
Zombies... THOUSANDS OF THEM! That's exactly what you're up against in Dead Rising. You take on the roll of Frank West, a photojournalist who has his eye on one big scoop. Dead Rising takes place in the fictional town of Willamette, Colorado. Bypassing the National Guard’s barriers via helicopter, Frank finds himself in a whole lot of trouble once he gets inside the town mall. As the story progresses, the dark and disturbing truth of the zombie outbreak becomes all too clear.
Trapped in a zombie-infested mall for 72 hours and don’t know where to start? We’ve got you covered with this complete guide to Dead Rising. Contained herein is a walkthrough for every case mission and optional scoop, as well as strategies and a slew of tips for defeating the psychopaths in the mall. You’ll also find details on every PP Sticker location, survivor, and Xbox 360 achievement.
Xbox 360
Right Trigger - Hold to aim gun. Aim object for throw. Spit (unarmed).
Left Trigger - Hold to switch to photograph mode.
Right Bumper - Switch to next object in inventory.
Left Bumper - Switch to previous object in inventory.
Left Thumbstick - Move Frank.
Right Thumbstick - Move the camera.
Y Button - Order survivors to follow you.
B Button - Context-sensitive activation (open doors, speak to people, pick up objects, etc).
A Button - Jump.
X Button - Press to attack. Hold to perform secondary attack.
D-pad UP - Put away object (drop if inventory full) and switch to fists.
D-pad DOWN - Drop selected object.
D-pad RIGHT - Answer transceiver call.
D-pad LEFT - Look at watch, view current list of active scoops.
Back Button - Pause the game and view a map of the mall.
Start Button - Pause the game and bring up the pause menu.
Levelling up unlocks new skills. Each skill listed below cannot be performed until Frank has mastered the skill by levelling up. You can view the list of skills currently unlocked by pausing the game and selecting the “Status” option.
Jump Kick: Press X in mid-air.
Zombie Ride: Press A while pushing the Left Thumbstick toward nearby zombies.
Kick Back: Repeatedly push the Left Thumbstick in the direction Frank is facing.
Flying Dodge: Push the Left Thumbstick in the same direction twice in rapid succession.
Power Push: When grabbed by a zombie, repeatedly push the Left Thumbstick left or right.
Football Tackle: Press A while pressing down on the Left Thumbstick.
Judo Throw: When grabbed by a zombie, push the Left Thumbstick down repeatedly.
Double Lariat: Click the Left Thumbstick and press X.
Roundhouse Kick: Press X at the exact moment Frank touches the ground.
Lift Up: While facing a zombie, simultaneously press X and A without pushing the Left Thumbstick. Press X again to throw zombie.
Knee Drop: During a jump, press X while pushing downward on the Left Thumbstick.
Suplex: While behind a zombie, press X and A while simultaneously pushing the Left Thumbstick.
Wall Kick: Press X while pushing the Left Thumbstick in the opposite direction of a wall at the moment Frank makes contact with it.
Hammer Throw: Press X and A simultaneously while standing to a zombie's side.
Neck Twist: Stand near the head of fallen zombie and press X and A simultaneously.
Giant Swing: Stand near a fallen zombie's feet and press X and A simultaneously.
Face Crusher: While behind a zombie, press X and A simultaneously while pushing the Left Thumbstick toward the zombie.
Disembowel: Push the Left Thumbstick toward a zombie from the front while simultaneously pressing X and A.
Somersault Kick: Press A to jump, and then immediately press X.
Karate Chop: Press X to unleash this attack on zombies behind Frank.
Zombie Walk: Continuously hold X while near a crowd of zombies.
Arrow be my Compass: If you're having trouble finding your way around the mall, you can designate an active mission to have a guiding arrow appear at the top of the screen. Then, you can simply follow this arrow to reach the target destination. To select a case or scoop, first press left on the D-Pad to look at Frank's watch. Next, if there is currently more than one ongoing mission, select the one you are in the progress of completing and press the A button to set it.
The Sledgehammer: This powerful and durable weapon can be obtained each time you leave the Security Room. Instead of taking the elevator down to the warehouse from the Rooftop, always go through the door off to the left of the Air Duct. Once in the warehouse via this door, hop down off of the walkway, move to the end of the shelf and then jump over to the shelf that has the Sledgehammer on it. This weapon is great for crowd control. To perform the weapon's secondary attack, simply hold the X button and Frank will swing the Sledgehammer to the side, knocking down any zombies it connects with. Make a habit of grabbing this weapon whenever you leave the Security Room.
Colombian Roastmasters: This restaurant is on the second floor of the Paradise Plaza. It contains an unlimited supply of Orange Juice, a food item that replenishes Frank's health by three squares when consumed. A Katana can also be found on the orange awning to the right of the fridge that holds the juice. Just hop through the window, land on the awning, grab the Katana, and then jump down to the area below. Make a habit of visiting the Colombian Roastmasters restaurant when in Paradise Plaza so you can restore your supply of health items. Optionally, you can take two Orange Juice containers and combine them using the blender in the restaurant to acquire a special "Nectar" drink.
Cam's Camera: A single camera battery only has enough power to take thirty pictures. If you've taken thirty pictures and find yourself with a dead camera battery, you can acquire a new one from a camera store, of which there are several in the mall. Cam's Camera, located in Paradise Plaza, is right next to the door that leads into the warehouse. Approach the battery rack near the service desk and press the B button when the prompt appears to swap the dead battery for a brand new one. Philo's Photos, which is on the second floor of Wonderland Plaza, and Pearly White's Photos, which is outside of Crislip's Home Saloon in the North Plaza, are other options.
Look out below: If you ever find yourself being forced to jump down from a high place, you can use the Knee Drop skill (provided Frank is at a high enough level (26) to have unlocked it) to avoid having Frank stagger upon landing. Jumping down from a high enough place without performing the Knee Drop skill will cause Frank to stagger about, giving the zombies below a clear shot at grabbing hold of him. While in the air, press X and push downwards on the Left Thumbstick to perform the skill.
One man's garbage: If you ever find yourself surrounded by zombies and in desperate need of a weapon, you might be able to find one by picking up and throwing a trashcan at a wall. When the trashcan breaks, its contents will be revealed. Most often you can find a Hunting Knife, a Handgun, or a Baseball Bat inside of a trashcan, which are all great weapons to get you out of a bind.
To serve and protect: The police uniformed zombie models tend to carry either a Nightstick or a Handgun. So, if you are in need of a weapon, keep an eye out for zombies dressed as police officers, then either knock them over or kill them and pick up their dropped weapon. Furthermore, zombies dressed in yellow Hawaiian shirts are always carrying a Hunting Knife.
Who turned out the lights?: It gets dark in the mall at around 12:00AM. To combat this, you can grab a Toy Laser Sword from one of the toy stores in the Paradise Plaza. With this item in your inventory, Frank will emit a healthy, red glow. Or is that healthy...? Might want to get that checked out.
To save, or not to save: Dead Rising's saving system can be a difficult to adjust to. You are given a single save slot, so you may end up inadvertently saving yourself into a corner. To avoid this, you have to save smart. If you are in the middle of a case and notice that you probably do not have enough time left to finish, do not save the game! If you save your game at the wrong time, you may leave yourself with an insufficient amount of time to finish your current mission. You can still continue playing once the "Truth has vanished" message appears on screen by selecting the "Return to Game" option. Though by doing this, you will not be able to unlock the true ending and will never learn the truth about the mysterious zombie outbreak.
You do want to know the whole story, right? Here's what you'll have to do if you find yourself in this unfortunate situation:
Try to complete the current case as quickly as possible. If it is impossible to complete the case with the amount of time that remains, there is no other option but to restart your game. Just be sure to select the "Save Status and Quit" option from the menu when the trail goes cold. Select this option and Frank's level will carry over from your current game when you start a new one. Be warned, as selecting this option will delete your current save game. With Frank's buffed stats, you should be able to repeat your progress much more easily and quickly than you did prior. Don't be afraid to restart the game if that is the only option. It may sting a bit, but unless you don't mind just failing the cases and getting a less impressive ending, you have no other choice.
Achievement-oriented: Dead Rising features a variety of achievements, 50 in all. It is impossible to earn all of these achievements in one playthrough due to the sheer variety of conditions that must be met. As such, try not to focus too much on unlocking achievements during your first run through the game. Certain achievements, such as Indoorsman, Outdoorsmen, Zombie Genocider, Frank the Pimp, Tour Guide, and perhaps PP Collector, require an awful lot of planning, time, and consequently a separate playthrough dedicated almost exclusively to the unlocking of that specific achievement.
The best time to look through the achievement list and try to tackle some of the less-time consuming ones is during the unfilled time between cases.
Shortcut to Paradise: Be sure to complete the “Out of Control” scoop on the night of the first day, as doing so makes the shortcut from Wonderland Plaza to Paradise Plaza or vice versa accessible, as well as cause a powerful melee weapon to spawn on the Space Rider platform in Wonderland Plaza.
Zombies keeping you down: At the start of Dead Rising, Frank's stats are quite pitiful. The game is much harder when Frank is at a very low level, such as levels 1-15. If you are finding it difficult to progress, you can select the "Save Status and Quit" option from the menu when Frank dies. If you select this option, you will have to restart the game, but Frank's stats will carry over. It is easy acquire a good amount of points near the beginning of the game. For example, rescuing the rooftop survivors and snapping their PP photograph yields a significant amount of points.
Save the Queen: If you spot a zombie that's standing on the spot with its arms flailing up in the air looking like it's in agony, apparently this is not normal zombie behaviour. Kill zombies that fit this description and a Queen will appear. If you catch this Queen and set it loose, the zombies nearest to you will fall down dead. Evidently this is a very useful item. Try to save any Queens that you obtain for dire situations, as well as for use in zombie-heavy zones such as Al Fresca Plaza. Queens are an asset during escort missions as well, because you can use one to clear a small path for the survivors you're trying to rescue.
A mannequin torso? Is that right?: If you ever find yourself at a loss for what to bring to a psychopath showdown, grab a Mannequin Torso. Seriously, it's surprisingly effective.
Don't lead, follow: Unfortunately, the AI in Dead Rising isn't the brightest. As such, the AI can make rescuing survivors a rather frustrating experience. In most cases, you can't really count on survivors to follow you, as they will frequently get trapped in the middle of large packs of zombies. This will ultimately lead to their death if not rectified; you could always backtrack and help them, but this wastes valuable time, especially if you are in a rush. What you can do is use the goal command to tell the survivors where to go. To assign a goal, hold RT and press the Y button while looking at the area you want the survivors to head for, such as a door leading into the next area. Once the goal is set, help the survivors get to this location by following them and attacking the zombies in their path.
I'd rather take the stairs: When heading back to the Security Room with survivors in tow, you will unavoidably have to ride the elevator up to the rooftop. The elevator, of course, is packed with zombies. This can make things difficult if Frank and/or company are injured. Fortunately, there are a couple of mannequins just outside of the elevator that can be used to clear the way. Pick one of these weapons up, hit the switch to open the elevator door, and give those zombies a face full of mannequin! While the zombies are knocked down, you can press the switch inside to take the elevator up to the rooftop. Any survivors with you do not need to be in the elevator, but just near it to travel up with you.
Masochist: Zombait can be used to attract zombies to Frank. With this effect, zombies will ignore survivors and go after Frank exclusively. To make Zombait, take some Pie and Snacks, find a blender, and mix the two items. Keep Zombait for use during an escort mission if things get hectic. While Frank is likely to take damage from the extra attention, you should be able to survive longer than an AI survivor ever could, since you can swerve rather easily between the zombies. Basically, run to the exit of the current area, fight off the zombies that are coming for you until the survivors are close, and then take off into the next area.
Zombies ate my survivors: When escorting a large group of survivors, you'll really need to keep an eye on them. As you run past groups of zombies, one or more of the survivors may get surrounded and trapped in the middle of a mob. If you reach a relatively clear area, happen to look back and spot one or more survivors surrounded by a mob of zombies, press and hold the RT button to command the survivors that managed to follow you to stay where they are. You can then run over to aid those who are trapped. Once you have cleared away the zombies, the stragglers will then run to join the waiting survivor(s). This time, help them get to this location by attacking the zombies in their path.
Braindamage: If you have more than one survivor with you and are in the Rooftop area, the survivors will commonly bump into each other and be unable to take turns climbing up the ledge to reach the Air Duct. Instead of jumping up and waiting for them sort things out, as soon as you reach the Rooftop via the elevator, hold RT and press the Y button while looking at a spot near the Air Duct. The survivors should be able get up this way without any trouble. When they are all up on the platform, climb up yourself and proceed through the duct to rescue the survivors.
Case 2 begins at 6:00AM on September 20th. Get to the Security Room after 6:00AM to trigger a short cutscene. The monitor catches Carlito dragging Dr. Barnaby, the old man you encountered near the end of the first case, through the Entrance Plaza.
If you are trying to complete all of the scoops as well as the cases, you will likely have more difficulty managing your time during the second day. Some of the scoops that you receive on the second day will conflict with the cases. So, depending on how fast you progress, you may need to skip some scoops for now, since cases are more important. If you want to try to complete all of the scoops, you'll need to use this walkthrough in conjunction with the scoops section of the guide, since several of them are best completed at the same time as one of these cases.
Your next task is to rescue the professor from Carlito. Leave the Security Room and head through the door across from the duct to enter the warehouse. Be sure to grab the Sledgehammer that's on the shelf, because it will definitely come in handy.
You will be facing Carlito again, so make sure to bring plenty of health supplies. Luckily, the shutter in the Paradise Plaza is now open, meaning you can quickly reach the Entrance Plaza from there. Upon exiting the warehouse, turn left and walk to the end of the screen to reach the Entrance Plaza.
PSYCHOPATH: Carlito
Before Dr. Barnaby can be rescued, you must defeat Carlito. When you gain control of Frank after the cutscene, head up the stairs to reach the Entrance Plaza walkway. Carlito is wielding a Sniper Rifle this time around, so he decidedly more deadly than when you first encountered him.

Round 2
If you only have a Handgun in your inventory, it won't be of much use against Carlito this time. Melee weapons or a powerful gun such as the Shotgun, work best. If you went into the warehouse area via the doorway, the Sledgehammer on one of the shelves may help you here.
The various shops along the walkway can be used to your advantage. Run and take cover in one of shops, wait until Carlito's attention is focused on Brad, and then quickly run out from cover and hide in another store closer to his location. Repeat this manoeuvre until you are close enough to run out and smash him with a melee weapon. Remain hidden in a store near to Carlito, and when he is aiming for Brad, run out and hit him a couple of times. Of course, Carlito won't stay in one spot, so you will be forced to run after him.
The Sniper Rifle Carlito wields is quite powerful; it can knock off two blocks of health with a single shot, as well as send Frank flying back. Though it may not do much good, try to jump around from side to side as you are chasing Carlito, just until you to a store that you can duck into. Don't follow directly behind Carlito, as he will periodically drop a bomb in his wake. Find a store to duck into quickly, because Carlito will turn around and focus on you once he has gained enough distance. While you a striking him with a melee weapon, only hit him two times at the most, because when you are close to him, he will use his Sniper Rifle as a melee weapon too.
A surprisingly effective weapon against Carlito is the Hockey Stick. You can find a supply of hockey sticks in the Shootingstar Sporting Goods store along the walkway. To get to this store, follow the walkway along to the right when you reach the top of the stairs and keep an eye on your right. Brad will most likely duck into this store and remain there for the majority of the fight. His job is to essentially act as a distraction. You don't want to stick around in the sporting goods store, because doing so would allow Carlito to keep track of both of his opponents at the same time.

Get a Hockey Stick from the sporting goods store along the upper walkway.
Wait until Carlito has just been shot, or is focused on Brad, before dashing out of the store and running over to the opposite end of the walkway. Duck into the first store you come to and keep an eye on Carlito from there. When his attention is focused away from you, leave the current store and enter one that is further down the walkway. Try to gradually make your way over to the store behind Carlito, so that he is positioned between yourself and Brad.
Once you've made it safely into the store behind Carlito, keep an eye on him and only pop out when he is focused on Brad. When you are out on the walkway, use the Hockey Stick to whip pucks at him. Get off as many pucks as you can before he can turn around, at which point duck back into the store to avoid getting shot.
If you have an SMG, Sniper Rifle, or Shotgun, just use the same method described above, but instead, pop out from cover and shoot him with the gun instead of running up and hitting him with a melee weapon.
Brad is injured, so you'll need to run down to the market in the North Plaza to retrieve some medicine for him. If you have completed the "Cut from the Same Cloth" scoop on the 19th, you can acquire an erotic photo for Kent requires at this point. While Jessie is sitting down on the bed next to Brad, back up from her and switch to your camera. Zoom in and focus on her crotch, but make sure that her breasts are in still in the shot. You should get 700-1,000 points for this erotic photo, which can be shown to Kent to complete the "Photo Challenge" scoop. Don't worry about giving Kent the photo right away, since for the time being, you still have a good amount of time left to complete the scoop.
You should also have received a transmission from Otis about the "Lovers" scoop, which takes place in Wonderland Plaza. Disregard this for now, as completing the current case is more important. If you have enough time after obtaining the medicine for Brad, you can complete that scoop on your way back to the Security Room.
The medicine that Brad needs can be found in the pharmacy section of the Seon's Food & Stuff supermarket, which is located in the North Plaza. The North Plaza isn't too far from the Security Room; you will have to travel through Leisure Park, and then, with “Medicine Run” set as your active mission, follow the arrow at the top of the screen to reach the entrance to the North Plaza. Time is of the essence here, so move as quickly as you can.
Note that if you have defeated Adam the Clown on the first day and have access to the secret passage, you can take the shortcut in the Paradise Plaza ladies room' to quickly reach Wonderland Plaza. Also, you can take the Small Chainsaw from the Space Rider platform on your way through Wonderland Plaza. Head to the north end of Wonderland Plaza reach the North Plaza, and then head down the long walkway to reach Seon's Food & Stuff. If you did not defeat Adam, unfortunately you'll have to run through Leisure Park.
Once you're in the North Plaza, run past the zombies and make your way to Seon's Market. Before stepping in though, stop by the Ripper's Blades store nearby. Smash the display case, grab a couple of katanas.
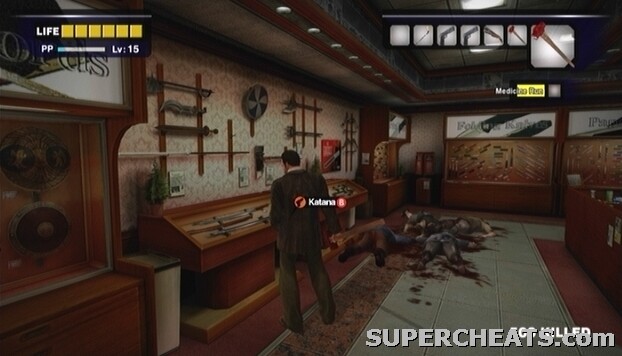
Head to Ripper's Blades, which is just outside of Seon's Food & Stuff, to find an unlimited supply of katanas.
Cletus may or may not be in the Huntin' Shack on the second day if you didn't defeat him on the 19th, but if you did kill him, consider stopping by the store to grab a couple of guns.
Upon entering Seon's, head to the back of the store and grab as many drinks from the fridge as you can carry. To get the medicine, you'll need to go through the door at the back of the store, which leads into the area behind the counter where the medicine can be found.
Attempt to open the door leading to the medicine to trigger a cutscene.
PSYCHOPATH: Steven Chapman
Did you really think you would be able to acquire the medicine that easily? Not surprisingly, you'll have to fight a psychopath before you can proceed. Keep in mind that even if you have the medicine, the timer is still going. You need to kill this guy fast enough to afford yourself enough time to get the medicine to Brad in the Security Room.
This guy has well earned the title of psychopath. Apparently, you're not allowed to shop in his store. That can't be good for business. That can't be good for anybody.

What a situation.
As soon as you gain control of Frank after the cutscene, you'll find yourself in the path of Steven's shopping cart of pointy objects. Quickly turn to the side and press the A button to jump up and grab onto one of the shelves to avoid being skewered by the crazed manager. That's not all; Steven also has a gun. You'll probably want to drop down to the opposite side of this shelf to avoid the blast.
This psychopath battle, luckily, isn't too tough. For one thing, you're surrounded by food items. Furthermore, there are many aisles that you can duck into to block yourself off from Steven and his shopping cart. If you are low on health and lack food items, just run to the fridges at the back of the store and grab a couple of drinks as you run by.
Steven's primary method of attack is running you down with his shopping cart. He will also turn the cart sharply if you are close enough to him; this move deals heavy damage and will throw Frank back.
If you are using a melee weapon, you will have to be much more cautious. One strategy is to run around the store and through the aisles to avoid Steven's shopping cart, and then running out when he stops to take out his gun. Steven's Shotgun is deadly accurate, so only run at him if his back is turned. The Katana or Sledgehammer work well here.
When you spot Steven with his Shotgun out and his back turned, run up to him, strike him with a melee weapon a few times, and then quickly duck into the next aisle to avoid his retaliation. If you're standing at the end of an aisle and Steven has his Shotgun trained in your direction, run to the opposite end of your current aisle, and try to get Steven's attention so that he'll run down the opposite aisle with his cart.

The perfect time to run out and attack Steven.
Another opportunity to get a couple of hits in is just as Steven turns a corner in an effort to chase you down an adjacent aisle. A melee weapon may stun Steven for a moment or so, but don't push your luck, as he can whip around his shopping cart rather quickly.
If you are using a gun, a good strategy is to stand behind the pillars near the shelves of food in the aisles to avoid his fire, and when he stops, pop out from cover and blast him a few times.
Steven can be killed quite quickly with a strong melee weapon. When he is dead, be sure to take a picture of his body if you are after the achievement associated with taking pictures of the psychopaths.
With Steven out of the way, you need to procure the medicine for Brad. You acquired a key after defeating Steven, so proceed through the door that you were unable to access before and run to the end the room. Grab the medicine, run out of the pharmacy, and exit Seon's Food & Stuff.
If you care to complete the Lovers scoop, you'll need to rescue the two survivors associated with the scoop on your way back to the Security Room. Provided, of course, that you have enough time. If you don't think you'll have enough time to make it back with the scoop in the equation, don't bother trying, as getting the medicine Brad to complete the case is much more important.
If you want to attempt to rescue the survivors associated with the Lovers scoop, it is almost mandatory that you have defeated Adam and have access to the secret passage in Wonderland Plaza. You won't be able to use the shortcut unless you defeated Adam on the first day.
So, if you have time to spare and think you can make it back to the Security Room before time runs out, what follows is one way to go about rescuing the survivors.
You're in the North Plaza now. The North Plaza is connected to Wonderland Plaza; look to the mall map to orient yourself if need be. Enter Wonderland Plaza, and visit the book store where Tanya and Ross can be found. Talk to both of them. When Ross asks for a gun, DO NOT give it to him! He'll just use it to kill himself, and Tonya will then refuse to follow you. When he asks for the gun, just start talking to Tonya and eventually she should agree to go with you, but you'll have to carry Ross, as he is severely injured.

Look for Ross and Tonya inside the “Run Like the Wind” shoe store in Wonderland Plaza.
Assuming you have defeated Adam the Clown, pick up Ross and make your way to the ladies room at the north end of the plaza. Once there, take shortcut to Paradise Plaza. You'll have to equip Tonya with a weapon, since there will surely be droves of zombies in your path. If you still have a Katana from your encounter with Steven, hand it over to Tonya.
By the time you reach Paradise Plaza, two women named Pamela Tompkins and Heather Tompkins may have spawned there. Saving Ross, Tonya, Pamela and Heather is ridiculously tough, in part due to terrible AI. If Pamela and Heather have not spawned in Paradise Plaza by the time you get there with Ross and Tonya, count yourself lucky, as they will likely spawn on your next trip through the plaza when you have more time to spare.
If Pamela and Heather have spawned in the plaza and you want to attempt to rescue all four survivors, you may have a difficult time of it. When you first reach Paradise Plaza via the Wonderland Paradise shortcut, tell Ross and Tonya to wait in the restroom. Pamela is likely in the middle of a pack of zombies, so the only chance you really have to rescue her is by throwing down a Queen. Heather should be in the Child's Play store on the lower level, while Pamela is outside surrounded by a pack of zombies.
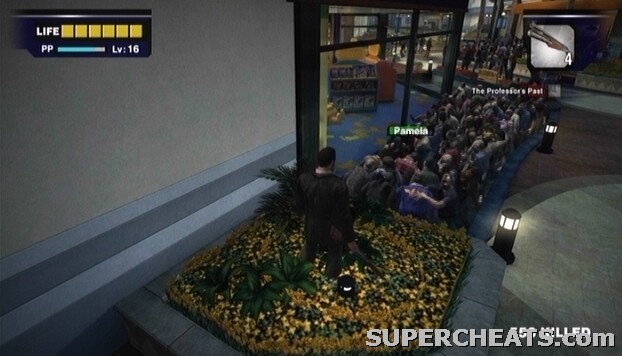
This is going to be tough...
If you managed to save both of the women, lead them to the restroom where the other survivors are waiting. Take the stairs to the right of the ladies' room up and follow it around to pass a large group of zombies on the lower level of the plaza. Put down Ross for a moment and clear the zombies on the stairs that lead back to ground floor.
Lead all four survivors back to the Security Room to earn a massive amount of PP. Then, head into the main room to end the second case.
Dead Rising features a total of 50 different achievements. Each achievement unlocked contributes a certain amount of points to your overall gamer score. You can acquire a grand total of 1000 gamer points by playing Dead Rising.
 1. Zombie Hunter
 2. Zombie Killer
 3. Zombie Genocider
 4. Self Defence
 5. Peace Keeper
 6. Punisher
 7. Legendary Soldier
 8. Hella Copter
 9. Tour Guide
 10. Frank the Pimp
 11. Full Set
 12. Humanist
 13. Life Saver
 14. Saint
 15. Strike!
 16. Costume Party
 17. Raining Zombies
 18. Gourmet
 19. Item Smasher
 20. Bullet Point
 21. Perfect Gunner
 22. Photojournalist
 23. The Artiste
24. Group Photo
23. The Artiste
24. Group Photo 25. Portraiture
 26. Census Taker
 27. Psycho Photo
 28. Psycho Collector
 29. PP Collector
 30. Snuff Shot B
 31. Snuff Shot J
 32. Transmissionary
33. Indoorsman
32. Transmissionary
33. Indoorsman 34. Outdoorsman
 35. Freefall
 36. Marathon Runner
 37. Carjacker
 38. Stunt Driver
 39. Stunt Rider
 40. Zombie Road
 41. Karate Champ
 42. Sharp Dresser
 43. Clothes Horse
 44. Level Max
 45. Unbreakable
 46. Overtime Mode
 47. 8 Mode
 48. 3 Day Survivor
 49. 5 Day Survivor
 50. 7 Day Survivor
After the opening video, you can sit through a short helicopter ride over the town of Willamette. This is a good time familiarize yourself with the photography aspect of Dead Rising. During this short on-rails sequence, you can use Frank's camera to snap pictures of the sights. Taking a picture of something interesting yields points. Earn enough of these points, and Frank will level up. As Frank levels up, his health increases; he becomes stronger, faster, able to carry more items, and can unlock new skills. Aside from snapping pictures, there are numerous ways to gain points; you'll learn more about those once you get to the mall.
This helicopter ride is completely optional; you can press start to skip past it if you're eager to get to bashing zombies. It would, however, be a good idea to sit through the ride so you can earn some valuable points to start off with.
The camera controls are simple; use the B button to zoom in, and the A button to zoom out. Use the Right Thumbstick to look around. When you have something interesting in the shot, press the X button to take the picture. Once a photo has been taken, you'll see a breakdown of the shot, and then receive points after they have been totalled up.
There are a number of photo opportunities in particular that yield a good amount of points. At the start of sequence, zoom in on the white car and snap a few photos of the man as he's being pulled off of the roof of the car, and then as he is being thrashed by the zombies. Next, take a few pictures of the zombies that are pushing up against the school bus when the helicopter gets close enough to receive a fair amount of points. Further ahead, a gas station will explode. Take a couple pictures of it—right when it explodes, as well as the aftermath—to gain more points.
Shortly after the gas station, you'll come to a building with a flat rooftop. Look to the roof of this building to spot a woman fending off some zombies. Snap a picture of the first zombie that falls off of the roof to earn a substantial amount points. Then, immediately take a picture of the woman and second zombie as they fall from the building to earn even more points. As you near the mall, snap shots of the dead zombies and woman until the sequence ends.
Once the helicopter has reached the mall and Frank is on the rooftop, take a picture of the man by the door with his arms folded. To switch to your camera, hold the left trigger down. Again, use the B button to zoom in, the A button to zoom out, and the X button to take a picture. When you're ready to move on, step through the door to enter the mall security room.
The Security Room is your safehouse. To save your progress, use the green benches at the bottom of the stairs. When you're ready to move on, go through the door marked "Janitor's Room," and then head through the yellow door straight ahead. Proceed through the door marked "Staff Only" and you'll find yourself in a long hallway. Move down this hall and head through the door at its end to reach the Entrance Plaza.

The Security Room
In the Entrance Plaza, a group of survivors are building up a barricade to prevent the zombie horde outside from gaining entrance to the mall. Your first task is to collect some objects strengthen the barricade.
Achievement Tip: Portraiture -- Take pictures of each of the survivors in the Entrance Plaza to earn additional points. Do so and you should also unlock the “Portraiture” achievement.
When ready, run down the area opposite the main entrance of the mall. Approach the large pile of items to trigger a cutscene. Lindsay, in a foolish attempt to save her little dog, claws her way through the barricade and throws open the door, allowing the zombies outside to enter the mall. Great. When you regain control over Frank, grab the two baseball bats near the assortment of objects and start cracking some zombies. Unfortunately, there isn't anything you can do to save the people in the Entrance Plaza. You're going to have to fight your way to the second level of the entrance plaza. Move towards the barricade, batting down any zombie in your path, and proceed up the stairs to reach the second level.
Inside the security room, you'll meet several of the game's characters. Feel free to save your game at this point, so you won't need to play through the opening sequence again if you end up dying.
When you regain control of Frank, attempt to exit through the duct in this area. Otis will hand over a transceiver and a map. Get used to talking to this Otis guy, because he won't give you a break. He's constantly calling Frank on the transceiver, usually at the most unideal of times. Try receiving a call from Otis while you're surrounded by dozens of zombies with only a stepladder as a means of defending yourself. If you use a weapon or are struck by an enemy, thus ending the transmission, Otis will call right back. Sorry for being rude Otis, I was just busy trying to keep a zombie from biting my head off!
Anyway, once you've gone through the duct, you'll find yourself on the rooftop. Hop down off of the platform and head to the right. You'll encounter a man named Jeff near the elevator; talk to him by pressing the B button. Jeff will join you, and you'll learn a little bit about the escorting aspect of Dead Rising.
Lead Jeff to the other end of the rooftop. There, you'll come across a woman named Natalie, whom Jeff is searching for. Get your camera ready, because when Jeff and Natalie are reunited, they will hug. If you snap a picture of the two at the right time, you'll receive a large amount of points. Stand close to the survivors, and take a picture that captures both of their faces when the little PP icon appears above them. The picture could be worth up to 10,000 points, and you'll unlock the “Photojournalist and “The Artiste” achievement as well.
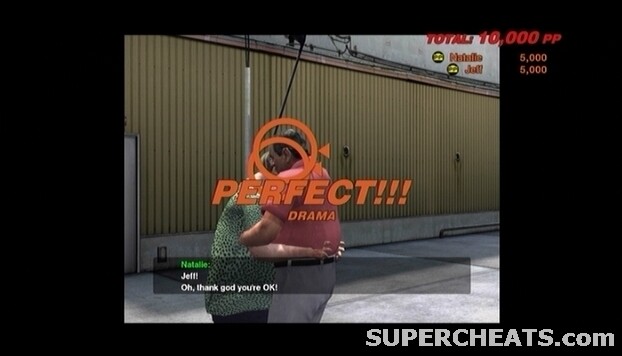
Capture both of the survivors' faces during their embrace to earn the maximum amount of PP.
Escorting mall survivors to safety is arguably the best way to gain PP. Future escorts missions will never be as easy as this one though. With Jeff and Natalie in tow, lead them back through the duct and into the security room. Be sure that the two survivors are standing on the upper level before heading through the duct, because otherwise they won't follow you through. With Jeff and Natalie safe in the security room, head back through the duct and use the door at the far left end of the rooftop to reach the warehouse area.
Otis will call Frank on the transceiver to quickly explain the layout of the mall. Afterwards, follow the catwalk and jump down onto the shelf below. Move to the end of this shelf and jump across to the shelf with the sledgehammer on it. The sledgehammer is very powerful and durable, making it a great weapon to use. Make a point of grabbing this weapon each time you leave the security room.
The Sledgehammer
Achievement Tip: Freefall -- If you drop down from the top shelf to the ground floor, you should earn this achievement just like that.
Head to the other end of the warehouse, and start down the hall that leads to Paradise Plaza. As you approach the door, you'll encounter Jessie, a DHS agent. Thus begins Case 1.
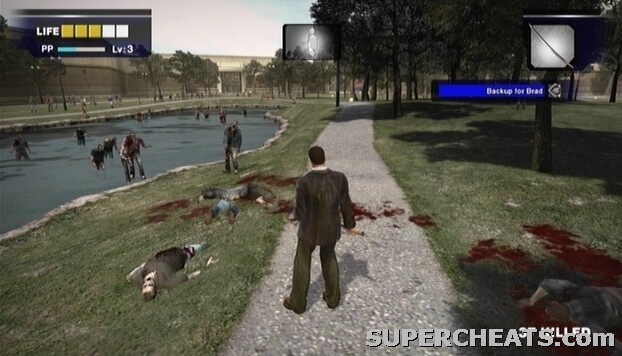
You have to get to the Food Court, where you then must aid Jessie's partner, Brad. Press the left button on the directional pad to look at Frank's watch. While looking at the watch, press the A button to select the Backup for Brad case file. With the case selected, an arrow appears at the top of the screen. Follow this arrow, and you will eventually be led to the Food Court where this part of the case takes place.
Before you get started, there are several areas of interest in Paradise Plaza that should be taken note off. If you head straight from the door you just came through and off to the right, you'll come to a set of steps that lead up to the second level of the plaza. Head up these steps and start down the walkway. Keep an eye on your left, as you'll soon reach the Colombian Roastmasters restaurant. This is a great place to stock up on food supplies.
Food is used to replenish lost health; simply select the food in your inventory using the Left and Right Bumpers and then press the X button to have Frank consume it. Orange Juice restores three squares of health, so take as many of them from the fridge in the Colombian Roastmasters as you have room for. Get in the habit of visiting this outlet whenever you visit Paradise Plaza and stock up on supplies.
It is important to always have some type of food in your inventory, as you never want to be caught without some way of replenishing health in a dire situation. To the right of the fridge that holds the Orange Juice, you can jump out of the window and onto the orange awning to find a Katana there. This weapon is very effective when used against zombies, however it isn't very durable.

Colombian Roastmasters

Katana
Once you've loaded up your inventory, hop down off of the awning and follow the arrow to reach the Leisure Park area.
Leisure Park is a large, outdoor area that you need to traverse to get to the Food Court. Luckily, since the area is so large, it is very easy to simply run past all of the zombies here. Make your way over door to the Food Court by following the arrow at the top of the screen.
Taking a stroll in Leisure Park.
There is a large group of zombies in front of the entrance to the Food Court. You should be able to easily cleave a path through this hoard with your Katana. Once you've cut your way through, open the door to enter the Food Court. Inside, you'll spot Brad in the middle of a gun fight.
PSYCHOPATH: Carlito
Psychopaths are the boss characters of Dead Rising. You'll encounter plenty of them in the Willamette Mall. Your first psychopath fight is against Carlito, who you surely recognize from your encounter with him on the mall rooftop.
To succeed here, you must help Brad repel Carlito without either Frank or Brad being killed. After the cutscene, you can run over and grab a couple of bottles of Wine from the counter if you lack health items. Brad has given Frank a second Handgun, so running out of ammo shouldn't be an issue.
Although it may seem like a good idea, do not climb up the boxes to reach Carlito. Carlito is wielding a very powerful gun, so trying to run at him won't do much good since you won't be able to move Frank while he's being shot at. Instead, move to the area behind the platform that Carlito is gunning from and shoot at him through the three windows using one of the handguns in your inventory. Aim and shoot for Carlito's head to deal more damage.
Carlito does scurry around quite a bit, so try to get a few shots on him as he moves from cover to cover. As Carlito's health dwindles, he'll move from the platform and take cover behind the signs above the chain of food stands. When Carlito runs out from behind one of the signs, fire at him until he ducks back behind cover.
While Carlito is above the food stands, he will occasionally throw bombs down toward you. Continue to aim and shoot at Carlito, but when he throws a bomb, quickly move away from it. After the blast, take aim and continue shooting at Carlito.
It's very easy to get a couple of headshots in while Carlito is lobbing one of his bombs down; just be sure not to stand by one for too long to avoid getting caught in the explosion. If you are low on health, take cover behind something and consume a food item bring replenish lost health. Remember, bottles of wine can be found on the bar if your inventory is empty.
Deal enough damage to Carlito and he will quickly retreat.
After the cutscene, follow Brad through the Food Court and outside to the Al Fresca Plaza. Be sure that Brad is with you before heading through the doors that lead outside, as you don't want to have to go back and get him. Turn right upon entering Al Fresca Plaza to reach the Flexin' Gym, where you can save your game by interacting with the door straight across from the first pane of breakable glass.
Across from the gym is McHardy's Hardware store. Inside, you'll find sledgehammers and chainsaws. While wielding a Chainsaw, you can cut through droves of zombies with relative ease, so consider grabbing one to make the journey through Al Fresca Plaza much less daunting. With a Chainsaw in hand, first press the X button to rev it up, and then once it's started you can use the X button to swing it about. The Chainsaw can't be stored in Frank's inventory, so you can't switch to another weapon while wielding one without dropping it. Furthermore, getting struck by a zombie will cause Frank to drop the weapon, so try your best to swerve away from lunging zombies.

Use the Chainsaw to cut your way through Al Fresca Plaza.
Follow Brad to the other end of Al Fresca Plaza and head through the door there to return to the Entrance Plaza. Once Brad has raised the gate here, continue following him through the plaza. You will soon encounter an old man who has locked himself inside of a store. There is nothing you can do for him at this point.
You now must travel back through Al Fresca Plaza, through the Food Court, through Leisure Park, and back into Paradise Plaza to reach the safety of the Security Room. Before leaving the Entrance Plaza, however, you can find a man named Bill in the "In the Closet" store on the upper level of the plaza. He is in the back area of the store, behind several stacks of boxes. Talk to him a few times, and when he realizes what has happened, talk to him again to have him follow you. Escort Bill to the Security Room to earn PP.
Rescuing Bill is completely optional, so if you aren't interested, just make your way back to the Security Room.
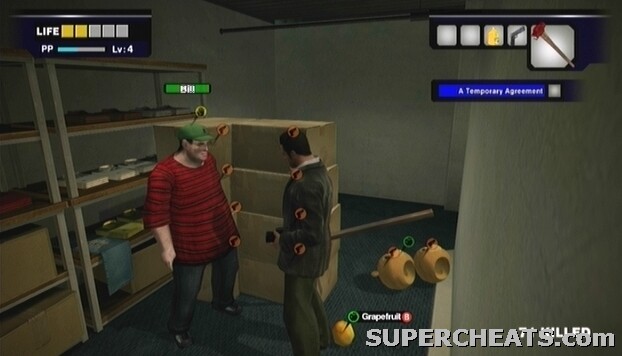
Look for Bill in the back room of the “In the Closet” store on the second floor of the Entrance Plaza.
The warehouse area is no longer zombie free; it is now swarming with zombies, and the elevator is packed too, so be ready for that. When you've reached the warehouse, ride the elevator up to the roof, make your way to the duct and head through to reach the Security Room. Once inside, step through the yellow door to trigger a short cutscene. That's it for the first case. You've now got some time to waste before the next case begins.
The second case starts at 6:00AM, so you can use this time now to unlock some achievements, or to complete the optional scoops that you have undoubtedly received from Otis over the transceiver. Refer to the "Scoops" section of this guide for information on every scoop that occurs on September 19th.
Case 3 is just a cutscene. Be in the Security Room at 11:00AM to complete it. You'll then have until 3:00PM, when Case 4 begins. Consider completing some scoops between now and then. Just keep in mind that you have to be in the Security Room at 4:00PM; don't stray too far from the Security Room when that time nears.
If you didn't encounter Pamela and Heather Tompkins on your last trip through Paradise Plaza, head there now and they should spawn.
This is just a short cutscene. Be at the Security Room shortly after 4:00PM to view it. The monitor shows Isabela, the woman Frank encountered in the market, on a motorcycle. You have quite a bit of time to kill before the end of the next part of the case, but it might be a good idea to go ahead and complete it right now. If you leave the case for too long, even if it seems that you have an adequate amount of time left to complete, you may not.
Avoid leaving this case for too long. Do not let the bar turn dark red. You need enough time to reach the area with the psychopath, and enough time to defeat her too. Time keeps ticking even during the fight. Thus, it would be a good idea to clear this mission immediately to avoid being stuck without enough time.
When you're ready to get started, travel to the North Plaza. The quickest way to the North Plaza and to this mission is through Leisure Park. Have "Girl Hunting" set as the active mission and follow the arrow to the location of the battle.
PSYCHOPATH: Isabela
The biggest threat when facing Isabela is being struck by her motorcycle. One hit from the bike will reduce your health a fair bit, so try your best to dodge as she speeds toward you. Luckily, this is a very easy battle if you can find an area where she can't reach you on her motorcycle, and is therefore forced to use her Handgun to deal damage.
All you really need is a strong gun to defeat Isabela. The Huntin' Shack happens to be in the North Plaza, so you can make your way over there, grab a couple of Shotguns, and return to the fight. The difficulty here is trying to make it to the gun shop without being struck by Isabela on her motorcycle. When you gain control over Frank, start down toward the Huntin' Shack and keep an eye on your right for some scaffolding. Head up the ramp when you reach the scaffolding. Remain vigilant, however, as Isabela can make it up here with her motorcycle as well. She'll either head up the ramp after you, or speed to the opposite end of the scaffolding, ride up the ramp there, and then attempt to meet you head on. If this is the case and you spot her up ahead, drop down the side of the platform and continue toward the Huntin' Shack.
Duck into one of the rooms along the hall leading to the Huntin' Shack and blast Isabela from atop a stack boxes to quickly finish the fight.
Once you've made it to the gun shop, hop over the counter and grab a couple of Shotguns. Then, exit the store and duck into the first room to your left. Isabela should soon follow. There is a stack of boxes in the corner of this room. You can avoid Isabela's motorcycle by jumping up onto these boxes. Since this is such a small space, it is easy to hit Isabela as she drives by the boxes and crashes into the wall. Aim for her head to deal more damage. Use this method and Isabela can be defeated rather easily.
After the battle, Isabela agrees to get Frank an interview with Carlito. You'll need to return to the North Plaza at 12:00AM on the September 21st.
Achievement Tip: Stunt Rider -- If you have time to spare, this is your chance to unlock this achievement. Isabela leaves her motorcycle behind after her defeat. Hop on the bike, speed down the hall, and hit one of the wooden ramps. Doing so should unlock this achievement, provided the bike flies far enough (33 ft.).
First, make your way to the security room to view a short cutscene. Afterwards, wait until 12:00AM (complete some scoops in the interim -- see the Scoops section of this guide for a list of every scoop that occurs on the 21st) and enter the North Plaza.
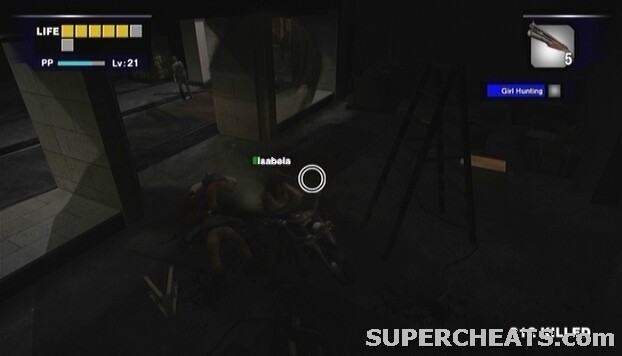
When the time comes, head into the room near the camera store within the hour. Isabela shows up, but she is being attacked by a zombie. Quickly kill the zombie to trigger another cutscene.
Isabela is injured, so you will have to carry her all the way back to Security Room. A man named Kindell should have spawned in North Plaza at this point. Look just outside the room, and he should be there. He's got a shotgun, so he is a good asset if you want to make it back to the Security Room in one piece.
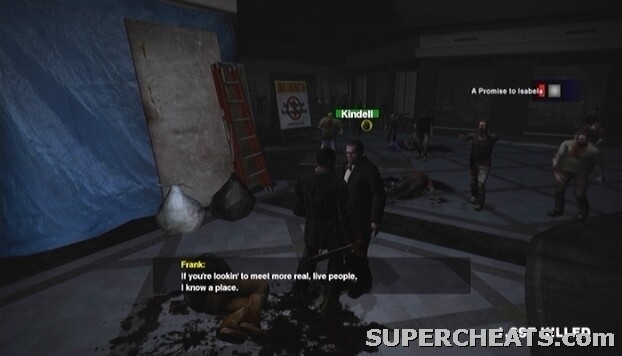
Look for Kindell in the North Plaza, just outside of the room where you were supposed to meet Isabela.
Put Isabela down for the moment and speak to Kindell a few times. Eventually, the man will agree to follow Frank. To get back to Paradise Plaza, you can either head through Leisure Park, or use the shortcut in Wonderland Plaza. Reaching the Paradise Plaza entrance from the Leisure Park North Plaza entrance while avoiding the convicts isn't too difficult; just hug the northwest wall as you make your way there. Bring Isabela and Kindell to the Security Room to complete the case.
When you receive a transmission from Otis, informing you that Isabela has woken up and wishes to speak to Frank, return to the Security Room. Watch the cutscene that ensues to complete Case 6. You've got some time to kill until the next case begins, so try to complete some scoops in the meantime. Refer to the Scoops section of this guide for a list of every scoop that occurs on the 22nd. Also, consider rescuing the hostile survivors; refer to the “Other Occurrences” section for more info.
When you hear Carlito's announcement to Isabela over the intercom, you should receive a transmission from Otis soon after. You need to report back to the Security Room before time runs out.
Get started on this case as soon as you can. Carlito has apparently prepared some bombs and plans to blow up the mall. There are five bombs attached to five different trucks in the Maintenance Tunnel.
If you completed the "Photo Challenge" scoop on the second day, be in Paradise Plaza at 12:00PM to complete the “A Photographer's Pride” scoop. For more information, check out the Scoops section of this guide. You should be able to complete this scoop relatively quickly, as well as “A Woman in Despair” before setting out to complete the case. If, however, you are very short on time, completing the case is much more important.
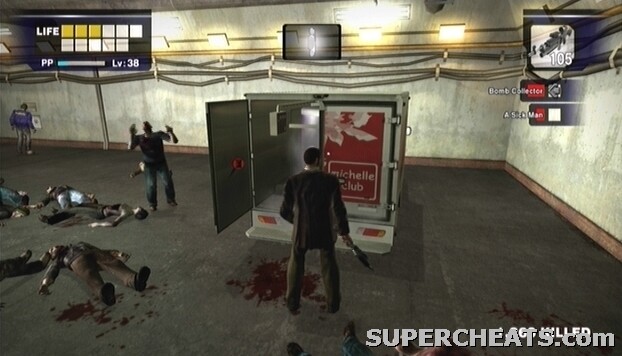
First and foremost, grab as many food items as you can carry, because you'll surely need for what's to come. To get to the Maintenance Tunnel, have the "Bomb Collector" case selected and enter Leisure Park. Once in Leisure Park, follow the arrow at the top of the screen to reach the parking lot. Hop on the motorcycle make your way to the Maintenance Tunnel entrance.
Upon entering the Maintenance Tunnel, ignore the arrow at the top of the screen and instead head straight and take a left. Continue heading in this direction and you will come to one of the trucks that contains a timed bomb. When you reach one of the rigged trucks, get out of your vehicle, approach and throw open the back doors, and remove the time bomb.
If you followed the instructions above, there should be a vacant, functional truck a few parking spaces away from the rigged truck. Swap this truck for your motorcycle, as it is much more durable.
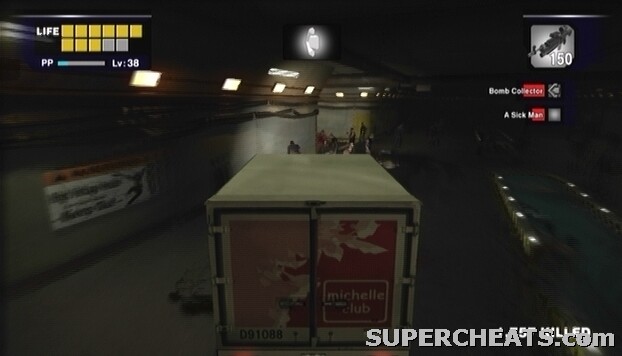
A truck makes moving through the Maintenance Tunnel much less of a hassle. It is not unbreakable, however, so enjoy it while it lasts.
Once you're in the truck, start following the arrow at the top of the screen. The truck is not unbreakable; running over zombies will quickly wear it out. So, as tempting as it may be, avoid running over too many zombies by only running over those you absolutely have to.
Press the Back button to bring up a map of the Maintenance Tunnel. Each question mark symbol indicates one of the time bombs, so plan out your route and head to the time bomb closest to your current location.
This case eventually becomes much more difficult. Carlito, of course, is not content to sit idly by while you remove the bombs and spoil his plan. As such, Carlito eventually shows up in a truck and is generally a pain.
If your vehicle happens to breakdown in the middle of the tunnel, this case becomes especially difficult. Carlito's truck can sustain an indefinite amount of damage, so if you're forced to travel on foot, he will continue trailing after you. Press on regardless, and continue following the arrow at the top of the screen.
When light is visible from the headlights of Carlito's truck, quickly swerve off to the side. Carlito isn't the best driver, so it is likely that he will run over some zombies rather than Frank, or simply ram into the wall. While attempting to remove a bomb from one of the trucks, Carlito will throw grenades to try and stop you. These deal some heavy damage, so waste no time. Be sure to take the time to heal by consuming a food item when you are in a clear patch and Carlito isn't driving straight for you.
Remove all five time bombs from the back of the trucks in the Maintenance Tunnel and make it back to the exit before it's too late!
Once you have collected all of the bombs, make your way back to the Maintenance Tunnel entrance to trigger a cutscene. If you don't make to the exit in time, it's game over for you.
Achievement Tip -- Snuff Shot B: To get this achievement, you must return to the Maintenance Tunnel and snap a picture of Zombie Brad. To get to Brad, turn right upon entering the tunnel. Keep traveling in this direction and turn left when the time comes. Continue heading in this direction and turn right when you can. After the cutscene that ensues, snap the picture of Brad to earn the achievement. While you're here, you can enter the room at the end of this area and retrieve the Maintenance Tunnel key.

Snuff Shot B
This is just a cutscene. Get to the Security Room before time runs out on this mission to view the cutscene and move on to the next part of this case.
According to Isabela, Carlito has a hideout in the North Plaza. He keeps a computer there, and Isabela believes that the group may be able to learn if Carlito has any future plans by logging on to it.
Head through the duct when you're ready to get moving. Speak to Isabela and she will take the lead. She insists on taking the elevator down to the warehouse, so be to deal with the pack of zombies inside. All you have to do is follow Isabela and kill the zombies around her. She will lead you through Leisure Park and into the North Plaza. Follow her through the plaza and eventually she will lead you to an empty store. The entrance to Carlito's hideout is above the stack of boxes in this area.

Follow Isabela to Carlito's hideout.
Once in Carlito's hideout, approach Isabela to trigger a cutscene.
Make your way to the Security Room to view a short cutscene. You can save your game in Carlito's hideout by interacting with the rug on the floor if you wish. When you're ready to move on, leave Isabela at the hideout and get to the Security Room before time runs out. Be sure to grab a couple of shotguns from the Huntin' Shack on your way through the North Plaza.
Make your way to the meat processing room in the Maintenance Tunnel post-haste! On your way through Paradise Plaza, stop by the Colombian Roastmasters restaurant on the second floor and grab as much Orange Juice as you can carry. Also, be sure to grab the Katana on the awning outside of the store before entering Leisure Park.
Have “The Butcher” selected and follow the arrow at the top of the screen to the parking lot outside of the Maintenance Tunnel. Hop in the vacant car here and drive into the tunnel. To get to the Meat Processing Area door, take the left turn once in the Maintenance Tunnel and follow this straight-forward route until you reach a large parking lot. Hop out of the car and locate the double-door here. Then, head through the door to trigger a cutscene.
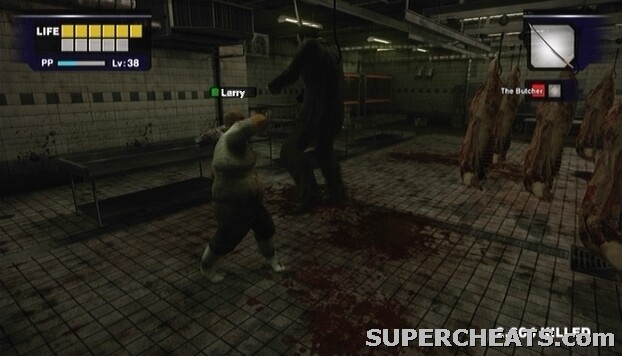
PSYCHOPATH: Larry Chiang
Each one of Larry the butcher's attacks is quite damaging, and on top of that, he is rather quick for his size. Regardless of his brute strength and surprising speed, however, Larry is not an overly formidable opponent, considering the fact that this far into the game, Frank is most likely sufficiently levelled to handle some punishment.
At the start of the battle, Larry will not attack until attacked first. So, hit him with a headshot or melee weapon and then quickly scurry away to avoid taking damage.

Larry the Butcher.
Though ranged weapons don't seem to work particularly well here, having one in your inventory can be an asset, because by using one, you can keep your distance from Larry and thus remain out of range of his most devastating attack. If you lack a ranged weapon however, you should be fine, provided you have a strong melee weapon in your inventory, such as the Katana.
From a distance, Larry uses throwing knives which deal a far amount of damage and will knock Frank to the ground. The knives are quite easy to avoid if you keep moving, but Larry has another ranged attack in his arsenal that comparatively harder to dodge. Larry will frequently remove one of the animal carcasses from the rows of hooks in the middle of the processing area and proceed to hurl it in your direction. If struck by the carcass, Frank will suffer a large amount of damage. The best way to avoid getting hit by a thrown carcass is by positioning yourself behind one of the other slabs of meat. If you're obstructed in this fashion, the thrown carcass shouldn't reach you.
Larry's close-ranged attacks are no less daunting. A common swipe from his meat cleaver can knock off a couple of blocks of health, and his overhead bludgeon attack even more. The move most importantly avoided, however, is his meat hook grapple. If you're close enough to Larry, he can grab Frank, carry him over to one of the vacant meat hooks in the processing area, hang him on it, and then proceed to furiously slash him. There doesn't seem to be an easy way out of this attack, so once you're caught, you are likely to take quite a bit of damage. Rotate the Left Thumbstick and tap the Left Trigger in an attempt to shake free. For this reason, you won't want to strike Larry with a melee weapon consecutively unless his back is turned. Just hit him once and dash away to avoid his retaliation.
Try your best to avoid this painful situation.
The ideal opportunity to get a hit or two in is while Larry is sharpening his cleaver. This animation frequently ensues just after one of Larry's attacks hit Frank. When you spot Larry sharpening his cleaver, Switch to a melee weapon, run in and hit Larry once or twice and then move out to avoid getting hit. Also hit Larry just after he throws a knife, provided you are close enough, and at the end of his duck-and-run manoeuvre.
If you need to restore health, take cover behind the machine that Carlito is hitched to and use a food item. You'll want to avoid taking cover behind this machine for too long, however, as Larry may still attempt to hit Frank with one of the animal carcasses, and in this event, there is a high chance that Carlito will be hit and sustain a large amount of damage. If Carlito dies during the fight, the case is over, so try to direct Larry's attacks away from him.
Continue attacking Larry until he finally falls. After the cutscene, get in the vacant truck just outside of the Meat Processing Area and quickly drive out of the Maintenance Tunnel and back into Leisure Park.
When you receive transmission from Isabela, quickly return to Carlito's Hideout in the North Plaza to trigger a cutscene.
All cases closed! But...
But what? Click to the next page to find out!
Trapped in a zombie-infested mall, with hours to waste waiting for your helicopter ride out of there...what is there to do? Well, not much, at least not during your first few hours of free time. Try to earn some achievements, perhaps?
Achievement Tip -- Snuff Shot J: As you move through the mall, you will trigger more cutscenes. After viewing the cutscene with the Special Forces soldiers and Jessie, return to the Security Room before 12:00AM and snap a picture of zombie Jessie to earn the "Snuff Shot J" achievement.
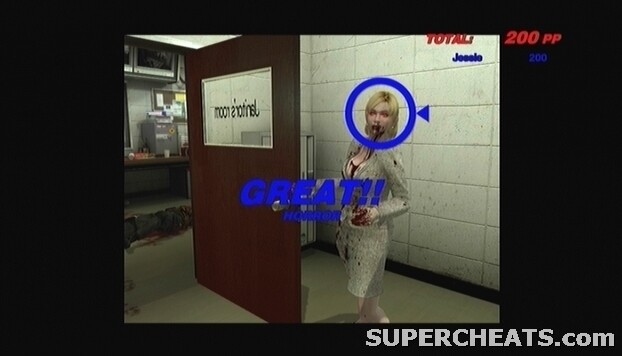
Snuff Shot J
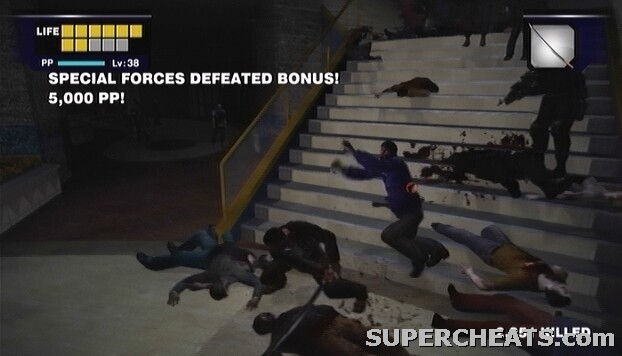
Achievement Tip -- Legendary Soldier: At 12:00AM, the mall will be crawling with Special Forces soldiers. To unlock the "Legendary Soldier" achievement, you'll have to take out ten of these guys.
The soldiers carry machine guns, which makes them formidable opponents. You are likely not used to having multiple enemies shooting at you at one time. In some instances, such as in the North Plaza, you may find yourself caught by crossfire and unable to move until your health is completely depleted. For this reason, do not try to go up against more than two soldiers at once. The seemingly best weapon to use to quickly kill one of these soldiers is the Katana. With a few slices, the soldier should fall. Each soldier yields a large PP bonus when killed.
If you need food items, there tend to be few soldiers around the Colombian Roastmasters restaurant in Paradise Plaza. Do not try the Seon's Food & Stuff in the North Plaza, as it's packed with soldiers. It may be a good idea to stop by Ripper's Blades, which is right next to Seon's, to stock up on katanas. The machine gun that the soldiers drop when killed is effective against them.
The Katana is an effective weapon against the Special Forces soldiers in the mall.
Achievement Tip -- Perfect Gunner: Since you've got time to spare, you can take a fully-loaded Machine Gun down to the Meat Processing Area in the Maintenance Tunnel to earn this achievement. Unload an entire, fully-loaded Machine Gun into one of hanging animal carcasses to earn the "Perfect Gunner" achievement.
Achievement Tip -- Hella Copter: The convicts in Leisure Park have been replaced by a Special Forces helicopter. Shooting this helicopter down unlocks the "Hella Copter" achievement. Use a Machine Gun and continuously aim and shoot at the helicopter as it flies over. Be careful though, as the helicopter has some heavy weaponry strapped to it.
If there's nothing left for you to accomplish, make your way back to Carlito's Hideout in the North Plaza. This must be done if you wish to unlock Overtime mode and see the true ending. To unlock Overtime mode, you must speak to Isabela after the cutscene at 10:00AM. Be at the Heliport at 12:00PM. To get to the Heliport, head up the stairs across from the Janitor's room door in the Security Room. View a cutscene, and then sit through the credits.
All hope is lost? Not quite. Read on.
To unlock Overtime Mode after the credits roll, you must have completed every case and spoken to Isabela after receiving her transmission at 10:00AM before heading to the Heliport for the 12:00PM pick up. Those are the only prerequisites that must have been in order to continue the story and unlock the true ending.
In Overtime Mode, you have 24 hours to find a cure to stave off Frank's infection. If Frank is going to live to see another day, you must collect some items from around the mall and bring them to Isabela in Carlito's Hideout. With these items, Isabela can then create a concoction that will impede the infection, giving Frank more time as a human. Though you're on a 24 hour timer, that is more than enough time to scrounge everything needed to save Frank.
You must scour the mall for a First Aid Kit, a Blender, Coffee Filters, a Magnifying Glass, a Camp Stove, a Developing Solution, a Perfume Bottle, and Cold Spray. As well, you'll need to provide Isabela with 10 queens.
The mall is still occupied by Special Forces soldiers, who are apparently cleaning up whatever survived the first wave. You'll want to get your hands on a Katana or two so you can easily deal with them.

Avoiding alerting the sentry drones or Special Forces will come running.
There are also small sentry drones that fly around the mall. If one of these sentries spots Frank, a siren will sound, alerting every Special Forces soldier in the area to your presence. Any gun is adequate for destroying one of these drones. The Machine Gun works especially well. Melee weapons work, too.
Before you get moving, consider stopping by the Huntin' Shack, as well as the Ripper's Blades, to grab a couple of guns and swords.
Since simply going down the list of items on the mission menu is both tedious and a waste of time, just go after the items in the order they are described here.
You're in the North Plaza now; you can obtain the First Aid Kit in the Seon's Food & Stuff pharmacy. Unfortunately, the Special Forces presence in Seon's is heavy. So, run. Simply run past the soldiers, swerving from side to side in a seemingly futile attempt to avoid their gunfire. Make your way to the double-door at the back of the store and head through. Enter the pharmacy and grab the First Aid Kit from the shelf. Grab a couple of bottles of Wine from the King of Wine section on your way out.
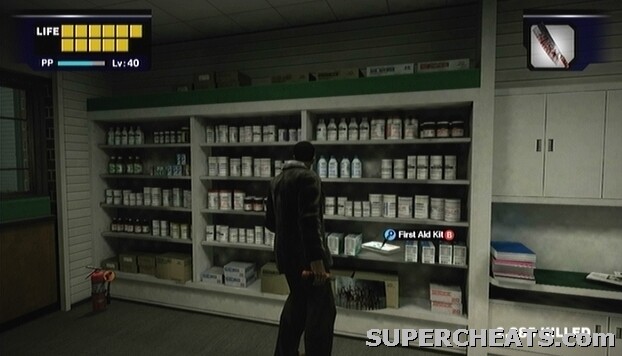
The First Aid Kit is found in the pharmacy inside of the Seon's Food & Stuff grocery store in the North Plaza.
Next stop is Wonderland Plaza to retrieve the Magnifying Glass. Once out of Seon's, leave the North Plaza via the west exit to reach Wonderland Plaza. The Magnifying Glass can be found in the Wonder Jewels store on the first floor of the plaza. Wonderland Plaza appears to be sparsely populated with soldiers, so you shouldn't have much difficulty getting to the store and acquiring the Magnifying Glass. The item is on the counter at the back of the store.

Look for the Magnifying Glass in Wonder Jewels, which is located on the first floor of Wonderland Plaza.
Once you have that, run through Wonderland Plaza and enter the Food Court. Here, you will likely encounter a few soldiers in the main area of the Food Court. The Blender is on the table that is behind the counter of the ice cream stand.
Take some Wine from Chris' Fine Foods if you are low on health items and need healing. Next, travel through Leisure Park and enter Paradise Plaza. There are quite a few soldiers in the plaza. If you are low on health, stop by the Colombian Roastmasters restaurant and grab some Orange Juice, as well as the Katana on the awning outside.
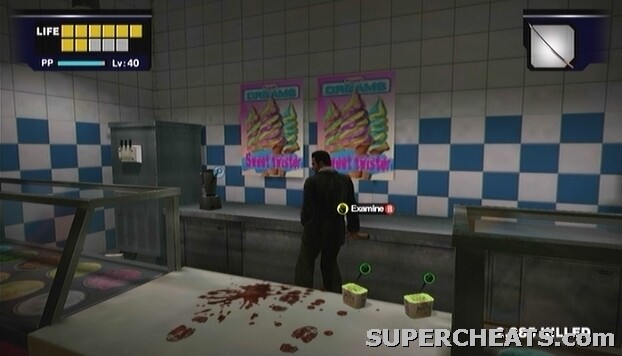
The Blender is behind the counter of the “Frozen Dreams” ice cream stand in the Food Court.
The Cold Spray is in the SporTrance store on the second level of Paradise Plaza. The Developing Solution can be found in Cam's Camera, which is located right next to the door to the warehouse. The Coffee Filters can be found in the Security Room. The warehouse area is swarming with soldiers, so take your time as you make your way through there.
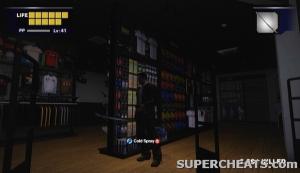
Cold Spray

Developing Solution
The Perfume Bottle can be found in Estelle's Fine-lady Cosmetics, which is on the second floor of the Entrance Plaza. The Camp Stove can be found in the Sports High store on the first floor of the Entrance Plaza. Now that you have everything Isabela needs, return to Carlito's Hideout in the North Plaza and hand them over to her.

Perfume Bottle
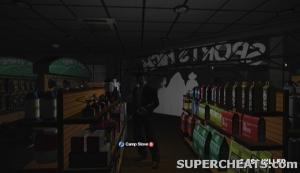
Camp Stove
Before Isabela can put the equipment to use, you'll have to travel to the clock tower in Leisure Park to retrieve a backup Generator. After the cutscene, interact with the panel on the side of the clock tower opposite the tunnel opening to retrieve the Generator. Return to Carlito's Hideout to trigger another cutscene.

A backup generator can be found by examining the panel on the clock tower in Leisure Park.
It's not over yet. Isabela needs ten adult queens to create the formula. You should have more than enough time remaining to acquire the necessary number of queens. If you spot a zombie that is standing in one spot with its hands flailing up in the air and its head tilted upwards, apparently this is not normal zombie behaviour. Kill zombies that fit this description and a Queen will appear. Both the North and Wonderland Plaza have a healthy population of zombies, so head to either of those locations and begin your search. The Maintenance Tunnel is also a good place to scour.
A good strategy is to run back and forth between the North and Wonderland plazas, killing any zombie you spot that fits the description of one that will yield a Queen. You will once or twice, however, have to stop by Carlito's Hideout to empty your inventory of queens to free up some space.
Be especially careful not to accidentally use a Queen. If you are wielding a weapon and it breaks or runs out of ammo, Frank will auto-switch to the next item in your inventory. Thus, you may inadvertently waste a Queen in your inventory. Monitor your ammo or weapon durability to avoid such an occurrence.
Once you have given ten queens to Isabela, she will then create the formula and inject it into Frank. Next, you're headed through the tunnel that seems to begin in Leisure Park. When you gain control of Frank after the cutscene, save the game where you are standing. ‘
Take Isabella by the hand and begin start down the zombie-packed tunnel. The zombies are only repelled by the perfume if they step within its aura.

Use Isabela's zombie-repellent perfume to part the sea of undead.
You will soon come to a large, iron gate. Stand by the grate and lift it up to have Isabela to crawl through. You will have to stand your ground here and fight off the zombies until Isabela activates a switch to open the gate so you can follow her through.
Take Isabela by the hand once again and continue to lead her through the sea of undead. When you reach the gate, open the door to proceed into the next section. Continue down the tunnel past you will soon encounter yet another gate. Open the grate to have Isabela crawl through, fight off the zombies while Isabela opens the gate, and then follow her through.
The light at the end of the tunnel! Though slightly obscured by the droves of undead that occupy the tunnel. When you regain control of Frank after the short cutscene, save your game where you are.
Proceed to carry Isabela through the last stretch of zombies. Take a left and head up the stairs here. Put Isabela down and flip the lever here to open the gate and unleash the zombies. Head outside and make your way over to the jeep in the distance. Hop in to trigger a cutscene.
BOSS BATTLE: XM3 Prototype Tank
Just as Frank and Isabela appear to be home free, an automated Special Forces tank rolls in to act as yet another barrier. This is an on-rails sequence, so the only thing you have to worry about is aiming and shooting. The tank has a lengthy life bar, which you'll need to deplete to halt its movement.
Though the tank is heavily-armoured, you can still deal damage, provided you shoot for the right parts. Firing at the two blinking boxes on the front corners of the tank will slowly drain the bar at the bottom of the screen. Each box has a pair of flashing green lights on its front, so they're easy to spot.
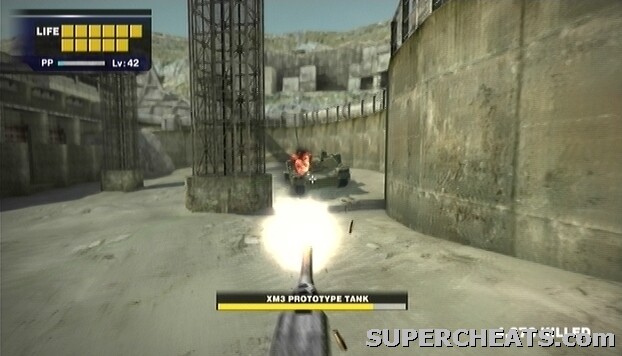
Fire at either of the boxes on the front corners of the tank to damage it.
When you see the little sentry unit appear on the top-right side of the tank, concentrate your fire on it. A green target-seeking laser will appear from the unit and attempt to locate a target for main cannon to fire at. If you destroy the sentry unit before the laser locks on to the jeep and turns red, the tank won't be able to fire its main cannon. The sentry unit will reappear once destroyed though, so always keep an eye out for the sentry and destroy it before it is able to lock on completely. Each blast from the main cannon knocks off one block of health, so it's worth taking the time to silence the sentry.
The XM3 tank also employs flying sentry drones. Aim and destroy these before they get too close. They are released at quite a rapid pace though, so you will only be free of their nuisance for so long.
Eventually the tank will begin to periodically fire-off four homing missiles at a time. These don't deal a whole lot of damage by themselves, but you can take a fair bit of damage if each one makes it to the jeep. Try to take out as many of them as you can before they reach the jeep by blasting them with the turret.
Continue firing at the weak points on the tank. When one box is destroyed, shift your fire to the other. Do this until the bar at the bottom of the screen is completely depleted and the tank comes to a stop
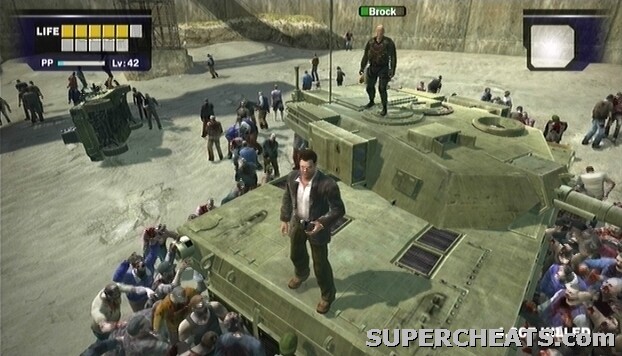
BOSS BATTLE: Brock
This fight can be quite tough. For one thing, your inventory is completely empty. You can only use skills to attack and damage Brock. Fortunately, you're health has been completely restored from the ordeal with the XM3 tank. The two most important skills here are Flying Kick (Jump and press X) and Knee Drop (push downward on the Left Thumbstick and the press X button while in the air).

This hardly seems fair.
Brock is able to block most attacks, and his own melee attacks are quite powerful. The trick here is to just keep moving! Don't stand in one spot for too long, and never try to hit Brock with a basic kick or punch. Constantly move between the cannon and body of the tank. When Brock jumps down, try to catch him off guard with a Flying Kick while he has his back turned as he tries to get back up to the cannon. You'll essentially just be running in circles around him, jumping up into the air and kicking when you get close.
If you fall into the hungry mass of zombies below, try using the Double Lariat skill (click the Left Thumbstick and press X) to escape and get back onto the tank.
Jumping up into the air and pressing the X button, and then pressing X again once you hit the ground to perform another kick seems to work quite well against Brock. Just do this once, then jump down to the body of the tank, hit Brock in the same fashion when he follows you down, and then climb back up onto the cannon. Knee Drop can knock off a large amount from Brock's health bar if it isn't unblocked, so try to get one through his guard every once in a while.
Keep your distance to avoid Brock's damaging melee attacks.
If Brock manages to get Frank in a chokehold, rotate the Left Thumbstick to escape.
Continue hitting Brock with Jump Kicks and Knee Drops until his health bar is completely depleted.
That's it; you've just completed Dead Rising and earned the true ending! Congratulations on a job well done!
September 19th Scoops:
Cut From the Same Cloth
Photo Challenge
Barricade A and B
A Mother's Lament
Out of Control
Japanese Tourists
Shadow of the North Plaza
September 20th Scoops:
Lovers
The Hatchet Man
The Coward
Restaurant Man
Above The Law
Mark of the Sniper
The Woman Who Didn't Make It
Antique Lover
September 21st Scoops:
A Strange Group
Long-Haired Punk
A Sick Man
A Photographer's Pride
A Woman in Despair
Other Occurrences:
Convicts
Cletus
Cultists
Ronald's Appetite
Floyd the Sommelier
Kindell's Betrayal
Hostile Survivors
Paul's Present
Simone the Gunslinger
Cheryl's Request
Cut From the Same Cloth
Photo Challenge
Barricade A and B
A Mother's Lament
Out of Control
Japanese Tourists
Shadow of the North Plaza
This is likely the first scoop you'll receive from Otis. At around 2:00PM, you should receive a call from Otis about a man taking pictures in Paradise Plaza. Enter Paradise Plaza and look for the man Otis spoke of in the Colombian Roastmasters restaurant on the upper level.
Once you've have located the man, speak to him a few times. Kent offers to give you some pointers on photography. To complete this scoop, you'll need to take a few pictures of Kent and earn a certain amount of points for each picture.
The point requirement for the first picture is 500 points. To take an adequate picture, stand close to Kent and zoom in on him by pressing and holding the B button. When he crouches to take a picture, snap one of him. Provided you were close enough and the subject is centered, you should earn the amount of points required to move on.
For the second photo, you just need to take a picture of Kent performing his "signature pose" worth at least 700 points. Keep Kent in the frame and snap the picture when he poses. Zoom in and make sure Kent is not too far away to get the most points.
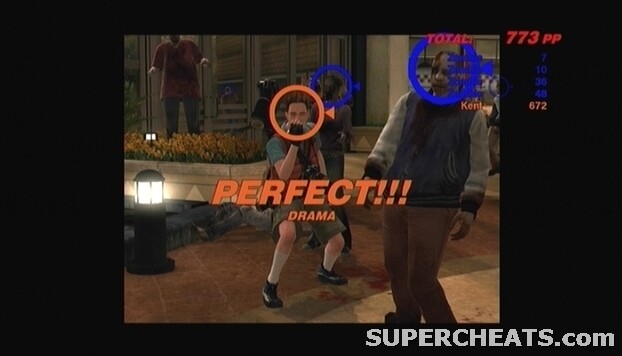
Snap a picture of Kent when he performs his signature pose and score at least 700 points to complete this scoop.
There is also an optional photo opportunity here. To get this one, wait until Kent jumps up into the air to kick a zombie. Take the picture when the PP icon appears above him. Just make sure he's in the shot and you should score a decent amount of points.
Once you've completed the “Cut From the Same Cloth” scoop, Kent gives you a challenge. To complete this scoop, you must find a suitable subject to take a high-quality erotic photo of, and then deliver that photo to Kent. Creepy.
Finding a subject for an erotic photo in a mall full of zombies is a decidedly difficult task, but an opportunity to acquire such a picture does arise on September 20th. The Photo Challenge scoop is available until sometime later on the second day, but be sure not to speak to Kent until you have an erotic photo to show him. If you speak to Kent without having an erotic photo to present to him, he'll laugh and walk away, effectively ending the scoop.
There is an opportunity to acquire an adequate erotic photo during Case 2-3 on the second day. In the Security Room, while Jessie is sitting on the bed next to Brad, take a few steps back from her and switch to your camera. Capture Jessie's face, breasts, and crotch in the picture. You should get 700-1,000 points for this photo, which is enough to complete the challenge.

Take this picture during Case 2-3 on the second day, and present it to Kent before time expires to complete the challenge.
When you have the photo, be sure to speak to Kent in Paradise Plaza before the scoop expires on the second day. Select the erotica photo to present it to Kent. Once you've completed this scoop, Kent demands another contest. He tells you to meet him in Paradise Plaza, tomorrow at noon, for another challenge...
You should receive word of this scoop from Otis at around 4:00PM. A couple of survivors have barricaded themselves in the Weber's Garments clothing store in Al Fresca Plaza. Before you get going, stock up on Orange Juice from the Colombian Roastmasters restaurant on the second floor of Paradise Plaza, and grab the Katana on the awning if you have any space in your inventory. You'll be facing tons of zombies during your quest to save these two, so you'll need enough food items to heal both Frank and the two men in the event that they sustain serious damage.
If you're starting this scoop a little later (past 6:00PM), entering Leisure Park will trigger a cutscene depicting a group of psychopaths terrorizing a couple of survivors. In the event that you do encounter the convicts on your way to complete this scoop, it would make the trip back to the Security Room much easier if you take them out now.
You'll need a Handgun to defeat these guys; there should be two zombie cops carrying handguns in the water by the Leisure Park entrance in Paradise Plaza. Kill these zombies on your way to Leisure Park and pick up one or both of the handguns if you have room in your inventory.
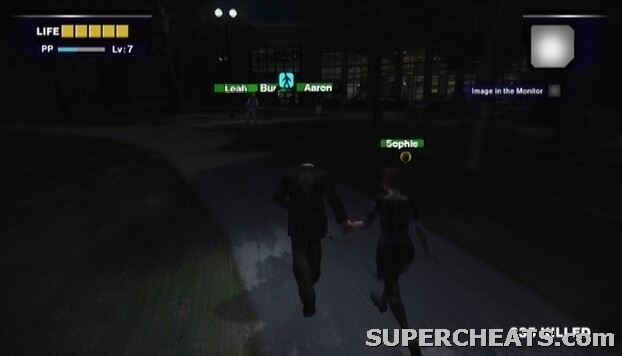
Rescue Sophie from the crazed convicts in Leisure Park after 6:00PM.
Taking down the convicts is substantially easier if you can manage to have them trap their jeep behind a tree. Perhaps because the AI in Dead Rising is so abysmal, if the convicts happen to hit a tree, there is a good chance that the driver will continuously reverse and accelerate back into the tree if you are standing on the other side of it, giving you a good opportunity to take out the gunner.
Run around one of the wider tress until hopefully, the driver crashes into it and becomes stuck. Once you've succeeded, take cover behind the tree, and then quickly pop out and try to score a few headshots on the gunner. The mounted turret on the back of the jeep is very powerful, so be careful. If you are low on health, use the tree as cover and down a bottle of Wine or some Orange Juice.
When you've taken care of the gunner, run around to the back of the jeep and grab hold the mounted turret. With the machine gun in hand, run around to the side of the jeep and shoot the two remaining convicts dead. When all three convicts have been dealt with, make your way over to Sophie to have her join your party.
Achievement Tip -- Carjacker: Once the convicts have been taken care of, hop in the driver's seat of the now-vacant jeep to earn this achievement.
Alternatively, you may be able to avoid the convicts completely with a little luck. However, killing them will greatly improve the likelihood of your success in escorting the four survivors.
If you didn't grab any Orange Juice from the Columbian Roastmasters restaurant on your way through Paradise Plaza, you can take a couple of bottles of Wine from the counter in the area to your left just as you enter the Food Court. If you wish, you can save your game once you reach Al Fresca Plaza by interacting with the restroom door in Flexin' Gym.
Once you've reached Al Fresca Plaza, make your way over to Weber's Garments, which is the second store on the left. Tear down the shoddy barricade and step inside. Burt, the man wielding a Baseball Bat, will immediately begin attacking you. Don't kill him; just rough him up a bit. To do this, don't use a weapon; instead, press up on the d-pad to put away your current item, and then start tapping the X button to pummel him. After he's taken enough punishment, speak to him until both Burt and Aaron agree to follow you.
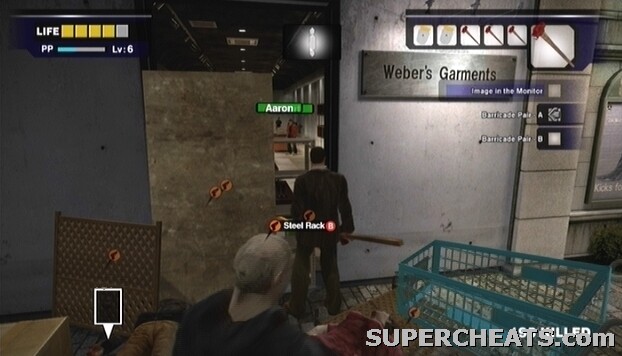
Aaron and Burt are holed up in the Weber's Garments store in Al Fresca Plaza.
To avoid wasting time, wait in the Food Court—just outside of the door that leads into Al Fresca Plaza—until 5:00PM. At this point, you should get a call about another scoop from Otis, this one concerning a woman who is also trapped Al Fresca Plaza. When you get the call, re-enter Al Fresca Plaza. Before moving on, tell Burt and Aaron to wait in Flexin' Gym or McHardy's Hardware Store (hold RT and press the Y button while looking at the floor). Refer to the section for the "A Mother's Lament" scoop for tips on saving the woman in that scoop, as well as the two men who are in your company now.
For maximum efficiency, this scoop is best completed at the same time as the Barricade Pair A and B scoop. Enter Al Fresca Plaza after receiving a call about a woman in the jewellery store there.
If you're in need weapons, you can grab some sledgehammers from the hardware store to the left upon entering Al Fresca Plaza from the Food Court. To equip Burt and Aaron with a weapon, stand by the character you wish to equip while holding a suitable weapon and press the B button when the "Give" prompt appears. Clear away the hoard of zombies in front of the door to the Food Court, and then command Aaron and Burt to stay there. They should be fine here if left alone, provided you've given each one a weapon and swept the vicinity of zombies. With "A Mother's Lament" as your active scoop, follow the arrow at the top of the screen through Al Fresca Plaza until you come to the jewellery store. You'll find Leah inside.
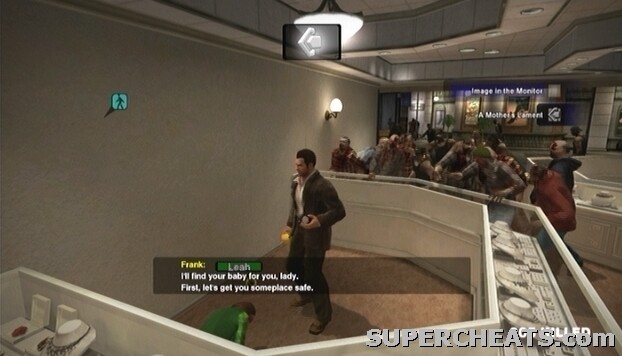
Look for Leah in the jewellery store in Al Fresca Plaza.
Speak to Leah until she agrees to follow. Hop over the display case, and then wait for her to jump over as well. Once she has made it over the barricade, approach her and press the B button near her to start carrying her. If for some reason she refuses to jump over the case, you will have to press the Y button to call her over. Unfortunately, calling Leah will call Aaron and Burt (and Sophie if she's with you) over too. If you're forced to call Leah, quickly clear the path for the other survivors with a Sledgehammer or Baseball Bat, then run back over to Leah and start carrying her.
Swerve between the zombies in the plaza and carry Leah back to the doors that lead into the Food Court. When you reach the door, tap the Y button to have Aaron and Burt follow you again. With the three survivors in tow, enter the Food Court. You can grab a couple of Wine bottles from the counter here if Frank or one of the survivors needs a health boost.
The journey through Leisure Park will be much easier if you've already killed the convicts and have Sophie with you. If this is your first encounter with the convicts, or if you left them alive on your way through, this next step may prove to be exceedingly difficult. Unfortunately at this point, the only way back to the Security Room is through Leisure Park.

Lead Leah and the other survivors through Leisure Park.
A woman named Sophie is being harassed by the convicts. Saving her is tough, but the PP boost makes the effort worthwhile. You can take out these psychopaths if you have a Handgun in your inventory, however doing so is rather tough. If you don't have a Handgun, zombie cops have a small chance of dropping one when killed.
If you're going to try and kill the convicts, first clear out a small area of zombies and command the survivors with you to wait there by holding RT and pressing the Y button while looking at the spot you wish for them to wait. Refer to the strategy included in the “Barricade Pair A and B” scoop section, or the strategy under the “Other Occurrences” section for tips on killing the convicts.
Alternatively, you may be able to avoid the convicts completely with a little luck. However, killing them will greatly improve the likelihood of your success in escorting the four survivors.
Once you've reached Paradise Plaza, lead the survivors up the steps ahead to bypass the mobs of zombies on the lower level. Stop by the Colombian Roastmasters restaurant and grab some Orange Juice if need be. When you're ready to move on, make your way through the warehouse then take the elevator to reach the rooftop. The elevator is full of zombies, so be careful!
On the rooftop, Hold RT and press the Y button while focused on a spot next to the duct. By doing this, you can avoid having the survivors constantly bump into each other as they attempt to follow you up onto the platform. When everyone on the platform, climb up yourself and go through the duct to bring the survivors into the Security Room.
At around 9:00PM, you should receive a transmission from Otis about this scoop. He tells you that one of the rides in Wonderland Plaza is spiralling out of control. Sounds like it's time to investigate. It would be a good idea to not start this scoop until at least 10:00PM, at which time you should get a transmission about a pair of Japanese tourists in Wonderland Plaza. It is much easier and less time consuming to complete the two scoops together.
If you're passing through Paradise Plaza, be sure to take some Orange Juice from the Colombian Roastmasters restaurant if you're low on health supplies, as well as the Katana from the awning through the window. Make your way through Leisure Park and enter the Food Court. If you haven't killed the convicts now, kill them now, as the machine gun mounted on the back of their jeep will make defeating the psychopath associated with this scoop much easier. Refer to the “Other Occurrences” section for tips on killing the convicts. You'll have to lug the machine gun through the next couple of areas. When you reach the Food Court (grab some Wine from the counter if need be), turn right and make your way over to Wonderland Plaza.
Upon entering Wonderland Plaza, you will receive another transmission from Otis. You may want to save your game at this point, so you won't have to walk all the way back to Wonderland Plaza in the event that you don't make it through this scoop alive. There is a washroom at the far end of the lower level of the plaza; interacting with one of the stall doors to save your game.
Before inspecting the rides, speak with the Japanese tourists in the book store to have them join your party. See the “Japanese Tourists” section of this guide for more information on rescuing these survivors. With the tourists in your party, equip one or both of them with a Handgun if you have a couple to spare and tell them to wait in the book store.

Inspect the controls of the Space Rider attraction in Wonderland Plaza.
The malfunctioning ride is located in the middle of the plaza. Approach the ride and climb up to the top of the metal steps. Wait until just after a car has gone over the track, and then jump over to the other side. Inspect the controls to your right to trigger a cutscene.
PSYCHOPATH: Adam the Clown
If you're afraid of clowns, you'll hate this guy. Unfortunately, yelling "GET A GRIP MAN!" here won't do anything. You're going to have to fight this insane clown.
Adam the Clown is rather tough to defeat, so if Frank is at a low level, you may have a difficult time fighting him. However, the rewards gained for defeating Adam can make much of the rest of your stay in the mall less difficult, so it is very worthwhile to put the effort in to take him down.
The quick and easy way to defeat Adam is by using the machine gun that is mounted on the back of the convicts' jeep in Leisure Park. Unfortunately, if you've already taken care of the convicts prior to facing Adam and therefore the machine gun is no longer available, you're out of luck as far as an easy route goes. On the flip side, if you managed to make it through the park without killing the convicts, kill them now so you can acquire this weapon.
Besides the turret, guns don't work particularly well against Adam, as he is surprisingly agile and able to dodge and block bullets. Melee weapons are one way to go, so hopefully you grabbed that Katana on your way through Paradise Plaza.
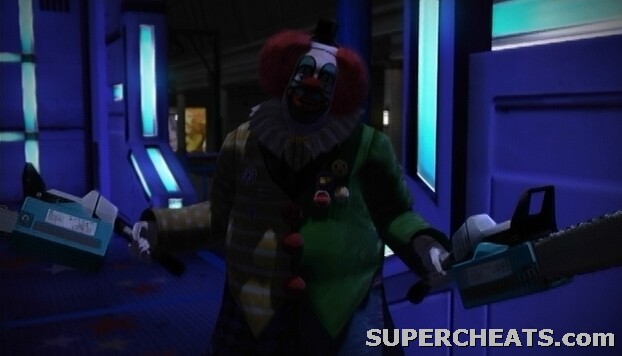
Adam the Clown. He's a little nuts.
If you've told the Japanese tourists to wait somewhere for you, they will cease waiting and start moving to your location after the cutscene. At this point, tell them to wait somewhere on the walkway. If you gave the survivors Handguns, they may be able to shave off a bit of Adam's health. They won't be in any danger, as Adam is fixated on Frank and will not attack them unless they get in his way.
Adam wields two mini-chainsaws that can dish out some serious damage, so try your best to avoid coming into contact with them. He also has a cache of throwing knives that he'll toss your way, however the thrown knives are quite easy to dodge and deal minimal damage. It is not wise to stay on the Space Rider platform where you first encounter Adam the Clown, because his attacks can throw Frank up into the air and onto the tracks, where he may then be hit by one of the cars as it whips by.
One way to kill Adam is to slowly whittle away his health by hitting him with a string of melee attacks, and then quickly moving out of his reach to avoid retaliation. Try to familiarize yourself with the moves he uses and learn to avoid them. Adam can destroy your melee weapon if you aren't careful. To avoid losing your weapon, do not attack him while he is in a defensive posture with his two mini-chainsaws crossed.
Though guns alone aren't particularly effective when used against Adam, you'll definitely want to have one in your inventory, as it can be used to counter one of his attacks. When Adam begins to fill a balloon with air, take aim and pop the balloon as he releases it, or just as it drops in front of him, to deal a significant amount of damage and send him into a coughing fit for a few moments. At this point, get in as much damage as you can—by continuing to shoot him, or by running in with a melee weapon—before he snaps out of it. Avoid hitting the balloon with a melee weapon, because doing so will send Frank staggering as well. If Adam manages to set the balloon loose, avoid it, because if it comes into contact with Frank, it will pop, leaving you vulnerable for a couple of seconds.

Shoot the balloon as Adam fills it with air to deal damage momentarily stun him.
If you run out of ammo, there should be a mob of zombie cops at the north end of the walkway, by the Sir Books-a-lot book store where the Japanese tourists were found. Kill one of these zombies and he should drop a Handgun. Also, if you need to heal, duck into one of the stores along the walkway and down some Orange Juice or a bottle of Wine.
Aside from dealing heavy damage with his mini-chainsaws, Adam can breathe fire too. To avoid getting scorched, do not directly in front of him, as he can get execute his flamethrower attack quite quickly. If Adam is knocked down at any point, quickly distances yourself from him, as he always retaliates with a flamethrower attack.
An opportunity to get a few strikes in with a melee weapon is just after Adam has finished performing his spinning attack. When he does this, he spins around over a large distance with his arms extended, and then is left vulnerable for a moment. Simply run away while Adam spins around to avoid taking damage, and then quickly move in and get a few hits in. If Adam performs more than one spinning attack in quick succession, chances are that he will become dizzy. While dizzy, he is completely vulnerable for several seconds. Guns will work against Adam at this point.
After Adam's disturbing death sequence, be sure to snap a picture of the dead clown if you are interested in unlocking the Xbox 360 achievements associated with taking pictures of the psychopaths in the mall.
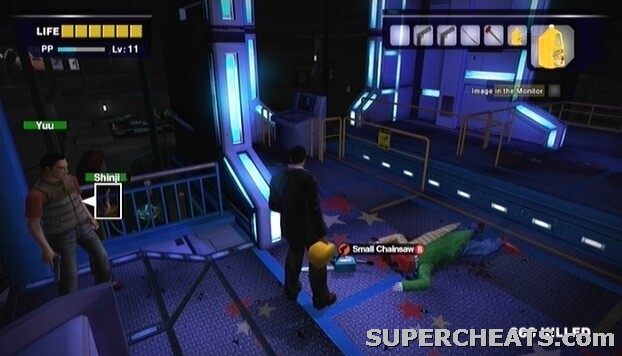
One dead clown.
When Adam is defeated, he leaves behind two mini-chainsaws. The Small Chainsaw is an incredibly powerful, nearly game breaking weapon that makes most of the psychopath battles a cinch. Though Adam chainsaw will break after continued use just like any other melee weapon, a fresh one will respawn on the Space Rider platform in Wonderland Plaza when one breaks. Furthermore, by carrying a certain combination of books, the durability of this weapon can be greatly improved.
Examine the machine once again to shut it down. Once the machine has been shut down, you will find a man named Greg. Thankfully, Greg knows of a secret passage out of Wonderland Plaza. This means that you won't have to lead the group through the misleadingly-named Leisure Park.
Call the Japanese tourists over by tapping the Y button and begin to follow Greg to the secret passage. You have to follow Greg there, as he will stop moving if you get too far ahead or fall behind. Use the Small Chainsaw to clear the way for Greg as he heads for the shortcut. The secret passage is a vent on the ladies' room ceiling, which leads back to Paradise Plaza. Keep this shortcut in mind when near Wonderland Plaza in the future.
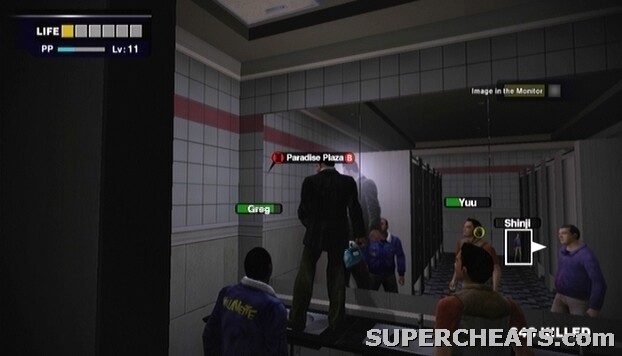
The Wonderland shortcut to Paradise.
Make your way through Paradise Plaza, through the warehouse, and back to the Security Room to rescue the survivors.
This scoop is best completed in conjunction with the "Out of Control" scoop. Wait outside of Wonderland Plaza if you have yet to receive this scoop from Otis. At around 10:00PM you should receive a transmission from Otis concerning this scoop.
Before fighting Adam the Clown, travel to the "Sir Book-a-lot" store along the upper walkway. The two survivors are Japanese, so they won't be able to understand what Frank is saying unless you pick up the "Japanese Conversation" book near one of the book cases in the store. With this book in your inventory, speak to the tourists to start a conversation with them.
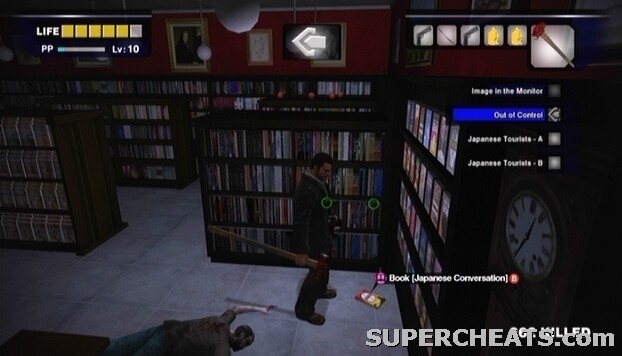
Pick up the Japanese Conversation book in the corner of the store so the Japanese tourists can understand Frank.
Continue speaking to the survivors until they agree to follow. At this point, get your camera ready, because when they agree to follow Frank, a PP icon will appear above their heads. Zoom in and capture both of the subjects' faces to acquire maximum PP. You no longer need the book, so discard it for another item if you wish.
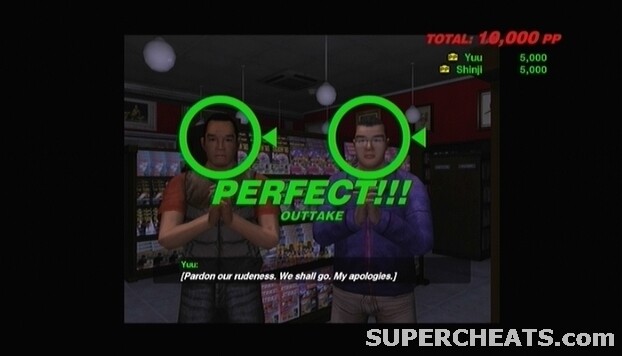
Snap a picture of the tourists once they have finished arguing and agree to follow Frank to earn a substantial amount of points.
With the two survivors in tow, command them to wait in the book store (hold RT and press the Y button while focusing on a section of the floor). If you happen to be carrying a Handgun or two, equip the survivors so they can defend themselves if a zombie approaches. If you don't have any weapons to give them, there are likely several zombies dressed in police uniforms outside of the store. These zombies are likely carrying Handguns, which they will drop when killed. If you need to make some room in your inventory by swapping out a few weapons for the handguns, do so, because you can just pick the dropped weapons back up on your way to the Space Rider.
Once the tourists are equipped, climb up the metal steps that lead up to the Space Rider attraction and inspect the controls to face Adam the Clown. While fighting Adam, you can command the tourists to wait somewhere on the walkway where there aren't many zombies if you fear for their survival.
You should receive a call from Otis on the transceiver about a man in the North Plaza at around 11:00PM.
If you have quite a bit of time to spare, since you will be in the North Plaza, you may as well get a side quest out of the way. If you visit the Huntin' Shack gun shop in the North Plaza, you'll encounter a psychopath named Cletus. This is arguably the toughest psychopath battle of the game, so if you only have time to either save David or kill Cletus, save David and leave Cletus for a future playthrough when Frank is at a higher level. If you do wish to face Cletus, be sure to bring along plenty of food items to restore lost health, as well as a melee weapon, such as a Katana. Melee weapons aren't particularly effective against this psychopath, so lean more towards guns. For more information on defeating Cletus, refer to the “Other Occurrences” section of this guide. Killing Cletus is optional, but killing him does give you access to a number of powerful weapons.
To get to the North Plaza, first enter Leisure Park. Set "Shadow of the North Plaza" as the active scoop, and follow the arrow to reach the doors that lead into the plaza. Once in the North Plaza, follow the arrow to a man David. David has a wounded leg, as he was attacked by a psychopath in the market. For this reason, you must provide support for David to get him safely back to the Security Room.

You'll find David wounded in an empty room in the North Plaza.
If you've defeated Adam to completed "Out of Control" scoop, you can use the secret passage in Wonderland Plaza's ladies' room. If not, you'll have to take David across Leisure Park while trying your best to avoid the convicts in the jeep. Frank can move quite fast even while supporting David, so you shouldn't have any trouble swerving around the zombies in your path.
Escort David to the Security Room to rescue and finish the scoop. When you get to the duct, you'll have to put him down, let him climb up onto the platform, and then go through the duct to reach the Security Room.
Lovers
The Hatchet Man
The Coward
Restaurant Man
Above The Law
Mark of the Sniper
The Woman Who Didn't Make It
Antique Lover
This scoop can conflict with the second case if you take too much time to defeat Carlito. If you are trying to complete all of the scoops as well as the cases, a good time to attempt this one is right after the Medicine Run case mission. This is very tough to do, even more so if you wish to save Heather and Pamela Tompkins as well. The strategy below is written with the assumption that you are attempting to complete this scoop after having defeated Steven.
You're in the North Plaza now. The North Plaza is connected to Wonderland Plaza; look to the mall map to orient yourself if need be. Enter Wonderland Plaza, and visit the book store where Tanya and Ross can be found. Talk to both of them. When Ross asks for a gun, DO NOT give it to him! He'll just use it to kill himself, and Tonya will then refuse to follow you. When he asks for the gun, just start talking to Tonya and eventually she should agree to go with you, but you'll have to carry Ross, as he is severely injured.
Look for Tonya and Ross inside of the “Run Like the Wind” shoe store in Wonderland Plaza.
Assuming you have defeated Adam the Clown, pick up Ross and make your way to the ladies room at the north end of the plaza. Once there, take shortcut to Paradise Plaza. You'll have to equip Tonya with a weapon, since there will surely be droves of zombies in your path. If you still have a Katana from your encounter with Steven, hand it over to Tonya.
By the time you reach Paradise Plaza, two women named Pamela Tompkins and Heather Tompkins may have spawned there. Saving Ross, Tonya, Pamela and Heather is ridiculously tough, in part due to terrible AI. If Pamela and Heather have not spawned in Paradise Plaza by the time you get there with Ross and Tonya, count yourself lucky, as they will likely spawn on your next trip through the plaza when you have more time to spare.
If Pamela and Heather have spawned in the plaza and you want to attempt to rescue all four survivors, you may have a difficult time of it. When you first reach Paradise Plaza via the Wonderland Plaza shortcut, tell Ross and Tonya to wait in the restroom. Pamela is likely in the middle of a pack of zombies, so the only chance you really have to rescue her is by throwing down a Queen. Heather should be in the Child's Play store on the lower level, while Pamela is outside surrounded by a pack of zombies.
This is going to be tough...
If you managed to save both of the women, lead them to the restroom where the other survivors are waiting. Take the stairs to the right of the ladies' room up and follow it around to pass a large group of zombies on the lower level of the plaza. Put down Ross for a moment and clear the zombies on the stairs that lead back to ground floor.
Lead all four survivors back to the Security Room to earn a massive amount of PP. Then, head into the main room to end the second case.
You should receive a call from Otis concerning a strange man in a hardware store at around 8:00AM. You will probably receive this call while searching for the medicine for Brad. Ignore the scoop at this point; leave it alone until you reach case 4.
Once you have advanced to the fourth case, you'll have a few hours to kill until the next case begins. At this point, you should have enough time to finish The Hatchet Man scoop, as well as The Restaurant Man scoop if complete them at the same time. The Hatchet Man takes place in Crislip's Home Saloon, which is located in the North Plaza. Before leaving Paradise Plaza, be sure to grab the Katana on the awning outside of the Colombian Roastmasters restaurant on the upper level of the plaza. Take some Orange Juice with you as well.
The quickest way to the North Plaza is through Leisure Park. Have The Hatchet Man scoop selected and follow the arrow to the North Plaza entrance. Upon entering the North Plaza, turn right to spot the entrance to Crislip's Home Saloon.
Since you're in the North Plaza, stop by the Huntin' Shack, which isn't too far from Crislip's, and take a Shotgun from the rack behind the counter. Even if you didn't kill Cletus on the first day, he should no longer be there at this point. If Cletus is there, however, you'll have to do without a Shotgun, which means you may have a tougher time with psychopath battle connected to this scoop.
When you're ready to get started, step into the hardware store to encounter Cliff.
PSYCHOPATH: Cliff Hudson
If you followed the instructions above, you should have a Katana and a Shotgun going into this fight. Cliff is deadly with his machete, and can knock off a couple of blocks of health per strike. For this reason, you'll have to be especially careful when facing him.
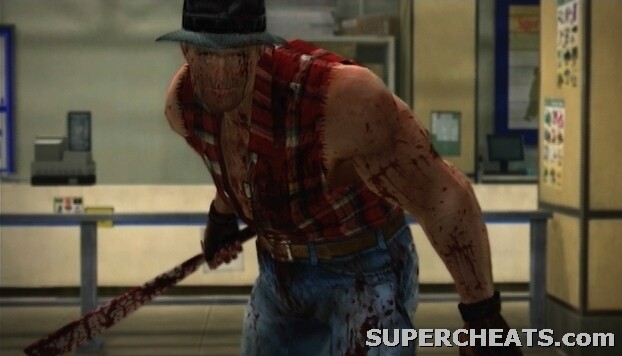
Crazy and wielding a machete. Never a good thing.
The best time to weaken Cliff is at the start of the battle, right after the cutscene. With Katana in hand, turn around to spot Cliff, run toward him, and slash him once. Never slash Cliff twice in a row, as he will just block the second attack and deal some damage to you. So, if your swipe connects, immediately backtrack or jump away to avoid his retaliation. Cliff is adept at close-ranged combat, so you don't want to be standing in one place for too long. After his retaliatory strike misses, run back in, slash him again, and move back out. Repeat this until he flees.
Cliff will likely remain attacking you in this fashion long enough for you to drain at least half of his health bar. He will eventually flee. Cliff uses trap doors to quickly and deceptively move through the store, which can be a problem. If you have a Shotgun, chase after Cliff as he makes his way to one of the trap doors and blast him. Cliff should cease running and turn back to fight you if a shot connects. Don't bother taking the time to aim with the Right Trigger, just point Frank in Cliff's direction and fire. As Cliff nears, switch back to your Katana and repeat the strategy described above.
In the event that Cliff does manage to jump through one of the trap doors, you will have to go on the defensive. It's nearly impossible to know where he will pop up, as there are trap doors all over the store. At this point, you can climb up onto one of the shelves to get a good overview of the store in anticipation of Cliff's appearance. The shelves by aisle one seem to offer the best view, so climb up the low stack of boxes against the shelf, then jump to grab hold of the top of the shelf and climb up.
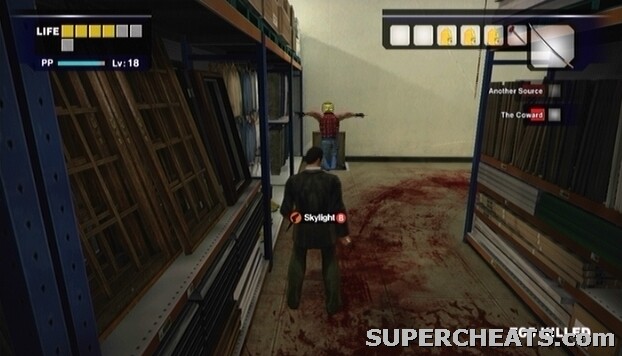
Cliff uses trap doors to quickly move around the store.
While atop one of the shelves, scan the store in an effort to spot Cliff. If you remain on the floor, Cliff will likely take to one of the shelves and lob pipe bombs down toward you. These pipe bombs are quite damaging, so for this reason it is integral that you prevent him from climbing onto one of the shelves in the store. Atop a shelf is the first place Cliff will usually go upon emerging from trap doors. However, if you are standing on one of the shelves as well, he won't remain there for long.
If at any point you run low on health, wait until Cliff takes to one of the trap doors before consuming a food item.
Repeat the strategy described above until Cliff falls.
Cliff leaves you with the Empty Store Key, which is used to unlock the store outside of Crislip's. Grab the machete before leaving Crislip's, and then use the key to open up the empty store just outside to find three survivors. You'll probably want to grab the Survival Book on the floor here, as it increases the effectiveness of food items by 100%.
If you want to attempt it, you can take these survivors across Leisure Park, but you'll have to make it past the convicts. It is fairly easy to make it from the North Plaza entrance to the Paradise Plaza entrance while avoiding the convicts by hugging the wall along the northwest end of the park, but you can use the Wonderland Plaza shortcut instead if you wish.
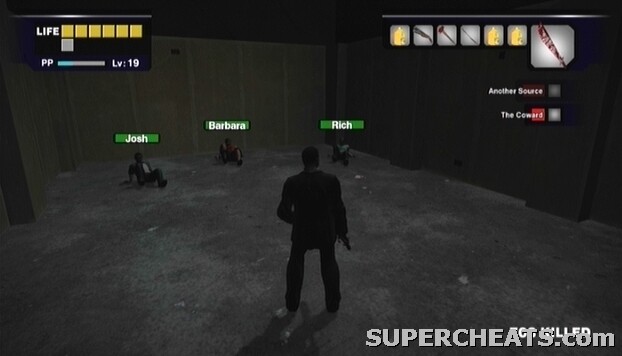
Look for Barbara, Rich, and Josh in the empty store next to Crislip's after defeating Cliff.
If you have yet to complete The Restaurant Man scoop, consider picking up the survivor in Jill's Sandwiches on your way through Paradise Plaza. You will need to give him any type of food item before he'll follow. If you don't have a food item in your inventory at the moment, you can grab something from the Colombian Roastmasters restaurant on the upper level of the plaza. Just be sure to command the survivors with you to wait in the restaurant until you return.
Once you're ready, lead the survivors back to the Security Room to rescue them.
If you happen to encounter the True Eye cult in Paradise Plaza, be sure to save the woman who has been captured by them. You'll have to kill all of the cultists around the plaza to save her. The cultists are quite tough, but if you have a Sledgehammer, tap and hold the X button while near a group of them. If you have a Shotgun, that works quite nicely as well. If you lack either weapon, use the Double Lariat attack instead (provided you've mastered it) by pressing up on the D-pad to drop your current weapon, and then clicking the Left Thumbstick and tapping the X button.
Be careful when facing the cultists, however, as if one manages to knock Frank out, he will be taken to their lair. At this point, it's quite likely that the survivors traveling with you will be lost. Also, if you're short on time, you could fail the current case. To avoid this, if spot one of the cult members slowly reaching into his pocket, dash away, because he will soon throw some dust into the air that can cause Frank to pass out.
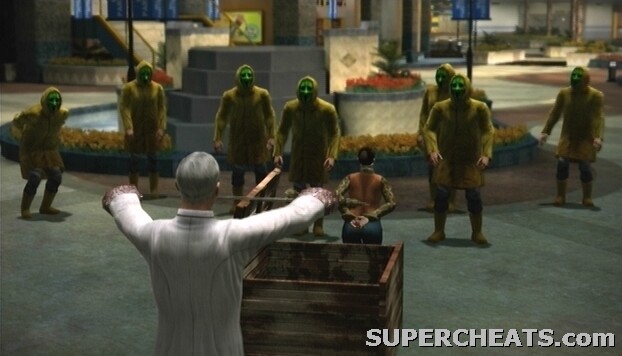
The True Eye cult first appear in Paradise Plaza around 2:00PM on the second day.
If you don't want to risk it, it may be best to just leave the cult be and continue to the Security Room with the survivors already in your party.
This scoop takes place in the Al Fresca Plaza. You should receive a call about the man in the hardware store there at around 9:00AM. The man is cowering behind the front desk in the McHardy's Hardware store. Hop over the desk and speak to him. At first, he refuses to follow. Press up on the D-pad to put away your current weapon, and then proceed punch him a few times. Eventually, the man will agree to follow Frank.
This scoop can be tough to fit in due to the cases and other scoops that run parallel with it. If this is your first playthrough, you may have to leave this scoop alone. Otherwise, you may be able to fit it in by heading to Al Fresca Plaza right after the third case ends, provided there's enough time left in The Hatchet Man scoop. Take the man through the Wonderland Plaza shortcut to both save time, and avoid the convicts in Leisure Park.
At around 11:00AM, Otis should call about a man in a restaurant in the Paradise Plaza. The survivor has barricaded himself in the Jill's Sandwiches restaurant. You have to bring him a food item and give it to him before he will agree to follow. Grab something from the Colombian Roastmasters restaurant on the upper level of the plaza if your inventory is currently empty. As Ronald consumes the food, take out your camera and get ready to take a picture of him when the PP icon appears above his head.
Since Ronald is so close to the Security Room, just pick him up the next time you're in Paradise Plaza and are headed for the Security Room.
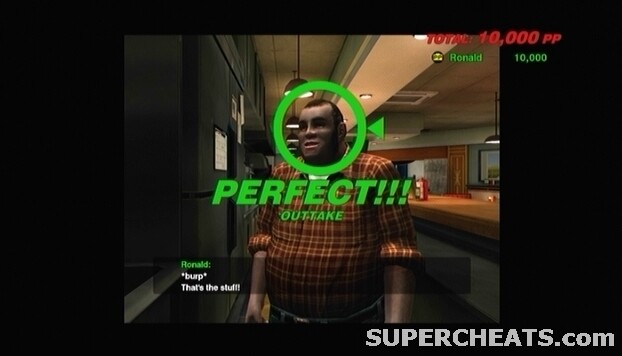
Snap a picture of Ronald after he consumes some food to earn a large amount of points.
You should get a transmission about this scoop at around 3:00PM. On your way through Paradise Plaza, grab the Katana on the awning outside of the Colombian Roastmasters restaurant on the upper level. Grab some Orange Juice from the fridge while you're at it. If you're not going through Paradise Plaza, you can also get a Katana from Ripper's Blades, which is just outside of Seon's Food & Stuff in the North Plaza.
If you're starting in Paradise Plaza, you'll want to head through Leisure Park, and then through the Food Court to get to Wonderland Plaza. The arrow associated with this scoop may be pointing toward the Entrance Plaza, but take the Leisure Park route instead, since it's guaranteed to be much safer at this point in time.
If you haven't been to Wonderland Plaza in awhile, you will likely encounter two survivors hanging from the rabbit statue at the north end of the Plaza. A mess of zombies lies below the dangling survivors. You'll have to clear away most of the zombies here to save them; this can be accomplished easily if you happen to have a Queen in your inventory. If you don't have anything to use, try the Double Lariat attack (provided you are a high enough level to have it mastered), which is executed by pressing up on the D-pad, then clicking the Left Thumbstick and tapping the X button.

Rescue Sally and Nick before they become zombie chow.
When most of the zombies surrounding Nick and Sally are gone, you can take a picture of each of them to receive 10,000 points apiece. Just stand behind them, switch to your camera, then zoom in and take the picture.
Afterwards, pick up a Hunk of Meat from the ground, hold RT, aim at one of the dangling survivors and press the X button to throw the meat to knock the survivor to the ground. Repeat with the other survivor, and then speak to both of them to have them join your party. Do not give either survivor a weapon at this point.
The Lovely Fashion House store is along the eastern walkway in Wonderland Plaza. Step inside here to trigger a cutscene.
PSYCHOPATH: Jo Slade
This is likely the easiest psychopath battle of Dead Rising. Have a Katana in your inventory (and optionally a Sledgehammer as well) and you're all set. You'll want to avoid using guns here, as melee weapons are much more effective.
Jo Slade, a large, female police officer, is holding four women captive in the Lovely Fashion House along the upper walkway on the east side of Wonderland Plaza. If you rescued Nick and Sally before going into this fight, as soon as you gain control over Frank after the cutscene, command them to stand in a corner so they remain out of danger. If they stay in the corner and do not do anything, Jo should not attack them. Make sure that you have not giving either of them a weapon, otherwise they may attempt to help by shooting Jo, which will turn her attention to them instead of you.
Jo is very slow when her attention is focused elsewhere. When she isn't chasing after Frank, she'll walk around the store and randomly kick and taser her captives. Jo's attacks are quite easy to avoid, but you'll take quite a bit of damage if one connects.
If Jo manages taser Frank, he will become incapacitated for about five seconds. While this state, Jo will walk around the store and harm the women. She doesn't do very much damage, however. Once you are able to move again, her attention will quickly shift back to you. Jo also has a simple bludgeon attack as well. Her bludgeon is quite slowly executed, so you can usually hit her with a melee weapon to stagger her, interrupting the animation and preventing her from dealing any damage.

A zap from Jo's taser will set Frank convulsing on the floor for several seconds.
Though Jo is quite fast for her size, she can easily be avoided by running around the tables in the store. Avoid jumping up onto a table, as doing so causes Jo to take out her Handgun and fire several shots off.
The strategy to use here is simple: run around the store with Katana in hand, slash Jo once or twice, and then sprint away again to dodge her attack. In most cases, you won't want to hit Jo more than twice in a row, as that is usually enough time for her attack animation to fully complete. If you are tasered, once Frank is back on his feet, immediately run at Jo, slash her a couple of times while she is preoccupied, and then dash away.
Another way to win this fight is by running out of the store while Jo is in pursuit. Once you're outside, Jo will stop chasing after you, and turn her attention to one of her captives. At this point, run back into the store and hit her over the head with a Sledgehammer while her back is turned. Repeat as necessary.
Once Jo is dead, be sure to snap a photo of her corpse if you are interested in unlocking the achievements associated with taking pictures of psychopaths.
Jo drops a Handcuff Key, as well as her Stun Gun. Use the Handcuff Key to unlock each of the four girls' handcuffs. Once everyone is free, lead them to the ladies' room in Wonderland Plaza. If you didn't rescue Nick and Sally before fighting Jo, take the time to save them now if they have spawned. They'll be dangling from the giant rabbit statue at the north end of the plaza. Take the shortcut to Paradise Plaza, and then proceed to lead the survivors to the Security Room.
There are three different scoops that can all be completed in the Entrance Plaza at this time. These scoops are "Mark of the Sniper," "The Woman Who Didn't Make it" and "Antique Lover." You should receive a call from Otis about these scoops at around 4:00PM. If you haven't completed “Above the Law” yet, complete that scoop one first. Afterwards, if Otis had yet to inform you of one of the aforementioned scoops by 4:00PM, he should call in with it now.
According to Otis, a group of snipers has taken control of the Entrance Plaza. Before you enter the Entrance Plaza, make sure you have a Sledgehammer in your inventory. You can find a Sledgehammer on top of the shelves in the warehouse, from McHardy's Hardware in Al Fresca Plaza, or from Crislip's Home Saloon in the North Plaza.
PSYCHOPATH: Roger, Jack, and Thomas Hall
The Halls aren't very tough, but defeating them may take awhile, as they'll try to keep their distance from you for the majority of the fight. The Sniper Rifle that each Hall wields deals a pitiful amount of damage, and serve solely to stop Frank in his tracks more than anything.
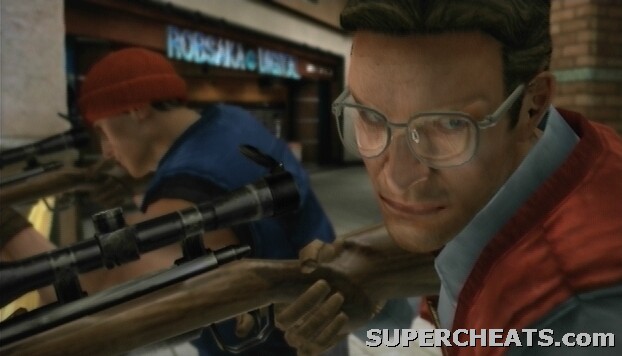
The Halls are armed with sniper rifles in the Entrance Plaza.
When you gain control over Frank after the cutscene, turn around and head up the escalator to reach the walkway. Duck into the Shootingstar Sporting Goods store to the right. Take a Hockey Stick or two from the rack at the back of the store and then wait by the entrance until the Halls approach.
The Hall family is much more efficient as a group, so you'll need to split them up. More than likely, one of the Halls will run into the store after you. Each Hall will run if you get too close to him, but fortunately Frank can run faster. The best way to inflict enough damage to quickly deal with the Halls is by using the Sledgehammer. First, chase after one of the Halls to separate him from the others. Otherwise, if the other members of the family are too close by, they will likely shoot Frank, causing him to flinch and stop moving.
When you near the Hall you're chasing after, continue running until you are a few strides in front of him. Then, with Sledgehammer in hand, press and hold the X button to swing the weapon to the side, hopefully stunning your target. If you managed to halt the target, turn Frank towards him and immediately tap the X button to hit him with the Sledgehammer's primary attack. If the hit connects, it should knock off a large chunk of the target's health bar. Repeat this strategy until all three have fallen.

Using a Hockey Stick to slap pucks at the Halls deals a fair amount of damage.
As soon as you kill one of the Halls, take a second to snap a picture of his corpse. If you wait too long, the body will disappear. Each one member of the family counts toward the Psycho Collector achievement.
Once the Hall family has been dealt with, there are several survivors in the plaza that can be rescued. Wayne can be found in the cosmetics store at the top of the stairs. Jolie, the survivor from The Woman Who Didn't Make It scoop, can be found in the Gramma's Kids store on the ground floor of the plaza. Talk to her, then start to leave and she will follow you.
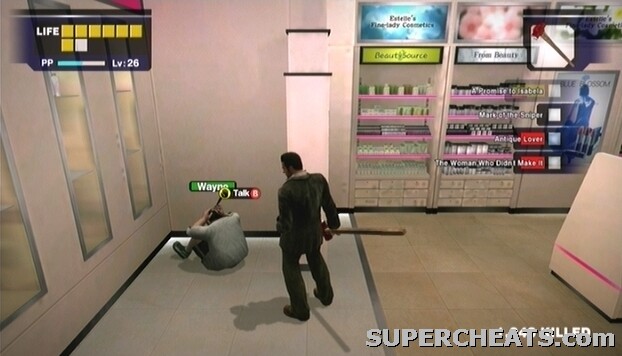
Look for Wayne in the cosmetics store along the crossway across from the escalator.
Lead Jolie up to the Ladies' Space clothing store along the walkway and gather her friend Rachel. Snap a picture of the two women when they hug to earn some points. Lastly, grab Floyd from the antique store along the walkway. After a short conversation, he'll agree to go with you. With all four survivors in tow, lead them through the Entrance Plaza, through Paradise Plaza, through the warehouse, and finally, to the Security Room.
Otis should call about a woman in a children's toy store in the Entrance Plaza at around 4:00PM. Save this woman after killing the psychopaths associated with the "Mark of the Sniper" scoop which also takes place in the Entrance Plaza.
Jolie can be found in the Gramma's Kids toy store on the lower level of the plaza. She believes her friend, Rachel, has been killed by zombies. She last saw Rachel in the Ladies' Space clothes store, which is also located in the Entrance Plaza. Attempt to leave the store and Jolie will join the group.

Take a picture of the two girls when they embrace to earn a substantial amount of points.
You'll have to lead Jolie up to the Ladies' Space store, which is located on the second floor of the plaza. If you travel there without Jolie, Rachel, who is hiding inside, will not listen to Frank. When the two reunite, take out your camera and be ready to snap a picture of them when they embrace. Speak to one of the girls afterwards to have Rachel join the group.
You should receive a call from Otis about an unusually calm man in an antique store on the second floor of the Entrance Plaza at around 4:00PM. Save this man after killing the psychopaths associated with the "Mark of the Sniper" scoop, which also takes place in the Entrance Plaza.
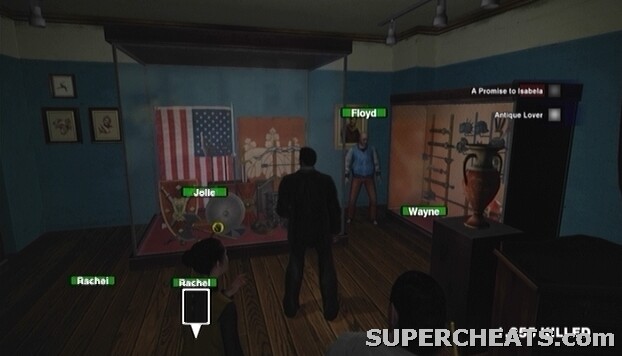
Look for Floyd in the corner of Ned's Knicknackery, which is located along the upper walkway of the Entrance Plaza.
Floyd can be found in Ned's Knicknackery, which is located on the second floor of the plaza. After a rather long conversation, Floyd will eventually agree to go with you. Floyd can be carried, though he can walk just fine, so doing so isn't necessary.
A Strange Group
Long-Haired Punk
A Sick Man
A Photographer's Pride
A Woman in Despair
This scoop becomes available at around 1:00AM. This is a good scoop to take the time to complete, as because you can earn a massive amount of PP by rescuing the survivors afterwards.
The raincoat cult has been spotted in Colby's Movieland, the cinema in Paradise Plaza. You must make your way to Colby's Movieland and defeat the leader of the mysterious True Eye cult to disband the group once and for all.
Before getting started, be sure to get the Sledgehammer in the warehouse on your way into Paradise Plaza. Also, stop by the Colombian Roastmasters restaurant on the second floor of Paradise Plaza and pick up some Orange Juice, as well as the Katana on the awning below the window next to the fridge.
Once you're all set, enter the Colby's Movieland theatre. Upon entering, head down the hall straight ahead, and turn right when you can. You'll come to a group True Eye cult members. This is where the Sledgehammer comes in handy. If you picked up this weapon, equip it and stand in the middle of the pack. Tap and hold the X button to swing the Sledgehammer around, hopefully sweeping the cult members off of their feet. Repeat this method until all of the cult members have been dealt with, or until the way is clear. Whichever you see fit.

Use a Sledgehammer to clear away the True Eye cult members outside of the theatre. Tap and hold the X button to swing the hammer.
Be careful, however; if you see one of the cult members slowly reaching into his pocket, stand back, as he will soon throw dust toward you. If you're hit by this dust, Frank will pass out, and be taken to the True Eye cult headquarters.
Sean, the leader of the cult, is in Theater 4. Locate and enter this theatre to trigger a cutscene.
PSYCHOPATH: Sean Keanan
Sean's attacks are fast and damaging, so hopefully you have plenty of food items in your inventory. If you followed the instructions above, you should have a Katana and a Sledgehammer going into this fight. The Katana is a quick and powerful weapon—ideal for taking out the cult leader.
Because Sean's attacks are so quick, it can be difficult to get a hit in without taking some damage yourself. There are three ideal opportunities to attack Sean: just as he lands after performing his lunge attack, just after he slides across the floor, and when he takes a step forward and thrusts his sword upward. If you're near enough to Sean to hit him just as he finishes or is in the middle of performing one of the attacks described above, go for it. However, only hit Sean once and then back off, as he can usually immediately retaliate with a sword swing. You want to minimize close-contact with Sean to avoid getting caught in a combo, which can be quite damaging.
The one attack to look out for is the aforementioned lunge, as it can knock off three health blocks per hit. If you're low on health and need to heal, run far from Sean and try to use a health item before he can catch up. Though Sean is fast and can easily keep up with Frank, he tends to become trapped by obstacles just like any other AI.

The True Eye cult leader at work.
If Sean has been damaged enough, he may fall to his knees and remain stunned for a few seconds. At this point, switch to your Sledgehammer and tap the X button to hit Sean, damaging him significantly. Then, you can hit once more as he moves to stand.
Once Sean has been defeated, be sure to take a picture of his corpse for the Psycho Collector achievement. You can pick up and use the sword he was wielding as well.
After the battle, Sean's lackeys will form a line outside and slowly funnel into the theatre. Pick up the Ceremonial Sword that Sean dropped, as it can easily cut through the cultists.
Once all of the cultists are dead, make your way around the theatre and free the captive survivors. The Warehouse Key can be used to free an additional survivor; use the key to unlock the door in the northeast corner of the theatre to reveal Cheryl.
The "Brainwashing Tips" book that Sean drops makes survivors more aggressive. Not particularly useful, so it's probably best to just leave it. Paradise Plaza is swarming with zombies as per usual, and that, coupled with abysmal AI, can make escorting the group of five back to the Security Room quite difficult. However, you'll receive a massive PP boost if all five survivors are rescued, so it's worth the trouble.
You should receive a transmission from Otis with this scoop at around 6:00AM. The Casual Gal's clothing store is located in Wonderland Plaza. Be sure to collect the Sledgehammer on your way through the warehouse, as well as the Katana on the awning outside of the Colombian Roastmasters restaurant in Paradise Plaza. Then, you can either head through Leisure Park and then the Food Court to reach Wonderland Plaza, or use the shortcut in the Paradise Plaza ladies' room (provided you defeated Adam the Clown on the first day).
If you head through the Food Court, you will more than likely encounter a man named Gil. He can be found drinking in the Chris' Fine Foods restaurant. Talk to the drunk, and when that gets you nowhere, hit him with something and then speak to him a few more times. Gil will eventually join the party. Get your camera ready and snap a picture when he poses PP icon to earn a substantial amount of PP. Gil is too drunk to walk unfortunately, so you'll have to support him.

Gil is not handling the zombie outbreak particularly well. Look for him in the Food Court.
Since you are heading to Wonderland Plaza to investigate the Casual Gals clothing store, there isn't much sense in taking Gil back to the Security Room just yet. You should take him with you, and then lead him back to the Security Room along with the survivors to be rescued during this scoop. Grab some Wine and then support Gil; lead him through the Food Court and into Wonderland Plaza.
Once you've reached the plaza, equip your Sledgehammer, locate the Casual Gals clothing store and step inside
PSYCHOPATH: Paul Carson
Paul Carson, an angry teenager, has trapped two women in the Casual Gals clothing store. He is evidently quite the arsonist, as he has an unlimited supply of Molotov Cocktails. If you followed the instructions above, you should have at least a Sledgehammer going into this fight. As soon as you gain control of Frank, run at Paul and hit him with the Sledgehammer. Hit him once more when he hits the ground, and then try to hook him back by pressing and hold the X button to swing the Sledgehammer to the side. It is possible to knock quite a bit off of Paul's health bar before he can even leave the store.

Paul Carson
If Paul manages to flee the store and Gil is in your company, command him to wait somewhere in the store while you pursue the psychopath.
Once out of the store, Paul will proceed to frantically run through the mall, dropping active pipe bombs behind him. A Shotgun would likely work well here, however the Sledgehammer alone is more than adequate. Since Paul is constantly dropping bombs in his wake, you'll have to be especially careful while pursuing him. If you can follow him and avoid getting caught in a blast radius long enough, he will eventually stop to catch his breath. This is the perfect time to deal some damage. Hit Paul as many times as you can with the Sledgehammer, and then try to trip him (press and hold the X button) as once he's back on his feet.
Aside from Pipe Bombs, Paul attacks using other types of explosives as well. He'll occasionally stop, light a Molotov Cocktail, and then throw it your way. Hitting him while he is doing this will cause the Molotov to drop; the ensuing explosion will damage you, while dealing minimal damage to Paul. As well, Paul also attaches explosives to RC cars and sends them your way. These can be easily avoided by simply running or jumping past them.
Chase Paul and continue to beat on him until his health bar has been completely depleted.
After the cutscene, you will appear in the Casual Gals clothing store, no matter your previous location. Paul ends up lighting himself on fire; you can choose to save him, or you can leave him to burn. Saving Paul is a good idea, because he counts as a survivor. If that isn't incentive enough, he'll eventually act as a Molotov Cocktail source back in the Security Room.
First and foremost, snap a picture of the burning teenager to earn a large amount of PP. To save him, grab the nearby Fire Extinguisher, equip it, and stand over Paul while holding the X button. It may not look like the extinguisher is even reaching the flames if the camera is spun around, but just keep the X button held down and eventually, when most of the extinguisher has been used, the flames will fizzle out.
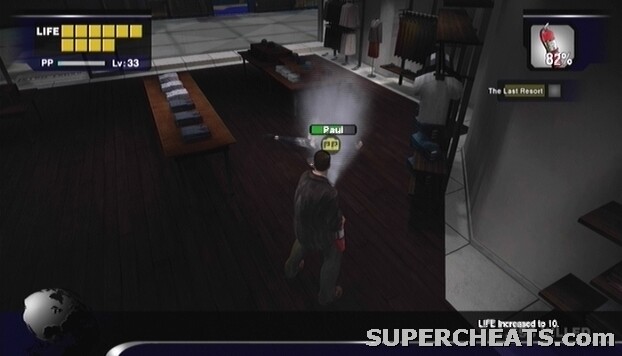
Use the Fire Extinguisher to snuff out the flames and save Paul. Or don't.
Once Paul has been saved, he agrees to follow Frank back to the Security Room. Now save the ladies who are locked in the closet. Speak either one of them to have them join the group.
If you have received the "A Sick Man" scoop, you can save the man associated with that scoop as well. Depending on the time, a woman named Susan may have spawned on the giant soccer ball near the entrance to the Food Court. If she is there, you can rescue this woman too. It might be the case that Susan will not appear if Gil is in your party. If you wish to save Susan but she does not appear, return to Wonderland Plaza sometime later and she should still be there.
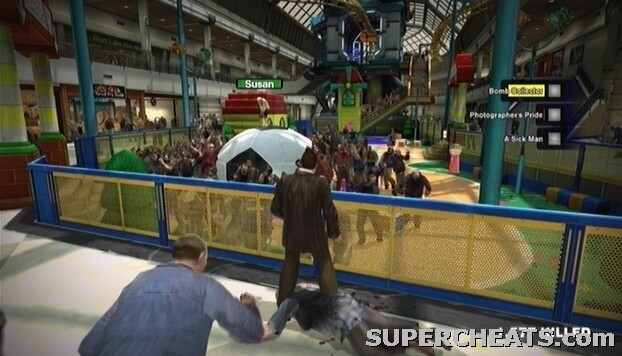
Saving Susan is tough without a Queen.
If you defeated Adam the Clown on the first day, head into the ladies' room and use the shortcut there to jump to Paradise Plaza. Then, lead the survivors to the safety of the Security Room to earn PP.
Otis should call you about a sick man in Wonderland Plaza at around 10:00AM. You can find this survivor in Estelle's Fine-Lady Cosmetics on the first floor of Wonderland Plaza. This is a simple escort mission, since despite being sick, you don't need to carry or support this man.
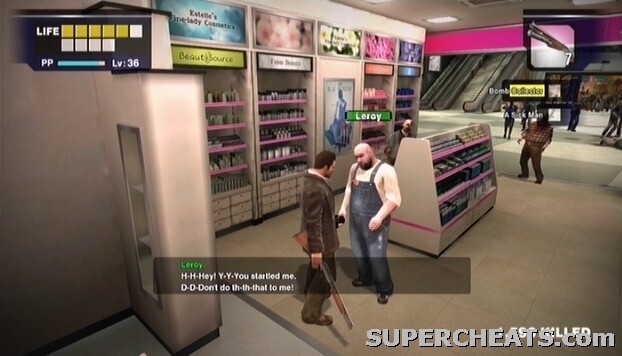
Look for Leroy in Estelle's Fine-Lady Cosmetics, which is on the first floor of Wonderland Plaza. He may be injured, but luckily he can still walk on his own.
A woman named Susan may be marooned on the giant soccer ball at the north end of the plaza. If she is there, you can rescue her as well. Since you are in Wonderland Plaza, you can use the shortcut in the ladies' room to jump to the Paradise Plaza, provided you defeated Adam the Clown on the first day. Once you're in Paradise Plaza, lead the survivors back to the Security Room to successfully rescue them.
This scoop becomes available at around the same time as the 7-2 case "Bomb Collector". Complete this scoop before moving on to Bomb Collector. Make sure you have a Sledgehammer in your inventory and you should be able to get this scoop out of the way in just a few minutes. This scoop is only available if you completed the "Photo Challenge" scoop on the second day. If you've fulfilled that prerequisite, be in Paradise Plaza at 12:00PM to trigger a cutscene.
If you are late for the meeting, Kent will be angry and something very unpleasant will happen to Frank. In the event that you are this late, you won't be able to save the survivor being held hostage by Kent, and you will have to fight him with your bare hands. For the sake of simplicity, just be there on time!
PSYCHOPATH: Kent
Though this isn't a particularly tough battle, Kent's attacks do deal a lot of damage, especially his flying kick. Aside punches and kicks, Kent also has a Handgun which he may use. The Handgun fire will stagger Frank a bit, but its shots are easy enough to avoid.

Use the Sledgehammer to make short work of Kent.
If you brought a Sledgehammer, you can end this battle in under a minute. First, use the secondary attack by pressing and holding the X button to swing the Sledgehammer to the side. If you manage to hit Kent with this attack, he'll be thrown to the ground. Quickly run up to him and use the weapon's primary attack by simply tapping the X button. This attack will knock off a large chunk of Kent's health. Hit him with a few more of these and to end the fight.
When Kent falls, take his advice and snap a picture of him. This photo counts toward the Psycho Collector achievement.
After the battle, free Tad and speak to him to have him join your party. You can pick up the “Camera 2" book that Kent dropped. This book increases the PP earned from photos by 100%. It's a good book to have with you, provided you have the inventory space to spare.
At this point, Paradise Plaza should be pretty much desolate, and in that case it will be very easy to rescue Tad. If get a call concerning the "A Woman in Despair" scoop, you can stop by the Players CD store in Paradise Plaza and pick her up if you wish. Most importantly, if you received a call from Otis about Kindell's Betrayal, be sure to stop by the Security Room to talk some sense into him before moving on.
You should receive a call about an injured woman in the Players CD store in the Paradise Plaza at around the same time you receive the "Bomb Collector" case mission. A good time to complete this scoop is just before you proceed to the Maintenance Tunnels to stop Carlito, since the Players CD store is very close to the warehouse door.
Look for Simone in the Players CD store on the first floor of Paradise Plaza. She has been bitten, but she isn't a threat.
Simone, the woman associated with this scoop, has been bitten by a zombie, and fears that she is infected. At first she will refuse to follow Frank back to the Security Room, but continue talking to her until she agrees.
Convicts
Cletus
Cultists
Ronald's Appetite
Floyd the Sommelier
Kindell's Betrayal
Hostile Survivors
Paul's Present
Simone the Gunslinger
Cheryl's Request
A group of three convicts first appear in Leisure Park at around 6:00PM on the 19th. When you first encounter these psychopaths, you are most likely not well-armed, since it is still rather early in the game. Before even attempting to face off against them, acquire a gun of some sort. You'll need at least a Handgun to defeat these guys; there should be two zombie cops carrying handguns in the water by the Leisure Park entrance in Paradise Plaza. Kill these zombies on your way to Leisure Park and pick up one of the handguns (or both, provided you have room in your inventory.
Once the convicts have been dealt with, they will eventually respawn in Leisure Park, and continue to do so from then on. Later in the game however, you will have access to more powerful guns, which make taking these guys out much easier. A good weapon to use against the convicts is the Sniper Rifle, since you are able to pick off the gunner from a distance before they can even drive up to you.
Initially, the convicts are terrorizing a woman named Sophie, whom can be rescued and escorted to the Security Room.
Rescue Sophie from the crazed convicts in Leisure Park after 6:00PM.
Taking down the convicts is substantially easier if you can manage to have them trap their jeep behind a tree. Perhaps because the AI in Dead Rising is so abysmal, if the convicts happen to hit a tree, there is a good chance that the driver will continuously reverse and accelerate back into the tree if you are standing on the other side of it, giving you a good opportunity to take out the gunner.
Run around one of the wider tress until hopefully, the driver crashes into it and becomes stuck. Once you've succeeded, take cover behind the tree, and then quickly pop out and try to score a few headshots on the gunner. The mounted turret on the back of the jeep is very powerful, so be careful. If you are low on health, use the tree as cover and down a bottle of Wine or some Orange Juice.
When you've taken care of the gunner, run around to the back of the jeep and grab hold the mounted turret. With the machine gun in hand, run around to the side of the jeep and shoot the two remaining convicts dead.
Achievement Tip -- Carjacker: Once the convicts have been taken care of, hop in the driver's seat of the now-vacant jeep to earn this achievement.
Cletus will appear in the Huntin' Shack in the North Plaza at some point during the 19th, and seems to disappear by nightfall on the second day. This is an unmarked side mission, so there is no scoop associated with Cletus. If you want to fight him, simply enter the Huntin' Shack some time after nightfall on the first day to trigger a cutscene. Be warned, however, as Cletus is arguably the toughest of the psychopaths to defeat. You may want to consider leaving Cletus alone until a future playthrough, when Frank is at a higher level.
If you do wish to face Cletus, it is probably best completed during the "Shadow of the North Plaza" that takes place during September 19th. If you visit the Huntin' Shack, which is located in the North Plaza, you'll encounter Cletus there. Before saving the man associated with the "Shadow of the North Plaza" mission, set your sights on taking out Cletus first. Be sure to have plenty of food items in your inventory. Melee weapons aren't particularly effective against Cletus, so lean more towards guns. When you reach the North Plaza, press the Back button to call up the map and locate the Huntin' Shack. Make your way over there to get started.
PSYCHOPATH: Cletus
After the cutscene, as soon as you gain control over Frank, take cover behind one of the display items. As you have surely noticed, Cletus is packing a shotgun. This is bad news for you, as the Shotgun is a very powerful weapon that can knock off large chunks of health. Try your best to remain in behind one of display objects while Cletus is firing. However, even if you are behind cover, you can still take damage, since the shotgun fire spreads.

Cletus isn't playing any games.
Only pop out from behind cover to shoot Cletus while he is reloading. This is your window of opportunity. Don't stay out in the open for too long though, because Cletus can reload his shotgun quite quickly. Another chance to get some shots in is when Cletus stops to take drink some Wine.
Don't even try to melee this guy, because if you get too close, Cletus will pick Frank up and throw him into the middle of the store, dealing a significant amount of damage and leaving you open to a shotgun blast.
If you are low on health, take cover behind one of the display objects and consume a food item from your inventory to regain some health. If you didn't bring a Handgun, you can smash the display case in the middle of the store to find one.
Alternatively, if you're the daring type, you can attempt to jump over the counter and grab a Sniper Rifle or shotgun. If you can manage to get your hands on either a Shotgun or Sniper Rifle, it will surely help. If you can take the abuse, go for it. The Sniper Rifle is the better choice, as you can use the scope to score some easy headshots. If you manage to get a Sniper Rifle and leave the store, you can shoot Cletus through the open double-door while remaining relatively safe.
If you want to go this route, hide behind the one of the store displays near the counter until Cletus is forced to reload his weapon. At this point, make a mad dash for the counter, hop over, and grab the Sniper Rifles from the rack on the far right. Only make this attempt if Cletus is standing at the other end of the counter, otherwise you likely won't have enough time to grab the weapon. Once you have the weapon, try to hop back over the counter and run for the exit. You will need plenty of healing items in your inventory to make it through this, as Cletus will likely be able to blast you a couple of times before you manage to exit the store.
There is a mob of zombies just outside the Huntin' Shack, so switch to a melee weapon and clear away as many of them as you can. Or, if you have a Queen, use it. If you are in dire need of healing, get into the corner, away from the Huntin' Shack double-door, and consume a food item. When the zombies outside of the store have been dealt with, stand back as far as you can from the open door. Switch to the Sniper Rifle and start hammering Cletus with shots from afar. The aiming is a bit jerky, but try your best to hit him in the head.
Cletus' Shotgun boasts impressive range, so you can still take damage here; move away from the door and use a food item from your inventory if your health is very low. If Cletus won't stop shooting through the door, head down the hall until the music stops, and then head back to the Huntin' Shack entrance and with any luck he will have calmed down.
When Cletus finally falls, you are free to loot the store of weapons. Also, be sure to snap a picture of the dead redneck if you are after the achievements associated with taking pictures of psychopaths.

Guns guns guns!
The cultists first appear in Paradise Plaza at around 2:00PM on the second day. When you next enter Paradise Plaza after 2:00PM, you will witness a short cutscene depicting the True Eye cult. The cult has captured a woman named Jennifer, and seems to be preparing to perform some sort of ritual. Frank, seemingly unresponsive to the young girl's cries for help, decides that this would be a good time to take some pictures. Until the cultists spot him.
The True Eye cult first appear in Paradise Plaza around 2:00PM on the second day.
You'll have to kill all of the cultists around the plaza to save Jennifer. As a unit, the cultists are quite tough, but if you have a Sledgehammer, tap and hold the X button while near a group of them to sweep them away. If you have a Shotgun, that works quite nicely as well. If you lack either weapon, use the Double Lariat attack instead (provided you've mastered it) by clicking the Left Thumbstick and tapping the X button.
Be careful when facing the cultists, however, as if one manages to knock Frank out, he will be taken to their lair. At this point, it's quite likely that any survivor with you will be lost. Also, if you're short on time, you could fail any current case or scoop. To avoid this, if spot one of the cult members slowly reaching into his pocket, dash away, as he will soon throw some dust into the air that can cause Frank to pass out.
If Frank is knocked out, he is then carried away to the cult's base of operations. All of your items are removed, excluding the camera and transceiver (go figure). There doesn't appear to be a way to get your items back once they've been taken from you. You can grab the sword from the red cloth in the main area and use it to slice through the cultists. Kill each and every cultist to receive the Pass Code so you can open the door and escape.
There are a couple of PP stickers in their base, so if you are after those for the achievement, you have no choice but to let them take Frank away.
Aside from that, the cultists have other ways of dealing damage. When low on health, a cultist may trigger a bomb that is strapped to him and run at you. If the suicidal cultist reaches Frank, he will latch onto him and attempt to hold him in place. Rotate the Left Thumbstick to shake the cultist off, and immediately jump away to avoid getting caught in the blast. A cultist may also take out a knife and dash toward you. If Frank is hit by this attack, he will take quite a bit of damage and be knocked to the ground.
Initially, once you have defeated all of the cultists in Paradise Plaza, you can open the box and free the woman inside. Take this woman to the Security Room to rescue her. From this point on, until you complete the "A Strange Group" scoop on the third day, groups of cultists will randomly spawn in different locations around in the mall. Once their leader is defeated, they will no longer spawn.
You get 500 PP per cultist killed, so if you see a large group of them, consider clearing them out to gain some much needed PP.
If you saved Ronald during the "The Restaurant Man" scoop on September 20th, eventually you will receive a call from Otis. He tells you that Ronald is getting worried about the lack of food in the Security Room and is forming a group of people to scavenge the mall for food.
You have plenty of time, but if you don't complete this scoop, you'll likely lose some survivors. Bring a food item back to the Security Room, locate Ronald, talk to him, and then hand the food item over to him. You'll receive 10,000 points for avoiding the possible mutiny.
If you saved Floyd during the "Antique Man" scoop, you will eventually receive a call from Otis. He says that Floyd thinks it would lighten the mood if some Wine was brought back to the Security Room.
There won't be any negative repercussions if you do not this, but fulfilling the request yields 10,000 points. Wine can be found in the dining area of the Chris' Fine Foods restaurant in the Food Court, or in the King of Wine section of the Seon's Food & Stuff supermarket in the North Plaza. Bring at least one bottle back, talk to Floyd, and then hand over the Wine over to him to earn your points.
If you rescued Kindell from the North Plaza when you encountered him during the "Transporting Isabella" case, you will eventually receive a call from Otis. He tells you that Kindell is basically freaking out, claiming that the helicopter will never arrive. Kindell is trying gain supporters so they can enter the mall and try to find another way out.

Talk some sense into Kindell before mutiny breaks out!
You should have a good amount of time to complete this, but just make you speak to Kindell before time runs out, otherwise you will likely lose some survivors. Speak to Kindell in the security room after receiving the call and Frank will talk some sense into him. You will receive 10,000 points for avoiding the possible mutiny.
At some point, snap a picture of the Air Duct that leads to the Security Room. Don't go after these survivors unless you have that picture.

Take a picture of the Air Duct on the Rooftop.
On the third day, if you visit the Huntin' Shack in the North Plaza, you are likely to encounter three survivors camping in the store. Do not step too far into the store, as you will be welcomed by a barrage of bullets. While getting shot at, Frank will probably stagger and be unable to move. Slowly turn around and let the bullets push you back out the door.
Afterwards, one of the survivors will come to the door to check on Frank. When the man comes to the door, head in and speak to him. Again, do not step too far inside, as the two survivors behind the counter will begin shooting again if you get too close.
Continue speaking to Jonathan and eventually Frank will mention the Security Room. The group demands to see a picture of the Air Duct that leads down to the Security Room before they'll agree to follow. If you don't have a picture of the Air Duct on hand, you have no choice but to run back to the Rooftop, snap a picture of the Air Duct, and then return to the survivors in the North Plaza.
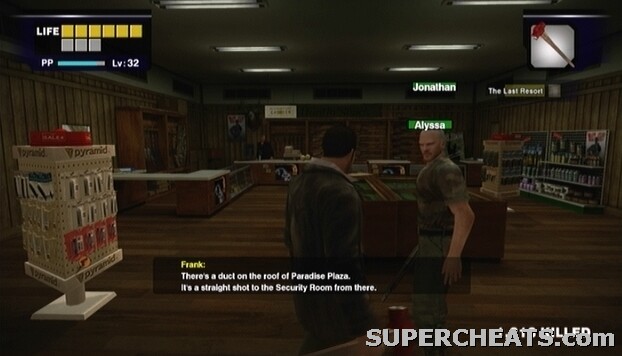
Show the Air Duct photo to the hostile survivors who are holed up in the Huntin' Shack during the morning of the third day.
Once you have shown the survivors the picture that they requested to see, they agree to follow Frank. Each of them is equipped with a gun, so escorting them shouldn't be too difficult. Take them through Leisure Park, since doing so is much quicker. Just hug the northwest wall as you make your way to Paradise Plaza in an effort to avoid stirring the convicts.
Be sure to swap something in your inventory for Brett's Machine Gun before taking the survivors through the Air Duct.
If you chose to save Paul in the “Long-Haired Punk” scoop after his change of heart, you will eventually receive a call from Otis. He tells you that Paul has something to give to you. Next time you visit the Security Room, speak to Paul to receive a Molotov Cocktail. This is a great thing to throw into a crowd of zombies!
If you took the time to rescue Simone from the "A Woman in Despair" scoop, Otis will eventually call with a request from Simone. Simone would like Handgun. Handguns are very easy to come by. Zombie cops are usually carrying one. Simone wants the gun as a precautionary measure, so it's safe to give it to her. Deliver the gun to Simone to receive 10,000 PP for fulfilling her request.
If you rescued Cheryl, who was locked in the movie theatre warehouse during the "A Strange Group" scoop, you will eventually receive a call from Otis. He tells you that she has a favour to ask. Next time you visit the Security Room, find and speak to Cheryl.
Cheryl wants Frank to take some pictures of her. She asks that he focus on her "important" parts. Take a few pictures of her as she does a few different poses. You will receive 10,000 PP for fulfilling Cheryl's request.
Below is a complete list of the survivors that can be rescued and the days on which they appear in the mall.
September 19th:
Jeff Meyer
Natalie Meyer
Bill Brenton
Sophie Richards
Burt Thompson
Aaron Swoop
Leah Stein
Greg Simpson
Yuu Tanaka
Shinji Kitana
David Balley
September 20th:
Tonya Waters
Ross Folk
Josh Manning
Barbara Patterson
Rich Atkins
Heather Tompkins
Pamela Tompkins
Gordon Stalworth
Ronald Shiner
Jennifer Gorman
Kay Nelson
Lilly Deacon
Kelly Carpenter
Janet Star
Sally Mills
Nick Evans
Wayne Blackwell
Jolie Wu
Rachel Decker
Floyd Sanders
September 21th:
Kindell Johnson
Ray Mathison
Nathan Crabbe
Michelle Feltz
Beth Shrake
Cheryl Jones
Gil Jimenez
Brett Styles
Jonathan Picardsen
Alyssa Laurent
Paul Carson
Mindy Baker
Debbie Willett
Leroy McKenna
Susan Walsh
Simone Ravendark
Tad Hawthorne
Below is a list of every survivor in the mall. A Notebook containing information on each survivor can be accessed from the pause menu.
001 - Ed DeLuca:
Helicopter pilot that brings Frank to the mall at the beginning of the game.
002 - Carlito:
Main antagonist.
003 - Alan Peterson:
Killed when the zombies break into the mall from the Entrance Plaza.
004 - Brian Reynolds:
Killed when the zombies break into the mall from the Entrance Plaza.
005 - Chris Hines:
Killed when the zombies break into the mall from the Entrance Plaza.
006 - Dana Simms:
Killed when the zombies break into the mall from the Entrance Plaza.
007 - Freddie May:
Killed when the zombies break into the mall from the Entrance Plaza.
008 - Kathy Peterson:
Killed when the zombies break into the mall from the Entrance Plaza.
009 - Lindsay Harris:
Killed when the zombies break into the mall from the Entrance Plaza.
010 - Todd Mendell:
Killed when the zombies break into the mall from the Entrance Plaza.
011 - Mark Quemada:
Killed when the zombies break into the mall from the Entrance Plaza.
012 - Ryan LaRosa:
Killed when the zombies break into the mall from the Entrance Plaza.
013 - Verlene Willis:
Killed when the zombies break into the mall from the Entrance Plaza.
014 - Otis Washington:
Mall janitor. Otis calls Frank on the transceiver with scoops as they arise.
015 - Jessie McCarney:
DHS Agent.
016 - Brad Garrison:
DHS Agent.
017 - Russell Barnaby:
Doctor encountered during Case 1-3. Story character.
018 - Isabela Keyes:
Encountered during Case 2-3. Story character.
019 - Jeff Meyer:
Found on the Rooftop on the 19th. Looking for his wife Natalie Meyer.
020 - Natalie Meyer:
Found on the Rooftop on the 19th. Looking for her husband Jeff Meyer.
021 - Bill Brenton:
Found in the "In The Closet" store in the Entrance Plaza on the 19th.
022 - Kent:
Fellow photographer, eventual psychopath. First encountered in the "Cut From The Same Cloth" scoop on the 19th.
023 - Cletus:
Psychopath redneck that can be encountered in the Huntin' Shack store in the North Plaza on the 19th. Is not associated with a case or scoop.
024 - James:
Killed by Cletus in the Huntin' Shack.
025 - Sophie Richards:
Found being terrorized by convicts in Leisure Park by nightfall on the 19th.
026 - Burt Thompson:
Found barricaded in Weber's Garments in the Al Fresca Plaza during the "Barricade A" scoop on 19th.
027 - Aaron Swoop:
Found Barricaded in Weber's Garments in the Al Fresca Plaza during the "Barricade B" scoop on 19th.
028 - Leah Stein:
Found in a jewellery store on the 19th during the "A Mother's Lament" scoop.
029 - Adam MacIntyre:
Psychopath encountered in Wonderland Plaza on the 19th during the "Out Of Control" scoop.
030 - Greg Simpson:
Man rescued from the out of control Space Rider attraction in Wonderland Plaza after defeating Adam.
031 - Yuu Tanaka:
Survivor found in Sir Book-a-Lot in Wonderland Plaza on the 19th during the "Japanese Tourists" scoop.
032 - Shinji Kitano:
Survivor found in Sir Book-a-Lot in Wonderland Plaza on the 19th during "the Japanese Tourists" scoop.
033 - David Balley:
Injured man found in the North Plaza on the 19th during the "Shadow of the North Plaza" scoop.
034 - Tonya Waters:
Woman found in a Wonderland Plaza shoe store during the "Lovers" scoop on the 20th.
035 - Ross Folk:
Injured man found in a Wonderland Plaza shoe store during the "Lovers" scoop on the 20th.
036 - Cliff Hudson:
Psychopath found in Crislip's Hardware in the North Plaza during "The Hatchet Man" scoop on the 20th.
037 - Josh Manning:
Man found in the empty store outside of Crislip's Home Saloon after defeating Cliff.
038 - Barbara Patterson:
Woman found in the empty store outside of Crislip's Home Saloon after defeating Cliff.
039 - Rich Atkins:
Man found in the empty store outside of Crislip's Home Saloon after defeating Cliff.
040 - Heather Tompkins:
Woman found in Paradise at some point during the 20th. In the Child's Play store.
041 - Pamela Tompkins:
Woman found in Paradise at some point during the 20th. Outside of the Child's Play store.
042 - Gordon Stalworth:
Man in the Al Fresca Plaza hardware store during "The Coward" scoop on the 20th.
043 - Ronald Shiner:
Man found in Jill's Sandwiches in Paradise Plaza during the "The Restaurant Man" scoop on the 20th.
044 - Jennifer Gorman:
Can be found being abducted by the True Eye cult in the Paradise Plaza starting at 2:00PM on the 20th.
045 - Jo Slade:
Psychopath encountered during the "Above the Law" scoop on the 20th.
046 - Kay Nelson:
Woman in the Lovely Fashion House being held hostage by Jo in "Above the Law."
047 - Lilly Deacon:
Woman in the Lovely Fashion House being held hostage by Jo in "Above the Law."
048 - Kelly Carpenter:
Woman in the Lovely Fashion House being held hostage by Jo in "Above the Law."
049 - Janet Star:
Woman in the Lovely Fashion House being held hostage by Jo in "Above the Law."
050 - Sally Mills:
Hanging from giant rabbit statue in Wonderland Plaza sometime during the 20th.
051 - Nick Evans:
Hanging from giant rabbit statue in Wonderland Plaza sometime during the 20th.
052 - Roger Hall:
Psychopath encountered in the Entrance Plaza on the 20th during the "Mark of the Sniper" scoop.
053 - Jack Hall:
Psychopath encountered in the Entrance Plaza on the 20th during the "Mark of the Sniper" scoop.
054 - Thomas Hall:
Psychopath encountered in the Entrance Plaza on the 20th during the "Mark of the Sniper" scoop.
055 - Wayne Blackwell:
Target of the psychopath sniper family in "Mark of the Sniper."
056 - Jolie Wu:
Woman in the Entrance Plaza on the 20th. Found during "The Woman Who Didn't Make It" scoop.
057 - Rachel Decker:
Jolie's friend. Found in the Ladies Space store on the second floor of the Entrance Plaza during “The Woman Who Didn't Make It.”
058 - Floyd Sanders:
Calm old man found in Ned's Knicknakery on the second floor of the Entrance Plaza during the "Antique Lover" scoop on the 20th.
059 - Kindell Johnson:
Man encountered in the North Plaza during Case 5-2.
060 - Sean Keanan:
Leader of the True Eye cult. Fought during the "A Strange Group" scoop on the 21st.
061 - Ray Mathison:
Man being held hostage in movie theatre during the "A Strange Group" scoop.
062 - Nathan Crabbe:
Man being held hostage in movie theatre during "A Strange Group" scoop.
063 - Michelle Feltz:
Woman being held hostage in movie theatre during "A Strange Group" scoop.
064 - Beth Shrake:
Woman being held hostage in movie theatre during "A Strange Group" scoop.
065 - Cheyrl Jones:
Woman found locked away in the closet in the theatre after defeating Sean in the "A Strange Group" scoop.
066 - Gil Jimenez:
Drunken man found in the Food Court sometime during the 21st.
067 - Brett Styles:
Hostile survivor holed up in the Huntin' Shack in the North Plaza during the 21st.
068 - Jonathan Picardsen:
Hostile survivor holed up in the Huntin' Shack in the North Plaza during the 21st.
069 - Alyssa Laurent:
Hostile survivor holed up in the Huntin' Shack in the North Plaza during the 21st.
070 - Paul Carson:
Psychopath encountered during "Long-Haired Punk" on the 21st. Later becomes survivor.
071 - Mindy Baker:
Woman being terrorized by Paul during the "Long-Haired Punk" scoop.
072 - Debbie Willett:
Woman being terrorized by Paul during the "Long-Haired Punk" scoop.
073 - Leroy McKenna:
Injured man found in cosmetics store on the first floor of Wonderland Plaza during the "A Sick Man" scoop on the 21st.
074 - Susan Walsh:
Old woman found on top of giant soccer ball at the south end of Wonderland Plaza at some point during the 21st.
075 - Simone Ravendark:
Young woman found in the Players CD store in Paradise Plaza during the "A Woman in Despair" scoop on the 21st.
076 - Tad Hawthorne:
Man being held hostage by Kent during the "A Photographer's Pride" scoop on the 21st.
077 - Steven Chapman:
Psychopath encountered in Seon's Food & Stuff during Case 2-3 on the 20th.
078 - Larry Chiang:
Psychopath encountered in the Meat Processing Area (Maintenance Tunnel) during Case 8-4 on the 21st.
There are 100 PP stickers total. Taking a picture of all 100 yields the “PP Collector” achievement, as well as the Hockey Mask clothing item, provided you complete the game in which all 100 stickers were captured.
While looking through the camera, when a PP Sticker is in the shot, a small icon with a percentage next to it will appear at the bottom of the screen. The higher the percentage is when the shot is taken, the more PP the photo will yield (10 per 1 per cent).
It does not matter how high of a percentage is scored for the sticker to count toward the achievement. The sticker will register as long as the PP icon is at the bottom of the screen when the picture is taken, and the score tally acknowledges the sticker.
PP Sticker (1/1): On the billboard above the green couch in the area outside of the “Janitor's room” door.
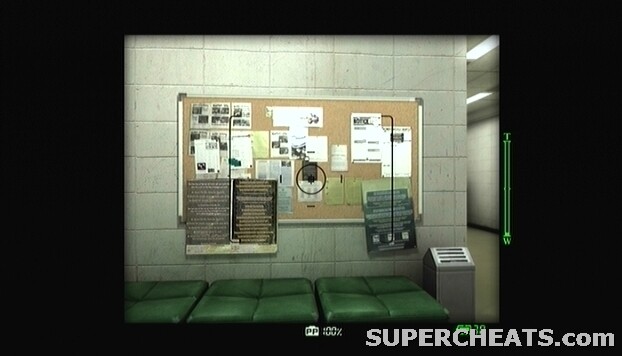
PP Sticker (1/1): The Air Duct that leads to the Security Room.
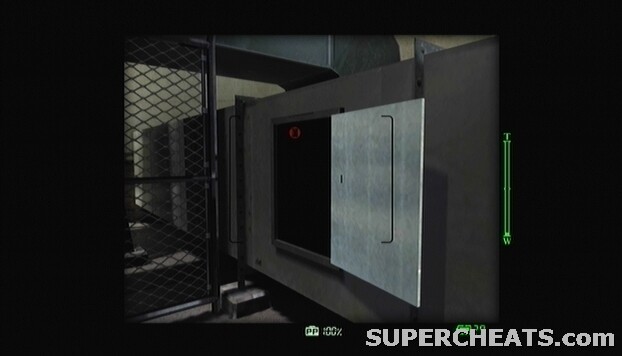
PP Sticker (1/14): Paradise Plaza, 1F. On the bird clock statue between Cam's Camera and Contemporary Reading.
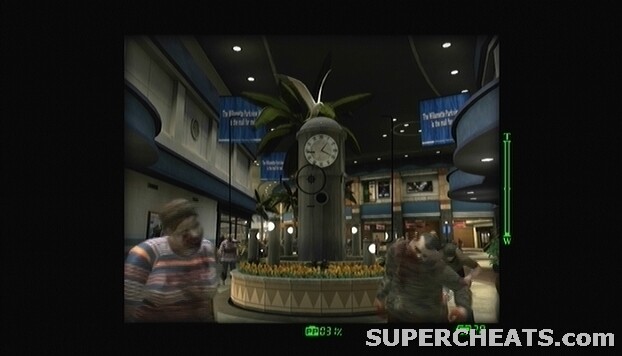
PP Sticker (2/14): Child's Play, 1F. On the confused-looking face of the giant Servbot.

PP Sticker (3/14): Players, 1F. On the cut-out ad outside of the store.
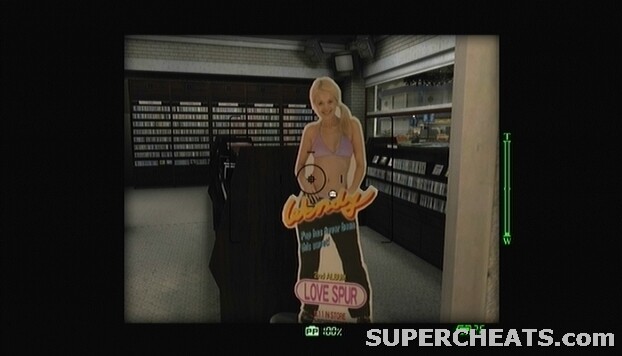
PP Sticker (4/14): Tyke n' Tots, 1F. On the sign above the store entrance.

PP Sticker (5/14): Ye Olde Toybox, 1F. On the large, stuffed bear on the shelf behind the service counter.

PP Sticker (6/14): SporTrance, 1F. Between the two basketball nets attached to the stairs that lead up to the second floor of the store.
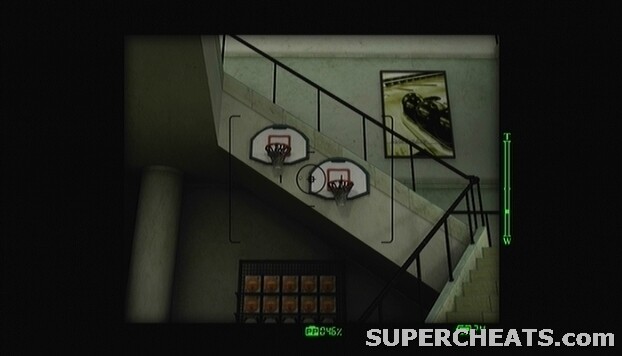
PP Sticker (7/14): Universe of Optics, 1F. On the face of the clock on the wall behind the service counter.
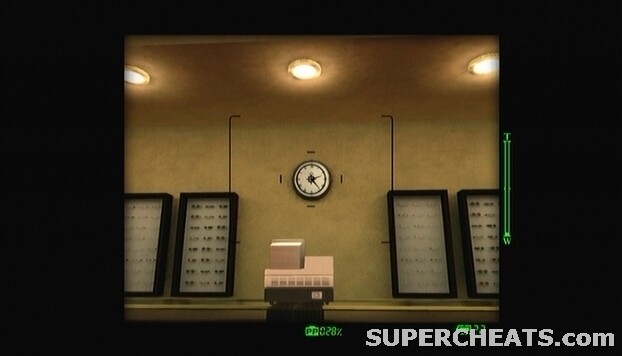
PP Sticker (8/14): Kid's Choice Clothing, 1F. On the sign above the store entrance.

PP Sticker (9/14): Marriage Maker's, 2F. On the green vase in the middle of the store.
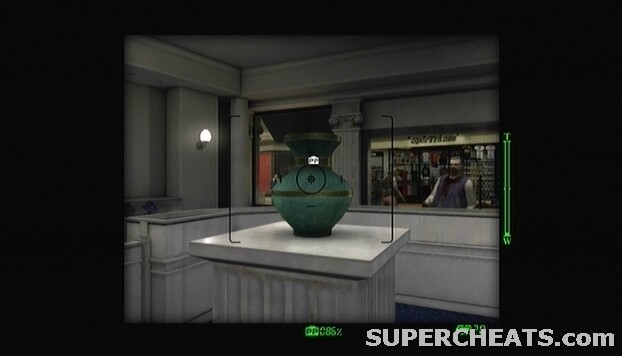
PP Sticker (10/14): Colombian Roastmasters, 2F. On the north-most green, circular sign that hangs outside of the restaurant.
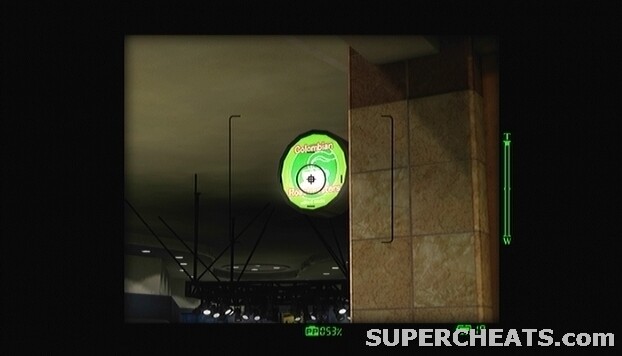
PP Sticker (11/14): Tucci's of Rome, 2F. On the light green t-shirt in the middle of the store.

PP Sticker (12/14): Paradise Plaza, between 1F and 2F. On the Kid's Choice advertisement poster in the stairwell that can be accessed via the doorway next to the restrooms.

PP Sticker (13/14): Tunemakers, 1F. On the sign above the store entrance.
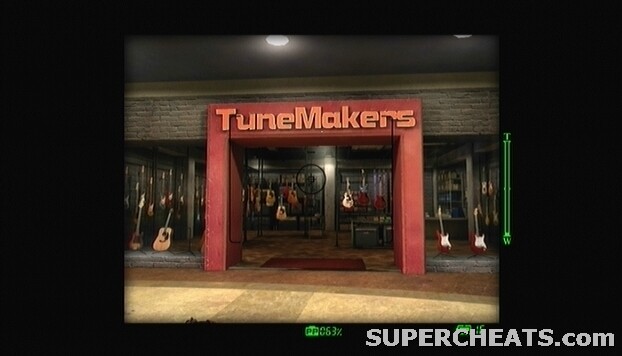
PP Sticker (14/14): Jill's Sandwiches, 1F. On the sign above the store entrance.
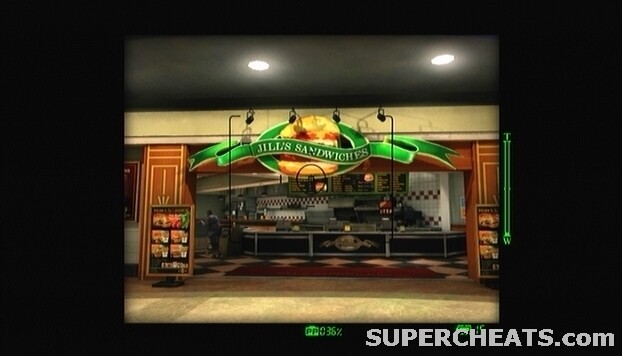
PP Sticker (1/12): Colby's Movieland. On the Ratman cut-out advertisement by the entrance.
PP Sticker (2/12): Colby's Movieland. On the Colby's Movieland sign above the entrance.

PP Sticker (3/12): Colby's Movieland. On the Megaman 2 cut-out advertisement by the entrance.
PP Sticker (4/12): Colby's Movieland. On one of the four movie posters behind the Ticket counter.
PP Sticker (5/12): Colby's Movieland. On one of the four movie posters behind the Ticket counter.
PP Sticker (6/12): Colby's Movieland. On one of the four movie posters behind the Ticket counter.
PP Sticker (7/12): Colby's Movieland. On one of the four movie posters behind the Ticket counter.
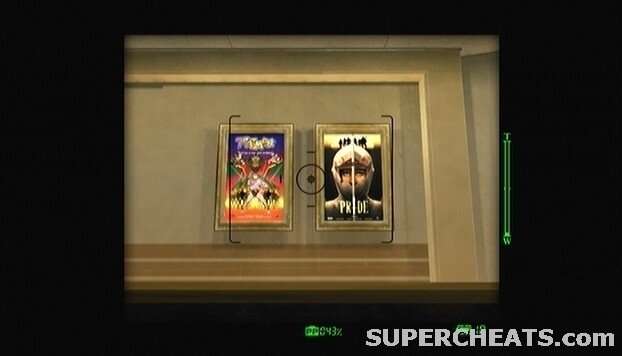
PP Sticker (8/12): Cinema Shop. On the Ticky character cut-out behind the table with the Ratman bust atop it.
PP Sticker (9/12): Cinema Shop. On the Ticky character cut-out outside of the shop.

PP Sticker (10/12): Cinema Shop. On the Ratman bust outside of the shop.
PP Sticker (11/12): Movieland Annex. To get to this area, Frank must get captured by the True Eye cult at some point after they appear on the afternoon of the second day. On the red True Eye banner in the worship area.

PP Sticker (12/12): Movieland Annex. To get to this area, Frank must get captured by the True Eye cult at some point after they appear on the afternoon of the second day. On the overturned Ticky character cut-out in the worship area.
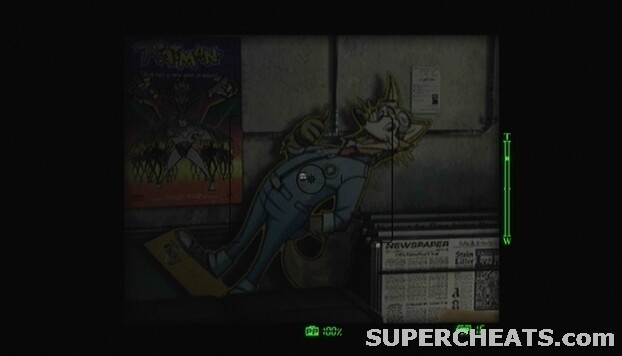
PP Sticker (1/4): On the south face of the clock tower. Stand at the north end of the lake and the PP icon should appear when using the camera from there.


PP Sticker (2/4): On the north face of the clock tower. Stand at the center of the assortment of flower beds and the PP icon should appear when using the camera from there.
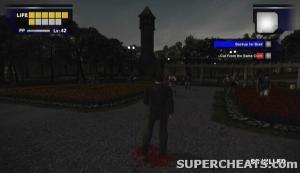
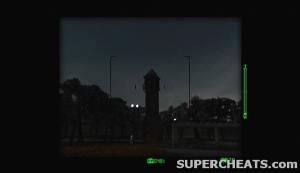
PP Sticker (3/4): On the east face of the clock tower. Climb up onto the shed on the east side of the park and the PP icon should appear when using the camera from there.
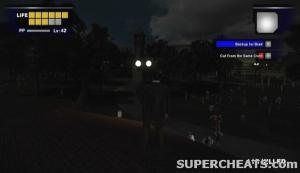
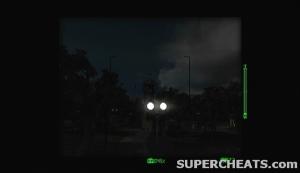
PP Sticker (4/4): The sign above the Maintenance Tunnel parking lot entrance.
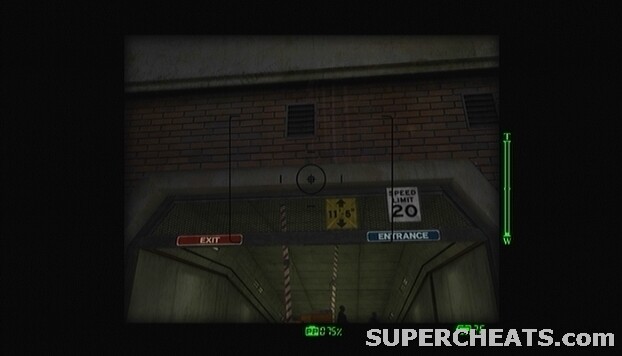
PP Sticker (1/11): On the Food Court sign (bee) above the entrance.

PP Sticker (2/11): On the cowboy cut-out to the right of the Food Court entrance.

PP Sticker (3/11): On the Food Court sign (bull) beyond the actual entrance.

PP Sticker (4/11): Food Court. On the Central Tacos sign.

PP Sticker (5/11): Food Court. On the sign above The Dark Bean.

PP Sticker (6/11): Food Court. On the Meaty's Burgers sign.
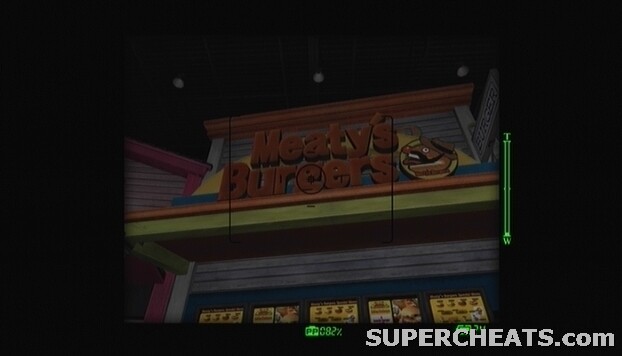
PP Sticker (7/11): Food Court. On the Frozen Dreams sign.

PP Sticker (8/11): Food Court. On the Jade Paradise sign.
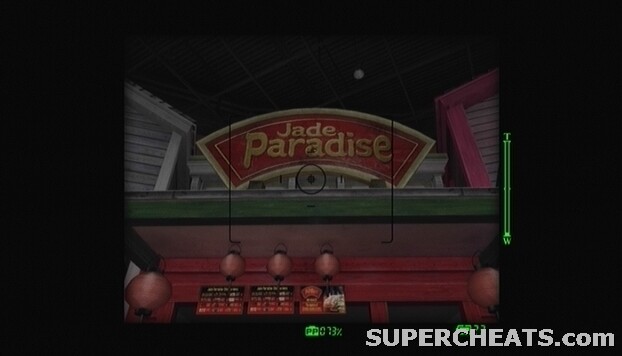
PP Sticker (9/11): Food Court. On the Teresa's Oven sign.
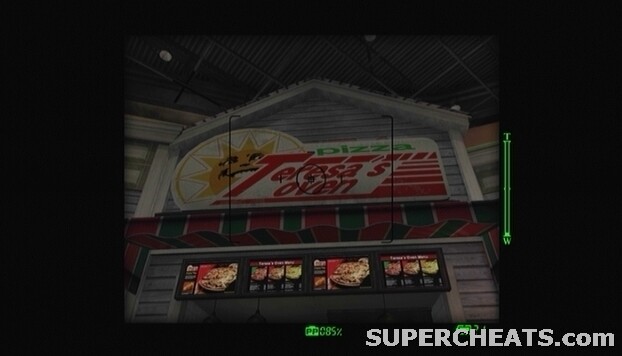
PP Sticker (10/11): Chris' Fine Foods. On the chef sign above the entrance at the west end of the Food Court.
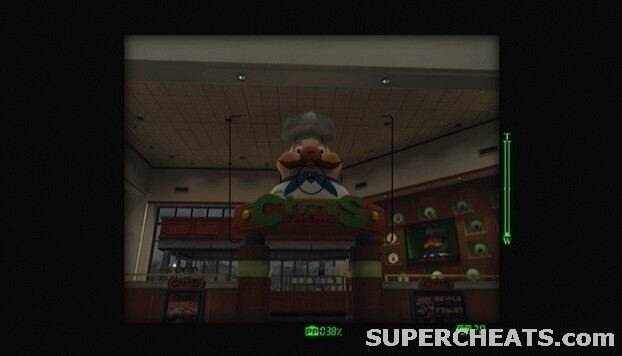
PP Sticker (11/11): Chris' Fine Foods. On the chef statue at the back of the seating area.
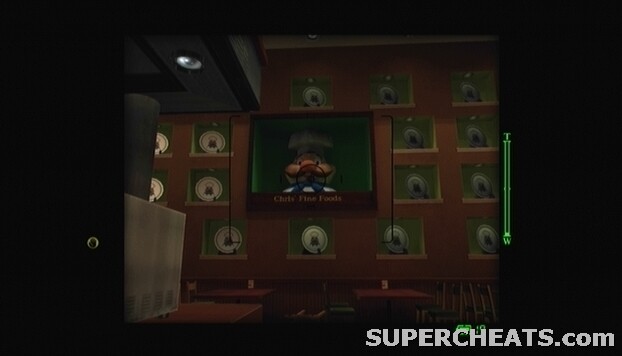
PP Sticker (1/11): On the sign above the entrance to the Food Court.
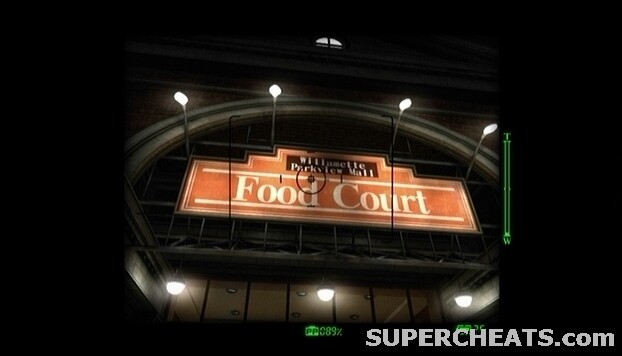
PP Sticker (2/11): Flexin' Gym. Between the posters on the wall behind the service desk.
PP Sticker (3/11): Flexin' Gym. On the display of the fourth furthest treadmill from the door.
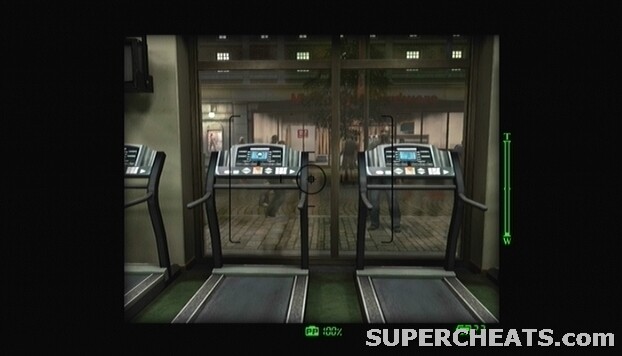
PP Sticker (4/11): Flexin' Gym. On the display of the fourth furthest stationary bike from the door.

PP Sticker (5/11): Flexin' Gym. Between the two posters at the north end of the wide mirror next to the restroom.

PP Sticker (6/11): Flexin' Gym. On the pec machine closest to the entrance.

PP Sticker (7/11): Flexin' Gym. On the green “Flexin'” banner along the south wall of the gym.
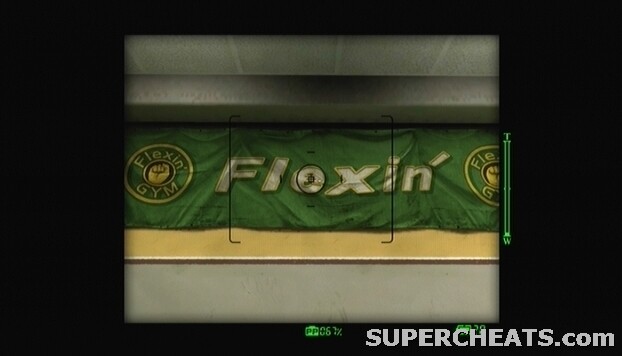
PP Sticker (8/11): Eyes Like Us. On the poster in the northeast corner of the store.

PP Sticker (9/11): Brand New U. By the sandals on the pedestal across from the store entrance.
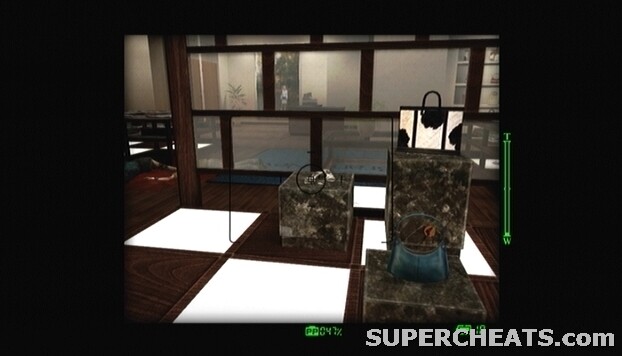
PP Sticker (10/11): Colombian Roastmasters. On the sign above the café.
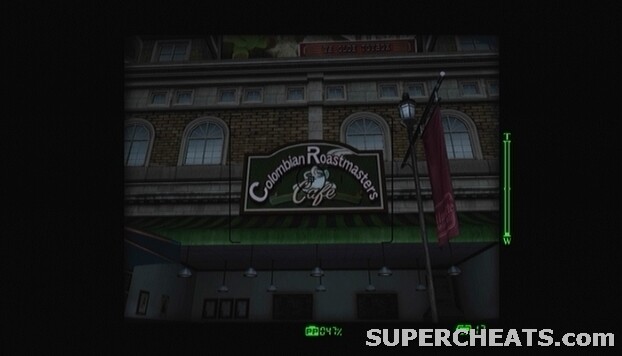
PP Sticker (11/11): Hamburger Fiefdom. On one of the menus above the service counter.
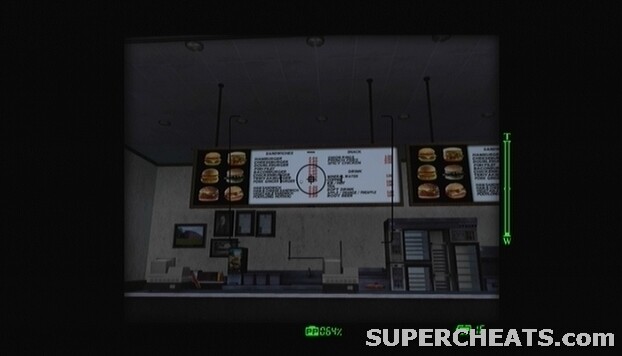
PP Sticker (1/10): Children's Castle, 1F. On the brown teddy bear in the southeast corner of the store.
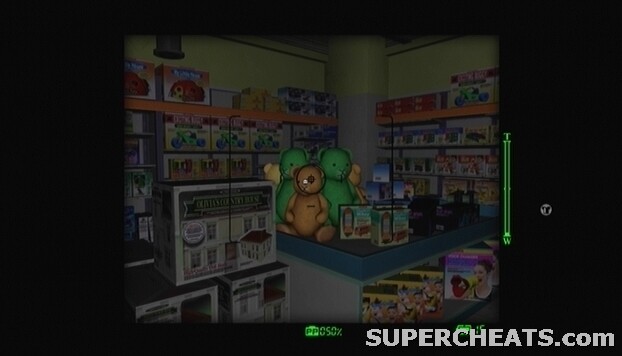
PP Sticker (2/10): Refined Class, 1F. By the shoes on the pedestal across from the store entrance.
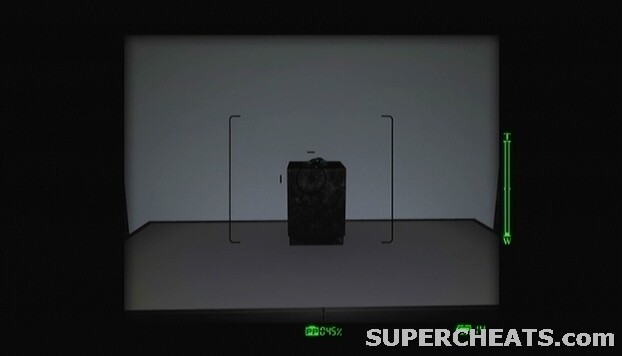
PP Sticker (3/10): Sports High, 1F. On the green tent that is set up in northeast corner of the store.

PP Sticker (4/10): Entrance Plaza, 1F. On the outer mall entrance doors at the south end of the plaza.
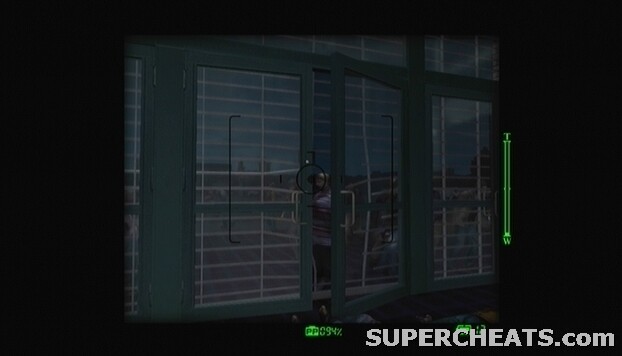
PP Sticker (5/10): Entrance Plaza, 1F. On the giant bee clock statue across from main entrance at the south end of the plaza.

PP Sticker (6/10): Robsaka Digital, 2F. On the cut-out ad outside of the store.
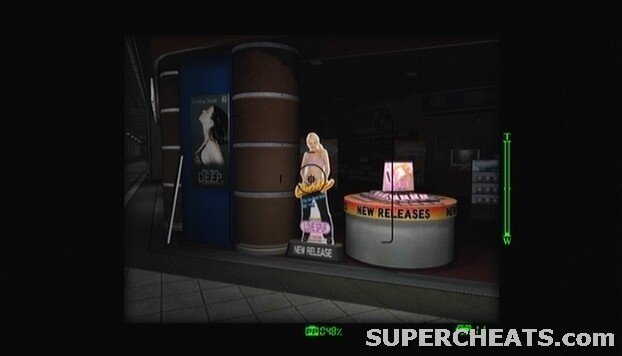
PP Sticker (7/10): Robsaka Digital, 2F. On the Ticky character cut-out outside of the store.

PP Sticker (8/10): Ned's Knicknackery, 2F. On the red crown atop the pedestal inside of the store.
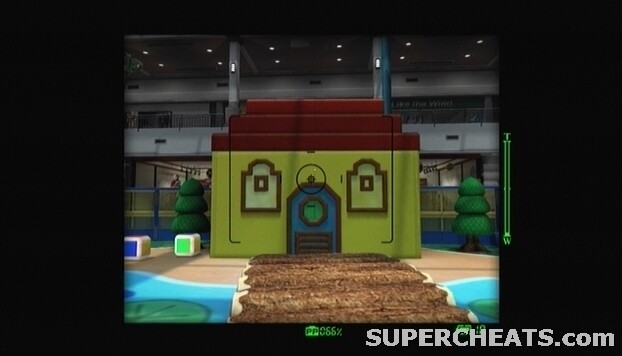
PP Sticker (9/10): Special Gifts, 2F. On the green vase in the middle of the store.
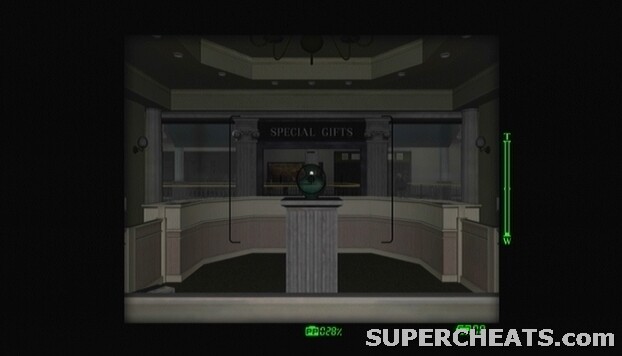
PP Sticker (10/10): Estelle's Fine-lady Cosmetics, 2F. On the poster behind the service counter.

PP Sticker (1/15): Wonderland Plaza, 1F. On the windmill in the Play Park at the south end of the plaza.

PP Sticker (2/15): Wonderland Plaza, 1F. On the front side of the yellow house in the Play Park at the south end of the plaza.
PP Sticker (3/15): Wonderland Plaza, 1F. On the giant rabbit statue at the southeast end of the plaza.

PP Sticker (4/15): Wonderland Plaza, 1F. On the yellow house in the Play Park area at the north end of the plaza.
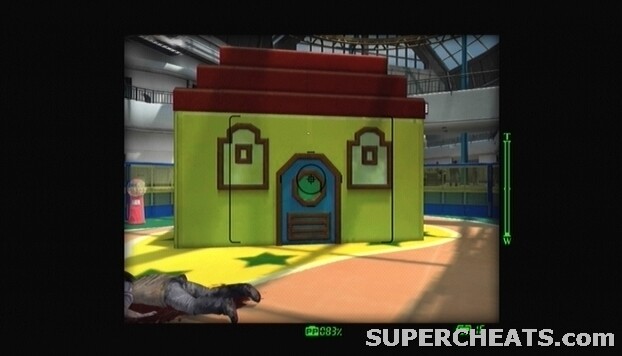
PP Sticker (5/15): Wonderland Plaza, 1F. On the giant rabbit statue at the north end of the plaza.

PP Sticker (6/15): Small Fry Duds, 1F. On the large poster behind the service desk.

PP Sticker (7/15): Small Fry Duds, 1F. On the green and yellow striped balloon that is hanging from the ceiling to the left of the service desk.
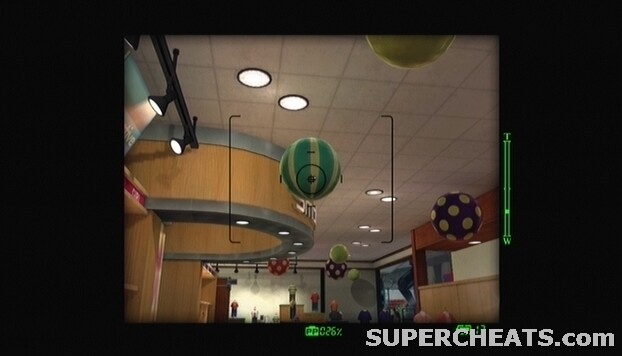
PP Sticker (8/15): Sir Book-a-lot, 2F. On the sign above the store entrance.

PP Sticker (9/15): Kokonutz Sports Town, 2F. On the sign above the store entrance.

PP Sticker (10/15): Wonderland Plaza, 2F. On the alien cut-out to the right of the Space Rider platform entrance. The Space Rider entrance is on the west side of the second floor walkway.
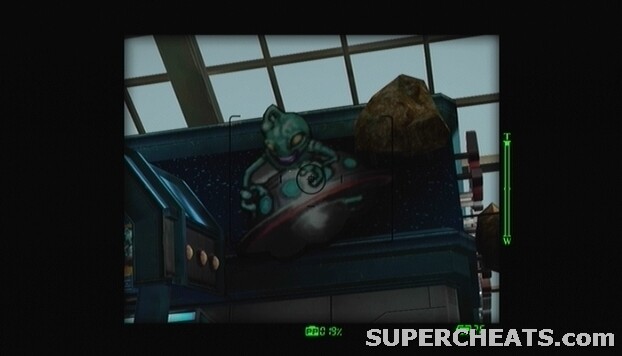
PP Sticker (11/15): Wonderland Plaza, 2F. On the astronaut cut-out to the left of the Space Rider platform entrance. The Space Rider entrance is on the west side of the second floor walkway.
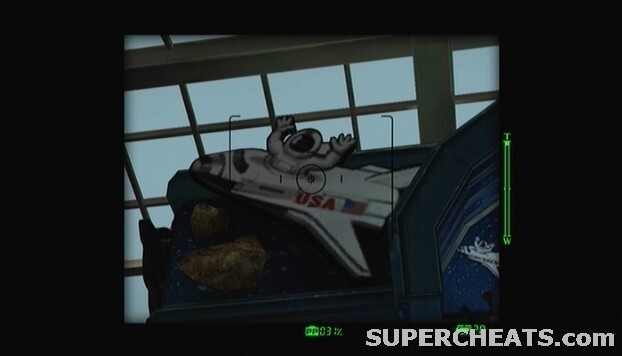
PP Sticker (12/15): Wonderland Plaza, 2F. On the Space Rider title sign above the platform entrance. The Space Rider entrance is on the west side of the second floor walkway.
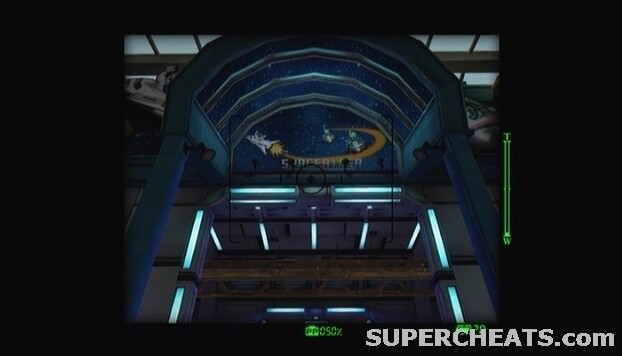
PP Sticker (13/15): Wonderland Plaza, 2F. On the astronaut cut-out on the east side of the Space Rider platform.
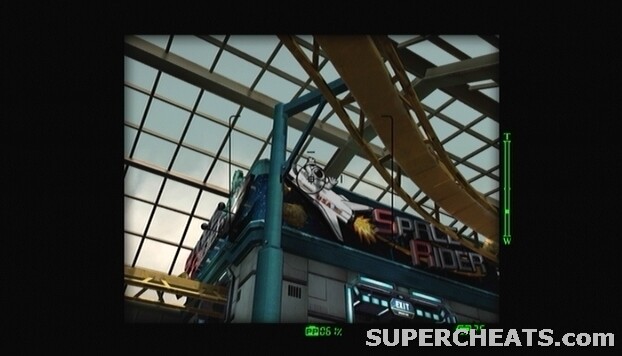
PP Sticker (14/15): Scruff & Scrapes, 1F. On the red shirt along the wall in the northeast corner of the store.

PP Sticker (15/15): Homerunner's, 1F. On one of the pictures along the south wall of the store.

PP Sticker (1/14): Ripper's Blades. In the Antique Swords display case along the south wall of the store.
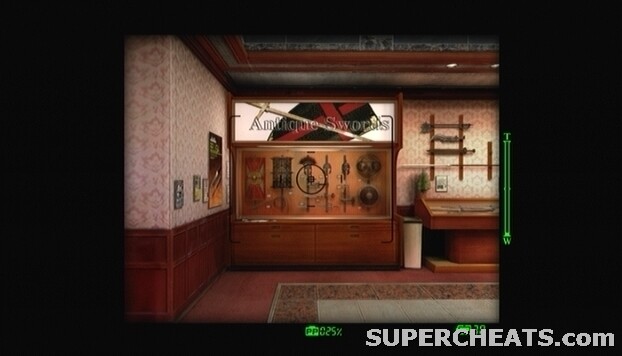
PP Sticker (2/14): Ripper's Blades. In the Antique Swords display case next to the service desk.
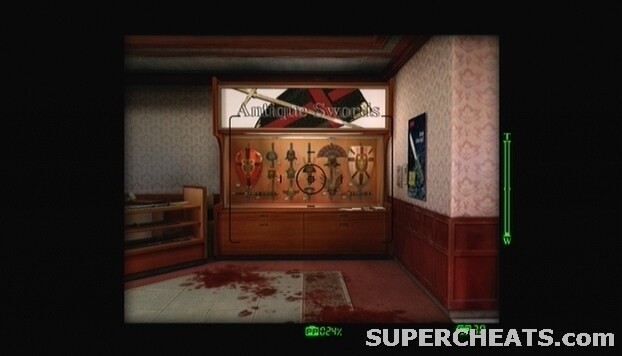
PP Sticker (3/14): Seon's Food & Stuff. On the large bottle above the Pharmacy sign in the southwest corner of the supermarket.

PP Sticker (4/14): Seon's Food & Stuff. On the Meats sign in the northwest corner of the supermarket.

PP Sticker (5/14): Seon's Food & Stuff. On the Seafood sign along the west end of the supermarket.

PP Sticker (6/14): On the Seon's Food & Stuff lettering above the supermarket entrance.
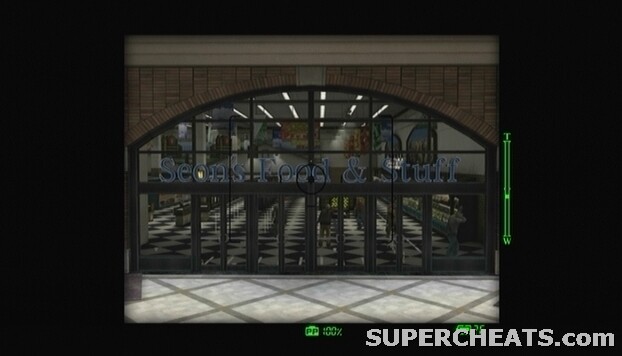
PP Sticker (7/14): Huntin' Shack. On the American flag in the store window to the right of the store entrance.
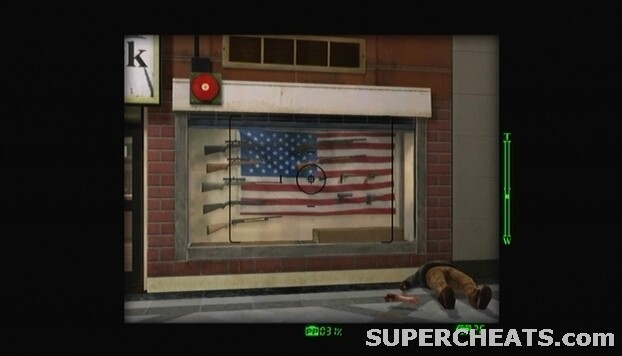
PP Sticker (8/14): Huntin' Shack. On the cowboy cut-out in the store window to the left of the store entrance.
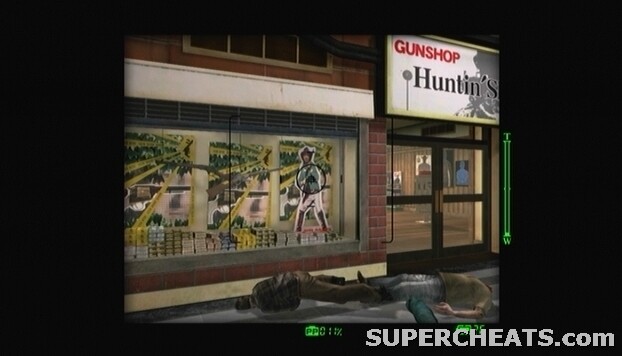
PP Sticker (9/14): Huntin' Shack. On the buck trophy inside of the store, on the wall by the store entrance.
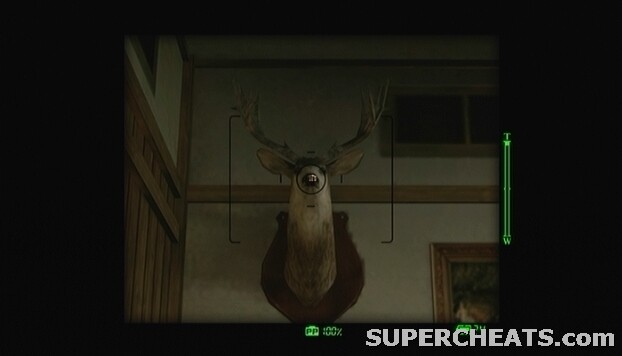
PP Sticker (10/14): Huntin' Shack. On the buck trophy mounted on the wall behind the service desk.

PP Sticker (11/14): Crislip's Home Saloon. On the sign above the store entrance.

PP Sticker (12/14): Crislip's Home Saloon. On the “Gardening as a pastime” board in the southwest corner of the store.
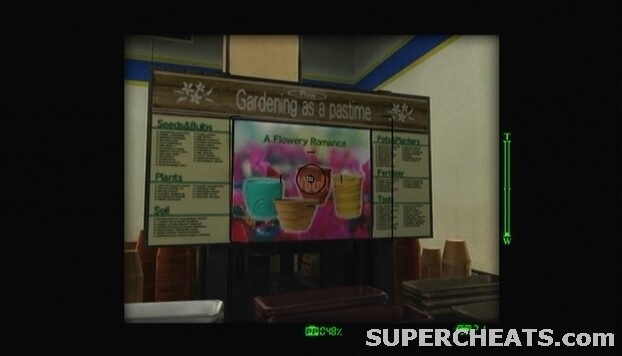
PP Sticker (13/14): Crislip's Home Saloon. On the “Supporting your lifestyle” board behind the service counter.

PP Sticker (14/14): On the statue in the middle of the fountain at the east end of the plaza.

PP Sticker (x5): There is one PP sticker on each of the five stationary trucks in the tunnel.
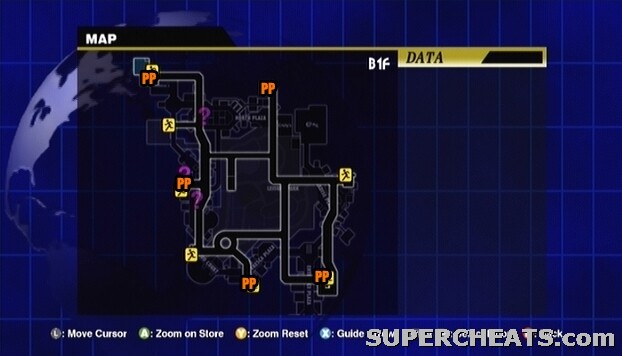
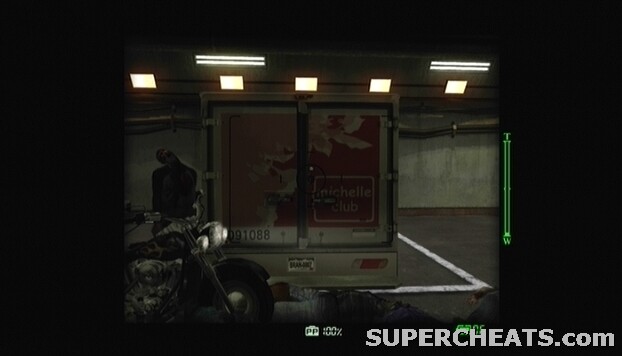
PP Sticker (1/2): On the “Cuts of Beef” poster in the northwest corner of the room.

PP Sticker (2/2): On the meat processing machine at the north end of the room.
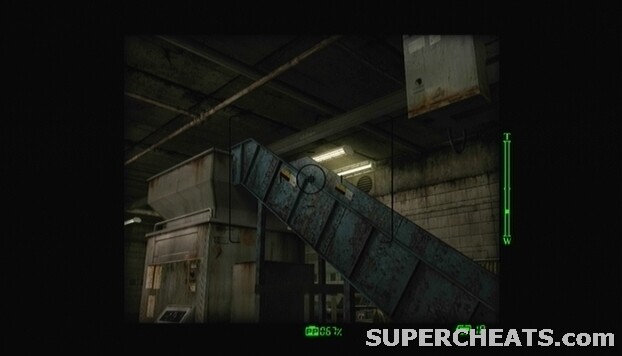
Bachman's Bookporium in Paradise Plaza
[Entertainment]:
Entertainment items (ex. instruments, small chainsaws) are three times as durable.
[Horror Novel 2]:
Gives 25% PP for killing a zombie.
[Engineering]:
Tools and construction items (ex. chainsaws, pipes) are twice as durable.
[Interior Design]:
Interior Design items (ex. chairs, televisions) are three times as durable.
Contemporary Reading in Paradise Plaza
[Sports]:
Sport-oriented items (ex. baseball bats, soccer balls, hockey sticks) are three times as durable.
[Hobby]:
Toy items (ex. boomerang, stuffed bears) are three times as durable.
[Camera 1]:
Gives 25% PP for photography.
[Weekly Photo Mag.]:
Indicates when it is an ideal time to take a picture. Colour represents genre of photo opp.
Everyone Luvs Books in Entrance Plaza
[Cooking]:
Effects of Juices created by mixing items last twice as long.
[Cycling]:
Allows you to ride bikes three times longer than usual.
[Travel]:
Travel items (ex. benches, pick ax) are three times as durable.
The Sinister Read in Entrance Plaza
[Health 2]:
Healing items are 25% more effective.
[World News]:
Gives 25% PP for rescuing survivors.
[Horror Novel 1]:
Gives 25% PP for killing a zombie.
[Lifestyle Mag.]:
Makes everyday items (ex. chairs, televisions) three times as durable.
Sir Book-A-Lot in Wonderland Plaza
[Criminal Biography]:
Edged weapons (swords, knives, hedge trimmers) are three times as durable.
[Japanese Conv.]:
Allows Frank to converse with the Japanese survivors in the “Japanese Tourists” scoop on the first day.
[Skateboarding]:
Allows Frank to perform a trick when on a skateboard.
[Health 1]:
Healing items are 50% more effective.
Empty Store in North Plaza
[Survival]:
Healing items are 100% more effective.
[Wrestling]:
Hand-to-hand combat and skills deal more damage.
Other Books
[Brainwashing 101]:
Survivors are no longer afraid of zombies. Found in Colby's Movieland after defeating Sean.
[Camera 2]:
Gives 50% PP for photography. Kent drops this book when defeated.
Unlockable items are obtained by earning certain achievements. To unlock these items, you must unlock the corresponding achievement and then complete the game. Once unlocked, you can find the items in bags behind the Air Duct exit in the Security Room.
Note: The game during which a particular achievement is unlocked must be completed to the end credits for the corresponding unlockable to be available during future playthroughs!
Ammo Belt:
Unlock the “Perfect Gunner” achievement.
Arthur's Boxers:
Unlock the “7 Day Survivor” achievement.
Cop Hat:
Unlock the “Saint” achievement.
Hockey Mask:
Unlock the “PP Collector” achievement.
Laser Sword:
Unlock the “5 Day Survivor” achievement.
Mall Employee Uniform:
Unlock the “Transmissionary” achievement.
Mega Man Boots:
Unlock the “Unbreakable” achievement.
Mega Man Tights:
Unlock the “Punisher” achievement.
Prisoner Garb:
Unlock the “Carjacker” achievement.
Pro Wrestling Boots:
Unlock the “Item Smasher” achievement.
Pro Wrestling Briefs:
Unlock the “Karate Champ” achievement.
Real Mega Buster:
Unlock the “Zombie Genocider” achievement.
Special Forces Boots:
Unlock the “Legendary Soldier” achievement.
Special Forces Uniform:
Unlock the “Hella Copter” achievement.
White Hat:
Unlock the “Census Taker” achievement.
Below are the requirements for unlocking the different endings in 72 hour mode.
Ending 1:
Solve every case, speak to Isabela at Carlito's Hideout in the North Plaza at 10:00AM on the third day, and be at the Heliport at 12:00PM on the third day.
Ending 2:
Do not solve all of the cases, but be at the Heliport at 12:00PM on the third day.
Ending 3:
Solve every case, but do not speak to Isabela after 10:00AM on the third day, and be at the Heliport at 12:00PM on the third day.
Ending 4:
Get captured by the Special Forces and remain captive at 12:00PM on the third day.
Ending 5:
Do not solve all of the cases and do not be at the Heliport at 12:00PM on the third day.
Ending 6:
Fail Case 7-2 by running out of time.
Overtime Mode: Complete Dead Rising by fulfilling the requirements listed under Ending 1.
Infinite Mode: Complete Overtime Mode.


 Sequence 3 - To Catch An Urchin: Assassin's Creed: Syndicate Walkthrough
 Titanfall Cheats and How To Guide
 The Witcher 3: Wild Hunt Monster Guide - How to Beat the Wolf King
 Halo 5: Guardians Hands-on review (beta)
 The Hobbit: Kingdoms of Middle Earth Tips