Unofficial Dead Island Guide by vhayste for
Congratulations on stumbling onto our complete guide to Dead Island. vhayste has put together exclusively for SuperCheats.com a great piece of work which willh elp you through the standard game, get all the collectibles and provide you with a raft of knowledge for defeating all the enemies that come your way in the game. We recommend you get started with the General Tips page as it provides some useful bits of information which should come in handy throughout the whole game. All the collectibles can be found at the start of the guide (beforethe walkthrough) in their own sections. We have chosen to give each sidequest it's own seperate page so you can hopefully more easily find the exact piece of info you are looking for. Feedback on the guide is welcomed in the comments box below. Exploration Tracking Quests Fast Travel Exploit

General Hints and Tips
After the prologue, the resort can be pretty much explored to your heart's content. This walkthrough will only assist you in finding collectables and performing quests. I won't dictate what you need to do step by step as this won't make your game any more enjoyable.
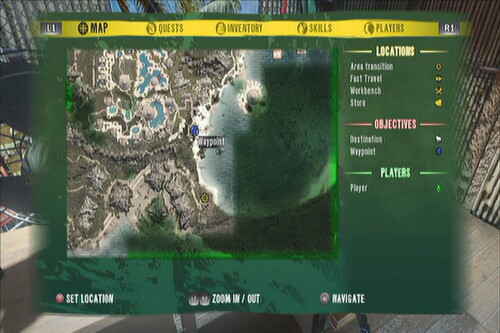
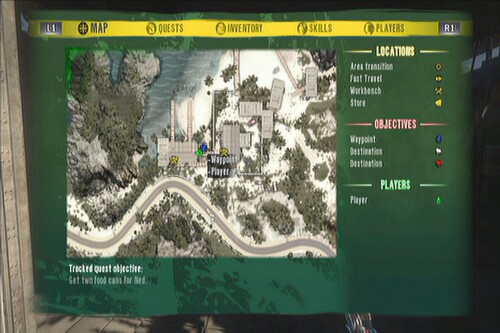
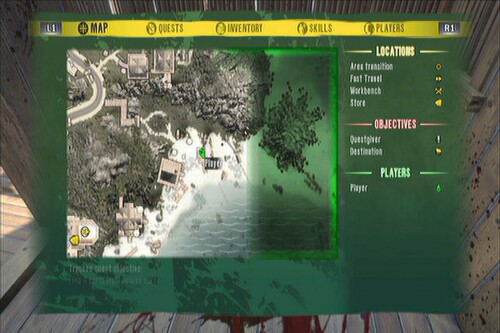
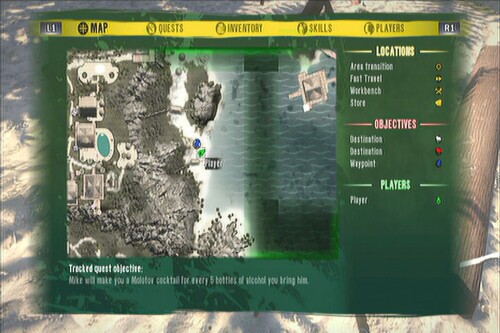
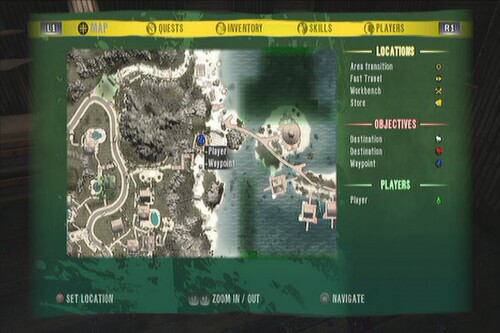
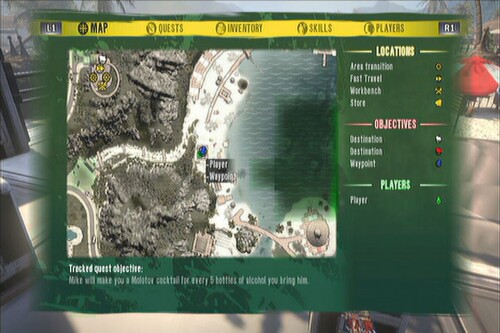
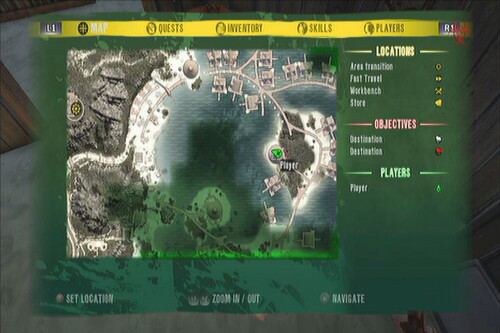
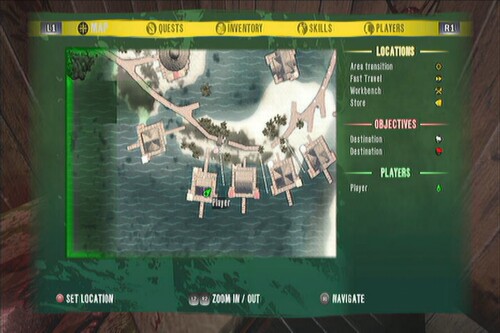
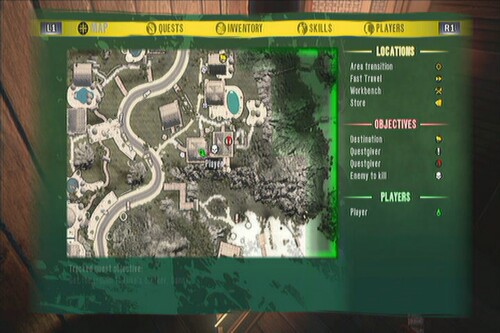
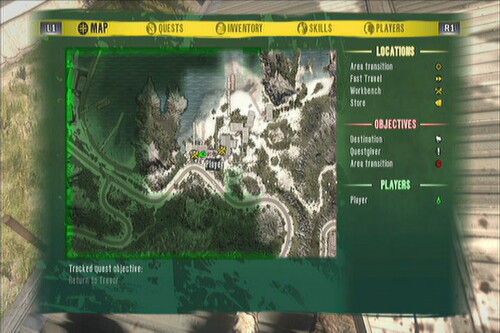
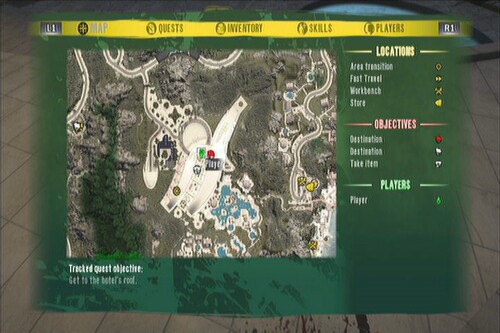
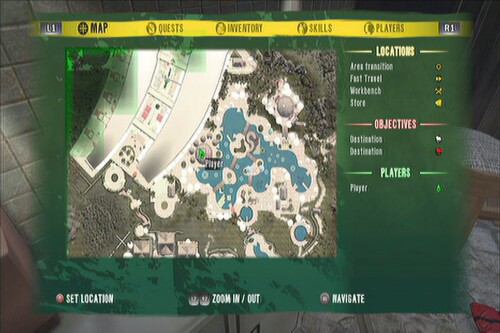
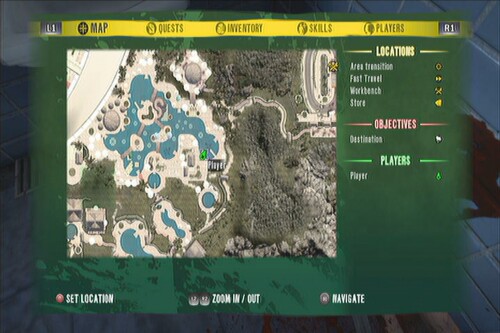
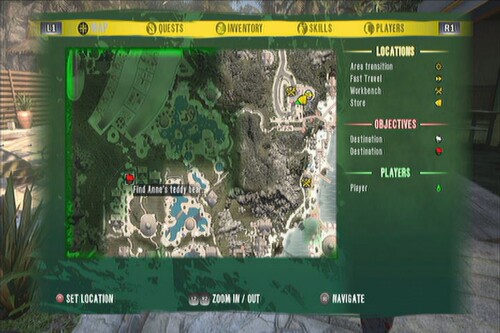
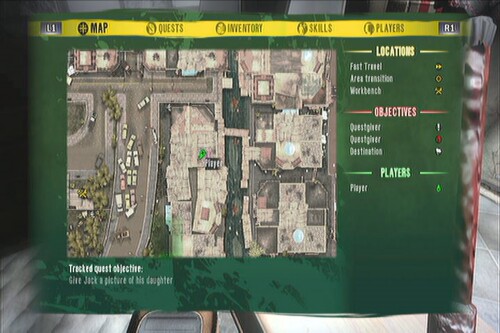
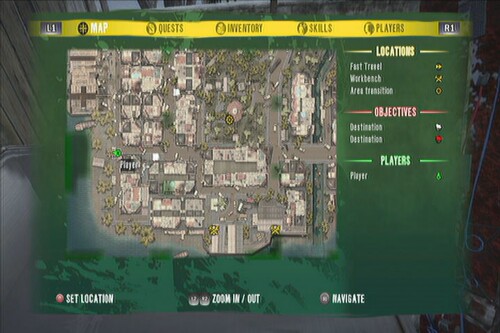
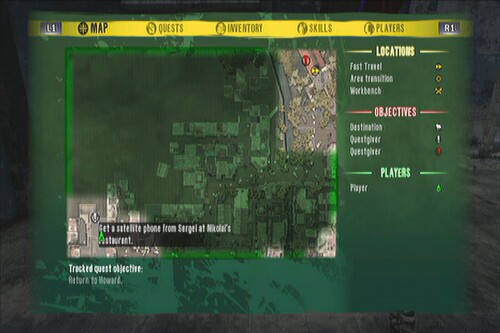
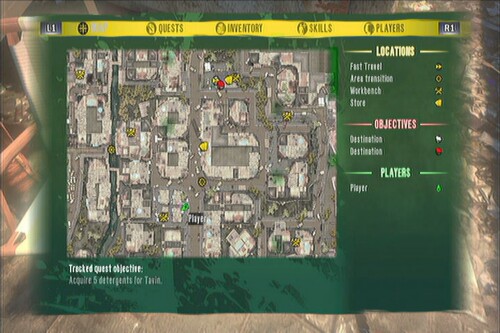
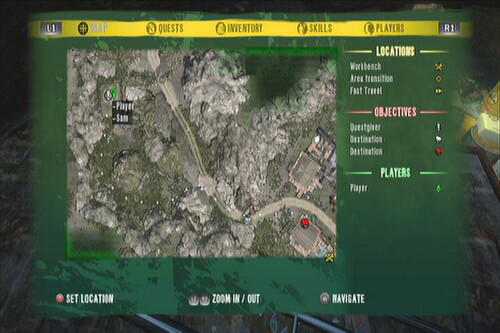
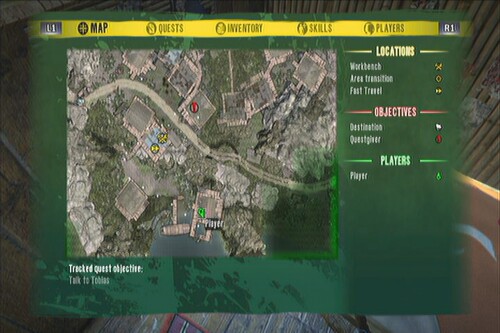
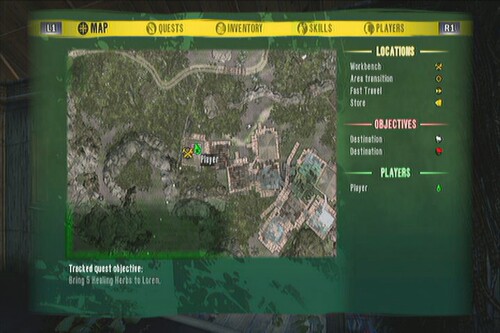
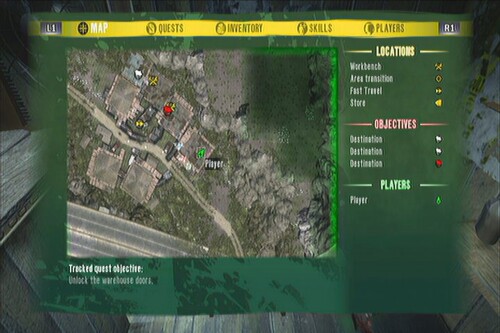
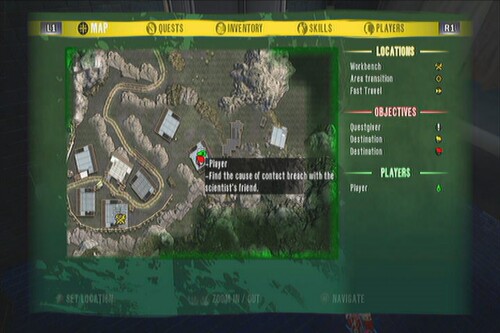
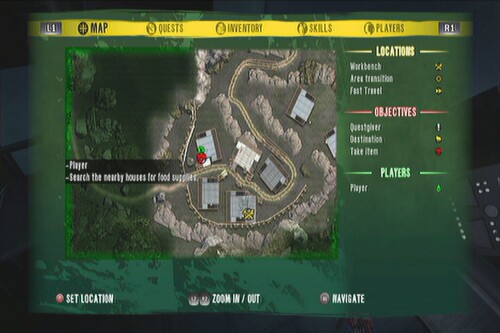
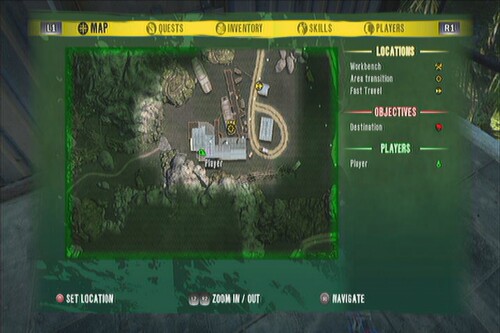
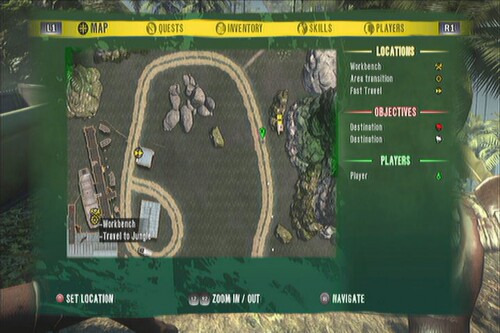
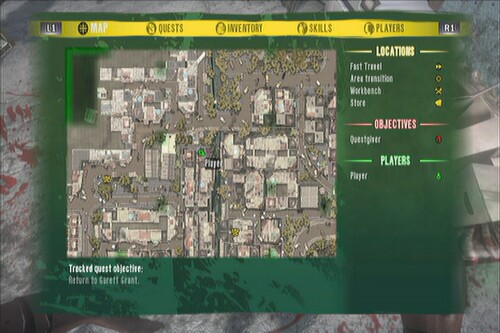
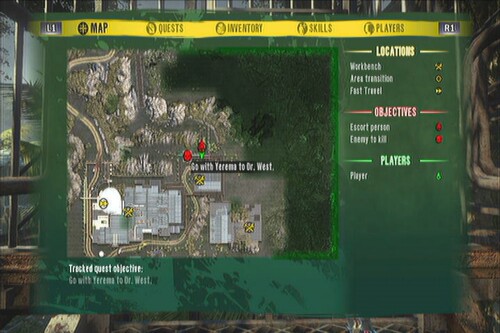
Quests can be tracked. Aside from the obvious red flag marker on the map, you'll even get to see white dots lined up to show you the path in your mini-map. You don't have to worry since all characters share the same quests. Just refer to this walkthrough for additional help.
You can basically use the 'Load Last Checkpoint' trick to get by faster, especially if you're just doing continuous quests. Take note that YOU SHOULD NOT use this especially if part of a main/sidequest includes collecting something and delivering it back to the questgiver; otherwise, you'll lose the item you collected and you'll have to redo the whole process again. Watch the video below to learn how to do it. This will save you A LOT of time.
Fast Travel Exploit
Health Recovery
You can restore a bit of your health by drinking numerous scattered energy drinks and eating snacks. These recovery items re-spawn over time. You can't stock up healing items, only medkits. It is a good habit to keep a lookout for these since you won't know when you'll need a quick drink to save your butt.
Kicking
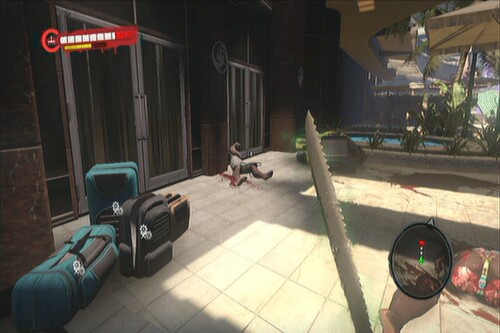
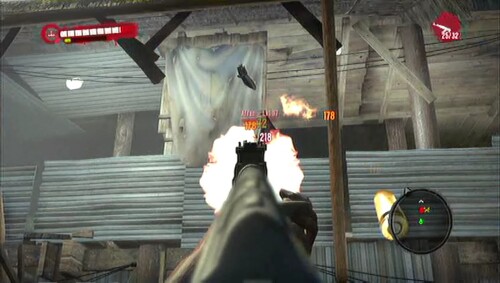
Don't just swing your weapon haphazardly; if it doesn't connect, you're open for the biting. A good way to deal with fast, aggressive (normal) zombies will be kicking them. This will stop them on their tracks, giving you more than enough time to decapitate them or crack their heads open. Kicking can also be used with dealing with hordes of zombies to keep your composure and give you some breathing space. By jumping and kicking, you can easily knock down infected and walkers with ease, leaving them open for you to stomp.
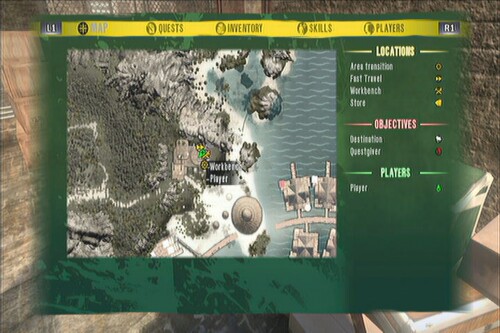
Materials and Workbenches
Workbenches are essential to keep your weapons in top shape. As such, make it a habit to scour every searchable containers, luggage, cabinet you come across with. Modified weapons sport some really impressive base stats and additional effects normal weapons don't have so make sure you're always carrying one. If you happen to find a merchant selling some uncommon materials, make sure to buy a good number of them so you won't have problems creating the mods that need them.
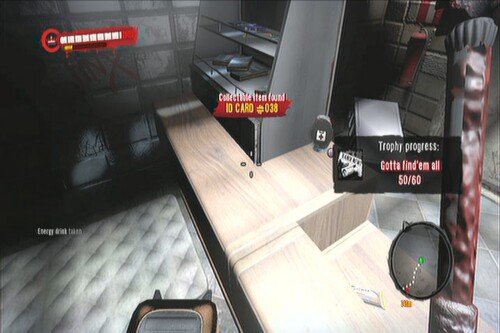
Collect Everything
Pick up almost everything that you come across with. Fortunately, only weapons, grenades, medkits and alcohol count towards your inventory limit. Miscellaneous items (materials and mods) don't count to your limit so there should be no reason for you for not picking them up.
Keep Your Weapons in Top Shape
You must remember that restoring a completely destroyed weapon is MUCH more expensive than maintaining it. As such, always keep your (main) weapons in top shape. It will be a hassle if you'll find yourself unable to afford the repair cost when you direly need it.
Look out for 'resupply points'
These are the places where you can find lots of recovery items such as drinks and food, as well vending machines (even better). There are several of these in the resort and in the city so remember their locations. In the jungle, you'll find these in front of stone idols as offerings. They may save you when you're in a pinch.
The undead are everywhere. And to make matters worse, they come in different types and sizes. Knowing the different enemies you’ll have to face in order to survive the zombie outbreak is essential to your survival. This section will introduce you to the various foes you’ll need to overcome - both living and undead, and also show some basic methods of fighting them.
Walkers
These are the common enemies you’ll find throughout the island. They’re usually in groups and have slow-moderate speed. They are dangerous in groups so try to avoid getting surrounded by them. They have the tendency to grab you and while you’re struggling, other undead will attack and damage you.
Be careful when dealing with burning walkers since you'll get hurt with their fire if they come too close. Also, don't bother shooting the bodies of armor-clad walkers as these won't stop them on their tracks.
Some of them are also known to use weapons which they brandish around. They are also known to throw these weapons with frightening accuracy. Best stop their tracks using well-placed kicks then plow them down with your weapons or finish them with stomps. Decapitating them and blowing their heads off also works wonders.
Infected and Walker Killing
Infected
They are fast, agile and extremely vicious. You will know if they’ve spotted you once you hear a bone-chilling shriek. They are easy to deal with alone. Just kick them to stop them on their tracks and stagger them, before cutting their head off or cracking their heads open. They are also known to climb rooftops, robbing you of your only safe solace.
Be careful however, when several infecteds are attacking at once. They can easily go in frenzy, clawing and swinging their arms multiple times, dealing continuous damage or instant death if you ever get cornered. When facing several infected, you’re only hope is either using your Fury skill or kicking and swinging your weapon like crazy. They should be priority targets especially if they attack alongside with a mob of walkers.
Thugs
These are larger version of walkers and they are almost, always solitary. They can deal solid damage which can knock you off your feet. When facing them, always take out the smaller fries first and stay out of its range. It is easier to take down alone.
One good strategy when dealing with these rotten muscular freaks is by using blunt or sharp weapons. Blunt weapons can break its arms while sharp weapons can cut them off, promptly lowering its threat level. A thug however, will attempt to headbutt you, which will still deal considerable damage. You can just perform a hit-and-run attack. Rush in, land a hit or two, then jump away before his arms hit you.
Thug Killing
Suicider
Do not ever, ever attack it using melee weapons or by kicking it. Its explosion is powerful enough to tear a group of walkers to shreds and even deal massive damage against hulking rams. Fortunately, these type of volatile undead are not that common. It’s better to take them out using guns or thrown weapons. In case you don’t have a ranged weapon or you’re somewhat feeling lazy in throwing your weapon, you can just promptly get near it to “light its fuse” then quickly move back to a safer distance. If ever you’re facing one in an enclosed space, hide behind a wall or something sturdy to protect you from the explosion. You can also use them to cause collateral damage to their fellow zombies and make your job easier.
Suicider Killing
Floater
This bloated, ranged undead is capable of shooting corrosive liquid at a considerable range. They are very weak against melee attacks and can be easily dealt with by charging towards them and slashing the hell out of them. Just be careful of their continuous stream of corrosive liquid. This is their only way of protecting themselves up close. Just move behind it and you shouldn't take that much damage. These enemies are common in the jungle area of the island, especially near bodies of water.
Floater Killing
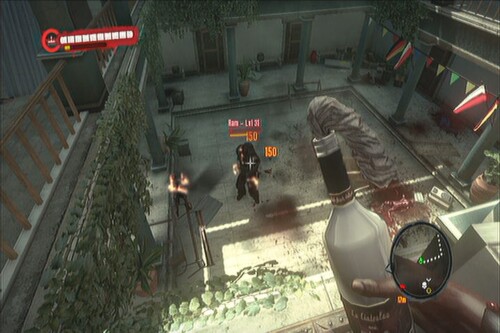
Ram
These crazed tanks are known to charge towards any survivor. As long as you’re dealing with them alone, they’re probably as easy as walkers to take down. Lure a Ram then let it lock on to you. Once it started its charge, evade and rush towards it while it has its back exposed. This is its only weapon point so land 2-3 hits and jump away before it kicks you. Repeat the same process until its dead. With a strong weapon, you can take down a ram with only two repetitions. Rams are also known to follow you in stairs or even tight spaces. Don't let this happen or you'll be in trouble.
Ram Killing
Butcher
These are tougher and more dangerous versions of infected. They are fast and agile, and they can perform leaping attacks that can catch you off guard or a series of damaging blows that can easily rip you to shreds. You can stop its charge by kicking it then slashing while its staggers. Just remember to use backsteps often; this is probably hard in tight, confined spaces. If you see some infected tagging along with a butcher, pray hard or use your fury skill.
Butcher Killing 1
Butcher Killing 2
Punks, Gang Leaders and Looters
These are human opportunists which will promptly attack anyone and anything on sight. They are commonly encountered in the slums of Moresby, inside barricaded positions. They are usually armed with guns but you’ll also encounter some wielding wooden planks and other weapons. These human enemies spawn regularly in their designated barricaded locations, making them cheap sources of guns and ammo.
Dealing with the firearm wielding ones are easy, as long as you have guns as well. However, melee-wielding punks are dangerous. Kicks don't stop easily so you need to swing your weapon and hopefully your swipe kills them before they hit you.
In order to survive the undead-laden island of Banoi, you’ll need weapons. You’ll start with basic and even mundane types such as boat paddles, pipes, wooden planks, broomsticks etc. As you level up, your enemies will also level up to match you and you’ll immediately discover that these weapons won’t be enough to stop them. You’ll need even more effective weapons to fend off any undead trying to have a taste of you.
You also need to be aware of the weapon types your character is more efficient with. You’ll know the weapon types characters prefer by checking their skill trees. By using your character’s preferred weapon class, you can enjoy enhanced damage and beneficial effects by allocating skill points to the related skills.
Purna - Firearms, Sharp Weapons
Xian Mei - Sharp weapons
Sam B - Blunt weapons
Logan - Thrown weapons, firearms
Weapons have color coding, indicating their quality. Higher quality weapons have higher stats and must be really sought after. Weapons can be bought from vendors, acquired as quest rewards, dropped by enemies or found as loot.
White - Common
Green - Uncommon
Blue - Rare
Violet - Unique
Orange - Exceptional
Each weapon have their parameters. Take note that these stats are based on the weapon’s level. It is actually recommended to get at least a new weapon every 5-7 levels or so to keep up with the increasing health of enemies.
Damage
Indicates the damage done directly to the target’s health
Force
Indicates damage dealt to the target’s stamina
Handling
Indicates the difficulty of handling the weapon. Basically low handling stat will make you lose stamina more for every swing.
Durability
This stat shows the number of attacks this weapon can make before breaking down. And just so know, a completely trashed out weapon will just be as good as a wooden broomstick. It is recommended to maintain them since restoring them will take out massive amount of cash.
Accuracy
This stat is only used by firearms. It determines the default value of hitting anybody with bullets.
Reload Time
Determines how speed you can reload the weapon.
Repairing
Continuous use of a weapon will gradually wear it down. Without maintaining it, it will lose its effectiveness and won’t serve you any purpose other than being a dead weight. There are numerous workbenches scattered in the game and it is encouraged to use and abuse them. Keep in mind that repairing a weapon when its even at 80% is going to be a lot cheaper in the long run than restoring it from 0% in one go.
Upgrading
With the help of a workbench and some cash, you can further increase the parameters of your weapon up to three more times. You may want to upgrade higher quality weapons instead of the white common ones.
Creating
If you have the blueprint, materials and cash, it is possible for you create your own ammo and explosives. Your trusty sharp machete or devastating bludgeon may tear a small group of zombies apart but you can do much if you’re ultimately facing a horde. That’s where explosives come in. You can simply stand in the safety of an elevated fence or vehicle then lob a molotov in the amassing horde around you and watch them burn. It is recommended to carry at least one type of explosive with you all the time.
Modifying
This method allows you to further increase the effectiveness and lethality of your weapons. You can add extra effects like chance to set your targets on fire, electrocute them, force them to gag their insides out, paralyze them for a few seconds and many more. You can also apply these modifications to firearms as long as you have the necessary blueprints. Take note that these effects will only take effect if you manage to land a critical hit. Character skills can increase these chances, which is another reason why should stick to the weapons your character is most proficient in using.
First, you need to find Blueprints. These are crafting plans which contain instructions and requirements on how to complete the mod. They are mostly given as quest rewards but there are also a good number of them that you need to find, especially when exploring various areas.
Once you have the blueprints, you need to have the materials. Various materials can be found by looting bags, containers, crates and corpses. You can also buy them from vendors. You have to remember that vendors change their inventory every now and then so if you see them selling particular materials that you can’t easily find anywhere (e.g. algae, suicider meat, floater meat, detergent), buy as many as you can to. Don’t afraid to hoard materials; they don’t count to your inventory limit and you’ll never know when you’ll need them.
Next, you’ll need a base weapon, as described in the blueprint you want to make. Fortunately, each blueprint has an array of base weapons you can use. Finally, you need some cash and of course, a workbench to work on.
As a summary, you need:
1. Workbench
2. Blueprint
3. Material
4. Base weapon
5. Cash
MODS AND BLUEPRINTS
This section will just feature the mods that you need to pickup. A good number of mods can be acquired by completing quests, which I definitely recommend.
Molotov
Quest: Born to be Wild
In the second firewall room during the quest

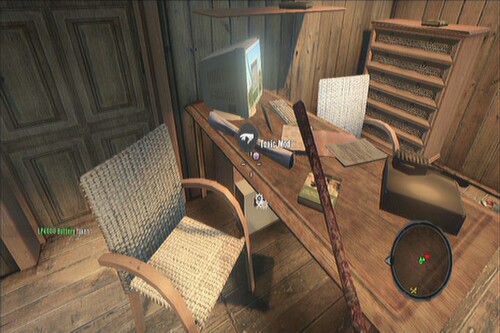
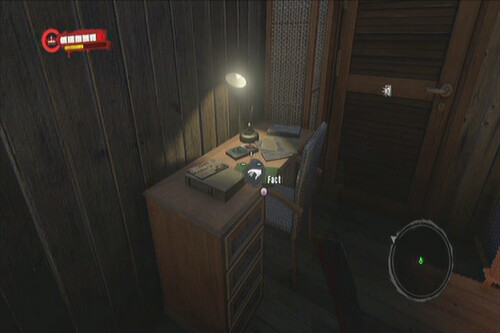
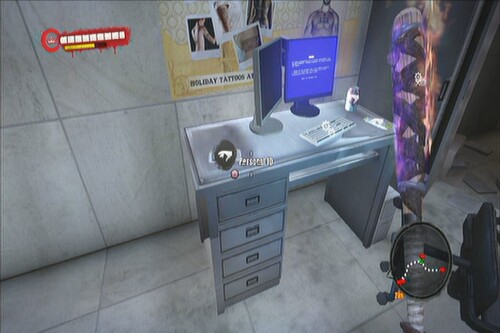
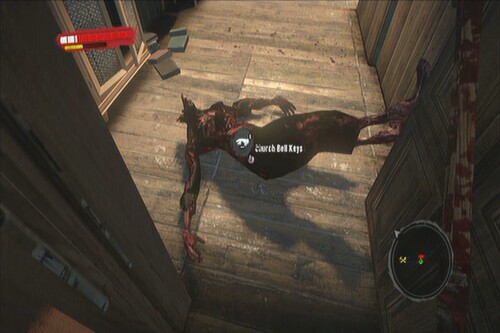
Toxic Mod
Quest: Sacred Silence
In the room where you need to kill the thug to get the church bell key, on top of the desk
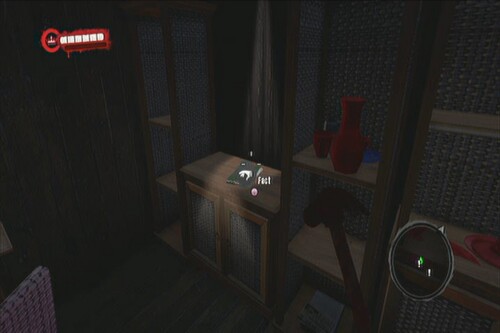
High Voltage Mod
Quest: Drowned Hope
In the control room, open the door to the left to find a small break room. The blueprint is on the table.
Shock Gun Mod
Quest: Let the Waters Flow
After opening the floodgate, check the newly opened room at the back.
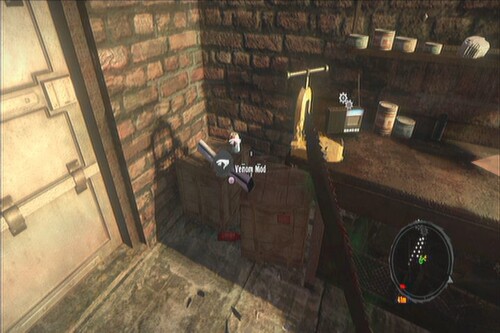
Venom Mod
Quest: Let the Waters Flow
Once you've reached the second floodgate, you'll find a door leading to a workbench with this blueprint.
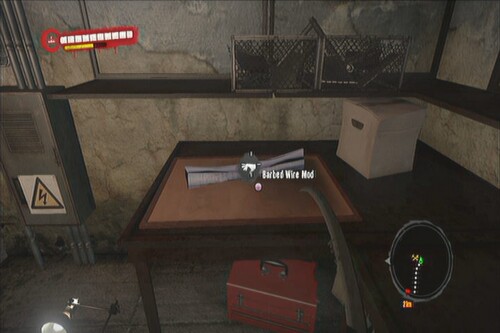
Barbed Wire Mod
Quest: Supermarket Journey
After entering the supermarket from the sewers, you'll find a room with a workbench. The blueprint is on the table beside it.
Striker Gun Mod
Quest: Supermarket Journey
After clearing the gang members in the stockroom, find the blueprint on top of a black crate near the workbench.
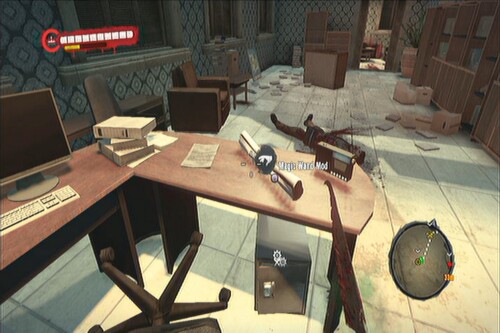
Magic Wand Mod
Quest: Bitter Return
After killing the infected mayor, find the blueprint on the mayor's table
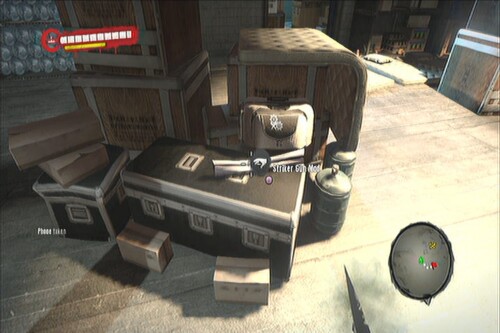
Pride Shotgun Mod
Quest: Bitter Return
You can find this in the main hall, in the middle along with some debris.
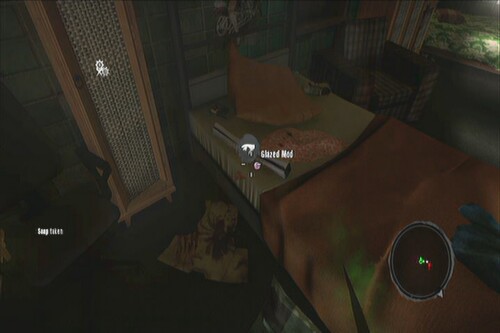
Glazed Mod
Quest: Uninvited Guests
Inside Alicia's room, on her bed.
Shotgun Ammo
Quest: Matter of Justice
The door across the chief's office should now be open. Enter it to find the blueprint on top of the shelf.
Weighted Mod

If its your first time to go there, you may encounter Jose Garcia. Rescue him to receive some ammo and this bunker that was previously locked should be open. Go inside the find a workbench and another blueprint.
Blueprint
Pistol Ammo
(Quest: Lady in Trouble)
Found in the police station, 2nd floor inside the first locked room with a workbench inside.

Razor Mod
(Quest: A Voice From the Sky)
Jungle, bunker. In the same table as the satellite phone. Refer to the quest details for the complete walkthrough and location.

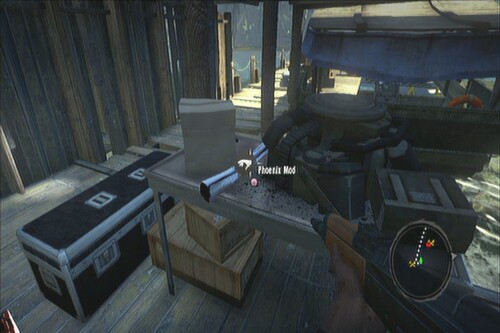
Phoenix Mod
(Quest: Soldier of Fortune)
Inside Afran's hideout/ dock. On the table by the boat.
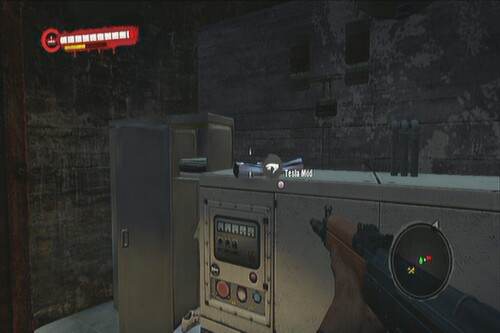
Tesla Mod
(Quest: Power Slaves)
Inside the generator room, beside the lockers.
Shock Shotgun Mod
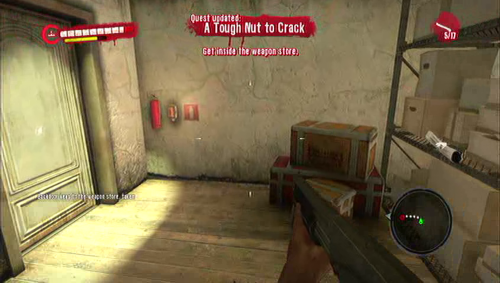
(Quest:A Tough Nut to Crack)
On the shelf, immediately visible as soon as you enter the abandoned house
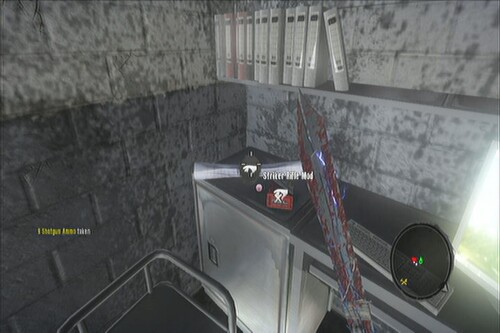
Striker Rifle Mod
Quest: Full Metal Jacket
Inside the armory, on the table.
Skulls are another set of collectibles in the game which will allow you to craft Developer mods. These are very powerful weapons which requires some basic materials, a lot of money and diamonds. Diamonds can be acquired by doing the continuous/ repeatable quest with Svetlana in the “Time for Booze” quest. You need to give her champagne, which can be farmed from the Supermarket or the Hotel’s kitchen area. The actual farming process will definitely take a while but it is worth it since you’ll also get XP and cash along the way.
After finding a skull, you need to find its “drop-off” location where you can place and activate it to receive the blueprint. This section will show you where to get the skulls and where to place them.
The stats seem to be randomized or refreshed whenever you preview and cancel a developer mod. Use this trick to get a weapon with higher stats.
Brown Skull
This can be acquired early in the game during the main quest “Black Hawk Down”. After escorting Nikolai to the bunker, look for a small manhole to the right of the workbench. If you forgot to get this earlier, you can just fast travel to Resort Bunker #2.
Enter the manhole and you'll reach the other bunker in the northern beach. Kill the suicider in the room and the skull should be among the pile of corpses on the floor.
Brown Skull Location
Now return to the previous bunker and fast travel to the lifeguard tower. Mark and head to this location:

Watch the video below to learn how to reach the altar where you need to put the brown skull and get your reward.
Brown Skull Drop
Green Skull
Put a marker on this location and head there. Watch the video below to learn how to find the green skull.
Green Skull Location
You need to backtrack to the Supermarket to get to the drop off location. You can do that by following these series of videos.
Slums to City Hall
Backtrack to Supermarket
Look for the part in the supermarket with liquors. Behind it is an aisle clay pots and next to it is an aisle of teddy bears.
Green Skull Drop
Blue Skull
To find the purple skull, you need to start the Uninvited Guest quest. Put a marker on this location and head there. This location is nearest to the warehouse so you can start from there instead.
Kill all the enemies inside until you reach the second floor. After dropping off the purple skull on the kitchen, check out the bathroom just across it then smash the glass cover of the shelf containing the Blue skull.
Purple Skull Drop and Blue Skull Location
To find the drop off, mark this location and head there:
If its your first time to go there, you may encounter Jose Garcia. Rescue him to receive some ammo and this bunker that was previously locked should be open. Go inside the find a workbench and another blueprint.
Blue Skull Drop part 1
Back track a bit then look for a manhole on the floor. Enter it then climb the ladder. Grab a LPG tank there then place it on the locked door. Shoot it to blow the door open and place the skull on the marked wall inside.
Blue Skull Drop part 2
Orange Skull
(Quest: Supermarket Journey)
After reaching the supermarket cellar, fight your way inside until you reach the first staircase. Check the pushcart behind it to find the skull.
Orange Skull Location
In case you missed this during your main quest to the supermarket, you can still return – however, it will be a dangerous and troublesome trek. You need to return to take the sewers to the City Hall, then take the sewers again leading to the Supermarket.
Watch the video below to learn how to backtrack to the city hall:
Slums to City Hall
Backtrack to Supermarket
After entering the sewers again leading to the supermarket, climb the only ladder in the area to find that the previously blocked door is already open. Just go inside the find the shrine where you can place the orange skull.
Orange Skull Drop
In case the orange skull is still not in your possession, continue following the path. It is pretty much straightforward so you can just move along until you reach the next door leading to the supermarket.
City Hall to Supermarket
Skull Purple
(Quest: Bitter Return)
On your way out through the sewers, you'll finally encounter a room with a floater and some toxic drums. Climb the only ladder there to find a small shrine on the upper level. You'll have a second chance during the main quest “Lady in Trouble”.
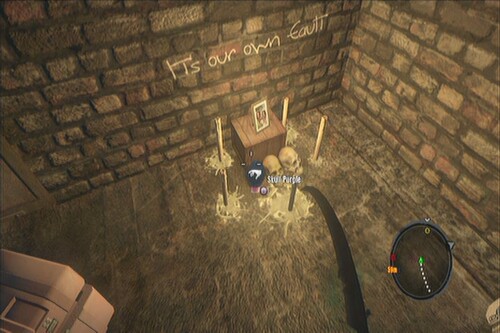
Purple Skull Location
To drop off the purple skull, you need to start the Uninvited Guest quest. Put a marker on this location and head there. This location is nearest to the warehouse so you can start from there instead.
Collectibles
Total: 40
ACT I
Banoi Herald #1
After reaching the beach house with other survivors. You can grab this before heading outside. If you missed it the first time around, you can go back here:

Banoi Herald #2
In the surfboard rental shop, on the table.

Banoi Herald #3
In the counter in the first floor of the Lifeguard Tower
Banoi Herald #4
Banoi Herald #5

Banoi Herald #6
Banoi Herald #8

Banoi Herald #9
Banoi Herald #10
Banoi Herald #11
Inside the bunker leading to the jungle, on the shelf of the workbench. The bunker's door can be blown open during the main mission “Devastator”.
Banoi Herald #12
Banoi Herald #13
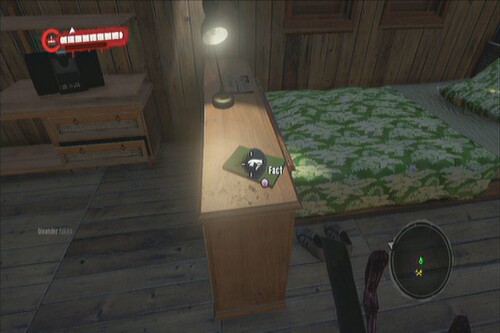
(Quest: Born to be Wild) Inside the medical room where you'll get the morphine, on the table.
Banoi Herald #14
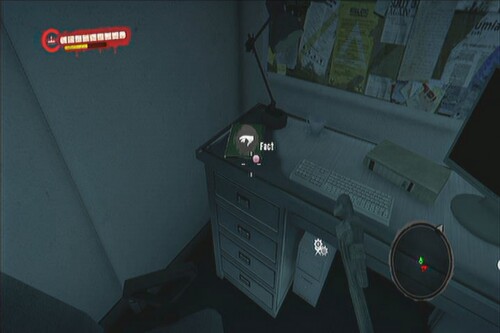
(Quest: Born to be Wild) After giving the morphine to Ken, you'll be asked to go to the Security Room. You'll find a small office after opening the new door. The herald should be on the desk.
Banoi Herald #15
During the quest Born to be Wild, in the small corner after the hotel's kitchen area.
Banoi Herald #16
During the quest Born to be Wild, inside the pantry of the hotel.

ACT II
Banoi Herald #17
Banoi Herald #18
2nd floor of the church
Banoi Herald #19
Banoi Herald #20
Banoi Herald #21
Banoi Herald #22
During the quest A New Broom Sweeps Clean, after entering the house, look immediately to your right to find it.

Banoi Herald #23
In the bathroom, during the quest In Cold Blood
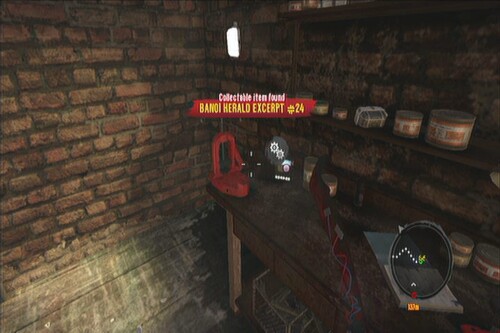
Banoi Herald #24
(Quest: Bitter Return)
Inside the workbench room, in the third floodgate leading to the exit.
Banoi Herald #25
They say this is in the manager's room but I wasn't able to find it. I've read in several forums that other players seems to have the same problem as well. Probably a glitch.
Banoi Herald #26
In the security room of the supermarket
Banoi Herald #27
Quest: Supermarket Journey
After breaking open a door that leads to a small kitchen. Find the excerpt on the table.
Banoi Herald #28
Quest: Lady in Trouble
Police station, 3rd floor, on the table in the second room.
Banoi Herald #29
Quest: Lady in Trouble
Police station, On the table of the room just past the prison cells.
Banoi Herald #30
Quest: Welcome to the Jungle
Inside the bus hanging by the broken bridge
Banoi Herald #31
On the table near the workbench. Be careful since this spot spawns 4-5 smugglers.
Banoi Herald #32
Quest: Soldier of Fortune
ACT III
Banoi Herald #33
I can't find this one myself but according to Wiki, it should be around this place. Like #25, this seems to be glitched as well. This doesn't really matter since you don't need to find ALL collectables to get the corresponding trophies. This only matters if you're a strict completionist.

Banoi Herald #34
Quest: Rotting Flesh
Inside the same room where you need to retrieve the tissue samples
Banoi Herald #35
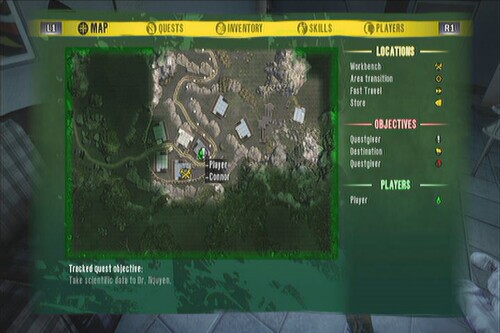
In the same living quarter where you'll find the questgiver Connor.
Banoi Herald #36
Quest: Rats in the Lab
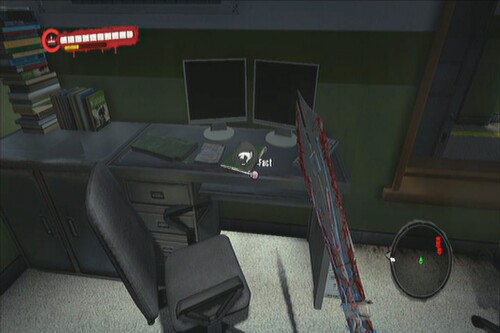
Inside the first room to the right, on the desk at the back.
Banoi Herald #37
Quest: River Trip
After meeting Will, check the bathroom behind him
ACT IV
Banoi Herald #38
Quest: Chasing the White Rabbit
After finding Recording #12, find the small ward to the right. See the video below for more details. This area is past the second stairwell with supplies and workbench.
Banoi Herald #38
Banoi Herald #39
Quest: Full Metal Jacket
On your way to the senior guard's office, look on the floor beside near some chairs.
Banoi Herald #40
Quest: River Trip
On the table, inside the laboratory lobby
Collectibles
Total: 100
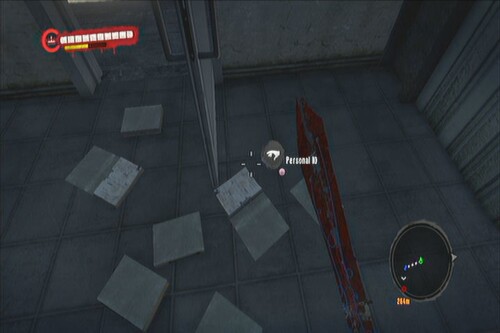
ACT I
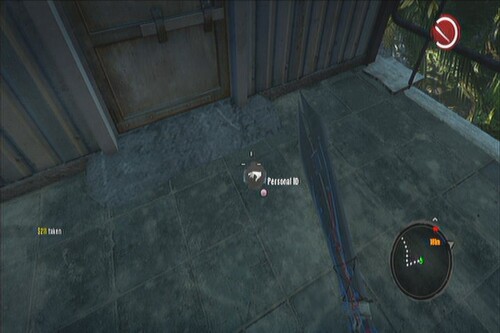
ID001
In front of Bungalow # 4, on a blue bag
ID002
ID003
ID004

ID005
ID006
ID007
ID008
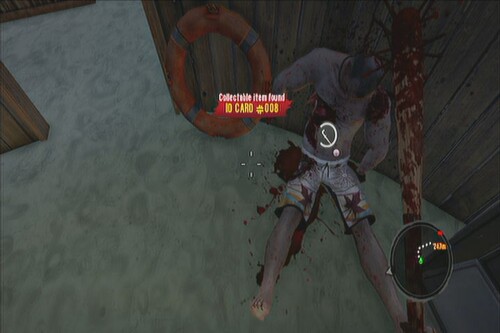
(Available after bringing Nikolai to the bunker during the quest Black Hawk Down)
ID009
ID010
ID011
ID012
ID013
ID014
ID015
ID016
ID017

ID018
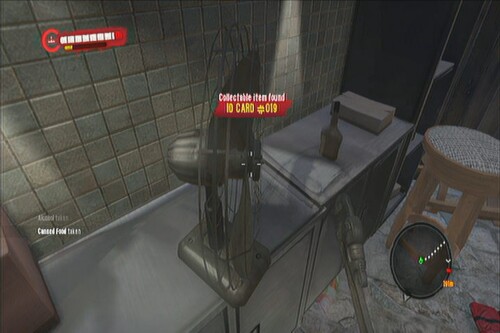
ID019
ID020
ID021

ID022
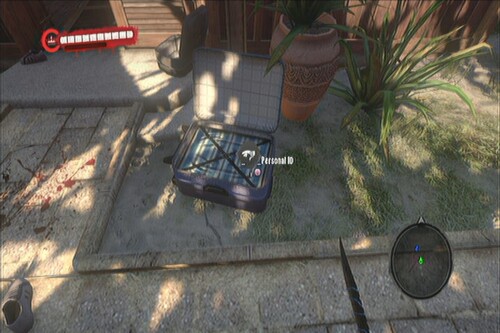
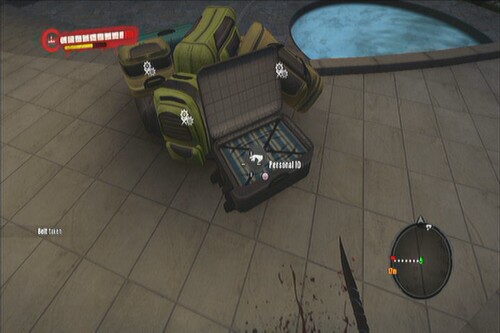
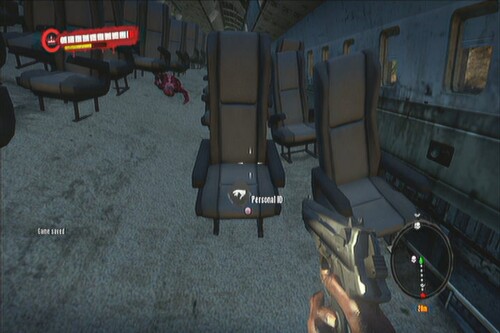
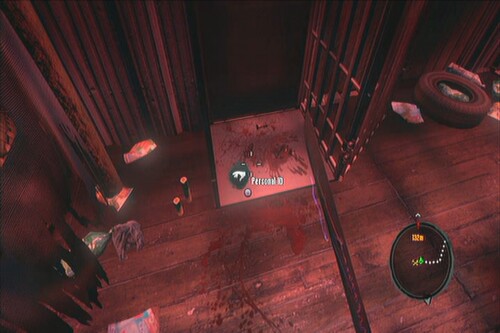
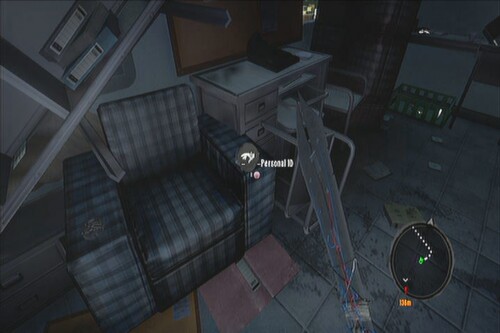
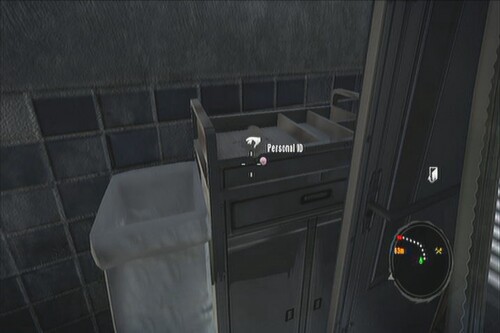
Start the quest “Gold Digger” by getting the key from the corpse in the main hotel lobby. You can find it easily during the main quest “Bird of the Roof” since its near the quest marker. Follow the trail to Bungalow 14 and you should find some wallets and the ID on the bed.
ID023
Rescue Steve Summers in this location by killing all zombies. Open the backdoor and you should find the ID on the table.
ID024

ID025
ID026
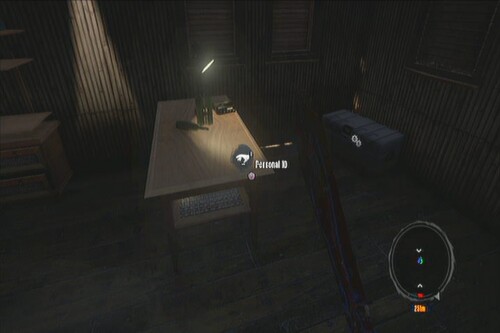
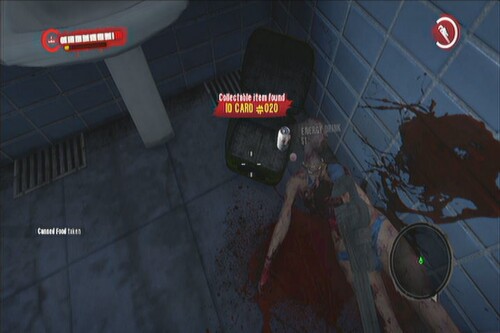
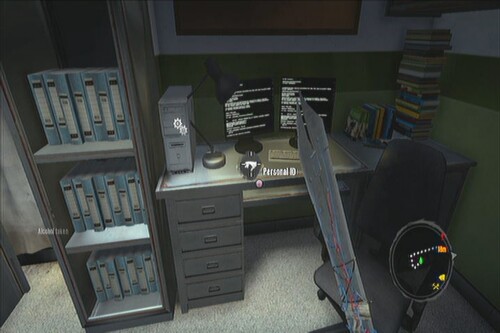
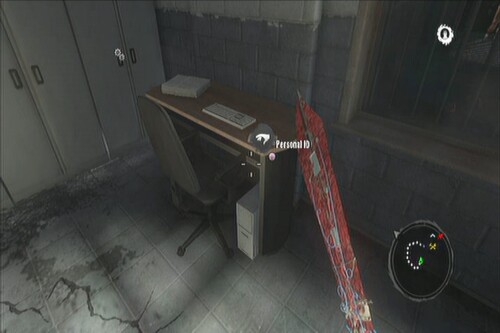
(Quest: Born to be Wild) After getting the mission to reset the servers, you'll find this on top of the terminal in the first room leading to the server room.
ID027
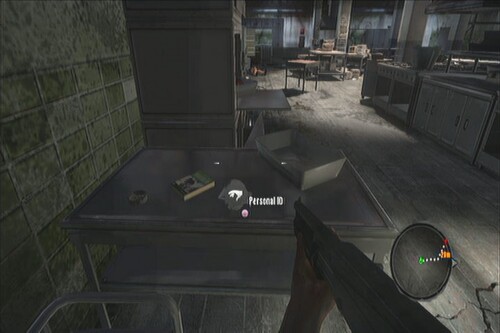
(Quest: Born to be Wild) In the kitchen where there are hanging, frozen meats, look for corpse in the middle of the room. The ID card should be there.
ID028
(Quest: Born to be Wild) After meeting up with Mike Davies in the hotel, he'll ask you to find his buddy, Ken. In the next hallway outside the elevator, you'll find a corpse near the doors. The ID card is beside him.
ID029
(Quest: Born to be Wild) After the swimming pool area, you'll reach the shower rooms. The card is on the shelf in front of the large doors.
ID030
(Quest: Born to be Wild) On the sofa, as soon as you enter the hotel on your way to the hotel parking lot
ACT II
ID031
ID 031
ID032
(Quest: Heroes and Villains)
On the table, inside the room in the warehouse where Amber is held.
ID033

ID034
ID035
ID036
ID037
Quest: 2nd Head of Cerberus, on the table beside the first loudspeaker.

ID038
ID039
ID040
ID 040
ID041
ID042
ID043
ID044
ID045
ID046
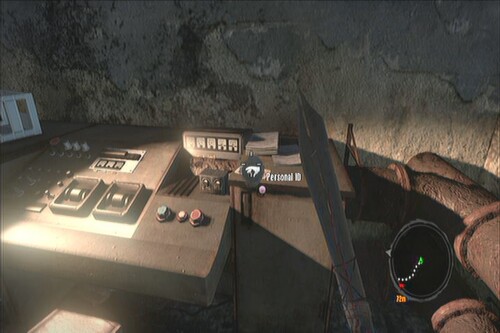
(Quest: Let the Waters Flow) On the table inside the floodgate control room.
ID047
(Quest: Let the Waters Flow)
This is inside the room where you can find the third workbench.

ID048
(Quest: Let the Waters Flow)
After entering the second floodgate, you'll need to follow a tunnel leading outside. There's a deadend tunnel with the briefcase and bag in the far end of it.
ID049
(Quest: Supermarket Journey)
In the first room with the Floater, climb the ladder on the left side.
ID050
(Quest: Bitter Return)
After getting the key from the mayor, you'll have to follow the trail leading to other sewer. There's a thug inside that you need to kill. You'll find the ID stuck on the billboard beside the workbench.
ID051
(Quest: Bitter Return)
After returning from the supermarket, you'll find the city hall overrun with infected. Continue going upstairs and you'll find the ID card beside two corpses and metal cabinets.
ID052
(Quest: Bitter Return)
After getting the universal key, backtrack in the other room past the veranda. You should be able to open the door there leading to a small office.
ID053
(Quest: Supermarket Journey)
After reaching the supermarket and continuing upstairs, the quest will be updated once you reach a large door. Before going there, continue along the corridor to another door with a small office.

ID054
(Quest: Supermarket Journey)
After entering the main supermarket area, look for the information counter. The ID is behind the counter.

ID055
(Quest: Lady in Trouble)
After reaching the next room where you need to kill the punks, look for the ID card in the counter.
ID056
(Quest: Lady in Trouble)
Past the room with the first workbench, you'll find the prison cells. It is located inside the farthest cell on your first right.
ID057
(Quest: Lady in Trouble)
In the last office room where you need to defeat the last batch of enemies, check the set of cubicles in the corner to find it on the table
ID058
Inside the abandoned house which will become one of your bases, after the quest A New Broom Sweeps Clean
ID059
In the final room of the Abandoned House during the quest “Grasp All, Lose All”
ID060
In the final room of the Abandoned House during the quest “Blood Ties”
ACT III
ID061
On the table in southern house of the Overpass Camp.

ID062
Inside the Bunker where Sam is located.
ID063
(Quest: King of the Swamp, River Trip)
Inside Mowen's Hut, on the table

ID064
(Quest: Spy Game, Death Wish)
Inside the radio station, on the billboard above the PC.

ID065
Quest: Soldier of Fortune
Inside the bus
ID066
River Village, inside the house by the harbor.

ID067
Plane Wreck, in the 2nd level, on one of the passenger seats.
ID068
River Village. On the bed, in the same house where you can start the quest “Death Wish” by talking to Brian
ID069
Jason's hut, inside the cage
ID070
Jungle Village. Fast travel to Jungle Village and it will take you to the village house with a workbench. The ID is located in the same room, on the stool beside a crate of fruits.
ID071
Quest: The Show Must Go On
Inside the bungalow where you need to search for the video camera, on the table.
ID072
Overpass Camp, inside the pub behind the counter
ID073
Overpass Camp, inside the warehouse. After completing “Visit to the Pub”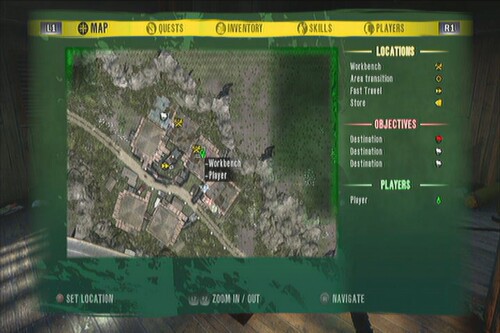
ID074
Laboratory: After getting the blood sample from the Natives, check out the room where Frank was trapped earlier. The ID should be on the desk.
ID075
Along the catwalk leading to the warehouses at the back of the Lab
ID076
Quest: Substance of Matter
On the desk inside the warehouse
ID077
Quest: Rotting Flesh
Inside the same room where you need to retrieve the tissue samples
ID078
Quest: No Sign of Life
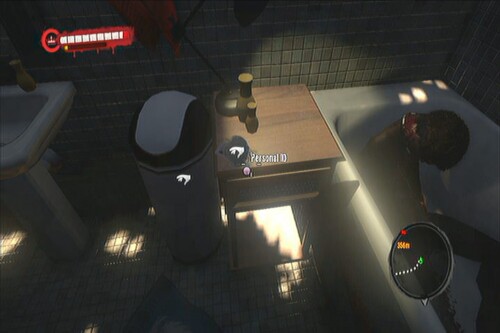
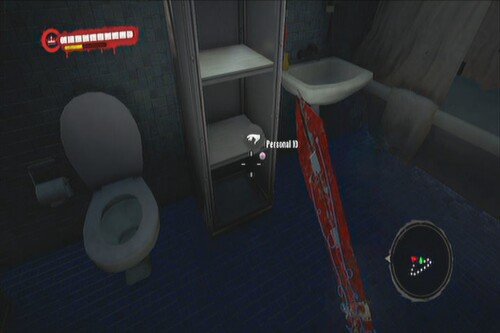
Inside the home of Sebastian's friend, in the bathroom
ID079
Quest: Where is My Pineapple
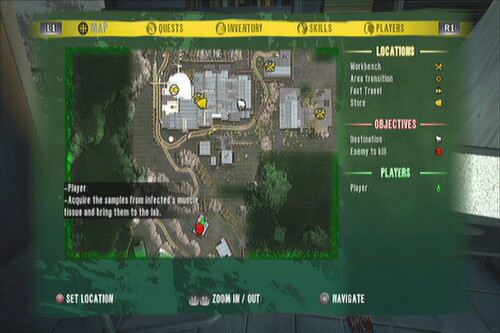
In the same room where you need to retrieve Nguyen's data.
ID080
Quest: The Dead Don't Eat Crackers
Enter the living quarter in this location from the roof and find it on the chair
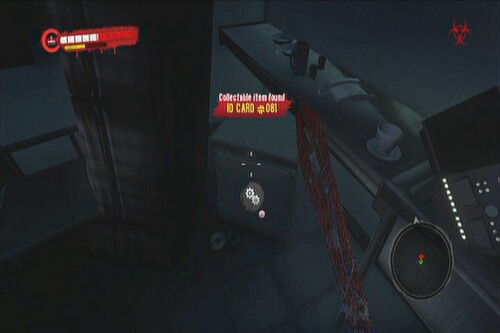
ID081
Quest: The Dead Don't Eat Crackers
Enter the second living quarter as part of the quest and find this ID on the table above the fridge.
ID082
Quest: River Trip
Check the building at the back of the boat. Go to the second floor and you should see the ID on the floor.
ID083
Quest: Scran's not for the Dead
Food and Storage Warehouse, On the floor, near the door in the corner
ID084
Outside the laboratory, near the vehicle and beside the bloodied corpse.
ID085
Follow the main road from Mowen's Boat until you find a wrecked truck. The ID is in the passenger seat.
ACT IV
ID086
Quest: Devil's Labyrinth
After the large room with multiple undead, there should be a workbench nearby. You can find it on the floor in front of it.
ID087
Quest: Dante's Kitchen
In the first area, you'll find a guard's corpse above the shelf. The ID card is beside him.
ID088
Quest: Full Metal Jacket
After reaching the second floor, open the doors to the right to find the infirmary. The ID should be there.
ID 088
ID089
Quest: Devil's Labyrinth
In the last part of the sewer area, before taking the ladder up, check the other dead end to find another dead guard. The ID should be beside him.
ID090
Quest: Devil's Labyrinth
After the second large room past the initial police barricade are some stairs going up. You can find the ID by the door under it.
ID091
Quest: Chasing the White Rabbit
After starting the quest, continue following the path until you reach a staircase with some ammo and supplies. Climb the stairs up to find the ID in the blocked path.
ID092
Quest: Devil's Labyrinth
After reaching the control room, you need to proceed to a blacked out stairwell. In the bottom you'll find an ID, beside a guard's corpse.
ID093
Quest: Chasing the White Rabbit
After going up the second staircase with some supplies and workbench, enter the first ward to the left and find the recording on the bed. Recording # 11 should be on the bed nearby.
ID094
Quest: Full Metal Jacket
Anytime after the double doors opened, open the door to the right of the fire axe to find this ID card.
ID095
Quest: The Green Mile
While escorting Alvaro out of the cell, the previously locked room will be opened by a thug. Defeat it and enter the room. The ID on the table.
ID096
Quest: Dante's Kitchen
In the second area where you need to kill some infected and a thug, find this on the table in the corner of the room.
ID097
Quest: Devil's Labyrinth
After starting the quest, head to the basement and follow the path. There should be an ID sitting on top of a cabinet beside a machine control panel along the way.
ID098
Quest: Devil's Labyrinth
In the sewer area, you'll encounter a floater after the second turn. Search the floor near it to find it.
ID 98
ID099
Quest: Devil's Labyrinth
After picking up ID089 and climbing up the ladder to the shower room, look immediately behind you to find the ID on the floor.
ID100
Quest: Chasing the White Rabbit
In the large ward just beside the room where you found Excerpt #38 and a few walks away from Recording #12, you'll find this ID on the bed near the exit.
Note: Seems like another glitch but the first time I approached it, the ID card appeared briefly then disappeared completely. Reloading the game from the last checkpoint solved the issue.
Collectibles
Total: 12
ACT I
Recording #1
Starting the Investigation
During the quest “Passport to Life”, you'll find this on the table.
Recording #2
Meeting the Informant
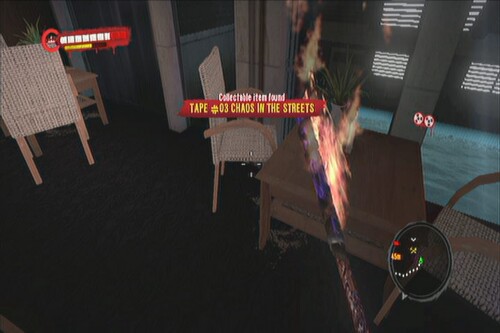
Recording #3
Chaos in the Streets
ACT II
Recording #4
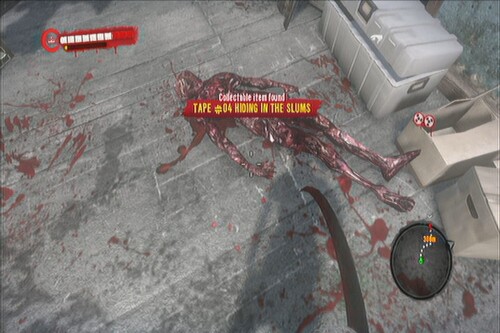
Hiding in the Slums
During the quest Third Head of Cerberus, you'll find this on the corpse beside the third speaker.
Recording #5
Message for the Family
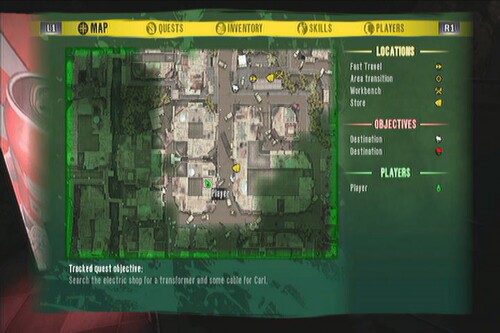
Inside the electronics shop, on the shelf. The electronics shop is marked in your map during the quest Radio Gaga.
Recording #6
A City in Ruins
Found as soon as you reach the police station during the quest “Lady in Trouble”. While in the underground parking lot, look for a dead cop near the door. The recording should be lying beside him.
ACT III
Recording #7
Heading to the Jungle
After reaching the River Village, its on Mutatero's table.
Recording #8
Something Big is Coming
Recording #9
The Lab
After reaching the lab, its on the desk before Dr. West's lab.
ACT IV
Recording #10
The Prison
As soon as you reach the prison, look for it on the bench.

Recording #11
Documenting The Symptoms
After going up the second staircase with some supplies and workbench, enter the first ward to the left and find the recording on the bed. ID#093 should be in the desk nearby.

Recording #12
It's Covered In Blood
After getting Recording #11, exit the ward and you should find a sitting corpse in the middle of the fork. The last recording can be found beside him.
Note: In my gamesave, I can't pick up the damn thing so I thought it was probably glitched. After quitting the game and reloading it and even restarting the console, I am still unable to pick it up so be warned.
These NPCs give extra EXP after you save them.
Haris
Beach Rescue
Alfred 300 exp
Harlan Johnson 500 exp
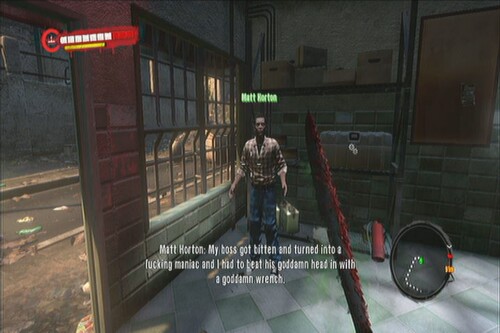
Matt Horton
Jose Garcia
Blue Skull Drop
Quest: Chaos Overture
Start by entering the bathroom to find a Medkit. Exit through the door. Before moving to the hallway, enter the first room to the right and scavenge available items inside. Head to the corridor and open the luggage along the way. Go through the next rooms and check out the closets and bathrooms for more items and cash.
Exit to the next hallway and continue looting the luggage. Head to the terrace to trigger a cutscene. Once done, continue checking more luggage then head to the broken elevator. Hold the button to open the hatch. Watch the next sequence.
Once back in control, crouch to exit the elevator then continue along. Follow the only path and slowly approach the corridor. Once you're told to run, quickly turn back and start sprinting (hold down the L3 button) to the other end of the corridor to trigger a cutscene.
Corridor Sprint
You'll be back in a hut with other survivors. Grab the Banoi Herald Excerpt # 1 near the bed as your first collectable in the game.
Blood in the Sand
Find a weapon and help the lifeguard get rid of the undead
Easy
2000 XP
Approach Jeannine near the exit to trigger the new quest. When ready, open the door. You'll be advised to pick up the weapon. Pick up the nearby paddle and you'll find yourself outside. Use R1 to attack; remember that you can deal bonus damage when you attack fallen enemies. Kill all zombies to complete the quest and trigger the cutscene.
Blood in the Sand
Passport to Life
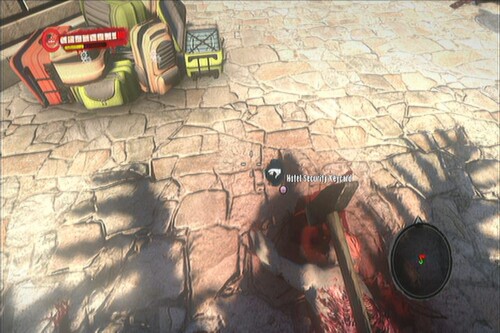
Bring the security keycard to the lifeguard tower from the Bungalow #11
Easy
400 XP, Nail D' Mod,
Once in control, you'll gain one level and one SP that you can use to purchase one upgrade. Next, talk to Sinamoi to receive a new quest. (Passport to Life). Head to the back room and talk to Steven to receive another quest (The Lost). (see the sidequests section of this guide for individual walkthroughs of all sidequests)
Head out and you can track the main quest for now. You can explore the nearby areas to find more weapons and other items. Weapons degrade very quickly so it is wise to stock up with as many spare weapons as you can. Continue following the path and kill enemies along the way. You may encounter a survivor in the middle of the bloody pool. Ignore or talk to him, then enter the bungalow nearby.
You can find a collectable (Tape #01 Starting the Investigation) on the small table near the books. Break the door open then continue to the bedroom. There's a walker zombie inside the bathroom so kill it then recover the security card on top of the table. Make your way back to Sinamoi and hand him the card to complete the quest.
Exodus
Go to the Lifeguard Tower and get rid of all the undead in the area.
Hard
600xp, Homemade Cleaver
Talk to Sinamoi again to start another quest. Follow the main path to the beach. You'll eventually encounter a survivor inside a truck surrounded by zombies. Kill them all to rescue the man and earn 500 exp.
Beach Rescue
Follow the man inside the supply shack and grab another collectable on the desk. (Banoi Herald Excerpt #2) There's also a good amount of cash inside the cash register. There's also a workbench inside where you can upgrade, repair or create modified weapons. Continue following the path until you reach the Lifeguard Tower. Clear all enemies and finally open the door to find a brute zombie inside. Using blunt weapons will stagger the enemy for a few seconds and it will be open after it swings its arms. Use these chances to deal further damage. Just move back in between its attacks to avoid getting damaged.
Brutish
Continue inside and continue clearing the building. There's a workbench by the garage and another collectable further inside (Banoi Herald Excerpt # 3) by the counter, beside the LCD monitor. Continue upstairs and open the hatch. Kill all the zombies there then finally, contact Sinamoi to complete the quest.
To Kill Time
Help Mike and Dominic.
Hard
Cash
The Lifeguard Tower will become your new hideout. There will be new quests available, and the shop will be open as well. Sell him most of the junk you don't need, then repair/upgrade your weapons as necessary. Talk to the quest NPCs to start their quests. It doesn't matter which one you take first but I do suggest completing all possible sidequests at this point. Complete the quests Ashes to Ashes and On the Air given by Mike and Dominic respectively. Talk to Sinamoi to complete the quest and continue with the storyline.
A Piece of Cake
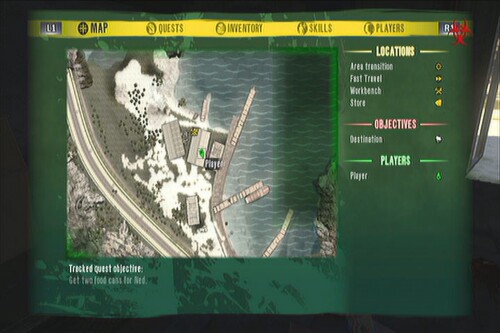
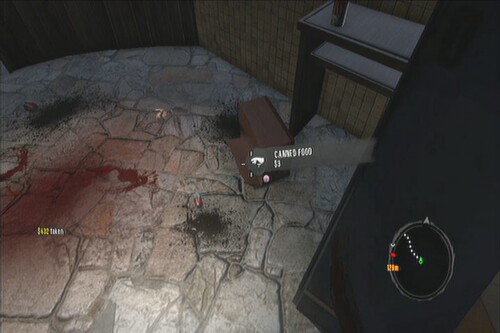
Search the hotel's poolside bars for cans of food. Bring 3 cans of food to Sinamoi.
Easy
1500 XP, Baseball Bat
Sinamoi
Head to the poolside west of the Lifeguard Tower. As you get near a canned food, it will be marked in the map. One is located in the first bar in the end of the stairs directly west of the tower. One is located inside a luggage in the underground women's restroom. Another canned food is located inside the locked poolside bar to the west. There's a storage key on the counter top that you can use to open the door. Once you've collected enough, return to Sinamoi.
Seek and Loot
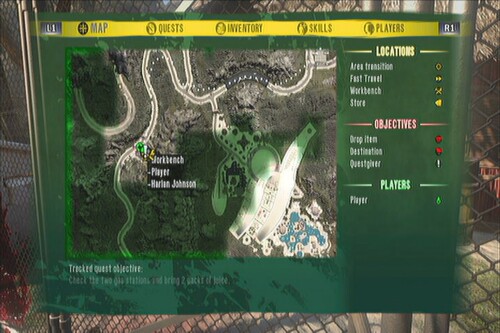
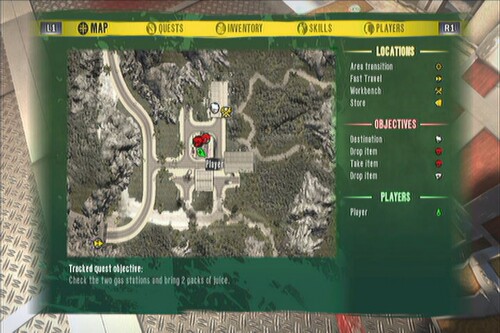
Check the two gas stations and bring 2 packs of juice
Hard
1800 exp, cash
Sinamoi
After completing A Piece of Cake, talk to him again to receive this quest. You need to check the two gas stations and bring two packs of juice. The first gas station is the Lighthouse gas station which you've visited earlier during the Ashes to Ashes quest. The second one is further to the southwest. You can find new quest givers along the way (if you haven't found them yet) and another one as soon as you've reached the 2nd gas station (see Waterdance). Bring the juice packs the Lifeguard Tower then talk to Sinamoi when done.
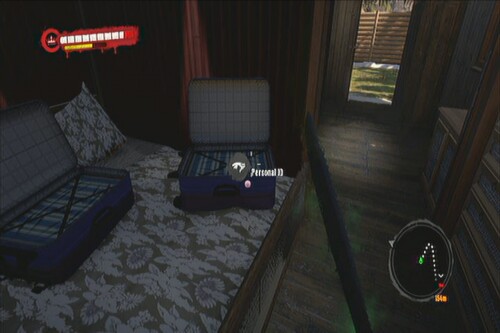
Born to Be Wild
Recover the Truck from the Hotel's Parking Garage
Very Hard
2100 XP, Diamonds
Talk to Sinamoi again after completing “Seek and Loot”. Head to the hotel parking lot as marked in the map. Once there, you need to take out two thugs. You can do it the easy way by lobbing a molotov cocktail at them. Once they're taken care of, look for the keycard which should be lying nearby. Use the keycard on the door nearby and travel to the next area.
While inside, you can smash the glass panes to check the rooms. Always search the cash registers as they yield a good amount of cash. There's an ID card on the sofa near the entrance (ID030). Head further inside until you reach the pantry. There should be another collectable on the table. (Banoi Herald Excerpt #16)
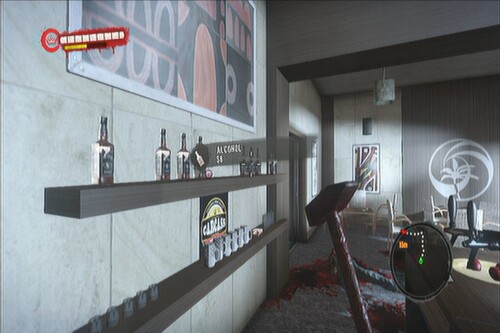
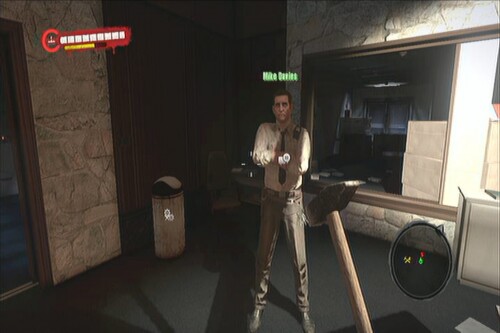
Continue forth until you reach the bar. There's a lot of alcohol on the shelf so go crazy and loot them all. Continue following the corridors until you meet Mike Davies. He'll then ask you to find his partner named Ken.
Hop on the elevator then enter the hatch. Exit it and move along to the kitchen. Clear the first kitchen then you'll have to continue to the objective marker. You have two ways here; bypass the mob of zombies in the next kitchen or kill them all for a large amount of experience and loot. Move along and grab another collectable along the way.
Continue along the straightforward path until you reach the steam-filled corridor. There are a couple of infected that will ambush you so be prepared. Continue forth until you reach the room with a workbench. Repair your weapons or modify them. There will be a lot of zombies in the next room and some of them are infected so don't go out completely to avoid getting surrounded.

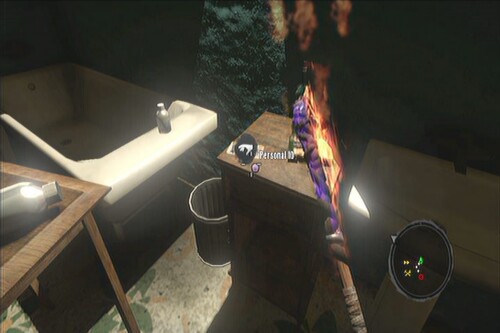
Go past the swimming pool then to the shower area. Kill the zombies along the way and don't forget to pickup the ID card on the shelf, in front of the large doors.
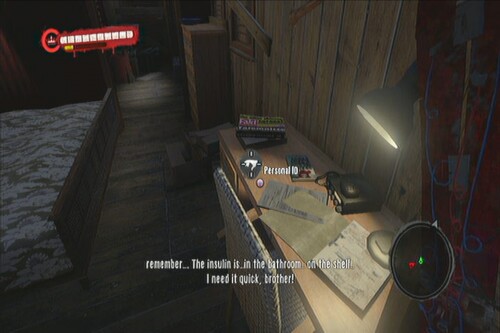
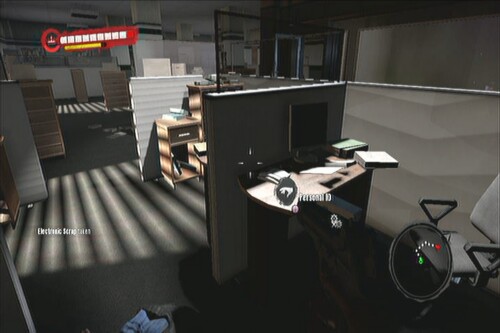
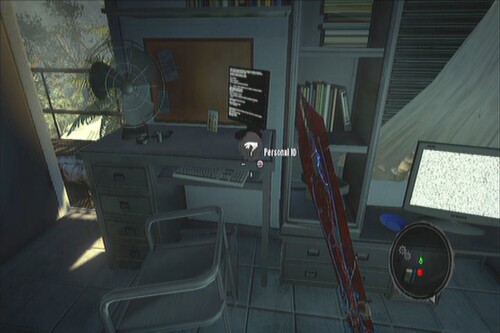
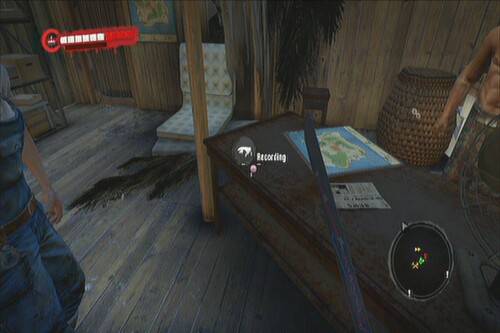
Fight your way to the second floor and to the objective point. Bash the door open and find Ken inside the supply room. He'll ask you to fetch the morphine in the medical room. Head there and clear the rooms. Aside from the morphine, there's another Banoi Herald Excerpt in the nearby table so don't forget to grab it as well.
Return to Ken and give him the morphine. This time, you'll be asked to head to the security room. Exit to the same door again and carefully clear the corridor. In the small office room, there's another Banoi Herald waiting to be picked up. Grab it on the table.
Continue forth until you reach the small cafe. There's a recording on one of the tables there.
Continue to the next hallway until you reach the corridor leading to the security room. Defeat all zombies their then go inside. Talk to Mike to continue.
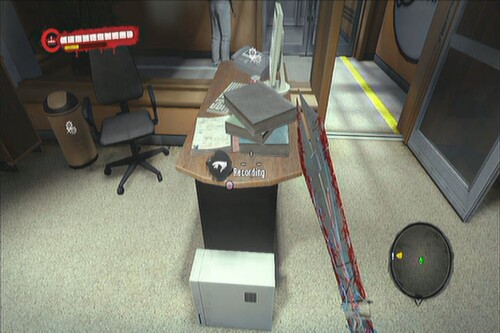
Exit and make sure that your weapons are fully repaired before heading to the server room. Grab the collectable ID card beside the firewall terminal then activate it.
Clear the zombies in the second room, including a thug. After defeating them, grab the Molotov blueprint then operate the terminal.

Finally, clear the last server room then activate the two terminals there. Reprot to Mike to update the quest. Exit the security room then follow the path leading to the parking lot. Clear the path then enter the armored truck.
You'll need to drive the armored truck back to the lifeguard tower. After parking the truck, talk to Sinomai to complete the quest.
Truck Mowdown
Black Hawk Down
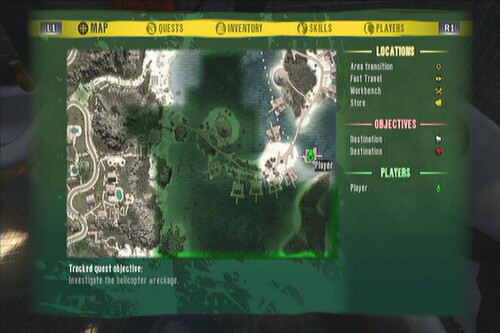
Investigate the helicopter wreckage ad bring Sinamoi any supplies you find.
Medium
2400 XP, Shock Mod
After delivering the armor truck in the previous mission, talk to him to get this quest. Head to the crash site and watch the scene. Here's you'll be introduced to a new enemy type. You don't need to kill it yourself; you can approach it then back away to let it detonate alone.
Continue to the burning wreckage and you'll find Nikolai there. Talk to him and he'll advise to move to the bunker by the beach. You need to escort him there.

Kill the zombies along the way until you reach the bunker. Once there, head inside and talk to him to update the quest. You need to report to Simonai next. You can also talk to Nikolai again to open up a new sidequest. You can also check out the manhole nearby since it takes you to the other bunker in the northern beach. You can take note of this feature for your convenience later on.
Once ready, you can just fast travel from the bunker back to the Lifeguard Tower. Talk to Sinamoi to complete the quest.
Misery Wagon
Go to mechanic to reinforce the truck
Medium
2700 XP
Talk to Sinamoi again to receive this quest. Hop on the armored truck then drive to the location marked in your map. Once you've reached the destination, clear all zombies in the area. You can use the truck to crush the walkers in front of the garage but you still need to leave the vehicle and defeat a wave of infected.
Once done, head inside the garage to complete the quest.
Only the Strong Survive
Protect the workshop while the mechanic works
Hard
3400 XP
This quest is activated automatically as soon as you enter the garage. Talk to the mechanic to update the objectives. Make sure that you have healed up using the healing items inside before heading out. The infected will come running in the front gate so you have to stand your ground and repel waves of them. There are healing items inside the open toolbox under the junk pile left of the gate. After defeating all infected, talk to the mechanic again to complete the quest.
On the Road
Travel outside the resort to find food, medicine and weapons
Take Jin and drive to the city tunnel
Very Easy
5000XP
Talk to Jin to start this quest. Hop in the armored truck then drive to the tunnel southwest of the resort.
Ram on Heaven's Door
Help the people in the church fend off the attack of the undead.
2000 XP
Once back on your feet, head to the church and help the survivors fend off the zombie attack. Here you'll face yet another type of enemy. The Ram. This bastard will literally charge towards you and will cause massive damage in addition to being knocked down off your feet. If you have a stock of them, you can use Molotovs to easily kill all enemies. If not, you can just go back to the gates since this is a safe spot then rush in again when you have the chance. Quest is completed once the infected has been cleared out.
Church Defense
Sacred Silence
2000 XP Mace
This quest is received automatically after completing the previous one (On the Road). Head inside the church and talk to Mother Helen. You need to silence the bells next. Ram the door open then kill the thug inside. Pick up the church bell key from its body.
Pick up the Toxic Mod blueprint on the desk then open the control panel near the door. Turn off the church bell by operating the button inside. Return to Mother Helen to complete the quest.
NOTE: You can talk to Jin inside the church and deposit some items you can't carry. This will free up your inventory and will allow you to carry the stuff you really need or you want to sell later on. Take note that Jin's storage is known to be glitchy; sometimes, withdrawing maxed number of items (alcohol or medkits for example) will sometimes make them disappear for no apparent reason.
TIP: You can use the rooftops to safely explore the slums. Look for ladders that will take you there. The streets are littered with the dead and the rooftops are your only way of moving around the city fast and safe. Take note however that the fast moving infected can reach the rooftops if there is a lower elevated area that they can jump on. Furthermore, due to the layout of the city, some ladders don't will just lead to deadends and precarious jumps.
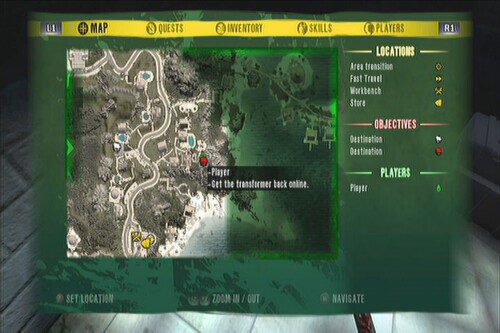
Drowned Hope
Check what happened to the pump station
Hard
4000 XP, Sticky Bomb Mod
Talk to Mother Helen to start this quest. (There will be new quests so don't forget to acquire them as well). Head to the marker set on the map. You need to be careful since there will be suiciders among the basic walker and infected groups, as well as pistol wielding punks who will shoot you on sight. You can loot their guns, if you manage to kill them.
Head to the marker and approach the pump station. You'll have to clear the area of bandits.
Pump Raid 1
After clearing the initial wave of enemies in the first pumping room you'll come across a control room. Open the door to the left to find a small break room. The High Voltage Mod blueprint is on the table.
Continue clearing the enemies on the second room and outside. After defeating them all, open the small warehouse to find Antonio and his companion
Pump Raid 2
Go with him to the Control Room to complete the quest.
Drop by Drop
Close the 5 hydrants
Hard
4500XP, Meat Bait
Talk to Antonio to start this quest. The fire hydrants you need to turn off will be located in the map one by one. Just clear all enemies in the area before attempting to turn them off.
Each hydrant has groups of zombies surrounding it with at least one ram or thug. Turn all five hydrants then talk to Mother Helen to complete the quest.
Way of Salvation
Escort Joseph to the water plant.
Medium
4500 XP, Cash
After completing the quest Drop by Drop, talk to Joseph outside of the church entrance. Escort him to the water plant. You don't need to kill everything on sight; just keep running when he says so and defeat only the ones preventing your advance. Keep protecting him until you reach the entrance to the sewers.
Let the Waters Flow
Cut the water flow to the canals. Open the floodgates.
Medium
5000 XP
Talk to Joseph again to start the quest. Move along and climb up the first ladder. Turn off the two valves.

Once done, climb down the ladder then go to the floodgate next. Before moving to the chamber, grab ID card on the table and check out the newly opened room to find the Shock Gun mod on the shelf. Use the workbench as necessary.
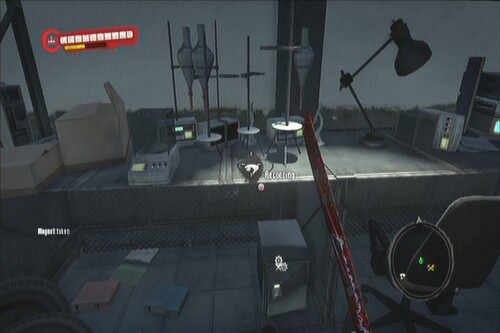
You'll have to the deal with a new enemy called the Floater. This is a ranged infected that can deal considerable damage for every attack. You can throw an LPG tank and detonate it from a distance by shooting at it or, you can just get close and hack and slash the floater. It's weakness is melee attacks.
After defeating it, continue following the path and kill the enemies until you reach the second floodgate. You should find a door leading to workbench. Another mod is waiting inside.
The path is pretty much straightforward from here on so continue following the path until you reach a room with two doors. One of the doors has a workbench in it and another ID card.
Continue again until you reach another similar room with a workbench. Use it if you want; enter the other room to find another floater. Throw the LPG tank and shoot it to get rid of all of them at the same time.
Continue fighting your way through the last remaining enemies until you reach the exit. Quest completes automatically.
Head Against the Wall
Go to the town hall and investigate the situation.
1000 XP
This quest is started automatically after finishing the previous one. Talk to the mayor to complete the mission.
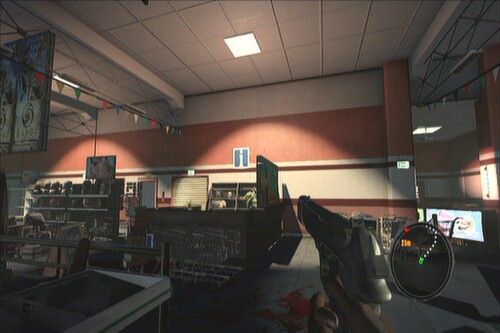
Supermarket Journey
Gather supplies from the supermarket
Hard
5000 XP
Follow the trail and talk to Josh. Accept the quest then go downstairs to talk to the policeman guarding the door.
This will open up a new quest. “Guard on Duty”. You just need to bring him an alcohol. After that he opens the door. Head inside and travel to the sewer.
Stay away from the toxic sludge to avoid getting damaged. Continue to the next hallway then kill the suicider and other walkers inside. Continue following the straightforward path until you reach the door to the supermarket.
Once you're in the supermarket, turn off the steam valve then clear the room. Continue ahead and kill the Floater inside. You should also find a workbench nearby. Grab the items, materials and Barbed Wire mod there.

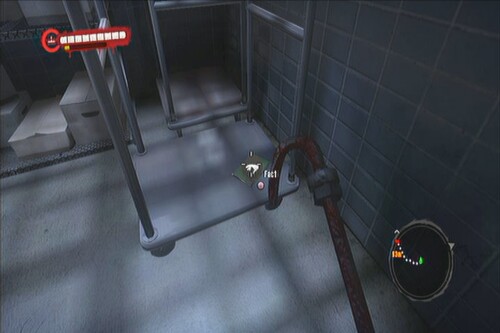
Carefully follow the corridor and fend off an infected rush. Before going upstairs, check the pushcart underneath it to find a Skull Orange. Continue upstairs and use the vending machine to heal yourself, if needed. Continue forth until the quest updates. Don't open the main doors yet; continue further and you should find a door. Open it to find a small office. There should be an ID there.
Open the large door to reach the main supermarket area. There are punks inside so kill them all. There are a lot of energy drinks and food inside so don't worry about restoring your health. Just stay behind cover and pick them off one by one.
Follow the trail until more punks ambush you. Clear them all and don't forget to grab another ID behind the information counter before moving forward.
Continue following the trail until the door is closed. Break the other door open, then kill the walker on the table. Don't forget to grab a Banoi Herald excerpt on the table.
Continue to the security room and kill the two infected inside. There is a Ram on the other side of the door so get rid of it before moving to the next room.
You'll find survivors inside but you can just ignore then. Break down the next green door and kill the gang members inside.
Warehouse Raid
Before moving the supplies, look for the Striker Gun Mod blueprint on a crate near the workbench. Finally, interact with the pushcart containing supplies to complete the quest.
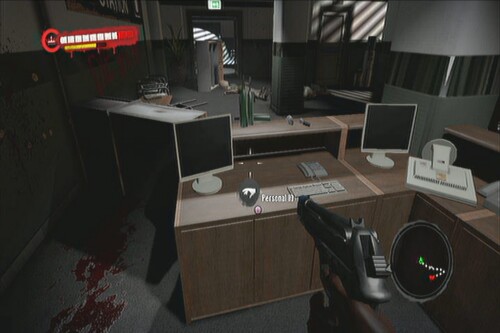
Bitter Return
Get back to the City Hall
Easy
6500 XP
You'll be back in the sewers again. Just fight your way back to the City Hall. On your arrival, you'll immediately realize everything’s gone FUBAR. Continue upstairs and grab the ID card beside the metal cabinets.
The other paths are practically blocked for now so go outside and follow the hallway. There is a ram and suicider below so you can just lob an explosive or molotov there to kill them safely.
Follow the straightforward path until you reach a door that needs to be broken open. Kill the two infected inside, then break open another door again. Kill more enemies inside then open the next door to reach the terrace. Kill the walker there then hold the machine gun turret. You can kill the zombies below for some extra exp.
City Hall
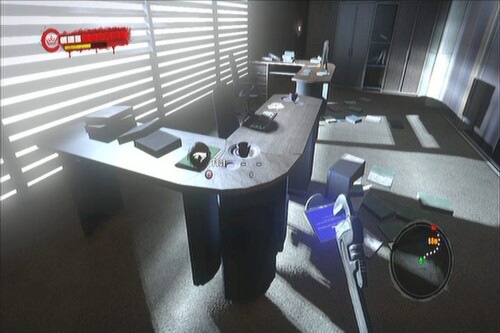
Continue breaking down doors and killing enemies until you reach the infected mayor. Kill him to get the universal key and complete the other sidequest “Big Daddy, Where are You?”. Before leaving the room, grab the diamonds from the safe and the Magic Wand Mod blueprint on the mayor's table.
The key will allow you to open the previously locked doors. First, backtrack in the other room past the veranda. You should be able to open the door there leading to a small office. Grab the ID on the table.
Follow the trail as it leads you down to the other sewer exit. Before going there, break open the barricaded door leading to the city hall entrance. Head to the main hall and find the Pride Shotgun Mod blueprint in the middle.
Continue following the trail and kill the thug inside and use the workbench. Grab another ID stuck on the billboard beside the workbench.
You'll need to find your way back to the slums. Continue until you reach the third floodgate. From there, you can find another Banoi Herald inside the workbench room.
On your way out through the sewers, you'll finally encounter a room with a floater and some toxic drums. Climb the only ladder there to find a small shrine on the upper level. There's a Skull Purple there.
From this room, there will be several exits to the slums, all of which are valid. However, following the trail will lead you to the manhole nearest to the church. Return to the church to complete the quest.
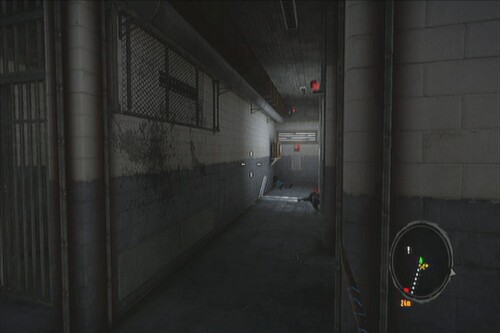
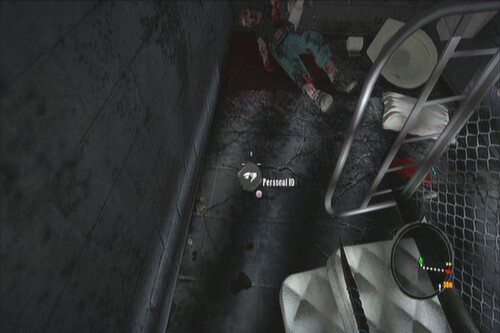
Lady in Trouble
Find Jin and the car
Medium
5000 XP
Talk to Mother Helen to start this quest. Head outside to find Joseph. Talk to him to get the key. The sewers where you need to enter is right next to Nick's Hub (abandoned house – safehouse) to the south of the map. You can just fast travel there then exit to the slums.
Enter the sewers and follow the trail. If you didn't get the Purple Skull earlier, this trail will lead you back to toxic room with a floater and some toxic walkers. Just climb the ladder there and it will lead you to a small shrine. Continue following the trail until you reach the door leading to the police station.
Purple Skull
Once you've reached the police station, continue forth and look for a dead cop near the door. You should find a recording beside him.
Continue upstairs until you find a locked door. Before continuing, break the door open in the next room and kill the infected inside. This should give you access to the workbench, as well as the blueprint for the pistol ammo.
Continue inside and check out the farthest cell in the first corridor to the right to find an ID card. Continue ahead and talk to Reza to start a new quest. Just return to the control room and activate the lever to open the cells. Talk to him to complete the quest.
Continue moving forward and kill the next two zombies. Before entering the door, check out the room across it to find another Banoi Herald Excerpt.
Open the next door and kill all the punks. Check the counter in the next room for another ID card.
Continue upstairs and use your own guns to take the punks out from cover. You should find another Banoi Herald Excerpt on the table inside the second room.
You can explore the next rooms if you want to collect various materials. Continue following the trail and take out the punks who comes your way. Clear the next office room and before heading to the mission marker, find another ID card in the set of cubicles in the corner. Finally, open the door and watch the cutscene. After the scene, talk to Jin to complete the quest.
Faith Will Move Mountains
Return to the church and talk to Mother Helen to complete this brief quest and receive your reward.
It's Never Too Late
Drive the armored truck with food, medicine and weapons to the Lifeguard Tower.
Easy
5500 XP
Sinamoi
In case you fast traveled to other locations because you're finishing up some of the quests here, the armored truck might not be there anymore. It will be actually transported to the edge of the tunnel back in the resort area. To find it, just take the transitional exit in the northeast corner. Refer to the video below:
Never too Late
Once you found the truck, drive it back to the lifeguard tower to complete the quest.
Never Too Late part 2
Bird on the Roof
Get to the hotel's roof
Medium
6000 XP
This is automatically given after completing “It's Never Too Late”.Follow the trail as it leads to you around the northern side of the hotel and to the main lobby. Near the quest marker, you'll find a corpse in the middle of some luggage. Grab the Key to Bungalow 14 from it to start a new sidequest, “Gold Digger”. You can make a quick detour to Bungalow 14 if you want, otherwise, continue forth with the mission. Just enter the door and watch the scene to complete the quest.
Home Sweet Home
Medium
This quest is automatically started after talking to White on the roof. Head back to the lifeguard tower and talk to Mike. Next, talk to Jin to start another quest.
Devastator
Blow up the entrance to the old bunker
Get to the tunnel through the old bunkers
Get to the Jungle Village and find Mowen
Hard
6000 XP
Enter the armored truck and drive to the tunnel marked in your map. Once there, stop the vehicle and talk to Jin once she's out. Escort her on the way to the bunker. Take out any infected that will try to ambush you from the bushes. Follow the path to the bunker then arm the explosives on the door.
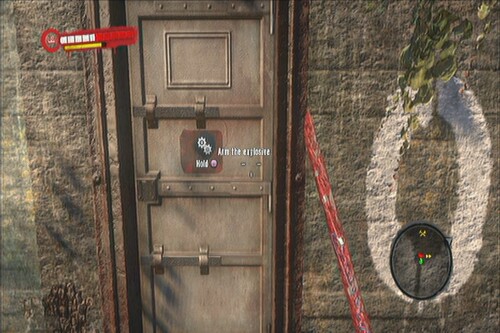
Once armed, approach Jin to trigger the explosion. Head inside the bunker and use the workbench if necessary. Don't forget a Banoi Herald Excerpt on the shelf as well. When ready, use the manhole to reach the Jungle.
Welcome to the Jungle
Find Mowen in the River Village
Very Hard
You should be able to start pursuing your pending quests with objectives located in the jungle but I suggest finding the village first so you'll have a supply point. Enter the vehicle and just follow the trail to the next quest marker. You'll have to stop and eliminate all the undead in the falls before you can move forward. Don't forget to grab the Banoi Excerpt inside the bus.
After clearing the path, you'll have to escort Jin on foot. Just stick close and take out any infected that comes your way. You may also run past them as Jin will continue running as long as you stick close to her. Continue following her until you reach the village. Enter the house where the other survivors are to complete the quest.
Chasing Shadows
Recover the stolen weapons and ammo and bring them back to Matutero.
Hard
6500 XP, Auto Rifle
Talk to Matutero to start this quest. Take note that there are new sidequests available so I suggest checking them out first before continuing with the story. Follow the trail as it leads you to another small village in the mountains. Clear the enemies and head to the marker. Here, you'll encounter a new type of enemy – the Butcher. Treat it as an upgraded version of an infected which makes it a rather extremely dangerous enemy. When up close, just swing your weapon wildly and hopefully your modded weapons' effects connect.
Butcher Killing
Continue following the path until you reach the road. With your quest updated when you crossed the hanging bridge, follow the marker leading to the weapon box to the northeast. Clear all enemies, and be careful of the occasional infected that will come your way. Follow the road east and you should find a pick up truck.
From here, you can track the sidequest “A Voice From Above the Sky” (provided that you updated the quest by talking to Nikolai's man in his restaurant in the city). It's just a quick detour so go ahead and do it first. See the quest details in the Sidequest portion of this guide for the complete walkthrough.
Once ready, grab the weapon boxes and load them in the back of the pickup. Follow the trail and drive them back to the village. Once done, unload the boxes to their designated places then talk to Matutero to complete the quest. Keenan, the trader will also be back on business so check out his goods from time to time.
Weapon Delivery
Soldier of Fortune
Get back to the boat and kill Afran
Very Hard
6500 XP, Cash
I suggest taking at least one firearm with you in this quest. Head to the marked location on the map. Once there, kill the two guards on the watchtowers, then climb the other one to the right. Hop in the nearest guard tower and use the mounted machine gun to clear the opposition.
Sweep
Climb down and take out another batch of smugglers. Grab a Banoi Herald Excerpt inside the first house east and an ID card inside the bus.
Continue following the trail and clearing all enemies along the way. The marker will then update to the western part of the village. Carefully head there and continue mowing enemies down until a cutscene plays. After this, you'll finally be able to kill Afran. You can use the explosive barrels to your advantage; just stay in cover and take out his henchmen one by one. He is heavily armored so expect him to take a considerable amount of punishment before he goes down.
Break open the door and find a blueprint on the table beside some crates and the boat. Once done, hop on the boat and sail back to River Village to complete the quest.
King of The Swamp
Find Mowen on the Swamps
Very Easy
1000XP
Talk to Matutero. After reaching the swamp, head to Mowen's hut. There's nothing much to do here other than picking up some herbs along the way. Upon reaching his hut, the quest is complete. Don't forget to grab the ID on table beside him.
River Trip
Check the situation in the Laboratory
Medium
3000 XP
Accept the quest then head back to the boat and travel to the laboratory. Once there, grab a vehicle nearby and drive to the lab. Disembark and continue inside. Kill the zombies by the door and grab the Banoi Herald Excerpt on the table. Continue inside.
Continue inside and loot all you want until you reach Dr. West. Talk to him to complete the quest.
House of Science
Help the scientists in the lab. Complete the following quests then talk to Dr. West. See the Sidequests section of this guide for more details.
Rats in the Laboratory
Power Slaves
Man of Faith
Find the natives camping near the lab
Hard
7500 XP, Reaper
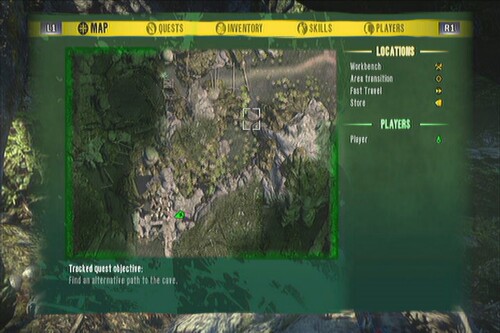
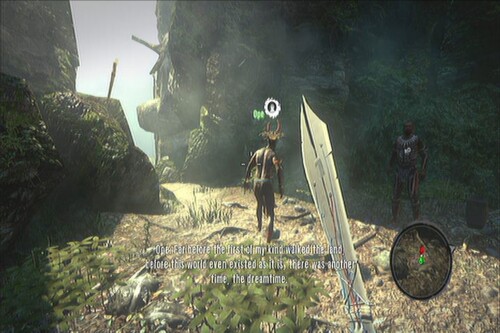
Track this quest and fast travel back to the boat. From there, take the backroad to the west. Follow the path until you find the entrance to the village. Once there, the quest will be updated. You'll have to find an alternative path to the cave. Just take the uphill path to your left (south if you base it on the map) and just follow it.
You'll find the village but first you must enter the arena and survive. Hop in and start killing. I suggest use this chance to store rage as you'll need it on the second round. After disposing the first batch, you'll have to face two more infected and another, tougher infected warrior. Kill them by any means possible and obtain the blood sample from the infected warrior afterward.
Arena of Spirits
Follow the trail and take the ladder out of the arena. You can also start a sidequest by talking to a warrior along the way. Fast travel back to the lab and hand over the blood sample to Dr. West. The ID inside the room where Frank was previously trapped should now be open. Take a quick detour and grab it. Hand over the blood sample to complete the quest.
Demonic Science
Help scientists in the lab
Very Hard
Cash
Help the scientists in the lab. Complete the following quests then talk to Dr. West. See the Sidequests section of this guide for more details. After completing this quest, more quests will become available.
Substance of Matter
Rotting Flesh
Pure Blood
Use Ope's help to find a stable strain if the virus
Very Hard
8500 XP
Complete all the available sidequests first if you want before heading to Ope's Cave and do this main quest. Once ready, fast travel there and talk to Ope. Escort him back to Mowen's Boat. Once he reaches the boat, make all the necessary preparations and travel with him to the catacombs.
Once you've landed on another uncharted territory, stick close to Ope and protect him from any undead. You'll eventually reach a village where there are tons of these. The stupid shaman will draw attention by moving in the middle of the village. Just be prepared to fend off the attacks.
Follow him as he leads you deeper into the woods. He'll stop and warn you about incoming enemies. Brace yourself for an infected ambush.
Once they're taken care of, continue along the path and get rid of more walkers and a thug. Pick up some fruits along the way as needed, then continue to the hanging bridges. A butcher and a couple of infected will ambush you so get ready.
Continue following him until you reach a drawbridge. You need to operate the lever on the other side so jump to the other side and operate the lever. Continue following Ope until a cutscene plays.
After the scene, you'll have to protect Yerema this time. Stick close and escort her as she leads you out of this place. You don't need to fight all of them; just follow Yerema and kill everything that attempts to slow her down – especially the infected. Continue running and heal as necessary. Once you're near the boat, a scene will trigger. You can rush to Mowen's aid immediately then deal with the remaining zombies along the way.
Ancestral Recall
Continue escorting Yerema until she reaches the boat. Finally, travel back to the Laboratory once done. You'll have to escort her again on foot until she reaches Dr. West. There will be a lot of zombies along the way so make sure you get rid of them quick. You'll finally reach the vicinity of the lab but then again, you must kill every threat before Yerema can move.
IMPORTANT NOTE: There's a known glitch at this part where Yerema will refuse to follow you even if you killed all the zombies in the area. According to what I've found in the forums, this happens if you quickly killed the zombies above the stairs in the catwalk to the right before the game tags them as important targets. To prevent this from happening, let the “key” zombies rise up and turn to red skulls (target objectives) before killing them. Take note that they will stand up one by one once you get near them. Upon killing the third zombie, Yerema should move from her position and start running ahead of you. If reloading your checkpoint doesn't bring them back, quit the game and reload your game save.
There are several infected here and a few walkers as well but you can exploit them by closing the gate and attacking them from behind it, preferably with a firearm so you can aim and land easy headshots. After clearing the area, Yerema should run by herself to the lab and talk to Dr. West to complete the quest.
Hard Talk
Speak to Mowen
Simply fast travel back to the boat and speak to Mowen to complete the quest.
Boat Supplies
Go with Mowen to the city
Get fuel to the boat
Bring Mowen's package from his secret stash
Hard
9000 XP
Talk to Mowen then head out to the city when you're ready. Talk to him to update the quest. You'll have to find his package first as marked in the map. The fastest way there is to select a continuous quest, reload the checkpoint to teleport there then fast travel to the abandoned house/square. The quest marker should be a short sprint away. Also, there's a sidequest available at the gunshop. Refer to the sidequest “A Tough Nut To Crack” for the complete walkthrough and location.
Head to the marker and clear the area. Climb the ladder beside the container van and head to the red container van on the other side. Open it to find some items inside, including the package Mowen asked you to find.
Next, you need to take two gas canisters from the gas station. Fortunately, there's a pick up truck there that you can ride. Grab the gas canisters and load them in the back of the truck.
Finally, drive the fuel back to Mowen's boat. Just follow the trail; however, you'll need to carry the canisters on foot so park the truck as near as you can then clear all nearby zombies so you can carry the canisters without danger. Talk to Mowen to complete the quest.
Back in Black
Take four rods from the workshop of Jin's father.
Medium
Make your way to Jin's workshop and kill all enemies that will come your way. The rods are just piled up at the back of the workshop. Pick them up then return to the boat. Put the rods in the boat then talk to Jin. Watch the cutscene. The voice will then force you to check out the lab.
No Time to Talk
Head to the lab as fast as you can.
Just fast travel to the lab and head to the objective marker. Kill all zombies inside then head to Dr. West's lab. Release Yerema. You'll now need to take the antidote and head to the prison.
Warning: Once you leave to the prison, you won't be able to return to the island. This is the turning point in the game so I suggest do whatever you need to do at this point before heading there. See the checklist below to know what you can find at this point of the game. Just refer to this guide's individual sections for the individual locations of the listed collectables.
Collectibles Checklist:
Banoi Excerpts 1-37, 40
Skull Locations and Drop Offs
Personal Ids 1-85
Recordings 1-9
Mods and Blueprints
When you're ready, grab the antidote inside the small fridge and operate the nearby radio. Watch the following scene. Quest complete.
Titus Andronikus
Once you've reached the prison, you'll need to head off to the next objective point. Before moving forward, make sure to grab the recording on the bench.
Follow Mowen and let him do the talking. After the gate opens, continue inside and head to the canteen. Watch the next scene to complete the quest.
The Green Mile
Locate Titu's friend in cell block A (A-3-14) and free him.
Hard
10000 XP, Metal Kanabo
Talk to Titus to start this quest. After accepting his quest, I suggest starting the two new sidequests available at the moment. Head to the prison block (preferably with the quest “Acid Funk” active). Once there, I suggest completing the fairly simple objectives of Acid Funk sidequest (refer to the sidequest section for details) then head to the 3rd floor where you can find the cell you're looking for. Kill all undead outside the cell door.

The bastard will tell you to open his cell door, so happily oblige and head to the control room. Open his cell then the alarm will start roaring off. You have to turn it off quickly before all hell breaks loose. Head to the first floor and fend off any infected rushing towards you. The alarm controls is in the same floor but on the other side. Run there and quickly deactivate it.
Once done, you'll need to escort him back to Titus. Approach him and take out the target zombies marked as red skulls. You'll need to take out the ram as well. Continue escorting him to safety. The quest is completed as soon as he reaches Titus. Talk to Alvero as well to receive your reward.
Full Metal Jacket
Get weapons and ammo from the armory
Hard
10000 XP, Sledgehammer
Follow the trail and continue upstairs. After reaching the second floor, open the doors to the right to find the infirmary. The 088 ID should be there.
088 ID
Continue sweeping the rooms and follow the path. There will be human guards who you need to deal with as well. After getting through the guards' barricade, break open the next door. Talk to Kevin and find a way to open the armory doors. You'll need to hunt the senior guard and get the masker key. Backtrack a bit and follow the trail. Before entering the first room, look on the floor to find a Banoi Herald Excerpt.
Clear the two rooms and you'll find the master key. Before handing the master key to Kevin, I suggest lining up the propane tanks near the double door in the far end of the corridor. Several infected and a thug will appear there in a short while.
After handing over the key, prepare for the surprise attack of the infected. If timed right, you should be able to take out all enemies with one bullet. Otherwise, kill them all before Kevin can open the armory. Check out the door to the right of the fire axe and pick up the ID card.

Once inside, grab the Striker Rifle Mod on the table then go inside and take the ammo box. Deliver it to Titus. Be careful since the corpses a while ago will stand up and attack you.
Dante's Kitchen
Get food from the kitchen. Kill all undead in the kitchen and storage room.
Medium
10000 XP, Heavy Pistol
Follow the trail to Dante's Kitchen and kill all enemies inside. There's an ID beside a dead guard so don't forget to pick it up as well. Continue to the second area.
There are 3-4 infected here and a thug. Clear them out and pick up the ID card before returning to Titus.
Devil's Labyrinth
Find your way to the armory in Cell Block B
Very Hard
Head to the basement and follow the path. There should be an ID sitting on top of a cabinet beside a machine control panel along the way. Continue following the path. Be careful of the room with many undead. You should find two propane tanks along before reaching it.
After clearing the large room with multiple undead, there should be a workbench nearby. You can find the ID on the floor in front of it.
Follow the path until you reach a metal catwalk. Kill the two infected below but inside of entering the double doors, I suggest breaking open the door in the catwalk. You should be able to easily deal with the policemen using this route.
Continue to the next door to reach another large area with several undead. Use the propane tanks along the catwalks to get rid of them easily. After killing them all, go downstairs and continue following the path.
Before climbing the next stairs up (with the red alarm lights on), grab the ID on the floor near the door just under it.
Continue upstairs until you reach the control room. Use the workbench as necessary, then exit. The cellblock has several undead running rampant so find your way around them to reach the control room's other door. You have to go down to ground level, climb the second and third floors before going down again to the second floor to reach the control room.
Upon reaching it, you'll be given new objectives by the “Voice”. Follow the new trail and proceed to a blacked out stairwell. In the bottom you'll find an ID, beside a guard's corpse.
Continue moving along until you reach the sewer area. Follow the path and kill the floater along the way. Search the floor near it as there's another ID card waiting to be discovered.
ID 098
In the last part of the sewer area, before taking the ladder up, check the other dead end to find another dead guard. The ID should be beside him.
Climb the ladder up and immediately look behind you to find another ID on the floor.
Move along past the second shower room then exit to through the double doors. Follow the trail along the corridor until you find Yerema and Jin. Follow them to the elevator then get in. Watch the following scene. Quest completed.
Chasing the White Rabbit
Find your way to the hospital roof.
This is the last quest so I suggest carrying all the best weapons you have and upgrade them to the max. When ready, follow the path until you reach a staircase with some ammo and supplies. Climb the stairs up to find an ID in the blocked path.
Open the door and get ready to fight off several undead, including a ram. You can lob molotovs at them and quickly fall back and lock the door to let them die easily. Continue clearing the wards as you make your way to another set of stairs. Heal and rearm as needed.
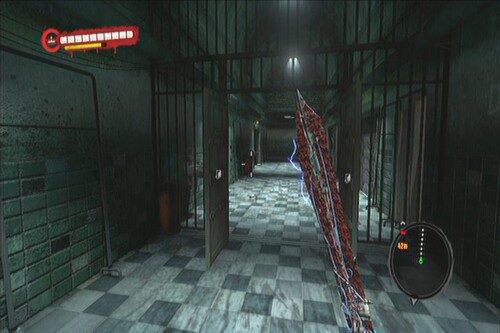
Head to the next corridor and enter the first ward to the left. You should find a recording on one of the beds there. Check out the nearby desk as well for yet another ID card.
Exit the ward and you should find a sitting corpse in the middle of the fork. The last recording can be found beside him.
Note: In my gamesave, I can't pick up the damn thing so I thought it was probably glitched. After quitting the game and reloading it and even restarting the console, I am still unable to pick it up so be warned.
Kill all enemies then get the last excerpt by following the very short video below.
Excerpt 38
Once done, clear the next ward and pick up the last ID card in the game.
Note: Seems like another glitch but the first time I approached it, the ID card appeared briefly then disappeared completely. Reloading the game from the last checkpoint solved the issue.
This should be all the collectables you can get so you may focus in hacking and slashing your way to your objective. Continue upstairs to reach the rooftop.
On the Edge
Don't let White escape the island
25000 XP
For the first part, kill all his guards. Next, a wave of infected will attack. Fend them off and check if the steel fence has already broken down. Once it is, rush there and kill the thug blocking the path. Watch the cutscene.
Don't let White escape the island part 1
You'll have to finally defeat the infected White. This guy is very fast and your only hope is to prevent his charge. Use a fully upgraded and modded pistol or rifle and pray that it crits and triggers elemental effects. Some infected will join the fray so expect to die several times. You can fight White on the helipad and halt his charge between the concrete barriers.
Don't let White escape the island part 2
Sidequests in Dead Island play a major part in the game, and there are tons of them! We thought it would be easier therefore to dedicate a seperate short page to each one to allow you to go straight to the sidequest you are looking for instead of scrolling through one huge page of data.
The following pages of this guide detail all of the sidequests and what you have to do to complete them, they appear in the order the are encountered in the game (in our playthrough) as opposed to being sorted alphabetically.
Find Maggie and tell Steven her location
Easy
300 xp, cash
Steven
You can find Maggie inside the Lighthouse (which you'll reach a little later on as you complete some quests). Talk to her then tell Steven about her location to complete the quest.
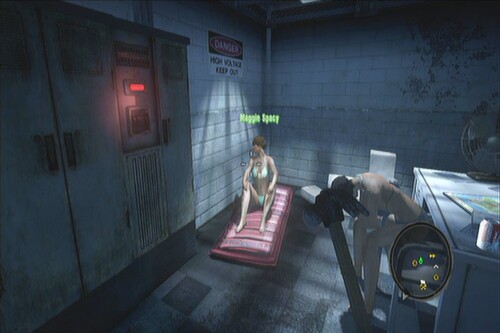
Find 4 parts from nearby cars
Very Easy
300 Exp
Hank
You just need to find four non-working cars nearby and approach them to gather the parts. The first one is a few steps outside the hideout and more up road. Once you have all four parts, you can make a quick dash back to the hideout and hand them over to Hank to complete the quest. Wait for a bit and you should be able to use the truck as needed.
Go to the lighthouse and bring back a signal amplifier.
Medium
1000 xp, cash
Dominic
You can get to the lighthouse using a vehicle but it will be better if you'll do the Bloody Valentine quest first, since it will require you to bring a survivor there. Once done, head to the top of the Lighthouse to find James.
After getting the quest updated, you'll be asked to help restore the power in the lighthouse. Complete the quest “Ray of Hope” to restore the power. This will open the warehouse shed inside the lighthouse and the amplifier can be found inside.
Take the amplifier back to Dominic to complete the quest.
Bring fuel from the gas station to burn to bodies.
Very Hard
900 exp, Molotov
Mike
You can do this quest later, not until you've unlocked the Lighthouse and leveled up a bit. Head to the gas station and approach Satthis by the broken window. Next, talk to Dan Mark to update your quest. Exit to the back door then climb up the roof. Next, jump inside then quickly remove the barricade. Kill all zombies then head inside.
Turn on the power unit in the corner of the room then remove the barricade. Get an empty canister then place it beside the pump. You need to press and hold the button to refill the canister. Take note that several infected will arrive by intervals so be prepared. In case you need HP, there are vending machines inside the gas station that have $5 Energy Drinks. Once filled, take the canister and put it on the back of the truck. Now get back to the truck and drive your way back to the Lifeguard Tower. Take the canister then place it in front of him. Talk to him to complete the mission.
Acquire 5 bottles of alcohol
Very Easy
Reward: 50 exp, Molotov
Mike
This is a very convenient repeatable quest since you can get a Molotov per 5 alcohol bottles. These bottles are scattered pretty much around bars and similar locations so you won't have problems finding them.
Help Jack get into the infirmary
Easy
500 exp, cash
Jack
Break the door open and kill the two zombies inside. Take note that if you leave the room, the dumb zombies will refuse to go out and eat the free meal (named Jack) outside. Once the two undead are killed, talk to Jack to receive your reward.
Find an ambulance or a lifeguard vehicle and bring the paramedic's bag to the tower.
Medium
700 exp, Sickle
Jack
Talk to Jack after completing Bloody Health Service to start this quest. Exit the hideout and follow the road uphill and you'll find a paramedic truck. You can pick up the bag from the back of the truck. Return to Jack to complete the quest.
Look for Kelly's husband, a concierge named William.
Medium
700, Homemade Machete
Max
Head to the location marked in the map then talk to William inside the bedroom.
Head back to Max and Kelley and tell them the news to complete the quest.
Retrieve Jeannine's necklace from Bungalow #6 in the Silver Bungalows District
Easy
500 xp, Slicer
Jeannine
Her necklace is inside the bungalow where you'll find Roger and Jessica Nelson (quest giver). Just head to the location, drive the truck blocking the entrance out of the way then enter the bedroom. You should see the necklace on the shelf.
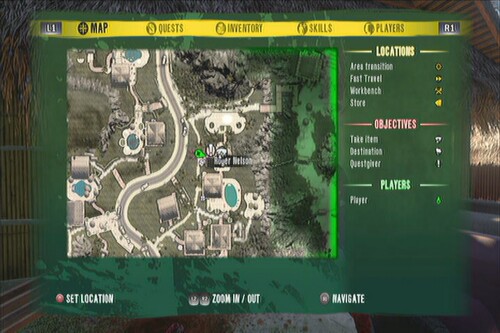
Quest Giver Location: 9-10-2011_34
Find Annie's teddy bear. It should be in Bungalow 15 in the Hotel Bungalows Area
Easy
500 xp, Nuts and Bolts Mod
Track the quest if you want then head to the location as shown in the map. Be careful since there's a psychopath guarding the teddy bear; just kill the bastard then take the bear. Deliver it back to Anne to complete the quest.
Acquire water for Kim
Very Easy
50 Exp, 70 cash
You should have a few bottles with you, if you've been collecting stuff here and there. This is a repeatable quest so just keep talking to her to earn 50 exp and cash for every bottle of water you bring her.
Get the insulin to Luke's brother, Danny.
Easy
500 exp
Luke
Find Luke in the location presented above. Just kill the enemies around the bungalow and talk to him to get this quest. Make your way to his brother, which is conveniently tracked for you. Head there are kill the undead. Go inside and give the insulin to Danny to complete the quest.
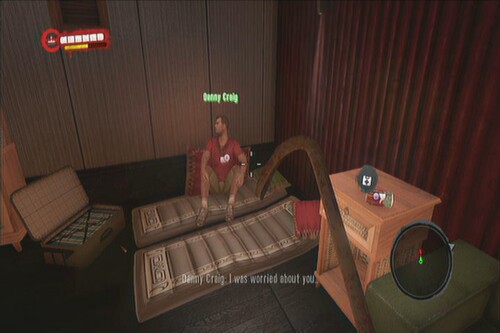
Take Jessica, Roger's Wife to James at the Lighthouse.
Easy
700 exp, Homemade Double Blade
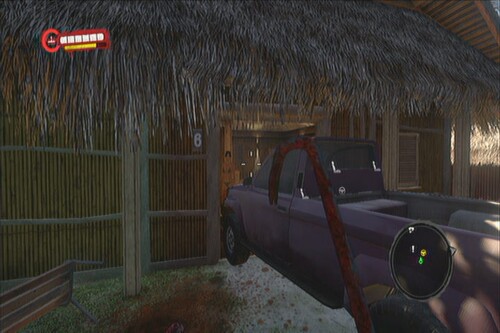
Find the couple in the location above then drive the truck away to clear the path. Talk to Roger in the bathroom to start the quest. Next, enter the truck and park it near Jessica's range to prompt her to ride. Now follow the path leading to the Lighthouse and mow down any undead along the way. Quest completed once you bring her to safety.
Bloody Valentine
Help the people around the lighthouse.
Hard
500 exp, Cash
James Stein
Automatically triggered once you've reached the Lighthouse. Talk to James and accept the quest to unlock more quests. Complete a few quests from the people in the lighthouse, especially restoring its power in “A Ray of Hope” quest. You'll finally get the objective to talk to James. Do so and earn your reward.
Get 4 flares from the wrecks on the coast.
Hard
500 exp, Nail Hammer
Trevor Cohen
Head to the location marked in the map. Take note that there are several Infected here; they're much faster and can easily overwhelm you if you're not careful. You can reach the shipwrecks by taking the northwestern path since the northeastern one is blocked somehow.
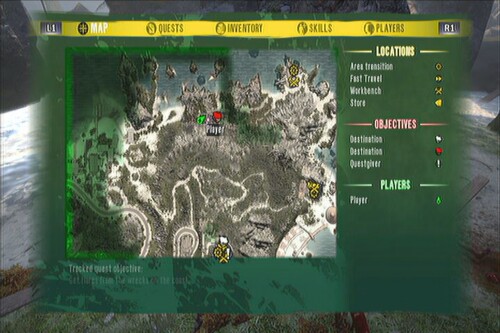
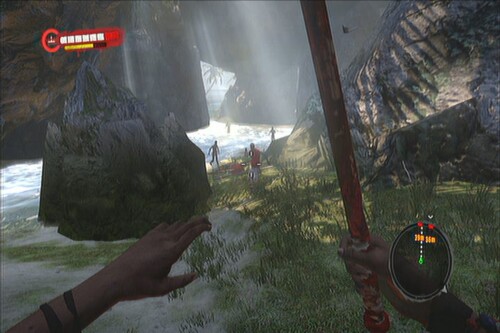
Once you've reached the area, the game will automatically mark the position of the flares. Be careful not to provoke too many zombies to make your life a bit easier. Grab all four flares then return to Trevor to complete the quest.

Find painkillers and bandages for Linda. Check infirmaries and ambulances.
Medium
500 exp, Deo-Bomb
Mick Fler
Painkillers and bandages can be found in ambulances; surely you have come across them earlier. There are also some in the Lifeguard Tower clinic so you can just fast travel there to get some. If you picked them up along the way, you can just hand these over immediately to Mick to complete the quest.
Look near the jungle for the location of the aircraft.
Hard
3500 exp, Military Machete
Monica Goldberg
You can just ignore this for now since it will be a while before you'll reach the jungle area as part of the flow of the story. Once you've reached the village in the jungle, you may track this quest and proceed to the crash site. After viewing the crash site, the quest will update. Its up to you if you want to go in and kill all smugglers. There's also an ID on the 2nd level so you may pick it up as well.
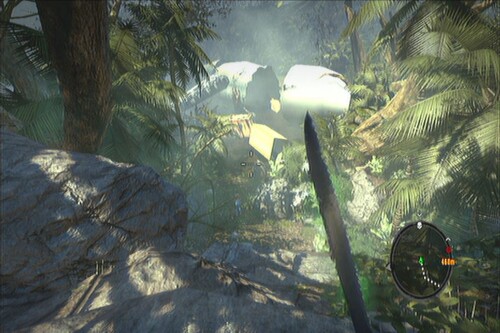
Travel back to the Lighthouse and talk to Monica.
Find Marcus and fix the transformers powering the lighthouse.
Medium
1200 xp, Wrench
Darvin Park
Find Marcus in the bungalow marked in the map. Kill all the zombies near him then talk to him.
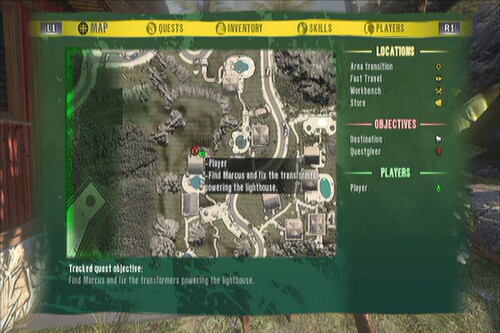
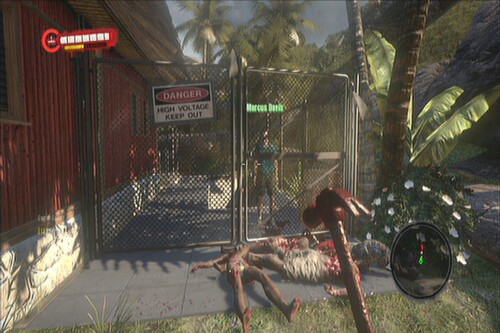
You'll then need to get the other transformer online. Head to the marker and break the door open. Once inside, turn on all the power units to update the quest. Once done, head back and talk to Marcus. Once ready, continue to the Lighthouse and talk to Darvin to complete the quest. This will also open the storage shed where the amplifier and a workbench is located.
Acquire the key from Omar's undead deadbeat.
Medium
600xp, cash
Omar Torres
You can find Omar in the bungalow near where you'll find Anne's teddy bear.
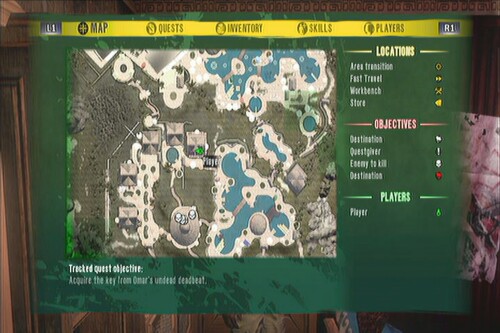
After accepting the quest, head to the initial marker. Once you reached it, the quest will update and will ask you to follow the trail of blood. Follow the trail and it will lead you to the underground washrooms. You'll find a thug zombie inside. Kill it then retrieve the key. Return it to Omar then find the safe behind the painting in the next room. Talk to him again to complete the quest
Hit and Run

Help Omar get to the Lifeguard Tower.
Easy
600 xp, Revolver
After completing “Hit and Run”, talk to Omar again to receive this quest. Stick close to him and kill any zombies nearby. Do this until he reaches the Lifeguard Tower. Once he safely reaches it, talk to him to complete the quest.
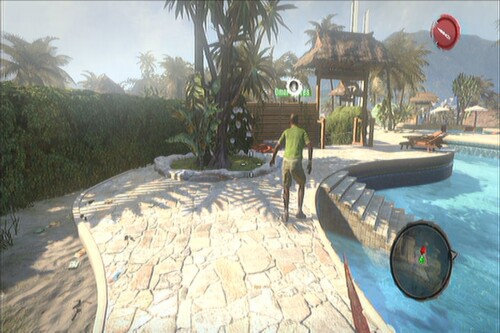
Get booze for Stanley.
Easy
400 exp, cash
Kill all zombies surrounding the hut and Stanley will open the door. Talk to him to start the quest.

Alcohol is scattered everywhere and you should have stocked some of them. If you don't have enough, just search the area and the game will mark the location of nearby alcohol for you. Give him all the alcohol he needs to complete the quest.
Get food cans for Ned.
Very Easy
50 XP, Cash
This is another repeatable quest. This time you have to hand over canned food to Ned. These are also scattered all over the place so just pick them up whenever you come across them then surrender them to Ned.
Find a bottle of champagne for Svetlana.
Medium
100 xp, Diamonds
Svetlana
You can find Svetlana in the location below.
This is a repeatable quest; the game will mark the location of nearby champagnes once you're in range.
Find Anne, Jennifer's sister.
Very Easy
Reward: 500 exp, Heavy Mod
You can find Jennifer in this location:
Anne is the same NPC that gave you the quest Toy Story. Just head to her location then talk to her. Finally, head back to Anne and inform her that Jenny is safe to complete the quest.
Finish the HELP sign out in the clearing.
Hard
700 xp, Torch Mod
James Stein
After completing Knockin' on Heaven's Door, talk to James again to receive this quest. Head to the clearing marked on the map then kill all zombies. You need to grab the crates scattered around and place them on the designated spots. Be careful since there will be a constant stream of infected rushing in regular intervals. If you need a breather, you can quickly run back to the lighthouse. It will be easier to throw the crates rather than carrying them to the correct spots.
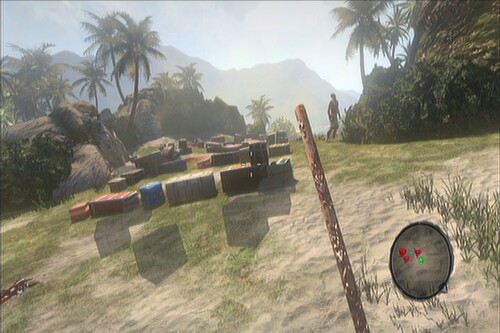
After placing all crates, report back to James to complete the quest.
Get Laurie's husband out of the wrecked car.
Easy
400 Xp
Laurie
Find Laurie along the road in this location:
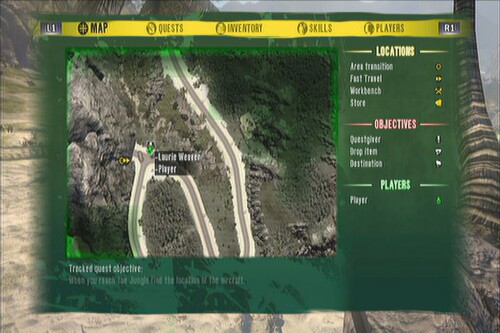
Follow her to the crash site. Press and hold the button to open the door. However, it won't open; only budge a bit. Next, defend the Weavers against the wave of infected. Once they've been dealt with, open the door again to complete the quest. You can also open the rear door of the car to get the medkit and weapon there.
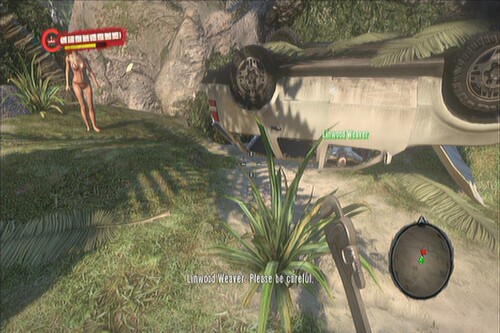
Help Harlan get inside the hut.
Very Easy
500 XP, Baseball Bat
You can find Harlan's small compound surrounded by zombies. Run them over with your truck to get bonus experience. Talk to him to get this quest.
Jump on the elevated outcropping on the right side of the hut then use it to jump over the fence. Break the door open and kill the zombie inside. You can also pick up a Banoi Herald #12 inside. Grab the key from the zombie's body then open the door to complete the quest.
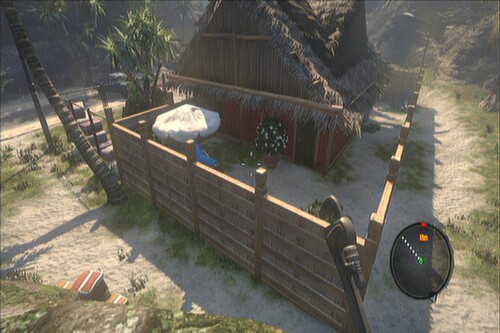
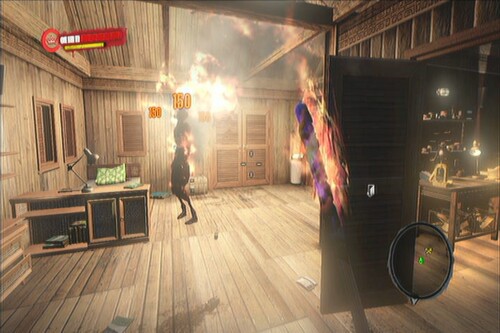
Find 2 gas cans at a gas station and deliver them to Harlan.
Medium
500 xp, Cash
After completing “Make Yourself at Home”, talk to Harlan again to trigger this quest. Follow the road to the gas station down south. Just pick up two of the many gas canisters in the area and put them at the back of your truck. Deliver these canisters to Harlan to complete the quest.
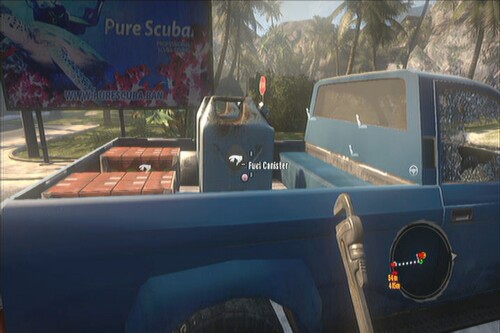
Turn off the electricity in the area.
Medium
This is automatically given to you as soon as you reach the southwestern gas station. You need to turn off three switches, as marked in the map. For switch A, you need to find a van with crates on and in front of it and use it to get over the fence.
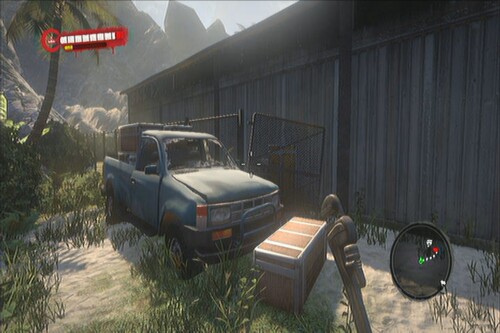
Clear the warehouse and turn off the power unit. Remove the barricade to open the gates then turn off the second power unit.
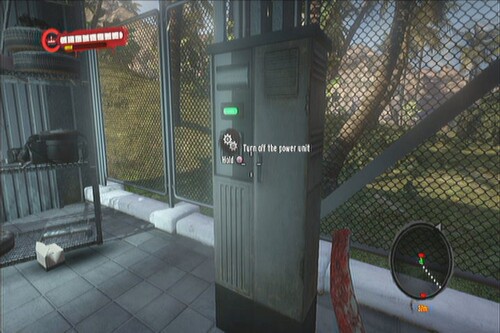
Finally, head to the third power unit near the tunnel. There will be burning infected that will attack from time to time so quickly kill them then arrange the nearby crates so you can reach the ladder. The quest is completed after turning off all switches.
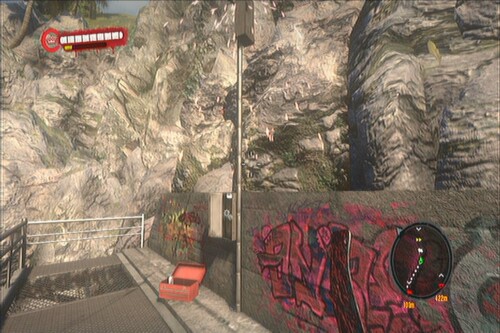
Though there is no exp reward for completing this quest, this will enable you to get the ID card on the roof of the store and destroy the skylight to gain access inside the store. There are juice packs here that are needed for the main quest “Seek and Loot”.
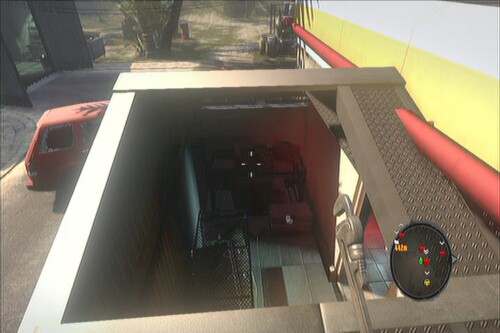
Bring Harlan 3 bottles of Alcohol.
Very Easy
Reward: 50 XP, Molotov
A repeatable quest similar to Mike's Fiery Drinks repeatable quest but Harlan will just ask you to bring three bottles instead of five. This is a pretty good deal so I suggest bringing your alcohol to Harlan instead.
Check Richard's house.
Very Easy
Richard
Find him in this location and save him from the undead. After getting his key, head to his house. There will be several infected that will rush in so be prepared. Once done, you're free to loot whatever is inside his house.
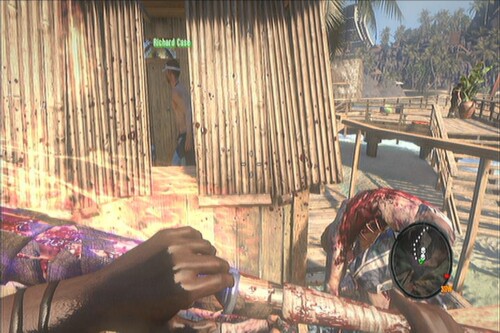
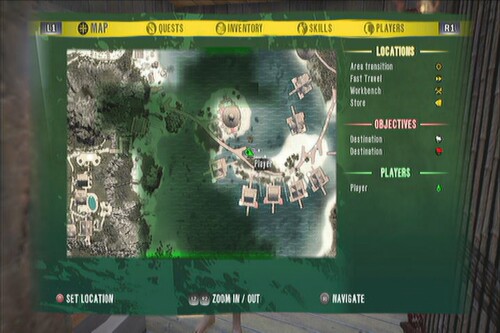
Get a satellite phone from Sergei at Nikolai's restaurant.
Very Hard
3000 XP
Talk to Nikolai after successfully taking him to the bunker. The restaurant is located in the city which you'll reach during Act II. The restaurant is located a bit southwest of the church as seen here:
Locate Sergei inside and talk to him to update the quest. The next part of the quest will wait until you've reached the jungle. Once you've reached the jungle, you'll get a main quest titled “Chasing Shadows”. Track the quest until you get the objective to recover the weapon boxes. You may need to kill some enemies guarding the boxes. Follow the road east and you should see a pickup truck.
From this point, you can resume tracking this quest. Follow the road until you see a large tree trunk. Just go through there and wade through the foliage and you should see the entrance to the bunker.
Voice from the Sky
Get up the upper platform to find a Razor Mod blueprint on the table and the satellite phone as well. Pick up the phone to complete the quest.
Check Hotel Bungalow 14.
While following the trail for the main quest “Bird of the Roof”, you'll find a corpse in the middle of some luggage near the quest marker. Get the key from it to start the quest. Head to one of the marked locations in the map. The quest completes after entering the bungalow. Aside from the wallets with “meh” amount of money, you can find an ID card inside.
Provide Deanna with Insulin.
Medium
1500 XP, Cash
Deanna
Head to the marker set on the map. You need to be careful since there will be suiciders among the basic walker and infected groups, as well as pistol wielding punks who will shoot you on sight. You can loot their guns, if you manage to kill them. It will be better if you'll find the warehouse first since the pharmacy is just a short walk away from it.
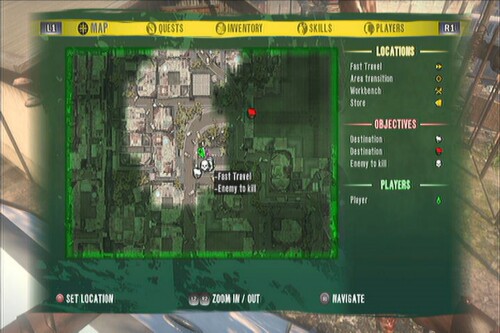
Head inside and grab the insulin and deliver it back to Deanna to complete the quest.
Put Mugambe's wife and daughter out of their misery.
Medium
1500 XP, Heavy Pistol
Mugambe
Track the quest and head to the marker. Once inside, kill all zombies first then break down the door. Take note that Mugambe's sister and wife are tougher versions of those fast infected so don't take them lightly. Once taken care off, report to Mugambe to complete the mission.
In Cold Blood
Hang the posters in different spots in the town.
Hard
1500 XP, Impact Mod
Howard
The first spot where you can place the poster is near the warehouse.

The next spot is near the abandoned house hideout (Square) If you've unlocked it before, you can just fast travel there.
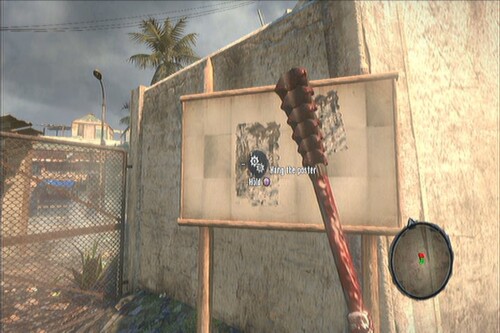
The next spot is just a short walk away from the second one. It will be automatically marked in your map. It is advisable to clear all enemies in the area first before placing the poster.
Head to the next spot and clear the path.
The final billboard is farther away to the northwest. It will be marked in the map so you may stick to the alleys to avoid encountering too many undead in the main roads. Once you've posted the last poster, return to Howard to complete the quest.
Bring 5 bottles of alcohol for Theresa.
Medium
1500 XP, Cash
Theresa
If you have alcohol on stock, you can just have them over to Theresa to complete the quest. Otherwise, you can fast travel to Resort Bunker # 2 then head to the nearby bar. There should be a good number of alcohol there you can retrieve, as well as other items for repeatable quests such as canned food and water. If its not enough, travel back to the church to 'replenish' the items then go back again. Hand over the 5 bottles to complete the quest.
Get rid of all the undead from in front of the warehouse.
1500 XP
This quest is automatically triggered by approaching the warehouse in this location:
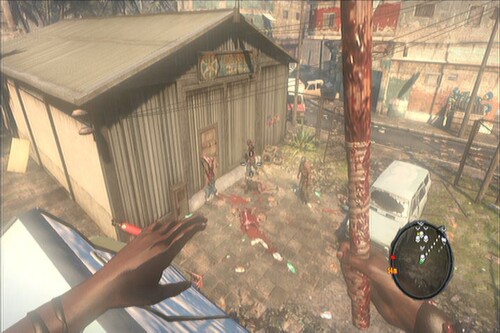
Kill all enemies outside the warehouse then enter it to complete the quest. You'll find more survivors inside, most of them have new quests for you. For your convenience, there's also an option to fast travel to the church.
Search for the electrical shop for a transformer and some cable for Carl.
Medium
1500 XP, Big Splitting Axe
Carl
Track the quest and head to the location marked in your map. Barge inside the store and grab what you need. Deliver the items to him to complete the quest.
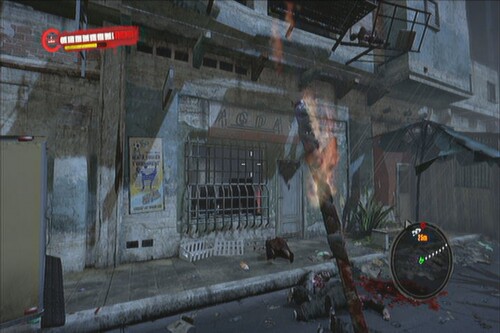
Give 5 bottles of alcohol to Florencio to get Molotov Cocktails.
Medium
1500 XP, Molotov
Florencio
If you have alcohol on stock, you can just have them over to Florencio to complete the quest. Otherwise, you can fast travel to Resort Bunker # 2 then head to the nearby bar. There should be a good number of alcohol there you can retrieve, as well as other items for repeatable quests such as canned food and water. If its not enough, travel back to the church to “replenish” the items then go back again. Hand over the 5 bottles to complete the quest.
Bring 5 detergents to Tavin.
Medium
70XP, Incendiary Grenade
This is a repeatable quest that will enable you to make incendiary grenades from detergents. These can be found or looted like any other random materials. They are also sold by merchants; however, since their inventories gets rotated, you may not see them sold often.
Look for Kwan's brother.
Hard
1500 XP, Cash
Kwan
Head the marker and enter the abandoned house. You can clear the infected in the rooms and loot them before breaking in Cho's room. Talk to him and escort him back to Kwan. Quest completes as soon as he meets up with his brother.
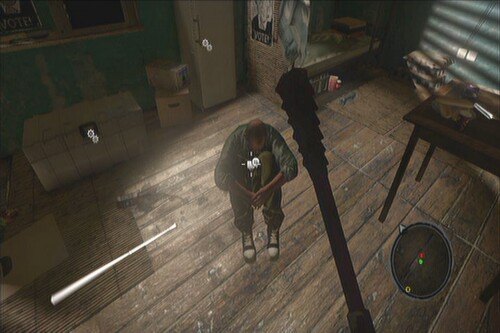
Blood Ties
Bring Carla an Asthma Inhaler.
Medium
1500 XP, cash
Carla
The pharmacy is just a few steps away from the warehouse. You can get the inhaler in any of the two pharmacies. Get the inhaler inside and deliver it to Carla to complete the quest.
Bring the family souvenir.
Medium
1500 XP, Paralyzing Strike Mod
Jack
There are two locations where the picture of Jack's daughter is located and both are guarded with punks. Be careful when dealing with them since they're fast, they wield weapons and most of the time, you can't interrupt them with your kicks.
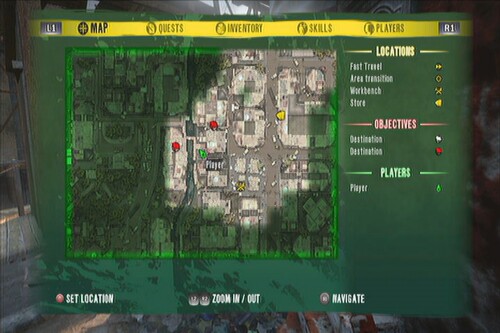
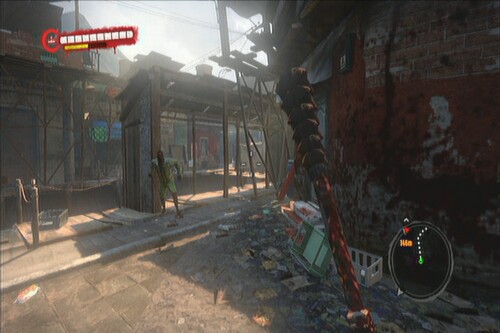
Just clear any one of the two locations and search for the souvenir. Deliver it to Jack to complete the quest.
Get rid of the looters in Stan's House.
Hard
1500 XP, Cash
You can find Stan in this location, near the electronics shop for the quest “Radio Gaga”. You'll need to head inside the abandoned house so I suggest check your weapons and health before entering.
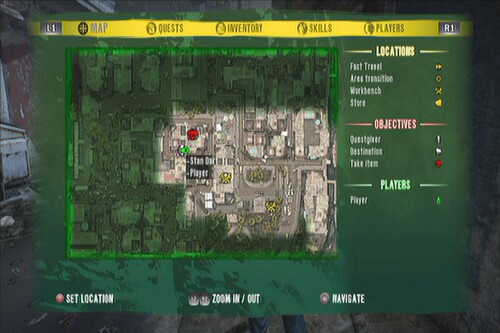
Once inside the house, carefully check the areas. There are several looters that you need to take care off. Take out the first two that will charge towards you, then carefully go upstairs. The enemies here are armed with guns so it is advised to carry at least one in your inventory.
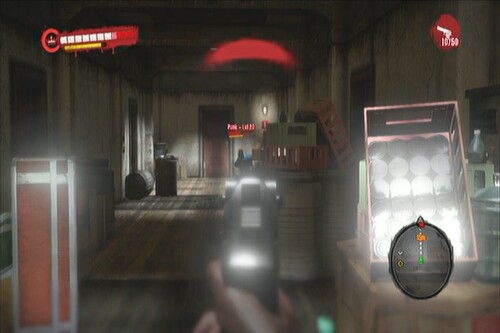
Fight your way to the last room where there are four looters waiting inside. Break the door open then step aside. If you have explosives or a molotov, this is the perfect time to use it. Otherwise, you have no hope of surviving by going commando and brandishing your weapon inside. Once cleared, exit the house and return to Stan to complete the quest.
Kill Nick's infected friend then report back to him.
Hard
1500 XP, Cash
You can find Nick and the small band of survivors in the area below:
After accepting the quest, climb the ladder in the side of the building then enter the abandoned house from the roof. Kill Nick's buddy then unlock the door. Talk to Nick to complete the quest and receive your reward.
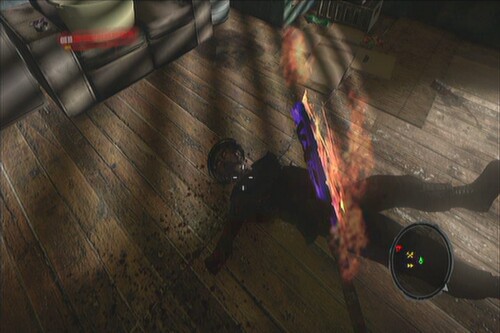
The place will also become your new supply point, allowing you to fast travel and maintain/ upgrade your weapons.
Record a transmission for Nick.
Hard
1500 XP, Old Smoky Mod
This quest becomes available after completing A New Broom Sweeps Clean. Just wait until you've gain access to the jungle as part of the story and preferably until you acquired the quest “Death Wish”. Once ready, head to the radio station and kill all enemies. Check out the radio in the rack to update the quest. Report back to Nick to complete the mission.
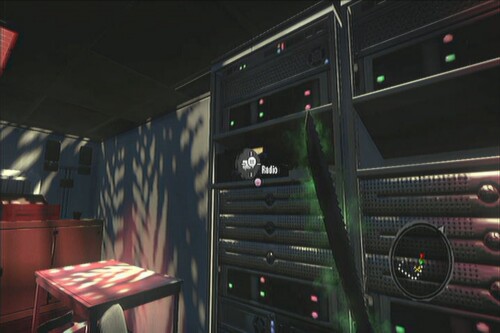
Bring the Medicine to Lucas.
Medium
1500 XP, Big Baseball Bat
This quest becomes available after completing A New Broom Sweeps Clean. Talk to Lucas to get started. You just need to bring him the medicines you can get from the pharmacy near the warehouse. Fast travel to the warehouse, grab the medicines then fast travel back to Lucas. Hand him the medicine to complete the quest.
Take Terrance's last will and testament to his family.
Easy
1500 XP, cash
Find the dying Terrance here:
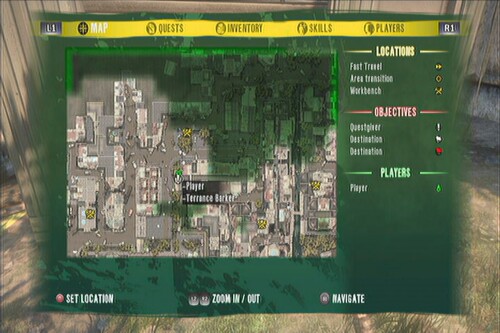
Accept the quest and deliver his will to his family inside the church to complete the quest.
Help the man.
Easy
1500 XP, Cash
Ojibon
You can trigger the quest automatically if strayed near this area:
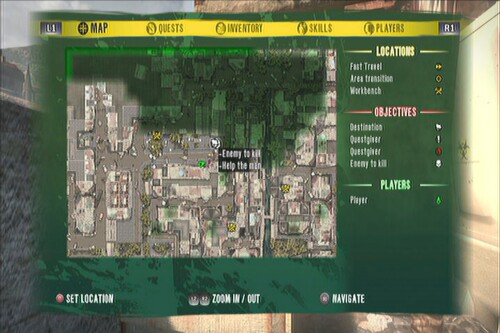
Just kill all the marked infected in the area then report to him to complete the quest and get your reward.
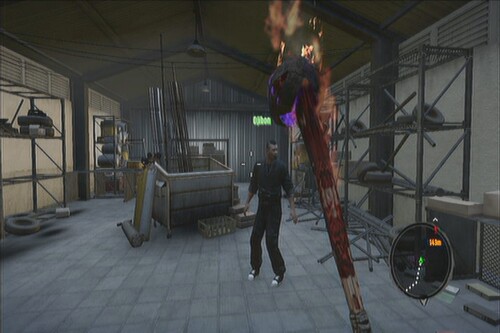
Clear the living dead from the area in front of the pumping station.
Easy
1500 XP, cash
Talk to Frank in the pumping station after completing the main quest “Drowned Hope”. The enemies you need to kill will be marked in the map so just go crazy and get rid of them.
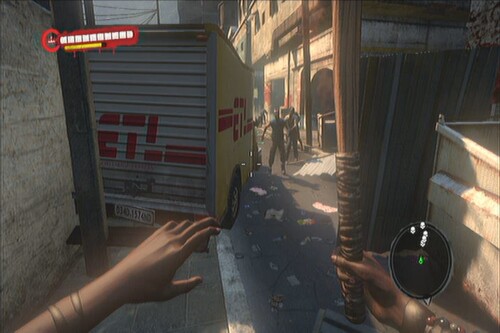
Get the tools from Antonio's Workshop. Bring the tools to Bruno.
Medium
1500 XP, Cash
Bruno
Make your way back to the Pumping Station and find the tools Bruno is looking for inside the warehouse at the back, where Antonio and Frank were held previously. Deliver the tools to him to complete the quest.
Get the nails for the barricade construction.
Easy
70 XP, Cash
Bruno
This repeatable quest will be available after completing “Fortress of God”. Nails are like other random items in the game. You can loot them from almost everywhere. Just deliver these to Bruno to get the rewards.
Get batteries for Rian.
70 XP, Cash
This repeatable quest becomes available after “Drop by Drop”. You can bring 5 batteries to Rian in exchange for XP and cash.
Message to the Masses
Bring the recording to Garett
Medium
1500 XP, Cash
Track the quest then fast travel to the warehouse. Make your way to the broadcast station. You need to jump over the fence using the dumpsters to get inside. Talk to Garett to complete the quest.
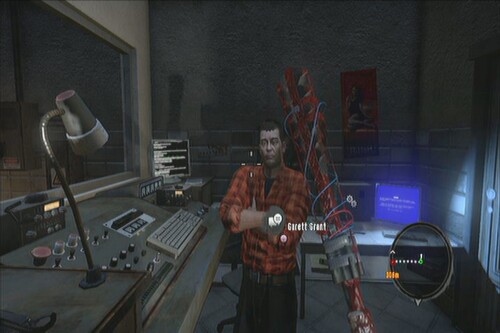
Activate the 4 loudspeakers in Shanty Town.
Medium
1500 XP, Cash
You need to find the loudspeakers and activate them. Don't worry as they're all marked in the map. Follow the trail and you should see a ladder. Take that and carefully approach the makeshift hideout across the wooden plank. Clear the enemies inside (there are two free molotovs inside too) then fix the loudspeaker.
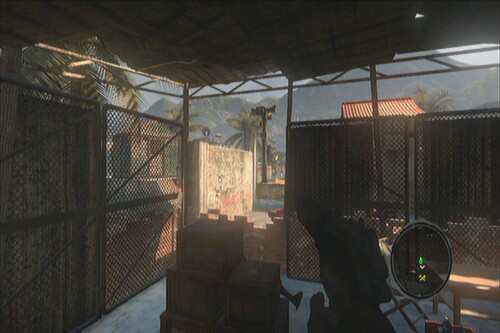
Head to the second loudspeaker. You can't reach it immediately so look for the ladder in the adjacent building to the east.
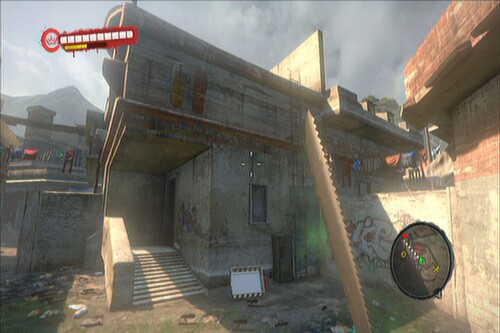
Cross the wooden plank to the next loudspeaker then climb the ladder down to reach the control panel.
The third speaker is somewhere close by. Climb back up then cross to the next building south. Take out the undead and the thug guarding the next speaker.
For the last speaker, find the platform in the middle of the street west of the building it was on. Jump to the roof of that building. Just be careful since there are two suiciders in there.
Finally, return to Garrett to complete the quest.
Activate the 4 loudspeakers in Eastern Waterfront.
Medium
1500 XP, Pistol
Talk to him again to start another similar quest but this time on a different location. You can return to the warehouse to sell some stuff and repair your gear. Otherwise, head to the first of the next set of speakers. This one is a bit tricky. First, you need to find the ladder that will allow you to reach the first speaker. Well, you can find it here:
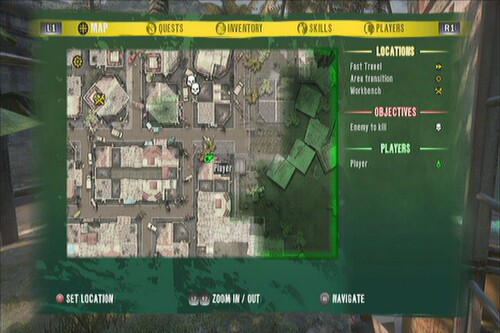
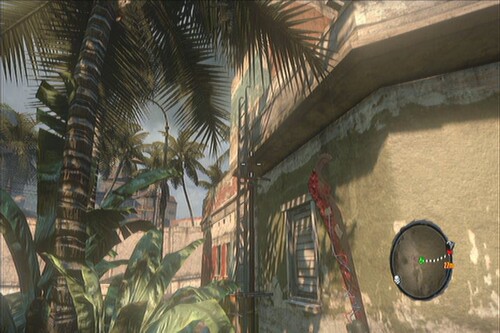
You just need to hop from one ledge to another to reach the speaker. You can watch the video below:
The Second Head of Cerberus part 1
You need to run-jump to reach one of the ledges. The two corpses near the loudspeaker are actually walkers so don't get caught off guard.
The second loudspeaker is a bit easier. Just head to the next building and climb the ladder on the back. Go to the leftmost side of the building and thread the wooden planks to reach it.
The third one is also easy. Just head to Nick's Hub (marked on the map, has the entrance to a hideout) then check the barricaded part to the west. Remove the crates, crouch down and enter to reach the control panel.
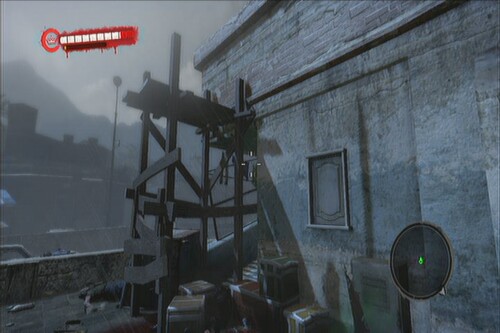
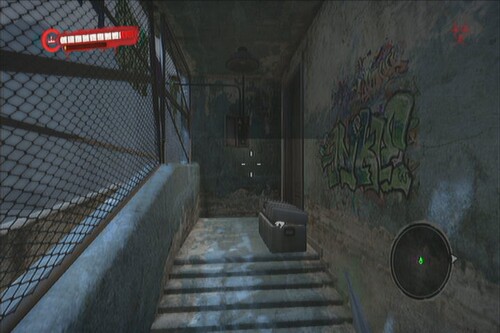
Now head to the last and final speaker. There's a thug guarding it so get rid of it first then walk on the wall to reach the control panel. Finally return to Garett to complete the quest.
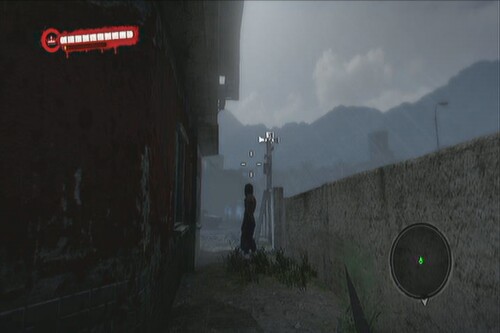
The Second Head of Cerberus part 2
Activate 4 loudspeakers along Canale Street.
Medium
1500 XP, Piranha Mod
Like the other two, talk to Garett again to get this quest. The first speaker is located in the quarantined portion of the city, where there are an infinite and quick respawn of infected. This part is a headache and you'll end up dying multiple times. Just avoid staying in one place and keep moving to the speaker. It should be on the side of an apartment with wooden planks to reach it.
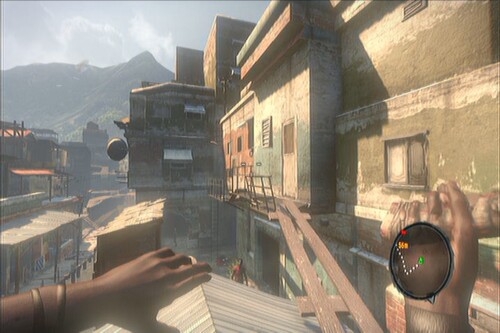
Once activated, make your way to the second speaker then find the ladder in the location below:
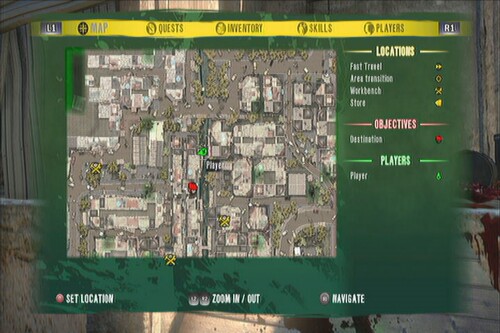
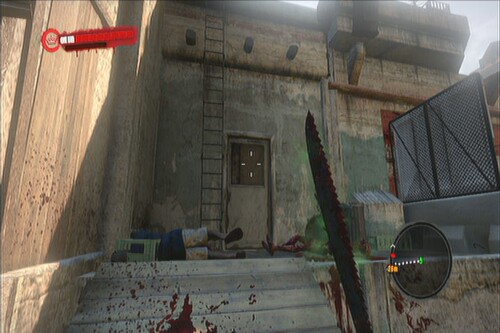
Climb the ladder and carefully approach the loudspeaker. There are punks guarding it so take them out first.
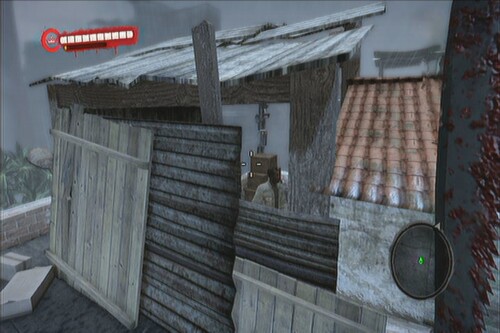
The third speaker should be in the same rooftop, on the other side. However, you won't be able to jump back so you have no choice but to jump back to the ground and climb the same ladder again. The loudspeaker can be found to your immediate right.
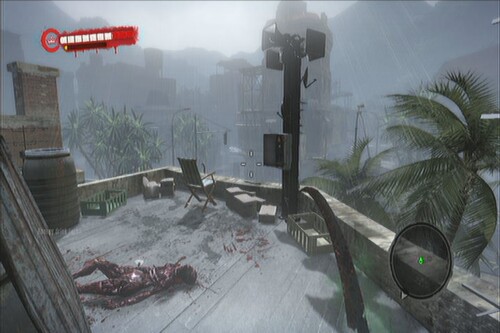
Report to Garett to complete this quest.
Find and bring alcohol for the guard
Very Easy
1500 XP
You'll get this quest as part of the tasks in the main quest “Supermarket Journey”. Just find the booze marked in the map then bring it to the guard.
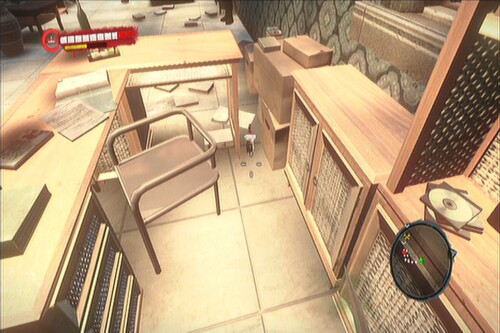
Obtain a universal key from the Mayor
1500 XP
This quest is automatically acquired after completing “Supermarket Journey”. Just continue following the path until you reach the infected mayor. Just kill him to get the key.
1500 XP, Battle Double Blade
Note: Before heading inside, make sure you have the Purple Skull. Check the particular section of this guide to learn where to get it. Once you complete the quest, you won't be able to go back inside so it is recommended to have the Purple Skull on hand.
Put a marker on this location and head there. This location is nearest to the warehouse so you can start from there instead.
Head inside and start killing every undead inside Alicia's house. There are some infected inside so proceed with caution. Continue to the second floor and clear the undead trying to claw their way in to Alicia's room.
After clearing them, drop off the Purple Skull on the stove in the kitchen to the left to get your reward, then grab the Blue Skull inside the bathroom to just across. Get inside Alicia's room and check her bed to find the Glazed Mod.
Talk to her to complete the quest. Take note that you won't be able to return here so make sure you have grabbed everything before leaving.
Open the cells of those in custody.
Easy
3000 XP, Police Baton
You'll find Reza inside one of the prison cells in the second floor of the police station during the main quest “Lady in Trouble”. Talk to him and accept the quest. Return to the control room and activate the lever to open all the cells. Report back to him to complete the quest.
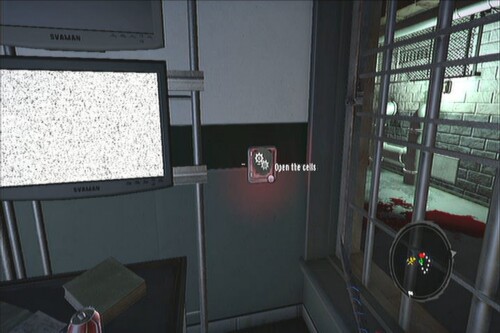
Bring the document file from the police station.
Hard
1500, Pride Gun Mod
After returning from the main quest “Lady in Trouble”, return to the church and talk to Tim. After receiving the quest, I suggest fast traveling back to the Abandoned House – Square (Nick's Hub) so you can receive another quest in the police station as well. Travel back to the church and follow the trail to the police station. Once inside, continue to the second floor and head to the prison cell where you found the ID earlier. Talk to the radio to update the quest “Paperwork”.
Continue following the trail and fight your way through the undead until you reach the last office room where you found Jin earlier. Tim's File is located in the same corner cubicles where you found the ID earlier. The door in the other side of the room should be open now. Go there and find the Shotgun Ammo blueprint inside. Return to Tim to complete the quest.
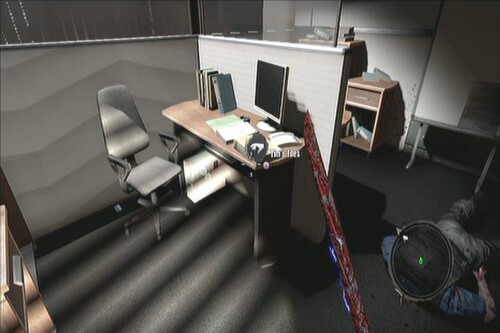
Clear the cemetery of all the walking dead.
Hard
3000 XP
Gabriel's Sledgehammer
Talk to Mother Helen after Faith Will Move Mountains. Just head to the graveyard beside the church and kill all undead in there. Once done, talk to Mother Helen to complete the quest and receive your reward.
Find a spade for Owain.
Easy
1500 XP, Wicked Sickle
After completing Bury the Dead, go upstairs of the church and talk to Owain. To find the spade, fast travel back to the Lifeguard Tower and visit the surf shop. Check the video below for more details. Once you have the spade, just select the main quest active and load the last checkpoint. This will take you instantly back to the church. Hand over the spade to complete the quest.
Six Feet Under
Find Bill at the police station.
Hard
1500 XP, Cash
Best done alongside the sidequest “Matter of Justice” (talk to Tim in the church after rescuing Jin), talk to Patrick inside the Abandoned House – Square to receive this quest. Travel back to the church and follow the trail to the police station. Once inside, continue to the second floor and head to the prison cell where you found the ID earlier. Talk to the radio to update the quest.
Continue following the trail and fight your way through the undead until you reach the last office room where you found Jin earlier. The quest tracker will lead you to the chief's PC. Just download the file and return it to Patrick to complete the quest.
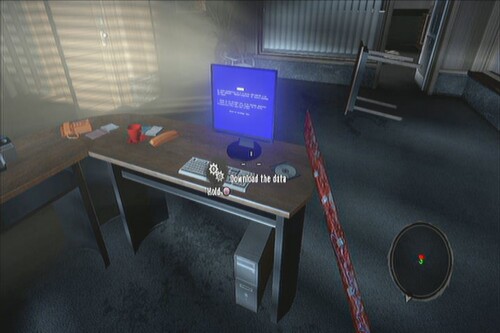
Bring the gun from Tim's House.
Hard
1500 XP, Short-Circuit Mod
After completing his initial quest, Matter of Justice, talk to him again to receive this quest. Head to the house then follow the video below. After getting the gun, just exit the house to complete the quest.
Judgement Day Quest
Free Vang's Daughter.
3000 XP, Lightning Mod
Head to this location and you should find a man calling out for you:
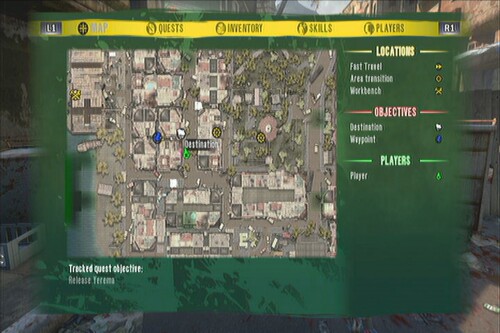
Follow him and kill the punks that will appear. They can't be easily stopped by kicks so just hack and slash them. Once done, talk to Vang and accept his quest. Head to the warehouse marked in the map. Once there, clear all zombies.
Open the gates and carefully approach the bandits' hideout. Take them out and proceed inside the warehouse. After killing all the bandits outside, break the door open where Amber is held and kill two more bandits. Grab the ID card on the table then shoot the electronic lock by the door to release her. Talk to her to complete the quest.
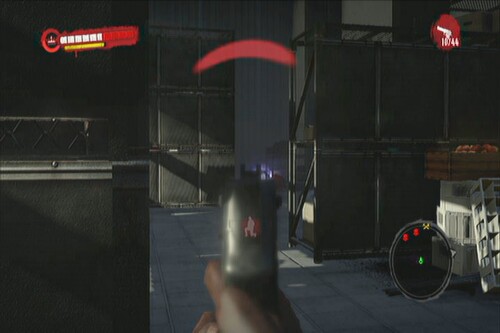
Help Jared get into the Store.
1500 XP
Check the gunshop in this location and you should find two men trying to get inside. If you didn't see anyone, try coming back a bit later. (I found this while doing the main quest “Boat Supplies”)
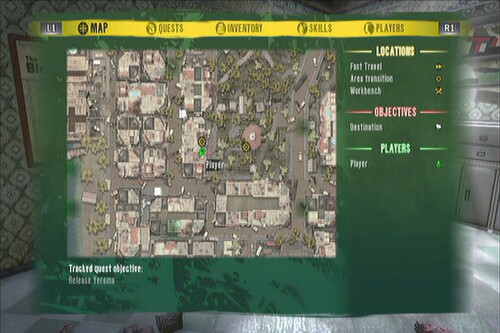
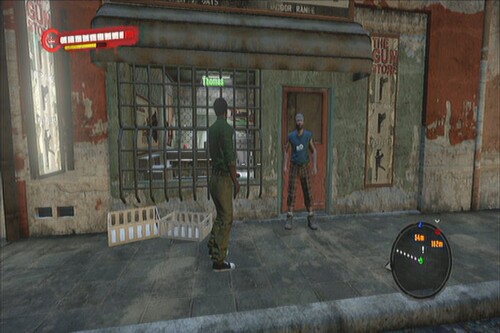
Accept his quest then enter the abandoned house nearby. Once inside, kill all zombies inside and grab the keys from the thug. Don't forget to grab the blueprint on the shelf as well. Exit back to the slums. Once you're back in the store, kill all zombies inside, remove the barricade and open the door. Defeat two waves of undead that will come rushing in because of the alarm and the quest will be completed.
A Tough Nut to Crack
Kill all the undead by the harbor.
Medium
1500 XP, Cash
Talk to Tobias inside his house in the village to start this quest. Head to the harbor and take out all the zombies inside the house. Don't forget to grab the ID card beside the bed. Return to Tobias to complete the quest.
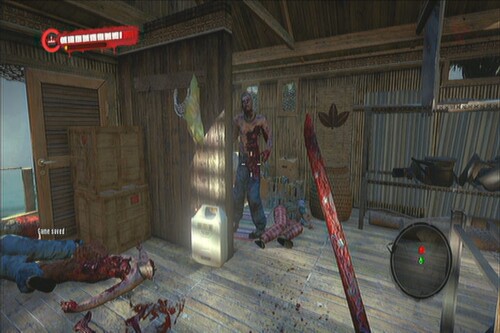
Bring bandages to Loren.
Easy
1500 XP, Hatchet
Talk to Loren from the window of her house to start this quest. The house where you need to go next is marked in the map. Head there and break open the door. Once inside, you need to look for the key to the medical wardrobe. It should be located inside a dish beside a white bag in the corner of the room. Open the wardrobe and take the bandages. Deliver them to Loren to complete the quest.
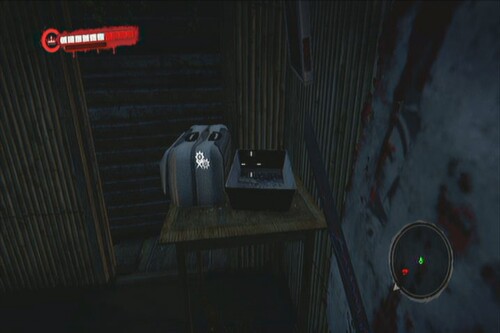
Gather the herbs and take them to Loren.
Easy
100 XP, Cash
Talk to Loren after completing her previous quest “Blood in the Tropics”. The herbs are scattered in the jungle; you can just pick them up as you try to complete your other quests. They will be automatically marked in your map when you get near their locations. There should be some near along the path leading to Sam (quest giver on the map)
Search through the bunkers and bring canned food to Brian.
Easy
100 XP, Small Rifle Ammo
This is a continuous quest. Just trade your canned foods for some rifle ammo. Pretty handy if you're using rifles regularly.
Kill Vargas.
Hard
3000 XP, Shark Mod
Talk to Carter. Take a vehicle and travel to the marked location. Once there, clear all enemies in the area. The other sidequest “Spy Game” is in the same location as well. He'll be holed up inside. To kill him quickly, just lob any explosive inside, just to fulfill Carter's request to make the bastard suffer. Once done, report back to Carter to complete the mission.
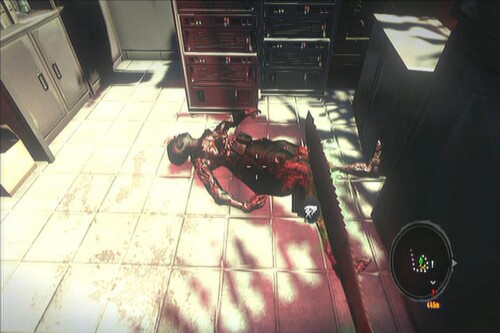
Bring Sam a Medkit or bandages.
Easy
500 XP, Striker Shotgun Mod
Find Sam inside the bunker a short walk north of the village. Just give him a medkit to complete the quest and get the mod.
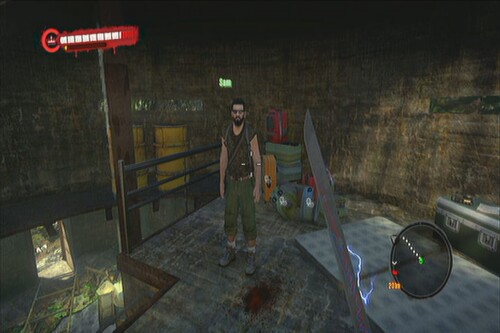
Rescue Makimbah's bride from the rival village.
Medium
3000 XP, Brutal Machete
Find Makimbah inside the Overpass Camp, east of the transition point leading back to the resort. Travel back to River Village and the location of Makimbah's bride will appear. Head there through the rooftops and jump inside. Talk to his bride to update the quest.
Head to the Gaia Falls area and jump on top of the hanging bus. Open one of the bags there and you should find Mahina's necklace inside. Return to the camp and convince Makimbah of his bride's death.
Obtain the warehouse key from the mechanic.
3000 XP, Nail Hammer
Dwight Turner
Find Dwight inside the Overpass Camp, east of the transition point leading back to the resort. Head to the pub and check the back. You need to place some crates for you to stand on.
Break the door open and kill all enemies inside. Grab the key from the thug's body and don't forget to get the ID behind the counter. Open the warehouse using the key to complete the quest. Talk to Dwight again to receive your reward. Don't forget to grab the ID on top of the cabinet inside.
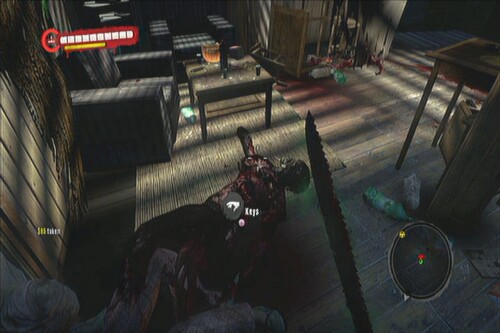
Find the International Geographic video camera.
Hard
3000 XP, Detox Rifle Mod
Amanda
Track the quest then fast travel to the Waterfall Bunker. Follow the trail uphill then climb the ladder that you'll see. Continue forth until some wooden stairs comes to view. You can head east a bit, past some bamboo trees to find Mongina, a quest giver. Start her quest “Remains of the Damned” then enter the compound. Kills the next two infected that will immediately detect you, then find a way inside the bungalow. Use the wooden ramps to reach the rooftops. I suggest taking out the zombies outside first so you won't have to deal with them later. There should be an opening where you can drop in.
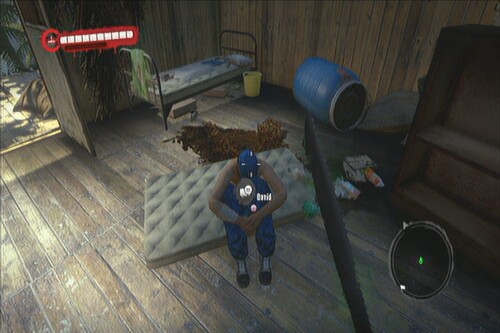
Once inside, kill all enemies, including a thug. After that, search all bags inside until you find the video camera. There's also an ID card on a table near the bed so pick it up as well. You'll need to leave the place so remove all barricades, then carefully open the door. There will be infected waiting for you outside so deal with them as well.

Bring 5 cans of food.
Easy
100 XP, Cash
Pono
Continuous quest.
Acquire 5 batteries.
Easy
100 XP, Small Pistol Ammo
Ethan
Continuous quest.
Help Claire find her son.
Easy
3000 XP, Rifle Ammo (blueprint)
Claire
Travel to River Village and find David inside the same house where Carter is. Talk to him and return to Claire to complete the quest.
Find the location of the plane crash. Retrieve the navigation devices from the plane.
Hard
3000 XP, Pick of Destiny
Head to the crash site and carefully clear the area of bandits. There's also an ID on the 2nd level so you may pick it up in case you missed it earlier.
You can find the parts of the navigation device since they will be marked in the map. Just crouch down and you should be able to see the first one underneath the plane wreck. Pick it up and continue killing the bandits on your way to the second part.
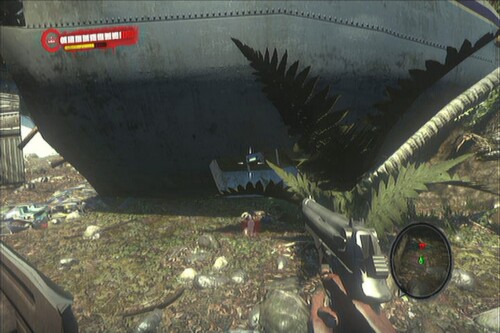
Find the entrance at the back of the plane and use the fallen tree trunk as a ramp to reach the open door. 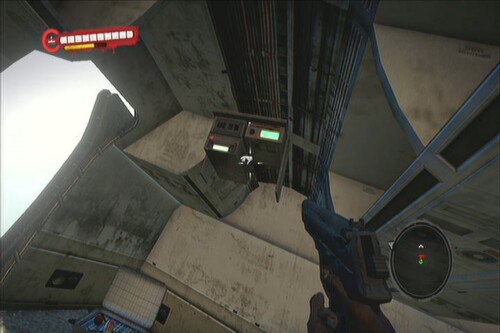
After picking up the second part, more enemies will appear so fight your way through them and deliver the parts back to Chris to complete the quest.
Help the woman survive.
1500 XP, Cash
This quest is automatically triggered as soon as you get near the bridge in this location:
Just kill all enemies and she'll come out from under the pick up.
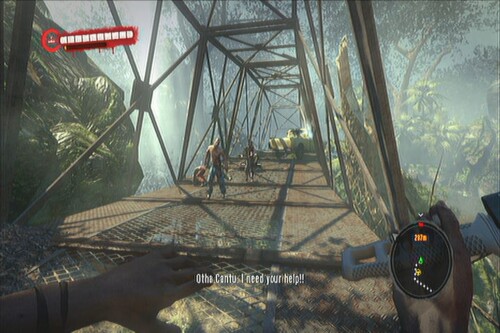
Collect all boxes with medicine. Deliver the medicine to Paul.
Easy
1500 XP, Saw Disc Axe mod
Otha
After saving Otha, talk to her again to receive this quest. You need to collect all medicine boxes scattered in the ravine below. Just make this quest active then carefully collect the boxes. In case you made mistakes, just reload your last checkpoint to start again on the bridge. Be careful when crossing the other side since there's a butcher waiting there. Continue following the path until you reach the last box on the bottom.
Second Aid Quest
If you follow the path, you'll come across a small camp made by a very strong psychopath named Jason. Don't join the fray; just lob some explosives on him while he's busy with the undead and take him off from a distance. Once he's killed, check out his shack for an ID and a chainsaw.

Make your way to the camp and talk to Paul to complete the quest.
Bring back skulls to Mongina.
Hard
3000 XP, Cudgel
You can find Mongina in the location below, preferably while doing the sidequest “The Show Must Go On”.
Head to the ghost village and refer to the videos below for directions on how to collect the four skulls.
Skull # 1
Remains of the Damned skull 1
Skull # 2
Remains of the Damned skull 2
Skull # 3
Remains of the Damned skull 3
Skull # 4
Remains of the Damned skull 4
Once you have all four, return to Mongina and place the skulls on the basin behind her. Talk to her to complete the quest.
Get a new fuse from the warehouse. Use the new fuse to restore power.
Hard
6500 XP, Shock Rifle Mod
Will
Exit then make your way to the warehouse. Once you reached it, kill the ram, then grab the recording on the desk. Break open the door in the next room then grab the fuses on the table.
Some of the corpses here will stand up so take them out then exit the warehouse. Continue to the generator room and grab the Tesla Mod beside the lockers. Put the fuse on the generator then operate the panel to bring the power back. Once done, you'll have to run all the way back to the lab since there will be several infected that will attack you along the way. Talk to Will to complete the quest.
Rescue Frank from an undead infested part of the laboratory.
Easy
6000 XP, Cash
Bob
Follow the trail to the next door then clear all zombies inside. Check the first room to the right for a Banoi Herald Excerpt. After killing all the undead, report back to Bob to complete the quest.
Get 5 Oleander flowers.
Medium
1000 XP, Cash
This is a continuous quest. Talk to the warrior in Ope's Cave after surviving the arena of spirits.
Bring aluminum potassium from the warehouse to the lab.
Medium
8500 XP, Deathstalker Mod
Follow the trail as it leads you to the barricaded entrance to the warehouse in the back of the lab. Use the crates to jump over the obstacles and enter the door. Kill all enemies inside, grab a couple of free molotovs, and a personal ID.
Once done, carry the jerrycan of aluminum potassium back to Frank then put it on the designated spot.
Acquire the samples from infected's muscle tissue and bring them to the laboratory.
Easy
8000 XP, Magnum
Follow the path uphill to reach the marked location. Enter the room and kill the infected inside. Here you'll find an ID and a Banoi Herald so don't forget to grab them.
Bring Icaridin to Dr. Laghance.
Medium
3000 XP, Detox Gun Mod
Check the warehouse you visited earlier to find the chemical Dr. Laghance has requested. Pick it up and deliver it back to him to complete the quest.
Bring Dr. Nguyen's scientific data from his Bungalow.
Hard
3000 XP, The Machete
Follow the trail and continue past the quarters where you acquired the tissue sample from Nick and John earlier. Continue down the broken stairway and kill all enemies below.
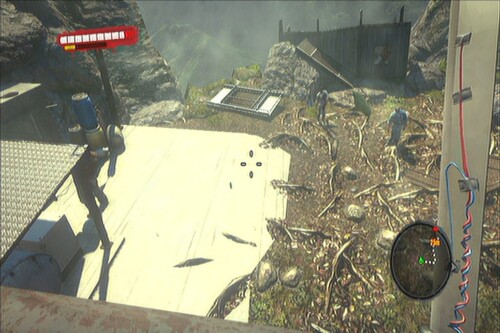
Once done, enter the dangling living quarters and kill the undead inside. Pick up the ID as well. Pick the laptop in the bedroom then return it to Nguyen to complete the quest.
Find Floater Tissue.
Hard
3000 XP, Short Shotgun
Talk to Nguyen after completing “Where is my Pineapple?” If you have at least one Floater Meat in your inventory, you can just hand it over to Nguyen to complete the quest quickly. Otherwise, you may find them in the food/water warehouse west of the laboratory and the holding pens. If you're picking stuff up regularly, chances are you have come across them since I was able to find 2-4 floater meat while doing the “Power Slaves” quest.
Take Dr. Connor's notes to Dr. Monroe.
Medium
3000 XP, Katana
Find Dr. Connor in his living quarter shown here:
Pick up his files on the table then deliver it back to the lab. Deliver it back to Monroe to complete the quest.
Clear and secure the water and food storage.
Medium
3000 XP, Cash
Talk to Monroe again after completing “Deux Ex Machina”. Head to the food/water storage warehouse and kill all undead inside. Make sure to pickup the ID near the other door in the corner. Report back to him to complete the quest.
Bring five suicider meats to Monroe.
Medium
1000 XP
If you have some at hand, just hand them over to complete the quest. Otherwise, you can try checking various merchants if they have them on sale or do it the hard way and collect them from killed suiciders. This is a repeatable quest.
Kill all the undead near the scientist's house.
3000 XP, Battle Double Blade
You'll trigger this quest by going near this house:
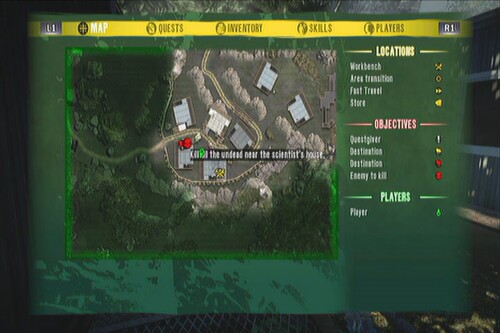
Simply defeat all enemies here. Take note that there is a possibility that infected and a butcher will join the fray so watch out.
Investigate the reason for the breach of contact with the scientist's friend.
Medium
3000 XP, Cash
Talk to Sebastian after completing Dense Macabre. His friend's home is located a few walks to the east. Head there and kill the walkers inside. Grab the ID in the bathroom and activate the radio. Head back to Sebastian to report his friend's demise and to complete the quest.
Find food supplies for scientists.
Medium
3000 XP, Kukri
Talk to Sebastian after completing “No Sign of Life” to start this quest. Enter the nearby living quarter from the roof. (Stand on the glass skylight and destroy it) and get the food from the fridge.
Next, break in the living quarter beside it. Kill all enemies inside and grab the food from the fridge. There's also an ID above it so pick it up as well.
Send the message from sebastian's computer.
Medium
3000 XP, Wakisahi
Talk to Sebastian again after completing “The Dead Don't Eat Crackers”. This will lead you back to the laboratory so head there and find Sebastian's computer. Just follow the trail to find it.
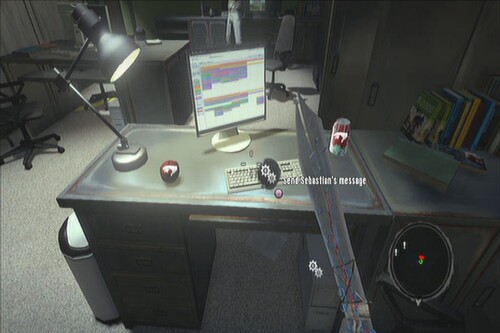
After sending the message, report back to Sebastian.
Drive to this location and you should find a struggling couple inside. Kill all undead outside to complete the quest.
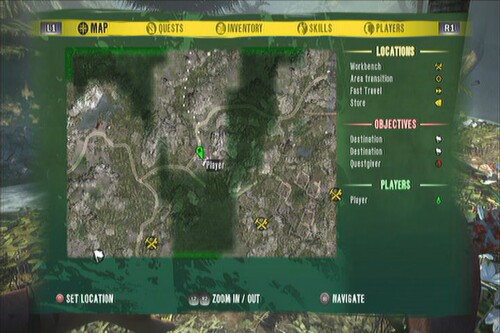
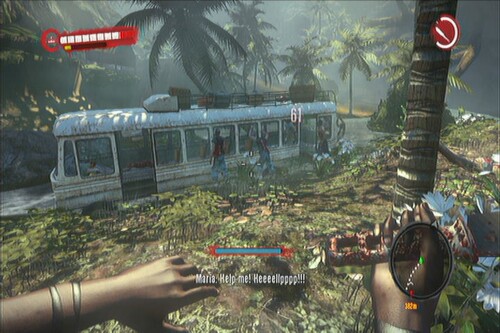
Stop the Butcher of Banoi from terrorizing the prison.
Get back to Angel
3000 XP, Zed's Demise
Angel
Follow the trail and open the door to the next area. Continue following the path of bodies until you find him inside an enclosed room. Be careful since his machete can quickly kill you. Fighting him with melee weapons will prove challenging since he can evade them. Fortunately, he's not that tough. Well placed gunshots will put him down quickly. Report to Angel to complete the quest.

Note: Zed's Demise is an awesome sharp weapon with considerable length. Definitely a must-have for Purna or Xian Mei!
Take the drugs to Dreyfus.
Medium
3000 XP, Short Shotgun
Since this place has no map, you have no choice but to rely on the trails. Follow it until you reach the large cell block. Approach the cell to update the quest. Go upstairs and make your way to the control room. Open the dealer's cell and return there to find all the drugs.
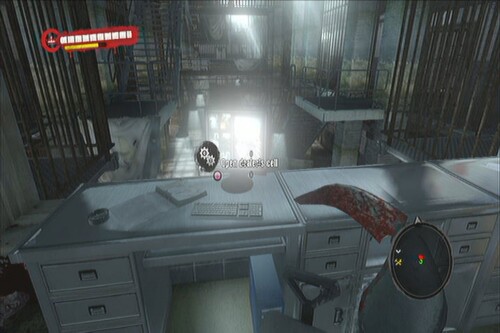
There are four spots where you need to search. The first one is on the upper bunk bed, then the metal scrap on the same bed, then the toilet bowl and the fixture in the sink. Once you have them all, return to Dreyfus to complete the quest.
Acid Funk Quest
Get some Thorazine from the infirmary. Get back to Harland.
Medium
3000 XP
Exotic Double Blade
You can find the medicine in the same infirmary where you found the ID Card 088 earlier. Just follow the trail and it will lead you there. Pick the thorazine up and deliver it to Harland.
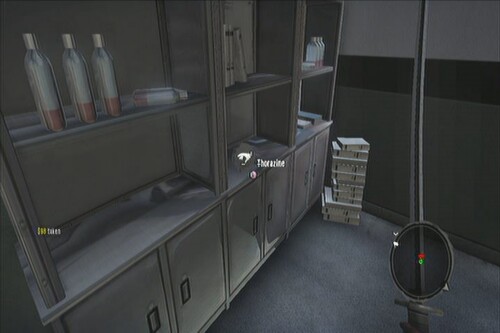
Each of the four main characters in the game have their own skill sets which complements their fighting style and abilities. Though it is a fact that they can use all weapons, they will become more efficient zombie-killing machines by making them use their preferred weapon class.
As you earn experience and level up, you'll gain skill points that you can allocate to the any of your character's three skill trees: Fury, Combat and Survival. Fury contains enhancements to the character's signature moves. Once enough Rage is accumulated, a character can unleash special Fury moves to turn the tide of battle which makes it invaluable during tight situations. Combat is where you'll find weapon and combat-related enhancements. You can specialize in certain weapon types and even increase their effectiveness, durability, stamina costs, etc. Survival skill contains upgrades that will help make your life a bit easier as you get by on the island. This tree has very helpful upgrades such as increased backpack slots, damage mitigation, experience boosts, increasing the amount of money found, lowering maintenance costs, stamina boosts and enhanced durability for weapons to name a few. Take note that some of these upgrades has three ranks, enabling you to further increase the bonuses received from these enhancements.
You can only earn one skill point per level. Since the max level a character can attain is 50, you can only get 49 skill points (you start with 0 SP at LV1). This feature in the game will allow you to mold your character as you see fit. I strongly recommend getting the best upgrades in each tree or skills that complement the build you’re trying to achieve.
This section will tackle the skill trees of each character and may help you decide what skills to get for your character.
Stats: Health - 100, Speed - 100, Stamina - 90
Specialty: Firearms
She's a former police officer turned VIP bodyguard. She specializes in firearms and is a natural leader. She has access to upgrades that also increases her team members' attributes such as damage and critical rate. If you're a team player and prefers gunfights most of the time, you'll find Purna as the suitable chick for the job.
Fury Tree
Guardian
Damage 10%, Critical Hit chance 10%, Stamina Cost -15%, Health Gain 25%
As long as its active, Purna can use her sidearm without the need of any ammo.
Attack Formation
Increases the damage you and all team members inflict while Fury is active.
Rank 1 = 5% damage
Rank 2 = 10% damage
Rank 3 = 15% damage
Inspiring Kick
Enables you to obtain more Rage when you kill enemies by kicking them
Rank 1 = 15% Rage
Rank 2 = 30% Rage
Rank 3 = 45% Rage
Grim Inspiration
Enables you to obtain more Rage when you kill enemies using modified weapons
Rank 1 = 10% Rage
Rank 2 = 20% Rage
Rank 3 = 30% Rage
Guardian Spirit
This upgrade makes your Fury last longer, allows you to kill two enemies at once as well as the following bonuses: Damage 20%, Critical Hit chance 20%, Stamina Cost -30%, Health Gain 50% HP, 50% stamina gain and 10% Rage.
Fiery Spirit
Increases your chances to set your enemies on fire while Fury is active
Rank 1 = 5% chance
Rank 2 = 10% chance
Rank 3 = 15% chance
Volatile
Decreases the amount of rage required to trigger Fury
Rank 1 = 5% rage
Rank 2 = 10% rage
Rank 3 = 15% rage
Righteous Fire
Earn more rage when when killing enemies using firearms
Rank 1 = 10% rage
Rank 2 = 20% rage
Rank 3 = 30% rage
Guardian Angel
Further extends the active duration Fury and allows you to kill three enemies at once as well as the following bonuses: Damage 30%, Critical Hit chance 30%, Stamina Cost -45%, 100% Health Gain, 100% stamina gain and 20% Rage.
Combat Tree
Blade Fighter
You’ll be more effective when wielding sharp weapons. You’ll get 5% sharp damage, -10% sharp stamina cost, 1% sharp critical hit chance and 5% damage for precise head shots
Hard Knocks
Increases melee damage
Rank 1 = 5% damage
Rank 2 = 10% damage
Rank 3 = 15% damage
Vampire
Restores some stamina for every kill.
Rank 1 = 10% Stamina
Rank 2 = 20% Stamina
Rank 3 = 30% Stamina
Randori
Decreased stamina cost when fighting hordes of zombies
Rank 1 = -10% Stamina
Rank 2 = -20% Stamina
Rank 3 = -30% Stamina
Kick of Strength
Restores some stamina when killing zombies using kicks
Rank 1 = 10% Stamina
Rank 2 = 20% Stamina
Rank 3 = 30% Stamina
Gender Wars
Boosts damage when killing zombies of the opposite sex
Rank 1 = 5% damage
Rank 2 = 10% damage
Rank 3 = 15% damage
Maintenance
Increases the durability of melee weapons
Rank 1 = 10% durability
Rank 2 = 20% durability
Rank 3 = 30% durability
Firearms Training
Purna becomes more effective with firearms. You’ll get the following bonuses:
-10% Reload Time, 2% Critical Chance, 10% accuracy, -10% Recoil
Enables the ability to stomp on enemies.
Cold Rage
Kills increases chance to deal critical hit (lasts for a few seconds)
Rank 1 = 4% chance
Rank 2 = 8% chance
Rank 3 = 12% chance
Executor
Increases your chances to land a critical hit using firearms
Rank 1 = 1% chance
Rank 2 = 2% chance
Rank 3 = 3% chance
Elemental Affinity
Increases the duration of all elemental attacks
Rank 1 = 20% duration
Rank 2 = 40% duration
Rank 3 = 60% duration
Piercing Shots
Increases chances of bullet penetration
Rank 1 = 10% chance
Rank 2 = 20% chance
Rank 3 = 30% chance
Wunderwaffe
Increases damage of modified firearms
Rank 1 = 10% damage
Rank 2 = 20% damage
Rank 3 = 30% damage
Rapid Fire
Decreases reload time of firearms
Rank 1 = -10% reload time
Rank 2 = -20% reload time
Rank 3 = -30% reload time
Gun Kata
Improves your effectiveness in using firearms. This upgrade gives you the following bonuses:
-20% Reload Time, 3% Critical Chance, 20% accuracy, -20% Recoil
Survival Tree
Boost Mood
All members within the 5m aura range will have 15% boost in damage, durability, force and handling.
Deeper Pockets
Increases the maximum backpack slots
Rank 1 = 2 Slots
Rank 2 = 4 Slots
Rank 3 = 6 Slots
Picklock
Enables you to open locked containers
Rank 1 = Open LV1 locks
Rank 2 = Open LV2 locks
Rank 3 = Open LV3 locks
Optimal Maintenance
Reduces repair costs
Rank 1 = -10% cost
Rank 2 = -20% cost
Rank 3 = -30% cost
Conditioning
Increases your maximum stamina
Rank 1 = 5% stamina
Rank 2 = 10% stamina
Rank 3 = 15% stamina
Glory Hound
Increases exp gained from kills and assists
Rank 1 = 50% EXP
Rank 2 = 100% EXP
Rank 3 = 150% EXP
Custom Maintenance
Increases the durability of modified weapons
Rank 1 = 10% durability
Rank 2 = 20% durability
Rank 3 = 30% durability
Boost Ambience
All members within the 10m aura range will have 20% boost in damage, durability, force and handling.
Recovery
Increases the chances of avoiding getting interrupted when hit while attacking
Rank 1 = 20% Chance
Rank 2 = 40% Chance
Rank 3 = 60% Chance
Recycler
Increases the amount of ammo produced from workbenches
Rank 1 = 25% more
Rank 2 = 50% more
Rank 3 = 75% more
Providence
Increases the amount of ammo found in loot
Rank 1 = 20% more
Rank 2 = 40% more
Rank 3 = 60% more
Jackpot
Increases chances of finding rare items in loots
Rank 1 = 5% chance
Rank 2 = 10% chance
Rank 3 = 15% chance
Rain of Bullets
Increases your ammo capacity per level.
Rank 1 = 10 pistol rounds, 10 rifle rounds and 5 shotgun shells.
Rank 2 = 10 pistol rounds, 10 rifle rounds and 5 shotgun shells.
Rank 3 = 10 pistol rounds, 10 rifle rounds and 5 shotgun shells.
Second Chance
Increases the chances of getting instantly revived after dying.
Rank 1 = 10% chance
Rank 2 = 20% chance
Rank 3 = 30% chance
Boost Aura
All members within the 15m aura range will have 25% boost in damage, durability, force and handling.
Stats: Health - 90, Speed - 100, Stamina - 100
Specialty: Bladed weapons
Xian Mei is the game’s assassin class and a skillful wielder of knives and other bladed weapons. She’s quick and nimble, making her the best choice for players who prefer tactical melee combat.
Fury Tree
Blood Rage
Use your most lethal skills to quickly deal with nearby enemies.
Grim Inspiration
Gain more rage by killing zombies with sharp weapons
Rank 1: 6% rage
Rank 2: 12% rage
Rank 3: 18% rage
Lightning Moves
Enables you to move faster while Fury is active
Rank 1: 33% speed
Rank 2: 66% speed
Rank 3: 99% speed
Assassin’s Guile
Increases HP while on Fury
Rank 1: 30% health
Rank 2: 60% health
Rank 3: 90% health
Boiling Bloodrage
Fury lasts longer and makes you even more effective in combat
Flowing Strikes
Gain more rage for critical kills
Rank 1: 27% rage
Rank 2: 54% rage
Rank 3: 81% rage
Rerage
Increases chances to recover 20% rage after activating Fury
Rank 1 = 10% chance
Rank 2 = 20% chance
Rank 3 = 30% chance
Volatile
Decreases the amount of rage required to trigger Fury
Rank 1 = 5% rage
Rank 2 = 10% rage
Rank 3 = 15% rage
Boiling Bloodrage
Fury lasts longer and is more devastating
Combat Tree
Blade Fighter
You’ll be more effective when wielding sharp weapons. You’ll get 5% sharp damage, -10% sharp stamina cost, 1% sharp critical hit chance and 5% damage for precise head shots
Maintenance
Increases the durability of sharp weapons
Rank 1 = 10% durability
Rank 2 = 20% durability
Rank 3 = 30% durability
Flawless Blade
Enhances the damage of sharp weapons
Rank 1 = 5% damage
Rank 2 = 10% damage
Rank 3 = 15% damage
Flying Strike
Deal extra damage when attacking while jumping using sharp weapons
Rank 1: 33% damage
Rank 2: 66% damage
Rank 3: 99% damage
Backstab
Deal extra damage when attacking enemies from behind using melee weapons
Rank 1 = 20% damage
Rank 2 = 40% damage
Rank 3 = 60% damage
Deep Wounds
Increases chance of causing bleeding when landing critical hits using sharp weapons
Rank 1 = 10% chance
Rank 2 = 20% chance
Rank 3 = 30% chance
Effortless
Decreases stamina cost of sharp weapons
Rank 1 = -10% stamina
Rank 2 = -20% stamina
Rank 3 = -30% stamina
Sharp Expert
5% sharp damage, -10% stamina cost, 2% critical hit chance, 10% damage on fallen enemies. Enables you to stomp the head of fallen enemies (and instantly kill them)
Poisonous
Prolongs poison duration.
Rank 1: 15% duration
Rank 2: 30% duration
Rank 3: 45% duration
Telling Blows
Increases critical hit chance when using sharp weapons.
Rank 1: 4% chance
Rank 2: 8% chance
Rank 3: 12% chance
Serrated Blade
Increases bleeding duration on enemies.
Rank 1: 30% duration
Rank 2: 60% duration
Rank 3: 90% duration
Stroke of Luck
Increases chances getting an instant kill when using sharp weapons.
Rank 1: 1.5% chance
Rank 2: 4% chance
Rank 3: 4.5% chance
Master Assassin
Increases bleeding and poison damage
Rank 1: 20% increase
Rank 2: 40% increase
Rank 3: 60% increase
Pressure
Increases critical hit chance when health is below 50%.
Rank 1: 3% chance
Rank 2: 6% chance
Rank 3: 9% chance
Blade Master
5% sharp damage, -5% sharp stamina cost, 5% sharp critical hit chance, 15% damage on fallen enemies. You can stomp fallen enemies without stopping
Survival Tree
First Aid
Increases effectiveness of Medkits by 25%
Vampire
Gain stamina boost after every kill
Rank 1: 10% stamina
Rank 2: 20% stamina
Rank 3: 30% stamina
Life Insurance
Decreases cash penalty upon death.
Rank 1: -15% cash penalty
Rank 2: -30% cash penalty
Rank 3: -45% cash penalty
Spectre
Decreases chances of attracting enemy attention
Rank 1: -5% threat
Rank 2: -10% threat
Rank 3: -15% threat
Endurance
Increases stamina regeneration
Rank 1: 15% faster
Rank 2: 30% faster
Rank 3: 45% faster
Picklock
Enables you to open locked containers
Rank 1 = Open LV1 locks
Rank 2 = Open LV2 locks
Rank 3 = Open LV3 locks
Deeper Pockets
Increases the maximum backpack slots
Rank 1 = 2 Slots
Rank 2 = 4 Slots
Rank 3 = 6 Slots
Field Medicine
Increases effectiveness of Medkits by 50%
Merchant
Decreases the prices of items you buy
Rank 1 = -10% discount
Rank 2 = -20% discount
Rank 3 = -30% discount
Choice Cuts
Earn bonus exp for severing limbs
Rank 1 = x2 EXP
Rank 2 = x3 EXP
Rank 3 = x4 EXP
Combo
Earn bonus exp when killing enemies within 5 seconds of each other
Rank 1 = 10% EXP
Rank 2 = 20% EXP
Rank 3 = 30% EXP
Equal Chances
Decreases penalties when fighting higher level enemies.
Rank 1 = No penalty on enemies one level higher
Rank 2 = No penalty on enemies two levels higher
Rank 3 = No penalty on enemies three levels higher
Custom Maintenance
Increases the durability of modified weapons
Rank 1 = 10% durability
Rank 2 = 20% durability
Rank 3 = 30% durability
Rally
Increases stamina regeneration when HP drops below 50%
Rank 1 = 15% regeneration
Rank 2 = 30% regeneration
Rank 3 = 45% regeneration
Surgeon General
Increases effectiveness of Medkits by 75%
Health: 100, Speed: 100, Stamina 80
Specialty: Throwing Expert
Considered as a jack-of-all-trades, Logan is a character with no real strengths or weaknesses. His Fury skills allows him to throw weapons at longer ranges with increased lethality. He also puts alcohol in good use. There are two skills that gives significant benefits to him while he’s drunk.
Fury Tree
Bulls Eye
Allows you to hit 2 enemies with a single thrown weapon up to 15m away.
Furious Throw
Killing enemies with throws gains additional rage
Rank 1 = 10% rage
Rank 2 = 20% rage
Rank 3 = 30% rage
Longshot
Increases Bullseye’s throwing range
Rank 1 = 2.5m
Rank 2 = 5m
Rank 3 = 7.5m
Grazing Hits
Increases the chance to inflict bleeding damage with Bullseye
Rank 1 = 15% chance
Rank 2 = 30% chance
Rank 3 = 45% chance
True Bullseye
You can hit three enemies at once.
Battle Rage
Additional rage earned with one-handed weapon kills
Rank 1 = 6% Rage
Rank 2 = 12% Rage
Rank 3 = 18% Rage
Wings of Death
Increases your chance of killing enemies instantly when throwing while Bullseye is active.
Rank 1 = 3% chance
Rank 2 = 6% chance
Rank 3 = 9% chance
Volatile
Decreases the amount of rage required to trigger Fury
Rank 1 = -5% rage
Rank 2 = -10% rage
Rank 3 = -15% rage
Dead Eye Bullseye
You can hit 4 enemies with one thrown weapon
Combat Tree
Heavy Hitter
Blunt weapons are now more efficient and effective.
5% blunt damage, -10% blunt stamina cost, 1% blunt critical chance, 5% damage for precise blunt head damage
Mass Driver
Increases throwing range of melee weapons
Rank 1 = 2.5m
Rank 2 = 5m
Rank 3 = 7.5m
Fencer
Increases damage of single handed weapons
Rank 1 = 5% damage
Rank 2 = 10% damage
Rank 3 = 15% damage
Kicker
Increases chances to inflict bleeding effect using thrown weapons
Rank 1 = 15% chance
Rank 2 = 30% chance
Rank 3 = 45% chance
Maintenance
Increases the durability of weapons
Rank 1 = 5% durability
Rank 2 = 10% durability
Rank 3 = 15% durability
Flow
Reduces stamina cost of one handed weapons
Rank 1 = -10% stamina
Rank 2 = -20% stamina
Rank 3 = -30% stamina
Frenzy
Increases damage for 5 seconds after each kill
Rank 1 = 10% damage
Rank 2 = 20% damage
Rank 3 = 30% damage
Sharp Apprentice
5% sharp damage, -10% sharp stamina cost, 10 sharp critical hit chance, 5% damage for precise head shots. You can also stomp the heads of fallen enemies
Mighty Throw
Increases damage of thrown weapons
Rank 1 = 5% damage
Rank 2 = 10% damage
Rank 3 = 15% damage
Aimed Shots
Increases damage of firearms
Rank 1 = 5% damage
Rank 2 = 10% damage
Rank 3 = 15% damage
Way of the Warrior
Increases critical hit chance of one-handed weapons
Rank 1 = 2% chance
Rank 2 = 4% chance
Rank 3 = 6% chance
Economical Throw
When an enemy is hit with a thrown weapon, it will inflict damage to nearby enemies
Rank 1 = 10% damage
Rank 2 = 20% damage
Rank 3 = 30% damage
Telling Blows
Increases critical hit chance of thrown weapons
Rank 1 = 10% chance
Rank 2 = 20% chance
Rank 3 = 30% chance
Shinobi
Chance to kill enemies instantly using thrown weapons. (enemy level should be equal or lower than yours)
Rank 1 = 3% chance
Rank 2 = 6% chance
Rank 3 = 9% chance
Firearms Apprentice
-10% reload time, 10% accuracy, -10% recoil, 10% critical hit and 10% critical damage
Survival Tree
Boomerang
15% chance to retrieve thrown weapons
Efficiency
Reduces weapon upgrade costs at workbenches
Rank 1 = -10% upgrade cost
Rank 2 = -20% upgrade cost
Rank 3 = -30% upgrade cost
Deeper Pockets
Increases the maximum backpack slots
Rank 1 = 2 Slots
Rank 2 = 4 Slots
Rank 3 = 6 Slots
Drunken Master
Increases damage when drunk
Rank 1 = 20% damage
Rank 2 = 40% damage
Rank 3 = 60% damage
Conditioning
Increases your maximum stamina
Rank 1 = 10% stamina
Rank 2 = 20% stamina
Rank 3 = 30% stamina
Picklock
Enables you to open locked containers
Rank 1 = Open LV1 locks
Rank 2 = Open LV2 locks
Rank 3 = Open LV3 locks
Scavenger
Increases chances of finding weapons in great condition
Rank 1 = 15% chance
Rank 2 = 30% chance
Rank 3 = 45% chance
Reliable Boomerang
30% chance of retrieving a thrown weapon
Fireproof
Increases fire resistance
Rank 1 = 15% resistance
Rank 2 = 30% resistance
Rank 3 = 45% resistance
Custom Maintenance
Increases the durability of modified weapons
Rank 1 = 10% durability
Rank 2 = 20% durability
Rank 3 = 30% durability
Discipline
Increases maximum health bars
Rank 1 = 1 bar
Rank 2 = 2 bars
Rank 3 = 3 bars
Medicinal Purposes
Regenerates your HP when drunk
Rank 1 = 1% regeneration
Rank 2 = 2% regeneration
Rank 3 = 3% regeneration
Appraiser
Increases chance of finding an upgraded weapon
Rank 1 = 5% chance
Rank 2 = 10% chance
Rank 3 = 15% chance
Reflection
Chance to knock out enemies when you receive damage (enemy level should be equal or lower than yours)
Rank 1 = 10% chance
Rank 2 = 20% chance
Rank 3 = 30% chance
Righteous Boomerang
50% chance of retrieving a thrown weapon
Health: 110, Speed: 100, Stamina: 90
Specialty: Blunt weapons
Sam B is the game’s tank class. He’s strong and can take a bit more punishment compared to the other characters. His Fury skills allows him to take more damage and generate it to Rage, which in turn he can use to regenerate his health for every Fury kill. His combat skill tree further increases his effectiveness in using blunt weapons and his survival skills even allow him to further decrease damage and even regenerate his HP over time.
If you prefer fighting up close and personal, then Sam’s your man.
Fury Tree
Haymaker
Unleash your Fury to smite enemies with devastating blows, knocking them down with single hits
Grim Inspiration
Enables you to obtain more Rage when you kill enemies using blunt weapons
Rank 1 = 6% Rage
Rank 2 = 12% Rage
Rank 3 = 18% Rage
Feel No Pain
Makes you more resistant to damage while in Fury
Rank 1 = -10% damage
Rank 2 = -20% damage
Rank 3 = -30% damage
Sticks and Stones
Chance to gain Rage when receiving damage
Rank 1 = 5% chance
Rank 2 = 10% chance
Rank 3 = 15% chance
Greater Haymaker
Fury lasts longer and each punch sends enemies into the air
Smash Hit
Gain additional Rage by smashing heads using blunt weapons
Rank 1 = 20% Rage
Rank 2 = 40% Rage
Rank 3 = 60% Rage
Pain Killer
Gain health for every Fury kill
Rank 1 = 3% health
Rank 2 = 6% health
Rank 3 = 9% health
Volatile
Decreases the amount of rage required to trigger Fury
Rank 1 = 5% rage
Rank 2 = 10% rage
Rank 3 = 15% rage
Incredible Haymaker
Fury lasts even longer and you can literally make your enemies fly away.
Combat Tree
Heavy Hitter
Blunt weapons are now more efficient and effective.
Blunt damage 5%, Blunt stamina cost - 10%, Blunt critical hit chance 21
5% damage for head shots using blunt weapons
Maintenance
Increases the durability of blunt weapons
Rank 1 = 10% durability
Rank 2 = 20% durability
Rank 3 = 30% durability
Effortless
Reduces blunt weapons’ stamina cost
Rank 1 = -10% stamina
Rank 2 = -20% stamina
Rank 3 = -30% stamina
Devastation
Increases force and damage of all blunt weapons
Rank 1 = 3% damage, 10% force
Rank 2 = 6% damage, 20% force
Rank 3 = 9% damage, 30% force
Lights Out
Increases enemies’ KO time
Rank 1 = 2s
Rank 2 = 4s
Rank 3 = 6s
Exploit Weakness
Increases chance to score a critical hit when enemy’s stamina is below 50%
Rank 1: 2% chance
Rank 2: 4% chance
Rank 3: 6% chance
Tackle
Enables you to tackle enemies
Rank 1 = Push the enemies away to make some space
Rank 2 = Knock enemies to the ground
Rank 3 = Tackle stamina cost -50%, allows you to ram through locked doors
Blunt Expert
Blunt damage 5%, Blunt stamina cost - 10%, Blunt critical hit chance 2%
10% damage for head shots using blunt weapons
Enables you to stomp on knocked down enemies.
Powerful Impact
Increases damage with modified blunt weapons
Rank 1: 2% damage
Rank 2: 4% damage
Rank 3: 6% damage
Big Stick
Increases damage with two-handed weapons
Rank 1: 2% damage
Rank 2: 4% damage
Rank 3: 6% damage
Hammer Blows
Chance to instantly kill enemies using blunt weapons
Rank 1: 10% chance
Rank 2: 20% chance
Rank 3: 30% chance
Critical Impact
Increases chance to land a critical hit with modified blunt weapons
Rank 1: 3% chance
Rank 2: 6% chance
Rank 3: 9% chance
Telling Blows
Increases critical hit chance when using blunt weapons.
Rank 1: 1% chance
Rank 2: 2% chance
Rank 3: 3% chance
Aimed Shots
Increases overall damage of firearms
Rank 1 = 5% damage
Rank 2 = 10% damage
Rank 3 = 15% damage
Earthshaker
Blunt damage 5%, Blunt stamina cost - 10%, Blunt critical hit chance 3%
Stomper can be used without stopping
Enables you to use a special attack to instantly knock out your enemy
Survival Tree
Recuperation
Regenerates 10% HP per minute
Motivation
Chance to turn incoming damage to stamina boost
Rank 1: 10% chance
Rank 2: 20% chance
Rank 3: 30% chance
Decoy
Generate threat and attract the enemies’ attention
Rank 1: 10% threat
Rank 2: 20% threat
Rank 3: 30% threat
Money Magnet
Increases amount of looted money
Rank 1: 10%
Rank 2: 20%
Rank 3: 30%
Hardened
Reduces melee damage received
Rank 1 = -5% damage
Rank 2 = -10% damage
Rank 3 = -15% damage
Picklock
Enables you to open locked containers
Rank 1 = Open LV1 locks
Rank 2 = Open LV2 locks
Rank 3 = Open LV3 locks
Deeper Pockets
Increases the maximum backpack slots
Rank 1 = 2 Slots
Rank 2 = 4 Slots
Rank 3 = 6 Slots
Regeneration
Regenerates 15% HP per minute
Bulletproof
Reduces bullet damage
Rank 1 = -6% damage
Rank 2 = -12% damage
Rank 3 = -18% damage
Bone Breaker
Increases XP for breaking enemies’ bones
Rank 1 = XP x2
Rank 2 = XP x3
Rank 3 = XP x4
Backfire
Enemies receive damage for knocking you down
Rank 1 = x1 backfire damage
Rank 2 = x2 backfire damage
Rank 3 = x3 backfire damage
Custom Maintenance
Increases the durability of modified weapons
Rank 1 = 10% durability
Rank 2 = 20% durability
Rank 3 = 30% durability
Fence
Increase the prices of items you sell
Rank 1 = 10% sell price
Rank 2 = 20% sell price
Rank 3 = 30% sell price
Last Stand
Decreases damage received when health is below critical level
Rank 1 = -20% damage
Rank 2 = -40% damage
Rank 3 = -60% damage
Rebirth
Regenerates 20% HP per minute
This section will discuss some of the trophies in the game and how to get them. Self-explanatory trophies won't be tackled anymore.
The Whole World Went Away (Platinum)
Collect all other trophies.
One is all I need (Bronze):
Kill 5 Infected in a row with a single blow.
You need to successfully kill 5 infected in a row, with one shot each. Best done by joining the game of a lower level friend with your main, higher level character. Lower level zombies have lower health and thus, higher chances of getting one-shot. Decapitating, using one-shot weapons (developer weapon: Mindblowing Knife) or carefully-aimed shotgun shots are also helpful in getting one-shot infected kills.
Can’t touch this (Bronze):
Use a hammer to kill a series of 15 zombies without taking damage.
Again, best done by joining the game of a lower level friend with your main, higher level character. Lower level zombies have lower health and you should be able to kill them fairly easy. If you're going solo, try doing this early in the game as higher level zombies are more aggressive and harder to take down using only the hammer. Just target solo zombies. Knock them down and finish them with your hammer. If you're facing multiple ones, just run. As long as you don't take damage, you can ninja your way and assassinate lone targets without much problems.
Humanitarian (Bronze):
Kill 50 human enemies.
Moresby has some barricaded positions where punks regularly spawn. Just hunt them down again and again to unlock this.
Light my fire (Bronze):
Set 10 zombies on fire simultaneously.
The molotov will do the trick here. Best done in Moresby, get the attention of several zombies and step on top of trucks or ambulances. Let them gather and carefully throw a molotov near them.
10 heads are better than 1 (Bronze):
Kill 10 zombies in a row with headshots.
You must kill 10 zombies (strictly zombies only) in a row using headshots. Take note that the finishing blow must be headshots for this to count. It is recommended to use fully upgraded but unmodded guns to prevent accidental triggering of elemental damages. Just get the attention of several walkers and hop on top of elevated positions such as trucks, fences, vans, ambulances etc.
A taste of everything (Bronze):
Kill a zombie with 10 different melee weapons.
Just kill a zombie using any type of weapons you find and you'll unlock this.
To put it bluntly (Bronze):
Kill 250 zombies using blunt melee weapons.
These are heavy, unsharp weapons which can break enemy bones and require a good amount of stamina per swing. Sam B's the best character to do this since he's a blunt weapon specialist. Other characters can do this but preferably in the lower levels and with fully upgraded, modified blunt weapons. Kills made by thrown blunt weapons counts as well.
Hack & slash (Bronze):
Kill 250 zombies using edged melee weapons.
Easily acquired by Purna and Xian Mei, decapitate any enemy you find to get it counted. Kills made by thrown sharp weapons are counted as well.
Guns don’t kill but they help (Bronze):
Kill 250 zombies using firearms.
Purna's Rage skill do count towards this trophy but the easiest and most practical way of getting this trophy is by using the mounted machine gun in the terrace of the city hall (preferably after it was overrun by the undead). Kill all zombies in sight, reload the checkpoint then repeat.
Tae Kwon Leap (Bronze):
Kill 25 zombies with your bare fists.
Just target lone, unaware zombies then knock them down with a kick. Crouch down and deliver devastating blows to their faces to kill them.
I want one of those (Silver):
Customize 25 weapons.
Only modded (not upgraded) weapons will count. Thrown weapons such as Deo-bombs, Molotovs (created from workbench) and Meat Baits also count towards this.
Karma-geddon (Bronze):
Kill 50 zombies using a vehicle.
Recommended to be done as early as possible since higher level zombies have higher HP which will make them harder to kill in one go.
Catch! (Bronze):
Kill an Infected with a grenade blast.
The infected are those fast, noisy zombies that tend to rush you. Just knock them down with a jump-kick then lob a grenade near it to kill it.
Road Trip (Bronze):
Drive a total distance of 10 kilometers.
Just drive around using the van from the lighthouse or from the lifeguard tower (after repairing it). Trophy progress will update as you drive. Use this chance to run over zombies for the Karma-geddon trophy. Best done during lower levels since zombies are pretty much easy kills. Higher level zombies have more HP, making them harder to kill in one go.
Cardio (Bronze):
Travel a distance of 20 kilometers on foot.
Just walk around and explore as much as you want and you'll unlock this automatically.
Rootin’ Tootin’ Lootin’ (Gold):
Loot 5 Exceptional Weapons.
Exceptional weapons have orange colors in their names. These are randomly found as zombie loots or from chests. The only way to increase your chances of finding them more frequently is by purchasing Logan's Scavenger or Purna's Jackpot skills. Xian Mei and Sam B doesn't have equivalent skills that has the same benefit. In my playthrough, I was able to unlock this automatically without purchasing the mentioned skills.
Tis but a flesh wound! (Bronze):
Sever 100 limbs.
Use sharp weapons to sever enemy limbs easily.
There and back again (Silver):
Explore the entire island.
There are 72 points in the island, and even the interiors of buildings count towards these points. If you've been doing all the sidequests, you should be able to unlock this trophy as soon as you finish the prison area. This is also a known bugged trophy, as most people report that it stops at 71/72. A patch is promised by the developer but I haven't installed it yet so I can't vouch for its fix.
Ah! Spoiled meat! (Bronze):
Kill a Butcher using an axe.
You can use other weapons to whittle its HP down but the finishing blow should come from an axe.
On, no you didn’t (Bronze):
Kill a Ram using tackle skill.
The tackle skill is available to Sam B. Lure a Ram and dodge its charge attack. Use any conventional weapon to lower its HP then finish it off using your tackles. Take note that you must hit its wound on its back to deal damage.
Gesundheit! (Bronze):
Heal yourself with a medikit 100 times.
Swing them sticks (Silver):
Kill 150 enemies using Analog Fighting controls.
You can switch between analog and digital controls by pausing the game and going to Options. This takes time to get used to. For some reason, driving and shooting kills count towards this achievement. If ever it stops counting, you may want to resume killing using melee weapons and try shooting/running them over to see if it resumes counting.
Right 4 Life (Silver):
Complete act I with 4 different characters.
If you don't have enough real-life friends to play with, you can always visit forums and check if you can trade trophies with other players.
Busy, busy, busy (Silver):
Finish 75 quests cumulatively.
Check out the sidequests section of this guide for the individual walkthroughs of the quests.
Learning the ropes (Bronze):
Reach level 10.
Dedicated student (Bronze):
Reach level 25.
School of hard knocks (Silver):
Reach level 50.
You may reach LV50 only on your second playthrough. You should be around LV38-42 during your initial playthrough.
First! (Bronze):
Kill a Suicider with a grenade.
You can actually spot unaware suiciders most of the time, so just lob a grenade at them and watch them splatter. Also, you can shoot gas canisters should a suicider is nearby and you should still get this trophy.
Knock, knock (Bronze):
Breach a locked door with the first blow.
Practice, practice, practice.
Gotta find’em all (Bronze):
Find 60 collectibles.
There are around 140 collectibles in the game. Check the collectibles section of this guide for the complete list of items you can search and find. Personal Ids, Excerpts, Recordings, even Blueprints count towards this trophy.
Nearly there (Bronze):
Find 120 collectibles.
There are around 140 collectibles in the game. Check the collectibles section of this guide for the complete list of items you can search and find. Personal Ids, Excerpts, Recordings, even Blueprints count towards this trophy.
Steam Punk (Silver):
Create weapons to rival the gods of fire or thunder.
Just create a weapon using the Shock or Torch mods. The Shock Mod is a reward from the quest Black Hawk Down while the Torch Mod is a reward for completing Counsel of Despair.
Need a hand? (Bronze):
Join another player’s game.
Warranty Void if Used (Bronze):
Create a customized weapon.
Unlocked as soon as you create you first customized / modified weapon
Rageman (Bronze):
Kill 100 enemies with Fury attacks.
Cumulative until the end of the game. If you managed to get the upgrades to gain rage faster and to lower the required rage to activate your Fury skill, you can get this faster.
People Person (Bronze):
Play with 10 different co-op partners for at least 15 minutes each.
Ménage à trois (Bronze):
Complete 5 quests with 3 co-op partners.
Originality (Bronze):
Play in a co-op team of 4 different playable characters.
Together in the light (Bronze):
Complete 5 quests in a single co-op game with the game partners.
Going steady (Bronze):
Complete 25 quests while playing with at least one co-op partner.
Everybody lies (Bronze):
Use a large medkit to heal an injury of 5% or less.
You can burn yourself for a second then use a large medkit immediately.
Hell in paradise (Silver):
Complete act I.
No raccoons in here (Silver):
Complete act II.
King of the jungle (Silver):
Complete act III.
Banoi Redemption (Silver):
Complete act IV.
A very special day (Bronze):
Kill 250 zombies with modified weapons.
How many days exactly? (Bronze):
Play Dead Island at least 28 days after starting it for the first time.
Savior (Bronze):
Save 5 people besieged by zombies.
As you check the island, you may encounter trapped survivors besieged by zombies. Kill all zombies so you can talk to them earn some rewards. Some of these people can also open up new quests. Check the “Rescue” portion in this guide to find other besieged survivors. The Sidequests section will also cover quests given by rescued survivors.


 Fallout 4: How to Get the Locked Vault 111 Cryolater Gun Using Dogmeat
 Star Wars: The Force Unleashed 2 Walkthrough Video Guide in HD
 Top 10 Best PS3 Role Playing Games of All Time
 Pack Man Mission Guide GTA V
 How to Really Hide Folders Full of Questionable Content