Unofficial Crackdown 2 Guide by Michael Monette for
Players return to Pacific City in Crackdown 2. Buildings and infrastructure crumbling, the city is now in shambles. A large insurgent group called Cell fight to take control of the city during the day and hordes of lethal mutants roam the streets at night. As a biologically enhanced Agent working for Pacific City’s Agency, it’s your job to rid the city of its Freak problem and quash the Cell uprising. Our guide to Crackdown 2 comes complete with a Project Sunburst walkthrough and maps showing the location of every collectible in the game (all 925 of them!) as well every Vehicle and Wingsuit Stunt Ring. You’ll also find information on weapons, vehicles and a complete list of Xbox 360 achievements. Note: This guide was written based on the RUTHLESS difficulty level. The instructions and strategies contained within will still apply to a campaign played on a lower or higher difficulty level, but the amount of damage enemies deal and the amount of damage they can sustain may differ from what is described in the walkthrough.
On Foot Controls Left Bumper - Reload Weapon Left Trigger - Lock Target (Hold) Right Bumper - Throw Grenade/Object, Detonate Limpet Charge, Activate Floating Proximity Mine Right Trigger - Fire Weapon (Hold), Throw Object Left Stick - Move, (Click) Crouch Right Stick - Look/Aim, Precision Targeting, Jump (Hold) Y Button - Wingsuit, Use Turreted Weapon, Look At (Hold), Enter/Exit Vehicle B Button - Melee Attack, Ground Strike (Hold), Barge (Hold), Pick Up/Drop Object (Hold) A Button - Jump (Hold) X Button - Swap Weapon, Pick Up Weapon (Hold) D-pad UP - Orb Ping D-pad DOWN - Cancel Race (Hold) Back Button - Game Progress Screen, Call Helicopter Start Button - Intel Screen Vehicle Controls Left Bumper - Fire Vehicle Weapon (Hold), Decrease Helicopter Height Left Trigger - Brake/Reverse (Hold), Fire Left Helicopter Turret Right Bumper - Next Music Track, Increase Helicopter Height Right Trigger - Accelerate (Hold), Fire Right Helicopter Turret Left Stick - Steer, Air Control, Helicopter Speed Boost (hold) Right Stick - Look Behind (Hold) Y Button - Enter/Exit Vehicle B Button - Horn (Hold), Fire Vehicle Weapon (Hold), Jump (Hold, SUV Only) A Button - Handbrake D-pad UP - Orb Ping D-pad DOWN - Cancel Race (Hold) D-pad LEFT - Decrease Music Volume D-pad RIGHT - Increase Music Volume Back Button - Game Progress Screen, Call Helicopter Start Button - Intel Screen 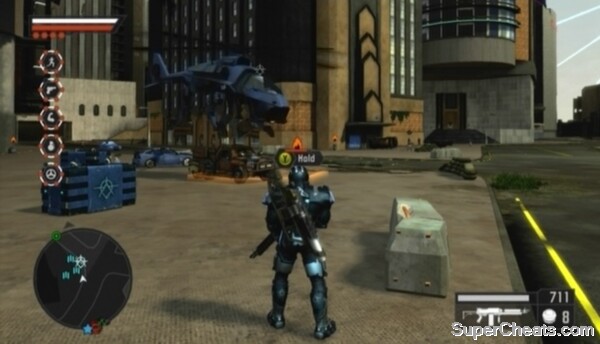
Controls
You can develop your Agent in five different areas: Agility, Strength, Firearms, Explosives and Driving. Each time you level one of these skills your Agent will gain new abilities and become more proficient in that area. At the time of this writing, the level cap for each skill is five.
Agility
The Agility skill determines your Agent’s running speed and how high he can jump. Level the Agility skill by collecting the Agility Orbs and Renegade Agility Orbs scattered throughout the city and by completing Rooftop Races and Wingsuit Stunt Rings.
Check out the “Agility Orbs” and “Renegade Orbs” sections of this guide for maps showing the locations of all 500 Agility Orbs and 30 Renegade Agility Orbs respectively.
Agility 2 - Running speed and jump height increase (about 15 feet).
Agility 3 - Running speed and jump height increase (about 20 feet).
Agility 4 - Running speed and jump height increase (about 25 feet).
Agility 5 - Unlock Wingsuit (hold Y while in the air to activate) and Wingsuit Stunt Rings.
Strength
Your Agent’s Strength skill determines his total number of hitpoints as well as what objects he can pick up and how far he can throw them. Each Strength skill level gained will unlock an additional health bar (denoted by a red circle below the red health meter in the top-left corner of the screen) and a new skill.
Develop your Agent’s Strength skill by killing Freaks and Cell soldiers with melee attacks, thrown objects, and the Barge Attack and Ground Strike abilities.
Strength 2 - Health increase, ability to lift some heavy objects and wield them as weapons
Strength 3 - Health increase, ability to remove and wield turreted weapons
Strength 4 - Health increase, unlock Barge Attack (hold B while sprinting)
Strength 5 - Health increase, unlock Ground Strike (hold B while in mid-air)
Firearms
Levelling your Agent’s Firearms skill requires killing Freaks and Cell soldiers with non-explosive weapons. Each time you gain a Firearms skill level, new Agency weapons will be unlocked and from then on available whenever you deploy your Agent.
Increasing the Firearms skill will also improve your Agent’s lock on function when targeting enemies.
Firearms 2 - Unlock Assault Rifle, Sniper, UV Shotgun
Firearms 3 - Unlock Ultra SMG, Ultra Shotgun, Machine Gun
Firearms 4 - Ultra Assault Rifle, Harpoon
Firearms 5 - Unlock Turret Machine Gun, AM Sniper
Explosives
Improve your Agent’s Explosives skill to increase the size and impact of explosives, as well as unlock grenades and explosive weapons. You can level your Agent’s Explosives skill by killing Freaks and Cell soldiers with grenades, explosive weapons and explosive objects (barrels, canisters, etc.).
Explosives 2 - Unlock UV Grenades, Satchel Charge
Explosives 3 - Unlock Proximity Mines, Flocket Launcher
Explosives 4 - None
Explosives 5 - Unlock Turret Rocket Launcher, Turret Flack
Driving
Levelling the Driving skill won’t offer any enhancements to your Agent’s driving abilities, but each level gained will unlock a new Agency vehicle you can from then on request when deploying your Agent.
Level your Agent’s Driving skill by running over Freaks and Cell soldiers, completing Road Races and Vehicle Stunt Rings, collecting Renegade Driving Orbs or by performing tricks (barrel rolls, J-Turns, etc.). Check out the “Vehicle Stunt Rings” and “Renegade Orbs” sections of this guide for maps showing the locations of all 30 Vehicle Stunt Rings and all 15 Renegade Driving Orbs respectively.
Driving 2 - Unlock Agency Buggy
Driving 3 - Unlock Agency Supercar
Driving 4 - Unlock Agency SUV
Driving 5 - Unlock Agency Tank
You can equip your Agent with unlocked weapons on the Agent redeployment screen or by requesting a weapon drop at an Agency Landing Zone.
Unlock Agency weapons by levelling your Agent’s Firearms and Explosives skills. You’ll unlock two or three new weapons with each skill level you gain (save for Explosives level four).
Weapons used by Cell soldiers are stronger than Agency weapons. To unlock a Cell weapon, you must acquire the weapon from a dead Cell soldier and then bring it to the marker at an Agency Landing Zone to store it. Once you’ve done that, you can then select the weapons at a Landing Zone or when redeploying your Agent.
Unlock Cell weapons by delivering them to the marker at Agency Landing Zones.
Agency Landing Zones are created when you capture certain Tactical Locations. These Landing Zones are denoted on the tracker and map (when the “Tactical Locations” objective is selected) by an Agency emblem icon.
Agency Weapons
SMG
Unlock: Firearms Level 1
Bullet Damage: 1
Effective Range: 4
Fire Rate: 8
Shotgun
Unlock: Firearms Level 1
Bullet Damage: 6
Effective Range: 2
Fire Rate: 2
Assault Rifle
Unlock: Firearms Level 2
Bullet Damage: 2
Effective Range: 6
Fire Rate: 6
Sniper
Unlock: Firearms Level 2
Bullet Damage: 8
Effective Range: 8
Fire Rate: 2
UV Shotgun
Unlock: Firearms Level 2
Bullet Damage: 8
Effective Range: 1
Fire Rate: 2
Feature: UV - Super effective against Freaks, non-lethal against human targets
Ultra SMG
Unlock: Firearms Level 3
Bullet Damage: 3
Effective Range: 5
Fire Rate: 10
Ultra Shotgun
Unlock: Firearms Level 3
Bullet Damage: 8
Effective Range: 2
Fire Rate: 1
Machine Gun
Unlock: Firearms Level 3
Bullet Damage: 7
Effective Range: 6
Fire Rate: 6
Ultra Assault Rifle
Unlock: Firearms Level 4
Bullet Damage: 5
Effective Range: 7
Fire Rate: 4
Harpoon
Unlock: Firearms Level 4
Bullet Damage: 8
Effective Range: 10
Fire Rate: 2
AM Sniper
Unlock: Firearms Level 5
Bullet Damage: 9
Effective Range: 9
Fire Rate: 1
Turret Machine Gun
Unlock: Firearms Level 5
Bullet Damage: 9
Effective Range: 8
Fire Rate: 6
Flocket Launcher
Unlock: Explosives Level 3
Bullet Damage: 7
Effective Range: 5
Fire Rate: 2
Turret Rocket Launcher
Unlock: Explosives Level 5
Bullet Damage: 7
Effective Range: 7
Fire Rate: 2
Turret Flack
Unlock: Explosives Level 5
Bullet Damage: 10
Effective Range: 5
Fire Rate: 1
Grenade
Unlock: Explosives Level 1
Damage: 5
Blast Radius: 5
Mag
Unlock: Explosives Level 1
Damage: 1
Blast Radius: 1
Feature: Magnetic
UV Grenade
Unlock: Explosives Level 2
Damage: 5
Blast Radius: 5
Feature: UV - Super effective against Freaks, non-lethal against human targets
Satchel Charge
Unlock: Explosives Level 2
Damage: 5
Blast Radius: 5
Feature: Manual Trigger - Hold RB to detonate
Proximity Mine
Unlock: Explosives Level 3
Damage: 5
Blast Radius: 5
Feature: Auto-Detonate - Detonates when target is near
Cell Weapons
Ingalls XGS
Unlock: Acquire from Cell and store at an Agency Landing Zone
Bullet Damage: 2
Effective Range: 5
Fire Rate: 6
Ingalls AL-107
Unlock: Acquire from Cell and store at an Agency Landing Zone
Bullet Damage: 4
Effective Range: 6
Fire Rate: 6
Demp 90-A
Unlock: Acquire from Cell and store at an Agency Landing Zone
Bullet Damage: 7
Effective Range: 3
Fire Rate: 2
Mach HMG-120
Unlock: Acquire from Cell and store at an Agency Landing Zone
Bullet Damage: 8
Effective Range: 7
Fire Rate: 4
Sniper SX-1A
Unlock: Acquire from Cell and store at an Agency Landing Zone
Bullet Damage: 10
Effective Range: 10
Fire Rate: 1
Grenade Launcher
Unlock: Acquire from Cell and store at an Agency Landing Zone
Bullet Damage: 8
Effective Range: 6
Fire Rate: 2
Rocket Launcher
Unlock: Acquire from Cell and store at an Agency Landing Zone
Bullet Damage: 8
Effective Range: 6
Fire Rate: 2
Homing Launcher
Unlock: Acquire from Cell and store at an Agency Landing Zone
Bullet Damage: 7
Effective Range: 5
Fire Rate: 1
Cluster Grenade
Unlock: Acquire from Cell and store at an Agency Landing Zone
Damage: 8
Blast Radius: 10
Grenade
Unlock: Acquire from Cell and store at an Agency Landing Zone
Damage: 8
Blast Radius: 10
Quacker
Unlock: Acquire from Cell and store at an Agency Landing Zone
Damage: 10
Blast Radius: 10
Feature: Manual Trigger - Hold RB to detonate
There are five unlockable Agency vehicles. You’ll unlock each of these vehicles when your Agent’s Driving skill reaches a certain level.
One unlocked vehicle can be selected when deploying your Agent. You can also request an unlocked vehicle be dropped by helicopter at an Agency Landing Zone.
You can unlock Cell vehicles and some civilian vehicles by first acquiring the vehicle and then delivering the vehicle to an Agency Landing Zone. Once at a Landing Zone with the vehicle, drive onto the Agency marker, get out of the vehicle, then press the Back button to call the helicopter and select the “Store Vehicle” option. As with the unlockable Agency vehicles, once unlocked these vehicles can be deployed with your Agent or requested at an Agency Landing Zone.
Unlock Cell and civilian vehicles by storing them at Agency Landing Zones.
Agency Landing Zones are created when you take over certain Tactical Locations. These Landing Zones are denoted on the tracker and map (when the “Tactical Locations” objective is selected) by an Agency emblem icon.
Unlockable Agency Vehicles
Cruiser
Unlock: Driving Level 1
Top Speed: 6
Acceleration: 6
Armor: 6
Buggy
Unlock: Driving Level 2
Top Speed: 8
Acceleration: 10
Armor: 4
Feature: Machine Gun - Hold RB to fire, Right Stick to aim
Supercar
Unlock: Driving Level 3
Top Speed: 10
Acceleration: 10
Armor: 7
Feature: Scoop - Push other cars out of the way without losing speed
SUV
Unlock: Driving Level 4
Top Speed: 8
Acceleration: 7
Armor: 7
Feature: Jump - Press B to jump (hold for a higher jump), hold B to stick to surfaces
Tank
Unlock: Driving Level 5
Top Speed: 5
Acceleration: 3
Armor: 10
Feature: Rocket Launcher - Press RB to fire
Before your Agent can be deployed to Pacific City, you must run through a few diagnostics programs. Once your HUD is online, use the Right Stick to move the target reticule at the centre of the screen onto the four red lights on the sides of the shielded door. You can then invert the aiming style by pressing the B button when prompted or leave things as they are by pressing the A button to continue.
Once you've completed the targeting program, the shield will lower and you will be instructed to jump off the ledge through the doorway. Run to the ledge and press and hold the A button to jump. Your Agent will take severe fall damage when he lands, but not enough to kill him. Once your Agent's health is completely restored, move on to the agility zone. Follow the white trail up the steps and collect the Agility Orb at the top.
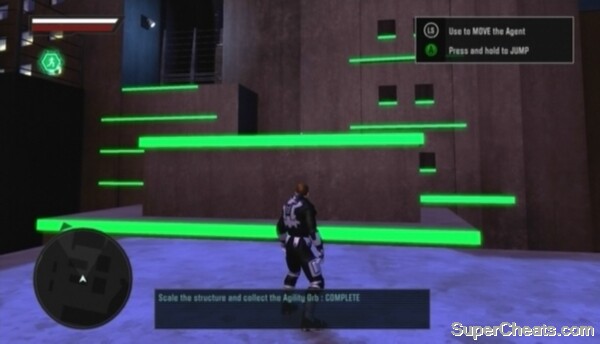
Exit the Agility Zone to move on to the next test.
Your next task is to leave the area. First, you must stand on the switch on top of the platform to open the exit and then pass through the door at the other end of the room before the door closes. Follow the white trail onto the first platform and stand on the marker to open the door. Then, jump over to the top of the platform north of the marker and from there to the green ledges at the other end of the room. Hold the A button when jumping to jump higher and travel further. Your Agent will automatically grab hold of a green ledge when he reaches one. While hanging from a ledge, press and hold the A button again to jump up to a higher ledge and then again to reach the top of the platform.
Hit the marker beyond the door to move on to the firearms program. Make your way to the white blip on the Mini Map and pick up the SMG there by holding the X button. Use free aim to kill the idle Freak nearby. You then must use precision aim by locking on the Freak that appears and using the Right Stick to target the Freak's head or legs. Shoot the Freak's head or legs while locked on to continue. Next up is a free-for-all. Pick up the Shotgun that appear and blast the Freaks to complete the program.
Follow the white trail to the next area to start the hand-to-hand combat program. Beat down the first Freak with the B button and then take on the group of Freaks that appear.
Once you're finished with close quarters-combat, pick up the Grenades that appear (at the bullets icon on the Mini Map) and use them to destroy the group of Freaks at the centre of the zone. Lock on with LT and press RB to throw a grenade. Kill all of the Freaks with grenades to complete the program.

Kill the Freaks in the manner specified.
After the explosives test, follow the white trail out of the area and get in the Agency car there. Standby and an Agency Helicopter will pick up the car and transport your Agent to Hope Springs.
Before you can get started on Project Sunburst, you must recover the Beacon Prototype from the Cell Stronghold in Springside Quay. The Springside Quay stronghold consists of two Tactical Locations, both of which are marked on the tracker in the bottom-left corner of the screen with separate red “C” icons.
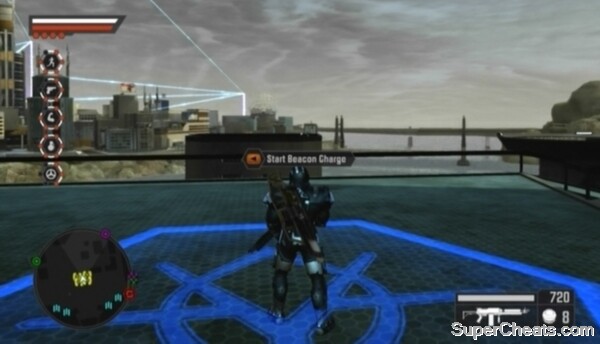
To initiate a tactical assault on the stronghold, you must stand on the Cell symbol the icon on the tracker is pointing to and press the Back button to call for an Agency Helicopter. Once you've done that, enemy soldiers will begin to enter the area. Each enemy will appear on the tracker as a red blip.
Press the Back button while standing on a Tactical Location marker to initiate an assault.
To take control of a Tactical Location once you've initiated an assault, you must kill enough of the Cell soldiers that spawn to deplete the meter in the top-right corner of the screen.
As you have yet to develop any of your Agent's skills, you may find it tough securing these first couple of locations. If your Agent is killed, you can have him redeployed at the nearest drop spot so you can get right back into the action. This may mean reinitiating the assault, however.
Tactical Location: Springside Quay
The first Tactical Location at the docks entrance is littered with explosive materials. Use these to your advantage. A flame icon appears above explosive items, so target these items when one or more enemies are close by and set it off with gunfire.
Your Agent is currently equipped with an SMG and Shotgun. The Shotgun is a powerful weapon that works best at close-range. Because your Agent's health and shield are low, it's best to stick with your SMG and Grenades when facing more than one soldier. If there's a lone soldier, you can run up with your Shotgun and blow him away.
Once you've helped the Peacekeepers secure the docks entrance location, make your way to the next Tactical Location marker further south.
Tactical Location: Container City
The marker for this location is on the central elevated platform. Clear all of the enemies surrounding the marker before calling a helicopter.
Agents with a level three Strength skill can remove turreted weapons from their housing. Until then, using a turret will leave you immobile and vulnerable to enemy gunfire.
There are two turrets on the central platform, but these are of limited use at this point since you're left immobile while using one. Once you've increased your Agent's Strength skill to level three, he'll be able to detach turreted weapons and carry them around.
If you're playing solo, it's best to drop down from the elevated platform once you've called the helicopter, as using one of the turrets on the platform would leave you open to enemy gunfire. If you're with one or more other players, one or two of you can get on the turrets on the central platform while the others sweep the area below.
There are several explosives in this area, so use them to your advantage if there are enemies nearby.
If your Agent's shield is down and his health is low, duck into one of the open containers surrounding the central platform and remain inside until his health and shield are back up. There's one such container just north of the central platform (one of the blue containers by the makeshift ramp). Just make sure you have your Shotgun equipped to deal with any soldiers that come after you.
Once you've captured both Tactical Locations, your next objective is to start activating the three Absorption Units tied to the Beacon inside the Power Station. Before you get to that, it would be worth upgrading all of your Agent's Skills to at least level two. When you attain Firearms level two you'll unlock the Assault Rifle and UV Shotgun, two weapons that serve you well when it comes time to tackle the next objective.

Using non-explosive weapons to kill Cell soldiers and Freaks will increase your Agent's Firearms skill.
Upgrading your Agent's Agility skill requires collecting the green Agility Orbs scattered around the city. There are many easy-to-reach Agility Orbs around the docks; you'll need to collect about 10 to attain level two -- less if you're playing on the Tough or Fragile difficulty levels. This guide includes a map showing the locations of all 500 Agility Orbs in Pacific City, so refer to the “Agility Orbs” section before you get to collecting.
Although after detonating the Power Station Beacon you can tackle the remaining eight Beacons in any order you wish, it is highly recommended that you detonate the remaining Beacons in the order they are presented in this guide.
Crackdown 2 is an open world game, but some parts of the city are rougher than others. As such, you'll want to take on the Beacons in the order the game instructs you to via the flashing Absorption Unit icons on your map and tracker.
Once you clear all of the Beacons in Hope Springs, your Agent will be better equipped to survive Green Bay and then Unity Heights. Later Beacon deployment areas require a skilled Agent with powerful weapons, so it's best to work your way up.
Before taking on this objective, make sure you've levelled all of your Agent's skills to at least level two. You'll unlock the Assault Rifle and UV Shotgun at Firearms level two and UV Grenades at Explosives level two. UV weapons are highly effective against Freaks. You'll be facing a mess of Freaks when you go on to defend the Beacon after activating all three Absorption Units, so the UV Shotgun and UV Grenades will definitely come in handy.
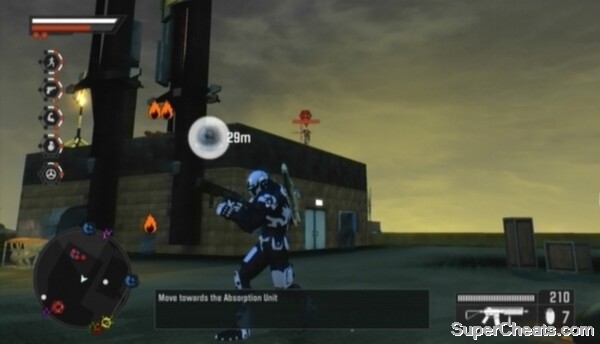
Before the Beacon can be delivered to the Power Station and detonated, you must activate a network of three Absorption Units to power it. The three units tied to the Power Station Beacon are on the northeast side of southern Hope Springs.

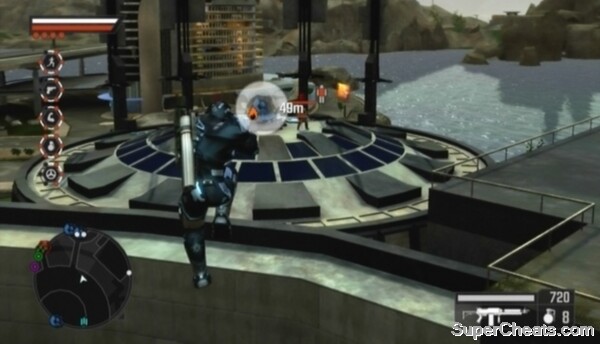
Stand on one of the platforms surrounding the Absorption Unit until the meter in the top-right corner of the screen is completely full to activate the unit.
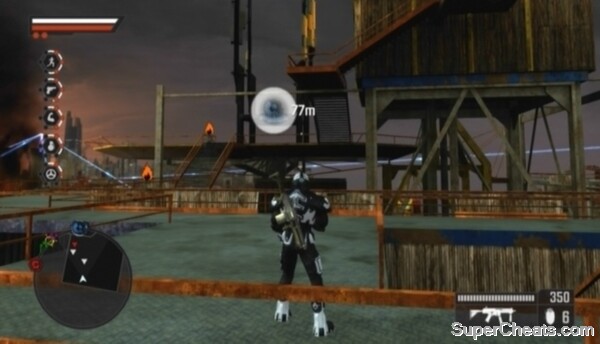
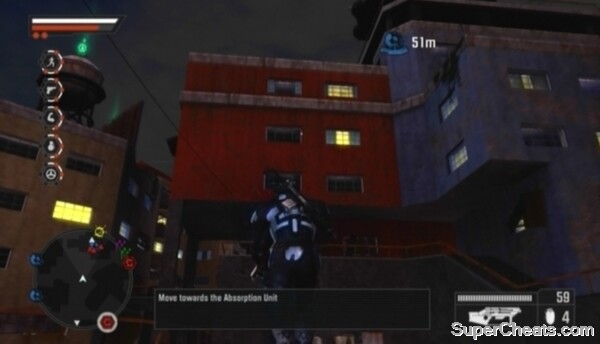
Your current objective is highlighted on the tracker in the bottom-left corner of the screen. To activate an Absorption Unit, you must first get to it. Absorption Units are typically high up on buildings and other platforms and surrounded by Cell soldiers. Once you've reached the unit, eliminate any enemies nearby and then stand on one of the configuration platforms attached to the unit until the meter in the top-right corner of the screen is completely full to bring it online.
Some Absorption Units can be hard to reach, so make sure your Agent's Agility skill level is at least level two (level three is ideal) before getting started.
Absorption Unit 1
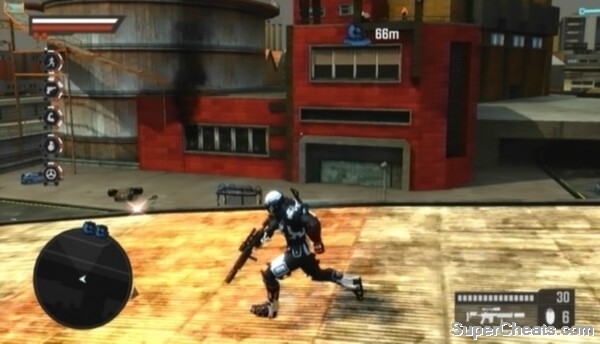
This is the east-most unit on your map. The unit is on top of the fenced-in industrial building. Pass through the opening along the wall on the east side of the building and then start climbing the stairs along the south side of the building to reach the roof.

Absorption Unit 1
Jump from the stairs over to the Absorption Unit and kill any Cell soldiers nearby. Stand on one of the platforms surrounding the Absorption Unit until the meter in the top-right corner of the screen is completely full to activate the unit.
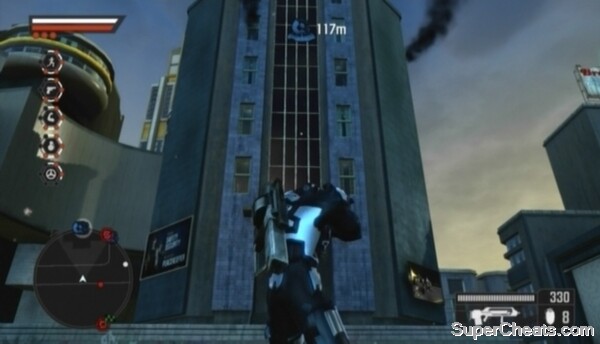
Absorption Unit 2
This unit is on top of a red industrial building. Climb up the ridges next to the windows along the east side of the building to reach the lower roof and then climb up the ridges to the north to reach the second Absorption Unit.
Absorption Unit 2
Absorption Unit 3
The final unit is at the end of a bridge next to the Purgery Chemical Technologies building. To reach this unit, head up the stairs along the side of the building across the street and then jump up to the platform to the west. Ascend using the column of windows to the north to reach higher ground and then cross the bridge over to the Absorption Unit.
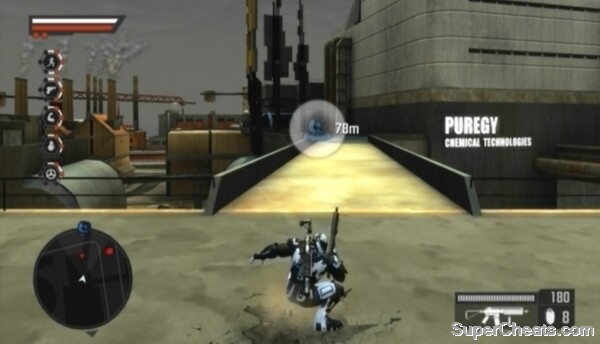
Absorption Unit 3
Power Station Beacon
Before getting started, ensure your Agent is equipped with an Assault Rifle, UV Shotgun and UV Grenades. You can switch your Agent's weapons at an Agency Landing Zone or by selecting the “Extraction” option in the System section of the Intel Screen and redeploying him.
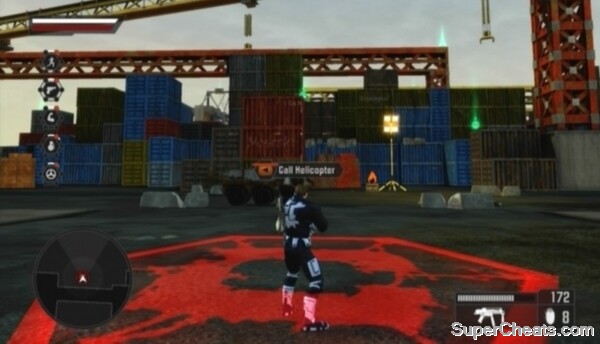
Once you've activated all three Absorption Units and your Agent is outfitted with the appropriate weaponry, make your way to the white blip on the tracker in the bottom-left corner of the screen. Stand on the Agency symbol there and a white trail will appear. Follow this white trail and it will lead you to the entrance to the cavernous Freak Lair underneath the power station.
Continue following the white trail down the step-like platforms and then drop down to the bottom of the tower. If your Agent isn't packing a UV Shotgun, you can find one by the weapon crate at the south-most bullets icon on the tracker.
When ready, stand on Drop Point marker in the middle of the lair and press the Back button to signal an Agency Helicopter to drop the Beacon inside.

UV weapons are highly effective against Freaks.
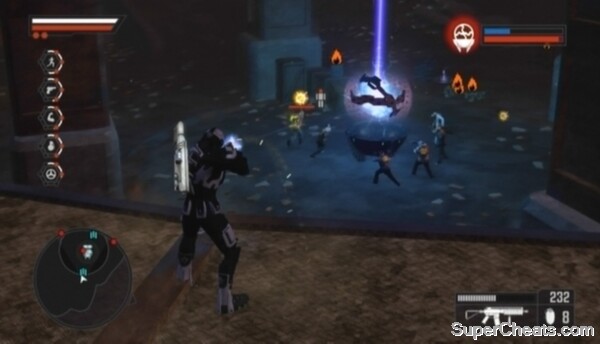
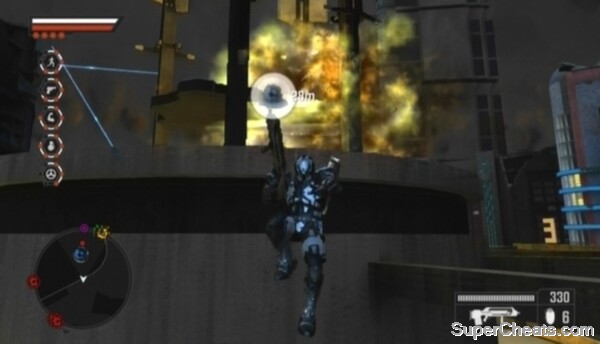
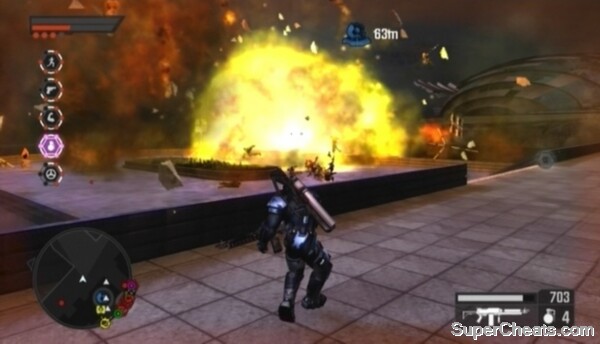
Once the Beacon is set, you must defend it until the blue meter in the top-right corner of the screen is completely full. The meter will fill overtime, so you just need to keep the Freaks off the Beacon until it detonates. The red meter below the blue meter represents the Beacon's condition. You'll fail the objective if the Freaks manage to destroy the Beacon before it detonates.
Though there are many Freaks in this lair, the only Freaks you have to worry about are those that appear on the tracker as red blips. These Freaks have a glowing symbol above their heads; they'll stand back and throw projectiles at the Beacon, damaging it. The other Freaks in the lair may make it difficult to move around, but they deal a negligible amount of damage to the Beacon, so try your best to ignore them and focus on taking down the attacking Freaks that appear on your tracker.
UV weapons are highly effective against Freaks. One shot from a UV Shotgun will destroy a Freak and any others close by. The UV Shotgun has very limited range, so get up close to your target before firing. UV Grenades work well for clearing out large crowds of Freaks (as do standard Grenades), and you can also target the explosive items scattered about the lair.
Continue sprinting around the lair and blasting attacking Freaks with your UV Shotgun to quickly put them down. If you run out of ammo, switch to your Assault Rifle and continue mowing down the attackers. If your Assault Rifle is out of ammo, look for another weapon by the weapon crates (the bullets icons on your tracker) around the Beacon.
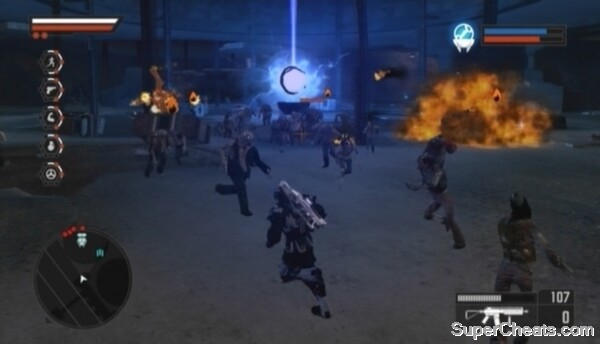
Defend the Beacon until it detonates.
Continue defending the Beacon until the blue meter in the top-right corner of the screen is completely full.
Defending the Power Station Beacon
Absorption Unit 1
The first unit tied to the Weapons Factory Beacon is in the northeast quarter of southern Hope Springs. Make your way to the blinking Absorption Unit icon on your tracker in the bottom-left corner of the screen to locate the first unit in the network.
This unit is on the rooftop of the industrial building with a “Hi-Power” sign above its main entrance. To reach the top of this building, start by jumping onto the bus shelter next to the southern entrance and then from there jump to the pipes attached to the southern side of the building. Once on top of the pipes, jump over the railing and head through the alley to the east. You can ascend to the roof from here using the black, protruding structures along the west side of the building.
Absorption Unit 1
Because you are near a Tactical Location, there will be many Cell soldiers on the roof of this building. Take the time to clear them out before activating the Absorption Unit. The rooftop is littered with explosive objects, so use these to your advantage. You can secure the Tactical Location here afterward if you are so inclined.
Absorption Unit 2
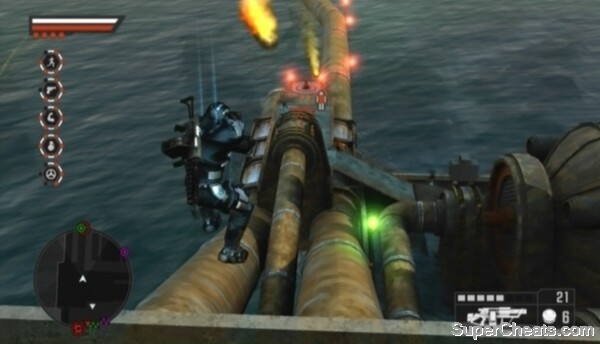
This next unit is a bit of a pain to get to. It's on the south-most rig in the water southeast of southern Hope Springs. You'll have to cross the first two rigs to get to the third where the Absorption Unit is. Each rig is rife with Cell soldiers, so make sure your Agent is equipped with an Assault Rifle, Shotgun and Grenades. You can switch your Agent's weapons at an Agency Landing Zone or by selecting the “Extraction” option in the System section of the Intel Screen and redeploying him.
To get to the first rig, you can either swim out to it or cross the large piping attached to it. It's best to swim to it, since you'll no doubt have Cell soldiers firing at you if you attempt to cross the pipe.
Fight your way to the other end of the first rig and jump to the suspended stairs attached to the second. The second rig is crawling with Cell soldiers. Since you'll be fighting in close quarters, it's best to go at these guys with your Shotgun
Keep an eye on your tracker as you move toward the south end of the rig. White blips denote enemies that are not yet aware of your presence, while red blips denote enemies who are on to you. Further, triangular blips on the tracker denote enemies who are either above or below you, depending on which way the tip of the blip is pointing.
Absorption Unit 2
When a group of enemies becomes aware of your presence (usually when one of them fires a flare), they often cluster together when trying to reach you. This is where grenades are especially useful. The dumb-as-rocks AI very rarely scatters when a grenade is thrown, so you can often score multiple kills with a single, well-thrown grenade.
Fight your way to the top level of the second rig. The stairs at the south end of the top level lead to the third rig. Mind the gap.
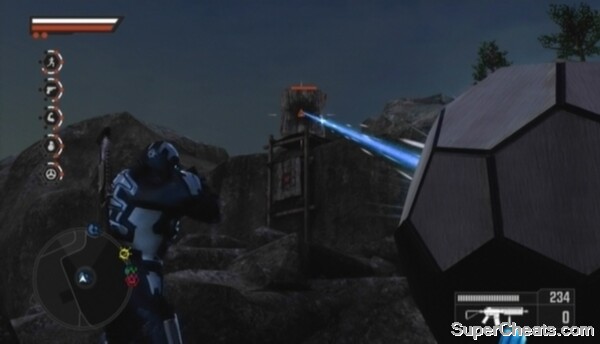
There are many Cell soldiers in the area surrounding the Absorption Unit. Since you're more in the open now, equip your Assault Rifle and start picking off enemy soldiers from afar. If your Agent's health is low, fallback down the stairs and remain there until his health is restored before heading back up to continue the fight. As per usual, there are plenty of explosive materials dotting the area, so use these to your advantage if there are enemies nearby them.
When the area is clear, head for the Absorption Unit on the platform in the northwest corner of the rig. Eliminate any remaining enemies nearby and then stand on one of the platforms until you've activated the unit.
Absorption Unit 3
The final unit is on the east-most bridge between northern and southern Hope Springs. It's on top of the platform midway down the bridge. There is a group of Cell soldiers surrounding the unit; they'll fire down at you as you approach, so quickly make your way to the series of red ridges leading up to the middle of the platform and start climbing.

Absorption Unit 3
Once on the platform, use your Assault Rifle and Grenades to take down the enemy soldiers there and then get to activating the unit.
Weapons Factory Beacon
Before getting started, ensure your Agent is equipped with an Assault Rifle, Machine Gun (go with a UV Shotgun if you don't yet have this weapon unlocked) and UV Grenades. You can switch your Agent's weapons at an Agency Landing Zone or by selecting the “Extraction” option in the System section of the Intel Screen and redeploying him.
The Beacon deployment area is inside the weapons factory on the island east of southern Hope Springs. Cross the ruined bridge over to the island and make your way to the weapons factory at the north end. To get inside the factory, you must climb the rocks surrounding the tower to get to the opening at the top of the tower. The rocks on the east side of the tower are the easiest to climb.
Once you've made it up to the tower, ascend to the top using the grooves around the tower. Use the platforms all along the walls of the inside of the tower to descend to the Freak Lair without suffering fall damage. When you've made it to the bottom, stand in the marker and call the helicopter to get started.
There are two different types of attacking Freaks in this lair: the projectile-throwing Freaks you encountered in the Power Station lair and a new, exploding type. These new Freaks will attempt to run at the charging Beacon and explode to damage it. These explosions deal modest damage and just one bullet is enough to detonate these exploding Freaks, so there's not much to worry about.
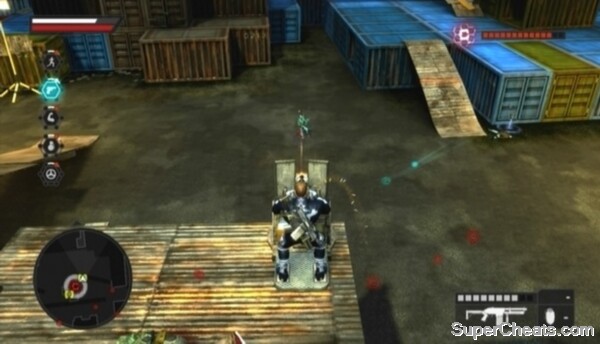
Stand on the circular walkway while defending the Beacon.
The best way to go about defending this Beacon is to remain on the circular walkway that's suspended above the bottom floor and take down attacking Freaks from there. The exploding Freaks will enter the lair from the entry points on the bottom floor and the projectile-throwing freaks from the entry points along the side of the circular walkway.
Not only does remaining on the circular walkway protect you from the garden variety Freaks below, but it also puts you in a good position to take down both types of attacking Freaks with your Assault Rifle.
Keep an eye on your tracker for red, upside down triangles, as these will denote exploding Freaks below you if you're standing on the walkway. You just need to hit these Freaks with one bullet to detonate them, so get on that as soon as they enter the area and then get back to clearing any projectile-throwing Freaks on the walkway.
Continue sprinting around the circular walkway, gunning down any projectile-throwing Freaks that appear on the walkway and any exploding Freaks that appear below, until the blue meter in the top-right corner of the screen is completely full and the Beacon detonates.
Defending the Weapons Factory Beacon
Absorption Unit 1
This first unit is at the northeast end of northern Hope Springs. This one is easy to reach. Just make your way to the blinking Absorption Unit icon on your tracker and get onto the roof of the building there. Eliminate the Cell soldiers surrounding the unit and then stand on one of the configuration panels until you've activated the unit.
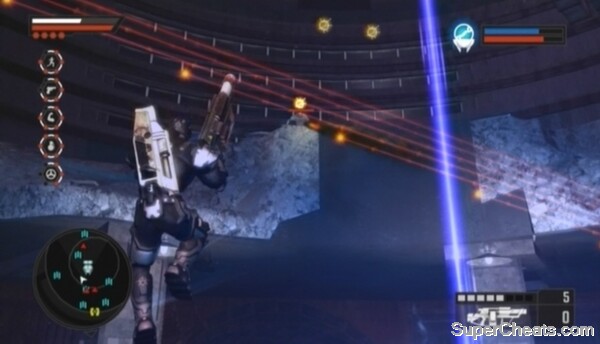
Though you've activated this unit, there's a makeshift barrier blocking the power beam now emitting from it. You must demolish this barrier so the unit can power the Beacon. Follow the power beam emitting from the unit to spot the barrier.
Demolish the barrier blocking the activated unit's power beam.
There are a few ways you can go about tearing down the barrier. If you've unlocked the Flocket Launcher weapon (by levelling your Agent's Explosives skill to level three), you can simply fire a single rocket at the barrier to knock it down. If you don't have such a weapon, stand on the rocks directly below the barrier and either throw a grenade up there or throw an explosive object and shoot it in mid-air when it reaches the barrier.
Absorption Unit 2
This unit is up on one of the hills surrounding Mason's Quarry. Getting to it is a bit tricky. You'll need climb out of the quarry west of the Absorption Unit icon on your tracker to get onto the hill.
Inside the quarry, get onto the lower ridge and sprint over to the large boulder partway down. Jump onto this boulder and then onto the middle ridge. Then, sprint to the southern end of the middle ridge and jump up the rocks there to reach the hill.
Eliminate the Cell soldiers surrounding the platform and toss a grenade or two onto the platform to detonate the explosive barrels there. When the area is clear, stand on one of the configuration platforms until you've activated the unit.
Reaching Absorption Unit 2
Absorption Unit 3
The final unit of this network is on top of a curved, red-bricked building at the north end of southern Hope Springs. You can scale to the top of the building by climbing the last column of windows in the southeast corner. Make sure you're climbing the correct column, because if your Agent's Agility skill isn't high enough you'll need the tan protrusion above the column to make it to the top.
Take down the Cell soldiers surrounding the Absorption Unit and then get to activating it.
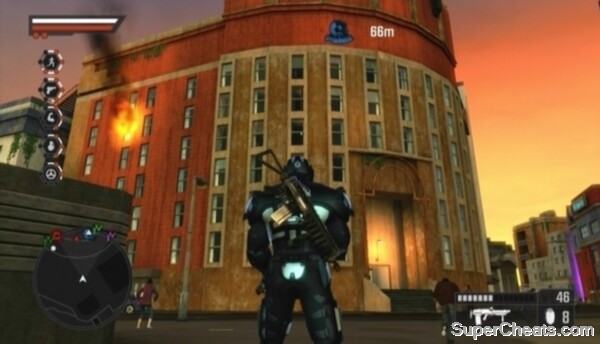
Absorption Unit 3
Mason's Quarry Beacon
Before getting started, ensure your Agent is equipped with an Assault Rifle, UV Shotgun and UV Grenades. You can switch your Agent's weapons at an Agency Landing Zone or by selecting the “Extraction” option in the System section of the Intel Screen and redeploying him.
The Beacon deployment area is inside the cavern accessible from the middle ridge in Mason's Quarry. Get onto the lower ridge and sprint over to the large boulder partway down. Jump onto this boulder and then onto the middle ridge. Start south once on the middle ridge and turn left when you reach the cave entrance.
Drop down to the Beacon Drop Point marker in the middle of the cavern and press the Back button to signal to the helicopter.
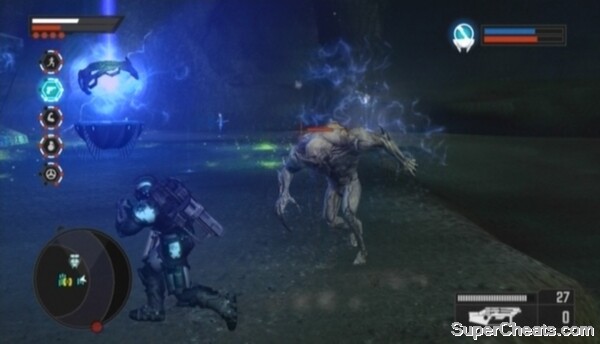
The attackers in this lair are large, agile Freaks that throw acidic projectiles. These Freaks will jump onto one of the rock columns surrounding the Beacon and throw projectiles at the Beacon from atop the column.

Use the UV Shotgun to blast attacking Freaks perched on the rock columns.
As per usual, attacking Freaks will appear as red blips on your tracker. When one of these Freaks appears, follow the red dot to the Freak's perch, then jump up and blast the Freak with your UV Shotgun. All it takes is one well-aimed shot to blow the Freak away. The UV Shotgun has limited range, so make sure you're close enough.
While the Beacon charges, continue sprinting around the area to avoid unmarked Freaks and use your UV Shotgun to knock attackers off of the rock columns as they appear. Although it's best to ignore common Freaks and focus on eliminating attackers, it might be worth throwing a couple of UV Grenades when the Freaks are dense to give yourself more room to move around.
Keep this up until the blue meter in the top-right corner of the screen is completely full to detonate the Beacon.
Defending the Mason's Quarry Beacon
Ensure your Agent is equipped with an Assault Rifle, Sniper Rifle (or Flocket Launcher if you've levelled your Agent's Explosives skill to level three) and Grenades before setting out to activate this network.
Absorption Unit 1
Look for this unit on a platform alongside the beach at the west end of southern Green Bay. Toss a Grenade onto the platform or shoot one of the explosive barrels to kill the Cell soldiers guarding the unit.

Absorption Unit 1
The biggest threat here is the armoured, Rocket Launcher-wielding Cell soldier on the rock formation south of the platform. Use your Sniper Rifle or Flocket Launcher to take him down. He's armoured, so it'll take quite a few hits with a Sniper Rifle to kill him. Aim for his head. Jump or dodge to the side to avoid incoming rockets if necessary.
Absorption Unit 2
This unit is on a suspended platform at the end of the boardwalk along the south coast of southern Green Bay. The start of the boardwalk is just off the street that runs alongside the beach.
A group of Cell soldiers will appear as you near the gazebo; a couple of well-thrown Grenades can clear them out. When the way is clear, move through the gazebo and kill the enemy soldiers standing on the other side. Toss a grenade onto the Absorption Unit platform to kill the two enemies there before jumping over to it. With that, stand on one of the configuration platforms until you've activated the unit.

Use Grenades to clear the way to Absorption Unit 2.
Absorption Unit 3
The last unit in this network is on top of a grey office building at the east end of southern Green Bay. You can scale one of the window columns on the west side of the building to reach the roof. The Cell population in this part of Green Bay is dense, so be sure to clear any soldiers on street level before beginning your ascent.
Once on the roof, gun down the enemies on the platform and then stand on one of the configuration platforms to begin activating the unit. There are snipers and one or two Rocket Launcher-wielding enemies on the rooftops surrounding the Absorption Unit platform, so use your Sniper Rifle to take out these enemies while configuring the unit. Jump or move onto one of the other platforms if you need to dodge an incoming rocket or lock on to a distant enemy for a quick kill.
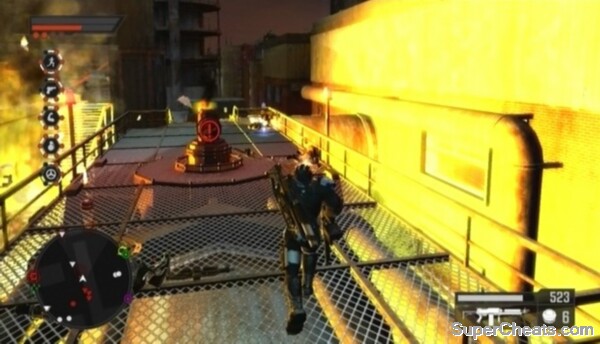
When the Absorption Unit is online, you'll come to learn that something is blocking the power beam the unit is now emitting. You must destroy the makeshift barrier blocking the power beam so the active unit can power the Beacon.
Use a Flocket Launcher to demolish the barrier. If you've levelled your Agent's Explosives skill to level three, you can select the Flocket Launcher on the Agent redeployment screen. Switch your Agent's weapons at an Agency Landing Zone or by selecting the “Extraction” option in the System section of the Intel Screen and redeploying him.

Use a Flocket Launcher to demolish the barrier blocking the power beam.
Follow the power beam emitting from the unit east to the barrier (the power beam trajectory also appears on the map on the Intel Screen). From street level, look for the barrier on top of a white building. Lock on to the barrier with your Flocket Launcher equipped and fire a rocket to knock the barrier down.
Sportiz Gym Beacon
Ensure your Agent is equipped with UV Grenades before setting out. You can switch your Agent's weapons at an Agency Landing Zone or by selecting the “Extraction” option in the System section of the Intel Screen and redeploying him.
The Beacon deployment area is below the Sportiz Health and Fitness Complex at the west end of southern Green Bay. The entrance to the Freak Lair is along the white wall on the beach behind the complex. Move through the opening in the wall and drop down to the weapon crate on the platform at the end of the tunnel. Swap whatever weapon you have for the Harpoon next to this crate.
After picking up the Harpoon, head east to the Beacon Drop Point. Before calling the helicopter, be sure to pick up the Ultra Assault Rifle by the weapon crate across from the Beacon. Be sure to hold on to the Harpoon when picking up this weapon.
Once your Agent is equipped with the Harpoon and Ultra Assault Rifle, stand on the Beacon Drop Point marker and call the helicopter. With that, jump onto the rock formation east of the drop point (the one with the Online Orb). Remain perched here for the duration of this mission.

Perch yourself on one of the rock formations surrounding the Beacon and use your weapons to keep the Freaks off.
The attacking Freaks in this lair are the large, agile, projectile throwers you've likely encountered before. As with the Mason's Quarry Freak Lair, these attackers will jump onto one of the rock formations surrounding the Beacon and throw projectiles at the Beacon from there. The Harpoon can take these Freaks down with one shot, so you can effectively remain perched on one of the rock formations and just pick off attackers as they spawn.
As per usual, attacking Freaks will appear on your tracker as red blips. When one of these Freaks appears, lock on with your Harpoon equipped and fire once to take him down. Unmarked Freaks will swarm the Beacon and deal minor damage to it overtime. Though you can just as well ignore these Freaks, periodically toss a UV Grenade down at the Beacon to clear them away.
Some of the unmarked Freaks in the lair will be hostile towards you. If you're perched on a rock formation, the only Freaks you have to worry about here are unmarked agile ones. These guys will leap onto your perch and take swipes at you. If you're attacked by one of these Freaks, you can either hit him with a Harpoon or melee him off the platform. If you do choose to melee, just be careful not to fall off the platform yourself!
Your Harpoon gun ammo is limited, so don't waste any on garden variety Freaks. Only use harpoons on attackers and those Freaks that would actively attack you. If you do run out of Harpoons, the Ultra Assault Rifle boasts impressive range and accuracy, so remain on the rock formation and continue picking off attackers as they appear.
Keep this up until the Beacon is fully charged.
Defending the Sportiz Gym Beacon
Things get tough here. Before getting started on this one, you'd do well to level your Agent's Firearm and Agility skills each to at least level four and Explosives to level three. The Ultra Assault Rifle and Harpoon weapons you unlock for attaining Firearms level four and the Flocket Launcher at level three will serve you well here. As well, an Agility skill level of four may be required to reach the final Absorption Unit (or, at the very least, make reaching it much easier).
Absorption Unit 1
Look for this unit on top of a blue and red building at the northwest end of southern Green Bay. Use the windows on the west side of the building to reach the top. Once on top of the building, toss a Grenade onto the Absorption Unit platform to take out the Cell soldiers there. Gun down any remaining enemies near the unit and then stand on one of the configuration platforms to start the activation process.
Absorption Unit 1
Enemies dot the rooftops surrounding this Absorption Unit, so stand on the configuration panels at the back of the platform so the unit can shield you from enemy gunfire.
Absorption Unit 2
This unit on the island villa west of northern Green Bay. This villa happens to be a Cell Stronghold, so expect plenty of resistance.
Ensure your Agent is equipped with an Ultra Assault Rifle, a Flocket Launcher and Grenades before setting out to activate this unit. You can switch your Agent's weapons at an Agency Landing Zone or by selecting the “Extraction” option in the System section of the Intel Screen and redeploying him.
This Cell Stronghold is made up of two Tactical Locations: one on the mainland and the other within the island villa walls. You can secure these two Tactical Locations before getting to the Absorption Unit if you wish. Alternatively, you can drop down to the beach, swim out to the island, climb up to the villa and hop over the wall to avoid the mess of enemies at the front gate.

Swim out to the villa to avoid the Cell soldiers on the mainland.
The island villa is not as heavily-guarded as the mainland gate. There is an armoured, Rocket Launcher-wielding enemy on the tower at the back of the villa to watch out for. Take him down with your Flocket Launcher and then turn to the remaining enemies.
When the area is clear, step onto one of the platforms surrounding the Absorption Unit to start the configuration process. Once the unit is online, you'll come to learn that the power beam emitting from the unit is being blocked by a makeshift barrier. You must follow the power beam and demolish the barrier blocking it. One rocket will do it. The power beam trajectory is visible on the Intel Screen map as well.
Absorption Unit 3
The final unit in this network is on top of the lighthouse at the north end of northern Green Bay. Like the last one, this unit is within another a Cell-held Tactical Location and thus heavily guarded. You can secure the Tactical Location before going for the Absorption Unit if you wish, though you can just as well fight your way to the unit.
Ensure your Agent is equipped with an Ultra Assault Rifle, a Sniper Rifle and Grenades before setting out to activate this unit. You can switch your Agent's weapons at an Agency Landing Zone or by selecting the “Extraction” option in the System section of the Intel Screen and redeploying him.

The final Absorption Unit is within a Cell Stronghold, which is heavily guarded.
Approach the lighthouse from the south. Use your Sniper Rifle as you approach to pick off the snipers and Rocket Launcher-wielding enemies at the front. Jump around and move from side to side in an attempt to dodge enemy gunfire as you clear the area around the lighthouse. If you're taking a lot of damage, fallback and take cover somewhere out of range until your Agent's shield and health are back up.
When the surrounding area is clear, head up the stairs to the right of the lighthouse, climb up the rocks and jump onto the platform attached to the lighthouse (the one with the Agility Orb on it). From here, jump up to grab hold of the bar in front of the window above. Continue jumping upward until you reach the window with the green curtain at the top.
Hug the side of the lighthouse and walk along the ledge to the platform to the left. Jump onto the platform and then over to the higher platform to the east. From here, face west and jump up to the platform higher up. Jump up to the next platform to reach the top of the lighthouse and then gun down the enemies there with your Ultra Assault Rifle. Activate the Absorption Unit when the area is clear.
Reaching the final Absorption Unit
Radio Station Beacon
Before setting out, ensure your Agent is equipped with an Ultra Assault Rifle, Harpoon and UV Grenades. You can switch your Agent's weapons at an Agency Landing Zone or by selecting the “Extraction” option in the System section of the Intel Screen and redeploying him.
This Freak Lair is underneath the radio station at the north end of northern Green Bay. Make your way to the station and drop down the chasm to enter the lair. Stand on the Beacon Drop Point marker once inside and call the helicopter to start.
The best place to position yourself here is on the flat rock east of the Beacon Drop Point, as common and brute Freaks won't be able to reach you here. As well, this spot will afford you a good view of the lair and each entry point.
As per usual, Freaks attacking the Beacon will appear on your tracker as red blips. A single, well-aimed shot from a Harpoon gun will kill these Freaks. Just keep an eye on your tracker and when a red blip appears, turn to it, lock on to the marked Freak and hit him with a harpoon to take him down.

The Harpoon gun makes short work of the attacking Freaks in this lair.
Since your ammo is limited, don't waste any harpoons on common Freaks. Common Freaks will swarm the charging Beacon and deal modest damage overtime, so periodically throw a UV Grenade at the Beacon to clear them away.
Occasionally, three attackers will come in through the southeast entry point at once. Try to take two or three of them out with a well-thrown UV Grenade to conserve your Harpoon ammo. When you do run out of harpoons, switch to your Ultra Assault Rifle. This weapon boasts impressive range and accuracy, so remain on the rock formation and continue picking off attackers as they appear.
You may encounter brute Freaks in this lair. These guys are larger and stronger than your average Freak and can pick up and throw objects. Keep an eye out for these guys and be ready to dodge when one picks up an object. The distinct, hulking growls they make give them away.
Remain in position and continue harpooning highlighted Freaks as they appear. Keep this up until the blue meter in the top-right corner of the screen is completely full and the Beacon detonates.
Defending the Radio Station Beacon
Level your Agent's Firearms skill to level four and Explosives to at least level three. You'll need Proximity Mines and the Flocket Launcher (both unlocked at Explosives level three) when defending the Comms Center Beacon.
Absorption Unit 1
The first unit is on top of the tall, blue and green building at the west end of southeast Unity Heights. Start by climbing onto the monitor to the right of the main entrance on the south side of the building. From atop the monitor, jump over to the awning above the main entrance.
Once on the awning, you can ascend to the top of the building using the sash bars on the column of tinted windows on the south side of the building. It can be difficult to make this climb because sometimes the Agent won't grab onto the bars. This can be frustrating, but just keep at it. Try pushing forward on the Right Stick when the Agent jumps up to the next bar.
Scale this building to reach Absorption Unit 1.
When you've made it onto the roof, gun down the enemy soldiers surrounding the Absorption Unit and then stand on one of the configuration platforms to start the activation process. Remain on the platform until the unit is online.
Absorption Unit 2
Ensure your Agent is equipped with an Ultra Assault Rifle and a Flocket Launcher before setting out to activate this unit. You can switch your Agent's weapons at an Agency Landing Zone or by selecting the “Extraction” option in the System section of the Intel Screen and redeploying him.
This one is on top of the curved building in the northwest corner of southeast Unity Heights. Use the rows of windows on the east side of the building to reach the roof. There are several snipers on surrounding rooftops, so quickly get onto the Absorption Unit platform to avoid their fire.
There is a Grenade Launcher-wielding enemy on the structure west of the Absorption Unit. There happens to be an explosive barrel next to him, so target the barrel and shoot it to blow him away. Activate the unit when the area is clear.

Use explosives to deconstruct the barrier blocking the power beam.
A makeshift barrier is blocking the power beam now emitting from this unit. The barrier is on top of the building across the street east of the unit. Target the barrier with your Flocket Launcher and fire a rocket to demolish it.
Absorption Unit 3
The final unit in this network is on top of one of the blue buildings at the centre of southeast Unity Heights. Use the column of windows on the north side of the building to reach the roof.
The Absorption Unit is guarded by an armoured, Turret Machine Gun-wielding Cell soldier. Take him down with grenades or your Flocket Launcher and then step onto one of the configuration platforms. There are snipers and Rocket Launcher-wielding enemies on top of the buildings to the south; take them out if they're causing you grief.
Comms Center Beacon
Before setting out, ensure your Agent is equipped with a Flocket Launcher and Proximity Mines. Both of these weapons are unlocked upon attaining Explosives level three. You can switch your Agent's weapons at an Agency Landing Zone or by selecting the “Extraction” option in the System section of the Intel Screen and redeploying him.
The Freak Lair is beneath the Comms Center at the southeast end of Unity Heights. Head to the end of the wall connected to the cylindrical structure, then move through the opening in the side of structure and drop down to the Freak Lair.
This Freak Lair is beneath the Comms Center at the southeast end of Unity Heights.
Take note of the Flocket Launcher next to the weapon crate northwest of the Beacon Drop Point marker and the Proximity Mines next to the crate east of the drop point. You'll need to use these to replenish your ammo at some point.
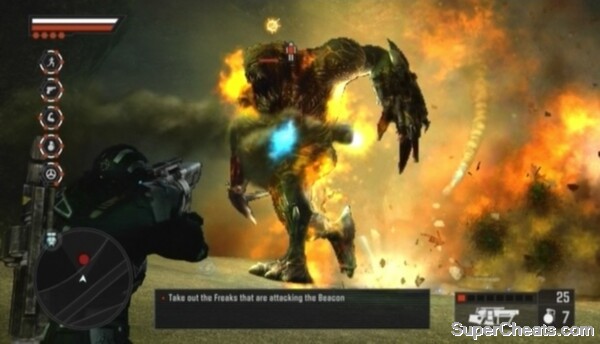
Stand in the Beacon Drop Point marker when ready and press the Back button to signal to the helicopter. Then, jump onto the platform northeast of the Beacon Drop Point marker and await the first wave of Freaks. Face south and focus on the group of explosive barrels there. A giant Freak will soon emerge from the ground south of the Beacon. The giant will sprint over to the explosive barrels and roar; hit the barrels with your Flocket Launcher to set them off and damage the giant.
Needless to say, the giant Freaks in this lair are the biggest threat to the Beacon. They require a ridiculous amount of explosives to bring down and will likely deal severe damage to the Beacon before you manage to make the kill.
On the upside, the only Freaks you have to worry about here other than the giants are the agile Freaks that will periodically perch themselves on the rock platform northeast of the Beacon. If you can manage to kill the two giant Freaks (a second giant will appear when the Beacon is about a quarter of the way there) before they destroy the Beacon, you can likely defend what's left of the Beacon quite easily.
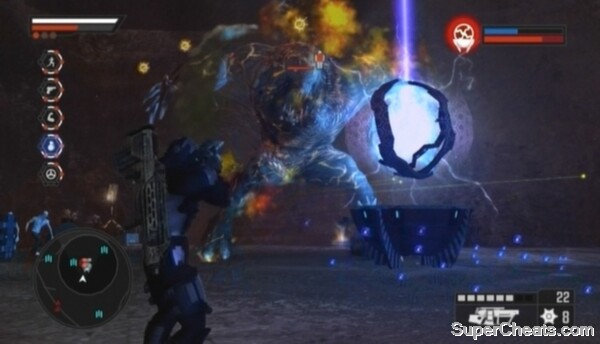
Giants can severely damage the Beacon, so take them down as quickly as you can.
To bring down a giant quickly and minimize damage to the Beacon, lock on and begin firing rockets as soon as one appears. Jump around to avoid common Freaks and continue firing rockets and throwing Proximity Mines at the giant until it falls. Once you've managed to bring the beast down, focus on keeping the rock platform northeast of the Beacon clear of agile Freaks. Collect the mine and rocket ammo at the weapon crates if need be.
As soon as the second giant Freak appears, turn your attention to him and take him down the same way you did the first. You only have two giant Freaks to worry about, so once you've taken down the second, continue defending the Beacon from the agile Freaks that perch on the rock platform until the Beacon detonates.
Defending the Comms Center Beacon
You'd do well to level your Agent's Firearms, Explosives, Strength and Agility skills to at least level four before attempting this one. You'll definitely need Strength level three so your Agent can rip up and carry turreted weapons.
Absorption Unit 1
This unit is on the east-most support structure on the bridge between southwestern Unity Heights and northern Green Bay. To get to the top of the structure, ascend using the ledges all the way up the column on either side of the bridge. When you reach the highest ledge, inch over to the left or right and then jump up to reach the platform.

Ascend to the top of the support structure using the ledges all the way up the column on either side of the bridge.
Once on the platform, gun down the Cell soldiers surrounding the Absorption Unit. There are explosive barrels up here, so be careful not to accidentally detonate one and get yourself killed. When the area is clear of enemies, stand on one of the configuration platform to begin the activation process. Remain on the platform until the unit is online.
Absorption Unit 2
The second unit is on top of one of the buildings south of Unity Heights Square. To reach the unit, start by ascending one of the columns of windows on the west side of the black building next to the Absorption Unit building.
When you reach the window at the top of the column, use the Right Stick to focus the camera on your Agent's side. Push the Left Stick toward the building on the other side of the alley and press the A button to jump over to the ledge there. Once on the ledge, use the balconies on the side of the building you are now on to reach the roof. Ascend to the platform, kill any Cell soldiers there and then get to activating the Absorption Unit.
Reaching Absorption Unit 2
Absorption Unit 3
The final unit is on top of the red and black building northwest of Unity Heights Square. Start by scaling the window column on the north side of the building. When you reach the top of the column, jump onto the platform to your right and ascend to the Absorption Unit using the ridges on the north side of the building. Once at the top, jump up to the platform and activate the final Absorption Unit.
Unity Heights Square Beacon
Before setting out, ensure your Agent is equipped with an Assault Rifle, Flocket Launcher and UV Grenades. If you've levelled your Agent's Explosives skill to level five, trade the Flocket Launcher for a Flak Turret. You can switch your Agent's weapons at an Agency Landing Zone or by selecting the “Extraction” option in the System section of the Intel Screen and redeploying him.
The Beacon deployment area is in the parking garage beneath Unity Heights Square. The parking garage is accessible through the collapsed portion of the square. Drop into the Freak Lair, stand on the Beacon Drop Point marker and call the helicopter to get started.
Hop onto the trailer east of the Beacon Drop Point marker and face west. When the Freaks start coming, a giant Freak will emerge from the ground at the west end of the garage. Use your Flak Cannon or Flocket Launcher to quickly put him down.
Several different types of attacking Freaks will appear on your tracker in this lair. You'll face two giants total (the second will appear when the Beacon is a bit less than half of the way there) as well as a mix of agile, exploding and projectile-throwing Freaks.

Use the turret to make short work of giants.
Agile Freaks will perch themselves on the collapsed columns east and north of the Beacon. Use melee attacks or your Ultra Assault Rifle to keep the columns clear with. Exploding and projectile-throwing Freaks will enter the garage in groups. The projectile throwers will line up and pelt the Beacon with acid. Use UV Grenades and your Ultra Assault Rifle to clear away these groups of Freaks. Keep your distance when killing explosive Freaks (the armless ones), as the ensuing burst will knock your Agent down if he's too close.
When the second giant appears, immediately head for the turret northeast of the Beacon and remove it from its housing by holding the X button. Once you have the turret, get behind the giant and continue firing at him until he falls.
As well as the attacking Freaks, you also have brute Freaks to contend with. Brutes are the large, muscle-bound Freaks that can pick up and throw objects. There are plenty of cars and rubble scattered around the garage these Freaks can pick up and throw, so be careful. Try your best to ignore these Freaks and focus on taking out attacking Freaks when they appear on your tracker. Just keep sprinting around the garage to avoid them.
Continue sprinting around the garage, using your Ultra Assault Rifle and UV Grenades to take out attacking Freaks as they appear, until the Beacon detonates.
Defending the Unity Heights Square Beacon
Before attempting this Beacon, your Agent should have Firearms and Explosives skill levels of at least four. An Explosives skill level of five is highly recommended if you're playing solo and on a difficulty higher than Tough.
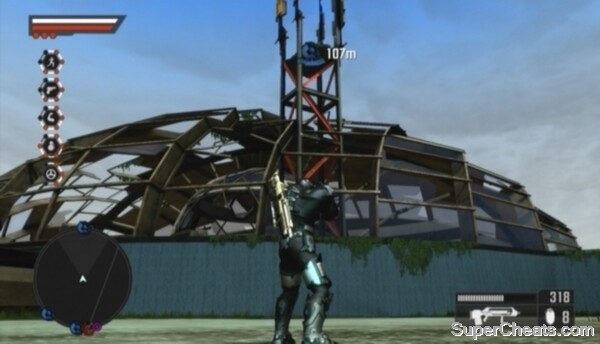
Absorption Unit 1
This unit is on a raised platform inside the domed building in the northeast corner of Unity Heights. There is a sniper on this platform, so be careful. Use your Sniper Rifle or Harpoon to kill the sniper before climbing up.
To reach the platform, start by jumping onto the intact glass window to the right of it. Then, jump across the broken portion of window over to another intact window further up the dome. Continue up to the metal part of the dome and then jump over to the Absorption Unit platform. Stand on one of the configuration panels surrounding the unit and remain there until the unit is online.
Use the turret to make short work of giants.
Absorption Unit 2
Ensure your Agent is packing an explosive weapon or grenades before setting out to activate this unit. You can switch your Agent's weapons at an Agency Landing Zone or by selecting the “Extraction” option in the System section of the Intel Screen and redeploying him.
The second unit is in the ruined security centre between northern and southeastern Unity Heights.
Approach this unit from the north. Jump onto the wall above the tunnel opening there and face southeast. Grab hold of the ledge on the gap in the dark grey support column and then jump to the ledge higher up. Hug the wall while walking to the other end of ledge, then jump onto the collapsed bridge and over to the Absorption Unit platform.
There's an armoured, Turret Machine Gun-wielding Cell soldier guarding this Absorption Unit. Take them down with an explosive weapon or grenades. He's tough to beat otherwise.
Absorption Unit 3
Bring the big guns for this one: a Flocket Launcher, Rocket Launcher or Grenade Launcher. You can switch your Agent's weapons at an Agency Landing Zone or by selecting the “Extraction” option in the System section of the Intel Screen and redeploying him.
The final unit is on top of the parking garage at the south end of northern Unity Heights. Ascend to the top of the garage using the open ramps on the west side. There is a sniper on top of the structure north of the platform and two armoured enemies -- one wielding a Turret Machine Gun and the other a Rocket Launcher -- guarding the Absorption Unit. Kill the two armoured soldiers with grenades or another explosive weapon and then take down the sniper before getting to the unit.
Use explosive weapons to take out the armoured soldiers guarding the Absorption Unit.
Security Ruins Beacon
Defending this Beacon is tough if you're playing solo on a difficulty level higher than Tough. Enlist the help of another player over Xbox Live if possible. Of course, this objective is still doable if you have no choice but to play solo, although you may be in for a tough time.
It is recommended that you level your Agent's Explosives skill to level five before attempting this. You'll also need the Homing Launcher and Cluster Grenade Cell weapons. To acquire a Cell weapon, you must take it from a dead Cell soldier and then bring the weapon to the marker at an Agency Landing Zone. Once you've done that, you can then request these weapons at a Landing Zone or when redeploying your Agent. Cluster Grenades are quite common, but you can only find a Homing Launcher at Cell-held Tactical Locations in Unity Heights.
When you're ready to get started, equip your Agent with a Flocket Launcher, Homing Launcher and Cluster Grenades. You can switch your Agent's weapons at an Agency Landing Zone or by selecting the “Extraction” option in the System section of the Intel Screen and redeploying him.
The deployment zone is beneath the ruined security centre between northern and southeastern Unity Heights. Jump onto the wall surrounding the centre and then drop down to the Freak Lair entrance. Fall down to the Beacon Drop Point marker and give the signal to the helicopter to start.
Quickly take down the first giant with your Flocket Launcher.
As soon as you've given the signal, cross the rock bridge east of the Beacon and face north. A giant Freak will soon appear. Immediately lock on to the giant when he appears and start firing your Flocket Launcher at him.
This giant will jog around the circular path surrounding the Beacon. He will periodically stop to pick up a boulder and then hurl that boulder at the Beacon. He has no interest in attacking you. You can down him quickly with your Flocket Launcher if you keep after him and continuously pelt him with rockets. You can likely kill him before the Beacon even drops.
Once you've downed the first giant Freak, cross back over the rock bridge to the Beacon and throw a Cluster Grenade or two to clear away the Freaks surrounding it . Another giant will soon appear. This one will run up to the Beacon and continuously smash it until you manage to bring him down. Immediately lock on to this giant when he appears and use what ammo you have left in your Flocket Launcher to damage him. Finish him off with your Homing Launcher.
Once you've downed two giants, another will appear on the circular path surrounding the Beacon. As with the first giant you encountered, this one will remain on the path and hurl boulders at the Beacon. Completely ignore this guy. He'll deal a negligible amount of damage to the Beacon and killing him will just spawn another giant, so leave him be.
Use the UV Shotgun to keep the Freaks off the Beacon.
The biggest threats to the Beacon are not giants, but rather unmarked attackers. Agile and projectile-throwing Freaks will still attack the Beacon even if they don't appear on your tracker. Unlike in previous lairs where you could pretty much ignore the unmarked Freaks, these ones Freaks can cause a lot of damage if you ignore them. As such, you must remain near the Beacon to keep these Freaks distracted. Trade one of your weapons for the UV Shotgun next to the weapon crate southwest of the Beacon and use it to eliminate any Freaks that appear near the Beacon.
Continue blasting the Freaks that appear around the Beacon (while completely ignoring the giant Freak marked on your tracker) until the Beacon detonates.
Defending the Security Ruins Beacon
Before attempting this Beacon, your Agent should have Firearms and Explosives skill levels of at least four. An Explosives skill level of five is highly recommended if you're playing solo and on a difficulty higher than Tough.
Equip your Agent with an Ultra Assault Rifle or Mach HMG-120 and a Flocket Launcher or Homing Launcher before setting out.
Absorption Unit 1
This unit is on a circular structure in the southwest corner of the ruined research centre in the northwest corner of northern Unity Heights. The unit is guarded by two armoured Cell soldiers -- both wielding Turret Machine Guns -- and two unarmoured soldiers wielding explosive weapons on nearby rooftops.
Target the explosive barrel to eliminate the armoured soldiers guarding the unit.
There is an explosive barrel on the Absorption Unit platform between the two armoured soldiers, so hit one of the soldiers with a rocket and you'll likely detonate the barrel and kill them both. Use your Homing Launcher or Flocket Launcher to take out the explosive weapon-wielding soldiers watching the platform nearby. Activate the unit when the area is clear.
Absorption Unit 2
The second unit is on top of one of the buildings next to the bridge south of the ruined research centre in the northwest corner of northern Unity Heights. Use the walkways on the west side of the building to reach the top.
There are a couple of explosive weapon-wielding Cell soldiers on the roof, so use your Flocket Launcher or Homing Launcher to take them down. As well, you'll encounter one armoured soldier wielding a Turret Machine Gun in the doorway just below the Absorption Unit platform. There should be an explosive barrel nearby you can use to kill him.
Climb up to the Absorption Unit platform when the area is clear and stand on one of the configuration panels to activate the unit.
Absorption Unit 3
The final unit is on one of the buildings west of the ruined security centre at the northeast end of northern Unity Heights. Cell soldiers are rife in this area of the city, so go at it with a Mach HMG-120 and a Homing Launcher or Flocket Launcher.
Start by jumping over the makeshift barricade covering the alley between the two buildings. There is a mess of soldiers on the patio behind the two buildings, so immediately throw a couple of Cluster or Shrapnel Grenades to wipe them out. There is also an armoured soldier wielding a Turret Machine Gun on either side of the walkway behind the buildings, so be careful. Take them out with an explosive weapon and then start climbing up to the Absorption Unit platform.
Shrapnel and Cluster Grenades are powerful Cell weapons.
Climb the column of windows along the north side of the building to reach the rooftop. There's a turret emplacement at the top, so take out the gunner before jumping up to the Absorption Unit platform. There are two more enemies to contend with (if you haven't already taken care of them): another armoured soldier wielding a Turret Machine Gun and a sniper. To ensure the platform is clear, toss a Shrapnel or Cluster Grenade onto it before jumping over to activate the unit.
Research Ruins Beacon
Ensure your Agent is equipped with a UV Shotgun, either a Homing Launcher or Flocket Launcher and Cluster Grenades before setting out. You'll have unlocked the Flocket Launcher when you levelled your Agent's Explosives skill to level three, but the Homing Launcher and Cluster Grenades are Cell weapons (the Homing Launcher is a bit more powerful than the Flocket Launcher).
To acquire a Cell weapon, you must take it from a dead Cell soldier and then bring that weapon to the marker at an Agency Landing Zone to store it. Once you've done that, you can then select the weapon at a Landing Zone or when redeploying your Agent. Cluster Grenades are quite common, but you can only find a Homing Launcher at Cell Tactical Locations in Unity Heights.
You can switch your Agent's weapons at an Agency Landing Zone or by selecting the “Extraction” option in the System section of the Intel Screen and redeploying him.
This Beacon deployment area is inside the ruined research centre in the northwest corner of northern Unity Heights. Drop through the opening on top of the circular building in the middle of the research centre to reach the Freak Lair. Stand on the Beacon Drop Point marker once inside the lair and call the helicopter to get started.

Use explosives to quickly bring down the giant Freak that appears at the start.
Remain at the bottom of the lair and wait for the first giant Freak to appear from the southeastern entry point. Immediately start firing rockets at the giant when he appears. He'll make a beeline for the Beacon and begin pounding on it. Toss a Cluster Grenade when he reaches the Beacon to preserve your rocket ammo.
The other attacking Freaks in this lair will perch themselves on the circular walkway above the Beacon and throw projectiles at the Beacon from there. Despite these enemies, remain on the ground floor for as long as you can. When attacking Freaks appear on your tracker, equip your Homing Launcher, lock on to one of the Freaks and fire a rocket at him to take him out. Jump around to avoid the Freaks on the ground floor.
Whenever you're not eliminating marked Freaks on the walkway, use your UV Shotgun to clear away the unmarked Freaks around the Beacon. Unmarked Freaks will still attack the Beacon if you're not close enough to distract them. As long as you remain on the ground floor, the Freaks there will ignore the Beacon and attack you instead. It's easy to keep these Freaks at bay with the UV Shotgun.
Another giant Freak will appear when the Beacon is 50 per cent charged. If you've been saving your Cluster Grenades, you can take him down with only a couple (provided your Agent's Explosives skill is at level five and you're playing on a difficulty level no higher than Ruthless). Save your rocket ammo for the attacking Freaks still to come.
Target attacking Freaks on the circular walkway with your Homing Launcher.
When you run out of rocket ammo, you may have to take to the walkway to clear off the attacking Freaks when they appear. By the time you run out of rocket ammo, however, the Beacon will most likely be almost fully charged and hopefully still in relatively good condition. If the Beacon isn't nearly destroyed, you can probably ignore the attacking Freaks and just continue clearing the Freaks below with your UV Shotgun. If the Beacon is in bad shape and you do need to kill the attackers, you can get onto the walkway by first jumping onto the pillar south of the Beacon and then up to the walkway.
Continue defending the Beacon from Freaks until the Beacon is fully charged.
Defending the Research Ruins Beacon
This objective becomes active once you've detonated the initial nine Beacons in Pacific City. Before you can move on to the final Beacon at Agency Tower, you must crash the Refinery at the west end of northern Hope Springs and open the five valves there to restore the supply of fuel to the tower. A ridiculous number of Cell soldiers guard each valve, so you'd best prepare well.
It is recommended that you equip your Agent with a Mach HMG-120, either a Homing Launcher or Flocket Launcher, and Cluster Grenades. You'll have unlocked the Flocket Launcher when you levelled your Agent's Explosives skill to level three, but the Mach HMG-120 and Cluster Grenades are Cell weapons.
Unlock Cell weapons at the Agent Redeployment screen by delivering them to the Marker at an Agency Landing Zone.
To acquire a Cell weapon, you must take it from a dead Cell soldier and then bring the weapon to the marker at an Agency Landing Zone to store it. Once you've done that, you can then select the weapon at a Landing Zone or when redeploying your Agent.
Cluster Grenades are quite common, but you can only find a Homing Launcher at Cell-held Tactical Locations in Unity Heights. The Mach HMG-120 is sometimes used by Cell soldiers defending Tactical Locations in Unity Heights.
Make your way to the Refinery at the east end of northern Hope Springs when you're ready to go. The initial four valves appear on the tracker as red exclamation mark icons. It does not matter in which order you activate the valves, so just fight your way to each valve and clear the surrounding rooftops of enemies before attempting to open it.
Use your Homing Launcher, Flocket Launcher or grenades to clear each valve platform and any enemies in the near vicinity. Snipers and enemies with explosive weapons are the biggest threats here, so target them first. If you're continuously being pelted by explosives and your Agent is losing health fast, drop down to street level and take cover behind a building until his health is restored.
Open all five valves in the Refinery to restore fuel to the Agency Tower. Each valve is heavily guarded, so prepare well.
To open a valve, position your Agent in front of the turnwheel and press the Y button when the prompt appears. Getting this prompt to appear is a bit finicky, so it's important that there aren't any enemies nearby while you're attempting to open a valve.
Once you've opened the first four valves, a fifth will appear on your tracker. This valve is on the pipes at the northwest end of the Refinery. Fight your way to the final valve, toss a grenade onto the platform to clear away the enemies there, then move in and open the valve to complete the mission.
If your Agent is killed while pursuing this objective, there's no need to re-open any valves. Just redeploy your Agent at the nearest drop point and continue on to the next one (but be more careful this time!).
Activate the fifth valve at the northwest end of the Refinery to complete the mission.
Once you've infiltrated the Refinery and opened all five valves, you then must head to Agency Tower to detonate the final Beacon. You'll have to defend the three cores charging the Beacon from an onslaught of advanced Freaks, so ensure you're well-prepared before setting out.
As you've made it this far, presumably your Agent's Agility, Firearms, Explosives and Strength skills are all at least level four. It is recommended that you equip your Agent with a Mach HMG-120, either a Homing Launcher or Flocket Launcher (the Homing Launcher is a bit more powerful than the Flocket Launcher), and Cluster Grenades.
The final phase of Project Sunburst will take place at the Agency Tower.
You'll have unlocked the Flocket Launcher when you levelled your Agent's Explosives skill to level three, but the Mach HMG-120, Homing Launcher and Cluster Grenades are Cell weapons, so you'll have to deliver those to the marker at an Agency Landing Zone before you can select those weapons when redeploying your Agent.
When you're ready to get started, make your way to Agency Tower and follow the white trail that appears up to the Beacon Charge marker. Stand on the marker and press the Back button to begin charging the Beacon.
You will soon receive word that hostiles have been detected inside the energy field. The enemies you'll face here are former-agents-turned-freaks. These guys are powerful and there are a lot of them, so be ready for a tough fight.
There are three power cores charging the Beacon. You must defend each core in order, moving on to the next only when the previous core is fully charged. The blue meter in the top-right corner of the screen indicates the charging progress of the current core, while the red meter below it indicates the core's condition. You'll fail the mission if the Freaks manage to destroy any of the cores.
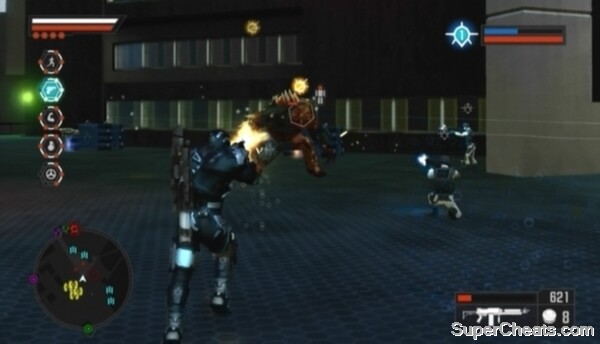
Defend each power core from the onslaught of lethal Freaks.
At each core, the Freaks will start by attacking the core at its base, moving higher and higher up the core structure as the battle progresses. Start on the lowest platform and continue killing the Freaks that appear there until the Freaks start climbing higher up, at which point use the ramps on either side of the platform to ascend to their level. The narrator will inform you of the Freaks' current position on the core structure, instructing you to move up to the mid- or top-level platforms to clear them out.
As when defending any Beacon, while defending Agency Tower you will encounter attacking Freaks who are marked on your tracker and HUD and will only attack the objective, as well as unmarked Freaks who serve no other purpose than to make defending the objective as difficult as possible.
For the most part, you'll want to take down unmarked Freaks with your Mach HMG-120, as these guys will come at you head on and you don't want to risk your Agent taking damage because he's too close to a rocket blast. Try your best to preserve rocket ammo, as you'll need plenty to defend the final core. Use your Homing Launcher to take down groups of two or more marked Freaks while using your Mach HMG-120 to gun down any that are close enough. There is an explosive pack attached to the vents marked Freaks perch on, so target these explosives with your Mach HMG-120 when a Freak is there to blow them away.
When the first power core is fully charged, move on to the next one by continuing up the ramps until you spot a numbered arrow on the ground pointing to the next core. Follow the arrows to the second core and prepare for another wave of Freaks. There are weapon crates near the start you can go to if you're low on ammo, though it's best to stick with a Mach HMG-120 and Homing Launcher if you've been frugal with your weapons.
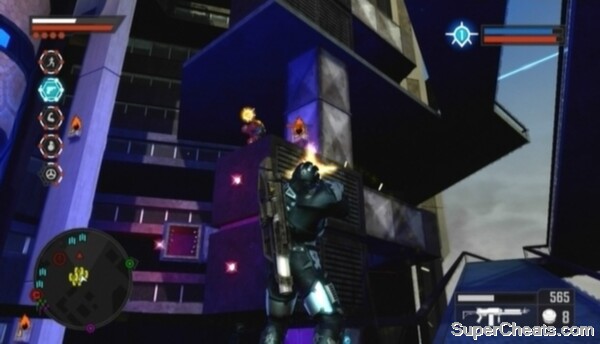
Target the explosive object attached to a vent when an attacking Freak is perched there.
At each power core you will face an increasingly large wave of Freaks. Defending power cores one and two is not difficult with the right weapons, but things can quickly get out of hand at power core three. There seem to be many more unmarked Freaks at the final core, and they can make it difficult to take out the Freaks attacking the core before things get out of control.
To maintain control at the third core, gun down approaching unmarked Freaks with your Mach HMG-120 (aim for their heads) and then switch to your Homing Launcher and blast any attacking Freaks on the platforms above or below you. You won't have time to run up and down the ramps to reach attacking Freaks, so just clear them out with your Homing Launcher as best you can from however far up the core structure you are. Move to the top-level platform once Freaks start appearing there and use your Homing Launcher to keep thing under control.
Defend the final core until it's fully charged to complete the final phase of Project Sunburst, ridding Pacific City of Freaks and winning you the game! Be sure to sit through the credits for an additional cutscene that hints at a sequel (or perhaps some downloadable content).
Defending the three Power Cores at Agency Tower
Tactical Locations
There are 27 Tactical Locations in Pacific City. These locations, marked on your map and tracker by red C icons, are occupied by Cell soldiers. You may find certain areas of the city more difficult to move through due to a high number of Cell soldiers there. If so, you're likely near a Tactical Location.
Tactical Locations can be captured to remove the Cell soldiers in that area of the city. Some of these locations will be converted to Agency Landing Zones when captured. Agency Landing Zones contain weapon crates and an Agency Marker. Press the Back button while standing on the marker at an Agency Landing Zone and you can request a weapon or vehicle drop. As well, you can store vehicles and Cell weapons at Agency Landing Zones to unlock them. Once you've stored a vehicle or weapon, you can then request that item at any Landing Zone or when redeploying your Agent.
Press the Back button while standing on a Tactical Location marker to initiate an assault.
To initiate an assault on a Tactical Location, stand on the Cell symbol the icon on your tracker is pointing to and press the Back button to call for an Agency Helicopter. Once you've done that, enemy soldiers will begin to enter the area. Each enemy will be marked on your tracker with a red blip.
To take control of a Tactical Location once you've initiated an assault, you must kill enough of the Cell soldiers that spawn to deplete the meter in the top-right corner of the screen.
When fighting for a Tactical Location, don't stray too far from the marker there, otherwise you'll lose the location. The tactical assault will end if your Agent is killed, however if you get back to the Tactical Location quickly enough and initiate another assault, you may not have to face as many enemy soldiers as you did before.
Some Tactical Locations are part of a Cell Stronghold. After capturing one of these locations, a message will appear on screen indicating your progress toward capturing the Cell Stronghold and the number of Tactical Locations needed to completely take control. It is important to capture these remaining Tactical Locations as soon as possible to take complete control of the stronghold, otherwise Cell can fight back and retake the parts of the stronghold you've captured so far. The locations needed to capture the stronghold are always close to each other, so check your map and head for the next spot as soon as you can.
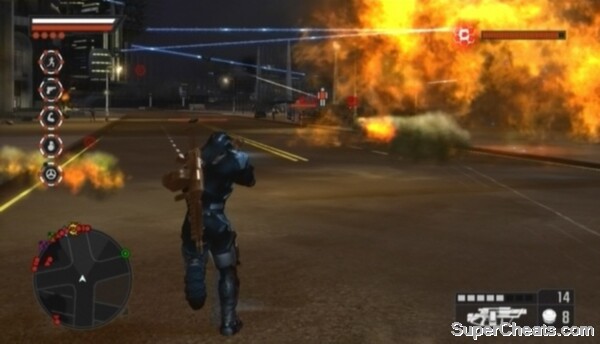
Tactical Locations, especially those in Green Bay and Unity Heights, are heavily guarded.
Tactical Locations pit you against a large number of enemy soldiers, so it's important to prepare well. Levelling your Agent's skills will make capturing these locations easier, as will unlocking more powerful weapons. It's best to equip your Agent with a powerful automatic weapon such as the Mach HMG-120, an explosive weapon such as the Homing Launcher and either Cluster Grenades or Shrapnel Grenades.
Capturing Tactical Locations becomes tougher as you move from Hope Springs to Green Bay and Unity Heights. Tactical Locations in Green Bay and Unity Heights are usually guarded by armoured enemies on turreted weapons and many snipers. Before initiating an assault, use an explosive weapon such as the Flocket Launcher or Homing Launcher to take out any enemies on turrets as well as any snipers on surrounding rooftops. Then, after initiating the assault, sprint away and find somewhere to take cover so you can restore any lost health before taking on Cell.
Enemies defending Tactical Locations will often enter the area in groups of three or more. Determine where the entry points are and use an explosive weapon to wipe out the groups of soldiers as soon as they appear.
Capture all 27 Tactical Locations to unlock the “Location, Location, Location” Xbox 360 achievement worth 50 gamer points.
Freak Breaches
Freak Breaches are similar to Tactical Locations, but are considerably easier. These events pit you against a large number of Freaks. These Freaks will continuously emerge from the breach until you've killed enough to deplete the meter in the top-right corner of the screen.
UV weapons are the way to go when tackling a Freak Breach, as these weapons are super effective against Freaks. The UV Shotgun and UV Grenades will definitely serve you well.

Freak Breaches pit you against a large number of Freaks. Kill enough to deplete the meter in the top-right corner of the screen to close a breach.
Freak Breaches can only be triggered during the late evening and nighttime hours. When it's the appropriate time, travel to one of the yellow Freak icons on your map and tracker. The ground will begin to shake. Remain within range of the Freak Breach to activate the event. Use your UV Weapons to take down marked Freaks as they appear.
Once you've depleted the meter in the top-right corner of the screen, an Agency Helicopter will fly in and plug the breach with explosives.
There are 25 Freak Breach locations in Pacific City. Close them all to unlock “The Closer” Xbox 360 achievement worth 10 gamer points. Only 10 Freak Breaches are available at the start. Unlock more by completing the breaches available to you.
Road Races
In a Road Race, you must speed through a series of waypoints as quickly as you can. Each race consists of one or more laps. Travel to one of the purple chequered flag icons on your map and tracker to participate.
You can use whatever vehicle you'd like to clear these races. The obvious choice is the Agency Supercar, which is unlocked by attaining a Driving skill level of three. The Agency SUV, unlocked by attaining a Driving skill level of four, is sometimes a better choice if the course is largely off-road.
Many of the races require knowledge of the course to do well. Here, only practice will help you finish the race or get a better time. Though you aren't up against any direct competition, if you're connected to Xbox Live your times will be compared with other players' on the Road Races Leaderboards.

Speed through the waypoints as quickly as you can.
Although there isn't an explicit time limit for completing these races, you must complete them within a certain amount of time. If you take too long, you'll lose the race. How fast you must complete a race isn't stated in game, so just run through as quickly as you can.
There are 15 Road Races in Pacific City. Complete all 15 to unlock the “Street Racer” Xbox 360 achievement worth 20 gamer points.
Only five races are unlocked from the start; complete these five races to unlock five more and then complete those five races to unlock the final five. Each set of races is more challenging than the last, allotting you less and less time to clear the waypoints.
Rooftop Races
The objective of a Rooftop Race is to run through a series of waypoints as quickly as you can. Each race consists of one or more laps. Travel to one of the green chequered flag icons on your map and tracker to participate.
Rooftop Races must be undertaken on foot. The higher your Agent's Agility skill level, the easier it will be to get a better time.
Some of the races require knowledge of the course to do well. Here, only practice will help you finish the race or get a better time. Though you aren't up against any direct competition, if you're connected to Xbox Live your times will be compared with other players' on the Rooftop Races Leaderboards.

Rooftop Races test your Agility skills.
Although there isn't an explicit time limit for completing these races, you must complete them within a certain amount of time. If you take too long, you'll lose the race. How fast you must complete a race isn't stated in game, so just run through as quickly as you can.
There are 15 Rooftop Races in Pacific City. Complete all 15 to unlock the “Rooftop Racer” Xbox 360 achievement worth 20 gamer points.
Only five races are unlocked from the start; complete these five races to unlock five more and then complete those five races to unlock the final five. Each set of races is more challenging than the last, allotting you less and less time to clear the waypoints.
Collecting Agility Orbs is one way you can level your Agent's Agility skill. Increasing your Agent's Agility skill level will allow him to jump higher and run faster.
There are 500 Agility Orbs scattered about Pacific City. There are 231 Agility Orbs in Hope Springs, 140 in Green Bay, 115 in Unity Heights and 14 on Agency Island.
The maps below show the location of all 500 Agility Orbs. Collect all of the Agility Orbs in Pacific City to unlock the “King of the World” Xbox 360 achievement worth 50 gamer points.
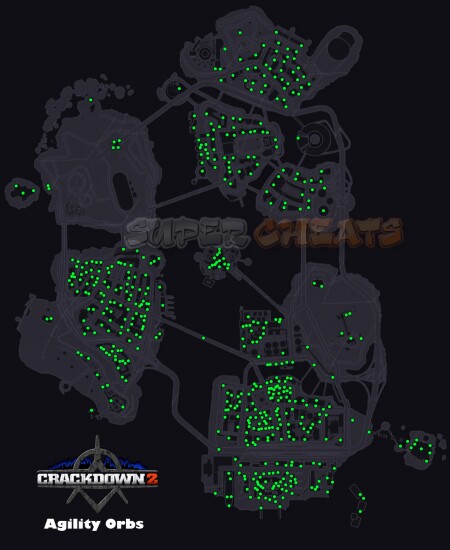
Click map to view full-size image

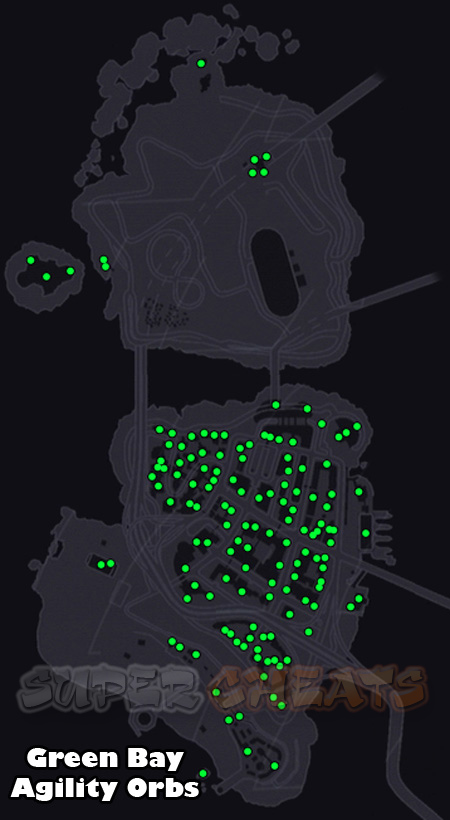

Agility Orbs are found on top of buildings and other high-up places. Most of these orbs are in plain sight, although some are difficult to get to.
Below is a list of tips to aid you in your quest to collect them all:
1) Use Orb Ping: Press up on the D-Pad and all nearby Agility Orbs, Hidden Orbs and Online Orbs will flash briefly on your tracker in the bottom-left corner of the screen. Agility Orbs are denoted by green blips.
You cannot use Orb Ping continuously and nearby orbs will only appear on the tracker briefly, but it is a useful feature nonetheless. When you use Orb Ping, you can only use it again once the green border around the tracker disappears. You can zoom out the tracker by entering and exiting the Agency Intel screen (using the Start button). Ping right after exiting the Intel screen to detect orbs further out.
Use Orb Ping in conjunction with the map provided with this guide. Travel to the location depicted on the map and then use Orb Ping to make certain you're searching the right area.
2) Keep Track: There's little worse in an open world game than taking on the task of gathering a huge number of collectibles only to come up one or two short at the end. As such, it is wise to keep track of the Agility Orbs you collect from the start.
If you're using the map provided with this guide, be sure to tick off each marker as you collect the corresponding orb. If you're viewing the map on a desktop computer or laptop, copy the map over to an image editing program such as Paint and use a paintbrush tool to tick off each orb as you collect them. If you don't have a computer near you while playing the game, you can print out the individual area maps and tick off each orb with a pen or pencil.
3) Use Agency Intel: Fortunately for completionists, Ruffian Games have included a way to track collected orbs in-game. Take advantage of this.
To use this feature, start by entering the “Achievements” section of the Agency Intel screen. Once in the Achievements section, use the Left Stick to scroll down to the “King of the World” achievement to view your progress. Press the A button once you have the achievement selected to view a map showing all of the Agility Orbs you've collected thus far. As well, in the bottom-left corner of the screen is a list of all four areas of the city and the number of orbs you've collected in each one. This list is especially useful if worst comes to worst and you wind up missing one or more orbs after following the map, as you could then limit your search to a particular area of the city and use Orb Ping to track down any remaining orbs.
4) Come Back Later: Some Agility Orbs require an Agility skill level of four or five to reach. If you can't find a way up to an orb that appears on the map, come back to it later once you've increased your Agent's Agility skill level by collecting orbs that are easier to reach.
5) Get a Helicopter: There are four helicopters parked on the helipad east of Agency Island. Reaching the helipad requires a Wingsuit, so you'll need an Agent with an Agility skill at level five.
A few of the Agility Orbs seem to require a helicopter to reach and others are just much less tedious to reach with one. Unlike with Hidden Orbs, you'll have to actually get out of the helicopter to collect an Agility Orb.
See the video below to learn how to reach the helipad with the Wingsuit.
Reaching the Agency Island helipad
There are 300 Hidden Orbs in Pacific City. There are 87 in Hope Springs, 101 in Green Bay, 105 in Unity Heights and seven on Agency Island.
Collecting a Hidden Orb will grant your Agent a small amount of experience in all five skill areas.
The maps below show the location of all 300 Hidden Orbs. Collect all of the Hidden Orbs in Pacific City to unlock the “Sixth Sense” Xbox 360 achievement worth 30 gamer points.
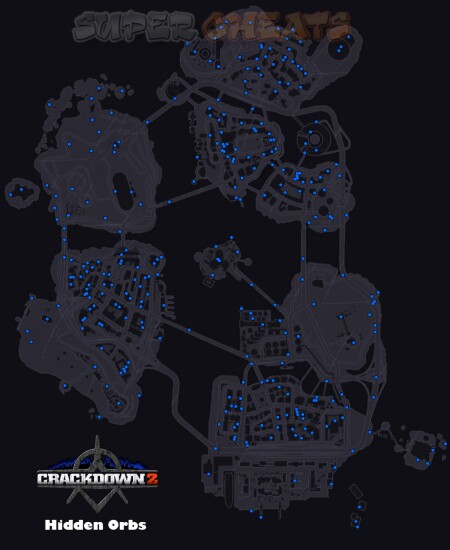
Click map to view full-size image

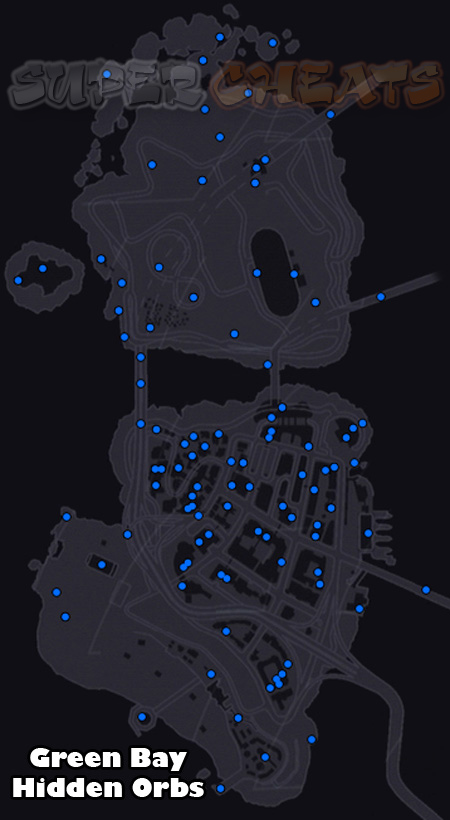
A small number of Hidden Orbs live up to their name. Most are quite easy to track down, and you will have an easier and easier time finding them once you become familiar with what types of places they tend to be hidden.
Below is a list of tips to aid you in your quest to collect them all:
1) Use Orb Ping: Press up on the D-Pad and all nearby Agility Orbs, Hidden Orbs and Online Orbs will flash briefly on your tracker in the bottom-left corner of the screen. Hidden Orbs are denoted by blue blips.
You cannot use Orb Ping continuously and nearby orbs will only appear on the tracker briefly, but it is a useful feature nonetheless. When you use Orb Ping, you can only use it again once the green border around the tracker disappears. You can zoom out the tracker by entering and exiting the Agency Intel screen (using the Start button). Ping right after exiting the Intel screen to detect orbs further out.
Orb Ping is invaluable when hunting for Hidden Orbs. Be sure to use Orb Ping in conjunction with the map provided in this guide. Travel to the location depicted on the map and then use Orb Ping to make certain you're searching the right area.
2) Look Around: Some Hidden Orbs can be quite difficult to find. In these cases, using Orb Ping is a must. Once you're standing on the spot the blue blip appears on your tracker whenever you ping, start looking around for possible spots the orb might be hidden. Determining where the orb could be hidden will become easier as you collect more and start to become familiar with the types of places they tend to be hidden.
The trickiest Hidden Orbs to find are those underground. If you're having a tough time finding a particular orb and you've used Orb Ping to determine that you're searching the right area, start looking around for a tunnel entrance or some other way underground. For example, there are several orbs hidden in underground parking lots.
Some common spots for Hidden Orbs are below bridges, between rocks and inside ruined buildings.
3) Keep Track: There's little worse in an open world game than taking on the task of gathering a huge number of collectibles only to come up one or two short at the end. As such, it is wise to keep track of the Hidden Orbs you collect from the start.
If you're using the map provided with this guide, be sure to tick off each marker as you collect the corresponding orb. If you're viewing the map on a desktop computer or laptop, copy the map over to an image editing program such as Paint and use a paintbrush tool to tick off each orb as you collect them. If you don't have a computer near you while playing the game, you can print out the individual area maps and tick off each orb with a pen or pencil.
4) Use Agency Intel: Fortunately for completionists, Ruffian Games have included a way to track collected orbs in-game. Take advantage of this.
To use this feature, start by entering the “Achievements” section of the Agency Intel screen. Once in the Achievements section, use the Left Stick to scroll down to the “Sixth Sense” achievement to view your progress. Press the A button once you have the achievement selected to view a map showing all of the Hidden Orbs you've collected thus far. As well, in the bottom-left corner of the screen is a list of all four areas of the city and the number of orbs you've collected in each one. This list is especially useful if worst comes to worst and you wind up missing one or more orbs after following the map, as you could then limit your search to a particular area of the city and use Orb Ping to track down any remaining orbs.
5) Get a Helicopter: There are four helicopters parked on the helipad east of Agency Island. Reaching the helipad requires a Wingsuit, so you'll need an Agent with an Agility skill at level five.
Some Hidden Orbs require a helicopter to reach and others are just much less tedious to reach with one. Unlike with Agility Orbs, you can collect Hidden Orbs while in a helicopter.
See the video below to learn how to reach the helipad with the Wingsuit.
Reaching the Agency Island helipad
Online Orbs require an active Internet connection and at least one other player to collect. There must be at least one other player within a certain range of an Online Orb to collect it.
There are 80 Online Orbs in Pacific City. There are 25 in Hope Springs, 30 in Green Bay, 24 in Unity Heights and one on Agency Island.
As with Hidden Orbs, collecting an Online Orb will grant your Agent a small amount of experience in all five skill areas.
The maps below show the location of all 80 Online Orbs. Collect all of the Online Orbs in Pacific City to unlock the “LIVE and let LIVE” Xbox 360 achievement worth 10 gamer points.
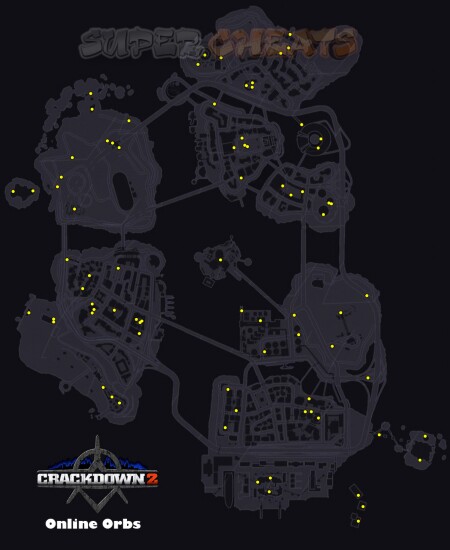
Click map to view full-size image
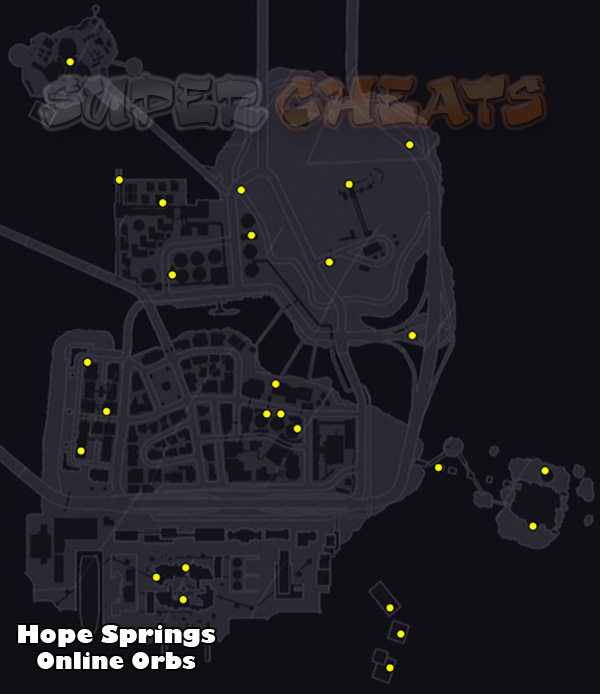


Below are a couple of tips to aid you in your quest to collect them all:
1) Use Orb Ping: Press up on the D-Pad and all nearby Agility Orbs, Hidden Orbs and Online Orbs will flash briefly on your tracker in the bottom-left corner of the screen. Online Orbs are denoted by grey blips.
You cannot use Orb Ping continuously and nearby orbs will only appear on the tracker briefly, but it is a useful feature nonetheless. When you use Orb Ping, you can only use it again once the green border around the tracker disappears. You can zoom out the tracker by entering and exiting the Agency Intel screen (using the Start button). Ping right after exiting the Intel screen to detect orbs further out.
Use Orb Ping in conjunction with the map provided in this guide. Travel to the location depicted on the map and then use Orb Ping to make certain you're searching the right area.
2) Keep Track: There's little worse in an open world game than taking on the task of gathering a huge number of collectibles only to come up one or two short at the end. As such, it is wise to keep track of the Online Orbs you collect from the start.
If you're using the map provided with this guide, tick off each marker as you collect the corresponding orb. If you're viewing the map on a desktop computer or laptop, copy the map over to an image editing program such as Paint and use a paintbrush tool to tick off each orb. If you don't have a computer near you while playing the game, you can print out the individual area maps and tick off each orb with a pen or pencil.
3) Use Agency Intel: Fortunately for completionists, Ruffian Games have included a way to track collected orbs in-game. Take advantage of this.
To use this feature, start by entering the “Achievements” section of the Agency Intel screen. Once in the Achievements section, use the Left Stick to scroll down to the “LIVE and let LIVE” achievement to view your progress. Press the A button once you have the achievement selected to view a map showing all of the Online Orbs you've collected thus far. As well, in the bottom-left corner of the screen is a list of all four areas of the city and the number of orbs you've collected in each one. This list is especially useful if worst comes to worst and you wind up missing one or more orbs after following the map, as you could then limit your search to a particular area of the city and use Orb Ping to track down any remaining orbs.
There are two types of Renegade Orbs: Renegade Agility Orbs and Renegade Driving Orbs. Renegade Orbs won't stay put, forcing you to chase after them in a vehicle or on foot.
There are 15 Renegade Driving Orbs and 30 Renegade Agility Orbs in Pacific City. Of the Renegade Driving Orbs, there are five in Hope Springs, five in Green Bay and five in Unity Heights. As for the Renegade Agility Orbs, there are 10 in Hope Springs, 10 in Green Bay, nine in Unity Heights and one on Agency Island.
Collect all 15 Renegade Driving Orbs to unlock the “Renegade Racer” Xbox 360 achievement and all 30 Renegade Agility Orbs to unlock the “Renegade Racer” achievement. Both achievements are worth 20 gamer points a piece.
The maps below show the location of all 15 Renegade Driving Orbs and all 30 Renegade Agility Orbs.
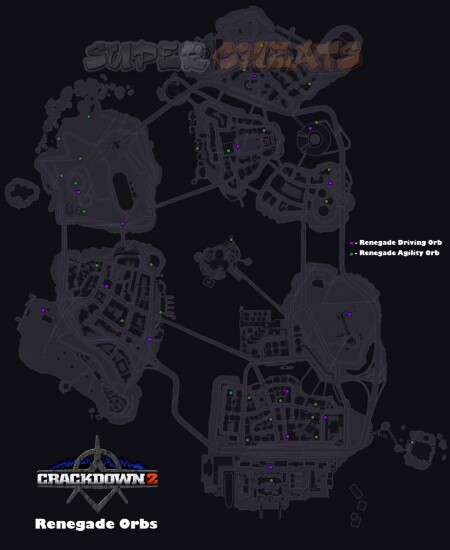
Click map to view full-size image
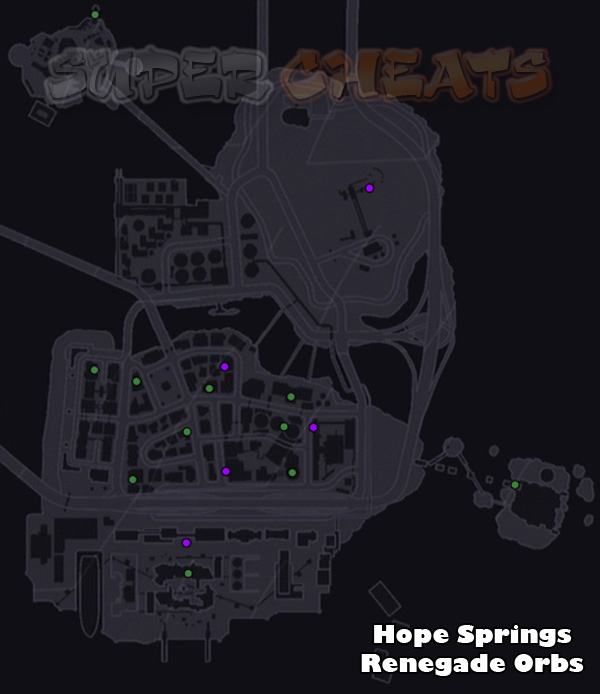

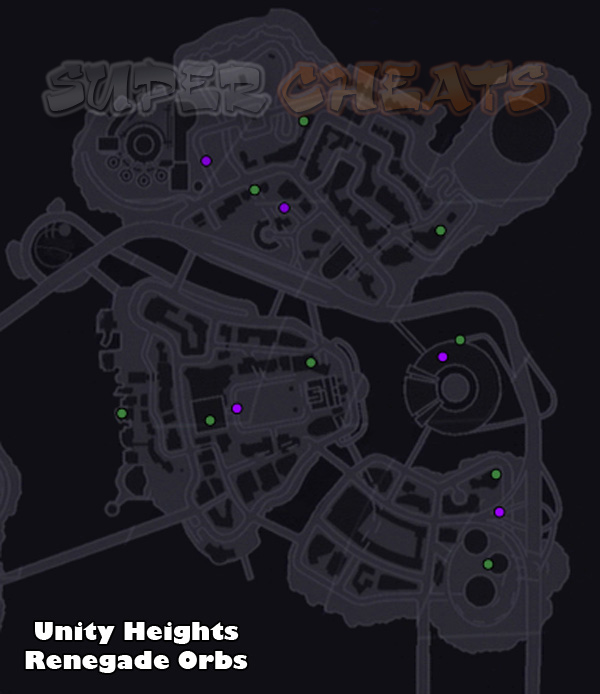
Unlike with the other types of orbs, Renegade Orbs will appear on your map and tracker without Orb Ping. Renegade Driving Orbs are denoted by a rotating purple icon and Renegade Agility Orbs by a rotating green icon.
Renegade Driving Orbs can only be collected while in a vehicle and Renegade Agility Orbs can only be collected while on foot. Catching these Renegade Orbs can be irritating, so they're best left to the end.
The ideal vehicle for catching Renegade Driving Orbs is the Agency Supercar, unlocked by attaining a Driving skill level of three.
You'll need an Agility skill level of at least three to catch a renegade Agility Orb, although a few do seem to require a skill level five.

Catching a Renegade Driving Orb requires a vehicle.
There are 52 Audio Logs in Pacific City.
There are five series of audio logs: Catalina Thorne, PCNN, Freak Watcher, Whistleblower and Surveillance Files. Collect and listen to these Audio Logs to learn more about the goings-on in Pacific City.
The maps below show the location of all 52 Audio Logs. To collect an Audio Log, approach the faction symbol and hold the B button to pick up the log and listen to it. Audio Logs do not appear on the tracker when you use Orb Ping, but they are all in fairly conspicuous places.
Collect all 52 Audio Logs in Pacific City to unlock the “Closed Book” Xbox 360 Achievement worth 20 gamer points.
The maps below show the location of all 52 Audio Logs.

Click map to view full-size image
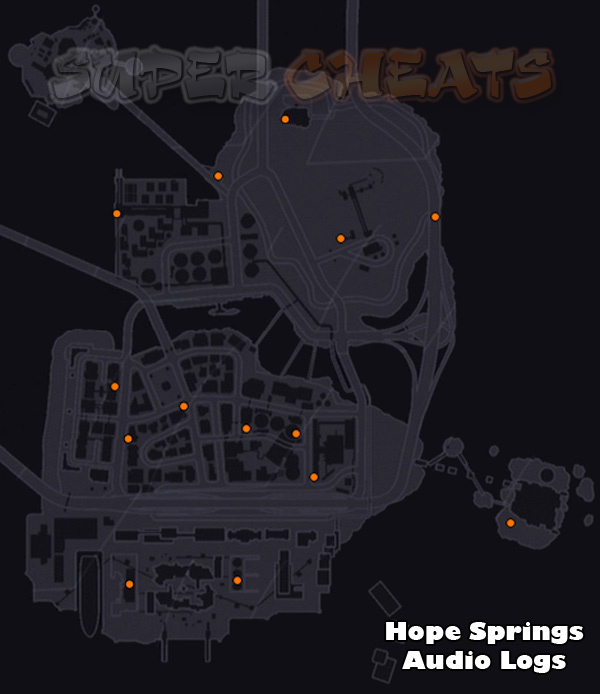
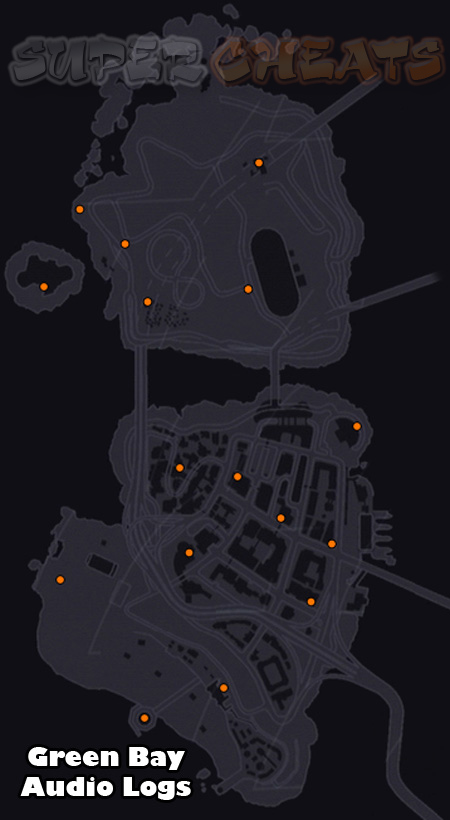

There are 40 Vehicle Stunt Rings in Pacific City.
Vehicle Stunt Rings appear in the world as purple rings in the air. Completing one of these stuns requires jumping a vehicle through one or more rings.
The Agency SUV, unlocked by attaining a Driving skill level of four, is the ideal vehicle for completing Stunt Rings. While in an SUV, you can hold the B button to jump. Hold the B button for a longer time to jump higher. You can also stick to flat surfaces while in an SUV by holding the B button.
Complete all 40 Vehicle Stunt Rings to unlock the “Stuntman” Xbox 360 achievement worth 20 gamer points.
The maps below show the location of all 40 Vehicle Stunt Rings. The number next to each marker corresponds with a video that shows how the stunt can be done.
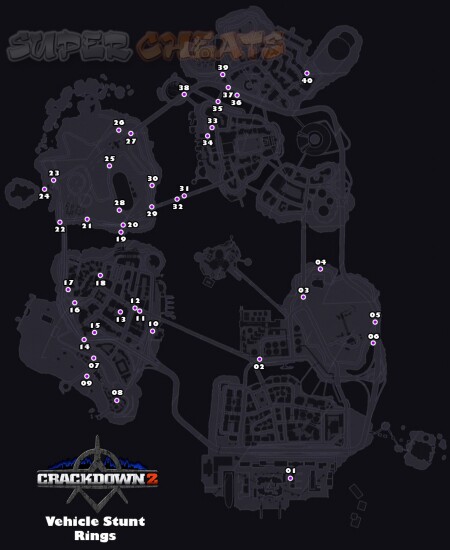
Click map to view full-size image


Stunt Ring 01
Stunt Ring 02
Stunt Ring 03
Stunt Ring 04
Stunt Ring 05
Stunt Ring 06
Stunt Ring 07
Stunt Ring 08
Stunt Ring 09
Stunt Ring 10
Stunt Ring 11
Stunt Ring 12
Stunt Ring 13
Stunt Ring 14
Stunt Ring 15
Stunt Ring 16
Stunt Ring 17
Stunt Ring 18
Stunt Ring 19
Stunt Ring 20
Stunt Ring 21
Stunt Ring 22
Stunt Ring 23
Stunt Ring 24
Stunt Ring 25
Stunt Ring 26
Stunt Ring 27
Stunt Ring 28
Stunt Ring 29
Stunt Ring 30
Stunt Ring 31
Stunt Ring 32
Stunt Ring 33
Stunt Ring 34
Stunt Ring 35
Stunt Ring 36
Stunt Ring 37
Stunt Ring 38
Stunt Ring 39
Stunt Ring 40
When you level your Agent's Agility skill to level five, you'll unlock the Wingsuit and 10 Wingsuit Stunt Rings will appear in Pacific City.
Wingsuit Stunt Rings appear in the world as green rings high up in the air. Completing one of these stunts requires using the Wingsuit to glide through a series of rings.
Complete all 10 Wingsuit Stunt Rings to unlock the “Wingsuit Racer” Xbox 360 achievement worth 20 gamer points.
The map below shows the location of all 10 Wingsuit Stunt Rings.
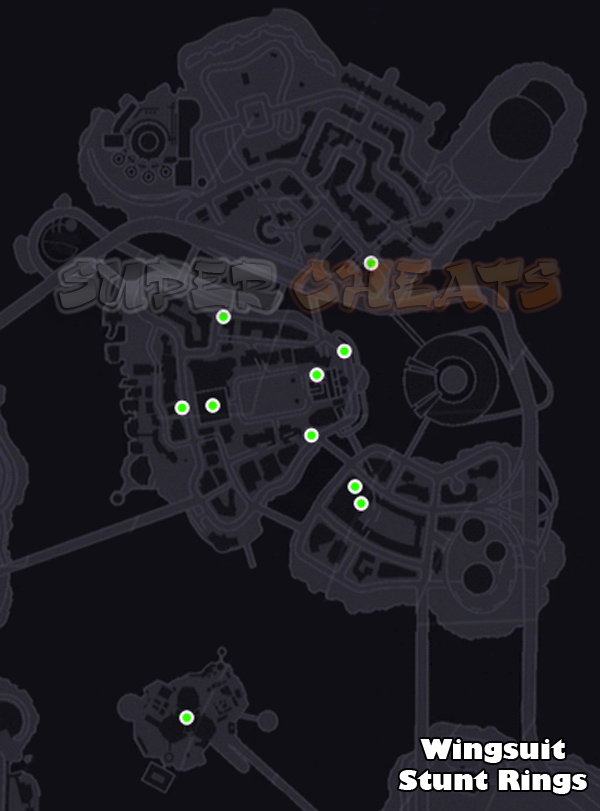
Wingsuit Stunt Rings are more difficult to complete than Vehicle Stunt Rings, likely requiring several attempts and a mastery of the Wingsuit.
Gliding with the Wingsuit is fairly simple. Once you've activated the Wingsuit by holding the Y button while in the air, push up on the Left Stick to dive down. When the trail behind your Agent turns from blue to red, push the Left Stick down to fly higher. Continue doing this and you can glide indefinitely. Be careful not to push down on the Left Stick too soon or too late, as doing so will cause your Agent to lose altitude and make it more difficult to remain in the air.

Completing Wingsuit Stunt Rings requires a mastery of the Wingsuit.
Wingsuit Stunt Rings are placed high up in the air. The green ring is the first ring of the stunt, while subsequent rings you must glide through are orange. You must glide through these rings in order. When you pass through one, the next ring in the series will turn green.
The starting point for these rings is usually just off the top of a tall building. The easiest way to reach these stunt rings is to use a helicopter. There are four helicopters parked on the helipad east of Agency Island. You'll need to use the Wingsuit to reach the helipad.
See the video below to learn how to reach the helipad with the Wingsuit.
Reaching the Agency Island helipad
Crackdown 2 features 15 unlockable Avatar Awards. A few of the awards require downloadable content to unlock (the Toy Box and Deluge add-ons). These add-ons are not yet available at the time of this writing.
Freaky Slippers (Male and Female) - Unlock the “First Hurdle” achievement (complete Agent Diagnostics).
Level 1 Agent Suit (Male and Female) - Unlock the “Light Bringer” achievement (detonate all nine Beacons).
Ruffian Hat - Complete the “Hope Springs Savior” achievement (detonate all beacons in Hope Springs).
Green Agent Suit (Male and Female) - Complete “Fly Swat” (Toy Box Add-on only).
Green Agent Helmet - Download the Toy Box Add-on.
PVP Agent Suit (Male and Female) - Complete “15 Minutes Of Maim” (Deluge Add-on only).
PVP Agent Helmet - Download the Deluge Add-on.
Agency Hoodie (Male and Female) - Unlock the “Jack of all Trades” achievement (complete one of every objective type).
Orb Shirt (Male and Female) - Have the “First Blood” achievement (eliminate one gang boss) from the first Crackdown unlocked.
Crackdown 2 features a total of 50 different achievements. Each achievement unlocked contributes a certain number of points to your overall Gamerscore. You can acquire a grand total of 1000 gamer points by playing Crackdown 2.
 1. First Hurdle
 2. Get Connected
 3. Plugged In
 4. Big Bang
 5. Hope Springs Savior
 6. Green Bay Savior
 7. Unity Heights Savior
 8. Light Bringer
 9. All Under Control
 10. Location, Location, Location
 11. Pest Control
 12. The Closer
 13. Tower Power
 14. Tellin' Stories
15. Closed Book
14. Tellin' Stories
15. Closed Book 16. In Plain Sight
 17. Sixth Sense
 18. First Rung of the Ladder
 19. King of the World
 20. In the Net
 21. Renegade Runner
 22. Renegade Racer
23. Speed Demon
22. Renegade Racer
23. Speed Demon 24. Street Racer
 25. Rooftop Racer
 26. Wingsuit Racer
 27. Stuntman
 28. LIVE and let LIVE
 29. Who's the Daddy?
 30. Solid Block of Orbsome
 31. Jack of all Trades
 32. Pebble Dash
 33. City Glider
 34. Squad City Glider
 35. Open up a Can
 36. Co-op Keepy-Up
 37. Yippee-Kai-Yay
 38. Strike!
 39. Victory Roll
 40. Mosh Pit
 41. Scarface
 42. Zero Factor
 43. Street Sweeper
 44. Pin Cushion
 45. Bomberman
 46. 25 Ways to Die
 47. Car Jump
 48. Chopper Stomper
 49. Party Bus
 50. Pile Driver

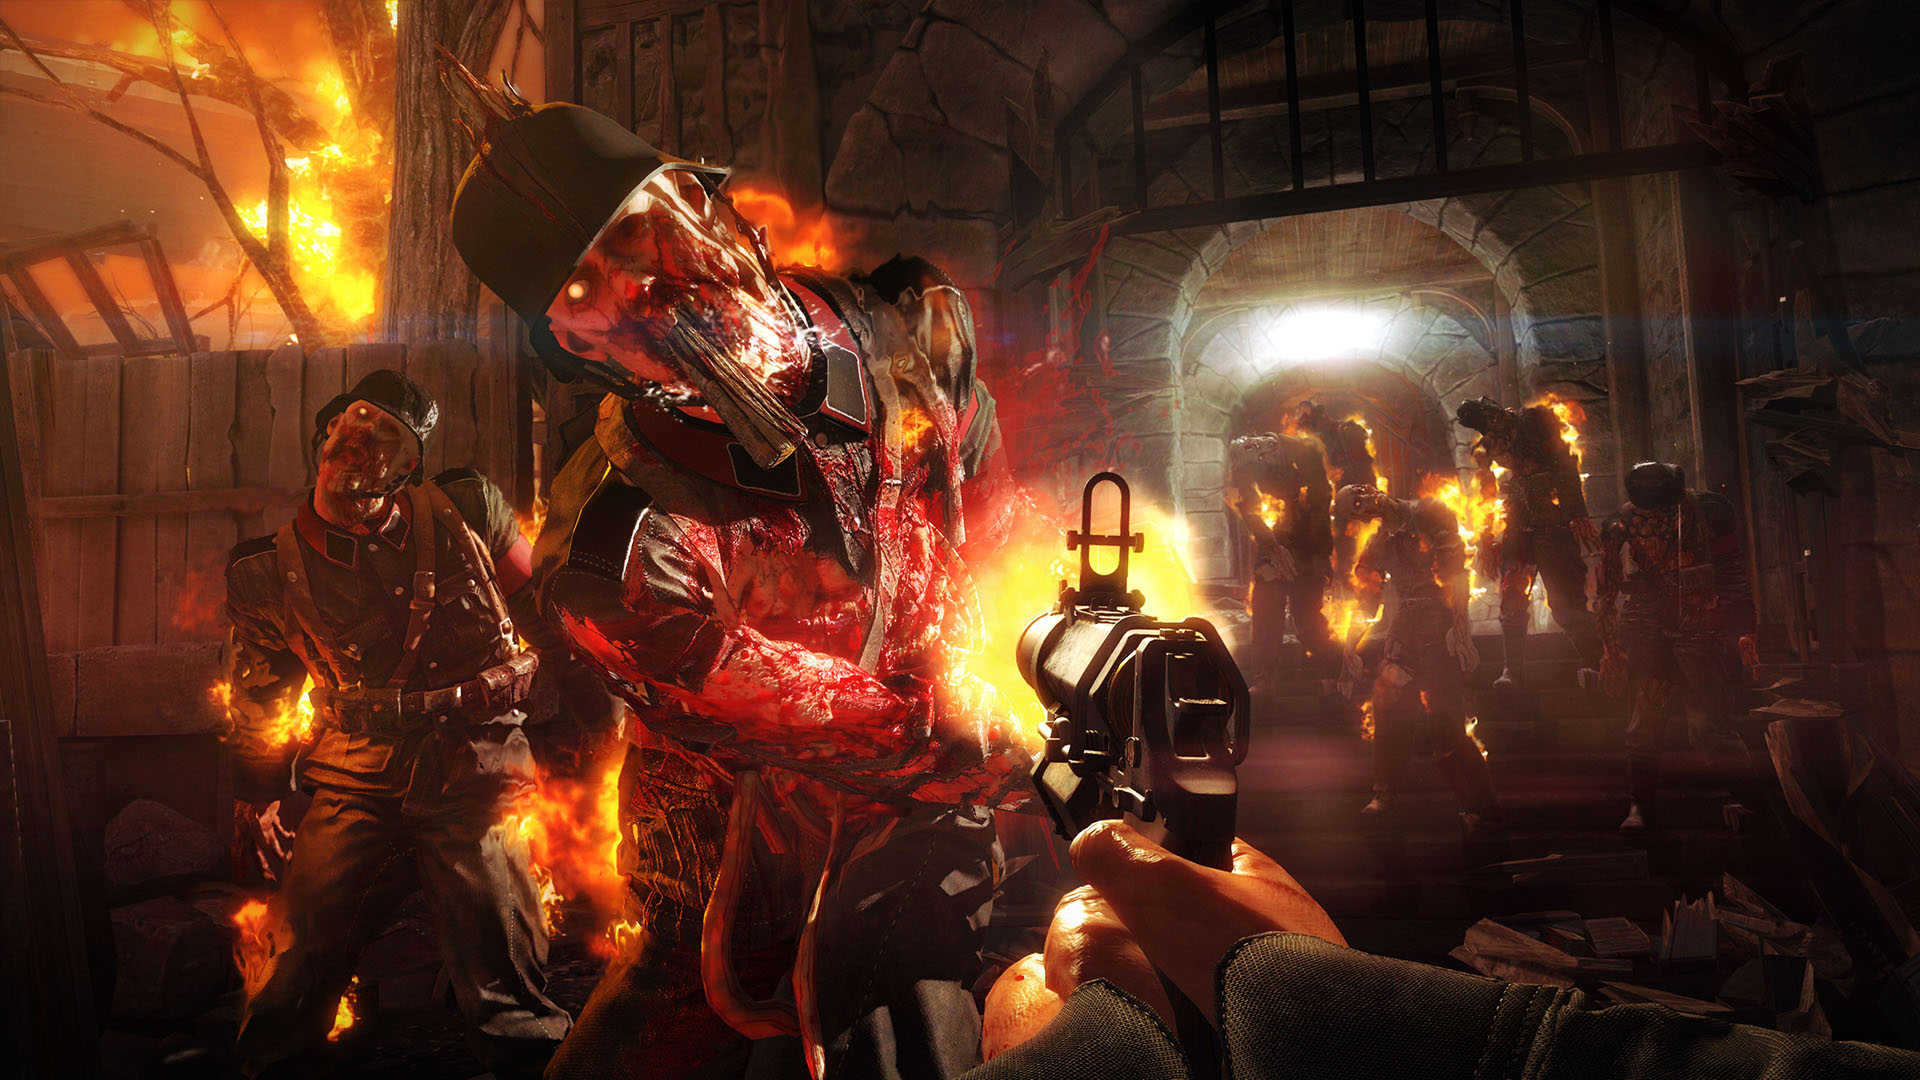

 Dracula Palace Escape Walkthrough
 Fallout 4: Defend Artillery at a Settlement walkthrough
 Syndicate Preview, Plus Ten Minutes of Raw Gameplay Footage
 The Last of Us Remastered Artifacts Guide
 Far Cry 4 Guide: How to Easily Dominate Outposts