Following the events that took place in Monolith Production's First-person Survival Horror title Condemned: Criminal Origins, former SCU agent Ethan Thomas returns to take care of business in Condemned 2: Bloodshot. Ethan's life has evidently taken a turn for the worse since the end of the first game, as he is now both an alcoholic and homeless, though his state isn’t much different than the majority of those who inhabit Metro City these days. Things are an absolute mess, with mass violence and riots breaking out everywhere, on the streets of Metro City everyone wants you dead. As Ethan Thomas, it's up to you to investigate the cause of the madness that has seized the city and put an end to it.
In this guide you will find a complete walkthrough covering each of the eleven missions in Condemned 2, as well as the locations of every Sonic Emitter, TV/Radio and Player Response prompt. You don't need a degree in forensics to make it in this city; we've got you covered with directions to earning a Perfect rating on every forensic event.
Note -- This walkthrough was written based on the Normal difficulty level. The strategies and directions contained within still apply to an Easy or Hard mode playthrough, though enemies hit harder and can sustain more damage on higher difficulty levels.
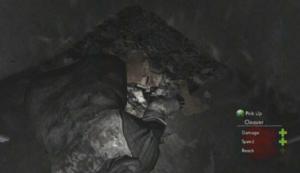
One-Two Combo – 3x damage
Alternating Attacks (Left Attack Right Attack, Right Attack Left Attack) then Combo Attack
Parry Counter – 3.5x damage
Parry Attack then Combo Attack
Advanced Parry Counter – 4x damage
Parry Hook then Combo Attack
Bum Rush Combo – 4x damage
Sprint Attack Attack then Combo Attack
Disarm Attack Combo – 3x damage
Hook Attack then Combo Attack/Disarm
Stinger Attack Combo – 5x damage
Hook Hook Attack then Combo Attack
Triple Cross Combo – 6x damage
Same or alternating Hooks then Combo Attack
Flying Fist Combo – 10x damage
Right Attack Right Attack Left Attack then Combo Attack
Toe Stomp Combo – 1.5x damage (requires Silver level upgrade)
Stomp Kick Attack
Nut-Cracker Combo – 1.5 X extended groin recoil (requires Silver level upgrade)
Stomp Kick Groin Kick (to groin)
Footprint Combo – Knockdown (requires Gold level upgrade)
Stomp Kick Roundhouse Kick while AI is dazed
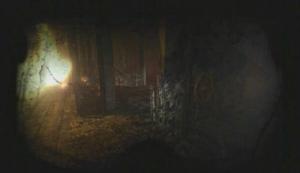
The first part of this mission serves as a tutorial. First you will learn about Player Responses; when the Player Response prompt appears at the bottom of the screen, you then have a short amount of time to press the Player Response Button (A on Xbox 360, X on PS3) to trigger a response from Ethan pertaining to the current situation. Each mission has a certain number of response opportunities, and triggering all of them yields the highest number of mission points in the Player Response category. You can see the total number of response opportunities in the current level and how many you have triggered so far by viewing the mission objectives. Even a single missed response will prevent you from earning a Gold rating and upgrade at the end of the mission, so always pay attention.
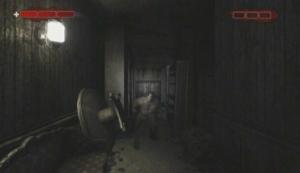
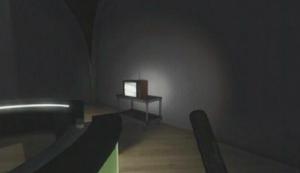
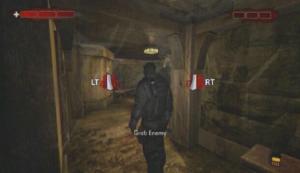
Follow the bum up the stairs and approach the gate. Press the Player Response button when the opportunity arises to seize control and throw the gate open. Here you will experience combat for the first time. After a short, verbal confrontation, a number of thugs will appear, giving you the chance to familiarize yourself with the combat system. Follow the instructions that appear onscreen and defeat each of the thugs. These guys aren’t very tough, but there are a couple of health packs atop a television that you can use if need be. If you think this onslaught of thugs was unwarranted, you’d better get used to everyone hating you soon, because that’s the norm in this city.

Health Packs
Enemy
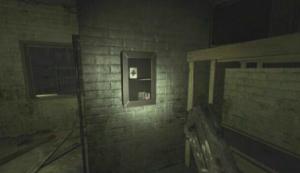
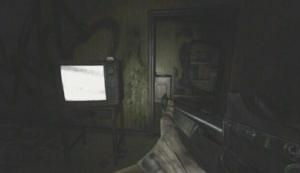
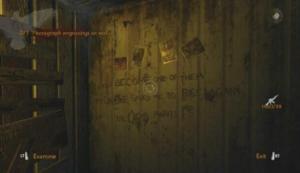
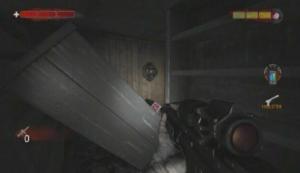
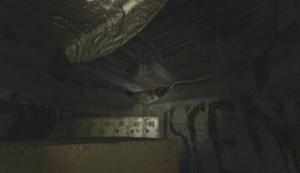
When you’re ready to move on, open the gate next to the dumpster and start down the walkway. Approach the TV and grab hold of its Antenna (1/5). Adjust the antenna using the Right Thumbstick (or Analog Stick) until a picture is visible. Hold the control stick in this position until the clip ceases. As with player responses, the antennas/reports are also a factor in determining the score you receive at the end of the mission. Each level has a number of TVs and/or radios; you can see the total number of them (under “Antennas”) in the current level and how many you have activated so far by viewing the mission objective menu.

Gate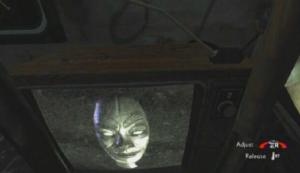
TV/Antenna
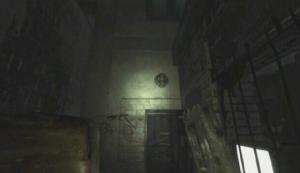
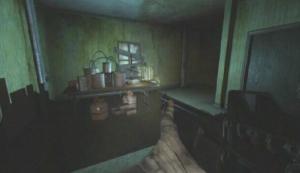
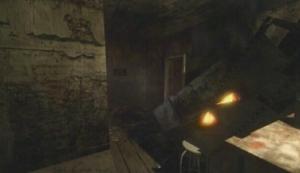
Proceed through the door at the other end of the walkway to enter the TV repair shop. If you haven’t a melee weapon, take up the Electric Conduit by the door, or the Pipe on shelf above the speaker, and then make your way to the back room.
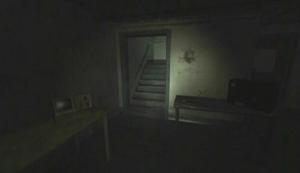
Antenna (2/5): Upon entering the back room of the TV repair shop, ignore the steps leading down to the basement and instead head up the stairs at the opposite end of the room. The TV sits on a shelf at the top of these stairs.
Stairs
Antenna
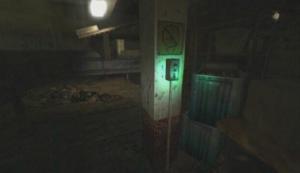
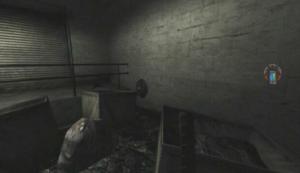
Take the stairs down to the basement and fight off the thug down there. At the bottom of the stairs, turn left and move past the shelf to spot a TV, or Antenna (3/5). There is also an Emitter (1/3) on the wall here. You’ll take damage if you get too close to the emitter, so throw something at it to avoid its harmful effects. These emitters, as well as the player responses and antennas, play a part in determining your score at the end of the mission. You can see the total number of emitters in the current level and how many you have destroyed so far by viewing the mission objective menu.

Antenna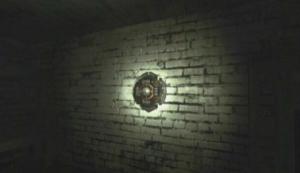
Sonic Emitter
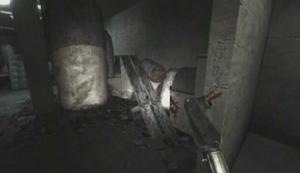
When you’re ready to move on, sprint back up the stairs and quickly take out the TV-throwing thug at the top. Head up the stairs at the opposite end of the room and activate the TV if you haven’t already, otherwise proceed through the open doorway. Move as far down as you can and push the shelf over to gain access to the room. You’ll have to kill the thug here with a chain attack. Just attack him until the chain attack tip appears, read it carefully, then follow its instructions and successfully pull off the chain attack to take him out instantly. Level one chain attacks won’t kill every variant of enemy instantly, but they do deal a fair amount of damage regardless. The next thug that enters the room must be dealt with using an environmental finisher; attack him until he falls to his knees, then grab hold of him and bring him over to a TV marked with the white skull icon to perform a brutal takedown.

Chain Attack
Environmental Kill
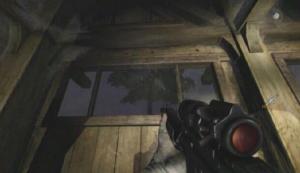
A cabinet in this room holds a couple of health packs, so use them to restore your health if need be, otherwise climb through the open window at the far end of the room
Press the Player Response button when the prompt appears, then move to the end of the walkway and peer down into the alley below. Notice the dog there; drop down and take him out before he can sink his teeth into you. Afterwards, open the gate next to the clothes dryer to knock one of the explosive barrels aside, then immediately sprint to the opposite end of the alleyway to avoid getting caught in the explosion. After stepping through the gate, turn left and sprint to the other end of the street.
Health Packs
Gate
Emitter (2/3), Antenna (4/5): The emitter is attached to the wall above the doorway just beyond the overturned car. Take aim and throw your weapon—or one of the bricks next to the car—at the emitter to destroy it. A TV sits in the barred niche next to the same doorway.
Emitter
Antenna
Head into the building just beyond the overturned car, move to the opposite end of the corridor and proceed through the door outside. Upon entering this room, turn left and open the door there. Hit the player response button when the prompt appears and step back into the streets. Kill the two thugs in this area (the slime-covered one is especially tough, so be careful) and then approach the wooden fence across from the dumpster. Stand back and wait for a fire to start, eventually reaching the explosive barrels and destroying the fence.
You’ll encounter some strange creatures on the other side of the fence. These guys, while weak in terms of vitality, can dish out some serious damage if you’re not careful. To make matters worse, their attacks are much quicker than yours and they have a longer reach than most melee weapons allow. Either hit one with a sprint attack immediately after it has spawned, or dodge an attack and quickly punch him out. Once they’ve been dealt with, head to the far end of the street and turn left when you reach the clothes dryer. Climb up the ladder to reach the walkway above.
Ladder
Move down the walkway until you fall through. Climb the second ladder straight ahead and drop down into the alleyway. If you are in need of health, head down the stairs to find a storage locker that holds two health packs. Proceed to the end of the alleyway and pick up one of the bricks by the locked door. Take aim at the bottom of the ladder casing and hit the seal to jar it open, partly lowering the ladder. The pile of bricks near the locked door provides an infinite amount of bricks, so simply pick another one up and try again if you missed the ladder the first time. Stand beneath the ladder and press the action button when the prompt appears to pull yourself up.
Ladder Casing
Ladder
You’ll encounter more of those tar creatures once on the roof.
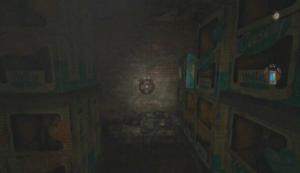
Emitter (3/3): Once the enemies have been dealt with, approach the pile of bricks in the top-left corner of the rooftop. Pick up a brick and then turn left to spot an emitter attached to the building across the way. Throw a brick at the emitter to destroy it.
Bricks
Emitter
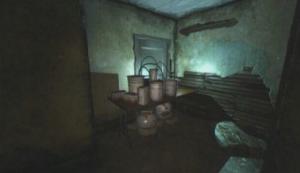
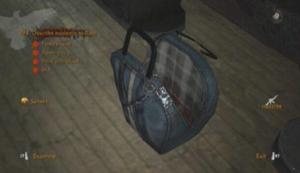
Look around for a pile of boards covering a hole in the roof. Approach the boards and press the action button to move them aside when the prompt appears, then drop down into the area below. If you lack a weapon you can pick up a Brace near the wheelchair up ahead. From where you fell, turn left after passing by the first wheelchair and move to the opposite end of the room. Go through the double door there and enter the small room in the bottom-right corner. Pull the lever to open the gate on the other side of the glass.

Boards
Lever
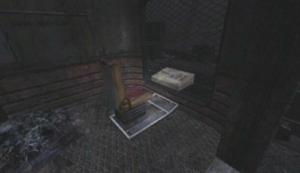
Antenna (5/5): Before leaving the room, activate the TV on the table beyond the two work desks.

Antenna
Unfortunately you released three thugs by opening that gate. One will be waiting for you behind the shelf in the lever room; sprint towards the double door and pull off the Bum Rush Combo (Sprint Attack Attack then Combo Attack). There is another in the next room, so carefully move around the shelves until he shows himself. Afterwards, move to the far end of the room and head through the double door there. The last guy is here, so quickly take him out and then proceed through the open gate at the other end of the room.
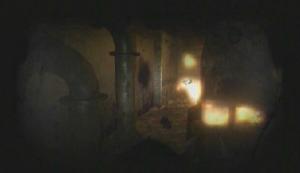
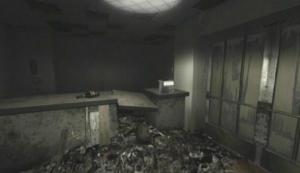
Climb down the stairwell to spot Vanhorn. Hit the Player Response button when the prompt appears, then hop into the slime-covered room. Move past the pillar on the right and take a look at the ceiling. This mission’s Optional Objective is to destroy all fifteen of the ceiling sacs in this area. While you don’t have to complete this objective, doing so will improve the score you receive at the end of the mission.
Whatever you do, do not walk underneath one of the ceiling sacs, because if you do a creature will break free from the sac and grab hold of you. Turn left and move beyond the shelves there, then hug the wall and move towards the table in front of the pillar up ahead. Move around the ceiling sac and step onto the table. There is a pile of bricks on this table; pick up and use these bricks to destroy all of the ceiling sacs in the room (there are 10 in the initial area, 3 in the adjacent hallway, 1 in the operating room and 1 in the room across from there).
Ceiling Sacs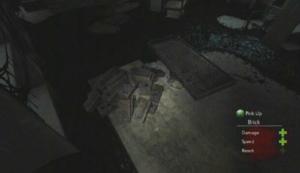
Bricks
Make your way to the end of the slime-covered hallway and cross the ledge to reach Vanhorn and complete the mission.
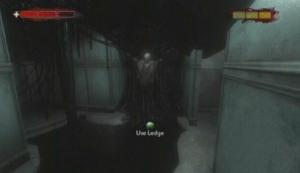
Vanhorn
Be ready to press the Player Response button when the prompt appears during the briefing. Dorland hands you a Riot Gun, a welcome change from the melee weapons you’ve had to use up to now. Follow Dorland underneath the billboard and into the hotel.
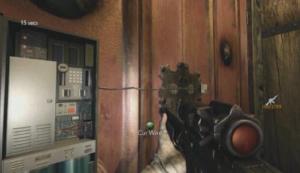
Open the SCU storage locker that is pointed out and take the ammo within, then head down the stairs at the opposite end of the room. Make your way to Dorland’s position in down the hallway and step into the small area up ahead. There’s nothing of immediate interest here, so return to Dorland and continue down the hall.
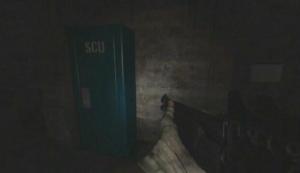
Storage Locker
Le Rue will kick in the door of room 512 to reveal a meth-lab. There are four such labs in the hotel, and this mission’s Optional Objective is to destroy each of them. Blast the meth-lab once and then step out of the room to avoid taking damage from the subsequent explosion. That’s one of four; the remaining labs will also be pointed out in this guide, so follow along to reach their locations.
Meth-lab
Open the jarred door to room 511 at the end of the hall and step inside. There is nothing of interest here, so step back into the hall where Dorland has uncovered a hole in the wall which leads into the hotel cafeteria. Duck under the wall and take out the addict that lunges at you with a quick blast from your Riot Gun. There is a shotgun-wielding thug through the broken wall at the opposite end of the cafeteria. He’s taking potshots at your allies, so carefully make your way there and take him out. There’s nothing notable about room 508, so head to the end of the hall where Dorland and Le Rue are standing and enter 507.
Make your way to the other end of the room and duck under the hole in the wall. Antenna (1/4) is next to the doorway at the opposite end of the room. Enter the bathroom and drop down through the hole in the wall. Leave this room and step out into the hall.
Antenna
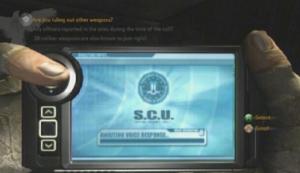
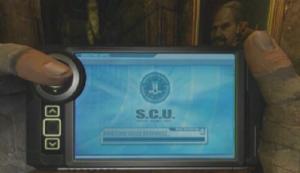
Forensics -- When you reach the elevators, Ethan will bring up his Field Kit to communicate with Rosa. The answers you choose during these briefings with Rosa count towards the Forensics rating you’ll receive at the end of the mission. Asking irrelevant or redundant questions will net you a low rating, while asking the right ones will give you a Perfect rating. In this instance, the best questions to ask are “Any officers reported in the area at the time of the call?” followed by “Is there a commuter train that passes by the hotel?” for a Perfect rating.
Field Kit
Be prepared to press the Player Response button after speaking with Rosa. Jump down the elevator shaft after Dorland. Be ready for another Player Response prompt after the fall, then pry open the elevator door to reach safety.
Start down the hall across from the elevators. You’ll encounter a brute partway down; be very careful, because this guy can dish out some serious damage. Hopefully you have a weapon with you, if not the Riot Gun you were given at the beginning of the mission. Otherwise just try your best to parry his attacks and hit him with some combos to bring him down quickly. Once he’s down, punch the board blocking the doorway across from the table that the brute moved aside until the meth-lab beyond it explodes.
Brute
Meth-lab
Continue to the end of the hall and turn right at the double door. Your Spectrometer indicates that there is a sonic emitter in this room. Select it from the Forensic Tools menu and follow it to Emitter (1/3), which is attached to the wall above the shelf that’s next to the doorway. There’s a pile of bricks in the back room, so pick one up and throw it at the emitter if you currently lack a weapon.

Emitter
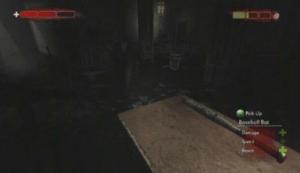
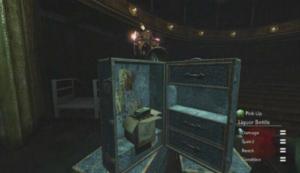
Exit this room and step into the dining area across the way. Approach the long table at the other end of the room and pick up the baseball bat on it. At this point a number of thugs will appear and attack. Take them out, then head through the doorway at the end of the stage at the far end of the room. Move to the end of this corridor to reach the outside area of the hotel. Pick up the Shotgun at the top of the stairs and down some Liquor to steady Ethan’s aim. The calming effects of the drink are only temporary; the time before the effect wears off is displayed by the draining bottle in the top-right quarter of the screen. There’s a slightly more powerful Riot Gun and a couple of health packs in the locker across from the stairs.
Baseball Bat

Shotgun
Continue down the path until you reach another set of small steps. Stand at the side of these steps, aim down the sights of your gun and blast the rioters up ahead. Take up any ammo from the rioters once they’ve been dealt with and approach the double door up ahead. Emitter (2/3) is attached near the first set of windows above the door; shoot it or throw a melee weapon at it before heading through the double door. Be ready to hit the Player Response button once you’re back inside the hotel.
Rioters

Emitter
Forensics -- A “Study Evidence” icon will appear onscreen when you enter a room with examinable evidence. As with the Field Kit responses, the discoveries you make here count towards the Forensics rating you’ll receive at the end of the mission. Reporting the evidence incorrectly or making observations that are off the mark will earn you a poor rating, while making relevant observations and identifying the evidence correctly will net you a Perfect rating. You first need to select three things that identify the body. To get a Perfect rating here, examine the victim’s face and select “Adult male” from the available options, examine his jacket and select “Police uniform,” then pick up the badge by the victim’s right hand and select “Police Badge #46.” Submit the evidence to move on to the next stage.
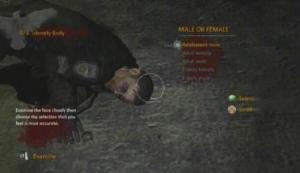
Identify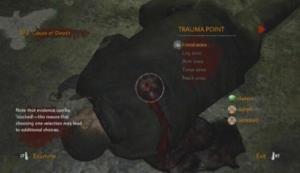
Cause of Death
For a Perfect rating on “Cause of Death,” examine the bullet wound on the victim’s back and select “Torso area,” “Gunshot wound,” and then “Exit wound.” As for the “Has the Body Been Moved?” category, first select the UV Light from the Forensic Tools menu and then examine the blood trail behind the body. Select “Blood trail” and then “Victim crawled.”
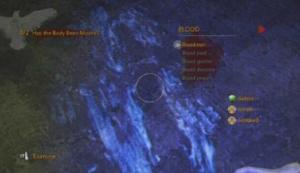
Blood Trail
Use your UV Light and start following the visible blood trail. Move the couch aside and start down the hallway beyond it.
Antenna (2/4): Stop following the blood trail for a moment and take a right at the t-junction. Enter room 106 and locate the bathroom. Be careful though, because there is a pistol-wielding thug on the other side of the door. Take care of him first and then activate the radio on the sink.
Antenna
Emitter (3/3): Continue following the blood trail until the Spectrometer appears on the right side of the screen. The blood leads off to the left, but continue moving forward and step through the opening in the wall on the right. Head through the door across from the bathroom and turn right upon entering the room. Look above the yellow chair to spot the emitter attached on the wall. Shoot or throw something at the emitter to destroy it, and then exit back into the hall through the hole in the bathroom wall.

Emitter
Antenna (3/4): Move to the end of the hall (where the door to room 101 is) and turn left. Be careful, as a brute will smash through a wall along the way. Kill him off, then step into the room he broke out of. A TV sits on the dresser at the far end of the room.
Antenna
Forensics -- The blood trail will lead you into a small room. Examine the blood pattern and select the “Outward pattern” and “Vic dropped from above” options to get a Perfect rating. Pick up the 9mm, then pry open the elevator door to climb to the floor above.

Evidence

Blood Splatter
From the elevator room, turn left and then left again. Follow the hallway until you reach an area with two elevators and kill off the brute that appears. At the elevators, take out your UV Light and follow the short blood trail down the hallway. When you reach the end of the trail, turn right to spot a meth-lab through a hole in the wall. Throw something at it to set it off, or walk down the steps beyond the trail, turn right and enter the room through the hole in the wall to get closer to it.

Meth-lab
Antenna (4/4): Head down the hallway across from the meth-lab spot and search for the door to room 208. Enter the room and go through the doorway on the right side. Activate the TV on the end table and then head back into the hall.

Antenna
From the two elevators, follow the blood trail down the hallway on that right until you reach some tables and chairs. At this point, turn into the dining area and proceed through the open double door at the opposite end. Move past the two yellow chairs and turn right at the t-junction. At the end of the hall, move the board on the right side and duck under the wall. There is an armed thug in this room, so be careful. Destroy the meth-lab in this room and pick up the thug’s gun if needed.

Board
Meth-lab
Forensics -- When you’ve found the start of the blood trail, examine the blood splatter on the door and select the “Exit splatter” option, then identify the “Policeman’s cap” on the chair to earn a Perfect rating.

Blood Pattern

Police Hat
Open the blood splattered door to room 212 and make your way into the adjacent room. Look down into the hole to spot a grisly scene. Be ready to press the Player Response button when the prompt appears. Jump down into the room with the body. When Dorland asks for your location, examine the phone on the table across from the body and select “Room 119” for a Perfect rating. Rosa then asks you to send her a picture of the body; select the Camera from the Forensic Tools menu and focus in on the body. To get a Perfect rating, you have to adjust the camera so the picture is as clear as possible before snapping the picture. To determine adequate clarity, what you see in the lens should look similar to what you would see while not using the camera. Afterwards, snap a picture of the victim’s face to complete the mission.

Telephone
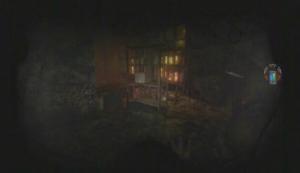
There is no need to waste time fighting the thugs on the tracks, so find the wooden board along the left side of the tracks and cross it to reach the apartment building across the way.
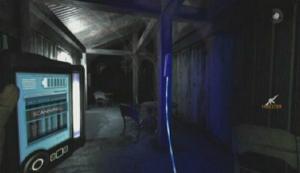
Once you're in the apartment, head through the doorway to the right of the trash bags and scan the wall to spot an Emitter (1/3). Destroy the emitter and then exit into the hallway. Upon entering the hallway, turn left and walk as far down as possible. A radio sits on a machine here; activate Antenna (1/2) and then head through the only other doorway in the hall.

Emitter
Antenna
The Optional Objective is to destroy the two meth-labs in this apartment building, the first of which can be found through the open doorway to the left. Hit the lab once and then step out of the room to avoid taking damage from the explosion. Afterwards, head through the doorway at the opposite end of the room and observe the unnerving mannequin there. Proceed through the doorway next to the mannequin and climb up the stairs through the doorway up ahead.
Meth-lab
Knock the chair aside and open the door at the top of the stairs. Move down the hall and go through the first open doorway you come to. Careful here, because there is a brute in this area and he is evidently upset about something. Take out the brute and then destroy the meth-lab in the back room. Peek through the hole in the wall just outside of the doorway that leads into this room to spot a chair blocking the door. Pick up a brick and toss it at the chair to unblock the door.
Meth-lab

Blocked Door
Antenna (2/2): Open the door across from the entrance to the meth-lab room. The TV is on the dresser here.
Antenna
When you're ready to move on, step back into the hall and head through the now unblocked door. Go through the door at the top of the stairs; be careful, as two armed enemies will step out into the hall. When the way is clear, enter the room next to the stairway door.
Emitter (2/3): Upon entering the room, sprint to the other end and turn right. The emitter is attached to the wall, just above the sink.

Emitter
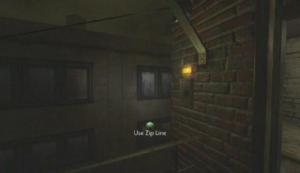
Head through the doorway in the top-left corner of the room and step out onto the balcony. Use the zip line to reach the warehouse across the way.
Zip Line
Enter the warehouse and sprint towards the pistol-wielding enemy at the far end. Hit him with a Sprint Attack and then try to take him down with a combo before he can get a shot off. Pick up his weapon and then down the Liquor that's on the shelf. The nearby storage locker holds a couple of health packs and a Shotgun, but hold on to the .44 for now.
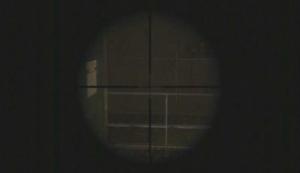
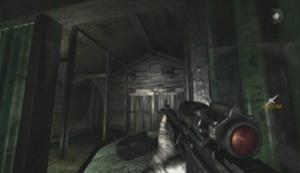
Emitter (3/3): Peering through the doorway, use the scope of the .44 that the enemy was wielding and scan the wall beyond the fence on the other side of the tracks. The emitter is attached to the wall, right across from the warehouse door. Shoot the emitter, and then you can grab the Shotgun from the storage locker if you wish.
Emitter
Drop down from the warehouse walkway onto the tracks below. Sprint towards the fire in the distance and approach the gate near the crashed train car. Be ready to press the Player Response button when the prompt appears. Afterwards, head through the opening in the fence, across from the ladder that leads up to the warehouse entrance, and hop down to the wood plank. Again, be ready to press the Player Response button when the prompt appears. Cross the wooden plank and climb up the ladder on the other side.
Walk down the ramp and kill the thug that appears. Once the thug has been dealt with, attempt to cross the second wooden plank to complete the mission.
At the start of the mission, examine the map to the right of the door and select “Walker Doll Factory” from the list of options for a Perfect rating. Afterwards, head through the door and go down the stairs.

Factory Map
Forensics -- There are six tanks in this area which you must identify. Each tank is either a mixing tank or a settling tank. Check out the poster above the table that's across from the stairs that you used to enter the area to learn the difference between the two. As you can see, the mixing tanks are connected to pipes, while the settling tanks are not. There are four mixing tanks and two settling tanks (one of which is tipped over, so examine its lid instead). Identify the six tanks correctly and send the results to Le Rue to earn a Perfect rating.

Tank Info.
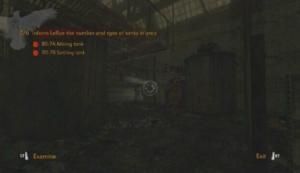
Mixing and Settling Tanks
When you're ready to move on, make your way to the area behind the three mixing tanks and head up the set of stairs there. Start across the catwalk and examine the controls that you come to. There's a lock on the controls, but Le Rue suggests that the manager must have written the combination down somewhere in his office, which is located at the very end of the catwalk. Once in the manager's office, select the UV Light from the Forensic Tools menu and flash it next to the stack of packaged dolls to reveal the combination printed on the wall. The padlock combo is 17-23-10.
Door Controls
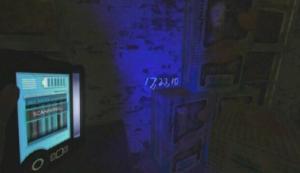
Padlock Combination
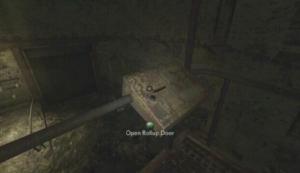
Enter the combination to release the controls and then use the controls to open the rollup door below. Do whatever you can to avoid the demonic dolls that crawl under the door, as hitting one will cause it to explode. Either throw a weapon at the doll from a safe distance, or get close enough to the doll so that it will arm itself, then back away from it to avoid taking damage from the explosion. Duck under the rollup door to enter the next area. Be ready to press the Player Response button when the prompt appears. Make your way to the back of this area and enter the Ventilation Control Room. Push aside the steel shelf and crawl through the vent.
Antenna (1/2): Once you're out of the vent, turn right to spot the radio on a workbench.
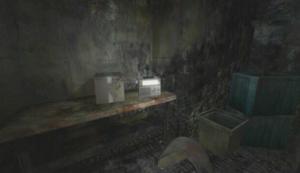
Antenna
Proceed through the door across from the vent. Be careful, though, as there are a couple of rioters in this room. Take them out, then make your way to the other end of the room and head through the door there. There are more of those demonic dolls in this area, so remain vigilant. Walk along the conveyer belt and open the flap at its end. Close the flap again once you're through, then open the flap across from it, head through, and close that flap again. With both flaps in place, hit the switch on the nearby pillar to start the conveyer belt. Now walk along the outside of the belt until you reach some shooting flames. Stall here until one of the boxes on the now operational conveyer belt is about to reach the fire. Move past the fire while it's being blocked by one of the doll boxes to make it safely across.
Conveyer Controls

Fire
Emitter (1/3): Walk to the end of the hall that's beyond the shooting flames and go through the door on the right. Move past the first stack of boxes and you should be able to see the emitter attached to the wall to your left.
Emitter
At the end of the hall that is beyond the fire, step through the door on the left. Activate Antenna (2/2) in the corner at the far end of the room and then head through the nearby door. Slowly walk down this hall, because about midway down a burning man will break through the wall and run towards you. Quickly hit him with your melee weapon, or simply run away so as not to be set ablaze yourself. After that incident, make your way to the end of the hall and turn the valve there to cut off the gas. Proceed through the opening created by the burning man and climb to the top of the stairs.

Antenna

Valve
To make it any further you'll need to fetch a gas mask from the Safety Foreman's office, The entrance to the office is blocked by some junk, but there are a couple of propane tanks propped up against the door that can be used to clear the way. Search the room for a container that has one of those demonic dolls in it and take a doll from it. Aside from being downright creepy, these dolls also explode shortly after being thrown. Toss the doll behind the workbench that is blocking the office door to set off the propane tanks, knocking the workbench aside.

Dolls
Foreman's Office
Enter the Security Foreman's office; be ready to press the Player Response button when the prompt appear shortly after entering. Open the file cabinet drawer that is marked “Masks” and press the Player Response button when the prompt appears. The masks aren't where they should be, but one can be found in the bottom drawer of the desk closest to the flames. Be careful after putting on the mask, because a burning man will lunge at you.
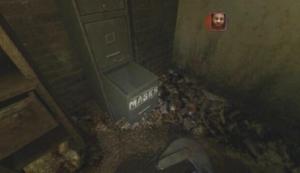
Mask Drawer

Mask
Exit the office and head through the second door. Move the debris off of the trapped man and then go through the door on the left. Move to the other end of the catwalk and drop down to the catwalk below.

Trapped Man
Ignore your Spectrometer for now and slide down the nearby ladder to fight off the burning enemies below. Afterwards, move through the ruined cabin and turn the valve attached the pipeline behind it. Shutting off this valve lowers the flames that are blocking off the doll container along the broken conveyer belt. Take a doll from the container and climb back up the ladder. Stand a safe distance away and throw the doll next to the shelves and other junk that are blocking the way to the next valve. If thrown correctly, the way will be cleared when the doll goes off.
Valve
Shelves
Emitter (2/3): Once the garbage has been moved out of the way, head to the very back of the area. The emitter is attached to the wall next to the furnace. Be careful though, as a couple of burning dolls will emerge from the furnace.
Emitter
Turn the valve here and then slide back down the ladder. Shutting off the valve stopped the other flames that were blocking your way before, so move through the ruined cabin again and pass by the conveyer belt. There are a couple of burning enemies to watch out for here. There's a storage locker which contains a couple of health packs too, so seek it if you need to restore your health. Move down the corridor near the painting on the wall to reach the next area.
Boss Battle -- Use the switch to operate the conveyer belt and you will attract an especially disconcerting individual. This strange character is quite deadly; she is very quick and wields a “lollypop” saw that can dish out some serious hurt. It would be best to get this weapon out of her hands right off the bat, so hit her with the Disarm Attack Combo (Hook Attack Combo Attack). Once the weapon is out of her hands, feel free to take it for yourself. Try your best to parry her attacks and hit her with a few combos until she retreats. A cabinet by the entrance to this area holds a few health packs, so sprint over to it if you need to restore your health.
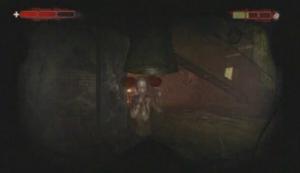
Boss

Health Packs
It's not over yet; your enemy has taken refuge on the catwalk at the other end of the room where she has two containers of exploding dolls at her disposal. She'll throw the dolls at you from the catwalk, but you can fight back with your own arsenal. There is a container of dolls tucked away behind the furthest pillar in the room. You must use these dolls to bring her down by throwing them over to the catwalk she is on, avoiding the dolls thrown towards you at the same time. She moves fast, so you'll have to time your throw just right to catch her in the doll's blast radius.
A good time to throw it is while she's running across the catwalk to one of the doll containers; throw the doll near the container that she is going for before she reaches it and hopefully she will take some damage. All the while you'll have to work to avoid the blasts from the dolls thrown at you, so sprint to the other side of the room if one lands near you, or seek refuge behind the pillar. Hit her with exploding dolls enough times and she will run off.

Boss

Doll Container
After the fight, head up the ramp to reach the catwalk and go through the door. Move down this hall until you reach the elevator.
When you reach the service elevator, Le Rue will ask you to tell him its ID. Examine the sign on the elevator. Careful now, this is “shaft” 4C, but “service elevator” 3B, so select “Service Elevator 3B” from the choices to earn a Perfect rating. Afterwards, try to start the elevator to find that it is not operational.
Forensics -- You're going to have to correctly rewire the elevator panel to get the elevator up and running. The smaller panel on the other side of the elevator is correctly wired, so you can use that one as a guide to rewire the bigger one. Connector #1 is the Bare wire, Connector #2 is the Thick wire, and Connector #3 is the Stripped wire.

Correct Wiring
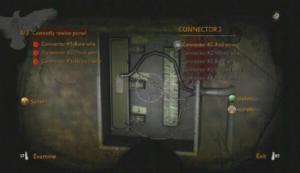
Panel
Unfortunately rewiring the panel does not completely repair the service elevator as it has blown a fuse, so you'll have to find a replacement. Climb through the hatch at the top of the elevator to get out.
Emitter (3/3): Walk down the steps outside of the elevator until the Spectrometer icon appears on screen. At this point, head down the last set of steps and scan the wall to the left to spot the emitter.

Emitter
Climb the stairs up to the top of the elevator shaft and make your way to the end of the path. Enter the room beyond the debris and take one of the fuses that are on the table there. Attempt to return to the elevator and a doll will appear. It explodes and breaks the wooden boards below it, causing you to fall down to the floor below. Guess whose back? It's that strange woman you faced at the assembly line. She'll have her Lollypop Saw here too, so quickly get it out of her hands and pick it up for your own use. Try to parry her attacks and hit her with a few combos or your Stun gun to allow you to get a few hits in. There is a cabinet in this area that holds a few health packs that can be used to restore your health if need be. When your opponent falls to her knees, drag her over to the nearby skull icon to end her with a brutal environmental kill.
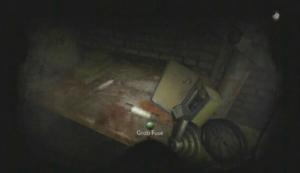
Fuses
Boss
Duck under the debris blocking the doorway and drop back down into the elevator. Replace the fuse to start the elevator and complete the mission.
When you gain control over Ethan, after Rosa has left the room, select the camera from the Forensic Tools menu and snap a picture of the X-Rays above the sink that is across from Vanhorn's body. This mission's Optional Objective is to capture two different chest X-Ray pictures on camera. You'll come across the second later in the level; it'll be pointed out in this guide when the time comes. There's also a radio on a table near the X-Ray room door. Activate Antenna (1/3) and then approach the X-Ray table and get on. A couple of Player Response prompts will appear while you're on the table, so pay attention.

X-Rays
It's easy to get lost in the SCU building, but you can use the GPS to find your way if that helps. When Ethan gets off of the table, head through the double door in the other room. Walk straight ahead and head through the door on the right. Be ready to press the Player Response button at all times, because there are plenty of prompts in this level. Go through the two double doors and walk down to the opposite end of the hall until Ethan blacks out.
Afterwards, head through the double door in front of you and turn right. When you reach the collapsed lockers, move through the nearby laboratory and exit through the double door at the other end. Proceed through the doorway next to the lockers and exit the room through the door at the other end. Upon entering the hall, turn right, then right again. Turn left when you reach the double doors and go through the southern-most one (there are no lights on in the hall beyond it). Walk down this hall and enter the second door on the right. The second set of chest X-Ray pictures are on the wall by the door.

X-Rays
Exit the office once you've snapped the picture and continue down the hall. Your vision will bug out partway down, but try your best to navigate regardless. When you reach the end of the hall your vision will return to normal. At the double door, turn into the room on the right. Move through the doorway at the opposite end of the room to reach another hallway. Enter the open office on the right for a Player Response prompt before heading through the double door at the end of the hall.
Try to open the door from your side to trigger an event. After, open the storage locker at the other end of the room and take the .9mm that's inside. Follow Pennington to the offices upstairs. You'll eventually come to a laboratory that contains a couple of Assault Rifle-wielding enemies. Be especially careful here, as these weapons can cut you down in an instant. There is a storage locker near the entrance to the lab that contains a health pack and some extra ammo if need be. Once both enemies are down, pick up one of their Assault Rifles and continue following Pennington.
Officer

Shootout
You'll encounter more enemies along the way. There are also plenty of storage lockers that hold health packs and ammo, so keep an eye out. When you reach the room that's covered in black slime, watch out for the ceiling sacs; all it takes to pop one is a single bullet. A group of those tar creatures (for lack of a proper name) will attack you once Pennington disappears, so back yourself into a corner and unload into them with your Assault Rifle.
Enemies
Once Ethan regains consciousness, step into the hall and make your way to the elevator. A radio sits on the trolley next to the elevator door. Activate Antenna (2/3), then enter the elevator and use the panel inside to ride up to the management offices.
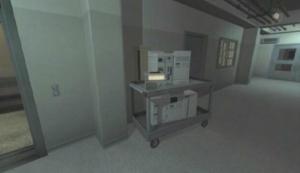
Antenna
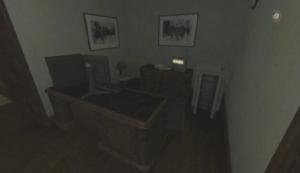
Emitter (1/1): When the elevator reaches its destination, turn left and walk down the hall until you reach an office. Enter the office and approach the hanging picture next to the desk. Punch the picture to knock it from the wall, revealing the emitter behind it.

Picture

Emitter
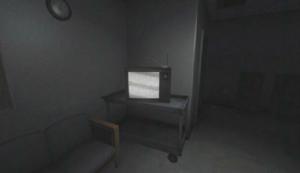
Walk down the hall until you come to Farrell's office. Upon entering, turn right to spot a radio on a table. Activate Antenna (3/3), then approach Farrell's desk and take a seat.
Antenna
Farrell
Forensics -- Farrell will ask you a number of questions about what happened during the last few missions. You have to answer each and every one of these questions correctly to earn a Perfect rating at the end of this mission. Here are the correct answers to his questions:
1. We carried Vanhorn's body away from the hotel.
2. Yes.
3. Dorland shot a power transformer creating a small explosion.
4. I was in an apartment complex next door.
5. The helicopter started taking fire.
6. Dorland.
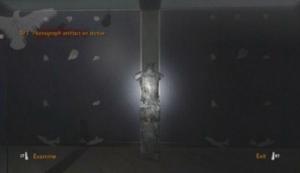
When the police officer reveals the blood-covered wheelbarrow, whip out your UV Light and examine the tire marks behind it. Select “Tire trail to door” from the list of options to earn a Perfect rating. Be ready for a Player Response prompt afterwards. Approach the officer to be helped over the wall and into an adjacent room. There's another Player Response prompt here, so be ready. This mission's Optional Objective is to not kill any of the security guards in the museum. This is easier said than done because they will attack relentlessly if you're spotted. A general tip is to have the thugs in the museum kill any pursuing guards for you, but avoiding them all together is ideal.
You should have gained an upgrade for Ethan's boots at the end of the previous mission which allows for an easier time sneaking. This upgrade will come in handy here, though its effectiveness is dependent on the rating you received at the end of that mission. To sneak, gently push the control stick in the direction that you wish to move. Essentially, if you can hear Ethan's footsteps, so can your enemies. You'll be reduced to a slow pace, but you won't alert any guard who is not looking directly at you while sneaking. All in all, refraining from killing the guards is a good idea, since it contributes to the score you'll receive at the end of the mission and will even net you an achievement on the Xbox 360 version.
Exit this room through the open doorway and step into the hall on the right. Head through the first door to your right and make your way to the other end of the office. Hit the Player Response button when the prompt appears, then proceed through the door at the end of the room and pass through the double door at the end of the hall. There's nothing interesting here, so move to the other end of the room and step through the door there. There is a group of guards sitting at the table in the middle of this large area, so creep to the doorway across the way and head through.

Guards
Forensics -- When you reach the blood pool, Ethan will bring up the Field Kit to communicate with Rosa. Initially you will have to ask a couple of questions; the questions you choose to ask will affect the Forensics score you receive at the end of this mission. First, ask “Did you find any fingerprints on the paper?” and for the second choose “Do you think Vanhorn nursed his nephew back to health?” to earn a Perfect rating. Afterwards, take a clear picture of the saw in the pool of blood and then one of its handle. For the final question, ask “What about the saw? You said it looked medieval?” for a Perfect rating.
There is another forensics event which can be accessed by climbing up the nearby set of stairs. You have to identify the camera that would have captured SKX while he committed the act. It's camera 1501.

Evidence
Camera
Once you're ready to proceed, climb over the wall at the top of the steps. Walk to the very end of the wood paneling and then jump down through the hole and into the room below. There is a TV in this room, so activate Antenna (1/2) and then creep out the door. There are a couple of security guards in the offices down this hall, so you'll have to move slowly to avoid being detected. Upon entering the hall, turn right; the surveillance room is through the door straight across from you. Slowly make your way to the surveillance room door and slip in.

Office
Antenna
All you must do once inside is identify the backup drive that would contain the footage of SKX. This is a simple task if you correctly identified the camera previously. It is backup drive 1501, the second drive from the bottom in the stack of drives on the table. Examine the drive and submit your choice to view the gruesome footage.

Surveillance Room

Backup Drive
After leaving the surveillance room, slowly walk towards the open doorway straight ahead (you may be able to see a security guard seated at a table there) and turn right when you reach it. When you reach the split, turn left and head through the door there. Move through this room to enter the main area of the exhibit.
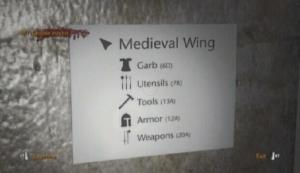
You'll run into some thugs upon stepping foot in the Medieval Wing. If you happened to attract the guards' attention, you can lead them to these thugs to have them killed if you're going for the optional objective as well. A couple of the thugs will flee, but one will remain to attack you. Take him out, then approach the stairs at the other end of the floor. Take a look at the “Medieval Wing” sign next to the stairs. Examine the sign and select “Medieval Tools 13A” to have that location marked on your GPS. Head up the stairs when you're ready to move on.
Sign
There are a couple of security guards in this next area; they'll be difficult to avoid, especially if you want to activate the TV behind the circular desk. Stand in wait until the guard walks away—likely to be killed by the nearby thugs—before moving in to activate Antenna (2/2). Afterwards, make your way to the other end of the room. Stop on the way and smash one of the display cases that contain knight's armor and a sword, or approach the weapon rack at the far end. The sword and battleaxe are powerful melee weapons, so be sure to pick one up before proceeding.
Antenna

Weapons
Emitter (1/3): When you reach the bridge, look to the archway leg to your left to spot the emitter. You'll have to toss something at it to destroy it, so throw your current weapon in an attempt to hit it. If you miss, return to the weapon rack, take up another weapon and try again. Once you do hit it, be sure to get another weapon into your hands before continuing.
Emitter
You'll encounter a battle garb-wearing, war hammer-wielding enemy at the end of the bridge, so do not cross too quickly. Hopefully you've got a medieval weapon of your own, but if not turn back now and pick one up. When you reach the arched doorway at the end of the bridge, back away when you spot the enemy and let him come to you. He'll attack with a relentless fervor; try your best to parry one of his attacks, then use your stun gun to incapacitate him and slash away. When the warrior thug has fallen, cross the bridge and move through the next section of the exhibit. Walk across the wooden boards and drop down into the area below.
This area contains a number of sword/axe carrying thugs and a couple of security guards. Unfortunately the guards can't tell friend from foe and will attack you regardless of your intentions, so it is best to sprint away until they are cut down by the enemies in the area. Emitter (2/3) is attached to the middle pillar closest to the wooden boards you hopped down from, so find and destroy it once the vicinity is clear of hostiles.

Emitter
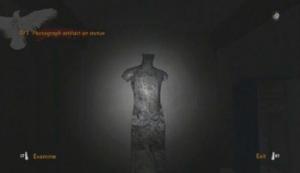
Afterwards you should eventually receive a message from Rosa, telling you that someone has requested that you take pictures of three strange artifacts in the museum. If you don't hear from Rosa, though, just follow the instructions in the paragraph below to trigger the objective.
This is another Optional Objective, and thus does not need to be completed, but doing so will affect the rating you receive at the end of this mission. So if you want to earn the Gold level upgrade at the end of this mission, do it. There are only three statues, the locations of which are marked on your GPS. The first statue can be found in the Black Band/Maximillian I exhibit area, which can be reached by heading through one of the two doorways across from the bottom of the stairs you just scaled. The statue is between the two exhibits; snap a clear picture of the artifact on its face and then head back up the stairs and make your way to the end of the corridor.
Statue

Artifact
When you're ready to move on, search the area for a set of stairs and climb up. There is a guard and warrior thug in this room. Let the thug kill off the guard, then move in, hit the enemy with your stun gun and start attacking.
Emitter (3/3): Once you're outside, turn right and scan the brick wall behind the lower wall to spot the emitter. There is a pile of bricks by the base of the lower wall, so pick one up, take aim (aim just a bit above the emitter) and launch it towards the wall. This pile provides an unlimited number of bricks, so you can attempt to hit the emitter as many times as necessary.

Emitter
Bricks
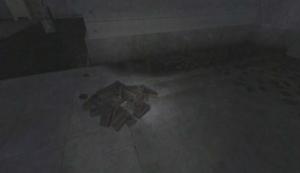
Forensics -- From the door that brought you outside, turn right and head through the door at the end of the way. When you reach the gruesome scene, approach the table and take a picture of the metal tools on the table. Once that's done, move closer still and collect a sample of the blood, then a sample of the metal pieces. When the selection of questions appears, ask “Any evidence the metal pieces came from Rachael Mars's body?” to earn a Perfect rating.
Evidence

Metal Pieces
After the investigation, be ready to press the Player Response button when the prompt appears. A couple of thugs will jump you on your way out, so grab one of the swords from the knight's armor displays if you are not currently armed. Upon exiting the room, immediately turn left when you pass the crate and Sprint Attack the guy waiting for you there. Once they have been dealt with, make your way to the opposite end of the courtyard; you'll encounter a security guard and a couple of thugs along the way, so let the guard get killed (though if you don't care about the optional objective, take care of him yourself) and then take out the two enemies.
Another artifact statue is nearby and will now be pointed out, so skip this paragraph if you aren't interested in completing the second optional objective. From the door that brought you outside, turn left and walk down the path there. Keep walking until the “Study Evidence” prompt appears on screen. At this point stop and snap a picture of the artifact on the statue's mouth. Afterwards, head through the doorway to the right of the statue

Statue
Once back inside the museum, turn left and climb through the board there. You'll encounter a battle ready enemy who dons a full suit of armor and wields a fierce looking battleaxe. This guy is no joke, so quickly sprint to the opposite end of the room once you've got your bearings and cross the bridge there. The knight will fall through the boards due to his heavy armor, providing a temporary reprieve. You will run into him again, though, so don't get too comfortable.

Knight

Boards
The last of the artifact statues can be found in this room, but take out the hostiles here first before worrying about that. Be careful, as a thug will lunge at you as soon as you enter. Once they have been dealt with, search for the statue near the entrance to this exhibit and take a picture of the artifact on its face. There is an SCU locker next to the statue that contains a couple of health packs if needed. Take one of the Oro Crossbows from the display case before stepping over the boards at the far end of the room. It's that knight again!
Statue

Oro Crossbow
Boss Battle -- If you're armed with an Oro Crossbow this won't be a tough fight, so take one from a nearby display case if you aren't packing one already. This guy hits hard, but his armor and axe are evidently cumbersome as he moves quite slowly. The basic idea here is to wait until his axe gets stuck in the floor, then proceeding to hit his backplate with crossbow bolts or a Sprint Attack.
There is a SCU storage locker and a couple of health packs in the area if one of the knight's hits does connect, as well as a couple of Oro Crossbows full of extra bolts. When you've hit the knight's back enough times, the metal plate covering his back and abdomen will shatter. Aim your bolts at the exposed flesh and take swings at him until he falls to the floor. Approach the fallen knight and end this bout with a brutal finishing move.

Knight
After a rough landing, start down the trail next to the plane's tail-end and follow this path until you reach a bridge. There are a couple of Player Response prompts along the way, so be ready. When you reach the bridge, attempt to cross it and you will fall through. There is a piece of evidence nearby; examine the bloody chunk and select “Arm” from the list of options. To determine the approximate time of the kill, zoom in on the wrist and remove the watch from it. Select “February 24th” for the date and “0003” for the time to earn a Perfect rating. Collect a sample of the evidence and then start down the blood-smeared path beyond it.

Evidence
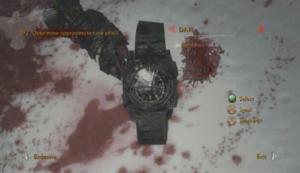
Watch
The Spectrometer icon will appear as you make your way down the path, though there are no emitters to be found in this particular mission, so just ignore it. Eventually Ethan will bring up the Field Kit to communicate with Rosa. Select “Dehydration? With all this snow?” to earn a Perfect rating. Afterwards, continue following the trail until you reach the service building. Locate the entrance and step inside.

Service Building
Forensics -- You'll come across a corpse upon entering the service building. To determine the identity of the victim, first examine the eyes and select “Male,” then examine his jacket and select “SCU,” and then pick up the wallet next to his left leg and select “D. Payant” for a Perfect rating. Be ready to press the Player Response button when the prompt appears afterwards.

Evidence

Wallet
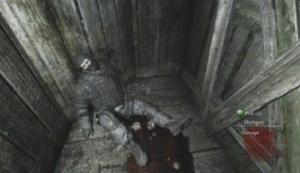
Head through the doorway across from the corpse and make your way through these rooms until you come to another disturbing scene. This victim has had his legs torn off, and a quick look at his jacket tells you that it's another SCU officer, one of Dorland's men. Move on through the doorway across from the second victim and head up the stairs there. When you reach the top of the steps, move to the end of this area until you fall down a hole to the floor below.
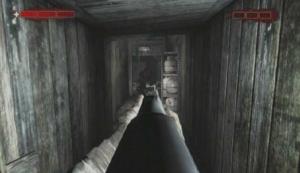
You'll meet a rabid bear down here; as soon as you spot him, whip around and take off down the hallway behind the two steel shelves. As you sprint down the hall, keep an eye on your right for a room you can duck into. Proceed through the doorway at the opposite end of this room and wait here for the bear to pop in and clear the way for you. Move through the opening at the end of the tunnel for a short reprieve.

Bear!
Antenna (1/3): Upon entering the room, move forward and turn left at the pillar straight ahead and step through the doorway there. The TV is sitting on a table in this room, across from the fridge.

Antenna
Climb up the stairs for another encounter with the bear. Slip past the dresser along the walkway and head through the doorway at the walkway's end. Quickly move through the opening at the far end of this room and squeeze past the bath to safety. In the next room, approach the dresser that's blocking the door and push it out of the way. As soon as you step out of the room, turn left and sprint down the hall there. You'll reach a survivor in the next area; first push the dresser to block the doorway, then sprint towards the injured officer—pressing the Player Response button when the prompt appears—and pick up the shotgun. Take aim at the propane tanks on the steel shelf to the right and wait until the officer shouts “Now!” before pulling the trigger.
Survivor
Bear
Start down the path and press the Player Response button when the prompt appears. Make your way to the end of the trail and enter Vanhorn's lodge. Creep into the next room and tiptoe towards the idle SCU officer. When you're right behind the officer, grab him and break his neck. Pick up the fallen officer's Assault Rifle afterwards and press on. You'll come to an explosive device along the way; examine the door of the device and select “DETM 12x” for a Perfect rating.
SCU Officer
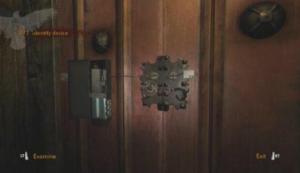
Device
Now for the hard part; to diffuse this device, you first need to locate and dispose of the six explosives attached to it. Each explosive is connected directly to the device with cables that can only be seen in UV lighting, so whip out your UV Light to spot the cables. As you can see there are cables running every which way, so it'll take a bit of work to follow them to each blast point. You must then throw the blaster through a window, far enough from the lodge to avoid death.

Blaster Cables
This is the most gun-heavy mission in Condemned 2, so you must keep your gun loaded to deal with the armed SCU officers patrolling the lodge. If you earned a Gold level holster from one of the previous missions, this upgrade will certainly come in handy as you can then carry two weapons of any type at once (ex., two Assault Rifles). Regardless, just be sure to retrieve the ammo from every fallen enemy's weapon and you'll be fine.
1. There is an officer patrolling the walkway through the first door, so take him out before heading down the stairs. One of the explosives can be found attached to the pillar near the fireplace. Remove the explosive and immediately toss it through the window next to the fireplace to safely detonate it.

Blaster

Window
2. From the lounge, follow the two cables that run beyond the doorway to the left of the stairs and continue following them until they branch off. Turn into the room on the right when you reach the split; the blaster is sitting on the first table on the left. To safely dispose of this one, grab it and then quickly return to the pool table room and throw it through one of the windows there.

Cables
Blaster
3. From the split in the pool table room, follow the second cable to the bar. Careful, as the setting off of the previous blaster likely alerted the SCU officers patrolling the area. Follow the blaster cable behind the bar and down the stairs there. Take out the officers in the kitchen and then continue following the cable to a pillar in the adjacent room. You have to throw this one through the small, square window in the nearby area. It may take a few tries to get it through, but luckily you just recently hit a checkpoint so a miss isn't a big deal.
Blaster
Window
Forensics -- There is an optional forensics bit near this blaster; head through the double door beyond the pillar that held the blaster and take a clear picture of the photos and engraving on the wall in this room.
Evidence
4. Return to the lounge and climb the stairs back up to the walkway. Follow the blaster cable that leads along the walkway, beyond a double door (not the one with a set of stairs beyond it) and into a dining area. As soon as you step past the fireplace here, turn right to spot the blaster attached to a pillar. You'll have to throw this one through one of the windows on the other side of the room. It might help to break the window beforehand to avoid having the blaster bounce back into the room. When you're ready, remove the blaster, sprint towards a window and toss it outside.
Blaster
Window
5. Return to the lounge walkway. Move along the walkway until you reach a double door with a set of stairs beyond it. Climb up the stairs and take out your UV Light to spot a couple of blaster cables. When they branch off, follow the cable that leads up the stairs on the right. You'll come to a hole in the floor, so stop following the cable and turn into the room to your left. Upon entering the room, turn right and enter the small passage there. Move to the end of the passage to reach another room. Step out onto the balcony and hop over to the one next to it. Step though the door and exit this room using the door at the opposite end.
Balcony
When you reach the second lounge area, head up the stairs and make your way to the other end of it. The blaster is attached to the side of the fireplace here. Before removing it, turn around and break the window behind it, then take the blaster and throw it through the open window.

Blaster
Window
Antenna (2/3): Head back down the stairs and follow the blaster cable that leads through a doorway. The cable will soon lead up through a hole in the ceiling, but continue moving forward while keeping an eye on your left. Go through the first door on your left and enter the room. The TV is sitting on the table near the chair.

Antenna
6. Proceed through the double door at the top of the stairs and move down the hall until you come across another cable. From the cable, turn around, move back down the hall and turn into the room on your right. Step onto the balcony and hop over to the one next to it. The blaster is attached to the pillar in this room. Remove the blaster and toss it from the balcony.

Blaster

Balcony
Antenna (3/3): In the same room, there is a radio sitting on a table in the closet across from the bathroom.

Antenna
Forensics -- Once all of the blasters have been disposed of, return to the detonator to start disarming it. You have a total of 60 seconds to do so before the place is blown sky-high, so you may want to jot these instructions down or memorize them before attempting to disarm the device. You must first describe the device to Rosa:
1. Examine the canisters and select “2 Canisters.”
2. Examine one of the power sources on either side of the device and select “120v/12v.”
3. Examine the lights in the top-left corner of the device and select “3 blinking lights.”
4. Examine the device's keypad and select “16 Button keypad.”
5. Examine the wires below the keypad and select “2 long/1 short.”
Submit this list to Rosa for a Perfect rating. Cut the wire on the right to successfully disarm the device. Be ready to press the Player Response button when the prompt appears afterwards.
Device
Wire
Climb down the stairs and examine the computer on the desk. Holster the .44 on the desk if needed, then examine the monitor and select “Vocal cords” to gain access to the computer. Vanhorn's video message will be interrupted as a troop of Dorland's men storm into the library. You're going to have to hold here until help arrives. A good place to make your stand is in the sitting area behind the fireplace. Sprint over to that area and down the Liquor that's between the two chairs to steady your aim. Fight off Dorland's men until Le Rue arrives. Carefully make your way to the escape vehicle and hop in to complete the mission.

Computer

SCU
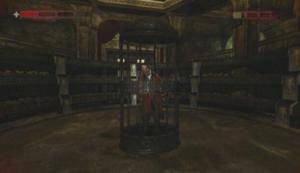
At the start of the mission, creep up on the guard nearest to the fence—slowly enough that you yourself cannot hear Ethan's footsteps—and grab hold of him when you're close enough. If done correctly, the guard chatting with Le Rue will be none the wiser, allowing you to sneak up and incapacitate him in the same fashion. There's one last guard to deal with in the bus, so quietly step onto the bus and take him out. If you kill the guards you'll fail this mission's Optional Objective, so incapacitating them is the way to go. With the guards out of the way, open the cage at the back of the bus and step in for a little chat with the serial killer known as SKX.
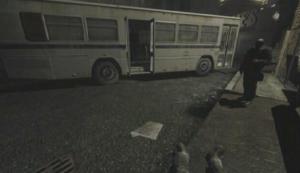
Guards
SKX
Unfortunately the commotion outside of the bus allows SKX to escape, so you're going to have to chase after him. Be ready to press the Player Response button when the prompt appears. Pick up Le Rue's Assault Rifle before heading up the stairs and into a bowling alley.
There are a couple of gun-toting thugs in the initial area, so tread carefully. Take them out, as well the other thugs in the area, and holster the .22 for later use. When the coast is clear, make your way to the doorway at the end of the right-most lane and enter the room there. You'll get a call from Rosa; be ready to press the Player Response button when the prompt appears. There's nothing of interest here, so start towards the opposite end of the room. A thug will pop out from behind the arcade machines near the end, so be prepared. An Emitter (1/3) is attached to the wall behind the collapsed shelves in the room just before the second alley.
Emitter
The next area is packed with thugs, so down the Liquor battle that's on the counter if you've still a gun with ammo and start picking them off. There's a Lever Rifle in the storage locker outside of the bathrooms if you need a weapon. Once the thugs have been dealt with, approach the right-most lane and examine the scorecard nearby.
Forensics -- Examine the scorecard on the projector. Your task is to connect each of the four names with one of the five choices in the menu. For UNCLE select “Vanhorn,” for MAYOR select “Mars,” for DIRECTOR select “Farrell” and for MAGICMAN select “Unknown.” Submit these answers to earn a Perfect rating.

Scorecard
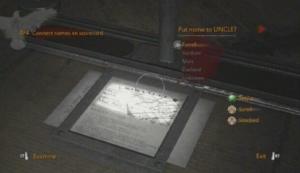
Names
Afterwards, examine the severed head on the ball rack near the scorecard. Zoom in on the head and select “Female head,” then zoom in on the bag below it and choose “Bowling bag.” For the contents, select “Filled with blood” and for the owner of the bag select “SKX.” Submit these choices to Rosa for a Perfect rating. Lastly, snap a clear picture of the head on the ball rack.
Bowling Bag
Move down to the end of the right-most lane and climb through to the back room. Walk past each of the lanes to reach a small corridor. Turn into the first room that you come to on your left to spot a radio sitting on a file cabinet. Activate Antenna (1/3) and then step back into the corridor. Continue past the second set of lanes and move through the opening in the wall.

Antenna
Emitter (2/3): This emitter is attached to the wall behind the chairs and desks in the first part of the school you come to. There's a pile of bricks on the ground that can be thrown to destroy it. You may have to knock a couple of the boxes out of the way before you can reach it, but luckily the pile provides an endless supply of bricks.

Emitter

Bricks
Antenna (2/3): Move to the other end of the locker room and head through the doorway there. Look to your right upon entering this area to spot the radio on a steel drum.
Locker Room

Antenna
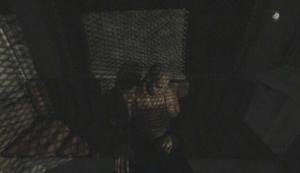
In the locker room, approach the stack of lockers at the far end of the room and climb through the opening in the ceiling above them. Make your way to the other end of the attic until you reach a square opening. Press the Player Response button when the prompt appears, then drop down into the torture room. There are three torture devices to photograph in this room to complete the Optional Objective; you'll need to locate each one, enter Forensics mode when the “Study Evidence” icon appears and snap a clear picture of each device. The first device is next to the dog cage, the second is a man trapped in a cage around the corner, and the third is the man being electrocuted near the room exit.
Opening
Torture Device
When you're finished taking pictures, use the door at the end of the torture area to enter a hallway. Be careful as you move through here because you'll be attacked by a rabid dog.
Antenna (3/3): Before leaving this hallway, move to the very end of it to find a radio sitting on the edge of a counter. Be sure to get this one before going through the hole in the wall because the game will auto-save at that point, and you won't be able to access this hall again without restarting the mission.
Antenna
Search for an opening in the wall (about midway down the hall) and move through it. There isn't much here, but you'll find an Emitter (3/3) behind one of the waste bins in the back room. To reach the doorway that's blocked by junk, locate the wooden ramp outside of the back room where the emitter was found and walk along the path of boards. Drop down behind the junk and proceed through the doorway. Move down this corridor and keep an eye on your right for a wooden door. Go through the wooden door when you come to it and press the Player Response button when the prompt appears. In this area, locate the freezer door and step inside.
Emitter
Ramp
You'll come across Farrell in the freezer. Examine him and select “He's still alive” to earn a Perfect rating. When Farrell is finished speaking, pick up the Cleaver next to the corpse in the corner of the room and cut the straps that bind Farrell. Your job now is to escort Farrell to safety. Kill off all of the hostiles in the kitchen and adjacent corridor. Lead Farrell the stairs at the end of the corridor and head through the door there to reach the school gymnasium.

Farrell
Cleaver
To end this mission you'll have to partake in a brawl with the homeless in the gym. A number of them will enter the arena, making for a relatively lengthy fight. Try your best to parry their attacks and hit them with combos—such as Bum Rush (Sprint Attack Attack then Combo Attack) and Flying Fist (Right Attack Right Attack Left Attack then Combo Attack)—to take them out quickly. The mission ends when the fight is over.

Arena
Your first task is to defeat Ethan's alcohol demon. Once the demon has been dealt with, you'll no longer need to consume alcohol to steady your aim. The demon isn't too hard to take down; hit him with a Sprint Attack as he charges towards you and then hit him while he's down to end it. When that's over and done with, climb up the stairs behind the counter and head through the double door at the top. You have to pull a couple of levers to gain access to the Ticketmaster.
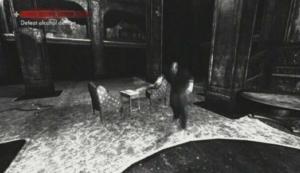
Alcohol Demon
Ticketmaster
There are two elevators on opposite ends of the walkway; each will bring you to one of the levers. Step into one of the elevators and you will be contacted by Rosa. Ask “See anything about the Oro's purpose, their objective?” to earn a Perfect rating. Afterwards, step out of the elevator and pull the lever in that area and then take the elevator back up to the walkway. Defeat the two women that were attached to the wheels on either side of the elevator and then make your way to the elevator at the opposite end of the walkway. Defeat the two women there too and then step inside the elevator. Pull the lever in this area to gain access to the Ticketmaster.

Elevator
Lever
Emitter (1/1): Attached to a pillar in the area that the eastern elevator (refer to your GPS) brings you to. It's on the pillar to your right as soon as you step out of the elevator. Can't miss it.

Emitter
Antenna (1/1): The radio is sitting on one of the cases in the area that the western elevator (refer to your GPS) brings you to. When you step out of the elevator, turn right and move behind the bunch of cases visible in the distance to spot it.
Antenna
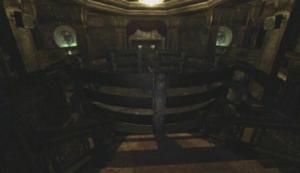
When both levers have been pulled, return to the walkway and down the stairs that lead to the Ticketmaster in the middle of the room. Push the three swords around his cage into him to spawn some enemies. Fight off the enemies and then proceed through the doorway behind the Ticketmaster's cage. You will be contacted by Rosa again when you step through the doorway. First, ask “Are you suggesting this organization is responsible for all that's wrong in the city?” and then “Does he describe how Sonic Generation works?” to receive a Perfect rating.
Ticketmaster
Field Kit
After, turn either left or right and move down the corridor in this direction. Go through the double door that opens up and approach the stage. The two Player Response prompts in this mission occur here, so be ready. Step onto the stage and wait for the curtains to be drawn.
Boss Battle -- First kill the woman that hops off of the wheel and then move over to the case at the far end of the stage. To defeat this guy, you'll have to throw a bottle at him while he's on one of the three pedestals surrounding the stage. He will disappear when the bottle hits and reappear on one of the other pedestals. When he reappears in the platform above the spike table, pull the lever next to it to defeat him.
Bottles
Magicman
At the start of the mission, make your way to the opposite end of the deck and head through the doorway there. Search for the anchor controls and activate the anchor to tear a hole into the deck that leads to the interior of the ship. A couple of Player Response prompts will appear afterwards, so pay attention. Follow the scrape mark left by the anchor to the newly created dropdown point and jump down.
Anchor Controls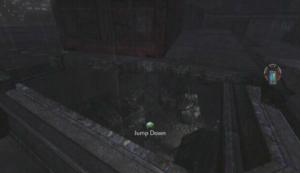
Dropdown
Emitter (1/6): After jumping down the hole, turn around to spot the emitter attached to the wall at the end of a short walkway.

Emitter
Move to the other end of this area and drop down to the area with the cargo containers. You'll encounter some mutants down here, including an as-of-yet-unseen larger, more powerful variant. These guys can be tough to bring down normally, so it would be best to use your stun gun for a quick kill. Aside from a few enemies there's nothing to see here, so move through the maze of cargo containers and climb up the ladder at the end of the way. Rosa will contact you when you reach the upper walkway, and a Player Response prompt will appear, so be ready to press that button.
Head through the door at the end of the walkway and follow this corridor to reach a door at its end. Turn left at the door and climb through the open window and onto a cargo container. Walk to the end of the container and drop down to the red container nearby. Climb up this container and move through the window at the other end. Go through the door at the end of this corridor and drop down through the opening in the floor.
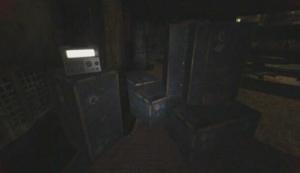
Antenna (1/1): When you reach the storage room, search the shelves on the right side of the room for a radio. Activate the radio before moving on.
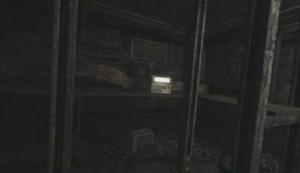
Antenna
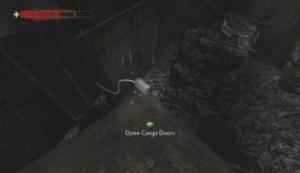
Keep moving until you come to a cargo door. Use the switch next to the door to open it. You'll encounter a hulking Metal Junkie in this area. Press the Player Response button when the prompt appears, then locate the nearby ramp and climb up it. You have to move fast, otherwise the metal brute can trap you in a corner, and at that point the only way out is death. If this happens, pause the game and select the “restart from the last save point” option, since the last checkpoint occurred at the entrance to this area.

Metal Junkie
Ramps
The cargo door switch has been inconveniently placed atop a nearby platform. Through the cargo door is your way out of this mess, so you'll have to hit the switch to open the door first. Move across the metal sheets and steel girder to reach the platform and use the switch to open the cargo door below. Hop down from the platform once the door is open and squeeze through the boulders to reach the next area. The boulders are no obstacle for the metal brute, however, as he'll have them out of the way in no time and be right on your tail again. Sprint to the other end of this area and head up the ramp there. Move across the overturned bus and cargo container to reach the upper walkway. Cross the platform and steel girder at the other end of this walkway. Climb up the ramp to reach the deck.
Cargo Door Switch
As soon as you are up the ramp, climb up the ladder straight ahead to reach the crane controls and operate the crane. Afterwards, step back outside and jump to the bus attached to the crane. Drop down through the sunroof, move to the front of the bus and exit through the door.
Crane Controls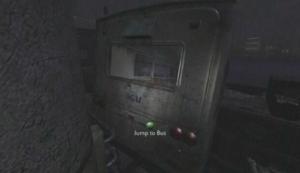
Bus
There is a news van door at the other end of this walkway, near the storage container. Snapping a picture of this door is this mission's Optional Objective, though this is no easy task considering the fact that the metal brute is still relentlessly pursuing you. If you're hoping to earn the Gold level upgrade at the end of this mission, you have to complete this objective, so you're going to have to move fast. As soon as you're off of the bus, run towards the news van door at the other end of the walkway (you should be able to spot it from where you are), enter Forensics mode, whip out your camera and take a clear picture of it. The metal brute will push his way through the rubble nearby, so immediately take off back down the walkway and turn left as soon as you can.

News Van Door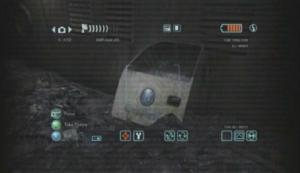
Photo
Proceed through the door at the end of the walkway for a short reprieve.
Move to the end of the initial area and go through the door on the left. Drop down from this walkway, go through the doorway and head up the stairs. In the next room, walk to the very end of the catwalk to spot Rosa below, running from a group of metal brutes. Great. Be ready to press the Player Response button when the prompt appears.
Emitter (2/6): At the very end of the catwalk, look to your right to spot an emitter attached to the wall. Throw your current weapon at it to destroy it. Don't worry if you miss, though, as you can always come back to this one once the metal brutes have been dealt with.

Emitter
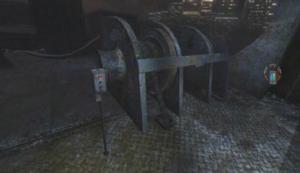
When you're ready to proceed, drop down from the catwalk to the area below and immediately sprint over to the doorway at the south end of the area. Climb up the pair of ladders at the end of the way to reach a magnet control panel. Your task is to use the powerful magnet in this area to deposit each of the three metal brutes into the nearby compactor. This, however, is no easy task, as more than likely one of them will have taken position in the area directly below the magnet controls and will periodically throw a boulder your way. This is irritating enough, but while the metal brute is there he's also out of the magnet's range, meaning you won't be able to put an end to him while he's there

Magnet Control Panel
Compactor
If you can deal with projectiles being thrown at you long enough to take out the two other metal brutes in the area below then do so, otherwise you can get the annoying one to leave you be by climbing back down the ladder (the opening of which the brute can't fit through) below the magnet controls and wait for him to forget about you.
Position the magnet above a Metal Junkie's path and activate it to grab hold of him when he walks beneath it. When you have one, move the magnet over to the compactor and deactivate the magnet to drop him in. Dispose of all three brutes in this fashion to proceed. Be ready to press the Player Response button when the prompt appears after crushing the first.
Emitters (3/6), (4/6), and (5/6): There are two emitters attached to the wall directly behind the magnet control panel, and one on the wall to the left of it. There is a pile of pipe fittings on the platform, which can be thrown at the emitters to destroy them.
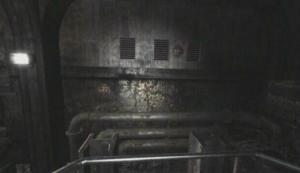
Emitters
Emitter
Emitter (6/6): This emitter is above the pipes on the wall to the left of the cargo hold that Rosa is hiding in. There is a pile of pipe fittings near the bottom-left corner of the cargo hold door. Hit the emitter with a pipe fitting to destroy it.

Emitter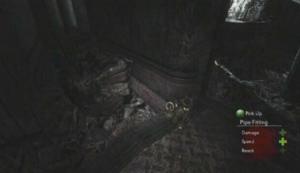
Pipe Fittings
When you're ready to move on, enter the cargo hold and press the Player Response button when the prompt appears. Afterwards, climb up the ladder across from Rosa and start across the catwalk. A pair of mutants will cause you to fall down to the area below. Ethan is injured from the fall and a wave of mutants is fast approaching. Armed with a bolt gun, you must hold them off until help arrives.
The biggest threats here are the mutants on the storage container to the left that throw pipe fittings at you. Blast any mutant that takes position on that storage container and then focus on keeping the charging mutants at bay. The bolt gun can cut through these guys with relative ease, so keep the trigger held down and fight them off until someone appears on the catwalk in the middle of the area. Take that person out to complete the mission.

Bolt Gun
You've gained the Voice Attack ability at the end of the previous level, and it is needed to complete this mission so make sure you know how to use it. Use Voice Attack to break out of the cargo container and step outside. Careful, as there is an armed gunman outside. Hit him with a Sprint Attack followed by a string of combos, or zap him with your stun gun, and pick up his Assault Rifle once he's been dealt with. There is another fallen SCU soldier across from the cargo container you busted out of, as well as a 9mm on the nearby table. Holster the 9mm and take the ammo from the Assault Rifle. There is also a SCU storage locker nearby that contains a couple of health packs which you can use to patch yourself up after that little encounter.
Voice Attack
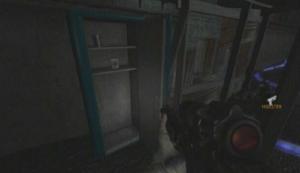
Storage Locker
Antenna (1/2): A radio sits on the table next to the SCU storage locker. Activate it before moving on.

Antenna
When you're ready to proceed, follow the blue tubes into the next area. There are a couple of armed gunmen around the bend, so keep to a slow pace and take them out from a safe distance. Fortunately since defeating Ethan's alcohol demon you don't need to consume any Liquor to steady his aim, so taking these guys out should be a snap. Follow the tubes down into the area below until you come to an Oro device. There are five such devices in this level, and overloading each of them is this mission's Optional Objective. To begin overloading one, first grab the antenna and then rotate it around until the white ring surrounding it shifts to a red color. Hold the antenna in this position until the ring shifts back to white and at this point, move the antenna again until it shifts back to red. Keep this up until the device overloads.

Oro Device

Device Antenna
Follow the tubes up the ladder at the end of this area. At the top of the ladder, Antenna (2/2) is the radio on the table straight ahead, and Emitter (1/2) is attached to the wall at the dead-end behind it. There is an Assault Rifle on the table next to the radio which you can use to reload your own. The next area is crawling with SCU troops, so proceed with caution. There is another SCU storage locker in the small shelter to the left that contains a couple of health packs and some ammunition for your Assault Rifle if need be. If the enemies at the other end of the area are giving you trouble, you can take them out quickly by hitting the propane tank or explosive barrel with gunfire.
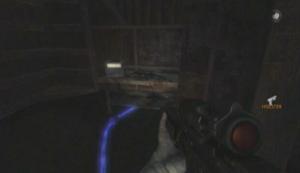
Antenna

Emitter
There is another Oro device at end of the way, but be sure to take out any hostiles in the area before you start overloading the thing. Once the device has been destroyed, continue following the tubes into the next area. You will be attacked by a couple of mutants and eventually fall through the floor. Make your way to the other end of the boat and drop down through one of the larger holes to the area below. There are plenty of mutants down here, including one of the stronger variant. Hit the bipedal mutant with your stun gun when he approaches and gun him down to avoid a tough fight.

Oro Device
Emitter (2/2): The final emitter is attached to the second pillar nearest to the doorway that leads out of this area.

Doorway

Emitter
Head up the steps near the ship's front-end and proceed through the doorway at the top. Climb up the ladder at the end of the way and start following the tubes down the corridor and through the doorway.
When you step into the next area, Dorland's helicopter will appear overhead and start gunning for you. The shelter that the roof above your head provides is minimal due to the amount of holes in it, so you'll have to move around a bit to ensure that you are out of his view. The only way to damage the helicopter is to hit the underside of it with gunfire. There are a couple of downed SCU soldiers here who's Assault Rifles you can use to reload your own when you are in need of ammo.
Dorland's Helicopter
When you've hit the helicopter a fair amount, it will briefly retreat. At this point, a group of SCU soldiers will appear and target you. There is a storage locker in this area that contains some Assault Rifle ammo and a couple of health packs; search for this locker and remain in that area once you've found it. This area provides plenty of cover from the ground troops, so use this to your advantage. Take out the SCU soldiers one by one—returning to the storage locker for health packs/ammo as needed—until none are left standing.
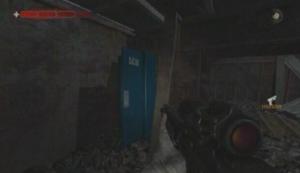
Storage Locker
Once the soldiers have been dealt with, move away from the storage locker until Dorland's helicopter reappears above. Unload into the underside of the helicopter until it loses control. If you run out of ammo during the attack, look around for a fallen enemy's Assault Rifle, or return to the storage locker to reload. When the helicopter catches fire and begins to crash, sprint back towards the storage locker to avoid being hit and killed by it when it does crash. Afterwards, make your way to the crash site just in time to spot Dorland escaping. Gun down the Oro from a safe distance, as getting too close to him results in an effect similar to that experienced when close to an emitter, and start after Dorland.
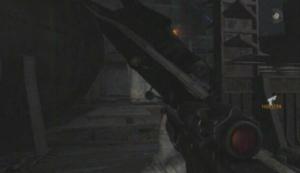
Crashed Helicopter
Slide down the ladder at the end of the way and move down the corridor. Step onto the platform in the next area and pull the lever to start ascending. You'll be attacked by a group of mutants on your way up. There are a couple of rebars attached to the side of the lift if you need a weapon. Step onto the walkway when the lift reaches its destination and make your way to the opposite end. Pull the sparking lever behind the lift and then defeat the mutants that attack. Make your way back across the walkway, step back onto the lift and pull the lever again to continue the ascent.
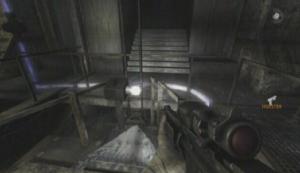
Lever

Lever
Head through the doorway once the lift reaches the top and enter the corridor to your right. Tread carefully here, as you will encounter a number of Oro. The first you come to is an unsettling being fixed with a jaw apparatus that allows it to emit powerful sonic waves. These creatures hang from the ceiling and will emit the sonic wave when you approach them. However since they lack eyesight and other senses you can sneak up on them and cut them down from the ceiling. If one does sense you and begins to scream, though, back away as to not take damage from it and use your Voice Attack to destroy it.
Oro Sonic
As for the bipedal Oro, you can hit them with your Voice Attack to shatter their masks, thus removing their sonic wave effect and allowing you to get close to them. These guys will charge at you, though, so if this happens just back away until you are out of range from the sonic waves and then quickly hit them with the attack.

Oro Sonic
Head down this corridor—keeping an eye out for Oro Sonics—until you reach a double door. Proceed through the double door to the next area and start across the walkway. You will be attacked by a mutant partway down, so hit him with your stun gun or a chain attack for a quick takedown. There is a storage locker in the area where the mutant popped out from. There are a couple of health packs within, so use them to restore your health if need be.
Two Oro Sonics occupy the area below and will begin to approach once they spot you. Back away from them until you can manage to remove both of their masks with Voice Attacks and then move in for the kill. There are two Oro devices in the area below: one on either side of the stairs that lead down into the area. Overload them both and then head through one of the doorways on either end of the northern wall of the room.

Oro Device

Oro Device
This area is littered with hanging Oro Sonics, so proceed with caution. Move through this area until you come to a dropdown spot. Drop into the area below to confront Dorland.

Exit
One of the two Player Response prompts in this mission occurs during Dorland's speech here, so be ready to press the button when it appears. Dorland is accompanied by two Oro Sonics who must be dealt with first, so wait until they step down from the center platform before hitting them with your Voice Attack. Once both of the Oro have been dealt with, follow Dorland across the catwalk and into the next area.
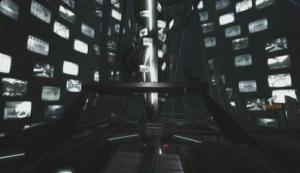
Dorland
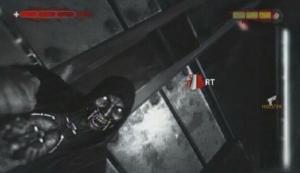
Oro
The final Oro device is at the end of this area; overload the device and then sprint back to the previous area. As far as final battles go, this one isn't very tough. The main idea here is to hit Dorland with enough Voice Attacks to remove his mask. Once that has been done, you will then enter a lengthy chain attack to finish him off. However you have more to worry about than Dorland here, as a number of mutants will jump onto the platform and target you. You can take them out with Voice Attacks too, but those are best saved for Dorland, so kill them quickly with your stun gun or chain attacks instead.

Oro Device
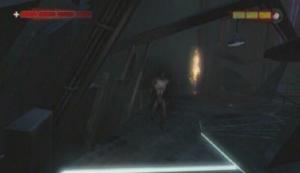
Sonic Dorland
Once you've hit Dorland with the final Voice Attack, you will then have to complete the chain attack to end the battle. If you mess up during this, however, Dorland will one-shot you, effectively ending the attack. Luckily the game auto-saves before you use the final necessary Voice Attack, so you can simply try again. Successfully complete the chain attack to defeat Dorland and complete the game.
Congratulations, you've just completed Condemned 2! Be sure to sit through the credits for an additional scene!
Forensic Event 1: Communicating with Rosa using the Field Kit.
Questions to ask:
1. “Any officers reported in the area at the time of the call?”
2. “Is there a commuter train that passes by the hotel?”
Forensic Event 2: Corpse in the hotel lobby.
Identifying the body:
1. Examine the victim's face and select “Adult male.”
2. Examine his jacket and select “Police uniform.”
3. Pick up the badge by the victim's right hand and select “Police Badge #46.”
Cause of death:
1. Examine the bullet wound on the victim's back and select “Torso area.”
2. Select “Gunshot wound” from the second menu
2. Select “Exit wound” from the third menu
Determine if the body has been moved:
1. Select the UV Light from the Forensic Tools menu.
2. Examine the blood trail behind the body and select “Blood trail.”
3. Select “Victim crawled” from the second menu.
Forensic Event 3: Blood pattern outside of elevator.
1. Examine the blood pattern and select the “Outward pattern.”
2. Select “Vic dropped from above” from the second menu.
Forensic Event 4: Start of the blood trail.
1. Examine the blood splatter on the door and select the “Exit splatter.”
2. Examine the hat on the nearby chair and select “Policeman's cap.”
Forensic Event 5: Determine the room number.
1. Examine the phone on the table across from the body and select “Room 119.”
Forensic Event 6: Take a clear picture of Vanhorn's face.
Forensic Event 1: Identify Doll Factory.
1. Examine the placard or map on the wall and select “Walker Doll Factory.”
Forensic Event 2: Identify the six tanks. Mixing Tank or Settling Tank.
1. Check out the poster above the table that's across from the stairs that you used to enter the area to learn the difference between the two.
2. Mixing tanks are connected to pipes, while the settling tanks are not.
3. There are four mixing tanks and two settling tanks (one of which is tipped over, so examine its lid instead).
Forensic Event 3: Open the padlock on the rollup door controls.
1. The combination is 17-23-10.
Forensic Event 4: Elevator ID.
1. Examine the sign on the elevator and select “Service Elevator 3B.”
Forensic Event 5: Rewiring the elevator panel.
1. Connector #1 is the Bare wire.
2. Connector #2 is the Thick wire.
3. Connector #3 is the Stripped wire.
Forensic Event 1: Talking to Farrell in his office.
Answers:
1. We carried Vanhorn's body away from the hotel.
2. Yes.
3. Dorland shot a power transformer creating a small explosion.
4. I was in an apartment complex next door.
5. The helicopter started taking fire.
6. Dorland.
Forensic Event 1: Determining if the mayor's body was moved.
1. Select the UV Light from the Forensic Tools menu.
2. Examine the tire marks behind the blood-covered wheelbarrow and select “Tire trail to door.”
Forensic Event 2: Blood pool in museum.
Questions to ask Rosa:
1. “Did you find any fingerprints on the paper?”
2. “Do you think Vanhorn nursed his nephew back to health?”
3. Take a clear picture of the saw in the blood pool and one of its handle.
4. Ask “What about the saw? You said it looked medieval?”
Forensic Event 3: Identify the camera that contains footage of the murder.
1. Select camera 1501.
Forensic Event 4: Identify the backup drive that contains footage of the murder.
1. Select backup drive 1501, the second drive from the bottom in the stack of drives on the table.
Forensic Event 5: Sign outside of the Museum Wing
1. Examine the sign by the stairs and select “Medieval Tools 13A.”
Forensic Event 6: Blood-covered table.
1. Take a clear picture of the metal tools on the table.
2. Collect a sample of the blood on the table.
3. Collect a sample of the metal pieces on the table.
4. Ask Rosa “Any evidence the metal pieces came from Rachael Mars's body?”
Forensic Event 1: The severed arm.
Determine body part:
1. Examine the bloody chunk and select “Arm.”
Determine approximate time of kill:
1. Zoom in on the wrist and remove the watch from it.
2. Select “February 24th” for the date.
3. Select “0003” for the time.
Sample:
1. Collect a sample of the evidence.
Forensic Event 2: Communicating with Rosa using the Field Kit.
Question to ask:
1. “Dehydration? With all this snow?”
Forensic Event 3: Corpse in the Service Building.
1. Examine the eyes and select “Male.”
2. Examine the victim's jacket and select “SCU.”
3. Pick up the wallet next to the victim's left leg and select “D. Payant.”
Forensic Event 4: Identify explosive device in lodge.
1. Examine the device and select “DETM 12x.”
Forensic Event 5: SKX's recovery room.
Note: This is an optional event, and easy to miss. The room is just beyond the area that contains the blaster which must be thrown through a small, square window of a shed to have it safely detonated.
1. Take a clear photo of the pictures and engravings on the wall in this room.
Forensic Event 6: Diffusing the device.
1. Examine the canisters and select “2 Canisters.”
2. Examine one of the power sources on either side of the device and select “120v/12v.”
3. Examine the lights in the top-left corner of the device and select “3 blinking lights.”
4. Examine the device's keypad and select “16 Button keypad.”
5. Examine the wires below the keypad and select “2 long/1 short.”
Forensic Event 7: Accessing the computer in Vanhorn's library.
1. Select “Vocal cords.”
Forensic Event 1: Names on scorecard.
1. Examine the scorecard on the projector in the bowling alley.
2. For UNCLE select “Vanhorn.”
3. For MAYOR select “Mars.”
4. For DIRECTOR select “Farrell.”
5. For MAGICMAN select “Unknown.”
Forensic Event 2: Torture devices in the abandoned school.
1. Take a clear picture of the first device, which is next to the dog cage.
2. Take a clear picture of the second device, which is a man trapped in a cage around the corner. 3. Take a clear picture of the third device, which is the man being electrocuted near the room exit.
Forensic Event 3: Severed head on ball rack.
1. Zoom in on the head and select “Female head.”
2. Zoom in on the bag below the head and select “Bowling bag.”
3. Select “Filled with blood.”
4. For the owner, select “SKX.”
5. Take out your camera and snap a clear picture of the head.
Forensic Event 3: Farrell in the freezer.
1. Examine Farrell and select “He's still alive.”
Forensic Event 1: Communicating with Rosa using the Field Kit.
Question to ask:
1. “See anything about the Oro's purpose, their objective?”
Forensic Event 2: Second communication with Rosa.
Questions to ask:
1. “Are you suggesting this organization is responsible for all that's wrong in the city?”
2. “Does he describe how Sonic Generation works?”
The majority of levels in Condemned 2 contain a number of Sonic Emitters. Finding and destroying these emitters plays a part in determining the score you receive at the end of the level. You can see the total number of emitters in the current level and how many you have destroyed so far by viewing the mission objective menu. You'll take damage if you get too close to an emitter, so throw something at it to avoid its harmful effects.
Emitter (1/3): In the basement of the TV and VCR Repair shop. From the bottom of the stairs, turn left and move past the shelf to spot the emitter attached to the wall (near the TV).
Emitter
Emitter (2/3): After exiting the TV Repair shop via a second floor window, head through the gate in the alley below and look for an overturned car. The emitter is attached to the wall above the doorway, just beyond the car.
Emitter
Emitter (3/3): Atop the Medical Supply store. Pick up a brick from the pile of bricks in the top-left corner of the rooftop and then turn left to spot an emitter attached to the building across the way. Throw a brick at the emitter to destroy it. You won't be able to return to this area short of restarting the mission if you fall through the hole in the roof.
Bricks
Emitter
Emitter (1/3): On the first floor of the hotel, shortly after the second meth-lab and brute encounter, you'll come to a point where a pop-up explains the function of the Spectrometer Forensic Tool. At this point, follow the Spectrometer to the emitter in the nearby room.
Emitter
Emitter (2/3): Outside of the hotel where the rioters are first encountered, it is attached near the first set of windows above the door back into the hotel.
Emitter
Emitter (3/3): When you reach the hotel lounge and have completed the Forensics event there, follow the blood trail until the Spectrometer appears on the right side of the screen. The blood leads off to the left, but continue moving forward and step through the opening in the wall on the right. Head through the door across from the bathroom and turn right upon entering the room. Look above the yellow chair to spot the emitter attached on the wall. Shoot or throw something at the emitter to destroy it, and then exit back into the hall through the hole in the bathroom wall.
Emitter
Emitter (1/3): Once you're in the apartment, head through the doorway to the right of the trash bags and scan the wall to spot the emitter.
Emitter
Emitter (2/3): After unblocking the door at the other end of the room with the brute and meth-lab, head up the stairs being the previously blocked door and enter the room at the top. Upon entering the room, sprint to the other end and turn right. The emitter is attached to the wall, just above the sink.
Emitter
Emitter (3/3): When you reach the Warehouse, kill the enemy inside and pick up his .44. Peering through the doorway, use the scope of the .44 that the enemy was wielding and scan the wall beyond the fence on the other side of the tracks. The emitter is attached to the wall, right across from the warehouse door. Shoot the emitter to destroy it.
Emitter
Emitter (1/3): After using a doll box to move past the shooting flames in the assembly line, walk to the end of the hall beyond the flames and go through the door on the right. Move past the first stack of boxes and you should be able to see the emitter attached to the wall to your left.
Emitter
Emitter (2/3): In the second assembly area, after moving the shelves and junk out of the way with a thrown doll, head to the very back of the area. The emitter is attached to the wall next to the furnace. Be careful though, as a couple of burning dolls will emerge from the furnace.
Emitter
Emitter (3/3): After correctly rewiring the elevator but having it fail due to a blown fuse, climb through the hatch at the top of the elevator to get out. Walk down the steps outside of the elevator until the Spectrometer icon appears on screen. At this point, head down the last set of steps and scan the wall to the left to spot the emitter.
Emitter
Emitter (1/1): This is found in one of the management hallways when you're on your way to see Farrell. When the elevator reaches its destination, turn left and walk down the hall until you reach an office. Enter the office and approach the hanging picture next to the desk. Punch the picture to knock it from the wall, revealing the emitter behind it.
Picture
Emitter
Emitter (1/3): In the Medieval Wing, when you reach a bridge that leads into an exhibit (guards and thugs can be seen fighting in the area below), look to the archway leg to your left to spot the emitter. You'll have to toss something at it to destroy it, so throw your current weapon in an attempt to hit it. If you miss, return to the weapon rack, take up another weapon and try again.
Emitter
Emitter (2/3): After facing the warrior thug on the bridge and clearing out the hostiles in the area below, look for the emitter attached to the middle pillar closest to the wooden boards you hopped down.
Emitter
Emitter (3/3): Once you're outside (shortly after receiving the statue Optional Objective from Rosa), turn right and scan the brick wall behind the lower wall to spot the emitter. There is a pile of bricks by the base of the lower wall, so pick one up, take aim (aim just a bit above the emitter) and launch it towards the wall. This pile provides an unlimited number of bricks, so you can attempt to hit the emitter as many times as necessary.
Emitter
Bricks
Emitter (1/3): Attached to the wall behind the collapsed shelves in the room just before the second alley.
Emitter
Emitter (2/3): This emitter is attached to the wall behind the chairs and desks in the first room of the Abandoned School. There's a pile of bricks on the floor that can be used to destroy it. You may have to knock a couple of the boxes out of the way before you can reach it, but luckily the pile provides an endless supply of bricks.
Emitter
Bricks
Emitter (3/3): After moving through the hole in the wall down the Abandoned School's hallway (which is reached shortly after the torture room) search for the emitter behind one of the waste bins in the back room.
Emitter
Emitter (1/1): In the Ticketmaster area, this emitter is attached to a pillar in the area that the eastern elevator (refer to your GPS) brings you to. It's on the pillar to your right as soon as you step out of the elevator. Can't miss it.
Emitter
Emitter (1/6): After jumping down the hole you created by activating the anchor on the deck, turn around to spot the emitter attached to the wall at the end of a short walkway.
Emitter
Emitter (2/6): When you first enter the room where Rosa is being chased by a group of metal junkies, before dropping down, move to the very end of the catwalk and look to your right to spot an emitter attached to the wall. Throw your current weapon at it to destroy it. Don't worry if you miss, though, as you can always come back to this one once the metal brutes have been dealt with.
Emitter
Emitters (3/6), (4/6), and (5/6): There are two emitters attached to the wall directly behind the magnet control panel, and one on the wall to the left of it. There is a pile of pipe fittings on the platform, which can be thrown at the emitters to destroy them.
Emitters
Emitter
Emitter (6/6): This emitter is above the pipes on the wall to the left of the cargo hold that Rosa is hiding in. There is a pile of pipe fittings near the bottom-left corner of the cargo hold door. Hit the emitter with a pipe fitting to destroy it.
Emitter
Pipe Fittings
Emitter (1/2): Shortly after you come across the first Oro device, you will come to a ladder. The emitter is attached to the wall at the dead-end behind the radio in the area at the top of the ladder.
Emitter
Emitter (2/2): This one is in the area that you fall from a catwalk to when attacked by some mutants. The emitter is attached to the second pillar nearest to the doorway that leads out of this area.
Doorway
Emitter
Each level contains a number of TVs and/or radios; you can see the total number of them (under “Antennas”) in the current level and how many you have activated so far by viewing the mission objective menu. Finding and activating these plays a part in determining the score you receive at the end of the mission.
Antenna (1/5): In the window outside of the TV and VCR repair shop.
Antenna
Antenna (2/5): Upon entering the back room of the TV repair shop, ignore the steps leading down to the basement and instead head up the stairs at the opposite end of the room. The TV sits on a shelf at the top of these stairs.
Stairs
Antenna
Antenna (3/5): Upon entering the TV repair shop basement, turn left and move past the shelf to spot a TV.
Antenna
Antenna (4/5): After exiting the TV Repair shop via a second floor window, head through the gate in the alley below and look for an overturned car. A TV sits in the barred niche next to the doorway beyond the car.
Antenna
Antenna (5/5): Inside the Medical Supply store, in the same room where the lever is pulled to open the gate in another room. Before leaving this room, activate the TV on the table beyond the two work desks.
Antenna
Antenna (1/4): On the fifth floor of the hotel, just before dropping down to the fourth, a TV sits on a dresser next to the doorway at the opposite end of the room.
Antenna
Antenna (2/4): When you reach the hotel lounge and have completed the Forensics event there, follow the blood trail into the nearby hallway. Stop following the blood trail for a moment and take a right at the t-junction. Enter room 106 and locate the bathroom. Be careful though, because there is a pistol-wielding thug on the other side of the door. Take care of him first and then activate the radio on the sink.
Antenna
Antenna (3/4): Move to the end of the hall (where the door to room 101 is) and turn left. Kill off the brute that smashes through the wall, then step into the room he broke out of. A TV sits on the dresser at the far end of the room.
Antenna
Antenna (4/4): Head down the hallway across from the final meth-lab spot and search for the door to room 208. Enter the room and go through the doorway on the right side. Activate the TV on the end table and then head back into the hall.
Antenna
Antenna (1/2): Upon entering the hallway outside of the first room of the Apartment Building, turn left and walk as far down as possible. A radio sits on a machine here; activate and then head through the only other doorway in the hall.
Antenna
Antenna (2/2): Open the door across from the entrance to the first meth-lab room (where the yelling brute is encountered). The TV is on the dresser here.
Antenna
Antenna (1/2): After crawling through the vent in the Ventilation Control Room, turn right to spot the radio on a workbench.
Antenna
Antenna (2/2): After using a doll box to move past the shooting flames in the assembly line, walk to the end of the hall beyond the flames. At the end of the hall, step through the door on the left. A TV sits on a table at the far end of this room.
Antenna
Antenna (1/3): on a table near the X-Ray room door (the area you are in at the start of the mission).
Antenna
Antenna (2/3): When you're on your way to see Farrell, before riding the elevator up to the management offices, look for the radio on a trolley next to the elevator door.
Antenna
Antenna (3/3): In the secretary room outside of Farrell's office, turn right to spot a radio on a table.
Antenna
Antenna (1/2): This one is in the room that you fall into at the back of the attic (shortly after the second and third Forensic events).
Antenna
Antenna (2/2): Behind the circular desk in the second part of the Medieval Wing.
Antenna
Antenna (1/3): This one is found shortly after encountering the rabid bear in the Service Building. Upon entering the lounge area, move forward and turn left at the pillar straight ahead and step through the doorway there. You must activate this Antenna before taking the stairs up to the walkway because the bear will begin to pursue you again at that point, so there's no turning back.
Antenna
Antenna (2/3): In the second lounge area (where there is a blaster attached to the fireplace at the end of the walkway), starting from the first floor, use your UV Light to follow the blaster cable that leads through a doorway. The cable will soon lead up through a hole in the ceiling, but continue moving forward while keeping an eye on your left. Go through the first door on your left and enter the room. The TV is sitting on the table near the chair.
Antenna
Antenna (3/3): One of the blasters is attached to a pillar in a small room that is reached by jumping over from one balcony to another. In the same room, there is a radio sitting on a table in the closet that's across from the bathroom.
Antenna
Antenna (1/3): In the second set of lanes in the Bowling Alley, move down to the end of the right-most lane and climb through to the area behind it. Walk past each of the lanes to reach a small corridor. Turn into the first room that you come to on your left to spot a radio sitting on a file cabinet.
Antenna
Antenna (2/3): In the Abandoned School's locker room, move to the other end of the locker room and head through the doorway there. Look to your right upon entering this area to spot the radio on a steel drum.
Locker Room
Antenna
Antenna (3/3): In the hallway reached shortly after the torture room in the Abandoned School, move to the very end of it to find a radio sitting on the edge of a counter. Be sure to get this one before going through the hole in the wall because the game will auto-save at that point, and you won't be able to access this hall again without restarting the mission.
Antenna
Antenna (1/1): In the Ticketmaster area, this radio is sitting on one of the cases in the area that the western elevator (refer to your GPS) brings you to. When you step out of the elevator, turn right and move behind the bunch of cases visible in the distance to spot it.
Antenna
Antenna (1/1): When you reach the storage room beyond the Cargo Hold, search the shelves on the right side of the room for a radio.
Antenna
Antenna (1/2): In the area that you are in at the start of the mission, search for an SCU locker. A radio sits on the table next to this locker.
Antenna
Antenna (2/2): Shortly after you come across the first Oro device, you will come to a ladder. There is a radio on a table at the top of the ladder.
Antenna
When the Player Response prompt appears at the bottom of the screen, you have a short amount of time to press the Player Response Button (A on Xbox 360, X on PS3) to trigger a response from Ethan pertaining to the current situation. Each mission has a certain number of response opportunities, and triggering all of them yields the highest number of mission points in the Player Response category. You can see the total number of response opportunities in the current level and how many you have triggered so far by viewing the mission objectives.
Prompt (1/6): At the beginning of the mission, while the bum is digging through the trash.
Prompt (2/6): Shortly after the first prompt, when you approach the gate that the bum is trying to open.
Prompt (3/6): In the area beyond the gate, shortly after the bum kicks at the sleeping man behind the fence.
Prompt (4/6): After climbing through the second floor window of the TV and VCR Repair Shop.
Prompt (5/6): In the streets below the TV and VCR Repair Shop, when you open the door beyond the Emitter and TV to see Vanhorn entering a Medical Supply store.
Prompt (6/6): When you spot Vanhorn behind the window in the slime-covered room at the bottom level of the Medical Supply store.
Prompt (1/5): During the briefing at the start of the mission.
Prompt (2/5): When Dorland attempts to pry open the elevator door on the fifth floor of the hotel (or after speaking with Rosa via the Field Kit).
Prompt (3/5): After falling to the bottom of the elevator shaft that Dorland opens.
Prompt (4/5): When you enter the hotel lobby (after facing the rioters outside of the hotel).
Prompt (5/5): Upon peering through the hole in the floor of room 212 to spot a grisly scene.
Prompt (1/3): When Dorland contacts you at the start of the mission.
Prompt (2/3): After moving through the Warehouse outside of the Apartment Building, you will eventually see Le Rue on the other side of the fence.
Prompt (3/3): While walking across the plank near the end of the mission to meet with Le Rue.
Prompt (1/3): After unlocking the door controls and moving under the rollup door.
Prompt (2/3): Outside of the Security Foreman's Office (after moving the workbench out of the way with a thrown doll.
Prompt (3/3): Upon opening the bottom drawer of the file cabinet in the Foreman's Office marked "Masks" to find it empty.
Prompt (1/10): While speaking to Rosa at the start of the mission.
Prompt (2/10): While lying down on the X-Ray table.
Prompt (3/10): While lying down on the X-Ray table (shortly after the second prompt).
Prompt (4/10): When you first step out into the hallway.
Prompt (5/10): In the hallway, walk straight ahead and head through the door on the right. Move to the end of this area for the prompt.
Prompt (6/10): In one of the dark offices that is reached shortly after the second set of chest X-Ray pictures.
Prompt (7/10): When you first encounter Officer Pennington.
Prompt (8/10): During the conversation with Farrell at the end of the mission.
Prompt (9/10): During the conversation with Farrell at the end of the mission.
Prompt (10/10): During the conversation with Farrell at the end of the mission.
Prompt (1/4): At the start of the mission, following the officer's remark about the museum being off-limits.
Prompt (2/4): After the officer gives you a lift into the museum.
Prompt (3/4): When Rosa contacts you shortly after the second prompt.
Prompt (4/4): After collecting the blood sample during the bloody table and metal pieces forensic event.
Prompt (1/6): When Farrell contacts you while you're walking down the trail at the start of the mission.
Prompt (2/6): When Farrell contacts you while you're walking down the trail at the start of the mission (shortly after the first).
Prompt (3/6): After completing the dead SCU officer forensic event that takes place when you first enter the Service Building.
Prompt (4/6): When you meet the injured SCU soldier while being chased by the bear.
Prompt (5/6): When Rosa contacts you after your recovery from the bear attack.
Prompt (6/6): After cutting the wire to diffuse the detonator in the lodge.
Prompt (1/4): When you spot injured Le Rue outside of the bus following SKX's escape.
Prompt (2/4): Shortly after entering the room beyond the first set of lanes in the bowling alley.
Prompt (3/4): When you enter SKX's torture room in the Abandoned School.
Prompt (4/4): When you enter the kitchen (the area before the freezer).
Prompt (1/2): When you enter the theater, before facing Magicman.
Prompt (2/2): In the theater, before facing Magicman (shortly after the first).
Prompt (1/8): Shortly after the start of the mission.
Prompt (2/8): After activating the anchor on the deck to create a hole.
Prompt (3/8): While approaching the hole created by the anchor.
Prompt (4/8): After you hear Rosa make a remark.
Prompt (5/8): When the first Metal Junkie makes an appearance.
Prompt (6/8): When you first enter the compactor room and spot Rosa running from a group of Metal Junkies.
Prompt (7/8): After disposing of the first Metal Junkie.
Prompt (8/8): When you meet up with Rosa in the cargo hold after disposing of the Metal Junkies.
Prompt (1/2): During Dorland's speech before the final battle.
Prompt (2/2): After destroying the last Oro Device (during the encounter with Dorland).
The Xbox 360 verion of Condemned 2: Bloodshot features a total of 38 different achievements. Each achievement that you unlock contributes a certain amount of points to your overall gamerscore. You can acquire a grand total of 1000 points by playing Condemned 2.
 1. Anger Management
 2. Beat Cop
 3. Big Game Hunter
 4. Self Medicated
 5. Brick Wall
 6. Bum King
 7. Can You Hear Me Now?
 8. Chain Gang
 9. Chief Investigator
10. Collector
9. Chief Investigator
10. Collector 11. Decisive Restraint
12. Defender
13. Detective
11. Decisive Restraint
12. Defender
13. Detective 14. Detective - First Grade
15. Bloodshot
14. Detective - First Grade
15. Bloodshot 16. EPA (Environmental Pwnage Area)
 17. Flambe
 18. Gold-Plated
 19. GOOOAAALLLL!
 20. Investigator
 21. Just The Facts
 22. Master Investigator
 23. Magellan
 24. A La Mode
 25. MP Overachiever
 26. The Plumber
 27. Punch Drunk
 28. Restraint... Not
 29. Rush Champ
 30. Serial Killer
 31. SKX
32. Sleuth
31. SKX
32. Sleuth 33. Survivor King
 34. Trooper
 35. Tune In Tokyo
 36. Sidekick
 37. The Final Word
 38. Cut Throat


 Facebook is Making You Look Like a Terrible Gamer
 The Witcher 3 Guide: How to Find Places of Power in the Skellige Isles
 Until Dawn Guide - How to Find All the 1952 Clues
 Fallout 4 Beginners Guide
 Thief (2014) Walkthrough