Activision's Call of Duty series has always been immensely popular. The Infinity Ward editions (Call of Duty 1, 2 and 4) are the more critically acclaimed versions. Regardless, Treyarch's efforts always sell well and boast the same sort of gameplay and thrills of their brothers. World at War is no different, but visit back to World War II gives us the chance to enjoy some nostalgic moments (as well as some fresh ones) from the series' past.
There are two campaigns, the USA in the Far East where you play as a Pvt. Miller, and the Russians on their invasion into western Germany. These are merged into one set of missions so you switch from one perspective to another on the other side of the globe.
The gameplay is very simple. There are no difficult decisions to be made though there are more frequent choices of routes than in previous instalments in the series. On Hardened or Veteran difficulties, finding the best cover points in each section is crucial. In certain sections the enemies will pile towards you until you move forwards, and choosing the best path through in order to do this is vital. It is for this purpose that the single player portion of this guide will come in handy. There are also 'Death Cards'. This deck of playing cards identified in game by a helmet balancing on a pole can be used to unlock cheats, a list of which (complete with movies of their locations) you can find in the 'Death Cards' section later on in this guide. Upon completing the game, there is a new game mode unlocked called Nazi Zombies. This is playable in co-op split-screen and online, and is a great feature to have as a reward. All the campaign missions that are playable in co-operative mode are marked as such at the start of their section.
The most important thing to know about the controls is that you can change them depending on your play style. As usual, the right triggers fire and throw grenades, the left triggers looking down the ironsights on the gun for improved accuracy and throwing special grenades (Molotov Cocktails and Smoke Grenades). You can switch these round by choosing the Lefty button layout. If you see yourself as a tactical player, it is recommended that you choose the tactical button layout. This puts melee attacks on the B/Circle button and change stance (to crouch or go prone) on clicking the right stick. This layout is also recommended for anyone attempting the game on Hardened or Veteran.
On easier difficulties or for particularly gung-ho gamers, you will want to keep melee on the right stick for lots of easy and satisfying knife and bayonet kills. The NOM4D layout is the same as Tactical, but looking down the iron sights is now 'sticky' so that you don't have to hold down the trigger to do it – just push it once to look down the sights and then again to come out of that view. You can also change the aiming sensitivity in the options menu, as well as the game's brightness (some sections of the game are set in darkness and you should ensure this is set up correctly so as not to ruin the experience.
USA
Makin Atoll, South Pacific
August 17th, 1942
Co-op: Yes
You, Private Miller, were on a small reconnaissance mission on this small island with a minor Japanese military base when you and your team were captured. A rescue mission is now taking place, and begins with that dramatic rescue.
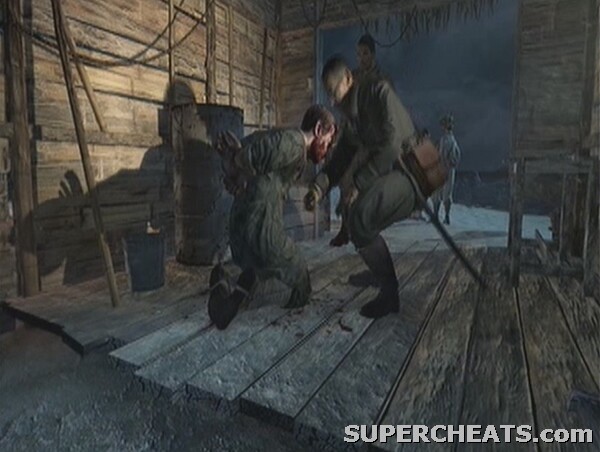
Never has the motto 'leave no man behind' been more welcome!
Once you are liberated by Roebuck, follow him outside. It has to be recommended that you pick up another gun as soon as possible. There is a Type 100 machine gun (a great little weapon in the single-player) as well as an M1 Garand (an always-useful rifle with a quick rate of fire). Both are stacked up against the crate that Roebuck fiddles with after gutting the Japanese soldier.
Collect the weapons and follow the team across the beach to the right.
DEATH CARD: 8 of Hearts (Thunder)
- Find the 8 of Hearts in the first shack you come to on your right. See the appropriate section of this guide for more info on the location.
Take cover by the two barrels as the beach closes up. Move up to the crates and debris on the left, next to the burning building, to edge forwards.
Use this cover and the alternative on the right to hold off the enemy
The enemy will attack both from the left towards the water and also from the jungle down the path to the right. Round the corner to the left when the area is clear and duck inside the burning shed. Use this while crouched or prone to pick off the enemies in the area.
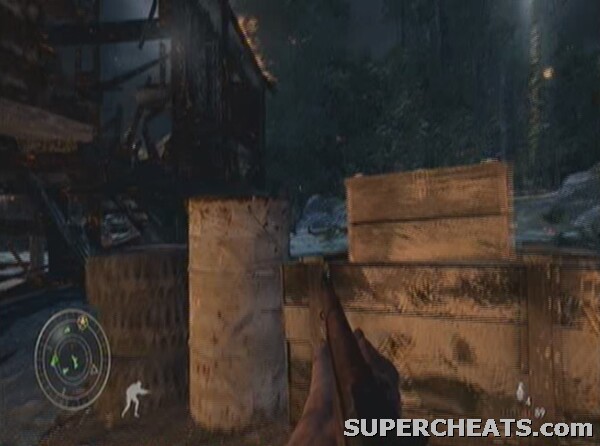
Move to the bottom of the ramp leading up to the wooden island buildings when clear. Shoot the enemy who bursts out of the door and attacks your ally, and then move on. From the barricade blocking the path forwards you can take out a good number of enemies from range.
Use the barricade as cover for some long range shooting
Take the path to the left, shooting the solitary soldier who should be facing the wrong way. Stay up on the decking of the buildings and use your Garand to take out as many enemies as possible from this position.
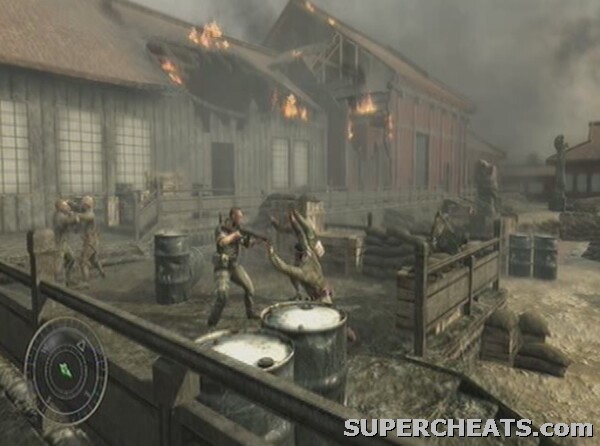
Move down to the beach once the enemies have thinned out a little and follow the team up the jungle-path once the checkpoint is reached. When your team-mate carelessly goes to investigate the ritual statue half-way up the path, ready your weapon as you will be attacked by Banzai soldiers intent merely at running at you and trying land a lethal blow with no regard to their own life. Should you get attacked by a Banzai unit, mash the B/Circle button as soon as possible to throw them off. Your team should deal admirably with them on this occasion however, while blocking a clear shot on most of the enemy for yourself.
Continue on until the path slopes downwards and curves left, opening up into a canyon crawling with Japanese soldiers. We need to rescue an allied squad which has been pinned down in the canyon. This is an easy opportunity for accidental friendly fire, so be aware that there is both a team attacking down low on the right from a boat, and one over the other side of the canyon past the tower and river. Start by helping both these squads by laying down fire on the Japanese that they are attacking. Take out the enemies and spotlight in the tower as a priority. Sprint and get in the bunker once the area is relatively clear. There is enough cover to keep you alive even if there are enemies nearby. This should also force your team forwards and hit a checkpoint. Link up with the squad across the river to proceed.
Head up the jungle-path with your squad. Once you reach the wooden shack, get ready for a conflict. When the Japanese soldiers spring up from their camouflaged hiding places, take out any in the immediate area and then retreat to the shack and use its windows for cover.
TIP: You can attack the hidden units before they get up. You can spot them by their leaf-covered suits; they will look like piles of leaves on the floor. A grenade in the middle will make your life much easier here.
As you move forwards more waves will be triggered, so feel free to fall back as necessary to keep yourself alive. Follow the path on the left-hand side of the clearing through a few more enemies on all sides, before reaching the truck we need to activate to proceed. Press X/Square while next to it to send it hurtling towards the base below.

Pierce the barrel on the truck and turn it into a giant explosive
Once inside the base perimeter head left and fight your way down into the bunker. Once you get inside there is ample cover, so make that a priority rather than clearing the outside. Hold X/Square to plant the charges where indicated and then make your escape. Wait for Roebuck to lead the way, head up the ramp out of the bunker and directly ahead and to the right of the building towards the water. You'll be knocked down by a grenade, but fortunately help is at hand.
Roebuck to the rescue
USA
White Beach, Peleliu
September 15th, 1944
Co-op: Yes
Two years have passed before this assault on the airfield at Peleliu. Like something straight out of Saving Private Ryan a daring beach attack using landing craft is the order of the day.
A truly epic scene
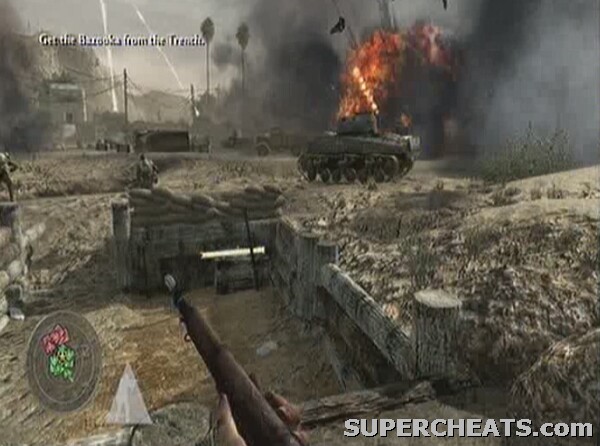
A poorly chosen landing site causes the craft to run aground, but thankfully, after being thrown into the water, Sgt. Sullivan pulls you to safety. You are then given access to a designator to pick targets for allied rocket strikes. Press D-Pad Right to select it, then Right Trigger once the targeting point is lit up and it is on the desired target to activate. In this case, use it on the Japanese infantry and bunker positions in the distance. Once the explosives rain down, the objective should complete and you can move up towards the front line of the Japanese defences.
Target the Japanese soldiers in the distance
Sprint forwards to the palisade and let the tanks go on ahead. Feel free to use as many rocket strikes as you need, there is no limit on them, just a short recharge time. Climb over the palisade call in another strike on the bunker in the distance. Upon reaching the bunker, take out the gunner if he is still active, then move up slowly on the left hand side. Wait for your team to catch up if necessary. Pick off the plethora of Japanese soldiers that will run at you as well as those that fire from range.
Be aware of the machine gun nest in the distance. It can hit you even from extreme distance. Using smoke grenades is not a bad idea to help you move up, but you can also simply target a rocket strike at the nest to take it out.
Use the rocket strike to take out the distant machine gun nest
Stay behind cover taking out enemies from range. Once they stop firing, move up on the left into the trench. You may well get charged as you move forwards, so get a gun out with a decent rate of fire or try to locate one on the floor. Inside the trench you will encounter enemies on top of the walls, so a good tactic is to use the rocket strike again and clear the immediate area out. If you see your tanks moving up on the far side you will know it is clear. Upon entering the trench there are enemies at the end who will pose a threat.
TIP: Use the explosive barrels in the trenches to make life easier.
As you move up keep a Type 10 or other quick-fire gun ready as you will get yet more Banzai attacks before the trench opens up again. At this point shoot the soldier out of the nearest tree or he will quickly take you out. After a few more Banzai charges, move up the left channel to meet up with a team preparing to enter the bunker.
Get into cover behind the truck and order in repeated rocket strikes to thin out the enemy and hopefully destroy some of the machine gun emplacements.

Use the trusty rocket strike from behind cover
TIP: An alternative approach is to head past the truck to the right and go into the bunker underground. It is filled with enemies, but when you emerge at the other end you are right next to the large building we are targeting with a great flanking position on the enemy! Or, just go head on with the rocket strikes…
More enemies will come streaming out of the bunker, complete with Banzai attacks from the flanks, so be prepared to fall back if necessary. Continue this until the area is clear and you can move into the entrance of the complex.
DEATH CARD: 4 of Clubs (Hard Headed)
- Find the 4 of Clubs in the far right corner of the field just before entering the building.
Once inside, stick your head up the ladder to the area above, which should be clear of any threats. Out of the side of the upper floor you will be able to see a mass of Japanese soldiers bearing down on you. Use the mounted machine gun, rocket strikes, grenades and rifle fire to rack up the kills. Rocket strikes in particular are effective here. You need to take out the two tanks moving forwards to complete the level, so aim your strikes in their direction and get rid of them.

Aim your rocket strikes at each of the enemy tanks in turn
With both destroyed, follow Sullivan and co. through the door in the back wall of the room and let their little scene play out. Stand ready to shoot at the door as a Japanese surprise will come running at the Sergeant, but alas, it's too late. On this sombre note, the mission ends.
USA
Airfield, Peleliu
September 15th, 1944
Co-op: Yes
We're still forging our way towards the airfield with the 1st Marine Division, but now without the life-saving expertise of Sgt. Sullivan. Follow the group through the suspicious-looking jungle-path until you reach the crashed plane.
Get ready for the next battle!
Ready your BAR for the inevitable conflict. Banzai warriors will come running at you as well as normal ranged infantry. Cover is extremely limited, so hunker down next to your allies and protect the angles. There is an odd concrete block on the right hand side which is probably the best cover in the area, though falling back obviously adds a lot of protection. Ditch your pistol for the Arisaka – a one-hit kill rifle - at the earliest opportunity, or the Type 100 which you should also be able to find amongst the dead.
As you move along there will still be enemy soldiers in the tree line. Once it quietens down and opens up into a fern-filled area within the jungle another Banzai strike will hit. Use the BAR or Type 100 if you have it to deal with the rushers. Head up the left-hand channel to flank while your team act as bait for the Banzai. With the immediate area clear, follow them up the right hand channel where more action awaits.
A well-defended bunker complete with sandbag emplacements outside now poses the threat. Use your long range weapon to try and take out the gunners in the bunker and any enemies nearby. Stay behind cover as far back as possible while still allowing for a clear shot on distant targets. Move in closer as it thins out and your allies push on.
With the immediate area clear, sprint into the bunker and take the Japanese inside unaware.

Get the jump on the Japanese soldiers for a change.
There may be seven or eight enemies in the small bunker, though if you use your Type 100 or BAR you can take them all out on your own on Hardened. Veteran may call for a bit more care, so move to the corners to get angles around them and at any enemies beyond. Be aware of at least one Banzai attacker too.
Upon exiting the bunker you will be greeted by a battle scene outside. Move up to the wooden fence as the first cover point. Continuing the theme of quick movement, jog up the left hand channel through the shelled-out building. There are enemies within and nearby outside, but if you stay crouched this is an easy route.
TIP: You can wait for a flamethrower unit to move up and smoke the building, which will allow an unhindered move forwards.
Your allies will move up on the outside as you push up too. This area then provides great cover to flank the enemy as your allies move forwards.

Use the shelled out building as cover to get a flanking position on the enemy
Once the friendlies get level with your position head on through the ruins to see the large concrete bunker, defended by multiple machine-gun emplacements: the next target. The guns will focus on you until some more targets move up with you, so stay in cover until a bit of respite can be gained. Use a smoke grenade to provide this if it is not forthcoming. One of our flamethrower soldiers will move up and try to burn out the emplacements but this inevitably fails. We need to reach his dropped weapon to achieve the objective.
Advance to the cover on the left, by the burning truck. Go prone and crawl out to the flamethrower.
TIP: Use a smoke grenade to give you some cover under which to reach the flamethrower.

Stay prone to reach the flamethrower
Move up to the mound ahead, still prone, then stand and sprint to the wall of the bunker. If you stay left, the guns will not have time to adjust to you as the new threat. Fire the flamethrower with the Right Trigger while moving across the two gun windows to burn them out.
Enter the bunker in the door on the left hand section of the wall and burn out the rest of the inhabitants. The flamethrower is a great quick-assault and last-ditch weapon to use, especially in a small room filled with enemies such as these ones. Just be careful not to set yourself on fire! Flame your way through to the exit.
Run down the slope to the farthest burnt out vehicle and let your allies walk up the hill. Yet another Banzai attack will ensue, so stay behind the vehicle with a Type 10 or similarly rapid-fire weapon.
TIP: Use the flamethrower to burn down grass and vegetation to flush out Banzais before they surprise you.
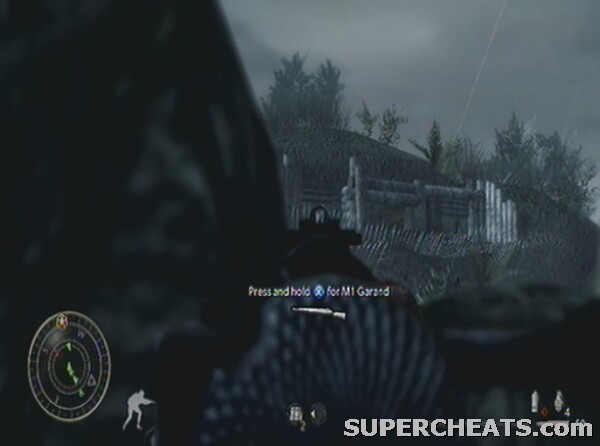
Your team will move up once the area is clear. Follow them up the hill and down the other side. Sprint down to the earth bank and move to its left hand side where an M1 Garand and a grenade attachment is waiting by the truck. Press D-Pad left to equip the grenade and then fire it (like a grenade launcher in Call of Duty 4) at your target.
TIP: You can continue to return to the location of the grenade attachment to get infinite grenades for it.
Use the grenade attachment for the M1 Garand
Direct hits at the sandbags and gun emplacements in the top floor of the building will take them out, but accounting for the dip on the grenades is quite tough to judge. Watch out for snipers on the very top of the bunker too. Clear the top floor, enjoying the rarity of destructible scenery in a Call of Duty game, before moving even further left to get an angle on the lower level.
TIP: You can also get close to the building and use the flamethrower, if you still have it, to flush out the enemy.
A checkpoint will trigger once the majority are clear and you can move up with your team. The left hand side is again the preferred route, so cover against the wall next to the opening on the bottom floor. Round the corner there is a host of enemies, so prime a grenade and send it their way. Use the M1 Garand and filing-cabinet cover to take out the rest, or the flamethrower's surprising range. Head into the room on the left.
Capture the stronghold
DEATH CARD: King of Hearts (Suicide King)
- Find the King of Hearts to the far right of this room as you look at the stairs going up, leaning against the wall with a lamp next to it.
Now go up the stairs near where you came in. Follow the troops to the hole in the side of the upper-floor wall, then down onto the airfield itself. Get over on the right by the blown up tanks for cover and begin to work your way up towards the downed bomber. Move up with the squad across the road and down into the trenches. Pick up the RPG, as there are now enemy tanks in the area that must be destroyed.
Get the RPG to take out the enemy tanks
There are three tanks, some of which you should have a line of sight to from the trench, but you may well have to climb out and use the vehicle carcasses as cover against their shells. Two hits on each tank should do it. There should be few, if any, enemy infantry in the area.
With that objective ticked off, move to the right hand side of the area and begin to attack the enemy trenches with ranged fire using the vehicle remains for cover. Once the enemy have been thinned out a little, move down into the front trench. You may well get Banzai attacked while down here, but considering the proximity to the bunker it's the best place to be. Stay on its right hand side if possible. Push up once the majority of enemies behind the log barricades have been eliminated, and head into the main trench connected to the building itself. This area is crawling with enemies, so proceed with caution.
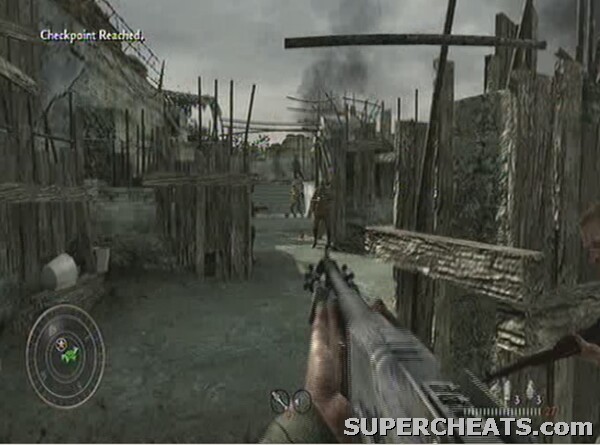
There are many enemies in the trenches
Take those that are in the first corridor out before moving cautiously up the steps at the end. Use a ranged weapon to take down the ones in the concrete tower. Use the downward alcove with the door next to the slope as good cover for this task. Move slightly to the right to get a view of the AA guns we need to destroy. Pick off the gunners to tick one of the four targets off your objectives list. Move up past the gun, taking out all the enemies en route.
You should soon be able to see the remaining AA guns in the distance. Use a ranged weapon to take out the gunners. Watch for the bright white flashes from their gunfire to locate them if you are struggling.
TIP: You can man an AA gun after taking out the gunners, then use it to destroy the rest!
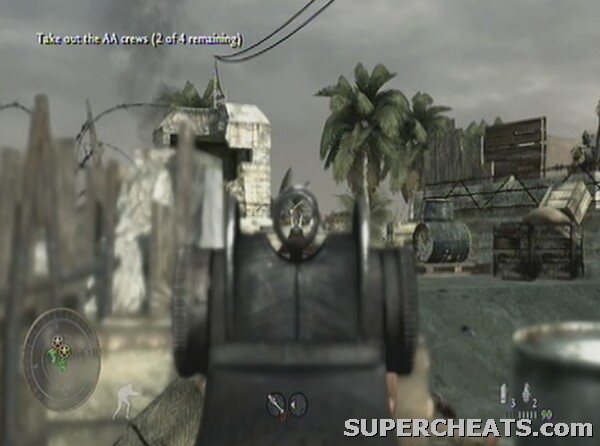
You can take out the gunners from an extremely long distance to complete the objective
Clear the roof of the building and await your squad to catch up. You will then be informed of a counter attack on your position. This is a tough section as we are required to destroy both incoming infantry and vehicles.
TIP: Taking a permanent station on either the mounted machine guns or the AA emplacements will draw enemy fire to too great a degree.
Pick off as many of the initial incoming ground troops as you can as they run towards the bunker using one of the mounted machine guns. Once the enemy trucks arrive, hop onto the AA gun and barrage them.

Use the AA gun to take out the trucks. This idea may sound stupid, but it's still a powerful weapon!
A tank will then emerge from the corner of the area. You must use the AA guns for this, so try to take it out as quickly as possible. The enemy infantry will undoubtedly be focusing all their efforts on you at this point. It should only take a few direct hits. Jump down and back onto the machine gun, clearing up as many Japanese infantry as possible.
After a checkpoint notice appears, a further truck and two more tanks will come rolling in. Repeat the tactics from before and use the AA gun's power to take them out. It is advisable to get off the gun at the first sign of trouble as you are a sitting duck otherwise. There's no immediate rush, though enemies will climb the wall of your building when they get close enough. Better late than never, some friendlies come in to finish off the straggling infantry.
Russia
Stalingrad, Russia
September 17th, 1942
Co-op: No
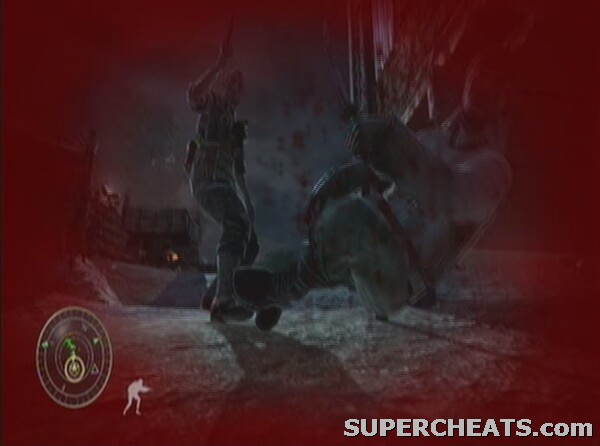
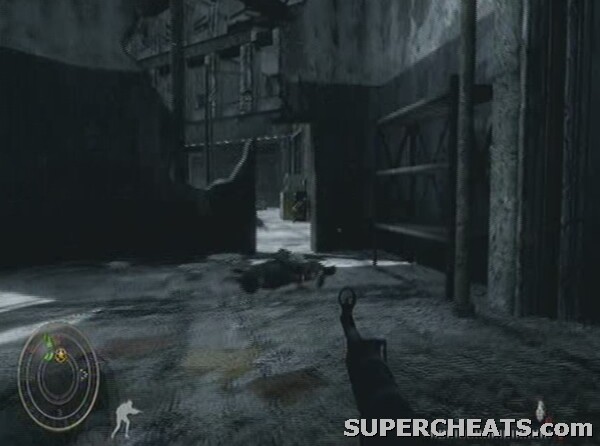
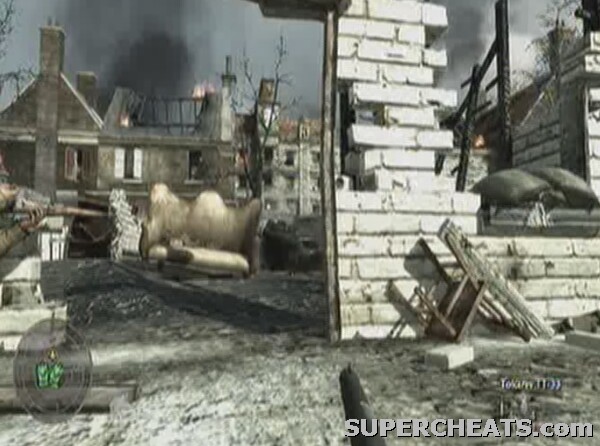
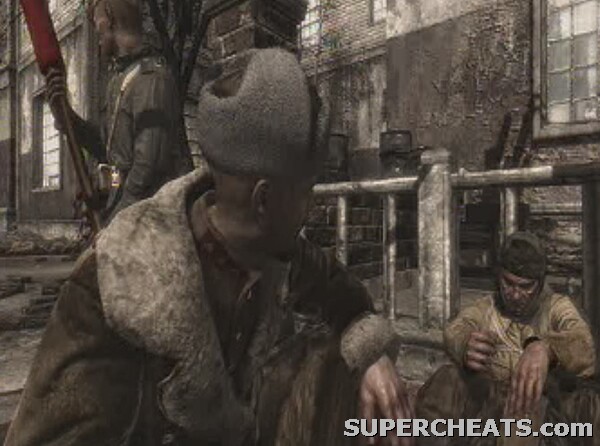
We're turning back the clock now as we take control of Private Petrenko. With his allies overrun in the crucial battle of Stalingrad, fortunately the Nazi soldiers assumed he was dead and have moved on.

The scene of a Nazi massacre of your allies
Crawl to the right at the start and you will see Sergeant Reznov, a character who will guide you through the rest of the game (and voiced by Gary Oldman…). Get close enough so that he moves into a prone position and begins crawling away. Follow him until he stops by the wall. Crouch on his right hand side as he gives you his rifle.
You need to eliminate the Nazi soldiers in the street without alerting their entire force. Take out the two by the yellow car, one crouched and the other standing, once prompted by Reznov. The others in the street should not react to this if you time it correctly with the noise of the bombers flying overhead. Adjust your aim to look right. Headshot the soldier standing in the centre of the street. Any misses will alert the enemy and make escape all the more difficult.

Aim for the head of the third Nazi soldier
As he falls to the ground, his colleague, crouched next to him, will investigate before swivelling to aim at you. Despatch him before he gets the chance to fire.
TIP: It is possible, and fun, to use a single shot to take out a pair of enemies if lined up correctly.
Even further right by the steps leading up to one of the houses is another pair of soldiers. It is advisable to shoot the one on the steps that is facing you first, then as the other turns round to investigate, hit him between the eyes.
TIP: Make sure you have plenty of bullets in your gun before starting on a new target, as having to reload as one turns round can be crucially detrimental to your success.
With that, a guard and his German Shepard dog will come to investigate the corpses. Though the dog is arguably more of a risk, it is an easy target to hit even while un-scoped if you just back off from the hole in the wall of your hideout and wait for it to come through the gap. Take them both out in whichever order you prefer (the dogs can be pretty frightening!). Reznov will then lead you out into the street. A German tank has stumbled upon the bodies, so wait for his prompt before following into the burning buildings to the right.
DEATH CARD: Five of Diamonds (Cold Dead Hands)
- Once Reznov leads you to the first building and opens the bar hatch to let you through, head to the left behind the bar rather than out of the door to collect the card.
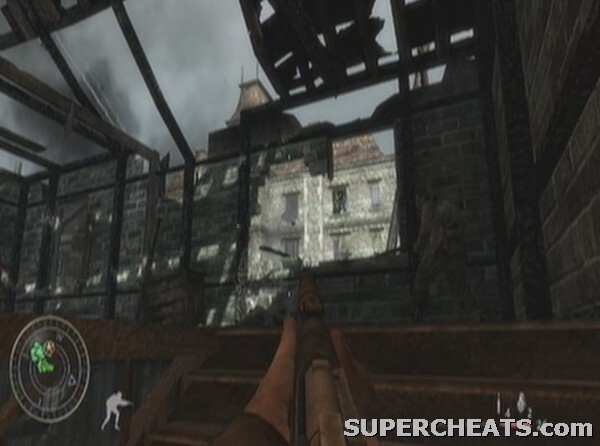
Follow him through the insides and then out onto the street again. As he investigates the window of the building a sniper opens fire, so jump in after the Sergeant. Head upstairs after him and into the room with its external wall blown off. Take cover behind the pale chair in the middle of the room so you are protected from the sniper, who is in the building overlooking from across the street. Reznov will attempt to draw the sniper's fire, so watch carefully for where the muzzle flash comes from as the enemy takes the bait.
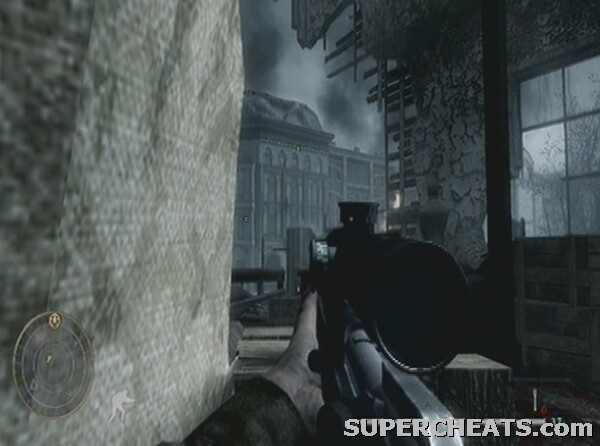
Make sure you spot the sniper as Reznov lures him out
If you miss this opportunity, you'll have to carefully edge around the room to get a line of sight on different parts of the building until you can see the enemy.
TIP: On easier difficulties, Reznov will lure the sniper more than once, as well as giving you hints on where he is.
He will use a decoy helmet to fool you on at least one occasion, so don't expose yourself even once you have the shot (though you don't lose much by returning to the checkpoint if you die). He seems to enjoy the right hand side of the building, on the third floor in particular. If you ensure you can only be hit from one side as you look for him, this narrows down his options in terms of positioning.
TIP: If you fire and miss, relocate to different cover.
Take him out, and follow Reznov out of the building.
Go prone by the window once you reach the ground floor and be prepared for a shock! The Nazi soldiers unleash their dogs on you, forcing a retreat through the building as they set it alight. Stay prone and crawl underneath the burning rafters. Shoot any soldiers in windows you can see, but don't go out of your way to do so. Once Reznov stands up, follow him further until the interactive scene where you need to jump out of the window.
Luckily we have some allies in the area. We now need to give them some sniper cover, so head up the ladder with Reznov.

Head up the ladder with Reznov
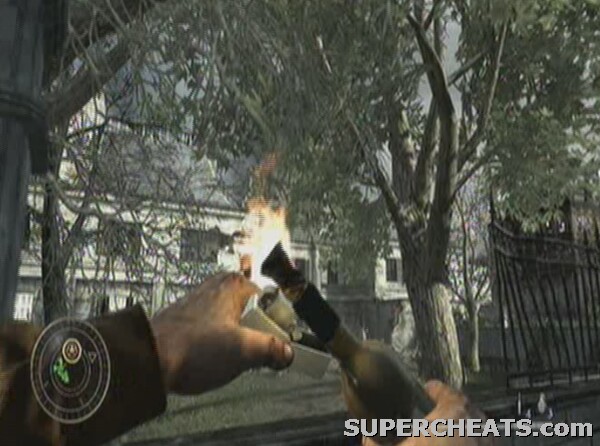
Once in place at the window and scanning the area with your sniper scope, target the backpack of a flamethrower soldier and fire a bullet into it to make it explode and wreak havoc amongst the enemy.
TIP: Wait for the flamethrower unit you are targeting to walk next to his comrades for massive damage!
Finish off the rest under the cover of the confusion, in particular a machine gun nest in the building opposite your position. There are also enemy snipers on the fire escapes and balconies of the surrounding buildings.
With the enemies thinning out, Reznov will lead you up higher into a bottleneck walkway which is soon to be overrun with enemies. Hang back in the room just before it opens up to the outside as enemies will appear and a pair of dogs will be unleashed. Once you hear them barking, back up as far as you can and hit them with an automatic weapon as they come through the door.
Stay in this room until the dog attacks have passed
With those nasty dogs defeated, move out into the open with Reznov. Fire down on the enemies below to help out your allies. Once the square is clear a checkpoint will be triggered as the enemy retreats below.
Clear the walkway of enemies.
An APC will then come rumbling into the square below, so use your sniper rifle to pick off the gunner before he has a chance to spot you. Another will come in from the left, so do the same (this one may well know you are here, so stay prone for a while so it can find a new target before continuing). Your allies will be working their way up to the top of the building, so watch your fire! Once you and they have co-operated to eliminate the majority of enemies, the checkpoint will clear.
Follow Reznov and clear the corridor when he halts. Turn left with him to emerge in another scene overlooking a grand square.

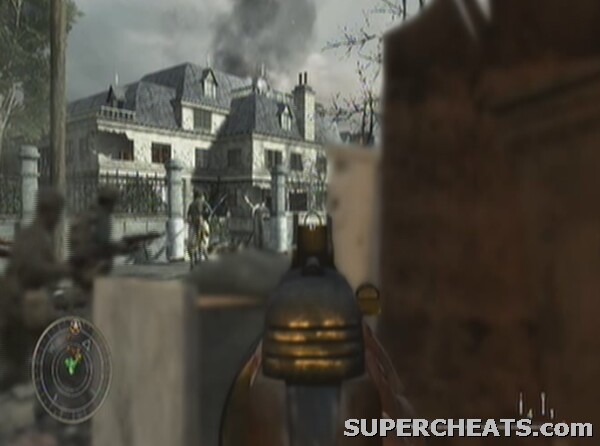
The main square which hosts the epic finale to this mission
The task is to kill General Amsel, which is easier said than done as he boasts a team of bodyguards particularly adept at killing opposition snipers!
They emerge from the hole in the wall of the large yellowish building adorned with banners to the left of the area. Take as many potshots at the group as you can while they run for cover. Take cover yourself however once they have time to steady their aim or you'll be on the end of a headshot bullet. Once they pass beyond the burned out tank you should be behind cover for the next shot, ideally relocated to a different section of the room. Do this for each enemy in his entourage that you kill. The General, if you have not yet killed him, will climb into a jeep allowing an easy shot. Steady your aim and take him out.
TIP: On the harder difficulties a sniper-bullet is a one-hit-kill for the player. The General's soldiers helpfully point at you once they know where you are, so either take them out quickly or relocate before they get the shot off.
Take out the General
This will trigger a series of grenades and explosives around your room. Follow Reznov running out the door, up the stairs, into the loft and then out of the window to complete the level.
Russia
Seelow Heights, Germany
April 18th, 1945
Co-op: Yes
The Germans are on the run now after the close-run combat at Stalingrad. We start off, like with 'Semper Fi' in the USA campaign, as a prisoner.
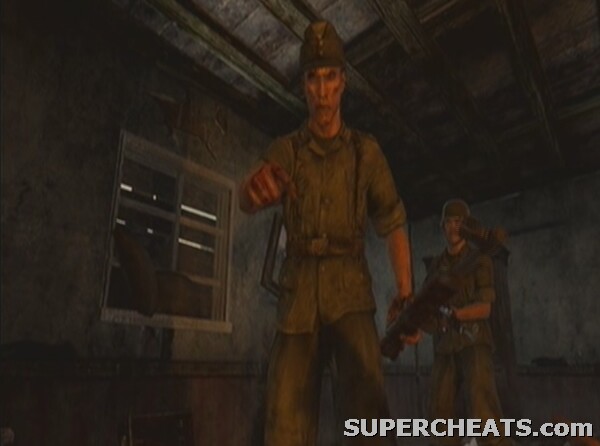
Yet again, a prisoner of the enemy.
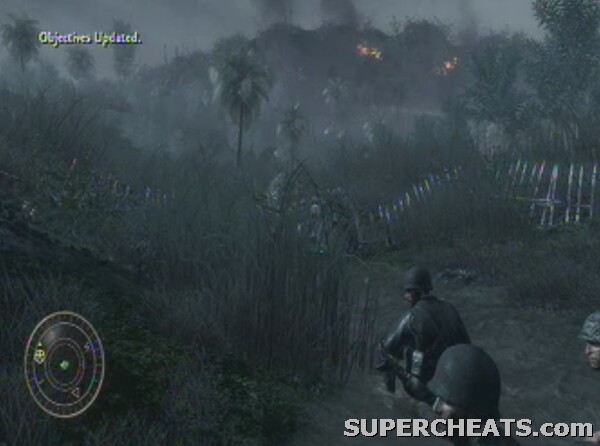
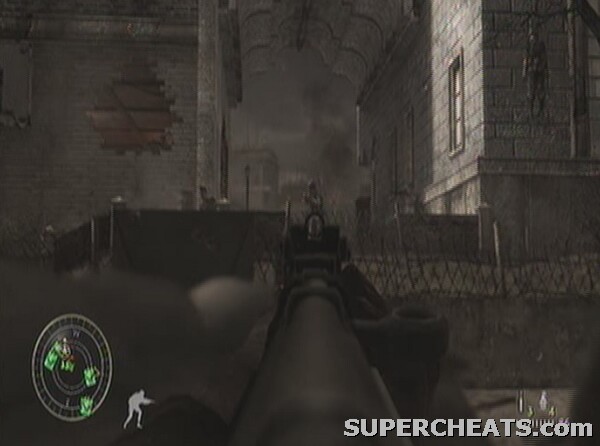
Again, we are rescued, so follow the stream of allied troops running past the shack. Mow down any enemies who should get in your crosshairs, though there is no threat until we pass out from the farm's field. Take the only route out from the farm area and you come to a fork in the track, filled with enemies. Hunker down and begin picking them off. There is very little difference between the routes, just a large mound separating them, but the right hand one boasts the height advantage, so take that once the area is clear.
You will come to an enemy sandbag bunker and a few early enemies, so take them out and then get in the trench nearby, following the slope as it goes uphill.
Follow the trench across the hillside.
There are many enemies en route, so take it slow if you are on Hardened or Veteran. Clear the area once the ground levels out, moving up to where the trench bends sharply left. Ensure this position is well clear of enemies, and then peer over the edge to deal death on the soldiers below.
Use your height advantage to clear the area below your position
There is a Deployable MG42 leaning against the crates by the corner of the trench and while it is low on ammo, it provides a good blanket of bullets to get some good hits on the mass of enemies. Rain down Molotovs and general gunfire to finish off the rest.
TIP: You can mount the MG42 on the wooden fence when prompted (jiggle it around a bit to get it in position) to increase accuracy. You have to dismount it to reload or if a grenade lands near.
TIP: There is additional MG42 ammunition nearby, a few metres back from the perimeter fence we are using to fire down from.
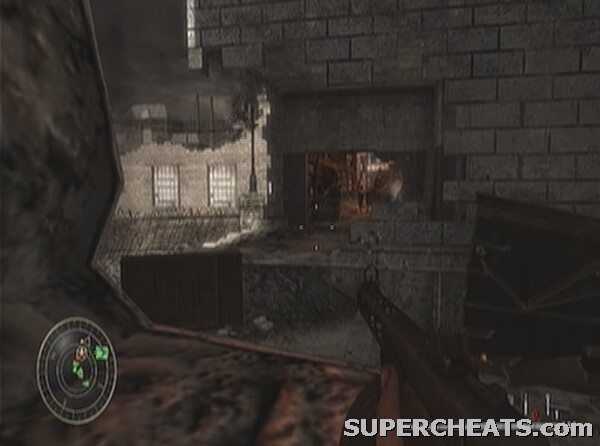
The Germans will keep reinforcing the position for some time, but once the deluge finally slows, jump down and proceed underneath the bridge.
Fight your way under the bridge
Kill the initial enemies as the path turns back into a trench, before arcing up left towards the farmhouse. We need to take out the enemy tanks, so pick up the Panzershreck leaning against the wall of the farm. Use it to take out the first tank, which should be in a position ahead of the barn allowing for an easy hit. Two shells should do it. There are still three tanks remaining, so head inside the farmhouse using the window on the wall by the Panzershreck to locate the next one.
Use the farmhouse for cover to take out the next tank
TIP: You can return to the same stash of Panzershreck ammunition as it never runs out in certain spots.
The final two tanks are much further away, towards the old-fashioned building to the north-west. You can take the first one out from long-range, without crossing the field, though you should resist the temptation to use the upper floor of the farmhouse to do so, as you are a sitting duck up there. The final tank is out of range until you cross the field and for now there are too many soldiers in the way to make that possible. Take them out to clear a path up towards the building in the north-west. Take the road up towards it and move along the wall by the Panzershreck to get a good line of sight on the enemies in the building.
Move into the ground floor once the area is clear enough and the tank should be visible out of the windows to the right. Use your RPG to take it out. With that done, move up to the barn directly north.

Head for the barn to regroup with your allies.
As you may have noticed from your radar, there is a tank inside the barn waiting to jump out at you. Ready your RPG and you should be able to get two hits on it to blow it up before it can take you out. If not, fall back to the last building and deal with it from inside. Once it's destroyed, head into the barn and make a left.
DEATH CARD: Joker (Sticks and Stones)
- It's in the first of the stable areas of the tank barn.
Once clear of the barn head for the tank convoy and press the action button to embark. Remarkably, this is probably the first vehicle convoy in the history of Call of Duty not to be destroyed in transit, but get off as it enters the German base to resume on-foot combat. Use the Panzershrecks dotted around the anti-vehicle concrete blocks to destroy the enemy towers, then a rifle to take out the remaining soldiers.

Cover here to clear the ground and towers of the camp
Head around to the right, taking out as many incoming enemies as possible.
TIP: Moving up on the left is incredibly slow and the respawning enemies make it a dangerous and fruitless process. The right is the way to go.
Move up slowly until the enemies stop coming and there is a route through the gap in the wire fence and into the enemy base. This section must be taken incredibly slowly as the sheer number of enemies will be overwhelming otherwise. Once past the fence and into the base, Panzershreck the towers like before, if possible, and move forward using the objects at the side of the road for cover.
Friendly tanks will come in after a short while and send the enemy fleeing. Move up on the right hand side through the shelled barrack building as the tanks make their way in your direction. There is no need to worry about destroying enemy tanks here as your friendlies will do the hard work. Shoot the running Germans if you feel like massacring people, otherwise wait patiently for the mission end as you run up the road with your allies.
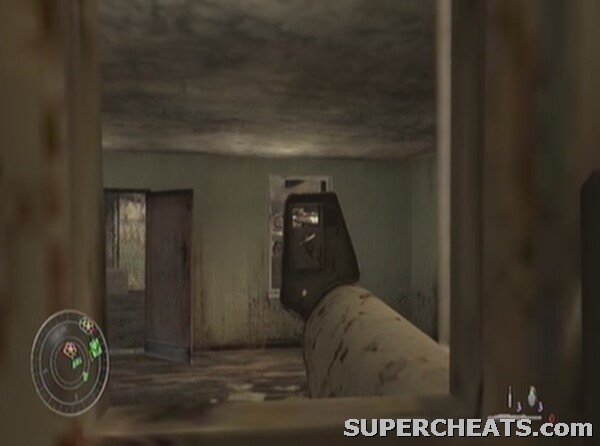
USA
September 15th, 1944
Peleliu
Co-op: Yes
This is a relatively straightforward level. We are continuing the push towards the airfield on Peleliu, this time assisted with a flamethrower to burn out the Japanese soldiers from their hiding places.

The flamethrower makes this level a relative doddle
Move through the initial trenches, clearing a path with your flamethrower.
TIP: The flamethrower has surprisingly good range, so use it to kill enemies both in the trenches and above them.
The mission is to take out the three enemy mortar pits. Throw some smoke grenades to cover your path before moving out of the first area. Once round the corner, turn on the flames to cook the enemy in their trenches.

Take out all the early enemies using the flamethrower
Follow the trench north and use a combination of grenades and flames to take out the enemies in the first mortar pit. Watch out for Japanese soldiers on the side of the trenches however, as they can pick you off quickly if you don't switch to your Garand. Take it slow as you move into the open area, picking off any enemies in the way. Use the cover behind the barrels at the entrance to the pit to clear the vicinity.
For the bunker beyond the open area just run in with your flamethrower activated and you should be able to burn out all the enemies within. Head back out and in the direction of the next mortar pit with this done. Stay aware of the numerous enemies that are sure to be lining the sides of the trenches, particularly as the trench turns from earth walls to wooden supports. As you round the corner and the trench-walls become earth again, watch for snipers in the trees and Banzai attackers on the ground.

Watch for enemies in the trees as well as down low
Follow the path through, relying on your flamethrower until the trench opens out again. Clear the area (it will be something of a battle of attrition) and then either head into the bunker on the left for the Death Card, or up the slope to the right to head to the next mortar pit.
DEATH CARD: Queen of Hearts (Vampire)
- It's in the bunker to the left as the trench slopes up into an open field on the right.
Once up the slope, loose some grenades into the pit to easily take out the mortar crew and its defenders.
Move straight through the pit and out the other side once the objective has been checked off. It won't be long before you need to use a gun with good range, such as the Arisaka, to pick off the distant enemies at the trench walls. Watch also for Banzai attacks. With the ranged targets eliminated, switch back to the flamethrower and continue through the tight trenches, burning out any enemies within.
You will come to a trench with a bunker entrance on the right and an open area with camouflaged snipers at its end straight ahead. Throw a smoke grenade and clear the bunker, then emerge back in the trench and clear the area. Flame the next bunker before heading through the narrow passage which leads towards the final mortar pit.

The bunker on the left is a dead end, but still needs to be cleared. The one on the right heads towards our objective
Move into the narrow corridor, using fire to clear the initial area. Take cover behind the barrels once it opens up and pick off the enemies at the end of the room. This may take some time on higher difficulties, with attrition being the way to go.
TIP: While the flamethrower is great at close quarters, be careful not to use it next to any explosive red barrels!
Getting through the bunker
With that done, follow the slope out and into the final mortar pit, which boasts numerous enemies and a couple of Banzai runners. Clear the area and the mission is complete once your allies have regrouped.
USA
September 16th, 1944
Peleliu
Co-op: Yes
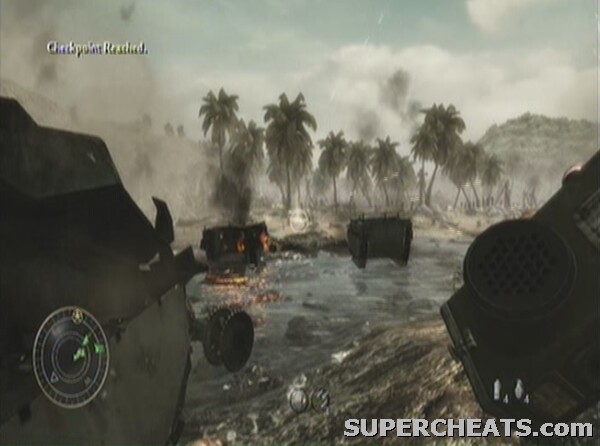
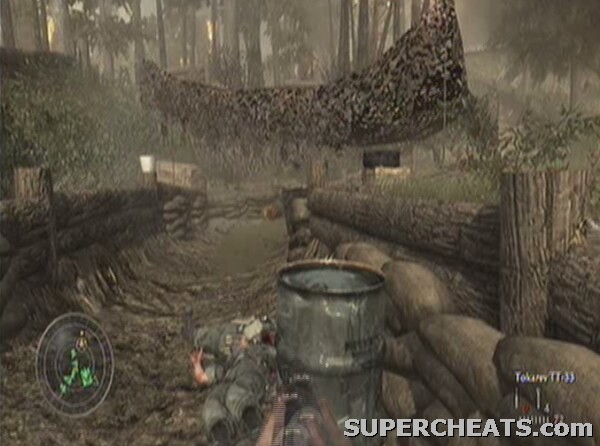
Back in Call of Duty tradition, we are in a tank convoy, and this one is not as well-fated as the last.
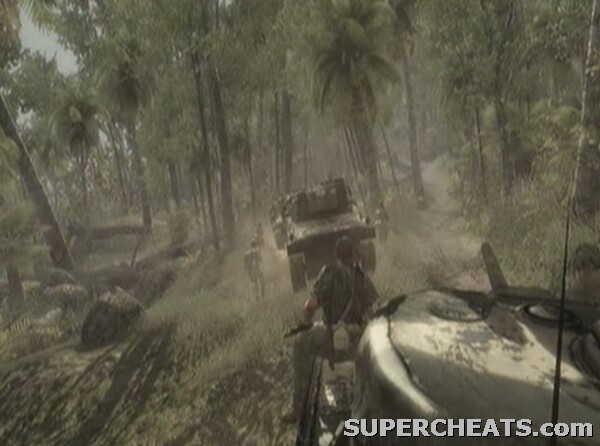
Wait patiently for the incoming doom
Your pleasant sojourn through the forest is interrupted by anti-tank positions raining down fire on your convoy. Press the action button to hop off the tank and take cover. Move up to the log on the left where your allies are also taking cover and use the beastly machine-gun the game generously provides you with to suppress the enemy.
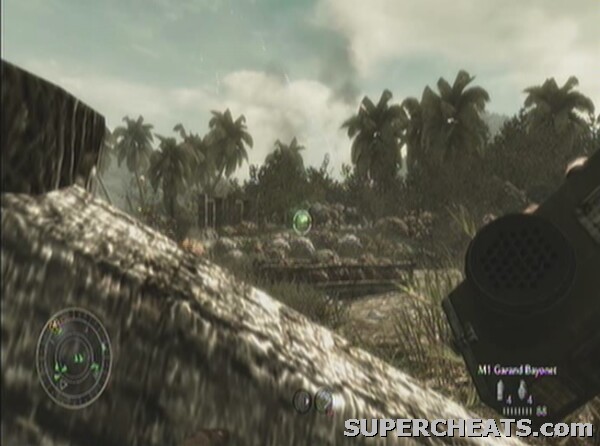
Move to the log on the right hand side to find targets once they thin out on the other side, and repeat this process until the area is clear. You will have to throw back more than your fair share of grenades too. Use the BAR to pick off enemies at range, though it has to be said that the machine-gun is probably the way to go here for the mostpart. Once your allies begin to fall you should be able to pick up a Garand if you want a more tactical approach.

Try to pick up a Garand to take out the more distant enemies
Begin to force your way up on the left, taking out the enemies amongst the undergrowth. Many will be difficult to spot, but if you move slowly, especially if prone, you should be able to make progress. Once you reach a certain trigger your allies will push up too.
TIP: As tempting as sprinting to cover is, in this section you may accidentally step on Banzai soldiers!
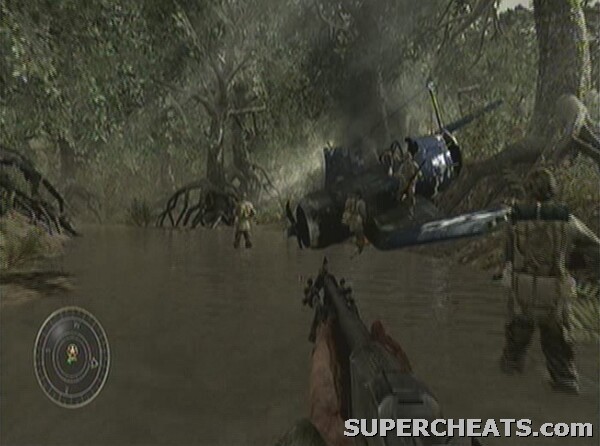
Climb up the bank of the river and use the height and bushes to mask your movement, though it should be said that you may step on at least one Banzai attacker hiding in the grass! A decent tactic is to sprint for good cover (there are a few rocky outcrops which are nearly impenetrable) and then wait for the Banzai's to come to you.
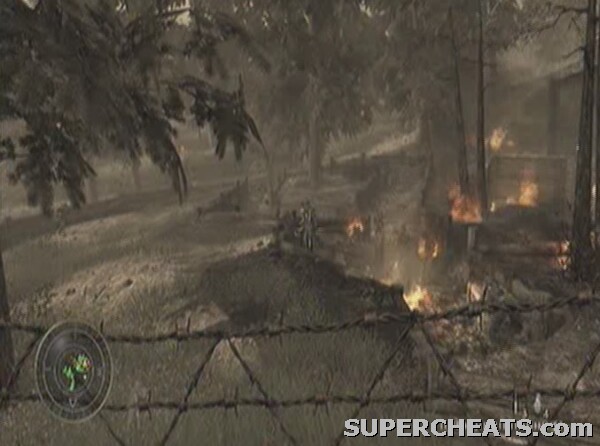
You will eventually come up on the anti-tank locations with a good flanking position and your team now in support. Grenade them out of their holes and finish off the rest with gunfire. Clear the front sandbag position then use it as cover to take out the remainder.
Fight your way up the riverbed to take out the anti-tank position
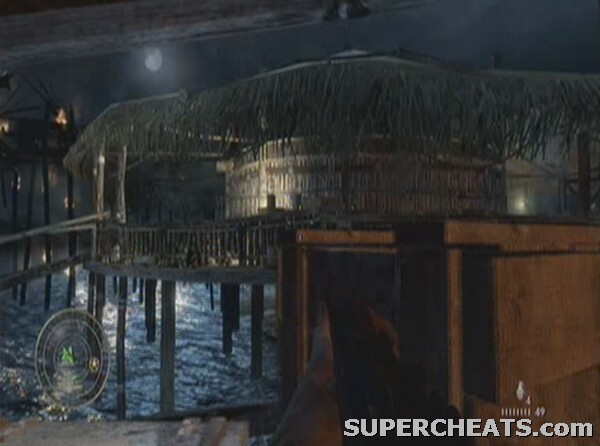
Head into the bunker at the top of the hill to get a Garand and Trench Gun if you want them, before moving on to the right with the rest of the squad. Clear the decks below the hill, then move down the slope. Once you have killed enough enemies, the tanks will roll in and squash the rest. Move past the AA emplacement to the next piece of cover heading roughly south. Clear the area of enemies, bearing in mind that these Japanese in particular have a penchant for throwing grenades at you with nastily short fuses. You will come in range of a shanty village (the last anti-tank position), so use a rifle to take out any threats.

Clear the collection of run-down shacks
Head up the hill now, jump over the log, and you can flank a few enemy soldiers. Your squad will join you, allowing the push forwards. Run down into the trench to use its wall for cover at the earliest opportunity. Shoot through the barbed wire at any foes in sight as your friendly flame tanks move in to finish the job. Follow the tanks as they push on, assisting by taking out the enemies around them.
You need to fight your way into the cave at the far end of the area. Use the sandbags as cover to push into the cavern. Head on through the narrow cave with the biggest and noisiest gun you can to keep the enemy suppressed. Once it opens up into a larger room, get behind the first row of cover and pick off the targets.

Assault the large room
Take the left hand path as the caves narrow again, stopping to turn right into the hallway half-way to get the Death Card.
DEATH CARD: Nine of Diamonds (Flak Jacket)
- Turn right half-way between the two large rooms in the caves to find it.
Return to the corridor and fight your way through until it widens once more. Take cover with the squad at the earliest opportunity inside the room so you can clear it more easily. Clear the enemies off the artillery guns and regroup with your squad when prompted as they gaze at the scenery outside the caves to complete another level.
Russia
April 16th, 1945
Seelow Heights, Germany
Co-op: Yes
This mission is entirely vehicular, very short, and generally is just a dash to the objective trigger points.
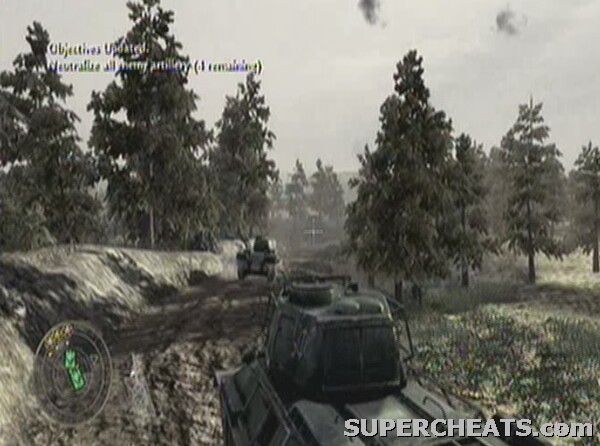
One of two vehicular missions in the game
On your tank you have both a flamethrower and an explosive shell turret. Use LB/L1 for the flamethrower and RT/R2 for the shells. LT/L2 looks closer at anything you're aiming at. Move up the path and flame the soldiers in the road. Shoot the tank that appears on the right with two direct shells, as well as the artillery up on the hill on the left to check off one objective. Take out or run away from any tanks, depending on their proximity to you. Destroy the mortar pits marked on the map to progress. As you round the corner back on the road one will have been hiding, so flame and shell it off the road.
TIP: On lower difficulties, most enemy tanks will only require one shell to destroy.
Follow the markers on your map, all the while watching the damage indicator in the bottom right hand corner. The damage on the tank recharges just like on foot health, but you should keep moving rather than stop to let it charge up, as you'll just get picked off by explosives.
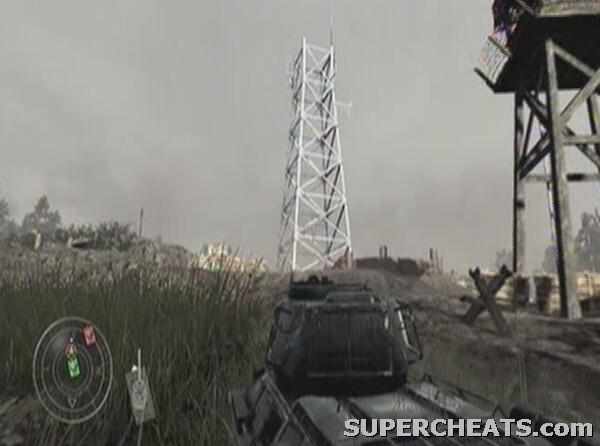
Take out the radio tower
Once you reach the military base, deal with any close tanks and flee round the corner of the base from the rest where you'll get a clear shot on the comms tower. Turn around and head along the path out away from the base. Battle your way past the legions of tanks, again, don't stop for anything. Drive to the left of the large building with heaps of RPG units and tanks, then along the narrow road towards the final objective marker. Ignore the quantity of tanks and just mash your way through.
TIP: You can fire both shells and flames at the same time.
You can fire perfectly well while moving and should treat this level more as a race than a shooting section.
Once you get to the end, hit the final objective and you'll be mercifully transported out of the carnage to the cutscene for the next level. A movie demonstrating how to complete this level using the tactics above now follows:
A complete movie of this level in progress
Russia
April 23rd, 1945
Pankow, Germany
Co-op: Yes
Following the tank-based push into German territory, we are now part of a ground attack into the heart of Germany.

Out of the tanks now and into the heart of Germany
Disembark from the carriage of the train and follow the squad up the bank. As the artillery rains down on the building ahead, sprint across and get behind the tank which begins forging its way into the town. Once it stops, crouch-walk to the ruined building in the middle of the area. Take cover against the outside wall, as being any further forward will cause the soldiers in the second floor of the houses of the town to pick you off.
Take cover behind this wall to pick off the enemy
Once the tanks, artillery and your own fire take out the initial threats, move up to the couch in the middle of the ruin and use it as cover. The furniture doesn't take grenades too well, so if any land near you, make sure you're fully away from them to avoid getting killed. Once the gunfire has been subdued a little, jump over the couch and cover behind the overturned black car just ahead. Clear the area in front and, once the objective flashes up telling you to destroy the Panzershreck soldiers and MG emplacements, sprint for the building on the right with the large hole in the side. Head up the stairs.
TIP: As soon as you enter this building your team will move up, so it's not a bad tactic to get in there even when the area is not fully clear.
Crouch near the top of the stairs to cover from the enemies in the windows outside and pick them off to make the upper floor of your building safe. Use it to remove all the machine-gunners and Panzershreck soldiers you can.
Use the stairs and upper-floor of this building to clear the area
There is also a Panzershreck you can use yourself leaning against one of the windows. The vast majority of the enemies are all in windows opposite the western side of the building. Once the objective is completed, head downstairs and out of the front of the building. Cross the street with your squadmates and enter the building you were just firing at via the damaged area on the right hand side. Move through the corridors (you shouldn't meet any enemies) and cross the fire escape to the next building. Descend the stairs to emerge back on street-level.
As a fellow-Russian executes some Germans a tank will come trundling indiscreetly over the top of them and create a hole in the left-hand wall for you to move through. Our task is to break into 'The Asylum'. Take cover behind the barricades as soon as you enter the street as there is a serious conflict taking place.
Take cover upon entering the street outside the Asylum
Take out the Panzershreck soldiers on top of the Asylum building as well as any enemies within range. Your squad will push up and create a bit of a diversion to allow you to move up along the right hand wall of the street, into a house, then (after clearing the area in front) out of the window and into the street. Use the stairs of the next house along as cover from the Germans in the street and doorways ahead.
You can climb the stairs and enter the building for even better cover. Continue to move towards the building on the right with the hole in, while covering your flank on the left from long range attacks by enemies in the Asylum building. Once you reach the aforementioned building, bear left to look at the Asylum. Ignore the path going through the wall into the courtyard and set up position against the wall to the right of this gap. Look over it to get a great flanking position on the enemy.
Use the gap in the fence to flank the enemy.
Use Molotovs and grenades to thin out the enemy and then pick off the rest with a rifle. Once your allies move up, head down the path into the garden of the Asylum to join them.
Enter through the arch into the courtyard.
DEATH CARD: Jack of Spades (Body Armour)
- Head under the arch and turn left, following the wall until you come to the corner. The card is just over the other side of the balcony.
Move through the rubble on the right rather than the arch to enter the Asylum. Hop over the barricade in the middle of the corridor and move up the hall. Once you come to the stairs you can pick up a shotgun halfway up, or ignore it and proceed into the corridor above.
TIP: The double-barrelled shotgun is great fun, but is one of the weakest weapons in the game on higher difficulties due to its short range.
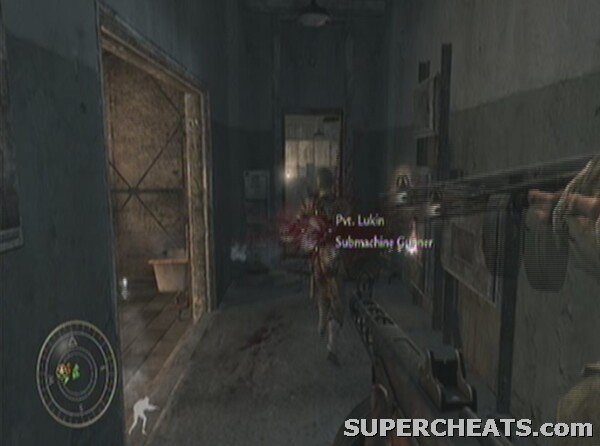
As Reznov and the others take cover carefully outside a room with an overturned bath inside the door, lob a grenade through the gap in the top right hand corner and move round to the left. Stay in cover though, or you won't last long.
Continue to spam the room with grenades, but get in the left corner of the first section of the room and pick off enemies with your weapon of choice. By sprinting back over to the right you should be able to pick up nearly infinite supplies of grenades from your continuously falling comrades.
Clear the 'bathroom' of enemies
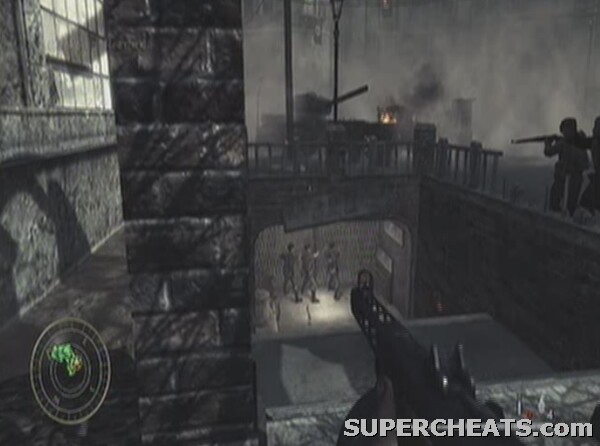
Once you are able to safely round the corner and shotgun or otherwise obliterate the last few enemies, move into the next room. Head left upon entering and mount the machine gun there. Mow down the Nazis that will insist on reoccupying the building directly ahead until they simply stop coming. Move around the top floor and clear any enemies in sight with your rifle. Head along the left side of the balcony and through the hole in the wall when prompted. Follow the corridor until you get to a sandbagged machine gun emplacement. Take out the gunner with grenades or gunfire and sprint up to the sandbags and cover there. Now you can shotgun and Molotov all those beyond.

You have to be brave, but this is the best way to take out those at the gun emplacement.
Go back out and through the corridor to the right with this area clear. Follow it round as it bends behind the machine gun area and take out any Nazis en route. Keep pushing forwards and you will come to be outside the building. Chase and shoot the retreating Germans as they flee the area.
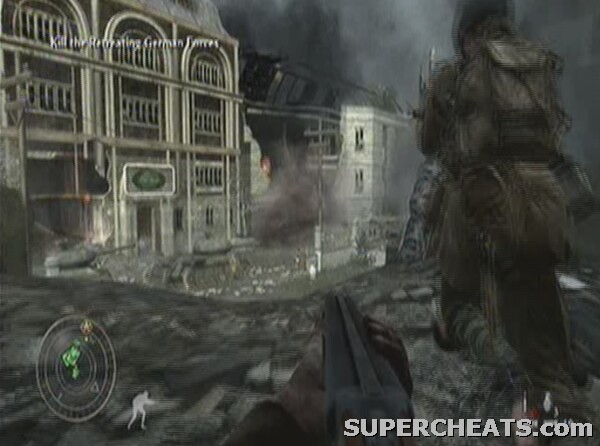
Chase down the enemy as they try to flee the city.
The most serious threats are in the windows of the buildings around the street. Catch up with the tanks as the road ends to complete the mission.
Russia
April 24th, 1945
Berlin, Germany
Co-op: Yes
The Nazi army is on its last legs and down to the last soldiers defending Berlin. That's not to say it's going to be an easy fight however!
The battle has reached Berlin.
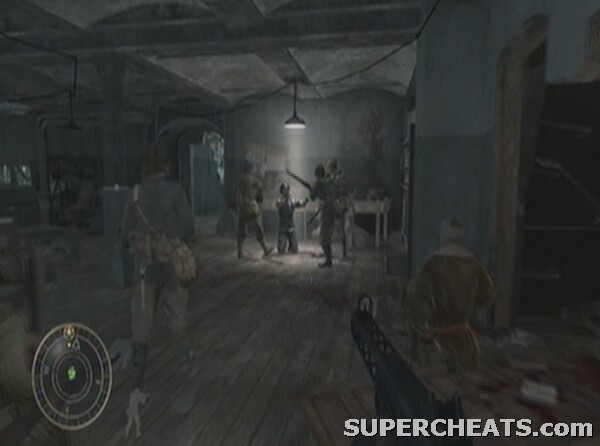
Head down the water-logged corridor to meet Reznov. Follow him to see some fellow Russians terrorising a Nazi soldier. Follow them out, across the roof and then back inside the building. Go down the staircase and through the rooms until you get to some allies covering before the next area. Take cover yourself behind the seat in the middle of the room to get a great view of the Germans in position ahead.

Use this chair for cover before opening fire on the Germans.
Lob a couple of grenades in there to flush them out and then pick them off. You should be able to move in fairly quickly after first contact. Watch out as you round the next corner however, as there are Nazis stationed in the corridor waiting to get some heavy hits on you. Head down the stairs cautiously, taking out the enemies on the way.
At the bottom, fire to the right through the hole and into the room beyond to eliminate the first few targets. Move through, hugging the left hand wall, and get into cover behind the furniture in the corner. Take out as many of the Germans at the other end of the room as you can, before moving up on the right, through the doorway, to partially flank the rest. There are very few ranged weapons on this level, so take your time to search any bodies for a rifle. If you are stuck with short ranged guns, use grenades to take out those clustered at the other end of the room and move on.
DEATH CARD: Ace of Spades (Undead Soldier)
- Rather than head onto the first floor of the balconies ahead, turn right and drop through the hole into the fire-filled room below. The Death Card is behind the ramp you land on.
TIP: By taking the Death Card route through the gap in the ceiling, you come out on the ground floor of the balconied room. From here, you can go into one of the corridors leading off and miss all the Nazis in the horrible room – your AI squad-mates will push up and deal with them instantly for you!
If you don't fancy the Death Card route and want to kill all the enemies yourself, stay on the upper level as it opens up into the balconied area, and a rifle becomes essential. There are enemies with Panzershrecks stationed directly opposite where you emerge, so as soon as you are on the balcony sprint to the left and go prone behind the sandbags. Here, the explosives will not kill you (throw back any grenades), and you can edge out and pick off the Germans while they are focusing on your allies.
See off the Panzershreck units
Once your team move forwards and the enemies on the opposite balcony have been taken out, move across the top of the stairs and round the other side, watching out for a machine-gunner who is likely to be stationed in the first corridor. Pass by it and enter the one next to it, the farthest to the left and in the corner of the room. Move down to the end of the corridor and out into the room at the back, watching for enemies who may flank you from the other corridors.
Head down the steps where you shouldn't see any enemies to meet up with Reznov. Once the area darkens, crouch to stay under the level of the smoke which otherwise clouds your vision. Once you get to the flaming wall on the left, get up close to the gaps in it and pick off the Germans you can see walking about on the other side. They'll run around like headless chickens but shouldn't know where you are. Once they run off or are killed, continue to follow the corridor as it moves out of the flames.
When you get to some steps, make sure the left entrance is clear before crossing into the door ahead.
The cost of not looking both ways
In the next room use the set of windows to clear the area outside. There are a lot of Germans in not-very-good cover, so you should have no trouble dealing with them. Vault directly out of one of the windows and into the small piece of cover on the other side. Clear any remaining enemies in the room and move through stealthily; you should be able to catch a few Germans off-guard and looking the wrong way.
The next room is much harder to break into. Enemies are positioned in the windows so you have to use attrition tactics to take them out. Use a rifle and hit them one at a time until the room is clear for entry.
Use your rifle to clear the next area
Push up to the windows and then around the corner through the derelict part of the building. Shooting anyone in your way, move to the gap in the outside wall on the right. We have now flanked the enemy, so lob a grenade at the two Nazis by the sandbags closest to your position.

Use a grenade to make the flank count
Finishing off the rest shouldn't be difficult with their attention diverted elsewhere. Sprint down into the street and behind the sandbags. Make sure you are facing left (in relation to the building we just exited) as that is where the next enemies are. Fight along the street, using the tanks to draw enemy fire and then picking them off in the windows and doorways of the buildings. Move up using the sandbag points on the right hand side as the squad push up with you.
TIP: Hang back from entering the square until the tank takes out the machine gunners or you will be taken out quickly. Ignore the advice to stand next to the tank when it flashes up on screen too, as it will shortly be destroyed.
Head past the smoking tank and you will come upon the entrance to the Metro. Feel free to execute the Germans in the entrance if you wish, or let your squad do it.
A moral choice, but one with little effect.
With that, rockets will begin hurtling down, so enter the Metro system yourself.
Move through the corridors, across the walkway over the platform and down the other side. Eventually you will come to a right hand turn with the first enemies of the Metro in sight. Stay on the left-hand platform and move up, clearing any Germans in sight. When the lights go off you can feel free to carry on as normal, despite Reznov's fears. When you get to the doorway on the left, enter it and clear the room. This will give you an easy flank of any enemies still outside. Bear in mind also that another Russian team is moving up on the right hand platform. The Germans that they are fighting can also shoot at you!
You will soon get to a barbed-wire barricade just ahead of a train carriage, complete with mounted machine gun. Take it out, and then you need to switch sides and join up with your friends on the right using the concrete slope allowing you to climb out of the water-logged tracks. Use the same tactics as before to move up and take out enemies both ahead and to the left in the train carriage. Enemies will be triggered to appear as you move up.
TIP: A good tactic is to move up and trigger the enemies, then drop back into better cover.
Stay in cover and push up slowly
There are more carriages and side-rooms to the left and right as you move further on, so make sure you check all sides before rushing in anywhere. Follow your squad into the carriage once the dead end in the tunnel is reached. Assist them in clearing the area immediately after it. Go and wait near (but not too near) the barricade, as enemies will shortly be bearing down on you. Use the central item of rubble for the best cover, and attack the enemy until the grand finale takes matters out of your hands to complete the level.
This is good cover right at the end of the level
USA
South of Okinawa
April 3rd, 1945
Co-op: No
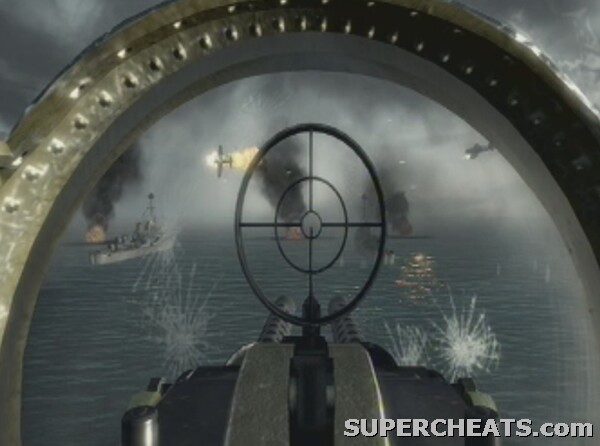
Now comes the only mission where we play as Petty Officer Locke. This is the second and final vehicular mission in the game.
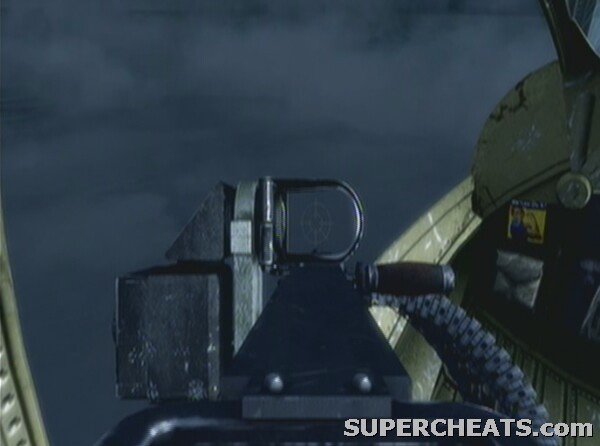
This time we're flying.
We need to destroy the Japanese merchant ships as well as the PT Boats protecting them. Push the action button to switch turrets (when you are prompted to do this, you probably should – though the game will do it automatically after a while). Switch to the bow turret and take out the boats below. There should be three large boats (the merchant ships) and a number of smaller ones (the PT Boats) patrolling alongside them. They will fire at you, so make sure you don’t dawdle in taking them out.
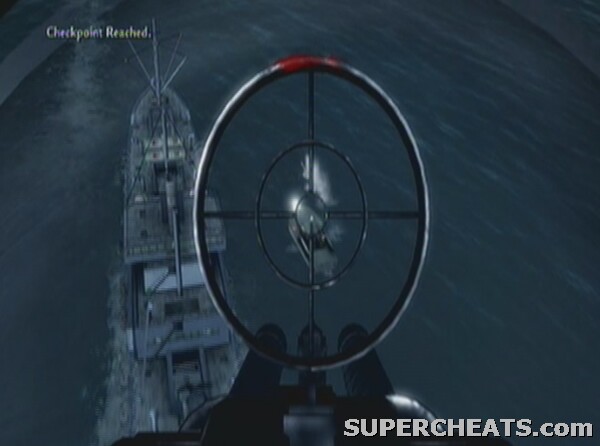
Focus on the merchant ships for the main objective
Switch to the ventral (bottom) turret as you fly overhead and are prompted to do so to get some more hits on them. This is the perfect opportunity to take them out, as you are directly above them and can deal some real damage. Focus on hitting the main deck of the ship. Move to the right turret when prompted and keep the fire coming. To begin with this section is at long range, but eventually the pilot will pull up alongside the merchant ships and allow you to take them out. Aim for explosives and fuel canisters on the decks.
Move to the left turret to do the same on the other side. Once you're back on the right, focus on taking out the spotlights on the ships. Back on the bow you should now be able to finish them off.
Take out the merchant fleet
Your craft receives a distress call from the friendly fleet. We need to head in and deal with some Japanese planes that are terrorising them. There are too many to make a real impact on, but just try and blanket them with fire to take out as many as possible.
TIP: Firing a few metres in front of each plane allows time for the shots to reach them accurately.
After the initial moment of quiet, they will turn to attack you. Try to land as many vital hits on the front craft as possible.
Our allied plane is shot down, but at least the Zeros are gone for now. The team are making an impromptu landing to try to rescue and protect survivors from the fleet. Once you near the water, the enemy fighters begin attacking again, so keep that gunfire on them. Press the action button when prompted to rescue any survivors that manage to swim to the plane and haul them aboard. Keeping yourself alive should still be the priority however.
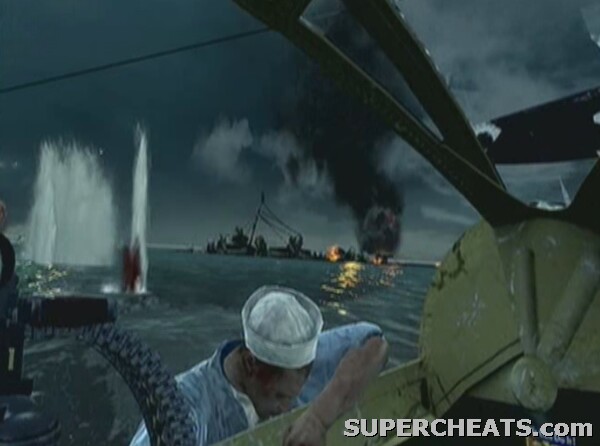
Rescue as many survivors as possible.
PT Boats will come in to try and disrupt the rescue operation, so make sure you take them out as quickly as possible (they are the smaller boats with the spotlights on). Switch turrets when prompted and keep the process going. Defend against the Zeros for one last time and allied craft come in to assist, making us clear for take-off and a remarkable escape.
Sit back as the escape is made.
USA
Wana Ridge, Okinawa
May 14th, 1945
Co-op: Yes
This is a tricky level through long grass with plenty of hidden enemies.
A dusk-assault on Okinawa
Follow your squad through the grass and rocks until the Banzai soldiers jump up and lob a grenade at you. Make sure the blast misses you, then use the flamethrower to burn all the attackers and the grass around.

Use the flamethrower as your main weapon
TIP: A good tactic is to use the flamethrower to burn the grass so enemies cannot hide in it, and to allow you to stay crouched without hindering visibility.
If you stay on the right hand side of the area you won't get lost and it will also give you protection from that side. Use your machine-gun to take out the enemies firing at you from the rocks once you near the side.
Watch out for the hatches in the ground which house hidden enemies, and stick to the right as you begin to head up the hill towards the top. About halfway up you will have to defend against a deluge of enemies, which is made very difficult by the sheer weight of grass around about, but burn as much of it down as you can and stay put until the Japanese stop coming. Once in range of the machine guns in the caves above, throw a smoke grenade to provide you with cover while moving up the rest of the way.

Smoke allows you to move up unscathed.
You should then be able to get to the top and into the tight cylindrical cave without too much trouble. At the top of this tunnel are enemies, so equip the flamethrower and take them out. It leads back outside into a grassy area with a couple of Banzai soldiers in, so watch out. Collect more satchel charges if needed, before heading past the parachute into the next open area. This houses the bunker we need to get at and destroy. Again, smoke is the way to do it, so pop some in front of the bunker windows (while moving up on the right) and fire the flamethrower through the slots and around the outside (there will likely be enemies milling around here). Once you push up to the bunker wall as you set off the flames your team should move up and make the rest easier.
With the insides clear, throw some satchel charges in (using left trigger) then detonate them (right trigger). That leaves us with two more to destroy. Cross over the area and head down the path to meet up with some more allies fighting the Japanese downhill.
DEATH CARD: Ten of Clubs (Painkiller)
- As you follow the path away from the first bunker and see the other friendly squad, there is a sort of shrine with a dead soldier on it, directly opposite as you emerge into the open. This is where the card is.
Push up to the sandbag barricades as quickly as possible after this. Shoot up at the enemies in the undergrowth on the right hand bank of the level, using the flamethrower to torch the grass if you are struggling to see them. Head up the second path on the right to flank the enemy and come up on the next bunker from an advantageous angle.
Set off a smoke grenade just like last time, push up to the bunker, and flame them out. Finish the job with satchel charges to leave just one bunker remaining. (You can find more satchel charges at the corner of the bunker wall from the direction we are attacking from if you need them).
Take out the second bunker.
Move back down the hill with the bunker destroyed. Watch for Japanese riflemen in a hill opposite, and begin to climb up the steep slope yourself. Smoke isn't essential this time as you are climbing up with a steep angle and the guns won't be able to get you until you are level. Regardless, use the flame and satchel tactics.
Rendezvous with Roebuck by the entrance to the building up on the hill to the left of the bunker we just took out. Follow him as you join up with some friendly tanks. Stay with it but at a safe (i.e. explosion-resistant) distance until it gets destroyed. Drop back and flame the grass around you, using the radar to locate Banzai and normal enemies.
Take cover behind the rock and use your rifle to try and pick off some of the enemies in the large bunker on the hill.
Fire up at the massive bunker
Follow the track to the left, through the various rocky outcrops and objects. There are plenty of Banzai and long range enemies in the area, so move slowly, heading to the right. You should pass under a bridge at which point you will need to slow even more and take out the Japanese in the tree line. Head up to the ridge following this and between the vehicles into the objective bunker.

Move between the vehicles and into the bunker
Watch out for an enemy as you turn the first corner, then move deep inside. Flame your way through the tunnels until you get to a ladder. There are enemies in the room at the top, though you should be able to climb up and ready yourself before they see you. Torch your way through this floor and up the ladder to the next. Shoot through the narrow window into the next area to get a good angle on the enemy and then move round yourself to clear the rest. In the final area stay in the bottom left corner and pick off the enemies by the waterfall and in the rest of the room.
TIP: Rather than take the dangerous but direct ladder route to surprise the enemy, you can take the path by the waterfall up to the top instead.
The final ladder at the back of this room which leads to the very top of the bunker is surrounded by enemy soldiers. You need to have your flamethrower equipped ready and spin in a circle while firing as soon as you reach the top to keep them away from you.
TIP: On harder difficulties there are more enemies at the top, but nothing the flamethrower can't deal with.
Once they drop, the level is complete.
The fight through the final bunker
USA
Shuri Castle, Okinawa
May 29th, 1945
Co-op: Yes
This dramatic and daring assault on Shuri Castle is the final mission for the US campaign.

The assault on Shuri Castle begins
Follow your team underneath the burning arch and to the supply drop. Quickly pick up the Browning and Scoped Springfield and then head for the left hand wall. Take out as many as you can before the snipers begin picking you off, then move to the pile of white logs to the right. Shoot the snipers out of the trees and then sprint up the path to the shelter when prompted to get to cover.
This is one of the hardest openings in the game
Drop down inside the tunnel and force your way through. Use the Browning to take out the first few Japanese who will be unaware of you. Push on past their table and climb the ladder at the end. The ominous objective to 'Assault Shuri Castle' will appear and that's just what we need to do.
Move along the wall and you'll get attacked by a number of Banzai units. Take them out and concentrate on getting up the first set of stairs. This should trigger a checkpoint and is a welcome relief so as to avoid the tricky start to this section again. Take out any distant enemies you can see from the bottom of the wall (particularly the mounted gunner shown below), but always be ready to reflex with a melee attack to throw off any more Banzai attackers. If you stay in one place, you shouldn't trigger any to come running at you.

Make taking out this machine gunner a priority
Use smoke grenades to cover the move forwards, but watch out for the hatches that open, sending attackers in your direction.
TIP: Once you have eliminated the occupants of the hatches you can then use them for your own cover. Once in a hole your squad will push up around you and should draw any more Banzai attacks.
Use your sniper rifle from inside the foxhole pictured below to take out as many enemies as you can, then push up to the statue in front. Again, watch out for Banzai holes that may activate as you move. Fall back to your own hole if you set them off and let the AI deal with them.
Head straight up the middle, vaulting over the concrete objects and using the next one forward as cover. Head right up the main steps after your team once the central path is clear.
A video of one way to storm the castle (albeit slowly!)
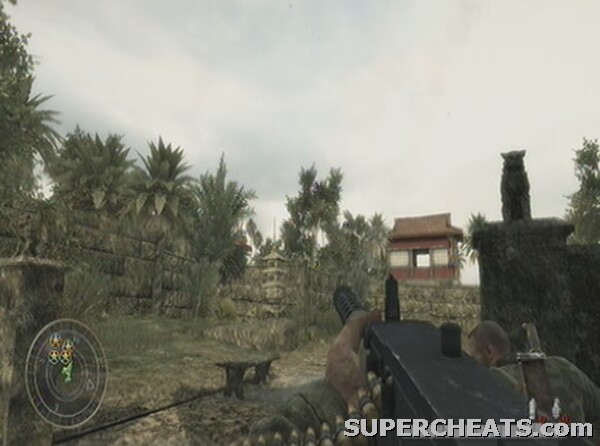
As soon as you come out of the small corridor underneath the arch turn right and cover behind the object there. All the enemies are over the right hand side of the area, so bed in and begin to pick them off. It shouldn't be long before you get a checkpoint and then you can begin to relax! Use the ornamental pond and its surrounding scenery further left to cover in and take out the enemies on the roof and in the windows of the building ahead.
Push into the corridors of the building and clear the side-room. Exit up the stairs into the main castle complex as we receive the objective to destroy four mortar crews. This is made easier by the fact that you can just lob grenades over the walls to destroy them.
Throw a grenade here to take out the first crew
If you don't have grenades or fancy doing it the more fun way, follow the winding path round to pick up a mortar from the crate by the wall. You pick them up with the action button and then just throw them like a grenade, except they detonate on impact. Aim them in the direction of the sunken mortar pits to begin ticking them off your objectives. With the first two destroyed, head up the steps to the final pair.
There are some more mortars in a crate to your right at the top of the stairs and another batch nearer the final pit on the radar. To the right of the last pit is an oriental bungalow, which houses a Death Card.
DEATH CARD: Three of Diamonds (Berserker)
- Find the Death Card inside the bungalow to the right of the final mortar pit.
With the card collected, head up into the main building (turn right out of the bungalow) and out of the other side. Take the path to the far left, shooting any enemies in the way. Watch out for enemies hiding behind statues as you continue to move up to the extreme left, against the wall. You should now be in a flanking position on a few of the Japanese defenders, so remove them and continue up the left hand path to the building. Hide amongst the ruins as cover for the final push.
When the notification flashes up, regroup with the squad by the large door into the building and follow them in once it is opened. Follow Roebuck through and get on the mounted gun when he stops. Mow down all those outside as your allies push through.

Get on the mounted gun
Shoot the explosive barrels dotted around to make things easier. With that area cleared, get off the gun and head right to where enemies are lurking in the room beyond. Go up the steps and left, then down into the tunnels with your squad. Shoot the explosive crate or lob a grenade into the first room you come to deal with the enemy within.
You will pass through one more room and then immediately following it is another full of enemies. Shoot the initial threats and then take the right hand side around the area. Watch out for Banzai attackers who frustratingly spawn at the sides (down the side-passages), and move underneath the scaffolding. Follow the path round and take the central exit out of the room. Clear the next area of Japanese with a little help from the explosives in the room and continue on until you get to the stairwell.
Deal with the enemies guarding it to allow the squad to move up. Head up the two flights of stairs and go out onto the balcony once the team open the door. Drop down to the left to see three Japanese soldiers surrendering. Make sure you are ready for action as the pair hassling the Sergeant will detonate a grenade which will actually kill Roebuck if you don't get them first.
Take out the pair of Japanese soldiers when you see the lone one begins to wrestle.
You will still lose a friend, but at least it's not Roebuck (there is an achievement for keeping him alive). Following this, Banzai attackers will come running out of the smoke, so be ready with a machine gun to deal with them.
TIP: With the sheer number of enemies it is advisable to have the Arisaka Bayonet in case you have to reload and melee quickly. You should be able to pick one up after you slay the first Banzai soldier.
Watch out for them coming from the right too (assuming you are covering towards the back-left corner of the area). They also go into 'last-stand' regularly, whereby they lie on the ground after they should rightfully be dead and use a pistol to attempt to take you out. Use the barricade on the left to hide behind and shoot the enemy in the back as they come running through. While a machine gun makes sense for sheer volume of bullets, using the Arisaka Bayonet as your primary weapon isn't a bad idea, as it allows you to fend off Banzai attacks without having to enter the often-fatal button-pressing mini-game.

Let Roebuck draw the fire while you're behind the barricade. He is invincible after all...
Before too long you should be given the laser designator from earlier in the campaign. Use it to target the northern building, then defend for thirty seconds until you can target the eastern one a couple of times. The first building should only take one strike, but the eastern one may take two or three. All the while make sure you stay in your barricade (if you are on Hardened or Veteran) and just defend until your strikes recharge. Make sure any downed enemies near you are in fact downed, and once the eastern building crumbles the level is complete.
Clearing out Shuri Castle
This concludes the US portion of the campaign!
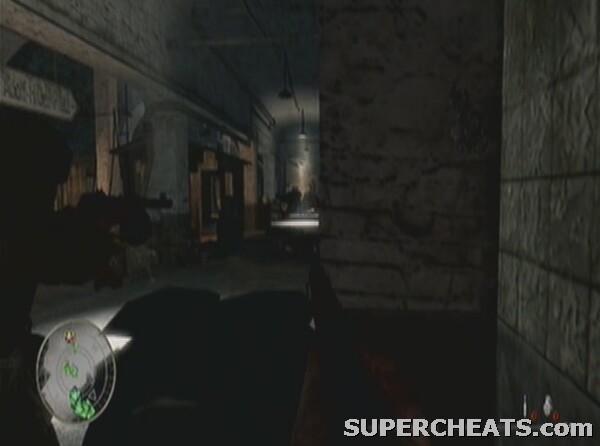
Russia
The Reichstag, Berlin
April 30th, 1945
Co-op: Yes
We have been pulled out of the flooded Metro system by Reznov and are now ready to begin our final assault on the German Parliament, the Reichstag.
Reznov saves us yet again
DEATH CARD: Six of Clubs (Paintball)
The location of the Six of Clubs
- Turn left to cross the street and descend the steps into the other metro entrance at the start of the game to find the death card within.
Follow Reznov the short distance down the road to the tank and regroup with the squad there to listen to the Commissar's speech on top of the tank. Head down the alley to the left after your team. Once the area opens up get behind the sandbags by the artillery gun. There are enemies on the first level and more in the blown-out sections of the building and its windows.
Use the artillery's sandbags for cover to pick off the first Germans
Grenades and Molotovs behind the enemy barricade have a good effect here. Once the majority of them have been thinned out, move up to the wall to get different shooting angles on any others. Head round to the left and sprint to the very left corner of the building, chucking a Molotov at any enemies remaining on the platform as shown below.

Cover at the corner of the building but make sure you take out the enemies outside first!
From here you should be able to get an angle to shoot inside the hole in the wall, while your team will also move up to draw fire and generally make life easier. Force your way inside to cover behind the furniture directly inside the hole on the right and you should hit a welcome checkpoint. There are enemies on the level directly above you as well as on the ground floor. Clear the bottom without moving too far using grenades and Molotovs, and then move around while aiming at the ceiling to spot and destroy those up high. Don't be fooled into thinking that it's safe when your allies are standing in the open - the enemy AI frequently fire at you and ignore easier targets.
Move forward through the room and to the large hole at the other end. Use the wall for cover and fire into the next building and clear the initial area.
Cover against the wall and fire into the building ahead.
Move into the street and then push on into the building itself. As you walk down the corridors in the library, be sure to look both ways wherever you go. Use the bookcases for cover until you and Reznov have cleared the room. Follow the mini-maze of bookcase-corridors until you get to the large window and a room full of Nazis. Flush them out with grenades and then move through the window and back outside. Follow the path until it heads underground and you will be held up behind the Commissar and two soldiers.
Wait for the artillery strike to hit the Reichstag and the whistle to blow, then count to five and sprint towards the action!
TIP: Make sure you wait about five seconds as the tank on the right is scripted to explode each time.
Move to the right and cover by the small concrete wall by the tank remains and pick off initial enemies in the grounds of the Reichstag. After the initial commotion has died down somewhat, sprint to the right hand corner of the walls of the grounds.

Head for this corner on the right as a great cover point. Sprint and don't look back!
Peek over the top of the wall and mow down the legs of any Germans in sight, then climb up and stay crouched behind the rubble. Use a rifle to pick off the guards by the first Flak 88, then run up to it and plant the charge with the action button before retreating behind cover. We need two of these Flak 88's taken out to trigger a checkpoint, so hang in there!
Use the Panzershreck leaning against the tank nearby to take out the next Flak 88 (to the south) – one direct hit should do it. You may want to clear the area a little first just to make sure you don’t undo all your good work so far. The main danger is grenades really and the only way to avoid them is not to attract too much attention.

Use this Panzershreck to make taking out the second Flak 88 a breeze.
You will then reach a checkpoint and can feel free to die a few times with no risk to your level progression! You need to try and move up on the right now (the right hand side of the left channel at least). You should see a building with a terrace on top – that is where we need to head. Take the route to the right of the blown up tank for the easiest way. Move forward slowly taking out one enemy at a time and ignoring the other Flak 88s for now (you can of course go for more aggressive tactics on lower difficulties).
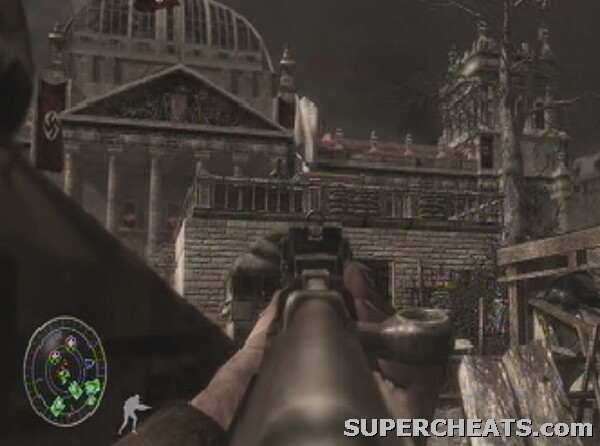
Head for this building!
Run round the crates, up the steps and cover against the wall of the building (you may want to make sure there are no Germans directly inside the door). Clear a path along the bottom of the next set of steps up to the Reichstag, and run along the bottom. When you come round the corner you will see the Flak 88. Take cover by the sandbags surrounding it. Inquisitive Germans should stick their heads up to look at you – shoot them. Stand up and deal with the rest, then run to the right and round the barricade and plant the charge. Jump off and head to the right as it blows up. Climb up the steps to the terraces and up to the highest point with the statue to the right. Look towards the Reichstag off the north-western corner of the terrace and shoot as many of the enemies below as you can. Grenades are good here.
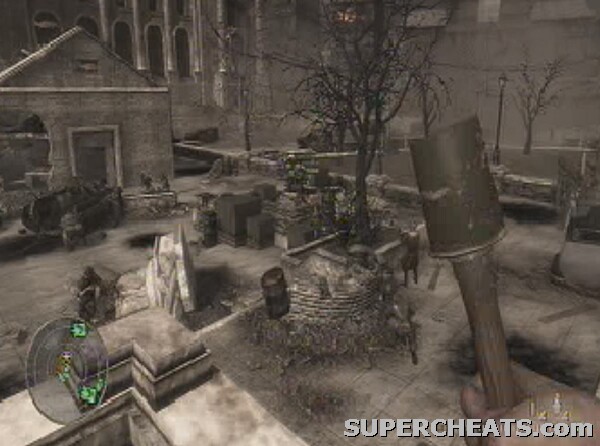
Use the height advantage on the enemy soldiers in the distance
Jump down to join your allies with the area clear. You are now right next to the final Flak 88, so stick a charge on it and blow it to smithereens. Clear the vicinity of enemies around the building ahead, then head down the right hand side of it and through the door. Clear the bottom floor; any soldiers in the area should all be caught unawares by your expert flanking manoeuvre. Climb up the ladder and do the same to those on the upper floor. There is a cracking sniper rifle (the PTRS-41) by the western end of the building, propped up against the wall, just underneath where an enemy sniper is stationed.
Get within shot of the Reichstag
Use the sniper station itself to get another height advantage over the enemy. Watch out to the south however, as there is another building like ours which may still have enemy snipers in. As well as grenades, simply use the sniper to pick off the legions of enemies running down the steps out of the Reichstag. You will undoubtedly run out of ammo, so go back down and swap guns until the torrent of Germans eventually stops coming.
At this point, drop down so that you are on the Reichstag steps. Watch out for snipers and Panzershreck units on top of the building itself, but concentrate on pushing up those steps. Once Reznov mourns over Chernov, you know you're through this area. Follow the Sergeant into the Reichstag to end the level.
Russia
The Reichstag, Berlin
April 30th, 1945
The final level in the game – clearing out the Reichstag.
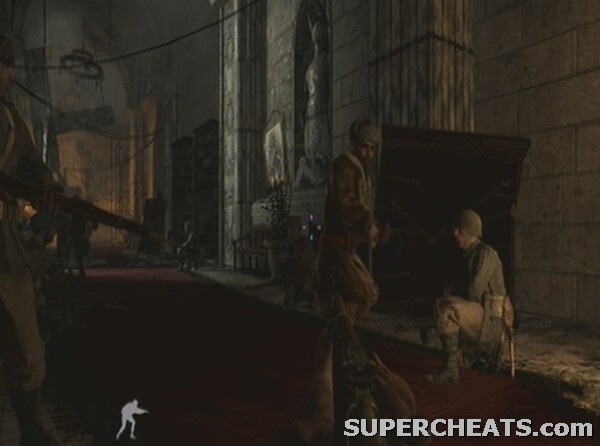
Reznov is leading us for one final push
Follow the team through the winding corridors until they open up into a large room with staircases on either side. Stay in cover behind the main barricade and pick off the nearest enemies. Move to the left and take that side of the room, underneath the arches in the dark.

Get rid of all the Germans in this section of the room
Look back into the centre of the room and shoot the Germans off the short scaffolding platform if you haven't already done so. Move back towards the centre of the room and you should find yourself at the bottom of the stairs. Work your way up, clearing them of enemies as you go.
Follow Reznov up the next lot of steps, through the corridors and stop with him at the next stairs. Lob a grenade through the open door to stir up the Nazis and continue through the corridors, stopping to enter the next door on the right to get the Death Card.
DEATH CARD: Two of Spades (Victory)
- In the corner of the room where a Russian and German were struggling – you can enter through the next door along to the one you first see.
Continue down the corridors and head up the stairs to the balcony once you come in sight of the German eagle.
Directly in front of you once you reach the top of the stairs is another PTRS-41 sniper rifle, so pick it up and get cracking! Lie prone and snipe through the banisters for greatest effect, though in reality you really shouldn't come under any fire. Once the flamethrower troops come in be sure to whack them in the fuel tank so they cause splash damage as well. Once the objective complete notice comes up and you are told to clear the ground floor, move to the right around the gallery to find Reznov. Wait for him to open the door and follow him through.
Down the steps you will find yourself a few metres above the ground level.

Assaulting the ground floor
Deal with the flamethrower troops who follow after the regular soldiers have been wiped out. Step out into the floor of the parliament yourself with the area clear. Collect the Panzershreck awaiting you in the centre of the room by Reznov, and fire a rocket at the German eagle above the stage. Once it falls to the ground, switch away the Panzershreck for a more appropriate weapon and regroup with your allies by the door leading out of the area.
Follow Reznov as he bursts the door down and climbs the stairs to another gallery area. Take cover behind one of the wooden outcrops and lay down some fire to the right. Use a combination of grenades and rifle fire to begin clearing the right hand side of the room of enemies.

Use whatever means necessary to clear the right hand side of the room
Move through along the gallery, using the wooden-but-stable items of furniture as cover.
Fight through the Reichstag gallery
Turn right when you get the opportunity and you will find yourself in a grey-lit set of corridors. Follow them until you get to some steps and a massive glass-roofed building. Use the steps as cover and pick off the enemies in the distance. Get behind the large concrete rubble for cover, and then move to the items of rubbish providing cover just in front of the large central cavity.
Clear a route heading left and dash into the door on the far left hand side, dealing with any enemies inside.
TIP: Move up on the left through the dark rooms for the easiest route.
Emerge out of the other door and focus on the Germans by the wooden scaffolding at the head of the area. Move forward and enter the next passage on the left to get nearer the scaffolding with no risk. Once it's clear your squad will move up. Follow them through the gap underneath the scaffolding and onto the roof for the finale. Pick up the flag as the building transitions onto the balcony with the action button.
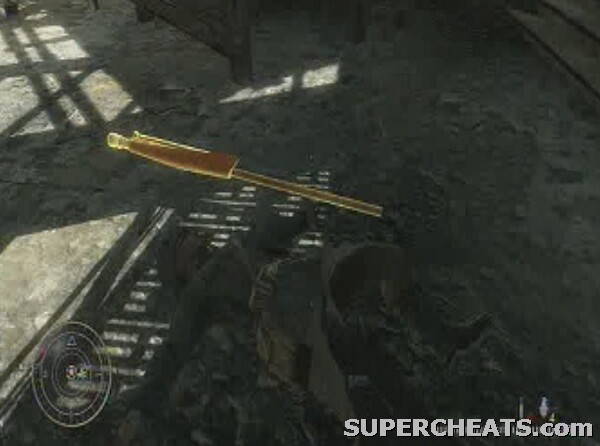
Get the flag on your way out onto the roof
With the flag in hand walk towards the Nazi one flying on the balcony. Jump over the wall, let the scene play out, then place the flag on the stand with the action button.
With that, the game is complete. Your reward? Cheats for all the Death Cards you discovered for co-op mode, as well as the fantastic Nazi Zombies game mode.

Congratulations!
DEATH CARD: Eight of Hearts (Thunder)

The Eight of Hearts
Unlocks: Hitting a headshot makes the enemy explode.
Find the 8 of Hearts in the first shack you come to on your right.
DEATH CARD: Four of Clubs (Hard Headed)
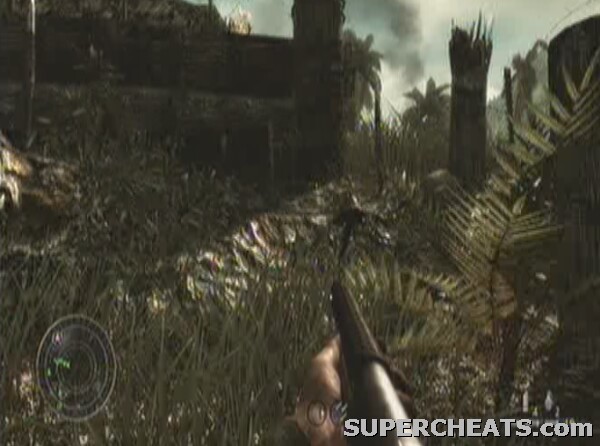
The Four of Clubs
Unlocks: Enemies take less damage, so effectively have more health
Find the 4 of Clubs in the far right corner of the field just before entering the main building/bunker in the last part of the level.
DEATH CARD: King of Hearts (Suicide King)

The King of Hearts
Reward: When in last stand mode (i.e. when you are waiting to be revived by your partner) your pistol will have explosive rounds.
Find the King of Hearts to the far right of the dark room in the main building/bunker, just before the airfield. It's leaning against the wall with a lamp next to it.
DEATH CARD: Five of Diamonds (Cold Dead Hands)

The Five of Diamonds
Reward: Enemies don't drop weapons or ammunition.
Once Reznov leads you to the first building after the sniping opening and opens the bar flap to let you through, head to the left behind the bar rather than out of the door to collect the card.
DEATH CARD: Joker (Sticks and Stones)

The Joker
Reward: Play with no guns, just grenades and your knife.
When you enter the barn which the tank burst out of in the farm section of the level it's in the first of the stable areas to the left.
DEATH CARD: Queen of Hearts (Vampire)
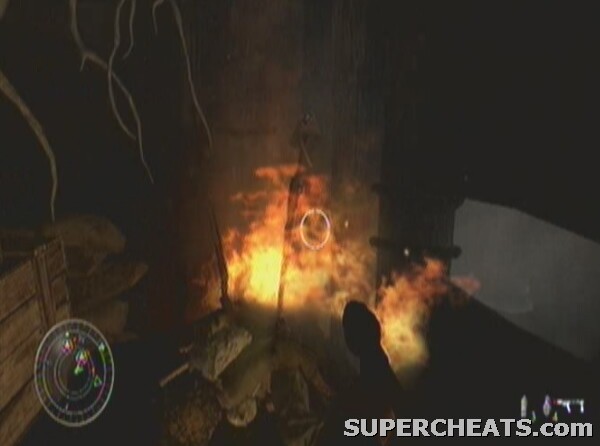
Queen of Hearts
Reward: Your own health recharges only when you kill enemies.
It's in the bunker to the left as the trench slopes up into an open field on the right just before the second mortar position.
DEATH CARD: Nine of Diamonds (Flak Jacket)

Nine of Diamonds
Reward: Enemies receive less grenade damage.
Once you enter the caves near the end of the level, move out of the first room into the thin tunnels and turn half-way between the two large rooms into an intersecting tunnel to find it amongst some bushes.
DEATH CARD: Jack of Spades (Body Armour)

Jack of Spades
Reward: Enemies can only be killed with headshots.
When entering the Asylum through the arch, turn left in the courtyard and follow the wall until you come to the corner. The card is just over the other side of the balcony.
DEATH CARD: Ace of Spades (Undead Soldier)
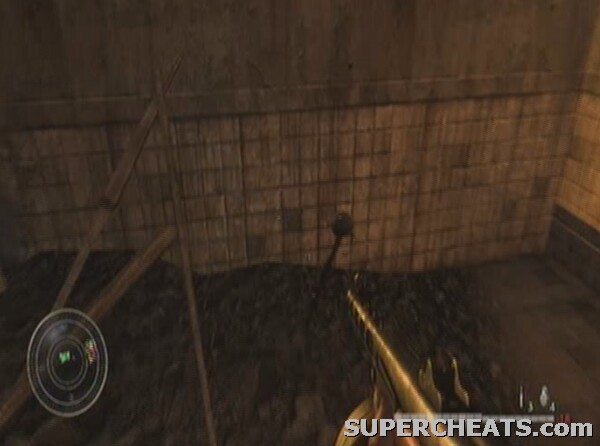
Ace of Spades
Reward: Undead/Zombie enemies.
When you arrive at the massive indoor balcony fight, turn right and drop through the hole into the fire-filled room below rather than going out onto the balcony itself. The Death Card is behind the ramp you land on.
DEATH CARD: Ten of Clubs (Painkiller)

Ten of Clubs
Reward: Shooting a co-op partner that is down (awaiting revival in 'last stand' mode) will now revive them.
As you follow the path away from the first bunker after destroying it with the satchel charges and see the other friendly squad, there is a sort of shrine with a dead soldier on it, directly opposite as you emerge into the open.
DEATH CARD: Three of Diamonds (Berserker)
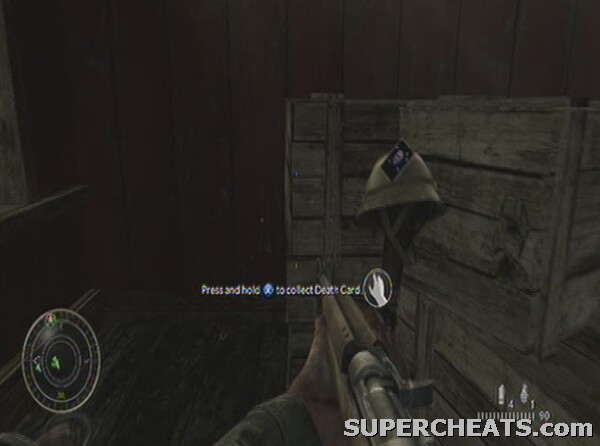
Three of Diamonds
Reward: Rage mode activates after three kills in five seconds, making you temporarily invincible but forcing you to use only the knife until it runs out.
Find the Death Card inside the bungalow to the right of the final mortar pit.
DEATH CARD: Six of Clubs (Paintball)

Six of Clubs
Reward: Paintball mode.
Turn left to cross the street and descend the steps into the other metro entrance at the start of the level to find the death card within.
DEATH CARD: Two of Spades (Victory)

Two of Spades
Reward: Between the lobby and the main parliament room in the corridors you can see a Russian fighting some Germans through a blocked doorway – another door to the room is opened for you further down the corridor, and the death card is just inside there.
The multiplayer in World at War is little different to that in its predecessor, Modern Warfare. The weapons, perks and maps have of course been given an overhaul, but the same frustrations and the same brilliances are in there. This guide aims to give you the knowledge you need to pick from these new items to hit the ground running and give yourself an immediate advantage over everyone else. Read on...
Capture the Flag:
This mode simply puts two teams battling to capture a flag in the centre of the map. They must then take it back to their base to score.
Domination:
This mode requires teams to hold as many of the three flags across the map as possible. Each team accumulates more points depending on how many flags they currently control.
Free for All:
In Free for All you need to hit a score limit or run out of time and be leading with the most kills to win the game. A team variant is available.
Hardcore Team Deathmatch:
Team Deathmatch with reduced health, limited HUD and no vehicles.
Hardcore Search and Destroy:
Search and Destroy with reduced health, limited HUD and no vehicles.
Headquarters:
This is a bit like domination, except the area you are required to hold is larger. It is a frantic but fun game mode that channels everyone into the same area.
Sabotage:
This is where a neutral bomb must be used to blow up an enemy target. You must also defend your own target from the enemy if they have the bomb.
Search and Destroy:
The same as Sabotage, but the bomb is not neutral.
Team Deathmatch:
The standard FPS game mode, simply kill the other team as many times as possible! Dying is not punished, but does reward the other team with points.
Veteran:
Boot Camp:
War:
There are numerous points to capture across the map and a team must seek to get them and hold them. Vehicular mayhem ensues.
Ground War:
This is like War, but supports a whopping 18 players.
Hardcore War:
War but with reduced health and a limited HUD, also supporting 18 players.
Surprisingly, it makes no noticeable difference as to whether you shoot an enemy in the legs, arms or chest. Clearly head-shots, if you can get the game to detect them, are great, but they are not that reliable. It is worth bearing in mind that it's not worth adjusting your aim if you happen to be aiming at the extremities of an enemy. The one benefit you have for aiming at the chest is an increased chance of getting a lucky head shot and a bigger target area than arms or legs. Generally, three direct hits to any part of the body will kill an enemy (note that some quick fire weapons launch more than one bullet with one press of the trigger – each press is counted as one shot in this guide). Holding down fire on automatic weapons obviously makes it tough to measure this, but generally if three bullets make a connection, you should see your enemy on the floor.

Don't be afraid to go for the arms and legs!
The only difference comes with sniper rifles, which do less damage on arms and legs.
It is also a good idea to get used to the idea of whipping out a pistol when in a fire-fight if you have to reload. Obviously this depends on the range at which you are fighting the enemy, though reloading should not be a huge problem if you are having a 200 metre rifle stand-off. As soon as your current magazine runs out of bullets, or even as it's getting low, hit the change weapon button (Y or Triangle) to pull out a pistol. Aim down the ironsights and get some crucial shots on the enemy to both do damage and prevent them from hitting you accurately. It's worth remembering however that you can pick up a new primary weapon at any time to replace your pistol, thus giving you two very good options, even if you don't have Overkill.
[video-to-go-here=codwawmpm1.wmv title=Use a pistol instead of reloading]
You may also find that you are getting 'spawn-killed' quite regularly. Unlike in some FPS games, this isn't the fault of the other team specifically targeting the enemy spawn, but the game's lack of a decent spawn system. As the example below shows, frequently you will be killed and reappear within feet of the enemy. The same can, of course, also go for them, and you will regularly die a few seconds after spawning in because you appeared in some sniper's scope.
[video-to-go-here=codwawmpm5.wmv title=Spawning problems]
See a description of each weapon in the game below, along with its basic statistics (note, these statistics are from the PC version, console versions differ slightly):
Pistols:
Colt 1911 - Power, ammunition and range is shared with all the pistols except the Magnum, which is a special case (similar to the Desert Eagle in Call of Duty 4). Every other pistol has 40 damage per shot, 56 for headshots, but damage goes right down to just 20 over approximately 5-10 metres. Each of the standard pistols can support 8 bullets in a magazine.
The US Colt has one of the fastest reload times, but everything else is the same as the other pistols.
Average Bodyshot Damage: 40 per shot.
Average Headshot Damage: 56 per shot.
Range: Short: Minus 20 Damage
Nambu – The Japanese pistol of choice shares the statistics of all the others, but has the quickest reload time of all the handguns in the game.
Average Bodyshot Damage: 40 per shot.
Average Headshot Damage: 56 per shot.
Range: Short: Minus 20 Damage
Walther – A German pistol, as with the others, but a longer reload time.
Average Bodyshot Damage: 40 per shot.
Average Headshot Damage: 56 per shot.
Range: Short: Minus 20 Damage
Tokarev – The Russian pistol has the longest reload time of all the standard pistols.
Average Bodyshot Damage: 40 per shot.
Average Headshot Damage: 56 per shot.
Range: Short: Minus 20 Damage
Magnum – The iconic Magnum has 50 damage at close range, with 70 for headshots, as well as slightly longer range than the other pistols, with damage decreasing from around 5-10 metres, but not so dramatically or suddenly as the others. The hard part is getting enemies in your sights accurately. The downsides are that it only has a six round capacity and takes longer to reload due to the nature of the gun's chamber.
Average Bodyshot Damage: 50 per shot.
Average Headshot Damage: 70 per shot.
Range: Short: Minus 20 Damage
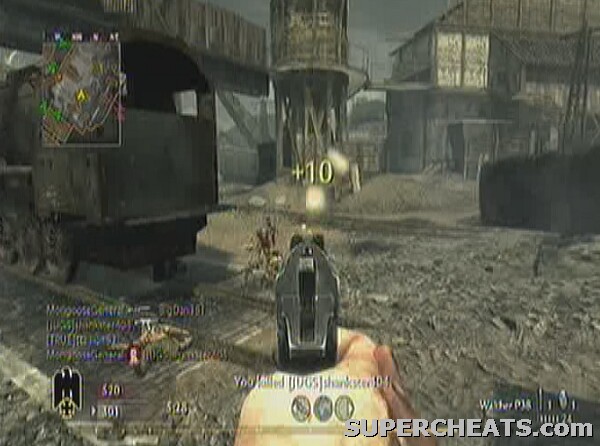
The pistols are not weak weapons
Shotguns:
Trench Gun – The American shotgun is, like the only other one in the game, superb at close range, but useless at anything else. It has pretty much the same range as a pistol, in terms of maximum damage, but with figures well over 100 for a hit anywhere on the body at this distance, it's an easy one-hit-kill. Over between roughly 5 and 10 metres damage decreases rapidly to around 80, so it may take an extra shot to finish off the enemy at this range. Remember too that the enemy stands a far greater chance of hitting you accurately from 5 metres, and their gun is likely to have a much better rate of fire. Make your shot count or you're dead!
Past about 15 metres the shotguns do no damage whatsoever, as it's physically impossible to land shots on enemies. The trench gun doesn't benefit from the 'Sawed-Off' attachment that the Double Barrelled Shotgun boasts, but has 4 rounds per clip as opposed to 2. It also has quicker reload times per shot.
Average Bodyshot Damage: One-hit-kill under 5-10 metres.
Average Headshot Damage: One-hit-kill under 5-10 metres (no headshot benefit).
Range: Extremely Short: No damage at greater distances.
Double Barrelled Shotgun - The only other shotgun in the game, and basically a civilian of farmer's weapon, the Double Barrelled Shotgun has large reload times of about 2 seconds, and obviously just the 2 rounds can be entered into the chamber at a time. It has approximately 15 percent more power than the Trench Gun, but as they both one-hit-kill close up and lose power so much over distance, this difference only occasionally comes into great effect. As a result of this better power though it means power becomes pretty much non-existent after around 10 metres, rather than the Trench Gun's estimated 15.
Of course, you can add the Sawed Off attachment, which increases power further, by around 12 percent. Add the Double Barrelled Shotgun's better power and the Sawed Off attachment and the increased power begins to become significant. But the reduced distance means you can only use this on seriously close quarter maps.
Submachine-guns:
MP40 – Many people's most loved, and most hated submachine gun, or the machine-pistol as it's called in German, is a very accurate, very powerful automatic weapon. Not quite so fantastic as the P90 in Call of Duty 4, or the PPSh in this game, but it's certainly a starting weapon that you can use from the off and never get rid of. It has decent times for reload and large magazines of 32 bullets. Despite this it has a relatively slow rate of fire, but thankfully can take out enemies in a couple of direct hits.
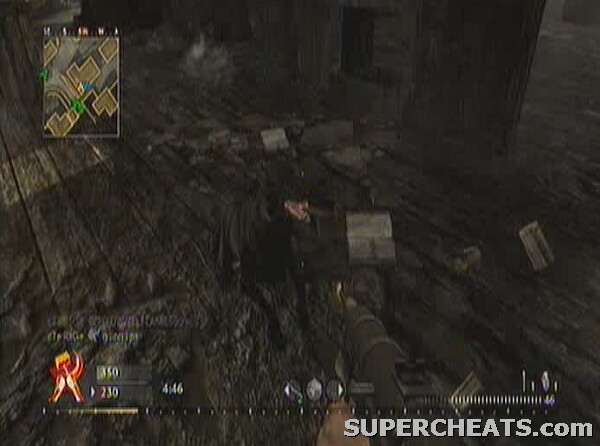
The MP40 in action against a dog
Attachments: Aperture Sight – Somewhat ridiculously, you can get World at War's equivalent of the Red Dot Sight for the MP40. While the gun's range isn't usually great, this is a cracking attachment to select, as it drastically increases your chances of being at least competent in longer range engagements.
Average Bodyshot Damage: 40 per shot.
Average Headshot Damage: 56 per shot.
Range: Short-Medium: Minus 10 Damage
Thompson – A cracking rate of fire (around 200 extra rounds per minute compared to the MP40) and high power at close range makes this American submachine-gun appear preferable to the MP40 at first glance. It does however rapidly lose power even at medium range, dropping down from 40 damage per shot to a meagre 20 at the point where the MP40 drops to just 30. Reload times are faster than the MP40 however. Based on this evidence then, it is possible and conceivable to use the Thompson as a short-range gun on maps like Courtyard, and the MP40 as your preferred short-medium weapon on more transitional map sizes. Using the Thompson on medium-range maps is not the wisest choice due to the 10 point hit in damage stats. Just 20 rounds in a magazine means the quick rate of fire comes at a price.
Average Bodyshot Damage: 40 per shot.
Average Headshot Damage: 56 per shot.
Range: Short: Minus 20 Damage
Type 100 – The Japanese Type-100 submachine-gun shares the Thompson's deficiencies, but also its quick rate of fire. In choosing between the two, the larger magazine with 30 bullets as standard should be considered. As a result however, it does take a fraction longer to reload. This minor drawback should not be enough to put anyone off using the Type-100 over the Thompson, but its horizontal size, covering much of your peripheral vision on the bottom of the game screen (though not at the top like the Thompson) may annoy, or be an advantage, to some players. Suffering from the same shortfalls as the Thomspon, the Type-100 is also a short-range weapon and loses half its power over distance.
Average Bodyshot Damage: 40 per shot.
Average Headshot Damage: 56 per shot.
Range: Short: Minus 20 Damage
PPSh-41 – If you've come up against the PPSh in combat then you will know that it is by far the most deadly submachine-gun in the game. The Russian weapon has a relatively dreadful damage rating of just 22 points per shot, but when you counter this with the fact that it fires a whopping 1250 rounds per minute, compared to the Thompson and Type-100's 750, and you can see why it's so impressive. The crux of the matter is that it is very difficult to fire a single bullet with the PPSh, so while you need to fire two for every one that the game's other submachine-guns do, the rate of fire (which is over double the MP40's 535 rounds per minute) enables you to do this and more. It carries 35 bullets in each magazine, which, due to the rate of fire, may see you coming up dry quite frequently. The speed of firing also means that you need to make sure you're accuracy is decent, or else you'll have exhausted your ammo before you land any hits. It is by far the best 'pray-and-spray' gun in the game however, and is also good for close-quarters reaction-based combat, where getting early shots off quickly may be crucial.
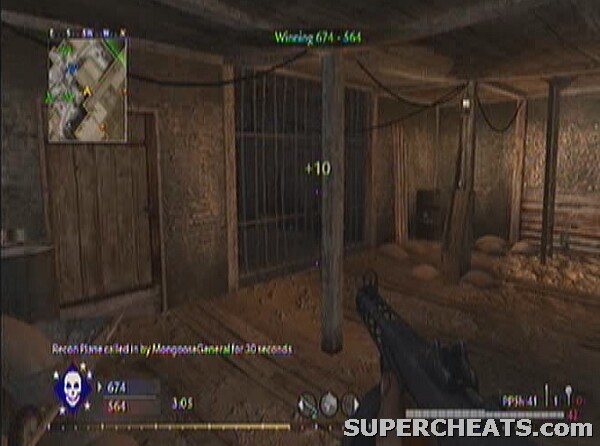
The PPSh
Despite sharing the same range limitations as the other submachine-guns (MP40 excluded), the PPSh's rate of fire goes some way to balancing this out. It is far more viable than the Type 100 or Thompson at medium range, though should still be surrendered to the MP40 if you have the choice – weapons with such insane rates of fire are never the most accurate! At range the decrease in power makes getting accurate shots in all the more important, and streaming bullets at a distant enemy is far more likely to reveal your position too.
Average Bodyshot Damage: 22 per shot.
Average Headshot Damage: 30 per shot.
Range: Short: Minus 8 Damage
Semi-automatic Rifles:
Gewehr 43 – This quick-firing rifle is good for people with a fast trigger finger. The massive downside is that you only get ten shots in a magazine, so any encounters with close-range enemies that require a quick burst of fire will inevitably leave you reloading before your opponent has been downed. Despite this, power, accuracy and range are all good. Over about 40 metres you will lose power unless you have the scope attachment.
Attachments: Scope – This increases damage (while scoped) to around 70 over any distance, so long as you can see the enemy.
Average Bodyshot Damage: 40 per shot.
Average Headshot Damage: 56 per shot.
Range: Long: Minus 10 Damage

The Gewehr 43
M1A1 Carbine – Very similar to the Gewehr but boasting 15 rounds in a clip rather than ten. Rate of fire is pretty much the same, although reload times on the Carbine are slightly longer. Most of the quick-firing semi-automatic rifles share many things in common, and there is little to recommend using the Gewehr or SVT-40 instead of the Carbine except for unlocking additional challenges.
Average Bodyshot Damage: 40 per shot.
Average Headshot Damage: 56 per shot.
Range: Long: Minus 10 Damage
SVT-40 – Another semi-automatic rifle with an impressive rate of fire, but sharing the Gewehr's flaw of just 10 bullets in a magazine. It also has a longer reload time. The choice between these last three weapons is down to preference mainly, though the Carbine is technically better if for the larger magazines alone. Should you feel the need for about half-a-second quicker reloads, then the Gewehr is preferable. Get used to the iron-sights on each gun and see which you prefer. While not much separates them statistically, you may well find one more comfortable to use than another.
Average Bodyshot Damage: 40 per shot.
Average Headshot Damage: 56 per shot.
Range: Long: Minus 10 Damage
M1 Garand – Another US semi-automatic rifle and the only one which supports a telescopic sight (a scope). As you might expect, the power is therefore higher, at an impressive 45 per shot, though it still tails off at the same time as the other semi-auto rifles, but down to 35 rather than 30. It takes a massive hit in terms of rate of fire as punishment for its power, at almost a third that of all the other semi-autos bar the STG. The 8-bullet clip doesn't set the world on fire either.
If you're looking for a transitionary gun which works nicely at medium range and also can function over longer distances, but you don't want a sniper rifle which forces you to play in a certain manner, the Garand is a perfect choice.
Average Bodyshot Damage: 45 per shot.
Average Headshot Damage: 63 per shot.
Range: Long: Minus 10 Damage
STG-44 – The upgrade of the MP-44, a gun many of you will remember from previous Call of Duty games, the STG is a German assault rifle. In the game however, it is classed as a rifle, which tells you most of what you need to know about its capabilities. It is very similar to the MP40 in terms of raw statistics, with an identical rate of fire and a similar magazine size (30 to the MP40's 32). It has longer reload times, though only fractionally. The big difference is this is basically an MP40 that you can use at medium-to-long range. You can shoot roughly double the distance of a MP40 before you start to lose power, dropping from 30 to 20 points per hit. Clearly the original 30 points for a hit is not as impressive as the MP40 or indeed most of the submachine-guns' 40, but the STG is something of a unique weapon in that it is a long range, quick firing gun which doesn't take up much of the screen. It is also pretty much the only gun that can be called an assault-rifle in the game.
As such, you can use it even at short-range, though obviously not as effectively as the submachine-guns. It is surprising that the range at which it loses power is equal to virtually all the semi-automatic rifles in the game, meaning that if you can put up with the larger size and weight, you have a gun that can potentially function in any situation. The question you have to ask is whether you want a gun that is 'jack of all trades but master of none', or an expert in your own preferred area. Its classification as a rifle is accurate, and the STG was ahead of its time effectively functioning as an assault rifle. It also means that the attachments follow the rifle pattern, allowing such oddities as a telescopic sight. The gun would feel more at home in the machine gun category, but you get the bonus of the rifle class attachments.
Average Bodyshot Damage: 30 per shot.
Average Headshot Damage: 42 per shot.
Range: Medium-Long: Minus 10 Damage
Machine Guns:
Type 99 – This is a cracking fully automatic machine gun. It has a high rate of fire and high damage, a whopping 45 in fact, as well as a really accurate iron-sight mode. The main drawback is that it is absolutely huge, but not in the way the Browning is for example. Instead the gun extends vertically up the screen, restricting your view heavily.
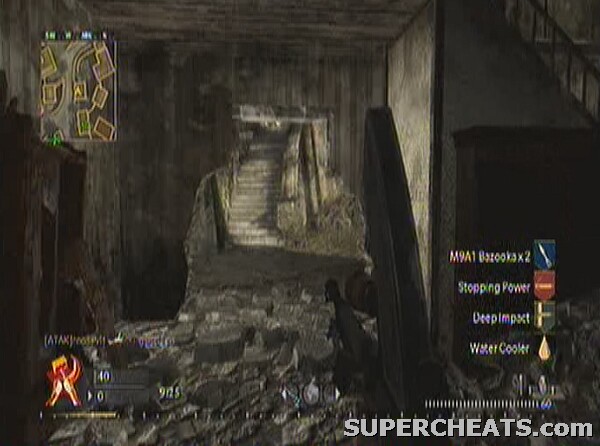
The Type 99
The gun's range, like most of the machine guns, is impressive. It shares its maximum distance before losing power with the game's rifles, and drops damage stats by a little over 10 points once this is exceeded. It has a rate of fire of 625 rounds per minute, making it a decent medium range weapon, though the gun's size makes it touch to manoeuvre and aim at short range. Despite this, it remains one of the only machine-guns to at least be manageable at short range as a last resort. It also has one of the longest reload times in the game, at around four to five seconds depending on the ammunition left in the 30-bullet magazine.
Average Bodyshot Damage: 45 per shot.
Average Headshot Damage: 63 per shot.
Range: Medium-Long: Minus 12 Damage
BAR – Standing for Browning Automatic Rifle, the BAR is an American versatile, high-range, high-power weapon. Compared to the Type-99, the rate of fire is poor, at 375 rounds per minute compared to 625. To counter-act this however, the gun is much smaller and lighter, just a bulkier version of a standard rifle, and reload times are well down on the 99. It is also slightly better at long range, and the weapon's size makes it easier to aim and pick off both distant and close targets. Regardless of the fire rate, this is not a bad weapon at short range, if you make sure the bullets that you do get off hit.
Average Bodyshot Damage: 45 per shot.
Average Headshot Damage: 63 per shot.
Range: Medium-Long: Minus 10 Damage

The BAR
DP-28 – Coming on to the beastly machine guns now, what would commonly be called (somewhat ironically) Light Machine Guns. The DP-28 is a Russian weapon with a distinctive circular magazine that sits on top of the gun. This makes is wide, but short on your screen. It shares damage and range statistics with the BAR, but has a massive magazine of 47 rounds. The reload time, due to the positioning and size of the magazine, takes longer than most. It can get off 469 rounds per minute, putting it between the BAR and the Type-99.
This is a large and heavy gun, despite not being too bad in terms of screen space. Bear this in mind when attempting to use it at short range, as you will not only struggle to move quickly between cover, but will find it difficult to readjust your aim in tight corridors or close combat scenarios.
Average Bodyshot Damage: 45 per shot.
Average Headshot Damage: 63 per shot.
Range: Medium-Long: Minus 10 Damage
MG42 – The German alternative to the DP-28, the MG-42 is usually found mounted in the single-player campaign and if you have ever come up against it, you'll know how severe the attacks can be. It has impeccable range, but weaker shot power compared to the DP-28. It loses no power over distance, but has just 30 damage per shot. The rate of fire excels the MG42 above the DP-28 however, with almost double the number of bullets per minute able to be fired. The magazine is also larger, if only marginally, at 50.
It is dangerously close to having the longest reload time in the game, at a whopping 6 seconds, only 'beaten' on this front by the Browning. Praying and spraying is a worthy strategy with this gun, but if you don't kill anyone with your 50 bullets, be prepared to switch to a pistol or run away, as no enemy will give you six seconds to reload! The cumbersome nature of the MG42, like many of the machine guns, makes it inadvisable to use at short range.
Average Bodyshot Damage: 30 per shot.
Average Headshot Damage: 42 per shot.
Range: Medium-Long: No loss of power
FG42 – The German FG42, while sounding similar to the MG42, is in fact quite different. It shares the same rate of fire, but has a magazine capacity of just 20 rounds. It also drops off in terms of power at a similar range to the other machine guns (though not as significantly), rather than the constant clout of the MG42. The massive advantage with this gun is that the reload time is way down on the rest, at under half the time taken by the MG42. The BAR is the only machine gun that can match it in this department. The magazine size obviously is a compromise, but when you throw its attachments into the mix it becomes quite a different story.
The FG42 is the only machine gun which can receive the telescopic sight attachment, though this has little effect on power. It merely allows you to see and attempt to hit longer distance enemies. It shouldn't need to be said that the FG42 suffers the safe misgivings as the other machine guns in the game, though its reload speed and smaller size makes it a little better up close.
Average Bodyshot Damage: 30 per shot.
Average Headshot Damage: 42 per shot.
Range: Medium-Long: Minus 8 Damage.
Browning M1919 – This is the American take on the MG42 and DP-28. Like the MG42, it has constant power over distance, not losing any strength from its already impressive 40 damage per shot for enemies further away. It has a high capacity of 50 rounds per magazine, but a significantly lower rate of fire when compared to the MG42 and FG42 (625 rounds per minute compared to 937).
It is pretty much the heaviest and largest weapon in the game too, and it also boasts the unsatisfactory statistic of longest reload time, coming in at a whopping 6.5 seconds. All this makes it unsuitable for close combat. Using Sleight of Hand is pretty much essential, though the magazine is so large you may not find it entirely necessary.
Average Bodyshot Damage: 40 per shot.
Average Headshot Damage: 56 per shot.
Range: Medium-Long: No loss of power.
Attachments: Bipod – This allows you to mount the weapon on a flat surface such as a wall, or, while prone, on the ground. It dramatically increases accuracy but leaves you open for attack from behind or grenades as you have to detach it to move.
Bolt Action Rifles:
Springfield – The American long distance rifle is pretty much like all the others (except the PTRS-41, which is distinctive in its power). It has the standard bolt-action 50 damage without the scope, but has a slightly better rate of fire than all the others (again, bar the exceptional PTRS). Depending on your style of play, you may find the rate of fire important, though bear in mind that it is only fractionally better. It allows you to quickly adjust your aim after a miss for that all important headshot, but the importance shouldn't be overstated. Each bolt-action rifle has five bullets per magazine.
Average Bodyshot Damage: 50 per shot (75 in chest, 50 in extremities).
Average Headshot Damage: 100 per shot.
Range: Long-Very Long: Minus 10 power (No loss of power with scope).
Arisaka – The Japanese rifle is exactly the same as the Springfield except for the fact that it takes an extra tenth of a second to fire each shot. There is little more to say, except that is you prefer the design of one of these rifles over the other, then that should be the deciding factor in your decision between them. You can also have the Bayonet attachment with the Arisaka, which is fun, but ultimately doesn't add much.
Average Bodyshot Damage: 50 per shot (75 in chest, 50 in extremities).
Average Headshot Damage: 100 per shot.
Range: Long-Very Long: Minus 10 power (No loss of power with scope).
Mosin Nagant – Russia's attempt at a bolt-action rifle is identical to the Arisaka, with the same slightly reduced rate of fire when compared to the Springfield. It takes almost exactly a second to fire each shot. Unlike the Arisaka, there are no special (or gimmicky) attachments on offer here.
Average Bodyshot Damage: 50 per shot (75 in chest, 50 in extremities).
Average Headshot Damage: 100 per shot.
Range: Long-Very Long: Minus 10 power (No loss of power with scope).
Kar98k – With a rate of fire in between the Springfield and the Arisaka, the German Kar98k again doesn't have much else to set it apart from the rest. As with the others, whether you choose this rifle or not comes down to how much you like the design and feel of it.
Average Bodyshot Damage: 50 per shot (75 in chest, 50 in extremities).
Average Headshot Damage: 100 per shot.
Range: Long-Very Long: Minus 10 power (No loss of power with scope).
PTRS-41 – Now for the exception. This is in fact a Russian anti-tank rifle, which should tell you something about the power of it. It comes with a scope as standard, and so benefits from the massive 70 damage you would normally get from the other rifles with a scope attachments from the off. This of course means it is less versatile. Again, like with the scope attachment for other guns, there is no loss of power over distance. Rate of fire is an impressive 75 rounds per minute, making it the quickest firing bolt-action rifle by around a tenth of a second.
The downside, though a small one, is that it takes about two seconds longer than the others to reload. As a sniper this shouldn't be a life or death issue (as you'd probably soon be dead if you were forced to reload quickly in battle anyway). With the scope it also takes up more of the screen and obviously loses the ironsights, meaning it's unsuitable at anything but long or very long range engagements.
As you can see from the figures below, even a chest shot with this weapon is a one-hit-kill, and that's without Stopping Power. Not having to hit a headshot is often crucial in battle.
Average Bodyshot Damage: 70 per shot (105 in chest, 70 in extremities).
Average Headshot Damage: 105 per shot.
Range: Long-Very Long: No loss of power.
Most perks are unlocked as you progress through the ranks in the game. There are three perk classes and you pick one from each. This is to stop the game from becoming too imbalanced with everyone picking all the damage and health-related perks.
Class 1:
Special Grenades x3: This increases the number of special grenades (Signal Flares or Tabum Gas) to three. The type depends on which sort of special grenade you have chosen with that particular class.
Satchel Charges x2: This equips your character with 2 Satchel Charges in addition to any special grenades. Satchel charges are very good against tanks, make a humorous noise when you try and detonate them without having planted any, and are cracking on objective games or in close quarter maps where you are often guaranteed kills.
M9A1 Bazooka x2: This equips your character with 2 Bazooka rounds. Bazookas are surprisingly good against infantry, and surprisingly useless against tanks. Great when enemies are clustered together.
Bomb Squad: This is for anyone who gets angry at constant Bouncing Betties deaths. They will now appear on the map with the ordnance icon that you will be used to seeing on allied mines.
Bouncing Betty x2 – This equips your character with 2 Bouncing Betties. These are proximity mines which can be planted anywhere on the map and explode when an enemy puts pressure on the area nearby. You can get many kills by planting them in doorways and simply staying alive (any active Betties are made redundant upon your death).
Bandolier: This perk is great for players who are constantly getting through all their ammo and have to switch to pistols. Certain guns with a small number of total ammunition or those that have a high rate of fire and churn through the ammo quickly make Bandolier, the perk which increases total ammunition (not the amount in each clip or magazine).
Primary Grenades x2: Unlike Modern Warfare, you only get one additional primary grenade (Frag Grenade, Anti-Tank Grenade or Molotov Cocktail) with this perk, making two in total.
M2 Flamethrower: The flamethrower is not as effective in multiplayer as it is in singleplayer, but this perk allows it to be used in addition to your other weapons i.e. it doesn't replace either your primary or secondary weaponry. As such it is a good weapon for snipers to have as short-range back up.
Class 2:
Stopping Power: The opposite of the much-maligned Juggernaut, this boosts your damage by 40% which allows some weapons to kill in one body shot and others in a quick two. It is cancelled out by players with Juggernaut.
Juggernaut: In contrast to Stopping Power, this decreases enemy damage by 25%, often needing at least one more bullet to finish you off than would otherwise be required. Stopping Power cancels out the effect of Juggernaut, so your would get no damage bonus, and they would receive no less damage, putting everyone back to a level playing field.
Fireworks: This perk boosts all explosive damage to increase your chances of taking out the enemy. Grenade fanatics in particular lap this one up, especially in conjunction with Primary Grenade x2 as a Class 1 perk.
Flak Jacket: This reduces explosive damage to help keep you alive following grenade or other explosive attacks. The natural answer to enemy fireworks, and useful on tighter maps with heaps of grenades and not much room to run.
Gas Mask: With the Gas Mark perk you will not be poisoned or have your vision affected by Tabum Gas. This usually distorts the screen and provides a similar effect to a flashbang from the first game (you struggle to see the enemy). The main idea is to use this as an offensive perk, so throw a Tabum grenade into a room, then run in among the gas to clear out the enemy.
Camouflage: If you're fed up with feeling that the enemy always knows where you are (the chances are that they do), then this perk is right up your street. Like the UAV Jammer from Modern Warfare, it ensures that you don't appear on the RADAR when enemy Recon Planes make a pass. The only time you will ever appear on the RADAR now is when you fire your gun. Of course, if you use a silenced weapon then this isn't a problem and you can, in effect, be totally invisible.
Sleight of Hand: This reduces reloading times by 50%, making it ideal for any guns which regularly need reloading, such as rifles, or those which take a long time to add more ammo, such as shotguns and light-machine guns.
Shades: If you either love or hate flare attacks, then this is probably an enticing perk. It reduces the effect of flares so you can either throw them in front of you while in a room, or hide in the flare and pick off enemies who then can't see you. Obviously enemy flares also appear dimmer, though they are not widely used in multiplayer.
Double Tap: The World at War debate is whether Double Tap is better than Stopping Power. As it increases your firing rate by double, you should, in theory, do twice the damage, making it more powerful than Stopping Power. Obviously on snipers or very slow firing guns you wouldn't necessarily hit both shots, but on medium to fast weapons (such as the BAR in particular) it's a very good thing to use. Certain guns like the MP40 or the PPSh may look and sound great with this perk, but your ammunition won't last long.
Overkill: Returning from Modern Warfare, here you can equip two primary weapons of your choice, rather than having to have a pistol as a secondary weapon. It's good if you are often running out of ammunition in your primary weapon, but the cost of not having any of the more recognised Class 2 perks such as Stopping Power or Double Tap means it's only really used by snipers so that they can more adequately defend themselves up close.
Class 3:
Deep Impact: This increases bullet penetration, allowing you to shoot through walls and most cover. The power of the gun and rate of fire that you are using determines the relative effectiveness of the perk. Useful for light-machine guns, where you can spray bullets at a wall and try to blindly hit enemies. It's also essential when an enemy retreats behind cover when they're nearly down, as you can now just finish them off.
Extreme Conditioning: You can sprint for twice as long with this perk, which is handy on maps such as Airfield with big gaps between cover. In objective games or even general Deathmatch it's also useful to get to the target (or behind enemy lines) before they expect.
Steady Aim: This perk increases accuracy when you're firing from the hip (i.e. not looking down the sights of the weapon). Especially useful for players with quick-fire and close quarter guns such as the PPSh or MP40.
Toss Back: If you hate always getting taken out by grenades when you pick them up to throw back, this perk resets the timer on the grenade, effectively giving you a free-throw. Grenades are not as common as they were in Modern Warfare, but on certain maps, such as Asylum, where particular locations are bottlenecks, it's not a bad one-off perk.
Second Chance: Treyarch's answer to Modern Warfare's Last Stand, players can now be revived when in 'Last Stand' mode. This is when you are injured but not killed, i.e. not shot in the head or grenaded basically and stay prone on the ground with your pistol to defend against or kill enemies. Any team mates with Second Chance can then heal you and get you back on your feet, saving the team 10 points and keeping you alive. Friendly players in Second Chance mode appear as crosses on the map.
Martyrdom: This pulls a pin on a grenade when you die, leaving any enemies, particularly your killer, to have to evacuate the immediate area. It's also useful as enemies will run round corners and over what they think is a corpse, but the grenade may not have gone off yet, getting an easy and free kill. To defend against it, don't kill someone and then run past their body until you give the grenade a chance to go off.
Fireproof: This perk is only useful against flamethrowers and molotovs, which are used very occasionally in the game. It protects you against both, and is mainly useful when you yourself have a flamethrower and can then follow the flames into the enemy with no damage.
Dead Silence: One thing that is noticeable in World at War is that you can now hear people sneaking up behind you or walking nearby. This silences your footsteps, and is the last part of the stealth perk combination.
Iron Lungs: Used for sniping, you can now keep your breath held (increasing accuracy by decreasing weapon movement) for twice the period.
Reconnaissance: A fun perk rather than a useful one, this shows dogs, artillery strikes and tanks on the map. If you particularly enjoy taking out the dogs and defending against them, then it's worth considering.
A Pacific map, Airfield is a large, primarily open encounter with a scattering of main buildings which promote sniping. There are a few routes through the map where you are almost guaranteed to find the enemy, such as the large military building or the corridor of structures down the opposite side of the map.
The trench that runs underneath the map is a good place to hide for close-quarters players, as is the run of buildings on the eastern side of the map. Mainly however, this map is only suitable for medium or long range weapons. You at least need to have some sort of capability for distant attacks if you want to rack up the kills.

Assaulting the main building
The main building is a great location to place Bouncing Betties, as you can be sure that the enemy will occupy it at some point. Place them near the stairs and doorways for the best effect. On alternative game modes, Search and Destroy teams should make use of the tunnels to attack and the great defensive nature of the main building to protect the target. In Domination the flags are spread out, with two being reachable by traveling through the trenches too, and the third to the southeast. The best tactic in deathmatch is either to find a decent location to set up and snipe, or to actively flank the enemy with a slightly closer-range weapon. You can get round behind the enemy as they siege the main building quite easily, for example, using the buildings at the side of the map to move up.
Gun Selection: As touched upon earlier, medium range guns are the best bet here, especially on Deathmatch. Despite this, sniping is very much a decent tactic, particularly on objective based game modes where placing snipers on the balcony of the main building will keep it well defended. For those of you who desire close-quarters fighting, stick to the buildings and tunnels, and don't go into the large open expanse in front of the main building. The building to the east which you can get into the upstairs via the back window is a good place to camp out if you're a close quarters player as the building is frequently occupied from both ends (Boucing Betties are good if you are looking to hold out here).

The view from the main building over the airfield itself.
Perk Selection: Stopping Power and Juggernaut are very important here, as there is plenty of open space but also lots of cover, meaning enemies have time to sprint out of your line of sight and similarly you could do with extra time to do the same. Stopping Power beefs up those rifles to encourage one and two-hit kills, and Juggernaut will keep you alive long enough to get some streaks going (artillery strikes are particularly deadly on this map due to the open nature). You just have to pick between these two. Snipers will want to use their usual perks such as Iron Lungs, all the more important with the abundance of small cover. On objective modes, use Camouflage to get the most out of the trenches and tunnels, though this perk doesn't help much in Deathmatch unless you're actively flanking the enemy.
This map is perhaps most closely related to Vacant from Modern Warfare, with its small array of corridors and large main room where most of the action and intense fighting occurs. There is not a lot more to say about strategy on this map, except that you can and will often be outflanked and surrounded by the enemy with the multitude of corridors and rooms giving easy access to exposed flanks. The main room on the upper floor is a haven for grenades and pray and sprayers. You may also find shotgunners sprinting around and getting some easy kills.
[video-to-go-here=codwawmpm9.wmv title=Finding some success in Asylum with a rifle]
Gun Selection: Shotguns or machine guns (sub or light) with a high rate of fire are the only realistic options here. One of the light machine guns such as the Type 99 or Browning are good, but dramatically impinge on your peripheral vision – something that is absolutely essential on this map to avoid being regularly flanked. The MP40, PPSh or Thompson are all effective here. Tabun Gas is fantastic for disorientating enemies, though whether or not you'll have time to kill them before you yourself are flanked is never guaranteed.
Perk Selection: Stopping Power, Double Tap and Juggernaut are the only realistic choices in the most important slot, though some may wish to consider Fireworks for its higher explosive damage (or Flak Jacket for its reduction). Extra Primary Grenades or Special Grenades are also useful. In slot three Martyrdom may well get you a good few cheap kills, Toss Back will give you many 'free' grenades from those thrown at you and Steady Aim will help with the pray and spray mentality of the level. Shotgunners should use Sleight of Hand to ensure they don't get caught out.
You can get attacked from any angle in Asylum
Castle is made up of two large, and important, main buildings, and another one which doesn't have a lot of impact on the gameplay. The first is made up of a large room, dotted with various pillars and nooks to hide behind, as well as a tower which is accessible from both sides of the building. This gives great views over the courtyard but is exposed to blind grenades. On the other hand, it is worth chucking an explosive through the window in the wall from the courtyard end (south) as there is very frequently an enemy in there.
The second building is set low in the pit of the level. It features internal areas and steps leading up to a balconied walkway, a high tower and another room which overlooks the courtyard to the east. This is a hotspot of activity and is a good section of the map to hold. The tower provides good views of the level and is only accessible from the walkway. Planting Bouncing Betties on the stairs going down to the lowest section of the level (the gardens of the castle) will reward you with a couple of kills, but it's also an idea to regularly check these steps to get the jump on enemies clambering up them.
The courtyard and garden with steps leading up to the castle should be avoided where possible, as the snipers from both towers will be able to pick you off with ease. Generally the map's main encounters take place in close quarters with one team attempting to siege one of the towers.
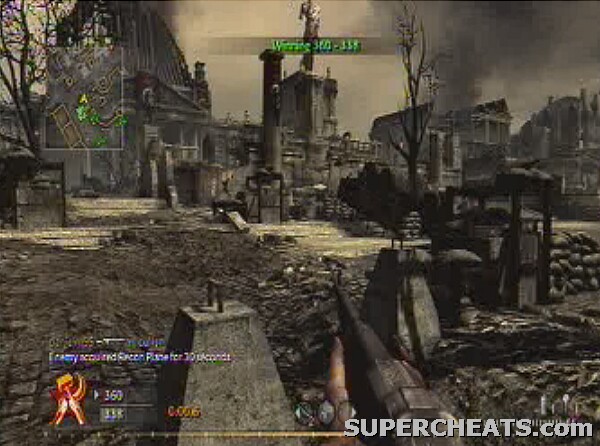
The castle
Gun Selection:
The pair of towers in this map makes a sniper rifle a viable option. Just be sure your whole team doesn't follow suit or you'll be ripped apart by enemy SMGs. An alternative to this, but still making use of the towers, is to take a gun with a bipod attachment. You can then mount this up high and rain down bullets upon the enemy with impressive accuracy. For those that don't fancy staying in one place for the whole game however, the map supports a variety of weapon types. While the gunplay is largely at close quarters, a bolt action rifle which allows you to pick off snipers and take on medium range enemies is a nice option to have.
In the buildings however, you will feel inept without a gun with a relatively fast rate of fire. As is often the case, the BAR is a good choice for its multi-functionality, and anyone who goes for their favourite machine gun won't be disappointed. Unless you are looking for a bipod weapon, the smaller the gun the better, as it's quite important to have a good view of all angles while defending or rushing the main areas.
Due to the close quarters play Tabun Gas as special grenades deserves a mention, though Bouncing Betties may be too hard to resist on such a predictable map.
Perk Selection:
Primary Grenades x2 is a cracking choice in slot one for this map. The two clear areas of activity mean throwing a relatively random grenade can often reward you with many kills if you just get it in a good position. Bouncing Betties can get you a few kills, again due to the hotspots in the map where you can generally guarantee enemies – snipers in particular will want to pick this perk.
In slot two, apart from Stopping Power or Juggernaut, Fireworks matches up well with taking an extra primary grenade, Double Tap may give you a bit of help in the rooms if you choose to take a rifle or slow firing weapon, and finally Overkill allows you to take both a sniper or rifle and a machine gun for those packed rooms.
Cliffside is a well balanced map with a large valley in the middle, numerous bunkers and a cliffside portion where kills can be guaranteed and much of the action happens. This is another great map that suits a number of play styles. Snipers can see from one end of the map to the other, and there is a hill and bunker which provide good cover and views. Machine-gunners will delight in the amount of cover and proliferation in enemies that you can find on the cliffside and in the main bunker.
The rocks and bushes dotted around the valley should mean you can use this as a route across the map, but just beware. The corridor of rocks that leads to the cliffside is a great area to throw grenades or plant Bouncing Betties, or if you come from the other end, through the bunker, take cover behind the wealth of cover here and hold it to rack up the kills.
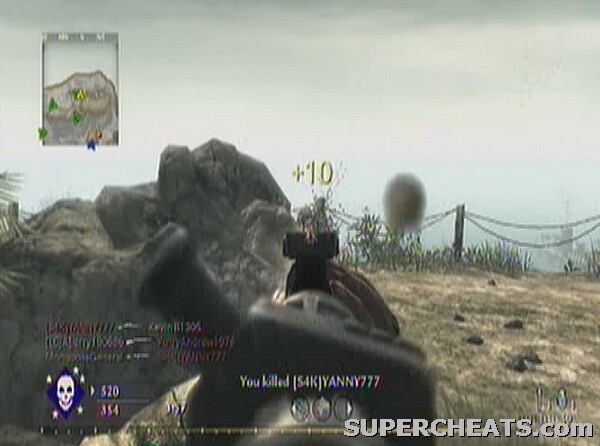
You can always rely on there being enemies on the cliff-edge
Gun Selection:
There are possibilities for sniping, but as an overall tactic for this map it's not very effective. Machine guns and rifles are the way to go, with the final choice coming down to personal preference. Tabun Grenades are useful for the cliffside area itself, though Bouncing Betties also have a role to play on this map.
Perk Selection:
Slot one is open for debate, though it would not be a bad map to try out Bomb Squad on due to the predominance of Bouncing Betties in certain areas of the map. Slot two could be occupied by Camouflage, as this is a map where stealth can certainly pay off, though sacrificing Stopping Power or Juggernaut is always a tough choice to make. Slot three boasts a few possible options. Deep Impact isn’t terribly useful here, but Extreme Conditioning is not a bad selection due to the large valley in the centre of the map where running for longer can be a matter of life and death (or a kill if you are pursuing someone). You may also wish to pick Second Chance as there are areas of the map where you would be able to retrieve a downed ally, which isn't often the case elsewhere.
This is a map similar to Castle in its appearance, but is much smaller and basically consists of a square, with a central pit and sparing use of buildings. Most of the action is concentrated on the centre, where there is the option for particular players to get a height advantage amongst the trees and pick off plenty of enemies before they even know where the fire is coming from. Once you've played this map a few times, however, you know what to look for, and if you are playing against experienced opposition you are unlikely to be able to get too much out of this tactic without dying.
Parts of the map, in particular the corners, are well shielded from the centre and some fighting takes place in these areas, especially in the building in one such location. Towards the large and inaccessible building at the head of the map, the stairs and walls around can be used for some intense combat and easy kills providing you are looking in the right direction.
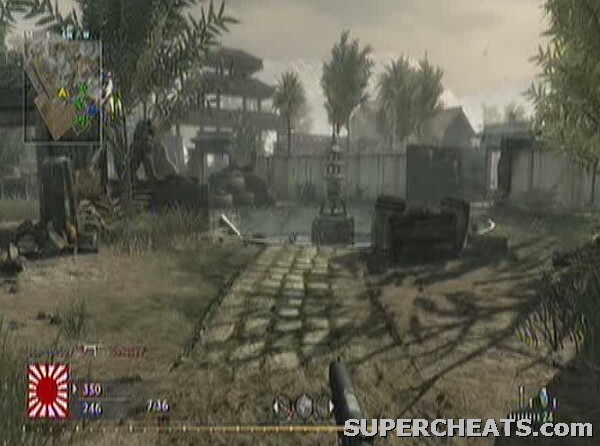
The centre of the level, somewhere not to be!
Gun Selection:
This is one of the smallest maps in the game, so sniping is instantly out of the equation. Shotgunners can have a riot if they play sensibly and avoid the open areas of the courtyard. Rifle-players may struggle to make use of their range, because, as the map is square, the distance is pretty much limited wherever in the arena you are. Machine-guns are therefore the obvious choice, with the smallest ones (MP40, Thompson) allowing you to watch both angles as you skirt around the edge of the centre of the map. Bouncing Betties are out as you generally don't have time to set them or stay alive for long enough for them to go off. Satchel Charges could be used more tactically (i.e. planting one in two of the opposite corners and then waiting in between for any enemies).
Perk Selection:
This is a map where that extra bit of health or bullet damage can be crucial, so it's almost impossible to recommend anything else than Stopping Power, Juggernaut or Double Tap as your main perk. You could use Gas Mask in slot two and then go overboard with the Tabun Gas grenades in the centre of the map. Some may choose to select Flak Jacket to reduce the effect of explosives, but in my experience they aren't too much of a problem in this map. This is despite the fact that they probably should be, so don't be afraid to select Fireworks to increase your own explosive damage. Martyrdom is probably the best perk in slot 3 on such a small map, otherwise Deep Impact is as reliable as always and Steady Aim can be crucial in the frantic fighting.
Dome is a tight map with limited options in terms of strategy. There is a large room with the dome itself and a hole in the middle, complete with ruined debris creating a covered path through the centre. There is access to a high building through a corridor inset into the wall which is a neat bottleneck, and this then looks down over the external portion of the map, located high above the city below. This outside area is where much of the action happens but you should be wary while on the lower section as it is very easy to be outflanked. Of course, on the reverse side, it is easy to get kills down there as you can use the height and element of surprise to easily catch opponents unawares.
There is not a whole lot more to consider with this map, except to say that very few areas are safe from enemy flanking manoeuvres. The only sure-fire tip with this level is that it is always worth throwing a grenade onto the balcony of the tower to clear out any snipers in there.
[video-to-go-here=codwawmpm10.wmv title=MP40 kills and use of cover on Dome]
Gun Selection: Sniping is possible, but really only from one location, the tower. You can just about get away with sniping from the inner hall outside and to the extremities of the level, but it's unlikely you'll get much of a consistent streak with this tactic as there is nowhere to hide. Rifles and machine-guns are the way to go here, but shotguns do have a place, particularly when used sensibly i.e. in the corridor and on the bottom level of the external area.
Perk Selection: As with all the close quarters maps, Stopping Power, Juggernaut, Double Tap, Flak Jacket, Fireworks and extra primary grenades are all great picks. Deep Impact can help, particularly on the lower and indoor sections where the cover is thin but plentiful.
This is an absolutely humungous map, set in the centre of ruined buildings, a central square and lots of open space. Snipers can have a field day, but the primary mode of death (or killing) comes in the form of stacks of tanks. Once your team controls these it's game over for the other teams. The target is generally to get hold of the vehicles and pin down the enemy in the centre of the map. You can leave enemy snipers in the buildings around the edge or in the main bunker, but if you can force the infantry into the open then they are simply at the mercy of you and your tank.
If you are trying to get out of a tough spot and the enemy have control of the vehicles (or you can't get to them), use anti-tank sticky grenades and satchel charges on the roads around the central area and detonate them appropriately. If you hold up in the trench in the centre then you can pick off enemy infantry as they get impatient and come looking for you, especially if you have a team-mate with you (you can watch one direction each). This is also a great location for sitting out dog attacks. The rest of the map is a haven for snipers and generally is very unsafe if you are out on foot. The main bunker has many entry points and should be avoided except as an area to plant Bouncing Betties or to camp in one of its corners as it is quite an active thoroughfare. As much as it may irk most players, you simply have to, as a team, utilise the vehicles on this map or you will not win.
The dreaded open space in Downfall
Gun Selection: Long-range weaponry, mainly favouring rifles, but not excluding some of the machine guns, such as the BAR for example, is the way to go here. Grenades are fairly useless, so ensure you pick the anti-tanks to at least have some purpose for them. It is worth mentioning that Smoke Grenades are also great against tanks, as they obviously then can't see the target, but ensure you throw it between you and the tank rather than at the vehicle itself, or it will obviously just drive through it. The linear path around the edge of the level means a tank will struggle to move into a position where it can see past the smoke.
Snipers can have a field day in the buildings and debris around the edge of the level, and they will also want to take Bouncing Betties to ensure they are not snuck up on.
Perk Selection: This is one of the maps where stealth can be a major advantage, so Camouflage and Dead Silence are a good pair to employ. Pair these up with a silenced machine gun and you can have a successful game with very few deaths. Of course, anti-tank classes also do well as part of a team with so many vehicles on the map, so Flak Jacket or Fireworks (to decrease enemy shells and increase the power of your anti-tank devices) are good choices. If you see yourself residing in a tank for much of the game then Extreme Conditioning (to run to them quickly), Fireworks (to do more explosive damage) and Reconnaissance (so you can see dogs, enemy tanks and artillery before it becomes a threat) can be applied. Bomb Squad is also a possibility as this shows enemy mines on any roads you are travelling on.
Apart from that, the usual gun-related enhancements are obviously good choices.
This is a frantic, medium sized map that focuses on, you guessed it, a large hangar. While generally there is not much space on this map for long range combat, the hangar is sufficiently large that scoped weapons can be used very effectively, and indeed can provide a critical advantage here.
The outside areas are neither particularly noteworthy nor important, though the most-travelled route into the hangar, a pile of rubble leading to the upper floor, is easily defended. Said defenders will crowd around the small hole, so a rifle grenade or RPG into there can cause carnage. Some killing does admittedly take place around this area, as people seek to take the offensive. Inside the small hole is a tough-to-defend room, with walkways then spreading out to the rest of the hangar. These walkways are great locations for rifle-based players, but can be easily suppressed from below.
On the lower level players make use of the abundance of cover and sweeping views of the upper area.

The hangar supports many different play-styles
Gun Selection: While machine-guns are certainly the most consistently effective weapon on this map, rifles should not be ignored as they can be crucial in defending the hangar. Staking out the lower level and using a rifle to take out incoming enemies, both above you and in your vicinity is crucially important in all game modes. Defending the hole is also helped greatly by a rifleman. Snipers won't find much joy on Hangar, except in the hangar itself, and then they will be easy targets for virtually any gamer. Shotguns are not terribly useful, despite the map's closeness in places. For defending the hole room they can be effective. Tabun Gas grenades are a great way to storm the entry points to the hangar, while Bouncing Betties and Satchel Charges are great ways to defend them.
Perk Selection: The explosive perks which have already been overly-mentioned can help gain entry to the hangar. Bomb Squad can eliminate the proliferation of Bouncing Betties and their risk to your team that litter this map after just a few minutes. Deep Impact is very useful for getting through the hole in the building, as well as for shooting through the walkways and generally raining bullets on the more populated areas of the map.
The only night time map in the game (which has since also had a free day version released, entitled Makin Day [see below]) provides numerous opportunities to be sneaky, helped by a high tide from the sea which allows players to camouflage themselves against and in the black water. Despite this, the map is frantic and tough to get kill-streaks on. By far the best place for this is in the centre of the walkways that jut out over the water. At the dead end (which also has a ladder down to the sea) where there is a tower, you and one or two others should be able to hold the portion from the three directional threat.
Enemies will attack from the sea, up the ladder and along the walkway. Unless they have Deep Impact, you should be able to hold out here and rack up the kills. Other proficient tactics come from using Deep Impact to fire into the round houses, which generally should be skirted around unless you are confident in your reflexes or the power and fire rate of your gun. The walkways are also pretty much death-traps, but if you are quick enough along them you can use them to get the jump on the enemy and get some quick kills together.
It's always advisable to lob a grenade into any of the roundhouses before entering or passing through, as most players regularly use these easily-flankable buildings for ill-advised respite throughout a match. One must be very careful when navigating Makin, as potentially you can be shot from all sides and above/below. Only with your back facing the sea or the edge of the level can you be truly safe from one side (and even then a dog attack may be activated!).

The tower in Makin
Gun Selection: The open areas to the back of the map and around the edges make sniping possible, but machine guns are by far the modus operandi of Makin. Shotgunners can have some fun on the walkways, but won't get much of a streak going due to the extreme likelihood that they will be shot from below or the sides. The BAR or any Light-Machine Gun is a good recommendation here, though it should be said that the pay-off between higher visibility (clearly crucial on such a dark map) and power needs to be carefully considered, and you may find yourself preferring an MP40 or Thompson-esque weapon.
Rifles can be employed in the areas away from the centre of the map, firing upon the walkways and buildings, or stationed in the tower and firing out.
Perk Selection: The stealth perks come highly recommended for Makin, flanking the enemy in the dark to unleash a torrent of bullets upon them is very satisfying indeed. Explosives don't have too much of a role on this map, largely due to the multitude of routes through each area, so those perks are only really down to personal favourites. Deep Impact is probably the most useful perk on Makin, to splinter through the wooden cover, buildings and walkways on the map.
Tactics, guns and perks for Makin Day are essentially the same as for Makin, with the only changes to the map coming in the abundance of light, more pieces of cover and a low tide. This means that stealthy players will have an impossible time creating an effective class in that mould. A more 'all-out' class focused on health and power is the order of the day. Incidentally, Xbox 360 gamers need to download this map from the Xbox Live Marketplace (you can use the 'Download Maps' link in the game's menu), but PS3 gamers should receive it through a mandatory patch.
This is a map set on the outskirts of Berlin in a German village, similar to the single player mission, Ring of Steel. There are numerous shelled-out buildings as well as tanks which are able to fire into most of them. Arguably the centre-point of the map is the church. This includes a tower which supports snipers, as well as a large main room.
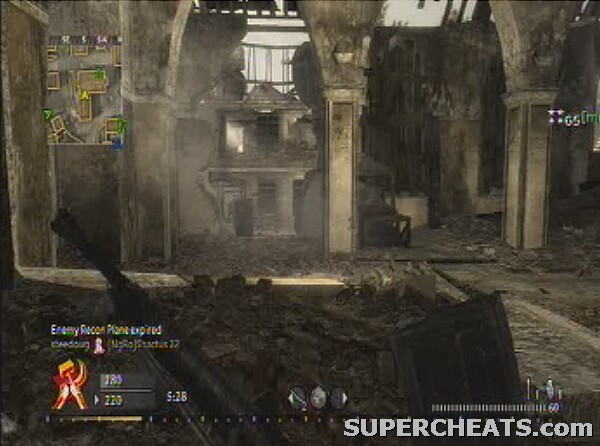
The church where you can always find an enemy
While no one likes campers, the church is a good place to do it as there are many dark corners and places to hide. It's also a good room to plant Bouncing Betties in as many players move through it to cross the map.
A good idea on this map is to satchel charge the road, preferably where there are corpses or debris to cover them up, and then detonate them as a tank comes near. You of course have to stay out of trouble until they come, but on this map it's never long before someone hops in a vehicle.
On the far north of the map there are some stairs going up a wall which supports the main road up the hill. You can use these stairs to cover and stick your head above the wall, picking people off without them knowing you're there.
As with many of the maps, some of the locations in particular are superb for sniping or long range rifle attacks. The upper floors of many of the houses in the village make great positions for these antics. In particular, they have only one route to the upper floor, so if you plant a Bouncing Betty on the stairs, you should be comfortably set for a kill-spree. If playing as a team on this map, it is advisable to try to control the high ground, meaning you can pick of enemies more easily. Even tanks will struggle to hit your allies if you hold the hilltop.
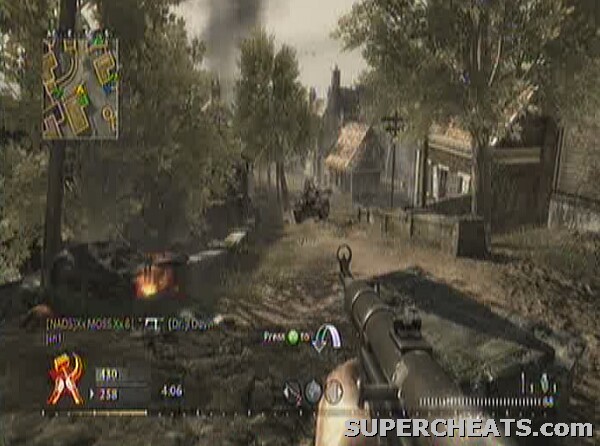
Controlling the hill should be a target for teams on Outskirts
All the action that you will encounter will likely focus on both the high ground and the church. In team-based matches the church is a good place to control as from the tower you can snipe out (though with a large degree of vulnerability) and the rest of the team can be pretty safe from the tanks in the church. At times you will get hordes of tanks parading around, so it is important to organise a few players to focus on this aspect of the engagement.
Gun Selection:
There is opportunity on this map for sniping and long range combat. However, the winding alleyways and buildings mean that a close-quarters weapon, even a shotgun, isn't a bad choice. This is one of the few maps where you can pretty much just choose your favourite set of weapons, equipment and perks and let rip. Mid-range weapons like the BAR and machine guns are probably the safest bet though. It depends whether you would rather be a specialist in one area or average in them all.
Perk Selection:
As with most maps, Stopping Power is a good selection, but more specialised perks, such as Bomb Squad (this map is a haven for them) or Camouflage (there are lots of good places to camp and hide and you don't want recon planes to ruin that) are not bad choices. Similarly, opting to bring Satchel Charges allows you to deal with the tanks, albeit still haphazardly, in the same way that bringing anti-tank grenades on this map will improve your chances against them – but clearly, if you are not the sort to go after tanks then these is a pointless addition to your arsenal. Flak Jacket, even for players who are not interested in destroying the tanks, will help you survive their explosive blasts and is great for those seeking to ignore the vehicles, but not get killed by them.
[video-to-go-here=codwawmpm6.wmv title=A pretty meagre BAR kill-streak on Outskirts]
Another large, vehicle map, Roundhouse is nonetheless a relatively simple engagement. An open area, dominated by a central walkway and round structure in the centre of the map, hence the name, Roundhouse is one of the few vehicle maps that is not completely dominated by them. It is very possible to play the map, completely ignoring the tanks, and never even be fired upon by them. A number of pillars and items of debris littering the map allows for relatively safe travel across its open areas.
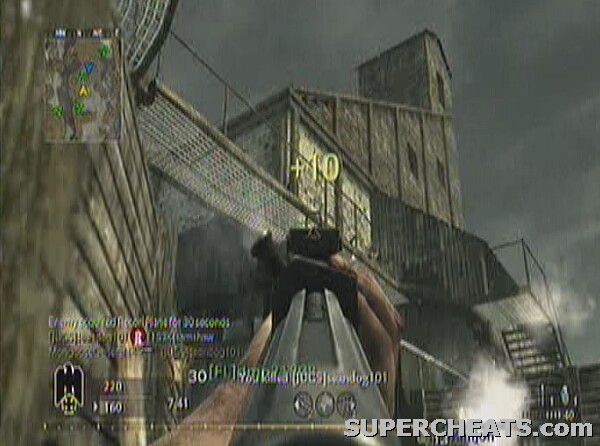
Watch out for snipers on Roundhouse
There are also side buildings, which accommodate more run and gun players. The upper walkway allows for heavily restricted firing out of the windows, but more usefully, for camping and surprising enemies as they use the building for cover. The fact that there are only two tanks means you should rarely have to worry about them that much in Team Deathmatch, as there movement is not that free across the map. On objective based modes however they become crucial, and a team seeking to succeed on Roundhouse in such modes should employ anti-tank classes.
The central building, the Rounhouse, is frequently littered with Bouncing Betties but provides access to the sniper walkway. This is a relatively straightforward target for any soldier with a rifle, but you can lay prone on it and get heaps of kills. Anyone seeking to destroy a sniper up there will also leave themselves terribly vulnerable to the behemothic tanks.
Gun Selection: Snipers can enjoy a good time of it on Roundhouse, both from the central walkway, if your team controls it (though it is frequently in dispute) and across the open plain. Tanks provide the most emphatic threat to snipers, but if you nestle yourself in some of the debris that scatters the map, you should have the best of it. Sticking to the outskirts of the map and slinking through the rubble, machine-gunners can also get a high number of kills with relatively few deaths. Shotguns are too short-range to work on Roundhouse, and rifles are probably the best bet. Light Machine Guns provide the extra range however, and with the map being so open, the lack of vision is not such a problem. Bouncing Betties are useful in the Roundhouse itself, and Anti-Tank Grenades and Satchel Charges are best saved for those planning on taking on the enemy tanks.
[video-to-go-here=codwawmpm6.wmv title=A tour of the open spaces on Roundhouse]
Perk Selection: Apart from the anti-tank perks, it is advisable to at least use Camouflage if you are attempting to skirt around the edge of the map. It is likely that, particularly with regards to those in tanks, kill streaks will be regularly hit and thus your position will be frequently beamed back to the enemy. The edge of the map is fantastic for flanking and sneaking up on enemies, so to keeping yourself off their radar is no small mercy. Snipers will obviously want Stopping Power, and the same applies if you plan on using a general purpose rifle. Second Chance is useful on this map due to its size and likelihood that an ally may get to you in time to save your life.
The final vehicle-supporting map in our list, Seelow is different from any other, though is perhaps most associated with Outskirts, due to the colours and environment but also the vehicular action. Like Roundhouse, the tanks don't play a major role here, with the main focus on sniping. There is a large hill in the centre of the map which has wooden tunnels and train cars stationary on it. This gives views over the two halves of the map. Each half has a number of buildings ideal for sniping, but clearly the hill in the centre makes a clear view across the entire map, or indeed merely into the other half, impossible.
In Team Deathmatch, if a team can control the central hill and set up effective snipers watching over both halves of the map, then they will succeed. This is a very risky manoeuvre however, as any enemy snipers, as soon as they spawn in, will know exactly where to look and fire. It is thus important to have at least some medium range infantry in your squad, running around and keeping the enemy snipers on their toes.
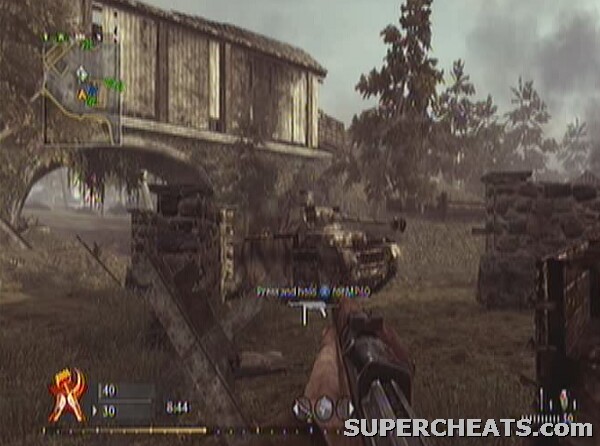
The tunnel and tanks of Seelow
There are two tunnels that bisect the central hill. These allow the tanks to pass under the hill and onto the other half of the map. Surprisingly, these rarely turn into bottlenecks, and are just used for transport. The hill is where all the action occurs, though most of this is at long range. There is an underground tunnel network too, which goes through the middle of the hill and both sides of this network culminate in a central room. This is prime camping territory, but most players use the hill itself to cross the map, if it is necessary. Watch out for the crop fields on both sides of the hill. It is a favourite tactic of some players to hide in the plants and snipe out, wait for players to walk near them, or to plant invisible Bouncing Betties beneath them.
Gun Selection: While machine-guns are never to be dismissed completely, this is one of the few maps where they are less useful. Rifles and Sniper Rifles are the way to go here. There is room for some Thompson and MP40 players to thrive, mainly in holding the central hill. As soon as you stick your head out of the safety of the wooden structures however, you won't last long. Smoke Grenades are a worthy Special Grenade to pick, due to their ability to shroud both the tanks and enemy snipers on the map. The clear division into halves means that you can chuck a smoke grenade on one side and be relatively assured of safety. It is also a good tactic to throw them and use the smoke to help capture the central hill.
Perk Selection: The tanks don't cause too much of a problem, so the anti-tank perks are only if you fancy playing that sort of game. The stealth perks work well here, as well as Extreme Conditioning – crucial for getting between the scant cover on each side of the hill – and Iron Lungs – snipers will need all the accuracy and time they can get for each shot to avoid revealing their position unnecessarily.
Upheaval is very similar to Outskirts in environment, but there are no vehicles and it is far more sniping orientated. There are tonnes of houses on the map, all of which make decent sniping spots. Of course, the very fact that you can get kills from these windows suggest that there is also something to be said for the rest of the map, the open sections. The train tracks and carriages provide cover for close and medium-range players, and the network of buildings make sneaking up on snipers nice and easy. Just watch out for Bouncing Betties!
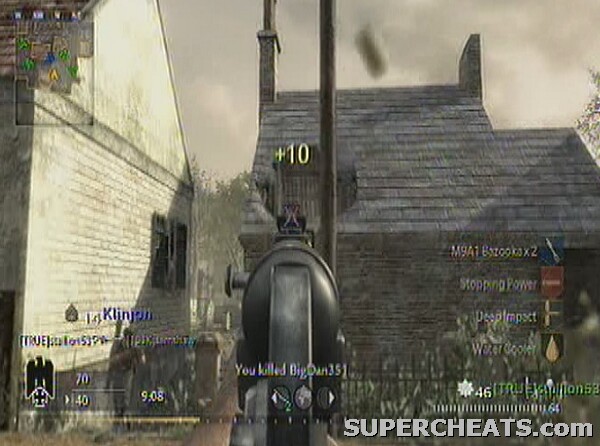
Upheaval's holey buildings are a haven for enemy snipers.
The small alleyways and fences mean if you stay crouched and using the correct perks you can effectively move through the map, taking out enemy snipers, all the while hidden from view.
Gun Selection: This is very much down to personal preference. Even the shotguns have a role as guaranteed one-hit-kills when clearing sniper buildings. Snipers will want to take Bouncing Betties with them, and cooked explosive grenades are probably the best for clearing rooms before entering.
Perk Selection: Upheaval is a great stealth map. A particular favourite is a combination of Bomb Squad in slot one, Camouflage in slot two, and Dead Silence in slot three. This allows you to see snipers' Bouncing Betties, ensure they can't see you sneaking up on them using a UAV plane, and also that they can't hear you as you trundle up the stairs to their position. Pick a silenced gun or do the dirty using a knife and you'll be in heaven. Snipers will want to stick to their usual perks, though bear in mind that using Fireworks gives Bouncing Betties more oomph too. For everyone else, Stopping Power, Juggernaut or Double Tap should be the perks of choice.
[video-to-go-here=codwawmpm8.wmv title=Watch out for camouflaged campers in the grass!]
Anti-Tank Strategy:
Most Call of Duty gamers will not be fans of the tanks, though they can get players a serious number of kills due to their massive firepower and ridiculous armour. To take them out, Satchel Charges are the best bet. Either use them as remote-detonation mines (place them in the road and then detonate them as a tank comes past), or use smoke or sheer daring to plant them right next to the tank. Don't bother putting them on the shell of the tank as the weakest point of the vehicle is its underside. Failing that, put one on the back section. Anti-Tank Grenades are, as the name suggests, pretty effective in that they stick to the first thing they hit, making them ideal for long-range attacks on tanks from cover.
[video-to-go-here=codwawmpm2.wmv title=Taking on a tank with a RPG is a recipe for death]
If you use these inaccurately you will have no chance of destroying a tank, as most players will only have a complement of one grenade. Stick it on the back of the tank or underneath it (you should be able to throw it pretty close to the underside) and you can get it in conjunction with a satchel charge nearby. Surprisingly, RPGs are not that effective and you will usually exhaust your ammunition for one life before the tank is destroyed. Having said that, aiming at the rear of the tank will dramatically increase your chances, but if you're going for any anti-tank class, Satchel Charges and Anti-Tank Grenades are the way to go.
If the tank is producing black smoke, one shot from any explosive weapon or grenade should then be enough to finish it off. A very good tactic if you have an Artillery Strike spare is to use it on the tanks. With plenty of warning most infantry can find shelter by the time your strike hits, but getting out of a tank (many gamers are very possessive of their vehicles) takes time and you should be able to get a guaranteed kill if you target an active tank specifically.
If there is a gunner on the tank then you have a great opportunity for an easy kill. Just make sure the tank hasn't spotted you (preferably only attempt this when there is no Recon Plane in the sky) and pick off the target.
[video-to-go-here=codwawmpm3.wmv title=Killing a tank turret enemy]
Kill Streaks:
Upon achieving 3, 5 and 7 kills in a row without dying, you are able to activate a series of special moves. The Recon Plane, Artillery Strike and Dogs respectively. It is probably worth using them as quickly as possible, as once you get to 5 or 7 kills it wipes out the previous special move if you haven't yet used it. Once you get to 5 kills, call in a strike and stay out of the way in case you get two kills to boost you up to a dog attack. Once you get 7 kills, depending on whether you are trying to get a new streak record for your profile, it's almost worth dying as the dogs will likely get you at least 5 kills and thus another artillery strike. Once at 7 kills, the moves don't reset, so a 14 kill streak won't get you two sets of dogs over that period, rather you have to die to be able to really make use of your dog attack's kills.
Recon Plane: Activated after 3 kills, this shows all the enemies on the map unless they're using the Class 2 Camouflage perk. It lasts for 30 seconds, showing enemies as red dots on your radar. You can then follow and seek out enemies – especially useful if they don't have a recon plane active. They become indispensable if you're hoping to win a Team Deathmatch game. It's not a bad tactic to wait for a friendly to get an artillery strike, though obviously it's wise not to use it while someone else has currently got one active!
Artillery Strike: Following a 5 kill streak, this acts similarly to the air strike in Modern Warfare, but blanket bombs an area in a rough circle rather than a line. It's wise not to use it where friendlies may be if friendly fire is on, and remember that you can be killed by your own strike, so watch where you put it! When you activate it you call up a map and pick the spot you want it to hit. With a recon plane active you can physically see where the enemy are, but it's an idea to put it where you envisage your team meeting the enemy if they're not already engaged. Targeting a specific enemy is unlikely to yield kills due to the delay from calling the strike to it actually hitting.
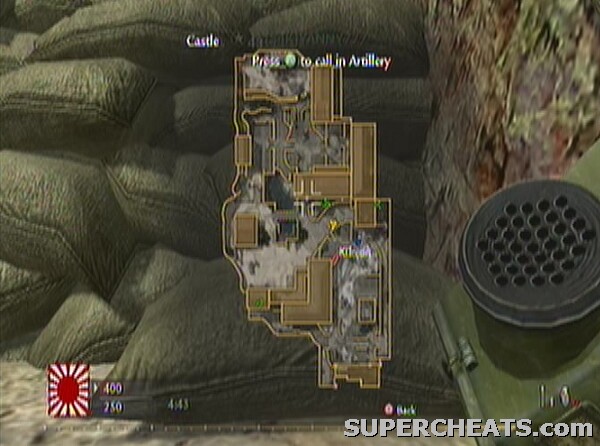
Calling in an artillery strike
Dogs: 7 kills in a row without dying will earn you the ability to call in a Dog Attack. This unleashes a pack of dogs on your enemies for 60 seconds. Any dogs that are killed in this time will respawn until either the kill limit or time limit is reached. Dogs have 100 health and do a whopping 90 damage, so are a great weapon to use. As well as giving you a full 10 for every person they kill, with an average of around 5 kills per attack, they reveal a lot about enemy positions. Most people will use either their primary or secondary weapon at some point against the dogs, meaning that they act as a basic Recon Plane. Few players on the map should escape them, as they are trained to seek out anyone, anywhere, and when they fire, they will appear on the Radar for your team to hunt down. As well as this, you can physically follow the dogs and kill whoever they find – while the enemy may choose to fire at you for the maximum points, you shouldn't have any trouble taking them out with the dogs mauling their legs. If you don't mind stealing kills, following another team-mate's dogs is a good way to find enemies and shoot the targets while they are under attack from the hounds.
Dog Defence:
It is important to listen to your team's spokesman as well as your team-mates in your headset to learn when the dogs are coming. Unlike the artillery, there is no indicator on the RADAR as to whether the dogs are on your team or not. The first sign you have after it is announced over the radio is you or your team-mates being attacked! The best strategy whenever there is a dog attack is to find a room with very few entrances (upstairs in a detached building is always good) and hunker down. Watch the entrance from a distance and use a quick-fire weapon to take out any dogs that come and get you. Rather than reloading, either switch to a pistol, or, if the dogs are right up close, use your knife or bayonet. You should be able to survive one bite before you'll be overwhelmed and killed.
A crucial point to note is that regardless of how many you kill, they will continue to respawn for 60 seconds or until the kill limit is reached. Once this happens, any not engaged will leave the map. While this may make it sound like a fruitless endeavour to pursue and seek out the dogs, like some players did in Call of Duty 4 with the helicopter, you now get 3 points for each one you kill. If you're struggling for points in the game, it's not a bad idea to lure the dogs to you and rack up the points.
Dogs have 100 health in regular games and 30 in Hardcore. Yes, that's the same as human players, meaning that you will probably need to get at least two direct hits on it (or one melee strike) before they die. Clearly they are not as lethal as human players due to the fact that they can't attack you from distance, but in packs they are a definite force to be reckoned with.
Nazi Zombies:
Everyone's favourite new game mode, Nazi Zombies asks you to team up with friends against hordes of zombies. Nazi Zombies. The mode takes place in the main building of the Airfield level, but with the lights out and windows boarded up. Points are awarded for kills, headshots and repairing the barricades as the zombies try to climb them. You can then use these points to purchase new weapons or ammunition with which to fight the horde.
It's not as simple as that however. Additional rooms are provided to lure you away from the starting point. These cost points to access, but boast better weaponry than the initial room. Once opened however, they provide a torrent of new access points for the zombies to get through, and essentially make keeping the barricades in good repair impossible.
The best tactic is debatable, but purchasing better weapons is essential, and good teamwork even more-so. More levels have been confirmed for downloadable content. Enjoy.
There are 46 achievements in total.
Carlson's Raiders: 10G
Complete 'Semper Fi' on any difficulty. (Solo only)
Stormed Peleliu: 15G
Establish a beachhead on the island of Peleliu on any difficulty. (Solo only)
The Last Stand: 20G
Survive the land and air conflict surrounding Okinawa on any difficulty. (Solo only)
Stabbed in the Heart: 20G
Complete all missions on the Eastern Front on any difficulty setting. (Solo only)
Get Your Hands Dirty: 30G
Complete 'Semper Fi' on Veteran difficulty. (Solo only)
Saved Private Ryan: 10G
Save the soldier before he burns to death. (Solo or co-op)
Bloody Peleliu: 30G
Complete 'Little Resistance' on Veteran difficulty. (Solo only)
Weapon of Mass Destruction: 15G
Radio in a naval bombardment that kills at least 4 Japanese soldiers. (Solo or co-op)
The Sword Is Broken: 30G
Complete 'Hard Landing' on Veteran difficulty. (Solo only)
No Safe Place: 15G
Burn an enemy out of a tree with the flamethrower in 'Hard Landing' (Solo or co-op)
Architect: 30G
Complete 'Vendetta' on Veteran difficulty. (Solo only)
The Professional: 15G
Shoot all of Amsel's henchmen, including their attack dog, without reloading. (Solo only)
Gunslinger: 15G
Assassinate General Amsel with a pistol shot. (Solo only)
The Hammer Strikes: 30G
Complete 'Their Land, Their Blood' on Veteran difficulty. (Solo only)
Scorched Earth: 30G
Complete 'Burn`em Out' on Veteran difficulty. (Solo only)
Firestarter: 15G
Complete a mission using only the flamethrower. Melee, grenades & explosives are OK. (Solo or co-op)
Fearless: 30G
Complete 'Relentless' on Veteran difficulty. (Solo only)
Hell on Wheels: 30G
Complete 'Blood and Iron' on Veteran difficulty. (Solo only)
Iron Fist: 15G
Destroy all towers and bunkers in 'Blood and Iron'. (Solo or co-op)
No Return: 30G
Complete 'Ring of Steel' on Veteran difficulty. (Solo only)
Ruthless: 15G
Kill 15 enemies while mounted on a tank in 'Ring of Steel'. (Solo or co-op)
When It Rains, It Pours: 30G
Complete 'Eviction' on Veteran difficulty. (Solo only)
Shot in the Dark: 10G
Kill 10 enemies while the lights are out in the subway in 'Eviction'. (Solo or co-op)
One Bad Gato: 30G
Complete 'Black Cats' on Veteran difficulty. (Solo only)
The Sum of All Zeros: 15G
Down 45 Japanese Zeros in 'Black Cats'. (Solo only)
Lights Out!: 10G
In 'Black Cats', blast out all of the spot lights in the Japanese cargo convoy. (Solo only)
Blowtorch & Corkscrew: 30G
Complete 'Blowtorch & Corkscrew' on Veteran difficulty. (Solo only)
Setting of the Sun: 30G
Complete 'Breaking Point' on Veteran difficulty. (Solo only)
Mortar-dom: 10G
Kill 8 Japanese with thrown mortars in 'Breaking Point'. (Solo or co-op)
Guardian Angel: 10G
In the final battle for Okinawa, save Sergeant Roebuck. (Solo or co-op)
For the Motherland: 30G
Complete 'Heart of the Reich' on Veteran difficulty. (Solo only)
Bearing the Burden: 30G
Complete 'Downfall' on Veteran difficulty. (Solo only)
Rough Economy: 15G
Kill 3 enemies with a single bullet. (Solo or co-op)
Close Shave: 10G
Survive a Banzai attack. (Solo only)
Snake in the Grass: 15G
Take out a Japanese soldier while he is lying in wait in the grass. (Solo or co-op)
Grave Robber: 15G
Collect all Death Cards in the game. (Solo only)
Kamikaze: 15G
Complete any level on Regular difficulty or higher using only melee and grenades. (Solo only)
Throw a Six and a Half: 15G
On Hardened or Veteran difficulty, complete a level without dying. (Solo only)
Purple Heart: 5G
When staring into the face of adversity, show courage and persevere. (Die many times in a section without giving up)
War Hero: 40G
Complete the game on any difficulty. (Solo only)
Hardened War Hero: 100G
Complete the game on Hardened or Veteran difficulty. (Solo only)
Get Your Left Foot Wet: 30G
Complete a match in Campaign Co-Op mode over Xbox LIVE. (Online co-op only)
Get Your Right Foot Wet: 30G
Complete a match in Competitive Co-Op mode over Xbox LIVE. (Online co-op only)
Blue Ribbon: 25G
Complete a 4-player Competitive Co-Op match in 1st place over Xbox LIVE. (Online co-op only)
(Exclusive to Xbox 360)
It’s All about Prestige: 0G
Achieve the first level of Prestige. (Multiplayer)
Go Get Some Sun: 0G
Achieve the highest level in the game. (Multiplayer)
There are 45 trophies in total.
Get Your Hands Dirty: Bronze
Complete 'Semper Fi' on Veteran difficulty. (Solo only)
Bloody Peleliu: Bronze
Complete 'Little Resistance' on Veteran difficulty. (Solo only)
The Sword Is Broken: Bronze
Complete 'Hard Landing' on Veteran difficulty. (Solo only)
Architect: Bronze
Complete 'Vendetta' on Veteran difficulty. (Solo only)
The Hammer Strikes: Bronze
Complete 'Their Land, Their Blood' on Veteran difficulty. (Solo only)
Scorched Earth: Bronze
Complete 'Burn 'em Out' on Veteran difficulty. (Solo only)
Fearless: Bronze
Complete 'Relentless' on Veteran difficulty. (Solo only)
Hell on Wheels: Bronze
Complete 'Blood and Iron' on Veteran difficulty. (Solo only)
No Return: Bronze
Complete 'Ring of Steel' on Veteran difficulty. (Solo only)
When it Rains, It Pours: Bronze
Complete 'Eviction' on Veteran difficulty. (Solo only)
One Bad Gato: Bronze
Complete 'Blackcats' on Veteran difficulty. (Solo only)
Blowtorch and Corkscrew: Bronze
Complete 'Blowtorch and Corkscrew' on Veteran difficulty. (Solo only)
The Sun Sets: Bronze
Complete 'Breaking Point' on Veteran difficulty. (Solo only)
For the Motherland: Bronze
Complete 'Heart of the Reich' on Veteran difficulty. (Solo only)
Bearing the Burden: Bronze
Complete 'Downfall' on Veteran difficulty. (Solo only)
Saved Private Ryan: Bronze
Save the soldier before he burns to death.
Weapon of Mass Destruction: Bronze
Radio in a naval bombardment that kills at least 4 Japanese soldiers.
Lights Out!: Bronze
In 'Black Cats', blast out all of the spot lights in the Japanese cargo convoy. (Solo only)
Rough Economy: Bronze
Kill 3 enemies with a single round.
Guardian Angel: Bronze
In the final battle for Okinawa, save Sergeant Roebuck.
Close Shave: Bronze
Survive a banzai attack. (Solo only)
Snake in the Grass: Bronze
Take out a Japanese soldier lying in wait in the grass.
No Safe Place: Bronze
Burn an enemy out of a tree with the flamethrower in 'Hard Landing'.
Purple Heart: Bronze
When staring into the face of adversity, show courage and persevere. (Die many times in a section without giving up)
Ruthless: Bronze
Kill 15 enemies while mounted on a tank in 'Ring of Steel'.
Mortar-dom: Bronze
Kill 8 Japanese with thrown mortars in 'Breaking Point.
Shot in the Dark: Bronze
Kill 10 enemies while the lights are out in the subway in 'Eviction'.
Blue Ribbon: Bronze
Complete a 4-player Competitive Co-Op match in 1st place. (Online co-op Only)
Get Your Left Foot Wet: Bronze
Complete a match in Campaign Co-Op mode. (Online co-op only)
Get Your Right Foot Wet: Bronze
Complete a match in Competitive Co-Op mode. (Online co-op only)
Carlson's Raiders: Silver
Complete 'Semper Fi' on any difficulty. (Solo only)
Stormed Peleliu: Silver
Establish a beachhead at Peleliu Island on any difficulty. (Solo only)
The Last Stand: Silver
Survive the conflict in Okinawa on any difficulty. (Solo only)
Stabbed in the Heart: Silver
Complete all missions on the Eastern Front on any difficulty. (Solo only)
The Professional: Silver
Shoot all of Amsel's henchmen, including their attack dog, without reloading. (Solo only)
Gunslinger: Silver
Assassinate General Amsel with a pistol shot. (Solo only)
Grave Robber: Silver
Collect all Death Cards in the game. (Solo only)
Throw a Six and a Half: Silver
On Hardened or Veteran difficulty, complete a level without dying. (Solo only)
Firestarter: Silver
Complete a level using only the flamethrower. Melee, grenades & explosives are OK.
Kamikaze: Silver
Complete a level on Regular difficulty or higher using only melee or grenades. (Solo only)
Iron Fist: Silver
Destroy all towers and bunkers in 'Blood and Iron'.
Sum of All Zeros: Silver
Down 45 Japanese Zeros in 'Black Cats'. (Solo only)
Hardened War Hero: Gold
Complete the game on Hardened or Veteran difficulty. (Solo only)
War Hero: Gold
Complete the game on any difficulty. (Solo only)
Platinum Trophy:
Awarded when all other trophies have been unlocked.
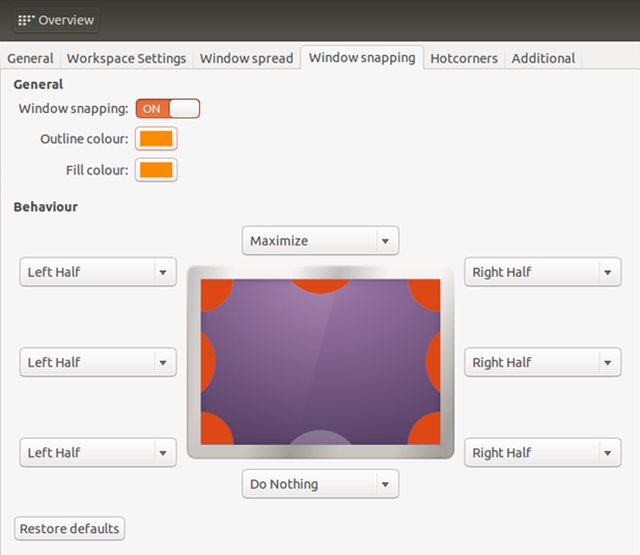
 GTA 5 Online Next Patch Release
 Is More Of The Same A Bad Thing? Not For Infinity Blade III
 MGS V: The Phantom Pain Durations of Tranq and Stun guns effects on guards
 9 Simple Tweaks to Customize Excel to Your Needs
 Chronicle of a Death Foretold - Mass Effect 3 Verdict Part I: Hype