Call of Duty: Modern Warfare 3 Guide by vhayste for
Welcome to our guide to Call of Duty: Modern Warfare 3. Our guide contains a full walkthrough of the single player campaign with all 46 Intel Locations marked. There is also an achievement guide, intel locations guide, guide to perks and weapons and Spec Ops. Seeing as this will be about the most important page in the guide, we figured we'd stick it somewhere near the top so it's a bit easier to find. Each piece of Intel is explained in the main walkthrough but we've summarised the locations below with the following videos. The location of all 46 intel items are discussed step by step in the main walkthrough. If you're able to find some yourself and you're just missing a few, just check out the list below: Black Tuesday Intel 1-1
Intel 1-2
Intel 1-3
Intel 1-4
Intel 1-5
Hunter Killer Intel 2-1
Intel 2-2
Persona Non Grata Intel 3-1
Intel 3-2
Intel 3-3
Intel 3-4
Turbulence Intel 4-1
Intel 4-2
Back on the Grid Intel 5-1
Intel 5-2
Intel 5-2
Mind the Gap Intel 6-1
Intel 6-2
Intel 6-3
Goalpost Intel 7-1
Intel 7-2
Intel 7-3
Return to Sender Intel 8-1
Intel 8-2
Intel 8-3
Bag and Drag Intel 9-1
Intel 9-2
Intel 9-3
Intel 9-4
Iron Lady Intel 10-1
Intel 10-2
Eye of the Storm Intel 11-1
Intel 11-2
Blood Brothers Intel 12-1
Stronghold Intel 13-1
Intel 13-2
Scorched Earth Intel 14-1
Intel 14-2
Intel 14-3
Intel 14-4
Intel 14-5
Down the Rabbit Hole Intel 15-1
Intel 15-2
Dust to Dust Intel 16-1
Intel 16-2
Intel 16-3
Story-related achievements will be unlocked automatically by completing the campaign missions in varying difficulty. These are pretty much self-explanatory so no further explanation will be needed for them. Explanation and videos will be provided to the other achievements. Too Big to Fail (10 points) Wet Work (10 points) Carpe Diem (10 points) Frequent Flyer (10 points) Up to No Good (10 points) One Way Ticket (10 points) Welcome to WW3 (10 points) Sandstorm! (10 points) Back Seat Driver (10 points) We'll Always Have Paris (10 points) Vive la Révolution! (10 points) Requiem (10 points) Bad First Date (10 points) Diamond in the Rough (10 points) The Big Apple (25 points) Out of the Frying Pan… (25 points) Payback (25 points) City of Lights (25 points) The Darkest Hour (25 points) This is the End (25 points) Who Dares Wins (40 points) The Best of the Best (100 points) Strike! (20 points)
Intel Location Guide
After reaching the initial building, you’ll have to make your way to the second floor. The intel is inside the bedroom, adjacent to the helicopter wreck, on the floor.
1-1 Bedroom Intel (01)
After reaching the store, go downstairs and check the counter under the staircase to find this intel.
1-2 Store Intel (02)
Once you cleared the front of the stock exchange building, you’ll have to go inside. To the left of the ammo crate where you can resupply, you’ll find this intel sitting on top of a small table.
1-3 Lobby Intel (03)
This intel is in the trading floor of the stock exchange. It is sitting on the kiosk beside the stairs leading to the rooftop.
1-4 Trading Floor Intel (04)
After reaching the rooftop and clearing it out, you’ll find this intel on the table behind some sandbags near the broadcast tower.
1-5 Rooftop Intel (05)
After entering the sub, you’ll find this intel immediately on one of the bunk beds in the next room.
2-1 Bunk Intel (06)
This intel is found in the first missile silo room, on the upper catwalks.
2-2 Silo Intel (07)
After making your way to the courtyard, check the alcove to the right. You’ll find the intel on top of a wooden crate.
3-1 Crate Intel (08)
After reaching the street, search the building past the two car wrecks. You’ll find this intel on the table inside the room.
3-2 Another bedroom intel (09)
This intel is located inside the weapons shack, on top of the drum, beside the crate containing the UGV.
3-3 weapon cache intel (10)
After your UGV gets destroyed, exit the basement and go to the small playground to your left. The intel is barely visible on top of the slide.
3-4 Slide intel (11)
After the zero-g sequence, go dowstairs and find intel on the tabletop near the door.
4-1 Airplane Intel (12)
After crash landing, follow the commander until you get past a fallen tree trunk. Check the ground for the intel.
4-2 Crash Site Intel (13)
After providing overwatch to Price and Soap, get down to street level and search the same building they last searched earlier. You’ll find the intel on top of the washing machine in the corner.
5-1 Dilapidated Building Intel (14)
After getting the first intel and regrouping with them, continue along and you’ll find a shanty to the left that you can enter. The intel should be on the small table inside, near the door.
5-2 Shack Intel (15)
This intel is located on the table inside the church.
5-3 Church Intel (16)
Enter the building in the second corner of the alley. The intel should be sitting in the corner of the dark portion of the room.
6-1 Alley Intel (17)
After reaching the loading area and before opening the back of the truck, head to the loading bay near the warehouse. Take the stairs to the catwalks and follow it until you reach the only open room. You’ll find the intel on the table.
6-2 Dock Intel (18)
This is during the second part of the mission. After reaching the station and while pursuing the escaping terrorists, you’ll come across a magazine store after the escalator. The intel is behind the counter, on the floor.
6-3 Station Intel (19)
After leaving the beach head and reaching the streets, turn to the right to find a fallen transport. Search the fuselage near the cockpit to find this intel.
7-1 Plane Intel (20)
During the part of the mission where you’ll have allied tank support, you’ll come across a turn in the main road. Search the courtyard near the objective point to find the intel on top of some equipment cases.
7-2 Yard Intel (21)
After finding the convoy of the vice president, you’ll have to enter an office area through a blasted wall. Before going upstairs, grab the intel on top of the table inside one of the cubicles near the windows.
7-3 Teknikor Deutschland Office Intel (22)
On your way to Waraabe's mansion, enter the building to the left and search the second floor. You'll find the intel near the window, in the room adjacent to the mansion.
8-1 Smuggler Intel (23)
This is found in the same room as Waraabe's. It should be immediately visible after breaching the door.
8-2 Waraabe Intel (24)
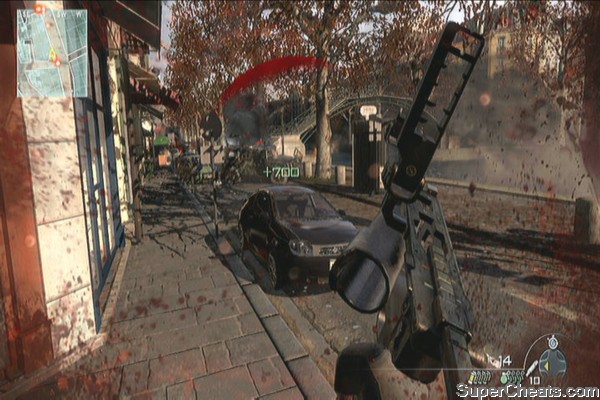
On your way to the exfil point (the sequence with the countdown timer) you'll encounter an enemy who will push a burning car towards you. There should be a money changer shop from where he's standing. Check it out to find this intel.
8-3 Money Market Intel (25)
After reaching the bookstore, head to the second floor. The intel is sitting beside the window behind a shelf.
9-1 Bookstore Intel (26)
Exit through the destroyed restaurant and to the plaza. Enter the coffee shop to the right, near the stairs and find the intel in the backroom, on small table.
9-2 Cafeteria Intel (27)
While pursuing Volks in the catacombs, you'll eventually run into a sequence where you'll get flashed by a flashbang. The intel is on top of the generator to the left, beside some iron grills.
9-3 Catacombs Intel (28)
While pursuing Volks, you'll finally reach a ladder leading out of the catacombs. Follow the straightfoward path along the corridor and you should find this intel along the way. It is impossible to miss.
9-4 Pursuit Intel (29)
After reaching the courtyard, check the room to your immediate right to find the intel at the end of the stairs.
10-1 Courtyard intel (30)
After reaching the streets and with the Eiffel Tower ahead, search the only bus to the left to find this intel.
10-2 Bridge intel (31)
After taking out the first patrol guards, Soap will tell you to follow him inside the next building to avoid being seen by the helicopter above. You'll find the intel inside, on the counter.
11-1 Apartment intel (32)
After your allied reinforcements appear in the plaza, check out the table under a parasol to find this intel.
11-2 Plaza intel (33)
While Price is escorting Soap, you'll come across a mobile phone shop. Find the intel on the floor, in the corner near the window.
12-1 Store intel (34)
While fleeing the castle and fighting your way through a bunch of enemies, you'll come across a studio-like room. Search the small room to the left to find the intel.
13-1 Castle intel 1 (35)
After reaching outside, follow the path to your right until you come across another building. You'll find the intel on a crate beside a metal chair.
13-2Castle intel 2 (36)
After landing, clear the enemies and move upstairs. The intel is located inside a cubicle near the ramp.
14-1 Office intel (37)
Continue to the rooftop and search for the intel behind the iron fence, beside the metal walkway.
14-2 Rooftop intel (38)
After reaching the ground level, enter the building “Trivo Buchhandlung” in the middle past the helicopter wreck. Find the intel beside the LCD monitor on the counter.
14-3 Trivo intel (39)
After the allied German tanks rolls in, clear a few more enemies then enter the building with the sign “Teknikar Deutschlan” to the left of the road. Find the intel inside.
14-4 Deutschlan intel (40)
When inside the demolished building, you'll come across an enemy-defended lobby. Clear it then approach the door marked in the objective marker. Sandman will kick it open but instead of following him upstairs, search the couch under the stairs to find this intel.
14-5 Athena intel (41)
After clearing the processing area, search the control room to the left to find the intel on top of the steel cabinet near the billboard.
15-1 Diamond Mine intel (42)
After breaching the floor open and saving the president, check the barrel behind the debris to find the intel.
15-2 Diamond Mine intel 2 (43)
After reaching the second floor while in a juggernaut suit, turn around and check the bar near windows.
16-1 Hotel Oasis Intel (44)
While pursuing Makarov, you'll come across a small casino room to the left of the main hallway. The intel is on the table.
16-2 Casino Intel (45)
After getting the second intel, you'll need to push through several more guards until you reach a larger bar. The last intel is sitting on the counter near where you came from.
16-3 Bar Intel (46)
Achievements
Back in the Fight (5 points)
Start the Single Player Campaign on any difficulty.
Destroy the Jamming Tower. Complete "Black Tuesday" on any difficulty.
Take back New York Harbor. Complete "Hunter Killer" on any difficulty.
Escape the mountain safe house. Complete "Persona Non Grata" on any difficulty.
Defend the Russian President. Complete "Turbulence" on any difficulty.
Infiltrate the village. Complete "Back on the Grid" on any difficulty.
Make it to Westminster. Complete "Mind the Gap" on any difficulty.
Save the US Vice President. Complete "Goalpost" on any difficulty.
Assault the shipping company. Complete "Return to Sender" on any difficulty.
Track down Volk. Complete "Bag and Drag" on any difficulty.
Escape Paris with Volk. Complete "Iron Lady" on any difficulty.
Reach the church. Complete "Eye of the Storm" on any difficulty.
Escape the city. Complete "Blood Brothers" on any difficulty.
Storm the Castle (10 points)
Discover Makarov's next move. Complete "Stronghold" on any difficulty.
Find the girl. Complete "Scorched Earth" on any difficulty.
Rescue the Russian President. Complete "Down the Rabbit Hole" on any difficulty.
Complete "Black Tuesday" and "Hunter Killer" on Veteran difficulty.
Complete "Persona Non Grata", "Turbulence", and "Back on the Grid" on Veteran difficulty.
Complete "Mind the Gap", "Goalpost", and "Return to Sender" on Veteran difficulty.
Complete "Bag and Drag" and "Iron Lady" on Veteran difficulty.
Complete "Eye of the Storm", "Blood Brothers", and "Stronghold" on Veteran difficulty.
Complete "Scorched Earth", "Down the Rabbit Hole", and "Dust to Dust" on Veteran difficulty.
Complete the campaign on any difficulty.
Complete the campaign on Hardened or Veteran difficulty.
Kill 5 enemies with a single grenade in Single Player or Special Ops.
The method below took me several attempts since the timing of cooking the grenades, throwing it and the angle of the throw needs to be just right. I found a Youtube video showing a much easier method of blowing yourself up in the middle of a group of enemies in the same stage. Just search for it if you want to try it.
Grenade party!
Jack the Ripper (20 points)
Melee 5 enemies in a row in Single Player or Special Ops.
This is easier to get done by doing a mission in Recruit difficulty. Just don't fire a single shot and keep melee-ing the enemies.
Informant (20 points)
Collect 22 Intel Items. (See Squad Leader)
Scout Leader (35 points)
Collect 46 Intel Items. Please see our Intel Location guide: http://www.supercheats.com/guides/call-of-duty-modern-warfare-3/intel-location-guide
This Is My Boomstick (20 points)
Kill 30 enemies with the XM25 in "Black Tuesday."
Your XM25 can deal splash damage so you can take out multiple enemies who are grouped together. The best spot to kill as many soldiers as possible early on is right before you enter the first building. There's a large enemy force there which you should run away from as part of the story. You can see the same group from the window, as you fight your way to the 2nd floor. Just wait for at least 3-4 soldiers get close before firing in their middle. I got this achievement unlocked by killing a couple more enemies in the trading floor of the Foreign Exchange building.
What Goes Up… (20 points)
Destroy all the choppers with only the UGV's grenade launcher in "Persona Non Grata."
Don't fire a single bullet to the choppers as this will lost your chance in unlocking the achievement. See the video below:
What goes up, must go down - using grenades
For Whom the Shell Tolls (20 points)
Destroy all targets during the mortar sequence with only 4 shells in "Back on the Grid."
To unlock the achievement for this sequence, you'll have to destroy four targets with only four shells. The first three are technicals so you wouldn't have problems targeting them. Take note that the mortar doesn't have that much splash damage so you have to land a direct hit to be able to kill them. The last target is a moving foot soldier so you have to time your release so it he gets hit directly. Otherwise, he'll just be blown like a ragdoll and still live, missing your chance to get this achievement. Just restart the checkpoint to do it again.
It's raining mortars!
Kill Box (20 points)
Kill 20 enemies with the Chopper Gunner in a single run in "Return to Sender."
This is preferably easier done when you need to take out the MG nests in the mansion since the enemies are close to each other.
Like picking off ants who fire back
Danger Close (20 points)
Take down a chopper with an AC-130 smoke grenade in "Bag and Drag."
After getting the ability to thrown support marker smoke grenades, you'll have to move to a plaza. There will be an enemy helicopters that will drop down reinforcements. Toss a marker grenade directly underneath it, preferably between the ropes and wait for the AC-130 to bring it down. You need to do this quick. If you failed, just reload the checkpoint. If there are a lot of enemies preventing your progress, lower the difficulty.
It's really dangerously close
Ménage à Trois (20 points)
Destroy 3 tanks with a single 105mm shot in "Iron Lady."
You need to wait for the 3 tanks to stand close to each other before firing a 105mm round in the middle.
Tank Destroyer
Nein (20 points)
Kill 9 enemies with A-10 strafing runs in "Scorched Earth."
Strafing Valkyrie
50/50 (20 points)
Complete a Special Ops Mission Mode game with the same number of kills as your partner.
The first Spec-Ops training mission has an equal number of enemies. You can take your time with a partner and count your “kills” manually to unlock this.
Birdie (20 points)
Kill 2 enemy helicopters without getting hit in a Special Ops Survival game.
Got this in the “Resistance” map. When the two enemy helicopters appear (Wave 6). When they appear on the map, you should be already inside a cover, preferably a tunnel so you can move easily. You can have a partner or do it solo. Your partner can take the grunt and deal additional damage. As long as you deal the finishing blow, it should count as your kill.
Serrated Edge (15 points)
Finish a Juggernaut with a knife in Special Ops.
The Juggernaut is the heavily armed soldier which will appear in Survival Mode. This can be easily done with a partner (to act as a decoy) and some flashbangs. Just deal as much damage as possible and when you feel that he's softened up, get behind him and knife him. You can also throw a flash grenade to give yourself a few seconds window to get close and knife him.
Arms Dealer (20 points)
Buy all items from the Survival Weapon Armory.
First of all, you need to reach the appropriate level so the other weapons can be unlocked. This is not something you can unlock early on. You just need to buy all weapons, including the starter weapons (Five-Seven), including the ones you pick up. This doesn't have to be done in a single session though. The achievement is cumulative. Just concentrate on buying the weapon set you can afford. It will help if you'll manually list the items you have bought. For the attachments, buying one for any gun will “count” for other guns as well.
Danger Zone (20 points)
Buy all items from the Survival Air Support Armory.
Aside from allied support units (Delta and Riot Shield Squad) and Predator/Air Strike, you need to purchase all the Care packages as well.
Defense Spending (20 points)
Buy all items from the Survival Equipment Armory.
First, you must have unlocked all items before you can purchase them. The last item you can unlock is the Riot Shield and that's at LV37.
Get Rich or Die Trying (25 points)
Have $50,000 current balance in a Special Ops Survival game.
This can be boosted with a partner. Just pick up weapons and don't buy anything for the first few rounds. You can also have your partner send money to you.
I Live (10 points)
Survive 1 wave in a Special Ops Survival game.
Survivor (20 points)
Reach Wave 10 in each mission of Special Ops Survival mode.
(see Unstoppable)
Unstoppable (40 points)
Reach Wave 15 in each mission of Special Ops Survival mode.
Tips:
Memorize the maps and consider finding “defensive” points. These are parts of the maps which you can easily dig in and hold out.
Use turrets. You must place them in an elevated position where they can provide maximum cover and avoid getting destroyed easily
Reinforcements – The Riot Shield team is always a better choice than the Delta Squad. Having them around increases your chances to survive.
Claymores – Place them along the paths the enemies are most likely to take.
Partner – Having a human partner will give you the advantage of having one additional turret and reinforcement squad.
No Assistance Required (20 points)
Complete a Special Ops Mission Mode game on Hardened or Veteran with no player getting downed.
Brag Rags (10 points)
Earn 1 star in Special Ops Mission Mode.
Tactician (20 points)
Earn 1 star in each mission of Special Ops Mission Mode.
Overachiever (40 points)
Earn 48 stars in Special Ops Mission Mode.
Flight Attendant (20 points)
Kill all 5 enemies during the zero-g sequence in "Turbulence."
Zero-G
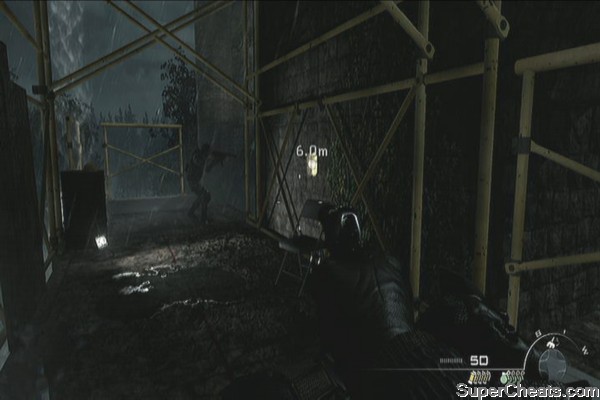
Start by moving forward. Take out the enemy soldiers while moving from cover to cover. If their armored vehicle appears, you can switch to your XM25 launcher to destroy it. Regroup with some friendlies along the way and continue fighting off more enemies. Finally a Hind will appear. Since you don't have any means of destroying it, you must run and enter the next building.

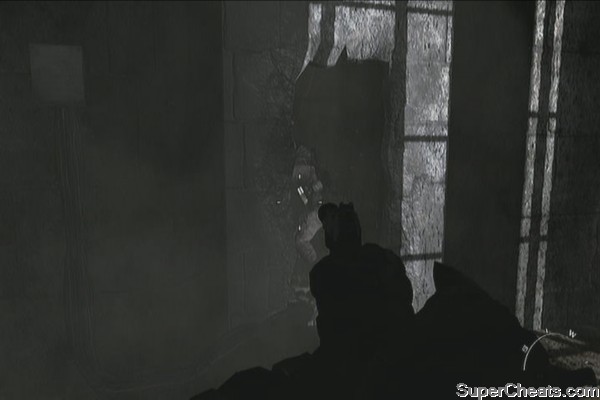
Once inside, continue upstairs and kill the enemies in the far end of the building. There's also an intel inside the second bedroom. Also, the enemies on street level can see you and shoot you. Don't hesitate to pick some of them off if needed.
Bedroom Intel
Continue following Sandman until you reach the staircase. Lob a 9-bang through the door and kill the enemies outside. Continue following your teammates and take out the two russian soldiers in the store below. Once you reached the ground floor, more enemies will start rushing it. Take them out at will. There's also another piece of intel in the counter beneath the staircase.

Store Intel
Head back to the street and take out enemy soldiers along the way. Fight your way through until you reach the stock exchange. There's an ammo crate inside that can refill your ammo so use it as necessary. There's also another intel on top of the table to the left of the ammo crate so don't forget to pick it up.


Lobby Intel
Continue upstairs and clear the trading floor. Before heading to the upper floor, grab another intel piece inside the kiosk beside the stairs.

Trading Floor Intel
Climb the stairs to the scaffolding. Take out the enemies who will appear in the balcony, then continue going upstairs until you reach the top level. Climb the ladder to the rooftop and kill all enemies there before moving to the second tier.
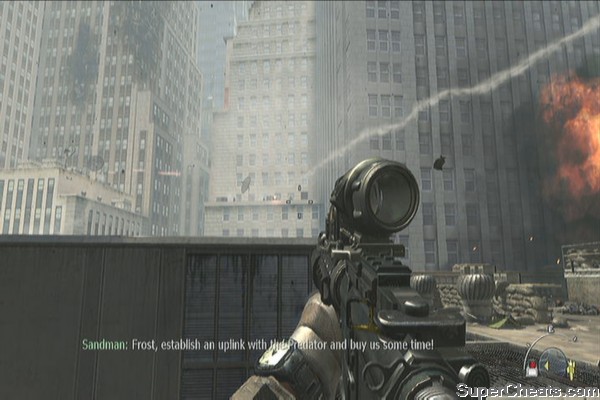
Kill the last batch of enemies guarding the jamming rig then pick up the last intel piece in this mission. Place a thermite charge on the jammer's power supply. Get to safe distance then detonate the charge.
Rooftop Intel

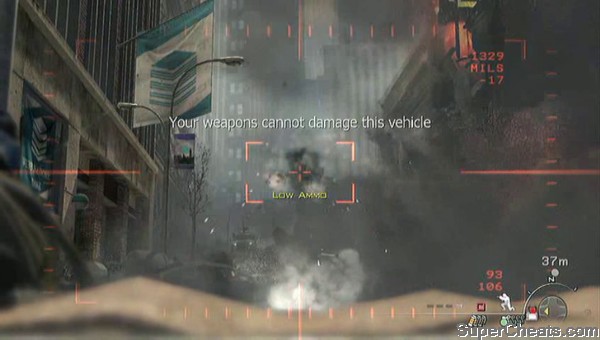
After that, more enemies will appear from the rooftop on the other building. A Hind will also appear making your exfil impossible. You'll have the Predator drone in your control so use it to take out the foot soldiers in the rooftops before finally taking down the Hind. Take note that you can control the trajectory of the hellfire missile. Once the Hind is taken out, jump to your evac chopper.

While you're on the gunner seat, kill all enemy foot soldiers on the rooftops and all enemy hinds that will appear. The mission will be completed afterward.
All Hinds Down
Steer your Blackspy craft and follow your team mates until you get out of the tunnel. You need to evade some enemy mines along the way before finally reaching the command sub. Wait until you get the signal to plant a charge on the sub's tail. Wait until it surfaces and board it.
Hunter Killer
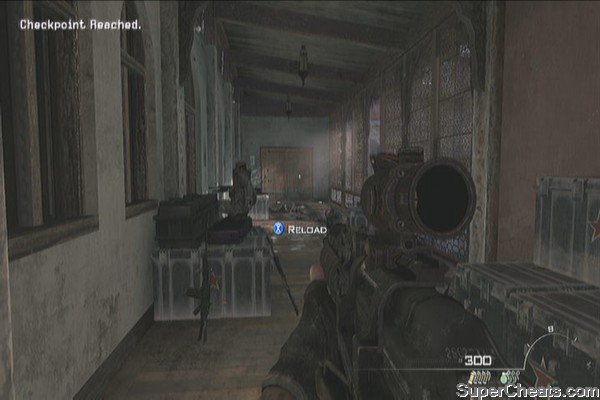
Kill all enemies on the deck then enter the hatch. Kill the next two enemies by the door then grab the intel on one of the bunk beds.
Bunk Intel
Continue fighting your way until you reach the missile silos. Kill all enemies inside and find the last of the two intels available in this mission.
Silo Intel
Fight your way in the second silo chamber until you reach the bridge entrance. Breach it open and kill all personnel inside.

Easy day, Overlord
Step on the balcony and kill all enemies outside. This is also a good opportunity to try getting the “Strike” achievement. You'll have to take out 5 enemies with one grenade. See the video below for reference:
Grenade party!
Once the doctor is taken out, go beside Soap and help him. After a few scenes, follow them outside. Kill the enemies who will barge in the hallway then continue downstairs and take out the enemies outside. Find the first intel in this mission on top of a wooden crate in inside the alcove to the left.
Crate Intel
Continue to the streets and clear it of enemies. Enter the house beside the burning building to find another intel inside the bedroom.
Another bedroom intel
Continue fighting your way through more enemies and following Price. You'll soon encounter a large number of enemies past the gate so go through the building and enter the shed containing the UGV. You should find another intel beside the shipping crate containing the UGV.
weapon cache intel
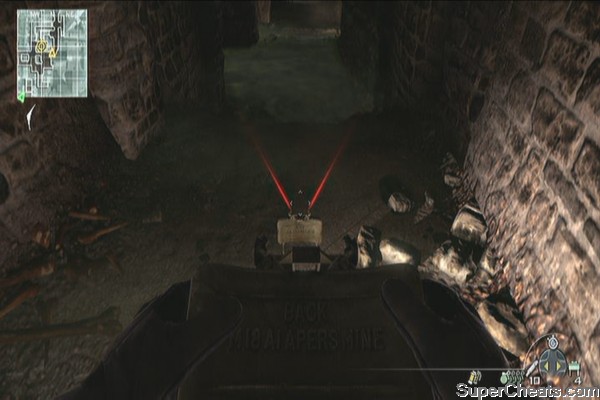
After picking up the intel, grab the controls and make sure to take out all enemy choppers using only the UGV's grenade launcher. Take note that if ever you hit it with your machine gun, you'll miss the chance in getting the achievement so you'll have no choice but to restart the whole mission. Continue clearing enemy forces until you reach the chopper. Eventually, your UGV will get destroyed by an enemy drone.
What goes up, must go down using grenades
As soon as you get out of the storehouse, look to your left to find a slide. The last intel in this mission is found there. Once done, continue running towards the chopper and watch the following scenes. Mission complete.
Slide intel
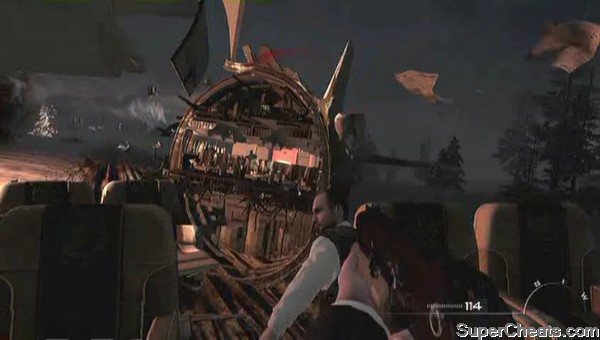
Follow the president to the conference room. Kill the enemies who will breach the door, pick up their weapon and move out. Continue forth and all of you guys will be tumbled around due to the sudden lost of gravity. In this sequence, you must kill five enemies to unlock the “Flight Attendant” achievement. You can just reload in case you failed to do so. Check out the video below:
Zero-G
You can fire your gun and kill the enemies while airborne. Go downstairs and find the first intel on top of the tabletop.
Airplane Intel
Continue killing the enemies along the way until you finally rescue Alena. Continue following Sgt. Federov and watch the following scenes.
Follow the commander outside the plane. After jumping over a fallen log, you'll find the last intel in this mission.
Crash Site Intel
Continue following the commander until you engage a large number of hostile forces. Take them out and move from cover to cover.

Continue clearing enemies until you find the president. Open the door and watch the following scenes.
Follow Soap and Price. Crouch when prompted then continue following them. Take out the targets near the village entrance then continue until you find more enemies in the open. They're about the set a poor civilian on fire so kill the bastards before they know what hit them.

Continue moving ahead until you find two more civilians about to be executed. Even if its against your moral standpoint, hold your fire and don't compromise the mission. Wait until Price gives the command to move on. Stay off the road and immediately go prone on the grasslands to avoid enemy detection.
Continue to the house and hold your position behind your two team mates. Head out when prompted and you'll spot two enemies on the wooden footbridge. Wait for the trucks to pass then take one out.

Continue to the village and climb the tower. Melee kill the guard and provide overwatch to your squadmates below. Kill the enemies as instructed.
Overwatch
After they cleared the large building, they'll be compromised. Switch to your AK-47 Suppressed and go down. Kill the enemies along the way and enter the same building they cleared before to find the first intel in this mission.
Dilapidated Building Intel
Regroup with Price and continue clearing the pathway ahead. You can take the stairs to the right and clear the upper levels. Find the second intel inside the red, graffiti covered shack to the left side of pathway.
Shack Intel
Continue following your team mates until then get to ground level. Kill the gunner from the technical in front of you then man the .50 cal from the nearby technical to provide covering fire from a large number of enemy troops.
Tech(nical) Support, at your service!
After getting blown off from the turret, follow Price again through the shacks to avoid enemy mortar. Along the way, you'll fall into a roof with a machete-wielding bastard waiting inside. Kill him immediately before he kills you then shoot the other guy along the way. Take out the enemies on the roof and continue moving forth until you have access to the mortar position on the watchtower.
To unlock the achievement for this sequence, you'll have to destroy four targets with only four shells. The first three are technicals so you wouldn't have problems targeting them. Take note that the mortar doesn't have that much splash damage so you have to land a direct hit to be able to kill them. The last target is a moving foot soldier so you have to time your release so it he gets hit directly. Otherwise, he'll just be blown like a ragdoll and still live, missing your chance to get this achievement. Just restart the checkpoint to do it again.
It's raining mortars!
Once done, jump from the ledge behind you then follow your team mates. Go through the sewer pipe, and fight your way through the shacks and shanties until you reach the church plaza. Kill enemies along the way and move your ass to the church. Inside, you'll find the last intel in this mission.
Church Intel
Breach the door open and a hyena will bite your arm. Use your pistol to kill the two soldiers in sight and Yuri will kill the hyena automatically. Mission complete.
Once in control, move along the alley and take out the first tango who exits the door. Enter that door and kill two sleeping guards inside. Exit to the alley and enter the building just ahead. You'll find the first of the two intels in this part of the mission in the corner of the dark room.
Alley Intel
Regroup with your team and continue clearing the next warehouse. Once you reached the top floor, there will be a heavy firefight by the docks. Join in and clear it. Once clear, your team will move behind the truck. Don't open it yet. Head to the docking bay, climb the stairs and follow the walkway until you reach a room with the last intel on the desk.
Dock Intel
Go back down and open the truck's door. More enemy forces will appear. Just mow them down and make your way to the construction site. After clearing the area, run to the pickup truck and board it. You'll have unlimited ammo during this sequence so continue firing at the hostiles inside the hijacked train. Keep doing this until the train crashes.
Terrorist Express
The second part of the mission will now start and there's one intel left to be gathered. Get on your feet and fight your way to the station. Take care not to hurt any civilians along the way.

Go up the first escalator and kill all enemies on sight. The last intel is located behind the magazine counter.
Station Intel
Continue heading upstairs and killing all enemies. You'll finally meet up with the rest of your squad. Continue to street level and move into position. After the truck is stopped, the scene will switch to the Davis family. Just watch the grim scene. Mission complete.

After landing, press forward by moving from cover to cover. Use the rocks to protect yourself from enemy gunfire. After reaching the street, head to the direction of the fallen plane and find the first of the three intels in the cockpit half of the plane.
Plane Intel
Fight your way to the main road until you reach the first turn with the help of your allied tank division. Clear the area behind the brick wall ahead to find the second intel.
Yard Intel
Regroup on Rhino One and you'll get the order to man the mini-gun on the top. Continue killing all enemies in sight. Once inside the garage, you can destroy the cars to blow them up and the enemies hiding behind them. After the accident, you'll have to leave the tank.
Rhino 2
Continue on foot and clear the enemy blockade. Go back to the streets and hold your position until Rhino One breaks through. Push forward then enter the building to your right.

After clearing the building, move forward the street and continue killing the enemy soldiers. Take out the RPG trooper on the third floor of a blown off building in the turn. Search the vehicles then head inside the office. The last intel for this mission should be inside.
Teknikor Deutschland Office Intel
Continue upstairs and breach the door. You should immediately kill the guy on the right, who is about to shoot the VP, and the other guy to the left who is running towards you. Kill those two first in order to proceed with the mission.
Saving people, one slow-mo sequence at a time
Just exit the door for exfil, mission complete.
After jumping off the truck, kill all enemies outside until you get the chance to use the remote chopper gun. Use it to whittle down enemy forces. Continue fighting your way towards the mansion. Enter the building to the left side, in front of the mansion then go to the third floor. Kill all enemies inside then grab the intel.
Smuggler Intel
This is the best time to attempt to achievement “Killbox”. You'll have to kill 20 enemies using the remote mini-gun. See the video below.
Like picking off ants who fire back
After clearing the MG nests, continue inside the mansion and continue to the second floor. Kill the remaining stragglers then breach the door in Waraabe's office. Kill all guards except him then grab the second intel on the table behind him.
Waraabe Intel
Head to the LZ and take cover as soon as the ambush sets it. You'll have to make it to the second LZ before the time runs out. Kill all enemy forces along the way as fast as you can. Once you've reached the point where the enemy pushes a burning car towards you, take note of the small building to the right called the Money Market. That's where the last intel in this mission is located.
Money Market Intel
Head to the unfinished building and fight your way to the top floor. Once you reached the top floor, use the remote gun to thin out the enemy forces. Nikolai will still get hit. Immediately run towards the rope and use it to go down.

Follow Price and take out the enemies as needed. Continue moving forth until you reach Nikolai. After reaching him, carry him and make your way to Echo Team's location.
Sandstorm!
Follow your team through the buildings until you reach the bookstore. Once its cleared, go to the second floor and check the window near the street to find the first out of the four intels in this mission.
Bookstore Intel
Head outside and regroup with the GIGN friendlies. Exit through the restaurant and kill the enemies in the square. Enter the cafeteria to find the second intel in the backroom.
Cafeteria Intel
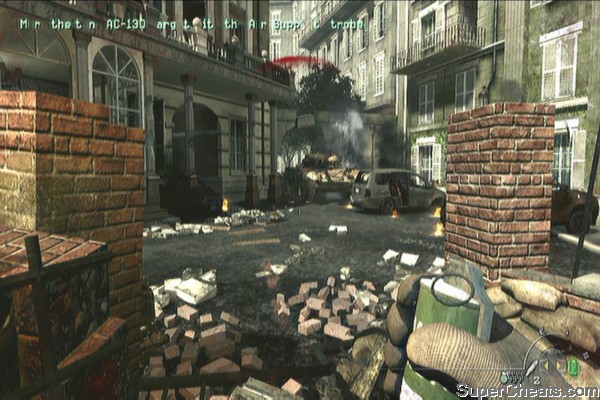
Continue moving forth and follow your lead until you encounter multiple enemy forces across the street. Equip your air support marker grenades and lob one to their position to let your your AC-130 gunship work its magic.

Once done, go downstairs. Get ready since this is the perfect spot to unlock the “Danger Close” achievement. If you look up, two enemy helis will fly by and one will hover to drop enemy soldiers. Toss a marker grenade directly underneath it, preferably between the ropes and wait for the AC-130 to bring it down. You need to do this quick. If you failed, just reload the checkpoint. If there are a lot of enemies preventing your progress, lower the difficulty.
It's really dangerously close
After that, throw another marker grenade to the enemy BTR and kill off the last remaining enemies to update your objective. Head to the catacombs next.

Continue following your GIGN lead from the sewers to the catacombs. Once your lead gets attacked, kill the enemy in front of you then continue forth until you get flash-banged. Clear the enemies in the room then immediately grab the third intel on top of the generator to the left.
Catacombs Intel
Quickly pursue Volk and kill all enemies along the way. Climb up the ladder and continue following the path. The last intel should be right along in your path. Quickly grab it and head outside.
Pursuit Intel
Kill all enemies then ride the van. Use the light machine gun in the backseat and use it to take out your pursuers. As soon as you reach Volk's vehicle, shoot the tires and kill his driver and guards. Watch the following scenes. Mission complete.
Volk's Wagon
After watching your evac craft shot down, you'll be thrown behind the weapons constrol of a nearby allied AC-130 gunship. There's an achievement you can unlock here by taking out 3 tanks with a single 105 mm shot. You need to wait for the 3 tanks to stand close to each other before firing a 105mm round in the middle. You can go all out with all other targets.
Tank Destroyer
After clearing a path for your ground unit, they will move across the street. The targets will be marked so take out all enemy footsoldiers in front and in their flank. You'll be asked to switch to enhanced imagery when they reach the intersection. They'll pop a purple smoke which is only visible in this mode. Take out more enemies and the RPG troopers in the building.

You'll be back again on the ground as frost. Flank the MG by going upstairs and taking out the gunner using the nearby sniper rifle.

Jump to the courtyard and immediately enter the room to the left. Go upstairs to find the first intel in this mission.
Courtyard intel
Head to the middle of the courtyard and use the mounted MG to take out the enemies on the porches and on ground level. An enemy tank will then break through. Equip your support marker grenade and pop it on the tank for our AC-130 support to take it out.
You'll be in the controls of the AC-130 again. Take out as many enemies as possible when the convoy picks up your team. Next, take out the pursuers until they reach the bridge.
The Guardian
Once you're back on foot, take out the tanks and enemies. Search the bus ahead to find the last intel in this mission.
Bridge intel
Continue forth and use your support marker to help you clear the path. Now, dig in and hold the position. Use the support marker grenades as necessary. Finally wait for the allied bombers take out the BTRs and level the area. Board the chopper to complete the mission.

Follow Soap and Price and swim discreetly to your objective point. Once you've reached the tunnel, follow Soap. Once you see the first set of targets, stay put and take out the two snipers on the roof once given the order. Continue forth and take out one of the patrols. Soap will tell you to hide from the incoming chopper. Follow him inside the building and find the first intel of this mission on the counter.
Apartment intel
Exit the building and continue following Soap. Enter the shop next and go prone. DO NOT move if Soap stays still. Exit the shop and jump over the dumpster and fence to reach the other side. Stay put until the rebels attack take out the enemies in the plaza. You'll find the second intel here as well.
Plaza intel
Continue forth and kill enemies ahead until an enemy armor appears. Pick up the RPG nearby and use it to take out the armor.

Head to the building entrance and continue following the mission markers until you reach the back street. Take out enemies along the way and head to the next marker. Do not near the tank. Just wait for Soap to burst a window open. Follow him around the blockade and to the next building. Take out more enemies them go out to the street. Go prone when prompted them continue running to the church to complete the mission.

Just do recon for the meantime. Track the convoy then find Price on top of the hotel when told to. Next, take out the guards and support Price as he clears the room.

After the scenes, pick up Soap and continue running until you get off the road. Price will take his turn to assist Soap. Head to the store and clear it. You'll also find the only intel in this mission there.
Store intel
Continue clearing the road ahead then enter another building to the left. More enemies will pour in; clear them out.

Cross the street and cover the duo's six. Continue covering them until you reach the resistance hideout. Head to the door and watch the next scenes.
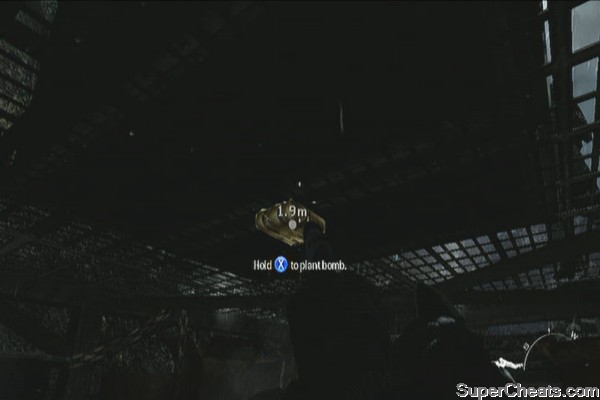
Follow Price and do everything he says. Follow him behind the trucks and take out one of the guards while the spotlight is away. Once you get the prompt, plant a C4 under the platform.
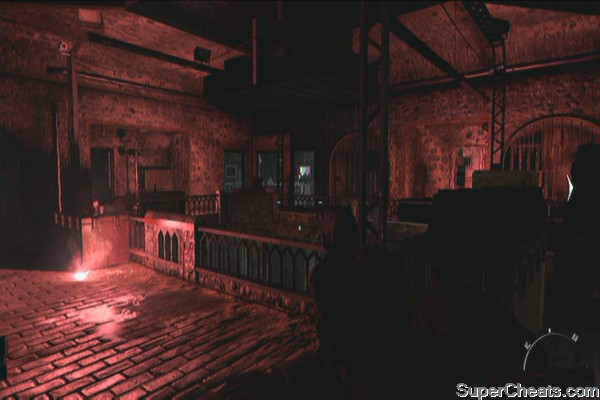
Continue to the security office and follow Price to the dungeons. Equip the night vision and take out the guards. Once they start using flares, remove your night vision and continue clearing the area.
Continue outside and climb the ladder. Plant the second C4 on the column.
Continue following Price. He will then plant an explosive charge on the wall. You have to trigger it on his go. Next, enter the hole you just blasted and climb up. Listen to the conversation between Makarov and his men.
Once done, you'll be back in the basement. Shoot your way through and follow Price to escape the castle. Continue upstairs and fight your way through the rooms. There's an intel in the small room to the left, past the studio-like room.
Castle intel 1
Once you've reached the exit, head to the right and continue following the straightforward path to find the second intel.
Castle intel 2
Continue following the path to regroup with Price then detonate the C4 under the bridge to continue. Head to the courtyard and more enemies will engage you. Stay in cover to avoid the BTR's fire then join up with Price as he commandeers a jeep.
After landing, take out the initial enemies in the LZ then go up to the office floor. Kill all enemies then find the first out of five intels in this mission on the the desk near the ramp.
Office intel
Next, head to the rooftop and clear the area. Grab the second intel behind the railings near a vent and catwalk.
Rooftop intel
Next, grab the M14 EBR and take out the targets on the roof across the next building. As the other team lands, more enemies will appear from the door. Take them all out.

In this part of the mission, you'll have access to request strafing runs from your allied A-10. There is also an achievement you can unlock here. You need to paint the strafing path and kill 9 enemies with it.
Strafing Valkyrie
After unlocking the achievement, take out enemy tanks to update your objective. Next, rappel down to street level. Continue forth and enter the building with the sign “Trivo Buchhandlung” past the chopper wreckage. The third intel in on the counter.
Trivo intel
Next, go through the door and grab an RPG to take out the tank. Continue clearing the streets.

Support the allied German tank advance and move from cover to cover as you take out enemy foot soldiers. The fourth intel is located inside the “Teknikar Deutschlan” building.
Deutschlan intel
Continue moving forward with the allied tank column until the building ahead collapses. Follow Sandman into the building and through the rubble. Once you've reached the target building, continue clearing the path. Check behind the staircase after Sandman opens the door near the lobby to find the last intel in this mission.
Athena intel
Continue upstairs and breach the door. Kill the last two enemies. Mission complete.
Clear the first room then after dropping to the lower level, jump off the elevator and take out all enemies along the way. Clear the next large, processing area. You'll also find an intel here.
Diamond Mine intel
Continue following your team until you reach outside. Kill the runners below and move forward the mine. Use the Predator's AGMs to quickly and efficiently clear the area.

Continue moving until you reach the mine and find the Russian president's daughter. Move along and take out the enemies along the catwalk. Rappel down and clear the enemies inside.
Breach the floor and carefully take out the president's handler and the other guards in slow motion. Grab the last intel behind you.
Diamond Mine intel 2
Escort the president outside and hold your position. Man the MG and take out enemies trying to push through. Remember to let go and take cover if you've taken severe damage. Once the team starts to move, kill all enemies until you get disabled yourself. Take out more enemies during this sequence and watch the mission completed n a distasteful way.
You'll be heavily armored and equipped so you'll be able to shrug most enemy gunfire and grenades. Walk towards the hotel and take out the soft guards. Do not injure civilians in the process. Continue to the second floor and grab the first intel in this mission.
Hotel Oasis Intel
Enter the lift and take out the enemy chopper. You'll have to jump to the other lift and continue moving forward without your heavy armor. The timer will start now and you need to fight your way fast to catch up with Makarov. The second intel is on the casino table to the left, a short walk away from the lift.
Casino Intel
After that, push through once and after crossing the bar and the walkway, the last intel should be on the counter.
Bar Intel
Push forward and you'll be thrown off balance because of the rockets. Pull yourself up and catch up with Makarov. Jump to the chopper and follow the command buttons for the next sequences.
This is where it all ends
This is a series of missions that you can do alone or with a buddy. There are two modes: Survival and Missions. Survival will pit you and your partner against waves of enemies which increase in number and difficulty per wave. Missions will bring you back to various mission areas in the campaign with different objectives and enemies.
Players will only have 4 maps initially available. They can unlock additional map sets per 5, 10 and 15 levels (for Missions) and 5, 15, 25 for Survival mode. Your SPEC-OPS level is different from your multiplayer level.
The stuff you can purchase in Survival Mode depends on your current level so it may be wise to go through Mission Modes first to gain a few levels to give you an edge in Survival.
General Tips:
Memorize the maps and consider finding “defensive” points. These are parts of the maps which you can easily dig in and hold out.
Use turrets. You must place them in an elevated position where they can provide maximum cover and avoid getting destroyed easily
Reinforcements – The Riot Shield team is always a better choice than the Delta Squad. Having them around increases your chances to survive.
Claymores – Place them along the paths the enemies are most likely to take.
Partner – Having a human partner will give you the advantage of having one additional turret and reinforcement squad.
Flashbangs are very effective against Juggernauts. Avoid facing them head on; always attempt to flank them or lure them towards your C4s and Claymores.
Helicopters can be taken out easily by assault rifles and light machine guns. Make sure you're under a tunnel or overhead cover to avoid getting shredded by machine gun fire.
Here are the list of items you can buy in Survival Mode.
The items in the weapons category have the same price but will be different in power so it pays to have the updated version – unless you can easily pick them up from the enemies.
Handguns ($250)
LV1 Five Seven Semi-automatic, (single fire)
LV1 USP .45 Semi-automatic, (single fire)
LV2 MP412 Revolver
LV11 Desert Eagle Semi-automatic, (single fire)
LV20 .44 Magnum Revolver
LV40 P99 Semi-automatic, (single fire)
Machine Pistols ($1500)
LV1 G18 Fully automatic, close range
LV3 SKorpion Fully automatic, close range
LV17 MP9 Fully automatic, close range
LV37 FMG9 Fully automatic, close range
Assault Rifles ($3000)
LV1 M4A1 Fully automatic, all purpose weapon
LV1 M16A4 3 round burst
LV5 SCAR-L Fully automatic, all purpose weapon
LV14 ACR 6.8 Fully automatic, all purpose weapon
LV24 AK-47 Fully automatic, all purpose weapon
LV32 FAD Fully automatic, all purpose weapon
LV39 G36C Fully automatic, all purpose weapon
LV43 CM901 Fully automatic, all purpose weapon
LV47 MK14 Semi-automatic, (single fire)
LV50 Type 95 3 round burst
Sub Machine Guns ($2000)
LV1 MP5 Fully automatic, close range
LV4 UMP45 Fully automatic, close range
LV13 MP7 Fully automatic, close range
LV23 PM-9 Fully automatic, close range
LV38 PP90M1 Fully automatic, high fire rate
LV46 P90 Fully automatic, large magazines
Light Machine Guns ($7000)
LV12 M60E4 Fully automatic, large magazines
LV18 PKP Pecheneg Fully automatic, large magazines
LV34 MK46 Fully automatic, large magazines
LV41 L86 LSW Fully automatic, large magazines
LV48 MG36 Fully automatic, large magazines
Sniper Rifles ($2000)
LV7 MSR Bolt action
LV16 Dragunov Semi-automatic, (single fire)
LV29 RSASS Semi-automatic, (single fire)
LV35 L118A Bolt action
LV42 AS50 Semi-automatic, (single fire)
LV49 Barrett .50 Cal Semi-automatic, (single fire)
Shotguns ($2000)
LV1 Model 1887 Lever-action
LV6 USAS 12 Fully automatic, low ammo
LV16 SPAS-12
LV26 KSG -12 Double Barrel
LV33 STRIKER Semi-automatic (single fire)
LV44 AA-12 Fully automatic, low ammo
Weapon Upgrades
LV1 Holographic sight $1000 Holographic sight
LV7 Red dot sight $750 Precision sight.
LV19 Grip $1250 Vertical foregrip for reduced recoil
LV28 M203 Grenade launcher $1500 Undermounted grenade launcher
LV28 GP25 Grenade launcher $1500 Undermounted grenade launcher
LV28 M320 Grenade launcher $1500 Undermounted grenade launcher
LV30 ACOG Scope $1250 Enhanced zoom ACOG scope
LV45 Shotgun attachment $1500 Undermounted shotgun attachment
Equipment
LV1 Frag grenade $750 Refill frags up to 4.
LV1 Flash bang $1000 Refills flash bangs up to 4
LV2 Claymore x5 (10 max) $1000 Directional anti-personnel mine,set off by enemy entering its proximity
LV3 C4 x5 (10 max) $1500 Charge of plastic explosive,set off manually with detonator
LV27 RPG-7 X2 (4 max) $2000 RPG-7X2
LV10 Body armor $2000 250 armor hit points
LV13 Self revive $4000 When knocked down,shoot your way back up
LV17 Sentry gun $3000 Mini-gun mounted sentry
LV31 Sentry grenade launcher $4000 Grenade launcher mounted sentry
LV37 Riot Shield $3000 Bullet resistant
Air support
LV1 Predators missile $2500 Missile from UACV
LV4 Air strike $2500 Precision air strike on selected location
LV14 Delta squad $3000 Delta force allies drop in via chopper
LV21 Riot shield $5000 Riot shield allies drop in via chopper
LV1 Quick draw $3000 Faster aiming
LV8 Steady aim $3000 Increase hip fire accuracy
LV22 Stalker $4000 Move faster while aiming
LV36 Extreme conditioning $3000 Sprint for longer distances
LV50 Sleight of hand $5000 Faster reloading
Here's also the list of maps available in Survival Mode:
Easy Maps
Bomb squads, Attack Dogs, Choppers and Juggernauts
Resistance
Village
Interchange
Underground
Regular Maps
Bomb Squads, Chemical Warfare, Choppers and Riotshield Juggernauts
Dome
Mission
Seatown
Carbon
Hard Maps
Bomb Squads, Claymore Experts, Choppers and Riotshield Juggernauts
Bootleg
Hardhat
Fallen
Outpost
Insane Maps
Bomb Squads, Chemical Warfare, Claymore Experts, Choppers and Armored Juggernauts
Lockdown
Arkaden
Downturn
Bakaara
Earn 'stars' by completing the missions in various difficulties. The following wakthroughs and videos are done in regular mode. Hardened and Veteran modes will feature the same objectives but with more intelligent enemies and higher damage dealt to you. Please adjust your strategies accordingly.
We've decided to allocate a seperate page to each mission as some have quite a few images and videos accompanying them. Just flick through the following pages to find the mission you are interested in or use the indes page.
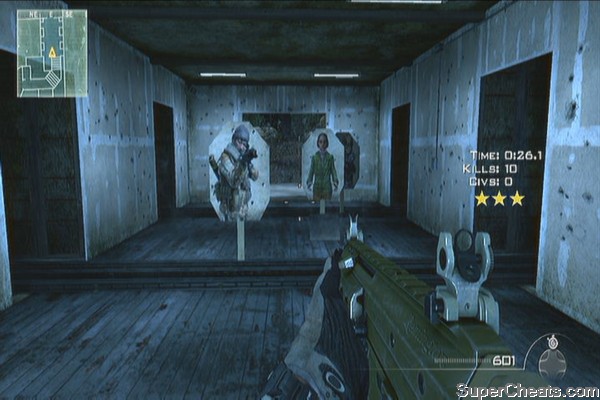
Test your skills on the obstacle course
This is the same as the tutorial course in the previous Modern Warfare games. You'll be evaluated for your speed and accuracy. You must take out all targets in an area before you can move unto the next one. The quicker you can clear the course, the higher your score
Capture President Vorschevsky for Makarov by hijacking his plane
This is a fairly straightforward mission and without the zero-g sequence. Just take out all enemies along the way until you reach the president's cabin. He should not be killed so be very careful where you place your shots. You'll have a few seconds of slow motion after breaching the door so use it to take out the vital targets near the president, before clearing out the others.

Stop the Russian submarine from having a nuclear meltdown
After landing, kill all the approaching enemies then breach the hatch. Slowly move forward the missile bays while taking out more enemies. It will be easier to scour the area with the thermal googles on so you can easily spot the enemies in hiding. The reactor should be in the room after the missile bays so clear it first then shut it down, then fight your way to the exit.

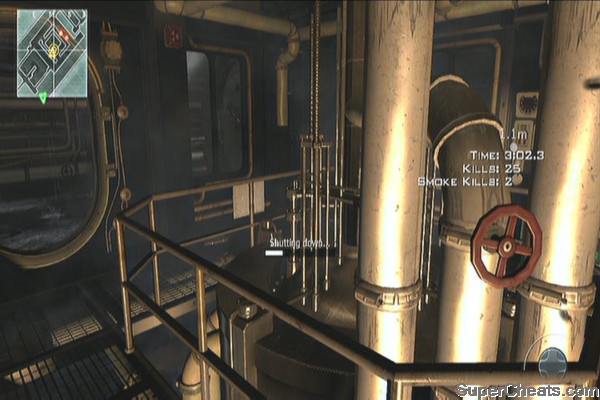
Once outside, there will be more enemies to deal with, especially reinforcements who will be brought down using a transport chopper. Take out the enemies hiding in the smoke cover as well then the last batch of enemies in your exfil point.
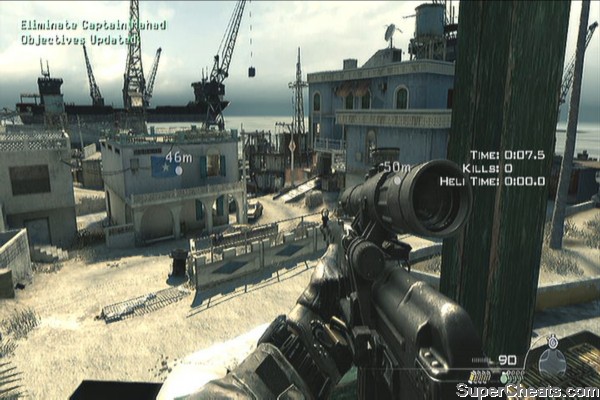
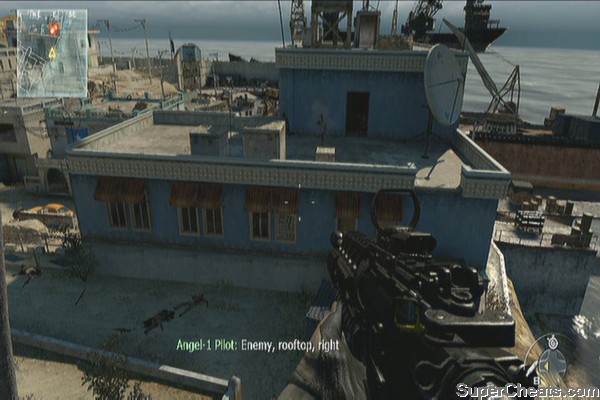
Local strongmen are holding our embassy staff for ransom. We don't negotiate with terrorists.
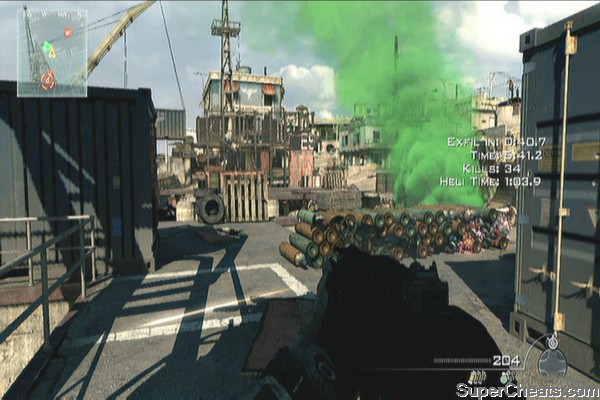
First, take out the guards and the first enemy heli. Then, take out the two leaders. You need to be careful as there's a lot of enemies hiding in the buildings.
After taking out the second leader, the location of the hostages will be revealed. Head there and release them, then throw a smoke grenade to mark your location. More enemies and another heli will appear so dig in and take them out. Defend the position until your transport arrives.
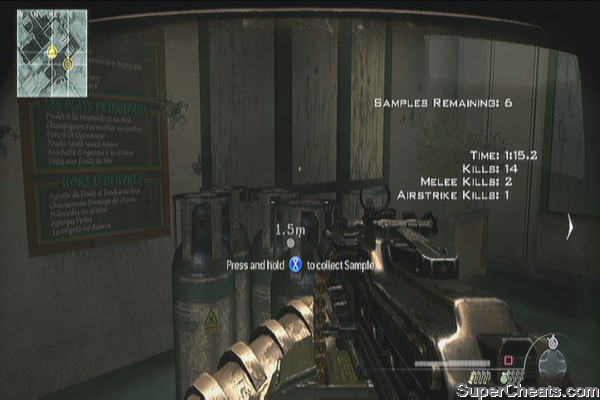
Collect samples of a deadly nerve agent in a Juggernaut suit
You'll have a Juggernaut suit equipped during this entire mission so you'll be more sturdy than ever. You also have the capability to use air support markers to call in an air strike from an allied AC-130. From your drop off point, there are two canisters which you can collect samples from. Get them before proceeding to the next area.
There's an enemy vehicle in the road upstairs so you can take out the gunner or destroy the whole vehicle with an airstrike for higher exp. Refill your ammo using the ammo cache nearby.

Continue to the ruined building and destroy it. The third sample should be right outside but there's another vehicle that will appear and some more footsoldiers. Take them all out, collect the sample then proceed to the plaza where there's another large enemy force waiting.
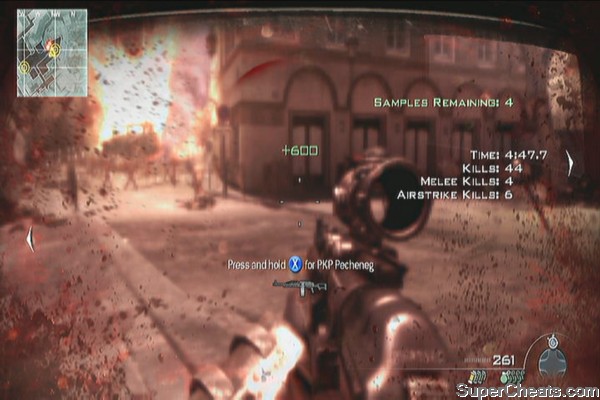
There's also an ammo cache here which you can use to refill your ammo and grenades. Collect the fourth sample in the area. Finally, go through the restaurant and kitchen and you'll have to face another juggernaut. Aim for the head and use flash grenades to temporarily halt its advance. Proceed to the bookstore and clear it. Gather the last two samples then continue upstairs in the adjacent building. There are more enemies inside, including several riot squads so you may have to fall back and lob some grenades / stun them to avoid getting overrun. Continue to the objective point to complete the mission.
Hack into enemy security sentries and reach the subway in time
This mission is only available for two players. One player will control the sentry cameras and assist the ground player to proceed. The ground player must find the location of the laptops along the path in order to switch sentry cameras.

Turret traps
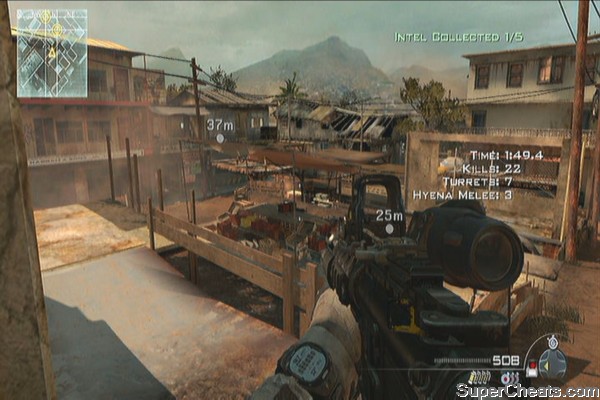
Intercept enemy intel to locate and eliminate the high value target
The intels are dropped randomly by enemies so you have no choice but to kill all targets in sight. Be careful of the automatic turrets deployed in the area. There is a total of seven in the game and taking them out also affects your overall evaluation. Basically, your score will be higher if you don't destroy them (thus making the whole mission more challenging). There's three turrets in the immediate area: left and right of the church, one on the roof before the ruined building (exit).

After collecting the three intels in the first area, proceed to the ruined building and take out the enemies who will run in. Don't head to the dirt road first; take out the enemies you can see then the turret to the far left. There's another turret on the roof to the left. Another turret is located at ground level in the far end of the road, behind the bamboo fence.

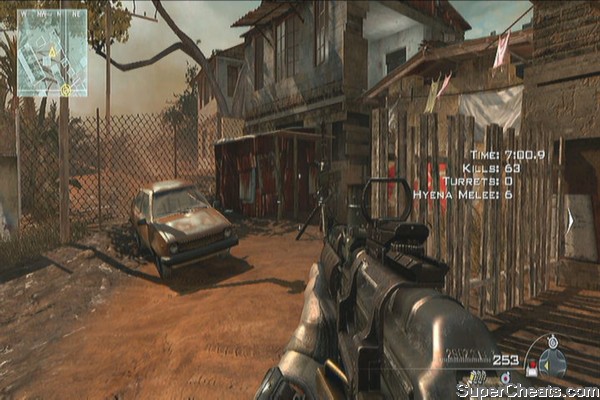
The last two intels should be dropped by the enemies inside the warehouse. Kill them all then grab the last two intels. Before moving forward, take out the last turret on the roof to the right then take out the hyenas as well.

Continue to the sewer pipe and take out any enemies who will attempt to ambush you. Climb the watchtower then kill the initial targets. Once done, paint the target building by equipping the laser designator and pointing it to the target then confirm the target by pressing the trigger. Mission complete.

Use stealth to save the president's daughter before Makarov's men find her
You can also save three civilians in this mission, at the same time remain hidden while moving quickly. See the video below for reference:
Silent Dead Redemption
Another round on the obstacle course with new weapons, more tangos and explosive breaching
Basically a ramped up version of the obstacle course. Complete the course as quickly and efficiently as you can to earn more stars.
Get as many rebels to the LZ as you can. Do it quietly.
This is easier done with a partner – split screen or online. Refer to the video below for reference:
Rebel rescue
Destroy sensitive data before the Russians get their hands on it.
Take out the russian ground forces then wait for your allied chopper to pick you up. Board the chopper and take out more enemies as you can. After reaching the rooftop, kill all enemy welcoming committee and continue downstairs. Clear the floor of enemies then carefully move down the ramp and take out more enemies from their. Once done, clear the entire floor before finally arming the bomb.

After arming the bomb, make your way out to the rooftop and kill enemies along the way. Board the chopper and watch the explosions. Mission complete.
Use the UAV and Juggernaut Suit to find and defuse IEDs.
You can do this solo or with a partner. If you're doing it solo, you have to take note of the following:
- Dig in and move behind covers
- Mark IEDs with UAV, use predator missiles to take out multiple enemies
- IEDs will disappear from view from time to time so you have to mark them again with your UAV.
- Tank will appear near the bridge
- Enemy helicopter will appear near the end


If you're doing it with a partner, one of you will be the defuser and one will be the support sniper and UAV controller. There will be more enemies in this mode so the sniper will have a bigger responsibility in protecting his partner on the ground. You may refer to the video below to get an idea how it is basically done.
Juggernaut bomb unit
Battle your way to Volk's hideout and download his master plan
For the initial sequence, use your grenade launcher to take out the enemies and enemy vehicles. Keep doing this until you've reached the target's hideout.
Once there kill the enemies along the way then drop a flash grenade before taking the ladder down to avoid ambushed below.

Clear the tunnel first before moving forth, then carefully make your way to the basement where the mainframe is located. Before planting the bug to download the data, make sure both weapons are fully reloaded and pick up some claymores on the nearby table. Set them up along the two possible enemy routes (stairs and the tunnel) – just make sure not to place them close together. You may want to replace your secondary primary weapon with either the shotgun or the light machine gun.


Defend your position until the download is complete. Once done, pick up one Riot Shield then fight your way back up. Along the tunnel, there will be a Juggernaut waiting so lob all your grenades from a distance to soften him up, then use flash riot shield melee to take him out. Continue fighting your way up and ride your vehicle to complete the mission.
Relieve the local militia of their contraband
For the first part of this mission, you'll have to take out ground targets while you're in a chopper. Switch between your light machine gun, assault rifle and your undermounted grenade launcher to take out enemies quickly. Remember to reload often, especially when there aren't that many tangos on sight.
After taking out the tangos on the roof, you'll have to exit the chopper and continue on foot. Immediately seek cover and take out the targets one by one. Proceed to the first building first and clear the rooms to find one of the contrabands in the second floor. Take note that even if you swept through the area, enemies will still appear as you go. Plant the explosives on the first crate then get to a safe distance before blowing it up.

Fight your way to the rooftop of the adjacent building and jump to the next rooftop to reach the building containing the second stash of contrabands. Blow it up then make your way to the exfil point. Mission complete.


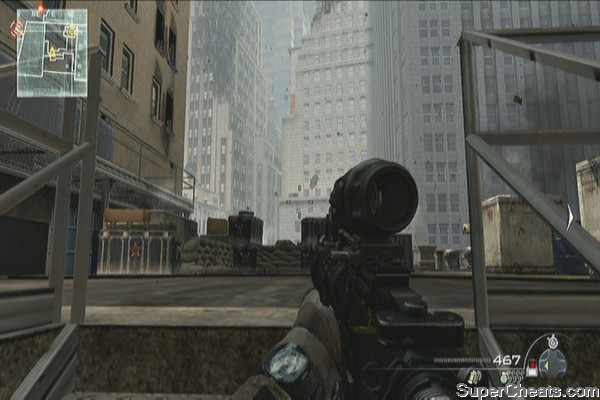
Find the encryption codes in the Stock Exchange and upload them to CENTOCOM
Carefully advance while taking out enemies slowly but surely. You have to clear the russian position in front of the stock exchange so don't hesitate to dish out splash damage with your XM25 launcher. After clearing the area, use the ammo crate near the entrance to refill your ammo then move to the trading floor.

You have to carefully move and collect the codes since more enemy reinforcements will appear from the stairs. Collect all codes then use the scaffolding to reach the walkway overhead and reach the ladder leading to the rooftop.

Head to the rooftop and take out some of the enemy soldiers on the roof of the other buildings. Upload the data and hold your position until the upload is completed. Mission complete.

Disable enemy anti-air defense and infiltrate their base with AC-130 support
(two players)
It's a race against the clock so the AC-130 gunner will play a major role here in opening a path for his partner on the ground. Always prioritize the helicopters and vehicles. The ground player should move carefully from cover to cover and the gunner should be careful in placing his/her shots to avoid friendly fire.
The ground unit will be responsible in finding the key laptops to extend the time and update the mission objectives. Refer to the video below to get an idea how this works.
Juggernaut bomb unit
M.O.A.B (Mother of All Bombs)
By achieving a 25 Killstreak (24 only if you have Hardline perk), you should be able to call in a MOAB. Take note that only kills using your weapons, bombs and equipment count. The MOAB will kill all enemies in the map, regardless of position and will disable their electronics, equipment and pointstreaks for a minute. Another added bonus is that the team who calls in the MOAB will earn double exp for the rest of the session.
The following Perks are unlocked as explained below.
Recon
Recon: Explosive damage shows target on mini-map
Recon Pro: Bullet damage shows target on mini-map
Sleight Of Hand
Sleight Of Hand: Faster reloading
Sleight Of Hand Pro: Switch weapons quicker
Blind Eye
Blind Eye: Undetectable to air support and sentry guns
Blind Eye Pro: Faster lock-on for launchers, and increased bullet damage to air support and sentries
Extreme Conditioning
Extreme Conditioning: Increased sprint time
Extreme Conditioning Pro: Increased climbing speed
Scavenger
Level Unlocked: 39
Scavenger: Get ammo from dead enemies
Scavenger Pro: Get more ammo from dead enemies
Quickdraw
Quickdraw: Quicker aiming (ADS)
Quickdraw Pro: Quicker recovery from using grenade/equipment
Blast Shield
Blast Shield: Increased explosive resistance
Blast Shield Pro: Resistance to flash and concussion grenades
Hardline
Hardline: Killstreaks require 1 fewer kill
Hardline Pro: Two assists count as kill towards killstreaks, and deathstreaks require 1 fewer death
Assassin
Assassin: Undetectable by UAV, portable radar, thermal, and heartbeat sensors
Assassin Pro: Immunity to CUAV and EMP, and no red crosshair or name appears when targeted
Overkill
Level Unlocked: 47
Overkill: Carry two primary weapons; second primary weapon cannot have attachments
Overkill Pro: Second primary weapon can have two attachments
Marksman
Marksman: Identify enemy targets at long range
Marksman Pro: Hold breath longer while sniping
Stalker
Stalker: Increased movement speed while aiming down the sights (ADS)
Stalker Pro: Delay enemy claymore explosions
SitRep
SitRep: Detect enemy explosives and tactical insertions
SitRep Pro: Louder enemy footsteps
Steady Aim
Steady Aim: Increased hip fire accuracy
Steady Aim Pro: Weapon is ready faster after sprinting
Dead Silence
Level Unlocked: 55
Dead Silence: Quieter movement, and Recon does not work as well against you
Dead Silence Pro: No fall damage
Weapon Proficiencies
Weapon level is increased by using it regularly and successfully killing enemies with it – basically, completing its challenges over and over again. They can be equipped to the weapon to enhance its stats and improve its performance.
1. Kick (reduced recoil)
2. Range (increased range)
3. Attachments (equip two attachments)
4. Focus (reduced flinching when hit)
5. Melee (faster melee attached)
6. Stability
7. Impact (bullets carry more damage through materials)
8. Speed (faster movement with weapon equipped)
9. Damage (shells do more damage; shotgun only)
Assault Rifles
(Weapon Level) 4 Kick
9 Impact
12 Attachments
16 Focus
22 Breath
28 Stability
Sub Machine Guns
4 Kick
9 Range
12 Attachments
15 Focus
21 Melee
28 Stability
Light Machine Guns
4 Kick
9 Impact
12 Attachments
16 Focus
21 Speed
28 Stability
Sniper Rifles
4 Kick
10 Impact
14 Attachments
18 Focus
24 Speed
28 Stability
Shotguns
4 Kick
9 Focus
14 Attachments
19 Melee
23 Range
28 Damage
Riot Shield
5 Melee
10 Speed
Weapons
Each weapon has its own set of challenges which will award you with additional experience if you completed the challenges. Some of the challenges including scoring kills and headshots, as well as scoring kills with various attachments equipped.
Assault Rifles
M4A1 Fully automatic, all purpose weapon
M16A4 3 round burst
SCAR-L Fully automatic, all purpose weapon
CM901 Fully automatic, all purpose weapon
TYPE 95 3 round burst (Level 32)
G36C Fully automatic, all purpose weapon (Level 42)
ACR 6.8 Fully automatic, all purpose weapon (Level 50)
MK14 Semi-automatic, (single fire) (Level 60)
AK-47 Fully automatic, all purpose weapon (Level 68)
FAD Fully automatic, all purpose weapon (Level 78)
Assault Rifle - Attachments
LV2 Red dot sight Precision sight.
LV5 Silencer Invisible on radar when firing, -range
LV8 Grenade Launcher Undermounted grenade launcher
LV11 ACOG Scope Enhanced zoom ACOG scope
LV12 Rapid Fire Increases fire rate (M16A4, Type 95)
LV14 Hearbeat Sensor Track enemy locations
LV17 Hybrid Sight 4x Scope with attached Reflex sight
LV20 Shotgun Undermounted shotgun
LV23 Holographic sight Holographic sight
LV26 Extended Mags Extended Magazines
LV29 Thermal See enemy thermal signature behind smokescreen
Sub Machine Guns
MP5 Fully automatic, close range
UMP45 Fully automatic, close range
PP90M1 Fully automatic, high fire rate
P90 Fully automatic, large magazines (Level 38)
PM-9 Fully automatic, close range (Level 56)
MP7 Fully automatic, close range (Level 74)
Sub Machine Guns - Attachments
LV2 Red dot sight Precision sight.
LV5 Silencer Invisible on radar when firing, -range
LV11 Rapid Fire Increases fire rate
LV16 ACOG Scope Enhanced zoom ACOG scope
LV19 HAMR Scope
LV22 Holographic sight Holographic sight
LV24 Extended Mags Extended Magazines
LV26 Thermal See enemy thermal signature behind smokescreen
Light Machine Guns
L86 LSW Fully automatic, large magazines
MG36 Fully automatic, large magazines
PKP Pecheneg Fully automatic, large magazines
MK46 Fully automatic, large magazines (Level 54)
M60E4 Fully automatic, large magazines (Level 72)
Light Machine Guns - Attachments
LV2 Red dot sight Precision sight.
LV5 Silencer Invisible on radar when firing, -range
LV8 Grip Reduced Recoil
LV11 ACOG Scope Enhanced zoom ACOG scope
LV14 Rapid Fire Increases fire rate
LV20 Hearbeat Sensor Track enemy locations
LV22 Holographic sight Holographic sight
LV25 Extended Mags Extended Magazines
LV27 Thermal See enemy thermal signature behind smokescreen
Sniper Rifles
Barrett .50 Cal Semi-automatic, (single fire)
L118A Bolt action
Dragunov Semi-automatic, (single fire)
AS50 Semi-automatic, (single fire)
RSASS Semi-automatic, (single fire) (Level 44)
MSR Bolt action (Level 66)
Sniper Rifles - Attachments
LV2 ACOG Scope Enhanced zoom ACOG scope
LV5 Silencer Invisible on radar when firing, -range
LV19 Thermal See enemy thermal signature behind smokescreen
LV13 Extended Mags Extended Magazines
LV15 Hearbeat Sensor Track enemy locations
LV22 Variable Zoom Scope Enhanced zoom scope
Shotguns
USAS 12 Fully automatic, low ammo
KSG 12 Double Barrel
SPAS 12 Pump action
Striker Semi-automatic (single fire) (Level 48)
Model 1887 Lever-action (Level 62)
AA-12 Fully automatic, low ammo
Shotguns - Attachments
LV2 Grip Reduced Recoil
LV5 Silencer Invisible on radar when firing, -range
LV12 Red dot sight Precision sight.
LV17 Holographic sight Holographic sight
LV26 Extended Mags Extended Magazines
Machine Pistols
FMG9 Fully automatic, close range
MP9 Fully automatic, close range
Skorpion Fully automatic, close range (Level 36)
G18 Fully automatic, close range (Level 70)
Machine Pistols - Attachments
LV2 Silencer Invisible on radar when firing
LV5 Akimbo Hip fire two weapons, -accuracy
LV8 Red dot sight Precision sight.
LV7 Holographic sight Holographic sight
LV10 Extended Mags Extended Magazines
Handguns
USP .45 Semi-automatic, (single fire)
P99 Semi-automatic, (single fire)
MP412 Revolver
.44 Magnum Revolver (Level 46)
Five Seven Semi-automatic, (single fire) (Level 58)
Desert Eagle Semi-automatic, (single fire) (Level 76)
Handguns - Attachments
LV2 Silencer Invisible on radar when firing
LV5 Akimbo Hip fire two weapons, -accuracy
LV7 Tactical Knife Faster melee attack
LV10 Extended Mags Extended Magazines
Launchers
SMAW Free fire or vehicle lock-on
Javelin Location and vehicle lock-on
Stinger Vehicle lock-on only (Level 40)
XM25 Free fire (Level 52)
M320 GLM Free fire (Level 64)
RPG Free fire (Level 80)
Lethal
Frag Grenade
Semtex Grenade
Throwing Knife
Bouncing Betty Grenade (Level 37)
Claymore (Level 53)
C4 (Level 69)
Tactical
Flash Grenade
Concussion Grenade
Scrambler
EMP Grenade
Smoke Grenade
Trophy System (Level 45)
Tactical Insert (Level 61)
Portable Radar (Level 77)
Camouflage
LV3 Classic
LV5 Snow
LV6 Multicam
LV8 Digital Urban
LV10 Hex
LV13 Choco
LV18 Snake
LV23 Blue
LV26 Red
LV29 Autumn
LV31 Gold
Score consecutive kills (without dying) and gain the ability to call in the following. If you have the Hardline perk, you should be able to use them with 1 less kill. Killstreaks also differ from different classes. To enable more Killstreak options, you must use “unlocks” which are earned when you level up.

Killstreaks also have challenges which will award you with extra experience by meeting their requirements.

Note: For the Killstreaks with the same number of kills, you can only choose one of them. Do this in the Custom Class menu.
Assault
3 UAV Show enemies on the minimap
4 Care Package Airdrop a random killstreak
5 I.M.S (Intelligent Munitions System) Detects and eliminates enemy combatants.
5 Predator Missile Remote control missile
5 Sentry Gun Airdrop a placeable Sentry Gun
6 Precision Airstrike Call in a directional airstrike
7 Attack Helicopter Call in a support helicopter
9 Strafe Run Strafing run of 5 attack helicopters
9 AH-6 Overwatch Get personal air support from an AH-6 Overwatch
9 Reaper Lase missile targets remotely from a Reaper UAV
10 Assault Drone Airdrop an assault drone
12 AC-130 Be the gunner of an AC-130
12 Pave Low Heavily armored assault helicopter
15 Juggernaut Receive advanced armor via Care Package
17 Osprey Gunner Be the gunner of an Osprey delivering several care packages
Specialist
2 One Extra perk
4 Two Extra perks
6 Three Extra perks
8 All perks
Support
4 UAV Show enemies on the minimap
5 Counter-UAV Temporary disables enemy radar
5 Ballistic Vests Deploy a bag of Ballistic Vests for your team
5 Airdrop Trap Kill enemies with a booby-trapped airdrop crate
8 Sam Turret Automated SAM turret that destroys aerial killstreaks
10 Recon Drone Control a Recon Drone, targeting enemies for your team
12 Advanced UAV Call in a Orbital Recon that shows the direction your enemy is facing
12 Remote Turret Toss a small turret and remotely control it
14 Stealth Bomber Airstrike undetectable on enemy maps
18 EMP Temporarily disables enemy electronics
18 Juggernaut Recon Receive advanced armor via Care Package
18 Escort Airdrops An Osprey delivers and defends several care packages
Die the indicated number of times in Multiplayer mode to get the corresponding bonus:
4 Final Stand (LV32)
Enter Last Stand mode after dying with your primary weapon
4 Juiced:
Move faster for 7.5 seconds after spawning
4 Martyrdom (LV51)
Drop a live grenade after dying
5 Dead Man's Hand: (LV57)
Enter Last Stand mode after dying with C4 equipped
5 Hollow Points(LV71)
Bullets cause more damage for one kill)
5 Revenge
See position of last enemy who killed you on mini-map

 Shiftlings (PC) Achievements / Unlockables
 Divinity: Dragon Commander Review
 The Dishwasher: Vampire Smile Dish Challenge Guide
 4 Web Games That'll Get You Laughing Out Loud
 GC Review: Assassin's Creed 4: Black Flag (PS3)