
Call of Duty: Modern Warfare 2 expands and continues the story of the original Modern Warfare installment. You'll get to play as various members of Task Force 141, including “Soap” MacTavish and Roach, fighting alongside other members such as Ghost. Your goal is to stop Makarov, a war criminal plotting his own war scheme. With some of the best graphics videogames have ever seen, a deadly addictive multiplayer mode and even a Co-operative mode, CoD MW2 is easily one of the most anticipated first person shooters of all time.
During the main campaign, which is about 7 to 8 hours long (or short) you'll get to search for a total of 45 Enemy Intel Laptops. Some are very difficult to find, and I can imagine you'd need some help in finding them. All Intel locations are fully integrated in this walkthrough. You can also use the complete quick checklist with minor hints if you feel confident that will be enough for you. Good luck, and good gaming.
This section of the guide has been written by Absolute Steve.
Grab the M4A1 from the table and shoot the targets behind you from the hip. The game will ask you if you want to switch to inverse aiming. I personally have gotten used to regular aiming, but it's up to you. Simply follow the sergeant's orders and shoot the targets by sitting and aiming through your sight, then by standing. Also shoot a target through the wooden fence, and lastly toss a grenade in the middle of all targets.
Note that you have a compass in the lower right of your screen. We'll be using this to navigate you around the area, so it's very important to use alongside this walkthrough.
ENEMY INTEL #1: This enemy intel can be found in the northeast side of the area. It's located directly under the white watchtower, next to a toolbox.
Video showing the location of Enemy Intel #1
Head east and go inside the pit. Collect the Desert Eagle, then grab any other machine gun you'd like and enter the practice course. Essentially shoot the hostile targets ASAP and don't shoot any civilians. When you go upstairs in the building, use your knife to take down the target. Finish the course by jumping down below afterwards.
After selecting the difficulty you want to play the game on, the game places you in the heat of the action right away. Your goal is to dispatch the enemy soldiers in the distance, after which a few jeeps will appear on the upper left bridge. Take these out, then move over the bridge to continue. Hop into your Humvee and you'll automatically position yourself behind the chaingun.
The first part of the ride is uneventful, but during the second half you're required to take out the enemy soldiers on the rooftop. It doesn't take long until your vehicle is hit by an RPG rocket, so quickly take shelter in the nearby house.
Head upstairs, take out a handful of enemy troops and take cover by the windows. When you've got eyes on the school, enter and terminate the hostiles, including those in the hall up the second floor. Proceed to the far end of this hall, and kill several more soldiers in this room.
ENEMY INTEL #2:
This Intel can be found after proceeding through the hall with the enemy gunners shooting through the windows earlier. After passing through this hall, check out the classroom to your right/west at the far end. This is right after someone says: "I think I saw one go in that classroom". The intel is located in here.
Video showing the location of Enemy Intel #2
ENEMY INTEL #3:
This Intel can be found right after exiting the school. It's standing on top of a crate nearby a taxi
Video showing the location of Enemy Intel #3
After this, follow your teammates into the alley northwest and kill several more enemies here. Go down the left street at the intersection, dispatch a few enemies and meet up with General Shepherd at the checkpoint.
Follow Captain MacTavish across the ledge and climb the ice. Take note that you can't just stop climbing at any point, or the ice will weaken, resulting in a long deadly fall. Leap over the gap like the Captain did, then follow him once again.
By using the heartbeat sensor you can spot targets from a distance. When MacTavish tells you to take out the guy on the left, do so on his mark. Of the next two patrols, take out the left guy once again. Proceed through the blizzard alone while Soap (MacTavish) stays behind to give you support in the form of Sniper Cover.
ENEMY INTEL #4:
Before entering the base to the south, first take out the handful of enemies nearby the entrance and explore the watchtower right in front of the entrance by going up the ladder. This intel is lying on the catwalk.
Video showing the location of Enemy Intel #4.
From here, make your way into the base and snipe guards all over the place while you sneak in. Carefully go around the containers as a truck approaches over the road, and proceed.
Make your way to the fueling station and plant the explosives. You'll now be out in the open, and your next destination is the sattelite on the west side of the area as indicated by your marker. Stay clear of any enemies and race your way over there. The Captain is already waiting for your arrival here.
ENEMY INTEL #5:
Before entering the building with MacTavish, head northwest and peek through the middle window of the hangar to your right, in which a jet is being fixed by two mechanics. Break the middle window and grab the Intel 'through' the window.;
Video showing the location of Enemy Intel #5.
Simply head upstairs to retrieve the ACS Module, then return to the Captain but don't show yourself. Instead, trigger the explosives you planted earlier and take out any remaining troops. With the majority of soldiers dispatched, follow the Captain and cover him at all times. Take out two snowmobiles after you reach the jeeps, then make a run for the cliff.
Quickly turn around and kill the soldiers that appear at the top of the hill, followed by taking out several snowmobiles. Hop onto one of these snowmobiles after downing all enemies, and race the course.
ENEMY INTEL #6:
Arguably the hardest piece of enemy Intel to find in the entire game, not in the least place since it's not picked up the usual way, but by driving over it during the snowmobile chase. To give you an indication where this tricky-to-spot Intel is located, it's about 1800 meters away from your goal, so it's relatively early during the course. Slow down considerably when you're about 1900 - 1850 meters away from your final destination, and you'll soon approach a small fence placed horizontally. As a landmark you should also be able to spot a hut on the hill to the right. If you pass this fence just barely to the left side, this intel is lying a few meters across if you just go straight ahead.
Video showing the location of Enemy Intel #6.
During the race it's obviously important to not bump into trees or large rocks along the way. Try to shoot as many enemy snowmobiles in front of you while racing to the end.
Some players may find this level disturbing... There is no enemy intel here so you can always just skip to the next one.
Follow Makarov's lead as you make your way through the halls. If you don't want to shoot civillians yourself, by all means don't do it. You'll soon head outside and proceed through a tunnel. When you get outside, continue to follow Makarov's lead and kill the enemies. There's not a lot to it - switch over to your grenade launcher to make things easier on yourself. At the end of this mission, well, you'll see for yourself what happens.
This chapter starts off with a bang. Quickly take cover while still in the car, then follow MacTavish down an alley. Take the shot at Rojas' right hand man, but make sure to shoot him in the legs for a non-lethal takedown.
The idea is to continue through the alleys, making your way to the top of the favela.
ENEMY INTEL #7:
To find this intel, proceed to the southwest corner after dropping down the favela. You should be able to spot a building with a motorcycle leaning against the wall. To the left of this building is a house with a big window - go inside and search around for this intel here.
Video showing the location of Enemy Intel #7.
Head up the stairs to the western side of the area and pass the fence where a dog will jump against. Take cover nearby the green garbage bin and watch those roofs 11 'o clock as several enemies drop down from there.
You'll also encounter a dog here; if it manages to grab you, quickly press the button prompt (right stick) to release yourself. Head into the alleys and keep an eye out for the rooftops the moment you see a plant in a vase falling from down below. It helps considerably to take out the higher positioned enemies first, and to use a flashbang for groups of enemies such as in this area.
There are snipers here as well, which you can recognize by the light reflecting from their scope in the distance.
ENEMY INTEL #8:
Climb up the building with the ladder and check the room directly in front of you (there usually was a sniper located here). The intel can be found in this room.
Video showing the location of Enemy Intel #8.
ENEMY INTEL #9:
Before continuing southwest, check out the rooms to your left/southeast, accessed by the small wooden steps. The first room contains a few hostiles, but the bedroom has this intel for the taking.
Video showing the location of Enemy Intel #9.
Keep an eye out for enemies on the rooftops as you proceed southwest. There will be a lot of Rojas' men in the alleys up ahead, so don't force your way through quickly, but take cover and take them out one by one. Head through the building up ahead by climbing the small steps.
Immediately take out the enemies with RPG's on top of the rooftops, then go around the corner and mow down the higher positioned enemies first. Cross the rooftops and dispatch several more enemies in the alley around the corner.
ENEMY INTEL #10:
This piece of intel is located in a building to your right after heading over several roofs and some stairs. Inside this room, go down the slightly concealed stairs to find this intel in the room below.
Video showing the location of Enemy Intel #10.
Press onward through the alleys to complete the mission.
Follow Sgt. Foley into the alley and basically follow him until he tells you to toss a smoke grenade onto the vehicle. The smoke allows you to cross the area into a next alley, but be careful of the numerous enemies here. Proceed to the tank station.
ENEMY INTEL #11:
This piece of intel is located inside the tank station and can be found on the counter. Easy enough, right?
Video showing the location of Enemy Intel #11.
ENEMY INTEL #12:
Nate's restaurant is across the road, nearby the crash site. This intel requires you to go slightly out of your way, however, as it's located in the CRB Financial building north of Nate's Restaurant and the crash site. Inside, defeat a handful of soldiers and look for this intel at the 'Online Banking' sign.
Video showing the location of Enemy Intel #12.
ENEMY INTEL #13:
This piece of intel can be found inside the Taco To Go building, south from Nate's Restaurant. Enter this building through the destroyed corner by crouching, then look for this intel on one of the tables.
Video showing the location of Enemy Intel #13.
Make your way over to Nate's Restaurant in the distant east. Go around the back and climb the ladder to the roof. Here, take out the enemy waves and focus especially on those troops with RPG's, as they pose a threat to the turret. You're required to move the turret to the other side of the roof soon in order to assist in taking down the enemy waves coming from the north.
Get off the roof when you're told to do so, and go inside the restaurant. The idea is now to curve around the vehicles across the street and enter the building nearby the tank station to retrieve the Predator Drone control rig. With this in hand, destroy the BTR80's by firing missiles from this Drone.
Head back to the restaurant, then to the Burger Town.
ENEMY INTEL #14:
Check the dumpster east of Burger Town to find this intel inside.
Video showing the location of Enemy Intel #14.
Cover the soldiers who are carrying Raptor (the VIP) to safety, then neutralize the enemy forces coming your way. This is easily done with the Predator Drone - that is, until it gets offline and you're forced to take out the rest of the enemies yourself.
Two choppers eventually show up, and in order to take them down you need a Stinger. The first Stinger can be found in the bar across the street where you also retrieved the Predator Drone from. Lock onto the chopper and blow it to smithereens. The other Stinger is located on top of the restaurant's roof. With the choppers destroyed, all that's left to do is to retreat to the convoy.
Your role in this mission is to support Captain MacTavish as the squad heads for the LZ. First follow the trail, then go around the building and look for a Dragunov Sniper Rifle on the balcony. Use this to take out all enemies in the open field right before you. If a grenade is tossed your way, quickly try tossing it back if possible - otherwise move away from your position.
ENEMY INTEL #15:
Before heading down the alley up ahead, explore the house to the right of this alley. This intel can be found inside.
Video showing the location of Enemy Intel #15.
Follow the team down the alley and take cover behind the walls and trash as you move into the next open area.
ENEMY INTEL #16:
After clearing this open area, check the far left side of this area to find this piece of intel.
Video showing the location of Enemy Intel #16.
Continue down the alleys, covering your team as they press onward. Go around the corner and clear this street.
ENEMY INTEL #17:
Enter the yellow building to your right/north by the entrance nearby the blue car and move to the upper floor to find this intel.
Video showing the location of Enemy Intel #17.
You'll soon get to another open area; Quickly take cover behind wooden fences as a vehicle stops across the street. It helps to toss a grenade over there - take out the gunner if he's still alive. Sweep the streets clean, then head east into the market and dispatch more enemies here. When you've reached the far east side of the market, the Landing Zone (LZ) will move to a secondary location considering the dangerous current situation.
ENEMY INTEL #18:
Before climbing on top of the rooftops, check the window behind the soccer goal to secure this piece of intel.
Video showing the location of Enemy Intel #18.
From the primary LZ, climb the rooftops to the southwest, and rush over the rooftops. You can't make the final jump - instead, what follows is a timed event in which you must make your way through the linear path of interiors of buildings until you reach the rooftops. From here, follow the instructions both carefully and quickly, and make a jump for the ladder at the secondary (or tertiary, rather) LZ.
Your first mission objective is to locate and neutralize the anti-aircraft guns. Head down the street and mark the yellow house for the Honey Badger to target. Having done so, continue down the street, dispatching enemy troops as you go. Make sure to mark the grey house, followed by the office appartment to the northeast so the Badger can support you.
ENEMY INTEL #19:
Head inside the office appartment of the 'Garden House' appartment complex to find this intel standing on the desk.
Video showing the location of Enemy Intel #19.
The same basically applies at the road checkpoint up ahead. With the support of the Badger, clear this area and continue down the road.
ENEMY INTEL #20:
Before proceeding through the road checkpoint, explore the right building of this checkpoint to find this intel immediately next to the entrance.
Video showing the location of Enemy Intel #20.
Proceed over the bridge and re-stock on ammo at the crate to your right. Give the Badger several orders to help control the crowd in the street.
ENEMY INTEL #21:
After crossing the bridge, enter the second house on your left by the front door and head up the stairs to your immediate right. This intel is lying in this hall.
Video showing the location of Enemy Intel #21.
When you reach the big villa at the northeast end of the blocked road, go inside and clean the area of hostiles. Back outside at the other end of the house, use your laser sight to send out the target information, allowing for the anti-aircraft guns to be taken out.
Proceed over to your final target and enter the burnt-out house to bring this mission to a close.
After the introductory movie, take out the guard silently by pulling him in the water (and naturally, stabbing him with your knife, which is done automatically for you). Head upstairs, take out the soldier hanging over the railing, then breach the door in this area. The game will play in slow motion the split second the door blows open, and you must dispatch the enemy soldiers inside the hostage room quickly.
ENEMY INTEL #22:
After breaching the hostage room, go up two flights of stairs. In the room up ahead, before going outside, check the metal cabinet to your left to find this intel hidden among the junk.
Video showing the location of Enemy Intel #22.
Go upstairs after securing the area and make your way to another hostage area. Rig one of the bodies with C4, backtrack slightly and wait for the Captain to give it a go. Dispatch any enemy survivors after executing plan B.
ENEMY INTEL #23:
After executing plan B, follow MacTavish into the room right around the corner. You should be able to spot this piece of intel in the cabinet.
Video showing the location of Enemy Intel #23.
Proceed to the derrick building on the top deck. You'll come across more enemy soldiers along the way, and the helicopter needs to be downed by acquiring the Stinger or RPG's inside the building. With that nuisance out of the way, head around the corner, clear the area and go upstairs.
ENEMY INTEL #24:
Or, before going up the last flight of stairs, go through the doorway to your right and check behind the stairs inside to locate this intel.
Video showing the location of Enemy Intel #24.
Approach the smoke screen that your enemy has set up with extreme caution. Use thermal-sighted weapons and make your way to the other side by the outer perimeter to your left. Here, breach the door and neutralize the last enemies of this area.
This mission starts off in a helicopter. You're required to take down any troops on those towers of the monastery you see, the ones with RPG's taking high priority. After the landing, simply follow the MacTavish and take out all enemies in the distance with your sniper rifle. Having done so, follow MacTavish & Co. southwest.
ENEMY INTEL #25:
Before entering through the gate with red lights, go up the short stairs nearby in the southwest corner. This intel is found in this room.
Video showing the location of Enemy Intel #25.
Head through the tunnel and dispatch the enemies as you go. A flashbang may help to sweep the tunnels clean. Ghost will stay in the control room - you have to follow MacTavish.
ENEMY INTEL #26:
This intel can be found in the monitor room in which Ghost stays behind. Check the northern side of this room to locate it.
Video showing the location of Enemy Intel #26.
Head down the stairs and clear the cells. Wait for Ghost to unlock the doors and circle around the area until you can go downstairs to a platform in the middle of the area. There are many weapons here, but it's best to grab one of the Riot Shield to take better cover from the many enemies.
After Ghost finally unlocks the door, follow MacTavish and use your riot shield to bash any enemies in your way, but don't get careless either.
ENEMY INTEL #27:
After passing the first cell doors in the circular chamber, with blue lights indicating they're unlocked, check the prison to your right/northeast, which is marked as prison 327. This intel is found inside.
Video showing the location of Enemy Intel #27.
Circle around the room and follow MacTavish down the rope, head down the dark tunnel and put on your nightvision goggles. Clear the tunnel from enemies and make your way through the cell blocks. Go through the next tunnel and take off your nightvision goggles. Dispatch the enemies around the corner behind several pipes and clear the area beyond here as well.
Breach the wall instead of the door at the end of the area, and fight your way through the showers. This is a rather intense shootout, and the second wave of enemies mostly has riot shields, so be prepared to use close quarters combat if necessary. Snipe the enemies on the first floor above you and eventually jump down the hole to reach a sewer canal.
Follow the sewers and slide down to close in on your objective, prisoner 627. Breach the wall, quickly kill the single troop (being held by 627) and watch the brief scene.
ENEMY INTEL #28:
After breaching the wall and locating prisoner 627, immediately look to your left/northeast. This intel is located here.
Video showing the location of Enemy Intel #28.
Escape the area by following the Captain. You'll be forced to turn around at one point - simply head into chamber you pass earlier, which has a big hole in roof. The chapter almost end - clip to the rope after the brief scene and you're all set.
Exit the base and follow Sgt. Foley. He'll lead you through the trenches. When you reach the building that's been occupied by the enemy, press onward when told to do so and refll your ammo at the large ammo stack nearby the right entrance. Dispatch the enemies, preferably with your grenade launcher and continue down the main hall. Clear the halls and turn right/east.
ENEMY INTEL #29:
You'll pass an elevator with a body blocking the doors, forcing the elevator to open and close continuously. This piece of intel can be found inside this elevator next to a dead body.
Video showing the location of Enemy Intel #29.
Dispatching the enemies here isn't much trouble, although there's one standing behind a door near the corner. Continue over the balcony and head up to the next floor, made possible by the big collapsed piles of debris. Engage the enemies in the office up ahead and turn south - dispatch the soldiers behind those doors first. Check the balcony on the northeast to plant explosives and trigger them from a safe distance. You can also restock on ammo on this balcony.
ENEMY INTEL #30:
Going south in this office, eliminate the soldiers behind the southern doors. In the semi-hidden hallway behind these doors you can find this intel nearby the men's restroom on the eastern side.
Video showing the location of Enemy Intel #30.
Proceed upstairs and continue through the rooms on the next floor. There will be a few enemies around, so watch your back. You'll reach the crow's nest soon enough.
Here, take position behind the sniper rifle and take out the very distant troops that are firing at the evac site with Javelins. After dispatching a few of them, enemies are closing in on the crow's nest, and you're going to have to stand groudn with what you have. Stand nearby the doorway and mow down all enemies you can get in sight. After this, grab one of the Javelins and take out the enemy vehicles in the distance.
Follow Captain Price and he'll tell you to take out one of the patrolling guards - he'll take care of the other. Next he'll ask you to take out the guard and his dog. Take out the fast dog first, then quickly dispatch the soldier. Price will take care of the remaining troops.
Move over the bridge and as soon as enemy vehicles are incoming, rush into the woods with Price until he tells you to slow down. This should be around a spot with two tombstones. Continue and Price mentions a three-man patrol. Take them out.
ENEMY INTEL #31:
This intel is found next to the three-man patrol of which Price gave you the option to leave them be or to take them out. It's found on the box that came down with a parachute.
Video showing the location of Enemy Intel #31.
Next up is another patrol; Quickly down them before they can alert more soldiers around the area, which means more of a hassle. There'll be another dog patrol up ahead, and it's your call to dispatch or leave them. You'll soon reach an open area with several barracks. Meet up with your team and clear the area.
In the next area you're asked to use the Drone on one of the targets around the base. The chopper is probably a good target to pick. After using the Drone, the base will be alerted, so move in. Proceed to the building with the number 33 on it, which is located to the west/northwest.
ENEMY INTEL #32:
Head inside the building with the number 33 on it, go through the next magazine hall and look for the intel nearby the doorway on the other side to the southwest.
Video showing the location of Enemy Intel #32.
Proceed north and a truck will show up. Use the Drone to take it out, then continue down the road and around the corner, curving west.
ENEMY INTEL #33:
Go left past the red bulldozers after going around the previous corner, and head for the building with the sattelite dish on top. Go underneath the viaduct and look for a staircase to your right. Dispatch any enemies here and collect the intel from this rooftop.
Video showing the location of Enemy Intel #33.
Head back to the main road and follow Price to the building nearby the sub. Hold your position here and use the Drone to take out trucks - or better yet, several trucks at once - when those missiles become available to you. Shortly after standing your ground, a scene will initiate.
Confused for a while by that second sun from the sky, there's no better time than *right now* to run for safety.
There is no enemy intel in this chapter.
Quickly get away from the crash site and follow Sgt. Foley and the rest of your team to a building nearby. When the explosions cease, go back outside and head down the street - you'll run into a fellow soldier who directs you to the Whiskey Hotel.
Enter, go upstairs and prepare for a shootout in the office area. Toss a few grenades over to the far side of the office and shoot anything that moves while staying low. There's a similar office up ahead; After clearing it, get back out on the streets and follow Foley. After dispatching three troops on a vehicle in the distance, it gets unclear whether the patrol on the road up ahead are hostiles or not. You soon enough find out.
Continue east and enter the building next to the burning trash container. Go downstairs and you'll reach a breached bunker.
Proceed through the destroyed bunker until you reach the frontline at the white house. It's not easy to make a run for the left flank without getting a scratch, but you should be fine if you take cover whenever possible, especially nearby the truck at the far left end. Dispatch the enemies by tossing a grenade and quickly moving in on them, then enter the building. When Dunn opens the door, clear the rooms up ahead.
ENEMY INTEL #34:
After Dunn opens the door, enter the next room (and dispatch any hostiles first, naturally). Check the couch around the corner to your left/west, this Intel is on top of it.
Video showing the location of Enemy Intel #34.
Proceed through the rooms and continue through a room with several monitors.
The enemies here fancy grenades, so be prepared to throw a few back at them. Proceed through the office and one of your teammembers tells you there's only 2 minutes left to reach the roof.
Pass the kitchen and go up to the next floor. There are various enemies here, so defeat the quickly and make your way up the stairs. Proceed through the large hole in the wall.
ENEMY INTEL #35:
Even if you're low on time, you still may want to check the right/north side of this room to secure this piece of Intel.
Video showing the location of Enemy Intel #35.
Follow your team down the trail and you'll run into an ambush. Evade the land mine first, then take out the enemies on the cliff to your left and run towards the smoke to avoid .. getting smoked.
There are various enemies in this zone, including well hidden ones with forest camouflage on them. Stay behind trees and always check your back before attempting to dispatch any enemies in front of you. Continue west and go over the hill. Around this time, two trucks attempt to leave the area, although they're soon enough destroyed with a little air support. Proceed to the house and dispatch a few more enemies before breaching the walls.
ENEMY INTEL #36:
Before entering the house, go around the back and travel to the far southwest of the area. There's a docking house here, and this Intel is located right next to its entrance.
Video showing the location of Enemy Intel #36.
Return to the house and breach the house. As expected, there are about a dozen enemies inside. Go upstairs and secure the area. As you breach the door upstairs, aim your sight at those boxes in front of you as two enemies are hiding behind them. A third one will assault you up front.
ENEMY INTEL #37:
This piece of intel can be found in the room you just breached upstairs. It's on a desk behind those boxes.
Video showing the location of Enemy Intel #37.
Go back to the main hall and head downstairs by the stairs to the south. Kill a few more enemies here, then breach the doors. The room to the right/east contains two hostiles, and this is also the armory with plenty enough ammo for you to restock.
ENEMY INTEL #38:
Simply grab this Intel from inside the armory.
Video showing the location of Enemy Intel #38.
The other room has a few soldiers attempting to escape, so be quick to kill them. Regroup with Ghost, then connect the DSM to Makarov's computer network and defend the house.
Several waves of enemies will assault the house very soon, so it might be a good idea to quickly place several claymore mines around the entrance. With the help of Ghost you can locate which enemy waves are coming from where, and especially the RPG waves are important to take note of considering their threat.
When the upload is complete, make your way to the landing zone to the far northeast side of the area. Try to kill as many enemies as you can while on the run, and eventually you'll run into a large group of soldiers once again. Run as far as possible while downing most of them and the game will play a scene.
As the mission starts, thin out the enemy ranks as much as you can before proceeding, as there's plenty enough going on in the battlefield.
ENEMY INTEL #39:
This Intel can be found in another airplane wreckage nearby. From your starting position, simply explore the wreckage to your west/northwest. It's lying in the cockpit.
Video showing the location of Enemy Intel #39.
Go southwest and Price & Makarov will have a little chat over the intercom. Not that it leads to anything, but it's amusing nonetheless. Beware of an enemy wave coming from your back as you continue southwest, and try to hide away, sniping enemies from a distance with both your sniper rifle and machine gun.
You'll reach another open area with lots of enemies. Trucks get blown up, a chopper dispatches several enemies. Your goal here is to essentially proceed through the wrecked plane straight up ahead, which will lead you into a large open area. Feel free to use whatever measures to get there, although it's safer to not get reckless.
Before hopping down the plane, realize that you're currently located on an excellent sniper position. Crouch and take out as many targets as you can before proceeding to make things more comfortable. Drop down and cross the road up ahead. A transport is being arranged for you, so keep going west.
ENEMY INTEL #40:
This Intel is once again found in the cockpit of a wrecked plane. To give you an indication of where to look, you'll be approximately 84 meters away from your destination, and the plane is lying on the hill just behind the road you crossed.
Video showing the location of Enemy Intel #40.
Catch your ride on the far west side of the area and shake off the jeeps from all sides. Near the end of the ride, your driver is shot and you'll have to manually drive the jeep into the airplane.
Follow Price down the trail and help him take out the patrol: You need to snipe the two guards on the right (and the dog if you have time). Slide down and quickly proceed over the road to take out the separated patrols, including doggy. Proceed to that jeep and hook up to the railing.
Hold the button prompt to brake, and dispatch one of the guards by slowly lowering yourself, then hit the melee button. Enter the cave, follow Price and move left as he commands you to do so, avoiding the incoming patrol. When the patrol has passed, take out the guard.
ENEMY INTEL #41:
Before proceeding north, first explore the eastern hall to find this Intel located on a crate. Don't go down too far, especially not around the corner, as there are too many hostiles here.
Video showing the location of Enemy Intel #41.
Go north at the intersection and follow price down this hall while sneaking past the small dozen of enemies. Two tangos with taclights will come down the stairs in the distance. Price will kill the one on the right, so take out the soldier on the left at his mark, then move upstairs.
After Price has brutally murdered the guard, venture in the steam area. It doesn't take long before all hell breaks loose. Fortunately for you, all enemies are easily located by their red laser sights. Take cover as much as possible and use your regular machine gun for this battle. With all enemies dispatched, proceed southeast and you should easily be able to spot the breached cave wall.
ENEMY INTEL #42:
Before going outside, grab this piece of intel to your left/northeast.
Video showing the location of Enemy Intel #42.
Follow Price outside and grab one of those riot shield. He'll snipe several enemies at the far end of the walkway, but you'll need to kill the remaining ones (with melee). Continue through the cave northeast and prepare for a shootout in the next area. The enemies will be using riot shields, so it considerably helps if you've got a few grenades left to toss at them. Don't forget to enjoy Hans Zimmer's excellent music score during these shootouts!
Continue down the cave north to find heavy resistance up ahead. Proceed further north instead.
ENEMY INTEL #43:
When leaving Price behind in the firefight, go north and look for this Intel on top of a crate nearby several black guncases.
Video showing the location of Enemy Intel #43.
Head southwest and pack a heavy machine gun along with several grenades and flashbangs to take out the pack of enemies, including several with riot shields. After downing every single one of them, head west and breach the door. Be very careful, as this is one of the toughest areas to breach: You'll want to immediately down the soldier in front of you, then turn right while keeping your finger on the trigger, and mow down the guy closest by to you to prevent him from meleeing you to death. If you can kill the other soldiers during this process, all the better.
ENEMY INTEL #44:
You'll want to immediately collect this Intel as soon as you secure this room, because you won't have much time. It's located on a table with loads of cola cans, against the wall to the west. Price will be standing nearby as he tells you to override the door controls.
Video showing the location of Enemy Intel #44.
Do what Price tells you and override the door controls to your right (also check the destination indicator if you're unsure where to look). Quickly run out of the cave and stumble into the next firefight.
After the short scene, follow Price through the field and press onward until you reach the cave to the southwest.
Quickly follow Price down the catwalk.
ENEMY INTEL #45:
Don't miss this Intel, which is found immediately to your left before getting on the boat.
Video showing the location of Enemy Intel #45.
What follows is an intense chase over the river. The first part focusses on enemies firing from the sides; There's not much you'll need to do here except to steer the boat smoothly through the river while stepping on it. You'll sail through a small cave which may be tricky for a short while, though it's not a very long cave.
With the choppers moving in, try firing while steering the boat, and evade any gunfire from the choppers with evasive manoeuvrers. Keep the boat steady at the far and of the river so Price can get a clear shot and a scene will play.
When you come back to consciousness, move to the chopper and waste the two wounded soldiers you come across. Follow Shepherd through the sandstorm and attempt to melee him. A scene will play, during which there are three moments in total where you'll have some control over the situation. The first moment is when you must attempt to grab the gun - follow the on screen button imputs. The second moment is with the knife, the third follows immediately afterwards.
Simply aim the crosshair at Shepherd and throw the knife to end the game.
Note: After beating the game you unlock the Museum level, which is listed as a separate act. You can walk through the museum as played during the credits, and you can shoot anyone you like, with any weapon you like.
All 45 Intel Locations are details here on this page with a description on how to find them and an accompanying video.
S.S.D.D.
ENEMY INTEL #1: This enemy intel can be found in the northeast side of the area. It's located directly under the white watchtower, next to a toolbox.
Video showing the location of Enemy Intel #1
Team Player
ENEMY INTEL #2:
This Intel can be found after proceeding through the hall with the enemy gunners shooting through the windows earlier. After passing through this hall, check out the classroom to your right/west at the far end. This is right after someone says: "I think I saw one go in that classroom". The intel is located in here.
Video showing the location of Enemy Intel #2
ENEMY INTEL #3:
This Intel can be found right after exiting the school. It's standing on top of a crate nearby a taxi
Video showing the location of Enemy Intel #3
Cliffhanger
ENEMY INTEL #4:
Before entering the base to the south, first take out the handful of enemies nearby the entrance and explore the watchtower right in front of the entrance by going up the ladder. This intel is lying on the catwalk.
Video showing the location of Enemy Intel #4.
ENEMY INTEL #5:
Before entering the building with MacTavish, head northwest and peek through the middle window of the hangar to your right, in which a jet is being fixed by two mechanics. Break the middle window and grab the Intel 'through' the window.;
Video showing the location of Enemy Intel #5.
ENEMY INTEL #6:
Arguably the hardest piece of enemy Intel to find in the entire game, not in the least place since it's not picked up the usual way, but by driving over it during the snowmobile chase. To give you an indication where this tricky-to-spot Intel is located, it's about 1800 meters away from your goal, so it's relatively early during the course. Slow down considerably when you're about 1900 - 1850 meters away from your final destination, and you'll soon approach a small fence placed horizontally. As a landmark you should also be able to spot a hut on the hill to the right. If you pass this fence just barely to the left side, this intel is lying a few meters across if you just go straight ahead.
Video showing the location of Enemy Intel #6.
No Russian
No enemy intel in this chapter.
Takedown
ENEMY INTEL #7:
To find this intel, proceed to the southwest corner after dropping down the favela. You should be able to spot a building with a motorcycle leaning against the wall. To the left of this building is a house with a big window - go inside and search around for this intel here.
Video showing the location of Enemy Intel #7.
ENEMY INTEL #8:
Climb up the building with the ladder and check the room directly in front of you (there usually was a sniper located here). The intel can be found in this room.
Video showing the location of Enemy Intel #8.
ENEMY INTEL #9:
Before continuing southwest, check out the rooms to your left/southeast, accessed by the small wooden steps. The first room contains a few hostiles, but the bedroom has this intel for the taking.
Video showing the location of Enemy Intel #9.
ENEMY INTEL #10:
This piece of intel is located in a building to your right after heading over several roofs and some stairs. Inside this room, go down the slightly concealed stairs to find this intel in the room below.
Video showing the location of Enemy Intel #10.
Wolverines
ENEMY INTEL #11:
This piece of intel is located inside the tank station and can be found on the counter. Easy enough, right?
Video showing the location of Enemy Intel #11.
ENEMY INTEL #12:
Nate's restaurant is across the road, nearby the crash site. This intel requires you to go slightly out of your way, however, as it's located in the CRB Financial building north of Nate's Restaurant and the crash site. Inside, defeat a handful of soldiers and look for this intel at the 'Online Banking' sign.
Video showing the location of Enemy Intel #12.
ENEMY INTEL #13:
This piece of intel can be found inside the Taco To Go building, south from Nate's Restaurant. Enter this building through the destroyed corner by crouching, then look for this intel on one of the tables.
Video showing the location of Enemy Intel #13.
ENEMY INTEL #14:
Check the dumpster east of Burger Town to find this intel inside.
Video showing the location of Enemy Intel #14.
The Hornet's Nest
ENEMY INTEL #15:
Before heading down the alley up ahead, explore the house to the right of this alley. This intel can be found inside.
Video showing the location of Enemy Intel #15.
ENEMY INTEL #16:
After clearing this open area, check the far left side of this area to find this piece of intel.
Video showing the location of Enemy Intel #16.
ENEMY INTEL #17:
Enter the yellow building to your right/north by the entrance nearby the blue car and move to the upper floor to find this intel.
Video showing the location of Enemy Intel #17.
ENEMY INTEL #18:
Before climbing on top of the rooftops, check the window behind the soccer goal to secure this piece of intel.
Video showing the location of Enemy Intel #18.
Exodus
ENEMY INTEL #19:
Head inside the office appartment of the 'Garden House' appartment complex to find this intel standing on the desk.
Video showing the location of Enemy Intel #19.
ENEMY INTEL #20:
Before proceeding through the road checkpoint, explore the right building of this checkpoint to find this intel immediately next to the entrance.
Video showing the location of Enemy Intel #20.
ENEMY INTEL #21:
After crossing the bridge, enter the second house on your left by the front door and head up the stairs to your immediate right. This intel is lying in this hall.
Video showing the location of Enemy Intel #21.
The Only Easy Day...Was Yesterday
ENEMY INTEL #22:
After breaching the hostage room, go up two flights of stairs. In the room up ahead, before going outside, check the metal cabinet to your left to find this intel hidden among the junk.
Video showing the location of Enemy Intel #22.
ENEMY INTEL #23:
After executing plan B, follow MacTavish into the room right around the corner. You should be able to spot this piece of intel in the cabinet.
Video showing the location of Enemy Intel #23.
ENEMY INTEL #24:
Or, before going up the last flight of stairs, go through the doorway to your right and check behind the stairs inside to locate this intel.
Video showing the location of Enemy Intel #24.
The Gulag
ENEMY INTEL #25:
Before entering through the gate with red lights, go up the short stairs nearby in the southwest corner. This intel is found in this room.
Video showing the location of Enemy Intel #25.
ENEMY INTEL #26:
This intel can be found in the monitor room in which Ghost stays behind. Check the northern side of this room to locate it.
Video showing the location of Enemy Intel #26.
ENEMY INTEL #27:
After passing the first cell doors in the circular chamber, with blue lights indicating they're unlocked, check the prison to your right/northeast, which is marked as prison 327. This intel is found inside.
Video showing the location of Enemy Intel #27.
ENEMY INTEL #28:
After breaching the wall and locating prisoner 627, immediately look to your left/northeast. This intel is located here.
Video showing the location of Enemy Intel #28.
Of Their Own Accord
ENEMY INTEL #29:
You'll pass an elevator with a body blocking the doors, forcing the elevator to open and close continuously. This piece of intel can be found inside this elevator next to a dead body.
Video showing the location of Enemy Intel #29.
ENEMY INTEL #30:
Going south in this office, eliminate the soldiers behind the southern doors. In the semi-hidden hallway behind these doors you can find this intel nearby the men's restroom on the eastern side.
Video showing the location of Enemy Intel #30.
Contingency
ENEMY INTEL #31:
This intel is found next to the three-man patrol of which Price gave you the option to leave them be or to take them out. It's found on the box that came down with a parachute.
Video showing the location of Enemy Intel #31.
ENEMY INTEL #32:
Head inside the building with the number 33 on it, go through the next magazine hall and look for the intel nearby the doorway on the other side to the southwest.
Video showing the location of Enemy Intel #32.
ENEMY INTEL #33:
Go left past the red bulldozers after going around the previous corner, and head for the building with the sattelite dish on top. Go underneath the viaduct and look for a staircase to your right. Dispatch any enemies here and collect the intel from this rooftop.
Video showing the location of Enemy Intel #33.
Second Sun
There is no enemy intel in the chapter.
Whiskey Hotel
ENEMY INTEL #34:
After Dunn opens the door, enter the next room (and dispatch any hostiles first, naturally). Check the couch around the corner to your left/west, this Intel is on top of it.
Video showing the location of Enemy Intel #34.
ENEMY INTEL #35:
Even if you're low on time, you still may want to check the right/north side of this room to secure this piece of Intel.
Video showing the location of Enemy Intel #35.
Loose Ends
ENEMY INTEL #36:
Before entering the house, go around the back and travel to the far southwest of the area. There's a docking house here, and this Intel is located right next to its entrance.
Video showing the location of Enemy Intel #36.
ENEMY INTEL #37:
This piece of intel can be found in the room you just breached upstairs. It's on a desk behind those boxes.
Video showing the location of Enemy Intel #37.
ENEMY INTEL #38:
Simply grab this Intel from inside the armory.
Video showing the location of Enemy Intel #38.
The Enemy Of My Enemy
ENEMY INTEL #39:
This Intel can be found in another airplane wreckage nearby. From your starting position, simply explore the wreckage to your west/northwest. It's lying in the cockpit.
Video showing the location of Enemy Intel #39.
ENEMY INTEL #40:
This Intel is once again found in the cockpit of a wrecked plane. To give you an indication of where to look, you'll be approximately 84 meters away from your destination, and the plane is lying on the hill just behind the road you crossed.
Video showing the location of Enemy Intel #40.
Just Like Old Times
ENEMY INTEL #41:
Before proceeding north, first explore the eastern hall to find this Intel located on a crate. Don't go down too far, especially not around the corner, as there are too many hostiles here.
Video showing the location of Enemy Intel #41.
ENEMY INTEL #42:
Before going outside, grab this piece of intel to your left/northeast.
Video showing the location of Enemy Intel #42.
ENEMY INTEL #43:
When leaving Price behind in the firefight, go north and look for this Intel on top of a crate nearby several black guncases.
Video showing the location of Enemy Intel #43.
Head southwest and pack a heavy machine gun along with several grenades and flashbangs to take out the pack of enemies, including several with riot shields. After downing every single one of them, head west and breach the door. Be very careful, as this is one of the toughest areas to breach: You'll want to immediately down the soldier in front of you, then turn right while keeping your finger on the trigger, and mow down the guy closest by to you to prevent him from meleeing you to death. If you can kill the other soldiers during this process, all the better.
ENEMY INTEL #44:
You'll want to immediately collect this Intel as soon as you secure this room, because you won't have much time. It's located on a table with loads of cola cans, against the wall to the west. Price will be standing nearby as he tells you to override the door controls.
Video showing the location of Enemy Intel #44.
Do what Price tells you and override the door controls to your right (also check the destination indicator if you're unsure where to look). Quickly run out of the cave and stumble into the next firefight.
After the short scene, follow Price through the field and press onward until you reach the cave to the southwest.
Endgame
ENEMY INTEL #45:
Don't miss this Intel, which is found immediately to your left before getting on the boat.
Video showing the location of Enemy Intel #45.
A lot has changed since COD4, but Modern Warfare 2 Multiplayer is still based on one of the most popular online shooters ever.
This section has been writted by Just One More.
The multiplayer component of Call of Duty: Modern Warfare 2 is based on developer Infinity Ward’s previous game in the series, Call of Duty 4, which mixed RPG-style character leveling with a first person shooter to create one of the most addictive online multiplayer games ever. With MW2, Infinity Ward has refined and added to the COD4 system in many ways, and previous experience with COD4 or COD5 will allow you to hit the ground running as you adjust to the new game. But having played one of MW2’s predecessors is certainly not required to gain a quick understanding of how the game works.
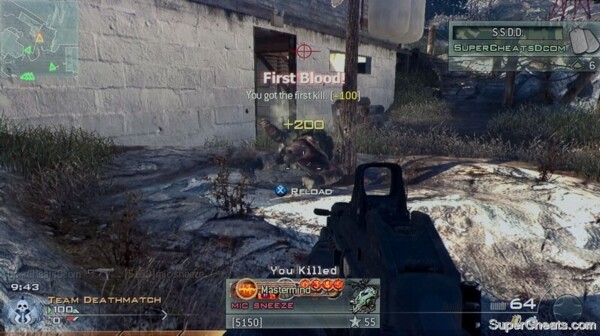
COD4 was one of the first shooters to exploit fully the concept of upgrading weapons and equipment via Experience Points (XP) by granting XP not only for getting kills and completing matches, but also for accomplishing various other goals within matches, such as killing opponents in mid-air or by shooting their own explosives through walls. MW2 takes that concept to the next level, offering bonus XP for contextual accomplishments in-game such as getting the first kill of a match or getting revenge on someone who has killed you earlier.
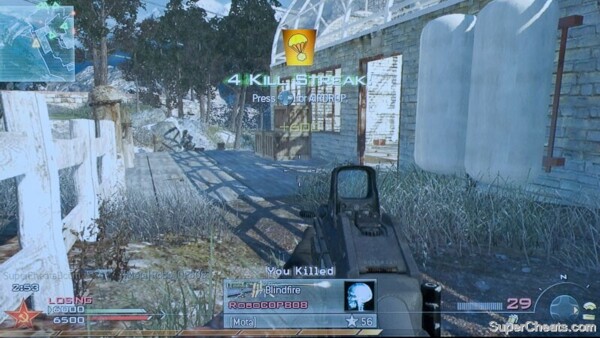
Some Killstreaks arrive via airdrops, others are instantly downloaded to the briefcase you carry in a pocket somewhere. Map: Afghan.
Also upgradeable via XP are Killstreaks, rewards based on consecutive kills without a death, and a new feature called Deathstreaks, for those unhappy times when you get consecutive deaths without a kill. More than ever before, your performance and accomplishments in-game affect how you can alter you abilities and add upgrades to your gear to change your online experience.

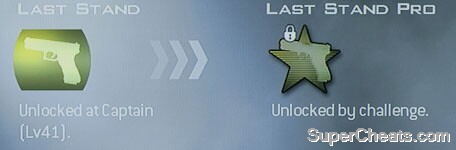
This title was earned by getting 10 kills with the Danger Close perk.
Beyond weapons, equipment upgrades and perks, game modes are unlocked via XP, and yet another new element of the Call of Duty MP system has been added: Titles and Emblems now join Clan Tag as ways to customize your lobby presence and show off in-game accomplishments. Success with almost any combination of weapons/equipment/perks might grant you a new title and/or emblem. Your Callsign comprises your chosen title, emblem, rank icon, clan tag, and screen name, and is visible in the lobby and at certain times in the game itself. If you do something noteworthy like shoot down a helicopter or get a triple kill, other players are notified via an on-screen update about your accomplishment accompanied by your Callsign.
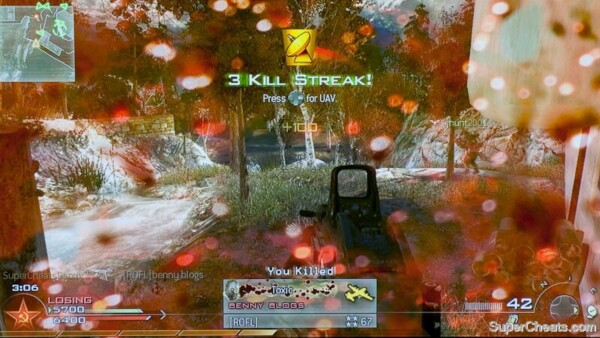
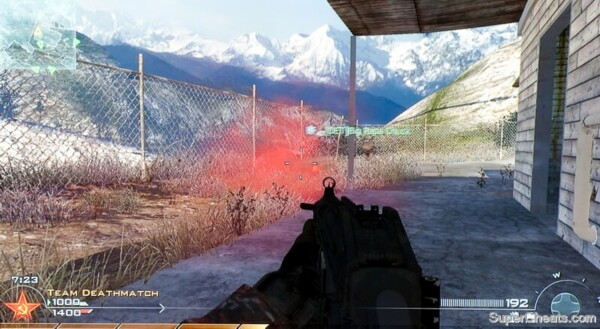
Fortunately, all of that blood evaporates if you can get to safety.
IW has enhanced the graphical details of the game, and added other touches to make the experience more immersive, such as the new wounded screen shown above. But the adversarial multiplayer game modes will be familiar to gamers with any first person shooter experience and consist of objective oriented games where teams work together to accomplish goals, and of straightforward solo or team death match games.
Killstreak rewards usually come via airdrops.
A player’s equipment choices increase as he or she reaches new levels and unlocks more weapons, weapon modifications, and perks, which add options for the in-game abilities of the player’s character. Most players will wish to rank up as quickly as possible to unlock all the possibilities. This is accomplished by completing matches, performing specific tasks within matches, and completing challenges related to weapons, perks and various in-game goals. For example, reaching milestones of X number of kills with a given weapon might unlock not only a new attachment for that weapon, but also grant XP valuable toward reaching the next rank.
Upgrading a handgun is worth it if you want a quicker melee. Map: Wasteland.
Reaching certain goals while using a given perk may add a feature to how that perk behaves as well as grant XP. While the basis for gaining XP is completing matches and performing well within that game mode’s rules (getting many kills in death match, or accomplishing game mode specific goals such as planting a bomb or claiming territory), attention to the many item-related challenges can greatly decrease the time between levels.
And this time around there are a lot of levels. Prestige returns, but after Level 70, which takes 2434700 XP to accomplish. While many players made it to Level 10 Prestige in COD4, doing so in MW2 will be a much greater accomplishment. And this time there are more rewards for accepting the Prestige Challenge than a single icon by your screen name. Some titles and emblems only unlock after the player has chosen the Prestige option, and you also receive more Create a Class slots, which came come in very handy, especially if you play a wide variety of game modes.
This guide, its screenshots and videos were created using the Xbox 360 version of MW2. The controls are different with the PS3 and PC versions, but the game itself, other than features specific to Xbox Live, are the same.
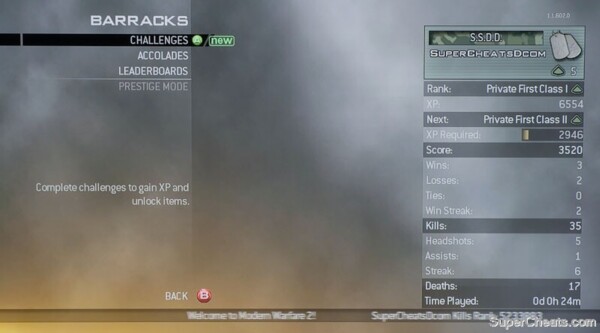
The Barracks menu, where you can keep track of your progress toward the next rank and view your Challenges, Accolades, and the Leaderboards.
The first thing you’ll notice if you played COD4 MP is that you now get many more points for in-game accomplishments. Not only are basic kills worth 100 points instead of 10, but new aspects of kills are also tracked and rewarded with extra points. Getting revenge on someone who has killed you earlier in that match, for example, gains extra points, as do avenging a teammate or saving a teammate who is under threat from your victim at the time of your kill. Each game mode has its own specific rewards within the context of that match’s rules.
Objective games such as Domination have their own points rewards. Map: Skidrow
Given the many new opportunities to gain XP in-game, it is not surprising that the number of points required to move up in rank has risen accordingly: it now takes almost two and a half million points to reach Level 70. Once you’ve reached Level 70 and earned enough XP to unlock the Prestige option, you can start over with a shiny Level 1 next to your Prestige icon and work toward another couple million points before Prestige 2 is an option. As with COD4, Prestige 10 is the limit. (Callsign elements and some Prestige Challenges do not reset with each Prestige level, but everything else does; all regular challenges, weapons, perks and equipment are relocked as if you were starting the game for the first time.)
Every level reached unlocks something, as shown below:
Level Points to Achieve Unlock
1 0 Grenadier Class (Famas with grenade launcher, Silenced SPAS-12 shotgun, frag grenade, 2x Stun grenades, Scavenger Pro, Stopping Power, Commando, Copycat)
First Recon Class (UMP with holographic sight, .44 Magnum with knife, Semtex, 2x Flash grenades, Marathon Pro, Lightweight, Ninja Pro, Final Stand)
Overwatch Class (L86 LSW with grip and holographic sight, AT4-HS launcher, Semtex, 2x Flash grenades, Bling Pro, Danger Close, SitRep, Painkiller)
2 500 Scout Sniper Class (Barrett .50cal with Heartbeat Monitor and FMJ, Silenced USP .45, Tactical Insertion, 1x Smoke grenade, Bling Pro, Cold-Blooded, Scrambler Pro, Copycat)
Titles
Emblems
3 1700 Riot Control Class (Riot Shield, Akimbo PP2000s, Blast Shield, 2x Stun grenades, Marathon Pro, Hardline Pro, Commando, Painkiller)
4 3600 Create-a-Class
5 6200 Challenges (Weapons, Perks, Equipment)
6 9500 Challenges (Basic Training)
Clan Tag
Painkiller (Death Streak)
7 13500 Throwing Knife (Equipment)
Challenges (rest of Basic Training)
8 18200 SCAR-H (Assault Rifle)
9 23600 Hardline (Slot Two Perk)
10 29700 Challenges (Operations)
3rd Killstreak slot unlocked
11 36500 Tactical Insertion (Equipment)
12 44300 Vector (SMG)
13 53100 Scavenger (Slot One Perk)
14 62900 Thumper (Launcher)
15 73700 4th Killstreak slot unlocked
16 85500 Challenges (Killstreak)
MG4 (LMG)
17 98300 Scrambler (Slot Three Perk)
18 112100 AA-12 (Shotgun)
19 126900 Blast Shield (Equipment)
20 142700 TAR-21 (Assault Rifle)
21 159500 Bling (Slot One Perk)
22 177300 G18 (Machine Pistol)
23 196100 5th Killstreak slot unlocked
24 215900 P90 (SMG)
25 236700 Cold-Blooded (Slot Two Perk)
26 258500 Challenges (Precision)
.44 Magnum (Handgun)
27 281300 Martyrdom (Deathstreak)
28 305100 FAL (Assault Rifle)
29 329900 Ninja (Slot Three Perk)
30 355700 Stinger (Launcher)
31 382700 Claymore (Equipment)
32 410900 AUG HBAR (LMG)
33 440300 Danger Close (Slot Two Perk)
34 470900 Striker (Shotgun)
35 502700 Challenges (Finishing Moves)
6th Killstreak slot unlocked
36 535700 WA2000 (Sniper Rifle)
37 569900 SitRep (Slot Three Perk)
38 605300 M93 Raffica (Machine Pistol)
39 641900 Final Stand (Deathstreak)
40 679700 M16A4 (Assault Rifle)
41 718700 Challenges (Humiliation)
Last Stand (Slot Three Perk)
7th Killstreak slot unlocked
42 758900 Ranger (Shotgun)
43 800300 C4 (Equipment)
Challenges (rest of Humiliation)
44 842900 Mini Uzi (SMG)
45 886700 One Man Army (Slot One Perk)
46 931700 M9 (Handgun)
47 977900 Payback Challenges
8th Killstreak slot unlocked
48 1025300 ACR (Assault Rifle)
49 1073900 Challenges (rest of Payback)
50 1123700 Javelin (Launcher)
51 1175000 9th Killstreak slot unlocked
52 1227800 M240 (LMG)
53 1282100 Challenges (Elite)
54 1337900 M1014 (Shotgun)
55 1395200 10th Killstreak slot unlocked
56 1454000 M21 EBR (Sniper Rifle)
57 1514300 Challenges (rest of Elite)
58 1576100 TMP (Machine Pistol)
59 1639400 11th Killstreak slot unlocked
60 1704200 F2000 (Assault Rifle)
61 1770500 Challenges (Intimidation)
62 1838300 Desert Eagle (Handgun)
63 1907600 12th Killstreak slot unlocked
64 1978400 Challenges (rest of Intimidation)
65 2050700 RPG x2 (Launcher)
66 2124500 13th Killstreak slot unlocked
67 2199800 Model 1887 (Shotgun)
68 2276600 14th Killstreak slot unlocked
69 2354900 15th Killstreak slot unlocked
70 2434700 AK47 (Assault Rifle)
It may seem that as your level increases, the number of points needed to rank up becomes much too high, but you regularly unlock new challenges to complete for bonus XP, and the points granted for in-game experience go up steadily as your rank increases. A lower ranked player will receive many fewer XP for a completed match than will a higher ranked player who participates in the same exact game. Winning helps a lot: in Team DM, for example, the winning players get twice as many points for the match as the losers get. You earn points for time spent in each match, and the points you earn are adjusted down from the maximum if you join after the game starts.
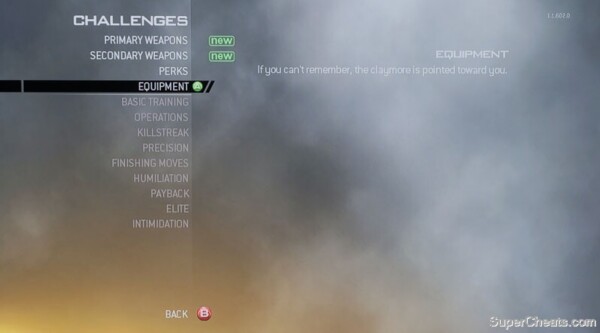
The Challenges Menu, where you can track your progress toward earning bonus XP.
There are challenges for every weapon, perk and item of equipment, as well as for many in-game possibilities. You can view your currently unlocked challenges as well as your progress toward each challenge in the Barracks section. Note that until a given challenge is unlocked in the Barracks section, you may not be able to earn credit toward its completion. Weapons challenges unlock at the same level with which you unlock the weapon itself.
Weapons/Equipment: For each weapon, kills with that weapon unlock new attachments and grant XP, but the available attachments vary by weapon/weapon class. For example, Heartbeat Monitors are not available on the SMGs. Sometimes kills with a given attachment in use are required to unlock other attachments. Earning all attachments grants Mastery of that weapon, which earns more XP and weapon-specific titles and emblems for use in your Callsign.
Perks: Each perk has its own challenges.
Killstreaks: Each Killstreak has its own challenges.
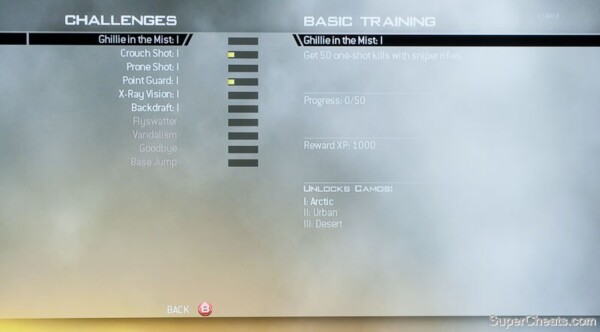
Basic Training: Challenges for basic in-game activities such as shooting down a helicopter, destroying a car, getting kills while crouched or prone.
Operations: Each game mode has its own set of challenges, granting XP for things like winning a certain number of matches in that mode or for accomplishments such as defusing a bomb.
Precision: Challenges that require accuracy, such as multiple kills with a single shot and hitting enemies with every round in a single clip.
Finishing Moves: Challenges related to getting the final kill in a match with given Killstreak rewards.
Humiliation: Challenges such as killing everyone on the other team without dying yourself, and getting kills while being stunned by a grenade.
Payback: Challenges related to getting Payback on someone who has killed you earlier by using various equipment options.
Elite: More in-game activity challenges such as completing a match with a 5:1 kill to death ratio and getting kills by shooting C4.
Intimidation: More in-game activity challenges, such as killing the entire team within 10 seconds and killing five opponents with a single air strike.
Perks show up here for your selection as they unlock.
Perks are the main way your in-game character can be different from others in the match, because perks can be combined in many different ways to suit your play style. Once you’ve reached Level 4 and unlocked Create-a-class, you can begin experimenting with various perk combinations to find which you like best and how different perks compliment each other when used together. While some perks are very effective on their own, things get really interesting when you combine your choices in each of the three perk slots along with your Killstreak and Deathstreak rewards and your weapon choices. Certain perks suit given weapons better than others. For example, Lightweight makes you move faster than you normally would with whatever weapon you chose, but if you happen to be using one of the SMGs, which along with the Sniper rifles give you the greatest mobility, you will be faster than any other player not using the same combo. If you then combine Lightweight, a mobile class, and Marathon, you can really fly around the map.
As you complete matches with any given perk in use, you work toward unlocking the Pro version, which adds something to make that perk more effective. Progress can be tracked by selecting the perk in the Create Class menu until you have completed the challenge and earned the Pro version. Remember that you only earn Pro credit by performing the required skill WITH that perk applied. For example, sprinting without Marathon chosen as a perk does not earn mileage toward unlocking Marathon Pro, and melee kills without Commando applied do not earn credit toward Commando Pro.
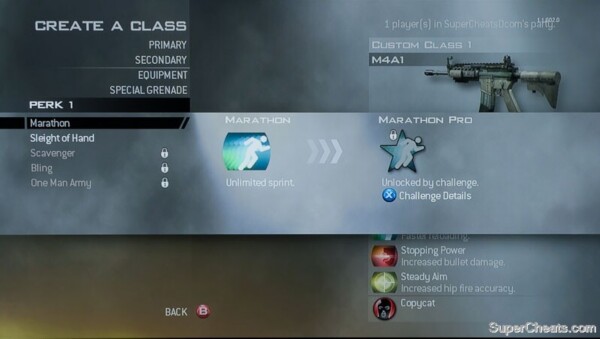
Until you unlock a good selection of perks, the default classes offer pretty good options.

Marathon (Unlocked at Level 1)
Ability: Unlimited sprinting.
Pro Ability (sprint 26 miles with Marathon): Climb over obstacles quickly.
Makes getting around maps much faster as you never have to rest unless you choose to. When combined with Lightweight and one of the SMGs, Sniper rifles or pistol/commando knife combo, this is a formidable class set up.

Sleight of Hand (Unlocked at Level 1)
Ability: Faster reloading.
Pro Ability (get 120 kills with Sleight of Hand): Faster aiming down your weapon’s sights.
Comes in very handy with weapons that have small magazines or huge magazines. With the former, you risk depleting your ammo in a fight and getting killed while reloading if another enemy comes along. With the latter, LMGs reload much more quickly once you decide to do so, so you’re vulnerable for a shorter time. Also good with some shotguns that have a slow reload time.

Scavenger (Unlocked at Level 13)
Ability: Full re-supply from dead enemies.
Pro Ability (re-supply 100 times with Scavenger): Extra magazines.
Most enemies will drop a blue satchel when they die, which you can move over to pick up. All weapons will be restocked, including launchers and equipment, such as frags and C4, though you can only carry one of these at a time. If you have placed a Claymore of C-4, you can pick up another and make it active for double protection, but you cannot have more than two active at once.

Bling (Unlocked at Level 21)
Ability: 2 primary weapon attachments.
Pro Ability (get 200 kills with a Blinged weapon): 2 secondary weapon attachments.
As you unlock weapon attachments such as the various scopes or ammo, you can equip two instead of one. Very handy if you like a silencer and a scope, or a scope with FMJ ammo.
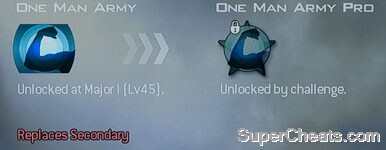
One Man Army (Unlocked at Level 45)
Ability: Replaces your secondary weapon, but allows you to change your class at any given time during a match.
Pro Ability (get 120 kills using One Man Army): Swaps classes in a shorter time.
Accessed via the Secondary Weapon button, this brings up a list of your classes to pick from. If you have two classes using this perk you can switch between them. Otherwise you stay with the class you choose until you die. When you respawn, you go back to the One Man Army class unless you select another in the usual way. Once you get OMA Pro, changing classes takes half the time and is an opportunity to get nearly free XP by using it every time you spawn and immediately changed to your actual desired class. As long as you spawn using OMA, every kill you get until you die, regardless of which class you change to, earns credit toward the OMA challenges.
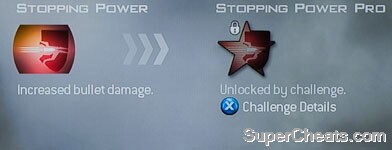
Stopping Power (Unlocked at Level 1)
Ability: Increased bullet damage.
Pro Ability (get 250 kills with Stopping Power): Increased bullet damage vs. helicopters and aircrafts.
The Go To Slot 2 perk for many players, turns high damage weapons into one-hit wonders.

Lightweight (Unlocked at Level 1)
Ability: Move faster.
Pro Ability (sprint 30 miles with Lightweight): Allows you to do a quick aim after sprinting.
Increases your sprint speed. See above note about Marathon perk.

Hardline (Unlocked at Level 9)
Ability: Killstreaks require 1 less kill.
Pro Ability (get 40 Killstreaks using Hardline): Death Streaks require 1 less death.
A very useful perk at the lower levels, allows quicker access to your Killstreak rewards. Sometimes one fewer kill makes a big difference toward how much help you get from above.
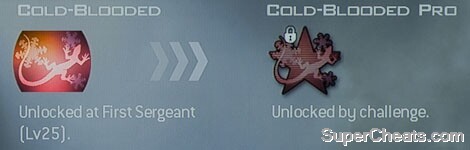
Cold-Blooded (Unlocked at Level 25)
Ability: Undetectable by UAV, air support, Sentry Guns, and thermal.
Pro Ability (destroy 40 enemy Killstreak rewards using Cold-Blooded): No red crosshair or name shown when you are targeted.
Combined with Ninja, the choice of stealth players as opponents have to be able to see you to know where you are. Very handy in avoiding death from choppers and planes. The best way to unlock the Pro version is to knife every enemy sentry gun you find and carry a launcher as your secondary weapon and destroy enemy UAVs and other air support.
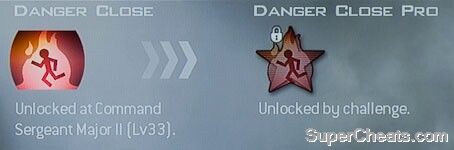
Danger Close (Unlocked at Level 33)
Ability: Increases explosive weapons damage.
Pro Ability (get 100 explosives kills with Danger Close): Increases air support damage.
The Stopping Power of explosives.
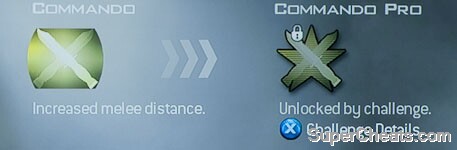
Commando (Unlocked at Level 1)
Ability: Increased melee distance.
Pro Ability (get 20 melee kills with Commando): You don't take any damage from falling.
With this perk you can knife opponents from crazy far away as if you had elastic arms.
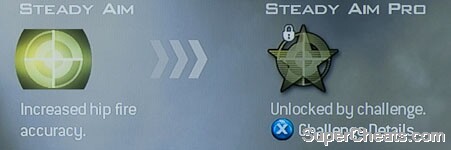
Steady Aim (Unlocked at Level 1)
Ability: Increased hip-fire accuracy.
Pro Ability (get 80 hip-fire kills with Steady Aim): You can hold your breath for a longer period of time.
Great for shotguns and no-scoping.
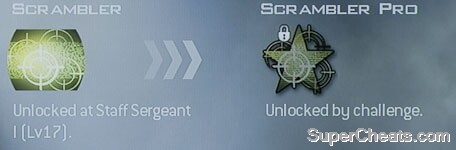
Scrambler (Unlocked at Level 17)
Ability: Scrambles (jams) the enemy radar in a small radius.
Pro Ability (get 50 close-range kills using Scrambler): Delays enemy Claymores, thus allowing you to avoid the explosion if you are fast enough.
Opponents see their radar HUD turn to grey static when you approach. Down side is that they know you’re close by somewhere. Pro version is very good against Claymores.
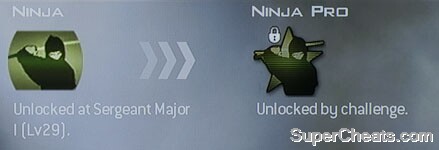
Ninja (Unlocked at Level 29)
Ability: Invisible to heartbeat sensors.
Pro Ability (get 50 close-range kills using Ninja): Allows you to move silently.
Stalkers with attached Heartbeat Sensors can’t tell you’re around the corner. Surprise!
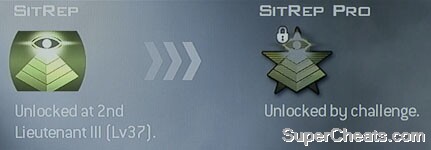
SitRep (Unlocked at Level 37)
Ability: Insertions. This will reveal enemy explosives and Tactical Insertions.
Pro Ability (destroy 120 enemy devices using SitRep): Makes enemy footsteps louder.
Enemy C4 and Claymores show up through walls as red outlines you can’t miss. Pro ability is handy as the foot noise in MW2 has been reduced noticeably from COD4.
Last Stand (Unlocked at Level 41)
Ability: Instead of dying, you pull out your pistol with inhuman speed to defend yourself as you lie on the ground.
Pro Ability (get 20 kills using Last Stand): This allows you to use items other than your pistol.
New in the MW2 version is the ability to crawl, so if you’re lucky you can reach some cover and not be so obvious to enemies. Last Stand is easily confused with the Deathstreak reward, Final Stand. The two are similar, but the former applies to every in-game death when the perk is selected in slot 3, and always results in a respawn, either right away if an enemy finishes you off, or several seconds later as you finally bleed out. Final Stand results from four deaths in a row (or three in a row, if you’re using Hardline Pro in Perk Slot 2), and is survivable IF no one finishes you off while you’re on the ground. Also, Last Stand adds a pistol for perk use even if you have some other weapon selected as your secondary.
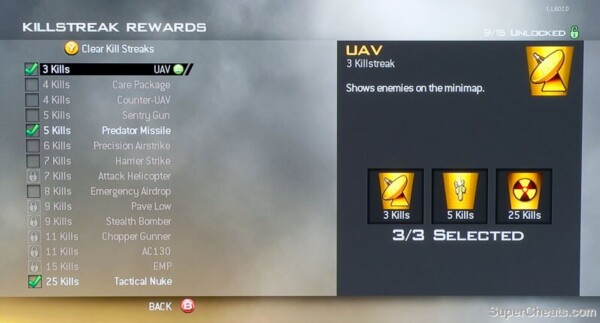
You can activate three unlocked rewards at a time.
Replacing COD4’s UAV for 3 kills, air strike for 5 kills, and Chopper for 7 kills, MW2 has many more choices of offensive and defensive options, gradually unlocked as a player’s rank increases. Players may then select any combination of three unlocked rewards to earn in game, from the UAV at 3 kills all the way to a Tactical Nuke at 25 kills without a death.
Use in-game elements such as UAVs and Killstreaks to thrive. Map: Invasion.
To manage your Killstreak rewards, select Killstreak in the lobby. Any unlocked rewards can be selected in groups of up to three. This is also the way to deselect all rewards if you decide to try for the Behind Enemy Lines title and 8-bit Price emblem by getting a 10-Killstreak with no rewards active. Killstreak unlocks are awarded from time to time as you rank up, and by level 70 you can unlock all 15 rewards.
Some Killstreak rewards count toward increasing your Killstreak, and some add to your kill total on the scoreboard but don’t count toward continuing your Killstreak. If you pull out a laptop in game and control the reward, such as with a Predator or Apache, any kills you get count toward your streak. But rewards that are controlled by the AI, such as the Pave Low, can help your team win the match even though they don’t count toward your Killstreak and earning the next reward.
The Killstreak rewards have special relationships with several perks. Danger Close Pro increases damage from air attacks. Hardline decreases the number of kills required to claim a chosen reward by 1. Many of the rewards are attacks from the air, and the Cold-Blooded perk makes a player invisible to UAVs, invisible to AI-controlled air attacks and Sentry Guns, and removes the red square highlight around enemies when a player is controlling an Apache, AC130 or Predator. So destroying enemy rewards (shooting down enemy UAVs, helicopters, Harriers, destroying Sentry Guns, etc.) for a total of 40 enemy rewards destroyed upgrades the Cold-Blooded perk to Pro if a player has Cold-Blooded in use when destroying enemy Killstreak rewards.
Once thrown, a red flare shows the Care Package or Emergency Airdrop where to leave their crates.
Most rewards arrive in the form of airdrops to be summoned by the player when and where desired. Choosing the location and timing to place the red flare that summons the reward is critical. The other team is notified of an incoming enemy package and will see the location of the crate if their HUD is not jammed, so air drops often bring enemy players to the drop location; they know someone will be there to claim the crate and will be looking for an easy kill or to steal the crate for themselves, or both. So be careful when and where you drop the flare. Also be careful where you stand while waiting for your crate: it can kill you if it hits you. The crate can be claimed by anyone, even the enemy, although the player who summoned the crate can claim it in a much shorter time. It takes teammates or opponents much longer to claim a crate for themselves, but this doesn’t stop ‘teammates’ from trying to steal crates from you.

Deathstreak rewards are consolation prizes for instances when you just can’t get a kill, and are selected by class as if they were a perk. The first two, Painkiller and Copycat, are unlocked at Level 4 with Create-a-class. Martyrdom unlocks at Level 27 and Final Stand at 39. Painkiller will activate after 3 consecutive deaths, and the others will activate after 4 consecutive deaths. Note that if you activate a Deathstreak reward but get a kill before you die again, the reward is cancelled, so if, after four deaths you see the Final Stand icon but they get a normal kill, you do not go into Final Stand next time you die. Descriptions of the Deathstreak rewards follow the Killstreak rewards.
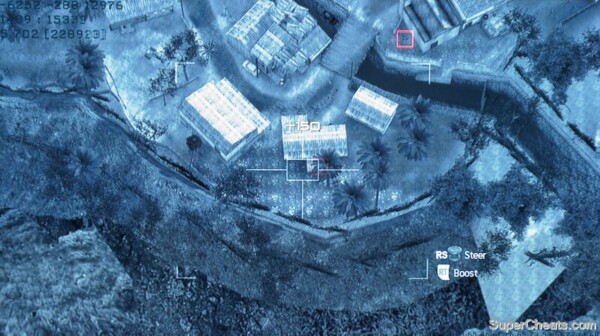
When guiding a Predator, look for the red squares that indicate enemies.
3 Kills - UAV
This launches a UAV that shows the locations and movements of opponents not using the Cold-Blooded perk as red dots on your team-members’ HUDs. The UAV can be shot down by the enemy.
4 Kills - Counter-UAV
This disables the enemy radar for a short period of time, even if they don't have a UAV in the air, but it is most effective if used just after you hear that the enemy has a UAV active. Can be shot down to restore active UAVs.
4 Kills - Care Package
The crate will contain either a random Killstreak reward up to an EMP (including rewards you haven’t selected as your three or even unlocked yet) or ammo. If you have trouble getting 11 kills in a row without dying, the Care Package (or even better, the Emergency Airdrop) may be your best bet to get a Chopper Gunner or AC-130. See above notes about dropping crates.
5 Kills - Sentry Gun
Airdrops a XM312 Sentry Gun that will automatically fire at enemies who are not using the Cold-Blooded perk. It can be destroyed by shooting or knifing it, or temporarily disabled with Flashbangs and Stun Grenades. When selected after delivery, the gun will glow gold if it can be placed and red if you need to move it to place it. The player who earned it can pick it up and move it as often as desired until it is destroyed or expires.
5 Kills - Predator Missile
When selected, the player opens a laptop to enter control mode. Enemies not using Cold-Blooded will appear as red squares on the screen. The player can aim and accelerate the descending missile, but is vulnerable while doing so. If killed while controlling the missile, the player will spawn normally after the missile explodes.
6 Kills - Precision Airstrike
Also uses a laptop to control location and direction of an airstrike. Best when used during an active UAV to determine locations of enemy players.
7 Kills - Harrier Strike
Similar to Precision Airstrike, except followed by a hovering Harrier that will fire at enemies not using the Cold-Blooded perk.
7 Kills - Attack Helicopter
Deploys a helicopter that will fire at enemies not using the Cold-Blooded perk.
8 Kills - Emergency Airdrop
A Care Package, but with four crates that may contain any combination of Killstreak rewards. These crates arrive via a cargo plane instead of the sporty little Care Package helicopter and take significantly longer to arrive. The spread of the four crates is pretty wide, so care must be taken where to drop the flare if you want to avoid some or all of your crate landing in inaccessible areas such as rooftops or even outside of the map. Certain maps such as Underpass make a successful 4-crate delivery almost impossible. Crates are stacked in your inventory in the order claimed, so before you grab the closest one, give some thought to what order you’d like to use them, and try to do this quick thinking as your ‘teammates’ are trying to steal your rewards.
9 Kills - Pave Low
Similar to the Attack Helicopter, but more effective as this model shoots two guns and has a better AI to find and attack enemies.
9 Kills - Stealth Bomber
Calls in a Stealth Bomber (B-2 Spirit) to carpet bomb the selected area. You can also control the direction, just like with the Precision Airstrike. This attack doesn’t show on enemy radar, but it has a distinctive sound that is easy to recognize, and if you don’t see a green icon on your HUD (meaning that the incoming Stealth Bomber is on your team), you’d better take cover because this one drops a lot of bombs.
11 Kills - Chopper Gunner
One of the most effective rewards, this one puts you behind the 25mm gun of an Apache helicopter. Enemies without the Cold-Blooded perk show up with red squares. You can’t control the flight path of the Apache, but you can aim the gun as the Apache moves around. As with the other laptop-accessed rewards, you can be killed while using the laptop, so find a secluded place to work if you can. The Apache can be shot down by enemy players but has countermeasure flares it will drop automatically. Multiple Stingers fired at the Apache will take it down in spite of the flares.
11 Kills - AC-130
Similar to the Chopper Gunner but with three types of gun to use as you prefer: the 25mm, 45mm and 105mm have different sounds on the ground, and the largest has good splash damage, especially with Danger Close Pro. The AC-130 can be shot down by enemy players but has countermeasure flares it will drop automatically. Multiple Stingers fired at the AC-130 will take it down in spite of the flares.
15 Kills - EMP
The best defense against an enemy helo or plane attack is the Electro-Magnetic Pulse reward, which disables all electronic devices on the map. No thermal scopes, no UAV, C4 etc., anything airborne will crash, and a fuzzy gray screen reminds you that the EMP’s effects are still active. Electronics come back online once it has expired. The EMP is also the only way to defeat the Tactical Nuke.
25 Kills - Tactical Nuke
The Tactical Nuke ends the match and kills everyone, but if you call it in your team wins the match from the grave. Once activated, the other team has a 10-second countdown to earn and activate an EMP or they (and you) are toast.

3 Deaths - Painkiller
After 3 consecutive deaths you receive a health increase for a brief time when you spawn. But since you usually spawn far enough away from enemies that Painkiller expires before it can help, this is the least useful Deathstreak.

4 Deaths - Copycat
Allows you to copy your killer’s class (weapons, perks, etc) from the killcam screen.
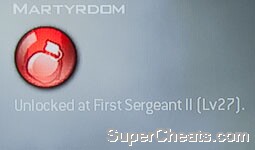
4 Deaths – Martyrdom (unlocks at Level 27)
Drops a live frag grenade where you die.

4 Deaths – Final Stand (unlocks and Level 39)
Similar to the Final Stand perk but allows you to use all weapons and equipment as well as revive eventually if no one finishes you off. This is easily the best Deathstreak if only for the possibility of getting back up without actually dying.
Final Stand in action. Map: Highrise.

One of the weapons you start off with is a very effective Assault Rifle, the trusty M4A1.
Many of COD4’s weapons return in the sequel, but most have changed in one way or another; the reliable AK-47 is now the last weapon you earn, semi-auto pistols and a revolver add the Tactical Knife as an unlockable option, and some old favorites have been updated to a more current version. The dependable MP5, for example, has been ‘upgraded’ to the MP5K and has a much look and feel from its predecessor. Of course some new weapons replace old ones, and often with very distinctive results.
Another major change in MW2 is the addition of shotguns and machine pistols to the secondary weapon slot. No longer do you have to define a class based around an assault rifle for longer shots or a shotgun for close quarters, now you can have both. The machine pistols are also very effect in confined spaces. This news is probably best appreciated by snipers, who can now take enemies apart from a distance but not have to rely on a semi-automatic pistol or knife if the game play moves indoors.
Though it has added new weapons and changed some of the old ones, IW put their usual amount of attention into overall balance from one weapon to the next. Weapons with a higher firing rate do less damage per round than slow fire weapons and vice versa, so that theoretically a good player could be just as effective with one weapon as another if he or she were willing to adjust playing style to fit a given weapon’s characteristics. Lying in the grass and sniping with a P90 would not be very effective, nor would charging a room with an Intervention. But all weapons are intended to be effective if used properly. So far there appears to be only one weapon in need of adjustment in this regard: if you meet a player using akimbo the Model 1887 shotguns you’ll understand why.
It’s deadlier than it looks.
There are some new additions beyond firearms. You may now equip a Riot Shield in your primary weapon slot and compliment it with a Blast Shield as your Equipment choice for even more protection. The Riot Shield not only protects you from enemy rounds and explosions but acts as a melee weapon if you get close enough. The Riot Shield will absorb quite a bit of damage before failing to protect its user. Don’t forget to crouch to protect your feet when you come under fire.
Like all weapons in the game, the Riot Shield has its strong points and its drawbacks. Map: Karachi.
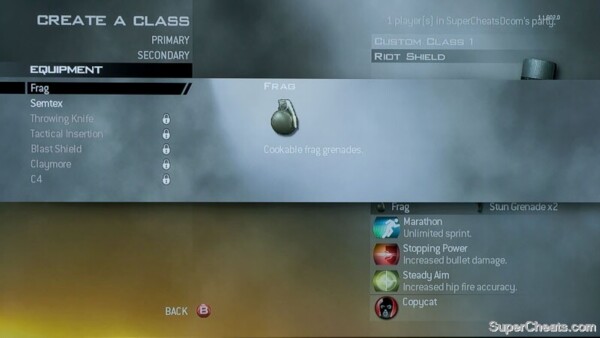
So many deadly toys: if only there were a Bling perk for Equipment.
In addition to a primary and a secondary weapon, you can choose a piece of Equipment:
Frag Grenade
Semtex
Throwing Knife (Unlocked at Level 7)
Tactical Insertion (Unlocked at Level 11)
Blast Shield (Unlocked at Level 19)
Claymore (Unlocked at Level 31)
C4 (Unlocked at Level 43)
Frags haven’t changed—you can still cook them to give enemies less time to throw them back. There is no 3x Frags perk anymore—the only way to carry more than one is to use Scavenger, which allows you to re-supply, but not to carry more than one at a time. No more grenade spam, yay!
Semtex is a timed explosive that sticks wherever it lands, including other players and Riot Shields, though a player using a Riot Shield and the Blast Shield has good protection. But while frag grenades can be bounced off walls and ceilings to reach campers, Semtex doesn’t bounce. As with frags, Scavenger lets you re-supply but not carry more than one at a time.
The Throwing Knife is a one-hit kill, silent and reusable. If you hit an enemy with it, you can reclaim it from the dead body. If you miss, the knife may be somewhere you can find it, though doing so is often difficult and risky. Getting shot while looking for a stray knife sort of defeats the purpose.
Enemy Tactical Insertion flares show red in game. Map: Highrise.
Tactical Insertion allows you to determine where you will spawn after your next death. You can drop a TI flare at the desired spot and as long as no enemy destroys your flare, that’s where you’ll spawn. Flares dropped by your team show up as green and enemy flares as red. Destroy any red flare you come across or risk an opponent suddenly appearing in that spot.
The Blast Shield adds protection when using the Riot Shield and prevents stun and flash grenades from affecting you, but blocks your mini-map in your HUD.
Claymores and C4, like frags, can be re-supplied with Scavenger but you can only carry one at a time, AND you can only have two Claymores active at once. If you try to place a third, one of the other two will detonate.
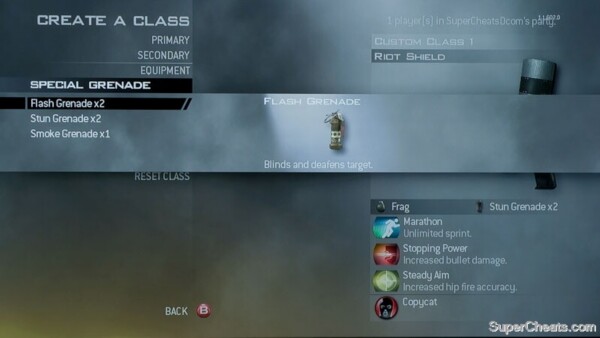
You also have a choice of special grenades. Flash grenades blind and deafen those within range, including yourself but not including teammates unless you’re playing one of the Friendly Fire modes. Stun grenades slow enemies down and impair vision. Smoke grenades create a thick cloud and are very useful in some objective games.
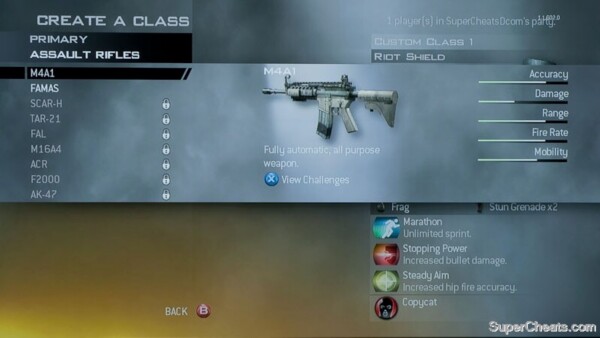
M4A1 - Auto, unlocked at Level 4
FAMAS - 3 round burst, Level 4
SCAR-H - Auto, Level 8
TAR-21 - Auto, Level 20
FN FAL - Semi-auto, Level 28
M16A4 - 3 round burst, Level 40
ACR - Auto, Level 48
F2000 - Auto, Level 60
AK-47 - Auto, Level 70
Attachments for the ARs:
Grenade Launcher (10 Kills)
Red Dot Sight (25 Kills)
Silencer (75 Kills)
ACOG Scope (150 Kills)
Full Metal Jackets (300 Kills)
Shotgun (20 Grenade Launcher Kills)
Holographic Sight (60 Kills while looking through the Red Dot Sight)
Heartbeat Sensor (15 kills with silencer)
Thermal Scope (20 kills while looking through an ACOG Scope)
Extended Mags (40 bullet penetration kills with FMJs)
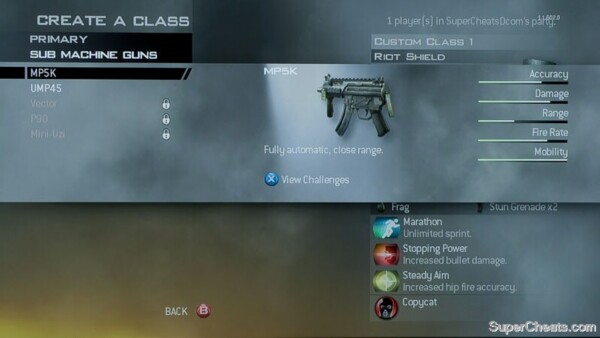
Sub Machine Guns (All Full Auto)
UMP .45 - Unlocked at Level 4
MP5K - Level 4
Vector -Level 12
P90 - Level 24
Mini-Uzi – Level 44
Attachments for the SMGs:
Rapid Fire (10 Kills)
Red Dot Sight (25 Kills)
Silencer (75 Kills)
ACOG Scope (150 Kills)
FMJ (300 Kills)
Akimbo (30 Kills with Rapid Fire)
Holographic Sight (60 Kills while looking through the Red Dot Sight)
Thermal Scope (20 Kills while looking through an ACOG Scope)
Extended Mags (40 bullet penetration kills with FMJs)
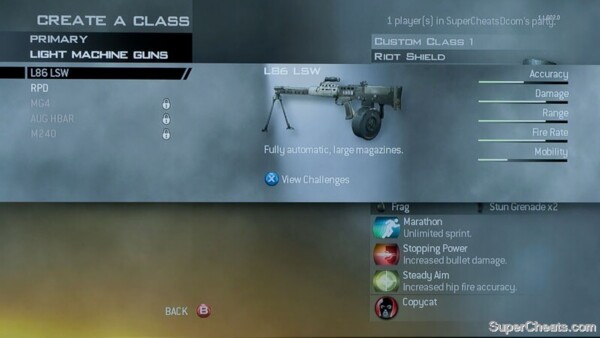
L86 Saw - Unlocked at Level 4
RPD - Level 4
MG4 - Level 6
AUG HBAR - Level 32
M240 - Level 52
Attachments for the LMGs:
Grip (10 Kills)
Red Dot Sight (25 Kills)
Silencer (75 Kills)
ACOG Scope (150 Kills)
FMJ (300 Kills)
Holographic Sight (60 Kills while looking through the Red Dot Sight)
Thermal Scope (20 Kills while looking through an ACOG Scope)
Extended Mags (40 bullet penetration kills with FMJs)

Intervention - Bolt Action, unlocked at Level 4
Barrett .50 Cal - Semi-Auto, Level 4.
WA2000 - Semi-Auto, Level 36
M21 EBR - Semi-Auto, Level 56
Attachments for the Sniper Rifles:
Silencer (10 Kills)
ACOG Scope (25 Kills)
FMJ (75 Kills)
Heartbeat Sensor (15 kills with silencer)
Thermal Scope (20 kills while looking through an ACOG)
Extended Mags (40 bullet penetration kills with FMJs)
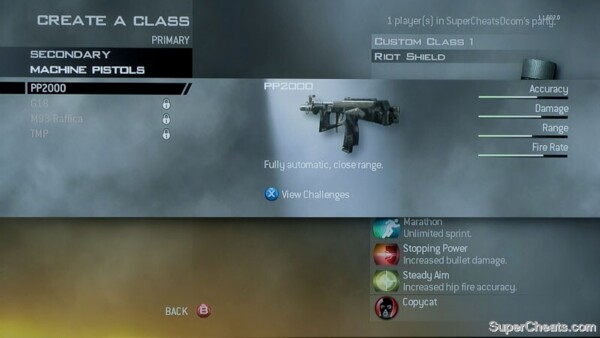
PP2000 (Level 4)
G18 (Level 22)
M93 Raffica (Level 38)
TMP (Level 58)
Machine Pistol Attachments
Red Dot Sight (10 Kills)
Silencer (25 Kills)
FMJ (50 Kills)
Akimbo (75 Kills)
Holographic Sight (10 Kills)
Extended Mags (150 Kills)
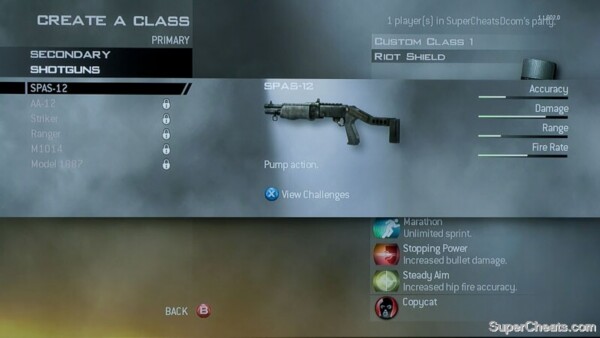
SPAS-12 (Level 4) Pump action
AA-12 (Level 18) Full auto
Striker (Level 34) Semi-auto
Ranger (Level 42) Double barrel
M1014 (Level 54) Semi-auto
Model 1887 (Level 67) Lever action
Shotgun Attachments
Red Dot Sight (10 Kills)
Silencer (25 Kills)
Grip (75 Kills)
FMJ (150 Kills)
Holographic Sight (250 Kills)
Extended Mags (400 Kills)
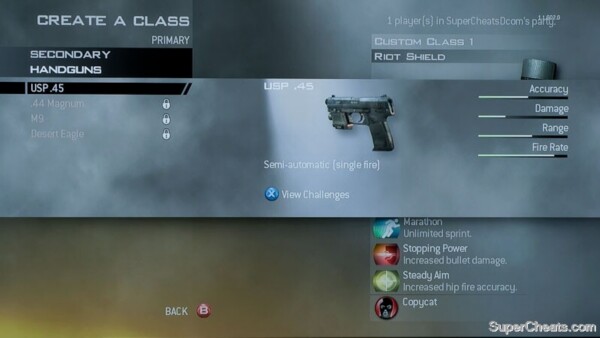
USP .45 (Level 4)
.44 Magnum (Level 26)
M9 (Level 46)
Desert Eagle (Level 62)
Handgun Attachments
FMJ (10 Kills)
Silencer (25 Kills) (USP .45 and M9 only)
Akimbo (50 Kills)
Tactical Knife (100 Kills)
Extended Mags (150 Kills) (USP .45 and M9 only)
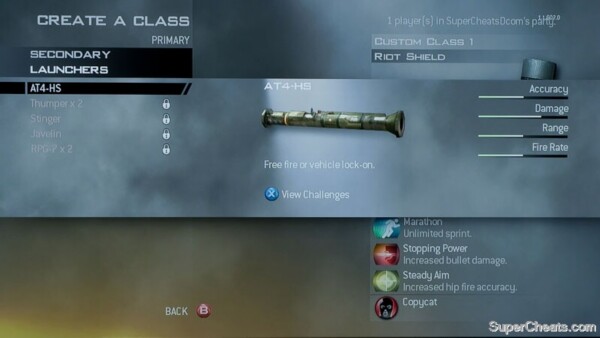
AT4 (Level 4) Free fire or lock on
Thumper x2 (Level 14) Grenade Launcher
Stinger (Level 30) Must lock on target
Javelin (Level 50) Must lock on location or vehicle
RPG-7 x2 (Level 65) Free fire
Equipment (see comments above)
Frag Grenade (Level 4)
Semtex (Level 4)
Throwing Knife (Level 7) Knife that you throw, can pick it up off the ground/dead body
Tactical Insertion (Level 11)
Blast Shield (Level 19)
Claymore (Level 31)
C4 (Level 43)
MW2 shipped with 16 multiplayer maps. Their names and a brief description of each follow:
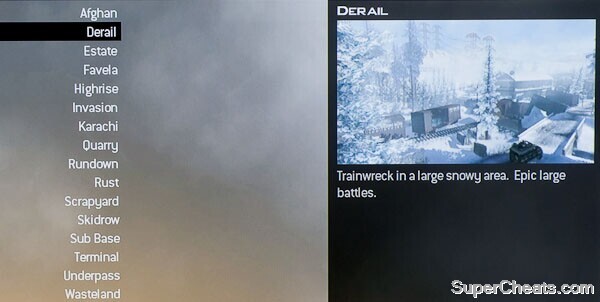
Afghan: Open desert map with plane wreckage in middle, a cave with multiple access points, and some bunkers to the northeast. Watch for players using a Speed class to cover the map quickly, and also for snipers in the bunkers and on the cliff to the west. You can jump off the cliff if you land on the mattresses below. You can also climb up on the airplane in the middle of the map for some good vantage points.
Derail: Open snowy map with train wreck and central building, rooftops for sniping, frozen river and lake, other buildings on perimeter. For a large map, this one gets better use on the perimeter because of the sightlines from rooftops and upper floors at opposite ends. While there is almost always action in the central building, there is often someone sniping from at least one end of the map. The wrecked train cars and opposing raised walkway on the west side of the map.
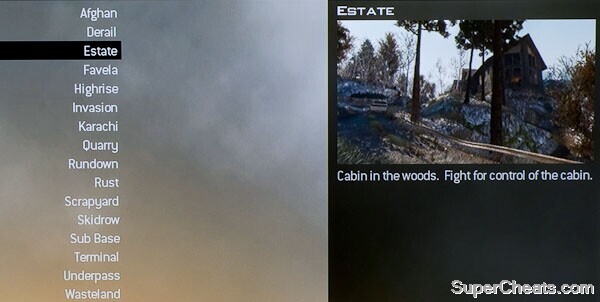
Estate: Multi-story house, boathouse, greenhouse at top of map, other buildings on lower section. Most fighting is drawn to the main house and trying to control its three levels. The upstair of the main house has two access paths, the main stairway opposite the front door, and a route over a wood pile to an upper balcony in the rear. The main flor is accessible from the front and the rear as well as from below via the basement stairs. While objective game modes make good use of the entire map, deathmatch games tend to waste most of it by concentrating on the main house.

Favela: Multi-level dense map of paths and buildings to enter with lots of rooftop access, open area at top and central courtyard. Perhaps the most complex of the original 16 maps, Favela’s central buildings have many stairways, ladders, planks and jumps connecting them for the player who has learned his or her way around.
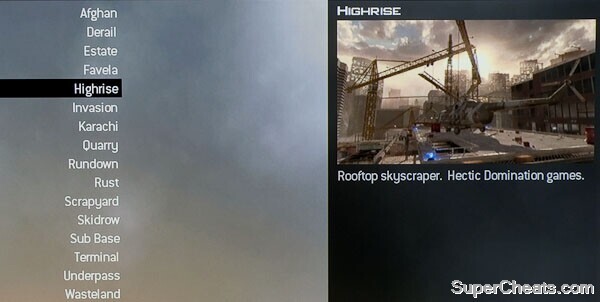
Highrise: Skyscraper map with opposing office sections, tunnel access to both with open area in middle below main level, crane with access, some perimeter climbing/glitch spots. It’s possible to move from the center helo pad across the cranes to a region ‘outside’ the map and hundreds of feet in the air to shoot back on top the map proper. You can also use this route to reach an elevated section in the north building. Take a leap of faith to grab the broken scaffolding to the left of the south building, then follow the ledge around to reach the rooftop. A lower level connects the two sides as well as offering an alternative route to the east from below. Similar to the central rooftop in Terminal, a good shot can make a long stand from the roof of the small building on the west side of Highrise. If an enemy tries this, blow up the tank he’s hiding behind.
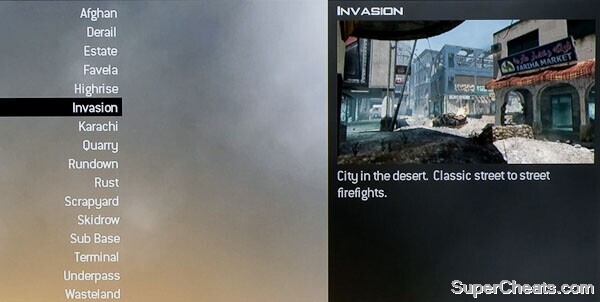
Invasion: Urban desert with many interior building paths, some multi-level buildings, gas station with roof to the south, multi-level mosque at the north west. Standard left, right and center paths connect the two sides, thought the west route along the river is fairly exposed. As you move east the buildings often have two levels, so look for ladders and stairways, and there is almost always someone on the rooftop by the gas station.
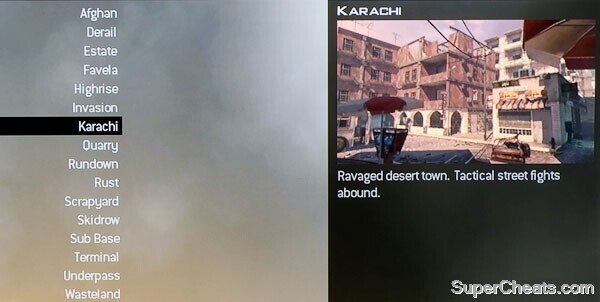
Karachi: Urban desert with many interior building paths, some multi-level buildings, popular rooftop spots, even a market with chickens in cages. Mainly a close-quarters map, Karachi finds most fighting in the areas surrounding the destroyed building in the center of the map. Rooftops to the south and southeast are popular and easy to defend until an enemy gets a Predator missile.

Quarry: Stone quarry with many levels/buildings on perimeter of multi-level stone blocks. This mp is basically a bowl with several locations where you can see from one side to the other, so try out the Javelin if you have it. Several buildings have upstairs catwalks with windows, so watch for snipers there and also scattered around the many stone blocks that surround the central tower.
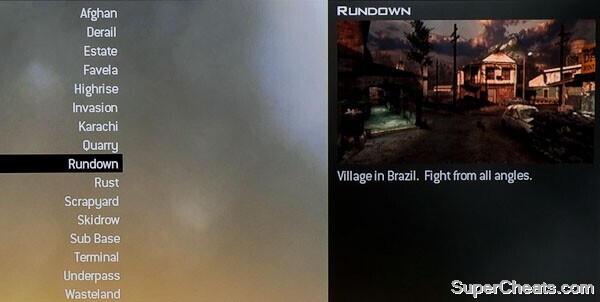
Rundown: Village at dusk with canal running north to south down the middle, buildings on both sides, many with interior access and upper floors with windows. The defining element of this map is the fact that access from one side to the other can controlled at four pinch points. There are three bridges, one with stairs from the canal below, all vulnerable from windows on both sides, and one set of stairs at the south of the canal that comes up several feet away from the southern-most bridge. Teamwork can own this map by controlling the bridges and the south stairs, though this is more easily done from the north-east side of the map. With the B flag on the center bridge in Domination, the north-east side is the one to take and control. Large open areas surround the central buildings, offering something for every play style.
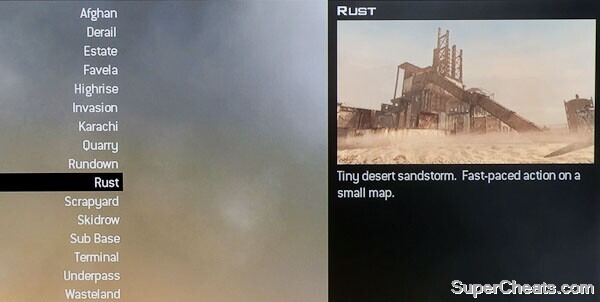
Rust: Very small map with a pipeline and tower to climb. This began life as a Free For All map but has now been added to games with more players. It’s pretty hectic with 12 players and matches don’t last long because you rarely have more than a few steps to take before spotting an enemy or dying. Set your Killstreak rewards to Care Package and Sentry Gun. The latter can rip up enemies on such a small map, and if you live long enough to claim the former, hope for a Harrier or Helo, which can be murder on the other side.
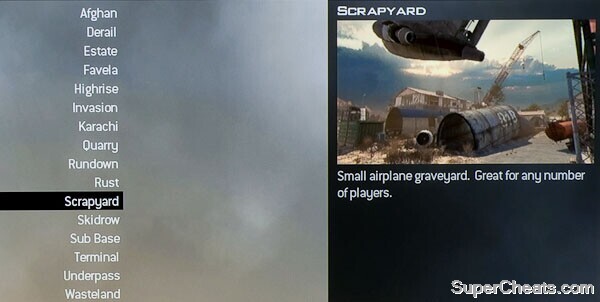
Scrapyard: Small map with broken airplanes in middle and perimeter buildings on all four sides. A warehouse on the south faces an office building on the north side, and both have upper level windows to watch out for, though the warehouse is more exposed due to the upstairs being a metal catwalk. Climb the ladder in the warehouse to the top level where you can see most of the map. Upstairs in the office has only one staircase and can be protected well with a Claymore. Inside the planes is close quarters combat, so a shotgun comes in very handy as your secondary weapon.

Skidrow: Urban office/apartments with tunnel on one side and central interior multi-level section that opens to street on one end and garage with forklifts on other. Mot of the action is in the book store at the center of the map that connects the playground with the forklift garage. Watch for holes in the ceiling above and stairs/hallways that lead into this zone of death. The good news is there are several places for Emergency Airdrops that allows you to claim all four crates and protect them once they’ve fallen. Watch for a machine gun turret above the playground, which can add to the kill count in the book shop.
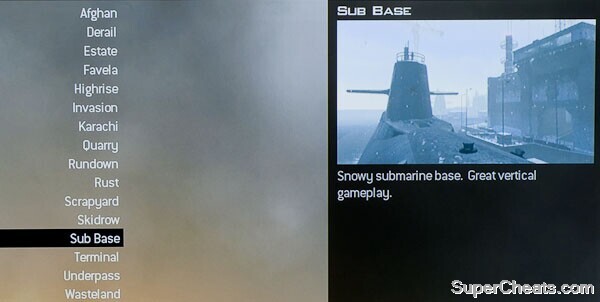
Sub Base: Snowy submarine facility with multi-level buildings, exposed central courtyard and peripheral paths. Many levels have exterior walkways or platforms, so seek out the higher ground and watch out for threats from above if you’re on the ground level. The central courtyard is surround by elevated rooftops and walkways, and most cross-map traffic seems to take place at the north and south sides for this reason. Toss an Emergency Airdop in the middle and sit back to watch the fun.
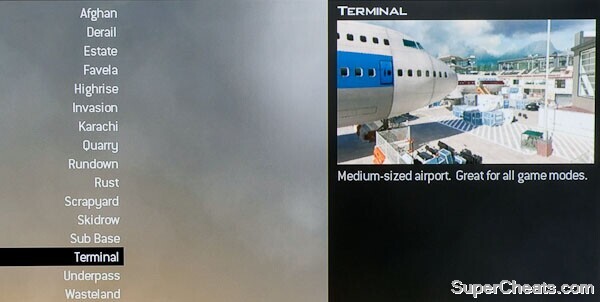
Terminal: Airport terminal with outdoor plane to enter from three points, interior airport waiting area with escalator and shops. This map is divided distinctly into two sides by one tight choke point, the entrance to the plane from the terminal, and the wider, more open one, the escalators leading from the upper to the lower level. In the middle is the rooftop from which you can see/shoot in 360 degrees. It has two entrances, a ladder adjacent to the escalators, and a barrel/storage crate on the level just below the rooftop. He who controls this area often controls the map as the vantage point is very good. Watch for Tactical Insertion flares up there, and once you gain that position, don’t give it up!
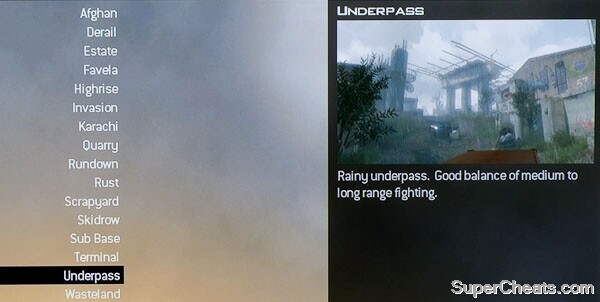
Underpass: Area under partially destroyed freeway overpass, with a grassy side divided from rundown buildings by a large flood drain with bridge. The many overpass structures make airdrops a challenge, and many matches will see a care package dropped where no one can reach it. The random approach direction of Emergency Airdrop planes means that even the best spots aren’t sure bets. There are plenty of buildings to explore as you look for good sight lines, and many levels on this map. The levels crisscross in several places, so beware of being picked off from above.
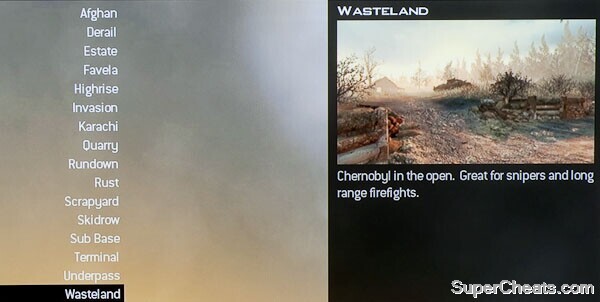
Wasteland: Redo of COD2 field map with central bunker that has three access points and some perimeter buildings. Most fighting in DM seems to focus on the bunker, but watch for snipers on the perimeter of the map picking off those coming and going to the party in the middle. Not much cover from Predators on this map, so when you earn one you’re sure to get somebody, and sometimes more than one if you can get lucky at one of the bunker’s entrances. This is another map with a border marked by radiation, so be careful to move back toward the center if you hear that clicking sound.
DLC Maps: As of now there are no plans for DLC until 2010 according to IW. Players can expect at least one set of maps to be offered at some point, however, probably by Spring 2010.
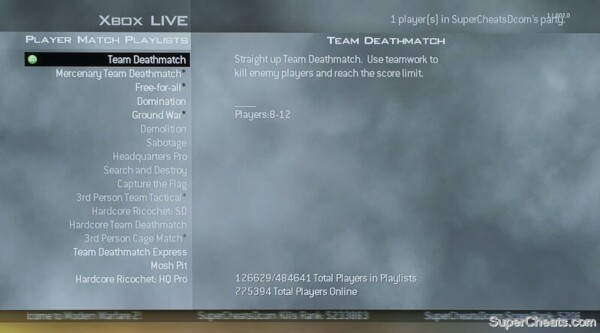
Team Deathmatch (unlocked Level 1): Work as a team to kill as many of the opposing team as possible, up to six players per team.
Mercenary Team Deathmatch (unlocked Level 1): Team Deathmatch with no parties allowed. Join alone and play with five random teammates against six players.
Free-for-all (unlocked Level 1): Every player against every other player.
Domination (unlocked Level 4): Capture and control three points on the map, gaining points toward victory for controlling more points longer than other team.
Ground War (unlocked Level 4): Team Deathmatch and Domination with up to nine players per team.
Demolition (unlocked Level 7): Attack and destroy two bomb sites within a time limit.
Sabotage (unlocked Level 10): Fight for control of a neutral bomb and plant it on the enemy’s bomb site to win.
Headquarters Pro (unlocked Level 10): Capture and defend a randomly spawning HQ site, gaining points toward victory for holding sites longer than other team.
Search and Destroy (unlocked Level 13): Defend and destroy the objective, no respawns.
Capture the Flag (unlocked Level 16): Bring enemy’s flag to your base while your flag is home to score.
3rd Person Team Tactical (unlocked Level 19): Team Deathmatch, Domination, Capture the Flag and Demolition from third person perspective.
Hardcore Ricochet (unlocked Level 19): Search and Destroy: Hardcore (limited HUD, extra bullet damage) S&D with ricochet friendly fire (friendly fire is directed back at shooter).
Hardcore Team Deathmatch (unlocked Level 19): Limited HUD, extra bullet damage, friendly fire ON.
3rd Person Cage Match (unlocked Level 19): 1 vs 1 deathmatch with third person perspective.
Team Deathmatch Express (unlocked Level 1): TDM with shorter time in lobby between games.
Mosh Pit (unlocked Level 1): Mixed bag of many games in one playlist.
Hardcore Ricochet (unlocked Level 1): Hardcore (limited HUD, extra bullet damage) Headquarters Pro with ricochet friendly fire (friendly fire is directed back at shooter).
Be creative: try different weapons and options to see what they can do. Map: Rundown.
All of the MP game modes have as their basic underlying principal the idea that it’s better to get more kills for your team than you offer deaths to the other team. This is most obvious in the Deathmatch modes, whether team based of solo (Free For All), but the objective modes are the same in that if, in Domination, you can keep killing the enemy players, they are less able to claim and hold the objectives; whenever they are spawning or running to an objective they are not actively contributing to their side’s score. The best players realize that a positive kill/death ratio is a better help to a winning effort than a lot of kills balanced by an equal number of deaths. A player who goes 10-5 has made a bigger contribution to a victory than a player who went 20-18 by a factor of 5-2.
The beauty of IW’s multiplayer environment and its many possible combinations of perks and weapons is that it allows players of many different abilities and style to be successful IF each gives some thought to which tools and abilities are available.
Use the tools you’re given—your UAV is invaluable. Map: Afghan.
There will always be more gifted players who can out shoot most opponents, and for whom the more subtle game options are of no interest. Indeed, such perks as Cold Blooded and Ninja may be disadvantages because they make it harder for enemies to find you. If you’re a quick, accurate aimer who never misses and who can outshoot anyone who dares play against you, Cold Blooded is the last perk you’d choose, because you want enemies to know where you are and come to you so you can kill them.
If, however, you prefer a different style of play, the many possibilities will almost certainly allow you to come up with something that helps you win more than you lose. If you’re not a quick shot but you are patient and don’t mind or even prefer a slower pace, create a class that suits those qualities.
If you’re a terrible shot, have no gift for strategy or clear thinking during the game, and you don’t mind the ridicule and ill will back in the lobby after the match, by all means grab some C4 and camp in a dark corner for a while. This is just a video game and all are free to play it however is enjoyable and rewarding to them.
Sometimes you’ll get unlucky. Map: Derail.
Pay attention to what weapons other players use, how they play, and if that combo works. Then try it for yourself to see if it suits you. You can even copy it exactly with the Copycat Deathstreak. Use the Killcam to watch what other players do and you might learn new strategies that will work for you.
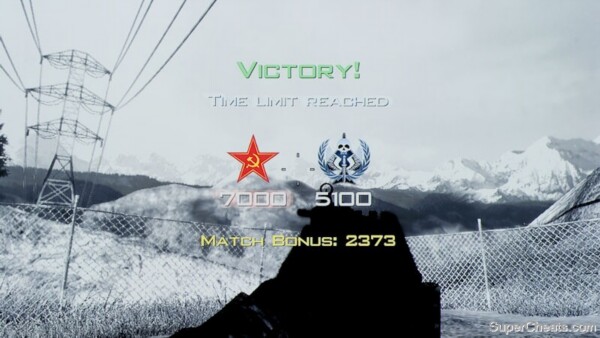


 Fallout 4: The Railroad - Operation Ticonderoga, Precipice of War and Rockets' Red Glare
 Heavy Rain Guide
 How To Simply and Effectively Deal With Remote Access Trojans
 How to Complete GTA 5 Online Series A Funding Heist : Trash Truck
 How to Save Safari Downloads to the Cloud Automatically