Unofficial Call of Duty: Black ops 2 Guide by vhayste for
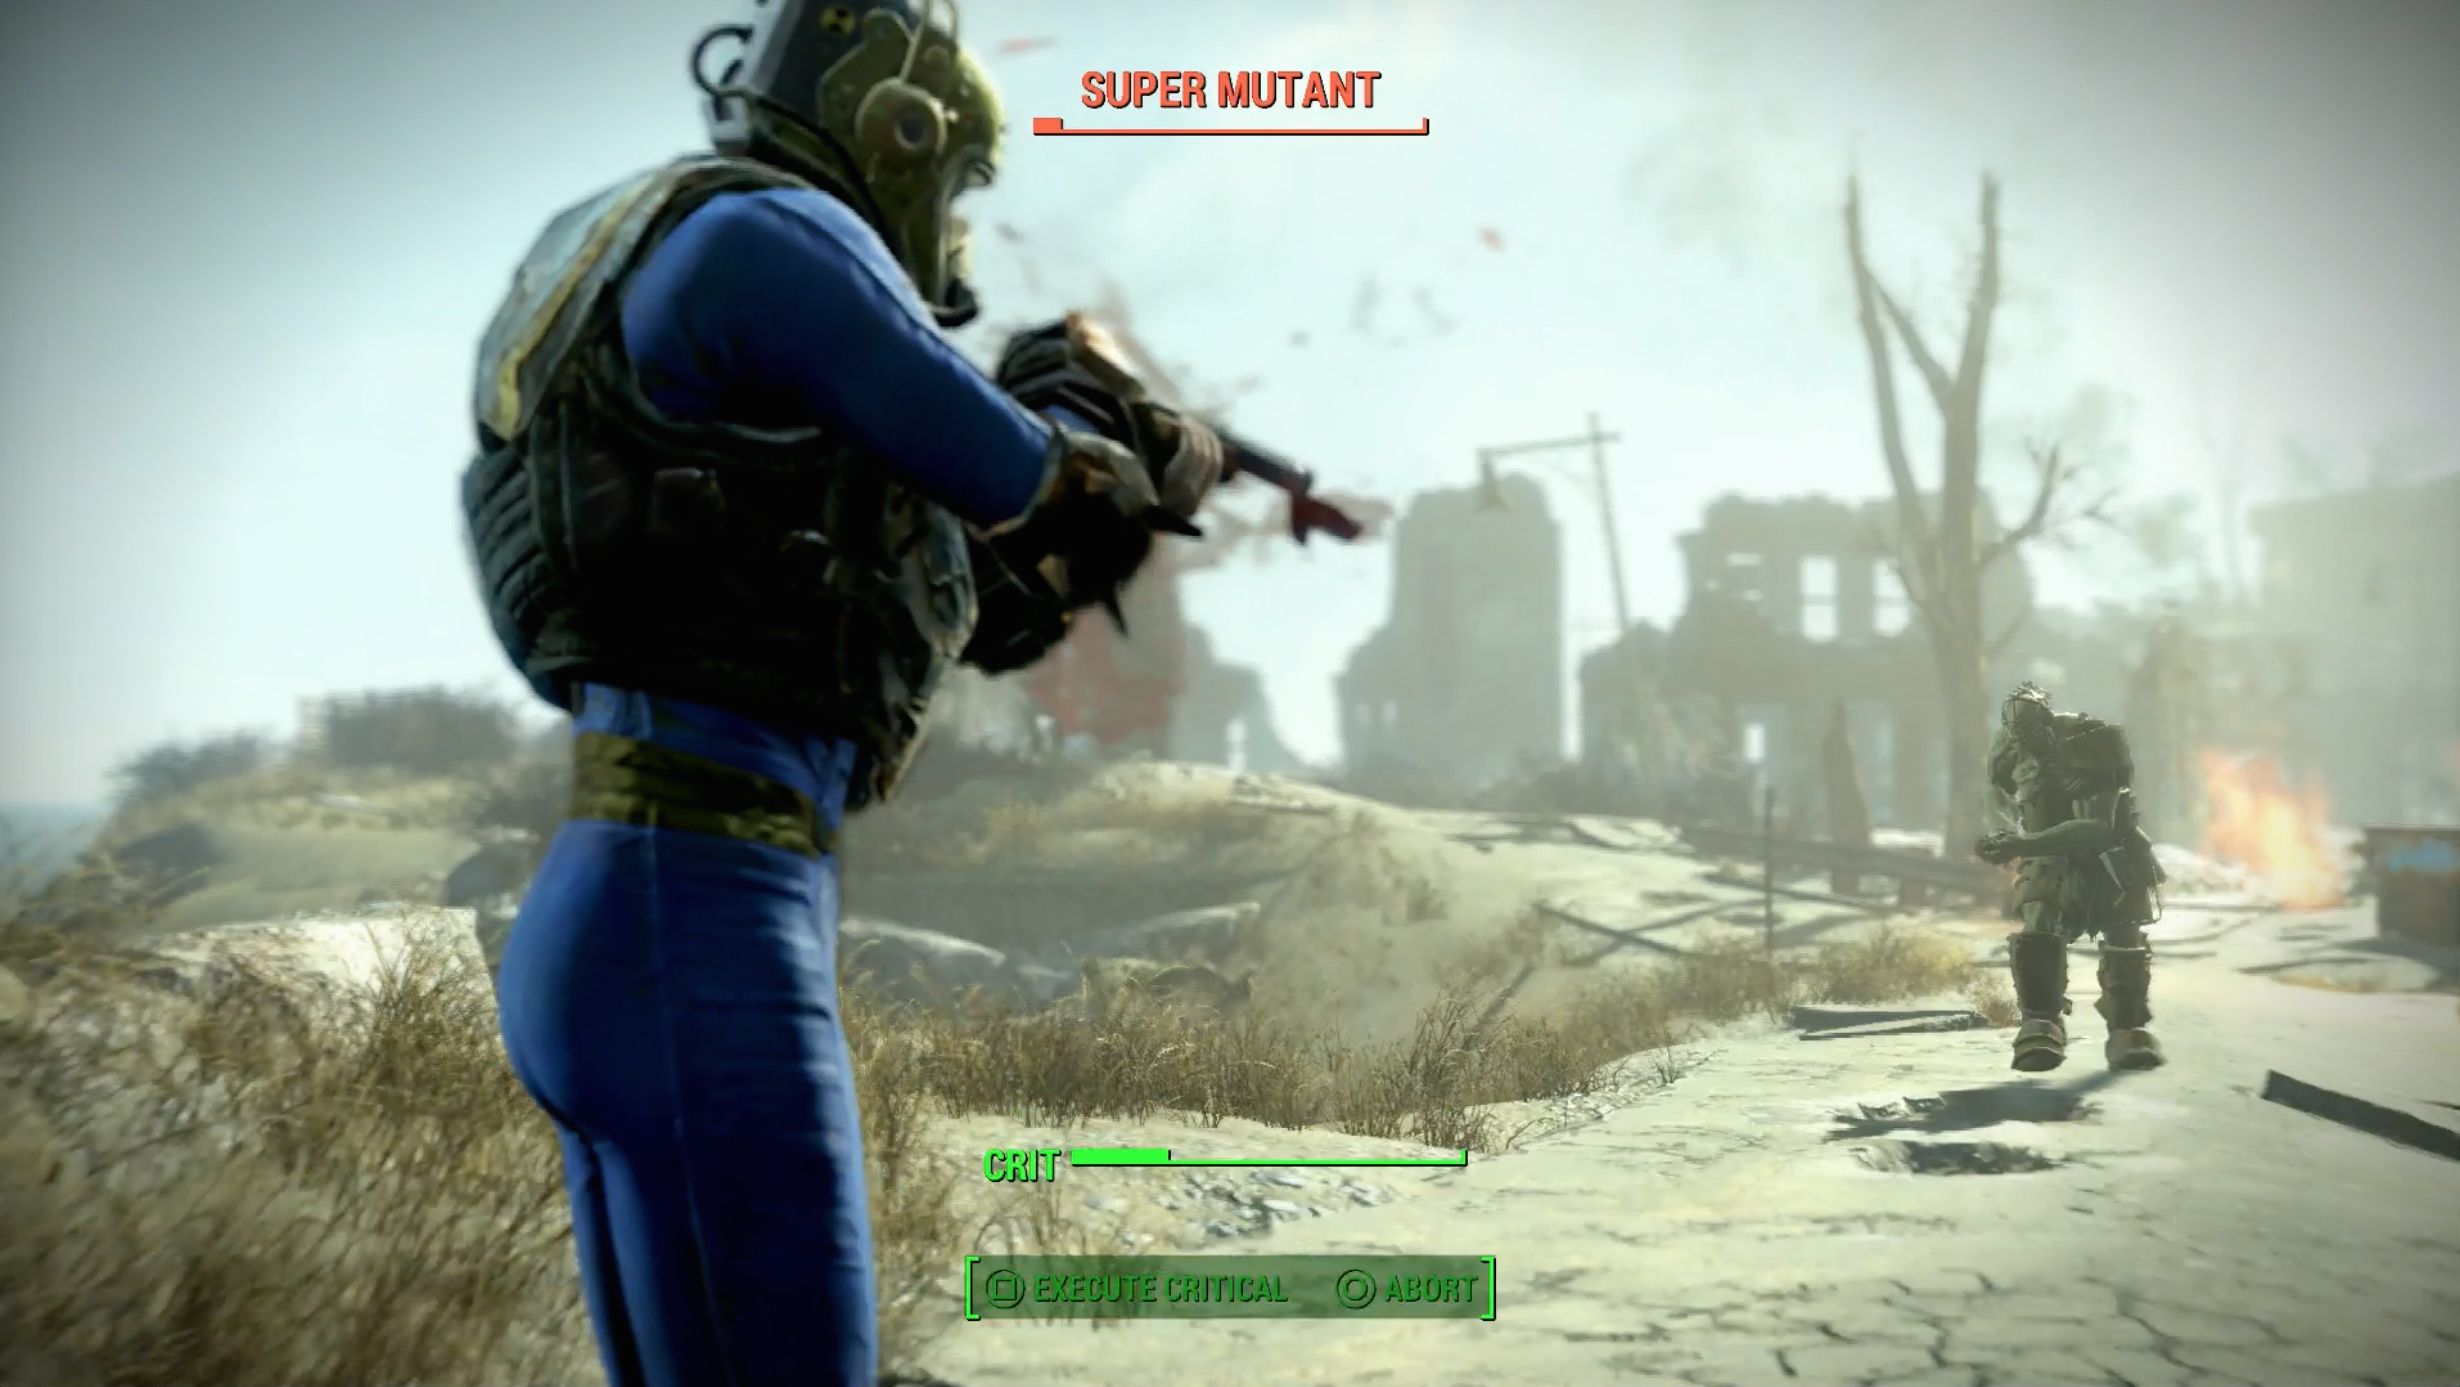
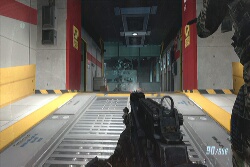
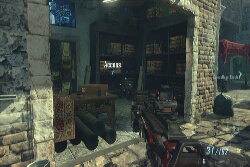
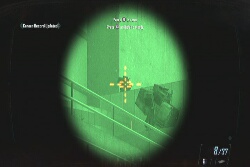
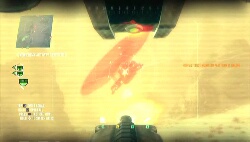
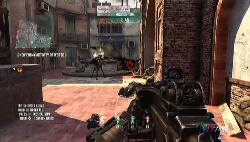
Welcome to our unofficial Call of Duty: Black Ops 2 Guide. Here you will find the complete single player walkthrough plus all the Intel Locations. We've added these into the walkthrough so you can easily find them as you play through, and also collated them into an Intel Locations document at the end of the document so they are all together in one place. We've also covered Strike Force Missions in this guide. Black Ops 2 is the sequel of the 2010 hit, Call of Duty: Black Ops. Players will undertake missions that happened in the past and the game's "current" futuristic setting. Players will have control over the course of the story by making major decisions and turning points as well completing covert Strike Force operations. SPOILERS BELOW!!! SPOILERS BELOW!!! SPOILERS BELOW!!! SPOILERS BELOW!!! SPOILERS BELOW!!! If you're after some missable trophies, you have to make the right choices during the course in the game. Refer to the list below: Mission 5: Avoid driving through the fire during the last part of the mission. (See the Hey Good Looking trophy) Mission 6: Catch up with De Falco and kill him. Otherwise, successfully complete the strike mission “Second Chance” Mission 7: Don't kill the target with a headshot; shoot him in the knee twice instead (See Family Reunion) Mission 8: Before starting the mission, finish the last strike mission “Dispatch”. This SFM is only available after successfully completing all four preceding SFMs. Mission 8: Kill Harper during the interactive scene. Mission 9: Don't kill the admiral but shoot him in the leg instead Challenges Once in control, head to the right side of the hill and fight your way to the marked vehicle. Before accessing it, grab the intel by the hole. Be careful of the mortar explosions before getting it.
This unofficial guide will help you get through the main campaign and strike force missions, gather all the intel in each campaign level, a brief guide in the game's impressive multiplayer.
Missable Trophies - Spoiler Alert!
Mission 3: Resist killing Kravchenko three times during the interrogation
Mission 1: Phyrric Victory
- Eliminate Enemy personnel (x15) with machete
- Destroy the MPLA tanks
- Eliminate enemy personnel (x5) with one mortar explosion
- Sink enemy vessels (x5)
- Dive to prone on an enemy grenade and survive
- Eliminate enemy personnel (x10) with animal trap
- Kill (x4) enemies with one mortar primed animal trap
- Use elevated improvised positions for confirmed sniper kills (x20)
- Collect intel (x3)
- 100% survivability rating
Before starting the mission, you'll have the option to select you have the option to select your loadout. You'll have the default for now but more options will become available as you continue. There are also 10 challenges per mission; completing all of them unlocks a Trophy. (More details in the Trophy List section of the guide)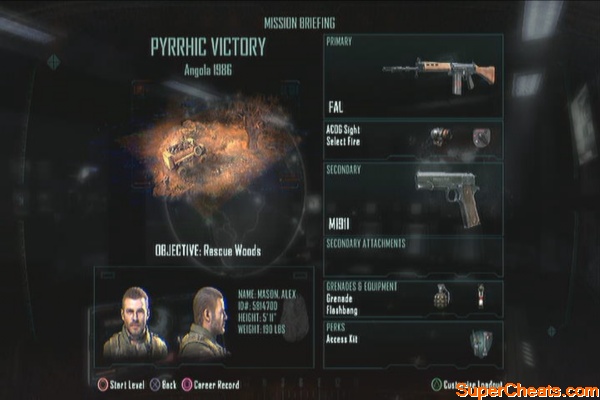
Mortar Intel
Next, access the compartment of the overturned Buffel and grab the mortar rounds there. Next, find the mortar team's positions and take them out. 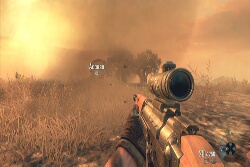
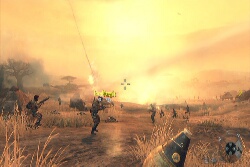
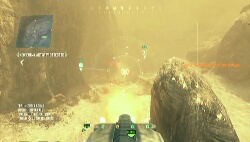
After taking out the mortar teams, more enemies will continue to pour in, including some tanks. Call in air support and manually control it to destroy the enemy armor. Keep killing more enemies. An enemy technical will appear in the battlefield. Take out the gunner and wait until more enemy vehicles appear. Call in another round of air support to take them out.
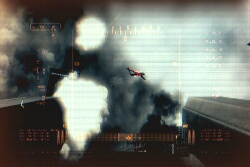
Death from above
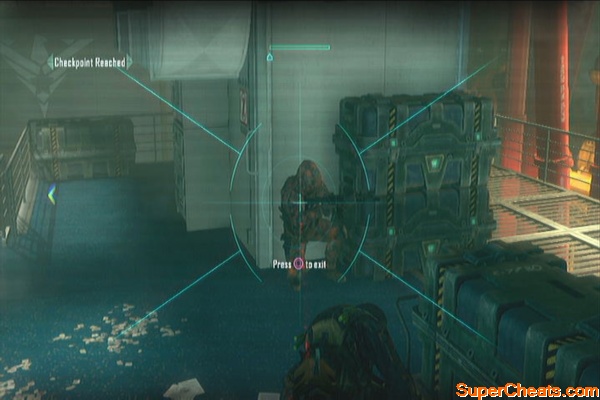
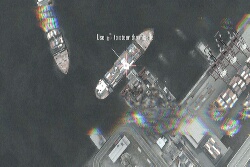
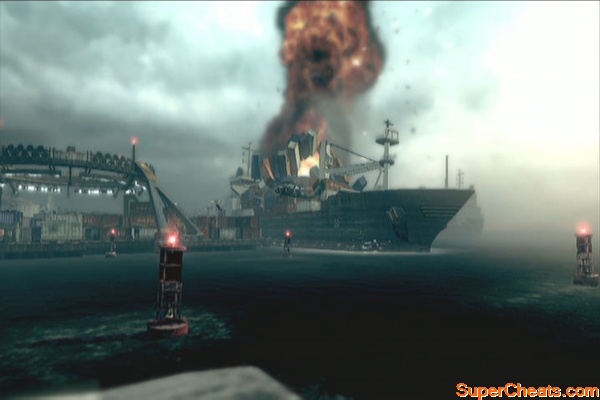
Once the enemy vehicles are destroyed, mount the Buffel to lead the final push. Keep shooting at the running enemies until a scene triggers. Next, you'll have to secure the barge. After landing in the barge, sweep the deck then open the box to equip a flak jacket. Next, take out the gunboats using the MG's placed in the right side and upper deck of the barge.
Death from above
Once the pursuers are taken out, climb the upper deck and check the corner after the MG emplacement to find another intel.
Barge Intel
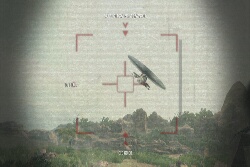
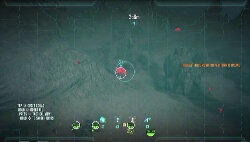
Regroup with your partner and open the container. After recovering Woods, equip the Valkyrie from the nearby container and use it to destroy the enemy helicopter. Take note that this weapon has limited range and you need to steer it manually to the target. 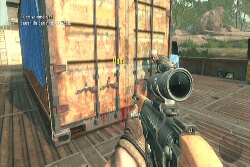
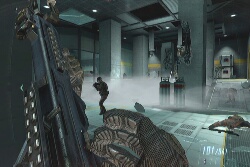
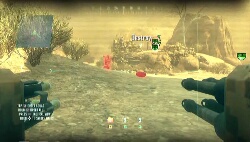
Follow the path and head to the village. Take cover behind the log when prompted. Crouch down and let the patrol pass. Head to the wooden hut then take cover again when you spot a new patrol. Follow your partner to the grass then crawl again to maintain cover. Continue forth when it's safe until you put Woods down. Head to the radio tower and grab the animal trap from the shed along the way. 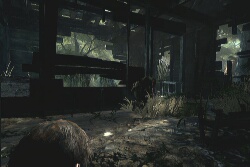

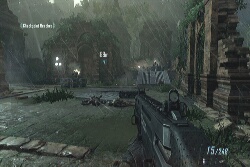
Crawl in the grass then head to the radio hut. Approach the window for a scene. After escaping the explosion, return back to Hudson and escape to the river. You can lay down animal traps along the way. Keep killing your pursuers and defend your position until you're ready to leave. After you reach the second area where you have to dig in and make a stand, check the platform on the tree to the northwest to find another intel. 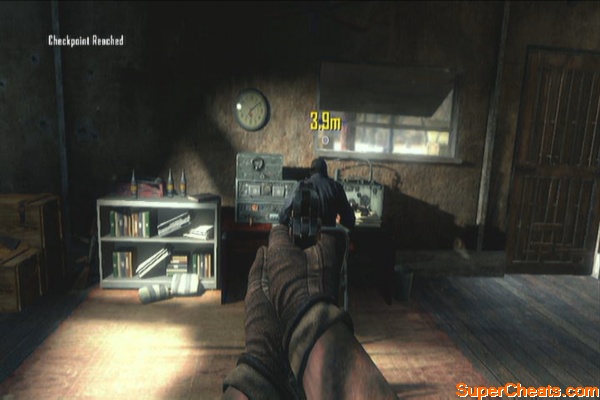
Jungle Intel
Continue killing enemies and follow Hudson when you tells you to move. After jumping off the water fall, take cover behind the rock and take out more enemies. Once Hudson is on the move, regroup with him and carry Woods to the objective. Mission complete.
Challenges
- Eliminate enemy heli before lift off
- Destroy sentry turret (x2) while disabled
- Eliminate enemy personnel (x4) with one round from Titus weapon
- Eliminate enemy personnel (x10) with heli turret
- Eliminate enemy personnel (x30) while using optical camo
- Destroy enemy ADs (x2) by exploding nitrogen tanks
- Eliminate enemy personnel (x10) with the Assault Shield
- Protect ASD resource from destruction
- Collect intel (x3)
- 100% survivability rating
For the first part of the mission, you have to alternately swing until you reach the rendezvous point. Just follow the onscreen instructions. After meeting up with Crosby and Salazar, stand near the edge of the cliff then deploy your wing suit when prompted. Use the right analog stick to steer. Just follow the flight path then deploy your chutes when prompted. 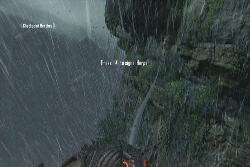

Once you get the go signal, you can head to the left and assassinate the cloaked soldier there. Fight your way to the lift and use it to reach the upper part of the area. 
Continue forth until you reach the landing area. Approach the grounded aircraft but before accessing it, check the room to the left to find an intel.
Landing pad Intel
Next, cut open the grounded aircraft to access its 40mm vulcan cannon and use it to take out as much enemies as you can before it gets destroyed. Next, to the next area. Take cover as there is a couple of auto-turrets here. Destroy them then move forth until you reach the temple door. 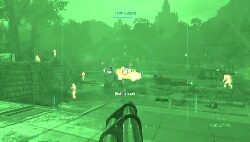
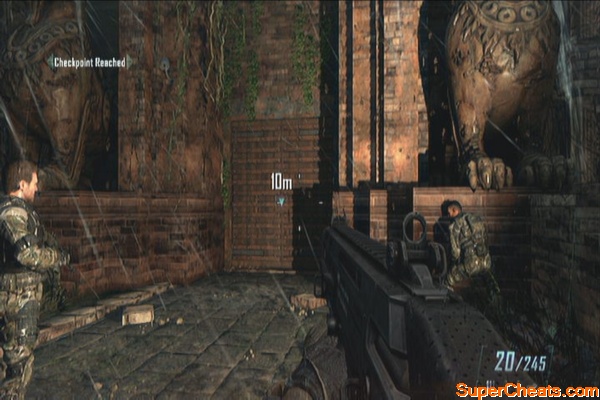
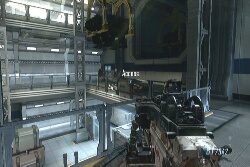
Stand back from the door as your allies will use explosive fletchettes on it. Continue inside to find the facility entrance. Wait until your allies open the door the walk towards the stairs. Take cover after the explosion and take out the drones. Once you've taken out a few enemies, check the room to the to find another intel.
Research facility Intel
After getting the intel, you can continue upstairs or take the path at ground level to clear the area. Kill all enemies until you reach an elevator. The elevator has four guards as well so take them out and use it. Continue to the next area and move carefully as you clear it. 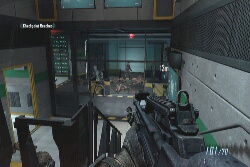
Access the drone bay to activate a friendly ground drone then check the container with your allies to find a researcher. More enemy soldiers will appear, as well as ceiling auto-turrets. After eliminating them, you'll have to open the vault. Before doing so, check the room where the enemies came from to find the mission's last intel. 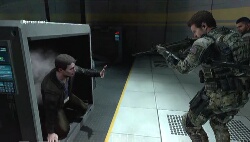
Vault Intel
Open the vault and follow the researcher inside. Obtain the Celerium drive and clear the remaining area to meet up with the extraction team to complete the mission. 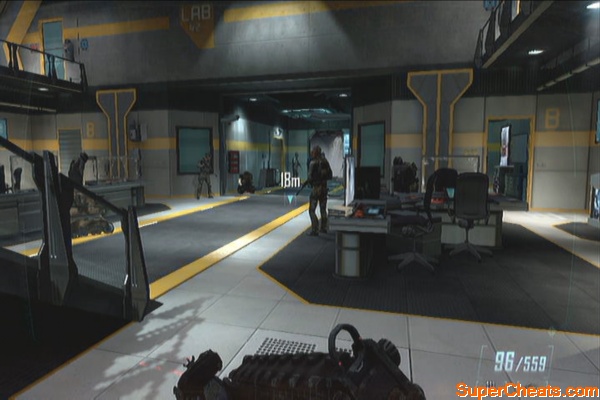
Missable Trophy: Dirty Business
Resist killing Kravchenko three times in a row.
Challenges:
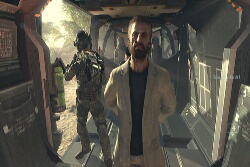
Once in control, go past your horse and pull out the talwar from the corpse. Ride the horse until you reach the Muhajideen camp. Follow Zhao to the briefing room. 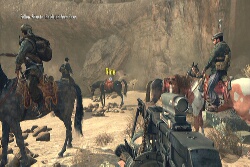
As soon as the attack starts, don't leave the room immediately. Instead, check the dark corner to the right to find an intel.
Briefing Room Intel
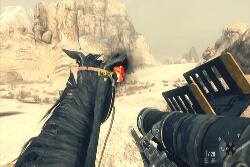
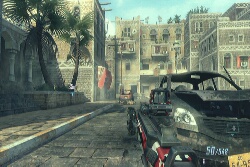
Head outside and follow your allies until you reach the ruins. After dismounting, fight your way to the weapons cache to grab the RPG that can destroy the soviet BTRs. Destroy the BTRs and kill the remaining soviet infantry using the RPG. Before leaving, refill your ammo using the ammo crate nearby then regroup with Zhao and Woods. Plan the cratering charge in their position then take cover. 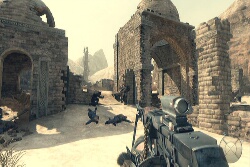
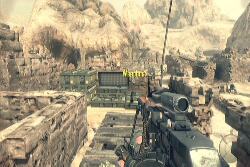
After detonating the triggering charge, ride the horses again and head to the base. There will be a tank at its doorstep but on the way there, take note of an ammo crate (with a red flag) near an uphill. If you follow the target indicator, you'll come across this spot along the way. The mission's second intel is located there.
Desert Intel
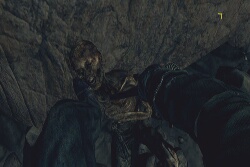
After getting the second intel, ride to the southeast to find some hanging bridges and a shallow cavern. Check near the entrance to find the last intel for this mission.
Desert Cavern Intel
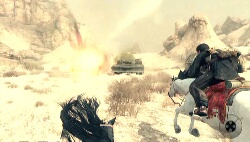
After getting the last intel, head back to your base and destroy the enemy chopper. There will be another marked chopper so find it and shoot it down as well. Another BTR and a tank will then make its way towards the base. Ride to their position and take them out as well. 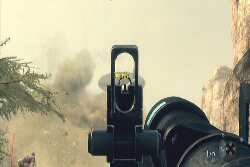
Next, head to the enemy ammo cache to take control of it. Stay put a bit then take out enemy reinforcements. Ride your horse again and head back to base for a scene. Ride towards the tanks and once your horse is taken out, escape and get out of the way. Just watch the next scenes. 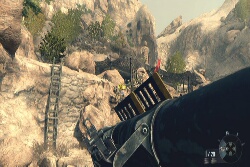
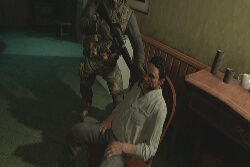
During the interrogation sequence, you must resist killing Kravchenko three times to unlock a trophy. Watch the remaining scenes to complete the mission.
Thorough interrogation
Challenges:
- Eliminate PDF enemies (x7) with shotguns in under 10 seconds
- Eliminate PDF enemies (x8) with truck mounted MG
- Rendezvous with Josefina in under 140 seconds
- Eliminate Cartel enemy personnel with Molotovs (x12)
- Crash an enemy truck
- Eliminate Cartel enemy personnel with mortars (x10)
- Eliminate Cartel enemy personnel with machete (x10)
- Located evidence of CIA presence
- Collecte intel (x3)
- 100% survivability rating
As soon as the mission starts, hack the enemies away until you get a weapon. Grab any rifle from killed soldiers then take out the enemies in the village. Check all the houses to help the oppressed people and continue forth until you reach the stables. 
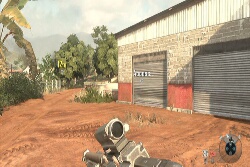
As soon as you reach the stables, head to the exit and check the cart to find this intel.
Stables Intel
Continue to the mansion and clear the guards. Continue inside the mansion and continue upstairs for a scene. 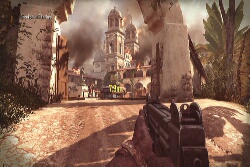
Observe Menendez then move out once the PDF personnel grabs him. Follow your squad then head to the river. Take out the MG by the shack to the right then continue forth. Take out the sniper on the rooftop ahead and move on. Check your fire and avoid hitting any civilians. Head inside the house to the right by the uphill path to find a box containing molotovs. 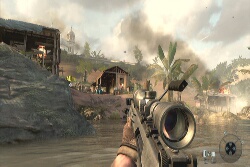
Continue uphill until you encounter an enemy MG truck. Take the driver and gunner out so you can use the mounted MG to take out the enemies. Fight your way to the next house, taking out the snipers by the windows and veranda. 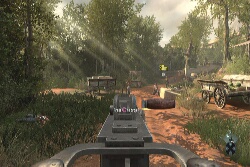
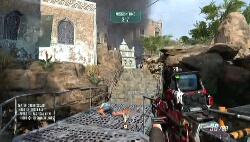
Go upstairs and wait until your teammates open the doors. Jump down to the ground then open the nearby storage to get some mortars. Continue to the courtyard and take out the snipers by the belltower, rooftop and porch ahead. There's another intel in the second level of the bell tower. Continue to the top of the belltower and equip the Dragunov there to eliminate the targets ahead.
Belltower Intel
After clearing the enemies, follow Woods and Aguilar inside the cocaine bunker. Access the armory to get a new melee weapon. Grab some new guns here if you want then continue forth. The bunker is heavily defended so you may want to use the molotovs and mortar shells you acquired earlier. Clear the main area then enter the room to the left before reaching the table barricade on the way to the target. 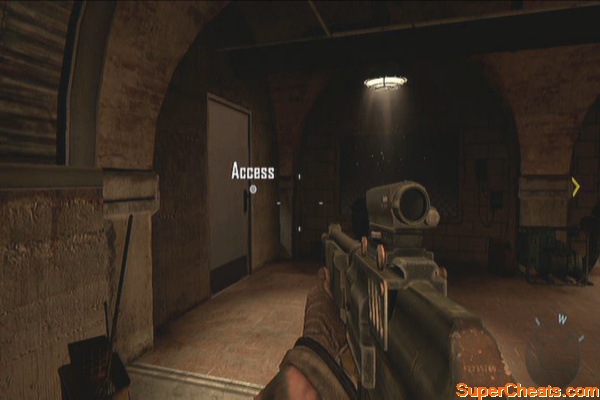
Bunker Intel
Clear the next room then head outside. Follow Woods back inside the house for a scene and to complete the mission.
Challenges:
- Avoid damage from large debris in streets
- Direct CLAWs to eliminate enemy personnel (x8) on the flooded street
- Record 400 TB of data from Mendez surveillance
- Incinerate enemy personnel (x10) with flamethrower attachment
- Protect CLAWs (x2) from destruction
- Deploy SOC-T boost to find alternate routes (x2)
- Destroy enemy vehicles (x20) with drone missiles\
- Destroy enemy vehicles (x8) with the SOC-T
- Collect intel (x3)
- 100% survivability rating
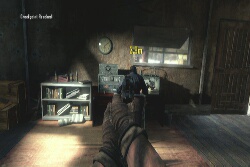
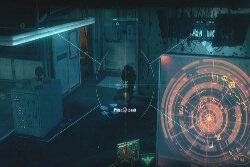
As soon as the mission starts, don't leave the room yet. Grab the first intel on the shelf across the room.
Assault Intel
Clear the building with the help of the CLAWs then head outside to the flooded streets. Be wary of the enemies on the balconies then continue fighting your way through more enemies until a large overturned bus goes your way. Open the gate to the left before the bus crushes you. Check the alley to your immediate right to find another intel and an ammo cache. 
Alley Intel
Follow Woods back to the flooded streets then stick close to him to avoid being spotted by MQ drones. If you get separated from him, then stay low and take cover to avoid the drone's search lights. Follow Harper to the narrow passage. A portion of the building will crumble ahead. Check the ground near the debris to find the mission's last intel. 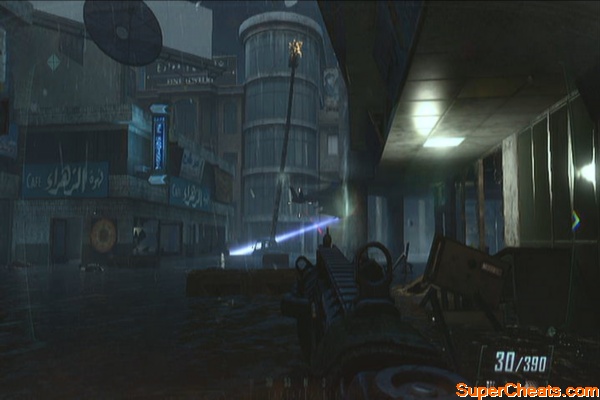
Debris Intel
Take out the guards by the sewer entrance, then head inside. If you have the access kit with you, you should be able to open the iron door containing SOC-T Intel. Slide down the tunnel then continue upstairs to trigger the next part of the mission. 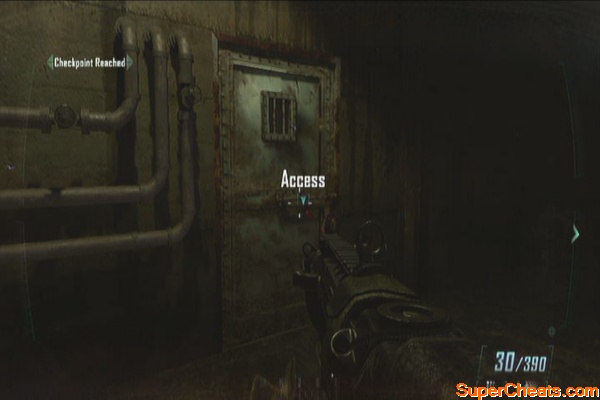
Get to the roof then execute the guards. Zoom in to Menendez to eavesdrop their conversation. Follow Harper to the next observation point then zoom in again to continue eavesdropping. After the target enters the room, continue following Harper to the next point. 
Observe Menendez and Defalco then continue following Harper to ground level. Continue to the trainyard for another surveillance. Finally, follow Harper again and swim to the next area. 
After the scene, head to the rail yard and engage the enemies there. Once available, take control of Brutus and Maximus. Use them to clear the rail yard easily. Once cleared, ride the vehicle to start the next section of the mission.
Twin CLAWs
You'll switch between the drone controls or driving. After the jump, you'll have the option to continue driving or controlling the drone instead. Controlling the drone will be much easier so take control of it and use it clear enemy drones, vehicles and soldiers until it gets destroyed.
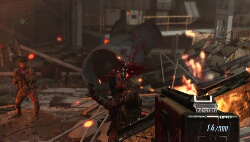
Hasty Escape
During the section where an enemy drone crashes in the oil pipe and causes a violent chain reaction, you must avoid getting Harper's face burned by the fiery jet before reaching the warehouse. In case that happens, save and quit then continue. The game will recognize that Harper didn't get hurt at all and you'll still get the trophy.
Hey Good Lookin
Note: This mission is the turning point for unlocking a few specific trophies, which will depend whether you'll let De Falco escape or kill him before he does. Refer to the Trophies list for the mission specific trophy requirements.
Challenges
- Obtain retina scan in less than 60 seconds
- Retrieve previous cargo (Ziggy)
- Kill enemy personnel with headshots (x5) in Club Solar
- Ensure zero non-combatant casualties
- Eliminate rappelling enemies (x5)
- Eliminate enemy personnel (x25) in the outdoor area
- Incapacitate enemy personnel (x20) using Combatant Suppression Knuckles
- Protect ASD resource from destruction
- Collect intel (x3)
- 100% survivability rating
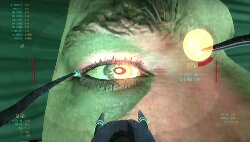
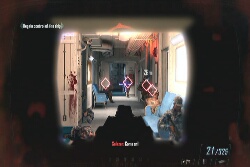
Just get through the security checkpoint and take the elevator. After reaching the CRC, kill the guards then take control of Ziggy. Continue until you reach the electro-static filter. Zap it and continue forth until you reach a vent. Follow the pipes to get through; otherwise, Ziggy will fall to the vent and get destroyed. 
Continue until you reach the opening of the vent. Jump down to the personnel below and zap him to scan his retina. 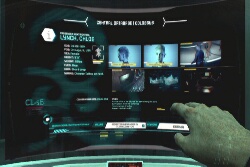
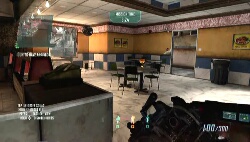
After losing control of Ziggy, enter the server room next then clear the area. Check the table by the wall near the objective point to get the mission's first intel.
Server Room Intel
Examine the panel and follow the directional prompts to search the database. Fight your way to the elevator then head inside Club Solar to find Harper and Chloe. 
Once the security armory is opened, grab some new weapons if you want. If you have the access kit perk with you, you should be able to open another cabinet containing a stun melee weapon. Continue to the mall area then kill the enemies as you move forth. There's another intel inside the d'Ho store in the lower floor so make sure to get it as well. 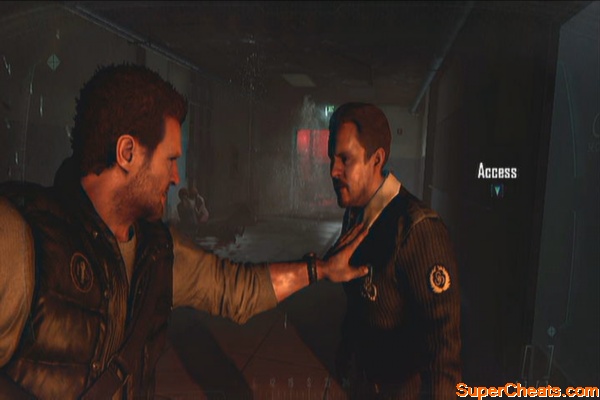
Mall Intel
Head to the second area to find another optional access door and a weapon/ammo cache. Opening the access door allows you to take an ASD with you. Open the door with Salazar to proceed to the next area. Continue outside and clear the enemy. Once DeFalco's name is visible in the hud, keep to the right to find another intel by a kiosk.
Plaza Intel
If you want to kill him move quickly; otherwise, he'll escape and you'll have to rescue Chloe through the Strike Mission, “Second Chance”
Challenges
- Perform a knife throw at enemy guard post
- Survive an enemy RPG blast which causes enemy collateral damage
- Destroy Noriega’s private jet
- Eliminate enemy personnel (x10) with truck mounted MG
- Destroy enemy ZPU (x1)
- Distract enemy personnel (x8) with Nightingale grenades at the same time
- Eliminate enemy personnel (x15) with IR strobe
- Eliminate enemy personnel (x8) in the clinic
- Collect intel (x3)
- 100% survivability rating
Once the mission starts, approach the guard above and attempt to melee him. Mason will do it instead so throw your knife to the other guard. Clear the roundabout of enemies then continue down the street to reach the warehouse. If you have the access kit, you should be able to cut open a locked box containing x8 Nightingale grenades.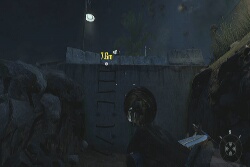

Head to the rooftop and clear it. Next, follow Mason and enter the hangar through the skylight. Once inside, assist the SEALs in eliminating the soldiers inside and follow Mason to the stairs. Before going downstairs, check the shelf beside it to find an intel.
Hangar Intel
Continue outside then kill the gunner. Use the mounted MG at the back of the truck to kill the enemies ahead. Continue following Mason to the next hangar. Kill a few more enemies then head to the marked motel room for a scene. 
Now, you have to escort Noriega to the army checkpoint. Kill the enemies abusing the civilians then follow Mason. You can move separately from them so just keep left and follow the path to find a building containing a second intel. Refer to the video below. It's about 86-88m away from the objective point.
Extraction Intel
After getting the intel, continue to the clinic and breach it to start the next phase of the mission. Once inside, check the sink ahead to find the mission's last intel.
Clinic Intel
Attempt to help the wounded nurse for a short cutscene. Next, kill the enemies that will appear from the corridors then catch up with Noriega. Help him up then get ready to run once a strobe has been thrown. Continue running then jump to the next building. Just follow the path until you reach the allied units. 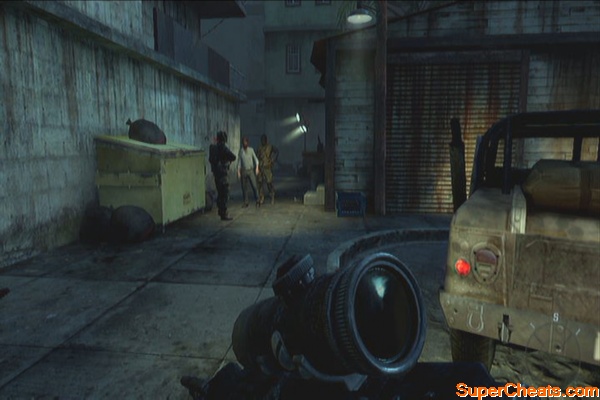
In the next scene, you'll have to shoot a masked target on the ground. Instead of shooting him in the head, you have to shoot the target on the legs, twice. This should unlock the missable trophy “Family Reunion”
Family Reunion
Challenges
- Destroy enemy quad drones (x20)
- Eliminate enemy personnel (x20) with sword
- Melee enemy personnel (x20) while using optical camo
- Destroy enemy quad drones (x8) with turret
- Eliminate Enemy personnel (x5) by exploding vehicles
- Destroy enemy ASD (x4) while disabled
- Eliminate enemy personnel (x5) as VTOL gunner
- Direct quad drones to eliminate enemy personnel (x25)
- Collect intel (x3)
- 100% survivability rating
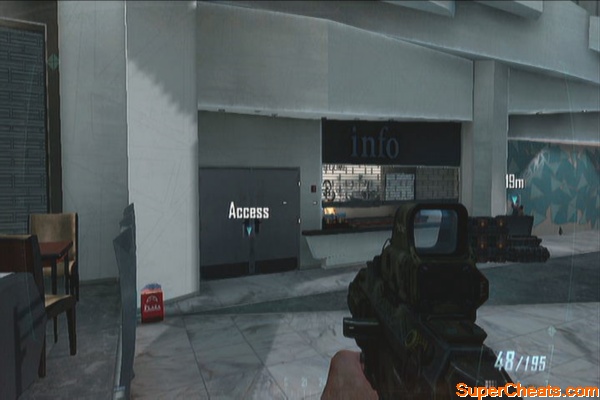
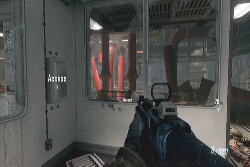
Join Menendez on stage then once the shooting starts, head to the right and enter the room to the left to find the mission's first intel. 
Access Intel
After getting the intel, continue upstairs to find a locked box. If you have the access kit, you can open it to get an optical camo suit. Activate it and head outside. If you head outside and check the textile store to the left, you'll find a cabinet with a sword inside. Pry it open using your access kit. 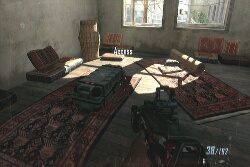
Continue following the objective point and eliminate enemies along the way. You should find an ammo crate and weapon cache across the balcony. Resupply then continue forth. Fight through more enemies and take them out as you meet up with Menendez. Here, you'll have the crucial scene. (Refer to the note at the start of the walkthrough section). 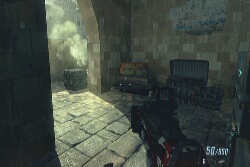
A test of loyalty
Once the second phase of the mission starts, you'll be given manual control over the quads. Continue to the street and enter the first house to the left. The second intel should be behind the boxes inside.
House Intel
Continue upstairs and kill the enemies there. There's an auto-turret at the end of the house so you can order your drones to take it out or destroy it yourself. Once outside, continue until you reach a house. There's a weapon and ammo cache there. Climb the ladder to the roof then get the last intel there.
House Intel 2
Fight your way across the bridge then continue clearing up the last few enemies until you catch up with Menendez and apprehend him in his VTOL. 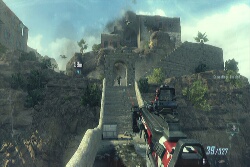
Challenges
- Located gift in Mason’s state room
- Incapacitate enemy personnel (x20) using Combatant Suppression Knuckles
- Provide sniper overwatch for SEAL team advance across flight deck
- Eliminate enemy personnel (x10) with security turret
- Destroy security turret (x3) while disabled
- Eliminate airborne enemies (x8) before they land
- Direct CLAW to eliminate enemy personnel (x5)
- Get to extraction in under 90 seconds
- Collect intel (x3)
- 100% survivability rating
Once the ship is attacked, hack the nearby weapon crate (with the access kit perk) to obtain a stun knuckle. Access the armory net to get your weapons. Head outside and eliminate the enemies. Take note that the ship's automated turrets are also hacked to target you. 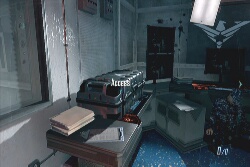
Continue upstairs then move to the bridge. Once inside, destroy the turret by the hallway. If you have the access kit perk, you can open the control panel to the right which will grant you manual control over the bridge turret. Use it to easily take out the enemy forces inside. 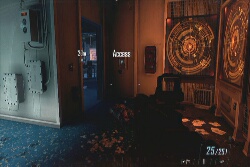
After clearing the room, head to the bridge and grab the intel on the right side corner.
Ship Bridge Intel
Go downstairs and head outside. Grab the sniper rifle nearby and provide overwatch. Kill as many enemies as quickly as you can for your allied ground forces to make it across. Continue to the lower deck then access the turret controls again (with the access kit) to help you take out the enemies. Continue down to the engine room then make your way upstairs. Head inside the room and talk to the technician. 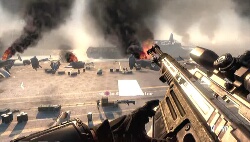
The control will switch to Menendez. Approach Briggs from behind then once in control, shoot him in the leg.
Turning point
Crawl in the vent and make your way to the server room. Approach the terminal then once in control, make your way to the hangar bay. Before going downstairs leading to the hangar bay, take the stairs to the right to find an intel there. Continue to the hangar bay to find Menendez.
Hangar Bay Command Intel
Ride the lift to reach the flight deck. Using the access kit, remove the obstacle from the control kiosk to the left to get the help of a CLAW unit. Now continue straight ahead to find the last intel on the parked VTOL in the far end of the deck.
Flight Deck Intel
Fight your way to the VTOL to evacuate and to end the mission. 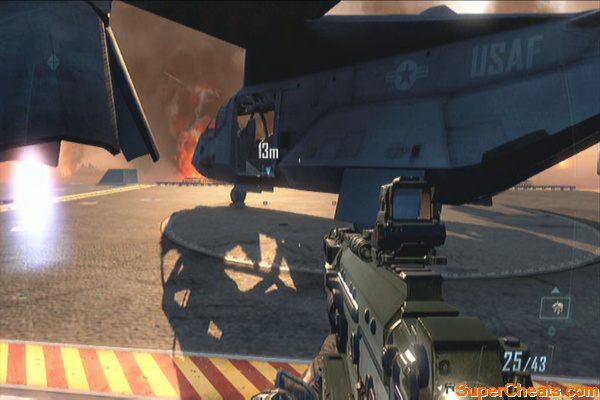
Challenges
- 100% impact ratio with SAM engagement on highway
- Perform headshot (x10) sniper kills from the upper freeway
- Direct quad drones to eliminate enemy personnel (x8)
- Rescue trapped SSA in damaged vehicles
- Destroy enemy drone (x30) using SAM on roof
- Protect G20 cougar at the interaction
- Destroy drones (x3) with one shot
- Destroy drones (x3) with one shot
- Protect all G20 vehicles
- Collect intel (x3)
- 100% survivability rating
After the scene, head to the SAM turret and use it to track and destroy the attacking drones. Keep doing this until you destroy enough of them. Next, regroup with the security detail and choose whether you'll snipe or rappel down. If you choose to become a sniper, prioritize taking out the MG trucks and snipers. Take note that your weapon can penetrate walls by pressing the trigger button.
Security
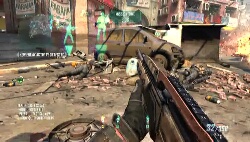
After reaching the ground, check the wrecked SUV to the left to find an intel on the ground.
Expressway Intel
Meet up with the president and approach the lead vehicle. Head to the driver seat and drive it until you collide with a lorry.
Security detail
In the next phase, you have to destroy the enemy CLAW units as you make your way to the street. If you have the Storm PSR equipped, you can easily destroy these CLAWs using a fully charged shot. Enter the building to the left and search the table there to find another intel.
Building Intel
Move up to the street until the third CLAW appears. Destroy it and head to the mall area. There's an overturned armored vehicle there. You can open the hatch using your access kit. This should free the trapped allied elements inside. Order the drones to lay down fire support on the plaza then continue inside the building to the left. There's another optional door you can open but before that, grab the mission's last intel on the souvenir kiosk to the right.
Souvenir Intel
If you continue to the roof, you'll find another SAM turret there. Use it to get rid of some of the drones outside.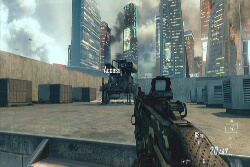
Once the turret is destroyed go back to the ground and continue to the objective point. Take out a few more enemies to protect the french convoy. After the scene, approach Anderson then pilot her fighter plane. Provide armed overwatch while in VTOL mode then after a while, you'll have to pursue high-speed fighter drones. Just follow them and shoot down as many as you can until you bail out.
Armed Overwatch
Clearing the skies
Challenges
- Avoid ALL anti-air missile
- Destroy ALL laser turrets
- Destroy enemy quad drones (x3) while disabled
- Perform sniper kills (x10) from more than 40m distance
- Melee camouflaged enemy personnel (x3)
- Direct quad drones to eliminate enemy CLAW
- Eliminate enemy personnel (x5) with one strike of the kinetic projectile weapon
- Protect ASD resource to the objective location
- Collect intel (x3)
- 100% survivability rating
Once you're in the air, avoid all the anti-air missiles. After landing, regroup with your team mates and fight your way to the objective point. You can also take out the laser turrets on the roof to aid the allied landing. 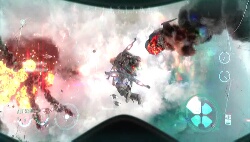
Make your way to the courtyard and clear the blue building #27. The mission's first intel is found on the second floor by the terminal.
Building #27 Intel
Continue to the target building and take out the enemy forces inside. Continue downstairs and hack the terminal by the assemble line to take control of one ASD. Continue further downstairs and take out more enemies. 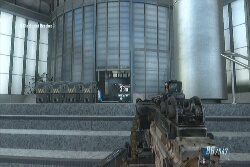
Head to the large control room and clear it. Check the terminal to the left by the second row upstairs to find another intel. Fight your way to the upper floor and approach the terminal for a scene.
Control Room Intel
Explosions will trigger across the base. Continue forth and clear the next area. Make your way to the dark, shaft-like section of the base and find the way downstairs. You'll find the game's last intel there.
Shaft Intel
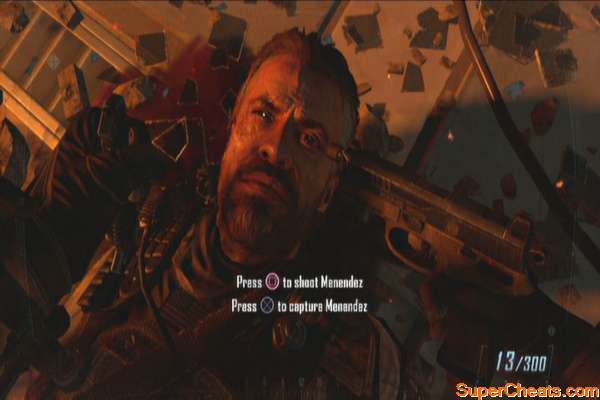
Now continue upstairs and fight your way to more enemy forces until you catch up with Menendez. Kill the two soldiers during the sequence and you'll have the chance to execute or capture Menendez. Do whatever you want (without any repurcussions) to complete the mission and campaign.
Mission 1: Phyrric Victory
1: As soon as the mission starts, head to the right side of the hill and fight your way to the marked vehicle. Before accessing it, grab the intel by the hole. Be careful of the mortar explosions before getting it.
Mortar Intel
2: While in the barge, climb the upper deck and check the corner after the MG emplacement.
Barge Intel
3: During your escape to the river, you'll make a brief stand for the second time. Check the tree platform to the north near the sides to find this intel.
Jungle Intel
Mission 2: Celerium
4: After reaching the landing pad where an repaired aircraft is held, check the room to its left to find the intel.
Landing pad Intel
5: After reaching the research facility in the temple, go inside and check the room to the left.
Research facility Intel
6: After learning about the Celerium from a researcher and repelling the enemy attack group, check the room where the enemies came from to find the mission's last intel.
Vault Intel
Mission 3: Old Wounds
7: After the briefing, don't leave the briefing room yet. Instead, check the dark corner to the right to find an intel.
Briefing Room Intel
8: After detonating the triggering charge, ride the horses again and head to the base. There will be a tank at its doorstep but on the way there, take note of an ammo crate (with a red flag) near an uphill. If you follow the target indicator, you'll come across this spot along the way. The mission's second intel is located there.
Desert Intel
9: After getting the second intel, ride to the southeast to find some hanging bridges and a shallow cavern. Check near the entrance to find the last intel for this mission.
Desert Cavern Intel
Mission 4: Time and Fate
10. As soon as you reach the stables, head to the exit and check the cart to find this intel.
Stables Intel
11: Upon reaching the courtyard, climb the belltower to the right to find the intel in the second level of the belltower, on the top of a wooden crate.
Belltower Intel
12: Once inside the cocaine bunker, clear the main area then enter the room to the left before reaching the table barricade on the way to the target.
Bunker Intel
Mission 5: Fallen Angel
13: As soon as the mission starts, don't leave the room yet. Grab the first intel on the shelf across the room.
Assault Intel
14: After the sequence where you need to push the gate open to escape the flooded streets, check the alley to your immediate right to find another intel and an ammo cache.
Alley Intel
15: While taking cover from the MQ drones, follow Woods until you reach a narrow passage. A portion of the building will crumble ahead. Check the ground near the debris to find the mission's last intel.
Debris Intel
Mission 6: Karma
16: After losing control of Ziggy, enter the server room next then clear the area. Check the table by the wall near the objective point to get the mission's first intel.
Server Room Intel
17: Once you reached the mall area, check the “dHo” store in the lower level to find this intel in one of the shelves there.
Mall Intel
18: While pursuing DeFalco, continue outside and clear the enemy. Once DeFalco's name is visible in the hud, keep to the right to find another intel by a kiosk.
Plaza Intel
Mission 7: Suffer with Me
19: After entering the hangar from the skylight, assist the SEALs in eliminating the soldiers inside and follow Mason to the stairs. Before going downstairs, check the shelf beside it to find an intel.
Plaza Intel
20: You can move separately from Mason and Noriega so just keep left and follow the path to find a building containing a second intel. Refer to the video below. It's about 86-88m away from the objective point.
Extraction Intel
21: Once inside the clinic, check the sink ahead to find the mission's last intel.
Clinic Intel
Mission 8: Achilles' Veil
22: Join Menendez on stage then once the shooting starts, head to the right and enter the room to the left to find the mission's first intel.
Clinic Intel
23: Once the second phase of the mission starts, you'll be given manual control over the quads. Continue to the street and enter the first house to the left. The second intel should be behind the boxes inside.
House Intel
24: Once outside, continue until you reach a house. There's a weapon and ammo cache there. Climb the ladder to the roof then get the last intel there.
House Intel 2
Mission 9: Odysseus
25: After reaching the bridge, grab the intel near the window in the right side corner, near the stairs.
Ship Bridge Intel
26: Before going downstairs leading to the hangar bay, take the stairs to the right to find an intel there. Continue to the hangar bay to find Menendez.
Hangar Bay Command Intel
27: After reaching the flight deck, continue straight ahead to find the last intel on the parked VTOL in the far end of the deck.
Flight Deck Intel
Mission 10: Cordis Die
28: After reaching the ground, check the wrecked SUV to the left to find an intel on the ground.
Expressway Intel
29: During the second sequence of the game where you need to destroy enemy CLAW units along the way, enter the building to the left and search the table there to find another intel.
Building Intel
30: After reaching the downtown plaza area, enter the building to the left then go up the escalator. This intel is on the shelf, by the souvenir kiosk to the right.
Souvenir Intel
Mission 11: Judgement
31: Clear the blue building #27 in the courtyard near the starting point of the mission. The mission's first intel is found on the second floor by the terminal.
Building #27 Intel
32: Head to the large control room and clear it. Check the terminal to the left by the second row upstairs to find another intel.
Control Room Intel
33. When your objective is updated to finding Menendez, fight across several rooms as the explosions start in the base. Once you've found the dark, shaft-like section of the base and find the way downstairs. You'll find the game's last intel there.
Shaft Intel
The game has different key decision points, which are tied to some missable trophies in the game. To get the best ending (and to play all through Strike Force Missions), you have to do the following. Warning: Spoilers ahead
Mission 3: Resist killing Kravchenko three times during the interrogation
Mission 5: Avoid driving through the fire during the last part of the mission. (See the Hey Good Looking trophy)
Mission 6: Catch up with De Falco and kill him. Otherwise, successfully complete the strike mission “Second Chance”
Mission 7: Don't kill the target with a headshot; shoot him in the knee twice instead (See Family Reunion)
Mission 8: Before starting the mission, finish the last strike mission “Dispatch”. This SFM is only available after successfully completing all four preceding SFMs.
Mission 8: Kill Harper during the interactive scene.
Mission 9: Don't kill the admiral but shoot him in the leg instead
Make sure to finish the Strike Force missions once they become available; some of them have will become available as you progress through the story or when you made a wrong decision.
Platinum (Platinum)
Awarded when all other trophies have been unlocked
No Man Left Behind (Bronze)
Rescue Woods.
Complete story mission 1 “Phyrric Victory”
Gathering Storm (Bronze)
Investigate the jungle facility.
Complete story mission 2 “Celerium”
Shifting Sands (Bronze)
Gather intel on Raul Menendez from Mullah Rahmaan.
Complete story mission 3 “Old Wounds”
Driven by Rage (Bronze)
Take down Menendez and his operation.
Complete story mission 4 “Time and Fate”
Waterlogged (Bronze)
Gather information on Raul Menendez' suspected terrorist plot.
Complete story mission 5 “Fallen Angel”
What Happens in Colossus... (Bronze)
Find the Karma weapon.
Complete story mission 6 “Karma”
False Profit (Bronze)
Capture Manuel Noriega and bring him to justice.
Complete story mission 7 “Suffer with Me”
Deep Cover (Bronze)
Capture Menendez.
Complete story mission 8 “Achilles' Veil”
Sinking Star (Bronze)
Interrogate Menendez.
Complete story mission 9 “Odysseus”
Late for the Prom (Bronze)
Escort the president to the secure location in downtown LA.
Complete story mission 10 “Cordis Die”
Death from Above (Silver)
Stop Menendez once and for all.
Complete story mission 11 “Judgement Day”
Old Fashioned (Silver)
Complete "Pyrrhic Victory", "Old Wounds", "Time And Fate", and "Suffer With Me" in Veteran.
This will unlock automatically once you complete the whole playthrough in Veteran difficulty. 4/11 missions are set in the past; completing all 11 missions in this difficulty will also unlock the “Black Ops 2 Master Trophy”
Futurist (Silver)
Complete all future levels in veteran.
This will unlock automatically once you complete the whole playthrough in Veteran difficulty. 7/11 missions are set in the past; completing all 11 missions in this difficulty will also unlock the “Black Ops 2 Master Trophy”
Giant Accomplishment (Gold)
Complete all challenges in Black Ops II.
Each mission has 10 challenges which you can view by accessing your Career Record. There are 16 missions (11 story and 5 strike force missions) which makes up a total of 160 challenges. Story missions will always include challenges like completing the mission without dying and collecting all intels. Strike Force missions always include completing the mission in tactical view only.
Also, always bring your Access Perk since some of these challenges require optional weapons/ explosives or access to areas that are otherwise inaccessible without it. Some weapons in the Loadout are also unlocked by completing a number of challenges on specific missions.
During gameplay, you'll know that you've unlocked a challenge when you see a “Career Record Updated” message in the upper left corner of the screen. The game however, won't tell you what challenge you have completed. Also remember that the challenges will only register after completing the mission. Quitting the game won't save the challenge progress and dying will reset the challenge's state during the last saved checkpoint.
Finally, before starting a new story, you may want to get the trophy first since your progress and challenges will reset as well.
Mission 1: Phyrric Victory
Eliminate Enemy personnel (x15) with machete
Destroy the MPLA tanks
Eliminate enemy personnel (x5) with one mortar explosion
Sink enemy vessels (x5)
Dive to prone on an enemy grenade and survive
Eliminate enemy personnel (x10) with animal trap
Kill (x4) enemies with one mortar primed animal trap
Use elevated improvised positions for confirmed sniper kills (x20)
Collect intel (x3)
100% survivability rating
Mission 2: Celerium
Eliminate enemy heli before lift off
Destroy sentry turret (x2) while disabled
Eliminate enemy personnel (x4) with one round from Titus weapon
Eliminate enemy personnel (x10) with heli turret
Eliminate enemy personnel (x30) while using optical camo
Destroy enemy ADs (x2) by exploding nitrogen tanks
Eliminate enemy personnel (x10) with the Assault Shield
Protect ASD resource from destruction
Collect intel (x3)
Mission 3: Old Wounds
Eliminate enemy personnel (x15) with pulwar sword
Destroy enemy helo with a mortar
Destroy tank with anti-tank mine
Run down enemy personnel (x10) on horseback
Destroy enemy helo with truck mounted MG
Destroy enemy helos (x4) at North Pass
Utilize stinger (without aircraft lock-on) to destroy enemy helo
Eliminate enemy personnel (x25) using alternate fire mode on stinger
Collect intel (x3)
100% survivability rating
Mission 4: Time and Fate
Eliminate PDF enemies (x7) with shotguns in under 10 seconds
Eliminate PDF enemies (x8) with truck mounted MG
Rendezvous with Josefina in under 140 seconds
Eliminate Cartel enemy personnel with Molotovs (x12)
Crash an enemy truck
Eliminate Cartel enemy personnel with mortars (x10)
Eliminate Cartel enemy personnel with machete (x10)
Located evidence of CIA presence
Collecte intel (x3)
100% survivability rating
Mission 5: Fallen Angel
Avoid damage from large debris in streets
Direct CLAWs to eliminate enemy personnel (x8) on the flooded street
Record 400 TB of data from Mendez surveillance
Incinerate enemy personnel (x10) with flamethrower attachment
Protect CLAWs (x2) from destruction
Deploy SOC-T boost to find alternate routes (x2)
Destroy enemy vehicles (x20) with drone missiles\
Destroy enemy vehicles (x8) with the SOC-T
Collect intel (x3)
100% survivability rating
Mission 6: Karma
Obtain retina scan in less than 60 seconds
Retrieve previous cargo (Ziggy)
Kill enemy personnel with headshots (x5) in Club Solar
Ensure zero non-combatant casualties
Eliminate rappelling enemies (x5)
Eliminate enemy personnel (x25) in the outdoor area
Incapacitate enemy personnel (x20) using Combatant Suppression Knuckles
Protect ASD resource from destruction
Collect intel (x3)
100% survivability rating
Mission 7: Suffer With Me
Perform a knife throw at enemy guard post
Survive an enemy RPG blast which causes enemy collateral damage
Destroy Noriega’s private jet
Eliminate enemy personnel (x10) with truck mounted MG
Destroy enemy ZPU (x1)
Distract enemy personnel (x8) with Nightingale grenades at the same time
Eliminate enemy personnel (x15) with IR strobe
Eliminate enemy personnel (x8) in the clinic
Collect intel (x3)
100% survivability rating
Mission 8: Achilles' Veil
Destroy enemy quad drones (x20)
Eliminate enemy personnel (x20) with sword
Melee enemy personnel (x20) while using optical camo
Destroy enemy quad drones (x8) with turret
Eliminate Enemy personnel (x5) by exploding vehicles
Destroy enemy ASD (x4) while disabled
Eliminate enemy personnel (x5) as VTOL gunner
Direct quad drones to eliminate enemy personnel (x25)
Collect intel (x3)
100% survivability rating
Mission 9: Odysseus
Located gift in Mason’s state room
Incapacitate enemy personnel (x20) using Combatant Suppression Knuckles
Provide sniper overwatch for SEAL team advance across flight deck
Eliminate enemy personnel (x10) with security turret
Destroy security turret (x3) while disabled
Eliminate airborne enemies (x8) before they land
Direct CLAW to eliminate enemy personnel (x5)
Get to extraction in under 90 seconds
Collect intel (x3)
100% survivability rating
Mission 10: Cordis Die
100% impact ratio with SAM engagement on highway
Perform headshot (x10) sniper kills from the upper freeway
Direct quad drones to eliminate enemy personnel (x8)
Rescue trapped SSA in damaged vehicles
Destroy enemy drone (x30) using SAM on roof
Protect G20 cougar at the interaction
Destroy drones (x3) with one shot
Destroy drones (x3) with one shot
Protect all G20 vehicles
Collect intel (x3)
100% survivability rating
Mission 11: Judgement Day
Avoid ALL anti-air missile
Destroy ALL laser turrets
Destroy enemy quad drones (x3) while disabled
Perform sniper kills (x10) from more than 40m distance
Melee camouflaged enemy personnel (x3)
Direct quad drones to eliminate enemy CLAW
Eliminate enemy personnel (x5) with one strike of the kinetic projectile weapon
Protect ASD resource to the objective location
Collect intel (x3)
100% survivability rating
F.O.B Spectre
Melee enemy personnel (x10)
Eliminate enemy personnel (x20) using sentry turret
Eliminate enemy personnel as CLAW (x10)
Complete mission with enemy never lowering defense field
Eliminate enemy ASD (x3) using only sentry turrets
Eliminate enemy personnel (x20) with headshots
Destroy enemy quad drones (x12)
Prevent enemy from planting more than one hacking module
Allow no more than one sentry turret to be destroyed
Complete the mission in “tactical view” only
Shipwreck
Destroy CLAWS (x2) using only soldiers
Use only 3 network intruders to complete the mission
Complete mission with more than 2:00 min remaining
Eliminate enemy personnel (x10) with headshots
Melee enemy personnel (x15)
Destroy enemy ASD (x3) as a CLAW
Eliminate enemy personnel (x15) with explosives
Eliminate enemy personnel (x15) while they are stunned
Run over enemy personnel (x20) with ASD
Complete the mission in “tactical view” only
I.E.D
Eliminate enemy personnel (x3) while they are planting IED
Eliminate enemy personnel (x10) on horseback
Convoy never stopped by presence of the IED
Destroy tanks (x3) with kinetic projectile weapon
Destroy help with kinetic projectile weapon
Eliminate enemy personnel (x20) as a quad drone
Run over enemy personnel (x10) as ASD
Use only ASDs to destroy tanks
Keep all vehicles in convoy safe
Complete the mission in “tactical view” only
Second Chance
Eliminate enemy personnel (x10) as HVI
Eliminate enemy personnel (x10) as VTOL turret gunner
Melee enemy personnel (x10)
Eliminate enemy personnel (x15) with headshots
Destroy enemy quad drones (x4)
Eliminate enemy personnel (x15) with explosives
Eliminate enemy personnel (x5) by exploding vehicles
Extract HVI in less than 60 seconds
Find the HVI in less than 90 seconds
Complete the mission in “tactical view” only
Dispatch
Melee enemy personnel (x10)
Destroy enemy ASD (x6) while disabled
Complete mission with more than 3:00 remaining
Eliminate enemy personnel (x20) with headshots
Eliminate enemy personnel (15) with explosives
Destroy turrets (x3) while disabled
Destroy multiple ASD (x2) with one explosion
Use only hacking module to complete mission
Eliminate enemy personnel (x10) while they are stunned
Complete the mission in “tactical view” only
Mission Complete (Silver)
Complete all challenges in a level.
Refer to “Giant Accomplishment” trophy
Just Gettin' Started (Bronze)
Complete 1 challenge in any level.
Refer to “Giant Accomplishment” trophy
Singapore Sling (Bronze)
Successfully neutralize the SDC freighter at Keppel Terminal.
Refer to the SFM “Shipwreck” in this guide's Strike Force Missions section.
Desert Storm (Bronze)
Successfully escort the VIPs to safety.
Refer to the SFM “I.E.D” in this guide's Strike Force Missions section.
Defender (Bronze)
Successfully defend FOB Spectre from incursion.
Refer to the SFM “F.O.B Spectre” in this guide's Strike Force Missions section.
Black Ops II Master (Bronze)
Complete the campaign on Hardened or Veteran difficulty.
Veteran mode is very unforgivable and you can die in seconds. Take your time in killing as many enemies as you can. Stay in cover and use prone more often. Don't charge ahead of your team and have your AI-controlled allies to
Art of War (Silver)
Successfully assassinate SDC Chairman Tian Zhao.
Refer to the SFM “Dispatch” in this guide's Strike Force Missions section.
Blind Date (Bronze)
Successfully rescue HVI.
Refer to the SFM “Blind Date” in this guide's Strike Force Missions section.
Family Reunion (Bronze)
There are two futures.
In the last part of Mission 7: Suffer with Me, you'll be asked to shoot the target. Instead of shooting him in the head, aim for the legs and shoot the target twice.
Family Reunion
Hey Good Looking (Bronze)
Plastic surgery avoided
During the last part of Mission 5: Fallen Angel where an enemy drone crashes in the oil pipe and causes a violent chain reaction, you must avoid getting Harper's face burned by the fiery jet before reaching the warehouse. In case that happens, save and quit then continue. The game will recognize that Harper didn't get hurt at all and you'll still get the trophy.
Hey Good Lookin
Showdown (Bronze)
A duel between rivals
There are several requirements to get this missable trophy. The actual trophy will pop out at Mission 9: Odysseus.
Mission 6: Let DeFalco go
Mission 8: Shoot Harper during the cutscene
You must not skip any chapters
Dirty Business (Bronze)
Listen and think before you shoot.
During the interrogation sequence of Mission 3: Old Wounds, you must resist killing Kravchenko three times to unlock a trophy. Watch the remaining scenes to complete the mission.
Thorough interrogation
Ship Shape (Bronze)
Reinforcements on the way.
This is another missable trophy. You have to finish all available strike missions before starting Mission 9: Odysseus. Chloe's SFM, “Second Chance” is not required for this trophy. (If you killed DeFalco in Mission 6, Second Chance will become unavailable)
Dead or Alive (Bronze)
Jailor or executioner.
At the end of the last mission, you'll have to choose whether you want to martyr Menendez or capture him. Do whatever you want to unlock this trophy.
Ultimate Sacrifice (Bronze)
Only one can survive.
During Mission 8: Achille's Veil, you'll reach a sequence where you'll have to choose whether to shoot Harper or Menendez. Attempt to kill Menendez to unlock this trophy.
Good Karma (Bronze)
Crack the celerium worm.
This is another missable trophy with the following requirements:
Mission 6 - Kill DeFalco. If he escapes, complete the SFM “Second Chance” to rescue Chloe
Mission 8 – Kill Harper
Mission 9 – Shoot Briggs in the leg
In case you messed up any of the steps, you have to backtrack to Mission 6: Karma and play through all missions, making sure you select the correct options.
High IQ (Bronze)
Collect all intel.
Refer to this guide's Intel Locations section for the individual locations of the all 33 intels in the game. Intels are only available in story missions.
Back in Time (Bronze)
Use a future weapon in the past.
There are only four missions in the past (refer to Old Fashioned trophy). Once you have unlocked some futuristic weapons, you can replay any of the four past missions and change your loadout before starting them. Kill enemies using that weapon and the trophy will pop out at the end of the mission. You can drop your futuristic weapon as long as you're able to kill enemies using it.
Man of the People (Bronze)
Stop the brutality inflicted by the PDF.
As you move along the path, you'll find some soldiers abusing some civvies. Kill them and search the houses for abused civilians as well. It doesn't matter if the civilians survive or not, or even if you accidentally kill them. 
Gun Nut (Bronze)
Complete a level with customized loadout.
Before starting a level, customize your loadout and select any other non-recommended choices.
Ten K (Bronze)
Minimum score 10k in every mission
Kills (10 pts each)
Headshots (50pts each)
Melee (100 pts each)
Robot / Vehicle Kills (150 points each)
Explosive (150 each)
Stun (250 each)
Difficulty (5000 points x difficulty level. There are 4 difficulties)
Challenges (2000 points per challenge)
Welcome to the Club (Bronze)
Reach Sergeant (Level 10) in multiplayer Public Match.
You can earn experience practically in almost anything. Just keep playing in multiplayer, preferably in a mode that you're comfortable with.
Welcome to the Penthouse (Gold)
Prestige once in multiplayer Public Match.
Once you've reached LV55, you can activate prestige mode in the Barracks of the multiplayer menu. This will take time, which will depend on your performance and the how often you play.
Big Leagues (Silver)
Win 5 multiplayer League Play games after being placed in a division.
To enter one of the seven divisions, you have to play 5 League games. After entering a division, you need to be in the winning team 5 times.
Trained Up (Bronze)
Win 10 multiplayer games while playing in Combat Training playlists.
There are two modes of CTPs: One is for LV10 players below and one is for everyone. You can earn full experience until LV10 but if your level is more than that, you'll only earn half the experience.
Party Animal (Bronze)
Win 10 multiplayer games while playing in Party Games playlists.
Party games are shorter and tend to have different rules. The modes available are: Gun Game, One in the Chamber, Sticks and Stones and Sharpshooter.
Tower of Babble (Silver)
In TranZit, obey the voices.
This trophy is a multi-step process which requires at least 2 people on original difficulty. You can do it with 3-4 people (much better). Another thing to note is that all four shouldn't have completed this method before – otherwise, they won't hear the voices and this method will not work for the others.
There are two voices to follow: Richtofen and Maxis'. The easiest and available method is from Maxis so that's what we're going to lay out here.
1: From the starting room, build a turbine by finding the following parts in the same room: Mannequin, Plane wing and Fan. All players must get one.
2: Ride the bus to the Diner and access the mystery box. One of the players must get an EMP grenade. This is completely random and make take several or few attempts depending on your luck. You can stick for a while and gather points until someone gets an EMP grenade. Once done, ride the bus to the power station.
3: Once you arrived, head to the shed and open the power station door for 750 points. There are three parts there that you can assemble to turn on the power. (box, lever and zombie hand)
4: Wait for Maxis' speech to finish then turn off the power.
5: All players now then need to go outside and follow the road to the left until you see a lantern. From there, continue forth while keeping on the left side of the road until you reach a cornfield. Navigate the cornfield until you find a pylon.
6: Converge by the pylon and hold off that position. Only kill the round's last zombie when the thunderstorm forms overhead. You need to do this to ensure that the lightning zombie spawns in the next round.
7: Once the electric zombie spawns, set up two turbines in the sides of the pylon to power it up. Once you hear Maxis' orders you to kill the lightning zombie (killing this special zombie will also unlock the trophy “You Have No Power Over Me”), lob an EMP grenade at it to kill it instantly. Keep a zombie alive at the end of this round.
8: Once done, pick up the turbines and the players need to go separately to any of the lanterns in the following locations: diner, town and bus depot. All players must set their turbines down at the same time. You should see some red smoke coming out of the lanterns confirming that you've done the steps right.
For two players, they can place the turbines in any of the lantern locations as long as they're separate. For 3 or more players, they need to place the turbines in the individual locations separately.
Don't Fire Until You See (Bronze)
In TranZit, have all doors opened without being set on fire.
While attempting this trophy, you should not get damaged by a fire or exploding zombie and you shouldn't walk over the lava or burning spots on the ground. There are 19 doors, some requires points to open, some need the turbine and there is one that requires a grenade. In case you get damaged and have to start all over again, you can deposit your cash in the bank and deliberately die so you can recycle most of the funds back.
To learn how the bank works, you may refer to this video: http://youtu.be/51gXWoHFXMo
Also you need to build a turbine to open the doors that require power. All the parts to build one is found in the starting room. Make sure not to leave them too long as they degrade and get destroyed. You need a total of 7000 points to open all the doors. You can stick around in the first area and farm until you get around 5000 points before leaving.
The list of the doors are as follows:
Bus Stop: 1 door (750 pts), 2 turbine doors
Diner: x2 doors (750 pts each), 1 turbine door
Farm: x2 doors (750 pts each), 1 turbine door
Power Bunker: 1 door (750 pts), 2 turbine doors
Town: x2 doors (1000 pts each), x2 doors (750 pts each),1 turbine door and vault door (requires grenades)
The Lights Of Their Eyes (Bronze)
In Green Run, pacify at least 10 zombies with 1 EMP.
Ride the bus to the diner where the mystery box is and keep farming for points so you can attempt getting EMP grenades from it. The weapons generated from the box is very random so you have to keep trying until you get the EMP grenades. Once you have it, let the zombies converge then lob a grenade in the middle so get two of them.
Undead Man's Party Bus (Bronze)
In TranZit, complete all additions to the bus in 1 game.
There are four different parts you can add to the bus that can be found in four different locations. The locations are fixed but the parts you can find on them are not. These parts are always inside the rooms that require power so before heading out to find them, build a turbine in the starting area.
Dance On My Grave (Bronze)
In Green Run, acquire your Tombstone.
Start a round with a co-op partner locally or online. Now make your way to the third bus stop and head to the bunker. You have to turn the power on so collect the three parts (box/panel, zombie hand and lever) and assemble them in the workbench. Make sure you have at least 2000 points as well.
Turn on the power and the gate will open up. Head to the perk machine and buy the Tombstone perk. Kill the zombies and leave the last one. Let it bring you down then press square to plant the Tombstone and die. Now have your partner finish it off and you'll respawn afterward. Just return to the spot where you planted your tombstone to get your weapons back and the trophy.
Standard Equipment May Vary (Bronze)
In TranZit, acquire 4 different equippable items in 1 game.
There are 5 optional equipments in the game, one for each area. Fortunately, the first four equipment can be assembled from parts found in their respective areas. The last one is a bit tedious since the parts are scattered throughout the areas. Also, take note that you can only carry one part at a time. After finding a part, quickly bring it to the workbench to start assembling.
Bus Station – Turbine: Mannequin, Fan and Wing
Turbine
Diner – Zombie Shield: Dolly, Car Door 

Farm – Turret: Lawnmower, Ammo and RPD
Power Bunker – Electrical Trap: Broken Mirror, Battery and Stand
You Have No Power Over Me (Bronze)
In TranZit, defeat "him" without being attacked by "him".
HIM is the codename for the lightning zombie that you can spawn after turning the power on in the Power Station. You need to use an EMP grenade to fully kill him. Refer to the (Tower of Babble) trophy details as the steps indicated there require an encounter with this lighting zombie.
I Don't Think They Exist (Bronze)
In TranZit, kill one of the denizens of the forest while it is latched onto you.
In the first area, open the door then head outside to the fog until a goblin-like creature latches to you. Kill it immediately while it is scratching your face until you get the trophy.
I didn't think they exist
Fuel Efficient (Bronze)
In TranZit, use an alternative mode of transportation.
In the first area, assemble a turbine (see Standard Equipment May Vary trophy) then gain at least 750 points to open the door. Now find a lamppost to the left of the bus then place the turbine there. Head to the fog to the left and let a gremlin latch unto you. While it is latched, bring it to where the lamppost is to remove the gremlin and have it create a portal for you. You need to hit the gremlin with few melee strikes to keep yourself from dying. Now jump to the newly created portal to reach the next area and unlock the trophy.
welcome to the gremlin portal!
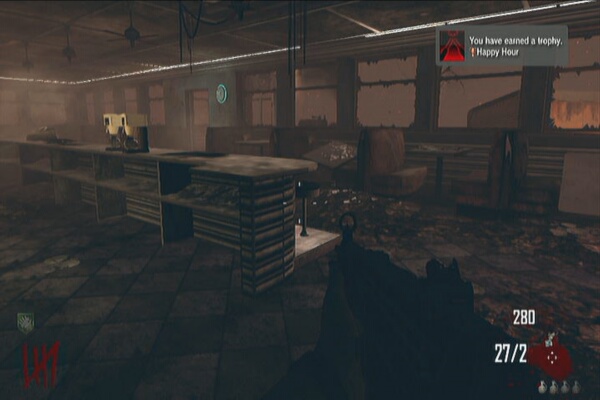
Happy Hour (Bronze)
In TranZit, buy 2 different perks before turning on the power.
First, buy the Revive perk from the soda machine to the left of the door. Next, assemble a turbine and exit the diner using the locked doors near the workbench to save money. (Recommended if you're just after the trophy) Next, ride the bus to the diner then open any of its doors. Now kill a few more zombies until you get 1000 pts then buy the MP5, beside the soda machine. Use the MP5 to accumulate 3000 pts more then power up the soda machine and buy the speed perk.
Don't worry if you used the Revive perk before buying the second perk. You' ll still unlock the trophy as long as you purchase the second perk.
Happy, happy hour
These are missions that are unlocked through the story, depending on the outcome you chose. Some SF missions will become available through these events however, you can still replay them from the Replay Mission option. Before you start an actual strike force mission, you'll have a tutorial. Just learn from the tutorial and take note of the various commands 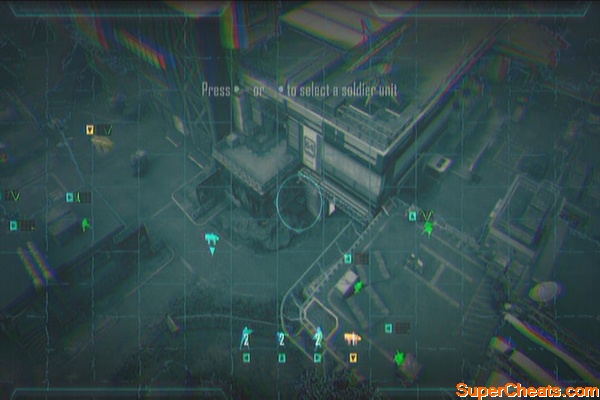
Primary Objective:
Defend the Factory by protecting its key exterior components
Challenges:
- Melee enemy personnel (x10)
- Eliminate enemy personnel (x20) using sentry turret
- Eliminate enemy personnel as CLAW (x10)
- Complete mission with enemy never lowering defense field
- Eliminate enemy ASD (x3) using only sentry turrets
- Eliminate enemy personnel (x20) with headshots
- Destroy enemy quad drones (x12)
- Prevent enemy from planting more than one hacking module
- Allow no more than one sentry turret to be destroyed
- Complete the mission in “tactical view” only
You have to defend the key positions for 10 minutes. It will be a challenge defending all three key points so you may want to concentrate your forces in the sat antenna and generator areas so you can create choke points. Reposition your turrets near the entrances but make sure they're not too exposed to get destroyed immediately or restricted to even be of help.
Don't let your CLAW stray away too much; instead, keep it near the auto-turret. Have one squad stand by on the ground and the other by the satellite antenna. Take control of one of the infantry there and take out the enemies as they come. The enemies will be arriving in the same spots, making it possible for you to anticipate their landing zones. 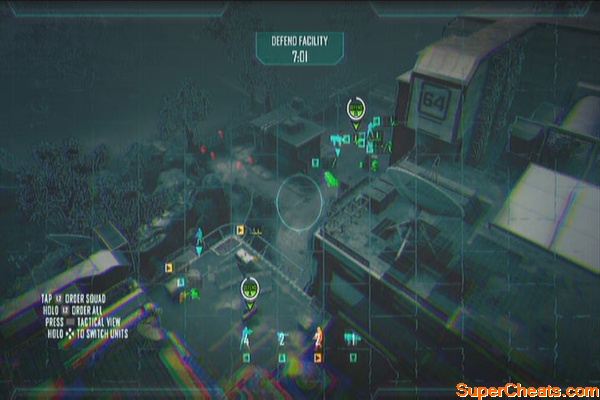
Primary Objective:
Sink the SDC cargo Freighter
Challenges:
- Destroy CLAWS (x2) using only soldiers
- Use only 3 network intruders to complete the mission
- Complete mission with more than 2:00 min remaining
- Eliminate enemy personnel (x10) with headshots
- Melee enemy personnel (x15)
- Destroy enemy ASD (x3) as a CLAW
- Eliminate enemy personnel (x15) with explosives
- Eliminate enemy personnel (x15) while they are stunned
- Run over enemy personnel (x20) with ASD
- Complete the mission in “tactical view” only
You have to capture all three points and launch a missile strike within 10 minutes.
Head to the first capture point and place your units near the key points. Take control of one of the infantry unit to plant a hacking module then defend that position until the hacking is complete. After clearing keypoint A, move your surviving foot soldiers and ASD inside the warehouse to north. You may want to take control one of them so you can reposition them so they can have a good view of the next capture point. 
Next, control the next fire team that will arrive and lead them to the container boxes overlooking the next capture point. Don't expose them too much; just reposition them there until your ASD and CLAW are ready. Order the ASDs and CLAW to head to capture point B and manually control one of the infantry soldiers. Provide cover to your bots by destroying enemy infantry and quads. Once the area's a bit clear, move the infantry squad on the ground to the capture point and order the other infantry squad that's on the container vans.


Get in cover and take out the incoming enemy forces, taking control of the Claw or ASD preferably. After capturing the point, order your ASDs and CLAW to move to the last capture point. It is rather near and the enemy deployment will be almost in the same area so be careful not to get caught in the open. Place your ASD and CLAW near the open while one squad at the rear of the capture point. For the last squad, you can manually control them to eliminate the targets heading to the last capture point.
After successfully hacking all three, call in a missile strike and steer the missile to the ship to complete this mission.
Primary Objective:
Escort the High Value Cargo to Extraction Site
Challenges:
- Eliminate enemy personnel (x3) while they are planting IED
- Eliminate enemy personnel (x10) on horseback
- Convoy never stopped by presence of the IED
- Destroy tanks (x3) with kinetic projectile weapon
- Destroy help with kinetic projectile weapon
- Eliminate enemy personnel (x20) as a quad drone
- Run over enemy personnel (x10) as ASD
- Use only ASDs to destroy tanks
- Keep all vehicles in convoy safe
- Complete the mission in “tactical view” only
In this mission, there will be no ground soldiers, just pure drones and ASDs. There are four vehicles to protect and several targets to destroy. You probably need to take control of your aerial units more often for added mobility. Use your quads to take out the RPG troopers on the mountains, helos or other soft targets such as the horseback riders then use ASD or HAMP (high altitude munitions platform) to take out the tanks. T'he convoy won't stop if there are IEDs on the ground. When that happens, destroy them first before you can move.
Be wary of your mini map and move ahead of the red targets to take out the enemies before the convoy reaches them. You can also order some of your drones to go ahead of the convoy to scout and mark targets.
Note: This SF mission is only available after De Falco escapes.
Primary Objective:
Secure the High Value Individual
Challenges:
- Eliminate enemy personnel (x10) as HVI
- Eliminate enemy personnel (x10) as VTOL turret gunner
- Melee enemy personnel (x10)
- Eliminate enemy personnel (x15) with headshots
- Destroy enemy quad drones (x4)
- Eliminate enemy personnel (x15) with explosives
- Eliminate enemy personnel (x5) by exploding vehicles
- Extract HVI in less than 60 seconds
- Find the HVI in less than 90 seconds
- Complete the mission in “tactical view” only
This is a fairly easy mission. You have to search the mark safehouses until you find Chloe. (I am not certain whether Chloe's position is fixed or set randomly). Order your squads to secure key areas, especially your rear to avoid getting flanked. There are usually 2-3 enemies inside each safehouse and a more enemies arriving randomly. Be careful of the enemy quads as well and RPG troopers. Once you find Chloe, you can take control of her to ensure her safety and head to the extraction point.

This SF is only available after successfully completing all four preceding SF missions. One of the four, “Second Chance” will become unavailable by killing De Falco during the last part of the campaign mission “Karma”.
Primary Objective:
Assassinate the High Value Target
Challenges:
Melee enemy personnel (x10)
Destroy enemy ASD (x6) while disabled
Complete mission with more than 3:00 remaining
Eliminate enemy personnel (x20) with headshots
Eliminate enemy personnel (15) with explosives
Destroy turrets (x3) while disabled
Destroy multiple ASD (x2) with one explosion
Use only hacking module to complete mission
Eliminate enemy personnel (x10) while they are stunned
Complete the mission in “tactical view” only
The way to the target is heavily defended. Avoid taking the streets; instead, consider routing your forces to the alley to the right. First, you can order all your units to converge in the initial area; just make sure to place them in cover. Next, route two units to the alley to the right and control one of them. Take out the auto-turrets by the fountain and hold that position with two squads. Order the last squad to regroup and guard the alley where you came from to avoid getting routed. 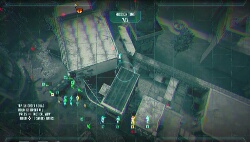
Next, bring one squad inside the diner and set their rally point there. The diner's entrance should bring you close enough to the target. Take out the ASDs and auto-turrets there then order two squads to guard the area. Make sure to kill enemy soldiers first as your squads are vulnerable when moving. Plant the EMP charge and defend it until it successfully detonates. Once done, open the door to assassinate the HVT. 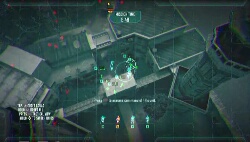
Taking out the nutjob
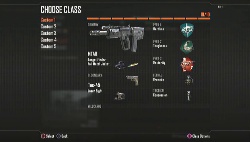
COD Black Ops 2 now allows you to choose the loadout you prefer through the “Create-A-Class” system. You'll be given 10 points to select the perks, weapons, attachments and equipment of your preference. This will enable you to remove, add or interchange various gears and perks to suit your style.
Primary weapons have two attachments be default while secondary weapons can only have one attachment. They can have an extra attachment each by including a Wildcard (refer to the Create-A-Class section) in your loadout. You can only carry one Lethal and Tactical equipment but there's an extra slot should you opt to choose.
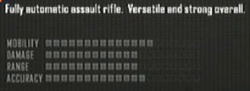
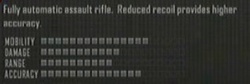
Assault Rifles
You'll be using these most of the time. They're deadly, efficient and versatile. You can trust these in close to long-range engagements, even enhance their capabilities through different attachments. Assault rifles are also powerful enough to penetrate through single layers of concrete or solid cover.
Mtar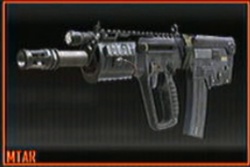
Type 25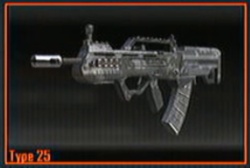

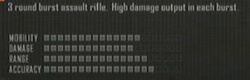
SWAT 556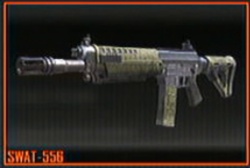
FAL DSW
M27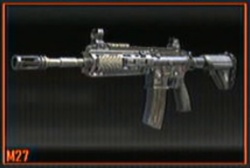
SCAR-II
SMR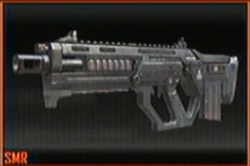
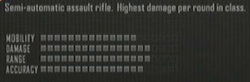
M8A1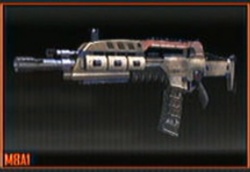
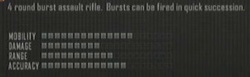
AN-94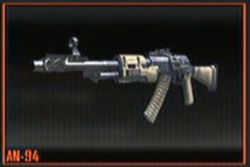
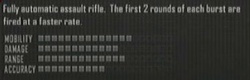
Sub Machine Guns
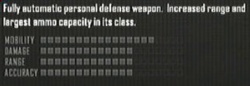
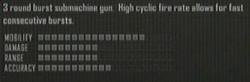
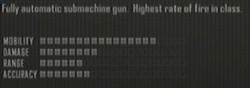
SMGs are lightweight and accurate weapons best used for fast-paced, close engagements that require mobility. Their fast aim-down-sight allows their users to aim quickly to a target and fire more accurate shots. SMGs deal more damage that assault rifles but their limited range somehow limits their usefulness against more distant targets.
MP7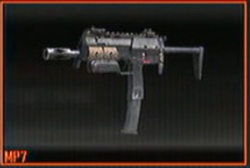

PDW-57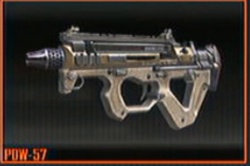
Vector K10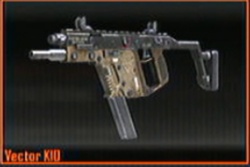
MSMC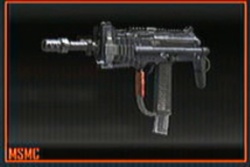

CHICOM CQB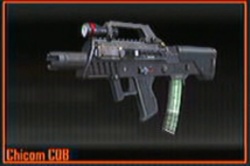
SKORPION EVO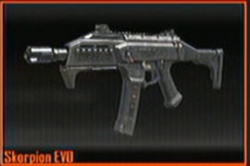
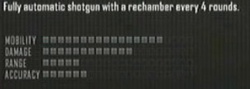
Shotguns
These weapons deal massive damage per shot at close rate, perfect for urban or CQB (close-quarter-battles) maps. However, this damage is practically mitigated as the target's distance increases as the shotgun pellets disperse at the wide area. Players who want to use shotguns as their primary weapons should make up with its limitation by having corresponding perks or a good secondary weapon.
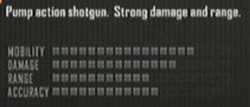
Remington 870MCS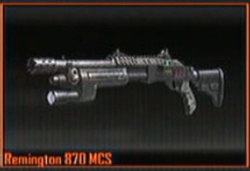
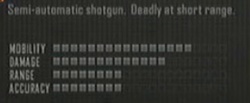
S12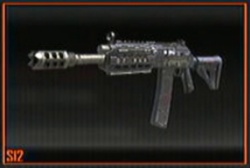
KSG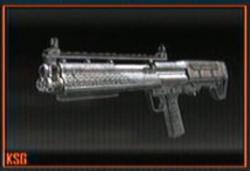

M1216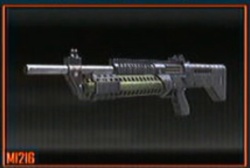
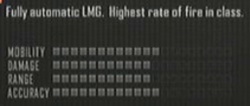
LMG (Light Machine Guns)
These are heavy weapons sporting large magazines, heavy damage and very high penetration at a cost of mobility, accuracy and slower ADS (aim-down-sight). Heavy gunners can use LMGs to setup defensive/ambush positions or provide covering fire during an assault. Their lack in accuracy and range can be further enhanced with the help of attachments while a player's overall efficiency when using this as a primary weapon can be further increased with the right perks.
MK48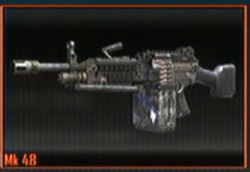
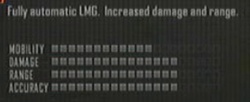
QBB LSW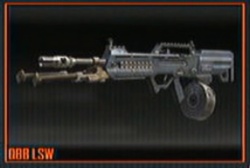
LSAT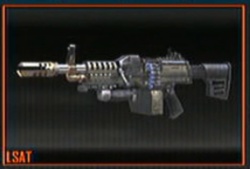
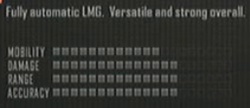
HAMR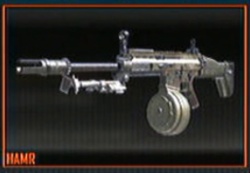
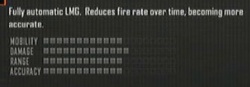
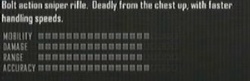
Sniper Rifles
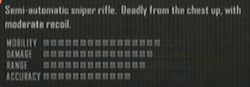
They're highly accurate, deadly even at long distances and can deal often fatal damage. Their only weakness is their slow fire-rate which is not a problem for some semi-automatic models. When used by a highly efficient player, sniper rifles can help lock down a certain path or area in the map. Snipers often carry a reliable SMG or pistol as their secondary weapon to defend themselves against close-quarter engagements.
SVU-AS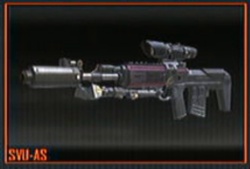
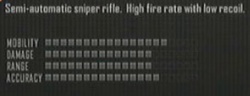
DSR-50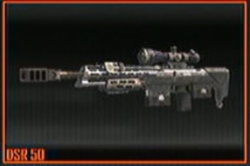
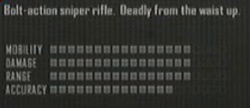
BALLISTA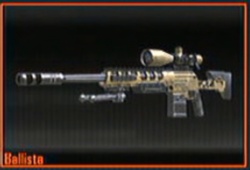
XPR-50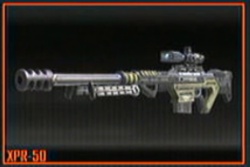
Special
There is only one “weapon” in this category and that is the Assault Shield. It's a bullet-resistant shield that can be deployed as cover. It is best used with team mates assisting behind or when you're caught in a firefight without any nearby cover.
Assault Shield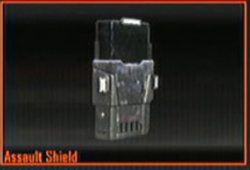

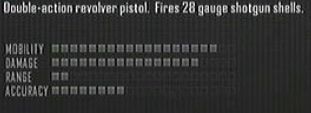
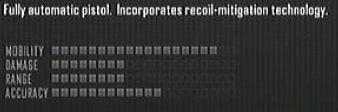
Pistols
These are trusty sidearms that you can immediately pull in times of emergencies. These are fast, lightweight and powerful enough to finish off enemies in case you run out of ammo in the middle of a firefight.
Five-seven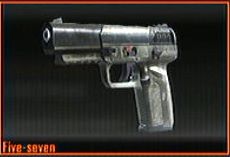
Tac-45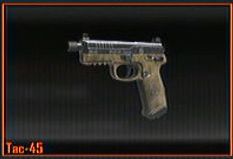

B23R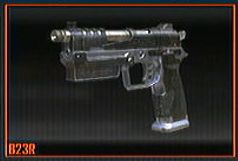
Executioner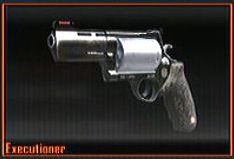
KAP-40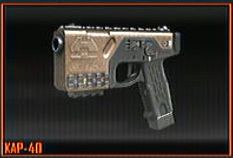
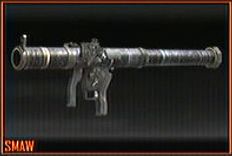
Launchers
These are heavy, explosive weapons that can easily destroy targets, especially drones and vehicles. They have very limited ammo so their usefulness will depend on the map and game mode.
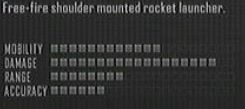
SMAW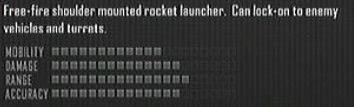
FHJ-1B AA
This weapon requires a lock-on to enemy vehicles or turrets. You can't fire it freely against human targets. 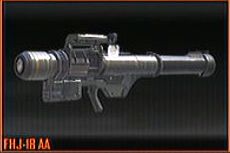
RPG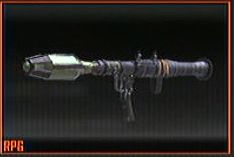
There are only two weapons in this category.
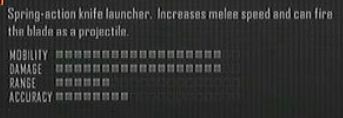
Crossbow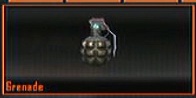
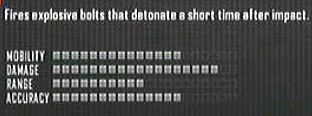
Ballistic Knife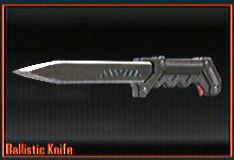
As the name suggests, this is a category of lethal thrown explosives or weapons.
Grenades
These are standard explosives that deals damage to a certain radius.
Semtex
It's a type of grenade that sticks to the surface where it was thrown. 
Combat Axe
This thrown weapon can instantly kill any target. The axe can be retrieved manually or automatically (with the Scavenger perk)
Claymore
These are mine that triggers when its directional beams are crossed. 
C4
A plastic explosive that can be detonated remotely by pressing Square twice. 
Bouncing Betty
Proximity mine that launches in the air before detonating. Can be avoided by crouching or going prone.
These are non-lethal items that help you gain tactical advantage in the battlefield.
Concussion
Disorients enemies and slows movement. 
Smoke Grenade
Produces a smokescreen upon impact
Sensor Grenade
Detects enemy soldiers within the line of sight
Black Hat
Hack equipment and/or care packages; disable enemy vehicles
Shock Charge
Proximity triggered mine that shocks and stuns enemies 
EMP Grenade
Disables enemy electronic systems
Flashbang
Blinds enemies and impairs their hearing
Trophy System
Destroys enemy projectiles within 10 meters. Vehicle projectiles may penetrate. 
Tactical Insertion
Drop-zone beacon that allows you to place your next spawn point. Not availabe in Free-for-All games. 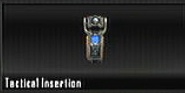
These are add-ons you can attach to your weapons to improve their performance. Primary weapons have two attachments be default while secondary weapons can only have one attachment. They can have an extra attachment each by including a Wildcard (refer to the Create-A-Class section) in your loadout. You can only carry one Lethal and Tactical equipment but there's an extra slot should you opt to choose. Some weapons such as launchers can't have any attachments at all.
Some attachments can't be used together, especially if they're in the same category (for example: scopes, sights and grips) When choosing an attachment, it is always a good idea to choose the ones that will cover your preferred weapon's weakness.
Reflex
Precision red dot sight
1 Range, 3 Accuracy
ACOG
Enhanced zoom sight
Range 1, Accuracy 3
Dual Band Scope
Nightvision scope with interlaced thermal overlay
Range 2, Accuracy 2
Laser Sight
Increases hip fire accuracy
2 Mobility, 2 accuracy
Suppressor
Invisible from radar when firing, reduzed muzzle flash but with less range
-1 damage, -2 range
Fast Mag
Reload faster
EO Tech Sight
Holographic sight. Provides a clearer view of the target than a reflex but with less peripheral vision.
2 Range, 2 Accuracy
Variable Zoom
While scoped, press R3 to adjust between 2 different zoom levels.
Mobility 1, Range 3, Accuracy 1
Fore Grip
Reduced recoil when aiming down the sights
4 accuracy
Extended Clip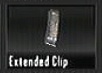
More ammo each clip
Adjustable Stock
Moves faster while aiming
2 Mobility, 2 accuracy
Target Finder
Identifies enemies and notifies when an enemy is in the crosshair
1 range, 3 accuracy
Long Barrel
Increases range
1 damage, 3 range
FMJ (Full Metal Jacket)
Increased material penetration and damage against enemy scorestreaks
Damage 3
Quickdraw Handle
Ergonomic handle for faster aiming
Mobility 2, Accuracy 2
Select Fire
Switch to burst or automatic fire with left directional pad. Automatic fire will always have more recoil.
Range 2, Accuracy 2
Rapid Fire
Increased rate of fire
Damage 4, Accuracy -1
MMS (Millimeter Scanner)
Detects lingering signatures from stationary enemies through materials up to 25 meters.
Mobility 2, Accuracy -1
Dual Wield (pistols only)
Hip fire two weapons
Damage 4, Accuracy -2
Tactical Knife (pistols only)
Carry a tactical knife in your offhand for faster melee attacks.
Mobility 2
Tri-Bolt (crossbow only)
Fire a bundle of 3 bolts at a time
Damage 2
This section will just show you the layout of the Standard maps. Strategies will still depend on the players and the mode they're playing.
Aftermath
Downtown Los Angeles. Close engagements in and out of the fallout of drone attacks. 
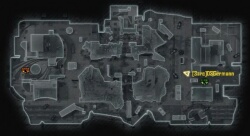
The main engagement area of this map is in the middle, where there is a wide, open area with elevated sniping points for both sides. The surrounding areas are tight, full of corners and small open areas.
Cargo
Port of singapore. Good for close quarter engagements and verticality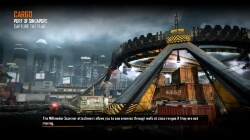
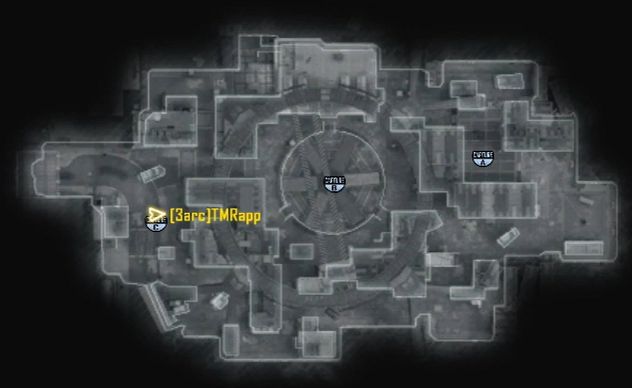
The main engagement area is the circular loading area where a couple of container vans are lifted regularly, providing / removing much needed cover. The surrounding area is small with tight corners, and there are paths leading to the upper container vans to have a much better view of the main area.
Carrier
Chinese Supercarrier. Open engagements on the deck, with great close quarters lights in the passageways. 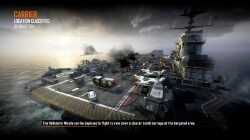
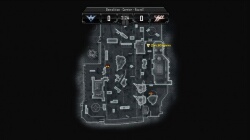
This area is relatively small with lots of open space so expect immediate enemy engagements. There are relatively few elevated spotting positions but they have no cover so expect that the enemies can easily see you as well.
Drone
Hidden drone facility in the heart of the Myanmar jungles. Great long engagements down the center, fun close quarter fights inside the facility. 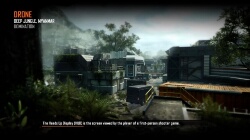
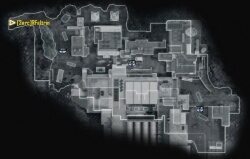
As the description say, the main engagement area will take place in the long stretch of road in the middle. The facilities will offer wide areas with many obstacles. There are a lot of openings that can be used for flanking.
Express
Los Angeles bullet train station. Good long to medium engagements up and down the bullet train tracks. 
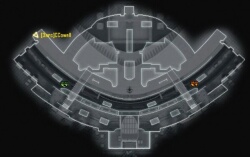
The train track offers little cover while the station itself has enough space for some frantic engagements. Drones may have difficulties navigating the area.
Hijacked
Luxurious super yacht. Franctic, yet controlled close-quarters engagements
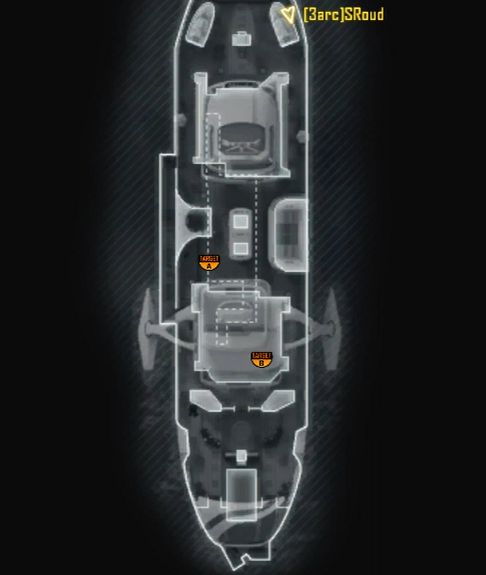
This is a really small map that will have players get into each other's throats in less than 30 seconds. There are no flanking routes meaning opposing teams will most likely engage in the middle and whoever successfully pushes the rival team forward.
Meltdown
Pakistan nuclear power plant. Battle for control of the nuclear cooling tower and the surrounding facilities. 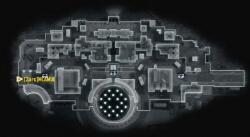
There are three possible main engagement areas, all of them located in the middle. Both sides have access to rooms with windows overlooking the opposing team's starting position.
Overflow
Pashawar, Pakistan. Great urban engagements in the flooded streets
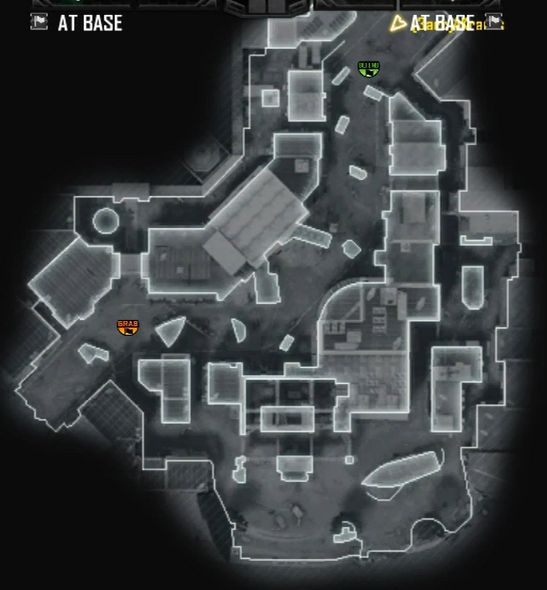
This is the same map as the last strike force mission in the campaign. The road in the middle is the main engagement area though there are two flanking routes in the northwest and southeast.
Plaza
Floating resort in the middle of the Indian Ocean. Tight corners and angles throughout.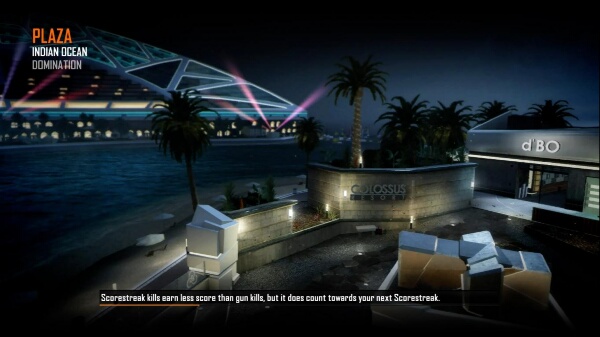
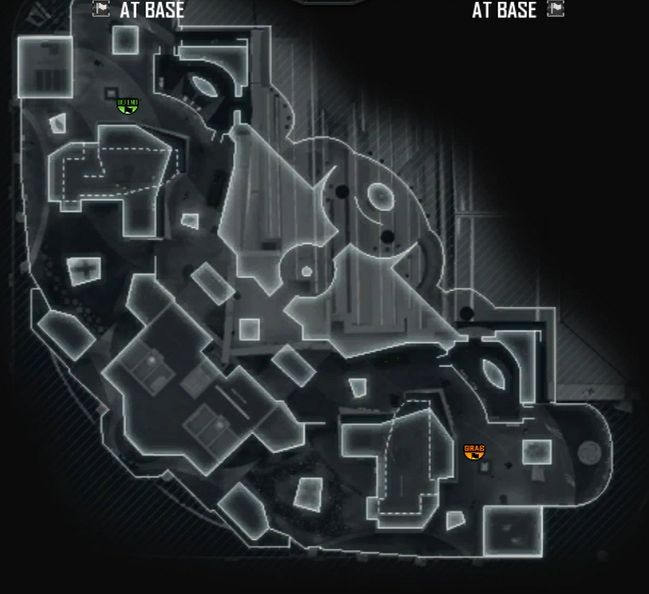
This map offers little hiding or camping space, not to mention many corners and angles so check your corners before moving to avoid getting surprised by enemies.
Raid
Fight through this hillside mansion in the Hollywood Hills. Hectic close-quarters engagements. 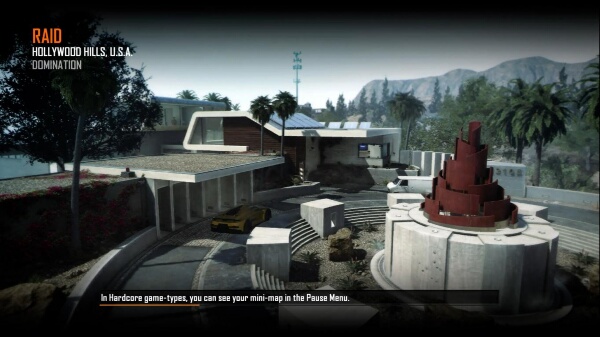
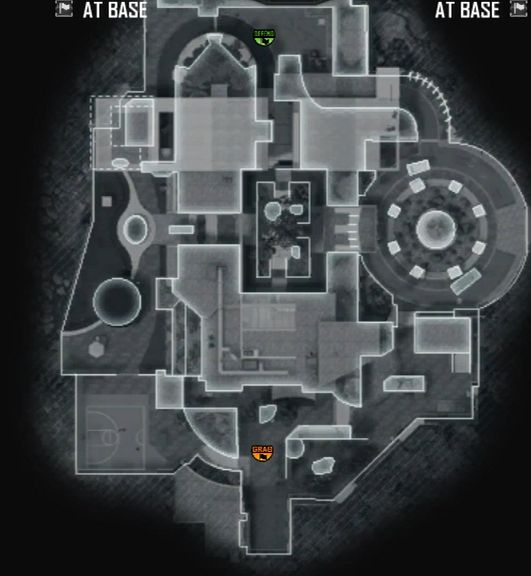
This map has many routes and corners as well but offers immediate close/mid-range battles. Both sides have access to rooms overlooking the 2nd and third open areas.
Slums
Run down section of Panama. Great close-quarters engagements and tough chokes to fight over. 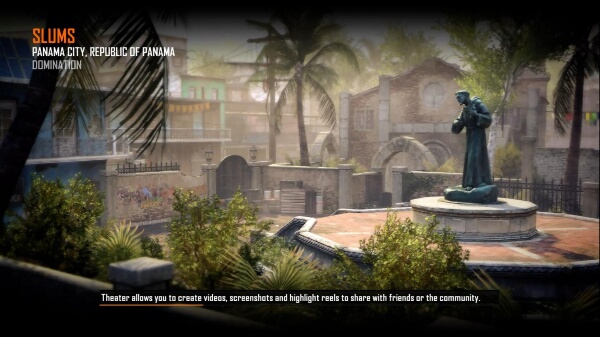
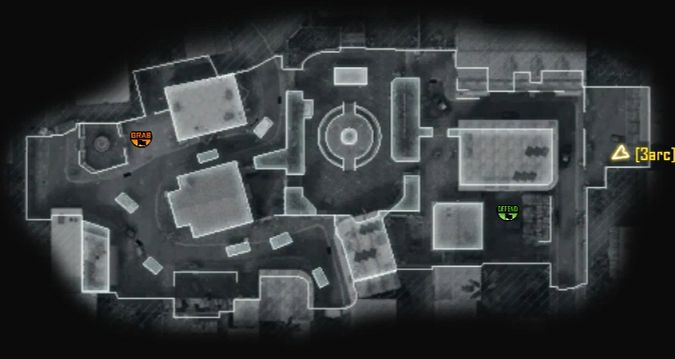
As the description said, there are strategic chokepoints in this map where you can put auto-turrets or guardians to efficiently lock them down.
Standoff
Border town between China and Kyrgystan. Classic engagements and destinations to fight over.
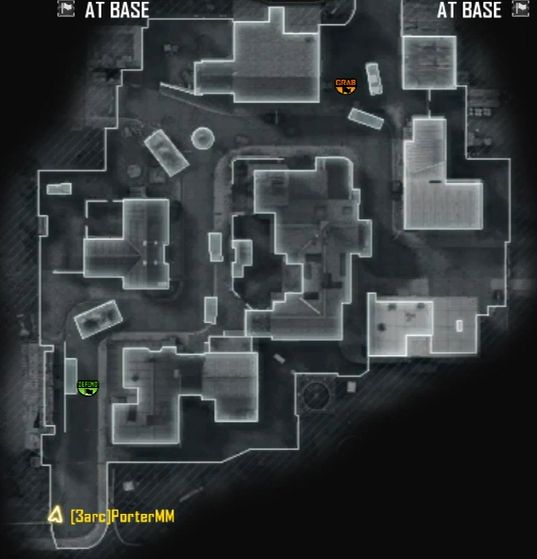
There are several elevated and overlooking positions here that snipers and heavy gunners can take to lock down or hold the path.
Yemen
Urban streets of Yemen. Tight alleys and close quarters engagements. 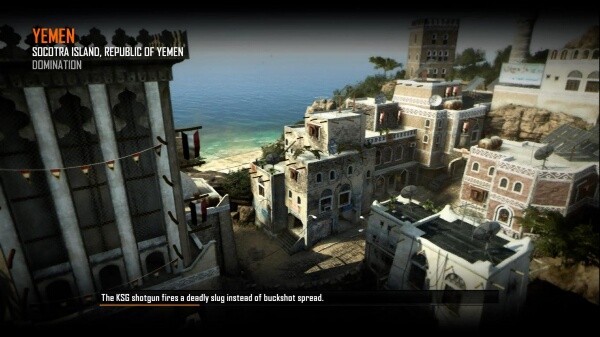
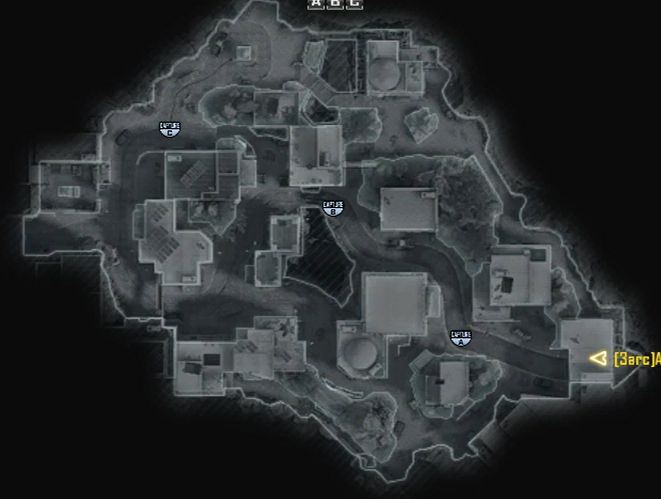
This map is full of buildings and tight streets. There are second floor windows that offers effective vantage point in most routes.
Image source: http://imgur.com/a/D7UMe#52
Team Deathmatch
Standard team vs team battle. Use team work to kill enemies and reach the score limit.
Free for All
Every man for himself; kill everyone
Domination
Three flags in a level must be captured. Your team gets points for having control of a flag. The more flags your team holds, the more points you gain.
Demolition
Teams alternate in attacking and defending two bomb sites. The attacking team must destroy both bomb sites to win.
Kill Confirmed
Team Deathmatch with a twist. Collect enemy dogtags to score for your team. You can also prevent them from scoring by picking up the dog tags of your fallen comrades.
Hardpoint
A neutral hard point to capture is marked in the map. Capture and hold it to gain points.
Headquarters
A neutral base to capture is marked in the level. Capture and hold it to gain points. The team that holds the HQ doesn't respawn.
Capture the flag
Get the enemy flag and return it to yours to capture capture it.
Search and destroy
Defend and destroy the objective. No respawn.
Gun Game
Kill players with your weapon to advance to the next weapon. The first one to get a kill with each weapon wins. 
One in the Chamber
One bullet in the chamber, a knife, three lives and instant kills. Players receive a bullet after each kill. 
Sharpshooter
Weapons cycle every 45 seconds. Kill players to score points. Gain perks for getting multiple kills in a row without dying.
Sticks and Stones
You get a crossbow, Ballistic Knife and a Combat Axe. Kill players to score points. Combat Axe skills reset enemy scores to zero. Good luck. 
COD Black Ops 2 now allows you to choose the loadout you prefer through the “Create-A-Class” system. You'll be given 10 points to select the perks, weapons, attachments and equipment of your preference. This will enable you to remove, add or interchange various gears and perks to suit your style.
You can remove some perks to free up points to allocate to your weapons, attachments and grenades or tactical equipment. In the other hand, you can also limit your weapons and equipment to get additional perks. There are a total of 6 perks which can be increased by a slot with the help of Wildcards. However, Wildcards also take up one allocation point, so getting an extra slot for each perk will leave you with a single weapon with no attachments. Choosing the right perks for your “class”, weapon loadout or playing style will go a long way.
Lightweight
Move faster. You take no damage when falling
Hardline
Earn scorestreaks faster by getting additional points per action. 
Blind Eye
Undetectable by AI-controlled air support. Take note that AI can be overidden manually so players can still see you when that happens. 
Flak Jacket
Take less explosive damage. This increases your survivability against most explosive weapons which can easily take you out instantly otherwise.
Ghost
Cannot be detected by enemy UAV's while moving, planting or defusing a bomb, or while controlling score streaks. 
Toughness
Flinch less when shot
Cold-Blooded
Resistant to targeting systems including: Dual Band, Target Finder, Sensor Grenade, MMS and player-controlled aircraft. No name or red-crosshair when targeted. 
Fast-hands
Swap weapons and use equipment faster. Reset the fuse when throwing back grenades
Scavenger
Replenish ammo and equipment from enemies killed by non-explosive weapons
Hard Wired
Immune to counter-UAV and EMP 
Dexterity
Aim faster when sprinting; mantle and climb faster. 
Extreme Conditioning
Sprint longer
Tactical Mask
Reduce the effects of flashbangs, concussion grenades and shock charges. 
Awareness
Enemy movements are easier to hear
Dead Silence
Move silently
Engineer
show enemy equipment in the map. Delay triggered explosives. Reroll and booby trap Care Packages.
Perk 1 Greed
Take a second Perk 1
Perk 2 Greed
Take a second Perk 2
Perk 3 Greed
Take a second Perk 3
Primary Gunfighter
Take a 3rd attachment to your primary weapon
Secondary Gunfighter
Take a 2nd attachment to your primary weapon
Overkill
Take a primary weapon as your second weapon
Tactician
Take a tactical grenade in place of your lethal grenade
Danger Close
Take a second lethal
Scorestreaks allows players to call in different, powerful reinforcements and access bonus or hardware such as drones. You earn points by killing enemies, completing objectives, or assisting team mates. You can equip up to three Scorestreak rewards at a time.
Remember that if you die, your earned scorestreak points will reset and you have to make your way up again. However, any unlocked scorestreak reward will stay. If you use that scorestreak reward however, you have to start from scratch.
RC-XD
A remote-controlled car packed with explosives (450 points)
UAV
Shows enemies on the mini-map (350 points)
Hunter Killer
Airborne drone that seeks out and destroys a nearby target (525 points)
Care Package
Air drop a random Score Streak (550 points)
Counter-UAV
Temporarily disables enemy radar (600 points)
Guardian
Projects microwave field which stuns and impairs enemies (650 points)
Hellstorm Missile
An air-to-surface missile which can be scattered into a cluster bomb while falling (700 points)
Lightning Strike
Launch a coordinated lightning strike on three locations (750 points)
Death Machine
Your own personal handheld mini-gun (850 points)
Sentry Gun
An automatic sentry gun which can be remote-controlled (800 points)
War Machine
Grenade launcher with rapid, semi-automatic firing (900 points)
Dragonfire
Remote-controlled quad-rotor with lightweight machine gun (925 points)
AGR
Air drop an autonomous ground robot that searches for and destroys enemies and can be remote controlled (1000 points)
Stealth Chopper
Call in a stealth helicopter which does not appear on the enemy’s mini-map (1100 points)
Orbital VSAT
Shows both enemy position and direction on the mini-map, cannot be shot down (1200 points)
Escort Drone
Get personal air support from an escort drone (1250 points)
Warthog
Jet aircraft that provides close air support with several strafe runs (1400 points)
EMP Systems
Temporarily disables enemy electronics (1300 points)
Lodestar
Lase missile targets remotely from the Lodestar (1500 points)
VTOL Warship
Be the gunner of a powerful VTOL Warship (1600 points)
K-9 Unit
Attack dogs that hunt down the enemy (1700 points)
Swarm
Call in a swarm of lethal Hunter Killer drones that search and destroy enemies (1900 points)