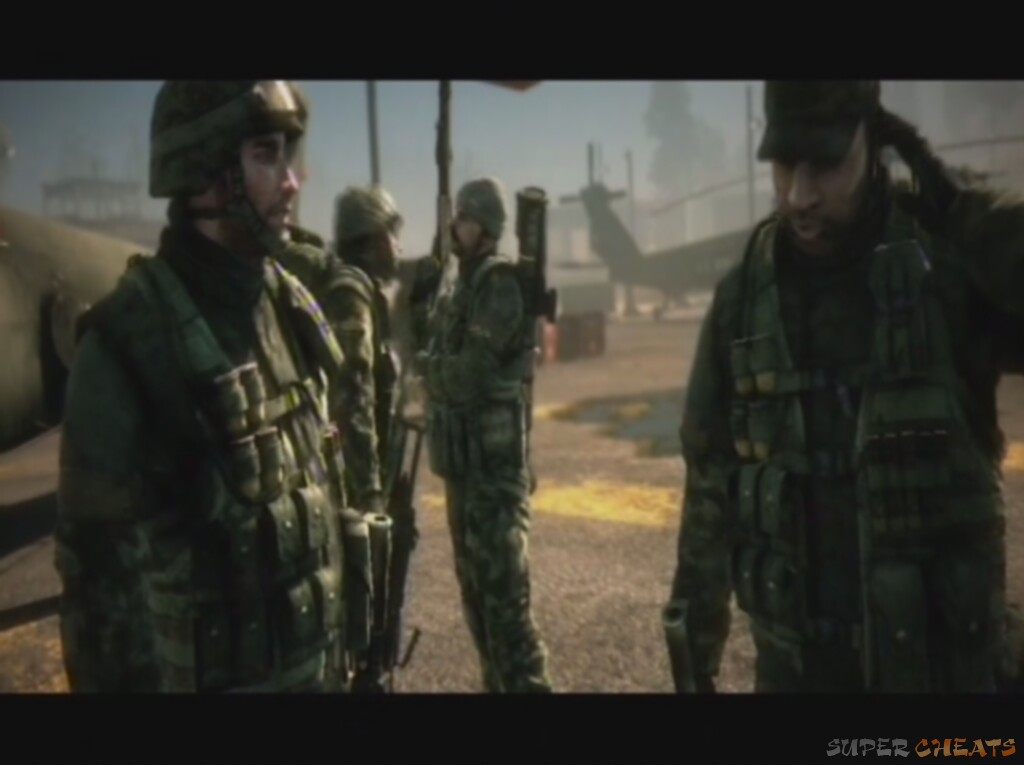
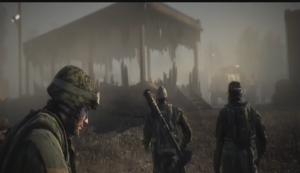
Battlefield Bad Company follows a series of events in the lives of a group of squadmates in 'B Company' of the US Army. You control Preston Marlow, who finds himself in this 'Bad Company', the dumping ground for troublesome soldiers then thrust into the frontlines effectively as cannon fodder. It's your job to survive the ordeal, and maybe get a little something for yourself in return.
Throughout the game the main objective is to stay alive on your quest for gold bars, the salary of a group of mercenaries known as The Legionnaires.
An epic hunt for gold
You can't actually fail the game, or have a "game-over" screen or similar. When you die, you automatically respawn near the scene and get as many more tries at the section as you need, complete with all the enemies you had vanquished still in their graves. While on some occasions the game uses checkpointing, it's rare throughout and those instances are mentioned in this guide. The walkthrough was written on Medium, but advice is given in places on how to complete or tackle certain sections on the Hard difficulty setting.
The game has definite sandbox elements, allowing you to approach each objective in a variety of different ways. In various vehicles, on foot, by river, from different directions; this guide aims to give you just one of those routes – what I have found to be the simplest, but once you become better at Bad Company experimentation is the name of the game, and the world of Bad Company is literally your oyster.
The walkthrough was written using the Xbox 360, but the only differences between versions are the controls. PlayStation 3 controls are provided in brackets where necessary. The early section of this guide, the first two levels, is an in depth guide to the game as well as a walkthrough to the sections. Everything is explained in detail as an accompaniment to the game's instruction manual and the tutorials given in the first level. The later section ignores button tutorials and simple strategies to give you an easy-to-follow walkthrough.
The scale of Bad Company
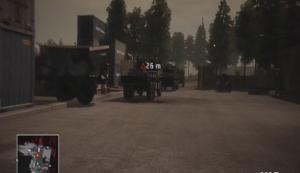
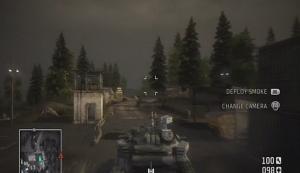
In the game the map is a vital piece of tech. Equipment spots, containing weapons, gadget and even gold are designated using a white X. Enemies can also drop collectible weapons. Ammunition crates are shown using a line of bullets. Gun emplacements have a small white turret-shaped figure. Vehicles have different icons depending on the type. There is a smal 'N' on the map which shows you which direction North is in at all times. This guide will frequently refer to targets using compass directions.
DICE have included a wealth of collectibles for you to find in the game. As well as weapons which you can find in equipment spots, there are also gold bars, five each on every level from the second onwards. They are contained in silver crates and while you will usually find one obvious one on each level, the rest are off the beaten track. Achievements are available in the Xbox 360 version for collecting all those on offer. This guide lists all the locations of the gold and equipment, as well as tips on how to get those dastardly achievements. The main walkthrough does not describe all of the collectibles in the body of the text as getting many of them require diversions not all gamers will be willing to take. Check the section above each level's walkthrough or at the end of the guide for full info on collectibles however.
It is rarely worth using any other weapons than assault rifles or sniper rifles in the single player campaign. A shotgun reduces your range hugely, and while a sniper rifle doesn't allow for close-quarters combat, you can switch to the pistol as a second weapon for all that. Some assault rifles have manual grenades rather than an under-barrel launcher and this is a disadvantage. Often you will find yourself in such a position that a launcher round at a wall is necessary to destroy it and move forward effectively.
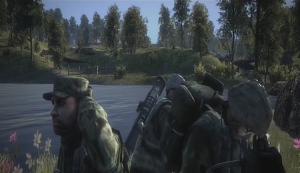
Your teammates are pretty unhelpful for the mostpart, even ignoring enemies directly in front of them. They can be handy with explosives, but you'll only want to rely on them to draw enemy fire, and do most tasks such as shooting from a vehicle yourself. They also beam around the level to catch up with you if you die or move to quickly for them. Often the will not move forwards with you and so you are usully required to take point and enter rooms first etc.
Fore more tips, particularly based on vehicular combat scenarios, check out the applicable story sections in the body of this guide
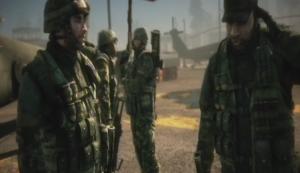
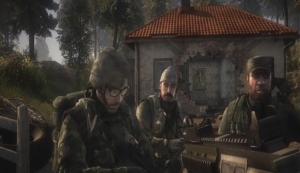
Sarge and the team
There is only one mode on offer here: Gold Rush. It takes place on a scalable map which gets bigger as the game progresses. One team attacks and the other defends (this is switched round once the mission is completed). A pair of large crates is placed in a predefined location and you must either attack or defend them. Once they are destroyed a new pair is assigned deeper into the map, and the attackers main spawn point moves up too, with the defence falling back. If the attackers resources run out (the more respawns they use, the faster these go down) the game also ends.
The multiplayer is class based, with Support being by far the best. You can heal yourself and your teammates as Support, making it invaluable to both attackers and defenders. You can also unlock the Mortar Strike, which is a major plus. Assault is also decent, allowing you to go headfirst into combat and stand up relatively well against any situation. A grenade launcher on the bottom of your main weapon is a major plus too – great for making discreet paths through buildings! You can unlock the auto-injector to heal yourself after a few matches; vital for staying alive in the field (it takes a while to recharge after each use).
Bear in mind that anything can destroy the crates. While the general idea is thought to be to run up to them and arm a charge, giving the defenders a certain amount of time to get to it and disarm it, you can use a tank, bullets, grenades, C4, anything apart from melee combat to do damage to the crate. Without the alarm sound that goes off once a charge is armed, doing consistent damage using other means is the stealthy way to go.
Artillery barrages are also the constant bane of players, with streams of shells falling throughout the game and someone always manning them from the offset. A good idea if they are getting on your nerves, particularly as a defender is to go on a mission of your own to eliminate the gunner. If the attackers are more than one set of boxes in, there main spawn will have moved forwards, leaving the main base, often housing the artillery gun, completely free, save for the one kill-hungry gunner operating the weapon. Destroying the weapon will give you some peace temporarily, and will likely make the gunner from thinking twice about returning.
A new game mode, Conquest, is being developed and is set to be released via downloadable content soon.
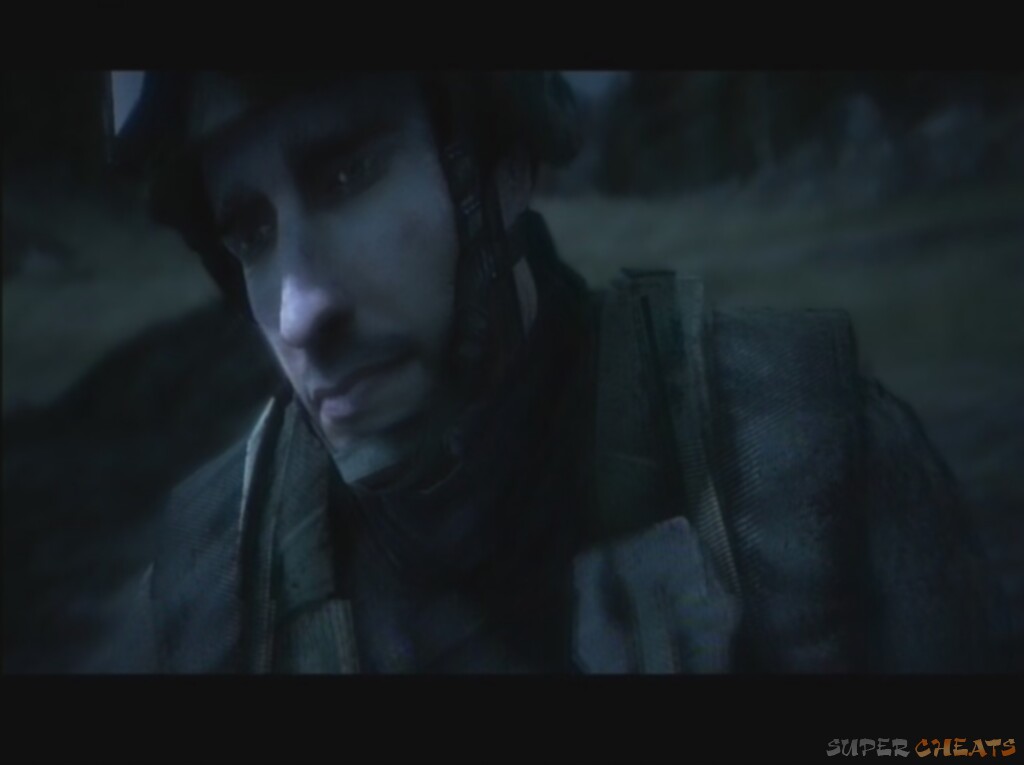
The video introduction explains your position in the game and the members of your squad. Should you skip it, the gist of it is outlined in the introduction section above. You can skip any cutscene by pressing Start, then Back (Select). You then enter an in-game scene where you have camera control and the dispatch-girl 'Miss July' is introduced. She'll provide help and assistance throughout the rest of the game.
Once the convoy you are travelling in gets shelled, you pass out and then must complete a short tutorial.
Sgt. Haggard will ask you to look up, then down, to test your controller's vertical inversion. Use the right-stick to do this, and confirm or change the vertical axis when prompted if necessary using the onscreen command.
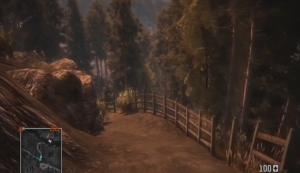
The opening tutorial section
Collectable weapons (1/5 and 2/5):
1. Soldiers in this section will drop AEK271 weapons
2. Soldiers in this section will drop S20K weapons.
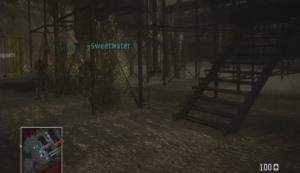
Objective: Reach Sweetwater
Simply move throughout the obstacles ahead. First you must press A or (X) while next to the obstacle to jump over the mound of rocks directly in front of your position. Then crouch by clicking the right stick and move under the hangover. Crouch is toggle-based, so click the stick again to stand up. Walk up to Sweetwater to complete the objective.
Use the Auto-Injector by cycling through your gadgets with LB or (L2), then press Right Trigger or (R1) to use. Press RB (R2) to reselect your weapon.
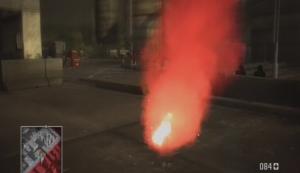
Objective: Destroy the Barrels
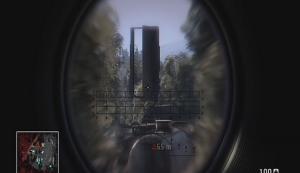
Aim at and destroy the three red barrels marked with objective indicators on the screen and map. A couple of bullets in each should do it. Remember, use LT (L1) to look down the iron-sights of the gun for more accurate aiming. Ammo is very precious in Bad Company. Once the third barrel is destroyed, the objective is complete.
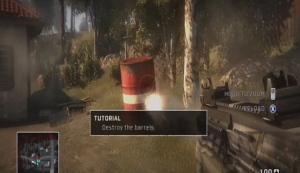
Blowing up barrels!
Objective: Fill up on Ammo
Bad Company features many ammunition crates to satisfy the weaponry's otherwise insatiable thirst for bullets. Walk over to the dark chest near where the last barrel was and stand as close to it as possible to collect more ammo and complete the objective. An audible chinking noise will confirm when you are collecting ammo.
Objective: Blow a hole in the house
Press RB (R2) to change fire mode for your assault rifle and switch to grenade launcher mode. Notice how the on screen crosshair also changes. Remember that the grenade will arch in the air, so be sure to aim a little higher than the place you want to hit on the wall. Shoot one of these rifle-mounted grenades at the front wall of the house as marked on your map to complete the objective. Make sure you don't fire through the window as this won't count, though you can take as many tries as you need. Feel free to destroy the house and trees to practice!
Destructibility adds a new dimension
Objective: Find a power tool
The power tool for repairing the Jeep is located in the house in the back room. To enter the house, either blow a hole in the wall or use your earlier one, or shoot the door through. It would be good practice to get used to using Y (Triangle) to knife thin obstacles such as wood and wire fences at this point. The door can be destroyed in one knife blow. Press RB (R2) to re-select your gun, and then proceed forwards to the metal cases on the floor. On top of them is the power tool, which you can pick up with the B button (Square).
Objective: Repair the Vehicle
Move back out of the house at the front and walk up the road to your right to the damaged vehicle. Get as close as you can then aim at a surface and press Right Trigger (R1). You may need to reselect the power tool with the LB (L2) gadget menu.
You'll be seeing a lot more of this
A short cutscene about your next objective follows: to disable an artillery base troubling your troops.
Objective: Eliminate artillery crews
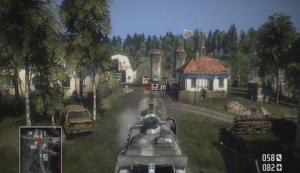
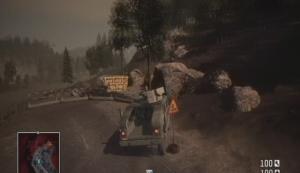
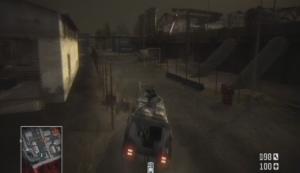
A major point of Bad Company is to choose the way you approach each mission. The easiest and quickest here is to use the vehicle you repaired, though you could walk if you wanted to be extra-stealthy. Your AI teammates rarely drive in the game, and so you now need to do some driving. Press Y (Triangle) to move around the seats and get acquainted with the different positions available in this regularly used vehicle, but make sure you are in the driving seat to proceed. The camera will either be directly behind and above the vehicle or inside it. Use Left Trigger (L1) to accelerate and LB (L2) to reverse and brake. Change the camera by clicking the Right Stick, rotate it by pushing the stick in a direction and finally choose a radio station with D-Pad down.
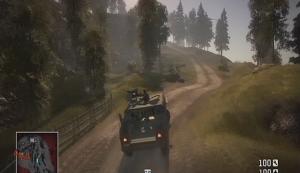
Vehicles don't take much getting used to
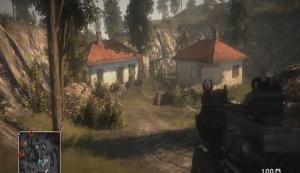
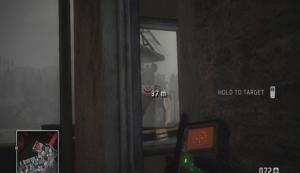
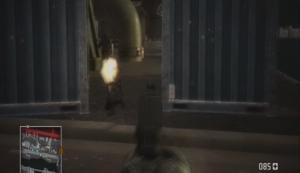
With the basics out of the way, proceed up the road until you reach the dead end where the road is blocked with crossed metal barricades. Exit the vehicle with B (Circle) and move towards the building on the left, climbing over the rocks and sandbags if necessary. There are no enemies in the vicinity until you reach the far end of the building. Use the window here to look down on the settlement below and take out any enemies you can see by looking down the sights to zoom in. One should be patrolling outside the house down the hill, while another should be inside the larger house itself. There are also plenty of explosive barrels (always painted red) to destroy any cover or enemies sheltering immediately in the house.
Move out of the building and proceed to the sandbags at the top of the hill, using your knife to destroy the fence silently. There will be one enemy hiding in the house on the right, you may be able to pick him off through the wooden slats on the window from here. If not, use either a grenade from your launcher, blow up a barrel to flush him out, or sprint down to the building and take him on in close quarters. That should be the last of the three enemies in this section. There is also an ammo crate back up the hill next to the radio tower, behind the stack of wooden crates. These are marked on the map with a three-bullet symbol.
Your first enemy encounter
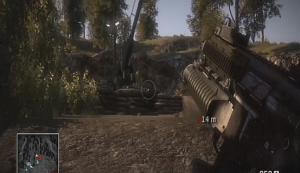
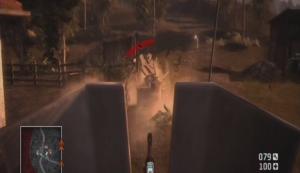
Move up through the house and towards the first artillery gun, which you may now be able to see firing in the distance. Reach the first set of sandbags looking into a gulley and stop; an enemy will come running at you who you should be easily able to despatch. Another may come after hearing the gunfire. Once the coast seems clear, move up to the end of the gulley and stop at the corner. Try and pick off the enemy manning the artillery gun if he has not already left his post. There will be at least three enemies in this area, so just make sure none are sneaking round behind you. To complete the objective you only need to kill the guards around the artillery guns, not destroy the weapons themselves.
The next gun is heavily defended. If you take cover on the corner before it, in between the two explosive barrels (safe practice is to destroy these first!) you can destroy a large and explosive, red crate by the gun, taking out any enemies nearby. Take out the man on the gun if he's still there, and clear the area. There will be about four enemies in the immediate vicinity. Once the red triangle has disappeared from your map, the area is clear and you can move on to the final gun. Note there is another ammo crate on your left as you move past this second gun amongst a square of sandbags.
Using grenades makes everything a lot simpler
Cautiously move along the path to the final gun; an enemy may well come at you before you round the corner. You should find five enemies amongst the gun, some on the left, others further away on the right. All need to be killed. Again, use the explosives to your advantage, and try and move up slowly to let your team follow (though often they will remain back, they do provide suppressing fire on occasion). This will complete the objective. Remain here until the next objective comes through; if this isn't happening, there must still be an enemy nearby. Move forwards if necessary to entice them out.
Sprint to avoid enemy fire
Objective: Regroup at the smoke
Move to the red smoke marked on the map by the third gun.
Protect the convoy
Objective: Man the artillery gun
As the newest member of 'B Company' you are being given the risky job of shelling enemy troops with friendlies in the vicinity. Man the third artillery gun using B (Circle) while next to it. You will be transformed into an overhead camera, looking at a village.

Artillery weapons are fun, but also very useful
Objective: Shell the incoming vehicles
Use the usual fire controls of Right Trigger (R1) to destroy the vehicles approaching on the road to the right. Use the right stick to move the camera. You want to fire about two seconds in front of them to ensure direct hits. Some may take alternate routes to avoid your barrage. Locate them using the triangles on the map and take them out, while ensuring not to hurt the friendlies.
Enemy vehicles are terrorizing our troops
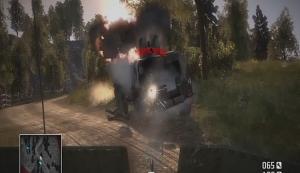
A second wave will come in, again with three armoured cars. Once the gun has recharged, realign it and do the same as before. One may take cover behind a house.
A third wave of four cars in pairs will then move down the same road. It is very hard to fail this mission as your own soldiers on the ground are competent enough to destroy the vehicles for you. Just be sure not to shell your own men.
Miss July will then tell you to go and clear out a river crossing past the village ahead.
Objective Ram
Collectable weapon (3/5):
3. XM8 (part of the 'Search the house for a weapon' objective)
Objective: Proceed towards the river crossing.
Move along the coastal path for a few metres, and then take the turning on the right towards the road with the vehicle marked on the map. Be warned, an enemy armoured car will come at you. Have a grenade primed and ready in the launcher, or stay in cover. Be sure to take out the gunner on top first. You could also quickly man the gun in the empty vehicle to take out the enemy here.
Enemy armoured cars are not too fierce
Get in one of the two vehicles (remember you still have the power tool to repair any damage) and drive towards the village. There are no enemies on this road until you pass the objective way past the village. You will see friendlies in the centre of the village, and pass an ammo crate on your way in.
Objective: Search the house for a weapon
You are volunteered to search the bombed-out house at the end of the road for loot. Take the vehicle as close as possible then exit the vehicle. There are no enemies in the house, just enter and go in the room straight ahead to find your first collectable weapon. Pick it up with B (Circle).
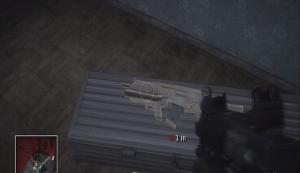
The easiest collectible you'll ever get
Objective: Eliminate all enemies
Get back in the vehicle and drive along the road to the river crossing marked on the map. At this stage of the game none of the enemies have RPGs or explosive weapons, so you are safe to drive your vehicle right into the outpost and let your team do some of the work. You could stop on the road up high before you reach it and pick some off with your new gun, then move in, or go offroad and smash through the side of the outpost with the element of surprise.
The village carries surprisingly few enemies, but lots of explosive crates, so watch where you're driving/standing/firing. The biggest challenge is the enemies in the river, as you will have to move through cover to get shots at them. The best course of action is to man one of the two machine guns marked on the map with the same icon as the artillery earlier, and fire up at the hill which possesses many threats on the other side of the water. You could also use your vehicle's mounted gun as an alternative.
The mounted gun provides much needed additional firepower
You will be informed that you need to 'hold down the fort' until the friendlies arrive, and an ominous-looking tank will tear down the hill towards you. Fire off a few rounds if you want, but then leave your mounted gun and get behind some non-explosive, sturdy cover. The tank will fire on you, but soon a friendly helicopter comes in to save the day. There may still be some enemies left at the top of the hill, so once the tank is destroyed, get back on the gun and finish them off. Ensure all enemies in the area have been killed (cross the river if necessary) to complete the objective.
Objective: Regroup at the smoke
There is another power tool in the village if you need it, and an ammo crate near the road entrance. Otherwise, cross the river and climb the hill to reach the smoke. Take a vehicle for speed and security if you desire, though there are no enemies on the path. There is an ammo crate in the house to the left of the smoke.
As your friendlies enter the village, Miss July informs you that you need to scout out a farm and eliminate any hostiles.
Objective Mustang
Collectable weapon (4/5):
4. 870 MCS found at the house with the armoured car and infantry using the more difficult right-hand channel route.
Objective: Proceed towards the west farm
The vehicle you may have brought up here will come in handy, as you can use it to quicken your journey to the farm. There are plenty nearby and in the village if you didn't however. On the map after a short distance you will see a fork in the road. Take the right hand channel to get the collectable shotgun, or the left hand channel for an easier route. The right channel features an armoured car with about four or five enemies in a building. Use a grenade launcher or manual explosives to take it out. The shotgun is directly in front of you as you enter the front door in the house. The left hand route is clear, though the armoured car may pose a threat once you pass the shotgun house off the road on your right. If you are attacked, it may be worth getting the collectable anyway, as the armoured car was the biggest threat in the area to begin with.
As you get nearer the farm, you will reach another fork. Neither feature immediate enemies until you get close to the farm, but the right hand one allows for a more stealthy and better protected run up the hill. I recommend following the right hand road all the way round, before smashing through the first set of sandbags to take out a couple of foes. Enter the house behind the sandbags and use it as cover to eliminate the enemy on top of the tall grain silos.
You have to check every dimension for enemies
This unleashes a nest of enemies, so fall back to the first house if necessary. About a dozen enemies will come at you, and a prudent strategy would be to man the mounted gun on the armoured car parked to the left of the first house. Remember, press Y or (Triangle) to switch position. Move the car forwards if necessary to get shots at more enemies. With practice you'll get much faster at driving a small distance, then switching to the gun with good speed. There will be more than a few soldiers in the main barn, one down the road to the left of the barn behind a barricade, and one shooting from long range in the tall building on the hill to the right of the grain solos from the end you entered at. There is another armoured car in the central barn should yours get destroyed, but remember you have the power tool for repairs too. Once the eliminate all enemies objective is complete you may as well get it!
Objective: Regroup at the smoke
This is the confirmation of the all clear, so explore the farm and fill up on ammo or weapons, before heading for the red smoke at the north of the central barn.
There was in fact a tank in the double doors of the tall barn, so be prepared to get thrown out of the cut scene into live gameplay.
Tank inbound!
Objective: Destroy the light tank
Run into what's left of the main building and take cover until the tank moves round the side (use the map for guidance). As it's about level with you once you're positioned inside the barn (it won't shoot you if it can't see you), move deeper in near to where the armoured car was (or is, if you didn't use it). Pick up the rocket launcher in the far corner as the tank moves round the other side. You could do worse here than to climb the ladder in the barn (as you look north from the rocket launcher pickup). Here you are pretty safe, and can take shots out of the big gap at the north end. Crouch down and fire at corners of the tank – remember that if you can't see the turret, the chances are it won't be able to hit you, so go for marginal shots rather than ones smack in the middle of it. You can always get more ammo from the crates around the farm (consult the map). Two shots should do the job.
The rocket launcher makes short work of it
Objective Impala
Objective: Regroup at the smoke
Remember to pick up your power tool if you would like to take it with you instead of the RPG, before heading to the smoke at the south of the farm.
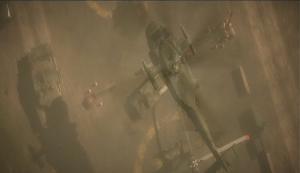
Better late than never, a friendly helicopter approaches, but gets shot down. With your transportation gone, you have to continue in the field and are sent to destroy an AA battery.
Objective: Proceed towards the anti-air base
Get in one of the many vehicles (repair it with a power tool if needed), remembering to fill up on ammo first. Head out of the eastern road of the farm and you may see a helicopter in the distance being plagued by AA fire, which is roughly where you will be heading. Stay on the road for the time being however. Turn left at the junction and proceed until you come under fire from (or reach) the sandbags and mounted gun just past the crossroads ahead. You can smash through the sandbags easily and take out the mounted gun, or park the car across the road and use it as cover. There are many enemies here, but either option is relatively effective. There is another collectable gun just past the mounted turret in the sandbags.

The AA base
Objective: Pick up C4 explosive
Amongst the same sandbags as the collectable and near the mounted gun is the C4. Pick it up. We'll need it to take out the AA batteries.
Objective: Destroy the anti-air guns
Move up through the tree line (you could take your armoured car if you wish), keeping an eye on your map for enemies. They will appear on the radar as soon as they are spotted by you or your teammates, or when they open fire. There is plenty of cover here, but take it slow, as there are outposts of enemies on each side as you move up. There are quite a few mounted machine gunners too. Move into the trench on the right as you come up the hill for additional cover, and take out the right hand base first. Leave the trench and move round the grass on the right if you come under too much fire, before taking out the mounted machine gunner who should be facing the wrong way, or will have dismounted to attack you. Kill the enemies guarding the AA gun while staying low (machine guns can hit you from other sides of the hill). Select the C4 from your equipment menu with LB (L2) and plant it with the Right Trigger. You only need one, so allow your character to bring out the detonator, ensure you are a good few metres away, and detonate (the edge of the sandbag circle should do).
C4 is great for this sort of thing
Move round the rocks on the western side of the map to proceed towards the most southerly AA gun. Use the contours of the hill for cover if necessary. The machine guns can take you out quickly even if you can't see them, as the top of your head may well be sticking out, so ensure your cover is decent! Use grenades or launchers to clear long range enemies, and move round to outflank the machine guns while your teammates keep them busy, using the hill's slope for cover. Stay at the base of the hill and use the same tactics to take out all the AA guns and their guards. There is more C4 available at the X's on the map, should you run out. You don't need to kill all the enemies to complete the objective, and your team will clean them up on the way to the regroup order if you want to be particularly quick about it.
Objective: Regroup at the smoke
Regroup at the northerly base of the hill at the red smoke nearby where we came in with the vehicle.
The regroup spot
Objective Bronco
Collectable weapon (5/5):
5. SCAR located in the southern equipment marker next to the river as you start this objective.
Objective: Proceed towards the east farm
Get in a vehicle, preferably with a gun (an armoured car would be ideal) again remembering to fill up on ammo, equipment etc. before leaving. Following the road you came in on, heading east, there will be no enemies, but one collectable weapon along the way. Once the houses come into range, get ready for a fight, though combat shouldn't begin until the current objective is recognised as completed.
Objective: Eliminate all enemies
Use the mounted turret on the vehicle while stopped at the first house if you have one to take out the guard high on the wooden structure at the far end of the farm, and any other guards firing at you initially. Get out before it blows up from too much damage, and sprint to the wall of the first house. There will be at least one guard inside, so blow the wall with a launcher or explosive and get stuck in. Climb up the stairs to the loft of the house for a great advantage in the rest of the fight. Blow your own hole in the roof for a section to shoot out of. There is also a RPG in this loft at the southern end, marked with a cross on the map. Use a combination of explosives and flanking away from the house to clear the rest of the buildings. Be sure to pick up RPG ammo at the western X if necessary as you'll need it in the future.
A tricky little village
Objective: Eliminate incoming reinforcements
Try and get back to a loft if you can, and pick off the incoming foot-soldiers. RPG the troop-carrier if you can, otherwise continue to take out the waves of soldiers. The loft in the barn structure at the northern end is a good place to take cover. Your team will control the bottom and keep the enemy at bay. There is also a mounted gun there, which is very handy indeed. Keep an eye in the distance as you may well see a tank shooting you from range.
If you can take it out in the field over the river then you'll save a lot of bother later (see the end of the video below for its exact location). After about three truckloads of soldiers, this tank will come into the village if you didn't manage to destroy it. Stay in cover until you get a comfortable RPG shot. It will struggle to hit you if you're crouched at the rear end of the barn's loft because much of the roof is indestructible. Otherwise, move round the side of the buildings, watching for enemy foot soldiers, until the shot is on. Again, two RPG rounds will do it. You should be able to take all of the soldiers out from the loft.
Watch for enemy armour!
Objective: Regroup at the smoke
Your friendlies are again just too late to get in on the action. Stock up, and regroup at the smoke in front of the barn.
Objective: Follow the convoy
Get in a vehicle of your choice, preferably an armoured car, and move out along the eastern road. The convoy will wait for you, so feel free to explore and stock up a little first. Stay well behind it, as it will be on the receiving end of yet more shelling.
Objective: Regroup at the smoke
With the convoy fleeing or destroyed, exit the vehicle and sprint to the smoke. The artillery shouldn't kill you even if it hits your position.
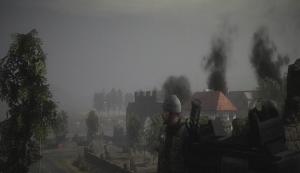
Air support is again promised, but found lacking. You need to destroy some radar trailers to allow the air support to come in. Be on your guard as soon as the Miss July transmission finishes, as at least one Russian soldier will come down the bank across the lake.
It may look picturesque, but all hell's about to break loose.
Objective Taurus
Objective: Destroy the radar jammers
You can move quite quickly through here, not least because of the artillery barrage keeping you on your toes and the enemy in cover. The trench on the right provides good cover for yourself, but there are no soldiers until you can see the towers ahead of you – these contain mounted guns and enemies. If you RPG or grenade the top of the towers it completely destroys the upper half and the enemy cover. Try and do this from distance to avoid being pinned down. The artillery fire is really just for effect, so try not to be too fazed by it as you move through.
Move up until you are level with the towers and flank to the left towards the first (most northerly) radar jammer (a large green tower, with a large rectangular similarly-coloured mass next to it). It isn't that well guarded, but there will be at least one enemy in very close proximity to it. Stock up on grenades at the ammo crate in the western tower if you need to, before unleashing your fire on the radar jammer (any part should do). You can also use C4, which is located in the more southerly tower and between the two in another equipment location. One C4 or a few grenades should destroy it. You may have the RPG from earlier too, allowing you to complete the objective from long range.
An RPG from long range
With one destroyed move onto the next one, bearing in mind that there are enemies in the distance to your left as you pass over the hill. Use the same techniques to destroy it.
Objective: Regroup at the smoke
Meet up at the sandbags by the red smoke on the edge of the hill. Stock up on ammo and equipment before this final section first.
Objective: Move in and secure the base
Man the mounted gun by the regroup point and fire to the east into the valley. Try and pick off as many soldiers as you can. Their weapons are relatively weak at this stage, so you shouldn't be in danger of any one-hit-kills from their guns. On the Hard difficulty setting you would be better to move up and try and pick them off using the iron-sights on your gun as the AI are very good shots and will kill you fairly promptly if you remain on the mounted machine gun for too long. When you've done all you can from the high ground, move down to cover in the valley. Use the hill slope and sandbags for cover, and watch for enemy fire to learn where to point your gun.
The enemy AI are not afraid to move forward, so keep an eye on your radar and make sure you are not getting outflanked. Try to move through the gulleys. This is quite a hard section, but if you die you'll respawn back at the top of the hill. Use the height advantage again if this occurs to take out any enemies that have moved in. There is an ammo crate about halfway towards the objective, which you may well need to use. Otherwise the enemy soldiers will drop plenty of ammunition should you need it.
The mortars are mainly for effect
Once you pass the ammo crate another wave will hit you. Watch out for mounted machine guns nestled in the buildings near the objective. On Hard these will take you out in under a second, so try to flank round and hit them from the side. If you take the left (northern) path there is a large hill that will cover you from the machine guns until you have a decent flanking position. With the machine gun down, the rest should be simple. Move in and enjoy the cutscene.
Sweetwater has found out that you were in fact fighting the Legionnaire's army, a highly-paid group of mercenaries. In fact, they're paid in gold bars. Finding one on the body, this sparks the hunt for the rest of the campaign. For now though, the army is still in command, so a few more routine missions are on the agenda.
The first sign of gold
This is the first level where you can find gold bars in secret locations for achievements and collectibility.
You start the level being airlifted in, discussing what to do with the gold bar found at the end of the last level, which your group has now decided to keep and split four ways – just to look after it for Uncle Sam. You need to go in ahead of your friendly convoy and clear any major dangers in this mission.
Once you are dropped in you land near a house with the Legionnaires logo and motto on it.

The Legionnaire logo
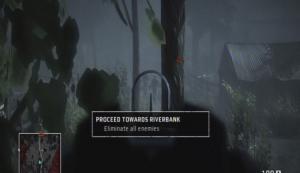
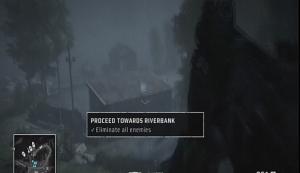
Proceed towards the river bank
Gold (1/5 and 2/5):
1. As part of the 'search the house' objective
2. In the large house with the mounted machine gun in the 'eliminate all enemies' objective
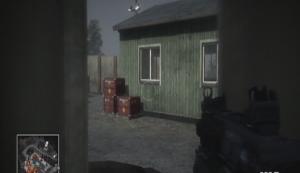
Objective: Search the house
Simply knife the door to enter, then locate the metal chest and press B (Circle). A cutscene will play that you will eventually become very familiar with as you locate another gold stash. There are no enemies to worry about in this section. Note that there is also some C4 in the house, to the right of the door as you go in. You may as well collect it as you start each level with no equipment except for the auto-injector. Leave the house the way you came in and regroup with your squad to trigger the next objective.
Objective: Move out
Begin to move along the road to the south of the house. Stay in the tree-line as there is a group of enemies ahead.
Stealth is advisable
Objective: Eliminate all enemies
Still amongst the trees, use your iron-sights to pick off any enemies in the open. One should be walking up the road ahead. There shouldn't be more than two enemies in range before you reach the iron shack in the field in front of the houses. Note on the map that there is a mounted machine gun in the loft of the house, so keep your eyes peeled for any movement up there. A sound strategy is to sprint to the wall of the house across the garden, so as to not get caught in the machine gun fire (it shouldn't see you until it's too late). Be careful, as there is at least one Russian in the first building that you will need to shelter against. Take him out.
The noise will alert the machine gunner if he has not already opened fire. Remain in the house and pick him off, using the window for cover. There will also be two guards in the downstairs of the main house. Once you've cleared it, proceed upstairs to the first floor. There is another silver chest containing gold directly to your left as you reach the top of the stairs (looking back out to the house you covered in before). Proceed up the ladder to the next floor and use the loft as cover (blow a hole in the roof) to take out the remaining enemies by the docks to the east.
Explosives work too
There is another iron shack containing enemies. Use explosives to take it out and kill anyone inside.
Objective: Regroup at the smoke
Exit the house and run to the red smoke by the dock.
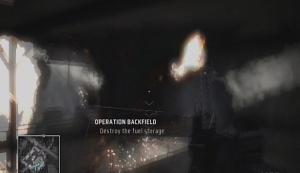
Operation Backfield
Gold (3/5):
3. In the construction pit detailed in the 'destroy the missile launchers' objective
Objective: Destroy the missile launchers
To get to the location of these two objectives, you have a number of choices. First however, take cover as an enemy patrol boat will come along the river. Simple bullets will take it out pretty quickly. You could also man the mounted gun facing out over the river.
So here you have a few choices. There is a collectable gun and some gold along the road to the right, heading east, from the large house we just fought in. It's only a narrow path, but you can take the armoured car that's parked on it all the way along. There are at least five enemies as well as a patrol boat with a grenade launcher on it scanning the harbour. Use your mounted machine gun where possible, before locating the shotgun near the blue, wooden building, and the gold, in the pit with the scaffolding in the middle.
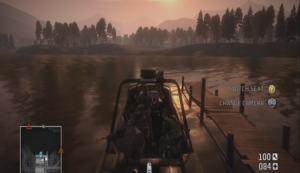
You can take a boat from here to investigate the secret collectable across the broken bridge back opposite the dock you started from. Make sure not to run the boat into the ground as you'll need it to get back along the river (though you can always swim to the other side and get another one).
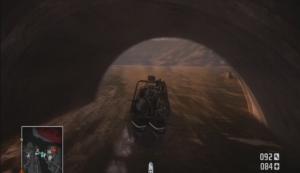
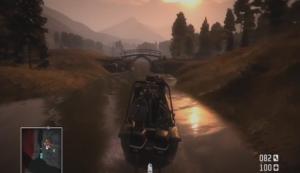
Otherwise, take a boat (the recommended option) and proceed down river to the objective.
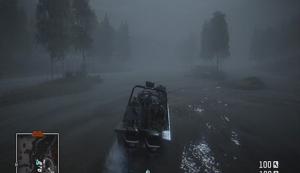
The boats are really good fun
You may see the patrol boat along the way if you didn't go looking for the gold and destroy it then. Pull your boat up once you begin to round the corner near the first set of objectives. If you exit the boat and climb the hill to the south-west of the targets you can gain a height advantage and maintain the element of surprise. The developers appear to have expected this though, and as the factory comes into view there is a mounted machine gun in one of the windows upstairs.
Once the immediate threat is removed, move up to the factory and enter into the western side. There is at least one enemy with access to a grenade launcher, so watch out. There are crates here for decent cover, so pick off as many enemies as you can before planting the C4 we picked up earlier on the missile launchers (there is more C4 at the northern entrance to the factory). Beware as there will be more than a few enemies here, and some on the gangways above you. Once you blow the C4 more enemies will come in and your team may well still be waiting outside, so be prepared to stay in cover and deal with them on your own. You may consider using the upper floors to take out soldiers on the outside of the factory, and there is also a collectable assault rifle up there on the roof.
Many C4s for many targets
Objective: Destroy the fuel storage
Get in a vehicle, again, preferably with weapons, and take the northern road out of the complex. There is also a river crossing, should you wish to try an alternative route. This northern road however is a relatively safe way into the enemy base. Follow it as it goes underneath the bridge and curves round, before crossing the bridge itself. Drive headfirst into the set of sandbags in line with the objective markers. The wall provides great cover before moving in.
There will be one guard in the green building to your right as you look at the objective, and plenty more once you enter the complex. Blow a hole in one of the green buildings and use it for cover to move forwards. Most of the buildings have guards in. Once the area seems relatively quiet, sprint for the middle green building.
This building is a very good location to take on the main building from. Watch your flanks as enemies may still be in the buildings behind you. You should be able to take out a couple of enemies through the large window on the stairs, and others will come out towards you as they hear the commotion. You can destroy the walls of the factory, so do this if necessary to get shots on the guards on your radar.
Simply shoot the red fuel storage containers located in the top corners of the factory to blow them up. You can do this from the outside if you blow holes in the right places, also possibly taking out guards nearby. For the white one on the ground floor you will probably need to use a grenade or C4. The explosion is quite large so stand back.
The equipment in this factory is just C4, and is not really worth going out of your way for at this stage. It's on the first floor if you want it however.
Objective: Regroup at the smoke
Meet back in the central green building you took cover in.
Miss July reveals that a Russian tank convoy is on its way to your position to capture the bridge. Here you are introduced to the most useful gadget in the game, the mortar strike.
Objective: Offside
Gold (4/5):
4. Find it in the same house as the equipment spot near where the tank stops in the city during the objective 'destroy the stationary guns'.
Objective: Pick up mortar strike
Simply walk over to it and press B (Square) as usual. To be able to use the mortar strike, you only need a line of sight to the target. You can bomb anything using it: buildings, land, vehicles.
Objective: Eliminate soldiers on the bridge
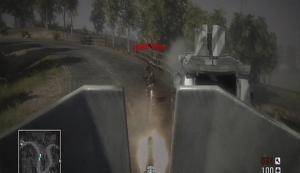
If you now reenter the factory and climb to the very top onto the roof using the stairwells at either end, you can target the tanks on the bridge without much risk to yourself. Simply point the mortar strike (select it in the gadget menu) at the target and hold the fire button until the two white lines meet in the middle. Make sure it's not accidentally aiming at any trees or the short wall in front of you, as that could be pretty disastrous! You can use it as many times as you like though, there is just a short recharge period. Target the bridge and watch the fireworks. You may need to use it more than once to take out the convoy.
Hit the convoy with a mortar strike
Allies are heading into the city, so you must now head to the 'city limits'.
Objective: Regroup at the smoke
This one's quite a way away and the bridge has been destroyed, so take the bending road around the outside to find another armoured car. The one you came in on will do if it's not too badly damaged! Carry on and cross the river to the previous factory. There shouldn't be any enemies here. Take the winding road as you did before, but instead of going across the bridge head in the opposite direction: take the right at the junction. An armoured car will come up on the road below you and your gunner will open fire. It may well be worth you taking over gun duties just to finish it off quickly, but it shouldn't take much.
The ruins on your right house a few Russians, but it's also the location of the regroup smoke, so disembark and clear the area. Use the turret as much as possible beforehand. There are three enemies in the ruins; just take it slow and it's a cinch.
Our tanks are in trouble, so we need to destroy the gun emplacements that are plaguing them. There are no friendly markers in the city though, so this is a perfect opportunity to use some more mortar strikes.
Objective: Destroy the stationary guns
Begin by shelling the nearest building until you can safely survey the area surrounding it. Simply aim at the roof with the Mortar Strike to demolish much of the structure and upper floors. Once you've cleared a lot of the enemy cover, move up to the brick ruins at the west side of the city. You can take out many of the guns using the mortars without even getting shot at. If you come under fire use the strikes to take out enemy hiding places. Enter through the main arch, using the downed tank for cover. There are enemies with shotguns and grenade launchers, so be sure to stay behind sturdy defences and watch your flanks.
There is a collectable silenced assault rifle in the first house on the right. This is also a good cover spot, so it's worth investigating. Move higher in each house, scanning for enemies and picking off any you see. There is an enemy on one of the gun emplacements, this time a grenade launcher, who will target you if you move into the open streets, so progress through the buildings until you get a clear shot. Use more mortar strikes to take out the emplacement. There is a shelled out loft accessible by ladder in the second building on the right from which you can take out the grenade launcher. Take a run up using sprint and then jump to make it across wide gaps between the upper floors of many of the houses if you want to change position. Blowing a hole in a roof often provides a great spot for picking off enemies. You can move a long way without even needing to touch the street by traveling through the upper sections of the houses in the city.
A mounted machine gun is in the roof of another building behind the grenade launcher. Use mortars to take it out. A tank will approach, but as long as you're safe in one of the lofts it shouldn't be too troublesome to call in more strikes and demolish it. You can survive a few shots on Normal, which should be enough time to aim and call in a strike.
A mounted rocket launcher is the south eastern objective, which you can again see from any loft relatively nearby in the centre of the city. The final one is behind a building round a corner, so is a little trickier. There is a house on the corner itself which you can use to call in a strike, but it is very destructible so if the emplacement sees you it may be necessary to move. Let your team draw its fire if they're in a suitable position. They're all invulnerable so no need to worry!
This final emplacement is quite well protected so shelling may not take it out completely. There is however a RPG at the equipment marker right on top of the gun emplacement on the map (the most southerly piece of equipment in the town). Use this to shoot the emplacement from long range. Apart from the RPG there is little of note in the town to go out of your way for. Some C4 and more mortar strikes, which are not integral for the rest of the level.
Objective: Regroup at the smoke
Head out of the town to the south, collecting any ammo on the way from the locations marked on the map. There may still be uncleared enemies in the town, so be careful.
As the convoy comes in, you're ordered to join it.
Protect the tanks
Collectable weapon (1/2):
1. M249, located in the first house on the right as the tank convoy begins moving. You will need to disembark to get it.
Gold (5/5):
5. In the southwesterly corner of the cemetery once the tank convoy section is finished.
Objective: Keep the tanks alive
You only need one tank active to successfully keep the mission going, and there are two options for how to do it. You can man the turret of one of the tanks as the AI is often incompetent, to protect the one you're in, and this is the tactic I recommend. Otherwise, you can all get in a jeep and try and protect them like that. Pick up the power tool by the ammo dump as you'll need to repair your vehicle (be it tank or jeep) at least once. There will be an AI friendly driving the tank, so just keep your eyes peeled for enemies with explosives as you move along the route. Take your position in the lead tank as you can then protect the rest from this position – you can also fall back to the others should it get too heavily damaged)
The first enemies are in the house to the right. The tanks can take these out using their main guns, but just try and pick off the RPG infantry with your machine gun if you can. Two enemy tanks will then come upon you, and again, unless you personally have explosives there is little you can do in this situation so concentrate on any enemy infantry. Next will be a house on the left. Aim at the windows and take out any occupants. There are 3 RPG soldiers in this house, but be careful not to overheat your gun as you'll then be a sitting duck. If you are in the first tank, watch out for the rocket emplacement at the end of the valley. Use your turret to take out the enemy nice and early before they can do anymore damage. Bombarding such emplacements with machine gun rounds should be sufficient to clear out the enemy.
It is more than sensible to get out and repair as you're going along. The tanks go at walking pace so you should have plenty of time during the lulls in combat.
The tank's shell turret is pretty poor against infantry, so as you near the city you'll need to be even more active in taking out any RPG soldiers.
Keep those tanks alive!
Objective: Regroup at the smoke
The smoke is in the graveyard near the tank objective point. Collect the gold first, located in the southwestern corner of the cemetery. Miss July tells you that a job to get you out of Bad Company has come up – destroy enemy communications. This is another city-based mission.
Assault east Zabograd
Collectable weapon (2/2):
2. The special-ops guards outside the radio room have AKS74u's.
Objective: Destroy the radio equipment
Your tanks will do their best, but there are many infantry units in the city. Enter through the broken hole in the wall, to the left of the main arch, and proceed into the building in front of you. Go upstairs and through the window you can take out a machine gun emplacement which should be busy firing at your tanks. There is a collectable assault rifle in the next building to the north.
There is another mounted gun, this time armed with rockets in the main square. Take it out with bullets while your tank keeps it occupied. By this stage, infantry resistance should be pretty light. The radio equipment is right to the west of the main square, or straight ahead as you'll be looking from the direction we came in at. The final street is very heavily defended, with at least one manned rocket emplacement and no tank support this deep in for you either,
Stay in cover until the gun moves round (you can see on the map which way it's facing), then emerge and pick off the soldier manning it. The house with the radio equipment in can be grenaded until you have a clear shot on the objective. A well aimed grenade from your launcher will do it. More ammo is by the friendly tank if you need it. There are many soldiers in the building itself so destroying the objective from the outside is preferable.
Objective: Regroup at the smoke
This is not in a great location as the soldiers in the radio house will be active and looking at you. Try and pick them off as you move into the street, though sprinting at the smoke will trigger a cut scene and let you off lightly.
It turns out they made the call anyway, so we're stuck in 'B Company' for a bit longer.
Objective: Protect the US tank
If you sprinted for the smoke the immediate enemies will be gone, but now there are plenty swarming by the tanks. Some with RPGs. The building right by the tank is a good cover point, containing a mounted machine gun you can use to protect the vehicle. There is also a mounted rocket launcher in the building directly west of the tank, on the top floor. There is a mortar strike gadget just outside the tank building too. You can use it to take out the vehicles that will be coming in, as well of course as the aforementioned emplacements. You will need to be able to quickly drop any equipment for the power tool as well so as to keep the tank's health up.
Move down to street level to heal the tank if its damage indicator gets too low (you can see it by looking directly at the tank, underneath the objective's distance meter).
With their vehicles down the enemy infantry are sitting ducks. Pick them off and clear the final wave.
Objective: Regroup at the smoke (in the central courtyard)
Secure harbour
Objective: Reach harbour
The final part of this mission involves simply moving to the harbour – there are no enemies on the way so feel free to relax. Get a vehicle and head out on the northern road to get to the harbour. You will come to an unmanned roadblock, so get out and move up the path on the right.
Move into the red smoke to compelte the objective.
The allure of the gold proves too much, and the orders from Redford are to take out the trucks in the harbour.
Objective: Reach trucks
Use mortar strikes to destroy the nearest two buildings as you move down the hill. The enemy will come up at you as soon as they spot you, so keep your eyes peeled. Move through the buildings and reach the trucks in the middle. They're pretty mortar resistant, so don't worry about that...You can sprint at them to trigger the mission completion without having to kill all the enemies in this section too.
You have followed the trucks towards a neutral zone. Haggard, crazed to get the gold, runs in firing his gun and sparks off an international crisis. We have to go in and get him back.
Saving Private Haggard
Collectable weapon (1/6 and 2/6):
1. An AN94 machine gun located at the equipment spot in the first guard tower on the right in the opening of the level.
2. SPAS shotgun in the house at the southerly equipment spot.
Objective: Reach Haggard by the smoke
You start up on a hill, which is a very decent position, so pick off as many infantry as you can from distance – there will be one in the guard tower, though there is no mounted gun. Some may sneak up the slope at you, so be aware. Sprint down to the guard tower and many bogeys will appear in the field to your right.
Haggard is not the cleverest
Run round and get in the door for cover and a collectable assault rifle. Be aware of a mounted machine gun at the next tower in the base, and a RPG soldier in the loft of a building near it. Your team will stay in the open, courtesy of their invulnerability, and force the enemy towards your tower.
Sprint to the house directly across the road to find a mortar strike nice and early. There will be a mounted machine gun amongst some sandbags, so climb back up the same tower you were in before and call in a barrage on its position. Watch out for the two guard towers in the adjacent field on the right, as these are manned as well as covering infantry in the field itself.
Once the coast looks clear, move up to the concrete and iron cross-hatched fencing. There will be a guard in the window of the top floor in front of you if you've not despatched him already. You will hear an engine and this is the signal to retreat. A tank will come down the eastern road (the main road passing through the village). Use the mortars on it from a safe position.
Tanks are your enemies
Fallback so your team take the fire, and use the opportunity to target it. It may take two strikes to destroy it. There is also an RPG in the equipment point in the central of the village if you need it. Head out of the village to the east once this is done.
Without crossing the bridge, bring down some mortars on the settlement across it. How Haggard got through all these guards is a mystery...Also notice the military bunker at the top of the hill overlooking the bridge on the left. Mortar fire won't do much to it, so, with both the other buildings shelled, move across. There will still be a good few enemies, and a mounted machine gun may well have survived the shelling on the right.
Indestructible bunkers are most frustrating
You may find it worthwhile to jump in the river if you come under heavy fire (or get blown into it; these guards have explosives) and then move up the bank to the left. Approach the bunker on the hill, killing the guard inside, before turning and taking out any stragglers in the village below from height. Use the ammo crate if needed amongst the sandbags, before moving up the road to meet Haggard.
Miss July isn't happy. Sarge takes the blame, but with the realisation that court-martial awaits the squad, the idea of going in deeper to get the gold sounds like a plan. You now need to destroy the antennae to stop the world and more importantly the US army from hearing about your exploits.
Reunited with Haggard
Cover your tracks
Collectable weapons (3/6, 4/6, 5/6 and 6/6):
3. XM8C at the equipment spot along the road to the right at the very start of this objective.
4. The snipers in the 'south antenna box' section carry SV98 rifles.
5. SVU sniper rifle in the 'east antenna box' section, located at the top of a guard tower at the northeast of the base surrounding the antenna.
6. MG36 machine gun at the equipment spot to the south of the barn where the AA gun is located in the 'destroy the north antenna box' objective.
Gold (1/6, 2/6 and 3/6):
1. To the right of the road block where the first sniper encounters take place.
2. In the bottom of the barn where the AA gun is located during the 'north antenna box' objective.
3. In the room next to the MG36 weapon collectable marked with an equipment spot to the south of the barn where the AA gun is located in the 'destroy the north antenna box' objective.
Objective: Destroy the south antenna box
Move up the road until you get to the fork. This is one of the more difficult sections in the game as the area is, as Redford states: 'crawling with snipers'. Move into the trees between the fork for cover rather than taking an exposed route on one of the roads. The tactic on Easy or Medium can be to take fire to see where the snipers are hiding, before returning the favour and taking them out. Equally, if you are getting frustrated by not being able to spot the snipers I recommend sprinting up the hill to take them on in close quarters (as shown in the video below). They shouldn't be able to get more than a couple of hits on you if you're sprinting before you're on them and their weak pistols with your assault rifle. Use their marks on the mini-map to discover where to run and let your team deal with any stragglers. On Hard you won't survive more than one shot, so a series of long range mortar strikes may be your best bet.
There's no shame in making use of the fun of mortars regardless of the difficulty either, so call some in at will. You may need to move up to the concrete blocks on the lefthand road to take out the rest of the snipers. They also have access to RPGs, which is a particularly lethal combination. Move up the hill on the left, using the rocks for cover. They can take a serious amount of damage, so don't be afraid to get back in cover and use the auto-injector.
Move up to the fence, then to the next row of rocks, and proceed into the centre. Blow the control box with grenades, C4 (located in the building at the top of the hill – be sure to pick the mortar strike back up again though) or mortars. There will be enemies in the forests and buildings in the distance.
Taking out the first antenna box
Objective: Destroy the east antenna box
Shell the building on the main road through the eastern antenna, there will be one guard in it. Ignore the helicopter for now as we'll deal with that once the problem comes. The road should be relatively clear apart from that, though there are snipers still in the area, and you may find a pair of soldiers moving down the road towards the shelled house. If there are any you can't hit as they move out into the trees, just shell the area until they disappear from the radar. Some have grenade launchers, so watch out. You can tell when they are about to fire as Sarge will shout 'grenade launcher'. Handy.
With the radar clear, move up. Again, some snipers will likely remain alive. Climb the hill and move along the road, killing any snipers who reveal themselves to you. Resist the urge to take out the antenna array box from long range with the mortar strike as this will trigger the helicopter to come in too early. Move up using the rocks and slopes for cover. Use artillery on the guard tower, and move into the centre of the complex, using the lower half of the tower for cover if you need to. Now you're close you can use mortars or general explosives to blow up the antenna box. Be sure to move in quickly afterwards however and sprint down the hill to get on the AA gun as you won't last long with the helicopter in tow.
The helicopter really packs a punch
Objective: Destroy the north antenna box
The AA gun is just outside the barn and once you man it with B (Circle) you can spin it round and aim up at the enemy chopper. A hearty barrage of flak is needed to see it hurtling to the ground, but it's unlikely it will do too much damage to you during the process. The emplacement appears to be invincible, but there are RPGs dotted around, most notably one in the very barn next to the AA gun that you can use as a fallback option.
Make sure you take your mortar strike with you, before locating an armoured car and moving on. Along the road out you will find a group of soldiers, one of which has a RPG. Drive up to them as quickly as possible and get on the turret to take him out fast. Then proceed to the objective. Another group is on the road, though they are only light infantry, before an armoured car comes towards you. Get on the turret and take it out, which should be a quick process.
Exit the vehicle as it takes damage and use the tree-line on the right for cover. Mortar the towers and wait for guards to come to you as the alarm activates.
Move through the base, collecting a collectable assault rifle along the way if you wish (located in the nearest hangar to the direction you come in from, on the corner).
Take note of the unoccupied tank by the antenna and make sure you don't accidentally mortar strike it, as we'll need it shortly. Safely C4 or grenade the antenna, with the C4 being found in the nearest guard tower.
Objective: Regroup at the smoke – just behind the antenna.
It has become clear that the trucks are going to the harbour, frustratingly at the other end of the level.
Chase the gold
Gold (4/6):
4. Take the right hand fork out of the base where you get in the first tank. The gold is in the house with the empty tank and equipment spot and is protected by soldiers.
Objective: Reach the harbour
Pick up the power tool in the iron shack by the antenna (yes, you can now ditch the mortar strike!). Get in the tank, and take the southerly road out of the base. The first two infantry should pose little problem as you move out. An armoured car with bullets that struggle to penetrate your heavy tank can also be easily destroyed as you move along, keeping to the right hand road. An enemy tank will come out of nowhere across the countryside. Press RB or (R2) once it's in range to deploy smoke and provide an infallible cover system. Using the radar and your positional awareness, shoot the enemy tank through the smoke. Move closer and out of the smoke if necessary, the enemy will often be focused on looking for you elsewhere and give you the element of surprise.
Once the road ends, bear off to the right, where the unoccupied tank and two equipment spots are on the map. There will be rocket soldiers, an armoured car and another tank in this vicinity. Use our previous tactics to take them out, and use the power tool if necessary to repair your tank. Should it get destroyed, consult the map to locate the two unoccupied ones nearby.
Briefly leave the tank and collect the gold and collectable in the building nearby (there should also be a new tank there if you want). Notice now that there are many active tanks on the map. Your best tactic is to head across country towards the objective marker, using smoke and power tool combinations to stay alive. This is a retreating tactic. While you can take many hits, the quickest, easiest and most thrilling way to get to the objective is to flee! Keep an eye on the map and avoid enemy armour where possible.
Be aware of the concrete blocks that you may get your tank caught on, particularly if you're in combat. Should your tank be destroyed once you reach the final leg it is possible to sprint down the field to the red smoke. This is a great videogaming moment and one that should not be missed by stopping and blowing up each individual enemy. They'll keep coming!
Stay away from confrontation!
Scout the harbour
Gold (5/6):
5. Once you deal with the first armoured car in this section go up the stairs next to it. The gold is behind the crates.
Objective: Scout the harbour
Plenty of on-foot action now, as you start amongst some boulders and trees in a rather covert position looking onto the harbour. Stealth is by no means required, or even advised. The enemies' eagle-eyes will pick you out in a second anyway, but take out the mounted machine-gun as quickly as you can from long-range.
Climb on the rock to get some added height and scout out some more enemies. More long-range fire should ensue until the initial area by the large fuel tanks is clear. Move up the rocks in front, then to the wire fence, covering behind the concrete base. Knife it and move in once you feel that it's clear.
The metal, yellow container to the north provides good cover to take out higher enemies. There will be some guards on the top of the silos, as well as more than one on the main footbridge going through the middle of the base, particularly dangerously armed with grenade launchers. With no more enemies in sight, move onto the footbridge and begin to crouch-walk forwards.
There will be a mounted machine gun and an armoured car (coming in from the south and on the level below the foot-bridge) which may well force you off the bridge once you're on it. The main tactic here is simply to attract their attention and try and take as many out as possible. As you go round the first corner on the bridge, the machine-gun will open fire on you. It can fire through the small gaps in the metal panels on the side of the bridge, so either take it out quickly or jump down and try from below. The gun itself is in a guard tower and you should be able to get some comfortable shots on it from below. With the armoured car, if you pick off the gunner it will allow you to use it for yourself.
Lure the enemy into firing and revealing themselves
Patch it up if you've still got the power tool from earlier, and follow the road out of the base that the car originally came in on. Should you have destroyed the vehicle, either return to the footbridge (where there's also a collectable shotgun) or take the other steps to the north. Drive into the centre of the base and get on the mounted gun to take out as many enemies as possible. There will be an enemy mounted gun for you to worry about in another guard tower, but the base itself is a hornet's nest on its own.
The hangar on your left as you come in hides an RPG in an equipment spot, which is well worth picking up now. There will be guards in there too, but nothing that should stop you from investigating. Use the hangar and shipping crates out of the northern end for cover as you move through. RPG the guard tower and the armoured car which will now have entered the base.
Take the next footbridge by the ammo crate and shipping containers you covered by once all is clear. Move along the bridge and into the hangar in front of it, which should both be relatively empty by now.

As you near the exit of the hangar however, many enemies will be unleashed on your position. Move through the rooms, using the windows to pick off the enemies outside. The RPG is very handy in this position, both to blow a way through to the smoke so you can sprint for it, and also to eliminate enemies in cover. You'll find shotgun troops in most of the rooms, so make sure you check the corners before moving on. In the equipment point to the south (the second-most southerly one in the area, in a hangar) you'll find a mortar strike, which will be very useful before continuing. There's also a collectable sniper at the equipment point next to it on the map. A sniper's not a bad choice for this next section either. Use a mortar strike on the drop-zone to clear the area by the smoke before moving in.
The harbour, and gold, is within sight
Locate the gold
Gold (6/6):
6. Head directly south as soon as you hit the bottom of the steps from your raised position as you start the objective, located by the door of the green house.
Objective: Reach the Cargo Ship
It's clear that the gold is being moved onto a cargo ship, so we need to go in and get it before they cast off. If you have a sniper, use it to pick off as many enemies as possible before moving in, most of whom will be in the windows of buildings and the main crane. A combination of mortar strike and long-range engagements will make your path forwards all the easier.
Once you move down, switch to close-quarter tactics and clear the rooms as you move up. An armoured car will come into view as you pass the first set of buildings. An RPG or mortar strike from cover will see it off in no time. Due to the large concentration of enemies by it, a mortar strike will help most, clearing a path you can take to get to the cargo ship. There are heaps of collectable sniper rifles in the area, and it's definitely a good choice moving forwards.
Move up to the large pipe where the dock splits into two piers.

Keep an eye on those containers
In the nearest building there will be two guards and steps going up the outside to the roof. Climb up and snipe or pick off anyone you can see, mortar striking any hives of activity. Look out for enemies on all sides once you reach the roof, particularly in the green buildings to your left. Leave the roof and stick to the right hand side of the pier. Keep an eye on the cargo containers to your left (the ship should be in the water to your right) as these hide many enemies in between them.
Enemies are adept at hiding
You'll also find one enemy patrolling the top deck of the boat, who you can easily snipe as you look at the end of it in the distance.
A satisfying shot
You can avoid many of the guards in the middle by staying on the wide-right flank. Get within about 40 metres of the objective and it will trigger the end of the level.
The US Army have closed on your position and are taking you in. Ever so close to getting the gold, the plan and your hopes appear to have been dashed.
The US Army has decided to make use of your AWOL status and send you behind enemy lines to find the President of Sedaristan.
Reach the vista point
Collectable weapons (1/8, 2/8, 3/8, 4/8, 5/8 and 6/8):
1. VSS sniper located in the left house in the first settlement you come to in the armoured car using route 1 as part of the 'south missile launcher' objective.
2. NS2000 shotgun located in the first building on the right as you enter the missile launcher base via the river bed.
3. PKM located in a hole across the bridge from the 'eastern missile launcher' objective base and on the left.
4. M24 in an island only accessible by water, located to the north of the 'eastern missile' objective and marked with an equipment spot.
5. M16 located in the settlement northwest of the bridge across from the 'eastern missile base', as well as the gold.
6. MG3 by the fence and explosives as you enter the 'west missile launcher' base.
Gold (1/5 and 2/5):
1. On the northern island located near the 'eastern missile' objective. It will have a white X near it as it's the same area as the M24 collectable weapon.
2. Aim northwest across the bridge from the 'eastern missile' base. The gold is in the central house at the settlement.
Objective: Regroup at the smoke
We need to get to higher ground and survey the surroundings (unfortunately this particular helicopter is out of use). Go to the smoke (there are no hostiles on the way) up the hill towards the objective.
As our evac chopper gets shot down, we are ordered to go and take out the SAM sites so another helicopter can get in.
Objective: Destroy the south missile launcher
You can see this one clearly from the observation point, and there are two possible ways to take on the first target. Take the narrow path down to the right to move out with the fence on your left. Here there are two main routes on offer:
Route 1: If you want a vehicle to go into the base with, but a harder route in, take the right hand route when they split. You'll see an armoured car, but it's unoccupied. Move up to the car and get in; begin driving along the main road until you see the small settlement and vehicle blocking the path. There is an RPG soldier in the centre between the two houses. If you're quick enough you can plough into him and remove the explosive threat nice and early. Otherwise, disembark with plenty of time to keep yourself (and your vehicle) alive. Pick off enemies from distance, but watch out for explosives. If you do manage to get the vehicle in and take out the RPG soldier early, use the turret to clear the rest.
Don't let Haggard use the turret!
Pick up the power tool from just outside the southern house in case you need it later (there's also a collectable sniper in the other building), and move on. As you exit the settlement, keep to the right hand road and avoid crossing the main bridge. This is heavily guarded with turrets, so instead take the road that bypasses underneath it, and leads to a river crossing. There are a few infantry on the route, but you can just drive on as their bullets will do little damage to your vehicle. Follow along the shallow riverbed until you get to the base on the map.
The scenic and potentially deadly route to the base
Route 2: Take the left hand route down the mountain-side to hit the riverbed. You will encounter no resistance until the main gun emplacements of the base rip into you. Without cover, you need to spring forwards and get safe, fast.
Now we're in the base (follow the wooden pier), everything's the same again.
Take out the gun emplacements with whatever you have available; if you have a vehicle this is considerably easier and you can also drive right into the centre of the base using your armour for cover. Once you're in the centre use an explosive to take out the SAM site on top of the building. A grenade will do just fine if it's all you have.
Objective: Destroy the east missile launcher
Move north through the base. You'll find a mortar strike at the most westerly equipment spot, and an empty tank further north. Clear any enemies on the way, most of whom will be in the main large building, and head towards the boat in the harbour. You'll find a hornet's nest riled up as you move towards it. Use the buildings for cover. Most worrying will be the armoured car, which you can use the mortar strike or grenades to take out. Also watch out for enemies on the tops of the buildings; these are quite easy to miss.
The boat is the safest, quickest and easiest option, however you can take the tank in the hangar along the road if you wish – we'll be following the boat route however. Get in it and go down the river to the right (east). Follow the coast, ignoring any enemies on the beaches (they have RPGs, so it's best not to stop) and head underneath the bridge.
Follow the coast round to the right and run the boat onto the beach. Kill any enemies in the immediate vicinity with the gun turrets on the boat (though be quick, as there are patrol boats in the area), before sprinting up to the concrete bunker's wall. Your team will take out many of the guards in the open, while you can get in cover and pick off the harder ones. Once against the bunker however, use a mortar strike or simple explosives on the SAM site, which is just to the left of the bunker as you look at it from the beach. A patrol boat will land on the beach and enemies armed with grenade launchers, RPGs and conventional bullets will sneak up on you. Take them out quickly.
Sprint for that bunker!
Objective: Destroy the west missile launcher
There's no need to clear the rest of the base. You could now take the unoccupied tank across the bridge, then turn left and head towards the northern launcher, but again, the easiest option is to take a boat. Head back into the water and along the way you came, passing under the first bridge and over the river crossing. Turn right at the inlet past the first launcher site we were at earlier, and follow it, through the narrow bridge, and make a landing soon after.
Climb up the hill on the riverbank and use the mortar strike or long range grenades to blow up the SAM site from distance. You can see over the fence and to the objective without needing to fire a shot. Use the gap in the trees to the left of the green building nearest the river to make the target.
Objective: Regroup at the smoke
Your regroup site is right in the middle of this small base, but you can always sprint at the smoke to trigger the cutscene and invulnerability! Otherwise, just take your time and take out the mounted turret in the guard tower first before moving into the smoke.

Unfortunately there's still no helicopter support, but Miss July has deployed a surprise at certain co-ordinates to make things easier.
Supply drop
Objective: Reach and pick up supplies
Use the tank in the base, or the one towards the river on the golf course (due east), and head along the golf course lining the river bank to the east. It's basically the route on the other side of the river to the one we took to the east missile launcher. Resistance is relatively light considering we're in a tank, though there are some RPGs. Once you hit the road at the end of the island, turn right and cross the bridge to where the east missile launcher was housed. There's a power tool by the wooden structure right at the entrance to the bridge if you need to repair your tank.
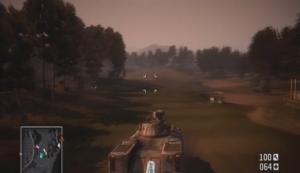
At this stage it's probably still worth keeping the mortar strike after the repairs are completed however. Follow the road off the bridge, passing to the right of the base we were in earlier. On this side of the river there's no resistance until we trigger the objective. Just follow the road, ignoring the turning to the right and you'll arrive at a small settlement clustered around the road.
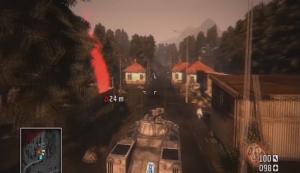
Exit the tank, move through the wooden fence and pick up the goggles in the equipment spot on the left hand side of the road. This is a laser designator, and picking them up triggers the objective. As soon as you pick them up a tank will come trundling in, so knife the fence behind them and move up the hill to get a good shot on it while relatively safe (it comes along the same road you came in on, but in the opposite direction).
Objective: Destroy the tank
Use the Left Trigger (L1) to look through the laser designator, then hold Right Trigger (R1) while focused on the tank. As the two bars move together the strike is called in. You can target any part of the vehicle, it doesn't really matter. The game then switches to a birds-eye view, similar to the artillery gun viewpoint in the opening level. You have to guide the missile in with the right stick, steering it towards the tank. You don't have to hit it, just get it pretty close and the blast should take it out.
The designator is only good against vehicles; you can't use it at all against infantry or buildings, so I would still recommend swapping it back for the mortar strike where you originally picked it up.
The tank never knew what hit it
Objective: Regroup at the smoke
Head for the red smoke near the fenced area where the laser designator was found.
All the action is going on at the President's palace, but there's so much action that we're apparently unequipped for it.
Reach the supply station
Collectable weapon (7/8):
7. PP2000 in the first house on the left in the supply base, marked with an equipment spot.
Gold (3/5):
3. By the monument north of the tanks in the car park.
Objective: Eliminate all enemies
Get back in your tank and continue along the road. You'll see a guard tower in the distance to show you're getting near. Try and shell it with the tank before moving in.
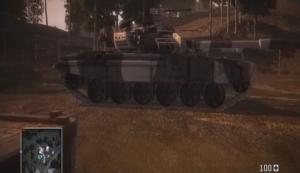
There are RPG troops in the base, but the tank is useful for clearing the immediate area. Once in the centre, an enemy tank will show itself. Use your mortar strike to take it out. If you climb on the roof of the first building (the ladder is located next to the road you come in on) you get a great view of all the surroundings and any hiding enemies. Keep shooting and moving until you get the confirmation that all enemies have been eliminated.
Reach the palace
Collectible weapon (8/8):
8. The UMP found in the right guard tower before you approach the bridge at the end of this section.
Gold (4/5):
4. In the pit by the unoccupied tank as you stay left on the level near the outhouse mentioned below.
Objective: Regroup at the smoke
Take a look around, picking up any collectable weapons you want. Check below for lists of what guns are where, before moving up to the car park where the empty tanks are marked on the map. For once, the smoke is actually a long, long way away, and it's a perilous route that we have to take to get there. It's probably worth swapping out your mortar strike for a power tool at this point (you can find one in the equipment spot near the first tank in the car park). Make sure you get one of these two tanks rather than the one you came in on, as these are much better, despite having a slower rate of fire.
Drive out of the car park and turn left, rejoining the road we came in on. This part of the level is an absolute minefield, so be prepared for some fairly unorthodox maneuvers to get to the objective. Head along the road and at the sharp bend where the fence appears to suggest going straight across the corner, follow the road so as not to flip your tank. After this bend, you'll meet an armoured car and RPG units. A simple cannon to the centre should destroy them. Follow the road across the bridge. Take out the armoured car and RPG soldiers that appear on the other side. You can drive past individual infantry so long as they don't have RPGs aimed at you.
Head off the main road to the left through the fences where the armoured car came from.
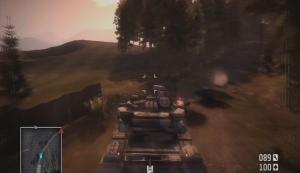
You'll find yourself on a golf course. Correct your direction once on the course to follow the map northwards. After driving for a fair distance, you'll come under long-range fire from an enemy tank. Take evasive maneuvers (it's very hard to hit it from so far away), before moving in closer, using smoke (RB/R1) if you come under heavy fire. It's a quick fire tank, so not as powerful as you, but capable of really stunning you and preventing cohesive counter-strikes. An armoured car will follow just behind the tank, but that's a breeze compared to what preceded it.
Smoke is a great ally
Get out by the monument with the two equipment spots by it to find a collectable weapon and a power tool, if you needed one. Use this period of quiet to repair your tank if you need to. Move on, now starting to turn to head eastwards, until you come under fire from the next tank, snuggled neatly on the fairway. They have amazing accuracy from distance, so you may need to use smoke and draw them in closer.
Now you'll get the chance to meet up with the main road again, but instead, turn left and join onto the next bit of the golf course just before it. You have more room to maneuver out here so it's the best option in a tank. You may well come under fire from tanks that you don't really need to engage. If they're too far away, or behind you by the time they open fire, you may as well press on. The course bends round to meet up with the road, where a tank is guarding the crest of a hill. You come up on it suddenly, so you can use smoke here while you pick it off blind.
Enemy tanks can prove very troublesome
There is another tank off the road nearby, which you can swap for if yours happens to get destroyed, as well as some gold hidden by a wooden outhouse at the back of the level.
Press on, now following the road until you get to the bend. Turn left to go up the steep hill (you can definitely make it!) and rejoin the comforts of the golf course. With trees on both sides, follow the heavily sloping fairway downwards. A tank will engage you in the distance on the road. Use smoke to mask yourself and draw it onto the course towards you. Continue along the fairway onto the green, and plough straight on through the trees in front of you to join up with the next hole.
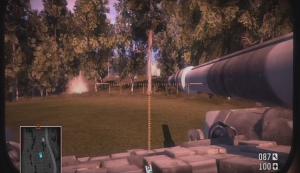
There is, of course, another tank, this time hiding in the woods on your left as you break through the trees. Another will also engage you from the right, up high in the distance. Get close to the first one and use smoke to protect you. Take it out as quickly as you can, then flank the other tank so you're coming up from below it and it can't get a shot on you. It's behind sandbags so can't come down to engage you. Move back onto the road to take it out.
Follow the road towards the guard tower up ahead. Cannon it into oblivion, then forge on across the bridge. This suspiciously empty looking bridge, is in fact planted with charges, so be prepared to get out of the tank or reverse in a hurry. You can find a collectable sniper and two submachine guns in the nearby equipment spots. The sniper is best for the next bit, so I'd recommend equipping that for now.
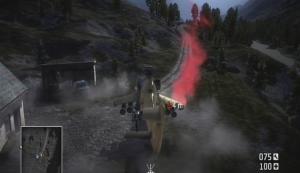
Jump over the railing and move along the metal grating that handily avoids the destroyed sections of the bridge. There are many guards both on the bridge and on the walkway below it, as well as sniping from in the distance. Move slowly without exposing yourself to too much fire at a time, and take them out one by one. As you reemerge on the other side the objective will be triggered. Phew.
Rescue the President
Gold (5/5):
5. In the back room on the bottom floor of the palace as mentioned below.
Objective: Search and secure the palace
We need to get to the President now we've made it through that hell-hole of a golf course. Move along the cobblestone path going up the hill. As it levels out, sprint for the second wall in, vaulting the first. This wall provides apt cover, and the enemy shouldn't come over it. You can easily pop up and dispatch a few, but to get the rest follow the wall round so you get into a flanking position on most of the enemies in the gardens. There are frequent machine gun nests in the centre, so be careful. If you flank to the right you'll have more chance of survival than the left hand route, as there is a good sized wall to cover against.
Once you approach the house, do another sprint maneuver to reach the main wall of the building. Shelter underneath a window, picking off any enemies who show themselves on the stairs or on the balconies indoors. Make sure you take out a good few before moving in, as some are armed with explosives, and there is a mounted gun too. Eliminate all enemies to proceed: some may be hiding in the corridors off the main room, but their resistance won't be too great, though there is one guard in the upper left room at the top of the stairs who is unusually well armed.
Objective: Regroup at the palace vault
Before proceeding to the vault collect the gold bar located in the back room downstairs. The vault itself is upstairs in the centre of the hallway.
Miss July reveals that the mission should be aborted, just as you find the President. As for evac? No chance. Luckily, despite insulting you repeatedly, the President has a way out for everyone.
This is the shortest level in the game, and while it contains many exploration opportunities, the quickest and easiest way to get through involves using the helicopter as much as possible. The President's gold-plated chopper has taken you towards the border, but you now need to fly through various canyons to reach Russia.
A quick tutorial will get you used to the controls. LT (L1) goes up, LB (L2) goes down, and you just have to balance speed on the left stick with height and direction on the right one. The game prevents you from going too high with warning alarms and threats of enemy interception.
Objective: Land the helicopter
Fly straight ahead and land by the red smoke outside the first house you see. There are no enemies here, so make a perfect landing using LB (L2) to lower the chopper.
Introducing the helicopter
Objective: Repair the helicopter
The helicopter is moderately damaged, but fortunately there is a power tool in the house. Enter through the door then turn left and go into the bathroom. It's just on the floor near the doorway. Move back outside and repair the helicopter in the same way you do any vehicle, just make sure the power tool is making contact with the body of the helicopter.
Objective: Get back to the helicopter
You should be right near the cabin anyway, but just return there and press B (Cirlce) to complete the objective.
Objective: Take off and destroy the trucks
Use LT (L1) to rise up, then move forwards towards the trucks. They are easier to aim at using the mounted gun on the chopper rather than the rockets, but both have advantages. If you get in the middle of the group you can press Y (Triangle) to switch to a gunner seat and spray them all with weaponry as Haggard hovers the helicopter. The trucks are highlighted with red diamonds. It's easier to use the weaponry in the cockpit view, so change it if need be.
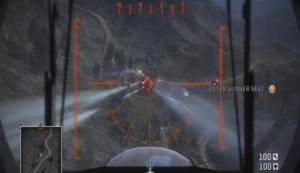
It takes some getting used to
This concludes the helicopter tutorial objective-set.
Destroy military infrastructure
Gold (1/5 and 2/5):
1. Land on the left hand side of the dam and enter the large, whte building to find this gold, marked with an equpment spot on the map.
2. In the 'destroy the radio equipment' objective, the gold is in the other room on the same floor as the radio room, by the door.
Objective: Follow the river
You can land anywhere for repairs or exploration if you want to, but the objectives will always stay marked on your radar. Now simply follow the curvatures of the river until you see another two diamonds coming at you along the river. These are boats, so take them out using your preferred weaponry.
You will soon approach a dam with trucks moving along it. Take them out and any enemies that insist on firing on you. We now need to try and disrupt enemy resistance.
Objective: Destroy the fuel silos
Proceed over the dam towards the forested island in the middle of the canyon. One rocket to each of the fuel silo sets will take them out quickly. They are the tall green cylinders amongst the trees, the tallest things on the island (not the trees…). You can land here and explore, picking up equipment and so on, but there are infantry enemies in place to make this difficult.
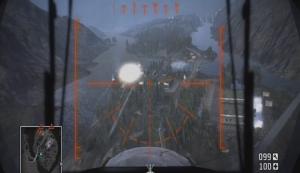
Flammable stuff
Objective: Destroy the military barracks
You are now introduced to a truly devilish unit. The AA vehicle. These fire merciless barrages at you whenever close, so try to spot them before you get in their range and use long range fire to take them out. This one will be just beyond the first bridge. Follow the road into the centre of the island to the rows of blue portacabins; these are the barracks, so use missiles to take them out. It may take a few rounds of carpeting before the objective is acknowledged as completed.
You really have to pummel those barracks
Objective: Destroy the radio equipment
If you keep following the road west along the island, you'll find another two AA units on the left hand road as it splits. Try to take them out from range, or, if they open fire, keep moving as you fire rockets at them. Pull back if the heat gets too intense. There is another one, completing a trio, following shortly behind them on the road, so don't get complacent! Take it out and proceed. You will probably need to land and repair at this point, though the land is a bit rugged. The top of the hill in the middle of the island sports the best landing spot. Make sure not to clip any trees or get out while parked on a slope as the helicopter will slide away. If destroyed, you're forced to start from the last checkpoint i.e. you'll have to fight those dastardly AA tanks again.
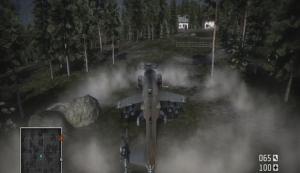
Turn right to move across the high bridge, firing rockets at the AA tank on it to send it falling to its doom through the newly-made holes in the bridge.
This is a harder section as you need to land and disembark the helicopter. However, to make it easier, rather than landing on the helipad, land on top of the objective building. Blow holes in the walls of the upper section to give you a quick route in on foot before landing, then park carefully on the flat roof of the complex. The bottom bunker and roof itself is invincible (see the video below for a full walkthrough of this maneuver).
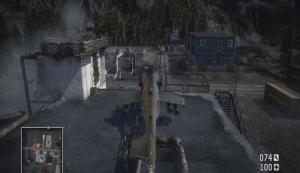
Get out, repairing the helicopter first if necessary, taking out any enemies you can see from the ceiling that pose an annoyance. Use the fire escape on the north-eastern edge of the roof to climb down and jump through the wall that you should have destroyed earlier. Move deeper inside and you'll see some more steps going into the reinforced basement. There shouldn't be any enemies in the main rooms, so move down, turn right, get your grenade launcher ready, and proceed towards the objective. As you get near, be ready as there are about four soldiers guarding the equipment. Stand by the door to the objective and grenade launcher the contents of the room, killing the guards and destroying the equipment in a few easy shots.
Sprint back up the way you came; enemies will be converging on your position. Time is of the essence! Go back up the fire escape, ignoring enemy gun fire as much as possible and launch back into your helicopter. An armoured car will have entered the base, but on the Normal difficulty setting it should not be necessary to take it out. Take off as quickly as possible and get some height and safety fast.
Land at the earliest safe opportunity if you need to repair the chopper or heal yourself after that quick burst.
Be quick about it
Move out
Gold (3/5):
3. On the small island further forward than where the first AA tank is, with a ruined building and a couple of enemies on.
Objective: Follow the river
There is an AA tank on the long, stretched island before the water opens up completely. This may well be before you get a chance to repair, so take it out from range as much as possible. The circular road it ends up on is a decent place to land, and I'd recommend doing so for repairs after you have taken it out as the next section is a little hectic. After this, follow the river until you hit the red triangle floating in midair (this looks like an enemy from distance, but is merely the objective distance marker).
Cut off Serdar's supply lines
Gold (4/5):
4. In the city under construction in the 'destroy the trucks' objective, the gold is in a large white house by the eastern side of the river, marked with an equipment spot low down, near where one of the AA tanks is. Take it out before the last truck so as not to trigger the incoming boats too early (you can still get the gold if not, it's just harder!).
The enemy appears to be moving supplies. Keeping in line with our disruption mandate, we need to destroy more trucks.
Objective: Destroy the trucks
These trucks are heavily protected by AA tanks, so take the first one out through the trees on the island if possible. Follow the road to catch up with the convoy, taking out the trucks on the way. As it opens up onto a construction site, you can use the fuel silos at the high end to take out enemies and trucks alike. Be careful of enemy infantry fire as well the AA tank by the silos themselves. Watching out for cranes and scaffolding, move towards the bridge across the river strait. There is an AA tank up high on a concrete ledge, and the rest of the trucks should all now be in the dock area. Take them out quickly so as not to take too much fire and be aware of another AA tank at the south of the base which you need to pass overhead to continue.
If your helicopter is in relative health (about 20 should do on Normal) continue ahead (south). Otherwise, clear the area and land in the docks, away from the riverfront and repair.
There are a lot of trucks to destroy
Objective: Destroy the incoming boats
Take out the cruisers that are bearing down the channel towards you. If you were repairing you should be out of range of their fire until you get back in. These are relatively easy to destroy as a few well placed rockets will sink them, and they have a large surface area for targeting. Wait here for the objective indicator to come up before moving on as it's easy to cross the red line assuming the next objective will be to follow the river and be on the receiving end of an artillery strike. Once you're across in a helicopter it's nearly impossible to get back and you'll have to restart from the checkpoint.
Reach the refuel base
Gold (5/5):
5. As you go on your way to get the fuel truck, walk straight down the road away from the helipad and the gold is in the large, white building on the corner as the road splits to the left, marked with an equipment spot.
Objective: Follow the river
The fuel warning noise starts and you need to high-tail it to a refueling station. Now the red no-go zone moves back and you can continue to follow the river. Two small boats will come towards you, which in truth pose no real threat and engaging them will only waste your fuel. Take them out if you want and continue up the river.
Objective: Land at the helipad
Fly over the base, destroying silos and any enemies you see en route, but without wasting unnecessary fuel, and land at the helipad marked as an objective at the north-east of the base.
Disembark and man one of the mounted guns at the front of the helipad, facing the road ahead. Pick off as many enemies as you can.
Objective: Find a fuel truck and return
The quickest way to do this is to go across country rather than engaging the enemies on the roads. There are three trucks available but only one needs to be retrieved. On Hard, the one at the north-west is your best bet, as you can move up using attritional combat, cover and fire, to make sure all is clear before you get the truck. On Easy or Normal, after taking out the armoured car that moves up to the helipad and the infantry that comes with it using a mounted gun, head towards the southern objective. It may look further than the rest, but the majority of the distance is across the countryside (see the video below for a detailed walkthrough of this segment).
Knife your way through the fencing on the left hand side of the entrance to the base, heading south, and move across the country keeping the pipeline on your right, and hugging the hillside. As the hills smooth out, move left to circle round the objective. Pick off as many enemies as you can from distance, before moving closer in. Head towards the cargo containers by the waterside for good cover near the truck we're aiming for. Without necessarily defeating all the enemies in the area, sprint for the truck and race it out of there, up the ramp and along the road in the direction it's already facing.
Follow the road and keep driving past the armoured car which will come tearing towards you. Turn right at the end by the hangar, and race back towards the helipad. It doesn't matter how damaged the truck is once you get it back, as long as it's not been destroyed! There are of course two more however, should that happen. Drive it back onto the helipad to complete the objective.
A quick route to a fuel truck
Haggard offers to fuel the helicopter, but damages it in the process. Sweetwater now needs to fix and refuel it, so we have to keep it all covered while he works.
Objective: Protect the helicopter
Hightail it to the mounted machine gun or rocket launcher and start to lay into the onslaught of enemies coming up at you. The machine gun is more useful as the majority of enemy units are infantry based, and you can switch between the two fairly quickly as the situation evolves. An armoured car will come down the road, but you should have plenty of time to take it out before it gets too close using the mounted weaponry. Fall back to the helicopter if you get overrun and try and sit it out like that, though this should only be a last resort.
As the objective completes, you'll be rewarded with a hostile armoured convoy converging on your position. Feel free to fire off a few rockets at the lead tank, but otherwise promptly retreat back to the helicopter.

Objective: Escape in the helicopter
Get back in the cockpit and move out.
The President reveals he knows the location of the gold, and an agreement needs to be reached for him to give it to us. All is forgotten however as Sweetwater points out that a black helicopter is coming up behind us. While you'd hope a massive helicopter would be spotted earlier, there's no time to react and our bird is shot down as the mission ends.