Unofficial Battlefield: Bad Company Guide by Mike Hazleton for
EA and DICE's sequel to the popular Battlefield Bad Company caused such unprecedented demand that the game's multiplayer servers could not handle the sheer volume of players in the weeks after launch. Thankfully that has all been addressed now, and a few pieces of downloadable content (DLC) have also been released. This guide aims to give an in depth walkthrough of both the single and multiplayer aspects of the game, covering all the maps, weapons and equipment on offer, as well as more general tips on play-style and tactics. In multiplayer, information on how to level up the quickest is provided, with full details on the pins, insignias, stars and achievements. The singleplayer campaign is set over two distinct periods. One level, the pilot of this relatively short story mode, is based in autumn 1944. The rest of the game is in the present day, featuring the soldiers of B Company. You play as Preston Marlowe, the newest recruit to the squad, having completed the epic missions of the first game. On most levels there are M-COM Stations to destroy. For anyone who has played the multiplayer mode, these are the boxes from the Rush game mode, which are also hidden throughout the campaign as collectibles to unlock achievements and trophies. You can also find collectible weapons on every level, and each time you pick up a new gun, it is added to your personal stash – it can then be retrieved from any supply point. The two collectibles sections in this single player guide refer to guns that you may not have picked up so far – getting them will tick them off on your collectible weapon screen and allow you to use them at supply drops. The game sometimes gives you one or two specifically to find on a level, but there are others too – these are marked here as ‘Other Collectibles’. Adapt to survive. Don't stay as the same class. For one thing, you level up much slower if you play as only one class. For another, while always playing as assault means your squad will never run out of ammo, if everyone else is also playing assault there will be a gap in your team's skills. The same applies to everyone playing as engineer on a vehicle map. Engineers run out of RPGs very quickly, so they need assaults to boost their supplies. Don't be afraid to stay in a mould. This will seem contradictory to the above statement, but it is important to emphasise that on any given map, it is vital to have roles (whether communicated or not) and functions to stick to. On Conquest this is particularly useful. If you capture a difficult enemy base and begin to hold it, your team will assume you are in control of the situation and pile on to the next one. If you then also move on, the base will undoubtedly be taken by any lone enemy infantry passing through. Conquest is notorious for everyone rushing to the next base and leaving massive defensive gaps. Play cleverly; you may have to sacrifice a little action to defend a base and help your team win. Use the destruction. Bad Company 2 boasts a brilliant engine which allows entire buildings to be destroyed. Use C4 to bring down buildings overlooking M-COM stations or providing enemy cover around bottlenecks. If you are constantly being sniped from a building, flank it and blow it up! Use the UAV properly. The UAV is not primarily an anti-infantry device. Evidence of this is that the machine gun is only available if you use the Alternate Weapon Package. Use the missiles, which have a very long recharge time, against tanks and buildings only. You can destroy a tank in the back with one of these, or two if you hit it elsewhere. This gives a massive bonus to your team, far more than just buzzing around gunning at infantry. In Rush, use the UAVs to target the M-COM buildings if Destruction 2.0 is possible. Unarmed UAVs are supposed to spot targets – don't forget this just because you can call in a laser-guided missile.
Burst fire. Very few guns can be accurately used in fully automatic mode without some regulation of recoil. Your gun may look level when you hold down the right trigger, but it takes far more bullets to kill someone if you just spray the gun as opposed to firing three or four bullets at a time. This is especially important at range, but it is easy to forget in close-quarters where you may expect spraying to kill the enemy – it often won't do it in time. Pick your class intelligently. If you have a team of snipers, don't join them. Whether you love sniping or not, this is absolutely terminal to a team, particularly on Rush. If only three or four of your team are playing as close-quarters classes, you will not be able to win the game, regardless of how good your snipers are. Not only that, but the enemies will be spread around ten snipers instead of the few that is all each team really needs. Use the environment to your advantage. We have already looked at using Destruction 2.0 to help in objective modes. You can also use explosive barrels and tanks to kill enemies and damage buildings. It is amazing how many players ignore these and you see explosive scenery even late in a game that has yet to be used.
Don't hog team assets. You may think you are the best tank, helicopter or UAV pilot in the game, but the chances are someone will use them in a different way to you. If you remain in the same role for the entire game, the enemy will adapt and get used to your tactics. Similarly, your allies will get frustrated at not being able to use the UAV, for example, for their own squad's needs. Consider your team when playing. Avoid getting spawn-killed. While Rush has safeguards in place to prevent spawn-killing, it is a necessary part of Conquest – if your team loses all its bases, you will be penned back at your deployment base. An exception to the above rule of not hogging vehicles is if you are being selfless on a map like Isla Inocentes and ferrying players from a spawn to the front line in a vehicle – this is crucial to stop yourself from being closed in at the deployment. On a map like Atacama Desert in particular, this can be a serious problem. Focus on vehicles. Some maps are extremely vehicle orientated. Engineers and Recons with mortar strikes have absolutely no excuse for shirking their anti-vehicle duties, yet few recons use their mortar strikes against tanks – against which they are very effective. Snipers rarely get into close combat, but they can certainly assist their team mates on the front lines. Just be careful when you are using mortar strikes not to catch a tree or telegraph pole, as this can bring the strike down on your own position!
Never leave your vehicle unattended. This may sound like a recommendation from the Metropolitan Police, but it is good advice. If you are rolling a tank towards an enemy position, don't get out unless it is absolutely necessary (to make repairs for example). On some maps, especially in Rush, giving the enemy a free vehicle can be catastrophic. The maps in Rush are often balanced so that one team has offensive vehicles, and the others defend against them. Allowing the enemy to get a helicopter or main battle tank can be lethal to your team's chances. If you are abandoning a vehicle, blow it up first, or C4 it so you can blow it up when it's in use again. Suicide is sometimes necessary. This is another Rush recommendation. If you are defending you have unlimited tickets, so you can die as much as you want. If an M-COM station is armed and about to blow up, just throw yourself at the room. If there is any chance that you can disarm the station, you must at least try. Forget about your kills to deaths in the objective modes, they do not matter. The same applies to taking on vehicles in other modes. Don't waste ten lives taking out a M3A3 Bradley, but risk a death to get an RPG away at the back of the tank. Have a last-ditch strategy. If you feel yourself getting shot, have a plan of action in place. This may vary based on where you think the bullets are coming from. Personally, if I am in a building I will pull a grenade and try to throw it where the enemy is likely to be coming from. Outside, a medic strategy is to spray whatever is left in your magazine to try to suppress the enemy. Assault classes may prime a 40mm grenade, as this can kill in one and potentially save your life. Think about it for each class and try to work out a strategy. You could of course just run.
Listen. The game gives you a lot of information over your speakers. This is not just limited to bullet directions. It may be worth you using the options to set English voices so that you know what is being shouted at you even when playing as the Russians. You will be informed which M-COM or flag is under attack, and when your team is winning or losing. Furthermore, players can press the spot button over a team mate to request their services, such as ammo, health or a vehicle repair. You can also ask for a vehicle pick up, and such commands are a useful tool to keep a team running successfully. Don't ignore this aspect of the game. You can also hear enemies. If you hear an American voice and you are playing as the Russians, you will know the enemy is near. Also, hear a grunting noise and the chances are someone has tried to knife you. Turn round and teach them a lesson. Use squads. If you are not in a squad, you will have to do a lot more walking than everyone else. You will also not have access to a squad's potential abilities, such as med kits, revives, unlimited ammo and vehicle repairs. While sometimes it is impossible to get into a squad, this is not usually the case. Spawn on a team mate in a tough situation and you can help take out an enemy. They can do the same for you, and it might just save your life.
Spot. Spot. Spot. This is the biggest recommendation of this guide. So many Bad Company 2 players ignore the spotting system in the game. This involves targeting enemies and highlighting them for your team to see. You should always spot anyone you are firing at, unless doing so would physically lead to your death, because the game does not spot automatically, even if you are under fire or actually hitting an enemy with your bullets. If you do not spot an enemy or vehicle (particularly frustrating with tanks) and then die, you have not assisted your team at all. If, however, you spot the tank, then your team know what killed you, where the danger is, and can move in to deal with it. The game provides UAVs, motion mines and spotting scopes for this purpose, but they are underused. You get points for spot assists, so there is even a benefit for you! You can also press the button when you can't see anyone, in case the game picks someone out for you. Sneaky tip... The Assault class is the most diverse in Bad Company 2. While not quite as efficient as SMGs at close range, the assault rifles function very well inside buildings or in tight environments. They are even better at mid-range combat, however, due to their great accuracy and high rate of fire. It doesn't end there, because with the assault rifles it is possible to compete with Recon class soldiers using sniper rifles at long-range. While Assault players cannot hope to do the same at Marksman distances, many will find themselves targeting and hitting snipers in situations where that would be impossible with a SMG. Most of the assault rifles are pretty evenly balanced, though there are a few stand-outs. The M16A2 is the last to be unlocked, and as the chart below suggests, it is one of the best. In rate of fire it is nearly unrivalled (but crucially, it fires in burst mode), and while damage is low, its accuracy is impressive. It is probably the best assault rifle to use to kill enemies with the fewest rounds. The M416 and the AN-94 Abakan are also worthy choices, with the Abakan winning on accuracy in the assault class, and generally being a very well balanced rifle, though like the M16, only firing in bursts (and two-round bursts as opposed to the M16's three); the M416 is also statistically similar to the M16, but deals slightly more damage at the expense of a little rate of fire and accuracy. Even the starting weapon, the AEK, is suitable for use by Bad Company veterans. If you favour accuracy, the M16, AEK and Abakan are all good choices. For those who prefer close-quarters weapons, more similar to SMGs, the F2000 is the best option. The Abakan also wins in terms of damage. In terms of the multi-class weapons, there is little reason to favour the shotguns due to the fact that you can attach a 40mm shotgun to the bottom of your assault rifle should you wish. The G3 and M14 bridge the gap between sniper rifle and assault rifle even further, so are worth considering (see the multi-class section below).
The assault rifles are unlocked at the following xp boundaries: AEK-971 – 0 xp Every assault rifle comes with a grenade launcher as standard. You can, however, swap this out for a smoke grenade launcher, or a shotgun attachment. These allow the Assault class to reach even greater levels of diversity and adaptability. In addition, the assault class can use C4 from the off, if using a multi-class weapon such as the Thompson or G3. After a few games, you will unlock the ammo box, allowing assault users to top up their own ammo (including 40mm grenades) and that of their allies. Assault equipment is unlocked at the following xp boundaries: 40mm Grenade launcher – 0 xp Specialisations: On top of the 40mm attachments, gun sights can be added to the weapons. Every rifle can have iron-sights, a red-dot sight or a 4x optical scope. In addition, there is the obligatory Marksman upgrade, increasing handling and accuracy during iron-sights aiming. The assault specialities are unlocked at the following xp boundaries: (Primary) Red Dot Sight – 14000 xp Note: Instead of a gun sight, the iron-sights can be left intact and another primary specialisation, such as extra grenades, chosen. Don't be restricted by the assault rifles. While the 40mm attachments may seem to be the main bonus of the assault class, using the G3 or shotguns and C4 can shake things up a bit. Few players also use the shotgun or smoke attachments, and in certain modes, Rush in particular, such additions can be vital to your team's success. Use the 40mm grenade launcher. While some may frown on the ‘noob tube', it is a big part of the assault class. It can destroy buildings around M-COM stations, do (a little) damage to vehicles, kill infantry with a direct hit (though it doesn't function at close range), and has impressive range. Disrupt snipers. Most of the assault rifles can reach snipers at impressive range. Even if you can't kill them, you will often be able to get a few shots on them and knock their scopes off allied positions. Drop lots of ammo boxes. You don't lose anything by dropping ammunition crates. In addition, you get 10 points every time someone walks over them (20 for a squad). Not only does this help your team, but you get lots of points and will level up quicker. Don't be afraid to play as assault. Just because there are some vehicles on the map, don't feel you have to choose engineer over assault. For one thing, you may well need to top up your allies' ammunition throughout the game. More importantly, it is a fact that the assault rifles perform better at mid-range than the SMGs, and someone needs to pick off the enemy engineers repairing their tanks. Be aware of long ammo-uptake times. It is not enough just to stand over an ammo crate until you hear the reload noise. Certain items take much longer to restock than others, and you may need to move off the box and back onto it before replenishing 40mm grenades, or, in the case of engineers, RPGs and anti-tank mines. The Engineer class is very similar to assault. Players will often struggle to choose between the two for an offensive and close-quarters class. The obvious advantage of the engineers is their strength against vehicles. If a team does not take any engineers on a map where vehicles have a role, it is almost impossible to win, as Recon is the only other class with any sort of anti-vehicle capabilities (unless you include C4 assault players). The SMGs that the engineer class uses are best at close-range, and the fact that they are all silenced means you are harder to identify and locate. The trump card of this class is their explosive capabilities, however, provided by RPGs and anti-tank mines. As with the assault class, many of the SMGs are very similar in terms of their abilities. The most balanced weapons are the 9A-91 Avtomat, the SCAR-L, the AKS-74U and the UMP 45. These all have decent rates of fire, but lose out on damage and accuracy to the assault rifles. If you are looking for something more diverse to suit your particular play style, the weapon with the highest accuracy is the AKS-74U. As mentioned above, it is fairly balanced overall, so is a good choice for those wishing to bridge the gap between SMG and assault rifle. The PP-2000 has the maximum rate of fire available, while the Uzi is a close second. These should be considered close-quarters weapons only, almost in the same manner as shotguns (though the ability to use Red Dot sights and scopes makes them a little more accurate). The 9A-91 has the highest accuracy, and is well balanced, meaning even new players should not be left out in the cold when it comes to competing on a level playing field. Unlike the assault rifles, you get no additional equipment such as 40mm grenades as part of each SMG. The most important factor for you will probably be the nature of the iron-sights. The SCAR-L, for example, has very clear sights, while those of the 9A-91 are quite crowded. Once you unlock extra sights for the guns, this becomes less of an issue, but some players will prefer to leave the iron-sights and use another of the primary specialisations.
The SMGs are unlocked at the following xp boundaries: 9A-91 Avtomat – 0 xp The rocket launchers take a lot of getting used to, as players must get into the habit of sneaking round the back of tanks, where one or two shots can take the vehicle out. Five or six may be required from the front. Jeeps can be taken out in a single shot, as can helicopters. You may assume that every RPG is the same, but that is not the case. For example, the M2 Carl Gustav is by far the best explosive weapon against enemy infantry, and you will regularly see players running round with only their Gustav to attempt to get stars with the weapon (and succeeding…). The RPG-7 is generally considered best against vehicles. Both these RPGs are compatible with the tracer gun, which is a small dart launcher that takes the place of a player's pistol. Once you get a shot on a vehicle or person, the compatible RPGs can then lock onto it and steer towards it. The M136 AT4 is not compatible. This works much like the mounted anti-tank turrets, and can be steered manually by the player. The upshot of this is the ability to have a normal pistol, a great asset in close-quarters combat. Whichever you prefer, they are vital to any successful team. To assist your team further, be sure to regularly use the Repair Tool, unlocked after a few games online. This gives you 20 in iterations as you repair a friendly vehicle (30 for a squad vehicle repair). Not only is this helpful to your team, but increases your points too. If you love driving vehicles or flying helicopters, an engineer is a good choice to allow you to make running repairs. Finally, Anti-tank mines can be unlocked. These replace RPGs, but are even more satisfying to use. Placing them at strategic locations can result in regular double and triple kills, particularly if they are used with care. The equipment for the assault class is unlocked at the following xp boundaries: RPG-7 AT – 0 xp The engineer class shares all the specialisations of the assault class. That means the SMGs are able to function at greater distances with the enhancements offered by scopes. The Marksman training implements an enhanced silencer, reducing recoil and increasing accuracy. The assault class's specialisations are unlocked at the following xp boundaries: (Primary) Red Dot Sight – 11,000 xp Decide on your favourite RPG. The trump card of the engineer class is its explosive anti-vehicle capabilities. The tracer gun has been enhanced in a recent patch, now making it physically possible for us mortals to hit helicopters with it. However, some engineers will resent losing their pistol slot for this addition. In that case, the M136 AT4 is the way to go. Despite using manual targeting, with practice you can get kills that would have been impossible with a tracer dart. Remember too that if you can hit it with a tracer dart, you could probably have hit it with a straight RPG. The tracers mean you can't accurately pick a part of the vehicle to target, such as the rear.
Pick appropriate specialities. If you want to be as good as possible at anti-vehicular combat, make sure you use the extra explosive ammunition perk. This increases RPG ammo and anti-tank mine ammo. Use anti-tank mines intelligently. It is easy to get more kills using anti-tank mines in a match than RPGs. However, you must be clever and not saturate the map with mines. If, for example, you play a Rush map, and the attackers don't find any mines at the first base, they will assume there are none at the second. You can then hit them with some sneakily placed anti-tank mines. Experienced players are usually cautious at the first base, so will take alternative routes to avoid mines. If lots of players are dropping lots of mines, you chances of hitting someone actually go down as the enemy play more carefully. Hide anti-tank mines. For most players, anti-tank mines are easy to spot, even when in a high-speed vehicle like a quad bike. To combat this, try placing them in shadows or among permanent debris. This makes them harder to see and distinguish from other mess, and increases your chances of getting some free kills. Be careful with explosives! A stray RPG can destroy your own M-COM station, costing you many points and possibly killing team mates. While laying anti-tank mines, if the mines are exposed to an explosion, you will be killed and the death will go down as a suicide. Be adaptable. On a map like Isla Inocentes, consider taking a tracer-compatible RPG if you don't usually. It is very difficult to hit helicopters otherwise, while the new tracer-dart speed increases your chances using the gun. By the same token, on some confined maps, using a tracer dart helps little, and costs you the amount of time it would take to get a shot on without it (note also that you can of course use the tracer-RPGs in manual mode, you just can't steer them after launch!). RPGs are not just for tanks. Use your explosive to take down buildings, kill infantry and cleave a path through the map. RPGs fire straight, so use them against snipers in rooftops or infantry on gun emplacements where bullets would not do the job. The Medic class is the marmite class of Bad Company 2. Some players love it for the adaptability and combat strength it supplies. Others hate it, resenting the accuracy and power of the class's LMGs compared to assault rifles and SMGs. It is, however, very necessary to achieve team success, particularly in Rush mode. As one might expect, the Medic's chief function is to revive team mates killed in combat. To this end, they are given a Defibrillator after a few hours of play. They also come equipped with med-kits, to heal living allies. Recent gameplay balancing has altered the power and accuracy of some of the LMGs, making them less accurate when fired from the hip. They can, however, still certainly hold their own in combat when used properly. Furthermore, the LMGs are second only to sniper rifles for their ability to punch through cover and damage whatever is on the other side. Because of their rate of fire, they can be used to spray buildings, particularly wooden ones, to suppress or kill enemy targets inside. The crosshair flashes when a hit is confirmed, and this allows you to locate enemies by spraying your LMG. The Medic's big weakness is that they are the only class in the game with no explosive capabilities. Even the assault class has its 40mm grenades and can use C4, but the Medics have nothing. Therefore, on vehicle maps, it is important to achieve a balance between Medics and Engineers. On any infantry maps, however, a squad of Medics can be nearly invincible. The Medic class's LMGs are a controversial topic. When a soldier is seen sprinting and jumping across the map firing a huge machine gun from his hip, it is clear why. However, most of the LMGs have weaknesses that can be countered by other classes, and as mentioned above, they can be defeated with ease by an enemy tank. The MG 3 is the last to be unlocked, and has a maximum rate of fire. It also has very low recoil. As a result of the rate of fire, like the engineer's Uzi and PP-2000, the damage and accuracy are poor. The damage in particular is the lowest by some margin in this class. The M60 is much loved by Medics due to its high accuracy. Attach a Red Dot Sight or a 4x Scope and you can outgun assault rifles and suppress snipers with this weapon. Most of the LMGs can be comfortably fired in controlled bursts, or even single shots, allowing those with the appropriate sights to function well over long distances. The M60 is well balanced, with medium damage and rate of fire. The XM8 and MG38 are closest to the MG 3, but trade some of the obscene rate of fire for a little more damage and accuracy. Like all Bad Company 2's starting weapons, the PKM LMG is well balanced and used effectively even by veterans. It outguns or equals the next two unlocks, the M249 and Type 88 LMG, and players new to the Medic class should have little trouble slotting in.
The LMGs are unlocked at the following xp boundaries: PKM LMG – 0 xp The Medic class is the lightest in terms of equipment. It has only the Med Kit and the Defibrillator. The former works like the assault class's ammunition crates. When an injured player stands over it, their health increases incrementally, and as the medic who deployed the pack, you receive 10 for every increment (20 for a squadmate). This really brings home the fact that health takes a long time to recharge, and even when your screen is not bloody, you may not be back at full health. Note that you can use the med kits to heal yourself, and a popular tactic is to stand on a med kit while in combat. This won't prevent you from dying via a headshot, but if you are in cover you can duck down and recharge your health before continuing the fight. The second piece of equipment is the Defibrillator. This can revive players from the grave, under any circumstances. That's right, even if a player has been headshotted, blown up by an Apache, and had their corpse knifed, you can still revive them before they respawn. Medics get 80 points for a squad revive, meaning it is on par with a kill and savoir bonus, while an impressive 50 are given away for a general team revive. The fact that Medics can do all this and still compete very well in combat leads to Medics often coming top of a team's scoreboard. In Rush particularly there is always a glut of corpses to be revived in certain places, and thousands of points can easily be accrued from revivals in a match, especially if you play in a squad. Revives have a more important function, however, as they retrieve the lost ticket from the player's death. This is vital in Rush as the attacking team, and is important in Conquest too. The medic classes equipment is unlocked at the following xp boundaries: Medic Kit – 1,400 xp Medics can put Red Dot Sights and 4x Scopes on their already beastly guns. In addition, they can upgrade their Med Kits in terms of effectiveness (increasing the speed at which a player is healed) and their range. On top of this, the usual Marksman upgrade is also available, increasing accuracy while stationary. The medic class's specialisations are unlocked at the following xp boundaries: (Secondary) Medic Kit Improved Heal – 12,000 xp Don't be a chronic reviver. Listen to your team mates. If someone tells you they don't want to be revived, don't do it just for the 50 or 80 points. You may ask why a player would not want to be brought back from the dead. For one thing, engineer and sniper players may have run out of ammunition. If you keep reviving them, there is nothing they can do to keep themselves alive. For another, it counts as a death (not in terms of your team, but from the individual's point of view). Think about what a medic would do in reality. If there was a room full of hostile units, the medic should attempt to clear the room before reviving an ally. Of course, some prefer to just get the 80 points for a defib and die along with their patient. This is not helpful to your team, however. There are instances where a daring resuscitation may be called for, such as if a dead player is near an M-COM box. They may be able to get a kill to defend or protect the box in the second or two before they are killed again. Basically, just be mindful of what will actually be achieved for your team if you revive an ally. And don't ignore requests for med kits. Be in an open squad. The only way a medic can really function effectively for their team is if they are in a full four-man squad. This allows them to spawn on their team mates and revive any downed allies or support them with their powerful LMGs. Take advantage of the LMG magazine sizes. The LMGs have at least 100 rounds in each magazine. This means you can effectively fire for three times as long as an assault or engineer class soldier without needing to reload. Be aware of reload times. The drawback with the LMGs is their extended reload time. Do not get caught short in the middle of combat, but most importantly, do not compulsively reload after each kill as you might do with assault or engineer classes. Do not pray and spray. The LMGs lose lots of accuracy when the medic is using them on the move. Furthermore, when the trigger is held down, the recoil is very high. This means medics should effectively get into a good position and then use the strengths of the LMGs to pick off enemies ahead. This is not to say that the trigger should never be held down, as one of this class's strengths is its suppressing ability. The Recon class is the niche in Bad Company 2. It is the only class that some players may conceivably never touch, basically functioning as other games' sniper class. It boasts a wealth of additional equipment and abilities, however, that make it fulfil far more than the ghillie-suited, stationary sniper role that some may expect. For one thing, if you have played enough as the other three classes, you will unlock multi-class guns, such as the G3 and shotguns, which the Recon class can use to excel in closer quarters. You can also begin the game with a M1-Garand if you are a Battlefield Veteran, and a Thompson if you bought the Limited Edition (also available at rank 10 to other players), both of which are again playable as Recon. You are provided with the means to avoid long-range combat as Recon. It is the only class which can use C4 as standard, and the shotgun-C4 combination is indeed a favourite of more aggressive Recon players. The class is most effective over long distances, however. The sniper rifles are quite easy to use, though you have to adjust for distance and only headshots result in one-hit kills. The class also has a support capacity, with mortar strikes and spotting scopes available to help out your team. Many of the maps are designed for snipers to flourish, but they are generally very well balanced. See the Rush and Conquest sections below for more information on where snipers can gain the most advantage. The only drawback to this class is that there is little way of protecting your position if you are sitting with your eye glued to the scope – usually trip mines or claymores are provided to assist in this matter, but snipers have to rely on their wits and the occasional motion mines in Bad Company 2. The sniper rifles are all very similar, more so than any of the other classes. Because of the nature of sniping, where only one or two shots are fired, damage tends to be the key statistic. In these terms, the M24, the rifle that all players start with, is second only to the M95, the final rifle to be unlocked. The M95 has high calibre rounds, meaning it can destroy a UAV in one shot and damage helicopters and jeeps. With the magnum ammo enhancement, it can also kill in one shot on most parts of the body at medium-range. The M95 was one of the weapons most affected by the recent patch, reducing its damage, but the stats chart below is up to date as of 24/06/2010 after the first batch of server updates. At the other end of the spectrum is the VSS Snaiperskaya. This has low damage and medium accuracy compared to all the other rifles. It is, however, fully automatic, meaning it can function as a very high powered assault rifle in the right hands. This is, indeed, the way most users get the best out of the VSS, but it is not suitable at all for close-quarters due to its tiny magazine of just ten rounds. You can put the Red Dot Sight on it to help with close-range accuracy, however. The damage means three to four body shots will down an enemy, and it is a good mid-range weapon for stealthy players – it comes with a silencer to further this end. The Type 88 and SVU Snaiperskaya also have higher rates of fire than the other rifles, but without such a great loss of damage and accuracy. They are semi-automatic, as opposed to bolt action or fully-automatic, and are good middle-ground rifles for those wanting the reaction times of the VSS with the damage of a bolt action rifle.
The sniper rifles are unlocked at the following xp boundaries: M24 – 0 xp In stark contrast to the medic class, recon units are loaded with a diverse range of equipment. C4 may seem an odd choice for Recon, as snipers are usually a long way from the combat and unable to make use of it. However, when you bear in mind that a shotgun can be used with the Recon kit, the shotgun-C4 combination becomes very attractive indeed. This is particularly true in Rush, where the M-COM stations can be cleared, have C4 planted on them, then armed, and the C4 detonated when defenders go in to disarm the box. They can, of course, also be used to destroy tanks, block paths from infantry, and destroy buildings – as well as some more creative uses. The motion sensor is great for shotgun recons, and is also vital for maps where flanking is likely, as it will show where the enemies in range are. You have three to use, but only one can be active at a time. It lets out a beeping noise, and once a player hears that he may hide and wait for the recon to come in and investigate, so beware. It can also be used defensively, to monitor anyone coming for a sneaky knife kill on the sniper. Mortar strikes are the ultimate anti-vehicle weapon, and you can get many kills in each game against tank drivers not moving around enough. This is particularly satisfying when a vehicle is in a stationary position bombarding an M-COM station or infantry. By the time the first mortar hits, the tank will struggle to move out of the way before it is destroyed. They can also be used against M-COM stations and enemy snipers camping in a certain position.
The equipment for the sniper class are unlocked at the following xp boundaries: As you might expect, specialisations for snipers come largely in the form of scopes to enhance their sniper rifles. Not only can they use the 4x scopes of the other classes, but a 12x scope. This is most useful with the M95 because of its high power, allowing marksman shots on a more regular basis. You may wonder why the Red Dot Sight is unlocked only after the 4x and 12x scopes, but that is because of the boost it gives to the shorter-range rifles, such as the VSS. Finally there is the Spotting Scope, which automatically spots targets for other snipers and closer infantry to take out at a certain range. The recon class's specialisations are unlocked at the following xp boundaries: (Primary) 4x Rifle Scope – 8,000 xp It's recon, not sniper. Like with the medic, many people interpret the function of the recon class differently. It should, in theory, primarily be used to assist more close-quarters infantry, spotting enemies, calling in mortar strikes to suppress targets and destroy vehicles, and to use motion mines to help give a clearer picture of enemy movements on the map. C4 and shotgun equals win on Rush. This combination was mentioned briefly above, and very few players actually make use of it. Shotguns have uses for every class in Conquest, but on Rush, the addition of C4 makes it very valuable indeed. You can burst into the area around an M-COM station, take out two or three enemies and then C4 the box. Arm the M-COM station and then retreat out of the building, waiting for defenders to come in before detonating the C4. Not only do you get a lot of kills like this, but you damage the M-COM even if it is disarmed. Similarly, some buildings can be destroyed with C4 to take out the M-COMs using Destruction 2.0. It takes 12 C4 charges to destroy an M-COM itself, so targeting the building may be best. Motion sensors are your friend. We have already outlined the benefits and importance of using motion sensors to spot enemies for your team. They are, however, just as useful from a personal standpoint. If you are assaulting a base or in a tight area, throw a motion sensor, as it might just save your life. No-scoping rarely works. Unlike other FPSs, such as Halo, for example, attempting to shoot enemies without using your sniper rifle's scope rarely works. There are no crosshairs for the sniper rifles, making aiming difficult, and it is easy to completely miss from close-range. It is possible to quickly scope and dispatch an enemy, and this is the best way to go. Of course, if you regularly find yourself in this situation, you may be the wrong class. Also consider using a Red Dot Sight.
Recon is the second anti-vehicle class. That's right, the recon class is second only to engineers in terms of their anti-vehicle capabilities. This is largely due to the mortar strike, which can take out a tank in seconds. They also have C4, which can be used as anti-tank mines in a road. Consider laying them in a strategic location and then hanging back to snipe enemies from long range while monitoring your C4 until enemies come near. Be creative with C4. You can do a lot with the C4 that the game provides. Probably the most inventive is to create a kamikaze vehicle. This involves planting lots of C4 onto a quad bike or other vehicle (try a UAV!) and getting an ally to steer it into an enemy. You can then detonate it when it nears enemies, or reaches an M-COM station. You could also do the driving, but it is harder to time the detonation correctly. Friendly C4 shouldn't hurt you or your allies, though if it is shot by the enemy you can be killed by it. You can also C4 vehicles and wait for enemies to get in them before detonation. Pick a good pistol. If you are playing with a sniper rifle, a decent pistol is essential. See the section below for more information on picking the best for your play style. Find a pistol that you like, and it is possible to dominate all other guns except shotgun at close range. Be a Marksman. You get marksman bonuses for especially long-range kills. These can add greatly to the normal 50 for a kill. The added benefit of this is that enemies will rarely be able to spot you at such extreme range, while your own close-quarters squads (especially on Rush) will be picking out enemies as they move through the level.
In addition to all the unique weapons, equipment and upgrades available for each class that have been shown so far, there are a variety of multi-class aspects to consider. These allow Recons to play like an Assault class and Medics to play like Recons. It shakes up the dynamics of each class, and this is largely down to the multi-class weapons. Most of them are shotguns, due to the fact that there is no shotgun class itself. In addition, there are three rifles, and five pistols. The rifles really swing the balance of the classes, as they bring the range and accuracy of sniper rifles to the lower classes, but bridge the gap between long and mid-range weaponry also allowing recons to compete with the assaults. Shotguns: As you might expect, most of the shotguns are all fairly similar. The first, unlocked at level 1, the 870MCS, has maximum damage, as do the SPAS-12 and NeoStead 2000, both later unlocks. These are all pretty much identical. There are two variants, however. The SAIGA has reduced damage, the same accuracy but much higher rate of fire than the standard shotguns. The USAS-12 is similar, but with lower damage, and is the last to be unlocked. Shotguns with high damage, such as the Neostead, should be used with the 12 Gauge Slugs specialisation, to increase accuracy greatly (see below).
Rifles: There are also three rifles on offer. The M1A1 Thompson (more of a SMG) is unlocked by owners of the limited edition, while for standard edition players, it comes at level 10. It is the same machine gun as in Battlefield 1943, and can't compete with the modern assault rifles and SMGs of the assault and engineer class. Its chief function is to provide a machine gun for recon players. The other two are more useful for other classes. Both the G3 and M14 function well for all classes at mid to long range. They have lower rates of fire, particularly the M14, but higher damage and accuracy as a result. They are perfect for players wanting to be able to compete with sniper rifles in other classes than recon. They cannot be used with scopes, however, for balancing purposes, leaving it all down to accuracy via the iron-sights. The small magazines of both guns make them weak in close-combat. In terms of choosing between the G3 and M14, the former has lower damage but almost double the rate of fire, while the latter can kill in two shots at close range. Note that Battlefield Veterans have access to the WWII M1 Garand. This has similar damage and accuracy to the G3 and M14 but much lower rate of fire. It's useful as an early rifle at medium-range for snipers or a high power gun for other classes.
Again, the drawback to all these multi-class weapons is that you cannot use the sights of class-specific guns with them. Whether you can live with that will be down to your play style. Pistols: There are a few decisions to make when choosing your perfect pistol. First, do you want something replicating a SMG or assault rifle, a weapon with a high-rate of fire that can spread its bullets effectively at close range? If so, the M93R is your best bet, with its burst fire mode. You can spray this quite well, and it is ideal for anyone who prefers very close-quarters fighting or who struggles with accuracy. If, on the other hand, you are comfortable with your accuracy, the MP-412 Rex or M1911 are ideal. These have very high damage, but low rates of fire. One shot to an enemy's head should take them out, especially with the Rex. It is most useful at range, and snipers may like it because they usually engage from longer distances anyway. For middle-ground pistols, choose the starting M9 or later MP443. They can be fired quickly in heated situations, which is particularly valuable when your primary weapon is out of ammo or you need to reload under pressure.
Any class can also use the Tracer Dart Gun in the pistol slot, though it is only of use to engineers. The multi-class weapons are unlocked at the following ranks: M9 Pistol – Rank 0 As the specialisations cannot be quite so simply explained through a chart, below you will find every multi-class specialisation, including a description and tips about them. (Primary) Lights Combat Equipment – Rank 5: This increases the speed of sprint. There are no players this is really redundant with, as even snipers need to relocate quickly. However, engineers benefit from it due to their necessity to flank behind tanks, while C4/Shotgun recons need it to get up close to their targets. (Primary) Ammo Hip Bandolier – Rank 6 This doubles ammunition capacity. Use this if you are not playing as assault (as they can stock up their own ammo anyway) and regularly find that you run out of ammo. Successful snipers may have this problem, as might players with fast-firing weapons. Note that it does not double tracer dart capacity. (Primary) Grenade Vest – Rank 7 This doubles the amount of grenades a player spawns with. It is a popular specialisation because of this, and indeed, it also doubles the number of 40mm grenades, making it a good choice for assault class soldiers. (Primary) Explosives Leg Pouch – Rank 8 Like the grenade vest, this doubles ammunition, but for explosive weaponry, such as RPGs, anti-tank mines and C4. Clearly there is no point in medics using it, but assaults with C4 could, and engineers and recons are most likely to. (Primary) 12 Gauge Slugs – Rank 16 The last primary upgrade to be unlocked, this tips the balance of power towards shotguns. It combines the pellets of most shotguns into a single ball, firing more like a sniper rifle. If you have ever wondered how you are being shotgunned from mid-range, this is why. Just be thankful you can't put sights on the shotguns, (Secondary) Extended Shotgun Magazine – Rank 9 This doubles the capacity of a shotgun magazine. As such, you may run out of ammo a lot quicker, and so this is best suited to assault class or in conjunction with Ammo Hip Bandolier. If you are not playing as an assault, ensure one is in your squad to top up your ammunition. (Secondary) Ceramic Body Armour – Rank 14 This increases health, much like Modern Warfare's Juggernaut. It does not protect you from explosions, only bullets, anything body armour would be able to protect you against. (Secondary) Magnum Ammunition – Rank 15 This increases the potency of every bullet you fire. As a result, you inflict more damage on enemies and bullet drop is reduced, making it very popular indeed with snipers. It is also useful if you are picking a low-powered weapon with other attributes as this will balance it out a little. (Secondary) Improved Demolitions – Rank 17 This increases explosive damage dealt by the player. As such, it also increases the effectiveness of RPGs, mortar strikes and C4 against tanks, benefitting engineers in particular. People also enjoy using it with the Carl Gustav against infantry. Electronic Warfare Package –1,200 xp This highlights enemy C4 and anti-tank mines near your vehicle. It's worth swapping this in if you find yourself playing on a map where such methods are being regularly employed. Active Armour Upgrade – 2,300 xp This increases vehicle health. Improved Warheads Package – 3,600 xp This increases damage dealt by your vehicle. It can give you the edge against an enemy tank. Quick Reload Package – 5,000 xp This reduces the cool-down time of vehicular weaponry.
Smoke Countermeasures Package – 6,500 xp This employs various countermeasures to protect your vehicle. In tanks, it is a cloud of smoke. This stops people from accurately hitting the tank, but allows recons or assaults to plant C4 using the shroud for cover. Helicopters drop flares, which deter enemy RPGs following a tracer dart. They have become more useful since the patch increasing tracer speed. Finally, the UAV drops smoke grenades. High Power Optics Package – 8,000 xp This gives vehicles increased weapon zoom. The main advantage to this is helping in the bombardment of M-COM stations of conquest flags. Alternate Weapon Package – 10,000 xp This adds an additional weapon to every vehicle already fitted with one. Most importantly, UAVs get a machine gun, tanks get a machine gun, APCs and helicopters get anti-tank missiles, while the gunner of a helicopter also gets a tracer to fire. These are advantageous if you feel your vehicles are underpowered and need an edge in combat. Story: Collectibles: Walkthrough:
Reach Trenches: TIP: There is no HUD (head-up-display) on this level unlike on every other Bad Company mission. This may seem like a disadvantage, but the positive is that you get infinite ammo, including grenades, once you first pick them up. Follow McKee: TIP: Pick up an additional weapon from one of the downed Japanese. While ammo is infinite, having the range of the Type 5 rifle can be handy later on.
Proceed through trench after trench, taking out the enemy infantry in each room and area. You should pass through three in total, including the first instance where you were required to deal with the enemy. Climb the hill and ladder on the next path, before following a narrow track to come out overlooking a lush field bathed in daylight. Stay on the path between the fences to catch up with your squad. Make sure you duck down when ordered and remain still to avoid the wrath of the Japanese convoy rolling through (though it is actually a cut-scene, so you can’t physically be spotted). When the air support rips through it, you are given control and can mop up the stragglers. Locate the Defector: Your squad does not know the truth behind this mission: that the information the scientist has is in relation to a devastating super-weapon. Our task it simply to get him off the island and back to US soil. Follow Unit to Airfield:
Capture Enemy Vehicle: TIP: While you cannot tell when you first pick up grenades, you do now have them (in unlimited supply), so use them to your heart’s content! The collapsed building has stairs leading to the roof, even once it has been destroyed. From here you can gain a good vantage point over the vehicles, and clear the area before moving in.
Defend Vehicle: Find Subpen Location: Breach Subpen Interior:
Escape to Captured Enemy Sub: Deal with them and pass into the final subpen. Use the path to the left once more, and cross the plank onto the submarine to trigger the final cut-scene and the level’s end.
The weapon goes off as your squad is fleeing the island. It creates a huge wave that destroys the submarine and everyone on board. Story: Collectibles: Walkthrough: Follow Unit: TIP: Pick up a second weapon to help in the mission ahead. A shotgun will not really be required, though some building-clearing will take place. Other Collectibles: Find the TOZ and AN 94-R off the group you ambush. Once you reach the boat stuck in the ice, a cut-scene plays, and the nature of your mission becomes a little clearer. The agent we were supposed to be assisting has been captured by a very formidable man, but HQ cannot give authorisation to take him out. As he leaves in the helicopter, we are given orders to fight through the town and secure the vehicle our agent was working towards. Follow unit: The first house should be clear. Use the upstairs to gain a vantage point on the street below. There is a Vodnik in the street too, so pick off the gunner or launch a couple of 40mm grenades at it from underneath the barrel of your assault rifle. With the vehicle taken out, you can move downstairs and slink between the buildings to mop up the rest of the soldiers. The road turns uphill to the left, where you should continue our building-clearing tactic. Watch for RPG soldiers in the windows of some of the buildings. Soon you’ll come upon a bus filled with Russians. Again, however, you can flank this using the buildings to the right. In fact, you have to use the building directly adjacent to the bus to get round the obstacle. There is an ammunition crate inside, which you should use to stock up. Secure Courtyard: When you can see no more enemies, move downstairs and sweep the area to clear out any stragglers. Hold Out Until Air Support Comes Online: TIP: It is best to be downstairs here, as you can move between cover as the tank destroys the positions around you. Before long, the air support will be available and you can call it in by equipping your binoculars with Back/Select. Get the tank in sight and press fire to call in an air strike. Retreat to cover until the ordinance has been dropped.
General Gameplay Tips
Use UAVs to spot, and to target vehicles and buildings.
Explosive barrels make for easy kills.
Mortar strikes are great against tanks. Even if the crew gets out, they will be hurt and should get picked off by your allies.
Grenades are a good way to get out of intense situations.
Squads are an integral part of Bad Company 2, and using them effectively can help rack up large kill streaks.
On Xbox 360, installing the game to your hard drive means you load the game and spawn before anyone who hasn't done it – a real advantage!
Assault Class
Weapons:
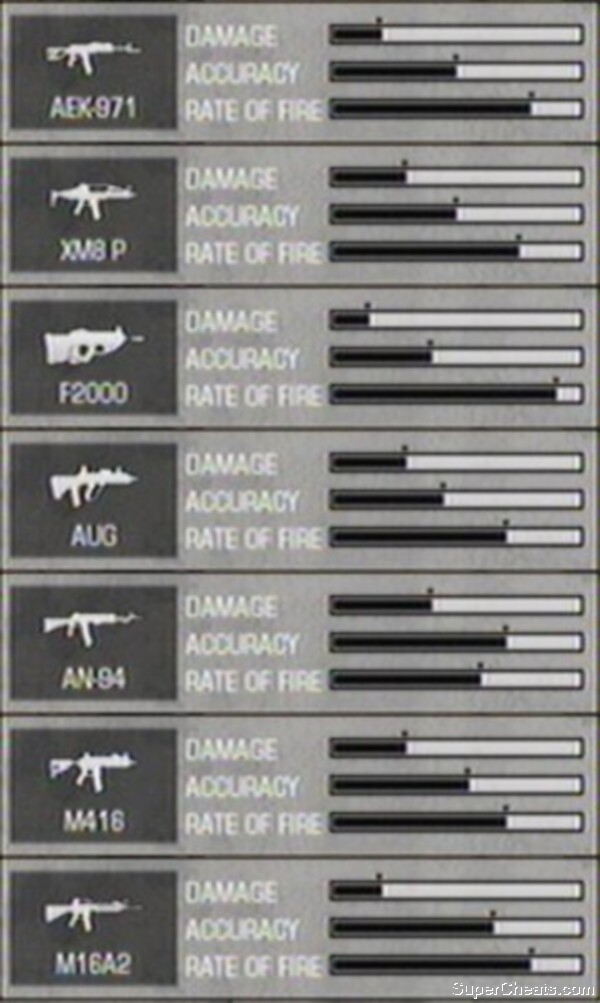
The assault rifles specialise in mid-range combat
Weapon Unlocks:
XM8 P – 3,000 xp
F2000 – 8,000 xp
AUG – 20,000 xp
AN-94 – 28,000 xp
M416 – 35,000 xp
M16A2 – 47,000 xpEquipment:
Equipment Unlocks:
C4 – 0 xp
Ammo Box - 1200 xp
40mm Smoke Grenade launcher – 5500 xp
40mm Shotgun – 11000 xpSpecialisation Unlocks:
(Primary) 4x Rifle Scope – 17000 xp
(Secondary) Marksman Assault Rifle Training – 24,000 xpHints and Tips:
Engineer Class
Weapons:
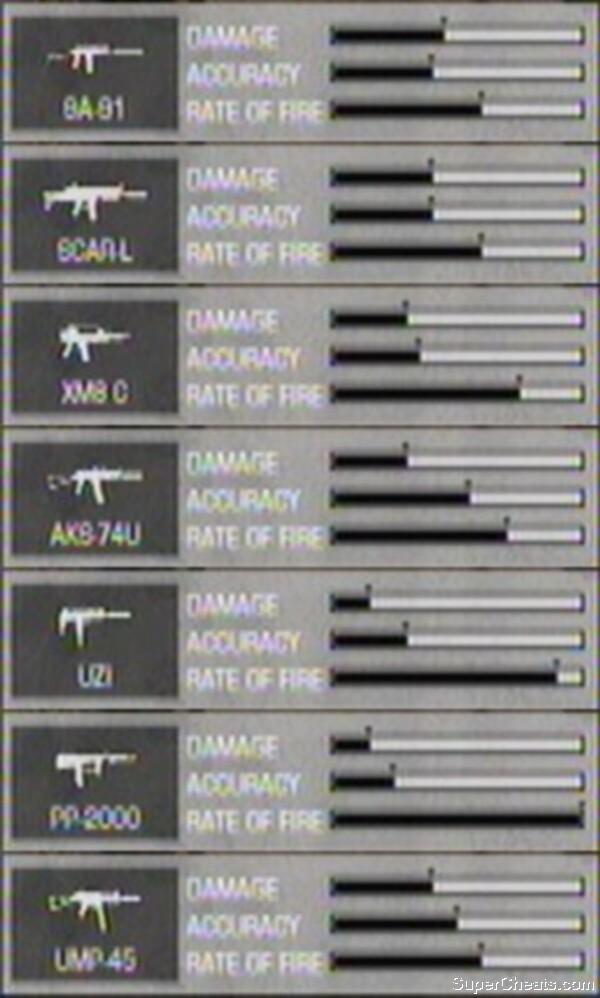
The SMGs are best at close-range
Weapon Unlocks:
SCAR-L Carbine – 2,500 xp
XM8 Compact – 6,500 xp
AKS-74U Krinkov – 15,000 xp
Uzi – 26,000 xp
PP-2000 Avtomat – 32,000 xp
UMP-45 – 43,000 xpEquipment:
Equipment Unlocks:
Repair Tool – 1,000 xp
Anti-tank Mine – 4,400 xp
M2 Carl Gustav AT – 8,700 xp
M136 AT4 – 19,000 xpSpecialisations:
Specialisation Unlocks:
(Primary) 4x Rifle Scope – 13,500 xp
(Secondary) Marksman SMG Training – 21,500 xpHints and Tips:
The M136 AT4 is the underappreciated part of the engineer class. This compilation shows what it can do.
Medic Class
Weapons:
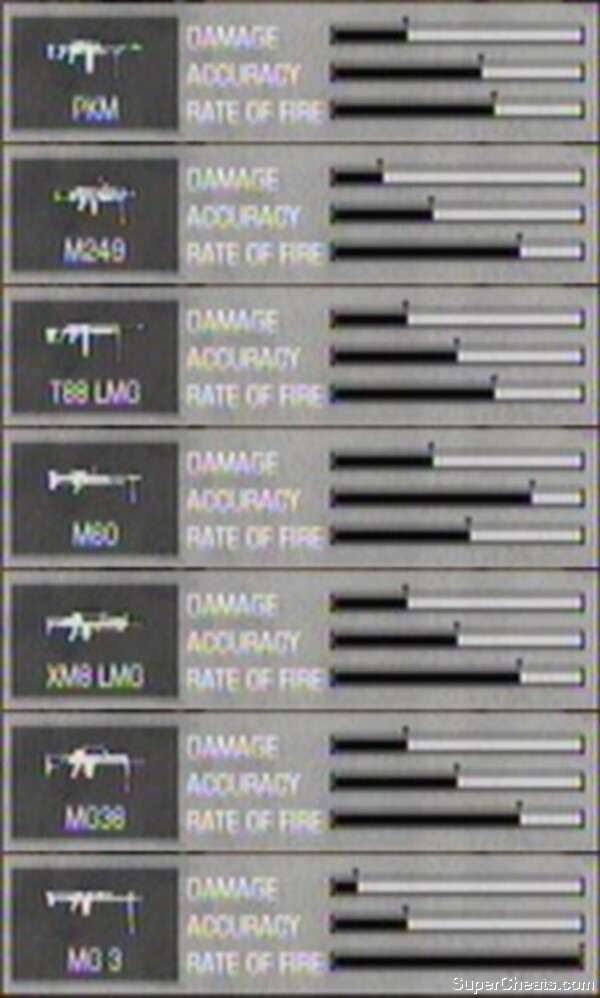
LMGs are good at all ranges, but are weakest in close quarters since the patch
Weapon Unlocks:
M249 SAW – 3,300 xp
Type 88 LMG – 8,600 xp
M60 LMG – 25,000 xp
XM8 LMG – 34,000 xp
MG36 – 42,000 xp
MG3 – 57,000 xpEquipment:
Equipment Unlocks:
Defibrillator – 5,800 xpSpecialisations:
Specialisation Unlocks:
(Primary) Red Dot Sight – 15,000 xp
(Primary) 4x Rifle Scope – 18,000 xp
(Primary) Medic Kit Improved Range – 21,000 xp
(Secondary) Marksman LMG Training – 28,000 xpHints and Tips:
Recon Class
Weapons:

The snipers are a similar bunch, with the exception of the VSS Snaiperskaya
Weapon Unlocks:
Type 88 – 2,200 xp
SV98 Snaiperskaya – 6,000 xp
SVU Snaiperskaya Short – 15,000 xp
GOL Sniper Magnum – 21,000 xp
VSS Snaiperskaya Special – 26,000 xp
M95 – 34,000 xpEquipment:
Mortar Strikes work against all kinds of enemies, and are great against popular camping locations.Equipment Unlocks:
C4 – 0 xp
Motion Sensor –0 xp
Mortar Strike – 4,000 xpSpecialisations:
Specialisation Unlocks:
(Primary) 12x High Power Scope – 10,000 xp
(Primary) Red Dot Sight – 12,500 xp
(Secondary) Sniper Spotting Scope – 17,000 xpHints and Tips:
Motion sensors are your friend, as it the ability to quickly snipe enemies at close quarters.
Marksman shots are not easy, but are very satisfying and can more-than-quadruple your points for the kill.
Multi-class
Weapons
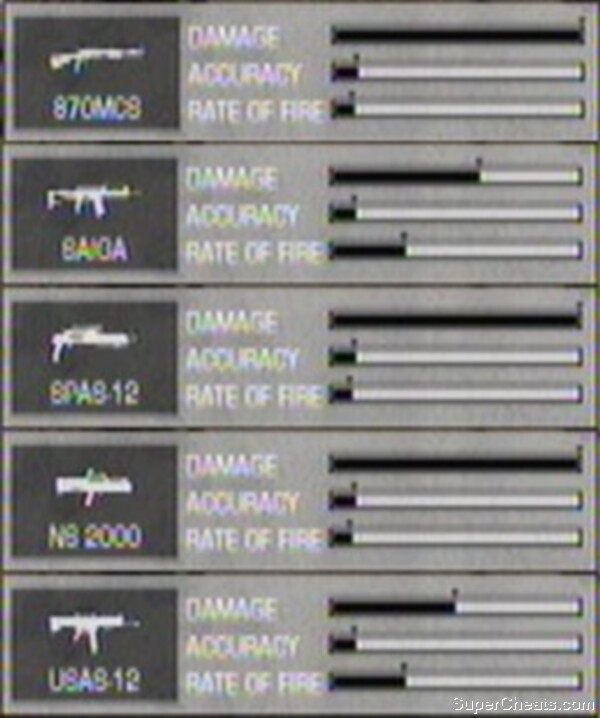
Shotguns are increasingly popular as players look for new ways to win
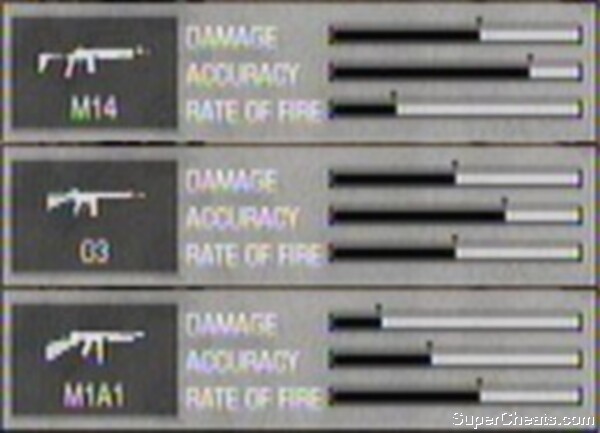
The rifles are suitable for all classes
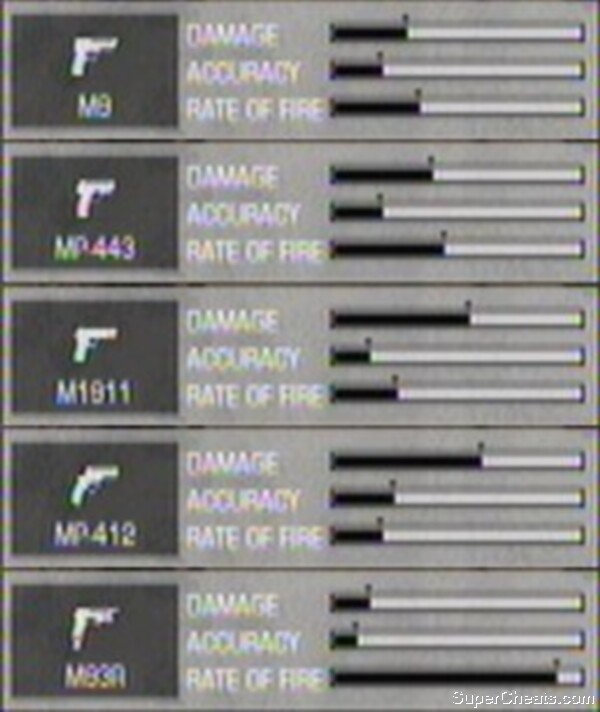
Pistols can save your life in tough combat situations
Weapon Unlocks:
M1 Garand – Rank 0
870 Combat – Rank 1
Saiga 20k Semi – Rank 2
MP-443 Grach – Rank 3
M1911 .45 – Rank 4
M1A1 Thompson – Rank 10
Tracer Dart Gun – Rank 11
MP-412 Rex – Rank 12
M93R Burst – Rank 13
SPAS-12 Combat – Rank 18
M14 Mod 0 Enhanced – Rank 19
Neostead 2000 Combat – Rank 20
USAS-12 Auto – Rank 21
G3 – Rank 22Specialisations
Vehicle Specialisations
There are lots of maps that are simply unwinnable without vehicles
Level 1: Operation Aurora
In this tutorial level you play as a different squad to B Company, set in 1944. A small group of commandos was sent to retrieve a Japanese scientist with crucial information for the allied war effort. Your character is not Preston Marlowe, but Thomas Wyatt.
None
Other Collectibles:
None
M-COMs:
None
The level begins at dawn, out at sea and in motorised dinghies. This is supposed to be a stealth mission, but as the boats move along they are spotted by a Japanese light. The first boat of the two is gunned down, before the enemy turn their attention to your crew. The game automatically has your character dive underwater, and when the cut scene ends you are back on dry land.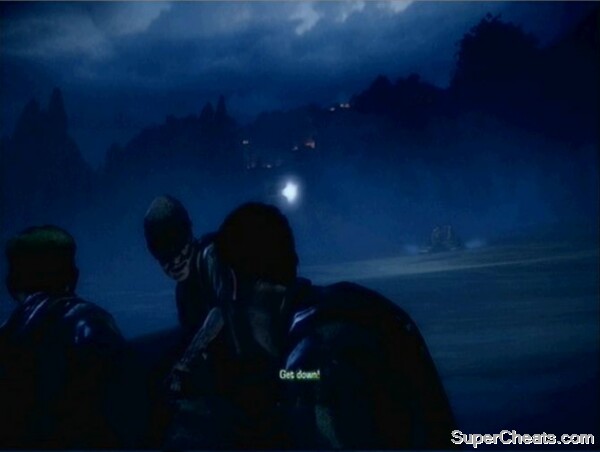
The point team did not fare so well in the night-time raid
Secure Safe Passage to Rendezvous Point:
Proceed up the path once you gain control of Wyatt. Ahead is a pair of enemy guards. You are appointed the role of taking the left-hand one out stealthily, so use the melee button to knife the soldier.
As you cross the water and head up the hill, an allied soldier throws you a Japanese Type-100 SMG.
After you have crossed the thin wooden bridge, you will be ordered into the trenches. Your ally will take out a guard ahead, but at the top of the next set of steps the reverse will occur as he waits for you to clear the trench. You will find around three guards here, so use the steps for cover against them.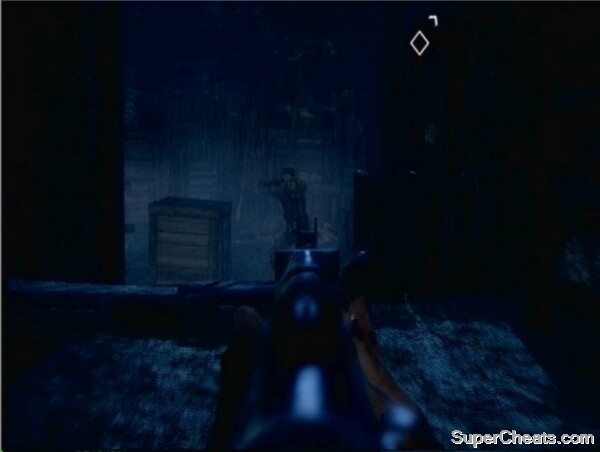
Help McKee to clear the trenches
It is a reassuringly short walk up the path to locate the Japanese scientist. Cross the wooden bridge to trigger a cut-scene.
With the bridge cut, climb even higher to come to a position overlooking a Japanese airfield.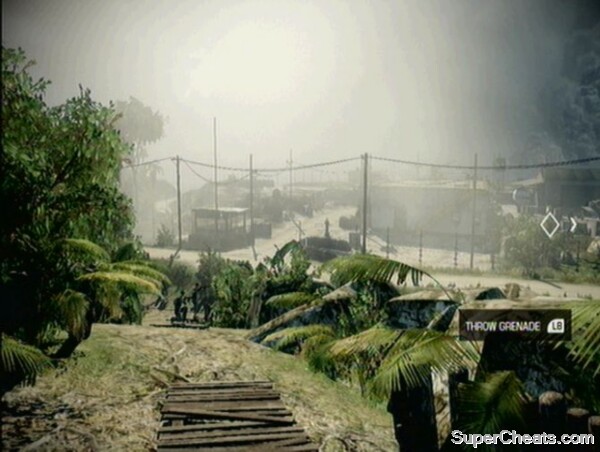
We need to clear the airfield to get a vehicle
From the top of the hill try to pick off the infantry by the front entrance using your Type 5 rifle. With this done, proceed down the hill. The vehicles are located in the section to the right of the large building destroyed by aircraft fire. You can use the trench at the front of the base for cover while moving up.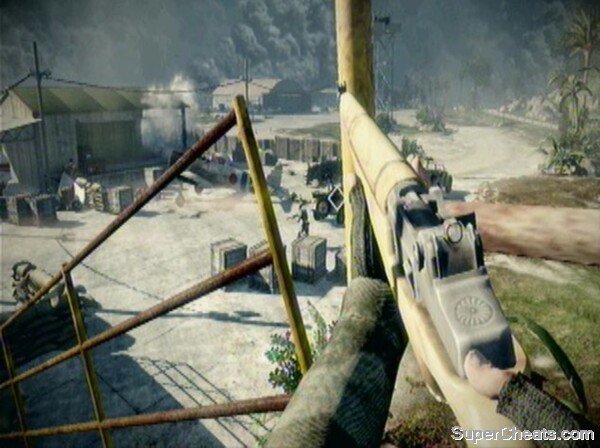
Use this building to flank the vehicular area
Once you reach the vehicle, you will mount the gun. It is difficult to fail this section, but you should nonetheless try to take out any RPG-wielding enemies threatening the jeeps. Watch out for those on bridges, and the jeeps which come in front of your vehicle to slow you down. Once you are driven to the target area, you will disembark and must then head around the corner on foot.
A Japanese enemy will run round the corner, so ensure you have the Type 100 out to mow him down. Around the corner there is also an enemy behind the sandbags, and another two will come into view from up ahead. There is one final enemy near the door you have to pass through to get to the subpen, near the crates.
The door needs to be breached before your squad can proceed. Follow the on-screen instructions to place TNT on the door, before standing back and detonating the charges. You will then find yourself in the pen itself.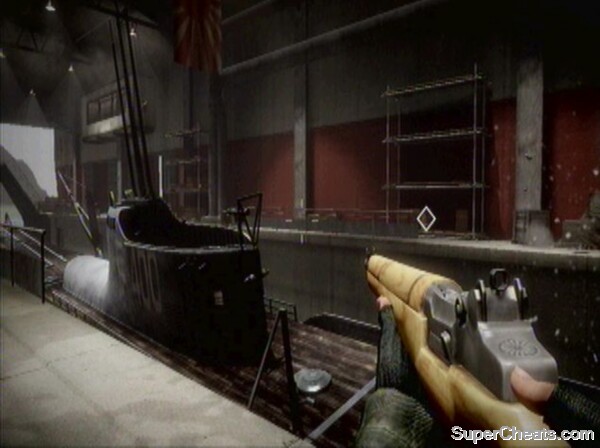
The subpen is crawling with enemies
Inside the subpen the whole place is coming down, as the Japanese weapon is being armed. Just before you cross to the other side of the pen, enemies will spill out towards you. Riddle them with bullets and move into the next area. Guards will be in the distance ahead of you. Follow the gangway to the left, shooting the infantry on the walkway above and then those at the end of the path you are on. Across the bridge to the right are more enemies.
Fight through the subpen to the end of this prologue level.
Level 2: Cold War
We’re in the present day now, and assisting a US counter-intelligence operation. It is a wintry mission, set in North Russia, as the playful name of the level suggests. Bad Company don’t know the nature of the mission exactly, as will become clear during the walkthrough below.
None
Other Collectibles:
AN 94-R, TOZ-194
M-COMs:
None
Having traversed the minefield, you are given control of Preston Marlowe as will become standard for the rest of the game.
Once you gain control of your character, follow your three squadmates along the snowy path. Wait at the edge of the upper path rather than dropping down, where your squad stops. Soon, the enemy patrol spotted during the cut-scene will come into view. Wait for Sarge’s countdown before firing on the enemy.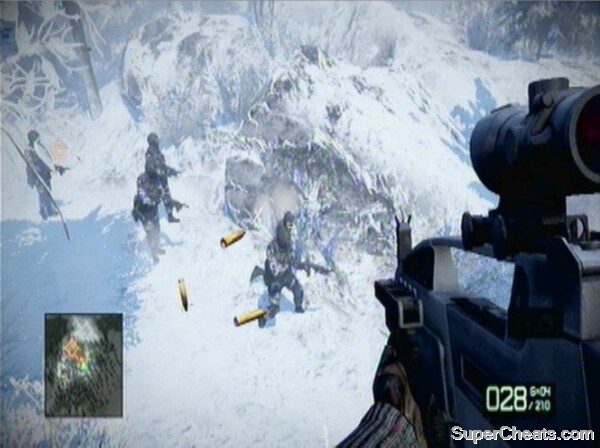
Get the drop on this patrol with the help of your squad
The town has a main road that is very tightly packed, but plenty of buildings to fight through if you would rather stay off the street. Indeed, this is the easiest way to proceed. Your squad moves up along the road, so head to the house on the left and begin to work through each one as you come to it.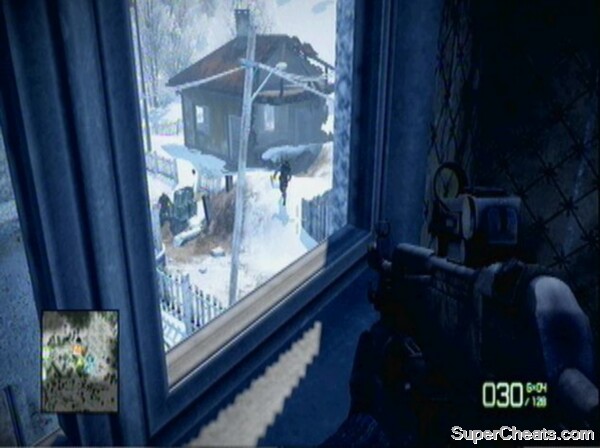
You can use the upper floors of this village’s houses to get overwatch positions on your squad
Once inside the building, waves of infantry will begin to attack. Get upstairs in the house and use the height to take out the enemies in the open courtyard area.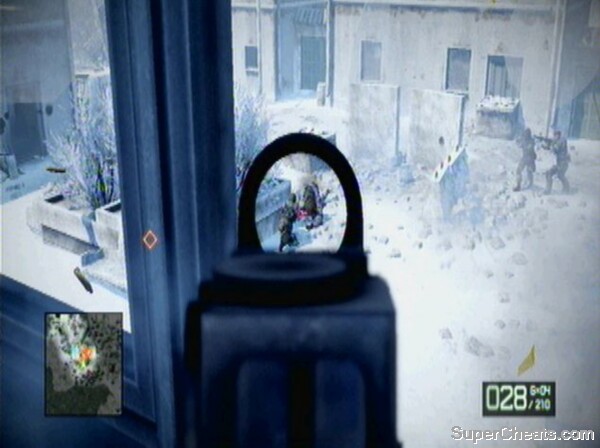
Use the height advantage to flank the Russians
An enemy tank appears at the edge of the village once the courtyard is clear. We need to hold position until air support is ready. Pick a spot to hunker down, but remember that enemy infantry will continue to move forward, so you need a line of fire out into the courtyard. There should be a house blocking the view to the tank, and you can use this (do not cover in the house itself, but use it as a long-distance shield) to assist.
Call in the air support against the enemy tank.
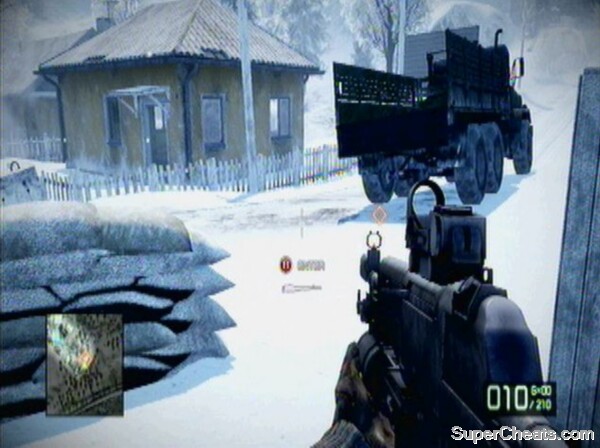
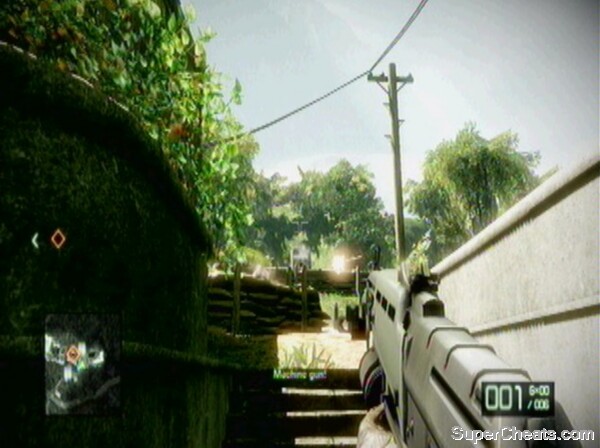
Locate Russian High Value Vehicle:
Once you get to the end of the tank’s road, another house with enemies upstairs will present itself to you. 40mm anyone not directly in view, before proceeding up the road. A quad bike and infantry will move forwards. Stay crouched to use the wall to the right as cover from other enemies while you take out these targets. You should then turn your attention to the right, and climb up into the buildings previously occupied by the enemy.
TIP: Before going down the street where the quad bike emerges, bear in mind that you can backtrack and take the path to the right instead. This is a slightly easier route, but takes longer.
The street beyond is filled with enemies. Take out as many as you can, using each building for cover. To the left (or ahead, depending on which route you took; see the tip above), is a KORD anti-personnel turret. Use explosives or flank around the back of it to take it out.
TIP: You can flank right round this entire area, using the snowy slopes on the right hand side to reach the target vehicle.
Near the target vehicle is another gun emplacement, this time without a shield. Kill the gunner and anyone in the street up to the truck, before embarking to begin the chase at the climax of this level.
Enter the truck as ordered by HQ
Reach Exfil Point:
On the back of the truck you will need to despatch some infantry chasing after your vehicle. With that done, switch to 40mm grenade launcher mode on your assault rifle. This is necessary to destroy the vehicles that now begin to chase your truck. The first quad bike comes just after you pass the first corner.
TIP: You have unlimited ammo, so let rip!
Pummel the ground in front of it to attempt to dislodge the driver and passenger, or destroy the bike altogether. Another will soon join it, before an intersection is reached. After a few more quad bikes, a Vodnik joins the chase
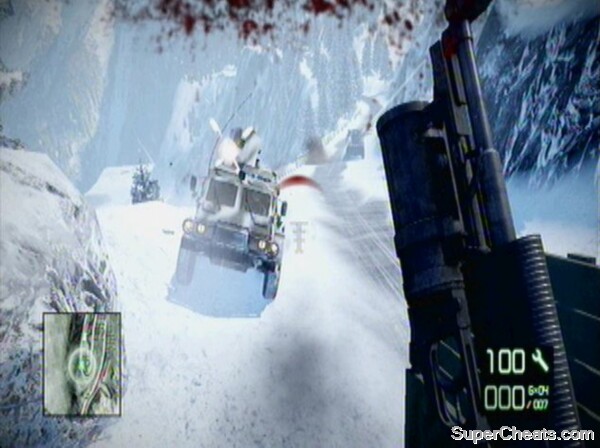
The Vodniks generally take two grenade shots to destroy them, though the first may in fact take out the driver and render the vehicle inoperable
TIP: Drop grenades behind the truck to catch any lingering vehicles.
Eventually Haggard will drive off-road, pursued by more Vodniks. He crashes having rejoined the main road, where two more Vodniks get into mischief. If you thought that was hectic, a helicopter then descends onto your position. You can take an early pot-shot against it, but the only real chance to get a hit on the aircraft comes at the end of the tunnel section.
Having left the tunnel, the helicopter comes in behind your truck. You need to be quick to take it out before it launches a missile at you – you have only a few seconds.
TIP: Be ready, facing out of the back of the truck with a 40mm grenade primed as you leave the tunnel to ensure you can take the shot quickly enough.
With the helicopter down, the mission ends.
Story:
The cargo in the truck turns out to be fake. The Russians are building a weapon, and the operation we were assisting was to discover more information about it and to steal a crucial part of the weapon. We have been welcomed into the Special Activities Division of the army, in what will, as in the previous game, be Sarge’s last mission. The US need more information on the weapon, and so have set B Company up with Aguire, an expert on this sort of thing, in Bolivia, and that is our next location.
Collectibles:
SPAS-12
Other Collectibles:
AEK-971, T88 LMG, M2 Carl Gustav, T88 S-R, SCAR-L, TOZ-194S
M-COMS:
2
Walkthrough:
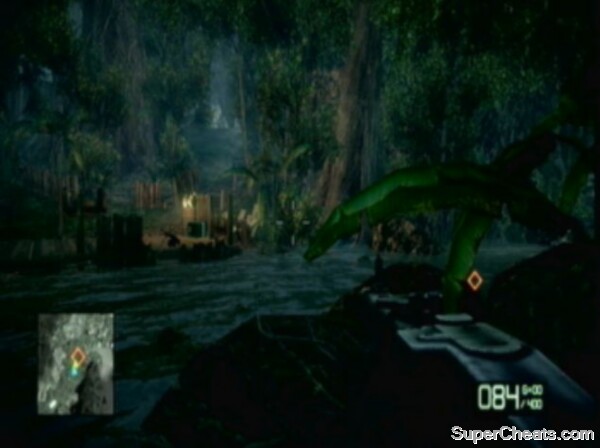
We are dropped in by our hippie helicopter pilot into a jungle wilderness.
Follow Unit:
This area is tense and atmospheric, but there are no enemies to worry about for a while. Move up the hill out of the water and into the village along the path ahead. Someone has wasted everyone and everything in the area, but don’t worry about that for now, just proceed to the marked house to find Aguire’s last known location. Aguire is nowhere to be seen, but has left a clue, suggesting he is upriver. Before you can dwell on this revelation, however, enemies appear.
Withstand Counterattack:
From the window that you begin at, enemies will come down the hill to the right and the hill to the left. The best tactic is to use an LMG to mow down the oncoming horde. Pick off any RPG units that pop up. You will get grenaded and your building will take plenty of hits, but eventually the Bolivian militia will stop coming.
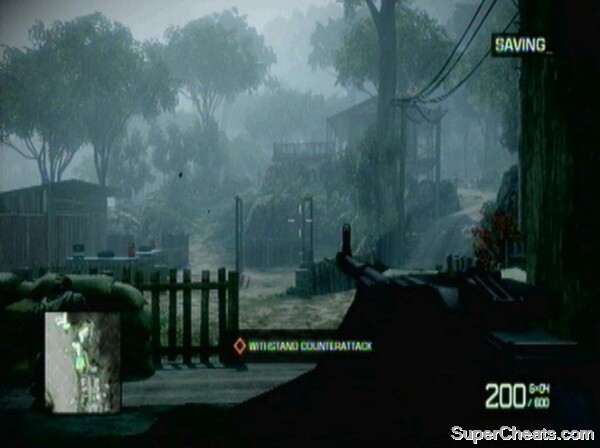
Defend your position
TIP: Don’t be afraid to move from the window. A good tactic, in fact, is to stand back from it in case of RPGs or grenades against the wall.
You can move outside once the enemy begin to thin out. With the area clear, an enemy boat will appear on the water. You need to head to the house on the hill in the centre (from your original window, marked on the map with a gun icon). The M2 Carl Gustav RPG is located on the surrounding balcony of this house. Once you have picked it up, head back towards the waterfront and launch some rounds at the boat. It should be relatively easy to hit.
Collectible: SPAS-12 – this is located in a house by the waterfront, marked on the map with a pistol icon (not the one with the Gustav).
Other Collectibles: Enemies will drop the AEK-971 and T88 variants in this area, and you can also pick up the Carl Gustav as mentioned above. Look for the T88 S-R near the boat.
This level’s collectible weapon, the SPAS-12, can be found in a shack by the waterfront.
Find Transport Upriver:
With the boat down, you can proceed to follow your team up the hill.
Move through the undergrowth to locate a small boat that will be used to move upriver to find Aguire.
Follow Aguire’s Trail:
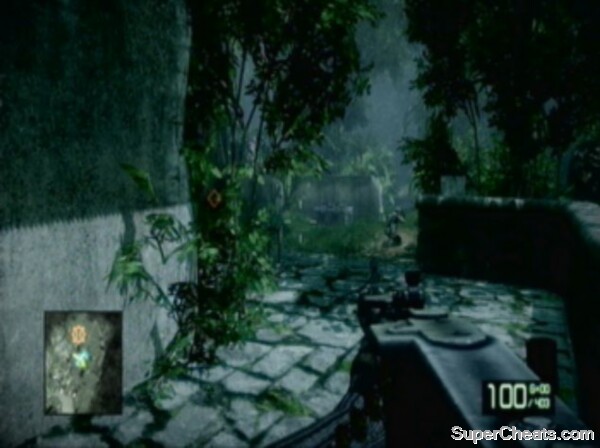
Proceed along the river. This is a very atmospheric section, with flashes of lightning and people moving along bridges and among the bushes at the edge of the river. Eventually you will come to a dead end. Run the boat into the ground and move out on foot. Once you reach the area covered in logs, enemies will surface out of the water. Use the logs for protection as you finish off the sneaky hostiles in this area. The river bends round to the right, where a rope bridge with an enemy on and a village bustling with activity are located. Before following this path, however, there is an M-COM station to be destroyed.
M-COM Station #1: Continue straight on up the paths past the log and guerrilla insurgent area, ignoring the objective marker and route to the right. The M-COM is to the left as you reach the peak of this slope.
The first M-COM station of this level is up the slope straight ahead.
Resupply at Flynn’s Weapon Cache:
You can now proceed under the rope bridge and into the village area. Flynn, the helicopter pilot, has dropped some weapons for us to pick up to make the rest of this mission easier. There are not too many enemies in the village, and you will soon be able to climb various sets of stairs at the side of this area towards the weapons cache.
M-COM Station #2: At the top of the staircases is the second M-COM station, next to the gap in the wall that you have to move through.
The second M-COM is on the route to the next objective.
With the M-COM destroyed, move through the gap in the wall. After travelling through a jungle section, you will come upon the yellow weapon cache. Access it and you can retrieve any gun you have picked up thus far.
Find Transport Upriver:
At the edge of this area you can gain an overwatch on the village below, where the boat we need is located. Take out any enemies in sight and move down amongst the houses. A much better craft than the previous one is available now, complete with grenade launcher. Get on board when ready.
Sweep and Clear Militia Logging Camp:
You are in control of the boat and the gun, though Sarge is actually the one manning it. There are not any enemies to deal with here, but once you reach the blockage in the river you can get the boat up close to the barricade and use the turret to wreak havoc on the buildings and infantry ahead. Some will try to rush your position, and you should be careful of getting flanked if you remain in the boat.
Use the boat’s turret to clear the initial area.
Once you have disembarked, use the land to the right, following it until you enter the side of the camp. Pick up the C4 in the first building you come to, marked by a gun icon, and then lay it in the middle of the dirt road ahead. You will hear a vehicle coming in, and you should detonate the C4 once it rounds the logs and comes into view.
TIP: C4’ing the truck is not necessary, but is good fun and nice practice for multiplayer!
With the truck out of the picture, move through the base, taking out the Bolivian enemies as you go. Many of them have shotguns here, and the AI is very accurate even at medium range with them. The vast logging area that you enter is prime flanking territory, for both you and the enemy, particularly the sections under roof cover. You must push through, however, until you reach a road leading to another village.
TIP: There are many collectible guns in this area, marked on the map by gun icons.
C4 the enemy truck and clear the logging camp.
Secure Access Road:
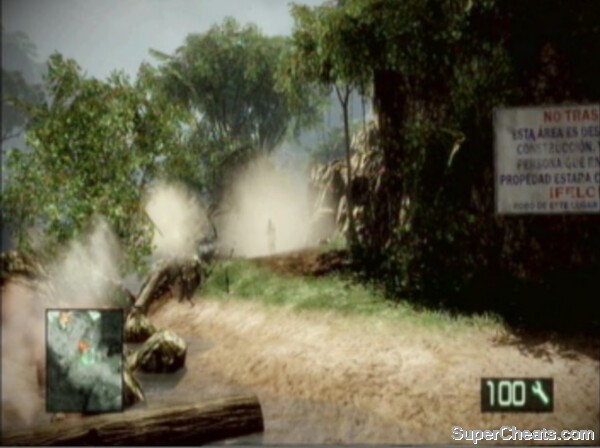
As soon as the buildings come into view, use your 40mm grenade launcher on the shanty houses up ahead. Once the enemy begin to reveal themselves as a result, let rip and take them down. Use the sandbags for cover, and when the coast appears clear, move amongst the houses.
TIP: A shotgun is a good weapon for the confined areas ahead.
Other Collectible: Two gun icons in the logging camp provide the TOZ-194S and the SCAR-L.
Be careful of every door you pass, as some enemies may be remaining. Targets will move to engage you once you clear the first pair of houses. Before long, however, you will reach a road, leading uphill. Reach the objective marker to complete the mission.
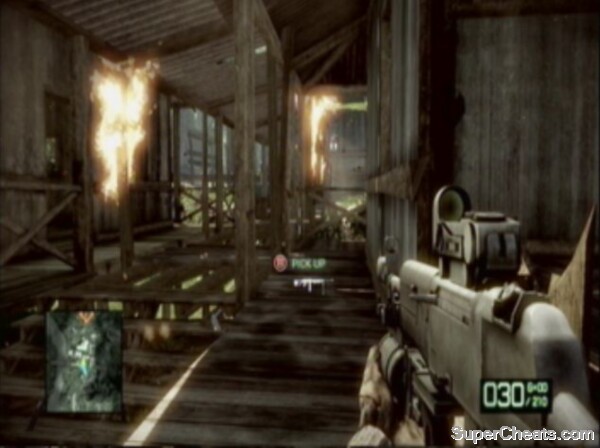
Nearly at the end now, but don’t get complacent! Watch out for hidden enemies amongst the flames.
Story:
This level follows on directly from the last. Having cleared the logging camp and road, we have proceeded upriver into a densely wooded section. The hunt for Aguire continues.
Collectibles:
None
Other Collectibles:
T-88 S, AEK-971R, SPAS-12S, MP-443
M-COMS:
2
Walkthrough:
You begin in the jungle, in darkness and during a thunderstorm.
Obtain Sniping Position:
Follow your squad along the jungle path. You will see an enemy in a shack, facing away from you. Sneak up behind him and knife him.
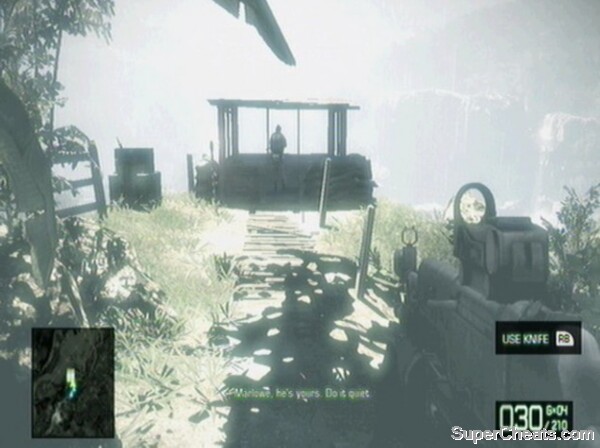
Take out the enemy who’s occupying your sniping position.
After this, a cut-scene will roll. We have spotted Aguire, but need to clear a path to get to him.
Other Collectible: You begin this level with the T-88 S sniper rifle.
Stealth is still the order of the day, so some tactical sniping is called for.
Terminate Militia Sentries:
There are a couple of important points to know for this section. First, you have to use the thunder to mask the sound of your rifle shots. This is indicated by a flash of lightning about half a second before the thunderclap – you can fire once you see the lightning. Second, you have a very powerful sniper rifle. Headshots are not necessary to kill in one, so aim for the chest.
Sarge will talk you through your targets.
The first is the ‘guy on the pier’. He is by the water’s edge to the left, next to a blue rowing boat. He is an easy shot. Wait for the lightning, then fire.
TIP: If you miss your shot, you have a split second to take another one while the thunder echoes around. If the soldier runs off, you fail.
The second sentry is to the right, and your squad get right up close to him before giving you the order to fire. You may notice another guard further right – he will turn away as the thunder claps.
The third is this guy to the right, and should be a simple execution.
With the initial area clear, your squad moves up.
A medic comes to the stairs they are on and heads down, looking towards the dead sentries. Take him out on the first thunderclap once he pauses at the bottom of the steps.
Two men will now come from opposite sides of a shack at the top of the stairs. They will stop, standing together in the middle. You may need two shots to take them out (though one stands in front of the other). Luckily, the thunder is now extreme, and you have time for at least two rounds.
With that, all the sentries are down.
Use the thunderclaps to take out the sentries.
Regroup with Unit:
When given the order, follow Sweetwater out of the guard tower and back down to regroup with the rest of your squad.
TIP: Don’t forget to swap out your sniper rifle if you want, using the resupply crate.
M-COM Station #1: The first M-COM of this level is to the left once you reach the top road with your team on. It is in the second to last shack past the parked trucks.
The M-COM is in this direction, in the second to last building of the row.
Follow Unit:
Move up the path to trigger a cut-scene. Haggard saves Sweetwater from a tripwire mine. This now becomes your duty. Follow behind your squad until they stop – this indicates a mine in the area. You should be able to see a lighter band going horizontally across the path, and this is a tripwire. You should approach it, look at the wire and then press the button when prompted to disarm it. When your squad stop for the first time, at the top of a small incline, the wire will be about three metres in front, as the hill begins to rise again.
Other Collectible: AEK-971R – this can be found on many enemies throughout the level.
The second is quite a way on. The game will autosave just before it, so keep an eye out for that as a helpful indication. Again, your squad will stop first. The tripwire is at the top of this slope.
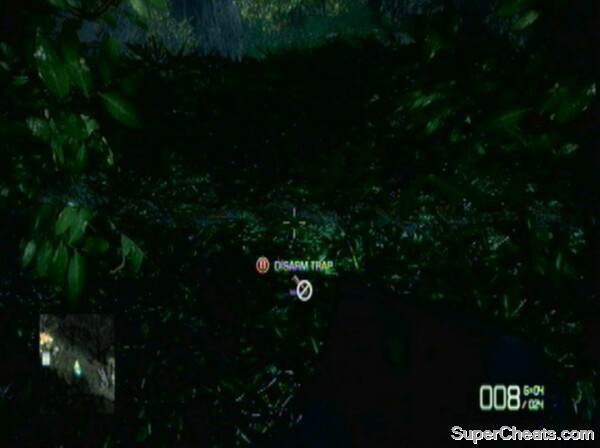
The tripwires can be hard to see, but look for a lighter colour and contrasting texture.
The final one is not too far. Look for a panel of wooden stakes on your right hand side opposite a rock – the tripwire is just beyond it.
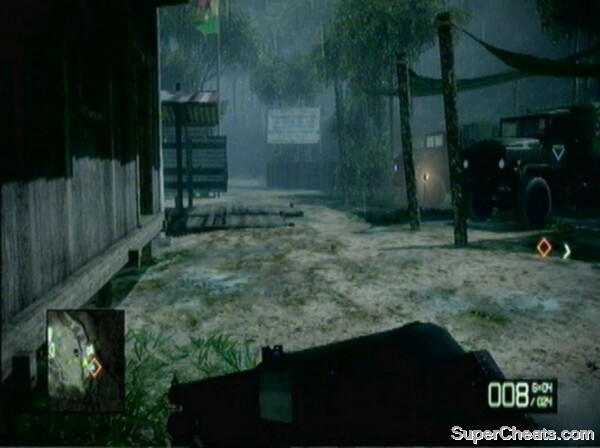
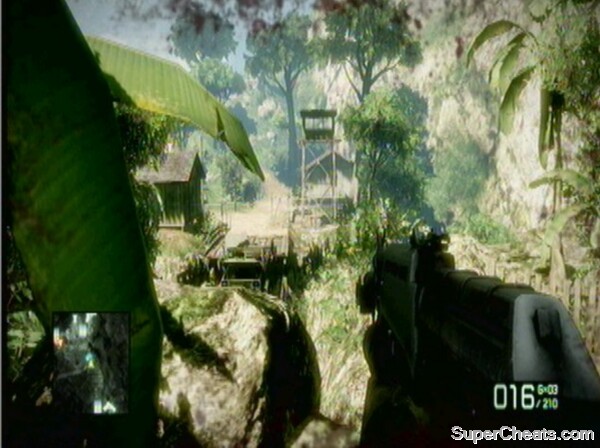
With that done, you can sprint on until you come in sight of a building. You should be able to move up the first street, but once it opens up enemies will engage you. Use the houses at the side as cover and to flank the enemy. Pass through their little camp and skirt alongside the cliff to continue. Eventually a cut-scene will trigger.
Assault Upriver:
You will find yourself overlooking a camp when the cut-scene ends. Sarge has an elaborate plan of action for you, but you can begin by peppering the camp with bullets. Indeed, the first step should be to take out the two guard towers that will otherwise wreak havoc on your position. Use 40mms to decimate their position.
You can then move down into the river as Sarge ordered. Surprisingly, there are enemies in the water, so push your way through carefully. Many will be hiding in bushes – stay on the alert. Once you reach the objective marker you can follow the path into the base itself. Your squad will follow. There shouldn’t be too many enemies left in the base, so clear the area. The objective will complete once this is done.
M-COM Station #2: There is an M-COM station in this camp, in the shack behind the rightmost guard tower.
The M-COM is in the shack behind this tower.
With the base dealt with and the M-COM destroyed, move uphill to trigger a cut-scene.
Aguire has been taken into the camp in the valley at the bottom of the hill. We need to rescue him.
Assault Militia Stronghold:
Use the resupply point at the top of the hill to stock up on ammunition and to get a Carl Gustav. Use this to destroy the bridge you see as you come around the corner in sight of the camp. Two guards are standing on it, and it is quite a humorous death to cause.
Use the stone wall next to the bridge to assault the shack across the river. You can then push on up the hill. Your squad is quite useful here, though the next section will be quite the opposite. Proceed through the house, clearing it and the path ahead of enemies. Sarge will order you to flank a machine gun next. This is not an easy task, as they really pack a punch and are covered by infantry on all sides. If you still have your Gustav, you can hit it from the front if you are quick and accurate. Otherwise, move past the first entrance to the level above, where Sarge will be waiting for you, and use the shack on the left for cover. Prime a 40mm to quickly take out the turret, before dealing with the infantry.
You can attack the turret from the front, but there’s more risk involved.
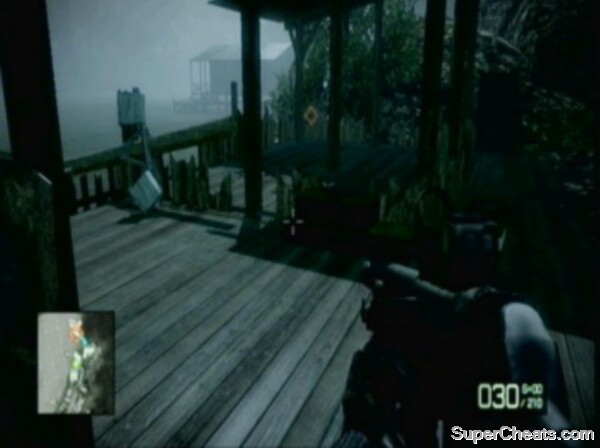
Head to the next objective marker once the initial area is clear. The next section of this level is very close quarters, much like the end of the Heart of Darkness. Pick up a shotgun if possible (there is a SPAS at one of the gun icons nearby) to make this a little easier.
Other Collectible: Pick up the SPAS-12S to unlock it.
TIP: Despite spraying their fire, you still need to have the crosshair over a target to hit them with a shotgun.
Use 40mms to rip through the wooden houses. With a path through cleared, you can move up into a courtyard area. Take out any enemies in sight, then move through the houses with your shotgun out. The final house you come to fronts onto a main road. At this point, everyone’s favourite vehicle, the Vodnik, rolls into shot. You can use 40mms on it or pick up the RPG which should be at the front of the house.
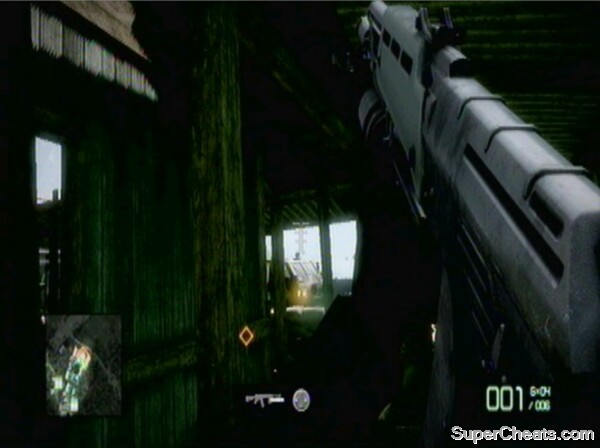
Use your 40mm grenades on the Vodnik if you want to be quick.
Neutralise Enemy Militia Elements:
Follow the road that the Vodnik was on to move forwards. Pass the fountain and use the walls and obstacles for cover against the masses of infantry in the area. Take out the machine gunner at the next row of walls and continue. As you go up the steps to the next section, be sure to pick up the Gustav by the ammo stash, as it will be needed in the battle to come.
An enemy tank will come into the courtyard. Get a shot on it, then retreat, as it will throw everything at you in self-defence. Two shots should take it out.
Liberate NSA Operative Aguire:
Go through the courtyard and past the tank wreckage to come out on Aguire, being held hostage by a Bolivian. You are automatically switched to your pistol, and must make the shot, killing the Bolivian but missing Aguire. The best tactic is to fire at the very top of the two bodies, as this will be the enemy’s head.
Deal with the tank then take out Aguire.
TIP: The game saved after you destroyed the tank, so if you miss it is not particularly consequential.
With Aguire freed, the level ends.
Other Collectible: The MP-443 is given to you during the hostage situation.
Story:
The terrorists may have got Aguire’s intel, but he made backups of them, which are stored in a satellite in orbit. We need to bring the satellite down to get the information we need. Flynn is dropping us in by helicopter.
Collectibles:
SCAR-L
Other Collectibles:
M95
M-COMS:
2
Walkthrough:
Flynn needs us to clear the drop-off point before he can hover low enough for an insertion.
Clear Hostile LZ:
The helicopter will circle the base, and it’s your job to take out all the enemies below. You can see the health of your vehicle in the bottom right-hand corner of the screen, but there isn’t too much that can scratch your helicopter. Eventually, vehicles will come in. The trucks have explosive barrels in the back, handily; the jeeps have RPG troops on the back – they can seriously hurt your helicopter, so prioritise any RPG units.
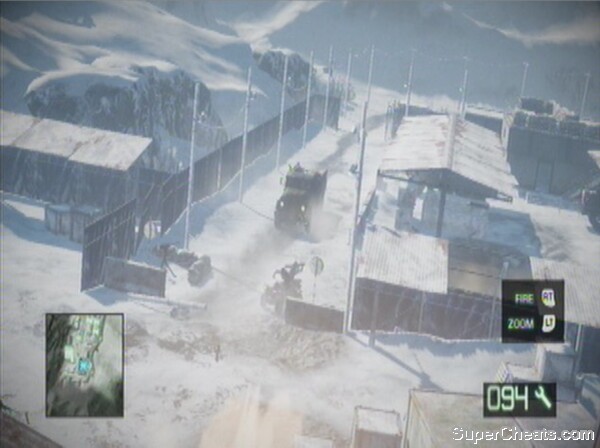
Spray the vehicles with machine gun fire to avoid getting RPG’d.
A cut-scene will play with the LZ cleared, after you take out the last few trucks.
Locate Satellite Control Substation:
Flynn drops you onto a rooftop. Move through the base, picking up ammo, collectibles and new weapons as you go.
Climb the steps at the back of the area, at which point you will be intercepted by enemy troops. There is a 50 cal machine gun turret above you (as well as a sniper even further up) which you are requested to flank, though it can be taken out with an accurate headshot on the operator. You can flank it by following the road below it to the side of its nest.
Proceed around the next corner.
Reroute Satellite:
M-COM Station #1: Before moving into the base where the satellite substation is located, head up the steps to the sniper nest on the mountainside, overlooking the camp itself. Not only is there an M-COM station in the hut up here, but you can pick up the enemy sniper rifle to use on the base below.
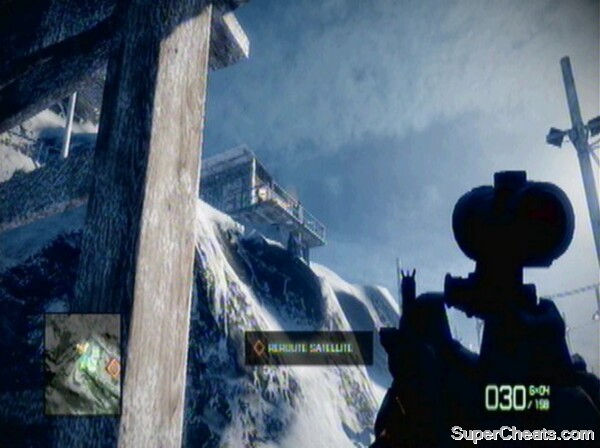
The M-COM is located up there.
Use the sniper rifle you have picked up to assist your squad in attacking the base. You will draw a lot of enemy fire, and even their shotguns can reach you from this extreme range – it won’t hurt you much, however. Focus your fire on the roof of the objective building.
Other Collectible: The M95 sniper rifle you are using here is a new weapon at this stage of the game.
Once you feel you can do no more at such distance, move down to help out your squad in close-quarters. Use the trucks on the right to cover behind as you move into the base.
Some of the infantry have RPGs, so be sure you are not too reliant on one piece of cover. With the outside clear, enter the satellite building. There are enemies inside, waiting for you, so collect a shotgun if possible (there should be one on the first enemy you encounter within). Look out for enemies behind any shut doors. You can then enter the central chamber to trigger a cut-scene.
Sweetwater has set the satellite to crash land near our position, from where we can retrieve the data server.
Follow Unit:
Follow your squad to an overwatch position.
Find Transport:
Flynn can’t extract us to take us to the satellite’s crash zone, so we need a vehicle. The village below will provide a jeep. Move down the path, picking up any weapons you want from the supply drop. From here you can stir up the hornet’s nest and begin firing at any targets in sight.
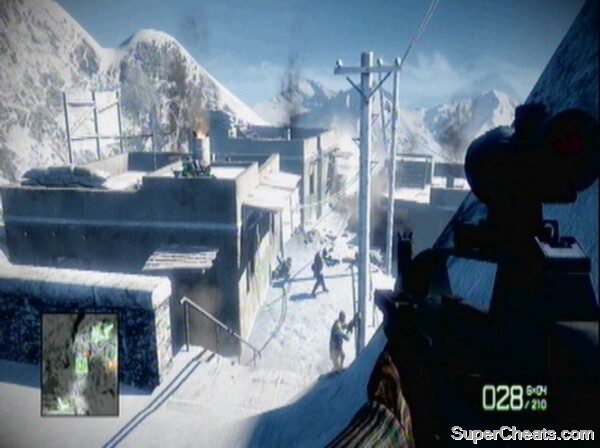
Begin the descent to locate a vehicle.
Watch out for MG turrets which enemies will man once they notice you. There is a mounted gun with a shield that you can commandeer to help attack the enemies below once the first section has been passed.
Collectible: SCAR-L – You can find this now at the gun icon to the left on your map. It is in a green crate to the side of a house by the cliff edge.
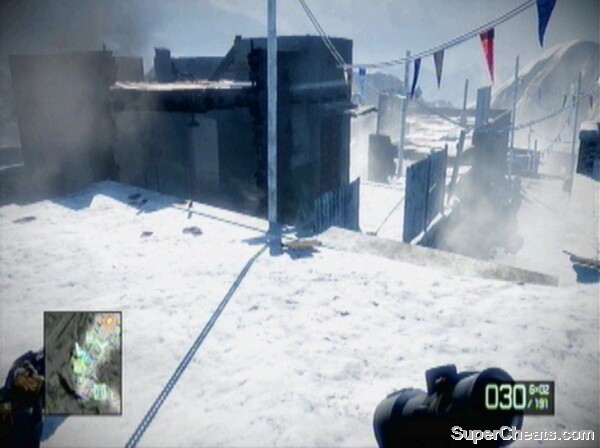
The SCAR-L is located at the weapon crate behind this house.
The next level down you can find two mounted guns, one a machine gun turret, the other a grenade launcher. Flank these before using them to attack the final area, where the vehicle is located.
M-COM Station #2: The final M-COM of this level is in the building behind the jeep.
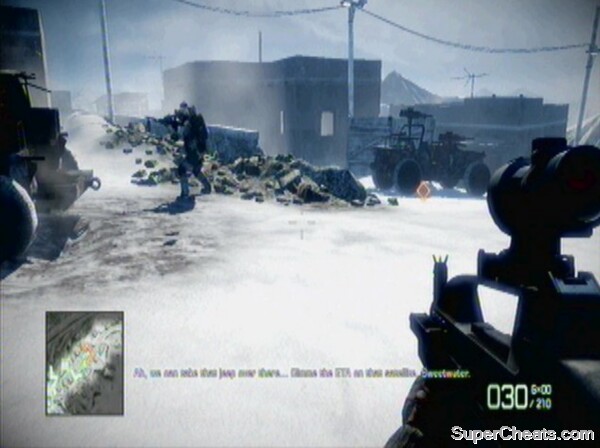
The M-COM is in the building behind this jeep, at the far end in a small room.
Mount up once you have secured the area to begin a fantastic section of driving.
Locate and Secure Satellite Impact Zone:
Your jeep has a grenade launcher mounted to it, which you control in addition to doing the driving (like the boat sections previously). The hardest part of this section is keeping the jeep on the road as visibility dives. Focus on this rather than destroying enemies, though you will need to take some out in order to survive. For example, trucks block the road, filled with angry RPG infantry in the back – these must be taken out.
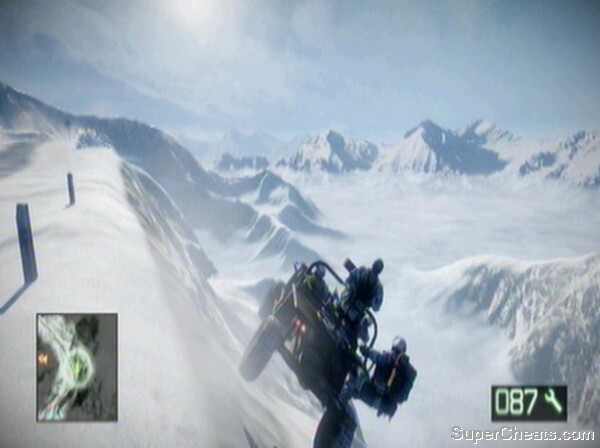
You usually have a bit of leeway even if you go off the road, just as long as it’s not a cliff edge!
Soon you’ll come upon some Vodniks and jeeps. Deal with them and continue along the narrow roads. Once you pass through the town and cross the bridge, a helicopter flies overhead and you are assaulted by a convoy of RPG-carrying jeeps. You will soon reach a point that triggers a cut-scene as the satellite crashes into the town up ahead.
Story:
Our task now is to secure the satellite landing zone. With that done, we can extract the data we need that is so vital to deciphering the foreign weapon discovered at the start of this campain.
Collectibles:
USAS-12
Other Collectibles:
None
M-COMS:
2
Walkthrough:
We need to proceed towards the crash site before we can secure the data.
Follow Unit:
There are no enemies en route to the satellite, so simply follow your AI allies. Once you get to the wreck, a cut-scene will play. The data box is too hot to touch at the moment, so we need to protect the satellite until it cools down.
Protect Satellite Wreck:
The first enemies come from the left. You can ignore most of the infantry. The crucial enemies are the RPG ones – they are the only units that can damage the satellite, and if it takes too many hits, you’re done for.
TIP: Keep both your guns loaded with ammo in case a RPG soldier emerges and you have to quickly switch to take him down.
There are two positions that RPG units take on this left flank. The first is the house nearest the satellite, where repeated RPG soldiers will take position on the roof. The second is the house to the left.
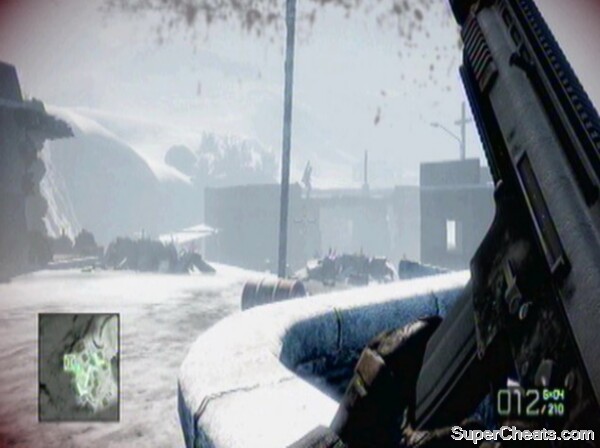
The roof of this building and the one to the right are where RPG soldiers will appear.
Once you have valiantly fought off the first wave of enemies, you will be informed that hostiles are attacking to the right. It is important to get a good position here, and you should climb to the right to get a height advantage on any enemies below – this also allows you to be closer to the terrorists that appear on the rooftops above. As before, the absolute focus should be on RPG-wielding enemies.
They can appear on the rooftops above you, on any of the buildings, and on the rooftops in the section below. The top rooftops are the ones that hurt you most, as it is easy to forget about them and take a few shots on the satellite before you even know the enemy are there.
TIP: You will be warned when one more RPG will destroy the box. This shouldn’t really be yet, as there is a greater threat to come that will be much harder to prevent from hurting the satellite.
When the last terrorist is eliminated, an enemy helicopter will appear. There is an RPG near the upturned red bath that you should have been covering near.
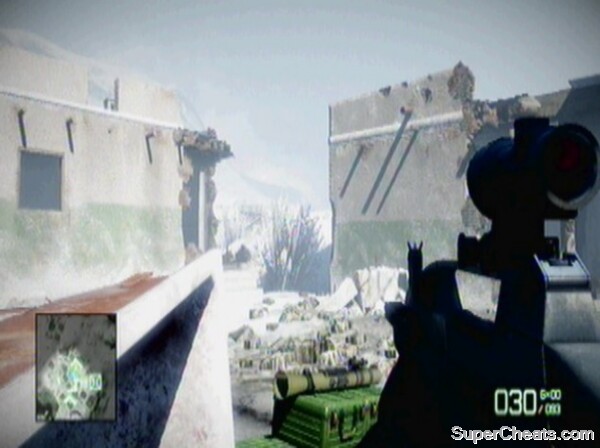
Find the RPG here.
Pick it up and look for the helicopter icon which should soon appear on the map. It is imperative that you take it down quickly, and because of the long reload times you should wait until it hovers to ensure every shot you fire lands on target.
TIP: Watch out for any lingering infantry, as your attention will be diverted.
Two shots should take the helicopter down and a cut-scene will occur.

Line up your shot carefully.
Haggard and Sarge go to look for a vehicle, and when bad weather comes in, Sweetwater goes out after them. Not for the last time, you’re on your own here.
Descend the Mountain:
This is a tricky section requiring some fast sprinting and close-quarters combat. The most difficult factor is that your screen freezes up if you stay outside for too long, eventually killing you. As such, you need to always be sprinting if you are outside, until you get into a house. You need a shotgun, which you can get from the supply drop if you don’t mind risking freezing, or off an enemy soon. The first building is marked with an objective indicator. A guard is outside in the snow, so take him out before knifing the door and entering.
Your screen will return to normal once inside.
TIP: Treat the frozen screen like the bloodshot screen showing your health.
M-COM Station #1: This is in a shack at the back of the building opposite the first one you enter (marked with an objective icon) on your descent. It is outside the house on the left of the top level as you look down the mountain.
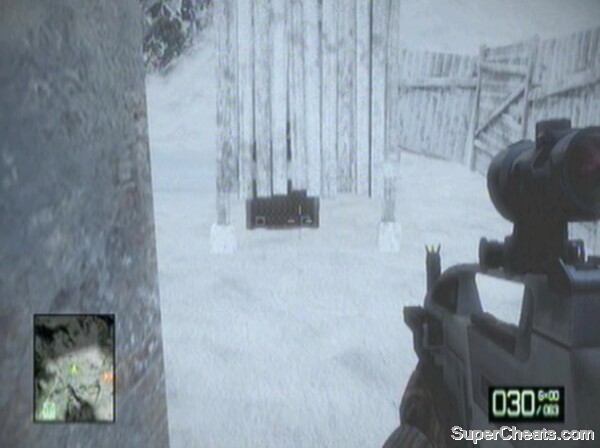
The location of the first M-COM of this level.
Beware as you enter any house during this descent. Enemies are also sheltering inside, while every time you fire more will travel to your position, so stay on your toes. The shotgun helps with this.
From the M-COM house, head down the mountain, past the next flare. You will find another flare on the left with a building nearby. Enter it to regain your heat, killing the enemy within. The next house is after a long stretch.
TIP: On Normal you can get down the mountain moving from house to house, but on higher difficulties you may have to think on your feet. Destroy some explosive barrels and stand by the flames to regain some lost heat and buy some time.
You can make it in one on Normal, but see the tip above if you are struggling. The house is past one flare, and is marked on the right by its own red beacon. You can enter through the hole in the side. You may find enemies outside this house – how they can stay outside nobody knows!
Use this house as a rest point, but watch for enemies outside.
Collectible: USAS-12 – Leaning against the wall inside the house you are using here to regain lost heat is the USAS shotgun. Very handy for the descent to come.
On the sprint down to the next building you will see two enemies in the open, braving the cold. Take them out with a longer distance weapon, before entering the building they were heading towards with your shotgun equipped.
Don’t waste too much time killing the pair of hostiles, or you’ll freeze before entering the building.
You should be able to see the next flare from the edge of this house. It marks the final house you need to cover in before entering a more built up village – with plenty of houses to use. There is a bridge outside and enemy infantry. Cross it, and take out any enemies at the windows.
M-COM Station #2: This is on top of the roof of the building to the right after you cross the bridge.
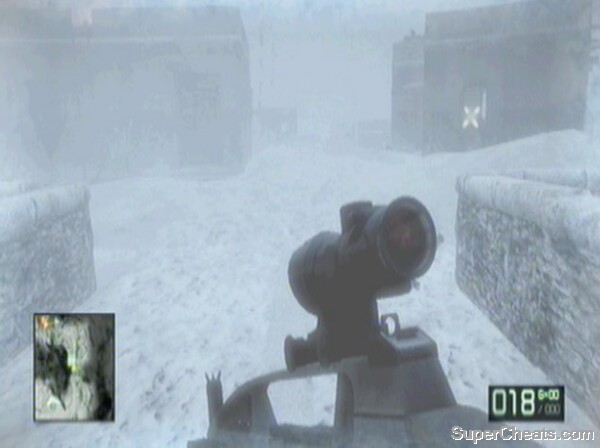
The second and final M-COM of this level is on the roof of the right hand structure. The ladder upstairs is oddly in the bathroom.
From here you should be able to run past the next two flares (turn left at the first one, it can be misleading) and into the house at the very end of this village. Kill any enemies who have come to investigate you, before heading upstairs and taking out an enemy on the balcony using a mounted grenade launcher. Go back downstairs and outside onto ground level.
Run past the first flare into the house on the right. The weather clears as you reach the next town. Flynn comes in, preparing to bombard the village to help provide you with a path through. You can run through most of this area, but should take out any RPG units not dealt with by the helicopter. Use your shotgun to deal with close-quarters enemies blocking your way.
Regroup with Unit:
The clearing at the bottom is too hot, so you must enter the building at the back, marked with an objective icon. Use the door at the back to get the jump on a crouched enemy, before climbing upstairs and mounting the ladder. Once at the top, a cut-scene will trigger, ending the level.
Descend the hill to reunite with the rest of B Company.
Story:
The data recovered gives B Company much information on the secret weapon. It is what is known as a scalar weapon, capable of creating a very powerful electro-magnetic field. The plan is to use it to destroy the US power grid, paving the way for a Russian invasion. All this is being masterminded by Arkady Kirilenko, the high-value target we spotted during the Cold War level.
Aguire has set us up with an armoured US convoy to get close to Kirilenko.
Collectibles:
MG3
M-COMS:
2
Walkthrough:
We are investigating Kirilenko’s last known location in a largely vehicle-based mission.
Rendezvous with 1st Armoured CAV:
As in previous missions, you are driving a tank and controlling the weapons. Keep up with the convoy until the objective indicators come on screen.
Eliminate Both ECM Radar Arrays:
We need to take out some radars to allow air support into the area before moving on. The tank’s turret has an optics package on it, allowing you to zoom in drastically closer than normal. You have to fire well above the target at range to stand a chance of hitting it, but it means you can often be safe from enemy shots. Move down the hill until you come alongside the radar arrays and can see them if you are struggling to get a shot.
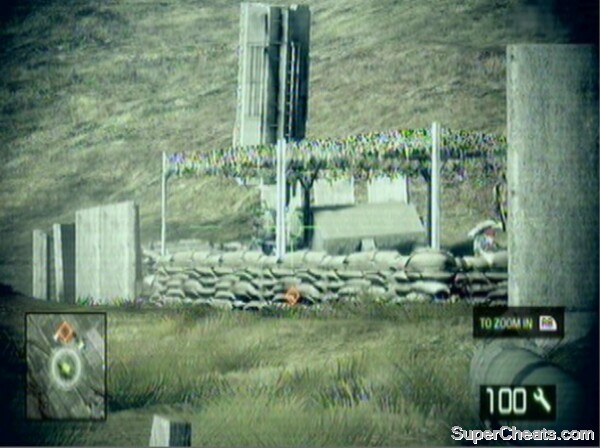
The radar arrays are visible once you get close enough. One shot should do it.
The right hand one requires moving down the road to get closer, though enough bombardments will destroy it. With both destroyed, you can move on.
Proceed with US Forces:
Continue up the road to the next objective marker.
Kill Enemy TOW Launchers:
The TOW launchers that you can see are on the rooftops, so begin a bombardment as soon as you like. You can then move in closer, but note that if you are hit full on, your tank will be destroyed. The trick is to get into a good position where you can accurately hit all the buildings, but where you have space to roll forwards and backwards, avoiding the TOW shots as they come in. The missiles are slow in the air, so you should have time to adjust your positioning.
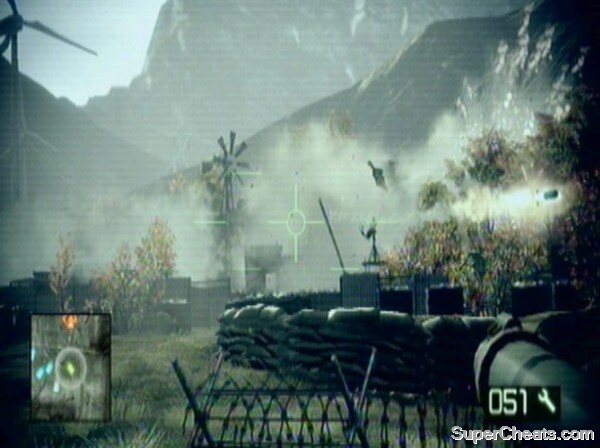
Move your tank to avoid the TOW missiles.
With the TOWs down, you can move into the area they occupied. Push right into the objective marker to activate the next task.
Secure UAV Station:
We need to use the UAV to take out some more TOW launchers and BMD-3 Bakhcha AA tanks.
M-COM Station #1: Before getting on the UAV, you should access the first M-COM station. To do so, cross the road you were travelling on, moving towards the windmill. The M-COM is just beneath the lookout post.
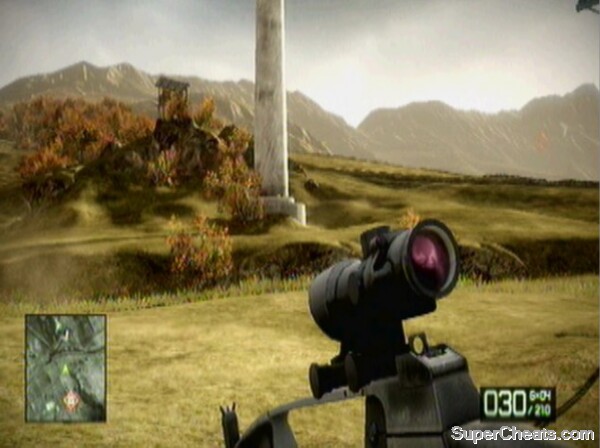
The lookout post next to the windmill watches over the M-COM station.
With the M-COM destroyed, look for the objective marker and man the UAV station.
Eliminate all BMD-3 AA Vehicles and TOW Launchers:
This is an easy section as long as you don’t fly too low or remain still for too long. Fly above the targets and call in missile strikes. You can change the trajectory after the missiles have been launched, so don’t worry about the UAV drifting in the air. One shot can take down a building; again, there is no need to be too accurate.
Tanks are clearly marked with their usual icon, while the TOW launchers have regular objective markers.
With all objectives taken care of, a cut-scene will trigger.
Proceed with US Forces:
Rejoin the convoy and follow it along the road.
Before long, an enemy tank will come towards you. Use your turret to destroy it and continue along the road.
TIP: Bombard enemy tanks as early as possible, and try to get around the side of them to take them out in one. Similarly, try to ensure they only fire at the front of your vehicle.
The next tanks will be off road to your left, and this is a good opportunity to hit them in the side.

You soon get used to these tank battles.
As you near the terracing below the windmills ahead, tanks will roll over the top. They are difficult to hit from range, so try to get around the side of them for easy kills.
Continue along the road until new orders are given. The town ahead is full of TOW launchers. They are too dangerous for our tank, but thanks to our clearing of the anti-aircraft units, we now have air support to assist us. Get out of the tank once you reach the objective marker by the house.
Use Laser Designator Binoculars to Airstrike Target Buildings:
This is a surprisingly dull section, due to the fact that the binoculars, equipped with Back/Select, take an age to recharge for each new shot. The tactics for this are relatively straightforward. Duck behind the tank or the slight bump behind it and use the gaps towards the town to pick out a building to attack. One shot takes everything out, so don’t worry about being too precise.
Once the shot lands, get back and wait for it to recharge. The only way to tell when it is charged is by the ‘System Online’ or ‘System Offline’ message on the sights of the binoculars themselves.

Shelter behind the tank as you wait for the strike to recharge.
Once each of the four buildings has been destroyed, we need to move into the town to look for Kirilenko.
Investigate Targeted House:
You have allied support for this infantry section, though you won’t notice them much. Cross the river and enter the town. Attack the enemies at the top of the slope before moving on.
Collectible: MG 3 – this can be found at the first gun icon you come to in the town.
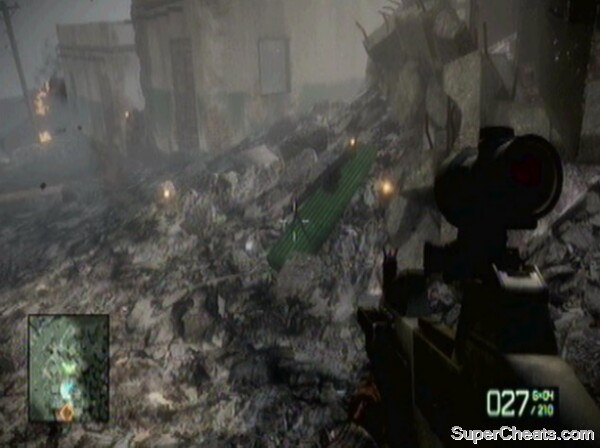
The MG 3 is located early on in the town section.
The road will soon open into a square section. There is a mounted machine gun turret on a rooftop.
Get inside a building for cover, before using 40mm grenades to destroy the emplacement.
M-COM Station #2: This is inside the house with the red paint to the left of the square.
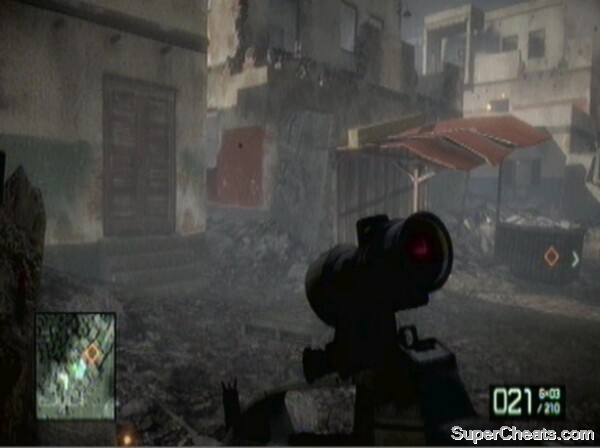
Find the second M-COM in this building with the red around the window.
With the area clear, move through the square, defeating any infantry that reveal themselves en route. Follow the path downhill to trigger a cut-scene.
Story:
Kirilenko was not in the town, but one of his men was. Sarge got him to talk, and we now know, for sure, where our target man is. We have commandeered some marines and a convoy of Humvees to assist us in this mission.
Collectibles:
None
Other Collectibles:
XM8
M-COMS:
2
Walkthrough:
We are back in a convoy again, directly following on from the last mission, though this time it’s a humvee one. This time we are not driving, but are in control of the machine gun up top.
Proceed to Zulu November Bridge:
Nothing happens until the bridge is reached, which is after a few dozen seconds of driving. At this point a blockage prevents further transport, and an ambush on your convoy takes place. You can’t really see the RPG units who bombard the humvees until your troop are on the move again, and your impact is initially negligible. However, another blockage prevents forward travel, and you need to try to defend your humvee from damage until it is cleared.
Once the enemy tank appears, you can begin to move again, with the blockage having been RPG’d by your own team to clear a path. More soldiers are in the river below, attempting to blast you off the road.
Air support comes in to destroy the tunnel, preventing Kirilenko’s escape.
Proceed Towards HVT Kirilenko:
Around a few more corners a road block is in place, forcing your vehicles off-road. Tanks then join the party, against which you can obviously do very little. They are assisted by RPG soldiers, however, who you should target with venom.
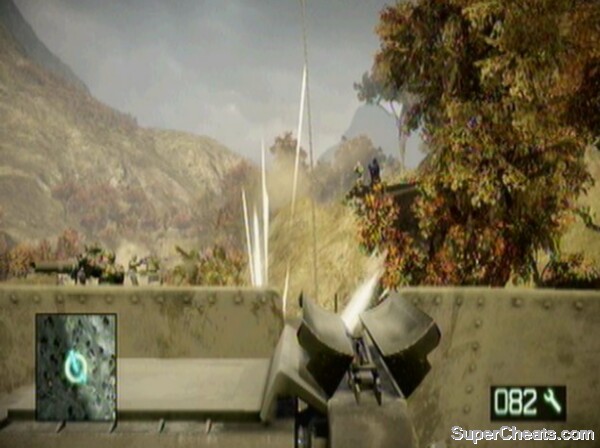
Watch out for RPG units along this narrow passage.
You will rejoin the main road before long, and soon start heading uphill. At the top, all hell breaks loose and you are forced out of your humvee. There is a small ditch behind the humvees which you need to try to stumble towards. This is deep enough that you are completely safe from enemy fire, except, obviously, against grenades.
Other Collectible: Pick up a XM8 off one of the dead US Marines.
Destroy Enemy ZU23:
Back to laser designating now, and you need to target the enemy anti-aircraft gun. Look for the objective indicator, before sticking your head up and targeting it with your binoculars. Red smoke will mark your designation until it is taken out.
Find Route to Kirilenko:
With all that excitement behind us, you now need to move into the desolated village to attempt to cleave a path to our HVT. At the top of the steps is a supply crate, so make good use of it.
M-COM Station #1: This is located in the back garden of the first building on the right at the top of the steps (the one with the supply crate in the front garden).
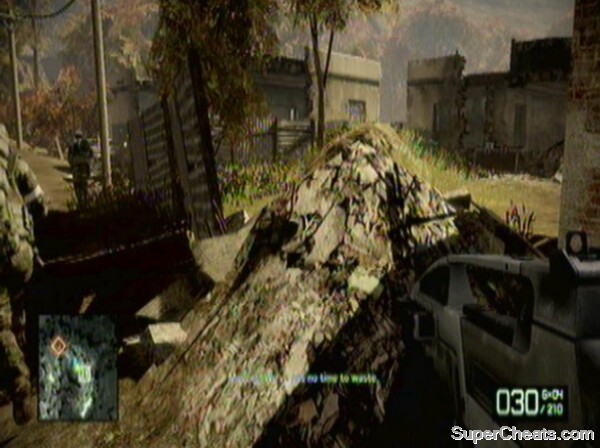
The M-COM is in the grounds of the right hand house.
Continue along the path as mortars begin to fall. Sprint through each objective marker, targeting any enemies not taken out by the ordinance. Pick up a shotgun off a dead soldier whenever possible, as Kirilenko’s men will stumble around corners and come up very close to you.
Soon you will enter a marked house and travel back outside again. Four enemies will pass by – take them out with a few shotgun blasts. More will come into range as they hear your gunshots. Pursue the objective markers until you come in sight of a drainage tunnel. Kill those guarding this route out of the area.
M-COM Station #2: The second M-COM of this level is to the left by the ford leading to the drainage tunnel.
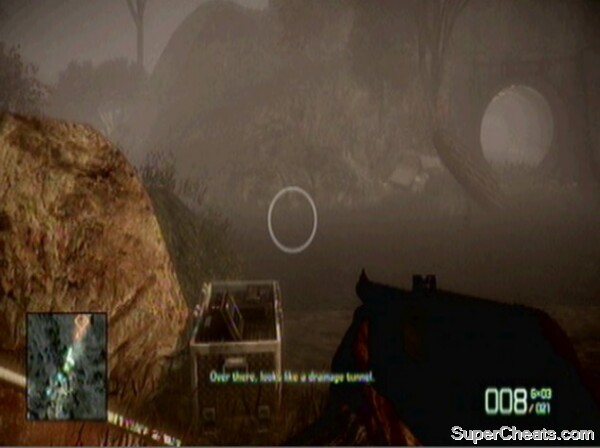
Destroy this M-COM before leaving.
For some reason there is one enemy inside the tunnel who will jump out at you as you move through. Give him a swift shotgun blast to clear the path to the ladder at the end of this level.
Story:
The ladder at the end of the last level led to the very room in which Kirilenko was currently present. He was looking at a shipping manifest for a boat named the Sangre Del Toro. An explosion goes off, allowing Kirilenko to make his escape, yet again. Luckily Flynn was in the area to extract B Company.
The ship was obviously important to Kirilenko, so it is important to our operation too. We are in the area, attempting to locate it.
Collectibles:
F2000, M60
Other Collectibles:
AN-94-S, MG 3R, M60-S
M-COMS:
4
Walkthrough:
Haggard snipes the gunner off a jeep to commandeer us a vehicle. This area is set in a vast desert, so good transport is essential.
Investigate Enemy Surveillance Outpost:
Get into the jeep and drive towards the objective. You will see the previous driver on the jeep running on the horizon. Mow him down and continue on to the outpost.
From the surveillance outpost three base stations have been identified. These will, once manned, be able to triangulate the position of the Sangre Del Toro.
Locate Base Station Bravo:
We will go to the nearest base first. This is the hardest one, and as such it is nice to have your full squad with you (you effectively lose a member of your team at each base). Bravo is located to the right of the surveillance outpost. There is a small road on the right hand side of the base which you can take your jeep up, leading to the main entrance.

Take this right hand narrow road to get to the base.
The entrance is blocked. The game marks Bravo with an icon in the small doorway you need to use to get inside. You can find it by following the wall for a short distance to the right of the gate.
Once inside, move through the arches until an open area is reached. Enemies will appear above, so take them out. More come on your own level, and you need to push through them to get to the next area. Use a shotgun to take down these hostiles in such close-quarters. Continue onwards until you come to some steps. At the top of the stairs you will have many enemies to battle through.
M-COM Station #1: Once you reach the top of the steps and the next area, turn round and go back down. The steps fall quite shallowly, but as they suddenly get steeper look to the right for a tiny set of stairs going up to a small room with the M-COM in.
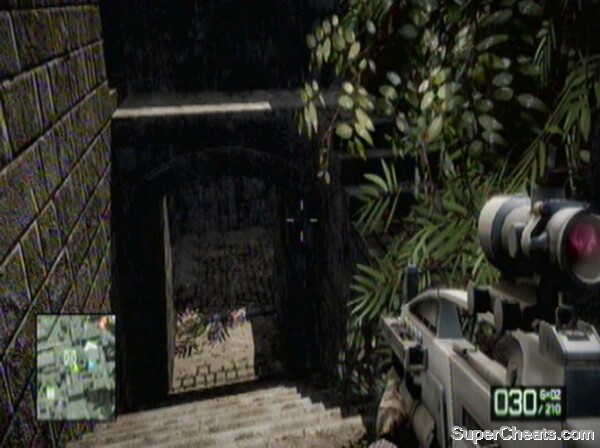
The stairs to the M-COM are easier to see coming down than going up – they are on the right of this image.
Having dealt with the M-COM, continue back up to the top. Hostiles are up above you, firing down, while more are on your own level. Deal with those upstairs before you move into the courtyard. Move into the courtyard and use the pillars for cover.
Collectible: M60 – The M60 is located next to the fountain in the centre of the courtyard, marked by a gun on the map.
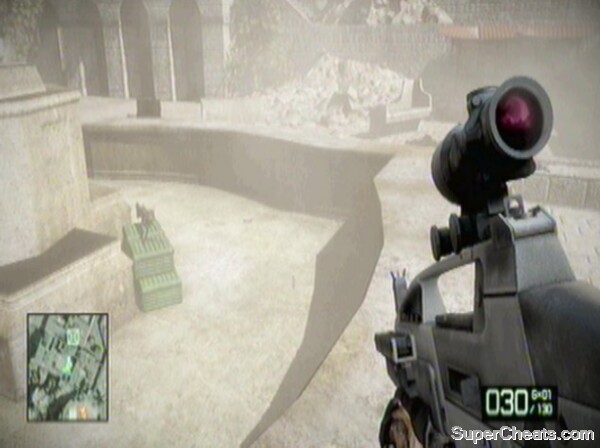
When the area is clear, collect the M60 before moving on
Other Collectible: Find an AN-94-S off a dead enemy in this section.
Once you have dealt with the courtyard, proceed through the network of tunnels and upstairs. Straightaway enemies will engage you, so clear the initial area. Hostiles are dug in around a variety of barricades. Use the rubble for cover while you pick them off.
Other Collectible: Enemies climbing over the walls should have MG 3Rs.
Head to the left towards the objective indicator. Once you reach it, a helicopter will emerge. Pick up the Carl Gustav positioned under the canopy, marked with a gun icon.
You need to get two hits on the helicopter to take it out. With that done, a cut-scene will be triggered. Haggard accesses the terminal, but has to stay here to be able to trigger the triangulation at the end of the level.
Locate Base Station Charlie:
Following the cut-scene you appear back outside the walls next to your jeep. Embark and head across the map to Alpha (the base to the left of the surveillance outpost). Pursue the road until you hit a dead end. Get out and follow the path on foot. When the rocks end, infantry appear. This area has really poor visibility, so advance with care.
Keep moving upwards, clearing the canyons of enemies as you go. Once you get to the supply drop, stock up. You then head downhill and drop onto the path below. Keep pressing through, watching out for the RPG soldier on a rock up high.
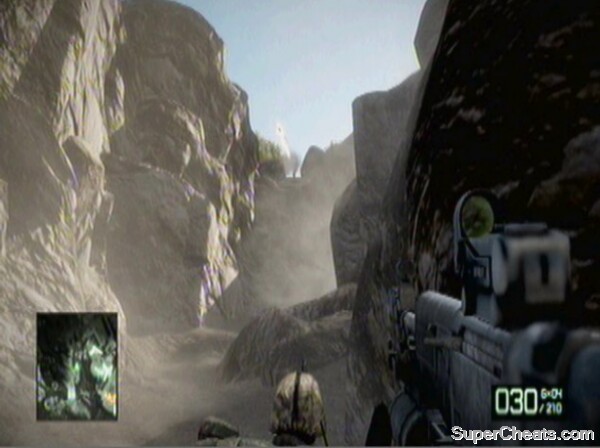
Watch out for RPGs.
Other Collectible: The gun icon nearby has a M60-S.
After more tight paths and RPG wielding enemies, you will reach a fortress section. Enemies are on the battlements and up the slope ahead. Make your way through, and on the right hand side up the slope is a mounted rocket launcher. Kill any infantry with clear sight on the emplacement so that you aren’t targeted while using it.
M-COM Station #2: Just next to the mounted rocket launcher is the second M-COM.
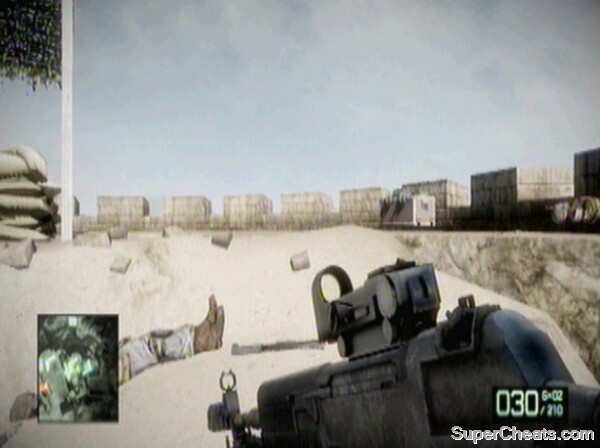
The M-COM is in the right hand battlement.
A helicopter will come into view and you should man the rocket turret. You can steer the missile after launching, making this an easy task. That is, until another helicopter surfaces. Do the same against this one, and then continue to move through the level, killing enemy infantry along the way. Continue to the objective marker to trigger a cut-scene and finish this base. Sweetwater stays behind this time.
Locate Base Station Alpha:
That leaves Sarge to support your assault on Alpha. When the cut-scene at Charlie ends, you can get in the nearby jeep and drive the long distance to Alpha. Watch out for the mine-field on the edge of the map – you can’t just drive diagonally directly to it. Go up the small slope when the minefield blocks your path until you reach a roadblock.
Kill the infantry in the building to the left, then climb over the blockage. To the front will be RPG units; try to pick them off using a scoped weapon. There are also snipers in the buildings, so move from cover to cover, watching the rooftops and windows.
M-COM Station #3: Look for the gun icon on the map nearby. The M-COM is over the road from it in a metal shack. It is as the road turns a corner to the right.
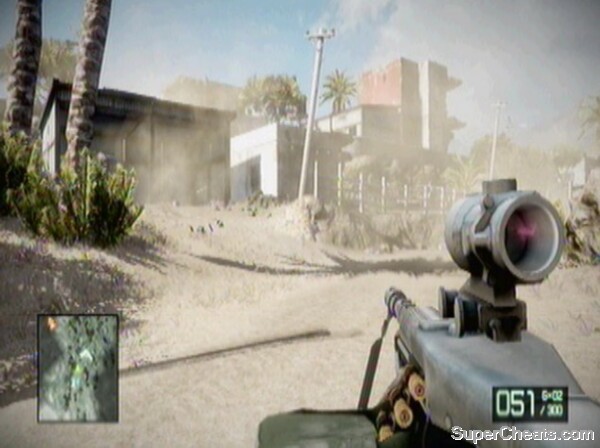
The third M-COM of this epic mission is in the shack to the left.
Collectible: F2000 – This is at the gun icon near the M-COM. Again, find this as the road bends to the right.
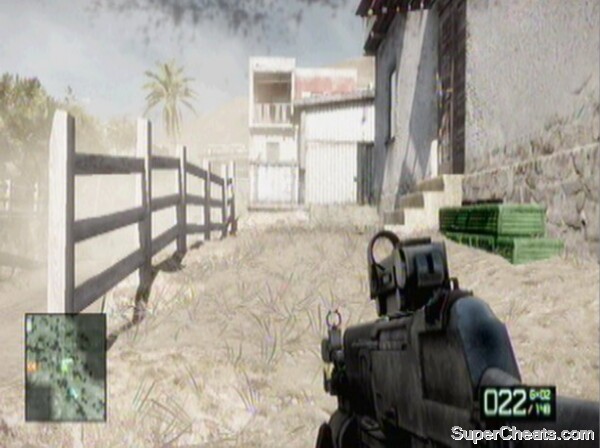
The location of the F2000 collectible weapon.
Continue down the road. As before, watch for snipers. When you round another corner, look for the guard tower and take out the sniper using it. Regular infantry will be in the buildings at the sides too. Follow the road and you will come to another jeep. Mount up and speed along the narrow path to the lighthouse. Turn right at the top and drive right into the objective indicator to trigger the cut-scene. Any enemies will disappear at this point.
Move to Triangulation Point:
You’re on your own now.
M-COM Station #4: This M-COM is located right near the cut-scene trigger under the scaffolding.
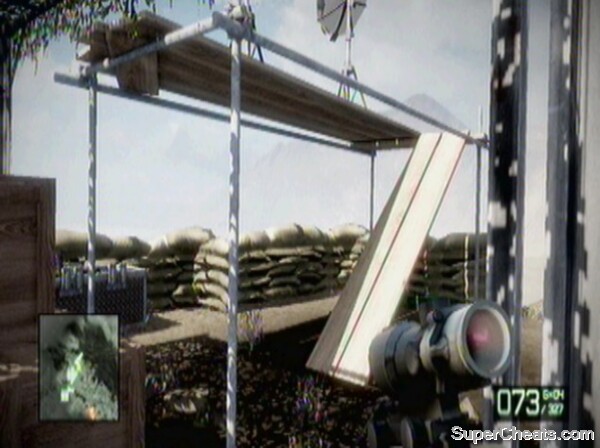
The last M-COM is in the sandbag position where all the computers are.
Get back in the jeep and head through the base the way you came. Speed through all the enemies, ignoring their fire until you get back out into the desert. It’s not far to the triangulation point, just follow the objective indicator. It’s a familiar-looking outpost. Go to the computer and press the button when prompted to synchronise the data.
Find a Route to Sangre Del Toro:
This will mark the location of the Sangre Del Toro on the map. A quad bike has helpfully appeared, to allow us to travel quickly to the boat. It is a simple task to follow the road. Just continue until you hit the dead end made by a boat and cargo containers.
The only way to get past this is to shoot the red barrels handily resting behind some of the blue cargo crates.
Shoot these barrels to make a route forwards.
The crates will then oddly move to produce a ramp for you. Get back on the quad bike and drive over the boat. There are some enemies on the route ahead, but as you are on your quad bike and cannot fire at them, you should press on as quickly as possible until you get to the Sangre Del Toro. Driving into the objective marker will trigger a cut scene.
Investigate Ship Interior:
The boat is a bit of a maze. Head through the window at the end of the room you start in. In the next area, fall through the gap in the floor. Walk over the ladder into the door on the left, before taking the next right. At the very end of this room is a series of crates and ladders, allowing you to get up to the next floor.
Bad Company takes on some platforming elements!
Follow the ladder into the centre of the next room to trigger the final cut-scene of this level.
Story:
In the Sangre Del Toro, Preston found a book recording the origins of the scalar weapon. This links in with the first mission of Bad Company 2, back in 1944. Preston also found the real version of the device that we found as a fake on the Cold War level. B Company are now on their way to meet Aguire, when they run into some trouble.
Collectibles:
None
Other Collectible:
M95S, F2000-R
M-COMS:
4
Walkthrough:
Having dived out of the helicopter after the device, things are not looking good.
Find a Clearing to Land:
You need to steer the parachute into a clearing. Ideally you should clear the first lot of trees, but even if you don’t you should survive the fall.
TIP: Look at the map – do not go into the dark areas because they can end in mission failure. They lighter places are on the map and fine to land in, though you may hit a tree or two!
Find Missing Squad Members:
Follow the dirt path through the rocks and undergrowth of this jungle.
Eventually you will come across a village with an objective marker on one of the houses.
M-COM Station #1: Just as you enter the village you will see two wooden sheds – the M-COM is to the left of the left-hand one.
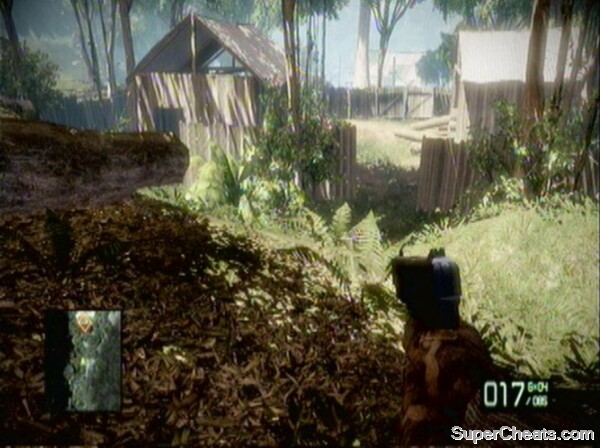
The M-COM is on the far left of this picture, next to the shed
With that taken care of, you can move towards the objective house to meet up with Sweetwater. Stop at the supply crate first, however, to pick up a rifle with a good scope. Sweetwater will give you a sniper rifle in the house, so ensure the range is not too great in order to keep a healthy balance.
TIP: A RPG will be needed later, and it is a good idea to take this a secondary weapon – you can swap it out once you get into the shack and then have easy access to it later.
Repel Enemy Counterattack:
Once inside the house, you should take cover against a window and assist Sweetwater in keeping the invaders at bay.
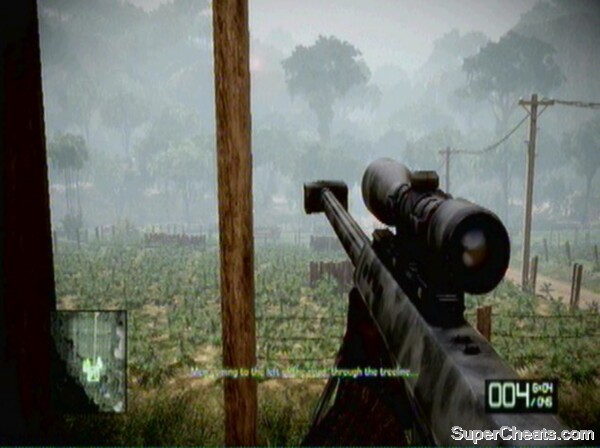
Protect your shack at all costs
The first enemies come down a hill to the left, but are soon joined by targets to the right along the main road. Swift and precise firing is required here to stop your shack from getting overwhelmed. If any do get into the mid-territory, switch to your other weapon to allow you to take them out quickly.
TIP: Use the radar to spot if any hostiles are coming up to your shack.
The most dangerous thing at this stage will be 40mm grenades and LMGs, which can rip through your cover and still do some serious damage. Move back from the windows if explosives come in and fire from a position further back. Before long RPG units will join the hunt, and they should be your priority.
Sweetwater will soon tell you that they are planning to rush the shack. At this point, ensure you have your assault rifle or other fast-firing weapon equipped and mow down any onrushers.
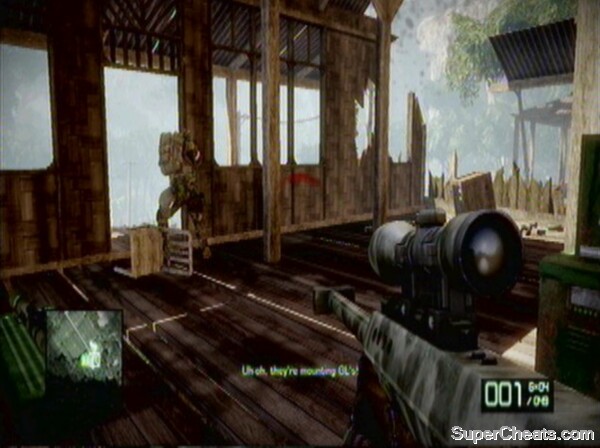
Things are really hotting up now
It is important that you take these guys out before they get too many shots away on their launchers. They have taken up positions on the barricades, and are easy to spot once you know what to look for. The launchers are unshielded, so a single sniper rifle shot will take out the occupant. Beware, however, as more enemies will come to man them before long. With your attention diverted, infantry are still rushing up to your shack, so don’t take your eyes off your surroundings for long.
A tank will then come down the main road. It is a BMD-3 Bakhcha, and will pulverise your shack if you are not careful. Either pick up an RPG from inside your shack (if you left one there earlier) or go back to the supply drop to get one. Get a couple of hits on it while remembering about close-quarters infantry too, and the objective will be completed.
Protect your shack and deal with the tank.
Find Missing Squad Members:
Before heading out once again, switch up your weapons at the supply drop if you wish.
Follow the path that the tank came down and you will come to an area with a house on stilts to the right. There are snipers in it, so pick them off from range if possible.
M-COM Station #2: This station is in the sniper house. To get to it, jump over the fence and locate the steps at the back.
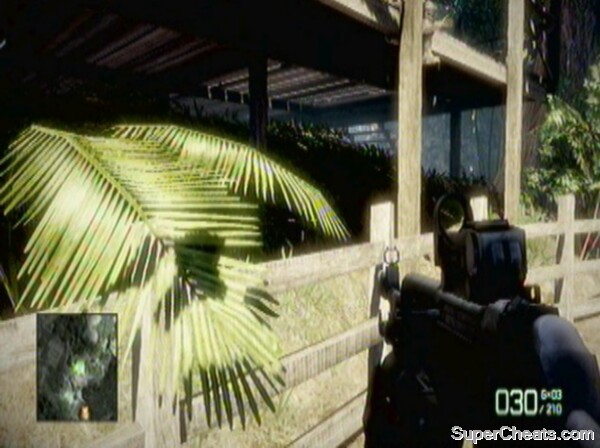
The M-COM is up the stairs to the right of this image.
Other Collectible: Pick up an M95S from one of the snipers.
Continue up the road when ready. Once you reach the objective marker, a cut-scene will roll. We need to rescue Flynn, who has been captured by the enemy.
Find Detention Facility:
Pick up a sniper rifle from the supply drop, and use it to pick off any enemies you can see below. In particular, look for the machine guns in the guard towers. A Vodnik will appear which you can snipe the driver out of. Once the base looks clear, move down into it. Watch for a guard tower in the trees to the right on your way down.
As you get further inside the base it will begin to rain and a new Vodnik will come in. Use 40mms on it. Support for the Vodnik comes in the form of infantry, who will have a position at the back of the base. Someone will be on a shielded mounted machine gun, with another guard in the tower above. Knife the fencing and flank them on the right hand side.
M-COM Station #3: This is at the back right hand corner of the base, in the last hut of the row.
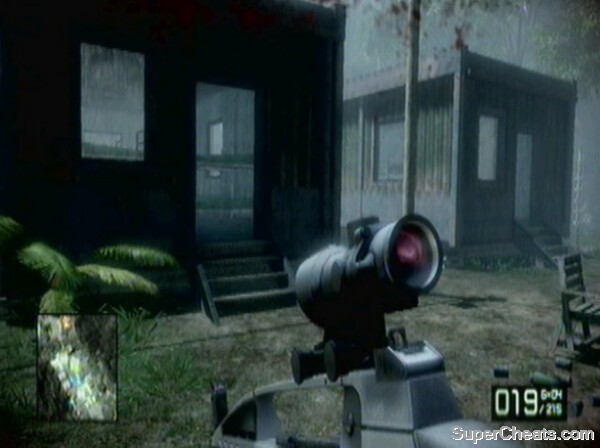
The third M-COM is in the right hand hut.
Other Collectible: Find the F2000-R in the row of shacks in this base.
You can now continue up the road and out of the back of the camp. Another detention centre will soon come into view. You can free the two hostages tied to the concrete blocks) to your left as you enter they base and they will assist you in the fight to come (though the one in the previous base could not be freed).
Move through the camp with your newfound allies, watching out for RPG soldiers. Use the indestructible log piles as cover while you move up. Use the house on the corner to protect your advance and allow you to flank enemies in the next area of the base. There are lots of enemies in the houses on stilts, so use 40mm grenades to clear them out.
You can then follow the wooden path out of the base and up through the mountains. A cut-scene will roll at the objective marker as your squad rescues Flynn.
Find Transport:
We now have a brief vehicle section to get to a helicopter.
M-COM Station #4: The final M-COM on this level is in the shack to the left of the quad bikes.
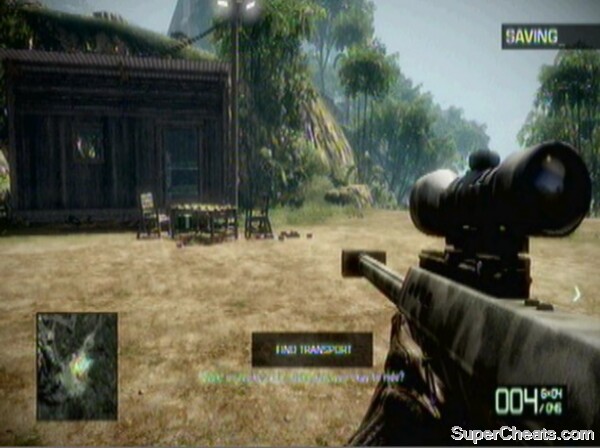
Find the fourth M-COM in this hut.
Get on the quad bike when you are ready to move out.
Reach Helicopter Depot:
This route is quite easy to follow, and your squad have a little race – see if you can win. Once you reach the objective at the helicopter depot, you are put out on foot.
Find Serviceable Helicopter:
Use the supply crate to get a sniper rifle and begin targeting the enemies inside the depot. Particularly watch for those in guard towers. Blow up the wooden bridge to take out any enemies standing on it, and the Vodnik protecting the route through. There is a path round the side that you can take to avoid the new gap.
As you move deeper in a Vodnik will emerge, so throw some 40mms at it to proceed. Watch for a RPG soldier on the rooftop as you round the bend. A tank will appear down this road. Fortunately it is dealt with, so stay out of range until you hear the explosion.
Past the tank is a helicopter. It can’t fly but you need to get in it and use its weapons against the incoming enemies.
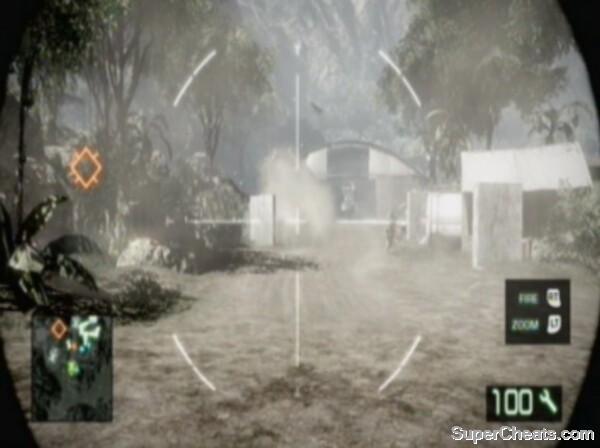
Use the helicopter’s guns to clear the route ahead.
There are lots of infantry, but your huge weapon should make light work of them. A Vodnik will come in, but again it hardly stands a chance.
With the road ahead clear, disembark and continue uphill. At the top an enemy helicopter will emerge. You don’t need to destroy it, just focus on the infantry guarding the stationary helicopter. Hit the explosive barrels to deal with them, before climbing aboard.
Rendezvous with Aguire:
You are now on the turret of the helicopter. Watch out for RPG infantry on the roads below, and trucks too. Quad bikes will join the chase soon, before an enemy helicopter comes into your sights. Just thrash it with machine gun fire until it drops.
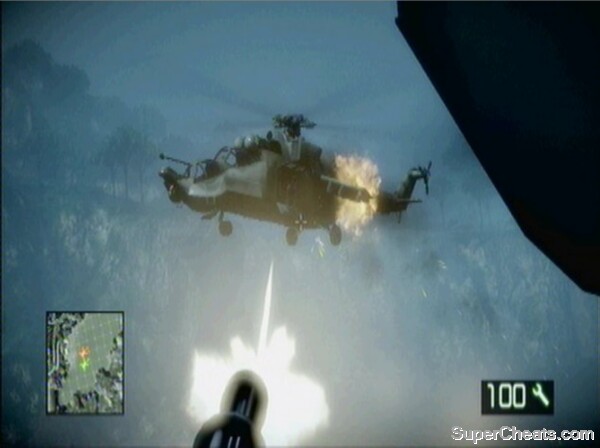
Take down the enemy helicopter.
Enemy trucks are on the road below now, before an enemy base you need to suppress. Having dealt with the base and another series of vehicles and infantry, one more helicopter will intervene. You may have to spin round a bit more to keep firing at the mid-section of the aircraft. Another will replace it with the first one down. After a while it turns to face you, firing missiles, and you cannot survive a volley of these.
After this dramatic flight, you will be dropped off, ending the mission.
Story:
Having given the device to Aguire, he then betrays B Company. It turns out he was allied with Kirilenko all along. Aguire is, in fact, the son of Thomas Wyatt, the commando we played as on the Operation Aurora level. The fact that his father died for the scalar weapon is the reason for Aguire’s deception. It is a day of double-crossing, and Kirilenko does so to Aguire, killing his partner. Fortunately, Flynn intervenes to save B Company, before being shot down (for good).
Collectibles:
None
Other Collectibles:
None
M-COMS:
4
Walkthrough:
Everyone is torn up about handing the weapon to Kirilenko, not to mention Flynn’s death. Follow the path past the dead soldier to trigger our first objective.
Assault Through Village:
We are now in pursuit of Kirilenko. Continue along the path and make use of the supply crate. It is worth picking up the Gustav here. You come out overlooking a town. There are two guards down below, but you should begin by RPG’ing the mounted turret on a rooftop nearby. You can then mop up any infantry in sight from your high position:
M-COM Station #1: Before entering the village, locate the two sheds on the left-hand side of the level. The M-COM is to the left of them amongst the trees.
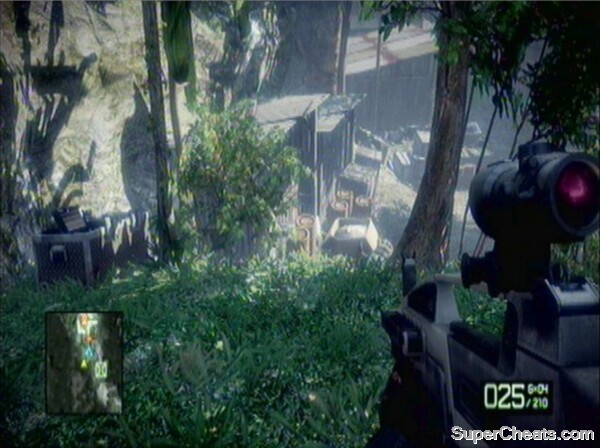
Look for these sheds to locate the first M-COM station.
You can now move down into the village. It’s a good idea to pick up a shotgun and move through the houses where possible. Soon you’ll come to an area overlooked by a variety of balconies and rooftops. Look out for a machine gun emplacement too. 40mm grenades can take down entire buildings, so use them wherever possible.
There is a marketplace below, bustling with hostile infantry. Grenade the area and clear the way before moving down, as the cover and flanking opportunities are better from above. You will come to a steep alleyway, from where you will be able to take out more rooftop enemies. Drop down towards the objective marker, shotgunning anyone within range (look for explosive barrels). Another marketplace area holds lots more enemies, so proceed with caution.
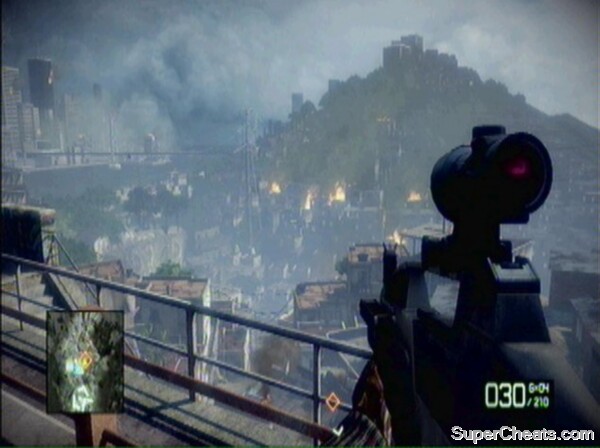
This is a very busy city, though the level is much more linear than it looks.
As you move down the steps into the second part of the city, the enemy begin to retreat.
Enter the Canal:
Mortar strikes are inbound and you will be killed by them if you move while they are landing. The best tactic is to follow Sarge, crouching where he crouches and sprinting where he sprints. You will receive damage but shouldn’t be killed if you cover next to your squad. Once you reach the bottom of another set of steps you can sprint for the canal.
Reach Surveillance Position:
Inside the canal you are safe from mortars and there are no enemies in the immediate vicinity.
M-COM Station #2: This is on the right as you begin to move down the canal.
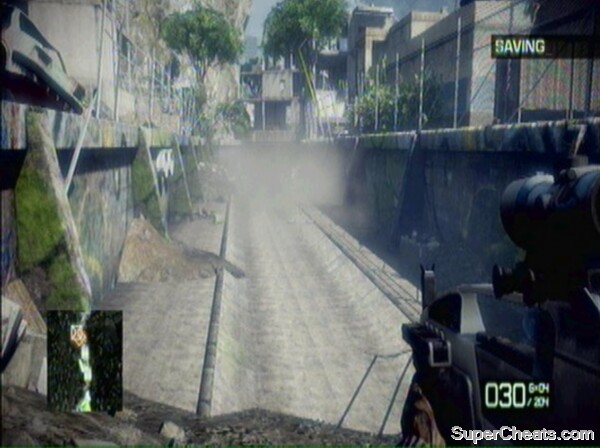
The M-COM is to the right.
Once you are past the M-COM position, enemies will engage you from the building under-construction above. There are lots of snipers up there, so use the walls of the canal for cover against them. You can move underneath with the building clear. As you reach the yellow bus suspended over the canal, more enemies attack. Pick up a shotgun where possible, because the fighting becomes very close-quarters from here on.
M-COM Station #3: The third M-COM is in a similar position to the last, nestled on the right hand side of the canal past the yellow bus.
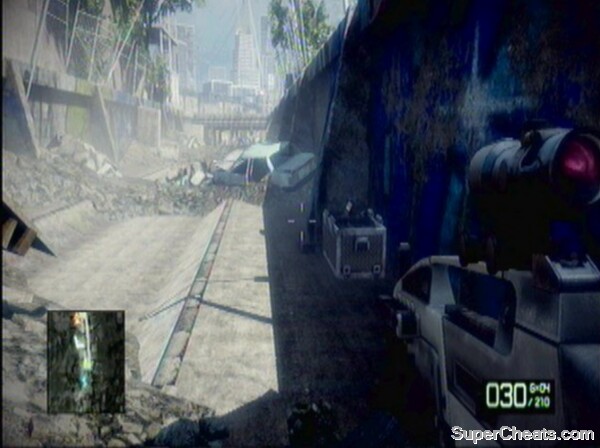
This M-COM is on the route you take through the canal, to the right.
Enemies will come in as you move near the M-COM, including two Vodniks on the bridge above. Infantry will move on your level, while the Vodniks will remain next to each other up ahead. You may need to move forward if all you have at your disposal is 40mm grenades, though you can pick up a Gustav from the gun icon to the left of this area.
Push up once the Vodniks are down, battling through more shotgun infantry. As you pass under the bridge, a pair of helicopters will move overhead. You can use your Gustav to take down at least one of these, though because two shots are needed getting them both may be a lot to ask. Ensure you retreat before long, as enemy soldiers will rush your position. Fall back into the tunnel to take them out as they pass through the bottleneck.
You can then move up, past the broken bus and into the sanitation system. Prime a grenade as you move inside and throw it at the door ahead. You will be flashbanged as enemies pour in. Throwing a grenade at the opening can take them out and make your life easier. Shotgun anyone remaining before moving through.
Back outside the drainage tunnel are more enemies to the right. Cover behind the pillar and thin out the horde before risking moving.
M-COM Station #4: As you emerge from the sewer, this is to the left against the wall.
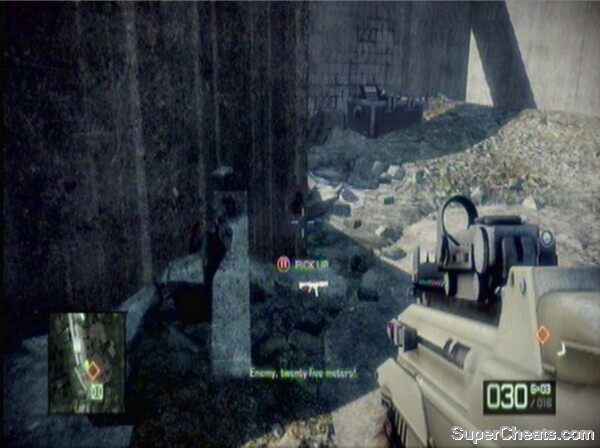
You should clear the area before arming this station.
Move over the rushing water (don’t fall in or you die!) and resupply by the objective marker. The tunnel up ahead has a nasty and odd surprise waiting for you – a burning truck. You can take it out with a RPG (from the supply crate), a 40mm grenade, machine gun fire, or you can duck into the centre of the channel having blown open the grates below your feet to have it go over your head.
Follow the objective marker up some stairs to trigger a cut-scene and the end of this level.
Story:
From our vantage point at the end of the last level we had a good position to see the Russians test-fire the scalar weapon. It is located on a plane ahead, and this level continues directly from the last in our quest to disarm it – after Preston’s team talk that is.
Collectibles:
None
Other Collectibles:
None
M-COMS:
None
Walkthrough:
You begin up high, exactly where the last level ended.
Traverse Blast Zone:
As you move through the blast-zone, the first enemies are staggering around, having been hit by the weapon. Take them out first, before looking to the warehouses on the right, where many enemies are located. You can move up underneath them, using their outer wall for cover.
Infantry will come on ground level too, so proceed with care. Pass over the train carriages, keeping one eye on the right hand side where the majority of the enemy are massed, particularly for RPG infantry.
As you approach the supply drop, an enemy squad approaches, with more moving through the warehouses. Grenade as many as possible to clear them out quickly.
Move through the blast zone to the supply crate.
Pick up a shotgun of your choice from the supply crate. You will need it for the section ahead.
Follow your squad up a ramp and into the warehouse section. You are given point through this area with very poor visibility.
Find Alternate Route to the Runway:
Grenades and shotgun blasts are the way to go here. Some of the enemies are a little further away, so you may need to break out your assault rifle again. Its 40mm grenade function is also useful in this area. Once you get to a set of stairs, an enemy will rush you, so shotgun him at point blank range.
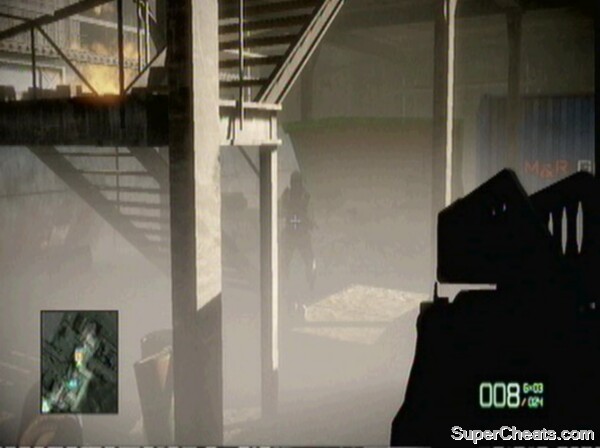
A shotgun or quick firing machine gun is vital in the warehouse section.
Do not be drawn out of the cargo container. There are two enemies up high with an overwatch position on the bottom of the stairs, so ensure you clear the enemy down low before thinking about them. Once they are down, you can proceed upstairs. Move through the building to trigger a cut-scene. The plane is beginning to take off, so we need to sprint to it and try to get on board.
Board Russian Cargo Plane:
Follow the slope down and into a familiar-looking storm drain. Sprint to the end and climb the ladder to end this very short level.
Story:
The team successfully got on the plane before it took off. They now need to fight their way to the weapon to deactivate it.
Collectibles:
None
Other Collectibles:
AKS-74U R, AKS-74U
M-COMS:
None
Walkthrough:
The start of this level is pretty stealthy, but the rest is all guns blazing!
Neutralise Target and Take His Weapon:
You begin only with a knife, trying not to alert the rest of the crew. Unfortunately, the guard up ahead has a friend further back, who was shrouded in the smoke so that your team could not see him. Knife the first guard, before taking his weapon, reloading (why he didn’t keep it loaded is anyone’s guess) and killing his ally.
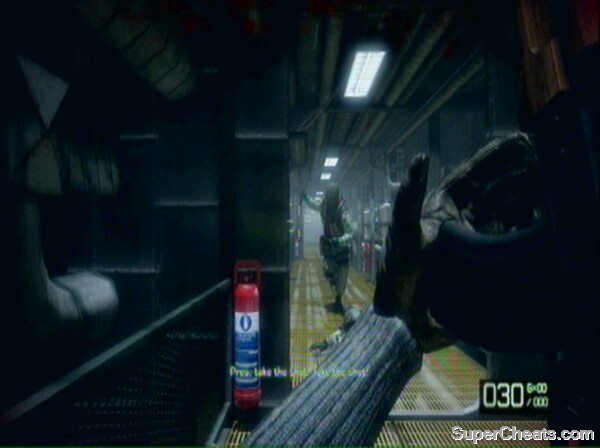
The second guard runs at you with his knife, but you should have plenty of time to take him down.
Other Collectible: You receive the AKS-74U R off the first guard.
Follow the corridor and go upstairs to get some much-needed ammunition.
Locate the Weapon Room:
Sneak through the next set of doors and pick off the guard you can see inside. Another will come to investigate. Pick up his gun to fill your arsenal.
Other Collectible: Find the AKS-74U on the bodies of soldiers in this area.
In the next section take the left hand door, as Sarge will deal with the guard to the right. There are lots more guards at the back of this room, guarding the weapon. Some may remain hidden until you approach before jumping out from behind the cargo.
You will then find yourself outside the weapon room. There’s no way round, so we need to locate the cockpit to find Kirilenko.
Storm Cockpit:
Haggard will throw you a shotgun to make the next section a lot more exciting with all-out attack gameplay.
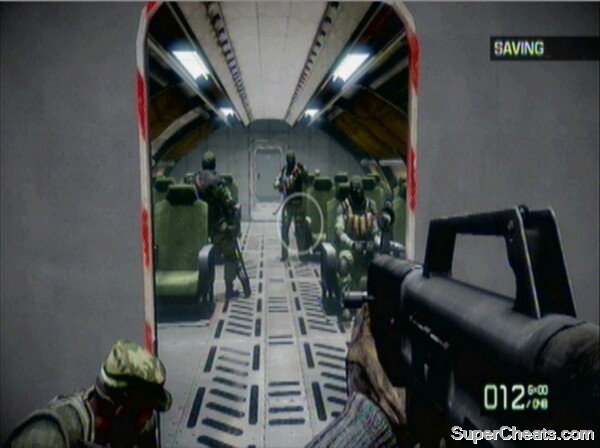
Shotguns at the ready.
Sarge breaches the door, enabling you to fight your way through. Use the seats for cover. It’s not exactly ideal protection, but it deflects the bullets enough to keep you alive. Move through the first room, and into the second – much like the first – full of hostiles.
Continue to push through and you will eventually get to the cockpit. Kirilenko is nowhere to be found. He comes through over a video link from the weapon room. B Company heads back downstairs with a plan.
Haggard places C4 on the edge of the weapon room, blowing the glass out of the wall.
Destroy Weapon Compound:
Use the pistol you are given to fire at the weapon’s centre. The explosion will cause the plane to break apart. Luckily your team thought ahead, bringing parachutes. Haggard and Sarge jump out, while Sweetwater is carrying your chute. Kirilenko comes out of nowhere and pushes Sweetwater out to get your parachute. You have no choice but to follow.
Terminate Kirilenko:
You will find yourself hurtling towards earth. Your task is to take out Kirilenko using your pistol. You are moved much closer to Sweetwater and the Russian as you fall, so wait until you can easily hit him before risking a shot.
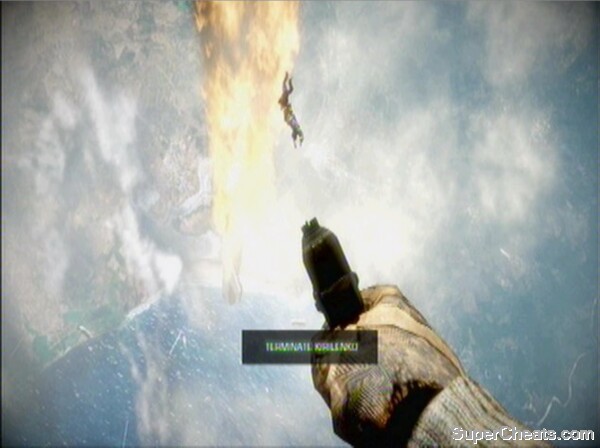
It’s probably much harder than this to accurately use a pistol while free-falling towards earth...
With that done, Sweetwater hands you the spare parachute and the game is completed! Congratulations.
You land in Texas, and are greeted by the US army. It turns out that while you have saved the US from the Russian threat in the south, they are invading in the north through Alaska. Setting up another game in the series, you are required to move north to help out.
This guide is going to focus on the two most popular game modes, Rush and Conquest. Later on will be brief guides to what the minor modes, Squad Rush and Squad Deathmatch offer.
Rush involves two teams and a varying number of bases. These bases each contain two boxes, called M-COM stations. These can be armed and destroyed, and when both stations in a base are terminated, the base is captured and the fight moves on to the next one. Teams take turns to attack and defend, with each map being played twice to ensure fairness.
The M-COM boxes can be armed by holding the action button (the same as to pick up a kit, which can cause problems – though if you hold it down you should avoid any difficulties). They must then be protected by the attacking team until the detonation occurs. The defenders will be battling to disarm them in the same manner. There are other ways to destroy the stations, however. Some are in buildings that can be destroyed with Destruction 2.0. This means players can use tanks, UAVs, RPGs, mortar strikes and C4 to destroy the M-COM station building, which also takes out the box inside. The developers have made some of the buildings in each map indestructible to prevent a team from being overwhelmed by ‘cheap' M-COM destructions.
You can also destroy the M-COM box itself manually, using the same explosives as above. They take about 12 C4 explosions to destroy, while tanks are very effective at this too.
The map moves every time a base is lost, opening up a new section and shutting off the previous one (except for on the first two bases of Isla Inocentes). The attackers then get different vehicles, suitable to assaulting the new base. The attacking team also has a limited number of tickets (the defenders have unlimited lives), meaning that every time one is killed, they come closer to defeat. Once their 75 tickets are exhausted, the game is won by the defenders. Medic revives can retrieve a ticket that would otherwise have been lost.
The shotgun C4 combination is a favourite in Rush.
Each Rush map is explored in detail opn the following pages of this guide.
Port Valdez was the map used to showcase what Bad Company 2 had to offer, appearing in the game's demo. It is a snowy map, stretched across the coast in Rush's trademark linear fashion. There are four bases that must be attacked (or defended), with two M-COM stations at each. The Russians are attacking, with the US defending. Gameplay passes from a mountainous start through a construction area, into a village, to a docking site and then back up into the hills for the grand finale. There are many vehicles on this map, but they do not dominate the map as much as one might expect. Helicopters and a lack of anti-aircraft turrets mean you must watch out in the skies, but the B3A3 Bakhcha comes in its AA variety for this map, helping somewhat. Despite the entire map being flanked by water, no boats feature, and it is largely an infantry/sniper map. There is one main road that runs through the entire level, frequently passing at least one of the M-COM stations in each base.

Snipers can dominate the first base.
1) Recon: This is one of the best Rush maps for snipers. The first base in particular often sees snipers attacking using the mountainous terrain, and defending from the tall construction building. Mortar strikes are effective in destroying the Alpha building here as well. For the other bases, attacking snipers can often find angles to kill defenders out towards the sea, looking along the coastline. Of course, the natural counter to this is to have plenty of snipers defending, and the tall construction buildings play into this strategy.
2) Medic: The high power of the LMGs combined with their ability to kill enemies over great distances and suppress targets is very useful on Port Valdez. Medics are usually better recommended for attackers, who have limited ticket numbers, and it is true that they will only have a very limited role if you are defending.
3) Assault: As this map is useful for snipers, the good distance of the game's assault rifles is also worth exploiting. Coupled with this, the 40mm grenades that can be bundled with the weapons can take down the M-COM buildings most effectively. The fact that those in the Assault class can resupply their complement of grenades is an added bonus. For defenders, it is not so highly recommended, and players may wish to choose Engineers over Assault, due to their anti-vehicle qualities.
4) Engineer: As mentioned above, defenders should prefer the Engineer class due to its variety of explosive options that can be used against tanks, helicopters and jeeps. It can, of course, also be used to repair defensive vehicles and turrets, of particular use when helicopters are involved. Anti-tank mines can be used along the main road and to protect areas around the M-COM stations.
Attackers Deployment:
Nestled high up in the mountains, this spawn is a haven for snipers, camping on the edge of the mountain overlooking the Construction Site below, or in the more tricky terrain to the side along the pipeline that follows the entire level to its conclusion. The attackers are granted a T-90 tank, one BMD-3 Bakhcha (AA variant), two quad bikes and a UAV. The UAV is particularly crucial for destroying the defences around the Alpha building at the Construction Site. The defenders also have a UAV. There are many routes down the mountain. There are roads to the right and left which the tanks must pass down, so beware for anti-tank mines blocking the road. The right hand road is a particular favourite with T-90 drivers, as it can pummel the Construction Site from the hill before retreating back for repairs. There is also a path through the trees for infantry off the right hand road, eventually leading to the Alpha M-COM building. The road to the left leads to the Bravo M-COM station. You can also descend the main mountain, either on foot or using a quad bike, though the ride is bumpy. While spawn killing is not allowed in Rush, enemies often congregate in the bushes below Attackers Deployment, and possess the element of surprise.
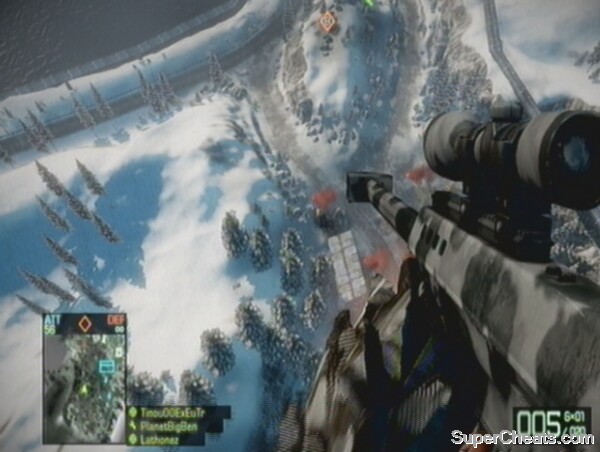
Here the two roads out of the Attackers Deployment are clearly visible, as well as the pipeline on the right.
Construction Site:
Those charged with defending the Construction Site have much at their disposal. It is one of the easiest areas to defend on Port Valdez. The defenders do not start with any vehicles, but are given anti-tank launchers (one near Alpha and the other in the tall construction building). There are machine gun emplacements too – one directly overlooking the Alpha building, in the house behind it (from the attackers point of view), and another in the construction building.
Alpha:
The Alpha M-COM station is in a two-storey house, with one side facing the main road, and the other a wintry path through some trees. The station is on the ground floor, and so can be quickly armed before a retreat. Attackers often arm the station and then move back outside amongst the trees to wait for any attempts to disarm the charge. The building can be destroyed. Defenders and attackers can hide on the upper floor and get a jump on anyone entering.
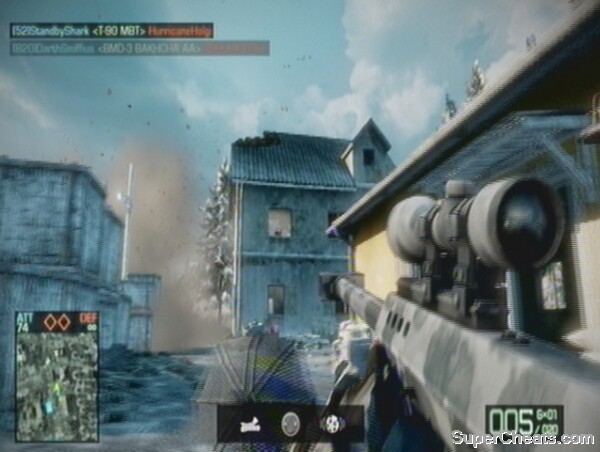
Alpha is overlooked by a machine gun emplacement.
Bravo:
Bravo is in the open, on the opposite side of the Construction Site. It is nestled in a crater, so is protected to some extent from enemies (in particular snipers). The construction building behind the crater has a perfect view of the M-COM, however. There is a small concrete building at one end, popular with attackers (somewhere for them to retreat once the charge is set), and nearer to the Attackers Deployment. Bravo is probably the most difficult to arm and destroy, due to its more open location, while the Alpha building can be taken out with Mortar Strikes and C4. Quad Bikes piled with C4 and then detonated at Bravo is a possible tactic.
Office Site:
The office site is rarely successfully held against attackers, largely due to the distance between the two M-COM stations. This makes a two pronged attack, where one box is armed and then another, the best tactic for the Russians. When one is armed, defenders run across to disarm it, and cannot get back to the other in time to prevent a further attack. Alpha is located on the main road, while Bravo is higher up, primarily accessible over a crest covered by a mounted machine gun and numerous buildings. The attackers spawn at the Construction site, where they have access to an M-90 MBT and a BMD-3 Bakhcha AA tank. The defenders have anti-personnel and anti-tank gun emplacements at the rear of the Office Site base.
Alpha:
Located on the main road from the Construction Site, Alpha can be plagued with tanks, which may then blast new pathways into the otherwise secure building housing the M-COM station. On one side is a hill, leading up to the Bravo area, but the main threat is along the road, which is guarded by buildings on one side. Anti-tank mines and infantry defending the entrance to the area are key. The building itself can be destroyed.
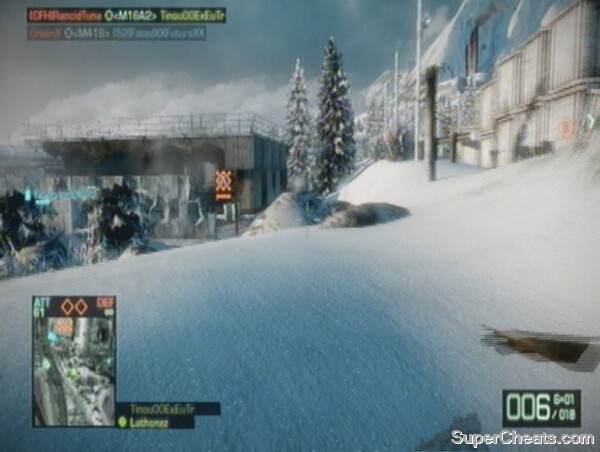
This building houses the Alpha M-COM station.
Bravo:
Bravo is in a small village above the Alpha station and road. It is accessed by the attackers over a ridge along a path off the main road. There are two large houses in the row of buildings before it, and attackers should be sure not to enter the wrong one. The first house has a mounted gun emplacement, watching the ridge, but this can be taken out with a well placed 40mm grenade, mortar strike or an RPG. The M-COM station is upstairs in the third building. The stairs to the first floor are often watched by camping defenders.
Harbor:
Attackers will now have access to the Russian GAZ-3937, which is an APC, allowing quick but lightly armoured access to the enemy base. The two M-COM stations are close together, making defence easier, and both of the buildings are invulnerable. This is possibly the easiest base on Port Valdez to defend. Defenders are given a variety of gun emplacements, but most importantly, a Bradley tank and an Apache helicopter (which can of course be stolen by the attackers as well). This can give the defenders the edge, as long as these vehicles are used responsibly. As well as the main entrance via the road (which is blockaded initially), there is a side entrance used by infantry which follows the coast-line. This is a very effective method to reach Bravo. The main road also forks off to the right just before reaching the harbour. Following this or going through the fences that line the fork are other ways to enter the base for infantry.
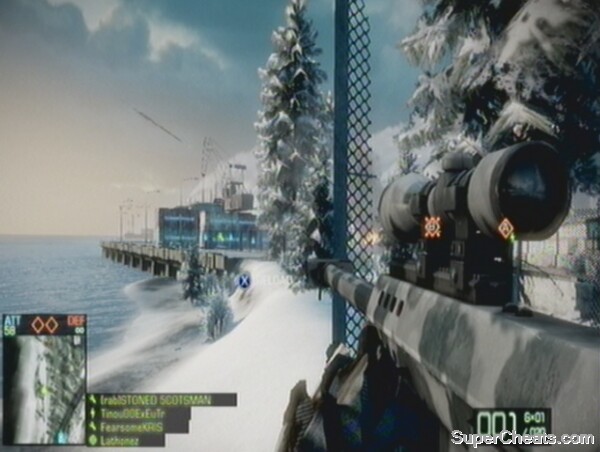
The side entrance to the Harbor is popular with infantry.
Alpha:
The Alpha building is located off the main road as it enters the harbour complex. It is a small and narrow building with open ground surrounding it. This makes it easy to defend from afar, but tough to keep players at bay if you are near the M-COM box itself. Once all the walls are taken out (the building cannot be destroyed), accessing the M-COM to arm it becomes much easier, and it is generally the less difficult of the two bases to destroy at the harbour.
Bravo:
Bravo is a large hangar located near the Apache helicopter. It is on the main road, allowing tanks to eventually access it. The openings are blocked by crates, preventing a vehicle from entering and monopolising control of the M-COM. Vehicles can of course fire through any walls that have been destroyed, and this is a great tactic for both defenders and attackers – whoever has a tank in the base at the time. There is also an entrance to the hangar at the back, towards the water. Possibly the best way to attack is via the cargo containers at the side, along the infantry path by the sea. This will usually outflank any defenders in the hangar.
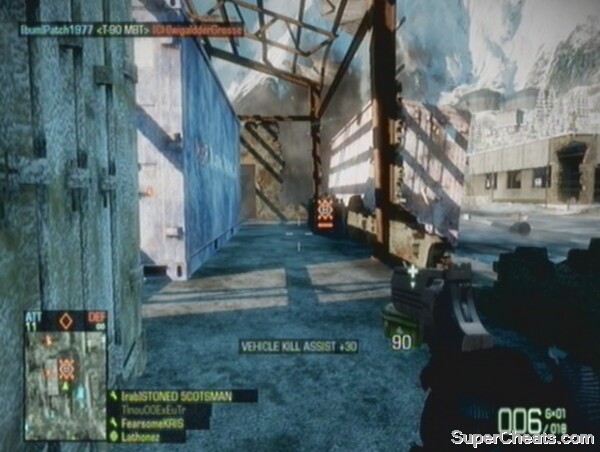
Bravo is easy to arm, but just as easy to disarm.
Comm Depot
The final area of Port Valdez is a communications depot, sitting atop a mountain and accessible by one main road and a narrow path. Attackers will now have access to a T-90 MBT, a Bakhcha AA to deal with the defenders' helicopter, and a UAV station. Defenders have a Black Hawk helicopter to attempt to prevent enemy vehicles from ascending the mountain, and to keep any infantry suppressed. The M-COMs are again close together, with Bravo right on the crest of the mountain, and easily accessible, but easy to defend, and Alpha further back, difficult to get to over open ground. While the main road up to the Comm Depot is the route any vehicles must take, infantry can leave the road earlier and climb up to the building at the top. There is also a road below the mountain and a path that follows the ever-present pipeline. This pipeline can be used by infantry, either as a path in itself, up to the flank of the Comm Depot, or as cover, for stealthier infantry seeking to move below it.
Alpha:
The Alpha M-COM is at the back of the flat area at the top of the mountain. It is located in a two-storey, thin building. The only way to get to it is across open ground, and there is a concrete wall preventing entry from a variety of angles. There are structures overlooking the M-COM building that can be used by defenders, and by attackers to protect their armed station. The building cannot be destroyed.
Bravo:
This M-COM is inside the Comm Station itself. This is a large, indestructible building with many rooms and points of entry. The main room, housing the M-COM, is accessible via a number of doorways, one almost directly from the outside (the walls can also be blown out). Defenders can use the computer consoles for cover, however, and camp in the corners to stop any attackers. The building has an accessible roof, which can help in attacking the central chamber.
This map, which has the sea on one side of it, is based largely on hilly and lush terrain. It features a helicopter at the initial base, and plenty of tanks. The nature of the terrain means vehicular combat plays a relatively small role, with vegetation and hills making it difficult to traverse the map. Anti-tank mines can be deployed on the roads to prevent the use of enemy vehicles.
1) Medic: Attackers will do well to play as Medics on this map, due to the medium-range combat. Clearly they will also be able to reduce the ticket-bleed with any defibrillations. Even for defenders, it is not a bad class choice, as many of the bases are compact and avoiding the need to regularly reload can make a dramatic difference to a team's success.
2) Engineer: While this is not the most vehicle-orientated map of the Rush selection, it is vital to have defensive engineers at the first base to combat the helicopters. Attackers would be better suited to use the Assault class throughout, as the defenders are never given any vehicles.
3) Recon: It's a tough case to choose between Assault and Recon as the third class on this map. Snipers can be valuable in assaulting the bases through the trees, and in the use of the lighthouse and attacking the third base downhill. Snipers are also useful defensively, in countering enemy recon troops.
4) Assault: The assault class is only really viable for attackers, as any defenders may as well be Engineers to deal with the vehicles. Still, one or two may be necessary to restore ammunition supplies of the defence.
Attackers Deployment:
The attackers start the game up a hill and through a forest from the first base. They are provided with a UAV, two quad bikes, a M3A3 Bradley, and a Black Hawk helicopter. This helicopter is vital in attacking the first base, as the defenders are not given anti-aircraft equipment to deal with it. It can be used both to assault the M-COM areas and to drop off attackers at the back of the base. Defenders should ensure they have engineers in their team to keep the helicopter moving and up high. Watch for paratroopers dropping in to avoid getting sniped.
Fishing Port:
This small fishing village is very difficult to hold against the attackers. This is primarily due to the fact that they are given a helicopter and tank, while the defenders have little to combat them with. Anti-tank mines and RPG engineers are the only real way to deal with the constant attacks. Coupled with this, there are multiple ways to reach the village. As well as the main road, players can get there through the trees, a popular haven for snipers. There is also a flanking route down by the river, which comes out by the Bravo M-COM. Both M-COM stations are inside buildings, neither of which is able to be destroyed with Destruction 2.0. There is a machine gun turret in the house overlooking both Alpha and Bravo, while there is another in between the two M-COM buildings.
Helicopters play a major role in this first base, allowing you to be dropped in behind the defenders' lines.
Alpha:
The Alpha station is in a building near the guard tower at the right hand side of the base (from the defenders point of view). The guard tower is often used by defenders to gain an additional angle on the M-COM, where players camp and wait for an attacker to approach the station. Like Bravo, it can be accessed from the rear if attackers are dropped off by helicopter.
Bravo:
The Bravo M-COM is situated on the left-hand side of the base, from a defenders point of view. It can most easily be accessed from the river below, which is a direct route from the attackers spawn. There is a barricade of sandbags blocking the flank, and defenders should try to defend this position. It can also be attacked from the rear, by the fishing huts and the sea, if the helicopter drops off players.
The Bravo M-COM can be easily flanked.
Lighthouse:
The attackers now take over the village base, complete with a helicopter and Bradley tank. The defenders are in charge of a new base, looked over by a large lighthouse. This is a haven for snipers, but infantry can also sneak in and get some good knife kills on the recons. The main road travels up the hill to the base, while there is also a hilly path through the trees. Round the side, near the water, is a path that can be used to reach the lighthouse and flank the defenders. It is incredibly difficult to get up to the base against a good defensive side, and the helicopter should be used to drop off attackers at strategic points. There is a building at the back of the base with gun emplacements on it, and this can be used to combat both the vehicles and infantry that assault the M-COM bases by the lighthouse.

Just getting to the Lighthouse base as an attacker can be tough.
Alpha:
Alpha is in a real building (not a wooden one) near the road leading into the base. With the front wall taken out, attackers can jump inside and arm the M-COM comparatively easily. With all the walls taken out, the mounted guns on top of the building at the back of the base can rip up the attackers, and this tactic should be considered a possibility by defenders.
These M-COMs are inside concrete buildings for a change.
Bravo:
The Bravo building is nearer to the lighthouse, and is much easier to defend. It is next to the flanking path on the cliff-edge, but the route to it is open to fire from the mounted turrets of this base. Both these bases can be attacked from beneath, using their stilts as cover to both defend and attack the M-COM boxes.
Village:
Down a steep hill from the Lighthouse base is the Village. Snipers have a good opportunity to get plenty of kills using the barricades overlooking the slope on any defenders in sight. There is also a main road heading downwards, which is popular with tanks. Drivers can bombard the M-COM buildings with the tank before retreating into cover around the corner of the road. For defenders, it is worth considering destroying the buildings around the M-COMs to prevent stealthy incursions. Attackers can use Bradley tanks and their helicopter to destroy the base.
The road and hill are the main features of the Village base.
Alpha:
This M-COM is on the right hand side, nearer the road, from the defenders' view. Like most of these bases, the surrounding building is made of wood and easy to destroy (though this won't take out the M-COM box). There is only one way to it, so C4 and a stout defensive line can help to reduce the attackers' success.
Bravo:
Bravo is opposite the Alpha M-COM across the road. It backs onto the water, and is on a pier, making access difficult for both defenders and attackers. If the surrounding structures are destroyed, the open terrain can help defenders. The Bravo M-COM is also in the line of sight of the anti-tank launcher at the Lighthouse base.
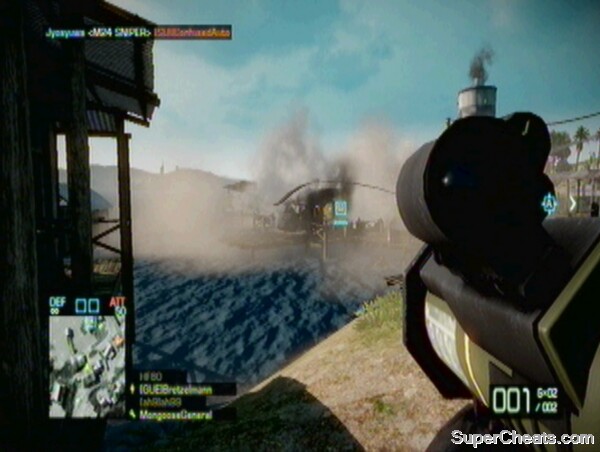
Helicopters are still a threat on this map.
Hilltop
As the name suggests, this base is nestled high in the hills of Valparaiso. It is a narrow base, but is very hard to defend. Two roads lead in, and there are many trees to provide cover for infantry. The hilly terrain also assists attackers, and it is hard for the defenders to engage the enemy until they are right inside the base. It is worth trying to hold the crest of the hill, but this leaves you exposed to sniper attacks. There is a central hill in between the two paths, which is covered in trees, as well as a path to the side, allowing limited flanking and a route to Bravo, again very well covered in vegetation. Vehicles are barely a threat here, as they struggle to make the ascent to the base under enemy fire.
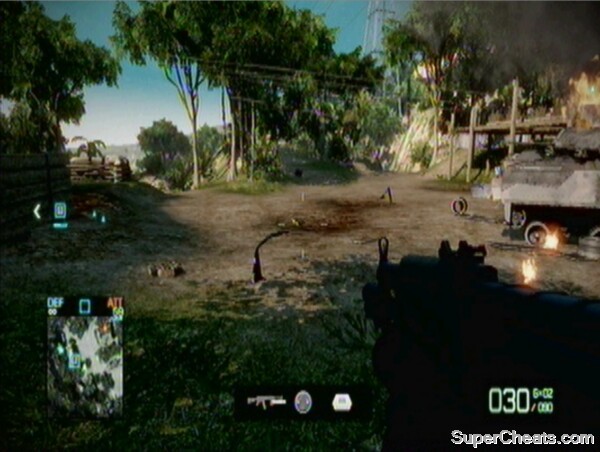
This base feels like it is on the edge of the earth, and is hellishly hard to defend.
Alpha:
The building with the Alpha M-COM inside is on stilts, so can be attacked from underneath the floor, and frequently is. Its high position means that once it is armed, it is easy to defend but hard to deactivate.
Bravo:
The Bravo building is across the road from Alpha. It is made of concrete, so it takes longer to remove the walls. It can be accessed over a hill and through some trees from the main road into the base. Defenders should protect it from the front, attempting to block the route through the trees over the hilltop.
These bases are a good location for a determined stand. Don't lose them.
Last Stand
This base is much larger than the hilltop. The attackers must traverse a large expanse before reaching it, and guerrilla warfare can be employed by defenders to help block the route forwards. The main road again leads right into the base, but tanks have to pass over a blind crest, which is a perfect place for anti-tank mines. The defensive nature of this base, with fences, gates and buildings, means it is hard to spot attackers until they are inside. They can flank around the front gate and into Alpha, or over the low wall and into Bravo. There is a raised mounted gun overlooking the entrances to both M-COMs towards the back of the base.
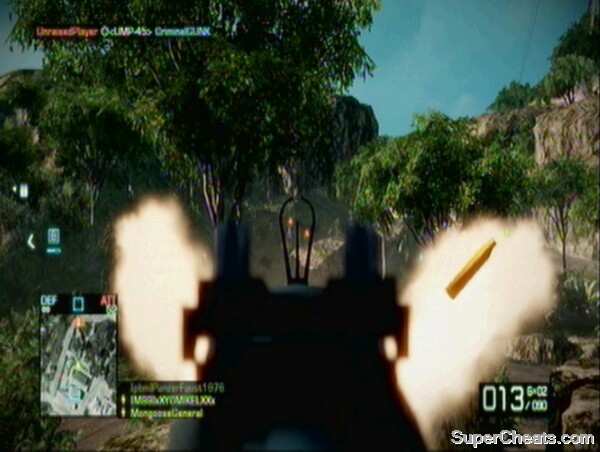
The jungle leading up to the Last Stand should be used to keep the attackers at bay.
Alpha:
Alpha is inside a two-storey structure, with external stairs leading up to the top, where the M-COM is housed. It is very easy for the attackers to access, and players can then camp in the corners upstairs to defend the armed box.
Bravo:
Bravo is in a smaller building than Alpha, more akin to the other structures used so far to house the M-COM stations. It can be reached over the low wall at the entrance to the base, and is the second building back. It can be defended more easily than Alpha, due to its lower position.
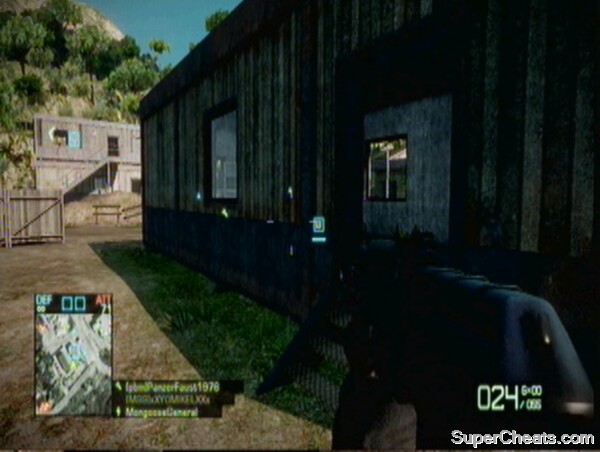
Finally some decent buildings for the M-COM stations.
Isla Inocentes has the same number of bases as Nelson Bay, but is a far larger game area. It also has a few quirks in the nature of its gameplay, which will become apparent later. The terrain is largely based on a string of islands for the first base, before becoming rooted on solid land. It is harder to attack than defend (with the US on the offensive), and needs good coordination and balance on the part of the attackers to be successful.
Isla Inocentes is an autumnal map, with lots of water and air combat.
1) Engineer: The defending team should employ plenty of engineers to combat the helicopters and tanks that are given to the attackers on this map. Engineers have little value for attackers, as there is only one helicopter on offer to guard the M-COMs, and that is at the final base.
2) Recon: Just as engineers are only really useful for defenders, recons primarily function for the attacking team on this map. The first base in particular needs snipers to assist those arming the two M-COM stations, and their use extends to the next two bases also. The terrain is often hilly, giving good views over the bases. Defenders will want some snipers to counter the attackers' recon units.
3) Assault: The attacking team, without the regular need to combat vehicles, will want assault units to provide medium-range cover. They can also resupply the snipers. As defenders, engineers may as well be picked over assault due to their anti-vehicle capabilities.
4) Medic: To reduce ticket-bleed, medics are useful for the attacking team. Their LMGs are not as good on this map as some others, though if you have a scope available and are good at using them at long-range it is an option.
Attackers Deployment:
The main quirk of this map is that the attackers' first two spawns are the same, so even after the first M-COMs are destroyed, the US forces spawn at the start. This base has two Black Hawk helicopters, vital for ferrying units to the first island and for keeping defending units suppressed, as well as three jet-skis and a patrol boat. There is also a UAV available. Once the first base is taken, a Bradley tank spawns here too.
Island
The island is separated from the attackers spawn by a long expanse of water, though there is a road and wooden bridge (that can be destroyed) allowing access via land. Defenders have to deal with the aerial threat of helicopters and paratroopers, as well as that from the sea and land. Most of the front of the island can be accessed with jet-skis and by infantry, while there is also a path up the side near the bridge.
Alpha:
The first M-COM station is on the edge of the island, facing the attackers' spawn. While it is protected from snipers by a line of concrete blocks, these can be taken out (usually by Mortar Strikes) to give snipers a line of sight to the crate. It is most easily accessible via the bridge and slope next to it. Once armed, players can use the concrete blocks to cover and watch over the box. It is overlooked by the hill towards the back of the base, and defenders can cover by the fishing boat and structures nearby to protect it.
Bravo:
Over the other side of the island is the Bravo M-COM station. It is housed in a small shed, which can be accessed from the plot of land near the edge of the cliff. Jet-skis can go up the slope at the front of the island and infantry can then quickly access the Bravo M-COM, though it is easier to defend than Alpha. Use the turret overlooking the beach at Bravo to assist in the attack.
The turret near Bravo can be turned round and used against the defenders.
Village
The village is on the next land mass along from the first island. The attackers still spawn at their original location, and face a long journey to reach the next set of M-COMs. The jet-skis remain, allowing individuals not in squads to reach the objectives more easily. The attackers now also have a Bradley tank, which must travel along the main road, past the bridge and continue to the base. As the name of the base suggests, there are many buildings in the area, one of which houses the Alpha M-COM, while the other M-COM is in a shack similar to Bravo on the island. For access by jet-skis and patrol boats, players can either enter a dock area or meet up with the road before actually reaching the base. The helicopter can also be used to ferry attackers to the base. They can also be dropped at the back of the base to flank the M-COM stations – capturing the various buildings and using their rooftops is a good strategy to dominate the defenders' spawn.
It's a long hike for the attackers to the Village.
Alpha:
The Alpha M-COM is in a brick-built building overlooking the corner where the main road curves round to enter the village. It is surrounded by metal fencing on two sides, with a sandbag emplacement allowing the defenders to hold an overwatch position on the road. There are many buildings towards the back of the village that can be used as vantage points to help defend Alpha.
Bravo:
Like Alpha, Bravo is raised up from the road, meaning it overlooks where most attackers will be coming from. It also has a better angle on the dock area than Alpha. The building it is in is only a shack, with walls on three sides, so it is easy to arm. The level here is also terraced, meaning that once you are in the shack, you are relatively well covered from the rest of the base.
Bravo is in a similar shack to in the previous base.
Last Stand
The final base of this level gives the defenders their only vehicle of the map. They are given a helicopter, useful for suppressing the attackers before they can reach the military base at the end of the valley. It is a long walk up a steep hill for the attackers, and snipers will enjoy using the crest to attack the base below. It is then a sprint down the hill to a trench, after which the M-COM stations can be directly engaged. The military towers are popular with snipers, but can be easily taken out early on with RPGs.
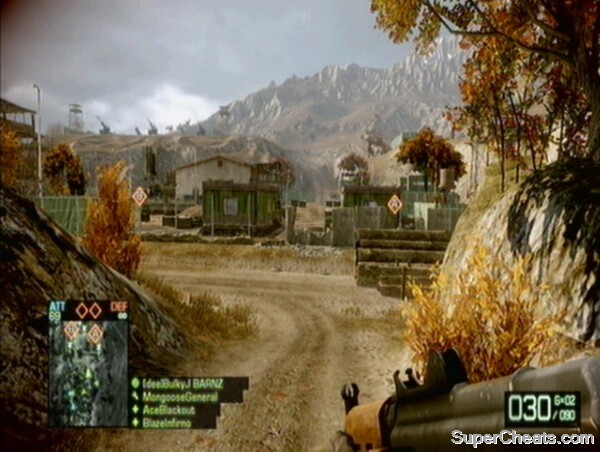
The last stand is set around a military base.
Alpha:
Alpha is in the open, sheltered from the attackers by a one-storey building, and flanked on three sides by fences. Once the fences have been knifed, it is pretty easy to get to and arm. It is overlooked by a guard tower, and this should be destroyed by the attackers as soon as possible.
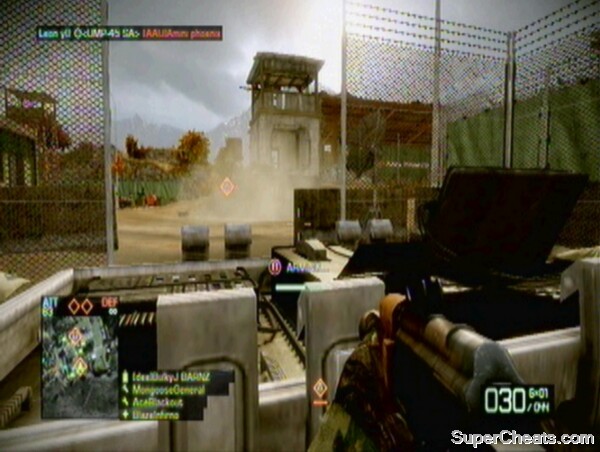
Alpha is very exposed, but sheltered enough to make it difficult to defend!
Bravo:
If you thought Alpha was exposed, Bravo is in a whole new league. Its only cover is a few shallow walls of sandbags. The large hangar can be used by defenders to keep an eye on the M-COM box, as can the nearby guard tower.
TIP: Drive a surviving Bradley tank to the crest of the hill and fire down on the base to assist in the attack, or to simply whittle away at the M-COM boxes' health.
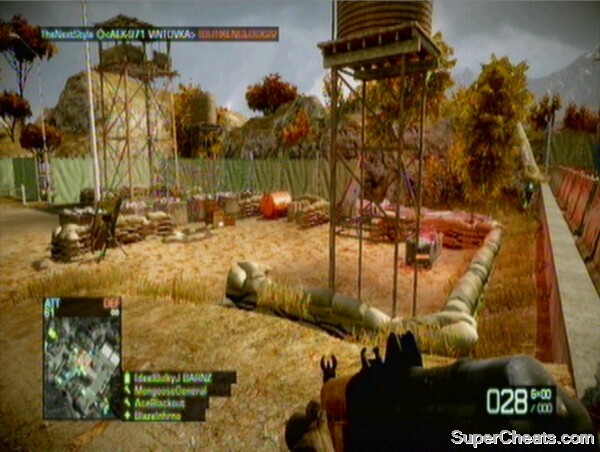
A smash and grab job on Bravo is the only real option
Arica Harbor is one of the most popular Rush maps. Set around a South American desert town and military base, it features high ground, long-range combat, close-quarters M-COM stations and vehicular combat, making it a map for all types of players. Helicopters do not feature, but there are plenty of land vehicles in the first few bases. It is a large map, with five stages in this Rush game type. The Americans are attacking the Russians on this map.
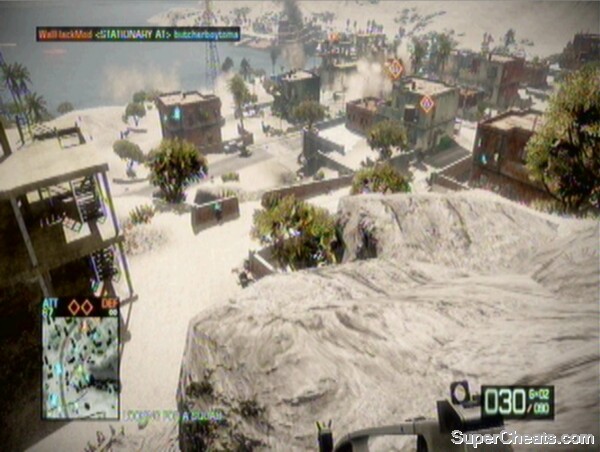
Arica Harbor is a very large map
1) Engineer: The vehicular combat of the first base, combined with the close-quarters nature of the rest, make the engineer class a good choice on this map. The attackers have far less need for anti-vehicle units on Arica Harbor, so assault may be a better choice if you are on the offensive.
2) Medic: LMGs are versatile weapons, but it is primarily for the attacking team, to reduce the number of tickets lost on each base, that medics should be employed on Arica Harbor. Their weapons are good for suppressing enemies, and this is one of the best maps for creating bottlenecks of players defending or attacking, where reloading could cost you an M-COM station.
3) Assault: As mentioned above, the attackers would benefit from using assault class units over engineers, as they have few vehicles to deal with and their increased accuracy is always a benefit. The 40mm grenades are useful for the M-COM stations, as some are in sealed rooms, while the 40mm shotgun is superb for attacking the tight M-COM areas themselves.
4) Recon: There are plenty of opportunities for Recon players to enjoy themselves on this map, but it takes a good knowledge of the bases. The first base has mountains, which can be used for discreet sniping, while the rest have tall buildings allowing snipers to turn the tide of the battle.
Attackers Deployment
This is far and away the best-stocked spawn in Bad Company 2. The Americans are gifted 3 Abrams Tanks, 2 Humvees, a quad bike and a UAV. Being in a squad is still essential, however, as it is difficult to reach the Border Control base without a vehicle, and even on the quad bike or in the humvees it is not easy.
Border Control
There is one main road towards this base, though it splits, going around two sides of the military installation. Concrete blocks stop the way in places, but it is still possible to get vehicles in a bombarding position over the defenders. It is almost inevitable that the defenders will plant anti-tank mines on the roads and in any gaps in their perimeter wall, so it is essential for any vehicle driver to take great care while moving forwards. The M-COM stations are in a central area, surrounded by concrete blocks, and are quite easy to defend. Outside this internal core are other buildings, which infantry and vehicles use to flank the defenders.
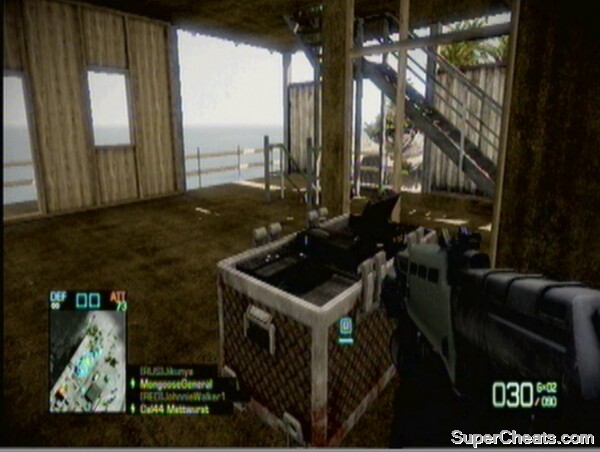
The road to the first base is long and dangerous
Alpha:
The Alpha M-COM is nearer the main road, but the raised piece of land on which the main base is located makes access a little more difficult. The best way to deal with Alpha is to use the tanks given to the attacking team to destroy the building with Destruction 2.0. Defenders are rarely found inside the building, however, so it is possible for infantry to assault and arm this M-COM.
Bravo:
Bravo is located behind Alpha, in a small and thin building that cannot be destroyed. It is usually taken out after Alpha, and there are many routes to it for infantry who do not have to stick to the road and can slink through the concrete perimeter that is in place to aid defenders.
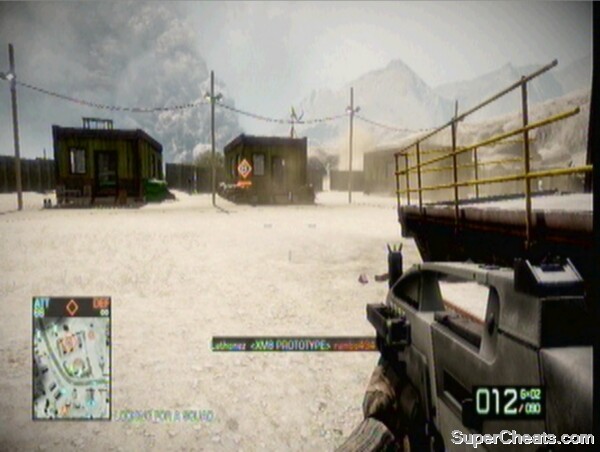
The Bravo building cannot be destroyed
Town
The Town base has since been converted into a great Conquest map. However, in Rush, the attackers face a daunting trip down a steep hill into the town. This is often exploited by snipers, attacking anyone in the open in the town below. There are scores of buildings that are all frequented by close-quarter units and snipers on their rooftops. The main road continues down into the town, again often dotted with anti-tank mines. Attacking vehicles can park right outside the Alpha M-COM station, but they can also go off the road and protect the area near Bravo.
Alpha:
Alpha has the unfortunate distinction of being impossible to find among new players to the game. Alpha is only accessible using explosives to blow open a garage door at street-level in the town, before it can then be armed. Once you locate it, it is notoriously difficult to arm, because defenders camp inside the garage area, but once activated, it can be protected by a small group of players. Grenades and RPG users can get plenty of kills bombarding the garage.
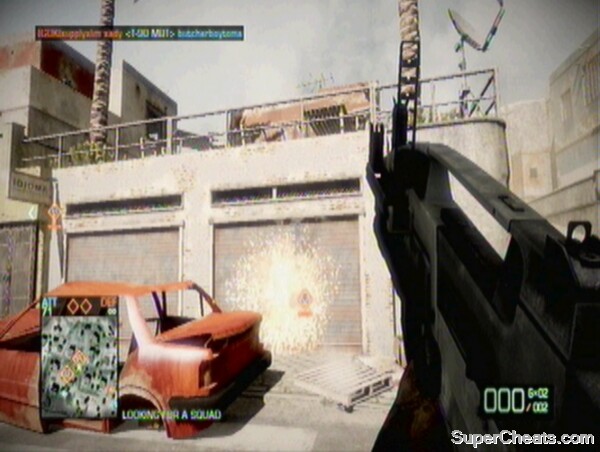
The hatch to Alpha must be physically blown open!
Bravo:
The Bravo M-COM is located opposite Alpha, in a multi-storey building. It is best accessed from the rear, as this surprises the defenders. It can also be destroyed using Destruction 2.0, and the UAV of the attackers comes in particularly handy here. Tanks should be brought down the road and used to destroy the building.
Bridge
The Bridge area is located not far from the town itself. Down another slope, there is a train track and crashed bus. The train and bus are the locations of the two M-COMs. This area is very vulnerable to snipers, using the town's buildings to dominate the defending army. However, it is also easy to flank these snipers, as there is plenty of cover for infantry moving left and right away from the bridge. The same is of course true of attacking infantry, and defenders must ensure they protect their flanks with advanced units. There is also a tall building overlooking the M-COM boxes, another area used by snipers – it is vital for defenders to keep this under control.
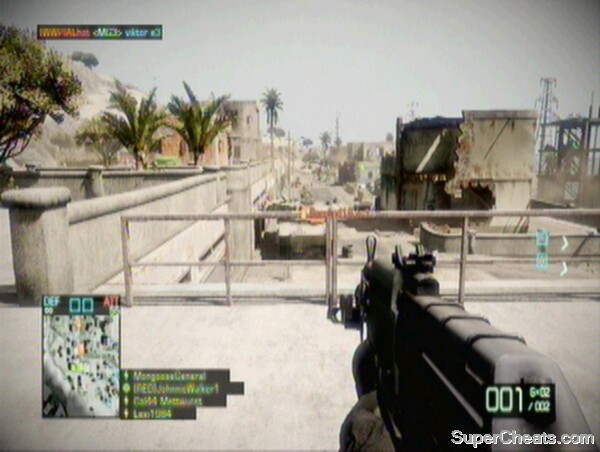
It is important for the defenders to flank the attacking units to relieve the pressure.
Alpha:
Alpha is located inside the bus. Once an attacker is inside the bus, he is invulnerable to most gunfire due to the high sides of the vehicle, and the only way to really remove them is using a grenade. While easy to arm, it is also easy to deactivate, and there is often a back-and-forth nature to this M-COM box. Getting to the bus is also quite easy, as there is cover in the form of buildings, rocks and trees between the town spawn for the attackers and the bus. The vehicle itself is also useful as cover.
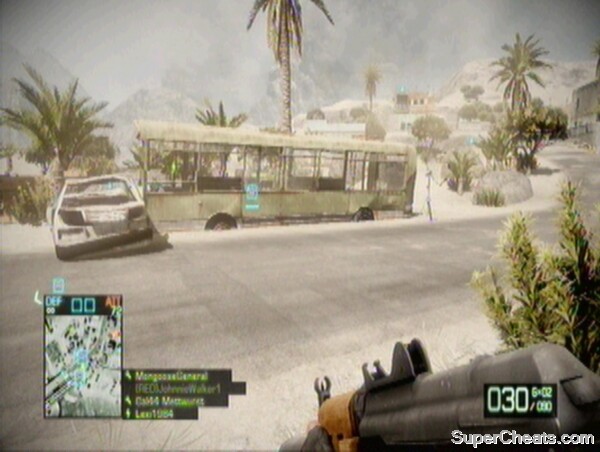
Alpha is located in a fairly battered bus.
Bravo:
This M-COM is located further back than the Alpha station, and the train carriage must be hit with a 40mm grenade or an RPG before the M-COM station is exposed. Repeated Mortar Strikes also pack a punch here, particularly with the amount of vantage points given to attacking snipers at this base.
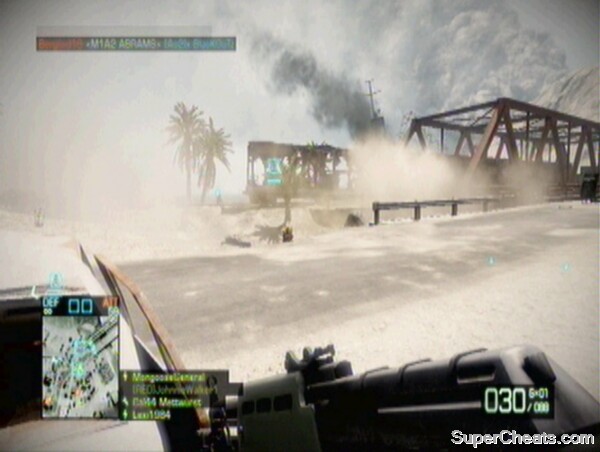
Bravo is in a train carriage.
Harbor
Assaulting the harbour involves traversing the long bridge section. There is lots of cover on this bridge for defensive infantry to use to prevent too many attackers from reaching the M-COM boxes. However, there is also a route under the bridge, and a road route along the side. Tanks can get across using this method.
Alpha:
Alpha is again located in a train carriage, close to the end of the bridge. This time, however, it is on its side. The roof and sides are impenetrable, meaning attackers tend to be funnelled through on entrance at the front. This entrance can be bombarded by tanks and RPGs, however, providing many kills for the attackers. Once armed, it is easy to protect due to the bottlenecked defenders. Throw plenty of grenades in to keep the defenders off.
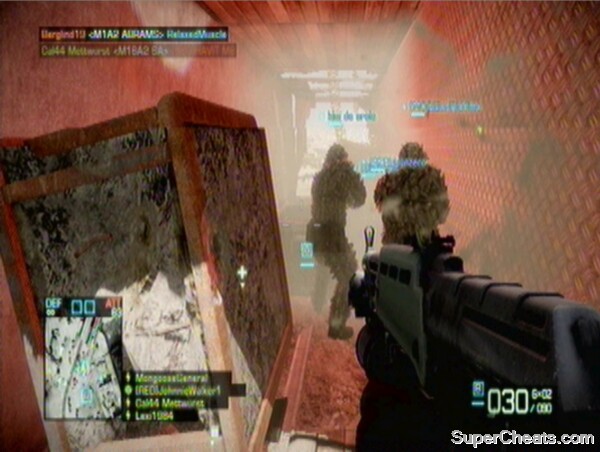
Another train carriage, but a very different nature to the battle surrounding it.
Bravo:
The Bravo M-COM is located in a building identical to that of Alpha on Nelson Bay's Last Stand. Because it is set back so far from the bridge, many players focus on defending Alpha. There is lots of cover to reach Bravo, however, and some defenders should be left to camp inside and deal with any attackers who focus on this base too early. It can become more exposed through persistent mortar strikes, though it is still partially covered by cargo containers.
Last Stand
The final base is unique to Arica Harbor. The building that the M-COM stations are housed in is not particularly original, as it is one of the multi-storey under-construction buildings visible elsewhere on this map, and on other Rush and Conquest levels. The distinction is that both M-COM boxes are in the same building. Reaching the building is easy, as there is plenty of cover on the route towards it. The M-COMs are well protected from vehicles, and defenders have lots of cover inside the building itself. The difficulty is that often one attacker can arm both boxes, which makes it difficult to keep the situation under control.
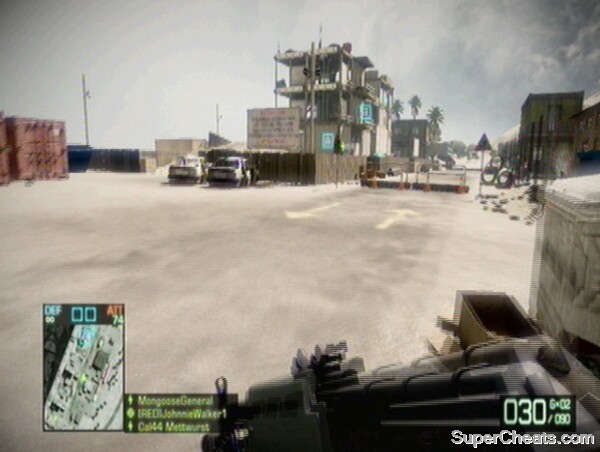
Two M-COMs in one building!
Alpha:
Alpha is on the lower floor of the building. As such it is the one most regularly armed. Defenders often camp in the corners around it, but holes can be blasted in the concrete surrounding it allowing for quick access.
Bravo:
Bravo is on the next floor up, so is usually armed after Alpha. Defenders from the roof can come down to assist if this does occur, but generally it is best to guard the bottom floor of the building.
Bravo is higher up, making it easier to defend
Nelson Bay is the smallest Rush map, with just three bases to attack or defend. It is also the only Rush map without any real vehicles. The attackers have quad bikes, and a UAV, but no tanks, jeeps or helicopters. It takes place at night, in a snowy environment, with the Russian forces attacking. It is also thought of as the most difficult map to defend on, both due to the fact that you only have three chances before failure, and the nature of the combat and M-COM destructibility. The amount of trees mean defenders should try to destroy the forests with bullets and explosives early on.
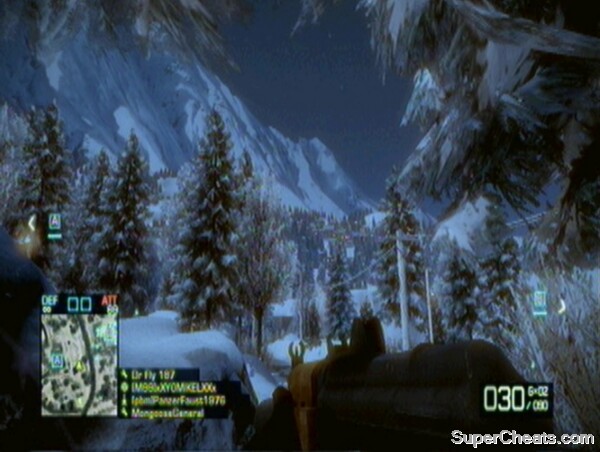
Nelson Bay is a haven for stealthy players.
1) Recon: The darkness and long-range combat on this map allows snipers and recon units to sneak around and generally pick off many defenders. Mortar strikes can really help the attackers, bringing down the M-COM buildings.
2) Assault: While there are many long-distance sections on this map, there are also occasions where close-quarters combat is called for. In particular, the fighting around the M-COM stations and in buildings are such instances. They are also versatile enough to help out against snipers over longer distances.
3) Medic: As usual, the attackers should take plenty of medics. Some of the LMGs are decent at long range, and while their bullets will struggle to penetrate the concrete walls on this map, they can still pack a punch against any defending class.
4) Engineer: It is hard to justify playing as an Engineer on this map, due to the absence of vehicles. Their guns are better at close-quarters than anything else, but their lack of effectiveness in other situations is too great a hindrance.
Attackers Deployment:
The attackers parachute in, but only have access to a UAV and a single quad bike in this base. The bike should be used to rapidly attack the M-COM stations before the defenders have time to react. There is little else to note about the attackers first spawn, except that there are two main roads leading from the spawn to the defenders' positions.
Civilian Area
Like all of Nelson Bay's areas, this village is an open, sprawling landscape with multiple lines of attack. The main roads towards both Alpha and Bravo are usually the best defended, while using the trees, snow and terrain for cover can bring in useful flanking angles on the defenders.
Alpha:
Alpha is nearer to where defenders most commonly spawn, but if Bravo has already fallen, it can be used to attack anyone attempting to protect the building. It is tough to defend as it is on open ground and easily accessible. Coupled with this, the mass of trees and hilly ground makes spotting attackers difficult. With some of the walls down, you can kill attackers as they enter, but again, this can be destroyed with Destruction 2.0, so you must not go too far with the destructibility. Attackers should focus on capturing Bravo first, as it can be used to destroy Alpha with explosive rounds.
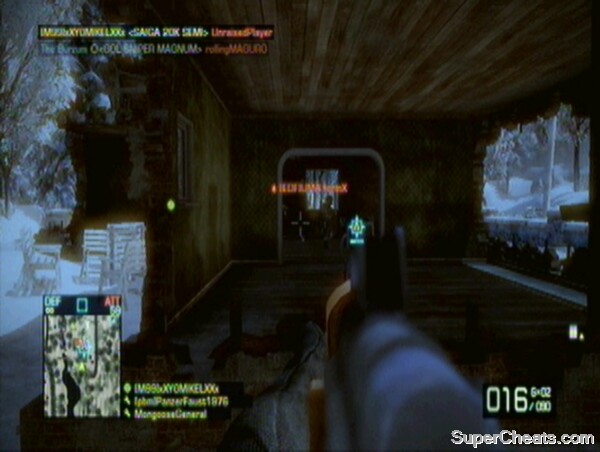
Alpha is one of the most difficult M-COM stations to defend.
Bravo:
This M-COM is in a three-storey building on the left-hand side of the base (from the defenders' point of view). The M-COM itself is directly up the first flight of stairs, and in the room at the top. If you don't find the idea repulsive, it is a good plan to have a defender camping at the back of the stairs to catch anyone climbing up – it's the only way in. This can also be used by attackers to protect an armed M-COM. Defenders can also hide in the roof and drop down when the M-COM is under attack. Defenders may wish to blast a hole in the side of the building next to the M-COM, so that snipers and other players can see in from outside. Note however that this building can be destroyed by Destruction 2.0.
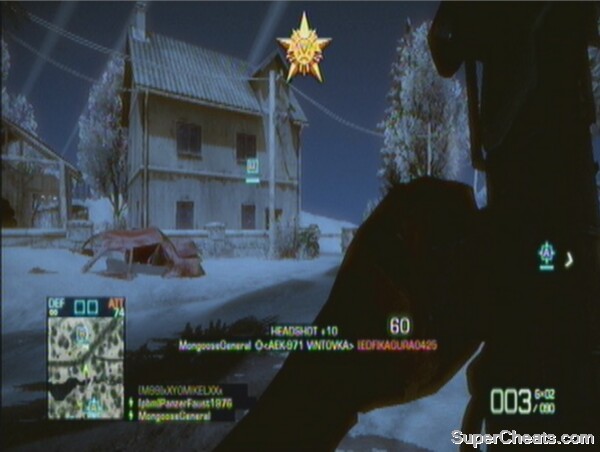
Bravo is in a well-protected building.
Army Outpost
This base is quite similar to the first, with one main building at the edge of the area, and one smaller in the centre. Unlike the first, however, neither building can be destroyed, and as such, this base should be treated as an essential hold for the defenders. Once again, there are two roads leading to the M-COMs, and plenty of undergrowth to cover in. Where the main road splits into two, there is a machine gun turret in a great position. It's hard to use for long without being killed, but is a vital tool in defending the outpost. Bravo in particular has flanking paths around the edge of the level going up to its entrance.
Alpha:
Alpha is in a thin, two-storey building, similar to that in the Last Stand of Valparaiso. This building cannot be destroyed, but it is a risky task to defend it from within, as it is so thin grenades can take out any infantry with ease. It is overlooked by an identical building next to it, which can be used by sneaky defenders to protect the upper floor of the M-COM building, if the walls have been blown out. This should be considered a necessity to allow defenders to protect the box.
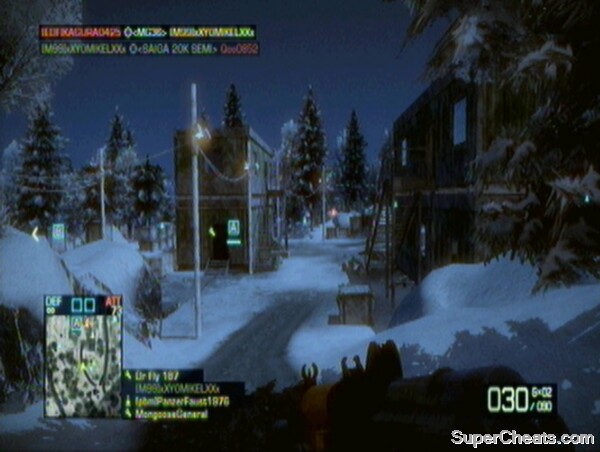
Alpha is in a prefabricated two-storey structure.
Bravo:
This M-COM station is in a more military building than we have seen thus far. It has emplacements on the roof and a machine gun turret round the back. There is a snowy path by the cliff-edge which attackers use to flank the base. There are multiple entrances, but the central M-COM room is fairly easy to defend. If Alpha is under heavy attack, defenders should consider giving up and placing all their eggs in a Bravo-shape basket.
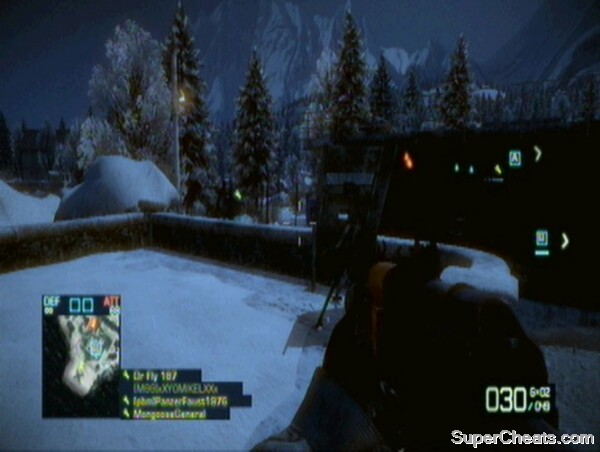
Bravo has its own machine gun emplacement over-looking the flanking path and main road.
Submarine Base
The Last Stand on this map takes place in a base similar to the last two. Alpha is again in the centre with Bravo on the exterior. Like the last base, Bravo is in a military building with an accessible roof. It can be easily flanked, but can be exposed through repeated explosive rounds. There is a train track running past Alpha towards Bravo, providing good cover for attackers.
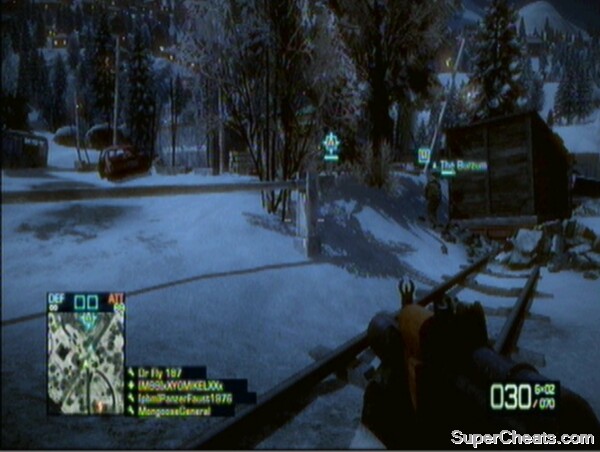
The train track is the distinctive feature of this base.
Alpha:
The Alpha building is located near the train track. It is one of the most memorable in the game, due to its tiny size and many entrances. The inside has numerous points of cover, but is very vulnerable to grenades. It cannot be destroyed by Destruction 2.0. It also humorously has a painted on door nearer the train tracks, which many attackers new to the game get caught out by. Entrance can be made via the doors in the side which can be blown open. If it gets armed, you really have to just throw bodies at it to be able to disarm it. Grenade the heck out of the building before entry – smoke grenades are not a bad idea.
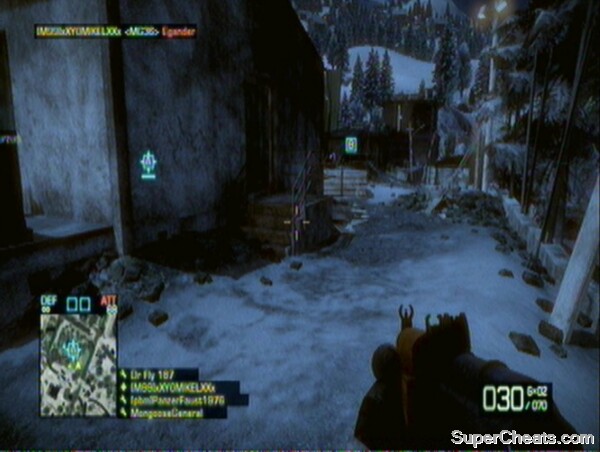
Alpha's dummy entrance.
Bravo:
Bravo is easy to defend, but is on a main road with a great flanking route by the cliffs (once again like the last base). It has emplacements on the roof, and a beastly interior section that should be defended at all costs. It is the easiest base on this map to hold against the attackers. Defenders should avoid being drawn away from Bravo to assist at Alpha. Attackers should bombard it with explosives to get a route into the central chamber and the M-COM. Once armed, it is incredibly difficult to deactivate unless the attackers neglect to protect it.
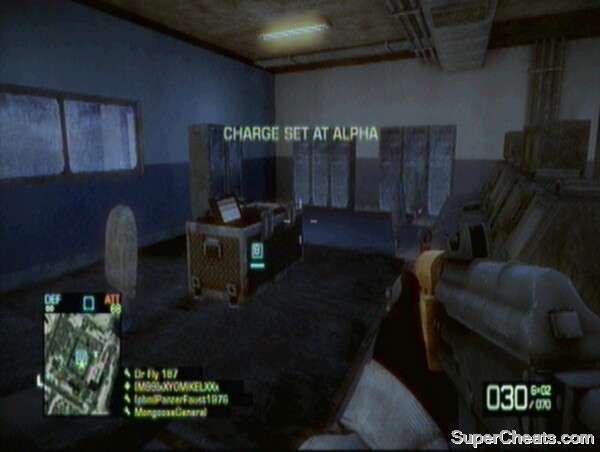
A stronghold inside the Bravo building.
This is a map very popular with snipers, due to the nature of the terrain. The first base, for example, is located across a mass of water from the attackers, with a small island in between. Snipers can use this island to wreak havoc on the defenders. Due to the large amount of water on Laguna Presa, boats and jet-skis are regularly used to assault the M-COM stations. The attackers play as the US team.
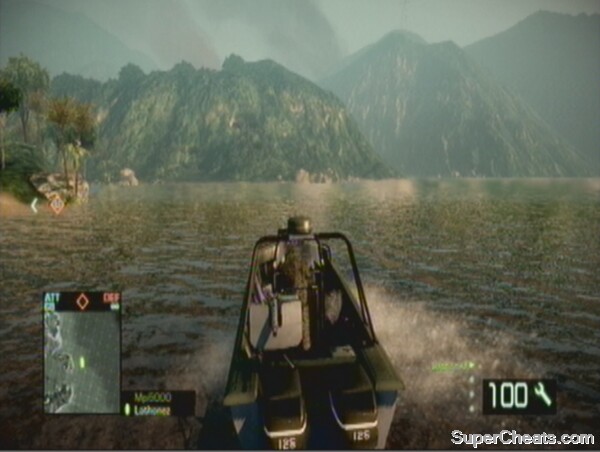
Watercraft can be used to subvert the defences of the first base.
1) Recon: By far the favoured class for attackers on Laguna Presa is Recon. Defenders also certainly need some snipers, both to Mortar Strike the attackers' deployments, and to prevent enemy Recons from getting a stranglehold on the map. Their motions can also be integral during close-quarters sections where the vegetation and buildings can make spotting targets otherwise difficult.
2) Assault: The accuracy and range of some of the assault rifles can rival the Recon class sniper rifles and so is a good choice for this map. Defenders and attackers alike can use this range to their advantage. Once the action reaches close quarters, in the physical attack or defence of the M-COM stations, assault soldiers again come into their own. The 40mm grenades can also rip through the wooden buildings that dominate this map. Their ammunition boxes are valuable to replenish supplies of anyone being constantly revived by medics.
3) Medic: As usual, attackers need Medics to retrieve lost tickets. Having a Medic at any regular sniper position is a must, as they can then be repeatedly revived. Their LMGs can cut through the wooden buildings and cause devastating damage to defenders.
4) Engineer: Engineers are useful on Laguna Presa for defenders, primarily to destroy the watercraft during the opening section, but also to target the Bradley tank that the US get to attack the third base.
Attackers Deployment:
The attackers begin on an island a long way from the first two M-COM stations. This allows defenders to prepare for the main assault. Attackers are assisted by Patrol Boats and Jet-skis. There is another island between the deployment and the main land mass, and this is used by snipers to reduce the range for their attacks. From the Attackers Deployment, boats can be sent directly onto the beaches of the main area, or around the side to attempt to flank defenders. There is also a UAV available to attackers which can help greatly in preventing defensive turrets from establishing a stranglehold on the seafront.
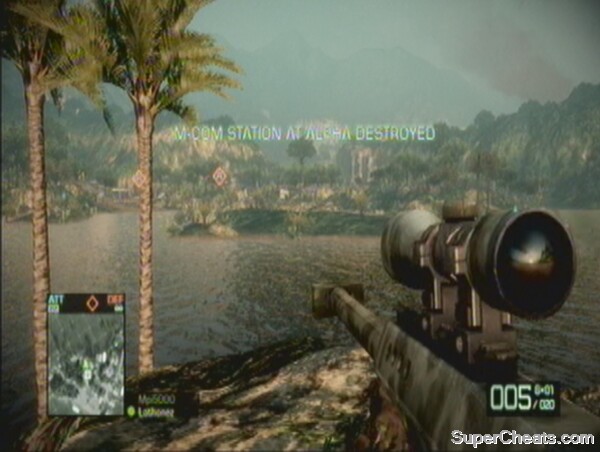
The Attackers Deployment is perfect for snipers.
Village:
To defend the village, there are two primary areas to watch. The main beachhead is where the majority of attackers land, and anti-tank mines should be laid on the sand to prevent enemies from racing their boats up the beach. As defenders, you also have access to gun emplacements overlooking the sea. Attackers can also use the route around the side of the village, popular to flank the defensive emplacements. As well as this, boats can land anywhere along the front of the village, but infantry can only climb the beach in a select few locations. The land in the middle of Alpha and Bravo can be used to watch over both bases by soldiers with long-range weaponry.
Alpha:
Alpha is set back from the water, across the small road and amongst a variety of wooden houses. It is easy to arm and difficult to defend, due to the number of different ways of getting to it. It can be quickly destroyed at the start of the match. There is also a machine gun emplacement overlooking it, but this can be just as valuable to attackers as defenders.
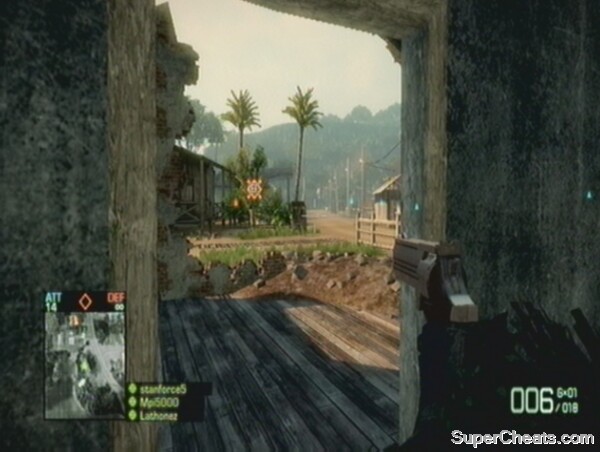
This road is popular with flankers, passing both M-COM buildings.
Bravo:
This M-COM station is located in a small building near the main coastline. It bears the full brunt of the attacking snipers, but is also easier to defend than Alpha due to the open ground around it. The walls and roof can be destroyed, leaving the M-COM box exposed to the elements (and RPGs). This makes it easy to defend, with no cover for attackers.
Mortar Strikes are a good way to bombard an M-COM to prevent anyone from disarming it.
Waterfall:
This base can be accessed by road from the village, and the attackers will now have a Bradley tank to use in assisting their advance. If there are any boats left over from the first base, these can be used to move up the river, which will eventually lead right into the heart of the next set of M-COMs. Overlooking both bases is a rocky outcrop, which is very popular with snipers. Putting C4 up here as defenders is a good strategy, and regularly peppering it with RPGs and grenades is a similarly good idea. The defenders may want to recruit extra engineers for this section in order to combat the Bradley, as it can be quite decisive if anti-tank mines and RPGs are not used to destroy it quickly. There is only one main road into the base, so it is an obvious place to lay mines.

Use this rocky shelf to get a great vantage point over the area below.
Alpha:
The Alpha building is on the side of the river nearer to the village. Like at Bravo in the first base, when the vegetation, walls and surrounding cover has been destroyed, attacking the M-COM box becomes much tougher. There is a small hill and rock just next to the building, providing some cover, and early in the round it can be reached quite easily, but as the line of sight of defenders opens up, the terrain begins to play into their hands.
Bravo:
Bravo is across the ford, and much more difficult to access than Alpha for the attackers. One tactic is to use the Bradley to forge a path across the river, dropping off infantry once the objective has been reached. Infantry can also sneak round and into the building. Arming Bravo will often surprise the defenders, but it is hard to protect the M-COM once a charge has been set – C4 or constant barrages may be the best bet.
Bridge:
As the name suggests, the key to attacking this base is the bridge. The defenders should C4 it and then destroy it when the first tank comes across to get maximum points and ticket loss of the enemy from the adventure. Once the bridge is down, there are two routes up to the base. The first is a short and steep path from the river, and the second is past the bridge and up some steps. Boats, surviving from the first base, can pass along the river. There is a lookout tower watching over the bridge, and buildings guarding the infantry routes up to the base. It is important for the attackers to try to control these entry routes if successful access to the M-COM stations is to occur.
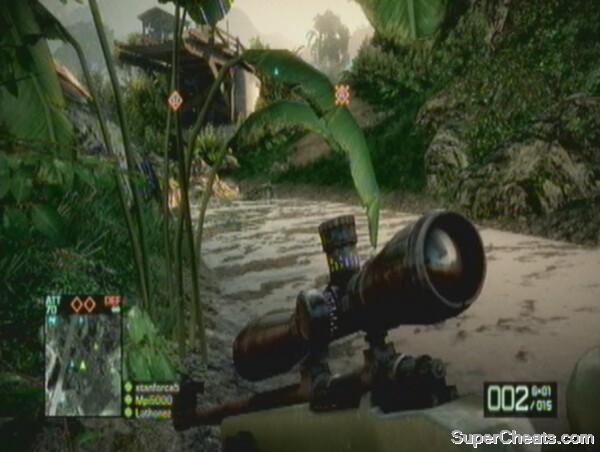
The bridge is the central focus of the early assaults on this base.
Alpha:
The Alpha building is on the right hand side of the base (from the attackers' point of view). Like the others, it is a single-storey building, around a hilly outcrop. Once the walls have been destroyed, it is easily accessible for attackers, and due to the hill on one side, it is relatively easy to defend once armed.
Bravo:
The Bravo M-COM station is right on the edge of the hill overlooking the river, and so is the easiest for the attackers to get to, though it is further along from the bridge. It is overlooked by mounted machine guns, so players should try to assault it from the side of the river.
Islands:
The river continues through the bridge base to the next area. This is the Charlie base of the Laguna Presa Conquest map, made up of wooden buildings and backing onto a large expanse of water. It is certainly distinct to the rest of the bases seen so far. Due to the wooden buildings, medics come into their own here, and generally it is an easy set of bases to take due to the masses of vegetation providing visual cover.
Alpha:
In the initial dock area, the Alpha M-COM is in one of the long buildings. The brick walls can be destroyed, giving attackers many routes in. There are other buildings overlooking the square in front of the M-COM building, which plays into the hands of defenders, but there are many other points of access to the building itself, from the river and road.
Bravo:
Bravo is a rarity, not being inside a building. Instead, it is in the centre of an enclosure of metal fences. The river passes it on one side, while from the front it is protected by an anti-tank emplacement. There is a small shed at the back, but the rocks and bridge above it act as a great overwatch position for Bravo.
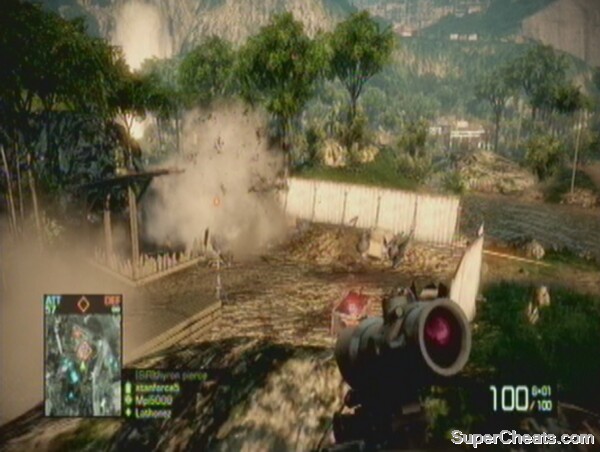
Bravo is inside a row of fences.
Last Stand
The Last Stand base is a shanty-town of wooden buildings. The river again flows past it, but watercraft are unlikely to play a role in the attack on the pair of M-COMs here. For defenders there is high ground above the two M-COM stations, aiding the protection of the M-COMs greatly. There is also some scaffolding towards the dam, which can be used by recon or assault classes to dominate the base.
Alpha:
Alpha is in a wooden building right on the river. These waterside buildings are on stilts, and players can hide underneath them while attacking or defending. The best offensive strategy is to decimate the wooden structure to help out your team mates, while defenders should take up positions around the building and prevent anyone from entering.
Bravo:
This M-COM is located back from the river, protected only by sandbags on the exposed side. Behind it is a cargo container, popular with camping attackers and defenders alike.
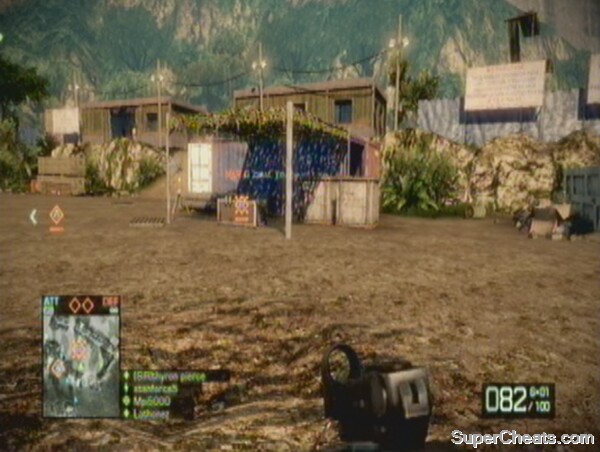
Bravo is exposed, but can be defended using the indestructible cargo container behind it.
This guide is going to focus on the two most popular game modes, Rush and Conquest. Later on will be brief guides to what the minor modes, Squad Rush and Squad Deathmatch offer.
Conquest is Battlefield's most famous game mode. It involves players starting at relatively even deployments and fighting for control of three or four bases, depending on the map. The rules are pretty basic and easy to pick up. To capture a base, indicated by a flag, players must stand within a certain radius of the flag (depending on the base), and wait until it lowers, before a new flag representing the player's team is put up. Once captured, a base can be retaken by the enemy team in the same manner, and the bases go back and forth throughout the match.
The flags also function as spawn points for the team in control of it. This makes it easier to defend them, but players actually spawn a small distance from the flag, so it is still possible to capture. Each team has a set number of tickets at the start of the match (recently increased dramatically in a patch). You lose a ticket for each death (medics can get them back with a revive), and many more depending on how many bases the enemy team holds. If they have all four bases, you will lose the game quickly if you don't rectify the situation. Each map is played twice to swap spawn points.
The following pages of this guide will now focus on conquest maps.
Atacama Desert is one of the largest Conquest maps. It still only sports three bases, but allows for long-range sniper combat and plenty of vehicular action. The two spawn points are virtually identical, with no advantage gained from being at particular one. The next bases on from each spawn are small villages, with lots of cover for infantry in the form of buildings, but easily navigable roads passing through for the plethora of tanks and vehicles on the map. The central base is the most hotly contested. There is a stranded ship with the UAV on, a haven for snipers, and a smaller vessel with an anti-tank launcher and one of the few anti-aircraft guns in Bad Company 2. This is the easiest map to spawn kill on (whether you condone it or not, it will happen in online games), due to the fast paced nature of vehicular warfare. As the anti-aircraft guns suggest, there are also a pair of helicopters available, one at each spawn.
Controlling the small boat with its anti-tank and anti-aircraft launchers is vital.
1) Engineer: Due to the large numbers of vehicles on this map, having a strong compliment of engineers on your team is vital. Since the server patch and the increased speed of the tracer dart, it is now more possible to successfully tag a helicopter, making the engineer class even more valuable here.
2) Recon: The long range nature of Atacama Desert makes snipers inevitable. As such, your team will need a good few Recon soldiers to cover the engineers and slowly sap the enemy's tickets. Motion balls are very important for Bravo base, where enemies can come from any angle. Additionally, control of the main ship must be a priority, as this houses the UAV and an overwatch position facing Bravo.
3) Assault: It is possible for engineers and snipers to stay alive for long periods on this map, as there are many areas with easily defensible positions. In particular, however, the engineers will need their RPG ammo topping up, making the assault class an important third cog in any successful team in the desert. While they will struggle against tanks, the Humvees and quad bikes can be downed with 40mm grenades, and the range of most of the assault rifles allow the assault class to hold their own against some snipers.
4) Medic: It is difficult to recommend the medic too much on this map, though as always they can help maintain your ticket numbers. Due to the spacing of the bases, taking a great amount of time to move between each one, medics will struggle to help anyone outside of their own squad. In short, if you are used to having a medic in your squad, don't feel the need to change for Atacama Desert. If you like to play as a lone wolf or ‘Rambo Medic', you may struggle to stay with the rest of your team.
RU Deployment:
At RU Deployment there are two T-90 tanks, one Cobra 4WD, two quad bikes, and a MI-28 Havoc. The most important thing is to secure Charlie, and then the team can focus on Bravo. It only really takes a single quad bike to secure the first base, unless the US Apache gets it, so the tanks should push onto Bravo. As for the Havoc, the crew piloting this should try to destroy the enemy tanks that will undoubtedly push onto Bravo too. Like the US base, there are a variety of defensive emplacements to use, including two anti-tank emplacements, a mounted LMG and an anti-aircraft gun. The AA gun should be manned straight away, as the enemy Apache can be targeted even at extreme range. These are primarily to guard against spawn-killing.
US Deployment:
At US Deployment there are two M1A2 Abrams tanks, one HMMWV 4WD, two quad bikes, and an AH-64 Apache. Players should focus on taking Alpha, because if this is not done successfully the enemy have a base close to your spawn from which to spawn kill. The tanks can push on to join the battle for the centre of the map. Due to the fact that this map is one of the worst/best for spawn killing, there are two TOW missile launchers, a machine gun emplacement and an anti-aircraft platform to help in its defence.
Bases:
Alpha (Western Island):
This can almost be written off as a US base, but if it can be successfully taken it is a real coup, enabling the Russians to flank Bravo and push on to the US spawn. It is very similar to Charlie, featuring various tall buildings that accommodate snipers, while their lower floors allow defenders and attackers to camp while watching the flag. Alpha's flag is much more exposed than that at Charlie, but there are rocks and bushes next to it that can be used to hide in if capturing the base on foot. It is overlooked by a variety of buildings. Defenders can sit in the surrounding buildings and watch the flag point. There are two main buildings overlooking Bravo, and snipers can use these to attempt to control the centre of the map. A M1A2 Abrams also spawns here.
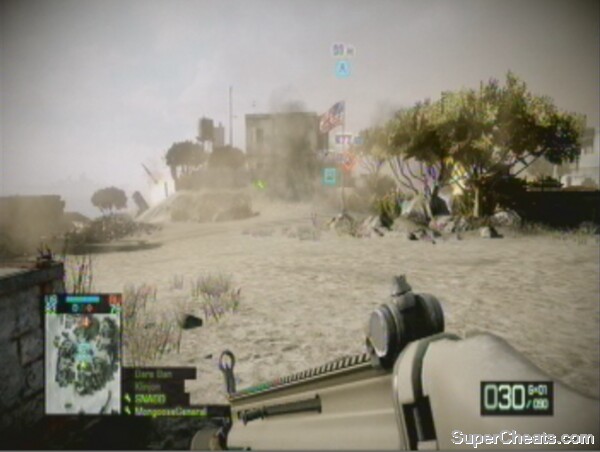
Alpha's flag is exposed, making vehicles the best way to capture it.
Bravo Base (Stranded Ship):
Bravo is flanked on both sides by ships. On one side is the large piece of wreckage which houses the UAV and a couple of separate gangways that tend to be exploited by snipers. On the other is a smaller segment, with dark internal rooms and ladders leading to the roof, containing a vital anti-aircraft gun and an anti-tank launcher. You are able to capture Bravo from inside the cargo containers around the flag, as well as from inside the hull of the smaller vessel. This makes it a very tough base to defend, as it can seem as though no one is in the area yet you will be unable to capture the base. Throw grenades inside the cargo containers near the larger boat, and at the smaller one. Use the two ‘walls' near the flag for a little cover. Being the centre of the map, it is popular with tanks. Anti-tank mines should be deployed and the anti-tank launcher used if you get into difficulties. Beware of snipers watching the top of the smaller boat where the gun emplacements are, although sometimes the risk is a necessity to protect this vital base.
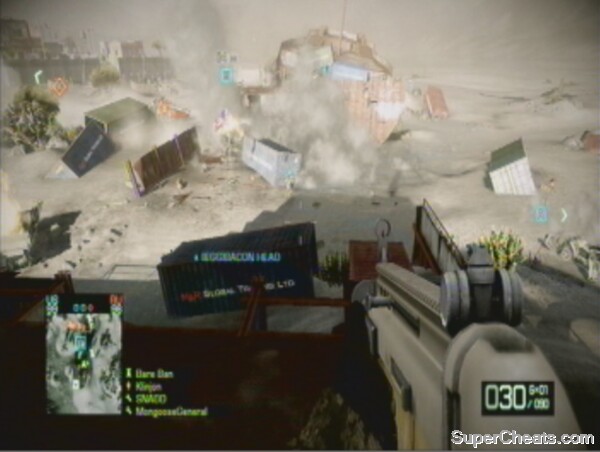
Bravo is very exposed and attacks can come from all angles.
Charlie Base (Eastern Island):
Charlie has smaller buildings overlooking Bravo when compared to Alpha, but its flag is in a better position, surrounded by crates and fences. The main Russian tank, the T-90 MBT, spawns here. It is relatively easy to attack, as there is an array of buildings at the front of the base towards Bravo, allowing players to fortify a position inside them and then launch an attack on the flag. Also, while the cover around the flag can help defenders, it also benefits attackers, as they have a position in which to hunker down while capturing the flag. By contrast, Alpha's flag is on its own, so defenders can see any attackers attempting to take it. Despite this, there are only a few buildings that overlook the flag effectively.
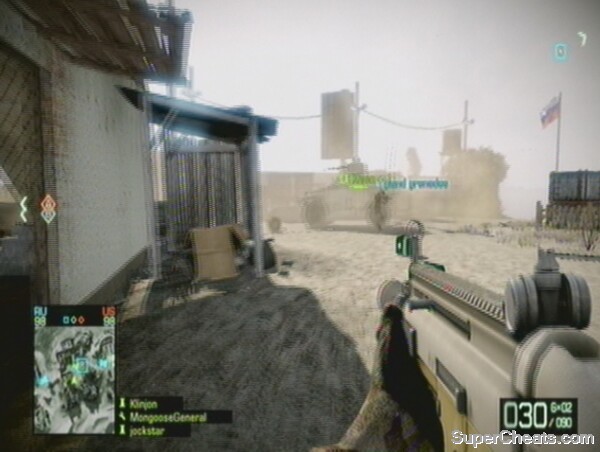
Charlie's flag has plenty of defensive cover.
Laguna Presa is a jungle map, also featuring patches of water and some elevated terrain. The two deployment bases are in very different positions, with the US base overlooking Charlie base, while the Russian deployment is nearer to Bravo and Alpha. Bravo is the focal point, being located on top of a hill. While this is not a terribly useful sniper position, the wooded slopes around Alpha provide superb cover. There are tanks to mix things up, though they do not dominate the map as with some other Conquest levels. The UAV is located at Alpha, where fiery wreckage provides good cover, making it a very difficult base to assault. Bravo can be attacked from two sides, and there are numerous places to camp on top of the hill when defending. Charlie boasts wooden houses and piers, providing limited cover, but also places to hide. It can be accessed from the water. The water effectively forms a moat around the three bases and can be traversed using jet-skis.
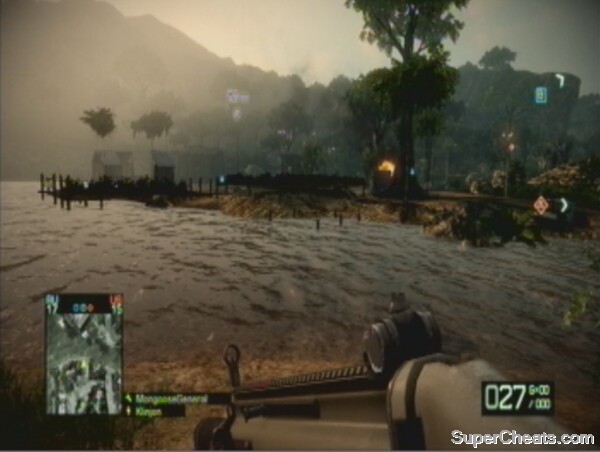
The dynamics of Charlie base really change towards the end of the game.
1) Assault: While vehicles play an important part on this map, they are not the main threat. Due to the nature of the environment, providing many places for enemies to hide in camouflage and making spotting particularly tough, it is crucial to get the extra stopping power provided by the assault rifles. The 40mm grenade attachment, or indeed the smoke grenade upgrade can, in the case of the former, blow chunks out of the wooden houses and combat the quad bikes on this level, or for the latter to provide cover to allow snipers to C4 enemy tanks.
2) Recon: With the jungle foliage on offer, there are many places to hide and stay relatively undetected, particularly behind the Alpha base. When you combine this with the fact that RU Deployment is raised up and that there is much of the terrain free from infantry-friendly cover and with good line of sight, you have a veritable haven for Snipers. This is despite the enclosed nature of this level. Motion sensors are incredibly useful to help your team find enemy snipers similarly camped in the bushes.
3) Medic: With the wooden buildings of Charlie base the LMGs that Medics utilise can rip through enemy cover very effectively. The rest of the level is quite open, and while a medic will struggle to effectively assault Bravo up the hill, guarding Alpha is a bit easier. It is also a short distance from the Deployments to the bases, and a quick Medic could get many revives on this tight map.
4) Engineer: There is not much between any of the classes on this map, but the weaker nature of the SMGs that the engineer specialises in makes them the least effective class on Laguna Presa. Nonetheless, it is important to have some engineers to deal with the enemy tank that will pop-up every so often, and to pepper Alpha and Charlie with anti-tank mines.
US Deployment:
There are two quad bikes at the US Deployment, as well as one M3A3 Bradley. The base itself overlooks Charlie, and as such that base should be an easy capture for the US team. The quad bikes can be used to reach Alpha, and while they cannot mount the hill at Bravo, you can use them to get close. The base is of little danger from spawn killing due to its raised position.
RU Deployment:
As with the US Deployment, the Russians have two quad bikes and a tank, coming in the form of the BMD-3 Bakhcha. RU Deployment can sometimes be prone to spawn killing as it can be attacked all the way along the banks of the water between Alpha and Bravo. It is, however, more useful for firing out of as a result.
Alpha Base (Crash Site):
Crash Site has little in the way of solid cover, though the downed helicopter's cargo can provide something in the way of protection. You can also use the flames, which are harmless to your character, as a visible screen against snipers and other enemies. The UAV is at Alpha, and is protected by a metal sheet. Some players may wish to flank round Alpha using the hills at the edge of the level. Spotting players who are in this area is almost impossible with the dense vegetation as cover, and it is a haven for snipers. If attacking Alpha, be sure to remain crouched as there are many objects littered about the base which will help to obscure the view of any defenders who may be looking for you. Defending Alpha is very difficult, and three people are really required: one to watch the direction of RU Deployment, one to watch US Deployment, and one to watch the area towards Bravo. Of course, depending on your nationality you can relax your concentration towards one of the Deployment bases. There is a jet-ski available at Alpha, near the UAV.
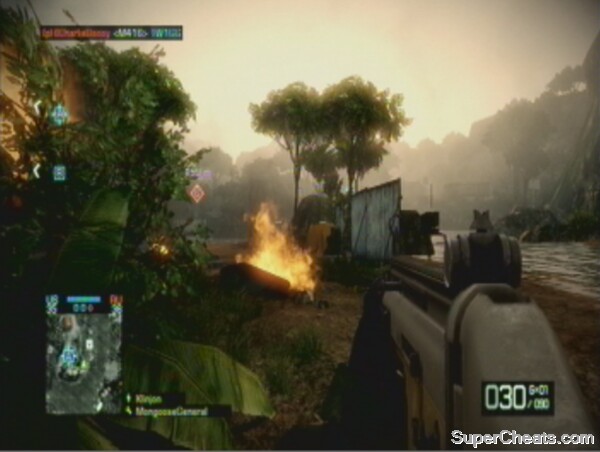
The UAV is located at Alpha.
Bravo Base (Hill):
The Hill has two main methods of approach. The most popular is via the path through the shipping yard, replete with cargo containers and point of cover. You can then move through the gap in the fence and up to the summit of the hill. The second is on the opposite side to the first, leading off from the main road heading from RU Deployment to Charlie base. In addition to these, you can climb up the hill and squeeze through various holes in the fence, from all sides. This allows you to surprise enemy defenders who may be watching the more popular entrances. In terms of defending, there are some bushes at the summit which offer excellent camouflage. Players tend to check left and right when coming through the main, first entrance described above to watch for people camping behind the fences. If you camp elsewhere, you should therefore be able to get a good few shots off before they see you. If attacking, be sure to grenade the hill first, as there is not much space up there and you can likely get some splash damage and send any defenders out of their hiding places to avoid your grenades.
Use a more imaginative route to surprise enemies atop the hill.
Charlie Base (Village):
Charlie is on a small, flat area of ground surrounded by wooden shacks. It is flanked on one side by water, towards the dam. It is frequently attacked by enemy tanks, being so close to US Deployment and easily accessible by vehicle along the road from RU Deployment. These tanks will often roll right into the centre of the base, by the flag itself – laying anti-tank mines here can be very profitable. There is also a jet-ski available from the boat-house on the waterfront. Hiding in the boat-houses or indeed in the water is an effective means of defence or attack at Charlie, while under one of the buildings (the one nearest to Bravo) you can crouch beneath the floor on the corner in something of a glitch-spot to surprise the enemy. By the end of the match Charlie will look very different indeed, as in all probability the wooden buildings will have been flattened, leaving very little cover for defenders.
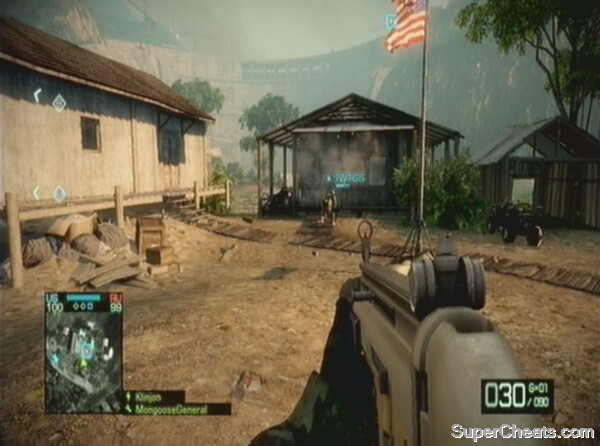
The corner near the water under the floor of the building to the left is a great spot to camp and survey Charlie.
Another three-base map, White Pass has two varied deployment points, mostly invulnerable to spawn killing. The main focus is, as is often the case, Bravo base, through which all players must pass to reach the opposite side of the map. The map's linear nature makes close-combat the order of the day. There are vehicles on this map, but rarely are they a threat to any base except Bravo. As the only snow map currently playable in Conquest, it represents a different sort of challenge. There are many buildings with loft spaces for snipers, and a rocky pass at the side of the map also popular with long-range players. Alpha base shares many similarities with Charlie on Laguna Alta in terms of layout and structure, and indeed this map generally feels very familiar if you have played much Conquest already.

The ledge above Bravo is a haven for flankers and snipers.
1) Assault: The close-quarters nature of the play on this map means a class with good short to medium range weaponry is preferable. The assault class fits this bill, of course, while their expertise with 40mm grenade launchers is invaluable for dealing with snipers in the roofs of the buildings around Bravo.
2) Medic: Every base is within a short distance of the next on this map, and a medic can be very effective sprinting between the buildings and reviving comrades. Dropping med-kits around Bravo will allow your team to bed in and defend it with more success. Most of all, the LMGs can punch through the thin walls of most buildings on this map, and medics can often get more kills than assault class players on White Pass.
3) Engineer: With short to medium range effectiveness provided by their SMGs, the engineer class is not far behind assault in terms of their role on this map. RPGs can assist in destroying buildings, particularly those around Bravo, and of course are essential for taking down the few enemy tanks that can cause you problems.
4) Recon: While there are positions for recon players to snipe on this map (such as on the hilly ledges behind Bravo or in the lofts of various buildings), they are chiefly useful for their motion sensors, assisting in the defence of Bravo especially. In addition, mortar strikes are very effective in assaulting the central part of the map, and a recon class with a shotgun can cause many problems.
US Deployment:
Both deployments are quite sparse, due to their close proximity to other bases. The US Deployment has a M3A3 Bradley and a quad bike. It is a short sprint down the slope to Alpha base.
RU Deployment:
The Russian spawn has a BMD-3 Bakhcha which is very effective against infantry, as well as a quad bike – useful for contesting Bravo and Alpha early on. It is very close to Charlie, and that base should remain in Russian control for most of the match.
Bases
Alpha Base (Factory):
Alpha is much like the mill on Laguna Alta, and Charlie base on Panama Canal. It supports plenty of cover on the ground floor of the factory, but multiple entrances. The first floor has cover and stairs down to the ground. You can capture the flag while on the stairs. There is also a window on the first floor leading out of the back of factory (there is also a ladder out here going to the roof). The roof is popular with snipers, and boasts a machine gun emplacement, while across the valley is an even taller structure that can be used by attackers to get an angle on anyone defending the factory itself. Another offensive strategy is to take a tank inside the factory, as there is room. Defenders should place anti-tank mines by the flag to combat this. Be aware that you can be flanked on many sides if you are inside the factory, and that there is a stairwell at the end of the building that can be used to surprise defenders guarding the doorways. Alpha can be used by the Russian team to spawn kill at US Deployment, as it is almost visible from the base.
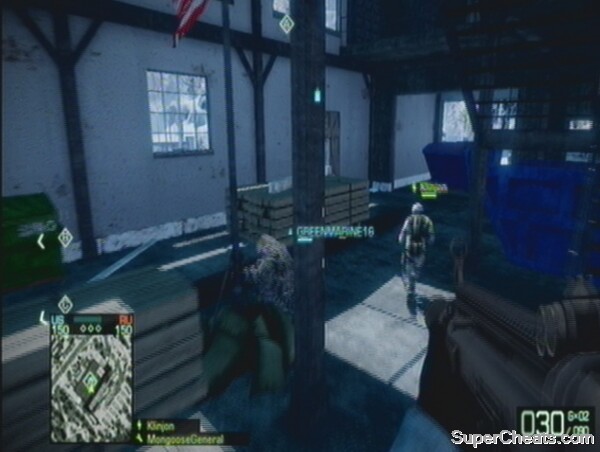
There are many points of entry into Alpha.
Bravo Base (Village Center):
There are two main buildings at Bravo, with the most important one nearer the UAV point (which is on the edge of the cliff at the back of the area). Both these buildings overlook the main road that passes by the flag. They can be destroyed, and should be, if a team is having a problem with campers in either of them. In particular, players camp behind the top of the stairs in buildings on this map, so it is a good idea to walk up the stairs backwards, watching the small landing above as you move. There is also a watchtower at Bravo, although this is rarely used by players due to its vulnerability to explosions. In addition to the two main buildings, there are many smaller structures. The roof areas of these are frequently used by snipers and other classes to lay down fire on the flag area of Bravo. Tanks will often come along the main road to sit by the flag, but anti-tank mines are regularly employed to combat this. There are machine gun emplacements in front and behind the Bravo flag.
A good team tactic is to capture Bravo, before destroying the buildings on either side of it – making it harder to assault for the enemy.
out of sequence
Charlie Base (Farm):
Charlie is closest to RU Deployment. It has a barn building with a mounted machine gun emplacement that can help a little in defence, but is not as useful as the other buildings around the flag in this manner. Players frequently camp in the buildings near the flag, and assault classes with 40mm grenades are useful for exposing them The well in the centre can be used to hide in, if crouched, though you are horribly exposed should someone see you. Charlie can be reached by the US soldiers by flanking Bravo, skirting along the edge of the cliff or moving through each building. The main road through Bravo also continues down to Charlie, allowing tanks to reach the base. It can be used as a base to spawn kill RU Deployment, though not as effectively as Alpha for US Deployment.
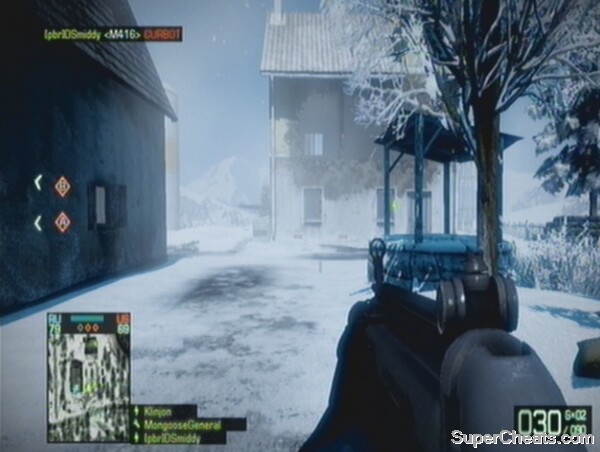
The buildings all around Charlie make it easy to defend.
Currently the only four-base map in Conquest, Panama Canal is a square area with two bases on either side of the canal. The spawns are similar, located at either end of a long road which passes along the bottom of the map. The US Deployment is closest to Alpha, while RU Deployment is closer to Bravo. Charlie base is similar to the Factory on White Pass and the Lumber Mill on Laguna Alta, sitting to one side of the main road route across the canal. Delta is protected by buildings on two sides, and is easily accessible by road. There are three main routes to cross the canal. First is a small path from Alpha, second is the main causeway across the middle of the map, open to enemy fire, while the third is a road from Bravo to Delta. Additionally the boats in the canal can be crossed, with difficulty, for a less predictable route to the other side. Panama Canal is one of few maps where every flag is directly accessible in a tank. This is a very diverse map, with plenty of opportunity for short and medium range combat, but lots of sniping
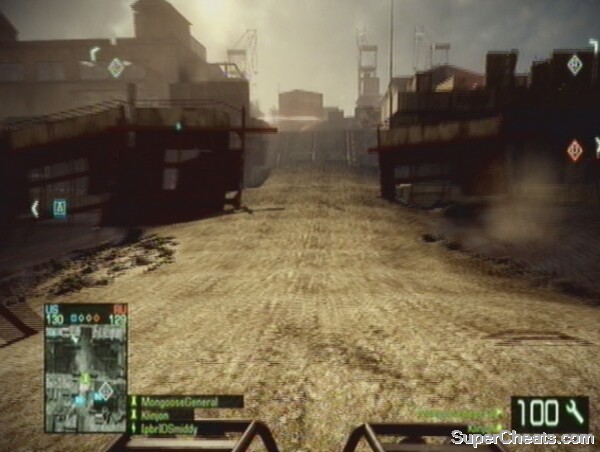
The causeway across the centre of the map is key, but risky to cross without a tank.
1) Engineer: There are too many vehicles on this map to avoid recommending the engineer class. It is essential both to keep repairing allied vehicles and to stop enemy vehicles from dominating the bases. Bravo in particular is prone to vehicular onslaught, and a good selection of engineers must be used to stand any chance of conquering this map. They can also place anti-tank mines in the bases and on the main causeway.
2) Recon: Although in terms of area and distance between bases this map is not the largest, there are plenty of opportunities for snipers. The top of Charlie building and the jungle between the two Deployment zones in particular are excellent positions. The mortar strike ability can be used to assist engineers in dealing with vehicles.
3) Assault: The range of the assault rifles is useful for picking people off across the canals, though 40mm grenades are not as effective on this map as on some of the others. Engineers will need constant resupplies of their RPG ammunition, while the powerful shooting of this class will be useful when assaulting the more open bases of Alpha and Delta, and attacking snipers on the roof of Charlie.
4) Medic: Most of the bases are too far apart for medics to successfully help team mates in multiple areas, but some function as killing zones, with many allied deaths often occurring. Bases such as Bravo and Alpha in particular can become bogged down in combat, and having medics there to revive team mates and suppress the enemy can tip the balance.
US Deployment:
There is a variety of vehicles available at the US Deployment, including both varieties of American tank. In addition to one M1A2 Abrams, and one M3A3 Bradley, there are two quad bikes, allowing quick access to Charlie and Delta.
RU Deployment:
RU Deployment shares the vehicles of the American spawn. It has two quad bikes, a T-90 MBT and a BMD-3 Bakhcha. These allow a balance to be struck between anti-infantry and anti-tank combat. Russian players should be able to take both Bravo and Delta from their spawn on that side of the map.
Bases
Alpha Base (Comm Center):
Alpha is a very difficult base to defend. Although there are numerous buildings surrounding the flag, and a machine gun emplacement guarding the road towards it, the difficulties come when enemies hide in those nearby structures. The flag can be captured while an enemy is in one of many places out of sight of the flag, and attackers can pick off defenders with ease when they search for the mystery invader. The machine gun backs onto a building itself, making it easy to flank. To assist with defence, however, there is a M3A3 Bradley that spawns here. There are paths behind the buildings adjacent to the canal at Alpha which lead past the boat in the water to Charlie. This is the most popular infantry route into Alpha base, and is one of the most hotly contested areas for infantry on the map. The main road to Bravo is also frequently travelled, while infantry like to move through the fences and rubble that lie between that road and the road linking the two Deployments. The road adjoining the Deployment bases is also one of the chief ways for tanks to flank round behind Alpha, and should be guarded against with anti-tank mines. If you are playing as the Americans, beware of tanks coming to Alpha from RU Deployment.
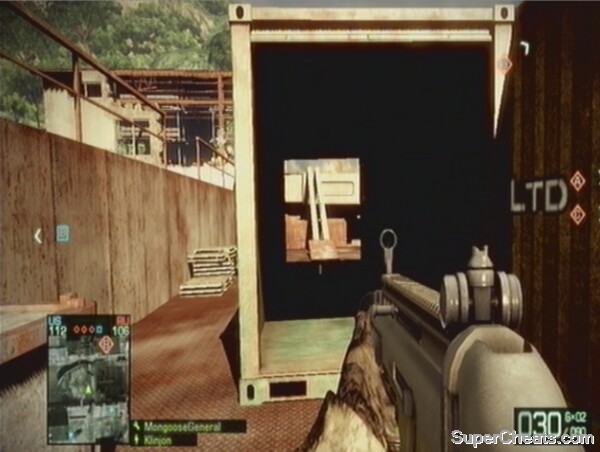
The gun emplacement at Alpha is in a good position, but can be flanked from behind.
Bravo Base (Warehouse):
Bravo is primarily accessible directly from RU Deployment, or along the road from Alpha. It can also be reached via a path from Delta, or across the causeway from Charlie. This makes it, like Alpha, very difficult to defend. Because of its ease of access by road, it is popular with tank drivers. Tanks can roll right inside the warehouse (from the front and back) and monopolise the area. Once they do this, they can easily be destroyed using C4, anti-tank mines or RPG attacks to the rear, but nonetheless, they can clean out any defenders very quickly upon arrival. In addition to the vehicular threat, infantry attacks can come from both flanks and through a number of entrances. On the side of the canal, steps leading down to the water can be used, as well as a thin path alongside the warehouse itself. On the opposite side, an area filled with rubble and debris is a haven for sneaky infantry. With this in mind, there are only one or two decent positions for defenders of Bravo. Behind the cargo container as you enter via the main opening is a popular location to camp and wait for attackers. Other than that, any of the four corners of the room at least keep players protected from one direction. The tall structure overlooking Bravo is probably the best defensive position available, though snipers from Charlie can pick you off once there.
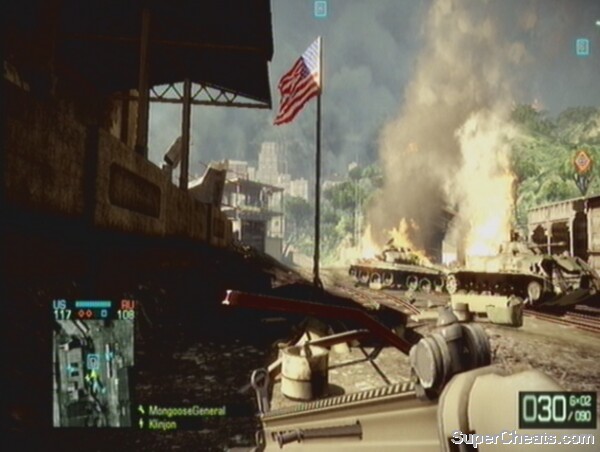
One of many more secretive routes into Bravo.
Charlie Base (Factory):
As always with this type of building, tanks can drive right inside and sit next to the flag. It is one of the easiest to defend, however, as it boasts cargo containers for infantry to hide in. It also carries the UAV station on the roof, and supports snipers with its height and commanding position on the map. The stairwells can be used to get to the roof and then jump down on any defenders below with the element of surprise. It is exposed to attacks on one side and through various doors and openings on the other. Anti-tank mines should be placed around the flag, while any engineers in the building can wait for a tank to come all the way in before dropping down behind it and getting a crucial shot on the engine. The building is indestructible, but is vulnerable through the gaps in the roof and from tank shells through the large openings in the walls. It is an important base to hold due to its value to snipers and proximity to Alpha. The main threats come in infantry form from Alpha, and in vehicular form from Delta and across the causeway crossing the canal.
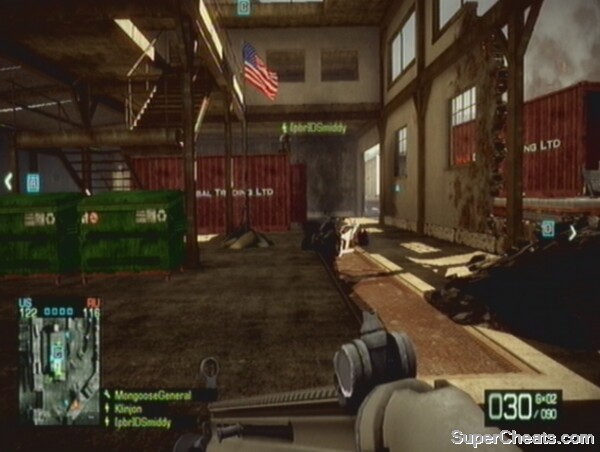
There are lots of hiding places at Charlie.
Delta Base (Train Yard):
The train yard is across the water from Bravo, but is linked with this base by a stretch of road that allows tanks to roll between the two sides of the canal with ease. There is a main road connecting it to Charlie, as well as a large run of warehouses at the back of the map, which allow infantry to pass from base to base with little chance of detection. The flag is in a good position to attack, because it is nestled next to a high wall underneath a building, allowing players to principally watch the directions of Bravo and Charlie. It also has defensive benefits, however. There is a mounted machine gun opposite the flag towards Bravo (though this can be as useful for attackers as defenders), but the real key is the large warehouse behind the flag. This has many nooks and crannies to hide in, as well as an upper floor and a further area behind it, meaning defenders can retreat against impossible odds or if they are ill equipped to deal with a tank, and then retake the base when the danger has passed. There is also a train carriage on the flank of the flag, which is very difficult to see into, making it another good hiding place. Delta is of little use to snipers, but other classes can get many kills from exploiting its defensive advantages. It is a vital base for launching a successful attack on Bravo.
The sheltered position of Delta's flag has advantages for attackers and defenders.
The layout of this map is quite complex, with the Alpha base down in the valley, in the form of the village; the Bravo base is higher up, on the side of the hill overlooking Alpha; Charlie is even further up, and is an industrial mill area. The spawns are not equal, with US Deployment nearest Charlie, but RU Deployment close to Alpha, which is a crucial base to hold due to its large area and central position. There are a few tanks on this map, and many quad bikes, and the tanks can swing the balance of the game, particularly concerning the Alpha base, which has many points of entry for vehicles.
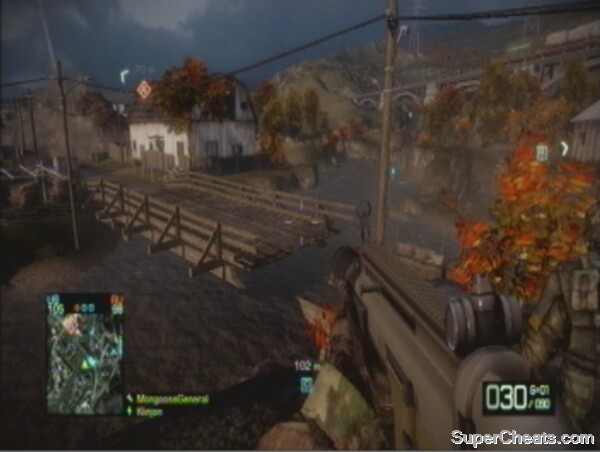
Every base on this map is important.
1) Recon: Because both Bravo and Charlie are up high, playing as a recon and using a sniper rifle can really help your team. If you are playing from US Deployment, snipers can quickly take Charlie and then have a position overlooking the Russian Alpha base. Between Bravo and Charlie there is also a straight road, allowing snipers to defend Charlie from the mill's roof, and for snipers to attack it from Bravo using the cover provided by the logs at the side of the road. Mortar strikes are also very useful for targeting the barn at Alpha, or the enclosed base at Bravo.
2) Engineer: The engineers are valuable here for blowing up the bridge by Alpha, and for preventing the tanks from gaining a foothold on the map. Not only that, the buildings at Alpha can be destroyed, making this explosive class a good idea if the fighting is concentrated around this base, as it frequently is.
3) Assault: Due to the wide-open nature of the valley, and the long distances over which much of the fighting happens, the Assault class is good due to the improved range of its rifles. In addition, the fighting in each base can be quite close quarters, making the diversity that the Assault Rifles afford priceless in many situations on Valparaiso.
4) Medic: The LMGs can really rip through the barn at Alpha, and indeed many of Alpha's buildings. As with Atacama Desert, however, there are quite long distances between the bases, making it difficult for a medic to effectively keep much of his team alive. Despite this, a medic who holds position defending Alpha, for example, would be a valuable addition to a team.
US Deployment:
At US Deployment there are three quad bikes and a M3A3 Bradley. The spawn is within easy reach of Charlie base, though it requires a trip up a steep hillside. Using the quad bikes, Bravo can sometimes also be captured before the Russians reach it.
RU Deployment:
In terms of physical characteristics, RU Deployment is almost identical to the US base. The main difference is that instead of an American Bradley tank the Russians have their BMD-3 Bakhcha. It is also considerably closer to Alpha, and Russian players should also be able to reach Bravo first, if they set out to target it specifically.
Bases:
Alpha Base (Farm):
Alpha can be attacked principally in three directions. These are across the wooden bridge (or, once the bridge is destroyed, from the river), from RU Deployment, and from US Deployment. It is thus a centre-point of this map, and while RU Deployment has easier access to it, it is always hotly contested. The barn building by the flag can be destroyed and often harbours hidden attackers. The upper floor of this building supports a mounted machine gun, which can terrorise players at Bravo base as well as in the river. The plethora of buildings dotted around this base are great hiding places for attackers and defenders guarding the flag, though you have to be in the barn area to actually convert the base. You should beware of quad bikes coming from RU Deployment, often loaded with C4 – shoot off the rider if possible, then get out of the way of the quad bikes!
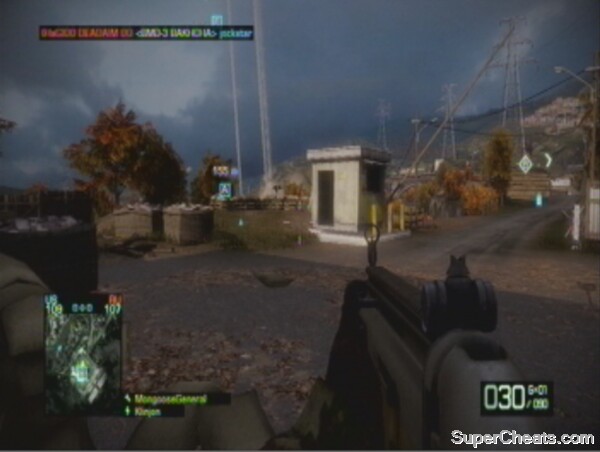
Destroy the bridge at Alpha to hinder enemy movements.
Bravo Base (Train Depot):
The Train Depot features a raised platform with a building and mounted machine gun turret guarding the area below, which houses the flag. There is much rubble to hide behind, as well as cargo containers that are a favourite camp spot for particular players. Bravo is the primary base used to attack Charlie, but is also useful for assaulting Alpha due to its position overlooking the barn. As such, it is an important point to hold. It can be attacked from the road below leading to Alpha via a circuitous route, or directly from Charlie. There is also a small hill which players use to conceal their actions until the last minute. The mounted turret has a perfect position watching this area, however, so an organised defensive force should be able to hold the base against most enemies. If attacking, beware of anti-tank mines around the flag, and throw grenades into the cargo containers and into the upper area to flush out any camping defenders.
Charlie Base (Lumber Mill):
This base is centred on the tall Lumber Mill. Built of concrete so as to withstand explosive attacks, it has two main storeys and then a flat roof area where snipers (and UAV-hogs) love to congregate. The second storey has a window overlooking the road from Bravo, and is also a good place for long-range kills. There are many points of cover outside the building, including log piles and small buildings. If the base comes under an irresistible attack, it is a good idea to retreat outside and wait for some of the attackers to disperse before retaking the building from the flank. The base can be attacked from the river below, or along the road towards Bravo. There is a mounted turret overlooking the road and valley, which can be used to suppress enemy attackers and rack up the kills. Next to this is a small guard outpost, and this should be manned to prevent enemies storming through the main entrance. Beware of the paths coming up from the river, however, as this is a very effective means of flanking the base (particularly as there is a rear door leading into the mill). The UAV is also located in Charlie Base, on top of the mill building.
The main entrance to Charlie is protected by a gun emplacement.
Arica Harbor is a converted Rush map, based on a small desert town. Unlike the Rush level, the bridge section is omitted, and all the fighting takes place around the main road in the town. Surprisingly, considering the plethora of vehicles on the Rush mode, there are no quad bikes, jeeps or tanks available for this map in Conquest, with players having to rely on the UAV for their vehicular kicks. There are many opportunities for every class due to the hill on which the Americans spawn and tall buildings helping snipers, and close quarters combat through all the houses in the town.
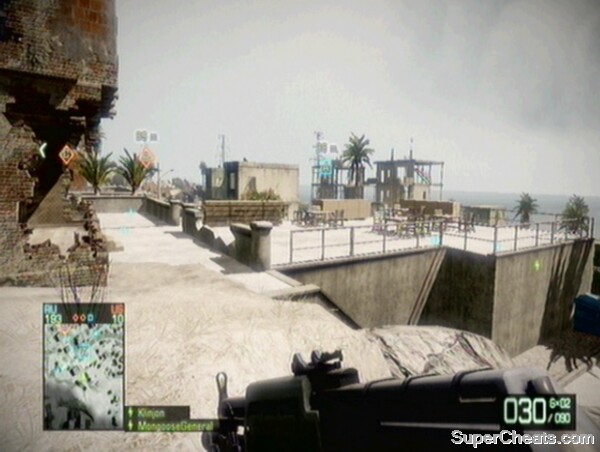
Any Rush players will instantly recognise this map.
1) Assault: As the assault rifles can function well even at long-range, they are the best choice for Arica Harbor. The diversity they offer means you can adapt your play style depending on how the match is going. The 40mm grenade attachment is great for destroying the walls in the bustling town centre area.
2) Recon: The tall building near the US deployment is a haven for snipers, and there are other high structures in the town. Mortar strikes are good for bombarding the flags, which have to be captured at short range.
3) Medic: There is not much call for medics on this map, but slightly more than there is for engineers. Their LMGs are good at long ranges, and because of the masses of people congregated around the flags in tight spaces, not having to reload frequently is a distinct advantage.
4) Engineer: As there are no vehicles on this map, engineers do not have much of a role in a successful team. Some players do prefer the SMG, and there is no reason to prefer the assault class if that is the case (especially as players' life expectancy on this map will be short so few ammo boxes will be needed). Of course, the engineers' RPGs can match 40mm grenades for building destruction too.
RU Deployment:
The Russian base is near the Bridge on this map, where the third set of M-COM stations on the Rush iteration are. While it lacks the height of the US spawn, it offers better flanking routes on the flags. From the Russian deployment, players can go off to the right, through a variety of tall buildings and up to street level to access Bravo and Charlie. Alpha, meanwhile, can be flanked on the left, using the red building next to the flag for cover. There is also a hole underneath the higher terrace by Alpha, much like the hole for the Bravo M-COM station of the second base in Rush (this can also be exploited in Conquest to guard Bravo).
US Deployment:
With no vehicles, there is not much distinctive about either deployment position. The Russian base in on the hill, near the military checkpoint of the Rush gametype. The tall building on the hill can be used by snipers to get an overwatch position on Charlie, as can the mountainous section at the edge of the map. It is also a good spawn point to flank each flag on the side near the mountains. It is closest to Charlie, and the US team should hold this base for the majority of the time.
Alpha (Town Near Bridge):
The Alpha flag is nearest to the Russian deployment. It is up a slope from their spawn, and is surrounded on two sides by a higher terrace, complete with a distinctive red building overlooking both the Russian spawn and the main road that supports each of the three flags. There is a section underneath the terrace that can be used to hide in while protecting or capturing Alpha. This garage area can be targeted with explosives to force out anyone camping within.
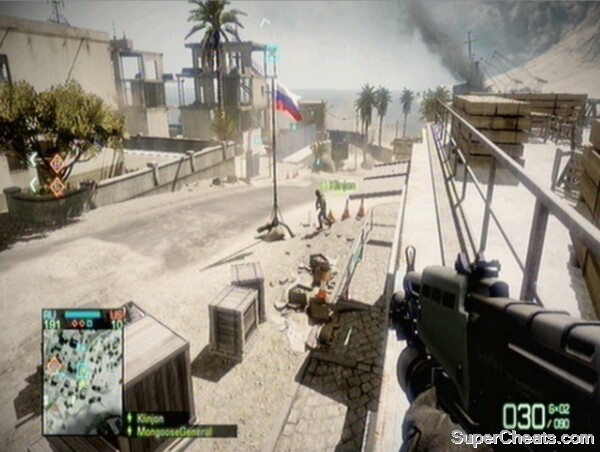
The buildings around Alpha are good as a vantage point over the other flags.
Bravo Base (Town Center):
Bravo is right in the middle of this map, and, as the name suggests, is nestled between many of the town's buildings. It is overlooked on all sides, but the wall of the terrace above can be used for cover from one half of the map. The buildings on the other side, however, afford anyone defending the flag a variety of cover. People attempting to capture the flag can also be attacked down the street, and there is little cover at Bravo itself. Planting C4 all around the road near Bravo is a good idea for anyone defending.

The garages alongside the road are crucial to holding Alpha and Bravo.
Charlie Base (Town Outskirts):
Charlie is close to the US deployment. As such, it is at the bottom of a large hill, overlooked by a tall building, still under construction, and anyone trying to attack it becomes easy prey for snipers. On the opposite side there is also a house, with a wall outside which can be used to provide a semblance of cover against the snipers.
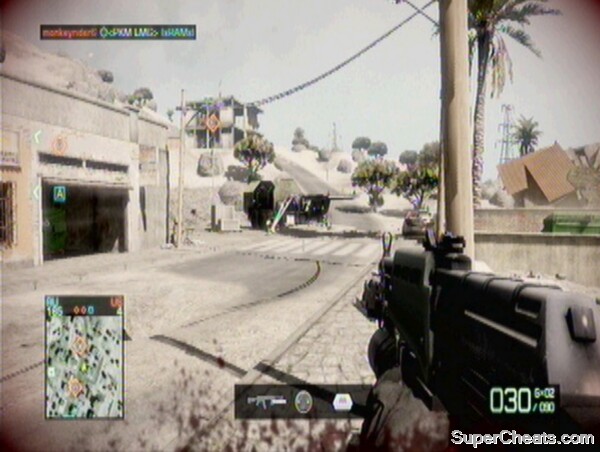
Charlie is in an exposed position, vulnerable in particular to sniper fire.
This is a variant of regular Rush, for eight players. The idea is to have two squads, with one attacking the M-COM stations and one defending, like normal Rush. However, one team of up to four players is much smaller than the usual, which one would expect to be between ten and twelve players. As a result of this, there is only one M-COM station in each base, only two bases in total, and the maps are dramatically reduced in size. The attackers only have 20 tickets, as opposed to the normal 75, and no vehicles are available.
The main tip for this mode is to stick together. The attackers generally attack in a group all together, so the defenders must stay as one to be able to fight them off. C4 works well to take out an entire team, as they may all enter the M-COM area through one entrance. Shotguns are also good to deal with multiple close-quarters enemies. Do not all stand together, however, as you can then be taken out with one well placed grenade, and this will allow the enemy to arm the M-COM before your squad respawns.
The maps available for Squad Rush are Panama Canal, Valparaiso, Atacama Desert, and Port Valdez. Laguna Alta has been announced for Squad Rush as part of Map Pack 3.
This is by far the simplest game mode. Unlike Squad Rush, this mode supports 16 players, with four squads of four. It is ideal for anyone a bit intimidated by the rules and regulations of Rush or Conquest. It is great for party play on Xbox 360 as well. It is a race to 50 kills, and while the maps are not as packed as in other modes, there is a light tank available for one team to capture and use. It is vital to keep this vehicle if you capture it, and engineers should repair it regularly. Many players use the recon class in this mode, and the motion sensor is particularly useful due to the ability to flank more easily with fewer players in the game. Medic revives do not remove a point from enemy teams in Squad Deathmatch.
The maps available for Squad Deathmatch are Isla Inocentes, Arica Harbor, White Pass and Laguna Presa. Nelson Bay has been announced for Squad Deathmatch as part of Map Pack 3.
Pins give 100 or 200 points each time they are earned, and usually even weak players can get a few in a game
Pins in Bad Company 2 are earned during combat, for various impressive feats of accuracy, brute force, vehicle expertise, and so on. There are forty to collect across all multiplayer modes. Unlike Insignias, they can be achieved multiple times, and are only given out for gallantry in a single round. As such, they have a much lower points total than Insignias.
Weapon Efficiency Pins:
These reward you for killing a certain amount of enemies with a single class of weapon in each round. Most are easy to get, though watch out for 4 melee kills in a round (if you are being chased by the same knife-wielding player every time you turn around, he may be trying to get this pin), 4 handgun kills (the MP-412 Rex is good for this), and 4 RPG kills, as these are particularly difficult to get. Note that even as a sniper you can get some other class-specific weapon pins, by using the G3 for example.
Assault Rifle Efficiency Pin: 7 Assault Rifle kills in one round [100 points]
Sub Machine Gun Efficiency Pin: 7 SMG kills in one round [100 points]
Light Machine Gun Efficiency Pin: 7 LMG kills in one round [100 points]
Sniper Rifle Efficiency Pin: 7 Sniper Rifle kills in one round [100 points]
Shotgun Efficiency Pin: 4 Shotgun kills in one round [100 points]
Handgun Efficiency Pin: 4 Handgun kills in one round [100 points]
Melee Efficiency Pin: 4 Melee kills in one round [200 points]
Emplacement Efficiency Pin: 6 kills with a weapon emplacement in one round [100 points]
Explosive Efficiency Pin: 4 kills with explosives in one round [100 points]
Grenade Launcher Efficiency Pin: 4 40mm grenade kills in one round [100 points]
Rocket Launcher Efficiency Pin: 4 RPG kills in one round [100 points]
Class-specific Pins:
These are rather self-explanatory. Resupply and Maintenance Ops are easy to get. The former can have you just leave your ammo crates around and wait for people to use them. Better yet, get your squad to do it! The latter checks off one repair every time the Vehicle Repair 20 comes up, so you can actually get this just by following the same tank around.
Resupply Ops Pin: Resupply 7 teammates in one round [100 points]
Maintenance Ops Pin: Get 7 Repair bonuses in one round [100 points]
Medical Ops Pin: Revive 5 teammates in one round [100 points]
Surveillance Ops: Get 5 Motion Tracker assists in one round [100 points]
Combat Pins:
These pins reward you for exemplary skill shown in combat. Most are easy to get through plenty of play time. Though 7 assists may seem like a tall order, it is surprising how often you get minor assists just by lobbing grenades or shooting enemies running in the distance. Spot them as you do it, to ensure someone finishes them off in good time. Combat Efficiency and Excellence requires patience, but will come up naturally given enough time – snipers are best for kills without dying, though a good tank team can replicate this. For the Squad Member pin, you are required to designate flags or M-COM boxes to attack or defend. When this is done successfully, one order has been fulfilled.
Kill Assist Pin: 7 Assists in one round [100 points]
Savior Pin: 2 Savior kills in one round [100 points]
Avenger Pin: 2 Avenger kills in one round [100 points]
Nemesis Pin: Kill the same enemy 5 times in one round [200 points]
Payback Pin: Kill your nemesis in one round [200 points]
Marksman Pin: 5 Headshots in one round [100 points]
Combat Efficiency Pin: Get 6 kills without dying in one round [100 points]
Combat Excellence Pin: Get 8 kills without dying in one round [200 points]
Anti Vehicle Efficiency Pin: Destroy 4 enemy vehicles in one round [100 points]
Squad Member Pin: Fulfil one attack and one defend order in a round [100 points]
Gold Squad Pin: Be part of the best squad in one round [200 points]
Ace Pin: Be the best player in one round [200 points]
Vehicle Pins:
Some players thrive in vehicles, and this class of pin is for them. Roadkills are easy to get in vehicles such as Humvees, particularly in confined spaces around flags or M-COM stations. Air Warfare includes UAVs, while all of these vehicular pins (except for Wheels of Hazard) allow passengers to get the points even when using their regular weapons (i.e. as passengers). Cars are classed as land vehicles that are not tanks.
Wheels of Hazard Pin: Roadkill 3 enemies in one round [200 points]
Naval Warfare Pin: Kill 4 enemies with water vehicles in one round [100 points]
Air Warfare Pin: Kill 5 enemies with air vehicles in one round [100 points]
Tank Warfare Pin: Kill 7 enemies with tanks in one round [100 points]
Car Warfare Pin: Kill 4 enemies with cars in one round [100 points]
Game-mode specific pins:
Destroying 4 M-COM stations is the hardest task on this list. Try playing as a C4 class and using Destruction 2.0 on as many buildings as possible. This is usually more effective than arming manually. See the Rush section of this guide for info on which M-COMs can be destroyed in this fashion. Flags can be captured many times in Conquest, so getting 3 captures in each round is not too trying. The Defender pins are given whenever you kill someone near the M-COM or flag, so these are easier to rack up.
M-COM Attacker Pin: Destroy 4 M-COM stations in one round [100 points]
M-COM Defender Pin: Defend 6 M-COM stations in one round [100 points]
Flag Attacker Pin: Capture 3 flags in a round [100 points]
Flag Defender Pin: Defend 6 flags in a round [100 points]
Conquest Winner Pin: Win a round of Conquest [100 points]
Rush Winner Pin: Win a round of Rush [100 points]
Squad Rush Winner Pin: Win a round of Squad Rush [100 points]
Squad Deathmatch Pin: Win a round of Squad Deathmatch [100 points]
Insignias are worth many more points than pins. They can only be gained once, unlike pins, and take a lot of play time to unlock. Some, such as gaining two platinum stars on two weapons, will take even die-hard players months and months of play.
Weapon Insignias:
500 kills may sound like a lot, but a regular player should be able to get all of the following insignias without too much trouble. Just play as one class and it shouldn't take too long. 100 mine kills is probably the hardest, because you can usually get one knife kill each game if you go looking to flank snipers.
Long Service Assault Weapons Combat: 500 kills with Assault Rifles [5,000 points]
Long Service Light Weapons Combat: 500 kills with SMGs [5,000 points]
Long Service Support Weapons Combat: 500 kills with LMGs [5,000 points]
Long Service Sniping Weapons Combat: 500 kills with Sniper Rifles [5,000 points]
Long Service Tactical Weapons Combat: 500 kills with Shotguns [5,000 points]
Distinguished Sidearms Combat: 100 kills with handguns [5,000 points]
Distinguished Explosive Combat: 100 kills using mines [5,000 points]
Distinguished Melee Combat: 100 kills with the knife [5,000 points]
Exemplary Marksman Combat: 100 Sniper Rifle marksman headshots [5,000 points]
Elite Melee Combat: 200 knife kills [10,000 points]
Distinguished Grenade Combat: 100 grenade kills [5,000 points]
Combat Insignias:
Some of these will take you a good while to achieve, particularly 5,000 kills, 200 vehicle damages, and 100 C4 kills. Engineers should be able to get 50 double kills with vehicle attacks.
Distinguished Marksman Combat: 100 headshots [5,000 points]
Elite Marksman Combat: 500 headshots [10,000 points]
Distinguished Combat Efficiency: Earn 50 Combat Efficiency pins [5,000 points]
Distinguished Combat Excellence: Earn 50 Combat Excellence pins [10,000 points]
Elite Multiple Target Combat: 50 double kills [5,000 points]
Distinguished Remote Explosive Combat: 100 kills using C4 [5,000 points]
Distinguished Retaliation Combat: Earn 5 nemesis pins and 5 payback pins [5,000 points]
Anti Vehicle Combat: 200 vehicle damages [5,000 points]
Distinguished Anti Vehicle Combat: 500 vehicles destroyed [5,000 points]
Combat Veteran: 5,000 kills [5,000 points]
Equipment Insignia:
Most of these should be relatively quick to get, providing you are playing as one class for an extended period. 100 mortar strike kills may take the longest. Note that repairs, ammo and tracer darts can all be repeated on the same target to speed things up a little.
Long Service Radio Warfare: 100 Tracer Dart plants on enemy vehicles [5,000 points]
Long Service Resupply Ops: 100 ammunition resupplies for teammates [5,000 points]
Long Service Maintenance Ops: 100 friendly vehicle repairs [5,000 points]
Long Service Medical Ops: 100 teammates healed
Long Service Surveillance Ops: 100 motion mine spot assists [5,000 points]
Distinguished Artillery Combat: 100 mortar strike kills [5,000 points]
Squad Insignia:
Clearly, to get any of these you need to play in squads, and while random squads are still an option for this, getting an organised group together will make things go markedly quicker. Attack and defend orders involve using the spot button (Back/Select) to target M-COM stations or flags to advise team mates on a strategy. They must be acted on (so a base must be taken or defended) before the statistics are awarded.
Squad Resupply Ops: 100 squad resupplies [5,000 points]
Squad Repair Ops: 100 squad repairs [5,000 points]
Squad Medical Ops: 50 squad heals and 50 squad revives [5,000 points]
Squad Surveillance Ops: 50 squad motion mine assists [5,000 points] Squad Combat Assistance: 100 squad assists [5,000 points]
Squad Teamwork Ops: 20 squad defend and 20 squad attack orders [5,000 points]
Squad Retaliation Ops: 20 squad avenges and 50 squad assists [5,000 points]
Squad Tactical Ops: 200 squad spawns on your position [5,000 points]
Game-mode specific Insignia:
Quite simply you must play Conquest and Rush to earn these.
Rush Good Conduct: 100 M-COM destroys [5,000 points]
Conquest Good Conduct: 100 flag captures [5,000 points]
Veteran Insignia:
If you thought some of the above took a long time, these will require an intense investment of time and effort. In particular, to play online for 120 hours, or five days, and to get 2 platinum stars, is something very few players will ever be able to achieve.
Distinguished Vehicle Knowledge: Earn all vehicle bronze stars [5,000 points]
Exemplary Vehicle Service: Get all vehicle pins [5,000 points]
Distinguished Weapon Knowledge: Earn all weapon bronze stars [5,000 points]
Exemplary Weapon Service: Get all weapon pins [5,000 points]
Exemplary Combat Service: Get all combat pins [5,000 points]
Elite Service: Get all pins [10,000 points]
Distinguished Battlefield Knowledge: Get all bronze stars [10,000 points]
Exemplary Battlefield Knowledge: Get 10 silver stars [10,000 points]
Elite Battlefield Knowledge: Get 5 gold stars [10,000 points]
Valorous Battlefield Knowledge: Get 2 platinum stars [10,000 points]
Superior Service Duty: Played online for 24 hours [5,000 points]
Distinguished Service Duty: Played online for 48 hours [5,000 points]
Elite Service Duty: Played online for 120 hours [10,000 points]
Weapon and item stars are the third way to get additional points while playing through Bad Company 2's multiplayer. With basic weapons, that is to say all the assault rifles, SMGs, LMGs and snipers, the following kills to stars apply:
Bronze star: 25 kills
500 Points
Silver Star: 50 kills
1,000 points
Gold Star: 100 kills
5,000 points
Platinum Star: 1,000 kills
10,000 points
Once you get one of these stars, it appears next to your weapon when seen in picture form in game. The gold stars build up until you get the tenth, which earns you a platinum star. Aiming to get stars with each gun is a good way to level up quickly.
For ‘other' weapons, such as the G3, pistols and shotguns, that can be used with any class, the following apply:
Bronze Star: 10 kills
500 points
Silver Star: 25 kills
1,000 points
Gold Star: 50 kills
5,000 points
Platinum Star: 500 kills
10,000 points
As for items/gadgets (e.g. mortar strikes, RPGs, etc.) the following kills to stars apply:
Bronze Star: 10 kills
500 points
Silver Star: 25 kills
1,000 points
Gold Star: 50 kills
5,000 points
Platinum Star: 500 kills
10,000 points
For vehicle kills, it's the following:
Bronze Star: 10 Kills
500 points
Silver Star: 20 kills
1,000 points
Gold Star: 50 kills
5,000 points
Platinum Star: 500 kills
10,000 points
Campaign (single player) achievements:
15G/Bronze: I knew we'd make it
Finish Operation Aurora mission
15G/Bronze: Retirement just got postponed
Finish Cold War mission
15G/Bronze: It's bad for my karma man!
Finish Heart of Darkness mission
15G/Bronze: They got all your intel?
Finish Upriver mission
15G/Bronze: Salvage a vehicle
Finish Crack the Sky mission
15G/Bronze: Alright, here it is
Finish Snowblind mission
15G/Bronze: Nobody ever drowned in sweat
Finish Heavy Metal mission
15G/Bronze: Ghost rider's here!
Finish High Value Target mission
15G/Bronze: Sierra Foxtrot 1079
Finish Sangre del Toro mission
15G/Bronze: Thanks for the smokes, brother!
Finish No One Gets Left Behind mission
15G/Bronze: Save me some cheerleaders.
Finish Zero Dark Thirty mission
15G/Bronze: Turn on a light.
Finish Force Multiplier mission
30G/Silver: P.S. Invasion cancelled, sir
Finish Airborne mission
50G/Gold: It sucks to be right.
Finish Airborne mission on Hard
15G/Bronze: New Shiny Gun
Find 5 collectible weapons
50G/Silver: Guns Guns Guns
Find 15 collectable weapons
15G/Bronze: Link to the Past
Destroy 1 satellite uplink
15G/Bronze: Communication Issues
Destroy 15 satellite uplinks
50G/Silver: Complete Blackout
Destroy all satellite uplinks
15G/Bronze: Ten Blades
10 melee kills in single player
15G/Bronze: Taxi!
Drive 5 km in any land vehicle
15G/Bronze: Destruction
Destroy 100 objects
30G/Silver: Destruction Part 2
Destroy 1000 objects
15G/Bronze: Demolish
Demolish 1 house
30G/Silver: Demolish Part 2
Demolish 50 houses
15G/Bronze: Assault Rifle Aggression
50 kills with assault rifles
15G/Bronze: Sub Machine Gun Storm
50 kills with sub machine guns
15G/Bronze: Light Machine Gun Lash Out
50 kills with light machine guns
15G/Bronze: Sniper Rifle Strike
50 kills with sniper rifles
15G/Bronze: Wall of Shotgun
50 kills with shotguns
Online Multiplayer achievements:
15G/Bronze: Multiplayer Knowledge
Reach Rank 10 (Sergeant I)
50G/Silver: Multiplayer Elite
Rreach Rank 22 (Warrant Officer I)
15G/Bronze: Assault Expert
Unlock 3 weapons in the Assault kit
15G/Bronze: Engineer Expert
Unlock 3 weapons in the Engineer kit
15G/Bronze: Medic Expert
Unlock 3 weapons in the Medic kit
15G/Bronze: Recon Expert
Unlock 3 weapons in the Recon kit
50G/Gold: Battlefield Expert
Obtain all unlocks in any kit or all Vehicle unlocks
15G/Bronze: 15 Minutes of Fame
Play for 15 minutes
15G/Bronze: Mission... Accomplished
In a round do one kill with the knife, the M60 and the RPG-7
15G/Bronze: Pistol Man
Get 5 kills with every handgun in the game
15G/Bronze: Airkill
Roadkill an enemy with any helicopter (note that the UAV can be used for this)
15G/Bronze: Et Tu, Brute?
Knife 5 friends
15G/Bronze: Demolition Man
Get 20 demolish kills
15G/Bronze: Careful Guidance
Destroy an enemy helicopter with a stationary RPG
15G/Bronze: The Dentist
Do a headshot kill with the repair tool (just use it instead of the knife, but make sure you hit them in the head!)
15G/Bronze: Won Them All
Win a round in all online game modes
30G/Silver: Squad Player
Obtain the Gold Squad Pin 5 times
15G/Bronze: Combat Service Support
Do 10 resupplies, repairs, heals, revives and motion mine spot assists
15G/Bronze: Award Aware
Obtain 10 unique awards (these include pins and insignia)
30G/Silver: Award Addicted
Obtain 50 unique awards (these include pins and insignia)


 How to Fix Fallout 4 Crashes, Freezes, Black Screen and Other Problems
 How to get more Attunement Slots in Dark Souls 2
 Wolfenstein - The Old Blood (PC) cheats, codes
 Here’s How You Can Set Quiet Hours on Windows
 The Immaturity Trap