Unofficial Battlefield 3 Guide by vhayste for
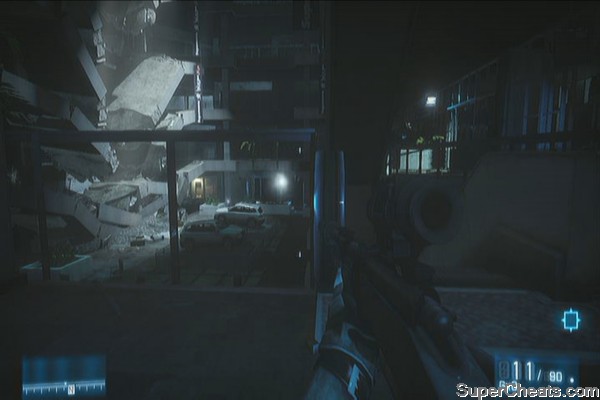
Check out our guide to Battlefield 3 which contains all you need to complete the single player walkthrough and all the co-op missions, a great achievement guide and a complete dog tag list other unlockables. Not on my watch (25 points) This is a bit tricky to do since it happens too fast. After getting on the bus which gets hit by an RPG, stay inside and take out the three enemies nearby. There are two enemies that will appear straight ahead as soon as you exit the bus. The building beside them will crumble and you have 3-4 seconds to kill them both before the debris buries them alive. See the video below.
It is recommended to do this on Easy mode since enemies will die quickly and your auto-aim will be more accurate.
Practice makes perfect (15 points) You only need to score headshots on the stationary targets so you can take your time and carefully aim at them. You don't need to land headshots on living targets. Just carefully move around the corners and kill enemy soldiers first before shooting the targets.
In the part of the mission where you stumble upon a group of enemy soldiers guarding the garage where you're supposed to go. Sneak behind the car hanging at the edge then press B to kick it down.
You can be my wingman anytime (30 points) • Kill all bandits without a single miss Here's a general rundown of what you need to do. The numbers indicate the order of the fighters you need to take out. Check out the video below for more information. 1 - Dump 2 flares to defend yourself. After getting the prompt to take out the enemy fighters, wait for the enemy to drop flares 3 times (fire as soon as third flare is released). Start counting only after you have weapons control! 2 - As soon as second fighters is in sight, fire missile 5 - You'll get a lock immediately if you killed the fourth bogey correctly. Just release your missile. After the cutscene, you'll have to defend yourself against two bandits. For the first barrage, wait for a solid tone then release your flares. In the next barrage, after the solid tone, release a flare then keep pressing LT again to immediately release another batch of flares (to deflect the second missile). Do the same thing for the third barrage. 6 - Wait for two flares, fire missile
Use zoom and adjust your shot since these tanks move only in one direction. You should be able to take them out in one go.
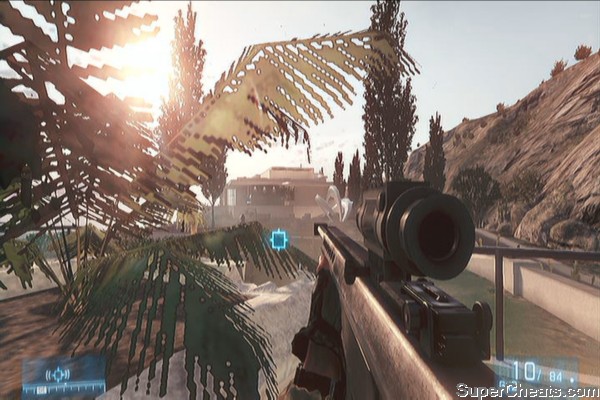
Butterfly (25 points) This is a very glitchy achievement to unlock and you need to take out the SU-25 with one shot. Some say that you won't unlock the achievement if you're killed by the bombardment and reloaded a checkpoint during the mission so may take that into consideration. One noticeable glitch you'll notice is that the objective to shoot down the SU-25 appears AFTER you destroy it and after moving to the objective marker. Another thing to note is that some say to stick close with Cole and hide where he hides until you get the chance to run to the Stinger. Once the jet is marked, take aim and fire once you get a solid lock.
Twofor (15 points)
Between a Rock and A Hard Place (15 points)
Ooh-rah! (30 points) Semper Fidelis (50 points) Car Lover (20 points) Untouchable (20 points) You must maximize your weapons' range as possible; don't just go up close to engage especially marked targets and enemy armor. You're fine getting damaged a bit – just don't take damage severe enough to disable your helicopter. Push On (20 points) Bullseye (20 points) In the nick of time (20 points) This is fairly straightforward mission and of course, should be done in Easy mode. Kill all the guys near the entrance then run to the platform. Continue killing the enemies as you make your way to the front of the first train. Take note that after crossing the barricades, the timer will start. Rush forward and you should immediately see the timer countdown ahead, inside the second train. Kill enemies along the way and find the bomb. Complete the quick-time event as fast as you can to disarm the bomb. Two-rah! (30 points) Army of Two (50 points) Lock 'n' Load (30 points) Air Warfare Ribbon (200 XP) Transport Warfare Ribbon (200 XP) Armored Warfare Ribbon (200 XP) Infantry Efficiency (30 points) Assault Rifle Ribbon (200 XP) – Assault Support Efficiency (30 points) Medical Efficiency Ribbon (200 XP) Resupply Efficiency Ribbon (200 XP) Maintenance Efficiency Ribbon (200 XP) Surveillance Efficiency Ribbon (200 XP) For accomplishing various tasks in a multiplayer game, players are awarded with Ribbons. You can earn multiple ribbons in a single game and you can even earn the same ribbon multiple times. Earning a ribbon also comes along with a bonus EXP. See the list below: Weapons Light Machine Gun Ribbon (200 XP) Carbine Ribbon (200 XP) Hand Gun Ribbon (200 XP) Sniper Rifle Ribbon (200 XP) PDW Ribbon (200 XP) Shotgun Ribbon (200 XP) Melee Ribbon (200 XP) Other Savior Ribbon (200 XP) Nemesis Ribbons (200 XP) Accuracy Ribbon (200 XP) Suppression Ribbon (200 XP) Anti Explosives Ribbons (200 XP) Squad Spawn Ribbon (200 XP) Streaks Combat Efficiency Ribbon (500 XP) Kits Resupply Efficiency Ribbon (200 XP) Maintenance Efficiency Ribbon (200 XP) Surveillance Efficiency Ribbon (200 XP) Vehicle Disable Vehicle Ribbon (200 XP) Air Warfare Ribbon (200 XP) Stationary Emplacement Ribbon (200 XP) Surveillance Efficiency Ribbon (200 XP) Transport Warfare Ribbon (200 XP) Armored Warfare Ribbon (200 XP) MVP MVP Ribbon (500 XP) MVP 2 Ribbon (400 XP) MVP 3 Ribbon (300 XP) Game Modes M-COM Defender Ribbon (200 XP) Flag Defender Ribbon (200 XP) Flag Attacker Ribbon (200 XP) Squad Rush Ribbon (200 XP) Squad Deathmatch Ribbon (200 XP) Rush Ribbon (200 XP) Conquest Ribbon (200 XP) Team Deathmatch Ribbon (200 XP) Squad Deathmatch Winner Ribbon (500 XP) Squad Rush Winner Ribbon (500 XP) Rush Winner Ribbon (500 XP) Conquest Winner Ribbon (500 XP) TDM Winner Ribbon (500 XP) It's better than nothing! (30 points) Colonel (50 points) 1st Loser (30 points) Most Valuable Player (30 points) M.I.A (20 points) These are unlocked automatically so no need to worry about them too much. This is the end (20 points) Wanted: Dead or Alive (20 points) Shock Troop (15 points) Where are the other two? (20 points) No Escape (30 points) FlashForward (10 points) This is a very short mission. Just treat this as a tutorial stage. If you've played previous Battlefield titles or any shooters, then controls will be very much familiar. The mission is pretty straightforward but we've wrapped of it up in the video below if you want to see it.
Battlefield 3 tells the story of Sgt. Henry "Black" Blackburn, a Recon Marine under secret interrogation in New York City by the CIA in order to determine the next potential location of a nuclear terrorist attack. Under suspicion of treason, Blackburn begins to recount the missions and events that brought him to this pass... and why he believes the militant Iranian insurgency called the PLR and a terrorist only known as Solomon are behind the impending attack...
Battlefield 3 Achievements Guide
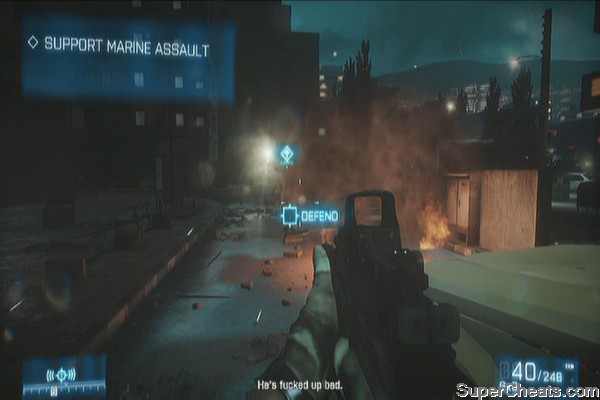
Protect Chaffin from the soldiers in the street in Operation Swordbreaker
Kill as many enemies as you can. After Doc thanks you and starts moving your buddy to safety, more enemies will appear. Take them as out as well and you'll get the achievement.
Involuntary Euthanasia (25 points)
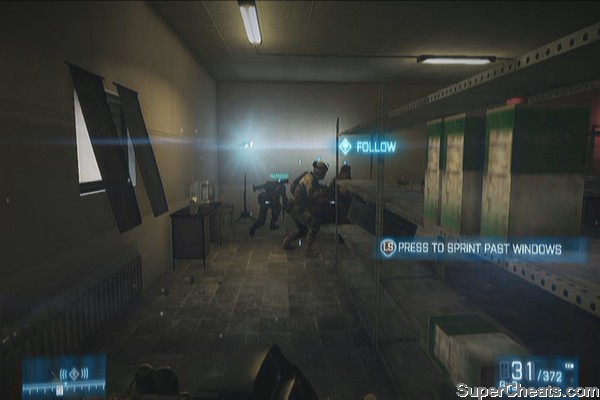
Kill the 2 soldiers before the building falls on them in Uprising
Leaving them alone could've saved me a few bullets...
The Professional (30 points)
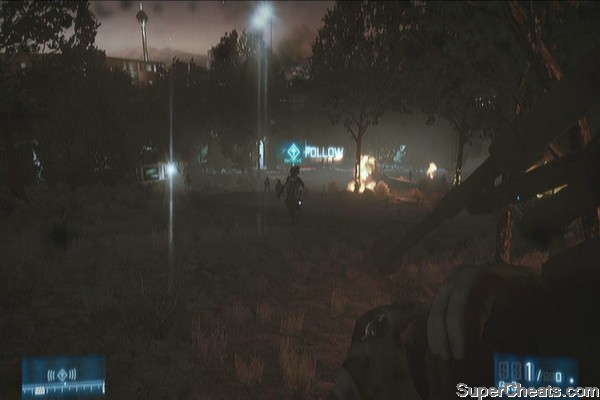
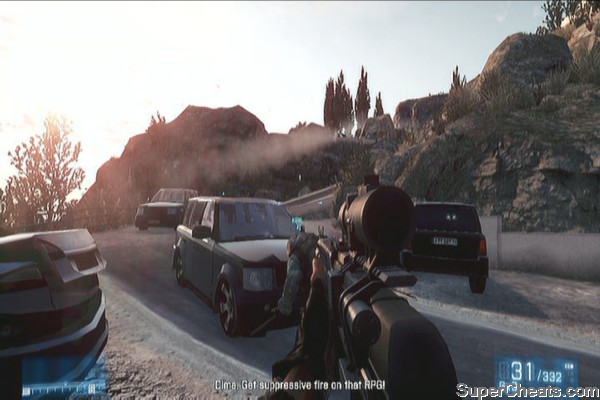
Complete the street chase in Comrades in under 2 minutes 30 seconds without dying
To unlock this achievement, you need to complete the street chase in less than 2 minutes, 30 seconds without dying. Stay on the left side of the street! Continue running and shoot only the enemies directly in front of you. Take note that the timer starts as soon as your character removes his gas mask. Refer to the video below for further details. It is strongly recommended to attempt this in Easy difficulty since you can't reload the checkpoint if you died during the chase. You'll have to restart the whole mission for it.
Dodging bullets is my specialty
Army of Darkness (30 points)
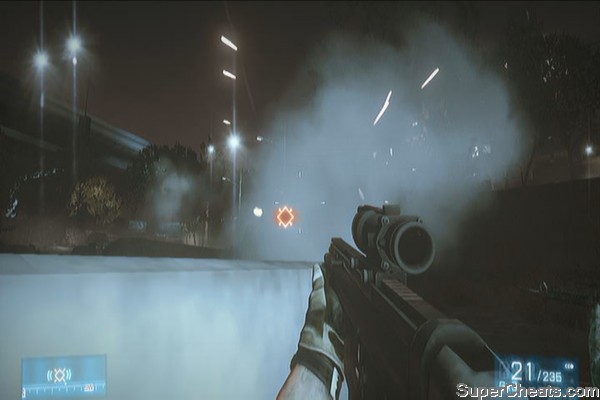
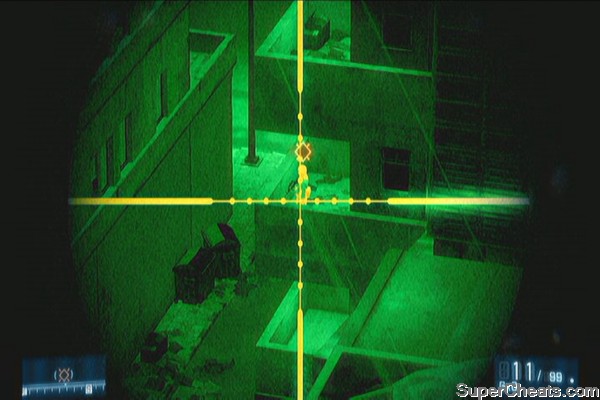
Shoot out the 4 lights with 4 bullets in Night Shift
Aim a bit on the top of each light and press-hold L3 to hold your breath and steady your aim. Remember that you can't hold your breath for too long. It's recommended to immediately shoot after holding your breath for 1-2 seconds.
Four lights with four bullets
Headshot each of the targets in the gun range in Kaffarov
Practice makes perfect
What the hell *are* you? (20 points)
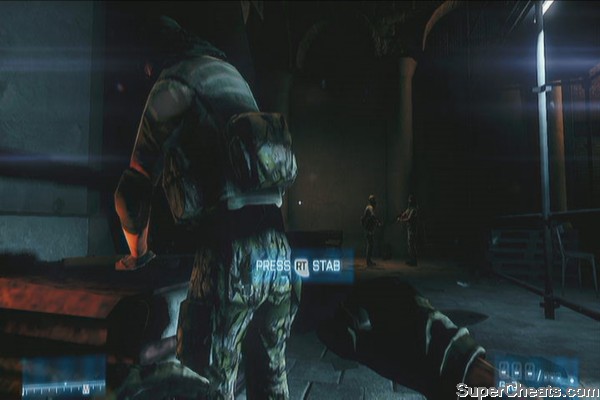
Take a russian Dog Tag in the forest ambush in Rock And A Hard Place
At the start of the mission, you'll be ambushed by enemy soldiers. There will be two nearby soldiers; kill one of them then run and knife the other to get the Dog Tag
That'll be mine, thank you
Roadkill (20 points)
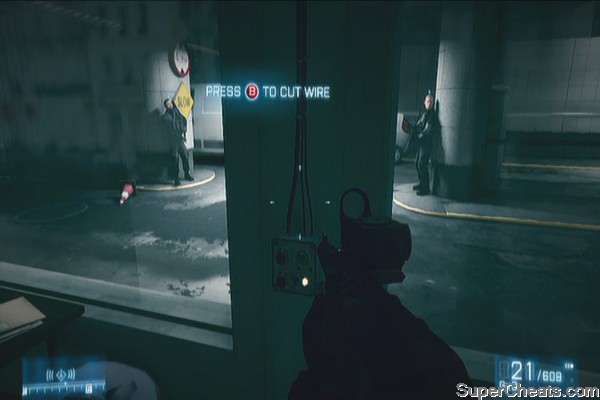
Kick the car to kill the soldiers in Uprising
Two for the road!
Complete Going Hunting in a perfect run
Remember that if you didn't meet any of the requirements to unlock the achievement, you'll have to restart the whole mission. It is recommended to attempt this achievement in easy mode.
• Do not get damaged
3 - As soon as you get a lock as the fighters moves to your left side, fire missile
4 - Wait for the enemy fighter to fly by and release countermeasure if tracked. Wait until you get a lock and after enemy releases flares three times. Fire missile once he's in front.
Note for #4: If you're not tracking the bogey's movements, you may miss seeing the first flare. Just take note of your plane's movements. The bandit will release two flares while in front of you. After the bandit releases its flare and after your plane barrel rolls, you may release your missile.
7 - Wait to get a clean lock, after 3 flares, fire missile
The Perfect Run
Scrap Metal (25 points)
Destroy 6 enemy tanks before reaching the fort in Thunder Run
Love the smell of burning steel in the morning
Take down the jet in one attempt in Rock And A Hard Place
...stings like a bee
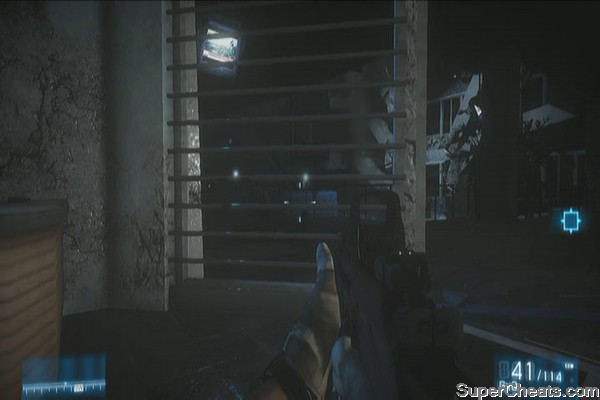
Take down 2 enemies with 1 bullet in Night Shift
After taking out the 2nd guard overlooking from the building, Campo and you will climb up the roof of the next designated RV. You'll be ordered to take out two guards standing by the entrance of the building your ground forces need to enter. Line up and kill them with one shot. See the video below.
Two PLRs, one shot
Beat Solomon, flawlessly, in The Great Destroyer
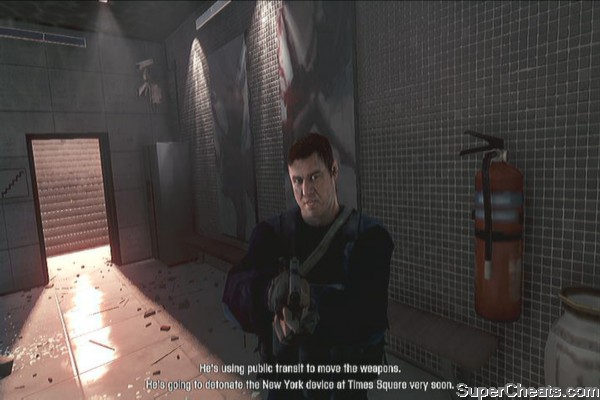
During the action sequence in Times Square, you have to press the quick-time action buttons that will appear in your screen correctly until you defeat Solomon. In case you missed a button, reload the checkpoint and try again.
New York City Brawl
Complete the campaign story
Complete the campaign story on Hard
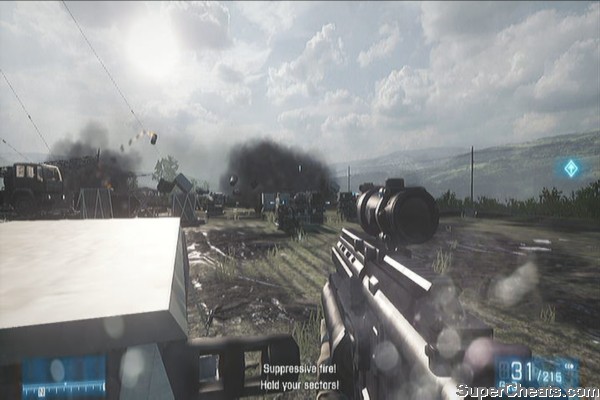
Complete the mission without losing a humvee in Operation Exodus
This is recommended in easy mode. Your priority targets will be the RPG troopers and tanks. It will also help if you and your friend both carry a fully loaded and ready Javelins as it only takes 3 Javelin hits (regardless of difficulty) to destroy them. You also need to remember the location of ammo caches so you can immediately resupply when needed.
When the mission starts, plant some claymores in the alley left of the overpass so you won't have problems later. For the first wave, take out the footsoldiers as usual, then take out the first tank using your javelin. For the second wave, the mines you placed earlier should be enough to destroy the second tank. Just concentrate on taking out the RPG troopers. For the last wave, the tank will appear from the tenement building by ramming through the front door so make sure you and your buddy concentrate your fire to it until it is destroyed.
Complete the mission without using the fire extinguisher in Fire From The Sky
For this mission, you and your buddy will have two different albeit very important roles. One will be the pilot and the other will be the gunner. The pilot will be responsible for keeping the chopper airborne while flying it as stable as possible for the gunner's convenience and efficiency, as well as evading enemy fire. The gunner will deal the most destruction as he has access to explosive, auto-cannon and hellfire missiles.
Aside from playing this on easy, it is also recommended to play with close friend so you can easily interact with each other. Though the pilot has access to unguided Hydra rockets, it is the gunner's main responsibility to take out enemies.
Ninjas (20 points)
Reach the VIP without setting off the alarm in Exfiltration
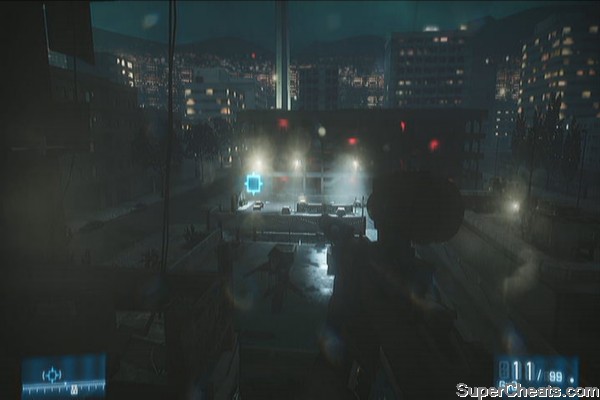
Again, recommended on easy and preferably with a friend. Having headsets is critical for communicating and timing your shots. You must take out the guards with one shot, so having individual targets and countdowns for synchronized shots is vital for this achievement. See the Co-op walkthrough for this mission for more details.
Reach the garage without going into man-down state in Hit and Run
This is pretty much a very straightforward mission where you need to need to fight through a bunch of enemies as you move towards the objective markers placed in the map. Playing this mission on easy is already a given but there's also one more thing that you must remember to unlock this achievement: both you and your co-op partner MUST NOT go into man-down state. Going through this mission in a slow yet steady pace is vital to keep yourselves alive in the entire ordeal.
Reach and save the hostages without alerting any enemies in Drop 'em Like Liquid
This is strongly recommended on easy difficulty and preferably with a friend. Having headsets is critical for communicating and timing your shots. You must take out the guards with one shot, so having individual targets and countdowns for synchronized shots is vital for this achievement. This is by far, the hardest co-op mission achievement to acquire. It will take one mess up to screw your chance of getting this achievement during the mission.
See the Co-op walkthrough for this mission for more details.
Disarm the bomb in under 20 seconds in The Eleventh Hour
Complete all co-op missions
The co-op missions are the following:
• Operation Exodus
• Fire from the Sky
• Exfiltration
• Hit And Run
• Drop 'Em Like Liquid
• The Eleventh Hour
Complete all co-op missions on Hard
Unlock all unique co-op weapons
Here's the list of all seven unique co-op weapons:
MP412 REX (63k co-op score)
KH2002 (126k co-op score)
MP7 (189k co-op score)
M39 EMR (252k co-op score)
M9-3R (315k co-op score)
SG553 (378k co-op score)
G3A3 (441k co-op score)
The scores are stackable which means you can repeat a mission over and over again until you get enough points to unlock the corresponding weapon.
Vehicle Warfare (30 points)
Obtain all 3 vehicle warfare ribbons
For accomplishing various tasks in a multiplayer game, players are awarded with Ribbons. You can earn multiple ribbons in a single game and you can even earn the same ribbon multiple times. Earning a ribbon also comes along with a bonus EXP.
For this particular achievement, you need to get a certain number of kill for each vehicle type. See the list below:
Kill 6 enemies with air vehicles in a round (jets and attack helicopters)
Kill 4 enemies with transport vehicles in a round (e.g. Grolwer, Amtrak, Buggy. You can also get kills from transport helicopters as a gunner though these kills won't count towards Air Warfare ribbon kills)
Kill 7 enemies with land vehicles in a round
Obtain all 4 weapon efficiency ribbons
For accomplishing various tasks in a multiplayer game, players are awarded with Ribbons. You can earn multiple ribbons in a single game and you can even earn the same ribbon multiple times. Earning a ribbon also comes along with a bonus EXP.
For this particular achievement, you need to kill 7 enemies using different weapon types: Assault Rifle, Light Machine Gun, Carbine and Sniper Rifle. These weapons are available to each kit. See the list below:
Light Machine Gun Ribbon (200 XP) – Support
Carbine Ribbon (200 XP) – Engineer
Sniper Rifle Ribbon (200 XP) – Recon
Obtain all 4 support efficiency ribbons
For accomplishing various tasks in a multiplayer game, players are awarded with Ribbons. You can earn multiple ribbons in a single game and you can even earn the same ribbon multiple times. Earning a ribbon also comes along with a bonus EXP.
In a round, do 5 revives
First, get the defibrilllator unlocked via Assault Kit then go into battle using it. Revive 5 team mates to get this ribbon
In a round, do 7 resupplies
While playing as a support class, perform seven resupplies (not ammo drops)
In a round, do 7 repairs
While playing as an engineer, repair a vehicle seven times to get this ribbon
In a round, get 5 motion Sensor Assists.
While playing as recon class, you must unlock the MAV (Micro Air Vehicle) first. Find a safe place to camp and go prone then deploy it. Use it to spot enemies for your team mates. If they kill an enemy you “tagged”, it will be counted towards this ribbon. You need 5.
Decorated (50 points)
Obtain one of each ribbon in the game
-------------
Assault Rifle Ribbon (200 XP)
In a round, kill 7 enemies with Assault Rifles
In a round, kill 7 enemies with Light Machine Guns
In a round, kill 7 enemies with Carbines
In a round, kill 4 enemies with Handguns
In a round, kill 7 enemies with Sniper Rifles
In a round, kill 7 enemies with Personal Defense Arms
In a round, kill 7 enemies with Shotguns
In a round, kill 4 enemies with melee weapons
---------
Avenger Ribbon (200 XP)
In a round, do 2 avenger kills
In a round, do 2 savior kills
In a round, do 2 Nemesis kills
In a round, get 5 headshots.
In a round, get 7 Suppression Assists.
In a round, destroy 2 enemy explosives
In a round, get 7 squad spawn bonuses
-------------
Squad Wipe Ribbon (200 XP)
In a round, do 2 squad wipe bonuses.
In a round, get 3 streak bonuses.
---------
Medical Efficiency Ribbon (200 XP)
In a round, do 5 revives
In a round, do 7 resupplies
In a round, do 7 repairs
In a round, get 5 motion Sensor Assists.
---------
Anti Vehicle Ribbon (200 XP)
In a round, destroy 3 enemy vehicles
In a round, disable 4 enemy vehicles
In a round, kill 6 enemies with air vehicles
In a round, kill 2 enemies with emplaced weapons
In a round, do 5 UAV spot assists
In a round, kill 4 enemies with transport vehicles
In a round, kill 7 enemies with land vehicles
--------
Ace Squad Ribbon (500 XP)
In a round, be part of the best squad
In a round, be the best player
In a round, be the 2nd best player
In a round, be the 3rd best player
--------------------
M-COM Attacker Ribbon (200 XP)
In a round, blow up 3 M-COM Stations
In a round, defend 4 M-COM Stations
In a round, do 5 flag defends
In a round, do 4 flag captures
Finish a Squad Rush round
Finish a Squad Deathmatch round
Finish a Rush round
Finish a Conquest Round
Finish a Team Deathmatch round
Win a Squad Deathmatch round
Win a Squad Rush Round
Win a Rush round
Win a Conquest round
Win a Team Deathmatch round
Finish as 3rd MVP in a ranked match
Achieve rank 45
Finish as 2nd MVP in a ranked match
Finish as MVP in a ranked match
Obtain your first enemy Dog Tag
Like in the campaign mission “Between a Rock and A Hard Place”, you'll get an enemy dog tag by killing him with a knife. If you're really having a hard time doing this against online opponents, you can simply boost it with a friend by allowing you to knife him once.
Secret Achievements
Failed to prevent the attack
Captured Al Bashir
Survived the quake
Found the nuke
Captured Kaffarov
Completed Semper Fidelis
Semper Fidelis
Runaway Train
p.s. Don't worry not all our guide pages are this short!
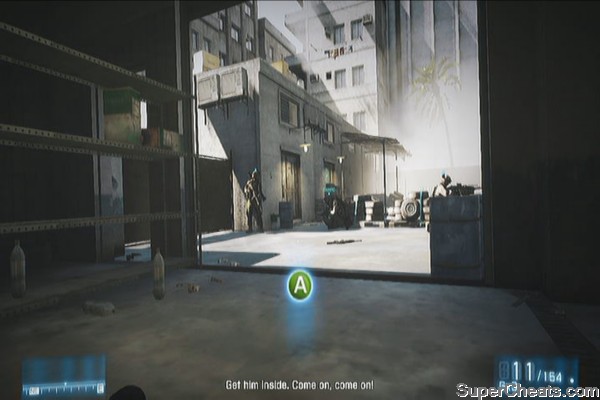
After the scenes, just follow your team mates to receive your mission briefing. After learning your objectives, head out. Follow your squad as you enter through the buildings. You'll finally reach the street. Stay put and wait for the technical to pass. Cross the street and stack up with your team mate by the door. Attempt to head out and your team will be ambushed. Drag your wounded team mate and keep pressing A to avoid getting damaged.
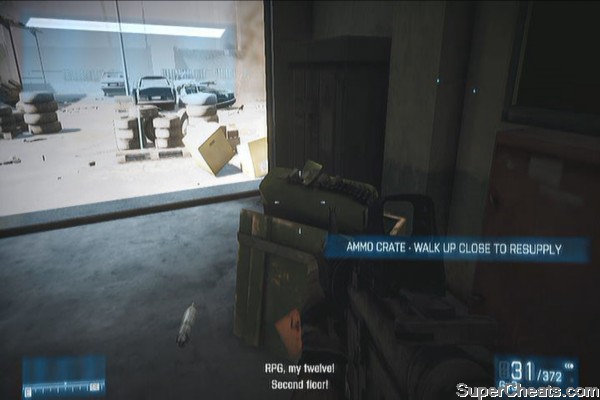
Once done, help your team take out the enemies outside. Don't worry about your grenades and ammo since there is an ammo crate nearby that can instantly resupply you. Keep clearing the enemies outside, including the two RPG troopers in the building to the south (look in your compass). Take note that your weapon can destroy the concrete walls so use that to kill the RPG soldiers without too much hassle.
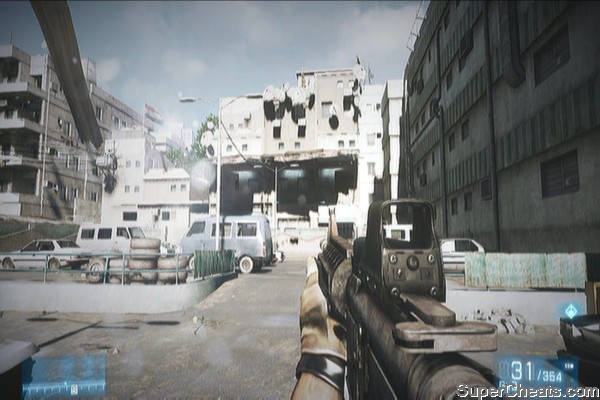
After clearing the area, regroup with your team mates inside the building. Follow them to the upper floors until you reach a large room. Sprint past the windows and kill the enemies that will appear from the corner. Continue following your squad to the rooftops.
Don't go ahead since there's a sniper taking potshots at you. Crouch and follow your team mates as you move from cover to cover. Join your team as they position themselves near the cover. Stay put until all of them positions themselves near the edge. Crawl towards them and grab the AT they'll hand to you. Press X to equip it and WAIT for them provide suppressing fire. The target will be marked in the hotel; just aim your weapons and release your projectile to destroy it.
Anti-Sniper AT
Next, head to the corner of the rooftop and cover your allies below as they extract your wounded comrade. Take out any hostiles who will appear from the alleys and the buildings. Continue helping them fend off three waves of hostiles until they get to safety. You will also unlock an achievement here if you killed most of the enemies, including some runners who will attempt to rush towards the building you're in after Doc Holiday leaves the scene.
Not on my watch!
Next follow your team mates as you cross the other building and descend to ground level. Continue to the next building where you'll find another ammo cache. Resupply and continue clearing the building. Head outside to find a destroyed HUMVEE and stay put until your orders are given. Trace the wire as instructed and it will lead you to a set of devices in a basement. Interact with it and beat up the terrorist who will attack you.

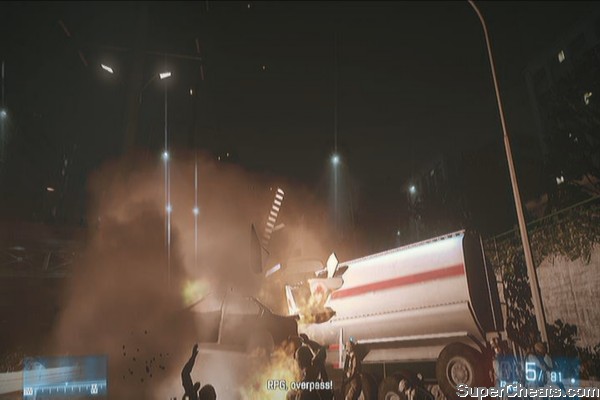
Return to the street and head to the overpass to get the LMG. Use it to fend off the enemy attack. After successfully defending your position, get down and head to the next marker. Get up the abandoned technical and use the mounted machine gun to lay waste on the enemies. Take note that you can shoot the cars to detonate them to your advantage. Continue doing this until a catastrophic earthquake takes place. Mission complete.
Tremor
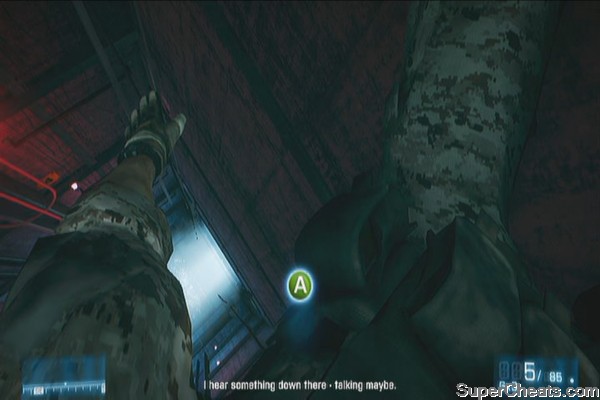
You'll have to avoid the PLR crawling around the place for this mission. Crouch and stick in the shadows. Follow the straightforward path until you reach a broken sewer pipe. Crawl inside and continue to the next building.
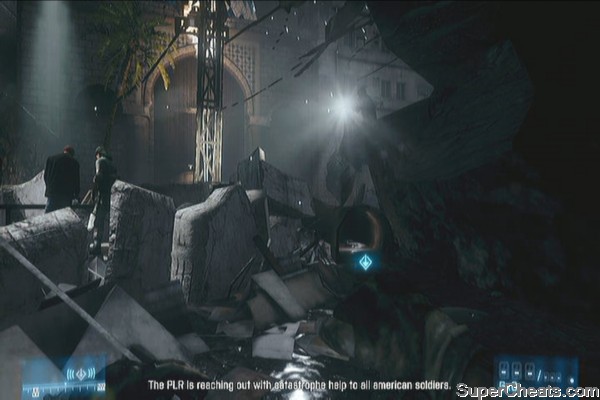
Once there, carefully and stealthily approach the nearest enemy and stab him from behind. Take cover and take out the other two guards. Take out the other guards in along the next corridor as well. Grab another weapon so you can have something to switch to then head outside.
Take out the guards and continue to the objective marker. There's an ammo crate nearby so use it to fully restore your ammo and grenades. You need to clear the next area of enemies. There is an achievement to be unlocked here so carefully approach the hanging car and press B to kick and drop it to the enemies.
Two for the road!
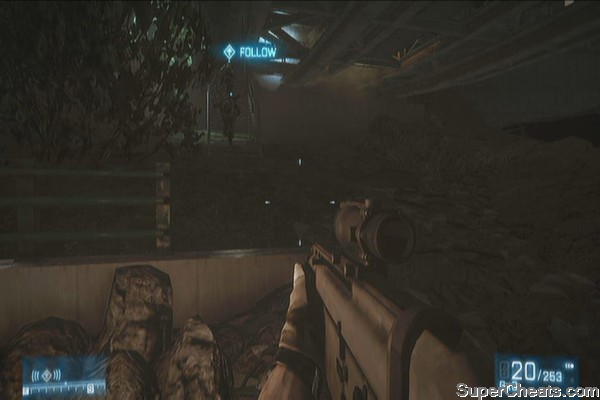
Head inside the garage and resupply using the ammo crate in the corner. The rear door will open. Hide behind a cover and take out the enemies waiting outside. Continue inside the wrecked bus and a rocket will blow it open. Before heading outside the bus, there's another achievement to be unlocked and its a little bit tricky. First take out the three enemies nearby. There are two enemies that will appear as soon as you exit the bus. The building beside them will crumble and you have 3-4 seconds to kill them both before the debris buries them alive. See the video below.
Leaving them alone could've saved me a few bullets...
This is easier done in Easy Mode since you can aim faster and more accurately, and enemies die faster. You just need to sprint outside and immediately zoom to auto-target the two enemies. It is recommended to kill the enemy to the left since he's closest to the crumbling building.
Once done, head to the next marker and kill two more enemies inside. Breach the door below and continue along the corridor to finally meet up with up with Montes. Follow him until you regroup with your other surviving allies. Run to the marked Humvee and man the turret. Use it to fend off the attacking enemies. More enemies will appear to the right. Rain lead to them until you get the prompt to run to the Osprey. Mission complete.
FUBAR
Once you're inside the F-18, follow the onscreen instructions to perform a pre-flight check with your aircraft. Once ready, press Y to take off. Enjoy the view for the meantime until your flight enconters multiple bandits. There's an achievement you can unlock here by doing a "perfect run". Remember that if you didn't meet any of the requirements to unlock the achievement, you'll have to restart the whole mission. It is recommended to attempt this achievement in easy mode.
• Kill all bandits without missing
• Avoid getting damaged
The Perfect Run
For more tips and details, refer to the "You Can Be My Wingman Anytime" achievement in the corresponding section of this guide.
Next, you'll be in anti-ground mode. You'll be switching to AGM-88. Lock on the targets and release your air-to-ground missile once you see the word "Lock" floating above the target. Destroy the initial three targets. Next, you'll need to switch to JDAM and infrared to locate the parked aircraft. They'll be illuminated brightly in the background so you shouldn't have problems finding them. Once you find your target, zoom in and press the trigger. Just keep the targets within your crosshairs to destroy them. Next, you'll have to destroy a couple more of planes exiting their hangars and attempting to take off. Use JDAM to get rid of them and prevent them from getting airborne.
Eye in the sky
Three vehicles will appear on the runway, as well as a helicopter. Once you're clear to engage, mark the spot where you want the A-10 to do its gunning run. After destroying the helicopter and the vehicles, runners will also become available. Just place a marker in the middle of the group and let the A-10 do the job. Mission complete.
Hit by a Thunderbolt
Follow your allies as you charge down the hill. Head to the spot where you need to set up your mortar then press B.
Climb up the wall then continue down the creek after eliminating the targets. Clear your path through until you reach the stairs leading back to the street. Take cover and take out to eliminate the first MG nest.
Continue ahead and use the canal to flank the second MG nest. Dispatch the first wave of enemies on sight then run across towards the marked stairs. Hurl a grenade through the window where the MG nest is located to clear them out. Continue inside the apartment and follow the straightforward path. After breaching the second door, you'll be ambushed by three enemies. Kill them then continue to your objective. Get in the Humvee next.
After pulling over, head to the next objective and you'll be caught in a major ambush. Don't bother shooting them all from your current position; just regroup with your squad and follow them as they attempt to flank the enemies.
Continue upstairs to the overpass and clear out the enemies. Continue following your team and clear the road ahead. Continue moving up as you kill enemies before finally, a tank appears. Quickly run to the trenches to avoid getting blown to bits. Follow your team mates to the next building.
Follow your team mates again to the plaza and wait for the T-90 tank to get blown up. Once done, follow your team mate and run to the allied position across the street. You'll now need to pick up the Javelin nearby and destroy the tank yourself. There will be two more tanks that will appear so do the same thing and blow them up.
Tank Hunter
Next, move to the next objective point and wait for your new orders. Follow your team leader to get into flanking position. Push your way to the back of the bank, then stand under the emergency ladder to boost your ally.

Jump to the window and take out the enemy silently. Exit and continue mopping the enemies in the atrium. There's an ammo crate nearby as well in case you need to resupply.
Push through the enemy positions until you reach your other team mates. Continue clearing out the remaining enemies then regroup. Continue inside the vault and rappel down the elevator shaft.
Once you get the prompt, throw in the flashbang inside the room then go ahead and clear it.
Mission impossible it is...
Once done, head inside the vault and help lift the lid. Mission complete.
Disembark from the car and head to the marker. Press B to hack the wire and open the gates. Continue to the parking lot and take out all enemies there. Continue downstairs, and fight your way to parking lot B. Continue following your comrades until you need to breach the door.
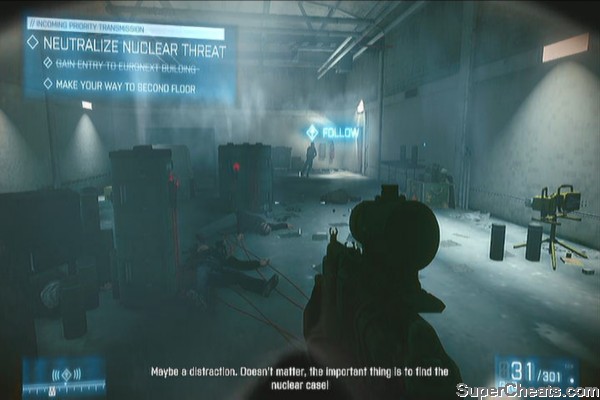
Equip your gas mask when prompted, then continue upstairs. Fight your way through an office area. There's an ammo crate in the middle of the room before the large hall so make sure to use it to your advantage.
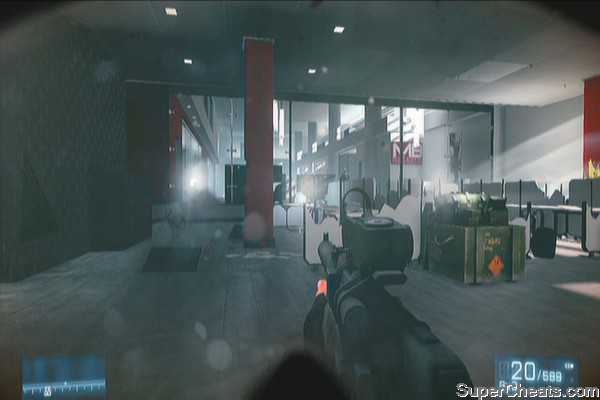
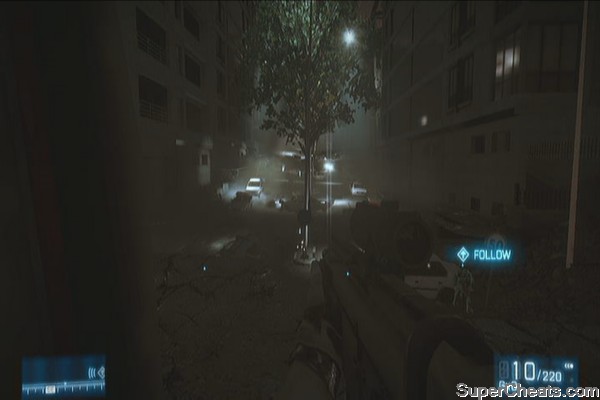
After clearing the area, continue upstairs and fight your way to the main trading room. You'll spot the nuke carrier there you don't chase him yet. Just kill everybody in sight then proceed in your pursuit. As soon as you reach outside the building, you'll have another achievement to unlock. If you're doing the campaign in Easy Mode, then good for you. Otherwise, you may want to retry it later in Easy difficulty since it is very hard to attempt this in Normal or Hard mode.
Dodging bullets is my specialty
To unlock "The Professional" achievement, you need to complete the street chase in less than 2 minutes, 30 seconds without dying. Stay on the left side of the street! Continue running and shoot only the enemies directly in front of you. Take note that the timer starts as soon as your character removes his gas mask.
After the sequence, continue pursuing the carrier until you finally catch up to him on the train platform. Kill the bastard in hand-to-hand combat and watch the following scenes.
This is the end
Once you have control to your tank, you can unlock an achievement early in this mission. As soon as you spot several enemy tanks, destroy six of them to get the "Scrap Metal" achievement. Refer to the video below.
Love the smell of burning steel in the morning
After destroying the tanks, you'll have to switch to thermal mode to spot two more enemy tanks. Take them out the watch the following scenes. Once in control, charge to the enemy fortification and take out the enemies. Remember to switch to your machine gun when dealing with infrantry, specially the RPG soldiers. The rocket batteries will be marked in your map so head there and destroy them all.
The cavalry has arrived!
After getting your new orders, head back out to the desert and hunt down enemy tanks. Next, you'll be ordered to take out the convoys. There will be some tanks here as well so take them out first before moving on to the softer targets.
We'll ruin somebody's day.
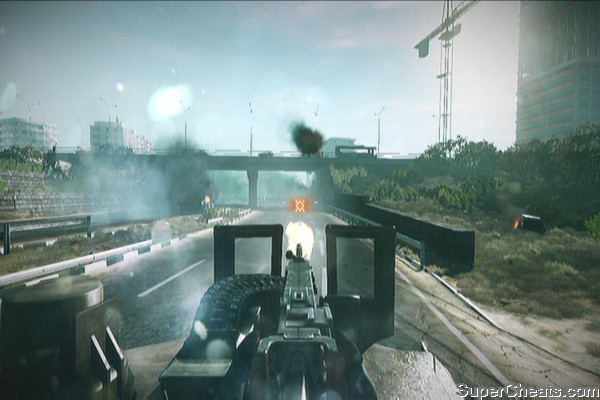
Next, head to the highway and join your allies. Continue following him until you reach the underpass. Approach the soldier on foot then you'll need to activate the trigger as marked in the map. Simply run there, grab the detonator, run back and activate it. Once done, go back to your tank to man the .50 cal.
As you move down the highway, keep a look out for enemy RPG soldiers. Also, you can eliminate enemies much faster by shooting at cars and explosive objects beside them. Along the way, a tank will appear in the gas station. Just shoot at the gas pumps and it should be enough to take out the tank. Continue along and wait until a friendly tank gets destroyed by a suicide bomber. Wait for a few seconds and two enemy vehicles will appear. Concentrate your attack and make sure that they're destroyed before getting near. One more will appear to your right; and you also need to take out the enemy RPG soldiers who will take position in the overpass. Wait a bit and mission complete.
Once in control, drive the tank through the small alley. After 3-3 is taken out, drive through the building and head to the objective marker. Destroy all tanks and enemy troops. Watch the for the next scene.
Walls are nothing
Next, you'll need to defend the allied extraction helicopter. Just take out enemies converging around the area. Remember that those sandbags can be destroyed by continuous gunfire. Keep doing this until you get captured as part of the story. Watch the next scenes, mission complete.
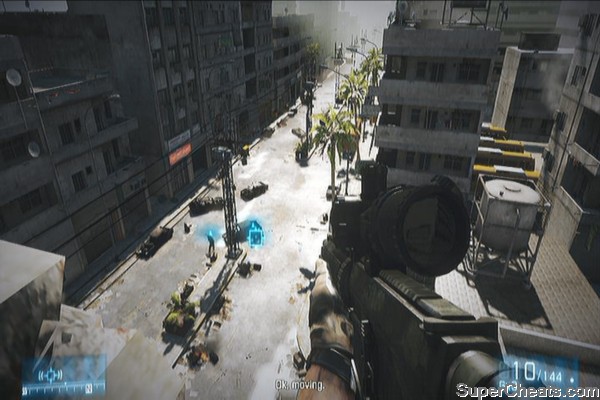
At the start of this mission, you'll have the chance to unlock another achievement. You need to take out the lights with one bullet each. Don't concentrate on the actual bulbs. Just aim for the metal part that's holding them. Crouching will also help steady your aim. Remember to hold your breath still as you take steady aim.
Four lights with four bullets
After taking out the lights, zoom at your allied ground units to detect their IR strobes. Next, stand up and head to the other side of the rooftop and dig in. Take out the PLR lookout on the second floor when ready.
Once done, move to the marked spot then rappel down to street level. Follow your team mate while avoid alerting PLR patrols. Climb up the wall then eliminate the sentry ahead.
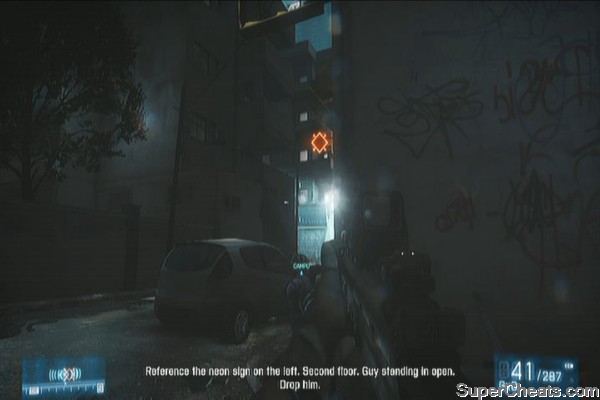
Move up behidn Campo and wait for the patrol to pass. Continue and climb the ladder up t othe next rooftop. Stack up and wait for the targets to appear. There are two soldiers here (that will appear as one in your scope). Line up and shoot to unlock the Twofor achievement. See the video below.
Two PLRs, one shot
Once done, climb down the ladder then follow Campo to the building. Take out the PLR using your knife. More enemies will appear so run through the door and continue running until you reach the sewers. Continue moving forward and climb the ladder up to street level. There will be enemies ahead so take them out as well.

Continue following Campo until you reach the same building where Miller was executed. After reporting, stack up behind the door and take out enemies that will come in from the next room. Continue ahead until you regroup with the marines.
Move along with your squad mates then climb up with Campo to the overwatch position on the rooftop. Provide covering support to your team mates.
Once your objective gets updated, follow Campo and stop HVT's car from escaping. Just head to the marked position and shoot at the car to make it crash. Head there and secure Al-Bashir. As Campo carries the package, take out a few enemies along the way. He will prompt you to fend off any pursuers so stay by the gate and take out the enemies. Once done, you'll be advised to join him in the next RV.
Upon regrouping, he'll ask you to lay down some claymores and defend the area from the incoming enemy assault. After getting rid of the first wave from the ground floor, more enemies will appear on the second floor. Take them out as well. Campo will relocate HVT to the other stall. Stay in cover and take out enemies who will approach from the second floor. Use your sniper rifle to find them in the darkness then switch to your assault rifle to take out nearby enemies.
Finally, your evac will arrive. Take out a few enemies along the corridor then follow Campo as he carries Al-Bashir to the evac plane. Hold off the landing area for a few more seconds, killing enemies as they come. Finally, when you get the order, jump on the plane.
As soon as you're ambushed, you'll have the chance to unlock yet another achievement at this point. You'll have to knife-kill one of the enemy soldiers there. The nearest ones are the soldiers by the wreckage. Kill one of them then run and knife-kill the other.
That'll be mine, thank you
Continue sweeping the area to eliminate the ambushers. Next, follow your team to regroup with Cole. Go downhill and proceed with your attack.
As you move forward, more enemies will appear, as well as a tank. Equip your anti-tank weapon then keep shooting at the tank to destroy it. Kill all remaining enemies then continue ahead.
No armor is too thick...
Follow Cole to the next attack point and clear it again. Continue pressing forward until two more enemy armors appear. Equip your anti-tank weapon again and take them out. If you need to resupply, there's an ammo depot in the side of the road.
and no metal is too strong...
Continue ahead and an enemy jet will attack. There's a glitchy achievement to unlock and you need to take out the SU-25 with one shot. Some say that you won't unlock the achievement if you're killed by the bombardment and reloaded a checkpoint during the mission so may take that into consideration. Another thing to note is that some say to stick close with Cole and hide where he hides until you get the chance to run to the Stinger. Once the jet is marked, take aim and fire once you get a solid lock.
One noticeable glitch you'll notice is that the objective to shoot down the SU-25 appears AFTER you destroy it and after moving to the objective marker.
...stings like a bee
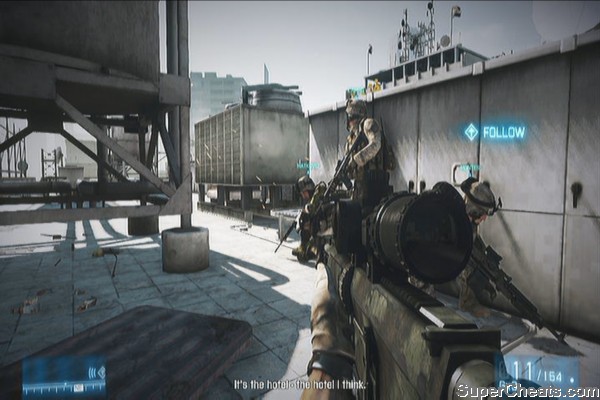
After landing, follow your team mates. Kill the enemies then open the drogue to get your second primary weapon. Go to the road and hop on the van. Upon reaching the enemy base, kill the guards as prompted then open the gate from inside the room. Fight your way uphill until you reach the poolhouse.
Once inside, enter through the door marked in your hud then go upstairs. Use your newly acquired sniper rifle to take out enemies at a distance. There will be enemy snipers so take them out quickly as well.
Continue inside the villa and take out the enemies inside. This is pretty straightforward so just keep pushing forward with your team mates until you reach a red room with more weapons and ammo cache. Cycle your weapons as needed then continue.
Room service!
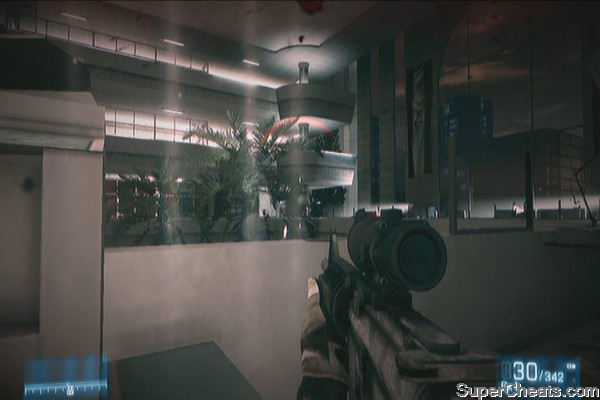
Head downstairs and continue killing enemies. It's a hard to see so just use their own flashlights as your personal marker. After that, you'll need to head to the target range. This is where you can unlock yet another achievement. Take your time to land headshots against the cardboard targets. You can also kill enemy soldiers using normal means.
Practice makes perfect
Move upstairs and continue clearing out enemies. Run towards the exit, then jump on the helicopter. Press B during the action sequence and watch the next scenes.
You'll be controlling Blackburn next. Head to the poolhouse and go to the marker. Watch the scene and when you have the chance, shoot at your ally once to complete the mission.
Make your escape and jump out of the window. Follow Montes to the street. Run to the objective point and jump. It's the whole Semper Fidelis mission again – minus the tutorial. This should be a quick and straightforward mission so just continue forth until you finally catch up with Solomon. Press the correct buttons quickly during the action event then continue your pursuit through the sewers.
Tunnel Rat
As you reach street level, you'll be in a car chase courtesy of Montes. Once you get to pull your handgun, aim and shoot at his car. In the ensuing action scene, press the quick-time action buttons correctly (to unlock the last achievement in the Campaign) and watch the following scenes.
Congratulations for completing the campaign!
You can only die once
This can only be done online with a friend. Each mission has a corresponding achievement by accomplishing specific tasks. When attempting to unlock achievements, it is actually recommended to play the mission in Easy mode.
Bonus: Don't lose a single humvee to get the "Car Lover" achievement
For this mission, you have to defend yourselves against three enemy waves, comprised of the basic foot soldiers, along with RPG troopers and heavy tanks. You need to use Javelins to take out the tanks. Your priority targets will be the RPG troopers and tanks. It will also help if you and your friend both carry a fully loaded and ready Javelins as it only takes 3 Javelin hits (regardless of difficulty) to destroy them. You also need to remember the location of ammo caches so you can immediately resupply when needed.
When the mission starts, plant some claymores in the alley left of the overpass so you won't have problems later. For the first wave, take out the footsoldiers as usual, then take out the first tank using your javelin. For the second wave, the mines you placed earlier should be enough to destroy the second tank. Just concentrate on taking out the RPG troopers. For the last wave, the tank will appear from the tenement building by ramming through the front door so make sure you and your buddy concentrate your fire to it until it is destroyed. Kill more enemies as needed then fall back to your extraction aircraft when prompted to complete the mission.
This can only be done online with a friend. Each mission has a corresponding achievement by accomplishing specific tasks. When attempting to unlock achievements, it is actually recommended to play the mission in Easy mode.
Bonus: Don't use the fire extinguisher to get the "Untouchable" achievement
For this mission, you and your buddy will have two different albeit very important roles. One will be the pilot and the other will be the gunner. The pilot will be responsible for keeping the chopper airborne while flying it as stable as possible for the gunner's convenience and efficiency, as well as evading enemy fire. The gunner will deal the most destruction as he has access to explosive, auto-cannon and hellfire missiles.
Aside from playing this on easy, it is also recommended to play with close friend so you can easily interact with each other. Though the pilot has access to unguided Hydra rockets, it is the gunner's main responsibility to take out enemies.
As soon as your fire teams have landed, two mortars will be marked in your map. The gunner must destroy the two of them quickly as your ground units head to their positions. Take out enemy foot soldiers along their paths and as they make it through the main road, two more targets and more foot soldiers will appear. Take them out as well.
Enemy armor will appear from the road up north. Be careful though since they have anti-air capability. Soften them up with your rockets then finish them with the cannon. Continue providing fire support to your fireteams below. A few moments later, two BMPs and a mobile AA will appear. The pilot must manuever the helicopter out of enemy gunfire while also allowing the gunner to counterattack. As long as you keep your height and remain mobile, you should be able to avoid too much damage.
Continue hammering down enemies until your fireteams reach the compound. Once there, a BMP will appear from the southwest while a BMP and mobile AA will appear from the northeast. Take out the lone BMP first, then carefully maneuver to destroy the other two high-priority targets.
After clearing the compound, your fireteams will work their way northeast to the extraction point. Continue providing support and take out more mobile AAs and BMPs. The mission is complete as soon as the fireteams boarded the transports and leave the area.
This can only be done online with a friend. Each mission has a corresponding achievement by accomplishing specific tasks. When attempting to unlock achievements, it is actually recommended to play the mission in Easy mode.
Bonus: Reach the VIP without setting off the alarm to unlock the "Ninjas" achievement
Again, recommended on easy difficulty and preferably with a friend. Having headsets is critical for communicating and timing your shots. You must take out the guards with one shot, so having individual targets and countdowns for synchronized shots is vital for this achievement. Aside from guards, you also need to disable CCTV cameras that will alert the guards and sound off the alarm.
Start by dispatching the guards watching TV, then sneak behind a couple more guards in the laundromat and drop them. Don't move just yet; there's a CCTV in the corner past the door so carefully take aim and destroy it. Go through the door and carefully look behind the metal railings to find another CCTV in the corner and one more adjacent to it, in the end of the corridor.
Continue through the door to spot another guard. Kill him then slowly ascend the stairs. There is a CCTV here and a guard that both of you must shoot down. Pick your targets then take them out. Continue upstairs and you'll find three targets this time: two guards, one camera.
This next set of targets is a tricky and probably the hardest part of this mission. One of you guys must line up by the staircase to the right so you can take out the guard nearest to the stairs and the CCTV. Mess this shot and you'll miss the chance to unlock the achievement. Take your time to set up then take them out when ready. Continue to the last corridor and pop the last two guys out and you should get the achievement. Reach the VIP to complete the mission.
Thanks to TheGamerReview for the very helpful pointers.
This can only be done online with a friend. Each mission has a corresponding achievement by accomplishing specific tasks. When attempting to unlock achievements, it is actually recommended to play the mission in Easy mode.
Bonus: Reach the garage without going into man-down state to unlock "Push On" achievement
This is pretty much a very straightforward mission where you need to need to fight through a bunch of enemies as you move towards the objective markers placed in the map. Playing this mission on easy is already a given but there's also one more thing that you must remember to unlock this achievement: both you and your co-op partner MUST NOT go into man-down state. Going through this mission in a slow yet steady pace is vital to keep yourselves alive in the entire ordeal.
Bonus: Reach and save the hostages without alerting any enemies to unlock the "Bullseye" achievement
Again, recommended on easy difficulty and preferably with a friend. Having headsets is critical for communicating and timing your shots. You must take out the guards with one shot, so having individual targets and countdowns for synchronized shots is vital for this achievement.
Go down the sewer and follow the tunnel until you spot the first enemy. Take him out, then climb up the ladder to ground level. Once there, you and your buddy must take coordinated, synchronized shots to ensure the pairs of guards are taken out at the same time. Drop the first two by the yard then the next two inside the aparment entrance ahead.
Continue upstairs then wait for the prompt to open the door with the ammo crate inside. There are two enemies inside that you must kill quickly. Fortunately, these are not counted towards the "not to alert" enemy list so don't be vexed. Next, loo to the window to locate Alpha Team. Zoom in and two guards will walk by. Do not shoot them immediately as they come into view (when the leftmost guy is still on the stairs). Wait for them to walk a bit more to the right and be completely still before taking your shot.
Next, the next pair of targets will be marked and they will position themselves behind a van. Again, wait for them to stand still before taking them out. Next, you'll have to take out the guards with hostages inside the two buses in the plaza. You and your buddy must pick one bus each. Kill the guards as soon as Alpha team deploys their flashbangs.
Replenish your ammo then head out to the streets. Two pairs of guards will be marked so take them out with synchronized shots as well. Now, one of you must stay in his current position while the other jumps down to the walkway below. There will be three enemies in the next set of targets. The team mate who stayed in position can pick off one easily but the team mate who took the walkway must take down two enemies with one bullet as they line up. If you mess up, just jump in the water to commit suicide and load the last checkpoint.
Go back to street level then look towards the hotel. Three enemies will appear so take out the the left and right guards first before taking out the one in the middle. Next, run to the right side to get a clear view of the set of enemies walking from the right side. Take them out as fast as you can. Next, locate the middle set of enemies. You must take them out as quickly as you can since they're in the process of calling in reinforcements. (therefore messing up your achievement operation). Move to the left side again, to get a clear view of the windows of the building ahead, then take out the sniper.
After the mission updates, head to the next vantage point. Once the target pair of guards appear, take them out with synchronized shots. Wait a bit and two more targets will walk in from the right side of the embassy grounds. Take them out as well. Next, three more enemies will appear in the middle, by the fountain. Kill them as quickly as possible.
Next, wait for Alpha team to stack in by the window and wait for the targets to stand still. Don't hesitate to fire multiple rounds because the distance and other obstacles won't always guarantee a one-hit kill. Wait for Alpha team to move upstairs and stand by the windows. Wait for the four targets to appear then order Alpha team to deploy the flash bangs. You and your buddy must take out two targets each as fast as you can. The achievement should pop up after this sequence.
Thanks to TheGamerReview for the very helpful pointers.
Bonus: Disarm the bomb in under 20 seconds to unlock the "In the nick of time" achievement
This is fairly straightforward mission and of course, should be done in Easy mode. Kill all the guys near the entrance then run to the platform. Continue killing the enemies as you make your way to the front of the first train. Take note that after crossing the barricades, the timer will start. Rush forward and you should immediately see the timer countdown ahead, inside the second train. Kill enemies along the way and find the bomb. Complete the quick-time event as fast as you can to disarm the bomb.
Every dog tag is listed below with the what you need to do to get each particular tag.
• DEFAULT DOG TAG - Blank Dog Tag Available To All
• PRIVATE FIRST CLASS DOG TAG - Reach Rank Private First Class
• PRIVATE FIRST CLASS 1 STAR DOG TAG - Reach Rank Private First Class 1 Star
• PRIVATE FIRST CLASS 2 STAR DOG TAG - Reach Rank Private First Class 2 Star
• PRIVATE FIRST CLASS 3 STAR DOG TAG - Reach Rank Private First Class 3 Star
• LANCE CORPORAL DOG TAG - Reach Rank Lance Corporal
• LANCE CORPORAL 1 STAR DOG TAG - Reach Rank Lance Corporal 1 Star
• LANCE CORPORAL 2 STAR DOG TAG - Reach Rank Lance Corporal 2 Star
• LANCE CORPORAL 3 STAR DOG TAG - Reach Rank Lance Corporal 3 Star
• CORPORAL DOG TAG - Reach Rank Corporal
• CORPORAL 1 STAR DOG TAG - Reach Rank Corporal 1 Star
• CORPORAL 2 STAR DOG TAG - Reach Rank Corporal 2 Star
• CORPORAL 3 STAR DOG TAG - Reach Rank Corporal 3 Star
• SERGEANT DOG TAG - Reach Rank Sergeant
• SERGEANT 1 STAR DOG TAG - Reach Rank Sergeant 1 Star
• SERGEANT 2 STAR DOG TAG - Reach Rank Sergeant 2 Star
• SERGEANT 3 STAR DOG TAG - Reach Rank Sergeant 3 Star
• STAFF SERGEANT DOG TAG - Reach Rank Staff Sergeant
• STAFF SERGEANT 1 STAR DOG TAG - Reach Rank Staff Sergeant 1 Star
• STAFF SERGEANT 2 STAR DOG TAG - Reach Rank Staff Sergeant 2 Star
• GUNNERY SERGEANT DOG TAG - Reach Rank Gunnery Sergeant
• GUNNERY SERGEANT 1 STAR DOG TAG - Reach Rank Gunnery Sergeant 1 Star
• GUNNERY SERGEANT 2 STAR DOG TAG - Reach Rank Gunnery Sergeant 2 Star
• MASTER SERGEANT DOG TAG - Reach Rank Master Sergeant
• MASTER SERGEANT 1 STAR DOG TAG - Reach Rank Master Sergeant 1 Star
• MASTER SERGEANT 2 STAR DOG TAG - Reach Rank Master Sergeant 2 Star
• FIRST SERGEANT DOG TAG - Reach Rank First Sergeant
• FIRST SERGEANT 1 STAR DOG TAG - Reach Rank First Sergeant 1 Star
• FIRST SERGEANT 2 STAR DOG TAG - Reach Rank First Sergeant 2 Star
• MASTER GUNNERY SERGEANT DOG TAG - Reach Rank Master Gunnery Sergeant
• MASTER GUNNERY SERGEANT 1 STAR DOG TAG - Reach Rank Master Gunnery Sergeant 1 Star
• MASTER GUNNERY SERGEANT 2 STAR DOG TAG - Reach Rank Master Gunnery Sergeant 2 Star
• SERGEANT MAJOR DOG TAG - Reach Rank Sergeant Major
• SERGEANT MAJOR 1 STAR DOG TAG - Reach Rank Sergeant Major 1 Star
• SERGEANT MAJOR 2 STAR DOG TAG - Reach Rank Sergeant Major 2 Star
• WARRANT OFFICER ONE DOG TAG - Reach Rank Warrant Officer One
• CHIEF WARRANT OFFICER TWO DOG TAG - Reach Rank Chief Warrant Officer Two
• CHIEF WARRANT OFFICER THREE DOG TAG - Reach Rank Chief Warrant Officer Three
• CHIEF WARRANT OFFICER FOUR DOG TAG - Reach Rank Chief Warrant Officer Four
• CHIEF WARRANT OFFICER FIVE DOG TAG - Reach Rank Chief Warrant Officer Five
• SECOND LIEUTENANT DOG TAG - Reach Rank Second Lieutenant
• FIRST LIEUTENANT DOG TAG - Reach Rank First Lieutenant
• CAPTAIN DOG TAG - Reach Rank Captain
• MAJOR DOG TAG - Reach Rank Major
• LIEUTENANT COLONEL DOG TAG - Reach Rank Lieutenant Colonel
• ASSAULT RIFLE DOG TAG - Obtain Assault Rifle Efficiency Ribbon 10 Times
• CARBINE DOG TAG - Obtain Carbine Efficiency Ribbon 10 Times
• LIGHT MACHINE GUN DOG TAG - Obtain Light Machine Gun Efficiency Ribbon 10 Times
• SNIPER RIFLE DOG TAG - Obtain Sniper Rifle Efficiency Ribbon 10 Times
• SHOTGUN DOG TAG - Obtain Shotgun Ribbon 10 Times
• PDW DOG TAG - Obtain Pdw Ribbon 10 Times
• HANDGUN DOG TAG - Obtain Handgun Ribbon 10 Times
• MELEE DOG TAG - Obtain Melee Ribbon 10 Times
• RESUPPLY DOG TAG - Obtain Resupply Efficiency Ribbon 10 Times
• MAINTENANCE DOG TAG - Obtain Maintenance Efficiency Ribbon 10 Times
• MEDICAL DOG TAG - Obtain Medical Efficiency Ribbon 10 Times
• SURVEILLANCE DOG TAG - Obtain Surveillance Efficiency Ribbon 10 Times
• TRANSPORT WARFARE DOG TAG - Obtain Transport Warfare Ribbon 10 Times
• ARMORED WARFARE DOG TAG - Obtain Armored Warfare Ribbon 10 Times
• AIR WARFARE DOG TAG - Obtain Air Warfare Ribbon 10 Times
• STATIONARY DOG TAG - Obtain Stationary Emplacement Ribbon 10 Times
• ANTI VEHICLE DOG TAG - Obtain Anti Vehicle Ribbon 10 Times
• ACCURACY DOG TAG - Obtain Accuracy Ribbon 10 Times
• AVENGER DOG TAG - Obtain Avenger Ribbon 10 Times
• SAVIOR DOG TAG - Obtain Savior Ribbon 10 Times
• NEMESIS DOG TAG - Obtain Nemesis Ribbon 10 Times
• SUPPRESSION DOG TAG - Obtain Suppression Ribbon 10 Times
• MVP DOG TAG - Obtain Mvp Ribbon 10 Times
• 2ND MVP DOG TAG - Obtain 2nd Mvp Ribbon 10 Times
• 3RD MVP DOG TAG - Obtain 3rd Mvp Ribbon 10 Times
• ACE SQUAD DOG TAG - Obtain Ace Squad Ribbon 10 Times
• RUSH DOG TAG - Obtain Rush Ribbon 10 Times
• RUSH WINNER DOG TAG - Obtain Rush Winner Ribbon 10 Times
• M-COM ATTACKER DOG TAG - Obtain M-com Attacker Ribbon 10 Times
• M-COM DEFENDER DOG TAG - Obtain M-com Defender Ribbon 10 Times
• CONQUEST WINNER DOG TAG - Obtain Conquest Winner Ribbon 10 Times
• CONQUEST DOG TAG - Obtain Conquest Ribbon 10 Times
• FLAG ATTACKER DOG TAG - Obtain Flag Attacker Ribbon 10 Times
• FLAG DEFENDER DOG TAG - Obtain Flag Defender Ribbon 10 Times
• TEAM DEATHMATCH DOG TAG - Obtain Team Deathmatch Ribbon 10 Times
• TEAM DEATHMATCH WINNER DOG TAG - Obtain Team Deathmatch Winner Ribbon 10 Times
• SQUAD RUSH DOG TAG - Obtain Squad Rush Ribbon 10 Times
• SQUAD RUSH WINNER DOG TAG - Obtain Squad Rush Winner Ribbon 10 Times
• SQUAD DEATHMATCH DOG TAG - Obtain Squad Deathmatch Ribbon 10 Times
• SQUAD DEATHMATCH WINNER DOG TAG - Obtain Squad Deathmatch Winner Ribbon 10 Times
• ASSAULT DOG TAG - Obtain Assault Service Star 1
• ENGINEER DOG TAG - Obtain Engineer Service Star 1
• SUPPORT DOG TAG - Obtain Support Service Star 1
• RECON DOG TAG - Obtain Recon Service Star 1
• DICE DOG TAG - The Wearer Of This Tag Contributed To Making This Game
• CO-OP DOG TAG - Obtain Co-op Service Star 1
• M16 PROFICIENCY DOG TAG - Obtain M16 Service Star 1
• AK-74M PROFICIENCY DOG TAG - Obtain Ak-74m Service Star 1
• M416 PROFICIENCY DOG TAG - Obtain M416 Service Star 1
• AEK-971 PROFICIENCY DOG TAG - Obtain Aek-971 Service Star 1
• F2000 PROFICIENCY DOG TAG - Obtain F2000 Service Star 1
• AN-94 PROFICIENCY DOG TAG - Obtain An-94 Abakan Service Star 1
• KH2000 PROFICIENCY DOG TAG - Obtain Kh2000 Service Star 1
• G3A3 PROFICIENCY DOG TAG - Obtain G3a3 Service Star 1
• 40MM GL PROFICIENCY DOG TAG - Obtain 40mm Gl Service Star 1
• M4A1 PROFICIENCY DOG TAG - Obtain M4a1 Service Star 1
• AKS-74u PROFICIENCY DOG TAG - Obtain Aks-74u Service Star 1
• SCAR-H CQB PROFICIENCY DOG TAG - Obtain Scar-h Cqb Service Star 1
• G36C PROFICIENCY DOG TAG - Obtain G36c Service Star 1
• SG553 PROFICIENCY DOG TAG - Obtain Sg553 Service Star 1
• SMAW PROFICIENCY DOG TAG - Obtain Smaw Service Star 1
• RPG-7V2 PROFICIENCY DOG TAG - Obtain Rpg-7v2 Service Star 1
• FIM-92 STINGER AA PROFICIENCY DOG TAG - Obtain Fim-92 Stinger Aa Service Star 1
• SA18 IGLA AA PROFICIENCY DOG TAG - Obtain Sa18 Igla Aa Service Star 1
• FGM-148 JAV PROFICIENCY DOG TAG - Obtain Fgm-148 Jav Service Star 1
• M15 AT MINES PROFICIENCY DOG TAG - Obtain M15 At Mines Service Star 1
• M27 IAR PROFICIENCY DOG TAG - Obtain M27 Iar Service Star 1
• RPK-74M PROFICIENCY DOG TAG - Obtain Rpk-74m Service Star 1
• M249 PROFICIENCY DOG TAG - Obtain M249 Service Star 1
• PKP PECHENEG PROFICIENCY DOG TAG - Obtain Pkp Pecheneg Service Star 1
• M240B LMG PROFICIENCY DOG TAG - Obtain M240b Lmg Service Star 1
• M60E4 PROFICIENCY DOG TAG - Obtain M60e4 Service Star 1
• TYPE 88 LMG PROFICIENCY DOG TAG - Obtain Type 88 Lmg Service Star 1
• C4 EXPL PROFICIENCY DOG TAG - Obtain C4 Expl Service Star 1
• M18 CLAYMORE PROFICIENCY DOG TAG - Obtain M18 Claymore Service Star 1
• M224 MORTAR PROFICIENCY DOG TAG - Obtain M224 Mortar Medal
• MK11 MOD 0 PROFICIENCY DOG TAG - Obtain Mk11 Sniper Service Star 1
• SVD PROFICIENCY DOG TAG - Obtain Svd Service Star 1
• SV98 PROFICIENCY DOG TAG - Obtain Sv98 Service Star 1
• SKS PROFICIENCY DOG TAG - Obtain Sks Service Star 1
• M40A5 PROFICIENCY DOG TAG - Obtain M40a5 Service Star 1
• M98B PROFICIENCY DOG TAG - Obtain M98b Service Star 1
• M39 MBR PROFICIENCY DOG TAG - Obtain M39 Mbr Service Star 1
• LASER RANGEFINDER PROFICIENCY DOG TAG - Obtain Laser Designator Medal
• MUAV PROFICIENCY DOG TAG - Obtain Surveillance Medal
• M9 PROFICIENCY DOG TAG - Obtain M9 Service Star 1
• M9 SUPPRESSED PROFICIENCY DOG TAG - Obtain M9 Supp. Service Star 1
• MP443 PROFICIENCY DOG TAG - Obtain Mp443 Service Star 1
• MP443 SUPPRESSED PROFICIENCY DOG TAG - Obtain Mp443 Supp. Service Star 1
• G17C PROFICIENCY DOG TAG - Obtain G17c Service Star 1
• G18 PROFICIENCY DOG TAG - Obtain G18 Service Star 1
• .44 MAGNUM PROFICIENCY DOG TAG - Obtain .44 Magnum Service Star 1
• 93R PROFICIENCY DOG TAG - Obtain 93r Service Star 1
• MP412 REX PROFICIENCY DOG TAG - Obtain Mp412 Rex Service Star 1
• M1911 PROFICIENCY DOG TAG - Obtain M1911 Service Star 1
• 870MCS PROFICIENCY DOG TAG - Obtain 870mcs Service Star 1
• M1014 PROFICIENCY DOG TAG - Obtain M1014 Service Star 1
• SAIGA 12K PROFICIENCY DOG TAG - Obtain Saiga 12k Service Star 1
• DAO-12 PROFICIENCY DOG TAG - Obtain Dao-12 Service Star 1
• USAS-12 PROFICIENCY DOG TAG - Obtain Usas-12 Service Star 1
• PP-2000 PROFICIENCY DOG TAG - Obtain Pp-2000 Service Star 1
• UMP-45 PROFICIENCY DOG TAG - Obtain Ump-45 Service Star 1
• PDW-R PROFICIENCY DOG TAG - Obtain Pdw-r Service Star 1
• P90 PROFICIENCY DOG TAG - Obtain P90 Service Star 1
• MP7 PROFICIENCY DOG TAG - Obtain Mp7 Service Star 1
• AS-VAL PROFICIENCY DOG TAG - Obtain As-val Service Star 1
• MAIN BATTLE TANK PROFICIENCY DOG TAG - Obtain Mbt Service Star 1
• INFANTRY FIGHTING VEHICLE PROFICIENCY DOG TAG - Obtain Ifv Service Star 1
• AA VEHICLE PROFICIENCY DOG TAG - Obtain Aa Service Star 1
• ATTACK HELICOPTER PROFICIENCY DOG TAG - Obtain Attack Heli Service Star 1
• SCOUT HELICOPTER PROFICIENCY DOG TAG - Obtain Scout Heli Service Star 1
• JET PILOT PROFICIENCY DOG TAG - Obtain Jet Service Star 1
• ASSAULT RIFLE MASTERY DOG TAG - Obtain Assault Rifle Medal 1 Time
• CARBINE MASTERY DOG TAG - Obtain Carbine Medal 1 Time
• LIGHT MACHINE GUN MASTERY DOG TAG - Obtain Light Machine Gun Medal 1 Time
• SNIPER RIFLE MASTERY DOG TAG - Obtain Sniper Rifle Medal 1 Time
• SHOTGUN MASTERY DOG TAG - Obtain Shotgun Medal 1 Time
• PDW MASTERY DOG TAG - Obtain Pdw Medal 1 Time
• HANDGUN MASTERY DOG TAG - Obtain Handgun Medal 1 Time
• MELEE MASTERY DOG TAG - Obtain Melee Medal 1 Time
• MORTAR DOG TAG - Obtain Mortar Medal 1 Time
• LASER DESIGNATOR DOG TAG - Obtain Laser Designator Medal 5 Times
• M18 CLAYMORE DOG TAG - Obtain M18 Claymore Medal 1 Time
• RADIO BEACON DOG TAG - Obtain Radio Beacon Medal 1 Time
• RESUPPLY DOG TAG - Obtain Resupply Medal 1 Time
• MAINTENANCE DOG TAG - Obtain Maintenance Medal 1 Time
• MEDICAL DOG TAG - Obtain Medical Medal 1 Time
• SURVEILLANCE DOG TAG - Obtain Surveillance Medal 5 Times
• TRANSPORT WARFARE DOG TAG - Obtain Transport Warfare Medal 1 Time
• ARMOR WARFARE DOG TAG - Obtain Armor Warfare Medal 1 Time
• AIR WARFARE DOG TAG - Obtain Air Warfare Medal 1 Time
• STATIONARY DOG TAG - Obtain Stationary Medal 1 Time
• ANTI VEHICLE DOG TAG - Obtain Anti Vehicle Medal 1 Time
• ACCURACY DOG TAG - Obtain Accuracy Medal 1 Time
• AVENGER DOG TAG - Obtain Avenger Medal 1 Time
• SAVIOR DOG TAG - Obtain Savior Medal 1 Time
• NEMESIS DOG TAG - Obtain Nemesis Medal 1 Time
• SUPPRESSION DOG TAG - Obtain Suppression Medal 1 Time
• COMBAT EFFICIENCY DOG TAG - Obtain Combat Efficiency Medal 1 Time
• MVP DOG TAG - Obtain Mvp Medal 1 Time
• 2ND MVP DOG TAG - Obtain 2nd Mvp Medal 1 Time
• 3RD MVP DOG TAG - Obtain 3rd Mvp Medal 1 Time
• ACE SQUAD DOG TAG - Obtain Ace Squad Medal 1 Time
• RUSH DOG TAG - Obtain Rush Medal 1 Time
• M-COM ATTACKER DOG TAG - Obtain M-com Attacker Medal 1 Time
• M-COM DEFENDER DOG TAG - Obtain M-com Defender Medal 1 Time
• CONQUEST DOG TAG - Obtain Conquest Medal 1 Time
• FLAG ATTACKER DOG TAG - Obtain Flag Attacker Medal 1 Time
• FLAG DEFENDER DOG TAG - Obtain Flag Defender Medal 1 Time
• TEAM DEATHMATCH DOG TAG - Obtain Team Deathmatch Medal 1 Time
• SQUAD RUSH DOG TAG - Obtain Squad Rush Medal 1 Time
• SQUAD DEATHMATCH DOG TAG - Obtain Squad Deathmatch Medal 1 Time
• SECOND LIEUTENANT DOG TAG - Reach Rank Second Lieutenant
• FIRST LIEUTENANT DOG TAG - Reach Rank First Lieutenant
• CAPTAIN DOG TAG - Reach Rank Captain
• MAJOR DOG TAG - Reach Rank Major
• LIEUTENANT COLONEL DOG TAG - Reach Rank Lieutenant Colonel
• COLONEL DOG TAG - Reach Rank Colonel
• COLONEL SERVICE STAR 5 DOG TAG - Obtain Colonel Service Star 5
• COLONEL SERVICE STAR 10 DOG TAG - Obtain Colonel Service Star 10
• COLONEL SERVICE STAR 25 DOG TAG - Obtain Colonel Service Star 25
• COLONEL SERVICE STAR 50 DOG TAG - Obtain Colonel Service Star 50
• COLONEL SERVICE STAR 100 DOG TAG - Obtain Colonel Service Star 100
• US SERVICE DOG TAG - Obtain Us Marines Service Medal
• RU ARMY SERVICE DOG TAG - Obtain Ru Army Service Medal
• ASSAULT SERVICE DOG TAG - Obtain Assault Service Medal 1 Time
• ENGINEER SERVICE DOG TAG - Obtain Engineer Service Medal 1 Time
• SUPPORT SERVICE DOG TAG - Obtain Support Service Medal 1 Time
• RECON SERVICE DOG TAG - Obtain Recon Service Medal 1 Time
• TANK SERVICE DOG TAG - Obtain Tank Service Medal 1 Time
• HELICOPTER SERVICE DOG TAG - Obtain Helicopter Service Medal 1 Time
• JET SERVICE DOG TAG - Obtain Jet Service Medal 1 Time
• STATIONARY SERVICE DOG TAG - Obtain Stationary Service Medal 1 Time
• CO-OP SERVICE STAR 5 DOG TAG - Obtain Co-op Service Star 5
• CO-OP SERVICE STAR 10 DOG TAG - Obtain Co-op Service Star 10
• CO-OP SERVICE STAR 25 DOG TAG - Obtain Co-op Service Star 25
• CO-OP SERVICE STAR 50 DOG TAG - Obtain Co-op Service Star 50
• M16 MASTER DOG TAG - Obtain M16 Service Star 5
• AK-74M MASTER DOG TAG - Obtain Ak-74m Service Star 5
• M416 MASTER DOG TAG - Obtain M416 Service Star 5
• AEK-971 MASTER DOG TAG - Obtain Aek-971 Service Star 5
• F2000 MASTER DOG TAG - Obtain F2000 Service Star 5
• AN-94 ABAKAN MASTER DOG TAG - Obtain An-94 Abakan Service Star 5
• KH2000 MASTER DOG TAG - Obtain Kh2000 Service Star 5
• G3A3 MASTER DOG TAG - Obtain G3a3 Service Star 5
• 40MM GL MASTER DOG TAG - Obtain 40mm Gl Service Star 5
• M4A1 MASTER DOG TAG - Obtain M4a1 Service Star 5
• AKS-74u MASTER DOG TAG - Obtain Aks-74u Service Star 5
• SCAR-H MASTER DOG TAG - Obtain Scar-h Service Star 5
• G36C MASTER DOG TAG - Obtain G36c Service Star 5
• SG553 MASTER DOG TAG - Obtain Sg553 Service Star 5
• SMAW MASTER DOG TAG - Obtain Smaw Service Star 5
• RPG-7V2 MASTER DOG TAG - Obtain Rpg-7v2 Service Star 5
• FIM-92 STINGER AA MASTER DOG TAG - Obtain Fim-92 Stinger Aa Service Star 5
• SA18 IGLA AA MASTER DOG TAG - Obtain Sa18 Igla Aa Service Star 5
• FGM-148 JAV MASTER DOG TAG - Obtain Fgm-148 Jav Service Star 5
• M15 AT MINES MASTER DOG TAG - Obtain M15 At Mines Service Star 5
• M27 IAR MASTER DOG TAG - Obtain M27 Iar Service Star 5
• RPK-74M MASTER DOG TAG - Obtain Rpk-74m Service Star 5
• M249 MASTER DOG TAG - Obtain M249 Service Star 5
• PKP PECHENEG MASTER DOG TAG - Obtain Pkp Pecheneg Service Star 5
• M240B LMG MASTER DOG TAG - Obtain M240b Lmg Service Star 5
• M60E4 MASTER DOG TAG - Obtain M60e4 Service Star 5
• TYPE 88 LMG MASTER DOG TAG - Obtain Type 88 Lmg Service Star 5
• C4 EXPL MASTER DOG TAG - Obtain C4 Expl Service Star 5
• M18 CLAYMORE MASTER DOG TAG - Obtain M18 Claymore Service Star 5
• M224 MORTAR MASTER DOG TAG - Obtain M224 Mortar Medal 5 Times
• MK11 MOD 0 MASTER DOG TAG - Obtain Mk11 Mod 0 Service Star 5
• SVD MASTER DOG TAG - Obtain Svd Service Star 5
• SV98 MASTER DOG TAG - Obtain Sv98 Service Star 5
• SKS MASTER DOG TAG - Obtain Sks Service Star 5
• M40A5 MASTER DOG TAG - Obtain M40a5 Service Star 5
• M98B MASTER DOG TAG - Obtain M98b Service Star 5
• M39 EMR MASTER DOG TAG - Obtain M39 Emr Service Star 5
• LASER TARGETING MASTER DOG TAG - Obtain Laser Designation Medal
• MAV MASTER DOG TAG - Obtain Surveillance Medal
• M9 MASTER DOG TAG - Obtain M9 Service Star 5
• M9 SUPP. MASTER DOG TAG - Obtain M9 Supp. Service Star 5
• MP443 MASTER DOG TAG - Obtain Mp443 Service Star 5
• MP443 SUPP. MASTER DOG TAG - Obtain Mp443 Supp. Service Star 5
• G17C MASTER DOG TAG - Obtain G17c Service Star 5
• G18 MASTER DOG TAG - Obtain G18 Service Star 5
• .44 MAGNUM MASTER DOG TAG - Obtain .44 Magnum Service Star 5
• 93R MASTER DOG TAG - Obtain 93r Service Star 5
• MP412 REX MASTER DOG TAG - Obtain Mp412 Rex Service Star 5
• M1911 MASTER DOG TAG - Obtain M1911 Service Star 5
• 870MCS MASTER DOG TAG - Obtain 870mcs Service Star 5
• M1014 MASTER DOG TAG - Obtain M1014 Service Star 5
• SAIGA 12K MASTER DOG TAG - Obtain Saiga 12k Service Star 5
• DAO-12 MASTER DOG TAG - Obtain Dao-12 Service Star 5
• USAS-12 MASTER DOG TAG - Obtain Usas-12 Service Star 5
• PP-2000 MASTER DOG TAG - Obtain Pp-2000 Service Star 5
• UMP-45 MASTER DOG TAG - Obtain Ump-45 Service Star 5
• PDW-R MASTER DOG TAG - Obtain Pdw-r Service Star 5
• P90 MASTER DOG TAG - Obtain P90 Service Star 5
• MP7 MASTER DOG TAG - Obtain Mp7 Service Star 5
• AS-VAL MASTERY DOG TAG - Obtain As-val Service Star 5
• MAIN BATTLE TANK MASTERY DOG TAG - Obtain Mbt Service Star 1
• INFANTRY FIGHTING VEHICLE MASTERY DOG TAG - Obtain Ifv Service Star 1
• AA VEHICLE MASTERY DOG TAG - Obtain Aa Service Star 1
• ATTACK HELICOPTER MASTERY DOG TAG - Obtain Attack Heli Service Star 1
• SCOUT HELICOPTER MASTERY DOG TAG - Obtain Scout Heli Service Star 1
• JET PILOT MASTERY DOG TAG - Obtain Jet Service Star 1
• ALIENWARE TEETH DOG TAG - Equip Your Battlefield 3 Soldier With This Alienware Teeth Dog Tag Provided Exclusively By Alienware
• RAZER SERPENT DOG TAG - Equip Your Battlefield 3 Soldier With This Razer Serpent Dog Tag Provided Exclusively By Razer
• 6 WOLF MOON - No One Likes A Lone Wolf. dr. Pepper Promotional Offer
• BYE KITTY - Hand Scratched During Long Lonely Hours On Watch. Dr. Pepper Promotional Offer
• ROAR - Highly Irregular, But Amusing. Dr. Pepper Promotional Offer
• PILE O BONES - Are All These Even From The Same Person? Dr. Pepper Promotional Offer
• OPENER - Indispensable Equipment For Excursions. Dr. Pepper Promotional Offer
• HAD TO BE SNAKES - Equip Your Battlefield 3 Soldier With This Snake Dog Tag Provided Exclusively By Act Of Valor
• FLAMING SKULL - Equip Your Battlefield 3 Soldier With This Flaming Skull Tag Provided Exclusively By Act Of Valor
• METAL - Equip Your Battlefield 3 Soldier With This Very Metal Dog Tag Provided Exclusively By Act Of Valor
• RABBIT DUCK - Equip Your Battlefield 3 Soldier With This Rabbit Duck Dog Tag Provided Exclusively By Act Of Valor
• DEATH'S HAND - Equip Your Battlefield 3 Soldier With This Deaths Hand Dog Tag Provided Exclusively By Act Of Valor
• ACE OF SPADES - You Win Some, You Lose Some. Exclusive Pre-order Offer
• ...AND COUNTING - Because Sometimes You Lose Track If You Dont Scratch It Down. Exclusive Pre-order Offer
• BRINGER OF DEATH - Because That's What Your Are Exclusive Pre-order Offer
• CAUSE OF DEATH - Fishy Abbreviation. Exclusive Pre-order Offer
• MORE DINOSAURS - What We Really Need. Exclusive Pre-order Offer
• HAGGARD - Gets Around Quite A Lot. Exclusive Pre-order Offer
• MAYAN - Incredible, Isn't It? Exclusive Pre-order Offer
• YARRR - Talk Like A Pirate Exclusive Pre-order Offer
• EDGY - Stainless Steel, Tempered In The Flames Of War. Exclusive Pre-order Offer
• TODO - Handy List For Any Battlefield Round. Exclusive Pre-order Offer
• NEED FOR SPEED - THE RUN DOG TAG - From Need For Speed - The Run
• MASS EFFECT 3 DOGTAG - A Gift From The Mass Effect 3 Development Team
• DICE DEV TEAM DOG TAG - The Wearer Of This Tag Contributed To Making This Game
• BATTLEFIELD 1943 DOG TAG - The Wearer Of This Is A Grizzled Battlefield Veteran
• BATTLEFIELD 2142 DOG TAG - The Wearer Of This Is A Grizzled Battlefield Veteran
• BATTLEFIELD BAD COMPANY DOG TAG - The Wearer Of This Is A Grizzled Battlefield Veteran
• BATTLEFIELD BAD COMPANY 2 DOG TAG - The Wearer Of This Is A Grizzled Battlefield Veteran
• BATTLEFIELD 2 DOG TAG - The Wearer Of This Is A Grizzled Battlefield Veteran
• BATTLEFIELD PLAY4FREE DOG TAG - From The Play4free Remake Of The Classic Bf2
• BATTLEFIELD VIETNAM DOG TAG - The Wearer Of This Is A Grizzled Battlefield Veteran
• TOURNAMENT WINNER DOG TAG - Win An Official Tournament
• TOURNAMENT RUNNER UP DOG TAG - Be Runner Up In An Official Tournament
• TOURNAMENT 3RD PLACE DOG TAG - Be Third Place In An Official Tournament
• ASSAULT SERVICE STAR 5 DOG TAG - Obtain Assault Service Star 5
• ASSAULT SERVICE STAR 10 DOG TAG - Obtain Assault Service Star 10
• ASSAULT SERVICE STAR 25 DOG TAG - Obtain Assault Service Star 25
• ASSAULT SERVICE STAR 50 DOG TAG - Obtain Assault Service Star 50
• ASSAULT SERVICE STAR 100 DOG TAG - Obtain Assault Service Star 100
• ENGINEER SERVICE STAR 5 DOG TAG - Obtain Engineer Service Star 5
• ENGINEER SERVICE STAR 10 DOG TAG - Obtain Engineer Service Star 10
• ENGINEER SERVICE STAR 25 DOG TAG - Obtain Engineer Service Star 25
• ENGINEER SERVICE STAR 50 DOG TAG - Obtain Engineer Service Star 50
• ENGINEER SERVICE STAR 100 DOG TAG - Obtain Engineer Service Star 100
• SUPPORT SERVICE STAR 5 DOG TAG - Obtain Support Service Star 5
• SUPPORT SERVICE STAR 10 DOG TAG - Obtain Support Service Star 10
• SUPPORT SERVICE STAR 25 DOG TAG - Obtain Support Service Star 25
• SUPPORT SERVICE STAR 50 DOG TAG - Obtain Support Service Star 50
• SUPPORT SERVICE STAR 100 DOG TAG - Obtain Support Service Star 100
• RECON SERVICE STAR 5 DOG TAG - Obtain Recon Service Star 5
• RECON SERVICE STAR 10 DOG TAG - Obtain Recon Service Star 10
• RECON SERVICE STAR 25 DOG TAG - Obtain Recon Service Star 25
• RECON SERVICE STAR 50 DOG TAG - Obtain Recon Service Star 50
• RECON SERVICE STAR 100 DOG TAG - Obtain Recon Service Star 100
• TANK SERVICE 5 STARS - Obtain Tank Service Star 5
• TANK SERVICE 10 STARS - Obtain Tank Service Star 10
• TANK SERVICE 25 STARS - Obtain Tank Service Star 25
• TANK SERVICE 50 STARS - Obtain Tank Service Star 50
• TANK SERVICE 100 STARS - Obtain Tank Service Star 100
• IFV SERVICE 5 STARS - Obtain Infantry Fighting Vehicle Service Star 5
• IFV SERVICE 10 STARS - Obtain Infantry Fighting Vehicle Service Star 10
• IFV SERVICE 25 STARS - Obtain Infantry Fighting Vehicle Service Star 25
• IFV SERVICE 50 STARS - Obtain Infantry Fighting Vehicle Service Star 50
• IFV SERVICE 100 STARS - Obtain Infantry Fighting Vehicle Service Star 100
• AA SERVICE 5 STARS - Obtain Anti Air Vehicle Service Star 5
• AA SERVICE 10 STARS - Obtain Anti Air Vehicle Service Star 10
• AA SERVICE 25 STARS - Obtain Anti Air Vehicle Service Star 25
• AA SERVICE 50 STARS - Obtain Anti Air Vehicle Service Star 50
• AA SERVICE 100 STARS - Obtain Anti Air Vehicle Service Star 100
• ATTACK HELI SERVICE 5 STARS - Obtain Attack Helicopter Service Star 5
• ATTACK HELI SERVICE 10 STARS - Obtain Attack Helicopter Service Star 10
• ATTACK HELI SERVICE 25 STARS - Obtain Attack Helicopter Service Star 25
• ATTACK HELI SERVICE 50 STARS - Obtain Attack Helicopter Service Star 50
• ATTACK HELI SERVICE 100 STARS - Obtain Attack Helicopter Service Star 100
• SCOUT HELI SERVICE 5 STARS - Obtain Scout Helicopter Service Star 5
• SCOUT HELI SERVICE 10 STARS - Obtain Scout Helicopter Service Star 10
• SCOUT HELI SERVICE 25 STARS - Obtain Scout Helicopter Service Star 25
• SCOUT HELI SERVICE 50 STARS - Obtain Scout Helicopter Service Star 50
• SCOUT HELI SERVICE 100 STARS - Obtain Scout Helicopter Service Star 100
• JET SERVICE 5 STARS - Obtain Jet Service Star 5
• JET SERVICE 10 STARS - Obtain Jet Service Star 10
• JET SERVICE 25 STARS - Obtain Jet Service Star 25
• JET SERVICE 50 STARS - Obtain Jet Service Star 50
• JET SERVICE 100 STARS - Obtain Jet Service Star 100
Use the kit (or class) as you play to earn “score”. Earning specific scores will allow you to unlock kit/class exclusive weapons and equipment.
Assault Kit
• 7,000 AS - Defibrillator
• 13,000 AS - M416
• 21,000 AS - M320
• 31,000 AS - AEK-971
• 41,000 AS - F2000
• 53,000 AS - M26 MASS
• 66,000 AS - AN-94
• 441,000 and 232,000 AS - G3A3
• 126,000, 441,000, and 232,000 AS - KH2002
Support Kit
• 6,000 SS - M249
• 11,000 SS - C4
• 18,000 SS - PKP Pecheneg
• 25,000 SS - M224 Mortar
• 40,000 SS - M240B
• 40,000 SS - M18 Claymore
• 60,000 SS - M60E4
Engineer Kit
• 7,000 ES - FIM-92 Stinger and SA-18 IGLA
• 13,000 ES - M15 AT Mine
• 21,000 ES - SCAR-H
• 31,000 ES - EOD Bot
• 41,000 ES - A-91
• 119,000 ES - G36C
• 278,000 and 232,000 ES - SG553
Recon Kit
• 6,000 RS - SV98
• 12,000 RS - T-UGS
• 18,000 RS - SKS
• 27,000 RS - SOFLAM
• 36,000 RS - M40A5
• 47,000 RS - MAV
• 57,000 RS - M98B
• 252,000 and 203,000 RS - M39 EMR
Earn experience to increase your level and unlock the corresponding weapon or specialization.
1. Private First Class - 1,000 points: 870MCS Shotgun
2. Private First Class 1 Star - 8,000 points: Sprint Specialization
3. Private First Class 2 Stars - 18,000 points: Woodland Camo
4. Private First Class 3 Stars - 29,000 points: G17C Pistol
5. Lance Corporal - 41,000 points: Ammo Specialization
6. Lance Corporal 1 Star - 54,000 points: Ranger Camo
7. Lance Corporal 2 Stars - 67,000 points: PP-2000 PDW
8. Lance Corporal 3 Stars - 81,000 points: Flak Jacket Specialization
9. Corporal - 96,000 points: Army Green Camo
10. Corporal 1 Star - 111,000 points: M9 TACT. Pistol
11. Corporal 2 Stars - 130,000 points: Explosives Specialization
12. Corporal 3 Stars - 150,000 points: Expeditionary Force Camo
13. Sergeant - 170,000 points: MP443 TACT. Pistol
14. Sergeant 1 Star - 190,000 points: Suppression Resist Specialization
15. Sergeant 2 Stars - 220,000 points: Paratrooper Camo
16. Sergeant 3 Stars - 250,000 points: UMP-45 PDW
17. Staff Sergeant - 280,000 points: Suppression Specialization
18. Staff Sergeant 1 Star - 310,000 points: Navy Blue Camo
19. Staff Sergeant 2 Stars - 340,000 points: G17C SUPP. Pistol
20. Gunnery Sergeant - 370,000 points: Grenades Specialization
21. Gunnery Sergeant 1 Star - 400,000 points: Jungle Camo
22. Gunnery Sergeant 2 Stars - 430,000 points: M1014 Shotgun
23. Master Sergeant - 470,000 points: Squad Sprint Specialization
24. Master Sergeant 1 Star - 510,000 points: Desert Khaki
25. Master Sergeant 2 Stars - 550,000 points: M9 SUPP. Pistol
26. First Sergeant - 590,000 points: Squad Ammo Specialization
27. First Sergeant 1 Star - 630,000 points: Urban Camo
28. First Sergeant 2 Stars - 670,000 points: MP443 SUPP. Pistol
29. Master Gunnery Sergeant - 710,000 points: Squad Flak Jacket Specialization
30. Master Gunnery Sergeant 1 Star - 760,000 points: G18 SUPP. Pistol
31. Master Gunnery Sergeant 2 Stars - 810,000 points: Squad Explosives Specialization
32. Sergeant Major - 860,000 points: PDW-R PDW
33. Sergeant Major 1 Star - 910,000 points: Squad Suppression Specialization
34. Sergeant Major 2 Stars - 960,000 points: SAIGA 12K Shotgun
35. Warrant Officer One - 1,010,000 points: Squad Suppression Resist Specialization
36. Chief Warrant Officer Two - 1,060,000 points: .44 Magnum Pistol
37. Chief Warrant Officer Three - 1,110,000 points: Squad Grenades Specialization
38. Chief Warrant Officer Four - 1,165,000 points: DAO-12 Shotgun
39. Chief Warrant Officer Five - 1,220,000 points: Veteran Kit Camo
40. Second Lieutenant - 1,280,000 points: P90 PDW
41. First Lieutenant - 1,340,000 points: G18 Pistol
42. Captain - 1,400,000 points: Spec Ops Black Camo
43. Major - 1,460,000 points: USAS-12 Shotgun
44. Lt. Colonel - 1,520,000 points: .44 Scoped Pistol
45. Colonel - 1,600,000 points: VS VAL PDW

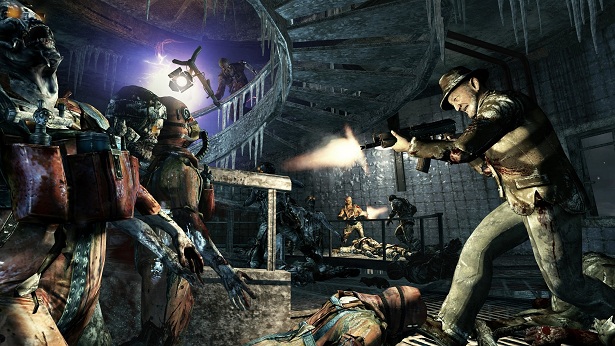
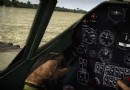 War Thunder Simulator Tutorial Offers Helpful Tips To Novice Pilots
 NBA LIVE 15 Wiki – Everything you need to know about the game .
 Destiny Beta: Invincible Enemies
 The Immersive Wonder of Audiosurf
 Reader, I Dated a Gamer: Discussions on Love, Sex, and Games