The Curio Society: Eclipse Over Mesina Walkthrough, Guide, & Tips
The Curio Society: Eclipse Over Mesina Walkthrough

Welcome to the The Curio Society: Eclipse over Mesina Walkthrough
After being contacted by a secret organization of elite mystery solvers, you’re sent out in the field to prove your skills. This job interview may be your last!
Whether you use this document as a reference when things get difficult or as a road map to get you from beginning to end, we’re pretty sure you’ll find what you’re looking for here.
This document contains a complete The Curio Society: Eclipse over Mesina game walkthrough featuring annotated screenshots from actual gameplay!
We hope you find this information useful as you play your way through the game. Use the walkthrough menu below to quickly jump to whatever stage of the game you need help with.
Remember to visit the Big Fish Games Forums if you find you need more help. Have fun!
This walkthrough was created by Anita Cule, and is protected under US Copyright laws. Any unauthorized use, including re-publication in whole or in part, without permission, is strictly prohibited.
General Tips
- This is the official guide for The Curio Society: Eclipse Over Mesina.
- This guide will not mention when you have to zoom into a location; screenshots will show each zoom scene.
- The screenshots will show where to play a Hidden-Object Puzzle (HOP) and what inventory item will be received.
- Some inventory items require further actions.
- A Match 3 game can be played instead of an HOP.
- This guide will give step-by-step solutions for all puzzles which are not random. Read the instructions in the game for each puzzle.
Introduction

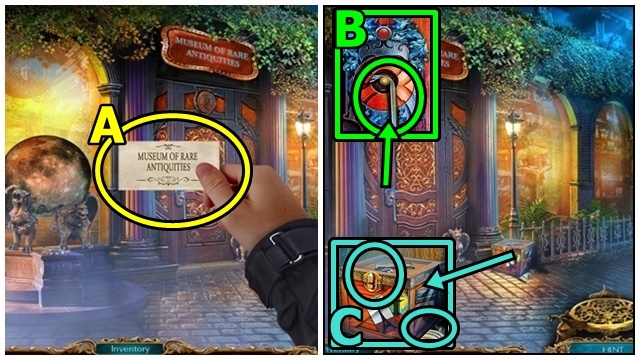
- Read the card (A).
- Take the CROWBAR (B).
- Read the note (C). Use the CROWBAR; take the GEARS.

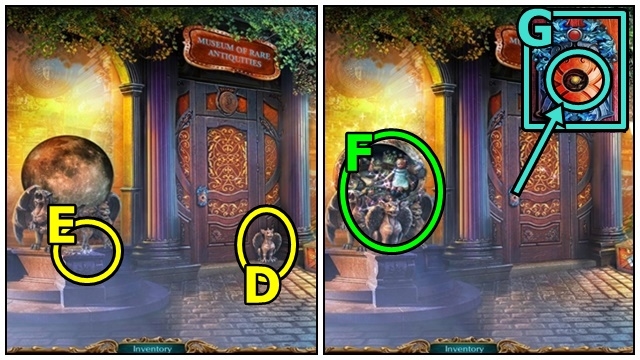
- Take the GARGOYLE (D), then place it (E).
- Play the HOP (F); receive the DOOR HANDLE.
- Insert the DOOR HANDLE (G).
- Enter the Gallery.

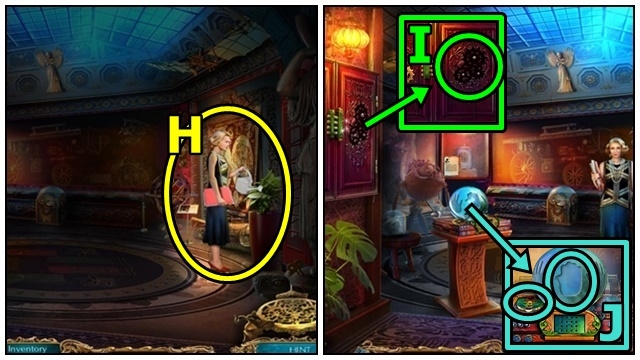
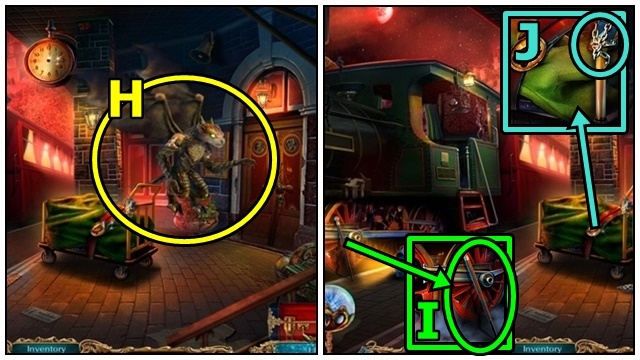
- Talk to Victoria (H).
- Insert the GEARS (I); take the HAND and PACKAGE.
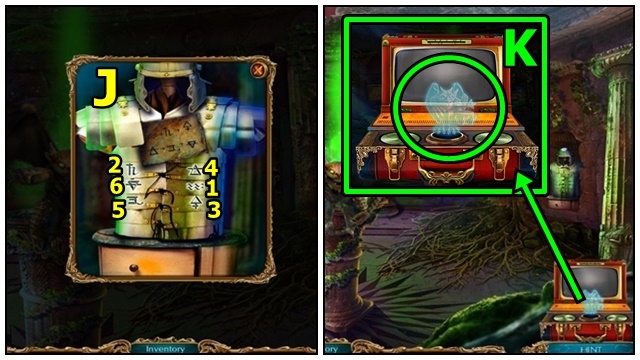
- Take the EGYPTIAN AMULET (J). Place the HAND; take the SAFE PART.

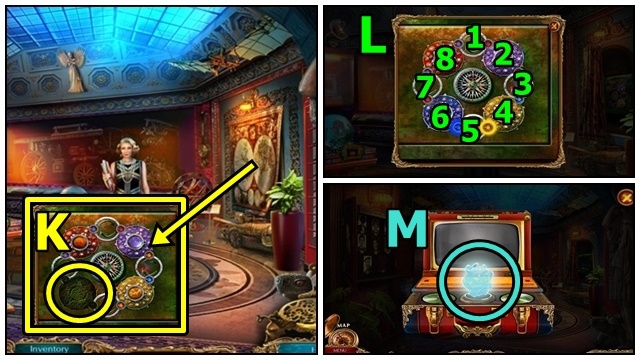
- Move the curtain (K). Insert the SAFE PART; play the mini-game.
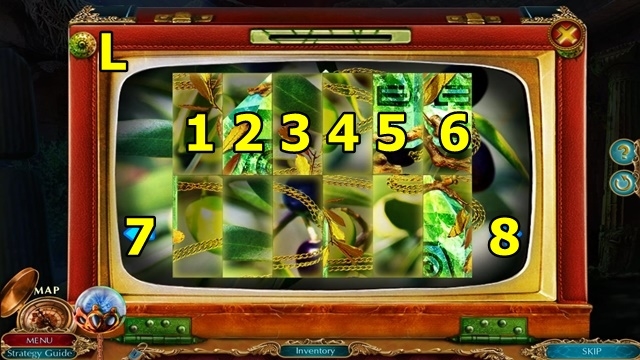
- Solution: 1-7-6-5-4-3-5 (L). Read the note; take the suitcase.
- Read the note off the PACKAGE (inventory); pull the strings; take the GARGOYLE STATUETTE.
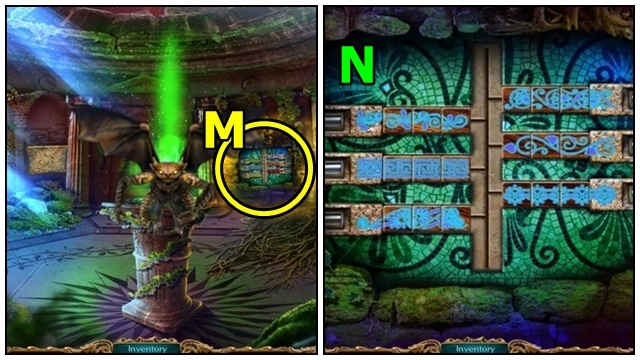
- Place the GARGOYLE STATUETTE (M); play the mini-game.

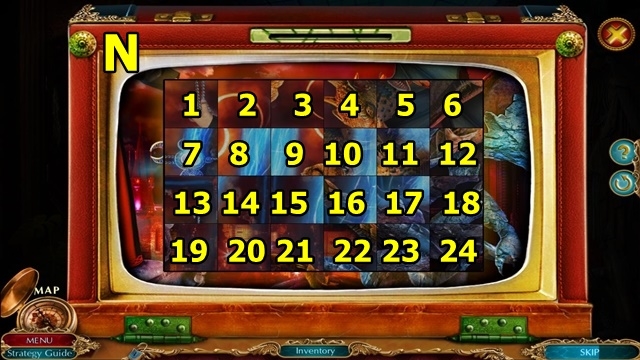
- Solution: 9×3, 10, 15×3, 16×3, 14×2, 13, 20×2, 19×3, 11, 12, 5, 6×2, 8×2, 3×3, 2×3, 1×3 (N). Take the PHOTO CLUE.

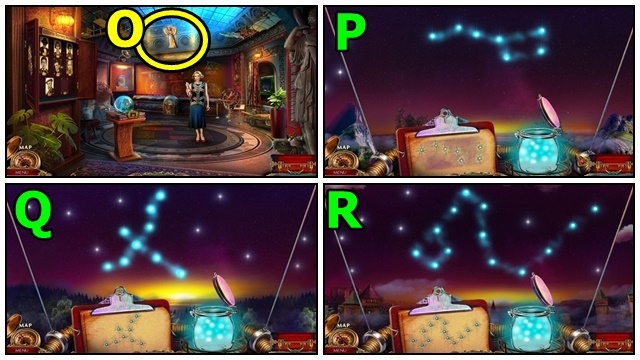
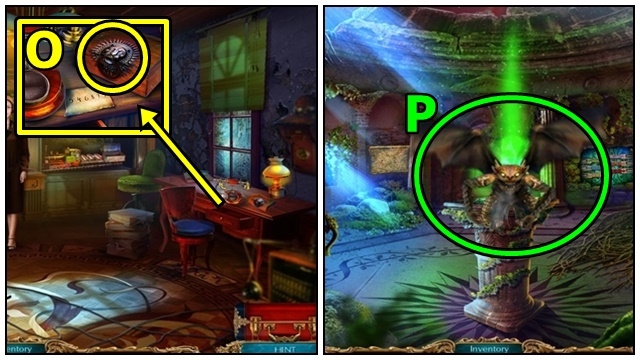
- Use the PHOTO CLUE (O). Play the mini-game.
- Solution: (P-R).
Chapter 1: Mesina

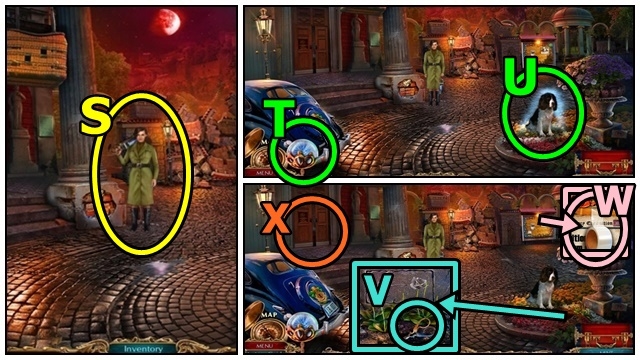
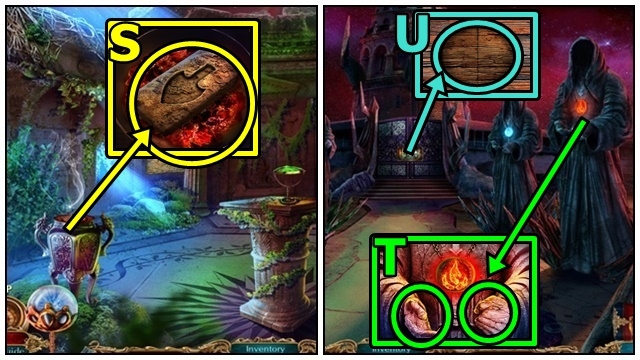
- Talk to Barbara (S).
- Use HARRY (T) on the dog (U).
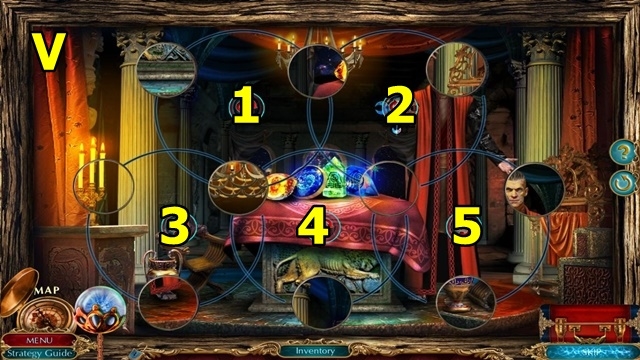
- Take the SCISSORS (V).
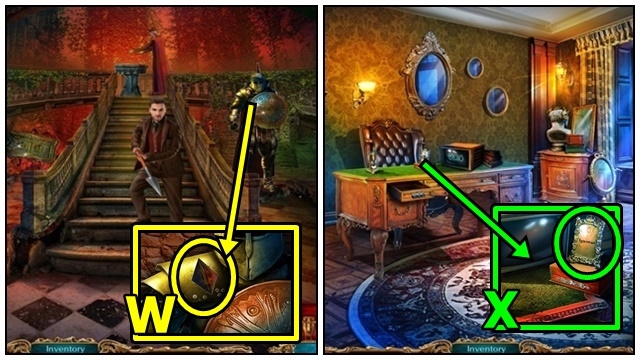
- Use the SCISSORS (W); receive the TAPE.
- Enter the Museum (X).

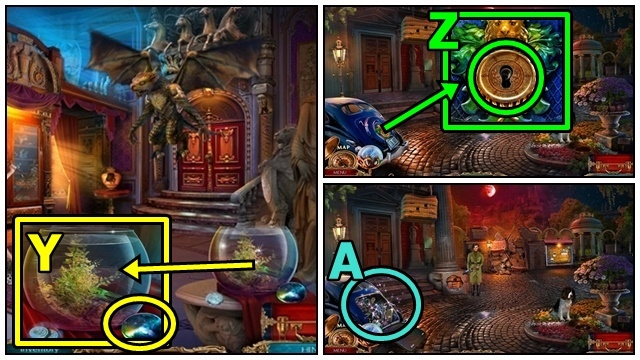
- Receive the CAR KEY.
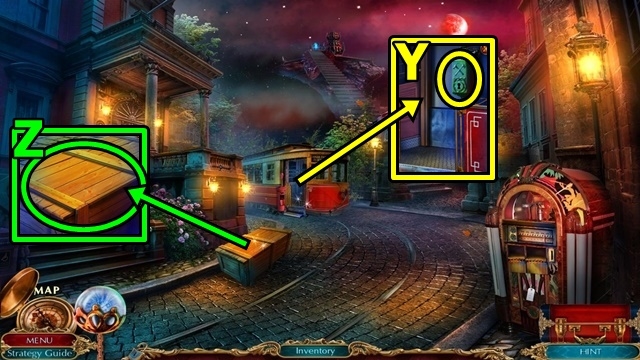
- Take the MOON MIRROR (Y).
- Move down.
- Use the CAR KEY (Z).
- Play the HOP (A). Receive the CASE.
- Enter the Museum.

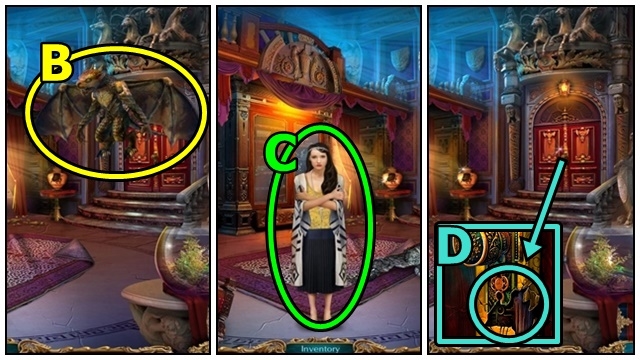
- Look at the diagram, then open the CASE (inventory). Reassemble the gun.
- Add the MOON MIRROR to the LIGHT CANNON (inventory); take the LIGHT CANNON.
- Use the LIGHT CANNON (B).
- Talk to the woman (C); receive the CROWBAR.
- Use the CROWBAR (D). Enter the Hall of Antiquities.

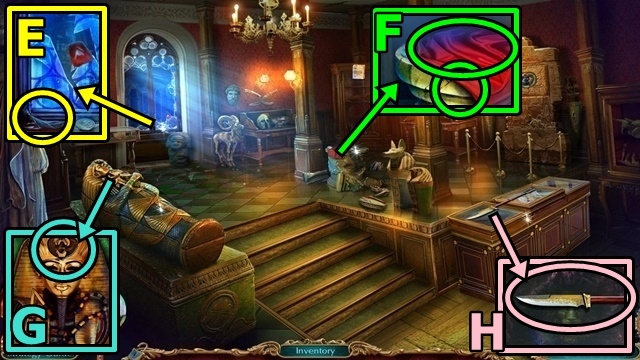
- Take the HAIR SAMPLE (E).
- Move the cloth (F). Use the TAPE; receive the FINGERPRINT.
- Add the EGYPTIAN AMULET (G); open the case, take the WIRE CUTTER.
- Take the SPEAR (H).
- Move down.

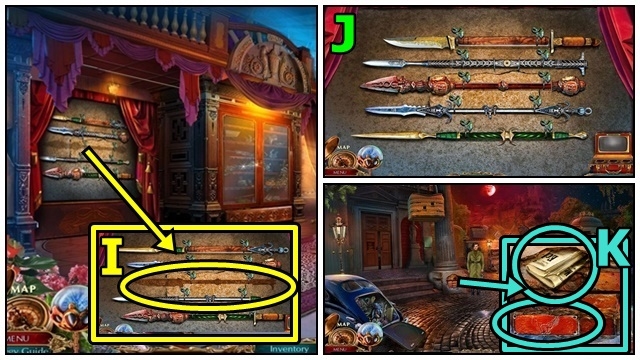
- Place the SPEAR (I); play the mini-game.
- Solution: (J). Take the PLATE.
- Move down.
- Take the note (K); insert the PLATE. Take the AMPHORA PART and CORK.
- Enter the Museum.

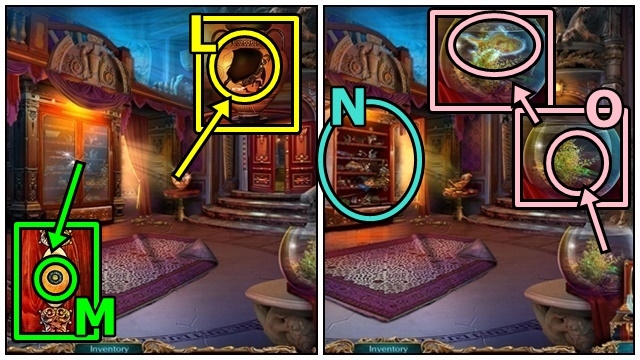
- Insert the AMPHORA PART (L); take the CUPBOARD HANDLE and PUZZLE FRAGMENT.
- Insert the CUPBOARD HANDLE (M).
- Play the HOP (N); receive the FISH FOOD.
- Add the FISH FOOD (O). Use Harry; receive the TWEEZERS.
- Enter the Hall of Antiquities.

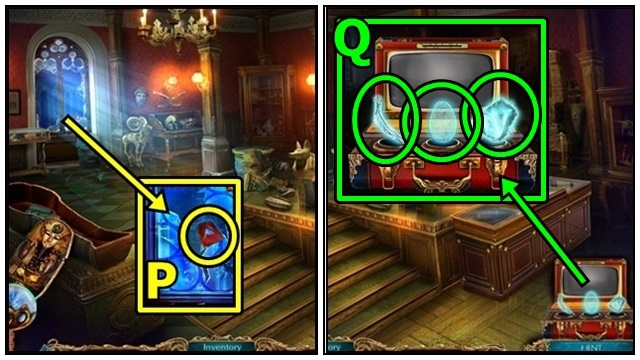
- Use the TWEEZERS (P); receive the FABRIC SAMPLE.
- Add the HAIR SAMPLE (Q); FINGERPRINT and FABRIC SAMPLE; play the mini-game.

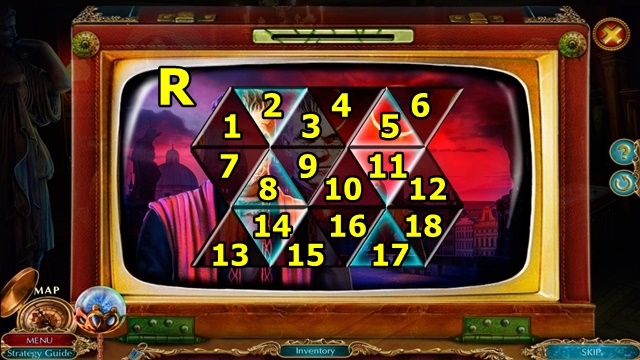
- Solution: 1-2, 2-3, 1-2, 4-5, 5-6, 4-5, 7-8, 8-9, 7-8, 10-11, 11-12, 10-11, 13-14, 14-15, 13-14, 16-17, 17-18, 16-17 (R). Take the PHOTO.

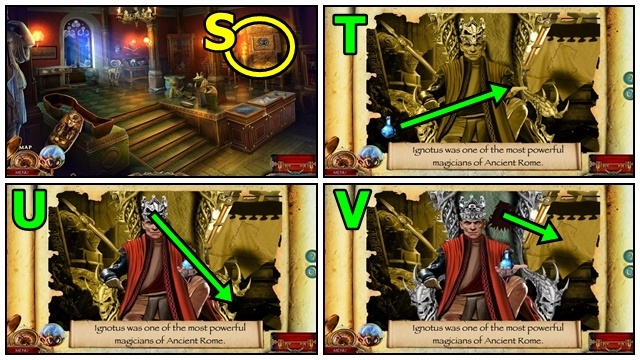

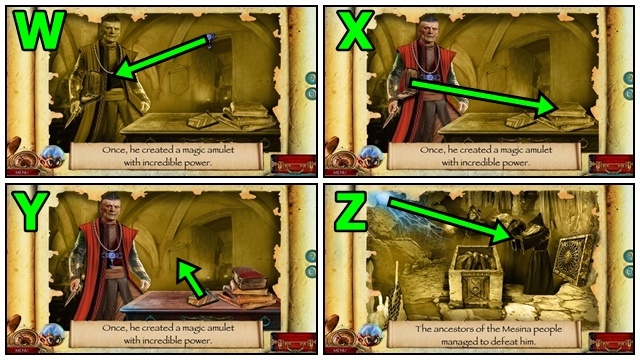
- Use the PHOTO (S); play the mini-game.
- Solution: (T-Z).

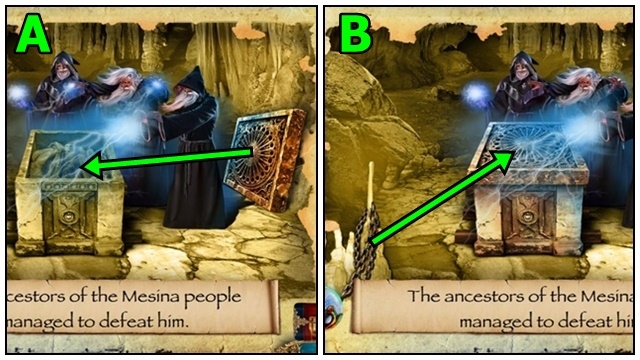
- Solution: (A-B). Take the JEWELED RING.

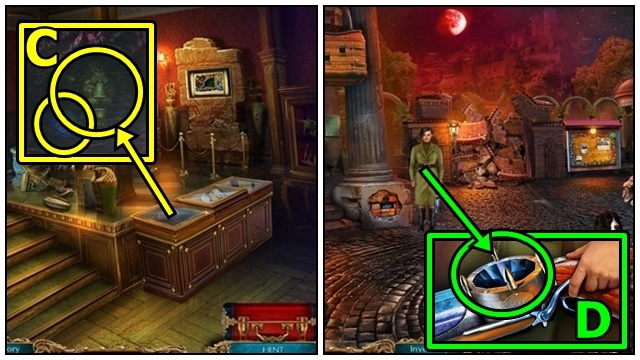
- Use the JEWELED RING (C); take the CANNON CRYSTAL.
- Return to Mesina.
- Add the CANNON CRYSTAL (D).
- Move forward.

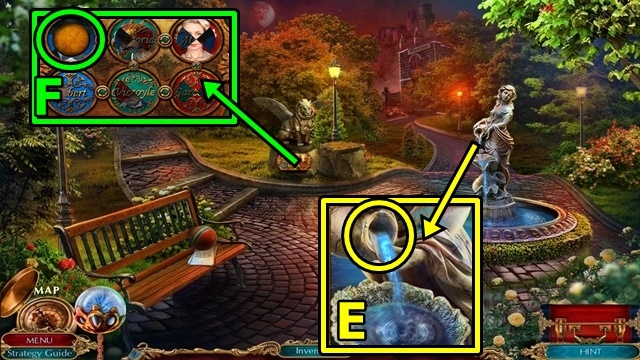
- Insert the CORK (E); take the BOILER HANDLE.
- Insert the PUZZLE FRAGMENT (F); play the mini-game.

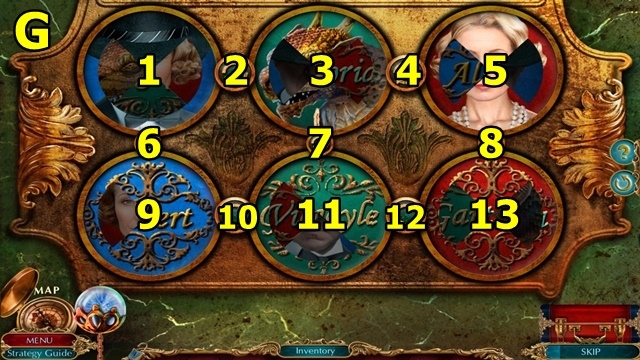
- Solution: 1×2-2-1×2-3×2-2-3×2-5×2-4-13×2-12-11×3-3-7-3×3-5-8-13×3-11×2-9×2- 10- 9×3-6-1-11-9-10-9×3-6-1×3-11-12-13-8-5-11×2-9-10-9×2-12-11×2-13×2-12-11×3-13×2-12-11×3-13-12-13×2-12-13×2-12-13×3 (G). Take the MOON MIRROR.
- Move forward.

- Insert the MOON MIRROR into the LIGHT CANNON (inventory); take the LIGHT CANNON.
- Use the LIGHT CANNON (H).
- Take the CANE (I).
- Use the WIRE CUTTER (J); receive the SCHEDULE NUMBER.
- Enter the Engine.

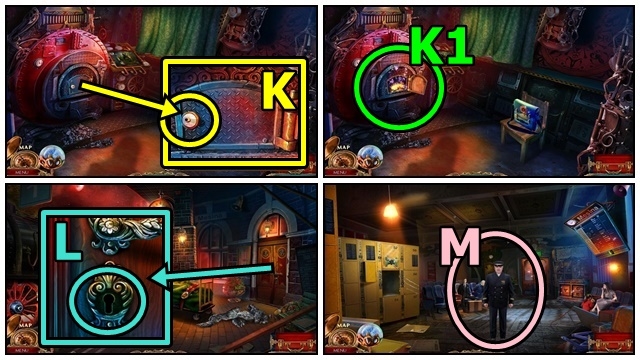
- Insert the BOILER HANDLE (K).
- Play the HOP (K1); receive the WAITING ROOM KEY.
- Move down.
- Insert the WAITING ROOM KEY (L). Enter the Waiting Room.
- Talk to the Engineer (M).

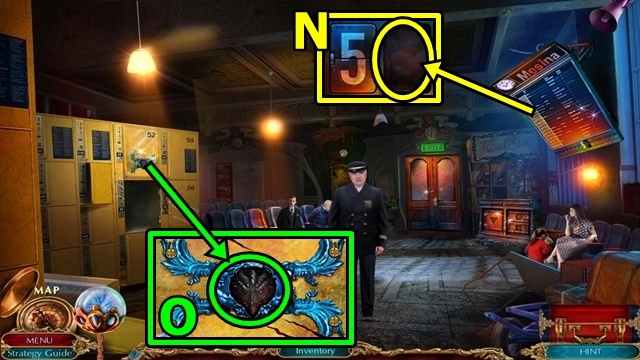
- Insert the SCHEDULE NUMBER (N); take the NOSE and DRAGON AMULET.
- Insert the DRAGON AMULET (O); play the mini-game.

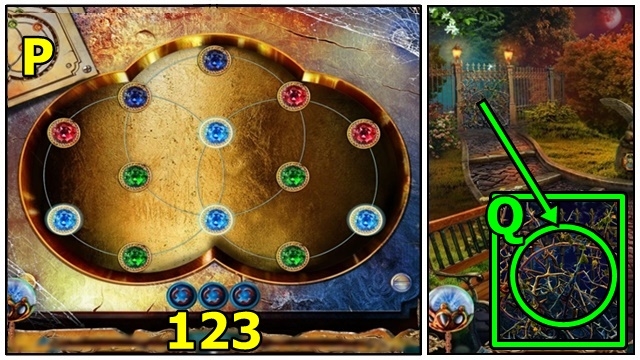
- Solution: 1×3, 2, 3×2, 2×3, 3, 2×3, 1×5 (P). Take the PLANT POISON.
- Return to the Park.
- Use the PLANT POISON (Q). Enter the Garden.
Chapter 2: The Water Tower

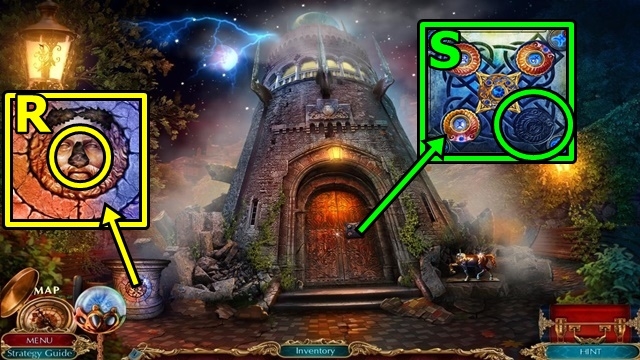
- Insert the NOSE (R); take the WATER KEY and RAKE.
- Insert the WATER KEY (S); play the mini-game.

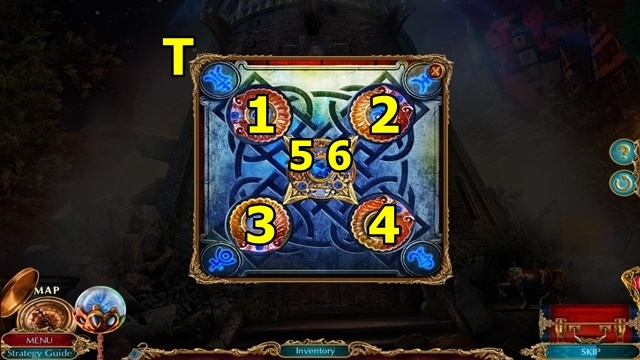
- Solution: 6-5-1×6-3×4-2×7-4×6 (T).
- Enter the Water Tower.

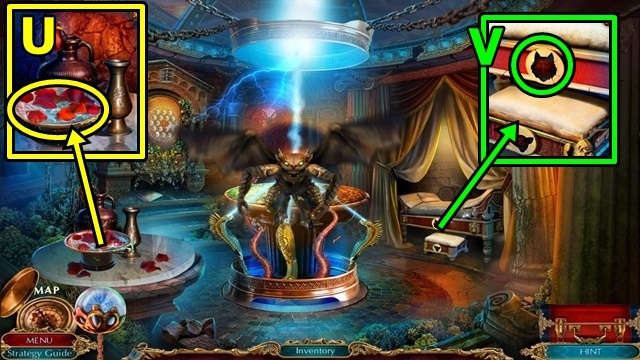
- Use the RAKE (U); take the WOLF AMULET.
- Insert the WOLF AMULET (V); take the DRAGON ICON, read the note.
- Return to the Train Station.

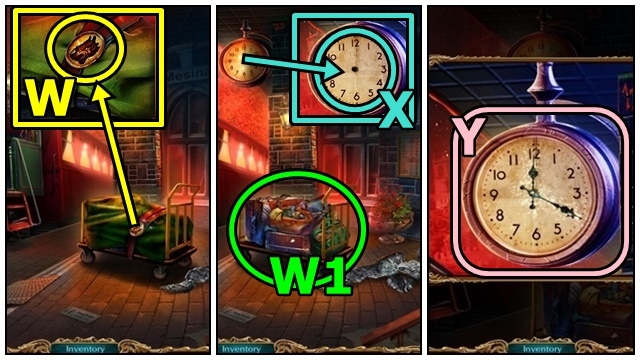
- Insert the DRAGON ICON (W).
- Play the HOP (W1); receive the CLOCK HANDS.
- Add the CLOCK HANDS (X); play the mini-game.
- Solution: (Y). Take the GEAR AMULET.
- Enter the Engine.

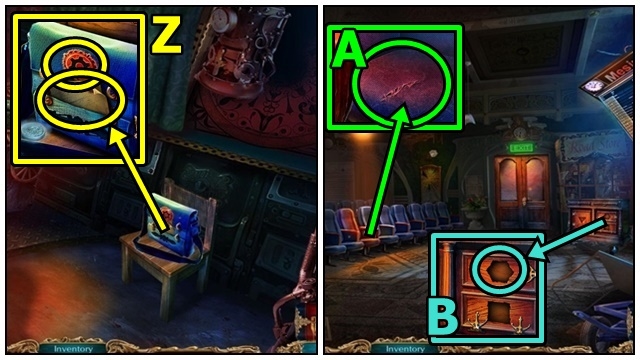
- Read the note (Z); insert the GEAR AMULET; take the GLASS, HEXAHEDRON and SILICONE.
- Return to the Waiting Room.
- Use the GLASS (A); take the PLASTER.
- Insert the HEXAHEDRON (B); take the PITCHER.
- Return to the Park.

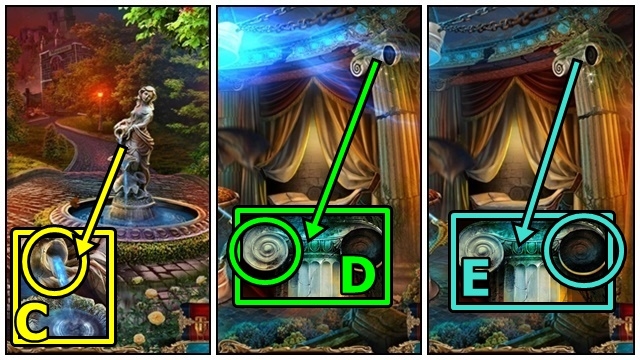
- Use the PITCHER (C); receive the WATER PITCHER.
- Return to the Water Tower.
- Add the SILICONE (D); take the SILICONE MOLD.
- Pour the WATER PITCHER, then PLASTER into the SILICONE MOLD (inventory); take the IONIC ELEMENT.
- Insert the IONIC ELEMENT (E); take the ANCIENT ROMAN CLASP.
- Return to the Engine.

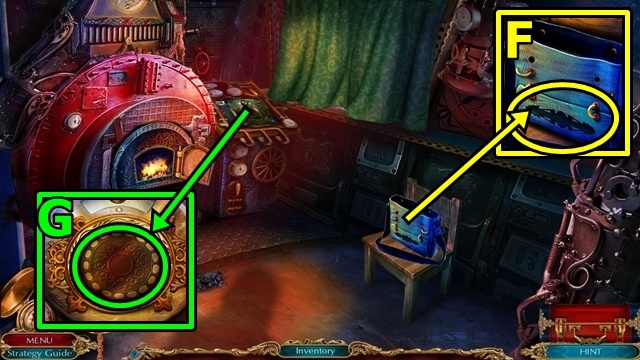
- Insert the ANCIENT ROMAN CLASP (F); take the PANEL BUTTON.
- Insert the PANEL BUTTON (G); play the mini-game.

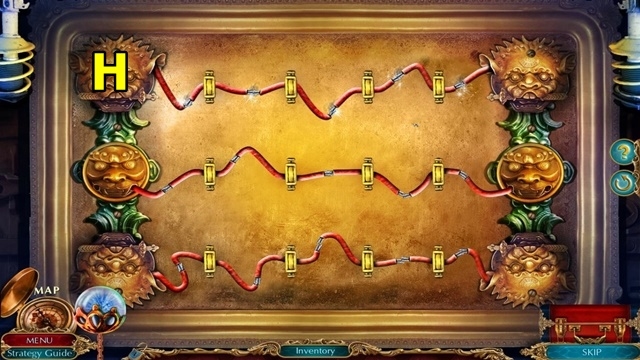
- Solution: (H). Take the FIRST AID KEY and TRAIN PARTS.
- Move down.

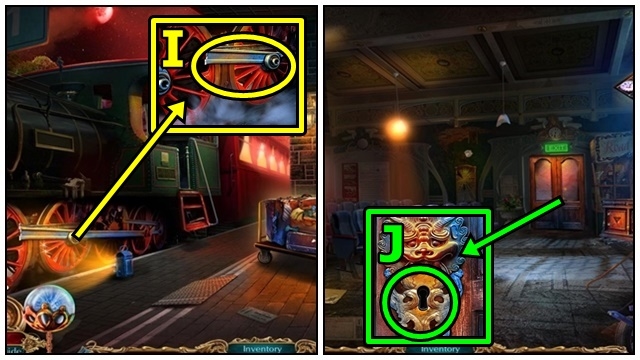
- Attach the TRAIN PARTS (I); receive the PIER KEY.
- Enter the Waiting Room.
- Insert the PIER KEY (J). Go to the Pier.

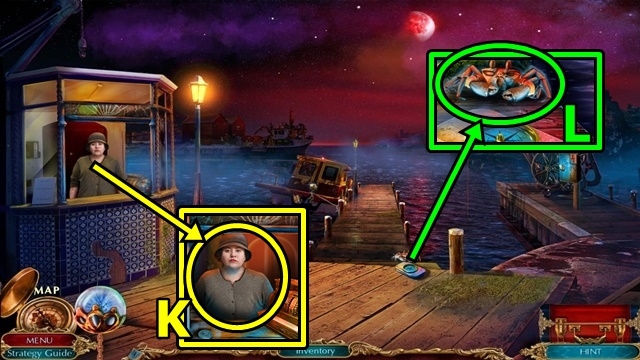
- Talk to the woman (K). Receive the LEVER.
- Use Harry (L); take the LAUREL CROWN.
- Return to the Garden.

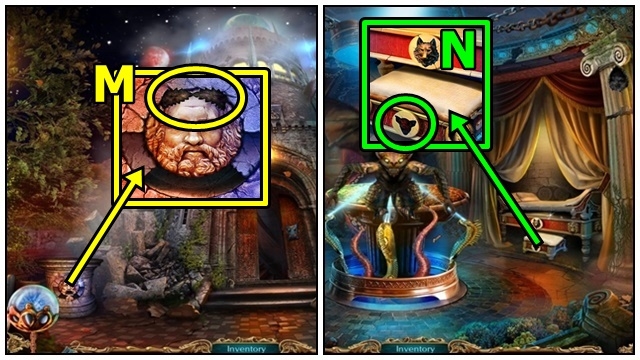
- Insert the LAUREL CROWN (M); take the GARGOYLE AMULET.
- Enter the Water Tower.
- Insert the GARGOYLE AMULET (N); take the BOARDS (1/2) and CENTAUR TORSO.
- Move down.

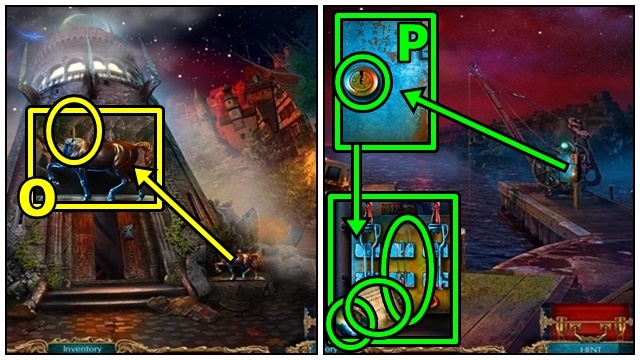
- Insert the CENTAUR TORSO (O); take the MASTER KEY.
- Return to the Pier.
- Insert the MASTER KEY (P). Take the MOON MIRROR; read the note. Insert the LEVER.

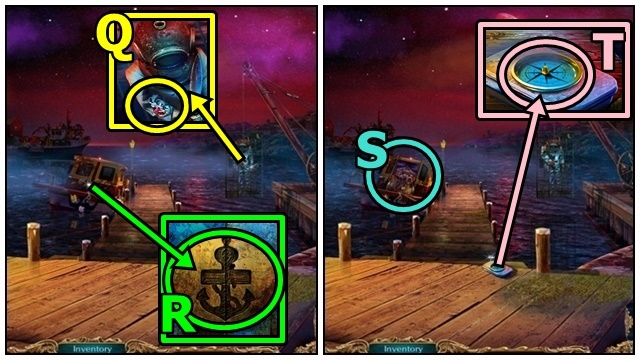
- Take the BOAT KEY (Q).
- Insert the BOAT KEY (R).
- Play the HOP (S); receive the COMPASS ARROW.
- Insert the COMPASS ARROW (T); take the TRIANGLE.
- Move down.

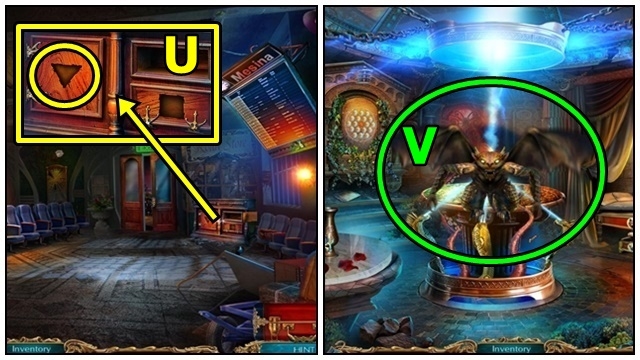
- Insert the TRIANGLE (U). Use Harry; take the METAL ROSE.
- Return to the Water Tower.
- Insert the MOON MIRROR into the LIGHT CANNON (inventory); take the LIGHT CANNON.
- Use the LIGHT CANNON (V).

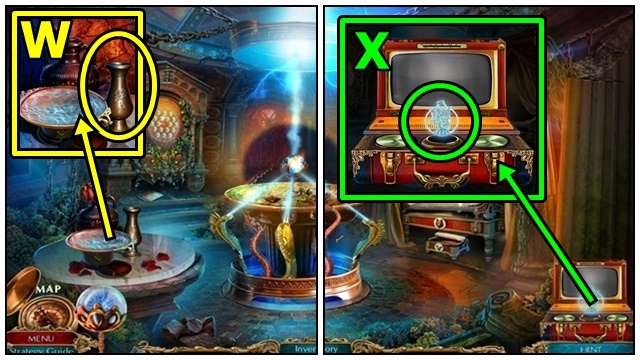
- Insert the METAL ROSE (W); take the GARGOYLE AMULET.
- Insert the GARGOYLE AMULET (X); play the mini-game.

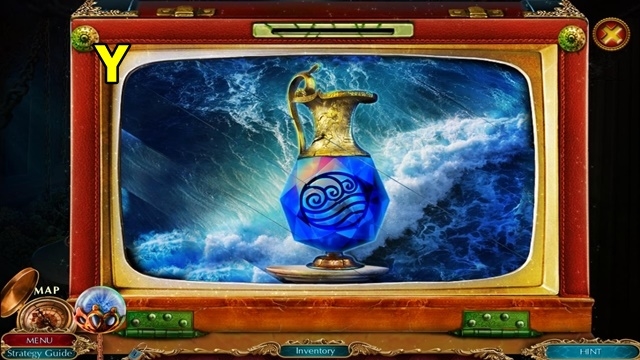
- Solution: (Y). Take the PHOTO.

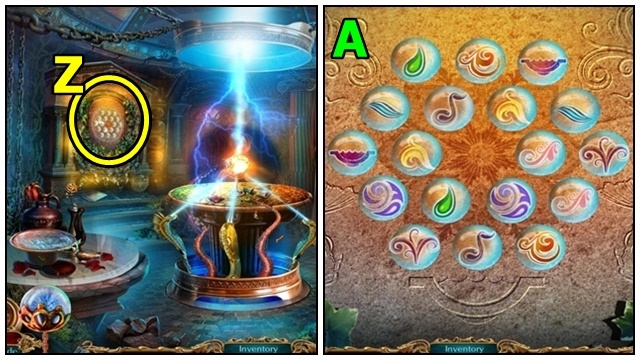
- Use the PHOTO (Z); play the mini-game.
- Solution: (A). Take the OIL.
- Return to the Pier.

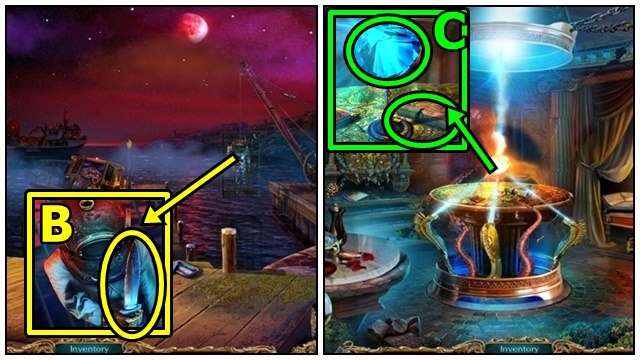
- Use the OIL (B); take the STEEL SWORD.
- Return to the Water Tower.
- Read the note (C). Use the STEEL SWORD.

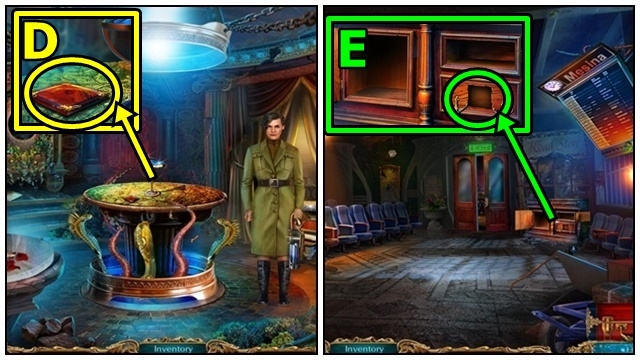
- Take the SQUARE (D).
- Return to the Waiting Room.
- Insert the SQUARE (E); take the REGISTER HANDLE and RING.
- Move forward.

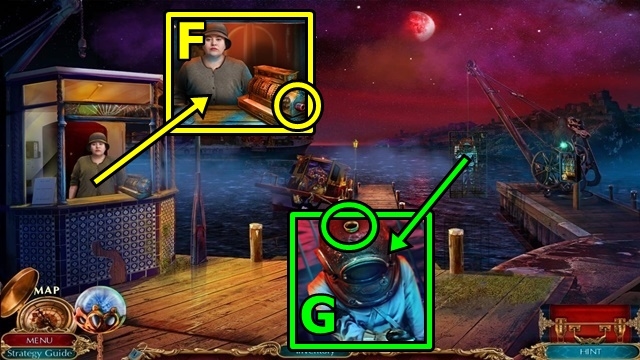
- Insert the REGISTER HANDLE (F); take the HOSE.
- Insert the HOSE (G); play the HOP.
Chapter 3: The Air Tower

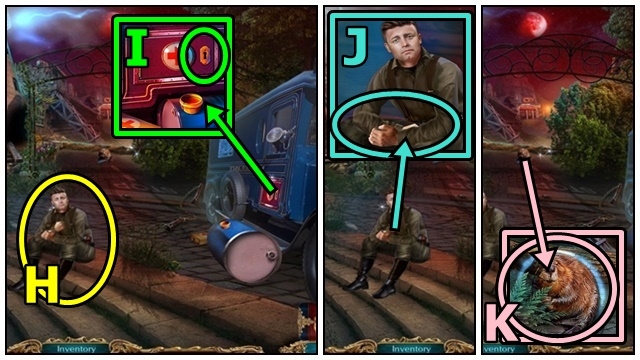
- Talk to Bill (H).
- Insert the FIRST AID KEY (I). Take the BOARDS (2/2) and BANDAGE. Read the note.
- Add the two BOARDS (J) and BANDAGE; receive the TOKEN.
- Use Harry (K). Move forward.

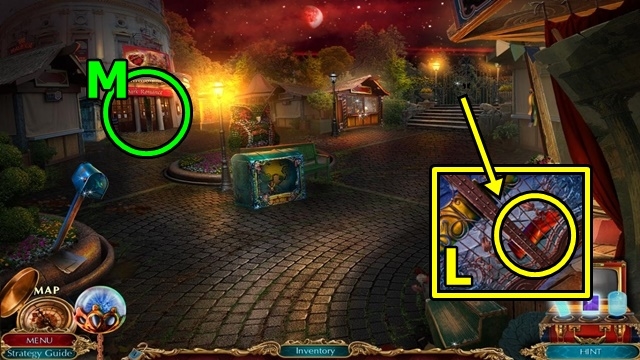
- Use the CANE (L), receive the GLOVE.
- Enter the Cinema (M).

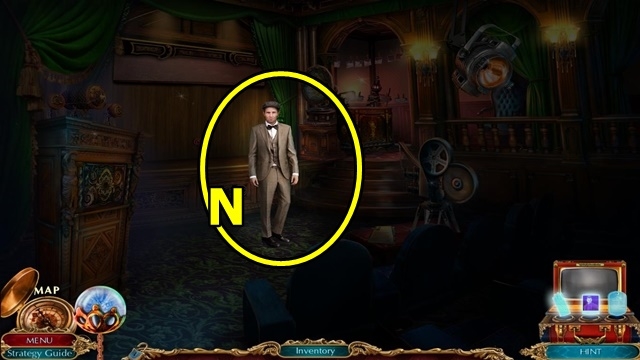

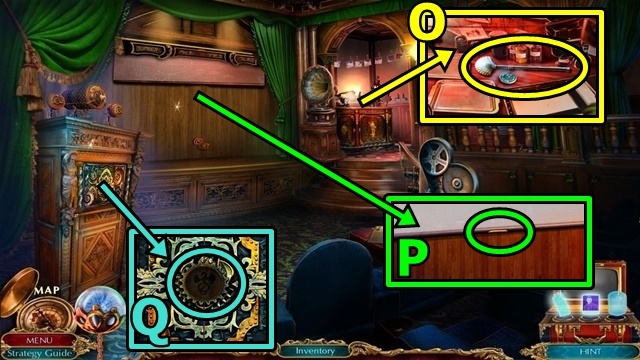
- Take the SHELL LEVER (O).
- Attach the RING (P); take the TWEEZERS and COGWHEEL.
- Attach the COGWHEEL (Q); play the mini-game.

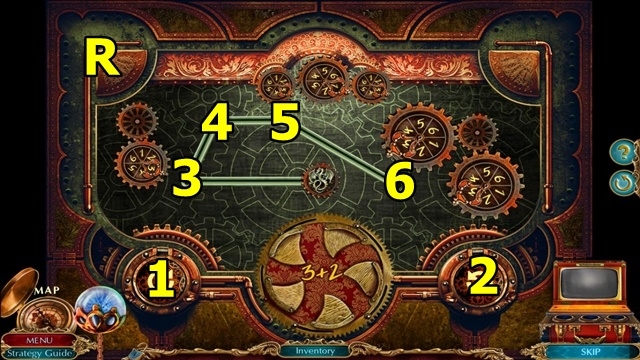
- Solution: 5-1-6-1×2-5-1-3-1×4 (R). Take the SWITCH.
- Move down.

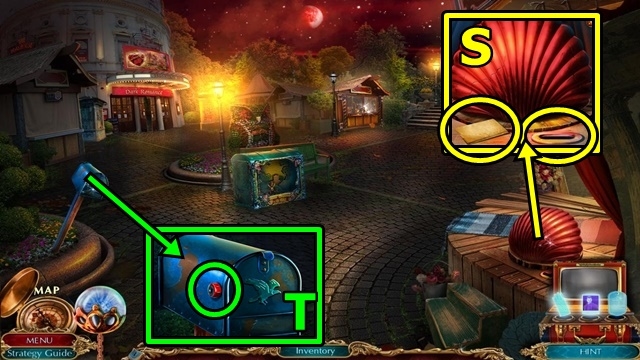
- Read the note (S); insert the SHELL LEVER. Take the MAILBOX TOKEN and NEEDLE.
- Insert the MAILBOX TOKEN (T); take the BROKEN FILM REEL and RAG.
- Move down.

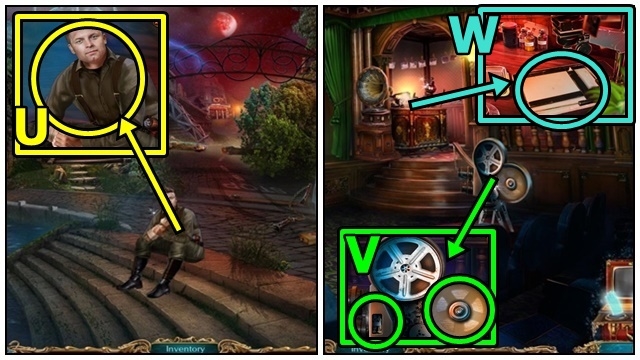
- Offer the BROKEN FILM REEL (U); receive the FILM REEL.
- Return to the Cinema.
- Insert the SWITCH (V) and the FILM REEL. Press the switch. Take the NOTE WITH CODE. Use the TWEEZERS; receive the FILM.
- Add the FILM (W); take the PHOTO.

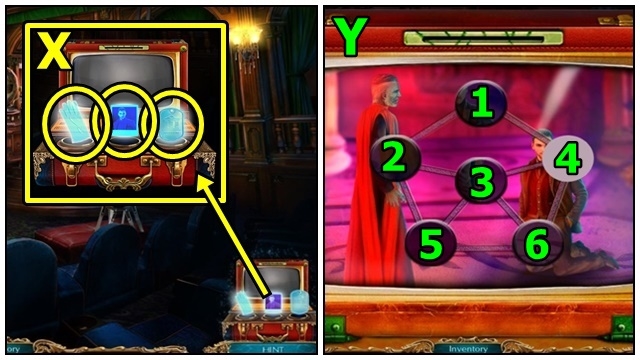
- Add the GLOVE (X), PHOTO and TOKEN; play the mini-game.
- Solution: 3-2-5-6-3-4-1-2-3 (Y). Take the PHOTO.
- Return to the River Park.

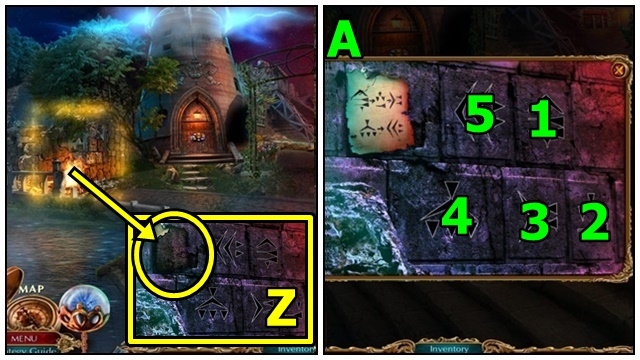
- Use the PHOTO (Z). Attach the NOTE WITH THE CODE; play the mini-game.
- Solution: (A). Take the AIR KEY and MOON MIRROR.

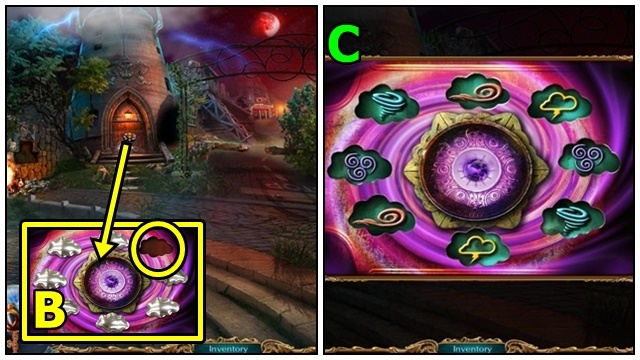
- Insert the AIR KEY (B); play the mini-game.
- Solution: (C). Enter the Air Tower.

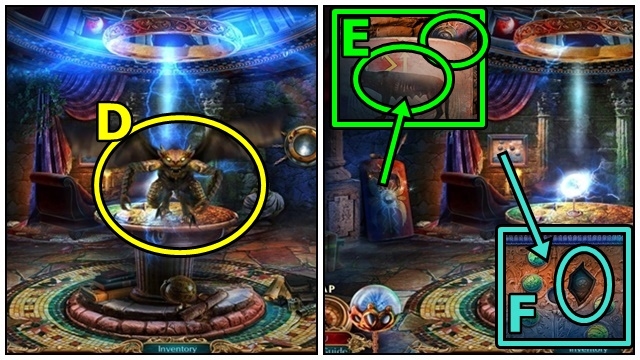
- Insert the MOON MIRROR into the LIGHT CANNON (inventory); take the LIGHT CANNON.
- Use the LIGHT CANNON (D).
- Use the RAG (E); take the PLASTER PATTERN.
- Insert the PLASTER PATTERN (F). Read the note; take the LETTER OPENER.
- Return to the Shopping District.

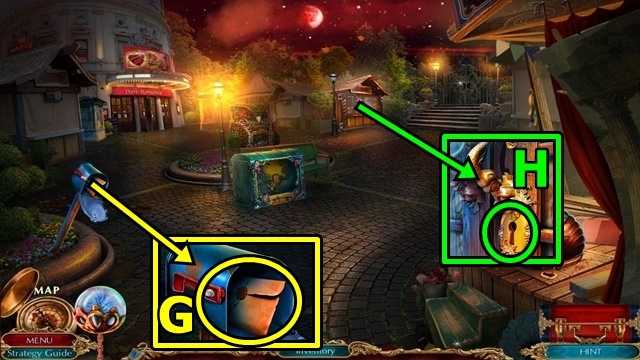
- Use the LETTER OPENER (G); take the SHOP KEY.
- Use the SHOP KEY (H).

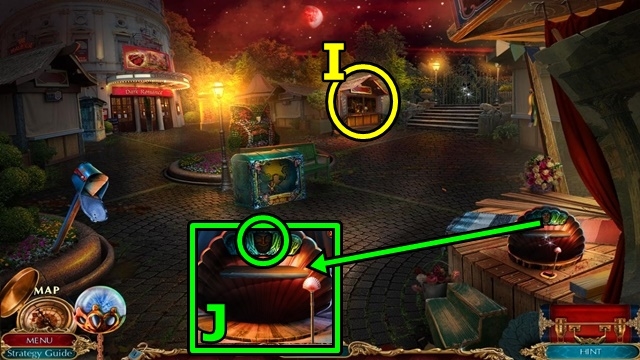
- Play the HOP (I); receive the COMEDY MASK.
- Insert the COMEDY MASK (J); receive the STRINGS.
- Return to the Air Tower.

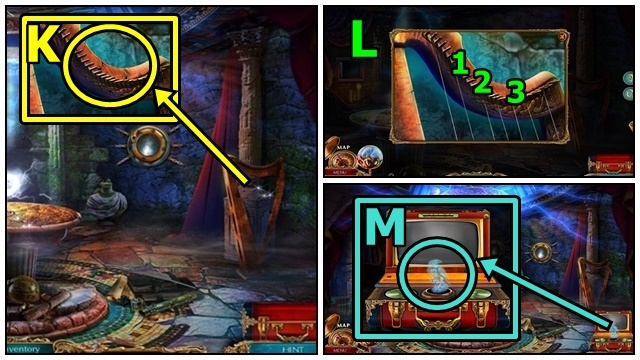
- Attach the STRINGS (K); play the mini-game.
- Solution: 2-1-3 (L). Take the EAGLE STATUETTE.
- Add the EAGLE STATUETTE (M); play the mini-game.

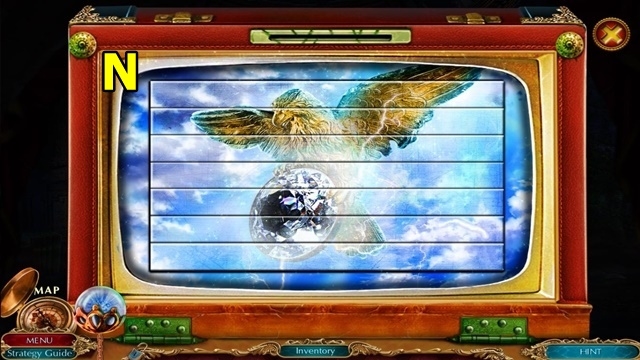
- Solution: (N). Take the PHOTO.

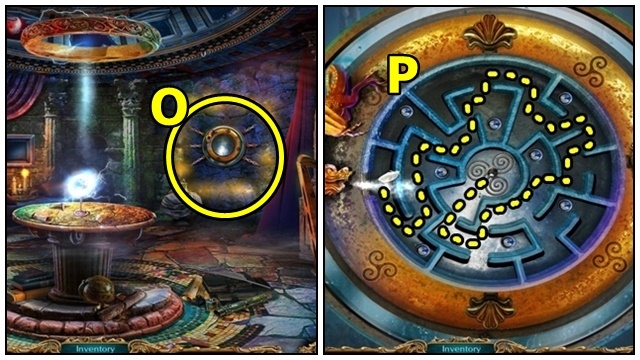
- Use the PHOTO (O); play the mini-game.
- Solution: (P). Take the FILE and COIN.
- Return to the Shopping District.

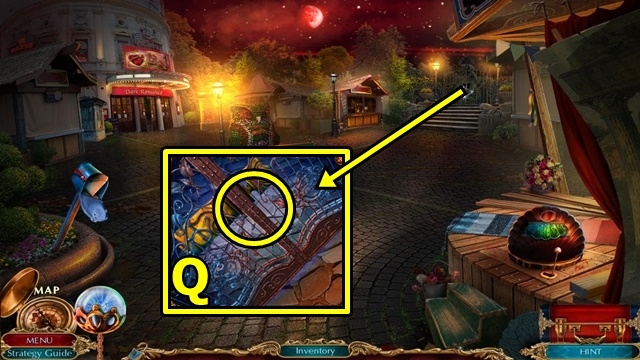
- Use the FILE (Q). Move forward.

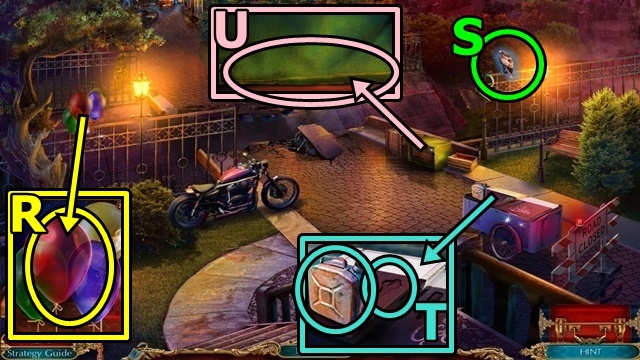
- Use the NEEDLE (R); receive the CONE.
- Use Harry (S); receive the HOSE.
- Take the CAN WITH HOSE (2/2) (T). Insert the CONE; take the PIZZA KNIFE.
- Use the PIZZA KNIFE (U); take the LIGHTBULB.
- Return to the Cinema.

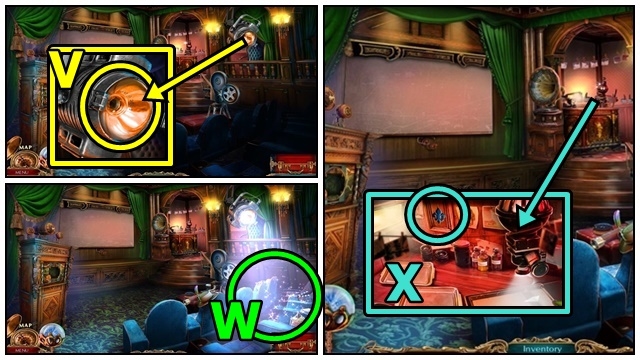
- Insert the LIGHTBULB (V).
- Play the HOP (W); receive the FLEUR-DE-LIS.
- Insert the FLEUR-DE-LIS (X); take the ICE CREAM BAR.
- Return to the Bridge.

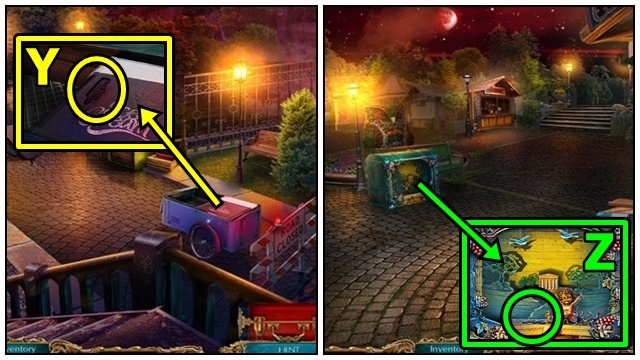
- Insert the ICE CREAM BAR (Y); take the CHERUB and CLOWN MASK.
- Move down.
- Insert the CHERUB (Z); take the WOLF FIGURE.
- Return to the Air Tower.

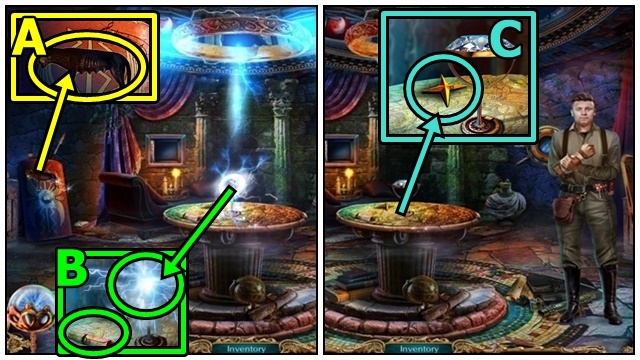
- Insert the WOLF FIGURE (A); take the BRONZE SPEAR.
- Read the note (B); use the BRONZE SPEAR.
- Take the FOUR-POINTED STAR (C).
- Move down.

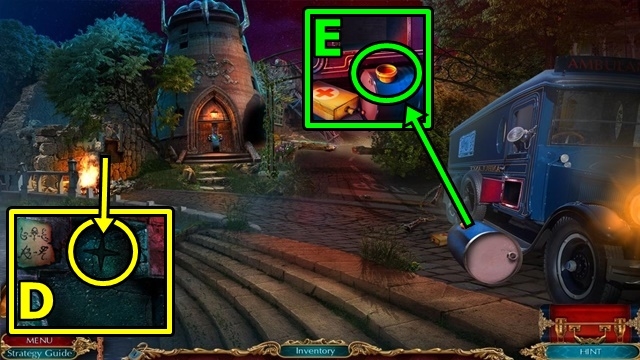
- Insert the FOUR-POINTED STAR (D); take the HELMET and the FORK.
- Use the CAN WITH HOSE (E); receive the FILLED CAN.
- Return to the Bridge.

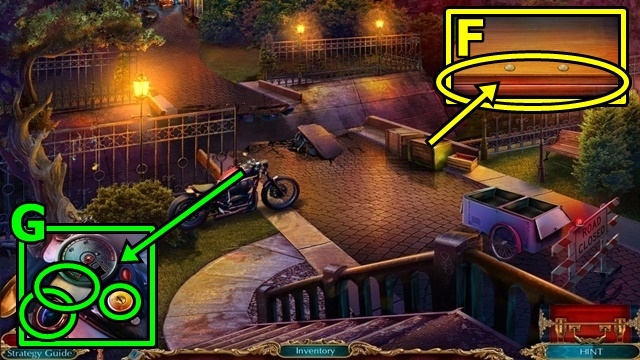
- Use the FORK (F); take the GARGOYLE PUPPET and MOTORCYCLE KEY.
- Read the note (G). Insert the FILLED CAN, then the MOTORCYCLE KEY. Turn the key.
Chapter 4: The Earth Tower

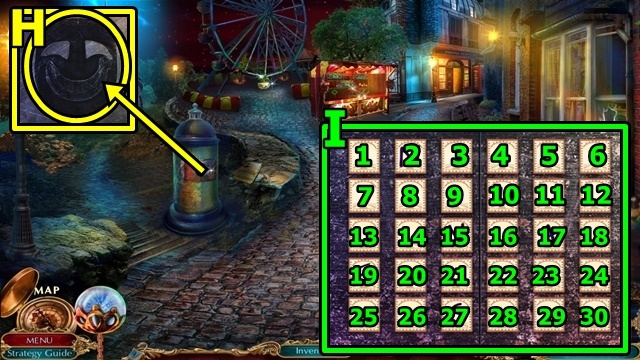
- Insert the CLOWN MASK (H); play the mini-game.
- Solution: 7×3-26-21-26×3-22-17×7-18×3-12×3-18×2 (I). Take the FLAME KEY.
- Move forward.

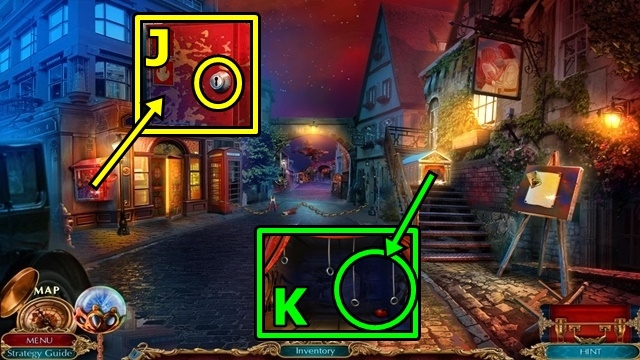
- Insert the FLAME KEY (J); take the EXTINGUISHER.
- Add the GARGOYLE PUPPET (K); take the SCREWDRIVER.
- Move down.

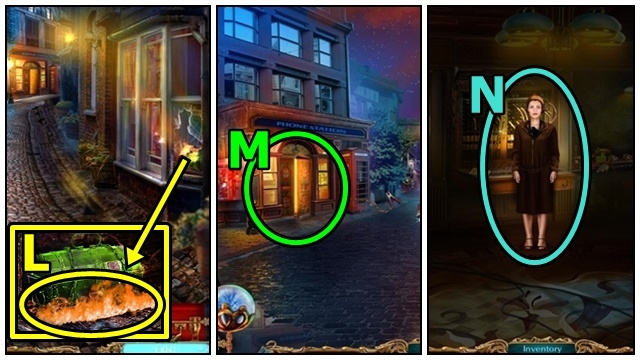
- Use the EXTINGUISHER (L); take the LOCKBOX CODE.
- Move forward.
- Enter the Telephone Exchange (M).
- Talk to the woman (N).

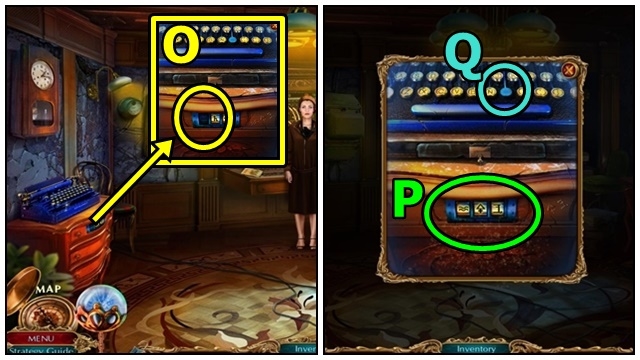
- Add the LOCKBOX CODE (O); play the mini-game.
- Solution: (P). Take the TYPEWRITER BUTTON and WIRES (1/3). Add the TYPEWRITER BUTTON (Q); take the WIRES (2/3).

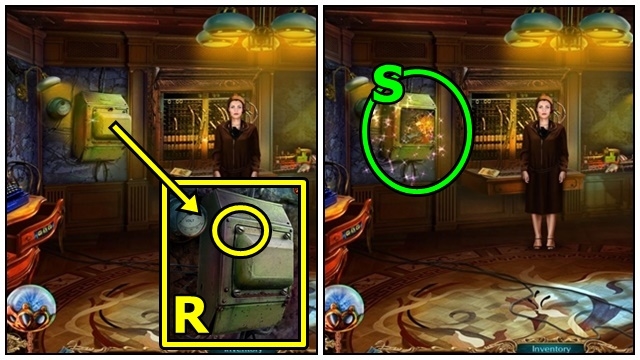
- Use the SCREWDRIVER (R).
- Play the HOP (S); receive the NUMBERED NOTE.

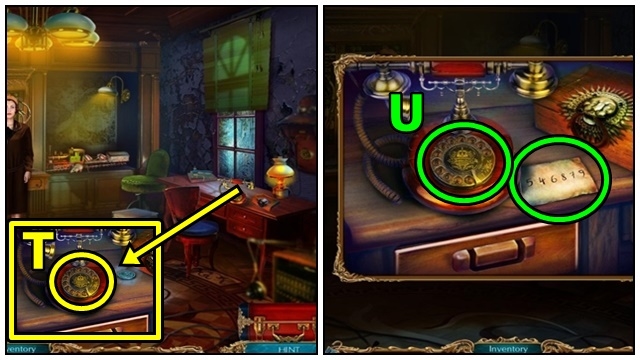
- Add the NUMBERED NOTE (T); play the mini-game.
- Solution: 5-4-6-8-7-9 (U). Take the TRAIN WHEEL.

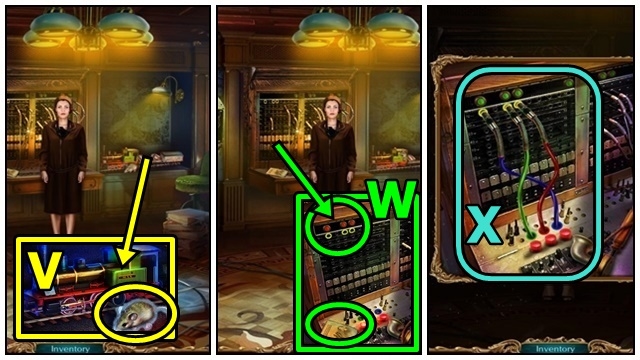
- Use Harry (V). Add the TRAIN WHEEL. Take the WIRES (3/3).
- Read the note (W); add the three WIRES; play the mini-game.
- Solution: (X). Receive the SLINGSHOT.
- Return to the Circus.

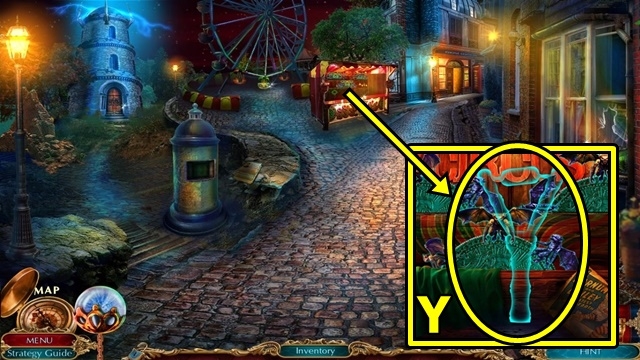
- Insert the SLINGSHOT (Y); play the mini-game.

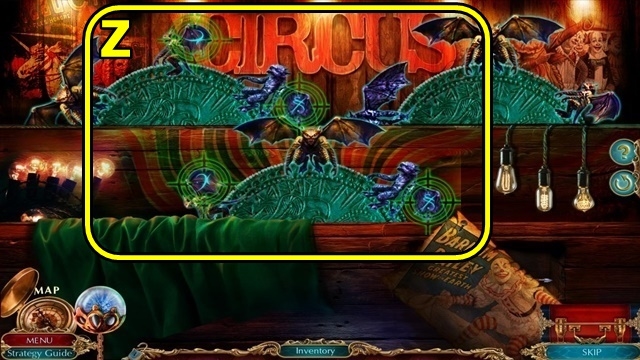
- Solution: Match the symbols on each wing. Shoot the wheel to make it rotate. The screenshot shows an example of matching the symbols (Z). Take the CROSSBOW and AMULET KEY.

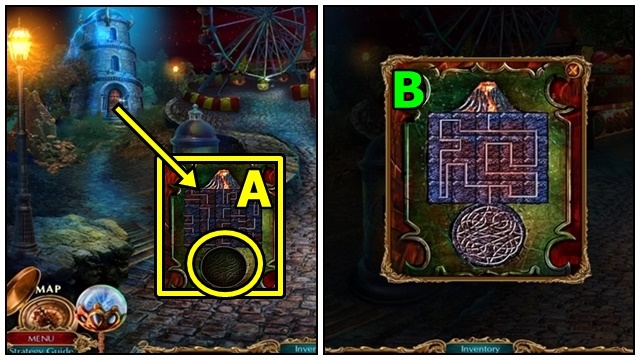
- Insert the AMULET KEY (A); play the mini-game.
- Solution: (B). Enter the Earth Tower.

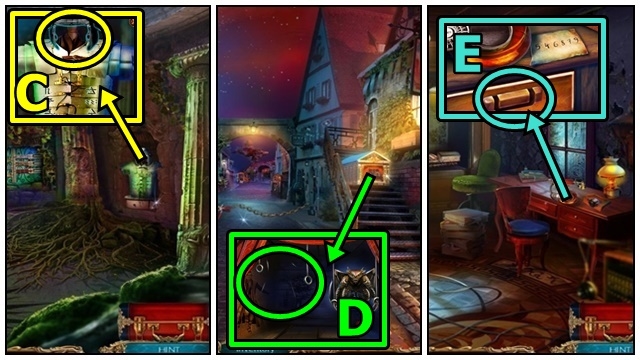
- Add the HELMET(C); take the IGNOTUS PUPPET.
- Return to Main Street.
- Add the IGNOTUS PUPPET (D); take the ARROW SHAFT and DRAWER PULL.
- Enter the Telephone Exchange.
- Add the DRAWER PULL (E); take the EAGLE FIGURE.
- Return to the Earth Tower.

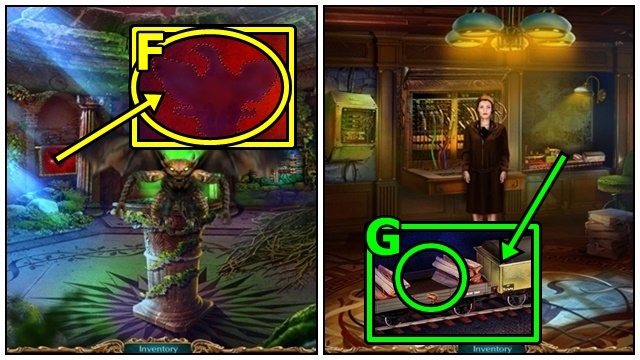
- Add the EAGLE FIGURE (F); play the HOP; receive the FIREWOOD.
- Return to the Telephone Exchange.
- Place the FIREWOOD (G); take the INCENSE and the ARROWHEAD MOLD.
- Return to the Earth Tower.

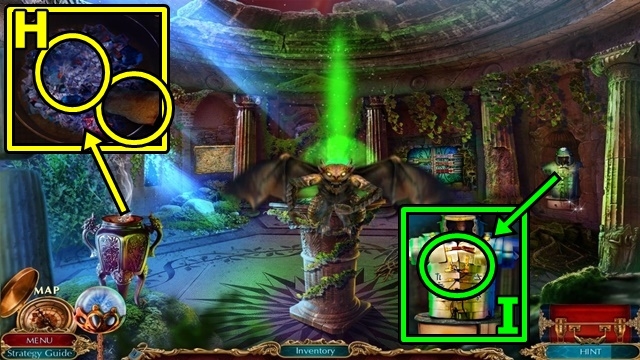
- Pour the INCENSE (H). Take the CODE.
- Add the CODE (I); play the mini-game.

- Solution: (J). Take the CLAY GARGOYLE and BELLOWS.
- Place the CLAY GARGOYLE (K); play the mini-game.

- Solution: 3-7-1-2-8-3-7×2-4-7×3-5-8×2-6-8-5-8×2-5-7×2-5-8×2 (L). Take the PHOTO.

- Use the PHOTO (M); play the mini-game.
- Solution: (N). Take the LION RING and COPPER.
- Return to the Telephone Exchange.

- Insert the LION RING (O). Open the box; take the MOON MIRROR.
- Return to the Earth Tower.
- Insert the MOON MIRROR into the LIGHT CANNON (inventory); take the LIGHT CANNON.
- Use the LIGHT CANNON (P).

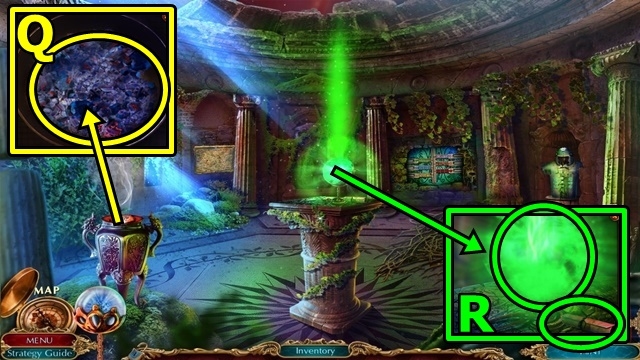
- Place the ARROWHEAD MOLD (Q); add the COPPER, then use the BELLOWS. Take the ARROWHEAD.
- Add the ARROW SHAFT and ARROWHEAD to the CROSSBOW (inventory); add the arrow; take the CROSSBOW.
- Read the note (R); use the CROSSBOW.

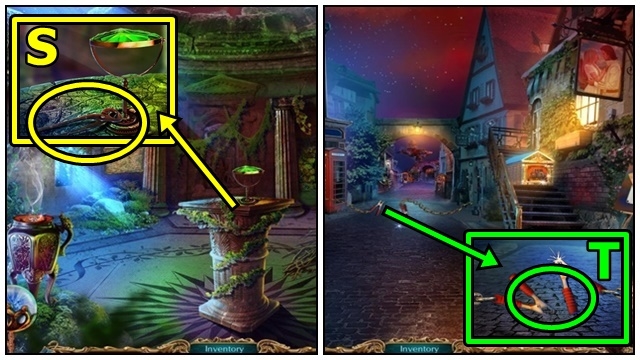
- Take the NIPPERS (S).
- Return to Main Street.
- Use the NIPPERS (T). Move forward.
Chapter 5: Gabriel’s House

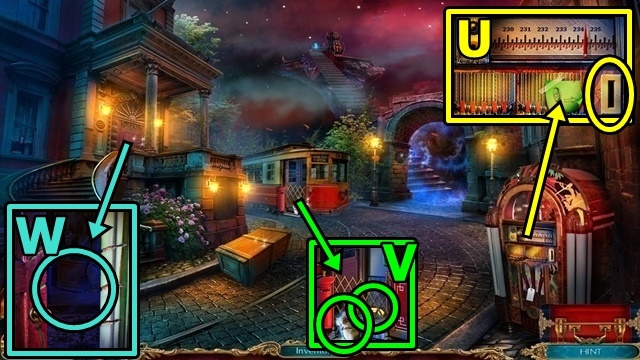
- Insert the COIN (U); take the MIRROR.
- Use Harry (V); take the GARGOYLE..
- Try to open the door (W). Use the MIRROR; play the HOP; receive the RED MOON MIRROR.
- Insert the RED MOON MIRROR into the LIGHT CANNON (inventory); take the LIGHT CANNON.

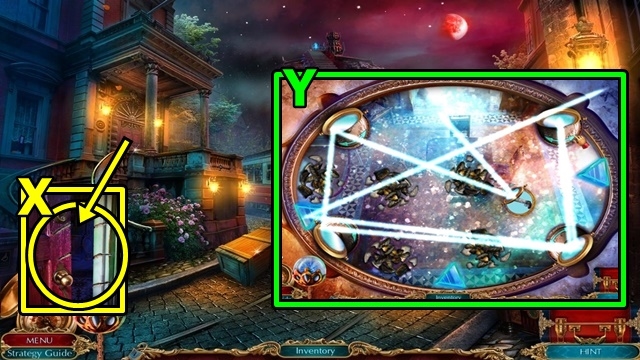
- Use the LIGHT CANNON (X); play the mini-game.
- Solution: (Y).

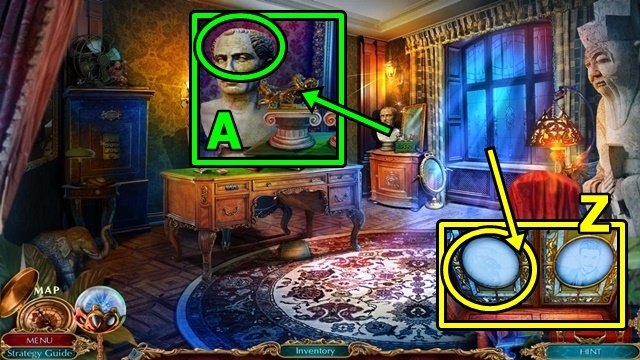
- Add the GARGOYLE (Z); take the LAURELS.
- Place the LAURELS (A); take the LEVER.
- Move down.

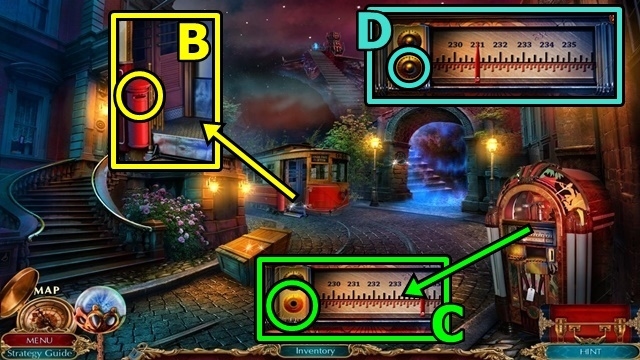
- Insert the LEVER (B); take the DIAL.
- Add the DIAL (C); play the mini-game.
- Solution: (D). Take the BRUSH.
- Move down.

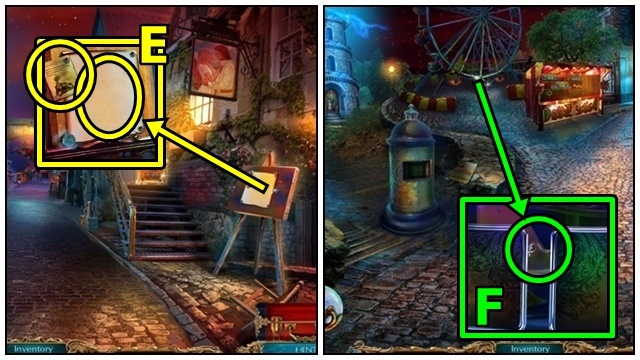
- Read the note (E); use the BRUSH; take the RULER.
- Move down.
- Use the RULER (F).

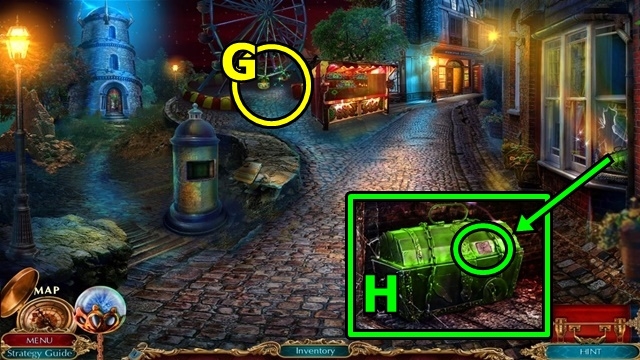
- Play the HOP (G); receive CHEST KEY.
- Use CHEST KEY (H); take the LENS.
- Return to Gabriel’s House.

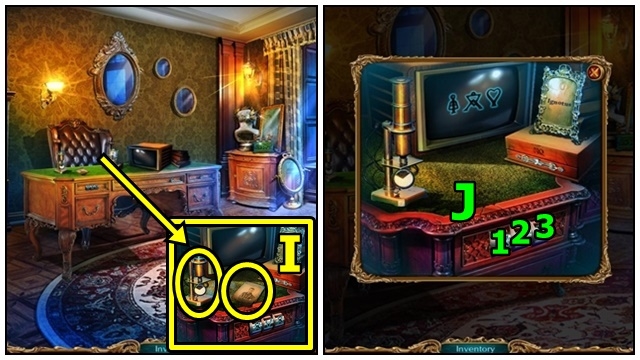
- Read the note (I); insert the LENS; play the mini-game.
- Solution: 1×3, 2×4, 3×3 (J). Take the PORTAL KEY and WATER BOTTLE.
- Move down.

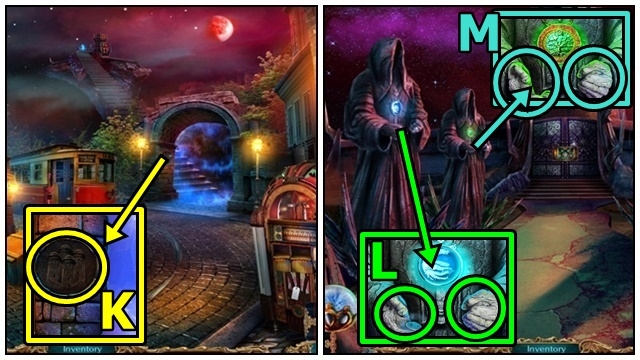
- Insert the PORTAL KEY (K). Move forward.
- Add the WATER BOTTLE (L); take the DIRT.
- Add the DIRT (M); take the CHARIOT.
- Return to Gabriel’s House.

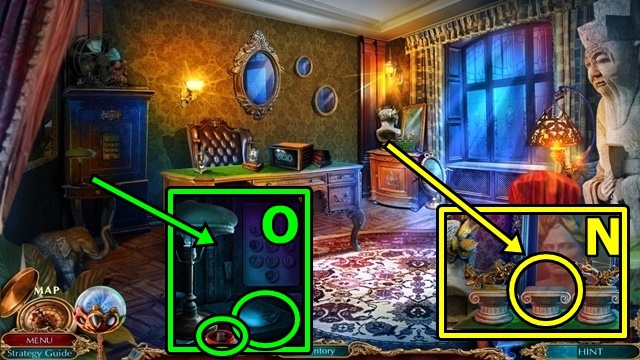
- Place the CHARIOT (N); read the note, take the SWITCH.
- Add the SWITCH (O); press the button. Take the FEATHER.
- Return to the Floating Island.

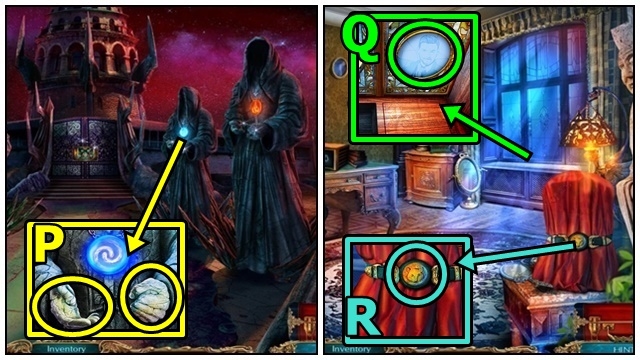
- Place the FEATHER (P); take GABRIEL’S PORTRAIT.
- Return to Gabriel’s House.
- Insert the GABRIEL’S PORTRAIT (Q); take the LOCKET.
- Insert the LOCKET (R). Use Harry; take the BUCKLE and TORCH.
- Return to the Earth Tower.

- Add the TORCH (S); receive the BURNING TORCH.
- Return to the Floating Island.
- Place the BURNING TORCH (T); take the ELEMENTAL CIRCLE.
- Insert the ELEMENTAL CIRCLE (U); play the mini-game.

- Solution: 5-4-3×2-4-3-2×2-1-4×2-1-4×2-1×2-2-5-2×2-5 (V). Move forward.
Chapter 6: The Main Tower

- Insert the BUCKLE (W); take the PORTRAIT.
- Return to Gabriel’s House.
- Insert the PORTRAIT (X); take the BUS KEY.
- Move down.

- Use the BUS KEY (Y); take the CROWBAR and HOOK.
- Use the CROWBAR (Z); take the STICK and RUBY.
- Return to the Main Tower.

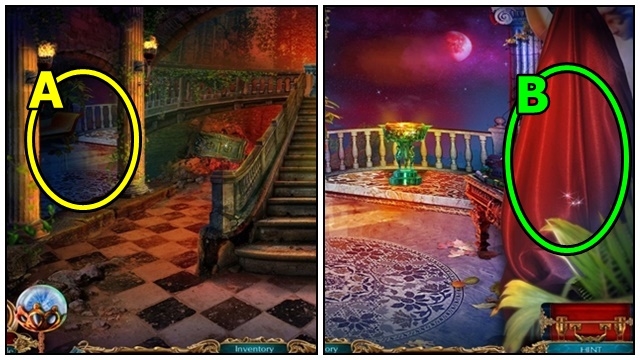
- Go to the Balcony (A).
- Move the sheet (B).

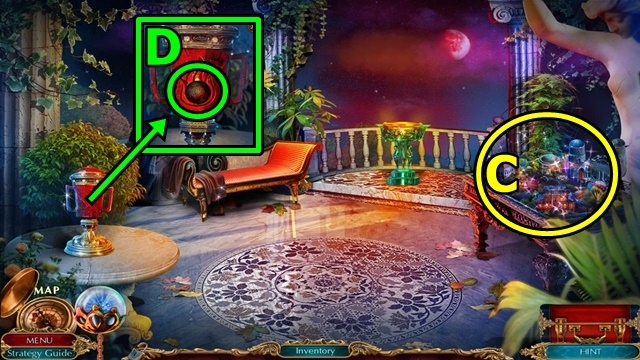
- Play the HOP (C); receive the BROKEN COMPACT.
- Insert the RUBY (D); take the ROPE and SCOOP.
- Return to Main Street.

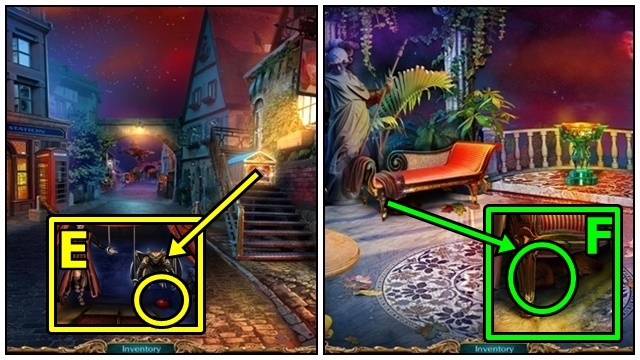
- Attach the HOOK and ROPE to the STICK (inventory); take the HOOK.
- Use the HOOK (E); receive the PINCUSHION.
- Return to the Balcony.
- Use the BROKEN COMPACT (F); take the POUCH.
- Add the PINCUSHION to the POUCH (inventory); take the POUCH.

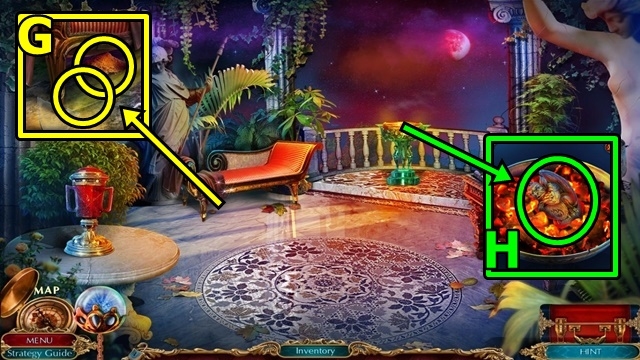
- Place the POUCH (G), then use the SCOOP; take the SANDBAG.
- Dump the SANDBAG (H); take the GARGOYLE and COAL.

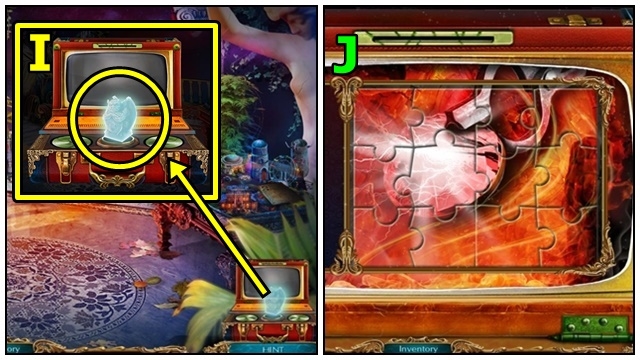
- Add the GARGOYLE (I); play the mini-game.
- Solution: (J). Take the PHOTO.
- Move down.

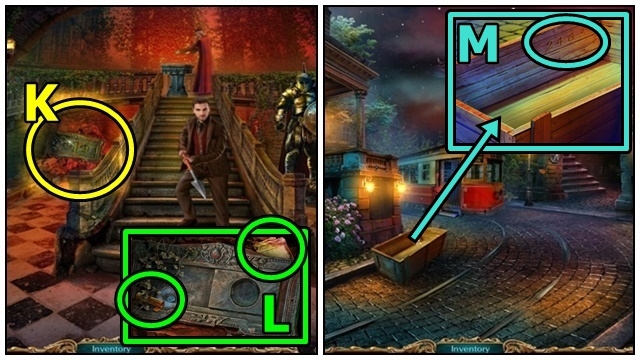
- Use the PHOTO (K).
- Read the note (L); take the PARCHMENT.
- Return to Mesina Square.
- Place the PARCHMENT (M), then use the COAL. Take the CODE.
- Enter Gabriel’s House.

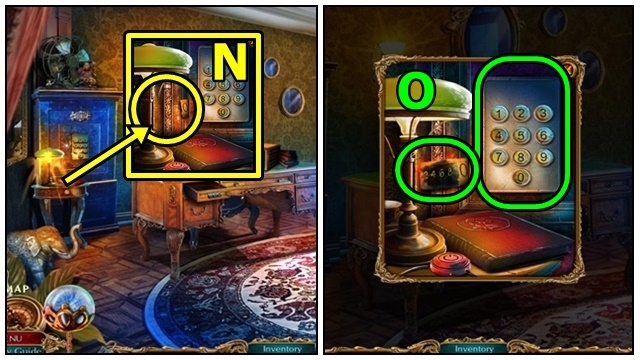
- Place the CODE (N); play the mini-game.
- Solution: 2-4-6-8-0 (O). Take the STRANGE MEDALLION and the SUPER MOON MIRROR.
- Return to the Main Tower.

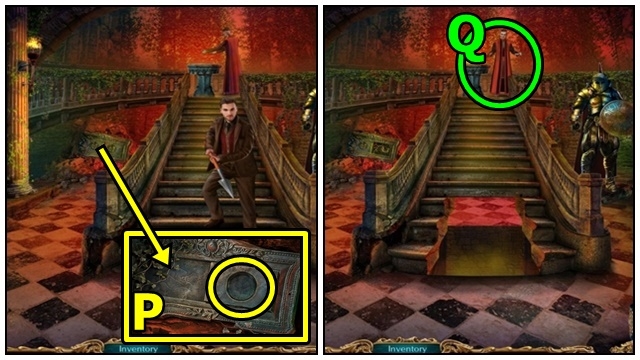
- Insert the STRANGE MEDALLION (P).
- Insert the SUPER MOON MIRROR into the LIGHT CANNON (inventory); take the SUPER LIGHT CANNON.
- Use the SUPER LIGHT CANNON (Q); play the mini-game.

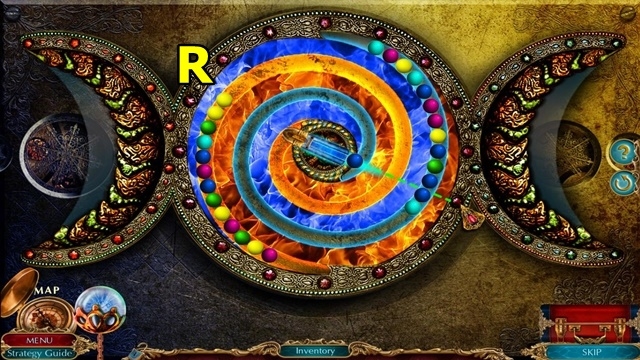
- Solution: Aim for multiple groupings of marbles (R).
- Congratulations! You’ve completed The Curio Society: Eclipse Over Mesina.





 PuppetShow: Lost Town Walkthrough, Guide, & Tips
 Delaware St. John Volume 2: The Town with No Name Walkthrough, Guide, & Tips
 Mystery of the Ancients: The Curse of the Black Water Walkthrough, Guide, & Tips
 Criminal Minds Walkthrough, Guide, & Tips
 Nightmares from the Deep: The Cursed Heart Walkthrough, Guide, & Tips