Ominous Objects: Phantom Reflection Walkthrough, Guide, & Tips
Ominous Objects: Phantom Reflection Walkthrough
Welcome to the Ominous Objects: Phantom Reflection Walkthrough
A mysterious mirror is causing havoc in your client’s house!
Whether you use this document as a reference when things get difficult or as a road map to get you from beginning to end, we’re pretty sure you’ll find what you’re looking for here.
This document contains a complete Ominous Objects: Phantom Reflection game walkthrough featuring annotated screenshots from actual gameplay!
We hope you find this information useful as you play your way through the game. Use the walkthrough menu below to quickly jump to whatever stage of the game you need help with.
Remember to visit the Big Fish Games Forums if you find you need more help. Have fun!
This walkthrough was created by prpldva, and is protected under US Copyright laws. Any unauthorized use, including re-publication in whole or in part, without permission, is strictly prohibited.
General Tips
- This is the official guide for Ominous Objects: Phantom Reflection.
- This guide will not mention each time you have to zoom into a location; the screenshots will show each zoom scene.
- Hidden-object puzzles are referred to as HOPs. This guide will not show HOP solutions. It will identify the location of the HOP and the inventory item acquired.
- This guide will show solutions for non-random puzzles. Please read the in-game instructions for each puzzle.
Chapter 1: The Main House

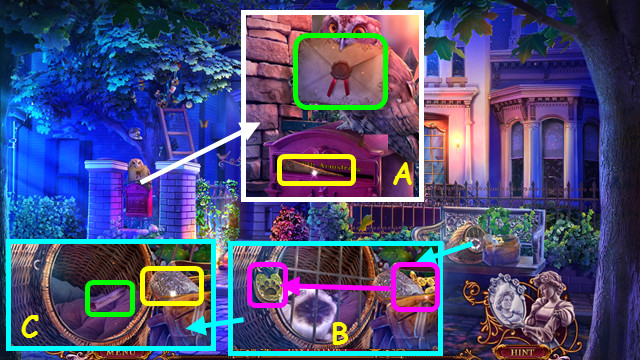
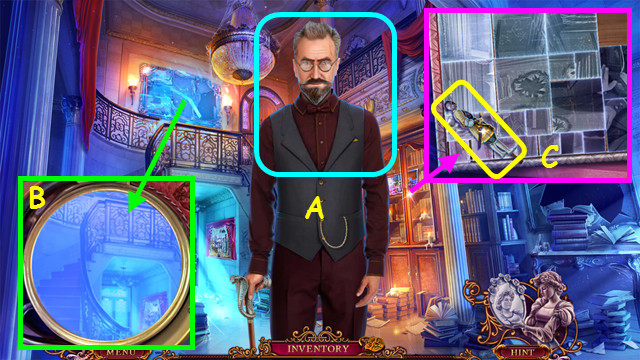
- Touch the letter; take the LETTER (A).
- Open and read the LETTER; take the WOMAN FIGURE and PIN (inventory).
- Bend the PIN twice to make the LOCKPICK (inventory).
- Take the PAW KEY; use it on the lock (B). You earn MR. JENKINS.
- Take the photo and GOGGLES CASE (C).
- Open the GOGGLE CASE; take the note, instructions, and GOGGLES (inventory).

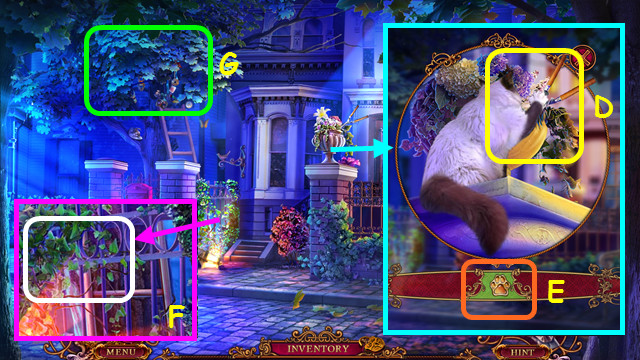
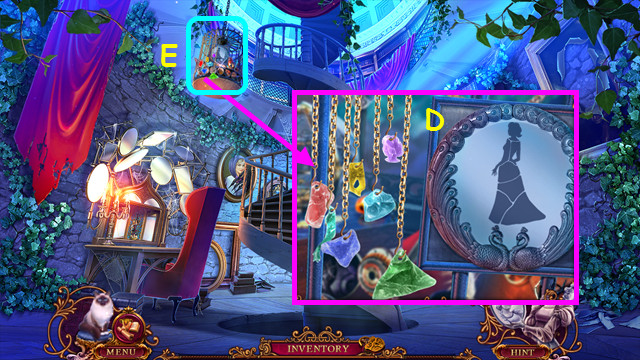
- Use MR. JENKINS (D).
- Press when the paw is in the green area; earn the SHEARS (E).
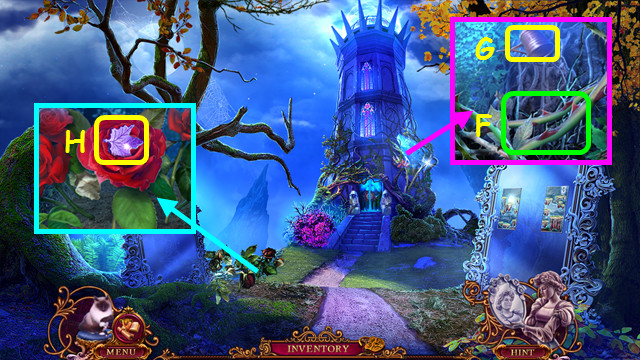
- Use the SHEARS (F).
- Play the HOP; earn the CORKED ACID (G).
- Open the CORKED ACID to make the ACID (inventory).

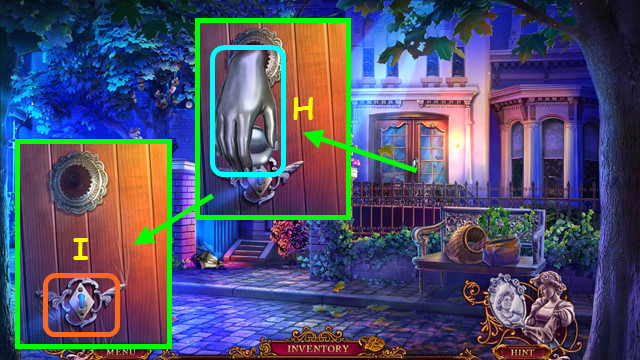
- Touch the hand; use the ACID (H).
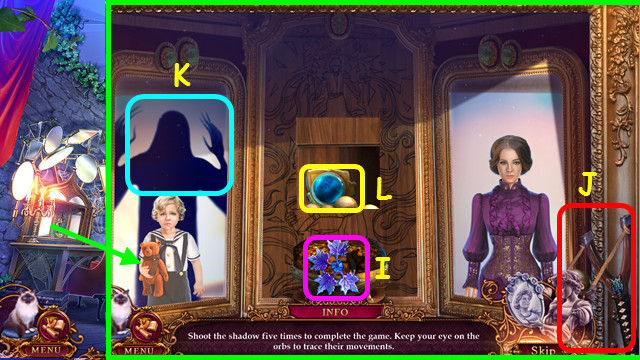
- Use the LOCKPICK (I).
- Walk forward.

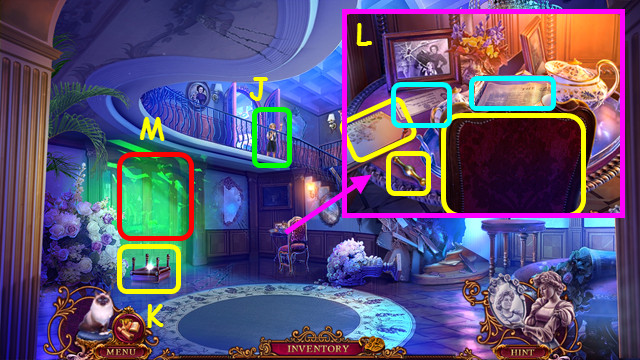
- Look at Patrick (J).
- Take the OTTOMAN (K).
- Take the CHAIR, MAP, and CORKSCREW HANDLE; read the paper and receipt (L).
- Restore the MAP and take the PENCIL (inventory).
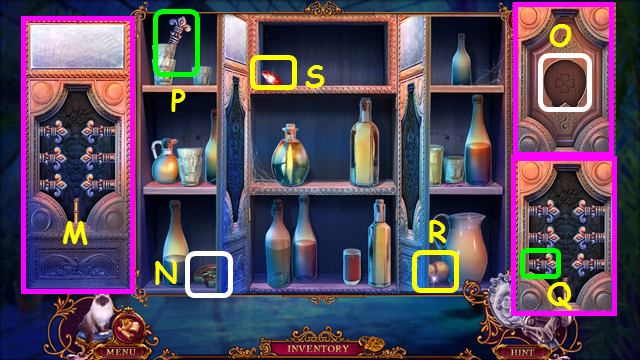
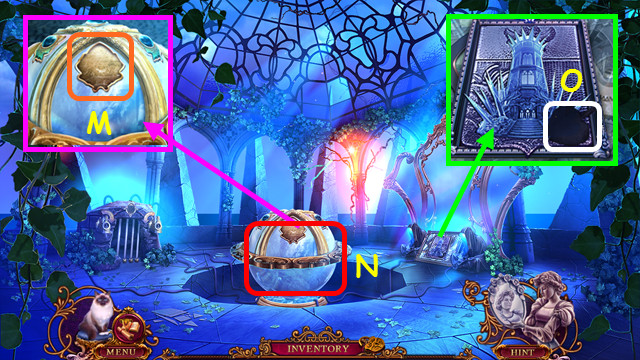
- Select the door (M).

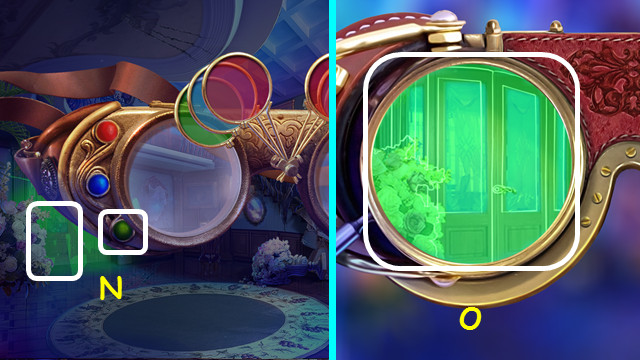
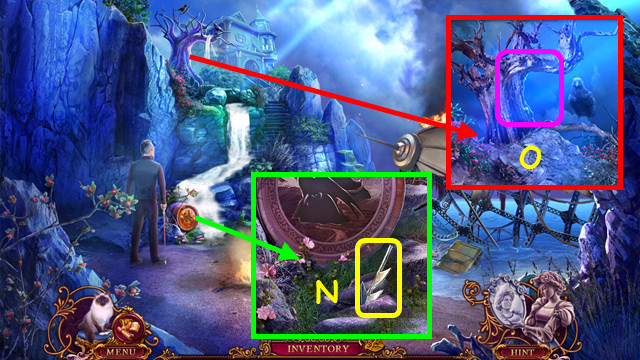
- Select the green lens to match the anomaly color (N).
- Rotate the lines to match the scene (O).

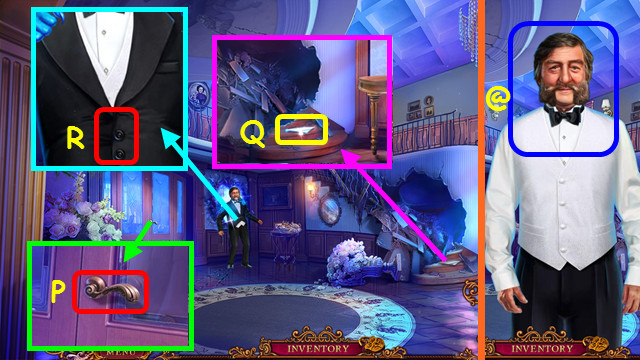
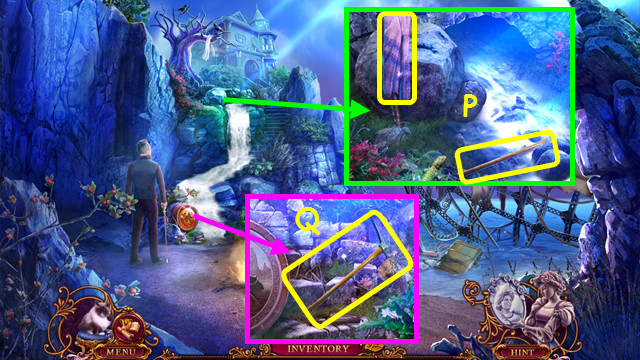
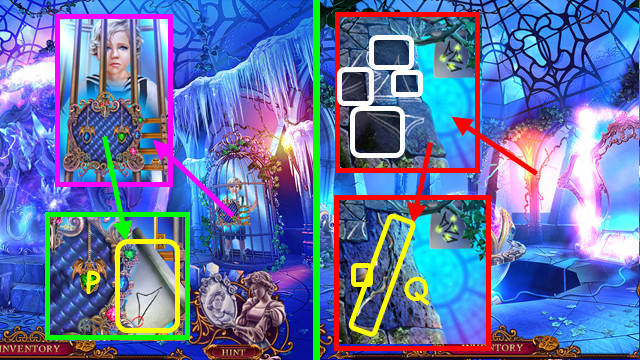
- Turn the handle (P).
- Take the GLASS PIECE (Q).
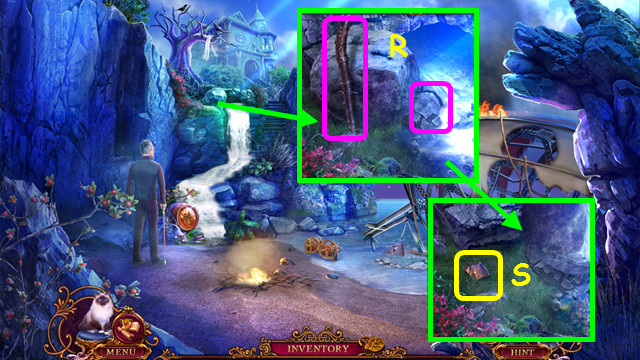
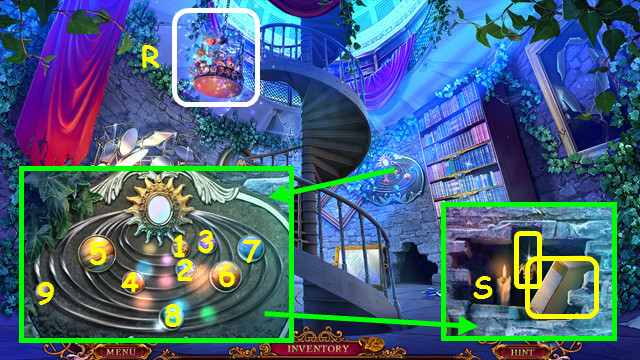
- Use the GLASS PIECE (R).
- Talk to the Butler (@).

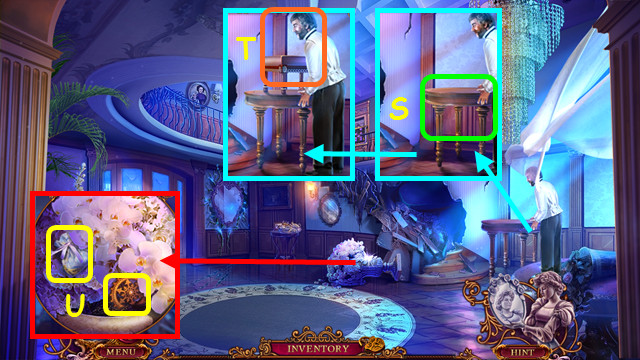
- Move the table (S).
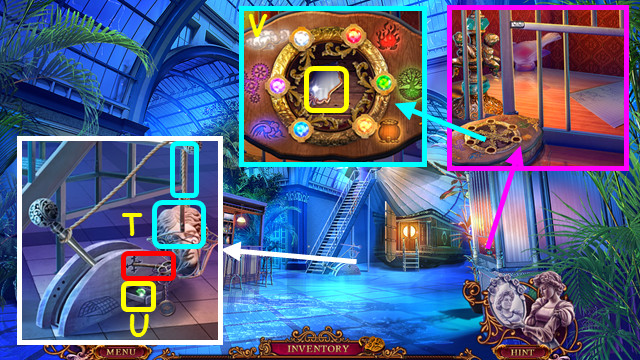
- Place the OTTOMAN and CHAIR (T).
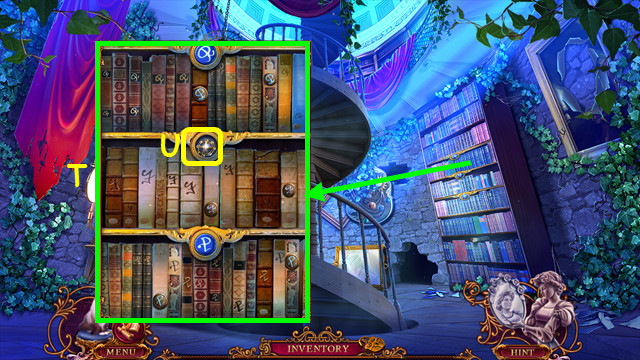
- Move the flowers; take the POUCH and GEAR (U).
- Open the POUCH to find the PELLETS (inventory).

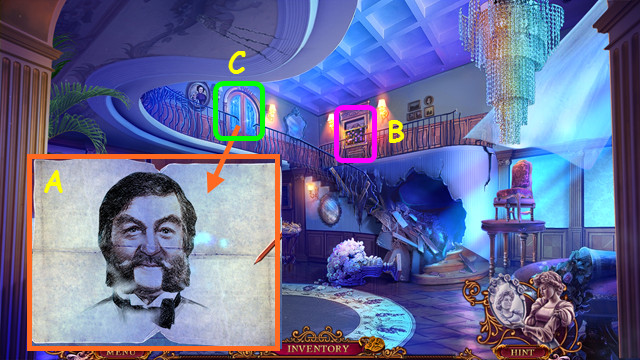
- Select the door; use the PENCIL on the paper until it folds (A).
- Note the mini-game (B).
- Enter Patrick’s Room (C).

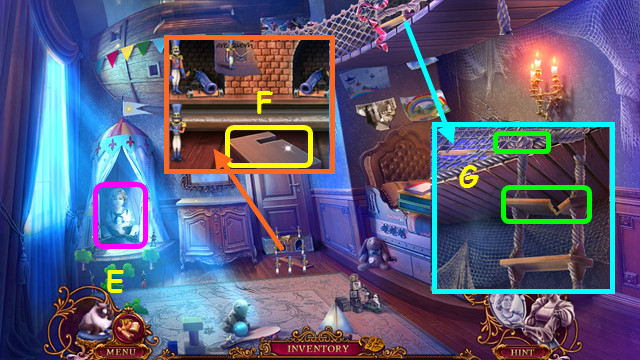
- Look at Patrick (E).
- Take the BOARD (F).
- Use MR. JENKINS; replace the BOARD (G).
- Play the HOP; earn the TOY GUN.
- Combine the TOY GUN and PELLETS to make the LOADED TOY GUN (inventory).

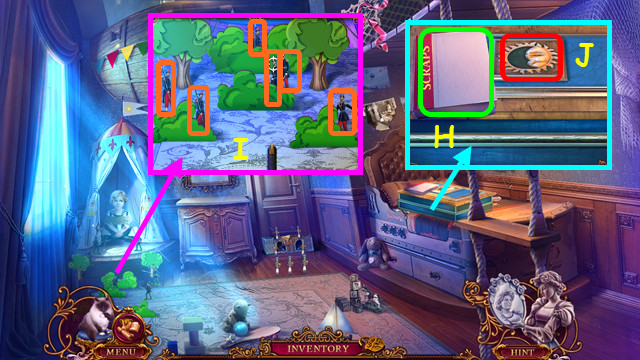
- Open the scrapbook; read the articles (H).
- Use the LOADED TOY GUN on the 6 toy soldiers (I).
- Talk to Patrick; earn the MOON FIGURE.
- Place the MOON FIGURE (J).

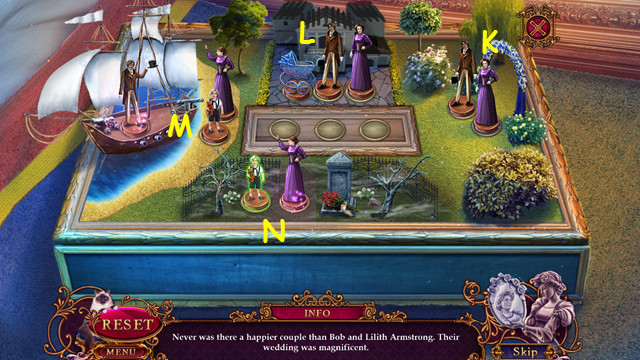
- Place Bob and Lilith (K).
- Place Bob, Lilith, and Patrick (L).
- Place Bob, Lilith, and Patrick (M).
- Place Lilith and Patrick (N).
- Take the invitation, BOTTLE, METAL SLIDER, and MAN FIGURE from the box.
- Walk down and select the mini-game on Lilith’s door.

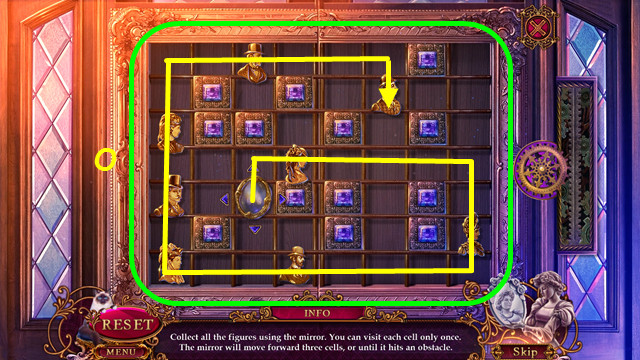
- Place the MAN FIGURE, WOMAN FIGURE, and GEAR on the device.
- Solution (O).
- Enter Lilith’s Room.

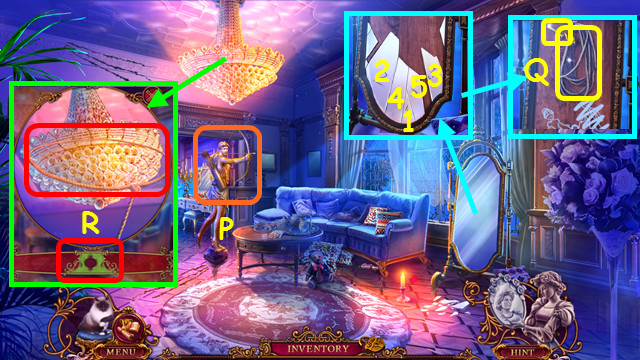
- Look at the statue (P).
- Solution (1-5).
- Take the CORKSCREW PART and ROPE (Q).
- Combine the CORKSCREW HANDLE and CORKSCREW PART to make the CORKSCREW (inventory).
- Combine the BOTTLE and CORKSCREW to find the INSTRUCTIONS (inventory).
- Use the ROPE; click when the indicator is in the green (R).

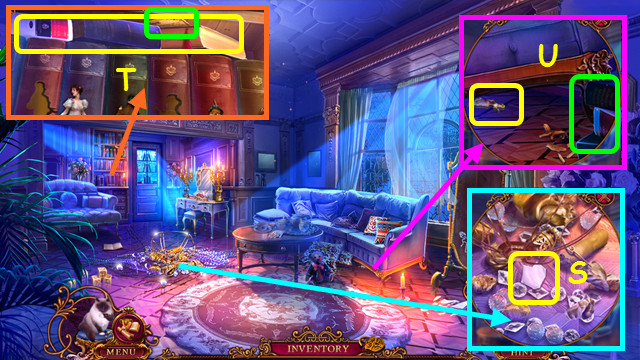
- Move the pieces; take the SHARD (S).
- Take the invitation and BOOKS (T).
- Place the BOOKS; use MR. JENKINS to take the 1st PAPER FIGURE (U).

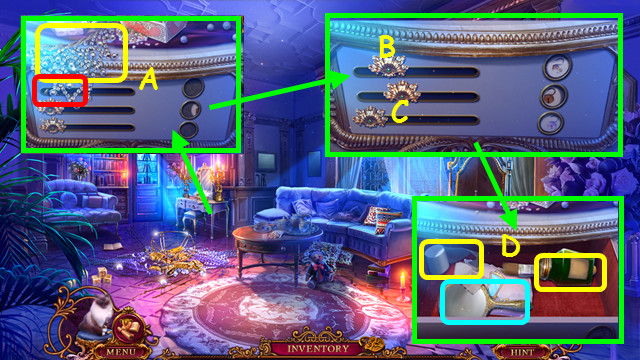
- Take the NECKLACE; place the METAL SLIDER (A).
- Slide B all the way right, and then back left until the lock appears; slide the other 2 slowly until the locks appear (C).
- Take the BANDAGE, GREEN PAINT, and mirror (D).
- Go to Patrick’s Room.

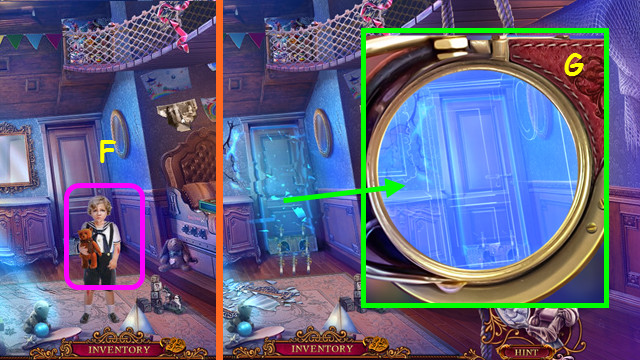
- Select Patrick (F).
- Select the door, use the blue lens, and align the lines (G).

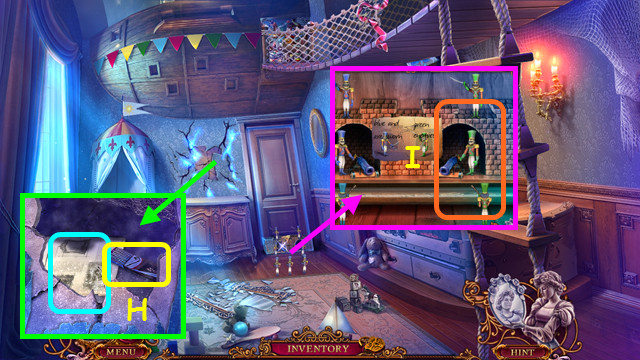
- Remove the wallpaper and bricks; take the MATCHES and article (H).
- Use the GREEN PAINT (I).
- Walk forward.

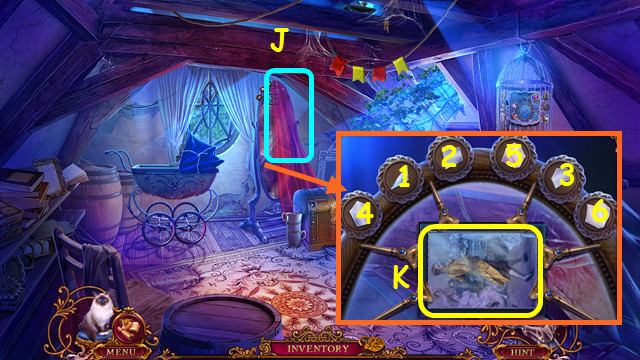
- Uncover the mirror (J).
- Place the SHARD; select the shards (1-6).
- Take the PAINTING (K).
- Remove the glass from the PAINTING; take the 2nd PAPER FIGURE (inventory).

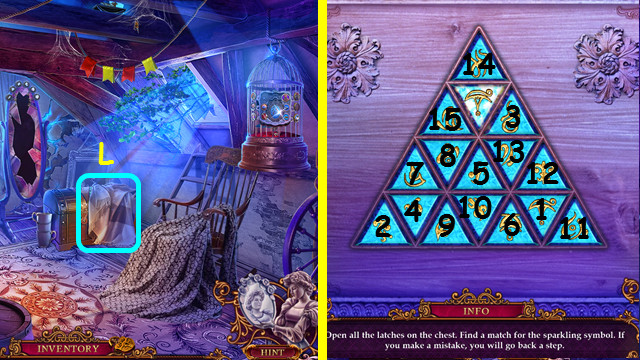
- Move the blanket; select the chest (L).
- Select the tiles (1-15).

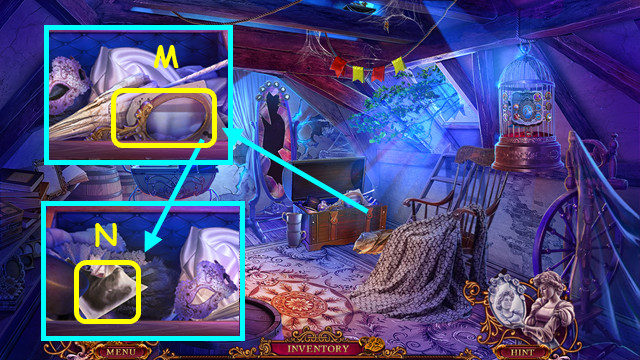
- Take the PAPER WITH MIRROR (M).
- Move the items; take the 1/2 PICTURE PART (N).
- Go to Lilith’s Room.
Chapter 2: The Dressing Room and More

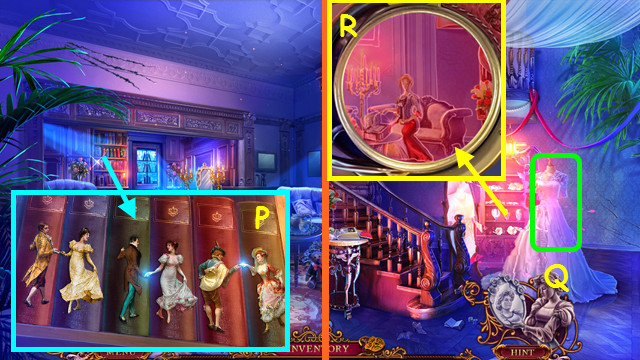
- Place the 2 PAPER FIGURES; swap the figures as shown (P).
- Walk forward.
- Look at the dress (Q).
- Select the bookcase; use the red lens, and align the lines (R).

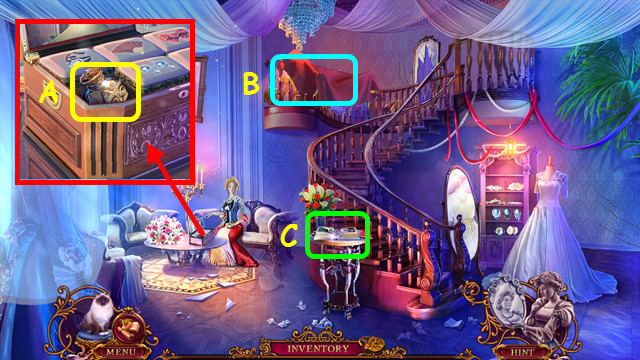
- Take the INK (A).
- Combine the PAPER WITH MIRROR and INK to make the INSTRUCTIONS (inventory).
- Move the blanket, play the HOP to earn the 1st CAGE BUTTON (B).
- Select the book (C).

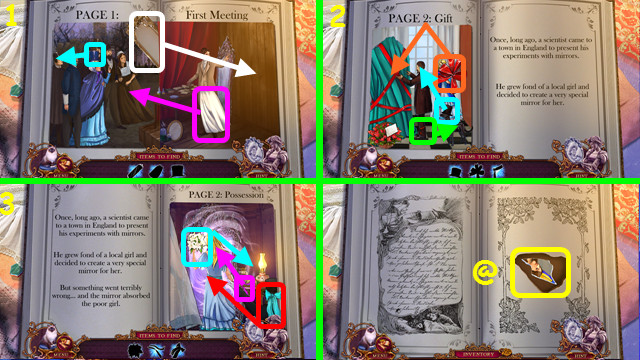
- Restore the items in the scenes (1-3).
- Take the 1/5 GLASS PIECE (@).

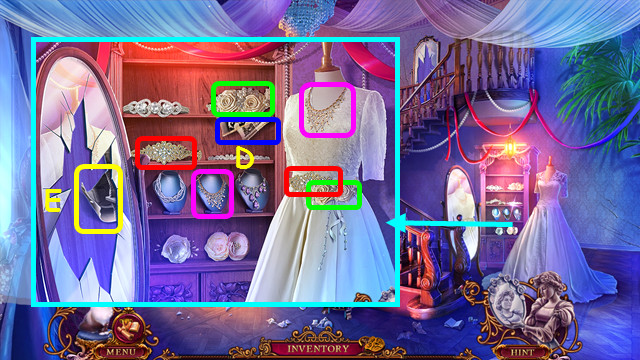
- Read the notes and place the NECKLACE (D).
- Restore the dress (color-coded).
- Take the 2/2 PICTURE PART (E).
- Go to Patrick’s Room.

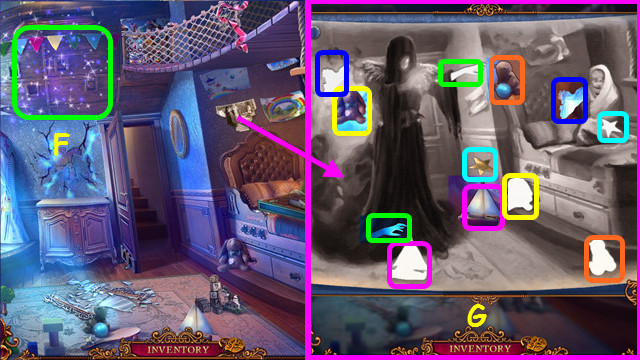
- Play the HOP; earn the BELL (F).
- Place the 2 PICTURE PARTS (G).
- Restore the elements (color-coded).
- Take the 2nd CAGE BUTTON.
- Walk forward.

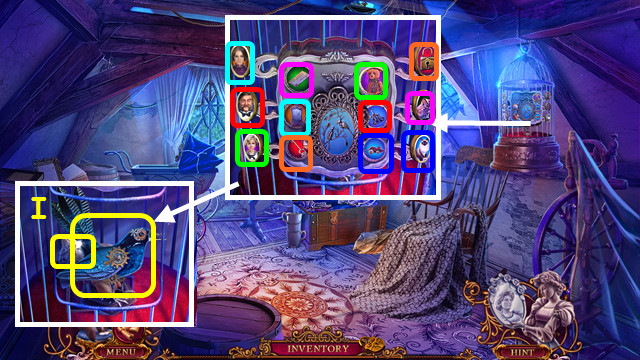
- Place the 2 CAGE BUTTONS on the cage.
- Select the pairs (color-coded).
- Take the BIRD and BROKEN LANTERN (I).
- Restore the BROKEN LANTERN and use the MATCHES to make the LANTERN (inventory).

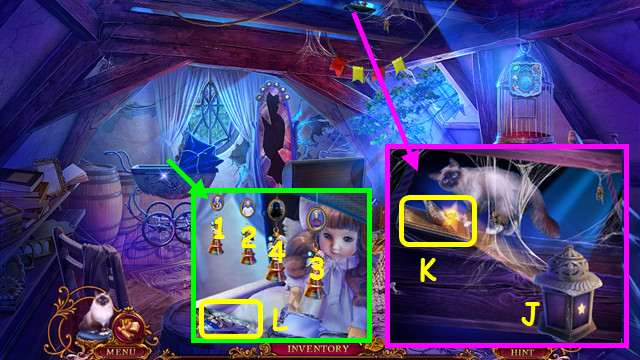
- Use the LANTERN (J).
- Touch the PAPERWEIGHT (K).
- Combine the BOTTLE and PAPERWEIGHT; take the SHIP (inventory).
- Place the BELL; select (1-4).
- Take the 2/5 GLASS PIECE (L).
- Walk down 2x.

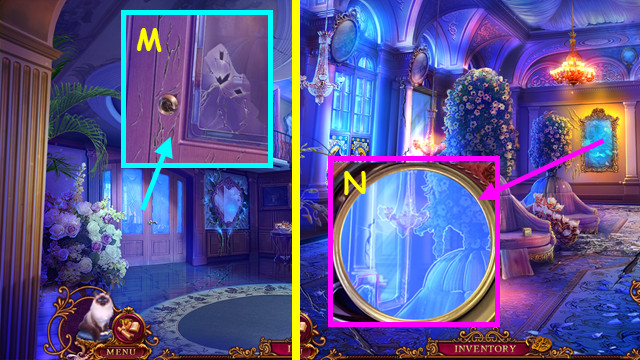
- Use the PAPERWEIGHT (M).
- Walk left.
- Select the mirror, select the blue lens, and align the lines (N).

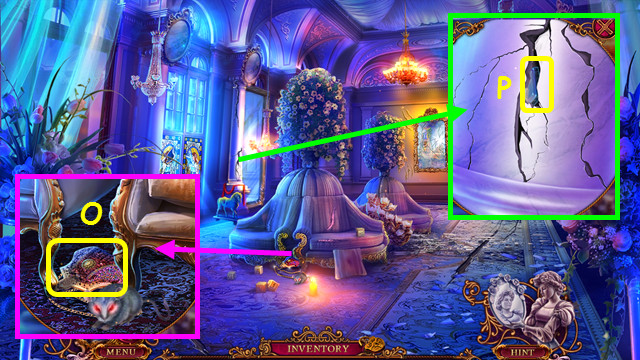
- Use MR. JENKINS to take the PURSE (O).
- Open the PURSE; take the 3/5 GLASS PIECE and TONGS (inventory).
- Touch the column; use the TONGS to take the BUTTON (P).

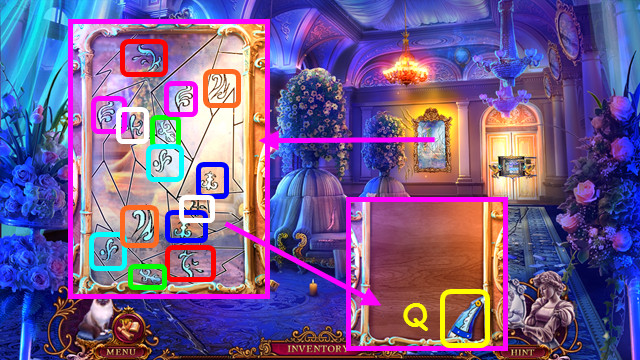
- Select the pairs (color-coded).
- Take the 4/5 GLASS PIECE (Q).
- Return to the Dressing Room.

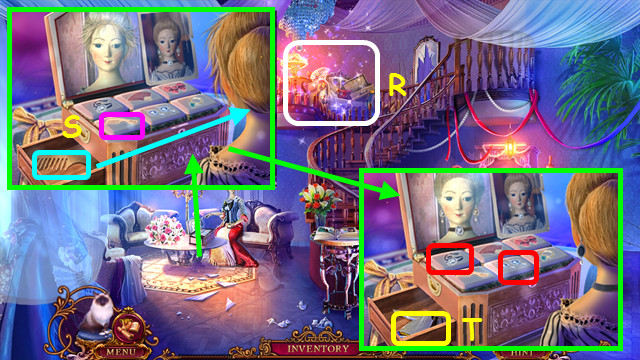
- Play the HOP; earn the PUZZLE PART (R).
- Place the BUTTON and push; use the comb on the mannequin (S).
- Press the choker and earring buttons; place the items on the mannequin (red).
- Take the 5/5 GLASS PIECE (T).
- Return to the Ballroom.

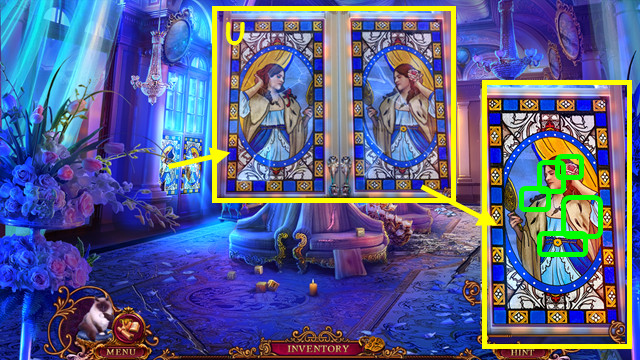
- Place the 5 GLASS PIECES; restore the windows (U).
- Select the differences (green).
- Walk left.

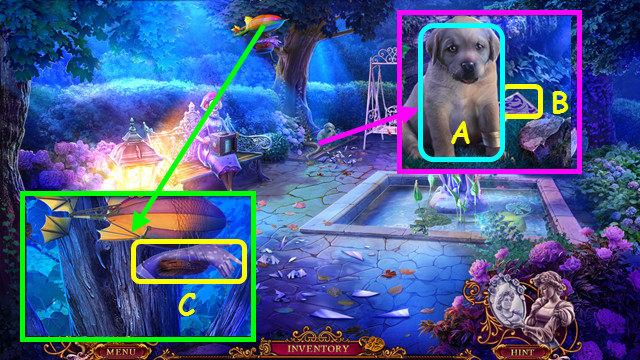
- Use the TONGS and BANDAGE (A).
- Take the 1/2 IRON TRIANGLE (B).
- Use MR. JENKINS to take the RUBBER GLOVE (C).

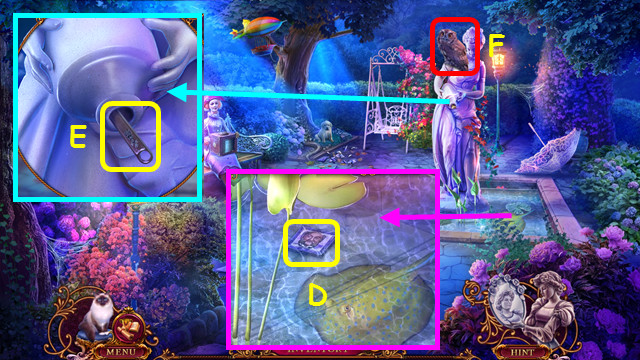
- Use the RUBBER GLOVE to take the 2/2 PUZZLE PART (D).
- Open the jug; take the WRENCH (E).
- Touch the owl (F).

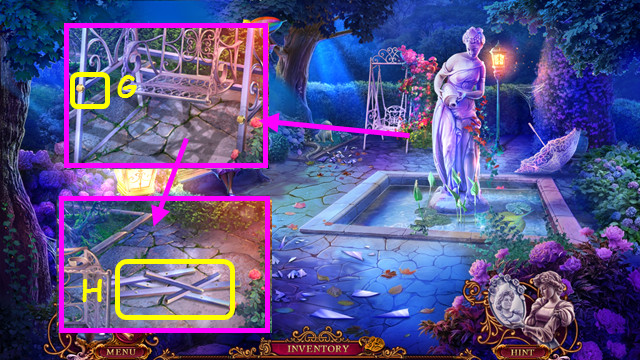
- Use the WRENCH to take the BOLTS (G).
- Take the BROKEN LADDER (H).
- Combine the BROKEN LADDER, BOLTS, and WRENCH to make the LADDER (inventory).
- Walk down.

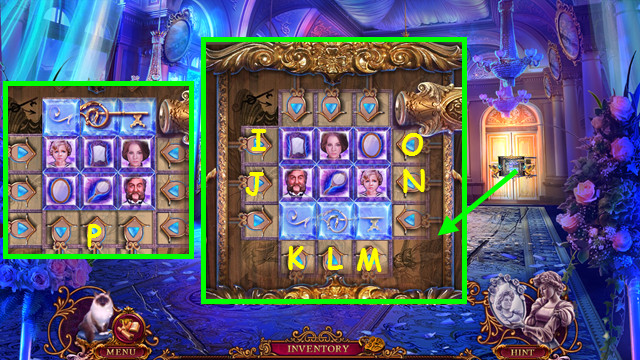
- Place the 2 PUZZLE PARTS in the grid.
- Solution: M-L-K-J-L-M-J-M-I-M-I-M-N-L-N-I-L-I-L-N-L-N-M-L-M-K-N-K-N-O-K-O-K.
- Final position (P).
- Walk forward.

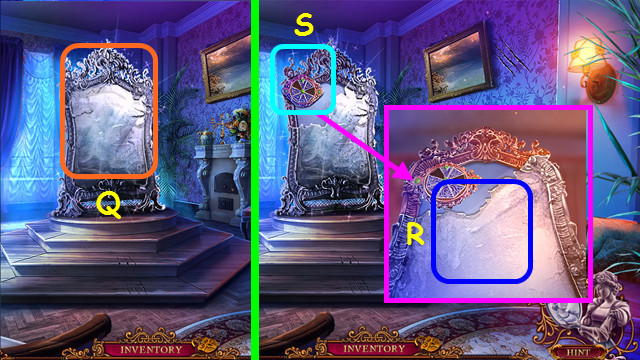
- Select the mirror (Q).
- Place the LADDER (R).
- Note the mini-game (S).

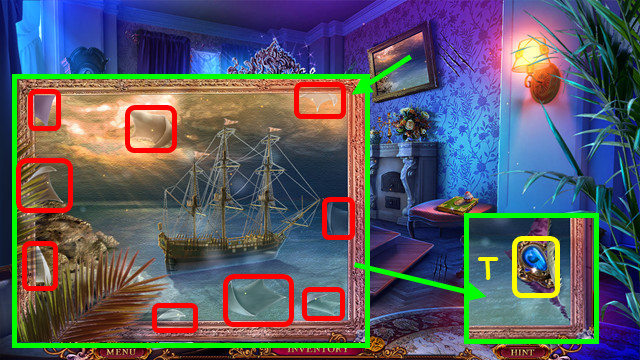
- Place the SHIP; place the 9 sails on the boat (red).
- Take the BOOK EMBLEM (T).

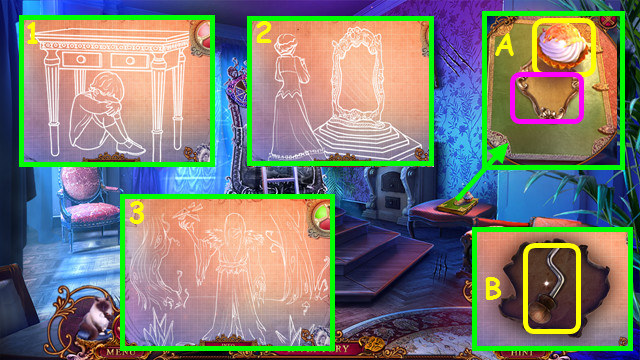
- Take the CAKE WITH HONEY; place the BOOK EMBLEM (A).
- Rotate the lines to reform the drawings (1-3).
- Take the CRANK (B).
- Go to the Backyard.

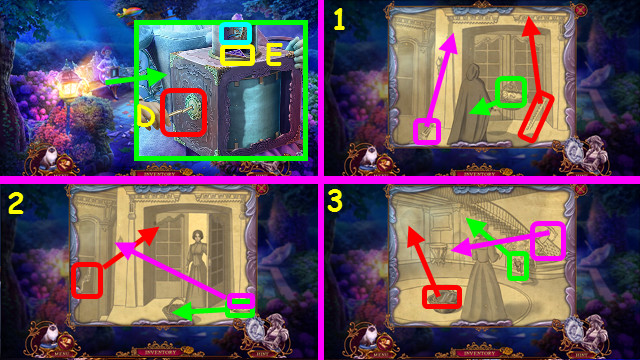
- Place the CRANK (D).
- Restore the items (1-3).
- Take the 2/2 IRON TRIANGLE and drawing (E).
- Return to the Secret Room; select the mini-game.

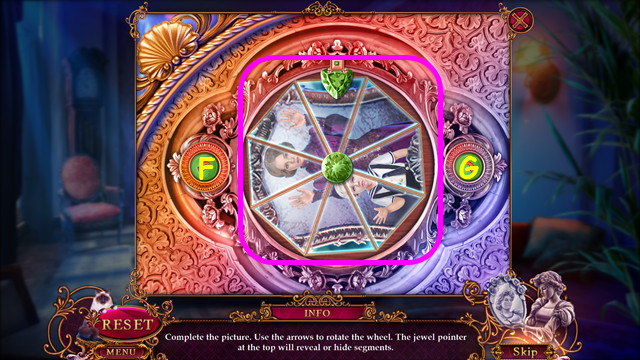
- Place the 2 IRON TRIANGLES in the device.
- Select G-Fx5-Gx2.
Chapter 3: The Village

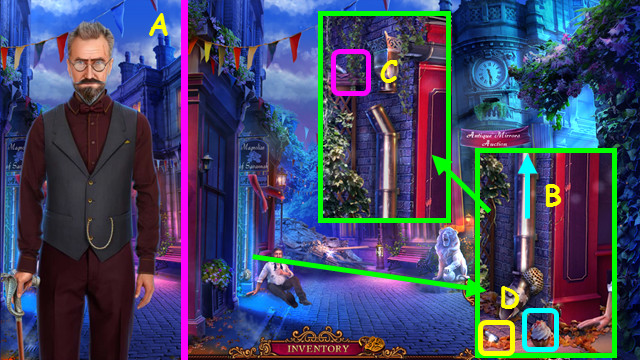
- Speak to Benjamin and Edward (A).
- Pan up (B).
- Use MR. JENKINS (C).
- Place the CAKE WITH HONEY; take the STONE FINGER (D).

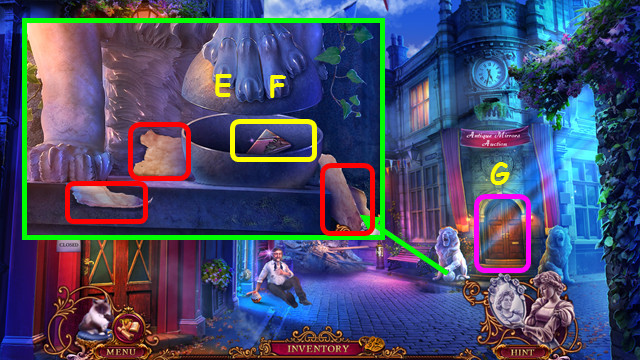
- Select and take the 3 note pieces (red).
- Place the STONE FINGER, press E-F; take the 1/2 STONE TRIANGLES.
- Enter City Hall (G).

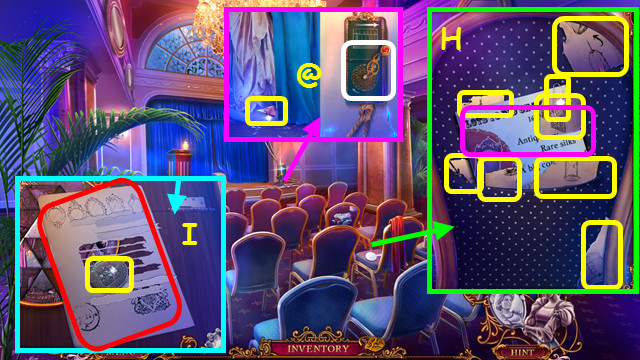
- Take the PAPER CLIP, 7 INSTRUCTIONS, and notice (H).
- Restore the INSTRUCTIONS (inventory).
- Turn the handle clockwise 4x; take the 2/2 STONE TRIANGLES (@).
- Take the COIN; select the note (I).

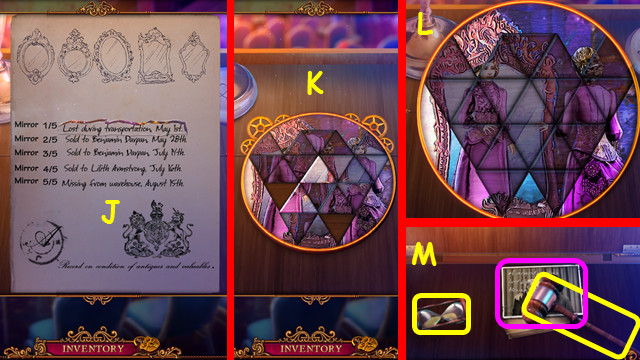
- Restore the note (J).
- Place the 2 STONE TRIANGLES; select the mini-game (K).
- Solution (L).
- Take the HOURGLASS, HAMMER, and notes (M).
- Walk down.

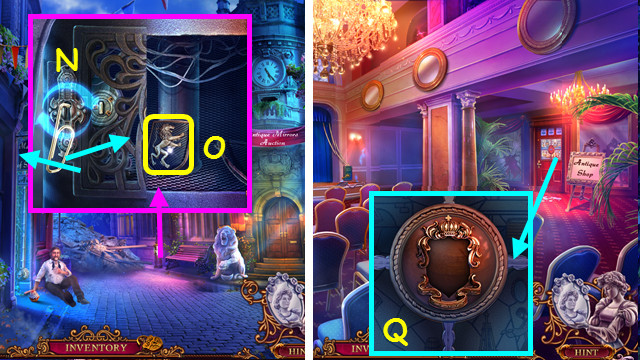
- Use the PAPERCLIP; drag it right and left (N).
- Take the COAT OF ARMS EMBLEM (O).
- Walk right.
- Place the COAT OF ARMS EMBLEM; play the HOP (Q).
- Walk right.

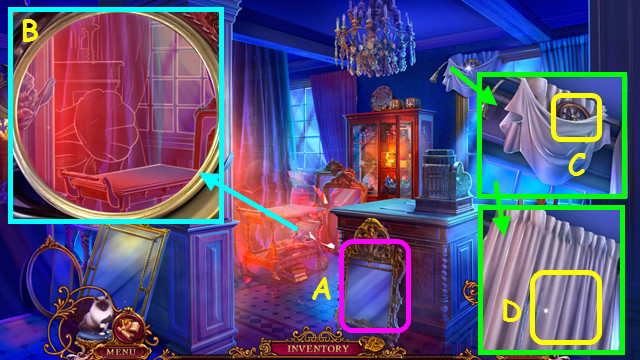
- Look at the mirror (A).
- Select the cart, select the red lens, and align the lines (B).
- Use MR. JENKINS to take the WHEEL (C).
- Take the CURTAIN (D).

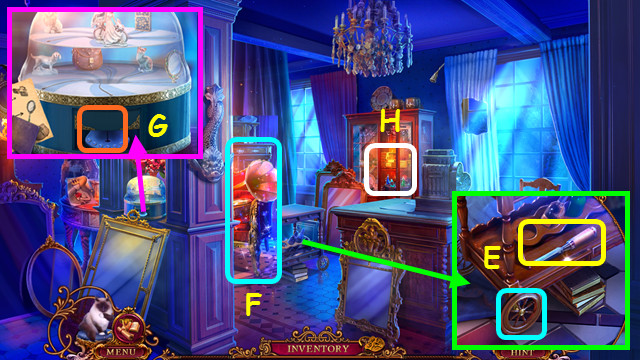
- Take the CHISEL; place the WHEEL (E).
- Play the HOP; earn the DOORBELL (F).
- Place the BIRD to take the LIGHTER; place the HOURGLASS to take the MIRROR (G).
- Note the mini-game (H).
- Walk down.

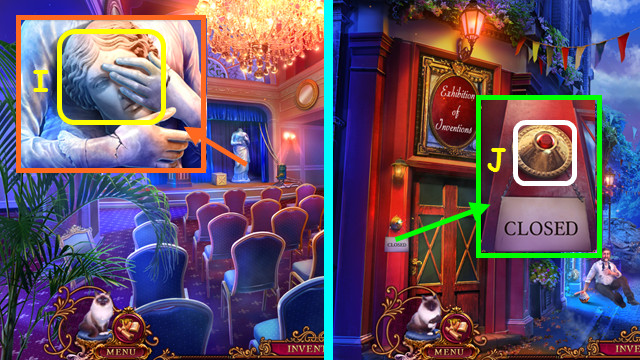
- Use the CHISEL and HAMMER; earn the STATUE HEAD (I).
- Walk down.
- Place and push the DOORBELL (J).
- Walk left.

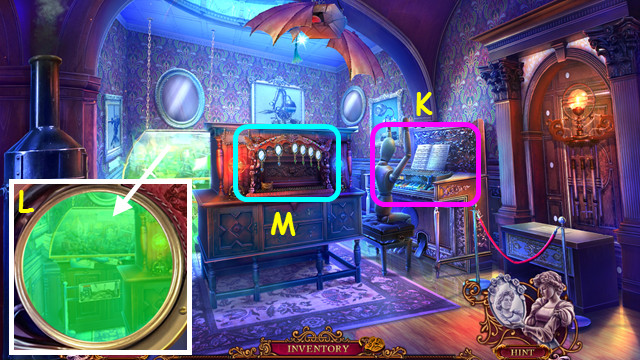
- Look at the organ (K).
- Select the machine, use the green lens, and align the lines (L).
- Select the cabinet (M).

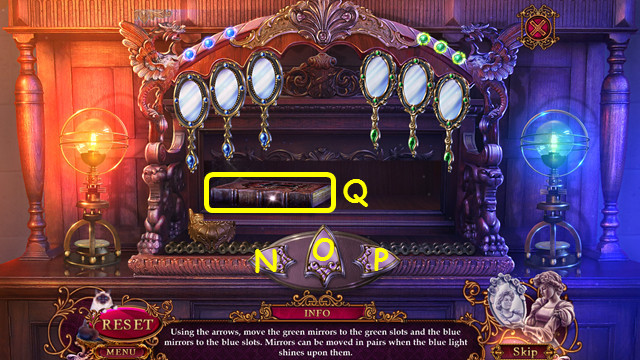
- Touch the mirrors; place the MIRROR as replacement.
- Solution: P-O-P-O-Px2-O-Nx3-O-Px5-O-N-O-N-O-Px2-O-Nx2-O-Nx4-O-Px5-O-Nx2-O-Nx3-O.
- Take the BOOK (Q).
- Select the BOOK (inventory).

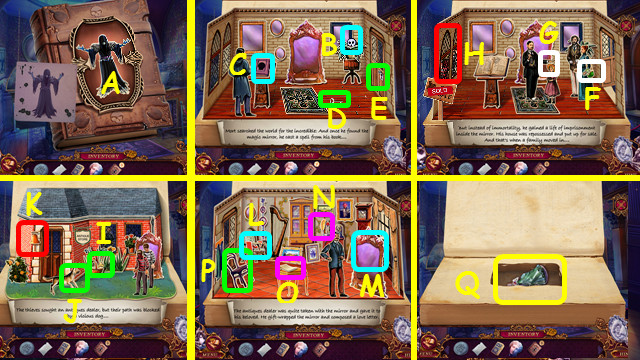
- Arrange the arms as shown (A).
- Move (B-C), (D-E), (F-G); select (H).
- Move (I-J), select (K), move (L-M), (N-O), select (P).
- Take the WOMAN FIGURE (Q).

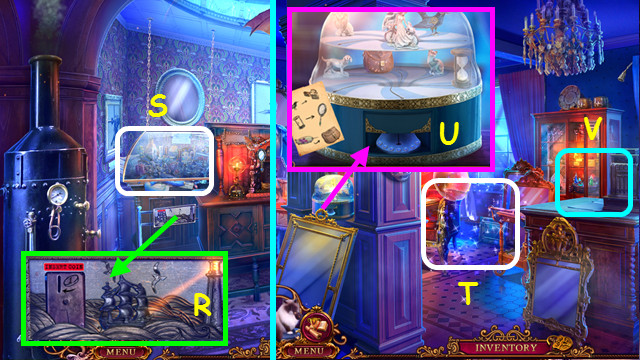
- Touch the boat; insert the COIN (R).
- Play the HOP; earn the AIRSHIP FIGURE (S).
- Return to the Antique Shop.
- Play the HOP; earn the TROWEL (T).
- Place the AIRSHIP FIGURE; earn the MEDICAL BAG (U).
- Open the MEDICAL BAG; take the MEDICAL SUPPLIES (inventory).
- Select the figurine mini-game (V).

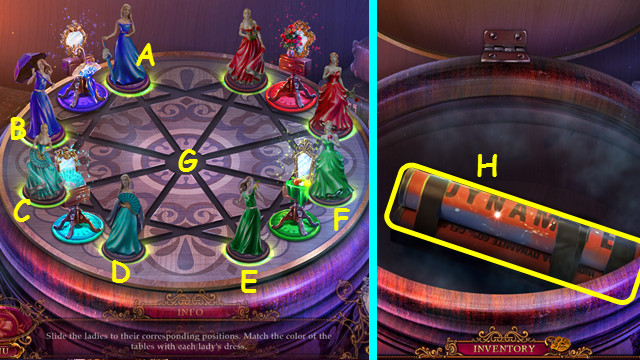
- Place the WOMAN FIGURE.
- Solution: AG-CA-GC-FG-DF-BD-GB.
- Take the DYNAMITE (H).
- Walk down 2x.

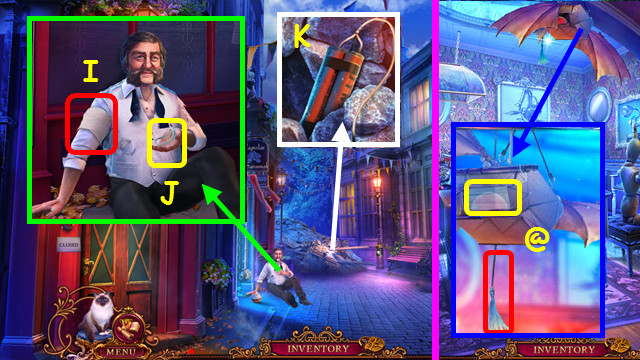
- Use the MEDICAL SUPPLIES (I).
- Take the PIECE OF GLASS and DYNAMITE FUSE (J).
- Walk left.
- Pull the tassel; use the PIECE OF GLASS to take the APPLE and GUNPOWDER (@).
- Combine the DYNAMITE, GUNPOWDER, and DYNAMITE FUSE to make the DYNAMITE WITH FUSE (inventory).
- Walk down.
- Use the DYNAMITE WITH FUSE and LIGHTER (K).
- Walk forward.

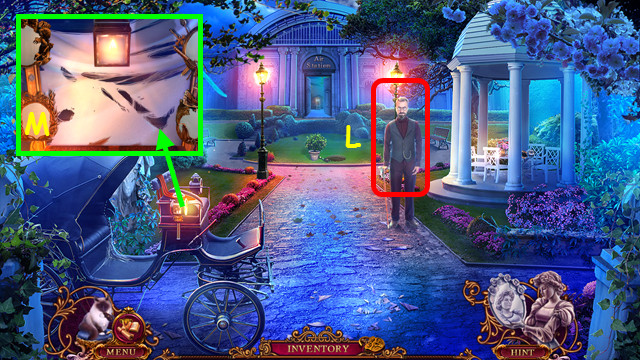
- Talk to Benjamin (L).
- Remove the cloth; place the CURTAIN (M).

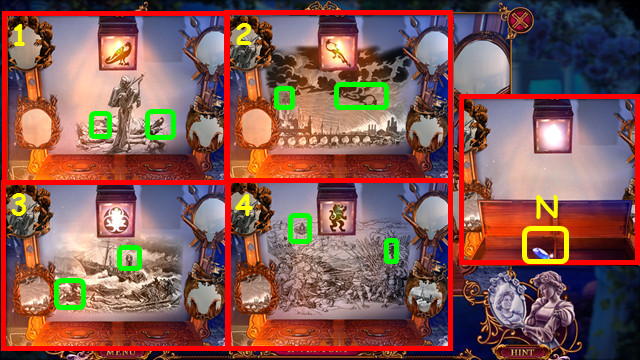
- Find the symbols in the scenes (1-4).
- Take the 1/3 CRYSTALS (N).

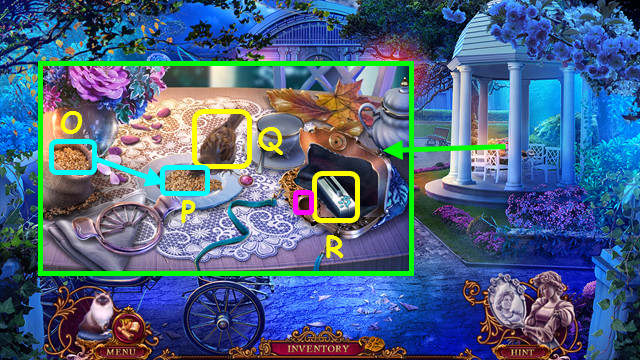
- Open the sack; move (O-P).
- Take the BIRD (Q).
- Remove the GEM from the BIRD (inventory).
- Place the GEM; take the PIANO KEY (R).
- Return to the Exhibition.

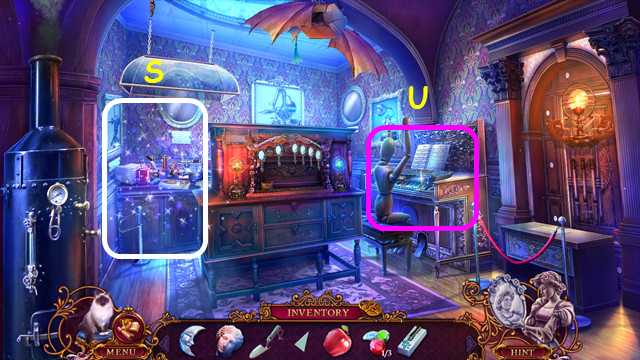
- Play the HOP; earn the RIFLE (S).
- Select the piano (U).

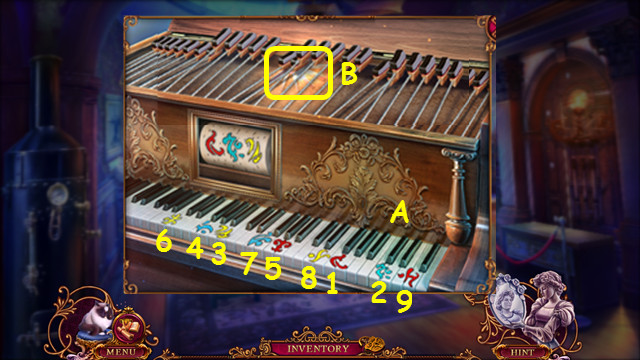
- Place the PIANO KEY (A).
- Select 1-9.
- Take the BLADES (B).
- Walk down and forward.

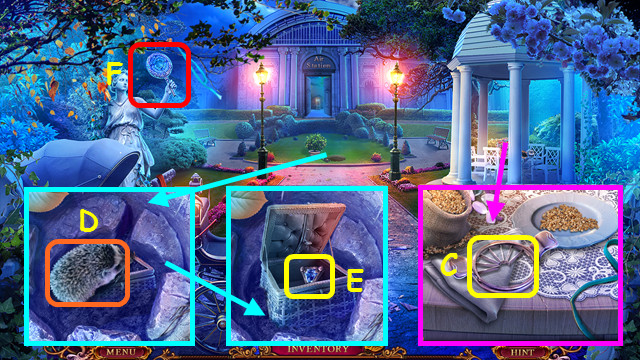
- Use the BLADES and APPLE to earn the APPLE SLICES (C).
- Use the APPLE SLICES (D).
- Use the TROWEL; take the GEM (E).
- Select (F).

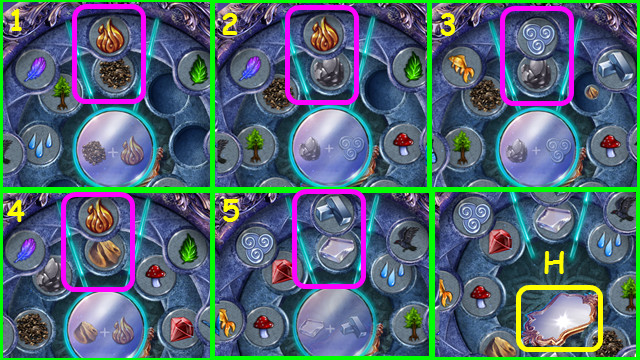
- Place the GEM on the device.
- Rotate rings to show pairs (1-5).
- Take the 1/2 MIRROR (H).
- Walk forward.

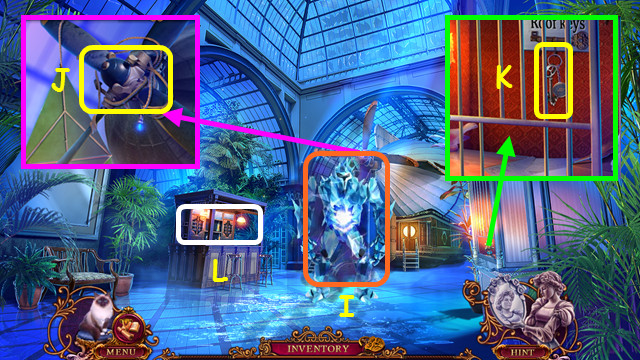
- Use the RIFLE (I).
- Use the PIECE OF GLASS; take the ROPE (J).
- Use MR. JENKINS to take the KEY (K).
- Select (L).

- Slide the bars (M).
- Move N-O, P-Q, and slide the bars.
- Take the CORK (R).
- Take the 2/3 CRYSTALS (S).

- Use the KEY; place the STATUE HEAD and ROPE (T).
- Take the 3/3 CRYSTALS (U).
- Place the 3 CRYSTALS and swap the crystals as shown; take the 2/2 MIRROR (V).

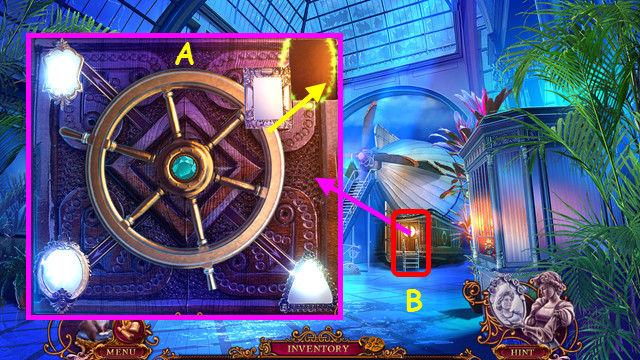
- Place the 2 MIRRORS; swap as shown (A).
- Walk forward (B).

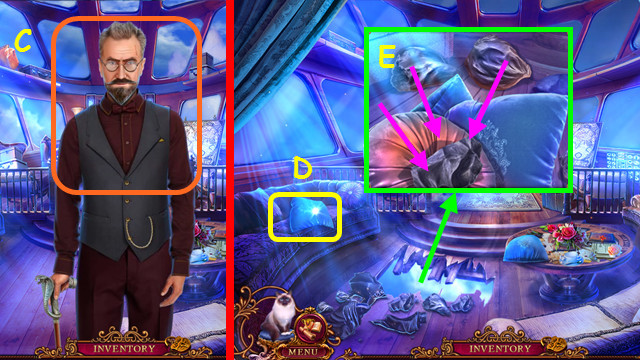
- Talk to Benjamin (C).
- Take the PILLOWS (D).
- Place the PILLOWS; move the 3 rocks onto the pillows (E).
Chapter 4: Benjamin’s House

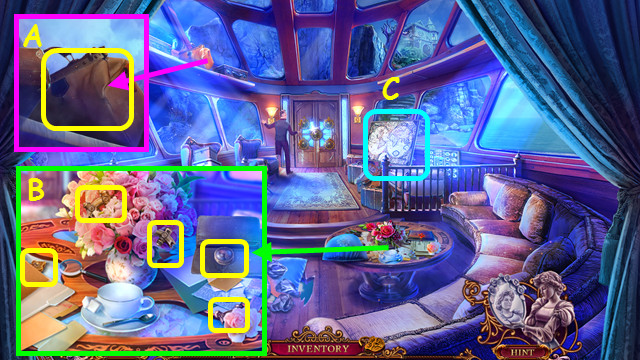
- Use MR. JENKINS to take the LUGGAGE (A).
- Move all the items; take the 5 of 6 WHEEL PARTS (B).
- Open the LUGGAGE; take the INSULATING TAPE (inventory).
- Select (C).

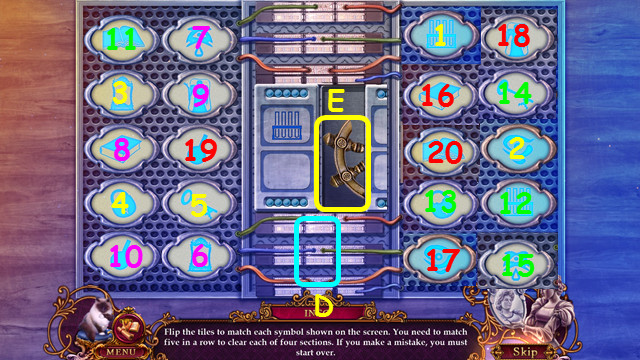
- Use the INSULATING TAPE (D).
- Select the tiles (1-20).
- Take the 6/6 WHEEL PARTS (E).
- Restore the 6 WHEEL PARTS to make the WHEEL (inventory).

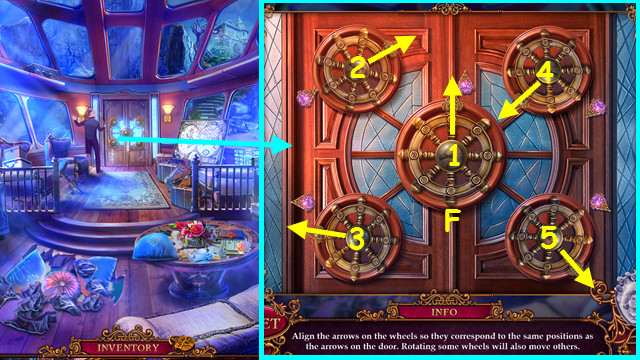
- Place the WHEEL (F).
- Solution (1-5).

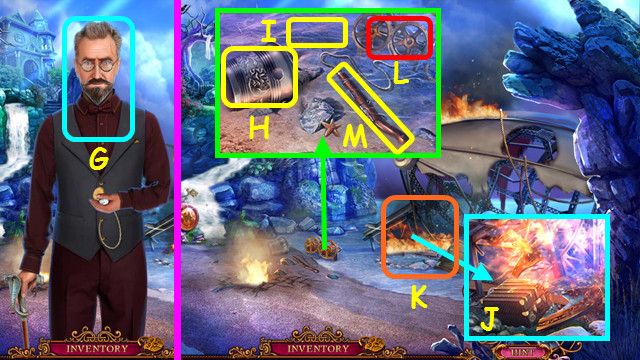
- Talk to Benjamin (G).
- Take the BROKEN BUCKET (H).
- Combine the BROKEN BUCKET and CORK to make the EMPTY BUCKET (inventory).
- Use the EMPTY BUCKET to take the BUCKET WITH WATER (I).
- Use the BUCKET WITH WATER (J).
- Play the HOP; earn the OILCAN (K).
- Use the OILCAN (L); take the HARPOON BASE (M).

- Take the HARPOON KNIFE (N).
- Combine the HARPOON BASE and HARPOON KNIFE to make the HARPOON (inventory).
- Use the HARPOON (O).

- Take the SCARF and PICKAXE HANDLE (P).
- Replace the PICKAXE HANDLE; take the PICKAXE (Q).

- Use the PICKAXE and move the stick (R).
- Take the 1/4 BARREL COVER PART (S).
- Walk forward.

- Talk to Benjamin (A).
- Select the mural, use the blue lens, and restore the lines (B).
- Open the cupboard; take the GUARD FIGURE (C).

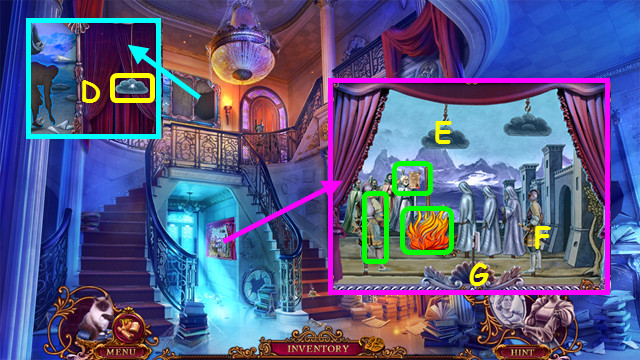

- Take the CLOUD (D).
- Place the CLOUD (E) and GUARD FIGURE (F).
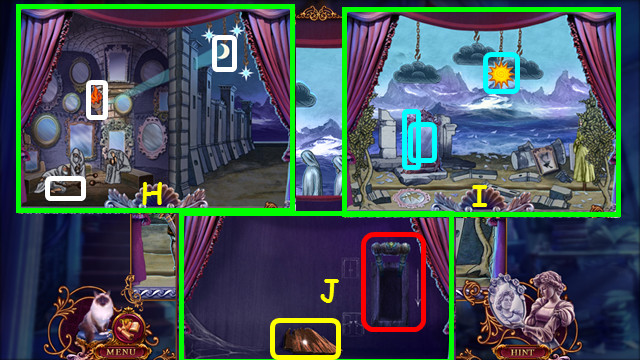
- Place the items that appear at G into the scene (green).
- Place the items that appear at H into the scene (white).
- Place the items that appear at I into the scene (blue).
- Take the 2/4 BARREL COVER PART; pull the lever (J).
- Walk forward.

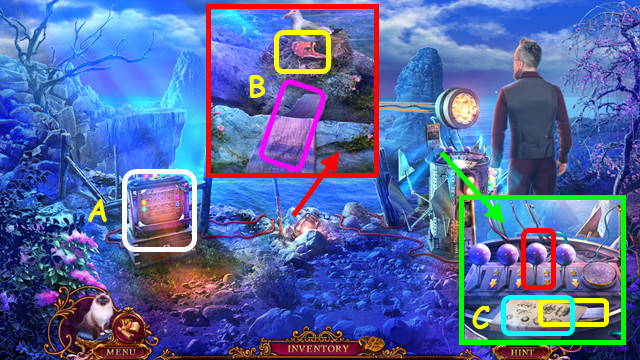
- Note the mini-game (A).
- Use the SCARF and MR. JENKINS to take the STEAK (B).
- Read the instructions, take the RULER, and remove the lever (C).
- Walk down.

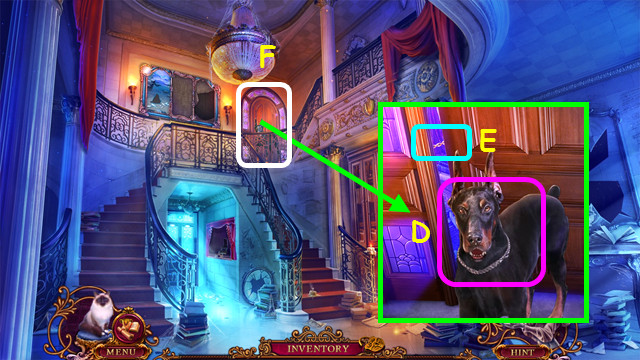
- Use the STEAK (D).
- Use the RULER (E).
- Enter Benjamin’s Office (F).

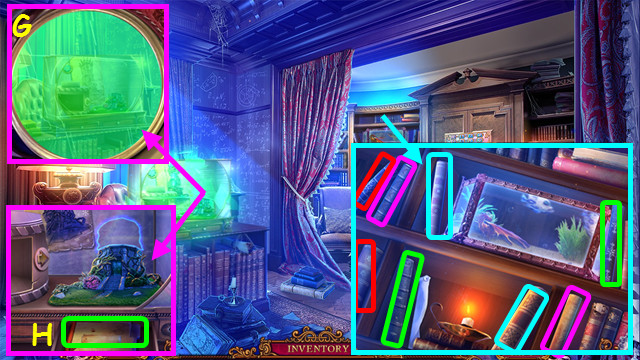
- Select the aquarium, use the green lenses, and align the lines (G).
- Take and read the folder (H).
- Select book pairs (color-coded).

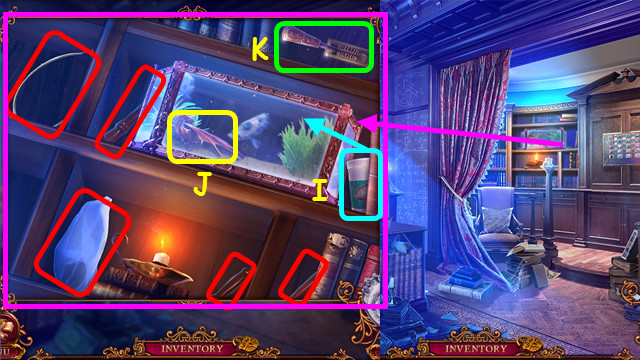
- Take the 5 NET PARTS (red).
- Restore the NET PARTS to make the NET (inventory).
- Use the food on the tank (I).
- Use the NET to take the 3/4 BARREL COVER PARTS (J).
- Flip the lever (K).

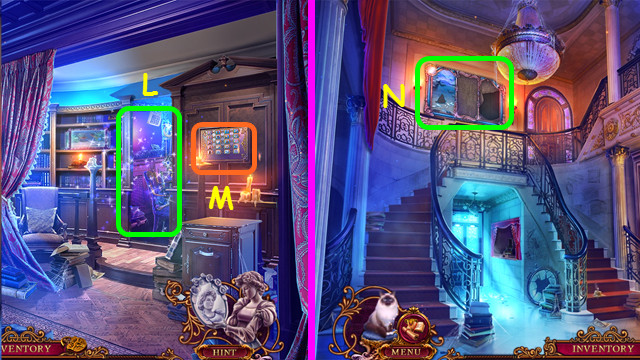
- Play the HOP; earn the PAINTING PART (L).
- Note the mini-game (M).
- Walk down.
- Select (N).

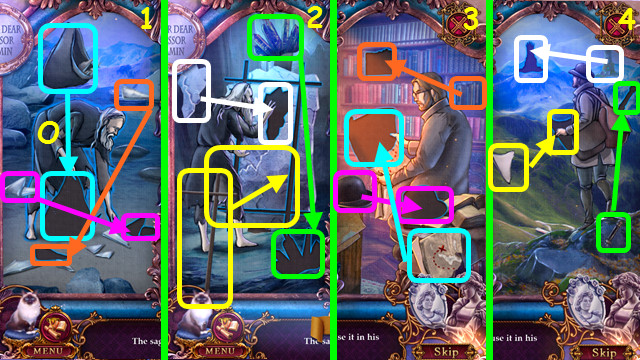

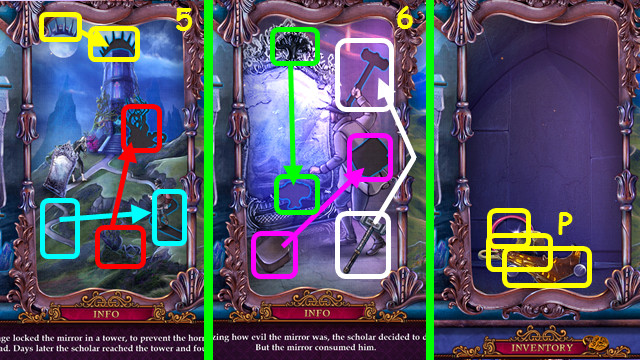
- Place the PAINTING PART (O).
- Restore the items in each scene (1-6).
- Take the 4/4 BARREL COVER PART, FLINT, and 1/3 WIRES (P).
- Restore the 4 BARREL COVER PARTS to make the BARREL COVER PART (inventory).
- Walk down.

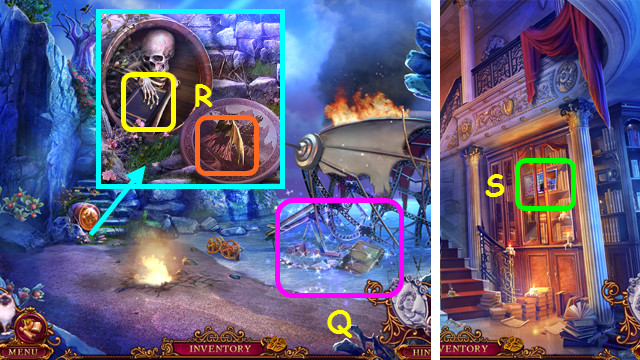
- Play the HOP; earn the TILE (Q).
- Place the BARREL COVER PART; open the book and take the PUZZLE PART (R).
- Walk forward.
- Select the mini-game (S).

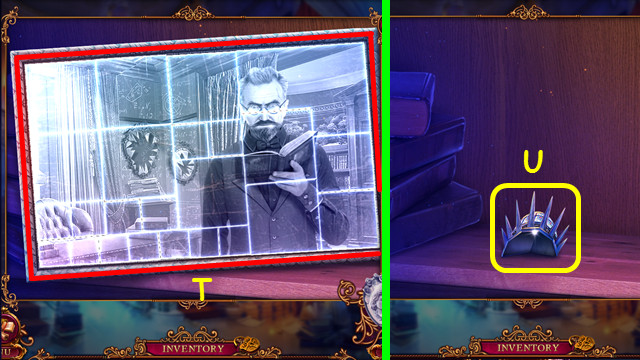
- Place the PUZZLE PART in the frame.
- Restore the photo (T).
- Take the TOWER PART (U).
- Go to Benjamin’s Office.

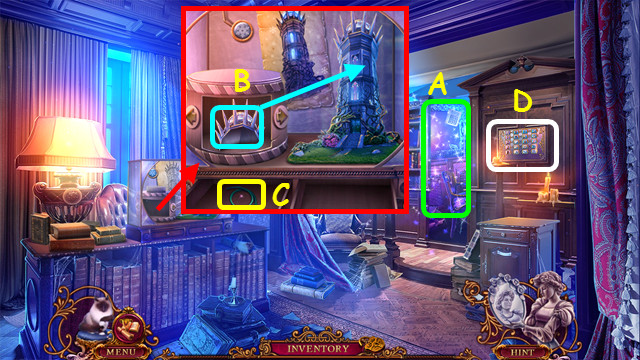
- Play the HOP; earn the 2/3 WIRES (A).
- Place the TOWER PART; use the buttons to find the tower parts and rebuild the tower (B).
- Take the 3/3 WIRES (C).
- Select the mini-game (D).

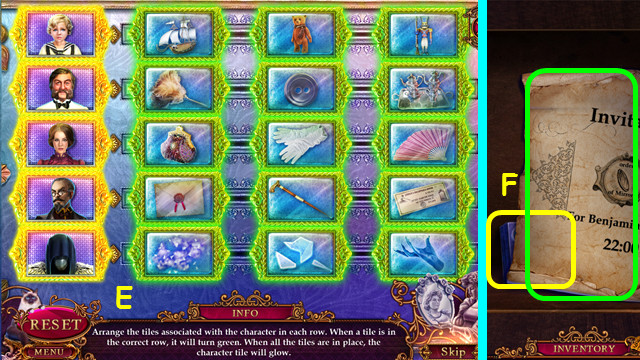
- Place the TILE on the device.
- Sort the tiles as shown (E).
- Move the invitation; take the ELECTRONIC PANEL (F).
- Go to the Cliffside and select the wires mini-game.

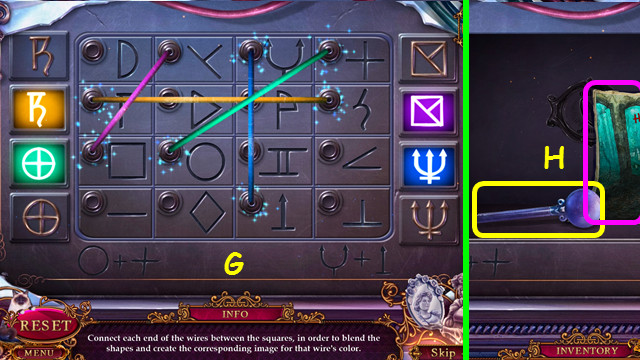
- Place the 3 WIRES on the device.
- Solution (G).
- Take the drawing and LEVER (H).

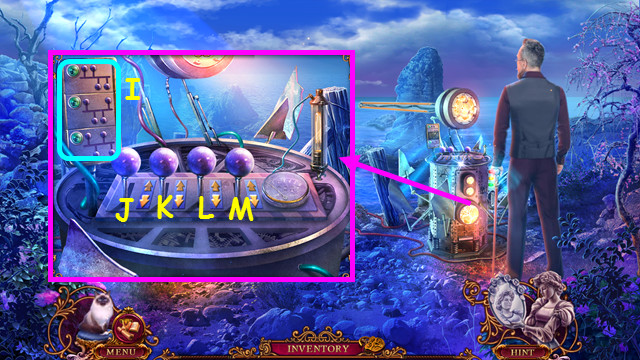
- Place the ELECTRONIC PANEL (I).
- Place the LEVER. Solution: J-K-K-M-L-M.
Chapter 5: The Caves

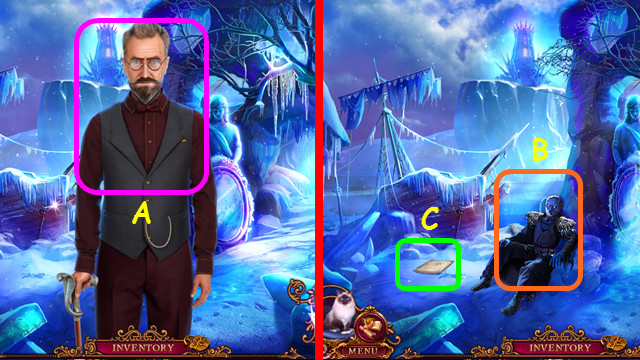
- Talk to Benjamin (A).
- Talk to the Guardian (B).
- Take the paper (C).

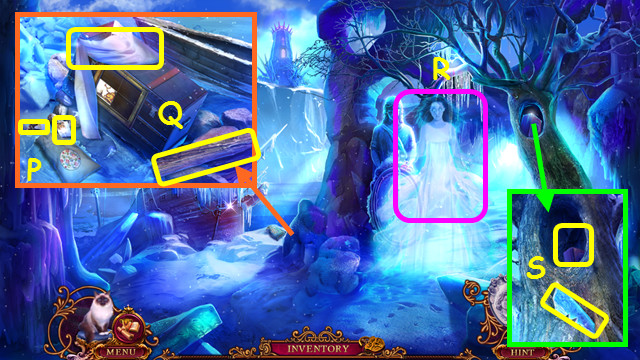
- Open the sack; take 2 of the 3 PICTURE TILES (P).
- Take the SAIL and PLANK (Q).
- Combine the PLANK, SAIL, and FLINT to make the TORCH (inventory).
- Use the TORCH (R).
- Take the SERRATED DAGGER; use MR. JENKINS to take the OLD BOX (S).

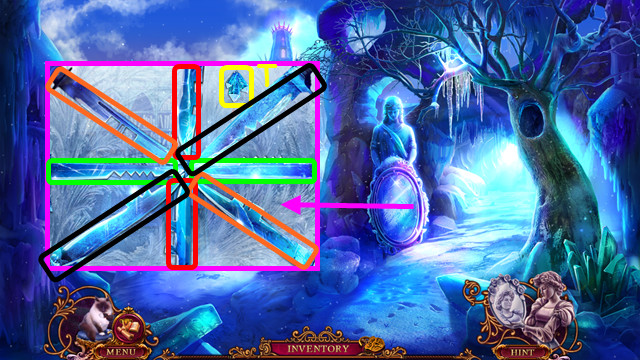
- Take the 1/3 CRYSTAL and place the SERRATED DAGGER (T).
- Select pairs (color-coded).

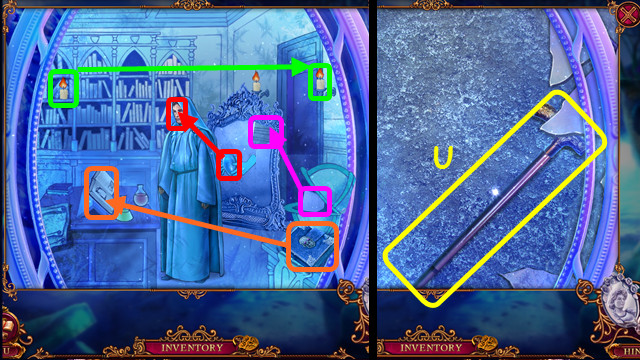
- Restore the items (color-coded).
- Take the CANE (U).
- Walk forward.

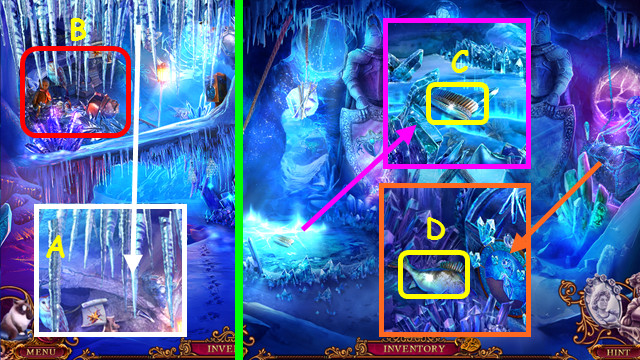
- Use the CANE (A).
- Play the HOP; earn the NET (B).
- Walk forward.
- Take the BRUSH (C).
- Take the FISH (D).
- Walk down.

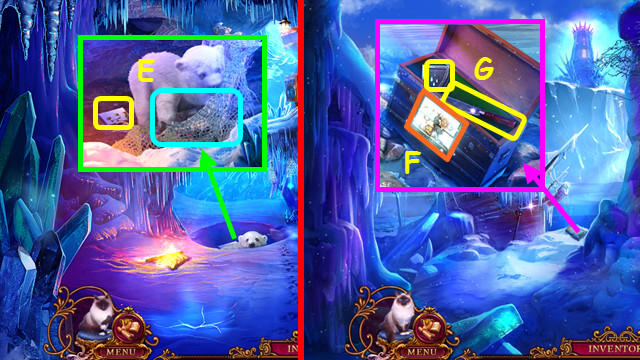
- Use the NET and FISH; take the 3/3 PICTURE TILES (E).
- Walk down.
- Place the 3 PICTURE TILES; restore the mosaic (F).
- Take the MACHETE and SHIELD PART (G).
- Walk forward 2x.

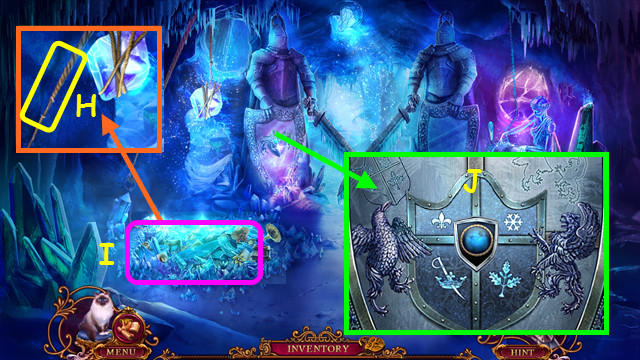
- Pan up; use the MACHETE to take the ROPE (H).
- Play the HOP: earn the SEEDS (I).
- Place the SHIELD PART; restore the shield (J).
- Walk forward.

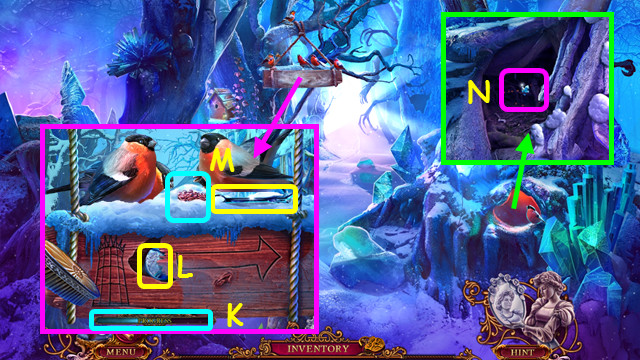
- Use the BRUSH until the meter fills (K).
- Take the TOKEN (L).
- Place the SEEDS; take the HOOK (M).
- Combine the HOOK and ROPE to make the GRAPPLING HOOK (inventory).
- Use MR. JENKINS (N).
- Walk forward.

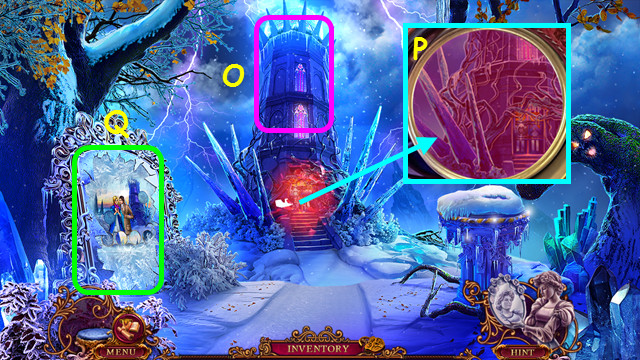
- Look at the tower (O).
- Select the door, use the red lens, and align the lines (P).
- Select the mirror (Q).

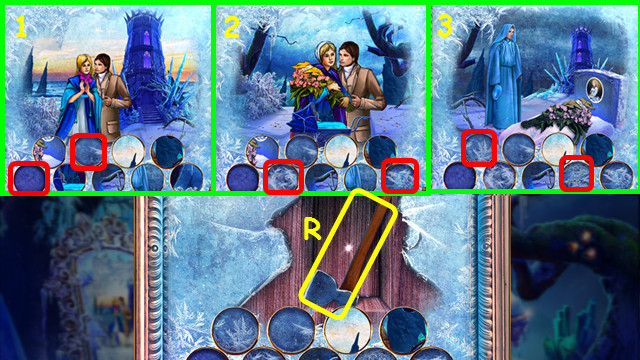
- Place the TOKEN; restore the pictures (1-3).
- Take the AXE (R).
- Walk down.

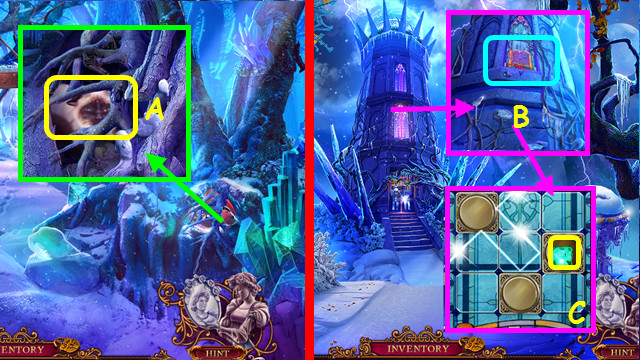
- Use the AXE to take MR. JENKINS and the 2/3 CRYSTAL (A).
- Walk forward.
- Use the GRAPPLING HOOK (B).
- Move the tiles as shown; take the ENCHANTED ICE CUBE (C).
- Walk down 3x.

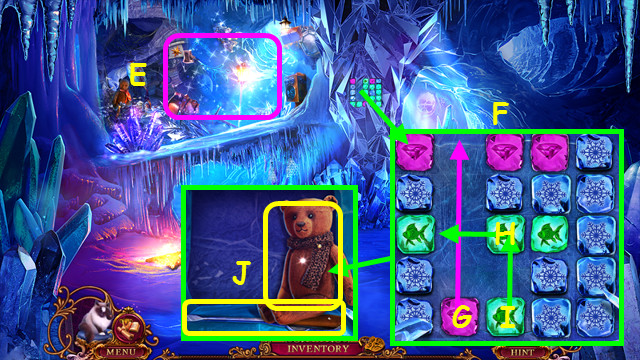
- Play the HOP; earn the KEY (E).
- Place the ENCHANTED ICE CUBE on the board (F).
- Move the red cube up (G).
- Move green cube left (H).
- Move green cube up (I).
- Take the TEDDY BEAR and SCREWDRIVER (J).
- Touch the lid of the OLD BOX and use the SCREWDRIVER (inventory).

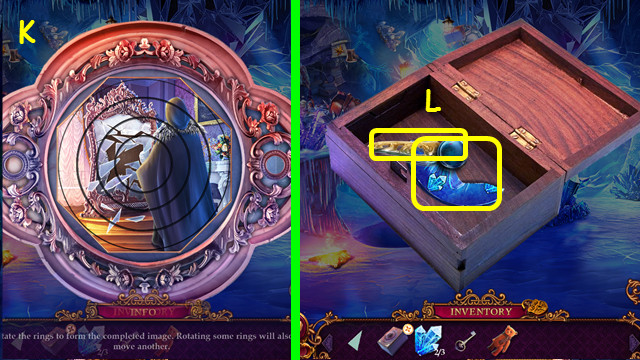
- Restore the picture; start in the center and work out (K).
- Take the drawing, HANDLE, and 3/3 CRYSTALS (L).
- Walk forward 2x.

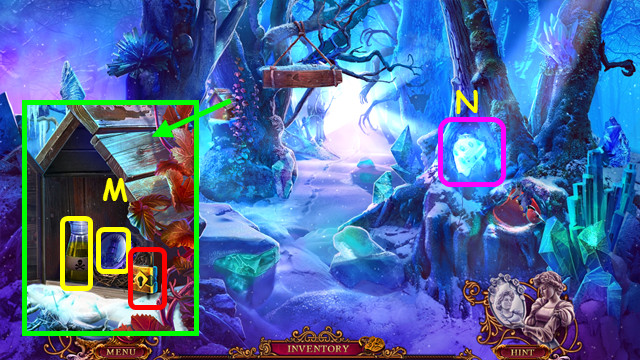
- Use the KEY; take the photos, notes, MIRROR, and PHOSPHOR (M).
- Select the mini-game (N).

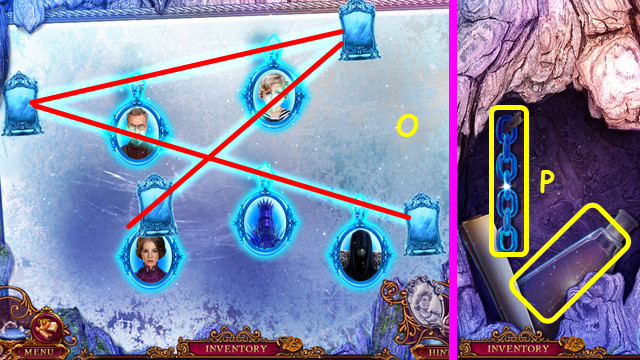
- Place the MIRROR on the frame.
- Arrange the mirrors as shown (O).
- Take the CHAINS and EMPTY FLASK (P).
- Walk down.

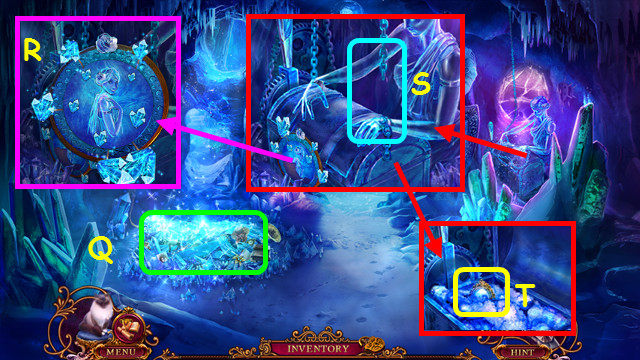
- Play the HOP; earn the MANGANESE (Q).
- Combine the EMPTY FLASK, PHOSPHOR, and MANGANESE to make the EXPLOSIVE POTION (inventory).
- Place the 3 CRYSTALS; move the outer crystals as shown (R).
- Place the CHAINS (S).
- Take the PIECE OF MIRROR (T).
- Walk forward.

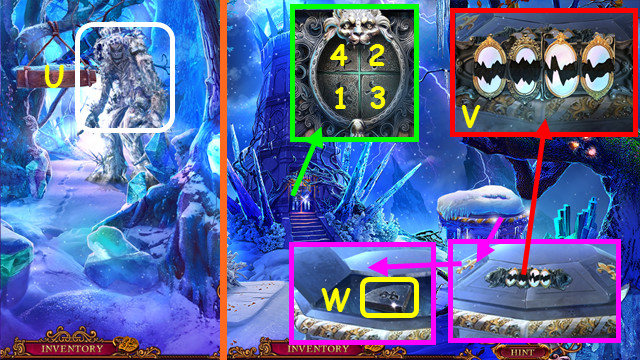
- Use the EXPLOSIVE POTION (U).
- Walk forward.
- Brush off the snow, place the PIECE OF MIRROR, and swap as shown (V).
- Take the DOOR PART (W).
- Place the DOOR PART; press 1-4.
Chapter 6: The Tower

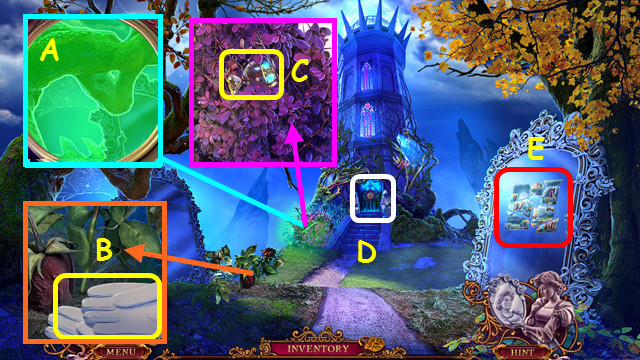
- Select the bush, use the green lens, and align the lines (A).
- Take the GLOVES (B).
- Use the GLOVES to take the CUP (C).
- Note the mini-game (D).
- Select the mirror (E).

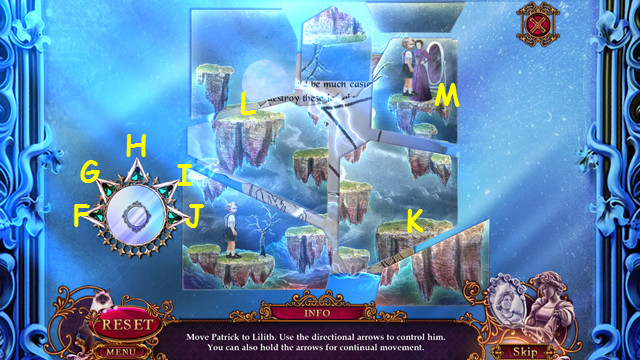
- Press and hold (I) to move Patrick to (K).
- Use (F) to move him to the left edge of K.
- Press and hold (G) to move him to (L).
- Use (J) to move him to the right edge of L.
- Press and hold (I) to move Patrick to (M).
- Read the note and take the 1/2 CLUE.
- Select the door mini-game.

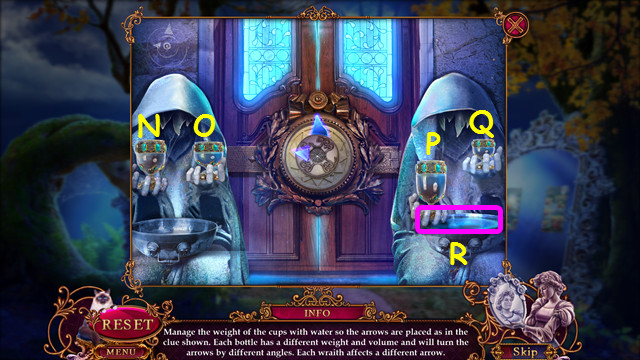
- Place the CUP (N).
- Fill and return the cups (O-P-Q) with water (R).
- Walk forward.

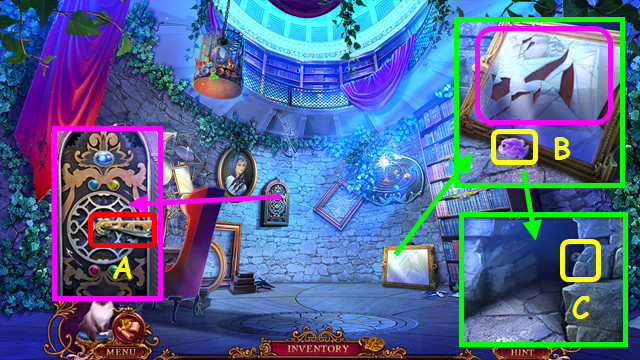
- Place and rotate the HANDLE clockwise several times (A).
- Take the STONE HEAD and move the mirror (B).
- Use MR. JENKINS to take the SCREW (C).

- Place the STONE HEAD; adjust the stones as shown (D).
- Play the HOP; earn the ACID (E).
- Walk down.

- Use the ACID (F).
- Use MR. JENKINS to take the WATERING CAN (G).
- Use the WATERING CAN 2x; take the METAL LEAF (H).
- Walk forward.

- Place the METAL LEAF (I).
- Use the slingshot (J) to shoot the shadow (K) 5 times.
- Take the AMULET (L).
- Go up the stairs.

- Place the AMULET (M).
- Play the HOP; earn the IRON HEART (N).
- Place the IRON HEART (O).
- Walk right.

- Take the 2/2 CLUE (P).
- Walk down.
- Place the 2 CLUES; press the rocks (white).
- Take the BOW and PLANET (Q).
- Walk down.

- Play the HOP; earn the ARROW (R).
- Combine the BOW and ARROW to make the BOW AND ARROW (inventory).
- Place the PLANET; Select 1-9.
- Take the BOOK and PENDANT (S).
- Open the BOOK; restore the photos to make the BOOK (inventory).

- Place the BOOK. Solution (T).
- Take the 1/2 VALVE (U).
- Walk up and right.

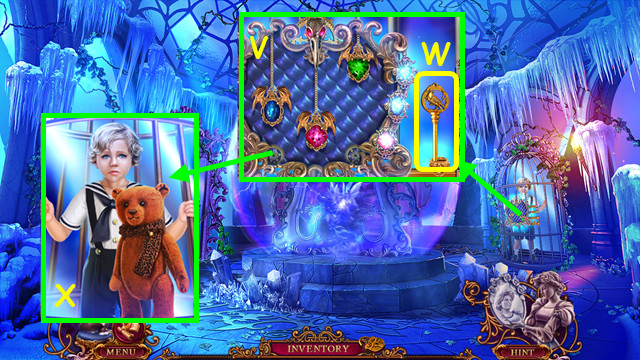
- Place the PENDANT; position the pendants as shown (V).
- Select the KEY (W).
- Give Patrick the TEDDY BEAR; earn the MECHANISM PART (X).

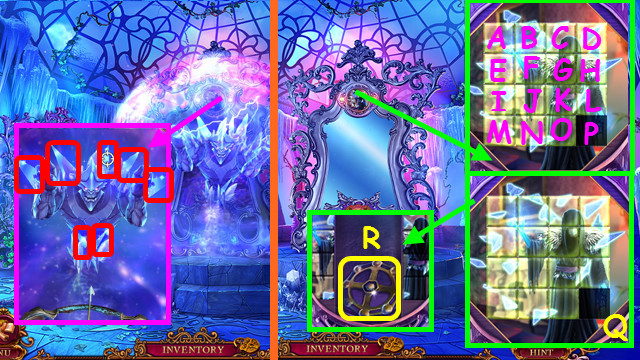
- Use the BOW AND ARROW; shoot the icy thorns (red).
- Select O-N-M-I-E-A-B-C-D-H-L-K-J-F-B-C-G-F-J-K-L-H-D-C-G-K-L-P-O-N-J-F-G-K-L-H-D-C-G-K-O-N-M-I-J-N-O-P-L-H-G-F-J-N-O-P-L-H-G-F-J-N-O-K-G-F-J-N-O-K-J-N-O-P-L-H-G-K-O-N-M-I-J-K-L-P-O-K-J-I-M-N-O-P.
- Solution (Q).
- Take the 2/2 VALVE (R).
- Walk down.

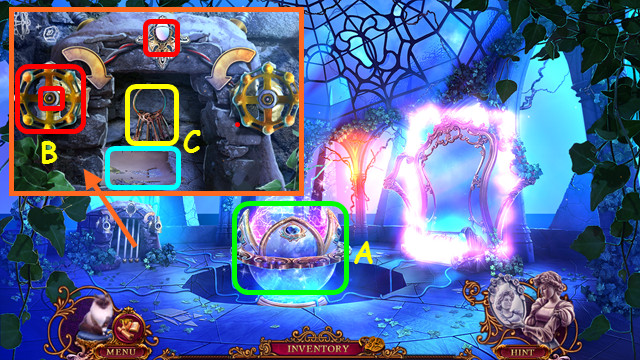
- Play the HOP; earn the MAGIC POWDER (A).
- Place the 2 VALVES, SCREW, and MECHANISM PART (red).
- Select Bx5.
- Take the note and KEYS (C).
- Walk right.

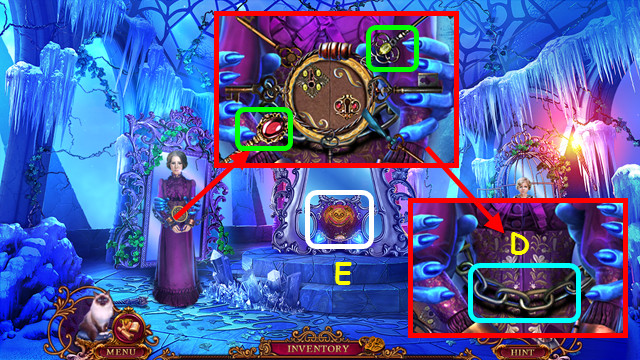
- Place the KEYS; select 2 keys (green).
- Use the MAGIC POWDER; earn the ENCHANTED PIN (D).
- Select the mini-game (E).

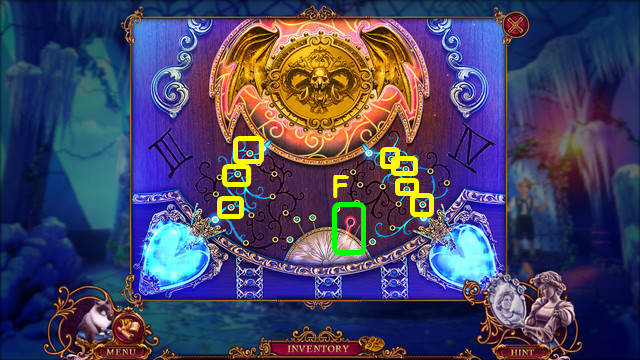
- Place the ENCHANTED PIN (F).
- Place the pins (yellow).
- Congratulations! You have completed Ominous Objects: Phantom Reflection!




 Midnight Mysteries: Haunted Houdini Deluxe Walkthrough, Guide, & Tips
 Surface: Game of Gods Walkthrough, Guide, & Tips
 Maestro: Notes of Life Walkthrough, Guide, & Tips
 Mythic Wonders: Child of Prophecy Walkthrough, Guide, & Tips
 Dark Romance: The Swan Sonata Walkthrough, Guide, & Tips