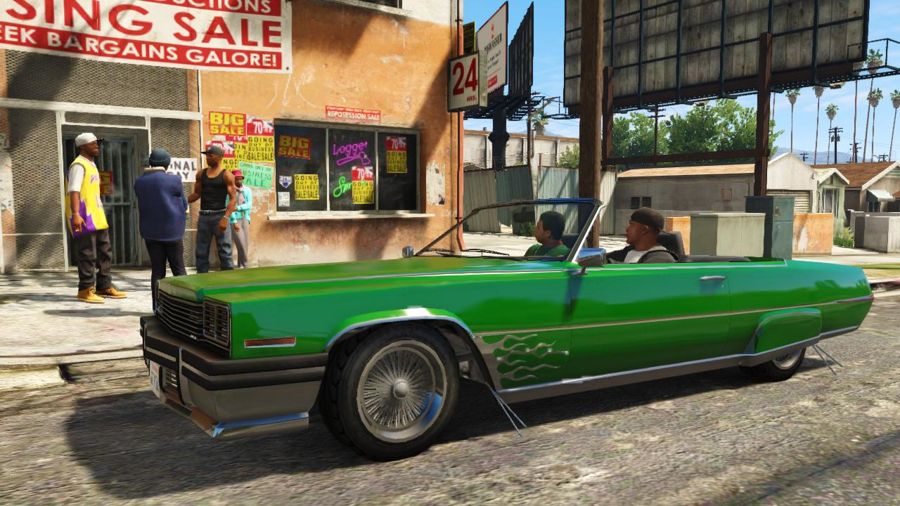
The glorious city of San Andreas is filled with interesting characters. This Grand Theft Auto 5: Strangers & Freaks Side Missions Guide will show you where to find side-quests from Freaks and Strangers displayed with the “?” icon in-game. We’ll tell you when and where you can find them, what the mission entails and any rewards you can receive.
Mission: Pulling Favors
Character: Franklin
Location: You can find Tonya near Franklin’s house after you complete the mission to repossess the bike.
Guide: It’s a pretty simple mission. Follow the GPS to pick up the truck near the police station before responding to calls and collecting busted up cars. Grabbing the cars is as simple as reversing and lowering your hook with the left stick. Raise the hook and then follow the GPS to hand in the vehicle. If you release the vehicle in the red “No Parking” zone, you’ll receive Gold rating.
Rewards: This unlock Tonya as a contact
Mission: Shift Work
Character: Franklin
Location: North East of Franklin’s house. I unlocked it straight after doing Tonya’s mission.
Guide: This is a street racing mission. There’s 6 racers total, including yourself. It’s a pretty basic track but be sure to utilize Franklin’s special ability to make it an easy win. You have to complete 2 laps. Also remember to slip stream other cars by driving in a direct line behind them, 2-3 seconds after the white trailmarks appear, make your move to overtake. In order to get gold you need to get the fastest lap time and no collisions.
Rewards: This unlocks street races throughout San Andreas between 20:00 and 05:00.
Mission: Pulling Favors Again
Character: Franklin
Location: You can find Tonya near Franklin’s house after you complete the mission to repossess the bike.
Guide: It’s a pretty simple mission. Follow the GPS to pick up the truck near the police station before responding to calls and collecting busted up cars. Grabbing the cars is as simple as reversing and lowering your hook with the left stick. Raise the hook and then follow the GPS to hand in the vehicle. If you release the vehicle in the red “No Parking” zone, you’ll receive Gold rating.
Rewards: This unlock Tonya as a contact
Mission: Paparazzo
Character: Franklin
Location: This mission can be found in the North of West Vinewood East of the green M for Michael’s place.
Guide: You can find the guy hiding in the trees using a camera. Apparently he’s been snapping pictures of a famous figure who’s been enjoying the night life. You’ll have to follow a limo to take pictures of a fleeing celebrity. Use Franklin’s ability once to get upside the car, then just stay close for a few minutes as he snaps shots. Save the rest of it for when another reporter shows on a bike before using the rest of the special ability bar to get up close while the photographer knocks him off the other bike. Then simply drop him off for your reward.
Reward: Unlock Beverly as a contact.
Mission: Pulling Another Favor
Character: Franklin
Location: This is the second mission for Tonya and can be accessed after completing the mission where you gain control of Michael for the first time. Head to her same location again to continue with the tow truck missions.
Guide: It’s almost identical to the first mission. Follow GPS, arrive, collect car, return. Simples.
Reward: N/A
Mission: Paparazzo – The Sex Tape
Character: Franklin
Location: This is a follow on from the first photography mission, Paparazzo. You can find Beverly near his previous location, East of Michael’s house.
Guide: This mission is another attempt at making the big time snapping celebrities in unfavorable situations. Keep the camera on the actresses face the entire time so that the small box remains green. The redder it gets, the worse score you’ll get. Keep her centered for the best chance at 100%.
Reward: N/A
Mission: Pulling Favors Again
Character: Franklin
Location: You will get a text message from Tonya asking for your help with the towtruck. Call her to begin the mission
Guide: As previously, head to location and grab the vehicle. This one is on a train track with an oncoming train on a collision course, so be sure to do it quickly. Pick up the drive before heading back. I would suggest avoiding Franklin’s special ability as it can make the car behave in rather weird ways.
Reward: N/A
Mission: Still Pulling Favors
Character: Franklin
Location: This is another Tow Truck mission that you obtain through text message. Wait for Tonya to get in touch.
Guide: This one is the easiest so far. By this point you’ve got the hang of the Tow Truck, it’s just a simple A to B job.
Reward: N/A
Mission: Pulling One Last Favor
Character: Franklin
Location: Tonya is waiting directly opposite Franklin’s house. You can unlock this Strangers & Freaks mission after the first heist at the Jewellery store.
Guide: Yet another very simple Tow Truck job. Accompany Tonya on your way to the automobile accident. Once there grab the car and take it to the nearby repair garage before taking Tonya back to the yard. You need to do this quick to get the gold rating. Other than that just drop the car dead on the spot.
Reward: N/A
Mission: Paparazzo – The Meltdown
Character: Franklin
Location: North in West Vinewood, just South West of Franklins new home. It becomes available straight after the mission with the helicopter rescue. It’s the photographer again, this time he’s hiding in the dust bin; still waiting for that perfect snap.
Guide: After finding the photographer in the trash can it takes a while before the next stage is available. After about 5-10 minutes Beverly will text you to inform you that the locations are now on your map. One of them involves snagging a photo of a celebrity following a police chase. There’s a nearby bike, I would suggest using that. It’s a short chase, about 30 seconds. Just be sure that you don’t attract police attention or you fail. At the end use your phone to grab a picture before sending it to Beverly. The second is snagging a photo behind a supermarket. You don’t have to go onto the roof, just hide behind the building on the right of the contact.
Reward: N/A
Mission: Grass Roots The Pickup / The Drag
Character: Franklin
Location: Textile City in the middle of LS. Available after you complete the rescue mission with all 3 characters participating.
Guide: This is a follow on from the mission with the same name with Michael so you can rest assured it’s going to get trippy; or not. After about 5-10 minutes Barry will text you with the locations of the weed drop. The first car, the most Eastern one, can be located at the center of the green circle. Just off the main road, the lighter color, there are two cross roads North and South. It’s in a pickup truck in the North. Be careful as there’s an unmarked police car waiting. I suggest marking Barry’s house before you get into the vehicle to avoid driving too far away as you evade the cops. Do the same again with the second that can be located on the North East side of the green area in the large scrap yard. This time you have to use the nearby Tow Truck to tow it to Barry’s place.
Reward:
Mission: Omega
Character: Franklin
Location: This one is located way to the North East in Sandy Shores. If you’ve stuck close to the story you probably haven’t been here yet so use a taxi for quick transport. Costs around $100. It appears the individual is scanning for extra terrestrial life..
Guide: You’re tasked with collecting a variety of spaceship parts. It’s quite a lengthy mission and IGN already have a great interactive map that lists all of the parts available. You can find it here.
Reward: Spaceship (?)
Mission: Paparazzo Reality Check
Character: Franklin
Location: South West of his new house. This mission unlocks after your assault on Grove Street.
Guide: This one’s pretty self explanatory. Just head to the marker and hang around. The mission ends once Beverly leaves. There’s an added objective for “Explosive Action” but I’ve not been able to figure out what it is.
Reward: N/A
Mission: Smoke-In
Character: Franklin
Location: After you help Barry with the previous mission wait about 10-15 minutes and you’ll get a text about a smoke-out at City Hall. City Hall is in Downtown Vinewood, South-East of Sub Urban.
Guide: Another simple one. Simply turn up, listen during the phone call and that’s it. He doesn’t show up so you can move on afterwards.
Reward: N/A
Mission: Exercising Demons – Franklin
Character: Franklin
Location: Not entirely sure when this unlocks as it’s located in the North Western peninsula Paleto Cove, just North of the lower Cable Car. Head onto the beach and you’ll see the lady that Michael raced earlier in the game.
Guide: You’ve got a tough fight on your hands here as you need to beat her in a Triathlon. When you first get into the water it’s about waist height, use your jump 2-3 times to get a decent head start. From that just keep pace through the water and you’ll stay in front. She’s pretty slow here. The biking part is the hardest to stay in front as there’s a bridge jump mid-way. Wait until the last second before releasing jump (R1) and stay central or she’ll overtake you. The final bit is just a sprint, it’s difficult to lose so you should be fine. There’s a 4×4 to the South when you’re finished, if you don’t want to walk.
Reward: N/A
Mission: Risk Assessment
Character: Franklin
Location: Vinewood Hills, just North of Franklin’s house. I unlocked it directly after completing the Exercising Demon’s mission.
Guide: You meet a dog and Franklin suddenly learns to speak bark. In a clear attempt to honor Lassi Franklin must follow the dogs clues and find the man stuck in a tree. Warning: This quest bugged for me on two attempts. I just kept killing myself and retrying. It worked eventually. After you rescue Dom you’ll have to follow him into his helicopter. As you sky dive release the parachute early and use L1/R1/LB/RB to use precision landing, hitting the zone is no problem. After that, you have to beat him down the mountain on a bike. Don’t worry about over taking him at all for the duration of the race. Just listen to his advice and wait until the 2nd last checkpoint before taking a tiny shortcut across the grass and crossing the finish. Be sure to use your break, a lot!
Reward: Dom as a new contact, unlocks parachuting
Mission: Liquidity Risk
Character: Franklin
Location: Outside Los Santos International
Guide: About 15 minutes after completing the previous task he will be at the Airport for the next stage. It’s easy and I don’t really want to spoil it, so enjoy.
Reward: N/A
Mission: Targeted Risk
Character: Franklin
Location: This one is on top of the bank, he’ll ring you and another D will pop up on your radar.
Guide: You’ll need to use a helicopter to reach the top of the Maze Bank. Dive fast and hard before opening your parachute, activate it late and then use the L1/R1/LB/RB to land slowly.
Reward: N/A

Mission:Grass Roots
Character: Michael
Location:You can find this Stranger & Freak side mission can be located North East of the Car Dealership after you unlock the ability to switch to Michael
Guide: The mission involves a brief conversation with a guy that wants to legalize weed. You’ll be sent on a trippy journey as you slaughter waves of aliens with a Minigun. Watch the minimap to see where they spawn before taking them out.
Mission:Exercising Demons
Character: Michael
Location: This mission can be found to the South West of Michael’s house, further South West past the golf, tennis courts and cinema.
Guide: Firstly, don’t try and knock her out to win the race. It doesn’t work. It can be quite a tricky mission at first but I can walk you through it. When you begin the race use your sprint to get ahead and jump the first fence. From there continue using your sprint until you reach the checkpoint sending you left down the stairs. Avoid the actual stairs and take a small short cut, jumping off the side. Be sure to use your jump whenever you’re going downstairs as it’s a lot quicker. If you still have full stamina at the final stretch, which you should, you can sprint the remainder of the way without worry.
Rewards: This unlocks Mary Ann as a contact.
Mission: Death At Sea
Character: Michael
Location: Paleto Cove, same location as the Sonar Collections Dock. I had also purchased the business.
Guide: This mission became available 10-20 minutes after I completed the main game. You’re tasked with finding missing submarine pieces for Abigail. Your map will feature the nearest area with pieces. From there you simply get close and then use the sonar. Aim for the middle of the white pulsating circles before diving, and then just repeat until the sonar disappears before heading back to the Dingy. This is assuming you’re following each of the closest zones. Be sure to look out for anything flashy as you can find weapons, cash and more. I’ve outlined the basics below:
*Shark in the area
Estimated Time To Completion 40-60 minutes. After collecting all the pieces get onto land and you’ll get a phone call.
Rewards: $10 – Make sure you follow her directly after.
Mission: Wait Lies Beneath
Character: Michael
Location: Paleto Cove, same location as the Sonar Collections Dock. This is an immediate follow on from Death At Sea.
Guide: Not sure if I messed this up or not. Followed her directly after the previous mission as she was returning to Los Santos. Mid-way I switched car and she got out of sight. In then said I had completed the mission but there wasn’t a reward screen or rating. If you get the opportunity, keep following as something else may occur.
Rewards: N/A
Mission: Rampage One
Character: Trevor
Location: Liqueur Mart near Alamo Sea
Guide: This one is pretty basic all you have to do is kill 25 rednecks within 2 minutes. Trevor will have his special on the whole time so he does increased damage and takes reduced damage but you can still get overwhelmed. Head up to the roof the liqueur store and kill rednecks from there. If you are having trouble getting 25 then use grenades or hop off towards the end.
Reward: None but you do get to blow off some steam.
Mission: Target Practice
Character: Trevor
Location: North of Chinese in Sandy Shores. Check for the guy near a buggy with a high velocity rifle.
Guide: The first stage involves sitting on his back porch while you pick off satellite dishes. Just follow the red dots on the mini-map and you’ll take them out in no time. Then drive to the motel and shoot the moving cars. When you aim for the tires literally aim at them, don’t over compensate for movement and distance. Just aim at the front edge and fire, wait until they’re close to make it easier. For the final step you can kill 2-3 Coyotes with a single bullet so wait until they bunch up.
Reward: Cletus as a contact
Mission: The Civil Border Patrol
Character: Trevor
Location: Grand Senora Desert
Guide: After you meet the two guys you will have to drive for a bit to get to the suspects. Once you get to the bar head inside and Trevor will say this is pointless because everyone has done something illegal in this bar, so head back outside. Once you get out there it will be time to chase the suspects. It is a bit of a long chase but once you finally catch up to them get out and use the stun gun on them to beat the mission.
Reward: $500, Stun gun, and new contact Joe.
Mission: Meeting Maude
Character: Trevor
Location: Sandy Shores
Guide: Just go up to the woman near the laptop and talk to her.
Reward: Maude as a contact and bail bond jobs
Mission: Fair Game
Character: Trevor
Location: Paleto Forest
Guide: For this mission you will be hunting with Cletus. Stay downwind, keep the arrow pointed towards you, and follow Cletus while in stealth mode. once you get close enough to the elk a red circle will appear on the radar, aim that way and wait for him to pop out and take the shot. After that you will need to follow Cletus a bit more and use the elk whistle to find the location of another elk. Once you see the big elk take the shot and Cletus will lead you to another one. The next elk will also have a doe with him so be sure to only shoot the one with the antlers! After you kill the third one Cletus will leave and you will have to hunt one on your own. Use the elk call and kill the last elk. Take a picture and send it to Cletus to complete this mission.
Reward: Unlocks the Hunting side events
Mission: Vinewood Souvenirs: Kerry/Mark/Willie/Tyler/Al Di Napoli
Character: Trevor
Location: When Trevor returns and you gain control of all 3 characters, this mission becomes available just after Michael escapes from the North. It’s up North, easy to reach with a quick taxi ride. Speak to the two old people searching through the dust bins.
Guide: Shortly after taking this mission you will get a text from Nigel. This creates small tanned colored areas on your map that contain the items from celebrities. These didn’t actually display on my minimap so if you can’t see them I suggest setting waypoints on the large map. This is actually 3 Stranger & Freak missions thrown into 1. They’re all simple as cake, search the middle of the tanned circle to find what you’re looking for. You can enter the golf club with a car near the front entrance and to get the item closest to the start point enter the club door. Another can be found, a stack of clothes, North East of the golf club. I never saw this for about 2 hours after starting this mission so it may not be there to begin with. After completing those objectives Nigel will eventually pop up on your map again. This is where you deliver the items. You’ll have to chase him until he crashes after going through the hospital, don’t try and hit him before then.
Reward: Nigel as a new contact
Mission: Grass Roots – Trevor
Character: Trevor
Location: This mission is in exactly the same location as Grass Roots in Michael’s early days.
Guide: In a similar trippy fashion, Trevor fights an onslaught of enemies but this time, it’s clowns. Same as before, take them down as they appear. Be sure to wipe out the vans as soon as they show as they spawn clowns until destroyed.
Reward: N/A
Mission:Extra Commission
Character:Trevor
Location:GWC and Golfing Society
Guide:I unlocked this after the mission with the cargo plane and the crop duster. Simply head to the marker to speak with the guy selling the house. After you accept the mission wait a few moments for a text message linking to a website. Press Square or X to open the web page and then select a property. Click “Get Directions” and it will link your GPS to that property. There’s quite a few signs so I suggest working from left to right.
Reward: Josh Contact
Mission:Rampage 2
Character:Trevor
Location:Rancho/Madconald Street
Guide:This time you will have to get 30 kills with an uzi and some grenades. Stick behind cover and make sure no one gets behind you, if they do take them out first!
Reward: None
Mission: Fair Game
Character: Cletus
Location: Paleto Forest
Guide: For this mission you will be hunting with Cletus. Stay downwind, keep the arrow pointed towards you, and follow Cletus while in stealth mode. once you get close enough to the elk a red circle will appear on the radar, aim that way and wait for him to pop out and take the shot. After that you will need to follow Cletus a bit more and use the elk whistle to find the location of another elk. Once you see the big elk take the shot and Cletus will lead you to another one. The next elk will also have a doe with him so be sure to only shoot the one with the antlers! After you kill the third one Cletus will leave and you will have to hunt one on your own. Use the elk call and kill the last elk. Take a picture and send it to Cletus to complete this mission.
Reward: Unlocks the Hunting side events
Mission: An American Welcome
Character: Trevor
Location: Mount Chiliad
Guide: Once you hop in the truck you will have to chase down a target until your partner shoots him with a stun gun. Once he does that get out and make sure he gets in the truck. Once he is in the truck follow the way point to another two guys you will need to capture. Just stay along them until your partner shoots them and you will beat the mission.
Reward: $500
Mission: Minute Man Blues
Character: Trevor
Location: Paleto Bay
Guide: This mission becomes available after completing An American Welcome. You’re tasked with killing your two friends. It’s a simple objective based mission. Go to check point, kill your targets. The first is guarding a group, you can snipe him without alerting the other. As you approach the barn the second tries to escape in a tractor. If you want Gold use your Stun Gun on both.
Reward: N/A
Mission: Vinewood Souvenirs – The Last Act
Character: Trevor
Location: Strawberry/Power St
Guide: This is the final mission for collecting the celebrity stuff for the old British couple. You can either take the car to the train track and watch the sparks fly or you can let him out free. I went to the train track, it was worth it.
Reward: N/A
Mission: Exercising Demons – Trevor
Character: Trevor
Location: Vinewood Hills
Guide: This unlocks quite late in the game. The crazy fitness lady returns. It’s a simple bike ride, impossible to lose unless you crash. Just keep your speed up and watch for traffic.
Reward: Mary Ann as a contact.
Mission: Mrs Philips
Character: Trevor
Location: Trevor’s house. Available after “The End” of the game.
Guide: Trevor’s mum sends you on a task to grab a truck full of drugs and a gentleman, literally. You’ve got a long drive as to find where the Deludamol Pharmaceuticals truck is, you need to travel to Los Santos. Check your map and highlight the strip club. To the East you’ll see an Eastern road that has a small grey road heading North, in a “J” like shape. It’s on the road heading South-South West, opposite that J road. After that it’s a long drive back to the trailer, and a bucket load of disappointment for poor Trevor.
Reward: N/A
If you know of any we’ve missed please put the information in the comments below and we’ll update the article, including crediting your name.
If you want to make millions on the stock market, complete every Heist with ease, or unlock all the random events; check out our Grand Theft Auto V Walkthrough Guide Collection.


 Fire Emblem: Awakening Guide – Chapter 8: The Grimleal Guide - GamersHeroes
 The Week in Review: HMVs collapse upstaged by a decapitated bikini babe edition
 . Plays, 12th September, 2015
 Who To Quarantine In Metal Gear Solid 5
 Pokemon X & Y Guide: Mega Evolutions Guide - GamersHeroes