When you reach the next level, you will see a short cutscene of a Combat Engineer setting up a turret while numerous other soldiers take positions behind cover. The turrets will create a near impenetrable wall in front of you, meaning that you will have to find an alternate way around. If you are playing as the Infiltrator class, this is easier than you may think. Simply use Tactical Cloak and get in position behind your targets. Have your squad destroy the turret while you focus on the soldiers.
Other classes will have to take a more risky route through this checkpoint. The only way to get past the wall of turrets is to flank around the wall to the right, but even then the walls are low and the cover can be sparse. Wait for the turrets to give up on firing at you and focus on your squad-mates instead before advancing down the hallway. If you have the Grenade, Singularity, or Warp abilities, they can be helpful in the close quarters of this hallway. Soldiers or Vanguards can use Shotguns as the enemies file around the corner. Still, these tactics will draw fire from the turret quickly. You will want to destroy it first, then, as it is capable of tearing your shields away alarmingly fast.
A safer way to flank the enemies is to use a decoy of some sort to draw their fire before pelting them, the turret especially, from behind with Grenades and Singularities. If you have EDI in your party, you can use her Decoy ability to create a clone of her to distract the enemies. If you are playing as an Engineer, use a Drone to distract the enemies similarly. Then head around to the right and clean up.
Casting Overload on the turret will take its shields down quickly. Likewise, the Cryo Ammo, Warp, and Disrupter abilities will be helpful for dealing with the turret while mowing down enemies at close range. When you destroy the turret and start to focus on the soldiers, take out the Combat Engineer first, so that he doesn’t have a chance to build another of the turrets. When all of the enemies have been cleared out, head into the hall and examine the wall safe to pick up some Salvage. Proceed to the end of the hallway and run through the door. Look to the side to find some medi gels. Switch to a precision weapon such as a Sniper Rifle or a scoped SMG if you have one and move onwards.
As you move into position in the next room, a feral dog creature will escape from the labs and attack the soldier directly in front of you. This will give the other enemies in the room pause. Using your scoped weapon, take this opportunity to get headshots on the stunned enemies. You should be able to whittle down most of your opposition in this room before they can begin a counterattack in earnest. Move further into the room, however, and more enemies will begin to file into the area.
This is a two-tiered arena, with a staircase leading to a balcony overhead that overlooks the lower floor. Keep your scoped weapon out and head immediately up the stairs to your right. Order your squad to cover you either from the side of the bottom of the arena, or from positions to your left and right as you take cover on the chest high wall in the center of the balcony. There will be several enemies waiting for you on this narrow hallway, so deal with them fast before you take cover. From this position, you can lean over cover and snipe the unsuspecting enemies below. You can even use Biotics to aid you in getting a good bead on the enemies. Singularity or Pull will work in a pinch if a pesky Cerberus soldier refuses to poke his head out from cover, while infusing your ammo with Incendiary or Cryo properties can damage enemies more than an average bullet would, meaning that you won’t always have to pull off perfect headshots.
You can also eschew the top floor altogether, a potent strategy for those who do not carry long-range weaponry. In this case, you should try to catch the enemies between you and your squad-mates, cutting them down in the crossfire. Order your squad to one side of the arena while you take cover on the other side. Wait for the enemies to approach, then use an Assault Rifle or Shotgun, combined with Biotics, to mow them all down.
More annoying than the standard enemy types are the Centurions and Guardians who will begin advancing in the next wave. If you are using a Sniper Rifle from the top floor, you can kill the Guardians by shooting through the slot in the front of their shields; ten kills in this way will earn you the Mail Slot Achievement/Trophy. As for the Centurions, simply rain down gunfire on them from above while commanding your teammates to do the same, either from the same elevated position as you or from the ground, where they can take some of the heat off of you. If you opted to stay on the ground, you can use one of several strategies to open up the enemies to fire. Use Pull if you have it to yank the shields right out of the Guardians’ hands. Alternately, use the Soldier’s Adrenaline ability to slow down time and flank behind them, or shoot through the slot in the front of their shields with increased accuracy. If none of these tactics are available to you, toss a Grenade in their direction to make them drop their shields, or use Tactical Cloak and sneak up behind them for a charged melee kill.
After all of the enemies are dead, search the lower floor for items. Approach the center of the room to find the Armax Arsenal Greaves sitting on a counter. Head to the back corner and search this area to find the Sentry Interface and Salvage. Now head upstairs. Run across the balcony and through the door on the other side. This will lead you to yet another series of battles.


 Sacred 3 – Tips & Tricks Guide
 The Elder Scrolls IV: Oblivion Plugin Walkthrough
 How to increase your damage and dps as a demon hunter in diablo 3 (as of Patch 1.0.3)
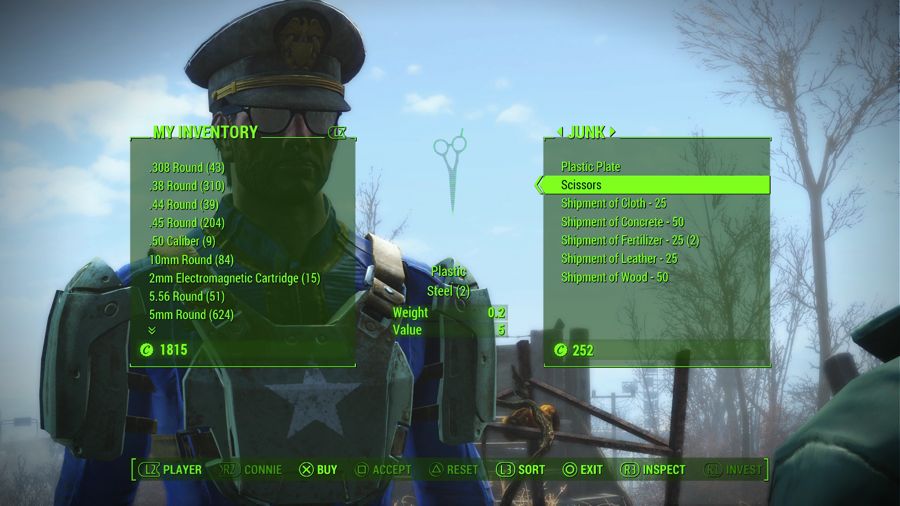 Fallout 4 - List Of Vendors Who Sell Settlement Material Shipments
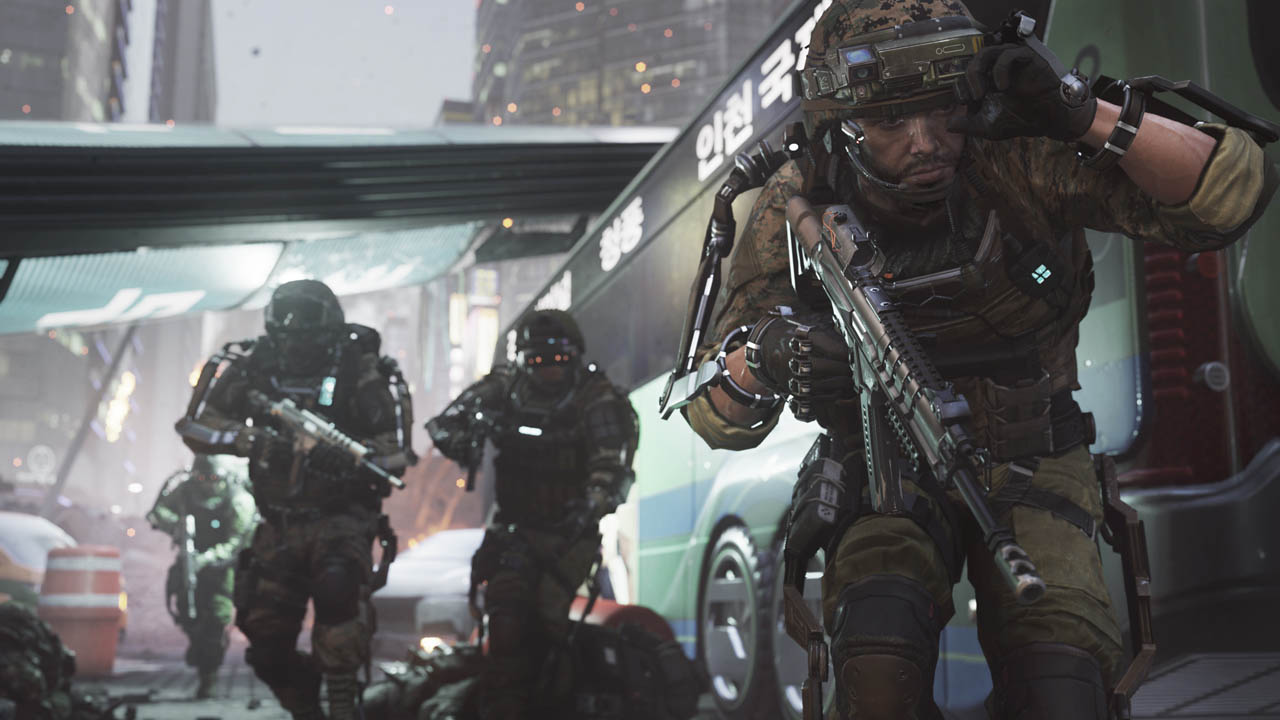 Call of Duty: Advanced Warfare – Perks Guide