It's been a little over a year since the original Ghost Recon: Advanced Warfighter (GRAW) was released for the PC, and already a sequel has been made. Ghost Recon: Advanced Warfighter 2 continues the tradition of the Ghost Recon series, in that it is a tactical shooter with the emphasis on tactics rather than just shooting. More importantly, it appears to be closer to the type of game fans of the series expected the first GRAW to be. It's no secret that many GR fans were disappointed by GRAW, and the developers GRIN appear to have listened to these complaints and incorporated changes which make GRAW 2 a notable refinement.
Having tried the recent Multiplayer Demo, I was very impressed with GRAW 2. The sights, sounds and gameplay are all much more carefully balanced than the average multiplayer game to be enjoyable and playable, while still keeping the game firmly rooted in the concept of rewarding the use of tactics and the right weapons rather than blindly running around firing at anything that moves. The single player campaign in the full version of the game also seems to be quite fun to play through, though multiplayer is where the game shines.
The game engine is much the same as that used in the first GRAW, however it too has been improved noticeably. Not only does it look better than the original GRAW, it also seems to have quite reasonable performance at maximum settings on most recent machines. However for those with older machines, not to mention people who want to know what all the settings do, and how best to adjust them for optimal FPS and gameplay advantage, I've prepared this guide. Spread throughout this guide are a range of tweaks, tips and tidbits which should please even the most die-hard Ghost Recon fan, as well as satisfying the curiosity of those completely new to the game. Give it a good go-through and see what you find.
Note: This guide refers to the latest version of GRAW 2 Version 1.05. Make sure to refer back to this guide as it will be updated regularly.
Before getting into any game-specific settings and tweaks, this section covers the obligatory system optimization information I include in all my guides. If you've followed this advice recently, you can skip this section.
Many people report problems with this game and in almost all cases these are due to general system issues and not the game itself. With that in mind I strongly urge you to take some time and follow the advice below if you truly want this game, and indeed every other game you own, to run at its fastest and most trouble-free.
The place to start is my free TweakGuides Tweaking Companion. It is the complete system optimization guide for Windows users. Designed for novice and advanced users alike, it is written in plain English to help you genuinely understand all aspects of Windows and your PC. The guide covers every major topic, from the correct installation of Windows and critical drivers and software, through to recommendations for every significant setting and feature, all the major performance and convenience tweaks and customizations, as well as detailed troubleshooting advice. There are also links to a range of reliable free applications for optimizing and maintaining your system, as well as to important resources for finding out even more about Windows and your PC. There are two separate versions: one for Vista and one for XP.
If you've ever wondered what common graphics and display settings like FPS, VSync, Refresh Rate, Antialiasing and Anisotropic Filtering are, and how they really work, then check out my Gamer's Graphics & Display Settings Guide for all the details in an easy to understand format. The guide also gives you a rundown on exactly how a game goes from a being a set of files on your hard drive to a 3D image on your screen, including relevant performance tips.
Finally, if you run an ATI or Nvidia graphics card, I have written two comprehensive guides which you should check out: the ATI Catalyst Tweak Guide and the Nvidia Forceware Tweak Guide. These guides cover absolutely everything about the latest graphics drivers, how to set them up correctly, as well as advanced tweaking, overclocking and benchmarking tips. They're a must-read for configuring your graphics card correctly.
The above information really will serve you well in the long run, not just in this game. If you don't optimize your system and keep everything updated and maintained correctly you will keep running into "mysterious" problems time and time again. Do yourself a favor and when you get a chance spend an afternoon or two optimizing your machine the right way with the guides above.
The next section goes into more detail about specific troubleshooting tips which address common performance issues with the game.

This section contains specific troubleshooting tips which address many of the common problems experienced by GRAW 2 players. Make sure to go through all of the advice below if you're having problems with the game.
Official Support: The first place to look for official support information is on the Ubisoft Support Site, which contains answers to many common problems. Also make sure to read the game's ReadmeENG.txt file and the game's manual, both found under the \Program Files\Ubisoft\Ghost Recon Advanced Warfighter 2\Support\Manual\ directory, as they contain a lot of useful information. If these don't help you, try the Official GRAW Forums or the GhostRecon.net GRAW 2 Forum for community support and information.
Note that the first time you start GRAW 2, you will see a dialog box which tells you whether all the components of your system meet GRAW 2's requirements. This program can be found under your \Program Files\Ubisoft\Ghost Recon Advanced Warfighter 2\Support\Detection\ directory and is called Detectionui_r.exe - you can run it at any time. If there are any red crosses against any component, investigate further. To see the exact minimum requirements for each component, left-click on the component's name (e.g. left click once on CPU Frequency and look at the bottom of the box for details). At times this application can mis-detect some newer hardware or software components, so as long as you're certain your hardware is higher than the minimum, and your drivers are the latest available, you should be fine.
Game Bugs: There are currently a range of known bugs for GRAW 2, including things like a lack of Dynamic Shadows on some graphics cards using certain driver versions; sound issues; tagging issues in Deathcam mode; and some unexplained crashing. These can only be fixed via patches, so keep an eye on page 4 of the guide for details of patches as they are released.
Windows Vista/7 Users: If you're having problems running this game under Windows Vista or 7, first make sure that you're using the latest graphics and audio drivers for your hardware, and the latest version of this game (see page 4 for patch details). Next, make sure you don't change your UAC settings after the game has been installed, as due to Virtualization this can change the location of the game files and settings. If you can't launch the game successfully when UAC is enabled, you will need to run the game with full Admin privileges. To do this either right-click on the launch icon and select 'Run as Administrator', or right-click on the launch icon, select Properties and under the Compatibility tab tick 'Run this program as an administrator' then click OK. I strongly recommend that you refer to the TweakGuides Tweaking Companion for more information.
Ageia PhysX Drivers: GRAW 2 requires the 7.05.17 Ageia PhysX Drivers or newer to work properly, even if you don't have an Ageia PhysX card or an Nvidia PhysX capable GPU. You can attempt to install the latest version of the PhysX drivers - which are included in the latest Nvidia graphics drivers and automatically installed, or available as a separate download here.
Sound Problems: See the Audio settings in the In-Game Settings section first. If you are having audio problems, then aside from making sure you're using the latest audio drivers for your sound card, GRIN recommends that you set the audio renderer to 'General Software'.
Mouse/Keyboard Lag: Typically the most common cause of mouse or keyboard lag is low framerates, so check your framerate using FRAPS and if it dips into the low teens or below then you will start getting noticeable control lag - lower various settings such as Resolution and/or Texture Quality and/or Post Effects for example to improve framerate.
Background Programs: Disable all background applications - especially virus, trojan and spyware scanners and messaging utilities. These applications can and do use up valuable CPU resources, take up precious RAM, cause memory conflicts and crashes to desktop, but most importantly they interfere with read/writes to your hard drive effectively slowing it down and causing even more in-game freezes and longer loading times. Full instructions on how to identify your startup programs and services and how to correctly disable unnecessary ones are in my TweakGuides Tweaking Companion. This is an important step you should not miss.
Overclocking: If you've overclocked any components on your system and are having problems such as crashes, reboots or graphical anomalies, the first thing to do is set everything back to default speeds and try running the game. If you don't experience the same problems at default speed, or they're reduced in severity, then your overclock is the primary culprit. Either permanently reduce your overclock and/or increase cooling to regain stability. Don't assume that because other games run with stability at a particular speed that GRAW 2 will do the same.
There are obviously many more problems people are experiencing with the game, but most of these are due to a lack of system optimization. GRAW 2 is based on a relatively solid and optimized game engine. In general the game can and does run with stability on a system which isn't overly stressed and poorly optimized. If you don't spend the time to optimize your PC, cool it properly, reduce/remove your overclocks, and select appropriate settings then you will experience more crashes, freezes etc. I once again strongly suggest reading the free TweakGuides Tweaking Companion at the very least if you want to resolve most issues with this and any other game.
That's just a basic rundown of troubleshooting tips. Read the remainder of this guide for more specific settings and tweaks which can help improve your performance and resolve any problems.
Official Patch
In what is likely to be the last patch for GRAW 2, a 1.05 Patch has been released with a range of changes as detailed here. This patch is recommended for all GRAW 2 MP players, and note that using this patch removes your campaign saved games, but leaves fixed save points intact.
Since the game is designed to detect and ask you to download relevant updates when you are connected to the Internet, both the developers and I recommend that you allow the game to patch itself this way rather than manually patching it yourself. Any patches downloaded through the auto-updater can also be found under your \Program Files\Ubisoft\Ghost Recon Advanced Warfighter 2\ directory if you wish to back them up.
As more patches are released, I will update this section to inform you of them so check back here regularly for details.
No-CD Patch/Copy Protection
In a move which is sure to please all GRAW fans, Ubisoft have decided not to include a disk check for the game. This means that you do not need to keep your original DVD in the drive, whether you want to play multiplayer or singleplayer. Since the multiplayer component of the game is protected via the requirement for a valid CD key, as long as you're using a legitimate copy of the game then you will not be bothered by any intrusive copy protection measures in GRAW 2. Kudos to Ubisoft for taking this step.

In-Game Advertising
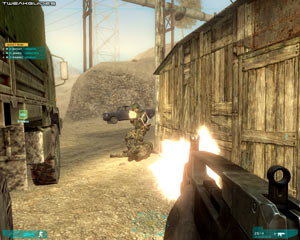
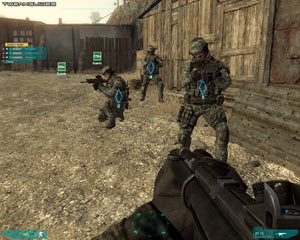
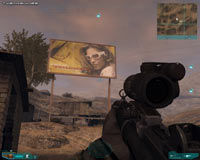
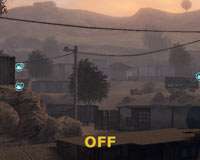
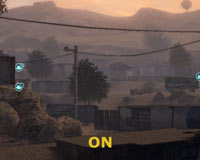
It appears that GRAW 2 has an in-game advertising system, judging by the ad billboards founds in several maps for example (see screenshots above). This is confirmed by the line <advertisements value="true"/> found in the context.xml file under the \Program Files\Ubisoft\Ghost Recon Advanced Warfighter 2 directory. However in general I have not found many real or intrusive advertisements in the live multiplayer maps as yet, so perhaps the system hasn't been switched on or fully populated with real ads for the moment. I will provide more details of precisely what this ad system entails as I investigate the full version of the game further.
Modifications
As of the 1.03 Patch, GRAW 2 now provides official support for modifications. You can access the GRAW 2 Editor by running the GRAW2_Editor.bat file found under the main GRAW 2 directory. Other modding tools are under the Program Files\Ubisoft\Ghost Recon Advanced Warfighter 2\public_tools directory. Importantly, tutorials on how to use the editor and the tools are found under the \tutorials directory, and should be read first before attempting any modding.
For the moment, if you want to download mods such as custom maps for GRAW 2, check the Downloads section of GhostRecon.net.
As more information comes to hand on prominent mods you can download for use with GRAW 2, I will provide them here.
The next section of the guide looks at the In-Game Settings for GRAW 2.
In this section I provide full descriptions for the in-game settings of Ghost Recon: Advanced Warfighter 2. I cover the visual and general performance impact of each setting, however bear in mind that it is impossible for me to give precise performance impacts - it all depends on your specific hardware combination and your other game and system-wide settings. The main aim is to show you what the settings do and let you decide what best suits your circumstances and tastes.
To access the in-game settings, click the Options link at the bottom of the main screen. Each section is covered in detail below:
Game Difficulty
At the top right of the Options box you can select the level of difficulty for the singleplayer campaign. The available options are Easy, Normal, Hard and Hardcore. The setting controls how challenging your enemies will be, including their accuracy and tactics, in the single player Campaign mode. It does not apply to the multiplayer component of the game.
SaveGames
This section lists all the games you have saved while proceeding through the single player campaign, as well as set saved points which the game autosaves as you proceed through the campaign. You can select to load one up at any time, or delete certain saves. It does not apply to the multiplayer component of the game.
Game
3D Mouse Sensitivity: This setting controls the sensitivity of your mouse while actually playing the game in 3D mode. It does not affect mouse sensitivity in 2D menus and interfaces (see Mouse Pointer Sensitivity below). The more to the right the slider is moved, the more sensitive your mouse will be to movements. Has no impact on performance so set to suit your taste.
Mouse Pointer Sensitivity: This setting controls the sensitivity of your mouse only while in the game menu screens and other 2D interface screens. The more to the right the slider is moved, the more sensitive your mouse will be to movements while moving around 2D screens. Has no impact on 3D mouse sensitivity or performance so set to suit your taste.
Invert Mouse: This controls whether moving the mouse forward will make your character look down (ticked) or up (unticked). Set to suit your taste, has no impact on performance.
Auto Reload: If ticked, as soon as your character runs out of bullets, he will automatically reload a new magazine of ammunition if available. Has no impact on performance, and there should be no reason to untick this, except perhaps to enhance realism.
Zoom Toggle: If ticked, when you select zoom mode on applicable weapons, you stay zoomed until you again click the zoom button. If unticked, you will only stay zoomed as long as you hold down the zoom button. Set to suit your taste, has no impact on performance.
Target Markers: If ticked, all tagged enemies will be flagged as red diamonds on your screen, even if they're not currently visible (See Conclusion section for more details on tagging). This applies to both singleplayer and multiplayer, and if disabled puts you at a great disadvantage. It has no impact on performance so it is strongly recommended that you leave this enabled.
Show Hit Indicator: If ticked, when you are being hit by enemy fire your HUD shows the general quadrant from which it came. You can disable this for greater realism, but it has no performance impact and is best left enabled.
Voice Quotes: This option controls the voice snippets you hear from teammates responding to your commands for example.
Sticky Peeking: If enabled, whenever you press the peek left or peek right button, you will remain in that position until you again press the same or opposite peek button. If unselected, you only peek left or right for as long as you continue holding down the relevant peek button.
Controls
This section has eight separate sub-areas for assigning the specific control key/mouse buttons you want to use for particular actions in the game: Movement, Combat, Tactical Map, Unit Selection, Singleplayer, Multiplayer, Chat and Misc. You should go through and set each to suit your taste.
Some important things to note here:
Refer to the Advanced Tweaking section if you want details of how to change key bindings manually, though it really shouldn't be necessary. For a range of gameplay tips which will help you better understand the importance of certain controls, see the last page of this guide.
Video
Aspect Ratio: The aspect ratio setting relates to the ratio of the width to the height of your monitor and/or desired resolution (see below). It can also restrict the resolutions you can choose from if the 'Show All Resolutions' option is unticked (again, see below). For example a resolution of 1024x768 has a 4:3 aspect ratio. Typically you should select the aspect ratio which matches your monitor's maximum resolution, as this is the correct aspect ratio for your monitor size. Standard CRT monitors are usually 4:3, most standard LCD monitors are 4:3 or 5:4, and widescreen LCD or Plasma monitors are 16:9 or 16:10. The best way to know if you have the correct aspect ratio is to look at round objects in the game (e.g. your sniper sights or car wheels) - they should appear perfectly round, not oval.
Resolution: This setting allows you to select the resolution of the game image, measured in pixels wide by pixels high. For example 1280x1024 means 1,280 pixels wide by 1,024 pixels high. The higher the resolution, the more detailed the image on screen, and importantly the less jagged lines there will be (also see Antaliasing further below), but the lower your performance. For more details see the Resolution section of my Gamer's Graphics & Display Settings Guide. The number of resolutions available here are limited by what both your graphics card and monitor can handle, and the Aspect Ratio setting covered above (unless 'Show All Resolutions' is unticked).
Note for Widescreen users: The retail version of GRAW 2 now supports proper widescreen resolutions without cutting off any part of the image.
Refresh Rate: Refresh Rate is covered in detail on this page of my Gamer's Graphics & Display Setting Guide. Once you've selected your desired Aspect Ratio and Resolution, you should select the highest available refresh rate here for optimal viewing. If you're having problems with choosing a refresh rate you know is supported by your monitor but is not displayed here, see the Advanced Tweaking section.
Fullscreen: If ticked, this option forces GRAW 2 to run in full screen mode. If for some reason you wish to run the game in a window on your Windows Desktop, then untick this option. In general for stability and performance I always recommend full screen mode, as there can be memory and resource management issues when a game is run in windowed mode.
Show All Resolutions: As discussed under Aspect Ratio further above, if ticked this option determines whether all supported resolutions on your monitor are displayed irrespective of the Aspect Ratio you've chosen. Usually if this option is not ticked, only the resolutions which match the Aspect Ratio selected will be shown. I recommend leaving this unticked at first, selecting your Aspect Ratio and Resolution, and only if you can't find the right supported resolution should you tick this option. If this still doesn't work, check the Advanced Tweaking section for other ways of possibly forcing another resolution.
To access the following settings you will need to click the 'Show Advanced Settings' button at the bottom of the Video options screen.
Brightness: This slider controls how bright or dark the in-game image will be. It has no impact on performance so set to suit your taste.
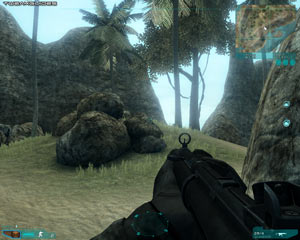
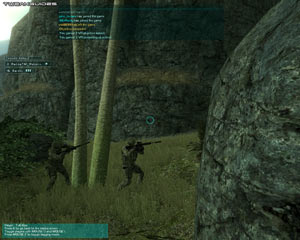
Environment Detail: This slider determines the level of detail in the general environment, but the main impact it has is on how much grass is displayed. You can see an animated visual comparison of Environment Detail by clicking this link: GRAW2_EnvDetail.gif (588KB). Since grass can reduce performance, lowering the slider from 1.00 towards 0.00 will improve FPS at the cost of a minor drop in the level of realism. More importantly, by removing grass you can gain a legitimate gameplay advantage in multiplayer, since enemies cannot hide in grass for example.
Physics: This setting determines the level of physics interactions in the game. If you do not have a PhysX-capable Card, then the only available option is Normal. If you do have a PhysX-capable card, then you can select PhysX High or PhysX Extreme. At these higher settings, physics effects such as explosions, debris and particles are much more detailed and realistic, and certain objects are destructible, however it is at the cost of some reduction in performance. A comparison of PhysX effects in GRAW 2 is provided here. In general given hardware PhysX physics is not utilized in multiplayer mode (to maintain fairness), non-PhysX owners will experience quite good physics effects even at Normal, and PhysX owners should only enable the higher settings for single player mode.
Note that even if you don't have a PhysX-capable card on your system, you can still enable some of the advanced physics effects - see the Advanced Tweaking section for details. Also note that GRAW 2 has to install the PhysX drivers for the game to work properly regardless of whether you have a PhysX-capable card or not. Don't uninstall this driver. If you have problems with the physics or the installation of these drivers, see the Troubleshooting Tips section of the guide.
Update: GeForce 8 series and newer owners can now access the enhanced effects of the PhysX High or PhysX Extreme settings in GRAW 2 with improved performance courtesy of GPU-based PhysX and the latest GRAW 2 1.05 Patch. Full details of how to enable and configure GPU-based PhysX are on this page of the Nvidia Forceware Tweak Guide.
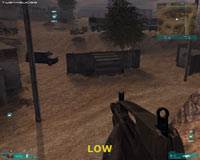
Texture Quality: Textures are the 2D surfaces on all 3D objects in the game. This setting controls how detailed the surfaces of objects will appear in the game. The higher this setting, the crisper and clearer surface textures will be, at the cost of reduced performance and more likelihood of loading pauses/stuttering as you walk around and see new objects/characters. There are three settings here: Low, Medium and High, though note that unless your graphics card has 512MB of Video RAM or more, then you will not see the High option by default - see the Advanced Tweaking section for another way of forcing High texture quality. For an animated visual comparison of texture quality, click this link: GRAW2_Textures.gif (641KB). Pay attention to the details on the ground, the pole to the right, and the weapon - these become noticeably blurry at Low.
The next section continues the look at the in-game settings and their impact.
Texture Filtering: This setting controls the way in which textures appear clearer and crisper as they fade into the distance. The available options here are Trilinear, Anisotropic 4x, Anisotropic 8x and Anisotropic 16x - though note that 16x Anisotropic may not be available on all cards. For more details see the bottom of this page of my Gamer's Graphics & Display Settings Guide. Each higher level of texture filtering progressively improves image quality, but reduces performance. The precise performance impact depends on factors including how recent your graphics card is, the resolution you are using, and how much Video RAM it has. The newer the graphics card and the higher the model, as well as the more Video RAM you have, the less noticeable the reduction in performance there will be, especially at higher resolutions. For the most part there shouldn't be a major performance impact so try at least Anisotropic 4x unless you're struggling for FPS on an older card, in which case just choose Trilinear as that is the lowest possible. Finally, make sure that if you have selected any level of Anisotropic Filtering here, that you do not also force AF for GRAW 2 in your graphics card's control panel - use one or the other, not both.
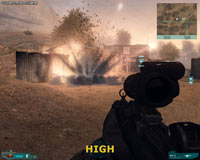
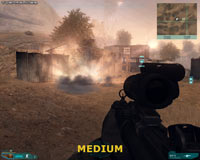
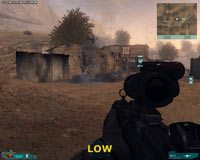
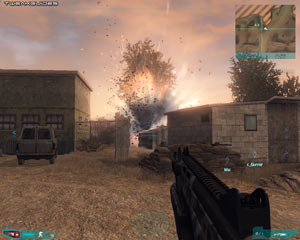
Effects Quality: This setting controls the detail level and richness of special effects in the game, like explosions and smoke. The available options are Low, Medium and High. See the screenshots above for a comparison of the different levels, though in reality the difference is hard to capture in screenshots. At the Medium and High levels, the effects quality appears almost identical; however at Low any heat distortion and much of the glare around the grenade explosion is absent. In other circumstances, things like particle effects (smoke, dust, etc.) will be reduced in quality when set to Medium or Low. For example the smoke from smoke grenades, while still serving its purpose of obscuring the view, will appear much more generic and not as realistic when Effects Quality is set to Low. The lower your setting here the better the FPS you will have in situations where such effects are used, in particular during heavy combat scenes.
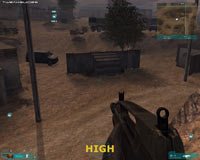
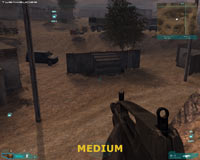
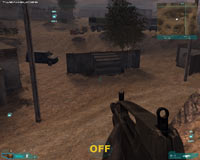
Dynamic Shadows: This setting controls the way in which certain objects cast realistic moving shadows based on light sources such as the Sun. The available options are Off, Low, Medium and High, and you can see a screenshot comparison of all four settings above. At both High and Medium, the poles, trees, van and barrels all cast shadows, though at Medium the shadows are slightly less distinct than at High because the game uses 1024x resolution Shadow Maps rather than 2048 resolution (See Advanced Tweaking section). However at Low the van, barrels and trees no longer have a shadow. At Off all dynamic shadows are removed, and only fixed shadows for static objects such as buildings and rocks remain. Reducing dynamic shadows will help improve FPS without a major sacrifice in realism.
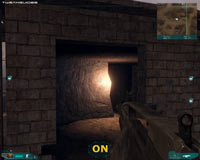
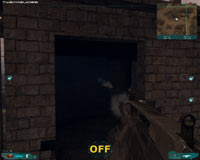
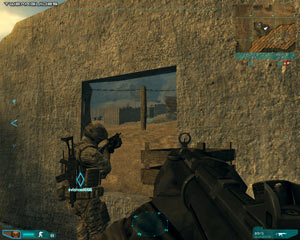
Dynamic Lights: If ticked, certain light sources (excluding the Sun) will react dynamically with the environment, increasing realism but reducing performance when such lighting is visible. For an example, see the screenshot comparison above. On the left, with Dynamic Lights On (ticked), the muzzle flush is clearly lighting up the inside of the darkened room. With Dynamic Lights Off (unticked), the muzzle flush doesn't light up the surrounding area. While best enabled for realism and possible gameplay advantage, you might have to to disable this option to improve framerates/prevent slowdowns in scenes with lots of gunfire or explosions.
Post Effects: This setting controls the quality of the lighting and the general atmosphere of the game. The available options by default are Low or High, however you can also turn Post Effects Off - see the Advanced Tweaking section for details. To see the difference between these three levels of Post Effects, examine this animated screenshot comparison: GRAW2_PostEffects.gif (494KB). Note that at Off the lighting is at its most basic; at Low the scene is more brightly lit and there's enhanced color to the lighting; at High the difference is very noticeable as the High Dynamic Range (HDR) lighting makes things slightly blurry and atmospheric. If you want the highest possible FPS, or perhaps the greatest advantage in spotting distant enemy in multiplayer, Off or Low Post Effects are best. However if you want more atmosphere in the game, and you also want to reduce the shimmering and appearance of jaggedness, I recommend High. The FPS impact should be minimal on higher-end graphics cards.
Anti Aliasing: Just as with the first Ghost Recon: Advanced Warfighter game, GRAW 2 uses a Deferred Lighting method which is incompatible with traditional Antialiasing. You cannot force Antialiasing for GRAW 2 in your graphics card control panel for example, nor should you, as this only causes problems. Fortunately, aliasing - the presence of jagged outlines - is far less pronounced in GRAW 2, as long as you have Post Effects set to High (see further above). For those who use Low Post Effects, or still find the presence of any jaggedness annoying, this setting allows you to select 'Edge Smoothing', to reduce the impact of jaggedness on screen. A screenshot comparison of a portion of the screen is provided above, however for the most part all this setting does is add blurring to the scene at the cost of quite a few FPS, even on high-end graphics cards, so I generally recommend leaving it at Off and setting Post Effects to High for a better overall result both in terms of image quality and performance.
Update: Nvidia users can now attempt to force proper Anti Aliasing in GRAW 2 using the instructions in this post on the GhostRecon.net forums. The improvement is noticeable, but the FPS impact can also be quite significant depending on the AA mode you use.
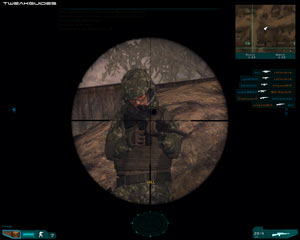
As a final note about the graphics, it should be understood that there is a limited draw distance for certain objects. In particular this means that beyond a certain distance you cannot see any friendly or enemy characters; they will be 'invisible'. You can see their muzzle flash if they fire, but that's it. This is done on purpose, and the draw distance can't be changed. It is fair in that if you can't see them, they can't see you. But it is worth keeping in mind especially if you play as a sniper.
Make sure to click the Apply button at the bottom left of screen to implement your video settings before moving on to the other options.
Audio
Master Volume: This slider controls the overall volume level in the game. It has no impact on performance, however I recommend initially adjusting the volume sliders for Music and Sound Effects separately (see below) before altering this. I've found that moving this slider in the game changes your global Windows volume as well, so it is best left unaltered.
Renderer: The audio renderer is the device the game uses to play back sound and music. Your default sound output device (usually a specific sound card) should be shown here, though in some cases it may not be available. If not, make sure your device is setup correctly in the Windows Control Panel, and make sure to install the latest audio drivers for the sound device (See the Essential Optimization section). If you have an unknown sound device, or have audio glitches, or there are no other hardware options, you should select Generic Hardware. If Generic Hardware is not available to you, or it causes audio glitches, for fastest performance on lower-end sound devices, select Generic Software. Depending on the device you choose here, your options may be limited in the Quality setting below.
Note that GRAW 2, just like the original GRAW, uses the OpenAL sound API. This means that you will have access to full hardware acceleration under Windows Vista/7.
Quality: The audio quality for the game is determined here by selecting either Low, Medium, High or Extreme. Depending on your sound card capabilities, the High or Extreme settings may not be shown. At the Low setting, up to 20 separate audio channels are required. At Medium, up to 32 are used. At High up to 64 channels are utilized, and at Extreme, only sound cards which can process 128 Channels will be allowed to see and choose this mode - namely cards like the SoundBlaster X-Fi. You cannot force your sound card to use more channels than it can physically output, so check your sound card's specifications. In general the greater the number of channels, the better the audio quality in return for lower FPS and potentially more frequent stuttering/loading pauses.
To access the following settings you will need to click the 'Show Advanced Settings' button at the bottom of the Audio options screen.
Music Volume: This slider controls the volume level for music in the game, and can be adjusted to suit your taste as it has no performance impact.
SFX Volume: This slider controls the volume level for all the various special effects in the game, and can be adjusted to suit your taste as it has no performance impact.
EAX Enabled: If you have an EAX (Environmental Audio)-capable sound card, you can tick this option to provide more realistic 3D sound positioning and better sound effects. While giving you a gameplay advantage in terms of providing better audio position, EAX can reduce performance on some sound cards, and can also cause audio glitches. If you're having sound issues, untick this option and restart the game to see if it helps resolve them.
Make sure to click the Apply button at the bottom left of screen to implement your audio settings before moving on to the other options.
The next section looks at the Advanced Tweaking possible for GRAW 2.
This section covers a range of things you can do outside of the in-game settings to further customize the game.
To access the advanced settings for GRAW 2 you will first need to go into your \Program Files\Ubisoft\Ghost Recon Advanced Warfighter 2\ directory. Under there, in the \Data\Settings subdirectory is renderer_settings.xml, the file containing your Video-related settings, and sound_settings.xml, the file containing your audio settings. Under the \Settings\profiles\[profilename] directory (or \Users\[username]\AppData\Local\GRAW2\ in Vista) are your key bindings (bindings.xml) and general game settings (settings.xml). We will examine the most useful of these files and settings further below, though note that any settings which can be fully changed within the in-game menus will not be covered again below - you should alter them from within the game.
Note: As of the 1.03 Patch, the files hud_visibility.xml and hud_palett_2.xml have been added under the Program Files\Ubisoft\Ghost Recon Advanced Warfighter 2\Settings directory. These are covered further below.
To edit these .xml files, open them with Windows Notepad or a similar text editor. Don't just double-click on them as they will open in your Internet browser where you cannot alter them; right-click on them and select 'Open With>Notepad'. And of course, before making any alterations to any of these files, make a backup of each first.
Renderer_settings.xml
resolution = "1280 1024"
This line determines your resolution as per the Resolution setting in the in-game Video options. However if you want to set a custom resolution - as long as you know it is supported by your display - then enter it here in "width height" format. It may only work in windowed mode however.
refresh_rate = "60"
This line determines the refresh rate for your particular resolution. The default is 60Hz, however you can choose a higher one as long as you are absolutely certain your display device supports that particular refresh rate at your chosen resolution. Setting a refresh rate which is too high for your display will result in a black screen on loadup.
<variable name="post_effect_quality" value="off"/>
While you can set the Post Effects quality within the game, either to Low or High, here you can disable Post Effects altogether. To do so, set the value field to ="off" here, as shown above. This will remove the special lighting effects, giving starkly different visuals to that normally seen, in return for a significant performance boost on older graphics cards - see the In-Game Settings section for a visual comparison. Note that setting Post Effects to Off will mean that Night Vision will not work properly.
<variable name="shadow_map_size" value="2048"/>
This option determines the resolution of the Shadow Maps used in the game. If you want to improve performance at the cost of a reduction in the sharpness of the shadows, set this to a lower value such as 1024, 512 or even 256. For example you can choose High Dynamic Shadows to have all objects casting shadows, then lower the shadow map size here so that the performance hit is not as great.
<variable name="texture_quality_backdrop" value="high"/>
By default, if you don't have a graphics card with 512MB or more of Video RAM (VRAM) onboard, you will not be able to select High for the Texture Quality in-game video settings. However, if you want to force GRAW 2 to use High Texture Quality (See In-Game Settings for a visual comparison), regardless of your graphics card, set every variable starting with "texture_quality_" to have a value = "high". Alternatively, you can simply select particular visual components to assign a Texture Quality of High. For example, you may wish to only force high for characters, vehicles and weapons. Using High Texture Quality may cause a decrease in FPS, and more importantly an increase in loading times and in-level stutter, which is why it's normally meant for cards with higher amounts of VRAM.
Settings.xml
<has_physx value="false" />
<physics value="0" />
The settings above determine whether a system which has a PhysX card installed will show advanced physics effects in GRAW 2. However even if you don't have a PhysX card, you can enable some of the advanced physics effects (at the cost of a major drop in performance), by changing the above values to <has_physx value="true" /> and <physics value="1" /> (=1 for High Physics or =2 for Extreme Physics). Go into the in-game options, and under Video options you should see the relevant value in the Physics box (i.e. High or Extreme). To make sure the new setting is in force, change one of your graphics settings to another value, then back again to its original value, and click the Apply button which appears. You will now see enhanced physics effects in the game, but once again this comes at a significant performance cost, so it is generally not recommended.
<ret_color value="29 137 151" />
This option determines the color of your target crosshair in the game. The value shown is in RGB Color format, with the default being 29 137 151 which is an aqua blue. You can change this to any color you wish. For example, try 34 139 34 for a military green crosshair color.
Bindings.xml
<button id="detag" binding="2" device="mouse"/>
All the key bindings for your particular profile are held in the Bindings.xml file under that profile's directory. For the most part these can all be changed in the in-game settings options, however if any bindings are not listed in the Controls options, you can change them manually here. For example by default the button that the Scrambler class uses to detag friendly teammates (See the Conclusion section for more details on detagging) is the Mouse 2 button, which is the middle mouse/scroll wheel button. To alter this, you can change the binding="2" option above to 0 (left mouse button) or 1 (right mouse button), or a key - in which case you need to change device="mouse" to device="keyboard" as well.
hud_palett_2.xml
<xdefine name="A" value="0.9 0.67 0.25"/> <!--(RGB:230 171 64)-->
This file has been added as of the 1.03 Patch, and allows users to customize the color of the various HUD menus and text elements, similar to the way it is done for the target crosshair (see Settings.xml further above).
hud_visibility.xml
<hud_element name="health" alpha="1.0" />
This file has been added as of the 1.03 Patch, and allows users to customize the transparency of various HUD elements, such as the health bar (shown above), crosscom, minimap, compass, etc. Find the relevant HUD element you wish to change, and alter its alpha="1.0" value to a number between 0.0 (totally invisible) through to 1.0 (completely solid). Note that the enemy, friendly and objective markers can only be toggled between fully visible and invisible, and you can alter this by changing their visible="true" value to false, or vice versa.
Console Commands
To access the in-game console, during multiplayer any time after spawning press the O key (the letter O, not zero); alternatively type /open or /console in the chat area. A console prompt will show up at the very bottom of the screen, and you can enter one of the commands below. Note that only the first 6 commands below are available to players; the other commands are only usable by server administrators. The full list of known console commands is provided below:
/close - Close the console window
/help [command] - Show help for one or all of the commands
/list [nickname] - Lists all players and their #IDs, or any players with the specified nickname
/login <password> - Login as admin on the server
/maps - Displays the available maps on the server
/vote <type><name> - Start a vote of <type> on <name>
/ban <#n nickname>
/kick <#n nickname> - Kicks a player by #ID or nickname
/kill <#n nickname> - Kicks a player by #ID or nickname
/msg <message> - Displays a system message to all clients
/play_map <#> - End current match and start a new one on the selected map
/print [command] - Listing the current settings
/reload - Reload the map with the new settings
/restart_match - Restart the entire match
/screenshot <#n nickname> - Asks a client for a remote screenshot. Client is identified by #ID or nickname
/set_admin_password
/set_anticheat <0 / 1> - Set anticheat true/false
/set_balance <0 / 1> - Set balance team true/false
/set_balance_limit <#> - How many more players that can be in a team if balance is enabled 1-31
/set_clangame <0 / 1> - If the match is a clan game
/set_friendly_fire <0 / 1> - Set friendly fire true/false
/set_immortal_dur <#> - Set immortal duration 0-10
/set_match_points <#> - Set the match points
/set_match_time <#> - Set match time 0-99
/set_max_deaths <#> - Set number of deaths 0-10, 0=unlimited
/set_min_respawn_wait <#> - Set min respawn wait time 0-10 seconds
/set_motd
/set_password
/set_password_enable <0 /1> - Use server password true/false
/set_punish_tk <0 /1> - Set punish tk true/false
/set_punish_tk_limit <#> - Set # of tk before getting kicked 0-60
/set_server_name
/set_start_condition <#> - 1=All slots full, 2=All players, 3=Server Ready, 4=One per team
/set_switch_sides <0 / 1> - Set switch sides true/false
/set_vote_enable <0 / 1> - Set vote true/false
/set_vote_kick_starters <#> - Times allowed to start a kick vote in one round 1-60
/set_vote_ratio <#> - Set vote ratio 30-100
/set_vote_time <#> - Set time until vote is closed, 10-60 seconds
/set_win_condition <#> - Set the winning condition, 1-4 (HamburgerHill) or 5-6 (MPCoop)
/start - Starts a round if it has not yet begun
/unban <nickname> - Unbans a player with #ID or nickname
If you know any additional working console commands, please Email Me and I will include them in the list above.
The next page brings the guide to a conclusion, but not without providing some important tips and tweaks.
This page brings the guide to a conclusion with some useful gameplay tips and tweaks you should make sure not to skip.
Gameplay Tips
GRAW 2 is first and foremost a strategic shooter, so it's important to understand and successfully utilize all the main features of the game if you want to enjoy the experience. It can be very confusing for new players to figure everything out. The first place to look is in the GRAW 2 manual which can be found in your game box as well as under your \Program Files\Ubisoft\Ghost Recon Advanced Warfighter 2\Support\Manual directory. Below are some important tips you should keep in mind when playing the game:
That's just a summary of the more important gameplay tips. Obviously much depends on your particular gameplay style, however GRAW 2 is not the same as the Battlefield series, or Quake or Unreal Tournament, or even America's Army. It has to be played on its own terms, and requires some patience, tactics and thought otherwise you will spend a lot of time waiting to respawn, which can be very frustrating, particularly on servers with limited numbers of available respawns.
Practising in 'Offline Mode'
As part of learning to play the game, and acquainting yourself with the layout of the online maps, you can practice in 'Offline Mode', even though such a mode doesn't actually exist. The best way to do this is to go to the main menu screen and click the Multiplayer link. Now click 'Create Server', and on the next screen set the server type to 'LAN Server'.
To play by yourself, so that you can acquaint yourself with the layout of particular maps, add the maps you wish to play on. Making sure to only select a game mode such as rvsa (Recon vs. Assault), since you cannot play solo in game modes such as tdm (Team Deathmatch) - the map will load, but you will only have a few seconds before Victory is declared since there is no opposing team. At the bottom of this screen, make sure to uncheck the 'Balance Teams' box, then click 'Create Server'. When the map loads, select the Recon team, and your desired class, and now you can wander the map and practice using your weapons. This is a great way to familiarize yourself with the map layout and check out the various hiding spots and so forth.
To play against a range of 'bots' (computer-controlled enemy), follow the steps above, but instead select one of the coop maps. You will play alone against a range of hostile bots.
In either case while it is no substitute for playing against human opponents online, it can help give you an advantage by knowing all the details of the map layouts, and allows you to experiment with different weapons and tactics.
Skip Intro Movies
If you want to avoid having to click through all the introductory/logo movies each time you launch GRAW 2, follow these steps:
1. Go to your \Program Files\Ubisoft\Ghost Recon Advanced Warfighter 2\Data\movies\ directory.
2. Rename the following .bik files or move them to another directory (e.g. create a new subdirectory and move them there) - I don't recommend deleting them: ESRB.bik, graw2_trailer.bik, grin_logo.bik, SIGNATURE.bik and ubi_presents.bik.
3. Now download the following archive containing blank movie files - each one is a blank .bik movie, not just a renamed .txt file: SkipIntro_GRAW2.zip (3KB). Extract the contents into the directory at step 1 above.
The next time you launch GRAW 2, after the initial splash screen it will reach the main menu after a brief period. Note that if you don't use the blank movie files above and you simply delete or rename the existing movie files, you will reach a black screen at startup which requires that you click your mouse several times to reach the main menu, otherwise you will simply sit at a blank screen for quite a while. That is why the method above is a neater solution.
Vertical Synchronization
By default, Ghost Recon: Advanced Warfighter 2 seems to run with Vertical Sync disabled. While this provides optimal performance, it can result in 'tearing', which some people find annoying. Since there is no option to enable VSync in the game, you can only enable it via your graphics card's control panel. However as soon as you enable VSync, your framerate can drop by as much as 50%. If you do want to enable VSync, I strongly encourage you to also enable Triple Buffering to prevent this drop in frame rate. More details can be found in the Triple Buffering section of my Gamer's Graphics & Display Settings Guide.
Checking FPS & Recording Videos
There is no way to check your framerate in Ghost Recon: Advanced Warfighter 2, so if you want to measure your FPS, you should use the latest version of the free FRAPS utility. Not only does FRAPS allow you to check FPS, you can also take screenshots and capture video footage, such as these GRAW 2 Gameplay Videos I made using Fraps.
Single vs. Dual Core CPUs
GRAW 2 is optimized for dual-core CPUs. As such, if you are running a single core CPU, there will be a noticeable performance disadvantage compared to a system which has a dual or multi-core CPU. If you're considering upgrading your system, keep this in mind as more and more games now take advantage of dual core CPUs.
Conclusion
That brings the guide to a conclusion. The guide was originally written for the demo version, but has been updated for the full version which is almost identical. I hope you found the guide useful, and if you have any additional working tweaks or tips or corrections you think might be useful, please email me with the details. Please keep in mind that I can't provide any personal tech/tweak support under any circumstances.
Until next time, take care!

 EA E3 2015 conference reaction
 Bloodborne guide part 05: Cathedral Ward and Old Yharnam
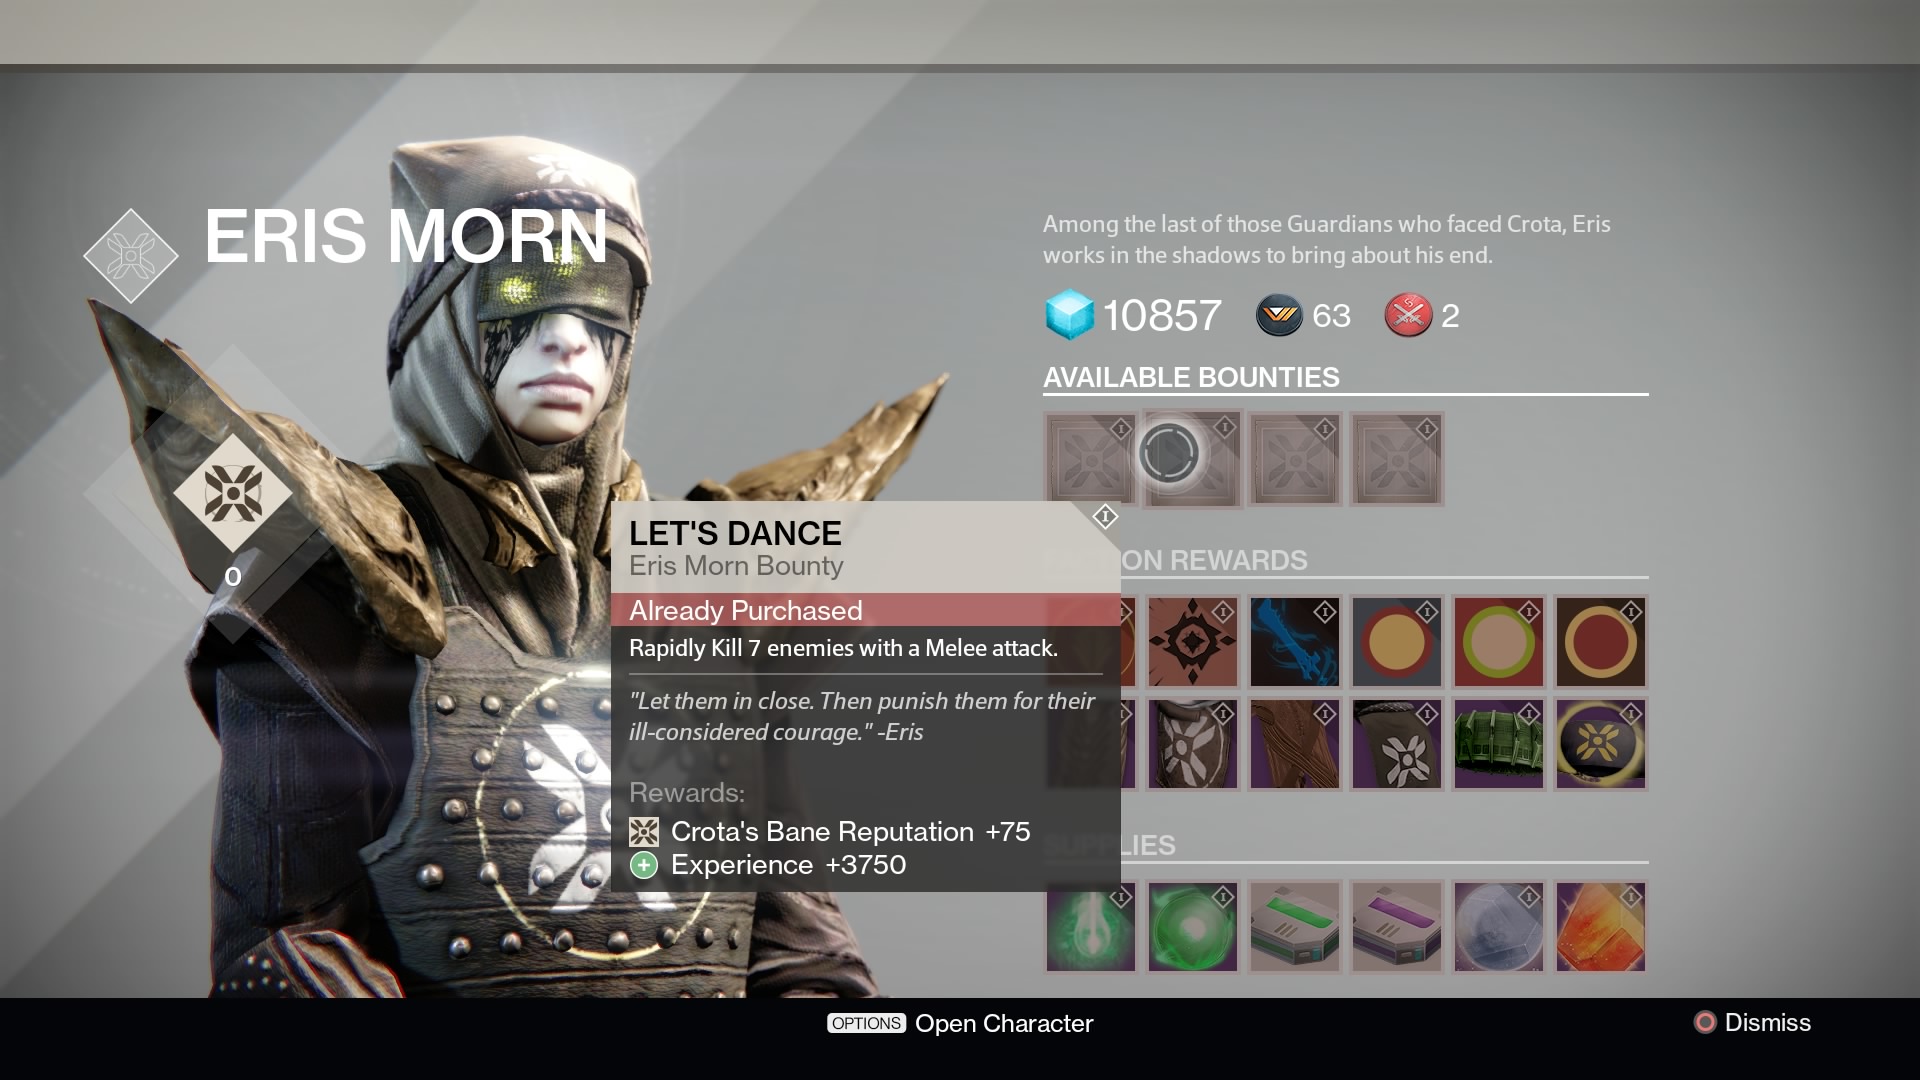 Destiny guide: how to access The Dark Below quests and content
 How To Play Old Games on Vista and Windows 7- 64 Bit Windows to 16 Bit Earthsiege II
 Pokemon X & Y Guide: Pokemon in Route 8 - Muraille Coast - GamersHeroes