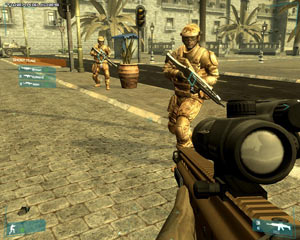
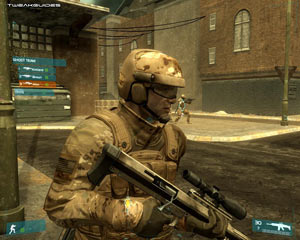
Ghost Recon: Advanced Warfighter (GRAW) is generaly classified as a 'tactical shooter', or perhaps more accurately as a 'squad-based tactical shooter'. I first encountered this type of game when I played the original Rainbow Six on my Nintendo 64 back in 1999. I recall it was quite a complex affair coordinating my squad using waypoints, instead of running in guns blazing. It was definitely a new concept in gaming for its time, and for some reason using a console rather than a PC didn't cause me any problems. I do however recall clearly that I eventually got quite tired of the planning and the tactics and left Rainbow Six uncompleted. I just didn't have the necessary patience, but more than that, something about it was just too simplistic and sterile for my liking.

Fast Forward to 2006 and we now have a highly refined and evolutionary product of what Rainbow Six began - Ghost Recon: Advanced Warfighter. GRAW continues in the tradition of other Tom Clancy games including the original Ghost Recon, as well as the Rainbow Six series. The aim is still to control a small elite squad through a series of missions using strategy and teamwork. While it's done in a first-person style (no third person in the PC version) primarily from the squad commander's point of view, you can give detailed commands to each of your men to guide them to achieve the objective.
However Ghost Recon: Advanced Warfighter is different from the previous incarnations of this genre. For better or worse, Ubisoft have recognized that today's gamer is an eye-candy junkie, and needs the sights and sounds of a game to be convincingly realistic for them to achieve proper immersion. This is probably the "something" which I felt was missing from the previous games. In any case GRAW definitely kicks the graphics up several notches, and then puts in place support for advanced physics effects using the recently-released Ageia PhysX card for those who want even more realism, and seals the deal with some very realistic sound effects.
And here's where we run into some difficulties. Given the type of eye candy GRAW uses, there are already many complaints about the lack of Antialiasing to smooth out the jagged lines. There are issues around the way the game prevents all but the latest 512MB graphics cards from using High Quality textures, and of course there are the usual issues around low framerates, mouse lag, crashing and so on. I've prepared this guide as a means of covering all these issues and providing all the known tweaks and solutions in one central source. Give it a read through and see if it helps you get more enjoyment out of the latest tactical shooter to hit the streets.
Note: This guide refers to the latest version of GRAW Version 1.35. Make sure to check back regularly for updates.
Before getting into any game-specific settings and tweaks, this section covers the obligatory system optimization information I include in all my guides. If you've followed this advice recently, you can skip this section.
Many people report problems with this game and in almost all cases these are due to general system issues and not the game itself. With that in mind I strongly urge you to take some time and follow the advice below if you truly want this game, and indeed every other game you own, to run at its fastest and most trouble-free.
The place to start is my free TweakGuides Tweaking Companion. It is the complete system optimization guide for Windows users. Designed for novice and advanced users alike, it is written in plain English to help you genuinely understand all aspects of Windows and your PC. The guide covers every major topic, from the correct installation of Windows and critical drivers and software, through to recommendations for every significant setting and feature, all the major performance and convenience tweaks and customizations, as well as detailed troubleshooting advice. There are also links to a range of reliable free applications for optimizing and maintaining your system, as well as to important resources for finding out even more about Windows and your PC. There are two separate versions: one for Vista and one for XP.
If you've ever wondered what common graphics and display settings like FPS, VSync, Refresh Rate, Antialiasing and Anisotropic Filtering are, and how they really work, then check out my Gamer's Graphics & Display Settings Guide for all the details in an easy to understand format. The guide also gives you a rundown on exactly how a game goes from a being a set of files on your hard drive to a 3D image on your screen, including relevant performance tips.
Finally, if you run an ATI or Nvidia graphics card, I have written two comprehensive guides which you should check out: the ATI Catalyst Tweak Guide and the Nvidia Forceware Tweak Guide. These guides cover absolutely everything about the latest graphics drivers, how to set them up correctly, as well as advanced tweaking, overclocking and benchmarking tips. They're a must-read for configuring your graphics card correctly.
The above information really will serve you well in the long run, not just in this game. If you don't optimize your system and keep everything updated and maintained correctly you will keep running into "mysterious" problems time and time again. Do yourself a favor and when you get a chance spend an afternoon or two optimizing your machine the right way with the guides above.
The next section goes into more detail about specific troubleshooting tips which address common performance issues with the game.

This section contains specific troubleshooting tips which address many of the common problems experienced by GRAW players. Make sure to go through all of the advice below.
Official Support: The first place to look for official support information is on the Ubisoft Support Site, which contains answers to many common problems. In particular, check the game's minimum requirements as they are quite steep, and if you don't meet them (or barely meet them) then you will experience poor performance and/or glitches. If these don't help you, try the Official GRAW Forums or the Ghost Recon.net Forums for community support and information.
Windows Vista Users: If you're having problems running this game under Windows Vista, first make sure that you're using the latest Vista graphics and audio drivers for your hardware, and the latest version of this game (see page 4 for patch details). Next, make sure you don't change your UAC settings after the game has been installed, as due to Virtualization this can change the location of the game files and settings. If you can't launch the game successfully when UAC is enabled, you will need to run the game with full Admin privileges. To do this either right-click on the launch icon and select 'Run as Administrator', or right-click on the launch icon, select Properties and under the Compatibility tab tick 'Run this program as an administrator' then click OK. I strongly recommend that you refer to the TweakGuides Tweaking Companion for Windows Vista for more information - in particular check the 'Gaming in Vista' section of the Graphics & Interface chapter; the UAC section of the PC Security chapter; and the 'Personal Folders' and 'Directory Junctions & Symbolic Links' sections of the Windows Explorer chapter. These will tell you how you can fix game-related issues and also explain the relevant differences of Vista.
SecuROM Issues: GRAW uses the SecuROM copy protection system. This is a system known to have certain issues, particularly on PCs which have any virtual disc emulators or specific types of disc copy software. The only real solution is to uninstall such software if you want to install and play GRAW. Make sure to also install the latest patch (See page 4 for details). For more details and possible solutions for specific error messages, see the SecuROM FAQ, and if nothing else works, send an email to SecuROM Support.
Gamespy Account Issues: A lot of people are having problems logging in or creating a new Gamespy account in order to play online. If you've followed the normal method outlined on page 5 of the guide, and you've also installed the latest patch, and still have problems, keep in mind the following things which Gamespy believes may help resolve the problem: Not pressing enter before clicking login will result in an error; When you enter your nickname if you use your mouse cursor to click on the next field 'Password' it results in an error - You must use the tab key or press Enter; When creating a login, if you use the mouse cursor to move from field to field you lose everything you typed - You must press the enter key. Gamespy have made it clear that these type of issues must be resolved by Ubisoft.
Multiplayer Problems: Most of the problems in GRAW Multiplayer, many of which have been patched out of the game as of the latest patch (See Patches & Mods section). For a list of current known issues and some discussion of these check this thread and this thread. Furthermore, note that as of the 1.16 patch onwards, GRAW Multiplayer does have a very basic anti-cheat method (it makes sure everyone is running unmodified files), but no real anti-cheat software. Unfortunately it's not clear when or if Ubisoft will incorporate genuine anti-cheat software into GRAW such as PunkBuster. This anti-cheat system boots you from an MP server if your game files do not match those of the server's version - so if you've installed any mods or made any changes to the games files (the tweaks in this guide aside), then you may have to uninstall the mods and/or reinstall the game to play MP on those servers. Once again though, make sure to install the latest patch as it contains a range of multiplayer fixes and playing on servers running the latest version will minimize the chance of problems or cheating.
Mouse/Keyboard Lag: Typically the most common cause of mouse or keyboard lag is low framerates, so check your framerate using FRAPS and if it dips below 15 or so then you will start getting noticeable control lag - lower various settings such as Resolution and/or Texture Quality and/or Post Effects for example to improve framerate. However if this doesn't work, check the Neat Stuff & Conclusion section of the guide and impement the 'Max Frames to Render Ahead' tweak. Furthermore, apparently some people have found this fix for keyboard lag to work for them. Finally, check the Hardware Cursor tweak under the Advanced Tweaking section. Update: the latest patch resolves this issue, so check page 4 for more details.
Graphical Glitches: If you are experiencing strange graphics, obviously first make sure your graphics card is supported by the game (See Official Support above). Next, make sure you check out my ATI or Nvidia Tweak Guides (See the Essential Optimization section) - especially the instructions on page 4 of those guides for doing a 'clean install' of the latest drivers. Next, make absolutely sure that your graphics card is not overheating - whether by reducing your overclock and/or providing more cool air flow through your case. Finally, make sure that you have not forced Antialiasing in your graphics card's control panel as this can cause problems with GRAW. Always set your Antialiasing to 'Application Preference' (or similar) when playing GRAW. See Page 6 of this guide for more details.
Virus Scan: Do a full scan of all your files using the following excellent (and free) tools: AVG Virus Cleaner for viruses, A-Squared for trojans, and Ad-Aware SE for spyware/adware. Viruses, trojans and spyware can cause unexplained behavior, general file corruption and system slowdown, and can also steal your CD Key. It's best to make sure your system isn't infected before moving on to any other other optimization measures. However make sure to disable any background scanning programs once you're done (See below).
Background Programs: Disable all background applications - especially virus, trojan and spyware scanners and messaging utilities. These applications can and do use up valuable CPU resources, take up precious RAM, cause memory conflicts and crashes to desktop, but most importantly they interfere with read/writes to your hard drive effectively slowing it down and causing even more in-game freezes and longer loading times. Full instructions on how to identify your startup programs and services and how to correctly disable unnecessary ones are in my TweakGuides Tweaking Companion. This is an important step you should not miss.
Overclocking: GRAW can be quite sensitive to overclocking. If you've overclocked any components on your system and are having problems such as crashes, reboots or graphical anomalies, the first thing to do is set everything back to default speeds and try running the game. If you don't experience the same problems at default speed, or they're reduced in severity, then your overclock is the primary culprit. Either permanently reduce your overclock and/or increase cooling to regain stability. Don't assume that because other games run with stability at a particular speed that GRAW will do the same.
There are obviously many more problems people are experiencing with the game, but most of these are due to a lack of system optimization. GRAW is not as buggy as people suggest. The game can and does run with stability on a system which isn't overly stressed and poorly optimized. If you don't spend the time to optimize your PC, cool it properly, reduce/remove your overclocks, and select appropriate settings then you will experience more crashes, freezes etc. I strongly suggest reading the free TweakGuides Tweaking Companion at the very least if you want to resolve most issues with this and any other game.
That's just a basic rundown of troubleshooting tips. Read the remainder of this guide for more specific settings and tweaks which can help improve your performance and resolve any problems.
Official Patch
Ghost Recon Advanced Warfighter is no different to any other game these days, and as such has had several patches released so far. The latest patch brings the game up to Version 1.35 (273MB). This patch contains all the fixes from previous patches/map packs as well, including the major 'June Patch', so you don't need to install them prior to installing this. The patch primarily contains fixes for multiplayer. As such it should be installed by all GRAW MP players, however single player users can stick with Patch 1.30 if they want, as there are no single player fixes in the latest patch.
As of the 1.16 patch several new features were added to GRAW, including a map editor (See Mods below), a new multiplayer mode, an anti-cheat checking method, and an Antialiasing/Edge Smoothing option - see Page 6 for details. As of the 1.21 patch, a new SLI checkbox was also been added to the graphics options, again see Page 6 for details.
No-CD/DVD Patch
Ghost Recon: Advanced Warfighter uses the SecuROM copy protection system. From my previous encounters with this system in games such as FEAR, I can vouch for the fact that it can cause a range of problems on legitimate versions of the game. See the Troubleshooting Tips section for more details if you're having problems.
However unfortunately for legal reasons alone, I cannot tell you where or how to get a No-CD or No-DVD patch for the game - please do not write to me asking for a way to do this. While backing up your game may be legal in some countries, it is illegal in most countries to circumvent copy protection, and also a breach of copyright to download/distribute altered files from a game (cracked .exe files for example) without the author's permission - so it is definitely illegal despite what people may say, even though I don't believe it's immoral.
Mods
As part of the 1.16 patch, Ubisoft have released a Map Editor which allows users to create custom maps for the game. As for a more general Software Development Kit (SDK) for GRAW, at the moment it is unclear whether an official or unofficial one will be released. The original Ghost Recon title received a wide range of mods from the community, and it is still possible to modify the GRAW files to a certain extent, so keep an eye on this page as well as community sites like GhostRecon.net for details of mods as they emerge.
Importantly, as of the 1.16 patch onwards, the addition of an anti-cheat option for servers can cause problems with mods. This option checks to make sure that the game files or folders on your PC match those on the server (don't worry, doesn't include changes from the tweaks in this guide). So if you've installed a mod and try to play on a server without that exact same mod, you will likely be kicked for mismatched files. More details are here.
Finally, Ubisoft has released an official mod/add-on called the Advanced Tactical Center which allows GRAW players to coordinate strategies, and is well worth trying.
The next section goes into the details of all of Ghost Recon Advanced Warfighter's In-Game Settings.
In this section I provide full descriptions for Ghost Recon: Advanced Warfighter's in-game settings, and where possible recommendations are provided. I cover the general performance impact of each setting, although bear in mind that it is impossible for me to give exact performance impacts - it all depends on your specific hardware combination and your other game and system-wide settings. For more details of precise performance impacts on various hardware, see articles such as this GRAW Performance Analysis.
Campaign
The GRAW Campaign is the single player (offline) portion of the game. Clicking the Campaign button takes you to a screen where you can select 'New Campaign' to start the singleplayer campaign from the very beginning; Select 'Continue' to pick up where you left off in your current campaign; Select 'Play Mission' to start a particular mission from the Campaign; or choose 'Load Game' to load up any one of the many autosave check points up and including the latest save from your current campaign. Note that game progress in GRAW is always saved automatically at particular points - there is no known way to manually save.
Multiplayer
Multiplayer is the online mode for GRAW, allowing you to play with other players over a network connection. To play with friends over a LAN connection, use the Local tab to join a LAN game if one is available. Most commonly though, you will want to play against opponents online over the Internet, so select the Internet tab. To play online though, you will need to have a Gamespy Account, and the quickest way to do that is to click the 'GameSpy Nickname' button. Enter your Nickname and Password for an existing Gamespy account, and if this doesn't work, or if you don't have a Gamespy account, then click the 'Create Account' button and fill in your details. Note that some people are having problems with this aspect of the game, so see the Troubleshooting Tips section for some possible solutions.
Once logged into your Gamespy account, to get a list of currently available online servers which you can potentially join, click the 'Update Server List' option at the top of the screen and wait for the list to populate. You can then join a server if it has an empty slot. Importantly, for minimal "lag" between your actions and their impact on the game when online, first set your 'Network Upload Speed' in bottom right hard corner of the Internet tab of GRAW Multiplayer to accurately match your Internet connection's upload speed. The default requirement is 512Kbits/s, however if you have a slower connection you can lower this down to 128Kbits/s, though note that some effects will be missing from online gameplay for you. Once you've done this, select a server which has the lowest Ping - preferably less than 100ms. Your Ping is the time in milliseconds (1000ms = 1 second) taken for a command or action you issue to travel to the server and then for the server to send back the impact of that command to your PC. The higher the ping, the higher the "lag" you experience. Servers which are physically closer to your location will have the best chance of the lowest consistent ping.
Furthermore, on many servers you may experience something called 'Packet Loss'. Packet loss is, as the name describes, lost data packets on the way to/from a server. This can result in odd online gameplay, like grenades suddenly disappearing, your character continually warping around, or being stuck in one place. In this case try another server, and if you get the same problem on all servers, it is your Internet connection which may be at fault - contact your ISP.
Finally, if you want to host an Internet game for others to join, click the 'Create Online Server' button at the bottom of the Internet tab in GRAW Multiplayer. Note that there are no dedicated server files for GRAW; a dedicated server is when a PC runs GRAW with minimal resource usage and noone actually playing from the host machine to provide the most optimal performance and minimal ping spikes. So instead if you are hosting a game on your machine, make sure you have plenty of upload bandwidth and don't try to host too many players, especially if players notice a lot of lag when playing on your server. See page 4 of the guide for more details of an upcoming patch which will add more Multiplayer modes to GRAW.
Options
The game options can all be accessed via the main menu screen under their relevant sections. Each is covered below in more detail:
Game
3D Mouse Sensitivity: This setting controls the sensitivity of your mouse while actually playing the game in 3D mode. It does not affect mouse sensitivity in 2D menus and interfaces (see below). The more to the right the slider is moved, the more sensitive your mouse will be to movements. Has no impact on performance so set to suit your taste.
Mouse Pointer Sensitivity: This setting controls the sensitivity of your mouse only while in the game menu screens and other 2D interface screens. The more to the right the slider is moved, the more sensitive your mouse will be to movements while moving around 2D screens. Has no impact on 3D mouse sensitivity or performance so set to suit your taste.
Invert Mouse: This controls whether moving the mouse forward will make your character look down (ticked) or up (unticked). Set to suit your taste, has no impact on performance.
In general if you are experiencing mouse lag issues, that is if your mouse appears to be unresponsive or lags when moving, then you will need to either decrease your Video Settings (particularly Texture Quality - see below), and/or implement the 'Max Frames to Render Ahead' tweak (See Neat Stuff & Conclusion section). For more details, including discussion of keyboard lag, see the Troubleshooting Tips section.
Single Player Difficulty: The options here are Easy, Normal and Hard, and determine how challenging your enemies will be while playing through the single player Campaign. Aside from altering the accuracy of your enemy and some of their tactics, I haven't found any noticeable performance impact from changing this setting so set it to suit your abilities.
Auto Reload: If ticked, as soon as your character runs out of bullets, he will automatically reload a new magazine of ammunition if available. Has no impact on performance, and there should be no reason to untick this, except perhaps to enhance realism.
Zoom Toggle: If ticked, when you select zoom mode on applicable weapons, you stay zoomed until you again click the zoom button. If unticked, you will only stay zoomed as long as you hold down the zoom button. Set to suit your taste, has no impact on performance.
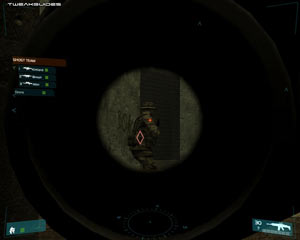
Target Markers: If ticked, all identified enemies will be flagged as red diamonds on your screen, even if they're not currently visible. Enabling this is up to you, as for some people it can reduce realism, for others it's a great tactical tool. Has no impact on performance so set accordingly.
Voice Quotes: This option controls the voice snippets you hear from teammates responding to your commands for example. Unticking this option should remove the voice quotes, but it doesn't appear to make any difference, even after a restart.
Controls
This section has five separate sub-areas for assigning the specific control key/mouse buttons you want to use for particular actions in the game: Movement, Tactics, Combat, Multi (Multiplayer), and Misc. Make sure to click through each of these tabs and take the time to assign keys as necessary. None will have any impact on framerates, so set them as desired.
The next page continues the In-Game Setting descriptions.
Video
Resolution: This setting allows you to select the resolution of the game image, measured in pixels wide by pixels high at a particular refresh rate. For example 1280x1024@60 means 1,280 pixels wide by 1,024 pixels high at a 60Hz refresh rate. The higher the resolution, the more detailed the image on screen, and importantly the less jagged lines there will be (see Antaliasing further below), but the lower your performance. The number of resolutions listed here and the refresh rates provided are limited by what both your graphics card and monitor can handle. To customize your resolutions and refresh rates further, see the Advanced Tweaking section. Also see the Aspect Ratio setting further below.
Fullscreen: If this option is ticked, the game will take up the entire screen when running. This should provide the most optimal performance and in particular the most stable configuration given the way Windows manages memory. However if you want to run the game in a smaller window on your desktop, make sure to select a Resolution which does not exceed your current desktop resolution and then untick this box. Performance may not necessarily be any better than fullscreen mode, and if you experience any problems then switch back to fullscreen mode.
To access the settings below, click the 'Show Advanced settings' button in the Video section.
Texture Quality: Textures are the 2D surfaces on all 3D objects in the game. This setting essentially controls how detailed the surfaces of objects will appear in the game. The higher this setting, the crisper and clearer surface textures will be, at the cost of reduced performance and more likelihood of loading pauses/stuttering as you walk around and see new objects/characters. There are three settings here: Low, Medium and High, though note that unless your graphics card has 512MB of Video RAM (not to be confused with System RAM), then you will not see the High option by default. However there is a way to select the highest texture quality on cards with less than 512MB of VRAM - see the Advanced Tweaking section. For an animated visual comparison of texture quality, click this link: GRAW_Textures.gif (544KB). While the difference between Low and Medium is noticeable, the difference between Medium and High is not dramatic. Pay attention to the skull mark on the soldier's shoulder and the bricks on the wall for places where subtle texture differences are visible between the various settings.
More details of the performance impact of Texture Quality and some of the other setings below on performance is in this GRAW Performance Analysis. As you can see from the article, using High Quality textures results in a significant increase in Video RAM usage, and thus greater likelihood of slowdowns and hitches. You can offset this impact with the Managed Textures settings - see the Advanced Tweaking section.
Texture Filtering: The available options here are Trilinear, Anisotropic 4x, Anisotropic 8x and Anisotropic 16x - though note that 16x Anisotropic may not be available on all cards. Texture Filtering is basically a method of making textures appear clearer and crisper as they fade into the distance. For more details see my Gamer's Graphics & Display Settings Guide. Each level of texture filtering progressively improves image quality, but reduces performance. The precise performance impact depends on factors including how recent your graphics card is and how much Video RAM it has. The newer the graphics card and the higher the model, as well as the more Video RAM you have, the less noticeable the reduction in performance there will be, especially at higher resolutions. For the most part, there isn't a major performance impact so try at least Anisotropic 4x unless you're struggling for FPS on an older card, in which case just choose Trilinear as that is the lower possible.
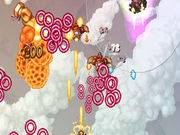
Effects Quality: This setting controls the detail level of special effects in the game, like explosions. The available options are Low, Medium and High. For an animated visual comparison of the Effects Quality levels, click this link: GRAW_Effects.gif (438KB). Note that at the Medium and High levels, the effects quality appears identical; however at Low the heat distortion around the grenade explosion is absent. In other circumstances, things like particle effects (smoke, dust, etc.) will be reduced or removed when set to Medium or Low, though note again that the difference between Medium and High is not great, and of course the lower your setting here the more FPS you will have in situations where such effects are used. Medium is a good compromise for most people while still providing good effects.
Brightness: This slider controls how bright the game image will be. The further to the right the slider, the brighter the screen. This has no impact on performance, so set to suit your taste.
Dynamic Shadows: Dynamic Shadows are shadows which react realistically with light sources. Most objects in the game cast dynamic shadows, but some shadows (e.g. building/structure shadows) are fixed. The options here are Off, Low and High. At Off, all dynamic shadows are removed, which reduces realism but can significantly improve performance on many systems - especially in scenes containing multiple characters. At Low and High the shadows are enabled at successively higher quality, but at the cost of some performance. The visual difference between Low and High is vitually unnoticeable, so for most people I would recommend Low if you want to enable shadows.

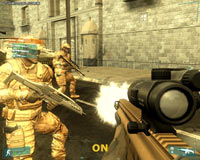
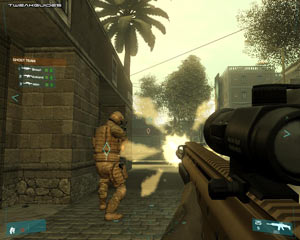
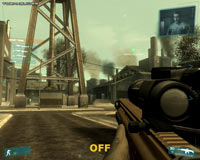
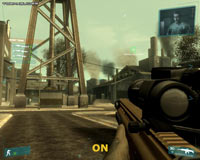
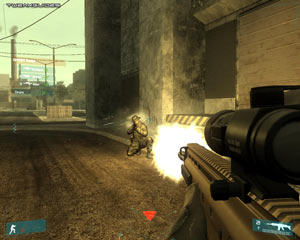
Dynamic Lights: If ticked, certain light sources will react dynamically with the environment, increasing realism but reducing performance when such lighting is visible. For an example, see the screenshot comparison above. At Dynamic Lights Off (unticked), the muzzle flash doesn't light up the surrounding area. At Dynamic Lights On (ticked), the muzzle flush is clearly lighting up the soldier standing to the left. For the most part dynamic lighting is not critical to the realism in the game, and can be disabled without a major visual impact if you want extra FPS.
Post Effects: This setting controls the quality of the space-related effects, particularly the lighting quality of the game. The available options by default are Low, Medium and High. For the most part I cannot find any visible difference between Low and Medium. However between Medium and High, the HDR (High Dynamic Range) effect becomes more clearly visible in the way the sky is lit - see this animated screenshot comparison: GRAW_PostEffects.gif (508KB). Note that the Off setting shown in the comparison is only available by editing the game's XML files. The impact of the highest setting is hard to demonstrate in screen shots, as it varies realistically depending on your surroundings. However if you really need the FPS, switching to Low Post Effects will give you a nice FPS boost without a major drop in image quality. If you want to switch Post Effects off altogether for a major FPS boost, or if you prefer that style of lighting, see the Advanced Tweaking section.
Antialiasing: Note, due to the type of Deferred Lighting method used by the developers, regardless of your Post Effects setting, Antialiasing is not possible in the game - even if you disable Post Effects, or try to force Antialiasing in your graphics card control panel. This is an unfortunate and contentious aspect of the game, since the gameplay relies a great deal on identifying small movements in your surroundings; something which the lack of antialiasing makes much harder due to jagged edges constantly moving and shimmering. However it is not resolveable as far as I know, so it's unlikely to ever be "fixed" by patching. Turn off any forced Antialiasing in your graphics card control panel, as it will not work regardless of which graphics card you use, and can only cause slowdowns and problems with GRAW.
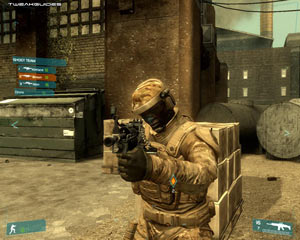
Update: As of the 1.16 patch, an option for Antialasing has been introduced for GRAW. However this setting does not use any form of normal Antialiasing whatsoever. When set to Edge Smoothing, it uses a Blur Shader post-processing effect to generally blur the entire image and thus reduce the appearance of jaggedness. On the plus side, this effect has no significant performance impact on most graphics cards; on the negative side, it blurs everything, including textures, and thus makes the image appear much less crisp. Below is a comparative screenshot of the effect:
It is difficult to see the difference in the image as it is compressed for web view, but basically the image on the right is blurrier than the one on the left - it is more noticeable in-game. If you don't like this effect or want maximum performance, set it to Off. However again note this is not Antialiasing, and you cannot enable or force any real Antialiasing (such as that in your graphics card control panel) with the type of lighting the game uses.
Update 2: As of the 1.21 patch, an SLI checkbox has also been added, showing users with SLI configurations when it is enabled in the game.
Aspect Ratio: This setting determines the the correct ratio of width to height (in pixels) to output to the screen, and should be set to suit your particular display type. Most standard computer monitors, particularly the traditional CRT monitors, are 4:3 displays. Some LCD displays, and all HDTVs such as Plasma screens are widescreen, and so have a 16:9 aspect ratio. Some LCD panels though supporting 4:3 display, show images more correctly using 5:4 ratios. For non-CRT users, the best way to know your correct aspect ratio is to check your display's manual for its 'native' resolution. E.g. if your panel has a 1280x1024 native resolution, divide the width by height (1280/1024 = 1.25) and select the same ratio here (i.e. 5/4 = 1.25, so choose the 5:4 ratio). The best way to know if you have the absolute correct aspect ratio is to look at round objects in the game (e.g. your sniper sights or car wheels) - they should appear perfectly round, not oval. If in doubt, set this option to Auto.
Once you've chosen your Video options here, you will have to click Apply at the bottom of the screen to implement them. Importantly, it seems that changing some of the video settings during a game can result in FPS drops - even when lowering a setting - so to see the correct impact of your changes, quit and restart the game.
Audio
Master Volume: As expected, this slider controls the volume of all sound effects, voices and music in the game equally. Set the slider to your preferred position, this has no impact on performance.
Renderer: The audio renderer is the device the game uses to play back sound and music. Your default sound output device (usually a sound card) should be shown here. If not, make sure your device is being correctly identified by Windows, and make sure to install the latest audio drivers for the sound device (See the Essential Optimization section). If you have an unknown sound device, or have audio glitches you can select Generic Hardware. If Generic Hardware is not available to you, for fastest performance on lower-end sound devices, select Generic Software. Note that depending on the device you choose here, your options may be limited in the Quality setting below.
Quality: The audio quality for the game is determined here by selecting either Low, Medium, High or Extreme. Depending on your sound card capabilities, the High or Extreme settings may not be shown. At the Low setting, up to 20 separate audio channels are required. At Medium, up to 32 are used (the limit for most common sound cards). At High up to 64 channels are utilized, and at Extreme, only sound cards which can process 128 Channels will be allowed to see and choose this mode. You cannot force your sound card to use more channels than it can physically output, so check your sound card's specifications. In general the greater the number of channels, the better the audio quality in return for lower FPS and potentially more frequent stuttering/loading pauses. See the Advanced Tweaking section for ways of further customizing/troubleshooting the Renderer and Quality settings.
To access the settings below, click the 'Show Advanced settings' button in the Audio section.
Music Volume: This slider controls the volume of in-game background music. Set the slider to suit your taste, has no impact on performance; that is, setting the slider to the far left does not reduce memory usage by unloading music.
SFX Volume: This slider controls the volume of in-game sound effects like gunfire. Set the slider to suit your taste, has no impact on performance. Once again setting this to 0 does not remove sound effects from memory.
EAX Enabled: If you have an EAX (Environmental Audio)-capable sound card, you can tick this option to provide more realistic 3D sound positioning and better sound effects. However EAX can reduce performance on some sound cards, and can also cause audio glitches. If you're having sound issues, untick this option and restart the game to see if it helps resolve them.
Also note that since GRAW relies on your general Windows audio settings, make certain that you have the correct speaker configuration chosen under your Windows Control Panel>Sounds and Audio Devices>Speaker Settings. If your speaker configuration chosen in Windows does not match the actual speaker configuration you have connected to your system, you will find you get a range of audio glitches and missing sounds.
The next section goes into the Advanced Tweaking possible with GRAW.
This section covers a range of things you can do outside of the in-game settings to further customize the game. This is actually quite important given that the developers have prevented certain settings from being enabled using the in-game settings.
To access the main advanced settings for GRAW, you will need to go to your \Program Files\Ubisoft\Ghost Recon Advanced Warfighter\ base directory. There, under the \Data\Settings subdirectory is renderer_settings.xml, the major file containing your Video-related settings. Under the \Data\Sound subdirectory is the settings.xml file which holds your tweakable Audio settings. And finally, under the \Settings\profiles\graw_profile_default directory is your character's profile, saved games and key bindings. To edit these XML files, open them with Windows Notepad or a similar text editor. Don't just double-click on them as they will open in your Internet Browser where you cannot alter them; right-click on them and select 'Open With>Notepad'.
Before making any alterations to these XML files, make a backup of each. Furthermore, note that settings which can be fully altered from the in-game settings are not covered below. Each major XML file is covered separately below:
Renderer_settings.xml
resolution = "1280 1024"
This line determines your resolution as per the Resolution setting in the in-game Video options. However if you want to set a custom resolution - as long as you know it is supported by your display - then enter it here in "width height" format.
refresh_rate = "60"
This line determines the refresh rate for your particular resolution. The default is 60Hz, however you can choose a higher one as long as you are absolutely certain your display device supports that particular refresh rate at your chosen resolution. Setting a refresh rate which is too high for your display will result in a black screen on loadup and can cause damage to the display.
<variable name="post_effect_quality" value="false"/>
You can set the Post Effects quality within the game, whether Low, Medium or High (See In-Game Settings section). However if you want to disable Post Effects completely, then set the value field to ="false" here, as shown above. This will remove the special lighting effects, giving starkly different visuals to that normally seen, in return for a significant performance boost. However note that using this tweak still does not allow you to force antialiasing. Further note that a side effect of this change is that Night Vision will not work properly, and the 2D tactical map will look different. The game was clearly designed with post effects as a central element.
<variable name="texture_managed_backdrop" value="true"/>
This setting appears to control the way in which texture data is managed between System RAM and Video RAM. The upshot of it is that for those with large amounts of System RAM (typically 1GB or more), setting all the "texture_managed" lines to have a value of ="true" seems to noticeably improve performance without reducing visual quality or increasing stuttering. Experiment on your system, but again note that if you have less System RAM (e.g. 512MB) you will likely get greatly increased stuttering from enabling this option. You may like to experiment with it anyway to see the impact on your machine.
<variable name="texture_quality" value="high"/>
By default within the game, people running graphics cards with less than 512MB of Video RAM cannot select High Texture Quality. However by editing this section of the .XML file, you can force high texture quality in the game for any video card. Simply edit every line starting at the one shown above down to the one just above the </render_settings> tag to "=high" for its value. That is, replace the words "low" or "medium" on each line to "high". This guarantees High Texture Quality, the impacts of which you can see in the animated .gif for Texture Quality in the In-Game Settings section. Importantly, as noted in that section, forcing high quality textures on graphics cards with less than 512MB of VRAM can result in slowdowns, constant hitches as textures are swapped out of Video RAM and mouse lag. The difference between Medium and High is not major, so unless you have a high-end system I don't recommend doing this. On a 256MB 7800GTX I can run full High Texture Quality without any problems, so you don't have to have a 512MB graphics card to use this setting.
Of course if you're smart, you can selectively set particular objects to High quality, such as those which are more noticeable (e.g. "texture_quality_characters"), and set others to Low or Medium if they're less noticeable. This will help reduce the Video Memory overload while still giving improved visuals.
Importantly: If you have changed the settings above, particularly by forcing High quality textures, do not go back into the Video options menu and select the Texture Quality dropdown box - this will reset the textures back to Medium or Low.
Settings.xml
<device name="Generic Hardware" min_voices="25" max_voices="128" require_eax="true"/>
<device name="Generic Software" min_voices="0" max_voices="32"/>
If you are not using a defined Sound Card in your Audio Renderer option (See In-Game Settings section), and instead are using the 'Generic Hardware' or 'Generic Software' option, you can customize them further here. For example, the min_voices item indicates the minimum sound channels used by the game, while the max_voices shows the maximum channels which can be used by GRAW. If you reduce the maximum number of channels you can improve performance at the cost of audio quality (e.g. reduce the max voices to 16 for Generic Software). However note that you cannot increase the number of maximum channels/voices beyond that which your sound device supports.
Furthermore, if your sound card is prevented from using the Generic Hardware profile due to lack of EAX support (i.e. a non-Creative sound card), then edit the require_eax line to require_eax="false". This should allow you to then use the Generic Hardware profile in the Renderer setting under Audio options.
<quality_setting name="high" min_voices="33" max_voices="64"/>
These quality_settings lines correspond to the options available in the Quality setting under Audio options in the game (See In-Game Settings section). For example, the line above shows that if I select High for the Quality setting under Audio, I will have a minimum of 33 channels and a maximum of 64 channels. If I want to further customize this, I could reduce the maximum number of channels and/or raise the minimum number of channels, until I arrive a good compromise of audio quality and performance. This is up to your personal preference: in general the less channels you have the less rich the audio quality in the game, and some sounds may be missing, but you may get slightly better FPS and/or less loading hitches.
Note again that you cannot force a sound mode which your sound card doesn't physically support. For example, you can't force your sound card to accept the Extreme quality unless you have a card which supports 128 separate channels of output, such as the Creative X-Fi series. Most older sound cards support up to 32 channels without a problem (equal to the Medium setting), and Audigy 2 cards with the latest drivers for example support 64 Channels (High setting). To ensure you're getting the most channels possible out of your sound card, install the latest audio drivers for it.
Profile.xml
Under the \settings\profile\ subdirectory there will be a specific subdirectory for each of your profiles. This is where your saved games and character details are kept, including your key bindings. If you only have one profile, it will be under the graw_profile_default subdirectory. Open the Profile.xml file in there to edit these settings:
<hardware_cursor value="true" />
If you are experiencing serious problems with your mouse cursor movements, you can set this value to ="false" as it can resolve such problems for certain types of input hardware.
<button id="action" binding="left ctrl" device="keyboard"/>
All your key/mouse control bindings are held in this section, with the action, the key bound and the device using it shown on each line. You can alter these within the game, so you shouldn't have to change them here. However if you find a particular key is not binding properly, or if you want to clear a binding, you can do so here. If anyone has details of a simple, clear and thorough guide for advanced keybinding advice, please Email Me and I will link to it here.
The next page concludes the guide with some neat stuff which can help improve performance.
Neat Stuff & Conclusion
The guide is coming to a close, but the following are some important tips you should try to improve performance and resolve problems.
Max Frames to Render Ahead
This tweak gained prominence with Oblivion, and is covered on the last page of my Oblivion Tweak Guide. I'll reproduce the same description here as it applies in precisely the same way: The setting in question is called 'Max Frames to Render Ahead', and it is usually hidden from the normal Nvidia Forceware Control Panel options. To enable it, I recommend using NVTweak 1.71, since NVTweak is easier to use to enable/disable this option (compared to Coolbits) and has other functionality which can come in handy. Run NVTweak and tick the 'Additional Direct3D' box, then close NVTweak. Now go into your Forceware Control Panel, and under the 'Performance & Quality Settings' item you will find a new item called 'Additional Direct3D Settings', click on it and you will see this option.
You can find out more about how to use NVTweak on this page of my Nvidia Forceware Tweak Guide. You will also find more information about the 'Max Frames to Render Ahead' option on that page, as well as other hidden options for the Forceware Control Panel. For ATI users, you can adjust the 'Flip Queue' setting which is the equivalent setting to the one above by installing and using ATI Tray Tools. The same values apply to both cards.
The amount of data produced by the GRAW engine means it can saturate your CPU and/or Video RAM with pre-rendered frames (whole screens ready to be displayed). On most systems this can result in noticeable mouse and/or keyboard lag, even when your FPS is reasonably high enough not to usually suffer from this (e.g. 25-30FPS+). By reducing the maximum number of frames to render in advance, you reduce this bottlenecking effect and hence significantly reduce or remove the mouse lag.
However, here's the important part: this is not a tweak for improving FPS as such. The general recommendation to set 'Max Frames to Render Ahead' (or 'Flip Queue') from its default of 3 down to 0 will actually reduce performance on many systems, particularly Dual Core or HyperThreading CPUs. Secondly, even on single core systems, you may notice reduced performance in certain areas. So on balance I strongly recommend setting this value to 2 to start with, and if you still have mouse lag, dropping it down to 1. Remember, not all mouse lag is due to this setting: in areas where you have very low FPS (i.e. below 10-15FPS), you will get lagginess - this occurs in virtually any game where your FPS drops down to the low teens or single digits. You will have to consider changing other settings to increase overall FPS. Also refer to the Troubleshooting Tips section for more details.
Ageia PhysX
When installing GRAW, you will notice it installs a PhysX driver even if your system doesn't have a PhysX card. It also adds a system tray item which reloads in the background each time you restart Windows. This is unnecessary in my opinion, and you can easily remove this driver by going to your Control Panel>Add/Remove Programs and selecting the 'Ageia PhysX' item and uninstalling it. I noticed no impact on my FPS whatsoever by removing the driver, however it does remove a background driver which is not needed.
Of course if you do have a system with a PhysX card, then make sure you download and install the latest Official PhysX Driver as this piece of hardware is still maturing and no doubt compatibility and performance issues are continually being improved by Ageia. GRAW will automatically detect your PhysX card and enable the additional physics effects in the game.
Update: For those of you without PhysX cards, here's a tip you can try to improve performance in GRAW thanks to Tiago Simes. Go to your GRAW launch icon, right-click on it and select Properties. In the Target box put one space after the last character and add EnablePhysX=false, then click OK. Some users report that this can provide a slight performance improvement in GRAW, so it can't hurt to try it.
Updated OpenAL Driver
Ghost Recon: Advanced Warfighter uses the OpenAL audio API. It comes with its own OpenAL DLL carrying Version 6.14.0357.11. It has been noted by some people that upgrading this driver can improve audio performance with GRAW, as pointed out in this thread. Try updating the OpenAL file as instructed there, although note that it is not necessarily going to improve performance - the version of OpenAL included with GRAW is not that old.
Update: You can try installing the new OpenAL 1.1 Library to improve OpenAL performance in GRAW.
Skipping the Intro Movies
At the moment, the only way I have found to skip the introductory movies in GRAW is to do the following. Go to your \Program Files\Ubisoft\Ghost Recon Advanced Warfighter\Data\movies directory, and rename the following files to something else (e.g. change their extension to .REAL_bik):
GRAW_HDEU.bik
grin_logo.bik
SIGNATURE.BIK
Now download the following archive containing blank movie files - each one is a blank .BIK movie, not a renamed .txt file: SkipIntro_GRAW.zip (2KB). Extract the contents into your \Program Files\Ubisoft\Ghost Recon Advanced Warfighter\Data\movies directory. Now whenever you start GRAW there will be a black screen as the game loads up, however you should reach the main menu quicker without the annoying intro movies.
Console Commands
At present I have not been able to find out how to open the in-game console for GRAW. If you know how to do this, please Email me and I will include it in the guide.
Update: You can however activate God mode (invincibility) by editing the actual game files packed in the quick.bundle game resource archive. The instructions are a bit tricky and not recommended for novice users, however full details are in this thread on the Ubisoft Forums. Full credit goes to paulkel101 for discovering this.
Is the GRAW Engine Flawed?
As usual with almost every new game on the market today, people are complaining about the GRAW game engine being flawed and that a patch should fix all of this, and so forth. And as always, this is a simplification which does not apply, as the game's engine - while not perfect - is not flawed, and as expected of new games, it requires newer hardware to run it properly. If there is a potential flaw with the game, it's that the lighting method chosen by the game's developers prevents Antialiasing being enabled. The game's Developers, GRIN, provide some comment on this topic here. As the developers state, the game requires a lot of CPU power as well as graphics card power because it has complex AI and physics, a large open game area to wander through, objects with complex polygons (e.g. the characters in the game), and thus it is a stressful game. It doesn't appear to scale downwards very well, meaning even if you reduce the options as far as possible, the things which need to stay the same (such as AI and physics) will still tax your system. Nor does it appear to take advantage of dual core CPUs. In fact for many people, their CPU will be the bottleneck in getting the most out of the game (anything close to 2GHz is going to struggle), for others, using an older graphics card (e.g. the Nvidia 6800 series) will also result in a lot of slowdowns. Again, the game is not designed for 2 year-old hardware, and this is the sad truth about PC gaming: you need to upgrade relatively often if you want to play current games properly.
If you haven't bought GRAW yet, then download the GRAW Demo (531MB) and consider the following: If you are having major problems running the demo, if you're dissatisfied with the quality of the visuals, especially the lack of Antialiasing, or if you just get very low framerates then I don't recommend buying the game. The demo and the full version are almost totally indentical in terms of performance and options, and the game's developers have specifically stated that Antialiasing is not possible given the Deferred Lighting method the game uses. These issues are not going to be patched away - at least not anytime soon. So I urge you to run through this guide, tweak the demo to the best of your ability, optimize your system with the TweakGuides Tweaking Companion, and then if you still find the game unacceptable, don't buy it. That's all you can do as a consumer.
Update: As of the 1.16 patch, GRAW now has a form of 'fake' Antialiasing option (Edge Smoothing). See page 6 for details, however note that it is not genuine antialiasing, it is simply a blur shader applied to the image to make everything look smoother. Genuine antialiasing is not possible with GRAW.
Conclusion
Having done an earlier version of this guide for the GRAW demo, and now for the full version (with minimal changes), I'm fairly confident it has the bulk of optimization information for the game. I've received a fair bit of user feedback, as well as more research on various forums and using the game myself, so I have a fair idea of what is and isn't possible with the GRAW engine. I hope you found the guide useful, and if you have any additional working tweaks or descriptions, please email me with the details. As always, please keep in mind that I can't provide any tech support, and that includes helping you work out how to apply these tweaks, or giving you upgrade advice. You can do some further research on our TweakGuides Forums, but please keep in mind that if you join the forums to beg for help or expect to be spoonfed answers then you will be quickly banned. Sorry, but PCs require that you put in some effort to learn how to optimize and maintain them, and that's precisely what my guides provide, so hit them first for your main source of information.
Finally, I would like to ask that you respect my copyright and not copy or paste the information in this guide (except for a paragraph or two) onto your website or forum. If more people do this, aside from wasting my time chasing them up for breach of Copyright, it will also eventually drive my website out of existence through lack of traffic, and hence lack of ad income and sponsorship - especially now that I've gone full-time on the site and no longer have a day job to support me. As the author I have the right to determine where they're hosting, and I don't think it's unreasonable for me to ask that they're only hosted on my site - which is free to acces, easily accessible and devoid of annoying ads or popups. Please respect this if you want to show your support for TweakGuides.
In any case, as I always say at the end of my guides, until next time take care!
 Games Like XCOM: Enemy Unknown
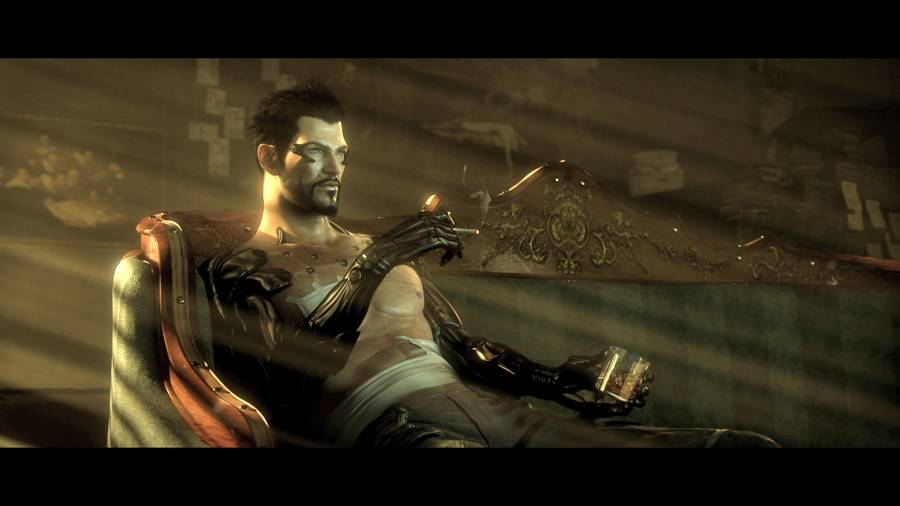 Deus Ex The Human Revolution Panchaea Quest Guide
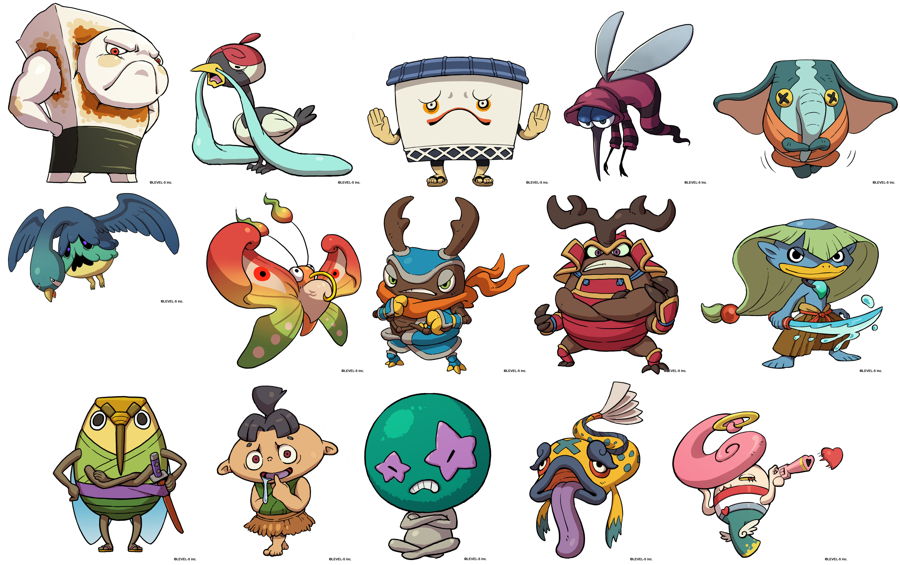 Yo-Kai Watch Guide: Side Quest Guide
 Emilys Star Wars The Old Republic Diary: Not another MMO
 Arkham Knight: What We Learnt at E3