Far Cry is a game I'd heard little about until the Far Cry Demo was suddenly released in late January 2004. When I played the demo my first reaction was quite simply "Wow!". Here was a game which had crept up on me without any warning and gave me my first taste of the next generation of gaming. I spent hours cleaning the drool off my keyboard.

Well the final version of Far Cry has been released, and I can again only say "Wow". This game has everything a fan of first person shooters would want: Jaw-droppingly gorgeous graphics, great sounds and atmosphere, amazing game physics, unprecedented AI, and the depth of gameplay and attention to detail that backs it all up.
I bet you're wondering "If Far Cry is so great, why does it need a Tweak Guide smart guy?". Well Far Cry's major strength is also its downfall - the amazing CryEngine game engine from CryTek is a demanding mistress. Your entire system will get a workout from Far Cry, often with unpleasant results. That's the mission of this guide...to make sure you avoid the pitfalls of the game and experience naught but the sweet nectar of Far Crys tropical fruit. Along with the regular slew of detailed setting descriptions, troubleshooting tips and console commands, the guide thoroughly covers the advanced tweaks which allow you to customize this game to suit your tastes.
Enter the guide. It'll be worth it, I promise you!
Note: This guide refers to the latest version of Far Cry (Version 1.4 and Version 1.32 64-bit). Make sure to check back regularly for updates.
Before getting into any game-specific settings and tweaks, this section covers the obligatory system optimization information I include in all my guides. If you've followed this advice recently, you can skip this section.
Many people report problems with this game and in almost all cases these are due to general system issues and not the game itself. With that in mind I strongly urge you to take some time and follow the advice below if you truly want this game, and indeed every other game you own, to run at its fastest and most trouble-free.
The place to start is my free TweakGuides Tweaking Companion. It is the complete system optimization guide for Windows users. Designed for novice and advanced users alike, it is written in plain English to help you genuinely understand all aspects of Windows and your PC. The guide covers every major topic, from the correct installation of Windows and critical drivers and software, through to recommendations for every significant setting and feature, all the major performance and convenience tweaks and customizations, as well as detailed troubleshooting advice. There are also links to a range of reliable free applications for optimizing and maintaining your system, as well as to important resources for finding out even more about Windows and your PC. There are two separate versions: one for Vista and one for XP.
If you've ever wondered what common graphics and display settings like FPS, VSync, Refresh Rate, Antialiasing and Anisotropic Filtering are, and how they really work, then check out my Gamer's Graphics & Display Settings Guide for all the details in an easy to understand format. The guide also gives you a rundown on exactly how a game goes from a being a set of files on your hard drive to a 3D image on your screen, including relevant performance tips.
Finally, if you run an ATI or Nvidia graphics card, I have written two comprehensive guides which you should check out: the ATI Catalyst Tweak Guide and the Nvidia Forceware Tweak Guide. These guides cover absolutely everything about the latest graphics drivers, how to set them up correctly, as well as advanced tweaking, overclocking and benchmarking tips. They're a must-read for configuring your graphics card correctly.
The above information really will serve you well in the long run, not just in this game. If you don't optimize your system and keep everything updated and maintained correctly you will keep running into "mysterious" problems time and time again. Do yourself a favor and when you get a chance spend an afternoon or two optimizing your machine the right way with the guides above.
The next section goes into more detail about specific troubleshooting tips which address common performance issues with the game.

This section contains specific troubleshooting tips which address most of the common problems experienced by Far Cry players. Many of the solutions are actually drawn from one of my guides mentioned in the Essential Optimization section. This is no coincidence, since many common Far Cry problems are not game bugs, but specific sub-optimal system conditions which lead to problems. Far Cry is a new and very system intensive game, and hence brings out instability and problems in all but the most rock-solid of machines. That's not to say it doesn't have a few bugs all its own, but hopefully the advice below can help you find the solution to your particular problem as fast as possible:
Official Support: The very first place to look for a solution to a particular Far Cry problem is the Official Far Cry Support FAQ. Answers to issues such as the "Error 1311 Message" are provided here. Combine this with the specific tips and resolutions provided in the Readme.txt file found in your \UBISOFT\Crytek\Far Cry\Support\ directory. You should also look at this Far Cry Q&A and finally, try hitting the Far Cry Forums and look for an answer, or post your own questions there.
Windows Vista Users: If you're having problems running this game under Windows Vista, first make sure that you're using the latest Vista graphics and audio drivers for your hardware, and the latest version of this game (see page 4 for patch details). Next, make sure you don't change your UAC settings after the game has been installed, as due to Virtualization this can change the location of the game files and settings. If you can't launch the game successfully when UAC is enabled, you will need to run the game with full Admin privileges. To do this either right-click on the launch icon and select 'Run as Administrator', or right-click on the launch icon, select Properties and under the Compatibility tab tick 'Run this program as an administrator' then click OK. I strongly recommend that you refer to the TweakGuides Tweaking Companion for Windows Vista for more information - in particular check the 'Gaming in Vista' section of the Graphics & Interface chapter; the UAC section of the PC Security chapter; and the 'Personal Folders' and 'Directory Junctions & Symbolic Links' sections of the Windows Explorer chapter. These will tell you how you can fix game-related issues and also explain the relevant differences of Vista.
CD-ROM Problems/Errors during installation: The official solution is here. Initially you should try updating all your device drivers, especially your motherboard drivers and CD/DVD firmware. Obviously you'll also need to use the original copy of the game CD, and if you see any Windows errors during installation attempt to ignore them and continue. If you get the "Error 1311" message then first try this solution from Microsoft. If that doesn't work, copy all the CD contents to your hard drive and attempt to install from there. Despite all this, there is still a major issue with Far Cry's compatibility with certain CD/DVD drives (see below) and emulation/burning software. Essentially you may be forced to disable or even uninstall any emulation/burning software especially Alcohol, CloneCD, and in some cases even Nero. This is due to Far Cry's SecuROM copy protection system.
DVD Drive Incompatibilities: If you have the DVD edition of Far Cry, and one of the DVD drives listed here then unfortunately it's unlikely you'll be able to run the Far Cry disk to install and run the game. Ubisoft has announced that these drives are "incompatible" with the Far Cry DVD edition. Attempt to update your drive's firmware as suggested above, and also a solution suggested by some is to leave the Far Cry DVD in your DVD drive for an extended period (e.g. 15 minutes) and it may eventually launch installation. Again these issues are largely due to Far Cry's copy protection system. Don't write to tell me it sucks, I already agree with you.
Invalid CD Key/CD Key In Use/Verification Time Out: Your Far Cry CD Key can be found on the back of the game's manual, on a large white sticker. You will not need to enter it when installing the game, however when you go to login to/create your Ubisoft Account to play Multiplayer, you'll have to enter it there. To start with, make sure you're patched to the latest version of Far Cry (See page 4 for details). If you're having problems getting it to recognize your valid CD Key, make sure you check the key entered and use capital letters where necessary. This may not solve your problems. You may have to disable your firewall to allow the CD Key to be recognised and prevent a time out. If your CD Key is listed as being in use, logout, wait a while (e.g half an hour), log back in and retry joining various multiplayer servers. Sometimes if you previously crashed or were disconnected your CD Key will appear to be "in use" for a while. If CD Key issues still occur, contact Ubisoft through their support site. Your games retailer cannot replace your CD Key if it is genuinely invalid, faulty, or just plain missing - only Ubisoft can give you a new CD Key.
Constant Disconnections/Punkbuster Kicks: While there are many reasons why people may be having problems connecting and staying connected to a Far Cry multiplayer game, the most common reasons are: Firewalls and Punkbuster. To start with, make sure you're patched to the latest version of Far Cry (again, see page 4 for details). If you have a firewall, you will need to allow Far Cry unrestricted access to the net, perhaps even having to disable the firewall. As for the second issue, as of the 1.1 Patch onwards Far Cry has been using the Punkbuster anti-cheat system. On many servers you will need to enable Punkbuster in your settings before you can join. It is common during gameplay however for Punkbuster to detect such things as any modified game files, No-CDs and the use of Alcohol or other virtual drive emulation software as being "cheats" and kick users of such files/tools. Disable all such cracks, virtual drives etc. and remove all modified files from games folders before attempting to connect to a multiplayer game, otherwise you risk your CD Key being permanently banned.
Virus Scan: Do a full scan of all your files using a virus scanner such as AVG Antivirus, a trojan cleaner such as A-Squared, and a spyware cleaner such as Ad-aware. Viruses and trojans can cause unexplained behavior like forced disconnection from the net, ping spikes or crashing of Far Cry to the desktop.
Background Programs: Disable all background applications, especially virus, trojan and spyware scanners and messaging utilities. This is a very important tip. These applications can and do use up valuable CPU resources, take up precious RAM, and raise ping, but far more importantly they interfere with read/writes to your hard drive effectively slowing it down and causing more in-game pauses, decrease FPS, increase load times. They can also cause memory conflicts with games like Far Cry and hence lead to crashes/lockups/reboots. Full instructions on how to identify your startup programs and services and how to correctly disable unnecessary ones are in my TweakGuides Tweaking Companion.
Overclocking: While it's extremely tempting to heavily overclock your system in an attempt to pump out better framerates with Far Cry, you will notice a lot of problems if you do so (e.g. flashing textures and graphical glitches, crashes to desktop and sudden reboots), and most of them will be related to overclocking. If you've overclocked any component(s) on your system, set everything back to the default settings and try running the game. If you don't experience the same problems at default then your overclock is the primary culprit. In particular, read through my TweakGuides Tweaking Companion for tools and instructions on how to correctly stress-test an overclocked system and determine which components are being pushed too far. Even if all your other games work just fine at your current overclock, Far Cry is likely to want more stability due to its system intensive nature.
CPU Speed: The Far Cry engine is quite CPU hungry, so if you have a reasonable graphics card but a lower powered CPU (e.g. P4 1.6Ghz), or vice versa, then you will find that this will hold back your performance significantly. If you're thinking of upgrading your machine, don't just upgrade to a fast CPU or a fast graphics card - you'll need both to get optimal performance in Far Cry.
RAM & Virtual Memory: Far Cry is extremely memory hungry. This is evident from the long loading times and in-game loading hitches and freezes some people are experiencing. Aside from buying more RAM (1GB or more is ideal), one critical thing you should do to help with this problem is to go through the Memory Optimization chapter of my TweakGuides Tweaking Companion. Combined with the tweaks covered later in this guide, this should help reduce most of your problems. Note that with less than 1GB of RAM there will still be some loading pauses, but they should be less severe.
Hard Drive Speed: In conjunction with the virtual memory tweaks above, it's important to remember that Far Cry is a massive game taking up more than 4GB of hard drive space. Quite obviously a lot of that will need to be loaded up at some point. On a modern operating system like Windows XP, memory management is quite good, however it can't work miracles. The whole process of continually loading information from your hard drive into RAM and back onto the drive is dependent on both the speed of your actual hard drive, and your Windows Memory Management settings. You can optimize your Windows memory management settings as covered in the tips above, but if you have less RAM (i.e. 512MB or less) and a slow hard drive then expect a lot more hard disk activity and hence longer loading times and in-game stuttering and freezes as Far Cry data loads back and forth.
Defragging: Make sure that after you've installed Far Cry you run through the System Maintenance and Drive Optimization chapters of my TweakGuides Tweaking Companion. In particular it is vital that you run the Windows Defragmentation utility after installing the game. Defragging ensures that the game's files are all on the same place on your hard drive, greatly reducing loading pauses/freezes and loading times. The longer it takes to defrag your drive, the more good it's doing you!
Antialiasing & Anisotropic: The use of Antialiasing and/or Anisotropic Filtering (both covered thoroughly in my Gamer's Graphics & Display Settings Guide) will greatly impact on your FPS in Far Cry. Even 2x Antialiasing for example can turn Far Cry from playably smooth (e.g. 30+ fps) to unplayable (e.g. 15 fps) depending on your hardware and in-game settings. For maximum framerates set both AA and AF to 0x or "Application Controlled" as well as turning them off in game (See In-Game Settings).
That's just a basic rundown of troubleshooting tips. Read the remainder of this guide for more specific setting and tweak information, and I repeat that you really do need to go through the various tweaks and tips mentioned above to ensure you get the best performance in Far Cry. There is no simple, single quick fix, and a problem with one area of your PC will result in a lot of grief when playing all new games, not just Far Cry.
Patches
As with most modern PC games, Far Cry has received several official patches since its release. The latest patch brings Far Cry up to Version 1.4, and contains a range of fixes and changes aimed exclusively at multiplayer. If your Far Cry is already patched up to Version 1.3 or above, you can download the incremental version of the 1.4 patch here (124MB). If you're installing the patch on a fresh install of Far Cry, the full version of the 1.4 patch is here (180MB) and contains all the changes from the previous patches as well. To see the list of changes the latest patch contains, check the links above. After installing the patch to see even more details on all the changes read the Features_Manual_FC1.4.pdf file found under your \Program Files\Ubisoft\Crytek\Far Cry\Support\Manual\ directory. For server administrators there is also a Server_Command_Table.pdf file in the same directory.
Note: Many people report problems with the new 1.4 Patch, and given that it almost solely contains multiplayer-related changes, for those who only play Far Cry single player I suggest patching up to Version 1.33 and/or trying the 64-bit to 32-bit conversion patch further below, rather than patching to 1.4.
An 'Experimental' Version 1.4 patch was leaked a while ago and is available at a range of places such as Guru3D. This patch is 5MB in size, and supposedly allows the use of HDR Rendering in combination with Antialiasing, on both Nvidia GeForce 8 and above cards, as well as ATI X1000 series or newer cards. To install this patch, you will have to extract the contents of the archive and overwrite the original versions in your Far Cry directories. Note however that this patch is quite likely to cause problems, so it is not recommended you install it unless you absolutely want to experiment with this functionality.
Finally, for people running 64-bit based systems on a 64-bit OS (like Windows XP Professional x64), you can install two Version 1.32 AMD64 patches - the Far Cry 64-bit Patch, and the Far Cry 64-bit Extra Content Pack, both downloadable from FileShack or 3DGamers among other places. These patches are described in detail here, but basically they improve performance on 64-bit machines (both Intel and AMD), and provide additional content such as improved textures, increased view distance and two new mutliplayer maps. Installing the 64-bit patches also provide a built-in No-CD for Far Cry, whereby you will no longer need to keep the game CD in the drive to play the game. If you're running the 64-bit patches on a 64-bit machine, don't install the latest 1.4 Patch.
Update: There is now a 64-to-32 bit Convertor Mod which allows regular Windows XP 32-bit users to use the 64-bit patches above. It may cause problems with multiplayer and there is a noticeable performance drop due to the system-intensive nature of the new content, but if you want to see Far Cry look better on a 32-bit OS, give it a try.

No-CD Cracks
As already indicated in my UT2004 Tweak Guide, I've made the decision not to provide detailed information about where to find No-CD cracks, nor how to circumvent the copy protection systems for legal reasons. Just like most gamers I am disappointed that Ubisoft have chosen such an intrusive and troublesome copy protection system for their phenomenal game. Whether you use a crack or other method to bypass the copy protection system is up to you. It may even result in a slight performance improvement.
However I strongly suggest that if you are using a No-CD or drive emulation software (like Alcohol) that you disable these if you're having problems. In particular, make sure you don't use these methods when attempting to go online and play Far Cry multiplayer, as the Punkbuster cheat detection system will likely consider these files as "cheats" and continually kick you from servers, eventually banning your CD Key permanently.
Note that if you install the 64-bit Far Cry patches (See Patches section above), then the game will no longer require the game CD in the drive to play.
Maps and Mods
Far Crys CryEngine has been designed to accept user-made maps and modifications, similar to other popular games like UT2004. Each copy of Far Cry comes with the Sandbox Editor, which allows anyone and everyone the opportunity to make their own maps and mod. The first major custom-made map currently available is this Far Cry Co-op Map, but clearly more will be available in a short space of time. Visit this guide for more updates on major maps and mods.
If you can't wait, then get cracking on your own custom maps or mods by firing up the Sandbox editor on your machine and downloading the SandBox Editor User Manual V1.1. Once you get the hang of it, the Far Cry engine is a great basis for making incredible maps and mods, and it is truly rewarding to make your own map or mod and share it with other players. For more detailed work, use the Far Cry Mod SDK.
A popular set of singleplayer mods/maps is the Matto series: Matto 1, Matto 2, Matto 3 and Matto 4. These mods include new environments, storylines and weapons, and are proving quite popular so they're well worth checking out.
The next section starts the guide's coverage of Far Cry's in-game settings and their performance impacts.
In this section we cover all the settings available for adjustment from within Far Cry. Settings which can only be altered in the .cfg files, the Far Cry Game Configuration Tool, or Developer Mode are covered in the Advanced Tweaking section.
To access the in-game settings, start Far Cry and click on Options on the main screen. You will then see four major areas: Game Options, Video Options, Sound Options and Control Options. Each is described in detail below:
Game Options
Enable Gore: When selected (selection box filled in) allows blood and bullet impact holes (decals) to be shown on characters when they are shot or blown up. Unselecting this option removes all blood and gore, and may provide a noticeable performance improvement in fight scenes at the cost of realism.
Lazy Weapon: The Lazy weapon slider determines how much your character's gun "lags" onscreen. The further to the right the slider, the more your gun lags with movements, which may look more realistic to some people. Note however that while a high Lazy Weapon setting may make the gun appear to lag, your targeting cursor should never lag regardless of this setting. A lagging cursor is due to low FPS and is also affected by your Mouse settings under Control Options menu (see below).
Corpse Stay: Determines the number of seconds before corpses (dead characters) disappear from view. Because lots of characters (dead or alive) on the screen can slow down graphics, setting this to a lower value can help reduce FPS slowdowns in heavy fight scenes by removing the dead bodies quickly. Conversely, if you want dead bodies to never disappear for ultra realism, set the value to 999.
Machine Spec: If you want Far Cry to automatically configure your Video and Sound options, set the type of machine you have (based on the three machine spec types detailed in your Readme.txt file). I strongly recommend against using this, and instead ask you to take the time to customize the settings as detailed in this guide, to suit your individual image quality and performance tastes. This is because most machines don't fall neatly into Low, Medium or High spec categories.
Multiplayer Name: Enter the name you wish to use when playing Far Cry online in Multiplayer. Has no effect on single player.
Multiplayer Model: Select the character type which will represent you when playing Multiplayer online. Has no impact on performance or your abilities when playing online or offline. Note you cannot change the character you play in the single-player campaign; you will always be Jack.
Multiplayer Color: Determines the color of your Multiplayer model's clothing. Has no impact on performance.
Video Options
Renderer: Far Cry automatically runs under the Direct3D9 renderer. This should give optimal performance and stability for all users, particularly those using the latest graphics drivers. However there is an experimental OpenGL renderer included with the game, but this can only be chosen by editing the System.cfg file (See Advanced Tweaking section).
Resolution: A range of available resolutions are presented here, shown as Pixel Width x Pixel Height x Color Depth (e.g. 1280x1024x32). Note in particular that since Far Cry runs in 32 bit color by default, if your desktop is set to a different color depth this may cause problems - change it to 32 bit color. The resolution chosen has a major impact on performance: the higher the resolution, the lower your FPS will be. The minimum possible resolution using these settings is 800x600. You can set lower/different resolutions and color depths in the System.cfg file (See Advanced Tweaking section).
Antialiasing: Here you can set the amount of Antialiasing (also called AA or FSAA) used in the game. The available options are: None=0x, Low=2x, Medium=4x and High=8x Antialiasing. Note that Far Cry will suffer significant performance degradation the higher the level of Antialiasing you use, especially on anything but the latest high-performance graphics cards. If you have any level of Antialiasing enabled in your graphics card control panel, they will override these settings. If you want to use Antialiasing in Far Cry I recommend either selecting "Application Controlled" (not 0x) in your graphics card's control panel and setting the AA level in-game here, or selecting None here and setting the AA level in your graphics card's control panel, not both. See my Gamer's Graphics & Display Settings Guide for more details.
Brightness, Contrast, Gamma Correction: These sliders determine how washed out/bright the game graphics look. Adjust to taste, has no impact on performance.
Full Screen: If this box is selected, Far Cry will run in fullscreen mode. If unselected, Far Cry will run as a window on your desktop. There may be performance and stability problems if Far Cry is run in windowed mode, so full screen is strongly recommended.
Vertical Sync: Vertical Synchronisation (VSync) is the synchronization of your graphics card and monitors' abilities to redraw the screen a number of times each second. This is measured in Hz (which is the same as frames per second), and your monitor will have a maximum rating in Hz for each resolution - e.g 1280x1024 at 85Hz. If VSync is disabled (unselected), your FPS will usually improve quite noticeably, however you may see some image "tearing" as your monitor and graphics card go slightly out of synchronization when the refresh rate exceeds the monitor's abilities. Turn off VSync for best graphics performance, however if the image tearing is too noticeable then enable VSync. Note that VSync can have a noticeable impact on any mouse lag you're having so select the mode which provides the least lag (in conjunction with the other mouse setting tips below). Usually this is Vsync Off, which is recommended for most people. For more details of VSync see my Gamer's Graphics & Display Settings Guide.
Play Background Video: If selected, will show the background video on the menu screens. If you are getting mouse lag in the menus, or just find it annoying, unselect this option to turn the video off. Disabling the background video may improve your performance slightly in-game.
Render Mode: If you've set the Special Effects Quality setting to High or above (see below), you will have the option of several different rendering effects here which can change the look and feel of Far Cry. The Default mode is the one most familiar to you, but Improved, Paradise, Cold and Cartoon are some subtle (and not-so-subtle) variations. Cartoon and Paradise are somewhat fantasy-inspired modes, but Cold provides a high level of realism, while Improved is a subtle change over the Default mode. The performance difference is minimal amongst the modes for the most part, but depends on your particular graphics hardware and Special Effects Quality settings. Paradise and Cartoon in particular may provide lower performance on older graphics cards like GeForce3/4s.
Advanced Video Options
These are accessed by clicking the Advanced button under the Video Options screen.
Texture Quality: This setting determines the level of detail the various textures (surfaces of objects) have, and the types of lighting and shadow effects these objects display. At Low the textures are extremely blurry, have minimal detail and appear completely flat. At Medium, textures are starting to show the beginnings of surface details, some depth (bump mapping) and realistic lighting interactions. At High the textures are well detailed, lighting effects bring out the surface depth of textures much more. At Very High the maximum quality textures are used and effects are highly realistic. The difference between High and Very High is not very noticeable. The successively higher your Texture Quality settings, the greater the amount of memory and graphics card power used. If you have 512MB of RAM or less you may notice much longer loading times and more in-game pauses with High or Very High settings. At the same time if you have an older graphics card (e.g GeForce4 or lower) you will notice a reduction in FPS with higher settings. I recommend Medium or High for most people.
Texture Filter Quality: This setting has two options: Bilinear and Trilinear. Bilinear texture filtering provides slightly less quality than Trilinear, which in turn provides less quality than Anisotropic texture filtering (see below). The higher the quality of texture filtering used, the smoother and less blurry textures will appear, especially more distant textures viewed at extreme angles. However there will be more of a reduction in FPS due to the extra work forced onto the graphics card. In fact although the visual quality difference between Bilinear and Trilinear is not very noticeable, the FPS difference can be 10% or more, so if you need extra FPS set this to Bilinear for minimal image quality sacrifice.
Anisotropic Filtering Level: This setting determines how well textures retain detail the further away they are from you, as per the Texture Filter Quality setting description above. At 1x Anisotropic Filtering (AF) distant textures can still appear blurry or indistinct, using Bilinear or Trilinear filtering. The higher the AF level used (2x, 4x), the sharper distant textures become, improving graphics quality at the cost of FPS, especially on older graphics cards. I recommend leaving AF at the default 1x (it can't be set to 0x) unless you have a very high end system, as raising AF will impact noticeably on performance without a large increase in visual quality. Also note you can increase AF values beyond 4x, but not in the in-game settings (See Advanced Tweaking). Just as with Antialiasing, I also recommend that if you want to use AF in Far Cry, you either use your graphics card's control panel to set it and leave it at 1x in Far Cry, or alternately set it to "Application Controlled" (not 0x) in your graphics card's control panel and adjust the AF level in Far Cry, not both. For more details again see my Gamer's Graphics & Display Settings Guide.
Particle Count: This setting determines the richness and volume of special effects such as smoke, steam, fog and explosions. As implied, the number of "particles" these effects contain is determined by this setting. At Low, effects like steam and smoke appear ghostly and thin, with little depth. At progressively higher levels such as Medium and High, these effects become more realistic and have greater volume. At Very High they are at their visual maximum. Note that the difference between High and Very high is not particularly noticeable. The higher this setting, the more noticeable the slowdown and sharp drop in FPS you will get when such effects are within view. For example if you're near a burning vehicle wreck, or steam escaping from a vent, and look towards it with High or Very High Particle Count your FPS may fall by 50% or more, especially if you have a slower CPU and graphics card. Medium is the recommended setting for most people.
Special Effects Quality: This setting determines the quality of special effects such as the coronas (halos of glare) around lights, and motion blur effects. When set to Low, all these effects are disabled, and are most noticeable in the lack of glare from interior lights, and no motion blur when you are drowning, flashbanged or fall from a height. At settings of Medium and above these effects are visible, and to be honest I didn't notice a dramatic change from Medium all the way to Very High. The performance impact of enabling the main Special Effects (i.e. Medium or above) will depend a great deal on your graphics card. Older graphics cards (such as the GeForce3) may notice a large impact on FPS in areas with lots of lighting for example, or simply may support these effects. Medium should be fine for most people.
Environment Quality: This setting controls the level of detail in your surroundings. At Low there are no birds or fish for example, and no decals (bullet holes, grenade impact marks) visible. At Medium some decals are visible, but still no birds or fish. At settings of High and above every environmental feature is visible. The difference between High and Very High is difficult to tell. The performance impact is again greatest on slower graphics cards and there is some additional CPU load due to the extra objects being handled, particularly in outdoor areas. In particularly heavy firefights, the higher this setting the more decals will be created, slowing down your FPS noticeably on many machines. Medium or High is recommended for most people.
Shadow Quality: As the name would suggest, this option controls the degree of realism for shadows in the game and the degree of dynamic lighting. At the Low setting virtually all shadows are disabled, except for low detailed static shadows from fixed landscape objects. At the Medium setting most inanimate objects such as boxes cast a shadow, but dynamic objects such as vehicles and swaying tree branches do not. At High and above everything casts a shadow, and walking under palm trees sees the swaying shadows of branches cast over you and your weapon. Once again the difference between High and Very High is very hard to tell. Shadows can have a major impact on performance, especially where there are multiple light sources (especially moving light sources) and complex, detailed objects visible. The higher the setting, the lower your FPS especially for slower graphics cards. Medium is recommended for most people.
Water Quality: The name of this setting is a giveaway. It controls the degree of realism of the water in Far Cry. At a setting of Low the water is an unattractive, opaque, uniform body of almost mercury-like liquid. There's no lapping at the shore, no visibility into the water depth. At a setting of Medium the water suddenly becomes very realistic and appears to have most of the effects of Far Cry's famous water. At progressively higher settings all the way up to Ultra High improvements are subtle and include more reflections on the surface (High), faster reflection updating on the surface (High to Ultra High), and the inclusion of refractions (underwater objects appear distorted). This setting quite obviously impacts on performance only in areas where there are large visible bodies of water, however the impact is not dramatic between Medium and higher settings. The performance difference between Low and higher settings will be more noticeable for those with very old graphics cards (e.g. GeForce3). Medium or High is recommended for most people.
Lighting Quality: This setting determines the quality of light interactions with the environment. At Low, surfaces don't show any sheen from lighting, and most lights emit a relatively dim unrealistic glow. At Medium the situation hasn't changed greatly, with surface textures still not having any noticeable shine or sheen to them. When set to High, the lighting greatly improves and reflects off appropriate surfaces (such as metallic floors) with a nice shine and depth. Your flashlight and all lighting give off a bright glow (depending on your Special Effects Quality settings - see above). Very High appears almost identical to High, except using Very High will ensure you're using Pixel Shader 2.0 (highest image quality). The higher this setting, the greater the impact on your FPS, especially on slower machines. Medium is fine for most people, High recommended for greater realism.
The next page completes the descriptions of Far Cry in-game settings.
Sound Options:
Sound FX Volume, Music Volume: The Special FX Volume slider controls the volume of the special effects in the game, such as gunfire and voices. The Music Volume slider controls the level of the music played in the game's initial menu screen, as well as the in-game music. The level of music/sound effects has no impact on performance, except if the sliders are taken all the way to the left (i.e. 0), whereby some people may notice a slight overall performance improvement, especially those with onboard audio or older sound cards, less RAM and/or a slower CPU.
Speaker Setup: Select the type of speaker configuration you have from the choice of Monoaural, Stereo, Headphones, Quadrophonic, Surround, Dolby 5.1. Settings with multiple channels like Quadrophonic, or Dolby 5.1 may experience a reduction in performance due to extra processing requirements depending on their sound hardware and CPU. Unless you have a high quality sound card and a multi-speaker setup, Stereo sound should suit most people both in terms of performance and audio quality, especially with EAX enabled (see below).
Doppler Effect: When enabled this setting attempts to emulate the Doppler audio effect, which is where the source of a sound rapidly moving past the listener changes pitch. Examples include bullets wizzing by you, or choppers as they pass overhead. It's a nifty trick, but obviously requires a bit more processing when such sources exist (usually during combat) and hence can reduce performance in these situations, although by how much depends on your sound hardware. Unselect this option if you want a performance boost without a noticeable drop in sound quality.
Hardware Mixing: If enabled, this uses your audio hardware, such as a PCI sound card, to process sounds and music. This can greatly improve audio quality, but may reduce FPS slightly. If you have a good quality sound card then I recommend selecting this option for optimal sound quality and minimal performance loss. Remember to update to the latest driver for your sound card otherwise you will experience audio problems. If you do experience such problems with this option, unselect EAX if enabled and see the Troubleshooting section, then the Compatible Mode setting below.
Enable EAX 2.0: Creative Lab's Environmental Audio (EAX) is a true 3D audio system which allows for greater depth and reality in sound. It is only possible on sound cards supporting EAX 2.0 and above, such as the SoundBlaster Audigy range of soundcards. This setting will only be available if Hardware Mixing is also selected, and due to the extra sound processing involved, can reduce overall performance. It may cause problems on some systems, so disable it if it does, and again see the Essential Optimization and Troubleshooting sections as well as Compatible Mode below. In my opinion if your sound card is capable of EAX, it is worth enabling due to the noticeably better 3D sound positioning.
Compatible Mode: If you get sound clicks or sound glitches during gameplay, make sure you install or even reinstall the latest drivers for your sound card (See Essential Optimization section for details), and if necessary reinstall DirectX9.0b after that. If that doesn't help, unselect EAX, then go to Start>Control Panel>Sounds & Audio Devices>Audio>Sound Playback>Advanced>Performance and lower the Hardware Acceleration slider one or two notches. Also make sure Sample Conversion quality is set to Best. If none of these work, enable Compatible Mode to see if that helps resolve problems. Compatible Mode should resolve most sound problems, but it does this by bypassing your sound card's drivers, meaning lesser audio quality and performance.
Enable Music: If selected this allows in-game music to play in the background. If such music annoys you, or if your system is low on RAM (i.e. less than 512MB) then select this option for a slight reduction in loading times and less loading pauses in-game.
Music Quality: This setting determines the audio quality of the music. The highest rate (High) gives a 44,100Hz sampling rate, with lower settings reducing audio quality (lower sampling rates) for less RAM usage and hence less loading times, less in-game loading pauses and a minor boost in FPS on some machines. I recommend Medium or High as the performance impact is minor, although if you're genuinely struggling or have problems with the music, setting it to Low will not reduce audio quality dramatically.
Control Options:
Key Bindings: The key bindings for the various in-game controls are here, and can be set according to your individual taste. For more details on key bindings, see the Game.cfg portion of the Advanced Tweaking section. Key bindings have no impact on performance.
Mouse Smoothing: If enabled (i.e set to Fast or Default), mouse smoothing will attempt to reduce any jerkiness in mouse movements. The Fast setting is a bit "crisper" than the Default setting, however setting this option to None gives the best mouse performance if you're experiencing any mouse lag. Enabling mouse smoothing can result in an increase in mouse lag. The performance difference between the three modes appears negligible if not non-existent.
Mouse Sensitivity: The further to the right the slider is set, the more sensitive your mouse will be to movements. This setting is the most important for improving mouse response due to mouse lag. I personally have the slider to the far right, and it has helped remove any traces of mouse lag on my system. However note that if your FPS falls low enough (i.e below ~ 15FPS) then you will experience mouse lag regardless. The best thing to do in that case would be to lower other settings (especially resolution) until you raise your framerate, and that will help reduce mouse lag during graphical slowdowns. This setting has no impact on FPS.
Mouse Acceleration: If the box next to this option is selected, mouse acceleration will be enabled, with the amount of acceleration determined by how far the slider is taken to the right. Mouse acceleration means the quicker you move your mouse, the greater the distance it will move. A small amount of acceleration can help improve a sluggish mouse (along with your Mouse Sensitivity setting), however it can also make it difficult to aim accurately. I personally recommend disabling mouse acceleration for optimal in-game performance. This setting has no impact on FPS.
Invert Mouse: If this box is selected, moving your mouse forward will make your character look down, and pulling the mouse back will make him look up. Set to personal taste, has no impact on FPS or mouse lag issues.
Well that brings us to the end of the in-game settings. However that doesn't end the ways in which we can tweak Far Cry. The next section looks at some additional places we can turn to for further customization of the game.
So far we've seen that the Far Cry in-game settings do allow for a fair amount of customization. In fact for most purposes they should be sufficient. But of course, given TweakGuides.com also caters to the hardcore tweakers out there, it's highly unlikely we were going to leave the tinkering at just the in-game settings. Below are several ways in which you can further increase performance and/or improve visual quality beyond the bounds of the in-game settings.
There are two major ways to further tweak the game's settings. The first one is by using the Far Cry Configuration Tool. The second one is to manually edit the .cfg files, which allows for a wider range of tweaking but is less user friendly than the Configuration Tool. The Configuration Tool tweaks are covered on the next two pages, with the .cfg file tweaks on the following pages.
Note that before we get into any tweaking with either method, I strongly recommend you copy your System.cfg and Game.cfg files and put these copies somewhere safe as a backup.
Far Cry Configuration Tool
You can launch the Far Cry Configuration Tool by clicking its icon, or if you can't find the icon, go to your \Program Files\UBISOFT\Crytek\Far Cry\Bin32\ directory and launch (double click on) the FarCryConfigurator.exe file. All of the settings under the Tool's main tabs have already been covered in the In-Game Settings section above, so they won't be covered again here. Changing them is exactly the same as changing them in Far Cry.
But wait...there is one particular section of interest to us. Go to the Video Options (Advanced) tab, and click on the Customize button on the bottom right. This will open up a new dialog box which contains tabs addressing all of the game's Advanced Video functions, such as Environment Quality, Lighting Quality etc. However unlike the descriptions given in the In-Game Settings section, here you can actually alter the individual components of these settings, and not just use presets like Low, Medium and High. For example if you just want to disable Motion Blur but keep the rest of your Special Effects Quality settings equivalent to High or Very High, you can do so here. Very handy for fine tuning the game.
These settings are covered below, but not in great detail due mainly to space considerations and my less than perfect knowledge of the intricacies of every setting. Indicative performance impacts are given, but you are encouraged to experiment, as the performance and visual impact depends a lot on your particular hardware and other settings as much as anything else. Note that editing these values using the Config Tool will make the appropriate changes in the corresponding entry in your main System.cfg file (see below).
They can also be changed in the game's console, or by manually editing the .cfg files (see below and also the Console Commands Section).
Texture Quality
r_TexResolution [0,1,2] - 0=Full texture resolution, 1=Half resolution, 2=Quarter resolution. The lower the texture resolution, the blockier all textures will appear. Setting to 1 or 2 may increase FPS and reduce overall RAM usage, but will decrease visual quality.
r_TexSkyResolution [0,1,2] - 0=Full resolution, 1=Half resolution, 2=Quarter resolution. Affects the resolution of the sky textures the same way TexResolution (see above) affects other textures. Setting to 1 or 2 may increase FPS and reduce overall RAM usage, but will decrease visual quality.
r_TexBumpResolution [0,1,2] - 0=Full resolution, 1=Half resolution, 2=Quarter resolution. Affects the crispness and clarity of bump-mapped (raised) surfaces. Setting to 1 or 2 will increase FPS, but will decrease visual quality.
e_detail_texture_quality [0,1] - 0=Use 1 texture for entire level, 1=Use multiple texture for levels. If detail textures are enabled (see below), setting this to 0 will use the same texture for every surface in a level which has detail textures which can reduce RAM usage but reduce image quality/realism. Setting to 1 will use more appropriate textures for each different surface, but will increase RAM usage.
r_DetailTextures [0,1] - 0=Off, 1=On. Detail Textures provide more detail to certain textures when examined closer up, such as pitting on metals or the bark on trees. If enabled can increase RAM usage and reduce FPS, but improves visual quality.
r_DetailNumLayers [0,1,2] - 0, 1 or 2 detail layers used per surface. On many textures which use extra layers to show detailed effects (such as gloss), this setting determines how rich such detailing will be. 0=no detail layers, 1 and 2 increase the layers. Reducing detail layers can improve FPS and reduce RAM usage at the cost of visual quality.
r_DetailDistance [0-16] - 0=Per-pixel blending of detail layers occurs at any distance, values up to 16=Per-pixel blending occurs at the set distance from character and beyond. Unclear of the impacts of this setting, I couldn't tell the difference when testing.
Texture Filter Quality
d3d9_TextureFilter [BILINEAR, TRILINEAR] - BILINEAR sets filtering to Bilinear, TRILINEAR sets filtering to Trilinear, as described in the In-Game settings section.
GL_TextureFilter [GL_LINEAR_MIPMAP_NEAREST, GL_LINEAR_MIPMAP_LINEAR] - If you are using the OpenGL renderer (See System.cfg in Advanced Tweaking Section) then GL_LINEAR_MIPMAP_NEAREST=Bilinear Filtering, and GL_LINEAR_MIPMAP_LINEAR=Trilinear Filtering under OpenGL. Similar performance impacts as described above.
Anisotropic Filtering Level
r_Texture_Anisotropic_Level [1-16] - The value set here will determine the Anisotropic Filtering level. In-game this is limited to 4 (4x). Here you can set it all the way up to 16x. Higher levels of AF will successively reduce FPS but improve texture clarity. Cannot be set to 0, 1x is minimum possible.
Particle Count
e_particles_max_count [0-infinity] - This number determines the maximum number of particles shown at any one time on screen by particle effects like smoke, steam, explosions. The lower the setting (0=Particle Effects Off), the less rich the effects will be, especially if there are more than one, but the higher your FPS in areas with such effects.
e_particles_lod [0.5-1.0] - 0.5=Lowest level of detail for particle effects, 1.0=Highest level of detail. At the lowest Level of Detail (LOD) FPS in areas with particle effects is much higher, but quality of effects much lower than at highest LOD.
Special Effects Quality
r_MotionBlur [0,1] - 0=Off, 1=On. Motion Blur occurs when drowning, falling from heights or being flashbanged. Turning it off will disable all such effects but improve FPS in such instances.
r_Glare [0-infinity] - 0=Off, Higher values=On. Usually a value of 1 is sufficient to turn on Glare, any higher seems to make no difference. Glare is the effect surrounding lights. Turning off Glare can improve FPS around visible lights.
r_GlareQuality [0,1,2] - 0=Low quality, 1=Medium quality, 2=High quality Glare. If Glare is enabled this setting controls its quality. Lower values may increase FPS, but reduce image quality.
r_Flares [0,1] - 0=Off, 1=On. Controls whether the Sun has a "lens flare" effect. May improve FPS outdoors if turned off.
r_checkSunVis [0,1,2,3] - Various methods of drawing the Sun in the sky. Image quality differences between the methods don't seem very noticeable. The performance impact of method 2 and 3 will be higher than 0 or 1, but FPS difference is minimal. Doesn't affect shadows.
r_Coronas [0,1] - 0=Off, 1=On. Coronas are the halos of light around light sources. Turning coronas off will improve FPS in areas with lighting, but at the cost of unrealistic lighting sources.
r_CoronaFade [0.0-1.0] - Time taken for a Corona to fade from sight when its source disappears from view. The higher the value, the longer the time taken. May improve FPS if reduced at the cost of some realism.
r_HeatHaze [0,1] - 0=Off, 1=On. Heat Haze is the distorting haze immediately surrounding areas giving off large amounts of heat. Turning this effect off can improve FPS in such areas at the cost of visual quality/realism.
r_ScopeLens_fx [0,1] - 0=Off, 1=On. When the Sniper Rifle is being carried, if you look at its lens you will see it actually shows a small distorted image of what is currently in front of the lens. Turning this effect off may improve FPS slightly at the cost of realism.
r_ProcFlares [0,1] - 0=Off, 1=On. I am unsure as to what Procedural Flares are and the impact of this setting.
r_CryvisionType [0,1,2] - 0=High quality, 1=Medium quality, 2=Low quality. This setting determines the type of image displayed when CryVision is used. The lower the quality, the poorer the image, although it is hard to tell the difference between High and Low quality. FPS impact may be noticeable on older machines.
r_DisableSfx [0,1] - 0=Off, 1=On. This is a confusing setting. Setting it to On is meant to disable all special effects. However it only disables a few of them like Motion Blur and not others - not sure why. Can improve FPS if enabled.
r_Beams [0,1] - 0=Off, 1=On. I am unsure as to what Procedural Beams are and the impact of this setting.
es_EnableCloth [0,1] - 0=Off, 1=On. Determines whether cloth items are physically tangible or not. For example if set to Off, you can walk right through a hanging fishing net and it won't move. If set to On, walking into the net makes it move. Disabling physical cloth can improve FPS slightly in such areas.
The details of the Far Cry Configuration Tool settings are continued on the next page
Far Cry Configuration Tool (Cont.)
Environment Quality
r_VolumetricFog [0,1] - 0=Off, 1=On. Turning Volumetric Fog off will increase FPS in areas which contain fog at the cost of realism.
r_EnvCMResolution [0,1,2] - 0=64 pixel, 1=128 pixel, 2=256 pixel. Determines the level of detail cube maps have. Cube maps are images on reflective surfaces such as glass which imitate the reflection of surroundings. The lower this setting, the more blocky cube mapped images will be, but the higher the FPS around such surfaces.
r_EnvCMResolutionInterval [0.001-1.0] - Determines the intervals at which the cube mapped images are updated on a surface. The lower this number the quicker they update, but the lower FPS will be around them.
r_EnvTexResolution [0,1,2,3] - 0=64 pixel, 1=128 pixel, 2=256 pixel, 3=512 pixel. Determines the quality of textures on Environment objects like birds, fish, decals (explosion/bullet marks). The lower the setting the more blocky these textures will be, but the higher the FPS and less RAM used.
r_EnvTexUpdateInterval [0.001-1.0] - Determines the intervals at which environmental textures are updated. The lower this number, the quicker they update, but the lower FPS will be around them.
e_decals [0,1] - 0=Off, 1=On. Decals are the marks left on the environment by bullet impacts and explosions. Turning decals off will remove all such marks but improve FPS, particularly during combat.
e_decals_life_time_scale [0.5-infinity] - Determines the length of time decals remain visible before being removed. The higher this value, the longer decals remain but the lower your FPS as more and more decals are created. Affects FPS most during combat.
ca_EnableDecals [0,1] - 0=Off, 1=On. Determines whether decals on characters (i.e bullet holes, slash marks, explosive burns) are visible or not. Turning this setting off will improve FPS during combat at the cost of realism.
e_overlay_geometry [0,1] - 0=Off, 1=On. Determines whether Overlay Geometry is enabled or not. Unclear as to what Overlay Geometry is.
e_obj_lod_ratio [5-infinity] - This number determines the Level Of Detail (LOD) for objects like vegetation, bushes and animals. In my testing the setting appeared to have no impact on LOD or FPS.
e_vegetation_sprites_distance_ratio [0.9-infinity] - Determines the range at which vegetation objects begin to turn to sprites. Increasing the ratio can reduce vegetation jaggedness, especially with Antialiasing enabled, but the higher this value the lower your FPS is areas with large views of vegetation.
e_cgf_load_lods [0,1] - 0=Off, 1=On. Determines whether LOD models for CGFs are loaded.
e_vegetation_min_size [0.0-infinity] - Determines the minimum size of vegetation which will be rendered. The higher this value, the less vegetation is rendered and hence FPS will be higher in areas with views of vegetation. Values above 30 generally mean no vegetation will be rendered.
e_flocks [0,1] - 0=Off, 1=On. If set to Off, removes all birds and fish from the game. Will improve FPS in outdoor areas at the cost of realism.
e_EntitySuppressionLevel [0-infinity] - Determines the minimum size of entities which can be spawned. I assume this means creatures like pigs and birds. Setting appears not to have any impact.
sys_skiponlowspec [0,1] - 0=Off, 1=On. If enabled, this setting considers your machine low specification and turns off all optional objects like birds, fish to gain FPS. If disabled, these objects are rendered (based on your other preferences) at the cost of some FPS.
Shadow Quality
e_stencil_shadows [0,1] - 0=Off, 1=On. Stencil shadows are moving or static shadows cast onto moving or static objects, like waving palm leaves on a moving character. Disabling stencil shadows will improve FPS at the cost of realism.
e_shadow_maps [0,1] - 0=Off, 1=On. Turning off Shadow Maps removes all shadows except those of the terrain and some fixed objects, even if Stencil Shadows are enabled. This improves FPS at the cost of realism.
e_active_shadow_maps_receiving [0,1,2] - 0=Off, 1=On, 2=High quality. When turned off, this only allows animated objects to receive shadows from other animated objects, like vehicles. This can improve FPS at the cost of realism. When enabled and set to High quality this reduces FPS but improves realism.
r_ShadowBlur [0,1,2,3] - 0=Off, 1-3=Shadow Blur methods. This setting when enabled allows the blurring of the edges of shadows cast, giving greater realism, with a reduction in FPS based on the method used.
e_shadow_maps_view_dist_ratio [10.0-infinity] - Determines the distance at which shadows are visible. The higher this setting, more distant shadows are visible but FPS is reduced.
Water Quality
r_WaterRefractions [0,1] - 0=Off, 1=On. If turned on, simulates the way in which objects underwater appear distorted due to refraction of light. If turned off, can increase FPS at the cost of realism.
r_WaterReflections [0,1] - 0=Off, 1=On. If turned on, many surrounding objects will reflect onto the water. If disabled this will only reflect basic landmasses onto the water, increasing FPS but decreasing realism.
r_WaterUpdateFactor [0.001-1.0] - Determines the intervals at which reflections on the water are updated. The lower this number, the quicker they update, but the lower FPS will be around water.
r_Quality_Reflection [0,1] - 0=Off, 1=On. If turned on allows reflection of all surrounding objects in the water. This decreases FPS in areas with water but increases realism.
e_beach [0,1] - 0=Off, 1=On. If turned on, waves lapping on the shoreline are visible. This can reduce FPS in watery areas but increase realism.
e_use_global_fog_in_fog_volumes [0,1] - 0=Off, 1=On. If turned on uses global fog in place of volumetric fog to simulate water murkiness with less than appealing results. This may improve FPS on older graphics hardware but reduces realism.
Lighting Quality
r_Quality_Bumpmapping [0,1,2,3] - 0=No bumpmapping, 1=Low quality, 2=High quality, 3=Very High quality. Disabling bumpmapping removes the raised surfaces effect on textures, but improves FPS. Enabling it at progressively higher quality levels improves the realism of the effect at the cost of some FPS.
r_Vegetation_PerpixelLight [0,1] - 0=Off, 1=On. If turned off, reduces the realism of lighting effects on vegetation but improves FPS in areas with vegetation.
e_light_maps_quality [0,1,2] - 0=Low quality, 1=Medium quality, 2=High quality. In areas where light maps are used (i.e fixed lighting effects drawn on objects) Low quality lightmaps will result in graphical anomalies like missing walls and objects. Obviously this improves FPS but ruins realism and gameplay. Medium and High resolve these glitches, with minimal FPS reduction.
ca_ambient_light_intensity [0.0-1.0] - Determines the intensity of ambient lighting around the player, which is lighting with no visible light source. The higher the value the brighter ambient light becomes, at the cost of minimal FPS but some realism.
ca_ambient_light_range [0.0-infinity] - Determines the range to which ambient lighting extends from the player. The higher the value, the lower your FPS may be if ambient light intensity is greater than 0.
e_max_entity_lights [0-infinity] - Determines the maximum number of lights which impact on objects. The higher this number, the more visible light sources are allowed to interact with an object (i.e. cast shadows, reflections, shine etc.), and hence the lower the FPS in areas with many lights.
e_stencil_shadows_only_from_strongest_light [0,1] - 0=Off, 1=On. If enabled, this restricts Stencil Shadows to only being cast by one source of light (the strongest visible source). This can improve FPS if Stencil Shadows are enabled and in places where there are multiple sources of light.
p_lightrange [0.0-infinity] - Determines the range of the player's flashlight when switched on. The higher the value, the lower your FPS depending on the size and complexity of the environment in which flashlight is used.
r_EnvLightCMSize [4-64] - Determines the pixel size of environmental lighting cube maps. Reducing the size will improve FPS in areas where such cube maps are used.
r_EnvLCMupdateInterval [0.001-1.0] - Determines the intervals at which the environmental lighting cube map is updated. The lower the value, the lower your FPS in areas where such cube maps are used.
cl_projectile_light [0,1] - 0=Off, 1=On. If turned on allows projectiles such as missiles to shed dynamic lighting as they move. This will reduce FPS especially in combat.
cl_weapon_light [0,1] - 0=Off, 1=On. If turned on allows your weapons to cast dynamic lighting as they fire (from their muzzle flash). This will reduce FPS especially in combat.
That ends the settings which can be edited through the Configuration Tool. I want to repeat something very important about the information above: the precise performance and visual quality impacts of these settings can and will vary based on your particular hardware and also on the combination of other options you have enabled in Far Cry. For example some effects reduce or increase FPS or RAM usage much less at lower resolutions than at higher resolutions. That's why my commentary is very general - it's impossible to note the exact performance impact under every circumstance and type of hardware used. The visual quality impacts will also vary because many of these effects use advanced shader techniques, which means a GeForce2 for example can't render any of them, while a GeForce3 will not look as nice as a 9800 Pro due to the different versions of shaders being used.
All of the settings covered in the last two pages relate to advanced video effects. However you can customize many more settings in the .cfg files and through the use of the game's Console. These are examined in the next sections.
System.cfg, Game.cfg & Devmode.lua
All of the game's major settings are held in the System.cfg and Game.cfg files in your \Ubisoft\Crytek\Far Cry directory. These files are read, and written to, by Far Cry each time the game launches and also when any of the game's settings are changed in-game, or by the Far Cry Configuration Tool, and sometimes when certain settings are changed in the Console.
However, the personal settings for your Profile are also stored in the \Ubisoft\Crytek\Far Cry\Profiles\Player directory under the filenames [profilename]_system.cfg and [profilename]_game.cfg. Any changes you make to the general .cfg settings while using a particular profile will be transferred to the profile-specific .cfg files as well. Whenever you switch profiles, Far Cry then transfers the settings from the relevant profile's .cfg files to the global System.cfg and Game.cfg files, making the game execute them the next time the game starts up. Keep this in mind, so that when you switch profiles you don't wonder why you've lost some of your tweaks. Try to stick with one profile if you can.
Below are descriptions of the Game.cfg and System.cfg files, and the mysterious Devmode.lua file which together control most of the game's settings.
Game.cfg
The Game.cfg file contains all your control key bindings and some important mouse settings. You should change all your major control bindings in the Control Options screen under the main Options (See In-Game Settings section). You can also edit them here if you wish, however while you can edit the existing settings in the file, if you add any additional lines to the file they will be deleted the next time the game starts. I am currently unaware of how to make additional key bindings "stick" in Far Cry, but I will update the guide when I know how. If you want to use additional keybindings you'll have to use Devmode for now (See Devmode.lua section below).
System.cfg
The System.cfg file contains all your major game settings (aside from key bindings). It includes the types of settings found in the Far Cry Configuration Tool, the major in-game settings, as well a bunch of other video and audio settings. While there are many commands you can change in the System.cfg file, this section only covers the major commands and what they do, and also will not cover again the settings and commands already explained in detail in the In-Game Settings and Far Cry Configuration Tool sections above. If you wish to change those settings, I strongly recommend you use the above methods to do so, and only edit System.cfg to change settings which cannot be accessed in any other way.
Just like the Game.cfg file, putting additional lines in the System.cfg file will not work. However, you can make Far Cry run additional commands by creating a new blank text file and renaming it to Systemcfgoverride.cfg, and placing it in your \Ubisoft\Crytek\Far Cry directory. You can now edit Systemcfgoverride.cfg and insert new commands, such as Console commands or one of the many other commands and variables contained in the consolecommandsandvars.txt file (See Console Commands section for details) and they will be executed each time Far Cry runs without being overwritten.
Below are the major commands which can be edited in System.cfg, and what each will do:
Update: If you've installed the official 1.4 Patch some of these commands may only work in Devmode.
cl_weapon_fx [0,1,2] - 0=Low, 1=Medium, 2=High. Controls the complexity of weapon firing effects. The higher the setting the more realistic weapons fire is, but the lower your FPS when firing or observing weapons fire.
game_GliderBackImpulse = "2.5f"
game_GliderDamping = "0.15f"
game_GliderGravity = "-0.1f"
game_GliderStartGravity = "-0.8f"
Changing the values here alters the glider's flight characteristics. Experiment with various values.
r_DisplayInfo [0,1] - 0=Off, 1=On. The same as the Console command, it displays a range of information including number of polygons drawn and frames per second (FPS) at the top right of screen. Note that this will also show the Shader type used on the bottom line of the information display ('Render Path'), if you're wondering whether SM3.0 has been enabled for example. Also note that changing this setting affects whether the game boots up with this information displayed by default or not.
r_Driver [OpenGL, Direct3D9] - OpenGL=Use OpenGL renderer. Direct3D9=Use default DirectX9.0 renderer. Setting the renderer to OpenGL may resolve problems and improve performance for some users, especially Nvidia graphics card owners. If you experience problems revert back to the default Direct3D9 renderer for optimal stability/compatibility.
r_HDRRendering [0-11] - 0=Off, 1-11=Level of Glare. High Dynamic Range (HDR) Rendering is a rendering method which can present incredibly realistic images by using vivid colors and lighting. By default this setting is disabled, but if your graphics settings are equivalent to 'Very High' and you have a graphics card which supports Shader Model 3.0 - that is the GeForce 6600 series and above or the ATI X1000 series or newer - then you can enable it by assigning a value between 1 and 11 for this setting. The values determine the level of glare from this effect, with suggested values being 7 or 2. Note that enabling HDR Rendering can see a significant drop in FPS. Also note that HDR will not normally work if Antialiasing is enabled, unless you have a GeForce 8 or ATI X1X00 series card or above.
r_HDRBrightOffset = "6.000000"
r_HDRBrightThreshold = "3.000000"
r_HDRLevel = "0.600000"
Changing the above values will affect the way HDR Rendering affects image quality (only if HDRRendering is enabled - see above). Experiment with various values, as they can affect performance and image quality.
r_Height [Pixelheight] - Determines the height of the screen resolution in pixels.
r_Width [Pixelwidth] - Determines the width of the screen resolution in pixels.
Changing these two settings will allow you to run in resolutions of less than 800 width and 600 height (the officially supported minimum resolution for Far Cry). Be very careful to select standard values supported by your monitor such as 640 x 480.
r_Colorbits [8,16,24,32] - Determines the color depth used for Far Cry. Lowering this will improve performance at the cost of image quality. You may experience glitches and problems at color depths below 32, and also if your desktop color depth doesn't match the one you select here for Far Cry.
r_EnhanceImage [0,1] - 0=Off, 1=On. When enabled, allows image post-processing enhancement. This can improve image quality, but reduce performance. Disable for an FPS boost if you don't mind the image quality degredation.
r_EnhanceImageAmount [0.0-1.0] - Determines the amount of image enhancement, if EnhanceImage is enabled (see above). The higher the value the better the quality of image processing used, but the less your FPS.
r_FSAA_samples [1-8] - Determines the level of Full Screen Anti Aliasing (FSAA) used, if FSAA is enabled. The higher the level of FSAA, the cleaner and less jagged the image but the significantly lower your FPS. Higher modes of FSAA may not be supported on all graphics cards, so be careful. For example setting this to 8 on an ATI card will result in a crash.
r_SelfShadow [0,1] - 0=Off, 1=On. When turned on enables per-pixel shadows depth comparing. This should mean that when turned on, vehicles and characters will also cast shadows on themselves. Turn off if you want higher performance with no noticeable image quality loss.
r_VolumetricFog [0,1] - Determines whether Volumetric Fog is used in areas requiring fog effects. Disabling this setting will use a lesser quality fog effect which is far less realistic, but may resolve problems and improve FPS in such areas.
s_DopplerValue [0.0-?] - If the Doppler effect is enabled, this number determines the strength of the doppler effect, which is changing pitch as sound sources move rapidly around you. Experiment with various values, with FPS impact likely to be negligible.
s_DummySound [0,1] - 0=Off 1=On. Enabling this setting turns all sound off.
s_MaxHWChannels [0-64] - Set the maximum number of hardware sound channels (0=Software sound) usable by Far Cry. If you know your hardware supports more hardware channels (e.g. 64 channels on Audigy1/Audigy2 cards) then attempt to increase this value for an increase in audio quality but a decrease in FPS.
s_MaxSoundDist [0-?] - Determines the maximum distance (in meters) at which sounds are heard by the character. The higher the value, the lower your FPS.
s_MinHWChannels [0-64] - Determines the minimum number of hardware sound channels required before Far Cry will allow Hardware Sound and effects like EAX. If you are having problems with enabling hardware sound on a sound card, try lowering this value and see if it helps. May reduce performance if reduced.
s_SampleRate [11025-44100] - Determines the sampling rate at which Far Cry audio (music and sound effects) are played back. Lowering this setting will improve performance but reduce audio quality.
sv_maxbitspersecond = "30000"
sv_maxrate = "30000"
sv_maxrate_lan = "100000"
See the Console Commands section for usage of these multiplayer server commands.
There is one more configuration file we can edit in Far Cry, and it's called Devmode.lua. This file contains the Developer Mode (Devmode) settings, but to access it first you must go to your Far Cry game icon, right click on it and select Properties. In the Target box, insert a space after the last " mark and type "-Devmode" (without quotes). It should look something like this:
"C:\Program Files\UBISOFT\Crytek\Far Cry\Bin32\FarCry.exe" -Devmode
Click Apply and OK to close the Icon Properties box. The next time you run Far Cry from this icon it will begin in Developer Mode, which is essentially a cheat mode. Aside from now having access to every level in the game, there are some nifty commands and functions available in Devmode, and the ones which are accessible in the Devmode.lua file are detailed here. Others are detailed in the Console Commands section below. Remember to create a backup of Devmode.lua before making any changes to it.
Important Update: Make sure you disable Devmode (i.e. remove it from your shortcut) before playing Far Cry Multiplayer on Punkbuster-enabled servers.
Here is a list of Developer Mode commands in Devmode.lua and what they do. Performance impacts are not discussed since these are not performance-related commands or tweaks:
cl_display_hud [0,1] - 0=Off, 1=On. If turned off, this setting removes all traces of the Heads Up Display (HUD) on the screen. This can be useful for taking screenshots for example.
cl_drunken_cam [0,1] - 0=Off, 1=On. If turned on, this makes the view look as though the player is drunk. I don't use this tweak, and instead prefer to do it the old-fashioned way with 15 beers.
ThirdPersonView [0,1] - 0=Off, 1=On. If turned on, Jack will be visible on screen in the 3rd person view. You can control him the same as usual, and also use the F1 button (default binding - see below) to switch between 1st and 3rd person views.
There are already several working key bindings by default in Devmode. You can use the following commands at any time while in Devmode:
F1 - Toggle between 1st and 3rd person views.
F2 - Skip to the nearest save point.
F3 - Toggle Old Designer Mode (Fly mode).
F4 - Toggle New Designer Mode (Fly mode).
F8 - Toggle Debugger.
F11 - Toggle AI Information on screen.
F12 - Take screenshot.
P - Give player all weapons.
O - Give player all ammunition.
However if you look around the Devmode.lua file, you will see several key bindings which have -- marks in front of them. This means they won't be read by the game engine and loaded up when Far Cry starts in Devmode. By removing the -- in front of these bindings you can enable them, but be very careful. Some of them conflict with existing key bindings or don't work, or cause problems. For example, here are two functions which are assigned to F11, but only the first one is currently enabled, as the second one has -- marks in front of it:
Input:BindCommandToKey("#ToggleAIInfo()","f11",1);
--Input:BindCommandToKey("#ToggleScreenshotMode()","f11",1);
To switch them around, insert -- in front of the first line, and remove the -- from the second line. Save the Devmode.lua file and relaunch Far Cry. You can now use F11 in Devmode to toggle the special "Screenshot mode", which if turned on, removes the HUD and crosshair, as well as any info displays on screen, and the enemy AI also no longer sees or hears you. This is perfect for wandering around the game and taking screenshots (using F12), especially when combined with F4 (Fly mode). Press F11 again to return to normal mode at any time.
So unlike the Game.cfg file you can not only edit Devmode.lua, but also insert your own new keybindings with various commands, but once again be careful. See the Console Commands section below for some useful Devmode-only console commands which you can use in the Devmode console, or insert into Devmode.lua. Devmode is great for experimenting, but I take no responsibility if you ruin your savegames for example, so backup everything before playing around. And before you ask, your savegames can be found under the \UBISOFT\Crytek\Far Cry\Profiles\player\[Profilename]\Savegames\ directory.
The next section covers some useful Console Commands which you can use both in normal mode and Developer mode
To open the console in Far Cry, press the ~ key. You can use the same key again to close the console. The console allows you to change many game settings and view important information during the game. Almost all the commands already detailed in this guide can be run through the console, with the addition of a \ in front of them. However many of them won't have any impact if run from the console, as they need to be changed by changing the in-game settings (See In-Game Settings section), by using the Far Cry Configuration Tool, or editing the System.cfg file (See Advanced Tweaking section).
If you want a full list of every console command and system variable used in Far Cry, type "\dumpcommandsvars" (without quotes) in the console. This will write a large text file called consolecommandsandvars.txt to your \UBISOFT\Crytek\Far Cry\ directory. Since the file is so long, to save you time and effort a list of the most useful working console commands is shown below with descriptions for each.
Note: Some commands require that you enter Far Cry in Developer Mode. These are indicated with (Devmode only) next to them. See the Advanced Tweaking Section for more details on how to enable Developer Mode.
Demo Commands
\DEMO [Demoname] - Plays an existing Far Cry demo. You must first load up the same level as the one the demo was recorded on. (Devmode only).
\STOPDEMO - Stop playing demo. (Devmode only).
\RECORD [Demoname] - Starts recording of a demo. (Devmode only).
\STOPRECORDING - Stops recording of a demo. Saves the files Demoname.tmd and Demoname.log to the UBISOFT\Crytek\Far Cry\Levels\[Levelname] folder, where levelname is the name of the level the demo was recorded on. (Devmode only).
\DEMO_SCREENSHOT_FRAME [Framenumber] - Make a screenshot from the specified Framenumber during a demo playback. (Devmode only).
Information/Debugging Commands
\R_DISPLAYINFO [0,1] - Toggles rendering information display including Frames Per Second (FPS). 0=Off, 1=On.
\R_FLUSH - Flushes system cache and reloads textures to remove graphical anomalies. Doesn't appear to work at the moment in either mode.
\DSTATS [0,1] - Displays debugging statistics.
\MEMINFO [0,1] - Displays memory information by modules.
\MEMSTATS [0,1] - Displays extensive memory statistics. The display of this information can slow your machine down to a crawl so be careful.
\R_PROFILESHADERS [0,1] - Displays profiling information on rendered shaders. 0=Off, 1=On.
\R_SHOWVIDEOMEMORYSTATS [0,1] - Displays information about video memory usage. 0=Off, 1=On.
\S_SOUNDINFO [0,1] - Toggles onscreen sound statistics. 0=Off, 1=On. (Devmode only).
\D3D9_NV30_PS20 [0,1] - Toggles PS2.0 shaders on Nvidia NV30 graphics cards. 0-Off, 1=On. Improves image quality but reduces FPS. (Devmode only).
General Commands
\CLEAR - Clears console text.
\FOV Angle - Sets the player's visible Field of View (FOV) between 1 and 180 degrees (Devmode only).
\LOAD_GAME [Gamename] - Loads a previously saved game with the given Gamename.
\SAVE_GAME [Gamename] - Saves the current game with the given Gamename. Use LOAD_GAME to load this game. Can be used for Quicksaving outside of the automatic save points.
\LOAD_LASTCHECKPOINT - Loads the player at the last checkpoint reached.
\CL_DISPLAY_HUD [0,1] - Toggles the Heads Up Display (HUD). 0=Off, 1=On.
\HUD_CROSSHAIR [0,1] - Toggles whether the crosshair is drawn onscreen or not. 0=Off, 1=On.
\AI_IGNOREPLAYER [0,1] - Toggles whether the AI can detect the player or not. 0=Off, 1=On. (Devmode only).
\AI_SOUNDPERCEPTION [0,1] - Toggles the AI's ability to perceive player-based sounds. 0=Off, 1=On. (Devmode only).
\E_TERRAIN_LOD_RATIO [0-5] - Determines the rate at which distant terrain features are removed/displayed on screen. Default is 5, but setting to 0 will ensure the most detailed terrain. The lower the setting, the lower your FPS in outdoor areas but the more vegetation will be visible in the distance.
\CL_MOTIONTRACKER [0,1] - Toggles the motion tracker mode on the binoculars. 0=Off, 1=On.
\CL_MSG_NOTIFICATION [0, 1] - Toggles the HUD messages sound notification. 0=Off, 1=On.
\R_SHOWLINES [0,1] - Toggles visibility of wireframe overlay. 0=Off, 1=On (Devmode only).
\THIRDPERSONANGLE [Angle] - Sets the angle at which the camera views player in 3rd person mode. (Devmode only).
\THIRDPERSONRANGE [Range] - Sets the range of the 3rd person camera (when in 3rd person mode) from the player. Ranges from 0 to 7 meters. (Devmode only)
\QUIT - Exits Far Cry.
Multiplayer Commands
Note: If you've installed the official 1.4 Patch (See page 4), then make sure to refer to the file Server_Command_Table.pdf in your \Program Files\Ubisoft\Crytek\Far Cry\Support\Manual\ direcotry for additional Server and Multiplayer-related commands.
\CL_CMDRATE [Rate] - Limit the number of command packets sent from client to server in bits per second.
\CL_UPDATERATE [Rate] - Limit the number of update packets sent from the server in bits per second.
\CL_MAXRATE [Rate] - Maximum bits per second sent from client to server in bits per second.
\CL_PASSWORD [Password] - Sets the client password to join a password protected server. It must match the server password otherwise you will get disconnected.
\CL_PUNKBUSTER [0,1] - Enables PunkBuster for client, 0=Disabled, 1=Enabled.
\CL_RCON_PASSWORD [Password] - RCon (Remote Control) client password to allow connection to the RCon for the server.
\CL_RCON_PORT [Port] - RCon port number. Default is 49001.
\CL_RCON_SERVERIP [RconServerIP] - RCon IP Address.
\CONNECT [ServerIP] - Connects to the specified multiplayer server IP supplied.
\RECONNECT - Reconnects to the most recent multiplayer server.
\DISCONNECT - Breaks the client connection with the current multiplayer server.
\UBILOGIN - Connects to the Ubi.com game service.
\UBILOGOUT - Disconnects from Ubi.com game service.
\UNBAN [PlayerID] - Removed the ban from the specified player. Use \LISTBAN to get a list of banned IPs.
\BAN [Playername] - Bans specified player from the server. Use \LISTPLAYERS command to get list of playernames.
\BANID [PlayerID] - Bans specified player from the server. Use \LISTPLAYERS command to get list of player IDs.
\KICK [Playername] - Kicks the specified player from the server. Use \LISTPLAYERS command to get list of playernames.
\KICKID [PlayerID] - Kicks the specified player from the server. Use \LISTPLAYERS command to get list of player IDs.
\LISTBAN - Lists current banned IDs on the server.
\LISTPLAYERS - Lists current players on the server by name and ID.
\RCON_CONNECT - Connects to the RCon (Remote Control) server.
\RCON [Command] - Execute a console command on a RCon (Remote Control) server.
\SV_CHANGEMAP [Mapname, Gametype] - Changes to the specified map and game type. If no gametype is specified, the current gametype is used.
\SV_DEDICATEDMAXRATE [Rate] - Changes the server update speed in bits per second for dedicated servers.
\SV_RELOADMAPCYCLE - Reloads the mapcycle file, specified in the sv_mapcyclefile cvar.
\SV_RESTART [time] - Restarts the game in the number of seconds specified.
\SV_MAXCMDRATE [Rate] - Limits the maximum command rate clients can specify in bits per second.
\SV_MAXRATE [Rate] - Limits the cl_rate allowed on internet clients in bits per second.
\SV_MAXRATE_LAN [Rate] - Limits the cl_rate allowed on LAN clients in bits per second.
\SV_MAXUPDATERATE [Rate] - Limit the maximum updates clients can specify in bits per second.
\SV_NETSTATS [0,1,2,3] - Toggles network statistics. 0=Off, 1=Display net statistics, 2=Display an updatecount graph, 3=Display both.
\SV_PASSWORD [Password] - Specifies the server password in a multiplayer game. Specifying a null string means, no password.
\SV_PORT [Portnumber] - Sets the server port for a multiplayer game. Default is 49001.
\SV_PUNKBUSTER [0,1] - Enables PunkBuster for server. 0=Disabled, 1=Enabled.
\SV_RCON_PASSWORD [Password] - Specifies RCon (Remote Control) server password. If there is no password specified RCon is not activated for this server.
\SV_SERVERTYPE [Lan, Ubi] - Specifies the server connection type 'UBI' or 'LAN'.
The next section covers a few neat things you can do with Far Cry, and brings the guide to its conclusion
We're almost at the finishing line, just a few more nifty tips and tricks to go, and we're done!
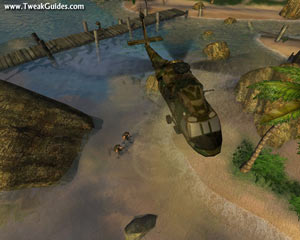
HDR Lighting in Far Cry
Far Cry was one of the first games to offer HDR Lighting for graphics cards which support Shader Model 3.0; namely GeForce 6600 or above, or ATI X1000 or above graphics cards. To enable HDR in Far Cry, you will need to use the r_HDRRendering command as covered on page 9 of this guide. An experimental 1.4 Patch for the game (See page 4 for details) also allows the use of HDR in combination with Antialiasing, something which is normally not possible in Far Cry, however this appears to only work on ATI X1000 cards and above. If you wish to enable HDR + AA on an ATI card, it is recommended that instead of installing the experimental 1.4 patch you use the 6.10 Catalysts or newer. In general though since Far Cry wasn't really designed for HDR lighting, you may see visual anomalies when HDR is enabled (with or without AA), and of course performance will be lower when HDR lighting is used. In any case at least the option is there for you to try.
Skip Introductory Movies
To skip the introductory movies (Ubisoft, Crytek, Sandbox logos) every time you load up Far Cry, just go to your \UBISOFT\Crytek\Far Cry\Languages\Movies\English\ directory, and create backups of (or rename) the files Crytek.bik, Sandbox.bik, and Ubi.bik. Now create three new (empty) text files and rename them to the above filenames and place them in the same directory. Far Cry will now skip playing these movies and load up much faster, and use less RAM to boot. Note this method should work with or without the use of a No-CD crack.
To save time you can download the replacement blank movie files I've prepared from here (Skipintro.zip, 1Kb).
Saving Games At Any Point
If you dont like the way in which Far Cry automatically saves your progress through the single player campaign at certain save points, and want to save manually anywhere in the game, this tweak might be what you need. To save a game anywhere, open the console (press ~) and type "\save_game gamename" (without quotes) where the gamename can be any name or number you like. For example:
\Save_game Quicksave
Will save your current place in the game under the name "Quicksave". You can now reload this game position at any time by opening the console and typing "\load_game Quicksave" (without quotes). Note that the saved game file is saved under the name you gave it (i.e. Quicksave.sav) in your \UBISOFT\Crytek\Far Cry\Profiles\player\[Profilename]\savegames directory.
If you want to assign and use specific keys to make the saving/loading functions faster, you'll need to do so in Developer Mode. See the Advanced Tweaking section for more information on enabling Devmode and the Devmode.lua file.
Open up your Devmode.lua file and copy and paste the following lines into the end of that file:
Input:BindCommandToKey("#Game:Save('Quicksave')","f9",1);
Input:BindCommandToKey("#Game:Load('Quicksave')","f10",1);
Note that in the bindings above F9 is quicksave and F10 is quickload. You can edit the words "F9" and "F10" in the lines above to whichever keys you want to use for quicksaving and quickloading, just check to make sure they're not being used for another function in Devmode or this won't work. Also note that quicksaving and quickloading this way may lead to a few glitches or odd AI behaviour in the game every once in a while.
Far Cry Music
If you enjoy the music of Far Cry and want to extract it and listen to it separately, all the music is contained in the file Music.pak in the \UBISOFT\Crytek\Far Cry\FCData\ directory. To extract the contents of this file, simply copy the file to an empty folder somewhere else (don't mess with the original), and rename it to Music.zip. It can now be opened, and the contents extracted, with any archiving program like WinZip. The music is mostly in Vorbis .Ogg format, and can be played with a free music player like WinAmp.
If you extract the entire contents of the Music.zip file you'll notice a lot of folders and subfolders are created with slices of music for various levels and various moods. For complete tracks, such as the music playing in the background of the game's menu, go to the directories Menu and Titletrack. For example, the track playing during the menu is called MenuMusic_shortversion.ogg, and is one of my favorites from the game.
Far Cry Benchmark
At the moment there is no official Far Cry benchmark. You can record a demo on a particularly challenging stretch of the game and circulate that for others to try, as people have done so far, but a true objective official benchmark which makes all the settings equal on every system - and hence makes comparisons valid - is not yet available. Perhaps the CryTek team will release one as part of their next patch. Stay tuned to this guide for an update.
HardwareOC have released a Far Cry Benchmark of their own which you can try along with this Registration Utility. It weighs in at around 1.5MB and is free and easy to use. Install the benchmark, run it and select your language, resolution and level to bench, then let it run through the set benchmark.
Conclusion
That brings to a close a rather large tweak guide for what is currently my favorite game. Far Cry really is a step ahead of most other games (except perhaps in its plot), and for those who think that it's simply a run and gun game, Id suggest that perhaps you need to play the game on a harder difficulty, take your time to explore, and employ a lot more stealth. Being stealthy also gives you the time to soak up the incredible atmosphere this game has, and appreciate the amount of detail thats gone into Far Cry.
Anyway enough about my love affair with the game. I hope this guide has given you the knowledge to customize Far Cry to suit your preferences for performance and eye candy. In many ways the guide only scratches the surface, as there are many, many ways in which you can tweak and customize Far Cry. I leave additional experimentation to your curiosity.
Since the CryEngine game engine is new and relatively undocumented, I have attempted as much as possible in writing this guide to test every tweak and tip, and research all available information. Combined with my own knowledge of game engine functionality, this ensures a high degree of accuracy. However I would truly appreciate it if readers could Email Me and tell me if theyve discovered any inaccuracies, or if they understand more clearly what particular functions do, or even if they've found some useful tweaks which I haven't mentioned in my guide. I can then feed this information back into the guide (after further testing) to ensure everyone has the most accurate information to work from when tweaking.
Of course if you just want to let me know what you think about this or any of my other guides, or about my site in general, I would love to hear from you too. Please remember that I can't provide any personal tech support or tweaking advice. Note that I have already had many requests for a "printable" version of my guides. For the moment, due to limited server bandwidth on my new site I can't provide downloadable versions of the guide, however if you send each page of the guide to your printer it will now print in a clean, full page format as detailed here.
Links and Credits
The guide is the result of a great deal of personal testing, but also a fair bit of searching for information and tips on various sites. I recommend that if youre a fan of Far Cry like I am, that you visit the following sites:
Far Cry Official Website
Far Cry Forums
FileShack Far Cry Section
Well, thats all for now. Ill be back with more updates to this guide, and indeed more guides very soon, so check back on TweakGuides.com regularly. Take care guys!