Fear.
That's the feeling I had when I first thought about writing a Doom 3 Tweak Guide. One of the most highly-anticipated games of the last few years, and the pressure was on for me to write this sucker and put it up for everyone to improve their Doom 3 performance. But enough about me.
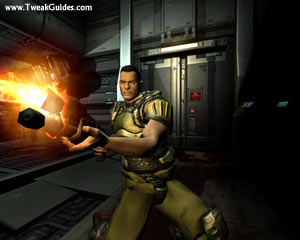
Elegantly scary. That's the best way to describe Doom 3. It's a blend of science fiction and horror which, with the aid of an incredible graphics engine, immerses you in the heart-pounding action which underlies every aspect of this game. Now I'm actually not a huge horror fan, however for some reason the game seems to work for me. I can't put my finger on it, but I guess the main reason is the amazing game engine. This elegant, optimized, beautiful piece of work shows remarkable atmosphere and attention to detail. It is quite clear why the game took so long to develop and release - the developers were putting every ounce of their energy into making sure this thing is as close to an interactive movie as you can get on a modern PC. If you haven't played Doom 3 yet I honestly think you should try it because chances are you will like it. You can download the demo from here.

Now this isn't a review of Doom 3, as many writers better than I have already churned out dozens of those for you to read over. This is a Doom 3 Tweak Guide, and once again other writers have already turned their hand to this topic too. However I have a feeling you'll consider this the mother of all Doom 3 Tweak Guides. Why? Because this one gathers all the known tweaks, and many new ones I've experimented with and documented, all in one place. I can confidently say that if you read this guide, you will find at the very least several major tweaks which you haven't tried before, which can help you improve your performance in Doom 3. The guide covers all the in-game settings in detail, but it also goes into lengthy coverage of many of the all-important advanced console and config commands which will let you eke out as much performance as possible from an already-optimized engine.
Don't be scared - start the tweaking journey with the Doom 3 Tweak Guide!
Note: This guide refers to the latest version of Doom 3 Version 1.3.1, including the Doom 3: Resurrection of Evil expansion pack. Make sure to check back regularly for updates.
Before getting into any game-specific settings and tweaks, this section covers the obligatory system optimization information I include in all my guides. If you've followed this advice recently, you can skip this section.
Many people report problems with this game and in almost all cases these are due to general system issues and not the game itself. With that in mind I strongly urge you to take some time and follow the advice below if you truly want this game, and indeed every other game you own, to run at its fastest and most trouble-free.
The place to start is my free TweakGuides Tweaking Companion. It is the complete system optimization guide for Windows users. Designed for novice and advanced users alike, it is written in plain English to help you genuinely understand all aspects of Windows and your PC. The guide covers every major topic, from the correct installation of Windows and critical drivers and software, through to recommendations for every significant setting and feature, all the major performance and convenience tweaks and customizations, as well as detailed troubleshooting advice. There are also links to a range of reliable free applications for optimizing and maintaining your system, as well as to important resources for finding out even more about Windows and your PC. There are two separate versions: one for Vista and one for XP.
If you've ever wondered what common graphics and display settings like FPS, VSync, Refresh Rate, Antialiasing and Anisotropic Filtering are, and how they really work, then check out my Gamer's Graphics & Display Settings Guide for all the details in an easy to understand format. The guide also gives you a rundown on exactly how a game goes from a being a set of files on your hard drive to a 3D image on your screen, including relevant performance tips.
Finally, if you run an ATI or Nvidia graphics card, I have written two comprehensive guides which you should check out: the ATI Catalyst Tweak Guide and the Nvidia Forceware Tweak Guide. These guides cover absolutely everything about the latest graphics drivers, how to set them up correctly, as well as advanced tweaking, overclocking and benchmarking tips. They're a must-read for configuring your graphics card correctly.
The above information really will serve you well in the long run, not just in this game. If you don't optimize your system and keep everything updated and maintained correctly you will keep running into "mysterious" problems time and time again. Do yourself a favor and when you get a chance spend an afternoon or two optimizing your machine the right way with the guides above.
The next section goes into more detail about specific troubleshooting tips which address common performance issues with the game.

This section contains specific troubleshooting tips which address many of the most common problems experienced by Doom 3 players. Several of the tips below are drawn from my guides mentioned in the Essential Optimization section. This is no coincidence, since many common Doom 3 problems are not game bugs, but general sub-optimal system conditions which lead to problems. Doom 3 is very elegantly coded, but is quite system intensive in a unique way and uses many advanced features. This brings out instability and problems on most systems, so I can't stress enough the importance of taking the time to go through the checklist of advice below, as well as the rest of this guide, if you're having a problem with the game.
Official Support: If you have a problem with the game, the first place to visit is the Activision Doom 3 Support Site. There are also several official documents you should read for more gameplay information and answers to common questions. The first one is in your \Doom 3\Docs\ directory, and is called Help.htm. You can also view an electronic version of the game's Manual by clicking on Manual.htm in your \Doom 3\Docs\ directory. Finally, if you still can't find the answer to your question, you can visit one of the many Doom 3 support forums, such as the PlanetDOOM Forums, where other players may be able to help you out.
Recommended System Requirements: The system recommended system requirements for Doom 3 are actually not terribly steep, and for reasonable performance you should try to meet them. The Minimum and Recommended system requirements are listed in the Help.htm document under your \Doom 3\Docs\ directory. Luckily, the Doom 3 engine looks great even at the lowest settings, so as long as you meet these minimum requirements you can run the game and enjoy the experience.
Running Doom 3 on Windows9x: Doom 3 is only officially supported on Windows XP/Windows 2000 and more recently on Windows Vista. It normally only installs on systems using these operating systems. However if you want to run it on an older Windows, try this tweak: Running Doom 3 on Windows 98. If you want to run it on Vista make sure to use the very latest patch (See page 4 for details).
Windows Vista Users: If you're having problems running this game under Windows Vista, first make sure that you're using the latest Vista graphics and audio drivers for your hardware, and the latest version of this game (see page 4 for patch details). Next, make sure you don't change your UAC settings after the game has been installed, as due to Virtualization this can change the location of the game files and settings. If you can't launch the game successfully when UAC is enabled, you will need to run the game with full Admin privileges. To do this either right-click on the launch icon and select 'Run as Administrator', or right-click on the launch icon, select Properties and under the Compatibility tab tick 'Run this program as an administrator' then click OK. I strongly recommend that you refer to the TweakGuides Tweaking Companion for Windows Vista for more information - in particular check the 'Gaming in Vista' section of the Graphics & Interface chapter; the UAC section of the PC Security chapter; and the 'Personal Folders' and 'Directory Junctions & Symbolic Links' sections of the Windows Explorer chapter. These will tell you how you can fix game-related issues and also explain the relevant differences of Vista.
Installation/Loading Problems: Many users report that they have difficulty installing or launching Doom 3. It is important to understand that Doom 3 uses a copy protection system which objects to the presence of CloneCD, Alcohol, Daemon Tools and even Nero Burning Rom (in rare cases). So if you are experiencing these problems make sure you disable and even uninstall any such software if you want Doom 3 to run. Don't tell me this isn't cool, I agree with you.
Audio Problems: Many users, especially those with Nvidia chipsets, report audio problems with their audio skipping or cutting out. Firstly, make sure you have the latest drivers for both your sound card and also your motherboard. Next, check your audio settings under Control Panel>Sound and Audio Devices and make sure they are set correctly. If all else fails though, go to Control Panel>Sounds and Audio Devices>Advanced and click the Performance tab, and move the Hardware Acceleration slider one or two notches to the left. This should resolve most audio issues, at least until a patch comes out.
CD Key Problems: The Doom 3 CD Key is found on a sticker in your Doom 3 CD case, or on the back of the game's manual. Once you enter this CD Key during installation, it is also placed in a file called doomkey in your \Doom 3\base\ directory. It is vital that you do not share your CD Key or lose it, since Activision will not provide you with a replacement key. Treat it like your Bank PIN number and stash it away somewhere safe. Also make sure that you don't allow your \Doom 3\ directories to be shared as part of any P2P program (like Kazaa or Emule), and that you don't ever include the CD Key in any emails, since Activision will never ask for your CD Key. If at any time you want to see/edit your CD Key, you can do this by going to the Multiplayer Settings screen from your Doom 3 Main Menu (See In-Game Settings section).
Virus Scan: Do a full scan of all your files using a virus scanner such as the following excellent (and free) tools: AVG Virus Cleaner for viruses, A-Squared for trojans, and Ad-aware for spyware. Viruses, trojans and spyware can cause unexplained behavior, general file corruption and system slowdown, and can also (in some cases) steal your CD Key. So it's best to make sure your system isn't infected before moving on to other measures. However make sure to disable any background scanning programs once you're done (See below).
Background Programs: Disable all background applications, especially virus, trojan and spyware scanners and messaging utilities. These applications can and do use up valuable CPU resources, take up precious RAM, cause memory conflicts and crashes to desktop, and lag online play, but most importantly they interfere with read/writes to your hard drive effectively slowing it down and causing more in-game freezes and loading pauses. Full instructions on how to identify your startup programs and services and how to correctly disable unnecessary ones are in my TweakGuide Tweaking Companion. This is an important step you should not miss.
Overclocking: Doom 3's engine is extremely sensitive to overclocking. If you have overclocked any components on your system and are having problems such as crashes and reboots, or 'artifacting' (graphical anomalies) set everything back to default speeds and try running the game. If you don't experience the same problems at default speed then your overclock is the primary culprit. Don't assume that because other games run with stability at a particular speed that Doom 3 will do the same. The Doom 3 engine is new and unique, and stresses hitherto less-used aspects of your hardware. Most users are reporting that they have had to clock back to default speeds or dramatically drop their overclocks in order to play the game without problems.
Graphics Card and CPU: Doom 3 is very reliant on advanced graphical techniques, and needs a lot of graphics power for optimal performance. However your CPU also plays a role in how well Doom 3 performs, and a high-end card with a lower-end CPU will suffer, just as a powerful CPU with a low-powered graphics card will also see low FPS in Doom 3. If you want to see how CPU and graphics power combine in Doom 3, read this interesting: AnandTech Doom 3 Article. If you're looking to upgrade, but have a limited budget (don't we all), this article may help you decide whether to upgrade your CPU or Video Card first.
Memory Subset: It is highly recommended that you run Doom 3 with 1GB of RAM for smooth gameplay. Doom 3 is highly reliant on your system RAM and video RAM for its performance. Regardless of RAM size however, you must ensure that you optimize your Virtual Memory settings by following the step-by-step instructions in my TweakGuides Tweaking Companion. Combined with the tweaks covered later in this guide, this should help resolve many issues. A lack of RAM and sub-optimal virtual memory settings, especially when combined with overclocked memory (and/or aggressive RAM timings), can lead to lots of small in-game loading pauses, longer loading times and memory conflicts leading to freezes, crashes to desktop, and even sudden reboots.
Defragging: Another vital tip is to make sure that after you have installed Doom 3 you run through the system maintenance procedures detailed in my TweakGuides Tweaking Companion. If you only do one thing on that list though, make sure you run the Windows Defragmentation utility after installing Doom 3. It is a very large game (over 3GB of data), and defragging ensures that the game's files are all on the same place on your hard drive, greatly reducing loading pauses/freezes and loading times. It may take a little while but it is well worth it.
Antialiasing and Anisotropic Filtering: If you have mysteriously low frames per second despite being certain that your hardware is capable of more, then one place to check would be your graphics card's Antialiasing and Anisotropic Filtering settings. These are explained in detail in my Gamer's Graphics & Display Settings Guide. I strongly recommend that you set any forced Antialiasing and/or Anisotropic Filtering in your graphics card's control panel to 'Application Preference', and use Doom 3's in-game and/or config settings to determine the levels of these (See In-Game Settings and Advanced Tweaking sections below). Forcing AA or AF in the control panel may conflict with Doom 3's settings and cause slowdowns.
That's just a basic rundown of troubleshooting tips. Read the remainder of this guide for more specific settings and tweaks which can help improve your performance and resolve any problems.
Official Patch
It is traditional for any modern PC game nowadays - no matter how well it's coded - to receive at least one patch during the course of its life. The game's programmers often resolve certain issues, improve particular aspects of gameplay, or add new features through such patches. Doom 3 has also received a couple of patches, bringing it up to Version 1.3.1. The latest patch contains all the changes from the previous patches, addresses a few small game bugs and importantly adds improved Windows Vista compatibility with Doom 3. Note that this update will not ruin your current savegames, but if you are currently playing in nightmare mode, you will need to reenable nighmare mode using the g_nightmare console command (See the Advanced Tweaking section). The full list of changes is included in the file update_readme.txt in the \Doom 3\Docs\ directory after you have installed the update.
To make sure you are running the latest version of Doom 3 at any time, there are two things you can do:
Whichever option you choose, make sure you are running the latest version as this is a requirement for joining most multiplayer servers, and also ensures you experience the best performance and least issues when running the game. Keep an eye on this guide for notification of further updates, and their performance impacts, as they are released.
Resurrection of Evil Expansion Pack
Doom 3: Resurrection of Evil (ROE) is an official expansion pack recently released for Doom 3. It contains an entirely new storyline, new monsters and some new weapons - however it is very similar to the original Doom 3 playing experience. Aside from the additional gameplay of the expansion pack, it also comes bundled with the official Version 1.2 patch for Doom 3, found under the \Patches\ directory on the Resurrection of Evil CD. This patch contains several changes and fixes which should improve Doom 3 single and multiplayer gameplay. One of the major changes of the patch involves the removal of the CD check for the game - see the No-CD section below for full details. The patch contains all the changes from the previous Version 1.1 patch, and must be installed before ROE can be installed. It also appears as though the patch is not available to Doom 3 users unless they buy the expansion pack, however there is now a more recent 1.3.1 Patch which anyone can download and install, with or withour ROE (See above).
In general all of the tweaks in this guide apply equally to Doom 3 and Doom 3 Resurrection of Evil, since ROE is pretty much just an 'official mod' for Doom 3 and not an entirely new game. Note though that the settings in the .cfg files for the base Doom 3 game do not automatically apply to the expansion pack - ROE's config files are held separately in the \Program Files\Doom 3\d3xp\ directory. So if you've created an Autoexec.cfg file for Doom 3 (See the Advanced Tweaking section), you can simply copy this file into the \Program Files\Doom 3\d3xp\ directory and those tweaks will then also apply to ROE when it starts up. However you shouldn't copy the DoomConfig.cfg file across since there are differences between these files for Doom 3 and ROE. You can also copy the command line options from the Doom 3 icon across to the end of the target line in the ROE icon properties and they too will apply without any problems.
No-CD Patch
Important Note: As of patch Version 1.2 onwards Doom 3 has a built-in No-CD. Details of the latest patch is provided above, however if you are running Doom 3 version 1.2 or newer (which is strongly recommended) you will no longer need the CD in the drive to play either Doom 3 or Doom 3: Resurrection of Evil.
Doom 3 has a protection system based primarily on a CD Key check you must have a valid CD Key to install and play Doom 3 and/or Doom 3 Resurrection of Evil. Doom 3 also checks to make sure you don't have certain drive emulation or CD copying software installed. Software like Alcohol, Daemon Tools and CloneCD can and will cause problems when attempting to install/run Doom 3, so if necessary uninstall this software to ensure Doom 3 runs without any problems. This is an unfortunate necessity with some of the latest games and it is up to you whether you tolerate such protection systems or not.
Doom 3 Versions 1.1 and below also have a CD check, whereby you must have the game CD in your CD/DVD drive to launch the game. This is incredibly annoying, and long-time readers of my guides know two things that I don't believe in this crude protection system, and that while No-CD files are available to defeat it, I don't provide details about where to get them due to legal concerns.
However as noted above, as of Version 1.2, Doom 3 and Doom 3 Resurrection of Evil no longer require a Doom 3 CD to remain in the drive to play. Instead now whenever you are connected to the Internet and playing Doom 3 (whether single or multiplayer), Doom 3 will verify your CD key online to make sure you have a legitimate copy of Doom 3/ROE installed. This is much better than the CD check which was annoying and thankfully this has been recognised and the check finally removed.
Maps and Mods
Aside from the official ROE Expansion Pack, Doom 3's incredible engine has spawned many user-made mods and maps. Just like earlier id games such as the Quake series and Return to Castle Wolfenstein, the engine driving Doom 3 is just too lush and malleable for any mod and map makers to pass by. Expect to see many more user-made and official Doom 3 mods, maps, add-ons, total conversions, etc. The main ones to hit the net are in these:
Doom 3 Mod Pack #1
Doom 3 Mod Pack #2
Doom 3 Mod Pack #3
Doom 3 Mod Pack #4
Another great mod is the Classic Doom Mod, which allows you to play the original 1993 Ultimate Doom game on the Doom 3 engine - give it a try!
If you have an itch to be creative, you can use the built-in DoomEdit editing tool included with the retail version of the game. To access this, start the game and open the console (See Advanced Tweaking section), and type "Editor" (without quotes). Note that the editor starts in a window, so if you want to use DoomEdit regularly you should set your Doom 3 resolution to the same as your desktop, then set Doom 3 to run in Windowed mode (r_fullscreen 0) before launching DoomEdit.
When using DoomEdit the only thing limiting your creativity is a bit of a learning curve and your own imagination. Don't be scared to experiment. Take advantage of Doom 3's advanced lighting and shadows - think of an Aliens vs. Predator mod based on the Doom 3 engine, or perhaps a multiplayer Thief mod, or how about a fun mod which gives players giant heads and NERF weapons? Uh, forget that last one anyway just get to work feeding the gamers' frenzy for anything related to Doom 3!
Rest assured that as other significant patches, mods, and maps are released, both official and user-made, I will link to them here and provide details for you to download and try them yourself. I would strongly suggest you check back here often.
The next section of the guide covers In-Game Settings for Doom 3.
In this section I provide full descriptions and recommendations for Doom 3's in-game settings, allowing you to achieve a good balance between audio-visual quality and performance. I note the performance impact of each setting, although bear in mind that it is impossible for me to give exact performance impacts - it all depends on your specific hardware combination and your other game and system-wide settings.
To access the in-game settings, start Doom 3 and under the Main Menu you will find the following options, which are explained in detail below:
Controls
This section has four separate categories for player control options you can change: Movement, Weapons, Attack/Look and Other. The procedure to change any of these is quite simple - left-click on one of the spaces next to the name of the control option and then press the mouse button or key you wish to assign to that control setting. Set these according to your taste, however a handy tip is to assign the right mouse button (Mouse 2) to your Flashlight (under Weapons), to facilitate faster switching back and forward between the flashlight and your weaponry during the game.
See the Advanced Tweaking section for more details of how to use the bind command.
Game Options
Player Name: Enter the name for your character. This is only used in Multiplayer matches. Has no impact on the single player game or performance.
Free Look: When set to Yes, this allows you to use the mouse (by default) to change your character's view direction. If set to No, moving the mouse back and forward will not make your character look up or down, it will make him walk back or forward. Has no performance impact, set to your personal taste.
Invert Mouse: If you are using a mouse in the game to control your player's view, setting this option to Yes means that pushing your mouse forward will make the character look down, and pulling the mouse backward will make him look up. If set to No, the results are the exact opposite. Has no impact on performance, set to your personal taste.
Auto Weapon Reload: If set to Yes, whenever your current weapon has fired its last bullet/charge your character will automatically reload it. Has no impact on performance.
Auto Weapon Switch: Setting this option to Yes means that if your player runs over a higher-powered weapon than the one he is currently holding, he will automatically switch to it.
Show HUD: The HUD is the Heads Up Display - the information around the current player view. This includes health, current weapon ammo, and things such as the video disk and PDA icon. If set to Yes, this information is displayed. If set to No, all such information is removed from the screen. The performance difference is negligible, so it is not recommended that you disable the HUD since it provides valuable information vital to good gameplay.
Show Gun Model: If set to Yes, you will be able to see the weapon you are holding in front of you. If set to No, your weapon will not be displayed on screen, although it will function exactly the same as normal. Setting this to No may improve framerates due to a reduction in what has to be drawn on screen, however not having your gun displayed can cause confusion as to what you are holding, so it is not recommended.
Show Decals: Decals are the marks left on surfaces such as bullet holes and energy scorch marks. Setting this option to No removes all such decals which can reduce realism, but will improve performance, particularly during combat scenes.
Smooth Mouse: This slider controls how smooth your mouse movements will be in the game. The further to the right you move the slider, the less "jumpy" your mouse will feel as your mouse movements are averaged out. Unfortunately for most people, increasing mouse smoothness also results in quite noticeable mouse lag, whereby there will be a slight delay between your mouse movements and how that's translated to what appears on your screen. I recommend you move the slider to the far left to disable mouse smoothing, so that you minimize any mouse lag.
Mouse Sensitivity: This slider determines how sensitive your mouse is in the game. The further to the right the slider, the more sensitive your mouse is to being moved. Adjust this setting until you can turn around rapidly, yet also make small changes in your aim without excessive jumpiness. Has no impact on performance. Note, if your mouse is "lagging" in the game, aside from mouse smoothing (see above), this is primarily due to low framerates. You must adjust your settings to improve your average FPS and you will notice an improvement in mouse lag. Also see the Advanced Tweaking section for more details.
Once you're done changing these settings click 'Apply Changes'.
System
[Video Settings]
Video Quality: There are two sections under this setting. On the left, there is an option to 'Scan hardware and select optimal video quality', and on the right there are four levels of quality: Low, Medium, High and Ultra. Each is covered below:
Scan Hardware: When this option is chosen, Doom 3 attempts to set the "optimal" settings based on your hardware configuration, automatically selecting your Screen Size and Quality level (See below), as well as a range of other game variables. The rules it follows to do this are heavily influenced on your graphics card model and video memory size. As such, in my experience and based on a lot of reader feedback the auto-detector is almost always wrong. It selects very conservative image quality and resolution settings to maximize your FPS (Frames Per Second), but it is far wiser and more rewarding to change the in-game settings manually (and also do some Advanced Tweaking) to get everything to run smoothly and look great. As such I don't recommend you use this feature, and instead read the remainder of the guide for details on how you can do it yourself. But you knew I was going to say that, right?
Low, Medium, High and Ultra Quality: Below are the major differences between the different quality levels and the associated hardware it is recommended you use to be able to run that quality level smoothly:
Low Quality: This mode is designed for a graphics card with 64MB of Video RAM. It uses compressed textures (textures are the 2D images used on the surfaces of all 3D objects) and light maps, and texture resolution is also limited to 512x512 at most. The reason for this is that large uncompressed textures quickly fill up your Video RAM and cause a lot of swapping into and out of the Video RAM, creating small pauses and freezes. Texture compression and reducing the resolution of textures keeps the Video RAM overhead low, with the down side being some "compression artifacts" (i.e. blurriness, some pixelation and most noticeably a purplish tinge to textures). The game will also use only one sound per event. For example, firing the shotgun has the exact same sound effect every time. This is done to reduce memory usage, as all sounds are preloaded into RAM wherever possible.
Medium Quality: This mode is designed for a graphics card with 128MB of Video RAM. There is still compression used for textures, and light and render maps. Texture sizes are not automatically reduced however, so all textures will appear at their full resolution. There will still be compression artifacts however, but once again this must be done to keep Video RAM demand low. The number of sounds per event also increase, such that there will be some variety for each sound effect at the expense of some system RAM. This mode is the one recommended for most people as it is a good balance of image quality and performance.
High Quality: This mode is designed for a graphics card with 256MB of Video RAM. In this mode there is no texture compression (which greatly increases Video RAM usage), however light maps are compressed still. It is important to note that in this mode, Anisotropic Filtering is automatically enabled and set to 8x, which is quite high. This helps noticeably sharpen textures as they fade into the distance, however it has a pronounced impact on performance. Essentially in High Quality mode texture quality is improved over Medium Quality due to removal of compression and through use of Anisotropic Filtering, but at the cost of a significant performance hit on cards with lower Video RAM and processing power.
Ultra Quality: This mode is the highest possible for Doom 3 and is designed for a graphics card with 512MB (!) of Video RAM. No compression is used for anything, hence while graphics quality is at the best it can possibly be (not including Antialiasing, which you can also enable separately), there is a major performance hit for current systems. Due to the lack of compression loadup times are theoretically reduced, however in exchange for this most systems will notice a lot more freezes and pauses as video information is constantly being swapped into and out of your Video RAM. For the most part the difference between High and Ultra Quality modes is difficult to tell.
Some important things to understand about these settings:
Screen Size: This setting determines the resolution of the game image. That means how many pixels are displayed on the screen. A resolution of '800x600' means 800 pixels wide by 600 pixels high on your monitor. The higher the resolution, the more pixels shown and the more detailed and clearer the game image, but it takes more graphics card power (and some CPU power) and hence you will see less frames per second. The highest resolution available in this list of resolutions is limited to what your graphics card and monitor are actually capable of rendering (drawing on screen). The resolution has an important impact on your framerate in Doom 3 in conjunction with the Quality settings (see above). If nothing else helps you improve your FPS you will have to reduce the resolution.
Note: To display Doom 3 in Widescreen mode, or in fact at any other custom resolution, you will need to use the r_mode -1 command and then enter the screen height and width in the r_customheight and r_customwidth settings. E.g. r_customwidth 1280 r_customheight 720 will give the correct aspect ratio for widescreen diplays (16:9). See the Advanced Tweaking section for more details.
Fullscreen: If set to Yes, this means Doom 3 will run in fullscreen mode. This is recommended, as it provides optimal trouble-free performance. However if you want to run the game in a window instead - and see a performance improvement - select No. This will run Doom 3 in a window with the resolution you specify in the Screen Size setting. Note that if the Screen Size setting is larger than your Windows Desktop resolution, parts of the Doom 3 game window will not be visible. Therefore if you plan on running Doom 3 in windowed mode you should specify a Screen Size of equal to or less than your current Windows Desktop resolution. Note also that running in windowed mode may cause additional problems and instability, due to memory management issues, so bear this in mind if you're troubleshooting.
Brightness: The brightness slider controls the brightness of the game image. The further right you move the slider, the brighter the image. Brightness values which are too high result in washed out and unrealistic images, especially since Doom 3 is heavily reliant on the element of surprise, suspense and fear all influenced by the game's lighting (or lack thereof). You should also refer to the Advanced Tweaking section for adjustment of Gamma. This setting has no impact on performance.
[Audio Settings]
Surround Speakers: If the game detects that you have a surround-sound capable speaker setup, this option can be set to Yes. The game determines your speaker setup based on what you have chosen under the Control Panel>Sound and Audio Devices>Speaker Settings>Advanced section in Windows. Make sure you have the correct speaker setup selected in Windows, as this also affects your audio quality and any audio problems you may experience. If you are unsure of the best speaker settings to precisely match your setup, select 'Desktop Stereo Speakers' in the Control Panel. Selecting Surround Speaker mode can reduce performance slightly due to extra processing requirements, and may also cause some audio glitching on certain systems. See the Troubleshooting Tips section above for more details.
EAX 4.0 HD: If you have a sound card capable of Environmental Audio (EAX) 4.0 - namely the SoundBlaster Audigy range using the latest drivers - then you can enable this option for a slight performance hit but an improvement in audio quality/positioning.
Reverse Channels: If set to Yes, the left channel will be outputted to your right speaker channel and vice versa. You should set this to No unless you specifically require this functionality. Has no impact on performance.
Volume: This slider controls the game volume for both music and sound affects. Adjust according to your tastes. Has no performance impact.
For more details on how to adjust several other important audio settings in more detail see the Advanced Tweaking section.
Once you're done with all these settings, click 'Apply Changes' to put them into effect. Note that certain changes require you to close and restart Doom 3 before they come into effect. The next section continues the In-Game setting descriptions.
Advanced Options
High Quality Special Effects: With this setting set to Yes, Doom 3 will use a range of advanced graphical techniques to increase your immersion in the game. For example, looking at a column of fire will produce a highly realistic heat haze effect. These effects take some graphical power to produce, so disabling this option (setting it to No) will improve your performance at the cost of realism and immersion.
Enable Shadows: This setting determines whether you see any real-time shadows cast for objects in the game. If set to Yes you will see most objects casting very realistic shadows, which move with dynamic sources of lighting (such as swinging lamps for example), however your FPS will be lower as your system has to do more calculations to determine where shadows are cast at any point in time. This is particularly noticeable when there are multiple characters/enemies on the screen, as they cast very complex shadows. If set to No, these shadows will disappear, although this doesn't mean all the areas of darkness in the game will be removed. Your performance will improve, but the atmosphere of the game may suffer somewhat. If you feel comfortable turning this option off, then the performance improvement (which is significant on many systems) may be worth it.
Enable Specular: If set to Yes, specular lighting gives the surfaces of objects, ranging from metals to skin, a realistic sheen. When combined with Bump Maps (see below), this option creates a very plausible illusion in Doom 3 that your surroundings are real. However obviously it reduces performance, so if you're after more FPS and don't mind the drop in realism, set this option to No.
Enable Bump Maps: Bump mapping is an effect which makes 2D textures appear as though they are 3D, with depth and grain. If set to Yes, surfaces will appear much more realistic, especially when light shines on them, however your performance will be lower. Again, if you can do without this effect turn it off.
Vertical Sync: Vertical Synchronization (also called Vertical Sync, or simply VSync) is the synchronization of your graphics card and monitor's abilities to redraw the screen a number of times each second (measured in FPS or Hz). If VSync is disabled (set to No), you may see some image "tearing" as your monitor and graphics card go slightly out of synchronization when the refresh rate exceeds the monitor's abilities, however your FPS can now exceed your monitor's refresh rate. For more details, read my Gamer's Graphics & Display Settings Guide. There is something important to understand when talking about VSync and Doom 3 though - the Doom 3 engine is specifically capped at 60FPS, so normally you cannot exceed this framerate regardless of your VSync setting (you can exceed it by using the com_fixedtic -1 command - see Advanced Tweaking section). You can still have a refresh rate higher than 60Hz, it's just that your monitor will simply show some frames more than once. It is always recommended that you have as high a refresh rate as possible to ease eyestrain (See Advanced Tweaking section). Whether VSync should be on or off in Doom 3 is not set in stone - it differs by system. Some people have reported to me that they get better, and more importantly smoother framerates with VSync enabled (Set to Yes). Others show through their Timedemo results (See Neat Stuff & Conclusion section below) that having VSync off improves their average FPS. You will need to experiment, but to begin with I recommend firstly checking your graphics card control panel to ensure that the Vertical Sync option there is set to 'Application Preference', and then in Doom 3 set VSync Off. If you are happy with it, keep it off, however if you find the image "tearing" too annoying, or want smoother FPS, then set VSync back to On. Also run a Timedemo with VSync on and off and see what your particular results show.
Antialiasing: Antialiasing is a method of smoothing the jaggedness of lines in 3D graphics. For more details see my Gamer's Graphics & Display Settings Guide. This setting has (up to) five options: Off, 2x, 4x, 8x and 16x. When set to Off, there is no additional Antialiasing used, unless you have forced Antialiasing enabled in your Graphics card's control panel. Antialiasing set to Off provides the fastest performance. When set to 2x Antialiasing, this uses your graphics card to smooth out jagged lines at the cost of some FPS. Higher levels of Antialiasing will reduce FPS even more, but smooth out jaggedness considerably, particularly for distant objects. Note that if you have any level of Antialiasing enabled in your graphics card control panel, they will override these settings. If you want to use Antialiasing in Doom 3 I recommend selecting 'Application Preference' (not '0x') in your graphics card's control panel and then setting the AA level in-game here. For most people however I recommend setting Antialiasing to Off since it is a major performance drain, and Doom 3 is a game which really doesn't require antialiasing at any resolution - the jaggedness of lines is barely noticeable.
Once you're done with these options click 'Close Advanced Options', then click 'Apply Changes' to put them into effect.
Defaults: If you want to return to the default settings for the game, click this option. Note that doing this will mean you will lose all your existing customized in-game settings.
Multiplayer
Find Multiplayer Game: In the Game Browser screen you can look for a Doom 3 Multiplayer server to join. At the top of the screen, select Internet or LAN (Local Area Network) depending on where you wish to play. Then click 'Get New List' to bring up a list of all available Internet or LAN servers you can try to join. If playing on the Internet, try to join a server with the lowest Ping, as the lower the ping the lower the online 'lag' you will experience. Once you find a suitable server, highlight it and click 'Join Game'. Note, if you have an invalid Doom 3 CD Key, you cannot play Doom 3 online.
Browser Filter: If you want to refine the list of servers displayed, you can do so under this section. Select the Gametype of the servers you wish to display, whether you want to see Password protected servers or not, and finally in the 'Servers' setting, whether you want to Hide Full (hide servers which are full), Hide Both (hide servers which are full and those which are empty), or Show All. Click the 'Apply Filter' button to use these filter settings in the main Game Browser window.
IP Connect: If you know the IP number of the specific server you wish to join, enter it here then click 'IP Connect' to join that server, otherwise leave this area blank.
[Create Server]
Server Name: Enter a name for your server. The default server name is 'Doom Server', however since your server name is what other players will see in the Server Browser, give your server a unique name.
Game Map: Select the particular map you want the server to run.
Server Type: You can select whether your server is seen on the Internet, or whether it is only meant to be visible to those on your private LAN.
Game Type: Choose the game mode for the multiplayer server, that is either Deathmatch, Team DM (Team Deathmatch), Last Man (Last Man Standing), or Tourney (Tournament mode).
Team Damage: If set to Yes, teammates can hurt each other with friendly fire in Team Deathmatch mode.
Frag Limit: Set the number of frags (kills) the highest scoring player must reach before the round ends.
Time Limit: Set the maximum time limit for each round in minutes. If a player hits the Frag Limit first, the round will end earlier, otherwise at the end of the time limit the highest scoring player will win. If there is a draw the game will continue until a winner is decided.
Max Players: Choose the maximum number of players allowed on the server. This is limited to 4 by default.
Do Warmup: If this option is set to Yes, at the start of each round there will be a 'warmup' period before the start of the actual match, allowing players to join and prepare for the upcoming game.
Allow Spectators: If set to Yes, spectators (people who aren't playing) can join your server and watch the proceedings. Spectators draw bandwidth just like players, so if you're on a limited bandwidth connection note that additional spectators can lag your server.
Dedicated: Select whether you want this server to be a Dedicated Server. This provides optimal performance for the server, however you cannot play on a machine which is acting as a dedicated server.
[Advanced Server Options]
Use Password: If set to Yes, you can set a password (in the Password setting below) which players must enter before they can join the server. This effectively restricts your server to individuals who know the password, and no-one else can join.
Password: If the Use Password setting is set to No (See above), this option will be unavailable, however if set to Yes, this option allows you to enter the password required to join the server.
Remote Console Password: If you want to access this server from another machine, then the password required to access the server using a remote console is set here.
Reload Engine on Map Change: If set to Yes, whenever a new map begins the server will reload the Doom 3 game engine. This can help prevent any engine data corruption and crashing and can improve memory usage, but increases the load time between maps depending on the server's specifications.
Allow Server Side Mods: If set to Yes, this allows the server to run unofficial mods for Doom 3.
Map Cycle Script File: You can specify a script file to determine the order and behavior of map cycling on the server. For example, create a script file called 'mapcycle.scriptcfg'.
Pure Server: If set to Yes, this checks to make sure that people connecting to your server have identical original Doom 3 files.
Configure Server Rate: Determines the maximum data rate which the server provides to individual players. Set it here, and then see the Advanced Tweaking section to modify the data rate more precisely.
Once you've finished adjusting all these settings to your satisfaction, click the 'Create Multiplayer Game Server' button to start your server and it should be viewable to other players.
[Multiplayer Settings]
CD Key: Your CD Key is vital to being able to connect and play Multiplayer Doom 3. The key displayed here is the one you entered when you first installed Doom 3, and it can be found on the back of a sticker on your game manual, or in the game's CD case. You should never need to change it, and of course you should never share it with anyone (See Troubleshooting Tips), however it can be edited here if necessary.
Data Rate: This setting has a major influence on how smooth your gameplay will be online. Make sure you choose the appropriate connection type here. The options, in order of lowest bandwidth to highest, are: ISDN, DSL/LAN and T1/Cable. See the Advanced Tweaking section for more details of how to fine-tune your data rate for even smoother gameplay.
Always Run: If set to Yes your character will run by default when you move around online. This is recommended given the fast pace of Doom 3 Multiplayer. Note this setting doesn't affect Single Player.
Player Name: The player name you entered in the Main Menu should be shown here, and is the one which will display when you play online. See the Advanced Tweaking section if you want to insert special characters or color codes into your player name.
Player Skin: Choose a skin color from the options provided. The color you choose helps to differentiate you from other players online, but only in certain game modes.
Once you've made the appropriate changes, click the 'Save Settings' button, then click on the 'Main Menu' option at the top of the screen to get back to the main menu.
We're done with all the settings you can adjust using the In-Game Menus. Come back and adjust them as necessary, but for now we move on to Advanced Tweaking - the heart of the Doom 3 engine.
You can change more than just the settings available under the in-game menus in Doom 3. Since it is based on a highly advanced engine, there are many, many variables which can be adjusted to alter the way in which Doom 3 looks, sounds and operates on your machine. Why would we want to alter these variables - shouldn't the programmers who designed the game know best and have already set them up optimally? Well of course they do, and yes Doom 3 is heavily optimized already. But there are so many different combinations of PC hardware and software that it is impossible for any games developer to customize the game to suit your machine perfectly. So tweaking command variables means you can further customize the engine to run at its best on your particular setup. Furthermore, since you can alter many of the settings within the game to suit your personal preferences, so too there are many more finicky settings you can access in the console to further refine image quality and controls to suit your tastes. Tweaking is not something people do to appear cool, nor is it a waste of time. It yields real performance improvements and allows you to exercise your right to have the game looking and feeling precisely how you want it to.
There are two main ways in which you can access and alter command variables in Doom 3 - through the Console and through .cfg (Config) files. To save time in this guide, I detail all the major commands one by one in the next section, and you can then decide the method to use to implement particular ones. The methods are essentially interchangeable, meaning changing the variable using one method has the same impact as doing it another way - the only difference is which is more convenient for you. These methods are detailed below:
The Doom 3 Console
The console is the closest you can get to having direct real-time access to Doom 3's engine. Through the console you can enter commands to change engine variables during the game. To open the console, start Doom 3 and then press the CTRL, ALT and ~ keys together (in some countries you will have to press CTRL, ALT and the key directly beneath the ESC key if ~ doesn't work). You will see the console come down, and you can enter text at the command prompt. A list of commands you can enter are covered in the next section. To make regular access to the console easier, enter the following line into the console:
set com_allowconsole 1
This means that you can now open and close the console by simply pressing the '~' key (the key above TAB), and not three keys at once. Note that to make this setting (and many other settings) "stick", i.e. remain enabled even after quitting and restarting Doom 3, you will need to insert it into a Config file, or in the game icon's Target line, both of which are covered below.
Doom 3 Config Files
Although you can alter many variables by entering them into the console, most command variables need to be set each and every time you start Doom 3. This is because the game engine resets these variables to their default state as the engine initializes at startup. By default, when the game engine starts, it automatically detects the presence of, and runs the command variables from two specific files: DoomConfig.cfg and AutoExec.cfg. DoomConfig.cfg already exists in your \Doom 3\base\ directory, and you can edit it using a text editor like Windows WordPad or Notepad. However changing some of the settings in DoomConfig.cfg will see them reset to default values again the next time you restart Doom 3. So the best thing to do is create a new text file, rename it to "AutoExec.cfg" (without quotes) and place it in your \Doom 3\base\ directory. You can now enter all your custom tweaks and settings into this file, and they will come into effect automatically each and every time you start Doom 3. This makes it easier to keep track of what you have tweaked, and if at any time you want to remove all your tweaks, you can simply delete the AutoExec.cfg file.
Note that there is another way of executing a config file, and that is to firstly create a config file with any name you wish, e.g. MyTweaks.cfg, place it in the \Doom 3\base\ directory, and then in the Doom 3 console at any time type:
exec MyTweaks.cfg
This will run all the command variables in your new .cfg file, however unless you actually execute this file it will not be automatically run at startup time - only DoomConfig.cfg and AutoExec.cfg are automatically detected and run by Doom 3.
Doom 3 Icon Commands
There is one more way you can run command variables for Doom 3 - enter them as part of the command line for the Doom 3 icon. To do this, first right-click on the icon you use to launch Doom 3, and then select Properties. In the Target box, you will see something like this:
"C:\Program Files\Doom 3\Doom3.exe"
You can add command variables to the end of this line by using a space and then a '+' sign in front of each command. For example, to allow easy access to the console each time you start Doom 3, change the target line to the following:
"C:\Program Files\Doom 3\Doom3.exe" +set com_allowconsole 1
Note that there are quotes around the target to the Doom3.exe file, but after that, simply add a space and a plus sign before each command. Another example is provided below with two commands:
"C:\Program Files\Doom 3\Doom3.exe" +set com_allowconsole 1 +set r_gamma 1.3 +disconnect
This means that every time I use this icon to launch Doom 3, it changes my console to one-key access (using the '~' key), changes my gamma from 1.0 to 1.3, and skips the introductory movie. Note the spacing - none between the plus signs and command, but a single space between each separate command.
So Which Way Is Best?
Now you know how to apply command variables in the Doom 3 engine, as I mentioned before, there is no single way which is the "best way". Each method works, it just depends on what you find more convenient. I personally prefer to place all my tweaks in a single AutoExec.cfg file, because that way I can see at a glance all the settings I've changed, and if need be I can remove the file (e.g. for troubleshooting purposes), or change each setting back to default. I can also easily back up this file so I can quickly reapply the same tweaks if ever I reinstall Doom 3, or if my settings are lost after I patch the game.
However, I suggest that you use the in-game console to try some commands and what effect they have on the game, and then you can insert them into your AutoExec.cfg file once you've determined if they're worth using, and which values work best for you. Some commands are only really useful if used in the console - for example the "recorddemo" command records a custom demo...not something you want to have in your AutoExec.cfg file at any point. Also note that certain commands don't come into effect until the game is restarted (e.g. if vid_restart is used), so you will have to experiment by placing those in your AutoExec.cfg first, see what they do, and then decide whether to keep them or not.
Importantly, if you are going to edit DoomConfig.cfg, first make a backup of the file so that should something go wrong you can restore the file to its original state. Also, some people recommend that you make changes to DoomConfig.cfg and then make the file read only to prevent the game from erasing/resetting some of the changed settings. I personally don't recommend this, as Doom 3 needs to have write access to DoomConfig.cfg so that for example when you change one of the in-game settings or a key binding, it can record the change in that file.
The next section provides a list of all the game's command variables, and descriptions for most of them.
This section lists out all the major command variables by general function, and provides descriptions and recommendations for the important ones. This list is by no means exhaustive, since there are literally hundreds of command variables for Doom 3.
Usage rules
Config and Console Usage: In the Doom 3 engine, when you want to use a command - whether in a config file or in the console - you can simply type the name of the command, and then any values or parameters (if required), however you must place exactly one space after the command and any following value or parameter. E.g: r_displayrefresh 85. You don't have to use "" (quotes) around the value, nor do you have to use the Set or Seta command in front of them.
Set and Seta In Front of Commands: You will see in certain places, like the DoomConfig.cfg file, that a command is prefaced with the words Set or Seta. You can also insert these in front of your commands in the console or config file, however they aren't necessary. Set is used to tell the game engine to set a cvar to a particular value. Seta is more useful in that it tells Doom 3 to set the cvar value, and then archive it (store it). There is also a Sett command, which specifies that the setting is for a tool (DoomEdit is the primary tool) - that means it has no influence on gameplay. Further, there are Setu (User Info) and Sets (Server Info) commands just so you know.
Current and Default Values: If at any time you want to see the currently used value for a command variable, open the console and type the name of the variable without a value. For example, type "r_displayrefresh" (without quotes) and you will see the current value for this variable on your system, and importantly you will also see the default value. If you can't remember a command name while in the console, type the first letter(s) of it and then press the TAB key - the console will show you all commands beginning with the same letter(s).
The following is a list of all the major commands for Doom 3, grouped by function, and with as full a description as I am capable of based on my own knowledge, the developers' help text and personal testing. Please Email Me if you have more knowledge of any of these commands, or if you have other useful commands to add to this list. Settings which can be easily and fully changed in the Main Menu of the game will not be covered here - see the In-Game Settings section for descriptions of those. Also some of the more obscure commands are not very useful to most users (such as developer, debugging and radiant commands) and these are not included. Finally, there are no cheats here - those are widely documented elsewhere and not something I regularly include in my guides. Ok, here is the list:
General Commands
com_showFPS [0,1] - If set to 1, shows the current frame rate in Frames Per Second (FPS) at the top right of the screen.
com_allowConsole [0,1] - If set to 1, allows the command console to be opened by using only the '~' key, rather than CTRL + ALT + ~.
bind [keyname, command] - Binds a command to a key. For example:
bind F10 com_showFPS 1
bind F11 com_showFPS 0
This binds the F10 key to the command "com_showfps 1" (which turns on the FPS counter), and the next line binds the F11 key to the command "com_showfps 0" (which turns off the FPS counter). If you want to make a key binding "toggle", that is pressing the same key turns a command on or off, then use the 'toggle' command instead, for example:
bind F10 toggle com_showFPS
Now the F10 key alone will turn the FPS counter on and off, which frees up the F11 key.
bindunbindtwo [keyname, command] - Same as bind command, however if the key you want to bind is already being used more than twice, it will unbind it first then bind it to the command you've specified.
unbind [keyname] - Unbinds any existing commands from the single key named.
unbindall - Unbinds any commands from all keys. This command is used most commonly as a starting command before setting bindings, so that you can be sure the keys you are binding are not already in use by another command.
loadGame [savename] - Loads a saved game with the name specified. If no name is specified, loadgame will load the last quicksave.
saveGame [savename] - Saves your current game under the name specified.
editor - Opens the Doom 3 "DoomEdit" level editor. See Patches, Maps and Mods section.
echo [text] - Prints the specified text on the screen.
exec [filename] - Executes the commands in the config filename provided. For example to execute all the commands in a custom configuration file called MyTweaks.cfg, type:
exec MyTweaks.cfg
And all the commands in that config file will be compiled and run.
screenshot - Takes a screenshot and places it in your \Doom 3\base\screenshots\ directory as a .tga file, similar to using the F12 key.
conDump [filename] - dumps the entire contents of the console for the current session to the filename specified (as a .txt file) and places it in your \Doom 3\base\ directory.
freeze [seconds] - Freezes everything in the game for the number of seconds specified.
clear - Clears the console of all text to date. Useful if you want to clear the console before generating specific text (e.g. listcmds) then condump them cleanly.
con_noPrint [0,1] - If set to 1 provides text feedback in the console, but not on the screen when console is not visible.
exit - Closes Doom 3 and exits to the Windows Desktop.
Performance Commands
[Cache Tweaks]
The following commands control the image cache, which if enabled and set correctly can help smooth FPS and may also boost performance:
image_useCache [0,1] - If set to 1, uses background loading to cache image information. This may not necessarily improve framerate performance, but it does assist in smoothing out frame rates and reducing loading pauses. Note that the image_cacheMinK (see below) size must be raised from its default otherwise the game will crash when using this setting. Once this setting is enabled, the actual cache value is set in the image_cacheMegs setting below.
image_cacheMegs [Megabytes] - Determines the maximum amount of system memory to allocate to temporary loading of full-sized precompressed images if the cache is enabled by setting image_useCache to 1. Note that since this caching only applies to precompressed images, using the Ultra Quality setting will render this setting useless, since at Ultra quality no texture compression is used. Since a cache is only a temporary holding area, and not the place where the entire game is meant to reside, do not raise this value to something extremely high as that will simply reduce the available memory for the rest of Doom 3. Try a value of 128MB for those with 512MB of system RAM, and if you have 1GB or more of RAM, you can try a higher value like 196MB or 256MB for example. Do not automatically set this to half your system RAM or some monstrous amount.
image_cacheMinK [KiloBytes] - This setting determines the minimum size in KB for precompressed image files to be loaded into the cache. To make sure most image files can be loaded, and to also prevent a system crash when enabling caching, select a value like 3072 to start with. Raising this setting may improve caching, but it may also hinder caching if most textures are below the size you specify, so don't just raise this value for the hell of it.
[Graphics Tweaks]
r_brightness [value] - Determines the overall brightness for the game. You can adjust this using the slider in the main options menu (See In-Game settings), however if you want to fine tune it you can do so here. Has no performance impact.
r_gamma [value] - Determines the gamma level (essentially a form of brightness) for the game. Raising this value too high can make the game image appear washed out. Has no performance impact.
r_displayRefresh [Hz] - Determines the refresh rate used when Doom 3 is launched. You should already be getting the maximum refresh rate possible on your monitor when playing Doom 3 through the use of a refresh rate fix (See my ATI Catalyst Tweak Guide for a link and instructions for both Nvidia and ATI users), however if you want to set this manually, determine the supported maximum refresh rate on your monitor for the resolution you've chosen for Doom 3 (e.g. I run Doom 3 at 1280x1024, and my monitor can do 85Hz maximum at this resolution), and set this variable to that value.
r_multiSamples [0,2,4,8,16] - This setting determines the level of Antialiasing samples used. This can be set using the in-game menus (See In-Game Settings section). The numerical values here are 0 which is no antialiasing, 2, 4, 8 and 16.
com_videoRam [MB] - Shows the detected amount of video memory on your graphics card in MB. If this value is incorrect, set it to the correct value to improve performance.
cm_backFaceCull [0,1] - If set to 1, removes all polygons behind the direction the player is facing - that is, all the things the player cannot see. This can improve performance, but if you experience any visual anomalies set this back to 0. Note it's cm_backFaceCull, not com_backFaceCull.
com_purgeAll [0,1] - If set to 1, discards all data between level loads. Can increase loading times noticeably but may help reduce in-game pauses.
com_machineSpec [-1,0,1,2,3] - Shows the currently detected machine specification level, with the choices being -1 - Not detected, 0 - Low quality, 1 - Medium quality, 2 - High quality, and 3 - Ultra quality.
com_fixedTic [-1,0,1] - If set to 0 (the default) Doom 3's ticrate is capped at 60FPS, meaning the game framerate cannot exceed this, except when running a timedemo. If you want to remove this cap, set com_fixedTic to -1. Setting it to 1 removes the cap, but causes the game physics to go out of sync. Removing the FPS cap doesn't necessarily improve performance, and can lead to more variable framerates. Note that com_fixedTic -1 doesn't work as of the latest patch.
setMachineSpec - Detects your system hardware and sets the value for com_machineSpec (See above).
execMachineSpec - Executes all the relevant config files and sets variables based on the machine specifications provided by the com_machinespec variable. For example, if you raise your machine spec to 3 using "com_machinespec 3", then running the command "execMachineSpec" will change all your settings and config variables to the ones appropriate to a machine suited for Ultra quality performance (i.e very high end).
r_vertexBufferMegs [Megabytes] - This setting controls how many MB are allocated to the vertex buffer. Increasing this value will see a performance improvement on most systems, so try increasing it to 48MB or 64MB.
r_orderIndexes [0,1] - If set to 1, reorganises indexes to optimize vertex use. This improves rendering performance.
r_usePortals [0,1] - If set to 1, uses portals to perform area culling, otherwise everything is drawn. Setting this to 1 provides the best performance.
r_useOptimizedShadows [0,1] - When set to 1, uses the dmap generated static shadow volumes, which provides optimal performance.
r_lightScale [value] - All light sources are multiplied by this value. Increasing this value increases the intensity of all visible light sources. Basically it makes light sources brighter the higher the value.
r_skipParticles [0,1] - If set to 1, this disables all particle effects, including smoke, fog, steam etc. This can dramatically improve performance in areas with these effects, however it can reduce realism greatly as well.
r_skipDiffuse [0,1] - If set to 1, disables diffuse lighting. This improves performance, but also darkens areas where such lighting is used since no lighting is used to replace the removed diffuse lighting.
r_skipUpdates [0,1] - If set to 1, lighting is not updated, meaning all lighting will become static (fixed direction and intensity). This can improve performance significantly, but reduces realism.
r_skipDeforms [0,1] - If set to 1, any material which can be deformed will remain in its original state.
r_skipFogLights [0,1] - If set to 1, disables all fog lights which can improve performance.
r_skipTranslucent [0,1] - If set to 1, disables translucent rendering, which can improve performance (but reduce realism) in such areas.
r_skipInteractions [0,1] - If set to 1, disables all light interactions with surfaces, effectively making almost all surfaces black.
r_skipMegaTexture [0,1] - If set to 1, uses only the lowest level images. This improves performance at the cost of lower image quality for some surfaces.
r_skipGuiShaders [0,1,2,3] - If set to 1, this removes all Graphical User Interfaces (GUIs) in the game (i.e. computer terminals, security screens etc.), if set to 2, GUIs aren't drawn but they can still be interacted with, if set to 3 they will be drawn, but cannot be interacted with. These settings can improve performance but obviously reduce playability.
r_useShadowCulling [0,1] - If set to 1, tries to remove shadows from partially visible lights. This provides optimal performance.
r_useLightCulling [0,1,2,3] - Determines the light culling method. 0 is no culling, 1 is box culling, 2 is the exact clip of polyhedron faces, and 3 also includes areas. This should be set to 3 for optimal performance. Other methods can reduce visual anomalies with lighting but will reduce performance.
r_useCulling [0,1,2] - Determines the object culling method. 0 is no culling, 1 is sphere culling and 2 is sphere and box culling. Setting this to 2 provides optimal performance, but other methods can be tried to reduce visual anomalies.
r_renderer [best, arb, arb2, cg, exp, nv10, nv20, r200] - Determines the rendering path to use. Some renderers can't run on certain hardware - for example cg is an Nvidia rendering language and can't run on ATI cards. You can experiment with these to see which is best on your system, as I haven't had the chance to test these on various hardware.
r_ignoreGLErrors [0,1] - This setting should be set to 1, to ignore OpenGL errors. Most people will have one or two OpenGL errors throughout the game, and these don't seem to affect gameplay.
r_znear [value] - This setting determines the distance at which z-buffer clipping occurs. The default value is 3, and lower values can result in graphical anomalies for distant objects but improve performance, while higher values may help reduce any z-buffer graphical anomalies, but may reduce performance.
r_useInfiniteFarZ [0,1] - If set to 1, this uses the no-far-clip-plane trick which provides optimal performance.
r_useStateCaching [0,1] - This option should be set to 1 for optimal performance, as it caches OpenGL state changes.
r_useIndexBuffers [0,1] - If set to 1, uses ARB_vertex_buffer_object for indexes. This can actually reduce performance, so set to 0.
r_useVertexBuffers [0,1] - If set to 1, uses ARB_vertex_buffer_object for vertexes, which improves performance.
r_useCachedDynamicModels [0,1] - If set to 1, uses cache snapshots of dynamic models which improves performance.
r_useTwoSidedStencil [0,1] - If set to 1, optimizes the processing of stencil shadows.
r_useTurboShadow [0,1] - If set to 1, uses the infinite projection with W technique for dynamic shadows which improves performance without a noticeable drop in image quality.
r_useShadowVertexProgram [0,1] - If set to 1, does the shadow projection in the vertex program on graphics cards with this capability. If you set this to 1 and experience problems or a crash, it is because your graphics card does not support this functionality.
r_useShadowProjectedCull [0,1] - If set to 1, removes polygons which would fall completely inside shadows, optimizing performance.
r_useTripleTextureARB [0,1] - If set to 1, this allows graphics cards with 3+ texture units do a two pass instead of three pass which improves performance. Set this to 1 and if you experience problems, your graphics card does not support this function.
r_useConstantMaterials [0,1] - If set to 1, this setting uses pre-calculated material registers if possible, improving performance.
r_useNV20MonoLights [0,1] - If set to 1, this option uses optimized rendering for mono lights.
r_mode [-1,3,4,5,6,7,8] - This setting determines the resolution, as set in the in-game menus under Screen Size (See In-Game Settings section). The mode values are 3 = 640x480, 4 = 800x600, 5 = 1024x768, 6 = 1152x864, 7 = 1280x1024 and 8 = 1600x1200. Note, you can use -1 for r_mode, and this tells the game to use the values for r_customHeight and r_customWidth to set screen width and height - this is useful for allowing things like widescreen mode.
r_aspectratio [0,1,2] - This setting allows you to set the aspect ratio of the image, which is mainly used for displaying on TVs. The options are 0 = 4:3 (normal), 1 = 16:9 (standard widescreen), and 2 = 16:10 (nonstandard).
r_useLightPortalFlow [0,1] - If set to 1, this uses a use a more precise area reference determination for lighting. Setting this to 0 improves performance but may result in graphical anomalies.
g_projectileLights [0,1] - If set to 1, allows dynamic lights for projectiles. Setting this to 0 can improve performance in combat.
g_doubleVision [0,1] - If set to 1, shows a blurry "double vision" effect when taking damage. Setting this to 0 removes this effect and can improve performance when taking damage.
g_muzzleFlash [0,1] - If set to 1, shows a flash from the muzzle of weapons that are firing. If set to 0, this effect is disabled, which can improve performance.
g_showBrass [0,1] - If set to 1, visible shells will be ejected from weapons. If set to 0, no visible shells will be ejected, and performance may be improved in heavy combat.
g_showHud [0,1] - If set to 1, this enables the Heads Up Display (HUD). If set to 0, this removes the HUD from view, which may give a minor performance improvement. This command is most useful for taking "clean" screenshots (i.e. without the HUD).
g_showPlayerShadow [0,1] - If set to 1, the player will cast a shadow when standing near lights. If set to 0, the player casts no shadow, which improves performance.
g_nightmare [0,1] - If set to 1, Nightmare difficulty level can now be selected on the main menu screen. If set to 0, this option is disabled. Normally players must complete the entire game before Nightmare mode is enabled.
g_bloodEffects [0,1] - If set to 1, full blood effects (blood sprays, splattering etc.) is enabled. If set to 0, this is removed, which may yield a small performance improvement in heavy combat.
g_skipViewEffects [0,1] - If set to 1, removes various view-related special effects like the damage effects (double vision). This can improve performance.
g_fov [angle] - Specifies the angle for the Field of View (FOV). The wider the angle, the larger the field of vision for the player, giving a "fish eye" view in effect, however performance will be reduced. The smaller the angle, the higher the performance. The default of 90 is recommended, but players can try 85 which is a value used in some other games and will gain a slight boost in FPS. In multiplayer, g_fov can only be changed between 90 and 110.
g_skipFX [0,1] - If set to 1, disables certain special effects (I'm unclear on which). This can improve performance.
g_skipParticles [0,1] - If set to 1, disables certain particle effects (does not include smoke, dust, fog effects etc). This can improve performance, particularly in areas which use these effects to a large extent, but realism will be reduced.
image_usePrecompressedTextures [0,1] - When set to 1, all textures will be precompressed, resulting in less video memory being used and hence smoother performance on most machines. There may be some minor compression artifacts on textures, but these are hardly noticeable. If set to 0, this setting will force realtime compression on textures which results in reduced image quality and performance. Note that if this setting is set to 0 and the image_useCompression setting is also set to 0, uncompressed textures will be used for highest image quality, but performance will suffer and you will get more small pauses depending on the amount of Video RAM on your graphics card, so on balance this should be set to 1.
image_useNormalCompression [0,1,2] - Specifies the compression method used for textures. 0 disables normal map compression for the highest image quality for textures, 1 is 256 color compression (if available), which gives the best performance but provides the most compression artifacts, while 2 is rxgb compression. When combined with the setting above and below, setting this to 0 provides optimal image quality for minimal performance hit.
image_useCompression [0,1] - When set to 1, compression is used - with the method of compression specified in the image_useNormalCompression variable. Compression provides the fastest performance by reducing the size of all textures and light maps, but there are some (minor) compression artifacts. When set to 0, precompressed textures are still used, but realtime compression is not used if image_useNormalCompression and image_usePrecompressedTexures are activated. This results in better image quality, but slower performance particularly during periods when precompressed textures are not used.
image_preload [0,1] - If set to 1, Doom 3 attempts to preload most images in the background, meaning less loading pauses during the game but longer loading times. If set to 0, images are loaded dynamically as needed, meaning more loading pauses during the game. 1 is the recommended setting.
image_lodbias [value] - Determines the Level of Detail (LOD) bias for mipmapped images. The higher the number, the less detail is visible on surrounding objects. This can improve performance, but reduces image quality. The default is 0, and values above 1 reduce detail quite heavily, so experiment with fractional values such as 0.2 or 0.5.
image_anisotropy [1,2,4,8] - This setting determines the level of Anisotropic Filtering used in Doom 3. Valid values are 1, 2, 4, and 8. The higher the value, the lower your performance, but the crisper textures will appear in the distance. Note that 1 is the lowest you can set for Anisotropic - 0 will simply default back to 1. Also note that if you have forced Anisotropic Filtering in your graphics card's control panel, it will override this setting, so for optimal performance set the Anisotropic Filtering level in your control panel to 'Application Preference', and adjust the level here.
image_filter [GL_LINEAR_MIPMAP_NEAREST, GL_LINEAR_MIPMAP_LINEAR] - Determines the OpenGL texture filtering method to use on textures by default. GL_LINEAR_MIPMAP_LINEAR is Trilinear Filtering, however if you want a performance boost without any noticeable image quality loss, change this setting to GL_LINEAR_MIPMAP_NEAREST which is Bilinear Filtering.
[Sound Tweaks]
The following commands all influence the way sound behaves in Doom 3:
s_force22kHz [0,1] - If set to 1, this forces lower quality (22kHz) audio, which reduces sound quality but improves performance.
s_numberOfSpeakers [2,4,5,6] - This value shows the number of speakers the game has detected, based on the your general Windows settings and In-Game settings. You can manually alter this value, however make sure it matches your current speaker setup otherwise you will have missing audio channels.
s_volume_dB [Decibels] - This is the sound volume for the game in decibels. You should use the in-game menu volume slider to adjust the sound, but if it is too low or too high you can also adjust it here. Be careful as decibel values are not linear.
s_maxSoundsPerShader [value] - This setting determines the maximum number of sounds to use per shader, that is how diverse the sounds effects are. Increasing this value increases sound variety but also increases memory usage and can reduce performance.
s_clipVolumes [0,1] - When set to 1, this removes sounds which cannot be heard which provides optimal performance.
s_useOcclusion [0,1] - Occlusion is a method which muffles sounds which aren't clearly heard, such as those behind walls and objects. If set to 0, this method is disabled reducing realism but it may increase performance.
s_realTimeDecoding [0,1] - This setting determines whether sound decoding is done in real-time or not, however it is protected and cannot be set to 0 (nor should it need to be).
s_playDefaultSound [0,1] - When set to 1, if any sounds are missing a beep is played back instead. If you are getting a lot of beeping errors, you can set this to 0 to remove them.
s_noSound [0,1] - If set to 1, disables sounds.
[Downsizing Tweaks]
The following values control the largest size allowed (in pixels) for textures, lighting and render maps. If downsampling is not enabled, these values make no difference. However if downsampling is enabled, changing the limit values can improve performance by restricting the size of texture, light and render maps. The common values are 256 for 64MB graphics cards, 512 for 128MB graphics cards and 1024 for 256MB graphics cards. You can try lower values for your graphics card to see if loading times and in-game pauses are improved, and judge whether your image quality has fallen or not. Typically smaller sample size limits will result in more pixelated textures and less detailed lighting as textures and lightmaps are resized from their original resolutions to smaller ones.
image_downSizeLimit [pixels] - This setting controls the diffuse light map downsample limit - the largest size in pixels for the diffuse light map. Use 256 for graphics cards with 64MB of Video RAM, 512 for 128MB VRAM and 1024 for 256MB VRAM or above.
image_downSize [0,1] - If set to 1, this puts into effect the downSizeLimit value specified above. If set to 0, textures are displayed at full resolution for highest image quality but lower performance.
image_downSizeBumpLimit [pixels] - This setting controls the bump map texture downsample limit. Use 256 for graphics cards with 64MB of Video RAM, 512 for 128MB VRAM and 1024 for 256MB VRAM or above.
image_downSizeBump [0,1] - If set to 1, this puts into effect the downSizeBumpLimit value specified above. If set to 0, bump mapping on textures are displayed at full resolution for highest image quality but lower performance.
image_downSizeSpecularLimit [pixels] - This setting controls the specular lighting light map downsample limit. Use 256 for graphics cards with 64MB of Video RAM, 512 for 128MB VRAM and 1024 for 256MB VRAM or above.
image_downSizeSpecular [0,1] - If set to 1, this puts into effect the downSizeSpecularLimit value specified above. If set to 0, surface effects on textures are displayed at full resolution for highest image quality but lower performance.
The next section continues the command variables listing.
Demo Commands
recordDemo [demoname] - Records a demo of your current gameplay with the name specified. The demo is placed in your \Doom 3\base\demos\ directory by default. This directory is created the first time you record a demo.
stopRecording - Stops recording the current demo.
PlayDemo [demoname] - Plays back a demo with the name specified.
compressDemo [huffman, demoname] - Compresses a demo file of the name given using the 'huffman' compression scheme (the only one currently available in Doom 3), creating a new, smaller version of it with the extension .demo.huff in the \demos\ directory.
com_preloadDemos [0,1] - Preloads all demos. Set to 0 will reduce memory usage, which is recommended.
com_compressDemos [0,1] - If set to 1 will compress demo files recorded, reducing their size. These files may take longer to load.
demoShot [demoname] - Creates a screenshot for the demo file specified.
avidemo [demoname] - Creates an AVI from an existing demo.
avigame - Creates an AVI from your current gameplay.
com_aviDemoHeight [pixels] - Determines the resolution height in pixels for AVI demos generated through the avidemo command. The greater the size, the larger the resulting file.
com_aviDemoWidth [pixels] - Determines the resolution width in pixels for AVI demos generated through the avidemo command. The greater the size, the larger the resulting file.
com_aviDemoSamples [samplerate] - Determines the sample rate for AVI demos generated through the avidemo command. The higher the rate, the larger the resulting file will be, but the smoother it will play.
roq [filename] - Encodes a roq file, but requires the name of, and path to, the roqParam file.
Benchmarking Commands
benchmark - Runs a benchmarking procedure which uses progressively less pixels for the current image (screen size shrinks) until a result is provided at the end in the console.
timeDemo [demoname] - Runs a timedemo on the demo name provided. If no demos exist, you can use the default demo1 built into Doom 3. See the Neat Stuff & Conclusion section for more details.
timeDemoQuit [demoname] - Runs a timedemo using the demo specified, and then exits the game completely when done.
Control/Movement Commands
sensitivity [value] - This value represents your mouse sensitivity, as set by the slider in the in-game menus (See In-Game Settings). Raising the value increases the mouse's sensitivity to movements in the game. You can make subtle adjustments here if the slider is too awkward.
pm_crouchrate [seconds] - This setting controls the time it takes for the player to switch from standing to crouching. The higher the setting, the longer it takes.
pm_normalviewheight [value] - Determines the height of the player's view when standing.
pm_crouchviewheight [value] - Determines the height of the player's view when crouching.
pm_staminarate [value] - Determines the rate at which the player regains Stamina points. Divide the pm_stamina value by this rate to calculate how long it takes for the player to fully regain all his stamina.
pm_staminathreshold [value] - When stamina falls below this value, the player slows to a walk.
pm_stamina [value] - Determines the length of time a player can run.
pm_runspeed [value] - This setting determines how fast a player can run. Higher values result in a faster running speed.
pm_walkspeed [value] - This setting determines how fast a play can walk. Higher values result in a faster walking speed.
pm_crouchspeed [value] - This setting determines how fast a player can move while crouching. The higher the value, the faster a crouching player can move.
pm_stepsize [value] - This is the maximum height over which a player can step without having to jump. Lower values may result in players not being able to climb stairs without jumping for example.
pm_jumpheight [value] - This setting is the approximate height a player can jump. Higher values will result in a higher jump height.
[Disabling Bobbing Tweaks]
The variables below control the slight bobbing movements your player has when moving around, such as when he is running (runroll, runpitch, runbob), walking (walkbob, bobroll, bobpitch, bobup) and crouching (crouchbob). These bobbing, pitching and rolling movements are all quite realistic, but may be annoying to some people. Raising the values increases the bobbing and pitching, while reducing the values lessens the intensity of these movements. Setting all of them to 0 will completely remove any bobbing and pitching motions for your character.
pm_bobroll [value]
pm_bobpitch [value]
pm_bobup [value]
pm_runroll [value]
pm_runpitch [value]
pm_runbob [value]
pm_walkbob [value]
pm_crouchbob [value]
View Commands
pm_thirdPersonDeath [0,1] - If set to 1, enables third person view when the player dies. Note this command may force third person view even during normal gameplay, so disable it if this is not to your liking.
pm_thirdPerson [0,1] - If set to 1, shows the player in third person view.
pm_thirdPersonAngle [angle] - If third person view is being used (i.e. pm_thirdPerson is set to 1), this determines the angle of the third person camera view. 0 (the default) is behind the player, while 180 is looking directly at the player's face. Other values view the player from various angles.
pm_thirdPersonHeight [value] - If using third person view, this determines the height of the camera from normal view height. Positive values raise the camera above normal view height, negative values below normal view height.
pm_thirdPersonRange [value] - If using third person view, determines the distance of the camera from the player. 80 is the default, and 0 is right inside the players head.
pm_maxviewpitch [angle] - This setting determines the maximum angle a player can look down. Higher positive values will result in the player overshooting his own feet. Negative angles will result in the player looking up when attempting to view downwards.
pm_minviewpitch [angle] - This setting determines the maximum angle a player can look up. Higher negative values will allow the player to look up and over the back of their own head. Positive values will result in the player looking downward when attempting to look up.
Information/Diagnostic Commands
com_showMemoryUsage [0,1] - If set to 1, shows the amount of memory allocated to the game and various assets.
com_memoryMarker [Megabytes] - This marker shows the approximate amount of memory (in MB) used by Doom 3 in its last run. Don't alter this value, just see what it is.
game_memory - Displays the amount of game memory allocated, and to how many objects.
showTriSurfMemory - Shows the amount of memory used for polygon surfaces.
com_showSoundDecoders [0,1] - If set to 1, shows all the currently loaded sounds, how large they are and how far through playback (in %) they are.
g_showPVS [0,1] - If set to 1, shows a wireframe border around all portals such as doors and passageways.
r_showSurfaceInfo [0,1] - If set to 1, shows the surface material name when a cursor is pointed at a surface.
r_showTris [0,1] - Enables wireframe mode. If set to 1, shows all visible geometry in wireframe. If set to 2, it only draws front-facing geometry in wireframe. If set to 3, shows all geometry (visible or not) in wireframe. Interesting to see how many polygons are being used for certain effects, like smoke and steam.
r_showLightCount [0,1,2,3] - If set to 1, colors each surface based on the light count, if set to 2 also counts everything through walls, and if set to 3 also prints overdraw.
r_showShadowCount [0,1,2,3,4] - If set to 1, colors the screen based on shadow volume depth complexity, if set to 2 prints overdraw count based on stencil index values, if set to 3 only shows turboshadows, and if set to 4 only shows static shadows.
r_showSilhouette [0,1] - If set to 1, highlights every edge which casts a shadow.
gfxInfo - Displays a dump of graphics information, including graphics card model, driver version, supported paths etc.
listSounds - Lists all sounds currently loaded and the amount of memory they are using.
listImages - Lists all images currently loaded and the amount of memory they are using.
listCvars [-help] - Lists all cvars, and if the -help switch is used, help text is also provided.
listCmds - Lists all commands with current values.
[Reload Commands]
The following commands all reload particular aspects of the game, such as sounds, images, decals and Graphical User Interfaces (GUIs). Using these commands at any point can help resolve any anomalies or glitches you are experiencing with these particular aspects of the game by reloading them from scratch. Note, some aspects take a while to reload (e.g. reloadImages and reloadEngine can take quite a while), so be careful if using such commands in an online game.
reloadEngine
reloadSounds
reloadModels
reloadImages
reloadSurface
regenerateWorld
reloadGuis
reloadDecls
reloadCgPrograms - Reloads CG programs. This can help resolve graphical anomalies during gameplay on Nvidia cards.
reloadARBprograms - Reloads ARB programs. This can help resolve graphical anomalies during gameplay on ATI cards.
cvar_restart - Restarts the cvar system.
s_restart - Restarts the Doom 3 sound system.
vid_restart - Restarts the video rendering system, which essentially reloads Doom 3. You must use this command to implement certain changes, such as changed resolution.
developer [0,1] - If set to 1, enables Developer mode, which allows certain other console commands to work such as the freeze, god, crash, error and gameerror commands.
devmap [mapname] - Loads a map in Developer mode.
noclip - Toggles clipping on/off. By default clipping is on. When clipping is turned off, you can walk through solid objects, useful for troubleshooting.
god - Enables God mod, useful for troubleshooting.
Multiplayer/Server Commands
connect [servername] - Connects to a multiplayer server with the given name
disconnect - Closes the current game map. Also used for skipping the introductory movie by appending +disconnect to the Doom 3 icon Target box (See Neat Stuff & Conclusion).
reconnect - Reconnects to the last server connected to successfully.
ui_name [string] - This is your character name as set in the in-game menus. The only reason you may want to edit it using this command rather than the in-game menus is if you want to insert special characters in your name, or use color codes in front of letters. The color codes are ^1 Red ^2 Green ^3 Yellow ^4 Blue ^5 Aqua ^6 Purple ^7 White ^8 Grey ^9 Black. E.g. ^5Persian^1Immortal provides the text PersianImmortal when my online name is displayed in multiplayer games. Don't go nuts with this, it can be very annoying.
serverNextMap - Changes to the next map on your server.
serverMapRestart - Restarts the current map on your server.
serverForceReady - Forces all players on your server to be ready for match start.
say [text] - Says the provided text in Global Chat in multiplayer.
sayTeam [text] - Says the provided text in Team Chat in multiplayer.
gameKick [playername] - Kicks the specified player from the server.
serverInfo - Shows information about the current server when in multiplayer.
rcon [command] - Sends the command specified to the remote console.
net_clientMaxRate [Bytes] - This setting controls the maximum amount of data in bytes per second you can receive from a server every second. By default, servers will only provide 16000 bytes per second at most (as set in the net_serverMaxClientRate setting), but you can try lowering this value to reduce your ping and stabilize it when playing Doom 3 online. Try values such as 10000 or 12000. Note that values which are too low will cause problems, as Doom 3 multiplayer is not designed for dialup speeds (i.e. 6000 or less).
net_serverMaxClientRate [Bytes] - If running a server, this setting determines the maximum amount of data which can be sent to each player in bytes per second. The default setting should be fine, however if you find your server struggling, or you have a limited bandwidth connection, you can try lowering this setting slightly. Once again, keep the value reasonably high, as too low a rate will result in packet loss, ping spikes and unplayable multiplayer for all who join the server.
si_maxPlayers [value] - This setting determines the maximum number of players on your multiplayer server. Unfortunately at the moment it cannot be set higher than 4 here or in the in-game settings.
That's the current list of the more useful Doom 3 command variables which I know. Once again I really need knowledgeable readers to send me better descriptions for any of the above commands which are not completely clear, and also any additions you feel need to be made. So please, if you genuinely know what something does (no guesses please), Email Me. This section can then serve as a central resource for Doom 3 players to refer to for command tweaking.
The next section has a few neat tweaks and wraps up the entire guide.
Here we are at the end of another TweakGuides.com tweak guide, and a particularly epic one at that! Only a few more tweaks to go, but ones which might help you gain a few more FPS and get some more out of this great game.
Latest ATI Catalysts
For ATI graphics card owners, make sure you are using the official ATI Catalysts, version 4.10 or higher, as these have built-in optimizations for Doom 3. You should not need to use the old Beta 4.9 Catalysts which were advertised as being "optimized for Doom 3", since the official 4.10 Catalysts onwards contain all the beta's performance improvements without the bugs. I strongly recommend all ATI graphics card users update to the latest Catalysts for maximum performance and stability under Doom 3. For full details of where to download the latest Catalysts, how to install them correctly and most importantly how to set them up the right way, see my comprehensive ATI Catalyst Tweak Guide.
ATI Shader Tweak
You can use this shader tweak to improve performance on ATI graphics cards, available from the: Beyond3D Forums - full instructions are in the link. I haven't personally tried the tweak, but users report a 1-2 FPS boost on average.
Update: This tweak has been incorporated into the latest ATI Drivers for a while now, as detailed in this thread, so you no longer have to apply it.
Speed Up Load Times
One method some people are recommending to speed up loading times and perhaps boost performance is to unpack the zipped .pk4 files in the \Doom 3\base\ directory. These .pk4 files contain all the files Doom 3 uses to run the game, and at the start of each Doom 3 session these are unpacked and loaded up, which can take some time. If you want to use this method, follow these steps:
1. Firstly make sure that you do not delete the .pk4 files. Move them somewhere else on your system.
2. Rename each file from .pk4 to .zip.
3. Extract the contents of each file using WinZip to the \Doom 3\base\ directory. This may take a fair bit of time.
4. Make sure you run Windows Defragmenter after this procedure, as the files will be spread all over your hard drive. Do this by going to Start>Run and typing "Defrag.msc" (without quotes), then click the Defragment button.
5. You can now start Doom 3 and it should read these files much more quickly.
Note that I personally don't recommend this method, as the performance gains are minimal, with the main gain being faster loading times. The down sides to this method are that playing Doom 3 multiplayer becomes difficult, as most servers will consider your game files to have been altered and you will be kicked. Also, when it comes time to patch/update the game, you will have to remove these files, replace the original .pk4 files (that's why you shouldn't delete them!), run the patch, then unpack them again. Rather tedious given the 3GB + of information that needs to be unpacked.
Doom 3 Game Music
If you like the Doom 3 title music, and indeed any sound effects and ambient music in the game, you can find these in the pak003.pk4 file in your \Doom 3\base\ directory. Using the method mentioned before, rename this file to pak003.zip (make sure to name it back to pak003.pk4 straight afterwards), and use WinZip to extract the contents to an empty directory. The main theme music is called d3theme.ogg. Most of the sound effects and music are in .ogg format, which can be played back using the free WinAmp Audio Player.
Disable Startup Movie
If you want to skip the "beating heart" introductory movie each time Doom 3 loads, there is a simple method for doing this. Go to the icon you use for launching Doom 3, right-click on it and select Properties. In the Properties box which opens, find the Target line and add a space then "+disconnect" (without quotes) to the end of it. For example:
"C:\Doom 3\Doom3.exe" +disconnect
Now when you launch the game with this icon, the intro movie is skipped every time.
Doom 3 Benchmark
The Doom 3 engine developed by id Software is a very unique and elegant game engine. It can look fantastic, even on lower end machines. It is a perfect OpenGL benchmarking tool - especially since there are few recent OpenGL benchmarks. To use Doom 3 as a benchmark, start the game and open the game's console (See Advanced Tweaking section). From here you can launch custom demos (pre-recorded game sequences), at the end of which a set of figures showing your average framerate over the length of the demo. To run the built-in Doom 3 demo - and this is recommended if you want to compare your results to others - type "timedemo demo1" (without quotes) in the console. Wait for the run to finish and note the results, then you can compare them with others online. Note that with VSync disabled, framerates in the timedemo can exceed the normal 60FPS cap in the game engine.
If you want to record your own timedemo, load up a particularly challenging stretch of the game, then open the console and type "recorddemo demoname" (without quotes). E.g: recorddemo trialrun will start recording a demo called trailrun.demo in your \Doom 3\base\demos\ directory. Type "stoprecording" (without quotes) to stop recording this demo at any time. To then run this demo as a benchmark, simply type "timedemo trialrun" (without quotes) in the console and it will be played back, and your average framerate over the run will be shown. Note that the Doom 3 engine is extremely sensitive to overclocking because of the way it is designed, so if you crash, freeze, reboot or artifact during the run keep this in mind.
Taking Screenshots
Taking screenshots in Doom 3 is quite easy - simply press the F12 key and a screenshot is placed in your \Doom 3\base\screenshots\ directory as a large .tga format picture file. You can view .tga files using Adobe Photoshop, or a free utility like IrfanView. However if you want to use other methods for taking screenshots, try these:
I personally recommend either Fraps or Hypersnap DX if you want to take a lot of Doom 3 screenshots, however the built-in screenshot functionality is fine for most people.
Conclusion
Holy cow, I never thought I would finish this guide. If you don't know the saga that lies behind the writing of this guide, basically I recently bought a new apartment and had to move into it exactly two days after Doom 3 was released. So I got one night to sample the game, then the next few days were a blur of packing, shifting boxes, cleaning everything, more boxes (real horror involves boxes, I swear...), other large objects, and driving around town like a madman trying to get all manner of things done. My PC was offline all this time, and only just over three days ago did I manage to set it back up and start writing this guide. As I sit here now looking at the final product, I'm personally amazed I have put this together in such a short space of time...and that's why I'm relying on you, faithful reader. While to the best of my knowledge, and from personal testing, I believe the guide to be error free, I need you to let me know as soon as possible if you detect any errors in the guide. You know the drill, Email Me!
As always I really enjoy hearing from readers even if they just want to say "hi" or tell me what they think of this guide. Of course for time reasons I can't provide any personal tech support or tweaking advice. In the meanwhile, I hope you enjoyed this guide and that it helps you get more out of Doom 3 which is a truly excellent game, if not perfect in every way.
Links and Credits
I wrote this guide based primarily on my own testing and research, because not much tweaking information is available on the new Doom 3 graphics engine. However I did find several guides, articles and sites which were extremely useful in getting this guide completed in record time. I acknowledge their contribution, and strongly suggest that you check these out to enhance your Doom 3 tweaking experience:
Doom 3 Official Site
Activision Doom 3 Support Site
[H]ardOCP Official Doom 3 Hardware Guide
ViperLair Doom 3 Console Guide
AnandTech Doom 3 Hardware Guide
FileShack Doom 3 Section
PlanetDOOM Forums
DoomWorld Forums
Just a reminder - make sure to check back on this guide regularly, as I will definitely keep it updated with the latest feedback from users and more testing, and as new patches are released for this awesome game. Take care guys!

 Elder Scrolls V: Skyrim Where Is The Quil Of Germination
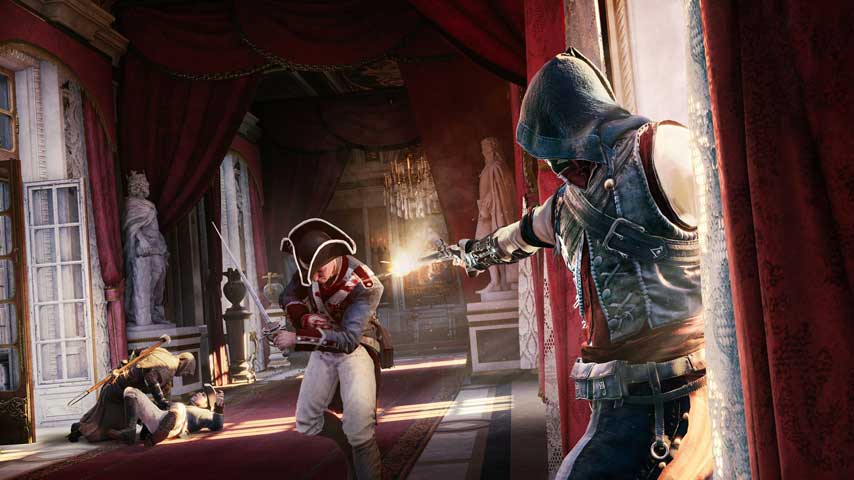 Assassin’s Creed: Unity guide – Sequence 4 Memory 2: Le Roi Est Mort – Find the Hideout
 LEGO Dimensions: Whats the deal with all the add
 Gears Of War 3 Leviathan Boss Guide
 Ni No Kuni Guide: Ding Dong Dell Side Quest Guide