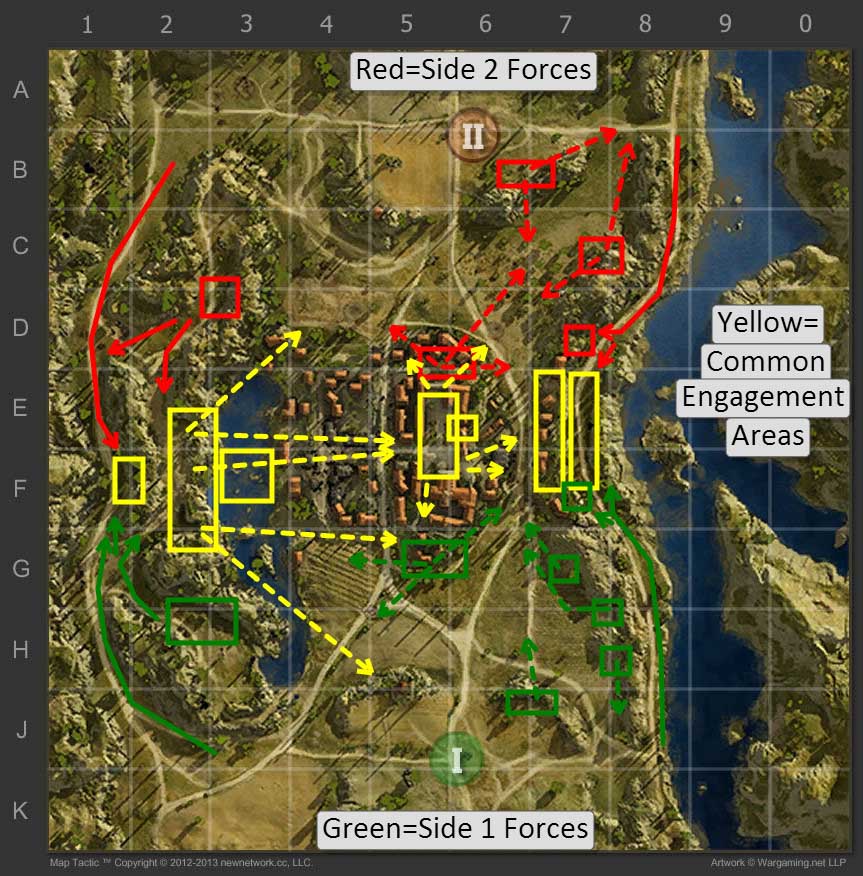
Abbey is a smaller map that is decided very quickly which team will have the upper hand. This map has 3 key locations located in the center of the map that are crucial to obtaining map control but at the same time require one another to prevent being flanked. The map below was created using which is a very useful tool to draw up strategies and show other’s useful information relating to the maps in World of Tanks.
The red routes are initial routes/locations used for side two on the map while the green routes/locations are for side one. Yellow refers to “shared” locations that are typically engagement areas which are fought over by both teams. Solid routes are initial routes taken from the spawn to the front lines, while dashed lines show firing alleys from the marked locations inside the boxes.
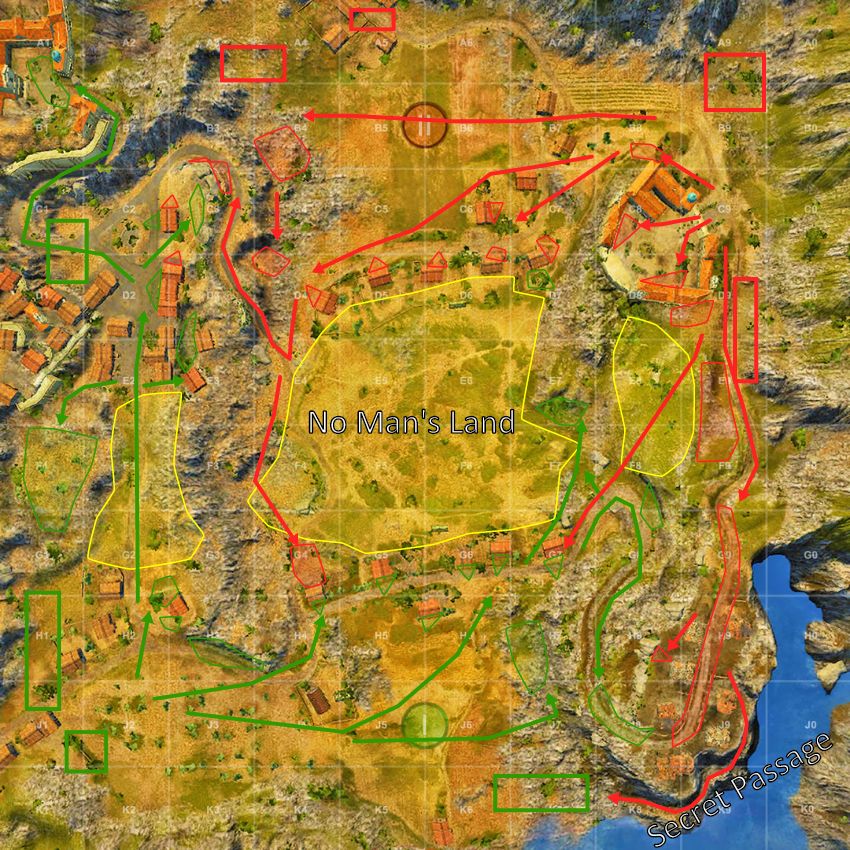
One of the more popular but deadly places on this map is the Abbey located in the center of the map. To get there you will need to go through E4/F5 and then turn into it where there is some cover from outside fire. There is also a small opening outlined in E6 which can be used to enter or escape by light tanks/mediums by driving from D5->D6->E6 along the outside edge of the Abbey. From inside the Abbey you can hit either base, the 2 line ridge, or the 7/8 line central area outlined in yellow. The downside is that if your team does not control the E2/F2 area you will be trapped inside the Abbey with no “safe” route to escape.
The western part of Abbey provides the most artillery protection due to the numerous ridges on this side of the map. To advance past the F line from either side your team needs to prevent a flanking maneuver from either the 1 or 2 line. Pushing one without having eyes on the other usually ends in disaster. Taking control of the 2 line and pushing forward to the opposite side will provide cover from artillery and also allow you to support the Abbey/central area of the map. Both sides have great defensible locations located in H2/3 and D2/3 which can be difficult to press if the enemy is dug in.
Before Abbey was reworked entering this road located on the east mean you were cut off from the entire battle. That is no more since there are two ramps located in D7/F7 that allows tanks to drive up into the 7 line to either continue advancing or to cross over into the 6 line. Battles here usually boil down to whichever side has the greater numbers and keep in mind that staying in E7/F7 to long will attract SPG fire and Abbey fire. If you find your team not heading down this road do not panic as there are great positions to defend it without actually going down and dying alone. The southern side has 3 locations in G7 and H7/H8 which allow defenders to cover the exit of the road and also assist the central are of the map. The northern forces have C7/C8 to cover their exit and also help the central area of the map.
Abbey is determined primarily off of the three key locations listed above. The 7/8 line relies on the Abbey since they Abbey can fire down into that location and the Abbey relies on the 2 line to prevent enemies from trapping tanks inside the Abbey. This leads to the 1/2 usually being the “key” to the map since the map works west to east in terms of flanks protecting each other. At the same time focusing to much on the west will spell doom for the rest of the team. Finding a good balance to defend the center of the map alone with the 7/8 line will pushing the 1/2 line will lead to an easier match for your team.


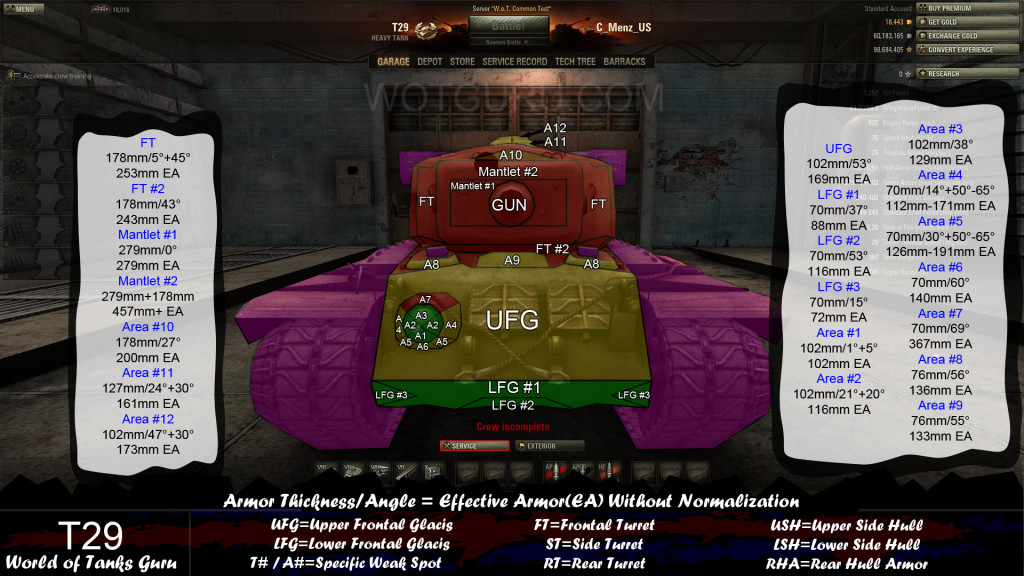 Weak Spot Guide: T29 - World of Tanks Guru
 World of Tanks Guide - 59-16
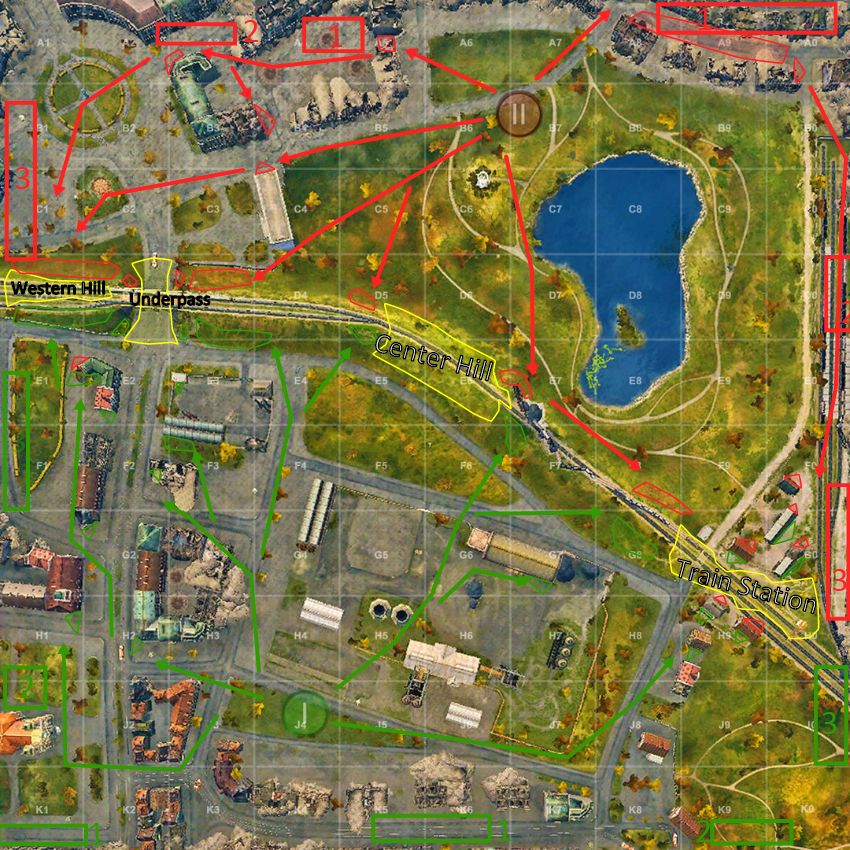 Map Strategy: Widepark - World of Tanks Guru
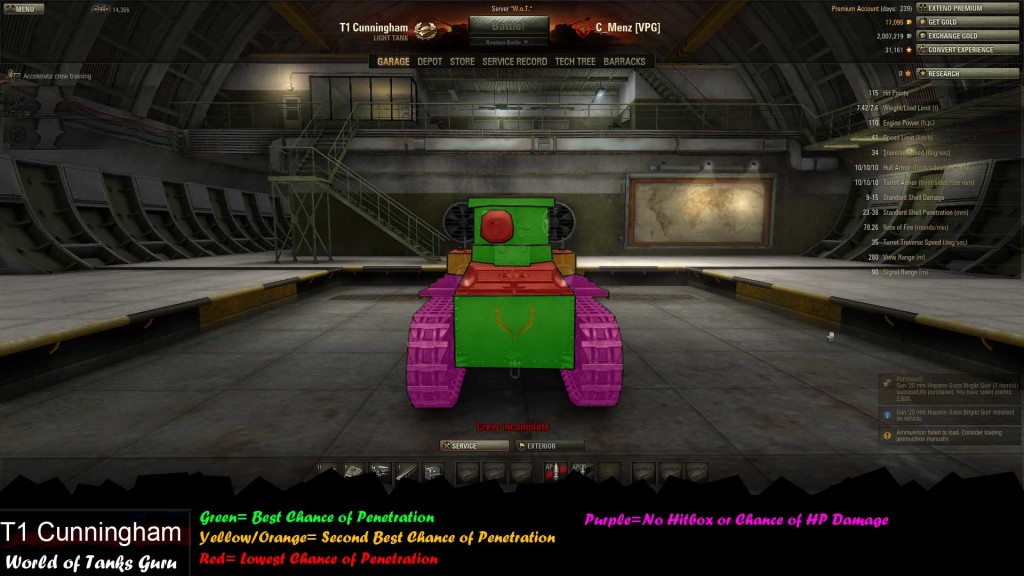 Weak Spot Guide: T1 Cunningham - World of Tanks Guru
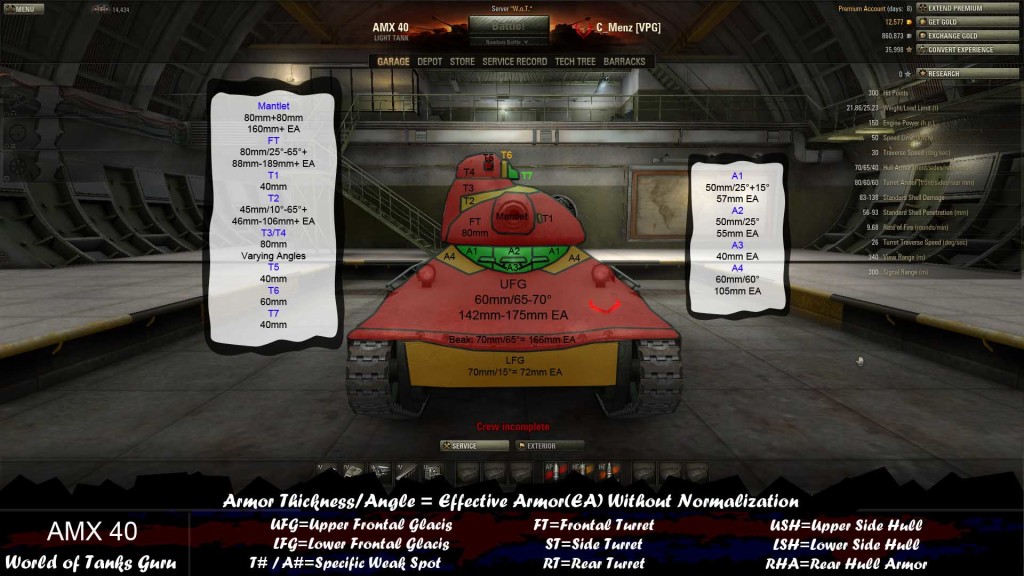 Weak Spot Guide: AMX 40 - World of Tanks Guru