The tier 7 premium British tank destroyer AT-15A is a slow but heavily armored tank for its tier and since it does not see tier 9 tanks due to its matchmaking it makes its armor better on a more regular basis. Facing the AT-15A like other “AT” tank destroyers you will be faced with an unusual frontal armor scheme with various angles, thick armor, and several weak spots unlike other tanks. Once you get to the sides and rear however the AT-15A like its other AT series tank destroyers loses a lot of its armor protection since the angles(one the sides) and thickness(on the rear) diminish compared to the frontal armor.
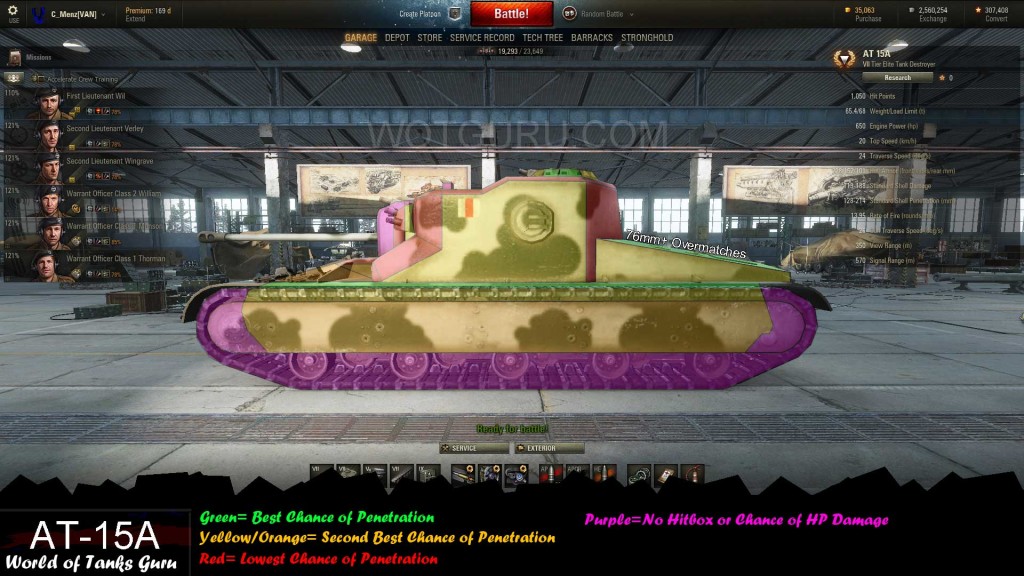
Frontally the AT-15A has great overall armor and can be tricky to confront for players unfamiliar with the armor scheme it uses. The lower glacis is not a weak spot and instead the upper glacis has the weakest armor on the hull of the tank(highlighted in yellow) and it is able to penetrated by most tanks since it only has 195mm of effective armor. Other areas highlighted in yellow are located further up the tank and range from 168mm to 230mm of effective armor. The good thing about the AT-15A’s armor scheme is that it cannot hull down since most of the weak spots are found above the tank destroyer’s gun. On the downside it makes playing the AT-15A difficult since you always have your weakest armor showing.
The weakest areas of the frontal armor are found on top of the AT-15A and are located on the hatches/machine gun turret. The two small hatches have around 130mm of effective armor and the large machine gun turret has 152mm of effective armor. The best area to aim at is the machine gun turret since it is large and there is a loader located in it, this way you can increase the AT-15A’s reload time if you take the loader out.
The side of the AT-15A becomes weaker but is still somewhat difficult to penetrate for lower tier tanks and tier 5 tanks in particular. This is because the entire side hull is covered by tracks and additional spaced armor except for the small green strip you see running along the side of the tank. This small strip is only 102mm thick and has no angle on it and is the weakest area of the AT-15A’s side armor. The small hatch on top has roughly 122mm of effective armor and the green engine deck on the back is capable of being overmatched if you have a gun over 76mm. Unfortunately the engine deck has 25.4mm of armor and the three caliber rule brings it just above 76mm which prevents a lot of mid tier guns from overmatching it.
The yellow areas on the side are up to 155mm of effective armor and are easy enough to penetrate for most tanks facing the AT-15A but can be difficult for some tier 5 and 6 tanks. The side hull armor covered by tracks(30mm) and spaced armor(12.7mm) can eat up a lot of HE/HEAT shells due to it having three layers of armor so be careful.
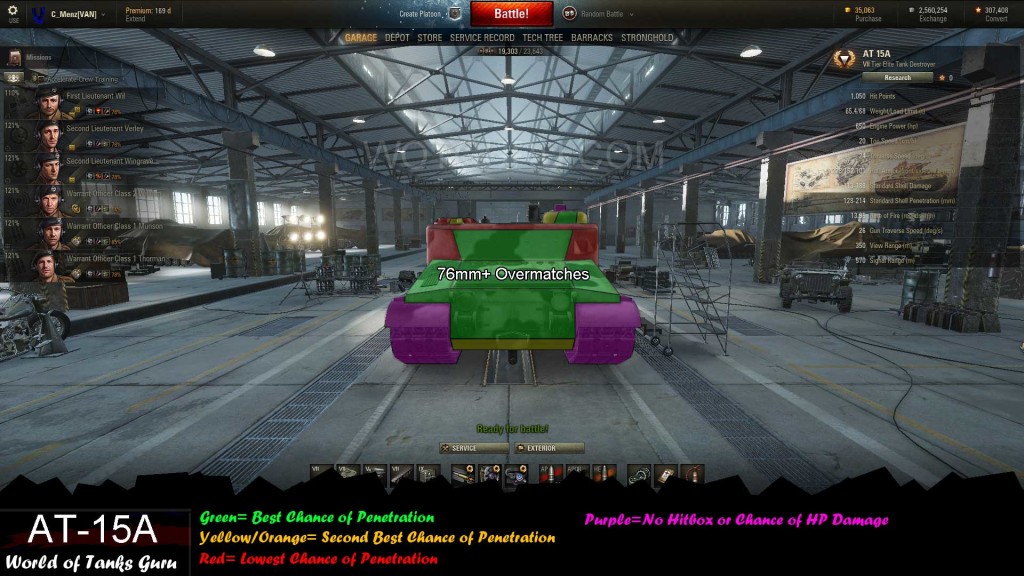
The rear of the AT-15A is very weak compared to the rest of the tank but it still has a lot of armor that is 101.6mm thick. Since it is this thick it can be difficult for tier 5 and tier 6 tanks to damage at times so make sure you are hitting flat sections. All green areas, except for the engine deck, have under 106mm of effective armor. The engine deck is still at an auto-bounce level and requires you to have a gun over 76mm in caliber to overmatch it, or for you to be firing from above it to negate the angle. Aside from the red sections on the superstructure and the angled yellow sections the rear armor should be easy enough to penetrate reliably.


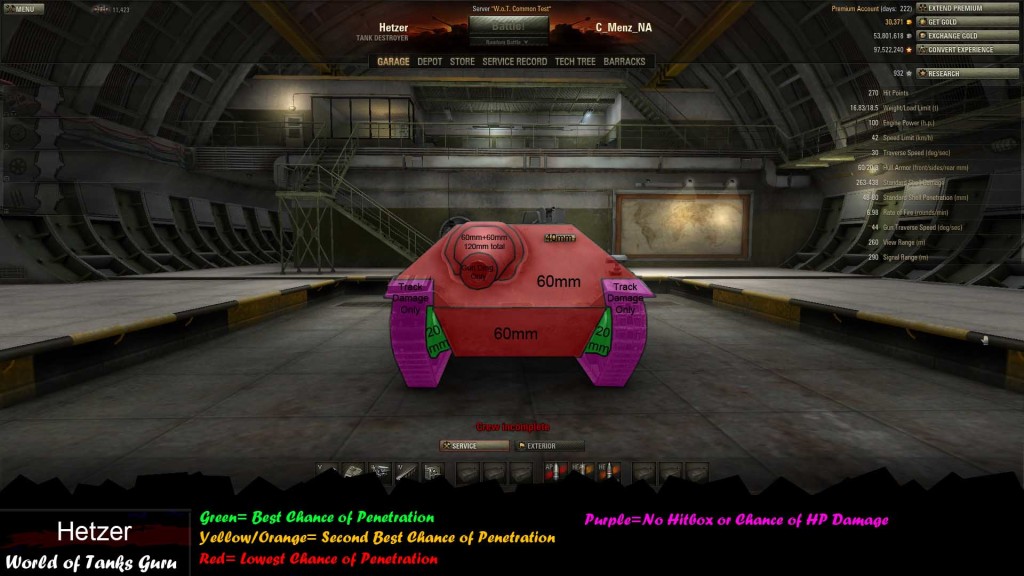 Weak Spot Guide: Hetzer - World of Tanks Guru
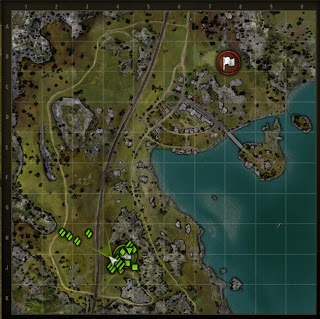 Map Strategy: Serene Coast - World of Tanks Guru
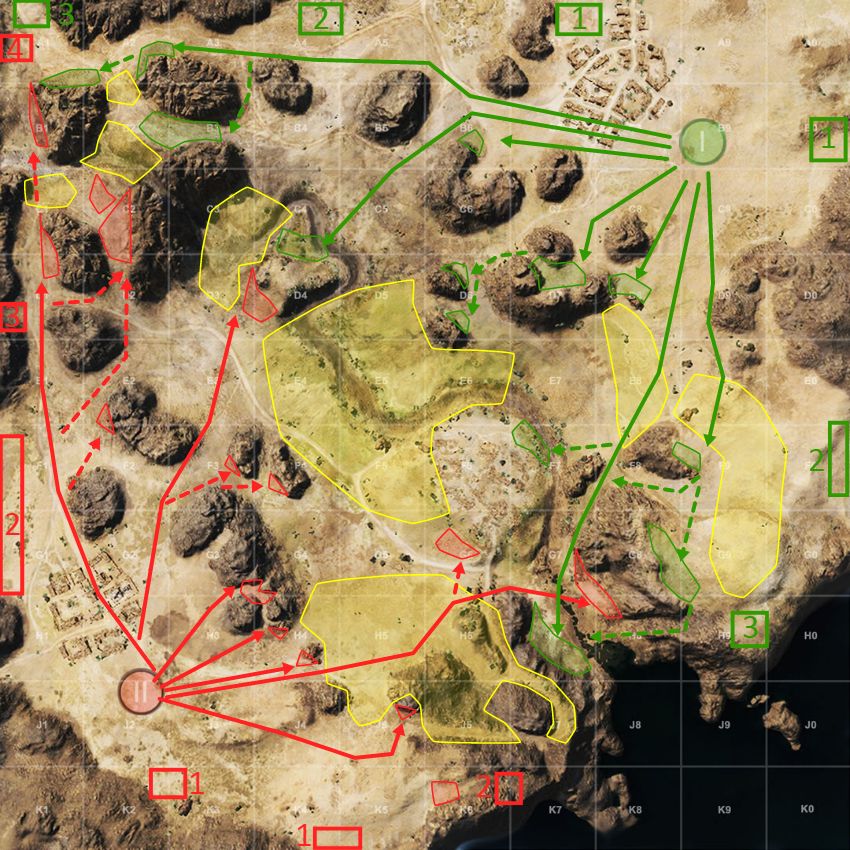 Map Strategy: El Halluf - World of Tanks
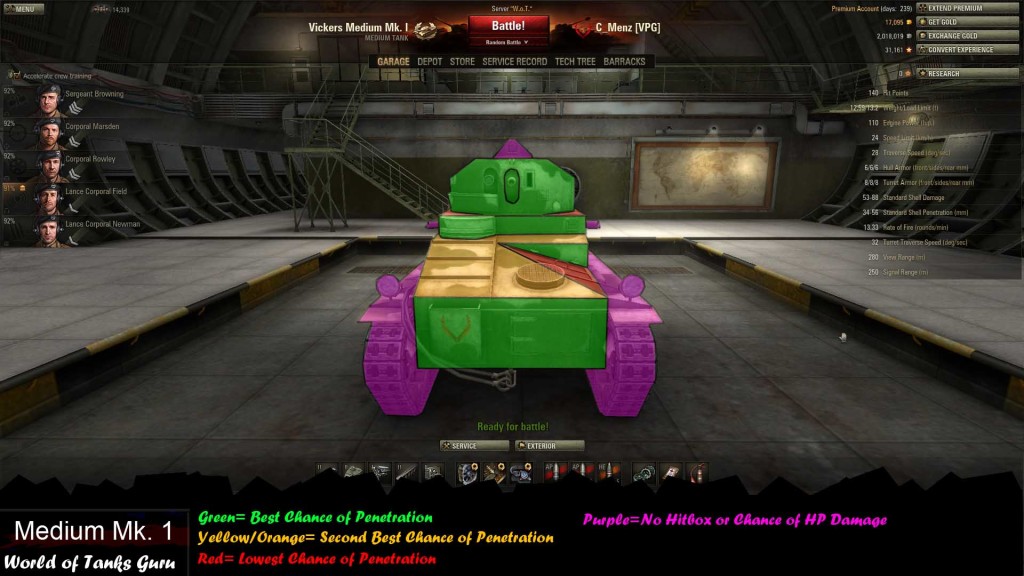 Weak Spot Guide: Vickers Medium MK 1
 World of Tanks Guide - 59-16