The IS-6 may not seem like a tank with a great deal of armor by looking at it’s listed stats. However, it’s armor scheme makes good use of angles and provides excellent protection overall which can fool a lot of people who do not know how to deal with one.
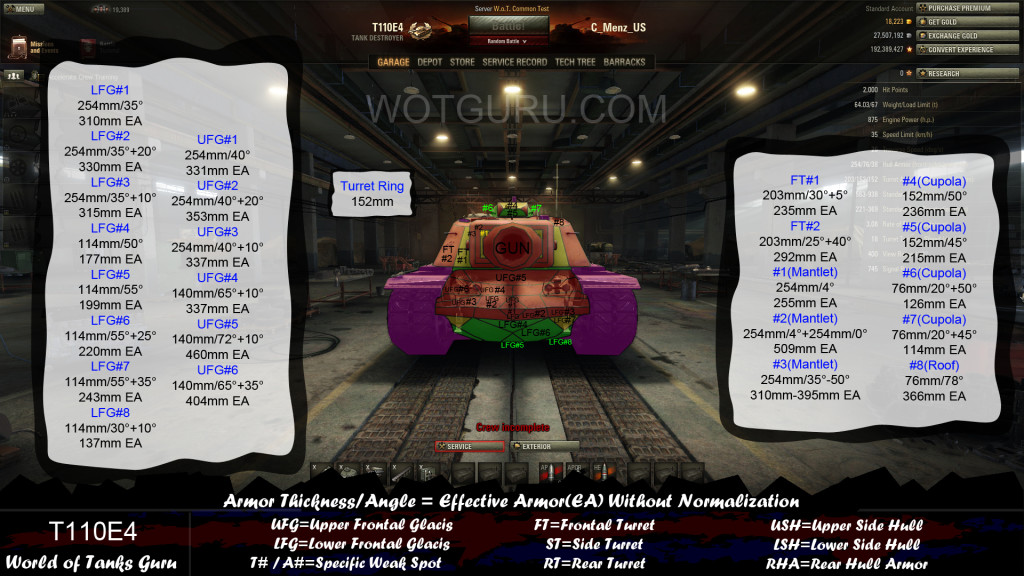
The index at the bottom of each picture describes a few abbreviations used and also the format in which the armor details are described in. Effective Armor (EA) refers to the overall effectiveness of the armor without normalization.
The armor values are presented in three different scenarios for the angled view of the tank.15° frontal(75° side), 25° frontal(65° side), 35° frontal(55° side), and 45° frontal(45° side).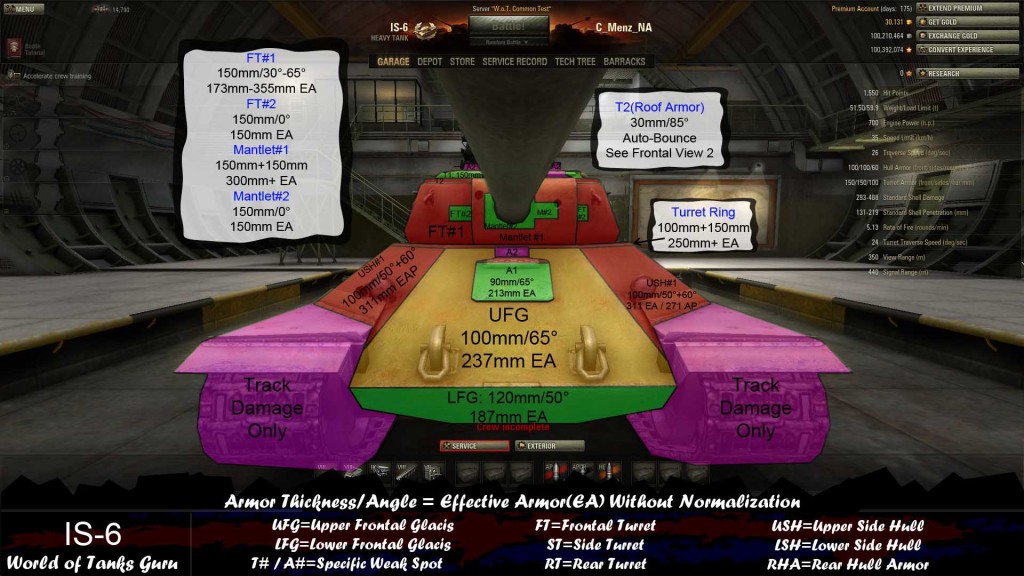
Frontally the IS-6 proves to be a great challenge against tier 7 and lower tanks. This is because the weak spots most rely upon(commander cupola and lower glacis) are still quite strong against tanks beneath the IS-6. The IS-6 relies upon angles for protection and try to negate these to be able to penetrate the IS-6 in an easier manner. The turret weak spots around the mantlet can prove to be valuable since if you are being face hugged they can be easier to hit than the cupola at times.
Keep in mind that as you get closer to the IS-6 the upper glacis/A1 gets weaker due to the angle being negated. On the other hand the lower glacis gets much stronger at closer range since it’s angle increases. The turret ring of the IS-6 is also unique in that it is covered by parts of the hull area which count as spaced armor making it extremely difficult to damage.
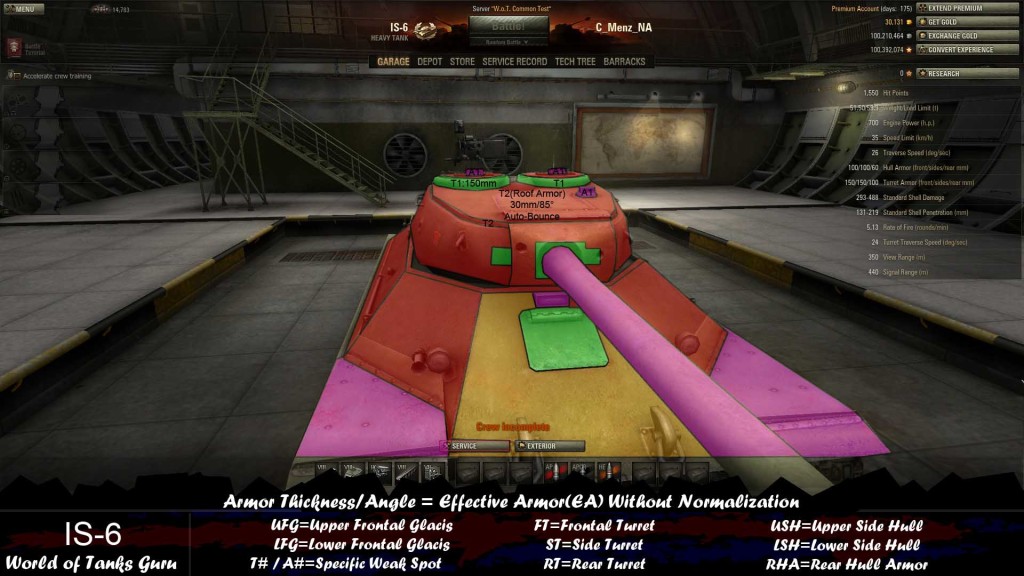
This frontal view simple shows the top of the turret better. The cupolas are weak to most tanks but are still 150mm thick meaning you want to hit them at the flattest area possible. The turret roof(T2) looks like there is a flatten area along the edge but it does not have it’s own hit box. Due to the 85 degree angle across the entire roof you will simply bounce off even though it looks flat unless your tank is taller than the IS-6.
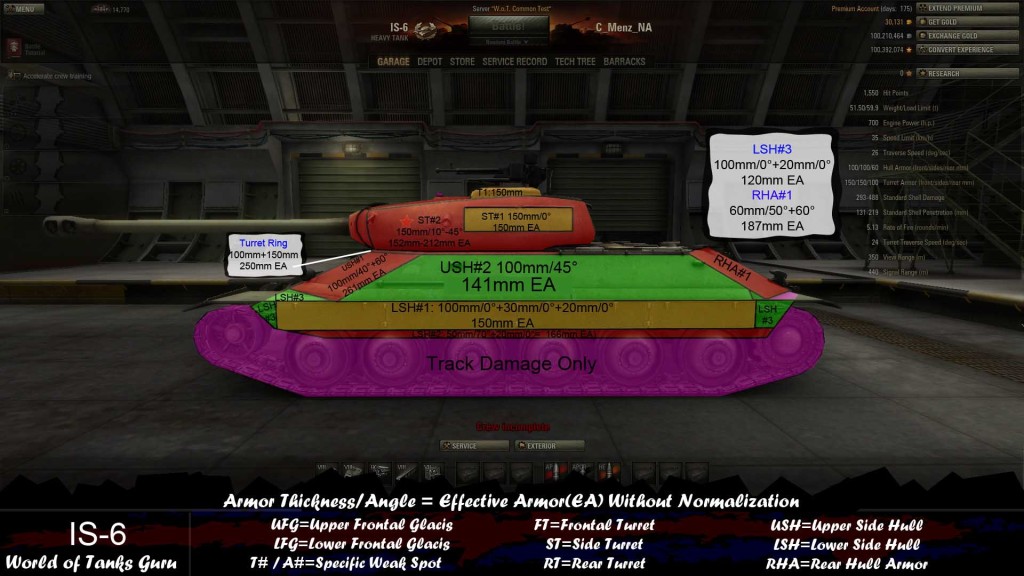
The side of the IS-6 fools many players. At first glance players might be drawn to shooting the flat area(LSH#1) which is covered by spaced armor but this area is actually stronger than the upper side hull area. Aiming beneath the spaced armor portion also proves to frustrate many since there is only a thin strip beneath it which has hull armor behind it(LSH#2). LSH #2 also is only capable of being damaged by non-HEAT/HE shells since it is at 70 degrees. If all else fails hitting the flat portions of the turret side or the LSH#3 areas at each end of the tank can be done with some careful aiming.
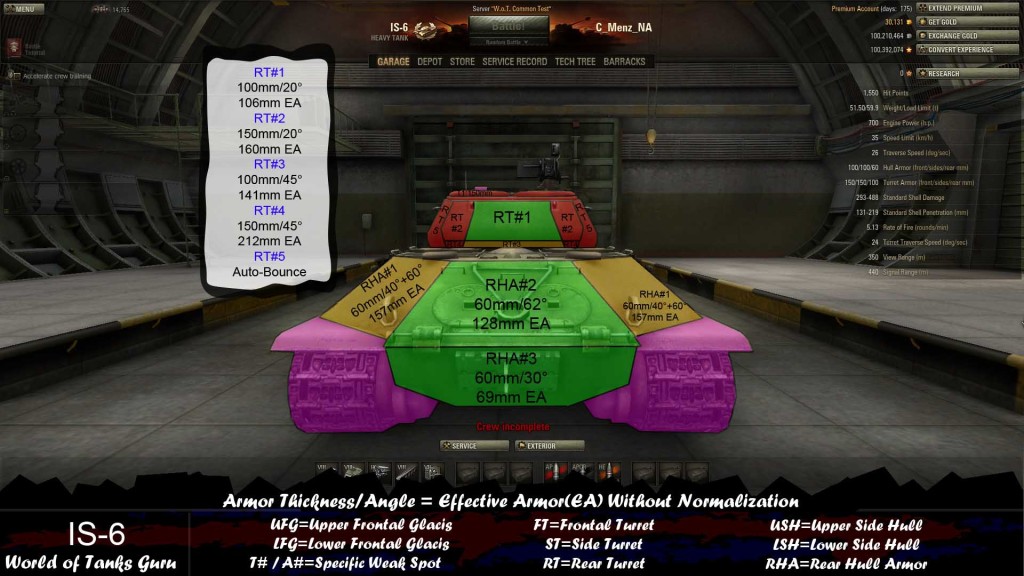
The rear of the IS-6 is simply if you remember to hit the central area of the tank in the hull and turret. The area here is the weakest and as you progress towards the side of the tank it gets much stronger.

When an IS-6 driver angle they change the armor values immensely. At low angles you will want to stick with shooting the LFG/A1 area but as they continue to angle the LSH#3/USH#1 areas become the prime weak spots. Just remember that the IS-6 relies on angles and try to aim for the flattest parts available(the ones pointing at you) and you will be alright. For turret armor values reference the frontal and side views of this guide.

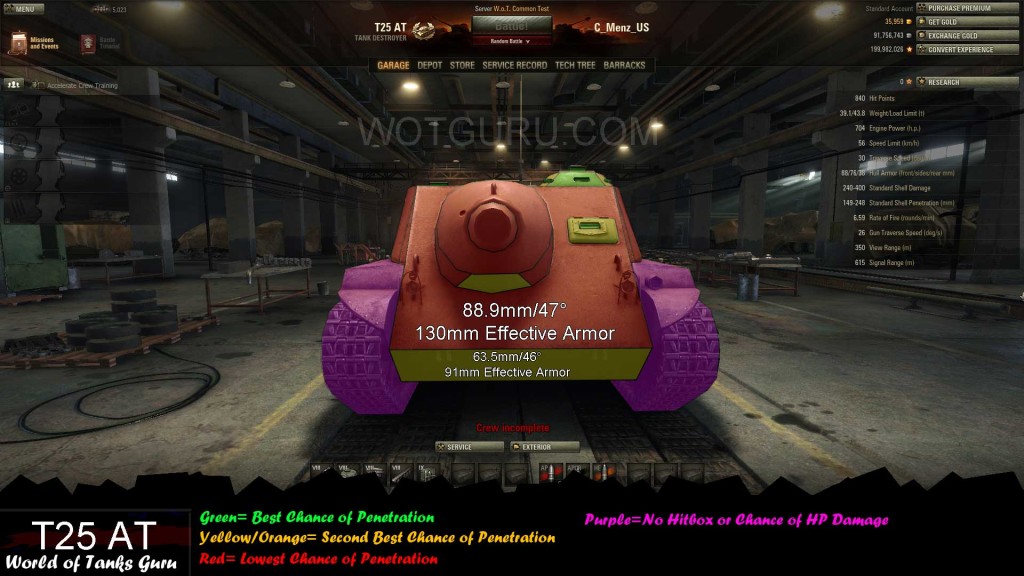 Weak Spot Guide: T25 AT - World of Tanks Guru
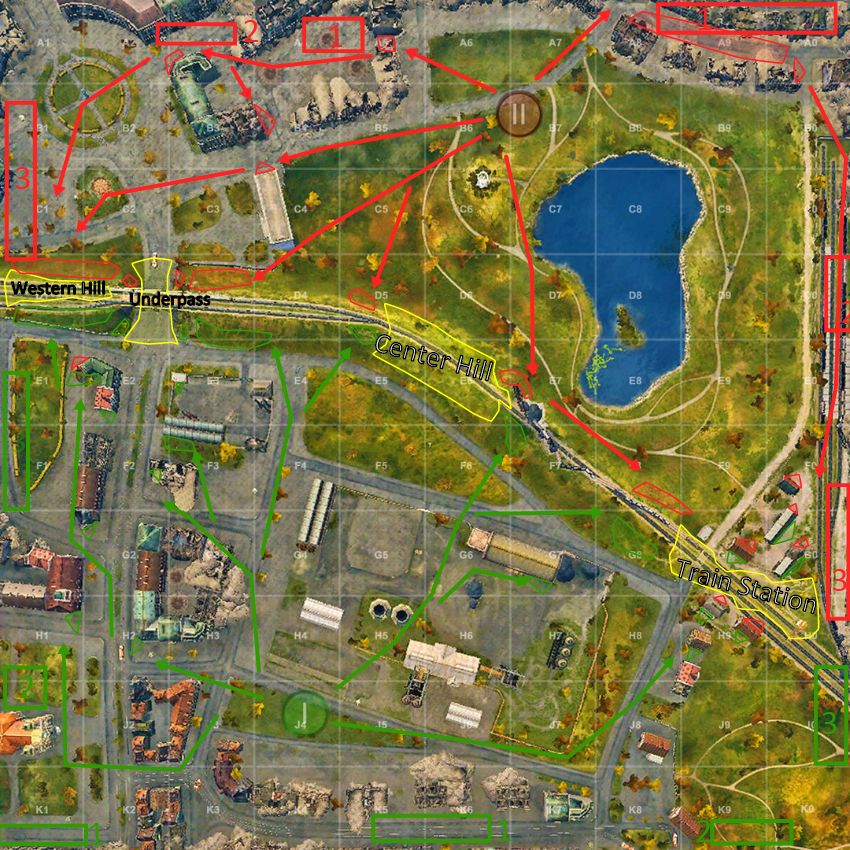 Map Strategy: Widepark - World of Tanks Guru
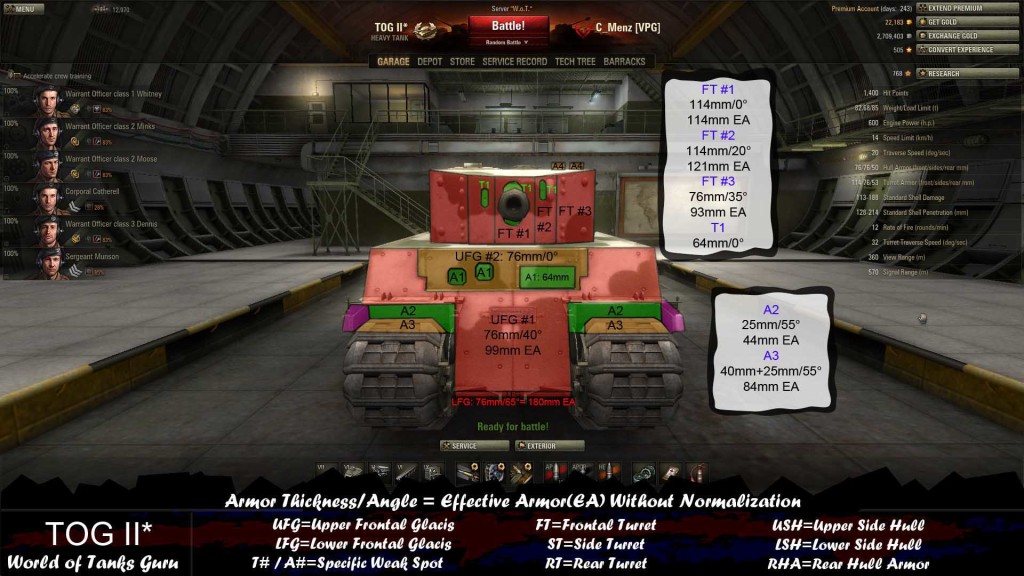 Weak Spot Guide: TOG II* - World of Tanks Guru
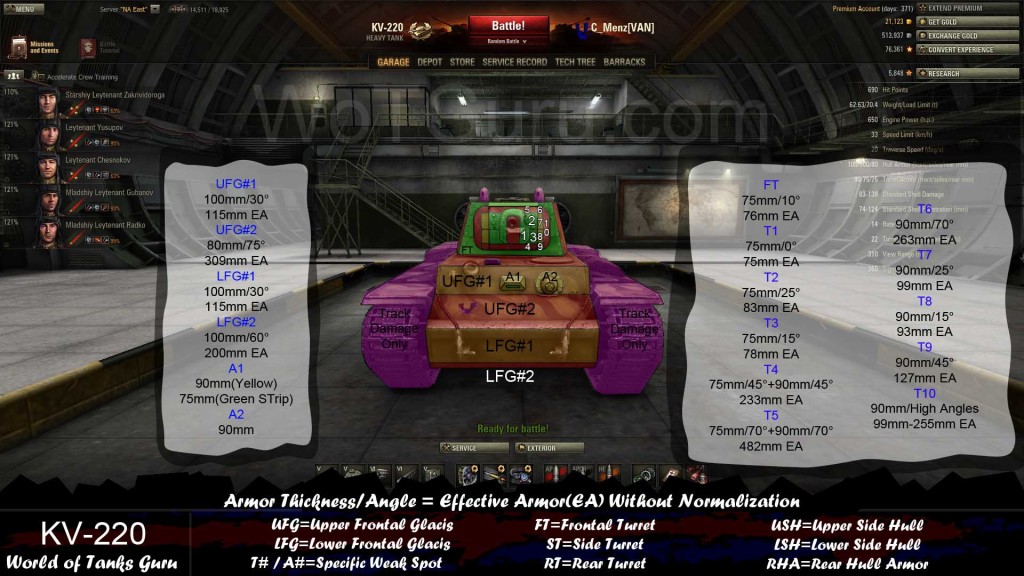 Weak Spot Guide: KV-220 - World of Tanks Guru
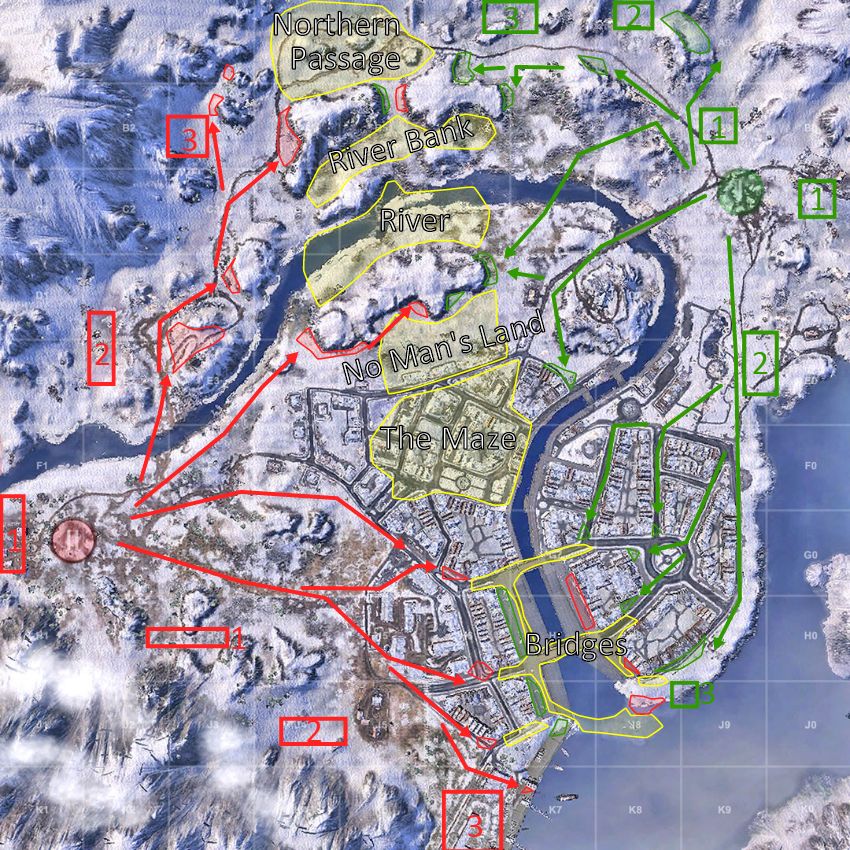 Map Strategy: Windstorm - World of Tanks Guru