The tier 6 monstrosity that is the TOG II* is now released on all World of Tanks servers. While it’s armor might not be thickest for a heavy tank in tier 6 it does surprisingly provide a decent amount of protection in unlikely places.
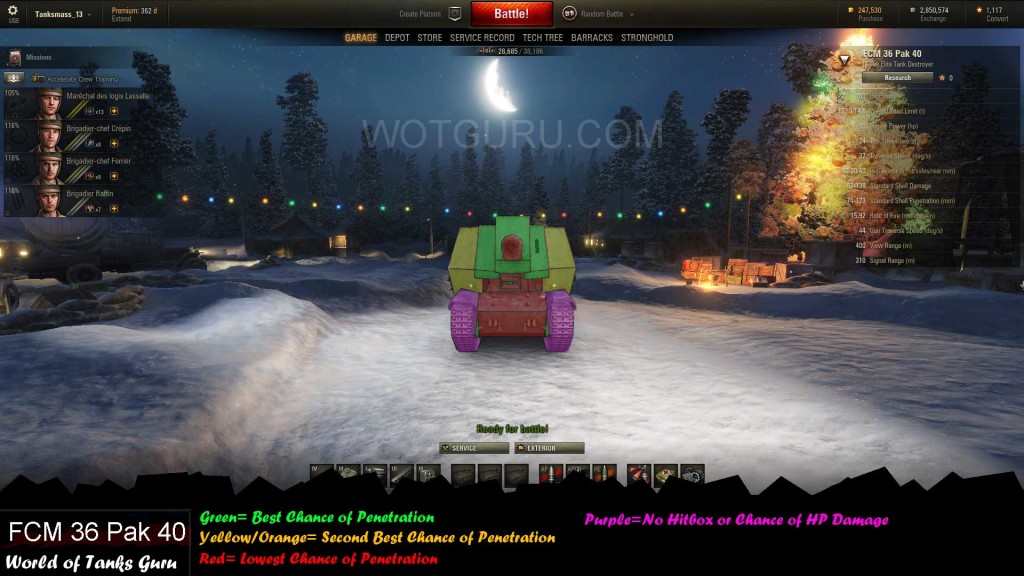
The index at the bottom of each picture describes a few abbreviations used and also the format in which the armor details are described in. Effective Armor (EA) refers to the overall effectiveness of the armor without normalization.
The armor values are presented in three different scenarios for the angled view of the tank.15° frontal(75° side), 25° frontal(65° side), 35° frontal(55° side), and 45° frontal(45° side).
Frontal View
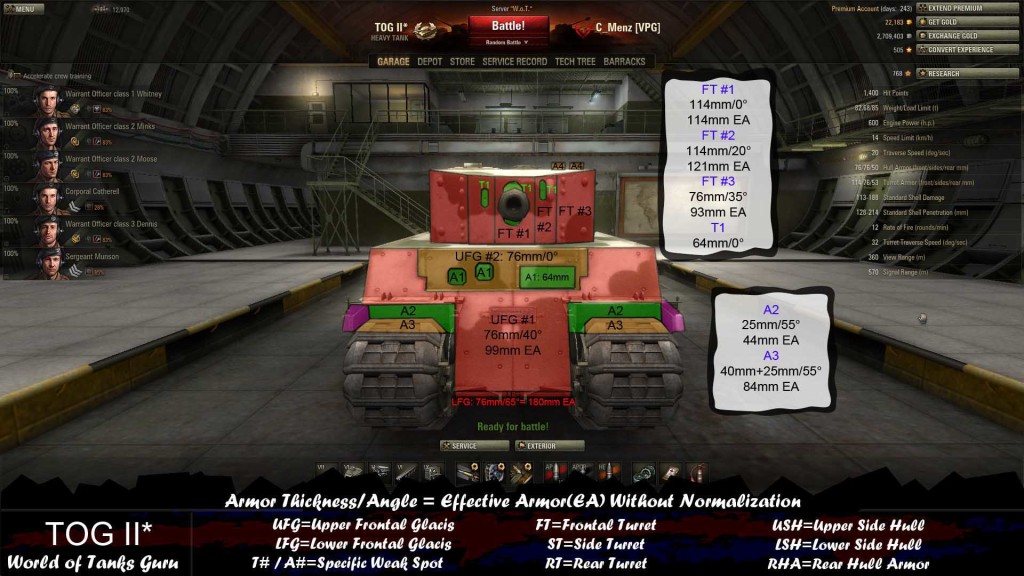
Frontally the TOG II* does not have overwhelming armor protection against T5+ tanks but does a decent job against tanks with lower penetration if they do not know where to aim. The strongest point is the lower frontal glacis which is very small and only visible against very short tanks and therefore not even worth shooting.
UFG #1
This part of the upper frontal glacis is 76mm thick and is at 40° making it have an armor value of 99mm EA. This does give much protection against most tanks the TOG faces but is listed as red sine it is one of the strongest parts of it’s armor.
UFG #2
This portion of the upper frontal glacis is also 76mm thick but has no angle on it at all making it extremely vulnerable.
LFG
The lower frontal glacis is very small and only short tanks at mid range can see/hit it. This coincidentally is the strongest part of the TOG’s frontal armor since it is 76mm/65° giving it a 180mm EA armor value.
A1/T1
Both A1 and T1 areas are protected by 64mm of armor on the hull and turret.
A2/
A3
This area around the tracks is only covered by 25mm of armor. A2 is 25mm at 55° giving it 44mm EA. A3 is covered by tracks giving it +40mm of armor and thus has 84mm EA.
FT #1/FT #2
Both of these areas are covered by a 114mm sheet of armor giving it better protection that the rest of the frontal TOG profile. FT #2 has a 20° angle on it making it slightly tougher than FT #1.
FT #3
FT #3 drops down to 76mm thick but is at a 35° angle making it have an armor value of 93mm EA.
A4
These two view ports on top do no HP damage and simply do crew/module damage.
Side View
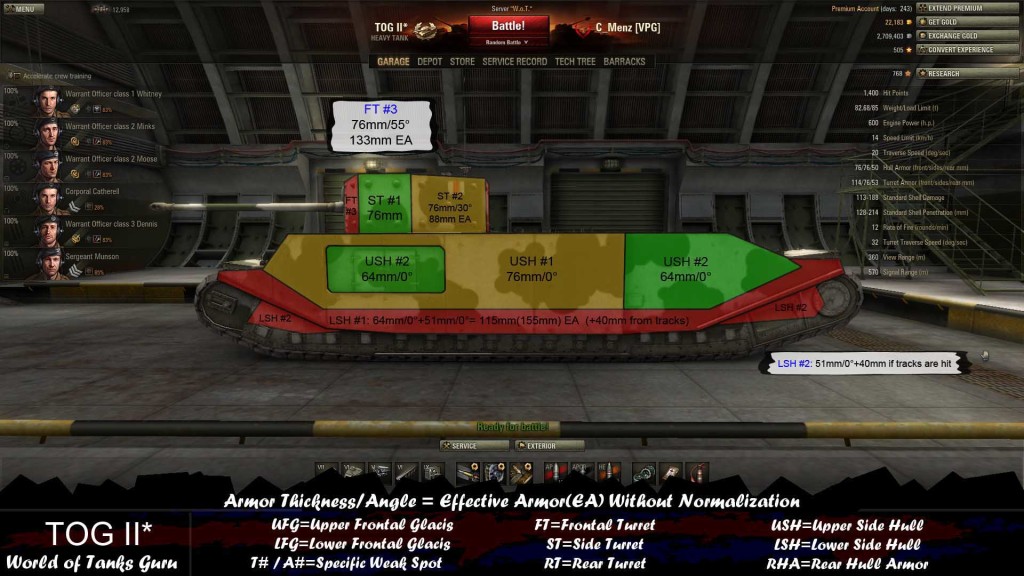
The TOG II* from the side is simply a huge target to practice on. You only need to be careful about hitting the lower hull areas.
USH #1/
USH#2
The entire upper side hull of the TOG has no angle on it making it extremely easy to penetrate. USH #1 is covered by 76mm of armor while USH #2 areas are only 64mm thick.
LSH #1
This lower section of the side hull is spaced armor and is quite tough compared to the rest of the tank. There is 64mm of spaced armor in this area with 40mm of tracks behind it before reaching the 51mm hull armor. This gives this area 115 EA/AP if you do not hit the tracks and 155mm EA if you do.
LSH #2
The rest of the lower side hull that is not covered by spaced armor is 51mm of armor covered by 40mm of tracks. This still puts the armor value at 91mm EA making it tougher to damage than the upper side hull.
ST #1/
ST #2/
FT #3
The side turret armor is only 76mm thick making area #1 easy to damage and area #2 slightly more difficult due to the 30° angle on it. FT #3 is the only strong part of the turret from the side since it is at a 55° angle.
Angled View
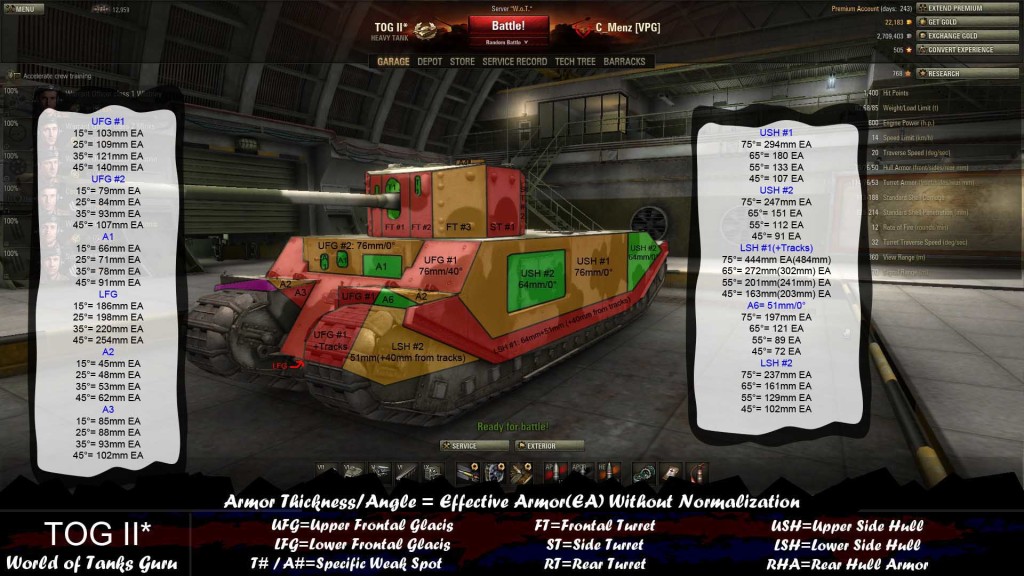
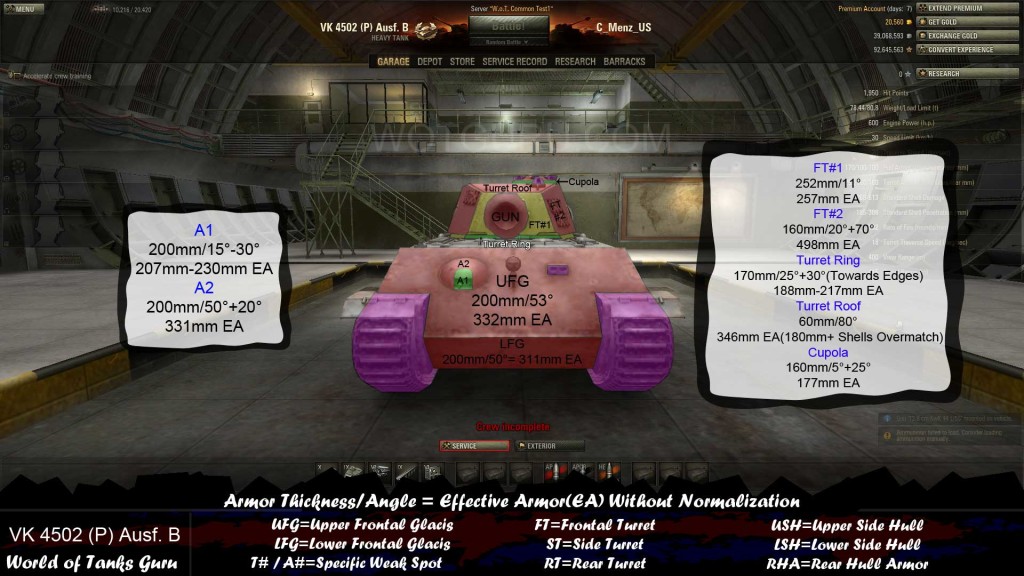
Since the armor on the TOG II* is the same thickness on the side and front it makes sense to always try and angle the armor to increase the effectiveness. This also opens up a slew of different areas to aim at. Specific armor values for each area can be found in the image above, listing them all here be a bit overkill.
Rear View
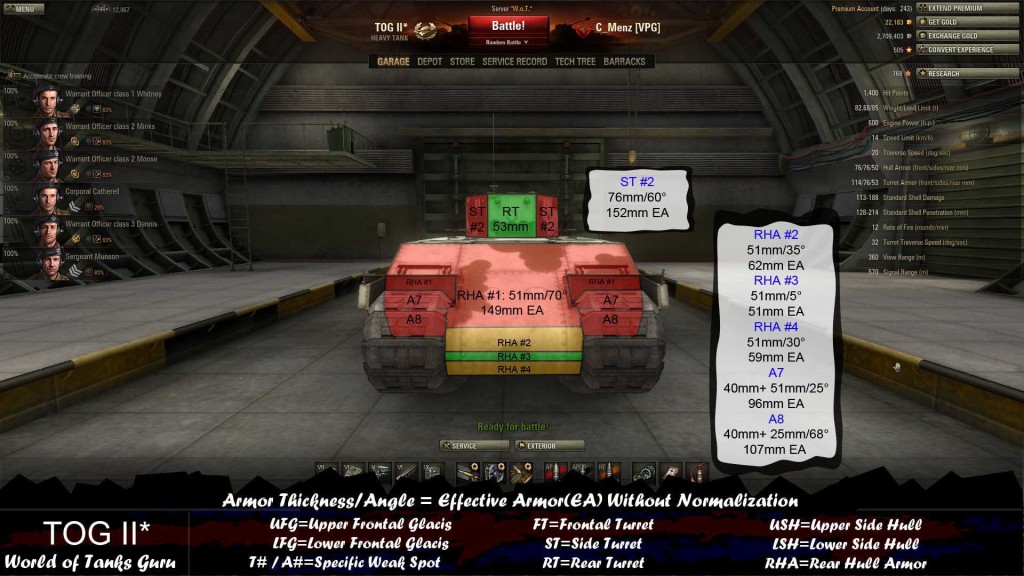
Finally some armor! Surprisingly the rear of the TOG II* actually better protected than the frontal hull. This is due to the massive 70° section on the rear hull which bounces a lot of shells at 75m+ since further than that many shells hit at an auto-bounce angle.
RHA #1
This section of the rear hull armor is only 51mm thick but is at an impressive 70° angle. This will auto-bounce a lot of rounds at mid range due to the angle(especially shorter tanks). However at close ranges the angle is negated and it becomes easy to damage.
RHA #2/#3/#4
This section of the rear hull armor is also 51mm but the angles are much less steep. RHA #2 is at 35°, RHA #3 is relatively flat, and RHA #4 is at 30° making all three easy to damage.
A7
This area of the upper portion of the rear tracks has 51mm hull armor behind it at 25° plus the 40mm track armor. This makes it difficult to damage compared to the RHA below it.
A8
Below A7 is this area which is only 25mm of hull armor at 68°. Although much thinner armor the steep angle gives it better protection and can auto-bounce shells passing through the tracks at close range since the angle increases to over 70°
RT
The rear turret armor is a mere 53mm thick with no angle on it making it extremely vulnerable.
ST #2
Due to the 60° angle on this portion of the turret it becomes one of the toughest places to damage from this view.


 Weak Spot Guide: VK 4502 (P) Ausf. B - World of Tanks Guru
 Map Strategy: Arctic Region - World of Tanks
 Weak Spot Guide: KV-4 - World of Tanks Guru
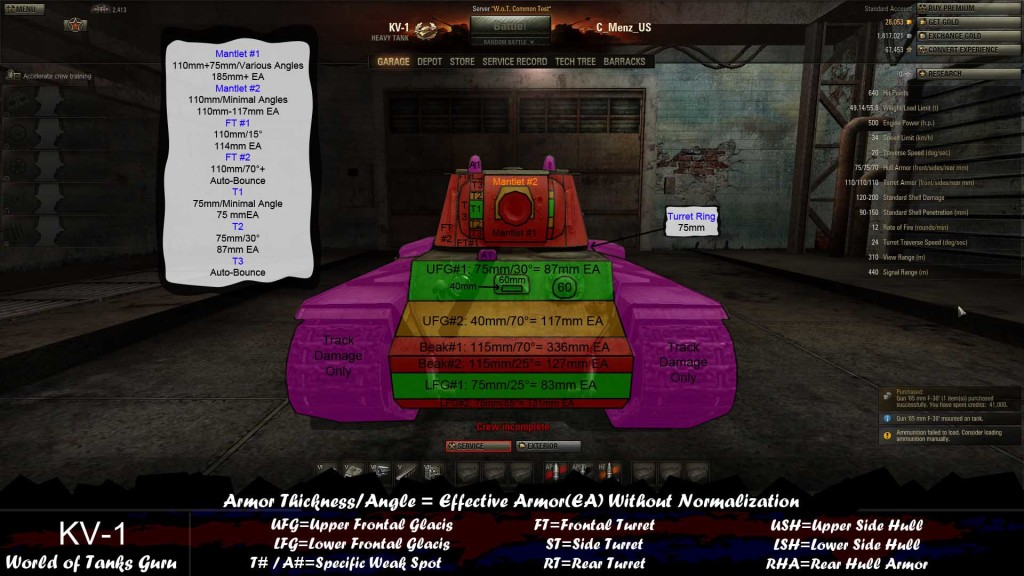 Weak Spot Guide: KV-1 - World of Tanks