At tier 9 the Russian heavy tank ST-I has a boat load of armor on both the hull and the turret making it very difficult to face even for tier 10 tanks. While the hull armor does not provide overwhelming thickness values most places are either angled very well or can be deceiving. The turret front is a tough nut to crack and when combined with the ST-I’s great gun depression it makes it even more deadly to face since it can hide the slightly weaker hull armor.
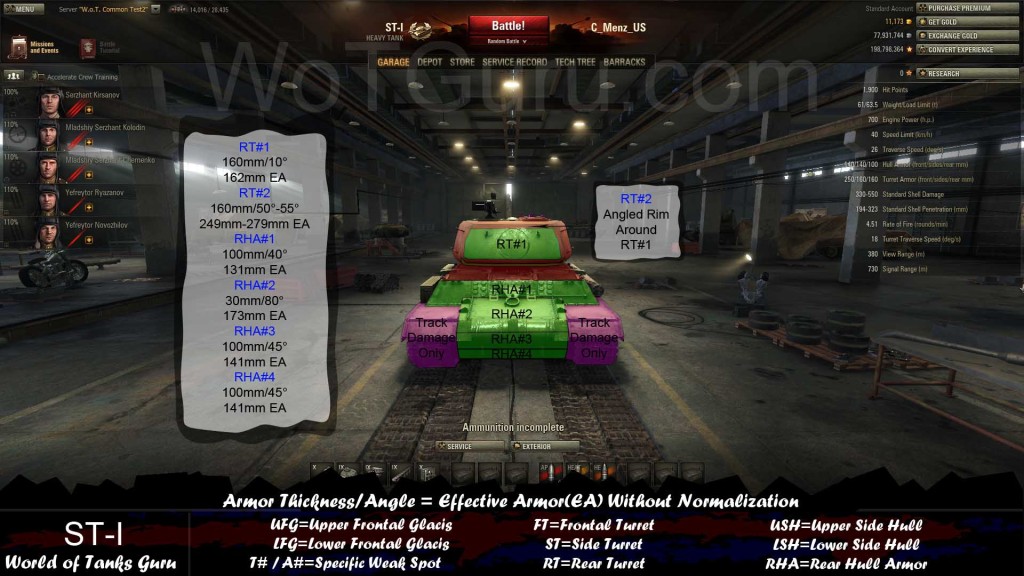
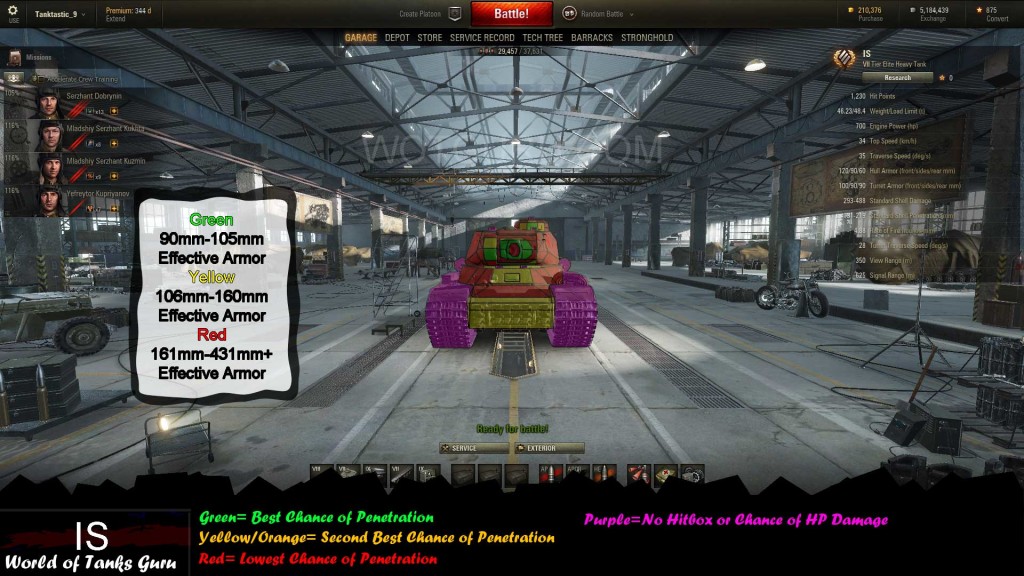
The index at the bottom of each picture describes a few abbreviations used and also the format in which the armor details are described in. Effective Armor (EA) refers to the overall effectiveness of the armor without normalization. The purple sections on each view represent places such as the track armor or view ports that you can do module damage but not HP damage. Next to some armor values you will see (^v) which means vertical angle and (<>) which means horizontal angle.
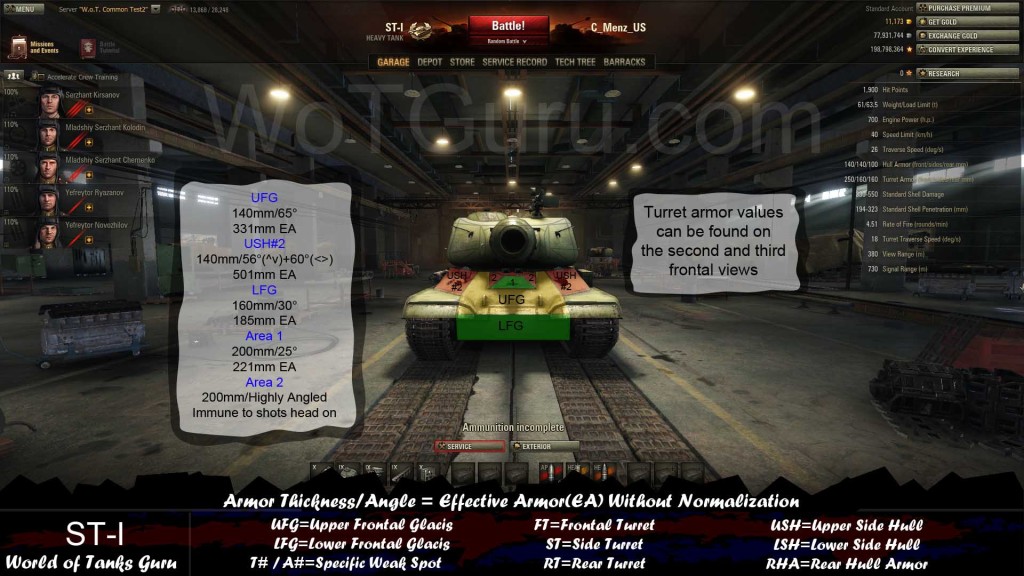
Frontally the ST-I’s hull armor is well protected against most tanks it will face and especially if the lower glacis is hidden. When facing a ST-I from this angle focus on the lower glacis if you are not within 50m of them since as you get closer than that the lower glacis will become angled more and thus harder to damage. Instead at close range shoot down into the upper glacis since it will loose some of it’s angle and will be easier to damage. The driver’s port that is area 1 is also a good weak spot to use if you can hit it reliably since it is not very large.
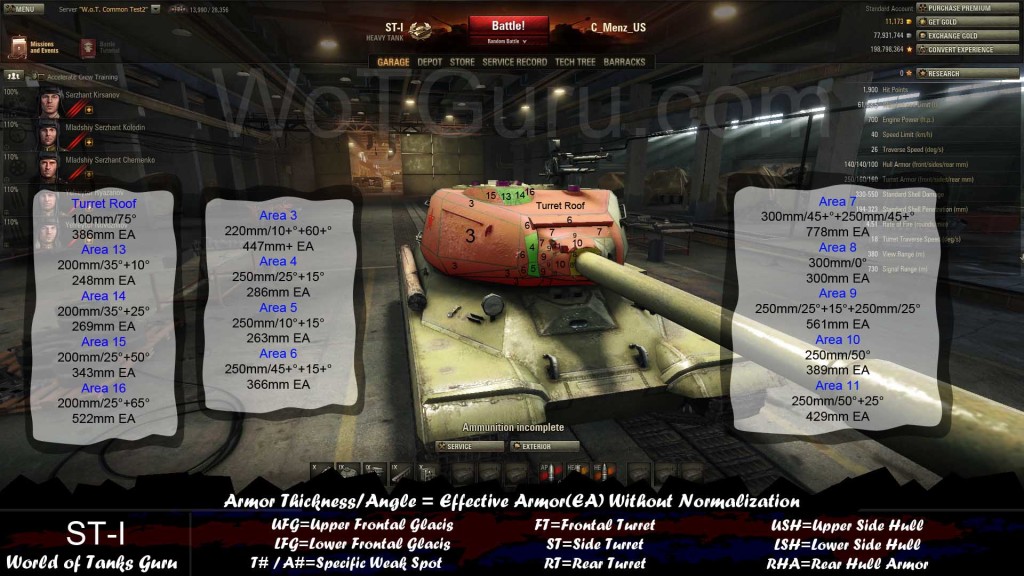
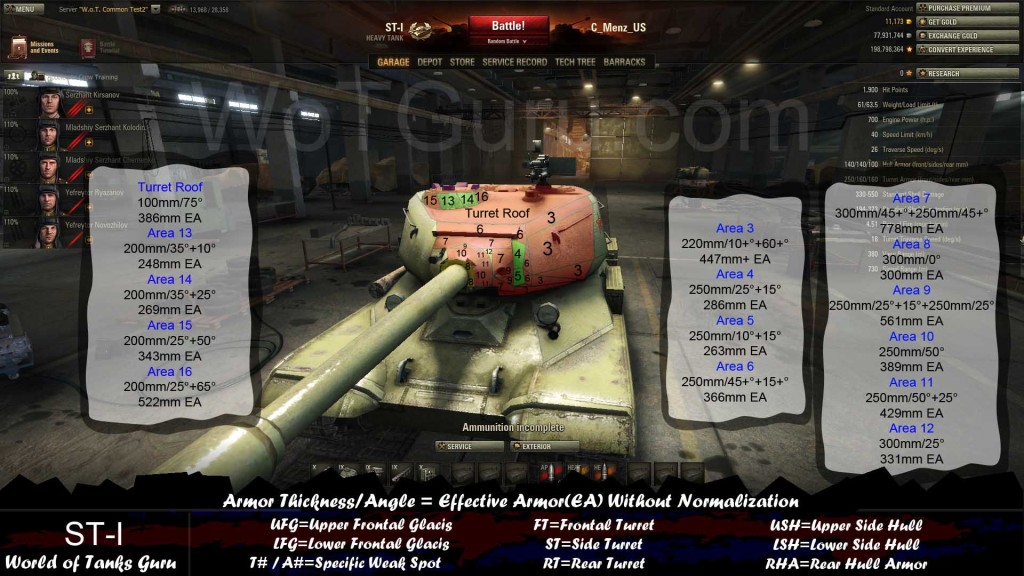
The turret front is where the ST-I shines since the ST-I has enough gun depression to hull down unlike other Russian heavy tanks. When encountering a ST-I that has it’s hull hidden you are limited in where you can damage it on it’s turret. On the turret front area areas 4 and 5 that are your best bet in this area. All other areas when the ST-I is facing you are very difficult or impossible to damage. Around the gun is a flat 300mm piece of armor that is also able to be damaged but there is a higher chance of doing 0 damage if you clip the gun module. On the turret roof of the ST-I is the cupola which also provides two small areas that most tanks can damage. Make sure to aim in the center/left side of the cupola and do not stray to far to the edges since while this is a weak spot it is still pretty tough.
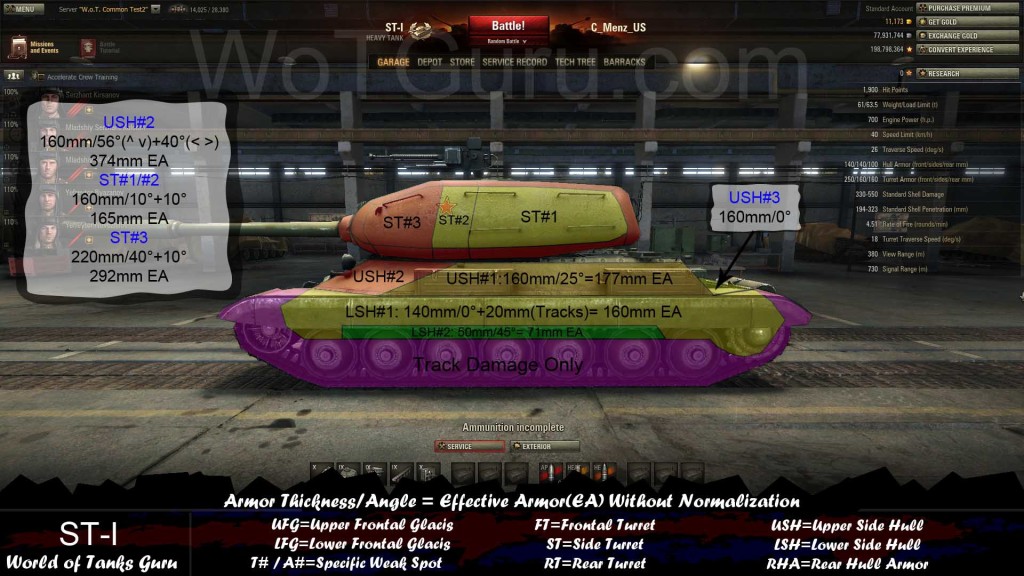
From the side the ST-I is still fairly well armored against tanks below it since it only has a lesser known weak spot on the lower hull that is truly “weak” The LSH#2 area is a very thin strip that is difficult to hit but is the weakest part of the side armor. Overall when shooting at a ST-I from the side simply stick to the flat spots on the turret or below the angled parts on the side hull(but not to low to miss the actual hull).
The rear of the ST-I is straight forward since the only well protected sections are the angled parts on the turret edges.
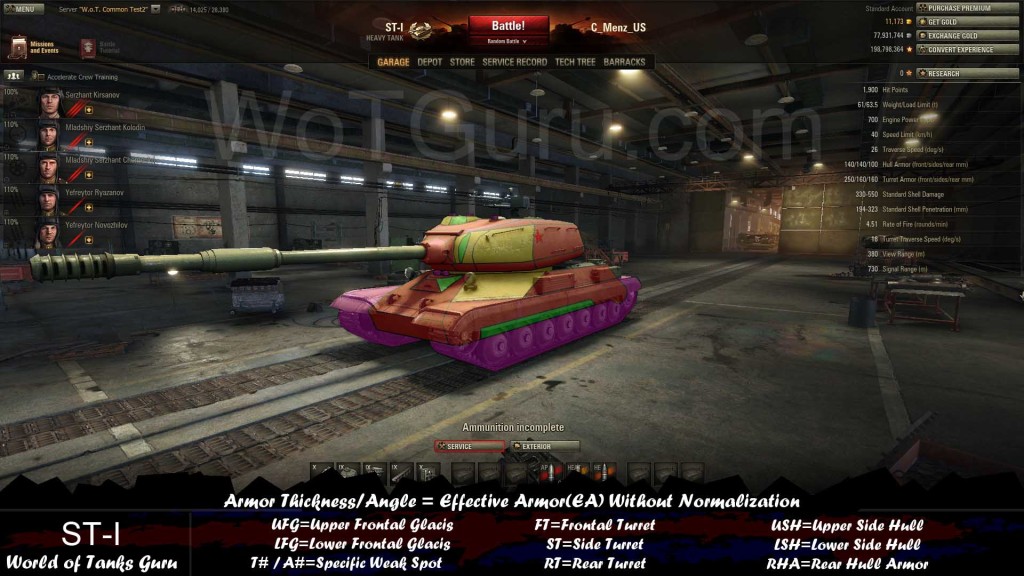
The ST-I can be very tricky to face when the ST-I can angle well. When the ST-I is angled slightly(under 30 degrees) is when it’s armor is most difficult to damage since overall there are limited weak spots to use on the hull. The only places on the hull to use when the hull armor is angled between a frontal view and side view are the thin strips of armor flattest to your and the USH#2 area between the upper glacis and upper side hull.
The two green areas on the drivers port and next to gun are the weakest for those areas when angled and the cupola while still strong on it’s side is easier than other armor on the ST-I from this view. The USH#2 area(yellow on this image) can still be very strong since even if the ST-I angles by 45 degrees from the front it still has 259mm EA. 259mm EA is weak for a tier 10 tank to punch through when normalization is taken into account but it still hard for other tanks to damage.

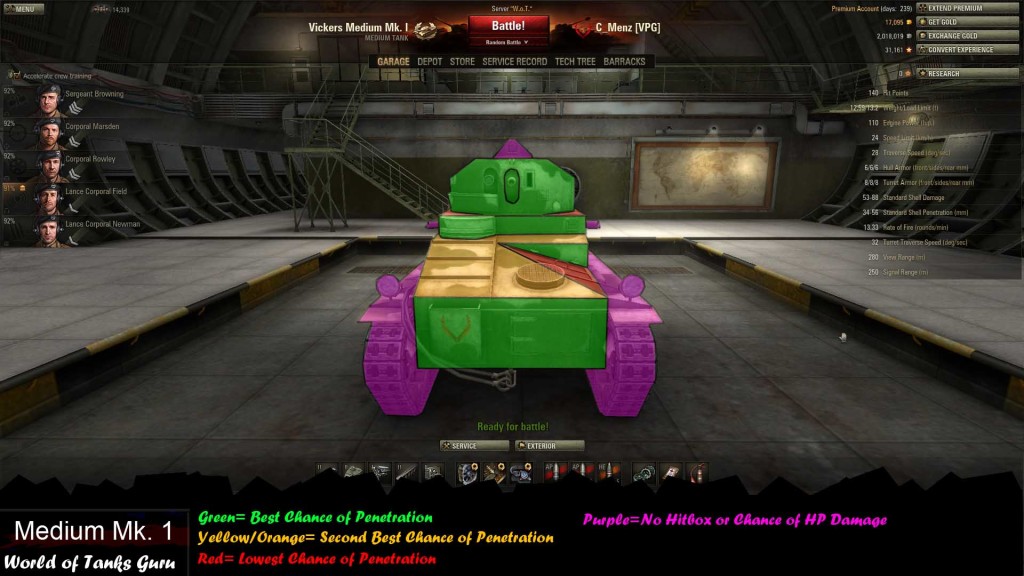 Weak Spot Guide: Vickers Medium MK 1
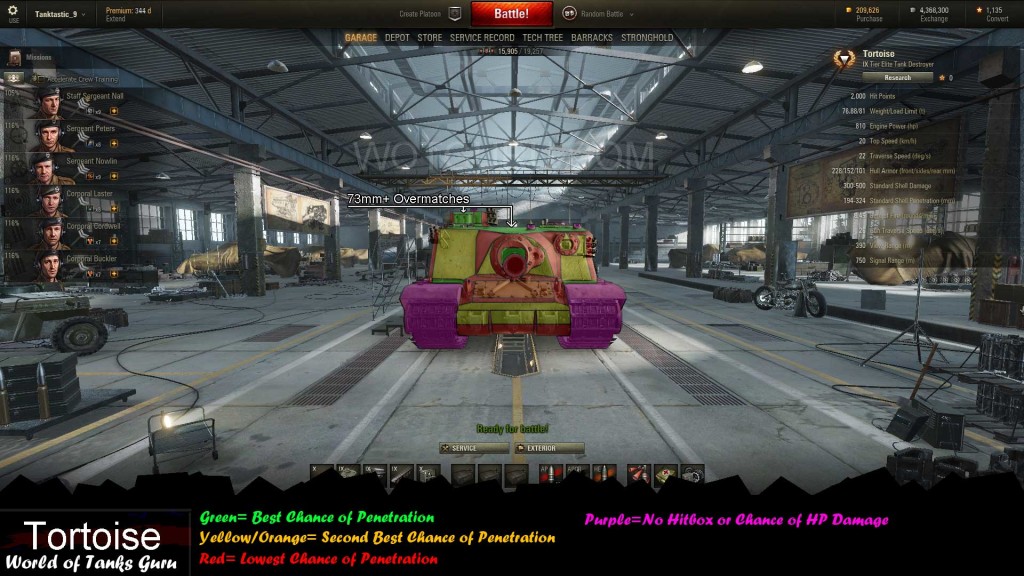 Weak Spot Guide: Tortoise - World of Tanks Guru
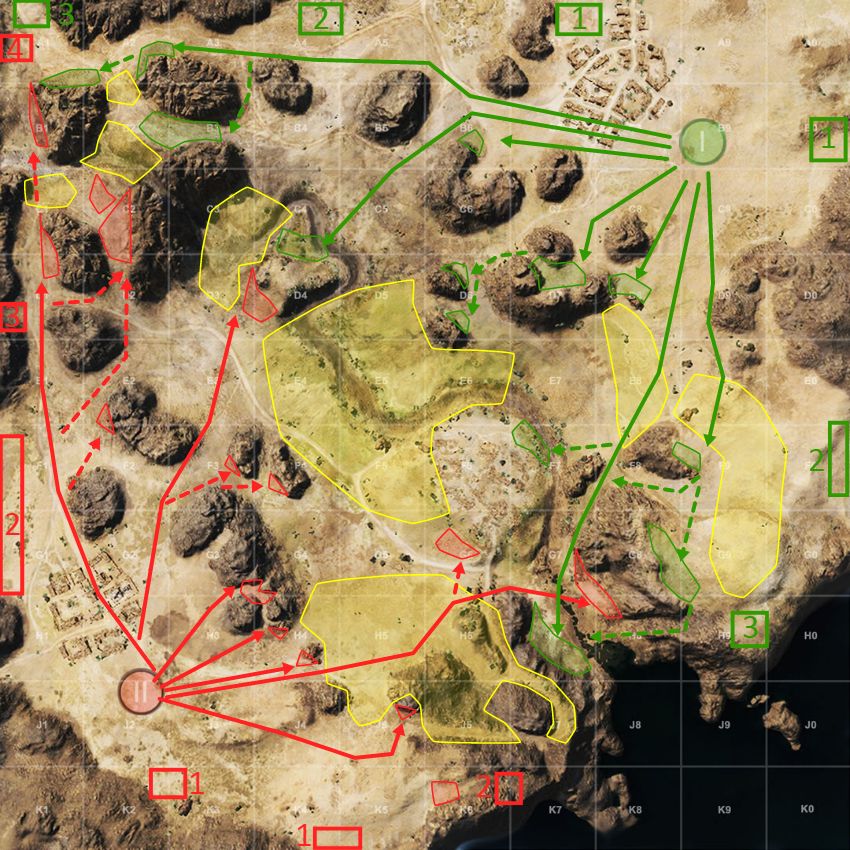
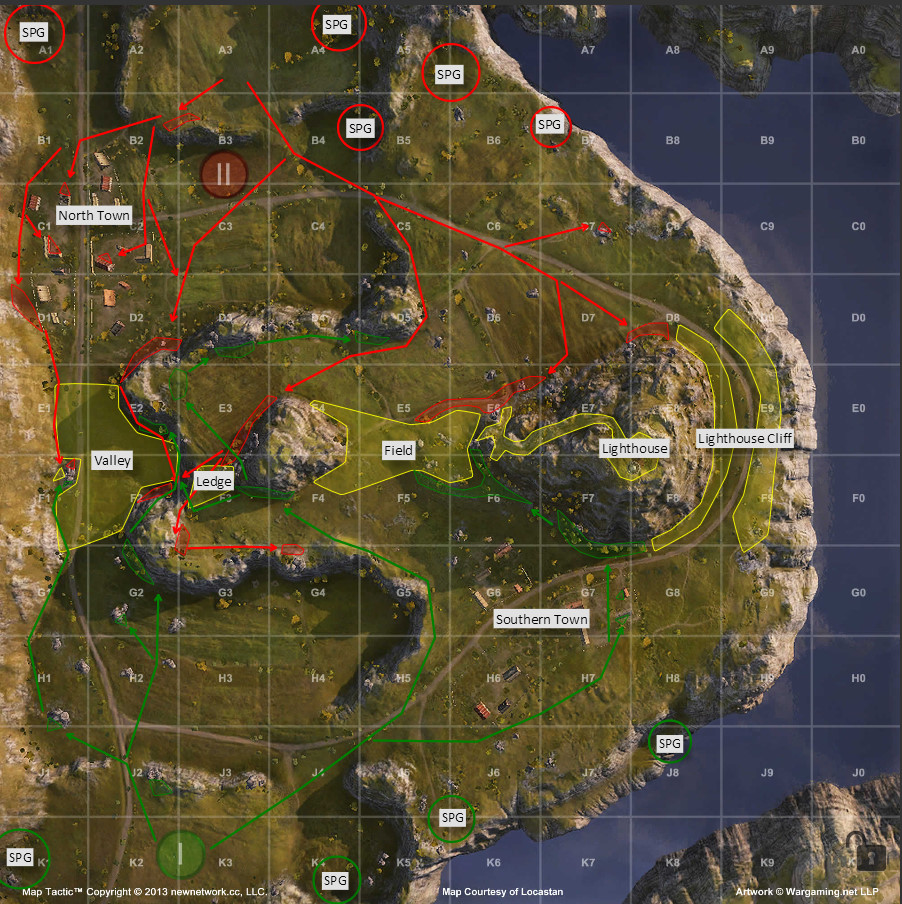 Map Strategy: Cliff - World of Tanks Guru
 Weak Spot Guide: T110E3 - World of Tanks
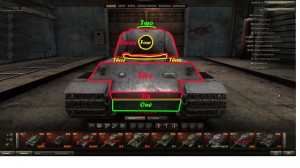 Weak Spot Guide: Lowe - World of Tanks Guru