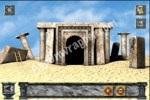
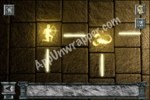
1. Tap the gate. Pick up the rock and take the key.
2. Go back and use the key on the locked gate to open it. Go through the gate.
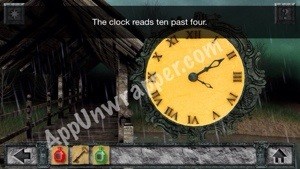
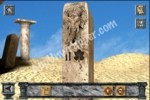
3. Notice the time on the clock. Tap on the lion to zoom in on it. Pick up the red Bottle of Strength from the water to the right of it.
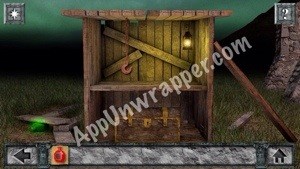
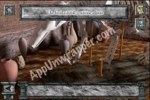
4. Go back and cross the bridge. Tap on the small shack to the left. Pick up the green Bottle of Spirit. Also pick up the Chain Hook.
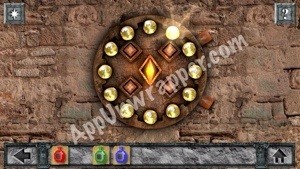
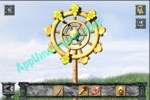
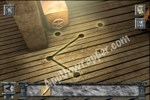
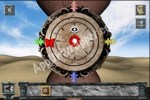
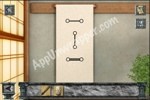
5. Go back to the lion and use the chain hook on the lever to the left and the pillars will turn into a bridge. There’s a puzzle here that’s pretty simple. Just press the buttons to rotate each ring, so they match up. Start from the outside one and work your way in. You’ll get a key at the end.

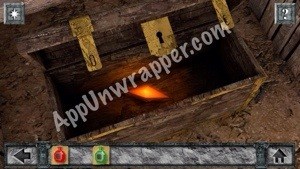
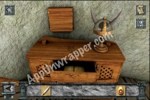
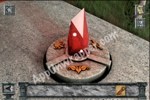
6. Go back to the small shack (Scene 3) where you found the hook and use the key to open the chest. Take the Citrine Crystal from inside.
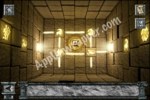
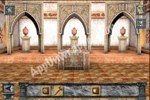
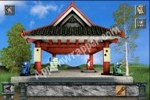
7. Go up to the cathedral. Take the blue Bottle of Honor from under the right window.
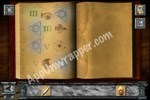
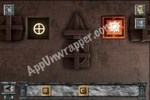
8. Above the door is a slot that fits the Citrine Crystal. Place it in there and press the buttons in this order to solve the puzzle (based on the clock you saw): Upper left, Bottom left, upper left. Now it will mimic the clock hands and unlock the door.
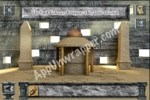
9. Enter the cathedral.
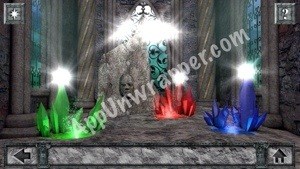
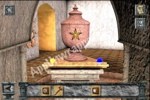
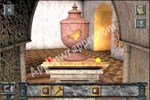
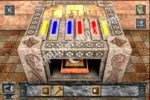
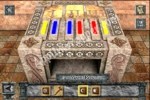
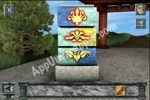
10. Pour the three different liquids by the corresponding colored crystals. Telvonus will wake up.
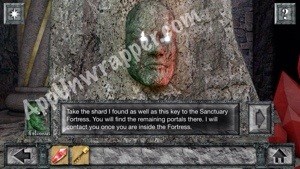
11. Talk to Telvonus. He will give you the Fortress Key and the Shard of Strength.
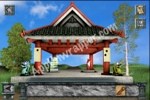
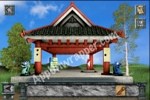
12. Exit the building and continue along the path (tap to the right of the cathedral). You will come across another building (Entrance to the Kingdom), which is locked. Use the Fortress Key to unlock the door.
13. Go through the door to enter the Kingdom:


14. Take the Mushroom Key that’s sitting on the well.
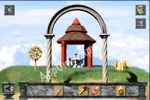
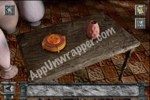
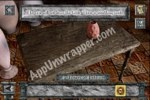
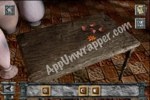
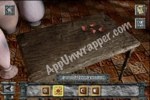
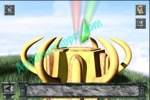
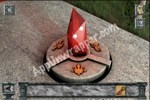
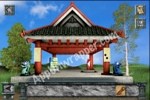
15. Cross the bridge. Put the Shard of Strength on the device to the right. Tap on the table under the gazebo and pick up the Horn.
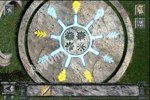
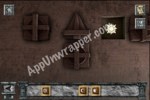
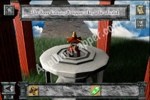
16. Tap above the gateway to continue on to this screen and notice the pattern on the ground:

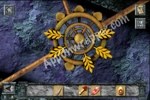
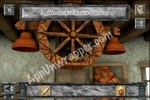
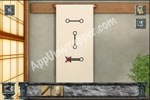
17. Enter the tunnel. Move the wheel on the left to look like this:
18. Continue on until you see this room. Pick up the Golden Egg.
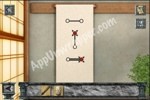
19. Go back to the screen with the arch and arrange the wheel like so:
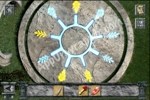
20. Go back to the design in the ground. Take the staircase up. Tap on the center of the wheel until it looks like this:
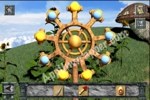
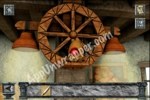
21. Go back a screen and tap on the mushroom house. Unlock the door using the mushroom key and enter.
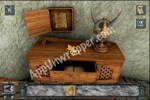
22. Zoom in on the dresser. Take the knife. Put the horn on the lamp and a drawer will open, revealing this book:
23. Zoom out and tap on the wheel. There’s a nest. Place the Golden Egg on it and two lights will turn on:
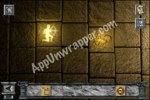
24. Note the pattern the lights make on the floor:

25. Go back to the glowing pattern on the floor and it will have changed. There are now shapes in the center:
26. Zoom out and tap on the puzzle to the left. Solve it and a bug shape will appear. Can’t use it at the moment:
27. Go back to the screen with the mushrooms. Use the knife to get the Charm from the mushroom. Then take the Scarab that is revealed.


28. Go to the puzzle with a slot for the Scarab and place it on there to get a rope:

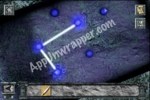
29. Enter the tunnel again and tap the blue crystals to the right do they look like this:
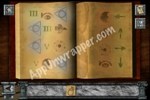
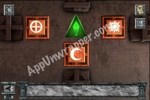
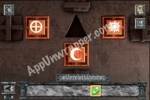
30. Go to the mushroom house and place the Charm in the slot on the desk. The locked box on the wall will open up, revealing the missing page from the book. Add it to the book:
31. Look on the floor under the lamps. The safe will now be open. Take the bucket from inside:


32. Go back to the well and attach the rope and bucket. Tap the handle until the bucket goes down into the well and comes back up with something in it. Take the Key of Spirit.
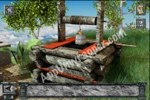

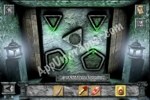
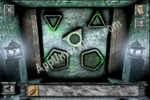
33. Enter the tunnel again. Go to the end. Using the pages from the book, solve the puzzle. The shapes should look like this to unlock the door:
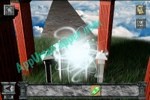
34. Tap the door to open it and enter the next room. Put the Key of Spirit in the device in front of you:

35. Tap on the glowing orb and you’ll be teleported to a palace entrance. You can’t turn back.
36. Enter the palace to the Exhibit Room. If you examine the dinosaur bones, you’ll notice one bone is missing. Tap on the table to the left and take the Token of Life. You can’t pick up the vase yet.
37. Tap on the doorway to enter the Symbol Room. Tap the next doorway and take the Symbol of Devotion above the middle door.
38. Enter through the middle door. Take the ladder. Examine the elephant carving to find a clue. You can also enter the Tomb and place the tokens you have on the matching symbols on the left and right walls. Or you can do that later.

39. Go back to the Symbol Room and use the ladder on the wall to the right. Climb up and open the cabinet that’s up there to find another clue and a Fossil.
40. Go back to the Exhibit Room and put the Fossil on the dinosaur skeleton. His mouth will open, revealing the Token of Wisdom. Take it.
41. Go to the Symbols room and tap on the globe to the left of the doorway. Between it and the vase is a Token of Solace. Take it.
42. Go through the doorway and take the the middle door again. Enter the Tomb and place all the Tokens on the matching symbols on the right and left walls. You need to play with the lines to match them up to the lines on the main wall. When they’re both matched up correctly, the Earth Relic will appear in the center of the main wall.
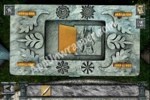
43. Go back to the three doors. Take the right door to the Mausoleum. Look at the door, then change the color of the flower on each dial to match the door. Also rotate the white symbol to point to the color of the corresponding symbol. If you get it right, the Mausoleum door will open.

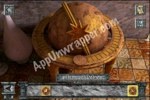
44. Enter the Mausoleum. Take the Hammer and the Star Relic and note the clue:
45. Go back to the three doors and take the left door to the Courtyard. Use the three clues we found to solve the puzzle. The star is I, the leaf is II and the bird is III. Solve the puzzle and you’ll get the Moon Relic.

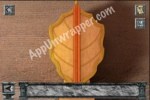
46. Go back to the Exhibit Room. Use the Hammer to break the vase on the table and get the Talisman.
47. Go to the Symbol Room and tap on the globe. Place the Talisman in the slot and a symbol will appear below it. You can change it to any of the three relics by tapping on it. Choose one and then go back and look at the wall above the globe. One of the pieces will have moved to reveal the symbol of the relic. Place the relic in that spot and go back and change the symbol on the globe to another one. Do the same for all three and you’ll get the Shard of Spirit.
48. Go back to the Mausoleum. Take the Key of Honour. Tap on the glowing white box. Tap on it again and you’ll teleport back to the mushrooms.

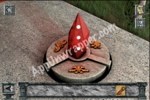
49. Place the Shard of Spirit where you placed the Shard of Strength (near the Honour Gateway).

50. Go to the Honour Gateway and use the key on it.
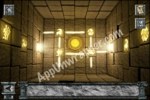
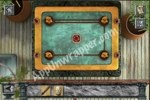
51. Enter the Honour Gateway and continue on through the Great Entrance to the Temple. Here you’ll see a puzzle with two dragon statues.
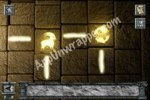
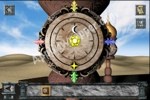
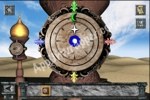
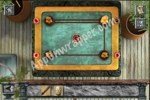
Like the previous puzzles, look at the colors of the dragons. You can change the color by going up to the scroll and taping the scroll to generate dots. On the left scroll it can either be none, one, two, or three in a vertical column. You can go up to the right scroll and tap on it to be another series of combinations. With either scroll, when you back up, you will see that the dragon color has changed. This is the method of changing both the left and right dragon colors.
Then, take a look at the center left stack of three blocks. Each block has a left and right color AND a symbol.
Then you go to the rotating wheel and see how many dots represent each symbol. This will be useful later but not right now.
So, we go back to the column and start with the top block. Blue on the left and yellow on the right with a symbol in the middle. Back up to the scroll on the left and enter a series of dots until you get a blue dragon. You then click on the dragon and an eye will light up that locks that color. You can then go back to the scroll and change the dots without changing the dragon color. You need this function in a bit. You then go over to the right scroll and click on it and back away until you get a green dragon. Again, click on the dragon to get an eye that locks the color.
Then go to the stack of blocks and take note of the symbol. Go over to the rotating wheel and you will see the same symbol…. that in this case has two upper dots.
Go back to the right scroll and click on it until you get the same upper two dots. Go over to the left scroll and click on it until no dots are shown. If you back up, you will then see a blue dragon on the left and a green dragon on the right. The scroll on the right will show two upper dots.

Then go the blocks and tap on the upper block. The symbol will be highlighted!
You then repeat the same sequence on the second and third blocks, dots, and dragons. When all three symbols on the block stack are lit, a door will open and a key will appear!

Take the House Key.
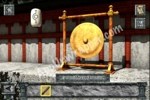
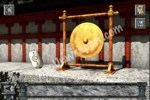
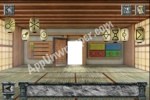
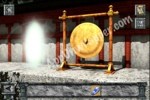
52. Continue along the path to the Residence Entrance. Tap on the gong and then take the Safe Key. Then use the House Key to unlock the door and enter the house.
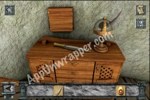
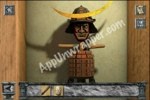
53. Take the Sword (katana) from the stand. Use the Safe Key to unlock the safe and take the Figurine.
54. Open the two cabinets below the safe ad take the Lantern and Umbrella.
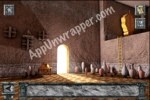
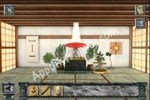
55. Walk through the doorway to the right to enter the Shrine Room. Put the umbrella under the light to see the Shrine. Put the Figurine in the empty spot on the Shrine:
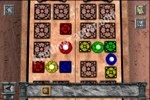
56. Look at the scroll on the wall. Notice you can tap the circles to turn them red. Look at the Shrine and tap a figurine. Then look at the scroll and you’ll notice one or two circles are highlighted. Tap those circles to make them red. Then go back to the shrine and tap the center stone. While the lights are flashing, tap the figurine diagonal to the light you want to stay on and then and you’ll notice it stayed red. Now you have to do the same for each of the others to make all the lights stay lit.


57. If you got all the lights to stay lit, the safe on the wall will open, revealing a Mask. Take it.
58. Go back to the Display Room. Put the mask on the coat of arms.
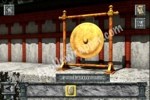
59. Go back to the gong and use the katana to cut down the lantern. Pick it up.
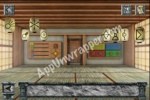
60. Go back to the Display Room. The door is now open to the left of the coat of arms. Take it to get to the Lantern Room. Place the lanterns from your bag on the empty strings.
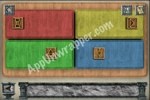
61. Notice that if you tap on a lantern, it moves and glows a certain color. Look at the color of each one. Focus on the left four and arrange the puzzle on the left wall to look like this.
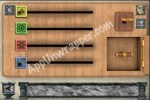
62. The safe will open, revealing another knob. Pull it until the puzzle on the right wall looks like this and the door will open.
63. Walk through the door to the Zen Garden:

64. This puzzle is fairly simple. Look at each of the three pillars with flowers at the top. They each have a symbol in the middle that can be changed to circle, square or triangle. They also have symbols above and below the center shape. Look at the shard in the middle of the garden. If you tap the flower, it changes and highlights the shape for that flower. Change that shape to the color of the flower on the corresponding pillar. Then go to that pillar and match the symbols and shape to what you saw on the shard. Tap the flower to light it up. Do this for all three pillars, then look at the fourth pillar and it will open up, revealing a Room Key. Take it. Also take the Shard of Honour from the grey shard.


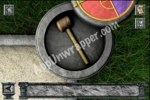


65. Go back to the gong and use the Room Key (looks like a hammer) on it. A portal will open. Tap on it to go back to the Honour Gateway. Place the Shard of Honour where you put the other two and watch the ending (or is it?).
Congratulations! You finished the game! If you liked this game, try these other escape games and adventure games.


 What’s the Word Answers All Letters
 Cloud Raiders Cheat for Cloud Nectar, Gold & Diamonds & Tips - AppGameCheats.com
 Total Conquest Hack for Gold, Food, Token & Crowns & Other Cheats - AppGameCheats.com
 4 Pics 1 Word Facebook Answers Level 81-100
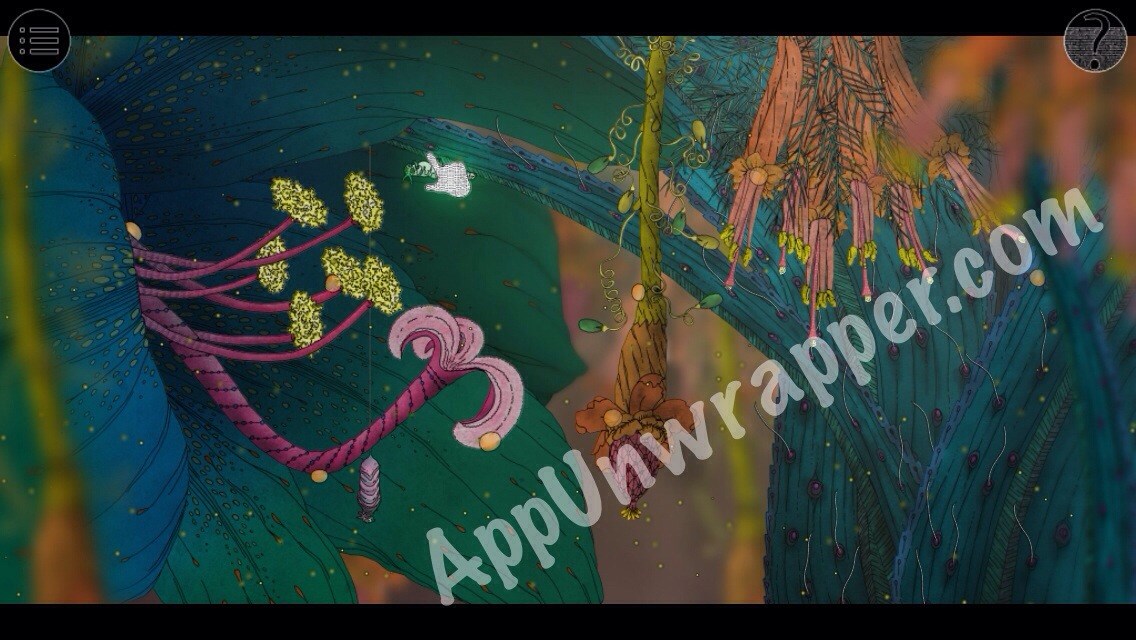 Morphopolis: Walkthrough Guide