
This unofficial guide for The Amazing Spider-Man 2 includes a complete walkthrough for the storyline mode. Apart from that, it encompasses all of the information necessary to complete the game in 100%, i.e. the whereabouts of audio logs, OSCORP Crates, comic pages, as well as Jameson's Photos. It also includes hints connected with hideouts, or the information concerning achievements/trophies. Additionally, each mission includes the whereabouts of upgrade crates. The Amazing Spider-Man 2 is the continuation of the first installment of Peter Parker's adventures, the spider man, a self proclaimed law enforcer, who needs to face his enemies again. Apart from an interesting storyline follow-up, the game offers an open world, a simple-yet-enjoyable combat system, quite a lot of side missions and lots of elements hidden throughout the game world.
The guide for The Amazing Spider-Man 2 includes:
Patrick "YxU" Homa ()

Movement

Climb

Sprint

Attack

Use/Dodge

Web-Rush

Spider-Sense

Crawl/Rappel

Web-Pull / Takedown

Web-Shot

Heal

Camera Mode

Pause/Game Menu

Movement

Rotate Camera

Camera Mode

Crawl/Rappel

Jump

Web-Shoot

Attack

Use/Dodge

Spider-Sense

Heal

Web-Pull

Left web (movement)

Web-Rush

Right Web(movement)

Phone Menu

Pause/Game Menu

Movement

Rotate Camera

Camera Mode

Crawl/Rappel

Jump

Web-Shoot

Attack

Use/Dodge

Spider-Sense

Heal

Web-Pull

Left web (movement)

Web-Rush

Right Web(movement)

Phone Menu

Pause/Game Menu
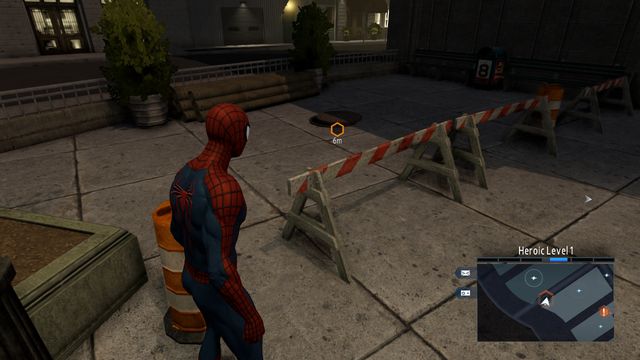
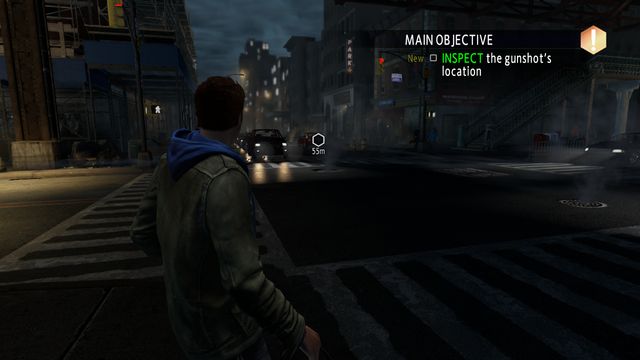 Walk over to the indicated location
After the game starts, go towards the marker on the screen. After a moment, the marker will change locations - walk over there and wait for the cutscene to end.
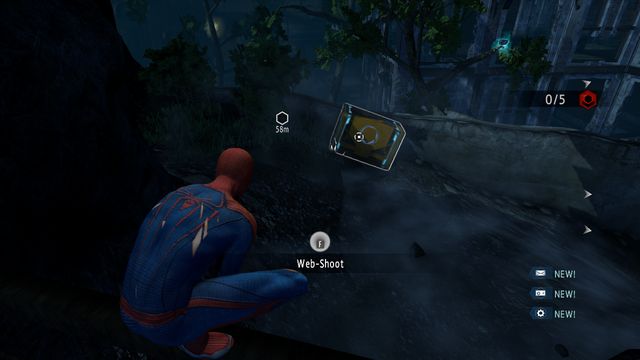
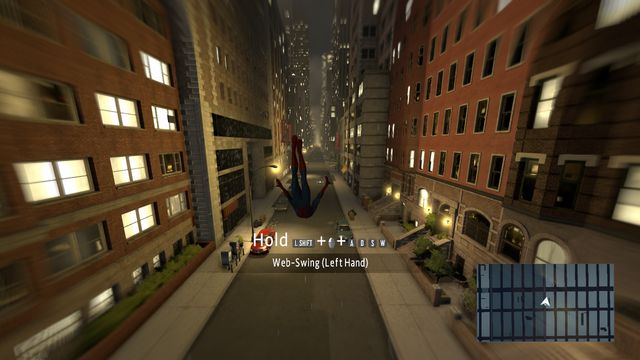 Tap the keys displayed on the screen
The game offers an open world and often requires you to move around the city. This is why the first tutorial in the game will show you how to move quickly, using walls and spider webs. Proceed ahead, quickly, to reach the marker.
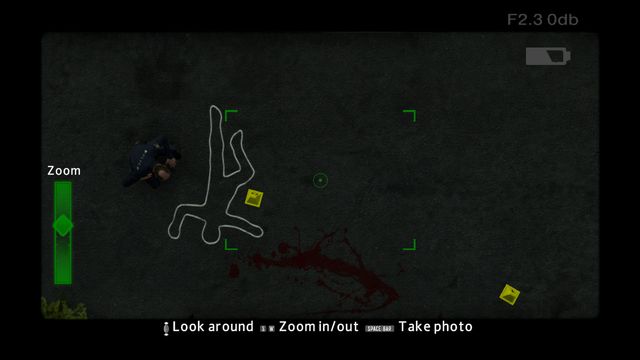
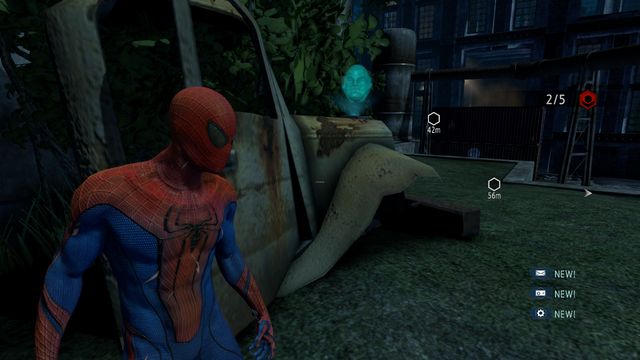
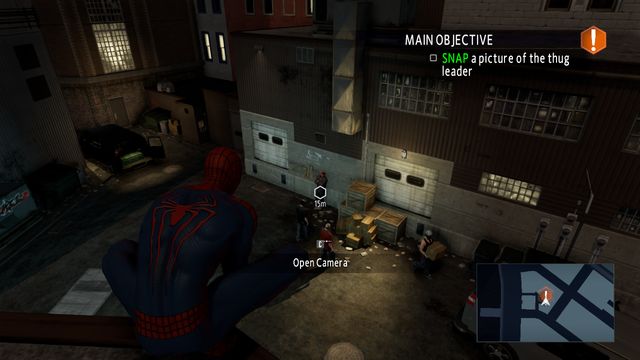 Your target is the guy leaning against the wall
Use the camera to take a shot of the man leaning against the wall. You are going to use the camera frequently, throughout the game.
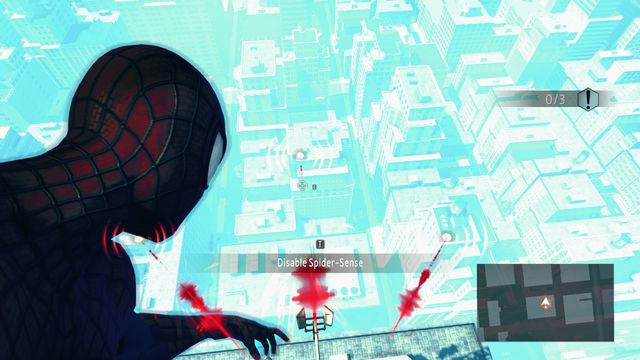
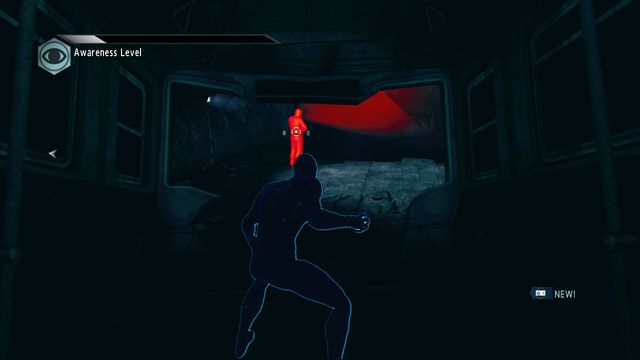
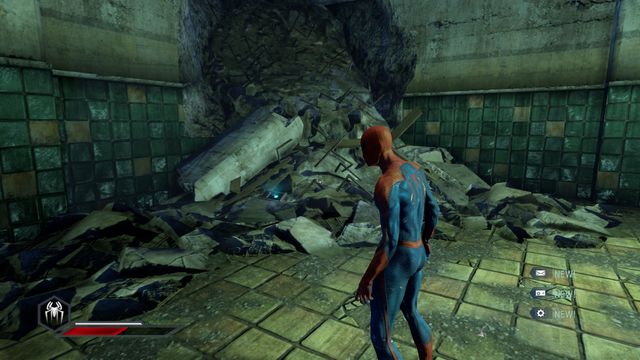
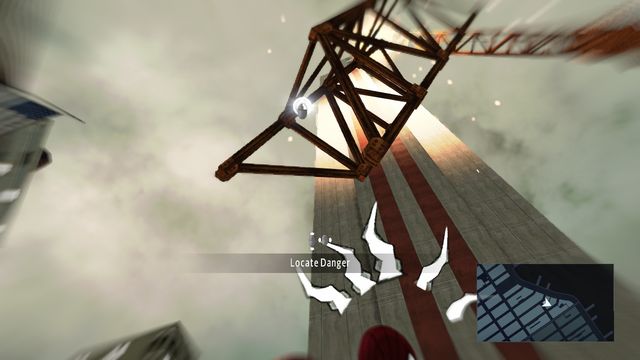 Do not look down - look up
After you take a shot, time will slow down and there will appear a white marker, above your character - it is a situation, in which Spider-Man senses danger. Use the mouse/analog stick to take a look around and locate the danger - you will notice a falling fragment of the crane, above your head. Press the action key, after which you will start a fight.
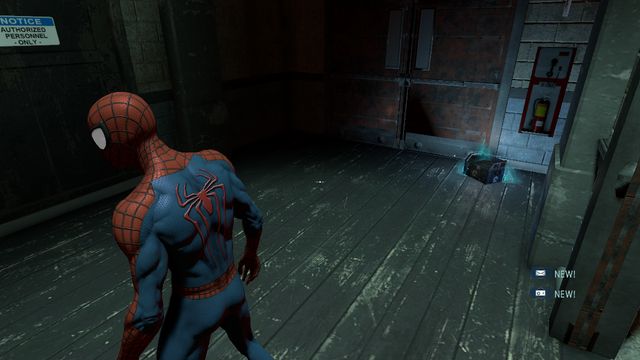
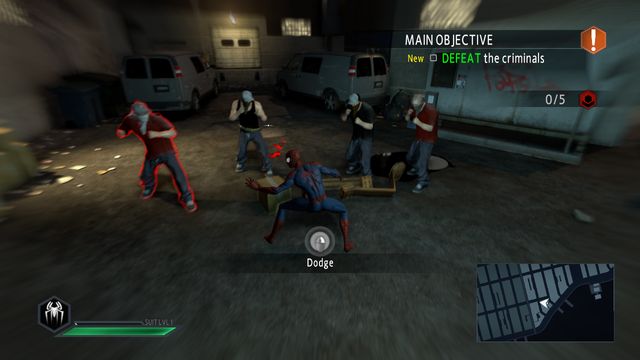 The health bar and the level indicator are in the bottom-left corner
The game will guide through the beginning of the fight. The basic thing here is to tap attack keys sufficiently fast and whenever you notice the red marker - dodge. After you land a blow, there will appear a combo meter on the left - the more blows you land without taking damage or escaping from the battle, the higher value will the meter reach. Thanks to this, you will be able to perform more powerful combos and you will reach the next experience level faster.
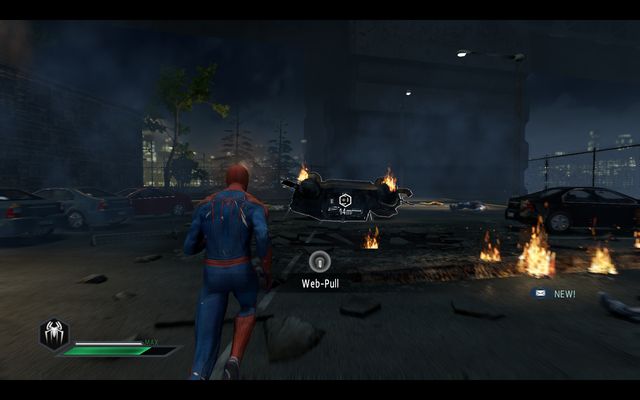
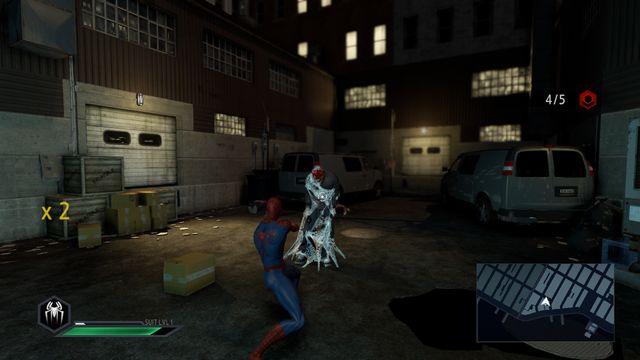 Web shooting immobilizes the opponent
Use the web on the last bandit. You need to tap the key several times to incapacitate the opponent. At this point, you can land the final blow. At the high combo level, you can use this key to perform some more interesting combinations, which eliminate opponents faster.
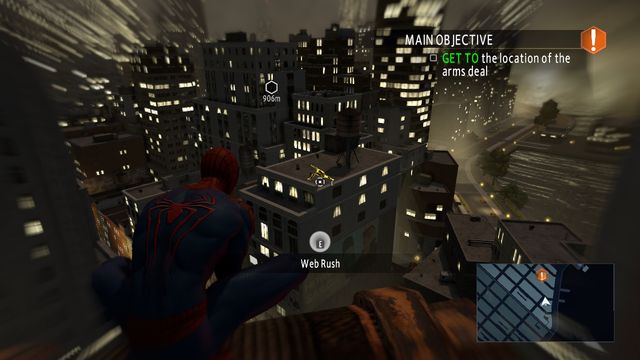 Web-Rush
After you defeat the opponents, another target appears on the map. You will get there faster, using the Web Rush, thanks to which you can move over the map, after you define the next point on the map. This is also useful during the battle.
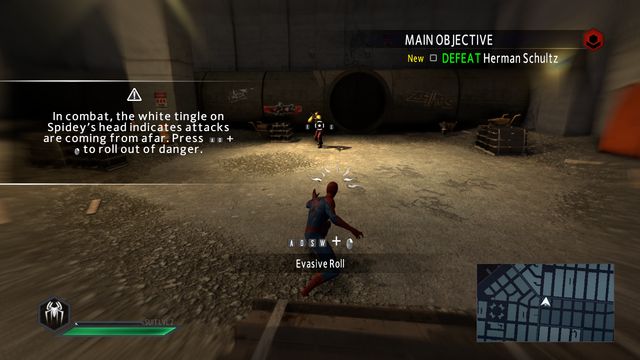
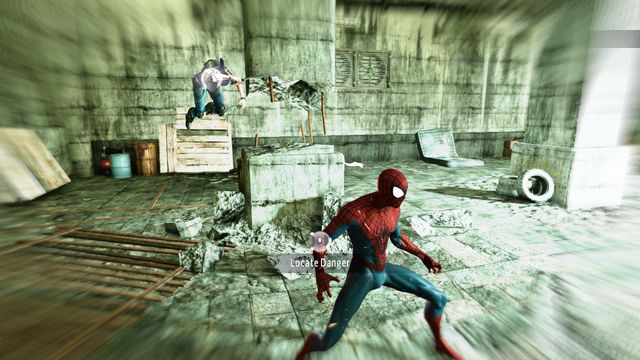
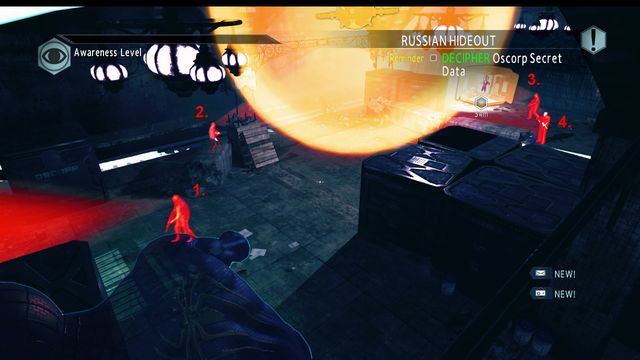
 Spider-sense detects targets
At the destination point, there are 3 fights for you to play - each with four opponents. First of all, use Spider Sense to locate all of the weapon crates that you need to secure. Then, attack any opponent with Web Rush.
 In between fights, spend some time healing yourself
If you sustained any wounds, during the battles, you can heal yourself by using the Heal key. Still, you need to watch out then and make sure that you are not attacked, while doing that.
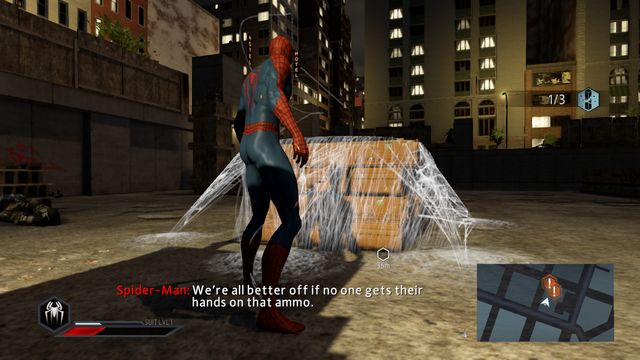 Secure the crates
After you have dealt with the Russians, use the web to secure weapon crates.
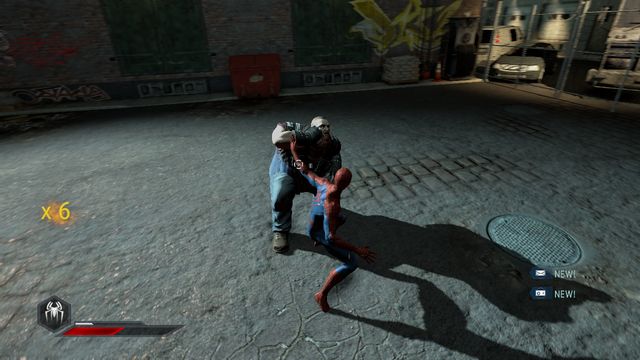
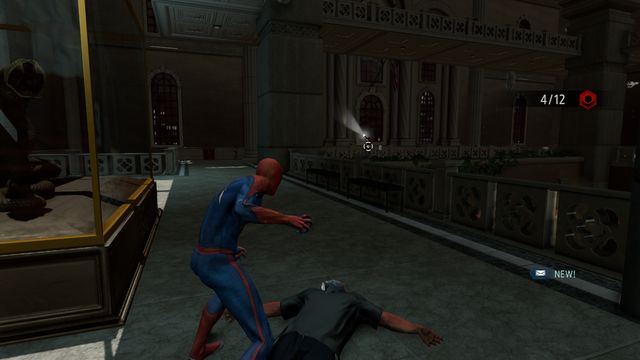
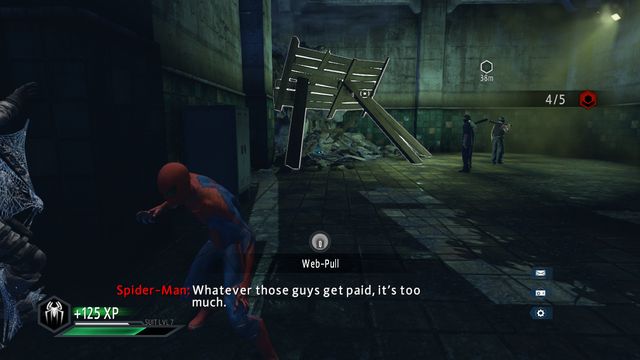
Dodge and pull the weapon off the opponent's handSome of the opponents use various weapons, e.g. firearms. One you notice a white danger marker, dodge using the action key + the movement key, in any direction. Then, use Web-Pull, to pull the weapon out of the opponent's hand.
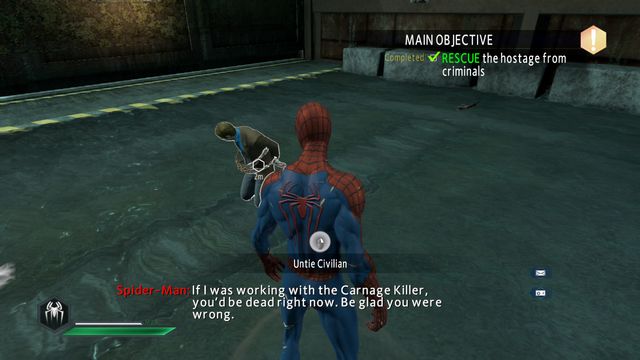
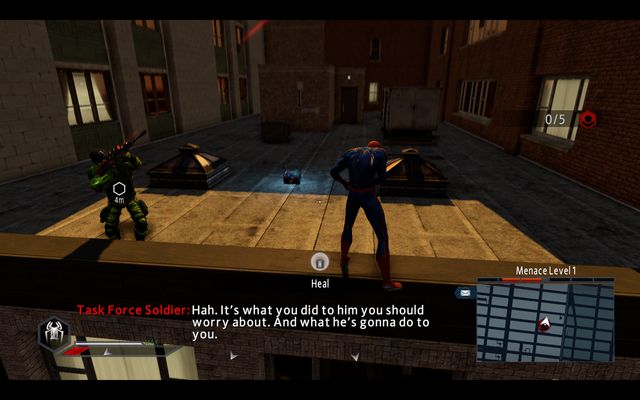
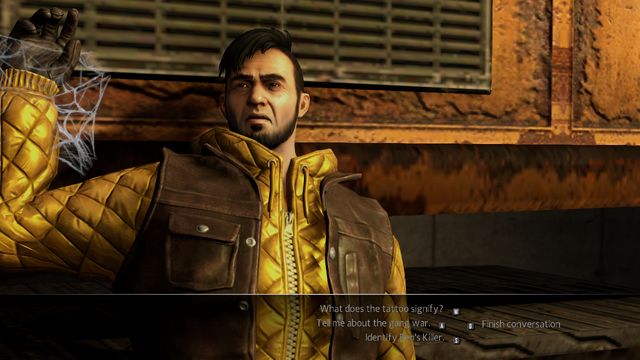 The interrogation
Once you have incapacitated the most important opponents, you will get the opportunity to interrogate them, to learn more about the storyline. These interrogations are not compulsory, nor do they influence the game, which is why you can skip them at any moment, by selecting "Finish conversation".
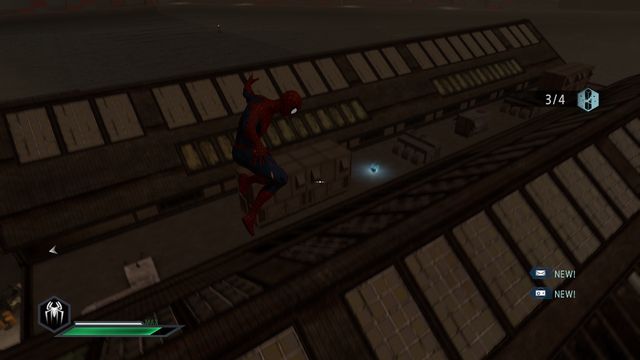
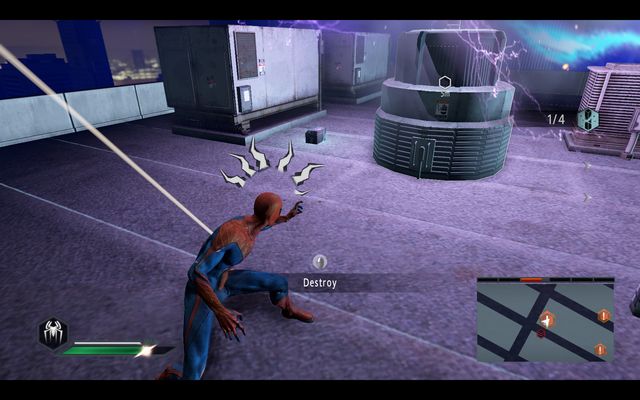
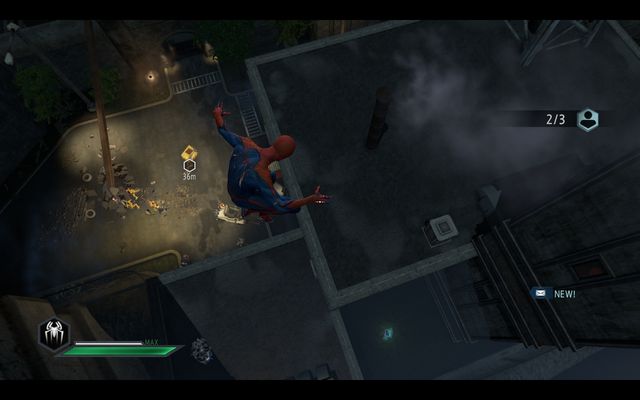
 Locate three relay dishes
At the beginning of the next mission, you need to reach the highest communications tower where, using Spider-Sense, you will be able to locate three antennas below. You need to climb onto each one of them.
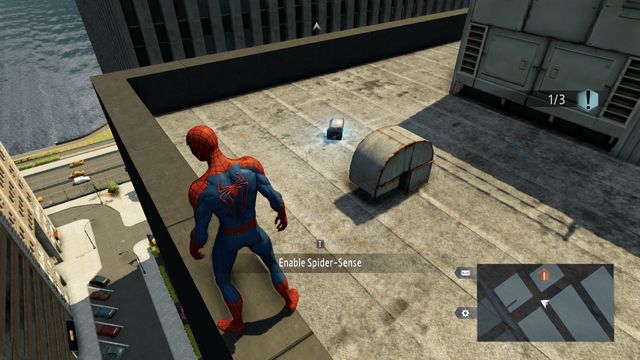
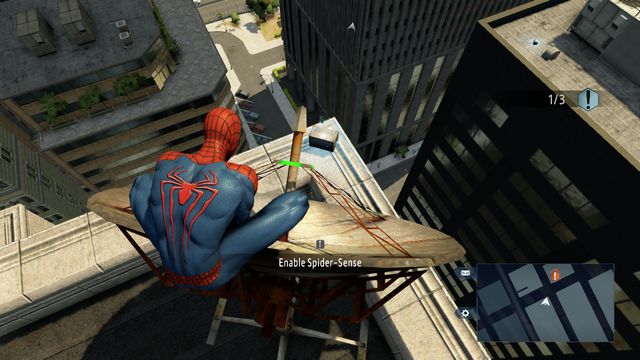 Upgrade crate #1
The first upgrade crate at this level is below the relay dish on the right (look down the tower).
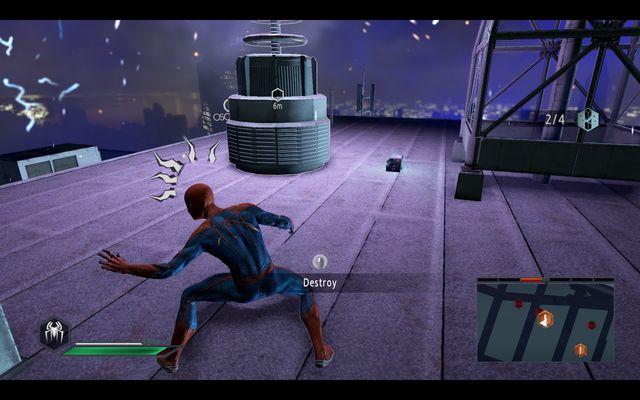
 Upgrade crate #2
The next crate is lying on the rooftop of the building opposite the tower.
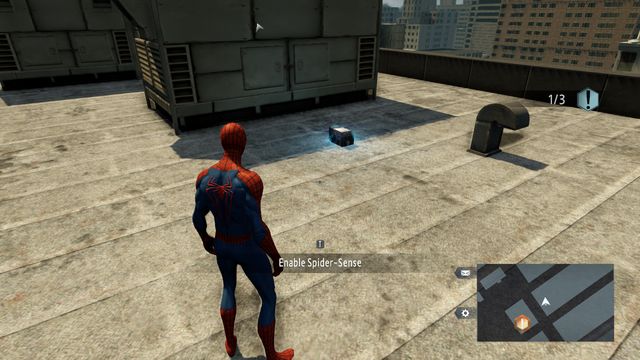 Upgrade crate #3
Once you turn, you will notice another upgrade crate, next to the previous one, on the same rooftop.
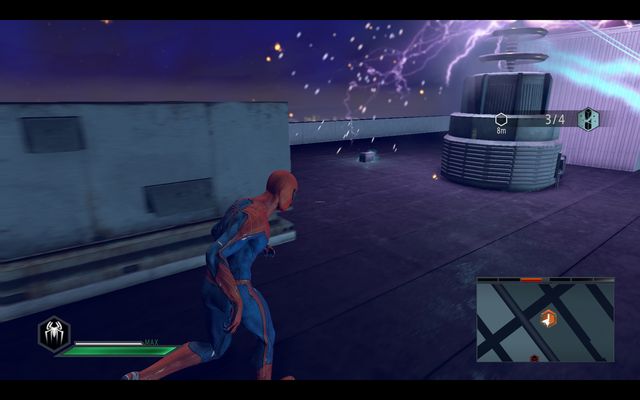
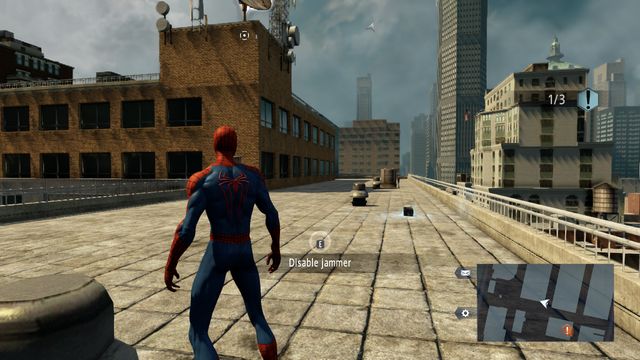 Upgrade crate #4
And there is one crate more, on the rooftop, under the last dish on the left.
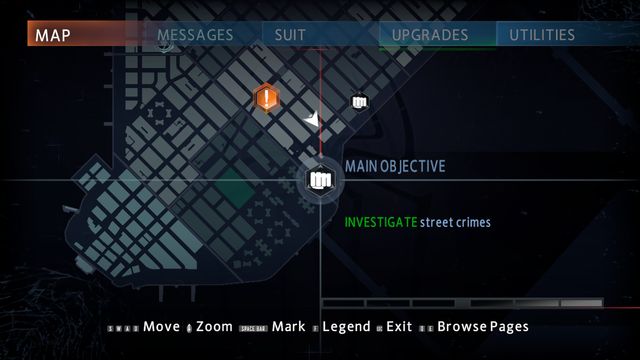 Street crimes
from now on, you will be able to conduct interrogations concerning street crimes. They are available only for some time but, there will be still appearing new ones. They are not considered additional missions but, they constitute the opportunity to gain more experience points, as well as they diversify the game. They consist in obstructing criminals from doing their job.
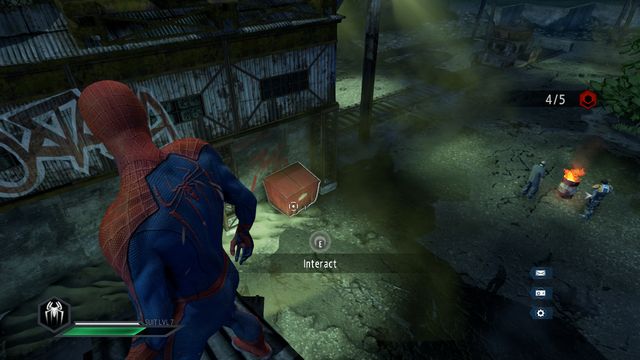
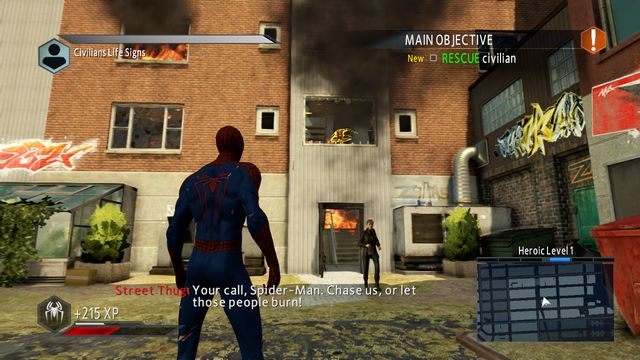 Upgrade crate #5
After you reach another mission point, and deal with several opponents, the building next to you will be set on fire, where your mission is to rescue the man inside. Before you enter the building, collect the upgrade crate from the generator to the right of the building's entrance. Jump in through the window above the entrance and climb two stairs up. Use Spider-Sense to locate the man.
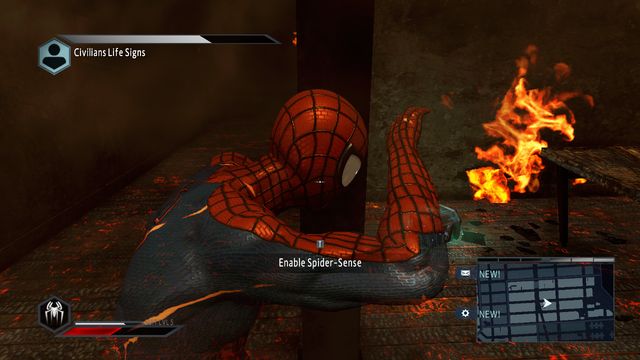 Upgrade crate #6
On the first floor, after you get to the stairs, from the side of the window, cross the door opposite your target. In the last room, there is another upgrade crate.
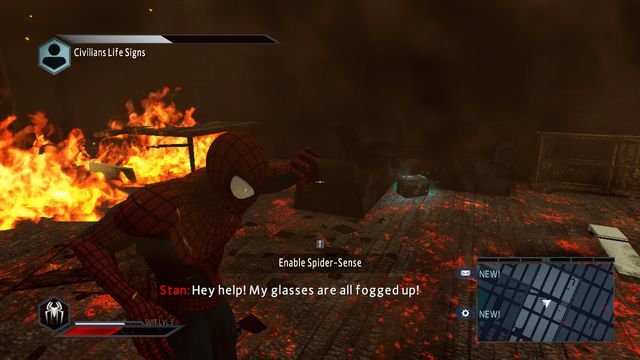 Upgrade crate #7
The last crate at this level, is in the room with the trapped Stan, in front of the flames, next to the desk.
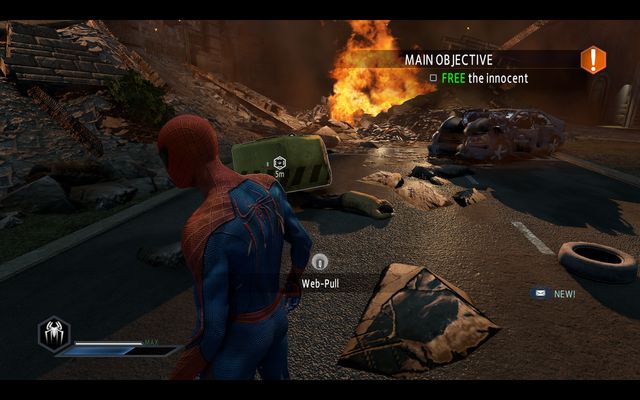
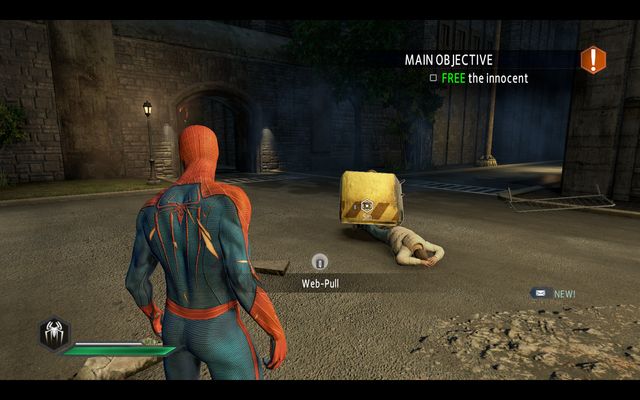
 Put out the fire
Then, use the web to extinguish the fire, by destroying the pipe, and carry the civilian out of the building, through the window opposite and take him to the stretcher, next to the ambulance.
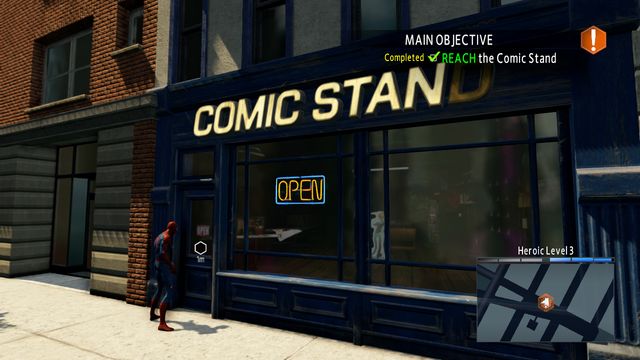
Comic StandThen, go to the Comic Stand. It is a small store where you can, among others, view the comic pages that you have found, or the unlocked statuettes.
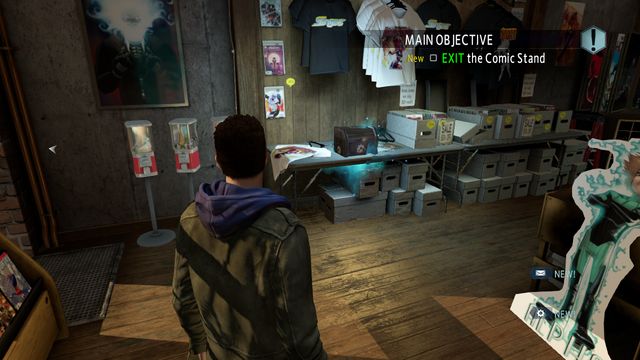 Upgrade crate in the Comic Stand
Inside, on the tabletop, there is an upgrade crate. Exit the store and go towards the next marker.
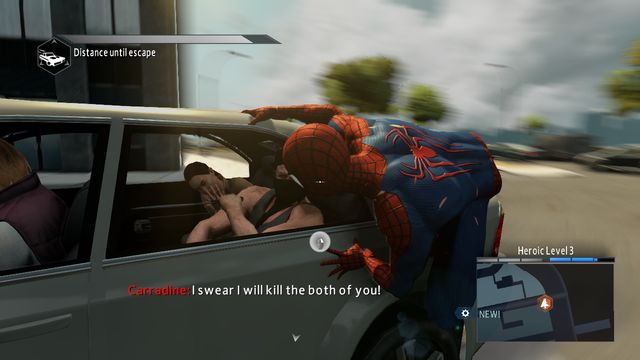 Approach the door on the left, first
After the cutscene, jump onto the car, You cannot stand in one spot, because you will then fall off the vehicle. First, walk over to the left side of the car, open the door with the action key and start tapping the attack key quickly, to pull the opponent off the car.
 Take the kidnapped woman out of the car.
Walk over onto the trunk, now and rip off the rear window, using the web. Now, rescue the passenger sitting on the rear seat.
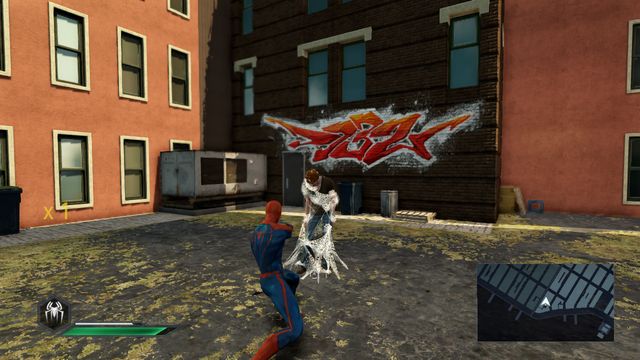
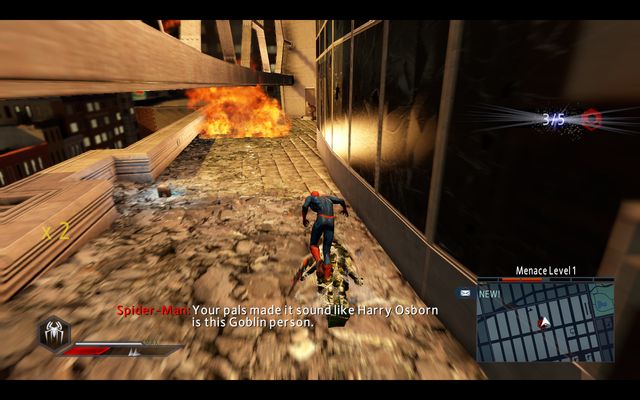
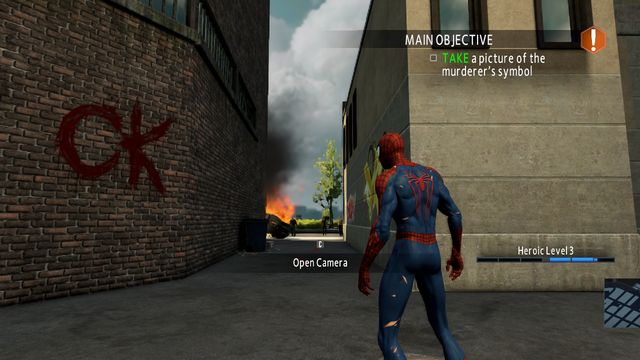
 The mark of the murderer
On the map, there will appear another destination. Once you reach it, you will notice the "CK" symbol, painted on the wall. Use the camera to take a shot of it. At the same time, it is the first collectible - a photo of the Photo Investigation series. After the cutscene, you will also receive the first audiolog #1.
 At home
Finally, return home. In your room, you can change your outfits and replay the missions that you have already completed. In the middle, on the carpet, you will find an upgrade crate. Go down to the ground floor and pay a visit to the aunt. After the conversation ends, exit the house.
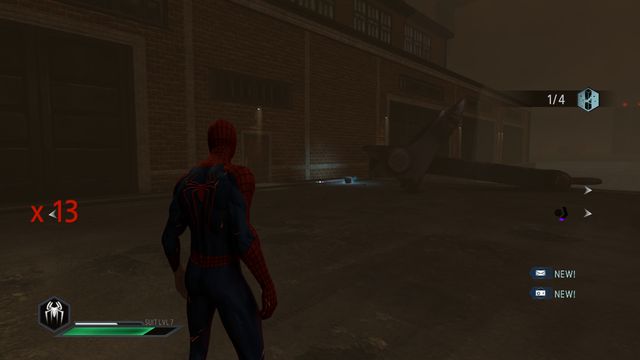
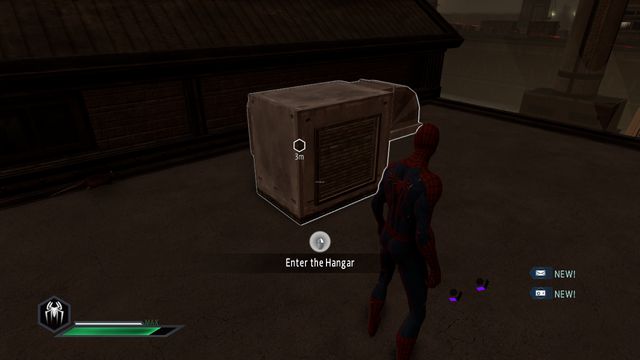
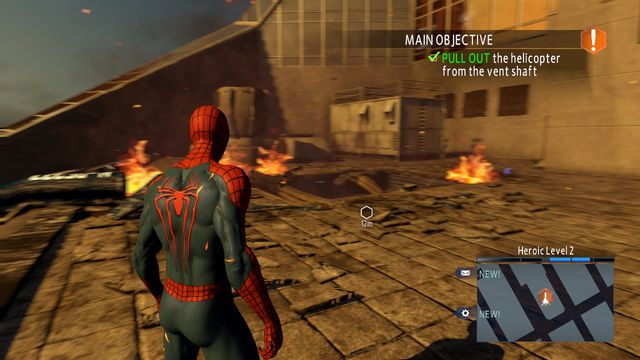 The rooftop on the OSCROP HQ
Reach the rooftop of the OSCORP HQ, where you will have to deal with four armed opponents. Then, using the web, get rid of the helicopter and enter the building, through the opening.
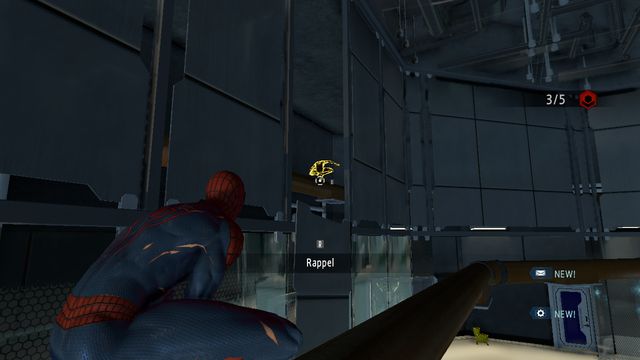
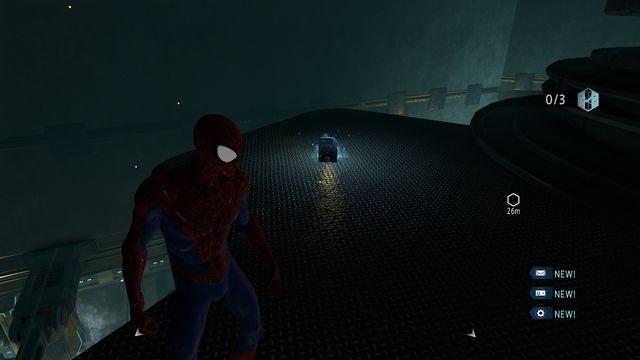
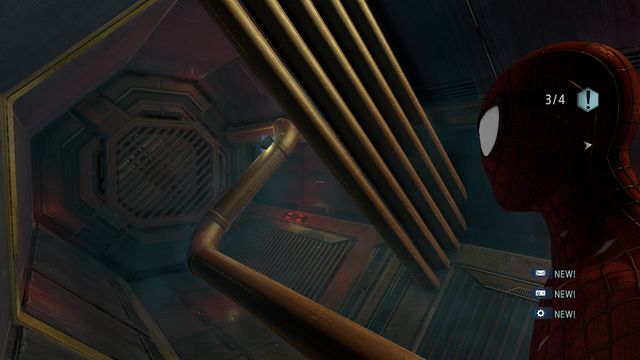
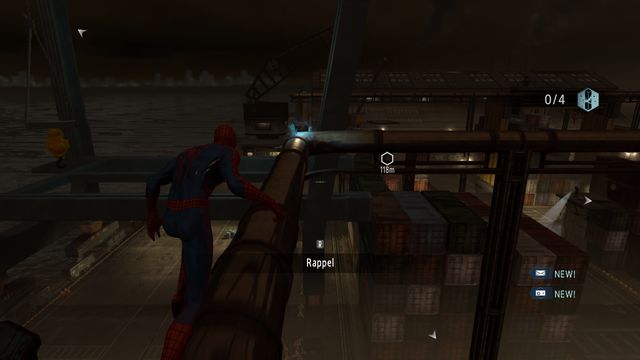
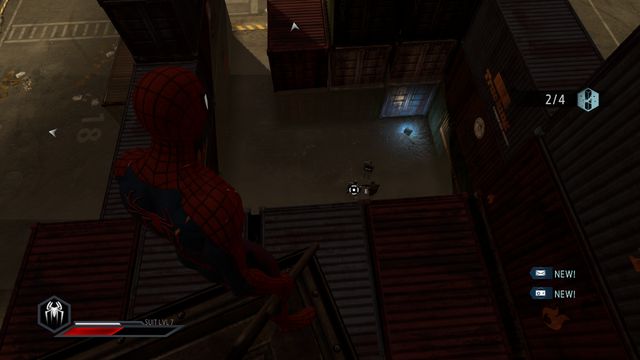
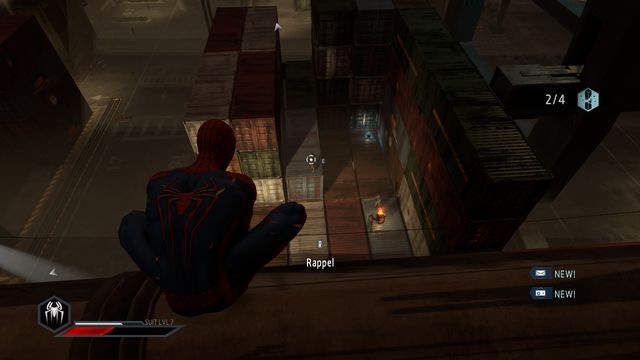
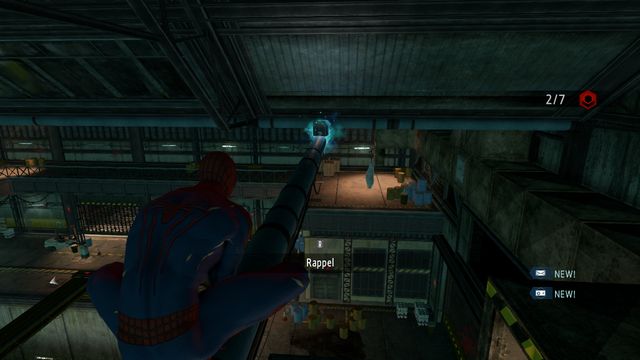
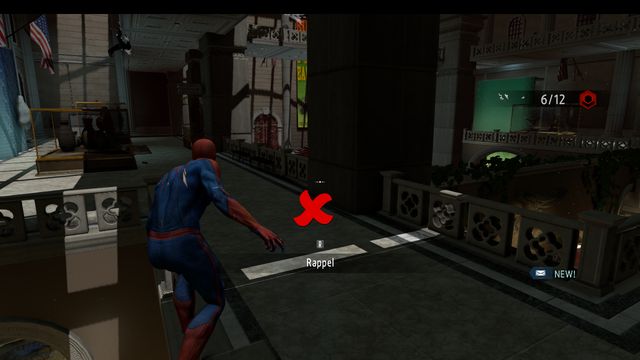
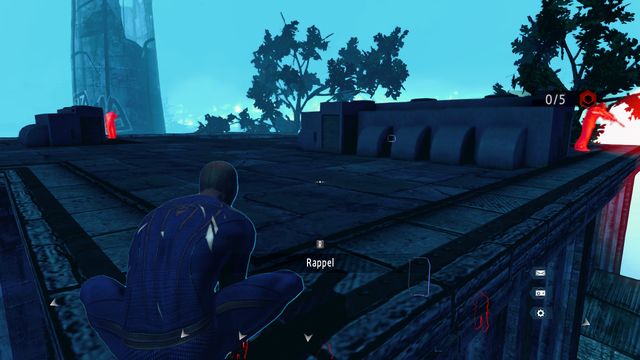
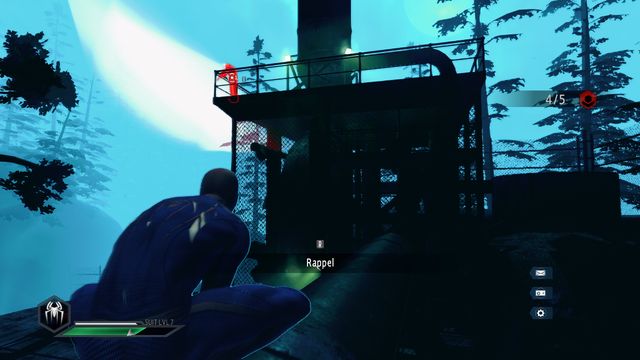
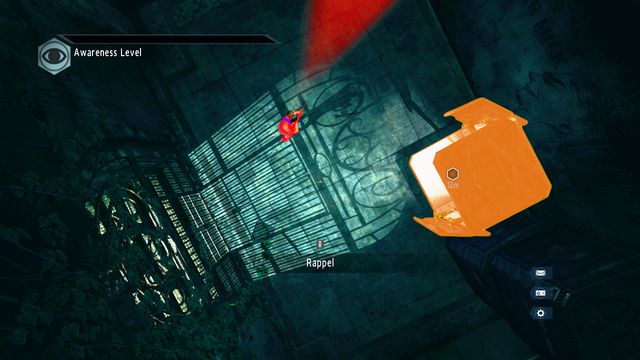
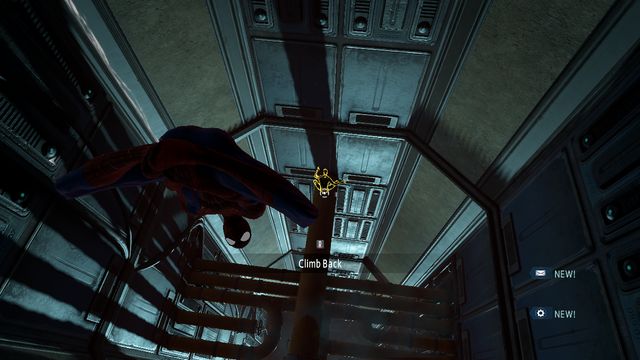 Rappel, using the web
Then, rappel using the web. Once you reach the very bottom, go right.
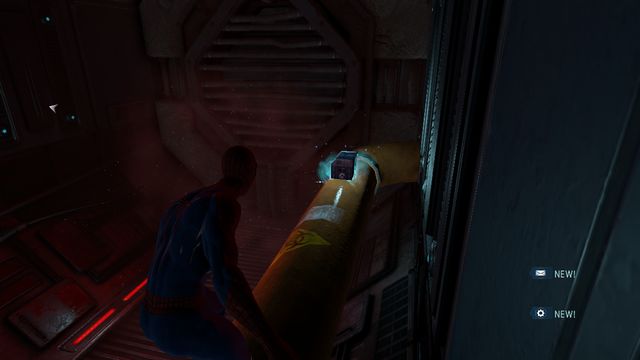 Upgrade crate #1
On the right, on the pipe, you will notice an upgrade crate, next to the wall.
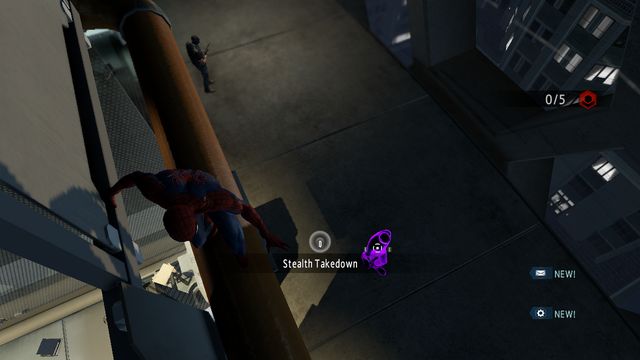
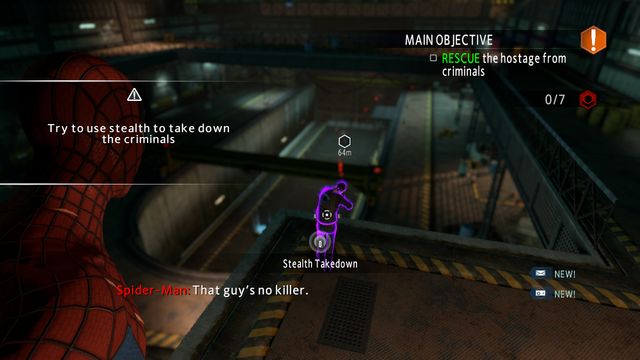
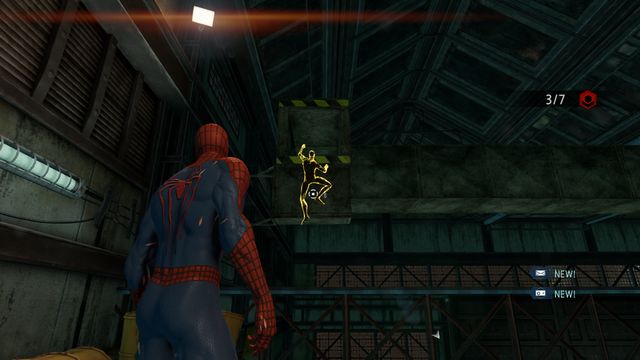
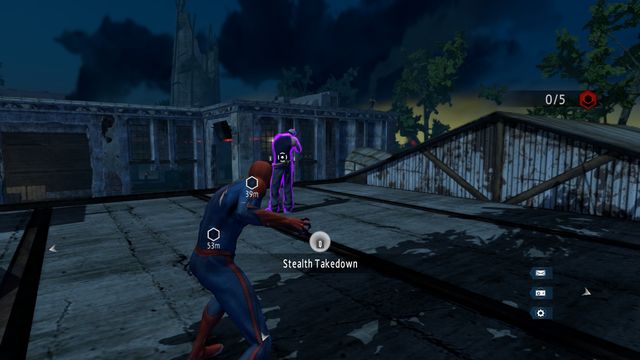
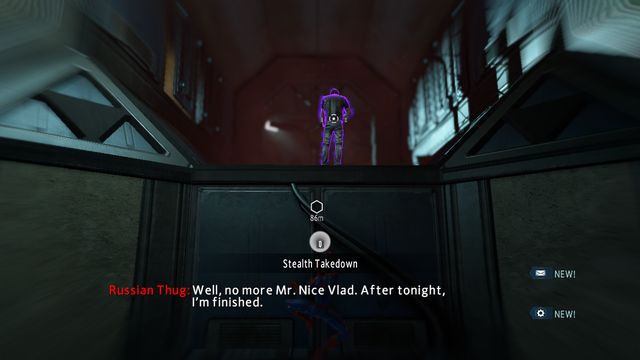 Perform a takedown
Climb up the wall. At the edge, you will notice a guard. Take him out silently, using the web.
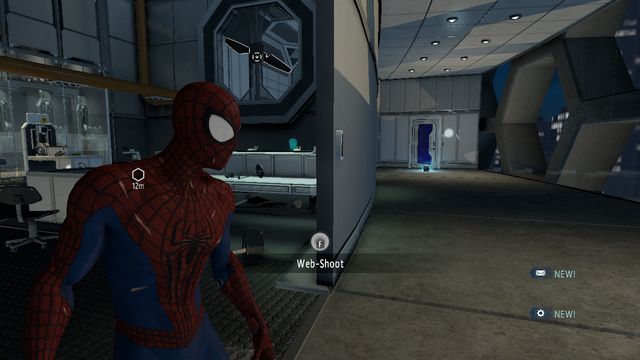
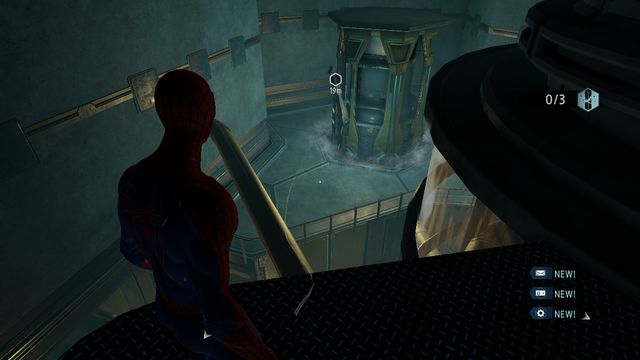
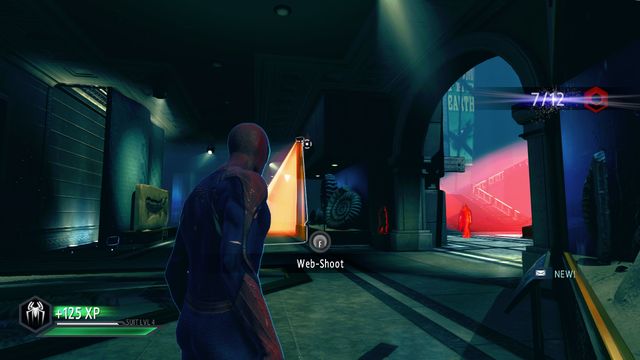
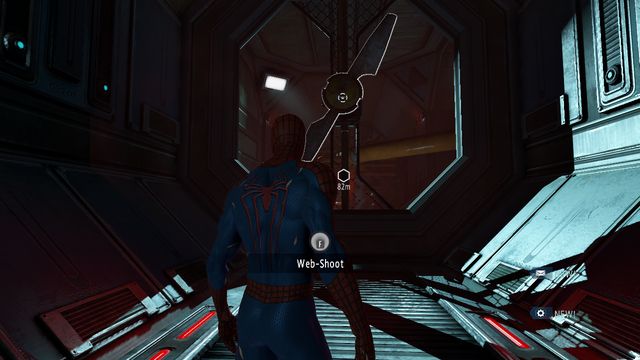 You can stop the fan with the web
To proceed, you need to stop the fan. You can do that by using the Web-Shoot several times.
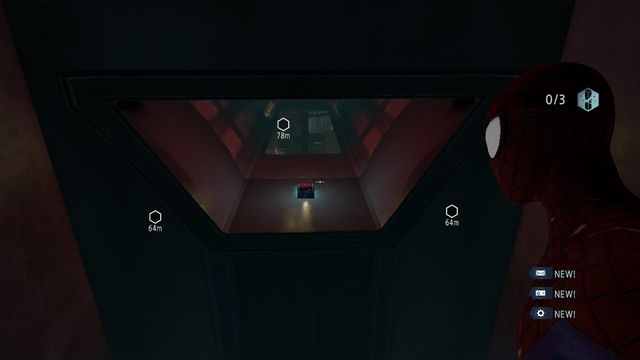
 Upgrade crate #2
The second upgrade crate is to the left of the hole in the middle.
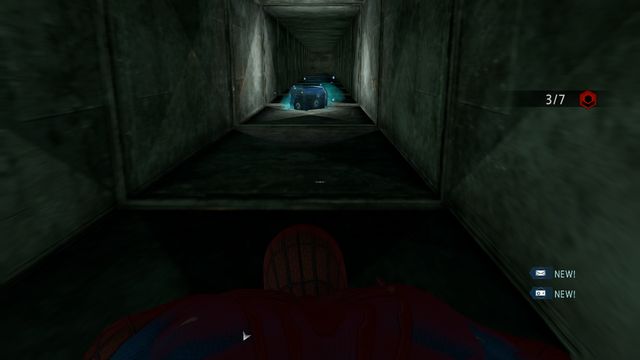
 Upgrade crate #3
You can collect another crate, after you climb down the hole at the wall, at the end of the corridor.
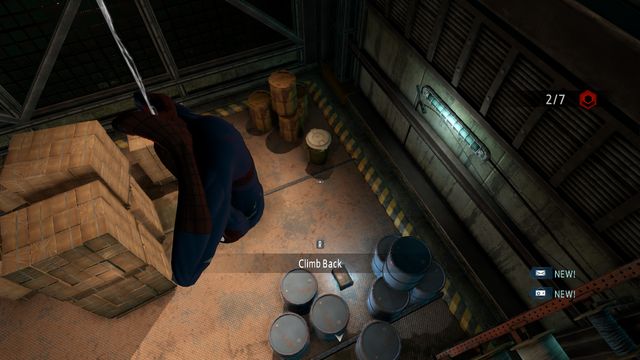
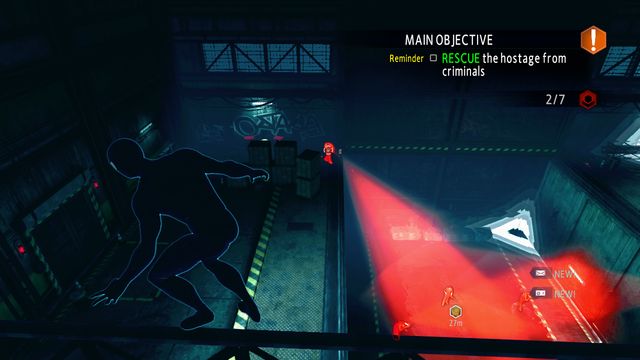
 Get rid of the opponent, from above
In the next room, eliminate five opponents, while moving along the pipe, for the whole time. First, get towards the windows and wait for the guard to walk over to the right. Then, pull him up with the web. Than, deal with the one in the doorway.
 Get over onto the pipes at the other side of the wall
The guard watching the hostages will approach you- deal with him then. After that, jump over onto the pipes behind the wall, across the hole in the structure. This way, get rid of the opponent at the terminals. The last guard is at the end of the corridor opposite.
 Upgrade crate #4
After you have cleared the room, you can collect the upgrade crate at the windows, on the left side of the corridor.
 Audiolog #2
On the right, in the corner, there is audiolog #2.
 Jameson's Photo #1
The first photo of the Jameson's Photos is the silver wings, behind the glass pane, opposite the fan. You need to use the camera to unlock this collectible.
 Audiolog #3
Audiolog #3 is on the desk, next to the hostages. You can now free the prisoner separated from the rest - Max, who will open the elevator door for you.
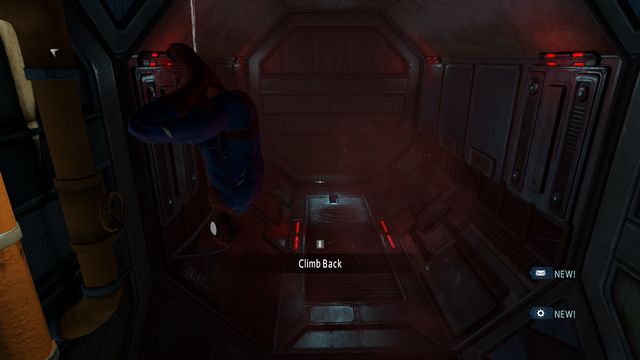
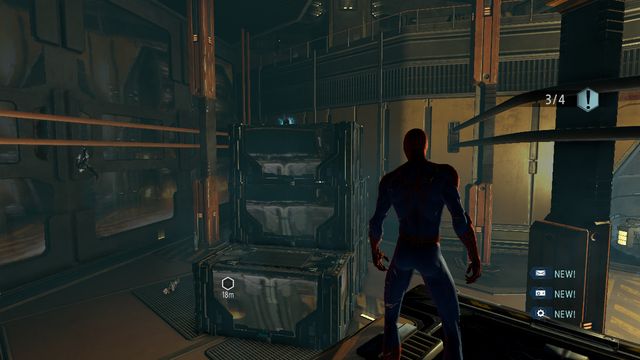
 Upgrade crate #1
In the second stage of the mission, you need to take the elevator to the bottom, climb back up the elevator shaft - on the very top, there is an upgrade crate.
 Upgrade crate #2
The second upgrade crate is on one of the even taller reactor structures, to the left of the elevator.
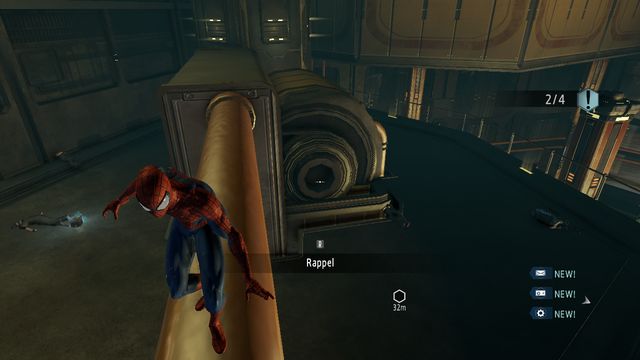
 Shoot the poles down with the web
First of all, you need to shoot down the catches of the three structures marked in the room. Once you do that, there will arrive two groups of opponents, which are fighting each other. If you move higher than them, you will get the opportunity to take them down, without being spotted.
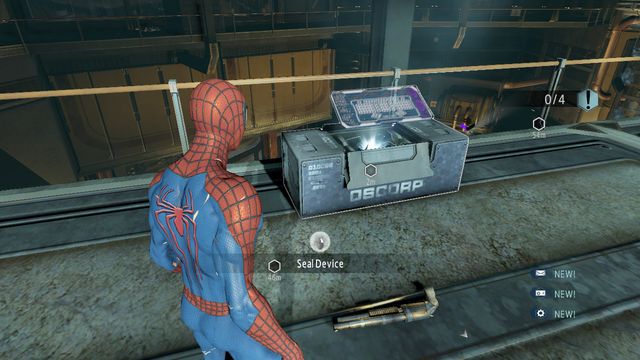 Mark the devices
Now, you need to mark the four marked OSCORP devices.
 Upgrade crate #3
The third crate is at the second level, to the right of the elevator door, at the wall.
 Upgrade crate #4 and audiolog #4
At the lowest level, you will notice two fans, on the left and on the right. Behind the one on the right, there is audiolog #4 and upgrade crate #4 above it.
 Upgrade crate #5
Behind the one on the left, there is another upgrade crate #5.
 Upgrade crate #6
The last, sixth, crate on this level is on the left side of the room, above the OSCORP device that you need to disable.
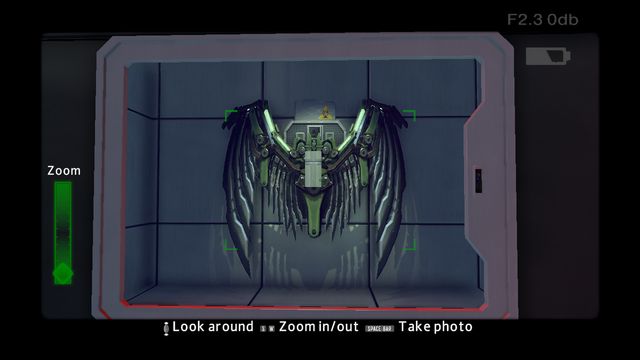
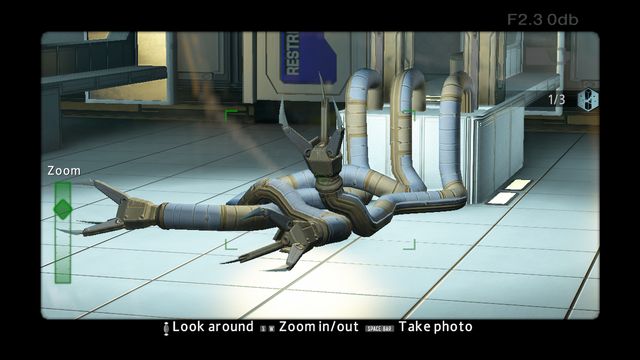 Jameson's Photo #2
ON level three, on the right, you will notice tentacles with pincers. Stand in front of these and take another photo for the collection.
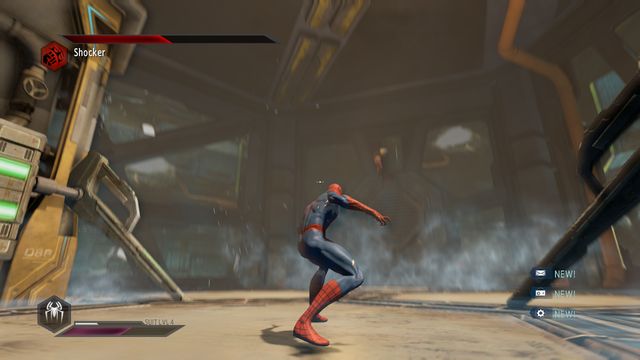
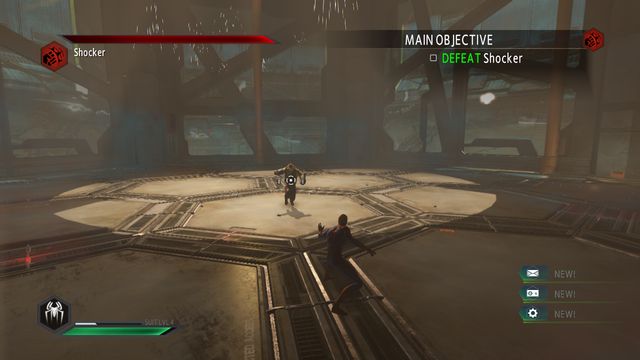 Shocker
The first boss that you are going to fight is the Shocker. He lands three types of attacks: a melee attack, a shockwave and a small AoE wave, over the ground - you then need to move away from the opponent. The key here is dodging and launching quick counters. After you dash away from the opponent, you can dash towards him or pull him with the web, before he lands another attack.
 Keep destroying the structures that appear
After Shocker's health drops to a half of the initial level, there start poles to appear. Once the boss jumps onto them, use the web to hide them back under the ground. The knocked-down opponent is an easy target now.
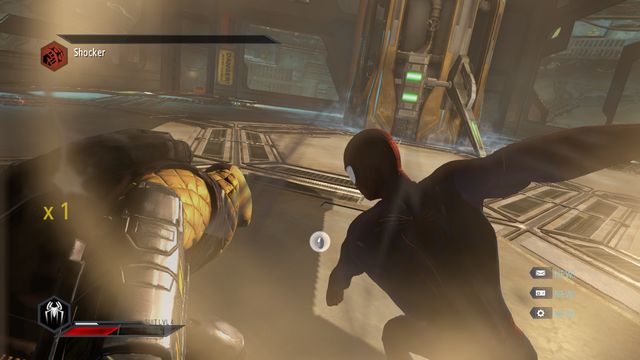 The final blow
At the moment at which Shocker's health drops to zero, you will have to tap the attack key, for three times, at the appropriate moment. After that, the fight ends.
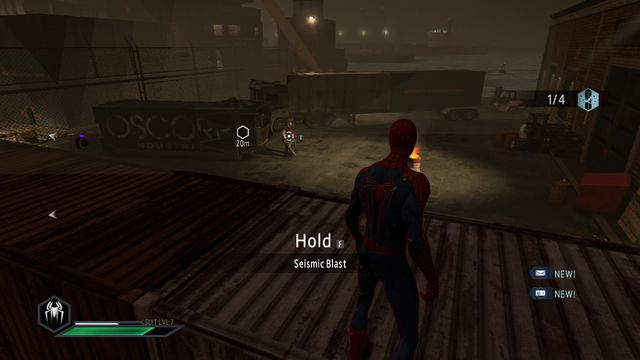
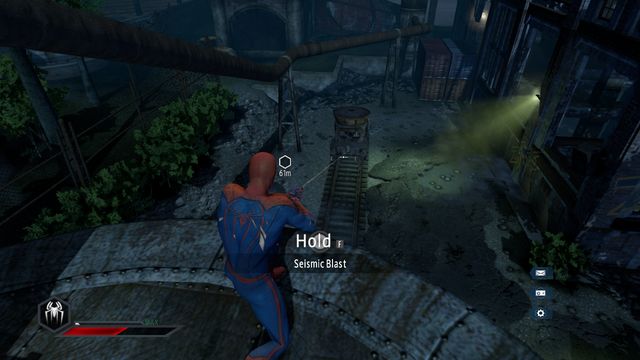
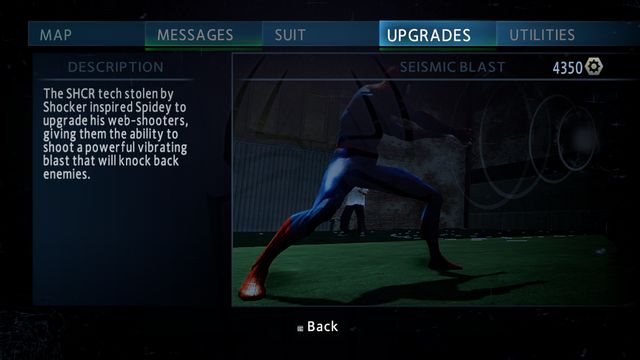 Seismic Blast
After the fight, you will gain a new skill, which is the Seismic Blast. It works like Shocker's blast wave.
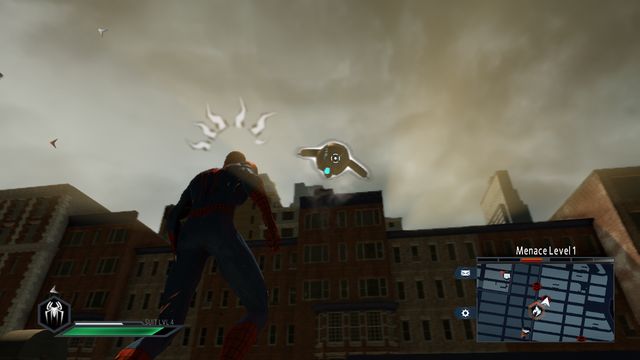 An enemy drone
From now on, whenever your hero meter reaches a negative value, marked as "Menace", you will be chased by the special forces. You can either escape from them, defeat them or raise your meter to the heroic level, by completing side missions. To be able to complete the next missions, you need to do, at least, two of the three actions: street crime, fire or a pursuit. Since the fire is a new event, it has been explained below.
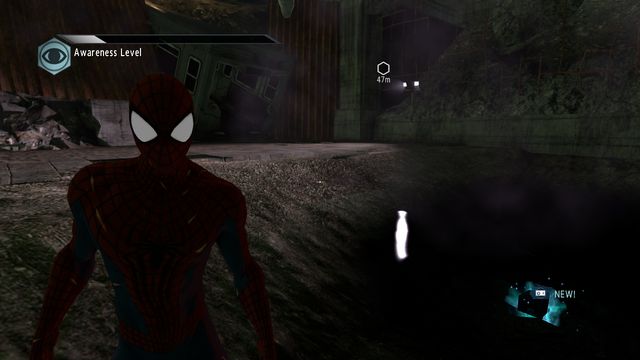
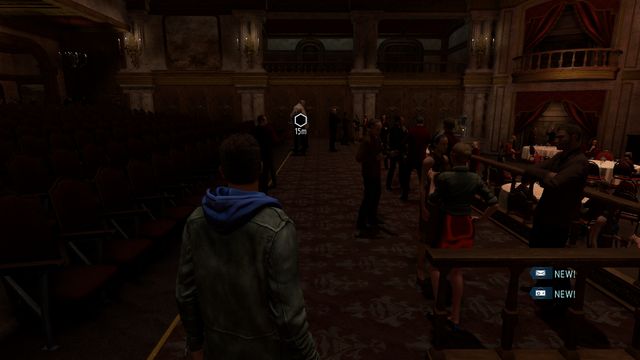
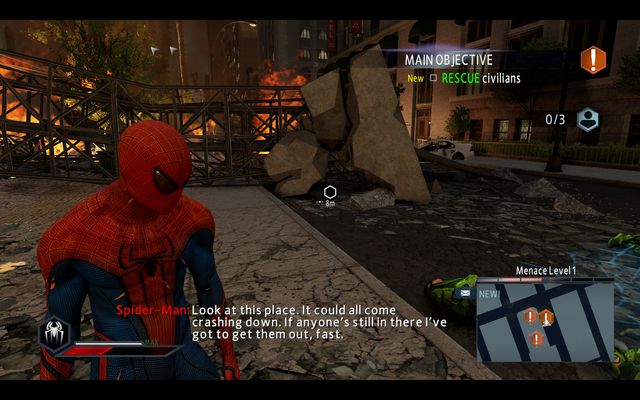
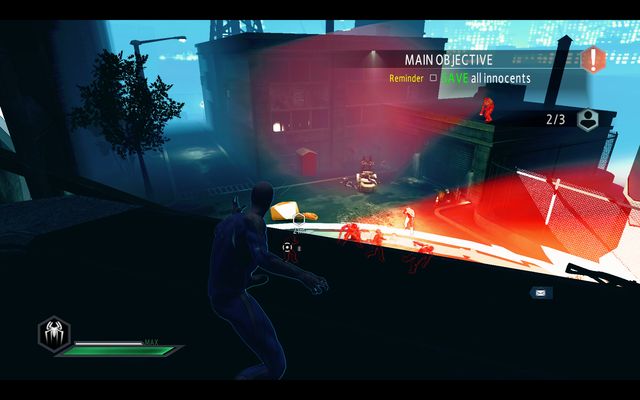
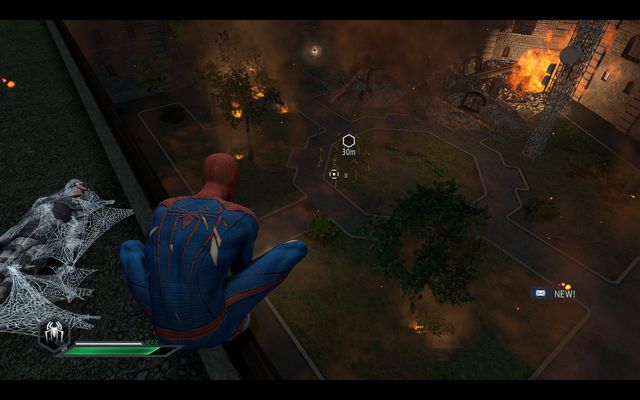
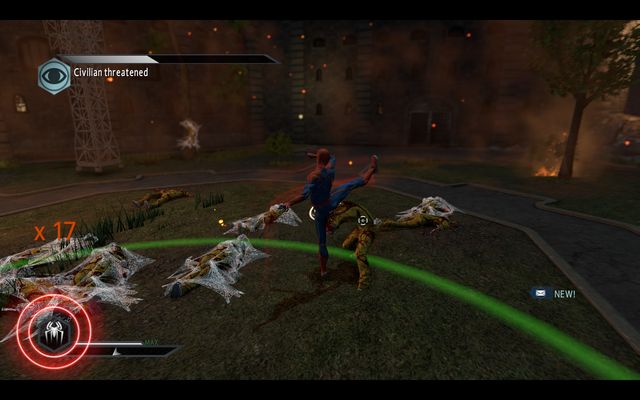
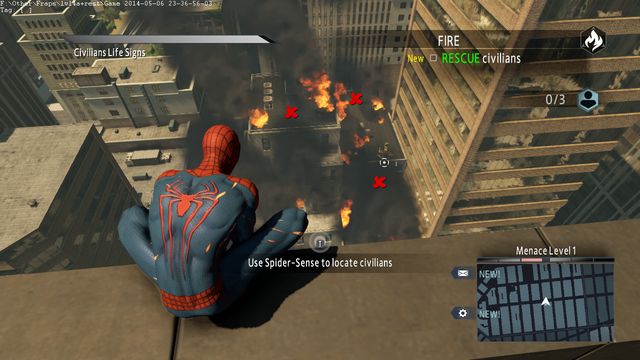 A spot with civilians
Once you get to your destination, use the Spider Sense to locate the civilians in danger. Their number has been specified on the right side of the screen. In the above screenshot, you can see the locations of the people that you need to rescue from fire, in this case. Each person needs to be grabbed and carried over to the ambulance, within the allotted time.
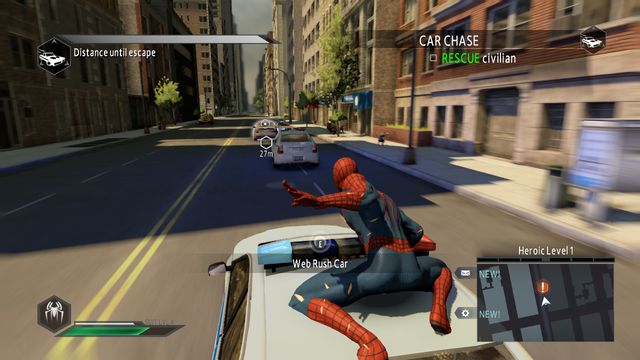 The pursuit
The pursuit is similar to the event of arresting Carradine - you need to jump onto the marked vehicle and eliminate the opponent on the rear seat and, after you rip off the rear window, pull the hostage out.
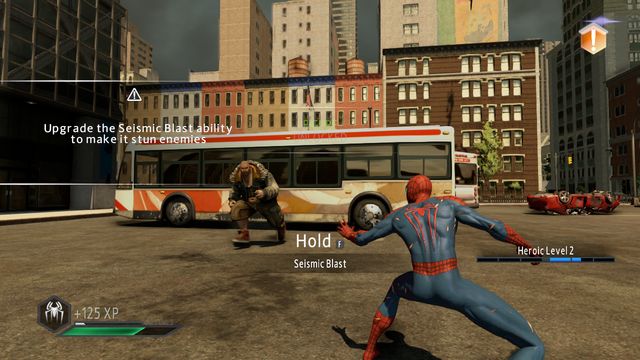 Brute
BruteAfter you have performed the action, and boosted the Heroic Level, you can approach the mission marker. After you defeat the opponents, you will have to deal with a bigger opponent - Brute. To attack him, you need to use Seismic Blast, by holding down the web shoot key. After several blasts, the opponent will give up. After the cutscene, walk over to the next destination.
 Kraven
Once you get there, exit through the door. Follow the corridor and start a conversation with Kraven. After the conversation, you need to take three photos of interesting objects.
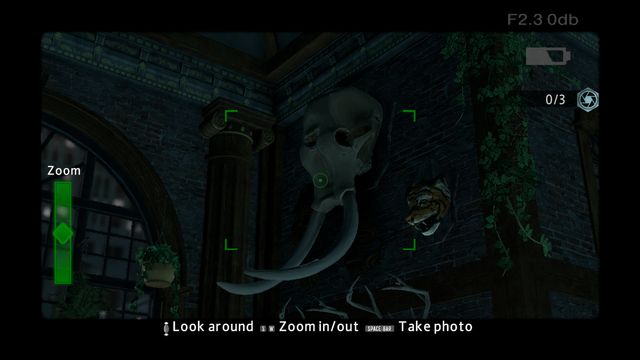 The skull
ON the wall to the left, you will notice a big skull. This is where you should take the first photo.
 The globe
The second interesting object is the globe at the window.
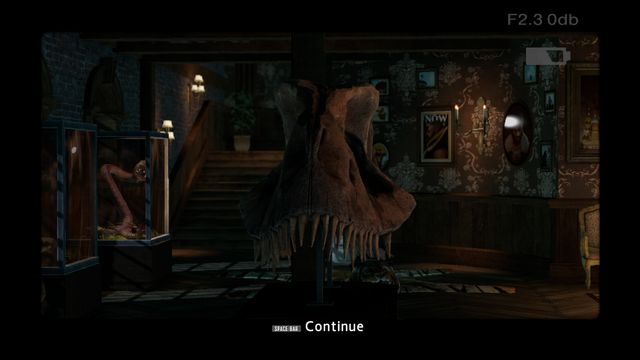 A skull in the middle of the room
In the middle of the room, you will notice the largest skull - it is the last object to take a photo of. After that, Kraven invites you upstairs.
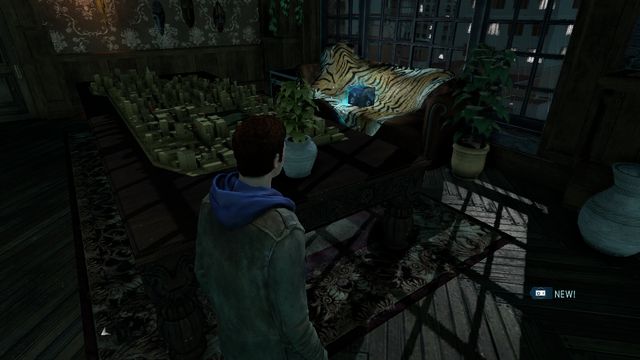 Upgrade crate #1
Before you follow him upstairs, collect three upgrade crates. The first one is behind the model of the city, next to the window.
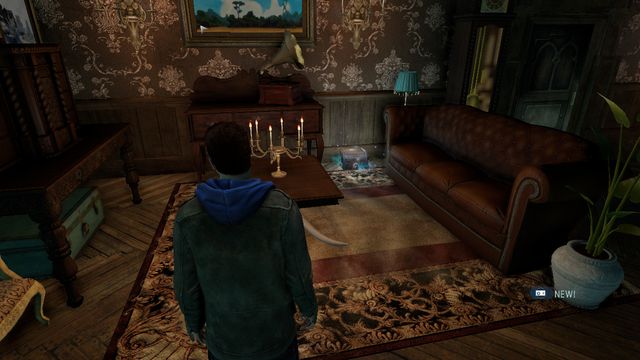 Upgrade crate #2
The second one is in the right corner of the room, next to the sofa and the wall.
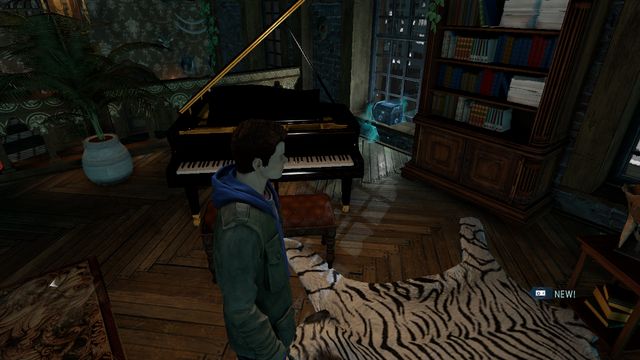
Upgrade crate #3The final one, after you climb the stairs, behind the piano. After another conversation with Kraven, leave the apartment.
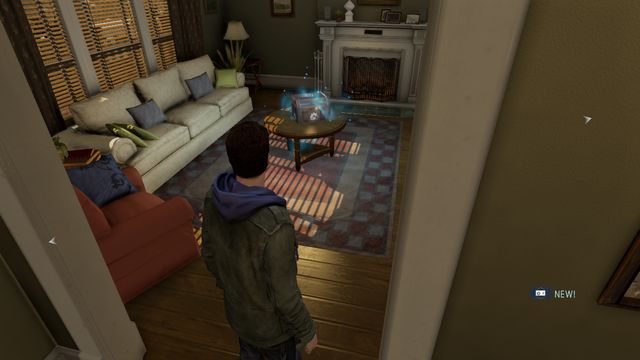 Upgrade crate at Peter's home
You start the next stage in Peter's room. Walk down to the living room - there is an upgrade crate on the table. Exit the building then and meet up with Kraven.
 Locate the criminals
After the conversation with Kraven, approach the destination, where you will be able to locate four criminals, using Spider-Sense.
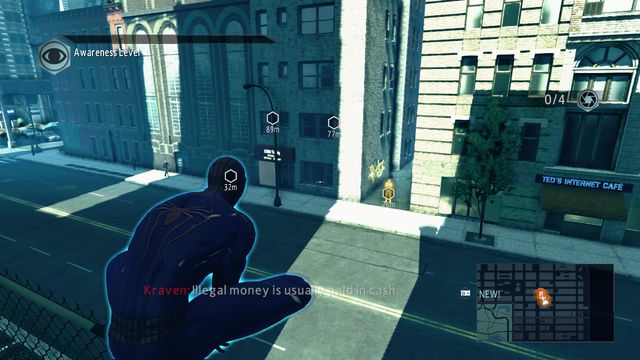
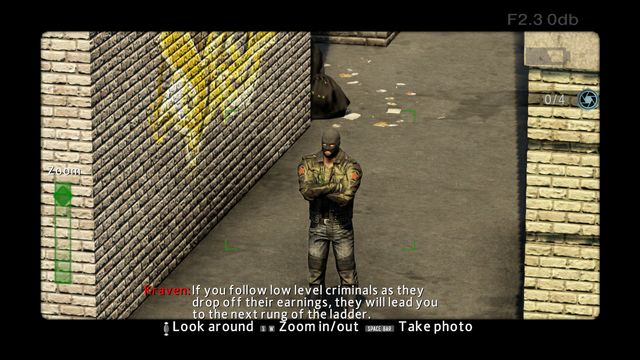 Photograph each one of the criminals
Take a photo of each criminal. You need to stay undetected. The "awareness level" meter will start to rise, as soon as you are spotted. As soon as it fills up, you will have to restart the mission.
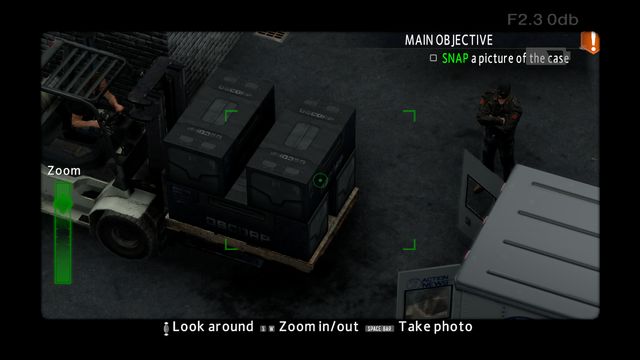 Photograph the crates
Then, jump onto the building in a way that allows you to see the alley between the buildings. Once you notice the forklift, take a shot of the crates on the fork.
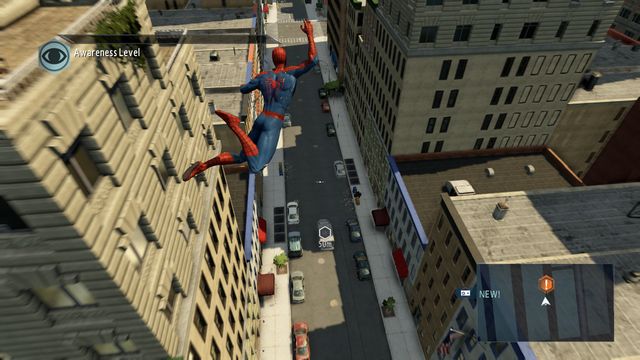 Follow the van
Then, after the white van gets out into the streets, you will have to follow it to the destination. Do not approach it too much, to prevent being spotted.
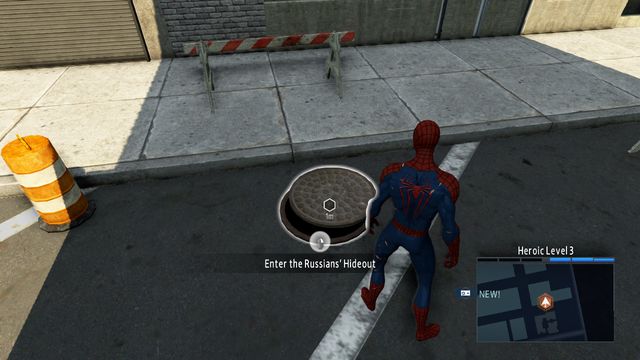 Enter the sewers
Once there, locate the sewer manhole. This will take you into the abandoned metro station.
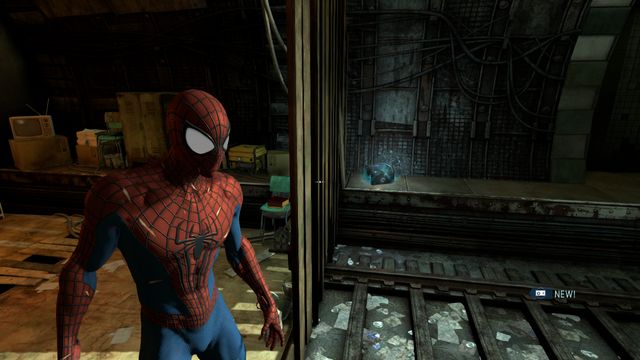 Upgrade crate #1
Behind the planks, there is an upgrade crate. Enter the railway car then.
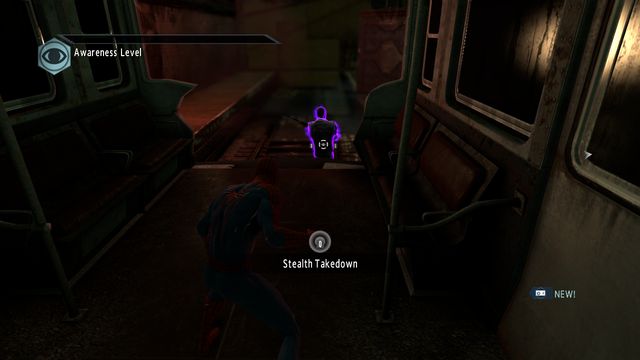 Eliminate the opponent
Quietly, eliminate the opponent and climb onto the ceiling.
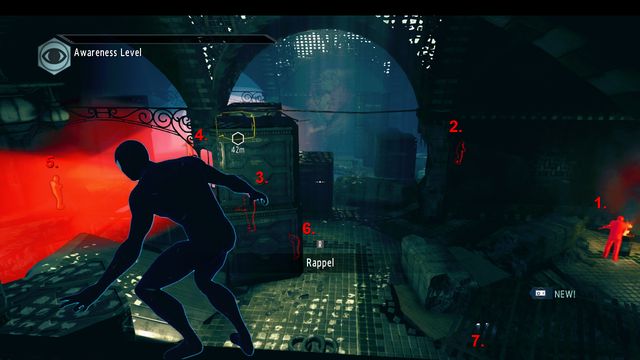 The order in which to take out the opponents
On the metro station, there are seven opponents. To prevent being spotted, you can eliminate them in the order specified in the above screenshot. The seventh guard is under the floor - you can deal with him later on.
 Upgrade crate #2
On the crates at the wall, there is another upgrade crate.
 Audiolog #5
In the hole, where there is a single guard standing, next to the headlight, on the crates there is audiolog #5.
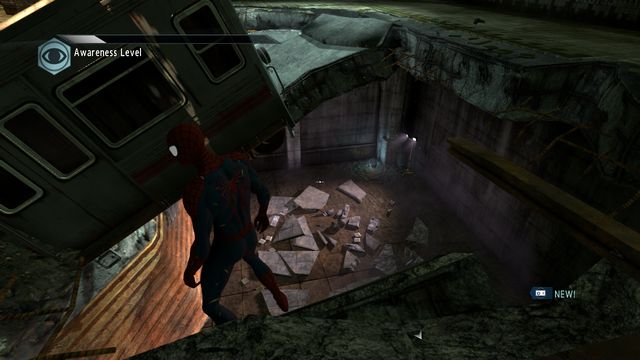 Upgrade crate #3
In the crate, under the wrecked car, there is an upgrade crate in the corner.
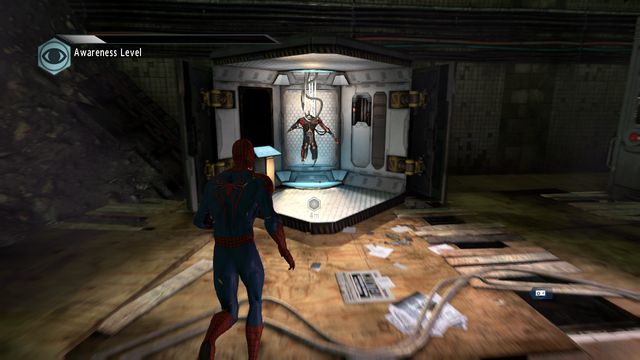 A new outfit
After you have eliminated the enemies, collect the outfit in the corner of the room.
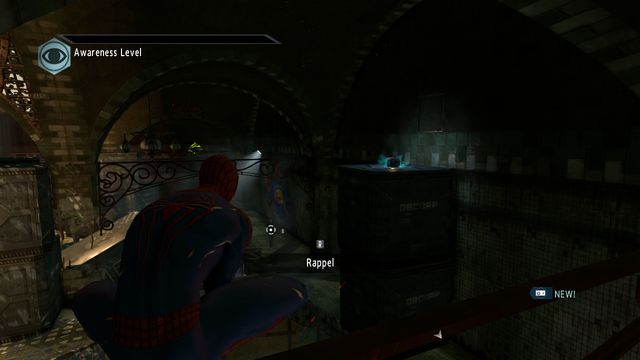
 The seventh guard
Walk under the damaged car, to the lower level. Here, you will find the last guard.
 Upgrade crate #4
In the water, there is another upgrade crate. Cross the grate now.
 Speedy
Time will slow down, after you exit the room. You need to turn back and press the action key to perform a dodge. Speedy is a very fast opponent but, it is easy to defeat him. The easiest method is to pull him with the web and land a quick combo.
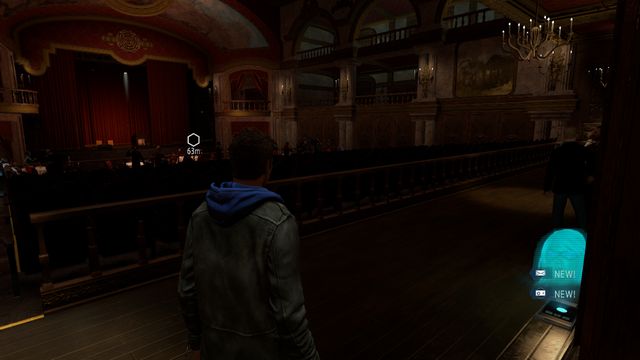 Audiolog #6
Go to the theater. Once there, after you end the conversation, go left, where there is audiolog #6 behind the armchairs.
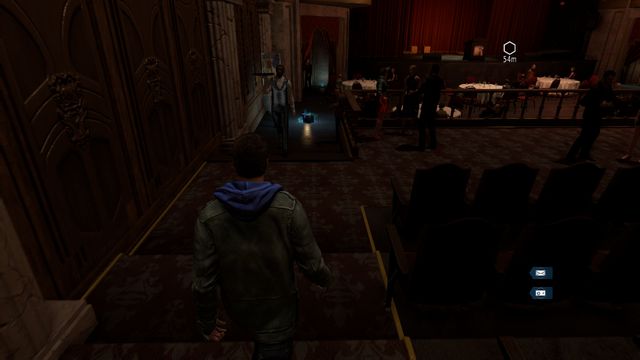 Upgrade crate #1
As you go alongside the wall, you will find an upgrade crate.
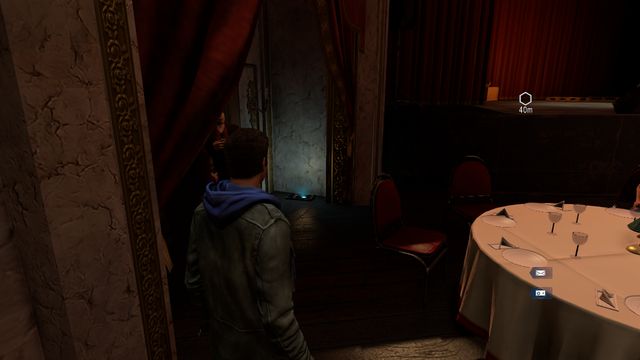 Audiolog #7
TO the left of the stage, behind the table, there is audiolog #7.
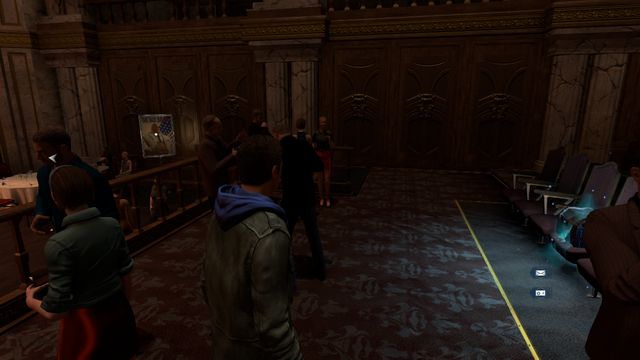 Upgrade crate #2
In one of the armchairs, in the front row, there is an upgrade crate.
 Audiolog #8
Walk through the door, into the corridor. Across the door, there is audiolog #8.
Enter the venting shaftApproach the door opened ajar, to put on the outfit. Use the web to remove the grate and enter the venting shaft.
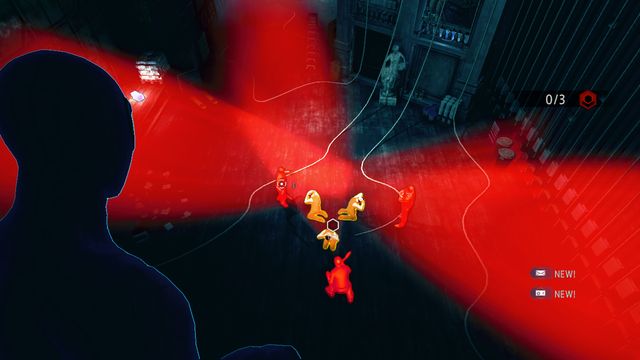 The hostages
After you walk out, you will notice three hostages and the Russians guarding them. Eliminate them.
 Upgrade crate #3
To the left of the venting shaft exit, there is an upgrade crate.
 Upgrade crate #4
On the left side of the room, there is another crate, on the boards at the wall.
 Audiolog #9
Approach the models at the end of the room. On the wooden scaffolding, there is audiolog #9.
 Upgrade crate #5
You can find one more crate at the other side of the balustrade of the model with white columns.
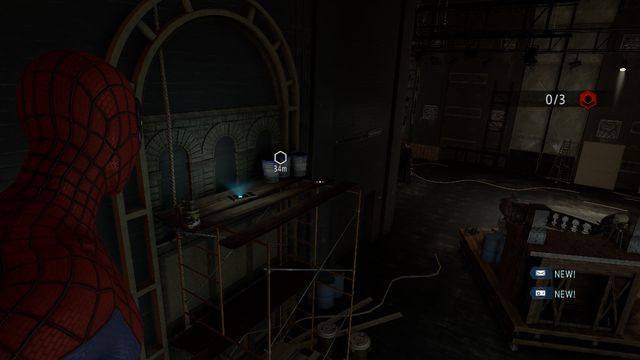 Audiolog #10
Audiolog #10 is at the exit gate, on the scaffolding at the wall.
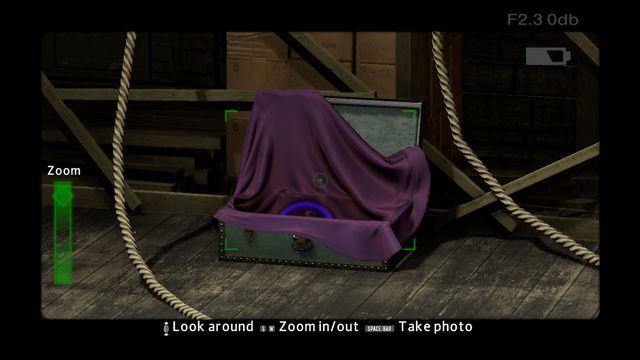 Jameson's Photo #3
Take a photo of the chest with violet cloth, to obtain Jameson's Photo #3. It is on the floor, at the wall with the model.
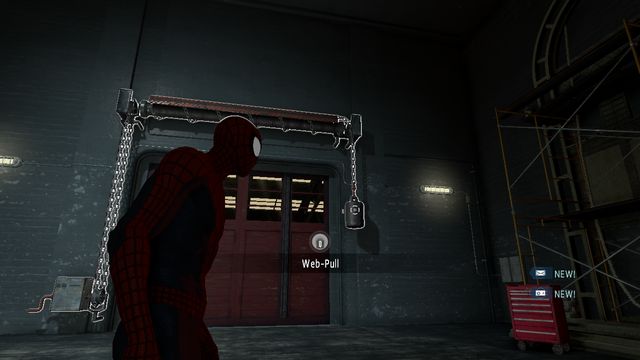 Open the gate
Once you deal with the opponents and free the hostages, you can open the gate. Use the web to pull the weight and hop to the other side, quickly, because the gate will soon slam shut.
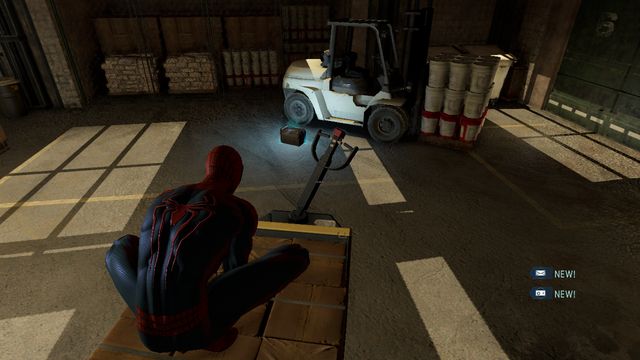 Upgrade crate #6
Another upgrade crate is next to the forklift.
 Upgrade crate #7
The final crate at the theater is on the left side, across the door to the corridor.
 Look right
Behind the curve of the corridor, time slows down - you need to look right, where the opponent is attacking from. Press the action key to dodge.
 Defeat the Brute
Outside, deal with the Brute and the three goons. Remember that, to deal a blow to the larger opponent, you need to use the Seismic-Blast before that.
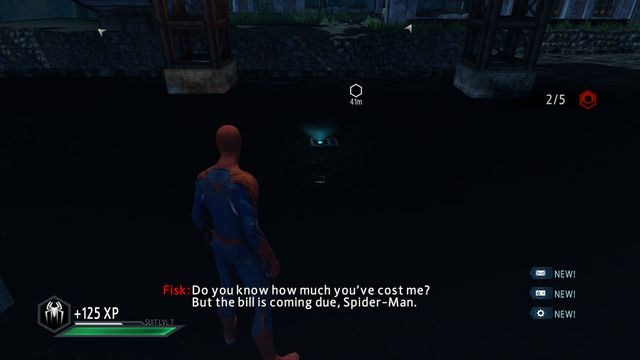
talk to FiskAfter the battle, you will return to the theater. Approach the counter, first, and talk to Fisk. Now, you can leave the theater.
 Upgrade crate #1
After you reach the docks, walk over pipes. In the spot where the pipes curve, you will notice an upgrade crate.
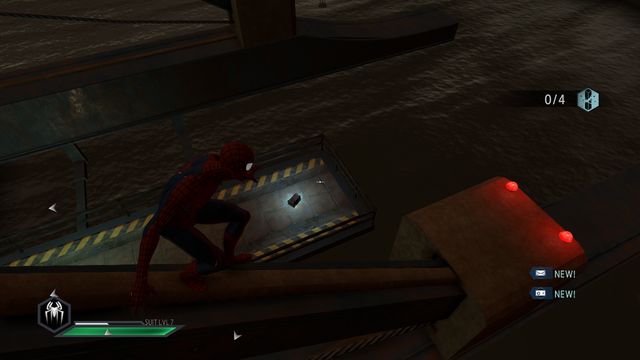 Eliminate the opponents from above
First of all, deal with the snipers from the building on the right. You can take them both out silently, by approaching them from behind.
 Upgrade crate #2
On the lower roof of the same building (to the right of the entrance) there is the second crate.
 Upgrade crate #3
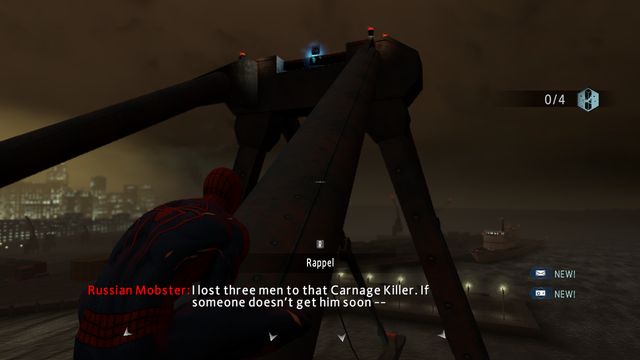
Get now to the tall crane on the left. Atop the crane, there is a crate.
Upgrade crate #4At the other end of the crane, there is another upgrade crate.
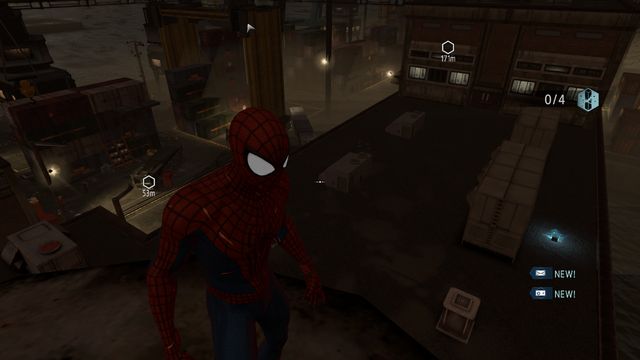
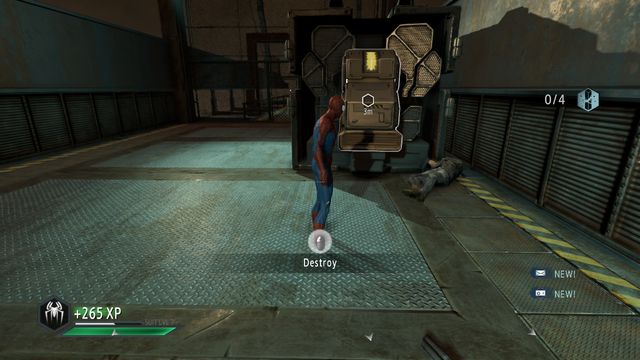 destroy the devices
Get rid of the criminals guarding the device and destroy it.
 Upgrade crate #5
Make it over to the building opposite the entrance. In front of it, closer to the bay, there is a crate.
 Jameson's Photo #4
Turn back and opposite the building next to containers, you will notice a robot. Approach it and take a photo for the collection Jameson's Photo #4.
 Brute
BruteThe next device is being guarded by a Brute. Defeat it with the Seismic-Blast and combos. Then, destroy the device.
 Upgrade crate #7
Among the containers, there is an upgrade crate. The three enemies can be eliminated by throwing the crate, suspended from the crane, onto them. However, you then need to use the spider web, quickly, to tie them to the ground.
 Upgrade crate #8
The next upgrade crate is among the containers, towards the entrance.
 Upgrade crate #9
The ninth upgrade crate is at the barrels, at the docks entrance.
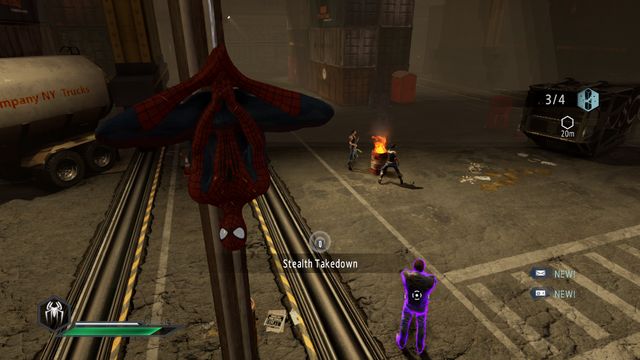 Surprise the opponent
Go towards the hangar on the right. At the flaming barrel, there are two Speeds. First of all, eliminate the guard from above, to prevent being spotted, and throw a gas barrel at the women, which is located to the right of them (requires Throw skill).
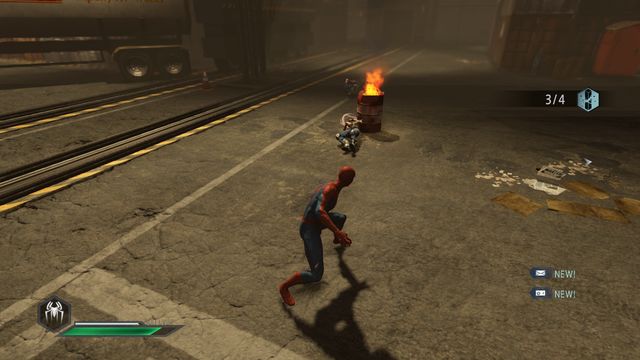 Blow up the barrel and entangle the opponents
Do not forget to tie them to the ground, before they get back up.
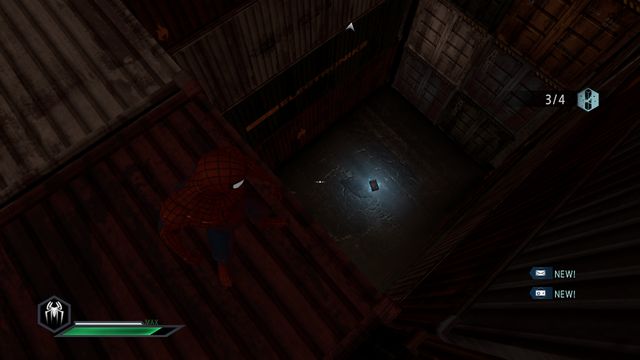 Upgrade crate #10
In front of the hangar entrance, there is tall wall of containers - inside, there is an upgrade crate.
 Upgrade crate #11
The last upgrade crate is on the hangar's rooftop.
 Audiolog #11
Audiolog #11 can be found at the hangar on the right, on the whit truck in front of the entrance.
 The venting shaft
The warehouse is the last building on the right. On the rooftop, there is a venting shaft, which you can take to get inside.
 Attack the first opponent
After you enter, you will notice a hostile sniper - take him out quietly.
 Upgrade crate #1
Jump onto the pipes under the ceiling. On the right, you will notice a crate.
 Upgrade crate #2
The second upgrade crate is on the same pipe, at the other side.
Upgrade crate #3After you rappel at the end of the same pipe, among the barrels, you will find the third crate.
 Upgrade crate #4 - entrance
Climb into the venting shaft, where you will find the fourth upgrade crate.
 Upgrade crate #4
In the venting shaft, you will find the last-but-one upgrade crate.
 Upgrade crate #5
The fifth crate is on the catch of the crane, at the end of the shaft.
 The sniper
The hostage is being watched by snipers, from both sides. First of all, take out the one on the left. Then, the other one.
 Free the hostage
Get rid of the last three opponents. Then, free the hostage.
 Meet up with Kraven
The next mission consists of two activities only: first, meet up with Kraven.
 CK
CKAfter the cutscene, you will start the fight with Cletus Kasady. The fight is a piece of cake, because the opponent is neither tough, nor does he have any superpowers. You can use all of the techniques that you know, on him. After the battle, walk over to the destination point of the next mission.
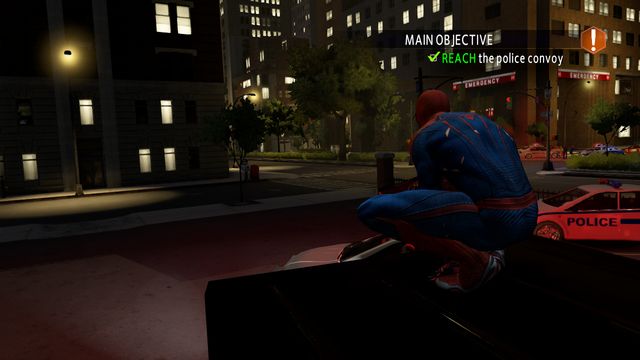 The escort
In the next mission, you need to jump onto the back of the police truck and protect it in any possible way.
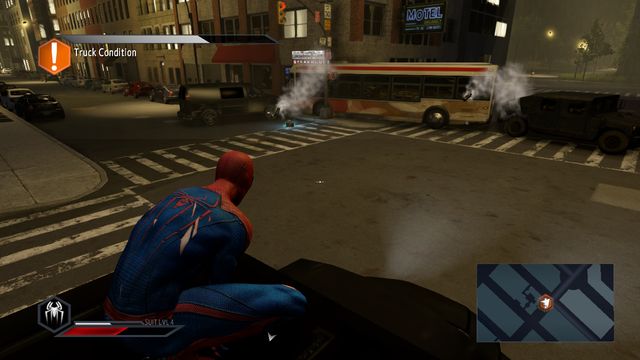
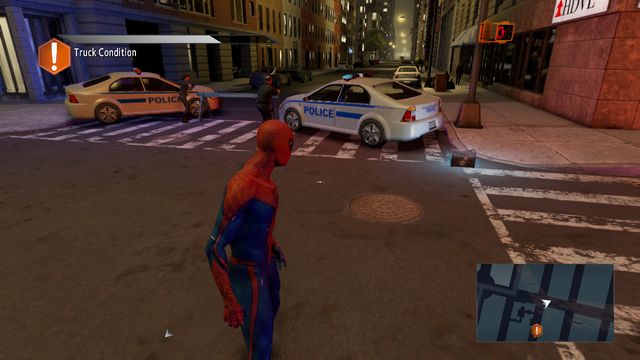
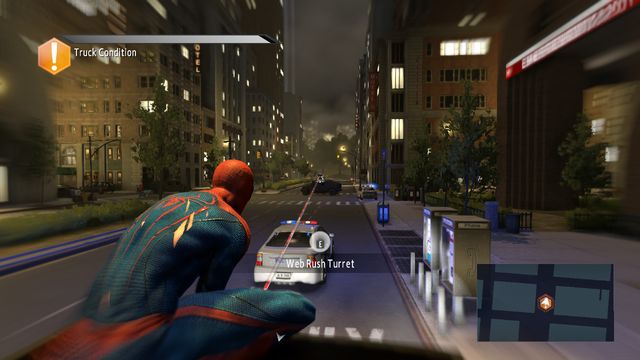 The road block
The first road block, with two armored trucks, appears after a moment. You can destroy the turrets using the web.
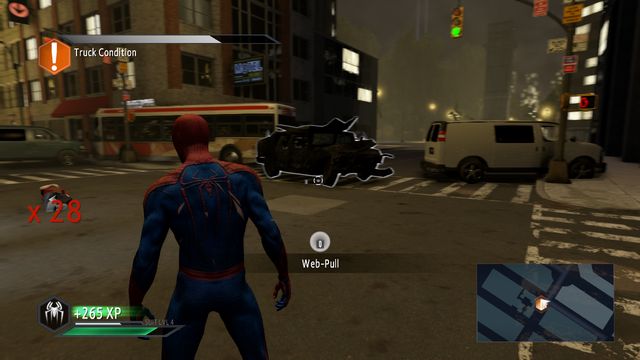
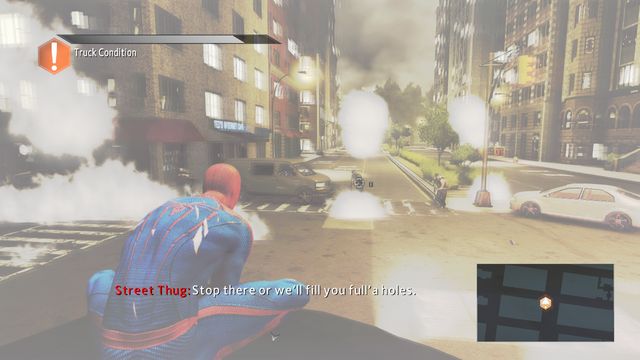 The ambush
The first ambush is right at the next crossroads. You and the van will be attacked by three armed opponents. It is best to pull their weapons off their hands, in the first place. This is meant to prevent them from damaging the vehicle.
Upgrade crate #1In the left corner of the road block, next to the bus, there is an upgrade crate.
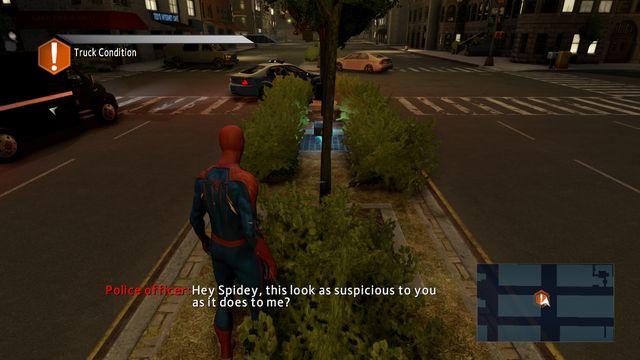 Upgrade crate #2
Follow the truck. Before the turn, on the lane of green, in the middle of the road, you will notice another upgrade crate.
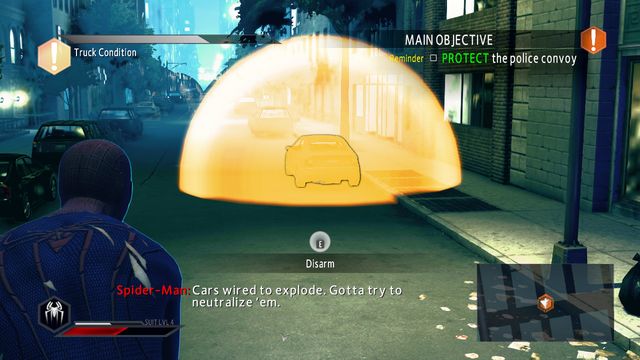 Car bomb
Activate the Spider-Sense then, to be able to detect car bombs. Use the web to disarm three cars, parked along the side of the road.
 Upgrade crate #3
At the next left turn, next to the police car, at the corner of the crossroads, there is another upgrade crate.
 Ambush II
The second ambush is a bit ahead. After you have eliminated the opponents, use the web to move away the obstacle on the road.
 Armored trucks
Two armored trucks are standing at the roundabout ahead. From now on, you need to hurry, while eliminating the obstacles, because the truck is not going to wait for you anymore. At the next block there are more car bombs. At the crossroads ahead, you will meet the last two shooters standing on the roofs of the cars. After the safe passage, jump onto the truck and wait for it to reach the destination.
 Upgrade crate #4
At the end of the route, to the left of the police car, there is the fourth crate.
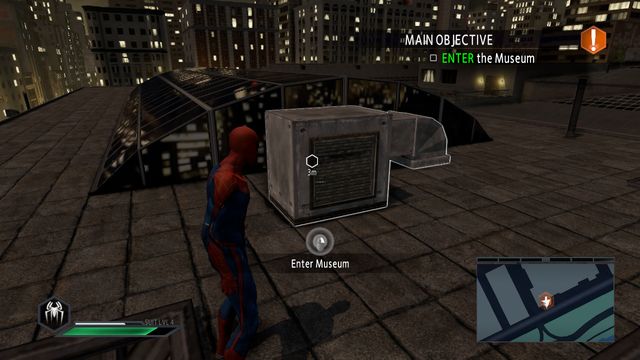 The museum's venting shaft
After you complete the mission, approach the next marker of the mission. Reach the museum's rooftop and gain access inside, using the venting shaft.
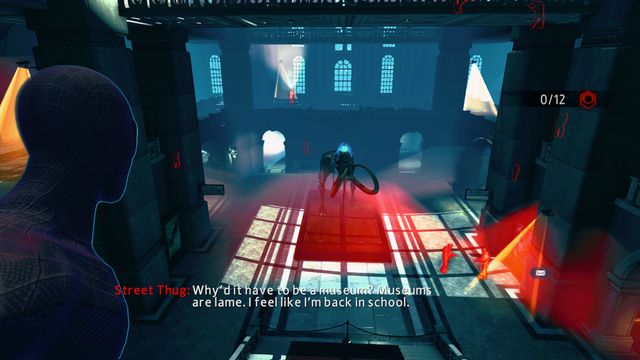 The museum hall
Once in the museum, use the Spider-Sense, to detect opponents, as well as cameras. In the area, there are six of them: two at the opposite side, one on the left, at the upper floor, one on the right at the upper floor, behind the pillar, one at the ground floor and one in the passage to the right of the skeleton in the middle. To immobilize the cameras, you need to use web shoot against them.
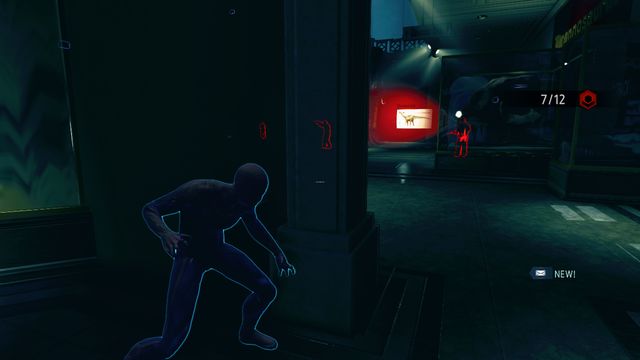
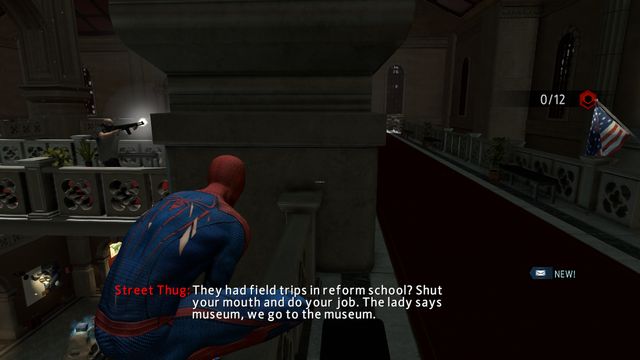 The first guard in the middle
One of the ways to eliminate the opponents, without being spotted, is to eliminate them from above. Jump onto the balcony on the right and hide behind the pillar, until the moment at which the guard passes it by and you will be able to attack stealthily.
 Deactivate the camera
Then, locate the camera on the pillar next to you and web shoot at it. Now, approach closer to the wall and watch the movements of the next guard. As soon as he starts walking the opposite direction, surprise him from behind.
 The third guard
On the right, at the lower level, you will notice two guards - one of them watching an exhibit and another one, patrolling next to him. Wait for the latter to walk outside of the line of vision of the former and grab him from the wall, or the barrier. Then, rappel on the web and grab the one watching the exhibit.
 The guard at the window
Then, knock down the guard at the windows. He is looking at the walls, which is why you need to get him from behind but, remember about the cameras. It is best to attack him right after he walks to the end of one of the sides. Now, deal with the last guardian opposite.
 The camera at the ground floor
You can now get down to the ground level. The best location is the end passage on the right of the hall, where no guard will be looking for you. Wait for the opponents to approach your location and eliminate them, when nobody is watching.
 walk over to the other side
Once you deal with everyone next to you, walk over from the corridor on the right to the one on the left. Here, you eliminate the enemies one after another, because they usually do not see each other.
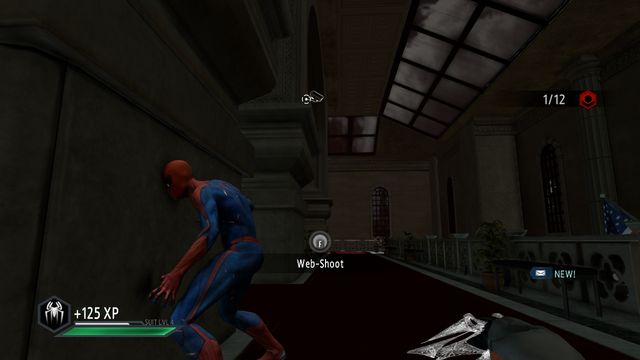
 Upgrade crate #1
Upgrade crate #1 is behind the grey screen on the ground floor. The best idea is to look for all the collectibles after there is only one opponent left, before the boss fight.
 Audiolog #12
Another audiolog #12 is on the left side of the hall, behind the green screen.
 Upgrade crate #2
At the first floor, next to the last pillar, you will find, on the right, another upgrade crate #2. Watch out for the camera next to it.
 Audiolog #13
Audiolog #13 can be found in the last hall at the ground floor, on the left exhibit encased in glass.
 Upgrade crate #3
The third crate is on one of the exhibits on the ground floor, in the left passage of the corridor.
 Upgrade crate #4
The fourth crate is on the head of the skeleton, in the middle of the hall.
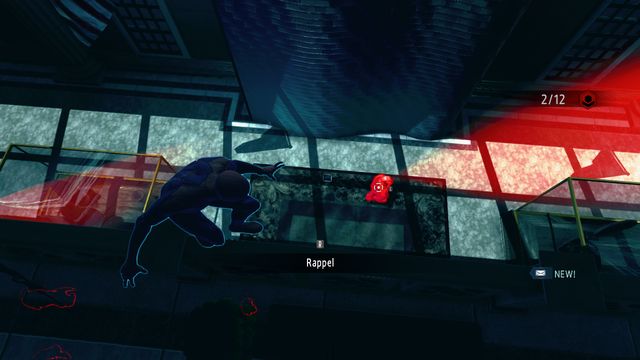
 Upgrade crate #5
You can find the last crate on the upper floor, on the left side, next to the window, above the green screen.
 Jameson's Photo #5
Jameson's Photo 5 needs to be shot to the skeleton in the middle of the hall.
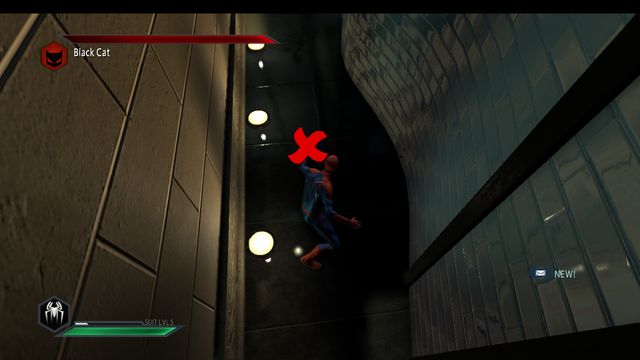
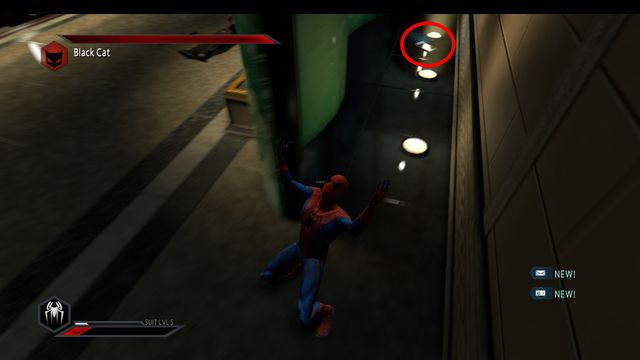
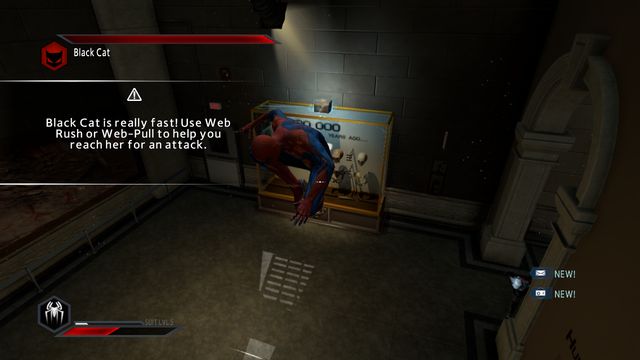
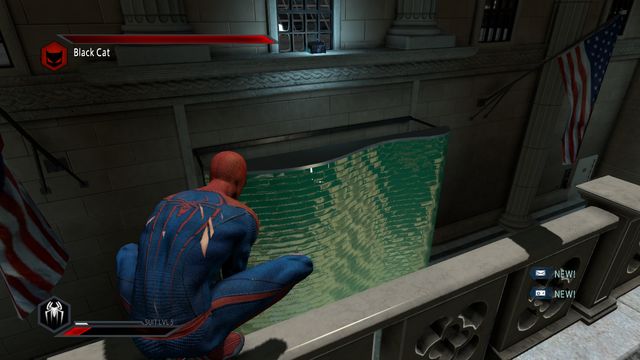
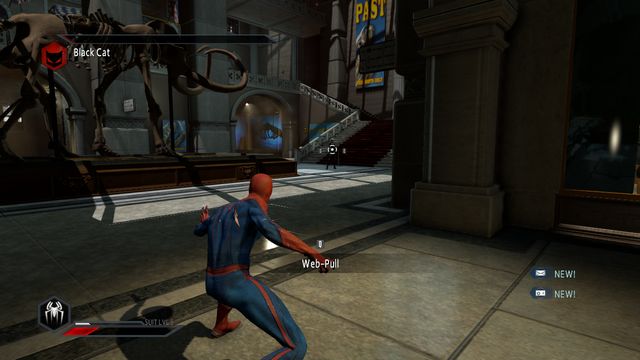
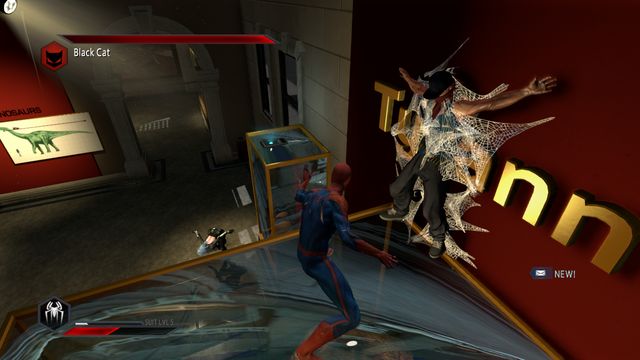
 Black Cat
The boss fight is not too much of a challenge, after you choose the right strategy. The opponent is landing strong melee attacks and she can throw daggers. She can also make it impossible to you to heal, by attacking by surprise. The key is to wait for her attack and counter with three/four blows. After several combos, Black Cat will start to hide all around the museum. You can track her down, using Spider-Sense.
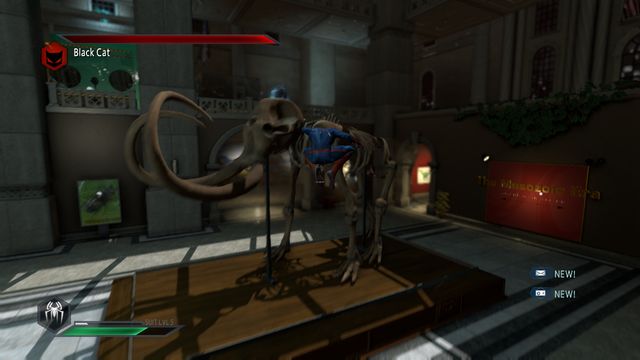
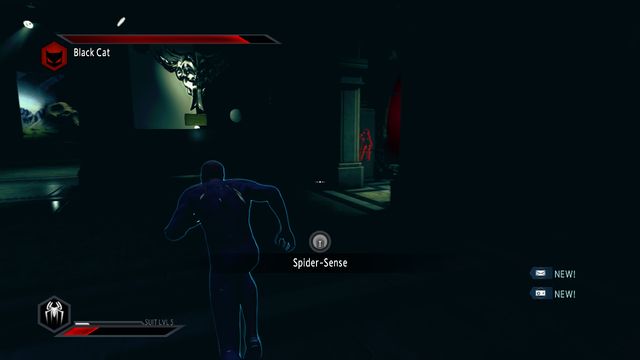
 The girl is waiting for you to attack
Once you have her in line of vision, dash towards here or pull her with the web and land a combo.
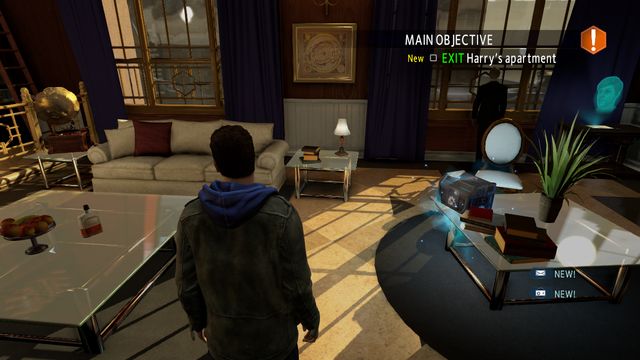 Upgrade crate #1
In the next mission, go to Harry's house. After a conversation, you will find an upgrade crate on the table, in the middle of the room.
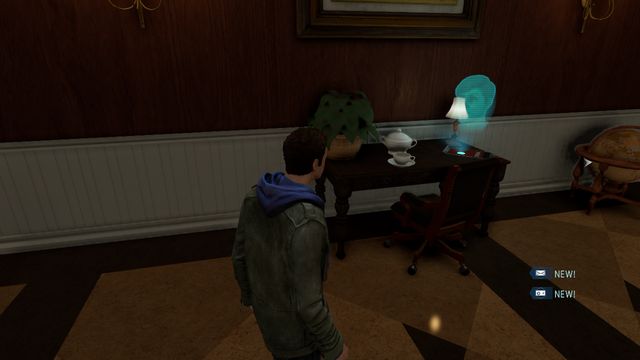
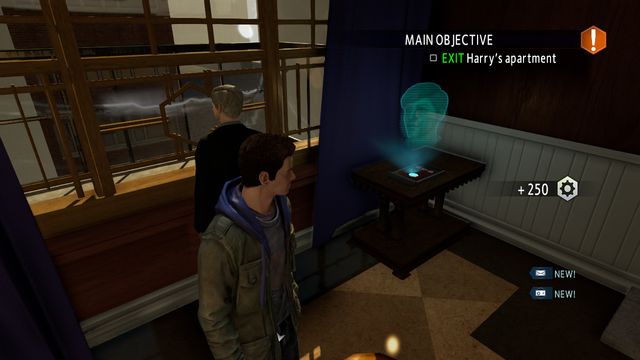 Audiolog #14
At the window, on the cabinet, there is an audiolog #14.
 Audiolog #15
The fifteenth audiolog is at the opposite side of the room, on the desk.
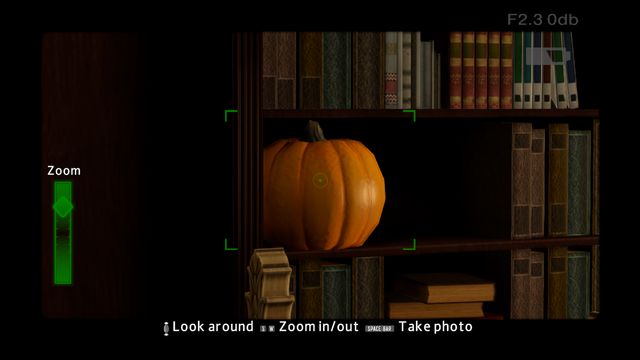 Jameson's Photo #6
IN the room, take a Jameson's Photo. You need to catch the pumpkin on the bookshelf.
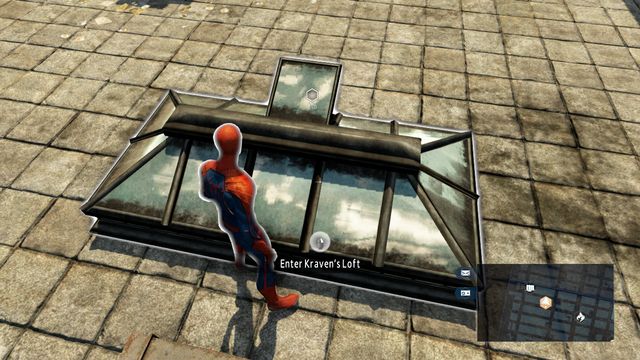 The entrance on the rooftop
After you exit the building and wait for a moment jump onto Harry's limo. After the cutscene, go to Kraven's hideout. You will access it through the skylight.
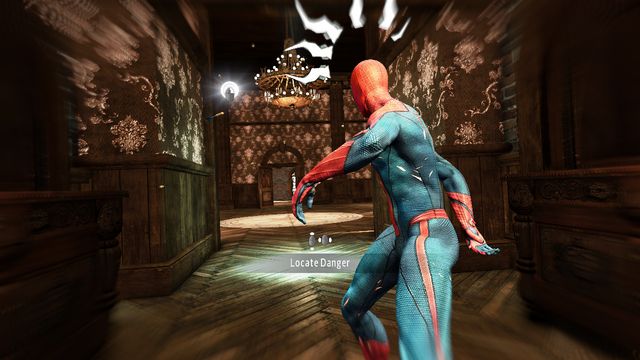 A trap
Go to the upper floor. At the end of the room, there is a trap. Turn around and tap the action key, many times.
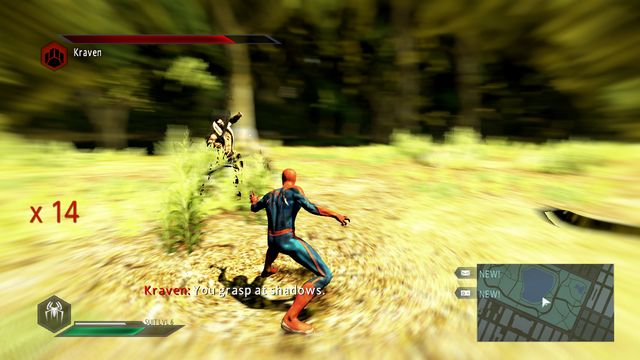 The fight with Kraven
The battle that you need to fight now is not too tough, if you play your cards well. Kraven does not defend too much against your attacks, but he uses the power of multiplying himself. You will then be attacked y several enemies, who die after a single blow. First of all, you should deal with the shadows, with a dashing kick, which will prevent them from landing a blow.
 Kraven in hiding
Occasionally, an opponent will jump at you from a tree. Use Spider-Sense, to locate him and use the web to pull him off the tree.
 The conversation
After the fights end, you will start a conversation with Kraven. After it ends, walk over to the next mission.
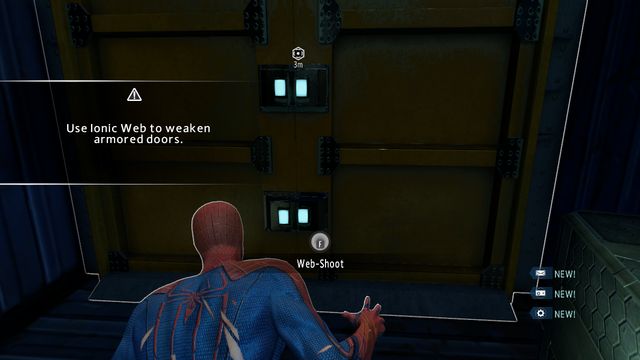 An OSCORP truck
Reach the destination point and hide inside the truck's trailer, in front of the entrance. To climb the trailer, shoot the door with the web. Now you have the Ion-Web power, which will allow you to destroy the OSCORP crates and the yellow armors of the enemies from Task Forces.
 An armored opponent
Deal with the first armored opponent. First, keep using the Web-Shoot, until the shield turns darker. Then, you can deal damage to the target.
 A sniper on the roof
First of all, climb onto the building on the right. On the rooftop, locate the sniper and attack him by surprise. Now jump over to the rooftop of the next building.
The two snipersAnother two opponents are also looking down and they do not suspect anything - eliminate them by surprise.
 The hole in the roof
Through the hole in the roof, you will notice a guard patrolling below. Slide down the rod to eliminate him. Then, return to the rooftop.
 The guard at the window
While sitting on the tree, next to the building, you can grab one of the opponents, who is standing with his back turned at you. Then, gain access into the building and get to the ceiling.
 The red cabinet
From the side of the window, through which you entered, you will notice a red cabinet. Use the web to throw it at the opponents, next to the fire. Then, jump down and pin them to the ground, before they wake up. Now, deal with the opponent on the bridge, between the buildings, above the sewer leading outside.
 The guard behind the building
Return onto the first building. Behind the building, on the side of the rocks, there is a lonely guard. Eliminate him silently, from the tree or the wall. Return to the rooftop.
 The unstable beams
Approach the edge, where you will notice two opponents at the fire. Use Web-Pull on the beams to the right, which will fall onto the enemies and knock them down. Entangle them with the web.
 The interior of the first building
You can now enter the first building. Inside, you will find two guards - you can eliminate both of them from above, without being spotted.
 The ground floor of the building in the middle
From the side of the tree at the second building, on the ground floor, you will find a crumbling wall. Enter and wait at the edge of the wall. Eliminate the opponent in the yellow armor silently and return to the sewer between the buildings.
 At the end of the tunnel
Enter the pipe, from the side of the water, where you will find a sniper at the end, facing away. After you have dealt with him, climb into a height (the ceiling or a pillar) and eliminate the other, patrolling, guard.
 The beams in the corner of the room
In the corner of the room, you will notice beams holding up a landslide. Destroy them to distract the opponents in front of it, and entangle them with the web.
 The rooftop of the third building
Finally, get over to the rooftop of the third building, in the corner of the map. There, you will notice two snipers. Deal with them.
 The red container
From the rooftop below, you will notice a red container - grab it and throw it at the guards next to the fire. Then, immobilize them.
 The mining cart
Return onto the rooftop, so that you overlook rails. Use Web-Pull, to pull the cart (twice) and knock off the enemy inside the building (Brute).
 Upgrade crate #1
The first crate is on the roof of the trailer, over which you climb at the beginning of the mission.
 Upgrade crate #2
The second crate is on the tree, in front of the middle building.
 Upgrade crate #3
The third crate is on the rooftop of the building in the middle of the location.
 Upgrade crate #4
Another crate is in the middle of the map inside of the damaged tower.
 Upgrade crate #5
Inside the building on the left of the map, at the end of the rails, you will find the fifth upgrade crate.
 Upgrade crate #6
The sixth crate is in the highest point of the building in the left corner of the location (the one with the rails).
 Upgrade crate #7
The seventh crate is on the barrel inside the first building, to the right of the entrance to the location.
 Upgrade crate #8
Crate #8 is atop the entrance to the pipe, from the side of the water.
 Upgrade crate #9
The ninth crate is at the end of the sewer pipe towards level -1 of the building in the middle.
 Upgrade crate #10
Upgrade crate #10 is located at the end of the tunnel, in the middle of the map.
 Upgrade crate #11
You can find the last-but-one crate under the first building, to the right of the entrance.
 Upgrade crate #12
The last crate is on the pile of rubble, at the building on the left side of the map.
 Audiolog #16
The sixteenth audiolog is on the hood of the car, next to the destroyed tower.
 Audiolog #17
Audiolog #17 is in the underground of the building in the middle. It is on the heap of rubble, in the corner of the room.
 Audiolog #18
Another audiolog is in the corner of the building in the middle, on the side of the entrance to the location, next to the tree.
 Audiolog #19
Audiolog #19 can be found under the first building, to the right of the entrance. It is on the ground.
 Jameson's Photo #7
The photo, which you need to take as the seventh one, is the green shirt located under the building, on the left side of the location, next to the spot illuminated by the lamp.
 OSCORP crate #1
Past the entrance to the location, you will notice an orange OSCORP crate, the only one located in the missions. Smash it, using the Web-Shoot, after you gain the Ion-Web in the previous mission.
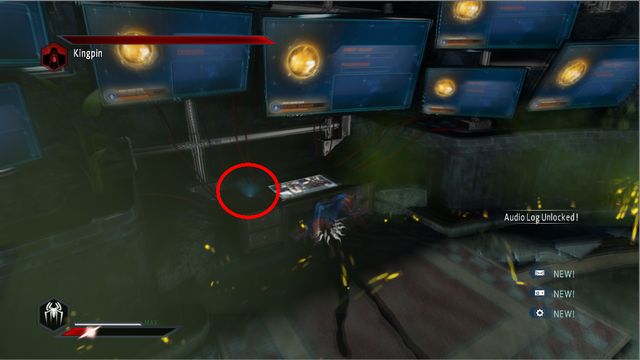 Audiolog #20
Unusually, as for a boss battle, before you begin, approach the desk and collect audiolog #20.
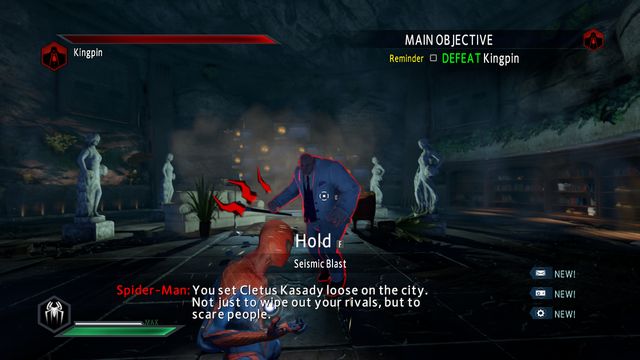 Kingpin
Finally, you are going to fight a boss. Kingpin performs four types of attacks: charge, attack in the position, beam attack and AoE attack. As for the AoE attack, he hits his cane against the ground, at which point you need to stay within a long distance. When it comes to the attack in the position, you need to dodge, just like in the case of the beam attack, also with the cane. Using the Stun-Blast will allow you to break the boss's attack.
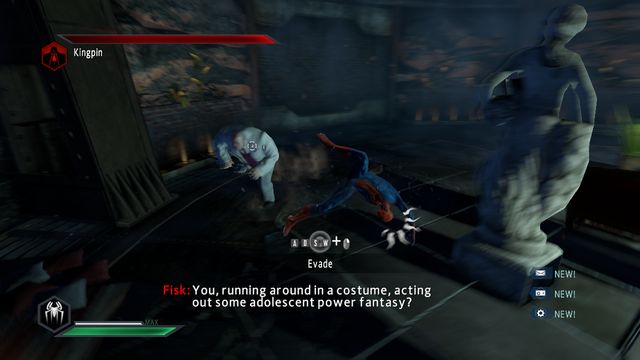 Charge
The key to success is to let the opponent perform his charge, dodge and allow him to slam against the wall. Once he is stunned, you can land 4-5 quick blows. For as long as he is stunned, you can get away from him and regenerate health.
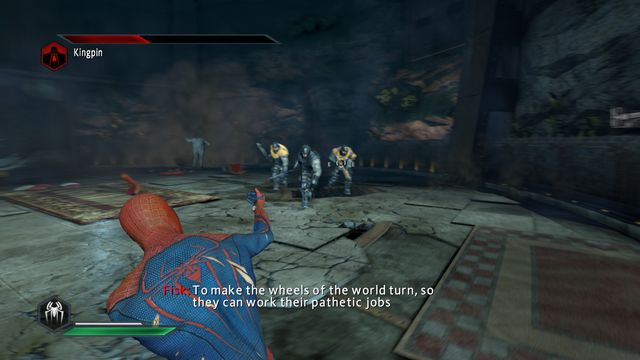 Reinforcements
As soon as the boss's health falls to 2/3 of the initial level, he will summon reinforcements. The first time he does that, two armored opponents will arrive. The second time around (1/3 of health), it is going to be three opponents. To destroy their armors, you need to shoot web and, when there are more than one next to you, use Stun-Blast, to toss them away. Also Kingpin will be trying to hit you, for the whole time but, as long as you do not incapacitate the guards, dodge from his attacks.
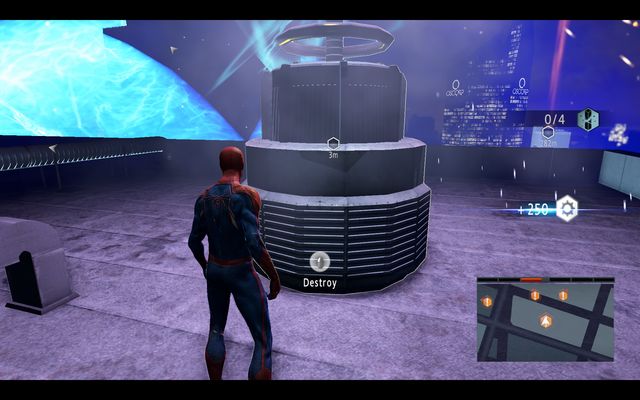 The first generator
You start the next stage from a boss battle. This time, it is Electro. In the first place, you need to destroy the four field generators, in the center.
 Upgrade crate #1
After you destroy the first generator, you will also be attacked by drones. The will keep appearing so, try to destroy the generators as quickly as possible. Behind the second generator, there is upgrade crate #1.
 Upgrade crate #2
Similarly, the second crate is behind the third generator.
 Upgrade crate #3
At the fourth generator, you will find another upgrade crate.
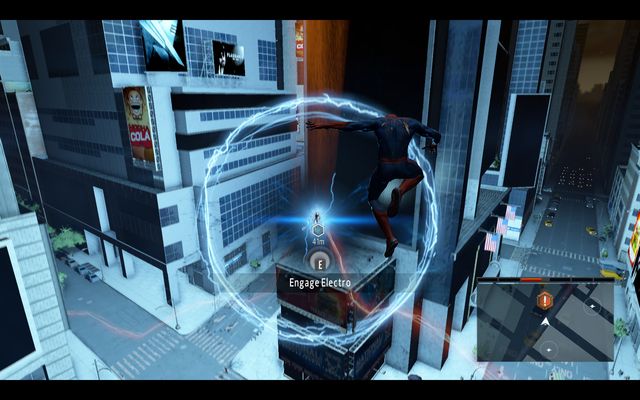 Electro
After you have disabled the field, go to Time Square and confront Electro, using the Web-Rush.
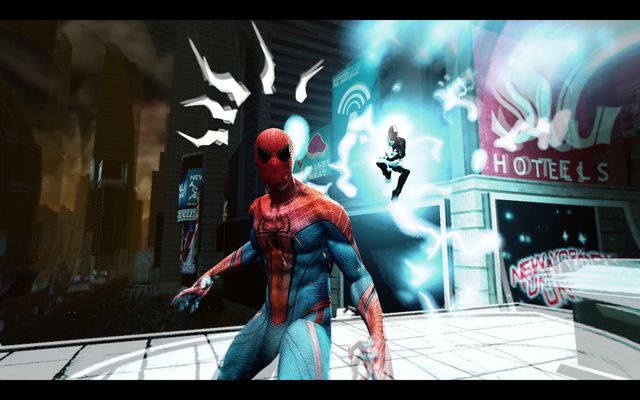 Sensing the danger
After the attack, the boss disappears and the danger sensing mode activates. Turn around and press the action key to perform a dodge.
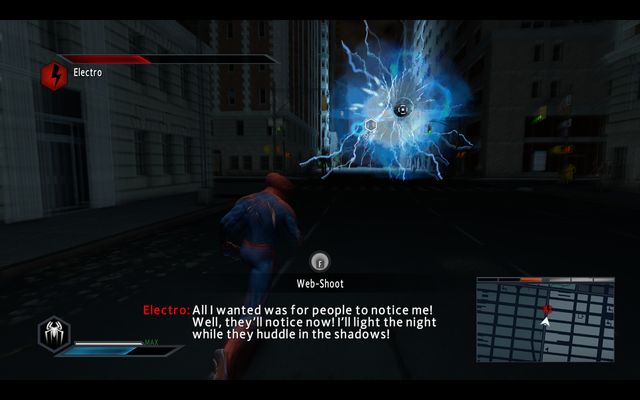 Keep shooting until Electro's halo disappears
Then, chase the opponent. Once you are out in the streets, avoid his projectiles, because they paralyze, temporarily, your abilities to use web. Fire at the opponent until his halo goes off - then, attack quickly.
Avoid the paralyzing boltsOnce the boss has 2/3 and 1/3 of health, you will see cutscenes, during which you need to tap, quickly, on the attack key. Towards the end, also fire at the opponent but, this time, you also need to fire at the boss's projectiles.
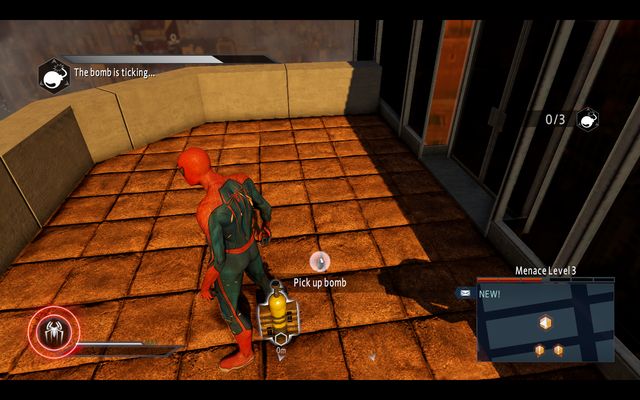 Well, a bomb...
At the beginning of the mission, deactivate 3 bombs all around the city. After you approach one, pick it up, with the action key and carry it over to the specified point, before time elapses. On of them is on the rooftop of a building.
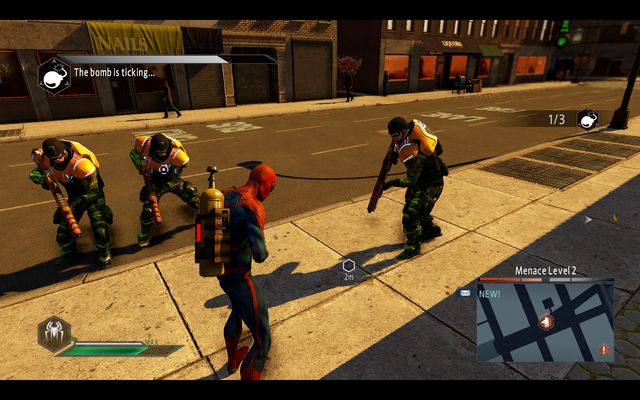 The second bomb
Another bomb is at the Times Square. You do not need to deal with the opponents, if you approach the bomb by surprise, or lure the opponents away from the bomb.
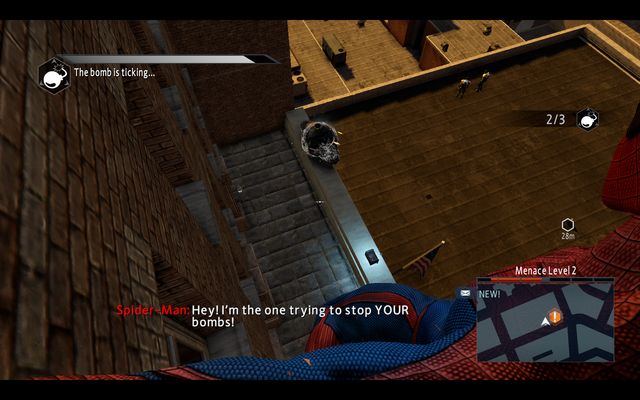 The third bomb and upgrade crate #1
The last bomb is on the rooftop and it is being watched by several guards. Above the flag, among the mines, you will find an upgrade crate.
 IN front of the OSCORP HQ
Go towards OSCORP. IN front of the entrance, there are five guards in flying vehicles. To defeat them, you need to throw, each one, off his vehicle, using the Web-Pull. Before that, however, deal with the snipers on the rooftop.
 Upgrade crate #1
In front of the building's main entrance, you will find upgrade crate #1.
 Upgrade crate #2
Opposite the skyscraper, on the rooftop, you will find the first sniper. After you eliminate him, collect upgrade crate #2.
 Upgrade crate #3
The third crate and the sniper are on the upper floor of the OSCORP HQ. Then, deal with the flying Task Force soldiers.
 A civilian under the rubble
After you deal with the enemy, you still need to escort three civilians into safety. The first one is at the street level, under the heap of rubble. Two others are at both sides of the OSCORP tower.
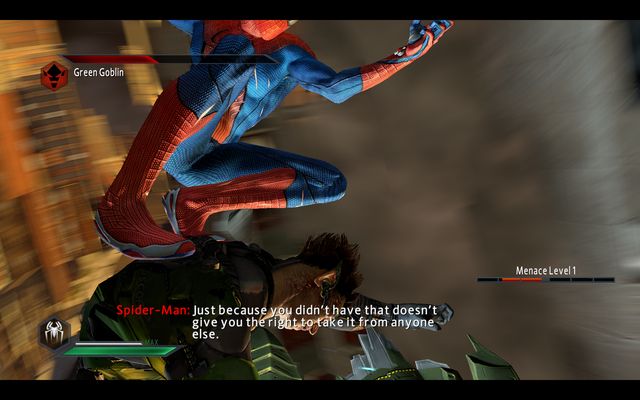
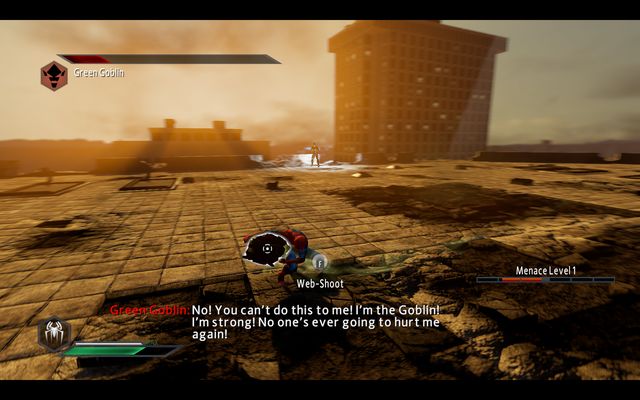 Green Goblin
The battle with Green Goblin is a bit different than the previous ones. First of all, keep shooting at the opponent and dodge from the bombs that he throws. The ones that you manage to shoot off, will be lying on the ground unexploded, temporarily inactive. Use the Web-Pull then, to grab them and send them back at the enemy. Whenever he falls down, approach and attack him. After a while, you need to perform a dodge, because his glider will be approaching from behind your back.
 The incoming enemy
After his health drops to a half, he will start an attack, during which you need to tap the keys displayed on the screen. It you do that properly, you will manage to hop onto the glider.
 The fight up in the air
Once you get on the Goblin's back, he will fly across the city. At this moment, you need to start banging his head against the buildings that you pass by, to the left and to the right, depending on the side at which they appear.
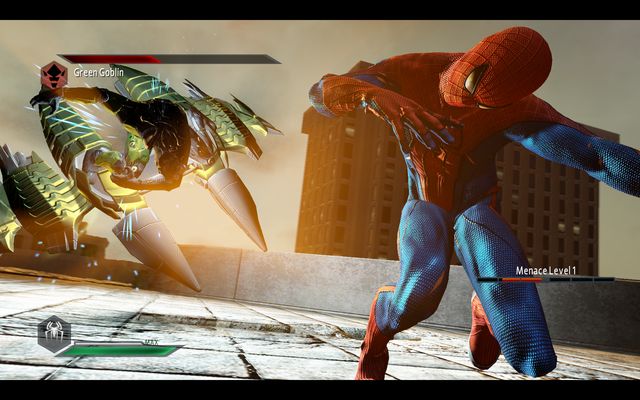
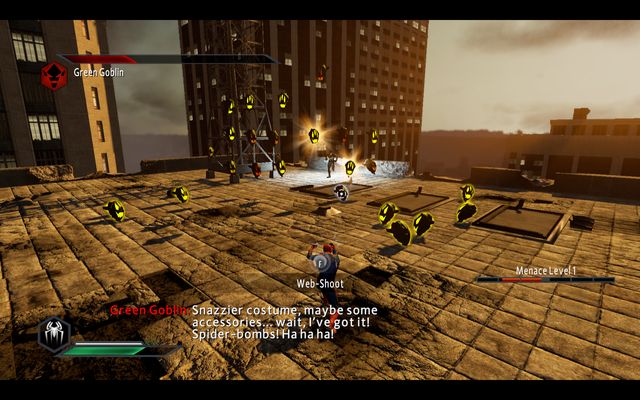 Goblin and the bombs
After you end the flight, you return to the rooftop. The Goblin will be surrounded by bombs that protect him. Just like earlier, shoot the web at them and throw the deactivated bombs at the opponent.
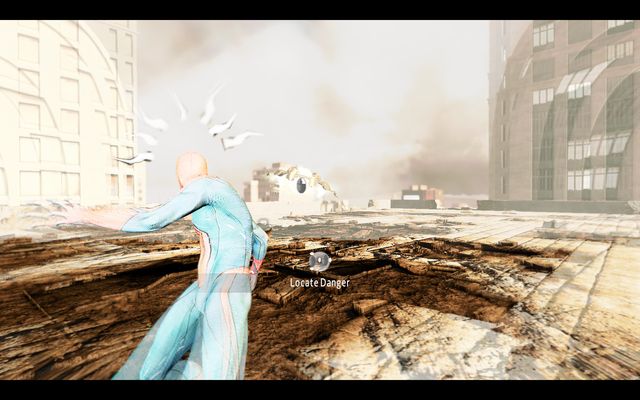 Sensing the danger
As soon as the opponent's health drops to zero, the danger detection mode will activate. Behind your back, as you look towards the bigger fragment of the wall, the glider will approach so, press the action button to dodge from it. This is where the battle ends.
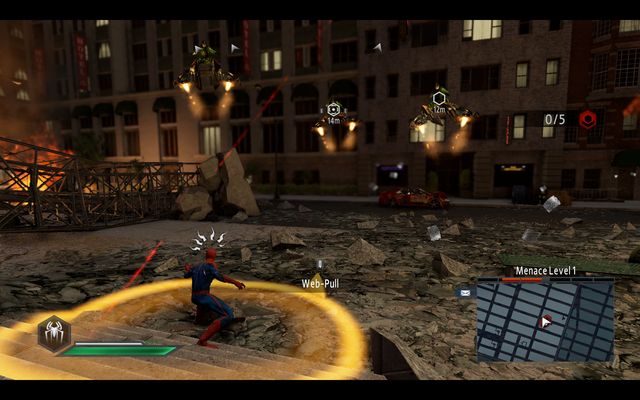
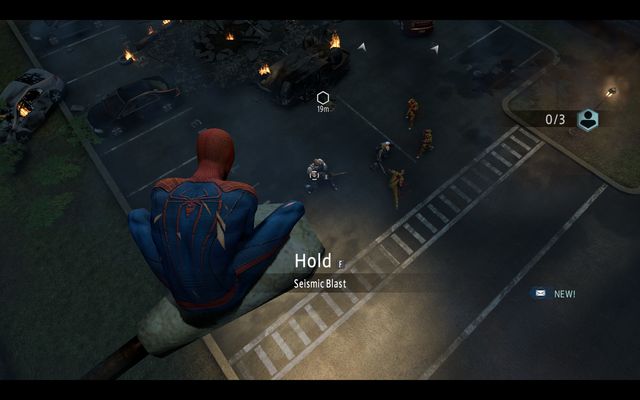 The Parking lot
First of all, eliminate the Brute and four remaining opponents, at the parking lot. The quickest way to do that is by using the Seismic-Blast on the group and pinning them down to the ground.
 Free the civilian
Under the overturned car, there is a civilian. Use Web-Pull to free him.
 Another victim
After you defeat more opponents, past the prison gate, free another civilian by freeing his legs from under the object.
 Upgrade crate #1
Behind the wall, on the left, on the tree, there is upgrade crate.
 The second parking lot
Get to the second parking lot. First of all, deal with the two snipers on the rooftops, by attacking them by surprise. Then, deprive the guards of their weapons and deal with them. Once your health bar runs low, dash away, to a rooftop, and heal.
 Upgrade crate #2
The second upgrade crate is behind the building, in front of which you fought the third group of opponents.
 Upgrade crate #3
On the tower above the buildings, you will find another - third crate.
 Free the third civilian
In the middle of the square, there is the last, fourth, civilian. Remove the obstacle, which will start a short cutscene.
 The prison yard
On the yard, over the wall, there is another target that you need to protect. Use the Seismic-Blast and entangle the opponents quickly to eliminate them as quickly as possible.
 Fight inside the circle
During the fight, you need to stay in the middle of the circle. If you leave it, the bar in the upper-left corner will start to fill up. Once it is full, you will lose.
 The venting shaft
After you enter the underground, walk over to the shaft on the wall.
 Snipers and upgrade crate #1
At the end of the shaft, you will find two snipers. Take them out, quietly, and collect upgrade crate #1 in the middle of the room.
 Guards at the ground floor
Climb over the window outside and climb onto the scaffolding. Deal with the guards who are patrolling below. Then, go ahead, where there are two more guards, facing away that you need to take out.
 Audiolog #21
Over the wall, reach the spot where you can see a puddle of water, wired to electricity. From there, you will notice an entrance to the cage. The Audiolog is inside.
 A rip in the wall
At the end of the room, you will notice an element of the structure, stuck in the wall. Pull it to open the way for yourself.
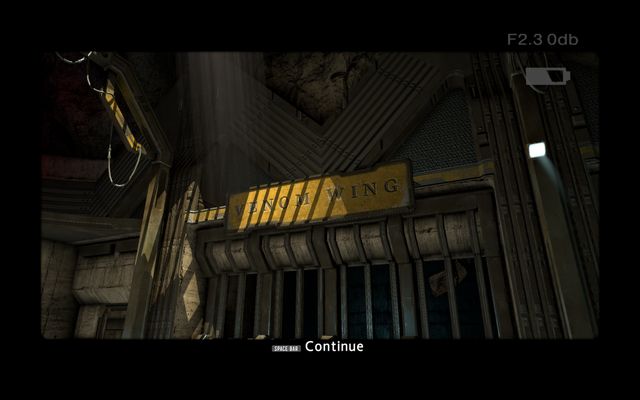 Jameson's Photo #8
Follow the corridor, by jumping between the wall and the rocks and watch out for the mines. Finally, you will notice the yellow sign, reading "Venom Wing" on the right - take Jameson's Photo #8 of it.
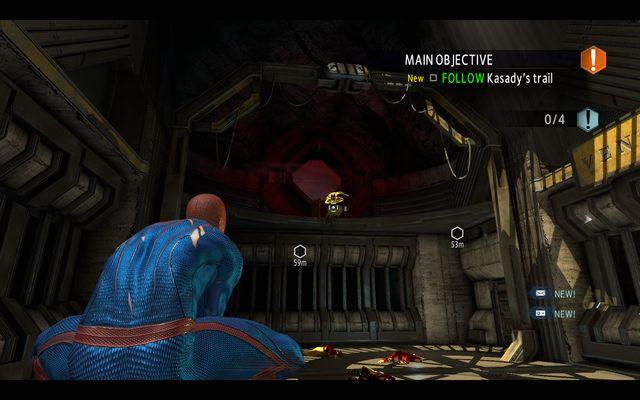 Jump into the opening in the wall
At the end of the corridor, you will notice an opening in the wall, which you need to jump into.
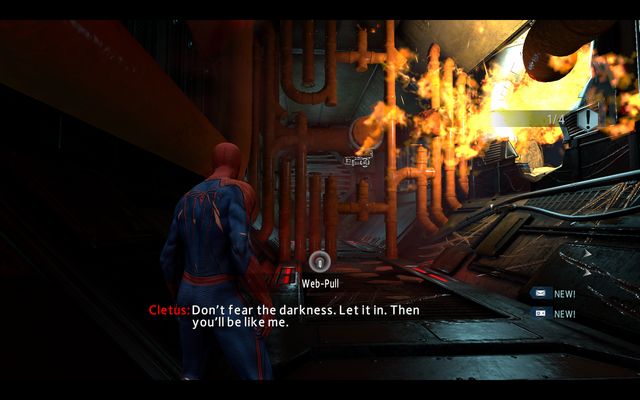 The flame activating lever
Along your path, you will notice pipes and fire. Use Web-Pull on the lever at the wall, to cut off the fuel. Then, cling to the wall and crawl over to the other side. In a similar way, you need to use a lever later on at this level, to destroy the tentacles clinging to the wall.
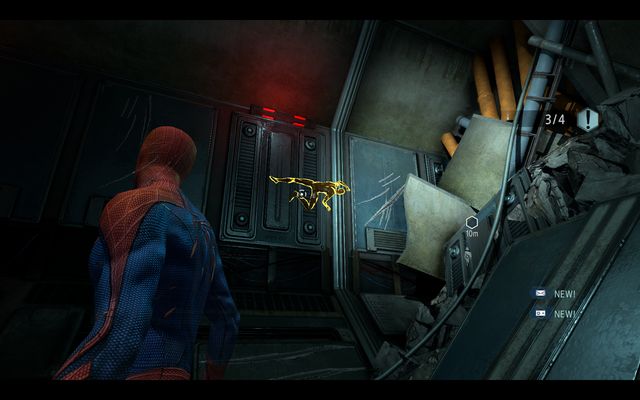 The passage point
Once you reach the end of the corridor, you will notice a collapsed passage. To get past this point, cling to the wall on the left and crawl over to the other side.
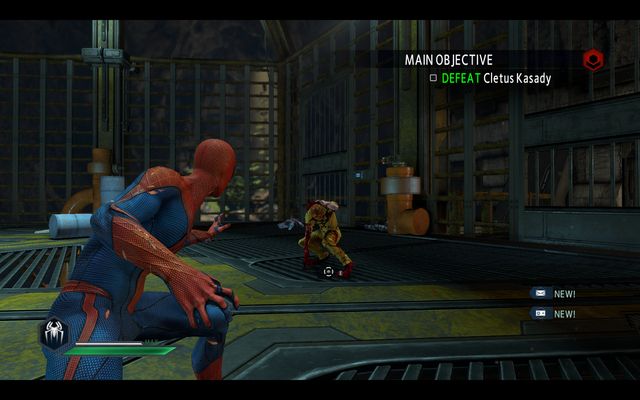 Cletus Kasady
At the beginning of the battle, you need to deal with Cletus Kasady. The lack of the health bar is due to the fact that you will defeat this opponent with a few blows only.
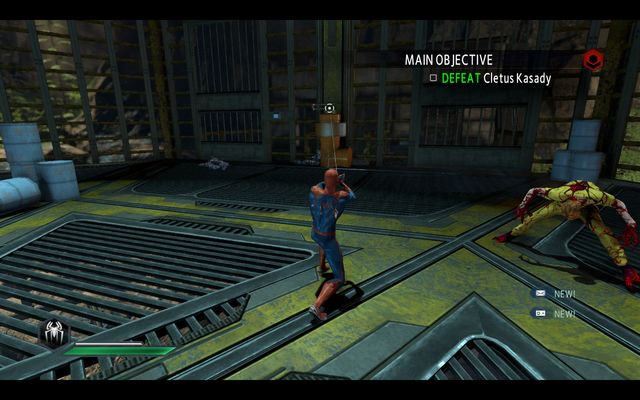 The flame levers
You can switch several levers beforehand. Thanks to this, there will appear flames, next to them. This will prove helpful, later into the battle.
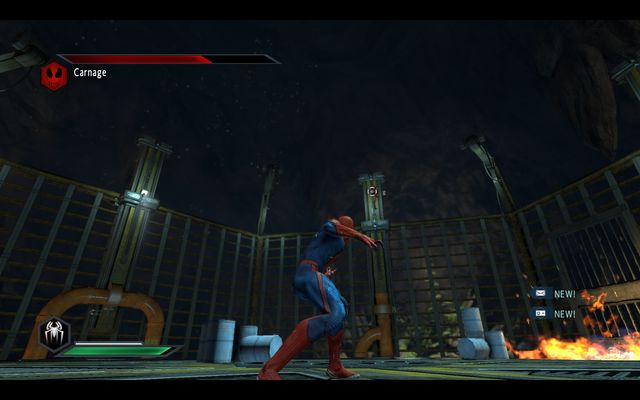 The opponent on a pole
Once you deprive the opponent of several health points, he will start jumping from pole to pole, around the arena. You can knock him down with the Seismic-Blast. It is best, if you start fire all around the arena, beforehand. Thanks to this, the opponent will fall straight into the flames, which will deal lots of damage to him.
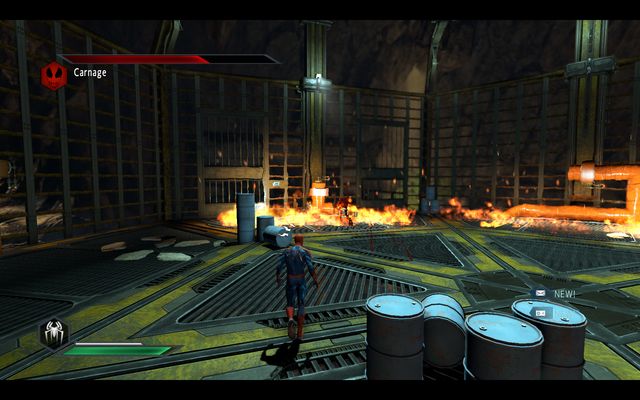 Carnage on fire
A moment after you use the Seismic-Blast, you can get away and heal yourself, because the opponent will stay in flames, for some time. In the case of the charge, you can stand in a way, in which there are barrels between you and Carnage. They will explode as soon as he slams into them, which will deal more damage to him.
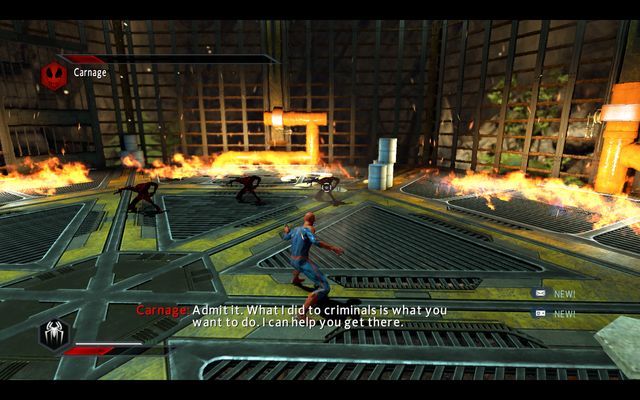 The smaller opponents
At two moments - when the opponent's health drops to a half, and also to a third, there also will appear smaller opponents in the arena (one at the first time and three at the second time), who will be attacking you on the ground, while Carnage is shooting from the poles. Attack them with a jumping attack to throw them towards the flames, to which they are as vulnerable as the boss. After you have eliminated them, you only need to land several blows to the boss, which ends the battle.
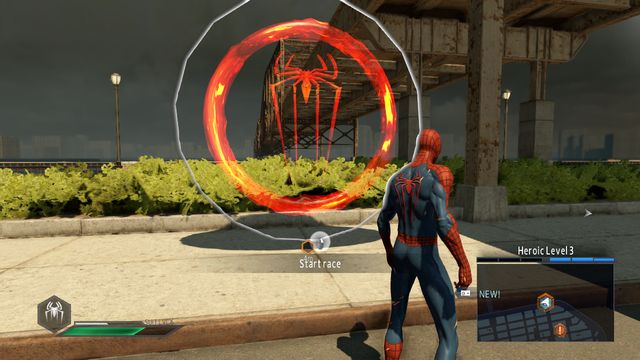
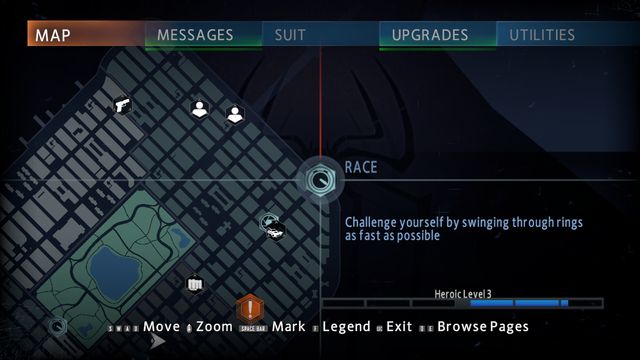 The races
Races are an additional activity available in the game. Several more become available after you complete the active ones. Each time that you complete a race, you receive a poster, available at Comic Stand. After you complete all the races, you receive a new outfit.
After you complete 5 races, you receive the "Fast-Tracker" achievement.
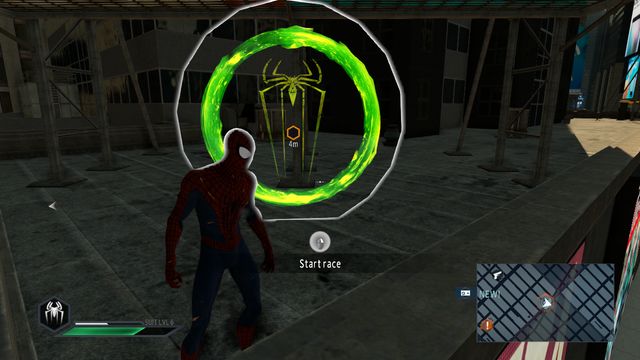 An easy race
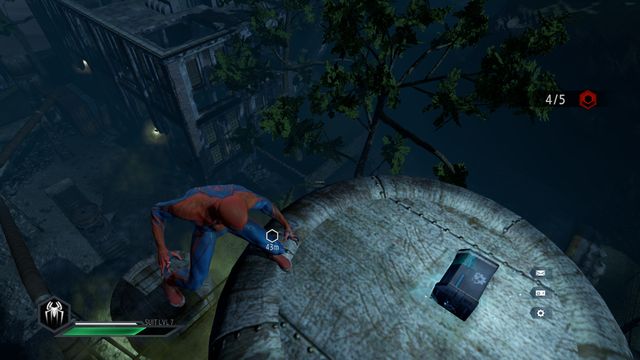
The races come in categories of the easier and the more difficult ones. The easier ones are symbolized with a green circle with spider inside.
 The racetrack
To complete an easy race, you need to use the web to jump between the checkpoints, within the allotted time. In the easy race, it is each next point that is the foothold.
 A difficult race
The more difficult races have been marked in red. Here, you need to complete the race in the way, in which you score all the checkpoints, but there is no foothold on the red ones. This is why, you need to catch on to the other elements in the area (buildings lampposts). Sometimes, there also appear blue checkpoints - there is a foothold on these.
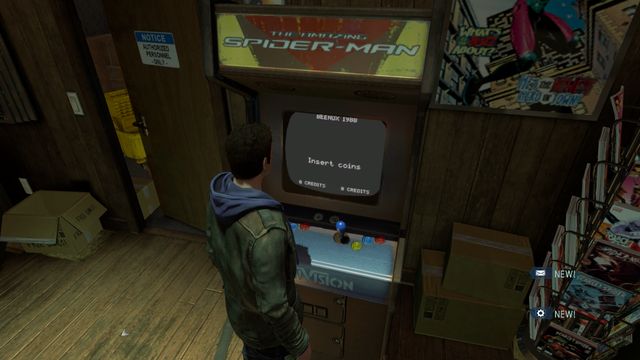 An arcade
At the Comic Stand there is an arcade. It starts combat challenges. They consist in defeating waves of opponents, often with additional requirements, like e.g. a limited number of blows that you take, or deactivated healing ability. There are 12 available challenges and you can complete at any moment, also after you complete the game's story mode, It is best to play them later into the game, with an outfit on a high level and well-developed abilities.
For the rounds that you play, you will be rewarded with concept art and, for completing all of the challenges, you receive the "Luchador" achievement.
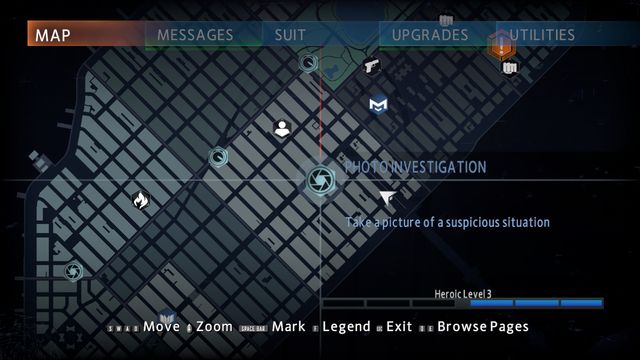 Investigations
The photos that you need to take become available after they appear on the map. If you miss any, it will be still available after you complete the story mode. There are three types of objects that you take a photo of.
After you complete all of the challenges, you receive the "Reporter" achievement.
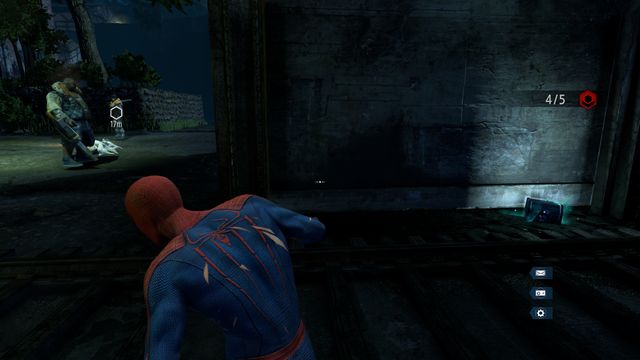
EvidenceIN one of the cases, you need to photo police evidence. Approach the car, where you will notice a laptop on the hood.
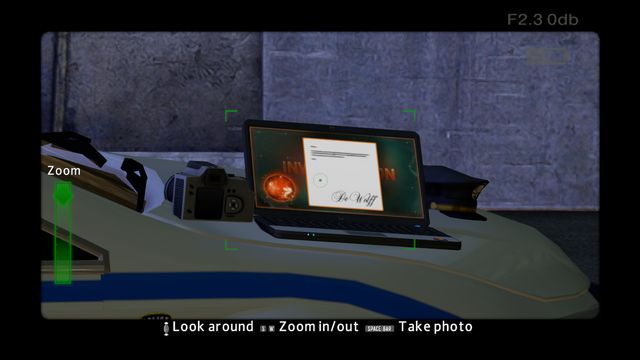 take a photo of the laptop
Then, after you zoom, take a photo of the laptop's screen.
After you photograph all of the evidence, you will receive the "Investigator" achievement.
 Special Agents
At some locations, there are agents, wearing black suits. You need to capture both, on one photo.
For taking photos of all the agents, you will receive the "Special Agent" achievement.
 Photo Investigation #1
You need to take a photo of the first building, towards the end of the second mission, to be able to continue (the "CK" mark painted on the building wall).
The crime sceneAlso, on the crime scene, take a photo of the marked evidence. If the marker does not go green, also try to include the "CK", which you should notice on the wall nearby.
Taking all of the photos unlocks the "Hunter of Killers!" achievements.
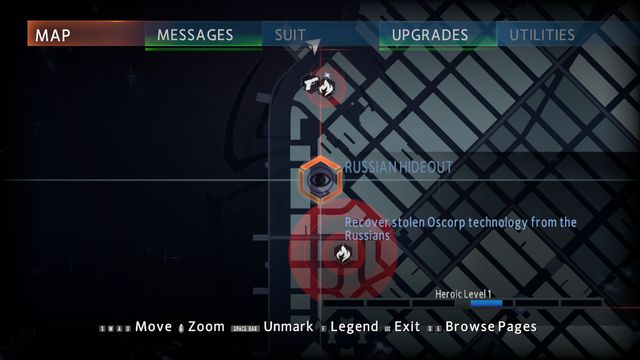
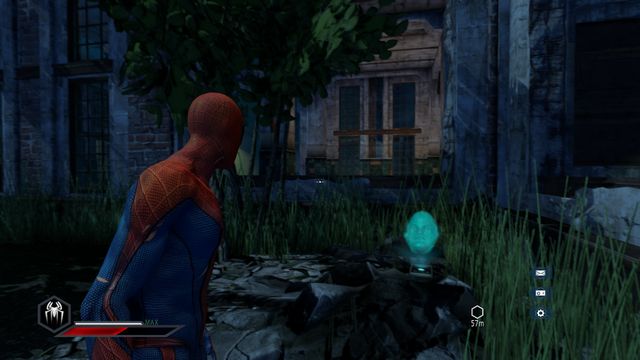
 Location #1
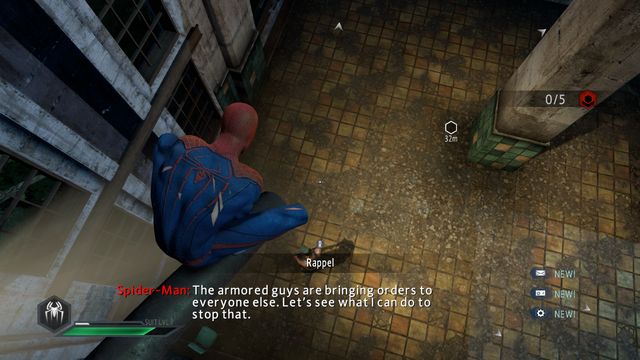
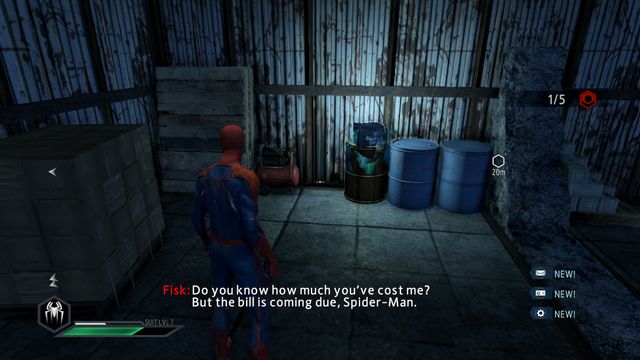
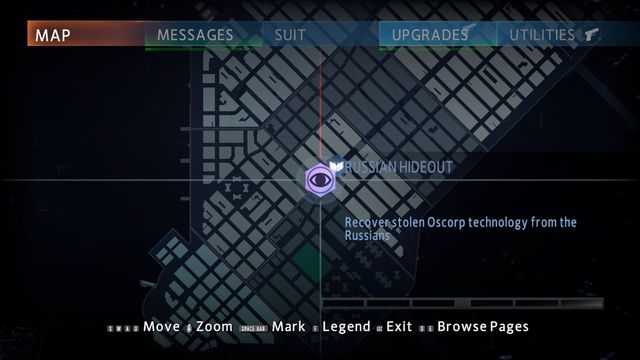
The hideout missions become available after the missions "Into the lions's den!". They consist in eliminating opponents in confined spaces and gaining access to a new outfit.
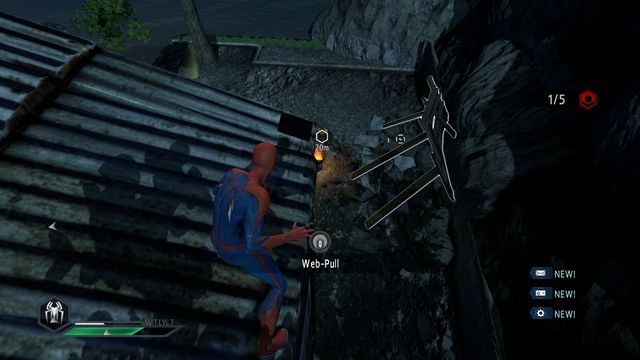
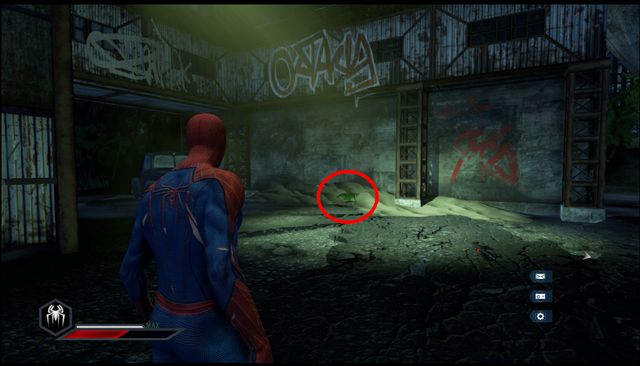
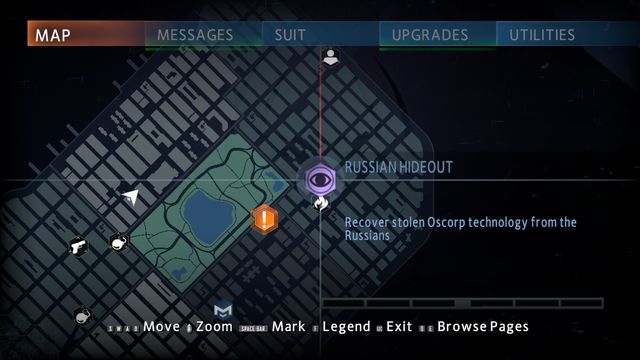
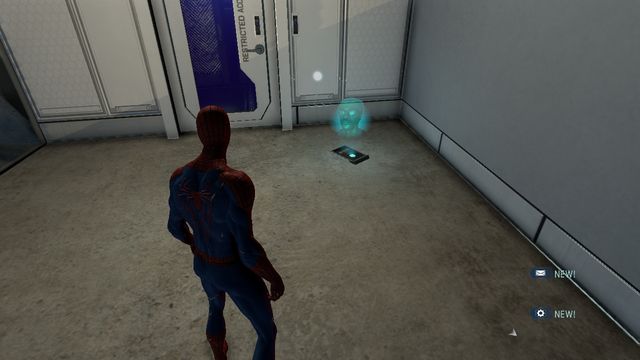
 The entrance to the hideout
The entrance to the hideout is under the manhole to the sewers.
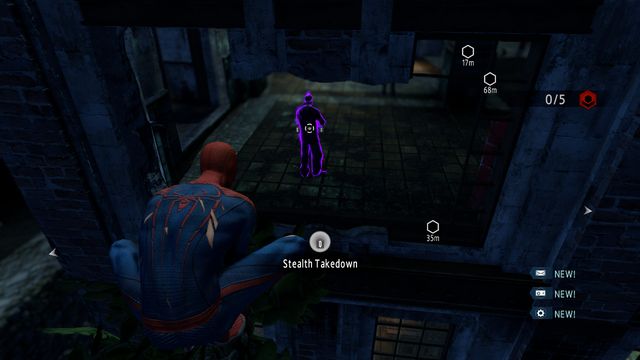
 The first opponent
Deal with the first guard quietly, by taking him by surprise. Then, climb towards the ceiling.
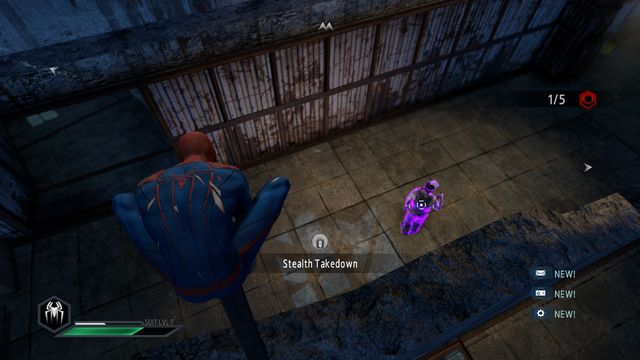
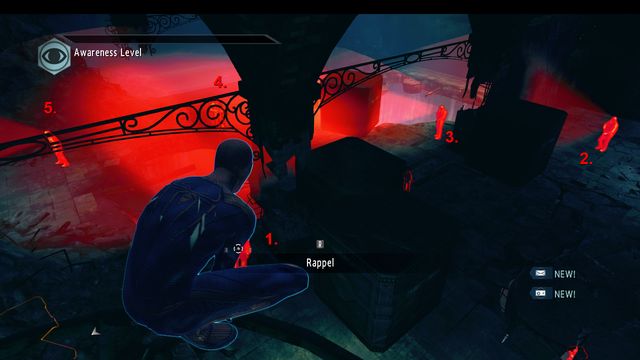
 The order in which you eliminate the opponents
As for the rest of the opponents, you can easily eliminate them in the order shown in the above screenshot. Still, watch out for the bombs and stick to the walls, at all times.
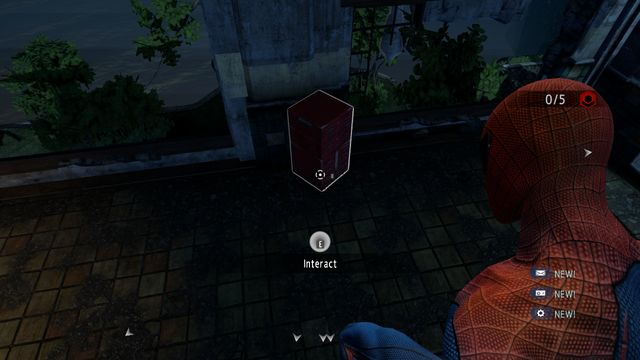
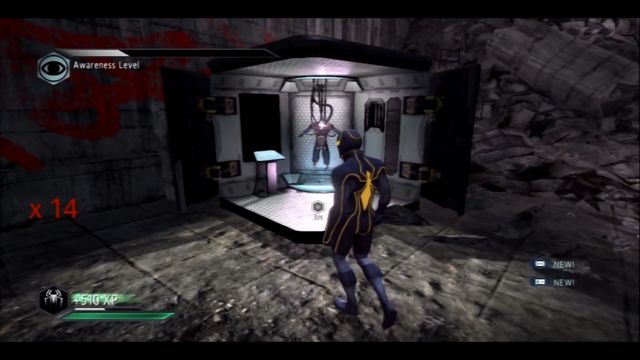
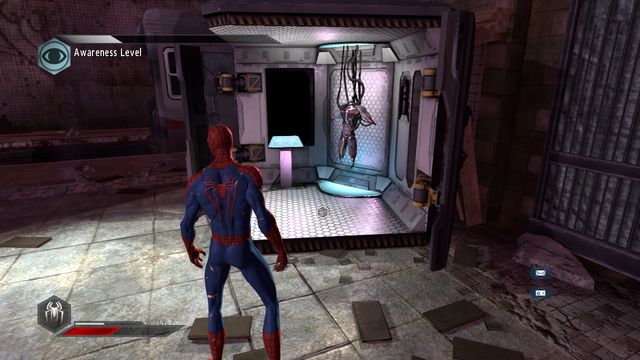 Collect the outfit
Finally, approach the device with a new outfit and collect it.
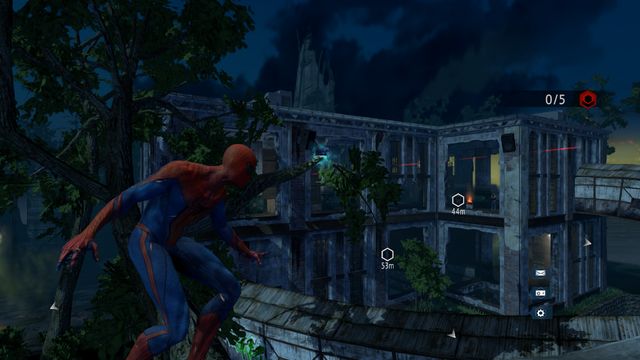
 Location #2
Hideout #2.
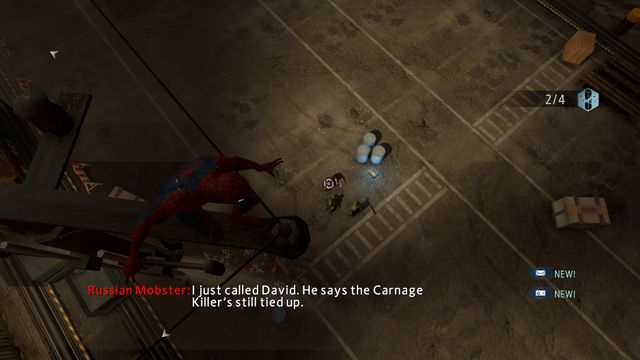
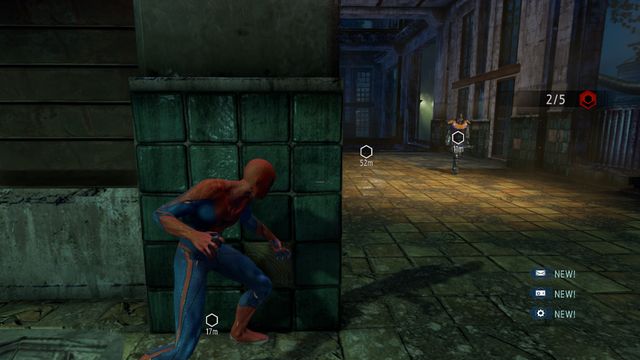
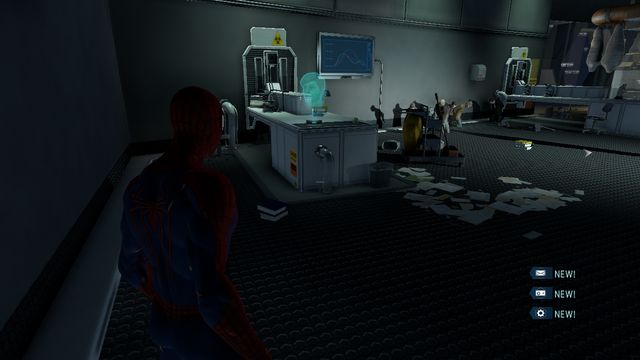
 The suggested order of eliminating the opponents
It is quite difficult to remain undetected, in this mission. After you deal with the first enemy, the closest to your position, make it over to the right. After you have incapacitated the second one, the third one should also approach here.
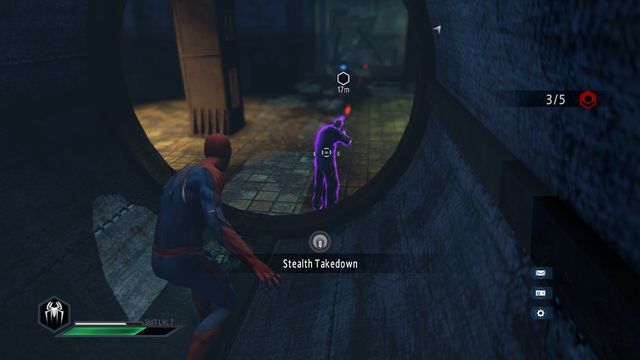
 The fourth opponent
As for the fourth one, you can easily eliminate him from the pillar, by climbing in through the ceiling. The fifth one can be left alone, because he is constantly looking through the grate and he does not turn back so, if no alarm is raised, he is not a threat.
 An opponent at the lower level
There are three to go, at the lower level. You eliminate one of them by lowering yourself, through the hole in the floor. The best thing to do is approach the second hole, from where you have a perfect view of the outfit. Use the Spider-Sense, where there are opponents looking and dart towards the outfit, as soon as they turn away.
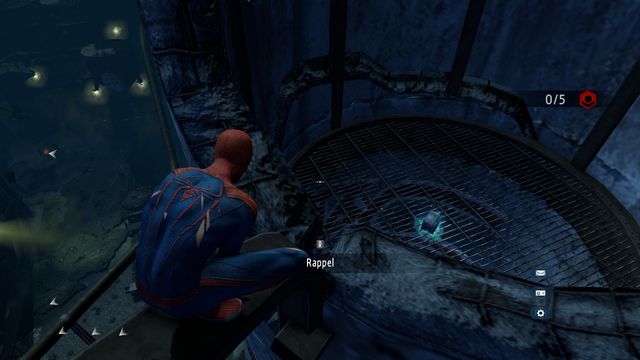
 Location #3
Hideout #3.
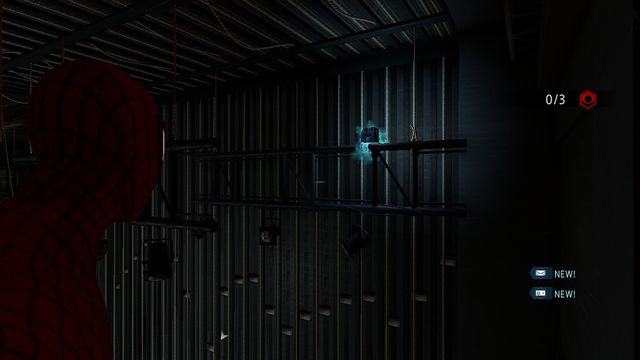
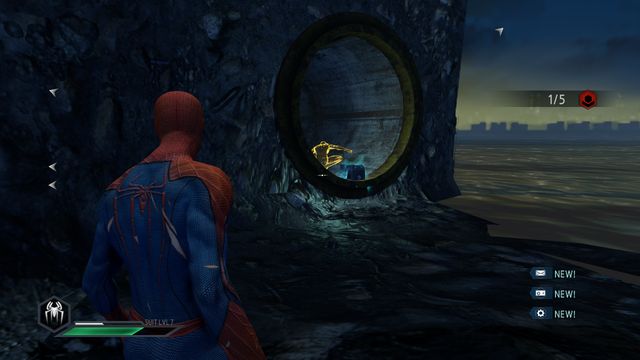
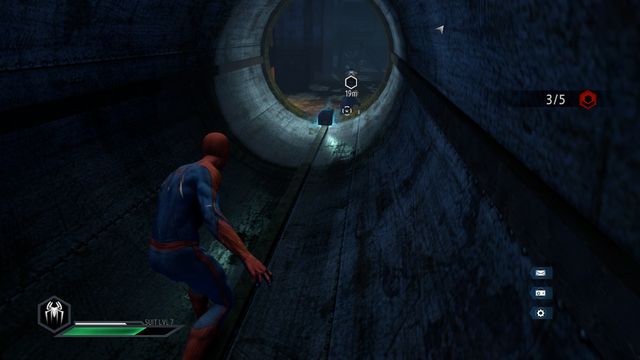
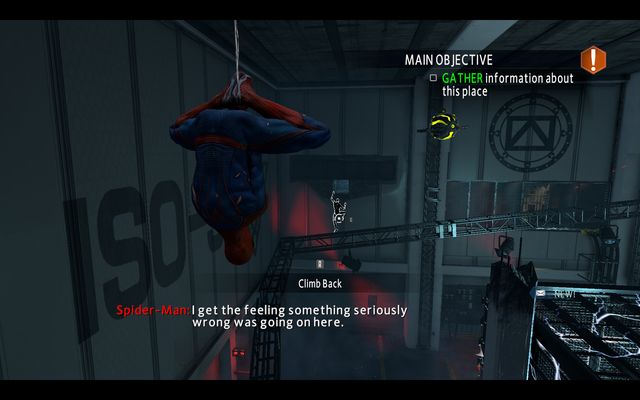
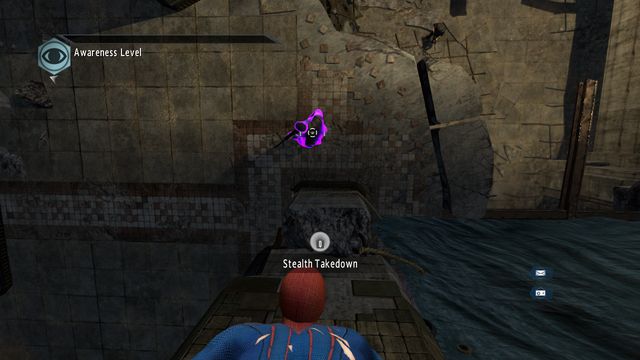
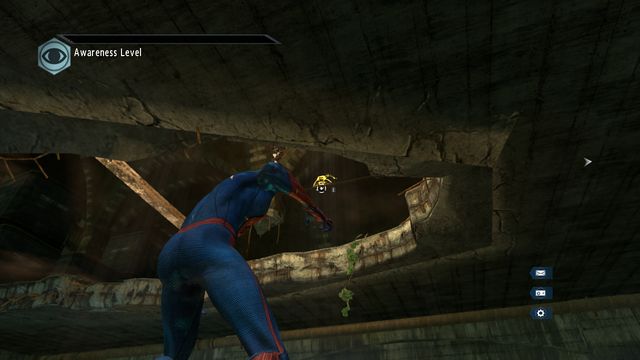
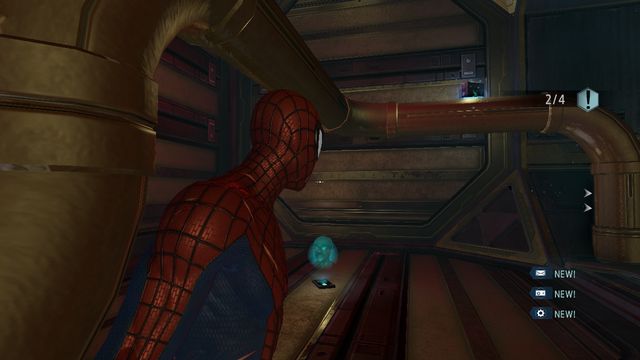
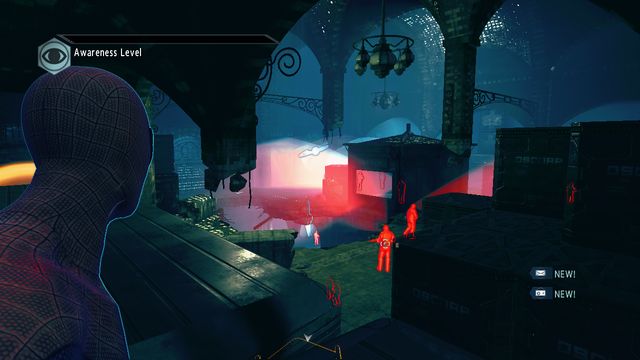 Make it over to the fan
In this hideout, you can get below, without attracting any attention. Under the ceiling, crawl over to the fan, opposite the room.
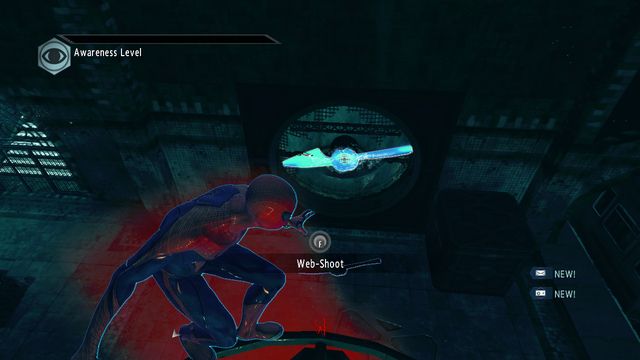 Stop the fan
Use the web to stop the fan and jump inside, quickly.
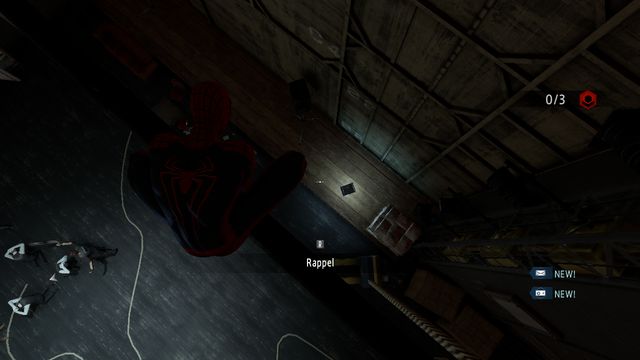
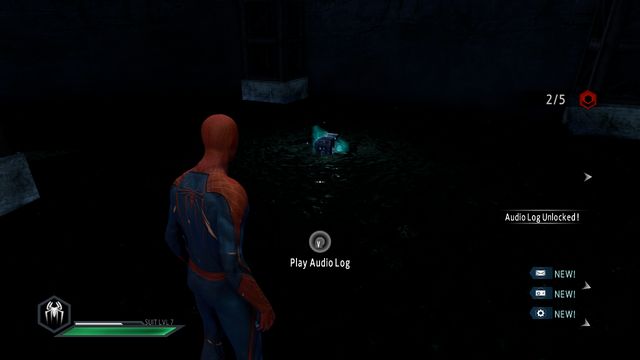
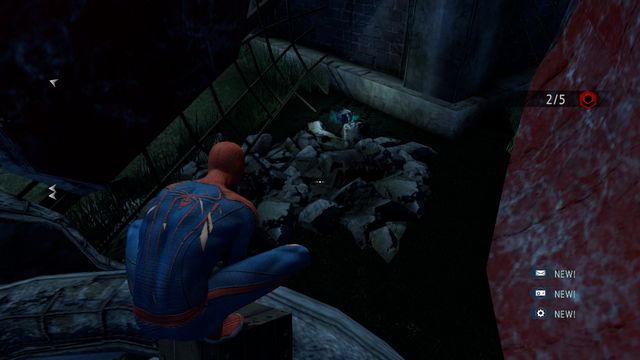
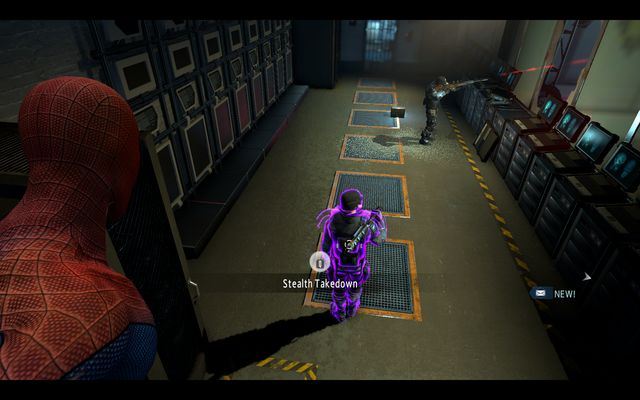
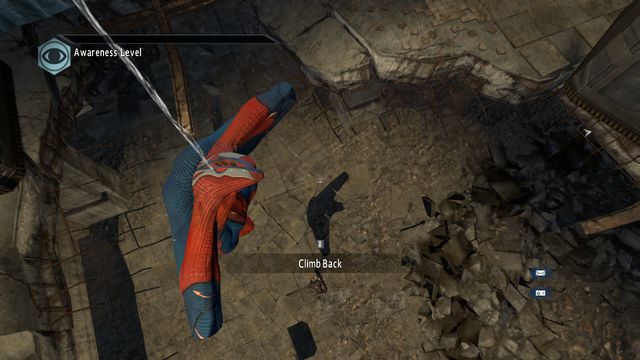
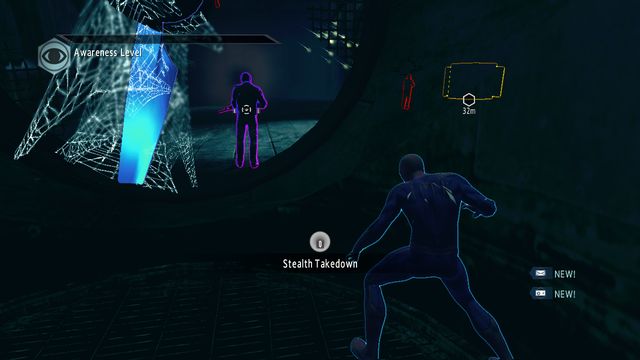 Take out the guard
At the exit, at the bottom, there is a guard. Pull him into the hole with the silent takedown.
 The second guard
Lurk under the ceiling to be able to take out the next guard, when he enters the room.
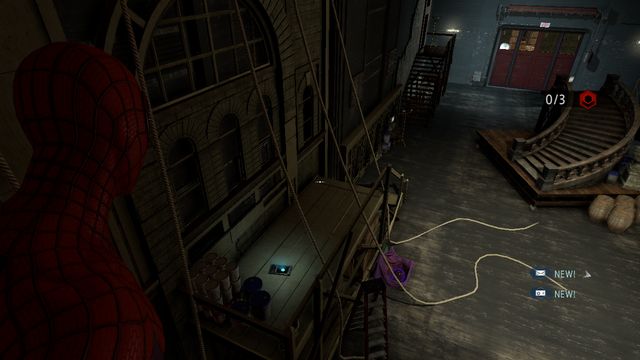
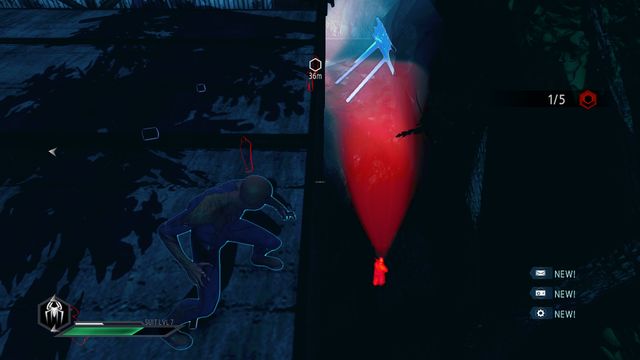
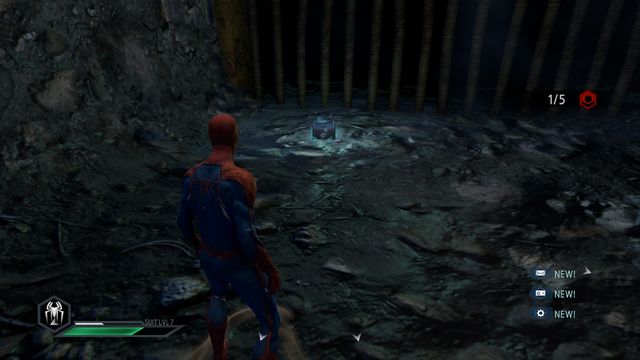
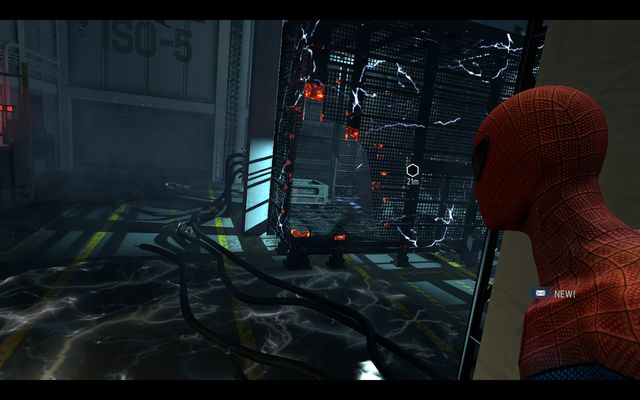
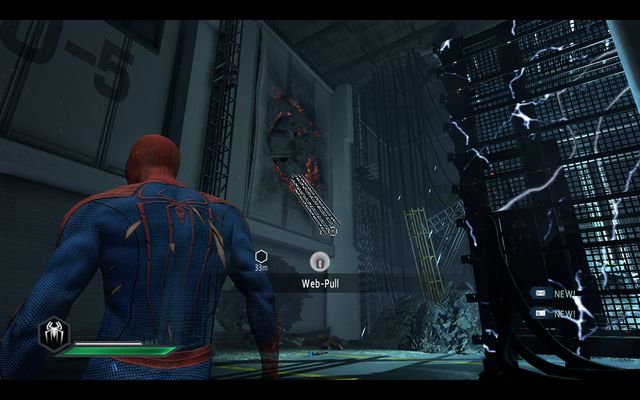
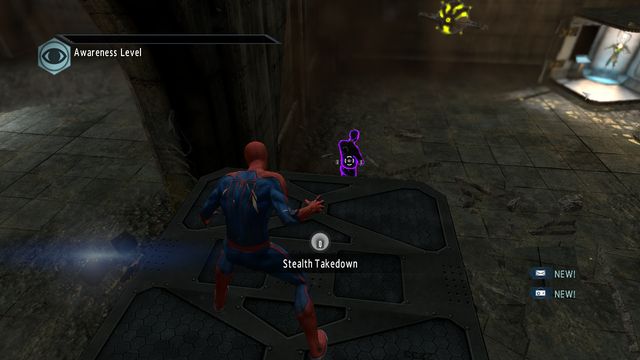 Collect the outfit
You are only one opponent away from the destination. After you take him down, you can blow up the mine, by shooting the web at it Then, collect the outfit.
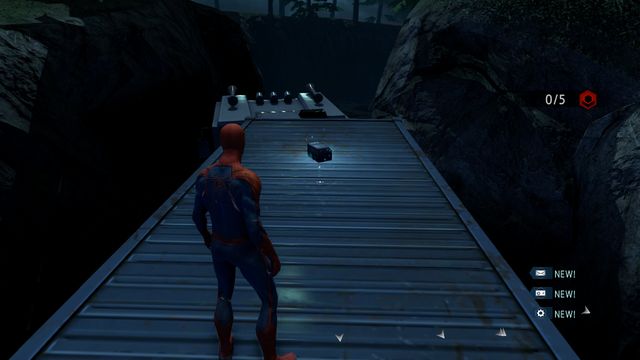
 Location #4
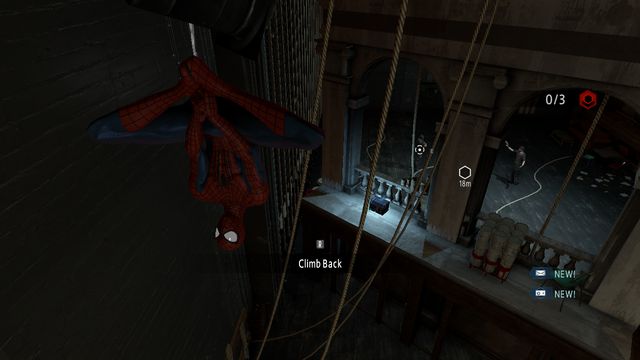
Hideout #4.
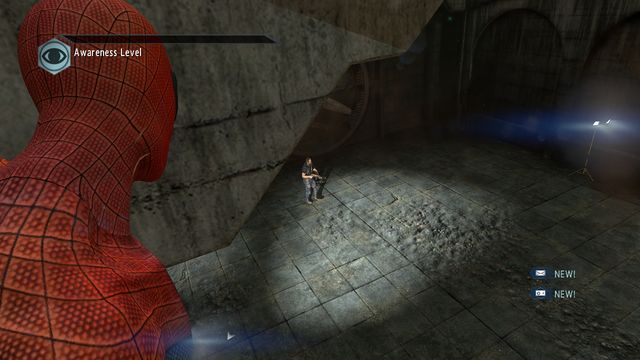
 A catch
First of all, jump onto the railway car in the middle. Then, reach for the structure that you can see on the right, under the ceiling, or for the ceiling itself.
 A lonely guard
Make it over to the next car on the right and, while clinging to the wall crawl over to the structure under the ceiling, opposite the outfit's location. Wait for the second guard to exit the room and deal with the one guarding the outfit. Now, run up quickly and collect the outfit.
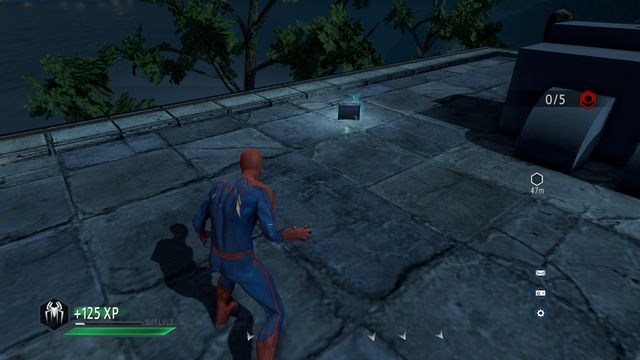
 Location #5
Hideout #5.
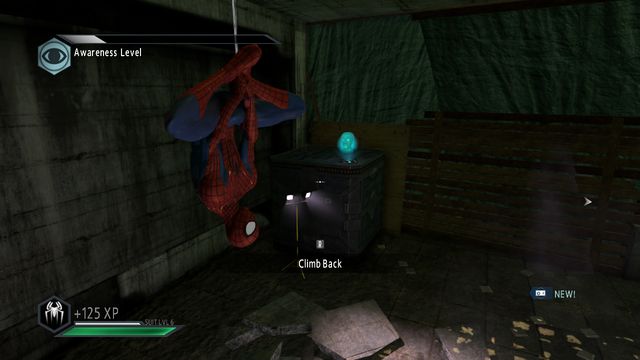
 Outfit 2099
to the left of the entrance, you will notice a large fan. Crawl, under the ceiling, next to the fan and use Web-Shoot to stop it. Then, climb to the level below. You will see two guards there - pull one of them, behind the fan and sneak up to the other from behind. At the same time, it is very easy to obtain the "Sneak" achievement here, for remaining undetected.
This type of missions is available from the very beginning of the game. These are missions that you can complete within a certain time window, before they end. Their course is different, each time and completing them influences your Heroism levels and the number of your experience points. They appear on the map for the whole time so, if you are up to, you can give them a shot. Later into the game, it is nearly compulsory to complete them, because you will be chased by the Task Forces, if your Heroism levels are too low, and this makes the game much more difficult. Completing each 10 of a given type, unlocks additional achievements.
 Street crimes
Street crimes are the first activity, available right after you complete the second mission. They are the simplest ones you simply need to eliminate several criminals.
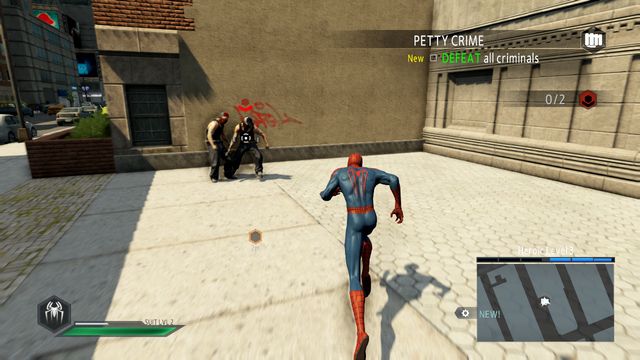 Obstructing criminals has a positive effect on your reputation
The number of opponents and the circumstances are random. Sometimes, the opponents may be armed. After o incapacitate them, you need to stand in the orange point to complete the mission. Completing 10 such missions is rewarded with the "Vigilante" achievement.
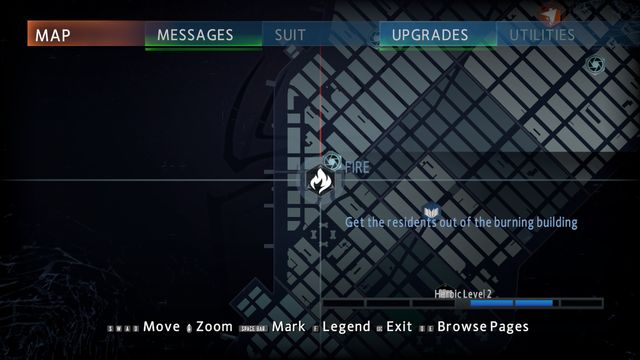 Fires
FiresTo start fire situation missions, locate the flame icon on the map and jump onto the fire truck, riding between the streets.
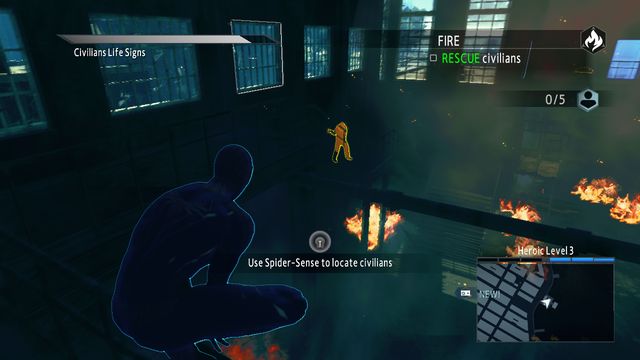 A flaming building
After you start a mission, you will get in front of the flaming building and you need to carry all of the civilians out, within the allotted time. Use the Spider-Sense to be able to locate all of the people inside the building. The type of buildings and the number of people to rescue, as well as their distribution around the rooms, are random.
Completing 10 missions of this type unlocks the "Fireman" achievement.
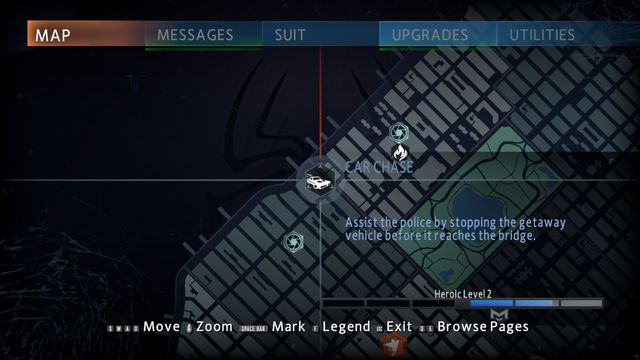 Car chase
Car chases are represented by the car icon, on the map.
 Pull the hostage out
To complete a challenge, you need to get onto the marked car and free that hostage, within the allotted time. Before that, you need to eliminate the kidnappers, next to the hostage. Move over the car to avoid being shot and, depending at which side the criminal is sitting, walk over to the left, or the right, side of the car. Then, by pressing the action key, throw him out of the car. After that, you can pull the hostage out of the car, through the back window.
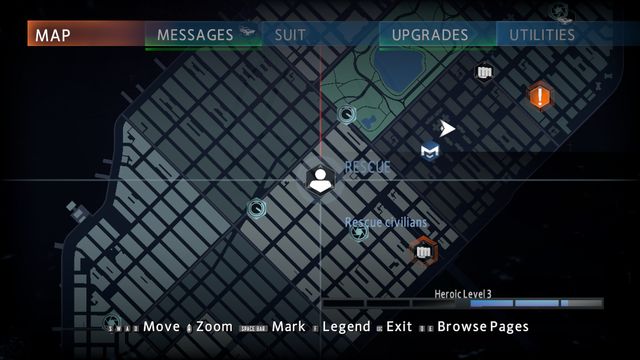 Rescue
Rescue missions are marked with an icon of a man and they consist in freeing the trapped civilians.
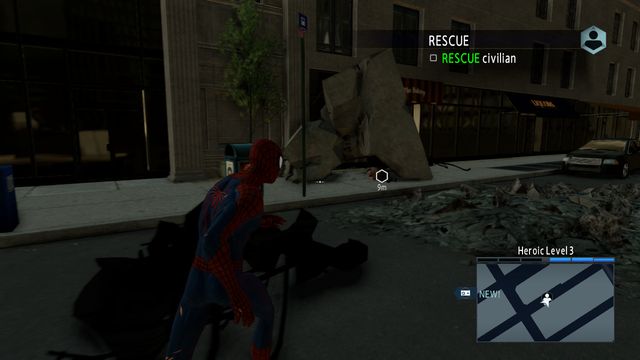 A man trapped under debris
The locations and the events are random and all of them consist in finding a victim and freeing them. Then, you need to carry them to the nearest hospital.
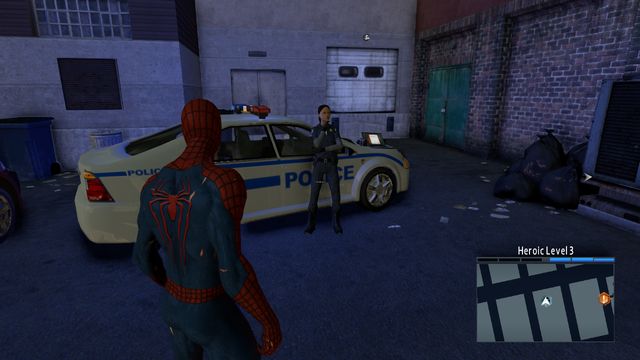
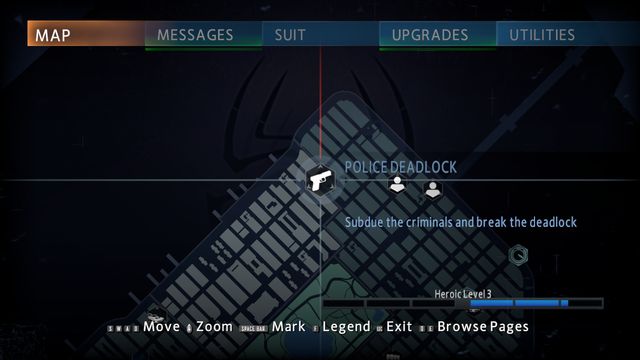 Police Deadlock
Ones of the more difficult missions that consist in eliminating a group of opponents, in a random location. To start a mission, reach the helicopter at the point specified on the map.
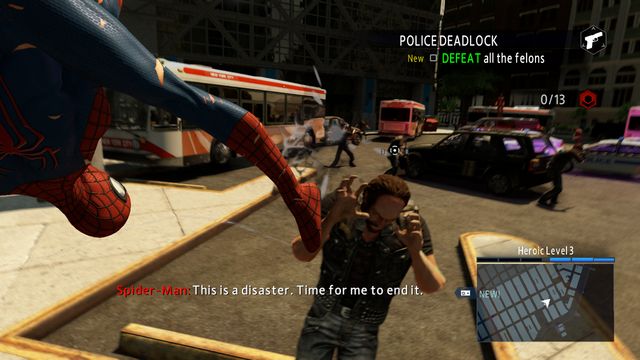 Eliminate all of the opponents
Often, the several opponents can be eliminated quietly. As for the rest of them, you need to deal with them in an open combat. The criminals are always armed and the numbers can reach a dozen-or-so people. Completing this kind of missions rewards you with lots of points.
Completing 10 missions of this kind rewards you with the "Enforcer" achievement.
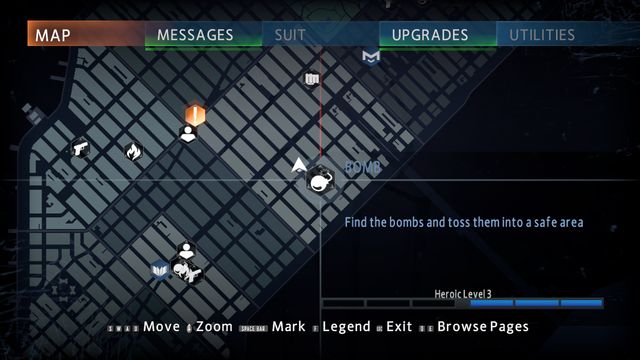 Bomb
BombThe bomb mission is a bit difficult and it requires you to react quickly. After you locate this kind of event on the map, a cutscene will start.
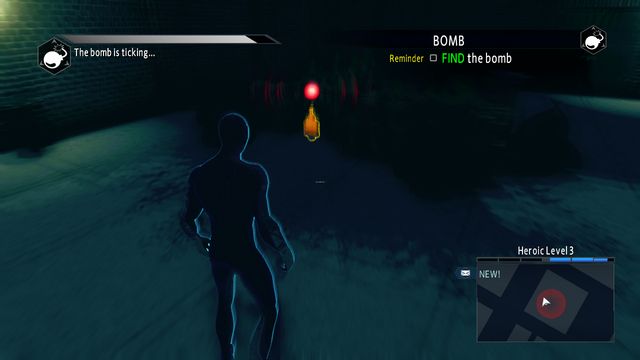 Locate the bomb
Use the Spider-Sense to locate the bomb quickly (yellow). Once you locate it, press the action key to pick it up. You need to do all of that really quickly, because the time is exceptionally strictly limited.
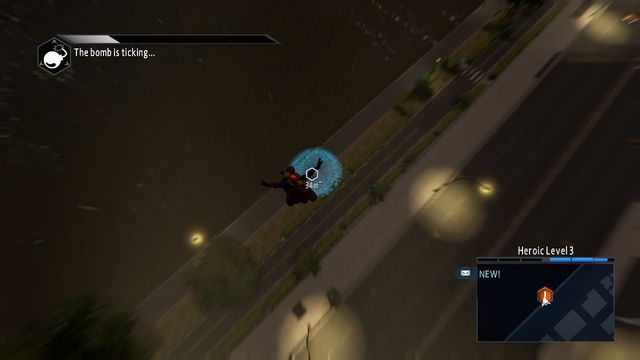 Get to the water
The marker will then appear at the edges of the city, near water. Reach there as quickly as possible, before time runs out. It is enough that you stand in the blue field to complete a mission.
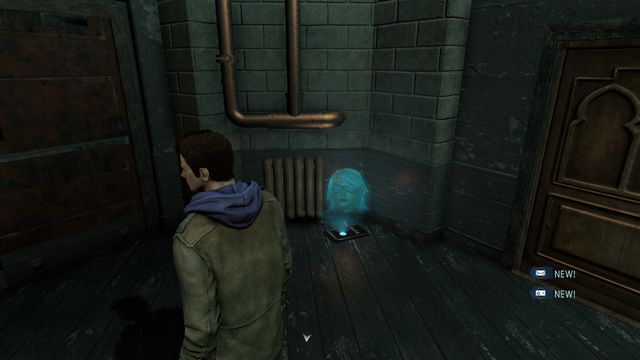
Apart from the ones that you can find during the missions, additionally, there are 20 more audiologs throughout the game world. The map indicates the whereabouts of all of them. The order in which you collect them is up to you, and it is possible right from the beginning of the game. Each of the audiologs is a journal of a different person - after you collect the whole set of the Black Cat journal, you can unlock the "Lover" achievement.
OSCORP Crates are the big orange containers which you need to destroy to collect. It becomes possible only after you have obtained the Ion Web (after the "My ally, my enemy" mission and the fight with Kraven) and also in this case, the order in which you pick them up is up to you. You need to fire at them several times, with the Web-Shoot and when the color goes dark, hit to destroy. In total, there are 30 crates in the game, where one is located in mission 11. Collecting a crate rewards you with 1000 upgrade points.
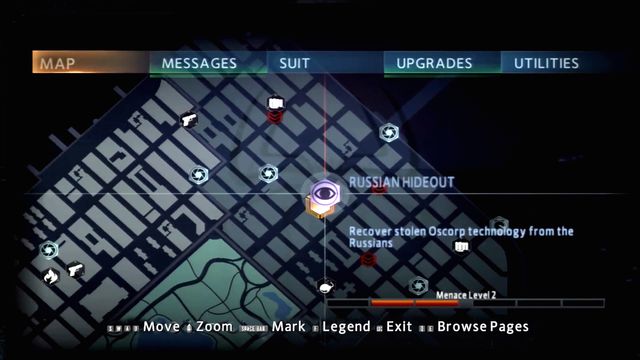
 OSCORP crate #1
The first OSCORP crate is in mission 11, right after you start the mission, in front of the entrance gate. The rest of them are scattered all around the game world, in the locations provided on the above map.
 Audiolog #1
You receive the first audiolog automatically, after the cutscene, once you have taken the photo towards the end of the mission.
 Audiolog #2
The second audiolog is at the OSCORP HQ, in the room with the prisoners, on the right side of the corridor with windows.
 Audiolog #3
Another audiolog is on the desk, next to the prisoners, to the left of the entrance, behind the fan.
 Audiolog #4
The next audiolog is at the bottom level of the reactor room, behind the fan, on the right.
 Audiolog #5
In mission five, you will find the next audiolog. It is on the crates in the hole, inside the hideout of the Russians, at the metro station. There will be one of the guards standing next to it.
 Audiolog #6
In the theater house, on the left behind the armchairs, on the side of the counter.
 Audiolog #7
To the left of the stage, behind a table, there is audiolog #7.
 Audiolog #8
Behind the door, in the corridor, there is audiolog #8.
 Audiolog #9
approach the model at the end of the room with props. On the wooden scaffolding, there is audiolog #9.
 Audiolog #10
Audiolog #10 is next to the exit gate of the room with props, on the scaffolding at the wall.
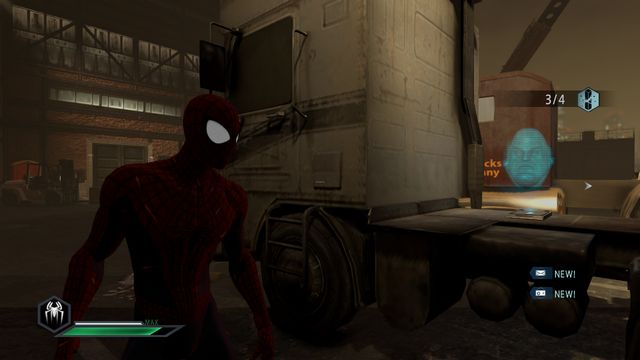 Audiolog #11
Audiolog #11 is next to the hangar on the right, on the white truck in front of the entrance
 Audiolog #12
Audiolog #12 is on the left side of the museum hall, behind the green screen.
 Audiolog #13
Audiolog #13 is in the last room at the ground floor of the museum, on the exhibit on the left, encased in glass.
 Audiolog #14
At the window in the cabinet, in Harry's room, there is audiolog #14.
 Audiolog #15
The fifteenth audiolog is at the opposite side of the room, on the desk.
 Audiolog #16
The next audiolog is on the hood of the car wreck, next to the destroyed tower.
 Audiolog #17
Audiolog #17 is in the underground of the building, in the center. It is on a heap of rubble in the corner of the room.
 Audiolog #18
Another audiolog is in the corner of the building, in the middle from the side of the entrance to the location, next to the tree.
 Audiolog #19
Audiolog #19 can be found under the first building to the right of the entrance, on the ground.
 Audiolog #20
Before the boss fight, approach the desk and collect audiolog #20 from there.
 Audiolog #21
Crawl over the wall to the spot, where you can see the puddle of water, with electricity flowing through it. From there, you will notice an entrance to a cage. The audiolog is inside.
ON the map, there are 5 objects that you are required to take a photo of: Fisk Tower, Wake, Comic Stand, The Daily Bugle, OSCORP. You need to include of the building's sign in the photo. Just like during missions, you need to zoom properly, until the bar, on the left side of the screen, turns green.
The OSCORP sign is on the left wall of the building, relative to the front entrance. The easiest way to capture The Daily Bugle after the "No one is safe!" mission, because you start next to the building. You need to take the photo after you climb onto the rooftop of one of the buildings around it - the sign is at the very top of the skyscraper. The photo of the Comic Stand can be taken at any moment, by going towards the book icon on the map - you need to capture the sign above the store's entrance. Fisk Tower - the sign is not too high, above the entrance, written in small golden letters. The Wake is a low apartment block with the sign on the roof, which you can capture after you climb on the rooftops. In "The Green Goblin" mission, you need to take a picture of the club next door, which makes it a good moment to take this photo also.
 Jameson's Photo #1
You need to take the first photo in the room with the prisoners (Level #1), of the steel wings hanging behind a glass pane, on the wall opposite the fan.
 Jameson's Photo #2
Another photo to take are the tentacles ended with pincers, in the reactor room (Level #2) on the right, behind the glass pane on the third floor.
 Jameson's Photo #3
Take the photo of the chest with violet cloth, to obtain Jameson's Photo #3. It is on the floor, in front of the wall with the model, after you walk through the venting shaft, from the theater room.
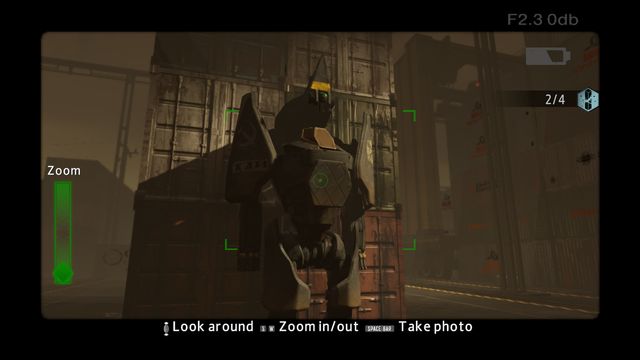 Jameson's Photo #4
Take a photo of the robot at the containers, opposite the hangar (opposite the entrance).
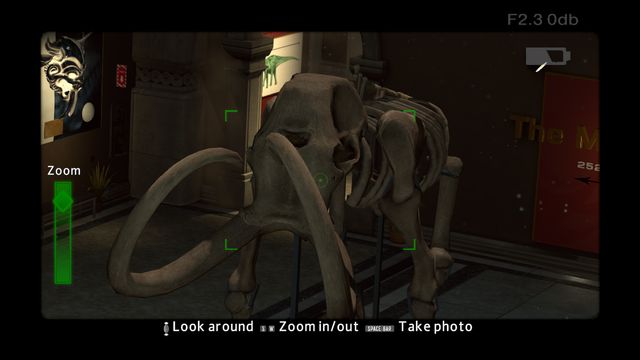 Jameson's Photo #5
You need to take this photo at the museum. You need to capture the skeleton of the animal, in the center of the hall.
 Jameson's Photo #6
Take the Jameson Photo in Harry's room. You need to capture the pumpkin on the bookshelf.
 Jameson's Photo #7
This photo is the green shirt in front of the building, on the left side of the location, on the sand, at the place illuminated by the lamp.
 Jameson's Photo #8
Inside the building, after you go past the room with the electric cage, follow the corridor, by jumping between the wall and the rocks, while minding the mines. Finally, you will notice a yellow sign on the right, reading "Venom Wing" - take a photo of it (Jameson's Photo #8).
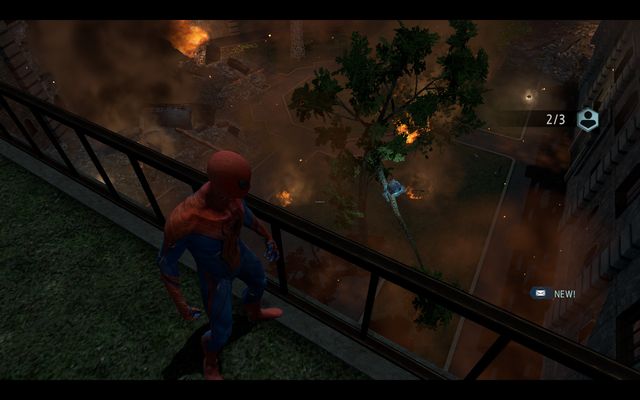
IN the game world there are as many as 300 comic pages. They are required to be collected, if you want to complete the game in 100%. Each of the pages is an element of a single comic book which, after being completed, are available to view at the Comic Stand. The majority of the pages are on the rooftops of buildings, although there are several in the alleyways. Some of the pages are not in any particular place, but they are carried by the wind and the hover around certain locations - they have been marked on the map in green. After you climb onto a rooftop, you can notice the airborne page, because it will be veiled in a green halo. To collect these, aim at them and fire the web. You need to press the jump button at the right moment, whenever such a piece of information appears on the screen.
Additionally, by developing your Spider-Sense and buying the last power - Acuity, you will be able to locate all of the collectibles much easier because they will be visible - after you use the Spider-Sense - over a considerable distance and through walls. Also, they will be marked on the radar/map, with the white star symbol, whenever you are near. After you collect all of the pages, apart from being able to view them at the store, you receive the Bookworm achievement.
Complete the game at the "Human" level.
Complete the game at the "Hero" level.
Also unlocks "Human" achievement.
Complete the game at the "Super Hero" level.
Also unlocks "Hero" and "Human" achievements.
Collect all comic pages.
Collect all of the Black Cat's journal entries.
Take all of the photos of Special Agents (Photo Investigation)
Take all the photos of detective DeWolf's laptop. (Photo Investigation)
Perform a x42 combo, in combat.
Perform 15 special attacks.
With the opponent stunned, press the key different than the basic attack, to perform a special attack.
Destroy 20 armors (Task Forces guards).
Unlock all bios.
Automatically, after you complete the game.
Complete all of the Photo Investigations.
Defeat 50 opponents with silent takedowns.
Deprive 50 of their weapons.
Unlock all costumes.
Complete all the Hideouts missions.
Complete all of the combat challenges (the arcade at The Comic Stand).
Perform 30 double dodges.
Score 100 critical hits.
Defeat 100 opponents.
Defeat 300 opponents.
Defeat 500 opponents.
Rescue 50 civilians.
Reach the maximum level for each outfit.
Unlock all of the concept arts (there are several more, available after you complete combat challenges).
Reach the maximum Heroism level. The easiest way to do that is at the beginning stages of the game.
Complete 10 deadlock missions.
Complete 10 fire situation missions.
Complete 10 rescue missions.
Complete 10 petty crime missions.
Complete 5 races.
Perform 50 special attacks.
With the opponent stunned, press a key different than the basic attack key, to perform a special attack.
Complete any Hideout mission, without being detected.
Take a photo of all Cletus Kasady's marks (CK) - during the Photo Investigations taking photos at the victims is necessary to complete the challenges.
Defeat Shocker.
Defeat Kraven.
Defeat Black Cat.
Defeat Cletus Kasady.
Defeat Kingpin.
Defeat Green Goblin.
Defeat Electro.
Defeat Carnage.
Deal damage from fire three times, to Carnage, before you defeat him.
Get the Seismic-Blast power.
get the Ionic-Web power.
Defeat an armored opponent, using the Web-Strike.
Only for the Playstation4 trophies - Obtain all the rest of the trophies (Platinum).
The Amazing Spider-Man 2 has a quite wide spread, when it comes to system requirements - it is going to run on the weaker computers but, it can be felt on the medium-powered ones at the maximum settings. The game is available in the DVD version, and is also digitally distributed for PC and consoles.
Singleplayer: Yes
Offline co-op (split screen/hot seat): No
Co-op over the Internet: No
Multiplayer: No
This guide has been drawn up for the PC version, using Lenovo Y500 laptop of the below specifications:
With the above specifications, there were no problems running the game.


 The Lord of the Rings: Conquest Game Guide & Walkthrough
 The Forest Game Guide & Walkthrough
 The Elder Scrolls V: Skyrim - Dragonborn Game Guide & Walkthrough
 The Last of Us Game Guide & WalkthroughThe Amazing Spider-Man 2 Game Guide & Walkthrough