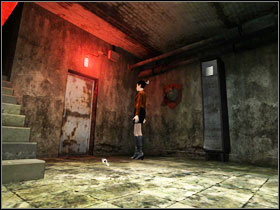
In this Still Life 2 guide I've placed a detailed walkthrough of the game, divided into ten, somewhat conventional chapters. Together we will solve a series of criminal cases and break some passwords while we're on it. Maybe we'll even kill one or two people and avoid a very unpleasant and unexpected death a couple of times.
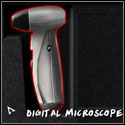
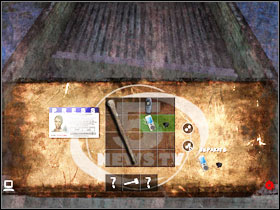
I've marked each item that we will take into our inventory with green. Appropriately - using an item that's in our possession is blue. When we will have to press or push an item in out surroundings, we will see orange. The last colour that we will encounter is brown, symbolizing the need of using an item from our CSIA. I also use it no number screens (1 on the left, 2 on the right). Lastly, if we will see a thickened text, it means that this information is important. Sometimes it's a password or a name, other times an analysis we have to perform on a given sample.
Before we begin, it's worth to mention one thing. In most cases when we can't use "something", or "something on something", we have to firstly take a look at this "something". If we don't click on an object and hear a comment given by one of the characters, we won't be able to perform certain actions.
Lukasz "Terrag" Znojek
Translated to English by Jakub "cilgan" Lasota
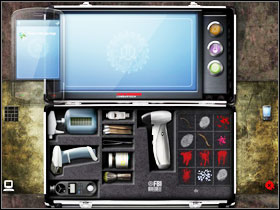
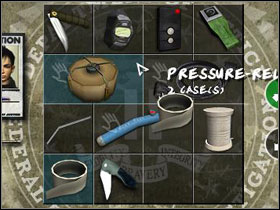
We get a hold of this briefcase filled with useful stuff in the 2nd chapter. Inside we will find the following equipment:
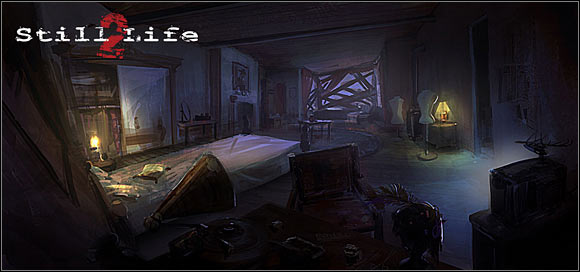
Digital Microscope
An ultra-light microscope, with a 100x magnification rate.

3D Scanner
The digital scanner is ideal for analyzing surfaces of various objects. It replaced old methods like forming a plaster cast at the crime scene.

Revealer Spray
A chemical substance, revealing blood marks after being sprayed onto a surface.

Fingerprint Powder
It enables to detect fingerprints invisible to the eye.

Electronic Nose
It takes samples of gas substances and prepares it for analysis.

Computer Key
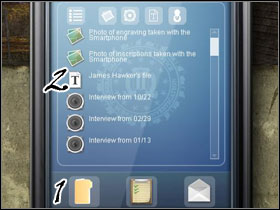
It allows you to analyse the files you're examining. It has decoding and monitoring software in it.

Sampling Swab
Sterile cotton.

Sampling Tongs
Sterile forceps.

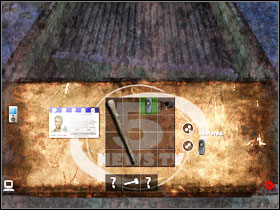
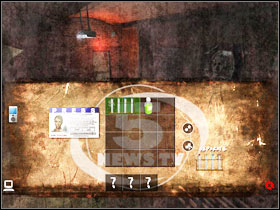
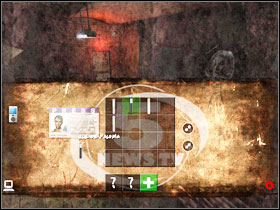
CSIA screen
It provides information on the nature of the sample and the result of the analysis. Sometimes you can click on the result to see a recovered text file.
Samples to analyze
You collect them during the game, by using the above equipment on the objects found on the crime scene. After selecting a sample, you can use the buttons on the right to analyze it. If the end result displayed on the screen is not complete (100%), it means that you have to analyze the sample once more, using another test.
We can distinguish three different methods of carrying out examinations:

Chemical analysis
This procedure based on a chemical analysis of the unknown substance using a series of reagents used to analyse the nature of the substance. Using this procedure on hair of blood allows to precisely determine the blood group and sex.

Computer analysis
It recovers damaged or partial computer data. It also provides exact information on the operating system and software used. You can also carry out a digital correction of an audio stream.

Database analysis
This function lets you compare the data (a digital database of fingerprints, blood samples, ballistic data etc.) with a database, in order to find a matching model.
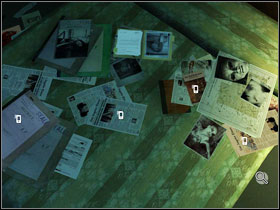
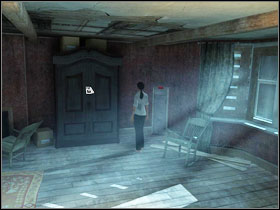
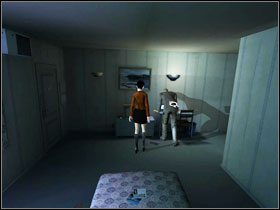
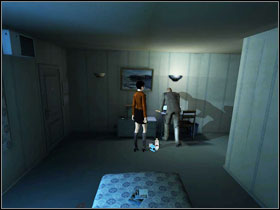
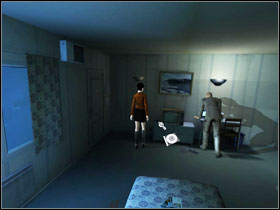
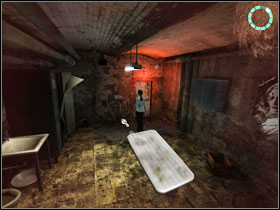
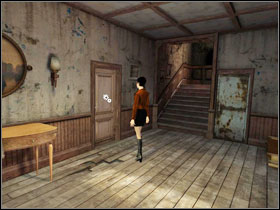
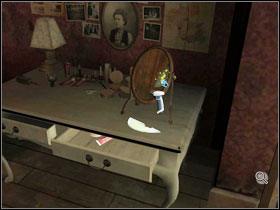
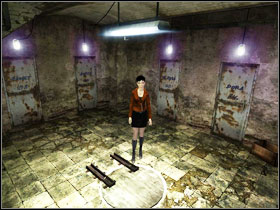
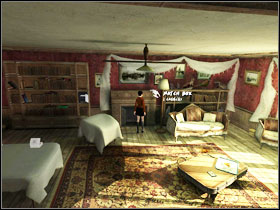
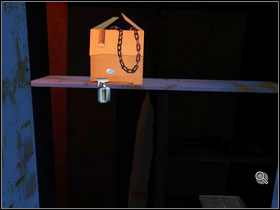
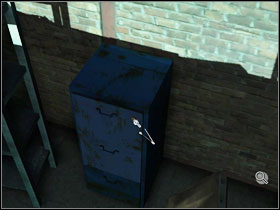
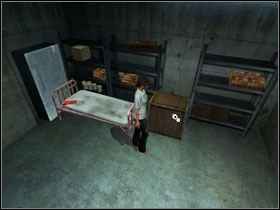
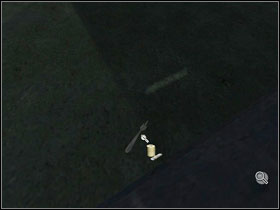
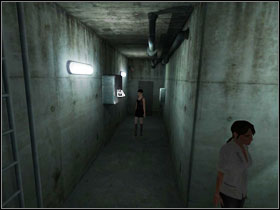
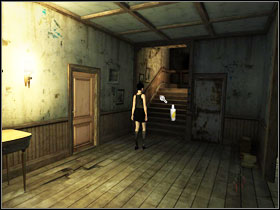
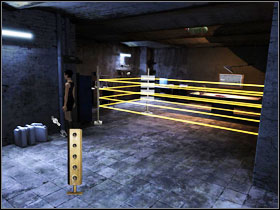
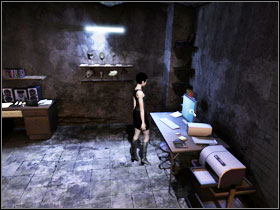
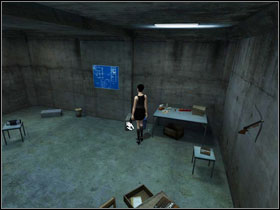
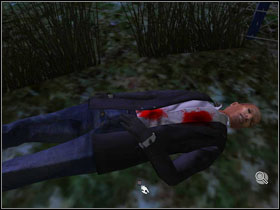
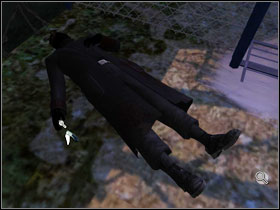
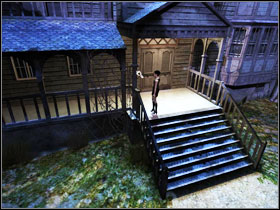
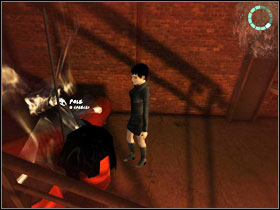
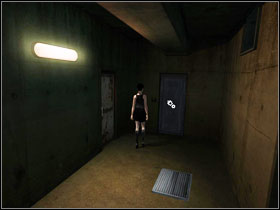
In the end of the talk, out character asks Claire for the password to the FBI database. On the bed you will find a series of documents #1. Its content automatically lands in our PDA. After looking at the materials, check the messages in the phone (we access it through the inventory screen) and read the code which we asked Claire for - "96Ha)7Mn". Afterwards take the transformer with cord from the cabinet by the wall #2.
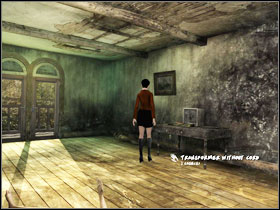
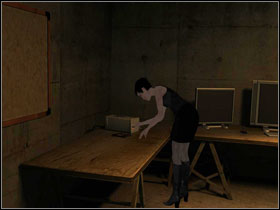
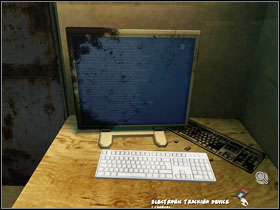
Across from the bed there is a desk with a laptop on it. It's disconnected and the battery is almost dead. Use the transformer with cord on the electric socket #1. Now we can see the screen of the device #2, which we can search for interesting information. Firstly we check out everything we can on the "Internet" and afterwards search the FBI database. The chapter ends once we find Henry Allen.

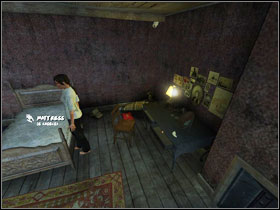
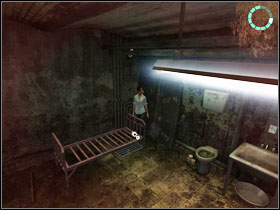
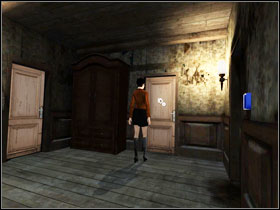
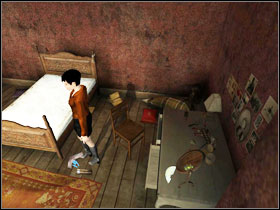
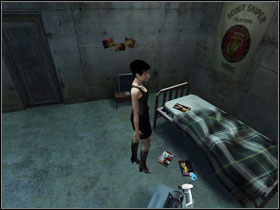
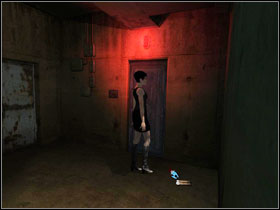
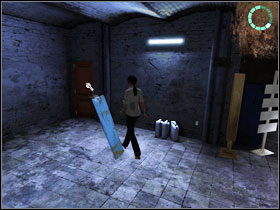
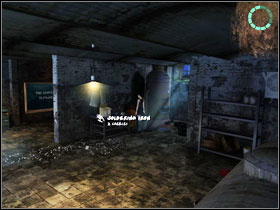
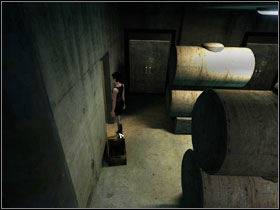
Take the nail file from the chest of drawers by the wall #1. Afterwards go to the other side of the room and take the rusty telescopic antenna from the TV #2.
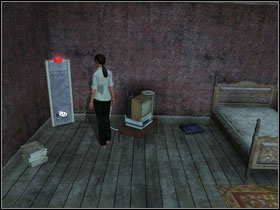
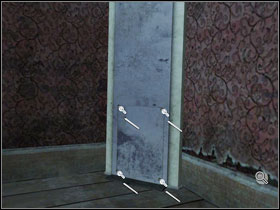
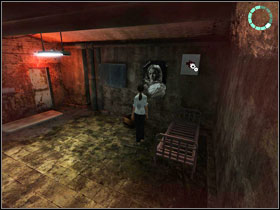
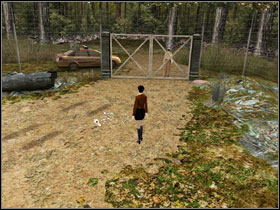
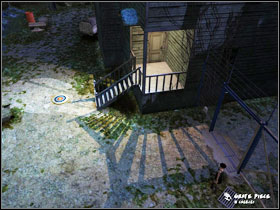
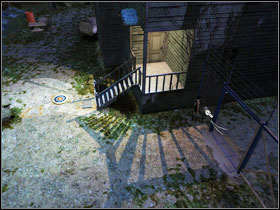
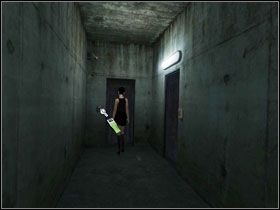
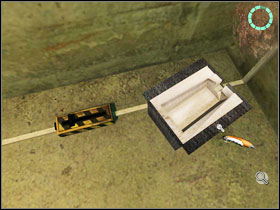
The electric gate standing in the corner of the room #1 has a control panel near the base, which you can check. When we click it for the first time, out character will comment on it and after the second time, we will be able to take a closer look at it. It's time to use the nail file, thanks to which we will unscrew the four screws holding the cover #2.
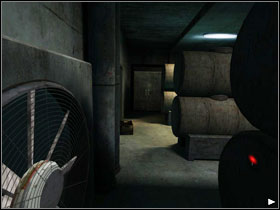
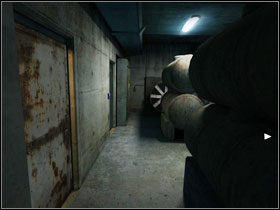
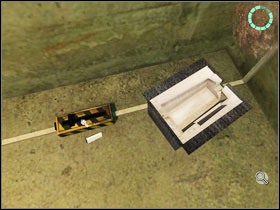
Behind the TV you will find a feeding cable which you must tear out of the TV #1. Using the rusty telescopic antenna, we switch the light next to the door to room #2. Go back to the cable and connect it to the opened control mechanism on the gate.

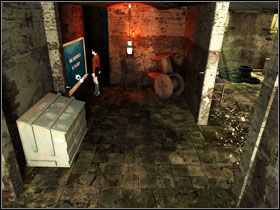
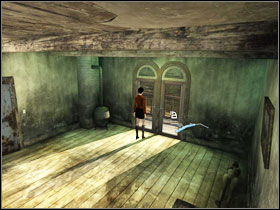
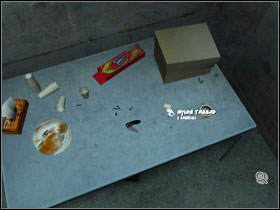
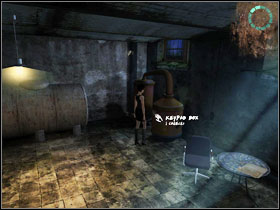
Take the poker, leaned against the stove #1 and take a closer look at the documents that you find. Once we get close to the window and click on the planks, the character will state that she can't tear them off bare-handed. Suggest her to use the poker #2.
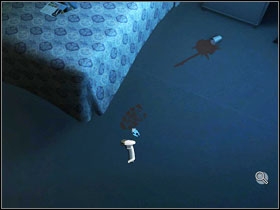
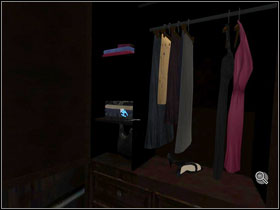
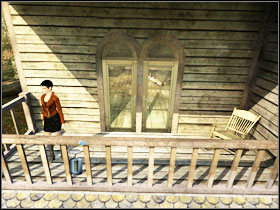
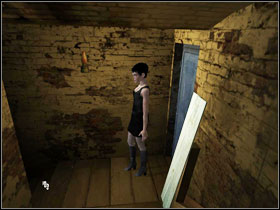
You're too high to jump down without damaging yourself. Before we take care of that problem, you first have to find space in your inventory. Open the wardrobe #1 and put every single item you have inside. Take the mattress #2 from the bed. Afterwards, approach the window and drop down the newly gained mattress.
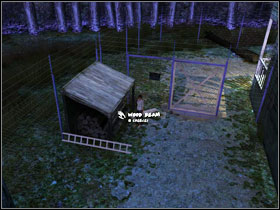
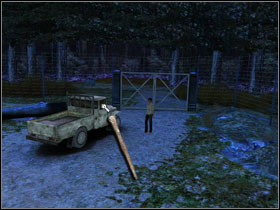
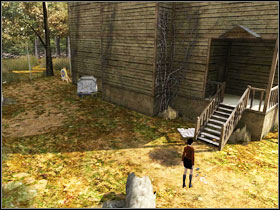
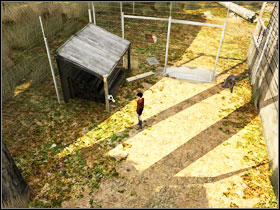
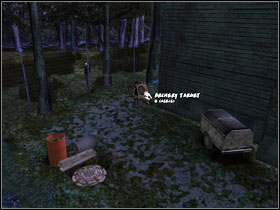
Take the wood beam from the shed on the side of the house #1. After that, run to the pickup parked nearby and look closely at its side window. Once it's obvious, that the door is locked, use the wood beam to break the window #2.
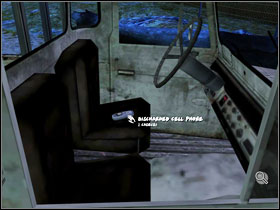
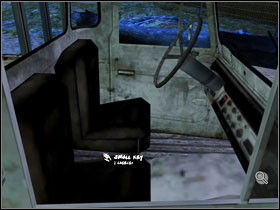
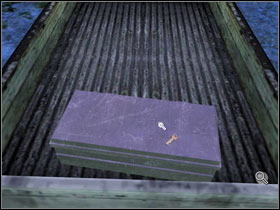
Look through the broken window and you will find two items inside - a discharged cell phone belonging to Paloma #1 and a small key hidden underneath the seat #2.
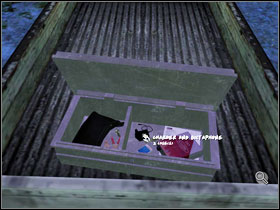
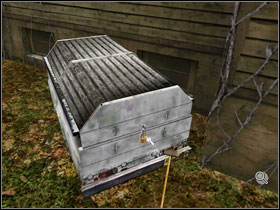
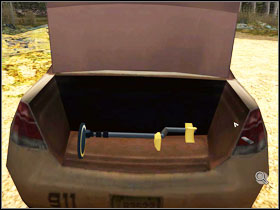
Use the small key to open the box in the back of the car #1. Take the charger and dictaphone #2 from inside. Also, check out the gas canister.
We need only the charger, so open your inventory and choose the charger and dictaphone and press the separate icon in the bottom right #1. The next step is choosing the discharged cell phone, the upper button #2, used to combine items and in the end, the charger.

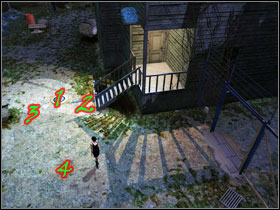
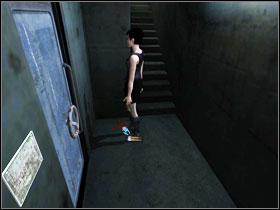
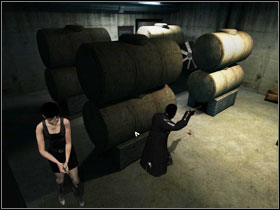
Use the shed #1 near the entrance to the building in the same way as the wardrobe before. Leave every item inside and then go back to the side of the house and take the ladder #2. Before you go on, check out the piece of wood lying near the gate.
Place the ladder beneath the window you jumped out of before #1, take the items you have left in the shed and go inside the well-known room. Near the door you will find a socket #2, so use the cell phone and charger on it. During the talk, mention every single clue you have found till now.

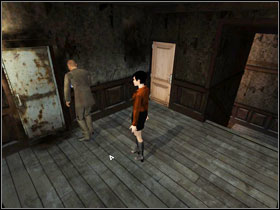
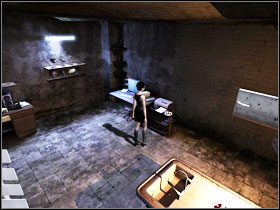
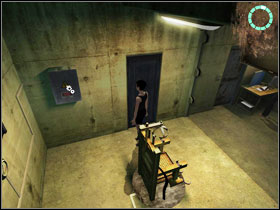
Talk to your partner #1 and after a short while you will receive a special toolbox #2, using which you can analyse virtually every clue you find. You can find a description of this gadget in "The CSIA" section of the guide.


Listen to the messages recorder on the answer-phone next to the bed #1. By clicking on it once again, we copy them to our PDA. Open the inventory and select the phone in the upper left corner. By clicking on the voice message icon #2, you send them to your CSIA. Next to the question mark on the right, a new speaker-like icon will appear. It's now one of our samples and we can run an analysis (a computer one in this case) by clicking on one of the icons (orange) on the right side of the CSIA screen.
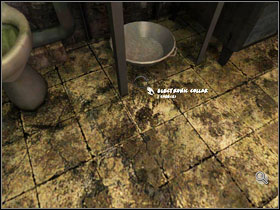
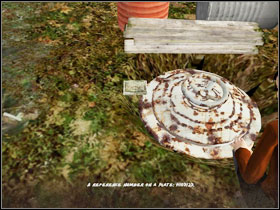
A couple steps behind, we find a clear shoe mark. Treat it with the 3D Scanner #1 and out new sample will be transferred to our kit. Run a database analysis (green button). To the left of the bed we find a TV remote. Use the Fingerprint Powder on it #2.
The remote has undergone a transformation and is now a series of yellow fingerprints. Use the 3D Scanner #1 on it and we will receive another sample for a database analysis. Notice a destroyed laptop underneath your partner's feet. Use the Computer Key #2 on it and we have a sample for a computer analysis. On the CSIA screen you should see the results of the analysis, which is a text file. By clicking on it, you will see its content.
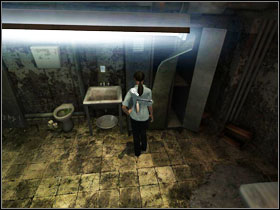
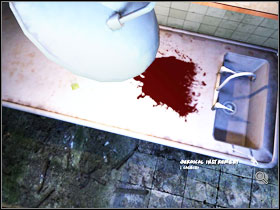
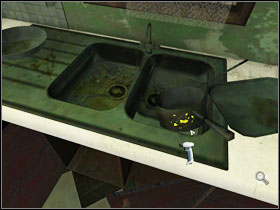
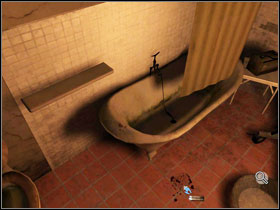
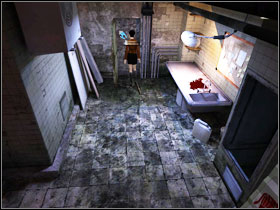
In the bathroom, on the sink, we find a faded blood mark, removed with a detergent. Use the Revealer Spray #1, thanks to which the blood will become visible again. Now all that's left is using a Sampling Swab #2 and we have another sample ready. Firstly, do a chemical (violet button) and then a database analysis.
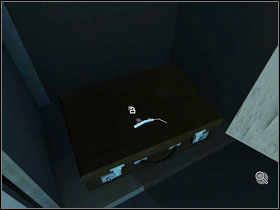
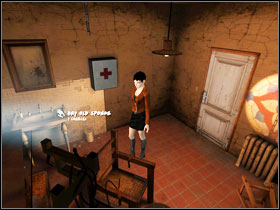
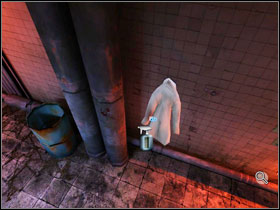
Take a closer look at the vent above the toilet and the character will state that she can sense a strange smell. It's time to make use of the Electronic Nose and collecting another sample for a chemical analysis #1. Exit the bathroom and take a look at the briefcase at the bottom of the wardrobe. Apparently the locks aren't there just for fun. Go back to your partner and during the talk, mention about the necessity of opening the lock. We will receive a pick gun with battery & tension wrench, which will be just fine for opening the mysterious briefcase #2.
Take a mini-DVD from the interior #1. In the main room, to the left of the TV, we will find a DVD player #2. It will help us in getting to know the content of the mini-DVD. Once all the clues are collected and checked, Vic will receive a call from Paloma and the chapter will end.

On the opposite side of the room, we find a ringing charged cell phone #1. After the talk, put back the phone to the cabinet on the wall #2, freeing every slot in our inventory.

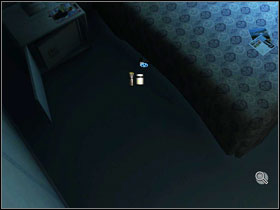
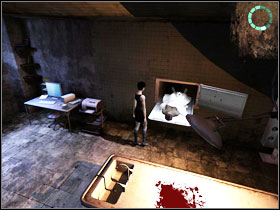
Take the mattress #1 from the bed and afterwards place it on the glass scattered on the floor #2. Before we exit get out of the room, we have to do something about the poison we have been injected with.
Push the bed #1, so that you can get to the first-aid-kit hanging under the ceiling #2. Take four tubes filled with liquid and a bottle filled with two thirds.
The first step in making an antidote is separating the tubes filled with liquid #1. Now is the ideal moment to save your game. Afterwards, using the combine option, we pour the liquid from the bottle filled with two thirds to a chosen phial. We have two attempts (we only have a limited amount of the green liquid). The correct antidote should be black. The blue or violet phial will probably give us the desired effect. If the liquid won't be black in the end - load the game and experiment with the other colours. Once we receive the desired antidote, we use in on Paloma's image placed in the inventory screen #2.
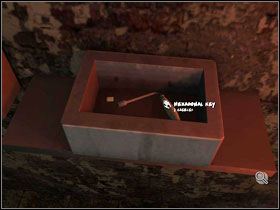
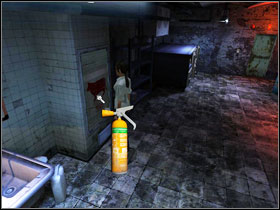
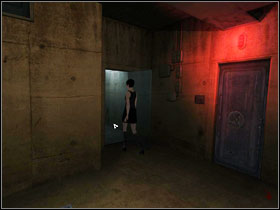
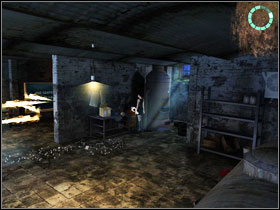
In the box to left of the door we find a memory card (we can read its content in our Dictaphone) and a hexagonal key #1. We can use the hexagonal key on the cabinet next to the sink #2. Inside we find a dry powder extinguisher.
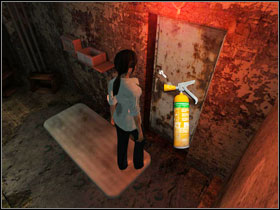
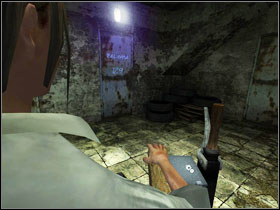
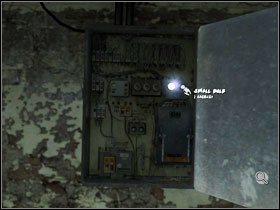
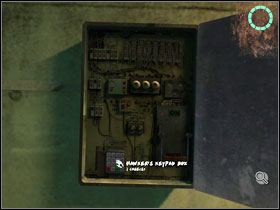
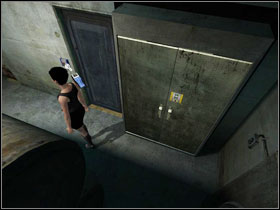
We use the dry powder extinguisher to batter down the door #1. In the next room, take a closer look at the electrical box on the wall, opposite to the chair #2 and afterwards touch it and see for yourself, that the warning wasn't there for nothing.
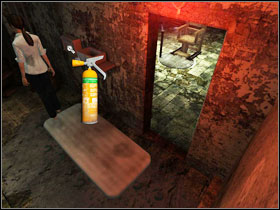
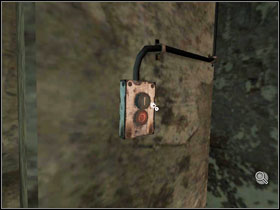
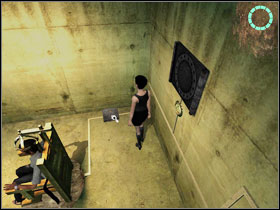
In order to get rid of the electrical problem, go back to the previous room and neutralise the electricity control panel #1 with the dry powder extinguisher. Return to the room with chair and lock the door behind you. You will see the button, waiting to be pressed #2.
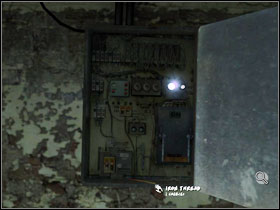
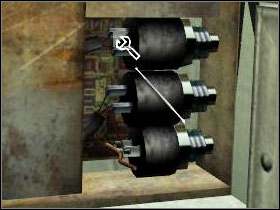
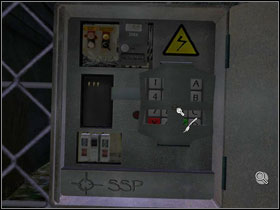
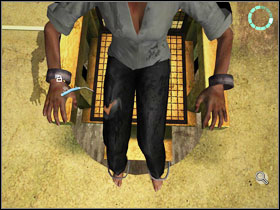
Once again we are playing with electricity. Take the iron thread #1 and a small bulb #2. Finally, pull the lever in the lower part of the box. It's time to open the next door.
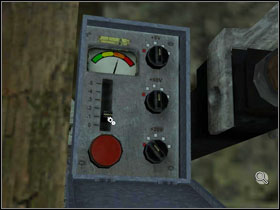
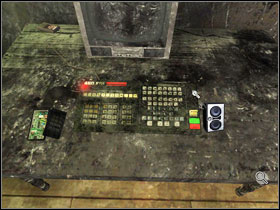
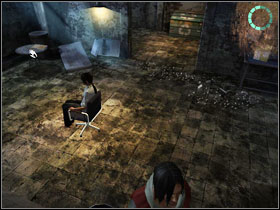
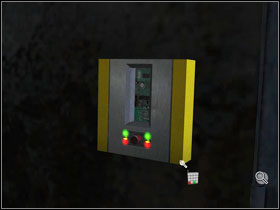
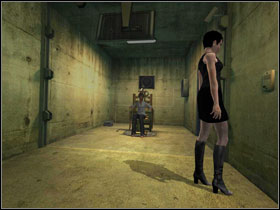
Push the electric chair and sit on it afterwards. Move the lever placed near the right hand of our character five times, until we see a door with "Paloma 129" written on it. It's time to open the voltage control console #1. In order to do that, click on the switches a given number of times:
Switch
How many times
+5V
Twice
+50V
Twice
+20V
Once
-1V
Once
The voltage should be at 129V. We approve those settings by pressing the red button #2 and in effect - electrocute Paloma and open the door. Before we head on, let's deal with the electrical collar.
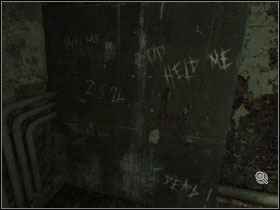

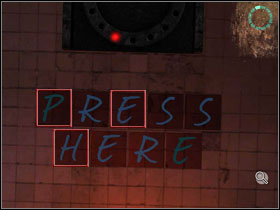
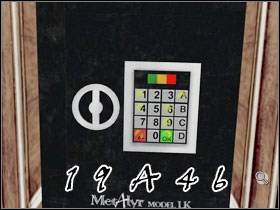
On the wall nearby the bed in the first room we can see some suspicious writings #1 and a mysterious code among them - 2324. Get close to the mirror above the sink, take a look at the mysterious holes in the collar and afterwards, use the iron thread on each of them as many times as picture #2 tells you to. Now we can move to the third room.

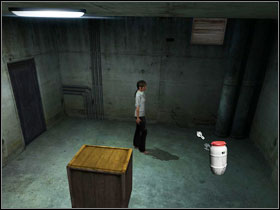
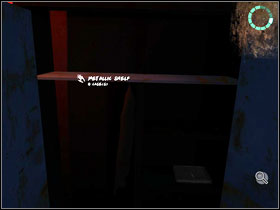
Take the empty spray from the metal cabinet #1. It can turn out that we don't have any space left in our inventory - in such a case, optimise the item arrangement so that you have four slots of free space, forming a square. Use the empty spray on the sink in the first room #2. Before we move on - put the hexagonal key inside the cabinet. Return to the last room, walk up the stairs and enter the morgue.

On the metal table in the opposite side of the room you can find a powder revealer #1 and a surgical instrument #2.
Combine the powder revealer #1 with the water spray and spray the product onto the wall, in the place between the "P" and "E" letters #2. Approach the door through which you entered the morgue. On the left we find a control panel which lets you input a code.

The information Paloma copied from the memory card in the first room will be prove useful now. There are three interviews recorded on our Dictaphone and from their dates you can form three different number combinations #1. Input each of them using the electrical keyboard #2, confirming with the green button each time. Eventually, our actions will open up three chambers with mannequins.
Each chamber has an artificial body inside, with a badge attached to its toe. On the badges you will find an underlined letter #1. Go back to the writing on the wall that we have found a couple minutes ago using the spray and press the corresponding letters #2. We just stopped the gas from getting into the room and opened a door.
When we reach the poster with the sliced cow, our character will notice some sounds coming out of the vent. After knocking on the poster it will turn out that the wall behind it is empty. It's the ideal moment to make a hole using the dry powder extinguisher #1. Inside the vent we put in the small bulb into the socket above and afterwards, using the surgical instrument, open the control panel. Before us are a few fuses. For the elevator to move, we have to use the iron thread on the lower one, and the surgical instrument #2 on the upper one. We get into the kitchen and walk through the door on Paloma's right.
After the conversation with everyone, approach the left column of the stairs #1 and take a closer look at the marks left on the ground. Scan the shoe and the tire marks #2. Compare both with the database.
Enter the house. The door #1 will lead us into the kitchen. Poking around in the fridge won't do any good, but you can the fingerprints off the dishes in the sink and compare them with the database. Proceed as always - first use the Fingerprint Powder and then the scanner #2. Go back to the corridor.
Make your way to the room on the right and approach the table with an opened book on it. Once McPherson takes a closer look on it, she will notice that the killer used human hair as bookmarks. One grab with the Sampling Tongs #1 and a new sample for chemical and database analysis is ready. When we examine the movie box lying on the sofa, Vic will inform, that it was released in 1946. Use the Fingerprint Powder on the safe placed on the bookshelf and you will see that this number is a part of the password. If we want to, we can ask Garris about the safe and he will give us the documentation. From it we learn, that the default password in this model is 00A00. Input the right combination #2 and open the safe.
Use the Fingerprint powder on the scenarios and right after that, the 3D Scanner. Run a database analysis on the newly gained evidence and afterwards order Vic to take a closer look at the box lying on the lower shelf. Once she carries it over to the bed, use the pick gun and open it #1. Next to the dresser by the wall #2 we find a piece of wood, which has been exposed earlier, revealing the hiding place. Use the Fingerprint Powder and the 3D Scanner on the piece of wood and afterwards run the database analysis.
Return to the corridor and go up the stairs, to meet the sheriff. After the conversation, open the wardrobe and use the Digital Microscope and then the Sampling Tongs #1 on the clothes. Afterwards, run a chemical and database analysis. Go to the bathroom #2.
Approach the bath and take a bit of blood from the floor (chemical and database analysis) #1 using the Sampling Swab. As for the blood marks in the bath, use the Sampling Tongs and get a new sample for chemical analysis. Take the dry old sponge #2 from the sink and afterwards open the medicine cabinet on the wall with the pick gun. Take the prescription and the antidote. Exit the bathroom.

Use the second #1 and enter the bedroom. Use the Digital Microscope and then the tongs on the bed's mattress #2 (right below the handcuffs) and then run a chemical and database analysis.
On the table we find a broken mirror #1. Take the fingerprints off of it using the Fingerprint Powder and 3D Scanner and check the database. Now all that's left is taking a blood sample from the towel lying on the floor #2 with a swab (afterwards a chemical and database analysis) and we can leave the room. Go back down the stairs.
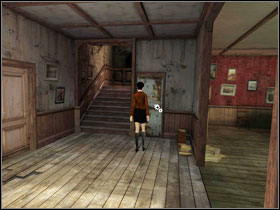
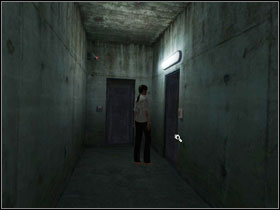
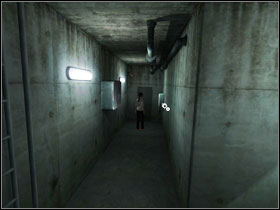
Check out the last room #1. There isn't much light in the corridor, but by going left #2, we can safely reach the basement.
Go deeper into the basement and take the demolition mass from the table #1. Considering its large size (4x2), you will probably have to reorganize your inventory. Under the stove we find small plastic pieces, which we can watch under the microscope and collect a synthetic hair from them using the forceps (chemical analysis). Go back to the 1st room and take a look at the board on the wall #2. You can move it and then make a hole in the wall, using the hammer. We land in a well-known room.
Open the door leading nowhere #1 and after taking a look at the wall behind it, use the microscope and afterwards a swab. Run a chemical analysis on the collected paint sample. Use another swab to collect a sample of the blood from the table and then run a chemical and database analysis. At the other end of the room, near the "dead" sign we find a white lab coat #2. Treat it with the Revealer Spray and a swab (chemical and database test). Now just use a swab to collect a bit of blood from the pipe next to the lab coat (as earlier - chemical and database analysis) and we can move on to the next room.
Under the door #1, we find a scratched floor. It has been thoroughly cleaned, so use the Revealer Spray #2 and then a swab. As usual with blood examinations, a chemical and database analysis will do the job.

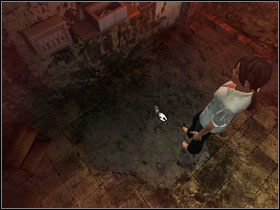
In the place where the electric chair was standing we find pieces of glass (right opposite to the little rails, on the other side of the wooden circle) #1. Once Vic takes a look at them, we use the microscope and forceps (chemical). When you open the voltage control panel you will see that it's too dark to notice anything. As we remember - Paloma pressed the button on the wall next to the door. After we do it, the interior of the box will lit up #2. Treat the lever with the Fingerprint Powder and the 3D Scanner (database analysis). Move through the room in which Paloma began chapter III.
Approach the frame of the. Order Vic to look at the wall with scratched passwords and take a photo of it. We must send the photo from out phone #1 to the CSIA. After that run a database analysis. Pick up the electronic collar #2 from the floor under the sink. If you want, you can look into the first-aid-kit hanging near the ceiling. If you do, McPherson will be bitten by a snake hidden inside and you will have to give her an antidote.
When we stand on the mattress near the entrance #1, our character will be able to look at the pieces of glass scattered on the floor. Use a swab #2 and run two tests on the newly gained sample - a chemical and database analysis. Return to the floor, to the corridor with a wardrobe.
Look at the digital lock near the rusted door and afterwards, using out hammer - we break the wooden one #1. On the barrier we find an unknown, electrical device. McPherson notices a chewing gum on top of it (generally, we don't see it). Take it #2 with your forceps and examine it with a chemical analysis. Phone to Claire from the lab (inventory/phone/envelope/envelope with a phone). Tell Vic to take a look at the device's keyboard and then use the pendrive (computer analysis). Walk down to the kitchen and wet the dry old sponge with the water from the sink. Use the same door leading outside as Paloma did.
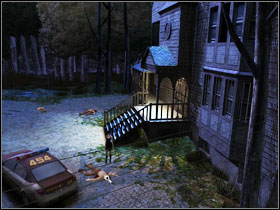
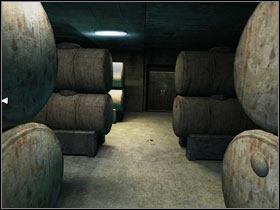
Under the stairs we find a piece of gum #1 and after using a swab, collect a blood sample (chemical and database). Destroy the lock of the nearby trailer with the hammer and take a rope #2 from the inside. Use the wet old sponge on the muddy number plate. By the red barrel we find an oil can.
Talk to Garrison, who's digging around by the side gate #1. Once we mention the electrical lock by the door on the floor, the agent will go there and try to take care of it #2. We have to give him a couple of minutes to finish.
On the shed's pillar we find a strange symbol #1, burned into the wood. Take a photo of it and run a database analysis of the photograph, after sending the photo from our phone to the CSIA. At the main gate we find traces of human feet and pickup tires #2. Scan both and compare them with the base. At the front entrance we find the sheriff. Talk with her about anything you want. We receive an electronic key. Run appropriate analysis on the received samples. It's time to call Claire and talk about every aspect of the case. Leave the hammer in the shed by the stairs, across from the police car. Return to the building and the dark basement corridor.
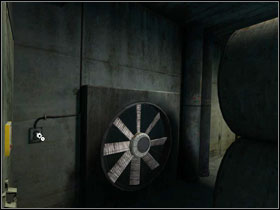
Use the oil can on the empty oil lamp hanging on the wall #1, return to the living room #2 and take the match box lying above the fireplace. By using them, we light up the lamp and illuminate the door on the right side of the corridor.
Move the plank covering the lock away #1 and use the electronic key that we got from the sheriff on it. On the wall of the new room we find a chamber with a body inside #2, from which we take a piece of skin (chemical analysis) with the forceps. Take a closer look at the computer nearby the chamber, turn it on and use the pendrive (computer analysis).

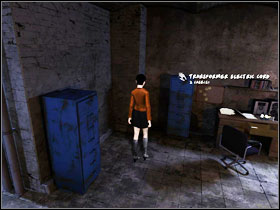
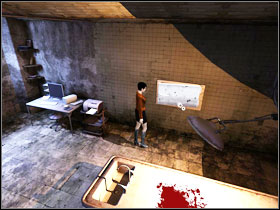
Open the drawer in the desk with the stereo on it #1 and take a look at the documents. Take one of the loudspeakers. From the blue drawer we take a transformer electric cord #2. In the centre of the room, there is an operating table. Use a swab on the big bloodstain and run a chemical and database analysis of it.
On the opposite side of the room, there is a big, closed cabinet #1. We open it with the pick gun. Inside we find a paper box, which will give us a new sample, after being treated #2 with the Revealer Spray and a swab (after that run the standard chemical and database analysis). Go outside. It's time to record ourselves on Claire's answer-phone and tell her about the documents. Now all we have to do is wait for the answer. Claire should call us in a couple of minutes and tell us the murderer's identity. The chapter will end once we step into the room upstairs, opened by our partner.
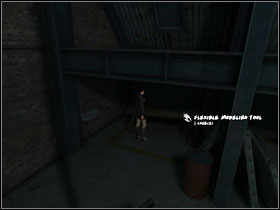
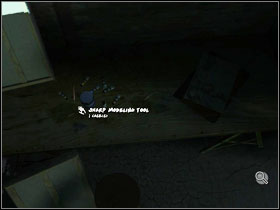
Opposite to the stairs, on the table next to the sink #1 - we find a flexible modelling tool. Pick up the sharp modelling tool from the table in the corner #2. Also take a look at the photos standing nearby. In the inventory we combine the flexible and sharp tools, receiving improvised picking tools.
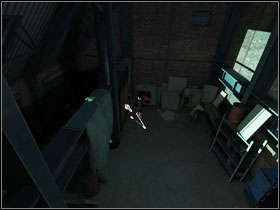
Using the picking tools, we get the wardrobe opened #1. Inside, beneath some rags, in the second drawer from the bottom, we find the killer's cape. We approach the blue cabinet #2 and once again make use of the improvised picking tools. Search the cabinets, reading and photographing every document. Once we finish, Richard will arrive at the gallery and we will be able to ask him about some interesting things.
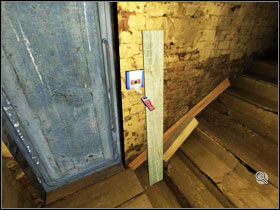
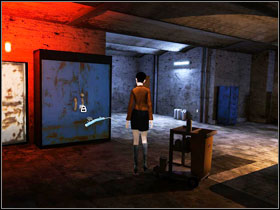
Across from the door, under the table #1, we find transformer without cord. Combine it in your inventory with the cord that you have found earlier. Connect it to the console by the wall (upper left corner of the operating keyboard) and plug in the speaker (upper right corner) #2. Press the machine's button and try to turn it on. Take a look at the opened box on the left. Before we go to the balcony, pick up the poker lying under the stove.
Open the balcony door #1 with the pick gun. Once outside, use the spray on the barrier #2 and then take a blood sample with a swab (chemical and database analysis). Go out of the house. Before we speak with James who arrived at the crime scene, Garris should cut in on the conversation. Tell him to go upstairs and check the console. Afterwards head to the kitchen, where you will exchange your observations with the sheriff. After the conversation, talk to her once again and we will receive the key to the sheriff's car.

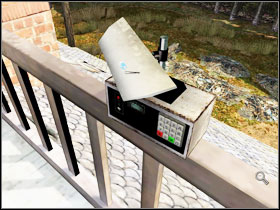
Use the key on the car's boot and take the metal detector #1 from inside. A new icon has appeared in our inventory (under the gun icon), representing the detector. Pressing it will change the device's strength. Set it to 3. Go to the back of the house and use the metal detector on the gray barrel #2. Get rid of the planks using the poker.
This way we have unveiled a hatch, but we can't do anything about it right now #1. Open the inventory and enter the phone screen #2. By pressing the right symbols, open Hawker's files. Get back upstairs to Garris, who's messing around the console. We learn that he needs the device's documentation. It's time to call Claire. Go back to the living room and begin a conversation with your ex-partner. Don't try to be gentle and choose the aggressive dialogue lines. Once the conversation is interrupted, call again and try to settle things down. After some talking, Hawker will help us with the computer in the basement.
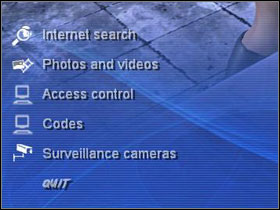
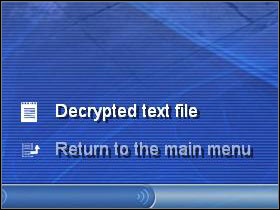
The monitor will guide us through the various options #1. By checking out the internet we can print the documentation Garris asked for. Skip the "access control" option for, go to the codes and open the text file only to find that it is encrypted. Our pendrive will help us; just plug it into the computer. This time unusually, the document won't be transferred to the CSIA. To open it, once again take a look at the monitor and after that - the codes. The decrypted file will appear before our eyed #2. If we want to, take the printed technical manual from the printer and go give it to Garris. There will be no time for that once we go into the "access control" and open the hatch (the code is H103123D55). We end the chapter by exiting the basement.
Despite the chapter's title suggesting that this time we will be controlling Paloma, we will start off with Vic. However our role will be just to have a quite long conversation with Richard #1. Afterwards there will be a cutscene and we will be moved to a bunker under the killer's house #2.
Tell Paloma to move the wooden box #1 and take the metallic pipe hidden behind it. Move the bed #2 away from the locker and take one roll of paper from the toilet paper shelf.

Using the pipe we open the locker #1 and take a plastic can and a magnet #2. Move the bed back to its place and take a closer look at the wall between the shelves.
Use the magnet at the shiny thing in the cracked wall #1. This way we will get a ring. When we take a closer look at the cell's door, Paloma will begin a conversation with the prisoner held in the opposite cell. Ask him to give you a fork. An unfortunate throw ends in the fork landing beyond our reach. Combine the magnet with the toilet paper and use it to get the fork #2 (you will have to approach the cell's door once more).
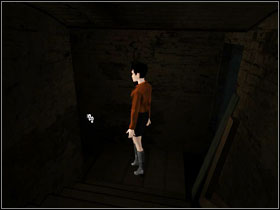
Place the plastic can under the vent #1, climb onto it and use the fork to get rid of two screws holding the grille #2. By entering the vent, we will get out of the cell and to the corridor.
Look through the air-vent in the door, deeper into the corridor #1 and communicate with Vic. She's still feeling dizzy and isn't too talkative. Go to the opposite end of the corridor and look into the box on the wall #2. Look at the empty amphetamine box and take first-aid-kit.
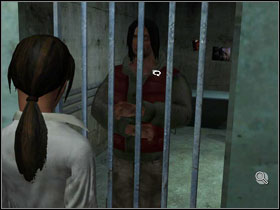
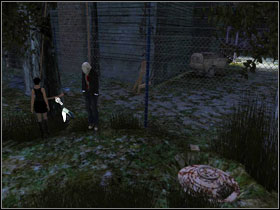
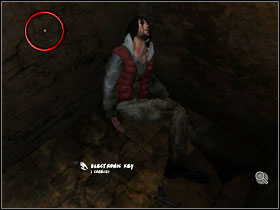
While on the way to McPherson's cell, talk to the imprisoned man #1. Mention the amphetamine and in exchange for the ring, he offers us a drug pill. Give the newly gained drug to Vic #2 - she will regain some vigour and return her sharp tongue will return. It's time for a logical riddle.

When asked about the electronic locks, McPherson mentions about two manes connected with their own - Paloma "Martin" and Victoria "Stanton". Having this knowledge, talk to the man in the cell and he will tell us that when the murderer was entering the code to Paloma's door, he used 4 as the first and 5 as the last number. The image above shows the system on which the code is built. The English alphabet has 26 letters. Having numbers from 1 to 9, number the letters and then assign numbers to the letters forming the names. In effect, we have two codes - 419295 to Paloma's cell and 1215265 Vic's cell. Input the code to McPherson's cell and you will gain control over the second woman.
Take the ginger bread from the table #1 and pick up the nearby metal detector. Give the bread to the imprisoned man, which will soften his hunger. Take the fork from the locker where Paloma's items were placed. If we plan on stepping onto one of the mines in the further part of the game, we should take the first-aid-kit and from the box across - a coloured disinfectant spray.


Use the button placed on the wall next to the ladder #1 and go outside. Carefully approach the door at the back of the house. Now it's very important to click on exactly the same spot as marked on the screen #2. By doing so, Vic will take a closer look at the mine placed there, reveal it a little and arm it...
We have to put something heavy on it. The archery target lying in the back will be perfect #1. It requires quite some space in the inventory (4x2), so tidy it up. Once the mine is covered, we will see that McPherson is quite hardcore and walking on mines is a normal thing for her #2.
Apart from that mine, there are two more (numbers 1, 2, 3) #1. Take the grate piece lying nearby the gate #2, approach the mine no. 2 carefully and use the metal detector set on the 1st level on it. Afterwards dig it out of ground and cover with the grate. In the place marked with 4, use the detector set on the 4th sensitivity level. Pick up the fragment of a bicycle tire from which Vic will make an improvised picklock.
Use the picklock on the box next to the gate #1. Use the fork on its interior and unscrew the lid covering the keyboard #2. Now we can take the keypad box, which will disarm the trap and we will be able to safely cross the gate. Go to the yard before the front entrance.
We find a watch #1 by the first body and by the second #2 - a knife. Before we go inside the house, take the multispectral lamp from the boot.
There are two traps in the corridor. Look at the dead rat at your feet #1 and afterwards spray the entrance to the living room #2 with our coloured spray. It will make some lines stretched across the room's walls to appear. Cut it with the knife, disarming the trap.
Do the same with the trap set by the stairs leading up. Firstly, take a look at the holes in the door frame #1, use the spray on the passage #2 and in the end, use the knife. Go to the living room, take the reflector (2x2) standing by the window and go upstairs, to the room from chapter I.
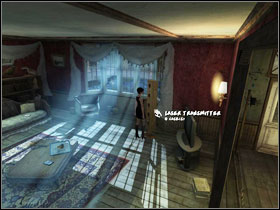
Put back the fork, picklock, coloured spray and the keypad box to the wardrobe #1. Go back to the living room for the laser transmitter (2x4) #2. Go down to the basement, to the room with a computer.
Take a look at the reflector and after that at the frame on the wall on the left #1. Place the lamp which you took from the car's boot in it. The next step is to connect transmitter to the socket by the floor #2. Now we can easily cut through the yellow beams. Use this to your advantage and move deeper into the room.
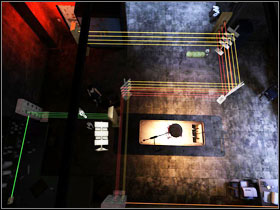
Place the reflector on the stand on the left side (by the green beams) #1. It's time to shut down the device emitting the signal by the green laser. Despite the big distance, press the button in the lower left corner of the screen #2.
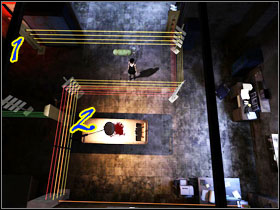

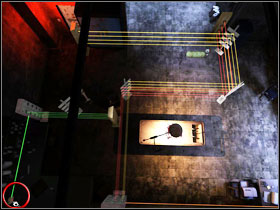
Take a look at and move two wooden emitters in the order marked on the screen #1. From now on we can move freely throughout the whole room. Tell Vic to turn off the device in the lower right corner of the screen #2 and say goodbye to the lasers.
Use the computer #1 only to learn that the password has been changed. The generous killer will call us and warn us about his near arrival. Hide in the chamber with the cold corpse of a woman #2. Soon, we will take revenge on the killer for everything he has done. Once you regain control over the character again, leave the basement.
Go upstairs to the wooden door #1 and higher, to the balcony. Pick up the remote control, check out the room with the wardrobe from which we take the keypad box and go back downstairs to the mined back of the house. Take another look at the box near the gate, from which you have taken the keypad box. Place the pilot (on the right) and the keypad (on the left) #2 inside. Associate the mark below with the one placed on the pillar which our character took a picture of in chapter IV and input the code visible on that photo. Accept it with the green button. Afterwards, take the programmed pilot and phone to the murderer.
Search the corpse's pocket and you will find a piece of paper with "Namlekco" written on it. Don't forget to take the electric key #1 and head to the hatch you used to get to the surface. It's closed, so we have to once more return to the basement #2 and the computer. After using "Namlekco" as the password, take a look at the file named "Karson File". Go to the "access control" and open the hatch (the same code as before - H103123D55). Go underground.
At the end of the corridor, use the electronic key to open the door #1. Take a mine and a pistol clip from the box in the corner #2. If you will follow the instructions contained in this guide, you won't need the first-aid-kit. Take the feeding cable that is linking the radio to the socket. Walk to the table on the right.
Take a look at the drawer's content #1, including the chewing gums. Read the notes lying on the desk and take the steel tension wrench. Next to the desk, on the floor, you will find out trusty old friend - the pick gun. By the second desk #2 in the room, we will find some more interesting stuff. We will acquire a nylon line, tape and if we want, we can take another knife.
On the left, next to the blue trashcan #1, there is our CSIA kit. The Fingerprint powder and the 3D scanner will be great for analysing the magazines next to the bed #2 (database analysis). Go back to the corridor.
Use a swab to take a sample of the blood from the air grille #1 (chemical and database), afterwards go to the cell opposite to Paloma's and use the fingerprint powder and the scanner to collect fingerprints behind the bars #2 (database). The last thing you must do here is to collect fingerprints from the magazines lying under the bed. The method is the same as before, so just don't forget to do a database analysis in the end.
In the inventory, combine the tape with the mine #1 and after that, take a closer look at the air vent in this room. Stick the charge to it and use the nylon line #2. Using the blown air vent, go to the next corridor of the bunker.
There's a closed door in front of you #1. Go to the inventory. Combine the knife and the watch and the received batteries - combine with the pick gun. Now just attach the iron key and we have a working picklock. By using it, open the doo. From the table, take another key and a keyboard. Take a look at the computer. It will do us no good without a suitable fingerprint. On the left we have a little Easter egg - Still Life box #2. Use the button behind the ladder and the ladder itself to get to the surface.
Use one of your knives and cut off the hanged man #1 and afterwards take the memory card #2 that felt out of his pocket. Transfer its content from the phone to the CSIA and run a computer analysis. Go back through the hatch and exit the computer room to the corridor.
On the opposite side, by the door #1 you will find some fresh blood marks (a swab, then a chemical and database analysis). Go through the door and on the other side you will find some more marks #2. Repeat the whole analysis procedure. Use the stairs, go to the end of the corridor and take a look at the door to learn that is no lock and we won't be able to open it.
We will have to go back to the murderer's body. Fortunately, we can use a door that was inaccessible before #1, which will speed up the whole process. Once there, use the knife to borrow the culprit's finger #2. Go back to the computer room, where a proper fingerprint was needed.
Use the finger on the computer #1 and return the machine to life. When you look at the screens, you'll see that a password is needed. Is you remember the date when the chewing gums found in the murderer's drawer entered the market, enter it. If you don't, take a look at the screen #2. After going to the cameras section, you will see that the access to one of them has been blocked. Step away from the monitor, use our magical pendrive, go back to the cameras section and take a closer look at it. A small talk with the murderer and the chapter will end.
We begin the chapter as Paloma. While avoiding the glass in the centre of the room, push your chair to the circular saw on the right #1. With our hands freed, go back to the left side of the basement #2, where a key awaits us on the table. Out character escapes and we return to the role Vic plays.
Activate the 4th group of cameras once more. In one of the screens, Vic spots a reflection of the number from the plate #1. Go to the "access control" and open the single closed door (upper one). Use the code learned a moment ago #2. Watch the scene and move to Paloma.

Look inside the blue locker #1 and take the metal shelf #2.
Use it to barricade the door #1 and afterwards use the phone #2 to call McPherson. The plot makes a twist again and we land in Vic' head.
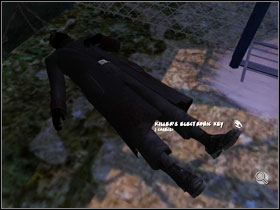
Go back though the hatch on the back of the house #1 and head to the basement, where Karson's body is. Pick up the electronic key #2, look and Hawker's gun and by using the forceps, get the bullet that got stuck in the wall. Run a chemical and database analysis. Go out of the house through the main entrance in order to find the second bullet.

In one of the wooden beams #1, we find one of the bullets from which Garris died. Take it out with the forceps #2 and run a chemical and database analysis. Do the database analysis again to compare the two bullets you have found. Vic will call Hawker. After the conversation, go to the basement with the computer.
In the printer, we find some documents #1 which will guide us to the gas mask. We find it in the blue locker #2. Read the password, it's quite ironic - "betrayal", afterwards input it into the computer and watch a cutscene. Some talking and we're back to the game.
Leave the room and go to the other side of the basement #1, where we have found a hammer a long time ago. Watch a cutscene after which #2 our character will once again return to some old events.
Approach the sink the use the murderer's cape on it #1. On the other side of the room, pick up the chain #2 and a hook from the floor. Combine them in the inventory and create a grabber.
Take a closer look at the burning barrel #1 and cover it with the soaked cape. Now we can remove the pole from between the barrels #2. Go deeper into the room ("behind" the sink).
Use the pole to open the window #1, after that use the grabber, to grab the beam above #2 and get out of the trouble safely by jumping through the window.
Approach the cylinder's valve near the table and #1 and turn it off. Take the soldering iron lying on your left #2 and run to the windows.
Above the pile of wheels you will find a switch which will open the windows on one side of the basement #1. Run to the opposite wall, take the keypad box #2 and afterwards, using another switch, open the other windows. Check the door that Hawker used to escape.
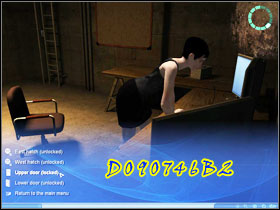
They are locked, however next to them there is a box in which we can place the keypad #1. To open them, use the same code that you have seen before through the camera. If we want to see it again, take a look at the back of the receiver on the right. The code is "D090746B2". Brave Vic is now capable of jumping though a wall of flames #2. Head to the room with the computer you have activated with a fragment of a finger.
Use the terminal #1, enter the cameras section and the group marked as "C". We see Hawker in the kitchen. Go see him - return through the flames #2. Unfortunately our character won't eliminate the psycho at once, but will warn and in effect - let him escape.
Take the detonator and C-4 charges #1. If you have two knives, you will have a problem with space in the inventory and will have to leave one of them it one the storerooms (for example the cabinet upstairs). Go back to the "second" corridor of the bunker #2 and take a look at the closed door. Combine the C-4 with the detonator and stick it to the door. Now it's time to combine the soldering iron with the feeding cable and afterwards stick it into the charge planted earlier. Finally, plug it into the socket. Boom!
We get to a room where Hernandez is placed behind thick, soundproof glass #1. Approach the computer in the corner of the room. Unfortunately its keyboard has been destroyed by the small detonation caused. Luckily, as a good detective, McPherson has an additional keyboard in her pocket. Use the computer and take a look at the cameras in the "E" group. Vic then realises that she had a tracking device with her all the time #2. We can't let such a gadget go to waste. Go through the locked door.
Tell our character to approach the fan on the left. However, she will stop after a while #1. Point the left side of the screen and once again, the correct direction leading to the fan. Once you finally get to the corner of the room, use the switch #2 to speed up the device and thereby - the noise level.
Stick the tracking device on the side of the tank standing in front of the fan. Afterwards, tell McPherson to retreat to the right side of the room #1. Follow your own steps. Eventually we reach the corner of the room #2. Tell Vic to turn right again. Now just a few more steps and...
Sneak up to Hawker from the behind #1. Afterwards, take his electronic key #2, PDA and the pistol.
Go to the room in the back #1. Take some cables from the table and combine them with the PDA. Use the pick gun on the drawer #2 and take the metal cutter from inside. Take a look at the board hanging above the desk and Hawker's list attached to it. On it you will find the password to the PDA - "nemesis". The last thing that will come are handy is the isolated cutting pliers - you will find it in the black box below the bed, across the desk. Go back to the finger-activated computer.

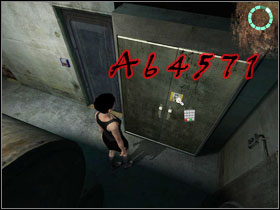
Plug in the PDA to the computer #1. Take a look at the monitor, activate the PDA and use the password mention above. Have a look at the nemesis file and you will find the code - A64571. It's time to go back to the hall and use the electronic key (blue) on the door leading to Paloma #2.
After regaining control over the character, go behind the chair and note the box placed on the cables #1. Bang, bang. The lid didn't stand a chance. Brutally use the metal cutter on it #2. Take the foam isolation fragment.
Look at the yellow switch #1 and afterwards fill it with the foam isolation fragment. Use the pick gun to free McPherson's limbs from the metal rims #2.
Open the box hanging in the corner of the room #1. Take the keypad box from inside #2. Exit the room.
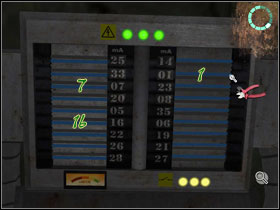
Use the keypad box on the metal locker and input the code found in the PDA #1. Between two barrels filled with explosive liquid, you will find a control panel. Point the indicator in the lower left part and McPherson will read an important milliampere value - 24. Take the isolated pliers and cut the wires showed on the screen #2 (summing tem up, they give exactly the amount we need). Congratulations, this time around, there was no big boom in the end.


 Sid Meiers Railroads! Game Guide & Walkthrough
 Sacred 2: Fallen Angel Game Guide & Walkthrough
 Sherlock Holmes: Crimes and Punishments Game Guide & Walkthrough
 Starbound Game Guide & Walkthrough
 Silent Hill: Homecoming Game Guide & Walkthrough