


This guide to South Park: The Stick of Truth comes in handy in what is called everyday life in the weirdest town of the United States of America. It offers a detailed walkthrough, description of the toughest boss fights, mini-games and puzzles, as well as tips on how to eliminate enemies without fighting by using the environment. It also considers all possible story-related choices that the player faces throughout the game. Moreover, all side quest are described along with detailed information on where to find specific, often hidden items, needed to complete the missions. With this guide's help the player should not have any problems with finding hidden items, such as keys, chinpokomons, and Facebook friends. It also reveals the mechanics of the combat system, magic spells, and abilities of all playable classes, that is: Fighter, Mage, Thief, and Jew. All player's companions are described, i.e.: Cartman, Kyle, Stan, Kenny, Butters, and Jimmy. The guide also contains a variety of general gameplay tips as well as information regarding potions, gear modifications, and unlockable achievements. South Park: The Stick of Truth is a turn-based RPG set in surrealistic universe of an extremely popular, though controversial TV show South Park. The game is full of unsophisticated humour, often referring to the most primitive human instincts, which is so characteristic of the show. The fans of the show will find a lot of references to their favourite episodes. You play as a new kid in town who gets involved into a war game between human Kingdom of Kupa Keep lead by Eric Cartman and Kyle Broflovski's Elves fighting over control of the mighty Stick of Truth, which can be used to rule the entire universe. As it turns out later, fantasy and reality interweave in South Park at every corner.
South Park: The Stick of Truth guide contains:
Arek "Skan" Kaminski ()

Movement

Run

Basic Attack/Select

Heavy attack/Block

Magic Attack

Interaction

Tools

Use a Tool

Choose a Spell (outside of combat)

Start Casting a Spell (outside of combat)

Social Network

Map

Inventory

Companions

Journal

Abilities

Movement/Aiming

Cast a Spell (outside of combat)

Heavy Attack/Attack (outside of combat)

Magic Attack

Attack/Block/Interaction

Run

Tools

Use a Tool

Choose a Spell (outside of combat)

Social Network

Hot keys

Movement/Aiming

Cast a Spell (outside of combat)

Heavy Attack/Attack (outside of combat)

Magic Attack

Attack/Block/Interaction

Run

Tools

Use a Tool

Choose a Spell (outside of combat)

Social Network

Hot keys
In the Western part of the town, you can find all of the basic public buildings, such as the school, the Community Center, the Town Hall and the Police Station. On the top street, there is Jimbo's gun store where it is good to take a look into, every once in a while, due to the increasing stock. It is also a good idea to complete two quests that ensure you with the ability to summon an ally into battle. You start the first one at the City Wok and the second one with the priest, in front of the Town Hall, who will tell you to go to church. When the zombie invasion starts (instead of elves, you will be encountering the undead in the streets), you also should take a peek to the Police Station, where you will be able to complete an additional side mission, which is easy to be overlooked.
The eastern side of the town are, mainly, stores and houses. It is here that the headquarters, of the main factions in the game, are located. The pirates and the girls can be found on the playground. The Kingdom of Kupa Keep and the Elven Kingdom are in Cartman's and Kyle's houses, respectively. In the middle street, there is also the manhole to the sewers, where you can find many hidden elements of the game, e.g. the Crab-Man, who is a part of the "Friends in Strange Places" achievement. In the North-eastern side of the map, there also is the farm, where you can complete several side quests, at the beginning of the game and Canada, where you will get towards the end of the game's storyline.
Search everything
Always search every corner. All of the lockers, and stashes, which you can open, you can tell by yellow handles, knobs, buttons, etc. This way, you will ensure yourself with constant access to potions, equipment, money and, sometimes, also keys for the nearby garages, where you can find another container.
Talk to everybody
Talk to each character that you meet and complete each quest. Not only will this provide you with more experience, but also you can unlock additional bonuses, like e.g. summoning a buddy into the battle, or simply adding a new Facebook friend. The more friends you have, the more special talents you can unlock. If someone does not want to become your Facebook friend, return to them later on, when your friend list is longer.
Look for ways to access inaccessible places
In the game, you can access many places, which seem to be inaccessible, including all sorts of ladders, podiums and containers. Pay attention to the glitters on the screen and cracks on walls. Due to the 2D view in the game, many of the elements may be hidden from view, behind a tree or a car so, you should try to squeeze into every corner. Often, you need to unlock a path by, e.g. shooting down a plank hanging in the air. Finally, many places, to be accessed, require a special tool , like a special sensor for teleportation, or the shrinking powder. If you notice a relay for teleportation, or a small hole in the wall, remember that place and return to it, once you can use a given ability (these unlock with your progress in the game).
Replace and modify your equipment
Check your equipment on a regular basis and replace things and mods with better ones. You should also remember to remove mods from the items that you are not using anymore. Try to fit the mods themselves, so that they reinforce your strong points. For example, if you play as a mage, and you have already unlocked the Dragon Breath, use the mods that increase damage from fire.
Look for ways to knock down an opponent before the battle takes place. If you see something on fire, you can definitely blow it up with a spell. If you see a stack of swaying books, wait for the opponent to walk under them and shoot at them, to make them collapse on the opponent.
Use shops
Visit shops on a regular basis, in both kingdoms (later on, also in the girls' HQ) and at Jimbo's. The weapons and the equipment that you find there should exceed what you can obtain from completing quests.
Mind your environment
Many of the opponents can be knocked down if you drop something onto them. Always take a good look around the place that you are in, The Stick of Truth is full of chain reactions in the Crazy Machines style.
Immobilize!
You are safe and sound if the opponent cannot move . This is definitely the best tactic so, you should upgrade on your abilities, so as to always have a stunning blow ready.
Better three alive, and one dead, than 4 wounded
Focus on single enemies, especially if they buff their companions with magic. Killing them one-by-one is much more effective than wounding each one bit-by-bit.
Use your buddies
Each one of your buddies has one special ability, like e.g. Kenny's charm. If the buddy does not need to use the potion, always use that attack, before you land the regular attack with that buddy.
Replace buddies
If your buddy is low on health and he is bound to fall from the next attack, and there is no way to heal him, (e.g. he is grossed '), replace him with another one. You should also replace him, if he is ineffective in a given fight. Take a close look at the opponent. Is he vulnerable to fire? Take Cartman. If he is vulnerable to damage from holy attacks, take Butters or Kyle. At the same time, do not be too cavalier about the swaps, because it takes up a turn.
Always have a supply of potions on you
You should always have plenty of potions on you, predominantly health potions, cure potions and the ones that regenerate PP. Also, the Speed Potion, i.e. the coffee from Tweak Bros. Coffee. Make sure that you always have a considerable supplies of it. If not, go to the Caf and buy some.
Regenerate mana outside of combat
Health and PP regenerate automatically after each battle. Mana does not. Always make sure that you actually have mana, before an important fight, to prevent wasting a turn to drink the mana potion.
Run away from battles that you do not want to fight
It is not necessary that you fight each and every opponent that you encounter in the street. Once you notice someone approaching you, start running. When you run away, the pursuers will return to their initial positions.
Use the summoning ability and restore it daily.
After you complete some of the side quests, e.g. Find Jesus, you will be able to summon an ally, during the battle, which will meant instantaneous death of all the opponents. You can summon once a day so, remember to visit each person that you can summon, first thing in the morning, to "recharge" them.
Combat is nothing out of ordinary in the Stick of Truth. You either will be attacked or will attack, nearly in each one of the locations so, it is a good idea to learn the rules that govern it. First of all, this is a turn-based game. This means that the characters perform their actions in turns, while the rest of them are waiting for theirs. The one to start is your character, then your buddy, and then the opposing team. Or the other way around. This depends on who strikes whom first, before the actual battle. When they see you, the opponents will start running towards you and try to hit you. Always try to beat them to it and land your blow as the first one, to gain considerable advantage at the very beginning. The best thing to do is to stand still and press the attack button, when the running opponent is close enough. Also, remember that the effects active on an opponent are carried into the battle itself. This includes stunning with a shot of the ranged weapon. A very good thing to do is shoot at the opponent and run up to him quickly and hit him. This way, the first round of the battle will be yours and additionally, the opponent will be stunned, i.e. as a matter of fact, you will get to use two turns, before he will be able to respond.
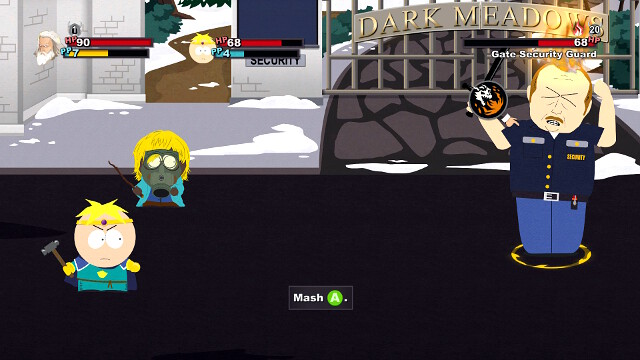 An example of using the special ability, by mashing the attack button
Battle in South Park may be turn-based, but it is much more interactive than in the case of the majority of the games of this type. To cast a spell, you first need to perform a certain action. Most of the times, this will only require you to press the attack button, at the moment at which your weapon is highlighted, but it is more difficult in some cases. Jimmy's Lullabye is a musical minigame, where you need to press the correct buttons, as soon as you see them in the circle. Kyle's Rain of Arrows is a QTE (quick time event), where you need to press the correct button at the right moment. Additionally, some of the abilities, e.g. Sling of David that the Jew has, maims you, if you fail to perform the throw sequence properly. The instructions to perform each of the abilities, appear on the screen when you select that ability to perform it. Remember that your time is unlimited so, you should learn them before you attack. In general, you perform your abilities in one of the four ways:
-press the appropriate button at the right moment (once you notice the gleam on your weapon, or when you are prompted to do so) e.g. the Lullabye or the Rain of Arrows;
- hold down the appropriate button for as long as you notice the appropriate effect (e.g. flash of light or a gas cloud, if you use magic) and release it, e.g. magic, Royal Kiss, Gust of Wind;
- mash one button systematically, as fast as you can, until you notice the effect, e.g. Dragon Breath, Brown Note;
-spin your character around, with the analog stick, or press left and right in turns, until you notice the effect, e.g. Hammer of Justice, Sling of David.
Once the enemy has his turn, your task is to block the attacks. Press the block button whenever you notice the white disc under your character's feet. Remember that some of the opponents attack several times within one turn so, you need to block all of the attacks. Blocking is the key to success in this game. By blocking, you limit the amount of damage that you take. For the purposes of easy and comfortable gameplay, it is necessary that you learn blocking intuitively, as fast as possible. Remember that, if you press the block button too early, this will give you nothing, so, mashing the block button is ineffective, when it is the opponents turn and you hope to be able to block This requires a certain amount of battles, but it is easy so, you should pick it pretty quickly. Additionally, if you block all of the opponents attacks, he will fall to the ground and you an counterattack, which will slightly wound him. Simply, press the attack button, or the magic button if you have the Counterfart perk, as your friend.
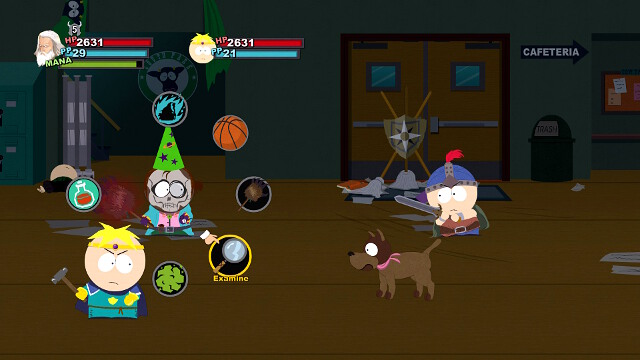
Another important element is the distribution of the individual characters, during the battle. This does not matter, in the case of your party, but is important in the case of the opponents. The opponents that are standing at the back, behind their ally, cannot be attacked in melee. Most of the times, it is various mages that are distributed this way, who use powerful spells, heal and rejuvenate the remaining opponents. At the same time, by themselves, they are quite weak and cannot take a series of the more powerful attacks, unlike the armored ones in the first row. They are the ones that should by your priority in each battle. You can attack them with ranged weapons or with AoE abilities (pay attention to the golden circles under the opponents, if you are launching an AoE attack, they show the blast radius and who takes damage). If there is no way to remove them quickly, try to neutralize them with stunning or putting to sleep.
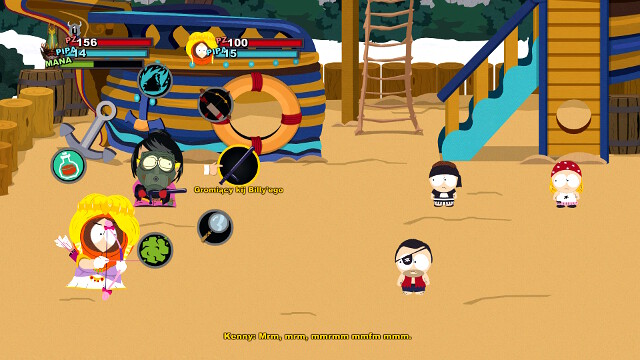 Attack selection dial
Your character has four basic offensive abilities. You can use only one per turn (in standard conditions). These are:
Abilities - special abilities that consume your PP (the blue bar). class exclusive;
Ranged attack;
Melee attack;
Magic - spells use up mana (the green bar), common for each class.
In most cases, the basic source of offensive attacks should be the abilities, but it may happen that you will be able to deal more damage with your weapon, if this is a really powerful one, or if it deal damage that the opponent is vulnerable to. The ranged weapons are used, mostly, to eliminate the opponents standing in the back row, which cannot be attacked with the melee weapon, and you use magic to immobilize and gross out the opponents.
Weapon attacks are divided into:
Basic attack - the regular weak attack. In exchange for that, you can perform it twice or three times (depends on the weapon). Useful mostly against shields. The shield is capable of withstanding a number of attacks, regardless of whether they are weak or strong ones. How much shield points an opponent has is displayed in the shield icon, next to the opponents health bar. By using basic attacks, you will be able to smash the shield without using up your most powerful attacks.
Power Attack - a strong, single attack that deals more damage than the regular attack. Used mainly against the armor. Symbolized by the helmet icon, next to the opponent's health bar. Only the strong attacks are capable of smashing the armor (from regular attacks, he will take damage of 1 only).
Magic attack - an attack reinforced with magic. The best combination that deals the most damage, in the majority of cases. If you are using a weapon and the enemy is not wearing a shield, use the magic attack (remember that it uses up mana), unless the opponent is resistant to being grossed out. Then, the power attack is more effective.
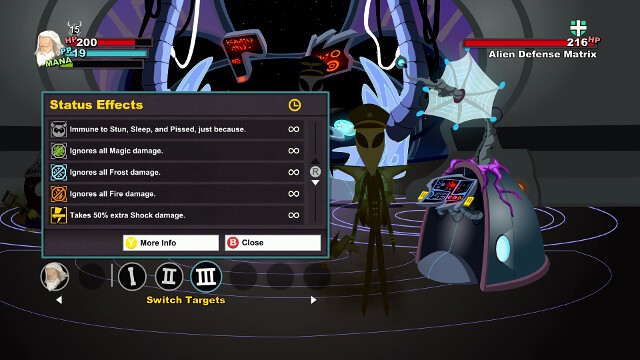 Checking the effects is often a key to success
After you start a fight, test your opponents, thanks to which you will find out what they are immune to and about their vulnerabilities. This is important in each fight, especially in the boss fights. Of course, try to use that knowledge and avoid using the abilities to which they are resistant, and use instead the ones that they are vulnerable to. This will make fights easier.
The effects, as the name suggests, endow the character with some effect, which can be either positive or negative. These include such elements as buffing of an attack or an ability, or the do the opposite, debuffing ones. You can remove negative affects by using cure potions. To remove positive effects from an opponent, throw a water balloon, or use some of the abilities. The effect icons can be found above health bars and, how long it is going to take, for a given effect, to wear off, can be checked by examining yourself and the opponent.
Another specific type of effects are, the so called, DoTs (Damage over Time), which are damage dealt regularly, over the course of several turns. To use them to their utmost, use them at the beginning of the fight. This way, the opponent will keep receiving damage, each turn, while you will be using other attacks.
The effects, which you will be using against the others and the others will be using against you, are:
-stun- the stunned character loses a round;
-sleep - just like above, but dealing any damage wakes the target up;
-slowing down - the target loses every second turn;
-set on fire- damage every turn;
-grossing out- damage every turn, decreases the potency of healing. Prevents the grossed out from eating and drinking(apart from the cure potion that clears the organism out);
-bleeding- damage every turn, accumulates five-fold for increased damage;
-piss-off- the target attacks the character that pissed off him and attacks in melee, without using abilities.
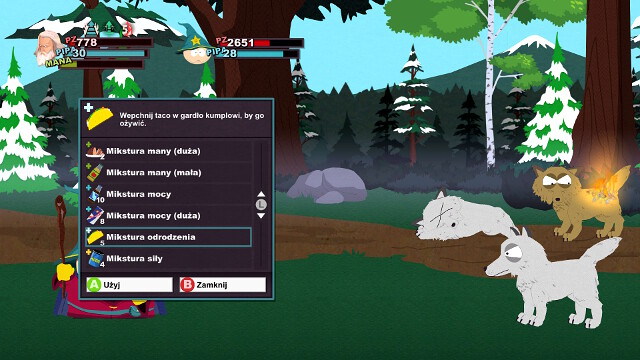 Always have a supply of potions on you
Potions are very important and they very often determine the outcome of the fight. Always remember to carry many potions on you, as many as possible. You can buy them at the store, but it is a better idea to take a look around the town and collect them from stashes. Every turn, you and your buddy, can use one potion (remember that in the case of your buddy, you will not be able to use his free ability) and it is in the toughest fights that you will be using them every turn. Apart from that, many perks harmonize with potions which, e.g. offers a buffed attack with every drink you have. In the game, there are the following potions available:
- health potion- restores a portion of your life;
- power potion- restores some PP;
-mana potion - restores some mana. Unlike PP, mana does not regenerate spontaneously so, use these potions outside of combat.
-strength potion - increases the damage dealt with the weapon and defense;
-speed potion - allows you to perform two actions in one turn, a key to success in many fights;
-revive potion - revives your buddy;
-cure potion - removes negative effects.
Apart from that, there are two useful items:
-water balloon- removes positive effects from the opponent;
-shit nugget- grosses out the target, you obtain them by using a toilet.
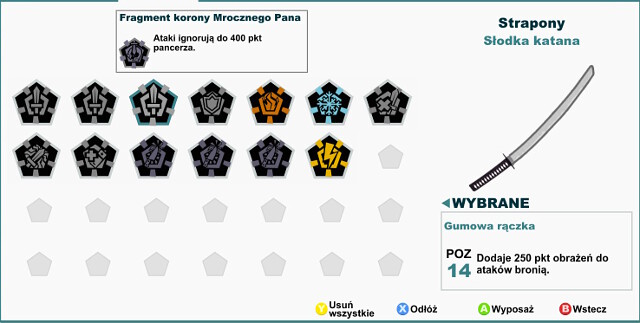 Weapon modification
Remember to replace your weapons and modify them on a regular basis. There are two kinds of mods: those for your weapons and for your outfits. The majority of items have one or two slots for strap-ons. Therefore, you should try to select the ones that you will profit from the most. The basic direction for your choice should be the level of the mod but, sometimes a mod of a lower level will be able to reinforce your strong points better than one of a higher level. Which are the useless mods are the ones that increase the amount of money that you get, because you will, most probably, always have very much money. Remember that mods can be removed. If you have already obtained a new weapon, the first thing that you need to do is remove the mod from the old one, after which you put it on your cool katana.
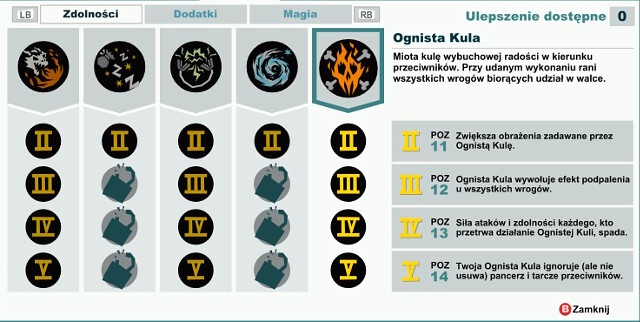 Mage tree
In the game, there are four classes available, which differ from each other with their special abilities and outfits, which you will be receiving as you progress through the game. However, in spite of what it might seem, they do not determine the strategy that you use and so, a mage with a good weapon in his hands can also land powerful melee attacks, and a warrior can use magic. Nevertheless, each class has its strong points. The warrior has strong armor and is capable of stunning opponents with ease. The mage mainly bases on damage from fire. The thief on bleeding and the Jew on holy damage, which few have access to, and deals the more damage the less health he has.
Each one of the classes has 5 unique abilities, which will be unlocked as you get promoted to a higher experience level. Apart from that, each time you gain the higher level of experience, you receive a point, which you can spend on upgrading those abilities. In the game, you can reach level 15, at most, so it is impossible to max out all of the abilities. In general, the best strategy is to upgrade, at first, the abilities that immobilize the enemy in a way (slows him down, puts to sleep or stuns). It not a good idea to max out one select ability, but it is a good idea to invest, at least, two points in it. Apart from that, you should upgrade one AoE ability, quite early into the game. In the third place, you should invest in a skill that will be helpful while ignoring, or destroying the opponent's armor.
All of the ability upgrades have the same level requirements. These are: For the first and the second ability, levels- 2, 3, 4, 5. For the third one, levels - 6, 7, 8, 9. For the fourth one, levels - 9, 10, 11, 12. For the fifth, levels - 11, 12, 13, 14.
Assault and Battery - Hits the opponent with a baseball bat
II - increased damage;
III - the stunned opponents receive more damage. Remember to stun the opponent in the first place, e.g. with Roshambo
IV - each attack restores some health;
V - attacks cause bleeding;
Roshambo - a kick in the crotch, the perfect attack stuns the opponent, which is perfect to launch the Assault on level 3
II - the perfect attack allows you to attack again, while ignoring the opponent's shield and armor. Makes the game easier right from the beginning;
III - the perfect attack decreases the opponents' defense;
IV - the kicks gross the target;
V - you gross all of the opponents. Very useful, it is a good idea to upgrade Roshando to its maximum.
Bull Rush - a head butt that breaks the armor, shield and decreases the target's defense.
II - increased damage;
III - increased damage, depending on your armor;
IV - the attack causes bleeding;
V - a successful attack speeds you up, you can attack once again. Next to the Kopalni this is a must, if you are the warrior so, try to reach this level as quickly as possible.
Horn of Irritation- removes positive effects from the target and makes everyone attack you without their special abilities.
II - deprives all of your opponents of their special abilities;
III - Stuns all the opponents, decreases the strength of the their attack and defense. It is not too good an idea to develop this ability, above this point.
IV - Increases the damage dealt by your party;
V - decreases PP requirements
Ground Stomp - An AoE attack, very high damage. Unlike, e.g. mage, where his last ability is the trump card, in the case of the warrior, this requires only 2 PP
II - increases damage, depending on your armor class;
III - additional damage dealt to your target. In this state, you will be able to defeat most opponents with one attack that cast positive effects on their allies;
IV - Attack Down on all the opponents;
V - all are stunned for the duration of one turn.
Dragon Breath - a series of fire attacks that sett the target on fire.
II - increases damage;
III - deals damage to the enemies directly above and below the target. They are small bits of low damage so, you should not rely on it as your basic AoE weapon, but it is useful for, e.g. driving away the zombies lying on the ground, before they rise again;
IV - after being successfully used, it increases ability damage starting with the next turn. Once you upgrade the Breath to this level, it becomes a very good fight-opening ability. In the second turn, it is a good idea to use the Fireball to max out on the damage that it deals.
V - each direct hit melts the opponent's armor. It is very useful, especially if you have Butters or Stan with you, who can deal considerable damage in melee.
Dust of Dreams - puts the target to sleep and, after being perfectly used, it also stuns. This is the basic stunner for the mage. As a matter of fact, this is an ability that there is no point in developing. It works well even at the first level, you can reach level 3, if you want to, where you stun two opponents at a time, but each additional point is sheer prodigality.
II - increases damage;
III - you hit the target and the one behind him, which additionally decreases their defense;
IV - the stun effect lasts one turn longer;
V - decreases cost in PP.
Lightning Volt - strikes the target, melts his armor and destroys his shield. On a perfect success, it additionally deals AoE damage
II - increases damage;
III - the lightning jumps over to another target;
IV -using the lightning creates a shield around you, which gives a shock to all attackers;
V - jumps over to an additional target.
Funnel of Frost - an attack on all the opponents in the row, which removes positive effects. If perfectly used (do not hold it longer than 2-3 seconds), it slows down the opponents.
II - decreases the effectiveness of the opponent attacks;
III - it leaves the opponents with their Defense Down;
IV - you create a cone, which turns this attack into a nice AoE ability. You need to remember then that you need to aim at the opponent in the middle.
V - the opponents take additional damage per each positive effect that the ability removes. Not very useful, because it rarely happens that someone has an effect that can be removed (assuming that you will be dealing with the opposing casters quickly), not even talking about a situation, in which the effect of this ability is discernible.
Pyre Ball - powerful damage for all the opponents. When upgraded to its maximum level, ends a battle within one or two turns.
II - increases damage;
III - sets all the opponents on fire;
IV - the strength of attacks and abilities of the opponents drop, not too useful,, but it is worth taking, for the sake of the next level;
V - the pyre ball attack ignore the opponent's armor. With this perk, this becomes a very powerful weapon. remember that the attack does not remove the armor; for this, you need to use the lightning or the Breath.
Backstab - the attack at the last opponent in the row. If successfully performed, it causes bleeding. It is easy to eliminate the enemy casters in this way.
II - increases the damage;
III - increases the damage per the opponent's every bleeding level (Bleeding can accumulate five-fold)
IV - your attack adds two levels of Bleeding;
V - increased damage to the stunned and slowed opponents. The basic for the thief. Upgrade to the maximum, as fast as possible.
Mug - a stunning attack. Additionally, you steal and item from the opponent - an useful potion, if you are lucky. Valuable only for the sake of the stunning effect. Do not upgrade this ability.
II - increases damage;
III - successful stealing also steals you the positive effect;
IV - stealing heals you;
V - the stunning effect lasts longer.
Execute - an attack that also destroys the armor and the weapon.
II - the final blow deals the most damage;
III - increased damage to the stunned opponents;
IV - perfect attack provides you with a bonus;
V - perfect attack enables you to perform two actions.
Stink Bombs - a throw of a series of bombs, they Gross Out and remove positive effects.
II - increased damage;
III - more bombs;
IV - you piss off the enemies;
V - the AoE attack.
Death by Thousand Blades - AoE attack that causes bleeding.
II - increased damage. Death inflicts more damage, in itself. With this attack, they are even higher. All of the additional points can be ignored and upgrade the Stink Bombs instead.
III - Attack Down on the opponents;
IV - requires less PP;
V - the attacks heal you.
Sling of David- an useful and powerful attack with a slingshot, which it is best to upgrade to the maximum level, right at the beginning. It carries the risk of hitting oneself, but you should master it, after several attempts, to the point where you will have no problems with it. On the pad, simply keep spinning the analog stick, and click right and left, in turns, on the keyboard.
II - increased damage;
III - you piss off the opponents;
IV - the projectile bounces off towards a random opponent, which creates a useful AoE, e.g. while fighting against zombies.
V - the less health you have, the stronger this attack is. The sling upgraded to the top level, in combination with perks such as Protect My Balls and Fight or Flight, can be lethal and kill the majority of opponents in one shot. At the same time, you need to remember that you are stepping on a thin ice and this is a risky tactic. It is best to use it in combination with the Speed Potion and, if necessary, let the buddy heal you.
Jew-Jitsu- a stunning attack, the Jew's basic stunner
II - increases damage
III - the less health you have, the higher the damage that you deal. A situation similar to that of the 5th level of the Sling;
IV - the perfect attack gives you a shield that protects you against the next attack;
V - the perfect attack gives you another turn;
Circumscythe - Slices off the armor and the shield of the opponent. Causes bleeding
II - increases damage;
III - the perfect attack causes two levels of bleeding;
IV - causes the Defense Down effect;
V - Grosses out everyone.
Whirling Doom - AoE damage that removes positive effects
II - increased damage;
III - the Dreidel bounces off more times;
IV - the perfect attack removes all of the negative effects on you;
V - sets the opponents on fire.
Plagues of Egypt - you send one of the plagues (pestilence, rain of fire, frogs, insects) onto the opponents. The Jew's strongest ability in standard circumstances (when your health is full) and adds an extra plague, per attack, if upgraded to the maximum level.
II - increased damage;
III - Pestilence and the Rain of Fire provide the party with the Attack Up effect
IV - Frogs and Insects increase the power of the party's abilities
V - you send an extra plague.
Each class has the same set of perks, which you can select in accordance with your own preferences. The perks can be unlocked by adding new friends to your Facebook friend list:
You receive the first perk for seven new friends;
2 for 12;
3 for 18;
4 for 25;
5 for 35;
6 for 45;
7 for 55;
8 for 70;
9 for 85;
10 for 100.
In the game, there are 20 perks,. you can have, in total, 100 friends so, you can unlock, in total, a half of them. Try to select them so that they match your abilities, weapons and buddies, as well as possible. In other words, if you base on the attacks with the Gross Out effect, for the most time (e.g. you have Kenny with you, or you are a warrior and make a constant use of Roshambo) you should take Dirty Fighting. If you have a good ranged weapon, take Marksman, etc. In general, I recommend that you focus on more defensive perks. As much as you can experience problems with survival, at the beginning of the game (you should have a lot of potions on you), later into the game, you will be finishing the majority of the battles, within several rounds. The Jew is the exception here, which should select things like Protect My Balls or the Fight or Flight, to max out on his damage. Also, what is very useful for everyone is the Second Wind, which brings the dead to life, with their health full.
Protect My Balls
You receive much less damage when you are critically wounded
Griefer
Opponents deal less damage if they are pissed off
Marksman
Stronger attacks with the ranged weapon
Pyromaniac
Increased damage that you deal to opponents and less damage received
Healing Wind
Magic attacks heal you, after being used
Growing Boy
More health by 20%
All Outta Bubble Gum
Healing with potions increases damage that you deal
Fight or Flight
You deal much more damage, if you are critically wounded
Bloodlust
Increased damage dealt to the opponents on fire and lower damage taken
Power Bottom
You receive PP with each magic attack with your weapon
Let It Slide
The duration of negative effects is shorter by one turn
Sucker Punch
The first attack in the battle deals extra damage
Brain Food
PP rises by two, whenever you heal yourself
Dirty Fighting
Increased damage dealt to and taken from the grossed out opponents
Counterfart
Counter with magic. Instead of pressing the standard attack, press the magical attack. It uses up mana, but it is stronger than the regular counter attack.
Necessary Roughness
Increased damage to the stunned targets
Mauler
Increased damage from melee weapons
Apprentice
PP increased by 20%
Second Wind
Revive potions resurrect your buddies with their health full
Fart of War
Magical attacks, with weapons, deal increased damage
Although useful in battle, magic will be, mainly, used to unlock blocked passages, with explosions. Another one of the spells that you will learn with your progress in the storyline. To use magic, you need mana which, unlike health and PP, does not regenerate spontaneously so, you need to drink mana potions on a regular basis.
Dragonshout - the basic spell that deals nice damage and stuns opponents. Outside of combat, it is used to increase fires that you can approach;
Cup-a-spell - a ranged counterpart of Dragonshout, thanks to this, you can use fire that you cannot access directly. Simply, direct the arrow in the direction in which you want to send the spell;
Sneaky Squeaker - a spell that diverts attention and makes the opponents more vulnerable to the next attack;
Nagasaki - the most powerful AoE spell. Outside of combat, you can use it to gain access to many inaccessible places, e.g. Crab People in the sewers, when you blow up the boulder in the way.
As you progress in the game, you will, ultimately, unlock six buddies that you can explore the town with. At any given moment, only one of your companions may be active. You can easily swap them outside of combat. If you swap during combat, this action will use up the companion's turn. Additionally, you can use the Buddy Command. Outside of combat, in certain places, you can have your buddy do something to cause an effect. And so, Butters can heal the wounded, Jimmy can use amenities for the disabled, Kenny can use his charms to lure the opponent into a trap and Stan can summon his dog to have it wet something (e.g. live wires). The only two characters that you cannot issue commands to are Cartman and Kyle, because they are kings and you take orders from them.
Each buddy has a special ability that he can use once per turn, without using up the ability attack or the melee attack. If you are not going to use a potion with your buddy, remember to use this ability always before you attack.
 Butters the Paladin
Butters is a paladin and you can easily say that he is one of the best companions. He deals lots of damage and, additionally, can heal for free, each turn. His downside is the low amount of PP so, to use his abilities to their fullest potential, you are going to need a lot of potions that regenerate PP. Still, even while attacking with the regular attack, he can deal considerable damage. He deals holy damage, which may be the key to succeeding, in some fights.
Natural Born Victim - Butters has twice as high probability factor of being attacked by the opponents. This is a passive ability.
Healing Touch - Butters can heal you. It is the free ability, it does not end the turn so, you can sue it and attack afterwards. Remember that using this ability makes it impossible to drink a potion.
Hammer of Justice - a strong attack connected with pissing the opponent off (he will not be using his abilities).
Hammer of Storms- an AoE attack against the opponent in the first row.
Professor Chaos - access to several additional, mainly shock abilities, which you will be choosing at random with the spinning wheel. From this wheel, you can access a strong attack against one target, several AoE attacks and a shield on Butters and his allies, which heals damage to the attacking opponent.
 Princess Kenny
Princess Kenny has useful AoE and can decrease the strength of the enemy attacks, every turn. Unfortunately, the damage that he deals with his weapon is quite low.
Immortality - when Kenny dies, you do not need to use the revive potion on him. After two turns, he will get up and return to the fight, with his health full. This is a passive ability.
Charm - Kenny causes Attack down effect on the enemy. Free ability.
Royal Kiss - it grosses out the opponent and deals considerable damage.
Furry Friends- very good AoE damage.
Unicorn Stampede- a QTE, after which Kenny deals damage to one row of opponents. You need to watch out because, if you make a mistake, while pressing the buttons, the unicorn will trample Kenny and kill him. Of course, he will revive, after a while.
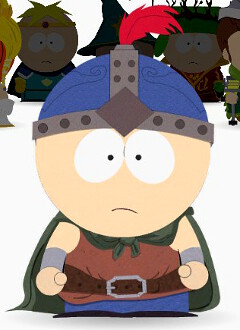 Stan the warrior
A warrior. Quite good AoE damage and a decent smash with the weapon. Has more health and PP than Butters. Yet the Paladin remains a better option, in spite of that.
Marked for Death - a free ability, Stan decreases the defense of one of the opponents.
Discus of Might- a discus throw towards the opponent. Then, it rebounds and hits a random opponent. Useful against multiple weak enemies and zombies, which may rise from the dead after a while.
Whirlwind Slash - a strong attack, combined with weaker attacks against the opponents above and below the main target.
The Way of the Sword- a very strong attack against one target.
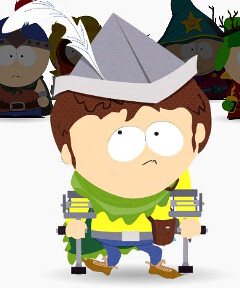 Jimmy the Bard
Jimmy is a bard, who is useful mainly for maximizing on the damage dealt by the player, because he himself is not capable of doing much. Probably, you will be using him the least of the available buddies, unless you need a constant flow of PP for your character. Useful from the perspective of the warrior.
Power Chord- a free ability, restores 6 PP, yours and Jimmy's;
Song of Buffness - increases damage dealt by the party and decreases the damage dealt by the opponents;
Lullabye - a mass putting of the opponents to sleep. The duration of the sleep depends on how well you did, while casting the spell. An opponent that you hit once, wakes up. Sometimes it is incredibly useful but, only several times throughout the entire game, like e.g. while fighting cows, during the side quest for Jimmy.
Brown Note - Jimmy's only offensive ability but, very strong, in exchange for that. High damage coupled with the Defense Down effect to the opponents.
 Kyle, The Elf King
The elf king with very strong abilities. As a matter of fact, his only downside is that you will be able to use him only during the last day of the game...
Rally - strengthens the melee attack and the ability attack. Free ability.
Summon Elemental - a strong, single attack with holy damage, against a single target.
Windstorm - AoE damage in a row.
Rain of Arrows - powerful AoE damage after successful attack (QTE). Even if you fail, damage is still decent.
 The Grand Wizard of the Kingdom of Kupa Keep
The king of humans and a powerful wizard. Cartman deals powerful damage, but in general he is discernibly worse than Kyle. He dies fast, due to no armor and a low number of health points.
Magic Missile- a free, single hit against the opponent. Relatively weak.
Flame Strike - strikes, opponents in a row, with fire and sets them ablaze .
Burning Cloud- A powerful fire attack but, not as strong as Pyre Ball
Curse - shock damage to a single target. Very useful, while fighting against some bosses.
 Ransack the house before going out
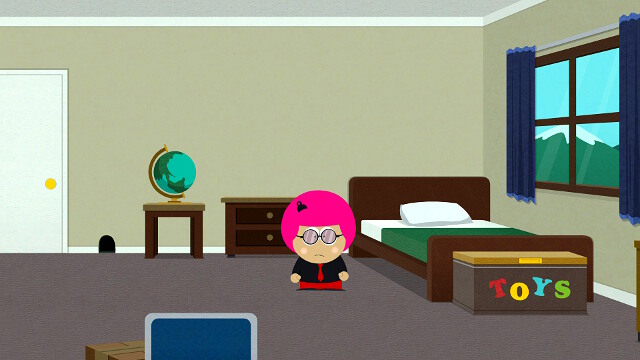
Once you create a character and watch the intro, you get to start the game in your room. Your first objective is to go out and make some new friends. Before you do that, however, it is a good idea to look around your house and thoroughly search through it. This is a recurrent element of gameplay, so you should make a habit of ransacking all encountered drawers and lockers. This way you can make your game significantly easier, by having a steady source of money, as well as other useful items. Always carefully look for yellow-coloured handles etc. This colour means you can open a given object or interact with it in another way. Most in-game locations repeat the same pattern, so you will quickly learn where to look for useful stuff. There is a locker in your room where you can keep items you want to use later. Moreover, by playing a mini-game in the restroom you get a poop which you can throw at an opponent in combat to disgust them. Once you have looked through the house, go outside. Optionally, if you take too much time, your dad will throw you out.
 Defend Butters
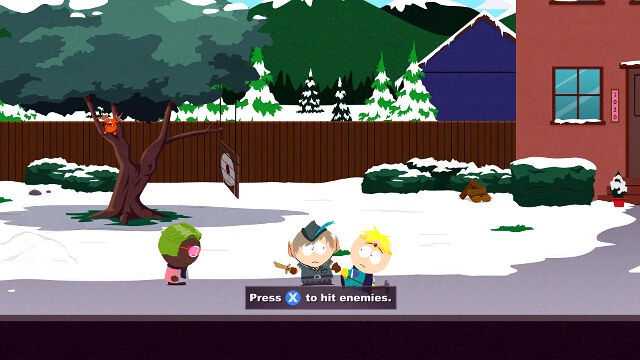
Once outside, head right to find Butters, who is fighting an unequal battle against a vicious elf. Butters seems to be losing, so he could use help. Approach the elf and hit him, so to scare him off. Butters becomes your first Facebook friend. Having a constantly expanding friend list is necessary to unlock new abilities for your character. This is why another habit you should form is talking to every person met in the town, including both children and adults. Some people are so elite that they will not want to become your friends until you have expanded your friend list to a proper size.
Follow Butters to Kupa Keep and meet the Grand Wizard.
 Choose your class
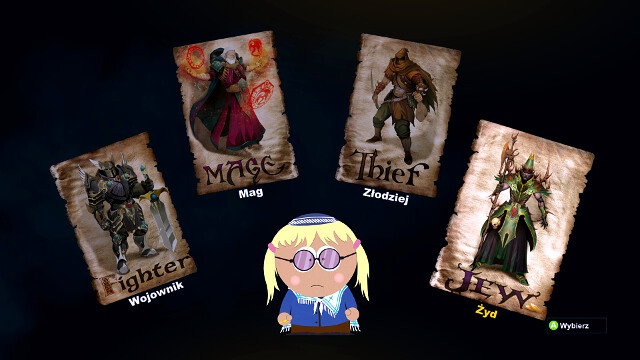
At Cartman's you may look around the keep. Later, you will have to choose your name and character class. Although, as you will find out, you do not have much to say as far as your name is concerned, the choice of character class is really significant and irreversible - you cannot change it later. Detailed information on specific classes can be found in an appropriate chapter of this guide. Once you choose your class, head to Clyde and buy from him a weapon suitable for your character (avoid gossips, unless you want to lose 2$).
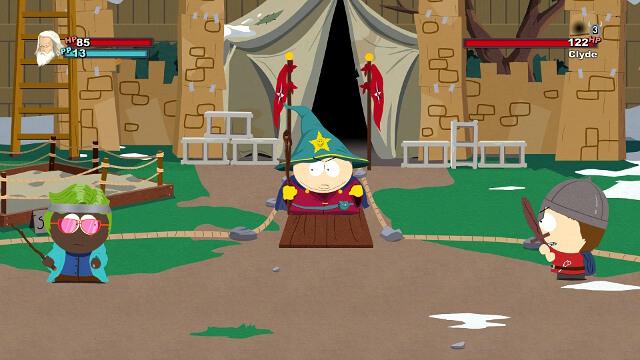 The duel with Clyde
It is time for combat tutorial. Although the combat is turn-based, it has some elements of an action game in it, requiring you to react quickly in particular moments. First, just hit the opponent. Select your weapon, click on Clyde and watch your character. Once he gets near the opponent, your weapon will glow for a moment. When this happens, you have to press the attack button again. If you do this too soon or too late, the blow will lose its impetuous and the damage will be much lower. Click each time you see glowing.
After you perform a basic attack, use a heavy attack. The pattern is the same.
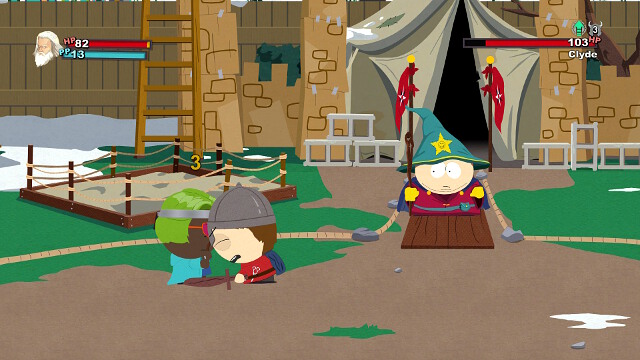 Block the attack
It is now Clyde's turn. You have to block his strike. When he starts running at you, at some point you will see a glowing circle under your character's feet. It is then, when you have to press the block button in order to reduce received damage.
Now it is time to use the special ability, depending on the class you have chosen:
-Fighter: press the attack button, to toss a ball. When it starts to fall down, press again to hit it with a bat;
-Mage: continually press the attack button;
-Thief: press the attack button each time your weapon glows;
-Jew: quickly press left and right buttons interchangeably to spin your sling (if you are using joy pad, simply rotate the analogue sticks anticlockwise) and when the sling starts glowing, press the attack button.
After you perform a special attack, the normal fight will resume. Clyde starts to perform double attacks (press the block each time you see a glowing), and then it is your turn to use one of the attacks you have just learned. You should not have any problems with defeating this opponent quickly. After the fight, follow Cartman to see the Stick of the Truth.
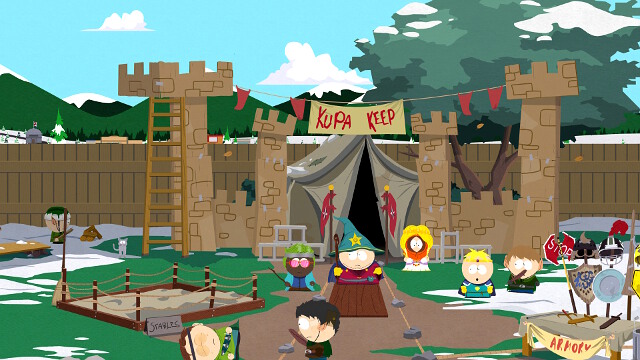 Elven attack
The Kingdom of Kupa Keep (KKK) is attacked by elves. This is the final part of the tutorial. You must fight three fights (to start a fight, simply walk toward an elf and hit him - no matter which one you choose, since the fights are always set in the same order):
1. Battle against a fighter and an archer. Here you will learn how to perform a counter-attack after blocking. When you successfully block an attack, the attacker will fall over. Then, press the attack button to hit him while he is laying down. With your special ability you should easily take down the two opponents. If needed, help yourself with a heavy attack;
2. A fighter and the archer no. 2. The warrior will assume riposte stance. This means that he can counter-attack every melee attack. Guys like this one can be eliminated with your bow or special abilities. Use your bow to shoot the archer. Once the archer is gone, the warrior assumes reflect stance, which in turn means that he can deflect bow-shots, but is vulnerable to melee attacks and special abilities. Finish him off using one or the other;
3. Two warriors. One of the opponents is hiding behind a shield. Shields can block a certain number of attacks, no matter how strong these are. This is why it is best to use abilities which consist of several strikes. Use the basic attack. Your first blow should get rid of the shield, while the second eliminate the opponent. The other warrior, in turn, has heavy armour, so invert the tactics. Use the heavy attack to cut through the armour.
After the last fight, the elves retreat. However, as it turns out, they managed to seize the Stick of Truth. You have to gather three best warriors in the Kingdom: Tweek, Token and Craig, in order to recover it.
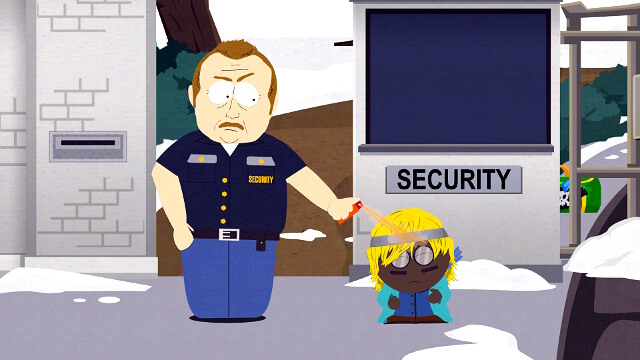 You cannot walk past the guard
Head to Token's house. You find out that the security guard will not let you in that easily and will use gas against you. You are going to need a gas mask. You can buy one in Jimbo Gun's for 2$ (if you are not carrying any money sell some rubbish or ransack nearby buildings). Go back to the security guard with the mask (note, that you have to put it on, it is not enough to just carry it in your inventory). Since he cannot use gas against you anymore, he will resort to more direct enforcement measures.
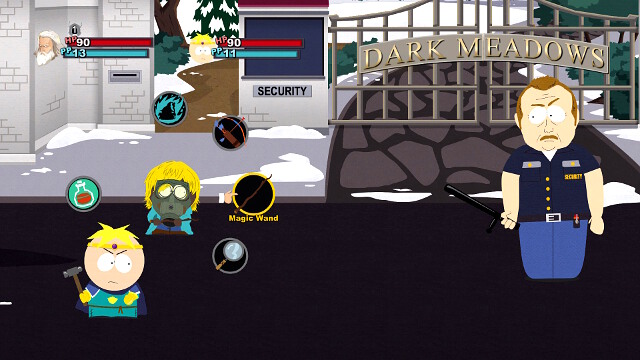 Defeat your enemy
Since the opponent has a lot of armour points, it is best to use heavy attacks and special abilities. If needed, remember that Butters can heal you up. Once defeated, the guard will drop a baton of 2nd level, which you will most likely equip instead of the weapon bought in KKK. Having won, you may simply walk to the door and tell Token what happened. You can find a couple of hidden treasures around his backyard, so it is worthwhile to look around before leaving the area.
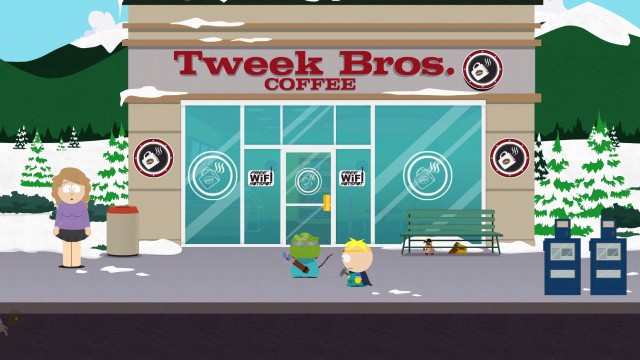 You can find Tweek in his parents' coffee shop
You can find Tweek in Tweek Bros. Coffee. Head to the back of the coffee shop. As it turns out, he cannot join the quest until he finishes all his duties. Head to Kenny's house to help him.
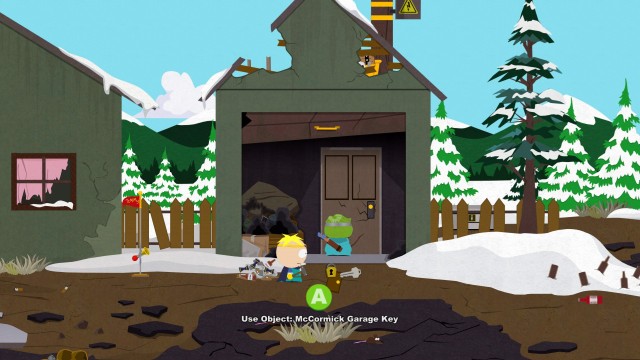 Enter through the garage door
Kenny's mom gives you the key to the rented room at the back of the garage. Get inside. Once there, you will have a battle to fight.
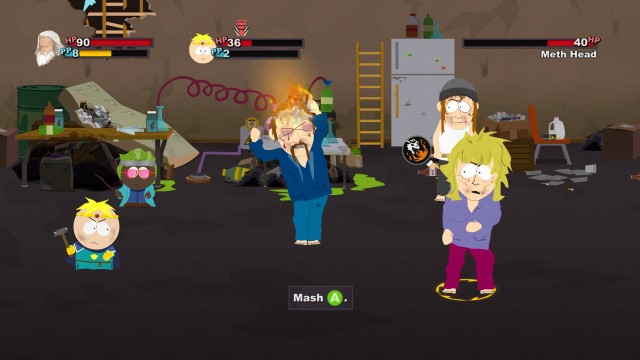
It is worth to carry some boosts and health potions, since the fight might be a bit difficult. First, focus on the woman, who can perform multiple attacks at the same time, so it is easy to fail to block them. Butters' Hammer of Storms is especially useful here - this can damage both her and the other opponent standing next to her.
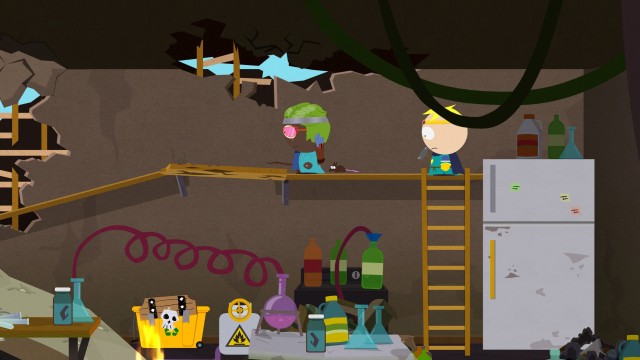
Climb up the ladder and hit the plank hanging down from the ceiling. It will fall down and create a passage, as shown at the screenshot. You can find the delivery for Tweek on the shelf. Turn off the burner so you could exit and head back to the coffee shop to complete the quest. As a reward Tweek gives you the key to his chest, which is located at the back of the building. You can get to it using the ladder.
 Craig is missing
At Craig's house you will learn that he has been put in detention at school. Head to KKK, to tell Cartman about this fact (make sure you have already recruited Tweek and Token). Cartman will come up with a plan of getting the thief out of his jail, but before doing that, he will introduce you to arcana of magic.
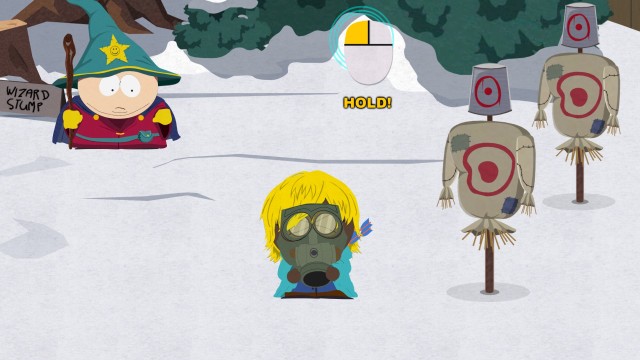 Learn how to cast spells
Cartman will teach you the Dragon Shout. In order to perform it, first hold down the right analogue stick (or hold the left mouse button). Next, use the left analogue stick (A and D on keyboard) to find the proper "frequency" by making the arrow point upward (note the intensity of the waves in the circle). Once you find it, cast the spell by moving the right analogue stick up or pressing the right mouse button. You have to successfully perform this action twice - first, on the dummy, then, on Kenny.
Having been introduced into the world of magic, you are now ready to rescue Craig. Kenny joins your team. You can only have one companion active at the same time, so by you choosing him you will put Butters aside, and the other way round. Note that you can switch them in combat, however, this costs your companion a turn - consider that before deciding to switch characters during combat.
It is time to rescue Craig, so head to the school.
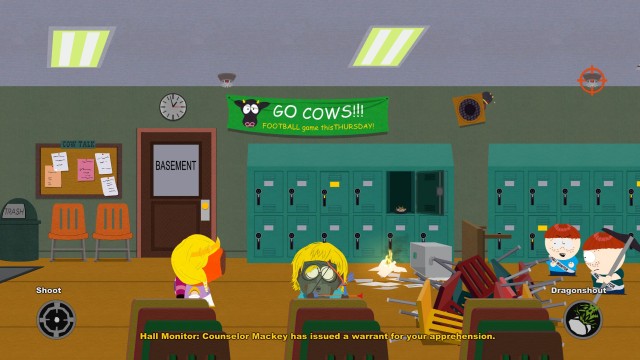
At school you will fight a hall monitor, who is not a tough opponent. Once you defeat him you will get a message from Cartman that ginger hall monitors can bite and infect you, which you should avoid. Instead of traditional combat, try to win some next confrontations by making use of the environment. Head to the right. There, over the barricade, you will find two more gingers. Approach the fire and use the Dragon Shout to cause an explosion and eliminate them immediately. This time you do not have to meticulously modulate the spell as you did during training. You just need to stand next to the fire and suck in some air and then release it (push the right analogue stick down and up or click the left and right mouse button). The fire triggers the sprinkler over the gingers, as shown at the screenshot, while the explosion causes the speaker to fall down into a pool of water and electrocute the boys. Look out for this type of chain reactions during your entire stay at school.
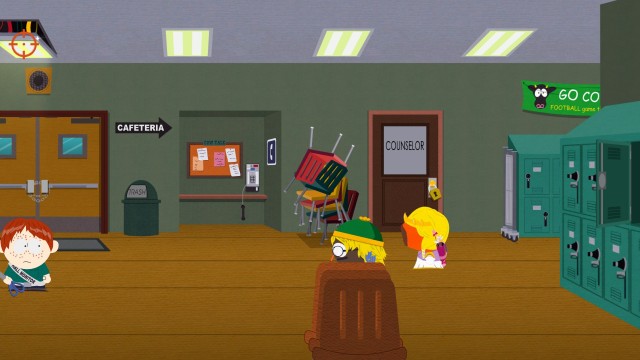
Craig is in the commons, which, unfortunately, is closed. If you want to get inside, you will need the gold key, which is in the room locked with the silver key, which in turn, is in the room locked with the brass key. Another ginger on your way can be eliminated either by pulling a surprise down on his head (look at the screenshot) or by shooting at the telephone and pulling the chairs over on him. Press on.
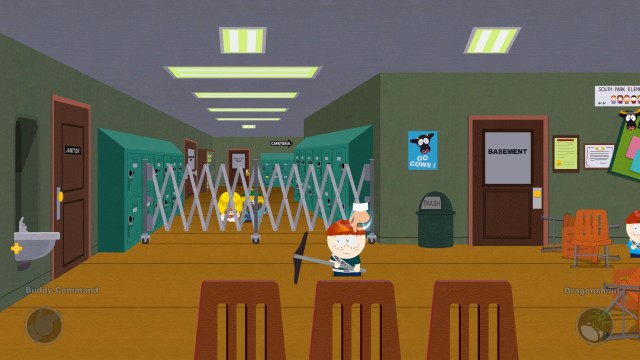 Use Kenny to get the gate open for you
You need your companion to open the gate. Select Kenny and use the Buddy Command tool to make him draw the guard's attention to himself. The randy guard will open the gate.
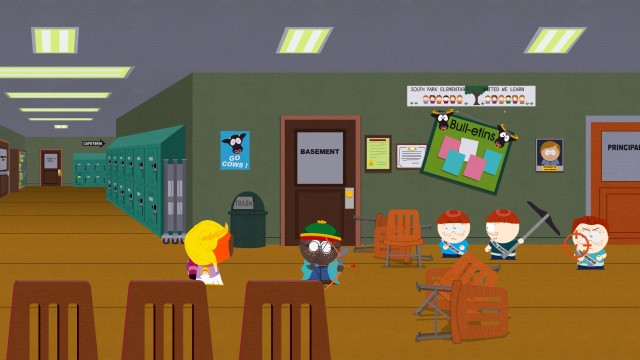 The group with the key
Shoot the board hanging over two gingers, in order to make the fight a lot easier. Now you have to fight the key bearer. He has a shield, so the basic attacks will be the best. Once you acquire the brass key, go back a little bit and open the locked door.
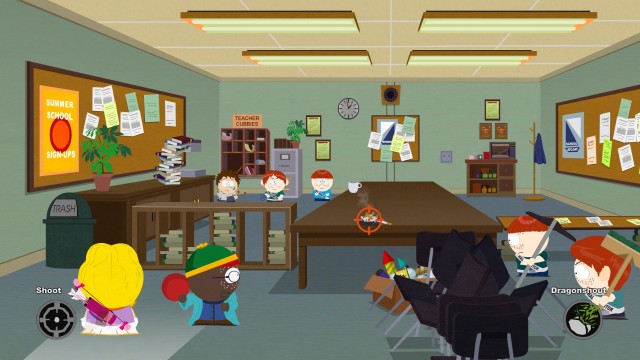 Time for some more chain reactions
Shoot the cigarettes to combust fireworks, which will take down one of the gingers at the back. The other one stands under the pile of books which are laying at the desk. Shoot them to eliminate him. Then, you just need to use the Dragon Shout on the burning fireworks to cause an explosion that will neutralize the two gingers on the right. The way to the key stands open. Switch Kenny to Butters and use Buddy Command to make him heal the wounded fighter under the desk. Then, he will give you the silver key. Go back to Mackey's office and open it with the key. The gold key can be found on the shelf in the middle of the room. Shoot it, to finally earn the access to the commons.
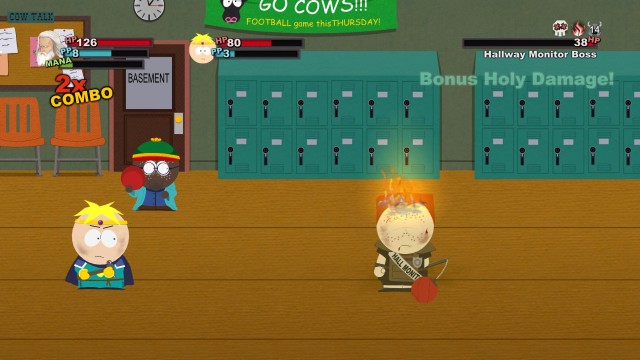 Boss fight
As you attempt to enter the commons, you are attacked by the Boss and two of his buddies. Above all, you must watch out for his cumulative abilities (casting a spell starts in one turn and ends with another), such as calling your parents. Always try to interrupt them with the Dragon Shout, which will additionally stun him. In the meantime try to quickly get rid of the other two. They are vulnerable to holy damage, so Butters will be most effective here. Do not forget to take the locker key from the fallen Boss. Using it you can open all closed lockers in the hall, so make sure to search them through before you enter the commons (the ones which can be open are marked with yellow). Finally, open the door. A cut-scene starts after which go back to the KKK.

Before the mission is over, you will learn a magic attack, Cup-A-Spell. This is similar to the Shout, but you can use it from a distance. The training goes almost as the previous one, with one difference - this time to find the proper frequency you have to turn the arrow to the right. After the training, the mission ends.
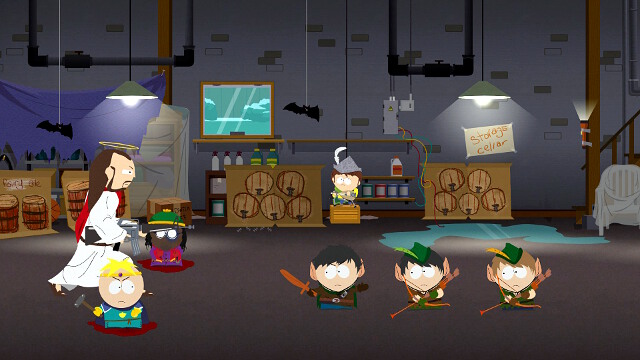 You should try to defeat the opponents as quickly as possible
Along with your buddies go to Jimmy's house/Inn of the Giggling Donkey. Cartman points you to the basement to look for the Bard. When you find him, you will have to fight three elves. The Bard will boost them with his song, so it is best to start off with your most powerful area abilities. Do not hesitate to call for an ally, e.g. Jesus. If you cannot afford that, help yourself with performance boosts.
Once you beat them, you will have to get through to the exit. First, you may want to use the Cup-A-Spell that you have just learned so to quickly eliminate the elf on the right.
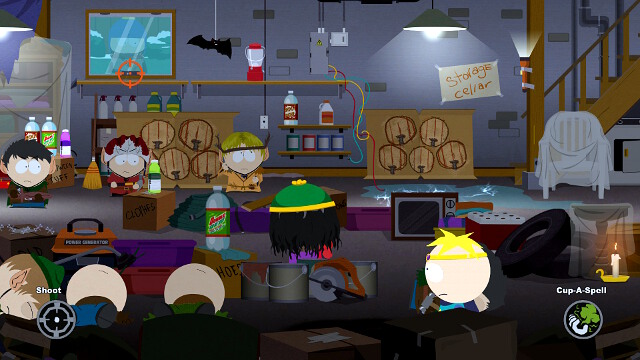 Make way for the thief
In order to leave the basement shoot at the window - there is Craig on its other side. On entering inside he gets hurt a little bit, so tell Butters to help him. Clear off the remaining elves and head upstairs.
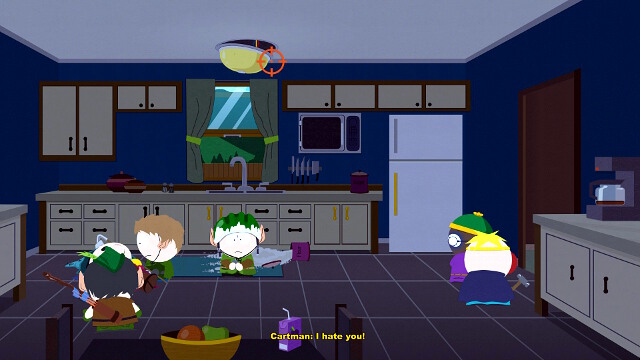 Defend the king
Head to the kitchen. Pull down the lamp on the opponents so to make the fight easier. Once you defeat others, command Butters to heal Cartman. Head upstairs.
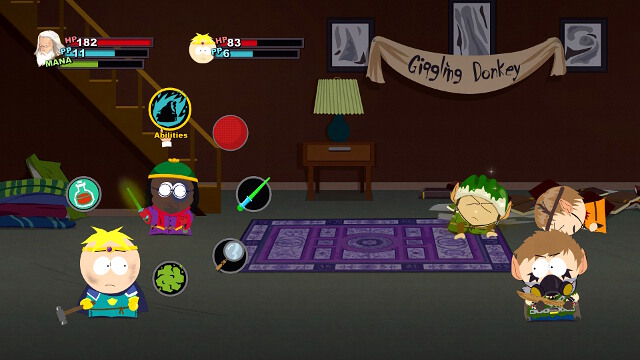 A fight the elves who are guarding the stairs
Before going upstairs you need to get through some more elves. Use the environment to get close to the door and let your companions in. To get upstairs, you will have to get through a tough opponent - a masked elf. He is resilient to magic and disgust effect. Moreover, he has a lot of HP and armour points, so use the most powerful single-strike attacks you have. It is of utmost importance to interrupt his spells. Butter's hammer is very useful for that purpose. Remember to keep replenishing Power Points (PP), so you could always use your buddy. After the tough fight. head upstairs.
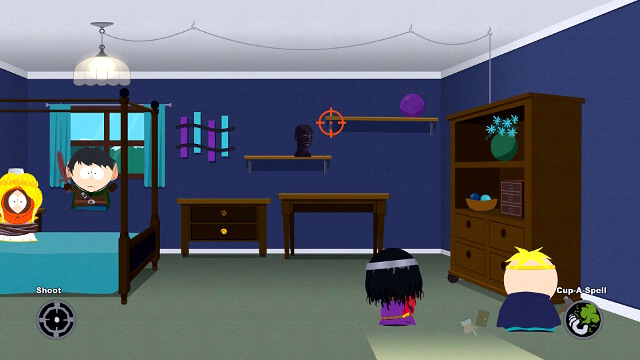
Heroicly saving the princess cannot be too easy. So first, shoot the shelf, as shown at the screenshot. Use the mess you have caused to climb on the chest of drawers and from there shoot the lamp hanging over the bed. Then, shoot the purple-blue decoration on the wall so it forms a ladder, which you can use to climb on the dresser on the right. Up there use the wire to heroically rapple down at the bed and save the princess. Talk to Kenny and go outside.
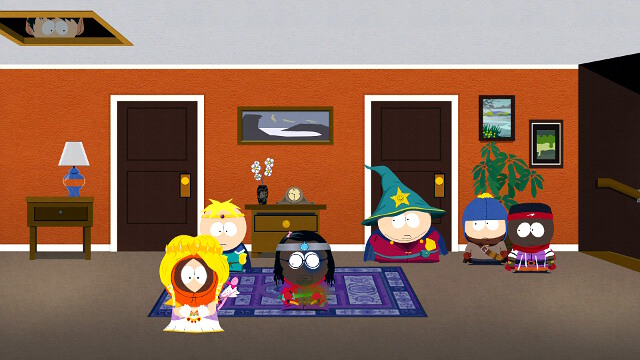 You need a ladder to get to the upper floor
Use Kenny's charms to get to the attic.
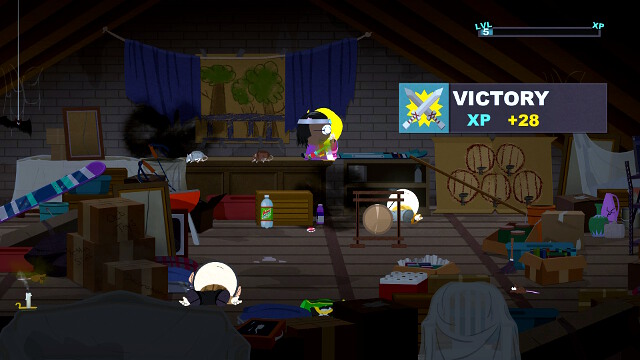 Clear off the attic
Use spells combined with lamps and candles to take down the enemies. Then shoot the chest on the right to make a hole in the floor, through which you can get to Jimmy's room on the lower floor.
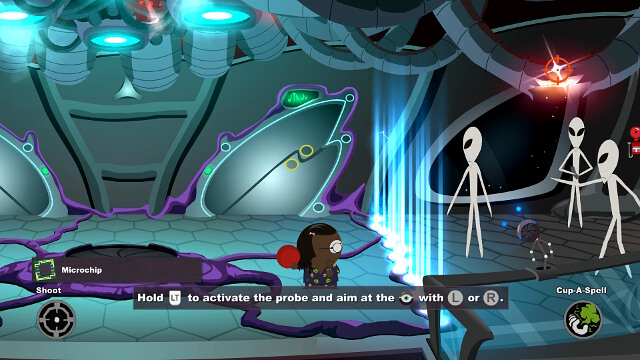 Battle against the Bard
Although Jimmy has a lot of HP and some dangerous abilities, he is not much of a challenge, as long as you are able to keep him stunned at all times. Ply him with abilities like Dragon Shout, Sleeping Powder, or Royal Kiss, so he was unable to do anything. If he summons rats, you can quickly get rid of them with Kenny's Furry Friends. Once the Bard is defeated you receive the Stick of Truth!
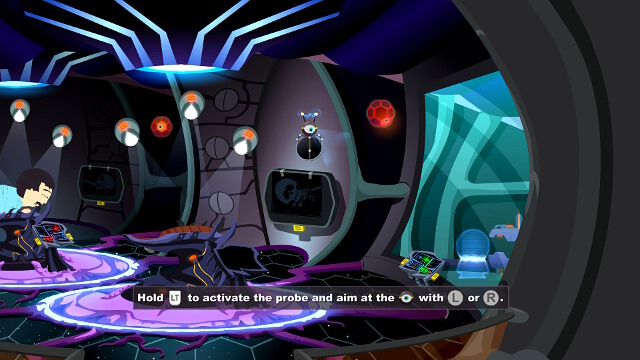 Learn how to use teleportation
Once you have reclaimed the Stick, get back home. If you go straight home, your parents will be nice to you. Otherwise, soon they will find you in the streets anyway and ground you. It does not influence the story though. In both cases you end up in the bed, from where you get abducted by aliens. When they try to probe you, you have to repeatedly click the attack button to break free. Unfortunately, you are surrounded by a force field, but, as it turns out, you can use the probe to teleport yourself outside of it. Select the probe from tools menu and aim at the transmitter at the wall in order to enter teleportation mode. You can then choose where you want to teleport yourself to. On the ship, as well as later in the town, there are many seemingly unreachable places. Use your probe to get there.

Once on the other side, you get cut off again. Teleport to the other side using the probe. Before you do that though, it is worth to shoot the cables, so to eliminate some enemies before engaging into combat (screenshot). The aliens are very vulnerable to electricity, so use mainly concussive attacks against them. When you manage to get through and defeat the aliens, use the probe to activate the elevator.
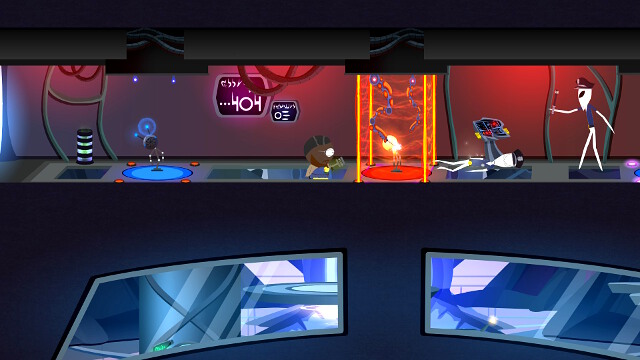
Use teleportation to get to the highest level of the location. In the place shown at the screenshot you can use magic, to fry up the aliens. Then, use the console to turn off the force field on the left and head that direction. You will encounter a rhythm mini-game, in which you have to press buttons in the right order as displayed on the screen. When you finish, go down again.
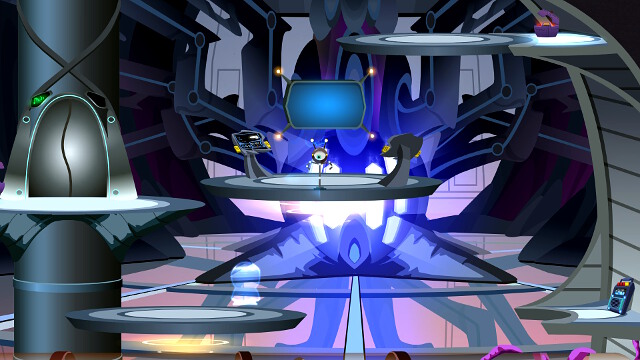 Teleport yourself to lower level
Use the probe in the middle of the room to get to the lower level. Note that by using the consoles on the central platform you can move the platform up and down. Move the lower platform and then teleport yourself into the tube beneath it. From the tube teleport yourself even lower, where you can use a console to open the door on the right side of the tube. Go back there and go to the right. There is another console as well as the same mini-game as previously. Do not get discouraged by first couple of sequences - this is all on purpose. After a couple of attempts, the music that you have to play gets much easier. This way you will unlock the room with the main console. Go back to the elevator.
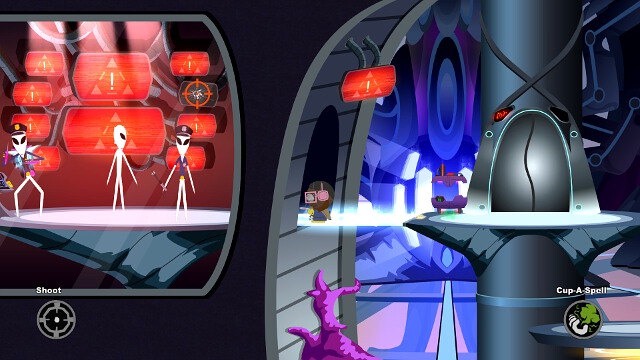 The main control room
As always, you can make the fight easier before it starts by pulling something down on the opponents' heads. You have to fight an ordinary fight with the chief of security. Remember about electricity and magic. Once you win, use the console to turn off the force field. Then get back to Randy.
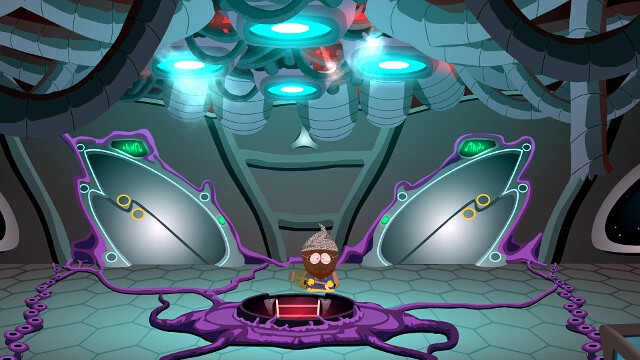 Stairway to Hobo
In the location leading to the room where you were previously being probed, you can see now a ladder to lower level. During your stay on the ship you must have come across audio-logs of one of earlier abductees. If you have listened to all of them, you can the man downstairs. On meeting him he starts to fight with you. The fight is not very difficult, provided that you manage to neutralize him. So make sure you have enough mana for Dragon Shouts. The defeated hobo will drop a hat which decreases the damage taken from Aliens by 25%. This will prove useful in the final part of the alien craft mission, just as any other item that you may have found so far which boosts you against aliens. Before you proceed, equip yourself properly and do not forget about weapon and armour modifications. Concussive damage items should go first.
 The ship bosses
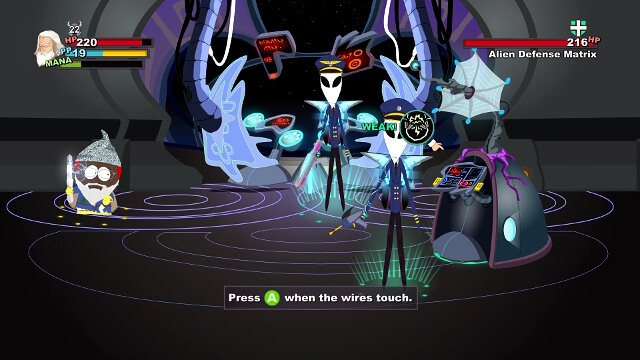
Get Randy free by playing more of the same mini-game. Next, pick up a gem from the floor, so to unlock the exit on the left. There, you will find a chipokomon, which you should immediately collect, as you will not have another chance to get here. Go farther to enter the ship's bridge. First of all, focus on Matrix, who is generating shields for the two pilots. He is resilient to pretty much everything except for electricity, from which he takes 50% extra damage, so use this type of attacks against him. The other two, without their shields, will not be so tough. However, you have to skillfully block their attacks, especially the rocket attack, so to reduce the damage you receive. Some boosts and health potions will be most probably necessary too. Once you defeat the pilots, a cut-scene launches and the mission ends.
 Try to recruit the goths
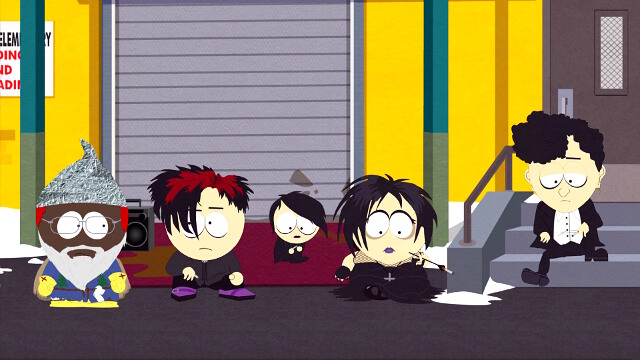
During the night the Stick gets stolen again. KKK needs some new blood, so Cartman sends you to recruit the goths. Head to the school and talk to them. First, you have to take care of your image, so they even considered taking part in your game. You will need cigarettes, coffee, and clothes.
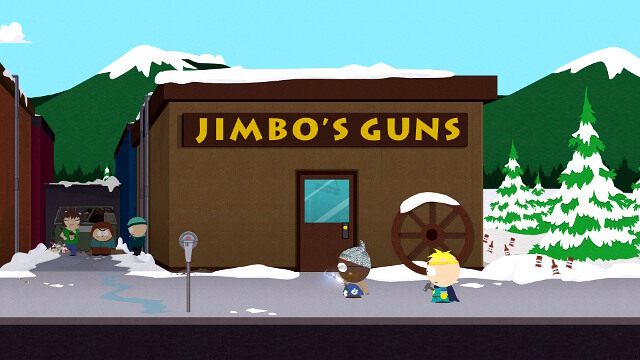 Take the cigarettes from the kids
Go in front of Jimbo's Guns. On the back alley you will find some kids smoking cigarettes. Attack them. They are very resilient to physical attacks, so you should primarily focus on your abilities and magic. Take the cigarettes from the defeated.
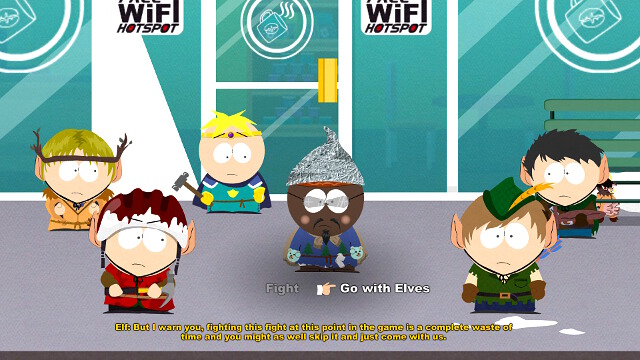 Fighting the elves is pointless
In Tweek Bross. Coffee buy a Dark Roast coffee for 1$. On leaving, you are stopped by elves, who offer you to take you to their king. You may try to fight them, but this is a waste of time - eventually you will go with them anyway. Once there, you are offered to betray KKK and recruit the goths for the elves. Jimmy and Stan join your company.
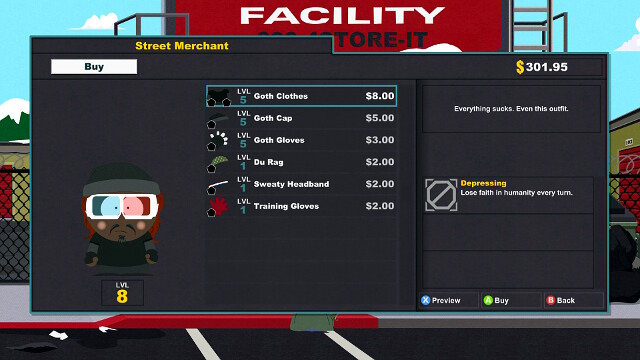 Buy some goth clothes
Head to the front of U-Stor-It and buy the goth cap, clothes, and gloves from the homeless man. Once clothed like this, head back to the kids in the school. You get another task. Head to the Community Center. Note, that you no longer have to wear goth clothes, so if you have better ones or simply do not like these, you may change them. Do not throw them away though!
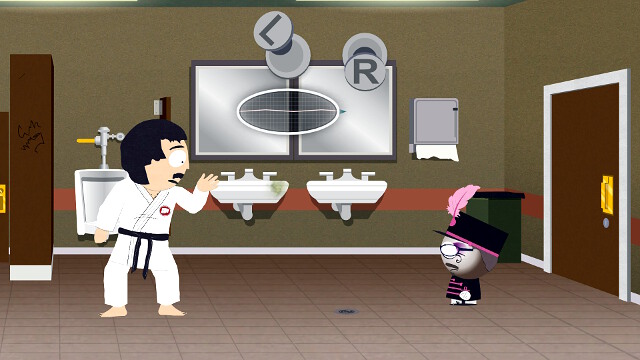
In the Community Center you will watch a brief cut-scene. After that, talk to Randy. He directs you to the restroom, where he is willing to teach you yet another spell, the Sneaky Squeaker. You can practice it, as you previously did with Cartman. Move the arrow to the side and hold it for a moment until the game tells you to release it. Use the newly learned trick to break into Taco Bell construction site.
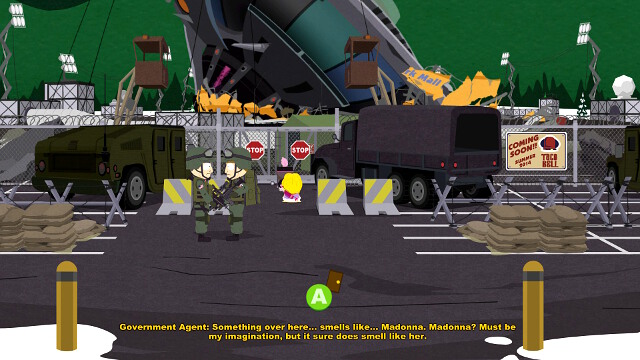
Use the new spell to distract the guards. Direct the spell so it flew past the guards (they will be highlighted with yellow) and deliver the blow when you see the colourless cloud is in the right distance. The soldiers will go to investigate the "explosion" as shown on the screenshot. Use it as an opportunity to get past them.
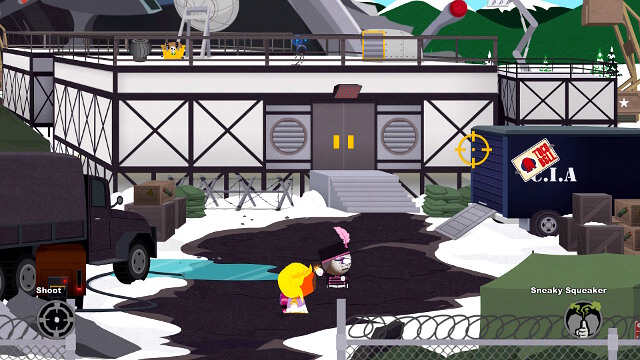
There is yet another soldier in front of the building. Use the Squeaker to get him into the truck and then shoot the tailgate, as shown at the screenshot, in order to lock him inside. Use the probe to teleport yourself on the roof, where you can use the vent shaft to sneak inside. Once there, you will have to fight a zombie. When you beat it, go into the Conference Room and take the voice recorder, then leave using the main exit. Three more zombies await you there - they may be a real problem. If needed, call an ally for help. Once you beat them, go back to the Community Center and show the recording to Randy.
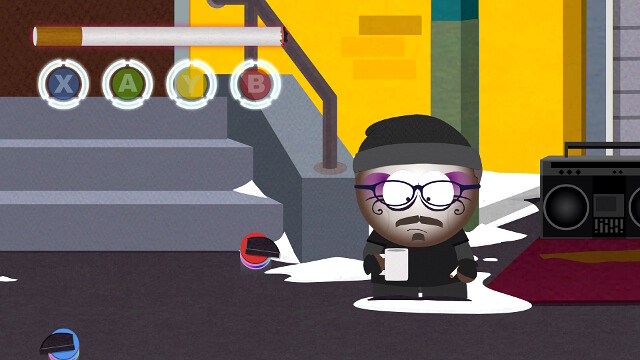 Dancing mini-game
After you have heard out the cassette, you get a picture needed for the goths. Go back to school then. Remember about putting on your goth costume. The last test is dancing game. You have to press appropriate buttons as their symbols level with their circles in the upper part of the screen. Once you are done, your new allies pledge loyalty to you. Now you need to decide to whom you want to help. If you choose humans/Cartman, head to KKK. If you prefer elves/Kyle, head to the Elven Kingdom. Talk to the leader of your choice and then climb the tower/tree to call forth your goth reinforcements to finish the mission.
 Assault on the school
No matter with whom you have sided, the pattern of this mission is roughly the same, the only difference being which groups are friendly or hostile. You launch an assault on the school so to reclaim the Stick of Truth, which is supposedly held in one of the desks. After the cut-scene you will learn that the main gate is closed, so look for the entrance at the side of the building. If you have sided with humans, you will find a wounded goth there. Use Butter's ability to heal him up and he will open the back entrance to the commons in return. If you are with elves, use Jimmy's ability to get inside through the accessible entrance.
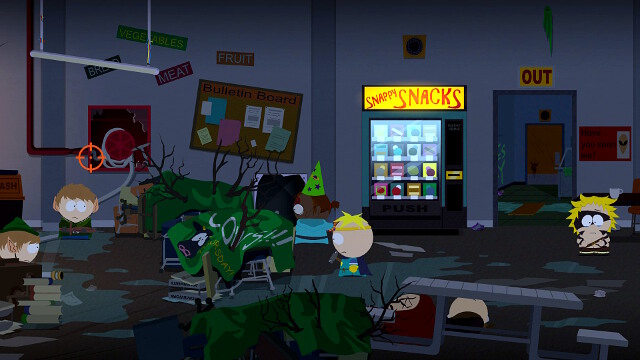 Use the environment to get rid of the enemies
When you get to the hall, you will have to go through several barricades. Shoot the pipe and then the wires above it, to electrocute the first opponents. Further on, use the vent and the probe to get to the other side of the barricade.
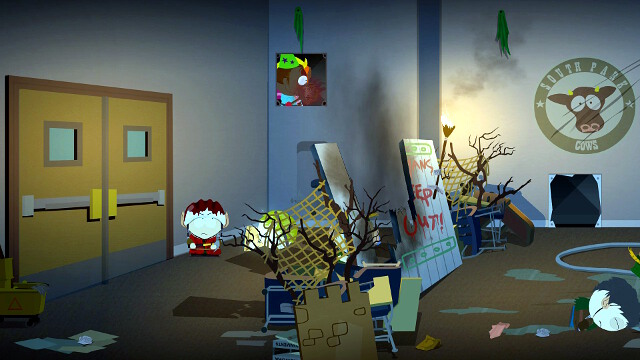 Make your way through using magic
Here, use the Cup-A-Spell on the torches, to blow up the barricade, then get back on the ground and walk through the doors.
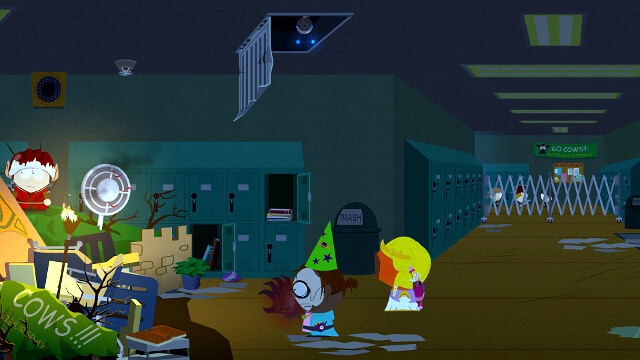
Use the probe to get to the vent shaft in the ceiling, as depicted at the screenshot. A big rat is inside, but you can easily get rid of it, if you hit the trap while the rat is charging at you. Step forth a little bit to lure it and then go back and trigger the trap. Then, shoot the wires to knock down the lamp, which you can use to get down on the ground. Once there, head to the basement. There, after a short cut-scene you will have to fight zombie gingers. The two with shields are vulnerable to fire, while the main opponent, to holy damage. Remember that the guy's minions have shields, so first knock these off with basic attacks. Note also that dead zombies go back to life in two turns, so try to kill them all at approximately the same time, preferably in one turn, by using area damage. When you win the fight, go through the door, which is farther in the basement.
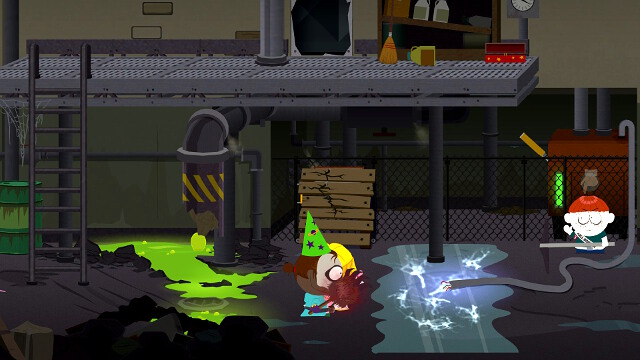 Use the help of your companions to get rid of the gingers
Destroy the pipe and climb up from where you may shoot the valve to turn off the water. You may also walk through the vent shaft and drop a gable vent on one of the guards so to knock him out. Next, go back and climb down the ladder and use the Buddy Command option to make Kenny lure the zombie ginger to step into the electrified water, when siding with humans. If you are siding with elves, then while standing on the elevated construction, tell Stan to call for his dog, so it expanded the wet area a little bit. Then, shut down the nearby generator so you could walk across the water safely. The last opponent in this room can be taken out by first shooting the electric box on the wall and then causing it to explode with Cup-A-Spell. In the boiler room you can fight the bacteria from the Big Game Hunting quest. Once you finish, leave the basement using the exit on the right, then head on farther this direction.
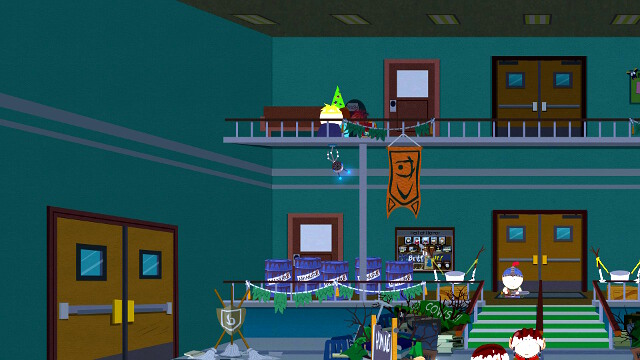 Get to the other side using the probe
Immediately after you enter the room, you are being shot at by Stan or Butters. Use the transmitter to quickly get to the balcony before you get too much damage. Then slide down on the rope to the other side. The fire resumes. Stand close to the barricade - one of the missiles should set it ablaze. Then use the Cup-A-Spell on it to blow it up. Stan/Butters retreats. If you have little health at this moment, remember that you can pause the game at any time by entering the inventory to eat something.
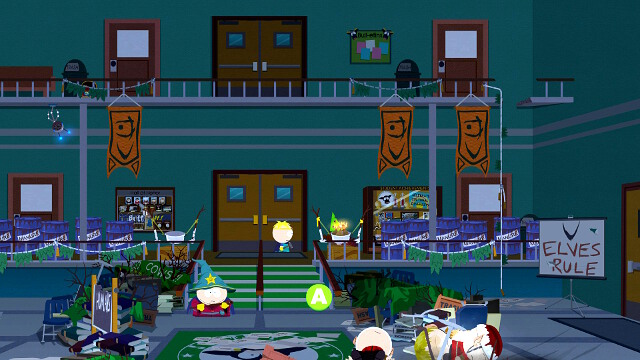 Let your allies in
Take over the catapult and use it once. Then use your magic on the object you have just hit with the catapult to open the way for the rest of your company. One of your companions will take care of the locked doors. Press on, as soon as he opens them.
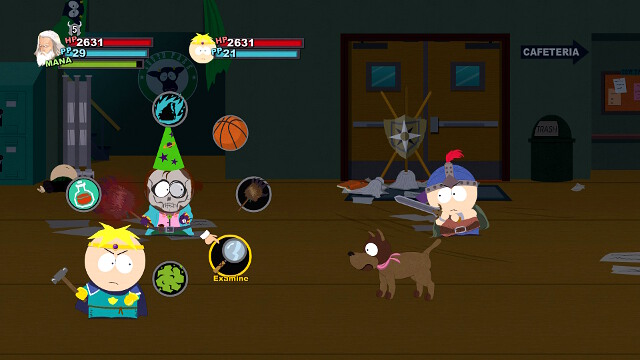 A boss fight
A fight awaits you - either against Stan and his dog or against Butters. When fighting Stan, roll out the big guns from the very starts. A good tactics is to drink a speed boost potion in the first turn with both of your characters and then attack with your most powerful abilities. This way you should get rid of the dog before it can perform a single move and hurt Stan a lot at the same time. Then, you just need to systematically drop his health, while healing yourself and blocking enemy attacks in the meantime. Butters seems to be a tougher opponent because of his shield, good armour, and heavy area attacks. Try to get rid of the shield as soon as possible and keep weakening his armour, while performing attacks with damage over turn, such as set on fire. Once you defeat the right hand of a given king, go up the stairs. There, you still have to get through several groups of enemies (you may as well fight or ignore them).
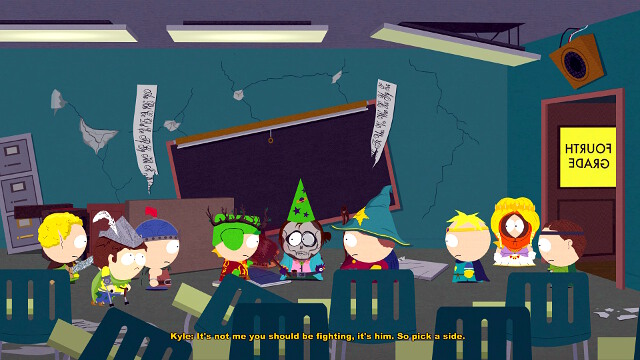 Choose where to put your loyalty
Now, you face the last choice: whom to help. Attack Kyle or Cartman. Cartman is as he is resilient to disgust and has more HP. Both opponents deal very high damage, so remember about healing yourself regularly, almost every turn. At the same time keep on attacking with the most powerful stuff in your arsenal -you will have the upper hand in an attrition battle like this. When your opponent's HP has dropped down to about 30%, the final sequence begins in which you have to keep pressing the attack button. Once you win, a cut-scene launches, after which you have to... go to bed.
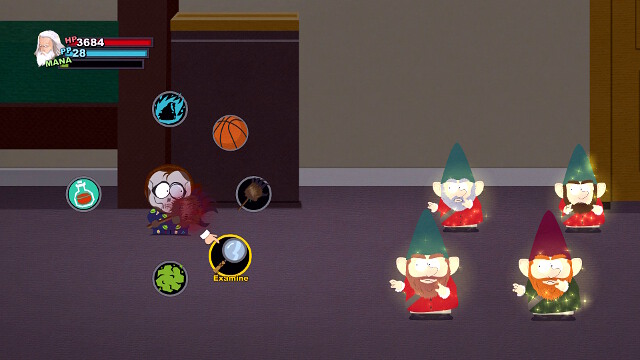 Fighting the gnomes
Apparently, another sleepless night is in store. You have to fight gnomes. Winning the first battle is nearly effortless, however, in the second one the gnomes shrink you, so it is no longer that easy. First and foremost, remember about interrupting cumulative attacks - Cup-A-Spell is perfect for that purpose. After the fight, change your clothes to the best ones in your possession and enter the mouse hole.
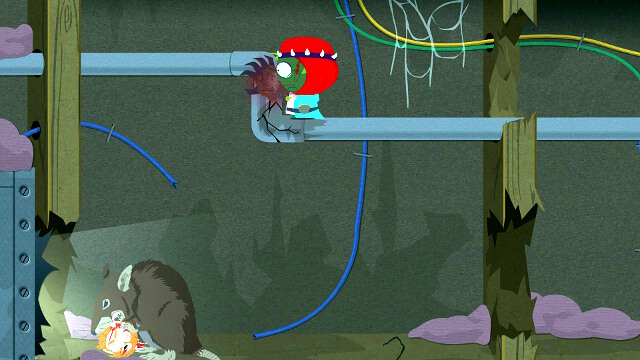
After you enter there, avoid the trap. You will notice a huge rat. Shoot the wire over it, then climb up where you can destroy the pipe by hitting the spot shown in the picture. The rat gets electrocuted and starts running toward the trap which kills it. Press on forward.
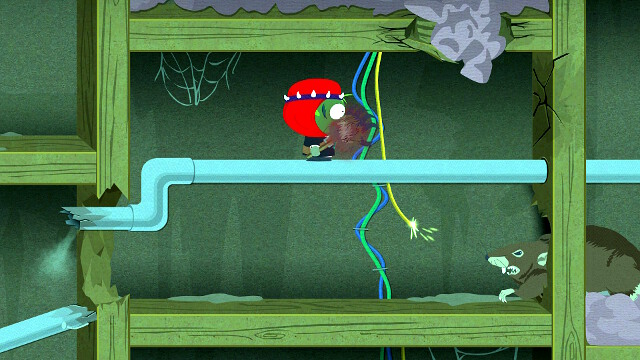 Get rid of the remaining rats
A little bit farther, you will come across a group of rats. Climb up, from where you can damage more wires and more pipes. Then, use magic on fire in order to blow up the rodents, thus unblocking the way ahead. Climb up and go through the light switch to your parents' bedroom. A little bit farther, on the cupboard, you encounter more gnomes to beat. They are especially vulnerable to fire and freeze. Do not forget about interrupting their spells. Once you defeat the gnomes press on, until you meet the warlock.
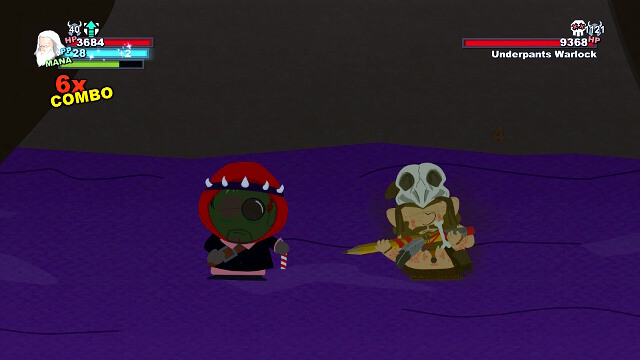 The final fight
This fight is pretty tough. First of all, try to knock off the opponent's armour. Another thing that you should watch out for are QTE (quick time events) sequences, when you have to press buttons accordingly as they are displayed on the screen in order not to get crushed. Once you defeat the gnome, the mission ends. More importantly, from now you are able to shrink yourself whenever you want, thus gaining access to many locations previously unavailable to you.
 The Girls' HQ
At the meeting, it will be decided that all of the local factions need to be unified in fight against Clyde. At first, your task is to try to convince the girls' to the alliance. Go to Annie, next to the Town Hall. If you have not yet one that, you will have to help her drive away the girls that are bullying her. Give her the letter and go to the meeting. After the cutscene, go to the playground. After another cutscene, you will have to fight Monica's boyfriend. It is not too demanding a fight. After you are done, return to the Town Hall, to Annie.
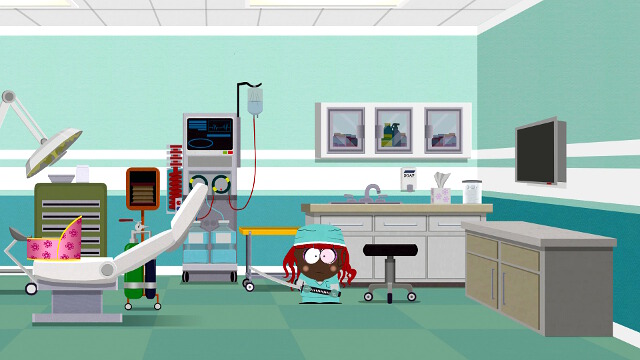
Change your looks and go to Unplanned Parenthood. Only doctors can access the archives so, you need to find a disguise. Go to the surgery, where you will have to play a simple mini-game, in which you need to keep mashing the attack button. Once the doctor leaves, collect the equipment, from the nearby doctor's cart and change, just like in the screenshot.
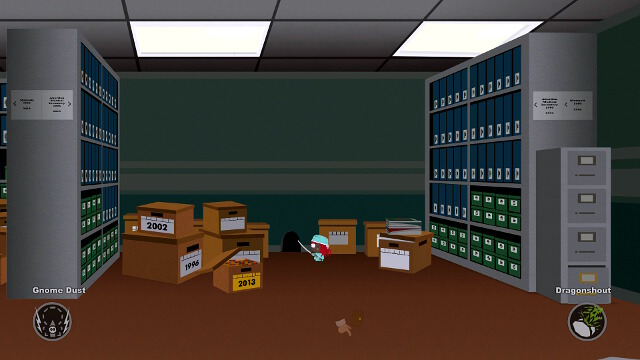 Leave through the mouse hole
In the archives, check the files from 2013. This will initiate a short cutscene, after which you will be locked up. Use the gnome shrinking powder to leave through the mouse hole. Inside, there are quite a few opponents waiting for you but, you can cut through them quickly, by shooting at the pipes overhead. The noise will provoke the soldiers to start shooting at that spot, which will eliminate the problem. You need to watch out and stay away. After that, with the help of magic, make it over to the other side (the soldiers will not react).
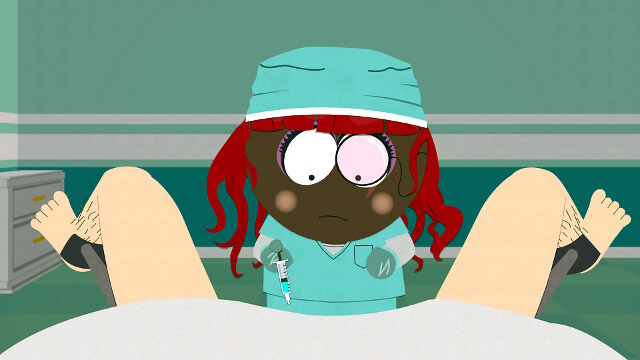 The surgery under way
Upstairs, talk to Randy. After another cutscene,, you will have to perform a surgery. First, you need to administer narcosis to the patient. Keep an eye on how the syringe moves and point it downwards, as soon as it is in the middle. Then, start spinning the left analog stick, or press the right and the left button in turns. The surgery itself is, simply, a string of commands displayed on the screen, which you need to perform. First, you need to lean the stick to the left (or hold down the LMB), and move it to the right, once (click the RMB). Then, lean the stick to the right (hold down the RMB) and move it to the left, quickly (press the LMB). After the surgery, leave the room.
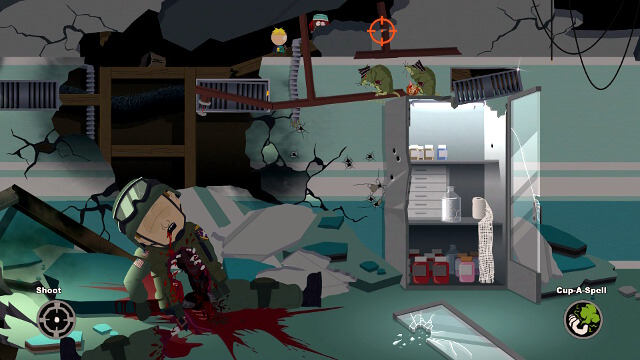
It is the fastest way if you shoot at the venting shaft, use the powder and walk over the fridge upstairs. The alternative rote is to walk over the soldier (literally), while shrunk, and climb over the round route. Then, you can shoot at the spot shown in the screenshot, to get rid of rats immediately. Then, enter the venting shaft and follow it until you reach the exit. The small mice that you find there can be eliminated with one shot.
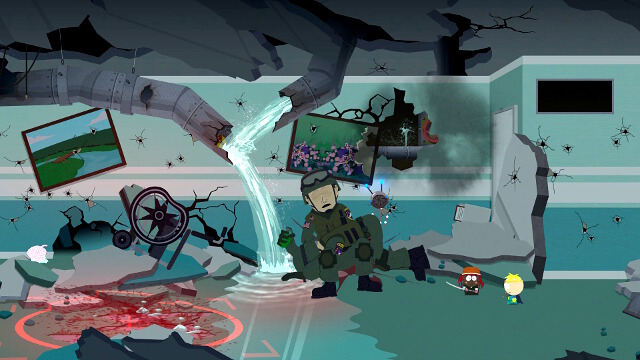 Reach the turret to disable it
Take a shot at the grenade of the dad soldier. Walk through the passage that the explosion created and collect the chinpokomon. Then, summon Stan and use Buddy Command on the rifle, to neutralize it. Alternatively, you can use the probe to reach the valve, shut off the water and teleport into the pipe, where you need to shoot at the wires to make the lamp fall down, onto the rifle. After the rifle is activated, use the Cup-a-Spell on it. Then, go ahead. You will be attacked by a group of zombie fetuses. Apart from the fact that, just like the regular zombies,, they are invulnerable to being Grossed Out and to fire, they can heal themselves, on a regular basis. The best idea is to use a powerful mass fire attack. The buddy that can work well here is Cartman. Then, exit. There you will have to fight a final boss. It is two enemies in one, a fetus and umbilical cord. The cord can heal itself, on a regular basis so, ignore it and focus on the fetus. What works best here is the strong melee attacks. Also, Kenny's Charm or Butters' Professor Chaos will prove their worth here. Once you manage to bring the fetus's health to zero, you will automatically win the fight. The only thing left to do now is return to the girls.
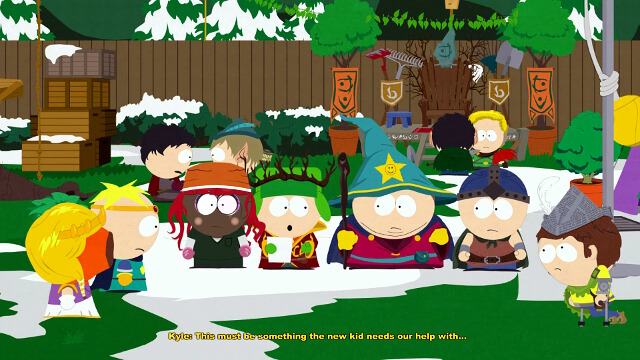 Nobody can read the list
Unfortunately, the clinic's file is in French. Return to the Elven Kingdom. There, you will be equipped with a special letter that will grant you passage to the mysterious kingdom up North, where you may be able to read the manuscript. But, before you go, you need to visit Photo-Dojo. The photographer at Photo-Dojo will have a strange request, when it comes to your looks.. Eventually, you will have to fight him, which you should have no problems with. Then, you will obtain a photo and you can go North, to Canada. Go to the entrance to the Lost Forest. To drive the rats away, use Dragon Shout.
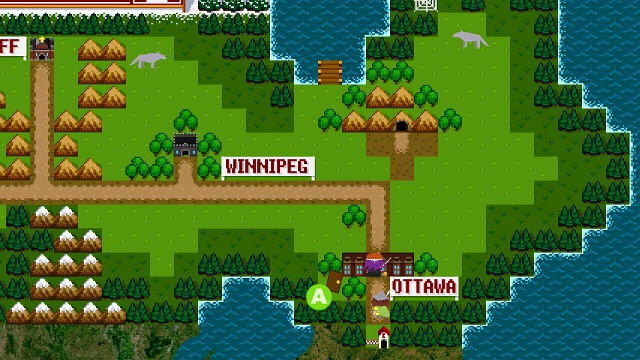 Canada
In the Lost Forest, go North four times. Remember that you can avoid all of the zombies by dashing next to them. Talk to the customs officer and he will open the gates for you. In Canada, go to Ottawa to talk to the prince of Canada. He will direct you to Winnipeg. While in Ottawa, it is a good idea to visit the exchange to exchange the American Dollars for the Canadian ones. Then, go to Winnipeg. Along your way, watch out for wolves, they are vulnerable to fire.
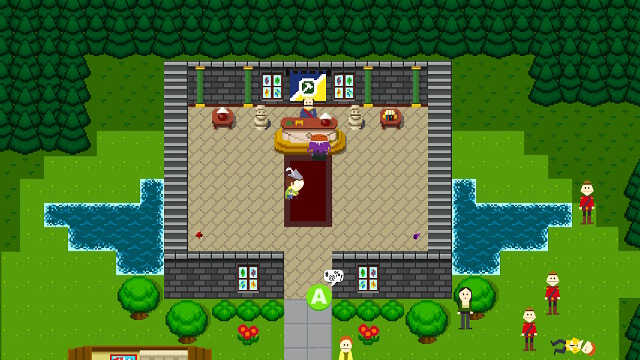 Defeat bears and bring their pelts in
Earl Winnipeg will help you, if you first deal with bears for him. Go to the right part of the city, where you will fight the battle. Bears are vulnerable to electricity. After you win, return to Earl and he will direct you back to the Prince in Ottawa. There, you will receive the order to eliminate the bishop of Banff. There is nothing else to do but to go to Banff.
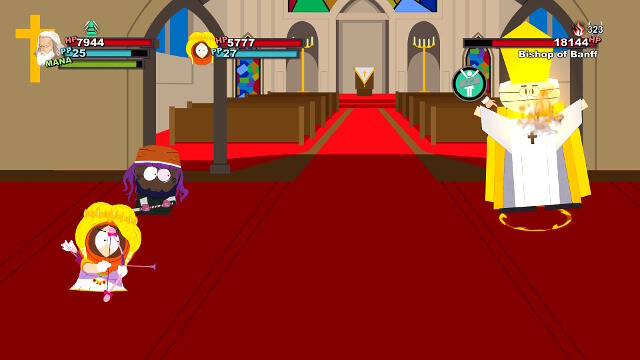 The fight with the chaplain
The opponent has quite a few armor points and is resistant to magic. Still, he should give up pretty soon, after you serve him with strong melee attacks and your abilities. After you win, you can spare his life (he will become your Facebook friend) or kill him. Return to the prince. Unfortunately, he will walk out on his end of the bargain. You will receive a letter from the Duchess, which you need to take to the Duke of Vancouver. Once you give it back to him, you are to go to the South of the city, to the mysterious monks. Walk onto the pier to be transferred to the ship and go to the cottage to the South, afterwards.
 Use your magic against the monks
Cast Dragon Shout on Phillip, and then Cup-a-Spell on Terrence. Finally, show them the Squeaker. They will teach you the last spell, Nagasaki. During the training, keep holding the spell down, this is a way to cause an earthquake. Hold the spell for as long as the trembling wall crumbles. With the new ability, go to Quebec Catacombs, to the North of Ottawa.
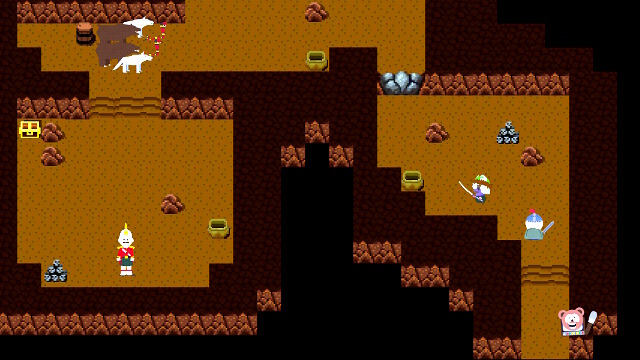 Use Nagasaki to get to the Prime Minister
Use Nagasaki to open the way. Keep modulating the spell until the wall starts to tremble. Then, keep holding it, until it cracks. You will now need to match up against the entire wildlife of Canada. The Power Potion, in combination with some strongest AoE ability, e.g. Jimmy's Brown Note should be able to deal with them very quickly. Free the minister of Montreal and he will translate the letter for you. Finally, you can return to South Park. To get there, you need to go South in the forest. Go to Annie and to Kyle, after that.
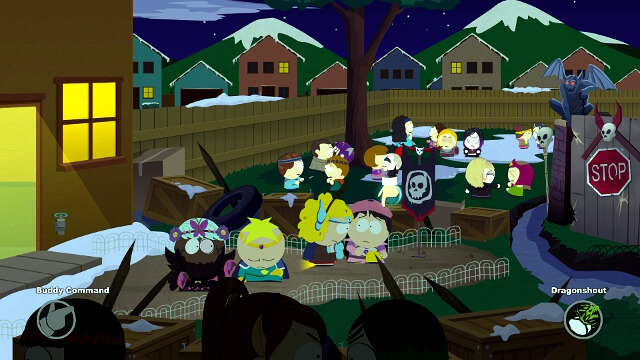 Help Wendy
It is the time that you deal with Clyde. First of all, use Butters to help Wendy. Then, use Nagasaki on the gargoyles holding the bridge.
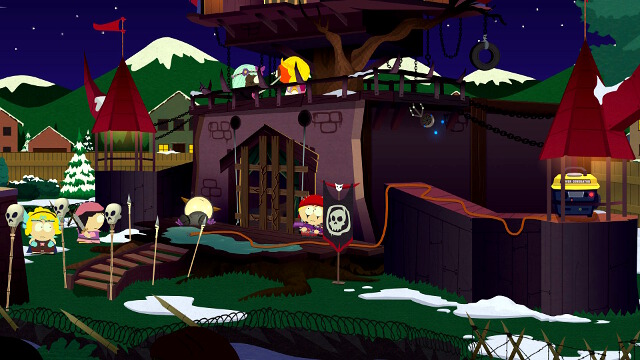 The entrance to the citadel
You can use the probe to get upstairs, disable the generator and drop items onto the guards. Then, you can destroy the door and enter. But instead, while on the ground, go behind the wall with the generator on it and slip inside, by using the gnome powder.
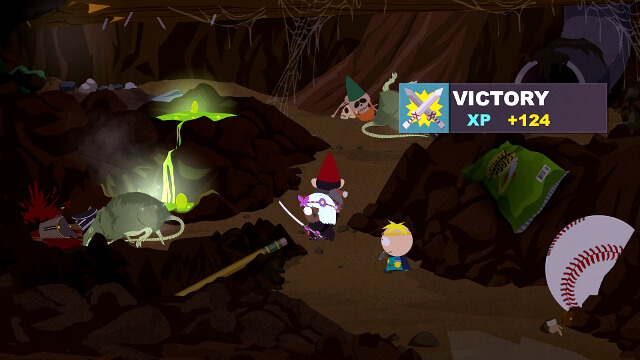 Sneak into the citadel
Inside, use Butters, to help the wounded gnome. Then, fire at the lighter, next to the rat and set it on fire, with a spell, to eliminate the rodent. Now, you can exit either through the left or the right side. If you go left, you will enter the ground floor, to the left, on the upper floor, thanks to which you will go around the guards below. Clear the main room and climb up the ladder.
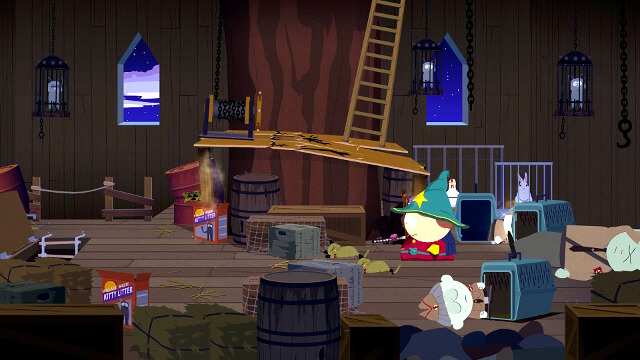 Use Nagasaki
Clear the room. Shoot at the base of the wooden structure and use Nagasaki on it, to smash it entirely. In a moment, there will appear a ladder, over which to get higher.
 Open the gate
Get rid of the guards here. Then, with Dragon Shout finish blowing up the tower on the right, which was started by Ike. After the rocket hits, the tower will start to crumble. Sweep it away with Nagasaki. Use the steering wheel to open the gate. With the teleporting device, reach the upper side of the tower, where you will find a chinpokomon. Then, teleport to the other tower and clear it. Once you are done, walk through the gate.
 Quickly, get rid of the remaining cows
Clyde will start preparing for fight by pulling a cow cage in. You should use this time to eliminate the remaining cows. At the sides of the building, you will find Stan and Ike. Once you approach Stan, he will throw a lamp in. Shoot at it and use Cup-a-Spell, to let Stan in and eliminate a cow. Then, approach the other wall and let Ike in, with Nagasaki. Then, use Cup-a-Spell on the fire, to throw the other cow off. This way, Craig will be left with only one cow to help him. Craig himself will, additionally, split into several opponents and, what is worse, they will be immune to AoE attacks. This means that you need to deal with all of them one-by-one. Fortunately, they are not too tough and they should be dead, at most, after three blows. However, you might need to use the Revive Potion. Once you are done, proceed along your path upstairs.
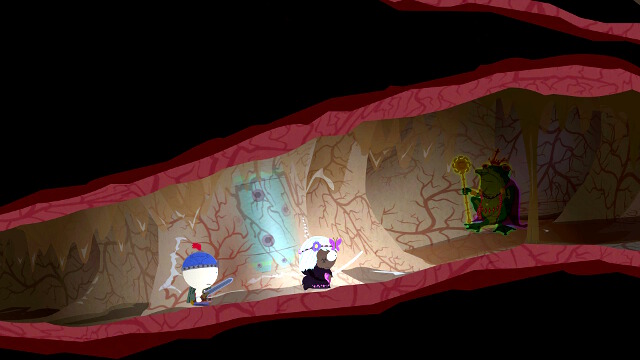 The journey through Mr. Slave
Watch out, if you leave the room that you are currently in, the bomb will explode and you will die. Shrink now and walk inside Mr. Slave (literally), to attempt disarming the bomb. Inside Mr. Slave, go ahead and keep destroying every obstruction. Once you reach the spot with electricity, summon Stan and use Buddy Command.
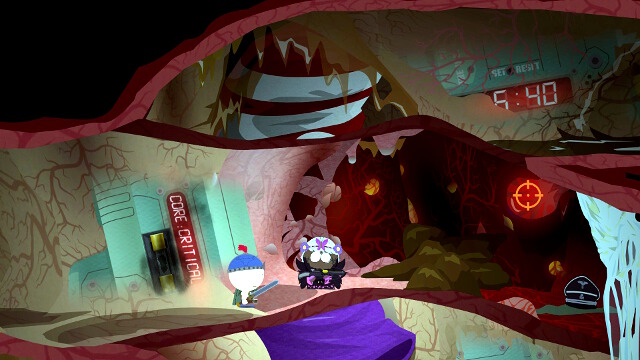
Shoot at the spot shown in the screenshot, when the zombie bacteria walks under it, to eliminate the germ. This way, you will unlock a probe, which you need to use to get to the other side. Then, keep going ahead. In a moment, you will reach a billiard ball.. Destroy it with Nagasaki.
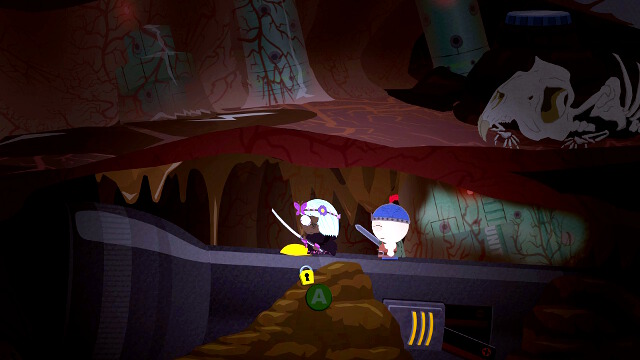 Use the torchlight
You will reach a torchlight. Batteries fell off so, you need to go down at the other side of it and put them in, before you go forward. Then, turn the torchlight on, which will drive the bats away.
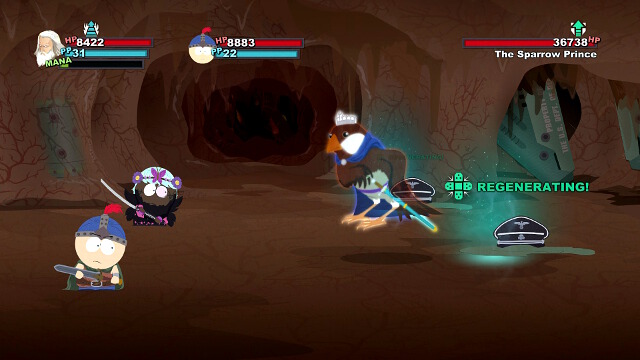 A boss fight
The opponent ahead is quite a challenge. It is resistant to being grossed out, freezing and all of the DoT effects. First of all you need to focus on the bacteria. Use some AoE effect when they fall down, to prevent them from getting up. Against The Sparrow King, use mainly melee attacks. A bit ahead, use Nagasaki on the next billiard ball and reach the switch, for the next device, by using the probe. Once you disable it, you will unblock further passage, blocked by two SWAT members. They have a lot of armor points so, it is best to use abilities that ignore armor.
 And it's all over again
To gain access to the bomb, use Jimmy's ability. The disarming process itself is the same minigame as earlier, in the clinic. First, press down when the needle is in the middle. Then, right and left, in turns. Finally, start vacuuming by keeping to the left and then switching to the right. Then, while on the left, switch to the right, and to the left again. Then, you will get outside.
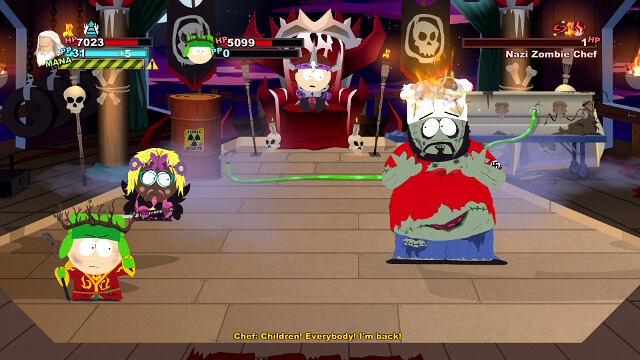 The fight with Chef
Your next opponent is the Zombie Chef. You need to watch out for the abilities of the cumulative effect. Chef will be trying to eat you, which you need to prevent by pressing the attack button. In general, although the fight is relatively long, this is not going to be although job. Finally, Clyde will set Chef on fire and you will have to cast a spell onto him, quickly. This mission will then end.
 The store
It is the time for the final showdown. You can equip yourself with all the necessary potions at the conveniently situated store. First of all, you need to make sure that you have the maximum amount of speed potions and rejuvenation potions. It is important that you also have some mana potions.
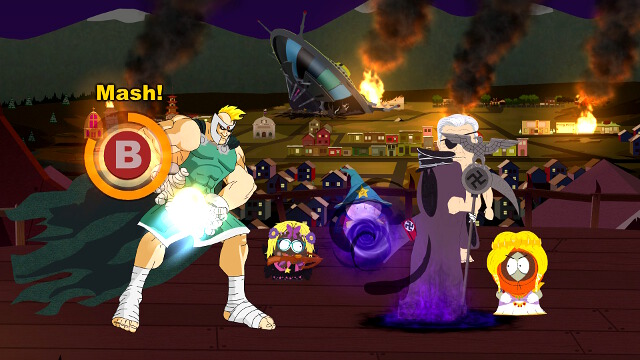
The final fight with Princess Kenny is, as a matter of fact, a dozen-or-so fights so, the key here is managing your potions with care. After you succeed for the first time, Kenny will drink a potion that will turn him into a zombie. At this point, Cartman will leave the party and he will be watching everything, which staying away. You will have to defeat the zombie princess for three times. What is even ore, Kenny will be using his special ability, on a regular basis, which will kill your current buddy., if you do not react early enough, with mashing the appropriate button, like in the above screenshot. If you manage to counter the spell, your buddy will be exhausted, and he will retire from further fight, and he will be replaced with another one. If you want to use one buddy only, throughout the entire battle, a good strategy is to ignore the QTE and let the buddy be killed by Kenny. Then, you can revive him with a potion. This is especially useful if you have the Second Wind, which revives your buddies with full health bar. However, this is risky, because you can use up all of the potions, this way, pretty quickly and you will then have to fight alone. Kenny himself seems to be especially vulnerable to power attacks, but it is also worth the effort to use various effects to slow down or set on fire. Use the speed and strength potions to eliminate him as quickly as possible.
 Use magic on Kenny
Fighting Kenny seems to be a lost cause, because the princess seems to refuse to die. Therefore, you will have to reach out for the ultimate weapon and break the gentleman's oath, which you made the first time that Cartman taught you magic. Eric will sneak up to the princess from behind and lift him. At this moment, you only need to use one of your spells. It will suffice if you use Dragon Shout. Land the attack and you will finally defeat Kenny. After the cutscene, you will only have to bid farewell and end with South Park: The Stick of Truth once and for all.
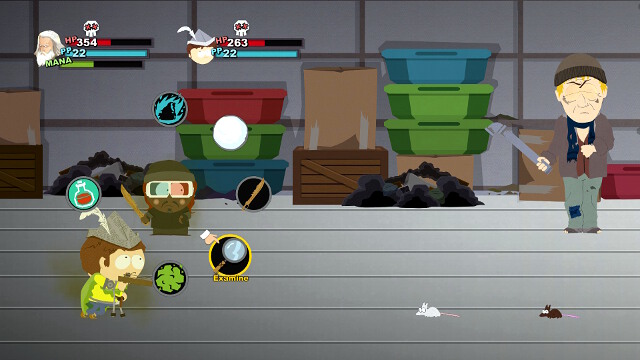 A fight with a homeless guy in a U-Stor-It truck
You receive this mission at the Town Hall, but you can start completing it still before you receive it. So, if you want to spare time, first defeat the homeless and go to the Town Hall afterwards. You need to deal with 6 groups of homeless people. They are not too difficult to defeat, but they can cause some negative effects, like bleeding so, it is a good idea to have some cure potions on you, and also have several weak rats to help them, which can be quite unpleasant, if left alive for too long so. Therefore, it is a good thing to eliminate them with an AoE attack, quickly.
1. To the right of Kenny's house.
2. Inside the U-Stor-It truck, in front of the storages.
3. To the left of the bus stop, there is a fence. In the fence, there is a hole covered with a pine so, you cannot see it at first glance. Walk under the tree and across the hole, towards the background. You will find another encampment there.
When it comes to the remaining groups, you can find them in the sewers. To get to the sewers main part, you need a teleportation device so, you can complete this task on the second day, at earliest. The sewers may seem to be a twisted labyrinth, but, in fact, they are quite linear and there is only one path ahead so, you should not lost your directions. Before you walk into the successive locations, explore the current location thoroughly. Give a turn to all the valves and climb down all the ladders. The valves shut off water from the pipes, which are in the way. Sometimes permanently and sometimes you only have several seconds that you need to do with. Therefore, you should remember about running. Once you explore the entire sewer area, you will emerge at the other side, next to the movies. Then, return to the Mayor. She will become your friend and reward you with money.
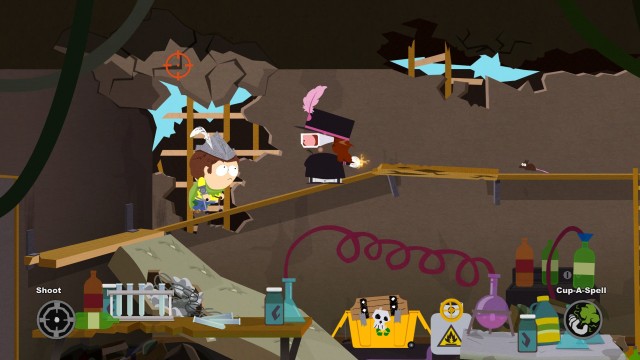 Unblock the way to the rooftop
Al Gore who is next to the movies, will ask you to mount three tracking devices that detect the ManBearPig. You will find the first one in the junkie hideout, in Kenny's house. Shoot at the ceiling to get higher, where you will install the sensor.
 The second sensor
The second sensor needs to be mounted on the rooster, atop the barn at the farm. To get there, you simply need to climb the ladder at the side.
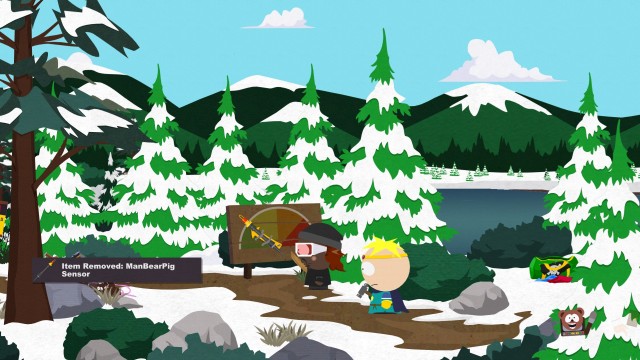 The third sensor
Mount the third sensor on the board at the pond. Once you return to Al Gore, he will give you a key to his stash at U-Stor-It. Go there. After the cutscene, you will be equipped with defibrillator, which you need to use in the sewers. In the sewers, there is an alien probe so, if you still do not have one, you need to put of completing this quest for later. If you do, use the probe to get to the ladder, over which you need to climb down.
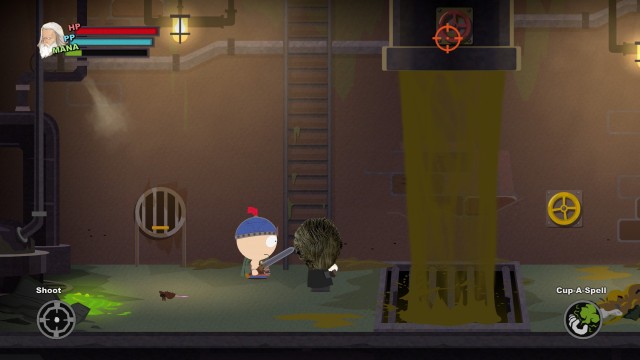 By shooting at the valves, you shut down the sludge
Shoot at the valve to unlock the way. Note that this does not shut off the sewage completely and only give you just enough time to run by. At the other side, use the defibrillator. This will turn the interest of some rats to you, but they should not be too much of a problem. After the fight, return to Gore with the data to complete this mission.
 The fight with Al Gore is one of the most difficult in the game
Gore will start to spam your Facebook account so, you will have to remove him from your friend list,. Go to U-Stor-It and solve the problem. You are up for a hard time. Gore himself is not too demanding, but he may put your party to sleep and heal himself and, additionally, he will summon some minions so, you need to take into account that this is going to be a long fight. Keep a lot of potions on you. Jimmy with his Lullabye or Stan with his AoE attack will work well here. First of all, try to ignore Gore and focus on his minions Once Al is the only man standing, the fight should be easy. After you win, you will receive a key to his top secret room so, do not forget to ransack it.
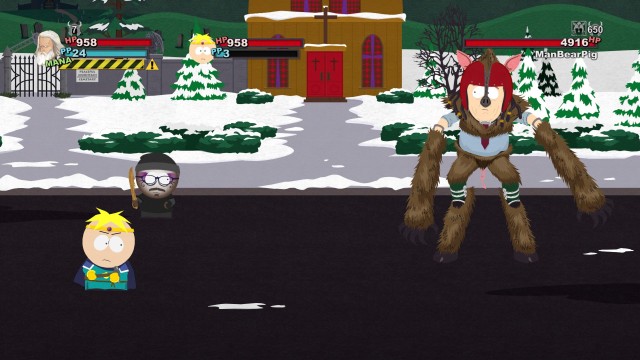 The ManBearPig
The MBP finally arrived...sort of. Go towards the church, to defeat it once and for all. As long as it is wearing the mask, it will be resistant to all sorts of magic but, during the fight, at some point, the mask will fall off. In general, this fight is much easier than the previous one. From the MBP, after you defeat it, you can collect the claw. It is a very good weapon for the 11th level.
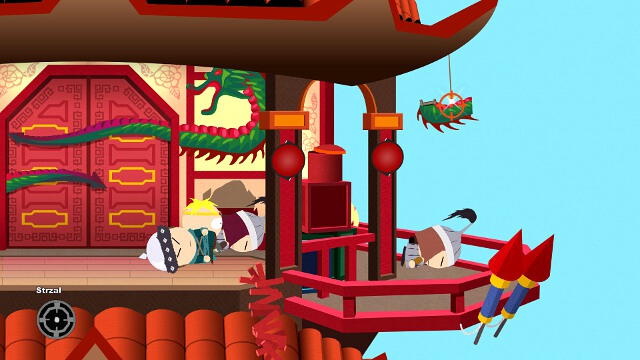 German-speaking cows
In the kingdom of elves, Jimmy will tell you that he needs a lute, which you can find at the farm. Once you get there, you will find out that there is something wrong with the cows which, for some reason, speak German. Use the key that you receive from the farmer, enter the barn and deal with the cattle. The cows are using the kamikaze tactics, and they will blow up both themselves, you and Jimmy. The best option is not to allow the situation in which they attack you, in the first place. Use all sorts of immobilizing effects Jimmy's Lullabye is especially effective here. While attacking the cows, try to use fire, because they are especially vulnerable to that. Alternatively, if you have a lot of health points and a supply of potions of health, you can try to survive the exploding cows, but it is a risky tactic.
Once you have defeated the cows, climb up the ladder and use magic to burn down the haystacks. In the backpack, you will find the lute. Return to the farmer, where this quest ends.
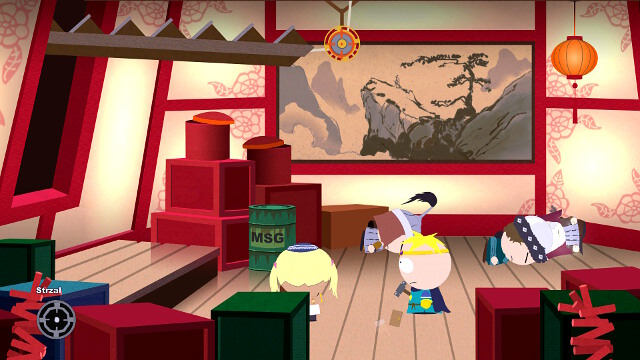
The mission starts at the City Wok. You need to go to the Tower of Peace and clear it off the Mongolian children. Right after you enter, you will be attacked by a group of kids. Then, after you shoot, you can unlock further passage for yourself, just like in the screenshot. Above, there is another battle that you need to fight. Remember that you can walk into the holes in the walls of the Tower, which have been made by the Mongolians. This way, you will reach a stash there. Go to the next level.
 Shoot the tail down
Clear this level and shoot at the dragon's tail to rip off some of it. Then, use it on the door and shoot at the dragons' eyes. This will open the way to the very top.
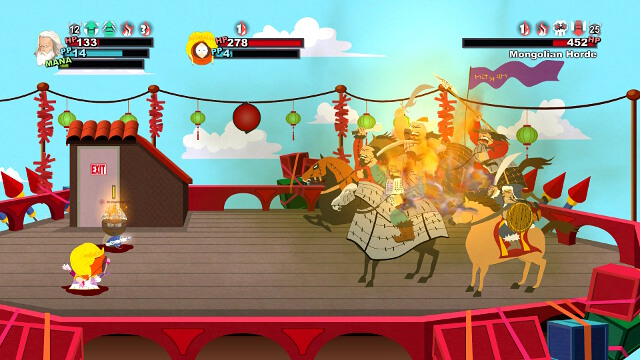 The horde
Here, you will have to square off against the entire Mongolian Horde, which can be troublesome, at the lower experience levels, because of the considerable damage that they deal. Fortunately enough, it is not too tough so, you can use everything that you have, against it. Also, grossing out and setting on fire may come in handy. After you defeat them, return to the City Wok. Mr. Kim will become your friend and, additionally, you will gain the ability to summon him into fight.
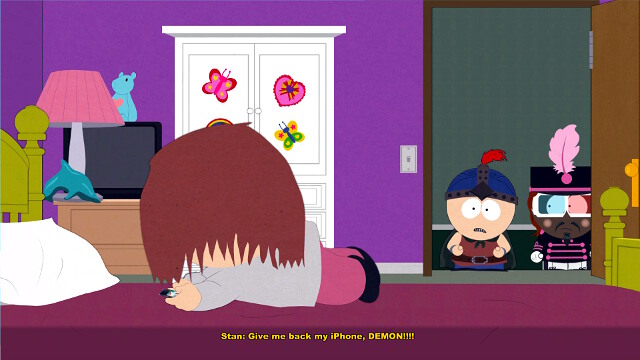 The She-Ogre is a tough opponent
You will receive this quest from Stan at the Elven Kingdom. You need to retrieve the iPhone from his sister. Make sure that you have a big supply of all sorts of potions, because this fight will be difficult, especially at the low experience level. Go to Stan's house. His sister's room is at the first floor. She has lots of health points (over 7000!), and she is, additionally, immune to immobilizing effects. Use the strongest attacks only and DoT effects, like e.g. setting on fire, bleeding or grossing out. Also, you will find the speed potion useful, which allows you to attack twice a turn. After the victory, Stan will become your friend.
At Jimbo's Gun buy a hunting book (3$) to start this quest. Using the items that you got you first need to lure the game out and hunt them in the corners of South Park and some other places.
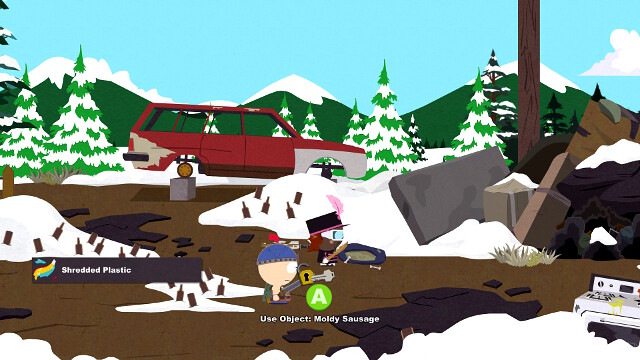 The place to call the dog
You will lure him behind Kenny's house. He is resistant to magic and grossing out but vulnerable to electricity.
Go to the farm and use the bell at the gate. There will appear a cow. You only need to hit it once and it is done.
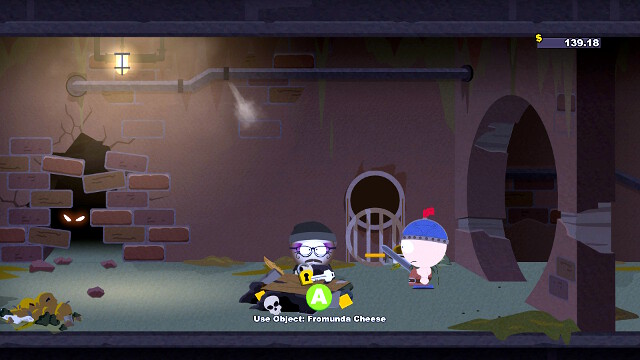 The mouse behind the wall
This place is in the upper part of the sewers. You get there from the back of the main location (where you mount the defibrillator for the MBP). First of all, you need to unlock the way with valves and by smashing walls (remember to pay attention to flashes and cracks). The mouse is resistant to grossing out, but it is vulnerable to ice.
In the basement of the school, during the attack on day two. It is completely invulnerable to magic and grossing out and it can heal itself. Also, it has lots of HP so, the fight is long. Use the strongest attacks, especially the ones with ice damage. It also may happen that the bacteria will split to three smaller ones, at which point you should use AoE effects.
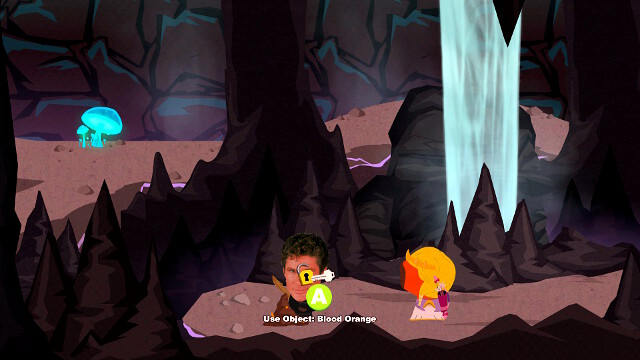 The place where you call in the bat
The spot to place bait is at the very end of the sewers, close to the entrance to the movies and the crab-man. You need to cross the entire sewers. Once you reach the strange caves, under the sewers, you will find a nearby stone, which you need to smash to unlock passage further. The bat is especially vulnerable to fire and, additionally, it can heal itself.
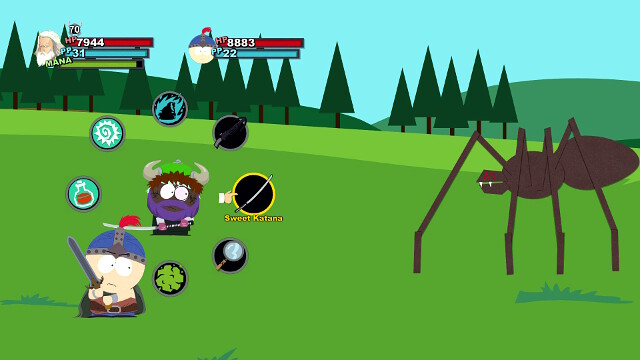 The fight with the spider
You will find it in the North-eastern part of Canada (you will get there during the Forging of Alliances mission). You will recognize the place by cobweb. It is resistant to magic, but vulnerable to holy damage.
Once you kill all of the animals, return to Jimbo. He and Ned will become your friends. You will also receive a key to Jimbo's stash. It is in the attic. Use the probe to get there. However, the weapon that you find there, is not of the best kind and you can buy something better from him at the store.
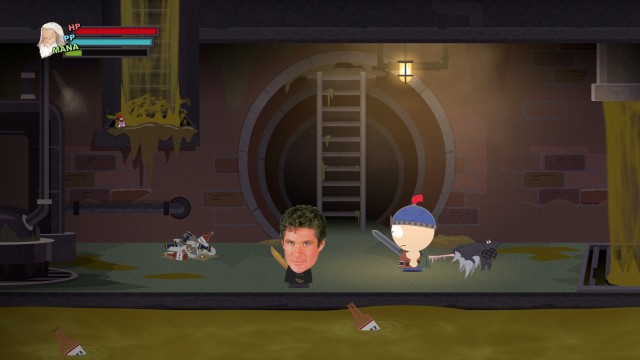 Amber
AmberMr. Hankey in the sewers needs your help while looking for his children. You can find Amber right next to the Hankeys' house, but the access is blocked off. Climb up the ladder and walk over to the left, using the grate pathway in the background. Turn the valve and climb down the ladder to help Amber.
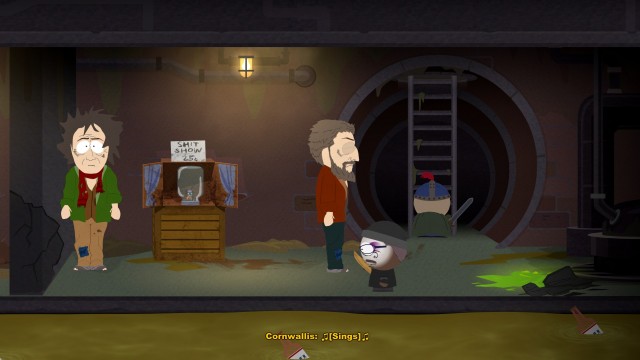 Cornwallis
In the right end of the location, where you climbed down the ladder to help Amber, you will find stairs to a group of homeless people (a part of the Homeless quest), which trapped Cornwallis.
 Simon
SimonAs you go deeper into the sewers, you will find Simon. Although the sewers may seem like a twisted labyrinth, as a matter of fact there is the only path here so, there is no way to get lost here. Remember to turn the valves, slide ladders down and use the locations' background. Simon is being attacked by a pack of rats. To reach him, you will have to widen the hole in the wall and walk over the grate in the background. As soon as you get there, the rat mom will arrive to aid her children. Use Stan's or Kenny's AoE attacks.
Return to Mr. Hankey. He and his wife will become your friends. Additionally, you will gain the ability to summon him into battle, once a day.
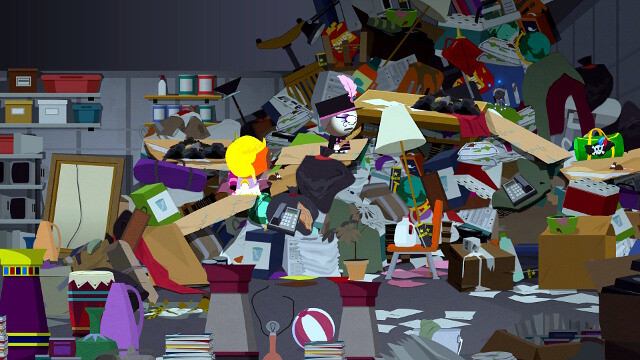 It is worthwhile to cut through all the trash to reach the bag
You receive this quest from Mr. Mackey, at the community center (you will gain access while completing the Find New Allies quest). He will give you his key to his storage at U-Stor-It (you enter U-Stor-It by climbing onto the trashcan, next to the homeless merchant. Inside, enter the main hall and press the button with padlock, at the counter, to gain permanent access). Enter the storage and leave the monitor on the pile,, next to the other ones. It is also worthwhile to cut through the pile of trash to reach the probe. Use it to teleport to the other side, where you will find a key to Mackey's post box, which you can use at the Post Office. Inside, you will find some potions and some money. Once you are done, return to Mackey and he will become your friend.
You need to collect five pairs of pants. You receive this quest at the beginning of the third day, from the gnome in your room, but you can collect the pants earlier. You can find them in:
1. Cartman's room;
2. Stan's room;
3. In Stan's mom and dad's room the entrance to the room is on the side of the player, which means that you cannot see the door. You can see its reflection on the floor., by which you will know where to stand)
4. In Kevin Stoley's room;
5. In Kyle's room;
As a reward, the gnome will become your friend.
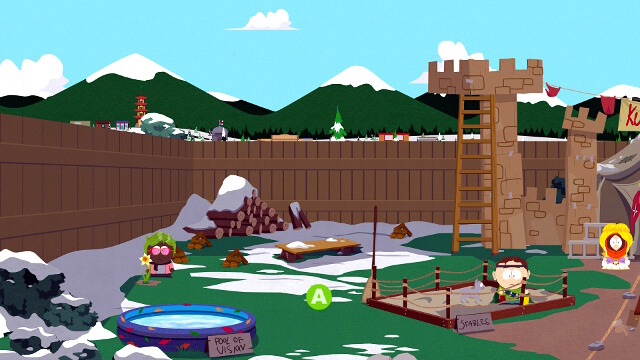 A flower for Kenny
Kenny, as is fit for a princess, expects a flower from the brave knight that you are. This is the first side quest that you receive and it's difficulty level is not something to sweep you off your feet. The flower is on the left side of Kupa Keep. Simply pick it and give to Kenny. As a reward, Kenny will become your friend.
You receive this quest at Mr. Slave's house. You only need to go to the Post office and collect the package from there. It is at the wall, at the back. Grab the package and bring it back to Slave. As a reward, you will be able to summon him into battle.
 One of the banners
This mission starts at the Elven Kingdom from the kid with messy hair. You need to destroy the human banners all around the town. You simply need to approach them and
1. At the playground;
2. In front of Mr. Slave's house;
3. In front of the church;
4. At the pond;
5. In front of Kevin Stoley's house
After you complete this quest, return to the Elven Kingdom. The quest-giver will become your friend
This mission starts at the Skeeter's bar. Climb down to the cellar. As a reward, you will receive darts for the third level and Skeeter and the bartender will become your friends.
 Timmy can drive you around the whole town for free
Unlock all of the fast-travel points in the city:
1. In front of U-Stor-It.
2. In Kupa Keep
3. In the Elven Kingdom
4. In front of Kenny's house.
5. To the right of Photo-Dojo.
6. In front of Token's house.
7. Next to the bus stop.
8. In front of the Post Office.
9. In front of Kevin Stoley's house.
10. In front of the Tower of Peace.
11. Next to the school.
12. In front of the church.
As a reward, Timmy will become your friend.

You receive this quest from Kevin Stoley in his house. You need to find his dad's iPad. You will find it behind the pine, close to the church (the screenshot). When you return, Kevin will become your friend and give you the Slowing projectile. A good level 4 ranged weapon.
This mission starts at the basketball course, next to the playground. You need to find 6 kids hidden all around the town:
1. Among trees, in front of Mr. Slave's house
2. At the farm in the bottom left corner of the location, at the fence.
3. In the sewers, right after you enter.
4. Behind the lamppost, between the Tower of Peace and City Wok.
5. Behind the tree, near the side path between the church and the pond..
6. Behind the desk at the bank.
After you have completed this quest, return to the playground and the kids will become your friends.
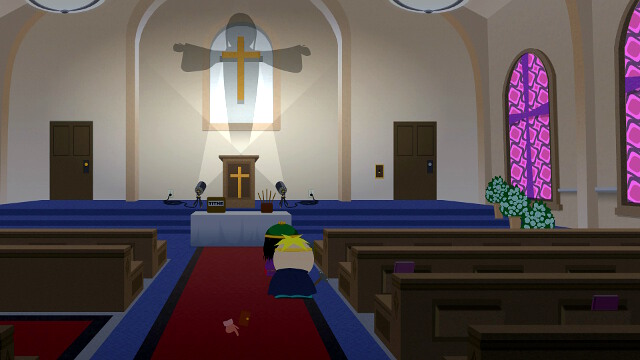 Find Jesus
You receive this quest from the priest sitting on the bench, in front of the Town Hall. Go to the church and take a careful look at the pews. Every now and then, you will notice Jesus leaning out from behind a bench. After you locate him, approach him and talk to him. Return to the priest. He will tell you to find him again. In the church, turn on the lights and direct the shafts of light into the center. The shadow will show you where Jesus is hidden. Talk to him and, as a reward, you will get the ability to summon him into battle.
This quest is very easy to be overlooked. It is available only after zombies appear in the town (After you search the Taco Bell building site during the "PTA Problems" mission). After you start the game's final (Beat up Clyde!), you will not be able to complete this quest, even after you complete the game.
Go to the Police Station, where sergeant Yates task you with collecting five zombie rings. Zombie may be in any location in the game (just like the elves that would attack you in the streets) so, finding them will not be a problem. Kill five and return to the Police Station. You will be rewarded with cash and Yates will become your friend.
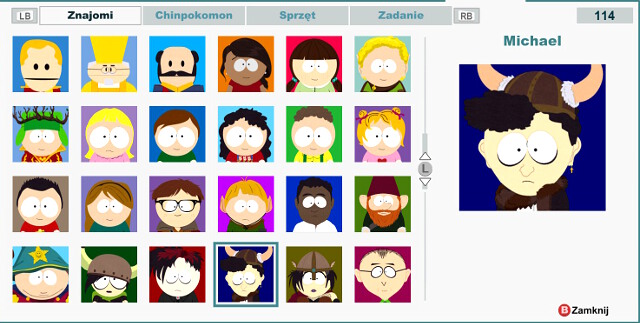 Friends list
In the game, there are many people that ever appeared in the show. Some of them perform an important role in the game world, but most of them are a kind of a tribute for the individual episodes. All of such characters can be added to your friends list on Facebook. You only need to talk to some of them, but some require you to complete a quest first, or to have enough friends. If there is someone who does not want to become your friend, return to them later on, after you have reached another level. Some of the friends are inaccessible and they require you to teleport first, using the probe, or shrinking with the gnome powder. If you still do not have access to these tools, you need to progress the storyline.
Apart from the collector's satisfaction, the friends list also translates to the list of perks that you can unlock. Apart from that, there are more than 100 friends in the game, but only 100 of them translate into perks. You receive the consecutive points for 7, 12, 18, 25, 35, 45, 55, 70, 85 and for 100 friends.
Friends that it is easy to miss and you will not have the opportunity to add them later on, in the order of appearance:
The remaining single friends:
Many of the locations where you find new friends, or chinpokomons, will require you to obtain a key. This is the list of keys and their whereabouts:
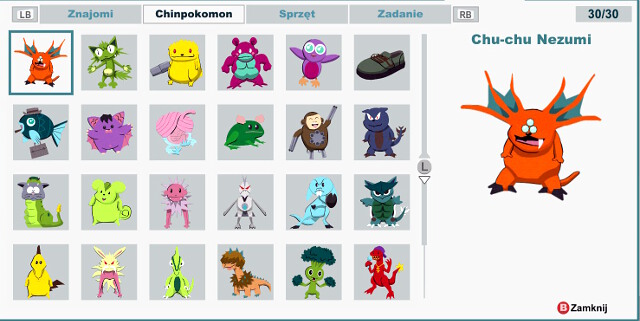 A collection of chinpokomons
In the game, there are 30 chinpokomons. Some of them can be obtained only once throughout the game. They are:
1. Ratroid - The attic of Jimmy's house. You will get there during the Bard quest;
2. Beetlebot - at the spaceship, during the abduction. The room with the Solar System, before the boss fight;
3. Gunrilla - in the upper left corner of the conference room at Taco Bell building site (PTA Problems);
4. Pterdaken - in one of the lockers, at the school hallway, in "Attack the school";
5. FetuSwami- n the Unplanned Parenthood clinic, while recruiting girls. You will find it close to the rifle. You need to shoot at the grenade of the dead soldier. The explosion will open the way through which you can walk, while shrunk. You will exit right next to the chinpokomon;
6. Shoe - atop Clyde's tower, during "Beat Up Clyde!". Teleport to the very top with the probe.
The remaining chinpokomons can be collected during the game or after you complete it:
7. Chu-Chu Nezumi - On the tree, next to Butters' house. Shoot it down with the bow;
8. Monkay - On the floor in Butters' room;
9. Pengin - Cartman's garage. The key is in the house;
10. Furrykat- in the snow, between Kyle's house and the tracks;
11. Vamporko- the basketball court at the Community Center (not at the playground). To get there, you are going to need to use the probe;
12. Lambtron - at the first floor of the Tower of Peace. It is hanging in the cage -shoot it down;
13. Flowerpotamus - At Skeeter's bar. The shelf at the wall in the background;
14. Stegmata - Kyle's garage. The key is in his parents' room;
15. Roostor - on the ventilation shaft in Chaos Lair in U-Stor-It. To get inside, you need a key that you can find in Butters' room;
16. Cosmonewt - in the wrecked spaceship at the bottom of the pond. To get there, you need to use the probe.
17. Gerbitoad - Next to the Hankeys' house;
18. Sna-Kat - on the tree in front of the Town Hall;
19. Gophermon - in the bathroom, in the Community Center;
20. Farasnar -Mackey's stash at U-Stor-It. To receive the key, you need to accept the quest from him., at the Community Center.
21. Donkeytron- inside the gas cooker, in the kitchen at the school. Turn the gas on and use a spell on it to open the cooker.;
22. Rabbitech - at the room with two pieces of evidence, at the Police Station;
23. Accountafish - it is in the building of the South Park Courier. To get there, you need a key, which you can find in a post box at the Post Office. The Pokomon is in the venting shaft. You need he shrinking powder to collect it;
24. Fat-Dactyl - above the cashier's deck, at the movies;
25. Mouse-Tik - in girls' HQ;
26. Biebersaurus - At the end of the sewers, close to the Crab-Man. Requires Nagasaki to get past the large boulder in the way;
27. Velocirapstar - a window at Token's house;
28. Terribovine - under the bench in front of Tweek Bross. Coffee, you need to shrink first;
29. Brocorri- frozen in front of the Tower of Peace. Shoot at the lampoon and use magic on fire to melt the ice with the explosion;
30. Poodlesaurus- in the venting shaft, in the hallway at the school.
Join KKK.
The basic achievement, which you will obtain after several first minutes into the game.
Spend one day in South Park.
You will be rewarded with this one after you complete the "Bard" quest.
Let Gingers bite you 3 times without blocking.
You can complete this achievement while at school. It is the special ability of the Gingers, which they will be using in battle. Simply, deliberately ignore blocking, when you see the piece of information that a Ginger is using bite. All of the three bites must take place within one battle. While you will be freeing Craig, they will be using it sporadically so, most probably you will receive this achievement while attacking the school.
Defeat the Ginger hallway monitor, while wearing freckles.
You need to have your freckles on, while fighting the boss, during the mission to save Craig from detention. You will be fighting before you enter the school cafeteria. You can add freckles while creating your character. If you did not, you will find them on the corpses of the defeated Gingers.
Throw a turd that you made, at the enemy.
Visit any of the bathrooms and play the minigame of shitting (mashing of the attack button). You simply need to use, it as a potion, during a fight
Find Jesus while playing as the Jew.
Complete the "Find Jesus" quest, while playing as the Jew.
Open all of the garages in South Park.
Walk from door to door and open garages. The keys should be inside the houses.
Sell 300 items.
It is the easiest to sell grey trash.
Sell no item during the game.
Simply, avoid selling anything. Remember that there is a stash in your room, where you can store the items that you do not need, to clean the mess in your inventory. If you want to complete this achievement and Junk Peddler, first finish the game and sell items afterwards.
Fart on four representatives of authorities.
Use magic, outside of combat, on Father Maxi, Mayor McDaniels, Principal Victoria and on the minister in Montreal. You can find the reverend on the bench in front of the Town Hall. The Mayor is at the Town Hall The Principal is in the Community Center and you gain access there only when you start the mission to recruit the Goth kids. It is the easiest to miss farting on the Canadian Minister. You will be, first, freeing him while visiting Canada, towards the end of the game. It is important that you fart on him before you talk to him, because he disappears after the conversation and you will miss the opportunity.
Shit your pants while fighting a boss.
Fill the mana bar entirely (best before the battle). Then you simply need to drink one more Mana Potion, during the boss battle (check the opponent first, to learn if he is a boss), and the task will be completed.
Shit your pants in three different battles.
Just like in the case of the Irritable Bowels. These do not need to be boss battles, though.
Block each attack, outside of the tutorial
You need to block, successfully, all of the attacks. If you find it difficult to block, try blocking an attack at the beginning of the fight and summon someone to end your fight for you.
Fart on ten enemies when they are knocked out
Simply, use the easiest magic on the bodies of the opponents after the battle.
Complete the game without ending the fight, even once, with your buddy knocked out.
You should have a supply of health potions and revive potions on you. You should also watch out for all the negative effects and remove them, if necessary, because one missed DoT may thwart your plans. Remember that your buddy can fall during the fight. What matters is that you need to revive him before the fight ends.
Defeat, at least, three opponents with your buddy unconscious.
Let your buddy fall down and defeat the opponents yourself. Note that completing this achievement will make it impossible to achieve "No Child Left Behind", unless you complete this achievement after you complete the storyline of the game.
Fart on a canine while in your gnome form.
You need to use the shrinking powder (after the "defeat Underpants Gnomes" quest), and simply fart on one of the dogs in the town.
Fart on every buddy in the game.
Use your magic on all six members of your party. Simply, switch between them, when you have access to all of them and fart.
Knock out, at least, three opponents with one fart, outside of combat.
The best way to complete this one is while cutting through a series of barricades, e.g. during the attack on the school. The situation, where three enemies are standing next to fire is rather unlikely, therefore the Sneaky Squeaker will prove useful here. Use it to lure enemies towards a fire, a lamp or anything that you can set on fire and cause an explosion with a standard spell.
Stop five channel attacks with magic.
Channel attacks are powerful ones, which require one turn to load. You can tell them by the message on the screen and the red halo around the enemy. It is incredibly often used by gnomes so, the moment when it is easiest to complete this achievement, is during the "Defeat the Underpants Gnomes" quest. Simply, use the Roar to stun the enemy that is casting such a spell. All of the five interrupts do not need to occur during one fight.
Defeat the Meth Tweekers while wearing the Evil Cartman goatee and the bald cap.
While fighting junkies (Call The Banners - Tweek) you need to be wearing the appropriate items that alter your looks. You can find Cartman's Goatee at his house, on the ground floor. The Bald Cap can be found at the Police station, in the bag next to Romper Stomper. To get there, you need a key. Go to the first floor and shoot at the shelf with trophies to reach a locked room, along the venting shaft, where you find the key.
Collect five chinpokomons.
Collect fifteen chinpokomons.
Collect 30 chinpokomons.
Befriend your dad.
To befriend dad, you need, at least, 55 friends. Then talk to him at your home.
Befriend half of South Park.
Befriend all of South Park.
You need to add anyone that you can. The list, alongside with requirements, can be found in the appropriate chapter.
Fart on a total of 100 people.
You can circulate your targets so, you can even achieve it on one person.
Fart 25 times on animals.
You can circulate your targets. The easiest way is to single out Cartman's cat, at Kupa Keep, as your target.
Complete half of the available outfits.
Complete all of the available outfits.
Complete all of the outfits and weapons.
It is important that you take a look into every container and search all of the bodies. It is especially important in the places where you will not be able to return anymore. These are: school - both while freeing Craig and during the attack; Jimmy's house - the "Bard" quest; the spaceship - Alien Abduction; Taco Bell Construction - PTA Problems; Clyde's house - Beat Up Clyde!; Unplanned Parenthood - Forging of Alliances; the walls in your house - Defeat the Underpants Gnomes. You should also remember that, for this achievement, you also need to get the gear sold at stores, i.e. Jimbo, KKK, The Elven Kingdom, Girls HQ, the homeless guy in front of the U-Stor-It and Canada.
Befriend Crab People and the Underpants Gnomes.
As for the Gnomes, complete the "Phase 1" quest. In the case of the crab people, you need to go to the other end of the sewers. You will find there a crab man and a big stone, which you need to blow up with Nagasaki (you learn this spell towards the end of the game).
Perform 100 perfect attacks.
Block 100 attacks.
Develop one of your abilities to its maximum.
Spend four points on one ability.
Spend 500 dollars.
The fastest way to do that is at Tom's Rhinoplasty.
Defeat 20 enemies with Cartman's ass.
Use Cartman's Burning Cloud.
Have Kenny die for 10 times in combat.
Remember that Kenny is immortal and he returns after two turns.
Accept your name.
When you enter your name, Cartman will be reassuring twice, if you are sure that this is the name that you want to go by. Click "Yes" twice.
Defeat the High Jew Elf Kyle in battle.
Defeat Kyle towards the end of the "Attack the School" quest.
Defeat Grand Wizard Cartman in battle.
Defeat Cartman towards the end of the "Attack the School" quest.
Befriend the Goth kids.
You will complete this one during "Gain New Allies" quest.
Fart on the defeated Nazi Zombie Fetus .
After the final fight, at the Unplanned Parenthood, during the "Forging of Alliances" quest fart on the aborted fetus that you defeated.
Summon Mr. Slave while inside him.
This one creates quite a paradox, when you summon your ally - Mr. Slave, during any of the fights, while exploring his intestines. Remember that you need to have him available, before the "Beat Up Clyde!" quest. If necessary, go to his home and activate him, before you start that quest.
Defeat Princess Kenny while looking like David Hasselhoff
Buy the most expensive surgery at Tom's Rhinoplasty and, while looking as David Haselhoff, fight the final battle. You need to take the surgery before the "Beat Up Clyde!" quest.
Watch your parents for 60 seconds.
During the "defeat the Underpants Gnomes" quest, at some point, you will climb over the light switch onto the cupboard, from which you will be observing your parents in the bed. Stand there for a minute.
Defeat Princess Kenny after you have contracted Dire AIDS.
While fighting animals in Canada, you can contract AIDS. To check your status, go to Ottawa and get examined at the local hospital. If you have AIDS, you simply do not need to treat it (i.e. do not select the treatment option at the hospital; you can still use healing potions, etc.).
Defeat Kenny in your girl makeover disguise.
Fight Kenny while dressed in your outfit from when you had the makeover, before going to Unplanned Parenthood. You need to be wearing each element of the outfit, i.e. the full dress, the wig and make-up.
Defeat Kenny and retrieve the Stick of Truth.
Complete the game's story mode.
Since the graphics aims at accurately imitating the TV show, South Park's system requirements are not steep at all. The game should run smoothly even on slightly outdated machines. This guide was based on the PC version of the game, the PC configuration being AMD Phenom II955 3.20GHz, 8 GB RAM, AMD Radeon HD 6970. The system met the game requirements and had no problems with smooth performance.
Single player: Yes
Offline coop (split screen/hot seat): No
Online coop: No
Multiplayer: No
This guide was based on the PC version of the game. The PC configuration was:
The game's performance on the above system was very smooth and the loading times short.
Yes, playing South Park on laptop is possible; for that you need Intel HD Graphics 3000 or a better one.




 Smite Game Guide & Walkthrough
 Shadowrun Returns Game Guide & Walkthrough
 Star Wars: Battlefront Game Guide & Walkthrough
 Sid Meiers Civilization: Beyond Earth Game Guide & Walkthrough
 Still Life 2 Game Guide & Walkthrough