


Prototype 2 game guide
Prototype 2 game guide includes detailed description of completing all main and side missions in single player campaign. In description of each step you'll find information on:
Jacek "Stranger" Halas
Translated by Maciej "Elrond" Myrcha
In this guide we use following color code:
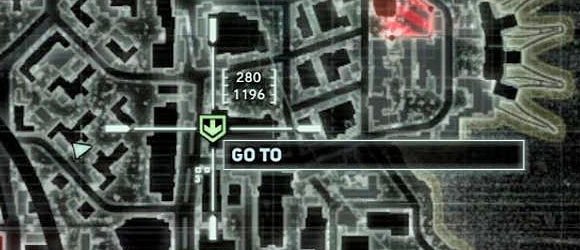
Coordinates can be read at any time during the game by pressing START button, selecting a first tab and setting cursor in required place. On the screenshot shown in the above example it is [280, 1196] location.
Notice! Before starting the game, I suggest to watch a video accessible from a main menu, which resembles plot and main events from the first episode of the series. Described level acts as a prologue, but you do not have any powers yet during completing it, for fairy obvious reasons.
New objective: Follow Alex Mercer
![Wait until you get full control over Heller and start following Mercer - [Main mission 1] Meet Your Maker - Main missions - Prototype 2 - Game Guide and Walkthrough](https://game.lhg100.com/Article/UploadFiles/201512/2015121619035825.jpg)
Wait until you get full control over Heller and start following Mercer. You do not need to hurry, because you won't fail the mission by losing Alex. Initially nothing can threat you, although you'll witness a brutal death of one of the Blackwatch soldiers.
![After few moments the game will start a cut-scene, showing Mercer's attack on Blackwatch helicopter and your task is to avoid being killed - [Main mission 1] Meet Your Maker - Main missions - Prototype 2 - Game Guide and Walkthrough](https://game.lhg100.com/Article/UploadFiles/201512/2015121619035963.jpg)
After few moments the game will start a cut-scene, showing Mercer's attack on Blackwatch helicopter and your task is to avoid being killed. Follow instructions on the screen and push left analog forward and then press A.
![Watch a new cut-scene, showing a huge monster - [Main mission 1] Meet Your Maker - Main missions - Prototype 2 - Game Guide and Walkthrough](https://game.lhg100.com/Article/UploadFiles/201512/2015121619035986.jpg)
Watch a new cut-scene, showing a huge monster. This time your task is to flee from the mutated beast and to do this, you have to push left analog down (heading to the bottom part of screen), while pressing right trigger (sprint). Fortunately there are no bigger obstacles on your way, so if you do not stop anywhere, you shouldn't die.
![A last scene of a prologue is a kind of fight with smaller mutated monster and in this case the only way to keep Heller alive is to mash X - [Main mission 1] Meet Your Maker - Main missions - Prototype 2 - Game Guide and Walkthrough](https://game.lhg100.com/Article/UploadFiles/201512/2015121619035984.jpg)
A last scene of a prologue is a kind of fight with smaller mutated monster and in this case the only way to keep Heller alive is to mash X. It is followed by several very interesting and important cut-scenes, after which you'll get to the second main mission.
New objective: Defeat the infected
![This level begins in Blackwatch facility in location [205, 1068] - [Main mission 2] Resurrection - Main missions - Prototype 2 - Game Guide and Walkthrough](https://game.lhg100.com/Article/UploadFiles/201512/2015121619035992.jpg)
This level begins in Blackwatch facility in location [205, 1068]. Start with trying two basic attacks: punch (press X button) and much stronger kick (hold X button). Perform these attacks to deal with two new groups of infected. Stronger attacks are particularly useful when attacking large groups of enemies and if you get surrounded then help yourself with jump option (A button).
New objective: Consume Blackwatch trooper to heal
![Do not worry about an order to burn all characters in the room (including Heller), because everything is perfectly directed - [Main mission 2] Resurrection - Main missions - Prototype 2 - Game Guide and Walkthrough](https://game.lhg100.com/Article/UploadFiles/201512/2015121619035925.jpg)
Do not worry about an order to burn all characters in the room (including Heller), because everything is perfectly directed. The game will now show you a mechanism of consuming opponents and although it has several meaning, in this case you should focus on regenerating part of Heller's health bar visible on the screen. In order to consume an enemy, you have to grab him first (B button) and then perform the proper action (Y button).
New objective: Consume the infected to heal
![After new round of fights begins, consume several more enemies, to fully regenerate your health - [Main mission 2] Resurrection - Main missions - Prototype 2 - Game Guide and Walkthrough](https://game.lhg100.com/Article/UploadFiles/201512/2015121619040079.jpg)
After new round of fights begins, consume several more enemies, to fully regenerate your health. Only now start main attacks, remembering of course about possibility of regeneration. Same as before, you have to fight until the point, where all characters in the room must be burned again.
New objective: Grab the table
New objective: Target the lab window
New objective: Destroy the lab window
![Wait until Heller stands up, walk to the table indicated by the game and lift it up (B button) - [Main mission 2] Resurrection - Main missions - Prototype 2 - Game Guide and Walkthrough](https://game.lhg100.com/Article/UploadFiles/201512/2015121619040075.jpg)
Wait until Heller stands up, walk to the table indicated by the game and lift it up (B button). Now you have to throw the table towards the glassy control room above you. Aim at the interactive point (hold left trigger) and throw the table (B button again).
New objective: Jump through the lab window
![There is only one more action left - getting out of the Blackwatch facility - [Main mission 2] Resurrection - Main missions - Prototype 2 - Game Guide and Walkthrough](https://game.lhg100.com/Article/UploadFiles/201512/2015121619040092.jpg)
There is only one more action left - getting out of the Blackwatch facility. Position yourself in front of damaged shutter and hold A button which will result in a long jump. If you've aimed it well, you'll get to the shutter with no problems. Otherwise, make sure you're not too far away. Jumping through the shutter will trigger another cut-scene and you'll finish this level.
New objective: Attack the Blackwatch commander
New objective: Consume the Blackwatch commander
![This level starts in location [292, 1313] and your first objective is to hit Blackwatch commander (X button) - [Main mission 3] The Strong Survive - Main missions - Prototype 2 - Game Guide and Walkthrough](https://game.lhg100.com/Article/UploadFiles/201512/2015121619040027.jpg)
This level starts in location [292, 1313] and your first objective is to hit Blackwatch commander (X button). You can now get to know with information on enemy alert system indicator (currently it is on highest, red level). After that, consume the commander, so press B and then Y. In this case you will not only regenerate your health, but also obtain the shape of attacked person.
New objective: Run away to escape alert
![Do not try to fight with helicopter and Blackwatch soldiers, just quickly start fleeing - [Main mission 3] The Strong Survive - Main missions - Prototype 2 - Game Guide and Walkthrough](https://game.lhg100.com/Article/UploadFiles/201512/2015121619040074.jpg)
Do not try to fight with helicopter and Blackwatch soldiers, just quickly start fleeing. Run in any direction, holding right trigger accordance to the game hint. This will activate sprint option, which as you probably remember from the past, is not limited only to running on the ground, but also allows you to run over the buildings' walls.
![But in this particular case I do not advise running over the walls, because your main task now is to find some secluded place, where enemies will lose Heller - [Main mission 3] The Strong Survive - Main missions - Prototype 2 - Game Guide and Walkthrough](https://game.lhg100.com/Article/UploadFiles/201512/2015121619040120.jpg)
But in this particular case I do not advise running over the walls, because your main task now is to find some secluded place, where enemies will lose Heller. So I recommend choosing one of the narrow alleys between buildings. After the game stops the actions, test the ability to shift your form into soldier you've killed recently (Blackwatch commander). To do so, just press left direction on D-pad, ending the chase.
New objective: Go to higher ground
![Your current mission's objective is to get to the rooftop of one of the high building in location [236, 1259] (you can restore Heller's form or stay in commander's shape) and this time you have to rely on running over the walls, holding the right trigger - [Main mission 3] The Strong Survive - Main missions - Prototype 2 - Game Guide and Walkthrough](https://game.lhg100.com/Article/UploadFiles/201512/2015121619040162.jpg)
Your current mission's objective is to get to the rooftop of one of the high building in location [236, 1259] (you can restore Heller's form or stay in commander's shape) and this time you have to rely on running over the walls, holding the right trigger. After reaching the rooftop, move to the shiny circle indicated by the game in order to start another cut-scene.
New objective: Go to church to look for father Guerra
![The next mission's objective is to get inside the church in location [281, 1196] and you may use the glide option by holding the right trigger - [Main mission 3] The Strong Survive - Main missions - Prototype 2 - Game Guide and Walkthrough](https://game.lhg100.com/Article/UploadFiles/201512/2015121619040115.jpg)
The next mission's objective is to get inside the church in location [281, 1196] and you may use the glide option by holding the right trigger. After getting to the church entrance, you'll watch another cut-scene.
New objective: Go to the hospital to look for the commanders
![Listen to the conversation with Guerra and learn how to target certain people - [Main mission 3] The Strong Survive - Main missions - Prototype 2 - Game Guide and Walkthrough](https://game.lhg100.com/Article/UploadFiles/201512/2015121619040165.jpg)
Listen to the conversation with Guerra and learn how to target certain people. After that, head to the hospital in location [212, 1108]. Your target is a rooftop of one of the building located near the hospital.
New objective: Hunt the Blackwatch commander
![Watch a short movie, explaining principles of hunting skill, functioning similar as radar - [Main mission 3] The Strong Survive - Main missions - Prototype 2 - Game Guide and Walkthrough](https://game.lhg100.com/Article/UploadFiles/201512/2015121619040191.jpg)
Watch a short movie, explaining principles of hunting skill, functioning similar as radar. When you press left analog, you'll "send" some kind of impulse, which "bounces" from the person you're searching for. In this case hunting is very simple, because one of soldiers patrolling hospital rooftop is your target (screen above).
New objective: Hunt and consume your target
![Now you can act in two main ways - [Main mission 3] The Strong Survive - Main missions - Prototype 2 - Game Guide and Walkthrough](https://game.lhg100.com/Article/UploadFiles/201512/2015121619040172.jpg)
Now you can act in two main ways. The first option is to shapeshift into previously defeated commander (left direction on D-pad) and to approach your new target without triggering an alarm. This is safer solution, although you have to watch out and not to perform any actions suggesting supernatural powers in presence of Blackwatch soldiers. Another option is to deal with enemies and despite appearances it is not a worse solution, because they are easy to overcome. Regardless of your choice, you have to grab targeted commander (you can use the sonar how often you want). Heller will automatically consume his victim, gaining access not only to its shape but also memories.
New objective: Go to the hospital parking lot to try to hunt the Blackwatch commander
![This is very simple task, because you have only to get closer to the shiny circle in location [210, 1091] and use the sonar again (press left analog) - [Main mission 3] The Strong Survive - Main missions - Prototype 2 - Game Guide and Walkthrough](https://game.lhg100.com/Article/UploadFiles/201512/2015121619040114.jpg)
This is very simple task, because you have only to get closer to the shiny circle in location [210, 1091] and use the sonar again (press left analog). You'll hunt the third commander this way.
New objective: Go to higher ground
New objective: Hunt the Blackwatch commander
![Head to the viewpoint marked by the game in location [151, 1156] - [Main mission 3] The Strong Survive - Main missions - Prototype 2 - Game Guide and Walkthrough](https://game.lhg100.com/Article/UploadFiles/201512/2015121619040243.jpg)
Head to the viewpoint marked by the game in location [151, 1156]. As it is located on the rooftop, you have to use glide and running on the walls. After getting to the indicated place, use the sonar again (press left analog). Thus you'll get the precious hint, because it is far easier to hunt down your victim, if you're using sonar on high located view point.
New objective: Go to the bridge
![1 - [Main mission 3] The Strong Survive - Main missions - Prototype 2 - Game Guide and Walkthrough](https://game.lhg100.com/Article/UploadFiles/201512/2015121619040222.jpg)
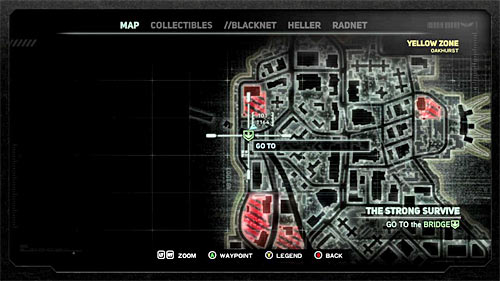
As you can notice, sonar's impulse "bounces" from victim located on the damaged river bridge in location [101, 1164] (screens above). Go to the indicated place in order to unlock further mission's objectives.
New objective: Glide across the broken bridge
![Your new task is to get to the third part of the damaged bridge - [Main mission 3] The Strong Survive - Main missions - Prototype 2 - Game Guide and Walkthrough](https://game.lhg100.com/Article/UploadFiles/201512/2015121619040291.jpg)
Your new task is to get to the third part of the damaged bridge. In order to do this, you have to bypass two large holes. According to game's hint, start with activating sprint option (right trigger), while running over the bridge towards the first hole. After getting close to the hole, hold the A button to perform a long jump and then hold the right trigger to glide to a new place [70, 1146]. Repeat all these actions after getting to the second part of the damaged bridge, finally reaching your target [34, 1133].
New objective: Hunt and consume your target
![Same as with the commander on the hospital's rooftop, you can choose a peaceful option and approach your target with no problems (screen above), while being in the shape of the last commander, or attack near soldiers, eliminating them quickly - [Main mission 3] The Strong Survive - Main missions - Prototype 2 - Game Guide and Walkthrough](https://game.lhg100.com/Article/UploadFiles/201512/2015121619040201.jpg)
Same as with the commander on the hospital's rooftop, you can choose a peaceful option and approach your target with no problems (screen above), while being in the shape of the last commander, or attack near soldiers, eliminating them quickly. Regardless of chosen option you have to grab the commander targeted with sonar (B button), obtaining his shape and memories.
New objective: Exit the alert
![The end of this mission is an escape from a pursuit consisting mainly of two Blackwatch helicopters - [Main mission 3] The Strong Survive - Main missions - Prototype 2 - Game Guide and Walkthrough](https://game.lhg100.com/Article/UploadFiles/201512/2015121619040221.jpg)
The end of this mission is an escape from a pursuit consisting mainly of two Blackwatch helicopters. Move quickly toward damaged parts of the bridge, which you have to bypass as you did before, that is bouncing while running and then gliding. Try not to stop, so you won't become an easy target for helicopters and Blackwatch soldiers.
![After getting to the other river back, focus on finding a hideout to lose the chase - [Main mission 3] The Strong Survive - Main missions - Prototype 2 - Game Guide and Walkthrough](https://game.lhg100.com/Article/UploadFiles/201512/2015121619040360.jpg)
After getting to the other river back, focus on finding a hideout to lose the chase. I personally suggest trying to hide under the bridge (screen above). Remember that in order to end the chase you have to shapeshift into recently killed commander by pressing left direction on D-pad. Now the mission is over and in order to start a new one (Operation Flytrap), you have to get to its marker shown on the map.
![To start the mission, go to location [226, 1108], specifically to the shiny circle located on the rooftop - [Main mission 4] Operation Flytrap - Main missions - Prototype 2 - Game Guide and Walkthrough](https://game.lhg100.com/Article/UploadFiles/201512/2015121619040351.jpg)
To start the mission, go to location [226, 1108], specifically to the shiny circle located on the rooftop.
New objective: Go to test site Washington to stop Blackwatch's specimen release
![Head towards current target in location [207, 1201] - [Main mission 4] Operation Flytrap - Main missions - Prototype 2 - Game Guide and Walkthrough](https://game.lhg100.com/Article/UploadFiles/201512/2015121619040334.jpg)
Head towards current target in location [207, 1201]. It is shiny circles on the ground - approach it. After that action you'll watch yet another cut-scene, after which you'll be forced to fight with mutated beast (Brawler).
New objective: Dodge the brawler
![Lean the left analog stick toward monster (up) and then press A button, so that Heller should jump over Brawler (screen above) - [Main mission 4] Operation Flytrap - Main missions - Prototype 2 - Game Guide and Walkthrough](https://game.lhg100.com/Article/UploadFiles/201512/2015121619040347.jpg)
Lean the left analog stick toward monster (up) and then press A button, so that Heller should jump over Brawler (screen above). You should remember that move, because it is the best way to avoid Brawler's attacks after the real fight begins.
New objective: Defeat the brawler
![As I said before, after the fight begins, it is best to avoid beasts attacks by jumping over it - [Main mission 4] Operation Flytrap - Main missions - Prototype 2 - Game Guide and Walkthrough](https://game.lhg100.com/Article/UploadFiles/201512/2015121619040330.jpg)
As I said before, after the fight begins, it is best to avoid beast's attacks by jumping over it. After each jump I suggest performing several quick attacks (by pressing X button), but when you see that the beast is still turned back to you, then you can also try a strong attack (by holding X button).
![Brawlers attacks take a lot of energy and I suggest reacting somehow to it, if you lose more than half of your health bar - [Main mission 4] Operation Flytrap - Main missions - Prototype 2 - Game Guide and Walkthrough](https://game.lhg100.com/Article/UploadFiles/201512/2015121619040336.jpg)
Brawler's attacks take a lot of energy and I suggest reacting somehow to it, if you lose more than half of your health bar. To regain health, grab (B button) and consume (Y button) civilians near you. Remember also about possibility of running over the battle field (right trigger), thus decreasing the risk of being caught by the beast.
New objective: Consume the brawler to get its claws
![You have to fight until brawler loses almost entire health bar and the game suggests you consuming the mutated beast - [Main mission 4] Operation Flytrap - Main missions - Prototype 2 - Game Guide and Walkthrough](https://game.lhg100.com/Article/UploadFiles/201512/2015121619040475.jpg)
You have to fight until brawler loses almost entire health bar and the game suggests you consuming the mutated beast. To do it, run to the monster and press B button. Performing this action will unlock an ability of using Claws, which replace standard fists hits.
New objective: Kill the brawler
![Wait for the second mutant and attack it - [Main mission 4] Operation Flytrap - Main missions - Prototype 2 - Game Guide and Walkthrough](https://game.lhg100.com/Article/UploadFiles/201512/2015121619040402.jpg)
Wait for the second mutant and attack it. Same as with the previous fight, I suggest jumping over the beast and attacking it from behind. Notice, that thanks to claws you can deal more damage. You can end this duel in a standard way or consume brawler (B button).
New objective: Attack the Blackwatch trooper
![Blackwatch soldiers will soon appear in the area and the game will suggest you testing a new attack named Claw Pounce, connected with claws - [Main mission 4] Operation Flytrap - Main missions - Prototype 2 - Game Guide and Walkthrough](https://game.lhg100.com/Article/UploadFiles/201512/2015121619040426.jpg)
Blackwatch soldiers will soon appear in the area and the game will suggest you testing a new attack named Claw Pounce, connected with claws. According to instructions on the screen, press and hold the left trigger in order to target a guard in front of you (screen above) and then attack him by holding X button.
New objective: Destroy the Blackwatch forces to prove to Guerra it can be done
![Start attacking the rest of Blackwatch soldiers - [Main mission 4] Operation Flytrap - Main missions - Prototype 2 - Game Guide and Walkthrough](https://game.lhg100.com/Article/UploadFiles/201512/2015121619040492.jpg)
Start attacking the rest of Blackwatch soldiers. If you want, you can still rely on an attack described above and target your enemies (left trigger + X), although it is not "a must". You might as well take a weapon from one of soldiers and shoot other enemies. I recommend also consuming at least one opponent, because soldier's "shaft" can be handy in a few moments.
![Notice, that after defeating first group of enemies, another squad of them appeared in the distance - [Main mission 4] Operation Flytrap - Main missions - Prototype 2 - Game Guide and Walkthrough](https://game.lhg100.com/Article/UploadFiles/201512/2015121619040448.jpg)
Notice, that after defeating first group of enemies, another squad of them appeared in the distance. If you've consumed any soldier earlier, you may now shapeshift into him, so you will be able to easily surprise your enemies (they won't expose you right now). During fights, according to game suggestions, try to avoid rockets. You can of course pick up the rocket launcher and use it to deal with Blackwatch soldiers faster.
New objective: Destroy the Blackwatch APC
![According to games instructions, take a rocket launcher from one of the opponents from the second squad (B button) - [Main mission 4] Operation Flytrap - Main missions - Prototype 2 - Game Guide and Walkthrough](https://game.lhg100.com/Article/UploadFiles/201512/2015121619040537.jpg)
According to game's instructions, take a rocket launcher from one of the opponents from the second squad (B button). Go to a safe distance from an APC, aim at it (left trigger) and shoot it three times, which should be enough to destroy the enemy's vehicle.
New objective: Exit the alert
New objective: Go to church to finally convince Guerra to join you
![Losing the pursuit should be a mere formality, because you've probably eliminated all enemy troops present in this area (otherwise escape the battlefield hiding on rooftops and in narrow alleys) - [Main mission 4] Operation Flytrap - Main missions - Prototype 2 - Game Guide and Walkthrough](https://game.lhg100.com/Article/UploadFiles/201512/2015121619040538.jpg)
Losing the pursuit should be a mere formality, because you've probably eliminated all enemy troops present in this area (otherwise escape the battlefield hiding on rooftops and in narrow alleys). In order to finish this mission, you have to return to the church in location [280, 1196]. The game will not allow you to take on the next main mission, so as a result focus on completing the side Blacknet mission titled Operation: Orion's Belt.
![This mission becomes available only after completing the side Blacknet mission titled Operation: Orion's Belt - [Main mission 5] Brain Drain - Main missions - Prototype 2 - Game Guide and Walkthrough](https://game.lhg100.com/Article/UploadFiles/201512/2015121619040578.jpg)
This mission becomes available only after completing the side Blacknet mission titled Operation: Orion's Belt. In order to begin this mission you have to get to location [363, 1122], specifically to a shiny circle on a building's rooftop.
New objective: Enter the Blackwatch base
![Check out the brief information on enemy alert indicator and then move to the guard standing nearby and consume him (button B and button Y) - [Main mission 5] Brain Drain - Main missions - Prototype 2 - Game Guide and Walkthrough](https://game.lhg100.com/Article/UploadFiles/201512/2015121619040523.jpg)
Check out the brief information on enemy alert indicator and then move to the guard standing nearby and consume him (button B and button Y).
![You can now head towards the main entrance to the base located in location [399, 1127] - [Main mission 5] Brain Drain - Main missions - Prototype 2 - Game Guide and Walkthrough](https://game.lhg100.com/Article/UploadFiles/201512/2015121619040524.jpg)
You can now head towards the main entrance to the base located in location [399, 1127]. Make sure that you are disguised as a previously killed Blackwatch soldier and move forwards.
New objective: Consume the Blackwatch trooper to enter the base and confront Rooks
![Try to approach the guard patrolling local square, learning how Viral Detectors work - [Main mission 5] Brain Drain - Main missions - Prototype 2 - Game Guide and Walkthrough](https://game.lhg100.com/Article/UploadFiles/201512/2015121619040537.jpg)
Try to approach the guard patrolling local square, learning how Viral Detectors work. Generally you must remember not to stay too long near detectors, because alert bar will be filled quickly, thus exposing Heller. I suggest placing your character in a corner indicated on above screen. Wait for the guard and then consume him (button B and button Y).
New objective: Infiltrate Rooks's briefing to kill Colonel Rooks
![This is very easy task - [Main mission 5] Brain Drain - Main missions - Prototype 2 - Game Guide and Walkthrough](https://game.lhg100.com/Article/UploadFiles/201512/2015121619040648.jpg)
This is very easy task. Head to the hand scanner in location [403, 1118], remembering about staying away from the viral detector. Interact with the scanner (button B), which will result in a longer cut-scene.
New objective: Chase and consume the scientists
![Prepare, because chase after four scientists will start right after cut-scene ends - [Main mission 5] Brain Drain - Main missions - Prototype 2 - Game Guide and Walkthrough](https://game.lhg100.com/Article/UploadFiles/201512/2015121619040616.jpg)
Prepare, because chase after four scientists will start right after cut-scene ends. First of them should be located nearby (screen above) and if you want to get some bonus experience points, you'll have to perform Pounce Grab attack, so bounce from the ground )hold A button) and then during in the air decide to reach the scientist and grab him (press B button). Do not worry if you won't succeed in a first try, because you can do it three more times.
![Head to the base exit (screen above), ignoring Blackwatch soldiers and focusing only on getting scientists - [Main mission 5] Brain Drain - Main missions - Prototype 2 - Game Guide and Walkthrough](https://game.lhg100.com/Article/UploadFiles/201512/2015121619040655.jpg)
Head to the base exit (screen above), ignoring Blackwatch soldiers and focusing only on getting scientists. I suggest holding right trigger all the time and perform jumps when needed.
![Your task is to chase, grab and consume other three scientists - [Main mission 5] Brain Drain - Main missions - Prototype 2 - Game Guide and Walkthrough](https://game.lhg100.com/Article/UploadFiles/201512/2015121619040606.jpg)
Your task is to chase, grab and consume other three scientists. This should not be a big problem, but try to fulfill a bonus objective connected with Pounce Grab attack before you eliminate the last, fourth scientist.
New objective: Exit the alert
New objective: Hunt and consume Dr. Shaffeld
![1 - [Main mission 5] Brain Drain - Main missions - Prototype 2 - Game Guide and Walkthrough](https://game.lhg100.com/Article/UploadFiles/201512/2015121619040655.jpg)
![Losing the pursuit shouldn't be a big problem, but remember about regenerating your health by consuming one or more persons - [Main mission 5] Brain Drain - Main missions - Prototype 2 - Game Guide and Walkthrough](https://game.lhg100.com/Article/UploadFiles/201512/2015121619040696.jpg)
Losing the pursuit shouldn't be a big problem, but remember about regenerating your health by consuming one or more persons. Hunting Shaffeld is nothing special and it is the same as previous hunts, so you have to use your sonar from time to time (press left analog stick), observing from high viewpoints where these impulses come from. Your target is location [370, 1024], in the north-western part of yellow zone.
New objective: Destroy the APC
![I strongly advise to be interested in bonus objective of this mission, which is destroying the APC with rocket launcher - [Main mission 5] Brain Drain - Main missions - Prototype 2 - Game Guide and Walkthrough](https://game.lhg100.com/Article/UploadFiles/201512/2015121619040739.jpg)
I strongly advise to be interested in bonus objective of this mission, which is destroying the APC with rocket launcher. Watch out for local soldiers, specifically those standing on the left. You can attack one of the soldiers and pick up the launcher from his corpse or wait for the opportune moment and consume the opponent with the launcher. The second option is safer but requires using the sonar. Also remember that you can't wait too long with this objective, because it will fail when the APC reaches the destination.
![After obtaining the launcher, start chasing the APC and if you haven't alerted guards yet, stay in your disguise - [Main mission 5] Brain Drain - Main missions - Prototype 2 - Game Guide and Walkthrough](https://game.lhg100.com/Article/UploadFiles/201512/2015121619040783.jpg)
After obtaining the launcher, start chasing the APC and if you haven't alerted guards yet, stay in your disguise. Otherwise do not stay on the main road, but jump over rooftops of adjacent building. Aim at the APC and shoot it four times, which should be enough to destroy the vehicle.
New objective: Consume Dr. Shaffeld
![Ignore enemies in the area and run as fast as possible to Dr - [Main mission 5] Brain Drain - Main missions - Prototype 2 - Game Guide and Walkthrough](https://game.lhg100.com/Article/UploadFiles/201512/2015121619040793.jpg)
Ignore enemies in the area and run as fast as possible to Dr. Shaffeld, not allowing him to escape from this place. Grab the scientist (button B) and consume him (button Y).
New objective: Exit the alert
![As soon as you regain control over Heller, start fleeing, trying to disappear from your opponents' sight and finish this level - [Main mission 5] Brain Drain - Main missions - Prototype 2 - Game Guide and Walkthrough](https://game.lhg100.com/Article/UploadFiles/201512/2015121619040749.jpg)
As soon as you regain control over Heller, start fleeing, trying to disappear from your opponents' sight and finish this level. The game will automatically present you an option of starting next main mission - Project Long Shadow.
![In order to start this mission you have to go to location [120, 1371], and specifically to the shiny circle on the ground - [Main mission 6] Project Long Shadow - Main missions - Prototype 2 - Game Guide and Walkthrough](https://game.lhg100.com/Article/UploadFiles/201512/2015121619040705.jpg)
In order to start this mission you have to go to location [120, 1371], and specifically to the shiny circle on the ground.
New objective: Investigate research post Long Shadow
![Your current target is location [209, 1591] - [Main mission 6] Project Long Shadow - Main missions - Prototype 2 - Game Guide and Walkthrough](https://game.lhg100.com/Article/UploadFiles/201512/2015121619040756.jpg)
Your current target is location [209, 1591]. Same as in the previous mission, you have to shapeshift into a soldier. If you haven't consumed any civilians since conversation with Rooks on the mission beginning, you can go to the main entrance right now. Otherwise grab one of the guards patrolling area next to the main gate and consume him (button B and button Y).
New objective: Infiltrate research post Long Shadow
New objective: Use the hand scanner to enter research post Long Shadow
![Use the hand scanner near the facility entrance gate (button B) and after getting into restricted area, go to the entrance door in the left building - [Main mission 6] Project Long Shadow - Main missions - Prototype 2 - Game Guide and Walkthrough](https://game.lhg100.com/Article/UploadFiles/201512/2015121619040811.jpg)
Use the hand scanner near the facility entrance gate (button B) and after getting into restricted area, go to the entrance door in the left building. Also in this case you have to use the scanner located in location [219, 1603].
New objective: Defeat the Hydra
![Prepare for the first full-fledges fight with the boss and I must say that it won't be easy to defeat Hydra - [Main mission 6] Project Long Shadow - Main missions - Prototype 2 - Game Guide and Walkthrough](https://game.lhg100.com/Article/UploadFiles/201512/2015121619040824.jpg)
Prepare for the first full-fledges fight with the boss and I must say that it won't be easy to defeat Hydra. First of all try to avoid her tendril attacks and the best solution is to constantly jump to sides, although one of the attacks (tendrils on the ground) may force you to jump up.
![The fight with Hydra will be also joined by facility workers and Blackwatch soldiers - [Main mission 6] Project Long Shadow - Main missions - Prototype 2 - Game Guide and Walkthrough](https://game.lhg100.com/Article/UploadFiles/201512/2015121619040826.jpg)
The fight with Hydra will be also joined by facility workers and Blackwatch soldiers. DO NOT kill him. There are two reasons for that: first of all, they are not interested in killing Heller. Second: these people are very good material to be consumed in order to regenerate your health. So if you kill them all too early, you will block a possibility of regaining health, because there are no new people in later phase of the fight.
![It is best to attack Hydra with rocket launchers, placed in lockers in room corners - [Main mission 6] Project Long Shadow - Main missions - Prototype 2 - Game Guide and Walkthrough](https://game.lhg100.com/Article/UploadFiles/201512/2015121619040887.jpg)
It is best to attack Hydra with rocket launchers, placed in lockers in room corners. But remember that when you consume someone, you will drop your weapons, so you should do these between attacks.
![Every time you pick the launcher, start targeting (left trigger) and shoot all rockets - [Main mission 6] Project Long Shadow - Main missions - Prototype 2 - Game Guide and Walkthrough](https://game.lhg100.com/Article/UploadFiles/201512/2015121619040867.jpg)
Every time you pick the launcher, start targeting (left trigger) and shoot all rockets. Unfortunately Hydra is very tough so keep monitoring your health, while avoiding boss's attacks. After you win the fight with Hydra, you'll be awarded with Tendrils ability.
New objective: Kill the Blackwatch troopers
![Move quickly towards Blackwatch soldiers and according to the game instructions, test your newly unlocked Tendrils attacks by pressing Y button - [Main mission 6] Project Long Shadow - Main missions - Prototype 2 - Game Guide and Walkthrough](https://game.lhg100.com/Article/UploadFiles/201512/2015121619040849.jpg)
Move quickly towards Blackwatch soldiers and according to the game instructions, test your newly unlocked Tendrils attacks by pressing Y button. Of course it is not "a must", because you can eliminate them with claws as well. Do not forget about regenerating your health bar if needed, by consuming nearby persons.
New objective: Exit research post Long Shadow
![Go to the exit located in location [216, 1577], using the stairs leading to the control room on the first floor - [Main mission 6] Project Long Shadow - Main missions - Prototype 2 - Game Guide and Walkthrough](https://game.lhg100.com/Article/UploadFiles/201512/2015121619040866.jpg)
Go to the exit located in location [216, 1577], using the stairs leading to the control room on the first floor. After encountering a new group of enemies, the game will offer you a possibility of using the power type of tendrils attack, called Black Hole, performed by holding Y button. As you've probably seen, it is a good way to eliminate group of enemies standing close to each other.
New objective: Exit the alert
![After the fight go to the right elevator in location [230, 1595] and use its control panel - [Main mission 6] Project Long Shadow - Main missions - Prototype 2 - Game Guide and Walkthrough](https://game.lhg100.com/Article/UploadFiles/201512/2015121619040943.jpg)
After the fight go to the right elevator in location [230, 1595] and use its control panel. Once you get to the ground, use the Black Hole attack again (hold Y button), eliminating all enemies near the elevator.
![The only thing left is to escape from the facility and lose the pursuit - [Main mission 6] Project Long Shadow - Main missions - Prototype 2 - Game Guide and Walkthrough](https://game.lhg100.com/Article/UploadFiles/201512/2015121619040930.jpg)
The only thing left is to escape from the facility and lose the pursuit. Remember about using the right trigger and A button. If you're strong enough, you can try to destroy Blackwatch helicopter (I recommend strong claws attack), but it is not required. This level will be completed after the pursuit is over. Notice, that there are unlocked two new missions: Feeding Time and The Lab Rat (you can start them in any order).
![In order to start this mission, you have to get to location [244, 1288], and specifically to the shiny circle on the ground - [Main mission 7] Feeding Time - Main missions - Prototype 2 - Game Guide and Walkthrough](https://game.lhg100.com/Article/UploadFiles/201512/2015121619040999.jpg)
In order to start this mission, you have to get to location [244, 1288], and specifically to the shiny circle on the ground.
New objective: Go to test site Jefferson to foil Gentek's civilian testing
![Your current target is location [311, 1033] - [Main mission 7] Feeding Time - Main missions - Prototype 2 - Game Guide and Walkthrough](https://game.lhg100.com/Article/UploadFiles/201512/2015121619040970.jpg)
Your current target is location [311, 1033]. After getting there find a shiny circle located on the building's rooftop (screen above). Approach it in order to start a new cut-scene.
New objective: Kill the Blackwatch defenders to access test site Jefferson
![1 - [Main mission 7] Feeding Time - Main missions - Prototype 2 - Game Guide and Walkthrough](https://game.lhg100.com/Article/UploadFiles/201512/2015121619040916.jpg)
![Head to the test site, located north-west from here - [Main mission 7] Feeding Time - Main missions - Prototype 2 - Game Guide and Walkthrough](https://game.lhg100.com/Article/UploadFiles/201512/2015121619040931.jpg)
Head to the test site, located north-west from here. Its approximate location is in [265, 965]. Your task is to eliminate Blackwatch squads stationing in the fenced area. I suggest two solutions for this task. First: go through the main gate (screen 1). Second: jump onto the rooftop to get behind two snipers (screen 2). In both cases you should be in disguise as a Blackwatch soldier, so you won't get attacked without a possibility of surprise action.
![First of all you should get a rocket launcher and if you're disguised as a Blackwatch soldier, you might go to the one of the enemies with the launcher and consume him (screen above) - [Main mission 7] Feeding Time - Main missions - Prototype 2 - Game Guide and Walkthrough](https://game.lhg100.com/Article/UploadFiles/201512/2015121619041043.jpg)
First of all you should get a rocket launcher and if you're disguised as a Blackwatch soldier, you might go to the one of the enemies with the launcher and consume him (screen above). Otherwise pick up the launcher from one of the defeated enemies (it is best to do it at the beginning of fights).
![Regardless of how you got the launcher, I suggest using it to destroy the APC located in the front of the facility - [Main mission 7] Feeding Time - Main missions - Prototype 2 - Game Guide and Walkthrough](https://game.lhg100.com/Article/UploadFiles/201512/2015121619041027.jpg)
Regardless of how you got the launcher, I suggest using it to destroy the APC located in the front of the facility. Using the launcher is not required, because if you have enough powers you can act completely different. After destroying the APC, attack Blackwatch soldiers. In this fight you might use previously acquired tendrils and especially Black Hole attack (hold Y button).
New objective: Consume the commander to access test site Jefferson
![The game probably won't allow you to kill all enemies at once, because after a while you should see a cut-scene showing another group of enemies joining the fight - [Main mission 7] Feeding Time - Main missions - Prototype 2 - Game Guide and Walkthrough](https://game.lhg100.com/Article/UploadFiles/201512/2015121619041090.jpg)
The game probably won't allow you to kill all enemies at once, because after a while you should see a cut-scene showing another group of enemies joining the fight. In that group you'll find the commander.
![If you prefer aggressive actions, keep attacking enemies, remembering about often regeneration - [Main mission 7] Feeding Time - Main missions - Prototype 2 - Game Guide and Walkthrough](https://game.lhg100.com/Article/UploadFiles/201512/2015121619041048.jpg)
If you prefer aggressive actions, keep attacking enemies, remembering about often regeneration. But if you want to play smarter, go away from the facility, wait until alarm goes off, disguise as a Blackwatch soldier and return to the mission start point. Thanks to that you'll get closer to your target (watch out for viral detectors!). Regardless of the chosen option, you have to grab and consume the commander (button B and button Y).
New objective: Use the hand scanner to access test site Jefferson
![This task is very easy because you only have to approach the hand scanner in location [249, 968] and interact with it (button B) - [Main mission 7] Feeding Time - Main missions - Prototype 2 - Game Guide and Walkthrough](https://game.lhg100.com/Article/UploadFiles/201512/2015121619041040.jpg)
This task is very easy because you only have to approach the hand scanner in location [249, 968] and interact with it (button B).
New objective: Consume the senior biologist to access the experiment room
![Right after beginning of the fight I suggest using the Black Hole attack (hold Y button), because most of enemies should stand in front of Heller and not far from him - [Main mission 7] Feeding Time - Main missions - Prototype 2 - Game Guide and Walkthrough](https://game.lhg100.com/Article/UploadFiles/201512/2015121619041071.jpg)
Right after beginning of the fight I suggest using the Black Hole attack (hold Y button), because most of enemies should stand in front of Heller and not far from him. After elimination of soldiers it would be good to consume one of the local scientists (after regeneration), so you can safely explore the facility. Your target is location [267, 993] and to get there you have to use a narrow passage and stairs.
![Before you decide to consume the biologist, you should deal with a new group of Blackwatch soldiers and if you've disguised as a scientist according to my suggestions, you can attack them by surprise - [Main mission 7] Feeding Time - Main missions - Prototype 2 - Game Guide and Walkthrough](https://game.lhg100.com/Article/UploadFiles/201512/2015121619041104.jpg)
Before you decide to consume the biologist, you should deal with a new group of Blackwatch soldiers and if you've disguised as a scientist according to my suggestions, you can attack them by surprise. During the fight watch out for opponents with rocket launchers and help yourself with tendrils or other unlocked good abilities. At the end locate the biologist and consume him (button B and button Y).
New objective: Use the hand scanner to access the experiment room
![This mission objective also doesn't require longer description - [Main mission 7] Feeding Time - Main missions - Prototype 2 - Game Guide and Walkthrough](https://game.lhg100.com/Article/UploadFiles/201512/2015121619041126.jpg)
This mission objective also doesn't require longer description. Scanner can be found in location [248, 965] and you have to interact with it (button B).
New objective: Defeat Juggernaut
![Prepare for a new fight with boss, but Juggernaut is much easier to defeat than Hydra - [Main mission 7] Feeding Time - Main missions - Prototype 2 - Game Guide and Walkthrough](https://game.lhg100.com/Article/UploadFiles/201512/2015121619041199.jpg)
Prepare for a new fight with boss, but Juggernaut is much easier to defeat than Hydra. First, note that the boss moves slowly and also slowly hits opponent. His attacks can be easily dodged. Only do not let Juggernaut to surprise you from a distance, because he can throw torn out pieces of concrete at you.
![I recommend looking around the room and regenerate by consuming some facility workers at the beginning - [Main mission 7] Feeding Time - Main missions - Prototype 2 - Game Guide and Walkthrough](https://game.lhg100.com/Article/UploadFiles/201512/2015121619041151.jpg)
I recommend looking around the room and regenerate by consuming some facility workers at the beginning. In addition, you'll find sheds with rocket launchers (screen above).
![Do not try to attack Juggernaut in a standard way with the rocket launcher, because he can block such attacks with his shields - [Main mission 7] Feeding Time - Main missions - Prototype 2 - Game Guide and Walkthrough](https://game.lhg100.com/Article/UploadFiles/201512/2015121619041166.jpg)
Do not try to attack Juggernaut in a standard way with the rocket launcher, because he can block such attacks with his shields. The solution is to jump over the boss (lean the analog towards him and press A button), so you can land behind his back. Right after that, shoot rockets at him, forgetting about manual targeting.
![Of course you do not have to use rockets to deal with him, because you can as well rely on quick attacks with tendrils for example (Y button) to inflict damage to boss (screen above) - [Main mission 7] Feeding Time - Main missions - Prototype 2 - Game Guide and Walkthrough](https://game.lhg100.com/Article/UploadFiles/201512/2015121619041225.jpg)
Of course you do not have to use rockets to deal with him, because you can as well rely on quick attacks with tendrils for example (Y button) to inflict damage to boss (screen above). But remember to dodge his attacks and you can easily win.
New objective: Consume the Juggernaut to get its shields
New objective: Block the rocket
![Finish this fight by consuming the boss (B button), which will be rewarded with Shield ability - [Main mission 7] Feeding Time - Main missions - Prototype 2 - Game Guide and Walkthrough](https://game.lhg100.com/Article/UploadFiles/201512/2015121619041221.jpg)
Finish this fight by consuming the boss (B button), which will be rewarded with Shield ability. The game will allow you to test it right away. Wait for the proper information to be displayed and press RB button, blocking a rocket which was shot towards you. Remember that blocking rockets and other missiles required perfect timing, because otherwise they will explode on impact.
New objective: Exit test site Jefferson
![Another group of enemies will soon appear in the room and you might use again shield ability to block a rocket (RB button), especially that there is bonus objectives connected with one such attack - [Main mission 7] Feeding Time - Main missions - Prototype 2 - Game Guide and Walkthrough](https://game.lhg100.com/Article/UploadFiles/201512/2015121619041246.jpg)
Another group of enemies will soon appear in the room and you might use again shield ability to block a rocket (RB button), especially that there is bonus objectives connected with one such attack. You do not have to get rid of all enemies in that way, because you can use as well claws, tendrils or other abilities. Remember though to first eliminate all enemies with rocket launchers.
![You can now head to the exit from location [250, 949] - [Main mission 7] Feeding Time - Main missions - Prototype 2 - Game Guide and Walkthrough](https://game.lhg100.com/Article/UploadFiles/201512/2015121619041292.jpg)
You can now head to the exit from location [250, 949]. Use the stairs leading to the upper control room. Regenerate by consuming scientists running around and then go to the elevator and interact with its control panel (B button).
![After getting to the ground, you should notice three enemies with rocket launchers awaiting you - [Main mission 7] Feeding Time - Main missions - Prototype 2 - Game Guide and Walkthrough](https://game.lhg100.com/Article/UploadFiles/201512/2015121619041233.jpg)
After getting to the ground, you should notice three enemies with rocket launchers awaiting you. QUICKLY press RB button to block rockets and thus eliminate all enemies (screen above).
New objective: Exit the alert
![Escape from the mission area should not be a problem, but I do not recommend using the guarded main gate, but instead jumping over the facility wall - [Main mission 7] Feeding Time - Main missions - Prototype 2 - Game Guide and Walkthrough](https://game.lhg100.com/Article/UploadFiles/201512/2015121619041347.jpg)
Escape from the mission area should not be a problem, but I do not recommend using the guarded main gate, but instead jumping over the facility wall. When you exit the alarm and finish this level, the fame will unlock the next mission ordered by father Guerra, titled Salvation.
![In order to start this mission you have reach location [424, 1265], and specifically a shiny circle on the ground, near the water - [Main mission 8] The Lab Rat - Main missions - Prototype 2 - Game Guide and Walkthrough](https://game.lhg100.com/Article/UploadFiles/201512/2015121619041332.jpg)
In order to start this mission you have reach location [424, 1265], and specifically a shiny circle on the ground, near the water.
New objective: Go to the convoy staging area to find Dr. Bellamy
![Your target is location [204, 1234] and you do not have to rush to get there - [Main mission 8] The Lab Rat - Main missions - Prototype 2 - Game Guide and Walkthrough](https://game.lhg100.com/Article/UploadFiles/201512/2015121619041357.jpg)
Your target is location [204, 1234] and you do not have to rush to get there. When you get close enough to the point marked on the map, the game will automatically display a new cut-scene.
New objective: Destroy the helicopter before it reaches Dr. Bellamy
![You can destroy the helicopter in many ways, but if you want to complete the bonus mission objective, you have to attack it at least once with Black Hole attack (hold Y button) - [Main mission 8] The Lab Rat - Main missions - Prototype 2 - Game Guide and Walkthrough](https://game.lhg100.com/Article/UploadFiles/201512/2015121619041375.jpg)
You can destroy the helicopter in many ways, but if you want to complete the bonus mission objective, you have to attack it at least once with Black Hole attack (hold Y button). Remember to activate your abilities (LB button) and get close to the helicopter. Fortunately it flies close to the bridge, so you can just long jump to reach it with your attack (screen above).
![There is far better way to destroy the machine - [Main mission 8] The Lab Rat - Main missions - Prototype 2 - Game Guide and Walkthrough](https://game.lhg100.com/Article/UploadFiles/201512/2015121619041417.jpg)
There is far better way to destroy the machine. I recommend using the rocket launcher to do it. Reload the last control points (you won't lose previously completed bonus objective). Make sure that you're disguised as soldier, reach the bridge (do not trigger the alarm) and look for a soldier with rocket launcher (screen above). Now just consume him (button B and button Y).
![After obtaining the rocket launcher, choose a good place to shoot from, aim at the helicopter (left trigger) and start shooting - [Main mission 8] The Lab Rat - Main missions - Prototype 2 - Game Guide and Walkthrough](https://game.lhg100.com/Article/UploadFiles/201512/2015121619041482.jpg)
After obtaining the rocket launcher, choose a good place to shoot from, aim at the helicopter (left trigger) and start shooting. Regardless of option you've chosen, you have to destroy the helicopter before it reaches its target. Remember about regeneration, when the helicopter starts attacking you. After destroying the helicopter, you'll probably have to lose the pursuit but it shouldn't be a problem.
New objective: Destroy the APC convoy before it reaches the airbridge
![Start attacking APCs at once - you'll find them in location [141, 1153] - [Main mission 8] The Lab Rat - Main missions - Prototype 2 - Game Guide and Walkthrough](https://game.lhg100.com/Article/UploadFiles/201512/2015121619041493.jpg)
Start attacking APCs at once - you'll find them in location [141, 1153]. If you want to complete the bonus objective, you have to use tendrils, but it is better to use quick attacks (pressing Y buttons) than stronger Black Hole attack. Try to attack vehicles one by one and focus only on the APC in front of the convoy.
![In breaks between attacks help yourself with jumps, so you'll be more difficult target for APCs - [Main mission 8] The Lab Rat - Main missions - Prototype 2 - Game Guide and Walkthrough](https://game.lhg100.com/Article/UploadFiles/201512/2015121619041448.jpg)
In breaks between attacks help yourself with jumps, so you'll be more difficult target for APCs. Do not forget about regenerations, especially that there are many civilians in the area, which can be consumed (screen above). Fight until all three APC's are destroyed.
New objective: Consume Dr. Bellamy to learn about Phase Two
New objective: Exit the alert
![Same as with one of the previous levels, ignore all opponents who are in the area and focus on getting Dr - [Main mission 8] The Lab Rat - Main missions - Prototype 2 - Game Guide and Walkthrough](https://game.lhg100.com/Article/UploadFiles/201512/2015121619041493.jpg)
Same as with one of the previous levels, ignore all opponents who are in the area and focus on getting Dr. Bellamy as fast as possible. Grab him and consume him (B button and Y button). The only thing left is to escape from the area to lose the pursuit.
![To start this mission go to location [191, 1132], and specifically to the shiny circle on the ground - [Main mission 9] Salvation - Main missions - Prototype 2 - Game Guide and Walkthrough](https://game.lhg100.com/Article/UploadFiles/201512/2015121619041447.jpg)
To start this mission go to location [191, 1132], and specifically to the shiny circle on the ground.
New objective: Go to the church to save father Guerra
![Move to location [270, 1195] - [Main mission 9] Salvation - Main missions - Prototype 2 - Game Guide and Walkthrough](https://game.lhg100.com/Article/UploadFiles/201512/2015121619041578.jpg)
Move to location [270, 1195]. Notice, that after approaching the church a new bar appears on the screen - it indicated church structure. Remember that it must be controlled to the mission end, so if you lose too much time during one of the fight, consider repeating this fragment by loading the last control point. This might prevent collapsing the church at the end of the mission.
New objective: Defeat the Blackwatch troopers before they destroy Guerra's church
![Try to get to the church's entrance as fast as possible, using sprint and glide options - [Main mission 9] Salvation - Main missions - Prototype 2 - Game Guide and Walkthrough](https://game.lhg100.com/Article/UploadFiles/201512/2015121619041538.jpg)
Try to get to the church's entrance as fast as possible, using sprint and glide options. After getting there, quickly attack opponents carrying rocket launchers, who gathered in front of the church. Good news is that you do not have to afraid their attacks towards you, because they should be focused all the time on shooting the church.
New objective: Tear off a TOW launcher
![A game will show you now, how to use freshly unlocked move: tearing off TOW launchers, mounted on APCs - [Main mission 9] Salvation - Main missions - Prototype 2 - Game Guide and Walkthrough](https://game.lhg100.com/Article/UploadFiles/201512/2015121619041558.jpg)
A game will show you now, how to use freshly unlocked move: tearing off TOW launchers, mounted on APCs. According to instructions, run to one of the vehicles and press B button to jump onto it.
![Press X button (Weaponize action) to grab the TOW launcher and start rhythmically pressing the same button, thus tearing off the launcher after few moments - [Main mission 9] Salvation - Main missions - Prototype 2 - Game Guide and Walkthrough](https://game.lhg100.com/Article/UploadFiles/201512/2015121619041592.jpg)
Press X button (Weaponize action) to grab the TOW launcher and start rhythmically pressing the same button, thus tearing off the launcher after few moments.
New objective: Destroy the APCs
![Stay on the armored vehicle, aim at it (left trigger) and shoot with the TOW launcher two rockets, which should result in destroying the vehicle - [Main mission 9] Salvation - Main missions - Prototype 2 - Game Guide and Walkthrough](https://game.lhg100.com/Article/UploadFiles/201512/2015121619041548.jpg)
Stay on the armored vehicle, aim at it (left trigger) and shoot with the TOW launcher two rockets, which should result in destroying the vehicle.
![Now focus on attacking the second APC - [Main mission 9] Salvation - Main missions - Prototype 2 - Game Guide and Walkthrough](https://game.lhg100.com/Article/UploadFiles/201512/2015121619041565.jpg)
Now focus on attacking the second APC. If you're out of missiles, you can of course repeat the previous actions, so jump onto the vehicle (B button) and tear off the TOW launcher (X button) or attack the APC with tendrils (Y button).
New objective: Defend the church to protect father Guerra
![If you still have TOW launcher, it would be best to use it to destroy the helicopter (screen above) - only one pack of missiles should do the trick - [Main mission 9] Salvation - Main missions - Prototype 2 - Game Guide and Walkthrough](https://game.lhg100.com/Article/UploadFiles/201512/2015121619041552.jpg)
If you still have TOW launcher, it would be best to use it to destroy the helicopter (screen above) - only one pack of missiles should do the trick. Otherwise I suggest pulling out the launcher from one of the local soldiers.
![I recommend attacking Blackwatch soldiers only after dealing with the helicopter - [Main mission 9] Salvation - Main missions - Prototype 2 - Game Guide and Walkthrough](https://game.lhg100.com/Article/UploadFiles/201512/2015121619041629.jpg)
I recommend attacking Blackwatch soldiers only after dealing with the helicopter. Same as before, you should quickly get rid of them, using most effective attacks.
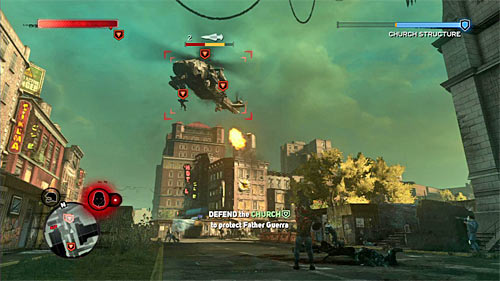
After eliminating of soldiers, two more helicopters will appear in the area and it would be good to use a TOW launcher or rocket launcher against them, because you have to deal with them quickly, before they can land and "send" soldiers against you. If you're not fast enough, you won't fail but you will have to deal with more opponents.
New objective: Defeat the Blackwatch assault team before they kill father Guerra
![Fight until you can watch a short cut-scene, showing more APCs coming towards the church - [Main mission 9] Salvation - Main missions - Prototype 2 - Game Guide and Walkthrough](https://game.lhg100.com/Article/UploadFiles/201512/2015121619041679.jpg)
Fight until you can watch a short cut-scene, showing more APCs coming towards the church. Quickly move to the armored vehicles and once you get close to them, jump onto the first one (B button) and start tearing off its TOW launcher (X button).
![A newly obtained launcher can be best used not to destroy the APC, but two helicopters flying towards the church (screen above) - [Main mission 9] Salvation - Main missions - Prototype 2 - Game Guide and Walkthrough](https://game.lhg100.com/Article/UploadFiles/201512/2015121619041669.jpg)
A newly obtained launcher can be best used not to destroy the APC, but two helicopters flying towards the church (screen above). If you do not destroy them, they will deliver more soldiers in area near the church.
![After dealing with helicopters, start destroying the APCs - [Main mission 9] Salvation - Main missions - Prototype 2 - Game Guide and Walkthrough](https://game.lhg100.com/Article/UploadFiles/201512/2015121619041631.jpg)
After dealing with helicopters, start destroying the APCs. Remember that when you're out of ammo, you can jump onto another vehicle and tear off its TOW launcher. You can also use for example tendrils to destroy both machines.
![Finally you can deal with Blackwatch soldiers, stationing near the church entrance, but if you've destroyed helicopters earlier, there will be not many of them now - [Main mission 9] Salvation - Main missions - Prototype 2 - Game Guide and Walkthrough](https://game.lhg100.com/Article/UploadFiles/201512/2015121619041637.jpg)
Finally you can deal with Blackwatch soldiers, stationing near the church entrance, but if you've destroyed helicopters earlier, there will be not many of them now.
New objective: Go to the church to check on father Guerra
![It is pure formality - [Main mission 9] Salvation - Main missions - Prototype 2 - Game Guide and Walkthrough](https://game.lhg100.com/Article/UploadFiles/201512/2015121619041623.jpg)
It is pure formality. Move to the shiny circle next to the church entrance in location [280, 1195], and the game will start a cut-scene. The mission ends and you'll unlock the next one - The Mad Scientist.
![In order to start this mission, you have to get to location [234, 1357], and specifically to the shiny circle on the ground - [Main mission 10] The Mad Scientist - Main missions - Prototype 2 - Game Guide and Walkthrough](https://game.lhg100.com/Article/UploadFiles/201512/2015121619041707.jpg)
In order to start this mission, you have to get to location [234, 1357], and specifically to the shiny circle on the ground.
New objective: Go to Koenig's facility
![Your next target is location [373, 1449] - [Main mission 10] The Mad Scientist - Main missions - Prototype 2 - Game Guide and Walkthrough](https://game.lhg100.com/Article/UploadFiles/201512/2015121619041704.jpg)
Your next target is location [373, 1449]. You have to get to the next shiny circle located on the building's rooftop in order to watch another cut-scene.
New objective: Consume the base commander to enter Koenig's facility
![I suggest starting with shapeshifting and disguising as a scientist or soldier, so you can easier get to the facility - [Main mission 10] The Mad Scientist - Main missions - Prototype 2 - Game Guide and Walkthrough](https://game.lhg100.com/Article/UploadFiles/201512/2015121619041730.jpg)
I suggest starting with shapeshifting and disguising as a scientist or soldier, so you can easier get to the facility. Depending on your preferences, you can glide there (screen above) or use the main gate.
![Once you get inside, spend few moments on searching for the commander patrolling this area - [Main mission 10] The Mad Scientist - Main missions - Prototype 2 - Game Guide and Walkthrough](https://game.lhg100.com/Article/UploadFiles/201512/2015121619041717.jpg)
Once you get inside, spend few moments on searching for the commander patrolling this area. But be careful and watch out for local viral detectors. Approach the commander, wait until he is not seen by anyone and then consume him (B button and Y button).
New objective: Use the hand scanner to enter Koenig's facility
![This is very easy task - [Main mission 10] The Mad Scientist - Main missions - Prototype 2 - Game Guide and Walkthrough](https://game.lhg100.com/Article/UploadFiles/201512/2015121619041733.jpg)
This is very easy task. Scanner can be found in location [347, 1479] and you have to interact with it (B button), watching out for nearby viral detectors.
New objective: Consume the Blackwater guard to access Koenig's office
![Notice, that the silent solution of this mission is additionally rewarded, so do not attack anyone here - [Main mission 10] The Mad Scientist - Main missions - Prototype 2 - Game Guide and Walkthrough](https://game.lhg100.com/Article/UploadFiles/201512/2015121619041726.jpg)
Notice, that the silent solution of this mission is additionally rewarded, so do not attack anyone here. If you hurry up, you'll be able to consume the guard patrolling the inner room before he can descend the stairs (screen above).
![If the guard manages to use the stairs, then consuming him will be unfortunately complicated, because you'll have to watch out for viral detector and to consume some other soldiers before attacking him (screen above), who observe you - [Main mission 10] The Mad Scientist - Main missions - Prototype 2 - Game Guide and Walkthrough](https://game.lhg100.com/Article/UploadFiles/201512/2015121619041837.jpg)
If the guard manages to use the stairs, then consuming him will be unfortunately complicated, because you'll have to watch out for viral detector and to consume some other soldiers before attacking him (screen above), who observe you.
New objective: Use the hand scanner to enter Koenig's office
![Hand scanner can be found in location [355, 1486], specifically on the balcony, where you've noticed recently eliminated guard - [Main mission 10] The Mad Scientist - Main missions - Prototype 2 - Game Guide and Walkthrough](https://game.lhg100.com/Article/UploadFiles/201512/2015121619041857.jpg)
Hand scanner can be found in location [355, 1486], specifically on the balcony, where you've noticed recently eliminated guard. Interact with scanner (B button) to watch the new cut-scene.
New objective: Exit Koenig's facility
![Go to the exit in location [318, 1484], remembering about avoiding the viral detector - [Main mission 10] The Mad Scientist - Main missions - Prototype 2 - Game Guide and Walkthrough](https://game.lhg100.com/Article/UploadFiles/201512/2015121619041866.jpg)
Go to the exit in location [318, 1484], remembering about avoiding the viral detector. Once you get outside the main building, you'll get new instructions.
New objective: Go to the project Orion depot
![Carefully leave the base and plan your route to location [110, 1370] - [Main mission 10] The Mad Scientist - Main missions - Prototype 2 - Game Guide and Walkthrough](https://game.lhg100.com/Article/UploadFiles/201512/2015121619041849.jpg)
Carefully leave the base and plan your route to location [110, 1370]. Your target is the shiny circle on one of the buildings' rooftop.
New objective: Destroy the communication systems
![There are three objects to be destroyed in locations [132, 1334], [135, 1288] and [99, 1288] - [Main mission 10] The Mad Scientist - Main missions - Prototype 2 - Game Guide and Walkthrough](https://game.lhg100.com/Article/UploadFiles/201512/2015121619041854.jpg)
There are three objects to be destroyed in locations [132, 1334], [135, 1288] and [99, 1288]. Your first step is getting inside the depot. I suggest in this case shapeshifting plus gliding or long jumping, because you have to get to the rooftops. You could destroy communication towers with standard attacks (claws or tendrils), but far more better solution is to look around in the location [132, 1334] for a shed with rocket launchers or for the opponent who uses such weapon (screen above).
![The main advantage of using rocket or grenade launcher is that you can all the time stay at the same place, shooting also more distant targets (screen above) - [Main mission 10] The Mad Scientist - Main missions - Prototype 2 - Game Guide and Walkthrough](https://game.lhg100.com/Article/UploadFiles/201512/2015121619041881.jpg)
The main advantage of using rocket or grenade launcher is that you can all the time stay at the same place, shooting also more distant targets (screen above). Eventually you have to destroy all three towers.
New objective: Shield bash the super soldier
![Prepare for the fight with a super soldier, who acts as a mini-boss - [Main mission 10] The Mad Scientist - Main missions - Prototype 2 - Game Guide and Walkthrough](https://game.lhg100.com/Article/UploadFiles/201512/2015121619041853.jpg)
Prepare for the fight with a super soldier, who acts as a mini-boss. You will be able to test the most effective move against such enemies - Shield Bash. According to instruction, start with holding RB button.
New objective: Defeat the super soldier
![Notice, that shield bash has stunned the super soldier for a moment, so quickly run towards him and press B button to perform a special attack on him - [Main mission 10] The Mad Scientist - Main missions - Prototype 2 - Game Guide and Walkthrough](https://game.lhg100.com/Article/UploadFiles/201512/2015121619041956.jpg)
Notice, that shield bash has stunned the super soldier for a moment, so quickly run towards him and press B button to perform a special attack on him.
![You will now proceed to the main part of the fight with the super soldier - [Main mission 10] The Mad Scientist - Main missions - Prototype 2 - Game Guide and Walkthrough](https://game.lhg100.com/Article/UploadFiles/201512/2015121619041918.jpg)
You will now proceed to the main part of the fight with the super soldier. The easiest method to win the fight is of course repeating moves mentioned above. Every time you see that the super soldiers tries to jump towards you, quickly hold RB button and then grab the stunned enemy (B button).
![Using the combination of moves suggested by the game is of course not the only solution, because you can as well pick up a rocket launcher from one of the defeated enemies or return to previously mentioned shed and get the grenade launcher - [Main mission 10] The Mad Scientist - Main missions - Prototype 2 - Game Guide and Walkthrough](https://game.lhg100.com/Article/UploadFiles/201512/2015121619041997.jpg)
Using the combination of moves suggested by the game is of course not the only solution, because you can as well pick up a rocket launcher from one of the defeated enemies or return to previously mentioned shed and get the grenade launcher. Regardless of your tactics remember about using local nearby soldiers for regeneration. Fight until you defeat the mini-boss, who can be eventually consumed.
New objective: Destroy the substations to stop project Orion
![Start attacking all substations marked by the game - [Main mission 10] The Mad Scientist - Main missions - Prototype 2 - Game Guide and Walkthrough](https://game.lhg100.com/Article/UploadFiles/201512/2015121619041907.jpg)
Start attacking all substations marked by the game. Depending on your preferences, you can use claws, tendrils or other available powers, as well as rocket or grenade launchers. Do not forget about regeneration Heller, as soon as he loses some more health points.
New objective: Defeat the super soldiers
![This time you have to defeat two super soldiers - [Main mission 10] The Mad Scientist - Main missions - Prototype 2 - Game Guide and Walkthrough](https://game.lhg100.com/Article/UploadFiles/201512/2015121619041996.jpg)
This time you have to defeat two super soldiers. The best method to inflict them damage is still skillful blocking their jumps (RB button) and then grabbing them (B button).
![You can also rely on rocket or grenade launchers, but remember to keep some distant while using such weapons - [Main mission 10] The Mad Scientist - Main missions - Prototype 2 - Game Guide and Walkthrough](https://game.lhg100.com/Article/UploadFiles/201512/2015121619041998.jpg)
You can also rely on rocket or grenade launchers, but remember to keep some distant while using such weapons. Try to focus on one of the super soldiers and after he is dead, take care of another. It is also important to control your health bar and regenerate yourself when needed.
New objective: Consume the super soldier
![You should obtain this objective as soon as one of the super soldiers is almost dead - [Main mission 10] The Mad Scientist - Main missions - Prototype 2 - Game Guide and Walkthrough](https://game.lhg100.com/Article/UploadFiles/201512/2015121619041942.jpg)
You should obtain this objective as soon as one of the super soldiers is almost dead. Quickly run to the mini-boss and press B button. If there are any other opponents in the area, you'll have to exit the alarm. Otherwise this mission will end immediately. The game will unlock the next main mission - Orion Phase Two.
![In order to start this mission, you have to get to location [504, 1364], specifically to the shiny circle on the ground - [Main mission 11] Orion Phase Two - Main missions - Prototype 2 - Game Guide and Walkthrough](https://game.lhg100.com/Article/UploadFiles/201512/2015121619042018.jpg)
In order to start this mission, you have to get to location [504, 1364], specifically to the shiny circle on the ground.
New objective: Go to the proving grounds to stop project Orion
![Go to location [213, 1512] - [Main mission 11] Orion Phase Two - Main missions - Prototype 2 - Game Guide and Walkthrough](https://game.lhg100.com/Article/UploadFiles/201512/2015121619042008.jpg)
Go to location [213, 1512]. Your mission's target is the large stadium, which serves as experimental proving grounds. The game will automatically display a new cut-scene when you approach the stadium (you may use the main gate or jump over one of the outer walls).
New objective: Defeat the Phase Two super soldier
![I suggest getting close to the super soldier while in disguise, so you can attack him by surprise - [Main mission 11] Orion Phase Two - Main missions - Prototype 2 - Game Guide and Walkthrough](https://game.lhg100.com/Article/UploadFiles/201512/2015121619042011.jpg)
I suggest getting close to the super soldier while in disguise, so you can attack him by surprise. After the fight begins, rely on the same combination of moves as in previous fights with super soldiers. Especially that one of such attacks is a bonus mission objective. You have to wait until the super soldier attacks you and hold RB button to hit him with the shield. After being stunned, grab the super soldier by pressing B button and performing special attack automatically.
![I do not recommend using standard attacks during the fight with super soldiers, because these attacks inflict only minimum damage - [Main mission 11] Orion Phase Two - Main missions - Prototype 2 - Game Guide and Walkthrough](https://game.lhg100.com/Article/UploadFiles/201512/2015121619042046.jpg)
I do not recommend using standard attacks during the fight with super soldiers, because these attacks inflict only minimum damage. Do not try also to use the rocket launcher (even not the TOW launcher from APC), because your opponent is resistant to such attacks. And I also do not recommend ignoring other, standard soldiers on the proving grounds, because they may be a threat to you (especially soldiers with launchers). You can also use them to regenerate yourself.
New objective: Consume the Phase Two super soldier
![Defeating the super soldier will probably take some time, so watch out and do not make mistakes which can result in losing almost entire health bar - [Main mission 11] Orion Phase Two - Main missions - Prototype 2 - Game Guide and Walkthrough](https://game.lhg100.com/Article/UploadFiles/201512/2015121619042142.jpg)
Defeating the super soldier will probably take some time, so watch out and do not make mistakes which can result in losing almost entire health bar. After winning the fight, run to the super soldier and press B button to consume him.
New objective: Perform a Devastator
![As a reward for defeating the super soldier, you've obtained ability of gathering the mass, which can be done each time Heller consumed any biological target - [Main mission 11] Orion Phase Two - Main missions - Prototype 2 - Game Guide and Walkthrough](https://game.lhg100.com/Article/UploadFiles/201512/2015121619042152.jpg)
As a reward for defeating the super soldier, you've obtained ability of gathering the mass, which can be done each time Heller consumed any biological target. When the bar visible under Heller's health bar is full, you'll be able to perform special attack called Devastator. As the mass bar is completely full right now, perform the mentioned actions by pressing B and Y buttons at the same time.
New objective: Consume biological targets to gain mass and fill your mass bar
![According to instructions, start consuming local enemies - [Main mission 11] Orion Phase Two - Main missions - Prototype 2 - Game Guide and Walkthrough](https://game.lhg100.com/Article/UploadFiles/201512/2015121619042185.jpg)
According to instructions, start consuming local enemies. Every time you consume some soldier, mass bar increases. You have to make it full entirely, which will trigger a cut-scene. You'll be then informed about super soldiers and brawlers appearing in the area.
New objective: Defeat the Phase Ones and brawlers
![The main information about this fight is fact that you do not have to worry about all creatures - [Main mission 11] Orion Phase Two - Main missions - Prototype 2 - Game Guide and Walkthrough](https://game.lhg100.com/Article/UploadFiles/201512/2015121619042175.jpg)
The main information about this fight is fact that you do not have to worry about all creatures. Your opponents should fight also with each other, and you should take an advantage out of this. So I suggest performing newly filled Devastator attack at the beginning of the fight (B + Y buttons), but make sure that some powerful enemies are close to Heller, because otherwise you'll only waste this attack's potential.
![Later during the fight you can act in two main ways - [Main mission 11] Orion Phase Two - Main missions - Prototype 2 - Game Guide and Walkthrough](https://game.lhg100.com/Article/UploadFiles/201512/2015121619042141.jpg)
Later during the fight you can act in two main ways. A first option is to eliminate all local standard enemies, filling your mass bar. Every time it gets to its maximum, approach brawlers or super soldiers and perform the Devastator attack (B + Y buttons).
![Another option is to focus only on super soldiers and brawlers - [Main mission 11] Orion Phase Two - Main missions - Prototype 2 - Game Guide and Walkthrough](https://game.lhg100.com/Article/UploadFiles/201512/2015121619042147.jpg)
Another option is to focus only on super soldiers and brawlers. In case of soldiers remember about blocking them with a shield (RB button), so you can grab them (B button). It is worth mentioning, that First Phase soldiers are not resistant to rocket attacks, so you can use launchers to inflict them damage.
![As for brawlers, it is best to jump over them and then attack them with claws, but as in the case of soldiers, you can attack them with rocket launchers as well - [Main mission 11] Orion Phase Two - Main missions - Prototype 2 - Game Guide and Walkthrough](https://game.lhg100.com/Article/UploadFiles/201512/2015121619042269.jpg)
As for brawlers, it is best to jump over them and then attack them with claws, but as in the case of soldiers, you can attack them with rocket launchers as well. I recommend also consuming all defeated mutated beasts.
New objective: Consume Dr. Burk
![Fight until you eliminate all enemy's elite units, which should result in displaying short cut-scene, showing Dr - [Main mission 11] Orion Phase Two - Main missions - Prototype 2 - Game Guide and Walkthrough](https://game.lhg100.com/Article/UploadFiles/201512/2015121619042292.jpg)
Fight until you eliminate all enemy's elite units, which should result in displaying short cut-scene, showing Dr. Burk's escape. Immediately start chasing that character, grabbing him and then consuming him. If there are any opponents in the area, you'll have to exit the alarm. Otherwise the mission ends. Notice, that the game has unlocked a new main mission, titled Natural Selection.
![In order to start this mission, you have to get to location [219, 1075], specifically to the shiny circle on Gentek building's rooftop - [Main mission 12] Natural Selection - Main missions - Prototype 2 - Game Guide and Walkthrough](https://game.lhg100.com/Article/UploadFiles/201512/2015121619042253.jpg)
In order to start this mission, you have to get to location [219, 1075], specifically to the shiny circle on Gentek building's rooftop.
New objective: Defeat the Blackwatch ambush
![Once you regain control over Heller, quickly kill nearby soldiers with rocket launchers - [Main mission 12] Natural Selection - Main missions - Prototype 2 - Game Guide and Walkthrough](https://game.lhg100.com/Article/UploadFiles/201512/2015121619042298.jpg)
Once you regain control over Heller, quickly kill nearby soldiers with rocket launchers. It is quite important, because otherwise they might disturb you in further fights.
![A good idea is to use rocket launchers left by defeated soldiers, to shoot down both helicopters which attack you (screen above), although if you prefer using Heller's powers, you can also attack the machines in a different way - [Main mission 12] Natural Selection - Main missions - Prototype 2 - Game Guide and Walkthrough](https://game.lhg100.com/Article/UploadFiles/201512/2015121619042233.jpg)
A good idea is to use rocket launchers left by defeated soldiers, to shoot down both helicopters which attack you (screen above), although if you prefer using Heller's powers, you can also attack the machines in a different way. Destroying helicopters will result in a short cut-scene being displayed.
New objective: Destroy the APCs to flush out the commander
![You have to destroy two APC, but you also have to watch out for other Blackwatch soldiers and Phase One soldiers - [Main mission 12] Natural Selection - Main missions - Prototype 2 - Game Guide and Walkthrough](https://game.lhg100.com/Article/UploadFiles/201512/2015121619042283.jpg)
You have to destroy two APC, but you also have to watch out for other Blackwatch soldiers and Phase One soldiers. In my opinion the best solution is to jump onto one of the APCs (B button) to tear off its TOW launcher and use it (X button).
![You can also attack APCs in different way, for example using tendrils' attacks (Y button) - [Main mission 12] Natural Selection - Main missions - Prototype 2 - Game Guide and Walkthrough](https://game.lhg100.com/Article/UploadFiles/201512/2015121619042322.jpg)
You can also attack APCs in different way, for example using tendrils' attacks (Y button). In addition, if your mass bar is entirely full, you can get close to APCs and perform the Devastator attack (screen above). Remember about regeneration and avoid a contact with super soldiers, the more that the game doesn't require to eliminate them.
New objective: Consume the commander to find Dr. Koenig's location
![Keep fighting until you destroy both APCs - [Main mission 12] Natural Selection - Main missions - Prototype 2 - Game Guide and Walkthrough](https://game.lhg100.com/Article/UploadFiles/201512/2015121619042346.jpg)
Keep fighting until you destroy both APCs. Quickly run to the commander marked by the game, not allowing him to escape from this place. Grab the commander and consume him (B button and Y button).
New objective: Exit the alert
![Escape from the area may be more difficult than usual, especially if super soldiers are still alive - [Main mission 12] Natural Selection - Main missions - Prototype 2 - Game Guide and Walkthrough](https://game.lhg100.com/Article/UploadFiles/201512/2015121619042366.jpg)
Escape from the area may be more difficult than usual, especially if super soldiers are still alive. Help yourself with sprint and long jumps, waiting for the moment at which the game will allow you to shapeshift and thus to lose the chase.
New objective: Go to base seven to find Dr. Koenig
![Go to location [170, 1331] - [Main mission 12] Natural Selection - Main missions - Prototype 2 - Game Guide and Walkthrough](https://game.lhg100.com/Article/UploadFiles/201512/2015121619042340.jpg)
Go to location [170, 1331]. You'll get the new objective once you get close to the target. It would be good to have a scientist's or soldier's disguise, so you won't trigger the alarm.
New objective: Destroy the fuel tanks to end the lockdown and access Dr. Koenig
![You have to destroy three groups of fuel tanks and I suggest using the rocket launcher taken from one of the soldiers or TOW launcher torn off from one of the APCs parked near - [Main mission 12] Natural Selection - Main missions - Prototype 2 - Game Guide and Walkthrough](https://game.lhg100.com/Article/UploadFiles/201512/2015121619042366.jpg)
You have to destroy three groups of fuel tanks and I suggest using the rocket launcher taken from one of the soldiers or TOW launcher torn off from one of the APCs parked near. It is also good to shoot from the rooftop of main facility building, so standard soldiers can't reach you. Destroy all tanks, getting anew rocket launcher or TOW launcher if needed.
New objective: Destroy Dr. Koenig's gunship
![The best method to destroy Koenig's gunship is the skillful use of Heller's shields, activated with RB button - [Main mission 12] Natural Selection - Main missions - Prototype 2 - Game Guide and Walkthrough](https://game.lhg100.com/Article/UploadFiles/201512/2015121619042462.jpg)
The best method to destroy Koenig's gunship is the skillful use of Heller's shields, activated with RB button. Hide behind the shield every time the helicopters shoots rockets at you, and with a bit of luck you will deflect them and hit Koenig's machine.
![Deflecting rockets is of course not the only way to win the fight - [Main mission 12] Natural Selection - Main missions - Prototype 2 - Game Guide and Walkthrough](https://game.lhg100.com/Article/UploadFiles/201512/2015121619042487.jpg)
Deflecting rockets is of course not the only way to win the fight. Another interesting option is to kill a soldier standing on the rooftop and take his rocket launcher (screen above).
![The last method suggested by me is an attack with tendrils each time you see a short circuit in the helicopter (screen above) - [Main mission 12] Natural Selection - Main missions - Prototype 2 - Game Guide and Walkthrough](https://game.lhg100.com/Article/UploadFiles/201512/2015121619042478.jpg)
The last method suggested by me is an attack with tendrils each time you see a short circuit in the helicopter (screen above). Regardless of the chosen variant, try to avoid being shot by a helicopter's gun, hiding behind the shield. Keep fighting until you get down the helicopter.
New objective: Defeat Dr. Koenig
![Dr - [Main mission 12] Natural Selection - Main missions - Prototype 2 - Game Guide and Walkthrough](https://game.lhg100.com/Article/UploadFiles/201512/2015121619042454.jpg)
Dr. Koenig is treated by the game as a boss, but defeating him is not difficult. The entire fight is very similar to fights against brawlers and that's because it is best to jump over Koenig and perform quick attacks with claws or tendrils immediately after landing behind him.
![During the fight you should notice that Dr - [Main mission 12] Natural Selection - Main missions - Prototype 2 - Game Guide and Walkthrough](https://game.lhg100.com/Article/UploadFiles/201512/2015121619042413.jpg)
During the fight you should notice that Dr. Koenig "sticks" his blades into the ground from time to time, becoming helpless in this way. This typically occurs after his failed attack or jumping over him. You should take advantage on such situations by quickly running towards him and pressing the button indicated by the game (Y or X), so Heller can perform a strong attack.
![In the next phase of fight, Koenig will start to flee from this area, but you'll have no additional difficulties because of that - [Main mission 12] Natural Selection - Main missions - Prototype 2 - Game Guide and Walkthrough](https://game.lhg100.com/Article/UploadFiles/201512/2015121619042572.jpg)
In the next phase of fight, Koenig will start to flee from this area, but you'll have no additional difficulties because of that. Just go to new area and keep attacking him.
New objective: Consume Dr. Koenig
![Fight until Dr - [Main mission 12] Natural Selection - Main missions - Prototype 2 - Game Guide and Walkthrough](https://game.lhg100.com/Article/UploadFiles/201512/2015121619042574.jpg)
Fight until Dr. Koenig's health bar is almost empty. After receiving relevant information, go to the seriously wounded scientist and consume him. Now you can watch a cut-scene ending this level. The game will unlock a new mission - The Airbridge.
Notice! This mission is all about getting to the city's Green Zone for the first time. But fortunately you do not have to rush sorting out all issues in the Yellow Zone, where you've started the gameplay, because between completing the mission, you can freely travel between unlocked New York zones.
![In order to start this mission, you have to get to location [281, 1080], specifically to the shiny circle on the building's rooftop - [Main mission 13] The Airbridge - Main missions - Prototype 2 - Game Guide and Walkthrough](https://game.lhg100.com/Article/UploadFiles/201512/2015121619042517.jpg)
In order to start this mission, you have to get to location [281, 1080], specifically to the shiny circle on the building's rooftop.
New objective: Consume the vehicle commander so you can board the airbridge
![The person you're looking for patrols one of the bases in the north of the yellow zone and its approximate location is [250, 965] - [Main mission 13] The Airbridge - Main missions - Prototype 2 - Game Guide and Walkthrough](https://game.lhg100.com/Article/UploadFiles/201512/2015121619042536.jpg)
The person you're looking for patrols one of the bases in the north of the yellow zone and its approximate location is [250, 965]. I recommend getting inside the base disguised as a soldier or a scientist, so you won't trigger the alarm.
![After getting inside the base, look for the indicated person and start following him, watching out for the local viral detectors - [Main mission 13] The Airbridge - Main missions - Prototype 2 - Game Guide and Walkthrough](https://game.lhg100.com/Article/UploadFiles/201512/2015121619042691.jpg)
After getting inside the base, look for the indicated person and start following him, watching out for the local viral detectors. Wait until the commander is not seen by anyone and then quickly approach him in order to consume him (B button and Y button).
New objective: Go to the airbridge and use it to reach the green zone
![Your target is in location [276, 979] but I do not recommend using the stairs, because they are located close to the viral detector - [Main mission 13] The Airbridge - Main missions - Prototype 2 - Game Guide and Walkthrough](https://game.lhg100.com/Article/UploadFiles/201512/2015121619042658.jpg)
Your target is in location [276, 979] but I do not recommend using the stairs, because they are located close to the viral detector. Instead leave the base and jump to the platform where you can see the helicopter. Go to the shiny circle and confirm your will to fly (button B).
![Once you see the New York map, locate the landing area - Green Zone SW, in location [624, 1451] - [Main mission 13] The Airbridge - Main missions - Prototype 2 - Game Guide and Walkthrough](https://game.lhg100.com/Article/UploadFiles/201512/2015121619042631.jpg)
Once you see the New York map, locate the landing area - Green Zone SW, in location [624, 1451]. Accept the travel to new location in game world (A button and then YES). After getting to the new place, you'll automatically proceed to the next main mission, titled Enemies and Allies.
New objective: Go to father Guerra to talk about Mercer
![Move to location [702, 1490] but remember to stay in disguise until you leave the base - [Main mission 14] Enemies and Allies - Main missions - Prototype 2 - Game Guide and Walkthrough](https://game.lhg100.com/Article/UploadFiles/201512/2015121619042624.jpg)
Move to location [702, 1490] but remember to stay in disguise until you leave the base. Your target is a shiny circle on the ground (screen above).
New objective: Go to the green zone high command to infiltrate Lt. Riley's briefing
![The next place where you have to go is in location [661, 1426] - [Main mission 14] Enemies and Allies - Main missions - Prototype 2 - Game Guide and Walkthrough](https://game.lhg100.com/Article/UploadFiles/201512/2015121619042639.jpg)
The next place where you have to go is in location [661, 1426]. When you approach your target, disguise as a scientist or a soldier and go to the shiny circle to start another cut-scene.
New objective: Enter the APC
![Notice, that the game unlocked an option of driving APC - [Main mission 14] Enemies and Allies - Main missions - Prototype 2 - Game Guide and Walkthrough](https://game.lhg100.com/Article/UploadFiles/201512/2015121619042610.jpg)
Notice, that the game unlocked an option of driving APC. So approach a vehicle parked in location [660, 1422] and double press B button to get inside APC.
New objective: Go to the rally point
![Your target is location [747, 1412], but it is good to spend some time to get to know how to control APC - [Main mission 14] Enemies and Allies - Main missions - Prototype 2 - Game Guide and Walkthrough](https://game.lhg100.com/Article/UploadFiles/201512/2015121619042764.jpg)
Your target is location [747, 1412], but it is good to spend some time to get to know how to control APC. Left analog is used for driving, while right one turns cannon turret. LB button is used to shoot the gun and RB button shoots rockets (in both cases you have unlimited ammo, but watch out not to overheat the weapon). On your way to the target you'll watch a cut-scene showing group of infected approaching.
New objective: Kill the infected
![According to game suggestions, you should kill infected by driving them over, because then you can complete the bonus mission objective - [Main mission 14] Enemies and Allies - Main missions - Prototype 2 - Game Guide and Walkthrough](https://game.lhg100.com/Article/UploadFiles/201512/2015121619042718.jpg)
According to game suggestions, you should kill infected by driving them over, because then you can complete the bonus mission objective. Do not worry if you kill only about 10 out of 60 mutants, because bonus target stays active also in further parts of the level. Do not also worry about penalties if you accidently drive over allies.
New objective: Go to the rally point
![Your updated next target is location [793, 1297] - [Main mission 14] Enemies and Allies - Main missions - Prototype 2 - Game Guide and Walkthrough](https://game.lhg100.com/Article/UploadFiles/201512/2015121619042726.jpg)
Your updated next target is location [793, 1297]. Once you get there, go to the shiny circle on the ground (screen above).
New objective: Kill the brawlers
![Before you start attacking brawlers, it would be good to complete mission bonus objective and drive over required number of infected - [Main mission 14] Enemies and Allies - Main missions - Prototype 2 - Game Guide and Walkthrough](https://game.lhg100.com/Article/UploadFiles/201512/2015121619042785.jpg)
Before you start attacking brawlers, it would be good to complete mission bonus objective and drive over required number of infected. This is not "a must", because the mentioned objective will stay active for a longer time, but it is good to have it done.
![As for brawlers, I suggest keeping a safe distance and being constantly on the move - [Main mission 14] Enemies and Allies - Main missions - Prototype 2 - Game Guide and Walkthrough](https://game.lhg100.com/Article/UploadFiles/201512/2015121619042794.jpg)
As for brawlers, I suggest keeping a safe distance and being constantly on the move. Use your available weapons (LB and RB buttons). Not all of the mutants appear at once, so stay focused.
New objective: Kill the juggernauts
![This task is nothing special, but the most important thing is not to let juggernauts get close to your vehicle - [Main mission 14] Enemies and Allies - Main missions - Prototype 2 - Game Guide and Walkthrough](https://game.lhg100.com/Article/UploadFiles/201512/2015121619042829.jpg)
This task is nothing special, but the most important thing is not to let juggernauts get close to your vehicle. It is best to use change your weapons, so they won't overheat at the same time.
New objective: Go to the bridge
New objective: Kill the brawlers
![The bridge can be found in location [793, 1255] and after reaching the shiny circle, more brawlers will appear in the area - [Main mission 14] Enemies and Allies - Main missions - Prototype 2 - Game Guide and Walkthrough](https://game.lhg100.com/Article/UploadFiles/201512/2015121619042823.jpg)
The bridge can be found in location [793, 1255] and after reaching the shiny circle, more brawlers will appear in the area. Keep the safe distance from mutants and keep shooting at them.
New objective: Go to your squad
![Other places where you have to go are locations [781, 1191] and [800, 1183] - [Main mission 14] Enemies and Allies - Main missions - Prototype 2 - Game Guide and Walkthrough](https://game.lhg100.com/Article/UploadFiles/201512/2015121619042899.jpg)
Other places where you have to go are locations [781, 1191] and [800, 1183]. Choose narrows streets between buildings and do not stop anywhere. After getting close to the second shiny circle (screen above), you'll see a new cut-scene.
New objective: Kill the hydras
![Fight with hydras is clearly more difficult and you have to focus mainly on dodging large pieces of concrete thrown by hydras (screen above), because each hit is a major damage to your APC - [Main mission 14] Enemies and Allies - Main missions - Prototype 2 - Game Guide and Walkthrough](https://game.lhg100.com/Article/UploadFiles/201512/2015121619042891.jpg)
Fight with hydras is clearly more difficult and you have to focus mainly on dodging large pieces of concrete thrown by hydras (screen above), because each hit is a major damage to your APC.
![I recommend considering two tactics - [Main mission 14] Enemies and Allies - Main missions - Prototype 2 - Game Guide and Walkthrough](https://game.lhg100.com/Article/UploadFiles/201512/2015121619042872.jpg)
I recommend considering two tactics. First option is to hide behind buildings, driving to open ground only to shoot several rockets (screen above). Another option is to drive forward and backward on one of the local roads, thus being a difficult target for monsters. Regardless of chosen tactics, you have to eliminate all hydras.
New objective: Go to the Blackwatch base
New objective: Exit the APC
![You can now go to location [896, 1270] - [Main mission 14] Enemies and Allies - Main missions - Prototype 2 - Game Guide and Walkthrough](https://game.lhg100.com/Article/UploadFiles/201512/2015121619042971.jpg)
You can now go to location [896, 1270]. You won't encounter any mutated monsters on your way there, so you do not have to watch out. Once you get to the target, park your vehicle in the shiny circle (screen above) and hold B button to exit the APC. This level will end soon and the game will unlock two new missions - A Stranger Among Us and The White Light.
![In order to start this mission, you have to get to location [814, 1476], specifically to the shiny circle located on one of the balconies of the skyscraper - [Main mission 15] A Stranger Among Us - Main missions - Prototype 2 - Game Guide and Walkthrough](https://game.lhg100.com/Article/UploadFiles/201512/2015121619042959.jpg)
In order to start this mission, you have to get to location [814, 1476], specifically to the shiny circle located on one of the balconies of the skyscraper.
New objective: Go to the Blackwatch rally point to join the extraction squad
![Your current target is location [891, 1301] - [Main mission 15] A Stranger Among Us - Main missions - Prototype 2 - Game Guide and Walkthrough](https://game.lhg100.com/Article/UploadFiles/201512/2015121619042975.jpg)
Your current target is location [891, 1301]. You have to go to the shiny circle on the rooftop of one of the buildings. Once you get there, you'll watch a new cut-scene.
New objective: Stealth consume an extraction soldier without entering alert
![Three soldiers indicated by the game can be found in locations [887, 1266], [898, 1262] and [895, 1275] - [Main mission 15] A Stranger Among Us - Main missions - Prototype 2 - Game Guide and Walkthrough](https://game.lhg100.com/Article/UploadFiles/201512/2015121619042995.jpg)
Three soldiers indicated by the game can be found in locations [887, 1266], [898, 1262] and [895, 1275]. Make sure that you're disguised as a soldier or a scientist before you approach them. It is very important, because according to received directives you can't get exposed.
![The current objective of this mission is to consume only one of three soldiers, and it doesn't matter which one of them you choose - [Main mission 15] A Stranger Among Us - Main missions - Prototype 2 - Game Guide and Walkthrough](https://game.lhg100.com/Article/UploadFiles/201512/2015121619042979.jpg)
The current objective of this mission is to consume only one of three soldiers, and it doesn't matter which one of them you choose. Make sure of course, that this person is not seen by anyone and remember to stay away from viral detectors. Consuming one of soldiers will allow you to advance to the further part of this mission.
New objective: Follow the extraction squad to Roland's location
![Follow the squad's leader trace - [Main mission 15] A Stranger Among Us - Main missions - Prototype 2 - Game Guide and Walkthrough](https://game.lhg100.com/Article/UploadFiles/201512/2015121619042924.jpg)
Follow the squad's leader trace. It is worth noting, that the game temporarily blocks Heller's powers, because you have to get to Roland without exposing yourself. That means that in further fights of this mission you'll have to rely only on weapons.
New objective: Kill the infected
![Start attacking infected, using the assault rifle you own - [Main mission 15] A Stranger Among Us - Main missions - Prototype 2 - Game Guide and Walkthrough](https://game.lhg100.com/Article/UploadFiles/201512/2015121619043080.jpg)
Start attacking infected, using the assault rifle you own. You have much ammo, but if you use it all, look around for other guns scattered around the area. As for the infected, keep them on distance, because they can inflict damage only in melee fight.
New objective: Follow the extraction squad to Roland's location
![Continue your walk in the company of other team members - [Main mission 15] A Stranger Among Us - Main missions - Prototype 2 - Game Guide and Walkthrough](https://game.lhg100.com/Article/UploadFiles/201512/2015121619043010.jpg)
Continue your walk in the company of other team members. Once you get to the site of new fight, quickly pick up the grenade launcher indicated by the game.
New objective: Kill the infected
![I suggest completing a new optional mission objective first - [Main mission 15] A Stranger Among Us - Main missions - Prototype 2 - Game Guide and Walkthrough](https://game.lhg100.com/Article/UploadFiles/201512/2015121619043088.jpg)
I suggest completing a new optional mission objective first. You have to kill three infected with the grenade launcher. Pass by brawler and run towards a larger group of mutants. Shoot the grenade launcher before the infected scatter in the area. If you've failed the bonus objective, consider reloading the last control point, because you can lose that way only a dozen or so seconds.
![Only after completing the bonus objective, start attacking brawler - [Main mission 15] A Stranger Among Us - Main missions - Prototype 2 - Game Guide and Walkthrough](https://game.lhg100.com/Article/UploadFiles/201512/2015121619043041.jpg)
Only after completing the bonus objective, start attacking brawler. Remember that you can't use Heller's powers, so perform many side jumps, trying to keep the monster on distance. When you run out of ammo to the grenade launcher, look around for other such weapon. Finally take care of standard infected.
New objective: Follow the extraction squad to Roland's location
![Continue your march and once you get close to another group of monsters, according to suggestions of one of your teammates, pick up a rocket launcher from the ground - [Main mission 15] A Stranger Among Us - Main missions - Prototype 2 - Game Guide and Walkthrough](https://game.lhg100.com/Article/UploadFiles/201512/2015121619043054.jpg)
Continue your march and once you get close to another group of monsters, according to suggestions of one of your teammates, pick up a rocket launcher from the ground.
New objective: Kill the infected
![Prepare for the fight with one hydra - [Main mission 15] A Stranger Among Us - Main missions - Prototype 2 - Game Guide and Walkthrough](https://game.lhg100.com/Article/UploadFiles/201512/2015121619043050.jpg)
Prepare for the fight with one hydra. During the fight keep a safe distance from it, so hydra won't get you or smash you with tendrils. Watch out also for large objects thrown by hydra.
![At the beginning use the rocket launcher to attack hydra and when you run of ammo, look around for another rocket launcher or grenade launcher - [Main mission 15] A Stranger Among Us - Main missions - Prototype 2 - Game Guide and Walkthrough](https://game.lhg100.com/Article/UploadFiles/201512/2015121619043114.jpg)
At the beginning use the rocket launcher to attack hydra and when you run of ammo, look around for another rocket launcher or grenade launcher. Keep fighting until hydra is dead.
New objective: Follow the extraction squad to Roland's location
![Resume the march but make sure to take a good weapon with you, because the next fight will start soon, without a possibility to prepare for it - [Main mission 15] A Stranger Among Us - Main missions - Prototype 2 - Game Guide and Walkthrough](https://game.lhg100.com/Article/UploadFiles/201512/2015121619043127.jpg)
Resume the march but make sure to take a good weapon with you, because the next fight will start soon, without a possibility to prepare for it.
New objective: Kill the infected
![After the battle begins, focus only on attacking brawlers appearing in the area - [Main mission 15] A Stranger Among Us - Main missions - Prototype 2 - Game Guide and Walkthrough](https://game.lhg100.com/Article/UploadFiles/201512/2015121619043105.jpg)
After the battle begins, focus only on attacking brawlers appearing in the area. Do not let mutants push you in a corner and perform many side jumps, thus avoiding damage. Luckily there are many grenade launchers and other powerful weapons in the area, so you do not have to worry about ammo. After dealing with brawlers, eliminate standard infected.
New objective: Follow the extraction squad to Roland's location
![Follow the squad leader - [Main mission 15] A Stranger Among Us - Main missions - Prototype 2 - Game Guide and Walkthrough](https://game.lhg100.com/Article/UploadFiles/201512/2015121619043169.jpg)
Follow the squad leader. In this case you do not have to worry about taking any powerful weapons with you, because you'll find many new guns after getting to the last battlefield. The fight will start neat the damaged helicopter (screen above).
New objective: Kill the infected
![When the hydra appears, pick up one of the TOW launchers lying on the ground near the damaged helicopter and start shooting the monster - [Main mission 15] A Stranger Among Us - Main missions - Prototype 2 - Game Guide and Walkthrough](https://game.lhg100.com/Article/UploadFiles/201512/2015121619043136.jpg)
When the hydra appears, pick up one of the TOW launchers lying on the ground near the damaged helicopter and start shooting the monster. You have to hurry up, because another hydra will soon appear behind your back. In addition brawlers will join the fight. Keep attacking the first hydra, but remember not to get close to it.
![After eliminating first hydra, attack previously mentioned brawlers - [Main mission 15] A Stranger Among Us - Main missions - Prototype 2 - Game Guide and Walkthrough](https://game.lhg100.com/Article/UploadFiles/201512/2015121619043260.jpg)
After eliminating first hydra, attack previously mentioned brawlers. These monsters are not so tough, so you can use standard rocket launchers to kill them. In the meantime watch out for pieces of concrete thrown by other hydra.
![Finally take care of the second hydra - [Main mission 15] A Stranger Among Us - Main missions - Prototype 2 - Game Guide and Walkthrough](https://game.lhg100.com/Article/UploadFiles/201512/2015121619043216.jpg)
Finally take care of the second hydra. Same as with the first one, it would be good to use the TOW launcher and use the damaged helicopter as a cover. You have to eliminate all mutants.
New objective: Go to the extraction point
![This is very easy task, because you have only approach the shiny circle in location [856, 1194] - [Main mission 15] A Stranger Among Us - Main missions - Prototype 2 - Game Guide and Walkthrough](https://game.lhg100.com/Article/UploadFiles/201512/2015121619043206.jpg)
This is very easy task, because you have only approach the shiny circle in location [856, 1194]. It will result in displaying a new cut-scene.
New objective: Kill the scientists to flush out Roland
![It is best to eliminate scientist by using the TOW launcher to attack them (screen above) - [Main mission 15] A Stranger Among Us - Main missions - Prototype 2 - Game Guide and Walkthrough](https://game.lhg100.com/Article/UploadFiles/201512/2015121619043283.jpg)
It is best to eliminate scientist by using the TOW launcher to attack them (screen above). You can also make the fight easier, by consuming few soldiers from the squad before the fight begins. Using the TOW launcher is of course not the only option, because you can also use your powers or the Devastator attacks.
![Notice, that one of the scientists is not dead - [Main mission 15] A Stranger Among Us - Main missions - Prototype 2 - Game Guide and Walkthrough](https://game.lhg100.com/Article/UploadFiles/201512/2015121619043256.jpg)
Notice, that one of the scientists is not dead. So run towards him and try to grab him (B button), resulting in displaying another cut-scene and finishing the mission. As a reward for completing this level, the game will unlock the new main mission titled A Nest of Vipers.
![In order to start this mission, you have to get to location [962, 1402], specifically to the shiny circle on the ground - [Main mission 16] The White Light - Main missions - Prototype 2 - Game Guide and Walkthrough](https://game.lhg100.com/Article/UploadFiles/201512/2015121619043380.jpg)
In order to start this mission, you have to get to location [962, 1402], specifically to the shiny circle on the ground.
New objective: Hunt and consume commander Gallagher
![As you probably remember from the last mission, it is best to start the hunt with getting to the rooftop of one of the highest buildings in the area - [Main mission 16] The White Light - Main missions - Prototype 2 - Game Guide and Walkthrough](https://game.lhg100.com/Article/UploadFiles/201512/2015121619043378.jpg)
As you probably remember from the last mission, it is best to start the hunt with getting to the rooftop of one of the highest buildings in the area. Only then send an impulse (press left analog stick), so you'll easily find the location of the commander you're looking for (screen above).
![1 - [Main mission 16] The White Light - Main missions - Prototype 2 - Game Guide and Walkthrough](https://game.lhg100.com/Article/UploadFiles/201512/2015121619043342.jpg)
![The exact location of commander Gallagher is [725, 1425] - [Main mission 16] The White Light - Main missions - Prototype 2 - Game Guide and Walkthrough](https://game.lhg100.com/Article/UploadFiles/201512/2015121619043332.jpg)
The exact location of commander Gallagher is [725, 1425]. You do not have to specially disguise or avoid viral detector, because when you'll try to grab and consume him, Gallagher will automatically defend himself and be revealed as Evolved one.
New objective: Chase commander Gallagher
![IGNORE Blackwatch soldiers stationing in the area and start chasing Gallagher - [Main mission 16] The White Light - Main missions - Prototype 2 - Game Guide and Walkthrough](https://game.lhg100.com/Article/UploadFiles/201512/2015121619043351.jpg)
IGNORE Blackwatch soldiers stationing in the area and start chasing Gallagher. Notice the bar visible in the right upper screen corner. When you are far from the commander, the bar decreases. If it gets "empty", you'll fail the mission.
![During the chase, help yourself of course with sprint, running over walls, long jumps and gliding - [Main mission 16] The White Light - Main missions - Prototype 2 - Game Guide and Walkthrough](https://game.lhg100.com/Article/UploadFiles/201512/2015121619043491.jpg)
During the chase, help yourself of course with sprint, running over walls, long jumps and gliding. Do not try to grab or attack Gallagher too early, because the chase will automatically end after getting to the target area. You'll watch then a new cut-scene.
New objective: Tear off a rocket pod
![After the start of a fight with hostile helicopter, the game will unlock a new attack - [Main mission 16] The White Light - Main missions - Prototype 2 - Game Guide and Walkthrough](https://game.lhg100.com/Article/UploadFiles/201512/2015121619043481.jpg)
After the start of a fight with hostile helicopter, the game will unlock a new attack. You'll be able to tear off a missile launcher mounted on the machine. Follow the instructions show on the screen - start with jumping towards the helicopter (A button).
![Right after performing the jump, press the B button to grab the helicopter - [Main mission 16] The White Light - Main missions - Prototype 2 - Game Guide and Walkthrough](https://game.lhg100.com/Article/UploadFiles/201512/2015121619043415.jpg)
Right after performing the jump, press the B button to grab the helicopter. The next step is to press X button (Weaponize), so Heller will focus on the launcher. Finally, same as with previous attacks on APCs, rhythmically press X button until you tear off the launcher.
New objective: Destroy Gallagher's helicopter
![It is beast to use newly obtained missile launcher to destroy helicopter, and this is also a bonus mission objective - [Main mission 16] The White Light - Main missions - Prototype 2 - Game Guide and Walkthrough](https://game.lhg100.com/Article/UploadFiles/201512/2015121619043436.jpg)
It is beast to use newly obtained missile launcher to destroy helicopter, and this is also a bonus mission objective. Target the helicopter (left trigger) and start shooting missiles (X button). The successful action will be rewarded with a very impressive cut-scene.
New objective: Defeat commander Gallagher to learn about the Whitelight program
![The fight with Gallagher is very similar to the one with Dr - [Main mission 16] The White Light - Main missions - Prototype 2 - Game Guide and Walkthrough](https://game.lhg100.com/Article/UploadFiles/201512/2015121619043485.jpg)
The fight with Gallagher is very similar to the one with Dr. Koenig, which took place in the yellow zone. First of all, try to dodge your opponent's attacks, especially that Gallagher uses very powerful blades.
![Look for an opportunity to perform quick attacks with claws or tendrils - [Main mission 16] The White Light - Main missions - Prototype 2 - Game Guide and Walkthrough](https://game.lhg100.com/Article/UploadFiles/201512/2015121619043547.jpg)
Look for an opportunity to perform quick attacks with claws or tendrils. From time to time Gallagher will be sticking his blades into the ground, becoming vulnerable for few moments. So you might use this to run towards him and press a button indicated by the game (X or Y).
![You can try to attack Gallagher with weapons taken from local opponents or for example special, Devastator attack (screen above) - [Main mission 16] The White Light - Main missions - Prototype 2 - Game Guide and Walkthrough](https://game.lhg100.com/Article/UploadFiles/201512/2015121619043596.jpg)
You can try to attack Gallagher with weapons taken from local opponents or for example special, Devastator attack (screen above). Notice also, that the fight takes place in a public area, so you can easily regenerate by consuming civilians. Keep attacking Gallagher until his health bar is almost empty.
New objective: Consume commander Gallagher to learn about the Whitelight program
![The only thing left is to approach Gallagher and consume him (B button) - [Main mission 16] The White Light - Main missions - Prototype 2 - Game Guide and Walkthrough](https://game.lhg100.com/Article/UploadFiles/201512/2015121619043566.jpg)
The only thing left is to approach Gallagher and consume him (B button). When you finish the fight, you'll be awarded with new ability - Blades. The game will automatically replace Claws with newly obtained Blades, but you can adjust everything precisely by opening "powers window" during the game (hold LB button).
![Notice, that you can test right away the strong blades attack, titled Tornado, which is activated by holding X button - [Main mission 16] The White Light - Main missions - Prototype 2 - Game Guide and Walkthrough](https://game.lhg100.com/Article/UploadFiles/201512/2015121619043625.jpg)
Notice, that you can test right away the strong blades attack, titled Tornado, which is activated by holding X button. This is very good attack to eliminate groups of enemies standing close to each other.
New objective: Exit the alert
![Depending on your preferences you can stay in this place, testing blades (screen above) or start fleeing, looking for some narrow alley where you can exit the alert - [Main mission 16] The White Light - Main missions - Prototype 2 - Game Guide and Walkthrough](https://game.lhg100.com/Article/UploadFiles/201512/2015121619043671.jpg)
Depending on your preferences you can stay in this place, testing blades (screen above) or start fleeing, looking for some narrow alley where you can exit the alert. After ending this mission the game will unlock another one - Taking the Castle.
![In order to start this mission, you have to get to location [966, 1356], specifically to the shiny circle on the ground - [Main mission 17] A Nest of Vipers - Main missions - Prototype 2 - Game Guide and Walkthrough](https://game.lhg100.com/Article/UploadFiles/201512/2015121619043639.jpg)
In order to start this mission, you have to get to location [966, 1356], specifically to the shiny circle on the ground.
New objective: Go to the lair to find Roland
![Your current target is in location [878, 1176] - [Main mission 17] A Nest of Vipers - Main missions - Prototype 2 - Game Guide and Walkthrough](https://game.lhg100.com/Article/UploadFiles/201512/2015121619043659.jpg)
Your current target is in location [878, 1176]. It is a shiny circle located on the rooftop of the building. Approach it to display a new cut-scene.
New objective: Kill the hydra to enter the lair
![During the fight with hydra I suggest acting in a disguise as a scientist or a soldier (at least at the beginning), so you do not have to worry about Blackwatch squads for now - [Main mission 17] A Nest of Vipers - Main missions - Prototype 2 - Game Guide and Walkthrough](https://game.lhg100.com/Article/UploadFiles/201512/2015121619043653.jpg)
During the fight with hydra I suggest acting in a disguise as a scientist or a soldier (at least at the beginning), so you do not have to worry about Blackwatch squads for now. A good idea is to consume mainly soldiers with rocket launchers, so you can use these weapons to attack from a distance (from the rooftops for example).
![If you do not mind the fact, that you can be exposed by enemies, I recommend catching passing vehicles and throwing them at hydra (screen above) - [Main mission 17] A Nest of Vipers - Main missions - Prototype 2 - Game Guide and Walkthrough](https://game.lhg100.com/Article/UploadFiles/201512/2015121619043639.jpg)
If you do not mind the fact, that you can be exposed by enemies, I recommend catching passing vehicles and throwing them at hydra (screen above). Watch out for the pieces of concrete thrown by the monster and do not get close to hydra, so it won't be able to grab you or smash you with tendrils.
![Important information about this fight is that other mutants also are involved in it - [Main mission 17] A Nest of Vipers - Main missions - Prototype 2 - Game Guide and Walkthrough](https://game.lhg100.com/Article/UploadFiles/201512/2015121619043712.jpg)
Important information about this fight is that other mutants also are involved in it. You can ignore standard infected, but watch out for brawlers (screen above) and do not let them surprise you. They are main reason that you should attacks hydra from rooftops, because then brawlers shouldn't be interested in Heller. Regardless of the tactics, defeat the hydra.
New objective: Enter the lair to find Roland
![Do not wait for the rights to end, but right away go to the lair entrance in location [874, 1163] - [Main mission 17] A Nest of Vipers - Main missions - Prototype 2 - Game Guide and Walkthrough](https://game.lhg100.com/Article/UploadFiles/201512/2015121619043746.jpg)
Do not wait for the rights to end, but right away go to the lair entrance in location [874, 1163]. Place yourself in the shiny circle, rhythmically pressing B button. Wait until you're transported underground.
New objective: Search the lair for Roland
New objective: Go to the biomass
![Your current target is location [900, 1173], east from the start point and you can go there right away, because elimination of the local infected is optional - [Main mission 17] A Nest of Vipers - Main missions - Prototype 2 - Game Guide and Walkthrough](https://game.lhg100.com/Article/UploadFiles/201512/2015121619043738.jpg)
Your current target is location [900, 1173], east from the start point and you can go there right away, because elimination of the local infected is optional. Besides, these creatures inflict minimum damage, so you do not have to worry about the at all. After getting to the indicated place, the game will display a new cut-scene.
New objective: Defeat the juggernaut to get its hammerfist
![After starting the fight with Juggernaut, I suggest returning to the previous part of the lair, because you'll have more space there - [Main mission 17] A Nest of Vipers - Main missions - Prototype 2 - Game Guide and Walkthrough](https://game.lhg100.com/Article/UploadFiles/201512/2015121619043763.jpg)
After starting the fight with Juggernaut, I suggest returning to the previous part of the lair, because you'll have more space there. Before you attack the indicated monster, get rid of all brawlers accompanying him, so they won't bother you later on.
![As for defeating juggernaut, the best method of inflicting him damage is jumping over him and performing quick attacks - [Main mission 17] A Nest of Vipers - Main missions - Prototype 2 - Game Guide and Walkthrough](https://game.lhg100.com/Article/UploadFiles/201512/2015121619043771.jpg)
As for defeating juggernaut, the best method of inflicting him damage is jumping over him and performing quick attacks. Also wait for moments, when the game allows you to perform special attacks, activated by pressing X, Y or B button. Dodge juggernaut's attacks, both melee hits and large objects thrown by him.
![Do not forget about infected in the area, because they are not only a good source of regeneration, but also of mass - [Main mission 17] A Nest of Vipers - Main missions - Prototype 2 - Game Guide and Walkthrough](https://game.lhg100.com/Article/UploadFiles/201512/2015121619043856.jpg)
Do not forget about infected in the area, because they are not only a good source of regeneration, but also of mass. That means that you will be able often able to activate the Devastator attack (B + Y), which inflict more damage than standard attacks. At the end consume juggernaut (B button). Winning the fight will be awarded with a new ability - Hammerfist.
New objective: Exit the lair
![Before leaving the lair, I recommend testing hammerfist, according to the game suggestion, especially that there is a bonus objective connected with that - [Main mission 17] A Nest of Vipers - Main missions - Prototype 2 - Game Guide and Walkthrough](https://game.lhg100.com/Article/UploadFiles/201512/2015121619043884.jpg)
Before leaving the lair, I recommend testing hammerfist, according to the game suggestion, especially that there is a bonus objective connected with that. Hammerfist should replace your current power activated by X button, so two main types of attacks are activated by pressing or holding this button. You can of course reorganize everything, opening the "powers window" at any time (hold LB button).
![In order to complete the bonus objective you have to kill at least 30 infected with hammerfist and that should be not a problem - [Main mission 17] A Nest of Vipers - Main missions - Prototype 2 - Game Guide and Walkthrough](https://game.lhg100.com/Article/UploadFiles/201512/2015121619043887.jpg)
In order to complete the bonus objective you have to kill at least 30 infected with hammerfist and that should be not a problem. After eliminating them, go to the shiny circle in location [845, 1161] and accept the return to the ground (B button).
New objective: Perform the charged air attack
![After leaving the lair, you'll have to test yet another attack connected with hammerfist, which can be activated only while in the air - [Main mission 17] A Nest of Vipers - Main missions - Prototype 2 - Game Guide and Walkthrough](https://game.lhg100.com/Article/UploadFiles/201512/2015121619043893.jpg)
After leaving the lair, you'll have to test yet another attack connected with hammerfist, which can be activated only while in the air. According to instructions, hold X button to perform an effective charged air attack.
New objective: Destroy the tanks to smoke out Roland
![I strongly recommend using hammerfist to destroy both tanks, because this is a condition to complete bonus objective - [Main mission 17] A Nest of Vipers - Main missions - Prototype 2 - Game Guide and Walkthrough](https://game.lhg100.com/Article/UploadFiles/201512/2015121619043832.jpg)
I strongly recommend using hammerfist to destroy both tanks, because this is a condition to complete bonus objective. Depending on your preferences you can perform standard attacks (pressing X), strong attacks (holding X) or charged air attacks (holding X while in the air). When you destroy the second tank, the game will display a cut-scene, showing Roland appearing on the battlefield.
New objective: Defeat Roland
![A fight with Roland is not different than previous fights with bosses - [Main mission 17] A Nest of Vipers - Main missions - Prototype 2 - Game Guide and Walkthrough](https://game.lhg100.com/Article/UploadFiles/201512/2015121619043957.jpg)
A fight with Roland is not different than previous fights with bosses. You can of course attack him with newly unlocked hammerfist, but it is fairly enough to attack him with blades or tendrils. In addition to standard attacks, wait for opportunities to perform special attacks and it is possible when you see icon of button X, Y or B over boss's head.
![Dodging Roland's attacks requires more concentration than usual, because it is not enough to jump over him - [Main mission 17] A Nest of Vipers - Main missions - Prototype 2 - Game Guide and Walkthrough](https://game.lhg100.com/Article/UploadFiles/201512/2015121619043981.jpg)
Dodging Roland's attacks requires more concentration than usual, because it is not enough to jump over him. He also uses occasionally area attacks and tries to jump away in such cases if possible, before such attack gets fully charged and performed.
![Since there are many civilians running in the area, you should use the similar tactics as when fighting juggernaut - [Main mission 17] A Nest of Vipers - Main missions - Prototype 2 - Game Guide and Walkthrough](https://game.lhg100.com/Article/UploadFiles/201512/2015121619043991.jpg)
Since there are many civilians running in the area, you should use the similar tactics as when fighting juggernaut. So try to fully load mass bar and use the Devastator attack (screen above). Watch out also for soldiers, but eliminate mostly those with rocket launchers and those who bother you during the fight.
New objective: Consume Roland to get his Shield Spikes
![Keep fighting until Roland's health bar is almost empty - [Main mission 17] A Nest of Vipers - Main missions - Prototype 2 - Game Guide and Walkthrough](https://game.lhg100.com/Article/UploadFiles/201512/2015121619043972.jpg)
Keep fighting until Roland's health bar is almost empty. Then consume the boss (B button) to get a shield upgrade (Shield), which allows you to use additional spikes.
New objective: Exit the alert
![If you want, you can spend some moments to test newly unlocked, upgraded shield, because super soldiers should appear in the area - [Main mission 17] A Nest of Vipers - Main missions - Prototype 2 - Game Guide and Walkthrough](https://game.lhg100.com/Article/UploadFiles/201512/2015121619043925.jpg)
If you want, you can spend some moments to test newly unlocked, upgraded shield, because super soldiers should appear in the area. As you probably remember, a key to success is to block their hits with a shield and counterattacks. After you've tested shield ability, exit the alert, finishing the mission.
![In order to start this mission, you have to get to location [847, 1292], c near the junction - [Main mission 18] Taking the Castle - Main missions - Prototype 2 - Game Guide and Walkthrough](https://game.lhg100.com/Article/UploadFiles/201512/2015121619043952.jpg)
In order to start this mission, you have to get to location [847, 1292], c near the junction.
New objective: Consume and equip a Blackwatch trooper form to infiltrate the meeting
![You can have some troubles with completing this mission, because it is not enough to consumer the standard soldier - [Main mission 18] Taking the Castle - Main missions - Prototype 2 - Game Guide and Walkthrough](https://game.lhg100.com/Article/UploadFiles/201512/2015121619044086.jpg)
You can have some troubles with completing this mission, because it is not enough to consumer the standard soldier. You must consume the elite Blackwatch soldier, as shown on the above screen. It is best to look for such individuals near bases and checkpoints. After finding a suitable "candidate", consume him and if you were not acting in disguise, lose the chase.
New objective: Go to the mission briefing to discover Rooks's plan
![Your current target is location [926, 1270] and it is shiny circle on the building where you can find a helicopter landing pad - [Main mission 18] Taking the Castle - Main missions - Prototype 2 - Game Guide and Walkthrough](https://game.lhg100.com/Article/UploadFiles/201512/2015121619044046.jpg)
Your current target is location [926, 1270] and it is shiny circle on the building where you can find a helicopter landing pad. Stand in the circle which results in displaying a cut-scene.
New objective: Go to Gentek's R&D office to stop Dr. Koenig's replacements
![Head to location [831, 1466] - [Main mission 18] Taking the Castle - Main missions - Prototype 2 - Game Guide and Walkthrough](https://game.lhg100.com/Article/UploadFiles/201512/2015121619044080.jpg)
Head to location [831, 1466]. You have to reach a shiny circle, located on the building's rooftop, behind large billboard.
New objective: Consume Koenig's replacements to see if they know Mercer's plan
![Scientists are stationing on the rooftop of very high building and their location is [812, 1469] - [Main mission 18] Taking the Castle - Main missions - Prototype 2 - Game Guide and Walkthrough](https://game.lhg100.com/Article/UploadFiles/201512/2015121619044075.jpg)
Scientists are stationing on the rooftop of very high building and their location is [812, 1469]. Once you get to the rooftop, I suggest carefully consuming Blackwatch soldiers one by one. There are four persons to be eliminated in total and if you're careful enough, you'll consume them without triggering an alarm.
![After killing soldiers, start consuming scientists and in this case you have to give up your disguise, because these persons are watching each other - [Main mission 18] Taking the Castle - Main missions - Prototype 2 - Game Guide and Walkthrough](https://game.lhg100.com/Article/UploadFiles/201512/2015121619044147.jpg)
After killing soldiers, start consuming scientists and in this case you have to give up your disguise, because these persons are watching each other. Good news is that scientists can't flee anywhere.
New objective: Find and destroy lieutenant Riley's tank
![There are five tanks in total, moving around in the area and they are always visible on your map - [Main mission 18] Taking the Castle - Main missions - Prototype 2 - Game Guide and Walkthrough](https://game.lhg100.com/Article/UploadFiles/201512/2015121619044157.jpg)
There are five tanks in total, moving around in the area and they are always visible on your map. Do not care about main objective for now, but focus on completing the bonus one. Start with approaching in disguise to one of the tanks. Jump onto the vehicle and take control over it (B button).
![After that action move towards other vehicles in the area and when you see one of them, start shooting it (LB and RB buttons) - [Main mission 18] Taking the Castle - Main missions - Prototype 2 - Game Guide and Walkthrough](https://game.lhg100.com/Article/UploadFiles/201512/2015121619044171.jpg)
After that action move towards other vehicles in the area and when you see one of them, start shooting it (LB and RB buttons). Destroying hostile vehicle with the tank controlled by you will result in completing the bonus objective.
![Depending on your preferences, you can keep moving inside the tank or use other Heller's abilities - [Main mission 18] Taking the Castle - Main missions - Prototype 2 - Game Guide and Walkthrough](https://game.lhg100.com/Article/UploadFiles/201512/2015121619044151.jpg)
Depending on your preferences, you can keep moving inside the tank or use other Heller's abilities. In the second case I recommend tearing off weapons mounted on tanks (X button) and then use them (screen above). Regardless of your choices, watch out for helicopters and super soldiers, trying not to fight them. Keep destroying tanks until you receive information, that you've destroyed Riley's vehicle.
New objective: Consume lieutenant Riley to gain his form and earn Rooks's trust
![Ignore all enemies and all vehicles in the area and focus only on getting lieutenant Riley - [Main mission 18] Taking the Castle - Main missions - Prototype 2 - Game Guide and Walkthrough](https://game.lhg100.com/Article/UploadFiles/201512/2015121619044126.jpg)
Ignore all enemies and all vehicles in the area and focus only on getting lieutenant Riley. Fortunately he won't stand long.
New objective: Exit the alert
![The escape might be a little more difficult than usual because you'll probably have to avoid helicopters and super soldiers - [Main mission 18] Taking the Castle - Main missions - Prototype 2 - Game Guide and Walkthrough](https://game.lhg100.com/Article/UploadFiles/201512/2015121619044233.jpg)
The escape might be a little more difficult than usual because you'll probably have to avoid helicopters and super soldiers. So I suggest helping yourself with sprint and looking for narrow alleys and other places suitable to lose the chase. The game will automatically unlock an access to next main mission titles A Maze of Blood.
![In order to start this mission, you have to get to location [773, 1364], specifically to the shiny circle on the ground - [Main mission 19] A Maze of Blood - Main missions - Prototype 2 - Game Guide and Walkthrough](https://game.lhg100.com/Article/UploadFiles/201512/2015121619044294.jpg)
In order to start this mission, you have to get to location [773, 1364], specifically to the shiny circle on the ground.
New objective: Go to the coordinates of dr. Gutierrez's last location
![Your target is location [850, 1212] - [Main mission 19] A Maze of Blood - Main missions - Prototype 2 - Game Guide and Walkthrough](https://game.lhg100.com/Article/UploadFiles/201512/2015121619044287.jpg)
Your target is location [850, 1212]. You have to get to the new shiny circle located on the building's rooftop. Watch the cut-scene with a bio-bomber who can create bio bombs and detonate them.
New objective: Hunt the bio-bomber
![New hunt awaits you, so it is worth to get to the rooftop of one of the highest buildings in the area, because when you send an impulse being up there, you'll be able to easily locate the person you're looking for (screen above) - [Main mission 19] A Maze of Blood - Main missions - Prototype 2 - Game Guide and Walkthrough](https://game.lhg100.com/Article/UploadFiles/201512/2015121619044217.jpg)
New hunt awaits you, so it is worth to get to the rooftop of one of the highest buildings in the area, because when you send an impulse being up there, you'll be able to easily locate the person you're looking for (screen above).
![1 - [Main mission 19] A Maze of Blood - Main missions - Prototype 2 - Game Guide and Walkthrough](https://game.lhg100.com/Article/UploadFiles/201512/2015121619044272.jpg)
![An approximate location of bio-bomber is [810, 1175] - [Main mission 19] A Maze of Blood - Main missions - Prototype 2 - Game Guide and Walkthrough](https://game.lhg100.com/Article/UploadFiles/201512/2015121619044388.jpg)
An approximate location of bio-bomber is [810, 1175]. Approach this person and consume it (B button and Y button). If bio-bomber is observed by someone, you can take off your disguise, because anyway you'll have to join the fight.
New objective: Defeat the bio-bomber to discover Archer's location
![I recommend starting the duel with bio-bomber with the Devastator attack - [Main mission 19] A Maze of Blood - Main missions - Prototype 2 - Game Guide and Walkthrough](https://game.lhg100.com/Article/UploadFiles/201512/2015121619044383.jpg)
I recommend starting the duel with bio-bomber with the Devastator attack. I suggest using this attack also later on, because there are many civilians in the area, which can be used to obtain some bio-mass.
![As for standard attacks, you can use any Heller's abilities to inflict damage to the boss - [Main mission 19] A Maze of Blood - Main missions - Prototype 2 - Game Guide and Walkthrough](https://game.lhg100.com/Article/UploadFiles/201512/2015121619044306.jpg)
As for standard attacks, you can use any Heller's abilities to inflict damage to the boss. Wait also for occasions to perform special attacks (X, Y or B button) and dodge more often than usual. It is very important not to be grabbed by the bio-bomber, because then he can use his bio-bomb on Heller and inflict large damage.
New objective: Defeat the bio-bomber before he can escape
![After losing about 2/3 of his energy bar, bio-bomber will start to flee - [Main mission 19] A Maze of Blood - Main missions - Prototype 2 - Game Guide and Walkthrough](https://game.lhg100.com/Article/UploadFiles/201512/2015121619044309.jpg)
After losing about 2/3 of his energy bar, bio-bomber will start to flee. Take a look at the bar visible in right upper screen corner. If it gets empty, you'll fail the mission. Use sprint, long jumps and other acrobatic moves, to stay closed to bio-bomber. The chase should not take long fortunately and after getting to the rooftop of one of the buildings the fight will continue.
New objective: Consume the bio-bomber to discover Archer's location
![Keep fighting until bio-bomber's energy bar is almost empty - [Main mission 19] A Maze of Blood - Main missions - Prototype 2 - Game Guide and Walkthrough](https://game.lhg100.com/Article/UploadFiles/201512/2015121619044346.jpg)
Keep fighting until bio-bomber's energy bar is almost empty. Then run toward the boss and press B button to consume him. Notice that you're rewarded with ability named Bio-Bomb. It is worth noting that you'll be able to test it in a few minutes.
New objective: Go to base Adams to look for Archer's contact
New objective: Hunt Archer's contact
![Head towards the base in location [901, 1386] - [Main mission 19] A Maze of Blood - Main missions - Prototype 2 - Game Guide and Walkthrough](https://game.lhg100.com/Article/UploadFiles/201512/2015121619044428.jpg)
Head towards the base in location [901, 1386]. Specifically you have to reach the shiny circle on one of the buildings adjacent to the base. Stand in the circle and according to the game's suggestions, press left analog to use the sonar.
New objective: Lure out Archer's contact with a bio-bomb
![Make sure that you're masked as a scientist or a soldier and glide towards the base visible in the distance - [Main mission 19] A Maze of Blood - Main missions - Prototype 2 - Game Guide and Walkthrough](https://game.lhg100.com/Article/UploadFiles/201512/2015121619044407.jpg)
Make sure that you're masked as a scientist or a soldier and glide towards the base visible in the distance. Approach the commander indicated by the game, who stands in location [870, 1421]. Grab him (B button) and use the bio-bomb on him (X button). Wait for an impressive bomb detonation and a new cut-scene.
New objective: Defeat Archer's contact to find out what he knows about Archer
![During this fight I definitely recommend testing the offensive attack with bio-bomb (this is also a requirement to complete the bonus objective) - [Main mission 19] A Maze of Blood - Main missions - Prototype 2 - Game Guide and Walkthrough](https://game.lhg100.com/Article/UploadFiles/201512/2015121619044433.jpg)
During this fight I definitely recommend testing the offensive attack with bio-bomb (this is also a requirement to complete the bonus objective). After the fight starts, grab any standard soldier (B button) and use a bio-bomb on him (X button).
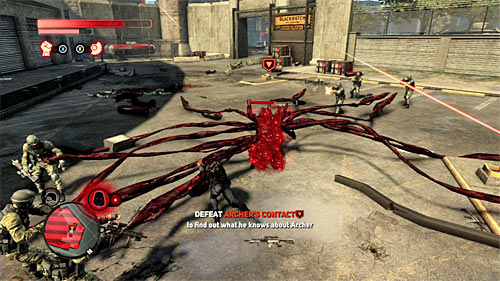
After "applying" a bio-bomb to soldier grab him again. Now target the boss (left trigger) and quickly throw a soldier at the boss (B button). If you've done everything according to the plan, a thrown soldier should hit the boss, exploding and dealing him serious damage.
![After completing the bonus objective you'll be totally free in your actions - [Main mission 19] A Maze of Blood - Main missions - Prototype 2 - Game Guide and Walkthrough](https://game.lhg100.com/Article/UploadFiles/201512/2015121619044422.jpg)
After completing the bonus objective you'll be totally free in your actions. Personally I recommend "arming" standard soldiers in bio-bombs and throwing them at Dr. Archer's contact, so he will lose his energy fast. But you can as well perform standard attacks or use the rocket launcher.
![Another interesting option is to use the Devastator attacks, especially that thanks to soldier running around the area, you can easily regenerate bio-mass bar - [Main mission 19] A Maze of Blood - Main missions - Prototype 2 - Game Guide and Walkthrough](https://game.lhg100.com/Article/UploadFiles/201512/2015121619044578.jpg)
Another interesting option is to use the Devastator attacks, especially that thanks to soldier running around the area, you can easily regenerate bio-mass bar. Watch out for guns mounted on base's rooftops. Theoretically you can ignore them, but if you do not want to heal yourself too often, you might destroy them and the best way to do it is to attack them with hammerfists (hold X button).
New objective: Consume Archer's contact to find out what he knows about Archer
![Keep fighting until your opponent's energy bar is almost empty - [Main mission 19] A Maze of Blood - Main missions - Prototype 2 - Game Guide and Walkthrough](https://game.lhg100.com/Article/UploadFiles/201512/2015121619044589.jpg)
Keep fighting until your opponent's energy bar is almost empty. Ignore other enemies, quickly run to the boss and press B button to consume him.
New objective: Hunt dr. Gutierrez
![Same as with the previous hunt, you might get to the rooftop of one of the highest building in the area, because when you send an impulse being there, you'll locate Dr - [Main mission 19] A Maze of Blood - Main missions - Prototype 2 - Game Guide and Walkthrough](https://game.lhg100.com/Article/UploadFiles/201512/2015121619044507.jpg)
Same as with the previous hunt, you might get to the rooftop of one of the highest building in the area, because when you send an impulse being there, you'll locate Dr. Gutierrez easily (Screen above).
![2 - [Main mission 19] A Maze of Blood - Main missions - Prototype 2 - Game Guide and Walkthrough](https://game.lhg100.com/Article/UploadFiles/201512/2015121619044512.jpg)
![The scientist you're looking for is standing next to the entrance to the large building in the south-eastern part of the green zone and his location is [960, 1495] - [Main mission 19] A Maze of Blood - Main missions - Prototype 2 - Game Guide and Walkthrough](https://game.lhg100.com/Article/UploadFiles/201512/2015121619044511.jpg)
The scientist you're looking for is standing next to the entrance to the large building in the south-eastern part of the green zone and his location is [960, 1495]. Approach Gutierrez in order to watch the cut-scene and start the fight with him.
New objective: Defeat dr. Gutierrez to discover Archer's location
![The fight with Gutierrez has same rules as previous duel - [Main mission 19] A Maze of Blood - Main missions - Prototype 2 - Game Guide and Walkthrough](https://game.lhg100.com/Article/UploadFiles/201512/2015121619044529.jpg)
The fight with Gutierrez has same rules as previous duel. So I recommend creating "living bio grenades" and throwing them at the boss. As for reminder, you have to grab any civilian or soldier (B button), "send" him a bio-bomb (X button) and throw him at Gutierrez (B button).
![If you do not want to waste time on creating bio-bombs, you can consume civilians in order to use the Devastator attack as often as possible, or perform standard attacks, using one of Heller's abilities - [Main mission 19] A Maze of Blood - Main missions - Prototype 2 - Game Guide and Walkthrough](https://game.lhg100.com/Article/UploadFiles/201512/2015121619044502.jpg)
If you do not want to waste time on creating bio-bombs, you can consume civilians in order to use the Devastator attack as often as possible, or perform standard attacks, using one of Heller's abilities. As for dodging boss's attacks I suggest jumping aside and not over him, because he reacts very quickly for such situations.
New objective: Consume dr. Gutierrez to discover Archer's location
![Keep fighting until boss's energy bar is almost empty and after receiving the last mission objective quickly run towards him to consume him - [Main mission 19] A Maze of Blood - Main missions - Prototype 2 - Game Guide and Walkthrough](https://game.lhg100.com/Article/UploadFiles/201512/2015121619044633.jpg)
Keep fighting until boss's energy bar is almost empty and after receiving the last mission objective quickly run towards him to consume him. If there are no more enemies in the area, the mission will end now (otherwise you'll have to lose the chase). The game will also unlock the next main mission - Alpha Wolf.
![In order to start this mission, you have to get to location [726, 1516], and specifically to the shiny circle on the ground near the junction - [Main mission 20] Alpha Wolf - Main missions - Prototype 2 - Game Guide and Walkthrough](https://game.lhg100.com/Article/UploadFiles/201512/2015121619044628.jpg)
In order to start this mission, you have to get to location [726, 1516], and specifically to the shiny circle on the ground near the junction.
New objective: Go to Archer's research facility
![The research facility can be found in location [672, 1640] - [Main mission 20] Alpha Wolf - Main missions - Prototype 2 - Game Guide and Walkthrough](https://game.lhg100.com/Article/UploadFiles/201512/2015121619044610.jpg)
The research facility can be found in location [672, 1640]. Once you get there, approach to the shiny circle located on the building's rooftop. This will start a new cut-scene.
New objective: Consume the scientist to enter Archer's research facility
![Before you go to the facility run by Dr - [Main mission 20] Alpha Wolf - Main missions - Prototype 2 - Game Guide and Walkthrough](https://game.lhg100.com/Article/UploadFiles/201512/2015121619044621.jpg)
Before you go to the facility run by Dr. Archer, make sure that you've changed your shape and are masked as a scientist or a soldier. Approach the person indicated by the game (approximate location is [690, 1670]). Follow the scientist, watching out for viral detectors and waiting for a moment when the scientist is not observed by anyone (help yourself with the sonar). Only then grab him and consume him.
New objective: Use the hand scanner to enter Archer's research facility
![The hand scanner can be found in location [682, 1685] and you can use it (B button) with no consequences - [Main mission 20] Alpha Wolf - Main missions - Prototype 2 - Game Guide and Walkthrough](https://game.lhg100.com/Article/UploadFiles/201512/2015121619044611.jpg)
The hand scanner can be found in location [682, 1685] and you can use it (B button) with no consequences.
New objective: Destroy the chemical storage tanks
![There are four tanks to be destroyed, but before you do this I suggest completing the new bonus objective - [Main mission 20] Alpha Wolf - Main missions - Prototype 2 - Game Guide and Walkthrough](https://game.lhg100.com/Article/UploadFiles/201512/2015121619044791.jpg)
There are four tanks to be destroyed, but before you do this I suggest completing the new bonus objective. Start exploring the large room and use the sonar there (pressing left analog) to find persons, which are not observed by anyone (white halo instead of the red one). Grab such persons (B button) and use the bio-bombs on them (X button).
After "sending" a bio-bomb, just walk away and wait for the explosion (screen above). It is worth noting that such actions do not trigger an alarm. So if you like that kind of attacks you can continue using it after completing the bonus objective (stealth "sending" two bio-bombs).
![I recommend destroying tanks after eliminating most soldiers stationing in this room (the best option is to kill them all first) - [Main mission 20] Alpha Wolf - Main missions - Prototype 2 - Game Guide and Walkthrough](https://game.lhg100.com/Article/UploadFiles/201512/2015121619044740.jpg)
I recommend destroying tanks after eliminating most soldiers stationing in this room (the best option is to kill them all first). The most basic method is to destroy tanks with standard melee attacks (screen above). It is worth noting that you do have to stay masked as a scientist or a soldier, because Heller has no resistance against poisonous fumes from destroyed tanks.
![I personally suggest destroying tanks with explosive barrels and other environment objects - [Main mission 20] Alpha Wolf - Main missions - Prototype 2 - Game Guide and Walkthrough](https://game.lhg100.com/Article/UploadFiles/201512/2015121619044795.jpg)
I personally suggest destroying tanks with explosive barrels and other environment objects. On the other side I do not recommend using the rocket launcher, because it will be more useful later. Eventually you have to destroy all four tanks, resulting in displaying a cut-scene with Dr. Archer.
New objective: Defeat dr. Archer
![During the fight with Dr - [Main mission 20] Alpha Wolf - Main missions - Prototype 2 - Game Guide and Walkthrough](https://game.lhg100.com/Article/UploadFiles/201512/2015121619044707.jpg)
During the fight with Dr. Archer you should rely on slow attacks, inflicting serious damage. My personal favorite is hammerfist, but tendrils should do good as well.
![On the other hand, I do not recommend using blades or claws, because Dr - [Main mission 20] Alpha Wolf - Main missions - Prototype 2 - Game Guide and Walkthrough](https://game.lhg100.com/Article/UploadFiles/201512/2015121619044785.jpg)
On the other hand, I do not recommend using blades or claws, because Dr. Archer is very agile in direct fight and even with many dodges you would probably be seriously injured. An additional difficulty is inability to regenerate, but this plays significant role only if you haven't unlocked mutations improving health regeneration process and making your energy bar longer.
New objective: Kill dr. Archer's Brawler pack
![Dr - [Main mission 20] Alpha Wolf - Main missions - Prototype 2 - Game Guide and Walkthrough](https://game.lhg100.com/Article/UploadFiles/201512/2015121619044845.jpg)
Dr. Archer should summon two brawlers for help after she loses about 1/3 of her energy power. I recommend hammerfists to attack mutants, but due the fact that you're fighting with two monsters, the best solution is charged air attack (hold X button). As you probably remember brawlers are less resistant to attempts to jump over them, so you can fight them in a short distance, performing quick attacks, with blades for example.
![Try to consume every defeated brawler, thus restoring part of your energy and charging the bio-mass bar - [Main mission 20] Alpha Wolf - Main missions - Prototype 2 - Game Guide and Walkthrough](https://game.lhg100.com/Article/UploadFiles/201512/2015121619044891.jpg)
Try to consume every defeated brawler, thus restoring part of your energy and charging the bio-mass bar. The same effect can be also achieved by grabbing scientists, who appear in the room, but you have to do it before they get murdered by brawlers or powerful area attacks.
New objective: Defeat dr. Archer
![Defeating brawlers will result in Dr - [Main mission 20] Alpha Wolf - Main missions - Prototype 2 - Game Guide and Walkthrough](https://game.lhg100.com/Article/UploadFiles/201512/2015121619044885.jpg)
Defeating brawlers will result in Dr. Archer rejoining the fight. The general scheme of actions remains the same in this case to try to keep Dr. Archer on a distance, relying mainly on powerful attacks. Watch out also for objects thrown by her, but fortunately there should be no problems with that.
New objective: Kill dr. Archer's Brawler pack
![Dr - [Main mission 20] Alpha Wolf - Main missions - Prototype 2 - Game Guide and Walkthrough](https://game.lhg100.com/Article/UploadFiles/201512/2015121619044804.jpg)
Dr. Archer will flee after losing about 2/3 of her health bar and this time she will summon four brawlers to attacks you. So it is very important to use powerful area attacks (you might have already the Devastator attack charged) and I still recommend using hammerfists. Do not get into a corner and consume every defeated brawler when possible.
New objective: Defeat dr. Archer
![Start attacking Dr - [Main mission 20] Alpha Wolf - Main missions - Prototype 2 - Game Guide and Walkthrough](https://game.lhg100.com/Article/UploadFiles/201512/2015121619044888.jpg)
Start attacking Dr. Archer again, watching out all the time and trying to dodge her powerful attacks. Fight until her energy bar is almost empty. Heller will automatically deal with Archer and gain the second special attack - Pack Leader.
New objective: Summon your Brawler Pack
![At the end of this mission you'll shortly test the newly unlocked special attack - [Main mission 20] Alpha Wolf - Main missions - Prototype 2 - Game Guide and Walkthrough](https://game.lhg100.com/Article/UploadFiles/201512/2015121619044956.jpg)
At the end of this mission you'll shortly test the newly unlocked special attack. To summon brawler pack you have to press X and A buttons at the same time. For the future, keep in mind, that by analogy to the devastator attack, this action will consume bio-mass. But you do not have to wait until the entire bio-mass bar is charged, because even its part can be used to summon brawlers (fewer amount).
New objective: Destroy the helicopter
![Target the helicopter by holding left trigger and then press right analog to order your brawlers to attack the machine - [Main mission 20] Alpha Wolf - Main missions - Prototype 2 - Game Guide and Walkthrough](https://game.lhg100.com/Article/UploadFiles/201512/2015121619044904.jpg)
Target the helicopter by holding left trigger and then press right analog to order your brawlers to attack the machine. Beasts will destroy the helicopter with no problems.
New objective: Dismiss the Brawler Pack
![The last feature of the newly unlocked ability is ordering brawlers to leave the area - [Main mission 20] Alpha Wolf - Main missions - Prototype 2 - Game Guide and Walkthrough](https://game.lhg100.com/Article/UploadFiles/201512/2015121619044969.jpg)
The last feature of the newly unlocked ability is ordering brawlers to leave the area. Hold left trigger and press X and A buttons at the same time. In the future it is best to dismiss brawlers right after completing the mission and before moving to next location.
New objective: Leave the base to call father Guerra
![It would be best to leave the base in disguise, unless you have nothing against losing the chase or testing newly obtained special attack on other enemies - [Main mission 20] Alpha Wolf - Main missions - Prototype 2 - Game Guide and Walkthrough](https://game.lhg100.com/Article/UploadFiles/201512/2015121619044964.jpg)
It would be best to leave the base in disguise, unless you have nothing against losing the chase or testing newly obtained special attack on other enemies. After conversation with Guerra the game will unlock a new main mission titled Fall from Grace.
![In order to start this mission, you have to get to location [747, 1529], specifically to the shiny circle on a parking lot - [Main mission 21] Fall from Grace - Main missions - Prototype 2 - Game Guide and Walkthrough](https://game.lhg100.com/Article/UploadFiles/201512/2015121619044933.jpg)
In order to start this mission, you have to get to location [747, 1529], specifically to the shiny circle on a parking lot. You'll regain control over Heller after watching several long cut-scenes.
New objective: Kill the evolved soldiers
![Before you start attacking soldiers for real, it would be good to complete the bonus objective - performing special attack, Pack leader - [Main mission 21] Fall from Grace - Main missions - Prototype 2 - Game Guide and Walkthrough](https://game.lhg100.com/Article/UploadFiles/201512/2015121619045063.jpg)
Before you start attacking soldiers for real, it would be good to complete the bonus objective - performing special attack, Pack leader. For a reminder - this attack is activated by pressing X and A button at the same time. Depending on your preferences you can leave brawlers on their own or order them to attack particular soldier (left trigger and then pressing right analog).
![A fight with the evolved soldiers doesn't differ from your previous battles - [Main mission 21] Fall from Grace - Main missions - Prototype 2 - Game Guide and Walkthrough](https://game.lhg100.com/Article/UploadFiles/201512/2015121619045046.jpg)
A fight with the evolved soldiers doesn't differ from your previous battles. If possible, try to attack your enemies one after another, remembering about avoiding their attacks. It is also worth to grab civilians running around the area (regeneration, bio-bombs, charging bio-mass bar) and consume every defeated evolved soldier.
New objective: Go to the Whitelight stockpile to prevent it from being released
![Before you go to location [650, 1268] I suggest dismissing brawlers (hold left trigger and press X + A) - [Main mission 21] Fall from Grace - Main missions - Prototype 2 - Game Guide and Walkthrough](https://game.lhg100.com/Article/UploadFiles/201512/2015121619045065.jpg)
Before you go to location [650, 1268] I suggest dismissing brawlers (hold left trigger and press X + A). Your target is the shiny circle located on the building's rooftop and when you approach it, you'll watch two important cut-scenes.
New objective: Defeat the goliath before it releases the Whitelight
![The duel with goliath is fortunately easier than it seems to be, although you have to watch out - [Main mission 21] Fall from Grace - Main missions - Prototype 2 - Game Guide and Walkthrough](https://game.lhg100.com/Article/UploadFiles/201512/2015121619045088.jpg)
The duel with goliath is fortunately easier than it seems to be, although you have to watch out. The important message is that you can't leave boss alone because then he will approach the huge tank and you'll fail the mission. For attracting his attention you can use quick attack on a short distance or thrown at him cars for example.
![During your attempts to attract his attention, you should of course watch out for his attacks and dodge them - the main problem is his charge (screen above), which destroys everything on his way - [Main mission 21] Fall from Grace - Main missions - Prototype 2 - Game Guide and Walkthrough](https://game.lhg100.com/Article/UploadFiles/201512/2015121619045014.jpg)
During your attempts to attract his attention, you should of course watch out for his attacks and dodge them - the main problem is his charge (screen above), which destroys everything on his way. In such situation I recommend getting to the rooftops of local buildings, because the standard escape on the city streets will be probably not enough. Fortunately, even if you lose some energy, there are many civilians and soldiers in the area, who can be consumed.
![Do not waste your time for performing standard attacks, because the key to defeat the goliath is to perform specific actions - [Main mission 21] Fall from Grace - Main missions - Prototype 2 - Game Guide and Walkthrough](https://game.lhg100.com/Article/UploadFiles/201512/2015121619045146.jpg)
Do not waste your time for performing standard attacks, because the key to defeat the goliath is to perform specific actions. Wait until the game zooms one of goliath's heads, showing it in a short cut-scene (screen above).
Quickly run towards the head and start attacking it, trying to "empty" its energy bar. You might help yourself with left trigger, because the game should automatically target this part of goliath's body. Try to use your best attacks (except the Devastator, which will be useful later). If you fail with destroying the head, the goliath will resume his march and you'll have to attract his attention again.
![The destruction of the head should lead to displaying another short cut-scene, this time suggesting that you have to attack the lower goliath's limb (screen above) - [Main mission 21] Fall from Grace - Main missions - Prototype 2 - Game Guide and Walkthrough](https://game.lhg100.com/Article/UploadFiles/201512/2015121619045181.jpg)
The destruction of the head should lead to displaying another short cut-scene, this time suggesting that you have to attack the lower goliath's limb (screen above). Same as before, quickly run to the indicated part of the mutant's body and start performing quick attacks. Keep hitting until you destroy the limb.
![Do not count on this that destroying the limb will somehow significantly slow down the boss - [Main mission 21] Fall from Grace - Main missions - Prototype 2 - Game Guide and Walkthrough](https://game.lhg100.com/Article/UploadFiles/201512/2015121619045179.jpg)
Do not count on this that destroying the limb will somehow significantly slow down the boss. Keep attracting his attention, waiting for the moment, when the game will suggest attacking another goliath's limb. In this case you probably won't be able to destroy the limb in one shot, but do not give up and do not leave goliath alone, so he won't get close to the huge tank.
![Watch out, because goliath will perform huge jumps to get closer to the tank and you have to avoid standing where he lands - [Main mission 21] Fall from Grace - Main missions - Prototype 2 - Game Guide and Walkthrough](https://game.lhg100.com/Article/UploadFiles/201512/2015121619045120.jpg)
Watch out, because goliath will perform huge jumps to get closer to the tank and you have to avoid standing where he lands. Wait until the game will suggest attacking his reversed head (screen above).
![If you have your bio-mass bar fully charged, it would be best to perform now the Devastator attack (standing next to goliath), and if you're lucky, the boss will die at once - [Main mission 21] Fall from Grace - Main missions - Prototype 2 - Game Guide and Walkthrough](https://game.lhg100.com/Article/UploadFiles/201512/2015121619045209.jpg)
If you have your bio-mass bar fully charged, it would be best to perform now the Devastator attack (standing next to goliath), and if you're lucky, the boss will die at once. Otherwise try to perform other powerful attacks to inflict damage to his head. You have to repeat those actions and do not let goliath attack the tank too often.
New objective: Consume the goliath
![Once the second head's energy bar is empty, then goliath is defeated - [Main mission 21] Fall from Grace - Main missions - Prototype 2 - Game Guide and Walkthrough](https://game.lhg100.com/Article/UploadFiles/201512/2015121619045290.jpg)
Once the second head's energy bar is empty, then goliath is defeated. You can now approach the beast and press B button to consume it. Take a note that defeating goliath has strengthened one of your abilities - Blades.
New objective: Exit the alert
New objective: Go to Guerra's location to save him
![I suggest leaving this area at once, because battle with goliath has attracted for sure large numbers of Blackwatch soldiers - [Main mission 21] Fall from Grace - Main missions - Prototype 2 - Game Guide and Walkthrough](https://game.lhg100.com/Article/UploadFiles/201512/2015121619045259.jpg)
I suggest leaving this area at once, because battle with goliath has attracted for sure large numbers of Blackwatch soldiers. After losing the chase, point your travel to location [702, 1490] and once you get there (screen above), approach the building's entrance, starting a new cut-scene. After completing the mission, the game will unlock a new one - The Descent.
Notice! This mission is entirely about going to the Red Zone for the first time. Same as with the thirteenth main mission (The Airbridge), you do not have to deal with all outstanding issues in the green zone, because the game will allow you to travel freely between all three zones of New York.
![In order to start this mission, you have to get to location [787, 1325], specifically to the shiny circle on the building's rooftop - [Main mission 22] The Descent - Main missions - Prototype 2 - Game Guide and Walkthrough](https://game.lhg100.com/Article/UploadFiles/201512/2015121619045275.jpg)
In order to start this mission, you have to get to location [787, 1325], specifically to the shiny circle on the building's rooftop.
New objective: Go to the Blackwatch base to find a pilot
![Go to location [891, 1300] - [Main mission 22] The Descent - Main missions - Prototype 2 - Game Guide and Walkthrough](https://game.lhg100.com/Article/UploadFiles/201512/2015121619045283.jpg)
Go to location [891, 1300]. When you get to the destination, land on one of the rooftops and look for another shiny circle. Approach it.
New objective: Consume the helicopter pilot to take his place searching for Dana
![The person youre looking for can be found on the rooftop, near the landing pad [922, 1273] and I definitely suggest approaching him disguised as a scientist or a soldier - [Main mission 22] The Descent - Main missions - Prototype 2 - Game Guide and Walkthrough](https://game.lhg100.com/Article/UploadFiles/201512/2015121619045248.jpg)
The person you're looking for can be found on the rooftop, near the landing pad [922, 1273] and I definitely suggest approaching him disguised as a scientist or a soldier. Once you get to the destination, you should note, that the soldier is observed by other people. I do not recommend starting the fight, because you can easily consume all other persons (use the sonar to locate soldiers, who are not observed by anyone).
![You should take care of the soldier indicated by the game after clearing the landing pad and its nearby area from other enemies - [Main mission 22] The Descent - Main missions - Prototype 2 - Game Guide and Walkthrough](https://game.lhg100.com/Article/UploadFiles/201512/2015121619045326.jpg)
You should take care of the soldier indicated by the game after clearing the landing pad and its nearby area from other enemies. He doesn't have any special abilities, so you can consume him without problems.
New objective: Go to the air bridge to fly to the Red Zone and find Dana
![The only thing left is to approach the new shiny circle in location [922, 1274], next to the place where youve consumed the pilot - [Main mission 22] The Descent - Main missions - Prototype 2 - Game Guide and Walkthrough](https://game.lhg100.com/Article/UploadFiles/201512/2015121619045309.jpg)
The only thing left is to approach the new shiny circle in location [922, 1274], next to the place where you've consumed the pilot. After getting to the red zone you'll automatically advance to the next main mission titled Predator and Prey.
New objective: Follow the flight leader to the signal truck tracking Dana's location
![This mission begins in the helicopter, so it is worth taking few moments to familiarize you with basics of flying - [Main mission 23] Predator and Prey - Main missions - Prototype 2 - Game Guide and Walkthrough](https://game.lhg100.com/Article/UploadFiles/201512/2015121619045379.jpg)
This mission begins in the helicopter, so it is worth taking few moments to familiarize you with basics of flying. To control the machine you use mainly left analog, while left and right triggers are used respectively to descend and ascend. Follow the helicopter indicated by the game, which is piloted by the squad leader.
New objective: Go to site alpha to defend the telemetry truck
![Your target is location [679, 149] and it is worth to reduce the high in advance (left trigger), because in a few moments youll be forced to attack ground targets - [Main mission 23] Predator and Prey - Main missions - Prototype 2 - Game Guide and Walkthrough](https://game.lhg100.com/Article/UploadFiles/201512/2015121619045312.jpg)
Your target is location [679, 149] and it is worth to reduce the high in advance (left trigger), because in a few moments you'll be forced to attack ground targets.
New objective: Defend the telemetry truck while it tracks Dana's location
![The truck is parked in location [681, 141] and in order to defend it, you should use helicopters weapons - [Main mission 23] Predator and Prey - Main missions - Prototype 2 - Game Guide and Walkthrough](https://game.lhg100.com/Article/UploadFiles/201512/2015121619045398.jpg)
The truck is parked in location [681, 141] and in order to defend it, you should use helicopter's weapons. LB button shoots the gun, while you use RB button to shoot rockets. Same as with armored vehicles you have unlimited ammo, but you can't let the weapons overheat.
![Notice that the game has offered you the opportunity to complete the bonus objective and you definitely shouldnt ignore it, because it is also associated with protecting the helicopter from damage - [Main mission 23] Predator and Prey - Main missions - Prototype 2 - Game Guide and Walkthrough](https://game.lhg100.com/Article/UploadFiles/201512/2015121619045373.jpg)
Notice that the game has offered you the opportunity to complete the bonus objective and you definitely shouldn't ignore it, because it is also associated with protecting the helicopter from damage. Every time any of the monsters on the ground throws a large object at you, the game will shortly display information about the possibility of pressing Y button (screen above). Press this button quickly, so the flying object will be destroyed before it hits the helicopter. The bonus objective requires two such actions, but you might destroy flying objects till the end of the fight.
![During the fight focus mainly on attacking these mutants, which are dangerously close to the defended truck, because it has its own energy bar (the right upper screen corner) and if you wont care about it, youll fail the mission, because it will get destroyed - [Main mission 23] Predator and Prey - Main missions - Prototype 2 - Game Guide and Walkthrough](https://game.lhg100.com/Article/UploadFiles/201512/2015121619045410.jpg)
During the fight focus mainly on attacking these mutants, which are dangerously close to the defended truck, because it has its own energy bar (the right upper screen corner) and if you won't care about it, you'll fail the mission, because it will get destroyed.
![In further part of the battle, several hydras will appear on the battlefield, and I recommend weakening them between attacking more mobile monsters, which get close to the truck - [Main mission 23] Predator and Prey - Main missions - Prototype 2 - Game Guide and Walkthrough](https://game.lhg100.com/Article/UploadFiles/201512/2015121619045414.jpg)
In further part of the battle, several hydras will appear on the battlefield, and I recommend weakening them between attacking more mobile monsters, which get close to the truck. Remember also about even more frequent destroying the thrown objects (Y button), because hydras will try to shoot you down for all costs.
New objective: Land and rescue the engineer so they can decrypt data on Dana's location
![Youll receive this objective right after new goliath appears in the area - [Main mission 23] Predator and Prey - Main missions - Prototype 2 - Game Guide and Walkthrough](https://game.lhg100.com/Article/UploadFiles/201512/2015121619045424.jpg)
You'll receive this objective right after new goliath appears in the area. IGNORE this monster and quickly fly to the engineer in the location [679, 149]. You have to descend (left trigger), so you can approach the large shiny circle on the ground (screen above).
New objective: Go to base Hotel Two Seven so the engineer can decrypt data on Dana's location
![Quickly start ascending (right trigger), so you wont get damaged by goliaths attacks - [Main mission 23] Predator and Prey - Main missions - Prototype 2 - Game Guide and Walkthrough](https://game.lhg100.com/Article/UploadFiles/201512/2015121619045479.jpg)
Quickly start ascending (right trigger), so you won't get damaged by goliath's attacks. Your next task is the flight to location [522, 438]. Once you get there, head to the landing pad on the building's rooftop (screen above).
New objective: Go to Dana's location to warn her about Blackwatch
![Dana can be found in location [741, 490] and you can of course use the helicopter to get there - [Main mission 23] Predator and Prey - Main missions - Prototype 2 - Game Guide and Walkthrough](https://game.lhg100.com/Article/UploadFiles/201512/2015121619045436.jpg)
Dana can be found in location [741, 490] and you can of course use the helicopter to get there. After you reach the destination, land in the place indicated by the game and hold B button to get out of the helicopter. The mission will end soon, and you unlock an access to the new main mission, titled Burned from Memory.
![In order to start this mission, you have to get to location [584, 108], specifically to the shiny circle on the ground - [Main mission 24] Burned from Memory - Main missions - Prototype 2 - Game Guide and Walkthrough](https://game.lhg100.com/Article/UploadFiles/201512/2015121619045532.jpg)
In order to start this mission, you have to get to location [584, 108], specifically to the shiny circle on the ground.
New objective: Go to the Blackwatch hot zone to investigate the disturbance
![Head to location [433, 299] - [Main mission 24] Burned from Memory - Main missions - Prototype 2 - Game Guide and Walkthrough](https://game.lhg100.com/Article/UploadFiles/201512/2015121619045553.jpg)
Head to location [433, 299]. Your target is a new shiny circle on the building's rooftop near the landing pad. Approaching the circle results in displaying the cut-scene.
New objective: Pick up a Whitelight barrel
![There are two Whitelight barrels in the Blackwatch base, and their exact locations are points [406, 307] and [407, 318] - [Main mission 24] Burned from Memory - Main missions - Prototype 2 - Game Guide and Walkthrough](https://game.lhg100.com/Article/UploadFiles/201512/2015121619045551.jpg)
There are two Whitelight barrels in the Blackwatch base, and their exact locations are points [406, 307] and [407, 318]. Before approaching the base I suggest shapeshifting into a scientist or a soldier, so you do not have to worry that you'll be attacked by Blackwatch squads or mutants.
![Run to any of barrels, but watch out for brawlers, who will try to interrupt your actions - [Main mission 24] Burned from Memory - Main missions - Prototype 2 - Game Guide and Walkthrough](https://game.lhg100.com/Article/UploadFiles/201512/2015121619045593.jpg)
Run to any of barrels, but watch out for brawlers, who will try to interrupt your actions. My recommendation is to ignore these monsters, because defeating brawlers without Heller's powers would be more difficult, and besides that more brawlers can come after you deal with these monsters. So move away from beasts and quickly pick up one of the indicated barrels (B button).
New objective: Go to the incinerator to dispose of the Whitelight barrel
![The incinerator is in location [394, 309] and I recommend using the long jump towards it, thus reducing chances of attack by brawlers - [Main mission 24] Burned from Memory - Main missions - Prototype 2 - Game Guide and Walkthrough](https://game.lhg100.com/Article/UploadFiles/201512/2015121619045531.jpg)
The incinerator is in location [394, 309] and I recommend using the long jump towards it, thus reducing chances of attack by brawlers. If you'll be attacked and will drop the barrel, you have to pick it up as fast as possible. Aim at the incinerator (left trigger) and throw the barrel at it (B button). It is worth noting that this action can be performed also from the distance, so you do not have to stand next to the incinerator.
New objective: Pick up a Whitelight barrel
New objective: Go to the incinerator to dispose of the Whitelight barrel
![Repeat all the above steps with the second barrel, still watching out for brawlers running around the area - [Main mission 24] Burned from Memory - Main missions - Prototype 2 - Game Guide and Walkthrough](https://game.lhg100.com/Article/UploadFiles/201512/2015121619045569.jpg)
Repeat all the above steps with the second barrel, still watching out for brawlers running around the area. Moving in disguise is not required of course, but if you reveal yourself, you'll have to face Blackwatch soldiers.
New objective: Kill the remaining infected so the Whitelight transport can safely enter
![Since you do not have to deal with barrels temporarily, I recommend getting back to Hellers shape and using his powers - [Main mission 24] Burned from Memory - Main missions - Prototype 2 - Game Guide and Walkthrough](https://game.lhg100.com/Article/UploadFiles/201512/2015121619045678.jpg)
Since you do not have to deal with barrels temporarily, I recommend getting back to Heller's shape and using his powers. You'll need them, because besides brawlers, you'll have to defeat two juggernauts.
![If possible, use mainly the area attacks, as Devastator or charged air attack with hammerfists - [Main mission 24] Burned from Memory - Main missions - Prototype 2 - Game Guide and Walkthrough](https://game.lhg100.com/Article/UploadFiles/201512/2015121619045670.jpg)
If possible, use mainly the area attacks, as Devastator or charged air attack with hammerfists. Do not forget about possibility of grabbing soldiers and infected running around the area, which can be used to regenerate energy, charge bio-mass bar or create bio-bombs. I also suggest consuming each defeated mutant.
New objective: Pick up a Whitelight barrel
![There are three new barrels in locations [474, 355], [485, 372] and [519, 346] - [Main mission 24] Burned from Memory - Main missions - Prototype 2 - Game Guide and Walkthrough](https://game.lhg100.com/Article/UploadFiles/201512/2015121619045676.jpg)
There are three new barrels in locations [474, 355], [485, 372] and [519, 346]. Head to one of these barrels. It is best to use sprint option, but you can also perform long jumps and glide to avoid stronger monsters. After reaching the barrel, pick it up quickly.
New objective: Go to the incinerator to dispose of the Whitelight barrel
![You can now return to the incinerator, to location [394, 309] - [Main mission 24] Burned from Memory - Main missions - Prototype 2 - Game Guide and Walkthrough](https://game.lhg100.com/Article/UploadFiles/201512/2015121619045663.jpg)
You can now return to the incinerator, to location [394, 309]. Remember to jump often, because besides brawlers you have to watch out for the evolved soldier. I suggest not wasting your time for the fight with him. If you want some more space, consider performing the special attack, Pack leader (X + A), but this is not required to succeed. After approaching the incinerator, throw the barrel inside.
New objective: Pick up a Whitelight barrel
New objective: Go to the incinerator to dispose of the Whitelight barrel
New objective: Pick up a Whitelight barrel
New objective: Go to the incinerator to dispose of the Whitelight barrel
![Do the same with other barrels - pick up each of them and deliver to the incinerator - [Main mission 24] Burned from Memory - Main missions - Prototype 2 - Game Guide and Walkthrough](https://game.lhg100.com/Article/UploadFiles/201512/2015121619045664.jpg)
Do the same with other barrels - pick up each of them and deliver to the incinerator. I do not advise any longer breaks and you should regenerate only in exceptional circumstances by consuming infected running around. Eventually you have to burn all three barrels.
New objective: Leave the base area
New objective: Exit the alert
![Killing brawlers and the evolved one is not required, although you can of course do it, gaining additional experience points - [Main mission 24] Burned from Memory - Main missions - Prototype 2 - Game Guide and Walkthrough](https://game.lhg100.com/Article/UploadFiles/201512/2015121619045703.jpg)
Killing brawlers and the evolved one is not required, although you can of course do it, gaining additional experience points. Regardless of your behavior, your last task is to lose the chase. After completing the mission, the game will unlock the next one - Last Resort.
![In order to start this mission, you have to get to location [630, 451], specifically to the shiny circle on the ground near the building's entrance - [Main mission 25] Last Resort - Main missions - Prototype 2 - Game Guide and Walkthrough](https://game.lhg100.com/Article/UploadFiles/201512/2015121619045754.jpg)
In order to start this mission, you have to get to location [630, 451], specifically to the shiny circle on the ground near the building's entrance.
New objective: Go to Cantrell's base to learn more about project Firehawk
![Your new target is location [729, 567] - [Main mission 25] Last Resort - Main missions - Prototype 2 - Game Guide and Walkthrough](https://game.lhg100.com/Article/UploadFiles/201512/2015121619045784.jpg)
Your new target is location [729, 567]. You have to get to the next shiny circle on the rooftop of one of the buildings.
New objective: Destroy the fuel storage tanks to force Cantrell out of the base
![Tanks can be found in locations [750, 595] and [730, 610] - [Main mission 25] Last Resort - Main missions - Prototype 2 - Game Guide and Walkthrough](https://game.lhg100.com/Article/UploadFiles/201512/2015121619045702.jpg)
Tanks can be found in locations [750, 595] and [730, 610]. Notice, that in order to complete the newly unlocked bonus objective, you have to destroy them with explosive weapons. So stay in disguise and get to the base. Locate a main building and look on its rooftop for sheds with rocket launchers (screen above) or grenade launchers.
![Start using grenade or rocket launcher to destroy indicated tanks - [Main mission 25] Last Resort - Main missions - Prototype 2 - Game Guide and Walkthrough](https://game.lhg100.com/Article/UploadFiles/201512/2015121619045886.jpg)
Start using grenade or rocket launcher to destroy indicated tanks. I suggest hurrying with this task, because your first attack will trigger an alarm and among enemies you'll find two super soldiers. Keep shooting until all tanks are destroyed.
New objective: Kill all the Blackwatch forces to give Cantrell no option except escaping
![The extermination of opponents should start with two super soldiers - [Main mission 25] Last Resort - Main missions - Prototype 2 - Game Guide and Walkthrough](https://game.lhg100.com/Article/UploadFiles/201512/2015121619045884.jpg)
The extermination of opponents should start with two super soldiers. I recommend the tactics best against such enemies, so block their attacks with a shield (RB button) and then counterattacks (B button). You should also fight with these enemies on rooftops, so other soldiers won't bother you.
![At the end take care of standard Blackwatch soldiers, but if you want to fight them on the main base square, first destroy local gun towers using rocket or grenade launchers or large objects which can be thrown - [Main mission 25] Last Resort - Main missions - Prototype 2 - Game Guide and Walkthrough](https://game.lhg100.com/Article/UploadFiles/201512/2015121619045807.jpg)
At the end take care of standard Blackwatch soldiers, but if you want to fight them on the main base square, first destroy local gun towers using rocket or grenade launchers or large objects which can be thrown. As a reward for winning the fight you'll watch an interesting cut-scene with fleeing Cantrell.
New objective: Go to the crash site to find Cantrell
![Head to the crash site which is in location [627, 584] - [Main mission 25] Last Resort - Main missions - Prototype 2 - Game Guide and Walkthrough](https://game.lhg100.com/Article/UploadFiles/201512/2015121619045834.jpg)
Head to the crash site which is in location [627, 584]. Since the accident took place in the middle of large square, you should sprint better than glide there. Once you approach the helicopter, you'll receive the new mission objective.
New objective: Defend Cantrell's helicopter or you'll never learn about project Firehawk
![Start attacking brawlers in the near area as fast as possible - [Main mission 25] Last Resort - Main missions - Prototype 2 - Game Guide and Walkthrough](https://game.lhg100.com/Article/UploadFiles/201512/2015121619045884.jpg)
Start attacking brawlers in the near area as fast as possible. During the entire battle, you have not only distracted monsters, so they do not attack the helicopter, but also eliminate them. Do not count on this that fight will end after the time limit, because the only way to win is to eliminate all mutants.
![Later on the fight will be joined by at least one juggernaut and then you should focus on that beast every time it tries to damage the helicopter - [Main mission 25] Last Resort - Main missions - Prototype 2 - Game Guide and Walkthrough](https://game.lhg100.com/Article/UploadFiles/201512/2015121619045889.jpg)
Later on the fight will be joined by at least one juggernaut and then you should focus on that beast every time it tries to damage the helicopter. As a reminder, the effective tactics against juggernauts is to jump over them and wait for an opportunity to perform powerful counterattacks (X, Y or B buttons).
![You can of course increase your winning chances by performing special attacks - [Main mission 25] Last Resort - Main missions - Prototype 2 - Game Guide and Walkthrough](https://game.lhg100.com/Article/UploadFiles/201512/2015121619045938.jpg)
You can of course increase your winning chances by performing special attacks. The Devastator is perfect option when you find yourself near group of mutants, but you have to watch out and not use it next to the helicopter, because you could damage it. Safer solution is Leader pack attack, especially if you can summon more than two brawlers.
![Do not forget about consuming all defeated mutants, especially that you can barely charge your bio-mass bar in another way - [Main mission 25] Last Resort - Main missions - Prototype 2 - Game Guide and Walkthrough](https://game.lhg100.com/Article/UploadFiles/201512/2015121619045934.jpg)
Do not forget about consuming all defeated mutants, especially that you can barely charge your bio-mass bar in another way. Fight until all mutants indicated by the game are dead. After that you'll watch yet another cut-scene.
New objective: Defend the evolved before she kidnaps Cantrell for Mercer
![The main difficulty in a new fight is a fact, that your opponent has whip - [Main mission 25] Last Resort - Main missions - Prototype 2 - Game Guide and Walkthrough](https://game.lhg100.com/Article/UploadFiles/201512/2015121619045985.jpg)
The main difficulty in a new fight is a fact, that your opponent has whip. So you have to be very careful because she can easily deal you damage in a long and average distance as well, and you won't be able to dodge these attacks every time. So you should try to hurt her in a melee fight.
![I do not recommend using the Devastator attack during this duel, because your opponent is very fast and she can move away from dangerous zone with no problems - [Main mission 25] Last Resort - Main missions - Prototype 2 - Game Guide and Walkthrough](https://game.lhg100.com/Article/UploadFiles/201512/2015121619045945.jpg)
I do not recommend using the Devastator attack during this duel, because your opponent is very fast and she can move away from dangerous zone with no problems. Far better solution is the Leader pack attack, because summoned brawlers can distract your opponent and stop her from using the whip regularly.
![Consider also the fact that you have to watch for hostile brawlers too, but you do not have to many problems with them - [Main mission 25] Last Resort - Main missions - Prototype 2 - Game Guide and Walkthrough](https://game.lhg100.com/Article/UploadFiles/201512/2015121619050003.jpg)
Consider also the fact that you have to watch for hostile brawlers too, but you do not have to many problems with them. You should consume those monsters, as well as other infected, because you do not have to stick to the central part of the square - the helicopter's energy bar is gone.
New objective: Consume the evolved to get her whipfist
![Keep fighting until your opponent's energy bar is completely empty - [Main mission 25] Last Resort - Main missions - Prototype 2 - Game Guide and Walkthrough](https://game.lhg100.com/Article/UploadFiles/201512/2015121619050027.jpg)
Keep fighting until your opponent's energy bar is completely empty. Run towards her and consume her. As a reward for that action you'll unlock the ability of using Whipfist - the last main power, which can be learned by Heller.
New objective: Target the helicopter
New objective: Destroy the helicopter
![The game will of course allow you to test newly unlocked Power - [Main mission 25] Last Resort - Main missions - Prototype 2 - Game Guide and Walkthrough](https://game.lhg100.com/Article/UploadFiles/201512/2015121619050058.jpg)
The game will of course allow you to test newly unlocked Power. At first you'll use the whip ranged attack. So target the enemy helicopter (hold left trigger) and then use the whip (hold X button). The machine will be destroyed right away, but in the future you'll need 2-3 whip attacks to achieve a similar result.
New objective: Destroy the rescue helicopters
![Before you deal with helicopters, take a closer look at newly unlocked bonus objective - you have to kill 20 standard infected using the whip - [Main mission 25] Last Resort - Main missions - Prototype 2 - Game Guide and Walkthrough](https://game.lhg100.com/Article/UploadFiles/201512/2015121619050058.jpg)
Before you deal with helicopters, take a closer look at newly unlocked bonus objective - you have to kill 20 standard infected using the whip. So run among mutants and start pressing (not holding) X button - you'll see how powerful the whip is! Completing this objective should take just a few seconds.
![Now you can take care of two new helicopters - [Main mission 25] Last Resort - Main missions - Prototype 2 - Game Guide and Walkthrough](https://game.lhg100.com/Article/UploadFiles/201512/2015121619050086.jpg)
Now you can take care of two new helicopters. I recommend using the whip to destroy them, although it is not required and you can sabotage them as well, deflecting rockets with the shield or use rocket launcher. If you plan to keep testing the whip, always start with targeting the particular machine (left trigger) and then perform the strong attack hold X button). As previously mentioned, each helicopter will lose its energy bar after two or three attacks.
New objective: Target commander Cantrell
New objective: Grab commander Cantrell
![You'll receive new objective after destroying both helicopters and it is not only about grabbing Cantrell but also about testing the last whip feature - pulling people to you - [Main mission 25] Last Resort - Main missions - Prototype 2 - Game Guide and Walkthrough](https://game.lhg100.com/Article/UploadFiles/201512/2015121619050159.jpg)
You'll receive new objective after destroying both helicopters and it is not only about grabbing Cantrell but also about testing the last whip feature - pulling people to you. So target Cantrell (hold left trigger) and "shoot" the whip at him (press B button).
New objective: Consume commander Cantrell to learn more about project Firehawk
![After you pull commander to you, make sure to consume him (Y button) - [Main mission 25] Last Resort - Main missions - Prototype 2 - Game Guide and Walkthrough](https://game.lhg100.com/Article/UploadFiles/201512/2015121619050100.jpg)
After you pull commander to you, make sure to consume him (Y button). This mission will end soon (unless you have to lose the chase first), and the game will unlock two new main missions - Fly in the Ointment and Divine Intervention.
![In order to start this mission, you have to get to location [745, 353], specifically to the shiny circle on the ground near the parking lot - [Main mission 26] Fly in the Ointment - Main missions - Prototype 2 - Game Guide and Walkthrough](https://game.lhg100.com/Article/UploadFiles/201512/2015121619050114.jpg)
In order to start this mission, you have to get to location [745, 353], specifically to the shiny circle on the ground near the parking lot.
New objective: Hunt and consume Lincoln to hijack his gunship and escort Ellis
![As you probably remember, it is best to start the hunt with getting to the rooftop of one of the highest buildings in the area - [Main mission 26] Fly in the Ointment - Main missions - Prototype 2 - Game Guide and Walkthrough](https://game.lhg100.com/Article/UploadFiles/201512/2015121619050113.jpg)
As you probably remember, it is best to start the hunt with getting to the rooftop of one of the highest buildings in the area. After that send an impulse (press left analog), thus easily locating the person you're looking for (screen above).
![1 - [Main mission 26] Fly in the Ointment - Main missions - Prototype 2 - Game Guide and Walkthrough](https://game.lhg100.com/Article/UploadFiles/201512/2015121619050162.jpg)
![Lincoln can be found in the military base in the eastern part of the red zone and his approximate location is [750, 215] - [Main mission 26] Fly in the Ointment - Main missions - Prototype 2 - Game Guide and Walkthrough](https://game.lhg100.com/Article/UploadFiles/201512/2015121619050122.jpg)
Lincoln can be found in the military base in the eastern part of the red zone and his approximate location is [750, 215]. It would be good of course to get into the base disguised as a scientist or a soldier. It is also very important to watch out for many viral detectors.
![Depending on your preferences, you can attack Lincoln or stay hidden and wait until he can't be seen by other people - [Main mission 26] Fly in the Ointment - Main missions - Prototype 2 - Game Guide and Walkthrough](https://game.lhg100.com/Article/UploadFiles/201512/2015121619050133.jpg)
Depending on your preferences, you can attack Lincoln or stay hidden and wait until he can't be seen by other people. In the second case you should use the sonar. Remember also that you can also consumer other soldiers stationing in the base. Regardless of your choice, you have to grab and consume Lincoln.
New objective: Enter the gunship to escort commander Ellis
![Head now to location [752, 189] - [Main mission 26] Fly in the Ointment - Main missions - Prototype 2 - Game Guide and Walkthrough](https://game.lhg100.com/Article/UploadFiles/201512/2015121619050110.jpg)
Head now to location [752, 189]. Your target is a landing pad on one of the rooftops of the military base. Go to the helicopter indicated by the game and press B button to get inside.
New objective: Escort commander Ellis to the Project Firehawk meeting location
![Ascend to the altitude similar to commander Ellis's helicopter (right trigger) and follow him - [Main mission 26] Fly in the Ointment - Main missions - Prototype 2 - Game Guide and Walkthrough](https://game.lhg100.com/Article/UploadFiles/201512/2015121619050235.jpg)
Ascend to the altitude similar to commander Ellis's helicopter (right trigger) and follow him. In further part of the mission you have to monitor two energy bars - your helicopter's bar and commander Ellis's helicopter's one. Do not let them get empty, because then you'll fail the mission.
![Notice, that you have now opportunity to complete the bonus objective and it is very easy - [Main mission 26] Fly in the Ointment - Main missions - Prototype 2 - Game Guide and Walkthrough](https://game.lhg100.com/Article/UploadFiles/201512/2015121619050201.jpg)
Notice, that you have now opportunity to complete the bonus objective and it is very easy. When you see mutated birds in the distance, start attacking them. You can't let them approach your helicopter or commander Ellis's machine. As for the bonus mission objective, you have to kill at least two birds with the gun (LB button) and at least two birds with rockets (RB button).
![Do not worry if you can't complete the bonus objective during the first encounter with birds, because you will meet them again later on - [Main mission 26] Fly in the Ointment - Main missions - Prototype 2 - Game Guide and Walkthrough](https://game.lhg100.com/Article/UploadFiles/201512/2015121619050264.jpg)
Do not worry if you can't complete the bonus objective during the first encounter with birds, because you will meet them again later on. Each time perform same actions, thus trying to attacks birds from as far as possible.
New objective: Go to the base and help defend it from the infected
![After receiving this mission objective, ignore Ellis's helicopter and fly to the military base in location [513, 435] - [Main mission 26] Fly in the Ointment - Main missions - Prototype 2 - Game Guide and Walkthrough](https://game.lhg100.com/Article/UploadFiles/201512/2015121619050283.jpg)
After receiving this mission objective, ignore Ellis's helicopter and fly to the military base in location [513, 435]
New objective: Kill the infected to protect the base
![You have to eliminate four hydras stationing around the base - [Main mission 26] Fly in the Ointment - Main missions - Prototype 2 - Game Guide and Walkthrough](https://game.lhg100.com/Article/UploadFiles/201512/2015121619050264.jpg)
You have to eliminate four hydras stationing around the base. I suggest stopping the helicopter in such places, that you can fight maximum two hydras at the same time (I t would be best to fight only one). It is very important to destroy the objects thrown by hydras and as you probably remember, you do it by pressing Y button in certain moments. Attack hydras until they are dead.
New objective: Go to Ellis's downed helicopter to defend it until the APC arrives
![Now head to location [547, 503] - [Main mission 26] Fly in the Ointment - Main missions - Prototype 2 - Game Guide and Walkthrough](https://game.lhg100.com/Article/UploadFiles/201512/2015121619050297.jpg)
Now head to location [547, 503]. You have to approach the downed helicopter, which will result in displaying a new cut-scene, informing about appearance of new mutated creatures.
New objective: Kill the infected to protect Ellis's downed helicopter
![Start with descending your altitude (left trigger) - [Main mission 26] Fly in the Ointment - Main missions - Prototype 2 - Game Guide and Walkthrough](https://game.lhg100.com/Article/UploadFiles/201512/2015121619050314.jpg)
Start with descending your altitude (left trigger). First clear the area around the downed helicopter and then attack a new group of hydras. Same as previously, do not forget about destroying objects thrown by hydras (Y button) and do not worry too much about Ellis's helicopter's energy bar, because it will be regenerated once the commander gets into the APC (new cut-scene).
New objective: Escort commander Ellis to the Project Firehawk meeting location
![As in the rest of this mission you have to protect the APC, you should lower your altitude, unless you have problems with maneuvering between buildings - [Main mission 26] Fly in the Ointment - Main missions - Prototype 2 - Game Guide and Walkthrough](https://game.lhg100.com/Article/UploadFiles/201512/2015121619050310.jpg)
As in the rest of this mission you have to protect the APC, you should lower your altitude, unless you have problems with maneuvering between buildings. Do not pay an interest in standard infected running over streets, because the real danger is bigger mutants. When you see the first group of monsters, try as fast as possible to eliminate hydra and then take care of other mutants.
![Along your way to the base you'll have to fight few more battles, mainly with hydras - [Main mission 26] Fly in the Ointment - Main missions - Prototype 2 - Game Guide and Walkthrough](https://game.lhg100.com/Article/UploadFiles/201512/2015121619050331.jpg)
Along your way to the base you'll have to fight few more battles, mainly with hydras. Plan your stops very carefully, so you won't have to fight all monsters at the same time. And do not forget about Y button which is used to destroy objects thrown at your machine.
![The main battle will take place near the road heading to the military base (screen above) - [Main mission 26] Fly in the Ointment - Main missions - Prototype 2 - Game Guide and Walkthrough](https://game.lhg100.com/Article/UploadFiles/201512/2015121619050325.jpg)
The main battle will take place near the road heading to the military base (screen above). I definitely suggest lowering your altitude and first taking care of more mobile mutants attacking the APC. Only after eliminating them, take down hydras.
![After the fight wait until the Ellis's APC enters the military base - [Main mission 26] Fly in the Ointment - Main missions - Prototype 2 - Game Guide and Walkthrough](https://game.lhg100.com/Article/UploadFiles/201512/2015121619050378.jpg)
After the fight wait until the Ellis's APC enters the military base. It will result in displaying new cut-scene.
New objective: Land at the base to consume the Firehawk commanders
New objective: Exit the gunship
![The landing pad is located in location [480, 887] and you have to lower your altitude to approach the shiny circle - [Main mission 26] Fly in the Ointment - Main missions - Prototype 2 - Game Guide and Walkthrough](https://game.lhg100.com/Article/UploadFiles/201512/2015121619050393.jpg)
The landing pad is located in location [480, 887] and you have to lower your altitude to approach the shiny circle. After landing hold B button.
New objective: Consume the commanders to postpone Project Firehawk
![An approximate location of commanders is in [490, 871] - [Main mission 26] Fly in the Ointment - Main missions - Prototype 2 - Game Guide and Walkthrough](https://game.lhg100.com/Article/UploadFiles/201512/2015121619050478.jpg)
An approximate location of commanders is in [490, 871]. Ignore fights in the base and approach them at once. As they are observing each other, and there are many enemies running around in the area, I would suggest to shapeshift into Heller and consume them instantly. You should also know that if you do not hurry with consuming commanders, one of them can die because of mutants attack and the mission will fail.
![It is also worth noting, that if any of commanders will try to flee, you do not have to run after him, because as you probably remember, Heller's whip can pull opponents to you (press B button after targeting the opponent) - [Main mission 26] Fly in the Ointment - Main missions - Prototype 2 - Game Guide and Walkthrough](https://game.lhg100.com/Article/UploadFiles/201512/2015121619050493.jpg)
It is also worth noting, that if any of commanders will try to flee, you do not have to run after him, because as you probably remember, Heller's whip can pull opponents to you (press B button after targeting the opponent).
New objective: Exit the alert
![Right after consuming all commanders, leave the base (it is best to jump over the water pool and not heading directly to the main exit) - [Main mission 26] Fly in the Ointment - Main missions - Prototype 2 - Game Guide and Walkthrough](https://game.lhg100.com/Article/UploadFiles/201512/2015121619050499.jpg)
Right after consuming all commanders, leave the base (it is best to jump over the water pool and not heading directly to the main exit). The mission will end soon and you'll unlock the next main mission titled Operation Firehawk.
![In order to start this mission, you have to get to location [565, 377], specifically to the shiny circle on the ground near the building's entrance - [Main mission 27] Divine Intevention - Main missions - Prototype 2 - Game Guide and Walkthrough](https://game.lhg100.com/Article/UploadFiles/201512/2015121619050485.jpg)
In order to start this mission, you have to get to location [565, 377], specifically to the shiny circle on the ground near the building's entrance.
New objective: Hunt and consume agent Griffin to discover Maya's location
![1 - [Main mission 27] Divine Intevention - Main missions - Prototype 2 - Game Guide and Walkthrough](https://game.lhg100.com/Article/UploadFiles/201512/2015121619050443.jpg)
![As you probably remember, it is best to start the hunt with getting to the rooftop of one of the highest buildings in the area - [Main mission 27] Divine Intevention - Main missions - Prototype 2 - Game Guide and Walkthrough](https://game.lhg100.com/Article/UploadFiles/201512/2015121619050425.jpg)
As you probably remember, it is best to start the hunt with getting to the rooftop of one of the highest buildings in the area. After that send an impulse (press left analog), thus easily locating the agent you're looking for (screen above). It turns out that Griffin is on the helicopter flying over a small park in location [680, 295]. Approach the helicopter to display a short cut-scene.
New objective: Follow the helicopter and grab agent Griffin when he disembarks
![Right after you receive this objective and the chase starts, perform several jumps to get onto rooftops of local buildings, because it is easier to follow the helicopter jumping from one rooftop to another - [Main mission 27] Divine Intevention - Main missions - Prototype 2 - Game Guide and Walkthrough](https://game.lhg100.com/Article/UploadFiles/201512/2015121619050524.jpg)
Right after you receive this objective and the chase starts, perform several jumps to get onto rooftops of local buildings, because it is easier to follow the helicopter jumping from one rooftop to another. Monitor the bar visible in the right upper screen corner. It can't get empty, because then the mission will fail.
![During following the helicopter rely on long jumps and glide option, trying to keep an eye on the machine, because tracking it based only on the green icon visible on the screen is much more difficult - [Main mission 27] Divine Intevention - Main missions - Prototype 2 - Game Guide and Walkthrough](https://game.lhg100.com/Article/UploadFiles/201512/2015121619050542.jpg)
During following the helicopter rely on long jumps and glide option, trying to keep an eye on the machine, because tracking it based only on the green icon visible on the screen is much more difficult. The chase will end after reaching the military base in location [728, 602].
New objective: Chase the evolved to retrieve agent Griffin
![When you regain control over Heller, IGNORE all other evolved opponents and follow the one, who has kidnapped agent Griffin - [Main mission 27] Divine Intevention - Main missions - Prototype 2 - Game Guide and Walkthrough](https://game.lhg100.com/Article/UploadFiles/201512/2015121619050589.jpg)
When you regain control over Heller, IGNORE all other evolved opponents and follow the one, who has kidnapped agent Griffin. Also during this chase you should rely on long jumps and glide option.
![During the chase, ignore hydras appearing in the area, because you do not have to fight them - [Main mission 27] Divine Intevention - Main missions - Prototype 2 - Game Guide and Walkthrough](https://game.lhg100.com/Article/UploadFiles/201512/2015121619050566.jpg)
During the chase, ignore hydras appearing in the area, because you do not have to fight them. Watch also out for attempts to slow down Heller by other evolved. The easiest way to avoid them is to jump frequently, but at least once you'll have to dodge the vehicle thrown at you. The chase will over after you reach the oval building in location [490, 280].
New objective: Kill the evolved to get to agent Griffin
![With this task is connected quite complex bonus objective, since you will have to kill evolved enemies in at least 6 different ways - [Main mission 27] Divine Intevention - Main missions - Prototype 2 - Game Guide and Walkthrough](https://game.lhg100.com/Article/UploadFiles/201512/2015121619050677.jpg)
With this task is connected quite complex bonus objective, since you will have to kill evolved enemies in at least 6 different ways. So I suggest starting with this objective, because later on you could have no time to complete it. First of all, you can use different types of Heller's abilities (claws, blades, tendrils, etc.).
Other interesting ways to fulfill objective requirements are special attacks, successful counterattacks (X, Y or B buttons) or using the helicopter flying over the battlefield (you can "steal" the helicopter's weapon or the machine itself).
![You can start using your favorite attacks only after completing the bonus objective - [Main mission 27] Divine Intevention - Main missions - Prototype 2 - Game Guide and Walkthrough](https://game.lhg100.com/Article/UploadFiles/201512/2015121619050651.jpg)
You can start using your favorite attacks only after completing the bonus objective. Do not let your opponents surround you and try to attack them one after another. Avoid also brawlers, which can be summoned by enemies. It is best to ignore them, because they will die, once their "master" is dead.
New objective: Consume agent Griffin to discover Maya's location
![The only thing left is to approach Griffin to grab him and consume him - [Main mission 27] Divine Intevention - Main missions - Prototype 2 - Game Guide and Walkthrough](https://game.lhg100.com/Article/UploadFiles/201512/2015121619050693.jpg)
The only thing left is to approach Griffin to grab him and consume him. After completing this mission, the game will unlock the next one - Lost in the System.
![In order to start this mission, you have to get to location [561, 751], specifically to the shiny circle on the ground - [Main mission 28] Operation Firehawk - Main missions - Prototype 2 - Game Guide and Walkthrough](https://game.lhg100.com/Article/UploadFiles/201512/2015121619050688.jpg)
In order to start this mission, you have to get to location [561, 751], specifically to the shiny circle on the ground.
New objective: Go to the staging area to destroy the Firehawk helicopters
![Your new target is location [523, 880] - [Main mission 28] Operation Firehawk - Main missions - Prototype 2 - Game Guide and Walkthrough](https://game.lhg100.com/Article/UploadFiles/201512/2015121619050711.jpg)
Your new target is location [523, 880]. You have to approach the shiny circle located on the rooftop of one of the buildings.
New objective: Destroy Blackwatch's thermobaric weapons to put an end to Project Firehawk
![This mission is divided in few parts, and the first task is to destroy four helicopters on the nearby landing pad - [Main mission 28] Operation Firehawk - Main missions - Prototype 2 - Game Guide and Walkthrough](https://game.lhg100.com/Article/UploadFiles/201512/2015121619050717.jpg)
This mission is divided in few parts, and the first task is to destroy four helicopters on the nearby landing pad. Its approximate location is [490, 890]. Start with getting to know about the bonus objective. In order to complete it, you have to get near the landing pad (it would be best to do it in a disguise) and steal one of the helicopters (B button).
![After stealing the helicopter, increase your altitude and use guns to shoot other machines - [Main mission 28] Operation Firehawk - Main missions - Prototype 2 - Game Guide and Walkthrough](https://game.lhg100.com/Article/UploadFiles/201512/2015121619050728.jpg)
After stealing the helicopter, increase your altitude and use guns to shoot other machines. After few moments the game should display a short cut-scene informing you about other helicopters over the red zone, which also should be destroyed.
![Each of indicated helicopters can be destroyed in many different ways - [Main mission 28] Operation Firehawk - Main missions - Prototype 2 - Game Guide and Walkthrough](https://game.lhg100.com/Article/UploadFiles/201512/2015121619050743.jpg)
Each of indicated helicopters can be destroyed in many different ways. The most obvious solution is to use the helicopter you've stolen from the landing pad and when it gets destroyed, you can steal another machine (also those connected with current objective).
![Another options are to deflect their rockets with a shield, to throw cars at them, shoot them with rocket launchers, attack them with the whip (screen above) or sabotage them (press Y button after landing on the helicopter - you have to but a proper finisher first) - [Main mission 28] Operation Firehawk - Main missions - Prototype 2 - Game Guide and Walkthrough](https://game.lhg100.com/Article/UploadFiles/201512/2015121619050735.jpg)
Another options are to deflect their rockets with a shield, to throw cars at them, shoot them with rocket launchers, attack them with the whip (screen above) or sabotage them (press Y button after landing on the helicopter - you have to but a proper finisher first).
![1 - [Main mission 28] Operation Firehawk - Main missions - Prototype 2 - Game Guide and Walkthrough](https://game.lhg100.com/Article/UploadFiles/201512/2015121619050713.jpg)
![The game should keep informing you about current location of helicopters and you can find their positions on your map - [Main mission 28] Operation Firehawk - Main missions - Prototype 2 - Game Guide and Walkthrough](https://game.lhg100.com/Article/UploadFiles/201512/2015121619050869.jpg)
The game should keep informing you about current location of helicopters and you can find their positions on your map. The only exception on your target list is a bunker in location [481, 609]. It is best to use the flying machine to destroy it. And I do not recommend to destroy it with Heller's abilities because once it is destroyed, it explodes and as a result you can get hurt.
New objective: Exit the alert
New objective: Meet with Galloway
![After destroying all indicated targets, lose the chase and then head to location [584, 486] - [Main mission 28] Operation Firehawk - Main missions - Prototype 2 - Game Guide and Walkthrough](https://game.lhg100.com/Article/UploadFiles/201512/2015121619050871.jpg)
After destroying all indicated targets, lose the chase and then head to location [584, 486]. You have to find the shiny circle on the ground. The last task within this mission is to talk to Sabrina Galloway.
![In order to start this mission, you have to get to location [584, 108], specifically to the shiny circle on the ground - [Main mission 29] Lost in the System - Main missions - Prototype 2 - Game Guide and Walkthrough](https://game.lhg100.com/Article/UploadFiles/201512/2015121619050874.jpg)
In order to start this mission, you have to get to location [584, 108], specifically to the shiny circle on the ground.
New objective: Go to Blackwatch command post to consume colonel Rooks
![The command post is located in location [515, 436] and since it is the military base, I suggest to shapeshift as a scientist or a soldier - [Main mission 29] Lost in the System - Main missions - Prototype 2 - Game Guide and Walkthrough](https://game.lhg100.com/Article/UploadFiles/201512/2015121619050873.jpg)
The command post is located in location [515, 436] and since it is the military base, I suggest to shapeshift as a scientist or a soldier. After approaching to your destination (the shiny circle near the landing pad), the game will display cut-scene showing meeting Rooks.
New objective: Go to base India Niner Six to get Dr. Carson to tell you Maya's location
New objective: Use the hand scanner to enter the base and look for Carson
![Head to location [414, 279] and same as with previous objective, do not forget to mask yourself as a scientist or a soldier before approaching the military base - [Main mission 29] Lost in the System - Main missions - Prototype 2 - Game Guide and Walkthrough](https://game.lhg100.com/Article/UploadFiles/201512/2015121619050810.jpg)
Head to location [414, 279] and same as with previous objective, do not forget to mask yourself as a scientist or a soldier before approaching the military base. Once you get to the destination, look for a scanner in location [444, 259]. Use it before you'll get recognized by nearby viral detector.
New objective: Consume the scientist to access Dr. Carson's lab
![The original location of the scientist indicated by the game is [434, 249], but you have to reckon that after approaching him with hostile intentions, he will flee somewhere else - [Main mission 29] Lost in the System - Main missions - Prototype 2 - Game Guide and Walkthrough](https://game.lhg100.com/Article/UploadFiles/201512/2015121619050998.jpg)
The original location of the scientist indicated by the game is [434, 249], but you have to reckon that after approaching him with hostile intentions, he will flee somewhere else. Remember also about current bonus objective, in which you can't get Heller exposed.
![Wait until the scientist stops in the new place - [Main mission 29] Lost in the System - Main missions - Prototype 2 - Game Guide and Walkthrough](https://game.lhg100.com/Article/UploadFiles/201512/2015121619050913.jpg)
Wait until the scientist stops in the new place. If he is observed by anyone, wait few moments or get rid of those persons by either consuming them or making them living bio-bombs (you won't fail the objective doing this). If he is not observed by anyone, just approach him and consume him.
New objective: Consume Dr. Carson to discover Maya's location
![Go up the stairs, using the hand scanner in location [435, 262] - [Main mission 29] Lost in the System - Main missions - Prototype 2 - Game Guide and Walkthrough](https://game.lhg100.com/Article/UploadFiles/201512/2015121619050936.jpg)
Go up the stairs, using the hand scanner in location [435, 262]. Once you get an access to the lab, approach Carson lying among the rubble (location [443, 266]) to consume him.
New objective: Exit base India Niner Six to board Carson's helicopter en route to Maya
![The exit from the base can be found in location [484, 247] and you should stay in shape of Dr - [Main mission 29] Lost in the System - Main missions - Prototype 2 - Game Guide and Walkthrough](https://game.lhg100.com/Article/UploadFiles/201512/2015121619050986.jpg)
The exit from the base can be found in location [484, 247] and you should stay in shape of Dr. Carson. Use the hand scanner to exit the building.
New objective: Kill the goliath so the helicopter can land
![With this task is associated quite difficult bonus objective, while you can't get hurt during the fight with the goliath - [Main mission 29] Lost in the System - Main missions - Prototype 2 - Game Guide and Walkthrough](https://game.lhg100.com/Article/UploadFiles/201512/2015121619050907.jpg)
With this task is associated quite difficult bonus objective, while you can't get hurt during the fight with the goliath. So you have to be very careful and not perform any risky actions. To inflict damage to the goliath I suggest the distance whip attack (screen above). It is sufficient to expose goliath's weak spots and at the same time relatively safe.
![Keep attacking him from the distance, remembering about dodging goliath's standard attacks and his charges (run away to building's rooftops) - [Main mission 29] Lost in the System - Main missions - Prototype 2 - Game Guide and Walkthrough](https://game.lhg100.com/Article/UploadFiles/201512/2015121619050937.jpg)
Keep attacking him from the distance, remembering about dodging goliath's standard attacks and his charges (run away to building's rooftops). Follow these actions until goliath's head activates as the next target for your attacks. Now you can use other powers to inflict damage to the head, but do not stay to long in one place and be ready to rapidly jump back when you see that the goliath is preparing the attacks.
![Once the head's energy bar is empty, attack one of the lower limbs of goliath indicated by the game - [Main mission 29] Lost in the System - Main missions - Prototype 2 - Game Guide and Walkthrough](https://game.lhg100.com/Article/UploadFiles/201512/2015121619050919.jpg)
Once the head's energy bar is empty, attack one of the lower limbs of goliath indicated by the game. Once you destroy it, goliath will become less mobile, but it doesn't mean that you can stop watching out for his attacks.
![Start attacking the goliath with the whip, waiting for the opportunity to attack his other limb - [Main mission 29] Lost in the System - Main missions - Prototype 2 - Game Guide and Walkthrough](https://game.lhg100.com/Article/UploadFiles/201512/2015121619050997.jpg)
Start attacking the goliath with the whip, waiting for the opportunity to attack his other limb. As you probably remember from previous fights with the goliath, destroying the limb in one "session" could be impossible, so be patient and do not risk too much.
![The last phase of the fight with the goliath is connected with attacking his reversed head - [Main mission 29] Lost in the System - Main missions - Prototype 2 - Game Guide and Walkthrough](https://game.lhg100.com/Article/UploadFiles/201512/2015121619051082.jpg)
The last phase of the fight with the goliath is connected with attacking his reversed head. Same as with previously destroyed limb, divide your attacks into parts, jumping away each time the goliath tries to attacks you.
New objective: Consume the goliath so the helicopter can land
![Keep fighting until goliath's energy bar is almost empty - [Main mission 29] Lost in the System - Main missions - Prototype 2 - Game Guide and Walkthrough](https://game.lhg100.com/Article/UploadFiles/201512/2015121619051064.jpg)
Keep fighting until goliath's energy bar is almost empty. Now you can approach the heavily wounded beast and press B button to consume it.
New objective: Kill the remaining infected so the helicopter can land
![There are few brawlers to be eliminated and if you do not want to additionally fight Blackwatch soldiers and gun turrets, you might move away from the place you fought goliath and wait for brawlers there - [Main mission 29] Lost in the System - Main missions - Prototype 2 - Game Guide and Walkthrough](https://game.lhg100.com/Article/UploadFiles/201512/2015121619051078.jpg)
There are few brawlers to be eliminated and if you do not want to additionally fight Blackwatch soldiers and gun turrets, you might move away from the place you fought goliath and wait for brawlers there. Kill mutants in any way, remembering about attacking one target at the time and consuming defeated enemies.
New objective: Exit the alert
New objective: Go to the landing zone to wait for Carson's helicopter
![You shouldn't have problems with losing the chase - [Main mission 29] Lost in the System - Main missions - Prototype 2 - Game Guide and Walkthrough](https://game.lhg100.com/Article/UploadFiles/201512/2015121619051030.jpg)
You shouldn't have problems with losing the chase. After it is over, shapeshift into a scientist or a soldier and head to the shiny circle on the street in location [459, 232]. Prepare for some new cut-scenes.
New objective: Defeat and consume the evolved to discover Mercer's plans for Maya
![You have to eliminate three evolved opponents and the fight with them shouldn't be problematic - [Main mission 29] Lost in the System - Main missions - Prototype 2 - Game Guide and Walkthrough](https://game.lhg100.com/Article/UploadFiles/201512/2015121619051045.jpg)
You have to eliminate three evolved opponents and the fight with them shouldn't be problematic. Since the battlefield is not large, you can use the Devastator or Pack leader attacks.
![Try to dodge opponent's attacks and always focus on attacking only one enemy at the same time - [Main mission 29] Lost in the System - Main missions - Prototype 2 - Game Guide and Walkthrough](https://game.lhg100.com/Article/UploadFiles/201512/2015121619051095.jpg)
Try to dodge opponent's attacks and always focus on attacking only one enemy at the same time. Do not forget also about consuming defeated opponents. Once you win the fight, you'll watch new cut-scenes. The mission will end soon and the game will unlock new main mission - A Labor of Love.
![In order to start this mission, you have to get to location [584, 108], specifically to the shiny circle on the ground - [Main mission 30] A Labor of Love - Main missions - Prototype 2 - Game Guide and Walkthrough](https://game.lhg100.com/Article/UploadFiles/201512/2015121619051134.jpg)
In order to start this mission, you have to get to location [584, 108], specifically to the shiny circle on the ground.
New objective: Go to Gentek Headquarters to rescue Maya from Rooks
![Your new target is location [737, 213], and since it is a military base, make sure to change your shape into a scientist or a soldier - [Main mission 30] A Labor of Love - Main missions - Prototype 2 - Game Guide and Walkthrough](https://game.lhg100.com/Article/UploadFiles/201512/2015121619051134.jpg)
Your new target is location [737, 213], and since it is a military base, make sure to change your shape into a scientist or a soldier. After approaching the base, you'll receive updated guidelines.
New objective: Hammerfist the entrance barricade to enter the facility and rescue Maya
![Before you start completing the mission objective, it would be good to eliminate some part of enemy units present in the area - [Main mission 30] A Labor of Love - Main missions - Prototype 2 - Game Guide and Walkthrough](https://game.lhg100.com/Article/UploadFiles/201512/2015121619051188.jpg)
Before you start completing the mission objective, it would be good to eliminate some part of enemy units present in the area. You should focus mainly on tanks and stationary turrets. Only after initial securing the area, land in front of the gate and start attacking it with hammerfist.
![Keep attacking the gate with hammerfist until the game will display a new cut-scene, informing you that you're now in the control of two juggernauts - [Main mission 30] A Labor of Love - Main missions - Prototype 2 - Game Guide and Walkthrough](https://game.lhg100.com/Article/UploadFiles/201512/2015121619051162.jpg)
Keep attacking the gate with hammerfist until the game will display a new cut-scene, informing you that you're now in the control of two juggernauts.
New objective: Destroy the entrance barricade using the Juggernaut pack
![According to the game suggestions, start with targeting the entrance gate (hold left trigger) and then press right analog to order juggernauts attacking it - [Main mission 30] A Labor of Love - Main missions - Prototype 2 - Game Guide and Walkthrough](https://game.lhg100.com/Article/UploadFiles/201512/2015121619051148.jpg)
According to the game suggestions, start with targeting the entrance gate (hold left trigger) and then press right analog to order juggernauts attacking it.
New objective: Defend the Juggernaut pack
![1 - [Main mission 30] A Labor of Love - Main missions - Prototype 2 - Game Guide and Walkthrough](https://game.lhg100.com/Article/UploadFiles/201512/2015121619051234.jpg)
![The title of this objective is self-explanatory - you have to protect your juggernauts - [Main mission 30] A Labor of Love - Main missions - Prototype 2 - Game Guide and Walkthrough](https://game.lhg100.com/Article/UploadFiles/201512/2015121619051259.jpg)
The title of this objective is self-explanatory - you have to protect your juggernauts. Be prepared for massive attacks of Blackwatch squads. I suggest focusing on destroying hostile tanks and helicopters. If you have so-called finishers, it is enough to catch the helicopter or the tank and press Y button. Otherwise you have to be creative - the best way to destroy tanks is to attack them with hammerfist and helicopters can be destroyed with the whip ranged attack.
![In pauses between attacking hostile machines, eliminate standard Blackwatch soldiers, and especially ones with rocket launchers - [Main mission 30] A Labor of Love - Main missions - Prototype 2 - Game Guide and Walkthrough](https://game.lhg100.com/Article/UploadFiles/201512/2015121619051232.jpg)
In pauses between attacking hostile machines, eliminate standard Blackwatch soldiers, and especially ones with rocket launchers. Prepare also to deal with super soldiers (it is best to defeat them with combination of block and counterattack.
New objective: Defeat then consume an Alpha Juggernaut to gain control of another Juggernaut Pack
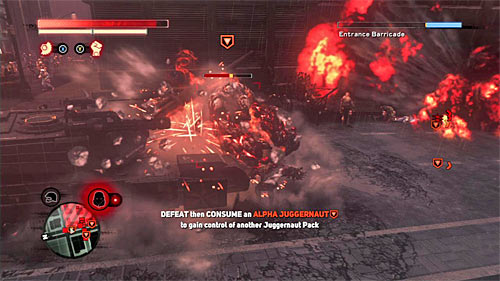
It is very likely that "your" juggernauts will die despite your efforts, before they can destroy the barricade. In this case, use the map to find the alpha juggernaut in the area and start attacking him. Act in the same way as with standard juggernauts, so use the fact that the beast is slow and wait for opportunity to perform special attacks (X, Y or B buttons).
New objective: Consume an Alpha Juggernaut to gain control of another Juggernaut Pack
![Keep fighting until alpha juggernaut's energy bar is almost empty and then press B button to consume him - [Main mission 30] A Labor of Love - Main missions - Prototype 2 - Game Guide and Walkthrough](https://game.lhg100.com/Article/UploadFiles/201512/2015121619051253.jpg)
Keep fighting until alpha juggernaut's energy bar is almost empty and then press B button to consume him.
New objective: Destroy the entrance barricade using the Juggernaut pack
New objective: Defend the Juggernaut pack
![Return to the barricade and summon new juggernauts by holding X and A buttons - [Main mission 30] A Labor of Love - Main missions - Prototype 2 - Game Guide and Walkthrough](https://game.lhg100.com/Article/UploadFiles/201512/2015121619051265.jpg)
Return to the barricade and summon new juggernauts by holding X and A buttons. Order juggernauts to attack the barricade and start protecting them. This time the barricade should be destroyed, but if the beasts die before it, repeat all previously mentioned actions.
New objective: Enter the Gentek Headquarters to rescue Maya
![You can now head to the shiny circle, which is located near the destroyed barricade in location [740, 213] - [Main mission 30] A Labor of Love - Main missions - Prototype 2 - Game Guide and Walkthrough](https://game.lhg100.com/Article/UploadFiles/201512/2015121619051374.jpg)
You can now head to the shiny circle, which is located near the destroyed barricade in location [740, 213]. Watch longer cut-scene, after which the mission is over. Now prepare for the last main game mission, titled Murder Your Maker.
Notice! Although it is the last game mission, you do not have to prepare for it in special way, because after completing it, you'll be able to continue playing in Free Roam mode!
![In order to start this mission, you have to get to location [534, 94] - [Main mission 31] Murder Your Maker - Main missions - Prototype 2 - Game Guide and Walkthrough](https://game.lhg100.com/Article/UploadFiles/201512/2015121619051310.jpg)
In order to start this mission, you have to get to location [534, 94]. Your target is the rooftop of one of the skyscrapers and after approaching your destination, the game will display a cut-scene with Mercer.
![First some important information about the final fight with Alex Mercer - [Main mission 31] Murder Your Maker - Main missions - Prototype 2 - Game Guide and Walkthrough](https://game.lhg100.com/Article/UploadFiles/201512/2015121619051311.jpg)
First some important information about the final fight with Alex Mercer:
![First, some general tips on this and next two parts of the fight with Mercer - [Main mission 31] Murder Your Maker - Main missions - Prototype 2 - Game Guide and Walkthrough](https://game.lhg100.com/Article/UploadFiles/201512/2015121619051322.jpg)
First, some general tips on this and next two parts of the fight with Mercer. First of all you should know that your opponent is very agile, so you need to master dodging. I do not recommend jumping over Mercer, but instead jumping to the sides.
![Mercer performs few regular types of attacks and the most recognizable of them is hanging in the air combined with spikes from the ground - [Main mission 31] Murder Your Maker - Main missions - Prototype 2 - Game Guide and Walkthrough](https://game.lhg100.com/Article/UploadFiles/201512/2015121619051314.jpg)
Mercer performs few regular types of attacks and the most recognizable of them is hanging in the air combined with spikes from the ground. Once you see the boss planning such type of attack, start long jumping, so you won't get hurt.
![Now it is time for details - [Main mission 31] Murder Your Maker - Main missions - Prototype 2 - Game Guide and Walkthrough](https://game.lhg100.com/Article/UploadFiles/201512/2015121619051465.jpg)
Now it is time for details. As previously mentioned, in the first part of the fight Mercer uses Blades, so you can't choose that power but rely on others. I recommend most of all hammerfist and the most effective is charged air attacks (screen above). There are three key factor for this attack: Mercer rarely blocks it, Heller automatically targets Mercer (so you do not have to hold left trigger additionally) and it deal great damage on a considerable distance (so you do not have to precisely hit Mercer).
![Of course you do not have to use hammerfist only - [Main mission 31] Murder Your Maker - Main missions - Prototype 2 - Game Guide and Walkthrough](https://game.lhg100.com/Article/UploadFiles/201512/2015121619051465.jpg)
Of course you do not have to use hammerfist only. You might as well perform attacks with claws and tendrils, as well as pick up nearby objects and throw them at Mercer. But such attacks are more risky.
![From time to time Mercer should try to perform special charges - [Main mission 31] Murder Your Maker - Main missions - Prototype 2 - Game Guide and Walkthrough](https://game.lhg100.com/Article/UploadFiles/201512/2015121619051461.jpg)
From time to time Mercer should try to perform special charges. Each time he performs such attack, dodge and then run to the boss pressing the key, which icon is visible over his head (screen above).
![Keep attacking Mercer until his energy bar is almost empty - [Main mission 31] Murder Your Maker - Main missions - Prototype 2 - Game Guide and Walkthrough](https://game.lhg100.com/Article/UploadFiles/201512/2015121619051426.jpg)
Keep attacking Mercer until his energy bar is almost empty. He should then make one more charge, described above. Dodge this attack, run to the boss and finish him. The game will display a short cut-scene, after which you'll automatically advance to the second part of the fight. Notice, that energy bars of both characters are regenerated.
![In the second part of the fight, Mercer will be using Whipfist and in my opinion this makes this encounter most difficult - [Main mission 31] Murder Your Maker - Main missions - Prototype 2 - Game Guide and Walkthrough](https://game.lhg100.com/Article/UploadFiles/201512/2015121619051411.jpg)
In the second part of the fight, Mercer will be using Whipfist and in my opinion this makes this encounter most difficult. Do not forget that you can't use the whip now and try to block his range attacks if possible, pressing RB button according to the suggestion visible on the screen (screen above).
![In order to inflict damage to Mercer, you should still use hammerfist, but as well as air charged attack, you can use standard attacks possible with this power - [Main mission 31] Murder Your Maker - Main missions - Prototype 2 - Game Guide and Walkthrough](https://game.lhg100.com/Article/UploadFiles/201512/2015121619051420.jpg)
In order to inflict damage to Mercer, you should still use hammerfist, but as well as air charged attack, you can use standard attacks possible with this power.
![In addition to hammerfist, you could use Blades, which were not available in the first part of the fight - [Main mission 31] Murder Your Maker - Main missions - Prototype 2 - Game Guide and Walkthrough](https://game.lhg100.com/Article/UploadFiles/201512/2015121619051542.jpg)
In addition to hammerfist, you could use Blades, which were not available in the first part of the fight. These are the best choice when you suddenly find yourself near Mercer and you do not need to dodge or block.
![In the second part of the fight Mercer will be using some of the previously described attack, but he will also have two new ones - [Main mission 31] Murder Your Maker - Main missions - Prototype 2 - Game Guide and Walkthrough](https://game.lhg100.com/Article/UploadFiles/201512/2015121619051542.jpg)
In the second part of the fight Mercer will be using some of the previously described attack, but he will also have two new ones. A first attack is a charge with the whip, which must be blocked with RB button. When Mercer fails to hit you with this attack for the second time, try to counterattack (press the button, which icon is visible over his head). The second Mercer's attack is an attempt to throw at Heller helicopters grabbed with the whip. Do not worry though about this attacks, because it is enough to dodge in certain moment.
![Same as with the first part of the battle keep fighting until Mercer's energy bar is almost empty - then prepare to dodge his last charge - [Main mission 31] Murder Your Maker - Main missions - Prototype 2 - Game Guide and Walkthrough](https://game.lhg100.com/Article/UploadFiles/201512/2015121619051585.jpg)
Same as with the first part of the battle keep fighting until Mercer's energy bar is almost empty - then prepare to dodge his last charge. After defeating the boss, you'll advance to the third, last phase of the duel.
![In the third part of the fight, Mercer will be using hammerfist, so the main thing is to keep him on distance, reducing melee fight to minimum - [Main mission 31] Murder Your Maker - Main missions - Prototype 2 - Game Guide and Walkthrough](https://game.lhg100.com/Article/UploadFiles/201512/2015121619051519.jpg)
In the third part of the fight, Mercer will be using hammerfist, so the main thing is to keep him on distance, reducing melee fight to minimum. Start with the Devastator attack, to get rid of birds attacking you (screen above).
![Do not worry, that you are not able to use hammerfist, because you can find replacement with no problems - [Main mission 31] Murder Your Maker - Main missions - Prototype 2 - Game Guide and Walkthrough](https://game.lhg100.com/Article/UploadFiles/201512/2015121619051513.jpg)
Do not worry, that you are not able to use hammerfist, because you can find replacement with no problems. I suggest whipfist for this part of the fight. Bounce and attack him from the distance with the whip (screen above). Mercer is almost defenseless for such types of attacks.
![Same as with previous parts of the battle, you can also use other powers - [Main mission 31] Murder Your Maker - Main missions - Prototype 2 - Game Guide and Walkthrough](https://game.lhg100.com/Article/UploadFiles/201512/2015121619051643.jpg)
Same as with previous parts of the battle, you can also use other powers. I do not recommend using neither claws nor blades, but rather attack him with tendrils. This is also the good choice if you want to keep Mercer on a safe distance.
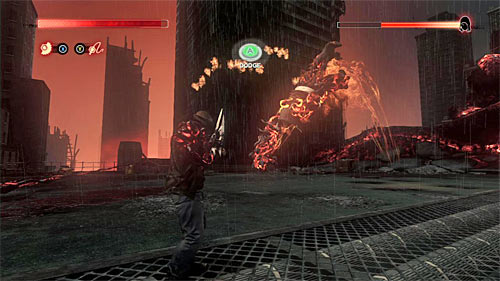
Mercer will again use the "jump" attacks and it works the same, as in the first part of the battle. So every time you see such attacks, just dodge. Do not forget about running towards him after his failed attack and pressing the proper button (its icon is visible over his head).
![Fight until his energy bar is almost empty and prepare to dodge his last charge in the fight and to press the indicated button (screen above) - [Main mission 31] Murder Your Maker - Main missions - Prototype 2 - Game Guide and Walkthrough](https://game.lhg100.com/Article/UploadFiles/201512/2015121619051670.jpg)
Fight until his energy bar is almost empty and prepare to dodge his last charge in the fight and to press the indicated button (screen above). After that you'll advance to the final - definitive defeating the boss.
![1 - [Main mission 31] Murder Your Maker - Main missions - Prototype 2 - Game Guide and Walkthrough](https://game.lhg100.com/Article/UploadFiles/201512/2015121619051637.jpg)
![Wait until Mercer performs a large jump towards you and blocks it by holding RB button (screen 1) - [Main mission 31] Murder Your Maker - Main missions - Prototype 2 - Game Guide and Walkthrough](https://game.lhg100.com/Article/UploadFiles/201512/2015121619051664.jpg)
Wait until Mercer performs a large jump towards you and blocks it by holding RB button (screen 1). After successful action start rhythmically pressing X button to pull out his first limb (screen 2).
![2 - [Main mission 31] Murder Your Maker - Main missions - Prototype 2 - Game Guide and Walkthrough](https://game.lhg100.com/Article/UploadFiles/201512/2015121619051671.jpg)
![Prepare to repeat those actions, so block boss's attack (RB button) and pull out Mercer's second limb (rhythmically press X) - [Main mission 31] Murder Your Maker - Main missions - Prototype 2 - Game Guide and Walkthrough](https://game.lhg100.com/Article/UploadFiles/201512/2015121619051734.jpg)
Prepare to repeat those actions, so block boss's attack (RB button) and pull out Mercer's second limb (rhythmically press X).
![3 - [Main mission 31] Murder Your Maker - Main missions - Prototype 2 - Game Guide and Walkthrough](https://game.lhg100.com/Article/UploadFiles/201512/2015121619051717.jpg)
![The last sequence is slightly different, because in addition to hold RB button (screen 1), you have to rhythmically press Y button (screen 2) - [Main mission 31] Murder Your Maker - Main missions - Prototype 2 - Game Guide and Walkthrough](https://game.lhg100.com/Article/UploadFiles/201512/2015121619051774.jpg)
The last sequence is slightly different, because in addition to hold RB button (screen 1), you have to rhythmically press Y button (screen 2).
![At the end, according to instructions shown on the screen, rhythmically press X button - [Main mission 31] Murder Your Maker - Main missions - Prototype 2 - Game Guide and Walkthrough](https://game.lhg100.com/Article/UploadFiles/201512/2015121619051730.jpg)
At the end, according to instructions shown on the screen, rhythmically press X button.
![And that's all - [Main mission 31] Murder Your Maker - Main missions - Prototype 2 - Game Guide and Walkthrough](https://game.lhg100.com/Article/UploadFiles/201512/2015121619051872.jpg)
And that's all. Have fun watching the last cut-scene and do not remember that after credits you can keep exploring the game world (or start a new campaign in the New Game Plus mode).
New objective: Go to the Blacknet terminal
![In order to start this mission, you have to get to location [237, 1172], specifically to Blacknet terminal - [Blacknet mission 1] Operation: Orion's Belt - Blacknet missions - Prototype 2 - Game Guide and Walkthrough](https://game.lhg100.com/Article/UploadFiles/201512/2015121619051841.jpg)
In order to start this mission, you have to get to location [237, 1172], specifically to Blacknet terminal.
New objective: Use the Blacknet terminal
![The terminal can be used only by soldiers, scientists and Blackwatch employees, but fortunately you do not have to look far - [Blacknet mission 1] Operation: Orion's Belt - Blacknet missions - Prototype 2 - Game Guide and Walkthrough](https://game.lhg100.com/Article/UploadFiles/201512/2015121619051863.jpg)
The terminal can be used only by soldiers, scientists and Blackwatch employees, but fortunately you do not have to look far. Decide to grab and consume (B button and Y button) one of the soldiers standing near (screen above). If possible, try not to trigger an alarm, because you would have to unnecessarily spend time on elimination of enemy units. You can now approach the terminal and use it (B button).
New objective: Hunt and consume dr. Samuel Billingsley
![As you probably remember from the last mission, it is best to start the hunt with getting to the rooftop of one of the highest buildings in the area - [Blacknet mission 1] Operation: Orion's Belt - Blacknet missions - Prototype 2 - Game Guide and Walkthrough](https://game.lhg100.com/Article/UploadFiles/201512/2015121619051820.jpg)
As you probably remember from the last mission, it is best to start the hunt with getting to the rooftop of one of the highest buildings in the area. Only then send an impulse (press left analog stick), so you'll easily find the location of the commander you're looking for (screen above).
![1 - [Blacknet mission 1] Operation: Orion's Belt - Blacknet missions - Prototype 2 - Game Guide and Walkthrough](https://game.lhg100.com/Article/UploadFiles/201512/2015121619051890.jpg)
![An exact location of Dr - [Blacknet mission 1] Operation: Orion's Belt - Blacknet missions - Prototype 2 - Game Guide and Walkthrough](https://game.lhg100.com/Article/UploadFiles/201512/2015121619051966.jpg)
An exact location of Dr. Samuel Billingsley is in [362, 1234]. I suggest approaching the scientist disguised as a soldier, so you won't alarm any opponents in the area. Consume Billingsley (B button and Y button) in order to obtain his shape and memories.
New objective: Go to the Gentek facility to find Rooks's location
New objective: Equip a military form to safely enter the restricted area
![Your next target is in location [135, 1322] - [Blacknet mission 1] Operation: Orion's Belt - Blacknet missions - Prototype 2 - Game Guide and Walkthrough](https://game.lhg100.com/Article/UploadFiles/201512/2015121619051939.jpg)
Your next target is in location [135, 1322]. Once you get there, watch short movie, from which you'll learn about functioning of fenced areas and that to get inside you need to consume one of the Blackwatch soldiers to obtain his shape. So approach the guard patrolling the area and consume him (B button and Y button). Notice - if you've consumed any soldier before getting to the facility, you can skip this step.
New objective: Use the hand scanner to enter the restricted area without arousing attention
![This is very simple task - [Blacknet mission 1] Operation: Orion's Belt - Blacknet missions - Prototype 2 - Game Guide and Walkthrough](https://game.lhg100.com/Article/UploadFiles/201512/2015121619051973.jpg)
This is very simple task. Go to the main facility entrance gate area in location [135, 1318] and interact with hand scanner (button B).
New objective: Consume the commander to enter the facility
![The commander resides in location [95, 1319], so you do not have to look for him - [Blacknet mission 1] Operation: Orion's Belt - Blacknet missions - Prototype 2 - Game Guide and Walkthrough](https://game.lhg100.com/Article/UploadFiles/201512/2015121619051982.jpg)
The commander resides in location [95, 1319], so you do not have to look for him. Approach the person indicated by the game (screen above) and consume him (button B and button Y).
New objective: Use the hand scanner to enter the facility without causing an alert
![Also this target is not too complicated - [Blacknet mission 1] Operation: Orion's Belt - Blacknet missions - Prototype 2 - Game Guide and Walkthrough](https://game.lhg100.com/Article/UploadFiles/201512/2015121619051948.jpg)
Also this target is not too complicated. The entrance to the building can be found in location [118, 1336] and you have to interact with the hand scanner (button B).
New objective: Stealth consume the commander
![Go to the adjacent room in location [122, 1305] - [Blacknet mission 1] Operation: Orion's Belt - Blacknet missions - Prototype 2 - Game Guide and Walkthrough](https://game.lhg100.com/Article/UploadFiles/201512/2015121619051971.jpg)
Go to the adjacent room in location [122, 1305]. Learn about consuming people who are observed by someone. In this case the commander is in the line of sight of soldiers standing on the right. You can check it by sending an impulse, because all observed characters are indicated in red (except white). Additionally you can target the commander after sending the impulse (left trigger), so he will be marked with eye icon above him.
![A solution to this problem is fortunately very easy - [Blacknet mission 1] Operation: Orion's Belt - Blacknet missions - Prototype 2 - Game Guide and Walkthrough](https://game.lhg100.com/Article/UploadFiles/201512/2015121619052093.jpg)
A solution to this problem is fortunately very easy. Get the soldier behind and consume him (B button and Y button). Only after that action decide to consume the commander, who is not observed by anyone right now.
New objective: Use the hand scanner to enter the lab without causing an alert
![Return to previous room and head to the hand scanner, located on the floor in location [91, 1371] - [Blacknet mission 1] Operation: Orion's Belt - Blacknet missions - Prototype 2 - Game Guide and Walkthrough](https://game.lhg100.com/Article/UploadFiles/201512/2015121619052099.jpg)
Return to previous room and head to the hand scanner, located on the floor in location [91, 1371]. Interact with it (button B).
New objective: Stealth consume Dr. Genovese
![Same as in case of the previous commander, first you have to check, by whom Dr - [Blacknet mission 1] Operation: Orion's Belt - Blacknet missions - Prototype 2 - Game Guide and Walkthrough](https://game.lhg100.com/Article/UploadFiles/201512/2015121619052003.jpg)
Same as in case of the previous commander, first you have to check, by whom Dr. Genovese is observed (location [117, 1351]). So send an impulse while pressing left trigger, thus learning that he is in line of sight of two soldiers (screen above).
![Go to each soldier and consume him (B button and Y button) - [Blacknet mission 1] Operation: Orion's Belt - Blacknet missions - Prototype 2 - Game Guide and Walkthrough](https://game.lhg100.com/Article/UploadFiles/201512/2015121619052090.jpg)
Go to each soldier and consume him (B button and Y button). Only after eliminating soldiers, go to Dr. Genovese and consume him.
New objective: Use the terminal without raising an alert
![This is very easy task - [Blacknet mission 1] Operation: Orion's Belt - Blacknet missions - Prototype 2 - Game Guide and Walkthrough](https://game.lhg100.com/Article/UploadFiles/201512/2015121619052048.jpg)
This is very easy task. Go to the shiny circle (screen above) to interact with terminal and watch a new cut-scene.
New objective: Exit the Gentek facility
![Return to the main room, descend to lower level and find a hand scanner (screen above) in location [150, 1325], so you can go back to the surface - [Blacknet mission 1] Operation: Orion's Belt - Blacknet missions - Prototype 2 - Game Guide and Walkthrough](https://game.lhg100.com/Article/UploadFiles/201512/2015121619052178.jpg)
Return to the main room, descend to lower level and find a hand scanner (screen above) in location [150, 1325], so you can go back to the surface.
![Do not go to the main gate but at any place use sprint option (right trigger) or perform a long jump (hold A button) in order to get past the high wall (it should be enough to start the alarm) - [Blacknet mission 1] Operation: Orion's Belt - Blacknet missions - Prototype 2 - Game Guide and Walkthrough](https://game.lhg100.com/Article/UploadFiles/201512/2015121619052142.jpg)
Do not go to the main gate but at any place use sprint option (right trigger) or perform a long jump (hold A button) in order to get past the high wall (it should be enough to start the alarm). Move away from the explored facility to end the mission. Notice, that as a reward for completing the mission you can choose a mutation from Offensive category. Additionally the game will unlock a new main mission - Brain Drain.
New objective: Go to a Blacknet terminal
![1 - [Blacknet mission 2] Operation: Black Tulip - Blacknet missions - Prototype 2 - Game Guide and Walkthrough](https://game.lhg100.com/Article/UploadFiles/201512/2015121619052132.jpg)
![In order to start this mission, you have to get to location [187, 1342] - [Blacknet mission 2] Operation: Black Tulip - Blacknet missions - Prototype 2 - Game Guide and Walkthrough](https://game.lhg100.com/Article/UploadFiles/201512/2015121619052198.jpg)
In order to start this mission, you have to get to location [187, 1342]. Very important information is fact, that its activation point is located in the base inaccessible for civilians, so you have to consume any soldier or scientist first and then shapeshift as the murdered person. Find the Blacknet terminal and interact with it (B button), watching out for viral detectors.
New objective: Hunt and consume corporal Jeffrey Fasolo
![As you probably remember, it is best to start the hunt with getting to the rooftop of one of the highest buildings in the area - [Blacknet mission 2] Operation: Black Tulip - Blacknet missions - Prototype 2 - Game Guide and Walkthrough](https://game.lhg100.com/Article/UploadFiles/201512/2015121619052270.jpg)
As you probably remember, it is best to start the hunt with getting to the rooftop of one of the highest buildings in the area. Only then send an impulse (press left analog stick), so you'll easily find the location of the corporal you're looking for (screen above).
![2 - [Blacknet mission 2] Operation: Black Tulip - Blacknet missions - Prototype 2 - Game Guide and Walkthrough](https://game.lhg100.com/Article/UploadFiles/201512/2015121619052229.jpg)
![An exact location of corporal Jeffrey Fasolo is [257, 1326], but it is located in the zone inaccessible for civilians, so it is best to approach him disguised as a soldier or a scientist - [Blacknet mission 2] Operation: Black Tulip - Blacknet missions - Prototype 2 - Game Guide and Walkthrough](https://game.lhg100.com/Article/UploadFiles/201512/2015121619052203.jpg)
An exact location of corporal Jeffrey Fasolo is [257, 1326], but it is located in the zone inaccessible for civilians, so it is best to approach him disguised as a soldier or a scientist.
![Corporal is in the line of sight of at least three Blackwatch soldiers a since it is not easy to get rid of them silently, I suggest not to bother with it and attack all enemies here - [Blacknet mission 2] Operation: Black Tulip - Blacknet missions - Prototype 2 - Game Guide and Walkthrough](https://game.lhg100.com/Article/UploadFiles/201512/2015121619052233.jpg)
Corporal is in the line of sight of at least three Blackwatch soldiers a since it is not easy to get rid of them silently, I suggest not to bother with it and attack all enemies here. Try not to fight long and do not risk the premature corporal's death, but as fast as possible after the fight begins, grab him and consume him (B button and Y button).
New objective: Go to capture site to sabotage the infected specimen
![Once you regain control over Heller, quickly leave the hostile area and only after the situation calms down, go to location [354, 1175] - [Blacknet mission 2] Operation: Black Tulip - Blacknet missions - Prototype 2 - Game Guide and Walkthrough](https://game.lhg100.com/Article/UploadFiles/201512/2015121619052297.jpg)
Once you regain control over Heller, quickly leave the hostile area and only after the situation calms down, go to location [354, 1175]. Also this place is inaccessible to unauthorized personnel, so consider entering it in disguise.
New objective: Use the hand scanner to release and consume the brawler
![It is worth to know, that interacting with the hand scanner (B button) is not the only option - [Blacknet mission 2] Operation: Black Tulip - Blacknet missions - Prototype 2 - Game Guide and Walkthrough](https://game.lhg100.com/Article/UploadFiles/201512/2015121619052212.jpg)
It is worth to know, that interacting with the hand scanner (B button) is not the only option. If you've chosen strength option and killed all local opponents, you might as well destroy a container with mutated beast, thus releasing it.
New objective: Defeat the brawler before it kills people
![Contrary to appearances, you do not have to worry about other people, although it is important to immediately start chasing the brawler - [Blacknet mission 2] Operation: Black Tulip - Blacknet missions - Prototype 2 - Game Guide and Walkthrough](https://game.lhg100.com/Article/UploadFiles/201512/2015121619052283.jpg)
Contrary to appearances, you do not have to worry about other people, although it is important to immediately start chasing the brawler. Help yourself of course with sprint (right trigger) and jumps (A button), trying to reduce the distance between you two. Performing the first attack on the brawler should make him stop, thus starting the real fight.
![After starting the fight with the brawler, remember about a trick known from initial mission - [Blacknet mission 2] Operation: Black Tulip - Blacknet missions - Prototype 2 - Game Guide and Walkthrough](https://game.lhg100.com/Article/UploadFiles/201512/2015121619052347.jpg)
After starting the fight with the brawler, remember about a trick known from initial mission. It is worth to jump over the brawler and then quickly attack it from behind. Try to perform your best attacks, because there are probably Blackwatch soldiers in the area. Use them mainly as regeneration sources, but if any of them has a rocket launcher, try to get it to attack brawler in alternative way.
New objective: Consume the brawler
![As you've probably guessed, you have to fight until brawler's health bar is almost empty - [Blacknet mission 2] Operation: Black Tulip - Blacknet missions - Prototype 2 - Game Guide and Walkthrough](https://game.lhg100.com/Article/UploadFiles/201512/2015121619052352.jpg)
As you've probably guessed, you have to fight until brawler's health bar is almost empty. Once you receive the relevant information, quickly run towards the monster and consume it (button B).
New objective: Exit the alert
New objective: Go to a Blacknet terminal
![Losing the chase might be more difficult than usual, so keep looking for alleys, where you can exit the alert - [Blacknet mission 2] Operation: Black Tulip - Blacknet missions - Prototype 2 - Game Guide and Walkthrough](https://game.lhg100.com/Article/UploadFiles/201512/2015121619052392.jpg)
Losing the chase might be more difficult than usual, so keep looking for alleys, where you can exit the alert. After this, go again to location [187, 1342]. Same as before, enter the base disguised as a soldier or a scientist, remembering about avoiding viral detectors. Again, interact with terminal (button B).
New objective: Hunt and consume corporal Tino Antonelli
![3 - [Blacknet mission 2] Operation: Black Tulip - Blacknet missions - Prototype 2 - Game Guide and Walkthrough](https://game.lhg100.com/Article/UploadFiles/201512/2015121619052360.jpg)
![Behave the same as with the previous hunt, so go to the rooftop of one of highest buildings in order to locate the corporal - [Blacknet mission 2] Operation: Black Tulip - Blacknet missions - Prototype 2 - Game Guide and Walkthrough](https://game.lhg100.com/Article/UploadFiles/201512/2015121619052346.jpg)
Behave the same as with the previous hunt, so go to the rooftop of one of highest buildings in order to locate the corporal. He should patrol the western part of the yellow zone, not far from water, and his approximate location is [78, 1308]. Make sure that the corporal is not observed by anyone and consume him (button B and button Y).
New objective: Go to the lair to sabotage Gentek's experiment
New objective: Enter the lair to sabotage Gentek's experiment
![Your new target can be found in location [110, 1213] and it is a shiny circle on the building's rooftop - [Blacknet mission 2] Operation: Black Tulip - Blacknet missions - Prototype 2 - Game Guide and Walkthrough](https://game.lhg100.com/Article/UploadFiles/201512/2015121619052432.jpg)
Your new target can be found in location [110, 1213] and it is a shiny circle on the building's rooftop. After watching a short cut-scene, go to the lair in location [114, 1192]. Again you might enter the zone inaccessible for civilians disguised as a soldier or a scientist. Position yourself in a shiny circle (screen above) and press B button to get to the lair.
New objective: Use the hand scanner to release and consume the brawler
![4 - [Blacknet mission 2] Operation: Black Tulip - Blacknet missions - Prototype 2 - Game Guide and Walkthrough](https://game.lhg100.com/Article/UploadFiles/201512/2015121619052457.jpg)
![Notice, that Gentek's squads fight in the lair with infected and if you're disguised, you do not have to attacks soldiers - [Blacknet mission 2] Operation: Black Tulip - Blacknet missions - Prototype 2 - Game Guide and Walkthrough](https://game.lhg100.com/Article/UploadFiles/201512/2015121619052449.jpg)
Notice, that Gentek's squads fight in the lair with infected and if you're disguised, you do not have to attacks soldiers. You can reach the scanner by choosing a corridor heading north (screen 1) or east (screen 2; barricade). In both cases you'll have to face large groups of infected and depending on your preferences you can eliminate them (it is very easy) or ignore them.
![Eventually you have to reach a second large lair chamber (screen above) in location [148, 1151], where you'll encounter hostile soldiers - [Blacknet mission 2] Operation: Black Tulip - Blacknet missions - Prototype 2 - Game Guide and Walkthrough](https://game.lhg100.com/Article/UploadFiles/201512/2015121619052498.jpg)
Eventually you have to reach a second large lair chamber (screen above) in location [148, 1151], where you'll encounter hostile soldiers. Depending on preferences you can eliminate them or leave them alone, focusing on you current mission objective.
![Try to consume one of the soldiers or scientists, because you can interact with the hand scanner (button B) only after shapeshifting - [Blacknet mission 2] Operation: Black Tulip - Blacknet missions - Prototype 2 - Game Guide and Walkthrough](https://game.lhg100.com/Article/UploadFiles/201512/2015121619052472.jpg)
Try to consume one of the soldiers or scientists, because you can interact with the hand scanner (button B) only after shapeshifting.
New objective: Chase the brawler to stop and consume it
![Start chasing brawler, choosing a tunnel heading north (screen above) - [Blacknet mission 2] Operation: Black Tulip - Blacknet missions - Prototype 2 - Game Guide and Walkthrough](https://game.lhg100.com/Article/UploadFiles/201512/2015121619052410.jpg)
Start chasing brawler, choosing a tunnel heading north (screen above). Fortunately you do not have to worry that the beast will get away, because the chase will end after few moments, specifically after getting to one of the large lair chambers.
New objective: Defeat the brawler
![Take a look at the grenade launcher locker, indicated by the game, because using one of these weapons is required to complete bonus objective - [Blacknet mission 2] Operation: Black Tulip - Blacknet missions - Prototype 2 - Game Guide and Walkthrough](https://game.lhg100.com/Article/UploadFiles/201512/2015121619052559.jpg)
Take a look at the grenade launcher locker, indicated by the game, because using one of these weapons is required to complete bonus objective. I recommend attacking brawler from upper shelves, because then you won't have to deal with infected in the same time. Besides it takes some time until mutant can reach upper shelves, and even when it succeed, you can jump to another one.
New objective: Consume the brawler
![Use the grenade launchers (or standard Hellers powers), until brawlers health bar is completely empty and then consume him in a well-known way (B button) - [Blacknet mission 2] Operation: Black Tulip - Blacknet missions - Prototype 2 - Game Guide and Walkthrough](https://game.lhg100.com/Article/UploadFiles/201512/2015121619052558.jpg)
Use the grenade launchers (or standard Heller's powers), until brawler's health bar is completely empty and then consume him in a well-known way (B button). Notice that this action resulted in strengthening of one of your abilities - Tendrils.
New objective: Exit the lair
![Go to the start point, which is in location [116, 1228] - [Blacknet mission 2] Operation: Black Tulip - Blacknet missions - Prototype 2 - Game Guide and Walkthrough](https://game.lhg100.com/Article/UploadFiles/201512/2015121619052512.jpg)
Go to the start point, which is in location [116, 1228]. You might disguise as a soldier or a scientist on your way back, so no one will bother you. Stand in the shiny circle and confirm leaving the lair (B button).
New objective: Leave the area
![If youve used the disguise, then you can leave this area safely - [Blacknet mission 2] Operation: Black Tulip - Blacknet missions - Prototype 2 - Game Guide and Walkthrough](https://game.lhg100.com/Article/UploadFiles/201512/2015121619052555.jpg)
If you've used the disguise, then you can leave this area safely. Otherwise you'll have to lose the pursuit. Mission will be over soon. Notice, that as a reward for completing the mission, you can choose a mutation from Predator category.
New objective: Go to a Blacknet terminal
![1 - [Blacknet mission 3] Operation: Clean Sweep - Blacknet missions - Prototype 2 - Game Guide and Walkthrough](https://game.lhg100.com/Article/UploadFiles/201512/2015121619052534.jpg)
![In order to start this mission, you have to get to location [311, 1293] - [Blacknet mission 3] Operation: Clean Sweep - Blacknet missions - Prototype 2 - Game Guide and Walkthrough](https://game.lhg100.com/Article/UploadFiles/201512/2015121619052673.jpg)
In order to start this mission, you have to get to location [311, 1293]. Very important information is fact, that the terminal can be used only by soldiers, scientists and Blackwatch employees, so make sure that you have proper disguise and no one can expose you during shapeshifting. Interact with the terminal (B button) in order to get instructions.
New objective: Hunt and consume corporal Stanley Carter
![As you probably remember, it is best to start the hunt with getting to the rooftop of one of the highest buildings in the area - [Blacknet mission 3] Operation: Clean Sweep - Blacknet missions - Prototype 2 - Game Guide and Walkthrough](https://game.lhg100.com/Article/UploadFiles/201512/2015121619052619.jpg)
As you probably remember, it is best to start the hunt with getting to the rooftop of one of the highest buildings in the area. Only then send an impulse (press left analog stick), so you'll easily find the location of the corporal you're looking for (screen above).
![Corporal should patrol the area near the church, where youll meet with father Guerra - [Blacknet mission 3] Operation: Clean Sweep - Blacknet missions - Prototype 2 - Game Guide and Walkthrough](https://game.lhg100.com/Article/UploadFiles/201512/2015121619052668.jpg)
Corporal should patrol the area near the church, where you'll meet with father Guerra. His approximate location is [315, 1215]. Make sure that corporal is not observed by anyone and consume him (button B and button Y).
New objective: Go to the overlook to survey the crash site
![Go to location [214, 1031] - [Blacknet mission 3] Operation: Clean Sweep - Blacknet missions - Prototype 2 - Game Guide and Walkthrough](https://game.lhg100.com/Article/UploadFiles/201512/2015121619052613.jpg)
Go to location [214, 1031]. The crash site you're looking for is located on the rooftop of very high building called Hidcalder (screen above) and if you want to get there, you have to run over the walls. When you get close enough to the crash site, the game will display a short cut-scene.
New objective: Retrieve the patrol schedules before Crossbow Two One arrives
![Now you have to participate in a kind of race, before your task now is to reach patrol schedules in a given time limit (you can see the counter on the screen) - [Blacknet mission 3] Operation: Clean Sweep - Blacknet missions - Prototype 2 - Game Guide and Walkthrough](https://game.lhg100.com/Article/UploadFiles/201512/2015121619052646.jpg)
Now you have to participate in a kind of race, before your task now is to reach patrol schedules in a given time limit (you can see the counter on the screen). A first schedule can be found in location [219, 1085] and others are indicated by the game on ongoing basis. Notice, that after approaching each schedule (you do not have to press any button), time limit increases, but you can't afford any longer pauses.
![During this race, focus on safely reaching the adjacent buildings - [Blacknet mission 3] Operation: Clean Sweep - Blacknet missions - Prototype 2 - Game Guide and Walkthrough](https://game.lhg100.com/Article/UploadFiles/201512/2015121619052726.jpg)
During this "race", focus on safely reaching the adjacent buildings. It is best in such cases to start with strong bounce (hold A button) and then to rely on gliding (hold right trigger).
![There are some situations, when you will have to run over the walls and watch out then not to fall down - [Blacknet mission 3] Operation: Clean Sweep - Blacknet missions - Prototype 2 - Game Guide and Walkthrough](https://game.lhg100.com/Article/UploadFiles/201512/2015121619052762.jpg)
There are some situations, when you will have to run over the walls and watch out then not to fall down. You should also remember that during gliding you can press A button to perform so-called dashes that help you to approach rooftops of more distant buildings. In order to complete that mission, it is not required to have fully developed all acrobatic abilities, although they can reduce the race difficulty.
![Continue collecting schedules, reaching after few moments the last of them and finishing this short level - [Blacknet mission 3] Operation: Clean Sweep - Blacknet missions - Prototype 2 - Game Guide and Walkthrough](https://game.lhg100.com/Article/UploadFiles/201512/2015121619052794.jpg)
Continue collecting schedules, reaching after few moments the last of them and finishing this short level. Notice, that as a reward for completing this mission you can choose a mutation from Defensive category.
New objective: Go to a Blacknet terminal
![1 - [Blacknet mission 4] Operation: Manticore - Blacknet missions - Prototype 2 - Game Guide and Walkthrough](https://game.lhg100.com/Article/UploadFiles/201512/2015121619052755.jpg)
![In order to start this mission, you have to get to location [258, 953] - [Blacknet mission 4] Operation: Manticore - Blacknet missions - Prototype 2 - Game Guide and Walkthrough](https://game.lhg100.com/Article/UploadFiles/201512/2015121619052788.jpg)
In order to start this mission, you have to get to location [258, 953]. Very important information is fact, that its activation point is located in the base inaccessible for civilians, so you have to consume a soldier or a scientist first, and then shapeshift. Find the Blacknet terminal and interact with it (B button), watching out for viral detectors.
New objective: Hunt and consume Dr. David Castleman
![As you probably remember, it is best to start the hunt with getting to the rooftop of one of the highest buildings in the area - [Blacknet mission 4] Operation: Manticore - Blacknet missions - Prototype 2 - Game Guide and Walkthrough](https://game.lhg100.com/Article/UploadFiles/201512/2015121619052857.jpg)
As you probably remember, it is best to start the hunt with getting to the rooftop of one of the highest buildings in the area. Only then send an impulse (press left analog stick), so you'll easily find the location of the doctor you're looking for (screen above).
![2 - [Blacknet mission 4] Operation: Manticore - Blacknet missions - Prototype 2 - Game Guide and Walkthrough](https://game.lhg100.com/Article/UploadFiles/201512/2015121619052889.jpg)
![An exact location of Dr - [Blacknet mission 4] Operation: Manticore - Blacknet missions - Prototype 2 - Game Guide and Walkthrough](https://game.lhg100.com/Article/UploadFiles/201512/2015121619052882.jpg)
An exact location of Dr. David Castleman is [197, 1003]. He shouldn't be observed by anyone so you can grab him at once and consume him (button B and button Y).
New objective: Consume the scientists to hinder the bio-weapon program
![When you open the map, you should notice two groups of scientists there (screen above) - [Blacknet mission 4] Operation: Manticore - Blacknet missions - Prototype 2 - Game Guide and Walkthrough](https://game.lhg100.com/Article/UploadFiles/201512/2015121619052895.jpg)
When you open the map, you should notice two groups of scientists there (screen above). Approximate location of the first group is [155, 1170] and for the second group is [255, 1235]. I recommend going to the first group for the start, because it will be easier to complete the bonus objective there - consume two scientists without triggering an alarm.
![After reaching the first group of scientists, shapeshift, so you can approach them - [Blacknet mission 4] Operation: Manticore - Blacknet missions - Prototype 2 - Game Guide and Walkthrough](https://game.lhg100.com/Article/UploadFiles/201512/2015121619052865.jpg)
After reaching the first group of scientists, shapeshift, so you can approach them. If you use the sonar, you should notice that silent elimination of scientist is "blocked" by one of soldiers, because he can observe them. So eliminate the mentioned soldier (screen above) and only after then ((with all necessary precautions) consume both scientists, completing the bonus objective.
![You can now go to the second group of scientists - [Blacknet mission 4] Operation: Manticore - Blacknet missions - Prototype 2 - Game Guide and Walkthrough](https://game.lhg100.com/Article/UploadFiles/201512/2015121619052960.jpg)
You can now go to the second group of scientists. In this case I recommend aggressive option, unless you do not mind a very slow elimination of guards. I propose to start with some area attack (Black Hole for example) and then quickly run to each of scientists and consume him.
New objective: Exit the alert
New objective: Go to a Blacknet terminal
![Exiting the alert could be harder than usual, so keep looking for alleys where you can lose the pursuit - [Blacknet mission 4] Operation: Manticore - Blacknet missions - Prototype 2 - Game Guide and Walkthrough](https://game.lhg100.com/Article/UploadFiles/201512/2015121619052908.jpg)
Exiting the alert could be harder than usual, so keep looking for alleys where you can lose the pursuit. After that, go again to location [258, 953]. Same as previously, you must get inside the base disguised as a soldier or a scientist, remembering about avoiding viral detectors. Interact with the terminal again (B button).
New objective: Hunt and consume lieutenant Cletus Ransom
![Behave same as with the previous hunt, so get to the rooftop of one of highest buildings in the area in order to locate lieutenant - [Blacknet mission 4] Operation: Manticore - Blacknet missions - Prototype 2 - Game Guide and Walkthrough](https://game.lhg100.com/Article/UploadFiles/201512/2015121619052984.jpg)
Behave same as with the previous hunt, so get to the rooftop of one of highest buildings in the area in order to locate lieutenant. He should patrol the outer part of the base, where you were using the terminal and his approximate location is [253, 977]. Make sure that lieutenant is not observed by anyone and consume him (button B and button Y).
New objective: Go to spawning hive J-10 to scout the operation
New objective: Enter the lair to find scientists and troopers
![Your new target is location [312, 1268], specifically the shiny circle on the buildings rooftop - [Blacknet mission 4] Operation: Manticore - Blacknet missions - Prototype 2 - Game Guide and Walkthrough](https://game.lhg100.com/Article/UploadFiles/201512/2015121619052992.jpg)
Your new target is location [312, 1268], specifically the shiny circle on the building's rooftop. After a short cut-scene, go to the lair in location [290, 1266]. Once again you should enter the zone inaccessible for civilians, disguised as a soldier or a scientist. Stand in the shiny circle (screen above) and press B button to get into the lair.
New objective: Kill the scientists before they escape
![There are three groups of scientists in total to be eliminated and you do not have to worry, that they will suddenly leave the lair - [Blacknet mission 4] Operation: Manticore - Blacknet missions - Prototype 2 - Game Guide and Walkthrough](https://game.lhg100.com/Article/UploadFiles/201512/2015121619052904.jpg)
There are three groups of scientists in total to be eliminated and you do not have to worry, that they will suddenly leave the lair. During elimination of each group it is worth using the Black Hole attack or other area ability, so the process goes faster. Do not forget about regenerating, because soldiers in the area can also attack you during the elimination of scientists.
New objective: Kill the Blackwatch troopers
New objective: Exit the lair
![After dealing with scientists, start eliminating soldiers - [Blacknet mission 4] Operation: Manticore - Blacknet missions - Prototype 2 - Game Guide and Walkthrough](https://game.lhg100.com/Article/UploadFiles/201512/2015121619053060.jpg)
After dealing with scientists, start eliminating soldiers. It should not be a big problem, although remember to regenerate your health before you kill all people here. After obtaining a new mission objective, return to the shiny circle in location [299, 1279] and accept returning to the surface (button B).
New objective: Destroy the patrol to force out the commander
![When you get to the surface, youll be unpleasantly surprised, because you have to destroy two APCs - [Blacknet mission 4] Operation: Manticore - Blacknet missions - Prototype 2 - Game Guide and Walkthrough](https://game.lhg100.com/Article/UploadFiles/201512/2015121619053063.jpg)
When you get to the surface, you'll be unpleasantly surprised, because you have to destroy two APCs. But you do not need to stress if you have no powers effective in fights against machines, because quick tendrils attacks (press Y button) are fair enough here.
![A good idea is also to attack soldiers with rocket launchers, because such weapons are very effective in destroying APCs - [Blacknet mission 4] Operation: Manticore - Blacknet missions - Prototype 2 - Game Guide and Walkthrough](https://game.lhg100.com/Article/UploadFiles/201512/2015121619053052.jpg)
A good idea is also to attack soldiers with rocket launchers, because such weapons are very effective in destroying APCs. You can also consume these soldiers, thus regenerating yourself. Fight until both vehicles are destroyed.
New objective: Consume the commander
New objective: Exit the alert
![Ignore all opponents who can be still alive and focus only on getting the fleeing commander as fast as possible - [Blacknet mission 4] Operation: Manticore - Blacknet missions - Prototype 2 - Game Guide and Walkthrough](https://game.lhg100.com/Article/UploadFiles/201512/2015121619053048.jpg)
Ignore all opponents who can be still alive and focus only on getting the fleeing commander as fast as possible. Grab him and consume him (B button and Y button). The last thing to do is to lose the pursuit, so use the sprint option looking for narrow alleys along your way. Notice, that for completing the mission you were rewarded with possibility of choosing mutation from Locomotion category.
New objective: Go to a Blacknet terminal
![1 - [Blacknet mission 5] Operation: Keyhole - Blacknet missions - Prototype 2 - Game Guide and Walkthrough](https://game.lhg100.com/Article/UploadFiles/201512/2015121619053077.jpg)
![In order to start this mission, you have to get to location [874, 1409] - [Blacknet mission 5] Operation: Keyhole - Blacknet missions - Prototype 2 - Game Guide and Walkthrough](https://game.lhg100.com/Article/UploadFiles/201512/2015121619053180.jpg)
In order to start this mission, you have to get to location [874, 1409]. Very important information is fact, that its activation point is located in the base inaccessible for civilians, so you have to consume a soldier or a scientist first, and then shapeshift. Find the Blacknet terminal and interact with it (B button), watching out for viral detectors.
New objective: Hunt and consume Dr. Marcella Walsh
![As you probably remember, it is best to start the hunt with getting to the rooftop of one of the highest buildings in the area - [Blacknet mission 5] Operation: Keyhole - Blacknet missions - Prototype 2 - Game Guide and Walkthrough](https://game.lhg100.com/Article/UploadFiles/201512/2015121619053170.jpg)
As you probably remember, it is best to start the hunt with getting to the rooftop of one of the highest buildings in the area. Only then send an impulse (press left analog stick), so you'll easily find the location of the scientist you're looking for (screen above).
![2 - [Blacknet mission 5] Operation: Keyhole - Blacknet missions - Prototype 2 - Game Guide and Walkthrough](https://game.lhg100.com/Article/UploadFiles/201512/2015121619053150.jpg)
![An exact location of Dr - [Blacknet mission 5] Operation: Keyhole - Blacknet missions - Prototype 2 - Game Guide and Walkthrough](https://game.lhg100.com/Article/UploadFiles/201512/2015121619053157.jpg)
An exact location of Dr. Marcella Walsh in location [798, 1441] and she should stay in a public place, so you can approach him without necessity of being disguised.
New objective: Intercept the helicopter
![Fortunately you do not have to race with the helicopter, because your only task now is to get to the shiny circle in location [756, 1404] - [Blacknet mission 5] Operation: Keyhole - Blacknet missions - Prototype 2 - Game Guide and Walkthrough](https://game.lhg100.com/Article/UploadFiles/201512/2015121619053140.jpg)
Fortunately you do not have to race with the helicopter, because your only task now is to get to the shiny circle in location [756, 1404]. Once you step in the circle, the game will show cut-scene.
New objective: Collect the mutagen containers before Blackwatch gets them
![Now you have to prepare for some kind of race, because your task is to pick up containers in certain time limit (there is a counter visible on the screen) - [Blacknet mission 5] Operation: Keyhole - Blacknet missions - Prototype 2 - Game Guide and Walkthrough](https://game.lhg100.com/Article/UploadFiles/201512/2015121619053115.jpg)
Now you have to prepare for some kind of race, because your task is to pick up containers in certain time limit (there is a counter visible on the screen). First container can be found in location [760, 1387] and others are indicated by the game on ongoing basis. Notice, that after approaching each container (you do not have to press any button), time limit increases, but you can't afford any longer pauses.
![During this race, focus on safely reaching the adjacent buildings - [Blacknet mission 5] Operation: Keyhole - Blacknet missions - Prototype 2 - Game Guide and Walkthrough](https://game.lhg100.com/Article/UploadFiles/201512/2015121619053204.jpg)
During this "race", focus on safely reaching the adjacent buildings. It is best in such cases to start with strong bounce (hold A button) and then to rely on gliding (hold right trigger). There are some situations, when you will have to run over the walls and watch out then not to fall down. You should also remember that during gliding you can press A button to perform so-called dashes that help you to approach rooftops of more distant buildings.
![In order to complete that mission, it is not required to have fully developed all acrobatic abilities, although they can reduce the race difficulty - [Blacknet mission 5] Operation: Keyhole - Blacknet missions - Prototype 2 - Game Guide and Walkthrough](https://game.lhg100.com/Article/UploadFiles/201512/2015121619053261.jpg)
In order to complete that mission, it is not required to have fully developed all acrobatic abilities, although they can reduce the race difficulty. Watch out at the end of the race (screen above), because if you can't perform very long jumps, it is better to bypass the water area from the left side, not risking wasting valuable seconds.
![Continue collecting containers, reaching after few moments the last of them and finishing this level - [Blacknet mission 5] Operation: Keyhole - Blacknet missions - Prototype 2 - Game Guide and Walkthrough](https://game.lhg100.com/Article/UploadFiles/201512/2015121619053290.jpg)
Continue collecting containers, reaching after few moments the last of them and finishing this level. Watch a new cut-scene and wait for instructions.
New objective: Go to a Blacknet terminal
![Go again to location [874, 1409] - [Blacknet mission 5] Operation: Keyhole - Blacknet missions - Prototype 2 - Game Guide and Walkthrough](https://game.lhg100.com/Article/UploadFiles/201512/2015121619053277.jpg)
Go again to location [874, 1409]. Same as previously, you must get inside the base disguised as a soldier or a scientist, remembering about avoiding viral detectors. Interact with the terminal again (B button).
New objective: Hunt and consume sergeant Emery McDonald
![3 - [Blacknet mission 5] Operation: Keyhole - Blacknet missions - Prototype 2 - Game Guide and Walkthrough](https://game.lhg100.com/Article/UploadFiles/201512/2015121619053282.jpg)
![Behave same as with the previous hunt, so get to the rooftop of one of highest buildings in the area in order to locate sergeant - [Blacknet mission 5] Operation: Keyhole - Blacknet missions - Prototype 2 - Game Guide and Walkthrough](https://game.lhg100.com/Article/UploadFiles/201512/2015121619053299.jpg)
Behave same as with the previous hunt, so get to the rooftop of one of highest buildings in the area in order to locate sergeant. He should patrol streets in the eastern part of the green zone and his approximate location is [935, 1345]. Make sure that sergeant is not observed by anyone and consume him (button B and button Y).
New objective: Go to base India Two One to destroy Blackwatch's tank
New objective: Consume the commander to gain access to base India Two One
![You have to reach a base in location [910, 1267] - [Blacknet mission 5] Operation: Keyhole - Blacknet missions - Prototype 2 - Game Guide and Walkthrough](https://game.lhg100.com/Article/UploadFiles/201512/2015121619053226.jpg)
You have to reach a base in location [910, 1267]. Make sure that you are disguised as a soldier or a scientist, because it is a best way to get inside the base. Locate the commander, remembering about avoiding viral detectors. Wait until the commander is not seen by anyone and consume him (button B and button Y).
New objective: Use the hand scanner to enter base India Two One
![Go to the hand scanner in location [918, 1267] and interact with it to get inside the main base building - [Blacknet mission 5] Operation: Keyhole - Blacknet missions - Prototype 2 - Game Guide and Walkthrough](https://game.lhg100.com/Article/UploadFiles/201512/2015121619053364.jpg)
Go to the hand scanner in location [918, 1267] and interact with it to get inside the main base building.
New objective: Destroy the motorpool scheduled for upgrading
![The important information is fact, that in order to complete the bonus objective, you have to use a tank to destroy at least one enemy machine - [Blacknet mission 5] Operation: Keyhole - Blacknet missions - Prototype 2 - Game Guide and Walkthrough](https://game.lhg100.com/Article/UploadFiles/201512/2015121619053312.jpg)
The important information is fact, that in order to complete the bonus objective, you have to use a tank to destroy at least one enemy machine. I strongly recommend this option. So take control over the single tank parked on the left side (by double clicking B button).
![Aim at the one of the three tanks on the right and start shooting, using LB and RB buttons - [Blacknet mission 5] Operation: Keyhole - Blacknet missions - Prototype 2 - Game Guide and Walkthrough](https://game.lhg100.com/Article/UploadFiles/201512/2015121619053353.jpg)
Aim at the one of the three tanks on the right and start shooting, using LB and RB buttons. After destroying first of them, you might of course attack other machines, ignoring a short cut-scene about Phase Two super soldier in the area among others.
![If you were quick enough, you should have destroyed all three tanks, before yours was destroyed too - [Blacknet mission 5] Operation: Keyhole - Blacknet missions - Prototype 2 - Game Guide and Walkthrough](https://game.lhg100.com/Article/UploadFiles/201512/2015121619053317.jpg)
If you were quick enough, you should have destroyed all three tanks, before yours was destroyed too. But if you didn't manage to do that, I suggest getting inside another tank. It is worth noting, that nothing bad will happen to you, if your tank explodes with you inside, so you can keep shooting until your machine is completely destroyed.
New objective: Kill the Blackwatch troopers
![First, I propose to focus on standard soldiers with rocket launchers, so they wont bother you later - [Blacknet mission 5] Operation: Keyhole - Blacknet missions - Prototype 2 - Game Guide and Walkthrough](https://game.lhg100.com/Article/UploadFiles/201512/2015121619053467.jpg)
First, I propose to focus on standard soldiers with rocket launchers, so they won't bother you later. You'll also regenerate your health bar and obtain mass needed to perform the Devastator attack.
![Finally take care of the super soldier - [Blacknet mission 5] Operation: Keyhole - Blacknet missions - Prototype 2 - Game Guide and Walkthrough](https://game.lhg100.com/Article/UploadFiles/201512/2015121619053432.jpg)
Finally take care of the super soldier. As already mentioned, he is a Phase Two soldier, so do not try to use a rocket launcher against him, because you won't hurt him this way. Instead block his attacks (RB button) and grab him each time he got stunned (B button). Repeat these actions until he is almost dead, but if you loaded the mass bar, you can also perform the Devastator attack, which will inflict him some damage.
New objective: Exit base India Two One
![Finish the fight with super soldier by consuming him - [Blacknet mission 5] Operation: Keyhole - Blacknet missions - Prototype 2 - Game Guide and Walkthrough](https://game.lhg100.com/Article/UploadFiles/201512/2015121619053494.jpg)
Finish the fight with super soldier by consuming him. Now shapeshift into a soldier or scientist and only then go to the exit in location [930, 1265]. Once you get inside, move away from the base and the mission will be over soon. Notice, that as a reward for completing the mission, you can choose a mutation from Predator category.
New objective: Go to a Blacknet terminal
![1 - [Blacknet mission 6] Operation: Jack-Of-All-Trades - Blacknet missions - Prototype 2 - Game Guide and Walkthrough](https://game.lhg100.com/Article/UploadFiles/201512/2015121619053470.jpg)
![In order to start this mission, you have to get to location [900, 1263] - [Blacknet mission 6] Operation: Jack-Of-All-Trades - Blacknet missions - Prototype 2 - Game Guide and Walkthrough](https://game.lhg100.com/Article/UploadFiles/201512/2015121619053400.jpg)
In order to start this mission, you have to get to location [900, 1263]. Very important information is fact, that the terminal can be used only by authorized persons, so you have to consume a soldier or a scientist first, and then shapeshift. Find the Blacknet terminal and interact with it (B button), watching out for viral detectors.
New objective: Hunt and consume lieutenant Barry Pollock
![As you probably remember, it is best to start the hunt with getting to the rooftop of one of the highest buildings in the area - [Blacknet mission 6] Operation: Jack-Of-All-Trades - Blacknet missions - Prototype 2 - Game Guide and Walkthrough](https://game.lhg100.com/Article/UploadFiles/201512/2015121619053514.jpg)
As you probably remember, it is best to start the hunt with getting to the rooftop of one of the highest buildings in the area. Only then send an impulse (press left analog stick), so you'll easily find the location of the lieutenant you're looking for (screen above).
![2 - [Blacknet mission 6] Operation: Jack-Of-All-Trades - Blacknet missions - Prototype 2 - Game Guide and Walkthrough](https://game.lhg100.com/Article/UploadFiles/201512/2015121619053583.jpg)
![Lieutenant Barry Pollock patrols streets adjacent to the park and his approximate location is [815, 1245] - [Blacknet mission 6] Operation: Jack-Of-All-Trades - Blacknet missions - Prototype 2 - Game Guide and Walkthrough](https://game.lhg100.com/Article/UploadFiles/201512/2015121619053513.jpg)
Lieutenant Barry Pollock patrols streets adjacent to the park and his approximate location is [815, 1245]. He should in a public place, so you do not have to shapeshift in order to approach him.
New objective: Destroy the helicopters
![You have to destroy the helicopters flying over the green zone and the easiest way to eliminate them is to tear off their launchers - [Blacknet mission 6] Operation: Jack-Of-All-Trades - Blacknet missions - Prototype 2 - Game Guide and Walkthrough](https://game.lhg100.com/Article/UploadFiles/201512/2015121619053559.jpg)
You have to destroy the helicopters flying over the green zone and the easiest way to eliminate them is to tear off their launchers. Go to the rooftop, wait for one of the helicopters and perform a long jump towards it (A button) combined with gliding (right trigger). Catch the machine (B button).
![Press X button to confirm tearing off the missile launcher and do it by rhythmically pressing X button - [Blacknet mission 6] Operation: Jack-Of-All-Trades - Blacknet missions - Prototype 2 - Game Guide and Walkthrough](https://game.lhg100.com/Article/UploadFiles/201512/2015121619053516.jpg)
Press X button to confirm tearing off the missile launcher and do it by rhythmically pressing X button. After obtaining the weapon, go to some rooftop and shoot the helicopter (screen above). If two other machines appear, shoot them too.
![Tearing off the missile launchers is not the only method to complete this mission, because you can also use blades and tendrils for example, tear off TOW launchers from APCs (screen above) or just take away launchers from Blackwatch soldiers - [Blacknet mission 6] Operation: Jack-Of-All-Trades - Blacknet missions - Prototype 2 - Game Guide and Walkthrough](https://game.lhg100.com/Article/UploadFiles/201512/2015121619053691.jpg)
Tearing off the missile launchers is not the only method to complete this mission, because you can also use blades and tendrils for example, tear off TOW launchers from APCs (screen above) or just take away launchers from Blackwatch soldiers.
![Regardless of your behavior, do not forget about regenerating and watch out for super soldiers between opponents (screen above) - [Blacknet mission 6] Operation: Jack-Of-All-Trades - Blacknet missions - Prototype 2 - Game Guide and Walkthrough](https://game.lhg100.com/Article/UploadFiles/201512/2015121619053645.jpg)
Regardless of your behavior, do not forget about regenerating and watch out for super soldiers between opponents (screen above). It is best to avoid contact with them. Depending on your preferences you can fight long battle or exit the alert each time you shoot the helicopter and start the fight again, having element of surprise. Eventually you have to destroy all three helicopters.
New objective: Consume the commander
New objective: Exit the alert
![Consuming the commander is very easy, because Heller should land near the last destroyed helicopter - [Blacknet mission 6] Operation: Jack-Of-All-Trades - Blacknet missions - Prototype 2 - Game Guide and Walkthrough](https://game.lhg100.com/Article/UploadFiles/201512/2015121619053603.jpg)
Consuming the commander is very easy, because Heller should land near the last destroyed helicopter. So quickly grab indicated person, not allowing him to flee.
New objective: Go to a Blacknet terminal
![Go again to location [900, 1263] - [Blacknet mission 6] Operation: Jack-Of-All-Trades - Blacknet missions - Prototype 2 - Game Guide and Walkthrough](https://game.lhg100.com/Article/UploadFiles/201512/2015121619053693.jpg)
Go again to location [900, 1263]. Same as previously, you must get inside the base disguised as a soldier or a scientist, remembering about avoiding viral detectors. Interact with the terminal again (B button).
New objective: Hunt and consume private Dane Fontenot
![3 - [Blacknet mission 6] Operation: Jack-Of-All-Trades - Blacknet missions - Prototype 2 - Game Guide and Walkthrough](https://game.lhg100.com/Article/UploadFiles/201512/2015121619053735.jpg)
![Behave same as with the previous hunt, so get to the rooftop of one of highest buildings in the area in order to locate private - [Blacknet mission 6] Operation: Jack-Of-All-Trades - Blacknet missions - Prototype 2 - Game Guide and Walkthrough](https://game.lhg100.com/Article/UploadFiles/201512/2015121619053746.jpg)
Behave same as with the previous hunt, so get to the rooftop of one of highest buildings in the area in order to locate private. He should patrol the central part of the park and his approximate location is [825, 1300]. Since private is located in the public area, you do not have to disguise in order to approach him.
New objective: Intercept the helicopter
![Fortunately you do not have to look for the helicopter, because the only thing to do is to get to the shiny circle in location [856, 1233] - [Blacknet mission 6] Operation: Jack-Of-All-Trades - Blacknet missions - Prototype 2 - Game Guide and Walkthrough](https://game.lhg100.com/Article/UploadFiles/201512/2015121619053799.jpg)
Fortunately you do not have to look for the helicopter, because the only thing to do is to get to the shiny circle in location [856, 1233]. After stepping in the circle, the game will display a cut-scene.
New objective: Retrieve the intel on your biological weakness
![Now you have to prepare for some kind of race, because your task is to pick up containers in certain time limit (there is a counter visible on the screen) - [Blacknet mission 6] Operation: Jack-Of-All-Trades - Blacknet missions - Prototype 2 - Game Guide and Walkthrough](https://game.lhg100.com/Article/UploadFiles/201512/2015121619053715.jpg)
Now you have to prepare for some kind of race, because your task is to pick up containers in certain time limit (there is a counter visible on the screen). First container can be found in location [829, 1214] and others are indicated by the game on ongoing basis. Notice, that after approaching each container (you do not have to press any button), time limit increases, but you can't afford any longer pauses.
![During this race, focus on safely reaching the adjacent buildings - [Blacknet mission 6] Operation: Jack-Of-All-Trades - Blacknet missions - Prototype 2 - Game Guide and Walkthrough](https://game.lhg100.com/Article/UploadFiles/201512/2015121619053705.jpg)
During this "race", focus on safely reaching the adjacent buildings. It is best in such cases to start with strong bounce (hold A button) and then to rely on gliding (hold right trigger). There are some situations, when you will have to run over the walls and watch out then not to fall down. You should also remember that during gliding you can press A button to perform so-called dashes that help you to approach rooftops of more distant buildings.
![In order to complete that mission, it is not required to have fully developed all acrobatic abilities, although they can reduce the race difficulty - [Blacknet mission 6] Operation: Jack-Of-All-Trades - Blacknet missions - Prototype 2 - Game Guide and Walkthrough](https://game.lhg100.com/Article/UploadFiles/201512/2015121619053871.jpg)
In order to complete that mission, it is not required to have fully developed all acrobatic abilities, although they can reduce the race difficulty. Watch out at places where you have to land on the bridge (example in a screen above) and on the parking lot. If you land too far, you'll have to go back to the container, thus losing valuable seconds.
![Once you approach the last intel container, the game will display cut-scene with evolved enemy - [Blacknet mission 6] Operation: Jack-Of-All-Trades - Blacknet missions - Prototype 2 - Game Guide and Walkthrough](https://game.lhg100.com/Article/UploadFiles/201512/2015121619053848.jpg)
Once you approach the last intel container, the game will display cut-scene with evolved enemy. Since he stole the intel, you have to chase him.
New objective: Chase the evolved
![Follow the thief - [Blacknet mission 6] Operation: Jack-Of-All-Trades - Blacknet missions - Prototype 2 - Game Guide and Walkthrough](https://game.lhg100.com/Article/UploadFiles/201512/2015121619053854.jpg)
Follow the thief. Notice the bar visible in the upper right screen corner. If the distance between you and the thief increases, the bar becomes shorter. If it gets empty, you'll fail the mission.
![During the chase, help yourself of course with sprint, running over walls, long jumps and gliding - [Blacknet mission 6] Operation: Jack-Of-All-Trades - Blacknet missions - Prototype 2 - Game Guide and Walkthrough](https://game.lhg100.com/Article/UploadFiles/201512/2015121619053845.jpg)
During the chase, help yourself of course with sprint, running over walls, long jumps and gliding. Do not try to grab or attack Gallagher too early, because the chase will automatically end after getting near one of the warehouses. You'll also get a new objective.
New objective: Defeat the evolved thief
![The fight with the thief is very similar to the one with Dr - [Blacknet mission 6] Operation: Jack-Of-All-Trades - Blacknet missions - Prototype 2 - Game Guide and Walkthrough](https://game.lhg100.com/Article/UploadFiles/201512/2015121619053966.jpg)
The fight with the thief is very similar to the one with Dr. Koenig, which took place in the yellow zone. First of all, try to dodge your opponent's attacks, because your opponent wants to get to the melee fight. Look for occasions to perform quick attacks with blades or tendrils. During the fight you should notice that the thief "sticks" his blades into the ground from time to time, becoming helpless in this way. You should take advantage on such situations by quickly running towards him and pressing the button indicated by the game (Y or X), so Heller can perform a strong attack.
![You can try to attack your opponent with firearms or the Devastator attack (screen above) - [Blacknet mission 6] Operation: Jack-Of-All-Trades - Blacknet missions - Prototype 2 - Game Guide and Walkthrough](https://game.lhg100.com/Article/UploadFiles/201512/2015121619053916.jpg)
You can try to attack your opponent with firearms or the Devastator attack (screen above). When you get hurt, retreat to one of the local streets, looking for civilians as a source of regeneration. Keep attacking the thief, until his health bar is almost empty. It is best to finish the fight by consuming your opponent (button B).
New objective: Go to a Blacknet terminal
![Again go to location [900, 1263] - [Blacknet mission 6] Operation: Jack-Of-All-Trades - Blacknet missions - Prototype 2 - Game Guide and Walkthrough](https://game.lhg100.com/Article/UploadFiles/201512/2015121619053967.jpg)
Again go to location [900, 1263]. Same as previously, you must approach the terminal disguised as a soldier or a scientist, remembering about avoiding viral detectors. Interact with the terminal again (B button).
New objective: Hunt and consume Dr. Edward Carolino
![4 - [Blacknet mission 6] Operation: Jack-Of-All-Trades - Blacknet missions - Prototype 2 - Game Guide and Walkthrough](https://game.lhg100.com/Article/UploadFiles/201512/2015121619053936.jpg)
![Behave same as with two previous hunts, so get to the rooftop of one of highest buildings in the area in order to locate scientist - [Blacknet mission 6] Operation: Jack-Of-All-Trades - Blacknet missions - Prototype 2 - Game Guide and Walkthrough](https://game.lhg100.com/Article/UploadFiles/201512/2015121619053998.jpg)
Behave same as with two previous hunts, so get to the rooftop of one of highest buildings in the area in order to locate scientist. He should walk the street east from the park and his approximate location is [895, 1370]. Because he stays in a public place, you do not need any disguise to approach him and consume him.
New objective: Go to base Juliet Seven Three to kill Dr. Fischer and the escaped infected
![The next target is location [918, 1545] and since it is a base not accessible by civilians, you should disguise as Dr - [Blacknet mission 6] Operation: Jack-Of-All-Trades - Blacknet missions - Prototype 2 - Game Guide and Walkthrough](https://game.lhg100.com/Article/UploadFiles/201512/2015121619053933.jpg)
The next target is location [918, 1545] and since it is a base not accessible by civilians, you should disguise as Dr. Carolino or other authorized person. Once you get there (screen above), it turns out, that fights take place in the base.
New objective: Use the hand scanner to enter the base while it's under attack
![I definitely recommend not joining the fights, because you could be then easily exposed - [Blacknet mission 6] Operation: Jack-Of-All-Trades - Blacknet missions - Prototype 2 - Game Guide and Walkthrough](https://game.lhg100.com/Article/UploadFiles/201512/2015121619053992.jpg)
I definitely recommend not joining the fights, because you could be then easily exposed. Run between fighting characters, remembering about avoiding viral detectors. The hand scanner you're looking for can be found in location [922, 1540].
New objective: Go to the main room to find Dr. Fisher
![Go to the main base room in location [913, 1543] - [Blacknet mission 6] Operation: Jack-Of-All-Trades - Blacknet missions - Prototype 2 - Game Guide and Walkthrough](https://game.lhg100.com/Article/UploadFiles/201512/2015121619054029.jpg)
Go to the main base room in location [913, 1543]. In order to get inside, you have to activate hand scanner (button B).
New objective: Kill the escaped brawlers before they make it to the streets
![Despite appearances you do not have to hurry, because brawlers are not going anywhere - [Blacknet mission 6] Operation: Jack-Of-All-Trades - Blacknet missions - Prototype 2 - Game Guide and Walkthrough](https://game.lhg100.com/Article/UploadFiles/201512/2015121619054008.jpg)
Despite appearances you do not have to hurry, because brawlers are not going anywhere. It is best to let monsters kill several facility workers, while in the meantime you can consume a soldier with rocket launcher.
![Join the fight with brawlers only when they are starting to win - [Blacknet mission 6] Operation: Jack-Of-All-Trades - Blacknet missions - Prototype 2 - Game Guide and Walkthrough](https://game.lhg100.com/Article/UploadFiles/201512/2015121619054021.jpg)
Join the fight with brawlers only when they are starting to win. Remember about well-known tactics of elimination these beasts - jump over them and perform series of quick attacks (with blades or tendrils).
![If you do not have to fight using melee attacks, you can use the firearms as well, preferably rocket launchers - [Blacknet mission 6] Operation: Jack-Of-All-Trades - Blacknet missions - Prototype 2 - Game Guide and Walkthrough](https://game.lhg100.com/Article/UploadFiles/201512/2015121619054078.jpg)
If you do not have to fight using melee attacks, you can use the firearms as well, preferably rocket launchers. Look around for a special shed with launchers (screen above). I suggest consuming each defeated brawler. Fight until you kill all mutants.
New objective: Consume Dr. Fischer to hinder the weaponization program
![Depending on your preferences, you can kill rest of Blackwatch soldiers or follow Dr - [Blacknet mission 6] Operation: Jack-Of-All-Trades - Blacknet missions - Prototype 2 - Game Guide and Walkthrough](https://game.lhg100.com/Article/UploadFiles/201512/2015121619054036.jpg)
Depending on your preferences, you can kill rest of Blackwatch soldiers or follow Dr. Fischer right away. Find him in one of the side rooms, then grab him and consume him (button B and button Y).
New objective: Exit base Juliet Seven Three
![The base exit can be found in location [955, 1533] and before using the hand scanner make sure that you're disguised as Dr - [Blacknet mission 6] Operation: Jack-Of-All-Trades - Blacknet missions - Prototype 2 - Game Guide and Walkthrough](https://game.lhg100.com/Article/UploadFiles/201512/2015121619054151.jpg)
The base exit can be found in location [955, 1533] and before using the hand scanner make sure that you're disguised as Dr. Fischer or other authorized person. Once you get outside, move away from the base and the mission will end. Notice, that as a reward for completing the mission, you can select a mutation from Power Specialist category.
New objective: Go to a Blacknet terminal
![1 - [Blacknet mission 7] Operation: Red Glacier - Blacknet missions - Prototype 2 - Game Guide and Walkthrough](https://game.lhg100.com/Article/UploadFiles/201512/2015121619054143.jpg)
![In order to start this mission, you have to get to location [760, 1335] - [Blacknet mission 7] Operation: Red Glacier - Blacknet missions - Prototype 2 - Game Guide and Walkthrough](https://game.lhg100.com/Article/UploadFiles/201512/2015121619054130.jpg)
In order to start this mission, you have to get to location [760, 1335]. Very important information is fact, that the terminal can be only used by authorized persons, so you have to consume a soldier or a scientist first, and then shapeshift. Find the Blacknet terminal and interact with it (B button), watching out for viral detectors.
New objective: Hunt and consume Dr. Ben Langham
![As you probably remember, it is best to start the hunt with getting to the rooftop of one of the highest buildings in the area - [Blacknet mission 7] Operation: Red Glacier - Blacknet missions - Prototype 2 - Game Guide and Walkthrough](https://game.lhg100.com/Article/UploadFiles/201512/2015121619054146.jpg)
As you probably remember, it is best to start the hunt with getting to the rooftop of one of the highest buildings in the area. Only then send an impulse (press left analog stick), so you'll easily find the location of the scientist you're looking for (screen above).
![2 - [Blacknet mission 7] Operation: Red Glacier - Blacknet missions - Prototype 2 - Game Guide and Walkthrough](https://game.lhg100.com/Article/UploadFiles/201512/2015121619054112.jpg)
![Dr - [Blacknet mission 7] Operation: Red Glacier - Blacknet missions - Prototype 2 - Game Guide and Walkthrough](https://game.lhg100.com/Article/UploadFiles/201512/2015121619054291.jpg)
Dr. Ben Langham should stand next to the phone booth in the central part of the green zone and his approximate location is [780, 1395]. Since the scientist stays in the public area, you do not have to disguise to approach and consume him.
New objective: Go to base Stronghold Three to kill the Brawlers scheduled for release
New objective: Use the hand scanner to release and kill the brawlers
![Your next target is location [640, 1448] - [Blacknet mission 7] Operation: Red Glacier - Blacknet missions - Prototype 2 - Game Guide and Walkthrough](https://game.lhg100.com/Article/UploadFiles/201512/2015121619054283.jpg)
Your next target is location [640, 1448]. After approaching the base, disguise as a scientist or a soldier and get inside. You have to use one of two available hand scanners (B button) in location [631, 1446]. Regardless of which scanner you've used, both brawlers will be released from cages.
New objective: Kill the brawlers
![Do not try to attacks brawlers from the beginning, because both creatures will start fleeing - [Blacknet mission 7] Operation: Red Glacier - Blacknet missions - Prototype 2 - Game Guide and Walkthrough](https://game.lhg100.com/Article/UploadFiles/201512/2015121619054233.jpg)
Do not try to attacks brawlers from the beginning, because both creatures will start fleeing. So you have to chase them. During the chase help yourself with sprint, running over walls, long jumps and gliding.
![The chase should be over near the closed passage to the red zone in location [730, 1155] - [Blacknet mission 7] Operation: Red Glacier - Blacknet missions - Prototype 2 - Game Guide and Walkthrough](https://game.lhg100.com/Article/UploadFiles/201512/2015121619054248.jpg)
The chase should be over near the closed passage to the red zone in location [730, 1155]. Now you can start attacking brawlers. The easiest tactics for these monsters is to jump over them and quickly attack with blades, claws, tendrils or other powers.
![You can also eliminate them in other ways, for example by activating the Devastator attack, taking away the rocket launcher from one of the local Blackwatch soldiers or jumping to the helicopter flying over the battlefield, to tear off its missile launcher - [Blacknet mission 7] Operation: Red Glacier - Blacknet missions - Prototype 2 - Game Guide and Walkthrough](https://game.lhg100.com/Article/UploadFiles/201512/2015121619054243.jpg)
You can also eliminate them in other ways, for example by activating the Devastator attack, taking away the rocket launcher from one of the local Blackwatch soldiers or jumping to the helicopter flying over the battlefield, to tear off its missile launcher. Regardless of the method, try to consume each defeated brawler. After the fight you might need to exit the alert, but it shouldn't be a big problem.
New objective: Go to a Blacknet terminal
![Go again to location [760, 1335] - [Blacknet mission 7] Operation: Red Glacier - Blacknet missions - Prototype 2 - Game Guide and Walkthrough](https://game.lhg100.com/Article/UploadFiles/201512/2015121619054366.jpg)
Go again to location [760, 1335]. Same as previously, you must get inside the base disguised as a soldier or a scientist, remembering about avoiding viral detectors. Interact with the terminal again (B button).
New objective: Hunt and consume sergeant Lance Bertram
![3 - [Blacknet mission 7] Operation: Red Glacier - Blacknet missions - Prototype 2 - Game Guide and Walkthrough](https://game.lhg100.com/Article/UploadFiles/201512/2015121619054370.jpg)
![Behave same as with the previous hunt, so get to the rooftop of one of highest buildings in the area in order to locate sergeant - [Blacknet mission 7] Operation: Red Glacier - Blacknet missions - Prototype 2 - Game Guide and Walkthrough](https://game.lhg100.com/Article/UploadFiles/201512/2015121619054366.jpg)
Behave same as with the previous hunt, so get to the rooftop of one of highest buildings in the area in order to locate sergeant. He should stand near the APC in location [650, 1443]. Make sure to enter the base disguised as a scientist or a soldier. Fortunately Bertram shouldn't be observed by anyone, so you can consume him right away.
New objective: Destroy the APC's carrying the biomass scanners
![There are three APCs to be destroyed - [Blacknet mission 7] Operation: Red Glacier - Blacknet missions - Prototype 2 - Game Guide and Walkthrough](https://game.lhg100.com/Article/UploadFiles/201512/2015121619054356.jpg)
There are three APCs to be destroyed. Two of them are parked in location [670, 1275] and the third one is in location [667, 1253]. I suggest approaching indicated vehicles in disguise. Their scanners are not functioning properly yet, so you won't be prematurely exposed.
![You can destroy APCs in many ways, but if you want to complete the bonus objective, you have to at least once use the Devastator attack - [Blacknet mission 7] Operation: Red Glacier - Blacknet missions - Prototype 2 - Game Guide and Walkthrough](https://game.lhg100.com/Article/UploadFiles/201512/2015121619054301.jpg)
You can destroy APCs in many ways, but if you want to complete the bonus objective, you have to at least once use the Devastator attack. I personally recommend using it only in further part of fights, when you stand next to damaged APC, because it may turn out that the attack is too weak to destroy fully functional vehicle. Remember also that the Devastator attack (B + Y) becomes available only after loading the mass bar, so after consuming biological characters.
![The most effective method of eliminating APCs is to use different types of launchers - [Blacknet mission 7] Operation: Red Glacier - Blacknet missions - Prototype 2 - Game Guide and Walkthrough](https://game.lhg100.com/Article/UploadFiles/201512/2015121619054321.jpg)
The most effective method of eliminating APCs is to use different types of launchers. So you can take away rocket launchers from Blackwatch soldiers or tear them off directly from attacked vehicles (B button and then X button). Less obvious methods are attacks with tendrils or other powers effective against metal targets. You can also throw explosive objects at APCs.
![If during advance to the next experience level, you've unlocked finisher connected with APCs, you can use it now by jumping on the machine (B button) and making it explode (Y button; screen above) - [Blacknet mission 7] Operation: Red Glacier - Blacknet missions - Prototype 2 - Game Guide and Walkthrough](https://game.lhg100.com/Article/UploadFiles/201512/2015121619054445.jpg)
If during advance to the next experience level, you've unlocked finisher connected with APCs, you can use it now by jumping on the machine (B button) and making it explode (Y button; screen above). Destroying all vehicles will result in displaying cut-scene showing helicopters.
New objective: Destroy the helicopters to find the biomass scanner engineer
![Also in this case you have a lot of freedom in choosing the fight tactics - [Blacknet mission 7] Operation: Red Glacier - Blacknet missions - Prototype 2 - Game Guide and Walkthrough](https://game.lhg100.com/Article/UploadFiles/201512/2015121619054411.jpg)
Also in this case you have a lot of freedom in choosing the fight tactics. You can for example use the rocket launchers taken away from Blackwatch soldiers or use the shield to bounce missiles (RB button), but in my opinion the best solution is to jump towards helicopter (A button) to catch it (B button).
![After that actions decide to tear off its missile launcher (X button) and then use it to shoot the helicopter (screen above) - [Blacknet mission 7] Operation: Red Glacier - Blacknet missions - Prototype 2 - Game Guide and Walkthrough](https://game.lhg100.com/Article/UploadFiles/201512/2015121619054466.jpg)
After that actions decide to tear off its missile launcher (X button) and then use it to shoot the helicopter (screen above). Of course if you run out of ammo, you can jump to another helicopter and repeat the action. Fight until all machines are destroyed.
New objective: Consume the engineer
New objective: Exit the alert
![Consuming the engineer is very easy, because Heller should land near the last destroyed helicopter - [Blacknet mission 7] Operation: Red Glacier - Blacknet missions - Prototype 2 - Game Guide and Walkthrough](https://game.lhg100.com/Article/UploadFiles/201512/2015121619054468.jpg)
Consuming the engineer is very easy, because Heller should land near the last destroyed helicopter. Quickly grab indicated person, not letting him to flee. In order to finish the mission you have to exit alert, but this should be also easy. Notice that as a reward for completing the mission you can choose a mutation from Offensive category.
New objective: Go to a Blacknet terminal
![1 - [Blacknet mission 8] Operation: Vivid Future - Blacknet missions - Prototype 2 - Game Guide and Walkthrough](https://game.lhg100.com/Article/UploadFiles/201512/2015121619054439.jpg)
![In order to start this mission, you have to get to location [728, 1477] - [Blacknet mission 8] Operation: Vivid Future - Blacknet missions - Prototype 2 - Game Guide and Walkthrough](https://game.lhg100.com/Article/UploadFiles/201512/2015121619054572.jpg)
In order to start this mission, you have to get to location [728, 1477]. Very important information is fact, that this terminal can be used only by authorized persons, so you have to consume a scientist or a soldier and disguise yourself. Find the Blacknet terminal and use it (B button), watching out for viral detectors.
New objective: Hunt and consume Dennis Wayne
![As you probably remember, it is best to start the hunt with getting to the rooftop of one of the highest building in area - [Blacknet mission 8] Operation: Vivid Future - Blacknet missions - Prototype 2 - Game Guide and Walkthrough](https://game.lhg100.com/Article/UploadFiles/201512/2015121619054547.jpg)
As you probably remember, it is best to start the hunt with getting to the rooftop of one of the highest building in area. Only then send an impulse (press left analog), so you can easily locate the person you're looking for (screen above).
![2 - [Blacknet mission 8] Operation: Vivid Future - Blacknet missions - Prototype 2 - Game Guide and Walkthrough](https://game.lhg100.com/Article/UploadFiles/201512/2015121619054505.jpg)
![Dennis Wayne should be walking in the central part of the green zone and his approximate location is [785, 1425] - [Blacknet mission 8] Operation: Vivid Future - Blacknet missions - Prototype 2 - Game Guide and Walkthrough](https://game.lhg100.com/Article/UploadFiles/201512/2015121619054594.jpg)
Dennis Wayne should be walking in the central part of the green zone and his approximate location is [785, 1425]. Try to consume him. Your attempt will fail and you'll learn that he also got viral powers.
New objective: Defeat Dennis Wayne
New objective: Consume Dennis Wayne
![Start fighting Dennis - [Blacknet mission 8] Operation: Vivid Future - Blacknet missions - Prototype 2 - Game Guide and Walkthrough](https://game.lhg100.com/Article/UploadFiles/201512/2015121619054540.jpg)
Start fighting Dennis. This duel doesn't differ much from previous encounters with mini-bosses (like with Dr. Koenig for example). So you should jump over Dennis, performing quick attacks and looking for opportunities to use special attacks each time you see icon of X, Y or B buttons over his head. Keep fighting until Wayne's energy bar is almost empty. Then consume him.
New objective: Intercept the helicopter
![Fortunately you do not have to chase the helicopter, because your task is only to get to the shiny circle or the rooftop in location [864, 1306] - [Blacknet mission 8] Operation: Vivid Future - Blacknet missions - Prototype 2 - Game Guide and Walkthrough](https://game.lhg100.com/Article/UploadFiles/201512/2015121619054556.jpg)
Fortunately you do not have to chase the helicopter, because your task is only to get to the shiny circle or the rooftop in location [864, 1306]. Once you get into the circle, the game will display a cut-scene.
New objective: Retrieve the intel to stop the Orion revival project
![Now you have to take part in some kind of race, because your current task is to reach indicated containers in given time limit (you can see the counter on the screen) - [Blacknet mission 8] Operation: Vivid Future - Blacknet missions - Prototype 2 - Game Guide and Walkthrough](https://game.lhg100.com/Article/UploadFiles/201512/2015121619054656.jpg)
Now you have to take part in some kind of race, because your current task is to reach indicated containers in given time limit (you can see the counter on the screen). The first container can be found in location [885, 1309], and next targets will be indicated by the game on ongoing basis. Notice, that after approaching each container, your time limit extends, but you can't afford any longer breaks.
During the "race", pay most attention on getting to adjacent buildings. It is best to start such actions with strong rebound (hold A button) and then rely on gliding (hold right trigger). In some situations it might be necessary to run over the walls and precise landing in the indicated area. It is also worth noting that in flight you can additionally press A button to perform so called dashes, which are helpful in reaching rooftops of distant buildings.
![This race is more difficult than previous ones in Blacknet mission, so to increase your chances of winning you should start it only after upgrading Heller's acrobatic abilities - [Blacknet mission 8] Operation: Vivid Future - Blacknet missions - Prototype 2 - Game Guide and Walkthrough](https://game.lhg100.com/Article/UploadFiles/201512/2015121619054649.jpg)
This race is more difficult than previous ones in Blacknet mission, so to increase your chances of winning you should start it only after upgrading Heller's acrobatic abilities. During the race ignore the fact, that you're under fire from all directions and do not stop anywhere. The most difficult moment is climbing the skyscraper at the end of the race (screen above) and in this case you should at least once deflect the rocket shot at you (press RB button).
![You should reach the last container (screen above) in time limit, if you've started climbing the building with at least 10 second before time limit and you haven't been hit by any rocket - [Blacknet mission 8] Operation: Vivid Future - Blacknet missions - Prototype 2 - Game Guide and Walkthrough](https://game.lhg100.com/Article/UploadFiles/201512/2015121619054696.jpg)
You should reach the last container (screen above) in time limit, if you've started climbing the building with at least 10 second before time limit and you haven't been hit by any rocket.
New objective: Exit the alert
![Losing the chase should make you no problems - [Blacknet mission 8] Operation: Vivid Future - Blacknet missions - Prototype 2 - Game Guide and Walkthrough](https://game.lhg100.com/Article/UploadFiles/201512/2015121619054627.jpg)
Losing the chase should make you no problems. I suggest jumping down, entering the narrow alley and shapeshifting.
New objective: Go to a Blacknet terminal
![Once again go to location [728, 1477] - [Blacknet mission 8] Operation: Vivid Future - Blacknet missions - Prototype 2 - Game Guide and Walkthrough](https://game.lhg100.com/Article/UploadFiles/201512/2015121619054613.jpg)
Once again go to location [728, 1477]. Same as previously, you should approach the terminal masked as a soldier or a scientist, remembering about avoiding viral detectors. Use the terminal again (B button).
New objective: Hunt and consume Dr. Soren Donnell
![3 - [Blacknet mission 8] Operation: Vivid Future - Blacknet missions - Prototype 2 - Game Guide and Walkthrough](https://game.lhg100.com/Article/UploadFiles/201512/2015121619054748.jpg)
![Act the same as with previous hunt, so get to the rooftop of one of the highest building in the area, to locate the scientist - [Blacknet mission 8] Operation: Vivid Future - Blacknet missions - Prototype 2 - Game Guide and Walkthrough](https://game.lhg100.com/Article/UploadFiles/201512/2015121619054786.jpg)
Act the same as with previous hunt, so get to the rooftop of one of the highest building in the area, to locate the scientist. He should stay in the base in location [625, 1451]. As Soren is observed by local soldiers, do not play with shapeshifting but attack enemies, trying to consume the doctor as fast as possible and losing the chase after successful action.
New objective: Consume the scientists to impede Gentek testing
![Scientists from the first group are gathered in the same place and their approximate location is [770, 1385] - [Blacknet mission 8] Operation: Vivid Future - Blacknet missions - Prototype 2 - Game Guide and Walkthrough](https://game.lhg100.com/Article/UploadFiles/201512/2015121619054739.jpg)
Scientists from the first group are gathered in the same place and their approximate location is [770, 1385]. Since this area is inaccessible for civilians (screen above), it would be good to get there masked as a scientist or a soldier.
![Good news is that none of the characters indicated by the game is observed by other people (the only exceptions is a soldier patrolling the area, but you can just wait as he passes by) - [Blacknet mission 8] Operation: Vivid Future - Blacknet missions - Prototype 2 - Game Guide and Walkthrough](https://game.lhg100.com/Article/UploadFiles/201512/2015121619054705.jpg)
Good news is that none of the characters indicated by the game is observed by other people (the only exceptions is a soldier patrolling the area, but you can just wait as he passes by). That means that you can consume all scientists without triggering an alarm.
New objective: Consume the scientist to impede Gentek testing
![In order to find the third, last scientist, you have to go to location [707, 1372] - [Blacknet mission 8] Operation: Vivid Future - Blacknet missions - Prototype 2 - Game Guide and Walkthrough](https://game.lhg100.com/Article/UploadFiles/201512/2015121619054751.jpg)
In order to find the third, last scientist, you have to go to location [707, 1372]. Once you get there, I suggest eliminating two guards, which are standing behind the scientist. Check also if your bio-mass bar is fully charged, because soon you may need it.
New objective: Consume the evolved infiltrators
![When you try to consume the scientist or two guards standing near, it turns out that all of them have viral powers - [Blacknet mission 8] Operation: Vivid Future - Blacknet missions - Prototype 2 - Game Guide and Walkthrough](https://game.lhg100.com/Article/UploadFiles/201512/2015121619054792.jpg)
When you try to consume the scientist or two guards standing near, it turns out that all of them have viral powers. Also notice the information about bonus objective - you have to defeat all evolved within 90 seconds. So I suggest starting with the Devastator attack.
![In the next part of the fight focus always on one target and remember that you have to consume your enemies and not to kill them - [Blacknet mission 8] Operation: Vivid Future - Blacknet missions - Prototype 2 - Game Guide and Walkthrough](https://game.lhg100.com/Article/UploadFiles/201512/2015121619054821.jpg)
In the next part of the fight focus always on one target and remember that you have to consume your enemies and not to kill them. So as a result you shouldn't use any powerful attacks when your opponent is almost dead. Keep fighting until you consume all characters indicated by the game.
New objective: Exit the alert
![Escape the area should not be associated with any complications, but to make sure that you lose the chase, help yourself with sprint and quickly find some place where you can change your shape - [Blacknet mission 8] Operation: Vivid Future - Blacknet missions - Prototype 2 - Game Guide and Walkthrough](https://game.lhg100.com/Article/UploadFiles/201512/2015121619054899.jpg)
Escape the area should not be associated with any complications, but to make sure that you lose the chase, help yourself with sprint and quickly find some place where you can change your shape. Notice, that as a reward for completing the mission, you can select mutation from Defensive category.
New objective: Go to a Blacknet terminal
![1 - [Blacknet mission 9] Operation: Spotted Cat - p. 1 - Blacknet missions - Prototype 2 - Game Guide and Walkthrough](https://game.lhg100.com/Article/UploadFiles/201512/2015121619054860.jpg)
![In order to start this mission, you have to get to location [482, 442] - [Blacknet mission 9] Operation: Spotted Cat - p. 1 - Blacknet missions - Prototype 2 - Game Guide and Walkthrough](https://game.lhg100.com/Article/UploadFiles/201512/2015121619054812.jpg)
In order to start this mission, you have to get to location [482, 442]. Very important information is fact, that this terminal can be used only by authorized persons, so you have to consume a scientist or a soldier and disguise yourself. Find the Blacknet terminal and use it (B button), watching out for viral detectors and ignoring "standard" infected running in the area.
New objective: Hunt and consume Dr. Jariv Kureshi
![As you probably remember, it is best to start the hunt with getting to the rooftop of one of the highest building in area - [Blacknet mission 9] Operation: Spotted Cat - p. 1 - Blacknet missions - Prototype 2 - Game Guide and Walkthrough](https://game.lhg100.com/Article/UploadFiles/201512/2015121619054877.jpg)
As you probably remember, it is best to start the hunt with getting to the rooftop of one of the highest building in area. Only then send an impulse (press left analog), so you can easily locate the person you're looking for (screen above).
![2 - [Blacknet mission 9] Operation: Spotted Cat - p. 1 - Blacknet missions - Prototype 2 - Game Guide and Walkthrough](https://game.lhg100.com/Article/UploadFiles/201512/2015121619054852.jpg)
![Approximate location of Dr - [Blacknet mission 9] Operation: Spotted Cat - p. 1 - Blacknet missions - Prototype 2 - Game Guide and Walkthrough](https://game.lhg100.com/Article/UploadFiles/201512/2015121619054971.jpg)
Approximate location of Dr. Jariv Kureshi is [550, 505]. Depending on the fact how quickly you can find him, he can be escaping from infected or lie wounded on the ground. Regardless of the turn of events, you have to consume him.
New objective: Stealth consume the Blackwatch trooper without entering an alert
![Your nest target is location [657, 670] and since it is Blackwatch post, it is very important to enter the area inaccessible for civilians masked as a soldier or a scientist - [Blacknet mission 9] Operation: Spotted Cat - p. 1 - Blacknet missions - Prototype 2 - Game Guide and Walkthrough](https://game.lhg100.com/Article/UploadFiles/201512/2015121619054951.jpg)
Your nest target is location [657, 670] and since it is Blackwatch post, it is very important to enter the area inaccessible for civilians masked as a soldier or a scientist. The Blackwatch soldier indicated by the game may be observed by one or two other persons. Depending on your preferences, you can wait until those characters go away or turn back, or you can consume them (screen above). In the latter case remember not to expose Heller, because you can't trigger the alarm.
![Wait until the Blackwatch soldier is not observed by anyone (or create such situation) and then approach him to consume him - [Blacknet mission 9] Operation: Spotted Cat - p. 1 - Blacknet missions - Prototype 2 - Game Guide and Walkthrough](https://game.lhg100.com/Article/UploadFiles/201512/2015121619054940.jpg)
Wait until the Blackwatch soldier is not observed by anyone (or create such situation) and then approach him to consume him.
New objective: Follow the Blackwatch patrol to the scientists working on the antigen
![Follow the squad leader - [Blacknet mission 9] Operation: Spotted Cat - p. 1 - Blacknet missions - Prototype 2 - Game Guide and Walkthrough](https://game.lhg100.com/Article/UploadFiles/201512/2015121619054953.jpg)
Follow the squad leader. Same as with one of the previously completed main mission, you can't temporarily rely on Heller's abilities, so you must rely on standard melee attacks and (mainly) on firearms. Follow the squad to encounter first group of monsters.
New objective: Kill the infected to protect the Blackwatch patrol
![Right after the battle starts, go to the weapons shed indicated by the game, taking the grenade launcher or rocket launcher - [Blacknet mission 9] Operation: Spotted Cat - p. 1 - Blacknet missions - Prototype 2 - Game Guide and Walkthrough](https://game.lhg100.com/Article/UploadFiles/201512/2015121619055083.jpg)
Right after the battle starts, go to the weapons shed indicated by the game, taking the grenade launcher or rocket launcher. Use mentioned weapons to attack brawlers, remembering about keeping the safe distance and performing many dodges.
![Finally take care of the infected birds - [Blacknet mission 9] Operation: Spotted Cat - p. 1 - Blacknet missions - Prototype 2 - Game Guide and Walkthrough](https://game.lhg100.com/Article/UploadFiles/201512/2015121619055003.jpg)
Finally take care of the infected birds. It is best to use machine guns to eliminate them. Try to dodge air attacks, jumping aside each time you see a monster trying to attacks you. Eliminate all indicated mutants.
New objective: Follow the Blackwatch patrol to the scientists working on the antigen
![Before you continue your march, pick up unused machine gun because that weapon will be very useful in few moments - [Blacknet mission 9] Operation: Spotted Cat - p. 1 - Blacknet missions - Prototype 2 - Game Guide and Walkthrough](https://game.lhg100.com/Article/UploadFiles/201512/2015121619055008.jpg)
Before you continue your march, pick up unused machine gun because that weapon will be very useful in few moments. Follow the squad reaching the place of the second battle with infected.
New objective: Kill the infected to protect the Blackwatch patrol
![Note the new bonus objective, which concerns killing 5 enemies without being injured - [Blacknet mission 9] Operation: Spotted Cat - p. 1 - Blacknet missions - Prototype 2 - Game Guide and Walkthrough](https://game.lhg100.com/Article/UploadFiles/201512/2015121619055008.jpg)
Note the new bonus objective, which concerns killing 5 enemies without being injured. Fortunately this is very easy challenge, because you can just attack "normal" infected indicated by the game. They are not very mobile and die fast.
![After completing the bonus objective, focus on attacking new birds flying over the battlefield, remembering about dodging often - [Blacknet mission 9] Operation: Spotted Cat - p. 1 - Blacknet missions - Prototype 2 - Game Guide and Walkthrough](https://game.lhg100.com/Article/UploadFiles/201512/2015121619055032.jpg)
After completing the bonus objective, focus on attacking new birds flying over the battlefield, remembering about dodging often. If needed, go back to the previous weapons shed for supplies. Finally deal with normal infected, who are not big challenge.
New objective: Follow the Blackwatch patrol to the scientists working on the antigen
![For the last time follow the Blackwatch squad leader - [Blacknet mission 9] Operation: Spotted Cat - p. 1 - Blacknet missions - Prototype 2 - Game Guide and Walkthrough](https://game.lhg100.com/Article/UploadFiles/201512/2015121619055116.jpg)
For the last time follow the Blackwatch squad leader. You'll get to the group of scientists after few moments and without more fights.
New objective: Consume the scientists working on the antigen that could kill you
![There are three characters to be eliminated in location [583, 740] and instead of starting the fight I recommend to consume them quietly - [Blacknet mission 9] Operation: Spotted Cat - p. 1 - Blacknet missions - Prototype 2 - Game Guide and Walkthrough](https://game.lhg100.com/Article/UploadFiles/201512/2015121619055128.jpg)
There are three characters to be eliminated in location [583, 740] and instead of starting the fight I recommend to consume them quietly. First, deal with the scientist on the left. He is observed by two Blackwatch soldiers, so consume them first and then take care of the character indicated by the game.
![The scientist in the middle is observed by alone Blackwatch soldier, so approach him first and consume him - [Blacknet mission 9] Operation: Spotted Cat - p. 1 - Blacknet missions - Prototype 2 - Game Guide and Walkthrough](https://game.lhg100.com/Article/UploadFiles/201512/2015121619055180.jpg)
The scientist in the middle is observed by alone Blackwatch soldier, so approach him first and consume him. After that you can consume the scientist with no problems.
![The scientist on the right shouldn't be now observed by anyone, so you can consume him without any additional actions - [Blacknet mission 9] Operation: Spotted Cat - p. 1 - Blacknet missions - Prototype 2 - Game Guide and Walkthrough](https://game.lhg100.com/Article/UploadFiles/201512/2015121619055190.jpg)
The scientist on the right shouldn't be now observed by anyone, so you can consume him without any additional actions.
New objective: Go to a Blacknet terminal
![Once again go to location [482, 442] - [Blacknet mission 9] Operation: Spotted Cat - p. 1 - Blacknet missions - Prototype 2 - Game Guide and Walkthrough](https://game.lhg100.com/Article/UploadFiles/201512/2015121619055131.jpg)
Once again go to location [482, 442]. Same as previously, you should approach the terminal masked as a soldier or a scientist, remembering about avoiding viral detectors. Use the terminal again (B button).
New objective: Hunt and consume Sergeant Raoul Whitehead
![3 - [Blacknet mission 9] Operation: Spotted Cat - p. 1 - Blacknet missions - Prototype 2 - Game Guide and Walkthrough](https://game.lhg100.com/Article/UploadFiles/201512/2015121619055134.jpg)
![Act the same as with previous hunt, so get to the rooftop of one of the highest building in the area, to locate the sergeant - [Blacknet mission 9] Operation: Spotted Cat - p. 1 - Blacknet missions - Prototype 2 - Game Guide and Walkthrough](https://game.lhg100.com/Article/UploadFiles/201512/2015121619055244.jpg)
Act the same as with previous hunt, so get to the rooftop of one of the highest building in the area, to locate the sergeant. He should fight with infected near one of the Blackwatch bases and his approximate location is [460, 600]. Depending on your preferences you can wait for opportunity to consume Raoul in disguise or quickly approach him as a Heller and grab him.
New objective: Go to the Whitelight facility to destroy the remaining barrels of Whitelight
New objective: Destroy the gun turrets to preoccupy Blackwatch forces with infected
![Your new target is location [485, 847] - [Blacknet mission 9] Operation: Spotted Cat - p. 1 - Blacknet missions - Prototype 2 - Game Guide and Walkthrough](https://game.lhg100.com/Article/UploadFiles/201512/2015121619055225.jpg)
Your new target is location [485, 847]. Once you get there, watch a short cut-scene and read information about bonus objective. In order to complete it, you have to pick up any vehicle wreckage (B button) and throw it at one of two defensive turrets in location [470, 837].
![If the turret is not yet destroyed, keep throwing at it nearby vehicles - [Blacknet mission 9] Operation: Spotted Cat - p. 1 - Blacknet missions - Prototype 2 - Game Guide and Walkthrough](https://game.lhg100.com/Article/UploadFiles/201512/2015121619055226.jpg)
If the turret is not yet destroyed, keep throwing at it nearby vehicles. It is worth noting, that you can perform these actions from a distance, so you won't get into turrets range. After completing bonus objective, deal with the second turret. You can destroy it in the same way (throwing vehicles) or use the rocket launcher or air charged attack.
New objective: Use the hand scanner to sneak into the facility
![Start with shapeshifting, disguising as a soldier or a scientist - [Blacknet mission 9] Operation: Spotted Cat - p. 1 - Blacknet missions - Prototype 2 - Game Guide and Walkthrough](https://game.lhg100.com/Article/UploadFiles/201512/2015121619055231.jpg)
Start with shapeshifting, disguising as a soldier or a scientist. Only now go to the scanner in location [493, 865]. Ignore fights, because you do not have to take part in them. Instead, focus on using the scanner.
New objective: Enter the main room to look for Whitelight
![This is very easy task, because you have only to interact with a new scanner in location [498, 857] - [Blacknet mission 9] Operation: Spotted Cat - p. 1 - Blacknet missions - Prototype 2 - Game Guide and Walkthrough](https://game.lhg100.com/Article/UploadFiles/201512/2015121619055314.jpg)
This is very easy task, because you have only to interact with a new scanner in location [498, 857]. After getting there, watch a new cut-scene, where you'll get to know about found barrels with the virus.
New objective: Use the hand scanner to activate the incinerator
![The scanner can be found on the left from the incinerator in location [517, 852], but before you use it, it would be good to eliminate at least few enemies in this room - [Blacknet mission 9] Operation: Spotted Cat - p. 1 - Blacknet missions - Prototype 2 - Game Guide and Walkthrough](https://game.lhg100.com/Article/UploadFiles/201512/2015121619055311.jpg)
The scanner can be found on the left from the incinerator in location [517, 852], but before you use it, it would be good to eliminate at least few enemies in this room. Depending on your preferences, you can consume them (Y button) or use bio-bombs on them (X button).
![Very important information is that one of your opponents is evolved - [Blacknet mission 9] Operation: Spotted Cat - p. 1 - Blacknet missions - Prototype 2 - Game Guide and Walkthrough](https://game.lhg100.com/Article/UploadFiles/201512/2015121619055398.jpg)
Very important information is that one of your opponents is evolved. This is a right one from two soldiers guarding barrels (screen above). By default you'll learn about it when you try to use the scanner, but he can also reveal himself when you try to grab him. You can of course attack him by surprise and use the Devastator attack before going to the scanner.
New objective: Throw the Whitelight barrels into the incinerator
![Generally you can act here in two ways - [Blacknet mission 9] Operation: Spotted Cat - p. 1 - Blacknet missions - Prototype 2 - Game Guide and Walkthrough](https://game.lhg100.com/Article/UploadFiles/201512/2015121619055333.jpg)
Generally you can act here in two ways. First option is to focus on securing the area. It is worth noting that the evolved opponent has powers similar to the bio-bomber from one of the main missions, so he can create and use bio-bombs on Heller, inflicting him huge damage. In addition, there are Blackwatch soldiers to be eliminated and in this case you should first of all deal with opponents with rocket launchers.
![A second option is to completely ignore your opponents and focus only on destroying barrels with the virus - [Blacknet mission 9] Operation: Spotted Cat - p. 1 - Blacknet missions - Prototype 2 - Game Guide and Walkthrough](https://game.lhg100.com/Article/UploadFiles/201512/2015121619055394.jpg)
A second option is to completely ignore your opponents and focus only on destroying barrels with the virus. Regardless of your choice, eventually you have to go to the barrels shed in location [470, 862].
![Each barrel has to be picked up and thrown (B button) to the incinerator (you can do it from the upper balcony) - [Blacknet mission 9] Operation: Spotted Cat - p. 1 - Blacknet missions - Prototype 2 - Game Guide and Walkthrough](https://game.lhg100.com/Article/UploadFiles/201512/2015121619055314.jpg)
Each barrel has to be picked up and thrown (B button) to the incinerator (you can do it from the upper balcony). Notice also, that the incinerator closes for few seconds after you throw the barrel, so you have to wait until it opens again.
![Even if you have killed all enemies in the room before completing the task, you have to reckon that new opponents might appear - [Blacknet mission 9] Operation: Spotted Cat - p. 1 - Blacknet missions - Prototype 2 - Game Guide and Walkthrough](https://game.lhg100.com/Article/UploadFiles/201512/2015121619055306.jpg)
Even if you have killed all enemies in the room before completing the task, you have to reckon that new opponents might appear. There will be also at least one evolved among them. Keep up with your previous tactics - so eliminate enemies or ignore them, trying to throw all barrels to the incinerator.
New objective: Kill the remaining evolved
![This task might be more difficult, if you've previously ignored your enemies, because in this case there will be probably four evolved to be killed - [Blacknet mission 9] Operation: Spotted Cat - p. 2 - Blacknet missions - Prototype 2 - Game Guide and Walkthrough](https://game.lhg100.com/Article/UploadFiles/201512/2015121619055436.jpg)
This task might be more difficult, if you've previously ignored your enemies, because in this case there will be probably four evolved to be killed. Otherwise you'll have to deal with probably two of them (screen above).
![During fights with elite enemies I suggest using area attacks (Devastator, air charged) and dodge often (so they can't grab you to use the bio-bomb) - [Blacknet mission 9] Operation: Spotted Cat - p. 2 - Blacknet missions - Prototype 2 - Game Guide and Walkthrough](https://game.lhg100.com/Article/UploadFiles/201512/2015121619055483.jpg)
During fights with elite enemies I suggest using area attacks (Devastator, air charged) and dodge often (so they can't grab you to use the bio-bomb). I also suggest trying to consume each eliminated evolved, thus regenerating energy and gaining bio-mass and experience points.
New objective: Exit the facility
![Disguise as a soldier or a scientist and head to the base exit in location [469, 887] - [Blacknet mission 9] Operation: Spotted Cat - p. 2 - Blacknet missions - Prototype 2 - Game Guide and Walkthrough](https://game.lhg100.com/Article/UploadFiles/201512/2015121619055473.jpg)
Disguise as a soldier or a scientist and head to the base exit in location [469, 887]. Use the scanner and once you go outside, move away from the base, ignoring fights around you.
New objective: Go to a Blacknet terminal
![For the third time go to location [482, 442] - [Blacknet mission 9] Operation: Spotted Cat - p. 2 - Blacknet missions - Prototype 2 - Game Guide and Walkthrough](https://game.lhg100.com/Article/UploadFiles/201512/2015121619055494.jpg)
For the third time go to location [482, 442]. Same as previously, you should approach the terminal masked as a soldier or a scientist, remembering about avoiding viral detectors. Use the terminal again (B button).
New objective: Hunt and consume lieutenant Sanjay McElroy
![1 - [Blacknet mission 9] Operation: Spotted Cat - p. 2 - Blacknet missions - Prototype 2 - Game Guide and Walkthrough](https://game.lhg100.com/Article/UploadFiles/201512/2015121619055453.jpg)
![Act the same as with previous two hunts, so get to the rooftop of one of the highest building in the area, to locate the lieutenant - [Blacknet mission 9] Operation: Spotted Cat - p. 2 - Blacknet missions - Prototype 2 - Game Guide and Walkthrough](https://game.lhg100.com/Article/UploadFiles/201512/2015121619055525.jpg)
Act the same as with previous two hunts, so get to the rooftop of one of the highest building in the area, to locate the lieutenant. He should fight with infected on one of streets in the northern part of the red zone and his approximate location is [585, 380]. Depending on your preferences you can wait in disguise to consume McElroy or approach him as Heller and quickly grab him.
New objective: Go to base India Six Niner to find Rottweiler
![Your next target is location [738, 602] - [Blacknet mission 9] Operation: Spotted Cat - p. 2 - Blacknet missions - Prototype 2 - Game Guide and Walkthrough](https://game.lhg100.com/Article/UploadFiles/201512/2015121619055583.jpg)
Your next target is location [738, 602]. Approach to the indicated base to learn how you can lure out Rottweiler.
New objective: Kill the Blackwatch forces to lure out Rottweiler
![You can eliminate Blackwatch squads in many different ways, but I suggest two options - [Blacknet mission 9] Operation: Spotted Cat - p. 2 - Blacknet missions - Prototype 2 - Game Guide and Walkthrough](https://game.lhg100.com/Article/UploadFiles/201512/2015121619055553.jpg)
You can eliminate Blackwatch squads in many different ways, but I suggest two options. First one is to get in disguise inside the base and locate a rocket launcher shed on the rooftops of one of the buildings (screen above).
![The second option is to obtain the helicopter and in order to do this I suggest moving to another Blackwatch base in location [750, 208] - [Blacknet mission 9] Operation: Spotted Cat - p. 2 - Blacknet missions - Prototype 2 - Game Guide and Walkthrough](https://game.lhg100.com/Article/UploadFiles/201512/2015121619055608.jpg)
The second option is to obtain the helicopter and in order to do this I suggest moving to another Blackwatch base in location [750, 208]. Steal the helicopter (B button) and fly it to the place of current mission. Now start shooting enemy forces (LB and RB buttons.
![Regardless of the way you act, watch out for the base defensive turret and super soldiers (screen above) - [Blacknet mission 9] Operation: Spotted Cat - p. 2 - Blacknet missions - Prototype 2 - Game Guide and Walkthrough](https://game.lhg100.com/Article/UploadFiles/201512/2015121619055644.jpg)
Regardless of the way you act, watch out for the base defensive turret and super soldiers (screen above). As a reminder, the best tactics to defeat them in a melee fight is to block their attacks with a shield (RB button) and then quickly counterattacks (bio-mass will be useful later).
New objective: Destroy the reinforcements to lure out Rottweiler
![Notice that the game has unlocked bonus objective (using brawlers to destroy hostile machines) and I recommend watching out during completing it - [Blacknet mission 9] Operation: Spotted Cat - p. 2 - Blacknet missions - Prototype 2 - Game Guide and Walkthrough](https://game.lhg100.com/Article/UploadFiles/201512/2015121619055637.jpg)
Notice that the game has unlocked bonus objective (using brawlers to destroy hostile machines) and I recommend watching out during completing it. It is divided into several parts and if you miss one of them, you won't be able to gain additional experience points. So start with the special attack, Pack leader (X + A) and then order your brawlers to attack the APC (press right analog after targeting the machine).
![When the brawlers are taking care of the APC, you can eliminate standard Blackwatch soldiers - [Blacknet mission 9] Operation: Spotted Cat - p. 2 - Blacknet missions - Prototype 2 - Game Guide and Walkthrough](https://game.lhg100.com/Article/UploadFiles/201512/2015121619055609.jpg)
When the brawlers are taking care of the APC, you can eliminate standard Blackwatch soldiers. If brawlers die before they destroy the APC, summon other monsters, earlier charging the bio-mass bar.
![After a while the game will display short cut-scene showing a second group of enemies - [Blacknet mission 9] Operation: Spotted Cat - p. 2 - Blacknet missions - Prototype 2 - Game Guide and Walkthrough](https://game.lhg100.com/Article/UploadFiles/201512/2015121619055664.jpg)
After a while the game will display short cut-scene showing a second group of enemies. In this case order your brawlers to attack the hostile tank.
![Ignore the tank yourself and start attacking super soldiers, who appeared with the tank - [Blacknet mission 9] Operation: Spotted Cat - p. 2 - Blacknet missions - Prototype 2 - Game Guide and Walkthrough](https://game.lhg100.com/Article/UploadFiles/201512/2015121619055601.jpg)
Ignore the tank yourself and start attacking super soldiers, who appeared with the tank. Same as previously rely on effective blocks and counterattacks. Do not forget that you can also grab persons running around to regenerate your energy, charge bio-mass bar or "arm" the bio-bomb.
![Third part of the fight will start once the hostile helicopter appears neat the Blackwatch base - [Blacknet mission 9] Operation: Spotted Cat - p. 2 - Blacknet missions - Prototype 2 - Game Guide and Walkthrough](https://game.lhg100.com/Article/UploadFiles/201512/2015121619055774.jpg)
Third part of the fight will start once the hostile helicopter appears neat the Blackwatch base. Same as previously you have to target the machine (left trigger) and order you brawlers to attack it (press left analog).
![The helicopter is accompanied only by weakest opponents so deal with them quickly and patiently wait until brawlers destroy the helicopter - [Blacknet mission 9] Operation: Spotted Cat - p. 2 - Blacknet missions - Prototype 2 - Game Guide and Walkthrough](https://game.lhg100.com/Article/UploadFiles/201512/2015121619055725.jpg)
The helicopter is accompanied only by weakest opponents so deal with them quickly and patiently wait until brawlers destroy the helicopter. Remember not to attack the machine yourself (also by deflecting its rockets with the shield), because you may fail bonus objective.
New objective: Destroy the tank to force out Rottweiler
![The fourth, last group of enemies consists of soldiers, tank and two APCs - [Blacknet mission 9] Operation: Spotted Cat - p. 2 - Blacknet missions - Prototype 2 - Game Guide and Walkthrough](https://game.lhg100.com/Article/UploadFiles/201512/2015121619055794.jpg)
The fourth, last group of enemies consists of soldiers, tank and two APCs. Note that APCs are not indicated by the game, so you do not have to destroy them using your brawlers. As a result it is best to destroy them using torn off launcher or by sabotaging them (Y button).
![Only after destroying APCs order brawlers to attack the tank - [Blacknet mission 9] Operation: Spotted Cat - p. 2 - Blacknet missions - Prototype 2 - Game Guide and Walkthrough](https://game.lhg100.com/Article/UploadFiles/201512/2015121619055746.jpg)
Only after destroying APCs order brawlers to attack the tank. In the same time attack Blackwatch squads, killing soldiers with rocket launchers first.
![The Blackwatch tank is more resistant than the one from previous part of the fight, so it will be probably your last target - [Blacknet mission 9] Operation: Spotted Cat - p. 2 - Blacknet missions - Prototype 2 - Game Guide and Walkthrough](https://game.lhg100.com/Article/UploadFiles/201512/2015121619055766.jpg)
The Blackwatch tank is more resistant than the one from previous part of the fight, so it will be probably your last target. Keep sending brawlers to destroy the tank. Fight until you eliminate all enemy forces (in that moment you should complete bonus objective).
New objective: Consume Rottweiler
New objective: Exit the alert
![Ignore enemy forces that may still be present in the area and as fast as possible run to Rottweiler - [Blacknet mission 9] Operation: Spotted Cat - p. 2 - Blacknet missions - Prototype 2 - Game Guide and Walkthrough](https://game.lhg100.com/Article/UploadFiles/201512/2015121619055743.jpg)
Ignore enemy forces that may still be present in the area and as fast as possible run to Rottweiler. You have to grab him and consume him but fortunately there will be no problems at all. This mission will end now, unless you have to lose the chase. Notice that as a reward for completing this mission you can choose mutation from category Offensive.
New objective: Go to a Blacknet terminal
![1 - [Blacknet mission 10] Operation: Long Horizon - Blacknet missions - Prototype 2 - Game Guide and Walkthrough](https://game.lhg100.com/Article/UploadFiles/201512/2015121619055817.jpg)
![In order to start this mission, you have to get to location [402, 308] - [Blacknet mission 10] Operation: Long Horizon - Blacknet missions - Prototype 2 - Game Guide and Walkthrough](https://game.lhg100.com/Article/UploadFiles/201512/2015121619055895.jpg)
In order to start this mission, you have to get to location [402, 308]. Very important information is fact, that this terminal can be used only by authorized persons, so you have to consume a scientist or a soldier and disguise yourself. Find the Blacknet terminal and use it (B button), watching out for viral detectors and ignoring fights with infected in the area.
New objective: Hunt and consume Lindsay Benhurst
![As you probably remember, it is best to start the hunt with getting to the rooftop of one of the highest building in area - [Blacknet mission 10] Operation: Long Horizon - Blacknet missions - Prototype 2 - Game Guide and Walkthrough](https://game.lhg100.com/Article/UploadFiles/201512/2015121619055878.jpg)
As you probably remember, it is best to start the hunt with getting to the rooftop of one of the highest building in area. Only then send an impulse (press left analog), so you can easily locate the person you're looking for (screen above).
![2 - [Blacknet mission 10] Operation: Long Horizon - Blacknet missions - Prototype 2 - Game Guide and Walkthrough](https://game.lhg100.com/Article/UploadFiles/201512/2015121619055848.jpg)
![Lindsay Benhurst stations in location [520, 430] and since it is military area you should approach it disguised as a soldier or a scientist - [Blacknet mission 10] Operation: Long Horizon - Blacknet missions - Prototype 2 - Game Guide and Walkthrough](https://game.lhg100.com/Article/UploadFiles/201512/2015121619055804.jpg)
Lindsay Benhurst stations in location [520, 430] and since it is military area you should approach it disguised as a soldier or a scientist. After getting there it will turn out that the person you're looking for is imprisoned in a special cage.
![Start with destroying the cage and depending on your preferences you can use the rocket launcher, one of Heller's abilities or throw a large object at the cage - [Blacknet mission 10] Operation: Long Horizon - Blacknet missions - Prototype 2 - Game Guide and Walkthrough](https://game.lhg100.com/Article/UploadFiles/201512/2015121619055854.jpg)
Start with destroying the cage and depending on your preferences you can use the rocket launcher, one of Heller's abilities or throw a large object at the cage. After freeing Benhurst try to consume him but since he also got virus powers, you'll fail.
New objective: Defeat Lindsay Benhurst
![Start the fight with Benhurst - [Blacknet mission 10] Operation: Long Horizon - Blacknet missions - Prototype 2 - Game Guide and Walkthrough](https://game.lhg100.com/Article/UploadFiles/201512/2015121619055989.jpg)
Start the fight with Benhurst. If you do not want to deal with the base defensive turret, try to move away from that location, hoping that Lindsay will follow you. But you can also stay in the base, using surrounding objects (helicopter, weapons sheds) to your advantage and consuming soldiers.
![Notice that Lindsay has ability to summon birds - [Blacknet mission 10] Operation: Long Horizon - Blacknet missions - Prototype 2 - Game Guide and Walkthrough](https://game.lhg100.com/Article/UploadFiles/201512/2015121619055928.jpg)
Notice that Lindsay has ability to summon birds. Extermination of flying creatures is not required, but when they become very tedious you should consider killing them, especially that they die fast.
New objective: Consume Lindsay Benhurst
![Keep attacking Lindsay until his energy bar is almost empty - [Blacknet mission 10] Operation: Long Horizon - Blacknet missions - Prototype 2 - Game Guide and Walkthrough](https://game.lhg100.com/Article/UploadFiles/201512/2015121619055906.jpg)
Keep attacking Lindsay until his energy bar is almost empty. Run towards him and consume him.
New objective: Destroy the helicopter so the Evolved can't hijack it
![There are three helicopters in total to be destroyed and first of them appears in location [406, 350] - [Blacknet mission 10] Operation: Long Horizon - Blacknet missions - Prototype 2 - Game Guide and Walkthrough](https://game.lhg100.com/Article/UploadFiles/201512/2015121619055993.jpg)
There are three helicopters in total to be destroyed and first of them appears in location [406, 350]. Approach the helicopter indicated by the game (you might jump over rooftops and gliding). Take a note at the bar visible in upper right corner of the screen. It shows distance between you and the helicopter and when it gets empty, you'll fail the mission.
![When you sufficiently approach the helicopter, you have to decide how you want to destroy it - [Blacknet mission 10] Operation: Long Horizon - Blacknet missions - Prototype 2 - Game Guide and Walkthrough](https://game.lhg100.com/Article/UploadFiles/201512/2015121619055947.jpg)
When you sufficiently approach the helicopter, you have to decide how you want to destroy it. You can jump on the helicopter and perform so-called finisher (Y button - requires appropriate mutation) or tear off its gun (X button). However I recommend using the whip. So target the helicopter (left trigger) and then use the whip distance attacks (hold X button or other button assigned to this power).
![After two or three hits the helicopter will explode - [Blacknet mission 10] Operation: Long Horizon - Blacknet missions - Prototype 2 - Game Guide and Walkthrough](https://game.lhg100.com/Article/UploadFiles/201512/2015121619055931.jpg)
After two or three hits the helicopter will explode. Regardless of the method you choose, you have to destroy hostile flying machine, which will result in displaying new cut-scene.
New objective: Retrieve the Blackwatch munitions before the Evolved arrive
![This objective is very similar to races know from previous Blacknet mission - [Blacknet mission 10] Operation: Long Horizon - Blacknet missions - Prototype 2 - Game Guide and Walkthrough](https://game.lhg100.com/Article/UploadFiles/201512/2015121619055948.jpg)
This objective is very similar to races know from previous Blacknet mission. In this case you have to collect four containers, randomly located in a small area. So help yourself with sprint option, run over the walls, perform long jumps and glide. You have to collect all ammo containers before time runs out.
New objective: Destroy the helicopter so the Evolved can't hijack it
![The second helicopter will appear in location [419, 472] - [Blacknet mission 10] Operation: Long Horizon - Blacknet missions - Prototype 2 - Game Guide and Walkthrough](https://game.lhg100.com/Article/UploadFiles/201512/2015121619055989.jpg)
The second helicopter will appear in location [419, 472]. Same as previously you have to approach the machine and then destroy it in any way. Remember - do not let the helicopter fly away.
New objective: Retrieve the Blackwatch munitions before the Evolved arrive
![Also this task doesn't differ from the previous such objective - you have to quickly find ammo containers - [Blacknet mission 10] Operation: Long Horizon - Blacknet missions - Prototype 2 - Game Guide and Walkthrough](https://game.lhg100.com/Article/UploadFiles/201512/2015121619060056.jpg)
Also this task doesn't differ from the previous such objective - you have to quickly find ammo containers. Collect all four containers before time goes out.
New objective: Destroy the helicopter to stop the evolved
![The third, last helicopter appears in location [640, 406] - [Blacknet mission 10] Operation: Long Horizon - Blacknet missions - Prototype 2 - Game Guide and Walkthrough](https://game.lhg100.com/Article/UploadFiles/201512/2015121619060048.jpg)
The third, last helicopter appears in location [640, 406]. Once again repeat all previously described actions - approach the machine and destroy it.
New objective: Defeat the evolved
![Start the fight with the evolved, during which you should rely on attacks performed in a short distance and (if possible) on the Devastator attack, which might empty the evolved energy bar if you have luck - [Blacknet mission 10] Operation: Long Horizon - Blacknet missions - Prototype 2 - Game Guide and Walkthrough](https://game.lhg100.com/Article/UploadFiles/201512/2015121619060088.jpg)
Start the fight with the evolved, during which you should rely on attacks performed in a short distance and (if possible) on the Devastator attack, which might empty the evolved energy bar if you have luck.
![During the fight try to dodge your opponent's attacks if possible and be aware that he can summon birds - [Blacknet mission 10] Operation: Long Horizon - Blacknet missions - Prototype 2 - Game Guide and Walkthrough](https://game.lhg100.com/Article/UploadFiles/201512/2015121619060078.jpg)
During the fight try to dodge your opponent's attacks if possible and be aware that he can summon birds. Notice also, that there are many infected running in the area, so you can easily regenerate both energy and bio-mass. Finish the fight by consuming the evolved.
New objective: Go to a Blacknet terminal
![Once again go to location [402, 308] - [Blacknet mission 10] Operation: Long Horizon - Blacknet missions - Prototype 2 - Game Guide and Walkthrough](https://game.lhg100.com/Article/UploadFiles/201512/2015121619060196.jpg)
Once again go to location [402, 308]. Same as previously, you should approach the terminal masked as a soldier or a scientist, remembering about avoiding viral detectors. Use the terminal again (B button).
New objective: Hunt and consume dr. Lawrence Foster
![3 - [Blacknet mission 10] Operation: Long Horizon - Blacknet missions - Prototype 2 - Game Guide and Walkthrough](https://game.lhg100.com/Article/UploadFiles/201512/2015121619060105.jpg)
![Act the same as with previous hunt, so get to the rooftop of one of the highest building in the area, to locate the doctor - [Blacknet mission 10] Operation: Long Horizon - Blacknet missions - Prototype 2 - Game Guide and Walkthrough](https://game.lhg100.com/Article/UploadFiles/201512/2015121619060175.jpg)
Act the same as with previous hunt, so get to the rooftop of one of the highest building in the area, to locate the doctor. Lawrence Foster stands on the rooftop in location [574, 324] and is accompanied by three brawlers. I do not recommend to attack nor to consume him, but to move away from the area after getting brawlers' attention.
![Start fighting with brawlers, who should not be a big challenge for you - [Blacknet mission 10] Operation: Long Horizon - Blacknet missions - Prototype 2 - Game Guide and Walkthrough](https://game.lhg100.com/Article/UploadFiles/201512/2015121619060194.jpg)
Start fighting with brawlers, who should not be a big challenge for you. I personally recommend fighting them on rooftops of other buildings, because you can push brawlers so they will fall down and that can give you more time to kill beasts one by one. Try to eliminate all three brawlers.
New objective: Defeat dr. Lawrence Foster
New objective: Consume dr. Lawrence Foster
![Only now return to Foster - [Blacknet mission 10] Operation: Long Horizon - Blacknet missions - Prototype 2 - Game Guide and Walkthrough](https://game.lhg100.com/Article/UploadFiles/201512/2015121619060118.jpg)
Only now return to Foster. When you try to attack him or consume him, it will turn out that doctor has virus powers. So as a result it will be easier to defeat him once previously mentioned brawlers are dead. As for the fight itself, reckon that Foster can summon birds. You should attack him with quick attacks in a melee fight. End the dual by consuming heavily wounded doctor.
New objective: Go to base Hotel Two Seven to kill dr. Vandiver and commander Chapin
New objective: Use the hand scanner to sneak into the base while it's under attack
![Go to location [515, 435] and since you have to get inside the military base, make sure to disguise as a soldier or a scientist - [Blacknet mission 10] Operation: Long Horizon - Blacknet missions - Prototype 2 - Game Guide and Walkthrough](https://game.lhg100.com/Article/UploadFiles/201512/2015121619060264.jpg)
Go to location [515, 435] and since you have to get inside the military base, make sure to disguise as a soldier or a scientist. Once you approach the base, watch a short cut-scene. Ignore the fights and focus only on getting to the scanner in location [513, 428].
New objective: Consume dr. Vandiver to stop fetal testing and access Chapin
![Dr - [Blacknet mission 10] Operation: Long Horizon - Blacknet missions - Prototype 2 - Game Guide and Walkthrough](https://game.lhg100.com/Article/UploadFiles/201512/2015121619060296.jpg)
Dr. Vandiver walks in the adjacent room and his approximate location is [497, 444]. Notice also new bonus objective - you have to stay hidden until you unlock an access to the room with commander Chapin. So stay hidden and do not attack anyone. In order to get to dr. Vandiver you have to use the passage guarded by two guards (screen above) and then go down the stairs.
![As you've probably noticed, the scientist indicated by the game is constantly observed by someone - [Blacknet mission 10] Operation: Long Horizon - Blacknet missions - Prototype 2 - Game Guide and Walkthrough](https://game.lhg100.com/Article/UploadFiles/201512/2015121619060295.jpg)
As you've probably noticed, the scientist indicated by the game is constantly observed by someone. You can solve this problem in two ways. First method is to successive consuming those characters, which are not observed by other persons. The second method (in my opinion better one) is to grab those character and make them living bio-bombs (X button; above screen).
![Main advantage of using bio-bombs is the possibility of elimination several persons at once and forcing others to leave their default positions - [Blacknet mission 10] Operation: Long Horizon - Blacknet missions - Prototype 2 - Game Guide and Walkthrough](https://game.lhg100.com/Article/UploadFiles/201512/2015121619060236.jpg)
Main advantage of using bio-bombs is the possibility of elimination several persons at once and forcing others to leave their default positions. What's more, such actions won't fail your bonus objective, because you're still not exposed. Keep performing your chosen actions until you can quietly grab and consume dr. Vandiver (screen above).
New objective: Use the hand scanner to access commander Chapin
![The hand scanner can be found in location [520, 433] - [Blacknet mission 10] Operation: Long Horizon - Blacknet missions - Prototype 2 - Game Guide and Walkthrough](https://game.lhg100.com/Article/UploadFiles/201512/2015121619060339.jpg)
The hand scanner can be found in location [520, 433]. Notice that by using this device you've completed bonus objective, so during rest of the mission you do not have to sneak any longer.
New objective: Consume commander Chapin
![An exact location of commander Chapin is in [524, 427] and you have to know that he has virus powers, so you won't be able to consume him without problems - [Blacknet mission 10] Operation: Long Horizon - Blacknet missions - Prototype 2 - Game Guide and Walkthrough](https://game.lhg100.com/Article/UploadFiles/201512/2015121619060346.jpg)
An exact location of commander Chapin is in [524, 427] and you have to know that he has virus powers, so you won't be able to consume him without problems. So you can attack him now, but my suggestion is to eliminate all soldiers in the room first. That will make the fight easier.
New objective: Defeat commander Chapin to stop Blacklight fetal testing
![You fight can be started directly by you or after an attempt of consuming commander Chapin - [Blacknet mission 10] Operation: Long Horizon - Blacknet missions - Prototype 2 - Game Guide and Walkthrough](https://game.lhg100.com/Article/UploadFiles/201512/2015121619060346.jpg)
You fight can be started directly by you or after an attempt of consuming commander Chapin. Once it has started, focus your attention not on the commander, but on the super soldier. Try to block his attacks (RB button) and then counterattack.
![After elimination of super soldier, start attacking commander Chapin - [Blacknet mission 10] Operation: Long Horizon - Blacknet missions - Prototype 2 - Game Guide and Walkthrough](https://game.lhg100.com/Article/UploadFiles/201512/2015121619060366.jpg)
After elimination of super soldier, start attacking commander Chapin. Same as with previous fights, try to hit him in a melee fight. Since the room is relatively small, the Devastator attack can also be useful here (screen above).
New objective: Consume commander Chapin
New objective: Exit base Hotel Two Seven
![Keep fighting until you can consume the commander - [Blacknet mission 10] Operation: Long Horizon - Blacknet missions - Prototype 2 - Game Guide and Walkthrough](https://game.lhg100.com/Article/UploadFiles/201512/2015121619060440.jpg)
Keep fighting until you can consume the commander. The only thing left is to exit the base, so go to the elevator in location [510, 412], disguised of course as a soldier or a scientist. After leaving the building the mission will end. Notice that as a reward for completing this mission you can choose a mutation from category Power Specialist.
New objective: Go to a Blacknet terminal
![1 - [Blacknet mission 11] Operation: Stun Circuit - Blacknet missions - Prototype 2 - Game Guide and Walkthrough](https://game.lhg100.com/Article/UploadFiles/201512/2015121619060455.jpg)
![In order to start this mission, you have to get to location [649, 658] - [Blacknet mission 11] Operation: Stun Circuit - Blacknet missions - Prototype 2 - Game Guide and Walkthrough](https://game.lhg100.com/Article/UploadFiles/201512/2015121619060488.jpg)
In order to start this mission, you have to get to location [649, 658]. Very important information is fact, that this terminal can be used only by authorized persons, so you have to consume a scientist or a soldier and disguise yourself. Find the Blacknet terminal and use it (B button), watching out for viral detectors and ignoring fights with infected.
New objective: Hunt and consume lieutenant Garrison Pugh
![As you probably remember, it is best to start the hunt with getting to the rooftop of one of the highest building in area - [Blacknet mission 11] Operation: Stun Circuit - Blacknet missions - Prototype 2 - Game Guide and Walkthrough](https://game.lhg100.com/Article/UploadFiles/201512/2015121619060435.jpg)
As you probably remember, it is best to start the hunt with getting to the rooftop of one of the highest building in area. Only then send an impulse (press left analog), so you can easily locate the lieutenant you're looking for (screen above).
![2 - [Blacknet mission 11] Operation: Stun Circuit - Blacknet missions - Prototype 2 - Game Guide and Walkthrough](https://game.lhg100.com/Article/UploadFiles/201512/2015121619060559.jpg)
![An approximate location of lieutenant Garrison Pugh is [555, 730] - [Blacknet mission 11] Operation: Stun Circuit - Blacknet missions - Prototype 2 - Game Guide and Walkthrough](https://game.lhg100.com/Article/UploadFiles/201512/2015121619060552.jpg)
An approximate location of lieutenant Garrison Pugh is [555, 730]. Depending on the fact how quick you can find him, he will still fight infected or lie wounded on the ground. Regardless of the turn of events you have to consume him.
New objective: Go to the overlook to survey the crash site
![Go to location [553, 663] - [Blacknet mission 11] Operation: Stun Circuit - Blacknet missions - Prototype 2 - Game Guide and Walkthrough](https://game.lhg100.com/Article/UploadFiles/201512/2015121619060580.jpg)
Go to location [553, 663]. The crash site you're looking for is located on the rooftop of one of the buildings (screen above). In order to get there you might run over walls and/or glide. After you approach the crash site, the game will display short cut-scene.
New objective: Retrieve the tracking equipment that can pinpoint Dana's location
![Now you have to take part in some kind of race, because your current task is to reach indicated containers in given time limit (you can see the counter on the screen) - [Blacknet mission 11] Operation: Stun Circuit - Blacknet missions - Prototype 2 - Game Guide and Walkthrough](https://game.lhg100.com/Article/UploadFiles/201512/2015121619060546.jpg)
Now you have to take part in some kind of race, because your current task is to reach indicated containers in given time limit (you can see the counter on the screen). The first container can be found in location [558, 647], and next targets will be indicated by the game on ongoing basis. Notice, that after approaching each container, your time limit extends, but you can't afford any longer breaks.
During the "race", pay most attention on getting to adjacent buildings. It is best to start such actions with strong rebound (hold A button) and then rely on gliding (hold right trigger). In some situations it might be necessary to run over the walls and precise landing in the indicated area. It is also worth noting that in flight you can additionally press A button to perform so called dashes, which are helpful in reaching rooftops of distant buildings.
![This race is more difficult than ones in initial Blacknet missions, so to increase your chances of winning you should start it only after upgrading Heller's acrobatic abilities - [Blacknet mission 11] Operation: Stun Circuit - Blacknet missions - Prototype 2 - Game Guide and Walkthrough](https://game.lhg100.com/Article/UploadFiles/201512/2015121619060672.jpg)
This race is more difficult than ones in initial Blacknet missions, so to increase your chances of winning you should start it only after upgrading Heller's acrobatic abilities. During the race ignore the fact, that you're under fire from all directions and do not stop anywhere. The most difficult moments are climbing the skyscrapers (screen above) and in this case you should deflect the rockets shot at you (press RB button) and help yourself with horizontal dashes.
New objective: Exit the alert
![If you didn't have longer breaks along your way, you should reach the last container located one of the rooftops (screen above) 7-10 second before time limit - [Blacknet mission 11] Operation: Stun Circuit - Blacknet missions - Prototype 2 - Game Guide and Walkthrough](https://game.lhg100.com/Article/UploadFiles/201512/2015121619060634.jpg)
If you didn't have longer breaks along your way, you should reach the last container located one of the rooftops (screen above) 7-10 second before time limit. Depending on your preferences you can lose the chase in a standard way or eliminating helicopters which were disturbing you during the race.
New objective: Go to a Blacknet terminal
![Once again go to location [649, 658] - [Blacknet mission 11] Operation: Stun Circuit - Blacknet missions - Prototype 2 - Game Guide and Walkthrough](https://game.lhg100.com/Article/UploadFiles/201512/2015121619060618.jpg)
Once again go to location [649, 658]. Same as previously, you should approach the terminal masked as a soldier or a scientist, remembering about avoiding viral detectors. Use the terminal again (B button).
New objective: Hunt and consume sergeant Vernon McNabb
![3 - [Blacknet mission 11] Operation: Stun Circuit - Blacknet missions - Prototype 2 - Game Guide and Walkthrough](https://game.lhg100.com/Article/UploadFiles/201512/2015121619060610.jpg)
![Act the same as with previous hunt, so get to the rooftop of one of the highest building in the area, to locate McNabba - [Blacknet mission 11] Operation: Stun Circuit - Blacknet missions - Prototype 2 - Game Guide and Walkthrough](https://game.lhg100.com/Article/UploadFiles/201512/2015121619060674.jpg)
Act the same as with previous hunt, so get to the rooftop of one of the highest building in the area, to locate McNabba. Same as the first character from this mission, McNabb should fight infected and his approximate location is [710, 540]. You can grab and consume him right away or wait until monsters get him down.
New objective: Destroy the tanks to smoke out commander Collins
![Initial location of tanks is [605, 515] but they are moving - [Blacknet mission 11] Operation: Stun Circuit - Blacknet missions - Prototype 2 - Game Guide and Walkthrough](https://game.lhg100.com/Article/UploadFiles/201512/2015121619060622.jpg)
Initial location of tanks is [605, 515] but they are moving. Approach tanks (it would be good to disguise as a soldier or a scientist). You have complete freedom as for destroying vehicles but I recommend jumping on machines indicated by the game.
![Depending on which abilities you have unlocked and your preferable tactics, you can sabotage tanks or take control over them - [Blacknet mission 11] Operation: Stun Circuit - Blacknet missions - Prototype 2 - Game Guide and Walkthrough](https://game.lhg100.com/Article/UploadFiles/201512/2015121619060785.jpg)
Depending on which abilities you have unlocked and your preferable tactics, you can sabotage tanks or take control over them. Destroy all three tanks, thus forcing commander Collins to get out of one of the machines.
New objective: Consume commander Collins for bribing you to reveal Dana's location
![Go after fleeing commander - [Blacknet mission 11] Operation: Stun Circuit - Blacknet missions - Prototype 2 - Game Guide and Walkthrough](https://game.lhg100.com/Article/UploadFiles/201512/2015121619060714.jpg)
Go after fleeing commander. When you try to attack or consume him, it will unfortunately turn out that Collins has virus powers.
New objective: Chase commander Collins
![Go after commander - [Blacknet mission 11] Operation: Stun Circuit - Blacknet missions - Prototype 2 - Game Guide and Walkthrough](https://game.lhg100.com/Article/UploadFiles/201512/2015121619060742.jpg)
Go after commander. Notice the distance bar visible in the upper right corner. If it's get empty you'll fail the mission, so stay close to the commander.
![During the chase use of course sprint, running over walls, long jumps and gliding - [Blacknet mission 11] Operation: Stun Circuit - Blacknet missions - Prototype 2 - Game Guide and Walkthrough](https://game.lhg100.com/Article/UploadFiles/201512/2015121619060744.jpg)
During the chase use of course sprint, running over walls, long jumps and gliding. Do not try to attack or grab commander, because the chase will end after you get to the rooftop of one of the skyscrapers. You'll know it because the game will display another cut-scene with the hostile helicopter.
New objective: Destroy the helicopter to force out commander Collins
![Again, you have complete freedom of actions - [Blacknet mission 11] Operation: Stun Circuit - Blacknet missions - Prototype 2 - Game Guide and Walkthrough](https://game.lhg100.com/Article/UploadFiles/201512/2015121619060808.jpg)
Again, you have complete freedom of actions. You can sabotage the helicopter, deflects its rockets or use the rocket launcher. I recommend destroying the hostile machine with the ranged whip attack (hold X button).
New objective: Defeat commander Collins
![Before you do anything, read new bonus objective which can be completed if you defeat Collins using only Claws and Hammerfist - [Blacknet mission 11] Operation: Stun Circuit - Blacknet missions - Prototype 2 - Game Guide and Walkthrough](https://game.lhg100.com/Article/UploadFiles/201512/2015121619060834.jpg)
Before you do anything, read new bonus objective which can be completed if you defeat Collins using only Claws and Hammerfist. So assign these powers to pad buttons (menu is opened by pressing LB), so you'll be ready after the fight begins.
![It is best to use Claws to perform quick attacks and they are perfect choice on a short range combined with often dodging commander's blows - [Blacknet mission 11] Operation: Stun Circuit - Blacknet missions - Prototype 2 - Game Guide and Walkthrough](https://game.lhg100.com/Article/UploadFiles/201512/2015121619060886.jpg)
It is best to use Claws to perform quick attacks and they are perfect choice on a short range combined with often dodging commander's blows.
![Hammerfist should be used each time Collins moves away from Heller - [Blacknet mission 11] Operation: Stun Circuit - Blacknet missions - Prototype 2 - Game Guide and Walkthrough](https://game.lhg100.com/Article/UploadFiles/201512/2015121619060876.jpg)
Hammerfist should be used each time Collins moves away from Heller. Do not forget also about great air charged attack (screen above), because it can deal considerable damage to the commander.
New objective: Consume commander Collins
![Fight until commander's energy bar is almost empty (you should also complete bonus objective then) - [Blacknet mission 11] Operation: Stun Circuit - Blacknet missions - Prototype 2 - Game Guide and Walkthrough](https://game.lhg100.com/Article/UploadFiles/201512/2015121619060898.jpg)
Fight until commander's energy bar is almost empty (you should also complete bonus objective then). The only thing left is to run to Collins and consume him (and lose the chase if there are any enemies in the area). Notice that as a reward for completing this mission you can choose a mutation from category Predator.
New objective: Go to a Blacknet terminal
![1 - [Blacknet mission 12] Operation: Clockwork - p. 1 - Blacknet missions - Prototype 2 - Game Guide and Walkthrough](https://game.lhg100.com/Article/UploadFiles/201512/2015121619060822.jpg)
![In order to start this mission, you have to get to location [761, 226] - [Blacknet mission 12] Operation: Clockwork - p. 1 - Blacknet missions - Prototype 2 - Game Guide and Walkthrough](https://game.lhg100.com/Article/UploadFiles/201512/2015121619060997.jpg)
In order to start this mission, you have to get to location [761, 226]. Very important information is fact, that this terminal can be used only by authorized persons, so you have to consume a scientist or a soldier and disguise yourself. Find the Blacknet terminal and use it (B button), watching out for viral detectors.
New objective: Hunt and consume dr. Alexander Murray
![As you probably remember, it is best to start the hunt with getting to the rooftop of one of the highest building in area - [Blacknet mission 12] Operation: Clockwork - p. 1 - Blacknet missions - Prototype 2 - Game Guide and Walkthrough](https://game.lhg100.com/Article/UploadFiles/201512/2015121619060916.jpg)
As you probably remember, it is best to start the hunt with getting to the rooftop of one of the highest building in area. Only then send an impulse (press left analog), so you can easily locate the scientist you're looking for (screen above).
![2 - [Blacknet mission 12] Operation: Clockwork - p. 1 - Blacknet missions - Prototype 2 - Game Guide and Walkthrough](https://game.lhg100.com/Article/UploadFiles/201512/2015121619060903.jpg)
![Dr - [Blacknet mission 12] Operation: Clockwork - p. 1 - Blacknet missions - Prototype 2 - Game Guide and Walkthrough](https://game.lhg100.com/Article/UploadFiles/201512/2015121619060963.jpg)
Dr. Alexander Murray should stay in a small park in location [676, 296] and he is surrounded by few Blackwatch soldiers. Depending on your preferences you can give up the disguise and rapidly consume the scientist or stealth eliminate all soldiers or wait until soldiers turn back and then grab Murray.
New objective: Hijack the helicopter to kidnap and consume Gentek VIP's
![Plan your travel to location [522, 437] and since it is a military base, I would strongly suggest disguising as a scientist or a soldier - [Blacknet mission 12] Operation: Clockwork - p. 1 - Blacknet missions - Prototype 2 - Game Guide and Walkthrough](https://game.lhg100.com/Article/UploadFiles/201512/2015121619060986.jpg)
Plan your travel to location [522, 437] and since it is a military base, I would strongly suggest disguising as a scientist or a soldier. Get to the landing pad on one of the buildings' rooftop, approach the helicopter and press B button to get inside (it won't trigger an alarm, assuming of course that you're disguised).
New objective: Go to the hot zone to rescue New Templar scientist
![Take off to the safe altitude (right trigger) and head to the destination point in location [574, 295] - [Blacknet mission 12] Operation: Clockwork - p. 1 - Blacknet missions - Prototype 2 - Game Guide and Walkthrough](https://game.lhg100.com/Article/UploadFiles/201512/2015121619060938.jpg)
Take off to the safe altitude (right trigger) and head to the destination point in location [574, 295]. Once you get there (screen above), you'll receive new mission objective.
New objective: Kill the infected to rescue New Templar scientist
![In this case youll have to deal with infected birds - [Blacknet mission 12] Operation: Clockwork - p. 1 - Blacknet missions - Prototype 2 - Game Guide and Walkthrough](https://game.lhg100.com/Article/UploadFiles/201512/2015121619060982.jpg)
In this case you'll have to deal with infected birds. First, notice a newly unlocked bonus objective. You must kill four birds while not being hit. So I recommend shooting birds from a large distance and after getting their attention, attacking those creatures who want to attack your helicopter. After completing bonus objective, keep attacking birds until you get rid of all of them.
New objective: Pick up the scientist
![The only thing left it to fly to the landing pad on the building's rooftop in location [576, 303] - [Blacknet mission 12] Operation: Clockwork - p. 1 - Blacknet missions - Prototype 2 - Game Guide and Walkthrough](https://game.lhg100.com/Article/UploadFiles/201512/2015121619061080.jpg)
The only thing left it to fly to the landing pad on the building's rooftop in location [576, 303]. Watch a short cut-scene, where you pick up the first scientist.
New objective: Go to the hot zone to rescue New Templar scientist
New objective: Kill the infected to rescue New Templar scientist
![The second scientist stays in location [683, 144] - [Blacknet mission 12] Operation: Clockwork - p. 1 - Blacknet missions - Prototype 2 - Game Guide and Walkthrough](https://game.lhg100.com/Article/UploadFiles/201512/2015121619061061.jpg)
The second scientist stays in location [683, 144]. Same as before you have to approach the destination and start attacking infected birds in the area. Watch out though, because there is also alone hydra to be eliminated. Keep shooting from the safe altitude, remembering about pressing Y button to destroy large objects thrown by hydra.
New objective: Pick up the scientist
![Land on the ground in the shiny circle in location [668, 145] and wait until the second scientist gets to the helicopter - [Blacknet mission 12] Operation: Clockwork - p. 1 - Blacknet missions - Prototype 2 - Game Guide and Walkthrough](https://game.lhg100.com/Article/UploadFiles/201512/2015121619061014.jpg)
Land on the ground in the shiny circle in location [668, 145] and wait until the second scientist gets to the helicopter.
New objective: Go to the hot zone to rescue New Templar scientist
New objective: Kill the infected to rescue New Templar scientist
![In order to find the last, third scientist, you have to go to location [552, 92] - [Blacknet mission 12] Operation: Clockwork - p. 1 - Blacknet missions - Prototype 2 - Game Guide and Walkthrough](https://game.lhg100.com/Article/UploadFiles/201512/2015121619061044.jpg)
In order to find the last, third scientist, you have to go to location [552, 92]. Right after enemies appear, move away from the destination and get rid of all birds.
![After eliminating birds, take care about new bonus objective - you must kill hydra without being hit - [Blacknet mission 12] Operation: Clockwork - p. 1 - Blacknet missions - Prototype 2 - Game Guide and Walkthrough](https://game.lhg100.com/Article/UploadFiles/201512/2015121619061077.jpg)
After eliminating birds, take care about new bonus objective - you must kill hydra without being hit. So stop your machine in such place that you can safely attack one of two hydras here and each time you'll see a warning (screen above) press Y button. After eliminating hydra and completing bonus objective, take care about the second monster.
New objective: Pick up the scientist
![The last scientist waits for a transport in location [560, 103] and same as previously you have to fly to the landing pad indicated by the game - [Blacknet mission 12] Operation: Clockwork - p. 1 - Blacknet missions - Prototype 2 - Game Guide and Walkthrough](https://game.lhg100.com/Article/UploadFiles/201512/2015121619061098.jpg)
The last scientist waits for a transport in location [560, 103] and same as previously you have to fly to the landing pad indicated by the game.
New objective: Go to the base to consume the New Templar scientists
New objective: Ascend to maximum altitude
![Fly to the base in location [522, 438] and after receiving updated objectives, start ascending (right trigger) - [Blacknet mission 12] Operation: Clockwork - p. 1 - Blacknet missions - Prototype 2 - Game Guide and Walkthrough](https://game.lhg100.com/Article/UploadFiles/201512/2015121619061124.jpg)
Fly to the base in location [522, 438] and after receiving updated objectives, start ascending (right trigger). Head to the point indicated by the game in location [563, 264] (screen above).
New objective: Bail out of the helicopter to fuck over the New Templar scientists
![The last action you have to perform is to leave the helicopter and in order to do this you have to hold B button, thus causing the helicopter with scientists to crash - [Blacknet mission 12] Operation: Clockwork - p. 1 - Blacknet missions - Prototype 2 - Game Guide and Walkthrough](https://game.lhg100.com/Article/UploadFiles/201512/2015121619061178.jpg)
The last action you have to perform is to leave the helicopter and in order to do this you have to hold B button, thus causing the helicopter with scientists to crash.
New objective: Go to a Blacknet terminal
![Go again to location [761, 226] - [Blacknet mission 12] Operation: Clockwork - p. 2 - Blacknet missions - Prototype 2 - Game Guide and Walkthrough](https://game.lhg100.com/Article/UploadFiles/201512/2015121619061109.jpg)
Go again to location [761, 226]. Same as before you have to approach the terminal masked as a soldier or a scientist, remembering about avoiding viral detectors. Use the terminal again (B button).
New objective: Hunt and consume corporal Kevin Duke
![1 - [Blacknet mission 12] Operation: Clockwork - p. 2 - Blacknet missions - Prototype 2 - Game Guide and Walkthrough](https://game.lhg100.com/Article/UploadFiles/201512/2015121619061113.jpg)
![Act the same as with the previous hunting, so get to the rooftop of one of the highest buildings in order to locate the corporal - [Blacknet mission 12] Operation: Clockwork - p. 2 - Blacknet missions - Prototype 2 - Game Guide and Walkthrough](https://game.lhg100.com/Article/UploadFiles/201512/2015121619061173.jpg)
Act the same as with the previous hunting, so get to the rooftop of one of the highest buildings in order to locate the corporal. Kevin Drake is one of soldiers defending themselves near sandbags in location [765, 305]. Similarly to the character from the previous hunting, you can give up the disguise and rapidly consume the corporal, stealth eliminate all soldier accompanying him or wait until soldiers turn back and then grab Drake.
New objective: Go to the containment site to watch Blackwatch's Goliath capture
![Head to location [569, 398] - [Blacknet mission 12] Operation: Clockwork - p. 2 - Blacknet missions - Prototype 2 - Game Guide and Walkthrough](https://game.lhg100.com/Article/UploadFiles/201512/2015121619061262.jpg)
Head to location [569, 398]. Once you approach it, the game will display a cut-scene showing the release of the goliath. Your task is of course to defeat him.
New objective: Defeat the goliath before it destroys the city
![The fight with the goliath can be played in two ways - [Blacknet mission 12] Operation: Clockwork - p. 2 - Blacknet missions - Prototype 2 - Game Guide and Walkthrough](https://game.lhg100.com/Article/UploadFiles/201512/2015121619061230.jpg)
The fight with the goliath can be played in two ways. If you do not mind to slowly reduce its health points, then you can attack it with the rocket launcher for example (there are many persons with such weapons standing on rooftops of adjacent buildings) or hijack hostile helicopters.
![I personally recommend the tactics based on targeting particular parts of goliaths body (similar to the battle fought in 21st main mission - Fall from Grace) - [Blacknet mission 12] Operation: Clockwork - p. 2 - Blacknet missions - Prototype 2 - Game Guide and Walkthrough](https://game.lhg100.com/Article/UploadFiles/201512/2015121619061256.jpg)
I personally recommend the tactics based on targeting particular parts of goliath's body (similar to the battle fought in 21st main mission - Fall from Grace). At the beginning start with standard attacks but watch out for goliath's charges (screen above) - it is best to avoid them by escaping to the rooftops.
![The fight with goliath is about weakening his four body parts - [Blacknet mission 12] Operation: Clockwork - p. 2 - Blacknet missions - Prototype 2 - Game Guide and Walkthrough](https://game.lhg100.com/Article/UploadFiles/201512/2015121619061241.jpg)
The fight with goliath is about weakening his four body parts. First of them is his head (screen above). Remember about using best direct attacks, because if you do not make it to empty his head's energy bar, you'll have to wait for the second occasion.
![2 - [Blacknet mission 12] Operation: Clockwork - p. 2 - Blacknet missions - Prototype 2 - Game Guide and Walkthrough](https://game.lhg100.com/Article/UploadFiles/201512/2015121619061266.jpg)
![The second and third body parts are goliaths limbs (screen above) - [Blacknet mission 12] Operation: Clockwork - p. 2 - Blacknet missions - Prototype 2 - Game Guide and Walkthrough](https://game.lhg100.com/Article/UploadFiles/201512/2015121619061359.jpg)
The second and third body parts are goliath's limbs (screen above). Particularly important is the first of limbs, because destroying it will reduce boss's mobility (but he can still perform large jumps).
![The last part of goliaths body is his reversed head (screen above) - [Blacknet mission 12] Operation: Clockwork - p. 2 - Blacknet missions - Prototype 2 - Game Guide and Walkthrough](https://game.lhg100.com/Article/UploadFiles/201512/2015121619061380.jpg)
The last part of goliath's body is his reversed head (screen above). Destroying it results in defeating giant mutant. During the fight remember about avoiding attacks of Blackwatch soldiers and helicopters (especially rockets shot at you). And regenerate regularly.
New objective: Consume the goliath before it destroys the city
![Quickly run to the wounded goliath and consume him by pressing B button - [Blacknet mission 12] Operation: Clockwork - p. 2 - Blacknet missions - Prototype 2 - Game Guide and Walkthrough](https://game.lhg100.com/Article/UploadFiles/201512/2015121619061388.jpg)
Quickly run to the wounded goliath and consume him by pressing B button. After that action do not forget about leaving the area, because soon it will be full of enemy forces.
New objective: Go to a Blacknet terminal
![Once again go to location [761, 226] - [Blacknet mission 12] Operation: Clockwork - p. 2 - Blacknet missions - Prototype 2 - Game Guide and Walkthrough](https://game.lhg100.com/Article/UploadFiles/201512/2015121619061367.jpg)
Once again go to location [761, 226]. Same as previously, you should approach the terminal masked as a soldier or a scientist, remembering about avoiding viral detectors. Use the terminal again (B button).
New objective: Hunt and consume Elwood Pine
![3 - [Blacknet mission 12] Operation: Clockwork - p. 2 - Blacknet missions - Prototype 2 - Game Guide and Walkthrough](https://game.lhg100.com/Article/UploadFiles/201512/2015121619061375.jpg)
![Act the same as with previous two hunts, so get to the rooftop of one of the highest building in the area, to locate the person youre looking for - [Blacknet mission 12] Operation: Clockwork - p. 2 - Blacknet missions - Prototype 2 - Game Guide and Walkthrough](https://game.lhg100.com/Article/UploadFiles/201512/2015121619061336.jpg)
Act the same as with previous two hunts, so get to the rooftop of one of the highest building in the area, to locate the person you're looking for. Elwood Pine stands near the group of Blackwatch soldiers in location [639, 231] and you can attack him right away because he has virus powers and can't be consumed in a standard way.
New objective: Defeat Elwood Pine
New objective: Consume Elwood Pine
![The fight with Elwood doesnt particularly differ from other duels with evolved enemies - [Blacknet mission 12] Operation: Clockwork - p. 2 - Blacknet missions - Prototype 2 - Game Guide and Walkthrough](https://game.lhg100.com/Article/UploadFiles/201512/2015121619061456.jpg)
The fight with Elwood doesn't particularly differ from other duels with evolved enemies. So try to use quick attacks and dodge Pine's blows. You can also try to take the rocket launcher from one of enemies or tear off the launcher from the tank. After winning the fight go to heavily wounded Pine and consume him.
New objective: Go to the Gentek facility to kill Mercer's infected specimens
![Your next destination is location [415, 281] and since it is a military base, it would be good to approach it disguised as a soldier or a scientist - [Blacknet mission 12] Operation: Clockwork - p. 2 - Blacknet missions - Prototype 2 - Game Guide and Walkthrough](https://game.lhg100.com/Article/UploadFiles/201512/2015121619061459.jpg)
Your next destination is location [415, 281] and since it is a military base, it would be good to approach it disguised as a soldier or a scientist.
New objective: Consume the commander to access Gentek's specimen facility
New objective: Use the hand scanner to enter Gentek's specimen facility
![The commander stands on the rooftop of the main building in location [399, 269] and he shouldnt be guarded by anyone so you can consume him right away - [Blacknet mission 12] Operation: Clockwork - p. 2 - Blacknet missions - Prototype 2 - Game Guide and Walkthrough](https://game.lhg100.com/Article/UploadFiles/201512/2015121619061419.jpg)
The commander stands on the rooftop of the main building in location [399, 269] and he shouldn't be guarded by anyone so you can consume him right away. After that action, head to the hand scanner in location [393, 289].
New objective: Release the infected so you can kill them
![In order to release the first of two groups of infected, you have to use the control panel in location [403, 298] - [Blacknet mission 12] Operation: Clockwork - p. 2 - Blacknet missions - Prototype 2 - Game Guide and Walkthrough](https://game.lhg100.com/Article/UploadFiles/201512/2015121619061413.jpg)
In order to release the first of two groups of infected, you have to use the control panel in location [403, 298]. It is worth noting that this action will expose Heller so I would recommend eliminating nearby soldiers first.
![Take few moments to familiarize yourself with newly unlocked bonus objective - [Blacknet mission 12] Operation: Clockwork - p. 2 - Blacknet missions - Prototype 2 - Game Guide and Walkthrough](https://game.lhg100.com/Article/UploadFiles/201512/2015121619061447.jpg)
Take few moments to familiarize yourself with newly unlocked bonus objective. You'll have to consume five infected monsters and since there are six beast in total (three per group), only one of them can be omitted. In the first group you'll find two brawlers and juggernaut (screen above).
![Start attacking brawlers and use the best tactics against them, so jump over them - [Blacknet mission 12] Operation: Clockwork - p. 2 - Blacknet missions - Prototype 2 - Game Guide and Walkthrough](https://game.lhg100.com/Article/UploadFiles/201512/2015121619061563.jpg)
Start attacking brawlers and use the best tactics against them, so jump over them. Only after defeating brawlers deal with juggernaut, avoiding his attacks. Since the beast is quite slow, it is worth running between two down rooms, because brawlers will be joining you quickly.
![During the battle I strongly recommend not using the special attacks - [Blacknet mission 12] Operation: Clockwork - p. 2 - Blacknet missions - Prototype 2 - Game Guide and Walkthrough](https://game.lhg100.com/Article/UploadFiles/201512/2015121619061551.jpg)
During the battle I strongly recommend not using the special attacks. Since the rooms are relatively small, it would be difficult to distinguish your brawlers from hostile ones after using Pack leader attack and the Devastator may prematurely kill some monster. Do not forget about grabbing soldiers running in the area and consuming each of defeated main beasts.
![After defeating the first group of mutants, return to the control panel and use it again - [Blacknet mission 12] Operation: Clockwork - p. 2 - Blacknet missions - Prototype 2 - Game Guide and Walkthrough](https://game.lhg100.com/Article/UploadFiles/201512/2015121619061507.jpg)
After defeating the first group of mutants, return to the control panel and use it again. This time you'll release one brawler and two juggernauts.
![I suggest starting the fight with defeating brawlers and after that focusing on attacking juggernauts with some powerful area attacks - [Blacknet mission 12] Operation: Clockwork - p. 2 - Blacknet missions - Prototype 2 - Game Guide and Walkthrough](https://game.lhg100.com/Article/UploadFiles/201512/2015121619061593.jpg)
I suggest starting the fight with defeating brawlers and after that focusing on attacking juggernauts with some powerful area attacks. Keep consuming monsters and if you see that you'll be not able to complete bonus objective, consider replaying the fight from the very beginning.
New objective: Exit the Gentek facility
![The only thing left is to leave the base, so head to the elevator in location [396, 271] (remember to stay masked as a scientist or a soldier) - [Blacknet mission 12] Operation: Clockwork - p. 2 - Blacknet missions - Prototype 2 - Game Guide and Walkthrough](https://game.lhg100.com/Article/UploadFiles/201512/2015121619061521.jpg)
The only thing left is to leave the base, so head to the elevator in location [396, 271] (remember to stay masked as a scientist or a soldier). Once you leave the building, the mission ends. Notice, that as a reward for completing the mission you can choose a mutation from category Power Specialist. And as a reward for completing the last mission you can choose a mutation from category Offensive.
There are three categories of secrets in Prototype 2:
1) Blackboxes - Items found at bodies of dead people.
2) Field Ops - In order to obtain each secret you have to eliminate group of enemies.
3) Lairs - These are underground lairs, which have to be cleared out from monsters and Blackwatch employees.
Note! Detailed information about location of secrets can be found in later part of this guide!
BLACKBOXES
Every time you find an interactive body, you have to approach it and press Y button. This will result in obtaining the blackbox and starting the recording associated with it (you do not have to listen to the end).
FIELD OPS
Every time you encounter the enemy special team, you have to eliminate all indicated characters (scientist or Blackwatch soldiers). The easiest way to do it is to attack them using the helicopter (screen above), the tank or the APC.
You might as well approach indicated enemies and it is best to do it in a disguise. After approaching enemies, use one of the Heller's powers (my favorite is a whip - screen above).
LAIRS
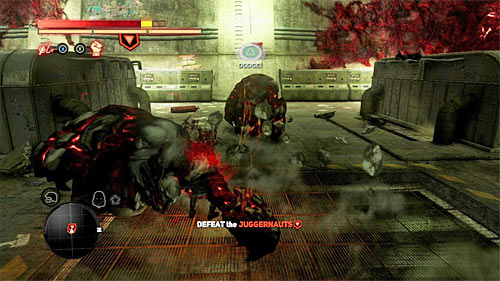
Every time you find a lair you have to enter it (B button) and then explore it. The game usually forces you to eliminate indicated enemy units and those can be either Blackwatch employees or infected monsters.
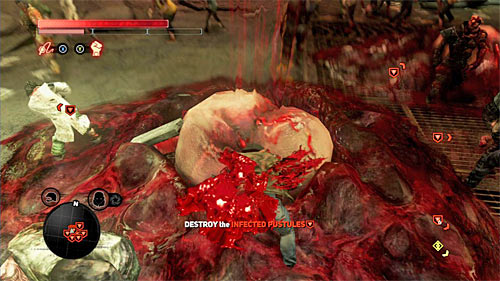
Watch out in situations when you have to destroy some kind of spores (screen above). I strongly advise to use best Heller's powers, because if you wait too long, then the spore can "hatch" a monster.
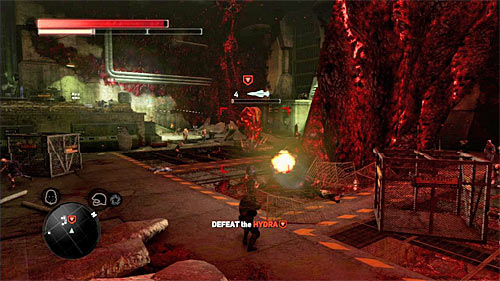
The only unique battle awaits you during exploration of the fourth lair in the red zone, because you'll encounter hydra there. Same as in main campaign mission keep a safe distance from the monster and use the picked up weapons (rocket launcher for example). You can also throw large objects at hydra.
Note! Detailed description of each secret marked on following maps is given later in this chapter.
MAP OF THE YELLOW ZONE:
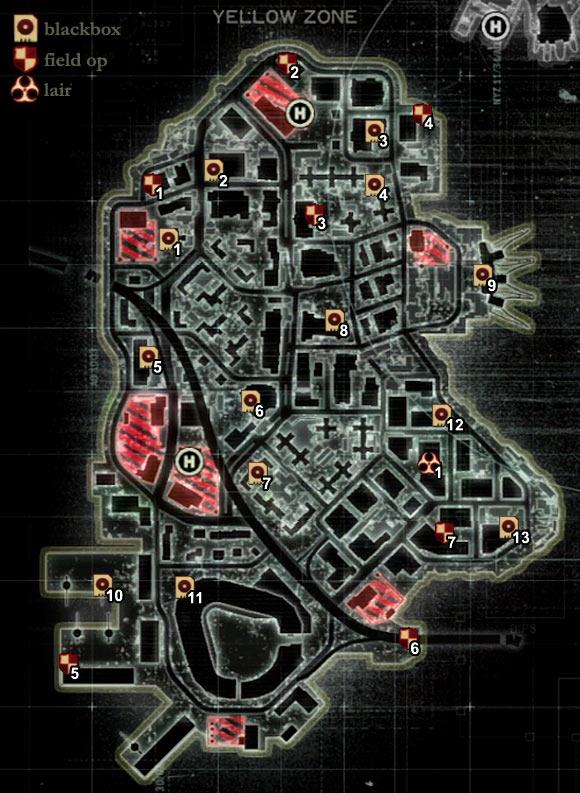
MAP OF THE GREEN ZONE:
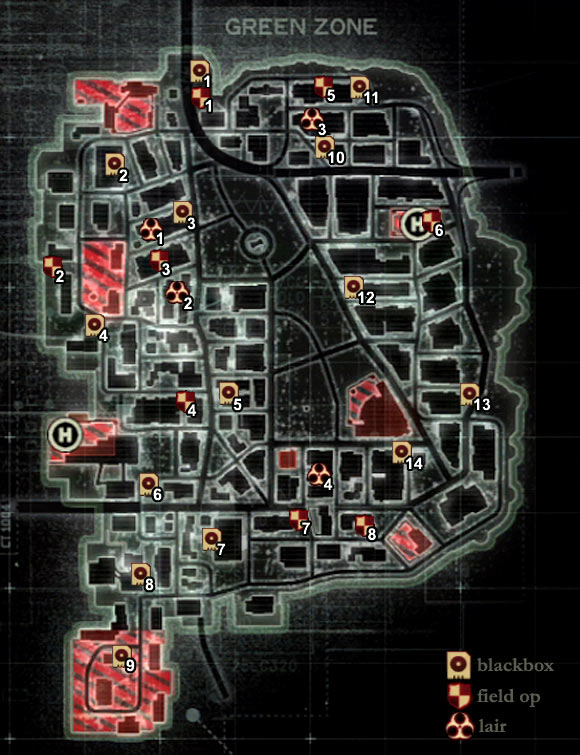
MAP OF THE RED ZONE:
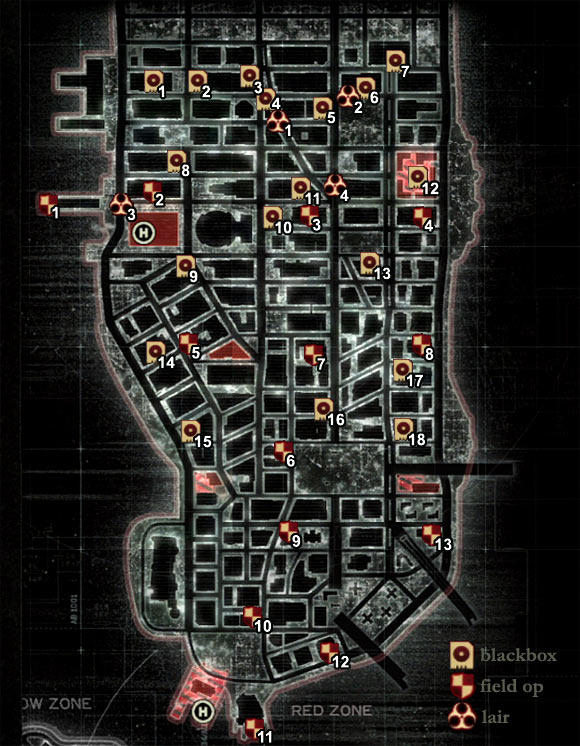
BLACKBOX 1
Area: Fairview
Coordinates: [145, 1110]
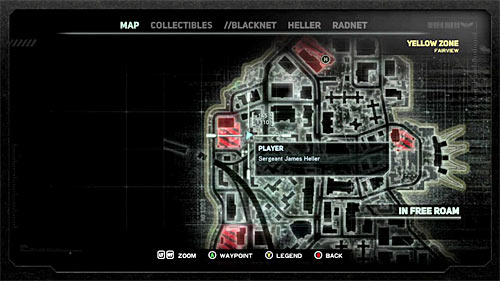
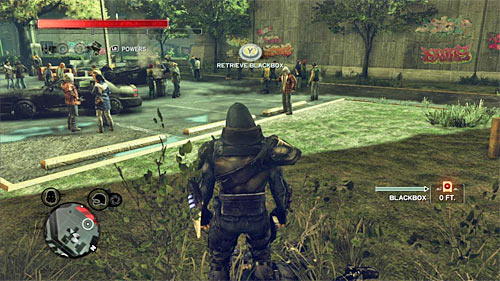
You can find the body on the ground, near the parking lot.
BLACKBOX 2
Area: Fairview
Coordinates: [188, 1041]
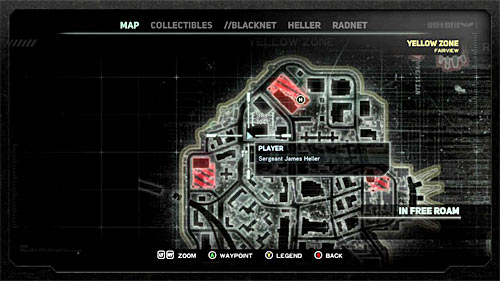
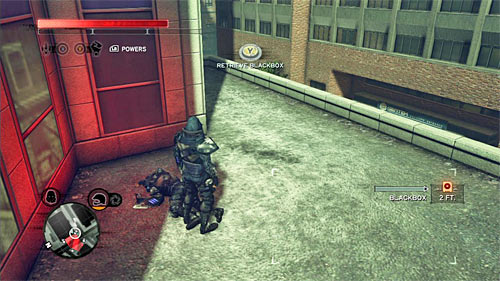
You can find the body on one of the lower balconies of the building.
BLACKBOX 3
Area: Fairview
Coordinates: [352, 998]
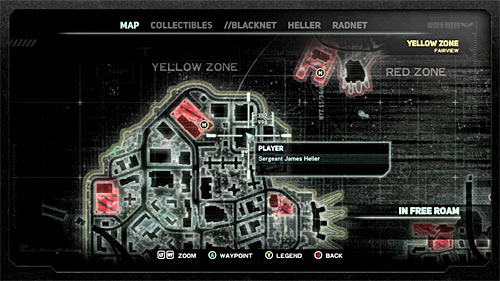
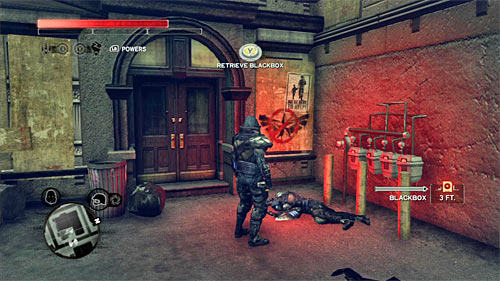
You can find the body on the ground, near the building's entrance.
BLACKBOX 4
Area: Fairview
Coordinates: [353, 1054]
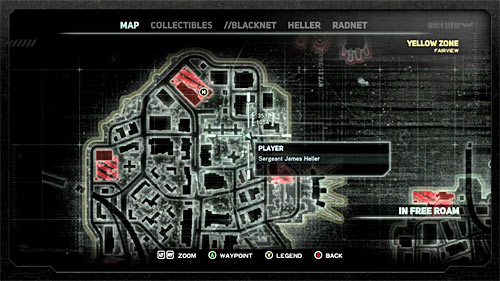
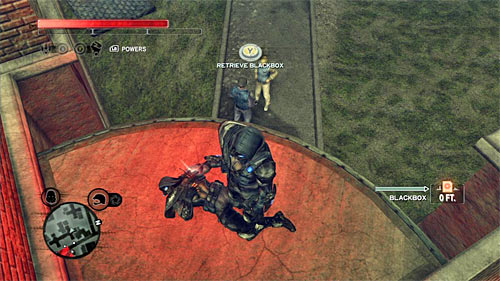
You can find the body on the small balcony over the building's entrance.
BLACKBOX 5
Area: Oakhurst
Coordinates: [122, 1231]
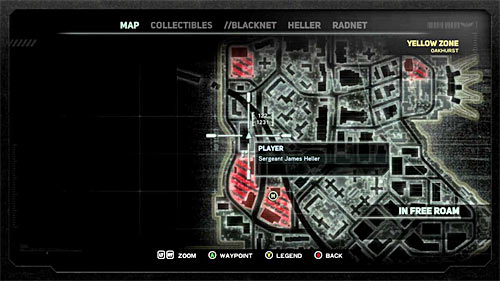
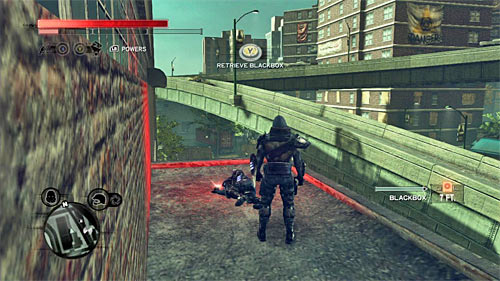
You can find the body on one of the lower balconies of the warehouse.
BLACKBOX 6
Area: Oakhurst
Coordinates: [225, 1273]
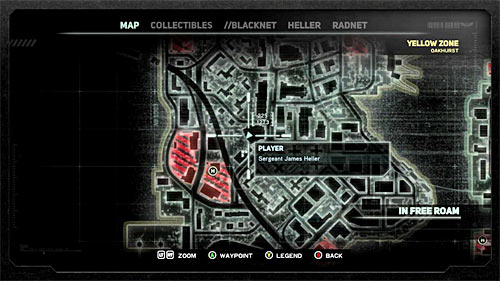
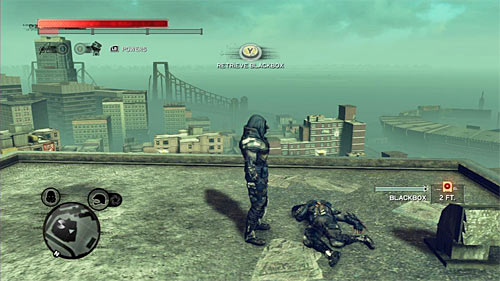
You can find the body on the building's rooftop.
BLACKBOX 7
Area: Oakhurst
Coordinates: [233, 1347]
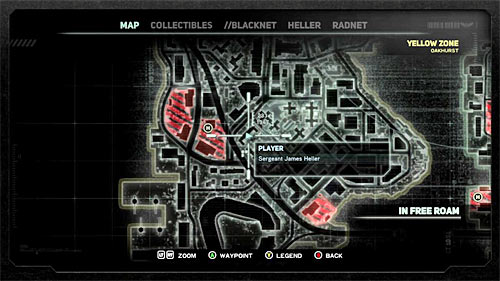
You can find the body on the ground and it is hidden in bushes.
BLACKBOX 8
Area: Oakhurst
Coordinates: [312, 1191]
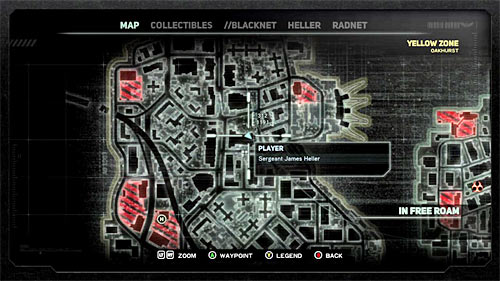
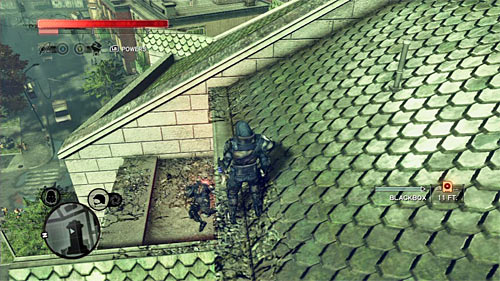
You can find the body on one of the church's balconies.
BLACKBOX 9
Area: Oakhurst
Coordinates: [464, 1145]
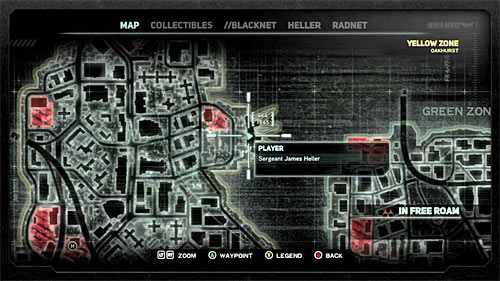

You can find the body on the building's rooftop, near the square where infected are kept.
BLACKBOX 10
Area: Linden Park
Coordinates: [74, 1460]
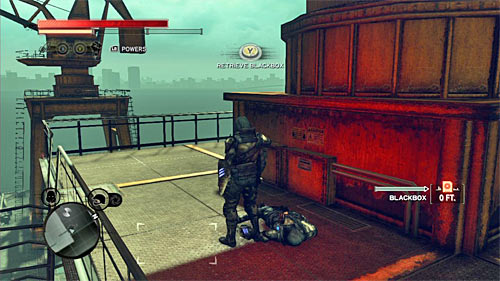

You can find the body on the balcony on one of the port crane.
BLACKBOX 11
Area: Linden Park
Coordinates: [157, 1464]
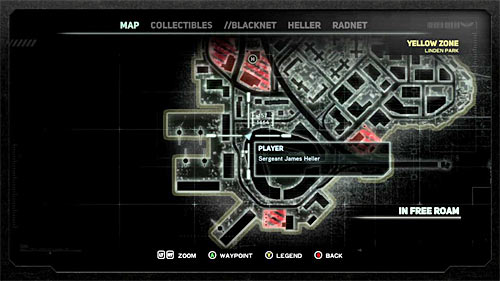
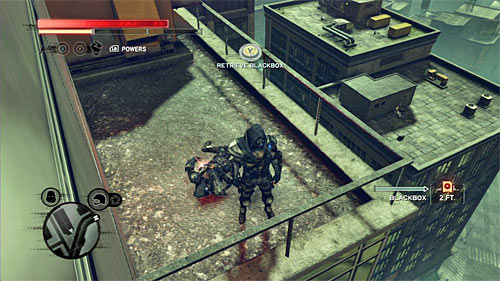
You can find the body on one of the outer stadium's balconies, under partially damaged marking.
BLACKBOX 12
Area: Linden Park
Coordinates: [421, 1286]
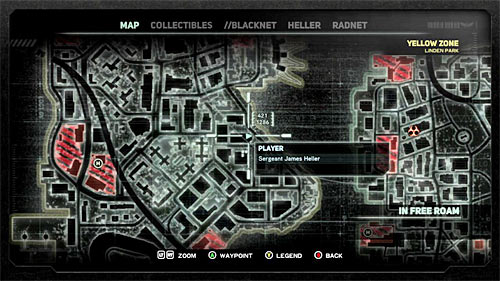

You can find the body on the RAD building's rooftop.
BLACKBOX 13
Area: Linden Park
Coordinates: [489, 1399]
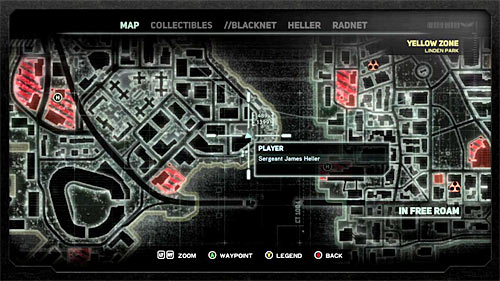
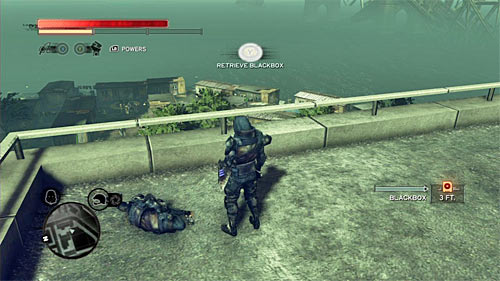
You can find the body on one of the lower balconies of Daily News building.
TEAM 1
Area: Fairview
Coordinates: [123, 1051]
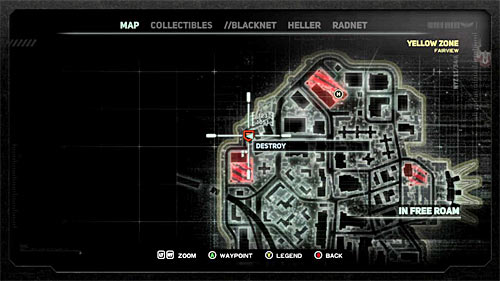
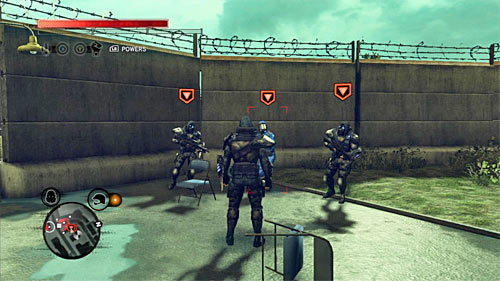
You can find the squad near the narrow alley and the wall with barbed wire.
TEAM 2
Area: Fairview
Coordinates: [264, 924]
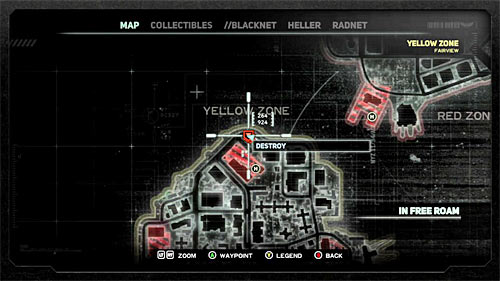
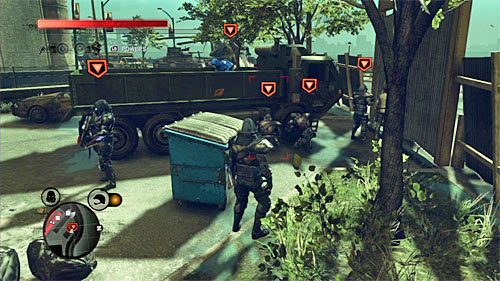
You can find the squad on a small square, near the street.
TEAM 3
Area: Fairview
Coordinates: [289, 1084]
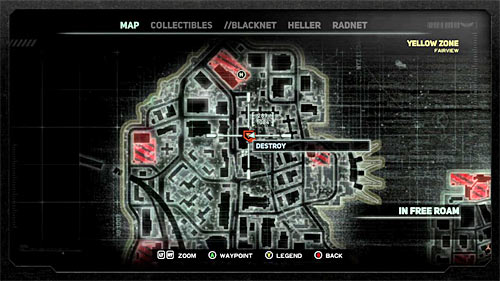
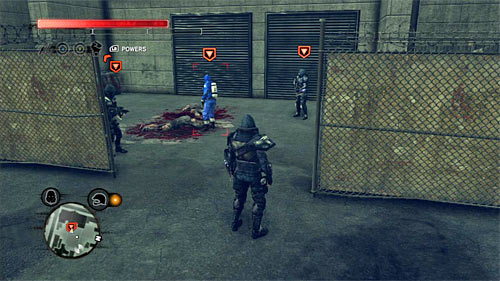
You can find the squad in a fenced area, next to the high building.
TEAM 4
Area: Fairview
Coordinates: [400, 982]
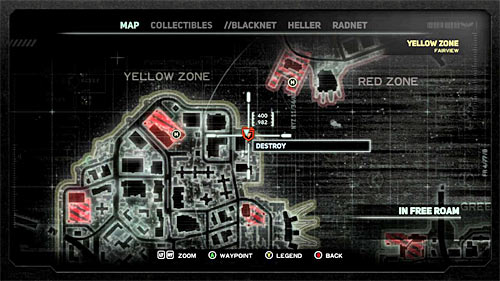
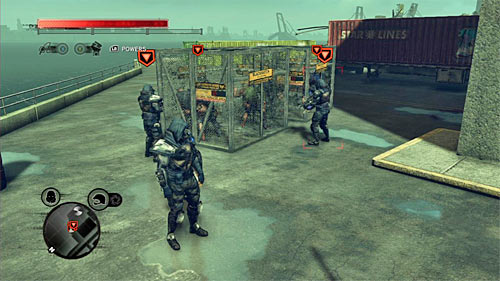
You can find the squad next to the cages where infected are kept, near the water.
TEAM 5
Area: Linden Park
Coordinates: [38, 1539]
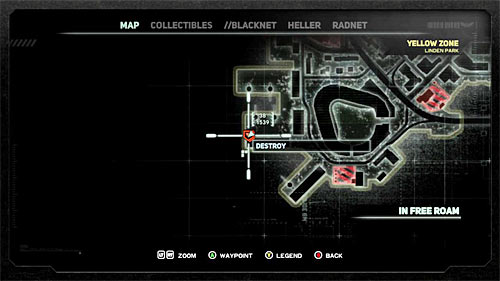
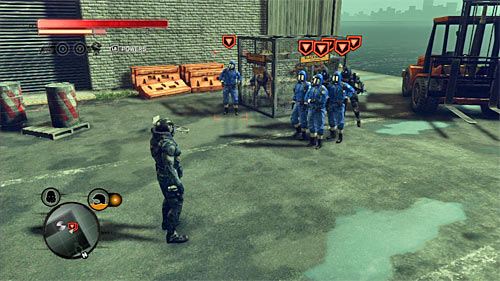
You can find the squad next to the cage in port, where infected are kept.
TEAM 6
Area: Linden Park
Coordinates: [387, 1511]
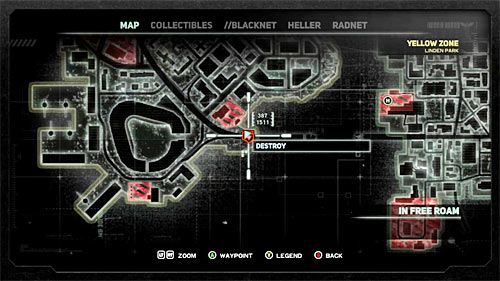
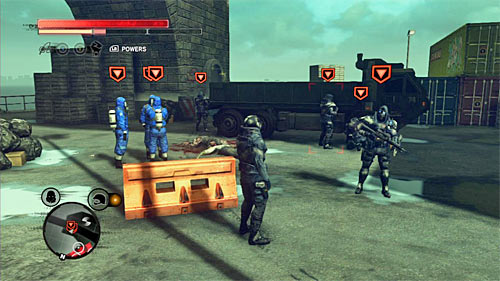
You can find the squad under the bridge.
TEAM 7
Area: Linden Park
Coordinates: [424, 1409]
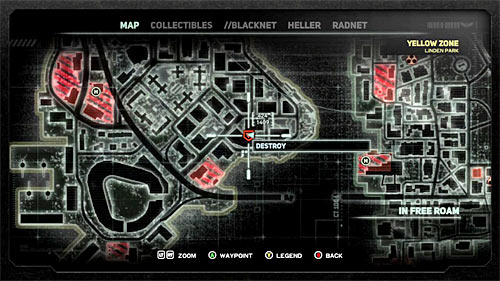
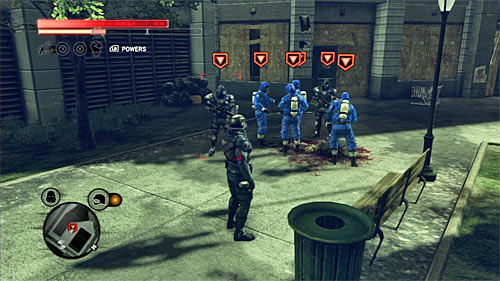
You can find the squad between skyscrapers.
LAIR 1
Area: Linden Park
Coordinates: [406, 1339]
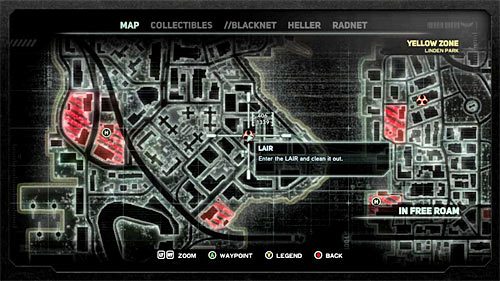
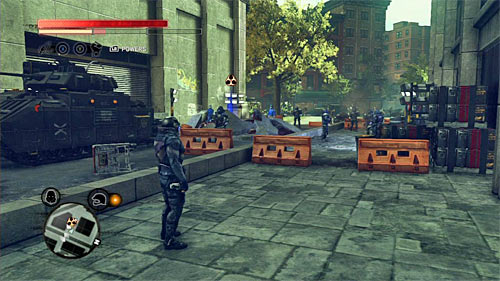
You can find the lair in the alley between skyscrapers.
BLACKBOX 1
Area: Fulton
Coordinates: [739, 1143]
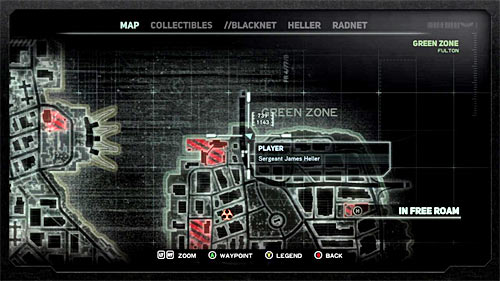
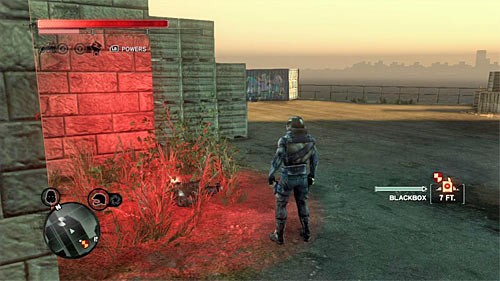
You can find the body on the ground, at one of the supports of the bridge.
BLACKBOX 2
Area: Fulton
Coordinates: [666, 1220]
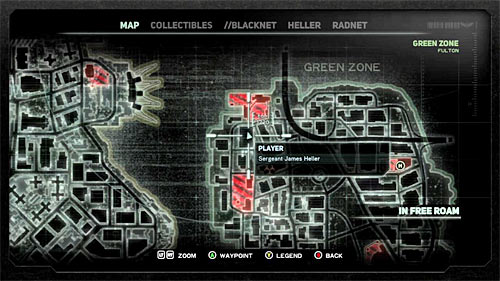
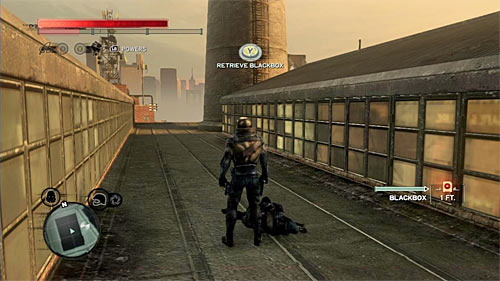
You can find the body on the building's rooftop, near the large chimney.
BLACKBOX 3
Area: Fulton
Coordinates: [725, 1261]
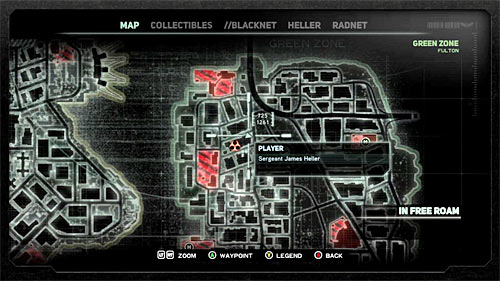
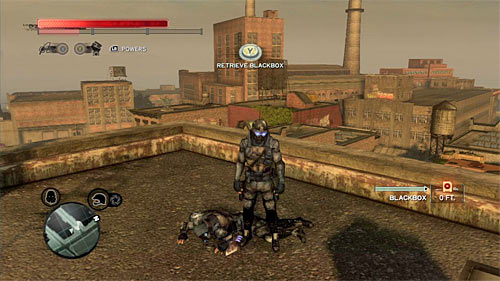
You can find the body on the building's rooftop.
BLACKBOX 4
Area: Fulton
Coordinates: [652, 1359]
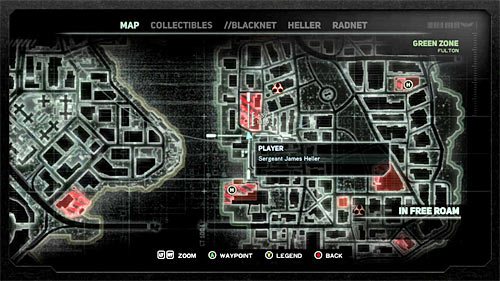
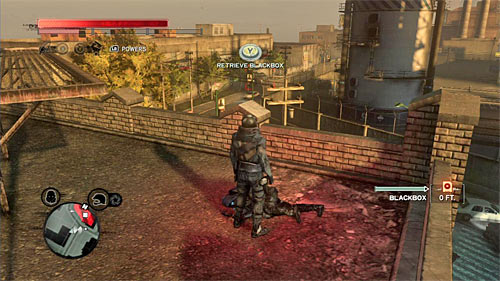
You can find the body on the building's rooftop, next to the billboard.
BLACKBOX 5
Area: Fulton
Coordinates: [760, 1416]
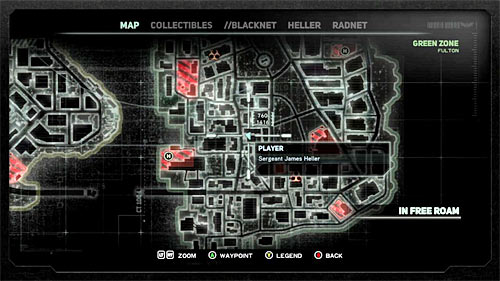
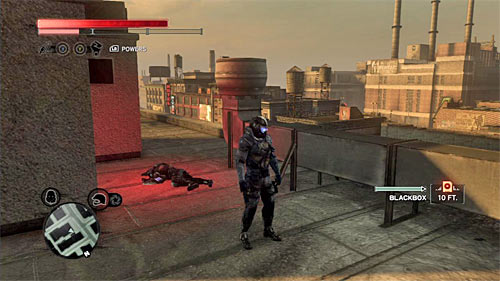
You can find the body on the building's rooftop.
BLACKBOX 6
Area: Salt Yard Plains
Coordinates: [695, 1494]
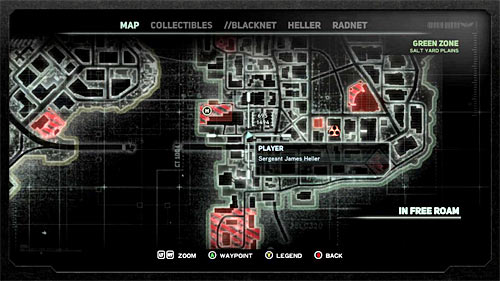
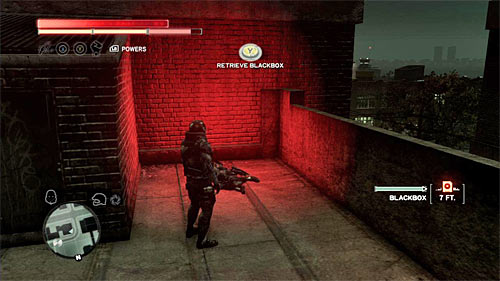
You can find the body on the building's rooftop, in a small alley.
BLACKBOX 7
Area: Salt Yard Plains
Coordinates: [750, 1540]
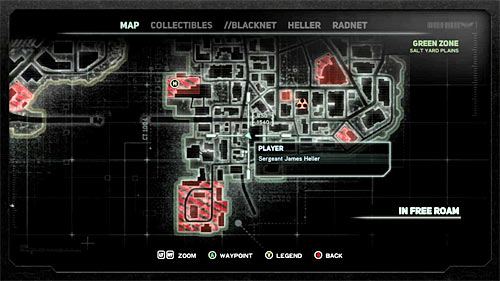
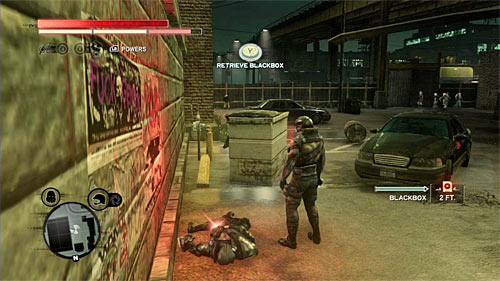
You can find the body on the ground, near the parking lot.
BLACKBOX 8
Area: Salt Yard Plains
Coordinates: [689, 1571]
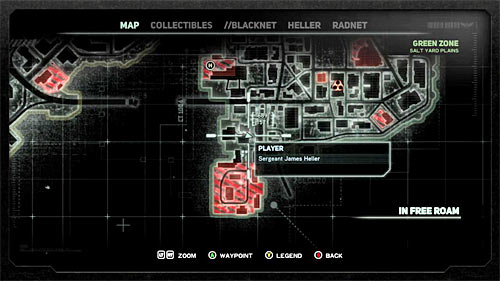
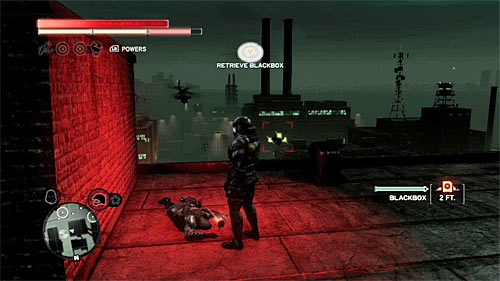
You can find the body on the building's rooftop.
BLACKBOX 9
Area: Salt Yard Plains
Coordinates: [672, 1640]
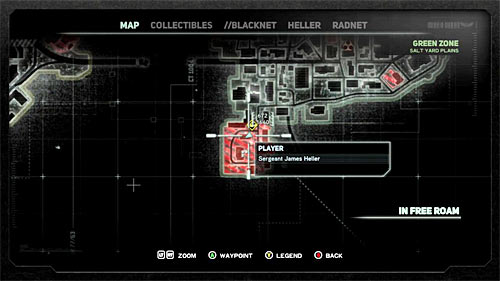
You can find the body between two large chimneys.
BLACKBOX 10
Area: Lincoln Meadows
Coordinates: [846, 1203]
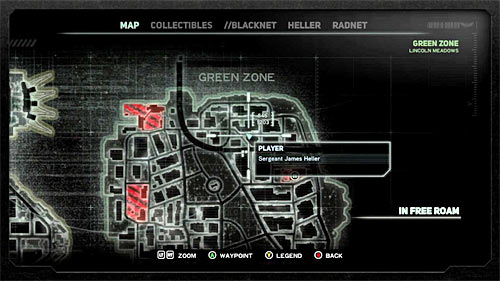
You can find the body on one of the building's balconies.
BLACKBOX 11
Area: Lincoln Meadows
Coordinates: [875, 1156]
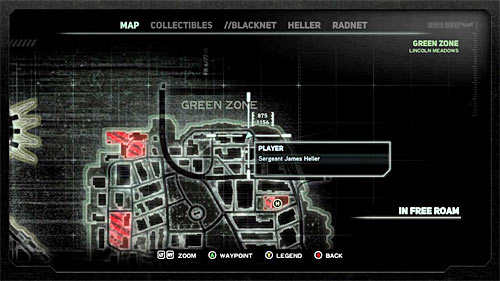
You can find the body on the building's rooftop, next to the tank.
BLACKBOX 12
Area: Lincoln Meadows
Coordinates: [870, 1326]
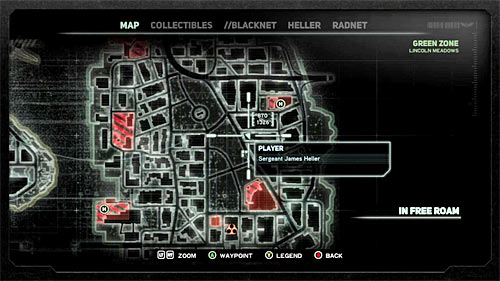
You can find the body on the building's rooftop.
BLACKBOX 13
Area: Lincoln Meadows
Coordinates: [966, 1414]
You can find the body in bushes, near the street.
BLACKBOX 14
Area: Lincoln Meadows
Coordinates: [910, 1464]
You can find the body on the building's rooftop, behind billboard.
TEAM 1
Area: Fulton
Coordinates: [738, 1164]
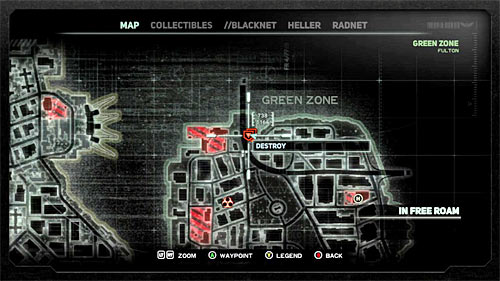
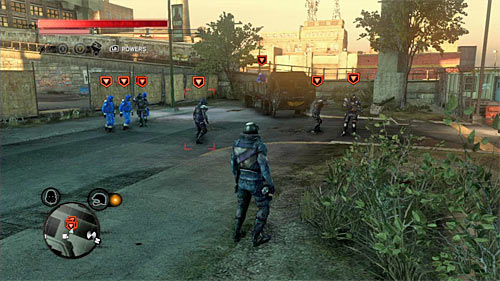
You can find the squad near the highway.
TEAM 2
Area: Fulton
Coordinates: [614, 1310]
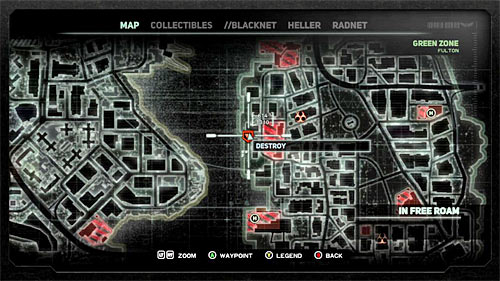
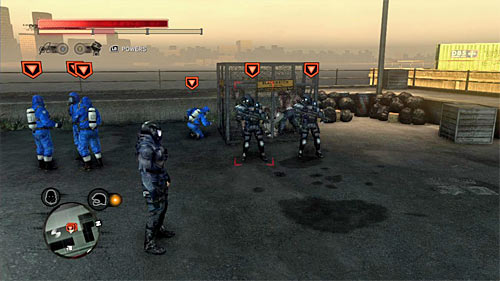
You can find the squad near the cage where infected are kept, near the water.
TEAM 3
Area: Fulton
Coordinates: [706, 1305]
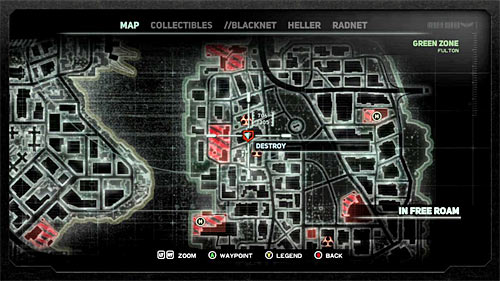
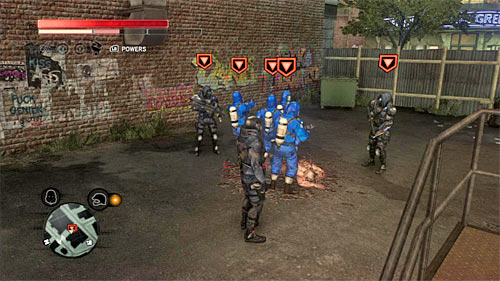
You can find the squad in the alley between buildings.
TEAM 4
Area: Fulton
Coordinates: [728, 1425]
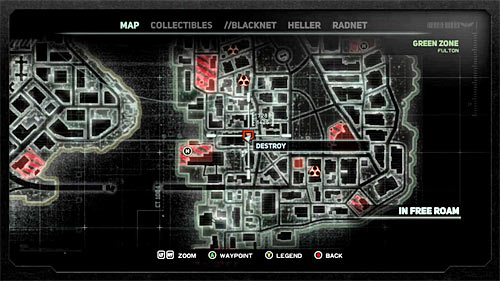
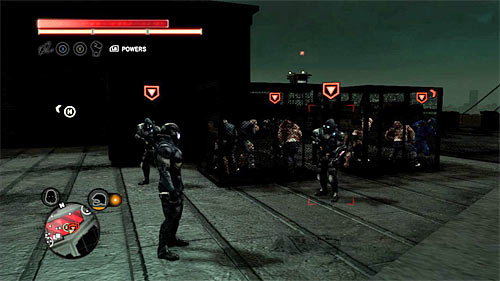
You can find the squad on a parking lot between buildings.
TEAM 5
Area: Lincoln Meadows
Coordinates: [845, 1149]
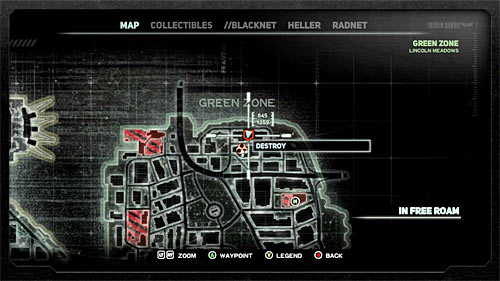
You can find the squad near a small square and a street between buildings.
TEAM 6
Area: Lincoln Meadows
Coordinates: [931, 1273]
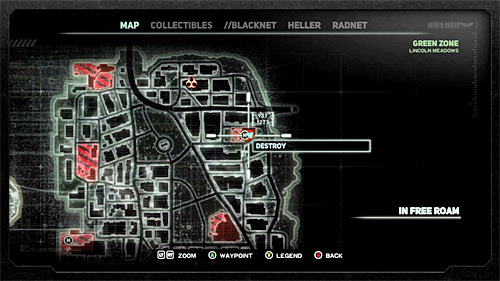

You can find the squad on the building's rooftop, near one of the helicopter landing pads.
TEAM 7
Area: Lincoln Meadows
Coordinates: [821, 1520]
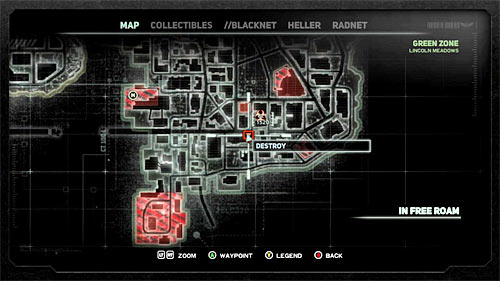
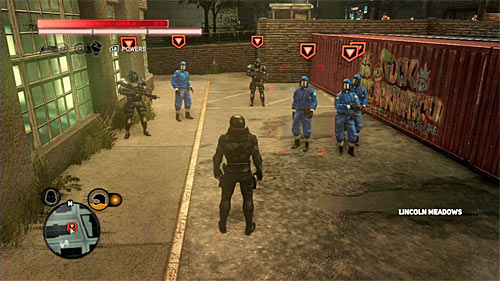
You can find the squad near the containers.
TEAM 8
Area: Lincoln Meadows
Coordinates: [879, 1524]
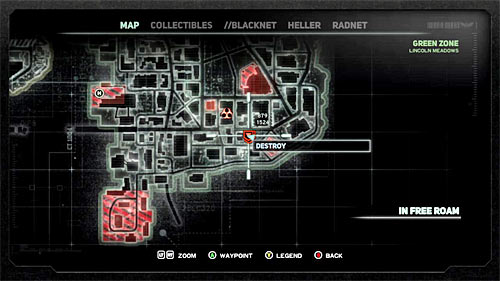
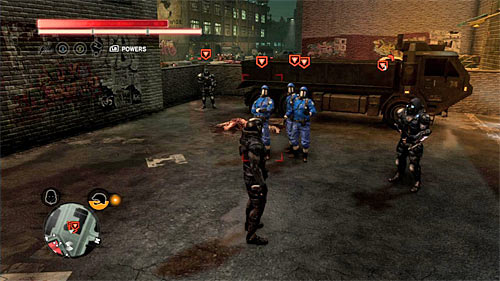
You can find the squad on a small square.
LAIR 1
Area: Fulton
Coordinates: [702, 1278]
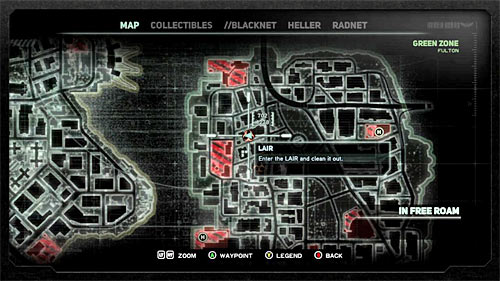
You can find the lair in the alley between buildings.
LAIR 2
Area: Fulton
Coordinates: [720, 1331]
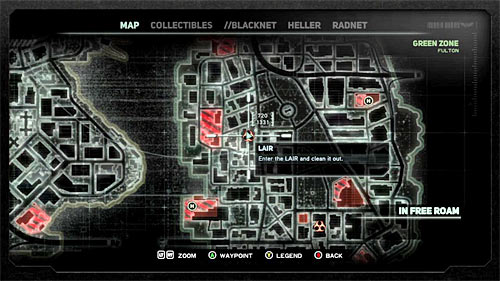
You can find the lair in the alley between buildings.
LAIR 3
Area: Lincoln Meadows
Coordinates: [834, 1181]
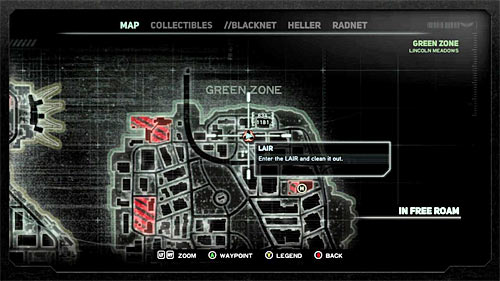
You can find the lair in the alley guarded by soldiers.
LAIR 4
Area: Lincoln Meadows
Coordinates: [842, 1485]
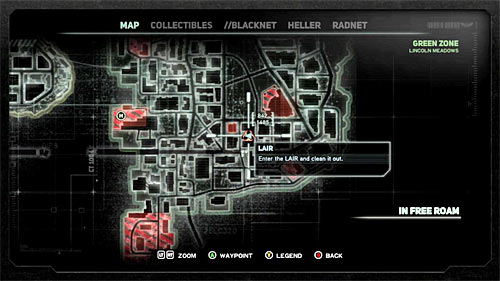
You can find the lair in the alley between buildings.
BLACKBOX 1
Area: Times Square
Coordinates: [417, 92]
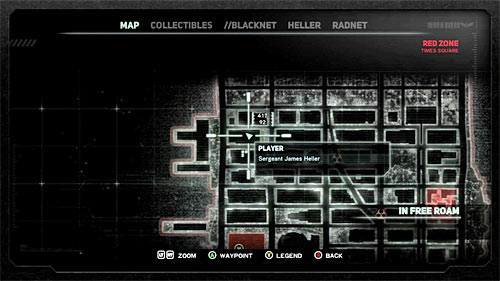
You can find the body on the building's rooftop.
BLACKBOX 2
Area: Times Square
Coordinates: [469, 93]
You can find the body on the building's rooftop, next to the tank.
BLACKBOX 3
Area: Times Square
Coordinates: [533, 84]
You can find the body on the partially damaged building's balcony.
BLACKBOX 4
Area: Times Square
Coordinates: [556, 123]
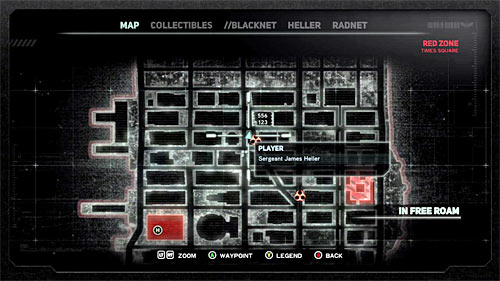
You can find the body on the red balcony.
BLACKBOX 5
Area: Times Square
Coordinates: [628, 129]
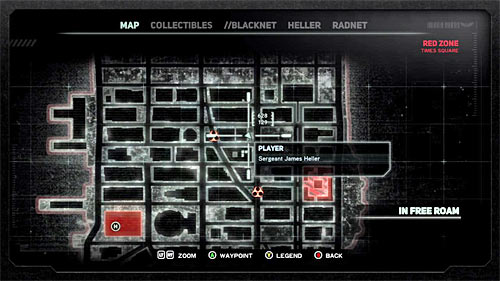
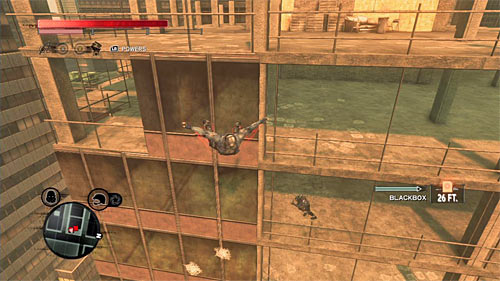

You can find the body on one of the building's floors. In order to locate it, it is best to approach the building from the east and use gliding to locate the proper floor.
BLACKBOX 6
Area: Times Square
Coordinates: [679, 102]
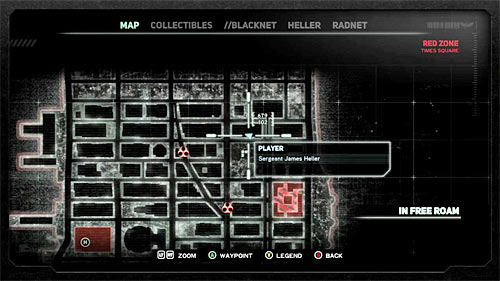
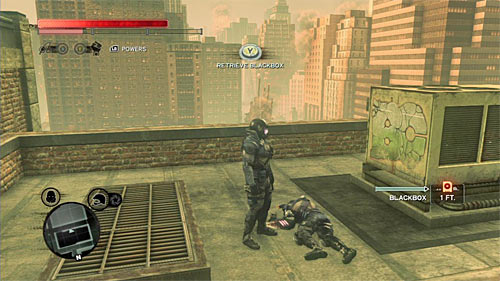
You can find the body on the building's rooftop.
BLACKBOX 7
Area: Times Square
Coordinates: [720, 67]
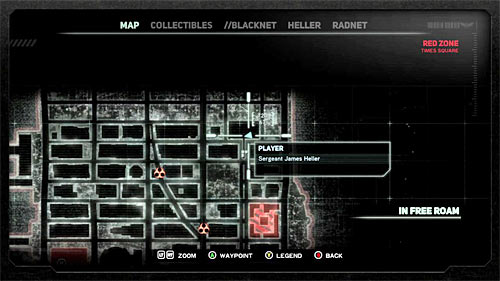
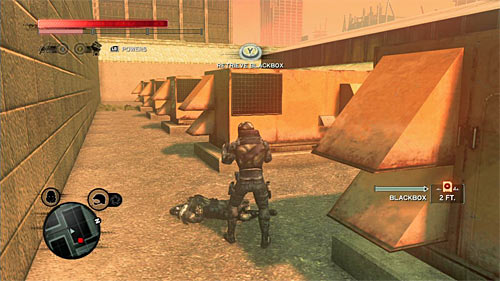
You can find the body on the building's rooftop.
BLACKBOX 8
Area: Midtown
Coordinates: [448, 196]
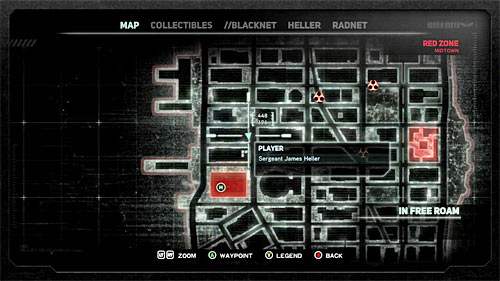
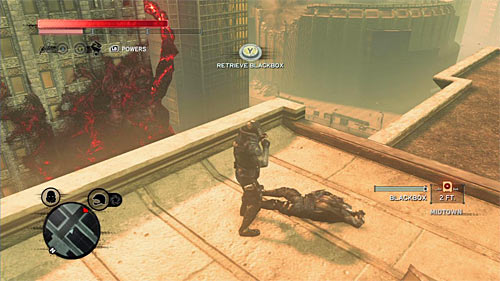
You can find the body on the building's rooftop.
BLACKBOX 9
Area: Midtown
Coordinates: [455, 328]
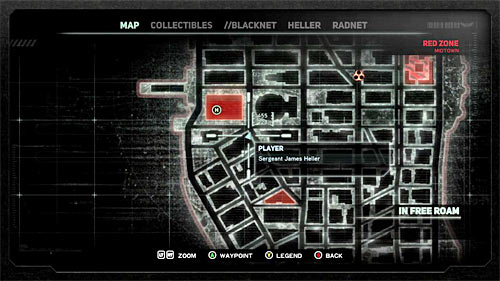
You can find the body in the ruined part of the building and in order to get there you should fly to the building from the north.
BLACKBOX 10
Area: Midtown
Coordinates: [564, 268]
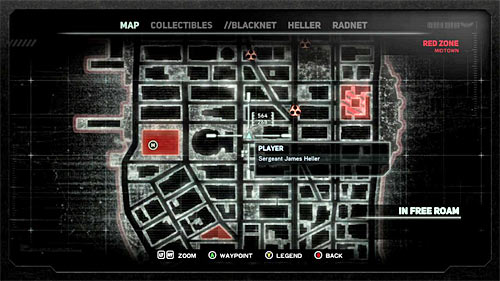
You can find the body on one of the small balconies in ruins.
BLACKBOX 11
Area: Midtown
Coordinates: [601, 230]
You can find the body on the building's rooftop.
BLACKBOX 12
Area: Midtown
Coordinates: [748, 216]
You can find the body on the highest point of the skyscraper.
BLACKBOX 13
Area: Midtown
Coordinates: [687, 325]
You can find the body in bushes on one of the rooftops.
BLACKBOX 14
Area: Chinatown
Coordinates: [417, 437]
You can find the body on the rooftop and it is hidden behind working air conditioners.
BLACKBOX 15
Area: Chinatown
Coordinates: [456, 536]
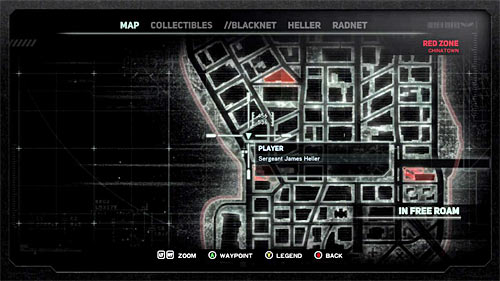
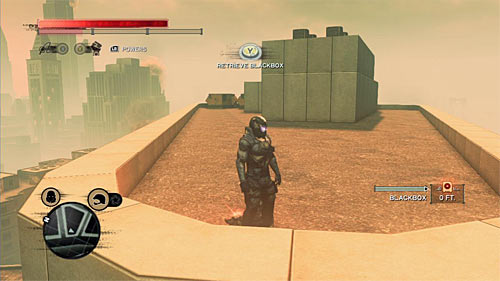
You can find the body on the building's rooftop.
BLACKBOX 16
Area: Chinatown
Coordinates: [634, 510]
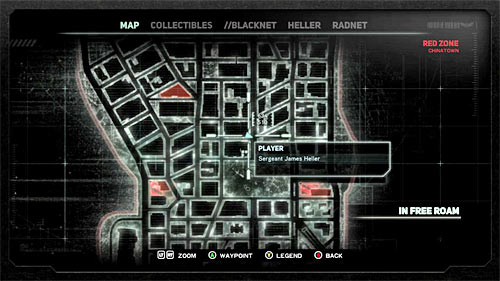
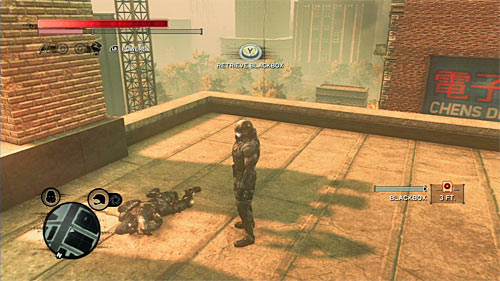
You can find the body on the building's rooftop.
BLACKBOX 17
Area: Chinatown
Coordinates: [725, 460]
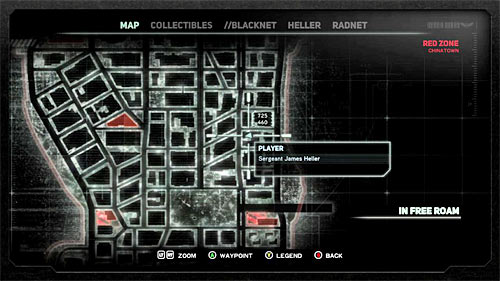
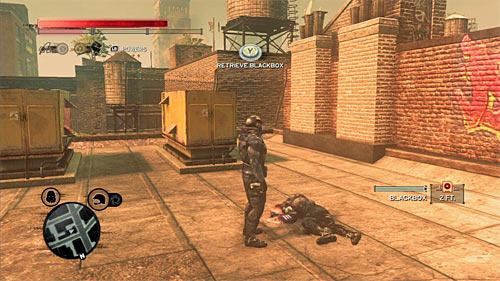
You can find the body on the building's rooftop.
BLACKBOX 18
Area: Chinatown
Coordinates: [730, 535]
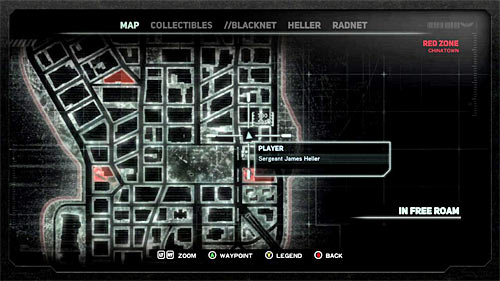
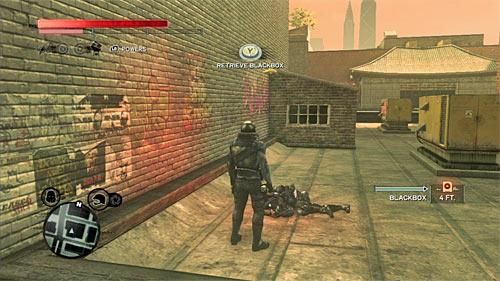
You can find the body on one of the lower building's rooftops.
TEAM 1
Area: Midtown
Coordinates: [286, 253]
You can find the squad in the port, near the cages where infected are kept.
TEAM 2
Area: Midtown
Coordinates: [408, 232]
You can find the squad on one of the lower parts of the building's rooftop.
TEAM 3
Area: Midtown
Coordinates: [609, 260]
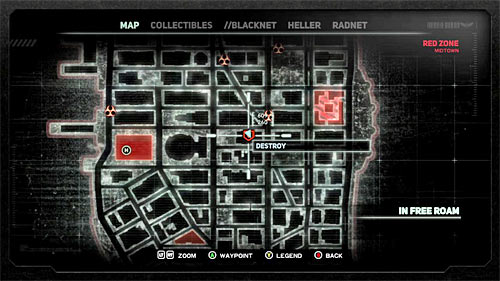
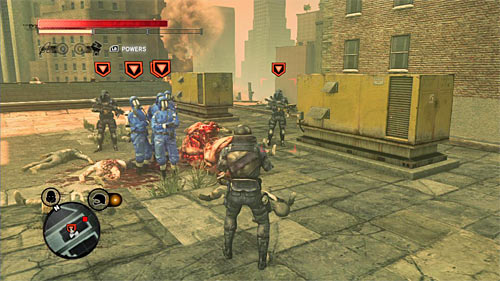
You can find the squad on the building's rooftop.
TEAM 4
Area: Midtown
Coordinates: [752, 266]
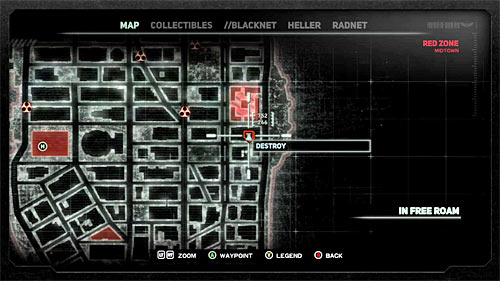
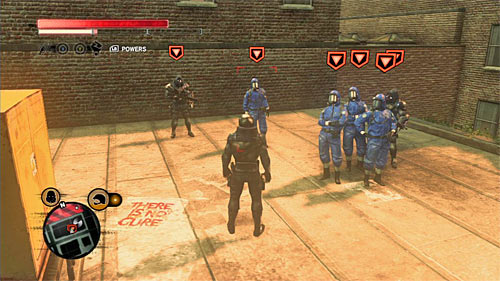
You can find the squad on building's rooftop.
TEAM 5
Area: Chinatown
Coordinates: [458, 425]
You can find the squad on one of the lower parts of the building's rooftop.
TEAM 6
Area: Chinatown
Coordinates: [573, 558]
You can find the squad on one of the lower parts of the building's rooftop.
TEAM 7
Area: Chinatown
Coordinates: [618, 440]
You can find the squad on building's rooftop.
TEAM 8
Area: Chinatown
Coordinates: [752, 425]
You can find the squad on building's rooftop.
TEAM 9
Area: Downtown
Coordinates: [585, 663]
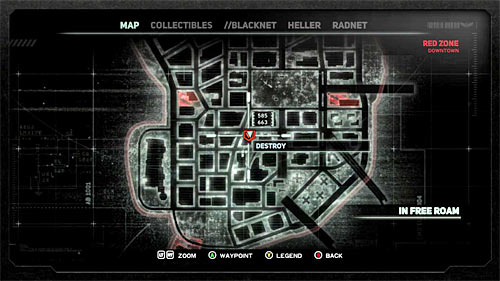
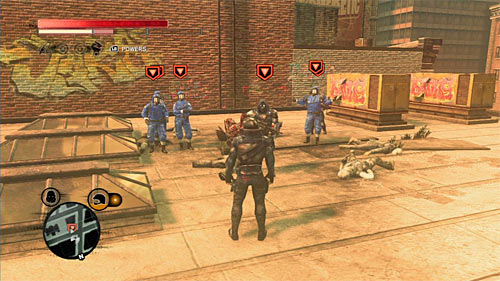
You can find the squad on building's rooftop, next to the tank.
TEAM 10
Area: Downtown
Coordinates: [533, 771]
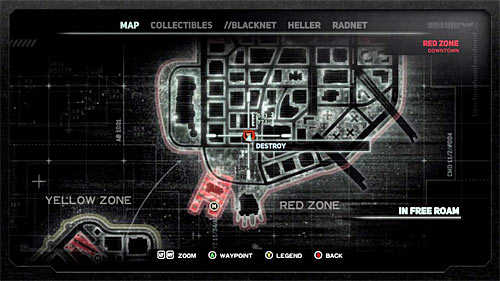
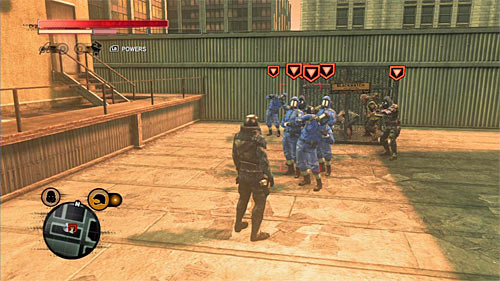
You can find the squad on building's rooftop, near the cage where infected are kept.
TEAM 11
Area: Downtown
Coordinates: [540, 912]
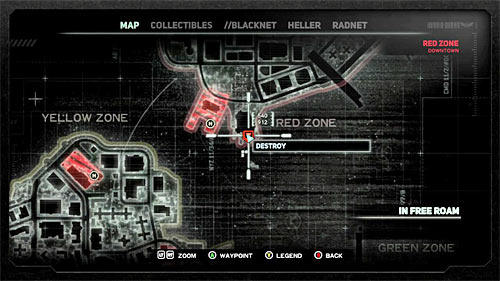
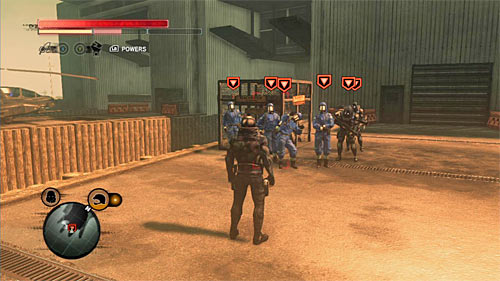
You can find the squad on a small platform on the back of Island Ferry building.
TEAM 12
Area: Downtown
Coordinates: [636, 819]
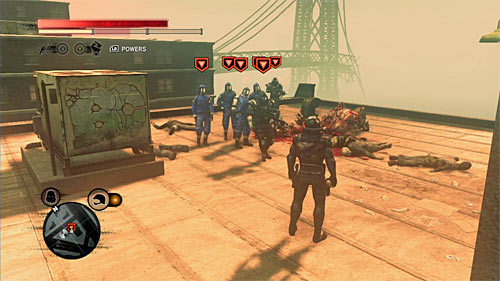
You can find the squad on skyscraper's rooftop.
TEAM 13
Area: Downtown
Coordinates: [763, 665]
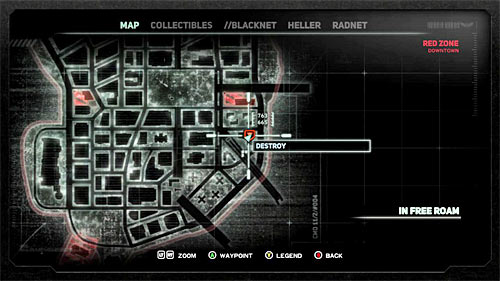

You can find the squad on building's rooftop.
LAIR 1
Area: Times Square
Coordinates: [568, 130]
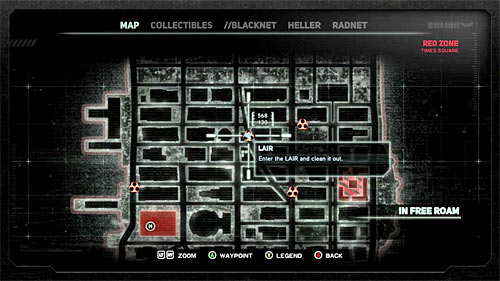
You can find the lair on one of the main street in Times Square.
LAIR 2
Area: Times Square
Coordinates: [661, 110]
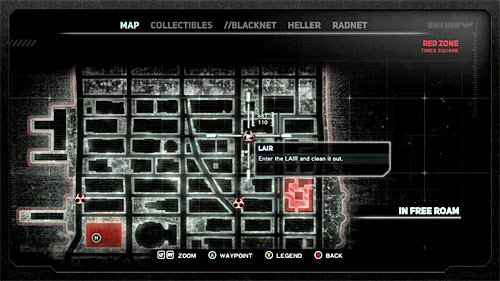
You can find the lair in the middle of the street.
LAIR 3
Area: Midtown
Coordinates: [374, 217]
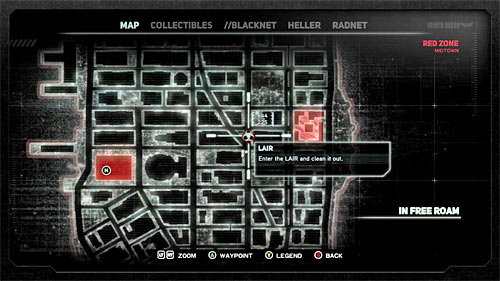
You can find the lair in the Middle of the street, near the water.
LAIR 4
Area: Midtown
Coordinates: [644, 225]

You can find the lair in the middle of the street.
During completing the campaign Heller learns five major powers. They can be described as melee weapons produced by the virus, which infected Heller. These are:
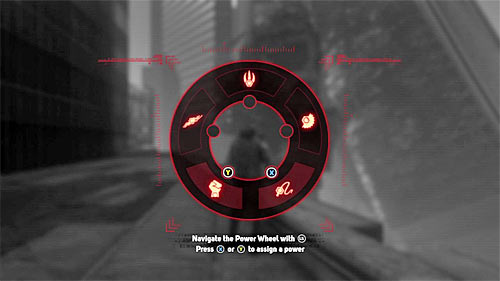
Suggestions regarding the usefulness of particular major power can be found in the walkthrough. You should remember that you can change them at any time by holding LB button (screen above). I recommend doing so before each difficult battle, especially the after opening the power window, the game pauses.
There are 33 mutations in total, which can be unlocked. In most cases they act as passive bonuses or somehow upgrade main Heller's powers. Mutations are divided into 5 main categories:
Mutation points can be obtained in two main ways. The first method is to complete Blacknet side mission, but in order to get the point you have to get 100% from the mission. Another method is to find secrets. In this case points are awarded whenever you found all secrets from the category (for example all blackboxes in Time Square area in the red zone). Information about the type of categories that you can develop is always displayed in the upper right corner (screen above).
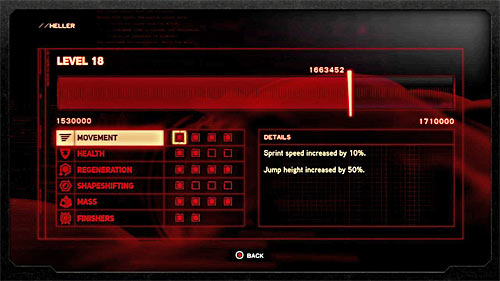
During the game you gather experience points. Each time you obtain a sufficient number of them you'll advance to the higher level and receive one development points. These points can be spent in six different categories:
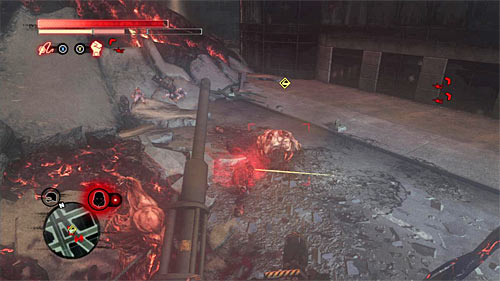
Heller develops all other powers mainly by defeating and consuming those opponents who have hand icon over their heads (screen above). After each successful action, the game grants you a random power and since there are dozens of them to be unlocked, I recommend using every opportunity to consume "special" enemies. I also recommend looking for enemies with icons of DNA chain (bonus experience points) and head (the possibility of obtaining memories of a murdered person).
Achievement name
POINTS
HOW TO ACHIEVE IT AND NOTES
Road Rage
20
Destroyed 10 Blackwatch tanks, APCs or helicopters using a single hijacked tank or APC. I recommend hijacking a tank and remain in motion, becoming a difficult target.
Lair to Rest
15
Destroyed a single Lair. More on this in chapter Secrets.
Sic 'em!
20
Destroyed 5 helicopters using Pack Leader. The important information is that you do not have to complete it in one shot, so use this ability until you get an achievement.
I Want Some More
10
This achievement is automatically awarded during the completing the main campaign.
Back Atcha!
20
Deflected 5 missiles at enemies using Shield Block. It is best to get this achievement during the fight with the helicopter or enemy with rocket launcher.
Hard to Please
20
Acquired a Mutation in each of the 5 categories. More on this in section Heller's Powers.
What a Bitch
30
This achievement is automatically awarded during the completing the main campaign.
I Caught a Big One!
10
Mounted a helicopter using Whipfist. Make sure to target hostile machine (left trigger) and hold B button.
Two for the Price of One
20
Simultaneously killed 2 Brawlers using a single Devastator. Wait until monsters get close to Heller before performing Devastator.
Up to No Good
30
Defeated all Field Ops teams. More on this in chapter Secrets.
Over-Equipped
20
Weaponized 10 vehicles. You can tear off the weapons by pressing X button after jumping on the machine.
//BLACKNET Hacker
40
Completed all //BLACKNET dossiers.
Icarus
15
Reached the highest point in the world. This is a top of the skyscraper in the red zone, in location [679, 263].
One by One
20
Stealth Consumed 50 Blackwatch troopers.
Finally Full
50
Acquired all 46 upgrades through Consumes. Remember to look for enemies with the hand icon over their heads.
You're the Bomb
10
10 or more kills using a single Bio-Bomb. You should try to complete this achievement in places with many living creatures (in lairs for example).
Spindler's Search
40
Destroyed all Lairs. More on this in chapter Secrets.
Who Watches the Watchers?
20
Consumed 10 //BLACKNET targets.
Cannonball!!
10
20 or more kills with a single Hammerfist dive attack. I mean here air charged attack. You should try to complete this achievement in places with many living creatures (in lairs for example).
Master Prototype
50
Completed the game on HARD difficulty. Do not change the difficulty level during the campaign because you may fail with this achievement!
The Best Offense
20
Countered enemy attacks 20 times using Shield. It is best to get this achievement during the fight with super soldier.
Compulsive Eater
10
5 consumes in 10 seconds or less. Try to get this achievement on civilians or other defenseless character, which can be easily consumed.
Do the Evolution
20
Acquired 5 Mutations. More on this in section Heller's Powers.
All Growed Up
50
Fully upgraded Heller.
Follow Your Nose
30
Found all BlackBoxes. More on this in chapter Secrets.
The Floor is Lava
15
Traveled a half mile using only Wall Run, Glide, Jump and Air Dash. I personally suggest trying it in the red zone, where you can find many high buildings.
Strike, You're Out.
10
Destroyed a Strike Team in 15 seconds or less. Strike Team appears after you are "annoying" for a long time. It is best to deal with them with the helicopter.
So Above It All
20
Spend at least 25 consecutive seconds in the air (helicopters don't count). I suggest completing it after developing Heller's acrobatic abilities. Jump from one of the highest buildings in the city, helping yourself with dashes.
Hijack Be Nimble
15
Stealth hijacked 5 tanks or APCs. Look in Blackwatch bases for machines which are not used by anyone.
Wanted Man
20
Triggered 50 alerts.
Project Closed
20
Completed a //BLACKNET mission.
Eating Your Way to the Top
30
Acquired 30 upgrades through Consumes. Remember to look for enemies with the hand icon over their heads.
Religious Experience
10
This achievement is automatically awarded during the completing the main campaign.
Something to Live For
30
This achievement is automatically awarded during the completing the main campaign.
The Mad Scientist
30
This achievement is automatically awarded during the completing the main campaign.
This is a Knife
20
This achievement is automatically awarded during the completing the main campaign.
It's an Epidemic
10
This achievement is automatically awarded during the completing the main campaign.
Just a Flesh Wound
10
Dismembered a Brawler. Jump over the beast, waiting for possibility to perform a special attack with X or Y button. Repeat this action until you get the achievement.
Vitamin B-rains
10
Acquired 10 upgrades through Consumes. Remember to look for enemies with the hand icon over their heads.
All Together Now
20
10 or more kills with a single Black Hole attack. As a reminder this is a special attack connected with tendrils. You should use it in places with many people.
Murder your Maker?
100
This achievement is automatically awarded during the completing the main campaign.
Anger Management
20
Destroyed 5 vehicles using a Finisher. You should first unlock a special power. Finisher is performed by pressing Y button after jumping over the machine.
Arcade Action
10
Karate kicked a helicopter. It is the standard kick, so you can't have any major power mapped to the button.




 Pirates of the Caribbean: At Worlds End Game Guide & Walkthrough
 Prison Architect Game Guide & Walkthrough
 Professional Farmer 2014 Game Guide & Walkthrough
 Pokemon X/Y Game Guide & Walkthrough
 Path of Exile Game Guide & Walkthrough