Welcome to the unofficial game guide to the "Pirates of the Caribbean: At Worlds' End". This guide consists mainly of a very detailed walkthrough of the singleplayer campaign of the game. You will find out almost everything about the main twelve missions. Obviously, you'll know what exactly has to be done in order to fulfill main goals. This will allow you to reach the end of each mission. Additionally, I've also described all sub-missions. You won't have to complete them in order to succeed, however I'd strongly recommend doing that. Most of these missions aren't too difficult (or complicated) and you'll be able to earn some precious rewards for finishing them. Some of these missions have been described along with the main goals, mostly when you're going to have to find someone/something (e.g. four prisoner cells in the first mission of the game) or when you'll participate in one of the mini-games (e.g. The Jackanism which appears from time to time). As for the rest of the goals, check the first part of the description of a mission if you want to find out more about the available subquests. I'm sure that you won't have any problems finding these descriptions. The second part of my game guide contains a detailed list of all available Achievements. I'm sure that you're familiar with these types of bonuses. For example, you will be able to unlock new playable characters. This will also enable to use them to repeat some of the previously completed missions. You can also check the achievements on your own, by choosing the Treasure Cove from the main menu of the game (you would have to click on various different types of bonuses). I guess I should also remind you about the necessity of saving your game progress. Sadly, you won't be allowed to do this during the course of the game, so don't forget to choose YES once you've successfully completed one of the missions. This also includes the secondary challenges which can be found in the main menu of the game. As for the missions, I've focused most of my attention on reaching new areas and exploring the surroundings. It's going to be very important if you plan on finding some of the hidden objects (including the crab pendants). I hope that you'll find my guide to be helpful and I'm sure that you won't have any major problems reaching the end. Have fun playing the game!
Stranger
Helpful hints:
- First of all, you can't forget about the possibility of destroying nearby crates, barrels or vases. I'm sure that you won't have any problems finding these objects or spotting them once you've reached a new area of the map. I will describe in the main part of the guide where you can find the most important objects. Most of them will contain gold pouches and you're going to need to collect gold in order to fulfill one of the secondary goals.
- Combat is a very important aspect of this game. While fighting a group of enemy soldiers, always try to score nice combo hits. Additionally, during most of the missions this is going to be required to fulfill one of the subquests. The most important thing here is to maintain a combo. As a result, you won't be allowed to take too much time between the hits (usually it has to be less than two seconds). Choose your targets carefully, especially if you see that one of the thugs is trying to block your attack. You will also have to avoid counterattacks, because they will interrupt your combo and you would have to start from the beginning.
- You should be using the block function quite frequently, especially if you're fighting minibosses or stronger characters. Once an opponent has made his move, try and perform a successful counterattack. Most of these actions will end with a hit. If you lost too much health, use the chicken wings to replenish your health meter.
Available subquests:
1. Crab Pendants - Find and pick up four crab pendants.
This is a fairly simple objective. If you want to find out where to search for the crab pendants, head on to the main description of this mission. You will be finding these objects inside barrels and crates. This means that you will have to be on a look out for interactive objects. Thankfully, their locations won't be random. You will always find the pendants in the exact same spots.
2. Defeat Enemies - Defeat at least ten enemies.
This is also a very simple task and I'm sure that you won't have to worry about finishing it. It's because you'll defeat more than 20 enemy units during the course of this mission, so you won't have to search for any additional opponents.
3. Prisoner - Release four groups of prisoners.
This sub-mission is very similar to the second one, mostly because you won't have any major problems finding the cages. You will have to free all prisoners in order to advance in the course of the mission. Otherwise you wouldn't be able to reach new locations.
4. Ole Enemies - Try and outsmart at least four enemies by performing an Ole move.
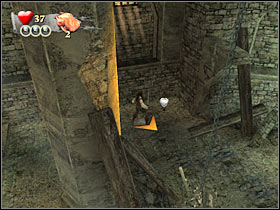
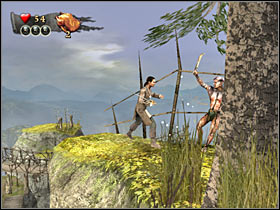
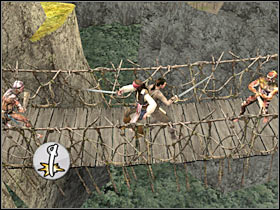
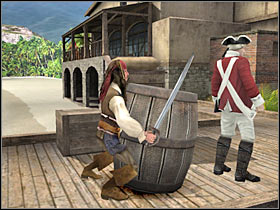
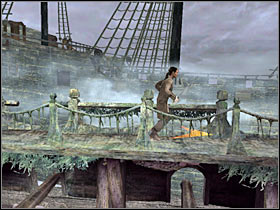
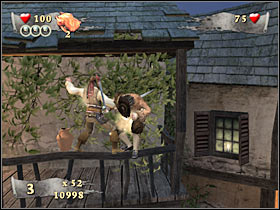
You can have some problems understanding what has to be done in order to fulfill this particular goal. You will have to perform a certain move - a dodge move, to be more specific. Additionally, you will have to be standing near one of the pits. Check the screen if you want to find out what exactly I'm talking about. Start off by pressing and holding a block key. Now you will have to wait for one of the enemy thugs to attack you. Once this happens, start hitting the side movement keys. As a result, your characters should perform a dodge move and the opponent will die. You will have to outsmart four enemy units in order to fulfill this goal. You should also remember that you won't be allowed to do this everywhere. There are only a few locations with the chasms. One of them is near the start (screen). You will come across a bridge later during the mission and there's an area surrounded with water near the end.

5. Loot - Collect at least 850 gold.
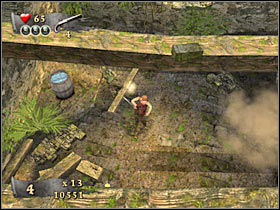
This is an extremely easy objective. You won't have to do anything in particular. Just be on a look out for gold pouches. If you've been to all main rooms, you should be able to gather more than 1000 gold pieces. Just remember to destroy all barrels and crates. Additionally, some of the enemy soldiers will leave gold pieces behind. Pick them up as soon as possible. Otherwise these objects would have disappeared from the map.
6. Hit Combo - Perform a x15 hit-combo.
This is by far the most difficult objective of this mission. The main reason is because you won't have a lot of opportunities to fulfill this goal. You will take part only in one bigger fight and that's going to be your only chance to finish up with this mission. Check the description of the main mission if you want to find out more about this. The most important thing while trying to score a high combo is that you avoid being hit by any of the surrounding enemy troops. Otherwise you would have to restart collecting combo hits. I would recommend choosing faster attacks. You can perform them by pressing the Z key. Additionally, you won't be allowed to take too much free time between the hits. As a result, if you notice that one of the soldiers is blocking your hits, immediately attack the next one. Avoid counter-attacks at all costs. It's sometimes better to block longer rather than lose the entire combo.
7. Level Notoriety - Earn at least 1500 Notoriety points.
Sadly, you won't be able to affect the outcome of this particular goal, mostly because Notoriety points are being added depending on how well you've managed to deal with other problems. First of all, you should try and complete all other sub-missions (including the Jackanism mini-game). Also, try and defeat enemy units by using high scored combos. It also includes some of the minibosses (they are going to have >100 health points).
Complete mission walkthrough:
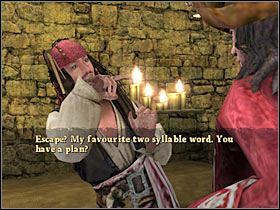
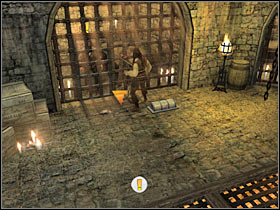
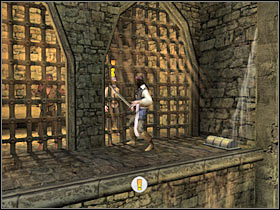
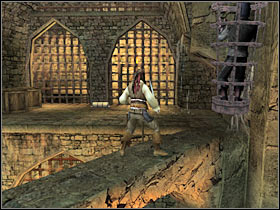
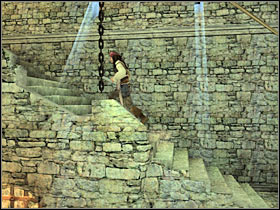
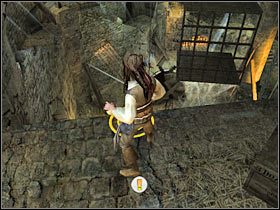
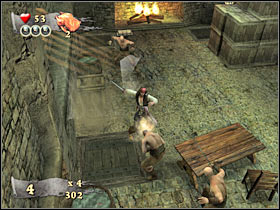
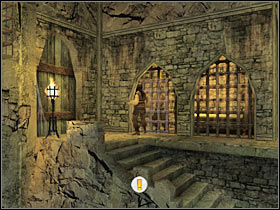
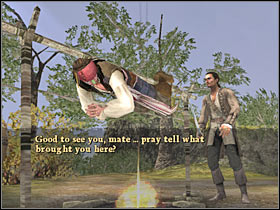
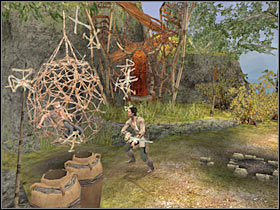
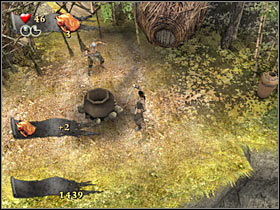
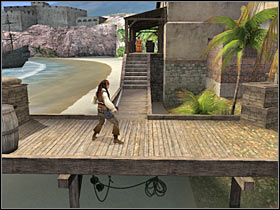
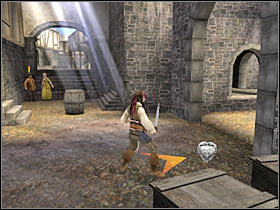
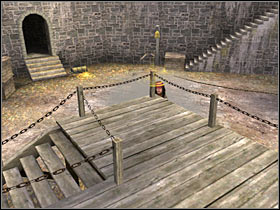
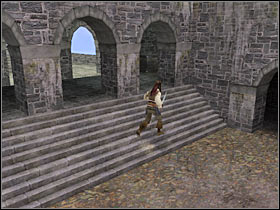
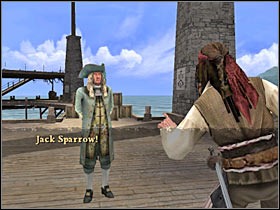
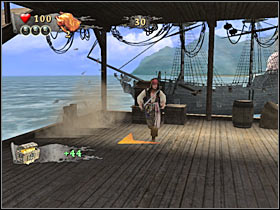
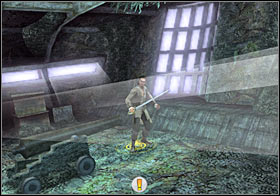
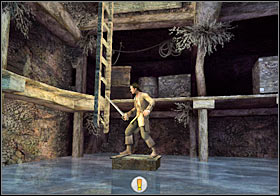
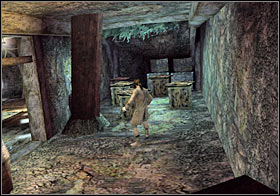
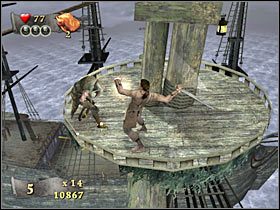
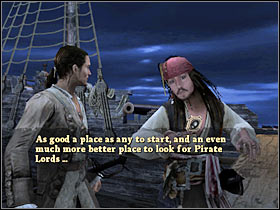
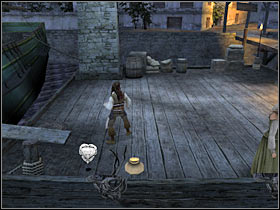
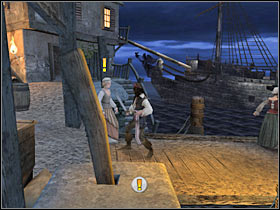
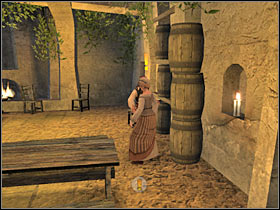
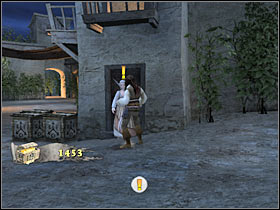
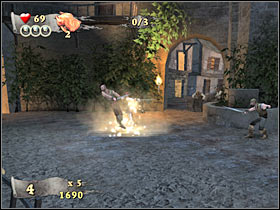
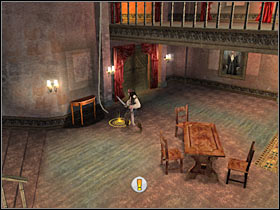
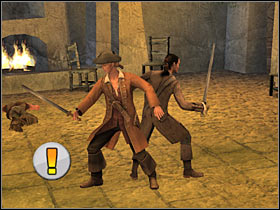
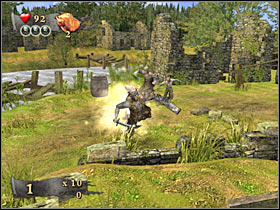
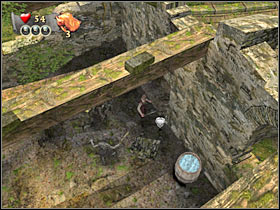
We'll start off with a short cut-scene (#1). You won't have to read all of these dialogs. Sadly, you won't be allowed to skip the cut-scene, so be patient. You'll start inside a small cell. Your main objective for this first mission will be to escape from the fortress. Exit the cell and destroy the first barrel (#2). You'll find your first crab pendant inside. Pick it up. Head on to your right. Destroy the second barrel. You'll probably find a medkit inside. Take it, as you may need it later during the game. As for the rest of the barrels, you will find gold inside most of them, however it's going to be random whether you find something or not. Use the stairs to reach the lower level.

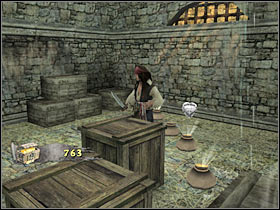
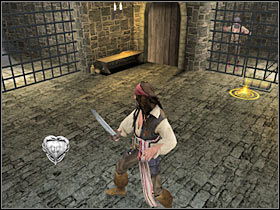
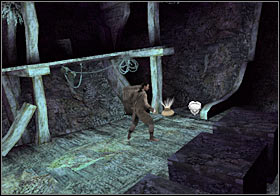
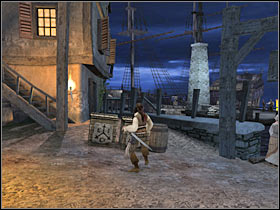
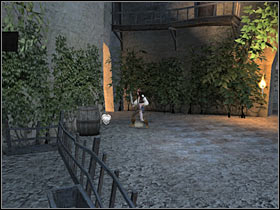
Once you're at the lower level, you might want to consider destroying some of the nearby barrels and crates. You should be able to find a health pack inside a crate located to your left (#1). As for the other barrels, some of them will contain gold pouches. Head on to the prisoners and talk to them (#2). Get ready for your first fight!
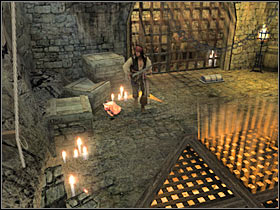
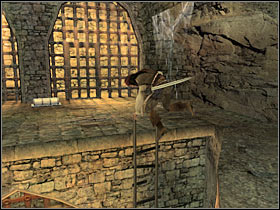
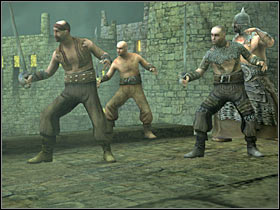
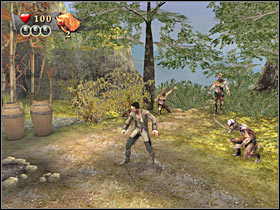
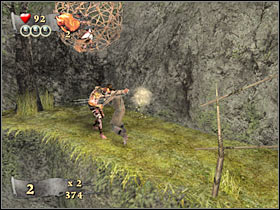
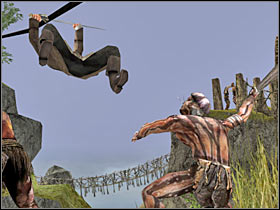
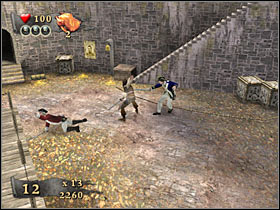
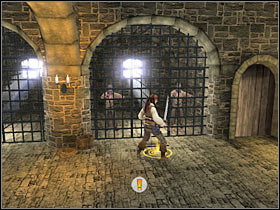
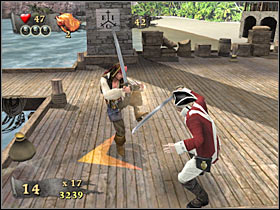
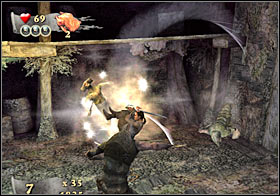
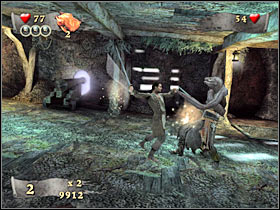
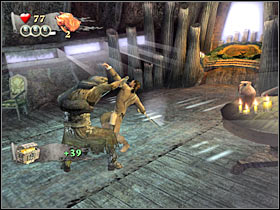
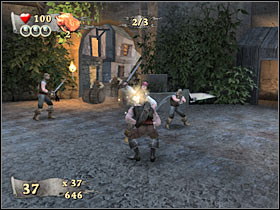
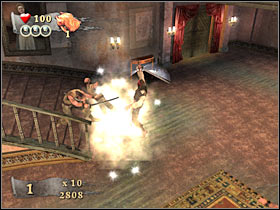
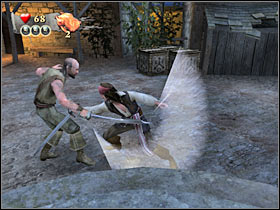
You shouldn't have any major problems killing two enemy thugs (#1). I would recommend choosing faster attacks, especially in the early part of this fight. Alternatively, you could try and score some kills for one of the sub-missions. You would have to trick enemy units by standing near the pit (#2) and performing a dodge maneuver. Either way, they have to die.
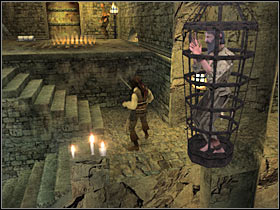
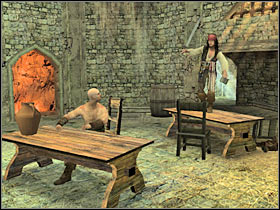
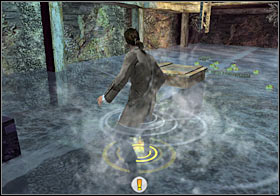
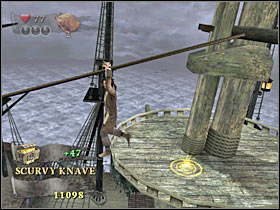
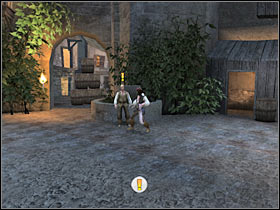
Once the enemy units are gone, you must go back to the prisoners. Jack should automatically free them. Once this is done, head on to the left side of the room. Stand on the glowing spot and press the action key (#1). As a result, you are going to be transported to a new location. Once you're on a new level, head on to your right. You won't find any crates or barrels in this area. Talk to one of the prisoners (#2) and use the handle to free him and his colleague. You will have to find two more cages to fulfill one of the subquests.
Head on to your left. You should be able to find a second glowing point here (#1). Use it by pressing the action key. Don't worry about one of the thugs, because he's going to be attacked automatically. Once you're on this ledge, you'll face-off against your first miniboss. Thankfully, this is a very easy fight. The game will suggest that you block most of his attacks (#2).

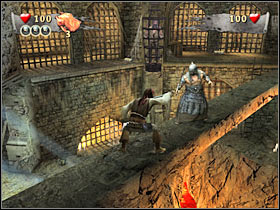
You will have to wait for the right moment to perform a successful counter-attack (#1). I would recommend that you focus on faster attacks. You should be able to hit the miniboss at least three times before having to use the block feature. This fight will probably take only take 30-40 seconds (#2). Once it's over, head on to your right.
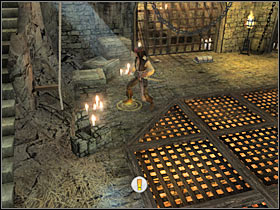
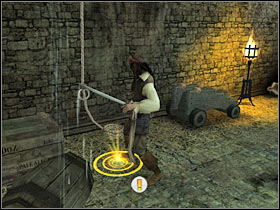
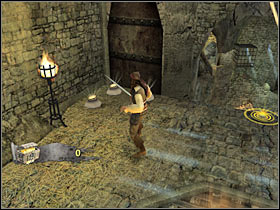
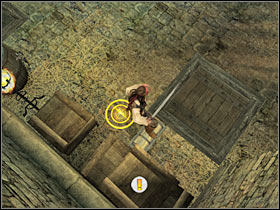
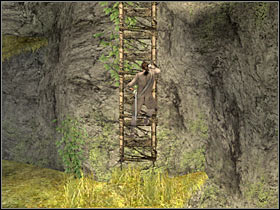
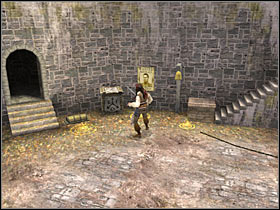
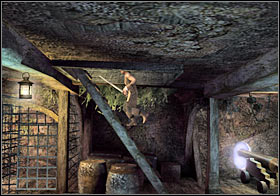
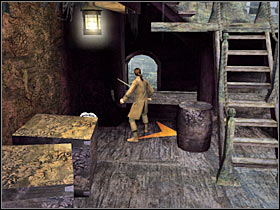
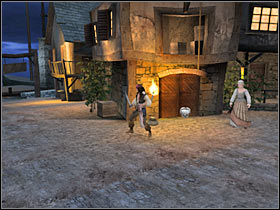
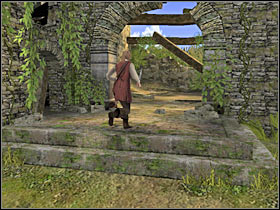
You should be able to spot a third cage here (#1). Go there now. Once again, you will have to start off by talking to the prisoner. This time you will find out about the secret locker. We'll get back to this problem later during the mission. Pull the lever in order to free him. You will also come across a few crates here. Destroy these objects. Use the ladder (#2) in order to get down to the lower level of the complex.
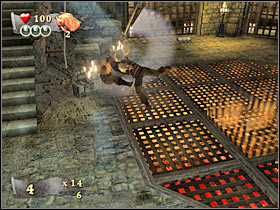
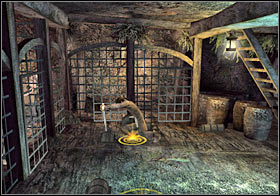
Head on to a nearby staircase. You will probably notice a small door along the way. The door is being guarded by a single enemy unit (#1). Take care of this small problem. Now, that the area is clear, use the lever, so you'll be able to enter this new room. Sadly, you won't find any barrels or crates inside. Instead, head on to a glowing dot. You will have to press an action key here (#2).
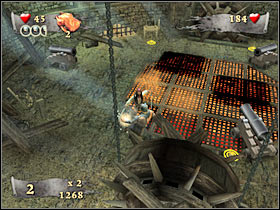
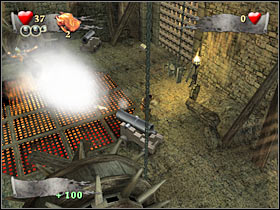
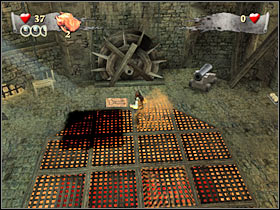
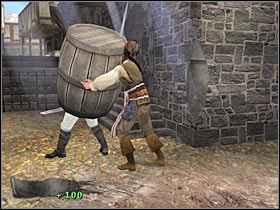
Once you've performed an action, you may proceed to the big cannon. Once again, press the action key. As a result, you will be able to blow up the door (#1). Enter the new room and use the small ladder. Once you're at the top, destroy all of the surrounding crates (#2). You should be able to collect at least 300 gold coins here.
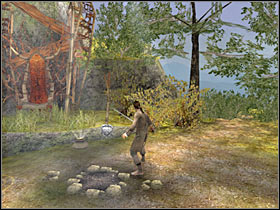
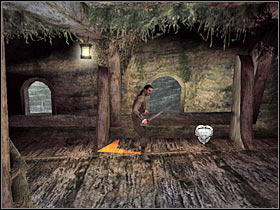
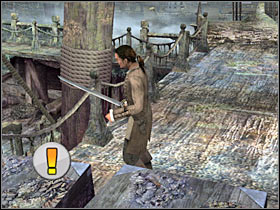
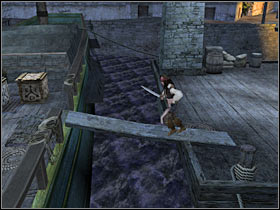
Once you've cleared out this room, head on to the lower side of the screen. Stand on the glowing spot and press the action key (#1). As a result, Jack will use the rope to reach the lower level. Don't use the nearby gate just yet. Instead, turn left and destroy a few other barrels (#2). One of these objects will contain a second pendant. Pick it up.
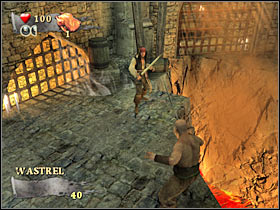
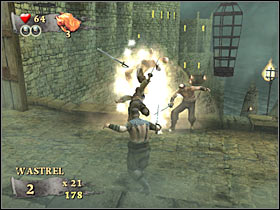
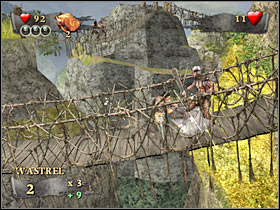
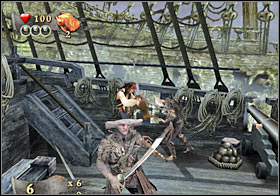
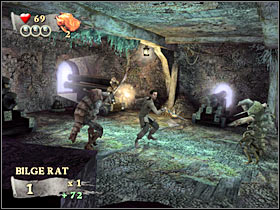
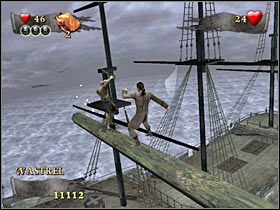
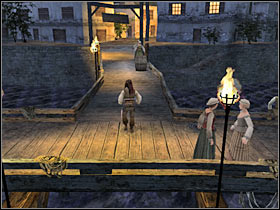
Make sure that you've destroyed all crates and barrels, because you won't be allowed to return to this location. Use the switch that's located near the gate (#1). Wait for the gate to open itself. Head on to a large bridge. A short cut-scene should appear on your screen (#2). As you've probably noticed, a larger group of enemy units was waiting for you here.
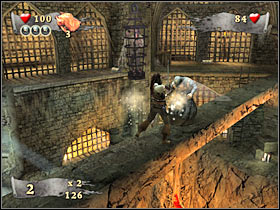
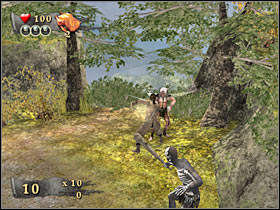
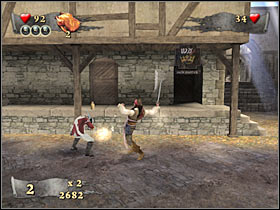
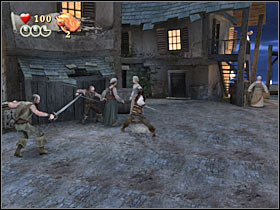
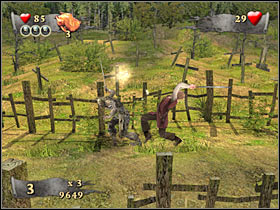
We'll start off with three "standard" enemy thugs. The easiest way to take care of this problem would be to use your standard attacks (#1). Alternatively, you could perform a few Ole moves. Once the enemies are gone, you will have to defeat the second miniboss (#2). Once again, it's very important to block his attacks. Additionally, perform successful counter-attacks. Don't forget to collect gold pouches from the bodies of fallen enemies.

Keep moving forward. You should encounter a few crates along the way. Destroy these objects and collect some gold (#1). Don't forget about one of your subquests. You're going to have to collect at least 850 gold coins in order to fulfill it. Once you've reached a glowing spot, stand on it and press the action key in order to be transported to a new location (#2).
Don't go up just yet. Instead, turn left and use the nearby stairs (#1). You should be able to enter a new room very soon. This is a second stash of this mission. Make sure that you've destroyed all barrels, because one of these objects will contain a third pendant (#2). I guess I don't have to tell you to pick it up. You may go back to the lower area.
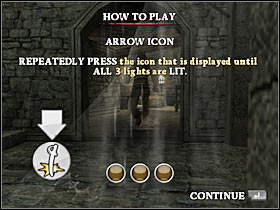
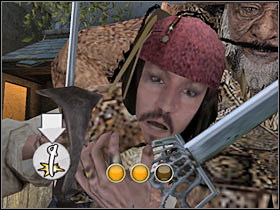
Head on to the previously unexplored corridor. This is where a very interesting mini-game will take place. It's called Jackanism. The rules of the game are very simple. Your job is to press certain keys, according to the icons which will be displayed on your screen. If you make a mistake, YOU WON'T BE ABLE to repeat the mini-game. The only solution to that problem would be to start over the entire mission. As a result, you must stay focused in order to succeed. The game will display some of the possible key functions on your screen. You will be pressing these buttons during the course of the mini-game, so make sure you've read all hints. Here's the list of possible keys:
1) hold key (represented by two characters - a yellow and a blue one) - C
2) WEAK attack (#1) - it's very important that you don't make a mistake here; the icon represents the Z key, not the X key (the X key has a lot of orange under the sword)!
3) upper movement cursor
4) all movement cursors; they have to pushed clockwise (and fast :-))
Once you've read all hints, the mini-game will begin (#2). Thankfully, even if you actually make a mistake, you will be able to continue your journey without any other interruptions. The only disadvantage is that you won't be allowed to collect a Charm Card. Check the second chapter of my guide if you want to find out more about some of the available bonus items.
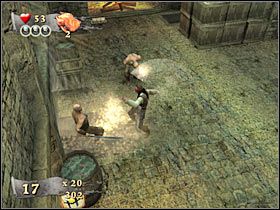
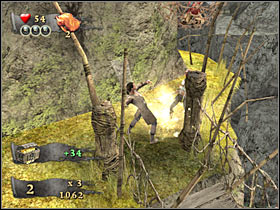
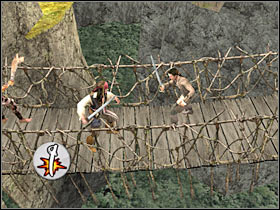
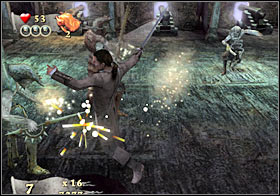
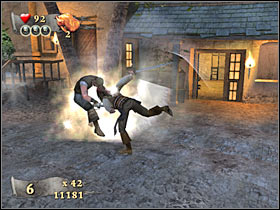
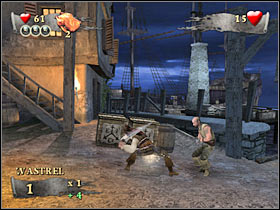
The result of the mini-game won't affect the outcome of the mission. As a result, you will take part in the longest battle of this mission. You will have to kill more than 10 enemy units. Most of the thugs will attack you right away (#1). This is also a very good opportunity to score a much needed combo. As a result, you will have to make at least 15 hits in a row (#2). Be careful, though. You can't be attacked by anyone, because you would have to restart collecting the combo hits. Also, try choosing faster attacks, instead of the strong ones.
Once you've secured this room (it's going to take about a minute or so), check your surroundings. You won't find any crates here. Instead, use three different levers (#1). As a result, you will be able to cross a much smaller bridge (#2). Go there now.
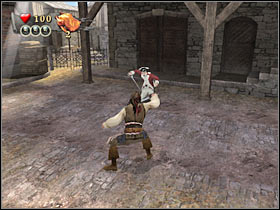
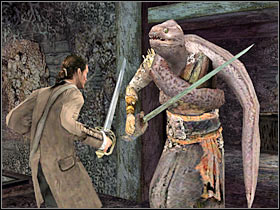
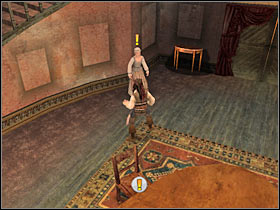
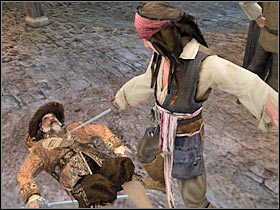
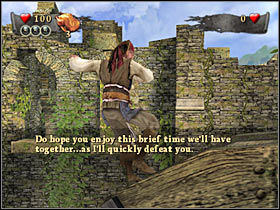
You should be able to reach the final, fourth cell in just a few seconds. Talk to the prisoner (#1). Once this is done, you will have to pull a nearby lever in order to free him. Use the stairs to reach the lower level. Once you're there, head on to the central section of this room. This is where you'll meet the boss of this location (#2). He has 200 health points, so it's going to be a slightly longer battle. Thankfully, it'll be quite easy to defeat him.
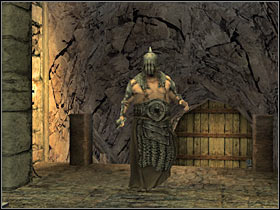
You can kill this thug without having to use any other tricks (#1). This would mean, however, that you would have to hit him at least 20-30 times. Try using blocks in order to avoid his attacks. You could also try and perform a few dodge moves in order to be able to stab him in the back. There are also a few interesting items in this room. You'll be able to use cages and cannons (#2) to your advantage. The only problem is that the boss would have to be standing in a correct spot in order to receive injuries.
Once this battle is over, you will have to pick up a large key that was left behind by your last opponent (#1). Don't exit this area just yet. You will have to locate a single crate. Destroy it and you'll be able to pick up the fourth pendant (#2). As a result, you will fulfill one of the side missions.
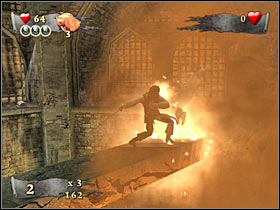
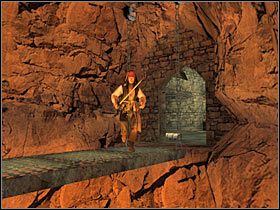
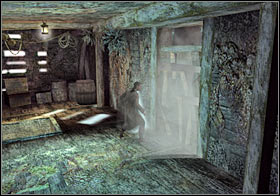
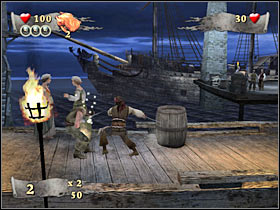
Once you've checked your surroundings, head on to a large switch (#1). Use it to open the gate. Head on to the next section of the map. You will come across a single opponent along the way. Take care of this small problem. Once this is done, step up to the TNT barrel and press the action key TWICE (#2). As a result, a second huge explosion will take place. You may exit the fortress.

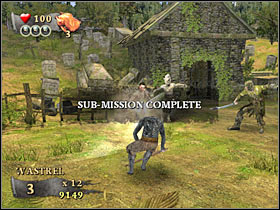
This is the final combat section of this level (#1). If you haven't completed the Ole submission, this is your last chance to do it. Once the enemies are gone, head on to a small pier that should be visible in the distance. A new cut-scene should appear on your screen (#2). That's it for the first mission of the game.
Important! Once you've finished this mission, you should consider going back to the main menu of the game. You will have an opportunity to perform three additional challenges. Choose Challenge Mode from the menu. The purpose of these missions is to unlock other valuable objects. Head on to the second chapter of the guide if you want to find out more about the bonus items. Obviously, these challenges are optional, however you shouldn't have any major problems completing the first set.
Combat Challenge
Objective: Defeat 10 enemies in under 1 minute.
Hints: You won't have much time to deal with the enemy units, so you should consider choosing some of the strongest types of attacks. Don't worry about the enemies interrupting your combo sequences, because that's not the point of this challenge. You should only watch out for your health bar, so you won't die too soon.
Combo Challenge
Objective: Perform x8 Combo.
Hints: You will have to be very focused while trying to succeed here. You will have two minutes to score such a combo, so take your time and plan your next moves very carefully. The most important thing here is to remember that you won't be allowed to take too much time before the next attack. If one of the enemy units is blocking your attacks, immediately attack someone else.
Loot Challenge
Objective: Collect 200 gold pieces.
Hints: This is one of the easiest challenges. The only thing you have to do here is to collect gold pouches from the bodies of fallen enemies. Don't worry about the time limit too much (2 minutes). Additionally, you won't have to perform any combo sequences.

Available subquests:
1. Crab Pendants - Find and pick up four crab pendants.
You won't have to worry about finding these pendants on your own. I've described in the main part of the walkthrough where to find them.
2. Free the Captured Crew - Save nine crew members.
Once again, you won't have to worry about finding all nine cages. Their locations have been described in the main walkthrough section of the guide. You shouldn't have any major problems finding the cages, however you will have to leave one of the cages for later in order to deal with the rest of these objects. Otherwise you wouldn't be allowed to return to them.
3. Loot - Collect at least 1000 gold.
I'd strongly recommend that you read this description. The first mission was very simple when it came to having enough loot. Sadly, it's going to be more difficult this time. You will have to collect gold coins mostly from the bodies of fallen enemies. If you have some problems gathering enough money, try extending the final part of the mission. It's going to be very simple, because you would be attacked by endless groups of enemy thugs (if you chose not to perform certain activities).
4. Hit Combo - Perform a x15 hit-combo.
This is a very similar objective to the one from the first main mission of the game. As a result, it's going to be quite difficult to score such a combo. You could try and do it at the beginning of the mission, however it's going to be much easier to fulfill once you're on a raft (it's near the end of the mission). The choice is yours.
Complete mission walkthrough:
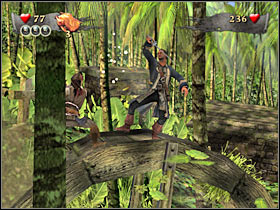
This mission will begin once one of your main characters (it's going to be Will Turner) has safely reached the island. You will have to watch a short cut-scene. Like I've said earlier, your main character for this mission is going to be Will. Thankfully, it won't change the manner of which the game is being played. You will have to deal with the first group of natives right away (#2). Get ready!
You shouldn't have any major problems dealing with the enemy units. Furthermore, you will have an opportunity to fulfill one of the side missions. It's going to be the Combo mission (#1). Obviously this is optional. Once the battle is over, destroy all of the surrounding vases. You should be able to find the first pendant inside one of the vases. Take it.
Try moving towards the left side of the screen. You should be able to locate a small cage here. You will have to press the action key in order to save the prisoners from the cannibals (#1). Once this is done, destroy all of the remaining vases and head on to your left. You will come across a single native here (#2). Kill him and free the second prisoner (by pressing the action key).
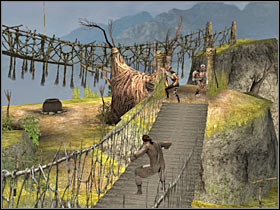
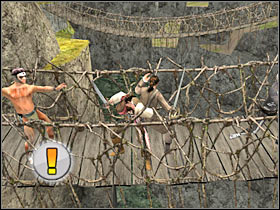
You may go back. The next thing on the list would be to locate a large hanging bridge which should be located nearby. Use the bridge (#1). Sadly, you won't be able to cross to the other side just yet, because you are going to be attacked by a miniboss (#2). Thankfully, he's only got 50 health points, so you shouldn't have any problems killing him.
Head on to your right. Once you've reached a larger area, you are going to be attacked by a new group of enemy units (#1). I wouldn't recommend going for the sub-mission combo here, because there aren't enough enemies in the area. Once you've taken care of them, destroy all nearby vases. One of the vases will contain the second pendant (#2).
Before you decide to use the second large bridge, there are a few other things that you're going to have to take care of. You will have to find three passageways. The first one is going to be located on your left (#1). Once you're down, turn right. You will have to defeat one of the natives (#2). Free the third crew member. You should also destroy the vases. Go back to the encampment.
Now you should consider checking out the passageway in the middle. It's hidden behind the bushes (#1). Take a look at the first screen if you can't find it. Just as before, you will come across one of the cannibals (#2). Defeating him is going to be very easy. Once he's gone, take care of the fourth prisoner. Go back to the main camp.
There's only one more passageway left. It's located near the large bridge (#1), in the upper right corner of the screen. Keep going towards the right edge of the screen. You should be able to perform a surprise attack here (#2). Rescue the fifth prisoner. You may go back to the encampment. Try using the large bridge (the one you've ignored earlier during the mission).
Once you're close enough to the central part of the bridge, a new cut-scene should be displayed on your screen (#1). The bridge is going to be destroyed by the cannibals, however Turner will survive the attack. You will find yourself standing on a new ledge. Go to your right (#2). You could use the destroyed bridge to climb up, however this won't be necessary.
I'm sure that you'll notice a ladder very soon. Ignore it for the time being and go right. Destroy the vase, pick up some gold and kill the native (#1). Now you will have head on to the large bridge. Don't worry. It's not going to be destroyed (#2).
Once you've safely reach a new platform, you will have to deal with a new enemy unit. Thankfully, killing the cannibal is going to be very simple. Make sure that you've destroyed all vases, because one of these objects will contain a third pendant (#1). Rescue the seventh prisoner. You may go back to the ladder (#2). I'm sure that you won't have any problems finding it.

Once you're at the top, you will have to deal with a single enemy unit (#1). You could also perform an Ole move, however doing this would result in losing a chance of collecting a gold pouch. I'm sure that you know what should happen next. Use the rope to reach the lower level. Turner should automatically take care of the remaining enemy units (#2).
Head on to your right. One of the prisoners is being held here, however IGNORE HIM for the time being, because rescuing him would automatically trigger a boss fight. Instead, destroy all vases. As a result, you will come across a fourth pendant (#1). I'm sure that you've noticed a road nearby. Go there now. You will find a new cage here (#2). Kill the cannibal and rescue the prisoner. Go back to the main encampment.
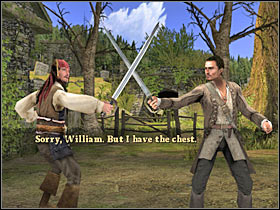
You only have one cage left. Stand on the glowing point and rescue the ninth prisoner (#1). As a result, you will automatically fulfill one of the subquests. You will also trigger a fight with the boss of this location (#2). Furthermore, it's not going to be a standard duel. You must do as your told if you want to succeed here. Thankfully, Jack Sparrow will assist you in taking down the boss. So... let's get going.
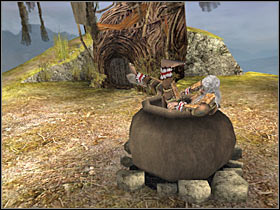
Like I've said before, you won't be able to defeat the boss with your blade. First of all, you will have to be standing near a large kettledrum (#1). Additionally, make sure that you're holding the block key. Wait for the boss to attack you and perform an Ole move. If you've done everything according to the plan, the boss should end up inside the cauldron (#2) and a funny cut-scene will appear on your screen.
The boss will escape and leave you with a few natives (#1). Thankfully, there's not going to be too many of them, so you shouldn't have any problems killing them. Once they're gone, the boss will return to the fighting area (#2). You will have to trick the boss two more times in order to win. There's also one more thing you should know about. You can't block the attacks endlessly. Sooner or later, you will have to perform an Ole move.
Now you will have to deal with an interactive cut-scene. Thankfully, even if you make a mistake here, you'll be able to repeat the cut-scene from the moment you've defeated the boss. Here's what you'll have to press:
1) ENTER (#1)
2) C (#2)
3) X (#3)
4) Z (#4)
Once this is done, wait for the new cut-scene to pop up on the screen.
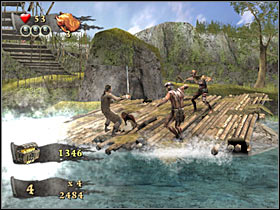
This is going to be the final part of this mission. Your objective will be to eliminate as many cannibals as possible (#1). This is also a good spot to score a successful combo chain (#2). Also, don't forget about the possibility of picking up gold pouches. You're going to need them for another subquest.
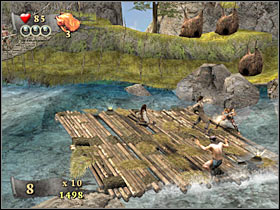
Thankfully, you won't have to worry about falling off the raft, because it's not possible. Your character will trip a few times, but that's it. Also, you won't lose any health points as a result of these actions. Once you've dealt with several groups of cannibals, you will have to start going towards glowing dots (#1; #2). Once you've reached each of these spots, press the action key. This is also a good moment to score a combo, because unless you've pressed the key in proper areas, you won't be able to move on with course of the mission.
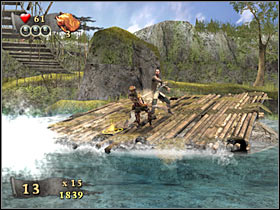
You should be able to reach a wooden barricade in just a few seconds. This time you're going to have to destroy three logs (#1) in order to be able to proceed with this part of the mission. As a result, the raft is going to reach a huge waterfall. A new cut-scene should appear on your screen (#2) and this mission will come to an end.
Just as before, you will be given an opportunity to take on three different side challenges. They are going to be more challenging this time, however there's nothing you should be worried about.
Combat Challenge
Objective: Defeat 15 enemies in under 90 seconds.
Hints: This is going to be a slightly more complicated challenge. I wouldn't recommend relying only on fast attacks. You should also consider using some of the stronger ones, mostly because you won't be given much time to kill your enemies.
Combo Challenge
Objective: Perform x10 Combo.
Hints: You shouldn't have any major problems with this particular challenge. The most important thing here is that you don't receive any hits. Try using some of your fastest attacks. Additionally, don't forget about the block key. You will have two minutes to finish this task.
Loot Challenge
Objective: Collect 250 gold pieces.
Hints: Focus all of your attention on collecting the gold, mostly because it's going to disappear a few seconds after you've disposed of an enemy unit. Thankfully, you will have plenty of time (two minutes) to win this challenge.
Available subquests:
1. Crab Pendants - Find and pick up four crab pendants.
I guess I don't have to remind you about the possibility of collecting these pendants. You shouldn't have any major problems finding most of them, however I would recommend that you read the description for this mission, because the last pendant is going to be hidden near the exit.
2. Wanted Posters - Find and remove three wanted posters.
You will find these posters in various areas of the map. Check the main description if you want to know exactly where to find them. Nevertheless, you shouldn't have any major problems searching them on your own.
3. Sneaky Man - Sneak up on four guards.
This is a very simple challenge, especially since none of the guards will actually attack you. As a result, it's going to be easy to sneak up on them. Check the description for this mission if you want to know how (and where) to stun the guards.
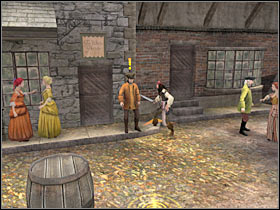
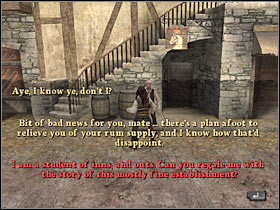
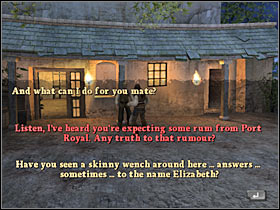
4. Rum Raid Part 1 - Distract the owner of a local tavern.
It's going to be an unusual task. You will have to talk to the owner of the tavern. The objective will be to choose correct answers in order to keep the conversation going. You shouldn't have any major problems choosing the answers from the list. I think it's quite obvious that they have to be less aggressive than the remaining ones. Sadly, you can't make a mistake here. Otherwise you wouldn't be able to repeat this challenge.
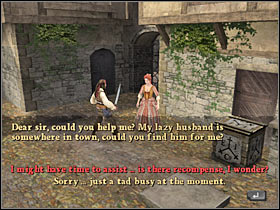
5. Missing Person - Find a missing husband.
This is also a very simple task. You should be able to find the missing husband without my assistance. You will have to talk to him. Obviously choosing a correct answer is going to be very important there. Once the conversation is over, you will have to go back to his wife. Check the main description for additional info.
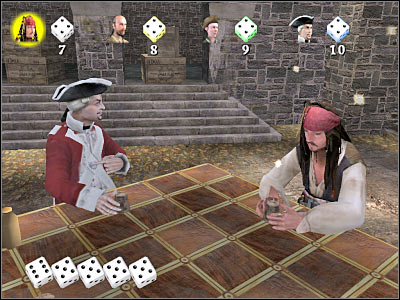
6. Pirate Dice - Win a game of Pirate Dice.
This is an optional challenge, so it would be wise if I explained it to you right away. Start off by talking to one of the NPC's. He can be found in the middle of the town square (check the main description for this level). Once you've agreed to play the game, you will be presented with a lot of useful hints. Make sure that you have familiarized yourself with all screens, because the game will explain you both the basic and the advanced rules of this game. You should also have at least one Charm Card at your disposal. You are going to be able to use these cards to cheat during the game. Sadly, you can only choose three Charm Cards from your inventory. Also, each of the cards can be used only once during the course of this mini-game. Obviously choosing better cards will allow you to extend your lead over the competition. As for the game itself, I wouldn't recommend playing aggressively, unless you're confident about your win (e.g. you have only fours and/or ones which also count as fours). You will have to bet correctly in order to increase your chances to be the one who's being challenged (by one of the AI players). Otherwise your opponents would probably earn a lot of money and you wouldn't be able to catch up to them. Make sure that you have used Charm Cards when it was absolutely necessary. Don't bet too much near the end, because you must have the largest amount of gold coins at the end of the tenth round. Good luck!
7. Loot - Collect at least 500 gold.
This is by far the easiest objective of this mission. You will only have to remember about one thing - destroying all barrels and crates. You could also pick up gold pouches from the bodies of fallen enemies. As a result, you should be able to collect 500 gold coins very soon.
8. Hit Combo - Perform a x17 hit-combo.
You can have some serious problems finishing up with this task, mostly because you won't have a lot of opportunities to score such a combo sequence. I would recommend that you wait until the final part of the mission. You are going to be attacked by a large group of enemy units once you've reached the main square. Also, you will be fighting with the soldiers near the end. It's going to be the dock area. Sadly, you would have to be a lot quicker there, because there's going to be an additional time limit to deal with.
Complete mission walkthrough:
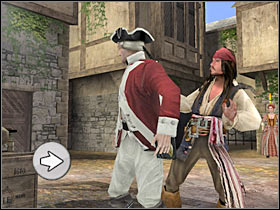
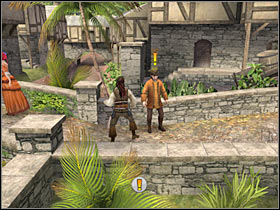
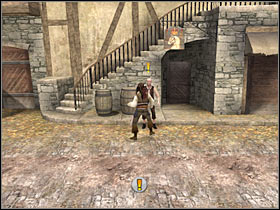
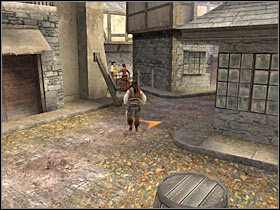
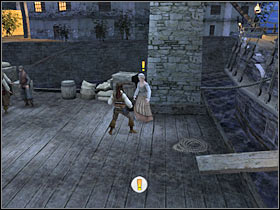
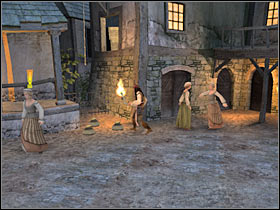
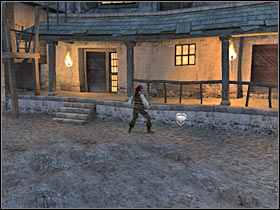
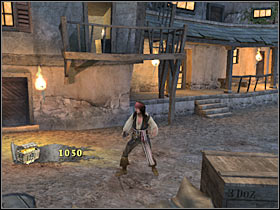
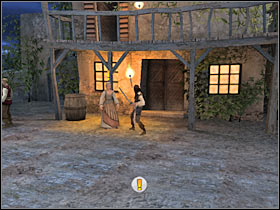
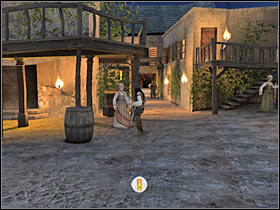
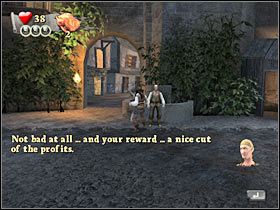
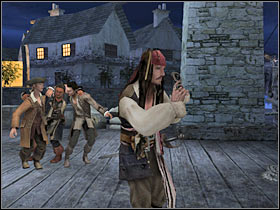
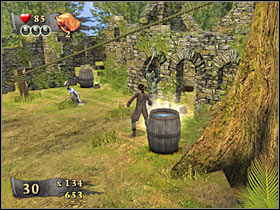
We'll start off by watching a short but interesting cut-scene. The game will give you a small hint here. As you've probably noticed, there's a guard nearby and you're going to have to take care of him in just a few seconds (#1). Make sure that you have read all the information windows. Once you've regained full control over Jack's movements, talk to one of the men standing here (#2). You will be rewarded with 200 gold coins for saving this guy from his cell in the prison fortress.
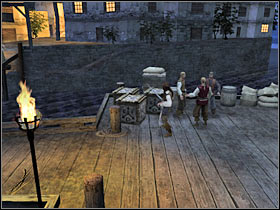
You should be able to find at least two barrels in this area. Destroy them, as they may contain gold pouches. Make sure that you have picked up these objects. Proceed to your right. Stand on the glowing point and press the action key (#1). As a result, you will dispose of this guard in a very funny way. You will also have to surprise three other guards, but we'll get back to it later during the mission. Keep moving right (#2). You won't have to explore the upper road, because you wouldn't find anything of interest there. Get ready for the "Jackanism" mini-game!
I guess it may surprise you a little bit, but this mini-game is going to be much easier than the one from the first mission of the game. You will be pressing similar keys, mostly ENTER (#1) and different cursors (#2). Also, even you make a mistake, you should consider restarting the whole level. The reason is you wouldn't have to repeat too many actions to reach the mini-game area. Once you've won the mini-game, destroy some of the nearby barrels (left side of the screen).
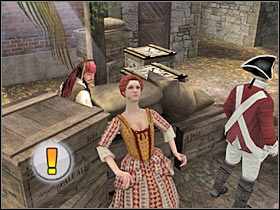
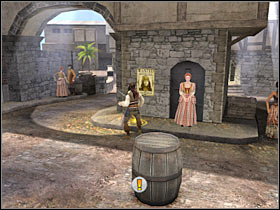
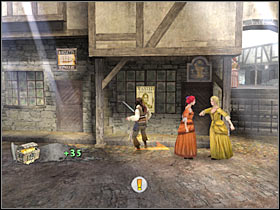
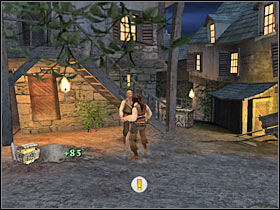
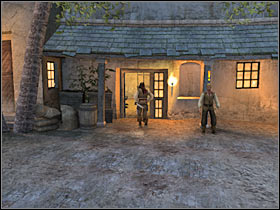
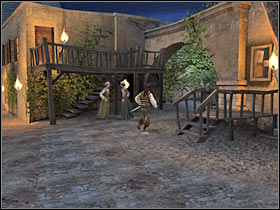
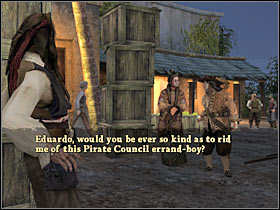
There are some crates to your left and near the bridge. Destroy them and collect gold coins. Now you should consider talking to a woman (#1). You will receive additional info for the 'missing husband' sub-quest. Make sure that you have chosen the first answer! Once this is done, head on to your right. Talk to one of the locals (#2). This man will grant you with a proposition to help him steal some rum from the tavern. You will have to agree. We'll get back to this mission in a short while.
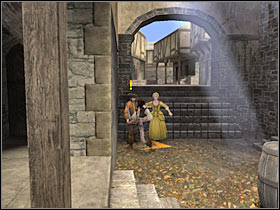
Keep heading towards the right edge of the screen. Don't forget to destroy all of the surrounding crates. Once you've reached the square, you should turn right. There's a wanted poster here (#1). Take care of that small problem. Next, you should consider talking to a woman (#2). As a result, you will receive new instructions. These are going to be the main goals for this mission.
There are some new crates to your right. It's very important that you destroy them, because one of the crates will contain your first crab pendant for this mission (#1). You could also destroy other barrels, however they will only contain gold pouches. If you want to take part in the mini-game, talk to one of the locals (#2). Check the second screen if you want to know where he's standing. The rules of the game have already been described and you will be able to read additional hints once you've started it.
Now you should consider surprising two other soldiers. They are patrolling this area, however they won't attack you. You will have to be standing near certain barrels (#1; #2). Once each of the soldiers stops near the barrel you will have to press the action key. Sadly, you will have to wait for one of the guards a little while longer. Be patient!
Once you've taken care of all other problems, talk to the owner of a local tavern (#1). You will have to be giving correct answers in order to keep the conversation going. This will allow the other pirates to steal the rum. You should be choosing the first answer from the top. The only exception is the first part of the dialog. You will have to choose a second dialog here (#2). Once the conversation is over, you should go back to the man who's standing near the bridge. We'll get back to this mission once you've reached Tortuga.
You won't have to use the nearby stairs, because you won't find anything of interesting there. If you've destroyed all barrels and crates, you may exit the square (#1). I guess I don't have to remind you to be on a look out for additional crates. Most of these objects will contain gold pouches. You will also be able to pick up a second wanted poster (#2). Keep moving right.
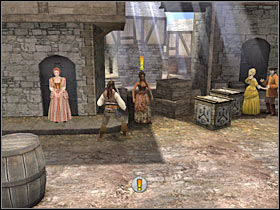
You should be able to reach the fourth guard very soon. Just as before, you will have to use a nearby barrel in order to get rid of him (#1). Once this problem has been solved, talk to one of the locals (#2). I wouldn't recommend escorting him to his wife. Instead, allow him to pay you 100 gold coins for your silence. You could also go back to his wife, however you would have to lie to her. You would be rewarded with 50 gold coins.
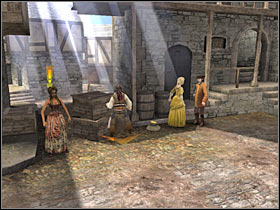
Make sure that you have destroyed all of the nearby crates (#1). One of these objects will contain a second crab pendant. Pick it up. You may proceed to the next location (#2). Get ready, because you will have to kill a few guards here.
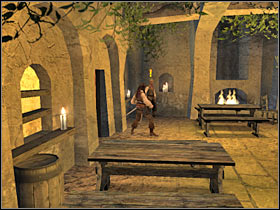
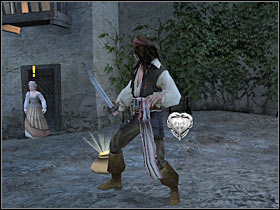
You will have to deal with several groups of enemy soldiers in this area. Once you've located one of the enemy units, try attacking (#1). As a result, the game should load a new scene (#2). Your main objective here will be to prevent both enemy units from reaching the bell, because that would raise the alarm in the entire city. Thankfully, it's going to be very easy to stop them. If one of the soldiers tries to run to the bell, stab him in the back. You will also be dealing with two soldiers at a time, so it's going to be very simple to get rid of them without losing too much health.

Once you've secured this entire area, you should consider destroying all of the surrounding barrels and crates. You will find a lot of gold coins here. Also, take the third wanted poster (#1). Now you should start thinking about completing main objectives. There are a lot of interactive points here. Stand on each of the glowing spots and perform an action (#2). Thanks to that, you will deal with most of the main goals. There's only one objective left - rescuing the prisoners.
Once you've been to all glowing points, exit the square by going inside one of the buildings (#1). You will have to use the stairs. Once the camera has changed its position, start moving to your left. You will come across several crates here. Most of these objects will contain gold pouches, so make sure you've picked them up. You will also find a third pendant inside a crate (#2).
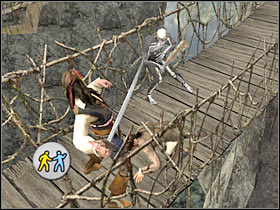
Now you will have to use two nearby levers (#1). As a result, you will be able to fulfill one of the main goals for this mission, because you will release all the prisoners. Now you will have to witness a new cut-scene that will involve one of the Pirate Lords. Your next objective will be to return to the start area. As you probably remember, it's going to be the pier. You will encounter your first miniboss very soon (#2). Thankfully, it's going to be very easy to kill him, especially since he's alone and he hasn't got much health. Keep going left.
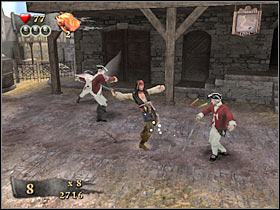
Once you've returned to the big square, you will probably notice that there aren't any NPC's in the area. Furthermore, you are going to be attacked by a large group of enemy units (#1). This is one of the few opportunities to score a decent combo sequence (#2). Sadly, it's not going to be easy, because your opponents will be blocking most of your attacks. They're also very good at performing counter-attacks. Once you've killed them, head on to the docks.
Once you've reached the bridge, you will have to defeat the second miniboss (#1). Just as before, this isn't going to be a difficult fight, however you must remember to use the block feature from time to time. You could also try and perform several stronger attacks. Keep going towards the start area. A short cut-scene will be displayed on your screen (#2). Jack will meet the governor.
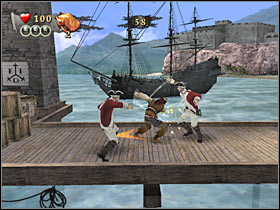
This is going to be your final chance to score a high sequence of combo hits (#1), however you will also have to know about a few other things. The good news is that if you fail to score a combo, you will be able to repeat this entire sequence (starting from the chat with the governor). The bad news is that you will have a certain amount of time to reach the ship. Once you've taken care of the first group of enemy units, start moving left and wait for the barricade to be blown to pieces (#2).
You will also have to wait for two other barricades to be destroyed. In the meantime, you will have to defend against enemy attacks (#1). You should be able to reach a larger section of the pier. You could consider destroying barrels in order to pick up some additional gold (#2), however this is optional. Additionally, you won't have to kill all enemy units.
Once you're ready, use the platform to reach the upper level. Destroy the crates which should be located on your left. This is very important, because there's a fourth pendant inside one of the crates (#1). You will probably have 15-20 seconds to leave this area. You could destroy other crates or head on to the exit right away (#2). Press the action key and this mission will end.
Just as before, you will have an opportunity to complete three side challenges.
Combat Challenge
Objective: Defeat 15 enemies in under 2 minutes.
Hints: As you've probably noticed, you will have more time to complete this challenge than in the previous (second) mission. Sadly, this is going to be a much more difficult mission, especially since your opponents are going to be tougher and they will perform a lot of counter-attacks. Try using some of your special attacks to take them down.
Combo Challenge
Objective: Perform x12 Combo.
Hints: You will have two minutes to fulfill the main objective of this challenge, however you shouldn't be worried about the time limit. If you won't make any mistakes, you should be able to score a combo within 30 seconds. You should take some time to observe your opponents. This will allow you to perform better counter-attacks. You'll also know when to block.
Loot Challenge
Objective: Collect 300 gold pieces.
Hints: You will have three minutes to collect 300 gold coins. As a result, this is going to be an extremely easy challenge. You will only have to watch out for your health bar, so you won't end your game before collecting enough gold.
Available subquests:
1. Crab Pendants - Find and pick up four crab pendants.
I'd strongly recommend that you familiarize yourself with the main description for this mission. Otherwise you would have probably missed one of the pendants and you wouldn't be able to end this challenge. You will also have to acquire that particular pendant very quickly, so you won't fail any other goals.
2. Defeat Enemies - Defeat at least ten monsters.
I guess I won't have to add anything else. You will be taking part in monster battles quite regularly and I'm sure that you'll kill more than 10 creatures.
3. Avoid Detection - Avoid being seen while trying to explore the main deck of the Flying Dutchman.
This challenge is quite tricky and you may have some problems finishing it, especially since the game won't tell you exactly what has to be done. Your objective will be to follow a certain path once you've reached the deck of the second ship. Check the main part of the guide for additional clues on how to do that..
4. Loot - Collect at least 600 gold.
You shouldn't have any major problems with this task. Most of the enemies will leave gold pouches behind and I think it's quite obvious that you need to pick them up. Also, you will come across two stashes while trying to explore the Flying Dutchman. You will find a lot of crates there, so it'll also help you gather enough gold coins.
5. Hit Combo - Perform a x20 hit-combo.
This is going to be the most difficult challenge for this mission, however you will have a lot of opportunities to score a good sequence. There are a lot of monsters on the map. You should also know that these monsters are going to be slower than the soldiers you've met in Port Royal. As a result, you won't have to worry about their counter-attacks too much and you won't be blocking their attacks too often. There are about 3-4 places with huge monster battles, so it's best to wait for more monsters to show up before you decide to give it a try.
Complete mission walkthrough:
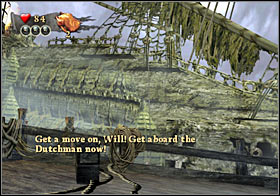
I guess you won't be surprised by the fact that this mission will begin with a long cut-scene (#1). As you've probably noticed, Flying Dutchman has appeared on the map and you'll have to deal with this problem during the course of the mission. The first part of this level will require you to repel monster attacks. Get ready, because you will regain a full control over your main character very soon (#2). I'd strongly recommend that you keep reading, because you will have to perform actions in a certain sequence, so you won't fail any of the available goals.
You will have to wait for the mission to begin. Ignore ALL of the surrounding monsters and start running towards the right edge of the screen (#1). You will have to use the stairs. Once you're there, destroy all nearby crates. One of these objects will contain your first pendant. This was kind of easy, now for the hard part. Go back to the starting area. I would recommend that you use the second staircase (#2), so you won't have to kill any monsters.
Keep running towards the left side of the screen. Move up closer to the upper staircase (#1). One of the monsters should be walking here. You will have to prevent it from using the stairs, because the objective here will be to protect Will against monster attacks. As a result, you will have to guard the stairs. Otherwise Will would be killed (#2) and you would have to repeat the entire mission. Thankfully, the monsters will be trying to use only the upper staircase.
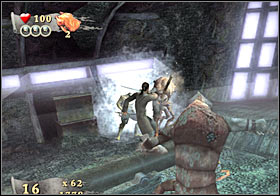
Focus all of your attention on guarding the stairs. Some of the monsters will try to get closer to it. Kill these creatures (#1). Be careful, though. Some of the monsters will appear near the stairs, so you can't leave this area. Otherwise you wouldn't have enough time to stop them. Once you've killed about 8-10 monsters, a new cut-scene should be displayed on your screen (#2). Jack will stay here and we'll take command over Will. It's time to explore the Flying Dutchman!

Once you've reached a new room, make a few steps forward. You are going to be attacked by a large group of monsters (#1). Despite what you might think, this is an excellent opportunity to score a high scored combo (#2). Like I've said before, these monsters are moving and attacking very slowly, so you should be fine.

Once you've killed all monsters, take a closer look at your surroundings. There are several crates here and most of them will contain gold pouches. Use the cannon (#1), so you'll be able to proceed to a lower level. Once you're there, turn right and destroy all crates. One of the crates will contain a second pendant (#2). Pick it up.
You may proceed to your left. Once you've destroyed several new crates, you will have to deal with a second large group of monsters (#1). I would recommend going back to the previous room and killing a smaller group. After that, take care of the rest. You will have to secure this room by destroying all crates. Press the action key in order to push a crate (#2).
New enemies will arrive in the area (#1). Thankfully, this is going to be a much smaller group, however you must still be careful. Once they're gone, press the action key once again. You will be standing on top of a crate. Press the action key (#2) and use the ladder to climb up to a new platform.
I guess you won't be surprised by the fact that you're going have to defeat new monsters here (#1). This is also a small group and you'll be able to corner some of your opponents in order to get rid of them easier. Now it would be a good idea to free some of the prisoners (#2). You will have to pull all four levers.
Don't exit this room just yet. Instead, go to your right. Use the sword to destroy a wooden barricade (#1). As it turns out, there's a stash here. Enter the new room. As you've probably noticed, there are A LOT of crates here (#2). Destroy these objects, especially since most of the crates will contain valuable gold coins.
Once you've gathered enough loot, go back to the previous room (the one with the cannons). You will have to locate a small staircase that's located near the cells (#1). Use the stairs and deal with a new group of monsters (#2). This group is going to be very small, so you won't have to spend too much time here.
Once you've dealt with all enemy units, try moving closer to the right door. A short cut-scene should be displayed on your screen (#1). As you've probably suspected, you will have to deal with this miniboss creature. The monster is very good at counter-attacks, so you won't be allowed to make too many mistakes. Use the block feature frequently and wait for the right moment to make a move (#2). You could also use the revolver or the bombs, however it won't be necessary.
Once you've killed the miniboss, head on to the right room (#1). That's where the boss was hiding. You will find a few crates here. Keep going right. You should be able to reach the main deck very soon. This is where you will have to avoid being seen by one of the monsters. I wouldn't recommend leaving this area just yet, because there are two pendants here. The third pendant is to the left, inside one of the crates (#2).
The fourth pendant can be found at the opposite end of the main deck (#1). Remember that you have to remain unseen! Once you've taken it, use the left staircase and start moving right (#2), because that's where you'll need to go next.
Head on to a room that's located on your right. Once you've entered it, a longer cut-scene will appear on your screen (#1). You will have to wait patiently for it to end. Now you must deal with two STRONGER creatures (#2). Try focusing all of your attacks on one creature. I wouldn't recommend fighting both monsters at the same time.
Once you've returned to the main deck, you will have to participate in a short interactive cut-scene (#1). As a result, you must press ENTER and X. You will find yourself in a new place. You shouldn't have any problems killing new monsters (#2), especially since there are going to be only a few of these creatures.
Now you will have to find a glowing spot. Press the action key (#1). As a result, your main character will use the rope. The final battle is going to be a little more difficult, mostly because you won't be allowed to block attacks (#2). Try playing more aggressively. Your opponent should focus only on defensive actions. Once he's gone, this mission will come to an end.
As you've probably suspected, you will be presented with a couple of new challenges. I have to warn you, though. They're going to more difficult than the previous ones.
Combat Challenge
Objective: Defeat 20 enemies in under 3 minutes.
Hints: You won't have to perform any combo sequences during the course of this mission, so you should consider using objects from your inventory (for the first time). The bombs seem to be very powerful. If you place them correctly, you'll be able to take down 2-3 enemies with a single explosion. You could also use the revolver to kill single opponents.
Combo Challenge
Objective: Perform x15 Combo.
Hints: Once again, you will have three minutes to score such a combo. Don't worry about the time limit and focus only on hitting your opponents and avoiding being hit yourself. It's not going to be easy, because the enemy combatants are going to be more aggressive this time. Choose your targets carefully. You should be using special attacks. Don't forget to block some of the counter-attacks, especially if you already have a high chain.
Loot Challenge
Objective: Collect 350 gold pieces.
Hints: I guess I won't have to add too many things. You'll have plenty of time to collect 350 gold coins - three minutes. If you're quick enough, you should be able to do this within 90 seconds.
Available subquests:
1. Crab Pendants - Find and pick up five crab pendants.
Despite the fact that you're going to have to find five pendants (instead of the usual four), you shouldn't be too worried about completing this task. You will only have to make sure that you have checked all barrels and crates and you will be able to collect them without my assistance. Otherwise, you should head on to the main walkthrough.
2. Face Slap - Find nine women, so they'll be able to slap Jack.
This is a very funny side mission and I'm sure that you won't have any major problems finishing it. You will have to find nine women, however it's easier than it sounds, especially since there's an icon above each target. You may have some slight difficulties finding the last (ninth) woman, because she can be found inside a local tavern. It's the same place where you can play Pirate Poker. Check my guide if you want to find exactly where to search for these women.
3. Pirate Poker - Win a game of Pirate Poker.
You probably had some problems understanding the basics of a dice game, however this time it should be different. I'm sure that you won't have any difficulties understanding the rules of this mini-game, because this a standard Texas Hold'em game. This means that you will be given two cards at the beginning of each round. Your main objective will be to figure out whether your competitors are bluffing, what they have at the moment and what are your chances of winning. I think I won't have to explain you the basics of Texas Hold'em, especially since there are tutorial screens at the beginning of the game. These screens will tell you almost everything. Obviously you will be able to use Charm Cards in order to cheat during the course of this mini-game. You will probably have more than three Charm Cards by now, so you will have to choose the most useful ones. Some of the cards will allow you to reveal cards of your opponents or will force your competitors to fold. Use them wisely. Remember that it's very important for you have the largest amount of money at the end of the tenth round. As a result, don't risk near the end, especially if you have a large advantage over your opponents. Otherwise they could take the lead and you wouldn't be able to catch up with them.
4. Rum Raid Part 2 - Protect the warehouse against the bandits.
You should consider reading the main description for this mission if you want to find out more about this particular challenge. All I can say at the moment is that you will probably have some serious problems winning it. Preventing the bandits from reaching the warehouse isn't going to be simple, especially when there are 2-3 of them nearby. Thankfully, even if you fail this mission, you will be allowed to repeat it countless times.
5. Loot - Collect at least 1500 gold.
It may seem that collecting 1500 gold coins (instead of the usual 600-800) should prove to be quite difficult. Thankfully, it's not going to be. You won't have any major problems ending this task. You will have to remember about the possibility of destroying crates and barrels. As a result, you should be able to gather enough gold before even meeting with the Pirate Lord.
6. Hit Combo - Perform a x21 hit-combo.
Once again, this should be a quite difficult challenge, however you will be able to make it a lot easier. I'll explain what exactly I'm talking about. During the Rum Raid Part 2 side mission you will be dealing with endless reinforcements. As a result, you should focus only on hitting your opponents because even if you fail this mission, you will be able to repeat it and the game won't undo results from this combo challenge. As you've probably noticed, your opponents will be running towards the warehouse, so you may as well stab them in the back. You won't have to worry about the counter-attacks too much. As a result, you should even be able to score a x35-x40 combo. Obviously this isn't necessary. Having a x21 sequence will do the trick.
Complete mission walkthrough:
We'll start with a cut-scene (#1). It's going to much shorter this time, so get ready, because you'll regain full control over Jack's movements very soon. The first thing that has to be done here is talking to one of the women (#2). As a result, you are going to be slapped in the face. Don't worry. You won't lose any health points. ;-)
Once you've talked to the first woman, destroy some of the surrounding crates (#1). You will find gold pouches inside most of them. Make sure that you have picked up these objects. Go left. I wouldn't recommend choosing the upper road just yet. Instead, keep moving left. You will come across new crates here. Make sure that you have destroyed all of these objects, because one of the crates will contain your first pendant (#2).
Keep moving left. You will have to get on board of a new ship (#1). You won't find any other pendants here, however the crates will contain additional gold supplies. Once you've collected the gold, go back to the pier and head on to the upper road (#2). You will encounter your first miniboss here.
First of all, you must focus on blocking attacks, so you won't lose too much health. I wouldn't recommend choosing standard attacks. Instead, wait for the boss to make his move and perform stronger counter-attacks by using the X key (#1). Thanks to that, you should be able to get rid of him. Talk to the second woman in order to receive a slap in the face (#2).
Make sure that you have destroyed some of the nearby crates (#1). Keep moving left. You should be able to reach a larger square very soon. Head on to your right. Destroy new crates. One of these objects will contain a second pendant (#2). Once you've taken it, try talking to the third woman.
I would recommend that you check the left side of the square. You are going to be attacked by a large group of thugs (#1). This is a similar fight to the one with the miniboss. As a result, consider using stronger and special attacks. Once it's over, check some of the nearby crates for gold coins (#2). Talk to the fourth woman.
There should be one more crate in this area. You will have to go left in order to find it. Destroy the crate, because it contains a third pendant (#1). Also, make sure that you've secured this entire square by destroying other crates. You won't have to use the stairs, because you won't find anything of interest there. Keep moving forward (#2). There are going to be some new crates in the lower section of the screen.
Keep heading towards the left edge of the screen. There are at least four crates in this area. Once you've destroyed them, talk to one of the locals (#1). It turns out that this is also a prisoner from the first mission of the game. He will reward you with 200 gold coins. Once you've reached a new square, keep moving left. Destroy some crates and talk to the fifth woman (#2).
Now you should talk to the owner of a nearby tavern (#1). This is going to be connected with the Rum Raid mission. You were trying to steal rum in Port Royal, however this time you're going to help the owner of this establishment. You will have to choose first answers from the top. Once the conversation has ended, enter the tavern (#2).
You will be able to perform two actions here. If you want to participate in a poker mini-game, you should talk a shady fellow. He's going to be standing on your left (#1). Check the subquests section if you want to find out more about the poker game. You will also find a woman here (#2). Talk to her and leave the tavern. Use the left exit, so you won't miss anything important.
You will have to make sure that you have destroyed all of the nearby crates. Talk to the seventh woman (#1). Once this is done, I would recommend that you choose a passageway that's located to your right (#2). It's mainly because the upper road leads to the boss area and you should try and finish some of the subquests in the first place.
You will have to check your surroundings very thoroughly here, because you will find a lot of crates and the camera view won't help you to find them. One of the crates will also contain a fourth pendant (#1). Pick it up and talk to the eighth woman in order to be slapped in the face (#2). Keep going left. Destroy more crates here.
Before you decide to do anything else, you should consider destroying a single crate which should be located to your left (#1). This is very important because the crate contains final fifth pendant. As a result, you will fulfill one of the side goals. Now you should talk to a guard (#2). Just as before, choose first answers from the top, so you'll be able to take part in a new side mission. Get ready!
I've already mentioned before that this challenge is going to be an excellent place to score a much needed combo sequence (#1). You shouldn't have any major problems doing that, however you will probably have to repeat the mission afterwards. Thankfully, you won't lose the combo. Now you should focus only on preventing the bandits from reaching the warehouse (#2). Attack anyone who gets closer to the northern passageway.
Thankfully, the game will leave you some margin for error. As a result, two of the bandits will be allowed to enter the warehouse. Once you've taken care of this problem, talk to the guard once again in order to receive a reward (#1). Go back to the second square and head on to the previously unexplored path (#2).
Enter this new building. You won't have to talk to one of the bodyguards. Instead, talk to two last women (#1), so you'll be able to close this side mission as well. You won't have to destroy the vases, because they wouldn't contain any valuable items. Head on to the glowing spot and press the action key (#2). Get ready for a much longer battle sequence!
I'd strongly recommend that you focus all of your attention on performing special attacks (#1). You won't be allowed to lose too much health here. Sadly, you will have to deal with a very large group of enemy units, so be patient and eliminate them one by one. You will have to wait for the game to display a new cut-scene. As a result, you will be allowed to exit this building (#2). Keep running forward.
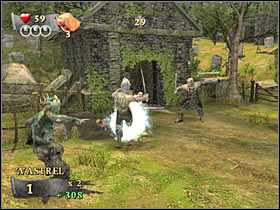
A longer cut-scene is going to be displayed on your screen in just a few seconds (#1). Jack will come across Mistress Ching. You will also have to defeat a Pirate Lord. This is going to be your first main boss, so must be very careful in order to survive (and win) this battle. Boss has 500 health points, however this fight is going to be divided into several smaller parts. Start off by blocking his attacks. You will have to perform instant counter-attacks (#2). You should consider choosing faster attacks (Z key), because there's a high probability that they'll be successful.

You will probably encounter several action sequences during this battle (#1). This usually means that you'll have to start hitting one of the keys. You will also have an opportunity to use objects from the background to your advantage. You would have to press ENTER while standing next to these objects (#2). They can be barrels or (as you can see on the second screen) water melons. This will allow you to advance to a second part of the battle.
Now you will have to take part in a well known mini-game, called Jackanism (#1). Remember that you won't be allowed to make any mistakes, however even if you fail here, you will be able to proceed with the main boss battle. Make sure that you don't press the wrong action key by mistake! As you've noticed, you will be using balustrades (#2). This is the final part of the battle.

Once again, you should focus all of your attention on performing faster attacks (#1), because these types of hits will be most successful. You will probably take part in an additional action sequence. Sooner or later, you'll defeat this Pirate Lord. As a result, new cut-scene will be displayed on your screen (#2). Thankfully, this isn't the end of this mission!
You will have to wait for the second cut-scene to pop up on your screen (#1). This time you will have to assist Miss Elizabeth. She's apparently being attacked in a local tavern. You will take part in an interactive cut-scene. Thankfully, it's going to be very simple. You will be pressing ENTER for the most of the time (#2). Now you will have to leave the city.

You should be able to regain full control over Jack's movements very soon. You will also have to deal with A LOT of enemy units (#1). These are going to be some challenging battles, especially since you'll be dealing with 2-3 thugs at the same time. Once you've killed them, start moving towards the ship (#2). You should also notice that new crates have appeared on the map. It would be wise to destroy them, however you will only find a few gold pouches.
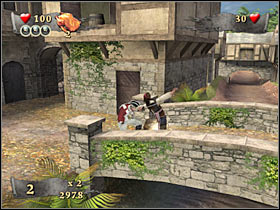
You will encounter your next miniboss very soon. I wouldn't recommend changing your approach. Choosing stronger attacks seems like a good idea, mostly because the miniboss will block the rest of your strikes (#1). Once he's gone, head on to your right. There are some new enemy units in the vicinity (#2). Thankfully, this is going to be a much smaller group. Don't forget about the possibility of destroying nearby crates!
Once you've reached the docks, you will have to defeat the final miniboss for this map (#1). I guess I don't have to repeat myself and to advise you to choose more powerful attacks. Don't forget about the crates on the second ship. Once you've reached the start area, a new cut-scene will be displayed on your screen (#2). This is the end for this mission.
Like always, you will be given an opportunity to participate in three different challenges, however you will also be able to take on Dueling mission for the first time ever.
Combat Challenge
Objective: Defeat 20 enemies in under 4 minutes.
Hints: This time you will be given more time to kill 20 thugs, however it's only because killing them is going to be a lot more complicated. First of all, you should try and pick up bombs, because you're going to need them to take out larger groups. As for the attacks, you should be using special ones all the time.
Combo Challenge
Objective: Perform x15 Combo.
Hints: You will have three minutes to score a needed combo sequence. This is a fairly difficult challenge, mostly because your opponents are going to be great at performing successful counter-attacks. They will also block most of your attacks, especially the weak ones. As a result, you will have to be very skilled in order to maintain a proper chain. Try using your special attack from time to time.
Loot Challenge
Objective: Collect 350 gold pieces.
Hints: This time you will be given four minutes to collect 350 gold coins. It's a simple challenge and you shouldn't have any major problems collecting gold within the given time limit. You will only have to watch out for your health bar.
Dueling
Requirements: You will have to complete "Loot Challenge" for this mission.
Hints: This isn't a completely new challenge. Instead, you will be given an opportunity to repeat the boss fight (with the Pirate Lord). The only difference is that you will have to defeat him within a certain time limit. It's going to be 120 seconds. Good luck!
Available subquests:
1. Crab Pendants - Find and pick up four crab pendants.
I'd strongly recommend that you follow my instructions. You can find them in the main section of the guide. The reason is you wouldn't be able to return for some of the pendants if you had chose the wrong way or advanced to a new location.
2. Gold Idol - Find and pick up a gold idol.
Once again, you should read the main description for this level. You probably won't be able to find the idol on your own, because it's very well hidden. Check the section explaining the fight near the waterfall, because that's where you will find the idol. You will have to enter a small cave and pick it up.
3. Buried Chest - Protect some of the crew members for 50 seconds.
I guess you might have some problems completing this goal. You will have to protect some of the allied units for about 45 seconds, because it's going to take 5 seconds for the cannibals to show up. You can't allow any of them to get closer to the hole in the ground. Otherwise one of the natives would probably use an explosive device and you would automatically fail this challenge (without being able to repeat it).
4. Hit Combo - Perform a x30 hit-combo.
30 hits is A LOT, especially since you need to score such a sequence in a row. Thankfully, you should be able to do this during one of the main fights. I'd strongly recommend that you do this early during the course of the game, because the final part of the mission will focus your attention on other things. Thankfully, cannibals are slower than thugs from the previous level.
Complete mission walkthrough:
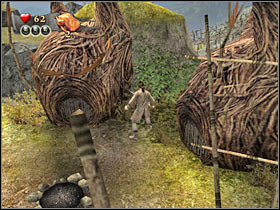
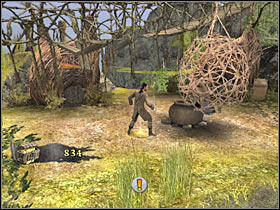
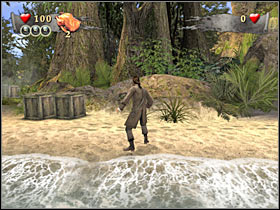
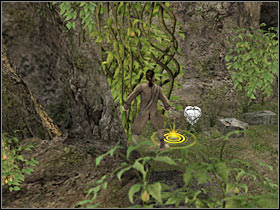
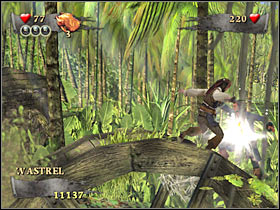
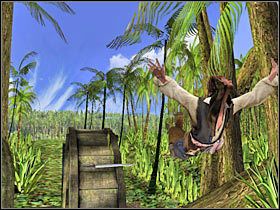
Start off by watching a short cut-scene and listening to what Jack has to say. You'll end up standing on a beach and playing as Will (#1). I guess I won't have to remind you to destroy all of the surrounding crates. Most of them will contain gold pouches. Some of the crates are hidden to the left of a small boat. Enter the jungle and destroy two crates (#1), however DON'T go any further, because you wouldn't be able to return for one of the pendants. Instead, return to the beach. If you would decide to try your luck in the jungle, you would have to deal with several traps and you would encounter quicksand.

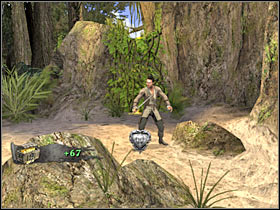
Head on to your right. I would recommend that you start off by destroying all nearby crates, including the lower ones. One of the crates will contain your first pendant (#1). As for the rest, you will collect additional gold. Now you will be able to use the ladder (#2). You will have to press the action key in order to use it.
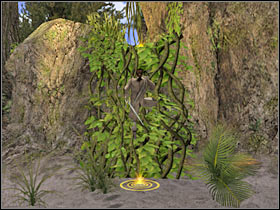
Once you're at the top, STOP your character. You will probably notice a pile of rocks (#1). You will have to avoid these traps at all costs. Touching them would be equal to an instant (and painful ;-)) death. Wait for the right moment and go left. Destroy the crate and press the action key (#2). This will allow you to reach a second ledge safely.
You will have an opportunity to destroy even more crates. This will allow you to gather new gold coins. Now you will have to avoid TWO similar traps (#1). I guess I don't have to remind you to wait for a right moment to make a move. Use the sword once again (#2) in order to leave this area of the map.
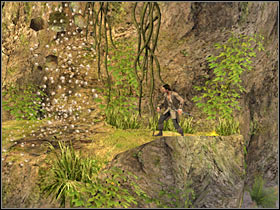
You will find yourself near a large clearing. I'd strongly recommend that you start off by going towards the lower part of the screen. You will have to find a glowing spot (#1). Use it in order to get to the ladder. Once you're on a lower level, destroy a single crate and pick up the second pendant (#2). DON'T go right or you'll die (quicksand) and you'd have to repeat the entire level. Instead, use the ladder to go back to the clearing.
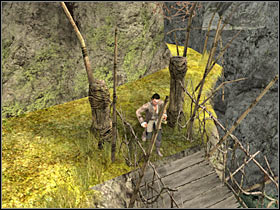
Now it would be a good idea to destroy some of the remaining crates (#1). Just as before, you should be able to find at least a few gold pouches. Go back to the area near the rocks. You should be able to locate a second ladder here, but you don't have to use it. Instead, start moving left (#2). Get ready for your first fight!
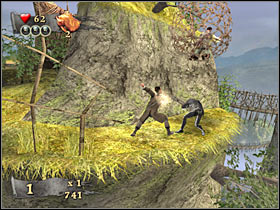
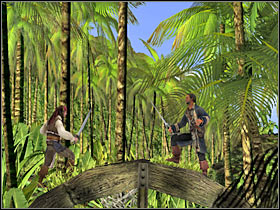
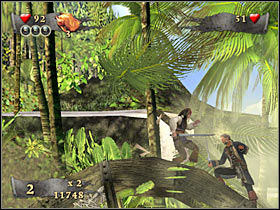
Once you've reached a new area of the map, you are going to be attacked by a large group of cannibals. I wouldn't recommend charging at them right away. Instead, destroy a nearby crate and pick up the third pendant. Otherwise you could lose it during the fight, because it would disappear after a few seconds (if you would accidentally destroy the crate). Now you may focus all of your attention on the natives (#2). Attack them.
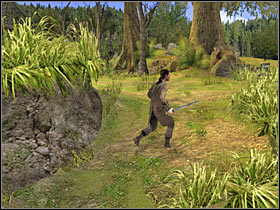
I've already mentioned before that it would be a good area to score a much needed combo sequence (#1). Make sure that you're using your special attack all the time. You should also consider changing your current targets frequently. Thankfully, most of the cannibals perform simple counter-attacks and it's easy to block these moves. Once the enemies are gone, head on to the left path (#2).
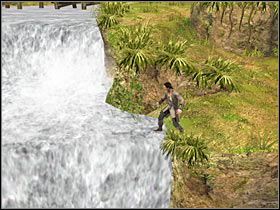
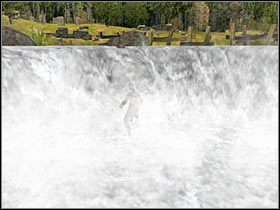
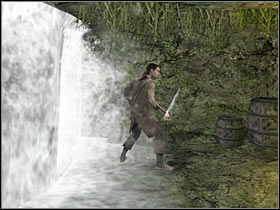
You should be able to reach a large waterfall very soon (#1). Thankfully, you won't have to worry about losing balance. You will only have to watch out for wood, because you may lose some health points here. A new group of cannibals should arrive here in just a few seconds (#2). You will have to take care of this small problem.
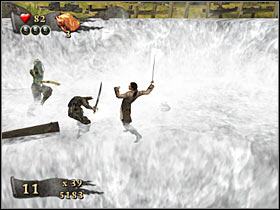
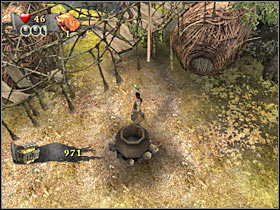
Once you've killed all natives, DON'T leave this area. Instead, you will have to find the idol. It is needed to complete one of the side goals for this mission. In order to find a secret entrance, you will have to be standing in the middle of the waterfall (#1). Enter a small cave (#2) and go right. Pick up the gold idol. You may exit the cave. Go left.
You should be able to reach a new clearing (#1). Wait for the game to display a new cut-scene. This is where you'll need to protect some of the crew members from the natives. Your allies are working inside a large hole and your objective will be to prevent the cannibals from going there (#2). Concentrate only on killing those men who will actually get closer. You could also try and push them back by performing other types of attacks.
You will also have to prevent the cannibals from using the bombs. I'm sure that you've familiarized yourself with these attacks by now. They can't get near the hole, because it's going to take them only about a second to use the bomb. You will have to defend this spot for 50 seconds (#1). Kill the rest of the cannibals and wait for a new cut-scene to be displayed on your screen (#2). You will be playing as Miss Elizabeth for the next few minutes.
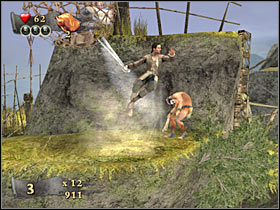
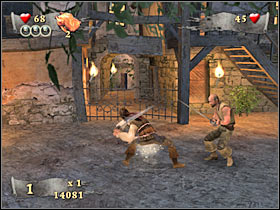
Start off by going left. You will encounter your first miniboss here. You will have to kill him. I'd strongly recommend choosing more powerful attacks by pressing the X key (#1). You will also have to block some of the counter-attacks. Once the boss is dead, head on to the ruins (#2). There's only one path here, so you can't get lost.
There are some challenging fights ahead. I would recommend that you start off by destroying a nearby crate, because you will find fifth pendant inside (#1). Once you have it, focus your attention on the cannibals. Sadly, this is going to be a difficult fight, because Elizabeth isn't as good as the rest of the playable characters, especially when it comes to special attacks.
You will have to kill at least 8-10 enemy units in order to be able to proceed to the next part of this mission. You will have to defeat new boss (#1). Once again, you'll be playing as Jack. The most important thing here is that you aren't in a hurry. Boss won't perform too many attacks, so it's very important that you try to counter-attack each of his moves (#2). You should also consider performing stronger hits.

You are going to reach the jungle area very soon, however this won't affect the main fight (#1). You shouldn't have any major problems hitting your opponent. Keep using your faster attacks (#2), because there's a high probability that they'll be successful.
Once you've taken enough life out of him, a new cut-scene will appear on your screen. Get ready for the "Jackanism" mini-game. Sadly, it's going to be more difficult this time (#1). Watch out for the final part of the mini-game, especially when you will have to press the ENTER key twice. You won't have to win the mini-game and you'll return to the boss fight after a short while (#2).
You won't have to change anything in your approach (#1), so you should continue performing faster attacks, however you may also consider trying a few stronger hits, because there's a chance that the boss won't block these moves. Once you've defeated him, a funny cut-scene is going to be displayed on your screen (#2). This is it for this mission.
Once again, you will be able to take on four challenges, instead of the usual three. The fourth challenge is going to be the boss fight (Dueling).
Combat Challenge
Objective: Defeat 25 enemies in under 3 minutes.
Hints: I guess I won't have to tell you that it's going to be a difficult challenge. You will have less time to defeat more enemies than in the previous mission of the game. As a result, you will also have to use bombs and revolvers to your advantage.
Combo Challenge
Objective: Perform x20 Combo.
Hints: You will have three minutes to score such a combo. Thankfully, this is an easy challenge, mostly because the cannibals are slower than the thugs from the previous challenge. They are also worse at performing counter-attacks and blocking your moves. As a result, you won't have to practice too much in order to win this challenge.
Loot Challenge
Objective: Collect 400 gold pieces.
Hints: This time you are going to have four minutes to collect enough gold coins. Once again, this is going to be one of the easiest challenges. You will only have to watch out for the energy bar, however I'm sure that you won't be injured too much.
Dueling
Requirements: You will have to complete "Combo Challenge" for this mission.
Hints: I guess I won't surprise you by saying that you will have two minutes to win this fight. It's not going to be easy, especially since it's a quite long battle. You should consider choosing stronger attacks, because (if successful) they will seriously injure your opponent.
Available subquests:
1. Crab Pendants - Find and pick up four crab pendants.
This is a very similar task to the one from the previous ship mission. This means that you will have to be in a lot of hurry to collect some of the pendants, because once you've completed a certain phase of the mission, you won't be allowed to return for these objects and you wouldn't be able to end this challenge. Thankfully, you won't have the same problem with the rest of the pendants. Read the main description for this mission if you want to find out more.
2. Ole Enemies - Try and outsmart at least five monsters by performing an Ole move.
You've had to deal with a very similar objective in the early goings of the game. Sadly, it's going to be much more difficult to finish it this time. Your main problem is going to be the time limit. You will have over a minute, however you will also have to do two other things at the same time - score a decent combo and pick up crab pendants. As a result, you must plan your movements very carefully, so you won't waste any precious seconds on running or finding enemy units. I would recommend choosing the right side of the main deck, near one of the crab pendants. You could also look for some other areas. The choice is yours, however make sure that tricking opponents into attacking you won't take too long.
3. Rescue - Protect some of the crew members against Kraken's attacks.
You won't have to go anywhere to take care of this quest, because you will be able to secure your win while trying to fulfill one of the main goals of the mission. At first, it's going to be quite simple to save one of the crew members. Sadly, it's going to get a lot more difficult once you'll leave the main deck. You will have to protect a second crew member. If the octopus hits you too many times, it'll also catch the crew member. As a result, your attacks will have to be very precise and you will have to avoid being hit by the Kraken.
4. Hit Combo - Perform a x7 hit-combo.
The only reason why you will only have to perform a smaller combo is because you will have to take care of two other things at the same time, including sending some of the monsters overboard. As a result, you must finish up with this task in about 5-7 seconds. No, I'm not joking.
Complete mission walkthrough:
We'll start off with a longer cut-scene (#1). Once again, you will be dealing with the Flying Dutchman and its undead crew. Get ready, because you will regain full control over Jack's movements very soon. You will have to defend the ship for a little over a minute. Sadly, you will have to spend each second wisely by completing some of the side missions. So... let's get to work.
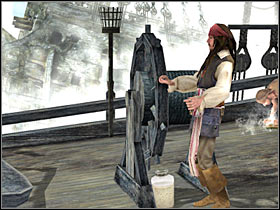
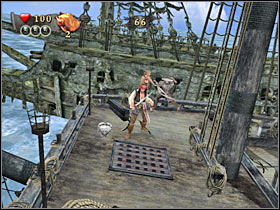
The first thing on your list should be reaching the left staircase. Destroy the crates, so you'll be able to pick up your first crab pendant (#1). Now start running towards the right edge of the screen. Ignore the monsters for the time being. Use the stairs and destroy new crates. One of these objects will contain a second pendant (#2). You will also have to make sure that these actions won't take too much time. Wait for the monsters to show up here.
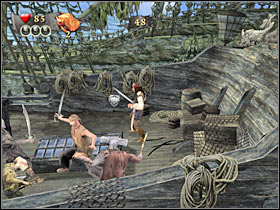
You can try and fulfill side goals in other order, however sooner or later you would have to perform a successful combo (#1). Try attacking different monsters, so they won't die, because you're going to need these creatures for the Ole mission. Now you should be standing near the second pendant (#2). Wait for the monsters to attack you and perform Ole moves to send them flying in the air. If you're lucky, you should be able to trick five creatures before the time limit runs out. You could also choose some other spots for the Ole moves. Left side of the ship seems like a good idea, however you would have to collect pendants in a reversed order (starting with the crates on your right).

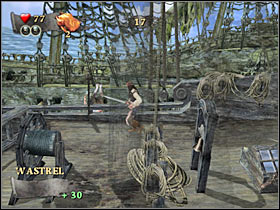
Once the time limit runs out, a new cut-scene is going to be displayed on your screen. As you've probably suspected, Kraken is going to be summoned. It's a giant octopus (#1). From now on you'll be playing as Will (#2). Let's begin!
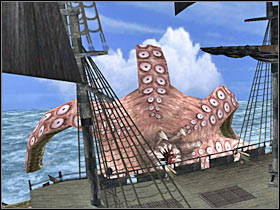
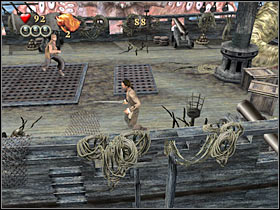
Your main objective here will be to concentrate all of your attacks on the tentacles. Kraken will use those to grab one of the crew members (#1). You will have to prevent the octopus from taking the crew member, that is - if you want to fulfill one of the side goals. You should also know that tentacles may appear in the lower section of the screen (#2).
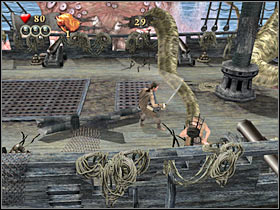
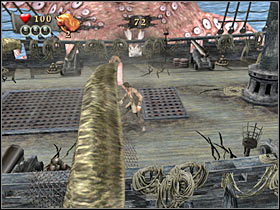
DON'T attack the tentacles unless they're after one of the crew members. Otherwise you would have probably been stunned and you would also lose a lot of health points. You will have to avoid objects that will be thrown at you (#1). Thankfully, there's going to be a shadow on the ground, so you'll know exactly when (and where) to dodge. Once the second time limit runs out, you will be allowed to leave the main deck area (#2).
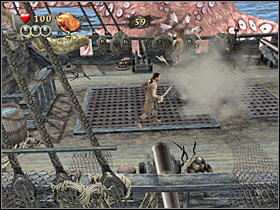
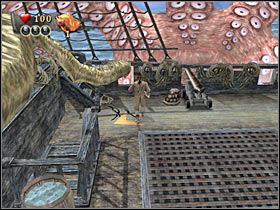
Once you've reached a new location, you will have to destroy a nearby barrel. It's very important because you will find a third pendant inside the barrel (#1). Head on to your right. Make a stop near the first cannon. As you've probably noticed, Kraken will try to attack you. This is where the second phase of the boss battle will begin (#2).
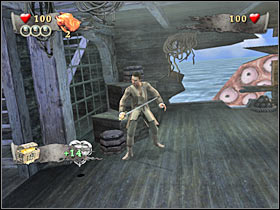
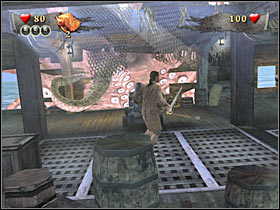
The objective here is quite simple. You will have to be standing to the left of the first cannon. Your goal is to attack the tentacles of the Kraken (#1). Also, you can't allow the creature to hit you, because the octopus would also grab one of the crew members. As a result, you wouldn't be able to fulfill one of the side goals. You will have to maintain your attacks for about 15 seconds. Your ally will use that time to load the cannon. Once he's finished, head on to the glowing spot.
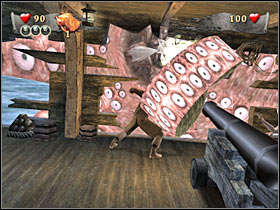
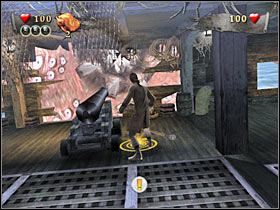
Now you will have to wait for the right moment to fire a cannon. Mouth of the octopus has to be located in front of the cannon. You will also hear growling. Once this has happened, use the cannon (#1). As a result, Kraken should lose 30 health points. Head on to your right. You will have to repeat all of these actions with the second cannon (#2). Start off by attacking the tentacles. You should be standing to the left of this cannon.
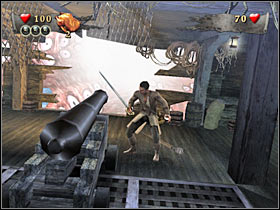
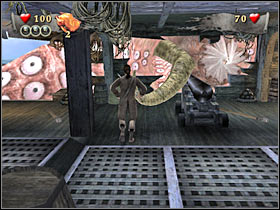
Make sure that you're attacking Kraken's tentacles all the time (#1), so the octopus won't be able to grab one of the crew members. As you probably remember, you are going to have to save these people if you want to fulfill one of the side goals. Once the cannon is ready, wait for the right moment to use it (#2). Kraken will be left with 40 health points.
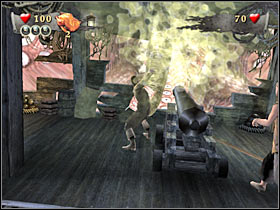
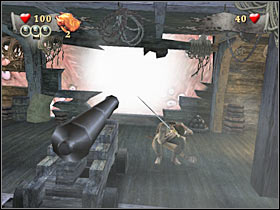
You will have to repeat these actions with the final, third cannon. You won't have to change anything in your approach. Focus all of your attention on attacking the monster. Once the cannon is ready, use it (#1). Thankfully, you won't have to worry about the crew members anymore. Wait for a cut-scene to be displayed on your screen (#2).
Start off by destroying a nearby crate. It's very important because you are going to find fourth pendant inside the crate (#1). Pick it up and start moving towards the upper section of the screen. You will have to participate in an interactive cut-scene (#2). It's not too difficult and even if you make a mistake, you will be allowed to repeat it.
Keep heading towards the glowing area. Once again, you will have to avoid the tentacles (#1). This is a very similar action cut-scene. Once it's over, head on to the glowing dot and press the action key (#2). This will allow you to advance to the final (and easiest) part of this mission.
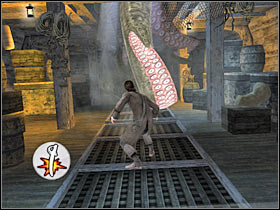
Now you will have to take part in two simple cut-scenes. The first cut-scene will require you to save Miss Elizabeth from one of the tentacles of the Kraken (#1). Next, you will be playing as Jack and you will have to cause a huge explosion on the ship (#2). This will allow you to get rid of the Kraken once and for all. You'll also end this short mission.
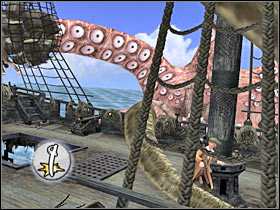
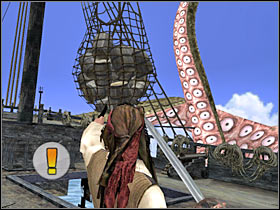
Despite the fact that you were trying to get rid of a boss creature, you won't participate in a Dueling mission this time. You will have to wait for the end of the Singapore mission to unlock new level from this group.
Combat Challenge
Objective: Defeat 30 enemies in under 4 minutes.
Hints: This isn't going to be a difficult challenge, however you won't be allowed to take too much free time while trying to kill the monsters. I'm sure that you will find the bombs to be very useful, especially since the map isn't going to be large. As a result, it's going to be quite simple to get rid of a large group of enemy units (with only one explosion).
Combo Challenge
Objective: Perform x25 Combo.
Hints: You will have three and a half minutes to win this challenge. Sadly, this is going to be a difficult mission. The most important thing here is that you'll be playing on a very small map. As a result, you will witness a lot of successful counter-attacks from the monsters. Focus all of your attention on performing strongest attacks (including the special ones), so you will be able to kill or stun at least two monsters at the same time.
Loot Challenge
Objective: Collect 400 gold pieces.
Hints: You will have four minutes to collect 400 gold coins, so there's plenty of time to win this challenge. You won't have to be in a lot of hurry, especially since you'll be playing on a much larger map.
Available subquests:
1. Crab Pendants - Find and pick up four crab pendants.
You shouldn't have any major problems finding all four crab pendants. I think it's quite obvious that you will have to be on a look out for destroyable crates. Additionally, you won't have to worry about not being able to go back for some of the pendants. You will have plenty of time to search for them and to pick them up.
2. Old Enemies - Find and talk to five old enemies of Captain Barbossa.
This is a very similar to the 'women mission' from one of the previous levels of the game (Tortuga). The only difference is that you'll be the one to hit NPC characters. Sadly, you won't receive any gold from them, however you shouldn't have any major problems finding these guys. Check the main description if want to know where they are.
3. Debt Collection - Collect a debt from three different locals.
This is going to be a slightly more difficult challenge. Not only you will have to find these people, but you will also have to collect debt. This means that you will have to choose correct answers, however you shouldn't have any major problems doing that. Just remember to focus the topic of the conversation on the debt, not other things.
4. Pirate Dice - Win a game of Pirate Dice.
This is a very similar objective to a side mission from one of the previous missions of the singleplayer campaign (Port Royal level). The good news is you will probably have more Charm Cards at your disposal than the last time you were trying to win this mini-game. As a result, collecting a prize here should be quite simple. Make sure that you've chosen three good Charm Cards, because that's how many times you will be allowed to cheat. Check the main description for this mission if you want to find out where to start this mini-game.
5. Hit Combo - Perform a x15 hit-combo.
This time you will only have to score 15 hits, so you may be surprised a little bit. The reason is because your opponents are going to be very skilled at blocking your moves and performing counter-attacks of their own. Nevertheless, you should have familiarized yourself with the controls by now, so you should be able to score such a combo, especially since you'll be taking part in a lot of longer fights.
Complete mission walkthrough:
Obviously this mission is going to start with a longer cut-scene. You will have to wait for the crew to reach Singapore. This is where this mission will take place (#1). You will be playing as Captain Barbossa. Start off by talking to one of the locals. He should be standing to your right (#2). Captain Barbossa will slap him. You will also have to find four other men from this group. This will allow you to fulfill one of the side missions.
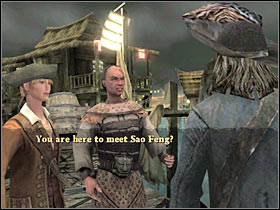
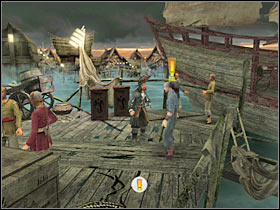
Now you should consider destroying some of the nearby crates. One of these objects will contain your first pendant (#1). Don't forget to destroy other crates as well, because you will also find some gold coins. Head on to your left. You should be able to locate a second man here. Talk to him (#2). This time you will have to choose the correct answers - second from the top. You will receive some gold for your efforts.
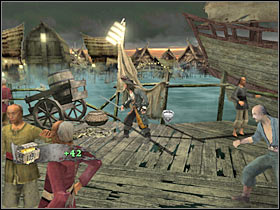
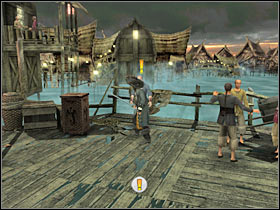
Keep moving towards the left edge of the screen (#1). You will encounter some new crates along the way. Destroy these objects and pick up gold pouches. Once you've reached a junction, go towards the upper buildings. If you want to participate in a dice mini-game, you will have to talk to one of the locals (#2).
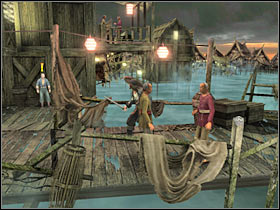
Despite of the result of the mini-game, you should go left. It's very important, because you will find one of the men from the list here. Barbossa will slap him (#1). You may go back to the junction. Head on to your left (#2).
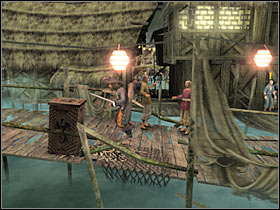
Once you've reached a new section of the pier, you will have to destroy all nearby crates. Also, talk to one of the natives (#1). Once again, you will have to choose a correct answer. It's going to be the first one. As a result of your actions, you will receive 200 gold coins. Head on to your left. Destroy some new crates and pick up a second pendant (#2).
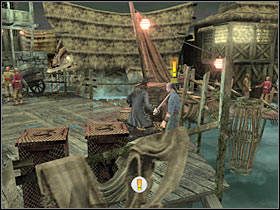
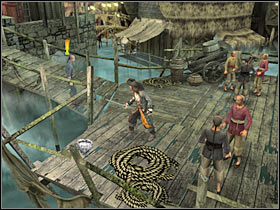
You will also encounter your final debtor in this area (#1). You will have to talk to him in order to ask him for the money. Choose the first dialog options from the top. This time you will receive 250 gold coins. Go left (#2).
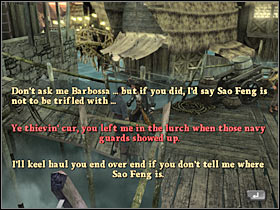
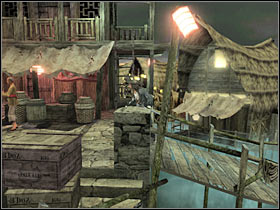
I would recommend that you remain here. You will have to locate a small ladder. Use it to reach a small balcony area (#1). Once you're at the top, start moving left. This will allow you to reach one of the men needed for the side mission (#2). Talk to him. You will only have to find two other men from this group. Return to the ground floor (use the ladder).
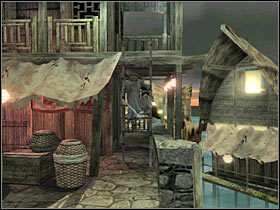
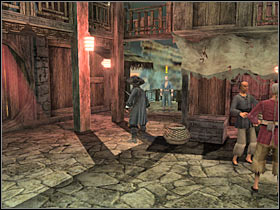
Before you decide to enter the bathhouse, you should consider talking to one of the natives (#1). He can be found in the background. Once this is done, enter this new building. Your last target will be standing on your right (#2). Talk to this fellow. As a result, you will fulfill one of the side missions and you'll be able to focus on more important tasks at hand.
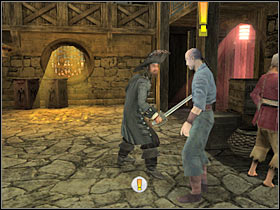
You won't have to destroy the crates, however you would be able to find some gold coins inside these objects. Make sure that you've explored all areas around the bathhouse. Talk to one of the guards (#1). He will be standing on your left. This conversation will trigger a new cut-scene (#2). Get ready for some action!
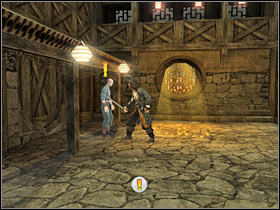
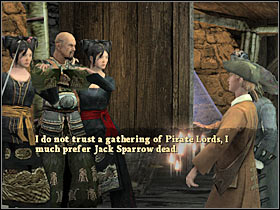
You will have to deal with a very large group of enemy units (#1). If you're lucky and skilled enough, you will be able to score a much needed combo sequence right away. Try attacking smaller groups, however you must also keep hitting them, so you won't lose the chain. You will be fighting here for about a minute. Now you will have to deal with a time limit. Ignore your opponents and head on to the lower ladder (#2).
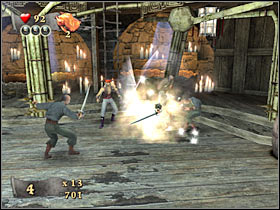
Once you've reached the upper balconies, you will have to assist some of the allied units. This means you will have to kill a few additional thugs (#1). You shouldn't have any major problems doing that. Once they're gone, return to the ground level. New enemy soldiers will be waiting for you here (#2). Don't forget about the combo side mission. You will have plenty of opportunities to score a decent combo sequence.
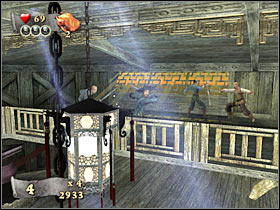
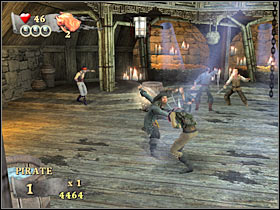
Eventually you will have to return to one of the balconies (#1). Once again, ignore all opponents and use one of the ladders. It doesn't really matter which ladder it's going to be. You will have to take out more enemy units here (#2). Thankfully, this isn't going to be a long fight.

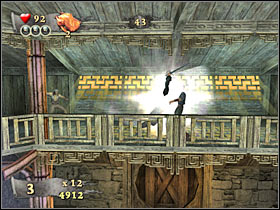
Once you've taken care of the second group of enemy units, a new cut-scene is going to be displayed on your screen. As you've probably suspected, you are going to fight these two women (#1). The first part of the boss battle is going to be quite simple. You will only have to focus on performing proper counter-attacks (#2). Most of these attacks will be successful. You can't play defensively, because you wouldn't be able to injure your opponent.
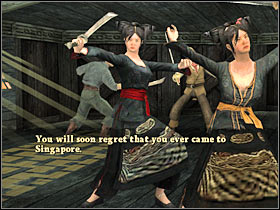
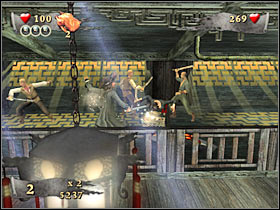
You will have to take part in action sequences from time to time. Most of these elements will require you to press certain keys (#1). I'm sure that you won't have any problems with that. Each of these actions will injure your opponent, so he will lose about 30-40 health points. You will have to wait for the game to display a new cut-scene (#2). As a result, you will resume the fight on the lower level.
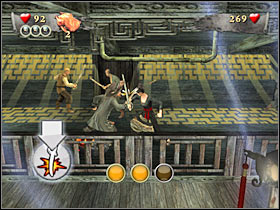
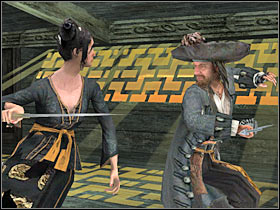
You shouldn't change anything in your approach. Perform faster attacks (#1), because they'll be most successful. You could also try some of the more powerful strikes, however it's going to be risky. You will also have to win several new action sequences (#2). It's all quite simple, so you should only be concerned about your health bar.
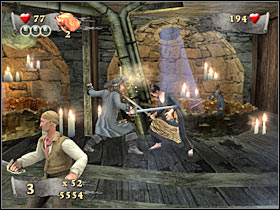
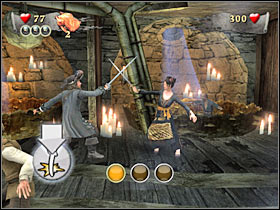
You will have to wait for the game to display a new cut-scene. This will allow you to proceed to the final part of this boss battle (#1). Sadly, your opponent will be playing more aggressively here, so you must use the block feature more frequently. It's also very important to use proper counter-attacks. You will have to defeat the boss in order to allow the game to show you a new cut-scene (#2). This isn't over yet. Get ready for some more action!
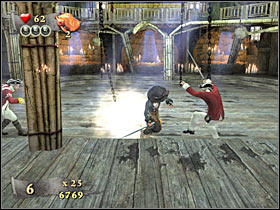
You will have to wait for this cut-scene to end. Now you will have to kill some elite soldiers (#1), however they won't be too difficult to take care of. Also, this is going to be a short battle, because the game will display a new cut-scene very soon (#2). You will be playing as Miss Elizabeth from now on.
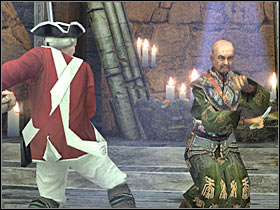
You won't find anything of interest in this first room, so you may as well exit the bathhouse. Head on to the lower section of the screen. Destroy the crates and pick up the third pendant (#1). Once this is done, focus all of your attention on enemy units (#2). Sadly, these are going to be some of the most difficult fights. Elizabeth isn't a good warrior, especially when it comes to special attacks. You will also have to block feature frequently.
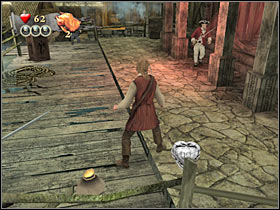
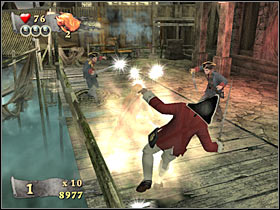
You will have to defeat all enemy units. Once you've taken care of this problem, head on to your left (#1). You won't have to search for any other crates. As you've probably suspected, a second group of elite units will be waiting for you here (#2). Choose your targets carefully. I suspect that you won't have to worry about the combo sequence anymore, so you won't have to create any additional chains. Don't forget to search this area once you've killed all assassins.
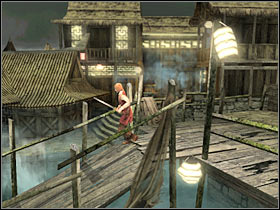
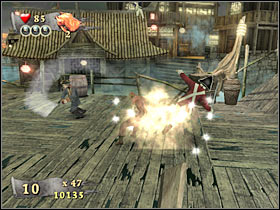
You will have to wait for the game to display a new cut-scene (#1). As you've noticed, a nearby bridge was destroyed. This means that you will have to find another way to get to the left section of the map. Head on to the bridge and press the action key while standing on a glowing spot (#2). This will trigger a large explosion.
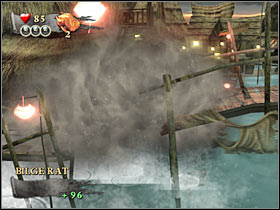
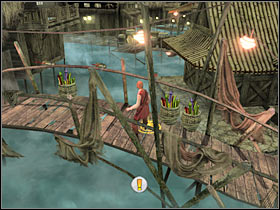
Once the explosion has occurred, a miniboss will appear in this area. As a result, you will have to defeat him. Thankfully, it's going to be very simple. Just make sure that you're using more powerful attacks. You will also have to block some of his moves (#1). Once he's gone, use the second launcher (#2). Defeat the second miniboss by using the exact same types of attacks.
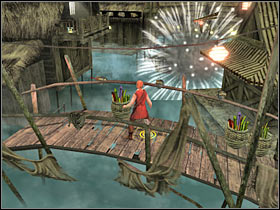
You will only have to fire one more bullet (#1). In order to do that, you must press the action key while standing on a glowing area. Now you must wait for one of the boats to get here. Make a few steps towards it. Press the action key once again. This will allow you to use the sword and reach the left side of the bridge safely (#2). You may proceed to the next section.
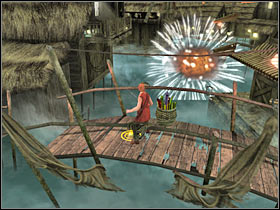
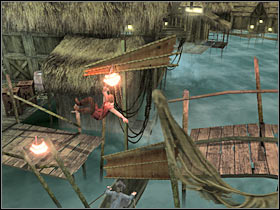
Start off by destroying one of the nearby crates. Once again, you shouldn't attack any opponents. Focus only on acquiring the fourth pendant (#1). Now you may begin attacking them. You will also have to make sure that there won't be any explosions in this area. As a result, press the action key near glowing spots (#2). You will have to be very careful in order not to miss anything. As for the soldiers, you shouldn't have any major problems killing them.

You will have to kill at least 12-15 enemy units (#1), so it's going to take you a while to get rid of them. Once you've taken care of all hostile units, a new cut-scene is going to be displayed on your screen (#2). This is the end of this mission. Get ready for the next one or try your luck with the additional challenges.
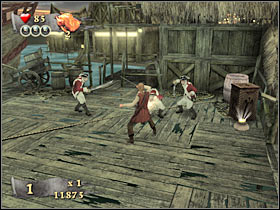
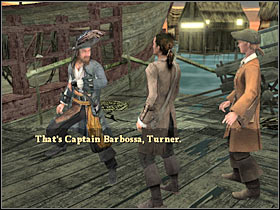
Once again, you will have an opportunity to participate in a Dueling challenge, however there are also three standard challenges. It would be wise to take a closer look at them, because you would be able to unlock new secrets.
Combat Challenge
Objective: Defeat 35 enemies in under 6 minutes.
Hints: As you've probably suspected, this is going to be a very long mission. There's a lot of work to be done here. Thankfully, defeating 35 minutes in 6 minutes shouldn't be too hard. The only difference is that you won't be using bombs or revolvers too often, because these objects will appear later during the mission. As a result, you should consider choosing special attacks of your chosen character.
Combo Challenge
Objective: Perform x25 Combo.
Hints: You will have three and a half minutes to win this challenge. You might have some problems achieving victory here, however you should be able to score a needed sequence once you've practiced enough. I'd strongly recommend attacking smaller groups or waiting for a better battle situation (e.g. when one of the enemy units is dead).
Loot Challenge
Objective: Collect 500 gold pieces.
Hints: You will have five minutes to collect 500 gold coins, so there's nothing you should be worried about. I'm sure that you'll be able to gather enough gold without having to repeat this challenge.
Dueling
Requirements: You will have to complete "Loot Challenge" for this mission.
Hints: I guess there's not much I could add here. Just as before, you will have two minutes to defeat your opponents. I would recommend choosing most powerful attacks in order to take down both women. Also, try to win all action challenges.
Available subquests:
1. Crab Pendants - Find and pick up four crab pendants.
You shouldn't have any major difficulties finding all four crab pendants. You will only have to destroy nearby crates and barrels. There's not going to be too many of these objects, so it'll be a lot easier. This mission has also a very linear structure, so you would have to try very hard in order to skip one of these pendants.
2. Loot - Collect at least 750 gold.
This is also a very simple mission objective. All you have to do is to wait for the monsters to drop gold pouches. Next, you must ensure that your main character collects these objects. You won't find a lot of gold in the chests, so focus only on the monsters.
3. Hit Combo - Perform a x26 hit-combo.
It might seem that scoring such a high combo should be quite difficult. Thankfully, you'll be going against the undead. Those creatures are much slower than normal enemy units. They are also quite dumb, so don't expect to see a lot of successful counter-attacks. You will be able to fulfill this goal in the early part of the mission or much later, so take your time and don't panic if you've failed to score a good combo.
Complete mission walkthrough:
You will have to start off by watching a very long cut-scene (#1). You wouldn't be able to skip past it, however a lot of interesting things will happen during its course. Once again, you'll be playing as Captain Barbossa. Your main objective for this part of the mission will be to find Jack Sparrow and rescue him. You'll probably notice that you won't be allowed to leave the mission area. If you try to go somewhere else, you are going to be attacked by the hands of the undead (#2). Each of these hits will take two points from your health bar, so I wouldn't recommend experimenting too much. Stick close to the main path and you should be fine.
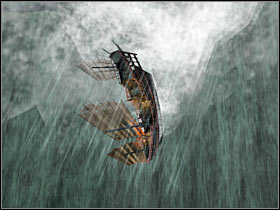
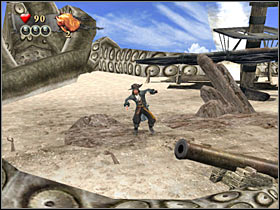
Start off by going towards the right edge of the screen. Ignore the tornados, because you won't be interacting with these objects. Destroy a single crate and move on. You will find your first crab pendant (#1) in the second crate. I think it's obvious that you need to pick it up. You are going to be attacked by the first group of the undead creatures very soon (#2). This isn't going to be a difficult fight, however you can't lose too many health points.

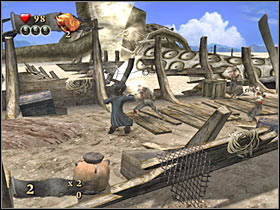
You should be able to reach a very large skeleton in just a few seconds (#1). Keep moving right. Remember that you shouldn't try stepping on the sand. Instead of being attacked by the undead, use the sword to attack one of the bones (#2). This will trigger a short cut-scene.
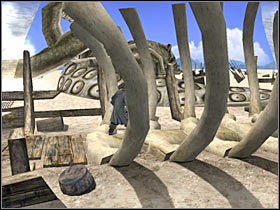
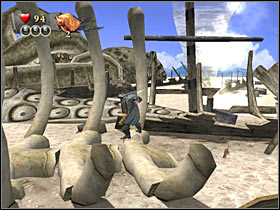
You will be able to use the bone in order to reach the next section of the map. I've also like to remind you to not go to sand areas. You will come across a crate. Destroy it and pick up a few gold coins. Keep moving right. A second group of monsters will be waiting for you here (#1). Thankfully, you won't have to worry about the invisible walls during the course of this battle. Once you've defeated the creatures, head on to your right (#2). Stop near the sand.
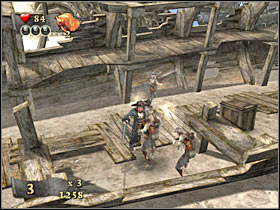
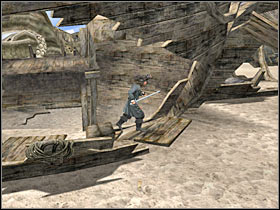
You will have to take part in a new type of an action sequence. Thankfully, there's nothing you should be worried about, because it's going to be very simple. There's a gauge in the lower left corner of the screen. You will have to wait for the sword icon to reach the upper field. After that, press the attack button. If you were correct, you will be rewarded with a new cut-scene (#2).

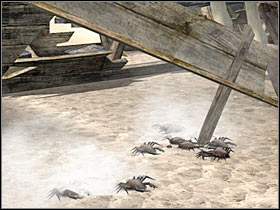
You will be able to advance to a new area of the map (#1). Be careful, though. You can't leave the main passageway, because you would have been attacked by undead creatures. Go up and then turn right. You will have to take part in a longer fighting sequence here. This is also a very good opportunity to score a combo chain (#2) that's needed for one of the side missions. Just make sure that you don't go too far to the left, because you would leave the safe area.
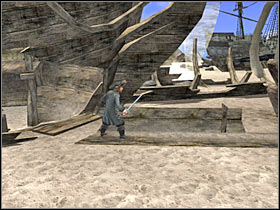
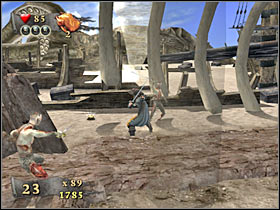
Head on to your right. Don't leave the main path, because you aren't allowed to walk on the sand. You will have to make a stop here (#1). Press the action key and win the action sequence. Now you will have to move to a small platform (#2). Finish the action mini-game once again. As a result, you are going to be transported to a new location.
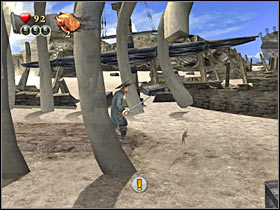
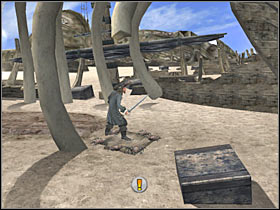
Keep heading towards the right edge of the screen. You will have to face a small group of undead creatures here (#1). Thankfully, you won't have to worry about ending up near the sand. As a result, focus all of your attention on killing these creatures. Once they're gone, go right. You will have to wait for an icon to appear on the ground. Head on to the rope (#2).
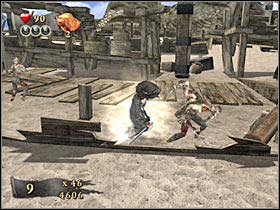
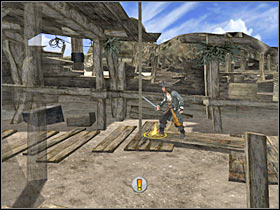
As you've probably suspected, you will have to use the rope in order to be able to reach one of the upper platforms (#1). You will find yourself standing on a main deck of a destroyed ship. Use the stairs and destroy some of the nearby crates. One of these objects will contain a second pendant (#2). Pick it up.
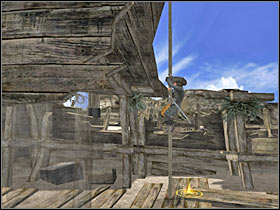
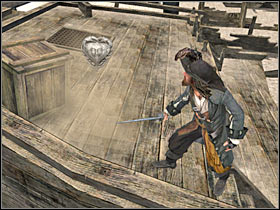
You will also have to defeat several undead creatures here (#1). You should be very careful, because the deck of the ship is very small and one of the monsters may surprise you with a successful counter-attack. Once the first group is gone, head on to your left and defeat the final creature (#2). That's where you'll need to go right now.
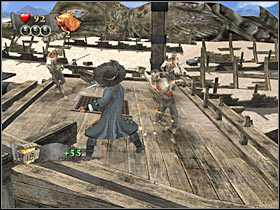
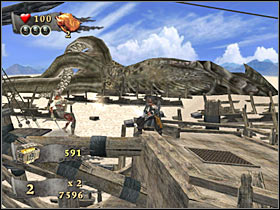
Use the skeleton as a small bridge. You will have to defeat a single opponent here. Thankfully, it's not going to be a miniboss of any kind. Once the creature is gone, press the action key (#1) in order to be able to proceed to the next location. You will reach the deck of a second ship. Just as before, you will have to defeat a large group of undead characters (#2).
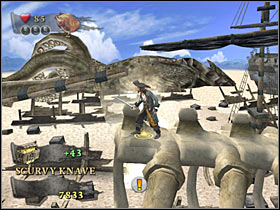
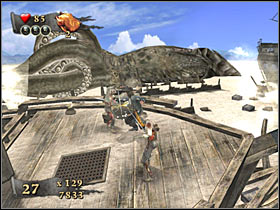
Take your time here to collect several gold pouches. Once you've defeated all monsters and cleared out the deck, go left. You will have to use a second rope here. This will allow you to reach the top of the pole (#1). You will have to be patient, because it's going to take your character a few seconds to actually get there. Once you're at the top, press the action key near a glowing spot (#2).
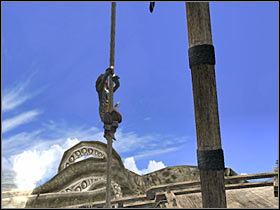
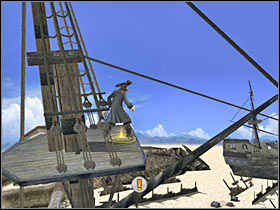
Sadly, you won't find anything besides gold in the crates, however you should still destroy these objects. You will need the gold for one of the subquests. Head on to your left. You will have to press the action key here (#1). Once you've completed an action sequence, start moving towards Jack's location (#2). Once you're there, wait for a new cut-scene.
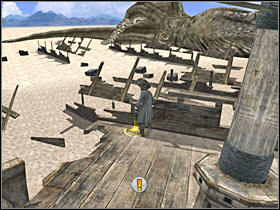
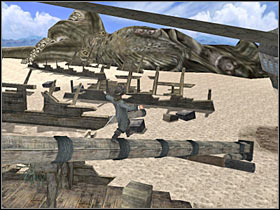
Once the movie has ended, you will have to get ready for some action. You'll be playing as Jack Sparrow from now on. Your objective will be to kick a few of the undead (#1). The creatures will try to get on board of this ship. You will have to prevent them from doing that. As you've noticed, Jack is moving kind of slow, so you should be standing in the middle, because you won't be able to take out all monsters. You will also be allowed to let five of these creatures get on board. Now you will have to participate in a Jackanism mini-game (#2). It's going to be more difficult, so you must stay focused in order to press correct action keys.
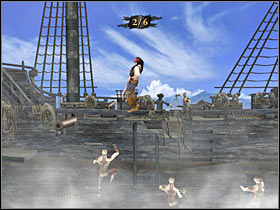
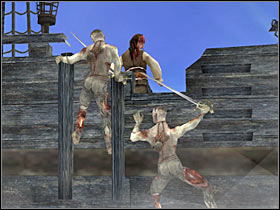
Once you've finished the Jackanism mini-game, you will have to defeat some of the monsters once again (#1). The rules of this mini-game won't change, so you should know exactly what has to be done here. Once you've taken care of this problem, a new cut-scene is going to be displayed on your screen (#2). You are also going to be transported to a completely new location.
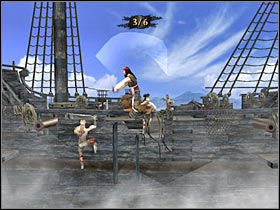
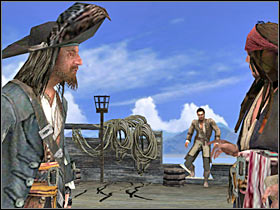
Like I've said before, you'll begin in a completely new scenery. I would recommend that you start the exploration process by destroying some of the nearby crates. This is going to be a very important task, because one of the crates will contain a third pendant (#1). Pick it up and go left. Once you've reached a larger area, you will have to kill several monsters (#2). These fights are going to be longer and more challenging. Don't forget about finding some new crates!
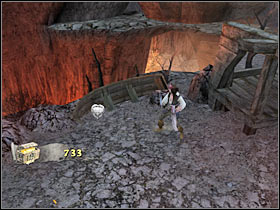

Once you've killed all monsters and picked up gold pouches, head on to your left. You will have to take part in an interactive cut-scene (#1). The objective will be to avoid obstacles which are going to be thrown at you, mostly huge boulders. It's not too difficult and even if you make a mistake, you'll be able to repeat the entire sequence. Get ready for the second battle (#2)!
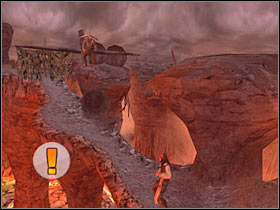
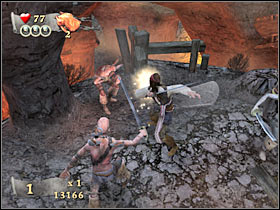
Take out all monsters and go left. Once again, you will have to avoid being hit by some large boulders (#1). Watch out near the end of this cut-scene, because you will have to press the ENTER key twice and you will have to do this quickly. I'm sure that you won't have any problems with other maneuvers. Now you will have to defeat the third group of monsters. Once they're gone, destroy the crates and pick up the final fourth pendant (#2).
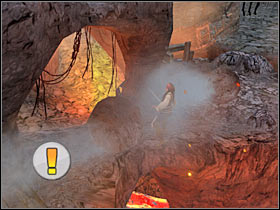
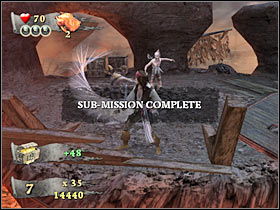
Destroy all of the remaining crates and pick up more gold. Once this is done, head on to your left. I guess you won't be surprised by the fact that you'll have to avoid being hit by the large boulders. You will also encounter a new group of enemy units (#1). Kill these guys and go left. You should be able to reach an interesting skeleton very soon (#2). Press the action key in order to free an allied unit. Now you will have to return to the start area.
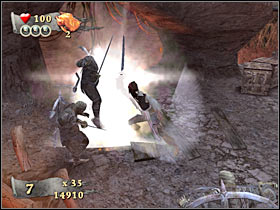
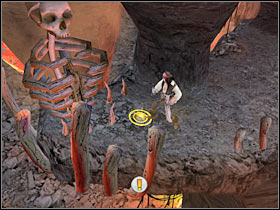
As you've probably suspected, you are going to be attacked by new monsters on your way back. The first group of enemy units will appear in just a few seconds. Check the first screen if you want to find out where it is (#1). Kill the monsters. Keep moving right. The second group is going to be much smaller, however make sure that you don't get hit too often. Once you've reached the starting area, a new cut-scene is going to be displayed on your screen (#2). After that, this mission will come to an end.
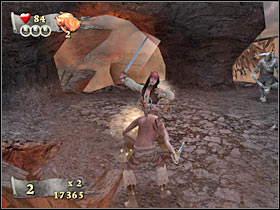
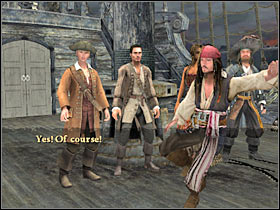
Since there wasn't any boss creatures on this map, you will only have to participate in three standard missions. They're going to be quite easy this time, so make sure to finish them.
Combat Challenge
Objective: Defeat 35 enemies in under 4 minutes.
Hints: I'm sure that your main concern will be the fact that you will only have four minutes to kill more than 30 creatures. Thankfully, you will have an opportunity to use a lot of bombs during these fights, so you should be able to kill the creatures faster than usual. Also, don't forget to use special attacks.
Combo Challenge
Objective: Perform x30 Combo.
Hints: If you're lucky, you should be able to achieve this goal without even having to repeat the entire challenge. The main reason is the monsters are very slow and clumsy. They won't perform too many counter-attacks and even if it happens, you'll have plenty of time to block these moves.
Loot Challenge
Objective: Collect 500 gold pieces.
Hints: Once again, you will be given five minutes to collect 500 gold coins. There's nothing you should be worried about. You will only have to watch out for counter-attacks, mostly because the map is going to be quite small. Make sure that the monsters don't hit you, especially if you don't have a lot of health points left.
Available subquests:
1. Crab Pendants - Find and pick up four crab pendants.
I guess you won't have any major problems with this particular challenge. Collecting some of the pendants will require you to act quickly, however it's nothing you haven't seen or done before. Obviously you will have to read the description for this mission in order to find out where to search for the pendants.
2. Don't Take A Hit - Don't take a hit while fighting Sao Feng.
This is going to be one of the most difficult challenges of the entire game. Sao Feng is a typical boss character and his attacks are very quick and precise. As a result, you will have to be lucky and skilled in order to avoid being hit by him. You will also have to perform counter-attacks of your own when it's safe. You can't hit Sao Feng while exposing yourself too much. You will also have to win several action sequences, however this shouldn't be a problem, especially since you've taken part in similar mini-games before. I would recommend attacking Sao Feng once he's performed his slowest attack. I'm sure that you'll figure out which one it is. The reason for doing so is that he won't have enough time to block your attack or to perform a counter-attack of his own. You should also remember about pressing and holding the block key each time a new part of the fight begins. Check the main description for additional hints.
3. Loot - Collect at least 850 gold.
You shouldn't have any problems collecting enough hold, however you must be on a look out for additional crates, because some of these objects will contain gold pouches. I'm sure that you'll be able to collect 850 gold coins long before this mission is going to end.
4. Hit Combo - Perform a x22 hit-combo.
I don't think you will have any major problems here, especially since you'll have a lot of opportunities to score such a combo sequence. I'd personally recommend waiting for some of the later fights. These battles will take place on board Sao Feng's battleship. You could also score a combo near the location of the second pendant. As always, the choice is yours.
Complete mission walkthrough:
Traditionally, at the beginning, you get to watch a cut-scene (#1). The heroes are attacked by Sao Feng. This is another sea level. As soon as you can control Jack, run to the left. Note that there is no time limit, so you do not have to hurry. Use the stairs and destroy the boxes, so you could pick up the first pendant (#2).
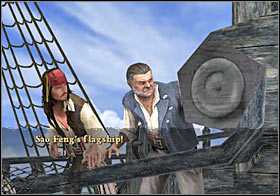
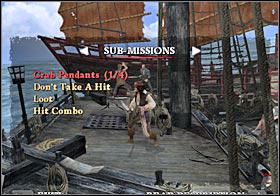
You could also go right and use the stairs (#1) again, however, the only thing you may find in the boxes is a pouch of gold (or nothing). The second pendant is not on the main deck. I would recommend dealing with the opponents first (#2). You have to beat a set number of enemies to proceed. It is best to fight the aggressors in the central part of the beach.
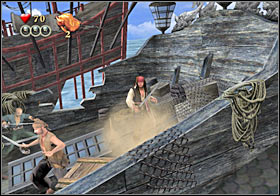
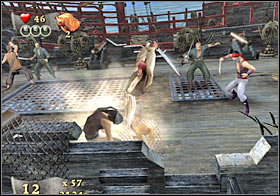
After you eliminate a dozen or so of the opponents, a brief cut-scene will launch (#1). As you have probably noticed, you can now head to the lower deck. Run to the right. Enter the small compartment. Ignore the enemies for a time being, and focus primarily on smashing the box with the second pendant (#2).
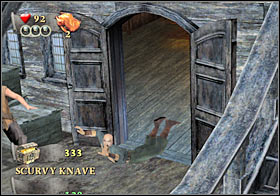
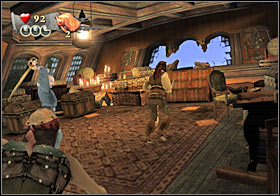
Now you may get back to the opponents. As I previously mentioned, this is a perfect place to get the required combo (#1). The only thing you should remember about, is to use the strongest special attack, because this has a chance of damaging or killing even 2 or 3 characters with just one hit. Eliminate all the adversaries (#2). Collect gold from the remaining boxes and get back on Pearl.
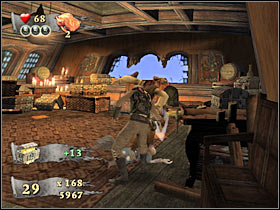
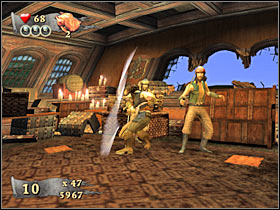
You will see another cut-scene (#1). Sao Feng himself now enters the deck. You will have to battle him while playing as Miss Elizabeth. If you are intending to complete all the subquests, make sure to read the second objective's description. Sao Feng must not hit you. I recommend you to hold the block button (#2) as soon as the duel begins, so you did not accidently lose precious hit points.
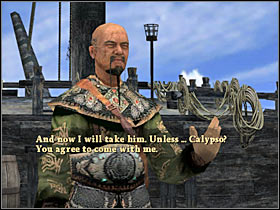
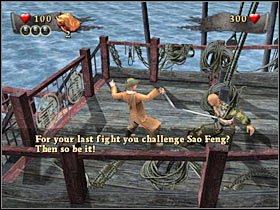
Now you should keep blocking the boss' attacks for a while, so you could watch most of them closely. You should especially wait for the attack shown at the first screenshot (#1). This one is the slowest of all, which should give you enough time to perform a counter-attack. Use quick strikes (#2) and attack the boss no more than 2 or 3 times in a series.
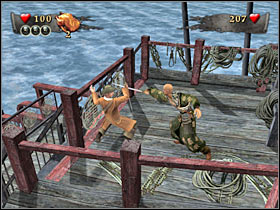
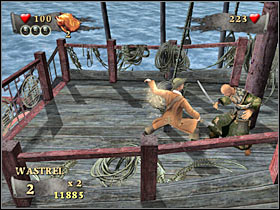
In subquest description I also mentioned interactive cut-scenes, which you should already know well (#1). Obviously, you have to win these, because each such sequence is an opportunity to take away 30-40 hit points from the boss. When the first stage of the duel is finished, a cut-scene will launch (#2).
<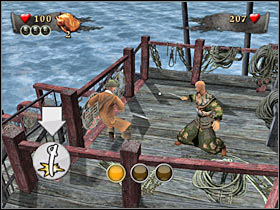

MAKE SURE you are holding the block button, as the fight will resume without any apparent warning (#1). You still have to wait for the right attack and counter-attack the boss as soon as it starts (#2). Use the interactive cut-scene too - this should launch in just a moment.
Once you've seriously wounded Sao Feng, a new cut-scene is going to be displayed on your screen (#1). Thankfully, you won't have to press any keys here. After that, you will resume the fight in a new section of the map. This is going to be the final phase of this battle. I wouldn't recommend changing anything. Keep blocking Sao Feng's moves. You will have to wait for one of his slower attacks. You could also use an interactive object to wound him (#2), however it's considered to be quite risky. If successful, Sao Feng would lose additional 50 health points.
Once you've defeated Sao Feng, you will have to wait for two additional cut-scenes. The second cut-scene is going to be more important than the first one. Sao Feng's ship is going to be attacked (#1). As a result, you will have to participate in new battles. Wait for the game to transport you to the deck of this ship (#2). Don't worry about the first explosion, however you will have to avoid other explosions. They will occur in the near future.
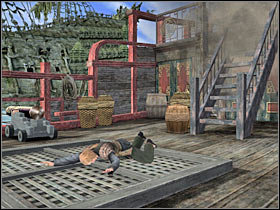
Ignore your opponents for the time being. You will have to destroy one of the nearby crates. This object will contain a third pendant (#1). Pick it up. Go left and start attacking the monsters. You should leave this area of the main deck (#2). You'll find out why in just a few seconds.
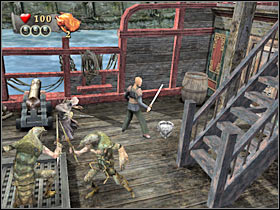
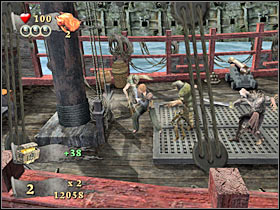
You should witness a new animation very soon (#1). As it turns out, the crew of the Flying Dutchman is getting ready to fire. This means you will have about 2-3 seconds to take cover. You will have to be standing in one of the orange spots (#2), because the rest of the ship is going to be destroyed and you would probably die as a result of one of the explosions. Leave the cover, however you should remain near it. You won't have to kill all monsters. Instead, focus mostly on blocking their attacks.
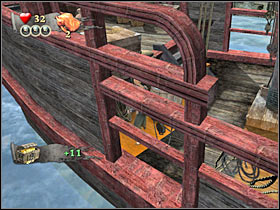
You will have to hide at least two more times. As a result, you won't be allowed to focus all of your attention on the monsters (#1). Staying near potential orange spots is going to be more important. Once the animations has been displayed, run to a designated area. Once you've completed this section, you will find yourself standing in a new location (#2).
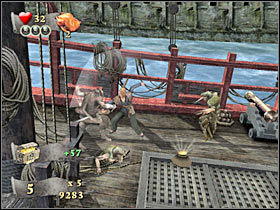
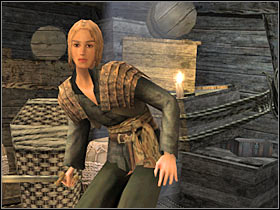
Start off by destroying some of the nearby crates (#1). You won't find any pendants here, however the crates will contain gold pouches. Nevertheless, you should be able to collect enough gold by now, so you may ignore these objects as well. You will have to take care of a larger group of monsters (#2). This is going to be a slightly more difficult fight, because Elizabeth has weak attacks. Choose your targets carefully and use the block feature from time to time.
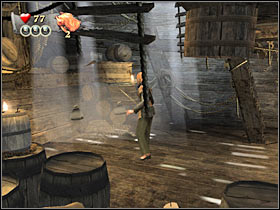
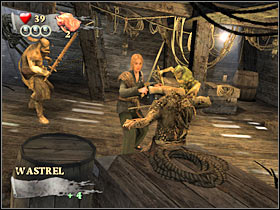
Once you've killed all monsters, you will have to go back to the left wall of this room. You should be able to see a glowing spot here. Stand on it and press the action key (#1). It's time for a short cut-scene. Once it's over, head over to a new room (#2).
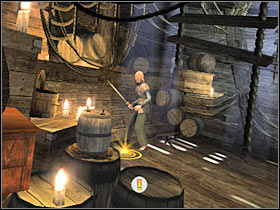

Once again, you will have to kill all monsters in order to be able to proceed to the next part of this mission. Head on to the right room. Destroy all nearby crates. This will allow you to pick up fourth pendant (#1). Once you've taken it, attack the monsters (#2). Just as before, this is going to be a long and challenging battle. You will have to use the block option frequently in order not to lose too much health points.
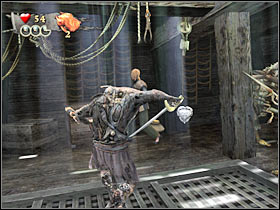

You will have to make sure that you've killed all creatures. Turn right and start moving forward. You will come across several other crates (#1). Destroy them and use the stairs. Now you will have to move left in order to get rid of the final group of enemy units (#2). This is a small room, so you will have to be very careful, especially when you'll be attacking larger groups of monsters. Exit the room. The game will display a cut-scene and this mission is going to end.
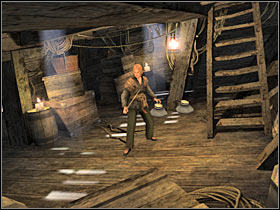
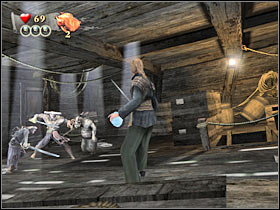
You've fought a boss character during the course of this mission, so you'll be able to participate in a Dueling challenge. There are also three standard challenges for you to accomplish.
Combat Challenge
Objective: Defeat 40 enemies in under 5 minutes.
Hints: It's not going to be an easy challenge, however I'm sure that you won't be surprised by it. The only good news is that you will be fighting monsters, instead of soldiers or elite warriors. Nevertheless, these monsters are going to be more skilled and faster than the undead creatures from the previous combat challenge. As a result, you should be using a lot of special attacks, especially since you'll have to defeat 40 monsters (8 creatures per minute).
Combo Challenge
Objective: Perform x40 Combo.
Hints: This is going to be an extremely difficult mission, especially since you'll be going against the crew of the Flying Dutchman. It's going to be very hard to wound these creatures without receiving any injuries. Watch out for sudden counter-attacks. You can't let the monsters force you into one of the corners of the map. Try and take out smaller groups (without losing the chain).
Loot Challenge
Objective: Collect 550 gold pieces.
Hints: You will have five minutes. That's a lot of time. You shouldn't have any problems collecting 550 gold coins. Like always, you will only have to remember that you won't be allowed to lose too much health.
Dueling
Requirements: You will have to complete "Loot Challenge" for this mission.
Hints: The rules of this mini-game haven't changed since the last time you took part in a Dueling challenge. As a result, you will be given two minutes to defeat the boss of this location. It's going to be quite simple to win, especially since it's a long battle.

Available subquests:
1. Crab Pendants - Find and pick up five crab pendants.
You shouldn't have any major problems acquiring all five pendants. You will be finding these items throughout the entire map. You will have to be on a look out for interactive (=destroyable) crates and barrels. At least one of the pendants will be well hidden, however if you explore your surroundings carefully, you should be able to find it... or you could head on to the main description in order to find exact locations. :-)
2. Pirate Dice - Win a game of Pirate Dice.
This is going to be your final approach with this mini-game. You will have to talk to one of the locals in order to be able to participate in the game. He is standing near a large gate (that's where the Pirate Lords are going to meet). Make sure that you're using Charm Cards, so you'll increase your chances of winning. Try and prevent other players from taking the lead.
3. Pirate Poker - Win a game of Pirate Poker.
Once again, you will have to go to the large gate. That's where you'll find a guy who's responsible for organizing a poker mini-game. My guess is that you'll be relying mostly on your current Charm Cards. I'm sure that you'll have a lot of these items in your inventory, but you will have to choose only three cards. Depending on a card, they will allow you to see cards of other players or will force them to raise. I'd strongly recommend achieving an early advantage and then playing passively, so you won't lose in any of the final rounds of the mini-game. Remember that you will have to be the one with the largest amount of money at the end of the tenth round.
4. Loot - Collect at least 650 gold.
You shouldn't have any major problems collecting 650 gold coins. I think it's quite obvious that you will have to destroy crates in order to pick up gold pouches. You'll also pick up a lot of gold coins from the bodies of fallen enemies... but I'm sure that you already knew that, so let's focus on the mission, shall we? ;-)
Complete mission walkthrough:
The game will begin with a very interesting cut-scene (#1). Our main characters will plan their next moves. You will also have an opportunity to enjoy a nicely done background of the Shipwreck City. Get ready. For the most of the mission, you'll be playing as Jack Sparrow. Start off by destroying some of the nearby crates. One of these objects will contain your first pendant (#2). You will have to find five of these items, so there's four left.
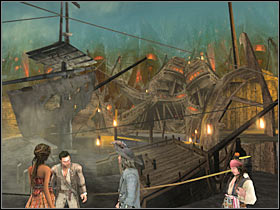
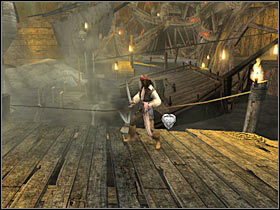
Head on to your left. You may consider talking to one of the pirates. You can find him by searching for a yellow icon (#1). Once the conversation has started, you will have to choose correct answers - the second and the first one. Proceed to the next section. You will encounter two pirates along the way (#2). Ignore them for the time being. Keep moving left.

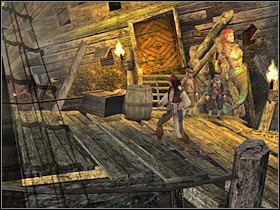
Once you're close enough to a large yellow gate, a new cut-scene is going to be displayed on your screen (#1). You'll find out that you will have to find and rescue two other Pirate Lords. They are probably being held by some mercenaries. Destroy all nearby crates. It's important, because one of these objects will contain a second pendant (#2).
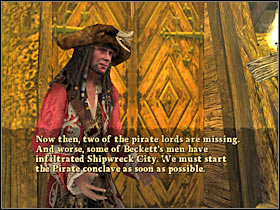
You will be able to fulfill two side missions here. If you want to find out how good you are at playing poker, you will have to talk to a guy who should be standing on your right (#1). The other pirate is organizing a dice game. He will be standing on your left (#2). If you want to skip these activities and proceed with the main task, head on to your left.
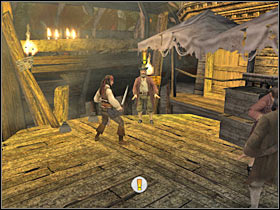
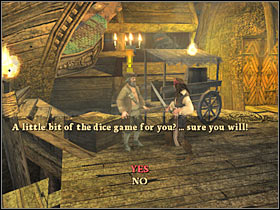
Keep heading left (#1). Sadly, you won't find any crates or barrels here, so you won't have to make any unnecessary stops. You should be able to reach a new location very soon. The game will display a longer cut-scene. Our main character will have to get rid of a mini-boss who's guarding (holding hostage - to be exact) one of the Pirate Lords. I'd strongly recommend choosing faster attacks (#2). A few of these hits and you will have one problem less to worry about.
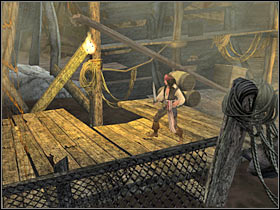
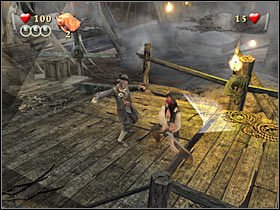
Destroy a single crate and enter this small building. You will have to get closer to a chair. Press the action key (#1) in order to rescue one of the Pirate Lords (funny animation ;-)). Now you will have to listen to a short dialog. As a result, your next objective will be to escort the Pirate Lord to the yellow gate (#2). As you've probably suspected, it's not going to be easy, because you will have to protect the Pirate Lord against other enemy units.
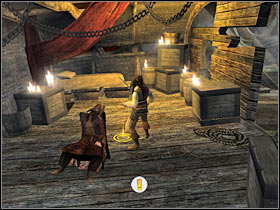
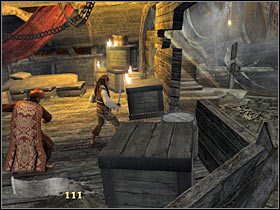
Start moving towards the right edge of the screen. You won't have to worry about the Pirate Lord being stabbed in the back, however you will have to defeat all enemy units before he reaches one of the holes in the ground. The first group will appear right away (#1). Once you've taken out all enemy units, head on to the glowing area and press the action key (#2). You have to be quick about it. Pressing the action key will allow the Pirate Lord to keep moving.
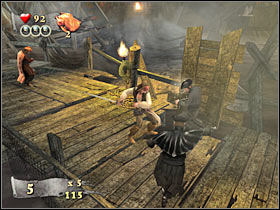
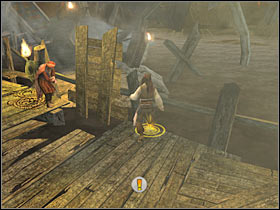
Head on to your right. You are going to be attacked by a second group of elite mercenaries very soon (#1). Additionally, you will have less time to kill them, so you should consider using special attacks, because they will seriously wound your opponents. Once they're gone, stand near the glowing area and press the action key (#2). If you were too late, you would have to start over.
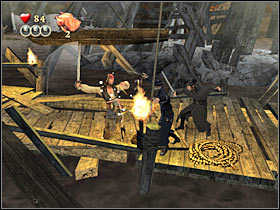
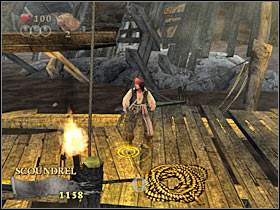
There's only one more obstacle in this area. You will have go there now. Once you're there, you are going to be attacked by a new group of mercenaries (#1). Remember to use stronger attacks (including the special ones) in order to get rid of them quickly. This fight can't take too long. Head on to the glowing area and perform a well known action (#2).
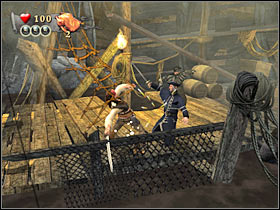
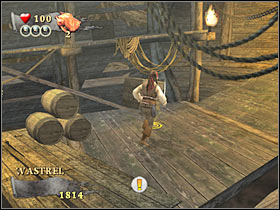
Now you will have to be patient, because it's going to take the Pirate Lord at least 20-30 seconds to get here. He will use a wooden plank (#1) and he will be moving towards the small gate. That's where you'll need to go right now. You will have to deal with the final group of enemy warriors (#2). Make sure that none of these thugs attacks the Pirate Lord!
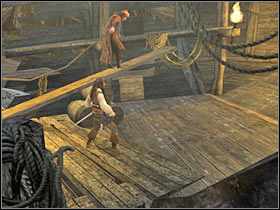
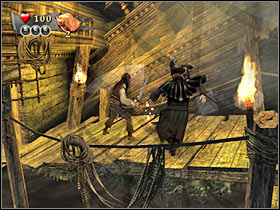
Once you've defeat your opponents, make sure to collect gold pouches from their bodies. Now you will have to wait for the Pirate Lord to get here. This will trigger a short cut-scene (#1). One of the pirates will offer you a suggestion. You will have to start moving right. I'm sure that you won't have any problems finding two pirates (#2). You've ignored them before.
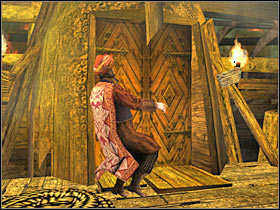
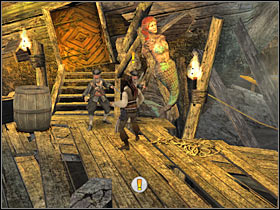
Now you will have to press the action key in order to begin the conversation. Sadly, it turns out that the pirates are trying to trick you. As a result, you will have to kill them (#1). This isn't going to be a difficult fight, however you must use the block button more often. Once the pirates are gone, head on to a large door and open it (#2).
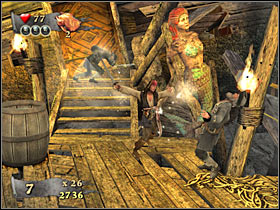

Turn right and use the stairs. You won't encounter any hostile units in this area. You will have to use the rope in order to reach a new location on the map (#1). As you've probably noticed, there are three glowing spots here. Ignore the rope action point, because you'll use it later. The right one would return you to the start area. As a result, use the upper one (#2). You will have to wait for Jack to reach a new sector of the map.
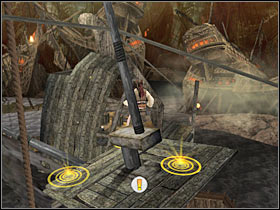
Once you've reached a new location, don't use the stairs just yet. Instead, head on towards a small balcony which should be located to your right. Destroy the crates. One of these objects will contain a third pendant (#1). Pick it up. You may proceed to the stairs (#2). You will be able to destroy at least one more crate along the way. Get ready for a long and challenging battle!
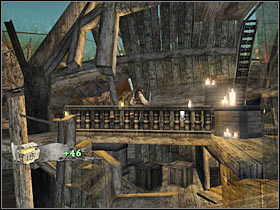
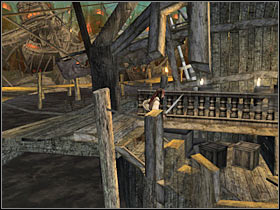
You are going to be attacked by a large group of skilled mercenaries (#1). As a result, these fights are going to be very difficult, especially since the mercenaries are going to be great at performing successful counter-attacks. You should be using the block feature very often. Focus on fast and special attacks. Once you've defeated them, check this entire area for additional crates. One of the crates contains a fourth pendant (#2).
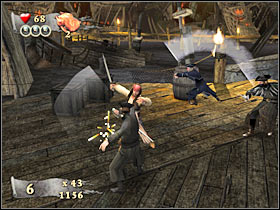
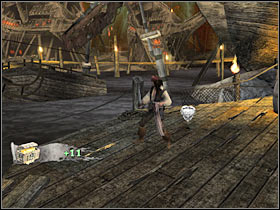
You could also check the other crates, however they will contain only gold pouches and you won't have to be worried about not being able to collect enough gold coins. Head on to your right (#1). A new cut-scene should be displayed on your screen (#2). Your objective here will be to save the second Pirate Lord. Thankfully, you won't be going against any mini-bosses here, so there's nothing you should be worried about. Get ready!
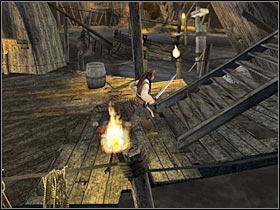
Once the battle has started, you will have to IGNORE the mercenaries. Your main concern here will be to get rid of the TNT barrels before they blow up (#1). You will have to get rid of three of these objects (#2). Once this is done, you won't have to worry about the Pirate Lord being suddenly killed.
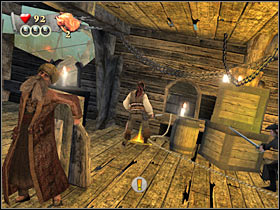
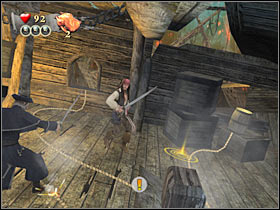
Now you may focus only on taking care of the elite mercenaries (#1). Just as before, you will have to spend more time blocking their attacks. Nevertheless, killing them should be a big problem. Once they're gone, head on to the Pirate Lord. You must press the action key in order to free him (#2). There's a short cut-scene here involving his return to the meeting area.
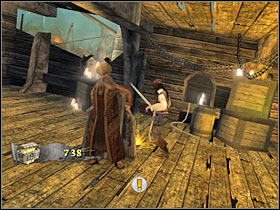
You don't have to go right, because you wouldn't find anything of interest there. Instead, go back to the left square (#1). You won't encounter any enemies here, however you will have to participate in a Jackanism mini-game (#2). I have to warn you. This mini-game is going to be quite difficult. You won't be given too much time to follow the orders, especially while trying to press one of the attack keys rapidly.

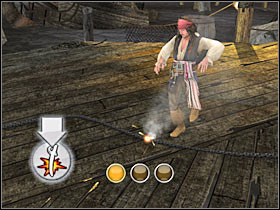
Head on to your left. Once you've reached a glowing spot, you will have to press the action key (#1). As a result, our main hero will use the rope once again. You will have to wait for him to reach a new location. Go left. Now you will have to press the action key in order to use the rope (#2). This will allow you to reach the top of the pole.
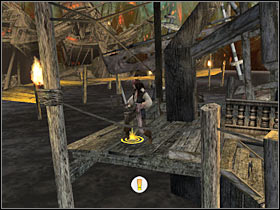
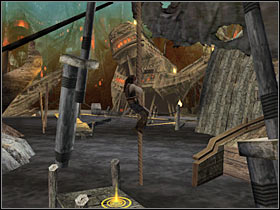
You will return to a well known location. I guess I won't have to remind you to go to the right glowing spot (#1). Press the action key and go back to the starting area. Now you will have to reach the yellow gate. As a result, start moving towards the left edge of the screen (#2).
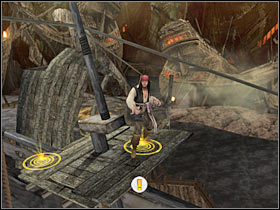
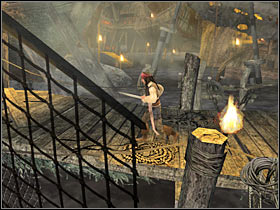
You are going to be attacked by a small group of mercenaries on your way to the gate. They will appear near a large door (#1). That's where you fought two other pirates. You will have to get rid of the mercenaries. Be careful, because there are a lot of thugs for you to kill. Once they're gone, go left. You will have to wait for the game to display a new cut-scene (#2).
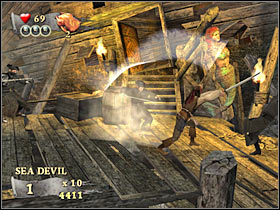
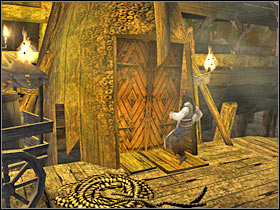
This is going to be the final part of this mission, however don't except to end it quickly. You will be playing as Captain Barbossa (#1). Start off by moving towards the left edge of the screen. Once you've reached a larger square, you will have to kill a few mercenaries (#2). They will appear in groups, so you must be very careful.
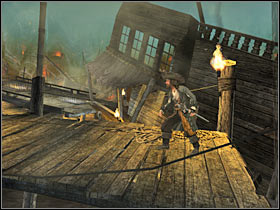
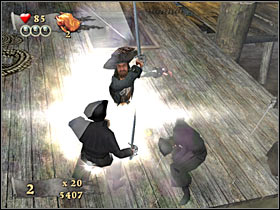
Once you've defeated the mercenaries, you will have to use the stairs (#1). You may have some problems finding the staircase, so check the first screen if you're lost. You will have to destroy some new crates here. One of the crates contains fifth pendant (#2). Take it.
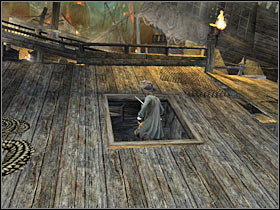
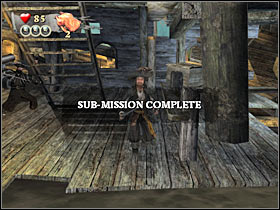
Once you've taken the pendant, you may proceed with taking down enemy units (#1). Thankfully, there aren't going to be too many of them, however you will have to make sure that you're using your special attacks all the time. Also, watch out for counter-attacks. Now you will have to use the cannon by pressing the action key (#2).
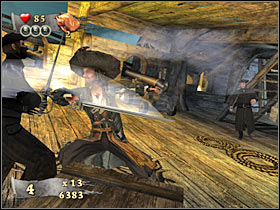
Once you've fired the cannon, go back to the upper level (use the stairs). You should already know that there's a new passageway here. You will have to use the destroyed construction in order to reach a new area of the map (#1). Keep moving forward (#2). Thankfully, you won't have to worry about losing balance. Once you've reached a deck of a new ship, go right.
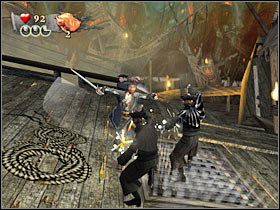
You are going to be attacked by several groups of elite mercenaries. I would recommend going back to the left side of the ship and eliminating them from there (#1). These aren't going to be challenging fights, however you must be careful and very precise. Once all the enemies are gone, head on to your right (#2). That's where the mercenaries showed up in the first place.
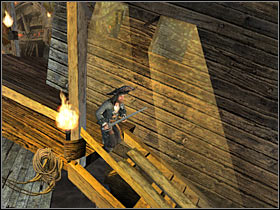
Use the stairs. You will end up near a well known place (#1). This is where you had to save one of the Pirate Lords. I guess I won't have to remind you to go left. You should be able to reach a new area very soon. Wait for the game to display a new cut-scene (#2). Get ready, because you will have to defeat a difficult opponent.
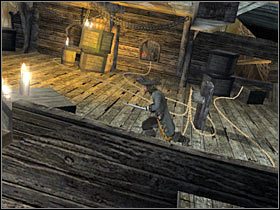
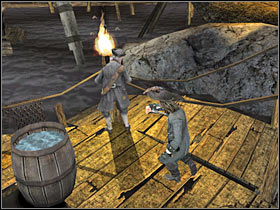
You will end up standing on a moving boat. Your objective will be to attack an enemy soldier. Sadly, it's not going to be easy, because he's very good at blocking your strikes (#1). You will have to be patient and you'll eventually wound him (#2). Ignore the explosions in the background. Focus all of your attention on killing this man.

Thankfully, you should be able to reach the dry land very soon (#1). You are going to end up near the yellow gate, so there's nothing more for you to do here. You will have to wait for the game to display a new cut-scene (#2). Get ready for the final mission of the game!

You haven't fought any boss characters during the course of this mission. As a result, you will be able to fulfill only three standard challenges.
Combat Challenge
Objective: Defeat 45 enemies in under 9 minutes.
Hints: This is going to be a very long challenge. You will also have to remember about a few important things. You'll be fighting on a very small map. As a result, you won't be allowed to perform any risky maneuvers, because you would sustain major injuries. You should consider attacking smaller groups of enemy units, especially since you won't be going after any combos.
Combo Challenge
Objective: Perform x35 Combo.
Hints: Despite what you might think, this isn't going to be a less complicated challenge than the previous one (from the 10th mission of the game). The main reason is that the mercenaries you'll be going against are very skilled and extremely fast. You will have to watch out for serious and unexpected counter-attacks. I wouldn't recommend going after larger groups of enemy units, however you must also achieve a successful chain. Focus mostly on special attacks. This will allow you to stun some of your opponents, so they'll become easier targets.
Loot Challenge
Objective: Collect 600 gold pieces.
Hints: You will be given seven minutes to win this challenge. As always, it's going to be the easiest one from the group of three challenges. Sadly, this means that you won't receive a proper reward for winning it. You will be given some Notoriety Points and nothing more. Nevertheless, you should consider participating in this challenge.
Available subquests:
1. Crab Pendants - Find and pick up four crab pendants.
This is the final mission of the single player campaign, so the game won't make it too easy for you to succeed. As a result, you will have some problems collecting all four pendants. You will have to be quick in acquiring them, especially since you won't be allowed to return for some of the pendants. You will also have to focus on doing other things at the same time. Check the main description for this mission if you want to find out more about this.
2. Defeat Enemies - Try and outsmart at least eight enemy units.
I guess you might have some problems understanding what has to be done in order to fulfill this mission objective. You won't be allowed to defeat enemies using standard types of attacks. Also, you won't have to perform any Ole maneuvers. Instead, you will have to contribute to something else. The objective here will be to let the boss character kill them. Check the main description if you want to find out how to do this. You should also take a closer look at the description of the third subquest, because you'll be completing them at the same time. You should also know that you will have plenty of opportunities to fulfill this mission objective, however you will be going against these types of attacks only during the first part of the mission, so you won't be allowed to stall these actions for too long.
3. Destroy Targets - Allow the boss character to destroy six groups of crates.
Like I've said before, quests (2) and (3) are tied together, however this one seems to be the more important and difficult one. The main reason is you will have to destroy crates, however you won't be doing this on your own. As a result, you must follow a certain path in order to fulfill this goal. Once again, I urge you to check the main description, because you should be able to find a very precise info there. Your objective will be to stand near designated crates long enough to attract the attention of the boss creature. As a result, these crates are going to be destroyed. The boss will either use a lightning or a tornado. You will also have to perform successful dodge maneuvers in order to avoid losing a lot of health points.
4. Hit Combo - Perform a x21 hit-combo.
I guess you may be surprised by the fact that it's going to be one of the most difficult side goals of the entire game. The main reason is that you won't have a lot of opportunities to score such a combo sequence. You will be changing your current locations very often and you will also have to focus your attention on two previous goals. It seems that your only chance for a high scored combo sequence is going to be one of the final battles, however you will be going against elite units, so you will have to be prepared for successful counter-attacks done by these monsters.
Complete mission walkthrough:
You will have to start this mission by watching a long cut-scene (#1). As you've probably noticed, the scenery for this mission is going to be very interesting. Your first objective here will be to find one of the hidden items. As a result, you will have to ignore the monsters. Head on to your left. Use the stairs (#2). Destroy the crate and locate the first pendant. Go back to the main deck.
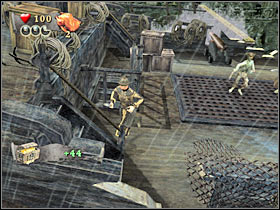
You could try and score a much needed combo sequence right away (#1), however I'd personally wouldn't recommend doing that, because you wouldn't have any enough time to take care of two other subquests. Additionally, Miss Elizabeth isn't a good fighter and it would take her a lot longer to achieve a decent chain. There are three groups of crates on this ship. It would be a good idea to make a stop near the group located on your left (#2).
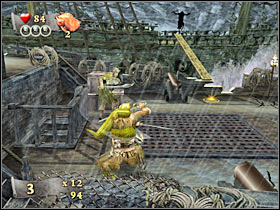
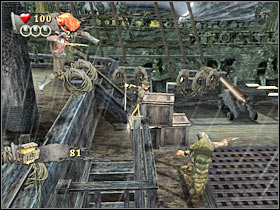
Each time you will have to do the same thing, so you should read this description carefully. Once you're standing near the crates, press and hold the block key. This should allow you to attract some of the nearby creatures. Now you will have to wait for the boss to begin the attack. Perform a dodge move and wait for the crates to be destroyed (#1). The second group can be found in the central part of the ship. As for the attacks of the boss creature, it will be using mostly lightning strikes (#2). If you see a white spot on the ground, this means you will have to leave this area at once. You will have about 2-3 seconds to do this, however you could also stay a little while longer in order to ensure that the attack will also kill some of the monsters. As a result, you will be completing two side missions at the same time.
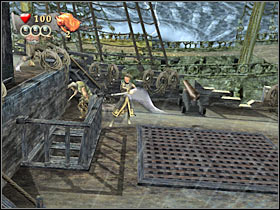
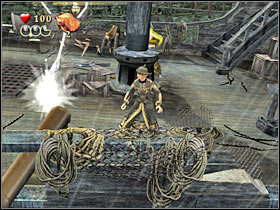
The third group of destroyable crates can be found on your right, near the second staircase (#1). Make sure that none of the monsters blocks you from the left, because you wouldn't be able to escape from the attack of the boss creature. Wait for the lightning strike to destroy these crates. If you haven't received new orders, you can consider spending this time on killing additional monsters (#2). You could also wait for a new attack of the boss creature in order to trick them.
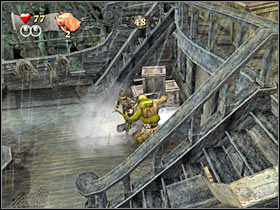
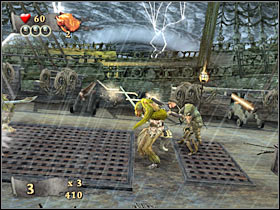
Now you will have to deal with your first timed objective. Ignore all nearby monsters. I'm sure that you've destroyed all three crates by now, so you should head on to a glowing area (#1). As a result, you are going to be transported to a deck of the second ship. Before you go any further, destroy the crates and pick up a second pendant (#2).
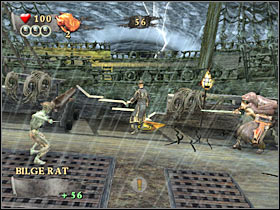
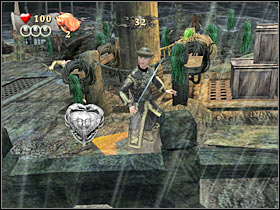
Now you will have to go to a designated area of the map (#1). You won't have to assist one of the allied units directly, however each time you decide to leave this area, a time meter bar will reappear on your screen. Don't leave this deck just yet. You should be able to find a new group of crates here (#2). Stand next to them and wait for the boss creature to begin its attack. You will also have to watch out for tornados. Make sure that your character won't end up inside one of these traps, because you'd lose a lot of health points.
Now for the hard part. You will have to go left. This means that you will be racing against time. Find a new group of crates, press and hold the block button and wait for the boss to attack you (#1). Once you've destroyed these crates, go back to the fighting area. Make sure that these actions won't take you more than 20 seconds. Wait for the new orders to appear on your screen. You will have to go right (#2).

Some new allied units are fighting the monsters here, however you may ignore them. Head on to the last group of crates (#1). Obviously you will have to wait for the boss creature to attack you. It's probably going to be a tornado, so make sure that you've dodged it. Also, this is going to be your last chance to kill the monsters for the second subquest. Once this is done, head on to the fighting area (#2) and kill a few creatures. You could also try and score a much needed combo.
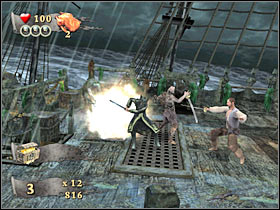
You will receive new objectives very soon. As a result, you will have to head on to the second ship (#1). Use the glowing area to reach the deck of that ship. Thankfully, you won't have to destroy any crates here, so focus only on attacking the monsters (#2). Just as before, it would be a good idea to try and score a combo sequence here.
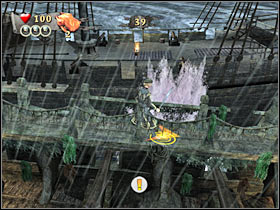
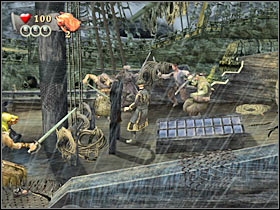
You will have to keep hitting the monsters for about a minute. Once this is done, a new cut-scene is going to be displayed on your screen (#1). You'll going to be playing as Will Turner. This is going to be the first part of the boss fight. Thankfully, it's quite simple. I'm sure that you won't have any problems hitting the boss (#2). Go ahead and perform several stronger attacks.
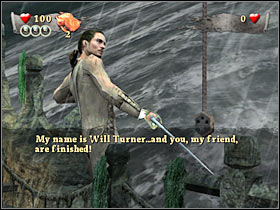
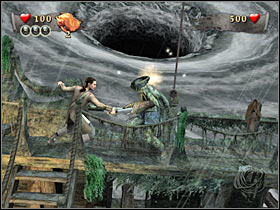
You will be taking part in action sequences from time to time (#1). You should be familiar with these types of actions, however you must press certain attack keys faster than usual. You will also have to press movement keys during one of the sequences. Once you've finished the first part of the fight, a short cut-scene is going to be displayed on your screen (#2). As you've probably suspected, you will be playing as Jack Sparrow from now on.

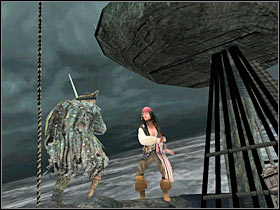
You shouldn't change anything in your approach (#1). Focus mostly on faster attacks, because they'll be most successful, however you may also consider choosing more powerful strikes from time to time. You should also notice two interactive ropes (#2). Cutting them down will allow you to apply additional injuries to the boss. You will have to press the action key while standing next to the rope in order to activate such an action.
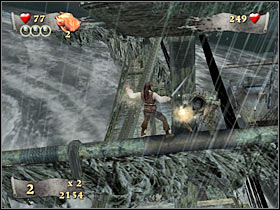
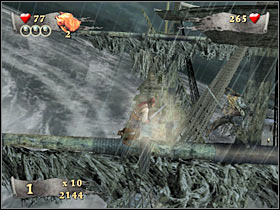
Get ready. You will have to participate in your final Jackanism mini-game (#1). I guess I won't have to warn you by saying that it's going to be quite difficult (especially near the sixth action). If you've successfully completed previous Jackanism mini-games, you should also be able to win this one. The final phase of the battle is going to be very simple (#2). Choose faster attacks. You will also have to block some of the counter-attacks performed by the boss.
Once you've defeated the boss, you will have to watch two separate cut-scenes. The second cut-scene is going to be more important (#1). You will have to defeat Beckett and his men. This is going to be your final task for this mission. Start off by attacking Beckett's mercenaries (#2). This is a great opportunity to score a much needed combo sequence, however you must be in a lot of hurry.
You will also be able to pick up two final crab pendants. You must visit two opposite sides of the ship (#1; #2). Check both screens if you want to find out where to look for the pendants. As a result, you will be able to take third and fourth pendant. You should have already fulfilled all of the available side missions, so you'll be able to focus on the main task at hand.
Let's proceed with the final part of this level. If you don't want to lose too much time or health then I recommend that you follow my instructions. Once again, you will witness a short animation that's going to be a warning (#1). The cannons are about to fire, so you'll have to find a cover. I would recommend hiding behind large groups of crates (#2). You should be able to find at least two of these spots on the main deck of this ship.
Once the cannons have fired, you may leave this area in order to attack some of Beckett's men (#1). I would also recommend moving towards the upper edge of the screen. You won't have to worry about the second cannon attack for the time being. Instead, you will have to wait for several glowing icons to appear near your cannons. Once this has happened, keep pressing the action key in order to use them (#2). You will witness short cut-scenes. These films will suggest that Jack is trying to move the ships closer to each other.
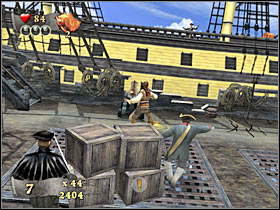
This operation is going to take a while, however you won't have to worry about the cannons on Beckett's ship. Instead, keep attacking his men. You should also observe what Beckett is currently doing. He will board your ship very soon. IMMEDIATELY start attacking him (#2). Obviously you won't kill him right away, but you'll at least wound him. Beckett will escape to his ship after he's going to take a few hits.
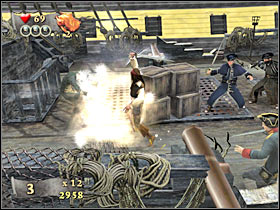
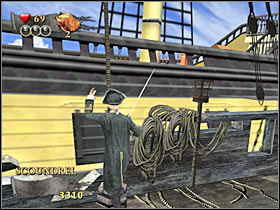
You will have to repeat all of these actions twice. Start off by attacking enemy units. Next, you will have to take cover in order to survive the cannon assault (#1). Once it's safe, leave the cover and wait for the allied cannons to be ready to fire. Use them to move Beckett's ship closer to yours. Once this is done, attack Beckett (#2) and ignore his soldiers.
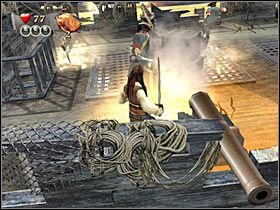
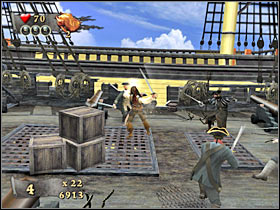
The third sequence is going to be very similar to the second one. You will have to end it by attacking Beckett (#1), however this time he won't leave your ship. You must hit him at least 10 times in order to succeed. Once this is done, wait for the final cut-scene to be displayed on your screen (#2). Congratulations! You've just finished the game! Also, this doesn't mean you won't be able to do anything else. You are allowed to repeat all levels in order to fulfill previously skipped subquests. Good luck!
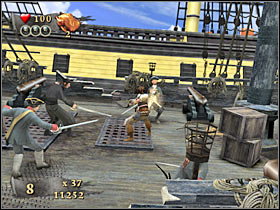
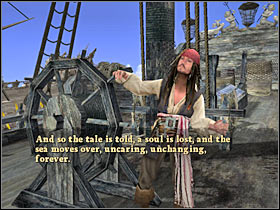
There's only one more thing to talk about - additional challenges. I guess I won't surprise you by saying that most of these task are going to be difficult. You will also have an opportunity to participate in a Dueling challenge (boss fight).
Combat Challenge
Objective: Defeat 50 enemies in under 9 minutes.
Hints: I guess I won't have to tell you that's is going to be a VERY long challenge, however you won't have to worry about the time limit too much. You should be able to kill 50 monsters in about 4 minutes. You'll be going against undead creatures, so it should be a little easier to kill them. Nevertheless, avoid attacking larger groups of monsters. You will also have to use bombs and revolvers from time to time, but I'm sure that you already know all that.
Combo Challenge
Objective: Perform x40 Combo.
Hints: It's going to be more difficult to win this challenge, especially since the monsters are going to be blocking most of your attacks. As a result, you will have to make sure that you don't end your current chain by not being able to hit any new targets. Don't attack single opponents, because you might not be able to maintain a successful sequence once the monster is gone.
Loot Challenge
Objective: Collect 700 gold pieces.
Hints: This time you will be given eight minutes to collect 700 gold coins, so there's nothing you should be worried about. Like always, this is going to be the easiest challenge of all three.
Dueling
Requirements: You will have to complete "Combo Challenge" for this mission.
Hints: There's not much to add here. I'm sure that you know exactly how this works - you will have to repeat the boss fight, however this time you will also have to remember about the existence of the time limit.
MAIN CHARACTERS - 22 characters to unlock
1. Captain Jack Sparrow
Requirements: You will have to finish Prison Fortress level.
2. Bootstrap Bill Turner
Requirements: You will have to finish "Defeat Enemies" subquest (Prison Fortress level).
3. Captain Teague
Requirements: You will have to finish "Combat Challenge" for the Prison Fortress level.
4. Mordillah
Requirements: You will have to finish "Combo Challenge" for the Prison Fortress level.
5. Cotton
Requirements: You will have to finish "Rescue" subquest (Isla de Pelegosts level).
6. Will Turner
Requirements: You will have to finish Isla de Pelegostos level.
7. Gibbs
Requirements: You will have to finish "Combat Challenge" for the Port Royal level.
8. Governor Swann
Requirements: You will have to finish "Combat Challenge" for the Pearl Vs Dutchman level.
9. Tia Dalma
Requirements: You will have to finish "Missing Person" subquest (Port Royal level).
10. Davy Jones
Requirements: You will have to finish Pearl Vs Dutchman level.
11. Elizabeth Swann
Requirements: You will have to finish Tortuga level.
12. James Norrington
Requirements: You will have to finish "Combat Challenge" for the Tortuga level.
13. Pintel
Requirements: You will have to finish Isla Cruces level.
14. Ragetti
Requirements: You will have to finish "Combat Challenge" for the Isla Cruces level.
15. Captain Elizabeth Swann
Requirements: You will have to finish "Combo Challenge" for the Davy Jones' Locker level.
16. Mercer
Requirements: You will have to finish "Hit Combo" subquest (Singapore level).
17. Captain Sao Feng
Requirements: You will have to finish Singapore level.
18. Lian
Requirements: You will have to finish "Combat Challenge" for the Singapore level.
19. Tai Huang
Requirements: You will have to finish Sea Battle level.
20. Captain Barbossa
Requirements: You will have to finish Shipwreck City level.
21. Black Bart
Requirements: You will have to finish "Combat Challenge" for the Maelstrom level.
22. Lord Cutler Beckett
Requirements: You will have to finish Maelstrom level.
PIRATES - 18 characters to unlock
1. Maccus
Requirements: You will have to finish "Hit Combo" subquest (Pearl Vs Dutchman level).
2. Angler
Requirements: You will have to finish "Combo Challenge" for the Pearl Vs Dutchman level.
3. Black Pearl Crew 1
Requirements: You will have to finish "Loot" subquest (Pearl Vs Dutchman level).
4. Black Pearl Crew 2
Requirements: You will have to finish "Combo Challenge" for the Sea Battle level.
5. Electric Arm
Requirements: You will have to finish "Loot Challenge" for the Pearl Vs Dutchman level.
6. Penrod
Requirements: You will have to finish "Hit Combo" subquest (Tortuga level).
7. Pirate 1
Requirements: You will have to finish "Loot Challenge" for the Isla Cruces level.
8. Pirate 2
Requirements: You will have to finish "Loot" subquest (Tortuga level).
9. Pirate 3
Requirements: You will have to finish "Loot" subquest (Shipwreck City level).
10. Quartermaster
Requirements: You will have to finish "Gold Idol" subquest (Isla Cruces level).
11. Palifico
Requirements: You will have to finish Pearl Vs Kraken level.
12. Cannon Arm
Requirements: You will have to finish "Combat Challenge" for the Pearl Vs Kraken level.
13. Chinese Henchman 1
Requirements: You will have to finish "Debt Collection" subquest (Singapore level).
14. Chinese Henchman 2
Requirements: You will have to finish "Combo Challenge" for the Singapore level.
15. Tortured Pirate 1
Requirements: You will have to finish "Loot" subquest (Davy Jones' Locker level).
16. Tortured Pirate 2
Requirements: You will have to finish "Combat Challenge" for the Davy Jones' Locker level.
17. Ratlin
Requirements: You will have to finish "Loot" subquest (Sea Battle level).
18. Hadras
Requirements: You will have to finish "Combat Challenge" for the Sea Battle level.
SOLDIERS - 10 characters to unlock
1. Prison Fortress Guard 1
Requirements: You will have to finish "Loot Challenge" for the Prison Fortress level.
2. Prison Fortress Guard 2
Requirements: You will have to finish "Hit Combo" subquest (Prison Fortress level).
3. Prison Fortress Guard 3
Requirements: You will have to finish "Level Notoriety" subquest (Prison Fortress level).
4. Female Warrior
Requirements: You will have to finish "Combat Challenge" for the Isla de Pelegostos level.
5. Male Warrior 1
Requirements: You will have to finish "Loot" subquest (Isla de Pelegostos level).
6. Male Warrior 2
Requirements: You will have to finish "Combo Challenge" for the Isla de Pelegostos level.
7. Red Coat
Requirements: You will have to finish "Jackanism" mini-game for the Port Royal level.
8. Black Cloak
Requirements: You will have to finish "Defeat Enemies" subquest (Maelstrom level).
9. Blue Coat
Requirements: You will have to finish "Loot Challenge" for the Pear Vs Kraken level.
10. Skeleton Demon
Requirements: You will have to finish "Hit Combo" subquest (Davy Jones' Locker level).
CIVILIANS - 11 characters to unlock
1. Inmate
Requirements: You will have to finish "Loot" subquest (Prison Fortress level).
2. Town Landlord
Requirements: You will have to finish "Hit Combo" subquest (Port Royal level).
3. Town Musician
Requirements: You will have to finish "Loot Challenge" for the Port Royal level.
4. Townsfolk 1
Requirements: You will have to finish "Loot" subquest (Port Royal level).
5. Townsfolk 2
Requirements: You will have to finish "Combo Challenge" for the Port Royal level.
6. Townsfolk 3
Requirements: You will have to finish "Rum Raid" subquest (Port Royal level).
7. Townsfolk 4
Requirements: You will have to finish "Loot Challenge" for the Isla de Pelegostos level.
8. Wench 1
Requirements: You will have to finish "Jackanism" mini-game for the Shipwreck City level.
9. Wench 2
Requirements: You will have to finish "Combo Challenge" for the Pearl Vs Kraken level.
10. Wench 3
Requirements: You will have to finish "Face Slap" subquest (Tortuga level).
11. Singapore Townsfalk
Requirements: You will have to finish "Old Enemies" subquest (Singapore level).
PIRATE LORDS - 6 characters to unlock
1. Capitaine Chevalle
Requirements: You will have to finish Port Royal Level.
2. Mistress Ching
Requirements: You will have to finish "Jackanism" mini-game for the Tortuga level.
3. Villanueva
Requirements: You will have to finish "Combo Challenge" for the Tortuga level.
4. Gentleman Jocard
Requirements: You will have to finish Davy Jones' Locker level.
5. Ammand The Corsair
Requirements: You will have to finish "Pirate Poker" subquest (Shipwreck City level).
6. Sri Sumbhajee
Requirements: You will have to finish "Combat Challenge" for the Shipwreck City level.
LIST OF ALL BONUSES:
PRISON FORTRESS
Captain Jack Sparrow
Bootstrap Bill Turner
Captain Teague
Mordillah
Prison Fortress Guard 1
Prison Fortress Guard 2
Prison Fortress Guard 3
Inmate
ISLA DE PELEGOSTOS
Cotton
Will Turner
Female Warrior
Male Warrior 1
Male Warrior 2
Townsfolk 4
PORT ROYAL
Gibbs
Tia Dalma
Red Coat
Town Landlord
Town Musician
Townsfolk 1
Townsfolk 2
Townsfolk 3
Capitaine Chevalle
PEARL VS DUTCHMAN
Governor Swann
Davy Jones
Maccus
Angler
Black Pearl Crew 1
Electric Arm
TORTUGA
Elizabeth Swann
James Norrington
Penrod
Pirate 2
Wench 3
Mistress Ching
Villanueva
ISLA CRUCES
Pintel
Ragetti
Pirate 1
Quartermaster
PEARL VS KRAKEN
Palifico
Cannon Arm
Blue Coat
Wench 2
SINGAPORE
Mercer
Captain Sao Feng
Lian
Chinese Henchman 1
Chinese Henchman 2
Singapore Townsfalk
DAVY JONES' LOCKER
Captain Elizabeth Swann
Tortured Pirate 1
Tortured Pirate 2
Skeleton Demon
Gentleman Jocard
SEA BATTLE
Tai Huang
Black Pearl Crew 2
Ratlin
Hadras
SHIPWRECK CITY
Captain Barbossa
Pirate 3
Wench 1
Ammand The Corsair
Sri Sumbhajee
MAELSTROM
Black Bart
Lord Cutler Beckett
Black Cloak
PRISON FORTRESS - 2 bonuses to unlock
1. Concept Artwork
Requirements: You will have to finish all subquests for each of the main missions in order to unlock concept artworks.
2. Challenge Modes
Requirements: You will have to finish each level in order to unlock bonuses for this certain mission. You can access them by choosing Challenge Modes from the main menu of the game.
ISLA DE PELASTOGOS - 2 bonuses to unlock
1. Concept Artwork
Requirements: You will have to finish all subquests for this mission.
2. Challenge Modes
Requirements: You will have to finish this mission of the game.
PORT ROYAL - 2 bonuses to unlock
1. Concept Artwork
Requirements: You will have to finish all subquests for this mission.
2. Challenge Modes
Requirements: You will have to finish this mission of the game.
PEARL VS DUTCHMAN - 2 bonuses to unlock
1. Concept Artwork
Requirements: You will have to finish all subquests for this mission.
2. Challenge Modes
Requirements: You will have to finish this mission of the game.
TORTUGA - 3 bonuses to unlock
1. Concept Artwork
Requirements: You will have to finish all subquests for this mission.
2. Challenge Modes
Requirements: You will have to finish this mission of the game.
3. Dueling
Requirements: You will have to finish "Loot Challenge" for this mission (it's one of the challenges; you can access the Dueling mission from the main menu).
ISLA CRUCES - 3 bonuses to unlock
1. Concept Artwork
Requirements: You will have to finish all subquests for this mission.
2. Challenge Modes
Requirements: You will have to finish this mission of the game.
3. Dueling
Requirements: You will have to finish "Combo Challenge" for this mission.
PEARL VS KRAKEN - 2 bonuses to unlock
1. Concept Artwork
Requirements: You will have to finish all subquests for this mission.
2. Challenge Modes
Requirements: You will have to finish this mission of the game.
SINGAPORE - 3 bonuses to unlock
1. Concept Artwork
Requirements: You will have to finish all subquests for this mission.
2. Challenge Modes
Requirements: You will have to finish this mission of the game.
3. Dueling
Requirements: You will have to finish "Loot Challenge" for this mission.
DAVY JONES' LOCKER - 2 bonuses to unlock
1. Concept Artwork
Requirements: You will have to finish all subquests for this mission.
2. Challenge Modes
Requirements: You will have to finish this mission of the game.
SEA BATTLE - 3 bonuses to unlock
1. Concept Artwork
Requirements: You will have to finish all subquests for this mission.
2. Challenge Modes
Requirements: You will have to finish this mission of the game.
3. Dueling
Requirements: You will have to finish "Loot Challenge" for this mission.
SHIPWRECK CITY - 2 bonuses to unlock
1. Concept Artwork
Requirements: You will have to finish all subquests for this mission.
2. Challenge Modes
Requirements: You will have to finish this mission of the game.
MAELSTROM - 3 bonuses to unlock
1. Concept Artwork
Requirements: You will have to finish all subquests for this mission.
2. Challenge Modes
Requirements: You will have to finish this mission of the game.
3. Dueling
Requirements: You will have to finish "Combo Challenge" for this mission.
PIRATE POKER MINI-GAME CARDS - 12 cards to unlock
CARD 1 - You must find all "Crab Pendants" while playing the Prison Fortress mission.
CARD 2 - You must finish "Hit Combo" subquest while playing the Isla de Pelegostos mission.
CARD 3 - You must find all "Crab Pendants" while playing the Port Royal mission.
CARD 4 - You must finish "Defeat Enemies" subquest while playing the Pearl Vs Dutchman mission.
CARD 5 - You must finish "Pirate Poker" subquest while playing the Tortuga mission.
CARD 6 - You must finish "Jackanism" mini-game while playing the Isla Cruces mission.
CARD 7 - You must find all "Crab Pendants" while playing the Pearl Vs Kraken mission.
CARD 8 - You must find all "Crab Pendants" while playing the Singapore mission.
CARD 9 - You must finish "Jackanism" mini-game while playing the Davy Jones' Locker mission.
CARD 10 - You must find all "Crab Pendants" while playing the Sea Battle mission.
CARD 11 - You must find all "Crab Pendants" while playing the Shipwreck City mission.
CARD 12 - You must finish "Jackanism" mini-game while playing the Maelstrom mission.
DICE SETS FOR THE PIRATE DICE MINI-GAME - 12 sets to unlock
SET 1 - You must finish "Jackanism" mini-game while playing the Prison Fortress mission.
SET 2 - You must find all "Crab Pendants" while playing the Isla de Pelegostos mission.
SET 3 - You must finish "Pirate Dice" subquest while playing the Port Royal mission.
SET 4 - You must find all "Crab Pendants" while playing the Pearl Vs Dutchman mission.
SET 5 - You must find all "Crab Pendants" while playing the Tortuga mission.
SET 6 - You must find all "Crab Pendants" while playing the Isla Cruces mission.
SET 7 - You must finish "Ole Enemies" subquest while playing the Pearl Vs Kraken mission.
SET 8 - You must finish "Pirate Dice" subquest while playing the Singapore mission.
SET 9 - You must find all "Crab Pendants" while playing the Davy Jones' Locker mission.
SET 10 - You must finish "Hit Combo" subquest while playing the Sea Battle mission.
SET 11 - You must finish "Pirate Dice" subquest while playing the Shipwreck City mission.
SET 12 - You must find all "Crab Pendants" while playing the Maelstrom mission.
TITLE SEQUENCE - 3 bonuses to unlock
1. Black Pearl
Requirements: You will have to collect 2000 gold coins.
2. Flying Dutchman
Requirements: You will have to collect 5000 gold coins.
3. Empress
Requirements: You will have to collect 8000 gold coins.
SWORDS - 9 swords to unlock
1. Cutlass
Requirements: This sword is already available at the beginning of the game.
2. Dutchman Sword
Requirements: You will have to finish the Pearl Vs Dutchman mission.
3. Norrington Sword
Requirements: You will have to finish the Isla Cruces mission.
4. Bone Sword
Requirements: You will have to finish the Davy Jones' Locker mission.
5. Gun Sword
Requirements: You will have to finish the Sea Battle mission.
6. Pirate King's Sword
Requirements: You will have to finish the Shipwreck City mission.
7. Davy Jones' Sword
Requirements: You will have to finish the Maelstrom mission.
8. Ghost Sword
Requirements: You will have to finish "Hit Combo" subquest for the Isla Cruces mission.
9. Legend Sword
Requirements: You will have to finish "Hit Combo" subquest for the Maelstrom mission.


 Prototype Game Guide & Walkthrough
 Prey Game Guide & WalkthroughPokemon X/Y Game Guide & Walkthrough
 Pillars of Eternity Game Guide & Walkthrough
 Prince of Persia Game Guide & Walkthrough