
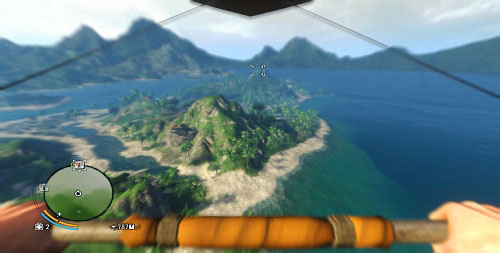
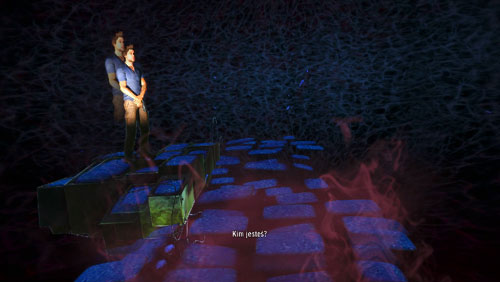
This Far Cry 3 guide contains a richly-illustrated walkthrough for all of the main-, and side quests of the main plot. Additionally, the guide includes maps with marked for collectible items, and the means of obtaining them.
This guide includes:

This guide has been color-coded in a following manner:
Michal Rutkowski

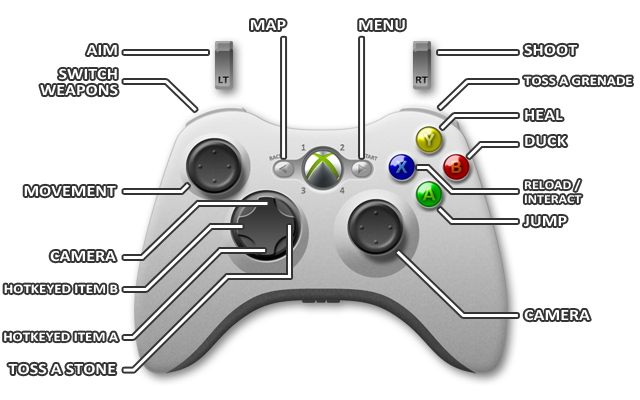
Movement

Sprint

Camera

Melee attack/eliminate

Jump

Duck

Reload

Previous weapon

Heal

Interact

Hotkeyed item A

Hotkeyed item B

Toss a stone

Switch weapons (press and hold down)

Aim

Toss a grenade

Shoot

Map

Menu

Movement

Sprint

Camera control

Melee attack/eliminate

Jump

Duck

Reload
Interact (press and hold down)

Previous weapon
Heal (press and hold down)

Hotkeyed item B

Hotkeyed item A

Toss a stone

Camera

Switch weapons (press and hold down)

Aim

Toss a grenade

Shoot

Map

Menu


Movement

Sprint

Camera control
Melee attack/Eliminate

Jump

Duck

Reload
Interact (press and hold down)

Previous weapon
Heal (press and hold down)

Hotkeyed item A

Hotkeyed item B

Toss a stone

Photo camera

Aim

Switch weapon (press and hold down)

Shoot

Toss a grenade

Map

Menu
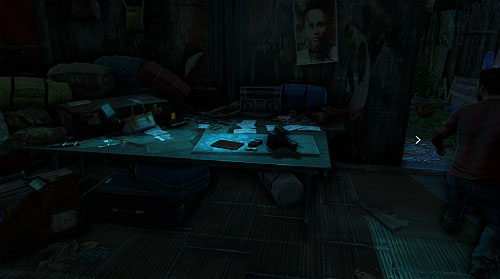
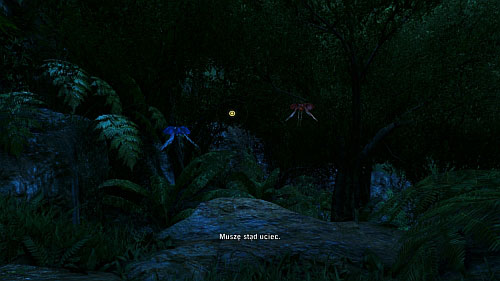
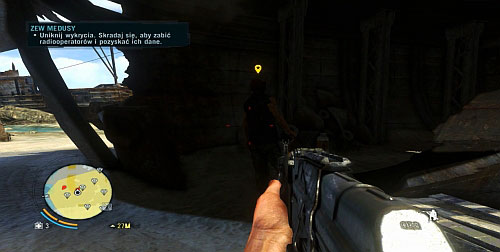
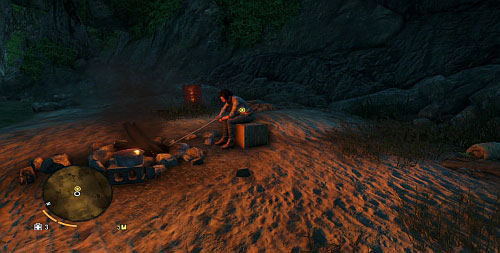
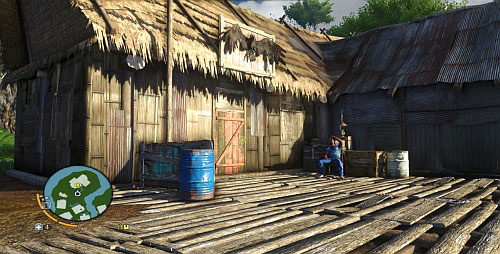
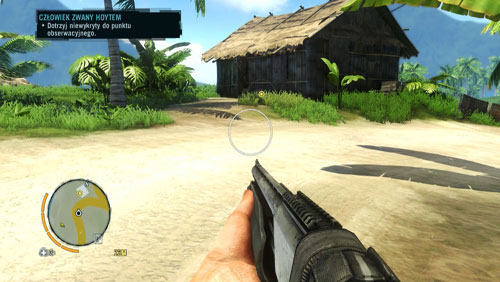
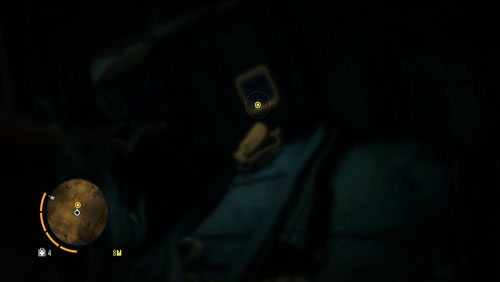
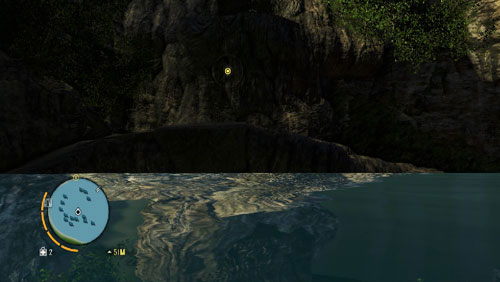
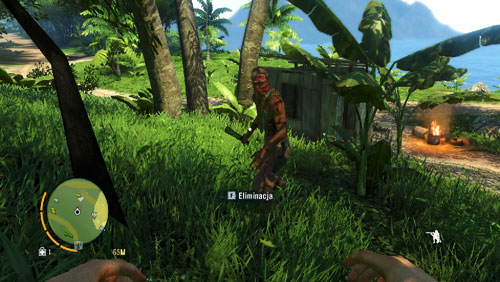
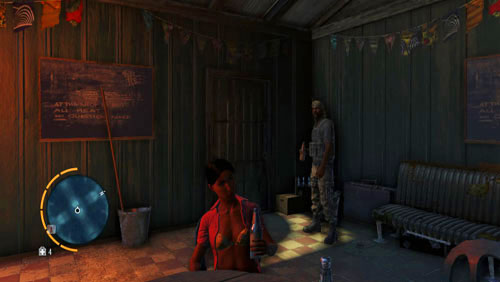
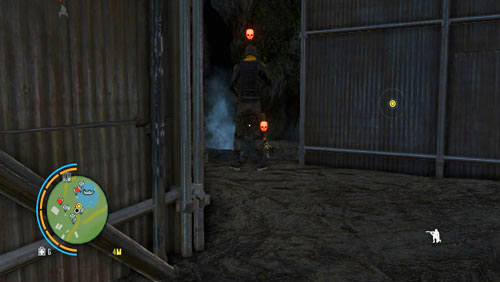
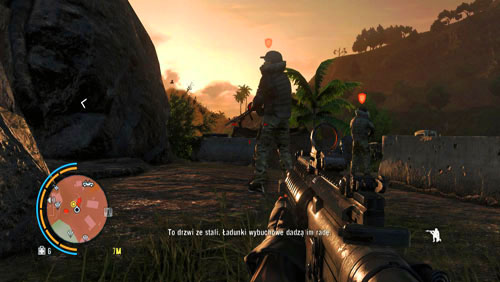
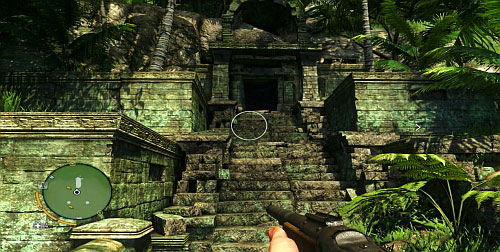
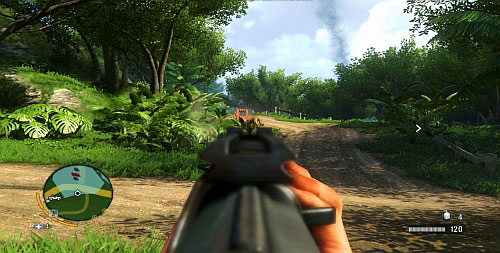
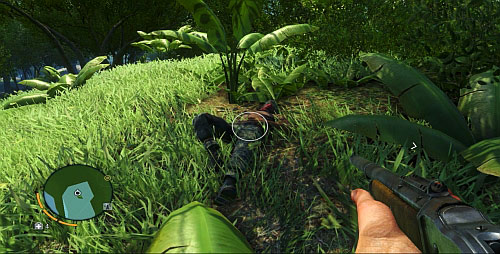
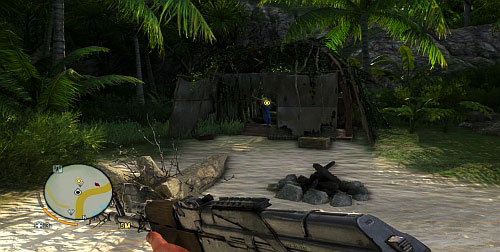
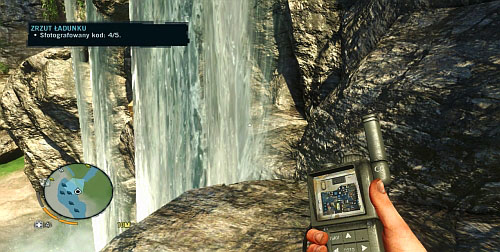
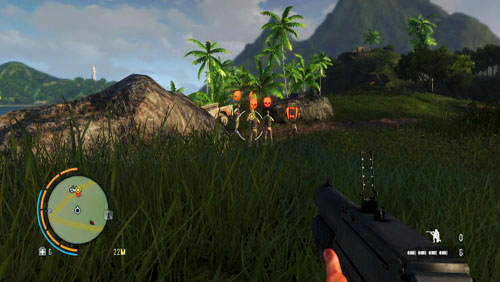
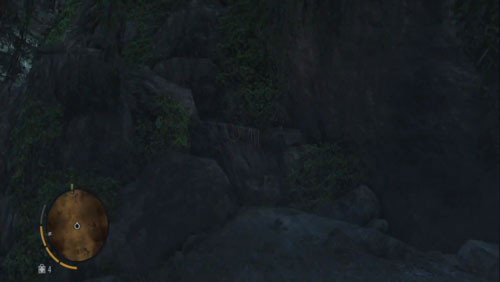
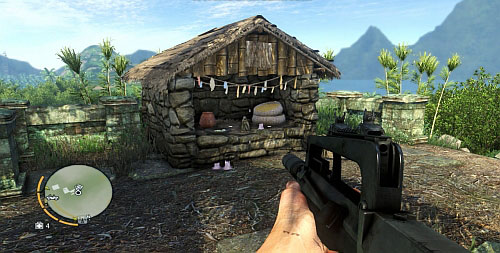
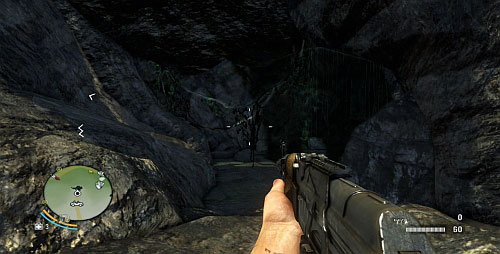
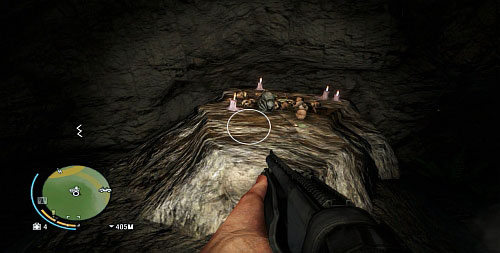
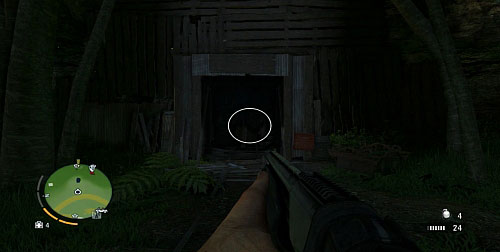
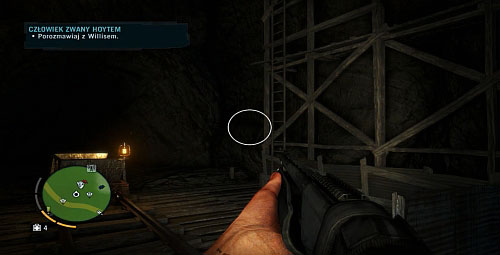
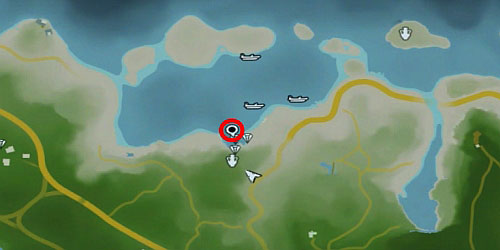
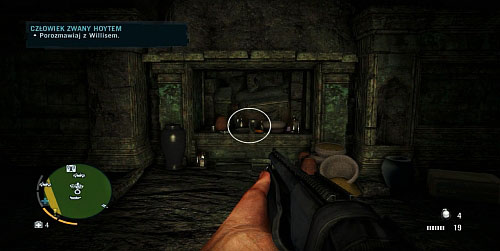
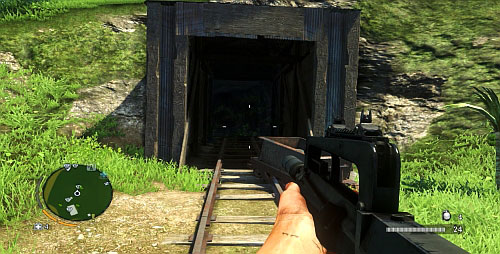
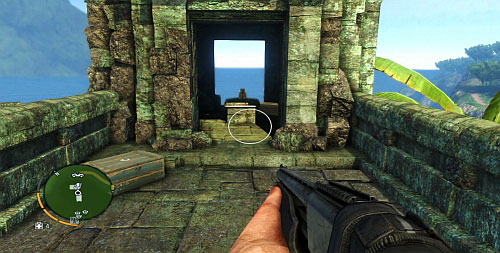
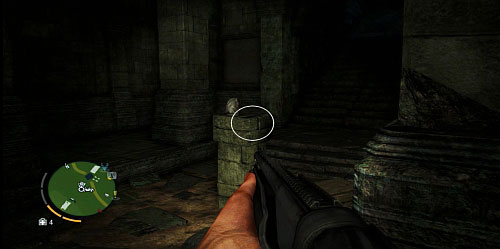
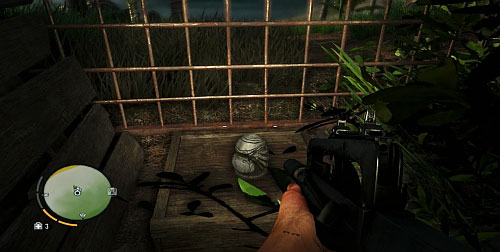
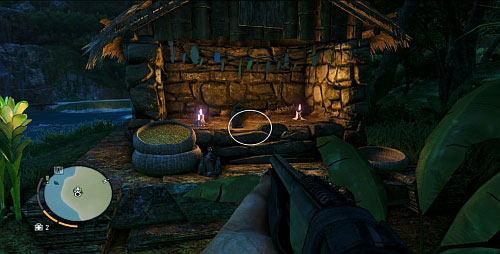
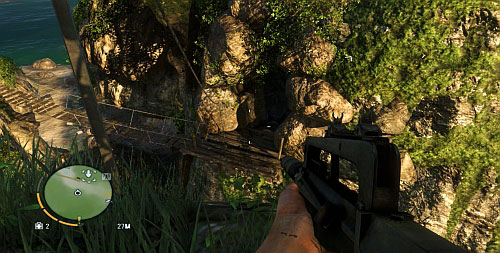
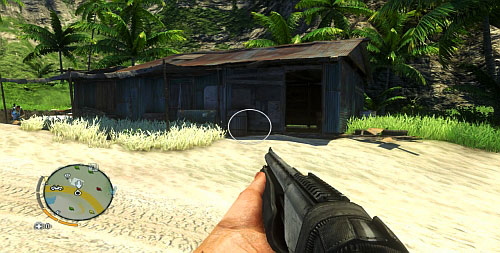
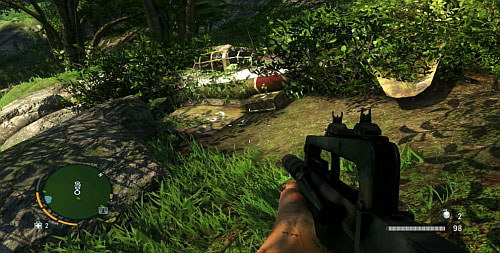
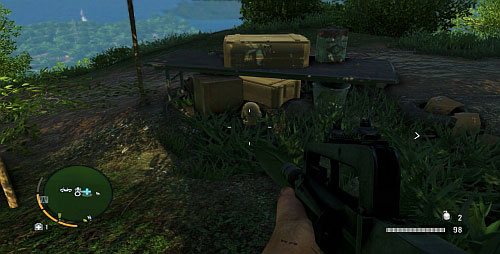
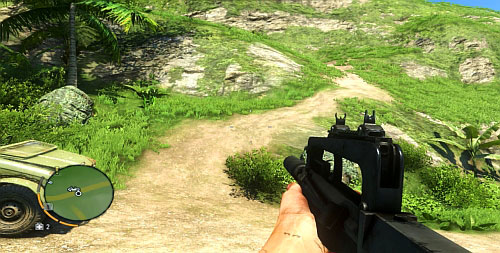
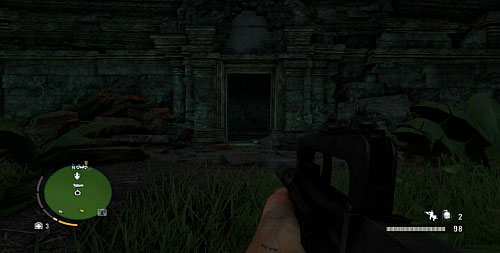
After you bust out of the cage, follow Grant. After you encounter the first enemies in the shack, duck and squeeze past on the left. As you follow Grant, you will pass under a building, go around dogs and further guards. Once inside the building, collect the items on the table.
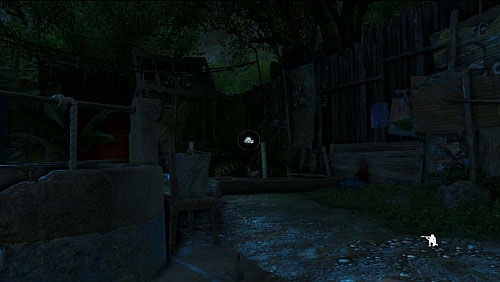
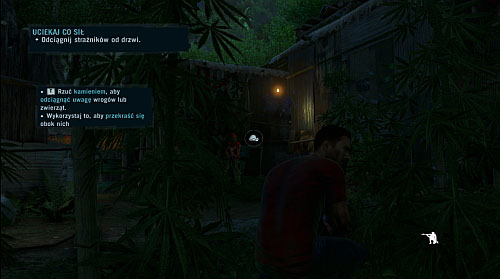
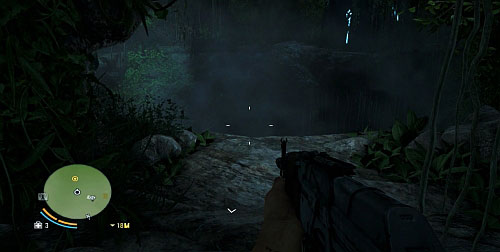
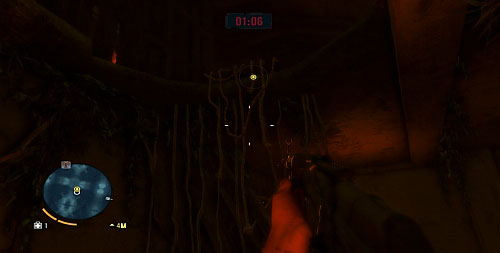
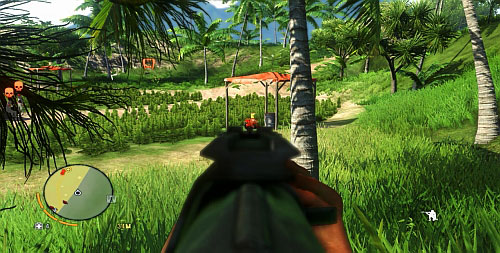
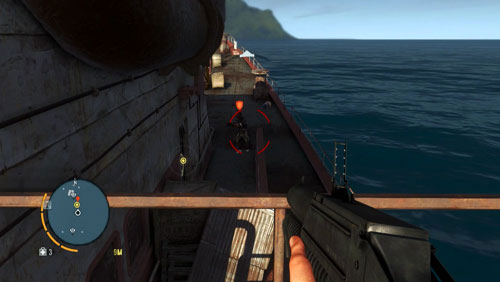
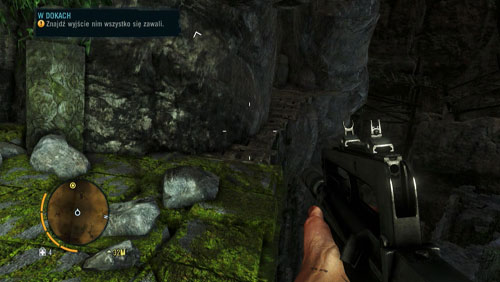
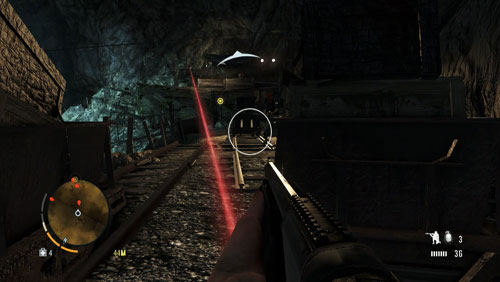
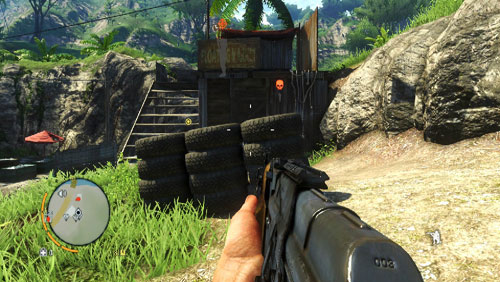
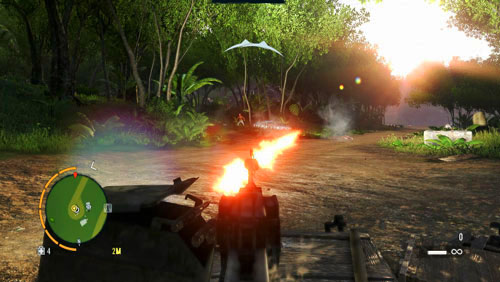
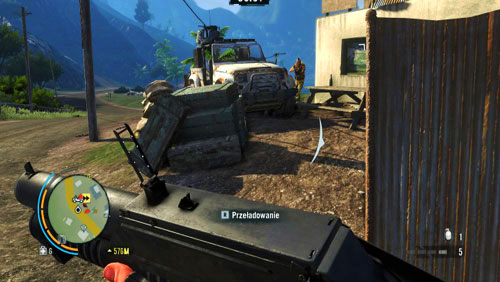
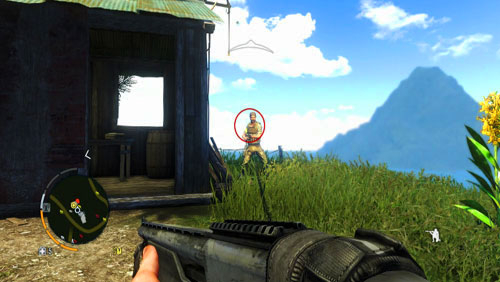
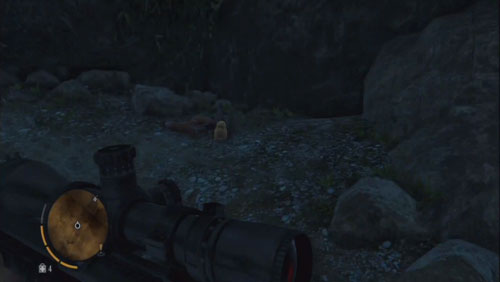
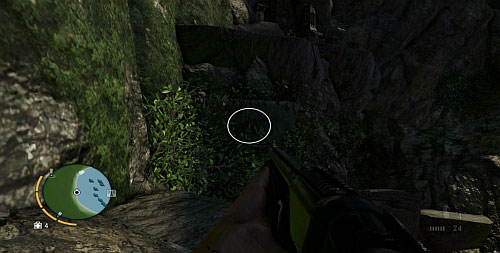
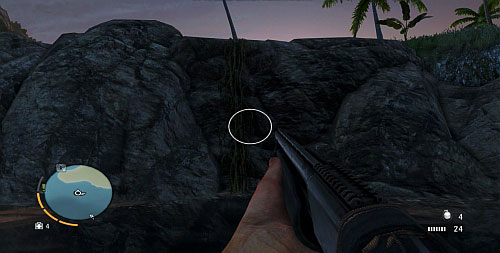
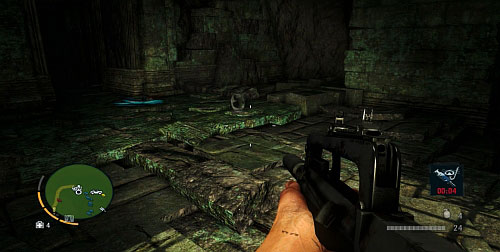
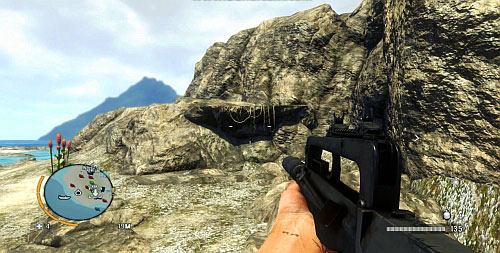
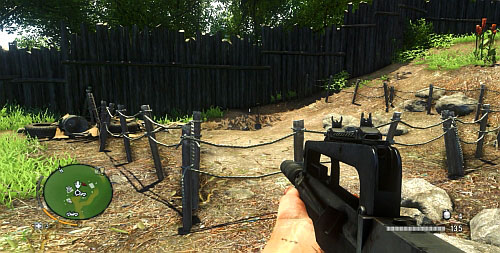
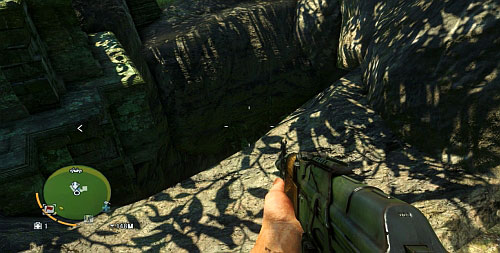
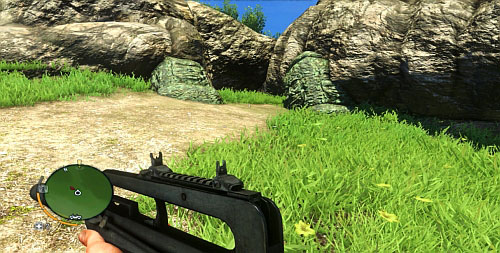
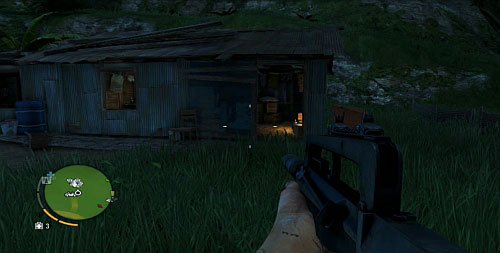
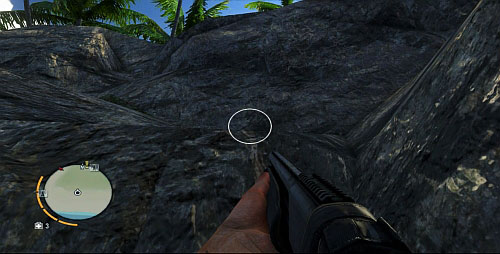
You will reach a spot where you need to toss a stone in the designated direction (the above screenshot), in order to distract the guard. Wait until Grant moves on and enter the shack. After you watch the cutscene, proceed into the encampment.
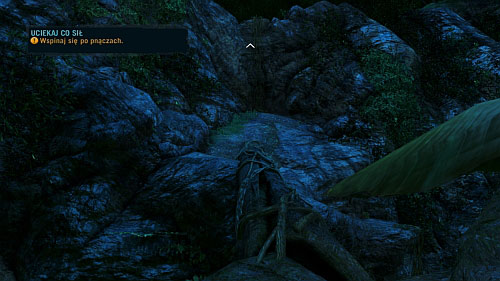
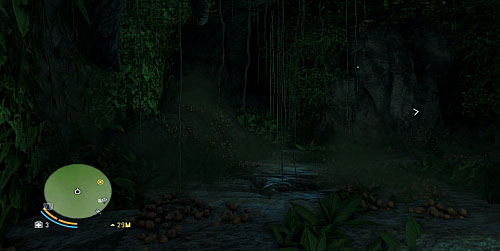
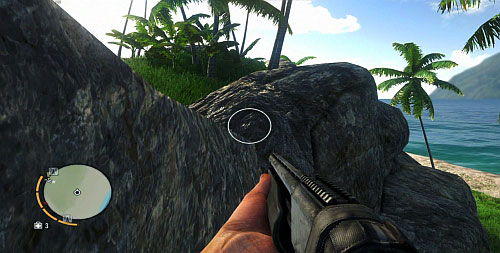
Follow Grant into the crop and toss a stone again, into the designated direction. Pass under the footbridge, and then through the hole under the building.
After the cutscene, press and hold down jump, in order to try and stanch bleeding. Run along the path towards the marker ahead. In the spot shown in the above screenshot, jump over to the other side.
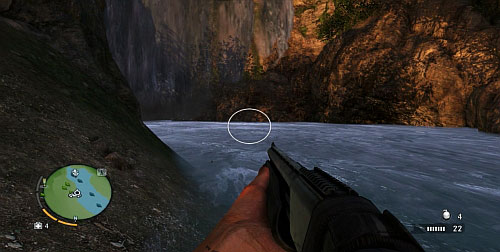
As you run towards the fallen tree that forms a makeshift bridge, watch out for the bear after you. If you stop for at least one moment, you die. At the other side of the gorge, climb up the vine.

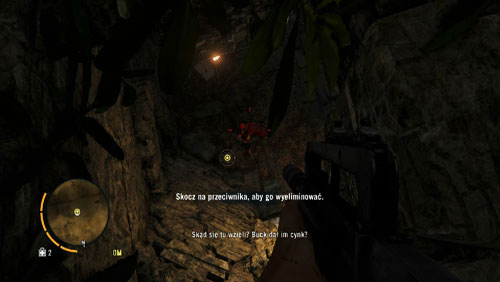
Squeeze through a narrow tunnel crouching. At the other end, you will be attacked by an enemy. Keep pressing jump quickly, in order to kill him. Next, try to reach the other side of the bridge.
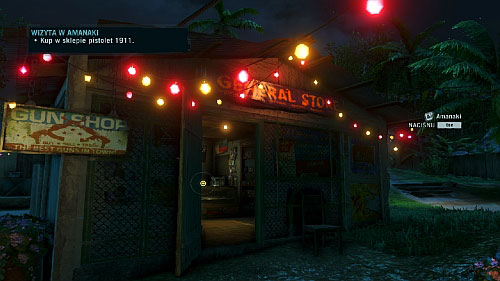
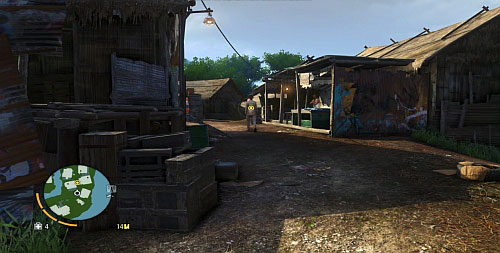
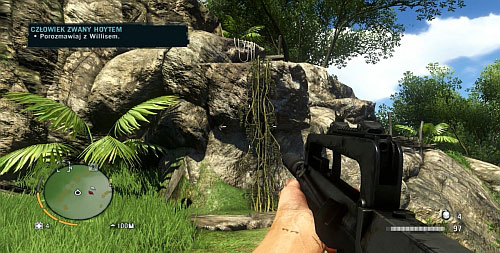
After you wake up, you will receive a knife, and after a moment's exploration of the village, you will also receive money for guns. Enter the General Store in front of you. Once inside, buy Colt 1911.
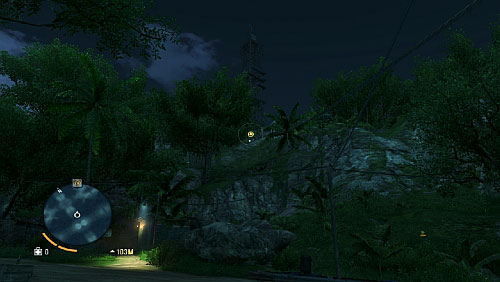
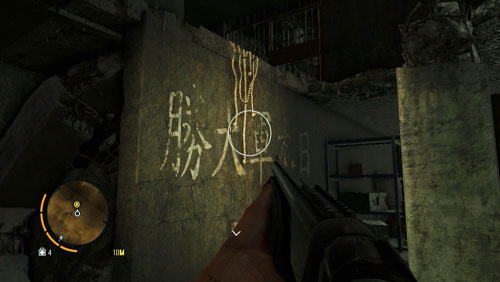
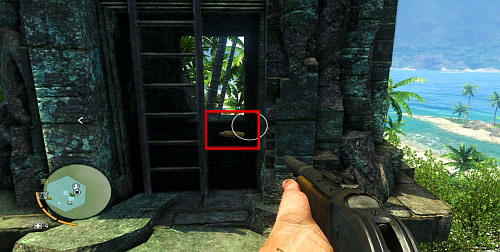
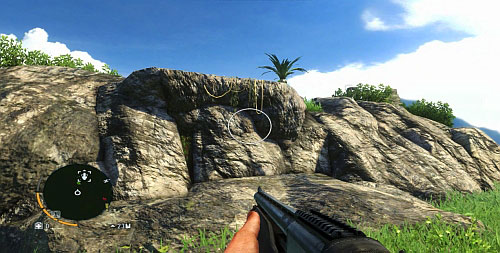
Equip your weapon and follow Dennis, to exit the village. At the other side of the road, you will find a path to the peak with the Radio Tower on it. Follow the path to the very top. You can access the mast through the hole in the fence, to the right.
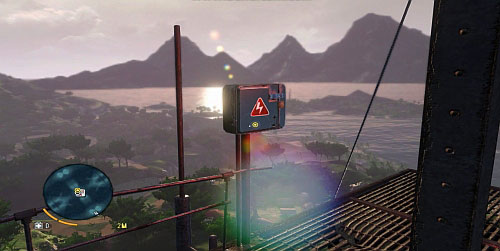
Right before you step on the stairs, kill a snake. To the left, there are two crates that you can examine. After you reach the top of the mast, destroy the coder device inside the box . To the right of the box, there is a zip line that you can use to get back down to Dennis.
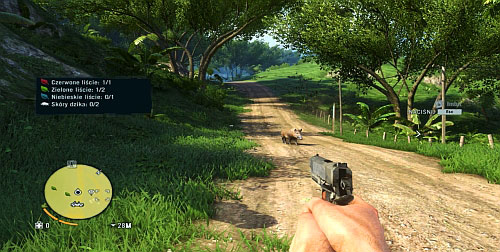
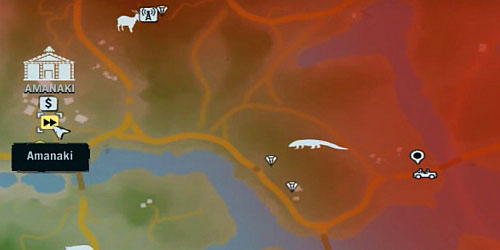
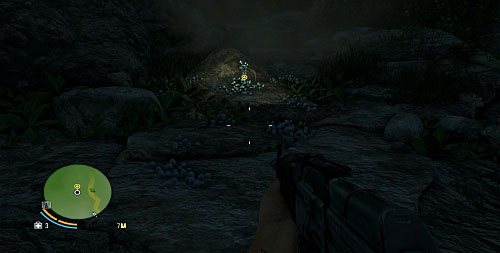
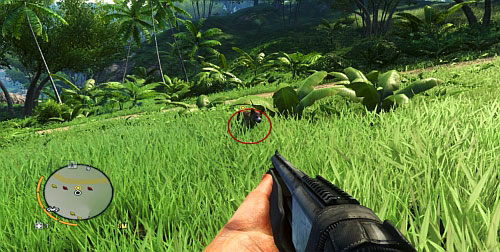
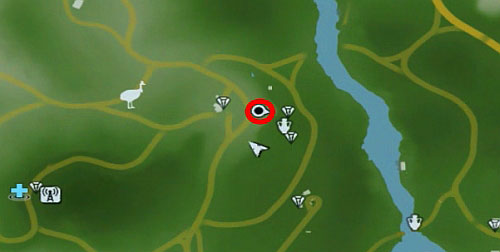
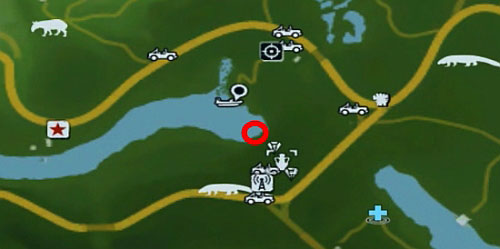
After you open the map, move your pointer over to the symbol of a boar on your map and set a landmark in this area. As you proceed to the right, you will find a car that you need to get on. Then, go towards the hunting place. Once there, look around for boars. If there aren't any, take your leave and return to the area. After you kill the animals, skin them.
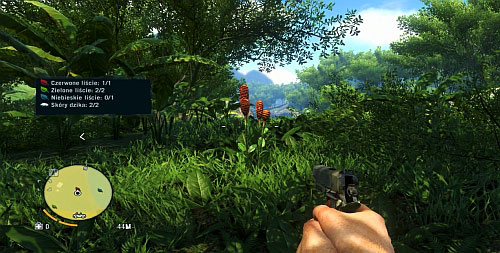
Apart from two boar hides, you also need to collect two green, a blue, and crimson plant. There should be quite a few of them displayed on your mini-map. The blue plants can be found nearby, in the river to the east.
After you collect all of the necessary ingredients, go to your map and choose the fast travel icon in order to move quickly back to the village. Once you are there, talk to Dennis, in order to prepare concoctions and a simple rucksack. When done, spend two of your skill points on "Elimination", and one of two other available skills.
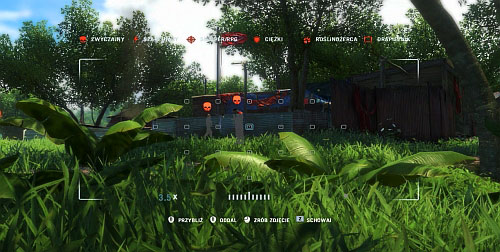
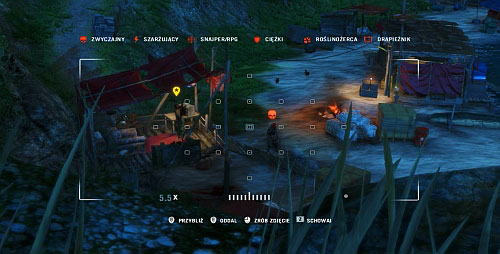
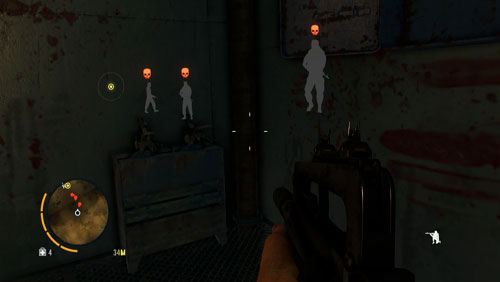
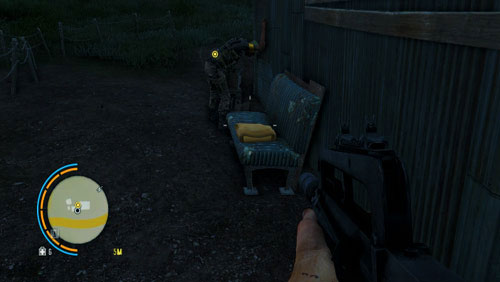
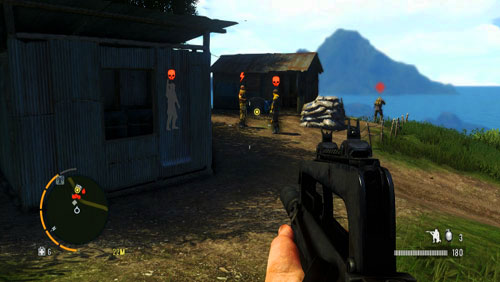
After you finish your phone call, get into the car with Dennis. When you reach your destination, go up the road. Change sides to the right and hide in plants. Approach the outpost as close as you can and use your camera, in order to mark the positions of as many enemies as you can.
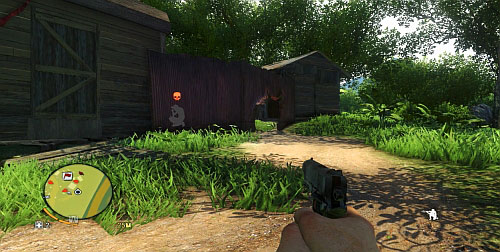
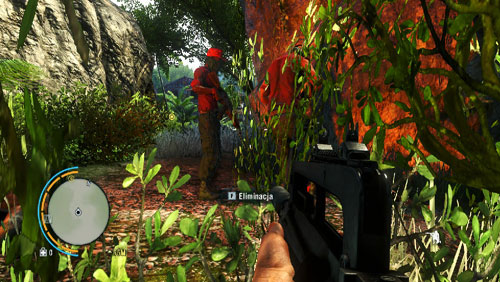
As you follow the fence to the right, you will find a hole. Right after you cross it, quietly kill the pirate, who should be cleaning his weapon here. Use the camera again and look around the area. Make sure that the area is not patrolled by a dog. To your left, there should be yet another enemy that can be taken out without alarming the remaining guards.
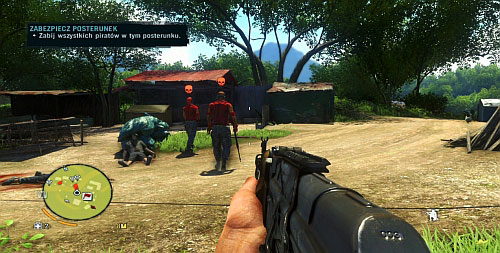
Wait now for the rest of the enemies to turn their backs at each other and try to take them out quietly, too. If you cause an alarm, Dennis will help you fighting, but you will have to mind his health bar at the top of the screen and make sure he doesn't die. Disposing of all of the pirates, is equal to securing the outpost, Enter the marked building to complete the mission.
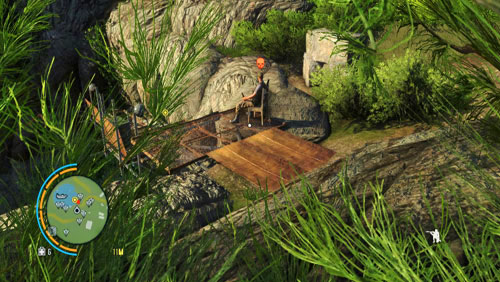
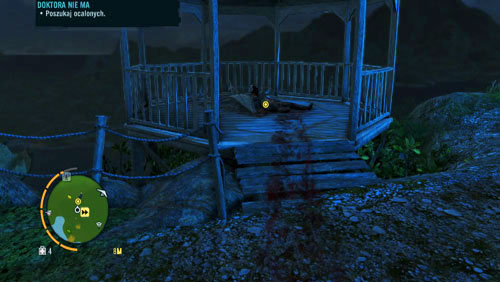
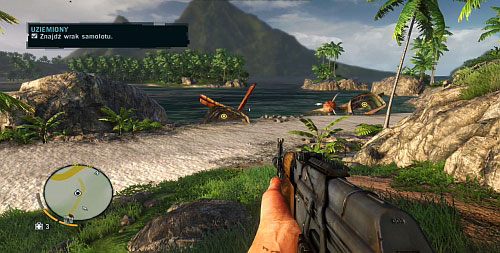
The path leading up to doctor Earnhardt's, can be found around the map coordinates X318, Y760 (use the "center map" option in the map window, so that the coordinates point to your position). When you are there, go to the first floor, where you can find Daisy. After you watch another cutscene, use the hang-glider behind the house, in order to reach quickly the area designated on the map.
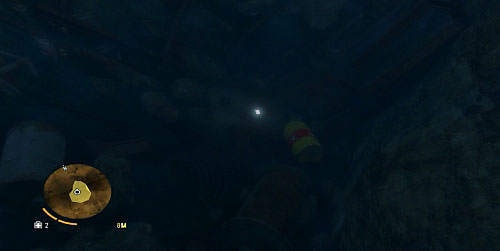
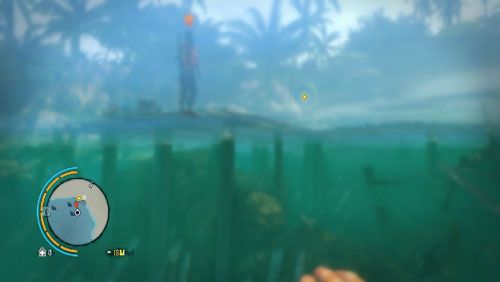
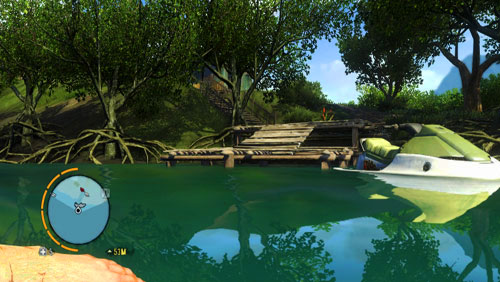
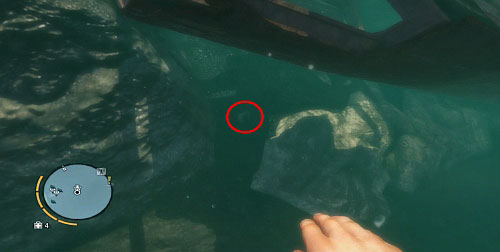
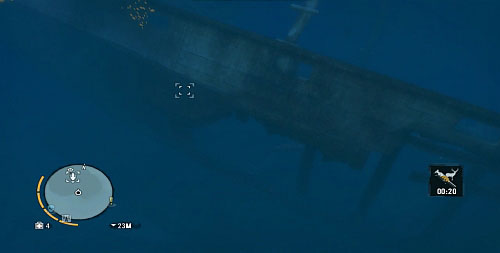
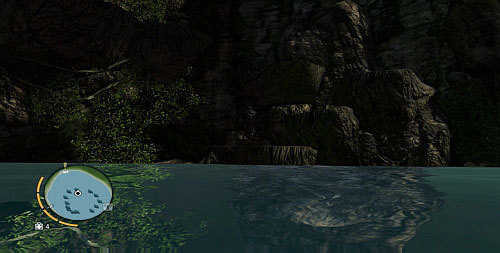
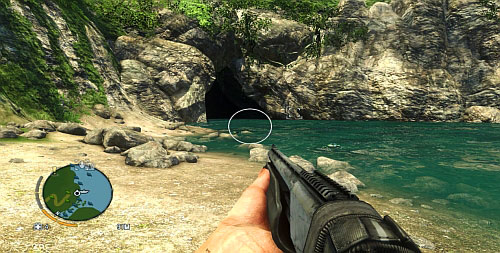
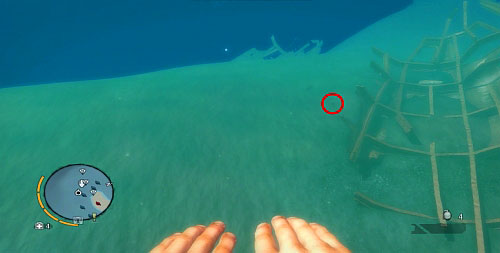
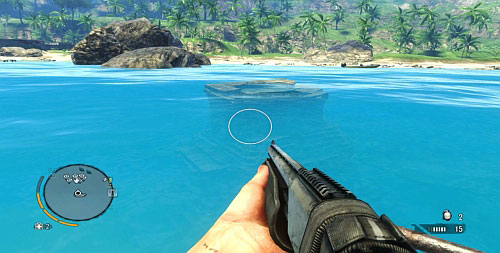
Drop into water in the marked area and enter the underwater tunnel. Get out of the water and follow the path. When you reach the cliff shown in the above screenshot, jump into water again.
Resurface and climb the vine up to the ledge. Use further vines to reach higher and higher. Finally, you will reach an area in which you will be intoxicated with mushroom fumes.
Once you start hallucinating, go forward. When you enter the greenhouse, wait for the door to the left to open. Finally, you will find the mushrooms that you are after, which you need to collect.
Exit the cave, take the passage to the right and start climbing up to reach the doctor's estate. After the cutscene, reenter the estate and talk to Daisy in order to complete this mission.
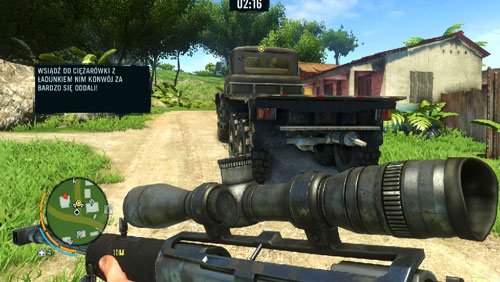
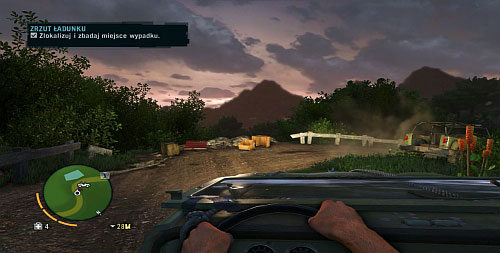
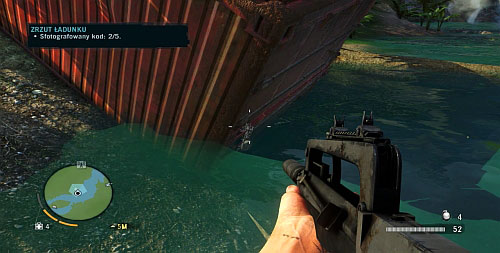
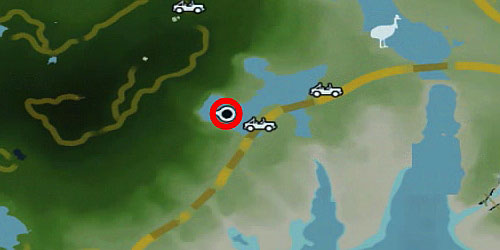
Drive down the beach to the designated area. After some time into the drive, you will come across rocks that will render further drive impossible. Right after you go underneath the rocky archway, you will encounter a pirate that can be easily taken out stealthily.
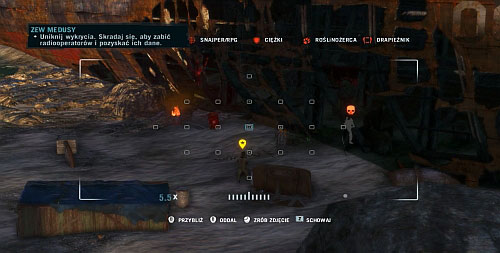
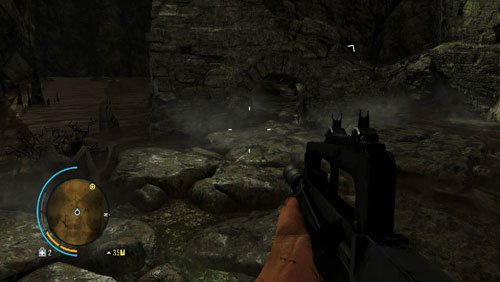
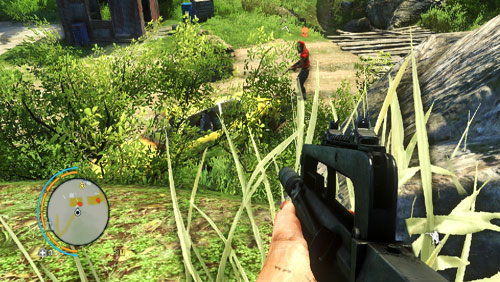
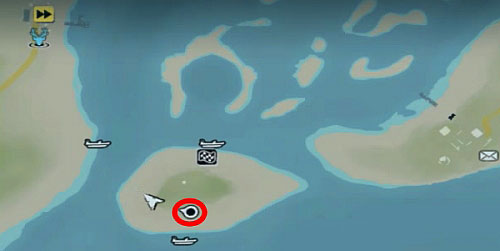
Walk over to the right side and climb a hillock, that overlooks the enemies below. Use your camera for reconnaissance. Your first objective is to obtain three keys from your enemies marked with stars (the above screenshot).
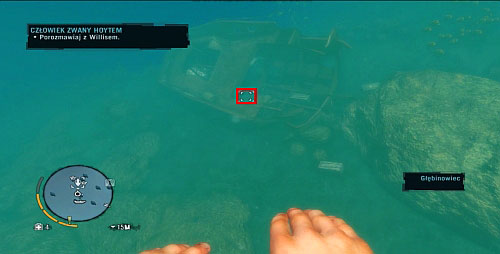
Get back down to the beach. Right next to the ship, there should be the first key owner. Wait for him to walk away, towards the ship. It is the best moment to kill him. From the corpse, collect the key. Inside the ship, there is yet another enemy, who shouldn't notice anything.
Your second target should be waiting at the other side of the shipwreck. Once again, wait for him to walk away from his company and kill him on the way back.
Go aboard the smaller shipwreck, from the side of the bow. Its rear side should be patrolled by one more target. Around, there may be one more guard. Wait for the target to enter the ship and kill him there, while paying attention to the other pirate.
With all three of the keys, go aboard the larger shipwreck and enter the room with the radio(inside, you can also find a flak jacket that will come in handy in just a moment). After you eavesdrop on the radio conversation, there will be reinforcements sent. Exit now and, from aboard the ship, kill all of the enemies on the beach, and the ones trying to go aboard. After you kill every single one of them, the mission will be completed.

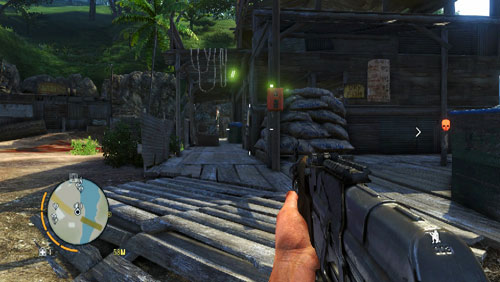
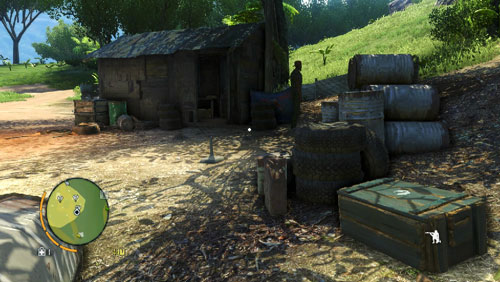
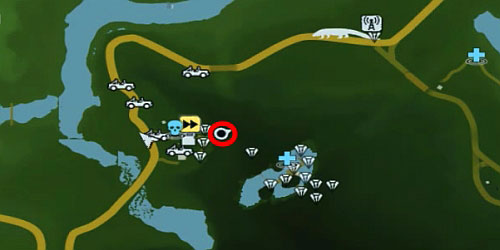
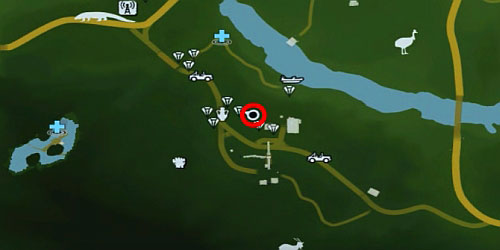
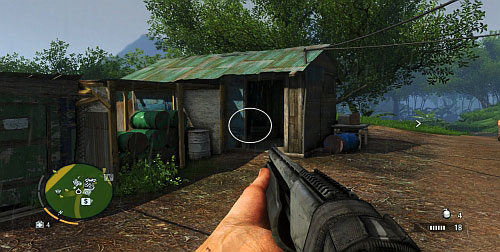
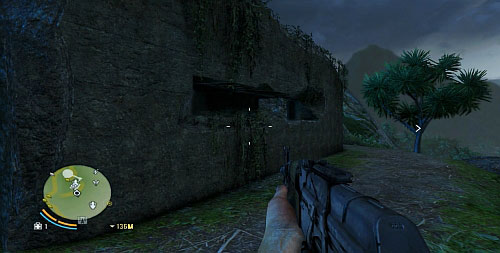
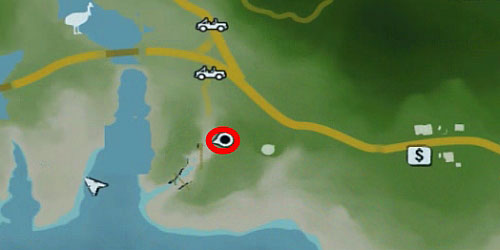
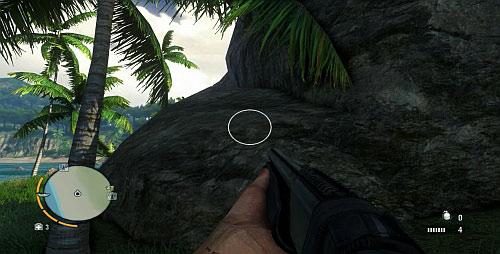
Return to Amanaki and talk to Dennis. You need to reach the Logging Camp, to the south-east of the village. Approach the comp from the west. To the left of the entrance, there is a building (the screenshot). Enter the building and go upstairs. This will give you a good position for using the camera and marking your enemies.
You need to reach the alarm box and neutralize it. You do not need to kill the pirates, unless they are facing the alarm box.
To the right, next to the alarm box, there is a cache of arms that is your next target. Enter the cache, replenish your ammo and plant the bomb in the designated spot. Now, you have fifteen seconds to run get as far away, from the explosion site, as possible. It's best to hide inside the building that you earlier observed your enemies from. Hide behind an obstacle or among plants. Soon after the explosion takes place, new reinforcements will arrive. That is why you'd better not stay out in the open. Now, you can take to killing the remaining pirates or leave the camp.
In order to reach the designated area quickly, you need to fast travel to doctor Earnhardt's place. Next to the estate, there is a hang-glider that you can use to reach your destination quickly. You need to be careful, though, and make sure that you aren't spotted or don't land too close.
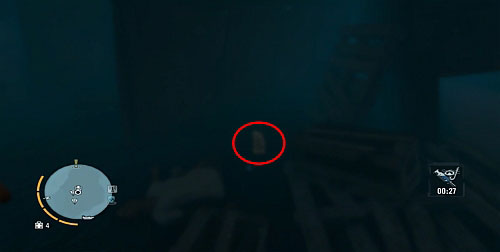
The cell key is held by the camp operator, who is marked with a star. In order to get lower, you can simply jump down in the area shown in the screenshot. You need, however, to be careful about guards underneath.
You can approach the operator's tower from the left. There is a makeshift podium there, which you can walk up to reach him and take him out quietly. The nearby guards Shouldn't notice anything. Collect the key from the corpse and go ahead.
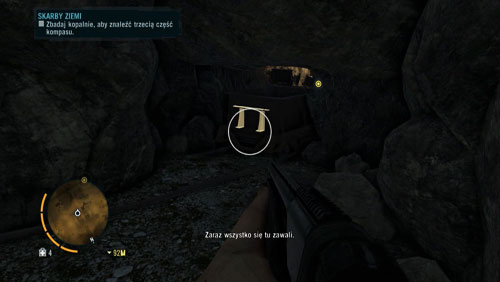
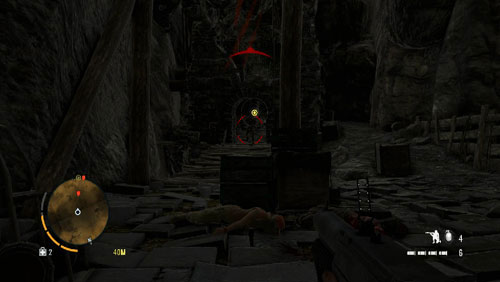
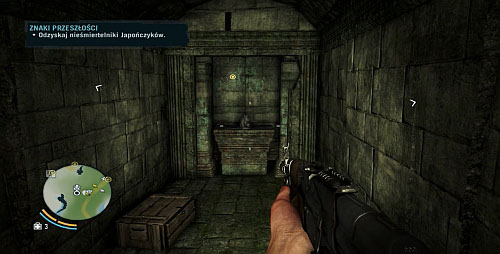
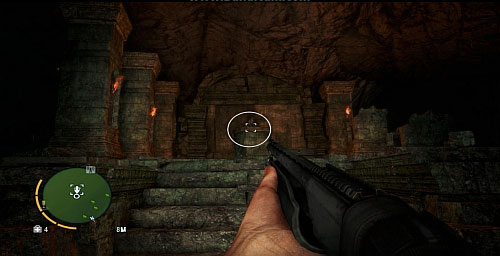
The way to the cell is well guarded. Before you take every step, you should look around carefully for any guards and eliminate them quietly. Another method is to sound the alarm purposefully and wait behind a cover at the entrance to the cave until the enemies come out.
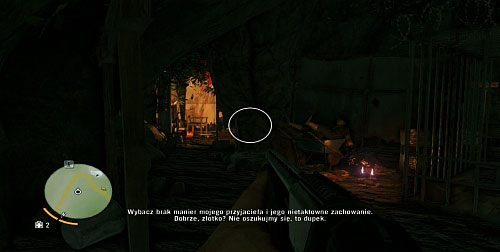
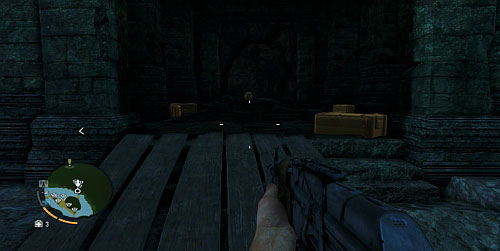
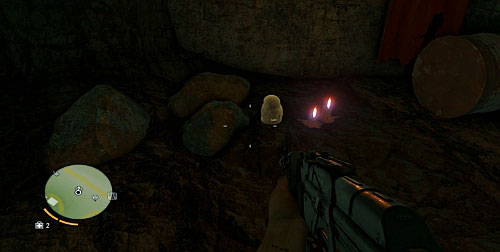
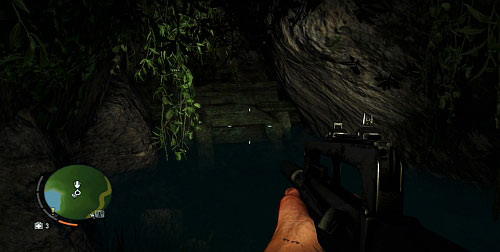
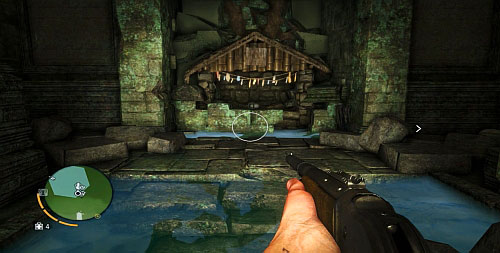
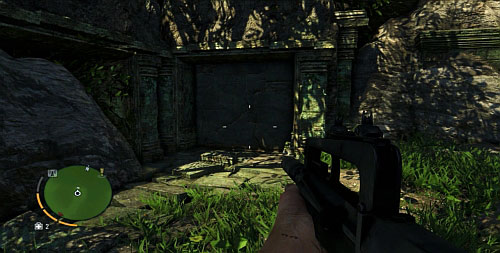
Open the or with the key and you will be standing in a cave with a projector. Go further into the tunnel (the screenshot), where you will be stunned.
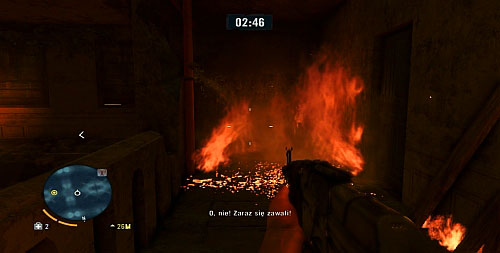
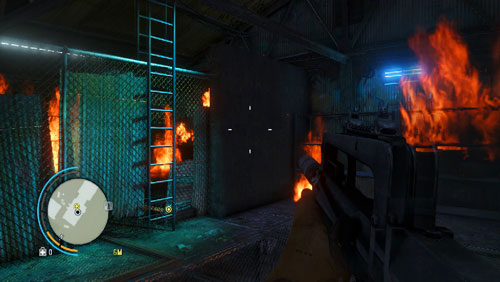
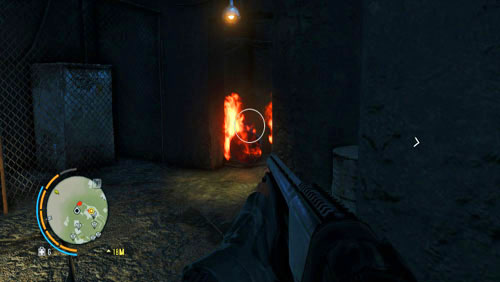
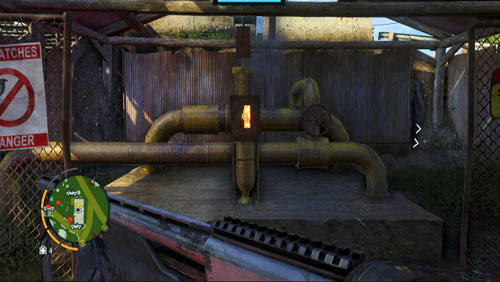
After the cutscene, you will have three minutes to reach your destination point. Climb the stairs to reach the balcony above. When you reach the door-case, approach the fire and wait for the pipe water to extinguish fire, which will allow you to go on.
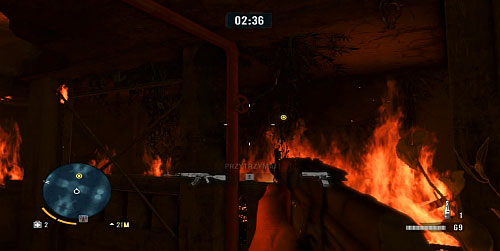
As you proceed, fire a shot at the pipe, shown in the screenshot, in order to proceed. Enter the room and use the ladder to reach a higher level. Then, walk over the plank to the next doorway, which needs to be smashed with a melee attack.
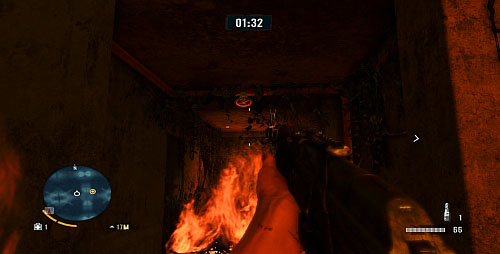
Walk through the narrow passage, by holding the right button, after you cross the doorway. Walk over the fallen pillar towards the passage. Fire a shot at the pipe attached to the ceiling and go on, along the corridor, into the passage to the right.
In the next room, keep to the left as you walk along the remains of the floor. Jump then onto the ropes hanging loosely, to climb up. Take the passage on the left which leads up to Liza.
After you watch the cutscene, keep pressing jump, in order to keep pushing the car. When the engine starts, you will jump into the car. From here, you need to start shooting at the pirates behind you.
After a while, the car will stop. Go forward and discharge your gun at the incoming pirates. Make use of the barrel at the rock to blow up several enemies. When the car moves again, you will have to shoot at the enemies that you pass. After a moment, the mission will be over.
The descent to the cave is located to the left of the garden house (in the picture there is Liza there). Go down the path to the cave under the house.
After you watch the cutscene, jump into water and dive in the area marked orange on your mini-map. The part that you are after can be found next to the source of light.
The head that you have found needs to be taken to Daisy, who can be found aboard the ship. After watching another cutscene, approach Liza near the fire. After you talk to her, leave the cave, which will finish the task.
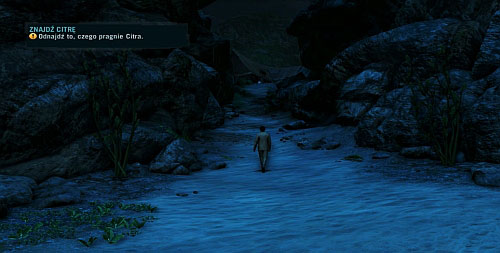
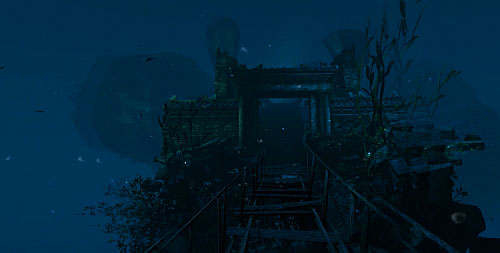
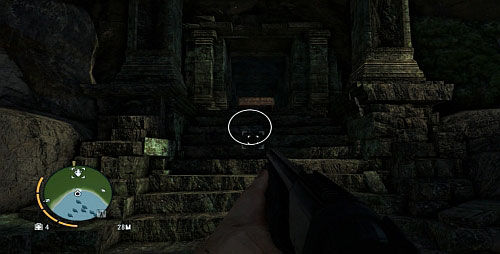
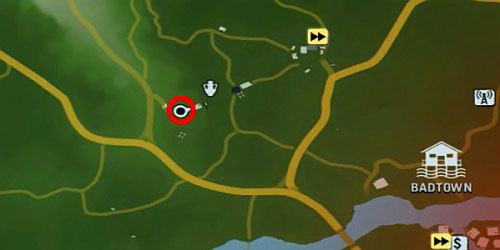
Make your way to the indicated area in front of the temple. When you come closer, you will be joined by Dennis. Follow him to meet Citra. After the cutscene, follow the man in white suit inside the bar.
In the next sequence, walk over the bridge and pick up the ancient dagger at the other side. After you see the cutscene, leave the temple to complete this mission.
Fast travel to Badtown, in order to save time. Once you are there, enter the city area and go to the marked bar. Inside sit at the table, wait for the game to finish, get up and leave.
Follow the man in white suit, but do not let yourself be seen. Each time, before he looks behind, the man will stop. It's a visible sign that you need to take cover. If you lose sight of your target, you will have 20 seconds to find him again.
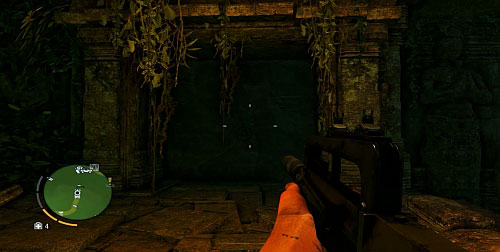
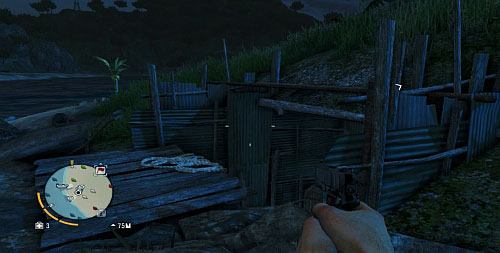
Finally, the man will enter the building shown in the screenshot, which will finish this mission.
Enter the designated house. After the conversation, the wall on the left will move and you will be able to go down to the basement.. After another conversation, collect the flame thrower from the table and additionally, equip yourself with the rocket launcher that will come in handy later on. Exit the house to make a phone call, during which you will talk to Dennis.
Reach the first marked area. Expect that you will encounter enemy patrols on your way to your destination. Do not go to the foot and, instead keep to the right side of the crops . This will allow you to shoot at the barrels that will explode and kill guards as a result (try to lure them into that area by tossing stones), and will burn up the crops, if you are lucky.
When you are at the further crops, you should also remain on the hillock to the right. On every one of the crops that need to be burned up, there are barrels, so try and shoot at them whenever there are as many guards around them as possible. Every next field will be protected with more guards than the previous one so, be prepared to put up a fight with the pirates, or escape from their sight in order to lose them.
After you burn up five plantations, your next target is the boat in the fishermen's village. I recommend that you go into water and swim underwater, as close as you can, to the target.
As soon as you enter the pier, the boat will take its leave. Quickly, equip the rocket launcher, mentioned at the beginning of this mission, or the flame thrower, and destroy the boat. Now, jump back into water and dive to avoid fight with the guards on the shore. Swim away into safety and fast travel back to Badtown.
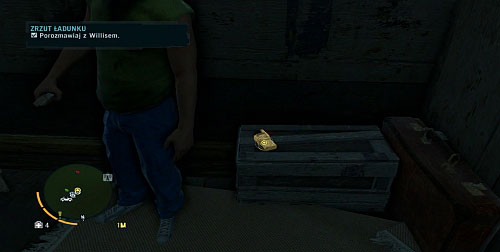
While in Badtown, go to agent Willis' house, where you need to go to the basement to talk to him. Go towards the marked area in the north. It is best if you approach it from the west. Once you enter the area that is "oranged out" on your mini-map, you mustn't be spotted. Enter the marked house. Staying inside, you will witness execution of villagers.
Leave the house and eliminate two guards, any way you want.
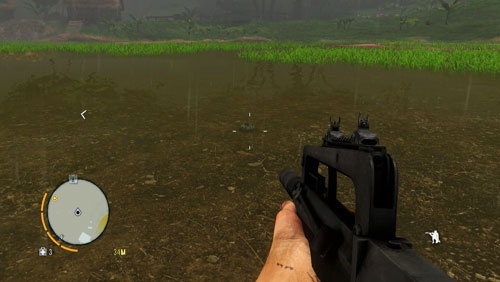
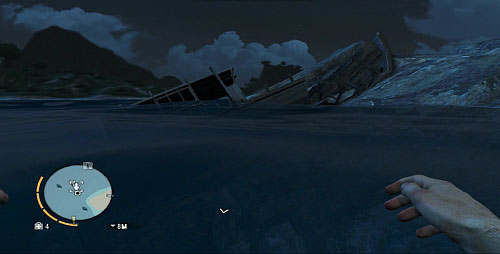
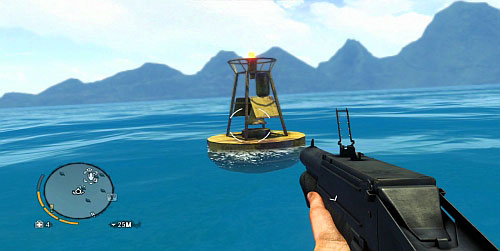
Now you need to cross a minefield. You can easily discern them in the water (the screenshot). You will also hear a characteristic sound once you get near them. Keep a safe distance and speed, because the mines can also explode when passed at a larger distance.
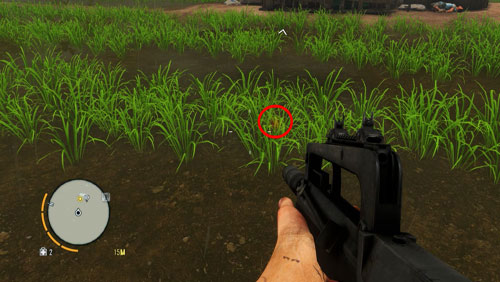
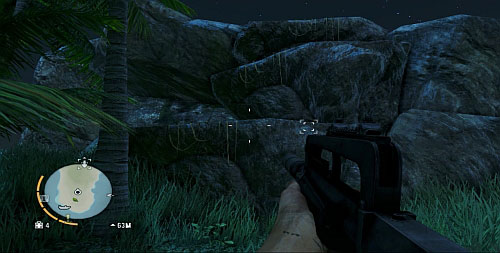
The problem starts when you enter the area overgrown with grass. You can now get up and watch for a blinking light of the mine (the crosshair in the screenshot), but you should focus now on listening to how far away from the mine you are.
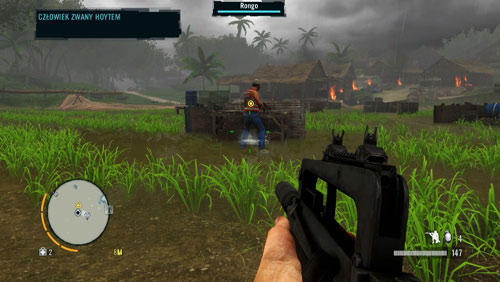
When you find Rongo and free him, follow him closely, while killing pirates. The mines are all over the field, and the agent can deliver you to the other side safely.
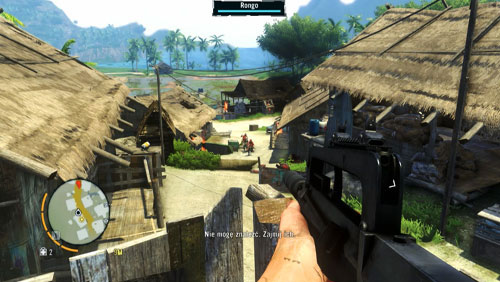
Keep eliminating your enemies until you reach the designated house. At this moment you will have to start protecting Rongo who will be busy searching the area for documents. The first wave of your enemies will approach from the direction of the field that you earlier had to cross yourself.
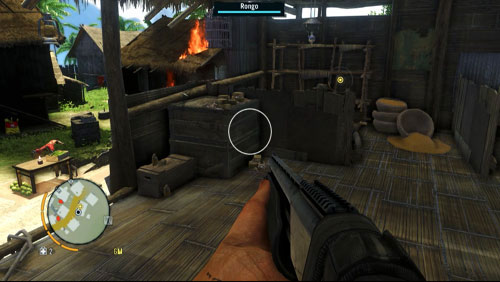
Inside the house, on the crate, (the screenshot) there is quite a lot of ammo, in case you need it. Every wave of the pirates will be marked on your mini-map, thanks to which you will know which direction they are coming from. After you kill the last one of your enemies, Rongo will finally succeed finding the documents. Approach him to complete this mission.
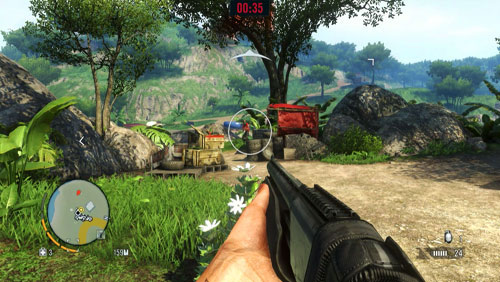
You must, absolutely, reach the marked area by car. Once you approach the area in which you are to take the quest, you will only have one minute and forty seconds to reach the marked area to the south-east. Ignore the enemies on the way and go directly towards your destination point. After you reach the village, where Oliver is being held captive, get out of your car and take a walk through the passageway shown in the screenshot.
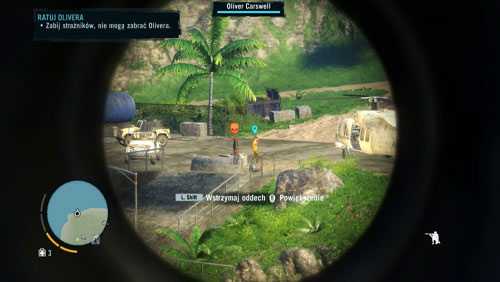
After you watch to the cutscene, on the scarp, you will be automatically equipped with sniper rifle. First, you need to snipe down the guard that is escorting Oliver to the chopper (it is not necessary that you are accurate).
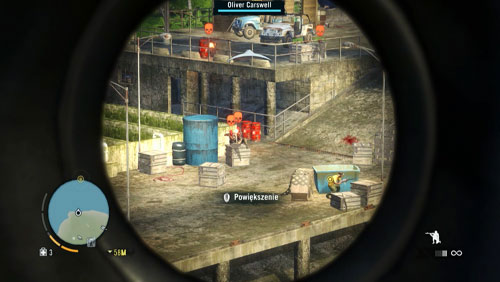
Then, you need to cover him by killing the enemies that are after him. You can make use of explosive barrels, to get rid of multiple enemies with a single shot.

When Oliver reaches the boat, jump into water and mount the turret. Shoot at other boats and cars that chase you along the road. At some point, you will also have to destroy the chopper. When there are no more enemy vehicles left, the mission completes.
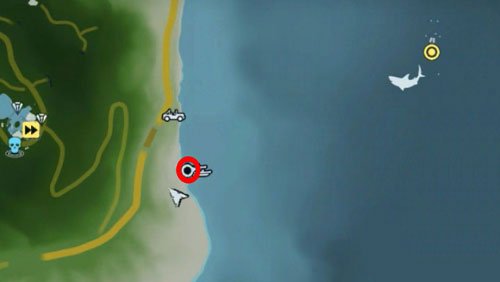
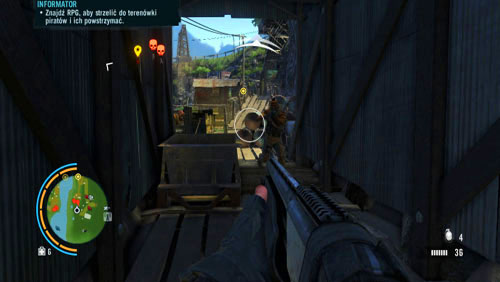
Exit the cave after you see the cutscene. After the phone talk fast travel to Badtown. Once there, go to the bar, where you will meet Buck. Leave the bar and make your way to the eastern shore - it's best to use the pier to do that. There you will find a jet ski that you need to take to approach the ship (don't get too close) that is your current objective.
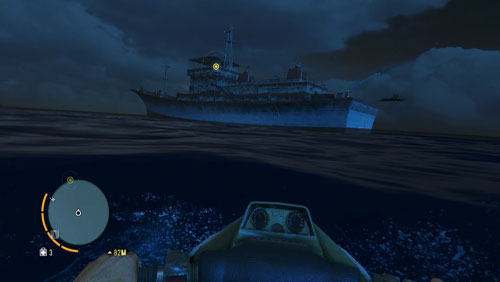
When you come close enough, make sure that there are no sharks in the water and cover the rest of the distance by swimming /diving, so that you are not noticed by your enemies onboard. To go aboard, you need to take the ladder on the ship's left side (in relation to the ship's stern).
There are quite a few enemies onboard. You can try and avoid encounters with them, or eliminate them quietly. If you have decided on killing them out, remember that there is an armored enemy out there and, as yet, you cannot kill him using Takedown.
After you enter, right behind the door, there will be the first one of the pirates waiting. Kill him without raising the alarm.
Further on, there will be another two waiting. Lure one of them away, by tossing a stone, so that you can kill him out of the other guard's sight.
Kill the other guard whenever it is convenient and neutralize the alarm on the wall. Climb down the stairs and go through the door.
Right to your right, there will be another enemy. Wait for him to look away from the door that you entered through and kill him quietly. Go on and kill another enemy in the very same room. Go through next door, and lure the pirate away by tossing a stone, out of his comrades' sight. Dispose of the rest of the enemies in the same way.
Open the massive door, behind which there is the armored enemy standing, with his back at the door. Shoot him on the nape of his neck to get rid of him quickly. Use the laptop computer on the desk.
Swim towards the designated area, and use glowing oxygen tanks on your way, to replenish your oxygen supply. Swim through the passageway and take a turn to the left, and then, to the right at the end of the corridor. You will be now a able to get up on the part of the deck that's above the surface of the water. As you pass through consecutive rooms, you will, eventually reach, a door which you need to open.
The room will be flooded with water, as a result. Swim through the opened door and try to get lower through the passageway to the left. You will be attacked by a pirate. Press the sequence of jump, crouch, use, to get rid of him.
Swim into the corridor behind the pirate's corpse, where you will find another oxygen tank that you need to use. Further on, swim over to the right side and take the corridors on.
You will, eventually reach a room with a tank, and a window that needs to be smashed. Once you do it, you will be able to get outside, which will complete this mission.
After you've talked to Buck, enter the bunker. Inside, you will find ropes hanging loose down the wall, which you can use to climb higher.
Once on the top, go a bit to the left, and then right, where you will be able to jump over a large hole. Climb down the decrepit stairs to your right, and jump down. Swim through the tunnel behind the destroyed grate. You will finally reach an area patrolled by several pirates. I recommend that you now go ashore and get into a fight. After you kill out all of your enemies, pass through the tunnel on the left.
You will reach a cave that is guarded by further enemies. Switch sides to the right, where there, atop the elevation, is an enemy to kill quietly. At the cave's other end, there is a pirate at the stationary cannon that you need to kill. You can try and kill the guards at the detonator, and blow up the entrance, and the abovementioned guard, You can also go for a safer method, and trigger the fight by killing the gunner first.
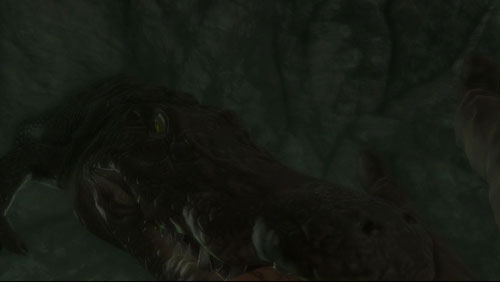
Whatever you decide to do, blow up the rocks that block off the passage out and pass through the door. At the end of the path, you will have to jump into water. Get ready to put up a fight with a crocodile in QTE. Swim underwater over to the other side and get out of water..
Open the door and jump into the water again. Swim over to the left side of the room, and get out of water. If you try to jump over the hole in the ground, you will fall down.
Resurface now, and enter the room with doors on both sides. First, enter through the ones to the right. Smash the glowing supporting elements, in order to flood the room. Leave, underwater now, for the previous room and take the door on the left. When it jams, resurface and swim above the jammed door.
Smash another three supporting elements. Once the room is flooded, resurface and mount the wooden structure and pass over it to the other side.. Jump back into water and return to the central area. Water level is high enough now, for you to get out of water.
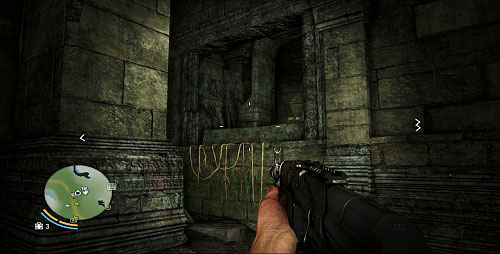
You will reach an area with an altar in its central part. Collect from it another part of the compass. Walk over to the left side of the area, where there is a narrow wooden passage (the screenshot), which you need to take, and press the button on your way.

Enter a narrow passage to get out of the cave and complete the mission.
Get to the entrance to the mines, where there is Buck waiting for you. Talk to him and go along the tunnel to its very end. To your left, there is an elevator that you need to take. Once downstairs, push the wagons over and kill the pirate, further on, when he turns away from you.
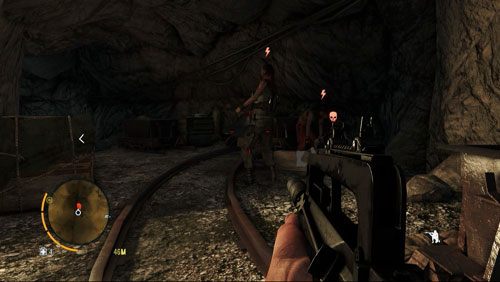
A bit further, there will be another enemy waiting for you. Then, wait for a whole group of enemies get near you and use the Chained Takedown skill to get rid of all of them without raising the alarm.
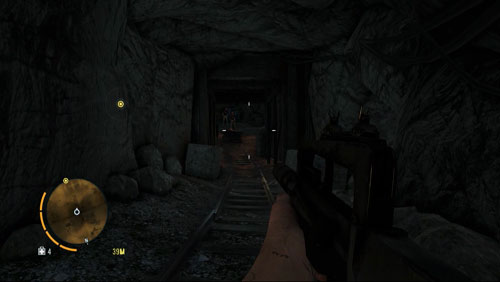
Then, push the wagon, filled with explosives, towards the pirates below. Take cover somewhere and kill out all remnants.
Go straight ahead to reach a cave. There is a group of enemies here, including two snipers. In order to hide from their bullets, push over wagon after wagon, while getting closer and closer to them. Also, watch out for pirates on your left.

Cross the bridge and kill out the remaining enemies, including an armored one. Further, discharge your gun at the wooden reinforcements to be able to collapse the ceiling onto your enemies. This will enable you to kill another sniper that is hiding behind a cover.
As you go forward, you will reach a door that can only be opened using the compass. Go through the tunnel and kill the monitor lizard. Use the mechanism in the ground to uncover a secret passage, and take it. As you go down, kill another monitor lizard. Keep jumping over from a ledge onto another.
Kill the monitor lizard and follow the path to reach an antique elevator. When you manage to crawl from under the remains of the elevator, take the path, while watching out for the snake. Jump over to the wooden platform and follow it to reach the temple. Kill the monitor and collect another part of the compass, from the altar.
The temple will, then, start to collapse. Take the stairs to the right to run. Keep running along the rocky ledge, until you reach the area shown in the screenshot, where you need to jump over to the other side. As you run on, you will, automatically, jump over a hole in the ground and get out of the cave.
Reach the marked area, where there will be Buck waiting for you. After you have talked to him, jump down the cliff into water. Get out of water on the left/western bank and climb the vine shown in the screenshot. This will take you to the cave that you need to enter.
After a moment's stroll, you will notice an ancient door to your left. Pass through the door and go along the tunnel, until you reach a wall with the vine hanging down from it. On the top, you will notice a pirate through the hole in the ground. If you have the Death from Above skill available jumping onto the enemy will do the trick.
Below, there are two other pirates. The Chained Execution skill will prove very useful here. The area further on is being patrolled by a dog and an armored enemy. I recommend that you start an open fight here.
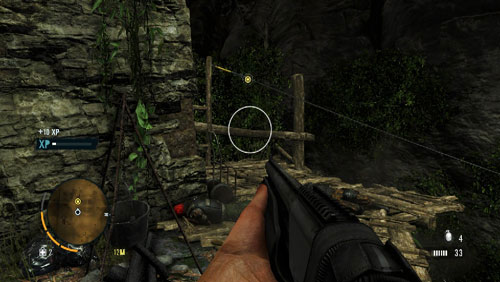
After you dispose of all of your enemies, enter the area next to the zip line (the screenshot) and collect the flak jacket from the crate.
At the end of the zip line, there will be, most probably, a pirate waiting for you. To kill him, you need to jump onto him. Now, you will be up for another fight. Find a cover and kill all of the enemies.
Get to the very bottom of the caves, by means of zip lines. After you zip for the last time, you will notice a torrent of acid to your right. Get down there on the wooden platforms shown in the screenshot. Down below, there are further pirates.
Keep to the right of the cave as you descend. You will, eventually, reach an area, in which acid will be squirting from between rocks (the screenshot). You need to pass when all of acid falls down onto the ground. That is where you will encounter another group of enemies.
Reach the end of the cave and make sure that you do not step into acid on your way. You will encounter further enemies there. After you kill every last of them, climb up to reach the stairs that the enemies used to stand on, using the vines on the wall (the screenshot). Once on the top, climb the stairs to find another ancient door, which you can open using the compass.
Reach the end of the path and jump onto the wall where there are vines hanging down. Jump down and go right over the wooden scaffolding. When you reach the very bottom, watch out for the sulfur fumes shown in the screenshot. Move over the surrounding elements of the environment that are elevated a bit, after the fumes fall for some time.
Eventually, you will reach vines that you need to use to climb higher. Then, jump onto the ledge and go towards the stairs . Use the compass on the statue shown in the screenshot. This way, you will open a descent. As you go down, keep killing monitors.
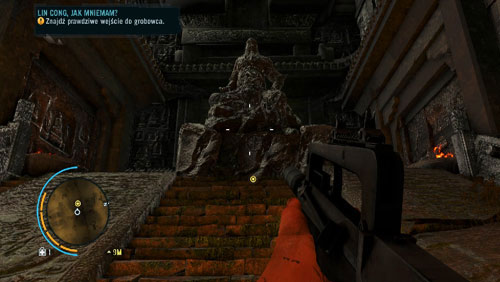
Once you collect the knife in the tomb, start running towards the marked exit. Crouch, enter underneath the lowering ceiling and start pressing the correct keys to crawl over to the other side. This way, you will leave the tomb and complete this quest.
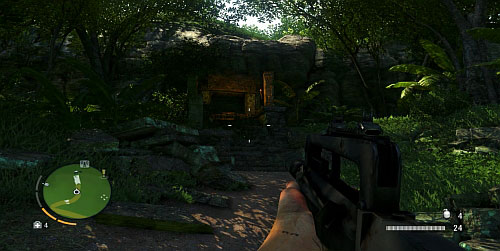
Fast travel to Badtown. Then, go to the southern part of the area, where you will find a path leading up to Buck's place (the screenshot).
Enter the house. After the conversation, you will find Keith. Then, you are up for a fight with Buck as a QTE. Press aim, shoot, shoot and then, keep pressing jump quickly, and then up. After you win the fight, you will be transported over to the cave, where there are the rest of your friends hiding. After the conversation, the mission will conclude. Leave the cave now.
Fast travel now to get near the Citra's Temple. Enter the temple and approach Dennis who is standing to the right. After you listen to the legend, leave to finish this mission.
Go towards the marked area and enter the church to talk to the Rakyat leader. He will give you C4 explosives that you need to plant on the tank. Then, climb the water tower before the allotted time passes. There, you will find a sniper rifle that you need to use.
Start killing soldiers below. Also, get prepared for reinforcements that will arrive, right after you kill some of your enemies.
When you manage to kill most of the soldiers descend from the water tower and enter the truck in the left part of the village, shown in the screenshot. Because your time is limited, try and steer around the enemies that are still alive.
Drive out of the village, and towards the marker (turn left on the crossroads with the blockade). Try and steer around the cars going for a head-on collision. The truck you are after won't make it far. Once you find it, kill out all of the soldiers that guard it and open the back door. This will complete the mission.
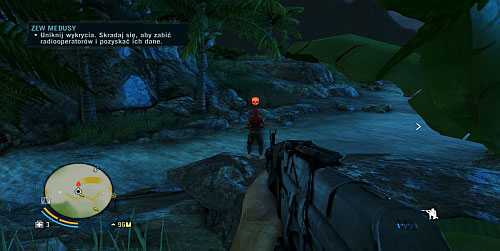
Once you are dumped into water, keep pressing jump, in order to set yourself free. Resurface now, and swim towards the waterfall. Right at the other side, there is a pirate, that you need to kill quietly, and collect his weapon. A bit further, there are two enemies, who also need to be taken out quietly, and their weapon collected.
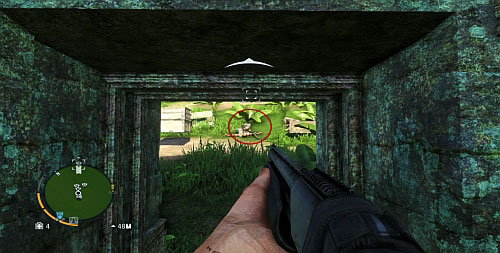
Walk over to the right and climb the slope. This place is an excellent vantage point overlooking the village. Jump down to the right into the plants. Make sure that you are not spotted/heard by the guard patrolling the area (marked with a skull in the screenshot). Wait for the enemy, marked in the screenshot, to go past you and take him out when you are not seen.
Remain in the bushes and go right, towards the sniper. Wait for the right moment to kill him and collect his weapon.
Opposite this building, there is an alarm trigger that is best neutralized.
Cross the river. You will notice the chopper guarded by snipers and an armored enemy. I recommend that you ignore the enemies and run headlong to the chopper. If you manage to reach close enough, the mission will be accomplished.
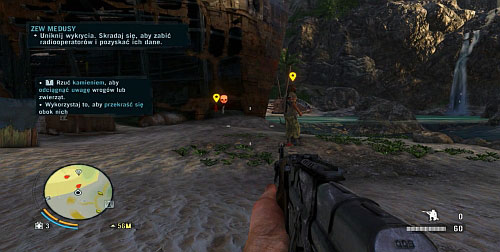
Press, and hold, the correct keys to get out of the pauper's grave. Go towards the marked village. Walk over to its right side and hide in plants. Lure one of the enemies towards you, by tossing a stone, and kill him when he comes close enough. Work the same trick with the other pirate. Enter the house shown in the screenshot (behind the enemy) and collect the flak jacket, and mines.
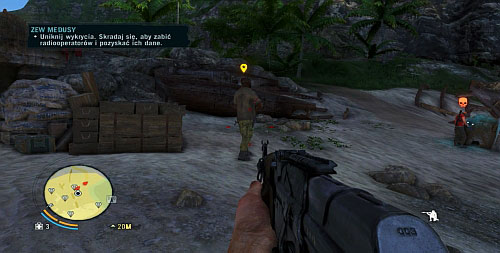
Enter the village and go to the house shown in the screenshot. Do not worry about the civilian to the right. Once inside, collect a first-aid kit and a C4 explosive. Kill the remaining enemies in this part of the village, without causing alarm.
Go now to the north-western part of the village, where there is an armored enemy standing in front of a house, and dogs. Walk around the house keeping a safe distance and get at its back. That's where you will find a ladder onto the building's roof.
Once on the rooftop, toss a stone to make the enemy take a few steps forward . Toss a C4 explosive to his feet and detonate it. If you are lucky enough, the explosion will also kill all of the dogs. Otherwise, try and kill them with mines. Enter the house to find your equipment whole in the locker.
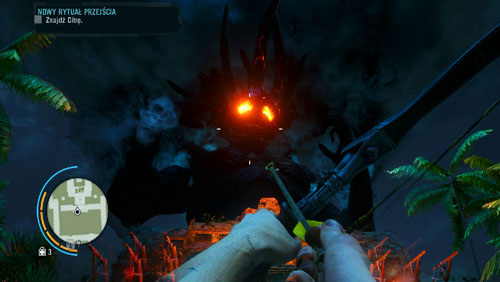
Before you start this mission, prepare a whole lot of healing syringes. Fast travel to Citra's temple and enter. Walk over to the rear part of the temple where you will find Citra. After you drink the potion, you will start hallucinating. The passage up the temple will be blocked off, and a large, black demon will appear above it. Discharge your bow at its head. When the demon bends down, escape back and to the sides while attempting to shoot at its face . Remember that you can heal yourself.
After a few accurate shots, the demon will disappear, and behind your back, enemies will start to appear. Be careful while shooting at them, and don't get wounded during the explosion.
When the demon appears again, continue shooting at its head, and avoid the "orbs" coming your way, shown in the screenshot. As soon as the demon takes a swing with its arm to toss them, start escaping to the sides. When you are not dodging, shoot your bow at the demon .
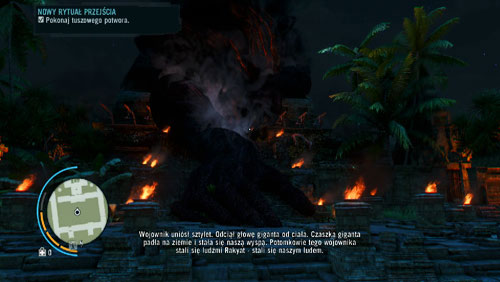
When the demon falls, climb over its arm. Halfway up the arm, press jump, and keep pressing rapidly the jump button afterwards..
This is the moment at which you gain access to a few new skills. Invest your points into Heavy Beatdown and additional health. Approach the cliff and jump down into water. Swim over to the other island. When you start to approach the enemy on the pier, dive to stay out of his sight. When you are close enough, kill him (the Death from Below skill).
Go out of water and go slowly towards the marked area. You will reach two guards that you need to take down with Chained Takedown. It is necessary that you remain out of anybody's sight while performing it.
As you go on, you will notice another enemy with a pack of dogs and a guard on the tower to the right. Ignore them and go left.
When you reach the area shown in the screenshot, toss a stone to lure the enemy off the wooden bridge and kill him.
Jump onto the ropes that hang loose, and climb up to get higher. When you climb up the stairs, everything will go aflame. Dash into the next room, jump through the window and turn left in the area where there is a cage with a tiger. Once there, you will find a ladder that you need to climb.
Hide behind the cover and kill as many enemies below as possible. You cannot, however, stay on the roof for too long, because, eventually, flames will reach here too .
Take the zip line to get down (the screenshot) and kill out the remaining enemies, including the one operating the mounted machinegun on the car. There are also tiger cages here, which you can smash if you want to.
Approach the bay door, through which several more enemies will come. One of them will be heavily armored. With Heavy Beatdown available, get out of the enemies' sight and get the armored enemy from behind to eliminate him.
Once you enter the hangar and pass the door, you will start hallucinating again. Go straight ahead over the TV sets. Climb the stairs where there you will find Vaas. Shoot, in order to pull the trigger.
Go straight ahead and eliminate further hallucinations. You may also try and dash ahead to avoid the enemies. You will reach an area where there is Vaas standing. Press melee attack, to kill him.
After the cutscene, leave the temple. Once outside fast travel to Dr Earnhardt's estate Once there, go down to the cave with your survivor friends in it. (Note! It's the last chance to collect the Spider 1 cult item). After the conversation, leave the cave to complete the mission.

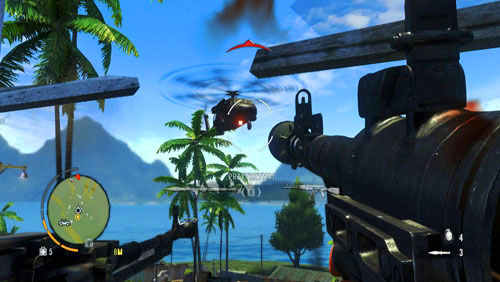
Travel to the Amanaki outpost. Make sure that there is a vehicle around. Then, approach the area marked with the yellow exclamation mark. After the phone talk, you will have five minutes to reach the designated area. Once you get close to your target, you will receive another phone call. Willis is surrounded by the enemies. Reach the airstrip and kill all enemies.
Net to the plane, there is a turret that you should make use of in case of problems. After you eliminate all of the enemies, Willis will take to repairing the plane, and you need to prevent him from dying. Take the turret again and get prepared for the attack.
The first wave will come from south, alongside the airstrip. The next one from the West. One of the enemies will be of the armored type. If he gets outside of the turret's reach, you will have to kill him with the weapon that you have on you. From the Northern and Western directions cars will come and from South, there will be further enemies coming, which need to be handled with the turret. Once Willis finishes the repairs, kill out all of the remaining pirates, including several armored ones.
Once you jump out of the plane, you need to press Sprint to use the wingsuit. Glide towards the marked area. When you get close to the ground,, open your parachute.
You will notice several pirates on the shore, standing near the truck. There is also a cage with a tiger in it, which should be freed, so it can handle several of the enemies.
Go around the remaining enemies, so that you are behind the truck. After you kill every last of them, get into the truck and get onto the road to the right of the beach. At the road's other end there is the entrance to a village.
Enter the Crazy Cock bar and talk to the bartender. Then, approach the door at the other side of the counter and give money to the guard shown in the screenshot. Go down to the basement and take your place at the table. After you play a game, leave the basement through the door that Sam left through. After you watch the cutscene, follow Sam, to complete this mission.
After you've talked to Sam go to the designated area. Approach the guard shown in the screenshot. Toss a stone and lure him away from the Docks descent. Once the passage is clear, start going even lower.
Wait for the guard shown in the screenshot to move and follow him, while keeping a safe distance.

When he reaches the area shown in the screenshot, wait for the other guard to go lower. Go around the enemy on the chair on the right, behind his back. On the far right-hand side, there is a passage that will take you deeper.
Once there, squeeze past the enemy shown in the screenshot, behind his back, and go over to the left side of the cave. Wait for him to turn his back at the descent and go ahead. If necessary, toss a stone to lure him away from the descent.
Further on, toss a stone to divert the attention of the enemy shown in the screenshot.
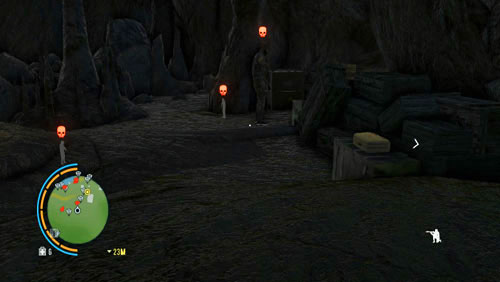
Keep to the left of the cave and go past the corpses, and go ahead. You will reach the marked spot on the left side of the cave. From here, you will notice several enemies shown in the screenshot.
Get over to the left side of the cave, to end up behind the enemy on the chair (the screenshot).
After you go down, keep to the right, to get around the armored enemy (in the screenshot with the shield symbol over his head), behind his back.
When you reach the pier, jump into water and dive immediately. Swim over to the back of the ship and climb the ladder to get aboard. Sneak behind the guard right behind the crates on the left and kill him.
After the conversation, approach the man-controlling guard. Approach the pedestal and listen to the speech. Right after you regain control of your character, climb the pedestal yourself. Go over to the other side and go straight ahead. Take the first turn to the left and go through the door. Go past the guards and to the boat, which you need to take to leave the area.
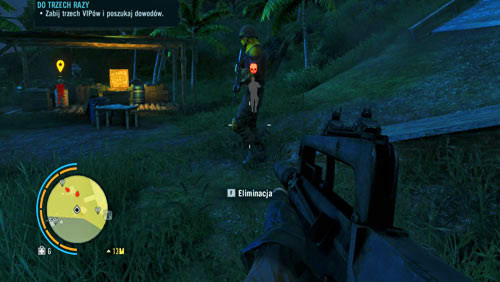
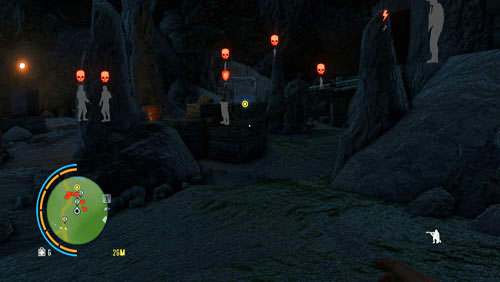
Once outside, you will remain neutral to the guards. You will be attacked only if you are spotted killing another enemy. Your objective here is to kill and search three VIPs that are staying on the temple grounds. Before you go about killing, take a careful look around with your camera and check within the sight of which enemies the VIPs are. Also, pay attention to the snipers on the higher levels of the structure to the right.
After you kill and search the first one of your targets, climb the stairs into the upper floor of the temple.
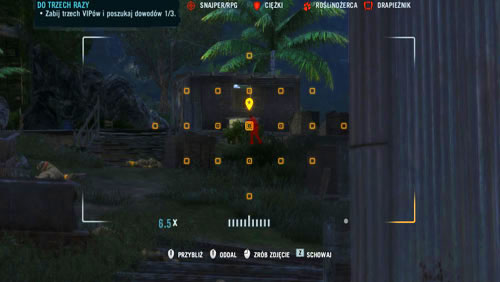
Your next target is on the very top. He is well guarded by the enemies, including two armored ones. Before you attack, try and eliminate the two in the first place..

The last one of your targets is in the mines, to the left . After you kill him, leave the temple grounds to complete the mission.
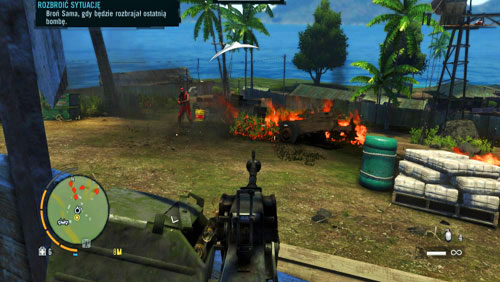
Reach the marked area and talk to Sam. Follow him to the first explosive. Once he starts defusing it, leave the building and prepare to repulse the attack. After you kill the last one of the enemies, follow Sam to the next target. If Sam "gets stuck" at any moment, shoot at him several times so he resumes running.

At the next house, kill the enemy on the roof and climb the ladder to get onto the roof yourself. Once here, start taking out the enemies coming from the West. When Sam manages to disarm the second explosive, go over to the third one, and watch out for the sniper on the top of the fan.
In the greenhouse, by the turret there will be an enemy, which you should try and kill from the greatest possible distance or, by hiding between covers, enter the greenhouse. Take hold of the turret yourself now and start killing the pirates. Make sure, at the same time, that you do not overheat the turret.
When the helicopter comes, bring it down with the RPG that you can find under the table, opposite the turret. Destroying the chopper will complete this mission.

Before you start this mission, obtain an RPG and a considerable ammo supply. Reach the marked area with the car and go down, and then up the path . When the path ends, enter the turret to the left and use the zip line to get across the river. Climb the ladder to the left of the two guards and use another zip line.
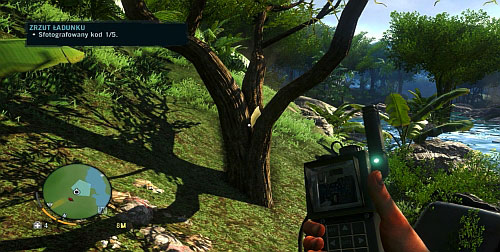
Get to the top of the tower and use your camera, to watch the meeting on the bridge. Take a photo and, when the message appears, kill the nearby guard and use the RPG, to destroy the designated car. You have a lot of time so, take your time aiming. Then, try and destroy the other car. This isn't necessary, but it will make your life easier later on.
After you destroy the car, take the zip line, and go down into the tunnel. Go towards the bridge and keep killing enemies on your way. Reach the other end of the catwalk, keeping to the left, and take the zip line to the other bank.

Walk toward the direction away from the bridge where, at the end of the wooden catwalk, you will find an entrance that will take you higher, on the left (right next to the cave entrance). Once up there, walk towards the bridge in order to climb even higher. You will reach the place shown in the screenshot where you will have to mount the platform with ropes hanging down from it. From here, take the rope to reach the other side.
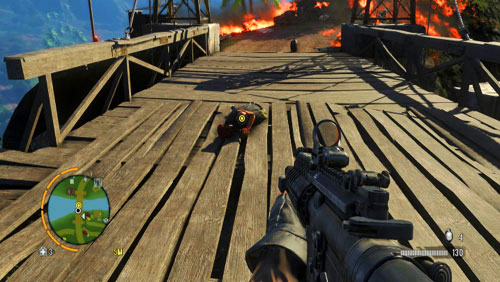
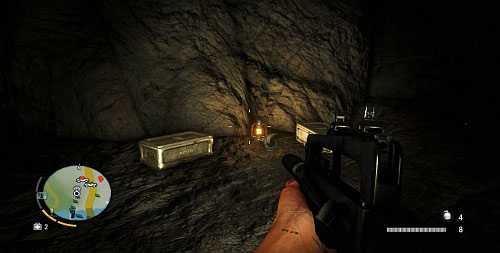
As you walk towards the bridge, kill all of the enemies that emerge from the caves. At the end of the catwalk, to your right, there is a cave, where you can replenish your ammo supplies near a crate. Leave now and take another zip line. Mount the elevation and approach the corpse on the bridge and collect the list. From the opposite direction, there will approach a car, which you need to blow up.
After you collect the list, start running towards the next destination. Try and run past the approaching guards as quickly as you can. Jump into the river and climb onto the ramp shown in the screenshot, and jump down. Use your wing suit and the parachute to land safely in the designated spot.
Approach the Hoyt's headquarters' entrance to meet Sam After you talk to him, you will watch a cutscene. Go down the stairs to the lower level, and then to the basement. Approach Sam, and follow him to the holding cell. Keep pressing appropriate buttons to torture Riley. After the conversation with Hoyt the mission will complete.
The entire camp is an exclusion zone so, in spite of wearing enemy uniform, you will be attacked once you enter. Use your camera to mark all of your enemies remaining within sight. To enter the camp, take the breach/bunker remains shown in the screenshot.
Walk over to the left side of the camp and disable the alarm trigger just in case someone gets the idea of using it. Keep going ahead and keep to the left at all times, to find a descent to further foxholes. When you reach the bunker shown in the screenshot, turn right and go straight ahead.
Keep to the western rim of the exclusion zone to reach your destination. In front of the door, there will be two armored enemies, which you need to kill before you plant the explosive. Put the explosive on the door and get back. After you blow up the door, run inside. Right after you cross it, the entrance will collapse behind you.
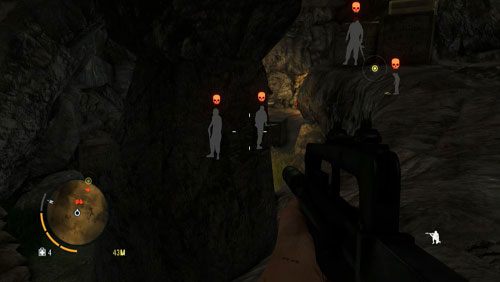
Get ready for a considerable number of enemies waiting right at the entrance. Keep locating further large groups of enemies using your mini map.
Once you reach the passage shown in the screenshot, get ready for a trap of rolling, flaming barrels. Right after you cross the threshold, get back to avoid taking damage.

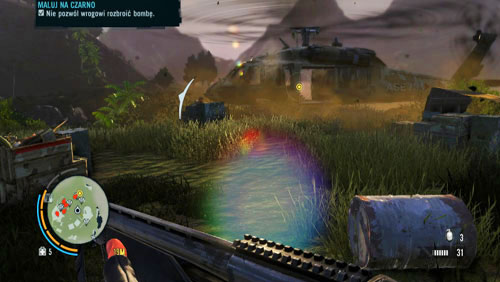
Kill the enemies on the stairs and climb up the ladder. The dish will be guarded by several enemies and a dog. After you eliminate all, plant your C4 explosives and mines on all passageways leading to the antenna (in front of the antenna there is an ammo box which you can use to replenish your supplies). Plant the explosives on the antenna itself. Now you need to protect the charges from enemies, who will be trying to disarm them. Properly planted C4 explosives and mines should make this task easier.
Once the helicopter lands near the antenna, mount it quickly. After the cutscene, jump out of the helicopter, use your parachute and land in a safe area.
Reach the designated rendezvous point with Sam. Pick up speed on the car and drive into the camp, and towards one of the four designated targets. Each one of them is heavily guarded by enemies, including the armored ones. Do not worry too much about the enemies outside of the building/structure, Sam will handle them. If you notice his health bar going too low, help him. After you plant the explosive and drive towards the remaining targets. The guards in your way can be ran over.
After you destroy all four targets, tables will turn and, you will have to cover Sam, using the car-mounted machine gun. Take advantage of the explosive barrels located here and there, to kill large groups of enemies. Focus your gunfire on the RPG-wielding mercenaries, as well as on other vehicles. Once Sam returns to the car, you will drive out of the camp, which will make the mission complete.
Before you set out on the mission, replenish your ammo supplies and get a flak jacket. Reach the Hoyt compound and talk to Sam. After you've played a few games and watched a cutscene, you will fight a knife duel with Hoyt. You need to be quick if you do not want to lose. Keep pressing jump, shoot, zoom in, shoot. Then press shoot, zoom in, shoot, shoot, zoom in, jump and up.
After you regain control, walk down the stairs, with the armored enemy on them. Leave the building and start running towards the marked gate, and kill the enemies in your way Outside of the camp, there is a car which you need to get on.
As you drive, you will have to deal with heavy fire on you and, sooner or later, your vehicle will be hit. In this case, you will have to walk towards your destination. On your way there, try and take enemies' car. There is plenty enough time to reach the airstrip even if you go there on foot.
After you reach the airport, get near the helicopter. In the airstrip area, the buildings in which Riley may be kept, will now be marked. Once you come close to the right one, you will hear Riley crying out loud for help. In my case, he was being kept in the prison right to the left of the helicopter. The building's rooftop (the ladder is on the western wall) is also a good vantage point from which you can take out nearby enemies. Kill all guards below and destroy the helicopter that has been following you for some time now. Inside, kill the armored enemy and enter the area where your brother is being kept.
After the cutscene, kill all of the mercenaries that are blocking the passageway to the helicopter. Once you mount the gunner seat, start killing the approaching enemies, but be careful not to overheat the gun.

After you go airborne, watch out for the enemies equipped with RPGs, who will be standing on rooftops of buildings and on containers. The next stage is to shoot down three enemy helicopters.
After the cutscene, approach the flaming estate that belongs to dr. Earnhardt, who is now lying in the garden house, near the estate house. After the cutscene, return to the helicopter. You will now be transferred to Citra's Temple entrance.
Enter the temple to find Citra. After the cutscene, leave the area and go straight ahead. Once you meet Citra, she will hand you a knife. Now you have to make a choice that determines the ending that you will see. After you make a choice, watch the last cutscene. After the credits, you will return to the game, which will give you the opportunity to continue playing.
This mission unlocks after you take over the outpost Road assistance Welshore building.
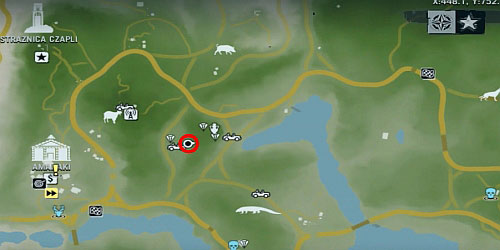
In Amanaki, talk to the parents of a missing girl. Exit the village on the south side and drive towards the area pointed to. You will find a corpse and five monitor lizards here, shown in the screenshot, which need to be killed in order to secure the area.
Jif you retreat a bit, to the nearby hillock, the animals will have problems attacking you.
Once you dispose of all of the monitors, approach the girl standing on the rocks near the corpse. After you listen to her story, the mission will be over.
This mission unlocks after you take over the outpost Valsa Docks.
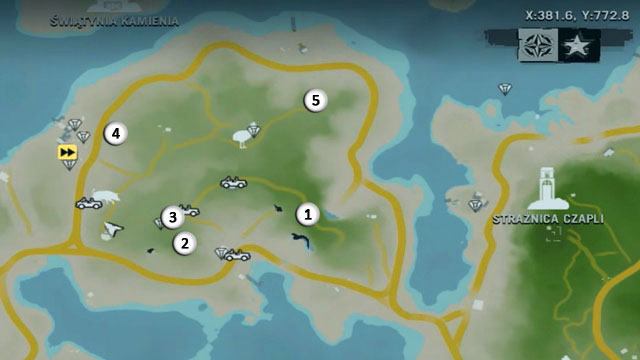
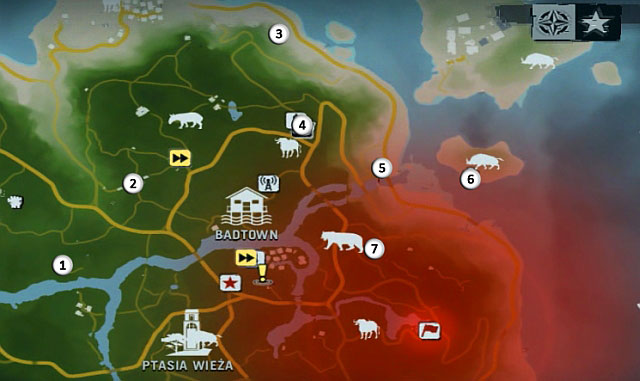
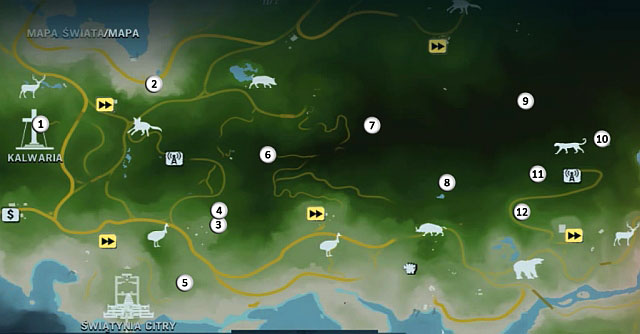
1) Tang
2) The first marker
3) Underground descent
4) The second corpse
5) The third corpse
![Go to the hut on the peak of the hill [1] - Tagging the Past - Plot missions - Far Cry 3 - Game Guide and Walkthrough](https://game.lhg100.com/Article/UploadFiles/201512/2015121518553706.jpg)
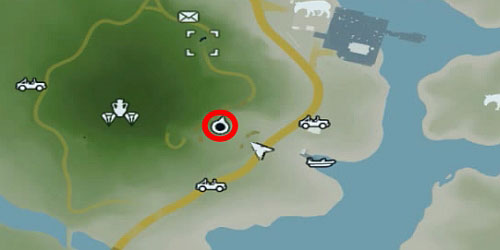
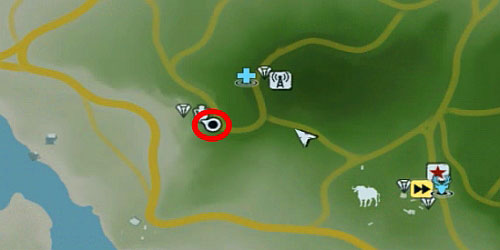
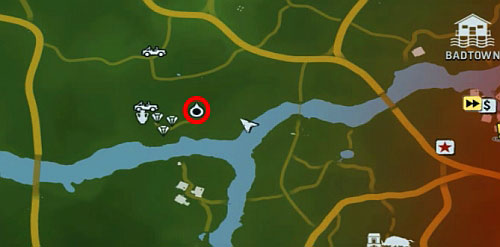
Go to the hut on the peak of the hill [1]. After you receive an assignment from Tanga, You should first go to the marker to the south [2]. Find the descent shown in the screenshot [3] take the descent.
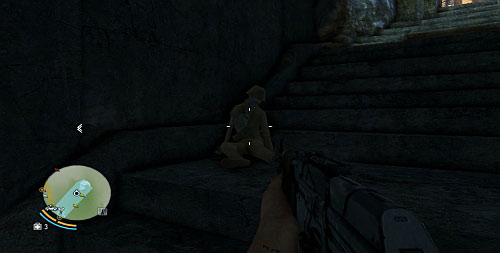
Once down there, turn and climb the stairs. Halfway up the stairs, you will find the corpse, you are searching for, and a dog tag.
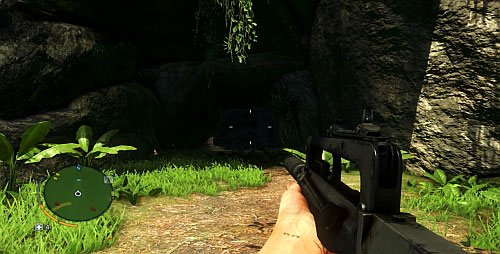
![The next corpse can be found at the wall around the cannon, on the left[4] - Tagging the Past - Plot missions - Far Cry 3 - Game Guide and Walkthrough](https://game.lhg100.com/Article/UploadFiles/201512/2015121518553768.jpg)
The next corpse can be found at the wall around the cannon, on the left[4].
![The last corpse can be found on the left of the cannon [5] - Tagging the Past - Plot missions - Far Cry 3 - Game Guide and Walkthrough](https://game.lhg100.com/Article/UploadFiles/201512/2015121518553782.jpg)
The last corpse can be found on the left of the cannon [5]. With all the dog tags, return to the questgiver to complete the quest.
This mission unlocks after you take over the outpost Northview Gas Station.
Talk to the mother of the deceased woman. Go to the hill in the east to find the husband of the deceased, standing over the grave (the screenshot). After you are done talking to him, take a few shots around his feet. Around the place, the Rakyata warriors (i.e. your allies) may happen to be. If this happens, start running in the direction of the questgiver. The warriors will be trying to kill you so, do not stop even for a moment. Conversation with the mother will conclude the mission with a success. To soothe the warriors, you need to save, and load the game again. Otherwise, even in the outpost that you have taken over, you may be attacked by your allies.
This mission unlocks after you take over the outpost Vanity Farm.

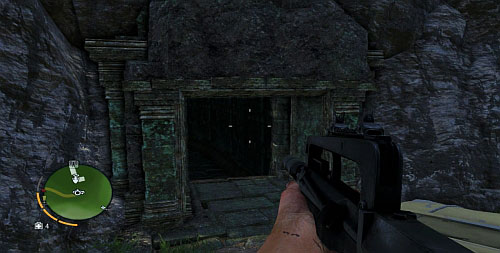
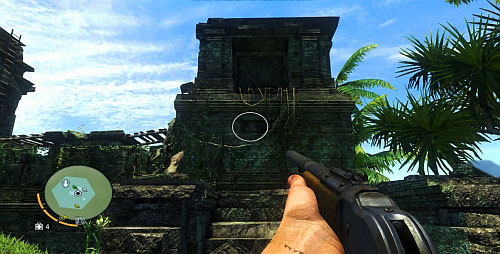
After you talk to Simham, you will have to find three engraved tablets. Go to the marker in the western part of the temple. Within the walls around the temple, in the corner you will see the structure shown in the screenshot.
Enter the construction and you will find the firs tablet in the corner.
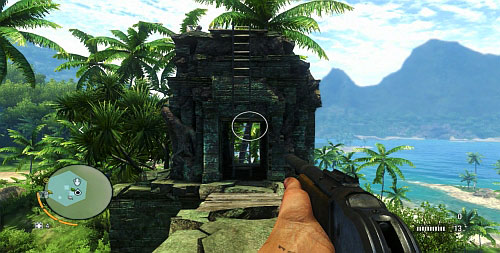
Go now to the marker in the northern part of the temple. Once there, you will find the passage shown in the screenshot.
Inside, go down the stairs and take the corridor on the left side of the area. At the end of the corridor, you will find a flooded descent. Dive and, at the end of the stairs to the right, you will find the second tablet. It will not stand out in any particular way so, be watchful.
Go now to the marker in the south, outside of the temple's limits. In the designated area, you will find the building shown in the screenshot.
Approach the tower to the right and climb the vine to reach higher. Destroy the wall in your way by shooting at it several times. Walk over the bridge to the left, to the other side, and walk around the tower on the left/right, over the remains of the cornice. That is where you will find the last one of the tablets. Return now to Simham to complete the mission.
This mission unlocks after you take over the outpost Death Camp.
After the conversation finishes, three marker will appear on the map. First, go to the east-most one. You will run into a tiger over a corpse there. Kill the animal, or scare it away, approach the corpse and take a photo with your camera.
Go now towards the south-most marker. To climb the hillock, take the hillside to the right which is not as steep (the screenshot).
Once you reach the peak, you will encounter three pirates that need to be killed. The corpse that you are looking for is in the western part of the bump.

The last corpse is leaning against rocks at the roadside. After you take the third photo, return to the village to talk to the questgiver.
This mission unlocks after you take over the outpost Old mines.
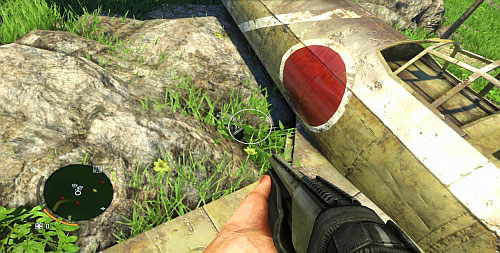
Enter the house and listen to the story of the plane crash. Go to the marked area, where there is a hang glider. Try to land on the beach, or in its vicinity. Once there, you will find fragments of the plane. Approach them to examine them..
To the left of the shown fragments, you will find a shack made out of the plane fragments, which you need to enter. Talk to the owner to complete the mission.
This mission unlocks after you take over the outpost The Hornet's Nest.
Enter the house and talk to Willis. After the conversation, collect the tracking device.
Drive your car towards the marked spot. In the spot, where the fence is destroyed, go down the hill (the screenshot).

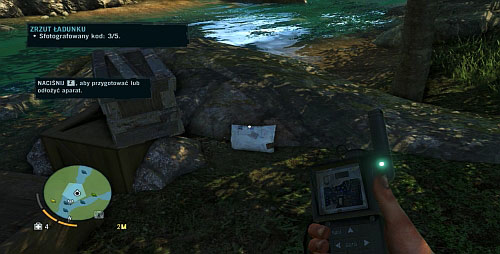
Once you are down below, take a photo of the package shown in the picture, which you can find in the area marked blue on your mini-map.
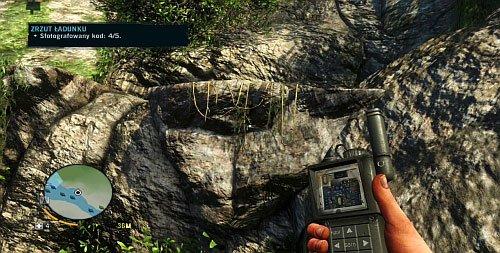
In the next search area, the package is among the branches of the tree, to the left.
In order to get to the third package, you need to shoot the padlock on the shipping container shown in the above screenshot. Swim inside the container to find the third package.
The next package can be found on the beach, near the rocks.
In the next area, jump down the waterfall, into the river below. As you swim down the river, on the left you will notice the vine shown in the screenshot. Climb it to reach the ledge.
Jump over to the next ledge that vine is hanging from.
Before you jump over to the next ledge on the left, kill the snake on it. Go right and jump over, onto the ledge behind the waterfall (the screenshot). That is where the last package is. Taking a photo will conclude this mission.
This mission unlocks after you take over the outpost Hubert Shore Power.
Enter the house, and learn that you need to collect three pieces of ginger. You can find it in the garden, right next to the house. Return with the plant to Alfie. Three heliconia fruits can be found on the hill that you can climb after you pass the NPC that offers taking part in races, (the screenshot). Return with the harvested plants to the questgiver. The last plants (pandan) can be found down in the valley near the questgiver's house. Once you return with the fruits, the mission will be over.
This mission unlocks after you take over the outpost Cradle View.
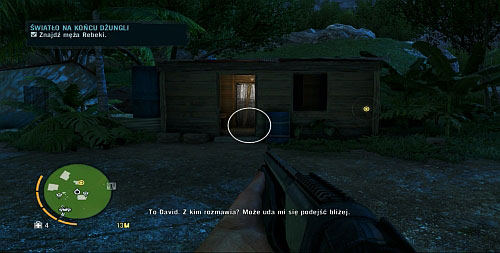
Enter the house marked with a blue exclamation mark. Inside, listen to Rebecca's story. The woman suspects her husband of cheating on her. Exit her house and approach the house opposite (don't get too close) (the screenshot).
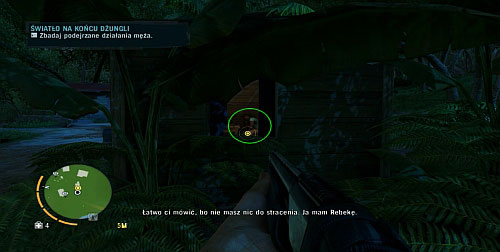
Walk over to the right of the house and hide among plants. Approach the window close enough to eavesdrop on the conversation. Don't get too close however, or else you will be spotted. After you listen to the conversation, return to the wife and inform her of the results of your investigation. This will conclude the mission.
This mission unlocks after you take over the outpost Nat's Workshop.
Go to the area marked on your map with a blue exclamation mark. Enter the house and talk to the owner. You will have to kill a rabid dog. Go to the marked area, where there will be a pack of dogs running around. It is a good idea to kill all of them before you search the area for your target.
I found the actual dog on the slope to the left. When you are close enough, the dog will be designated with a marker. After you eliminate it, return to Matti's house and talk to him to complete the mission.
This mission unlocks after you take over the Harmanse Gas & Repair outpost.
Approach Seto and accept the mission of reclaiming the stolen items. Find the first person that you are supposed to find and talk to them. Now, you will have to go to the Crazy Cock bar and win, in a game of w Poker, all the money of the other three players. After you have won, approach the gambler and give him his money. In return, you will be rewarded with the first item - a necklace.
Leave the town now and go into the marked area. You will see there a drunken guard, who needs to be killed. Right after you eliminate him and run through his pockets for the item, take to the heels if you want to avoid getting into fight with three other enemies, who will appear here.
The last one of the items can be found on one of the enemies shown in the screenshot. After you retrieve all of the souvenirs, return to Seto to complete this mission.
This mission unlocks after you take over the Longshore View outpost.
Get to the area marked with the blue exclamation mark and accept the mission of avenging the murdered family. Go to the first encampment and kill an enemy marked with a star, after which you should take cover in the river to the right (relative to the screenshot). This way you will avoid fighting the remaining enemies.
Swim up the river to approach the next objective of the mission. Once there, you will notice another enemy standing on a boat. If you have the skill Death from Below available, Swim up to him quietly and kill him. Then, dive again and start swimming towards the next target, to escape from the remaining enemies.
Once you reach the area, which is supposed to be occupied by the last target, get out of water near the pier shown in the screenshot.
Climb the stairs and walk over to the right of the building. That is where the last one of the family's murderers should be. After you kill him, return to Joseph to complete the mission.
This mission unlocks after you take over the Bridge Control outpost.
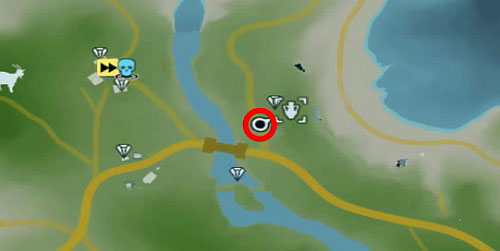
After you take the task from Steven, go into the designated area, where you will find a cave entrance. Reach the cave's other end and swim underwater to reach another cave. In the cave, you will find the corpse shown in the screenshot. Go now back towards the cave's exit. On your way there, you will be attacked by a crocodile. Kill it by pressing the correct button. Return now to the questgiver to complete this mission.
This mission unlocks after you take over the North Krige Crest outpost.
Enter the house and talk to the woman about her problems getting out of the island. Go to the first mercenary encampment and kill all of the enemies. Enter the designated house and collect the diamond from the suitcase.
Go, then to the next encampment. There is another group of enemies here. Wait for the two mercenaries to go their ways and start eliminating them quietly.
Return, with the diamonds, to the questgiver. After the conversation, kill the man beating the woman to end this mission.
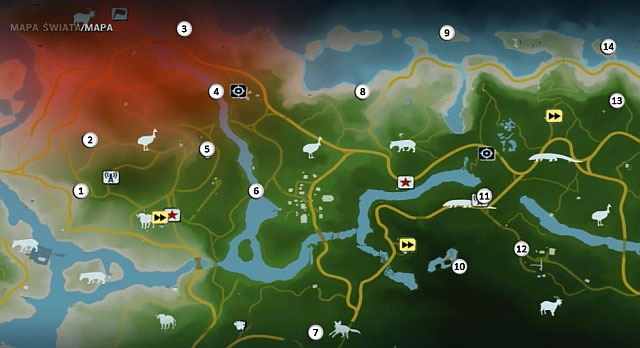
Cult items have been marked on the map with the symbol of a vase. When you come near to an item, it will be automatically displayed on your mini-map. For a number of statuettes you collect, you unlock awards like a new piece of weaponry, or a recipe. Below is a list of recipes, weapons and the numbers of cult items that you need to collect, in order to unlock them.
1. Spider 1
Note! It is the only statuette that becomes inaccessible later in the game. It is a good idea, therefore, to collect it as soon as you encounter it.
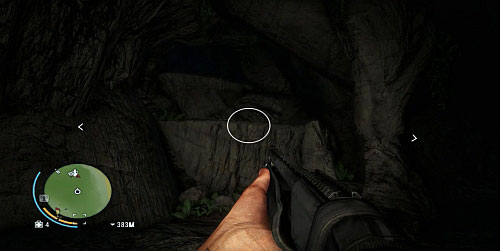
The statuette is in the cave, in which there are the main protagonist's friends (on the northern island under dr. Earnhardt's estate). Inside the cave, go straight ahead while keeping to the right. Reach the ledges shown in the screenshot. Climb then and then climb the hanging vine. Jump over the hole to reach the other side. As you go forward, climb down the vine. Eventually, you will reach a shipwreck.
Move to the next cave, where there is the statuette.
2 . Shark 1
Swim up to the marked area. Dive and swim under the shipwreck, where there is the cult item.
3. Heron 21
Follow the northern path to reach the peak of the elevation. You will find there vines that you need to climb to get higher (the screenshot).
Climb up the stairs to find an altar with the statuette on it.
4. Heron 16
The statuette can be found in the marked area between the boat and the rocks..
5. Boar 2
In the marked area, you will find the cannon shown in the screenshot. Climb the elevation. You will find the statuette next to the cannon.
6. Spider 21
Swim up to the island with the temple on it. Right next to the place marked with the number on the map, there is the descent shown in the screenshot. Climb the stairs down to the underground chamber, in which there is the statuette to the right.
7. Boar 1
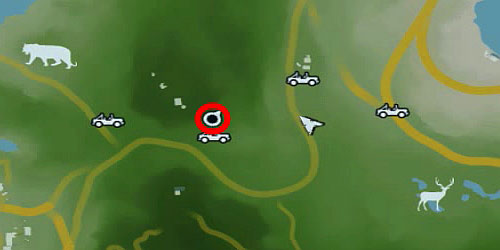
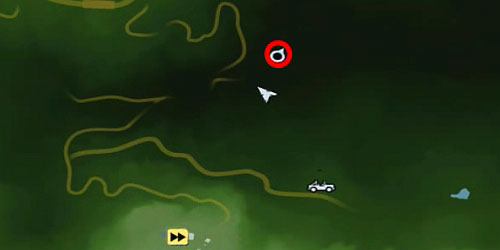
Drive to the area marked with the red circle in the screenshot.
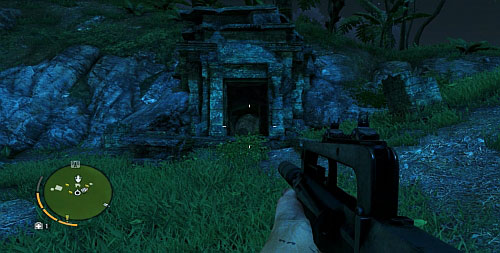
You will find yourself in front of the cave entrance shown in the screenshot.
Take the stairs to get lower. This will take you to a chamber with a crate in the middle. On your right, there is a hole in the wall, which you need to take (the screenshot).
Take the short corridor to the right. The statuette is at the end of the corridor.
8. Shark 21
Swim up to the marked area to find a boat wrecked against the rocks (the screenshot). Dive near the boat to find the statuette.
9. Heron 23
Get onto the island from the eastern direction. As you get near the statuette, you will reach ledges that you can climb (the screenshot).

Above, you will find two more ledges that you need to climb. Atop, there is the item that you are looking for
10. Shark 4
Reach the marked area. Underwater there is a sunken ship. Before you dive, you can use the Deep Dive syringe. This isn't indispensable, however. There is a hole in the bow that you need to take to swim inside (the screenshot). Next, swim through the passage to the left.
The statuette is in-between two containers.
11. Spider 23
Get to the area marked with the circle on the map.
You will find yourself at the cave entrance. After you reach the end of the passage, you will see two ledges, to your left, which you can jump on in the place where the vines are hanging.
On the top, on the altar, there is the cult item.
12. Shark 23
To find the item, dive near the pier shown in the screenshot.
13. Boar 23
Drive up to the peak of the hill from south. Jump down into the water from the cliff. Go ashore on the left (on the southern side) and climb the vines shown in the screenshot.
You will end up at the entrance to the cave that you need to take. Proceed forward, until you see an altar with the statuette on it, on your left (the screenshot).
14. Spider 3
Drive to the peak of the hill. Jump down from the cliff into water. Go ashore on the right (on the eastern side) in the spot shown in the screenshot. Climb the ledges that vines are hanging down from and turn back, where there is another ledge.
Keep jumping over from one ledge onto another and climb the ledge on the wall to your right. There are further ledges there which you need to jump onto.
You will wind up at the temple entrance. Inside, there is the statuette.
15. Boar 3
Go down the road until you reach its end, in order to end up in front of the altar with the statuette on it.
16. Spider 5
Reach the area marked with a circle on the map and you will find yourself in front of a rocky ledge. Use vines to climb onto it.
On your left, there is a zip line, that you need to take to get across.
Further, jump over to the other side. You will find a cave entrance there.

When you reach the end of the cave, you will notice a ledge on your left. Climb the ledge to get to the altar with the statuette on it.
1. Heron 3
In the area marked with the red circle, you will find a broken fence
Keep sliding down the rocks (the screenshot), to reach the car wreck, next to which there will be a statuette.
2. Boar 25
You will find the statuette in the spot marked with the number.
3. Spider 6
Reach the area marked with the circle on the map, near the Cradle View outpost.

You will face an entrance to a cave, in which there is an altar with the statuette.
4. Shark 6
Dive near the waterfall. The statuette is at the bottom.
5. Boar 5
Reach the area marked on the map. You will face an entrance to an old mine.
Shatter the wall, shown in the screenshot, that blocks off the passage beyond.
Once inside, take a turn to the right and climb the ladder next to the wagon (the screenshot). On the top, across the ladder, there is the statuette.
6. Shark 7
In the marked area, you will find a bridge with a truck, partially hanging over the bridge. Jump off the left (in relation to the screenshot) brink of the bridge and you will find the statuette.
7. Spider 8
Reach the area marked with a red circle in the above screenshot. You will find a hole in the ground, which you need to jump into, in order to land in water.

Get out of water . The item that you are looking for is standing on one of the pillars projecting from water.
8. Shark 8
Go to the area marked in the above screenshot. You will end up in water, in front of a rocky wall. Dive to find an underwater cave. The statuette is right at the entrance.
9. Heron 27
Swim up to the island from north-east . There, you can find vines that you can use to get onto the island (the screenshot). Walk over to the western part of the island, where there is an altar with the statuette on it .
10. Spider 27
Reach the area marked with the red circle. Near the Old Mine outpost, there is an entrance to the mines.
Get inside and climb down a long ladder, the leave the mines into a large open space. Go through the bridges, into the temple inside which, there's the statuette.
11. Shark 27
Swim into the cave marked with the red circle (the above screenshots).
After you take a turn to the right, you will find an altar to the right, with the statuette on it.
12. Boar 27
Reach the area marked with the red circle in the above screenshot, in order to face the mine's entrance. Inside, right after you take the left turn, you will find the item.
13. Boar 8
You can reach the hill through the path to the south. At its end, there is an entrance to the mine (the screenshot).
Enter the mine and smash the wall, shown in the above screenshot, that blocks off further passage.
Go through the U-shaped corridor , climb higher and jump over the hole in the ground right after you take the turn. Once you are on the top, exit the mine and face dogs.
As you climb higher, and higher, you will, eventually, reach a small temple with the statuette inside it.
14. Heron 5
In the southern part of the peninsula, there is a vine that you need to take to reach higher.
On the top, you will find an altar with the statuette on it.
1. Shark 11
Find the place marked with the red cross in the screenshot above.. You will face a cave entrance.
Inside, there is an underwater tunnel. Before you dive, prepare and use the Deep Dive syringe. After you go underwater, you will see a lot of blue plants, that are necessary for the preparation of the syringe. After you use the syringe, swim underwater to reach the other end of the tunnel. As you swim by, pick up further plants for the Deep Dive syringe.
Once you reach the other end of the tunnel and resurface, you will notice another underwater tunnel to swim through. Take the Deep Dive syringe again. After you reach the other end of the tunnel, resurface to face temple entrance. Kill the snake, next to which there is the statuette.
2. Boar 11
Reach the area marked with the red circle, in the above screenshot, in order to find temple entrance.
Upstairs, smash the wall that blocks off the entrance, shown in the screenshot.
Climb up the stairs. You will, eventually, reach the room with the statuette in it.
3. Spider10
Reach the are marked with the red circle in the above screenshot, to reach the mine entrance.
Jump over the large hole in the ground, or swim under the rocky platform if you've fallen into water, and climb up the vine.
At the end of the tunnel, there is a statuette standing on a crate.
4. Boar 30
The statuette is inside the house shown in the screenshot.
5. Shark 30
Jump into water, in the marked area, and swim into an underwater tunnel behind the waterfall.
The statuette is at the end of the tunnel.
6. Heron 9
Swim up to the isle from the north-western side, where you will be able to go ashore. In its southern part, you can find the cult item.
7. Heron 10
Reach the area marked with the red circle in the above screenshot, in order to find the zip line that you need to use.
You need to detach from the zip line in the right moment, so that you land on the hillock under, where there is the statuette (more, or less halfway down the zip line).
1. Shark 2
Swim up to the marked area, where there is a sunken shipwreck. You can find the statuette to the left of the shipwreck.
2. Heron 22
In the marked area, you will find the bunker shown above. The statuette is inside, to the right.
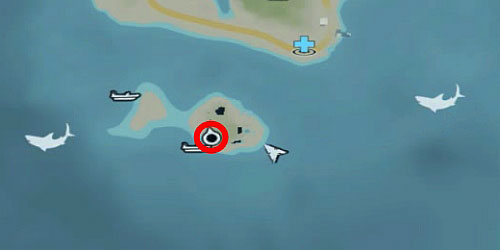
3. Spider 22
While on the Prison Break-In mission once you obtain the key from the camp operator, you will have to enter the cave. As you go toward your destination point, you can find the statuette behind the door, after you enter the cave with the projector.
4. Spider 2
Go to the marked area on the island.
You will face a ledge with vines hanging down from it. Climb the ledge and go straight ahead. After you climb another ledge,, without the vine this time, you will face another ledge that you need to climb.
Go over to the left side of the statue that you can see from the top, and take the descent shown in the screenshot.
Get inside and swim up to the left side of the room, where there is another statuette.
5. Shark 3
Before you set out for the area, equip yourself with the Deep Dive syringe. Reach the area marked with the number. Once there, you will notice a buoy shown in the screenshot. Use the Deep Dive syringe and dive near the buoy.
Underwater, you will notice a shipwreck, which you need to swim into. The statuette is in the place marked with the red square in the screenshot.
6. Boar 22
In the area marked with the red circle, you will find something looking like a trench, covered with a sheet of metal (the screenshot). Jump down, into the hole, and find the statuette on your right.
7. Shark 24
Reach the area marked with number 7, where you can find a patch of land delimited with a rope fence. Near the spade stuck in the ground, there is the statuette.
8. Heron 1

Reach the peak by taking the southern path shown on your map. On the peak, there is an altar with the statuette on it.
9. Shark 5
Jump into water and reach the area marked with the red circle in the above screenshot.
You will find yourself in front of a waterfall, which you need to swim behind. Resurface on the left side of the cave and dive inside the remains of the temple shown in the screenshot. Inside, there is the statue.
10. Spider 24
Get over to the left of the canyon, into the area marked with the red circle in the above screenshot.
You will end up in front of the zip line stretched over to the cave entrance. The statuette is inside the cave.
11. Boar 4
Take the road to drive to the area marked with number 11. You will be facing the temple entrance. Cut through the plants that block off the entrance to the temple. The statuette is at the end of the corridor, on the left.
12. Spider 4
Reach the area marked with the red circle in the above screenshot and start to go around the hill, in the counterclockwise direction.
In the northern part, there is a place, where the slope is inclined at an angle that makes it possible to climb higher. On the top, there is an entrance to the cave that the statuette is hidden in.
1.Heron 4
You need to take a hang glider to reach the top of the hill. One of these can be found in the area marked with the red circle in the above screenshot. In order to reach the top, use the narrow road to the north of the Vanity Farm outpost. Once airborne, reach the marked area (the square) and detach/land on the mountain with the cross on it.
The statuette is at the foot of the cross.
2. Boar 6
Enter the house near the beach shown in the screenshot. To the left of the entrance, on the crates, there is the statuette.
3. Spider 26

Reach the temple entrance shown n the above screenshot, near the area marked, on the map, with number three.
Go down the stairs where, in the room, there is the statuette on the altar.
4. Shark 26
Enter the temple through the entrance shown in the screenshot, near the area marked with the number three on the map.
Climb the stairs to access the room where statuette number three used to be and take the corridor to the left. At the end, there will be a flooded staircase. Dive and swim underwater into the room, in which there is the statuette in the central portion.
5. Spider 7
In the area marked with the number five, you will find a temple. Approach the tower to the right (the screenshot) and climb the vine.
While on the top, smash the wall that blocks off further passageway and go towards the tower to the left. Climb up the ladder to find the statuette.
6. Boar 7
Climb the elevation along the northern path off the main road (at the Vanity Farm outpost). The statuette is near the plane wreck.
7. Heron 26
Approach the marked area , taking the path to the north off the Vanity Farm outpost.

You will find yourself in front of the cave entrance, at the end of which there is an altar with the statuette on it.
8. Heron 7
A bit to the north of the small pond, there is a plane wreck. The statuette is near the wreck.
9. Heron 6
Climb the elevation to the top. The screenshot above shows one of the less sloped places. Look around for places where you can squeeze through. It may turn out that sprinting will be helpful while climbing.
Once you near the place marked with number 9, look around for a ledge with vine hanging down from it, shown in the above screenshot On the top you will find an altar and the statuette.
10.Boar 28

Reach the area marked with the red circle in the above screenshot, and enter the cave. The statuette is at the end of the cave, to the right.
11. Spider 28
There is another statuette under the table in the marked area.
12. Shark 28
In the area marked with number twelve, there is a hole in the ground. (right next to the temple ruins). Jump down into the water. Look at the mini-map to fid the statuette underwater. In the place where there is the statuette, you will also find a tunnel that leads up to the exit point.
1. Boar 9
Drive to the area marked with the red circle in the above screenshot, and find the path that leads up the elevation.
At the end of the path, there is the passage shown in the screenshot, which you need to go through.
Follow the gorge, jump over the rocks, behind which there is a wall that you need to smash (the screenshot).
Walk inside and climb down the stairs. You will reach a cave, in which there is the statuette, to the left. You need to jump over from one ledge to another, from right to the left, to get there.
2. Spider 11
A bit to the south off the area marked as number two, you will find the temple shown in the screenshot. The statuette is inside.
3. Boar 26
In the area marked as number three, there is a house shown in the screenshot. The path that leads up there is to the east. Inside, behind the crates, there is the statuette.
4. Heron 11
In order to get to this one, you need to use a hang-glider . One of them can be found in the area marked with the red circle in the screenshot above. Reach the landmark (the square) and land/detach on the elevation.
At that place, there is an altar with the statuette on in.
5. Shark 22
Before you go there, prepare the Deep Dive syringe. In the marked area, you will find yourself above an underwater tunnel that leads straight to the bottom. That is where the statuette is (the white square in the screenshot).
6. Shark 12
Before you go there, prepare the Deep Dive syringe. Reach the area marked as number six. There will be a fragment of ruins projecting above water. Mount the ruins and dive through the hole in the center (use the Deep Dive syringe ). Go to the very bottom, look at the mini-map where the statuette is and collect it.
7. Heron 24
Get to the island and go to the marked area. You will face a ledge that can be get onto by sprinting and jumping.
At the end of the ledge, sprint and jump over to the right side (shown in the screenshot). Then, turn right and reach the end of the ledge.
Jump to the left onto the hill's peak. Here, on the altar, you will find the statuette. If you have any problems climbing, to get to the peak, you can use the hang-glider described in statuette 4 (Heron 11).
8. Boar 20
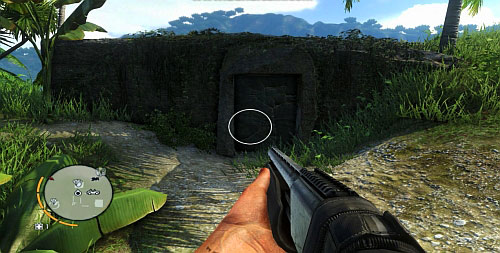
In the marked area you will face a destructible wall, that blocks off the entrance to the bunker. The statuette is inside the bunker.
1. Shark 10
Before you go there, prepare the Deep Dive syringe. Go into water and swim into the marked area. You will find yourself in front on an underwater tunnel. Use the Deep Dive syringe and dive into the tunnel.
The way further will be blocked off by planks, which will fall apart when you bump into them. Keep swimming up to the end of the tunnel, where you will notice a wall and a statuette for you to collect.
2. Shark 9
Go down to the beach, where there is the statuette between the rocks in the marked area.
3. Spider 9
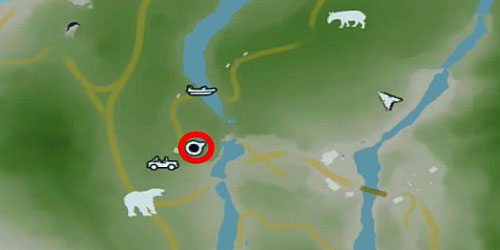
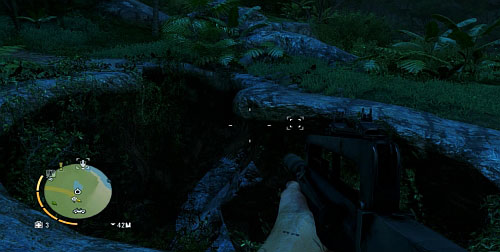
Reach the area marked with the red circle in the screenshot. You will end up over a hole in the ground. At the opposite side, in relation to the above screenshot, there is a ledge that you can jump down onto without falling into water.
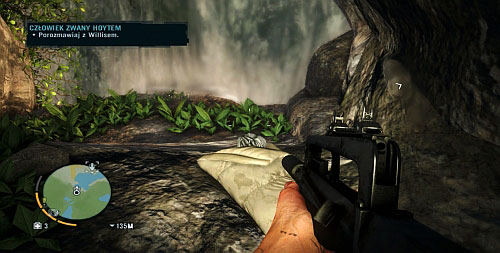
You will end up in front on the entrance to a tunnel, at the end of which there is the statuette (on the sleeping bag).
4. Boar 29
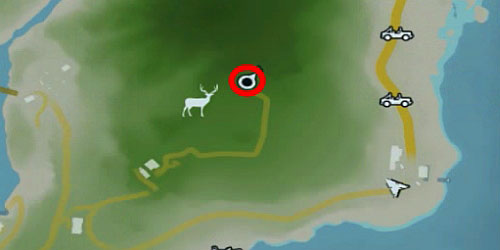
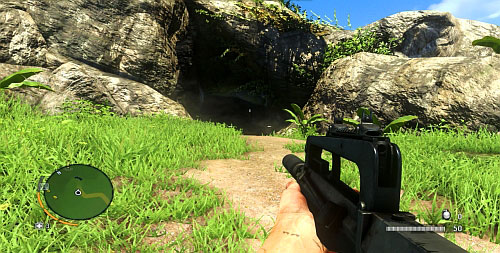
Take the road to reach the area marked with the red circle , and enter the cave.
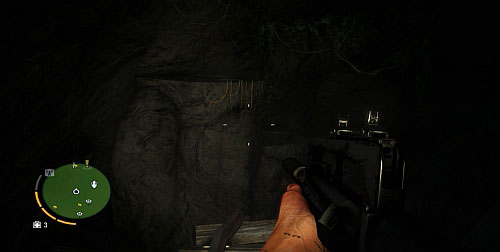
Follow the railway into the tunnel. You will reach a precipice with vines, which you can jump onto Next, jump down onto the ledge below.
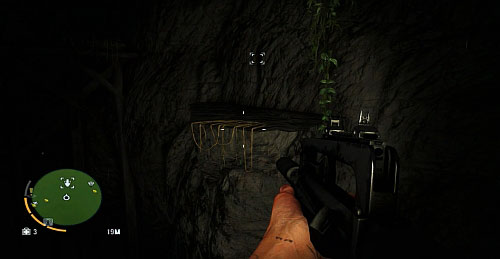
Turn right, and jump to the ledge that you can see there. Turn left and jump onto another ledge with vines on it. Follow the railway again, until the end of the tunnel, where there is the statuette.
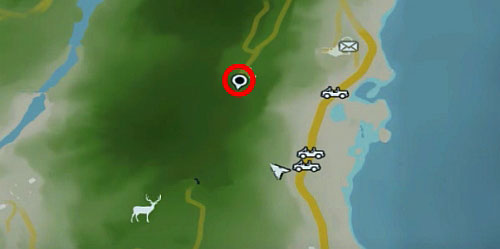
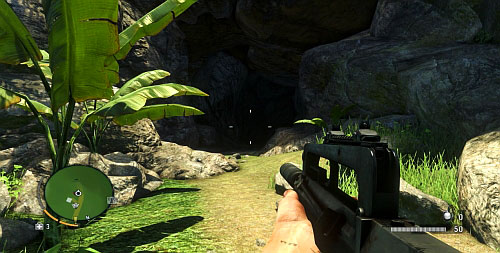
To reach this statuette, you can also take the entrance shown in the above screenshot.. This way, however, does not require that much jumping.
5. Boar 10
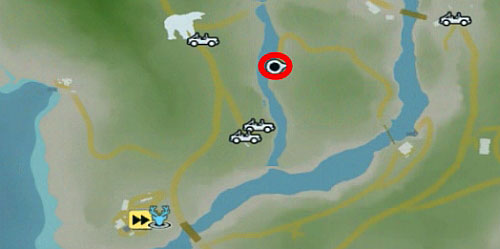
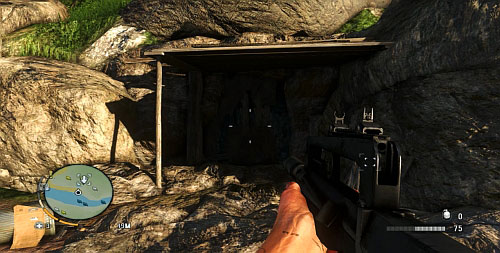
Reach the area marked with the red circle in the screenshot. Destroy the planks and reach the other end of the tunnel, where there is the statuette.
6. Heron 29
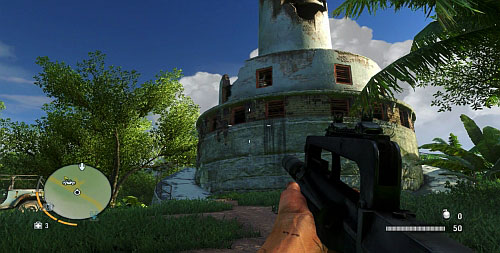
Approach the ruined lighthouse and enter. Climb the stairs to the top of the lighthouse, where there is the statuette.
7. Heron 8
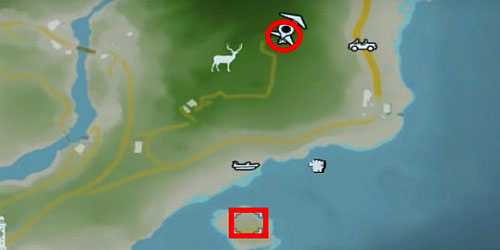
In order to get this statuette, you again need to use a hang-glider from the area marked in the screenshot above(the circle). Next, you need to land on the marked island (the square). That is where you will find the statuette.
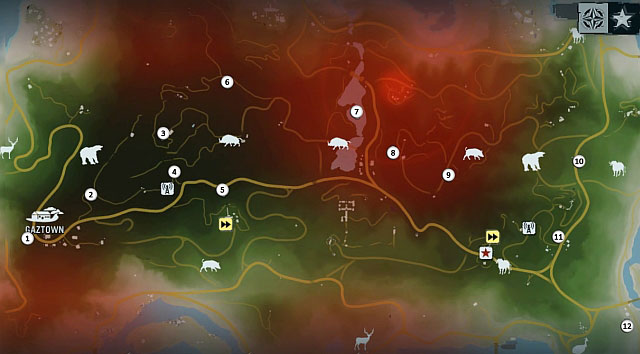
1. Heron 17
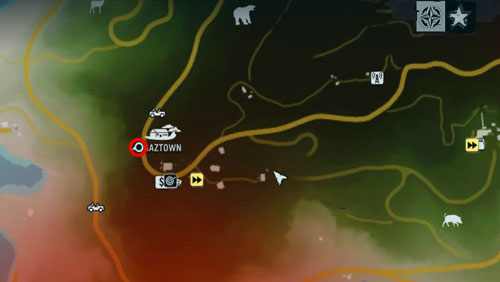
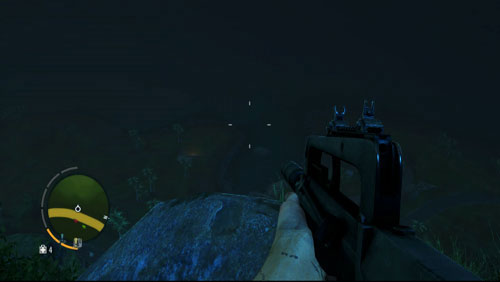
Stop in the spot marked in the screenshot. You will be standing on a cliff shown in the screenshot. Jump down from here and use the suit right away (sprint).
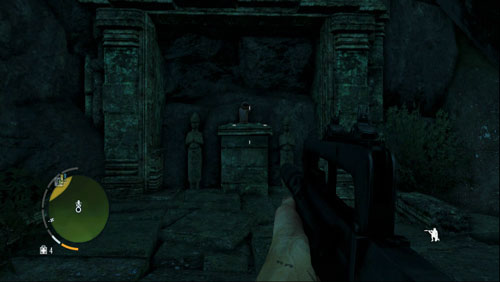
In mid-flight, you need to make a turn by 180 so that you face a rocky ledge shown in the screenshot. Once you do it, open your parachute and land on the ledge. Inside you will find the statuette You may also try to slide down the slope to reach it.
2. Heron 30
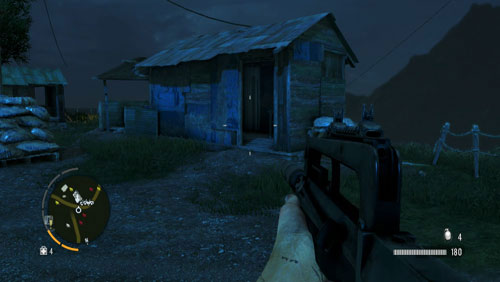
Get to the area marked as number two. You will find a house there, inside which there is the statuette.
3. Boar 17
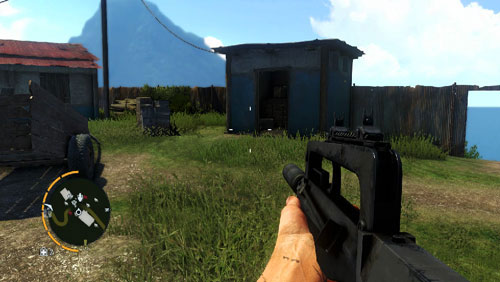
In the area marked as number three, You will face a building shown in the screenshot. Inside, in the left corner on the crates, there is the statuette.
4. Spider 18
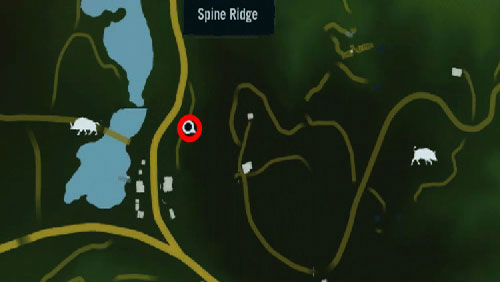
Follow the road marked with the number, to find a cave inside which there is the statuette.
5. Shark 18
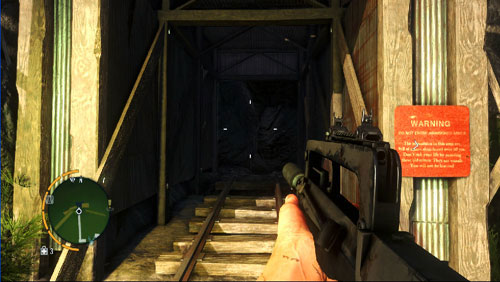
Reach the entrance to the mine, in the northern part of the North Krige Hill outpost.
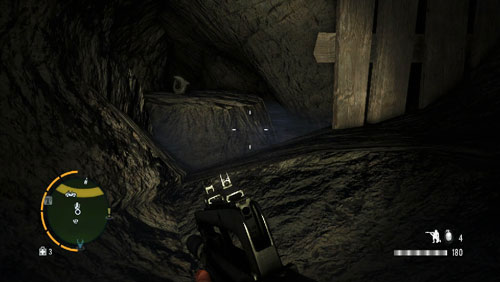
Go into the first corridor to the left, where you will find the statuette.
6. Boar 18
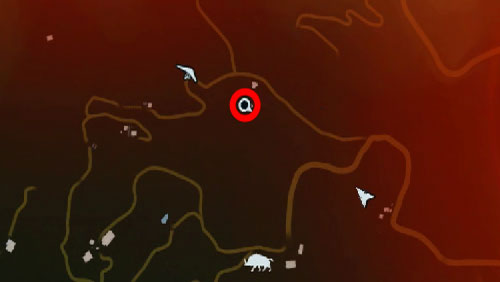
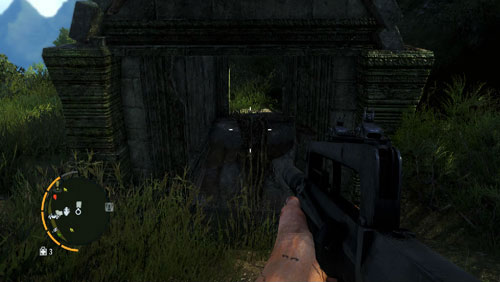
Reach the area marked with the red circle on the map, in order to face a descent with vines. Climb down and smash the wall that blocks off further passage and enter the area with the statuette in it.
7. Shark 16
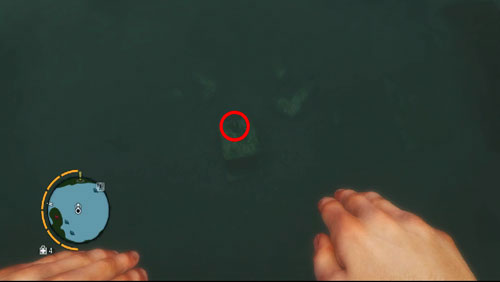
Dive in the area marked as number seven, to find the statuette.
8. Spider 16
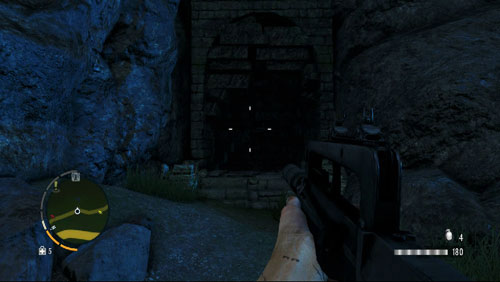
Reach the area marked with the red circle to face a cave entrance. Go past the debris on the left and reach the other end of the corridor. That's where the statuette is.
9. Boar 15
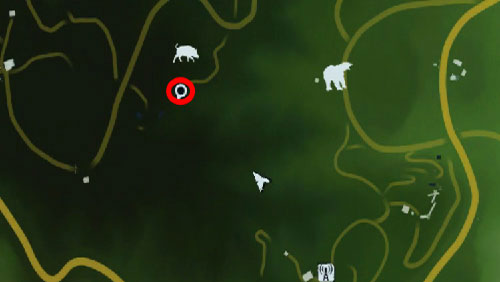
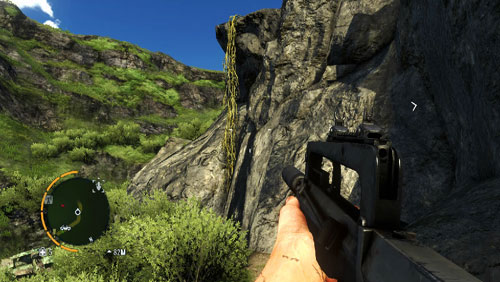
Reach the area marked with the red circle to find vines hanging down from a ledge.
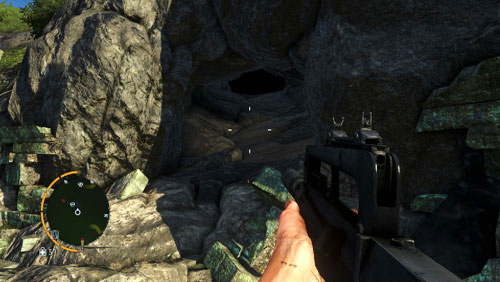
Climb higher and turn left to notice a cave entrance to the right. Approach the destructible wall to find the statuette.
10. Heron 15
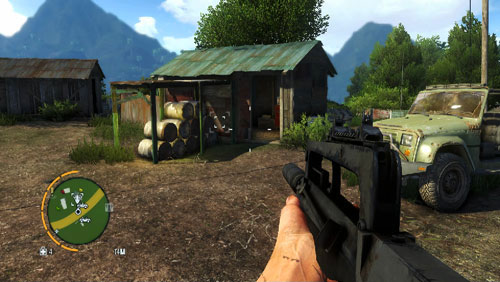
In the area marked as number ten, you will find a house. The statuette is inside..
11. Spider 30
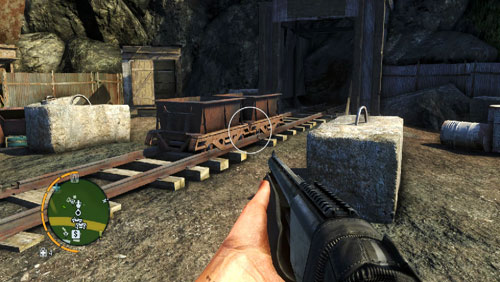
In the marked area, you will face two wagons. The statuette is hidden in the one closer to the mine entrance.
12. Spider 15
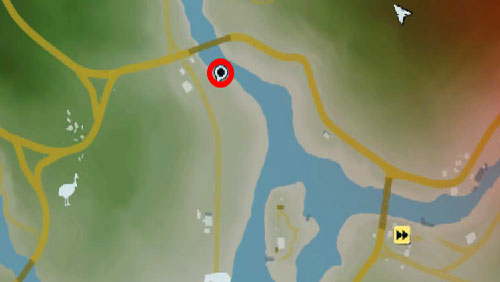
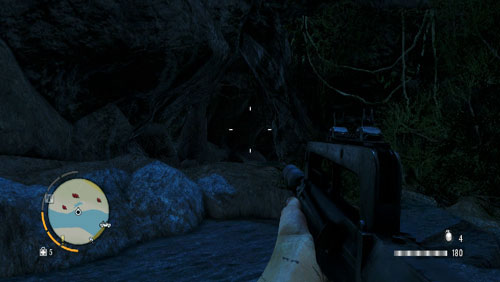
Reach the area marked with the red circle you will find an entrance to a flooded tunnel.
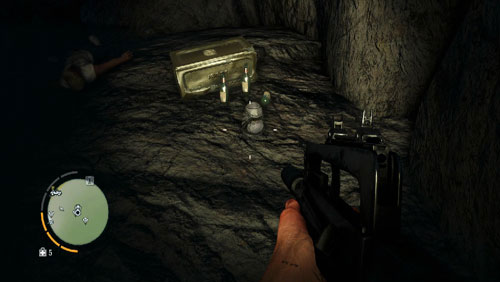
Swim to the end of the cave to find the entrance to the flooded tunnel. Swim through to the next cave, where there is the statuette near a chest.
1. Shark 29
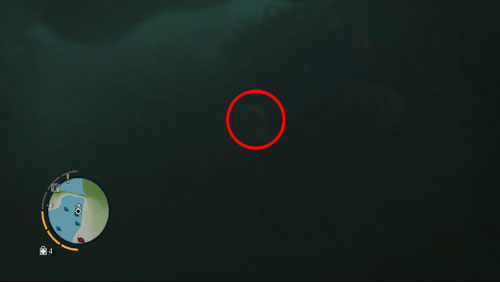
Dive to the right of the waterfall and you will find the statuette.
2. Heron 28
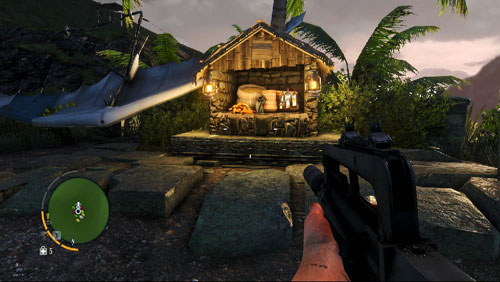
The statuette can be found on the peak of the elevation that you will reach through the path.
3. Spider 14
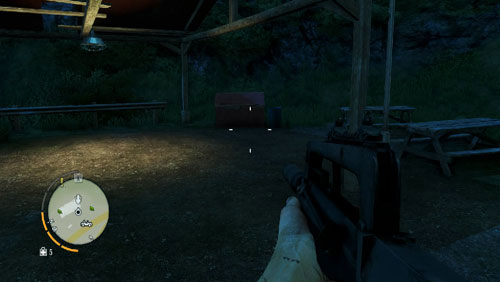
In the area marked with the number, you will find the statuette behind the red container shown in the screenshot.
4. Heron 13
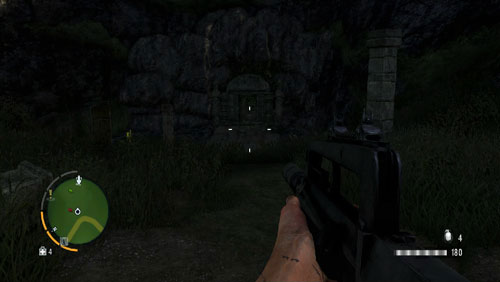
In the area marked as number four, the statuette is in one of the tables.
5. Boar 13
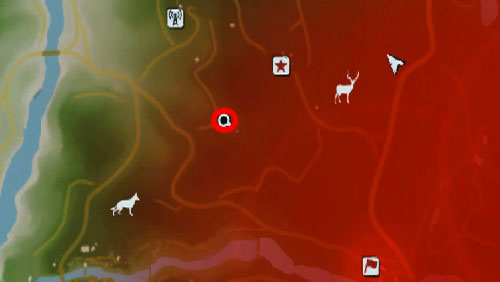
Reach the area marked with the red circle, to face the temple entrance. Inside the temple, there is the statuette.
6. Spider 25
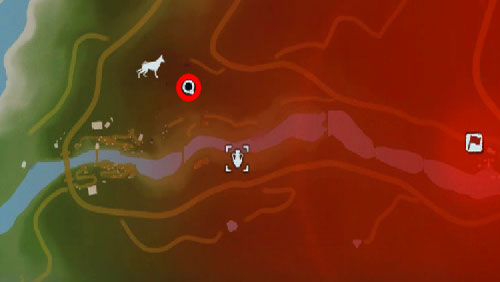
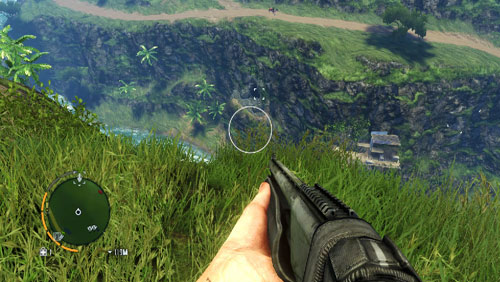
Reach the area marked with the red circle, to reach a cliff, from which you can see the entrance of the cave shown in the screenshot. Jump down and use your suit (sprint) and the parachute (crouch), to land near the cave entrance. Inside, you will find the statuette. You can, alternatively, try and slide down the slope onto the ledge in front of the entrance.
7. Boar 14
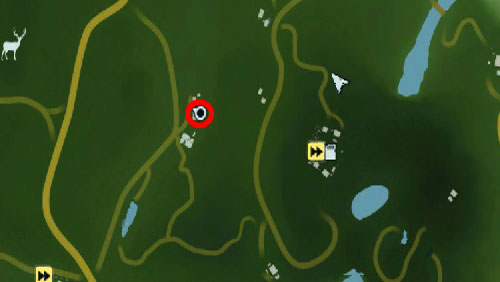
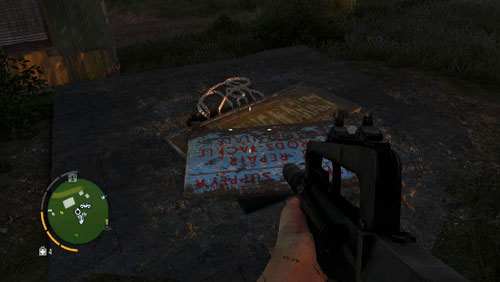
Reach the area marked with the red circle, to find a descent blocked off with plates . . destroy the plates (you need to use an explosive, like an RPG) and jump down. In the area below, you will find the statuette.
8. Spider 12
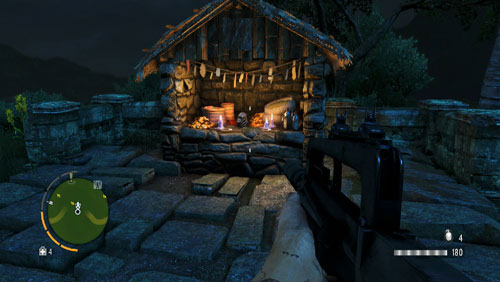
In the area marked as number eight, you will find an altar with the statuette on it.
9. Boar 12
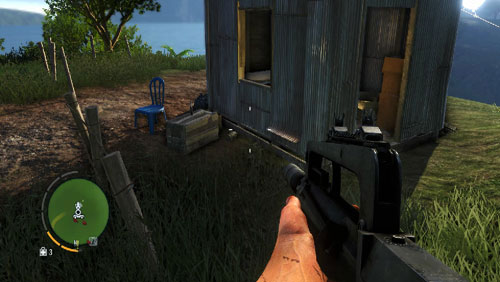
Reach the area marked with the red circle, near the Satellite Communications Hub. In this area, go in the South-Eastern direction, which will enable you to mount an elevation, where there is a statuette marked as number nine.

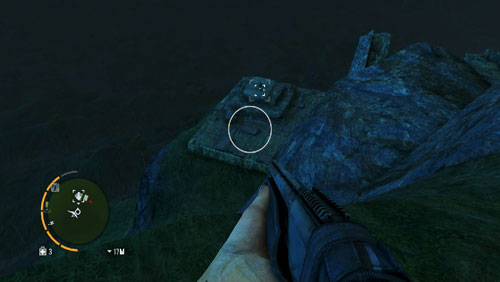
On the peak, from the area marked with the circle, you will notice a rocky ledge, on which there is the statuette.
10. Shark 25
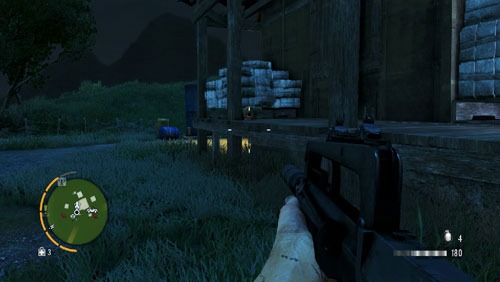
In the marked area, you will find the statuette on the house's porch.
11. Spider 13
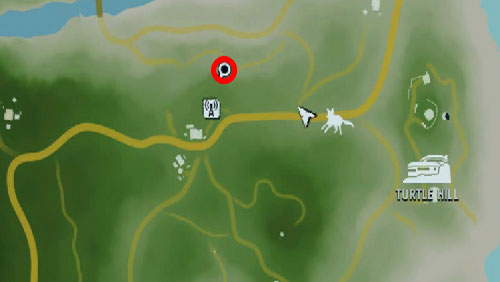
Reach the area marked with the red circle to face the cave entrance.
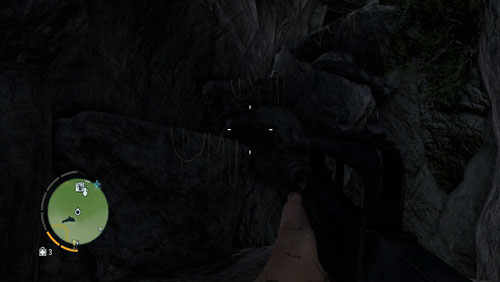
Inside, climb ledges overgrown with vines. On the top, you will find the statuette.
12. Shark 13
Next to the small house, in the area marked as number twelve, you will find the statuette.
13. Heron 25
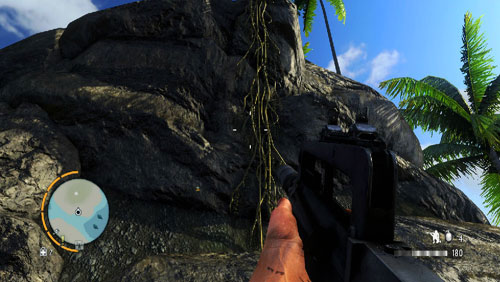
Approach the peninsula from north-west. You will find there vines that you can use to climb up. Collect the statuette from here.
14. Heron 12
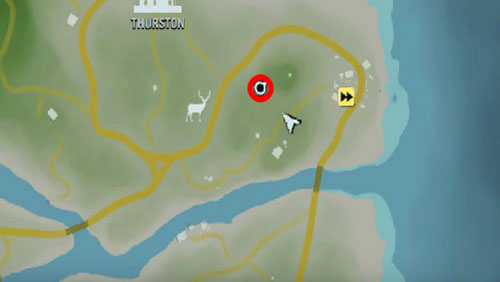
Climb the elevation starting in south-west. The slope there is gentle enough for you to reach the peak, where you will find the statuette.
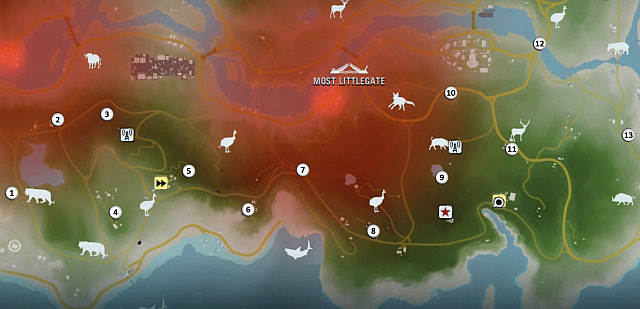
1. Spider 19
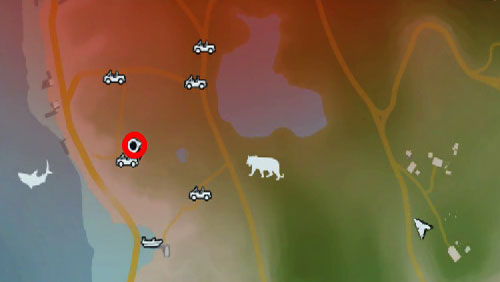
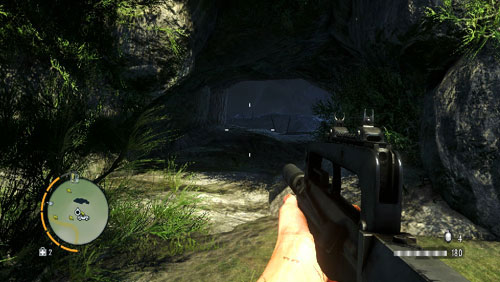
Reach the area marked with the red circle, to face a cave entrance.
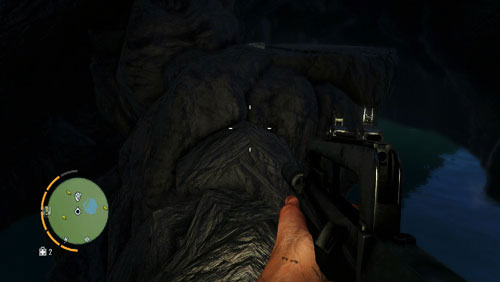
Inside, you need to go over a wooden bridge, turn right. Carefully, cross to the other side over the rocks shown in the above screenshot. Next to the chest, you will find the statuette there.
2. Shark 19
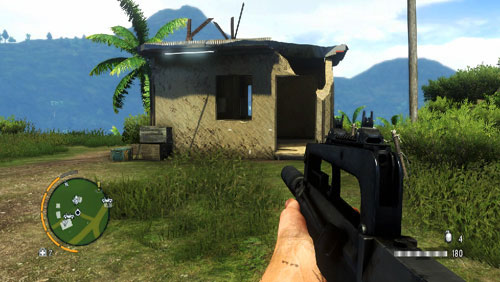
In the area marked as number two, you will find the statuette inside the house shown un the picture, to the left.
3. Heron 19
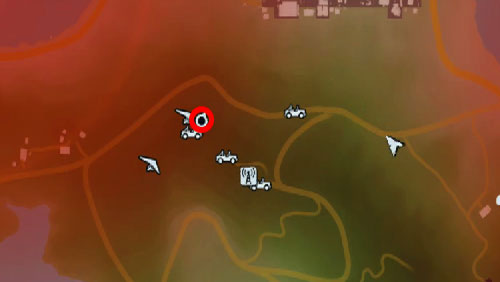
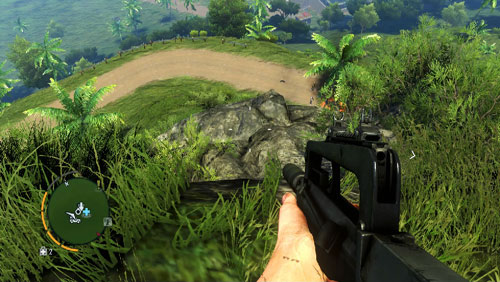
Reach the area marked with the red circle and jump down to the ledge shown in the second screenshot. The statuette is located right past the cave entrance.
4. Heron 18
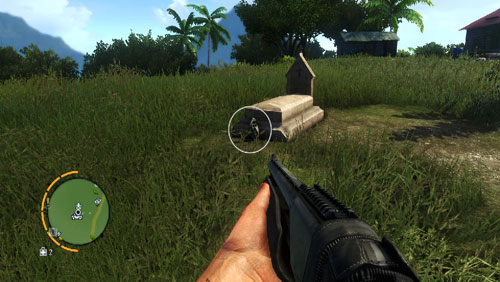
You can find the statuette next to one of the graves.
5. Boar 21
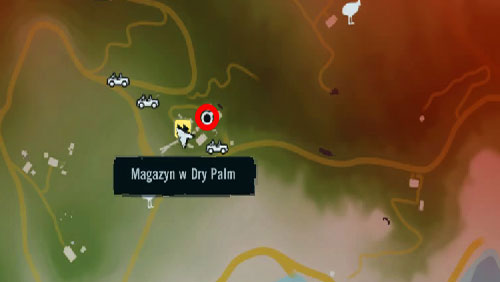
Reach the area marked with the red circle to find the entrance to the mines at Dry Palm Warehouse Outpost.
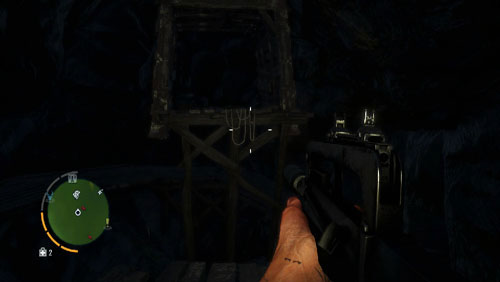
Inside, follow over the scaffolding into the tunnel. Take the first turn to the right to climb higher. You will, eventually reach the area shown in the screenshot, where you will have to jump over to the other side. That is where you will find the item that you are after.
6. Boar 19
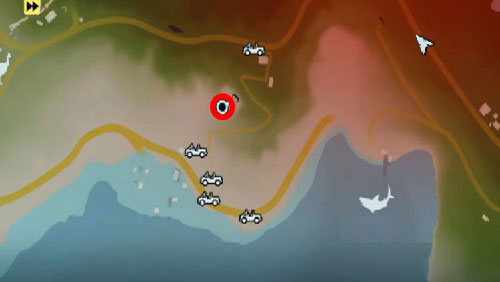
Go down to the beach, to the area marked as number six (the red circle). You will find there the entrance to a cave, inside which there is the statuette.
7. Spider 17
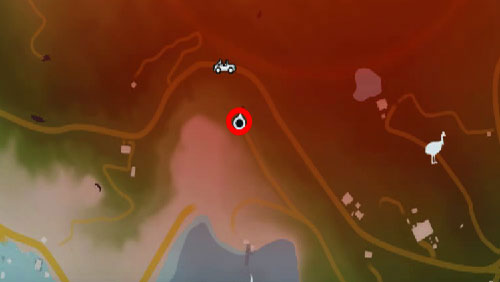
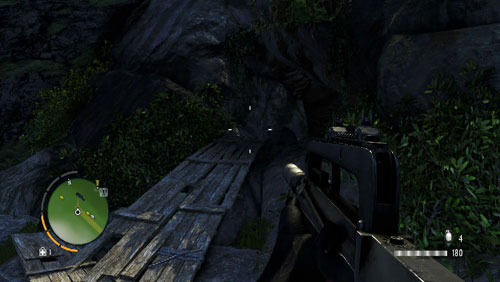
Reach the area marked with the red circle, to face the entrance to a cave.
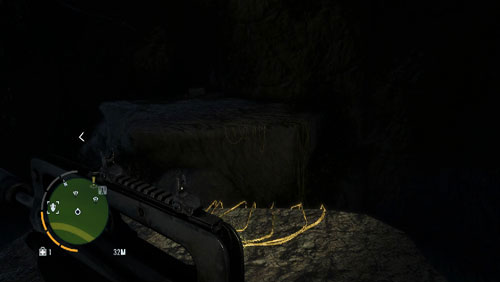
Inside, keep to the left and take the first corridor to the left. You will reach the area shown in the screenshot, where you will have to jump over to the other side. If you fail, you will fall into water. You can then use the vines to climb back up.
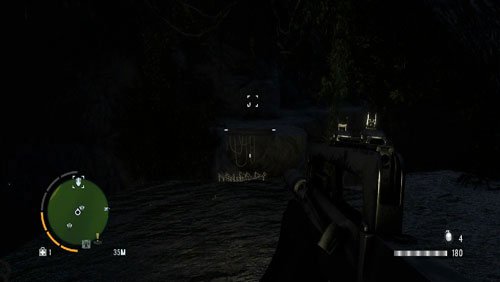
From here, you will have to jump over to the another ledge again. Following the tunnel, you will eventually reach the statuette by crates.
8. Spider 29
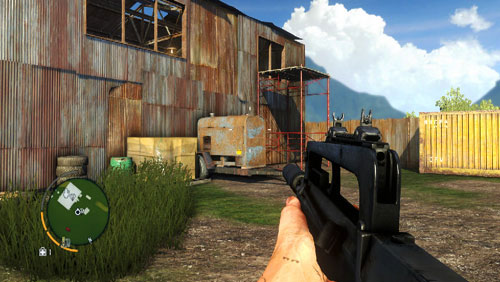
In the area marked as number eight, you will find an abandoned warehouse. Walk over to the back of the warehouse and use the scaffolding shown in the above screenshot. You jump on the scaffolding from the generator next to it. Enter the warehouse, where you will find the statuette.
9. Boar 16

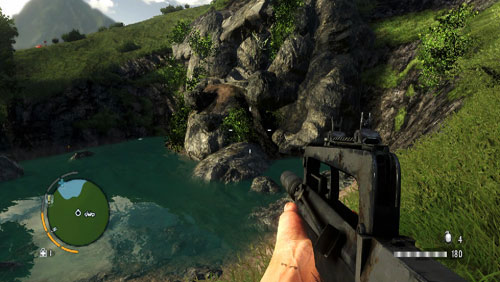
Reach the area marked with the red circle, to reach the area where you will find a cave entrance. Walk over rocks, higher and higher, to reach the entrance. There, near the collapsed passage, you will find the statuette.
10. Heron 20
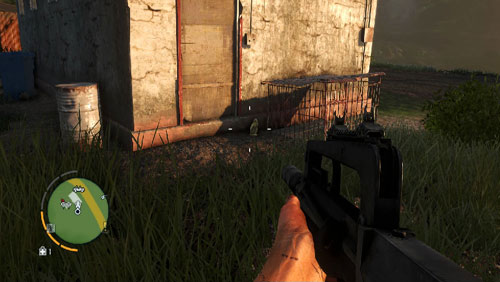
The statuette is on the left side of the building, next to the cage shown in the screenshot.
11. Shark 20
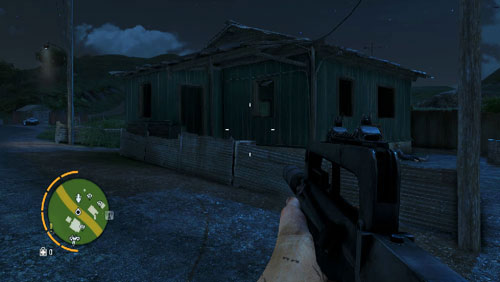
You can find the statuette inside the house shown in the screenshot, in the area marked as number eleven. It's on the TV set.
12. Shark 17
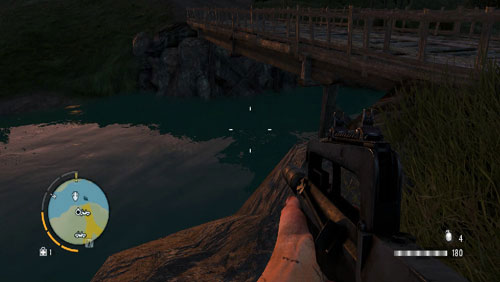
To find the statuette, dive on the left side of the bridge shown in the screenshot.
13. Spider 20

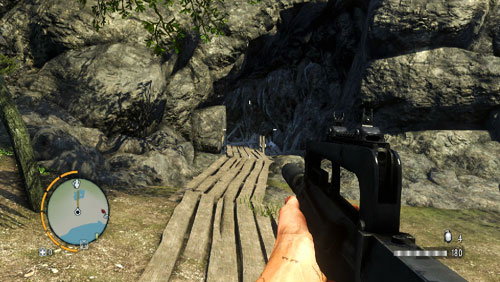
Reach the area marked with the red circle, to face a cave entrance.
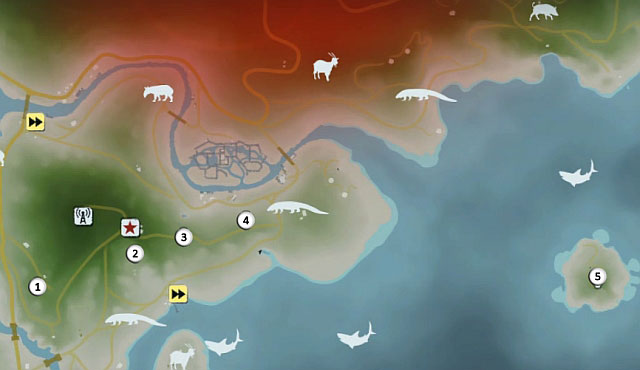
1. Heron 2
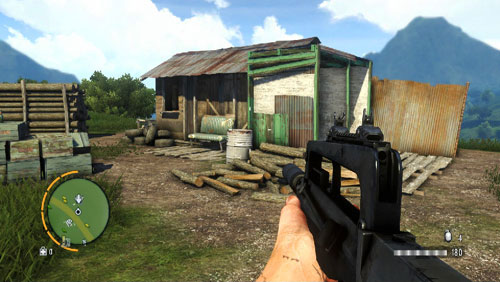
In the area marked as number one, there is a house inside which there is the statuette.
2. Boar 24
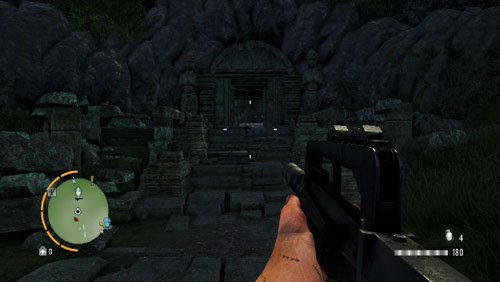
A bit to the south of the area marked as number two, there is the entrance to a temple, shown in the screenshot. Inside the temple there is the statuette.
3. Shark 14
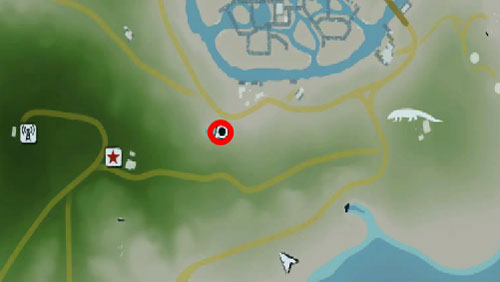
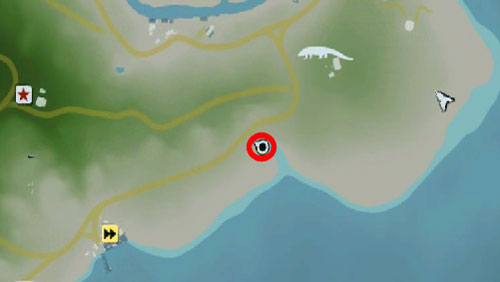
Reach the area marked with the red circle, to get to the entrance of a flooded cave. While swimming through the underwater tunnel, turn left where you will find the statuette on the bottom. (for better performance, look at the mini-map).
4. Shark 15

Before you come here, prepare the Deep Dive syringe. Reach the area marked with the red circle, to reach the entrance to a flooded cave, which you need to swim into. Swim over to its right side, where you will find an underwater tunnel.
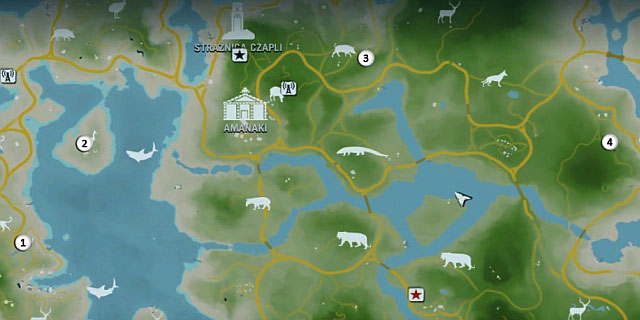
Swim through the tunnel to the next cave, where you will obtain the statuette.
5. Heron 14
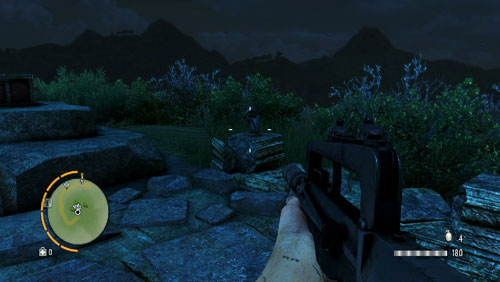
Reach the northern part of the island, where you will find a path leading up the elevation. The statuette is on the elevation's peak.
They are marked n the map with the symbol of a letter. For finding six letters, you will be awarded a new weapon: a Tanto, which increases damage dealt in melee.
1. Hyogo's letter
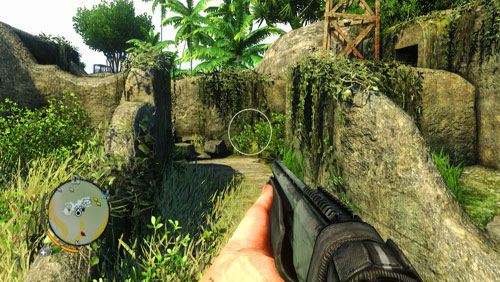
In the area marked as number one, you will find a bunker. While in its northern par, you will find the passage shown in the screenshot.
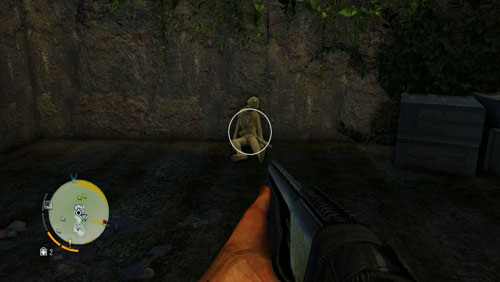
Mount it and turn right. Enter the bunker, where there is a corpse with the letter
2. Ren's letter
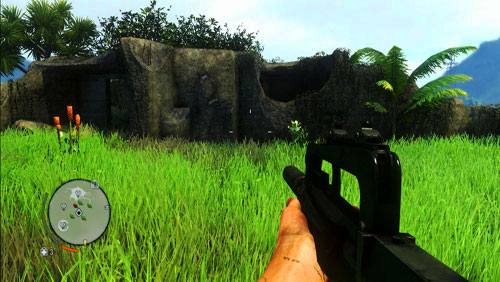
Get to the island marked with number two. Approach the bunker from the west. This will get you into the place shown in the screenshot. Walk over to the right of the structure in order to be at the northern side of the bunker.
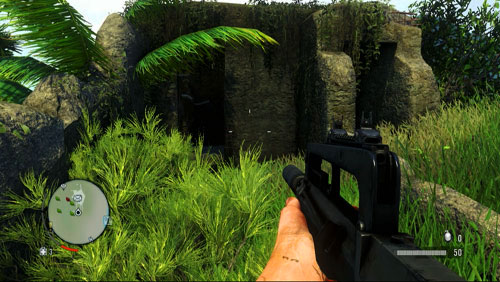
There are two entrances there. The corpse is in the one to the left.
3. Mori's letter

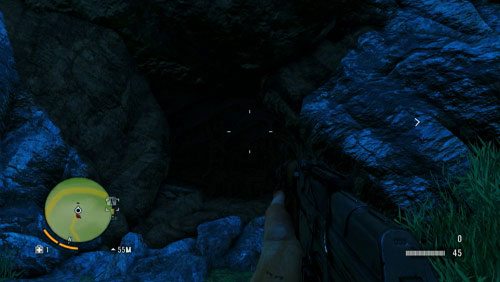
Find the area marked on the map with the red circle, to find the cave's entrance.
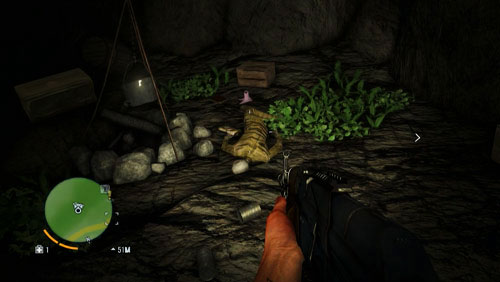
At the end of the cave, there is a corpse with the letter next to it.
4. Mogi's first letter
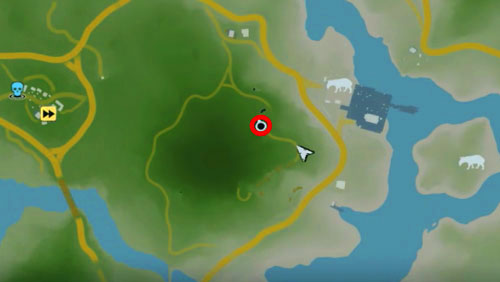
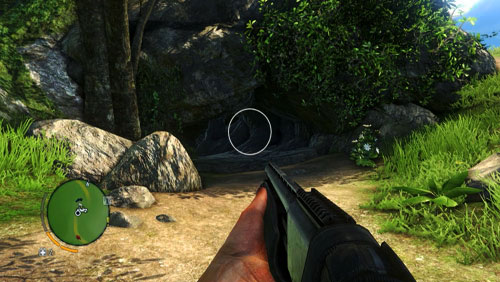
Approach the area marked with the red circle in the screenshot, to find the cave entrance.
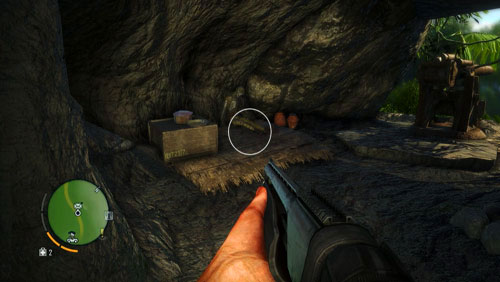
The corpse, and the letter, is at the other end of the cave.
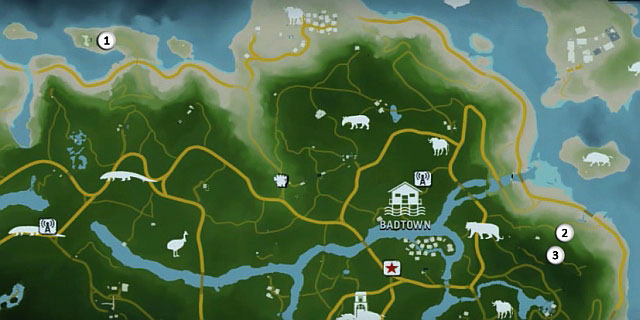
1. Mogi's third letter
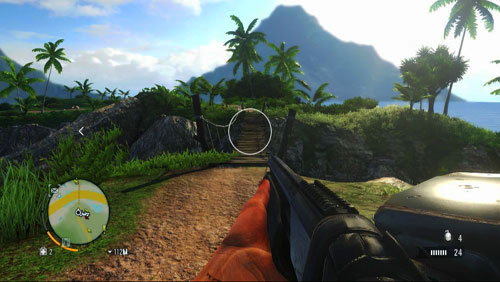
Make your way to the peninsula over the wooden bridge, that you can find in the area marked in the screenshot with the red circle.
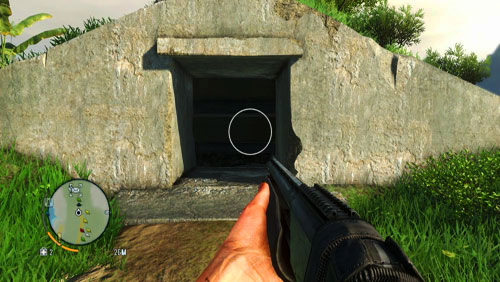
Approach the area marked as one, where you will find a bunker. Enter through the entrance on the western wall, shown in the screenshot, and go down the stairs.
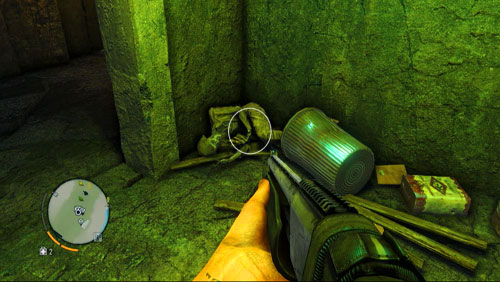
Downstairs, take the first passage to the left, glowing green. In the corner, there is the corpse with the letter.
2. Hayato's first letter
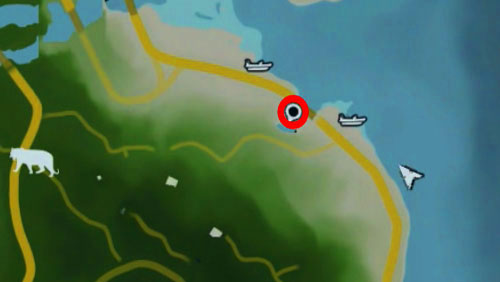

Go down to the beach in the place marked with the circle, to face a cave entrance.
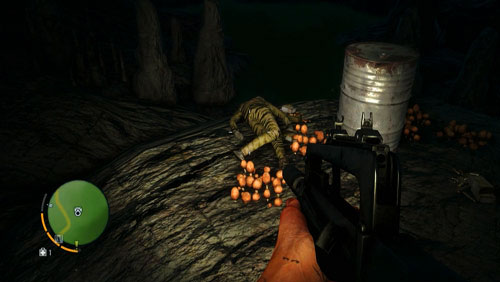
The corpse, and the letter, is at the end of the tunnel.
3. Swinji's letter
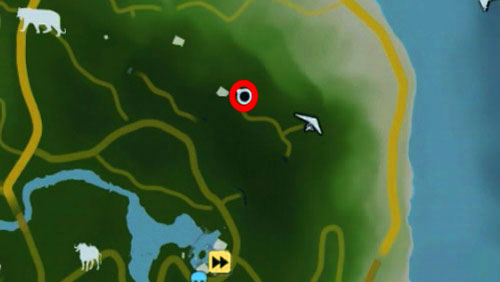
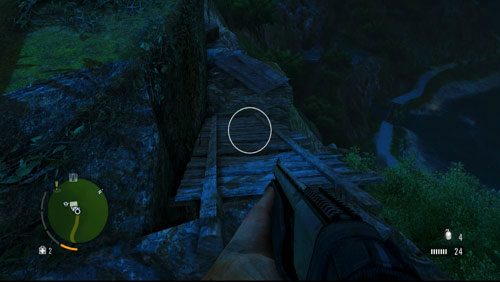
Reach the area marked with the circle in the screenshot. You will find a descent to your right, which you need to take.
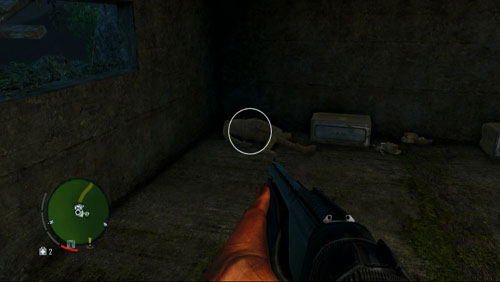
The entrance to the bunker is right after you turn the corner to the left.
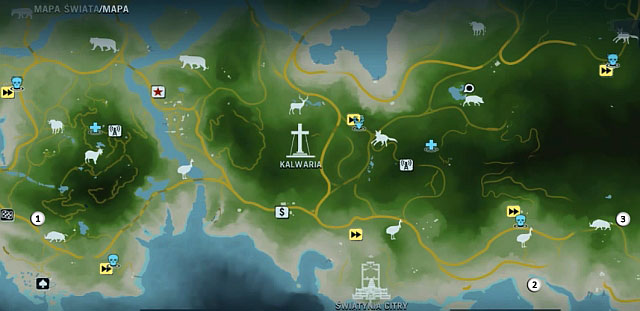
1. Sato's letter
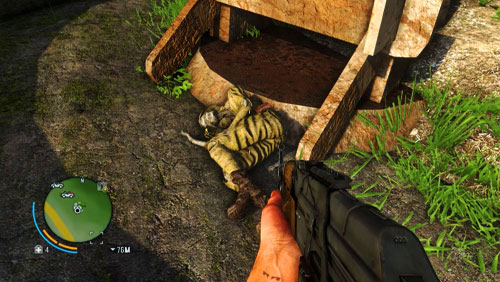
Mount the hill to reach the area marked with number one. You will find a cannon there, next to which there is a corpse and a letter.
2. Mogi's second letter
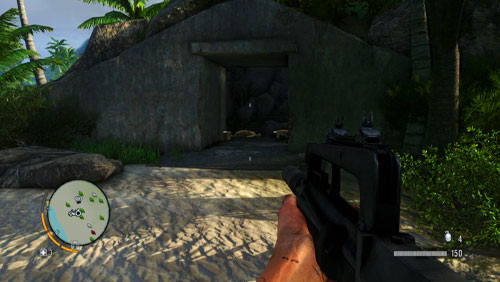
Reach the peninsula and the area marked with number two. There, you will find another bunker with the corpse and the letter inside.
3. Major Moga's fourth letter
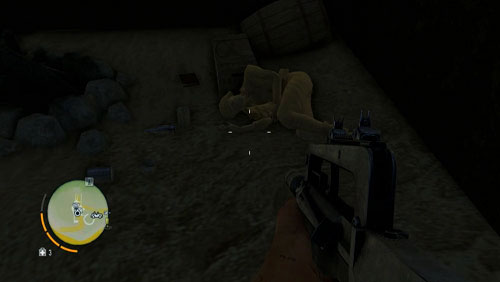
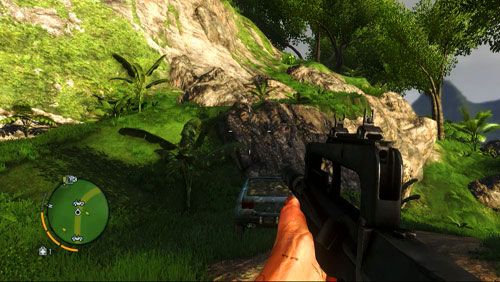
Climb the elevation in the area marked with the red circle.
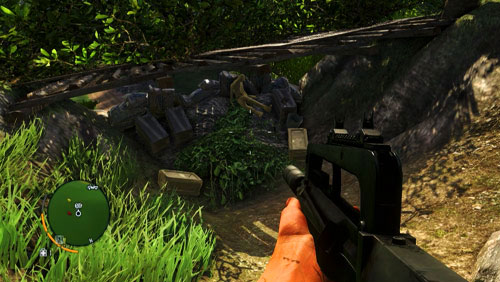
Approach the area marked as number five from the north, where there are battlements and the letter next to a corpse.
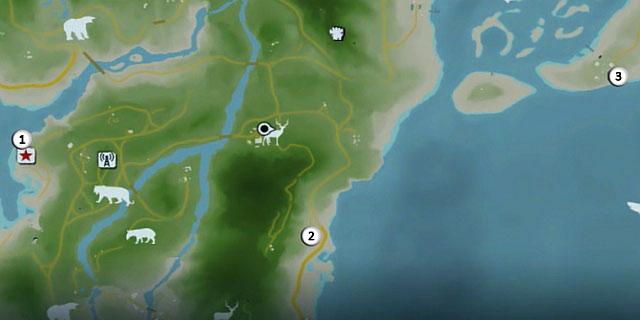
1. Tadao's first letter
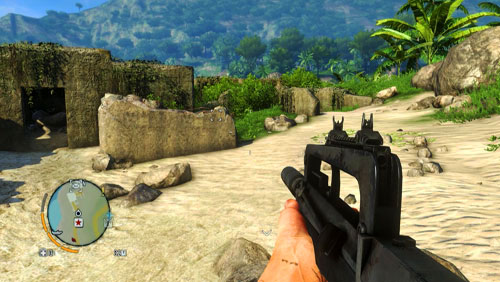
Reach the area marked as number one, to find the bunker shown in the screenshot.
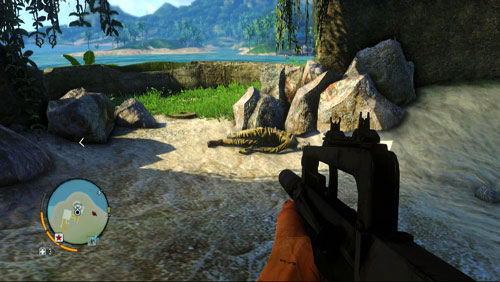
Go over to its right side, in relation to the previous screenshot, to find the corpse and the letter.
2. Tadao's second letter
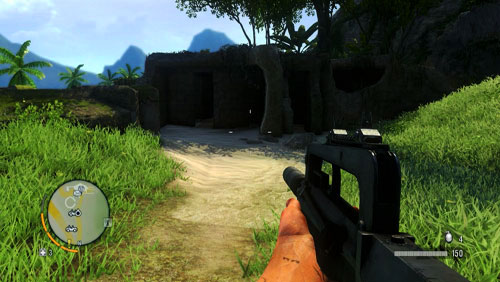
The next bunker can be found in the area marked as number two.
Enter the building to the left, where there is the letter and a corpse.
3. Hayato's second letter
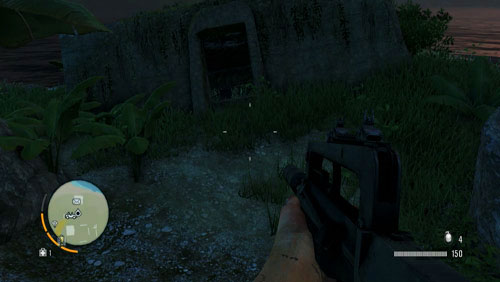
Drive to the marked area, where there is the bunker shown in the screenshot.
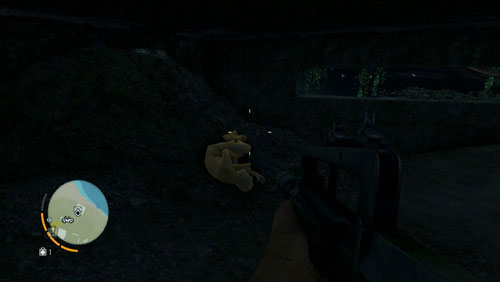
Inside, there is a corpse and the letter.
1. Hurk's third letter

Follow the path to reach the area marked as number one. In the designated place, there is a house, next to which there is a wooden structure to the right (the screenshot). Next to the structure, there is a manhole with a ladder.
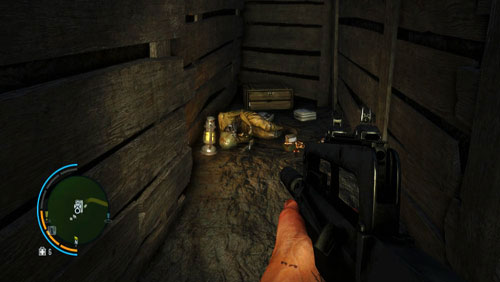
Once down there, reach the other end of the foxhole to find a corpse and the letter.
2. Hurk's first letter
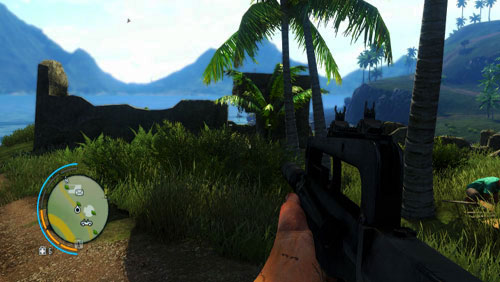
In the area marked as number two, you will find remains of a bunker shown in the screenshot. Enter the structure, where there is a corpse and the letter in the corner to the right.
1. Hurk's fourth letter
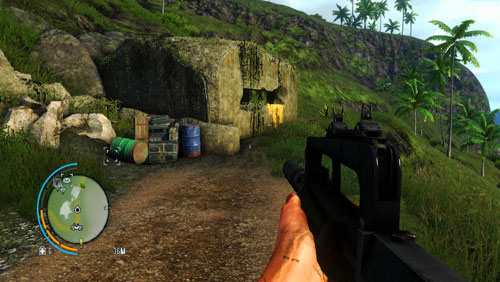
Go down into the bunker shown in the screenshot, which you will find in the area marked as number one. Inside, go down the stairs. On the right side of the chamber, you will find the letter.
2. Hayato's fourth letter
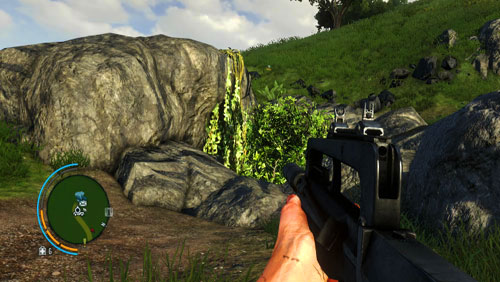
Follow the path into the area marked as number two. There, you will find a vine that you need to use to climb down. On the right, at the bank, you will find the letter.
3. Masawiro's letter
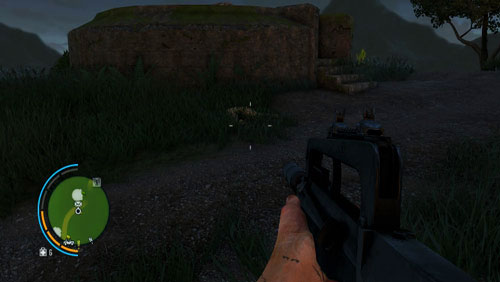
In the area marked as number three, there is a corpse with the letter (the screenshot), next to the building's entrance.
4. Hayato's third letter
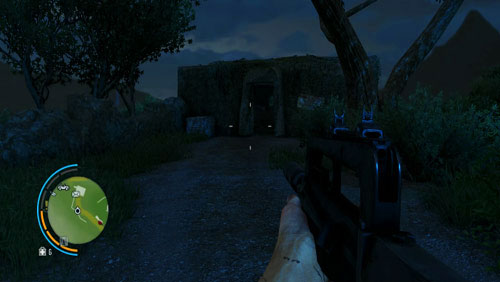
Reach the town marked as number four, where, inside the bunker shown in the screenshot, you will find the letter.
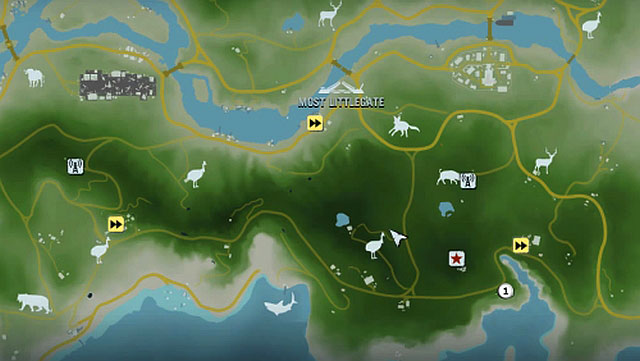
1. Hurk's second letter
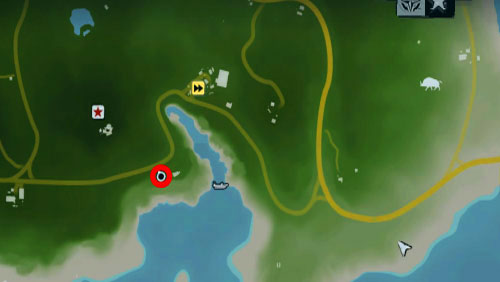
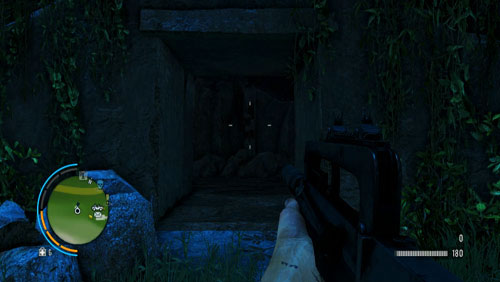
Reach the area marked in the screenshot, to find the side-entrance to the bunker. Enter the bunker and take the stairs to the right. Upstairs, there is a corpse and the letter.
There are various species of animals in various points of the map. Information about species living in a given area can be obtained after you destroy the coder inside the box, at the top of the radio tower.

Each animal you kill can be flayed, and materials thus obtained can be used to create new items, like bigger rucksacks, holsters cartridge belts etc. If you do not encounter an animal that you are looking for, in a given area, walk away from the area and return after some time. The time of the day has no bearing upon the appearance of animals in a given region.
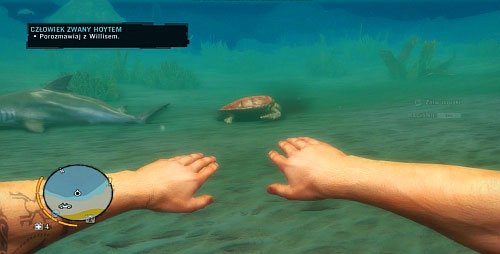
As far as hunting sea animals is concerned, you need to use boat and swim out to the areas in which these animals live. As soon as you spot the specimen that you are looking for, shoot it while on the boat, and jump into water to flay it. Dead bodies will be falling down to the bottom so, you need to hurry. You can also try and kill a given animal while on the beach, provided the animal swims up sufficiently close.
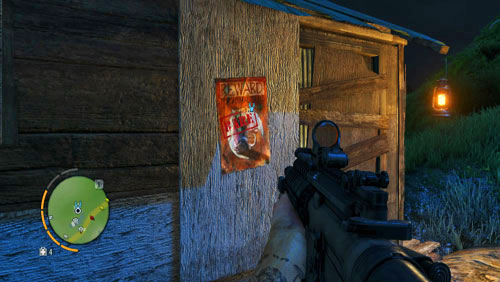
This kind of quests are unlocked only after you have taken over the outpost. They consist in hunting down an animal in a specified area, using specified weapon. Although every individual mission regulates which kind of weapon needs to be used, it does not really have to be a weapon picked up during a mission. You can, just as well, use a modified weapon, which makes things easier.
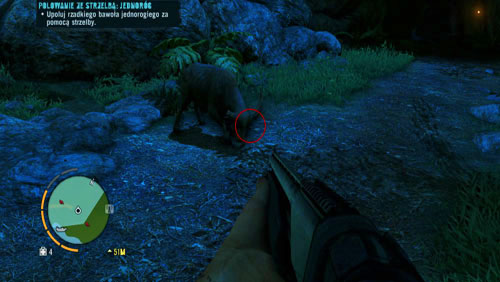
Only during these quests can you find unique animals, whose hides are necessary to craft the best items around. Below, there is a list of outposts that unlock quests with this kind of animals .
Northern Island:
Whenever there is a plant near you, it will be displayed on the mini-map. Different kinds of plants are marked with different colors. After you harvest them, you can use them to prepare a variety of syringes.
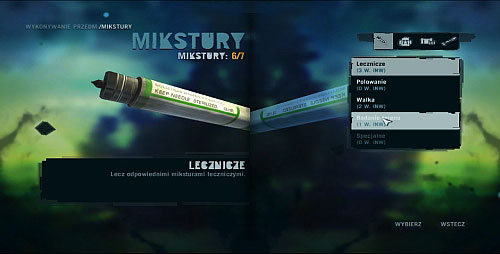
There are four categories of such plants: Healing, Hunting, Fight, Exploration, Special. All in all, they are very useful because they enable you e.g. to stay underwater for an extended period of time, heal wounds, or grant temporary invulnerability. New recipes can be obtained along your progress in the game, by finding hidden items, (e.g.. cult objects) and by performing side missions.
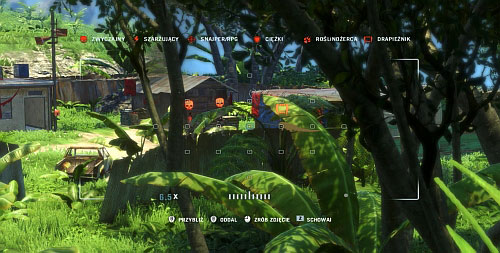
Before you start taking over an outpost, you should recognize the area first, with your camera. After that, your enemies are marked on your mini-map, and you will be able to see their silhouettes through obstacles. When there are two enemies side by side, and you still haven't unlocked the double-kill ability, toss a stone to make them separate.
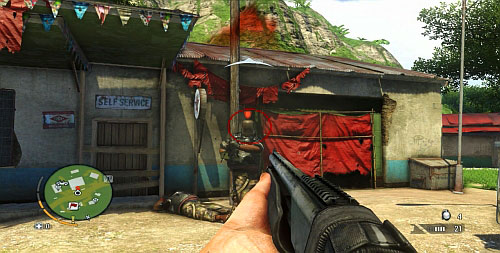
Enemies of various kinds are marked with different icons, depending on the type of weaponry that they carry. You should pay special attention to armored enemies (with the symbol of a shield overhead) They can be killed with a rocket launcher or an RPG. Another method assumes that you sneak behind them and shoot them on the head. You can also try and shoot their armor masks off their heads. After you unlock the Heavy Beatdown skill, you will be able to kill them with silent elimination.
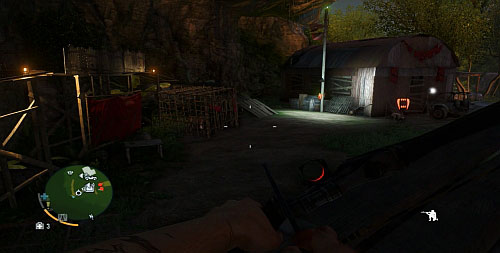
Sometimes you can see animal cages in outposts. It always pays off to destroy such a cage. It is possible that the released animal kills all of the enemies.
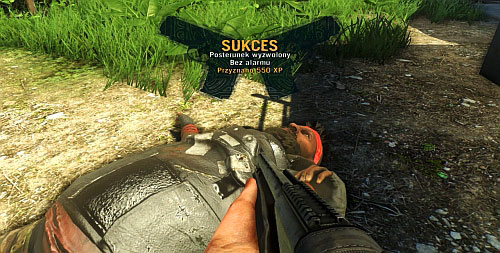
Depending on how an outpost is taken over, you are awarded experience points. For securing every outpost, you receive 500 experience points. For not causing alarm 550 points. If, throughout the entire mission, you are not spotted, you get 1500points. As you can notice, you receive more bonuses for not being seen at all and killing your enemies quietly.
In every outpost, there is a secret depot with an automated shop in it, and sometimes also items to collect, like memory cards. After you secure an outpost, you can fast-travel to it from anywhere on the map. Taking over an outpost, also unlocks plot missions , side quests and mini-games, like the path of the hunter or supply drop.
Below, there is a list of outposts, in which you can find memory cards after you search the depots.
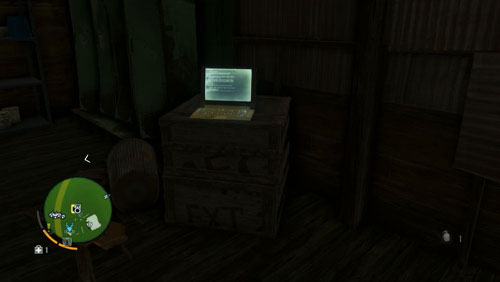
The Northern Island:
The Southern Island:
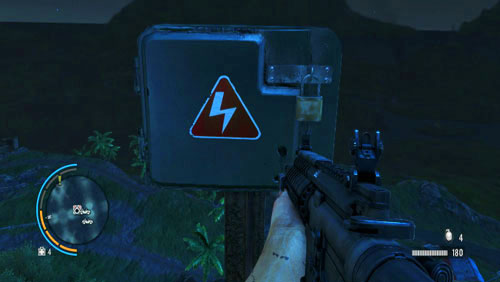
In order to uncover new map areas, you need to climb radio towers. On the top, there always is a wire box, whose opening, and disabling the encoder, uncovers a fragment of the map, and marks points of interest. The player is rewarded with unlocking new free weapons in shops, and enrichment of the stock. Before you take to the exploration of a given area, it is a good idea to climb the nearest tower to uncover it. Thanks to that, you won't have to explore blindly.
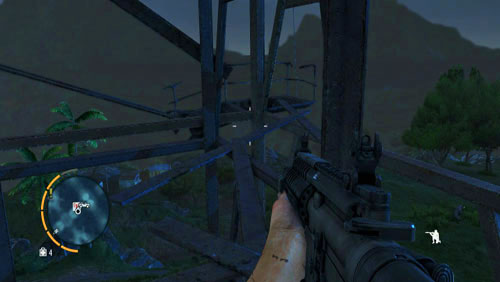
Every radio tower is a challenge and there are different obstacles on your path towards the tower. In most cases, the entrance is at the foot of the tower. There is a mast, the first floor of which you can reach only by using the nearby zip line. The way up requires jumping over holes and climbing. Often, you will have to walk to the other side of the mast over thin elements of the structure, shown in the screenshot, At all times, keep your eyes open for ropes hanging down, or other elements that you can use to climb higher.
Challenges that require the player to win a specific amount of points in a given time. It is a good idea to wait with performing these until you get skills that make fighting easier, like e.g. Chained Takedown, or faster movement. Every kind of enemy and the way it has been taken down, gives various bonuses, which has been presented in the screenshot above. Destroying a blue barrel, gives additional 10 seconds.
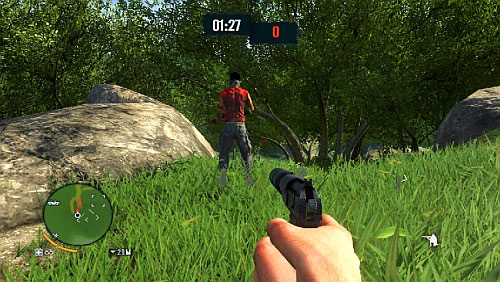
Every challenge requires a different type of weapon and a different fighting style. If possible, try and perform Chained Takedowns, and remain in hiding. This gives the largest amounts of points. Otherwise, always try to aim at the enemy's head. If it is a suppressed type of weapon, try to stay hidden in plants to prevent being spotted.
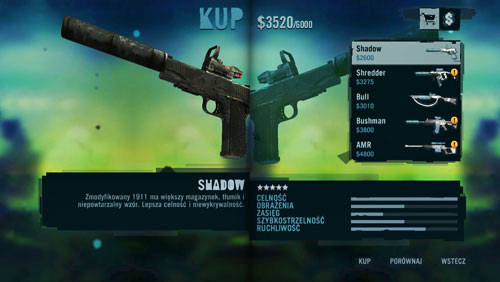
Apart from the regular weapons ,which you unlock as you progress in the game, there are seven weapons that will be added to the shop's stock, after you meet certain requirements. In some cases, you additionally need to buy a given weapon in shop, to be able to use it .Below, there is a list of these weapons accompanied with the requirements that are to be met. The number in the brackets is the price for this weapon.
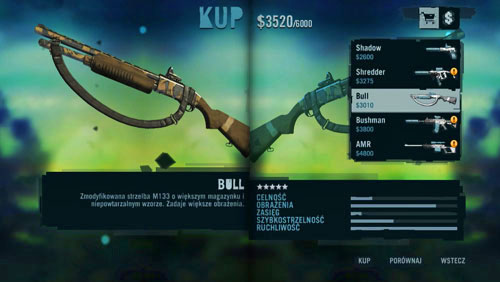
Modified Weapons:
Shadow (2600$): secure seventeen outposts;
Shredder (3275$): collect ten memory cards;
Bull (3010$): collect ten cult items;
AMR (4800$): collect twenty cult items;
Bushman (3800$): Enable eighteen radio towers;
Ripper (4200$): Complete six Rakyat trials;
Cannon: The weapon can be unlocked via the Uplay system for 30 points, or with a special code that you get with the game;
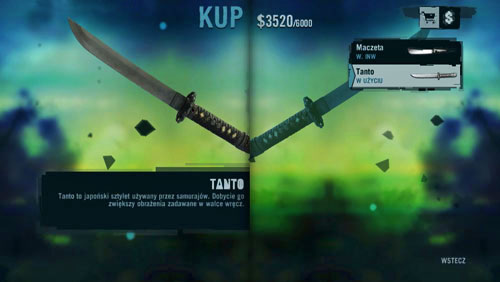
Melee weapon:
Tanto (-): find six letters of the lost;
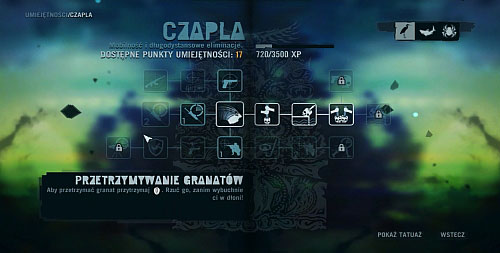
For most activities that you perform in the game, you receive experience points and get promoted to higher levels. Whenever you gain the next experience level, you receive a point that can be spent on a special skill. The skills are divided into three paths: Heron, Shark, Spider. Heron skill focuses on eliminating enemies over large distances, aerial attacks and prolonging the effectiveness of the syringes you inject yourself with. The Spider path improves bow skills faster switching/reloading of weapons and efficient movement. Among the Shark path, there are talents that increase your health bar by further segments, chained takedown and a very useful Heavy Beatdown.
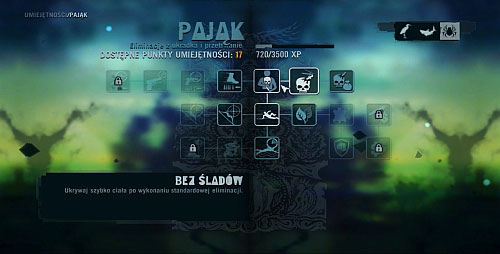
As far as the number of points you get, is concerned, the game prefers those who prefer silent elimination. A good example is killing an armored enemy with the Heavy Beatdown skill. For an enemy killed this way, you receive 500 points. That is why, you should first turn your attention, and develop, skills of silent assassinating. Then you should decide on the skills that mach the type of weapon that is most frequently used.
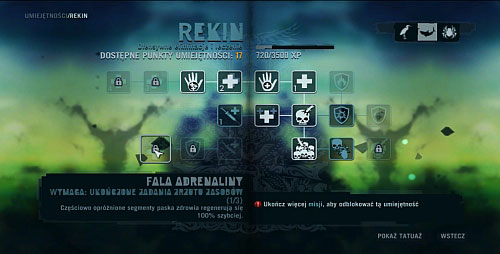
You can easily buy the skills from the path of your choice if you perform side missions. You gain access to the remaining ones alongside with your progress in the game. Some of the skills have additional requirements. E.g. in order to unlock Adrenaline Surge, you first need to perform three supply drop missions.

Mini games like poker, sharpshooter, race, knife throwing and supply drop (reaching a designated area within a limited frame of time) or wanted dead (killing a target with a specific kind of weapon), are a stepping stone in the main plot and allow you to earn more money. All activities in a given area require you to secure an outpost to unlock. Before you start doing supply drop, it is a good idea to secure all nearby outpost, in order not to run into an enemy patrol while performing the mission.
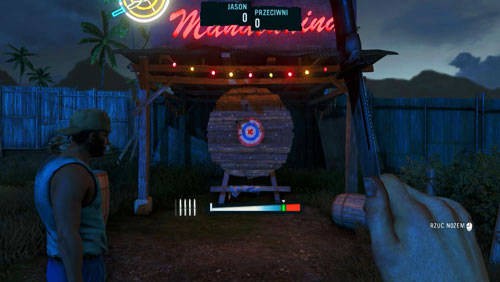
Although poker is the most profitable, it requires luck during card dealing. That is why, when there is a pressing need, I recommend that you do wanted dead which, apart from money will also give you experience points, as well as knife throwing, which requires releasing the button at the right moment. The most important thing, while loading the strength bar, is to make sure that you do not go beyond the green area. It is better to release the button before you reach the green area, instead of aiming at the middle of it.


 Fallout 3 Game Guide & Walkthrough
 Football Manager 2014 Game Guide & Walkthrough
 FIFA 14 Game Guide & WalkthroughFar Cry 3 Game Guide & Walkthrough
 F.E.A.R. 2: Project Origin Game Guide & Walkthrough