Unofficial Borderlands 2 Guide by vhayste for
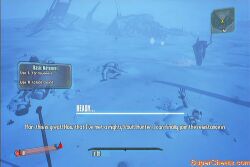
After the scene, you have to choose a character. Carefully read their description to know which style fits you the best. After selecting your character, follow the pesky robot called Claptrap until you reach his hideout.
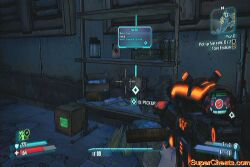
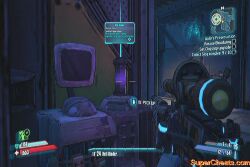
After the scene, get the gun from the cabinet to complete this rather simple mission. You can also check your menu right now and familiarize yourself with various options. Loot the other containers as well before leaving.
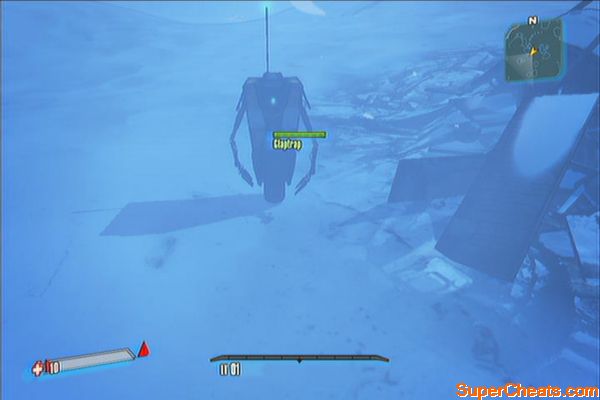
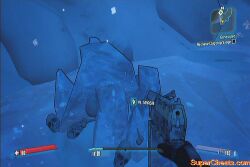
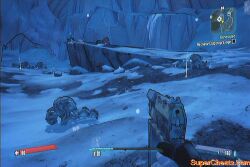
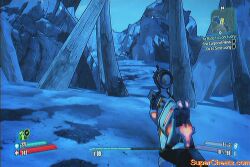
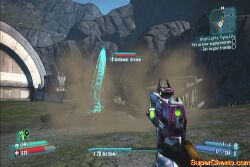
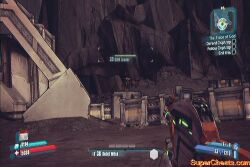
You have to retrieve Claptrap's eye back. Follow him as he opens the door and leads you outside. Continue looting the boxes and smash the icy skeleton piles along the way. Shoot the bullymongs that will ambush you and continue forth. As you reach the cliff, more bullymongs will appear. Take them out and go down to help Claptrap. Loot the boxes and continue past the wreckage.
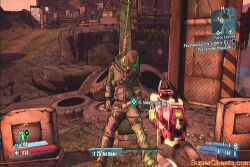
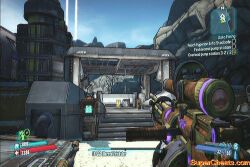
Boss: Knuckledragger

A desolate planet. An ancient alien artifact. An unstable dictator. Four vault hunters. And a gazillion guns.
Welcome to Supercheat's unofficial Borderlands 2 guide featuring illustrated walkthroughs that will help you complete the main story missions, optional side missions, challenges and trophies. Whether you're playing solo or with friends, this guide will assist you in your journey to kill Pandora's mentally unstable dictator, Handsome Jack.
Chapter 0: My First Gun

Chapter 1: Blindsided
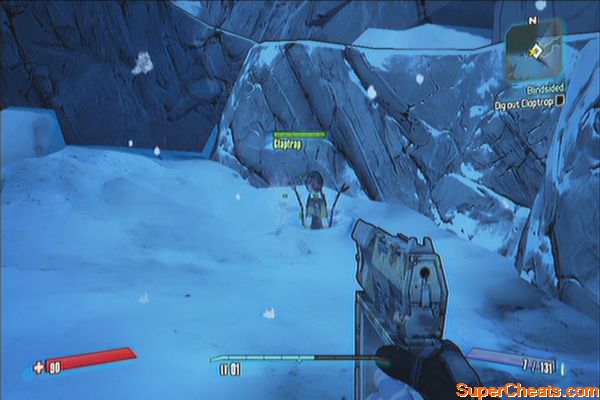
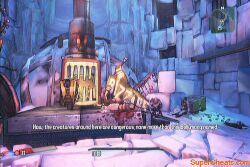
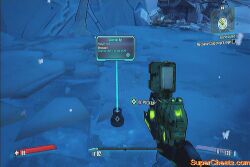
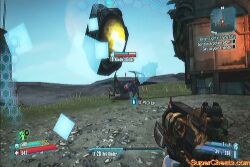
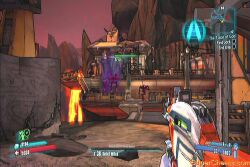
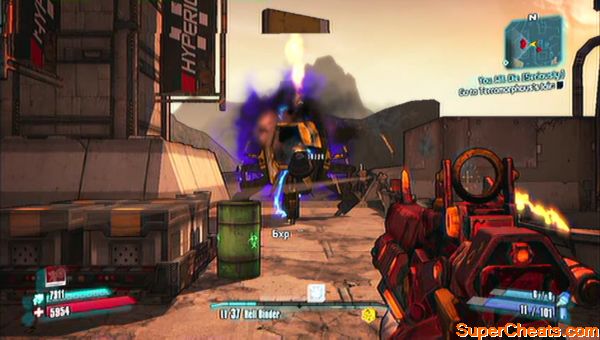
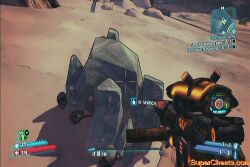
The Knuckledragger will appear afterward. Keep shooting at it then run away when it starts to charge. When it is critically wounded, fall back to the wreckage and take out his lesser minions. Once done, continue attacking him. Hitting the glowing blue part on his chest will deal critical damage so aim at it whenever you have the chance.
This is gonna hurt
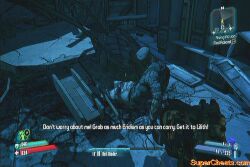
After defeating the enemies, pick up the loot as well as Claptrap's Eye. Continue up the ramp and wait until the heavy vault opens. Loot the chests inside, including the one in the middle. Talk to Claptrap to complete the mission.
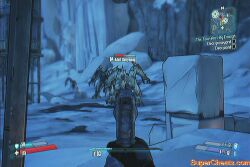
Travel to the Southern Shelf next. Follow the path to reach the town. Take out the bandits and the bullymongs to clear the area. Once done, wait for Claptrap to touch Sir Hammerlock's electrified gate then head there to meet him. Give him Claptrap's Eye to fix him. 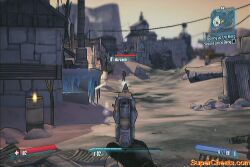

Follow Hammerlock to the Bounty Board so he can turn on the power. Talk to him to turn in this mission and start a new one. 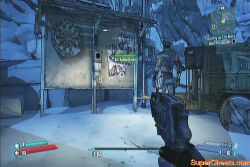
You have to get to Claptrap's boat next but there are optional missions you can tackle at this point:
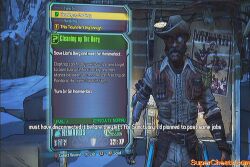
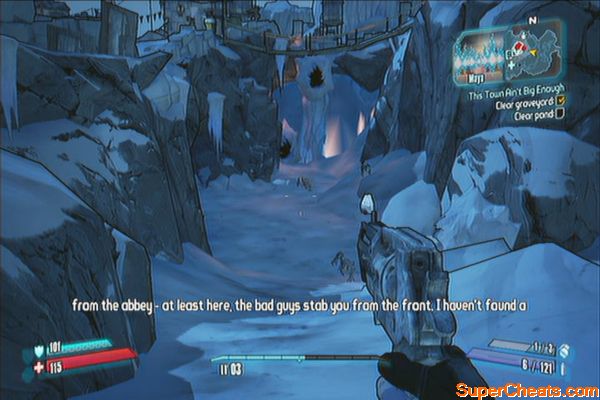
This Town Ain't Big Enough
Shielded Favors *
Best Minion Ever *
* (available after completing This Town Ain't Big Enough)
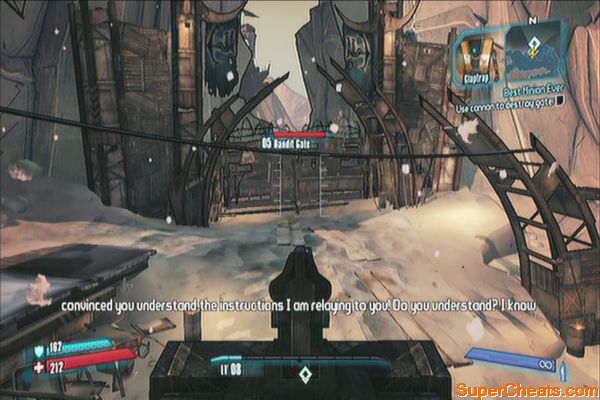
Check this guide's Optional Missions section for the individual walkthrough of each. Once all the optional missions are taken care of, talk to Claptrap and follow him to the bandit hideout. Clear the initial area then have Claptrap lower the bridge. Follow him then prepare for a battle. 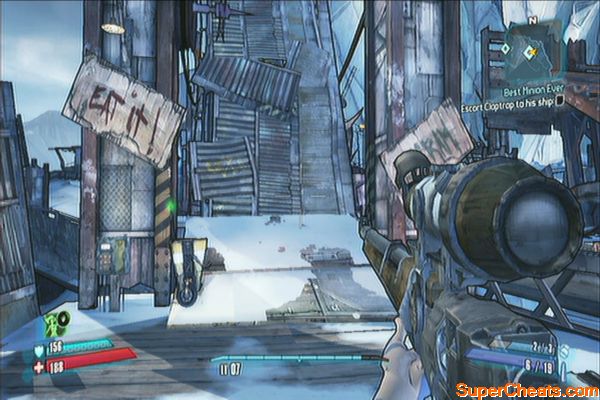
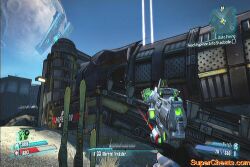
Boss: Boom-Bewn
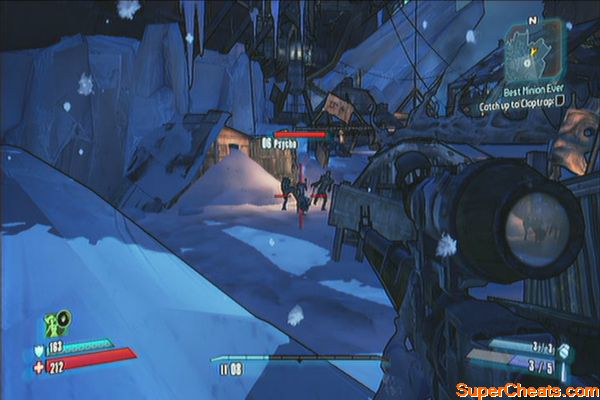
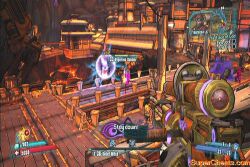
You have to be wary of the midget's shotgun and Boom's improvised cannon. Concentrate on the midget first while running around, preferably behind cover. After taking out the midget, concentrate your fire next on the cannon itself, while occassionally taking out charging Psychos. Once the cannon is destroyed, Boom will fight on foot and will fire homing explosives towards you. Psychos will continue rushing in so keep moving and run for cover when your shields are low.
Explosions, explosions
Burn, baby, burn
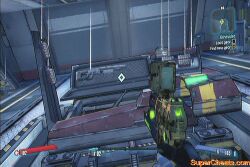
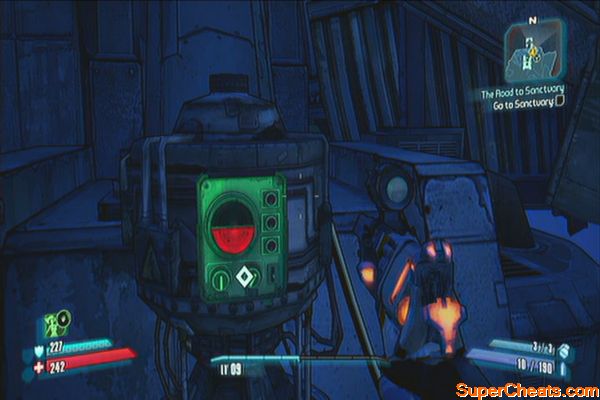
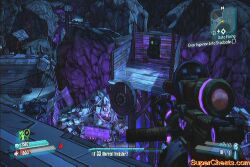
Disembark from the ship then head to the marked location. Examine the Catch-A-Ride terminal. Clear the nearby Fishguts Outpost then grab the Hyperion Network Adapter from a ruined robot on the ground. 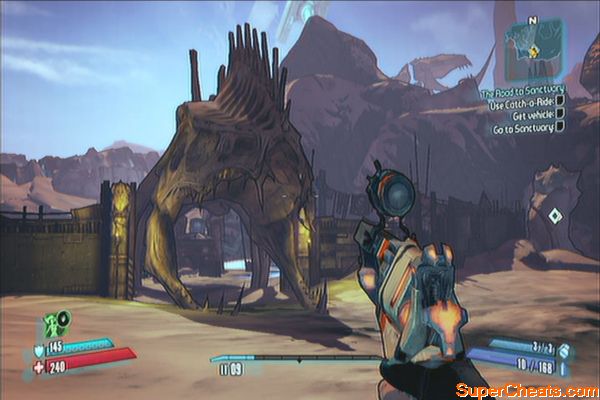
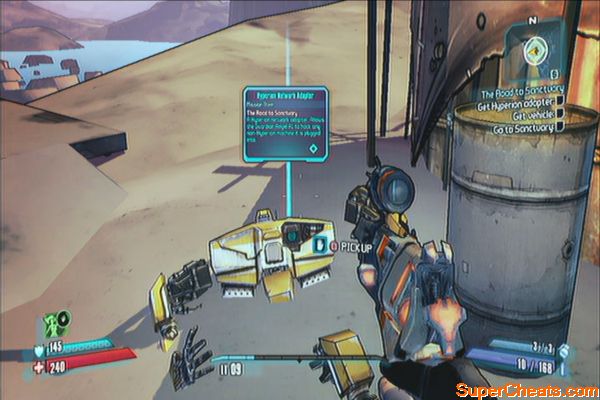
Head back to the terminal and install the adapter. Activate the terminal then select a vehicle you want. Ride the vehicle and follow the path. Lay waste on the enemies along the path and continue until you get outside the cavern. 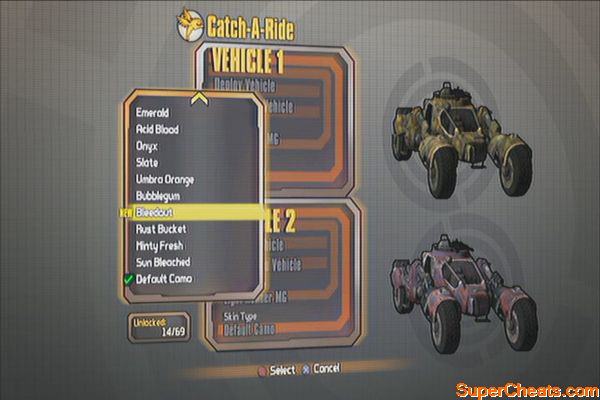
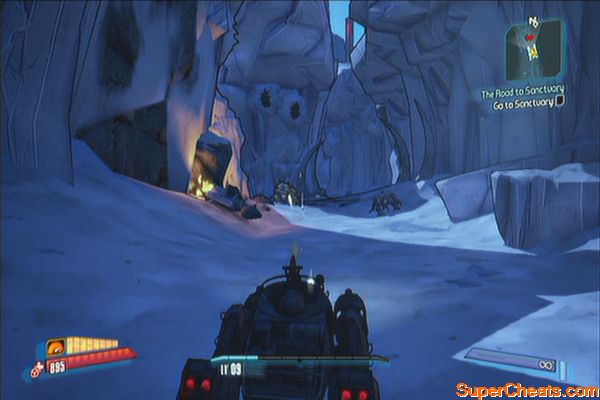
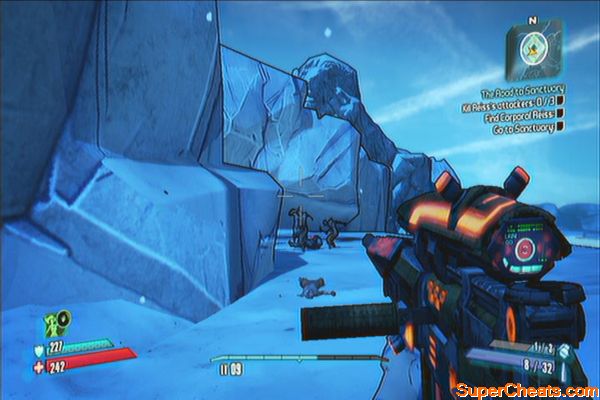
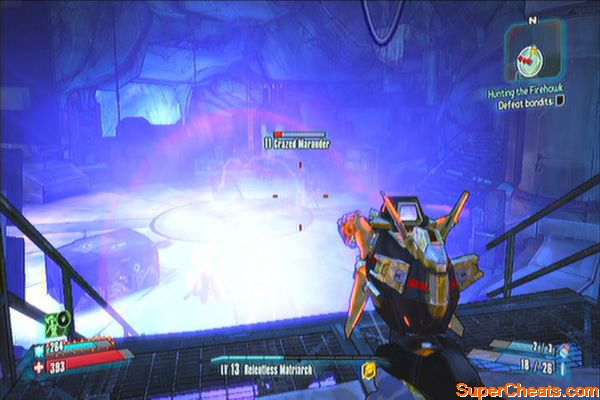
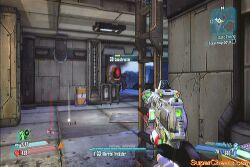
You can explore outside a bit then head to the Sanctuary by following the marker. Once there, kill the marauders outside the gate then use the intercom. 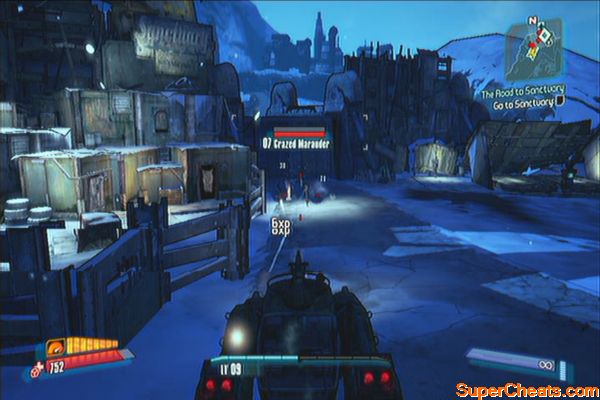
You mission will be updated. Head to the new marker to find an Echo recorder along the road. Continue to the Marrowfield. The entrance is narrow so you have to continue by foot. Head to the marker until you find Riese. Kill the bloodshots pounding him then talk to him to update your misssion. 
In addition to the objective to retrieve the power core, you'll have the optional objective to kill 20 Bloodshots. Both objectives are marked in the map so don't hesitate doing it as well while you're at it. Head to the marker to reach Windbreak Camp. Take position and clear the area of enemies. After taking them all out, find the power core and deliver it back to Sanctuary. Examine the intercom to open the city gates. Enter it afterward. 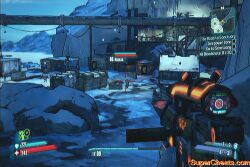
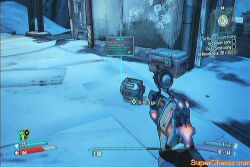
Once inside, head to the nearest marker and talk to Lt. Davis to update your mission. Turn around and remove the power core then install the new one. Talk to Lt. Davis again to turn in your mission and earn your reward. 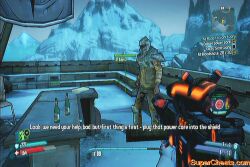
Approach Pvt. Jessup at the gate then talk to the town mechanic. Simply approach the markers to find Scooter. Take the eridium from him and pick up the two fuel cells in the garage. 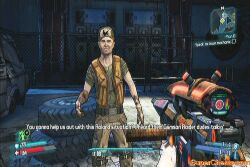
There are also optional missions available for you; simply head to the exclamation points in the map and talk to the NPCs under them.
Rock, Paper, Genocide: Fire Weapons! - Marcus Kincaid
Rock, Paper, Genocide: Shock Weapons! - Marcus Kincaid
Rock, Paper, Genocide: Corrosive Weapons! - Marcus Kincaid
Rock, Paper, Genocide: Slag Weapons! - Marcus Kincaid
The Name Game – Sir Hammerlock
Assassinate the Assassins – Bulletin Board
There's also an NPC named Michael Mamaril standing outside the hostel. Talk to him to receive a random weapon. 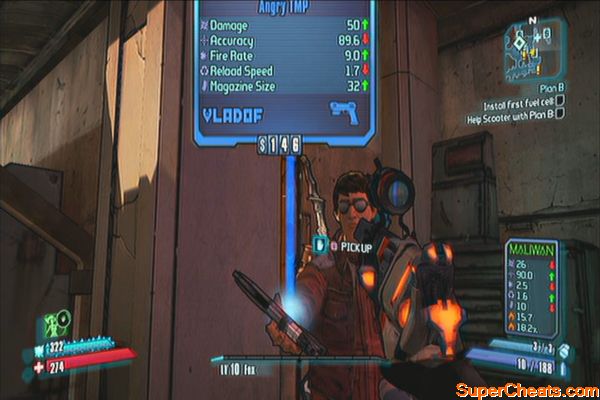
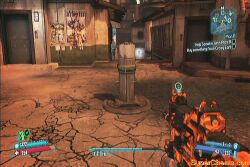
When ready, head to the plaza and lift the first hatch then install the fuel cell there. Do the same for the next fuel cell. 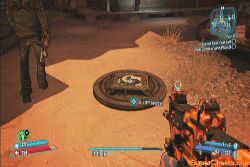
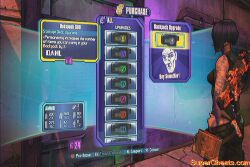
Next head to the Crazy Earl, a special shop that sells rare, unique upgrades that can only be purchased by Eridium. Buy something there to get the third fuel cell. Install the third fuel cell to update your mission. 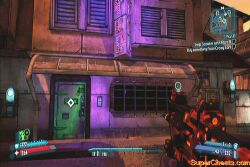
Next, head to the Raiders HQ and talk to the raider outside to get the key. Enter the HQ and examine the Echo recorder on the table to complete this mission. 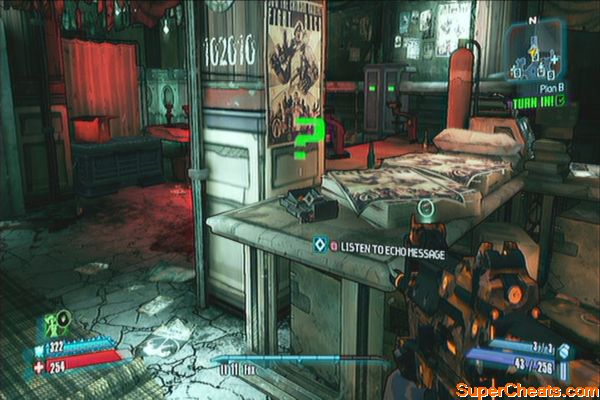
Head to the second floor and open the safe. You can now store items here for later use. You need to head to Frostburn Canyon but before heading there, there are new optional missions available again. You can opt to do them first before completing this story mission.
Do No Harm – Zed
Medical Mystery - Zed
Claptrap's Secret Stash – Claptrap
No Vacancy – Echo recorder in Happy Pig Motel
Neither Rain nor Sleet no Skags – Happy Pig Motel board, after completing "No Vacancy"
When ready, fast-travel to the Three Horns – Divide. Head to the marker, which you can access by jumping off the ramp using your vehicle. Find the camp there and clear it out of enemies. Enter the canyon afterward. 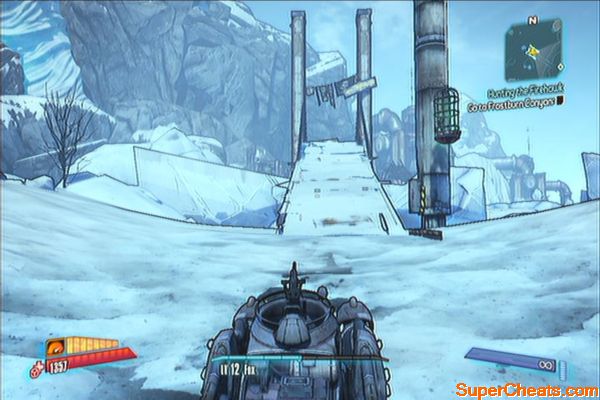
Make your way inside and fight off a few enemies. Don't bring entirely fire-based weapons here as there are heavily armored pyro nomads and later on, fire spiderants in the area as well. Just clear the immediate areas and follow the next markers until you reach the trap-filled passage leading to the Firehawk's lair. 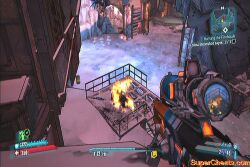
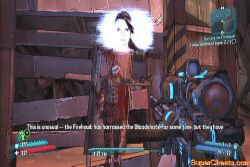
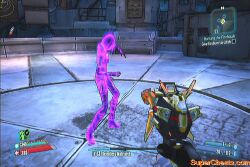
Approach the lair for a short scene. Revive Lilith then retrieve the eridium and give it to her. Once done, you have to repel several bandit attack waves. She'll be assisting you with her phasewalk abilities but you have to do most of the job. The final wave will include two badass bandits. Just concentrate on one of them and keep moving to avoid getting pummeled by their heavy attacks. 
After repelling the enemy attack, get another eridium and hand it over to Lilith so she can recover her strength. Talk to her again to turn over the quest. You can head back to Sanctuary for more optional missions.
Lilith is in your hq and has two optional missions for you. You must do this to earn extra exp and loot to prepare you for the main story mission ahead.
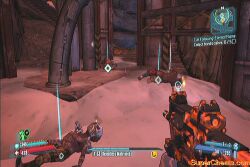
Cult Following: Eternal Flame
Cult Following: False Idols
Cult Following: Lighting the Match
Cult Following: The Enkindling
In Memoriam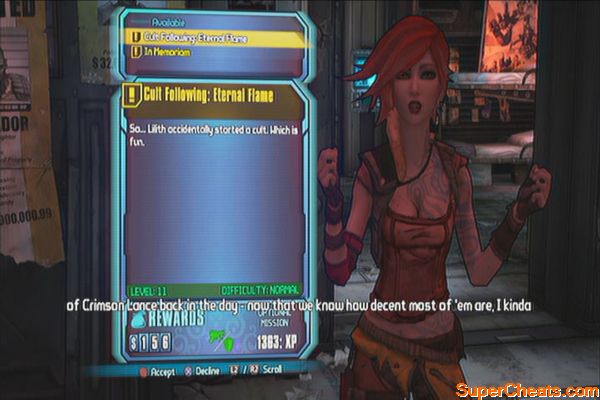
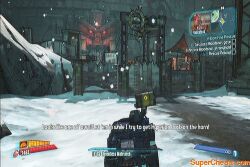
When ready, fast travel to Three-Horns Valley then grab a ride. Head to the bandit lair's gate and honk your horn. Kill the bandits then head to the portal leading to The Dust, like what Scooter suggested. 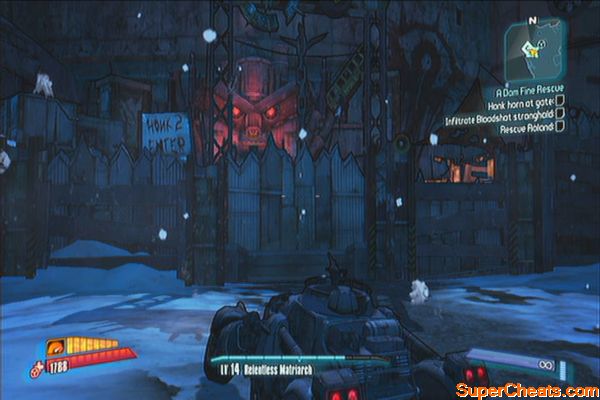
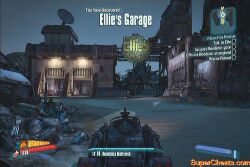
Once there, kill the enemy vehicles you encounter along the way then head to Ellie's garage. Talk to her to update your mission. 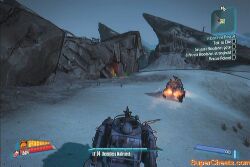
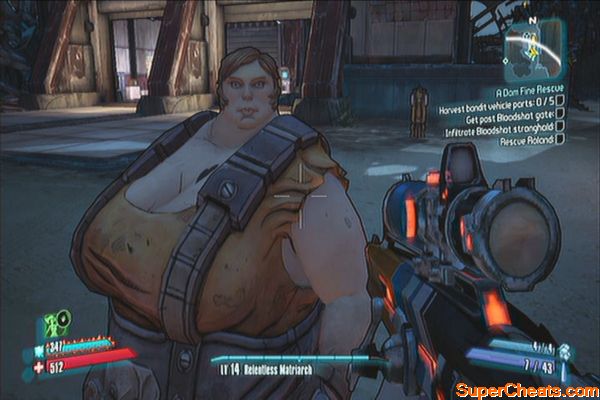
You can also talk to Loggins to get a new optional mission. (Too Close for Missiles) Head outside and destroy the bandit patrol cars to scavenge their parts. Once done, talk to Ellie to create a bandit technical. Fast-travel to Three-Horns Valley then ride the technical to the gate. Honk your horn for the bandits to open it then head inside and clear the area. 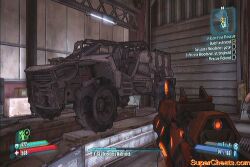
Defeat Bad Maw next then activate the lever to lower the drawbridge. Continue to the Bloodshot Stronghold.
Bad Maw and his Merry Midget
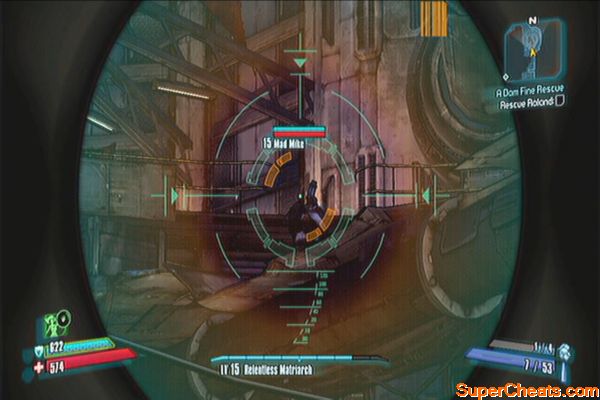
Follow the straightforward path in the stronghold and kill enemies along the way. You'll eventually reach a whirlpool in the area called Satan's Suckhole. Continue up the ramp and carefully take out the enemies along the way. There's a strong enemy up the ramp named Mad Mike. His attacks are really damaging so be careful when dealing with him. 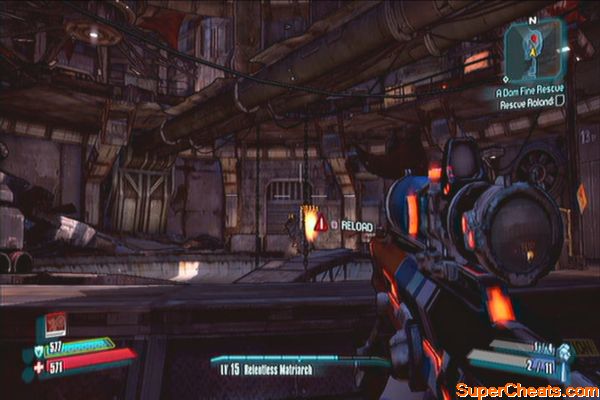
Get past the suckhole then continue to the next area. Kill more enemies there, then follow the eletric line of the electrical fence as it leads to a control room upstairs where you can turn off the power from the fuse box. 
Continue fighting your way deeper in the hideout until you reach the prison cells. Find Roland and examine the door of his prison cell for a scene. After that, move forth and take out the enemy robots along the way. Enter the portal leading to the Ramparts. 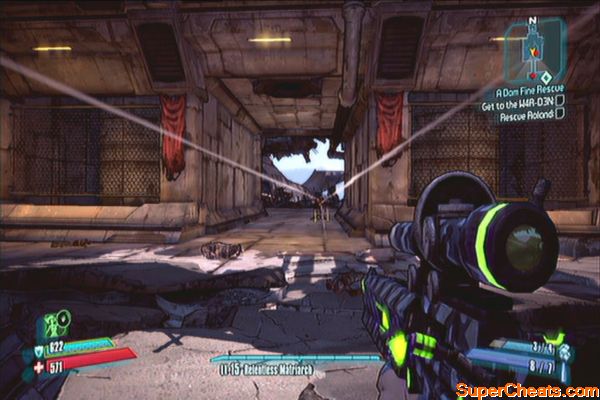
One there, find a corrosive weapon then refill your ammo and health if needed to. Fight your way along the straightforward path until you finally reach Roland. If you have explosive weapons, this is the best time to use them; just be careful not to get damaged yourself. 
Damn Fine Rescue, Soldier
Loot all the containers here then use the fast-travel station outside the gate. Return to Sanctuary and talk to Roland. Like before, you can take on optional missions:
Splinter Group - Tannis
Mighty Morphin – Sir Hammerlock
Positive Self Image – Ellie
Out of Body Experience – Loader remains
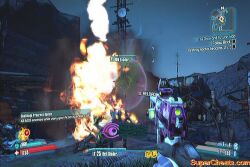
Once ready, head to Three-Horns Divide and head to the waypoint leading to the Tundra Express. Once there, go up and kill some varkids with fire to wake up Mordecai. You can also do Sir Hammerlock's "Mighty Morphin" optional mission here.
Meet up with Tina in the marked location. After talking to her and getting your mission updated, head out to search for the badonkadonks. 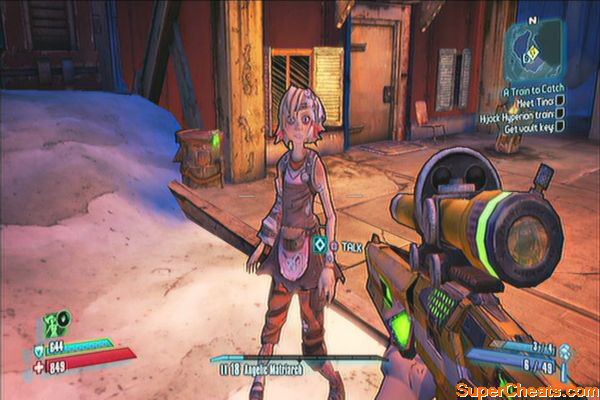
Head to the Buzzard Academy as marked in the map then clear the area before looking for the explosives. After recovering them, deliver them to Tina then leave her garage as she does the work. Finally, take out the damsels. Before leaving, you can also talk to Tina again to start a series of optional missions. 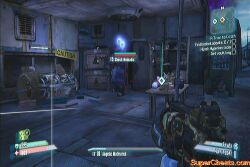
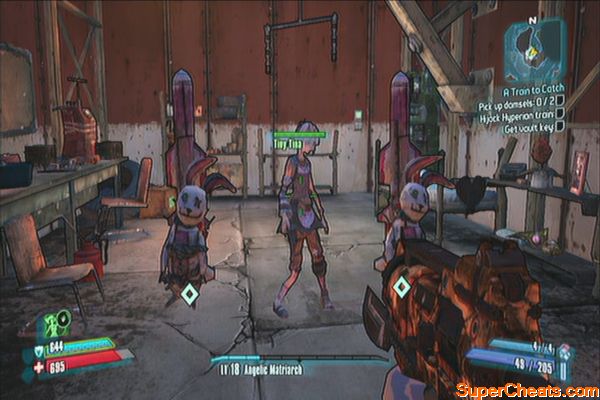
Head to Meltwater Crossing and follow the markers. Climb the stairs on the platform then set up the explosives there. Arm the rockets then wait until the train gets wrecked. Climb the wreckage and use the portal to End of the Line. 
Once there, follow the valley and fight your way through several loaders. Destroy them all and continue until you reach the Terminus Plataeu. Prepare your anti-armor/corrosive weapons and head to the open area for a boss fight.
Boss: Wilhelm
First, you have to find cover and take out the surveyors. Once theyr'e down, concentrate on using your corrosive weapons to eat up Wilhem's HP. It will continue calling in reinforcements and repair surveyors. These surveyors should be your priority since they restore Wilhem's shields and will harass you if left alone. Besides, they're vulnerable while charging Wilhem's shields. 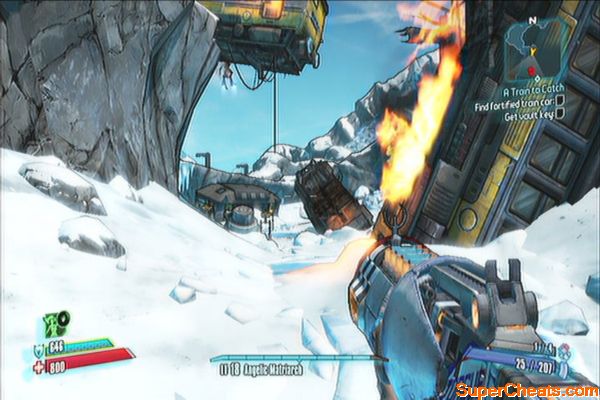
Wilhem
After defeating Wilhem, grab the loot and its power key then leave for Sanctuary. Deliver the power core to Lt. Davis to complete the mission.
Things will get messy as soon as you pop that Hyperion Power Core in so before doing that, I suggest completing these optional missions:
Mine, All Mine – Lilith
The Pretty Good Train Robbery – Tiny Tina (after Mine, All Mine)
The Good, The Bad and the Mordecai – Bulletin Board
Once you're ready, head to the shield generator and remove the old power core. Replace it with the Hyperion core you acquired earlier and all hell breaks lose. Head to the town center and meet up with Scooter. Head to the ignition primer and cycle it as instructed. 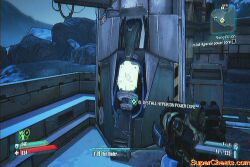
Next, head to the HQ and meet up with Roland. Grab all five Eridium nuggets and deliver them back to Lilith. Watch the next scene then leave the Sanctuary. 
Once done, catch a ride then leave to the Three-Horns Valley. Find the hill leading to the Fridge's entrance then activate the button to turn in the mission.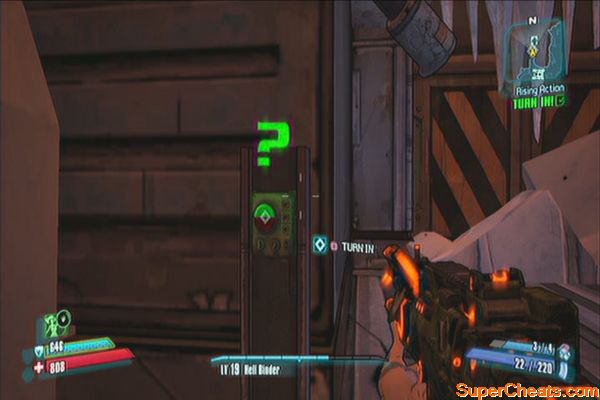
After the door is cleared of ice, enter the Fridge. Open the gate ahead and follow the marked location.(You can try the arena style battle in Fink's Slaughterhouse if you want) You can explore the Ice Maw Grotto and find some Crystalisks there but I suggest sticking to your mission first since it's impractical killing them for now. 
Operate the valve in the marked location then operate the lever down. Exit to the Highlands Outwash afterward. Head to the nearest fast-travel station and use it to update your objective. 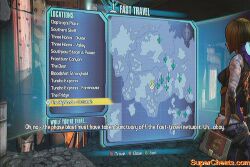
Make your way to the Eridium Extraction Plant marked in the map. Be careful of the invisible Needle Stalkers as you make your way to the plant. The plant is guarded by several Hyperion loaders and surveyors. You can lure a few stalkers to them to ensure a three-way fight to your favor. 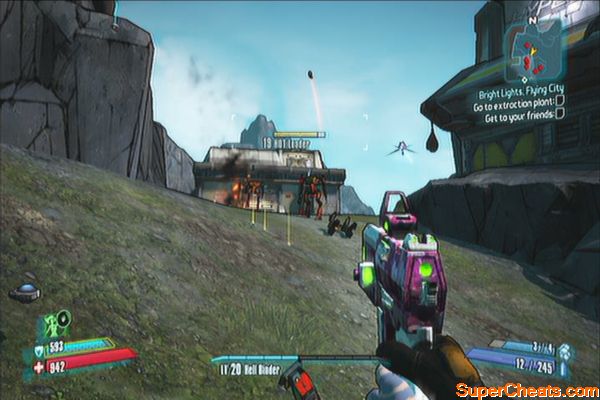
Once you've reached the plant, wait for the moving platform under the bridge to reach your side and ride it to cross the waterway or you can simply cross the bridge to the northeast. 
Be careful when you cross since a constructor will appear with some reinforcements. If you have a long-ranged corrosive weapon, you may want to use it to lessen the risk of getting blown by the enemies. Enter the next area and approach the lunar beacon. A gluttonous thresher will eat it so keep distance and take it out. Hyperion loaders will appear as well so don't destroy them first so they can act as fodder and deal damage as well. The thresher's eyes are its weak spot. 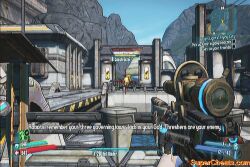
Once the thresher is defeated, grab the beacon and head to Overlook. Exit to the Highlands as marked in the map. Find the nearest Catch-a-Ride system and make your way to the town of Overlook. The area is infested with Threshers as well so be careful.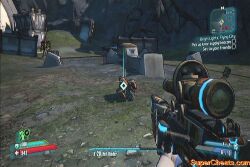

After reaching Overlook, plant the beacon on the execution stage then defend it against waves of Hyperion Loaders. The beacon is indestructible though you have to repair it as soon as its gauge is depleted. The enemy waves will become relentless; make sure to use the nearby vending machines to keep your ammo, grenades and HP up. The best position will be in the backstage behind the beacon so you both have cover and the ability to repair the beacon immediately at the same time. 
Once a constructor appears, stay close to the beacon while fending off its attacks so you can easily repair it as necessary. Keep repelling the enemy waves until the fast-travel station gets fully activated. Travel to Sanctuary afterward. 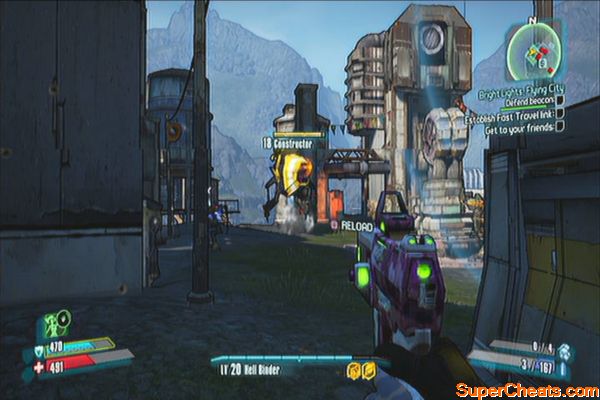
After receiving this mission, a lot more optional missions will become available. Some of them like The Overlooked and Clan War have succeeding missions as well.
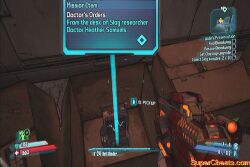
Doctor's Orders – Tannis
Hidden Journals – Tannis
Won't Be Fooled Again – Marshall Friedman
Safe and Sound – Marcus
Claptrap's Birthday Bash – Claptrap
Swallowed Whole - Scooter
The Cold Shoulder - Scooter
The Overlooked: Medicine Man - Scooter
Clan War: Starting the War – Bounty Board
Slap-Happy – Sir Hammerlock
Perfectly Peaceful – Sir Hammerlock
Arms Dealing – Overlook Bounty Board
Stalker of Stalkers - Overlook Bounty Board
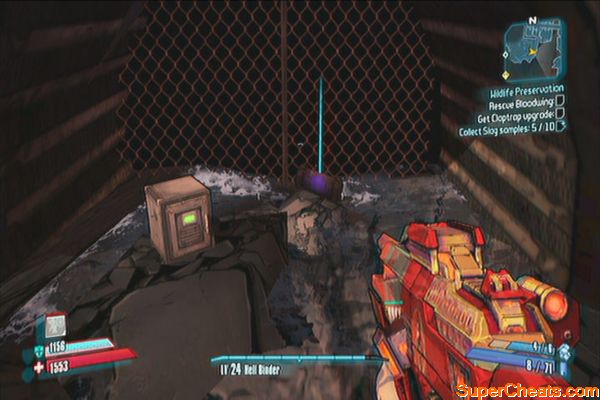
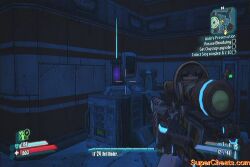
Once ready, fast-travel to the Highlands and make your way to the marked location. After reaching the Wildlife Preserve, reach Mordecai in his hideout and talk to him. Once done, head to the shipping yard destroy the initial batch of loaders. Activate the gate to trigger the alarm then fall back and destroy the loaders so the system calls in the reinforcements. 
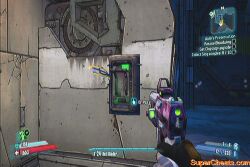
Inside the shipyard are more loaders and hyperion engineers. Get rid of them and before moving forth, look above the laser-blocked warehouse to the east to find a red generator on the rooftop. Destroy it to access the loot box inside.
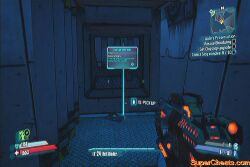
Continue to the skag breeding ground and fight your way to the observation building, where the first note for the optional mission "Doctor's Orders" is located. Make your way to the marked location to go inside the building. You'll find two slag samples inside. For your bonus objective, you have to find 10 of these. 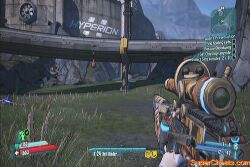
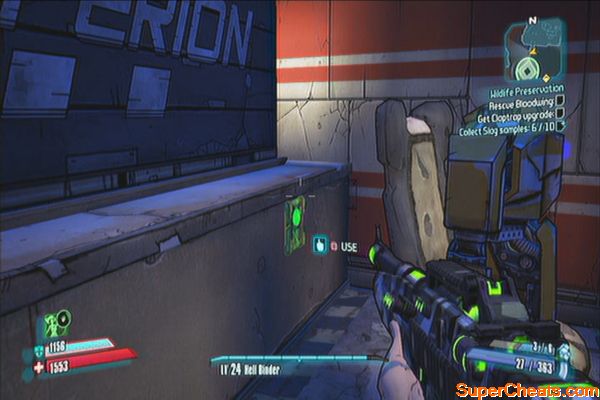
Head outside and continue destroying loaders and stalkers, including a Super Badass Loader. Once the coast is clear, head inside the Specimen Maintenance building. Enter the open room to the west near the sign that says "Bloodwing" to find a slag sample and another note for the mission "Doctor's Orders".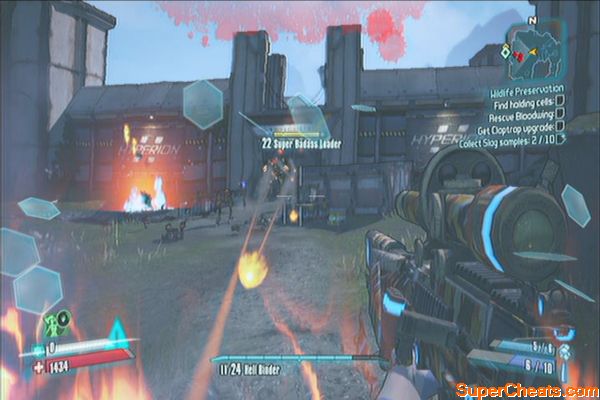
Enter Bloodwing's enclosure and pick up the feather on the ground. The other enclosures will be opened as well so prepare to repel the released beasts that will come after you. 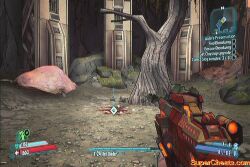
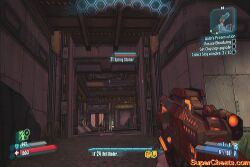
Make your way around the enclosure and grab two more slag samples in the newly opened rooms. Head outside and check the opening of the sewer to find another slag sample. Head northwest then climb up the walkway.
Continue until you reach the next open enclosure and fend off the skag attacks. Head to the building and get rid of the guards. Examine the button behind the experimental greeter to reveal a safe containing of the notes for the optional mission "Doctor's Orders".
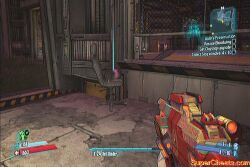
Continue past the lobby where you got the third note until you reach a warehouse. There are two more slag samples inside the control room. Clear the area and climb up the walkway. 
At the end of the tunnel above is a storage area full of hyperion loaders and engineers. Pull down the lever to release the stalkers. Once the area is clear of both enemies, find the last note on the last cell. 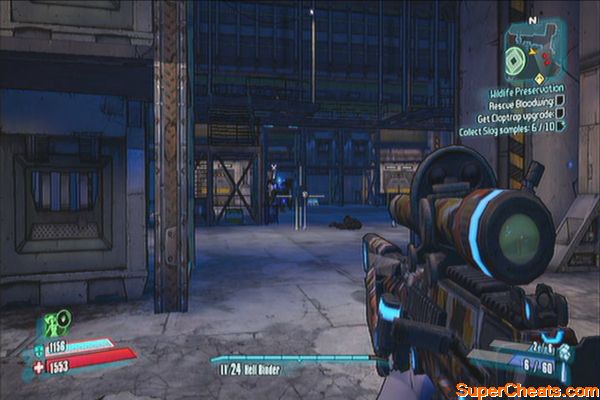
Continue to the last area to find the last two slag samples then take the lift down to the Observation Wing. 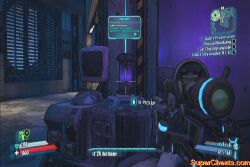
Here you'll have to fight the Slagged Bloodwing. She switches elements from time to time and the douchebag Jack will release skags to join the fray. Use your action skills as often as you can then use accurate, long-range weapons to deal damage while she's flying away.
Be careful of her dive-bomb attack since it can deal significant damage, even instantly take out your shields if you're near the explosion. Mordecai will give you hints with her attacks.
Slagged Bloodwing
After defeating her, grab the chip from her collar and return to Sanctuary. Don't worry about enemy reinforcements; Mordecai will clear the path up for you. Give Claptrap his upgrade then give him a high-five when he raises his arm to unlock a Trophy. Turn in the mission to Roland to complete it.
High Five!
Like before, you can start new optional missions before taking the main mission.
Rakkaholics Anonymous – Mordecai
Animal Rights – Mordecai
Poetic License – Scooter
Shoot this Guy in the Face -
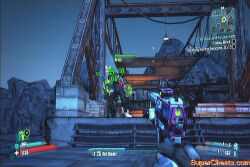
Once ready, fast-travel to the Highlands – Hyperion Bridge then take the uphill path to reach Thousand Cuts. Once there, head to Slab Town and clear the area of bandits. You can also switch to Scooter's Poetic License mission on to take photos of inspirational landmarks before moving on to deliver the note. 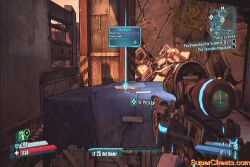
Make your way across the large makeshift bridge to the southwest then head to the Blizzard Factory. You have to survive the initiation by killing all enemies. Once done, deliver the note to Brick. 
The Slab Initiation
Follow Brick outside and take out the Hyperion Loaders along the way. Once you make it to the first mortar beacon, let him destroy the shield then take out the loader reinforcements that will come your way. 
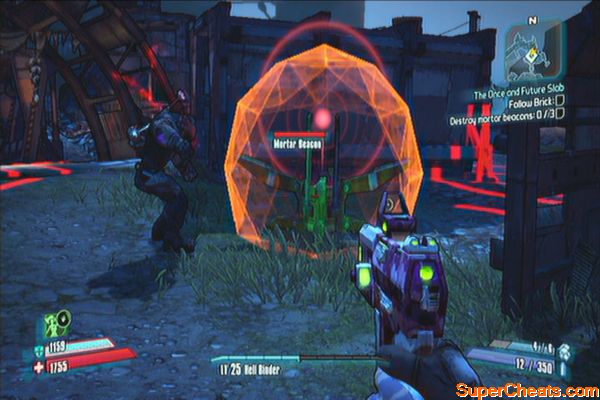
Keep following him until you find and destroy all three beacons. Just stay away from the targeting circles to avoid heavy damage. Once done, fast-travel to Sanctuary to turn in the mission. 
More optional missions are available.
Rocko's Modern Strife – Brick
Home Movies – Lilith
The Bane – Old ECHO recorder outside Moxxi's bar
Hell Hath No Fury – Moxxi
3:10 Kaboom - Lynchwood
Breaking the Bank - Lynchwood
Animal Rescue: Medicine – A skag named Dukino in Lynchwood
Hyperion Contact #873 – Overlook Bounty Board
When ready, head to the Hyperion Bridge and follow the marker to the bridge leading to Opportunity. This city is a town with hostile loaders so don't expect any rest here. There are new missions available here as well.
Statuesque – Opportunity Bounty Board
Written by Victor – Opportunity
When ready, head to Opportunity Square to find Jack's double. Kill him then grab the pocketwatch from his body. Head to the nearby info kiosk and activate it to download Jack's voice sample. Do to the same to the other marked kiosks. 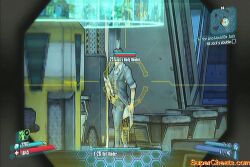
Next, head to the underground pass and enter the unmarked door to find a room where you can upload the samples to Angel. Take the voice modulator and head back to Sanctuary to turn over the mission. 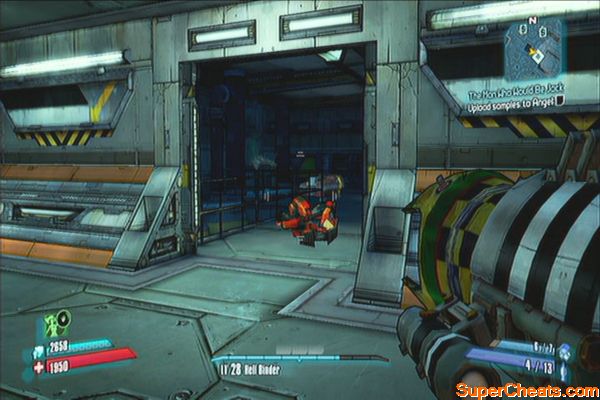
Go to Claptrap and convince him to help. After simply talking to him, fast-travel to Thousand Cuts. Head to the Bloody Knuckle Point and clear No Man's Land. Continue to the barrier and talk to Claptrap along the way. After deactivating the barrier, continue forth .
Fight your way past the barrier and with the help of the Slab Buzzards, take out the enemies along the way. It will help a lot bringing various corrosive weapons in this stage since even the hyperion soldiers are armored. Continue up the road until a Constructor appears. Find cover and shoot it from a distance. 
Continue pushing up until your path gets painted by mortar targeting markers. Keep moving and avoid staying in the circle. Fight your way until you reach the Control Core Depot. 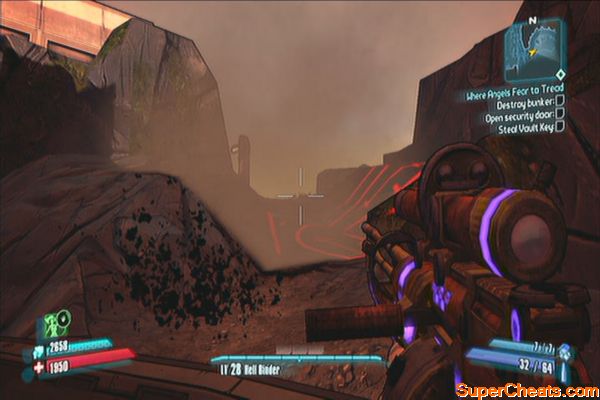
Move from cover to cover as you make your way up. There's a ton of hyperion soldiers, loaders and even a Constructor that awaits you here. Use the covers to your advantage as you take out the enemies one by one. After clearing the Control Core Depot, it's a straight run to the Bunker.
Once inside the Bunker, head to the rooftop. You have to keep destroying the auto-bunkers as they appear and avoid the laser cutters that will activate every now and then. 
After destroying all the auto-cannons, the "Bunker" will be activated and you'll have to fight it. Take cover and aim at its red "eye". Once it deploys auto-cannons, destroy them to completely take out the Bunker.
Bunker Video 1
Bunker Video 2
Go downstairs and enter the scanner. After the bio-signature scan, say the pasword to the modulator to open the vault door. Take the elevator down and enter the next area leading to Control Core Angel. 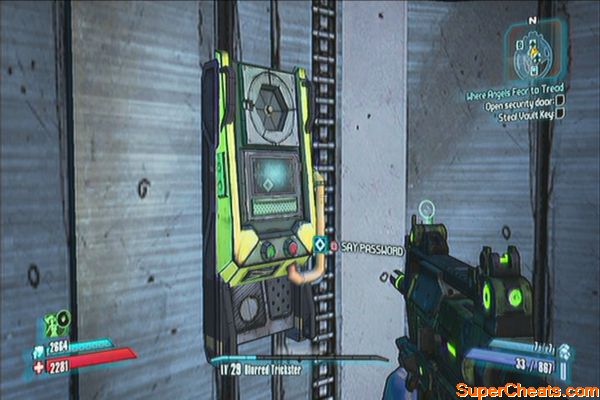
Upon reaching the core, you'll have to disable the shields of the eridium injectors to destroy them. Roland will assist you so spend the first few minutes of the fight destroying enemy loaders and the shock field generators. You have to be wary of the turrets as well. Each batch of loaders has a badass loader which you need to be careful off. Don't worry about the ammo since Angel will keep you supplied with various munitions. Keep destroying the loaders until the shields are taken out then destroy the injectors.
Angel Core Video 1
Angel Core Video 2
After the scene, you'll be teleported to the Marcus Munitions Vault. Exit the vault then head to the marker. You have to meet up with Mordecai. There's also new optional missions available. Nothing much to do here; just turn this mission over to Mordecai to complete it.
Demon Hunter – Sanctuary Bounty Board
BFFs – Sam Matthews
Bearer of Bad News – Mordecai
New optional missions available:
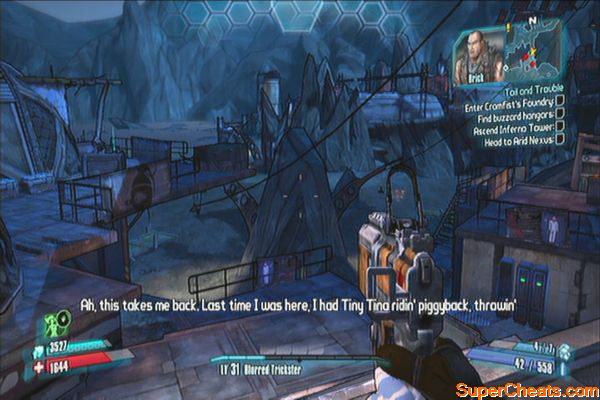
Capture the Flags - Brick
Monster Mash – Zed
The Chosen One - Marcus
Customer Service – Eridium Blight Bounty Board
To Grandmother's House We Go – Eridium Blight Bounty Board
Kill Yourself – Eridium Blight Bounty Board
A Real Boy: Clothes Make the Man
Travel to the Dust to reach Eridium Blight. From there, head to the southeast to the exit leading to the Arid Nexus and update your mission. Next, head to northeast to find Sawtooth Cauldron. There are some new optional missions here from the bounty board and from a friendly loader near the exit to Ore Chasm.
After reaching the Sawtooth Cauldron, two more missions will become available as well:
The Great Escape
The Lost Treasure
Continue heading down to the Stilt. You can place the flag in the designated area as part of the optional mission "Capture the Flags" and also start a new mission by checking the exclamation point to the northeast. (The Lost Treasure)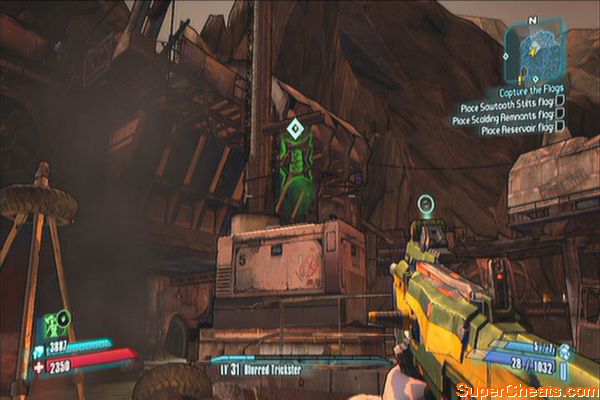

Once inside the Smoking Juano Grotto, make your way to the elevator and try to call it. Ambush forces will appear so quickly run away to a distance and take them all out. Once done, make your way to the Main Street Reservoir. 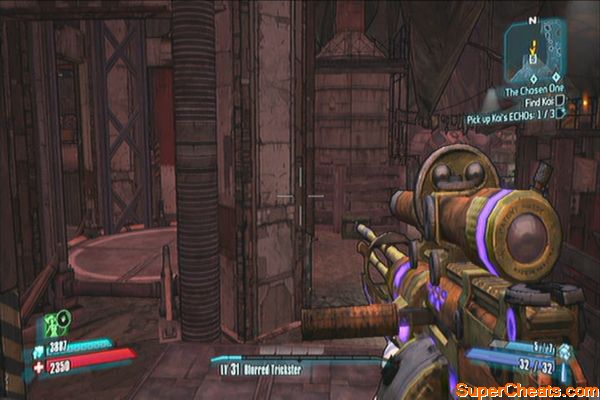
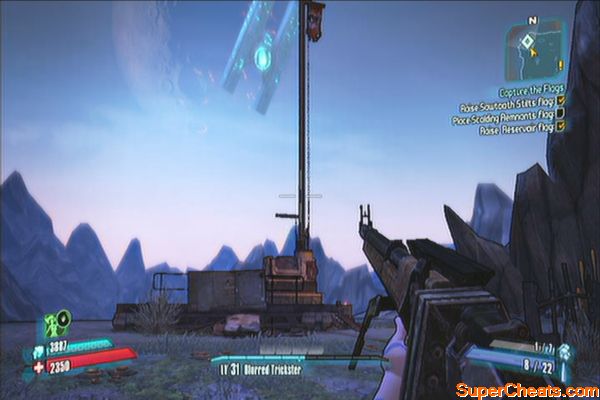
In this area, you can find Kai's corpse as well as his second and third ECHOs. (The Chosen One) and the generator to raise the Reservoir flag. (Capture the Flags) Keep heading west until you reach Cramfist's Foundry. 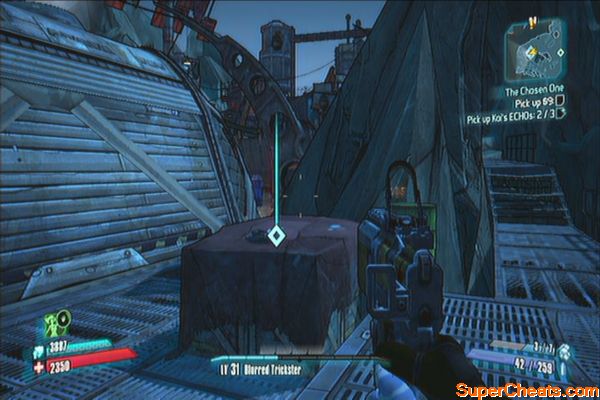
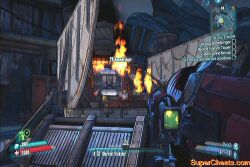
Head to the buzzard hangar as marked in the map and activate the console to open the hangar. Destroy the boss's buzzard afterward. 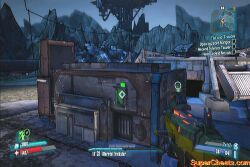
You can now head back to the Grotto to take the elevator but before heading there, continue to the north to reach the Scalding Remnants. There are several threshers here, as well as the third generator to raise the flag. 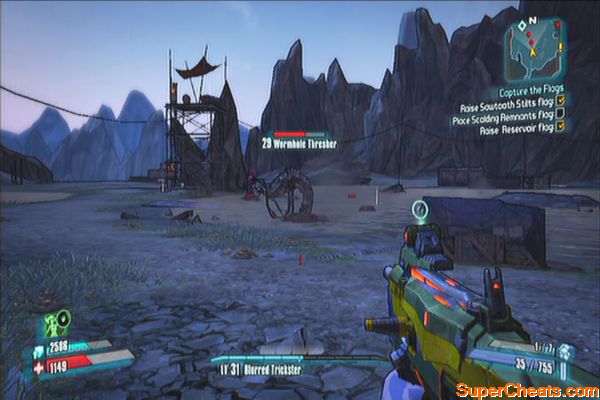
Follow the ramp up to backtrack to Sawtooth Stilts. Make your way back to the Grotto and to the elevator. As soon as the elevator opens, Mortar will appear. Defeat him to complete your bonus objective. 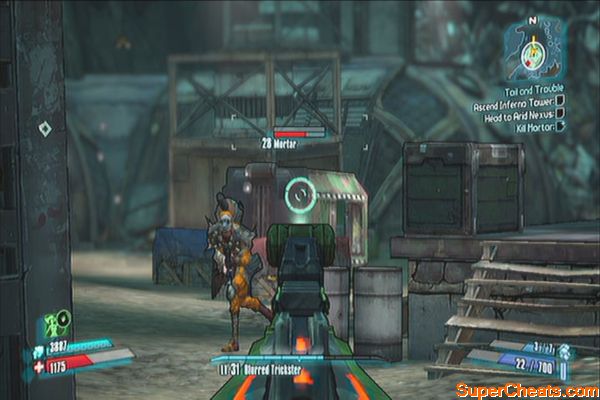
As soon as you reach the Buzzard Nest, go to the southwest to find a friendly goliath named Ulysses. Talk to him to start a new optional mission. (The Great Escape) You can do this before completing the main mission if you want. 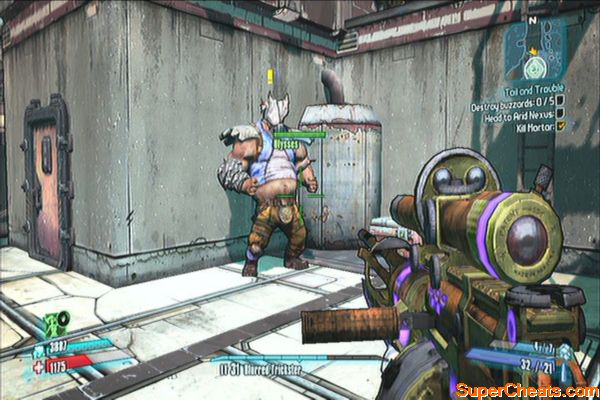
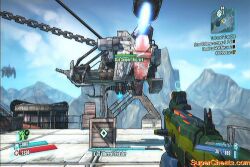
Destroy the flying buzzards then place the beacons on the crates so your allied buzzards can fly in and steal them. Once done, your job here is over. Jump down to the southwest and head back to Eridium Blight. You may also want to consider going back to Sanctuary to turn in some missions you have completed. 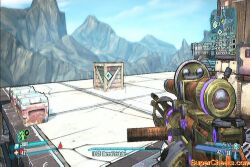
Make your way to the Arid Nexus exit and examine the switch behind you to turn in the mission. 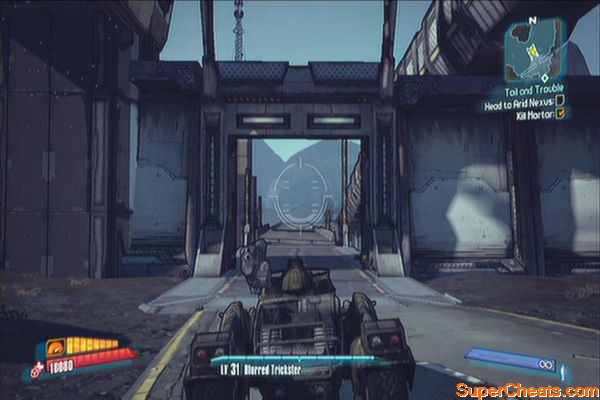
Here's the new mission(s) available:
This Just In – Mordecai, Sanctuary
Hyperion Slaughter – Rounds 1-5
Once ready, head to the main pipeline and attempt to climb the ladder there. After the quake, head to the Eridium Pumping Station and clear the area of enemies. 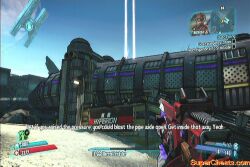
Turn the valves to overload the station then find the two other pumps to do the same. Pumping Station #2 is larger and is located underground so take the elevator down and carefully head to the valves. Take note that after turning the valves in the second pumping station, reinforcements will appear so brace yourself and carefully take them out. 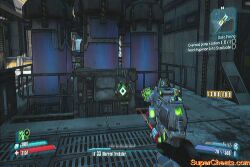
Exit the station and head to the marked pipeline. You'll have to ram the pipe using your vehicle so position your vehicle behind the ramp beside the pipeline and jump towards the pipe. After tearing it open, enter the pipe and follow it to the Transmix Regulator Station. 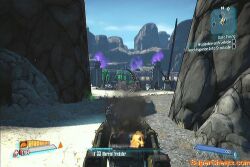
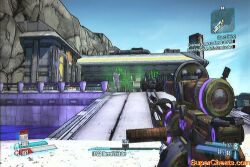
Climb up the ladder and take out the enemies. Continue to the marker to enter the Arid Nexus – Badlands. You can check the bounty board there for some new missions as well. Once done, head to the Stockade Elevator and use it. 

Uncle Teddy... AND MORE – Fyrestone Bounty Board, Arid Nexus Badlands
Get to Know Jack – Fyrestone Bounty Board, Arid Nexus Badlands
Hungry Like the Skag – Skag drop, Arid Nexus Badlands
After using the elevator, follow the road and take out the loaders along the way. Before reaching the Stockade's entrance, a Badass constructor will appear. Take cover and carefully take it out. Before moving in to the Stockade, look to your right to find a watchtower with an electrical fuse. Deactivate the it to disable the electric fence in Fyrestone. 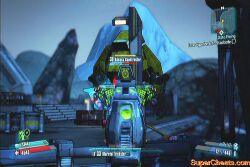
Enter the stockade and fight your way inside. Activate the console on the topmost floor. While it's downloader, two constructors will appear on both sides. Take cover and concentrate taking them one at a time. Once the area is clear, take the map and report back to Mordecai. 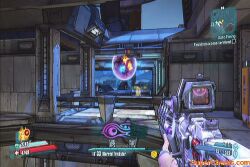
Talk to the various people in Sanctuary before talking to Claptrap to receive various items. Talk to Claptrap when ready then head to the Eridium Blight. Meet up with him on the marked location. Follow him to the main door and defend him from the enemy forces. Keep fighting enemy forces until Claptrap successfully opens the door. Continue upstairs to reach the Hero's Pass.
Note: The next area has tons of armored enemies so bringing in corrosive weapons will help 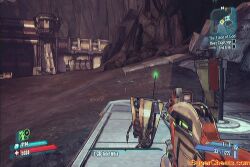
Once there, fight your way to the area where a hyperion barrier is deployed. Brick and Mordecai will join you so continue along the straightforward path until you reach the next area.
As soon as you reach the second barrier, keep destroying the enemies until Mordecai successfully destroys the barrier controls. Continue fighting your way until you finally reach the Vault of the Warrior. 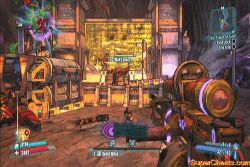
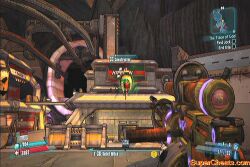
Once inside the cavern, follow the path then use the elevator down. Activate the last fast-travel station and continue to where Lilith and Handsome Jack is. First, you'll have to fight Jack. He will be cloaked and will summon a double and a personal surveyor to restore his shield. Kill his double to force him to attack you then once he disables his cloak, lead him. His personal surveyor will appear later in the battle, restoring his shield. Destroy it immediately and continue shooting him whenever you can to end the first phase of the battle.
Not so handsome after all
Fighting the Warrior should be easy enough, if you haven't had problems fighting Jack. The Warrior will summon volcanic crystalisks which can be ignored if your shields are high enough to render most of their attacks useless. Otherwise, you may want to deal with them first.
Throughout the battle, the lava level will rise, making your combat area smaller. Don't forget to use the resupply station as well to recover some ammo. Aim for the Warrior's chest since it is its weak point. Use the stone pillars to take cover from its fire and shockwave attacks. It also dives and emerge from diffrent directions so use your minimap to guide you where it appears.
.... what warrior?
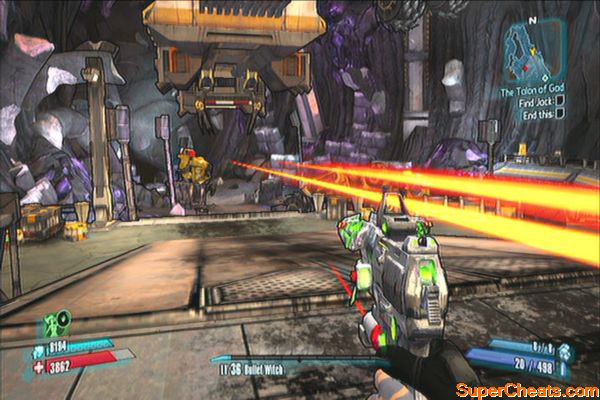
After the battle, you can now finally kill the Jack. Think of the most satisfying way for you to kill them then get rid of the scum. As a bonus objective, you can talk to Lilith and let her get her vengeance. 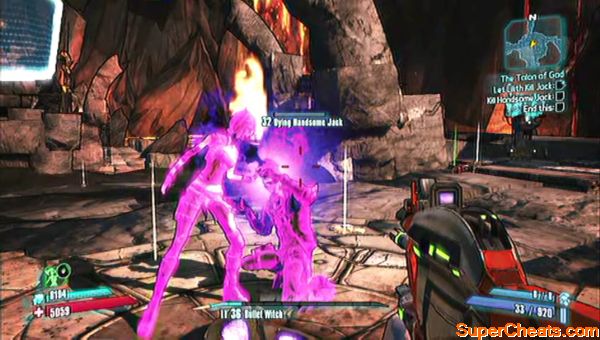
Next, examine the Key to complete the mission and end the game.
After the credits, you'll unlock a new playthrough called the True Vault Hunter mode. This will feature new and tougher enemies, get better loot and earn more levels. You can select this from the main menu. You can also finish the remaining optional missions you may have.
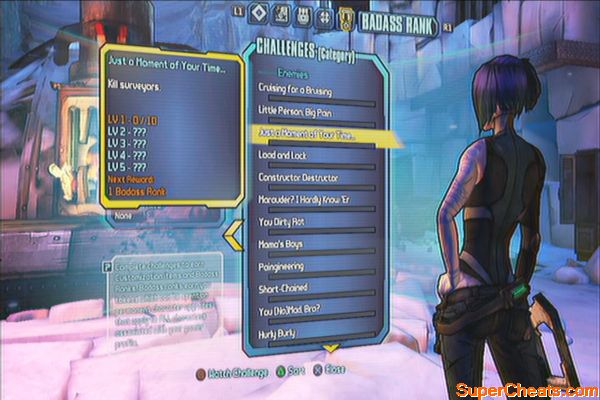
Challenges in the game requires you to kill a certain number of enemies using different methods and damage types, finding/destroying area-specific objects, buying/selling certain number of items etc. This are entirely optional and you'll unlock them along the way. Challenges allow you to earn a Badass token, which can be used to purchase a permanent stat bonus of your choice. Completing challenges also give you bonus customization items and experience.
Completing a challenge will increase its rank, increasing the next rank's requirement and will yield more badass rank and experience. Most challenges has the maximum rank of 5. You don't have to complete every single one of them to enjoy the game as some of them are tedious.
For the individual location of the vault symbols, please refer to the link below:
http://segmentnext.com/2012/09/17/borderlands-2-vault-symbols-locations-guide/ 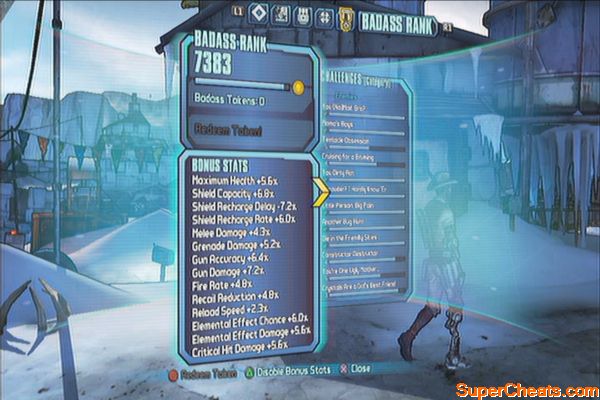
Arid Nexus - Badlands
Hey! Over there!
Find the hidden claptrap
Boned 2.0
Kill Bonehead 2.0
The Beginning of the End
Uncover the lost audio recordings from Arid Nexus
Arid Nexus - Boneyard
Dead Air
Kill DJ Hunter Hellquist while his portable radio is turned off
Cult of the Vault (1)
Discover the hidden vault symbol in this area
Under Pressure
Hit the hidden button at the refinery's base to summon Hyperion Troops. Then kill them.
Bloodshot Ramparts
The Not-so-phantom Tollbooth
Pay the toll
Cult of the Vault (1)
Discover the hidden vault symbol in this area
The Last Place You Look
Find all the missing car keys in this area
Bloodshot Stronghold
Eff Yo' Couch
Jump on all 5 couches in the Bloodshot Dam
Bloodshot Memories
Find the lost recordings of the bloodshot clan
Cult of the Vault (2)
Discover the hidden vault symbol in this area
Give it a Whirl
Kill an enemy by knocking him into the whirlpool
Cut 'Em no Slack
Defeat the splinter group in their assigned order.
Caustic Caverns
Can't Feel A thing
Stand in the acid ooze for 30 seconds without dying
Cult of the Vault (2)
Discover the hidden vault symbol in this area
Harchek's Revenge
Kill Blue before any of his leg crystals grow back
Ever Blow Bubbles?
Use the corrosive bubbles to reach the broken rail.
End of the Line
Master of All the Surveys
Kill Wilhem without destroying his surveyors.
Cult of the Vault (1)
Discover the hidden vault symbol in this area
Eridium Blight
Pipe Dream
Walk on top of the Eridium Pipeline
Cult of the Vault (3)
Discover the hidden vault symbol in this area
Can You Hear Me Now?
Destroy all 4 communication dishes
Vault Hunter vs The Volcano
Get up close and personal with the Volcano
Bring Out the Big Guns
Destroy all five Hyperion tower turrets
Twas Slag Killed the Beast
Kill King Mong while he is slagged.
Save the Turrets
Complete the fight at the gate before the Loaders destroy the tower turret
Tie Clip
Cut Donkey Mong's tie without any players being hit by his barrels.
Fink's Slaughterhouse
Cult of the Vault (1)
Discover the hidden vault symbol in this area
Friendship Gulag
Cult of the Vault (1)
Discover the hidden vault symbol in this area
In the Middle of the Night
During at night, alert a guard tower of your presence.
Frostburn Canyon
Burning Sensation
Find Incinerator Clayton's chronicles of the Firehawk
Cult of the Vault (2)
Discover the hidden vault symbol in this area
Totems of Fire
Ignire all 10 hanging totems
Praise be to Scorch
Kill Scorch without damaging his minions
Hero's Pass
Cult of the Vault (2)
Discover the hidden vault symbol in this area
When Nature Calls
Discover where the engineers do their business (3)
Environmental Protection
Disable the grinder arm controls.
Lynchwood
Cult of the Vault
Discover the hidden vault symbols in this area
Duel of Death
Have a duel with your partner along the main tracks. Hit each other with melee attacks to invite and accept a duel.
Do or Die
Find out why Axton came to Pandora
Look Ma, No Hands
Shoot the Skag Rider off his skag
That’s Impossible, Even for a Computer
Throw a grenade in the refinery's exhaust port
Last Train to Nowhere
Kill the bandit riding the five o'clock train.
Opportunity
Shame the Foreman
Kill Foreman Jasper without letting him construct any turrets
Opportunity Knocks
Find the lost Hyperion audio recordings in Opportunity
Top of the World
Explore your way to the three rooftops
Down with Big, Handsome Brother
Destroy the security cameras in Opportunity (8)
Cult of the Vault (2)
Discover the hidden vault symbol in this area
Ore Chasm
Cult of the Vault (1)
Discover the hidden vault symbol in this area
Sanctuary
Cult of the Vault (5)
Discover the hidden vault symbols in this area
Rise of the Crimson Raiders
Find the four recordings telling about the town's history.
Jackpot
Play the slot machines in Moxxi's bar until you score a jackpot in the form of multiple Eridium bars. Best attempted when you have a lot of cash to spare.
Sanctuary Hole
Sugar Shock
Find the secret bandit shack
Cult of the Vault (1)
Discover the hidden vault symbol in this area
Down the Rabbit Hole
Jump in the big hole
Sawtooth Cauldron
Cult of the Vault (2)
Discover the hidden vault symbol in this area
Happy Camper
Find Avie's hidden campsite
Haiku Hitman
Find out why Zero came to Pandora
Race to the Top
Get to the Buzzard Nest within 2 minutes of entering Sawtooth Cauldron
Southern Shelf
Cult of the Vault (2)
Discover the hidden vault symbols in this area
Make Boom Go Boom
You need to take out Boom and Bewm without taking direct damage from their cannon, Big Bertha. You may want to try this when your level is higher since you can fight them over and over again.
Fireproof
Defeat Captain Flynt without taking damage from the dragon breath. This is the fire that comes out of the vents on the floor. Just avoid these when you see the farthest one flaming up.
Southern Shelf - Bay
Cult of the Vault (2)
Discover the hidden vault symbols in this area
Vault Hunter on Wire
When you reach Blackburn Cave, don't use pull the lever to cross the river but instead use the chain to get across.
I can see your corpse from here
You need to find all telescopes in this area.
Midge-Mong Has No Friends
Kill Midgemong before they can call in reinforcements. Better done at higher levels with more powerful weapons/skills.
Southpaw Steam & Power
Cult of the Vault (3)
Discover the hidden vault symbols in this area
Boss Run
Defeat all bosses within 10 minutes. Better done at higher levels with more powerful weapons/skills.
The Bunker
Cult of the Vault (1)
Discover the hidden vault symbol in this area
BNK-3R Buster
Destroy BNK-3R without destroying any of his auto-cannons.
The Dust
Dust to Dust
Uncover the history behind the Zaford/ Hodunk feud
Cult of the Vault (3)
Discover the hidden vault symbols in this area
I’ve Got a Crush on You
Ride a vehicle and place in the crusher. Have your partner activate the controls and crush you once.
If You’re Not First, You’re Last
Complete the Hodunk Speedway within the time limit.
The Van is Damned
Wait for a broadcast from some random bandit telling you to stay away from the caravan. This Cara-van has two escorts and will follow the main road. Just follow the main road and you'll find it along the way. Destroy the escorts to make it stop. Quickly get on the top and open the chest above it. Take note that the van will speed up after a certain time.
The Fridge
Cult of the Vault (2)
Discover the hidden vault symbols in this area
Trapped Rat
Find the rat frozen in time
The Rakk Knight
Find the Rakkman's audio diary
Fairest of Them All
Kill Laney before her midget companions die.
It's Off to Hell We Go
Kill all Laney's midget companions before killing Laney herself.
Stiff Competition
Do not kill any Midget Boners before killing Smash-head
The Highlands
Cult of the Vault (1)
Discover the hidden vault symbol in this area
Failure to Communicate
Find and destroy all Hyperion comm towers (4)
Winds of the Highlands
Find all windsocks (8)
The Holy Spirits
Cult of the Vault (1)
Discover the hidden vault symbol in this area
Thousand Cuts
Cult of the Vault (2)
Discover the hidden vault symbol in this area
A Grave Matter
Smash all tombstones in Slab Town.
Slab UHF
Activate the radio tower atop Slab Town
Portrait of a Gunzerker as a Young Man
Find out why Salvador came to Pandora
Three Horns – Divide
Cult of the Vault (3)
Discover the hidden vault symbols in this area
Man’s Best Friends
Defeat Boll without damaging his pet skags.
Three Horns – Valley
Cult of the Vault (3)
Discover the hidden vault symbols in this area
This Ain’t My First Rodeo
Reach the top sign of the Happy Pig Motel. You'll have to stand on top of the nearest glacier and wait for it to shoot you up in the air. After reaching the sign, stay there until you complete this challenge.
Tundra Express
Positive Reinforcements
Find and activate all 3 alarms calling in bandit reinforcements.
Cult of the Vault (2)
Discover the hidden vault symbol in this area
Bug Off
Kill Madam Von Bartlesby without any players taking damage from her Bug Bombs.
What's Yours is Mine
Disable all Tiny Tina's pink mines (5)
King of the Buzzard World
Explore your way to the top of the Buzzard Academy
Vault of the Warrior
Cult of the Vault (1)
Discover the hidden vault symbol in this area
Dying of the Light
Find the last of the Fire Worshippers
The Warrior's Way
Kill the Warrior without any players shooting its heart
Wildlife Preservation Reserve
Siren's Song
Find out why Maya came to Pandora.
Cult of the Vault (1)
Discover the hidden vault symbol in this area
Mordy's Secret Stashes
Find Mordecai's three hidden stashes
Bear Minimum
Find 5 teddy bears stuck in stalker goo
Ride Together. Die Together
Kill Tumboo and Pirron within 10 seconds of each other.
Windshear Waste
Cult of the Vault (1)
Discover the hidden vault symbol in this area
You'll encounter all these enemies as you go through the game so you don't have to worry about finding them.
You (no) Mad, Bro?
Kill Nomads
Mama’s Boys
Kill psychos
Tentacle Obssession
Kill threshers
Crusing for a Bruising
Kill Bruisers
You Dirty Rat
Kill rats
Marauder? I Hardly Know ‘Er
Kill marauders
Little Person, Big Pain
Kill midgets
Another Bug Hunt
Kill varkids
Die in Friendly Skies
Destroy Buzzards
Constructor Desctructors
Destroy constructors
You're One Ugly Mother...
Kill stalkers
Crystals are a Girl's Best Friend
kill Crystalisks
Hurly Burly
Shoot the bullymongs' projectiles in mid-air
Short-Chained
Shoot the chains to release the midgets from the shields of the Torturers.
Load and Lock
Destroy loaders
Bully the Bullies
Kill bullymongs
Pod Pew Pew
Kill varkid pods before they hatch.
WHY SO MUCH HURT?!
Kill goliaths
Pest Control
Kill spiderants
Paingineering
Kill Hyperion personnel
Skags to Riches
Kill skags
Just a Moment of Your Time…
Destroy surveyors
Elemental Damage Challenges
Most of these challenges require the use of elemental weapons and grenades. Maya's innate abilities, especially here Phaselock's Cataclysm skill tree version count.
Cowering Inferno
Set enemies on fire.
Say Watt Again
Deal electrocute damage
Acid Trip
Kill enemies with corrode damage
Boom
Kill enemies using explosive damage. The mounted rocket launcher in the Light Runner vehicle counts.
I Just Want to Set the World on Fire
Deal burn damage
Corroderate
Deal corrosive damage
Slag-Licked
Deal bonus damage to slagged enemies.
Loot Challenges
Nothing Rhymes with Orange
Loot/purchase orange items
I like My Treasures Rare
Loot/purchase blue items
The Call of Booty
Open treasure chests. These are large boxes that contain better loot. Not to be confused with ordinary but large loot boxes that usually contain ammo or cash.
Open Pandora's Boxes
Open lootable boxes, lockers and objects.
Purple Resign
Loot/purchase purple items
Another Man's Treasure
Loot/purchase white items
It's Not Easy Looting Green
Loot/purchase green items
Gun Runner
Loot/purchase weapons
Money and Trading Challenges
Whaddaya Buyin?
Purchase items using Eridium
Psst. Hey Buddy
Trade with other players. This can be done offline via splitscreen.
Dolla, Dolla Bills Y'all
Collect dollars from cash drops. Enemy drops and looted from containers count.
Wholesale
Sell items to the vending machine.
Limited-Time Offer
Buy items of the day
For the Hoard!
Keep a certain amount of money in your possession.
Vehicle Challenges
One van leaves
Kill vehicles while in a vehicle
Turret Syndrome
Kill enemies using turrets and vehicles-mounted weapons
Blue Sparks
Kill enemies by power-sliding over them with your vehicle.
Passive Aggressive
Kill enemies while riding as a passenger (not a gunner) in a vehicle. You can do this while riding as a passenger in a Bandit Technical vehicle.
Hit and Fun
Kill enemies by running them over
Health and Recovery
Green Meanie
Get Second Wind by killing enemies using corrosive DoT (damage over time). When dying (Fight for your Life mode), you should kill an enemy while it's suffering from continuous corrosive damage.
Death, Wind and Fire
Get Second Wind by killing enemies using burn DoT (damage over time). When dying (Fight for your Life mode), you should kill an enemy while it's suffering from continuous burn damage.
Heal Plz
Recover certain amount of health.
Badass Bingo
Get Second Winds by killing badass enemies.
There is No Time to be Lazy
Revive a co-op partner
I'm Back. Shocked?
Get Second Wind by killing enemies using electrocute DoT (damage over time). When dying (Fight for your Life mode), you should kill an enemy while it's suffering from continuous electrocute damage.
I'll Just Help Myself
Get Second Wind by killing enemies
Grenades Challenges
You have to equip specific grenade mods to change their “types”.
Woah, Black Betty
Kill enemies using Bouncing Betty grenades
Pull the Pin
Kill enemies using grenades
Singled Out
Kill enemies using Singularity Grenades
EXPLOOOOSIONS
Kill enemies using MIRV grenades
Health Grenades
Kill enemies using Transfusion Grenades
Chemical Grenades
Kill enemies using Area-of-Effect grenades
Shield Challenges
Raid Rage
Kill enemies while buffed by a Maylay shield
Super Novas
Kill enemies using a Nova shield burst.
Game of Thorns
Kill enemies with reflected damage a Spike shield
Amp it Up
Kill enemies while buffed on by an Amplify shield
Ammo Eater
Absorb enemy ammo using an Absorption Shield
Rocket Launcher Challenges
Vehicle-mounted rocket launchers count towards this challenge.
Rocket and Roll
Kill enemies using a rocket launcher
Gone with the Second Wind
Get second winds using a rocket launcher.
Splish-Splash
Kill enemies using rocket launcher splash damage
Catch a Rocket
Kill enemies with direct rocket hits
(Requires Rank 5 “Splish Splash” to unlock)
Sky Rockets in Flight
Kill enemies from long-range using rocket launchers
Shield Basher
Kill shielded enemies using one rocket launcher each.
Sniper Rifle Challenges
No Scope, No Problem
Kill enemies using a sniper rifle without using scopes.
Surprise!
Kill unaware enemies using a sniper rifle
Eviscerated
Kill shielded enemies with one shot using sniper rifles
Long-shot
Kill enemies using a sniper rifle
Longshot headshot
Get critical hits with sniper rifles
Leaf on the Second Wind
Get second winds with sniper rifles
Sniper Hunting
Kill enemies with critical hits using sniper rifles.
Assault Rifle Challenges
Aggravated Assault
Kill enemies using assault rifles
This is my Rifle
Get critical hits with assault rifles.
From My Cold, Dead Hands
Get second winds with assault rifles.
This is My Gun
Kill enemies with critical hits using assault rifles.
Crouching Tiger, Hidden Assault Rifle
Kill enemies using assault rifles while crouched
SMG Challenges
Hail of Bullets
Kill enemies using SMGs
More Like Submachine Fun
Get second winds with SMGs
Constructive Criticism
Get critical hits with SMGs
High Rate of Ire
Kill enemies with critical hits using SMGs
Shotgun Challenges
Shotgun!
Kill enemies using shotguns
Faceful of a Buckshot
Get critical hits with shotguns
Lock, Stock and...
Get second winds with shotguns
Shotgun Surgeon
Kill enemies with critical hits using shotguns
Open Wide!
Kill enemies from point-blank range using shotguns
Shotgun Sniper
Kill enemies from long-range using shotguns
(Rank 5 “Open Wide!” required)
Pistol Challenges
Deadeye
Get critical hits with pistols
Hardboiled
Get second winds with pistols
Quickdraw
Kill enemies shortly after entering ironsights with a pistol
Pistolero
Kill enemies with critical hits using pistols
The Killer
Kill enemies using pistols
Melee Challenges
Fisticuffs
Kill enemies using melee attacks
A Squall of Violence
Kill enemies using melee attacks using bladed guns
General Combat Challenges
Afternoon Delight
Kill enemies during the day
… I got to boogie
Kill enemies at night.
...To Pay the Bills
Kill enemies using your action skill
Knee-Deep in Brass
Fire a lot of rounds
Gun Slinger
Deal damage with Tediore reloads
Boomerbang
Kill enemies with Tediore reloads
Not Full of Monkeys
Kill enemies with stationary barrels.
Critical Acclaim
Kill enemies with critical hits. And rainbows.
Miscellaneous
Haters Gonna Hate
Win duels
Sidejacked
Complete side missions
Compl33tionist
Complete optional mission objectives
Yo Dawg I heard You Like Challenges
Complete many, many challenges
JEEEENNNNKINNNNSSS!!!
Find and eliminate Jimmy Jenkins
This section of the guide will help you earn all the Trophies in the game. This will take approximately 40-60 hours, including the completion of sidequests. There are no collectibles in the game but there are different minor objects you can find in each area that will count to your “Challenges”.
Borderlands 2 also allows splitscreen multiplayer, making it convenient to those who are playing offline. Any player can join another player's game, no matter how far he is. A player who haven't even completed the game can join another player's True Vault Hunter Mode (the game's version of New Game ) however, the enemies will be generally impossible for him to defeat.
You can toggle between True Vault Hunter Mode and Normal mode by going back to the main menu, press Triangle to load the character you finished the game initially with. 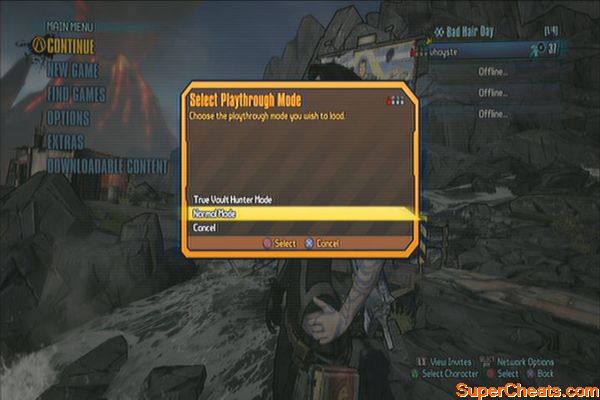
These are the general notes you should consider:
1. Level Boosting and Reaching Max Level
If you're playing as your main character, wait until you reach Chapter 8 and get Tiny Tina's optional mission “You are Cordially Invited: RSVP”. There's a level boosting trick here that you can use to quickly level up your other characters or your friends' characters. This can be done offline via splitscreen, as long as you have another controller. See the video below for more information.
There he is, the guest of honor; Flesh-Stick
To get all achievements, you must reach the highest level possible. This is only achievable in True Vault Hunter Mode, which is unlocked after finishing the game the first time around. The story and missions will all remain the same. The only difference is that there will be new and tougher enemies with enhanced attributes. You can also pad your level by partnering up with a high level co-op partner and doing high level missions with him/her.
2. Optional Missions and Challenges
There are more than 100 optional missions in the game. Some are pretty trivial that it can only be done in less than a minute, some are as tedious as story missions. Refer to this guide's Optional Missions section for the individual walkthrough of these missions. It is recommended that you do all these side missions before moving on to the main story missions to enjoy the bonus experience and loot they can provide.
Challenges in the game requires you to kill a certain number of enemies using different methods and damage types, finding/destroying area-specific objects, buying/selling certain number of items etc. This are entirely optional and you'll unlock them along the way. Challenges allow you to earn a Badass token, which can be used to purchase a permanent stat bonus of your choice. See the Challenges section for more details.
3. Exploration
Make sure to explore and cover as much area as possible. Larger areas are easily discovered using a vehicle while the smaller areas won't be that hard to explore on foot.
4. Class Specific Trophies
There are class specific trophies for each character which you can unlock by reaching their certain levels. According to PS3Trophies.org, you'll need a 5 Axton and Maya, a level 31 Zer0, and a level 21 Salvador to get all trophies.
Borderland Defender Round Two (Platinum)
Unlocked all Borderlands 2 trophies
Challenge Accepted (Gold)
Completed level 1 of all non-level-specific challenges with a single character
Refer to the Challenges section of the guide to learn the various challenges needed. There are 114 challenges in the game, and two of them are unlocked after reaching Rank 5 of the specific challenges. (Shotgun Sniper and Catch a Rocket)
Goliath, Meet David (Bronze)
Allowed a Goliath to level up four times before killing him
Goliaths are those bulky bandits wearing helmets and becomes enraged once their helmets are knocked out of their heads. Raging Goliaths attack whoever is nearby, including their own allies. They level up after killing their allies and they become even more powerful.
To get this trophy, deliberately knock off the Goliath's helmet to enrage it then assist it by weakening the targets around it so it can kill them easily. Keep doing this until the Goliath turns into a Badass, Super Badass, Ultimate Badass and Fata GOD-liath respectively. Once he transforms to this form, you can now proceed in killing it. You'll find Goliaths early in Frostburn Canyon.
Went Five Rounds (Bronze)
Completed Round 5 of any Circle of Slaughter
There are two Circle of Slaughter; one is Fink's Slaughterhouse in The Fridge and the Hyperion Slaughter in Ore Chasm in Eridium Blight. You can easily clear Fink's Slaughterhouse when you're around LV28 . 
Not Quite Dead (Bronze)
Reached level 5
Better Than You Were (Bronze)
Reached level 10
Always Improving (Silver)
Reached level 25
Capped Out…For Now (Silver)
Reached level 50
To reach LV50, you must continue the game in True Vault Hunter Mode, which is unlocked after finishing the game the first time around. The story and missions will all remain the same. The only difference is that there will be new and tougher enemies with enhanced attributes. You can also pad your level by partnering up with a high level co-op partner and doing high level missions with him/her.
Arctic Explorer (Bronze)
Discovered all named locations in Three Horns, Tundra Express, and Frostburn Canyon
Despite what the trophy description says, you must fully discover the areas so much as no gray area remains. The named locations in this map are the following:
Three Horns - Divide
Fishgut Outpost
Thirty Below
Snowbound Crossroad
Marrowfield
Windbreak Camp
The Drydocks
Three Horns - Valley
Happy Pig Motel
Shock Fossil Cavern
Split Skull bay
Frostsprings
Bloodshot Slums
Tundra Express
Varkid Ranch
Varkid Ranch Observatory
Tiny Tina's Workshop
Meltwater Crossing
Mount Molehill Mine
Old Man Johnson's Farm
Ripoff Station
Buzzard Academy
Skittering Mound
Frostburn Canyon
Incinerator Camp
Blisterpus Camp
Blacktoe Cavern
Frozen Ant Lake
Ashworth Camp
Firehawk Lair
Urban Explorer (Bronze)
Discovered all named locations in Sanctuary, Opportunity, and Lynchwood
Sanctuary
Scooter's
Dr. Zed's Clinic
Crimson Raider HQ
Marcus Munitions
Moxxxi's
Opportunity
Living Legend Plaza
Orbital Delivery Zone
The Pits
Residential Quarter
Opportunity Square
Waterfront District
Hyperion Office Complex
Lynchwood
Main Street
The Old Mine
Death Row Refinery
Gunslinger's Corner
The Grinders
Highlands Explorer (Bronze)
Discovered all named locations in The Highlands, Thousand Cuts, and Wildlife Exploitation Preserve
The Highlands - Outwash
Hyperion Extraction Plant
Orbital Receiving and Processing
The Highlands – Overlook/ Extraction Point / Hyperion Bridge
Frothing Creek Mill
Isotope Reclamation Tower
Mercury Induction Station
Lake Shining Horizons
Aggregate Acquisition
Overlook
Hunter's Bane
Blake Bridge
Whispering Riverbed
Old Cranky's Pond
Thousand Cuts
Slab Town
Broke Face Bridge
Buzzard Factory
Bloody Knuckle Point
No Man's Land
Competitor Deterrence Field
Control Core Loading Dock
Control Core Supply Depot
Wildlife Exploitation Preserve
Casa de Mordecai
Preserve Dockyard
Specimen Maintenance
Bloodwing's Enclosure
Observation Wing
Blight Explorer (Bronze)
Discovered all named locations in Eridium Blight, Arid Nexus, and Sawtooth Cauldron
Eridium Blight
Slagma Vapor Extraction
Slagma Refinery
The Slag Scar
Mount Hellsfort
Grandma's House
Lover's Leap
Bruiseboulder Quarry
Human Dwelling Place
Eridium Extraction Plant
Infested Grotto
Arid Nexus - Boneyard
Eridium Pump Station 1
Eridium Pump Station 2
Eridium Pump Station 3
Hyperion Truth Station
Loader Maintenance Depot
Transmix Regulator Station
Arid Nexus - Badlands
Fyrestone
T.K. Baha's House
Hyperion Info Stockade
Sawtooth Cauldron
Sawtooth Stilts
Smoking Guano Grotto
Mainstreet Reservoir
Cramfist's Foundry
Scalding Remnants
Buzzard's Nest
Avie's Camp
World Traveler (Silver)
Discovered all named locations
Some of the locations are accessible only after accepting the necessary side missions. Make sure to accept and do all side missions to find all these locations.
Sugar Daddy (Bronze)
Tipped Moxxi $10,000
You can simply tip the required amount then just exit the game through the XMB (don't Save and Quit) after unlocking the Trophy to get your money back. Or if you're just filthy rich, just tip away. 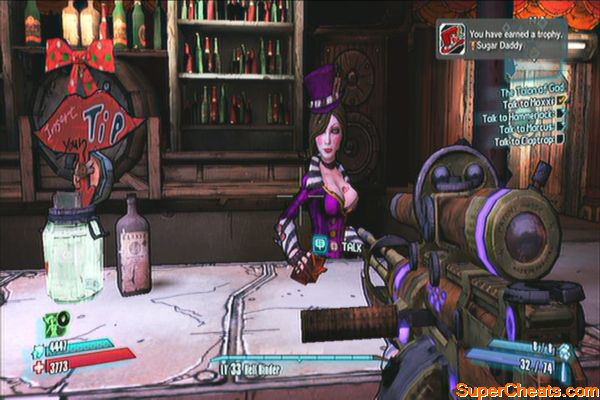
Decked Out (Bronze)
Had Purple-rated gear or better equipped in every slot
As you play in the game, you'll encounter various Purple equipment. The hardest one to find are the purple relics and class mods. Make sure to keep at least one of them in your vault until you get four purple weapons, shield and grenade mod.
Sabre Rattler (Bronze)
Killed 100 enemies with the Sabre turret
If your main character is Axton, you'll get this trophy eventually as you play in the game. Otherwise, you can simply use the Level Boosting trick mentioned at the start of this guide to increase Axton's level easily and even allow you to power up his turret. After getting this, you may revisit areas with lower level enemies your turret can kill.
Phased and Confused (Bronze)
Phaselocked 100 enemies
If your main character is Maya, you'll get this trophy eventually as you play in the game. Otherwise, you can simply use the Level Boosting trick mentioned at the start of this guide to increase Maya's level easily and even allow you to power up her phaselock (preferably the Cataclysm tree)
So Much Blood! (Bronze)
Gunzerked continuously for 90 seconds
You must have a higher level Salvador to do this trick. You must reach LV21 to unlock the skill “Yipee Ki Yay”. At rank 1, this skill adds 0.6 seconds to Gunzerk's duration for every kill. It will be better having a class mod that further increases its level and duration. Otherwise, you'll want to go beyond LV21 to have spare skill points to spare. Use the Level Boosting trick mentioned at the start of this guide to increase Salvador's level easily.
F8L Fool's post in PS3Trophies.org mentioned that the best way to do this is during the mission “Rock, Paper and Genocide: Fire Weapons”. Don't use a fire weapon but instead equip a non-rocket launcher weapon then gunzerk in front of the target. Aim for the head and quickly kill the target as soon as it emerges.
You may refer to the video below on how to do it:
http://www.youtube.com/watch?v=pqSqFsmI1zw&feature=player_embedded
Cute Loot (Bronze)
Killed a Chubby
These enemies are very, very, very rare and unfortunately, there's no exact way of making them spawn deliberately. You have to keep an eye on groups of enemies, even in open areas where you use your vehicle. I have only managed to find and kill three Chubbies in my entire playthrough. Another thing to note is that during a co-op game, you should be the one landing the finishing blow to get the trophy.
Tribute To A Vault Hunter (Bronze)
Got an item from Michael Mamaril
Keep an eye out for an NPC named Michael Mamaril in Sanctuary. Simply talk to him to get a free weapon and the trophy.
Definitely An Italian Plumber (Bronze)
Killed Donkey Mong
You'll find this aptly named bullymong in the Eridium Blight. One of its popular spawn locations is the area near the Human Dwelling Place / Ore Chasm exit.
Donkey Mong
High-Flying Hurler (Bronze)
Killed a flying enemy with a thrown Tediore weapon
Find a Tediore weapon that has the ability “explodes like a grenade when reloaded”. Wound a rakk, aim at it then reload so it hits the target. This may take a few tries.
Token Gesture (Bronze)
Redeemed 25 tokens
These tokens are acquired by completing challenges. Refer to the Challenges section for more details. The badass tokens you can redeem are the following:
Shield Capacity
Shield Recharge Delay
Shield Recharge Rate
Critical Hit Damage
Grenade Damage
Gun Accuracy
Gun Damage
Melee Damage
Elemental Effect Chance
Elemental Effect Damage
Fire Rate
Recoil Reduction
Reload Speed
Maximum Health
Unseen Predator (Bronze)
Remained in Zero's Deception mode for ten seconds straight
You need a LV31 Zero so you can unlock the “Many Must Fall” skill, which adds 2 seconds to his Deception skill per enemy kill. Use the Level Boosting trick mentioned at the start of this guide to increase Zero's level easily. The only way to do this is to find a group of enemies, luring them all towards you, activating Deception and killing them all as fast as you can.
Build Buster (Bronze)
Killed a Constructor without it ever building another bot. You can go back to the Hyperion Aggregate Acquisition base in the Highlands to find one of the lower level constructors there. Make sure that it fully deploys first before you kill it.
How Do I Look? (Bronze)
Unlocked 10 customization items
You can unlock customization items by completing challenges, through drops, loots, mission rewards or simply buying them from vending machines. Upon acquiring them, you have to use them from your inventory to unlock them.
Friendship Rules (Bronze)
Revived someone from "Fight for Your Life!" that is on your friends list
Better Than Money (Bronze)
Purchased 5 items from the black market
Up High, Down Low (Bronze)
Gave Claptrap a high five
High five!
Bounty Hunter (Bronze)
Completed 20 side missions
Did It All (Silver)
Completed all side missions
First One's Free (Bronze)
Completed the mission "My First Gun"
Dragon Slayer (Bronze)
Completed the mission "Best Minion Ever"
A Road Less Traveled (Bronze)
Completed the mission "The Road To Sanctuary"
New In Town (Bronze)
Completed the mission "Plan B"
An Old Flame (Bronze)
Completed the mission "Hunting The Firehawk"
No Man Left Behind (Bronze)
Completed the mission "A Dam Fine Rescue"
Wilhelm Screamed (Bronze)
Completed the mission "A Train To Catch"
Sky's The Limit (Bronze)
Completed the mission "Rising Action"
Can See My House From Here (Bronze)
Completed the mission "Bright Lights, Flying City"
Farewell, Old Girl (Bronze)
Completed the mission "Wildlife Preservation"
Got The Band Back Together (Bronze)
Completed the mission "The Once and Future Slab"
Identity Theft (Silver)
Completed the mission "The Man Who Would Be Jack"
An Angel's Wish (Silver)
Completed the mission "Where Angels Fear To Tread"
Bombs Away (Silver)
Completed the mission "Toil And Trouble"
Knowing Is Half The Battle (Silver)
Completed the mission "Data Mining"
Cool Story, Bro (Gold)
Defeated Jack
What does it mean? (Bronze)
I can't even capture it on my camera
This is a tribute to Youtube's “Double Rainbow Guy”. You can unlock this trophy by going to the Highlands in the Aggregate Acquisition base. Fight your way uphill then continue past the bridge to reach a far off warehouse where two badass loaders appear. Check the nook in the map and look below to find a tent. Hang around a bit and Handsome Jack (or Claptrap) will start adoring the double rainbow. Just look towards Sanctuary/ Overlook's direction to find it. Check the video below.
Perfect double rainbow
Well That Was Easy (Bronze)
Completed the mission "Shoot This Guy in the Face"
You'll find a quest marker in Thousand Cuts the first time you visit it. Head to that marker to find a crazy bandit that wants you to shoot his face. Comply and this trophy is yours.

Thresher Thrashed (Silver)
Defeated Terramorphous the Invincible
This mission becomes available after finishing the game and by talking to Tannis in Sanctuary. It's a LV50 mission so you have to make sure that you're at the right level before attempting this. 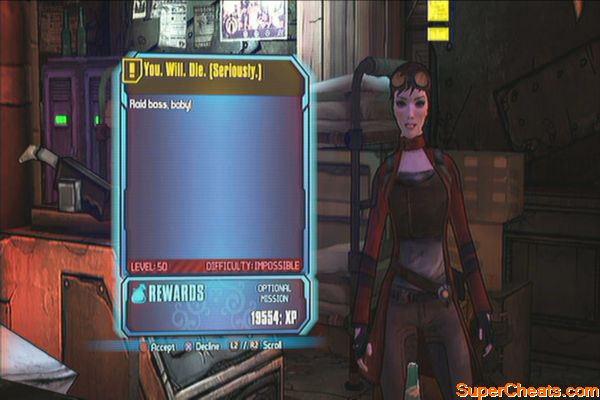
Feels Like The First Time (Bronze)
Opened the chest at the bus stop in Fyrestone
Definitely feels like the first time
After Sir Hammerlock restores power to the town, talk to him. Head to the northwest to find the graveyard and clear it from Bullymongs. Be careful of the adult bullymongs as they can deal more damage. Next, exit the town and go downhill to the pond below. Kill all the enemies there then turn it over to Hammerlock to complete. 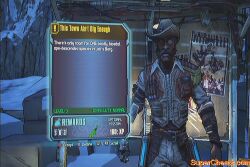
Open the gate to the northwest to leave the town. Head to the marker and defeat all bandits guarding the outpost. Climb up then pull the lever there. You'll have to find a fuse next. 
Head to the outpost to the south and clear it of enemies. Next, silly as it sounds, follow Claptrap's advice and attempt to run through the fence. Do it a few more times until the AI tells you to simply destroy the fuse box.
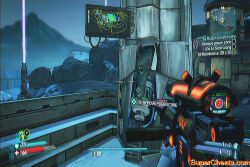
More bandits and bullymongs will arrive. Take them out then grab the fuse. 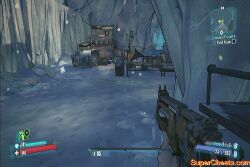

Don't forget to open the portalet near the fusebox to get some treasure. Backtrack to the elevator and install the fuse. Pull the lever and enter the room. Examine Dr. Zed's vending machine and purchase any shield. Backtrack to Liar's Berg to complete the mission. 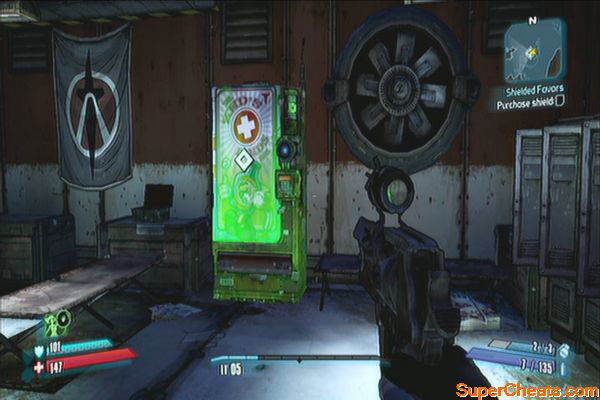
This mission becomes available after turning int the previous mission, Shielded Favors. Head to the Blackburn Cove to the south next. 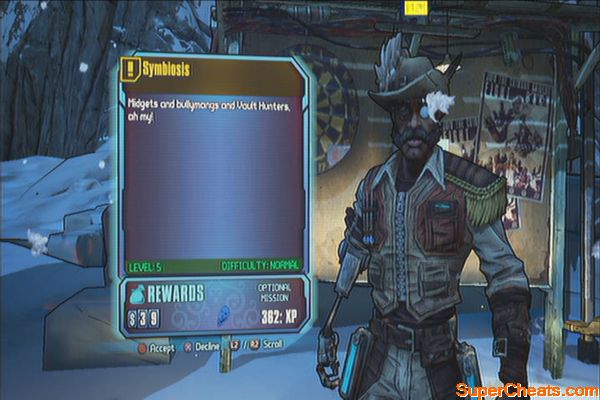
Once you've reached the bay, make your way to the southwest first to register a new location. (Ice Flows). There is one area there that has several bone mounds that contain random loot as well. Continue to the south and jump across the ice to reach another location (Ebonfloes). There are Badass Bullymongs here so be careful when trying to engage them. 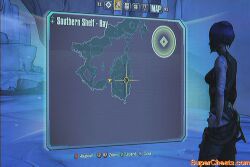
Make your way southeast to reach the makeshift settlement. Carefully go in and take them all out. Make your way to the upper floor and approach the door where the vending machines are and the target will come out. Using an incendiary weapon will be of great help here as setting them on fire will stop them from running around and making it easier to hit them. Report to Hammerlock afterward. 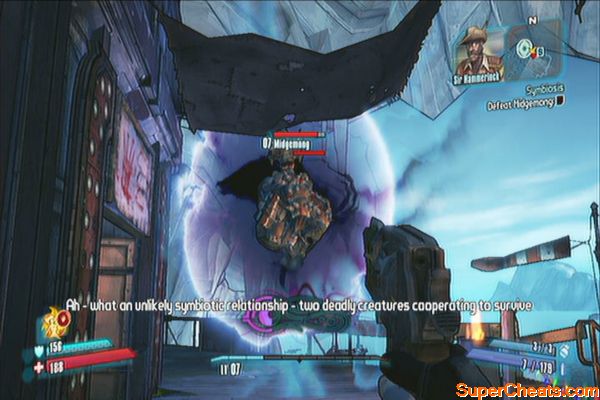
You have to gather 4 Bullymong Furs. You can get these by weakening them with gunfire then finishing them off with melee attacks. There's a bullymong lair in the northwest corner of the shelf. Head there and start harvesting. 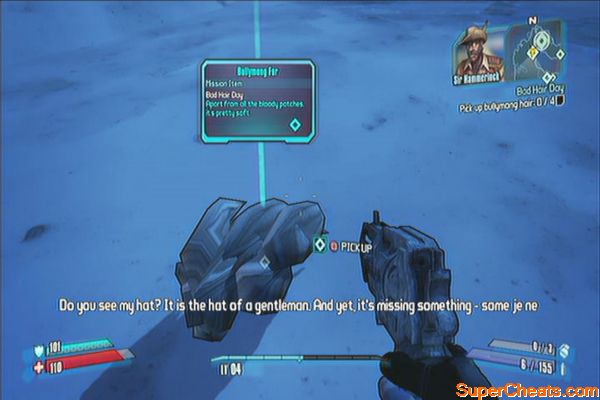
After meeting the quota, you'll have the option to bring the furs to Hammerlock in exchange of a sniper rifle or to Claptrap in exchange for a sniper rifle. 
Kill one of the bandits outside town until they drop an audio log. Play it to start the mission. 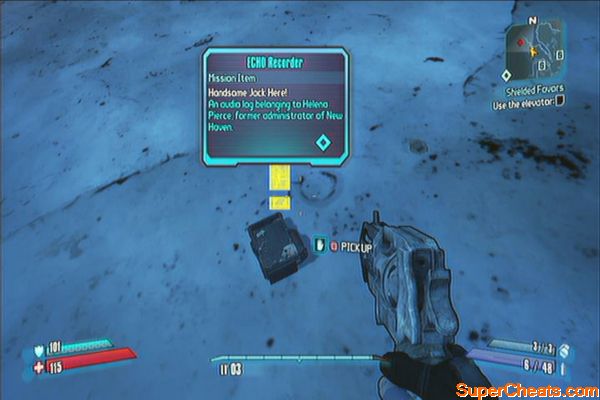
One of the audio logs is located back in town. Head to the objective area to find a locked container. Shoot the lock to open to find the audio log inside. The next one is on the rooftop of Hammerlock's shack. 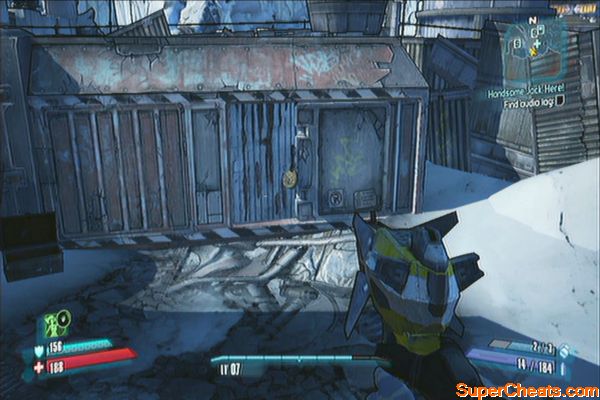
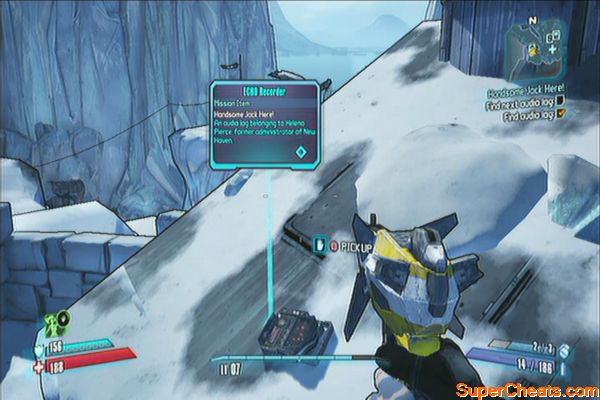
Head to the third location and open the container there to find the last audio log. Deliver them to Hammerlock to complete the mission. 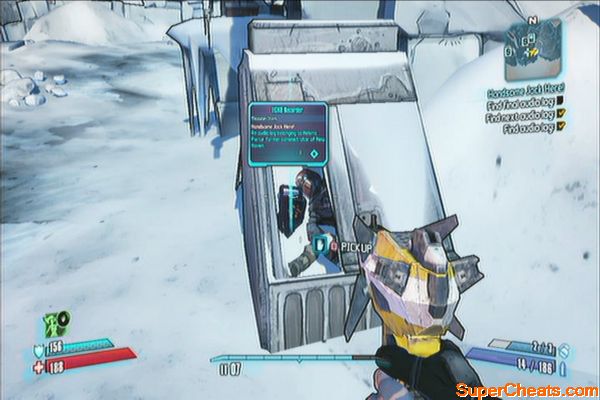
Rock, Paper, Genocide: Fire Weapons!
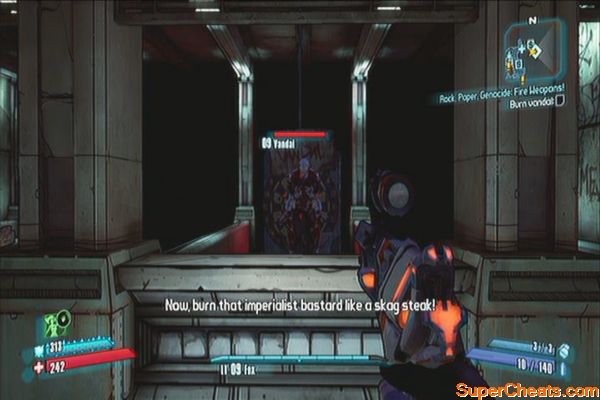
Talk to Marcus Kincaid to start this mission. Agree to test out his new weapons and head to the firing range. Once there, shoot the vandal with a fire elemental weapon. Turn in this quest to get your reward. 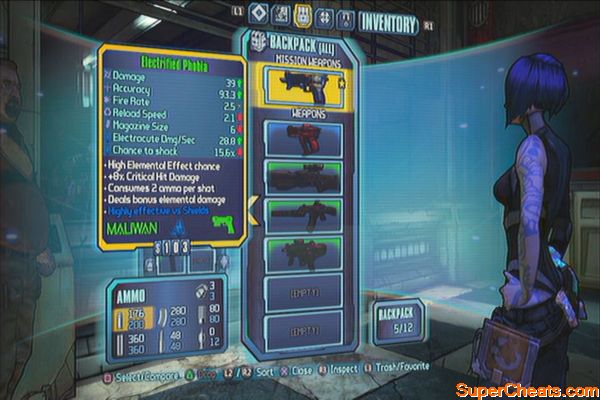
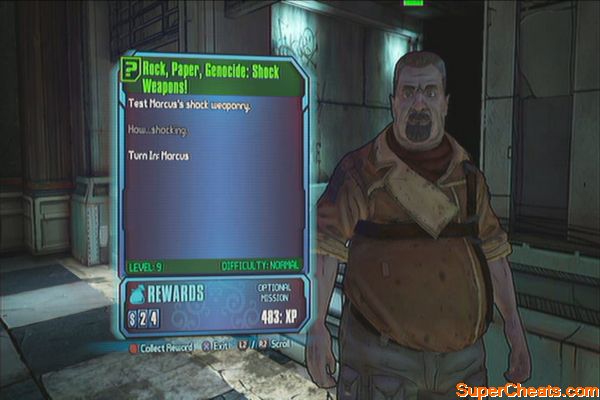
Rock, Paper, Genocide: Shock Weapons!
This is immediately offered by Marcus after finishing the Fire Weapons. Equip the mission weapon Marcus provided and shock the cheapskate.
Rock, Paper, Genocide: Corrosive Weapons!
This is immediately offered by Marcus after finishing the Shock Weapons. Equip the mission weapon Marcus provided and shoot the robot to complete the mission. Turn it over to him. 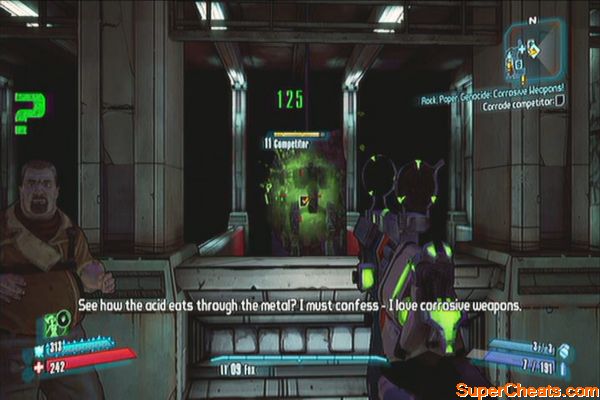
Rock, Paper, Genocide: Slag Weapons!
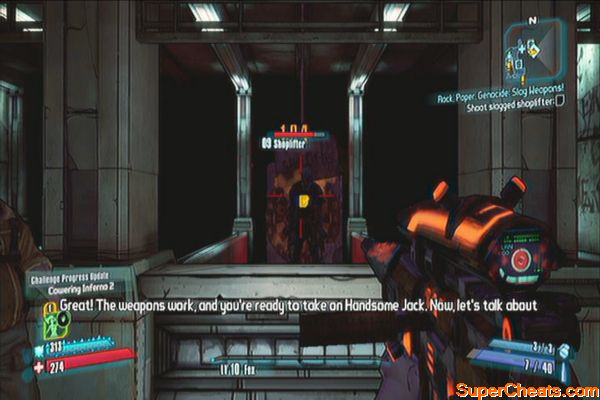
This is immediately offered by Marcus after finishing the Corrosive Weapons. Equip the mission weapon Marcus provided and slag the shoplifter. Switch to another weapon and shoot at the target to complete the mission. Turn it over to him. 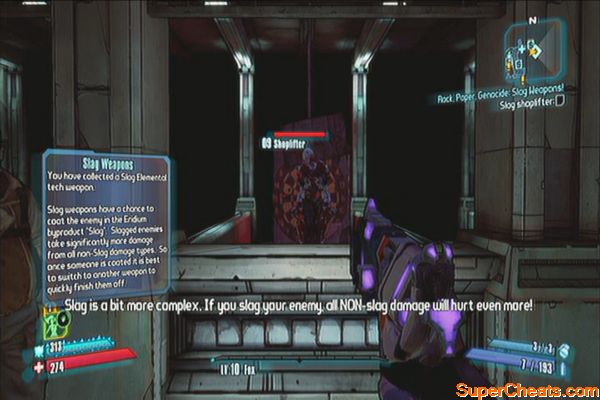
Find Sir Hammerlock inside Moxxxis. Next, you have to go outside town and search 5 bullymong piles and hunt down 15 bullymongs. 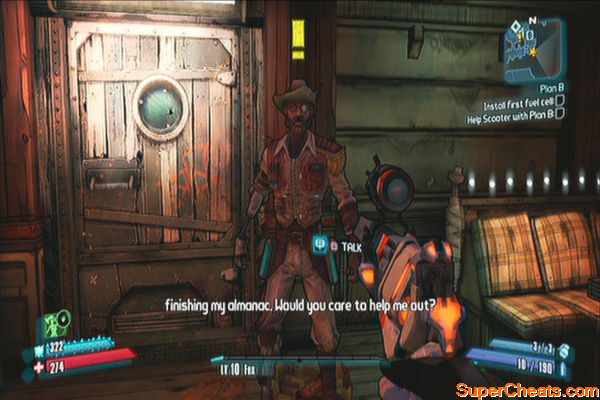
You can use your vehicle weapons to kill them; however you need to smash the bullymong piles with your melee attack to be counted towards the mission. After meeting the first two requirements, you know have to kill a Primal Beast with a grenade. 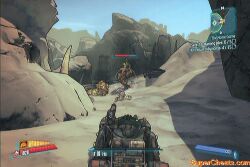
Know your grenade's fuse time and weaken the target with a few gunshots. Lob a grenade and lure it towards you, just in time the grenade explodes.
Next, you have to shoot an enemy's projectile. Find another group of Ferovores and kill them all except the Slinger. Stay away from it and wait for it to throw rocks at you. Shoot these rocks to update the quest. 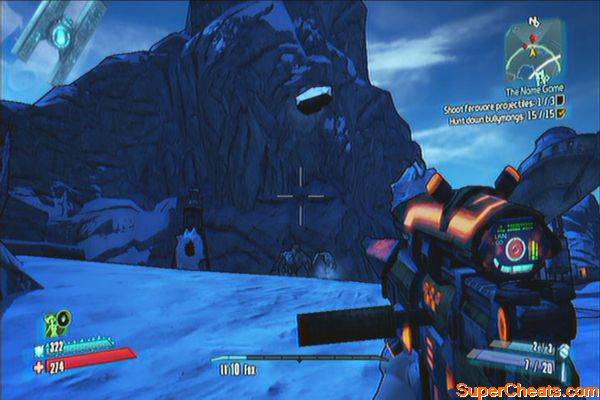
Finally, you just need to kill 5 more Bonerfarts to complete the objectives. Return to Sir Hammerlock to complete this task.
This is available from the town's bulletin board. Exit the town and head to any of the two marked exits of map and travel to the next area. Find the entrance of the Southpaw Steam and Power and clear the are of enemies. Enter the building and take the lift down. 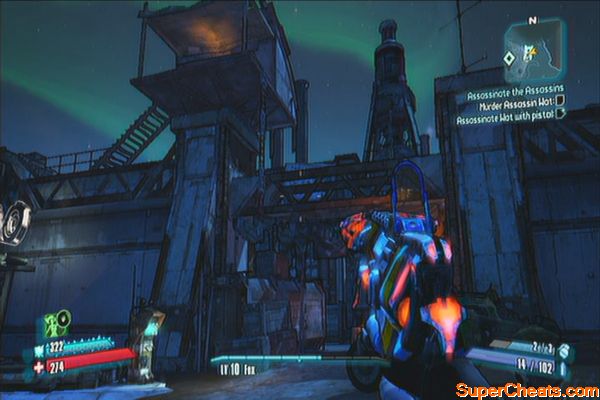
For your objective, you have to murder Assassin Wot. As for your bonus objective, you must finish him using a pistol. He's accompanied by a Badass brute so lead it away from him and concentrate your fire on it until it dies.
For your next target, you have to find Oney. You must waste this guy using your sniper rifle. Head to the marker and wait for the large gate to open. Stay at a distance since this guy's shotgun and explosives can really hurt you, not to mention that he also has suicide marauders helping him.
Sniper
Go to the lower level of the station and head to the marker. Take out Reeth's guards until he makes an appearance, with a heavily armored taskmaster. Take out the taskmaster first while keep moving since Reeth can throw incendiary projectiles at you that can set you to fire. Soften Reeth up with your guns then finish him off with your melee weapon to complete the bonus objective.
Melee
For your last target, you have to kill Rouf and to get the bonus experience, using a shotgun. First, clear his area from enemies. Be careful of the suicide and burning psychos that will aggressively corner you. After cleaning house, he will finally make his appearance. He will have two heavily armored bodyguards with him so make it your priority to take them out first.
Rouf is the hardest of the four since he's a fast target, wields a shotgun and has a very powerful melee attack. Keep distance from him while softening him up using other weapons. Once his HP is critically down, get to full shields and switch to your shotgun then get up close and personal to kill him.
After killing all assassins and reading their ECHO recorders, return to Sanctuary to turn in the mission and complete it.
After you get the story mission “Hunting the Firehawk”, head to Zed's clinic and talk to him to start this mission. Just press R3 to “operate” the patient and get an Eridium shard. Pick it up and deliver it to Tannis to complete the mission.

After you get the story mission 'Hunting the Firehawk', head to the Happy Pig Motel and check the recorder on the bulletin board to start this mission. First, turn on the steam pump. Next, you'll have to find three parts scattered around the area to fix it.
Head to the pump to the southwest then shoot the ladder to reach the top. Pick up the steam pump from there. Kill the bandits that will appear afterward.
Next, head to the south where the capacitor is. Open the capacitor door under the pump and kill the skags. One of them should drop the actual capacitor itself. 
Finally, head to where the gearbox is and slay the Badass Bullymong to get it. Return to the motel and replace the parts before finally activating the pump. Turn in t the mission to the bulletin board. The vending machines and other stations are now powered up.

After completing 'No Vacancy', this mission will be immediately offered to you. You have to deliver the packages within the time limit. The time will be extended for a few seconds after delivering the messages to the mailboxes. The catch is the actual location where you need to deliver the messages are packed with bandits. See the video below for the location of the mailboxes.
You may also want to clear the area of enemies before attempting this to have an easier time. Once done, turn it back in to the board to get your reward.
After completing 'Do No Harm', return to Zed and talk to him to start this mission. Head to the marked cavern and fight your way inside. Climb the stairs inside the camp and take out Dr. Mercy. Search his body then examine it again to turn in the mission. This opens a follow up mission.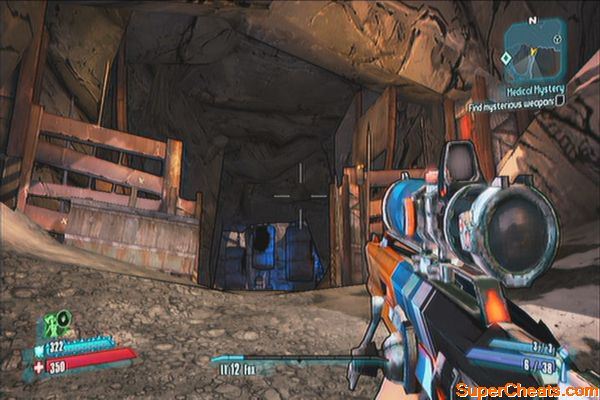
Medical Mystery
Medical Mystery: X-Com-municate
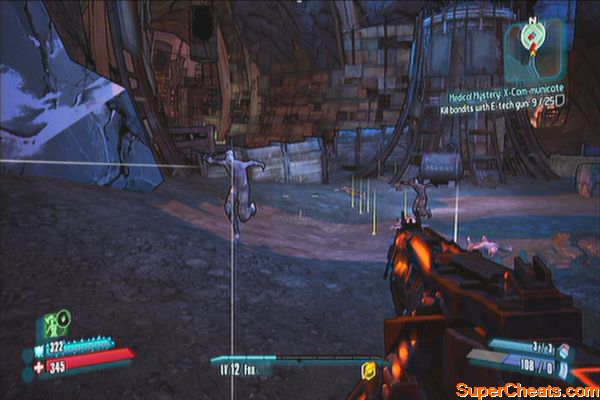
You'll get this after turning over Medical Mystery and examining Doc Mercy's body. You have to kill 25 bandits using the E-tech gun you have recovered. There will be psychos appearing in the camp but to complete the 25 count, you have to search for other bandit-laden area like the Split Skull Bay and Southpaw Steam and Power. Once you have met the required number of kills using the weapon, return to Happy Pig Motel and fast-travel back to Sanctuary to turn over the mission.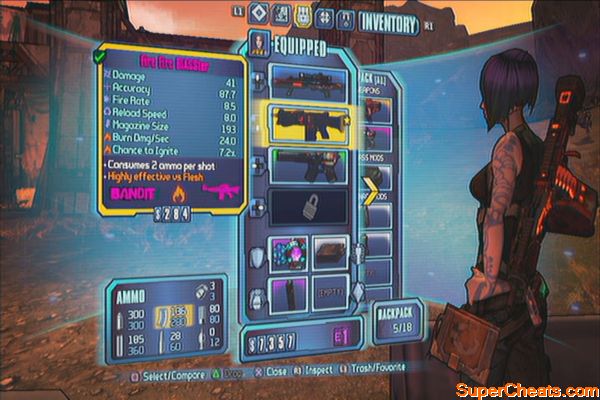
Cult Following: Eternal Flame
You can get this by talking to Lilith in the Resistance HQ in Sanctuary. Fast-travel back to Frostburn Canyon and head to the Incinerator Camp. Talk to Incinerator Clayton then use a fire weapon to burn bandits and collect their ashes. After collecting five ashes, return to Clayton to turn over the mission. 
Cult Following: False Idols
Head to the marker and find Scorch. It's a large fire spiderant. Just keep distance and aim for its abdomen to deal critical damage. After killing it, return to Clayton to turn over this optional mission.
False Idols
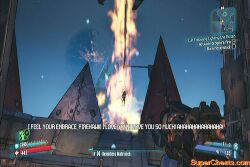
Cult Following: Lighting the Match
Open the nearby portalet then pick up the midget called Matchstick. Return to the entrance of the canyon then use the fast-travel station there to Southern Shelf. Head to the freighter and fight your way to Captain Flynt's stage. Follow the marker to find the incinerator behind the wall. Place Matchstick there then activate the lever to burn him. Return to Clayton afterward.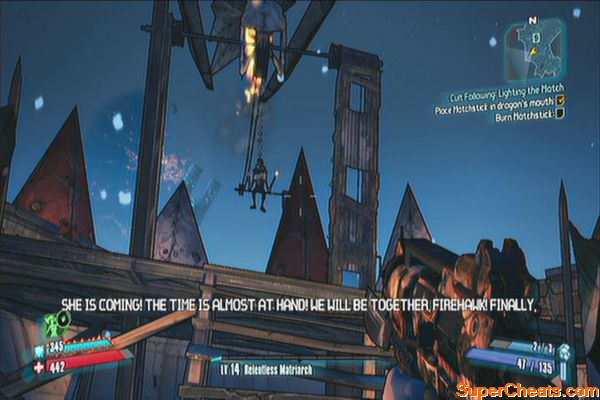
Cult Following: The Enkindling
Equip a fire weapon and light all marked effigies with fire by shooting at them. After lighting the effigies, head to the enkindling and pull the lever as instructed. Kill the cultists then turn in the mission to Lilith in Sanctuary complete it. 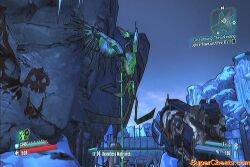
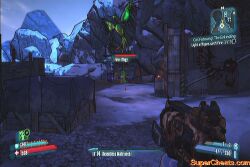

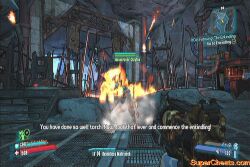
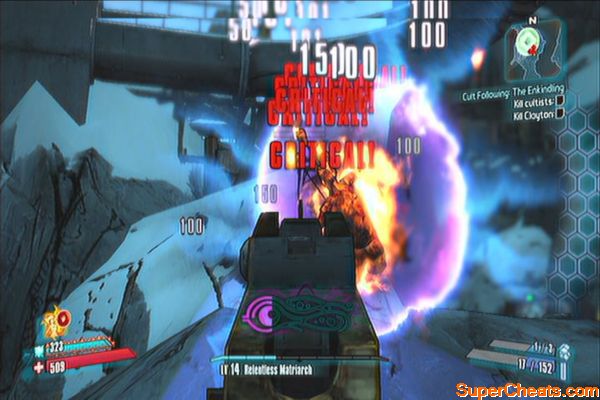
Travel to Three-Horns Divide, head to the marked location and enter the small camp. Kill the enemies there then take out Boll. Examine the ECHO recorder he drops then find the other recorders in the marked dead drop locations. 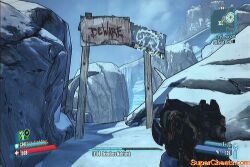
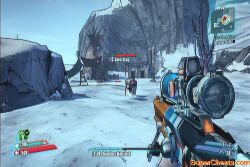
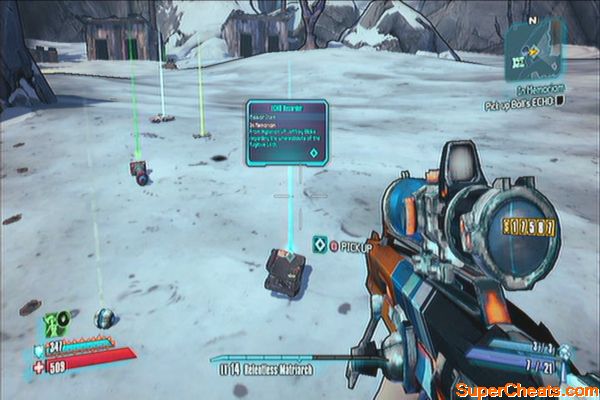
In this area, shoot the chains on the hanging anchor to find the recorder. 

In this area near the Sanctuary Gate and beside the pump, use the valve to spew the ECHO recorder out. 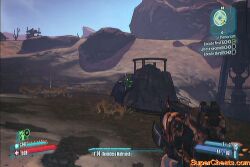
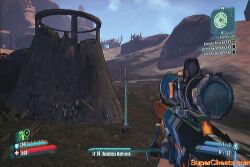
The third Echo is found near Claptrap's ship. See the video below to find it easily.
Memoriam: Third Echo
After getting all the ECHOs, turn them over to Lilith to complete the mission.
This is given by Loggins in Ellie's Garage in the Ramp. Find the buzzard camp in the area then use the nearby cliff as a ramp to jump to the camp.
You have to find 4 volleyballs and 2 gas cans. As an optional objective, you have to shoot down buzzard pilots. The volleyballs and cans are marked in the map so you just have to fight your way inside until you find them and the pilots. 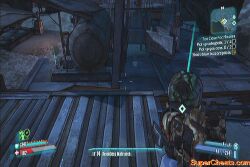
After getting all the cans and volleyballs, find their net and douse it with gas. Be careful though since three tough, shirtless guys will appear. Take them out then return to Loggins to complete the mission. 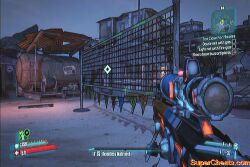
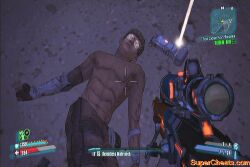
At the start of Chapter 8, talk to Ellie in her garage to start this quest. Next, head to the marked areas and destroy enemy vehicles to gather all 6 ornaments. Once done, return to her garage and place them in the indicated locations. Talk to her once more to complete the mission.
At the start of Chapter 8, talk to Tannis to start this mission. Next, head to Moxxi's place and get the pizza there as bait. Next, use a fast-travel station to travel back to the Bloodshot Stronghold. Continue until you find the marker. Jump down to the lower level and go through the tunnel. 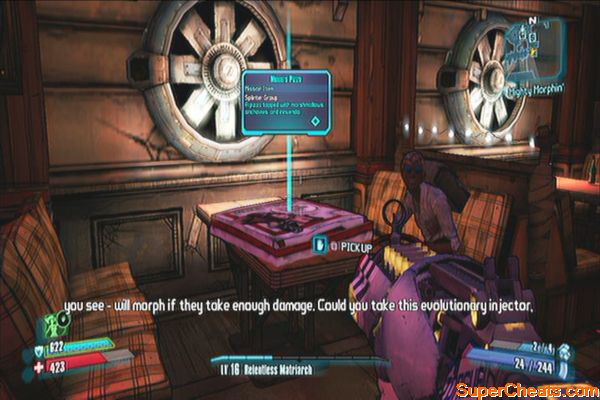
Kill the next few enemies until you find a room with an intercom. Activate it and place the pizza on the table in the middle. Four enemies will appear one by one, so keep moving and kill them all. These guys are very mobile so use shotguns, SMGs or assault rifles to take them out. 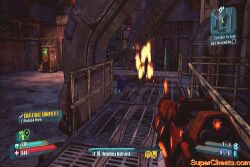
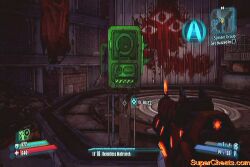
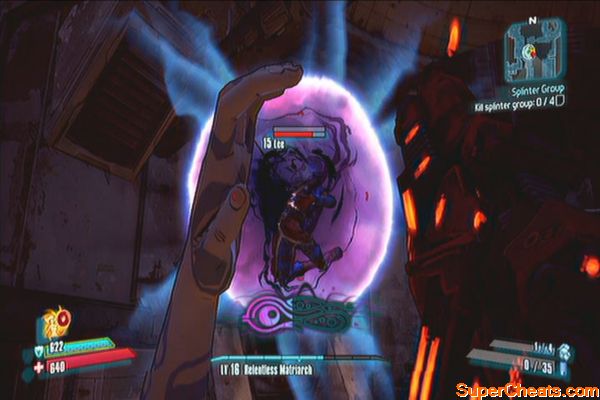
You can get this mission while doing the Splinter Group quest in the Bloodshot Stronghold. Wait for the abused robot to explode then examine its AI core to start this mission. Fight your way inside again until you reach the Ramparts again. 
Once you've reached the ramparts, head to the marked location then install the AI on the constructor robot. 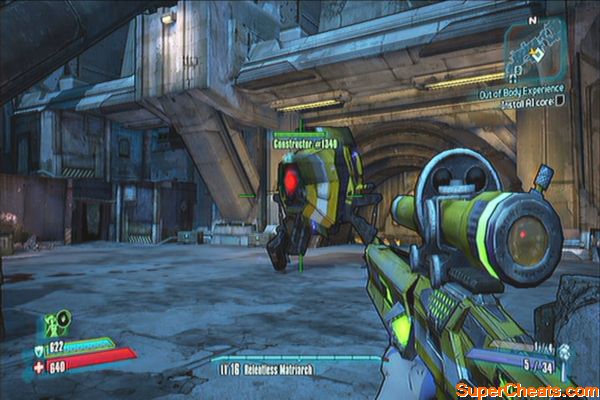
The robot will turn on you and summon reinforcements. Take them out while taking cover to avoid excess damage from the rockets. Aim for its eye to deliver critical damage. After destroying it, head to the next location and insert the AI Core to a War Loader. Destroy it again then return to Sanctuary. 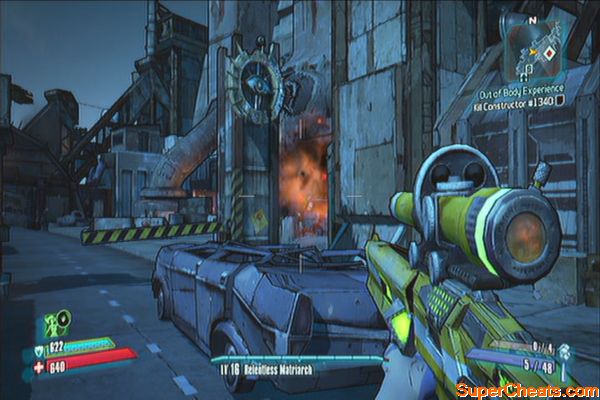
Head to Moxxi's place and install the AI Core in the radio. Destroy the radio then pick up the AI Core once again then bring the core to either Zed (shield) or Marcus (gun). 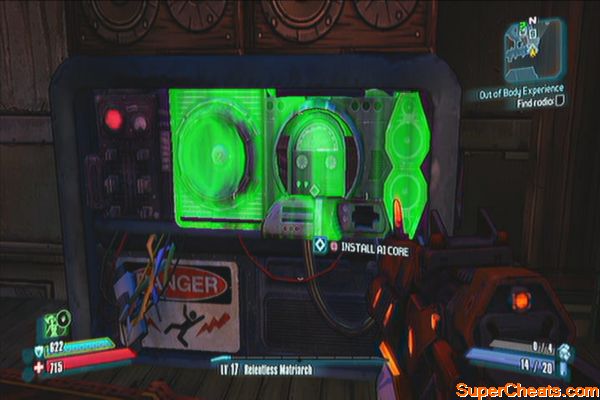
Talk to sir Hammerlock and retrieve the injection from him. You can do this while doing the main story mission, A Train to Catch. Head to the the varkid nests and disturb them. Keep an eye to the one that will burrow on the ground and immediately inject it while it's on pod form. Once it hatches to a mutated varkid, kill it. You have to repeat this four times to until you collect enough samples. 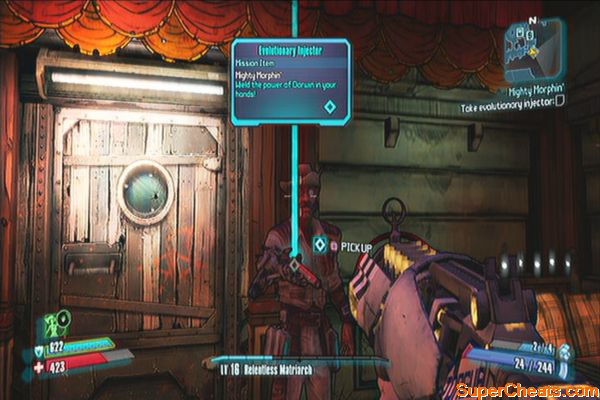
You can start this mission by checking the ECHO recorder dropped by a Tundra Patrol enemy in the Tundra Express. Find the stash and open it. Immediately run away to avoid the explosion then kill all the enemies that will appear. Turn in the mission by examining the cache. 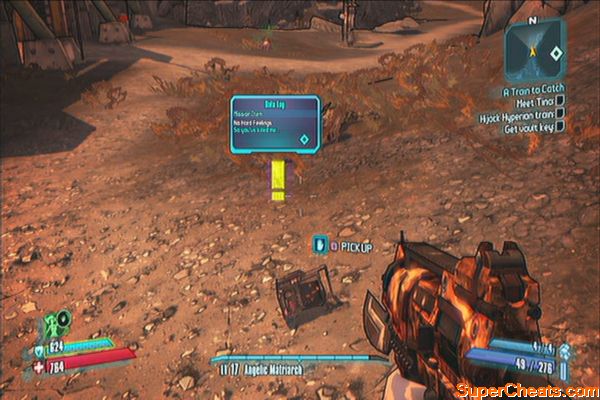
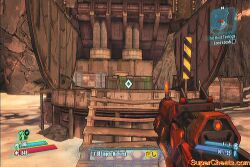
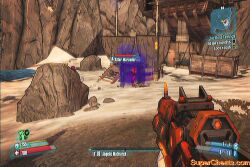
You are Cordially Invited: Party Prep
This is given by Tiny Tina in her workshop in the Tundra Express. You'll meet her while doing the main story mission, 'A Train the Catch'. She'll give this quest after she fixes the damsels. For this mission, you have to emancipate Sir Reginald. Head to the marked location and follow the path uphill to reach the Skittering Mound. Defeat the large varkid named Madame Von Bartlesby then retrieve Sir Reginald inside a bottle in the hive. 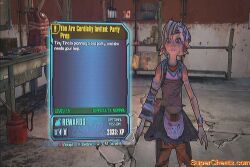
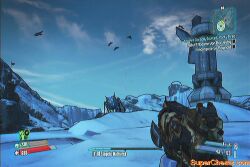
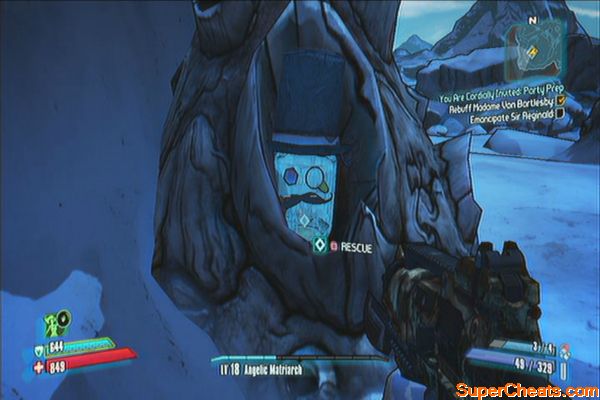
Next, recover Princess Fluffybutt from the shack in the middle of the road. There will be several buzzards flying around the Buzzard Academy. You can find the optional item, the crumpet in their as well. 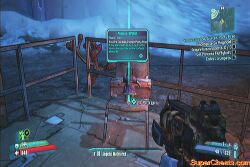
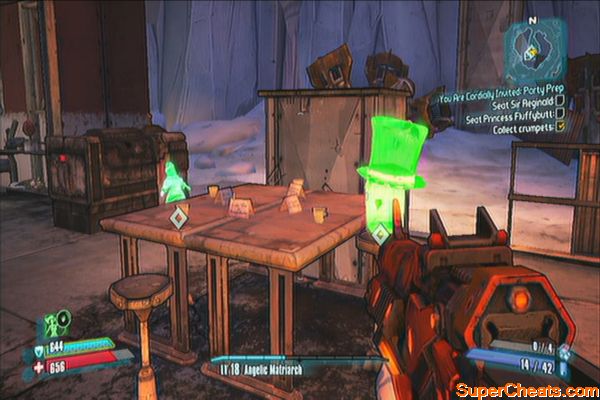
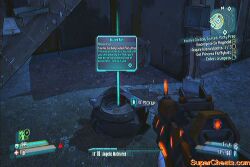
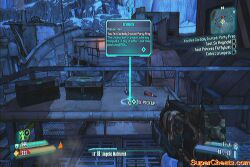
Return to Tina and seat the two guests. Turn over the mission to her to start a new one.
You are Cordially Invited: RSVP
Head to the nearby Meltwater Crossing and lure Flesh-Stick back to Tina's workshop. Stay close to him and shoot the ground near him to get his attention. After he is successfully captured, talk to Tina again to turn in the mission. 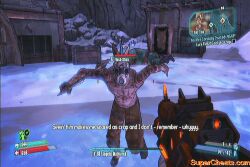
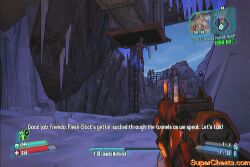
NOTE: You can kill Flesh-Stick over and over again to farm experience from him. This is the best method in the game so far and will easily increase your levels in a few minutes. This can be done alone in a single console as long as you have a second controller. See the video below for details.
There he is, the guest of honor; Flesh-Stick
You are Cordially Invited: Tea Party
First, activate the generator to start the mission. Before hitting Flesh-Stick, you must make sure that your weapon loadout is correct, and your grenades and ammo are full. If not, there's an ammo depot inside Tina's garage. Hit Flesh-Stick and kill the waves of bandits that will coming in to destroy the generator. Defeat them all to complete the mission.
Best. Tea. Party. Ever.
This is given by Lilith in the Sanctuary after retrieving Wilhem's power core. Travel back to the Tundra Express and head to the Mount Molehill Mine. Clear the area of enemies then head to the next marked location to find Prospector Zeke. As a bonus objective, you can kill the prospector using slag. 
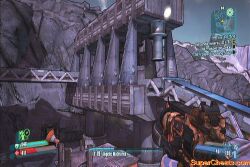
The prospector is located in the upper cliff. You have to climb up the conveyor ramps through the machine with pistons to reach the upper level. Once there, take out all minor enemies first. There is only one slag barrel in the area so if you're after the bonus objective, weaken his HP down to critical level then lure him towards the barrel. There's a risk that he'll hit it so avoid taking cover behind the barrel. After killing him, get the recorder and turn the mission in to Tiny Tina. 

The Pretty Good Train Robbery
This is immediately available after turning the mission 'Mine, All Mine' to Tiny Tina. First, collect all four dynamites in Tina's garage. Next, head to the marked location and use the railway to reach the entrance. Plant the first dynamite near the entrance. Make sure you're inside the station before sealing the gate closed.
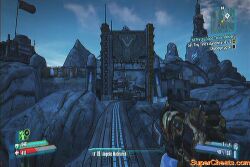
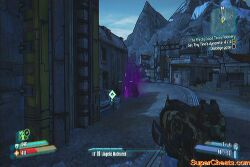
Once inside, clear the area of enemies then use the radio to call the train. Once the train arrives, place the explosives on the slots then wait for them to go off and collect the money. Once done, turn over the mission to Tina to get your reward.
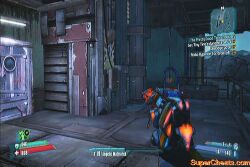
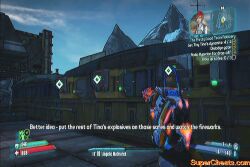
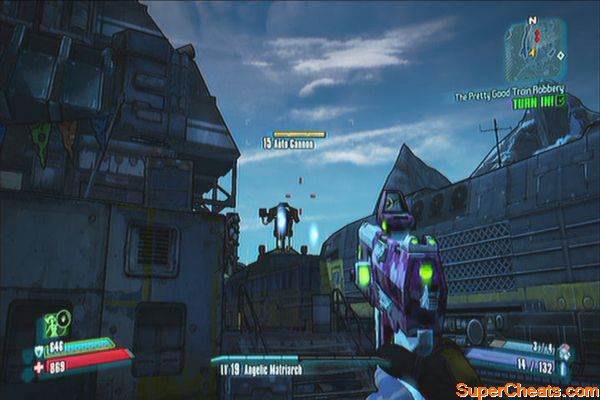
You can get this mission from the Sanctuary Bulletin Board at the start of Chapter 9 (before putting in the Hyperion Power Core). Head to The Dust and use the nearby rock ramp to reach the encampment up the hill. Head to the marked location and pry open the metal sheet. 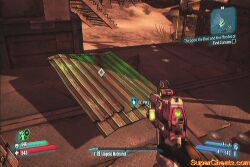
Next, head to the map exit of Friendship Gulag. Fight your way to Carson's cell. The area is guarded by Hyperion robots and engineers. After reaching the the cell, pry the iron grills open and play the ECHO recorder. You can now exit the area and head to the next location. 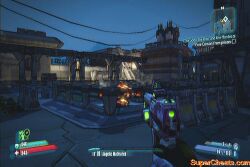
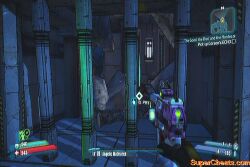
To reach the stash, you have to discover the valley northwest of Ellie's garage on foot. There are a few spiderants there that shouldn't pose too much problem for you. The marked location is in the graveyard uphill but you may want to clear the small encampment of bandits and a large spiderant called the Black Quen for extra exp.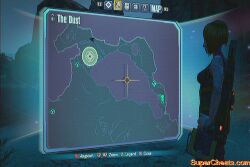
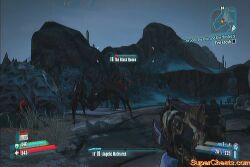
Continue uphill and search the shallow graves until you find the stash. Mobley and Gettle will appear and will engage you in a three-way standoff. Stay away from them and wait for them to wound each other before you go in for the kill. Open the chest to complete the mission then gather your loot afterward. 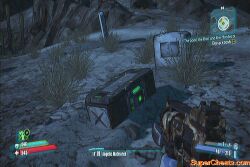
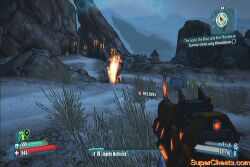
his is available in the Happy Pig Motel's Bulletin Board in Chapter 9. (Discovered this on the way to The Fridge) Pick up the dynamite and head back to the Three Horns Divide. Enter the large bandit camp called the Dry Docks and find all five furnaces to plant the explosives there. Once done, kill 8 freezing psychos and return to the Happy Pig Motel Bulletin Board to turn over the mission. 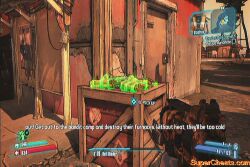
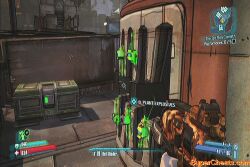
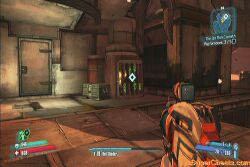
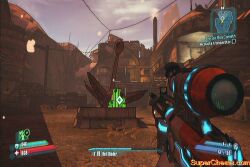

This is available at Chapter 11: Wildlife Preservation. Talk to Marcus to start this mission.
Fast-travel to the Sanctuary Hole in the Three-Horns Divide. Head back to where the Sanctuary once was located, then clear the area of enemies. Make your way to the northeast corner of the map to find a lift. Ride it down and continue killing enemies there. Go upstairs and exit to the southeast to find another lift going down. There should be another lift there leading to the Caustic Caverns. This is the same are as Sir Hammerlock's Perfectly Peaceful mission. 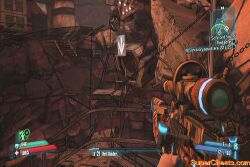
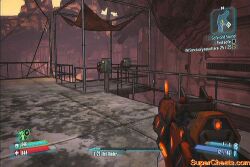
Follow the straight path until you reach the Rumbling Shore. There are some shallow grounds you can hop on to reach the other side of the Oozing Discharge. Follow the marker to find the safe on top of some blue crystals. Approach it and a large crystalisk called Blue will appear. Don't be intimidated by it as it can be defeated as easily as you can dispatch a normal crystalisk. Aim for the crystals to deal critical damage. Once done, open the safe and you'll have the option to deliver the pictures to Moxxii or Marcus when you get back to Sanctuary. 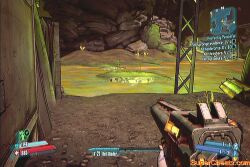
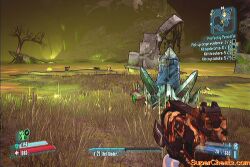
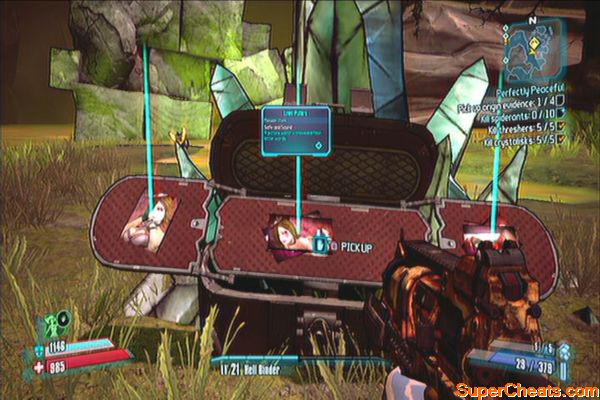
This is available at Chapter 11: Wildlife Preservation. Talk to Sir Hammerlock to start this mission. This is best done alongside with Marcus' Safe and Sound mission since they're both located in the Caustic Cavern. To reach it, you have to return to the hole where Sanctuary is once located then use the lifts down to reach the entrance of the cavern.
Once inside the cavern, you can find the first echo recorder on the trash pile near the dump trucks near the entrance. You can kill crystalisks and some varkids along the way as well. Continue forth and avoid the corrosive fluid all around you. Make your way to the Rumbling Shore where several threshers await. Kill five of them as part of the bonus objectives. Be careful not to get caught between them as they can easily rip through your shields. 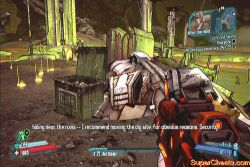
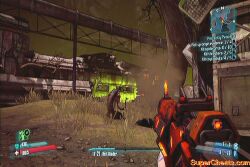
The evidences are marked in the map so you just have to go to their general locations and find them. Make your way to the Infested Warehouse and find the second evidence on a foundation. Exit the warehouse and make your way to the Abandoned Mining Site. Examine the old Echo on the post to get a new optional mission.More threshers will appear here, including a Badass Pyre Thesher. Keep distance and destroy it and move on to the next location. 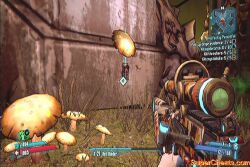
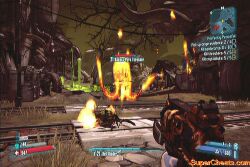
Next, you'll find another recorder in the northern peak of the area, attached to a tombstone. The last one is located inside the Deep Core base in the southern portion of the map. I recommend doing the Minecart Mischief quest after getting the third recorder as that mission will lead you to the crusher. Just jump down to the lower level and you'll reach the room where the last recorder is.
There's a spiderant hive outside where the last recorder is located so you can head out and kill spiderants until you meet the necessary quota for the bonus objective. 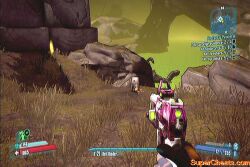
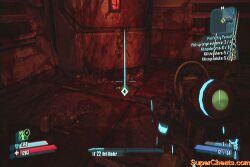
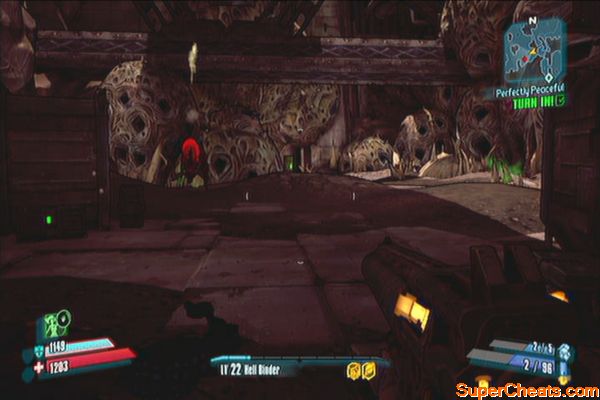
This can be started by examining the old Echo on a post in the Caustic Caverns. You can find this on your way to the third evidence during the optional mission 'Perfectly Peaceful'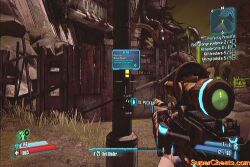
Keep pushing the cart along the rail and opening the airlocks along the way. Once you've reached the infested tunnel, take out the large group of varkids and sell your loot as well in the lone vending machine past the door to east.
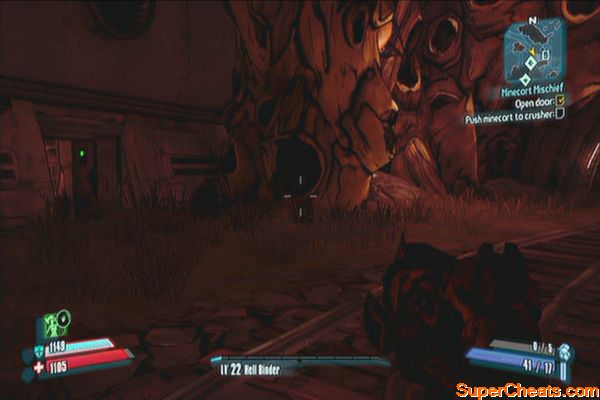
Open the third airlock and push the cart to the marked location. Pull the lever and take out the varkids that will attack you. Once done, pick up the raw eridium and turn in the mission by examining the rock nearby. 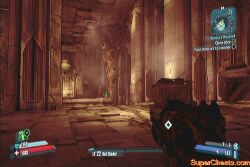
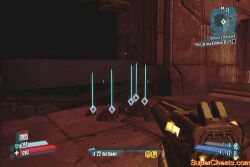
This is available at Chapter 11: Wildlife Preservation. Talk to Scooter to start this mission. Travel to the Fridge and search for the three girly magazines near the area. There's one inside a wrecked van, another on top of a wooden box near the 'Supplies' signboard and the last one on a wooden box overlooking the bridge to the left. 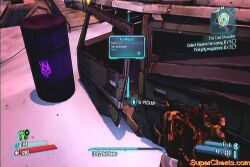
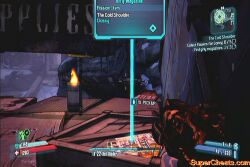

Go to the next marked area (Icemaw Grotto) and take out some rakks and crystalisks. Collect the tall, slim flowers scattered in the area. They're identical and they have markers on them so they're hard to miss. 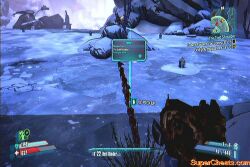
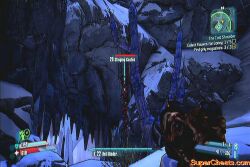
For the food, they're all found near the pizza van wreckage. Two are on the ground while the remaining pieces are stuck above. Place the pizza and the flowers in the marked location and prepare for battle. Aside from Laney, look out for the midgets. You may want to run to a distance and take them out one by one. 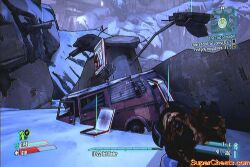
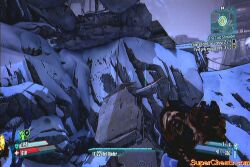
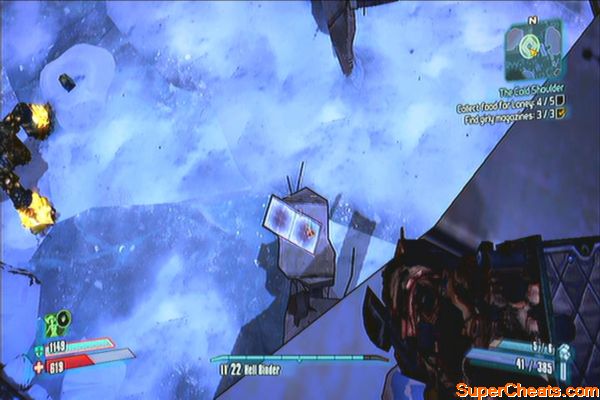
Once done, you can check the new opened area to discover the Rat Maze. Continue following this narrow path and fight through hordes of ratmen. Finally, you'll reach a lift leading to the Rakk Cave where the Rakkman is living. Defeat him to loot his treasure chest. 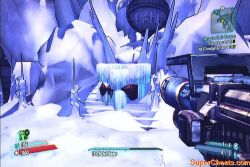

This is available at Chapter 11: Wildlife Preservation. Talk to Scooter to start this mission. Travel to the Fridge and the previously closed gate to the middle-eastern portion of the map should be open now. Follow the tunnel to the northeast which will lead to the Stalker Hollow. As a bonus objective, you must kill Shorty using a Shock Weapon. 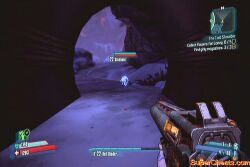
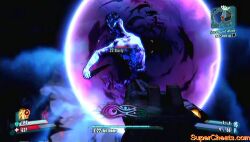
Note for Self-Person
Kill a Goliath that will appear in the Fridge to drop this ECHO recorder. You need to find the weapon cache and kill 10 midgets as a bonus objective. There are a lot of midgets where you can fight Laney again and further more inside the Rat Maze. Continue until you reach the Ice Claw Cavern. Clear the area and turn over the mission by smashing the ice and freeing the weapon cache. 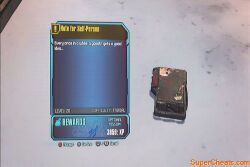
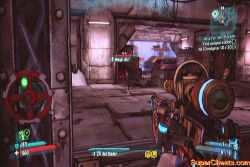
A large enemy called Smash Head will also break free from the ice so run immediately to gain distance and take him out. Be careful of his constant supply of midgets as well. 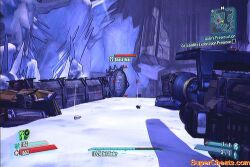
The journals are marked in the map so you just need to head to their general locations and collect them. They can be collected in any order you please.
1. Under Blake Bridge
2. In a boat, docked by a shack to the uphill lake north of The Highlands – Extraction Point
3. Frothing Creek Mill, inside a parked van
4. Aggregate Acquisition. This is a hyperion base and the journal is found in a room on a roof of the marked building. To reach it, you have to find the uphill path to the northeast then cross the bridge west, destroying the constructor along the way. Follow the path to the southwest until you reach the room.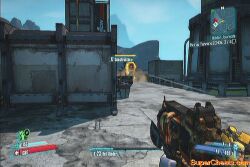
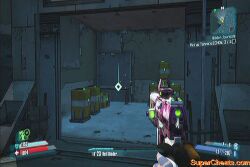
After collecting all journals, return to Tannis to complete the mission.
This becomes available from Tannis after completing the Hidden Journals mission. This is a rather easy quest that you can complete immediately by finding more ECHO recorders for Tannis.
The Chronicles of Her Torture
You can head to the stalker nests and kill the required number of stalkers. Search their piles to randomly get ECHO recorders containing more information about them. Once done, return to Overlook and turn over the mission on the mailbox. 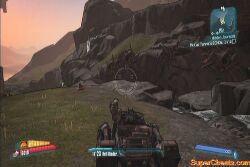
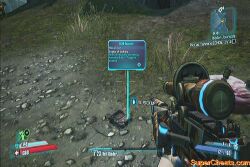
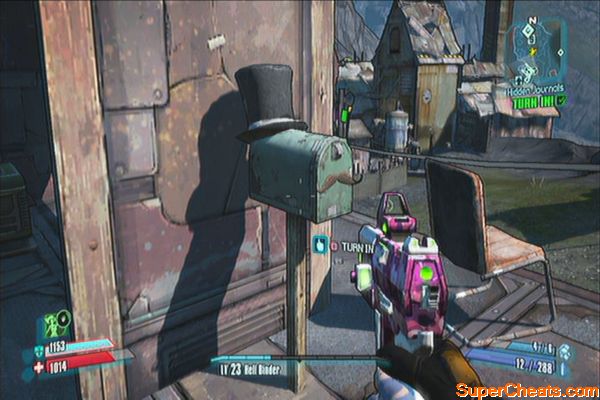
Continue killing Stalkers until one of them drops this item. This will become available only after completing 'Stalker of Stalkers'.
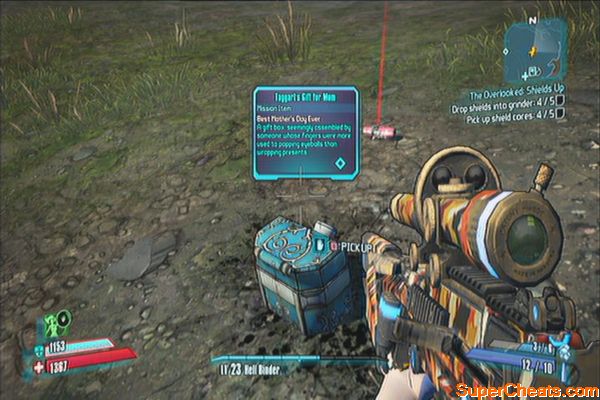
Henry's
Lair is located near the town of Overlook. Head there and kill several
stalkers until he appears. Take him out then loot Taggart's hand. Place
the chest in the middle of the lair to open it and turn over the quest.
Best Mother's Day Ever!
Head to Overlook's Bounty Board to start this mission. This has a time limit so you have to make sure to you have a vehicle ready outside town. You have to open 5 mailboxes and get 5 arms inside. You also need to deliver the goods back to Dr. Zed's PO box before the time runs out. See the video below for more information.
Fresh goods
The Overlooked: Medicine Man
This is a rather easy quest. First you have to climb the buildings near the clock tower to recover the battery. Place the battery near the medical vending machine then buy the shiver medicine. Next, go across the Blake Bridge and kill the Hyperion Requisition Officer walking around with a medical vendo on his back. Destroy him and his escorts then buy another medicine. Finally, head to the bay to find a container van. Open it to find a medicine vending machine inside then buy the last medicine. Return to Overlook to deliver the medicines then talk to Karina to complete the mission.
The Medicine Man
The Overlooked: Shields Up
This becomes immediately available after completing Medicine Man. You need five unwanted shields. Access your menu and drop the shields so they'll fall directly to the grinder. Once done, collect the shield cores that it will spew out. If you don't have time to loot for shields, you can just buy them from Zed's machines. Once you have the shield cores, deliver them to Karina to complete the mission. 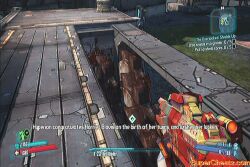
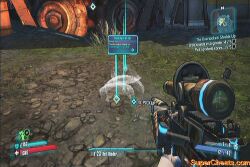
The Overlooked: This is Only a Test
Head to the Aggregate Acquisition, the Hyperion base overlooking the town. Fight your way to the mortar controls. Once you reached it, operate the controls as Karina instructed then return to her once the shields are tested successfully. 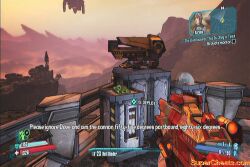

This is available in Chapter 10 by talking to Fink in Fink's Slaughterhouse. There are five rounds, each increasing in waves and enemy numbers. The enemy levels will range from 22-26. It is recommended to try all 6 rounds at least at LV26 or higher.
Head to the Highlands – Outwash and proceed to the Extraction Plant. Jump to the lake and place the arm there to summon Slappy. When fighting it, keep distance and use high-powered elemental weapons and grenades. Defeat it then return the arm to Sir Hammerlock.
Clan War: Starting the War
Head to Ellie's garage and talk to her. Pick up the dynamites and the rival clans' emblems. Head to the Hodunk Speedway entrance then plant the dynamite in the signboard's pillar. Back up and wait for it to be destroyed. 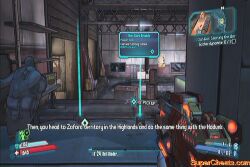
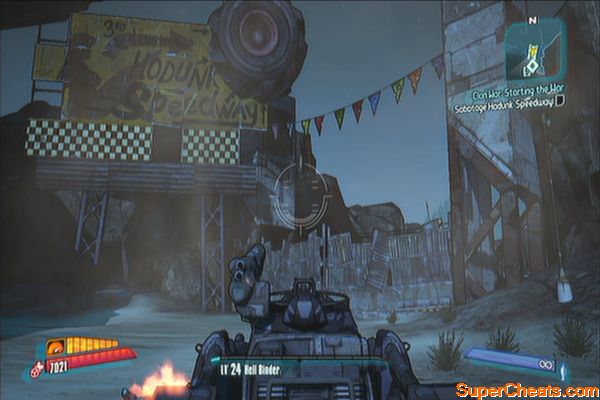
Next, plant the emblem on the large tire then fast-travel to the Holy Spirits bar outside Overlook. Blow up their distillery then place the Hodunk emblem there. 
Head inside the bar to respond to his call. Once inside, find Zaford and talk to him. Talk to him again to turn over the mission. 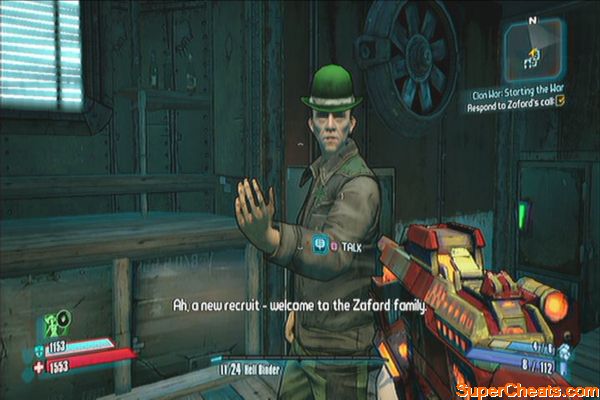
Clan War: First Place
Follow Zaford to the basement and grab all the dynamite there. Fast-travel to The Dust and head to the racetrack. Drive to the race track and place some charges on the fireworks crates on the bridge. After placing the explosives, climb up the viewing balcony near the bridge. 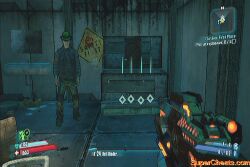

Once there, kill the pyrotech engineer and wait for the cars to cross the bridge. It will take good timing to blow them all up in one go. In case you didn't get all of them, chase them using your vehicle and finish them off. Now return to Ellie to complete the mission. 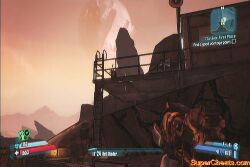
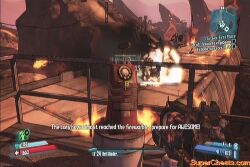
Clan War: Reach the Dead Drop
After completing Clan War: First Place, head to the Hodunk Speedway and talk to Jimbo. Fast-travel to the Highlands: Overlook and head to the second floor of the Holy Spirits bar. Examine the ECHO recorder there to turn over the mission. 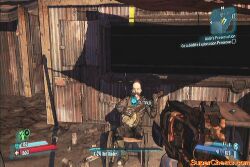
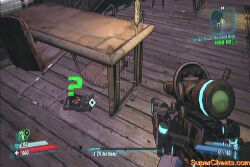
Clan War: End of the Rainbow
This is available immediately after finding the ECHO recorder in 'Clan War: Reach the Dead Drop'. Head to the marked location in the bar and follow the bagman without getting spotted. Once you reach the cavern where the cash is stored, kill the bagman and loot ten loot boxes as part of your bonus objective. Once done, use the key to exit the area. Fast-travel to the Dust and turn over the mission to the old coot Jimbo in the Hodunk Speedway.
Bagman Dies
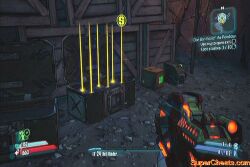
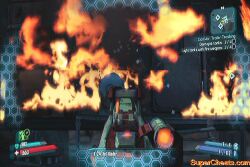
Clan War: Trailer Trashing
This becomes available after completing Clan War: End of the Rainbow. Ride to the southwestern portion of the dust to meet Steve. Talk to him to start the mission. As a bonus objective, you have to arrive to the Hodunk Speedway at night. Next, prepare a fire weapon and light up the gas tanks. Destroy four trailers then return to Steve to complete the mission.
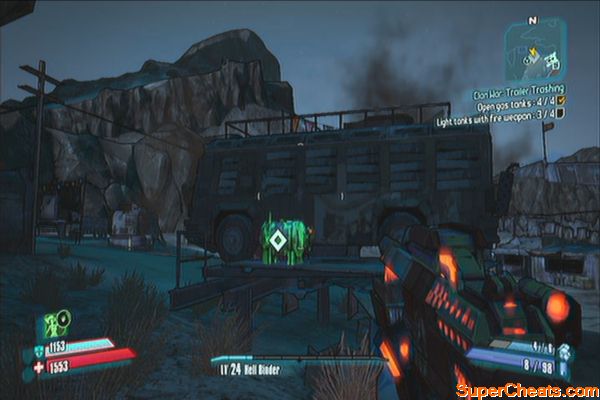
Clan War: Wakey Wakey
After completing 'CW: Trailer Trashing', go back to the Hodunk Speedway and talk to Jimbo to get this mission. Next, head to Moxxi's bar in Sanctuary and get drunk there. After downing three lagers, fast-travel to the Holy Spirits bar in Overlook. Head there and crash the party with bullets. The best spot would be in the second floor so you can have both cover and advantage. Return to Ellie to turn in the mission. 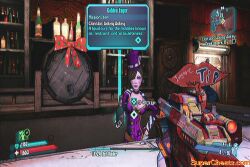
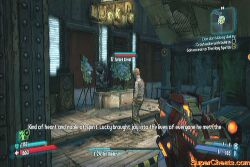
Clan War: Zafords vs Hodunks
Head to the train station and choose which side you'll be part of. Once the war starts, kill all the opposing family members to complete the mission. 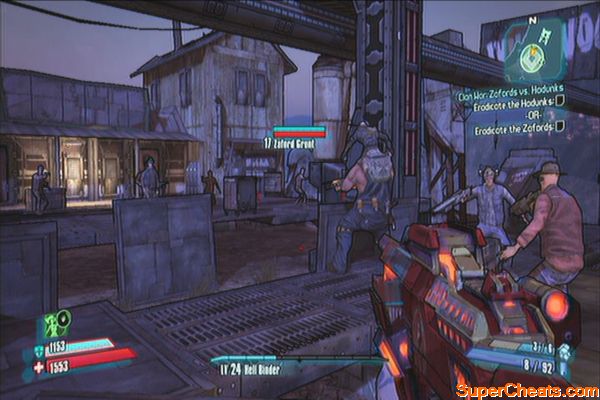
You can do this mission while doing the main story mission 'Wildlife Preservation'. The first note is found past the skag breeding ground. 
Inside a room with a weapon cache and a slag sample in the Specimen Maintenance building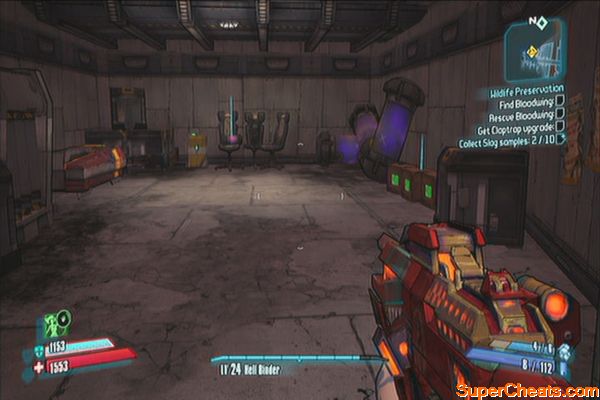
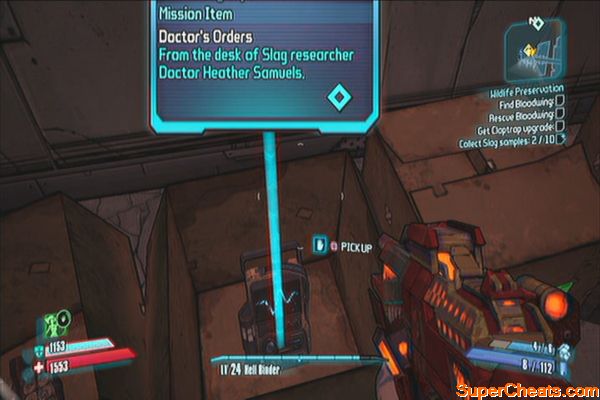
After reaching the building with an experimental robot greeter, activate the switch behind it to reveal a secret safe that has the note.
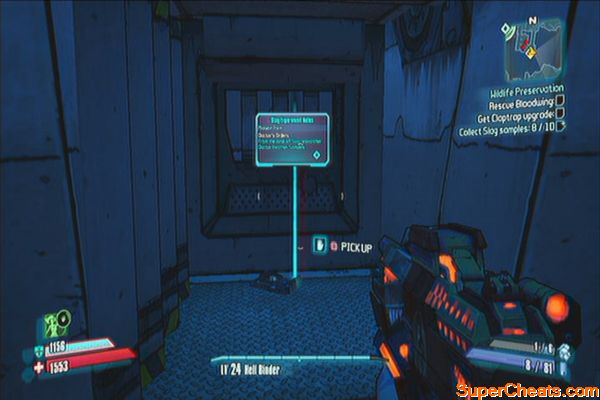
For the last note, continue past the lobby where you got the third note until you reach a warehouse. Clear it and climb up the walkway. At the end of the tunnel above is a storage area full of hyperion loaders and engineers. Pull down the lever to release the stalkers. Once the area is clear of both enemies, find this note on the last cell. 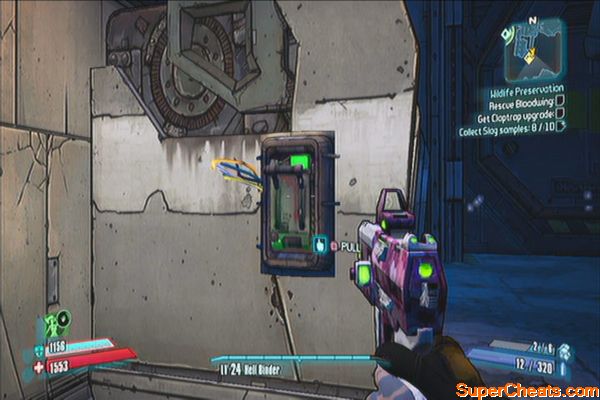
This is given by Mordecai at the start of Chapter 12. You have to head back to the preserve and release the creatures. You just need to keep at least seven of them alive to complete your bonus objective. You don't need to worry as well since these creatures will not be hostile towards you. 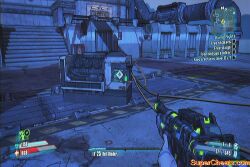

Make your way to the second area to release the skags. Like the stalkers, help clean house by attacking the keepers only. Finally, make your way to the last area where you can release the badass skag. Don't take the handlers lightly as they're tougher than the other two groups. 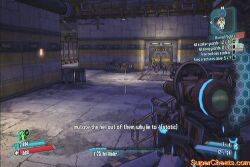
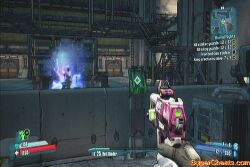
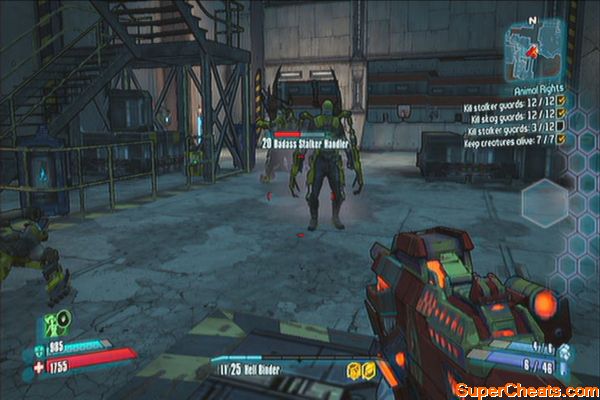
In the observation wing, you can also fight a different flying creature known as the Son of Mothrakk. Once done, return to Sanctuary and turn the mission in to Mordecai.
Head to the Dust and catch a ride. Chase the moonshiner van and keep shooting at it until it drops 10 barrels of booze. Collect these and deliver them to either Mordecai or Moxxi. Your choice. 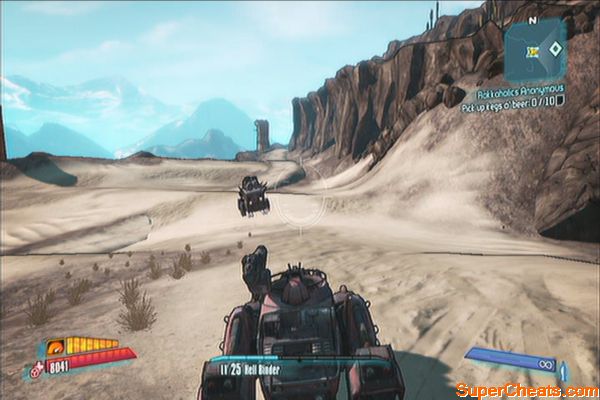
The magazine and three landmarks you must take photos of are scattered in the immediate area of the town and are conveniently marked in your map. You can get all these before deliver the note to the Slab King.
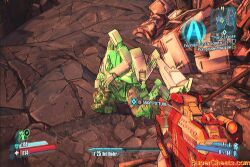
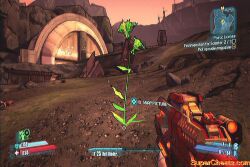
Return to Scooter then give the Poem to Daisy. Wait for her reaction as well. 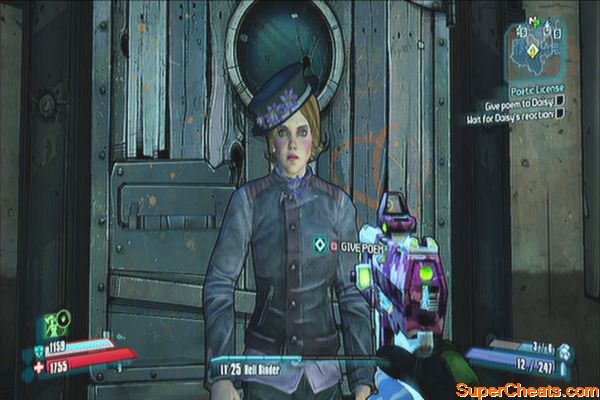
You'll find this optional mission marker after crossing the makeshift bridge on the way to the Slab King. Talk to this guy to get this mission. Well, you just need to take aim and shoot him in the face to complete this.
This mission is available from the Lynchwood Bounty Board. This is pretty straightforward; refer to the video below for more info. Just be careful with the last part where you need to blow the train. Wait for it to stop completely and load some eridium before blowing it up. Blowing it too early will botch the chance and will fail the mission.
The great train explosion
Head to the bank and attempt to open it. After getting denied, head to the marker to find a laxative. It is located on a rooftop so find higher ground and jump to reach it. 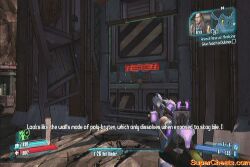
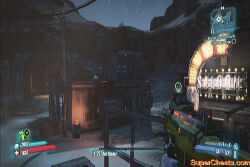
Head to the next objective point to kill Mad Dog to get his explosives. Return to the town proper and place the bomb on the marked location near the Grinders. Pour some laxatives on the bomb, then let the pup skag eat it. Then, wait for it to create a pile and check it to find the bomb. 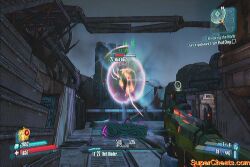
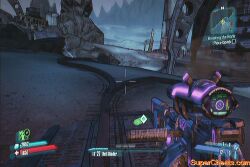
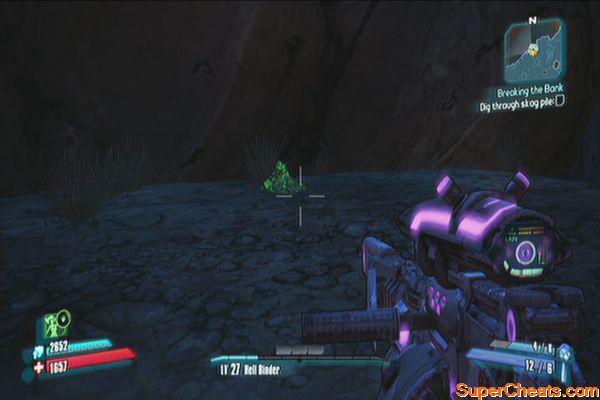
Blow the bank open then immediately run away to avoid getting killed by the heavily armed guards that will respawn near the entrance. Kill them all then loot the boxes clean and head to the marked location. Kill the guards and hide the evidence in the specified spots. Turn in the mission to the bounty board to complete it. 
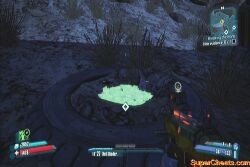
This given immediately after completing Breaking the Bank. Head to the Gunslinger Corner and confront the Sheriff. As a bonus objective, you have to kill her with a pistol and you must not shoot the deputy (at first). You can use high-powered weapons to whittle her HP down; just make sure that the finishing blow is delivered by your pistol. You can also kill the Deputy after getting rid of the Sheriff.
High Noon Showdown
Pick up the old ECHO recorder from the body outside Moxxi's bar. Ask Marcus about it then travel to the Dust to find Horace. His body is found in the valley north of Ellie's garage. Play his ECHO recorder then find McNally. Kill him and play his ECHO recorder. 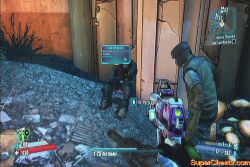
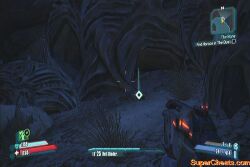
Next, head to Lynchwood afterward. You need to get to the train station and take a ride to this new area. 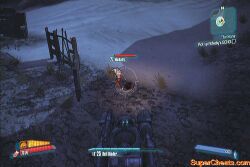
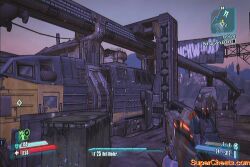
This area will feature tougher enemies at your current level so you may want to consider bringing upgraded weapons and equipment. Take the path northwest of the town and fight your way to the marked area. It's pretty straightforward so you don't have to worry about getting lost. 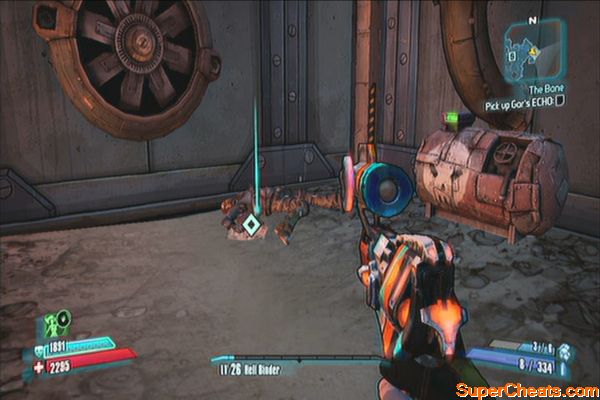
After finding the body and playing the ECHO recorder, head to the southeastern part of the town to reach the cemetery. Search the grave to find The Bane. You may want to equip this weapon and fire some test rounds to check it's abilities. 
Animal Rescue: Medicine
You'll find Dukina in the eastern end of the railway, behind the stairs leading to the rat infested area to the southeast. Free the poor guy by shooting the chain. Next, head to the marked location and find some puppy medicine. The medicine is located on the roof of the pharmacy so you have to find some stairs to get to higher ground and jump on the rooftops to reach it. Place the medicine near Dukino's cage. 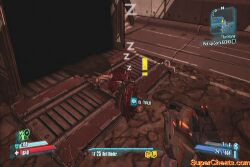
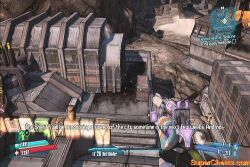
Next, you have to find some food. Head to the northwest portion of the town and find the food in the marked spots on the map. You can find these skag-on-a-stick hanging around small food kiosks. Grab all five of them then deliver them to Dukino. After feeding him, the puppy will instantly grow into a good sized skag. Talk to it to complete mission. This should start another follow up mission. 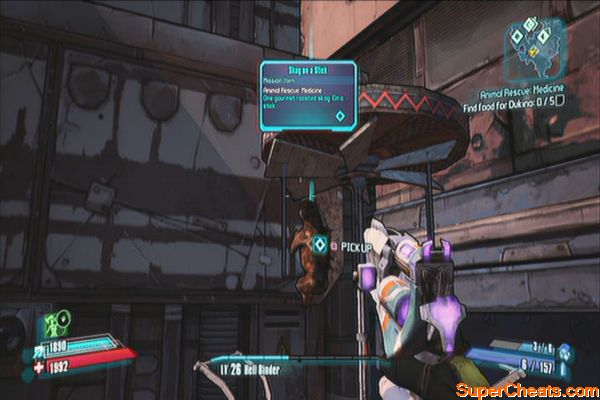
Animal Rescue: Food
You need to hunt some skags and shoot them in the mouth to get their tongues. Head to the marked location in the map and collect the required number of skag tongues. Once done, deliver the food to Dukina to complete the mission and start yet another follow up mission. 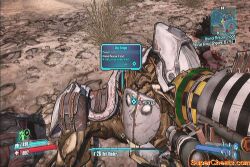
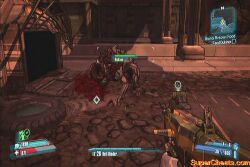
Animal Rescue: Shelter
You just need to follow Dukino and escort him to the Old Mine. There are rats there but Dukino will help out. You don't need to worry about him since he's invulnerable. Kill all enemies in the area then talk to Dukino to complete the mission.
New shelter
Simply talk to Rocko in Thousand Cuts to complete this short mission and to start a new one. 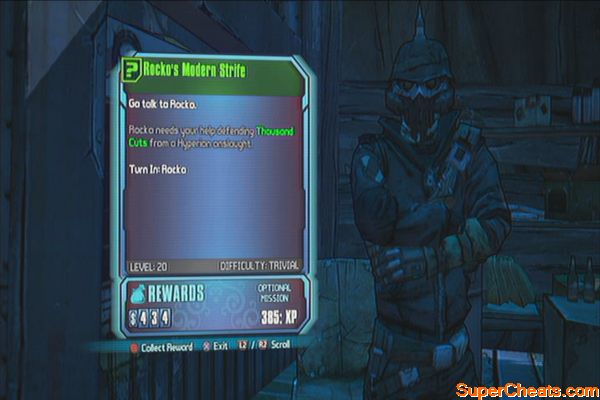
First find the bandit beacons beside the supply crate. Place them in the designated locations then man the turret in the choke point. Fend off the hyperion invasion and keep destroy the targets until the last few waves of badasses drop off from the sky. Turn over the mission to the crate. 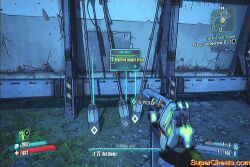
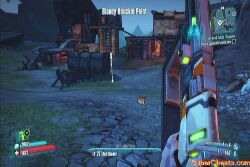
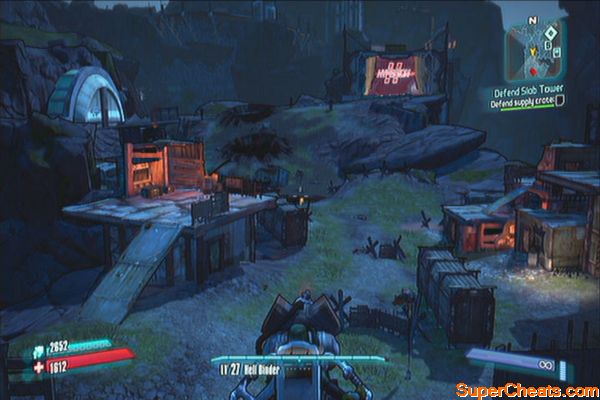
This is a lengthy optional mission where you need to kill 100 bandits. For the bonus objectives, you need to kill at least 25 of them using fire, corrosion, shock or explosives. You have to hunt the bandits in Lynchwood. Take note that for some reason, even skags and other creatures count as bandits; it will be a challenge to kill the exact number of enemies per element so try to aim at least getting 3 out of 4 elements covered. 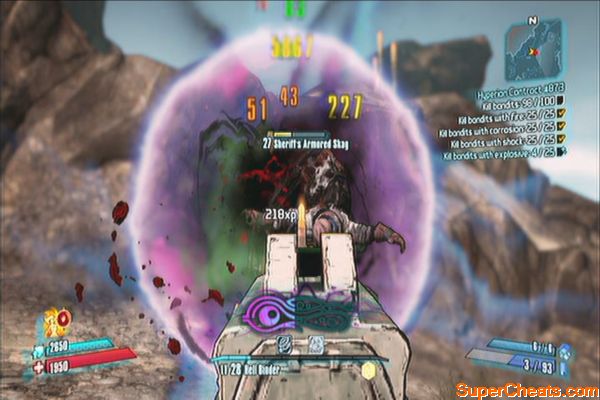
This is available in Opportunity's Bounty Board. Try shooting the marked statue nearby to update your mission. Next, head to the dropzone to search for an Overseer. Once there, hack it and protect it as it destroys the statues.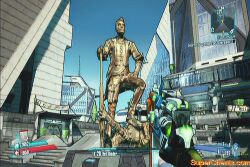
For the bonus objective, you have to keep the bot's HP above 50%. To do this, you must bring a lot of corrosive weapons for this particular mission as enemy constructors will also appear. Bringing launchers will also help a lot in taking out those pesky constructors. 

After cutting down the last statue push the button to order the overseer to dance. Turn over the mission to the Claptrap in Sanctuary afterward.
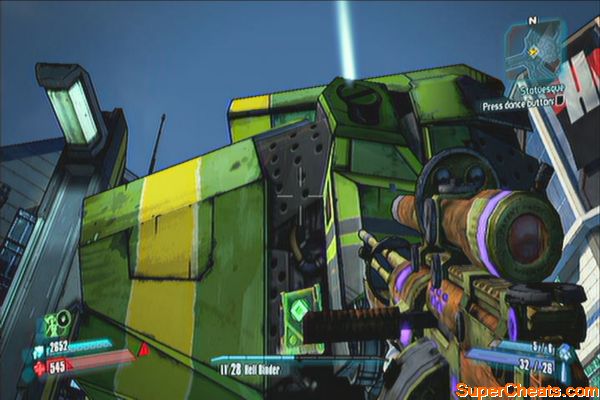
Head to the Pits in the southern area of Opportunity to find the Foreman. After killing him, loot the key and find the container van as marked in the map. Place the keycard there and open it to find some explosives. Grab one and head to the floodwall marked in the map and place the explosives there. Get to a distance and wait for it to explode and flood the construction site.
Hell Hath No Fury
Head to Moxxi's bar and get the video from her. Once you're in Opportunity, kill five engineers then grab the orbital beacon in the Orbital Drop Zone. Next, head to the marked location to find the surveyor lures. 
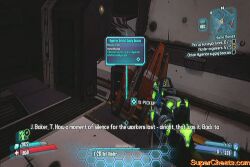
The surveyor lures are found in the rooftop of the marked area and you have to do a little jumping on certain spots to reach it. Watch the video below.
Reaching the surveyor lures
After getting the lures, place them on the marked signs. Finally, go to the Waterfront and place the orbital beacon on the marked spot. 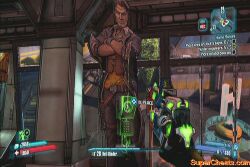
Wait for the crane to be destroyed then head to the Co-Op Center. It is found downstairs and guarded by two snipers so clear it out. Place the plug-in and upload the footage. Return to Lilith to complete the mission. 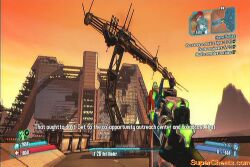
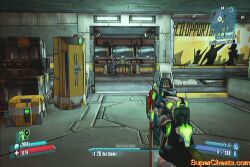
Examine the terminal in the Living Legend Plaza, under the statue. Just play the recordings around the murals to complete the mission. 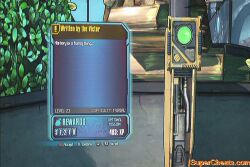
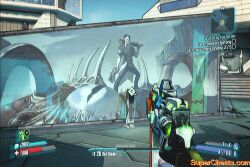
You can find four armed civilians having a standoff in front of Scooter's garage. Question all four as your bonus objectives then kill Jim Kepler. 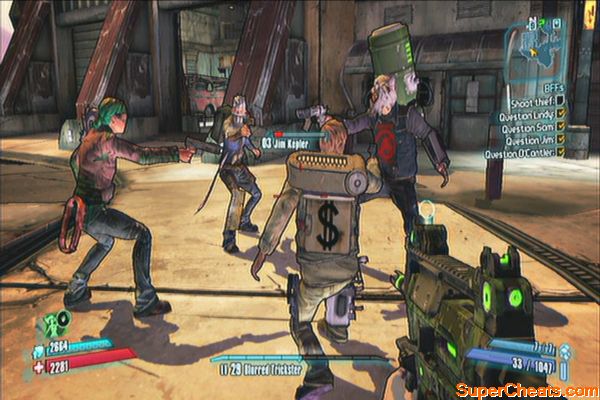
Fast-travel to Lynchwood and enter the Old Mine.
Here you'll find Dukino's mom. This is a very large skag and a very
powerful one so keep your distance and always seek the safety of the
boulders. Let the other enemies live as they will serve as great fodder
and will keep the target away from you. Using the combination of slag
and corrosive weapons will help a lot in dealing massive damage to this
giant, armored target. Once killed, talk to the adorable Dukino for your
reward.
Reaching the surveyor lures
You just need to simply talk to the indicated NPCs in Sanctuary. You just need to talk to Zed, Marcus, Moxxi, Scooter, Tannis and Brick. Next, open Roland's armory downstairs and loot the chest inside. 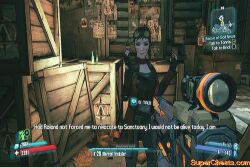
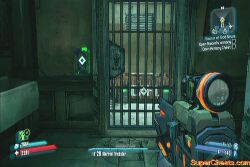
Monster Mash (1)
Check the valley behind Ellie's garage in The Dust and kill some spiderants there. Collect their parts then hand them over to Zed.

Monster Mash (2)
This time you have to collect four Rakk parts. Shoot them down and collect their parts to update the mission. You'll be required to collect skag parts this time. You can kill any rakk or skag to get their parts for this mission.
Monster Mash (3)
You'll have to hunt down 20 skrakks. You can find them in the Arid Nexus – Boneyard area. This area will become available after completing the story mission Toil and Trouble. Head to the marked area in the Arid Nexus and kill the flying hybrid of Skags and Rakks. Use a machine gun mounted vehicle here for easier kills.
Hybrids
After killing the required number of targets, return to the fast-travel station and head to Frostburn Canyon. Head to the marked area and find Dr. Zed's Abomination. This is a really easy target so just shoot and destroy it. Turn in the mission to Dr. Zed afterward.
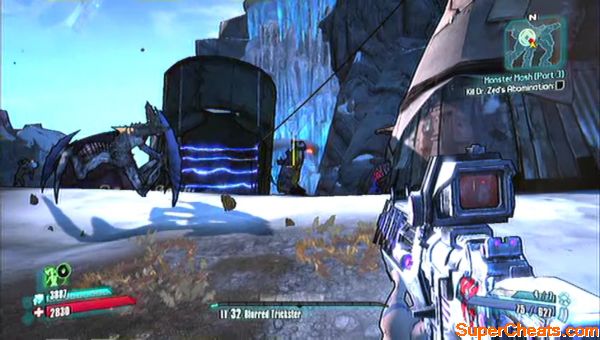
The starting point should be in the Eridium Extraction Plant. You may want to clear the area first to avoid any hassles. Use the light vehicle instead of the bandit technical since it is much faster. Refer to the video below.
Refunds? What refunds?
Head to Lover's Leap in Mount Hellsfont. You can jump or call the crisis hotline. Either way should resolve the mission. The only difference is that if you did kill yourself, you'll get the 12 eridiums. If you backed down, the experience reward will be tripled. 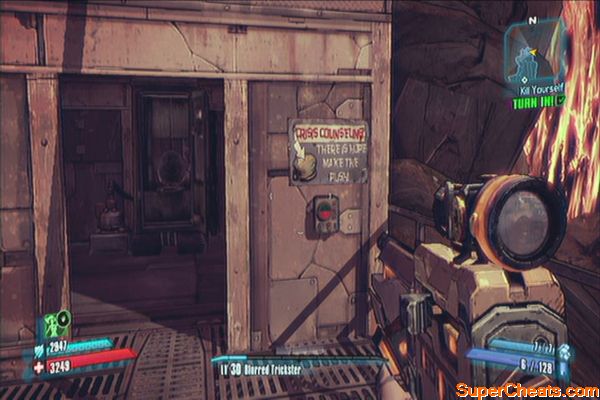
Head to the marked location and proceed on foot. Collect the flowers along the way until you reach the house infested by bandits. Pick the fifth flower in the planter outside the house and clear the area. Proceed inside and check the blood-stained bed to complete this objective.
Oh grandma, what bloody bed you have!
Head to Sawtooth Cauldron and find the three ECHOs before finding Kai. The first one is located in one of the buildings beside the ramp leading down to the Stilt. 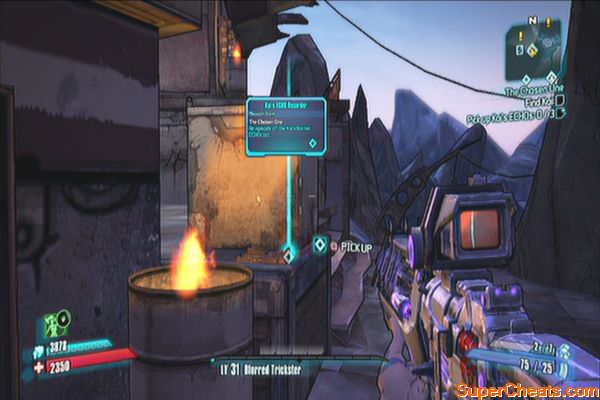
The second one is located near the entrance of the Main Street Reservoir.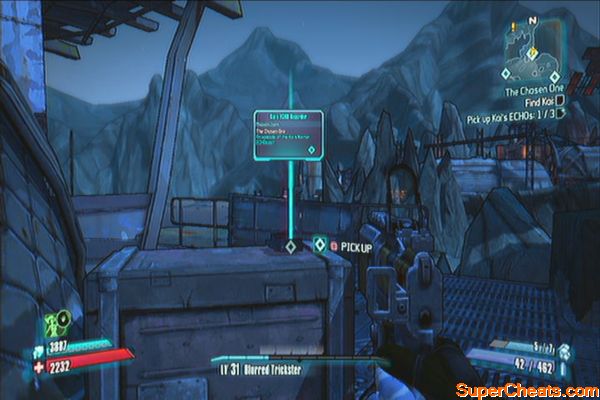
Kai's corpse and the $9 you'll need to pick up is located nearby but if you want to complete the bonus objectives, you'll get the third ECHO to the far west of the reservoir first before getting this $9. Deliver this to Marcus to complete the mission.
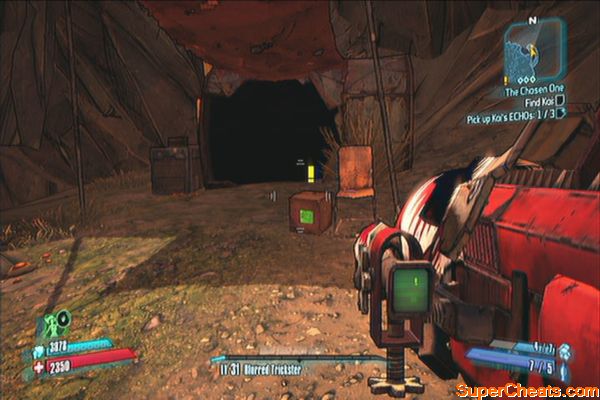
You must first reach Eridian Blight then go to Sawtooth Cauldron. It's better to go there after updating the story mission 'Toil and Trouble'. Once you've reached the Stilt, find the spot where you can place the flag. After placing it, activate the generator to raise it and defend that spot until the flag is fully raised. In case the generator stops, just reset it again until it stops. Destroy the generator afterward.
Once you've reached the Main Reservoir, find the second generator and place the Reservoir flag there. Like before, defend the area until the flag is reaches the top. 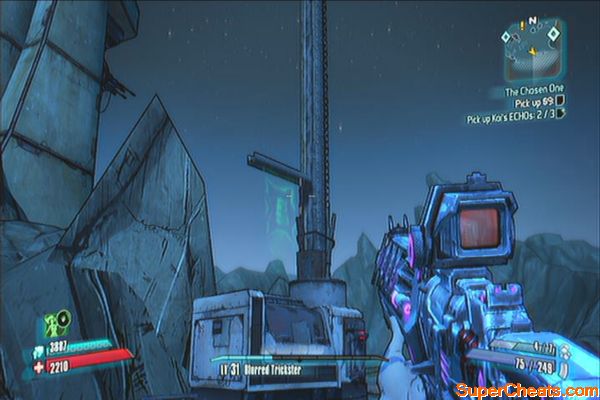
The last flag is located in the Scalding Remnant, north of Cramfist's Foundry. It's located to the far northwest edge of the area.
This can be started by opening a box containing an ECHO recorder in the Sawtooth Stilts. Kill all bandits you encounter until you collect all four map pieces. After finding all the pieces, you'll have to go to the Caustic Caverns to follow the clues.
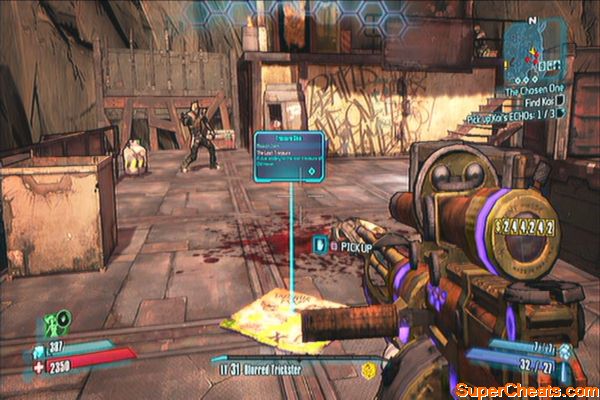
The clues you're looking for are switches. Be careful as well since the enemies here are almost as the same level as you. Refer to the custom objective markers on the maps below to find the switches.
'Under the acid-soaked railway' - Oozing Discharge 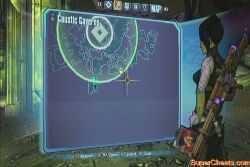
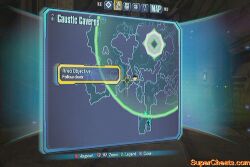
'In the warehouse on the shore' - Infested warehouse 
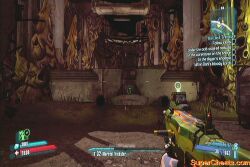
'In the Digger's Shadow' - Abandoned Mining Site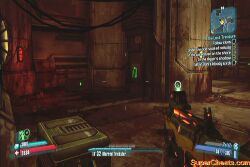
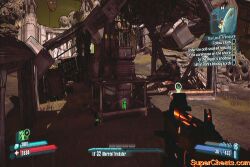
'Within Dahl's Bloody Sixth' - Deep Core Six
After activating all the switches, backtrack to the marked location and find the elevator that will take you to the upper floor of the facility. Fight your way through several spiderants nests and flying varkids until you reach the lever that will reveal a Dahl lootbox. 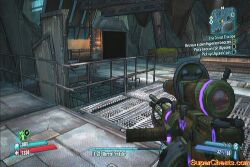
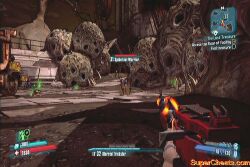
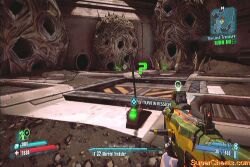
As soon as you reach the Buzzard Nest, go to the southwest to find a friendly goliath named Ulysses. Talk to him to start a new optional mission.
You have to retrieve a Hyperion Beacon for Ulysses and as a bonus objective, you have to get his pet as well. The beacon is located in the lowest level of the Grotto, near the exit leading to the Stilt. 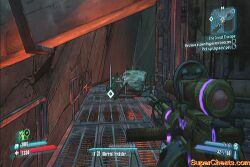
You can find Ulysses's pet, Frederick the Fish on the roof of a room beside the elevator in the Grotto. 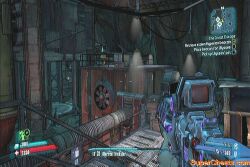
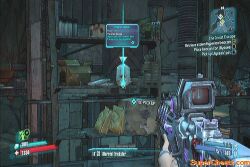
Return to Ulysses and place the beacon nearby to complete the mission. 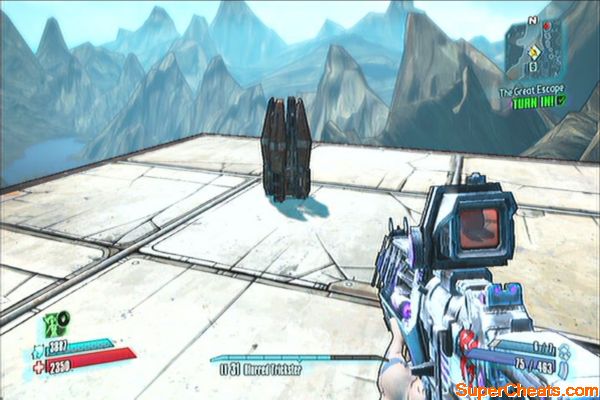
A Real Boy: Clothes Make the Man
Find this lone loader in the Human Dwelling Place near the exit to the Ore Chasm. Head to Mt. Hellsfont to the north and kill the bandits there. In case they didn't drop all the items needed, save and quit then clear the area again. Deliver the clothes to Mal afterward. 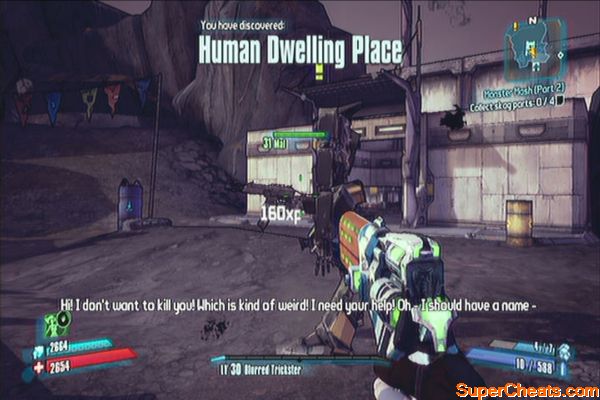
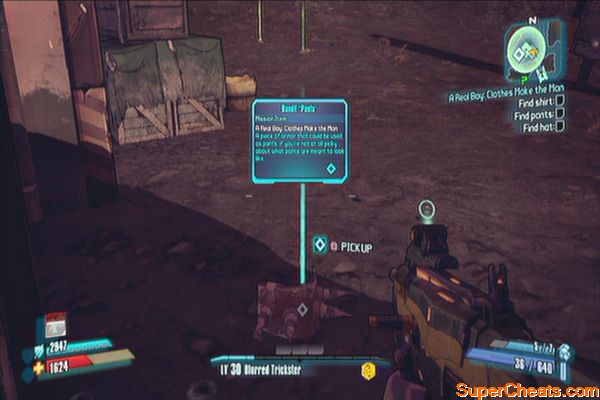
A Real Boy: Face Time
Now the robot will ask you to collect limbs. These are scattered in the map so head to each location and collect them. 
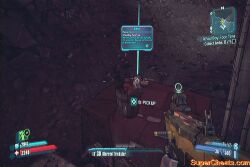
The last two parts are located in the Slagma Refinery. After getting the left leg, continue to the back to find another trail leading to a cliff. The last part should be there. Deliver the limbs to Mal afterward. 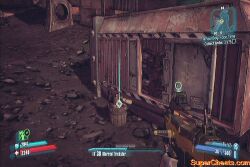
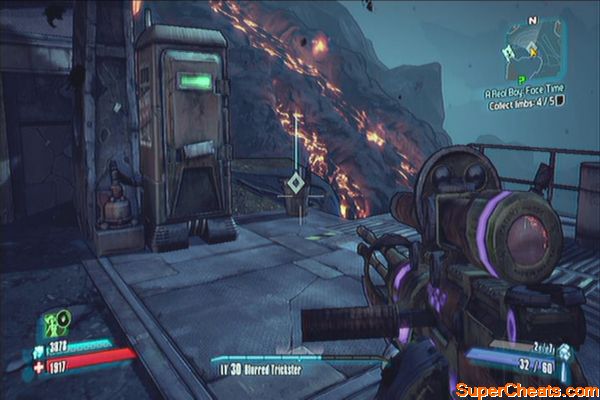
A Real Boy: Human
Simply defeat Mal and talk to him to get this mission done. 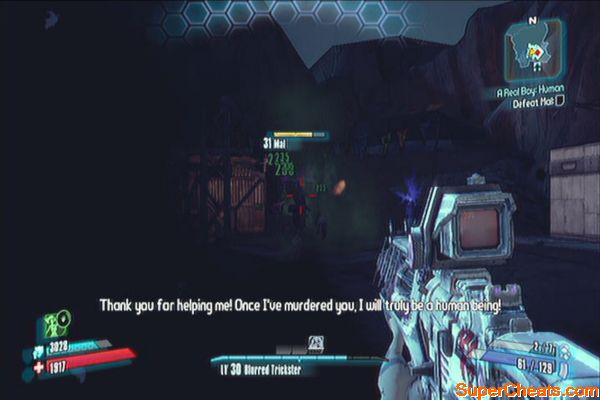
This mission becomes available as soon as you start Chapter 17: Data Mining. Head to the Hyperion Truth Network in the Arid Nexus. It's just a short ride away from the fast-travel station. Use the elevator and open the door. Kill the lying bastard then turn the mission to Mordecai. 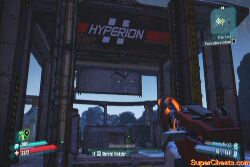
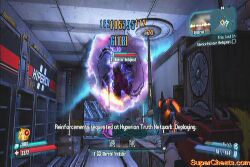
Enter the Ore Chasm and talk to Innuendobot there. This is similar to the Bandit Slaughter missions in Fink's Slaughterhouse. 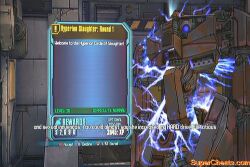
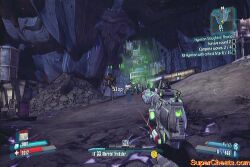
This is available in the Fyrestone Bounty Board in Arid Nexus Badlands. Head to Uncle Teddy's cabin and pull the chain hanging from the ceiling fan to open the door to the secret lab. 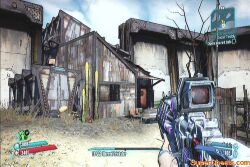
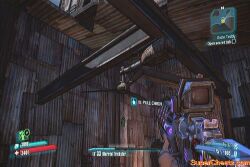
Enter the secret lab then open the boxes until you collect all evidences. Once done, pull the lever on the side of the vending machine to get the blueprint. You now have the option to mail the blueprints to Una or Hyperion. 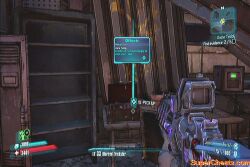
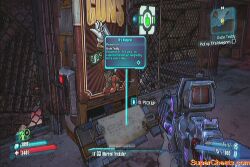
This is available in the Fyrestone Bounty Board in Arid Nexus Badlands. Head to the marked locations in the map to find the journals. 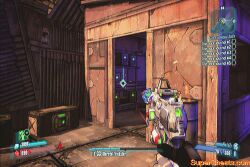
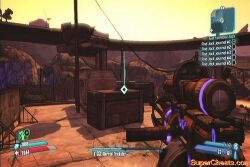
Near the area where you'll get the second journal, a giant loader called Saturn may appear. This guy is worth tons of experience should you manage to defeat it. However, expect a really hard fight unless you have some pretty serious firepower at your disposal. 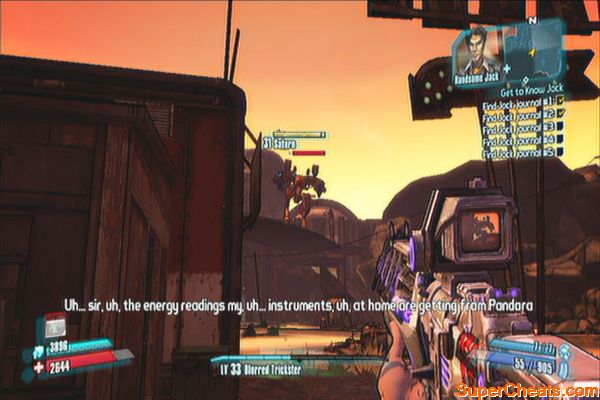
The other three journals are in the Arid Nexus Boneyard. The fourth journal is inside a garage. Kill the engineers and pick it up. Be careful as well since there's a EXP loader that will detonate behind you. The 3rd journal is inside a hyperion supply crate filled with EXP loaders. 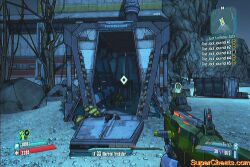
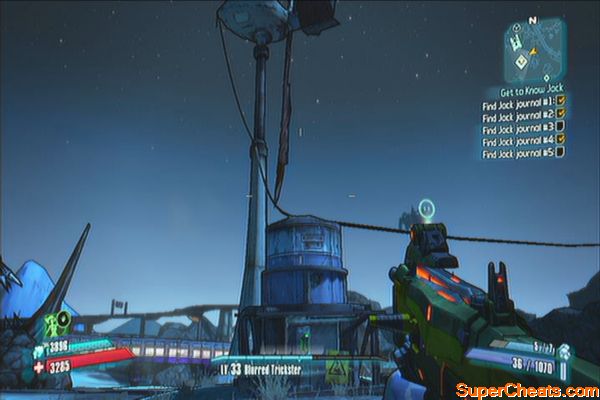
The fifth journal is on top of a windmill. Hit the switch in the substation beside it to power it up and bother the rakks on the nest. Kill them so one of them drops the journal.
Once you reached the Arid Nexus Badlands, kill skags until one of them drops the ECHO recorder. Play it to accept the mission. You just need to keep killing skags you encounter until you collect all the gun parts. After collecting the parts, deliver them to the Fyrestone Bounty Board to get your reward. 
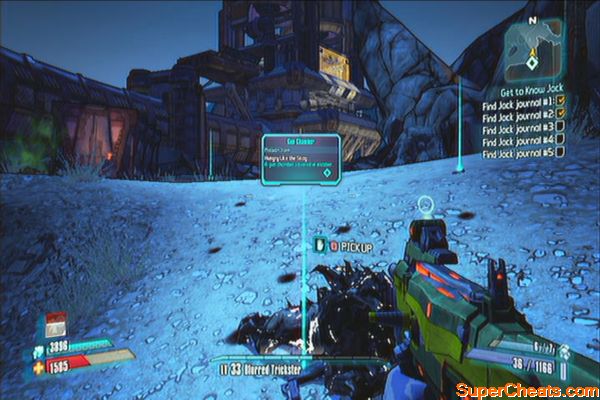
This is a post-game optional mission that can be given by Tannis in Sanctuary. It is LV50 so you ought to do this after you've reached the maximum level. You can reach this level by finishing the True Vault Hunter mode.


 How to make Dark Souls 2 easier?
 E3 2013: Taking a Look at Fantastia: Music Evolved
 5 Video Games From 2013 That Did Things Differently
 Fallout 4 Guide: Where To Find All The Companions
 Destiny: The Taken King Guide On How To Get Ecthar, Sword of Oryx