Unofficial Alan Wake Guide by Chris Boots-Faubert for
Alan Wake is what they call a psychological thriller, though it falls half-way into the action-adventure and half-way into the survival horror genres of video game. It was developed in Finland by Remedy Entertainment, and published world-wide by Microsoft Games, and a lot of pre-publishing PR went into this title. When the game was finally released, we had great expectations for it, and the really cool thing is that it actually lives up to those expectations! You are in for an amazing adventure, with all of the twists and turns that you would expect from a motion picture, and the really cool thing is that when this game is all done, and you have milked it for all that it is worth entertainment wise, they will be ready to release the DLC content that will let you begin enjoying it all over again! You might be thinking - that alone makes it a major bonus - but there is also the fact that Remedy recently announced that they have already started working on the sequel to Alan Wake! Not only is there DLC and a sequel in the works, but Remedy has stated that this was the fist "Episode" in the series, which means we can expect at least two and maybe as many as three new games in this series! I have to say that when I set out to write this walkthrough I suspected that the game would be similar to Heavy Rain, which was released for the PS3 and is another game that I did the walkthrough for, and even if it had been like that, it would have been good, but instead of follow in Heavy Rain's footsteps, Alan Wake carved its own path, and even though I have reached the end of this Episode, I am excited and enthusiastic about what is still to come! I hope that you enjoy the game and that this walkthrough helps you. I have included a full and complete guide, with each collectible indicated in the chapter as you play rather than as an appendix in the back, because the collectibles are a major part of the Achievement system in the game. Enjoy, be entertained, rejoice. Isn't it great to live in this gaming era? NOTE: A ticklist for the collectible items is included at the end of each chapter -- you will want to review this before you begin the chapters to familiarize yourself with these.
The game opens with a narrative that is punctuated by dramatic if spooky scenery, and you are introduced to the protagonist - Alan Wake - who you are going to play in this mystery-horror survival adventure. While it is not instantly apparent that this is a dream sequence - it is - your first indication is when the hitchhiker you hit with the car disappears! Move along the road and you will see the bridge ahead and a path to the right -- as you approach the path there is a CS and you are shown the lighthouse, and then you are back in control of yourself. Instead of taking the path, keep moving up the road to the bridge - it has collapsed so you were not going to be driving over that anyway! On the the bridge to the left just inside is the first Thermos Collectible (Thermos 1/100). Grab that now! Backtrack to the entrance of the Rain Cove Point Lighthouse Hiking Trail and enter the trail -- at this point you will get a checkpoint and a Taken will appear. Your task is to run like hell towards the lights that mark the path. Some of these will disappear when you reach them, while others remain for a short period or longer, and are there for you to use to recover your health. Let me underscore that - the red circle in the upper left corner of the screen is your health indicator, and when you stand in the light, it recharges. As you progress towards the first light the Hitchhiker appears, and has his opening say to you -- this is a character that you created in your most recent novel - a novel you do not remember writing which is a pity, since knowing his weaknesses might help out here (grin). Okay, one of his weaknesses is the light - a pretty sound case can be made that this is a battle between light (good) and dark (bad), you being the former, the Hitchhiker representing the latter. The deck will collapse here - if you are on it so will you so do not stand at the very end - and you can now run down the ramp that it forms. At the bottom, if you look to the right on the bulletin board as the Hitchhiker is having his say, you will notice a Missing Person poster with YOUR face on it. Very curious! As you move along the path you will encounter some barriers and pick-up items -- this is the basic tutorial for the game, and you will learn how to interact with things through it, so go ahead and interact with anything that you encounter, right? Your first respite is in a house a little ways along the path -- but the price of that respite is the death of a good Samaritan who tries to help you! Once the Hitchhiker has given him the ax he comes for you - and that is something of a problem as you need to flounder around in panic until a mysterious voice begins talking to you - and blows open the back door with the Tom the Poet poster on it! This voice is something of an enigma, and despite its importance to you throughout the game, we never do learn just who - or what - it represents. There are clues throughout, and at the end, but they are highly subjective and must be interpreted, so I challenge you here and now, at the beginning of the story: pay close attention to the voice and the clues that it gives to you, and when we reach the end of the game, decide what the origin of the voice is. There is a prize involved here -- I'll tell you more about that at the end of the walkthrough -- so keep this challenge in mind mate, you could end up winning it! Now back on the path -- after we see the Hitchhikers eyes on the TV's in the cabin everything goes sideways, and we are attacked and hurt! The voice tells us to follow the light, and explains why it is important both as a temporary haven and as a heal point. The voice then riffs a verse from a poem, asking if you understand? Well, no! Me either! The voice repairs the stairs, allowing us to progress - thank you voice! Shortly along the path we encounter a box with pistol ammo -- fill up on that now -- and a flashlight (hand torch). Grab the light as it is a good weapon to use against the darkness -- and of course a gun (of course a gun, we got ammo didn't we?!). After you follow the tutorial and kill the Taken with the combination of the light and the gun, look on the right side of the path at the fence and you will see a pyramid stack of cans sitting on the top fence rail - half-squeeze the left trigger to aim (but not use the high-power setting of the hand torch) and shoot the cans (Can Pyramid 1/12) to begin the second collectibles quest! Alan resumes his narrative and then you head for the lighthouse down the now obvious path. We jump over a few things along the way -- now we know how to jump! -- and we learn how to dodge attacks, which is a useful skill. Using the light (Left Trigger) and the gun (Right Trigger) lets us kill the darkness faster, which is good considering that batteries and ammo are in short supply, so faster is better! When we reach the post there is a box with a flare gun and some flares - we obviously want to grab that, but here is a not so obvious point that you need to be aware of: the Flare Gun is an instant-kill weapon, which means ammo for it is in much shorter supply, and you can carry only a handful at any time. That being the case, we want to hold off using the Flare Gun on the darkness -- save it for the birds, who are a much tougher enemy! After you grab the flares and flare gun from the box look a little ahead and to the right -- you see the stone stairs going down into that concrete bunker? Go down there and grab the next collectible (Thermos 2/100), and then head back up onto the path. So we have defeated the trio of darkness or have run away - and we arrive at the lighthouse - Yay us! At the fence in front of the lighthouse on the right side there is a bench with the next collectible on it (Thermos 3/100) so go ahead and grab that now! As we head into the lighthouse, and just as we start to feel a sense of accomplishment a new voice starts to whisper in our ear and... We wake up! It was a dream! A nightmare! It meant nothing! Or did it? [ ] Coffee Thermos 1/100 [ ] Coffee Thermos 2/100 [ ] Coffee Thermos 3/100 [ ] Can Pyramid 1/12

EPISODE ONE: NIGHTMARE
The Dream
The plot thickensCollectible Items Ticklist
After the CS that shows you the lighthouse head forward to the covered bridge - it is collapsed, and the thermos is sitting on the bridge just inside.
On a crate in the concrete bunker just off the path when you get the flare gun.
On a bench to the right just before you arrive at the lighthouse.
On the fence on the right side of the path after you receive the pistol.
Bright Falls
Arriving in Bright Falls
As we wake up we find ourselves in our car, on a ferry, out in the middle of nowhere in Washington State. We get out of the car and our lovely wife encourages us to go stand next to the local so she can take a photo of you with the redneck. Sort of nasty sentiment, but hey, whatever.
When we approach the man by the railing he introduces himself - name is Main, works at the local radio station as the host of the night shift -- and he wants an interview, but you rudely shut him down! After you head back to get teased by your wife you receive a call from your agent - Barry - who it is instantly evident is something of a pest.
The ferry arrives at the destination -- as all ferries must unless they sink, but that is a different game -- and we are dropped off at the local diner to pick up the keys and directions to the cabin we have rented from one Carl Stucky, owner of the diner and, presumably, of the cabin. Here we meet Rose, one of our biggest fans, who even has a cardboard cut-out of us that she snagged from the local bookstore. Wow, this town has a bookstore? No kidding?
The narrative tells us there is some small urgency, so we go looking for Stucky. On the way through the diner you need to do three things -- pay attention to the NPC chatter, play a song for the drunks, and grab the coffee thermos (Coffee Thermos 4/100).
We head to the back towards the bathrooms looking for Stucky and run into a mysterious old woman who not only knows who we are but has our keys and the directions. That's kind of spooky, but things get even more spooky as we leave and the local cop shares some rather disturbing news with us. There is a nut house in the area!
On your way out be sure to pause at the jukebox and put a coin in, then select a song. You do not have to stay to hear it, but you do need to do that as it factors in later.
As we drive away, the mechanic comes running out screaming for our wife and holding her keys. At least that is the first impression -- but then the implications sink in. That was not a mechanic, it was Carl Stucky, and the keys he is holding are for the cabin -- but wait, if THOSE are the cabin keys, what keys do WE have?! Directions and keys to a cabin we are not renting! Oh man, this bodes ill.
We pull up to what is clearly an ancient cabin -- well, ancient in the sense of America or Australia, you cannot use terms like "Ancient Cabin" to someone from the UK or Europe because they will cock their head to the side and sort of look at you with this quizzical expression that says "Uhh, riiiggghhhttt..." and point out that the shed on their grandmother's farm in Wales was built in 1560 and they still call that the New Shed, if you see what I mean. But I digress...
Before you head to the cabin, turn around and head all the way back to the car and you will get a focus opportunity to look at the cabin - do that - and you will learn something that will make sense later. Now grab the Thermos on the ground (Coffee Thermos 5/100) and then head back down to the cabin!
At the cabin you should take a quick look around before going inside -- where you discover the power is off. Before you do anything about the power, head onto the back porch of the house and turn right, then turn on the radio. You will hear Mr. Main talking about you! Rose calls in and blows your cover - and you groan.
Your wife points out that the power line goes to a nearby shed, and inside the shed you find an old generator. This is your first interactive - you have to start it. You accomplish this by button mashing of course, waiting until the arrow swings into the green area before hitting the A-button, and repeating this until the gennie starts!
With the power now on, you head into the cabin and look around and Alice tells you that she wants to clean up, and suggests that you have a better look around while she does that. Of course you have your look around, before returning tot he cabin, where you grab the Thermos from the kitchen counter (Coffee Thermos 6/100) and then head upstairs where you find Alice, in her underwear, with a surprise waiting for you!
No, the surprise is not her! You know, your mind is really in the gutter today, I can hear you thinking "Aruum humma humma!" Don't deny it!
Her surprise may be one that she thought was pleasant enough, but you are not happy with it at all! In fact you view that typewriter and the stack of paper as not simply a challenge to your manhood but an insult to that massive case of writer's block that you have hung around your neck! In a very angry frame of mind you run out of the cabin, secure in the knowledge that Alice will not follow you out into the night because she is afraid of the dark!
Outside on the wooden bridge you contemplate your frustration -- and the fight that you had with your wife that has driven a wedge between you -- when Alice begins screaming and the lights go out in the cabin! As you run back it is clear that something is very wrong inside, but before you can get there, the sounds of splintering wood and her final scream reach your ears!
When you finally do reach the cabin it is instantly obvious what has happened -- Alice has fallen off of the wooden porch that hangs out over the lake -- in fact the porch railing and part of the porch itself has broken off and is also in the lake! You must find help! You must save Alice! You must... dive into the lake?! No! You idiot! You don't even know if that water is deep enough to... Too late.
[ ] Coffee Thermos 4/100
In the diner on your way tot he bathroom you will spot this collectible on a counter in the back.
[ ] Coffee Thermos 5/100
On the ground of the overlook near the car after you arrive at the cabin.
[ ] Coffee Thermos 6/100
On the kitchen counter in the Cabin!
[ ] Radio Program 1/11
On the back porch of the cabin next to the stairs that lead down to the dock.
The wood bridge puzzle
You awaken in your car -- which is totally wrecked -- down an embankment and you can hear your wife's fearful cries in your head as you awaken! As you narrate your situation, and take stock of your situation, you come to the conclusion that you must go for help! A quick check of the car turns up the book written by the doctor of the local nuthouse -- which brings the fight back clearly in your mind. Not so good.
The path you need to follow is not real obvious, but if you look towards the ground you will see it. Before we get to the run through the woods I want to remark upon the collectibles in this game -- they are actually pretty easy to spot because they glow in the dark. All that you really need to do is keep your eyes open and look around.
Speaking of collectibles - and you approach the first glowing light you will find two pages of your manuscript (Manuscript Page 1/106 and 2/106) so go ahead and grab and read those now (yes, you can actually read the pages).
As you continue along the path you encounter one of the Taken (the Taken are the people taken by the shadows). You can see the gas station in the distance, but there are lights closer to you, which you think might be good news. You approach a fence at the end of the path to discover a logging yard!
To enter this you need to climb along the trunk of a tree that has fallen against the fence. Once inside the yard, you spot a shadowy form but it turns out to be a Taken. You have your first encounter with the Taken form of Carl Stucky -- who reads you the terms and conditions of your cabin rental!
As you run along the logs towards the pickup truck, here is your first Thermos collectible in the yard - pick that up (Coffee Thermos 7/100), and then move along the other side of the nearby stack of logs to find another manuscript page (Manuscript Page 3/106). A nearby stack of logs collapses - avoid that and run past it and along the path towards the light ahead.
The light is the open door of a nearby building and that is where you want to go first, because wandering through the log piles without the ability to defend yourself will just get you killed! Note that if you do end up getting killed, all of the collection items and resources that you picked up will have to be re-picked up unless you are notified that you have hit a checkpoint, as death puts you back to the start of the last checkpoint.
Now enter the building and you will find a pistol and hand torch, and to the right of these some batteries on the table there. On a shelf in the next room is some ammo. There is also a phone, but when you try to use it, Stucky cuts the line and knocks down the power pole, and then uses a piece of heavy equipment to push the building you are in over the edge of the embankment -- now would be a good time to bail out of the building through the door that has just opened, right?
You are attacked by some Taken -- and hopefully defend yourself well! Once you have taken out the immediate threat, use the flashlight to reveal a portable light with its own generator -- turn that on, and you will notice that there are arrows and signs painted in yellow that is only revealed when you shine light onto it. How convenient! Before you follow those, turn around and grab the ammo off of the oil drum here.
If you follow the arrows you will encounter a hidden chest (Supply Chest 1/30) with a flare gun in it first, and then an electrical box inside the overhanging building - you want to smash that to cut the power that is electrifying the fence, because you cannot get over the fence here with the juice on!
With the power now off you can safely climb over the fence. After you do that and as you approach the log picker, look to the left up the hill in the woods and you will notice a sparkling silver glow -- that is our next collectible! Go ahead and run in that direction to get the next collectible (Manuscript Page 4/106) now. Once you have that, head back towards the picker and you will see a lit supply box to the right with some ammo and batteries in it -- empty it and then head towards the broken fence.
There is a dangling power line here - mind that you do not walk into it as it will hurt you - but head past it and down the slope, and you arrive at the river. There are a series of logs falls that you can use to cross, so go ahead and cross the first one now, but do not head to the right to cross the second one yet! Head to the left instead and follow the path past some fallen logs to a rock with a Thermos on it (Coffee Thermos 8/100) that you should collect.
Now backtrack all the way to the right and cross the narrow triple-log bridge here to grab the next collectible that is on a crate at the end of the logs (Manuscript Page 5/106). Once you have that, backtrack tot he previous island and turn right, where you will cross the next log bridge, and you will eventually reach a checkpoint on the other side of the river, and do battle with three more Taken.
A word on battling the Taken: If you use your torch to damage them until their shadow disappears, it only takes a single gun shot to kill them. You also do not need to always use new batteries to recharge your torch, as it will recharge on its own over time (albeit slowly), so only use the batteries when you actually have to, like in the middle of a fight, and let it recharge on its own when you are not in battle or threatened.
Also not that you do not have to fully engage the light in order to aim your weapon -- try gently pulling the left trigger just a bit so that it engages the aiming mode but not the extra power through your torch -- there! Now you can put the bullets where you need them without draining the power from your torch!
Back on the path through the Logging Yard again, and as you regress along you will see more of the yellow arrows - follow those to a wood pile with a ladder and climb up -- from here you can actually get a better idea of where you need to go. Jump on the nearby bank and head up to the shack ahead, and you will see a message painted on the side. Inside the shack you will find another supply chest (Supply Chest 2/30), this one has some batteries in it for your torch, which is always a good thing to find!
Now backtrack to the log pile and go back down the ladder -- jumping will cause you to be hurt so I do not recommend that as a general tactic -- and once you are down the ladder head to the left and pick up the thermos (Coffee Thermos 9/100) just past the broken stairs that you see in a CS. To your immediate left in a red supply box mounted on a pole are some batteries and some pistol ammo - go ahead and grab those now.
Beside the pole is a winch system, which should clue you in on your next challenge -- you need to move that load of logs that is hanging from the drag line above to bridge the gap in the nearby log piles so that you can make your way up and across to the next area of the yard!
In order to do that you need to use the winch controls (the nearby red box with the blinking red light) but it presently has no power, so you need to locate the generator. The easy way to locate it is to climb the ladder nearby and look around - from up here you can see the generator in the distance, then just climb down and make your way to it, but as you approach another trio of Taken appear to hinder your progress. You will need to take them out before you can access the generator!
Once you have the gennie cranked up the lights come on and you now easily see the nearby well-lighted door! Head inside the building here and grab a manuscript page (Manuscript Page 6/106) and a shotgun!
Now return to the controls for the drag line and use that to move the logs to the point where they bridge the gap you need to cross, then use the ladder nearby the controls to climb up to the top of the stand, and running along the center of it, jump to the center of the suspended logs, work your way across and jump to the center of the next stack, gaining access to the next area! How very clever of you!
After you cross over look to the right and you will see the top landing of the broken stairs from below. On that landing is a table, and on that table is your next Pyramid Can stack (Pyramid Cans 2/12)! Go ahead and shoot those now!
As you head towards the light you will see that it is at a shed - and inside the shed is a radio and a box of shotgun ammo. Grab the ammo then turn on the radio (Radio Program 2/11) and listen to the program (there is an Achievement associated with listening to all of the radio programs).
As you continue on the path shine your light to the left to reveal another trail of yellow arrows that lead to another hidden supply box (Supply Box 3/30) in a shed -- this one has a flare gun! Take a moment to reload all of your weapons now if you need to, and then move back to the path and follow it to a manuscript page (Manuscript Page 7/106), which you should pick up, and then a little ways down the path on the right behind a small rock is a thermos bottle (Coffee Thermos 10/100). Grab that and then follow the path through the next section of woods.
After you drop down to the area below move straight ahead to the generator and start it to turn on the light. If you need to heal here, and grab the ammo and batteries on the ground as well. Ahead of you is an outcropping of rack -- move towards it but stay to the left (so that the rock is on your right) and you will find the next collectible (Coffee Thermos 11/100). Grab that after you fight off the three Taken, then head back to the light to heal.
You will have a few fights with more Taken, and then find another manuscript page (Manuscript Page 8/106) on the trail. At the next light spot there is a supply box with ammo and batteries, and then you continue on the path.
When you reach the fence follow the arrows to the left and grab the flare gun from the hidden supply chest (Supply Chest 4/30), then resume your path along the trial past the log claw, where you will encounter a group of slightly more robust Taken near a closed gate - you will need to kill them all before you can continue here.
On the ground in front of the gate is the next collectible (Manuscript Page 9/106) so grab that and then enter the gatehouse on your right. Grab the shotgun, shotgun ammo, and then move to the table where you will find a TV -- turn it on and watch the program (TV Program 1/14) and then, when it is done, use the controls to open the gate!
Exit the gatehouse and pass through the now open gate, and use the controls on the PTO on the left through the gate. Now head through the log piles towards the light to trigger the next Taken encounter - battle them and win, and then you will face Stucky (a mini-boss) who is a lot harder to kill. Be patient, take your time, do not waste resources, and you should easily manage to kill your first mini-boss!
There is a chest of ammo on the left of the path just before this big fight -- I would fill up on ammo here if I were you, and after the fight, before you continue along the path, return to the chest and fill up on ammo to replace what you used during the fight.
If your experience is similar to mind you will not actually defeat Stucky until after you reach the control box for the next gate -- I was able to open but not activate the gate controls before my final confrontation with him -- and killing him unlocks the Achievement "Nordic Walking" for 10 GP!
Take my advice, head back to the ammo crate and fill up, then on your way back after you pass under the swinging logs head to the right of the crane and grab the collectible here (Coffee Thermos 12/100) pass through the gate and head along the path to the gas station, where you will find it deserted. Go around the fence and grab the manuscript page (Manuscript Page 10/106) and thermos (Coffee Thermos 13/100) in the parking lot.
Once you have that Thermos, head out onto the road and along it to the left and into the fog. You will be attacked by a pair of Taken, and once they are dead, you will see that the road is blocked off by some trucks. On the road to the right of the trucks is the last Thermos for this chapter (Coffee Thermos 14/100). When you pick this one up it will force the spawn of three more Taken so be ready to fight them -- it would be a really bad time to end up dead, trust me on that.
Now you should head back to the gas station -- halfway there another trio of Taken will spawn for you to kill, but you are getting really good at taking them out by now so that should not be a problem! Once you arrive at the station go ahead and enter, but resist the urge to rush inside and use the phone to call for help just now, we will be doing that but there are a few other things that we need to do first!
At the station, enter via the garage, and head towards the office. The TV in the garage will turn on and you get a focus prompt - focus on the TV and watch the Alan Wake show (TV Program 2/14). When it is over enter the office and look ahead and to the left on the end of the merchandise rack where there is a sign for the Deer Fest -- you will be prompted to hit the B-button to read the sign and you should do that for your next collectible (Sign 1/25).
At this point you should check your statistics (hit Start then select Statistics in the menu) to verify that you have everything. You should have:
• Manuscript Pages 10/106
• Coffee Thermos 14/100
• Can Pyramids 2/12
• Chests found 4/30
• Radio Programs 2/11
• Signs 1/25
In the Achievement department you should have unlocked a minimum of the following:
• Follow the Light (10 GP)
• Let there be Light (10 GP)
• Nordic Walking (10 GP)
Now go ahead and pick up the phone on the counter and call for help if everything above matches, otherwise check to see that you got the last few and when you have all of the spots ticked, use the phone! This will unlock another Achievement -- Bright Falls' Finest (20 GP) for a total of 50 GP minimum!
Shortly the County Sheriff herself shows up, and you try to explain the situation but she immediately starts poking holes in your story. You get into her car and she takes you to your cabin... But it is no longer there! The cabin, the island, the bridge -- all gone! You are stunned, and she has this look on her face that clearly indicates she thinks she is dealing with a wack-a-doo here!
Thus Episode One ends with a fade to black and some music.... I am pretty sure that it is either Roy Orbison or someone who sounds a lot like him. Pretty cool anyway.
[ ] Can Pyramid 2/12
On a table on the top of the landing for the broken stairs.
[ ] Coffee Thermos 7/100
Beside the pickup truck by the fence inside the logging yard.
[ ] Coffee Thermos 8/100
On the far left-end of the first "island" in the river after crossing the first log bridge. The Thermos is on a rock here.
[ ] Coffee Thermos 9/100
Just past the broken stairs in the yard.
[ ] Coffee Thermos 10/100
Behind a rock on the right towards the end of this section of the path.
[ ] Coffee Thermos 11/100
Along the left side of the rock outcropping after the light.
[ ] Coffee Thermos 12/100
On the right side of the crane after defeating Stucky.
[ ] Coffee Thermos 13/100
In the parking lot of the gas station by the sign.
[ ] Coffee Thermos 14/100
On the road near the roadblock to the right of the trucks.
[ ] Manuscript Page 1/106
You receive this in a CS that is part of the story line and cannot be missed.
[ ] Manuscript Page 2/106
You receive this in a CS that is part of the story line and cannot be missed.
[ ] Manuscript Page 3/106
Around the corner of the small log stack on the way back from getting the thermos.
[ ] Manuscript Page 4/106
Up the hill on the wall of the small cutting shed before you pass through the broken fence with the dangling power line.
[ ] Manuscript Page 5/106
On a crate at the far right end of the first island in the river as you are crossing.
[ ] Manuscript Page 6/106
Inside the building after you get the generator started in the yard.
[ ] Manuscript Page 7/106
Found on the path - you cannot miss this one.
[ ] Manuscript Page 8/106
On the trail headed towards the next light.
[ ] Manuscript Page 9/106
On the ground in front of the closed gate.
[ ] Manuscript Page 10/106
In the parking lot of the gas station.
[ ] Nightmare Mode Manuscript Page 92/106
On the fallen tree past the fence as you enter the Logging Yard.
[ ] Nightmare Mode Manuscript Page 93/106
On a rock by the river after you complete the log bridge puzzle challenge.
[ ] Nightmare Mode Manuscript Page 94/106
On the door of the bathroom in the back of the service station.
[ ] Radio Program 2/11
In the shed with the light at the top of the hill after shooting the Can Pyramid at the top of the broken stairs.
[ ] Sign 1/25
On the end of the merchandise rack in the gas station.
[ ] Supply Chest 1/30
Behind the truck after following the arrows after you exit the building that Stucky pushes over.
[ ] Supply Chest 2/30
In the building at the top of the bluff after you use the ladder to climb up the stack of logs while following the yellow arrows.
[ ] Supply Chest 3/30
In the shed at the end of the yellow arrow trail.
[ ] Supply Chest 4/30
At the end of the arrow trail to the left of the fence.
[ ] TV Program 1/14
On the table in the Gatehouse.
[ ] TV Program 2/14
The TV is inside the garage at the gas station. It will come on all on its own, you just need to focus upon it and watch the show.
NOTE: A ticklist for the collectible items is included at the end of each chapter -- you will want to review this before you begin the chapters to familiarize yourself with these.
The introduction to this episode is a recap of the events of the previous one, and the way it plays out feels a lot like watching Lost! This episode begins with a flashback to earlier, when the Wake's were still at home in New York City.
Reassurances for Alice
The chapter opens with Alan coming home on a cold and blustery day. We may as well explore the apartment a little before we get into the meat of the flashback, right? I mean how often do you think we will be able to come here?
I don't know about you but I think they have a really nice bathroom -- check out that shower! Exit the bathroom and head into the bedroom -- there is a radio here and you can get a weather report on it but it does not count as one of the collectibles for the Radios. That is sort of odd, I think they must have forgot that this one was here or something?
Back in the hall there is an office on the right, where you can view a collectible (Manuscript Page 11/106 and 12/106) and examine some of your books on the shelf here. Now head into the other office that Alice is in, and grab the Thermos here (Coffee Thermos 15/100) and then head for the kitchen, where you need to turn on the coffee maker.
Return to Alice for a conversation, and then go next door and examine the mock-ups. More conversation, and then the power goes out! Alice freaks, and you get a loving CS in which you do your duty as the comforting presence. The flashback ends with a gentle song.
[ ] Coffee Thermos 15/100
On the desk in Alice's office.
[ ] Manuscript Page 11/106
In the small office of the apartment on the desk.
[ ] Manuscript Page 12/106
In the small office of the apartment on the desk.
Picking up the Collectibles
You find yourself in the station with the local doctor -- Doc Nelson -- looking after you. He gives you his professional advice, and then you head in to talk to the Sheriff. Examine the fish on the table to trigger a conversation with Doc Nelson about fishing, and then head through the door and immediately turn left -- read the two posters on the wall on the left... Be absolutely certain you read BOTH of them, one describes three missing men, the other describes one missing man. Both of these have to be read to get the next collectible (Sign 2/25). Check your statistics to verify that Signs now reads 2/25, and then head in to see the Sheriff!
Inside the office you get your phone off of the desk, and then you get interrogated. The phone rings and you stop out to take the call. It is Alice! And her kidnapper! He tells you to stop talking to the law, and gives you some instructions. Well, that complicates things immensely.
Return to the Sheriff and she will tell you how to get outside, and then starts to grill you again. You cannot say anything about the call, and you make your polite excuses and depart.
When you reach the front desk the deputy tells you how to get out back -- instead of heading directly there walk past the cell corridor door and into the room ahead, where you will find some collectibles: a Thermos (Coffee Thermos 16/100) and a page (Manuscript Page 13/106).
You can listen to the police radio traffic by clicking on the radio console -- and learn that the police are now aware that the garage was trashed. Head into the third cell in the corridor and grab the next collectible (Manuscript Page 14/106), and then look for the light switch and turn it on the help calm down the guy in the second cell.
If you are not in a hurry - and you should not be - go ahead and listen to the prisoner's story after you turn the lights on. He tells you about how he ended up there, and reveals that at least one of the people he is supposed to have attacked was in fact a space alien! Remember what I said about clues in the game for the voice? Yeah, this is one of them.
On he far side of the parking lot after you exit the corridor you will see a Thermos and a Radio -- go over and collect the Thermos (Coffee Thermos 17/100) and turn on the Radio (Radio Program 3/11). You hear the sign-off of the late night DJ, and a news report that includes some background and foreshadowing.
After you finish listening to the radio head to the rear of the lot and you get a focus prompt - look at the old rusty truck over the fence. You need to get to that, so move along the fence to the corner by using the pile of lumber to climb over, then kick the boards away from the hole in the fence and pass through.
Head straight so that the truck is on your left and you will see a rock on the right with a manuscript page (Manuscript Page 15/106). Head to the truck where you find Alice's driving license and then you get a call from Barry, your agent. He is in town! You ask him to pick you up at the jail.
As you re-enter the station the TV on the wall turns itself on and you see another installment of Wake TV! Check that out, and then head back into the police station, where you will encounter the shrink from the nuthouse talking to the cops -- he has paid for the damages that they caused. You now get a CS with the Sheriff, who you tell that you want to leave.
You get a little physical with Hartman, and then Barry shows up to save the day! You bail with Barry, who is very upset, and then the CS ends.
[ ] Coffee Thermos 16/100
On the table in the radio room at the jail.
[ ] Coffee Thermos 17/100
On the steps across from the jail door in the parking lot.
[ ] Manuscript Page 13/106
On the floor in the radio room at the jail near the table.
[ ] Manuscript Page 14/106
On the bunk in the third cell in the corridor at the jail.
[ ] Manuscript Page 15/106
On a rock in the back section of the jail parking lot after you kick open the fence.
[ ] Radio Program 3/11
Next to the Thermos on the steps on the far side of the parking lot outside of the jail.
[ ] Sign 2/25
The pair of missing posters in the hall at the police station.
Rusty Boss Fight
The chapter begins with a CS in which you narrate a bit while Barry drives you to the park, where you encounter Rose from the diner, your biggest fan! You harsh on her with Barry, who blows some of that harsh back in your face. I think Barry likes Rose, or at least likes the fact that she is a fan, and he comments that she even has her own fan site dedicated to you!
After you head inside you have the chance to snag your first collectible -- see that sign under the bones that reads "Buck-Toothed Charlie? Yeah, click on that (Sign 3/25) for some interesting factoids, and then head over to Barry. Behind him on the counter is your next collectible (Coffee Thermos 18/100) which you should snag before having your conversation with Barry.
You are prompted to have a chat with Rusty -- he is out on the deck looking after a hurt dog. He tells you where the registration form is, and tells you about what happened to Max. Go grab the form and continue the chat with Barry, and then take the form to Rusty. He takes the form and gives you the keys, and then the directions you ask him for.
Pay attention to Rusty's warning about the bear traps mate, because they really are out there. Also note his concerns about some missing campers...
Back inside Barry continues his harangue of you, and then you exit the center and get a CS with Barry at the cabin. Barry does not approve of the plan, and maybe thinks you are a little nuts, but he is willing to help in any way that he can. He agrees to wait for you and, if you are not back by morning, to call in the cops.
Now head downstairs and into the kitchen to grab the next collectible (Coffee Thermos 19/100), and then exit the cabin and work your way around to the back yard and snag the next Thermos (Coffee Thermos 20/100) off of the steps of the hot tub on your back deck.
Head back around front and take the steps down to the right, where you see a page next to the yellow truck (Manuscript Page 16/106). Say, you have been reading the pages when you get them, right? I mean they are a major part of the story -- and they give you details you sort of need too. You haven't? Well now is a good time!
Around the first curve to the left as you head down the road is another cabin (on the right side of the road). Head inside and you will find a radio on the table (Radio Program 4/11). Take a quick look around -- there is revolver ammo in the closet, so grab that, and then watch the shadow of a man walk past the window. Freaky.
Head back outside and continue down the road to the next cabin, where you will discover the windows broken and the place trashed. Inside is a TV -- go ahead and flip that on and watch the program (TV Program 4/14) -- then exit the cabin and return to the road as there is nothing else to find here. A short ways down you will see a phone booth on the right with a trail running off to the right behind it. Go ahead and follow that trail to the picnic shelter above and grab the next collectible (Manuscript Page 17/106) and then return to the road.
Ahead on the left is a small SUV that has been abandoned, and sitting on its back deck is the next collectible (Manuscript Page 18/106) that tells the details of the death of Rusty. Rusty is dead?! Oh man!
As you approach the Visitor Center you get a flashback and then a gunfight errupts ahead at the Center and you hear Rusty yelling for help -- wait, he is not dead yet?? We run towards the center but before you head to Rusty see that shed just past the abandoned truck on the left? Run in there and grab the next collectible (Coffee Thermos 21/100) and then head for Rusty!
As you exit the shed run straight ahead and under the fallen tree -- on the low stone wall on your right is the next collectible (Manuscript Page 19/106). Once you have that, run past the stairs and to the right around the back of this building and grab the next collectible (Coffee Thermos 22/100) that is sitting at the base of the tree here.
Run back around to the front of the building (this is the Ranger's Offices) and across the parking lot to the Visitor Center -- the door and windows have been smashed in and Rusty is laying in a trail of his own blood in the back. Go talk to him -- he gives you his keys and tells a very disturbing story about finding a page from your manuscript! The page is in his office in the other building, so head there now!
You use the keys to unlock the door and you enter, then head down the hall where you find the page on the floor (Manuscript Page 20/106). Go inside the office and you will find a gun cabinet with batteries and ammo in it -- grab those now -- then head into the next room. You are too late! Someone destroyed the circuit breaker with an ax!
You hear Rusty screaming as he is again being attacked by the Taken, but this time as you run to him you discover that the ground has these oily patches -- you view them as liquid darkness -- and they explode when you shine your light on them!
As you approach the entrance to the Visitor Center a pair of Taken appear -- and you kill them -- then head inside. Rusty's body is gone and something has torn a king-sized hole in the wall to the right! Not only that, but a Taken voice that is channeling Jim Carey but saying things that Rusty might say is now talking to you. I am starting to suspect that Rusty has been converted and we are going to have to kill his Taken form!
Head through the hole and into the yard and as you approach the shed Taken Rusty will appear on the roof and come after you! After you kill him you unlock the Achievement "Under a Thin Layer of Skin" for 10 GP, and then you should re-supply your ammo from the shed and kill the pair of Taken that appear next, before you run to the far opposite corner of the yard where the gate has been broken and where the path continues. As you follow that down there are some more sound effects, and then you approach a covered set of stairs with a light where you can rest and regain your health.
Heading down the stairs here to the right, you get a call from Barry -- and when the call is over, head along the path towards the next light. A little over halfway to it you will find a picnic table made from split logs, and on this is the next collectible (Manuscript Page 21/106). Follow the path to the steps where there is a red supply box with batteries and ammo -- take what you need -- and then head down the steps.
Exploring Moonshine Cave
As you reach the sign that points to Lover's Peak you will see a yellow arrow on the rock just behind it -- follow the arrows instead of the path for now, and you will enter Moonshine Cave. How cool is that? Towards the rear of the cave you will encounter a sign that you should read (Sign 4/25) as it tells you about the cave.
Now continue to follow the arrows to the rear of the cave where you find one of the hidden chests (Supply Chest 5/30) in which are batteries and a shotgun. You will unlock the Achievement "Finders Keepers" now, for finding 5 chests. Now exit the cave and head back to the turn off for the Peak, and follow that path.
Ahead is a phone booth with some batteries - when you take them it triggers a Taken attack so just kill them, right? Cross the nearby wooden bridge over the river, and you will come to a split in the path, with the Peak to the left, and an unmarked path tot he right. Take the right path for now, and you will find a picnic area ahead with the next collectible (Manuscript Page 22/106) called 'Barry Meets Rose' that fills in some more of the story. Head back to the sign and take the left path now.
As you follow the left path you will approach an old tree that is open in its center that has a sign near it and you will be attacked by some Taken, including one that must be a new type because it took a lot more killing than the usual ones! After you dispatch them, go to the sign and read it (Sign 5/25) to learn about the Great Old One and pick up another collectible!
Follow the path towards the next light and you will cross another bridge -- the light will then go out, but you can start the generator there to turn it back on, so if you are injured at all I would do that. Once you have healed, look ahead and you will see that the path divides again ahead. Take the path to the right to the picnic area and you will see a collectible here (Coffee Thermos 23/100) that you should grab now, and then head back towards the light and onto the main path.
Directly ahead on the path is your next collectible (Manuscript Page 23/106) and then, continuing along the path you will encounter another group of Taken with one of those hard to kill ones. You should be able to manage them, but chances are that by now you are low on ammo... There are supply points ahead, but the ammo is not overly abundant, so if you are low this may be one of those times when you want to backtrack to a full supply point. That shed in the back of the Visitor Center is an unlimited supply point, so consider a quick run back to fill up on ammo now, right?
Either way -- head back or continue -- we are on the path moving forward again.
You will arrive at a light haven and the gate to the Peak -- but the gate is blocked by a fallen tree. You can access that area by jumping the fence to the left, but BEFORE you do that, take the path to the right a ways and you will encounter your next collateral (Coffee Thermos 24/100), and a sign next to the slice of tree trunk that is hanging here (Sign 6/25) describing the tree rings.
Head back to the gate and jump the fence to the left, then move straight ahead a few steps and grab the next collectible (Manuscript Page 24/106). Now head up the stairs and call the tram, get on and use it to go down to the next area.
As you ride the tram something goes wrong, you get attacked by some birds and the tram slams its way to the base, where you are knocked senseless! As you are coming to your senses you see some Taken approaching -- and you have not only lost your gun, but you cannot reach your flashlight! Just when it looks the dimmest, rescue appears! Unfortunately you realize that the rescue has come from the man who kidnapped your wife!
You get the info on flares, and you can hit the supply box nearby for more flares and batteries, but in the end you have to follow this guy!
You reach a blocked-off area and the kidnapper orders you to use the flares from the supply chest to hold off toe Taken - you do that while he opens the lock to allow you to pass. BEFORE you follow him past the next bridge, look for the nearby map on the right of the path before the bridge and then look behind it to grab your next collectible (Coffee Thermos 25/106) -- grabbing this one also unlocks the Achievement "Damn Good Cup of Coffee" for 20 GP.
After you survive the attack at the Peak you get a CS in which the kidnapper tells you which way up is, and you end up falling due to your need to deliver a knuckle sandwich!
You both end up falling to the path below -- but you end up with the gun, which causes the kidnapper to run away. There are supplies scattered all around you, so first, pick them up! Now, turn around and head down the rocks towards the waterfall, look for the yellow painted arrows and follow them to the next supply chest (Supply Chest 6/30) where you get some batteries and two flares.
Once you have the supplies, return to where you started and follow that path a little ways and pick up your next collectible (Manuscript Page 25/106). Taking this unlocks the next Achievement called "Paging Mr. Wake" that is worth 20 GP!
Use the logs to cross the river twice and then follow the path -- try not to step into any of the bear traps, right?
as you follow the path you will reach a clearing with some barrels -- there are supplies on the left hand barrel (batteries and ammo) so take those. Now turn around and face the other barrel and you will see the next Can Pyramid (Can Pyramid 3/12). Go ahead and shoot that now!
Turn to face the river as you stand next to the left barrel and walk forward to find the next collectible (Manuscript Page 26/100) which you should grab.
[ ] Can Pyramid 3/12
On the barrel in the clearing after the bear traps.
[ ] Coffee Thermos 18/100
On the cafeteria counter in the park center.
[ ] Coffee Thermos 19./100
In the kitchen in your cabin in the park.
[ ] Coffee Thermos 20/100
On the hot tub steps on the back deck of the cabin.
[ ] Coffee Thermos 21/100
Inside the shed on the left as you approach the Visitor Center.
[ ] Coffee Thermos 22/100
At the base of the tree behind the building on the right.
[ ] Coffee Thermos 23/100
On a rock just past the picnic area.
[ ] Coffee Thermos 24/100
On the picnic table on the path to the right of the gate to the Peak before heading to the Peak.
[ ] Coffee Thermos 25/100
Behind the map to the right of the bridge to the Peak, before you cross it.
[ ] Manuscript Page 16/106
On the ground by the yellow truck in front of your cabin in the park.
[ ] Manuscript Page 17/106
On the floor of the picnic shelter up the trail to the right of the phone booth.
[ ] Manuscript Page 18/106
On the rear deck of the SUV that is abandoned on the left side of the road.
[ ] Manuscript Page 19/106
On the low stone wall under the fallen tree at the Visitor Center.
[ ] Manuscript Page 20/106
On the floor at the end of the hall in the Ranger's Offices.
[ ] Manuscript Page 21/106
On the picnic table off of the path midway to the next light.
[ ] Manuscript Page 22/106
On the picnic table off the right path on the way to the Peak.
[ ] Manuscript Page 23/106
On the path just past the haven light towards the Peak.
[ ] Manuscript Page 24/106
Just after you jump the gate fence heading for the Peak, on a rock.
[ ] Manuscript Page 25/106
On the path after you fall from the Peak.
[ ] Manuscript Page 26/100
On the rocks just past the barrels after the bear traps.
[ ] Radio Program 4/11
Inside the first cabin on the road.
[ ] Sign 3/25
The next sign is the one below the bones in the park center.
[ ] Sign 4/25
Inside Moonshine Cave.
[ ] Sign 5/25
At the old tree.
[ ] Sign 6/25
Near the picnic table on the right path past the gate prior to heading to the Peak.
[ ] Supply Chest 5/30
At the end of Moonshine Cave.
[ ] Supply Chest 6/30
To the left of the falls after the Peak.
[ ] TV Program 4/14
Inside the second cabin on the road.
Discovering the plane crash
Looking out over the water you can see the water mill and the light shining in its upper window -- that is our next destination, so we should continue on the path now, crossing over the log bridge and fighting our way through two groups of Taken before reaching the shack with the light and generator ahead. The generator is not running, and when we try to start it we are immediately attacked by Taken, so be prepared for that and fight them off!
Once they are dead, start the gennie and heal up, and then look in the shack here to find the next collectible (Coffee Thermos 26/100). Near the light on the path is a tree stump with batteries and ammo on the ground by it, so be sure that you grab those!
Now look ahead on the path and you will see another shack nearby - go to that one and inside you will find the next collectible (Manuscript Page 27/106) and a Hunting Rifle which you should grab. Chances are good that in the process of reaching this point you will have killed the 100 Taken required for the Achievement "The Six Gun Scribe" and so picked up another 20 GP so grats on that! You may want to consider concentrating on a different weapon now, to unlock the other Achievements for those...
Before you head down the wooden ramp then drop below, turn to the right a ways and walk forward to get a Focus Point - a crashed airplane! Head to the plane and go through it so that you tip it then exit and run around the back of the plane where you can now use the rocks to jump onto the broken wing. You should easily see the stash marker painted on the nearby cliff -- head over to it and grab the two flares from the hidden supply chest (Supply Chest 7/30)!
Now head back towards the ramp and follow the path ahead to the left, where you will find a flare to pick up, then drop down for a checkpoint and you will see a lantern on a tree in the distance. Head in that direction, and you will fight two groups of taken. When you arrive at the lantern you will find another generator you can start to create another Light Haven!
There is ammo for your revolver and hunting rifle here, so be sure to grab that -- it is on a create near the generator. Now before you continue to the path, keep going towards the mill from here and you will arrive at a cliff over the water. Follow that along to the right and you will see another section that juts out over the water with your next collectible on it (Coffee Thermos 27/100) so go ahead and grab that.
Now head back to the light and the path is to the left of the light between the large boulder and tree, so once you are back on it follow it until you see the next light -- and fight your next group of Taken! Now cross over the wooden bridge to the mill and the next Haven Light -- heal if you need to -- and then use the ladder to climb up onto the mill. As you move forward the platform you are on will break away and swivel -- don't panic! When it stops, drop down on to the crates on the platform below and enter the mill. Use your light to fry the pool of blackness on the floor so that you do not walk into it and get damaged.
In the left corner there is some revolver ammo, and once you have that head up the first two flights of stairs and burn the next black pool. As you go around the path here you will see another room attached to this one -- go in and take out the next pool, and then explore this room to find another pool to destroy and just beyond it outside, your next collectible (Manuscript Page 28/106).
Retrace your steps to the previous room and go up the stairs to a small landing. On the landing here is a large weight -- pretty obvious that you need to kick it even if you are not prompted to do so, right? Well? Kick it!
Now the elevator has come up and we can jump to it, and then jump to the other side, where we see our next collectible on a pile of sacks (Manuscript Page 29/106) for us to grab, and in it we learn a little more about what is happening to Barry back at the cabin! In the next room there is a pool for us to destroy, and some flares to collect. Say, you do not usually find flares in a flour mill, considering how dangerous flour dust is, but hey, what do I know?
In the right-hand corner of this room is your next collectible (Coffee Thermos 28/100) so grab that, and then climb the ladder in the other corner and take out the two black pools on the floor up there. As you exit the mill you will see that the path continues up and around to another building, where you first see a warning message and then are attacked by a rather robust Taken.
Inside the building is a fully-loaded hunting rifle, so grab that for sure, and then look carefully at the boxes here. They seem to create a path of sorts, so why not jump on them and see where this takes us? Ah ha! It takes us to the other side of the room and our next collectible (Manuscript Page 30/106) which we want and get! Now we jump back over the boxes and head outside, following the path around to the fence where there is a ramp of sorts for us to go over it.
On the other side is a wooden bridge, and across that is a red supply box with ammo and batteries -- so we should collect those now. The path is obvious from here, but take it with caution, as some Taken will appear and set off a log fall and some barrels -- you want to avoid both because not avoiding them will get you hurt. Kill the two Taken, and then progress along the path to the bend where you will find a flare on the bench and a large supply of revolver ammo and some batteries in a red supply box here.
There is a gate ahead and a sign on the right indicates that it leads to the Campground -- and once you push through it you are confronted by some Taken Brutes and a new type of mob wielding a chainsaw! The brutes are easy to kill, but the Chainsaw Taken takes a bit more effort and damage. You will need to quickly reload the batteries in your hand torch in order to drive away his shadow to make him vulnerable to your weapon, so bear that in mind mate!
Follow the path to the stairs and head up to the covered picnic shelter where you will get a call from Barry -- who you reassure. Once you are healed up head down the path and cross the nearby bridge, and then look to your right for the next collectible (Coffee Thermos 29/100). Hit the nearby red supply box for batteries and ammo, and then enter the campgrounds.
To the far left is a rustic restroom structure -- head over there to snag your next collectible (Manuscript Page 31/106) and once you have that, go ahead and enter the woman's room to the right, where you will find some rifle ammo. In the men's room you will find the keys to the garage -- and a TV (TV Program 5/14), so grab those and watch that before you leave!
On your way out you get attacked -- quickly kill that Taken -- and then head towards the lights of the truck across the lot. Unlock the gate and get into the truck and you will be given driving instructions and prompted to use each command for a certain amount of time to demonstrate that you got it. Well, you got it, right?
[ ] Coffee Thermos 26/100
Inside the shack at the Light Haven after you cross the river on the log bridge.
[ ] Coffee Thermos 27/100
On the jutting cliff across from the mill just past the haven light.
[ ] Coffee Thermos 28/100
In the corner of the room after the lift in the mill.
[ ] Coffee Thermos 29/100
On the picnic table just outside of the camping area.
[ ] Manuscript Page 27/106
Inside the second cabin on the trail. Don't forget to grab the Hunting Rifle here as well.
[ ] Manuscript Page 28/106
On the balcony outside of the mill on the second level.
[ ] Manuscript Page 29/106
On a stack of sacks on the other side of the third floor of the mill after you raise the elevator.
[ ] Manuscript Page 30/106
Over the boxes in the corner of the building just past the mill.
-- Manuscript Page 31/106
On the ground outside of the campground restrooms.
-- Supply Chest 7/30
On the rocks past the broken wing of the crashed airplane.
-- TV Program 5/14
In the men's room at the campground on your way out.
Vehicular homicide is the way
Before you follow the road to the left (which is the proper path) instead turn right and go until you reach the barricade. You will spot your next collectible here (Coffee Thermos 30/100), so hit B to get out of the truck and grab that now!
Once you have the collectible turn around and follow the road and shortly ahead of you will appear a Taken -- what you want to do is slam on the go-button and then hit the boost button (A) and ram that bugger good. Once he is down, back up and do it again to kill him!
Up the road are more Taken for you to run down with your truck -- is this cool or what? These will re-spawn, so go ahead and have some fun with them; besides it being fun there is also an Achievement involved here ('Right of Way' - You have peeled 15 Taken off of your bumper') that is worth a cool 10 GP!
Ahead of you is a logging truck partially blocking the road. Once you have killed the 15 Taken with your truck (which is hopefully still running - they do damage it when you hit them), pull up to the trailer and jump out. Run up the path to the right of it to the shack there and go inside to find your next collectible (Supply Chest 8/30) with a pair of flares in it -- those are worth grabbing!
I had to hoof it from here as the truck died -- too much damage from too many bumper-meet-Taken events. Sigh. If you don't wreck the truck though you can actually drive it quite a ways... The next Haven Light -- a short jog across the field -- is where we want to go now though. When you do get there, look at the picnic table - see that? Yes! That is our next collectible (Can Pyramid 4/12) so let's shoot some cans!
There is a fully-loaded hunting rifle here, so go ahead and grab that now as you cannot have too much ammo, right? As you follow the path towards the large red-and-white billboard you will spot the bridge that we need to cross -- on the other side if you go straight you will encounter a group of Taken near the truck with three brutes and a harder to kill one. Kill them!
Past the truck is a tunnel that you want to visit -- not just because you can, or even should, but because inside it is our next collectible (Manuscript Page 32/106). Reading this spells out your determination to rescue your wife -- but while we are on that subject, are you as confused as I am about it? I mean on the one hand, we stayed in a cabin that basically was destroyed along with the island it sits on in July of 1970 and it is now 2010... So okay, we stayed in a phantom island and our arrival there was engineered by that spooky old woman we met outside of the bathroom in the diner back in Bright Falls. I can accept that.
The confusion begins with the call from the "kidnapper" on our cell phone. Okay, first of all cell phones did not exist in 1970, and even if they did, how did that guy get our number? More to the point, presuming that he is a ghost, or perhaps a character from our unpublished manuscript that was somehow brought to life -- that seems to be the most likely scenario based upon what he said and the way that the manuscript pages are reading -- how does he mesh with the cabin and the old woman?! And if he is a character from the book, why was he afraid of us having the gun? Normally I would not worry about it, because these things have a way of working themselves out as the story progresses, but in this case, I am not so sure that is going to happen!
Okay, I guess we will have to take a wait-and-see attitude here... Turn around and exit the tunnel and then head to the right, following the fence to our next collectible (Coffee Thermos 31/100) which is sitting on the picnic table here. Once we have that, continue to follow the path back to our cabin, where Barry is hiding. As you approach the cabin you will see that the road is partially blocked by a trailer and truck, and beside the truck there is a box with a flare gun and some revolver ammo -- be certain to at least get the flare gun! You are going to need it in a minute!
As you approach the stairs leading up to your cabin there is another box with supplies on it to the left of them that has another flare gun and flare ammo in case you did not get the one at the truck -- note though that these do not count as Supply Chests for the Achievement...
BEFORE you go into the cabin, head around to the back towards the well, and you will find the next collectible (Supply Chest 9/30) which has some flare gun ammo in it. This is an important resource, because we are going to do something next that involves it, and that normally I would not do in a game, but this is a special exception...
The Birds -- There is an Achievement in the game for killing a certain number of the Taken Birds, but it is one of those Achievements that is actually pretty hard to get playing normally, because there simply are not that many places where you can kill these things, and they are rather hard to kill under normal circumstances anyway! So since we just obtained some ammo for the flare gun, this is a good time to go into rinse-and-repeat mode, and pick that Achievement off in a timely and convenient manner!
All that we need to do is arm the flare gun and start shooting the birds here -- there are a lot of them. Once you have used up all of your ammo, simply reload the last checkpoint, and you have the ammo back. Now kill birds, rinse-and-repeat, and you will quickly kill 1,000 birds and unlock the Achievement "If it Flies it Burns" for 20 GP! Note that the statistics stay with you regardless of whether you hit a checkpoint, so you can reload the last checkpoint and still have the kills in your statistics.
Once you kill enough of them you tell Barry to open the door and you get a CS of the next morning, in which you relate your activities. Barry gets a call from Rose, who has been taken... And the episode ends! At the end you will unlock the Achievement Park Ranger (15 GP).
Check your statistics now -- you should have the following:
• Manuscript Pages 32/106
• Coffee Thermos 31/100
• Can Pyramids 4/12
• Chests found 9/30
• Radio Programs 4/11
• Signs 6/25
• TV Programs 5/14
In the Achievement department you should have unlocked a minimum of the following:
• Under a Thin Layer of Skin (10 GP)
• Finders Keepers (20 GP)
• Damn Good Cup of Coffee (20 GP)
• Paging Mr. Wake (20 GP)
• The Six-Gun Scribe (20 GP)
• Park Ranger (15)
[ ] Can Pyramid 4/12
On the picnic table at the end of the road.
[ ] Coffee Thermos 30/100
At the barricade in the road to the right of the campground.
[ ] Coffee Thermos 31/100
On the picnic table to the right after exiting the tunnel.
[ ] Manuscript Page 32/106
At the end of the tunnel past the logging trucks.
[ ] Nightmare Mode Manuscript Page 95/106
This will appear on the path towards the end but only in the Nightmare Mode play-through!
[ ] Supply Chest 8/30
In the shack to the right of the jack-knifed logging truck in the road.
[ ] Supply Chest 9/30
Near the well behind the cabin on our way to rescue Barry.
NOTE: A ticklist for the collectible items is included at the end of each chapter -- you will want to review this before you begin the chapters to familiarize yourself with these.
Using the Spotlight
As the first chapter of Episode 3 begins you get a call from the Sheriff -- there is an FBI Agent waiting for you at the jail -- and Barry is convinced that Rose is the bomb! You agree to see the agent, but first you stop by the trailer park where you meet the park manager, Randolph. Barry fills you in on the strange happenings of the area, including the story of the island.
Follow Randolph until he shows you the boat that fell out of the sky -- turn to the right and you will see the next collectible (Coffee Thermos 32/100) on a picnic table next to the trailer on the other side of the path. Once you have that, continue to follow Randolph, and he will take you to Rose's trailer, at which point you will get a CS and learn that all is not well in Casa Rose!
When you wake up the TV pops on (TV Program 6/14), and once that finishes, take a quick look around -- Rose has something of a shrine on you, which is spooky in its own right. Also, where the hell is Barry?!
Head out to the kitchen and grab the next collectible (Coffee Thermos 33/100) off of the counter there, before you assess Barry and ignore Rose. Leave -- that would be best -- after all you have lost a day, and no doubt the cops and the FBI Agent are now pissed at you for not showing up...
Outside you find another collectible (Manuscript Page 33/106), and you notice that both your gun and torch are gone. Man you have really bad luck holding on to those, don't you?
Go straight ahead past the dumpsters and you will see a radio on the porch of the trailer ahead -- play that (Radio Program 5/11). Once the program is over follow the path and you will trigger a CS with the police and the Fed. Clearly the Fed wants you dead -- he starts shooting at you even though you are clearly not armed, and he puts a civilian in danger! Dood, you have some serious problems with the cops!
You roll through the broken fence and into the forest and the CS ends. Your main goal now is to escape the police, and that means running into the forest, but remember you do not have your gun or your torch! The trail is pretty long here, just keep running until you are blocked by a rock and have to jump up, at which point you drop down a short distance to where the path resumes, the sound of the police in the background.
Ahead of you on the left is the next collectible (Manuscript Page 34/106) which you grab, and after you read it, continue down the path. Ahead a police car crashes -- run up the road to the right of where the car crashed and you will find the next collectible (Manuscript Page 35/106). Run back up the road past the police car to the right and up the stairs to the Haven Light, and then proceed along the path and over the bridge, where you find another crashed police car!
As you run along the path a helicopter appears and they shoot at you, but before they can really hurt you a flock of dark birds takes the chopper out! Ahead of you there is a tower -- make for that and when you arrive go up the steps. There is a binoculars mounted there, use it to zoom in on the chopper crash site -- hey! It crashed right across the highway from Stucky's gas station! Small world!
Inside the tower is our next collectible (Coffee Thermos 34/100) so grab that. You can turn on the radio here and listen to the police chatter, which gives you some news on what is happening. Both Barry and Rose seem to be okay, which is good to know. If you use the second set of binoculars on the other side of the deck you can spot the lights of the radio station in the distance...
Head back down and follow the path and as you pass through the gate you get a Focus Prompt that shows you the radio station, and the narrative makes it clear that this is your next destination. As you progress along the path the darkness makes itself felt at the gates ahead, and you realize you cannot go that way, so you loop around to the left and find a searchlight that has no power. To the right of the light is a wooden ramp -- climb that to find your next collectible (Coffee Thermos 35/100).
Ahead here is a shed with a generator that powers the searchlight -- go crank that up and quickly run to the searchlight and point it at the gate below. It will quit, and you need to run back to the gennie and kick the tank back into alignment before starting it again, which will fry the darkness with its light! Excellent! Now we can run down and pass through the now open gate and run down the wooden stairs here.
Eventually we come to a shed where we find a flashlight -- very good because the next gates are infested with darkness! Using the torch, defeat the gates and then pass through, and we find Unit 51 -- another crashed police car -- and strewn about it are 6 flashbang grenades. Pick those up, they will very shortly save your life!
As you move along 3 Taken appear - the flashbang will insta-kill all three! Excellent! You do not need to do it, but at this point if you want to get the Flashbang Achievement out of the way, well, this is probably the best place to do it since you just hit a checkpoint after acquiring the grenades, and there are three Taken that appear quickly after you reload the checkpoint. I am just saying, if Achievements are your thing, well, this is a convenient spot to nail that one down.
As you move along the path you will see the Haven Light ahead - get to that and there are more flash-bang grenades and then turn on the radio and listen to the program (Radio Program 6/11). Head across the nearby bridge and immediately turn to the right and grab the next collectible here (Manuscript Page 36/106), and then continue on the path. Note that there are five Taken in the group that attacks you on the other side of the bridge, so if you time your throw correctly you should get them all with one flash-bang, which should earn you the Achievement "Sound and Fury" and an easy 10 GP!
On the path ahead as you reach the police car you will notice that there is a painted arrow -- follow the arrows to the next collectible (Supply Chest 10/30) which contains some batteries and three flares. here is a generator here and if you start it up it creates a Haven Light here for you to use as a checkpoint save. Now head for the police car and get the grenades out of its trunk and continue along the path ahead.
[ ] Coffee Thermos 32/100
On a picnic table in the trailer park.
[ ] Coffee Thermos 33/100
On the kitchen counter in Rose's trailer.
[ ] Coffee Thermos 34/100
Inside the spotting tower next to the stove.
[ ] Coffee Thermos 35/100
On the rock at the top of the wooden ramp near the searchlight.
[ ] Manuscript Page 33/106
On the ground outside of Rose's trailer after you wake up.
[ ] Manuscript Page 34/106
On the side of the path once you are running from the cops.
[ ] Manuscript Page 35/106
On the road to the right of the crashed police car.
[ ] Manuscript Page 36/106
On the bank on the other side of the bridge from the Haven Light.
[ ] Radio Program 5/11
On the porch of the trailer after you leave Rose's trailer.
[ ] Radio Program 6/11
On a crate near the Haven Light after you get the flashbang grenades.
[ ] Radio Program 7/11
Automatic as part of the story when you arrive at the radio station and talk to Maine.
[ ] Supply Chest 10/30
On the path to the right of the police car after the bridge.
[ ] TV Program
You see this automatically after the CS in Rose's trailer.
The Hidden Page and Thermos
As you approach the front of the radio station look at the base of the lit signs for your next collectible (Coffee Thermos 36/100) and grab it, then go inside the station. When you enter Maine announces it over the air (Radio Program 7/11), and the cops show up.
The FBI Agent arrives with the cops, and unlike all FBI Agents in real life, he is a loose cannon and starts shooting. I don't really get this part of the game... The FBI is one of the most professional law enforcement agencies in the world, they have the best trained agents in the world, and they simply would never behave like this... So something is really off here. I mean if it were the ATF I would understand, but the FBI?
Drop down and run to the path, where you will find your next collectible (Manuscript Page 37/106) hanging on the fence, so grab that and then head down the path. If you are having the same luck as I am you are down to some flares and one flashbang, but you do not have to worry since if you do this right, you will not have to use any of those!
At the mid-point of the path is a generator that you can start to create a Haven Light -- but there are also Taken there, so you are not getting that gennie going before they attack you. Fortunately for you there is a revolver and ammo near the generator, so run to that and grab it, then use your light and the revolver to kill the Taken, and then you can safely start the generator and have yourself a checkpoint! Yay you!
Now for the tricky part -- your next collectible is nearby, but it is not on the path you would normally follow, and can be considered one of the hidden collectibles I suppose. What you want to do is take the path to the right of the light (as you face it) and follow that to the wall, and then follow the wall to the left where you will find a path leading up the mountain to the broadcast tower -- and the collectible (Manuscript Page 38/106). Next to the collectible are two flares you will want to grab too.
On your way back down as you reach the first switchback you will be attacked by some crows -- just use your light to kill them -- and after that, instead of turning to the left on the switchback, head out on to the spur ahead, where you will find your next collectible (Coffee Thermos 37/100) right on the edge of the cliff. Check out that view! You have a bird's eye of the station and the surrounding area!
You will be attacked a few more times on the way down by small groups of birds, but if you use the nearby trees to dodge around you can easily take them out with your torch without taking damage.
As you progress down the path you will encounter a pickup truck that belongs to the local power company. Near the back is a portable light that you can turn on, a flare, and a loaded revolver, so grab those, and then carefully look around you. Nearby are some buildings -- go to the larger shed and you will find a shotgun and ammo, which you should quickly take as you are about to be swarmed!
Use your torch to drive the shadows away from two or three of the Taken, and then use the shotgun to kill several with one shot to unlock the Achievement "Two For the Price of One" and an easy 10 GP! Now take out the rest however you like, and then head over to the smaller shed where you will find the next collectible (Can Pyramid 5/12). After you shoot that it will unlock the Achievement "Carny" for another 10 GP, and then you can grab some batteries and revolver ammo on and near the table!
Now return to the first shack as if you were getting the shotgun again, but this time turn and exit by the door on your right, and head straight until you find the next collectible (Manuscript Page 39/106). Now turn around and follow the path towards the shotgun shed, but when you clear the trees take the right path to the small shed here, and go inside to snag the next collectible (Coffee Thermos 38/100).
Leave the shed and continue along the trail to the right and you will find another page on a rock to the right of the path (Manuscript Page 40/106). Continue along and you will see a Haven Light with a supply box -- empty the box and then continue -- after you get a phone call from Alice begging for help, you will continue along and find, on a tree, the next collectible (Manuscript Page 41/106) which you should grab.
Facing the stump, turn around and cross the trail and head for the nearby shed, where you will find a supply chest (Supply Chest 11/30) which you should empty. You will get batteries and 3 flares from the chest, and you will find shotgun ammo and revolver ammo on two shelves as well.
Return to the path and head towards the railroad bridge.
[ ] Can Pyramid 5/12
On the table in the smaller shed after the electric company truck.
[ ] Coffee Thermos 36/100
At the base of the lit signs outside of the radio station.
[ ] Coffee Thermos 37/100
On the edge of the cliff on the way down from the radio tower after the crows attack.
[ ] Coffee Thermos 38/100
In the second small shed after getting the page off of the fence.
[ ] Manuscript Page 37/106
On the fence just after leaving the radio station.
[ ] Manuscript Page 38/106
Along the wall to the right of the Haven Light.
[ ] Manuscript Page 39/106
On the fence after the shotgun shed.
[ ] Manuscript Page 40/106
On the right side of the trail after the thermos.
[ ] Manuscript Page 41/106
On the right side of the trail on a tree.
[ ] Supply Chest 11/30
Off of the path after finding the page on the stump.
Bulldozer Battle
As you follow the path towards the railroad bridge you will hear the trains passing overhead -- a lot of trains really which is odd. At the bridge you go under and use the metal ladder to reach the under-deck, and then thread your way along changing from side to side as the darkness starts to tear down the pipes and catwalk sections. When you get closer to the other end the darkness will start hurling objects that it has taken over at you -- your best defense here is to pop a flare and drop it at your feet a little ahead of you as that will help hold them off while you kill them with your torch!
There is an Achievement associated with killing 20 of the darkness-infected items (They're Heeeeeere! for 20 GP), but you cannot get that on a single run-through. You can restart the previous checkpoint and rinse and repeat as needed if you want to get this out of the way here... That may be a good idea considering that you have a concentration of infected items here, but that is your call.
Once you have defeated the objects you exit the deck on the left and head up the hill here to a fence, where you will be attacked by objects again. If you follow the fence all the way to the left you will find your next collectible (Manuscript Page 42/106) sitting on a metal beam on the ground. Grab that and then after you read it climb the ladder here and run forward to the Haven Light, where you will find a new flashlight! The one on the concrete footing is a Heavy Duty Flashlight -- hold B down to swap your regular one for it now!
Head to the right and you will see where you can drop down to the next level -- as you drop down look to the right in the distance and you will see the next collectible item (Coffee Thermos 39/100). Kill the objects here and then grab the Thermos before you head towards the train station.
Over by the station is a red supply case with some ammo and batteries, so be sure to empty that, and then look to the left and you will see the gate controls -- when you use those you will be attacked. Try not to die here because you may have not hit a checkpoint yet, and dying will put you back before the train bridge! There is a minor bug here and even though there are two checkpoints you should hit -- one at the foot to the ladder and one at the Haven Light -- you may not have hit them...
Once you clear out the Taken in the yard, head into the train station and kill the two Taken on the first floor, then head upstairs and grab the supplies -- batteries, ammo, and flares -- and then click the TV to watch the show (TV Program 7/14). After the program ends head out the door and look to the left, where you will see the next collectible (Manuscript Page 43/106).
After you head down the stairs you will hit a checkpoint and then some Taken and a possessed bulldozer will attack -- use your light to kill the bulldozer, and take out the Taken in the usual way! When you kill the bulldozer you will unlock the Achievement "Heavy Metal" for 10 GP.
There are two red supply boxes in the yard here, go ahead and empty those, and then open the gate with the controls. As you step through it look to the right and you will see the next collectible (Coffee Thermos 40/100) in a narrow space on the right side building. Once you have that, head along the path to the pickup truck and get in.
[ ] Coffee Thermos 39/100
On a palate in the stock yard after you get the heavy duty flashlight.
[ ] Coffee Thermos 40/100
In an alcove past the gate once you have defeated the possessed bulldozer.
[ ] Manuscript Page 42/106
On a piece of iron to the left side of the fence after the railroad bridge.
[ ] Manuscript Page 43/106
Outside of the second floor of the train station, after watching the TV Program.
[ ] Nightmare Mode Manuscript Page
Head right instead of left at the fence and you will find this one on a stump.
[ ] TV Program 7/14
Upstairs in the train station.
The Hidden Red Chair
You get a CS in which you are driving the truck towards the mine, and when it ends you are standing beside the road near the truck, so you need to get back in and start driving. You will pass a jeep on the left and reach a roadblock where the bridge is out, and have to detour to the right and around a stack of logs. As you round the corner and can just see the broken bridge, stop the truck and get out. To the right of the truck are some woods, and if you run through them to the cliff edge on the other side of the woods you will find a red chair with the next collectible on it (Coffee Thermos 41/100).
Once you have the Thermos head back to the truck and drive forward under the bridge until you come to a set of wooden stairs on the right, and stop. Get out and climb up the stairs, and you will see on your left a building -- where you will find a radio (Radio Program 8/11).
Head back to your truck and drive until you reach the Ranger Tower -- park and go in -- where you will find another radio (Radio Program 9/11). After the program ends jump back in the truck and head down the road until you reach a red building, where you should stop.
Go up the stairs and grab the next collectible (Manuscript Page 44/106), then get back in the truck and drive until you come to the Mine Museum, where you stop once again and get out. Head to the left and read the sign on the side of the display shed (Sign 7/25) then turn to the left and enter the mine entrance where you will find the next collectible (Coffee Thermos 42/100). Now head towards the entrance to the museum and snag the next collectible (Manuscript Page 45/106) on the boardwalk before going in.
When you enter you get a CS, after which you should head down to the bottom of the chute to the supply room to get the next collectible (Coffee Thermos 43/100). When you jumped down there was a cave-in, and you are not going back up. Grab the batteries and flare and then use the control to open the trap door, and jump down it. Ahead of you on the ground is the next collectible (Manuscript Page 46/106) so grab that now.
As you follow the tracks you will fight a group of Taken and a possessed mine cart -- there is a revolver and ammo dump, grab it and fill up! Move along fighting as needed until you reach the car with the ladder -- climb up and open the hatch, then kill the possessed items and drop down to continue the route.
As you exit you drop down and see a new monster -- a Tornado -- and you find your way blocked by electrical drops! You have to fight your way through the building and look for a way to turn the electricity off. There is a jeep here that you can drive -- get in and do that, and use it to take out the Taken who block the path between you and the far building where the electrical box is!
Once you have taken out all of the Taken, jump out and cut the power, then drive back to the other building. On your way back you will face more Taken and possessed things and will likely as not wreck the jeep taking them out. That is okay, you are done with it now anyway!
Once you are back and it is safe, run up the stairs and into the building, where you will encounter more Taken, and kill them. Grab the supplies in the small room then continue up the stairs and into the next level where you will fight more Taken. Climb the ladder here to the top level and you will find a well-lit red chair with the next collectible on it (Coffee Thermos 44/100).
On your way out of the room you will see a yellow spray-painted sign giving directions, and below it is the next collectible (Manuscript Page 47/106) which you should grab. Head out and down the stairs and then enter the building across the way to grab batteries and ammo and use the gate controls to open the gate. Now head out and through the open gate towards the forest.
There are some grenades near the power truck outside the gate, so grab those, and then follow the path towards the woods and you will find black pools to kill, after which there will be several waves of Taken to dispatch. Once you have taken care of those, continue on. You may want to strategically pause after each engagement to allow your torch to recharge, otherwise you will be burning through a lot of batteries!
As you hit the curve with the fog you will spot ahead of you on the left the next collectible (Manuscript Page 48/106) so grab that. Ahead on the left is a mine entrance -- go inside all the way to the back and on the left is the next hidden chest (Storage Chest 12/30) with 3 grenades in it. Once you have those exit the mine and stick to the left to find the next collectible (Coffee Thermos 45/100). This is actually sort of tough to get to because you have to make two careful jumps -- so try not to die, because if you do you have to repeat the last few steps!
Head back down the stairs and towards the Haven Light where you will find a box and trailer with supplies -- grab it all -- then head over the bridge and swap your double-barrel shotgun for the pump-action on by the light. Ahead you will see that the path splits. You want to follow the left-hand split, and follow that to the dilapidated building. Inside you will find flare gun ammo and your next collectible (Coffee Thermos 46/100).
The easiest way to do this is head back to the path and follow the spot lights, turning them on as you go, until you arrive at the last one, where you spotlight 5 or 6 Taken and take them all out with a single flashbang. Work your way through the graveyard to the entrance to the ghost town -- at the bridge you will find your next collectible (Manuscript Page 49/106) so grab that and then enter the town.
[ ] Coffee Thermos 41/100
On a red chair at the edge of the cliff on the right side from before the broken bridge.
[ ] Coffee Thermos 42/100
Inside the mine entrance.
[ ] Coffee Thermos 43/100
Inside the chute in the Mining Museum.
[ ] Coffee Thermos 44/100
On the top level of the electrified building.
[ ] Coffee Thermos 45/100
Off the end of the broken pier.
[ ] Coffee Thermos 46/100
Inside the dilapidated building.
[ ] Manuscript Page 44/106
At the top of the stairs at the red building.
[ ] Manuscript Page 45/106
In the Mining Museum.
[ ] Manuscript Page 46/106
On the ground outside of the museum.
[ ] Manuscript Page 47/106
On the top level of the electrified building near the exit.
[ ] Manuscript Page 48/106
On a rock on the left side of the path towards the woods.
[ ] Manuscript Page 49/106
On the bridge at the ghost town.
[ ] Nightmare Manuscript Page 97/106
Near a dirt pile to the left of the entrance to the ghost town.
[ ] Nightmare Manuscript Page 98/106
In the shack after the first bridge in the ghost town.
[ ] Radio Program 8/11
In the building up the stairs from the broken bridge.
[ ] Radio Program 9/11
In the Ranger Tower.
[ ] Sign 7/25
On the side of the display shed at the mine museum.
[ ] Storage Chest 12/30
Inside the mine off of the left side of the path.
The Lift Out and a Hidden Page
As you cross the bridge and enter the Ghost Town you will see a sign that you can read on the right -- do that (Sign 8/25) and you will learn about Gray Peak Gorge! After you read the sign step past it and head right along the side of this building, turning left when you move past the shed on the left, and then straight towards the shack with the broken open side ahead. Inside you will find your next collectible (Coffee Thermos 47/100).
As you head down the tracks you will be attacked by possessed items -- just use the standard tactic of popping a flare to hold them off and sniping them with your heavy-duty torch. Eventually you will reach some boxcars that are blocking the path and, when you go around them and drop down, you will be attacked by pieces of an old steam engine. Once you defeat all of the pieces you will unlock the Achievement "Iron Horse" for a very nice 10 GP - good on ya mate!
Now take a look around you -- see that building nearby? You try to get in but it turns out that you need a key... Hmmm... Well, it has to be here somewhere, right? Look around and you will see a shed nearby with a light on and, hey! The key! Excellent! Now head outside and grab the next collectible that is behind this shed (Coffee Thermos 48/100)
Now that we are inside, let's grab the flare gun ammo, the batteries, and watch the TV that pops on all by itself (TV Program 8/14). Inside the next room there is a bed with a Hunting Rifle leaning against it. You probably have the pump shotgun right now, and in order to take the rifle you will need to swap that for it... If you already have the Achievement for 50 kills with the shotgun but you do not have it for the rifle, swapping it out here makes sense. On the other hand, if you already have the rifle kills Achievement than I would keep the shotgun.
The door in this room is your exit to continue, so go ahead and hit that now!
As you exit the building you get another cameo appearance for the Tornado -- that uber boss we know we will eventually have to fight -- and then we see that there is a ladder to the left. Take that, and it leads to another ladder, which we also take, and then head up the hill, where we spot an arrow marker. Just as we see the arrow the kidnapper sends us a text message -- man that dude of darkness is really hooked in to the culture of the Internet Age!
Follow the arrow markers around to the right and then left and we locate the next chest (Supply Chest 13/30) that contains a flare gun and some ammo for it. Very nice. Now turn around and head along the trail, and you will hit a checkpoint as you head up the mountain. Remember that you now have the flare gun armed unless you switched back to the pistol or rifle -- you do not want to waste the ammo for it, so switch or be aware that it is armed, right?
As you progress along the path you spot two large flocks of death birds -- you have a choice here, try to take them out, or run. Do not underestimate the power of your hand torch, even when it is not in boosted mode it can kill these things. The challenge is really in the numbers, as there are a lot of them. I say take your time, move over the fragile wooden walkway, tuck your back against the cliff face like any good barroom brawler would do, and take the little buggers out!
Continue along the path once you have eliminated the first two flocks and another pair will attack once you hit the next wooden walkway -- jump across tuck into the cliff face and take them out with your torch. How simple was that?!
This particular path ends at the entrance to a mine, and when we drop down the level we land on collapses down to the next level down, so we will not be climbing back out of here, will we? No, continuing forward is our only option at this point! As you move forward the path is sort of set, there are no deviations until you reach a large open space in which you can go either left or right. On the rocks to the left you will see a painted warning.
Head to the left, keeping the rock wall on your left and you will experience some story elements -- you fall to your knees, you hear Alice screaming, that sort of thing -- but eventually as you follow that path around you will snag your next collectible (Manuscript Page 50/106) which is lying on a rock. Just be sure you do not go into the water, right mate?
Now backtrack all the way to where we entered this branch past the warning note sprayed on the rock and take the right branch, where you will drop down another level after walking over the wooden platform and, ahead of you on the left, is the next collectible (Manuscript Page 51/106), so go ahead and grab that.
There will be a cave-in and some Taken will break through the branch on the left that is sealed-off -- kill them and then head into the tunnel that they opened for you and just inside on the left you will encounter your next collectible (Coffee Thermos 49/100) which you should grab!
We are now going to work our way up and out using the lifts and machinery in the mine, so continue along and you will easily see the path that you need to follow from here! After you use the suspended platform three times to reach the exit you hit a Haven Light with a checkpoint, and then you exit the mines -- well done!
After you kick open the boards blocking the exit turn to your right and follow the stairs up and then climb into the tower for your next collectible (Manuscript Page 52/106). After you pick up the page trigger the Focus Prompt to see our next destination -- man that is a long ways away!
[ ] Coffee Thermos 47/100
Inside the broken shack past the sign.
[ ] Coffee Thermos 48/100
Behind the shed with the key in the train yard.
[ ] Coffee Thermos 49/100
On the left after entering the mine tunnel that the Taken open for you.
[ ] Manuscript Page 50/106
Near the end of the left branch of the mine as you follow the left wall.
[ ] Manuscript Page 51/106
On the left side of the path in the mine after dropping down from the wooden platform to the next level down.
[ ] Manuscript Page 52/106
On the tower at the top of the stairs after exiting the mine.
[ ] Sign 8/25
Just over the bridge into the Ghost Town on the right.
[ ] Supply Chest 13/30
Along the cliff face past the building after climbing the two ladders and going up the hill.
[ ] TV Program 8/14
Inside the locked building after fighting the Locomotive bits.
Dilapidated Mansion
Climb down and then use the stairs to go to the bottom of the area where you will be attacked by death birds and find the generator that powers both a Haven Light and the cable car that we need to use to cross this ravine. After you fend off the birds, start the generator and then grab the nearby supplies before you climb onto the cable car and use its controls. About half-way across things to a little sideways thanks to the birds, but we manage to hold them off until the car is almost to the end, where it collapses.
We are attacked by some Taken, and then make our way up to where the car should have arrived, to discover our next collectible item, a Can Pyramid (Can Pyramid 6/12)! Shoot that and then head along the path to the next Haven Light, where we find our next collectible Sign (Sign 9/25) that tells us all about Cauldron Lake, useful information to have!
Make sure that you empty the red supply chest at the light prior to continuing on from this point.
Head over the nearby suspension bridge for a fight with the Taken who are protecting the peak, and then once you reach the other side make your way up and to the left to snag the next collectible (Coffee Thermos 50/100). Follow the cliff face along the trail to the second large rock, behind which is the next supply chest (Supply Chest 14/30).
Back on the path turn left at the broken bridge and go down the path there to the next collectible (Manuscript Page 53/106) that is sitting on the rocks. Follow the path around to the side of the cliff and then turn around and head up, knocking down first one wooden section and then kicking down another to gain access.
At the top is an old dilapidated stone building to which you gain entrance via its cellar, kicking in the door. Inside their are painted messages on the wall -- mostly to someone named Tom? Oh! Thomas Zane the writer! Right, back on the plot here!
There are supplies scattered around the second floor, and when you make your way up to the third floor it collapses dropping you back down, and you are attacked by Taken. After you defeat them head back upstairs and jump the gap at the end, exiting the house via the collapsed balcony in the rear. When you reach the ground turn to face the house and then head around the right corner to the gate, where you will find the next to last collectible for this chapter (Coffee Thermos 51/100).
Follow the path down the slope to the wooden stairs, when you will begin narrating your concerns. On the stairs is the last collectible for this chapter (Manuscript Page 54/106), and then continue down the path. You hear the kidnapper confessing to someone, and you run only to trigger a CS in which the darkness takes the kidnapper before you can question him! You fall into the water and someone -- you do not know who -- saves you!
[ ] Can Pyramid 6/12
On the rail at the base of the cable car station.
[ ] Coffee Thermos 50/100
To the left and up after crossing the suspension bridge.
[ ] Coffee Thermos 51/100
Around the corner of the dilapidated house near the gate after the floor collapse and you get outside.
[ ] Manuscript Page 53/106
On a rock along the path to the left of the broken bridge.
[ ] Manuscript Page 54/106
On the stairs down the path after you leave the dilapidated house.
[ ] Sign 9/25
At the Haven Light after the cable car station.
[ ] Supply Chest 14/30
Behind the second large rock along the cliff face to the left of the trail after the bridge.
NOTE: A ticklist for the collectible items is included at the end of each chapter -- you will want to review this before you begin the chapters to familiarize yourself with these.
Escaping from the Lodge
As the chapter begins you get a weird CS in which Alice and Dr. Hartman morph into and out of each other, and you learn you have been drugged. You wake up in a room -- your room -- in the lodge, with a typewriter like the one from the cabin earlier. Hartman shows up to chat with you and then asks you to follow him. Hartman leads you on a tour of the facility and tells you about what he dies -- quite an ego on this guy! As you follow him outside you will notice a sundial -- go to it and read the sign on it (Sign 10/25).
After you look out over the lake a storm rolls in and Hartman takes you back inside the Lodge. The tour continues inside, as does his ego ride, and then you are more or less on your own. Head around the fireplace to the desk for the next collectible (Coffee Thermos 52/100), and once you have it turn around and face the door -- the book cover poster is the next sign you need to read (Sign 11/25) so move to the door and read it now.
Resume following Hartman into the hall and you will see the next sign (Sign 12/25) on the right side of the hallway. Read that for the official PR welcome to the Lodge, and then you will get a CS in which you are handed the next collectible automatically (Manuscript Page 55/106).
On your way back to your room a TV on the right up the stairs will turn on by itself -- stop and watch the program (TV Program 9/14) -- then turn around to the right and grab the next collectible (Coffee Thermos 53/100) on the railing near the window. Once you have that, head back to your room for a CS, and then leave your room and head back downstairs. You will pick up your next collectible (Manuscript Page 56/106) on the way.
When you get downstairs and reach the argument take the keys off of the unconscious nurse and go to Hartman's office -- in the office head to the right and pick up the next collectible (Manuscript Page 57/106) on the small table, and then head over to Hartman's desk where you will find a tape recorder. Play the recorder a total of three times in order to unlock the Achievement "Medical Opinions" for 10 GP.
After you finish listening to the tapes head out of the office and examine the photo on the wall outside -- it shows Hartman with the kidnapper! As yo move down the hall you hear Barry yelling - he is locked in in the next room, so let him out already! After your reunion with Barry go into the room and grab the next collectible (Coffee Thermos 54/100) on the window sill.
Open the locked door and go into Hartman's private office. You pick up your pages and the revolver and then confront Hartman! You receive the next collectible (Manuscript Page 58/106) automatically as part of this CS, and then you have to bail in a hurry!
Head upstairs and fire up the generator to get rid of most of the possessed threat, and then
On your way out you will be confronted by a pair of bear statues -- use a flare to make them go away, and you will see a TV near you that you should quickly turn on and watch to unlock the Achievement "Boob Tube" for 5 GP.
Yeah, a Verizon Wireless commercial -- I wonder how much they paid for that?
After the TV turns off turn around and look at the end table on the left for the next collectible (Manuscript Page 59/106). Ahead the hall is blocked by a locked door but a possessed chandelier will break down the door for you -- then use it by luring it to the next set of doors and dodging out of its way to break out of the Lodge!
Once you are outside, turn to the right and grab the next collectible (Coffee Thermos 55/100) off of the short wall of the planter here then go down the stairs and read the sign by the statue (Sign 13/25) before you see Barry to get his hand torch and use it to destroy the possessed gate then head through to the Haven Light where you also checkpoint.
You need to head through the hedge maze now -- but first grab the supplies on the table! Now into the maze, take a right and then another right and finally a left to arrive at a tree with the next collectible (Manuscript Page 60/106). Now follow the path past the tree, going left, left, then right and right to reach the courtyard with the bench. From there take three lefts and you will find the next collectible (Manuscript Page 61/106) on a bench.
You exit the hedge maze at a Haven Light -- and ahead of you are some Taken. Kill them then head to the gazebo ahead and grab the next collectible (Coffee Thermos 56/100) from the floor of the gazebo . There is also a flare gun, and in the red chest some batteries and ammo.
Follow the path to the next Haven Light and checkpoint, and once you heal, head into the shed here and grab the shotgun and ammo, then the next collectible (Manuscript Page 62/105). Fight your way along to the gates that you have to use your torch on, and then just past those you will pick up your next collectibles (Manuscript Page 63/106) on the ground and Can Pyramid (Can Pyramid 7/12) on the wall. Once you have those two, head to the next Haven Light and grab the supplies there.
Follow the path here along the wall then right and you will see the yellow arrow that indicates a supply chest is nearby! Follow the arrows to the chest (Supply Chest 15/30) and grab the flare gun and ammo from it, then backtrack to the path and head up the stairs, where you will find the next collectible (Coffee Thermos 57/100) along with more supplies on a table ahead.
You will see Barry at the end of the long path ahead -- either go ahead and talk to him to trigger the big fight with the Taken, and then head to the opposite end of the path for the next collectible (Manuscript Page 64/106) or get it and then trigger the fight -- either way that is the last collectible for this chapter, so good on ya mate!
[ ] Can Pyramid 7/12
On the wall by the manuscript page.
[ ] Coffee Thermos 52/100
On the front desk in the Lodge after the tour by Hartman.
[ ] Coffee Thermos 53/100
On the railing near the window after watching the TV.
[ ] Coffee Thermos 54/100
On the window sill in the room that Barry is locked in.
[ ] Coffee Thermos 55/100
Near the door on the half-wall of the planter after you escape from the Lodge.
[ ] Coffee Thermos 56/100
On the floor of the gazebo after you exit the hedge maze.
[ ] Coffee Thermos 57/100
On a table with some supplies just past the next Haven Light that is at the top of the stairs.
[ ] Manuscript Page 55/106
You are handed this in the CS after the tour ends.
[ ] Manuscript Page 56/106
On the stairs on your way down after the CS in your room at the Lodge.
[ ] Manuscript Page 57/106
On the small table to the right of the door in Hartman's office.
[ ] Manuscript Page 58/106
You receive this automatically in the CS.
[ ] Manuscript Page 59/106
On the end table after you watch the TV.
[ ] Manuscript Page 60/106
At the tree in the hedge maze.
[ ] Manuscript Page 61/106
On a bench in the hedge maze.
[ ] Manuscript Page 62/106
In the shed near the Haven Light after the gazebo.
[ ] Manuscript Page 63/106
On the ground a little ways past the gates you destroy with your light, just by the stairs.
[ ] Manuscript Page 64/106
At the opposite end of the path out of the chapter from Barry.
[ ] Sign 10/25
On the sundial in the yard of the Lodge.
[ ] Sign 11/25
The book cover sign beside the main door to the lodge.
[ ] Sign 12/25
On the right hand wall in the hallway after leaving the main room.
[ ] Sign 13/25
By the statue after exiting the Lodge.
[ ] Supply Chest 15/30
After the Haven Light as you follow the arrows along the path.
[ ] TV Program 9/14
On the stairs in the Lodge on the way back to your room.
Challenge of the Gods
The chapter begins with a hectic ride down the highway -- and somehow Barry managed to not only save that cardboard cut-out but bring it with him?! You tell Barry that you are headed for the Anderson Farm -- Barry is not happy about that -- but he is along for the ride, and he is your friend, no doubt about it. You explain what you think is happening, and like a true friend even though he does not really believe you, Barry sticks with you.
Just as everything is going smoothly a rock slide takes out the truck you are in, and once again you two are separated. Not only that, you once again managed to lose ALL of your kit! Here is an idea Alan - they are called POCKETS! You put stuff in them, and then you do not LOSE the stuff every time you fall down a hill or out of a crashing vehicle! I am just saying...
Right, so we are now on our own again -- as it should be -- and ready to resume our epic journey down the path of darkness and light! Follow the path all the way to the portable light at the entrance to the mine. As you cross the space between there and the tracks a bunch of possessed stuff comes to life -- try to avoid all that, hey? Now, at the light stop, turn around and run to the end of the wooden pier to the left to grab your first collectible for this chapter (Coffee Thermos 58/100).
Run all the way into the mine to where it is sealed-off and you will find your next collectible pinned to the barricade there (Manuscript Page 65/106), so go ahead and take that. Exit the mine and, while avoiding a lot more possessed stuff, follow the path to the left as you exit, going around to the right and up the slope to the upper mine area, where you will find a light overhead that you can move using a wheel. Move the light so that it is directly over the gates to the right and then go up the stairs behind the light. You will see the next collectible (Manuscript Page 66/106) on the ground near the generator that you have to start ahead in order to continue.
With the gates now destroyed, backtrack to them and pass through and you will find a hand torch in the shed ahead -- well, not perfect, but it is a start! Ahead is a generator that you need to start, but if you try to just run to it and start it the Taken will kill you. Basically you need to grab the torch, lure them to this end of the path, and then run like hell to the gennie and get it started before they catch up!
Now head to the next Haven Light and then once you are rested continue on the path to the campsite with the next collectible (Coffee Thermos 59/100). There is also a heavy-duty hand torch there, so go ahead and swap the one that you have for it before you continue along the path!
Use the light to destroy the gate ahead and then continue on the path to the bright glowing light and brief CS in which you have the next collectible delivered to you (Manuscript Page 67/106). Ahead those glowing dots are not pages, they are bear traps, so be wicked careful here and avoid them as you navigate the path, right?
Grab the three flares on the ground and then head towards the light ahead, and you will find the next collectible (Manuscript Page 68/106) on the ground just before the generator that powers the Haven Light. There is a shotgun here - take it - and then go into the dilapidated building here and grab the next collectible (Coffee Thermos 60/100) before you continue along the path. Note - to get the coffee thermos here you are going to have to kill the Taken that is upstairs, which will leave you with one shotgun shell. There are three more taken on the path on the way tot he next Haven Light -- obviously you cannot kill them! You are just going to have to run and dodge your way to the next lite mate, there is no other way!
Fortunately the next light is at the cabin, so head to the door and you will hear someone screaming and pleading and then some gun shots. Immediately go to the left into the dining room and get the shotgun shells from the table, then load your shotgun! Now in the kitchen is our next collectible so grab that (Coffee Thermos 61/100) and then explore the cabin.
Upstairs is the guy you saw in the jail the other day -- pick up the revolver and ammo, then listen to him as he tells his story. Now search the room and you will find the TV (TV Program 10/14) which you should watch, and then head downstairs and kill Danny before climbing out the broken window.
Go up onto the porch in the back of the cabin from here and pick up your next collectible (Manuscript Page 69/106). Before you get in the truck to leave, head down the bulkhead and into the cellar of the cabin to find the storage chest (Storage Chest 16/30) and grab the flare and flashbang from it. Okay, it is time to jump in the truck now!
Drive until you reach the tractor on the ight side of the road and stop. Get out and pick up your next collectible\ (Coffee Thermos 62/100) and then jump in and keep driving until you reach the fork in the road and stop. Get out and head to the right, then grab the next collectible (Coffee Thermos 63/100) next to yet another tractor!
Get back in the truck and continue straight on the road to the cabin ahead, stop and get out. Inside is a chest (Supply Chest 17/30) that has some grenades you will want to grab, as well as batteries and some ammo. Jump back into the truck and head down the road until you reach the ranger tower on the right -- stop and climb up there. There is a rifle and some rifle ammo if you want it, and a radio (Radio Program 10/11) that you should listen to. I wonder who the lost woman is??
You drive for a while but eventually you are forced to abandon your vehicle! As you run along the road you will need to kill a log grabber, and then you will reach a Haven Light beside a windmill. Make your way past the windmill to the barn ahead, and inside the barn you will find another chest (Supply Chest 18/30) that you should empty. As you follow the main path you will see some bleachers to the left with the next collectible on them (Coffee Thermos 64/100) which you should quickly grab because the CS will kick in right away.
After the CS ends you will find yourself on a stage with rock music playing and Barry operating the lights. The idea here is to not get hurt so that your vision turns to gray, and defeat the Taken who attack you. This challenge is in three parts, and as long as you step into the spotlight that Barry turn on you will checkpoint, which is good, because then if you go gray you can simply reload the checkpoint to try that part of the challenge again!
There are plenty of supplies here and you should grab them, but be aware of where the Taken are so that you do not end up getting hurt while collecting the supplies, right?
Once you get through this challenge you will unlock the Achievement "Child of the Elder God" for 10 GP -- though that challenge felt like it should have been worth 20 GP if you ask me! Now grab the next collectible from the DJ stand where Barry was (Coffee Thermos 65/100). Grab the supplies that are left, and then head down the stairs and around the side of the stage to grab the next collectible (Manuscript Page 70/106) from the junction box there.
Follow Barry to the barn -- it is blocked by a large tank that you need to move -- so head to the side of the barn and climb the ladder, then work you way to the front catwalk where Barry does a fine take-off on you using the cardboard cut-out. On the barn wall there is a switch - throw that and the tank is raised out of the way! Now drop down to the ground and go along the side of the barn and to the far right into the field, where you will find the next collectibles (Manuscript Page 71/106) by the tractor, sitting on a wooden wagon.
Head back to the barn and go in and turn on the TV (TV Program 11/14) inside, then head to the far right rear corner to grab the next collectible (Coffee Thermos 66/100)! After you collect all the supplies head upstairs and snag the next collectible (Manuscript Page 72/106), then make your way towards the button you need to push and nearby you will see a sign to read (Sign 14/25).
Now throw the switch and have yourself a nice fight, and then exit the barn and look for the dangling wires, as nearby them is your next collectible (Can Pyramid 8/12) sitting on the empty cable spool -- you have to round to corner to actually see and shoot it, and then you will be attacked by a large group of Taken! After you clear those out you should take out the possessed pickup truck from a distance so it cannot attack you.
Barry is up ahead at the Haven Light so join him and head inside the building there. On the third floor is your next collectible (Coffee Thermos 67/100) as well as the last Radio Program (Radio Program 11/11) and once you listen to that you will unlock the Achievement "KBF-FM" for a whopping 30 GP! After you play the radio grab the Heavy Lantern on the sacks nearby -- that should deliver some major light hurt!
Take the lift down from the top level and make sure that you clean out the red supplies cabinet on the wall before exit. As you walk outside that large red thresher combine inside comes to life and attacks you -- so make sure you watch your footing and kill that thing quick! Your best bet is to have a flare ready to drop and then scoot out of its way and hit it with the torch, the combination of which will kill it quickly!
After you kill the Taken head for the shed that they emerged from and use the ladder inside to climb up and drop down into the farmyard. Head across to the door, go inside and grab the silo keys, then head to the silo door and open it for Barry.
After you let Barry out of the building he will head for the Andersen's farmhouse. When you arrive at the farmhouse, first check the bathroom for the next collectible (Coffee Thermos 68/100) then get the next one in the kitchen (69/100) before you get the last collectible for the chapter (Manuscript Page 73/106) upstairs!
The fuse box is in the last room at the top of the stairs, so go ahead and fix that now! Head down to the living room and play the record on the table there for your clue to the Lady of the Light. You figure out the clue and decide that you should spend the rest of the night here before heading into town in the morning. Barry decides to get shitfaced, and despite your misgivings on the notion you join in!
[ ] Can Pyramid 8/12
Outside the barn after you exit look for the empty cable spool (a very large one near the corner of the building on your left).
[ ] Coffee Thermos 58/100
At the end of the pier to the left of the mine face.
[ ] Coffee Thermos 59/100
At the campsite just past the Haven Light.
[ ] Coffee Thermos 60/100
In the dilapidated building behind the Haven Light on the window sill.
[ ] Coffee Thermos 61/100
In the kitchen of the cabin.
[ ] Coffee Thermos 62/100
By the tractor on the side of the road.
[ ] Coffee Thermos 63/100
Past the split in the road on the right next to the tractor.
[ ] Coffee Thermos 64/100
On the bleachers at the farm.
[ ] Coffee Thermos 65/100
On the DJ stand on stage at the farm.
[ ] Manuscript Page 65/106
Pinned to the barricade at the back of the mine.
[ ] Coffee Thermos 66/100
Inside the barn on the right rear corner.
[ ] Coffee Thermos 67/100
On the third floor of the building you enter with Barry.
[ ] Coffee Thermos 68/100
In the bathroom in the Anderson Farmhouse (immediate right after entering).
[ ] Coffee Thermos 69/100
In the kitchen of the Anderson Farmhouse (Right rear corner).
[ ] Manuscript Page 66/106
On the ground by the generator on the upper path.
[ ] Manuscript Page 67/106
Given to you by the bright light on the path.
[ ] Manuscript Page 68/106
On the ground at the next Haven Light site, just before the generator.
[ ] Manuscript Page 69/106
On the back porch of the cabin.
[ ] Manuscript Page 70/106
Off the junction box on the side of the stage structure after the battle.
[ ] Manuscript Page 71/106
In the field to the far right of the barn on a wooden wagon behind the tractor.
[ ] Manuscript Page 72/106
On the second floor of the barn after raising the tank and going inside.
[ ] Manuscript Page 73/106
On the floor of the hall after heading upstairs in the Anderson Farmhouse.
[ ] Nightmare Mode Manuscript Page 99/106
In the outhouse next to the barn.
[ ] Radio Program 10/11
Inside the Ranger Tower.
[ ] Radio Program 11/11
In the building that you enter with Barry after the big fight!
[ ] Sign 14/25
On the second floor of the barn near the button.
[ ] Supply Chest 17/30
Inside the cabin after the split.
[ ] Supply Chest 18/30
In the barn just past the windmill.
[ ] TV Program 10/14
On the second floor of the cabin.
[ ] TV Program 11/14
Inside the barn after raising the tank.
The Creator Revealed
The chapter starts rather oddly -- you wake up and clearly you have a hangover -- but are you really awake? As you lay there you begin reliving the memory of that night at the cabin on the lake, and while more is revealed, what you get does not seem to be enough at first. I don't know about you but this revelation raised more questions for me than it provided answers!
Of course you are not really reliving these events, you are revisiting them in memory, and it appears that the Anderson's moonshine has had some restorative effect as you now remember more of the details of what happened than you did before -- which is good because we now know where the lost week went and why it disappeared! We also learn why we ended up in the accident that started our path through the darkness.
Okay, a lot of this is starting to make sense... Sort of...
The presence of that nasty old woman at the cabin makes more sense now, and clearly if she is not engineering our misery than she is contributing to a major slice of it, but the wispy disappearance of the cabin and its island only further confuses the story, especially when we show up as the being of light in that deep sea diving suit -- that is us right? Maybe a future us?
As everything starts to resolve we really wake up this time -- and we are not alone! That FBI Agent is standing over us with his gun in our face, and for a moment there I really thought he was going to pull the trigger! Instead he arrests us, and we end up laying on a bunk in the county jail totally wiped out. And just when you think it cannot get any worse, along comes that nasty old lady, who at this point must be at least part ghost or demon, right? Anyway, the plot thickens from here on it seems, and I don't know about you, but I cannot wait to see how this all resolves itself!
Note: There are no collectible items for this chapter!
NOTE: A ticklist for the collectible items is included at the end of each chapter -- you will want to review this before you begin the chapters to familiarize yourself with these.
An Homage to Barry
We resume in the jail cell with Barry, and lament that the Fed now has all of the pages from the manuscript. Speak of the devil, here comes the Fed! The Sheriff and the Fed start to argue and then you find an unlikely ally in the Sheriff! Who would have thought it?
The lights go out, the cell is open, it is time to explore the jail, right?
As you exit the cell there is a page on the floor (Manuscript Page 74/106) and nearby that another (Manuscript Page 75/106) so pick those up and read them, and then follow the Sheriff into the office, where you will find the next collectible (Coffee Thermos 70/100) near the window.
Follow the Sheriff around the corner to her office, which she unlocks, and then gives you back all of your kit! Excellent! We don't have to find this stuff all over again! Follow the Sheriff back through the cell corridor and outside, where there is a Haven Light. The gate is broken and someone has to go to the other controls -- and that someone is YOU!
Head to the rear of the lot and climb over the wooden fence here and through the hole in the chain link fence from before when we found Alice's driving license. On the wall is a leve you can pull to lower an access ladder that you climb to get to the roof. Once up there work your way around to the front of the building killing the dark pools you encounter. Climb up the ladder to the next area and take out more dark pools and three flocks of birds, and then use the lift to get to teh ground.
At the control box there are three (3) dead pools you need to destroy -- two on the door in plain sight, one on top. The one on top can damage you when you use the controls (it does not always but still) and so it needs killing.
Once the gate is open you will be attacked by Taken - defeat them and then head out into the next street, take out another group of Taken, and then go to the right to the covered picnic shelter where you will find the next collectible (Coffee Thermos 71/100). Now keep going down this road towards the black gate past the boat on a trailer and you can swing around on the boardwalk to the left where you will find supplies (Supply Chest 19/30) of a flare gun and and ammo for it. Now turn around and backtrack until you see the cannery (it says Fresh Seafood on it) and run out onto its pier through the gate door. You will spot the arrow markings then -- follow them around the back where you fight some more Taken, then climb the stairs to the chest and more supplies (Supply Chest 20/30) from which you will obtain some batteries and another flare gun. Excellent!
As you exit this area you will see the diner ahead of you -- go inside and play the jukebox there to unlock the Achievement "Drink 'Em Both Up" and then grab the supplies here. Your next collectible is on the floor by the cash register behind the counter (Coffee Thermos 72/100) so grab that and the supplies on the counter now.
Head to the back towards the bathroom for the next collectible (Manuscript Page 76/106). Once you have that it is time to resume our travel along the path! There will be another fight with Taken and then a button you can push to turn on a Haven Light and get a checkpoint. Do that and then follow the Sheriff as she heads towards our destination, and a car alarm will go off. Nearby here is a hotdog stand, and our next collectible (Can Pyramid 9/12). Shoot the cans off the top of the hotdog trailer then follow along.
At the end of the street by the barricade there is a Deerfest Banner strung over the road, and under it on the left is a port-a-potty with our next collectible (Coffee Thermos 73/100) on the ground as well as some supplies. Follow the Sheriff to the gate where you get ambushed by a lot of Taken -- after you defeat them head through the gate and then immediately look to your left -- under the party tent there is our next collectible (Coffee Thermos 74/100).
Basically search the town hall -- around the corner is our next collectible (Manuscript Page 77/106). Once you read that head upstairs ti watch some TV (TV Program 12/14) then empty the nearby chest (Supply Chest 21/30) of its flare gun and flare.
Now head back downstairs to get the keys! As you go through the main area and into the hall a Taken will burst out of the door ahead -- after you kill it enter the room it came from and grab the supplies -- there is a Hunting Rifle here if you want it -- then go into the room off of this one and grab your next collectible (Coffee Thermos 75/100).
In the office with the keys you will swap for the higher power torch and grab some supplies as well as the keys, then head back to the Sheriff. As you exit you get a CS with teh Sheriff and Barry -- poor Barry, this is just not his night. Before you follow the Sheriff head across he street to the park and read the Sign on the statue (Sign 15/25). Noe you can follow the Sheriff!
After a funny CS with the Doc, you head into the bookstore -- where we find our next collectibles, a thermos (Coffee Thermos 76/100) and a sign (Sign 16/25) on the right wall by the table. Head towards the back where the Sheriff is and there is another collectible (Manuscript Page 78/106) so grab that and read it then follow on!
As you exit the book store go to the left and into the building there to get the next supplies (Supply Chest 22/30) to add a flare gun and ammo to your kit. Now follow the Sheriff into the playground and turn left, gabbing your next collectible from the sandbox (Coffee Thermos 77/100). Further on you reach the church, but before you enter read th4e sign outside (Sign 17/25).
After you read the sign follow the street to the right and you will find a yellow rental van -- in the back is the next collectible (Manuscript Page 79/106). Once you read that head back to the church, where you will be ambushed again. Defeat the Taken and go inside -- the next collectible is on the lectern ahead of you (Manuscript Page 80/106).
You now have to go through the church basement to reach the parking lot behind it -- in the corner is our next collectible (Coffee Thermos 78/100) but before we can reach it we get ambushed! Kill those Taken! As you exit the church basement you get jumped by a brute, but save by Barry. Barry?! Sweet! I always liked that guy!
As you head up the stairs to the helicopter and approach the last set our next collectible is on a table ahead (Manuscript Page 81/106). After you grab the page off of the table and read it, continue along to the chopper pad, where you will find lots of supplies and, on the left on the barricade, a collectible (Coffee Thermos 79/100). That, by the way, is the final collectible for this chapter, so all that is left is for you to defend the pad until you can take off!
[ ] Coffee Thermos 70/100
In the office area of the jail by the window.
[ ] Coffee Thermos 71/100
On the counter in the picnic shelter to the right of the exit from the jail street.
[ ] Coffee Thermos 72/100
On the floor behind the counter in the diner.
[ ] Coffee Thermos 73/100
On the ground under the Deerfest Banner by the blue port-a-potty at the end of the street.
[ ] Coffee Thermos 74/100
Under a party tent after you get through the ambush at the gate, and the gate.
[ ] Coffee Thermos 75/100
In the storage room off of the office with the rifle.
[ ] Coffee Thermos 76/100
On the shelf in the front of the bookstore.
[ ] Coffee Thermos 77/100
On the sandbox in the playground.
[ ] Coffee Thermos 78/100
In the church basement.
[ ] Coffee Thermos 79/100
On the left of the helipad before the entrance.
[ ] Manuscript Page 74/106
Just outside of the cell door.
[ ] Manuscript Page 75/106
Near the exit door just outside of the cell door.
[ ] Manuscript Page 76/106
Near the bathroom in the diner.
[ ] Manuscript Page 77/106
On the stage near the podium around the corner from the fuse box.
[ ] Manuscript Page 78/106
On the counter in the back of the book store.
[ ] Manuscript Page 79/106
In the back of the rental van on the street with the church.
[ ] Manuscript Page 80/106
On the lectern in the church.
[ ] Manuscript Page 81/106
Off the stairs leading to the helipad.
[ ] Sign 15/25
On the statue in the park after leaving Town Hall.
[ ] Sign 16/25
In the bookstore on the right wall by the table [ ] it talks about your character from your books.
[ ] Sign 17/25
Outside of the church.
[ ] Supply Chest 19/30
On the boardwalk at the end of the street after turning right.
[ ] Supply Chest 20/30
On the Cannery pier towards the rear.
[ ] Supply Chest 21/30
On the second floor of the Town Hall in the left rear.
[ ] Supply Chest 22/30
In the building on the left after exiting the bookstore.
[ ] TV Program 12/14
On the second floor of the town hall.
Crossing the bridge
As the chapter starts you end up alone on the ground -- the Sheriff and Barry fly off in the chopper and then some birds attack you. Defend yourself as best you can against the birds, and once that threat is removed, follow the fence to the right and it will be on a Jersey Barrier there -- you score your first collectible of the chapter (Coffee Thermos 80/100)!
Now before we do anything else, head over to the shack by the gate and grab some kit -- because yes, once again we have lost our kit! Inside is a revolver, some batteries, and an unlimited revolver ammo dump. Man I miss that pump shotgun!
Using the revolver shoot the chains that are holding the door closed -- it may take a few shots -- after which you will be attacked by some Taken. Fight them off, and if you get in trouble there is a Haven Light inside that you can back into to heal! On shelves inside are more supplies so grab those, and then glory! A pump shotgun! Sweet!
Now head up the ramp and climb over the fence to the other side of the building and you will see a lit button to push -- it is a radio that you can play and I am not sure if it would count for the radio program collection since we have already completed that. It would be cool if it did though, because that would mane that there are more radios than you need...
As you move away from the radio you will get jumped by a large number of Taken -- back yourself into a corner so they cannot get at you from behind and fight them off! The tactic that worked best for me was to back myself into the corner by the radio where I first dropped down and then, using the torch, flares, and shotgun, take them out as they came at me. That worked best.
Our next collectible is ahead (Coffee Thermos 81/100) in the rear of this area, sitting in a pipe near the floor. After you leave the building there is a Haven Light and checkpoint ahead, and then as you follow the path you will need to drop down to the level below. When you do that, immediately turn to the left and you will find the next supply chest (Supply Chest 23/30). In this chest is a flare and a grenade -- I am not sure which I was happier to see but mostly both!
Use the button to open the gate and then immediately look left for a Taken. Hit him with your torch to drive him back into the live wires behind him to kill him. Now you will see a page on the ground there -- we cannot get that just yet -- so follow the main path around and go down the sitars and turn to the left where there is a box you can open to turn on a light. Grab the supplies here and then continue forward and to the left, kill some Taken, then work your way around and through the gate and we will obtain the page we saw earlier (Manuscript Page 82/106) .
Turn around and continue along the path here and you will find a red supply box with batteries, revolver and shotgun ammo, and flares in it. Empty it and then turn and follow the path some more, looping up past the transformers where you will be attacked by a pair of brutes. With them dead, head down the opposite stairs and turn right to grab the next collectible (Coffee Thermos 82/100).
Use the lift ahead to get on top of the trailer where you will find a red chair with the next collectible (Manuscript Page 83/106). Drop down and head to the Haven Light and checkpoint, then follow the path to the road, where you will encounter a dedication sign for the bridge -- read that (Sign 18/25). Now run across and to the right to the control room and grab the next collectible just outside (Coffee Thermos 83/100).
At the door to the control room you are attacked by a Taken -- kill it and then go inside. On the right you will find a flare gun and some pistol ammo. To the left batteries and flare gun ammo as well as the bridge controls. Use the controls to cause the bridge to rotate, then run outside and jump on! Some birds will attack, just pull out your trusty flare fun and kill them, then wait for this end of the bridge to reach the other side and jump off!
Head into the control room on this side for our next collectibles (Coffee Thermos 84/100) and a TV shoe (TV Program 13/14). There is another fully-loaded pump shotgun on the counter here as well as some shotgun shells and a flare, so be sure to grab those while you watch the TV show. When it is done -- and this is one you really should watch unless you are in a hurry -- exit the control room and continue along the path, and the Sheriff and Barry show up to provide you with some assistance from above with their spotlight.
You can now cover the path between the road and the power plant without having to burn through your batteries thanks to them, so take your time and kill the Taken as they are de-shadowed and you will arrive at the next Haven Light healthy, happy, and ready for the checkpoint!
As you reach the light you will note the yellow arrow on the rock -- there is a chest near the building so head there and open it (Supply Chest 24/30) and grab the flare gun ammo and grenades. If you have trouble finding this it is to the right of the Haven Light near the water -- if you went along the path under the pipes you went the wrong way!
Follow the path around the building and then drop down into the parking lot below. Near a shed on the left is our next collectible (Coffee Thermos 85/100), and once you have that head towards the main door to the building on the other side of the parking lot. There is a small yellow sign on the right side of the door -- read that (Sign 19/25).
As you step in front of the door a CS plays, and you meet the old woman! She has been expecting you, and invites you inside. There are supplies here, so do not be shy about stocking up! Inside her bedroom you will find the next collectible (Coffee Thermos 86/100). Weaver tells you about the switch and then sends you out into the night to push it!
Head out and to the right and follow the path, taking out the Taken as encountered, until you reach the next Haven Light. Here you have to figure out the path to the switch -- which is not all that complicated really. As you approach the controls there is a sign (Sign 20/25) for the Floodgate controls. Read that and then use the third switch (farthest on the right) to extend the walkway, then use the second switch (middle one) to extend the other two. Ignore the first switch completely!
With all three walkways extended run down to the first one then jump across to the other two and head right to the switch. Stop and pull out your pistol and look to the right of the switch for our next collectible (Can Pyramid 10/12). Shoot the cans, and then pull the switch! This unlocks the Achievement "Gatekeeper" for 10 GP.
Right, so you accomplished your goal, but there is a suck factor involved here, because now you have to get back to Weaver, and the walkways are going in and out, which means you basically have to time your jumps on them so that you do not die! You will die, no one is that lucky, but hey, it is a lessone learned, and eventually we will get past this mess!
Fight your way back to Weaver then fol,low her through the pipes, and then you get a CS, after which you will find the next collectible (Manuscript Page 84/106) ahead on a rock. Run ahead to the next Haven Light and checkpoint as you are attacked by birds, then keep following the path Ignore the fallen tree that will just lead you back to where you already were, so continue on the path until you drop down (and are again attacked) then head for the crash site.
When you reach the chopper it is deserted and there are no bodies, so head up the hill, grabbing the flare on the way, and you will see the Sheriff and Barry ahead, defending themselves against a major Taken attack. Run in and help defend them, and once you have the Taken defeated, head over the building here then go up just past it where you will find supplies (Supply Chest 25/30).
After you get the supplies continue along the path to the next Haven Light, where there are more supplies, and a checkpoint. That is always a good thing.
We now know where the elevator is that we need to use, so it is time to head up the hill towards it, and as we do we encounter a gang of the really fast Taken -- and kill them I hope! Either way we eventually reach the Haven Light, and then following the path we encounter a large concrete pipe with our next collectible in it (Coffee Thermos 87/100).
Call the lift and then defend against another attack until the lift arrives, at which point you should climb on and hit the button! When you get off of the lift above, look to the right for your next collectible (Coffee Thermos 88/100). Once you have it, the Sheriff will tell you to hold the button to open the door but, before you do, read the sign beside it (Sign 21/25). Now hold the button, and Barry and the Sheriff will get inside. Unfortunately you will not, because something goes wrong.
You tell them to continue, that you will work your way around, and then you are attacked by possessed wire spools. Kill them then hop over the fence and grab the next collectible (Manuscript Page 85/106) which is on the ground to the right after the fence. Follow the path here until you reach the Haven Light and a checkpoint, then continue on to the top, taking out the birds as you go.
Climb the ladder nearby and go to the searchlight, which you will use to slay the incoming Taken attack! Once you kill enough of them, the boss of the Taken, the Dark Tornado, finally puts in a meaningful appearance! RUN!
You will make your way along, down, and through the dam until you reach a building. Go in and run down the winding staircase and, at the bottom, grab the last collectible for this chapter (Coffee Thermos 89/100)!
Whatever that thing is it is really mad at you! Keep running until you reach the next lift with Weaver, Barry, and the Sheriff on it, and get in! You ride the lift down and enter the vault, where you find a special page left by the other author. You hear the story of the clicker! So how is it that this can be? Was Tom actually Alan's father? Hmm...
As this Episode ends and the new one begins you unlock the Achievement "The Lady of the Light" that is worth 20 GP.
[ ] Can Pyramid 10/12
To the right of the kill switch.
[ ] Coffee Thermos 80/100
Along the fence in the first area after the birds are killed.
[ ] Coffee Thermos 81/100
In a pipe in the back area of the second half of the power warehouse.
[ ] Coffee Thermos 82/100
Past the transformers on the right after fighting the pair of brutes.
[ ] Coffee Thermos 83/100
Just outside the bridge control room near the corner.
[ ] Coffee Thermos 84/100
In the bridge control room on the other side of the river.
[ ] Coffee Thermos 85/100
Near the shed in the power plant parking lot.
[ ] Coffee Thermos 86/100
Inside the Lady of the Light's bedroom in the corner on the floor.
[ ] Coffee Thermos 87/100
In the large pipe just before we get to the elevator.
[ ] Coffee Thermos 88/100
On the right after you exit the lift.
[ ] Manuscript Page 82/106
On the ground in the transformer yard after you reach the Haven Light and fight a group of Taken.
[ ] Manuscript Page 83/106
On top of the trailer ahead using the lift to access it.
[ ] Manuscript Page 84/106
In the pipe after the CS.
[ ] Manuscript Page 85/106
On the ground after you jump over the fence.
[ ] Nightmare Mode Manuscript Page 100/106
Next to the yellow bus just past the bridge as you follow the path.
[ ] Nightmare Mode Manuscript Page 101/106
On a rock near the wire spools and fence on the way to the switch.
[ ] Nightmare Mode Manuscript Page 102/106
On a stump to the right as you approach the helicopter crash site.
[ ] Sign 18/25
The bridge dedication sign on the way to the control room.
[ ] Sign 19/25
To the right of the door leading into the power plant.
[ ] Supply Chest 24/30
Near the water to the right of the Haven Light after you are helped by the Sheriff to get to the outskirts of the power plant.
[ ] Supply Chest 25/30
Just past the building after the big fight past the chopper crash site.
[ ] TV Program 13/14
On a TV inside the second bridge control room.
NOTE: A ticklist for the collectible items is included at the end of each chapter -- you will want to review this before you begin the chapters to familiarize yourself with these.
Completing the challenge of the Motel
The chapter begins with you back in your apartment in New York City, with a wicked hangover. You are prompted to find your glasses and some painkillers -- the glasses are on the bedside table, and the pain killers are in the bathroom. Leave the bedroom and listen to your answering machine message, then do as Barry says and go turn on the TV (TV Program 14/14). You will unlock the Achievement "Couch Potato" for a whopping 30 GP.
After you watch the show you get a CS with Alice in which you discuss - among other things - the trip to Washington. The narrative resumes, and you are back in the vault. When the CS ends look on the table near you for the next collectible (Coffee Thermos 90/100).
Before we continue here I need to mention something... There is an Achievement you can pick up here called "Gunless Wonder" but to unlock it you have to get to the lake without firing a gun -- any gun, or rather any weapon that uses the right trigger -- cannot be used. You do not have to do this now, you can reload this chapter later and do it, it is up to you.
Now check out the Verizon billboard -- man I used to have them as a cell provider, their coverage sucks here on Cape Cod., I am just saying... Now jump in your car and head down the road, and drive until you hit the rest area, where you should stop and get out. By the trailer is a sign that says "The Majestic" which you should read (Sign 22/25).
Get back in your car and drive until you reach the logging site, then drive down the site to the shack, get out and go in for the next collectible (Supply Chest 26/30). A side-note, if you have not been saving up flare gun ammo, start conserving it now, as you are going to need it soon very badly.
Head back up to the road and drive until you reach the tunnel, then stop! Get out and head to the left along side the barn here to grab the next collectible (Coffee Thermos 91/100). The tunnel is blocked inside, forcing you to get out and walk, which you do. As you reach the exit the darkness returns in a CS and day has been turned to night! Damn, I was enjoying the sunshine!
After you exit, ahead on the road are some Taken and the next collectible (Manuscript Page 86/106). If you are going for the no-gun Achievement here is a good place to use a grenade! After that, read the page and then proceed along the path to the car on the right side of the road. Jump in and start driving.
As you drive some Taken will spawn in the road -- the easiest way to deal with them is to boost your lights and run them down. When they are dead continue along to the hotel and turn into its parking lot. When you get out of the car look at the low wall on the left side of the parking lot for the next collectible (Can Pyramid 11/12). If you are going for the no-gun Achievement you do NOT want to shoot these!
I did an experiment, first checking my statistics to see what the count was for the cans, and it was 10/12, then I climbed up on the wall and knocked the cans down with my feet, and checked the statistics -- it was now 11/12! So you do not have to shoot them for them to count!
Now you can head inside, where you will find the next two collectibles, first a sign (Sign 23/25) and then a Thermos (Coffee Thermos 92/100) in the bathroom. On the counter in the office is the motel register, read that to learn that the Fed was staying here. There is a shotgun and ammo here - you can grab them even if you are doing the no-gun Achievement.
Now exit by the door and go into the first room on the right -- Room number 2 -- and you will see Agent Nightingale's jacket. Examine the stuff here and do not forget to grab the grenades off of the kitchenette!
Get back in the car now and use it to take out the Taken, then use the rear exit in the parking lot to get back on the road. Take out the possessed objects with the car's headlamps, and the other Taken, and when the car starts smoking (it will) head back to the motel parking lot and grab a fresh one, rinse and repeat until you have cleared the area of bad guys!
Chances are pretty good that you will die at least once trying to cross the bridge, probably when the excavator attacks since it can trap you on the bridge and really hurts when it hits! Just grin and bear it then, right?
Your best tactic here is really the slow-and-steady approach, as in slow-and-steady wins the race. Move carefully forward and when the objects attack kill them all quickly, then back up a little bit and let the torch recharge, so you are not burning through all of your batteries. When it has recharged continue forward, rinse and repeat. Before you approach the excavator make sure that your torch battery is fully recharged, and then try to hit it hard with it and not miss?
When the excavator attacks it blocks the path behind you with a wire spool so you cannot retreat. Your best strategy is to hit it with your torch and move left and right from side to side, avoiding its jaws. Once it is dead, carefully continue to the Haven Light, where you will regain health and hit a checkpoint. Excellent!
You can actually drive the car that is under the light -- so climb into it and drive! As you progress down the road you will see a field with a possessed monster truck and a barn. Kill the monster truck and then head for the barn, where you will be getting the next collectible (Coffee Thermos 93/100) at the house near the barn!
Drive down the road and eventually you will come to a bunch of cars and trucks blocking the road jsut before a tunnel where you will be forced to get out and walk -- there is a Haven Light here, and as you get past it, mind the dark pools on the ground.
There are supplies on the ground inside the tunnel and you will be attacked by Taken as you gather them. Once you have finished them off and grabbed the supplies, you will see the next collectible on the ground ahead (Manuscript Page 87/106). Once you read that, continue to the exit, where you will see a truck you can drive. Hop in and drive!
You will quickly reach a barricade in the road with a sign on the right that says Larsen's. Stop and get out, go to the gate to the right of the bigger sign, and read the small sign on the gate (Sign 24/25). Get back in the truck and drive around the right side of the roadblock then drive for a bit and stop at the next roadblock. There is a collectible on the running board of the green dump truck here (Manuscript Page 88/106) so grab that and read it.
Now you need to drive back to and around the first barricade and turn left, going through the gate to Larsen's and following the dirt road to the Haven Light, where you can get out and heal (if you need to) then explore the area. The next collectible is here, a chest behind the building (Supply Chest 27/30) that has some flares and grenades in it, both of which are worth having.
Head back around to the front of the building, and before you enter read the sign on the outside (Sign 25/25) to complete the Sign Collection and unlock the Achievement "Bright Falls Aficionado" worth a whopping 30 GP!
I want to add for posterity that unlocking this Achievement sent my Gamer Score to 70,011 which broke me into the 70K club and, I should add, is rather amazing. I have only owned a 360 for just a month over 2 years, and I am told that 70K in 2 years is a lot of Gamer Score... Just so you know I am not an Achievement Whore, I also review games for a newspaper and a web site, which is why I play so many and, obviously, have so high a Gamer Score. Ia m just saying...
After you enter head to the left side of the garage, where you will be attacked by two Taken. Once they are dead, grab the next collectible (Coffee Thermos 94/100) off of the shelf in the back, and some batteries off the shelf across from it.
Head upstairs and you will find the next collectible (Can Pyramid 12/12) on the deck outside. If you are going for the no-gun Achievement you will want to use your body to knock them down. Head up the stairs to the second floor to be attacked by two more Taken, then grab the grenade off of the shelf, a flare gun off of the desk, and use the switch at the top of the stairs. There is a door here, and when you exit through it you are on a deck with the Can Pyramid just to be clear.
Head back downstairs and jump in the blue truck, then drive through the gate to the left and you will encounter three Taken you can kill with the truck, before you reach a ramp ahead. Just before the ram stop, get out, and look to the right where you will find the next collectible (Coffee Thermos 95/100). Once you have that, jump back into the truck and take the ramp at speed -- and land below.
Follow the path around to the right and then left until you reach a container near the Haven Light ahead. You have to get out of the truck to reach the light -- do that, and you will find the next collectible nearby the light (Manuscript Page 89/106) next to some revolver ammo, three flares, and some batteries. The light includes a checkpoint as usual, and there is a ladder here for you to climb!
At the top of the ladder is a generator for you to start, and a flare gun, flares, and grenade to collect. The generator makes a switch below useable (you are shown that), and then you can climb down and quickly jump back into the pickup truck. A nearby front-loader will come to life as a pair of Taken spawn -- use the headlamps of the truck to kill all three, then drive to the switch and, getting out, use it.
Using the switch slowly raises the shipping container that was blocking your path -- you can now drive through or simply run through as there is another truck on the other side past the Haven Light you have now revealed. I chose to drive through and then hop out to use the checkpoint at the Haven Light before continuing in my original truck... Now drive along the road up the hill to the next Haven Light, where you can hop out and empty a red supply box!
Collectible Items Ticklist
-- Can Pyramid 11/12
On the wall on the left side of the parking lot at the Majestic Motel.
-- Can Pyramid 12/12
On the deck of the second floor of Larsen's Garage.
-- Coffee Thermos 90/100
On the table near you after the CS ends.
-- Coffee Thermos 91/100
Beside the barn to the left of the tunnel entrance.
-- Coffee Thermos 92/100
Inside the motel in the bathroom.
-- Coffee Thermos 93/100
At the house near the barn after killing the monster truck.
-- Coffee Thermos 94/100
In the left rear of Larsen's garage.
-- Coffee Thermos 95/100
To the right of the ramp in the junkyard after leaving the garage.
-- Manuscript Page 86/106
In the road after you exit the tunnel.
-- Manuscript Page 87/106
On the ground after you exit the tunnel.
-- Manuscript Page 88/106
On the running board of the green dump truck at the second barricade.
-- Manuscript Page 89/106
Near the Haven Light after jumping the truck over the ramp into the junkyard.
-- Nightmare Manuscript Page 103/106
On a bench inside the motel lobby.
-- Nightmare Manuscript Page 104/106
On the top floor of the barn after killing the monster truck.
-- Nightmare Manuscript Page 105/106
On a table on the second floor of Larsen's Garage.
-- Sign 22/25
At the rest area on the right near the trailer.
-- Sign 23/25
Inside the motel.
-- Sign 24/25
A small sign on the gate to the right of the roadblock.
-- Sign 25/25
Outside of Larsen's before you go through the door.
-- Supply Chest 26/30
In the shack at the bottom of the hill at the logging site.
-- Supply Chest 27/30
Behind Larsen's.
-- TV Program 14/14
Watch the TV in the living room.
Tornado Boss Fight
To the left in the darkness beyond the light is a shack, and if you go in you will find a supply chest (Supply Chest 28/30) with a flare gun and ammo in it. Do grab those, you will need the extra flare gun ammo, and then return to your truck, pull forward and park by the gate. Jump out and run up the stairs and go inside this building, then drop through the floor to the floor below.
On the side is a cart you need to push forward that is blocking the opening in the wall - use B to engage and then push A a lot to move it. Once it is moved, exit via that hole in the wall and run around to the front of the building where you will find a fresh truck with a pump shotgun leaning against it. I don't know about you but I was happy to see that pump shotgun! After you swap your double-barrel out for it, you can look around a bit but you will quickly trigger a CS and then the Tornado will put in an appearance.
In the first building on the right you can grab some pistol ammo, and when you exit confront a brute and a chainsaw wielding Taken. Kill them and then go into the next building on the right side of the road (it has a sign above that says Hollowax on it) to grab the next collectible (Coffee Thermos 96/100). On shelves in here there is also a pistol, a rifle, and a double-barrel shotgun just to be complete.
Exit this building and head for the searchlight ahead (there is nothing in the other buildings) and, at the light, use it to hold off the wave of Taken until some appear to your left. Leave the light pointed ahead to the left, then use your torch and flashbangs to take out the Taken trying to flank you. Once they are dead, use the searchlight to take out the remaining few Taken and you are good for this ambush!
If you look to the left of the light you will see supplies -- flares and flare gun ammo -- and you really should grab those! Now head to the building behind the searchlight with the mine cart on it, and push the cart until it stops. Inside here near the fireplace is our next collectible (Manuscript Page 90/106) so grab that and read it, and then push the mine cart blocking the door out of the way.
As you exit the building you will see the next Haven Light nearby, so go there to checkpoint, and then follow the path to the wooden structure and clean out the flare gun ammo and batteries from the red supply box there. In a hole in the floor is a mine cart that you can jump down into, and then release the brake on to go for a little ride. Do that!
You will be attacked by birds, and when the car arrives at the end of the track and you climb out, the tracks -- and the car -- collapse and fall! Ahead is a Haven Light and checkpoint, so go ahead and run to that to save and escape the birds, who will kill themselves flying into the light. Just past the light is a train car with open ends that you can run through, and out the other side around the rocks is our next collectible (Supply Chest 29/30) from which you will get flare gun ammo, flares, and grenades. Near the chest is also a pump shotgun and shotgun shells, so grab it all!
Backtrack to the Haven Light again and you will see a ladder nearby that you can climb. After the birds attack push the mine cart here along the track until you reach the end, and it falls down the gap. Now jump across and continue along the tracks to the shed ahead of you, where you will find the next collectible (Coffee Thermos 97/100).
As you follow the path you will be attacked by birds -- take them out with your hand torch, pausing after each kill to allow it to recharge before continuing. Up the hill you will be ambushed, and after you kill those Taken you need to mind your feet for the dark pools, which you should destroy with your torch. There is a Haven Light and checkpoint ahead if you do get hurt, and in that same building in the next room there is a red supply chest. You exit out the back of this building and continue along the path.
Eventually a large truck will fall from the sky, and a fast Taken will attack when that happens. Kill it and continue on the path and you arrive at a red shed with a generator in front of it. Start that to activate the next Haven Light and checkpoint, and gather the supplies that are here before you continue on the path. A large object will fall - it is not a truck, maybe scrap metal? After it falls you will be attacked again, so defend yourself.
Ahead of you a boat will fall out of the sky as you approach a box car, and then you are attacked. Climb into the boxcar (it offers a bit of protection from being flanked) and inside you will find some grenades and our next collectible (Coffee Thermos 98/100) which you should also grab. Kill the Taken and then get back on the path, and again be attacked. This is a tough area so take care and fight defensively!
Eventually you make it to another generator to activate the next Haven light and checkpoint (though this one only lasts for a few seconds before the light burns out), and you heal. Continue up the path here and narrowly avoid being crushed by a falling train car before you head up the slope, past more falling stuff, and finally reach the wooden stairs that lead to the next Haven Light. Be careful and destroy the dark pools on the stairs, and make your way to the light and checkpoint above.
At the top of the next stairs is a building, and after you enter it and turn right, the final supply chest! Go ahead and empty that (Supply Chest 30/30) and you will unlock the Achievement "Every Nook and Cranny" for a very nice 30 GP!
Head upstairs for some shotgun shells and a pump-action shotgun, and then drop down onto a crate below to leave the building. Nearby is an old rusty metal structure -- either an old windmill or maybe water tower? Behind that structure is your next collectible (Coffee Thermos 99/100) so go and collect that now,
Ahead is a switch, but to use it you need to find the generator and get it running, so look around and you will see a large gas tank with the generator by it. Once you get it running there is now power to that switch, but you also have a wave of Taken coming for you, so defend yourself as best you can, and then make your way to the switch. Click it, and face another wave of Taken while the lift lowers for you.
As soon as the lift arrives get on and push the button, and when it stops and you step off, look down at your feet to see the next (and last) regular Manuscript Page (Manuscript Page 91/106). Picking this up unlocks the Achievement "Picking Up After Yourself" for a very nice 30 GP! This is the last collectible for this chapter! Well done!
You have really irritates the Dark Force now! It blocks the path with possessed objects and starts sending waves of Taken after you. Could it be that it is afraid of you? I think it is!
As you make your way through he passage she throws a few objects at you, and when you reach the other end, look! The Tornado! Could this be the showdown fight?! Why yes... Yes it is!
Your best strategy here is to get nice and close and -- remember all the flare gun ammo I said you should save up? Oh yeah, it is shake-n-bake time!
Drop down and get closer. Drop down again and get still closer. When you can use your torch to destroy some of the objects that it is using as offensive weapons. Be careful not to fall down and die when you get to the last section of the path, and when Alan tells you that you have to get light into its heart, you are almost close enough to start killing it!
If you do not already have a full load of flare gun ammo, stop at the box on the path and fill up, then jump to the next platform and start pumping rounds into the Tornado, and it will quickly die! Not a bad boss fight after all!
[ ] Coffee Thermos 96/100
On a shelf in the Hollowax building after you get past the gate.
[ ] Coffee Thermos 97/100
Under the shed-like structure on the elevated wooden tracks after the Haven Light.
[ ] Coffee Thermos 98/100
Inside the red boxcar on the path after the boat falls from the sky.
[ ] Coffee Thermos 99/100
Behind the rusty metal structure after dropping down from the building onto the crate.
[ ] Manuscript Page 90/106
Near the fireplace in the building with the mine cart.
[ ] Manuscript Page 91/106
On the floor after you step off of the lift.
[ ] Nightmare Mode Manuscript Page 106/106
Behind the generator that you need to start to activate the lift.
[ ] Supply Chest 28/30
In a shack to the left of the Haven Light after driving up the hill from the junkyard.
[ ] Supply Chest 29/30
Through the train car past the Haven Light, and around the rocks. Do not forget to grab the shotgun and shells.
[ ] Supply Chest 30/30
Inside the building at the top of the wooden stairs.
Light
After the Tornado dies that ends the chapter, and we move on to the final chapter -- this one!
You get a CS in which the Darkness tries to use the image of Alice to trick you. We are back in our apartment in New York, but Alice is not acting right -- she is not afraid of the dark! You need to find the clicker to end this charade -- and you do! Head through the hall and into the kitchen, and from there into the loving room. Use the torch to burn away the word covering the clicker to reveal it and then take it!
The nightmare explodes and we find ourselves floating in the water with Tom in his diving suit and he gives us instructions -- you were paying attention, right? After we resolve in this new land of Darkness there are more words to destroy with our hand torch. Start with the one for Thermos and you reveal the final collectible for the normal game (Coffee Thermos 100/100)! Take it and you unlock the Achievement "Hypercaffeinated" for an awesome 30 GP!
Now destroy the other words -- they are basically dark pools in another form -- and as you destroy them you reveal the objects that they represent, and in so doing you will make your way tot he island and the cabin!
When you reach the cabin and open the door you reveal an oddly changed tableau of threat and fear. Using the clicker you send the Darkness to its own well-deserved final journey, and a CS plays out as you sit at the typewriter and begin to write the end of your novel. As the narration continues, and you pound away at the keys, you relive the memory of her loss, only this time when you jump into the water Alice is swimming towards you!
She reaches the surface and climbs out, collapsing on the deck, and calls your name and that triggers the cinematic ending sequence. So what od you think? Are you dead? No! You cannot be! After all there is at least two (2) DLC planned for this title if not more, so how could you be dead?!
Just when I think I have a handle on the reality of this, I hear Alice whispering for us to wake up! Was it all a dream? Did any of it happen? We will have to wait for the DLC -- or I shudder to fear it -- the sequel in order to know for sure!
[ ] Coffee Thermos 100/100
In the Darkness after you destroy the word "Thermos" to reveal it!
First I want to thank Peter 'Swash01' Boots-Faubert for his help with this walkthrough. Even when all he did was sit with me as I played, he helped, and that was the least of his contribution to this, as he played and replayed the game to help me lock down the location of each and every collectible item in it! Let me tell you, that sort of help only comes from people who love and respect you, so thank you Peter, it is much appreciated!
Next I want to thank Geofry 'GGlenn' Glenn for his assistance in finding the hard to find Coffee Thermos that was driving us bug-nuts. Thanks Geof!
Finally I want to thank Richard for the opportunity to do this one -- it was a blast!
There are 50 Achievements worth a total of 1,000 GP (not including DLC), and obtaining all 50 of these has a difficulty rating of about 6 out of 10, which means that while some extra effort is required you should be able to obtain all of the Achievements in this game without too much trouble.
The Achievements are spread over the entire game, and the chapter that you are likely to obtain them in is noted for each. The Achievements are listed in alphabetical order rather than in the order you may acquire them to make looking them up a little easier.
(01) Alan, Wake Up (50 GP) Complete the game on Nightmare difficulty.
In order to play on Nightmare Mode you have to beat the game on either Normal or Hard first. That means that it takes two complete play-through runs to unlock this one!
(02) An Idyllic Small Town (30 GP) Make it through "Night Life in Bright Falls" in one go without dying or restarting even once.
Just like it sounds, start the chapter 'Nightlife in Bright Falls' and then make it through in one go, without dying or restarting even one time! Simple enough, right?
(03) Back! Back, I Say! (10 GP) Save yourself with a flare.
To unlock this one you need to be near dead (your vision will be gray) and then use a flare to drive off a Taken.
(04) Boob Tube (5 GP) See what's on TV.
Watch the TV in the Lodge as you are making your escape to unlock this. Note that this Achievement has no relationship with the one for watching all of the TV Programs in the game. It is its own Achievement and can be earned even if you do not get to the other one.
(05) Bright Falls Aficionado (30 GP) Absorb every bit of local history and culture.
To unlock this you need to read all 25 signs that are located throughout the game.
(06) Bright Falls' Finest (20 GP) You finally manage to make that phone call.
This is story-related and cannot be missed.
(07) Carny (10 GP) Knock over five can pyramids.
Knock down or shoot 5 of the 12 stacks of cans to unlock this.
(08) Child of the Elder God (10 GP) Have a rock'n'roll moment without dropping to a low health state.
During the fight on the stage complete all three sections without your health dropping blow 1/3 -- if your vision goes gray you have failed. If you fail, you can restart from the last checkpoint -- there are three checkpoints in total for this fight.
(09) Collateral Carnage (20 GP) Defeat 20 Taken with indirect means.
This is simple enough to obtain, simply kill 20 Taken using exploding barrels, electric wires, or really strong light sources.
(10) Collector's Edition (50 GP) Find all of the manuscript pages in the game, including the ones in Nightmare mode.
Complete the game on Nightmare Mode having found all 106 Manuscript Pages.
(11) Come One, Come All (10 GP) Kill four Taken with a single shot from the flare gun.
Just like it says, when there are four or more Taken in a group, use the flare gun to kill them all with one shot to unlock this.
(12) Couch Potato (30 GP) Watch every single TV show.
Watch all 14 TV Programs throughout the game to unlock this.
(13) Damn Good Cup of Coffee (20 GP) Discover 25 coffee thermoses.
Pick up 25 Coffee Thermos' to unlock this.
(14) Departure (40 GP) Complete the game on Normal difficulty.
Just like it says, reach the end of the game on Normal Mode.
(15) Drink 'Em Both Up (10 GP) Put de lime in de coconut twice.
To unlock this you need to play the jukebox in the diner twice -- the first time when you arrive in town and stop to pick up the keys, and the second time after you are freed from the jail and are working your way through town with the Sheriff. Playing the jukebox the second time instantly unlocks this.
(16) Energized! (10 GP) Use 100 batteries.
This will come naturally as you play the game, so you do not need to do anything special to get it.
(17) Every Nook and Cranny (30 GP) Discover all of the hidden chests.
Just like it says, get all 30 Supply Chests to unlock this.
(18) Finders Keepers (20 GP) Discover 5 hidden chests.
Unlocked after finding the 5th Hidden Supply Chest.
(19) Float Like a Butterfly (15 GP) Perform a cinematic dodge.
To unlock this, simply do a dodge move successfully AFTER the enemy has started to swing on you.
(20) Follow the Light (10 GP) You were enlightened by a dream.
This is story-related and cannot be missed.
(21) Gatekeeper (10 GP) Cut the power to the transformer yard.
This is story-related and cannot be missed.
(22) Gunless Wonder (30 GP) Make it to Cauldron Lake without firing a single shot in "On the Road to Cauldron Lake."
Make your way to the lake without ever once using a weapon that requires the right trigger to be pressed. As simple as that.
(23) Hardboiled Writer (40 GP) Complete the game on Hard difficulty.
Simply play through the entire game on Hard Mode.
(24) Heavy Metal (10 GP) Survive the bulldozer attack.
When the bulldozer attacks simply use your torch or a flare to kill it.
(25) Hypercaffeinated (30 GP) Discover all coffee thermoses.
All that you need to do is find all 100 Coffee Thermos'
(26) If It Flies, It Burns (20 GP) Burn 1,000 birds.
Kill 1,000 dark birds either with the hand torch or flare gun.
(27) Iron Horse (10 GP) Encounter a steam engine.
You will face parts of an old steam locomotive that have been possessed. Simply kill each with your torch to unlock this.
(28) It's Not Just a Typewriter Brand (20 GP) Defeat 50 Taken with a shotgun.
Kill 50 Taken with the shotgun. Both the double-barrel and the pump-action shotgun count.
(29) KBF-FM (30 GP) Listen to all of the radio shows.
Listen to all 11 Radio Programs to unlock this.
(30) Let There Be Light (10 GP) You have restored power.
This is story-related and cannot be missed.
(31) Medical Opinions (10 GP) Listen to Hartman's recordings.
In Hartman's office there is a tape recorder. Simply play it three (3) times to unlock this.
(32) Meet the Deadline (30 GP) In "Mirror Peak," make it from the Coal Mine Museum to Cauldron Lake in 30 minutes.
Just like it says, make it through that level in 30 minutes or less!
(33) Missed by a Mile (25 GP) Perform a cinematic dodge 20 times.
Simply dodge after the enemy swings 20 times.
(34) Nordic Walking (10 GP) Unlike Stucky, you enjoy incontestable health benefits - namely you are not dead.
This is story-related and cannot be missed.
(35) Paging Mr. Wake (20 GP) Find 25 manuscript pages.
Find 25 Manuscript Pages. Does not have to be in order.
(36) Park Ranger (15 GP) Enjoy the sounds and sights of Elderwood National Park.
This is story-related and cannot be missed.
(37) Perchance to Dream (20 GP) Take a moment to reflect on past events.
This is story-related and cannot be missed.
(38) Picking Up After Yourself (30 GP) Find all of the manuscript pages in Normal mode.
Find all 91 Manuscript Pages in Normal Mode.
(39) Right of Way (10 GP) Drive over 15 Taken.
Remove the shadows of 15 taken with your headlamps and then run them down. Does not have to be done all at the same time.
(40) Sound and Fury (10 GP) Kill four Taken with a single flash-bang.
Just like it sounds -- find a group of four or more Taken together and kill them with a single grenade.
(41) Taken Season (20 GP) Defeat 50 Taken with the hunting rifle.
Just like it sounds -- you can get a count of how many you have killed under statistics in the pause menu.
(42) The Lady of the Light (20 GP) Discover the secret she guards.
This is story-related and cannot be missed.
(43) The Six-Gun Scribe (20 GP) Defeat 100 Taken with the revolver.
Just like it sounds -- you can get a count of how many you have killed under statistics in the pause menu.
(44) They're Heeeeeere! (20 GP) Inanimate objects shouldn't move of their own accord. Put a stop to this affront, oh, say, 20 times.
Just like it sounds -- you can get a count of how many you have killed under statistics in the pause menu.
(45) Thunder and Lightning (20 GP) Defeat 50 Taken with flash-bang grenades.
Just like it sounds -- you can get a count of how many you have killed under statistics in the pause menu.
(46) Tornado Wrangler (20 GP) Defeat the tornado.
This is story-related and cannot be missed.
(47) Two For the Price of One (10 GP) Kill two Taken with a single shotgun blast.
Simply remove the shadows of two Taken that are close together and kill them with the same shotgun blast.
(48) Under a Thin Layer of Skin (10 GP) Defy the park ranger.
This is story-related and cannot be missed.
(49) What Light Through Yonder Window (20 GP) Defeat 50 Taken with the flare gun, the way Shakespeare intended.
Just like it sounds -- you can get a count of how many you have killed under statistics in the pause menu.
(50) Wheels Within Wheels (20 GP) Meet the kidnapper.
This is story-related and cannot be missed.

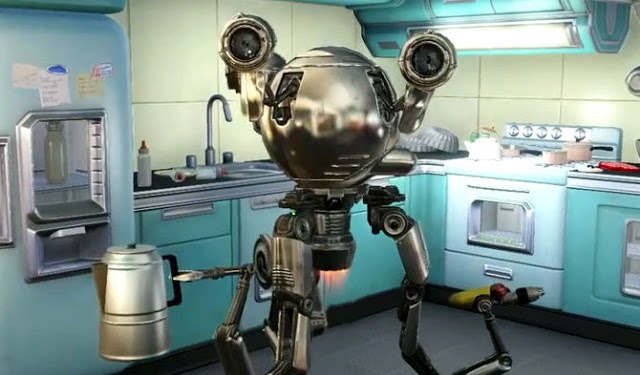


 SimCity Wiki .
 The Best Apps To Sign, Annotate & Edit PDFs On Your iPad
 Ariana Grande Falls during Toronto Concert
 Dreamfall Chapters: The Longest Journey Wiki – Everything you need to know about the game .
 Dark Souls II: Scholar of the First Sin Cheats