If you think about it, all video games are sort of about jacking into somebody else’s brain/body and ordering them around. Mindjack, therefore, has a definitive mechanic that’s almost like a game within a game — the title’s protagonists are highly trained special operatives, hackers who can enter the minds of anybody and anything around them. If you think that sounds cool — well, you would, because you like video games.
To help keep you alive when you’re hacking your way in and out of people’s brains, we’re preparing a detailed single-player walkthrough. Check back on release day for the first installments. In the meantime, we’ve got lists of trophies and achievements, as well as a Cheats page, which we’ll fill up with collectibles, unlockables, and cheat codes when they become available.
Rebirth
You begin as a Wanderer, the digital representation of a human mind.
Adjust the camera with the Right Stick.
Move around with the Left Stick.
Press the LB or RB to warp to your target.
Aim at the gentleman and pull the RT when the icon appears to Mind Hack the man and take control of his body.
Next, press down both the Left Stick and Right Stick to return to Wanderer state.
Now Mind Hack into the blue-screen terminal on the farthest left of the desk.
Scene 1-0 Bad Day at the Office
You begin as Jim.
Move forward to the flight information object and press A to take cover. Pressing A again removes you from cover. Aiming with the Left Stick before pressing A will execute a combat roll. You can also roll while walking.
Continue ahead.
The first enemy encounter.
Pull the RT to fire your weapon.
Pulling LT increases your aim.
Tap the RB to reload.
Collect weapons and ammo by pressing X when near a gun or grenade.
Throw grenades with LB.
The enemies here, known as Squawkers, don’t aim much and they’ll stand out of cover a lot so familiarize yourself with the controls and proceed around the corner.
In the next hall are some floating bots called Furies and more soldiers.
When you damage an enemy enough – robot or human – get within range and press X to make them your Mind Slave. These characters will fight along your side for a limited time.
You can also go to Wanderer state and take direct control of Mind Slaves or other characters such as the scared citizens that litter the next room.
Both actions use up Mind Power points, displayed as the blue bar when attempting a hack or enslavement.
Enemies do not expect to take fire from citizens allowing you to get a few surprise hits in.
If you find yourself up next to an enemy, press B to initiate a melee attack. Press B repeatedly to combo.
Hitting B on a downed enemy will also finish them off. Both techniques grant bonus XP.
If a member of your group becomes heavily wounded, move in close and press X to heal them. If all major members of the group are defeated, it’s game over.
Follow the objective mark in the hall to proceed.
Scene 1-1 Time to Leave
You’re attacked immediately by a group of Furies.
Grab the guns ahead (what happened to your others?) and take down the swarm.
Move ahead to the locked shutters.
Examine the gun rack to restock all ammunition.
Proceed through the door.
Engage the enemies in the hall and following room.
When up close with a wounded (though not incapacitated) enemy you can also hold B to take them as a shield. Press B again to release them.
Continue ahead and take out the many enemies that approach.
Use the cover provided. Even though the enemies wander around mindlessly, doing so will get you killed quickly.
Follow the hall to finish the scene.
Scene 2-0 Bird Shoot
This is a small space to get attacked in so blindfire (don’t hold LB) until you can Mind Hack a Squawker to help out.
Finish off the others and continue.
You’ve got more room on this roof so shift cover and work your way through the Squawkers.
When you’ve cleared them out an airship will appear. Your weapons don’t hurt it so wait until rocket-toting Thumpers show up – Don’t worry, they can’t aim.
It’s worth noting that you can’t Engage or melee fight these guys, so if you want, just get in close and fire away.
After defeating one, take the rocket launcher.
When you first aim at the Hawke it will shift to one side so wait a moment before firing.
More Squawkers and Thumpers will appear so resupply and find a safe spot to fire on the Hawke again.
Scene 2-1 Panic Room
Immediately take cover behind the pillar.
The first enemy will run right at you so take him out with blindfire then finish off the three up stairs.
There are several more enemies in the next room.
Whenever Furies are involved, either eliminate or enslave them first. They can get around your cover much quicker than humans and will cause a lot of pain if left unattended.
The control room is a large space with plenty of desks to take cover behind.
Squawkers will enter in waves from a door on the right side. Stay in the middle right of the room to get the drop on them without being too close.
Due to the number of enemies here you should enslave regularly to help keep the attention off of you.
With the room cleared, proceed through the hall to the elevator.
Scene 2-2 Colosseum
Take out the Furie at the top of the stairs and the Squawker down below.
Take cover immediately in the next room.
You’ll be attacked by Gun Wheel’s, fast little bots that will try to get in close. Treat them just like Furies.
Clear out the first wave of enemies then move left to find an ammo rack.
Stay posted here so that you can replenish your supplies.
Squawkers will continue to pour out in waves from the stairs for a while until a turret bot is introduced. Whittle it down then enslave it and clean up the last soldiers.
Head up the escalator.
Scene 3-0 Getting to Know You
Turn around from your starting position to find two grenades.
Grab the nearest gun then take cover.
There are several citizens around to take advantage of. Hack them then drop a few Squawkers to add to your group.
With the room cleared head toward the monorail tunnel.
There are two grenades on the left platform if you used yours previously.
Inside the tunnel are three Quick Draw bots and several Squawkers.
Enslave as many of the bots as you can and work your way forward through the soldiers.
Be sure to watch for those hiding in the crevices on the right side.
If you need to Hack, there is a maintenance worker at the beginning, where the engagement first began.
Head through the door.
Scene 3-1 A Stroll Into Town
There is one enemy at the beginning of this room.
Grab the grenades along the left wall then take him out and turn the corners. There are a lot of grenades throughout this scene so feel free to use them.
You can make your way from cover to cover here by switching between the citizens.
Clear the hall then move to the next room.
There are two Furies and some Squawkers.
Once you hit the catwalk above the tunnel take down a few of the enemies below and Mind Slave them.
This would be a good time for those grenades.
Now head down and fight your way forward.
In the next room are a couple Thumpers, this time with shotguns so watch out.
Take them out and enslave them as quickly as possible but don’t forget about the Squawkers. They’ll flank and overwhelm you if you aren’t careful.
Scene 3-2 Air Mail
Grab the grenade behind the crate on your left, then the gun up ahead.
The first part of this tunnel is dark so take cover behind the first carts and let the Squawkers show you where they are.
As you make your way forward, keep as many Mind Slave’s as you can.
A Quick Draw will come to greet you, take him into your group as well.
The next room is a relatively large area with a ton of cover. And behind nearly all that cover is an enemy.
Just like before when faced with large numbers, enslave every chance you get.
After you take down the numbers a little a ship will appear to drop off a Squawker and two Thumpers.
Focus your attention on the Thumpers, the sooner they’re on your side the better.
Finish off any last enemies and exit.
Scene 3-3 Fire Walkers
When the scene starts Rachel will charge up the stairs to the Thumper and Squawker pair. Be smarter than her and Mind Slave the Thumper from down low.
Once they’re both on your team quickly head down the other side and fight off the other enemies. The cover from the catwalk is too sparse.
There are three Squawkers above in the next room.
Take cover on the right at the entrance and pick them off one at a time.
Head up the stairs.
Scene 4-0 Tough Love
Head down the alley and grab the gun.
After the cutscene immediately get behind the riot glass.
Take out the policeman and a large mech will appear.
Fire at it a few times to make Jim decide they need to leave. For some reason though, they don’t.
You have to keep defeating the Policeman. They will respawn from the opposite side that you’re on.
After enough Policeman are dead the mech will be destroyed… somehow.
Now head through the door on the left.
Scene 4-1 Welcome Party
Grab the grenade behind the crate just ahead of you.
Move up the stairs.
After the Hawke appears grab the gun and grenade then proceed upward.
Keep working your way across the bridges and up the stairs. There are only a couple enemies on each landing so you shouldn’t have much trouble. Just try to avoid the Hawke’s fire by constantly moving.
On the top level more Police will drop in on a landing. Take them out as well.
The Hawke will create a convenient ladder for you but before you exit, take the stairs on this side down as far as they go.
On the bottom landing is a Red Stutter MK9. Red weapons are enhanced versions of those normally found.
Now follow Rebecca to the roof.
You’re quickly confronted by two Furies.
Mind Slave them then clear out the Policeman.
Continue around to the door.
Scene 5-0 Ellis Revealed
Follow Rebecca through the hall and into the office.
Grab the gun by the desk and enslave the first Squawker.
There’s another outside and to the left.
The third and fourth are around the next left corner.
Finish them off then continue through the newly opened door and down the stairs.
Get behind cover. The Squawkers won’t advance so just sit back and pick them off.
When the room’s cleared stock up from the several weapons littering the floor and exit.
In the hall get behind the first crate and deal with the lone Squawker that appears.
The room on your left is full of Squawkers and more will continue to pour in.
You can Mind Hack the Detonator Wheel’s in the other room to try and take a group or two out but with their slow speed and poor handling I suggest you stick to the big-room tactic: Mind Slave everyone.
Stay back in this room and let the Squawkers charge you that way you don’t have to go far for ammo.
Eventually a Thumper will appear but your little army shouldn’t have much trouble dealing with him.
Scene 5-1 Break It You Bought It
On your way down the first flight of stairs a Squawker will rush you.
Take him out and grab his gun.
At the very bottom turn left and grab the grenades behind the trash bin.
Proceed through the door and down the stairs.
At the very bottom of these stairs is another Squawker in hiding. He should peak out enough that you can finish him before he has a chance to react.
Hop over the counter.
Two Furies will charge right for you.
Enslave them then fire on the Squawkers from cover. There are two grenades ahead so go ahead and use yours.
Hop over the second counter.
In the next office are two Squawkers.
Clear them then turn right to face the enemies in the next room.
A few Squawkers will enter through the door and eventually a Thumper.
Fire what you have and Hack the security officer to the left if you need.
In the small hall a single Thumper will enter.
Mind Slave him so he can help you with the Furie and Squawker in the next passage.
Scene 5-2 Tech Ninja
Follow Rebecca around the two corners.
Arm up and enter the door.
Three Wraiths, fast moving special force soldiers, are inside.
While Rebecca will warn you about their skill these guys are a complete push-over.
Turn around as soon as you start and get behind the bookshelves.
The Wraiths won’t approach you, they’ll just move between cover and fire with pistols from the side.
Take out the first two from cover then move up and re-cover one row away from the last Wraith.
When he pops out, dunk him with your shotgun.
The only potential danger lies in their grenades. They throw them a very short distance however so if you stay back when fighting the first two there shouldn’t be any risk. Just don’t try to fight them with melee.
Scene 6-0 To the Docks
Grab the sniper rifle and rocket launcher then move forward.
Use your single rocket on the Slider then get behind the riot glass.
After it fires pop out and look above it. There is a Squawker sniping. Take him out with your rifle.
Use the rest of your ammo on the other Squawkers.
When you’re empty, move to the second set of glass and grab the machine gun.
Time your movements to the Slider. It makes a distinct noise when preparing to fire its cannon. It also stops moving, giving you ample time to dive out of the way.
Try to avoid being directly to the side though as it has turrets which will open fire.
Make your way behind and to the left to get more Thumper ammo.
Fire away what you have then take out some more Squawkers to resupply again, then finish off the tank.
Clear out any remaining enemies and proceed ahead.
It is also possible to get the Thumper ammo a little sooner by Hacking into the maintenance worker already behind the tank. But he’ll get shredded quickly so you have to fire off the shots fast to make it count.
Go up the stairs half way then turn around and take out the two Squawkers in front of you.
Proceed up on to the ledge and take cover.
There are a series of snipers along the outer right ledges. Take them out one by one as you proceed.
While you shouldn’t let Squawkers creep up on you, don’t underestimate the damage the snipers can cause.
If you’re having trouble, go to Wanderer then Mind Hack the security agent. He is much closer to the last few snipers. But be careful because they’ll turn on him even before he opens fire.
Just stay behind cover and sprint when you’re not and you’ll do fine.
Defeat all the enemies and the Hawke will fly away.
Head down the stairs and follow Rebecca around to the exit.
Scene 6-1 Coming Up Blank
Grab the gun then take cover behind the pillar.
A Furie will wander in. Mind Slave it then turn right.
Grab the grenade by the worker and use the chance to get some shots in on the backs of the Squawkers that enter.
Make your way around and finish them off then continue through the hall to the incinerator room.
In case the ton of weapons, explosive crates, and citizens didn’t tip you off, there’s a big fight ahead. Fortunately it looks a lot worse than it is.
Several Swarmers, monkey creatures with machine guns and mean clawing skills, will jump in. Just keep moving and firing on them. It’s a little overwhelming at first but once you start getting some Mind Slaves on your side the battle is a little less tense.
If you’re having trouble hitting them try using the Midas gun. Its focused spray makes aiming while moving easier if you’re relatively close (which you will be).
Swarmers will continue to pile in as the fight goes on. Just make sure to keep a healthy group of slaves on your side.
In the final part of the battle a group of Squawkers and a Furie will enter.
Get to cover and let your Swarmers distract the Squawkers. You deal with the Furie then move in to assist.
If you get beaten don’t forget that you have two citizens in the wings to help out. Hopefully you were able to save them up to this point.
You can also take control of any Swarmers you have left. Try to get in close and melee as their guns aren’t very powerful.
With the room cleared, head to the exit.
Scene 7-0 Revealed
Move through the corridor then grab the guns and grenades.
Begin left and take cover behind the cart.
Take out the first few Icarus soldiers nearby then look across the way for another sniping at you.
Either take him out with the Midas or move forward to get a rifle.
Take cover and beat on the first Quick Draw.
Let him lead the way toward the other Quick Draw, Furie, and Squawkers. If you still have sniper rifle ammo, pick off the enemies from a distance.
Make your way around, leap over the crates and head through the door.
Move through the corridors into another chamber.
When you first enter, look forward to a Squawker peaking out. Move ahead enough to make him leave cover then back up and fight him.
When he’s dealt with move forward and turn around to take on two more.
Now make your way slowly down the ramp. Use a rifle on the sniper if you can, then pick off anyone else from far away.
Go from cover to cover, taking slaves, until you reach the exit.
Scene 7-1 Gauntlet
Grab the gun and fill up on ammo.
Take cover against the Squawker.
Move in to Mind Slave him then grab new cover against the Quick Draw.
Go through the gate and follow the hall.
After you move through a door, take cover at the corner. Several Squawkers are on the other side.
Take them out then hang tight. A Thumper will barrel in.
Deal with him then move in for one final Squawker by the gate.
Follow Rebecca until another door.
Grab the grenades and ammo if you need it.
In this next room take cover right away. It’s best not to advance past this first point as enemies will appear on the top level and get the drop on you.
Stay back and use Mind Slaves as best you can.
Prioritize keeping the lower level Squawkers back (since they can creep up on you) but deal with the upper level enemies as soon as possible. This is a good place for grenades.
Move through the last hall to the exit.
Scene 7-2 Rebecca Comes Clean
Grab the gun then move to the first row of cover.
Squawkers will appear both on the lower and upper levels.
Take them out then restock at the gun rack by the stairs.
The next boss will burt through the door.
This big gorilla likes to charge at you but, not surprisingly, he isn’t too bright.
Just dive around the pillars if he comes for you and keep firing away. He’s basically a giant Swarmer – keep moving, keep firing.
After enough damage he’ll run away. Exit out the other side.
In the next room several Swarmers will leap down.
Just like before, expect to take some hits while you build up a team. Just keep moving.
A second similarly sized wave will appear before a third and very large group of Swarmers attack.
The key here is to stay near your team and keep adding new Mind Slaves every chance you get. If you get separated you’re going to have a lot of unwanted attention on you.
Once the Swarmers are finished the big ape will finally leap down, accompanied by multiple Squawkers.
Try to keep moving and divide your attention between the enemies. Prioritize whomever is closest and likely to pose a threat.
If you need to Hack there are several citizens in an adjacent room. They can’t, however, enter the room you’re in. This can be good and bad as they’re less likely to take damage, but have a limited vantage. I suggest saving them until you’re ejected.
Scene 8-0 Construction Site
Back up from your starting position and head left to find a Red Stutter behind some grey crates.
A Thumper will appear left of here. You can go after him as Jim but I suggest switching to Wanderer and hacking into a nearby maintenance worker.
Let him use his equipped Long Arm to get the jump on the Thumper with Jim’s support. By doing this you have two people to help distract the Golem, rather than one.
Move in and grab the launcher then take cover if you’re getting shot at.
Pop out and fire at the Golem. Remember that the rockets take a moment to reach the target so lead the big guy a little if he’s moving.
Take cover and reload then fire again. When you run out of ammo, resupply at the gun rack near the original Thumper.
Repeat this process until another Thumper appears. Prioritize taking him down.
Once the Golem’s defeated there will likely still be some support Squawkers around. Take them out from a distance with your rifle, resupplying as necessary.
More reinforcements will appear from a door in the far right corner. Hopefully Jim and Lyle are in close enough to adequately distract them.
Every once in a while check the brown girders to your left. Some Squawkers will spawn near here and fire on you if given the chance. Take them out before focusing on the others.
If you don’t see anymore enemies but the round hasn’t ended, make your way toward the middle of the area to draw some fire and learn the enemies’ positions.
While you’re more exposed out here, you’re near the end of the skirmish and you can take some Mind Slaves to help out.
Exit through the door near where you found the Red Stutter.
Take cover at the first corner. There is a Squawker waiting to get the drop on you.
Take him out then move up to the next corner.
The enemies are around the left so you can’t really grab actual cover. Just look for an opportunity and peak out to take down the first Squawker.
Run forward and into the left alcove. Fire on the next Squawker from here.
Now the next corner is a little tricky.
There is a Thumper waiting right on the other side ready to put the hurt on with his shotgun.
Peak around and take a shot or two to get his attention.
The Squawker assisting him should move behind the next wall and the Thumper should take some steps toward you.
You can’t fire from the cover of this wall so you just have to fire while moving, like in the alcove.
Move out and fire until you’re hit then get behind the wall quickly to recover.
Repeat this until you can make him your Mind Slave, then finish off the last enemy.
Proceed forward to finish.
Scene 8-1 Destruction Site
Head left between the first two ramps for a Midas and two grenades.
Go up the ramp on the right and follow it forward.
When the battle begins, take cover behind the slab overlooking the construction.
Squawkers will funnel out from the left and right sides.
Hold your position and fire on them. Mind Slave any that move out into open space.
When the ground’s clear, fire upon the unshielded Squawker on the scaffolding in the back.
Now head left and down the other ramp.
Move into range and take out the last enemy. He can’t be damaged through his shield and he walks a lot so lead his right side and fire when he’s open.
Head forward and turn left. Then follow the tire tracks as they curve past the ramps.
Go through the door and up the large slope. Take cover behind the crates.
Three Squawkers will appear, two moving straight for you.
Mind Slave them quickly then dispatch the third.
Now slide right and look to the second level of the scaffolding.
Take out the shielded Squawker. If you have Mind Slave’s he’ll have to divide his attention between you, leaving him open often.
Continue up and through the door.
When the next fight begins you’ll have two Squawker right on you. Take them out quickly before grabbing cover behind the bike (lightcycle anyone?).
Move up to the next bike and take out the third enemy.
Move to the large white vehicle and sneak around the right side to get the drop on the final Squawker.
Move forward.
Take cover behind the nearest bike. The enemies are far away but the Midas can take out each of the Squawkers. Leave the sniper for now.
If at any point you get in the red, however, take cover immediately. The sniper will finish you off if you’re not careful.
As soon as they’re defeated turn around. An Icarus will try to jump you. Mind Slave him for his efforts.
Four more Icarus soldiers will fly in now to support the sniper.
Take them out with the Midas as well. Two of them are equipped with sniper rifles but this just means they’ll wander out from cover for a shot.
When they’re defeated turn around to find another Icarus trying to sneak up on you.
More soldiers will appear at the end of the street as well as two rocket Furies.
Focus all of your attention on the Furies. These guys will get in close and knock out both you and Lyle quick, meaning game over. Don’t give them a chance. If one of the previous Squawkers happened to drop a Stutter, now is the time to use it.
With them gone you can breathe a little. In fact, why take out the last wave yourself when you can have an old friend do it?
Go into Wanderer mode and teleport around. For some reason the big gorilla from before is here. Hack into him.
Use the big guy to sneak up on the enemies and swat them with his melee. If you’re lucky they won’t ever notice you. If they do, however, he goes down fast.
The sniping Icarus is all that remains.
Become a Wanderer again and take control of one of the security guards. They’re much closer to the sniper and he won’t notice them at first.
Two things to be careful of here: First, the guards only have handguns, and the second, the sniper will fire much more frequently against them.
Just fire on him while he’s reloading then move behind a pillar before he shoots.
With the area cleared move Jim left to the objective.
Scene 9-0 Future City
Take cover behind the left terminal and fire on the Squawker on the upper left platform.
Turn around and grab the Midas and Long Arm.
Charge forward to the riot glass.
The sniper is on the upper platform just ahead. Wait to fire until right after he shoots.
There is a Squawker right behind the cover at the top of the stairs.
Sprint to the terminal on the left and quickly take him out.
Use the terminal for cover and finish off the second Squawker.
Now turn right and quickly get behind cover.
There are four Squawkers on your level and a sniping Icarus at the top of the next stairs. The sniper fires and reloads at a predictable rate so take him out first.
Deal with whichever Squawkers are closest first.
Finish off the other bottom two then look up toward where the sniper was to find one last enemy. Finish him off.
Head up the stairs then turn left and go up the wide set.
The hard part here is actually taking out the Squawkers, not the Slider. He just makes things a little more complicated.
When you first start out, take cover behind a terminal. No matter what, don’t get behind the half-sized Nerkas barriers. One hit from the Slider will take you down.
From your cover, fire on any Squawkers you can. Be sure to listen for the Slider and don’t pop out when he’s about to fire.
Move to the other terminal to get an angle on the other Squawkers.
When you’re ready, sprint up to the riot glass on the left. This will let you take out the rocket toting enemy if you haven’t already.
With the soldiers cleared it’s time to go toe-to-toe with the tank.
Remember that the Slider makes a distinct sound, as well as stops moving, just before firing.
Stand in one place to draw its aim then dive out of the way before it fires.
Sprint to the Thumper.
Wait for another shot then fire your rockets.
In between Slider attacks, resupply at the gun rack halfway up the left side.
Don’t worry about getting behind cover, just keep firing, reloading, and dodging.
When the vehicle erupts, head past it.
Move past the terminal and two Swarmers will charge you.
Concentrate your fire on one as you move slowly backward.
Enslave the first one that goes down then do the same to the other.
A Squawker is hiding behind each of the pillars.
When they’re gone two more Swarmers and Squawkers will appear.
Again, prioritize the Swarmers and try to keep your distance.
Proceed forward.
Scene 9-1 Steel Giant
A Gun Wheel will head straight for you. Destroy it.
Grab the gun and grenade.
Move up the stairs a few steps and notice the Squawkers above.
Let them come forward some more before taking them on. Mind Slave who you can.
Two more Gun Wheels will appear backed up by several Squawkers.
They’ll be bunched together so this is a good time for the grenade.
Head straight through the gate.
Move toward the center of the plaza.
This boss fight is pretty tedious so stay patient and don’t get reckless.
The Giant Foot has several attacks. The most dangerous is a double missile fire. When you see two red lines appear, sprint out of there completely. If you’re worried that you can’t make it in time, stay in the center and move toward the mech to limit your exposure to the blast radius.
If you get in too close to the side or front he’ll open fire with a machine gun. This will actually lessen after we do some damage to it.
Eventually it will make a warning sound and then fire a barrage of small missiles. Sprint away immediately. If you’re unlucky enough to get caught by more than one you’ll be toast.
The final attack is one you may never see but can be deadly. If you’re taking too long with the fight the Giant Foot will open its shoulders and fire several large missiles into the air. Red vertical lines will appear indicating their targets. Again, get out of there.
Time to fight. Grab the Thumper immediately to your left.
Move up to the first row of tall dark-grey boxes.
Turn toward the entrance, and using your regular gun, take out the Squawkers.
Now fire one rocket into each of the light-grey cylinders sticking out of the Giant Foot’s back.
Now sprint to the gun rack on the right (highly exposed) area of the plaza. Resupply and sprint back behind some cover.
Fire another rocket into the barrels of Giant Foot’s two large arm cannons. They’re the guns on either side of it that stick far forward. You need to hit the barrels, not where they’re attached to Giant Foot. Wait until its stopped moving to make sure you hit.
This will stall the machine for a bit but don’t relax.
Hit the gun rack again then dash back toward the tall boxes.
Move up to the second row and take out the Squawkers hiding behind the riot glass.
With them clear, fire on the Squawkers across from you. They’re accompanied by a Thumper but the launcher he uses has a limited range so take the Squawkers out first at range.
Now it’s time to deal with the Thumper. He takes substantially more damage to fell then others but keep on him.
Once he’s fallen run over and swap out your Thumper launcher for his Hot Head.
Immediately run back to the boxes as two more Squawkers and another Thumper will immediately come to take his place.
If you’re taking a lot of damage from the soldiers you can take out a few, but don’t kill all of them or a whole new wave will appear. Ignore the Thumper for now.
Time to finish off the Giant Foot.
The pattern you want to repeat is:
When he’s farthest away from the entrance, unload your Hot Head into the front of the Giant Foot. The rockets will explode after a short distance so make sure your reticle is red before firing.
As he’s moving to the other side sprint to the gun rack to resupply.
Fire into him until he starts to move again.
Resupply quickly then sprint immediately back to the Giant Foot. Go straight through the plaza and behind the second row of tall cover. If you’re quick enough you won’t get fired on.
Continue this process until he’s finally beaten. But you’re not done yet.
Get behind the second row of dark-grey columns and work your way through the Squawkers and Thumper that appear on this side.
It can be hard to get Mind Slaves in this area because of the angle of cover. Do so if you can but never expose yourself for too long.
If you have the Midas, take out the Squawkers near the entrance from a far. If not, move up to the first row and fire.
Be warned that this Thumper is touting a Thumper launcher so he can hit you from far away.
Fight him like you would a Slider: Fire, dive, reload, dive, fire.
You’re less likely to get hit dead on when in the open then you are to take radius damage from his rockets hitting your cover.
When the plaza’s finally cleared head toward the marked door.
Scene 9-2 The Awful Truth
Head forward and through the hall.
Grab the grenade and Midas.
Go through the door.
Grab the ammo beside you then turn around and enter the small room.
There’s a Red Stutter to the right.
For someone without any armor Lyle sure can take a lot of bullets to the face. But don’t worry, he poses almost no threat.
Enter the main room. If Lyle hidden behind the far workstation, take cover at the closes end of the drawers to your right. This will give you a good angle on him, even when he’s not popped out. If he’s behind the far drawers, take cover behind the nearest desk on the left.
After you whittle Lyle down awhile some Squawkers will appear from the far door. Mind Slave who you can then get back to fighting Lyle.
Once he’s defeated more Squawkers will appear but from a door to the right of the other. Just shift your cover on the drawers (so you’re on the same side as the citizen) and let them come to you.
After Lyle escapes (how is he alive?) exit through the back door and down the halls.
Scene 10-0 Campus
Go down the stairs and turn right.
Sprint over and grab the Midas and Stutter then take cover.
Move to the right riot glass and pick off the Squawkers. If one is persistent in his hiding, slowly work your way forward from the left side to finish him off.
Move up to the building wall and take cover.
There’s one more Squawker just on the other side.
Get to the curved cover and stay on the angle so you can catch the two Squawkers that appear to your left.
Shift to the left riot glass and pick off as many enemies as you can.
After enough some Swarmers will appear. Leave your cover if you have to but prioritize getting them on your side.
Squawkers may try to make their way past the large columns on your left so don’t get too distracted by the enemies straight ahead.
When no more Swarmers appear move up the left side of those large columns and clean out any remaining Squawkers.
Note that there is also another ape you can Mind Hack if you want but I’ve found Jim can’t really be trusted to fend for himself, and the fight here is pretty straightforward.
Head to the door in the back.
Scene 10-1 The Lowest Circle
When you begin you’ll be under fire but the enemies are far away so grab the guns and grenades.
Take cover behind the first left terminal.
Fight off all the Squawkers you can then move to the right terminal to get an angle on the others.
With most cleared, sprint up to the first bus stop ad wall.
Peak around the left and take out the Icarus sniper.
The Hawke won’t cause you much grief if you’re in here so don’t sweat him.
Eventually a Thumper will appear. First take out any Squawkers he brings with him.
Now fight the Thumper like you did the others – diving and firing.
When he’s beaten sprint up to grab his rocket launcher.
Fire on the Hawke. It likes to shift around so catch it just as it’s finishing a movement.
Resupply with the ammo from the new Thumpers that appear and keep firing at the Hawke until you take it down.
Clear out any remaining enemies and head left out into the street. Don’t get rid of the Thumper just yet.
You’re out in the open against a Slider, Thumper, and some Squawkers, but really, taking cover is going to cause more hassle.
Take out the Squawker nearest you and any others that are giving you trouble.
If you have any rockets, use them on the Slider.
Beat the Thumper soldier and resupply with his weapon.
Fire again on the Slider.
One more Thumper, one more volley on the Slider.
The biggest risk here is too pay too much attention to one enemy and forget to check whether you’re going to get a rocket to the body. Use your ears and listen for the Slider. Don’t let any living Thumpers out of your field of vision.
Acrobatics finished, head to the gate.
Scene 10-2 Headquarters
Take the weapons, then after the cutscene, the grenades.
Two Squawkers will run up on you, stay back but deal with them quickly.
Get behind one of stone pillars nearest you.
Peak out the side and fire on one of the two rocket-toting Thumpers. This is one of the only times I recommend using cover against them because the pillar will protect you from all damage.
When one’s finished, move to the other pillar and attack the same way.
Squawkers may try to run into your area so check periodically for any getting too close.
There’s a gun rack to the right of right pillar near the stairs. Use it as necessary.
Move up to the forward pillars when you’re confident no more will rush you.
Aim down and take care of any Squawkers, then turn your attention on the shotgun Thumper.
Head down the stairs into the clearing.
You’re faced with two Golems and a replenishing supply of Squawkers and Golems.
Grab the Thumper rocket launcher and take cover. Pick one of the Golems to focus your attention on. Fire your rocket on him.
The problem now is that the Golems will move in and block your access to the gun rack.
Switch to Wanderer and Mind Jack someone on the far side.
Take out the Squawkers here (enslaving if possible) then bring down the Thumper.
Take his launcher and fire on the same Golem as before.
If you don’t get the mechs’ attention, sprint in to the gun rack.
They’ll likely notice you then so get out as quickly as possible. Fire and resupply as much as you can.
If you’re killed, grab another civilian and use them to sneak up on another Squawker/Thumper team.
When you bring down your first Golem two rocket Furies will appear. Like always, try to keep your distance and concentrate all your fire on bringing them down. These guys are your biggest threat.
Eliminate the second Golem and any remaining enemies.
A quick tip if you’re having trouble. Prioritize whichever enemies are not focused on you. If you’ve got the Golems on your tail and you’re near some soldiers, take them out (or Hack into someone who is closer to them). If the Golems aren’t around but you’re in danger of regular fire, eliminate your most pertinent threat first, then attack the Golems.
Scene 11-0 Unwelcome Strangers
Grab the gun and ammo ahead then go past the escalators for two grenades.
Proceed up and get to cover right away.
Focus your fire on the Quick Draw in the center. He’ll try to get in close if you give him the chance.
Next eliminate the Squawker, then the second Quick Draw.
Fire on the Squawkers above as you make your way up to their level.
Take cover behind the first column at the top of the escalator.
If you’re able to stay here when you defeat them you’ll get a nice little bonus.
Three Squawkers and a rocket Thumper will appear just across the way from you. By being up on their level already, the rocketeer will blast two of his allies trying to hit you. If you’re lucky, he may even take out the third.
Take down the poor aimer then make your way around, restocking on the abandoned guns and grenades.
When you turn the corner, putting yourself now on the same side as the original Thumper, two more – with shotguns – will appear.
These guys are brutal at close range so take cover behind the first pillar to keep your distance. You’re going to take damage when you pop out to fire but just pull back as soon as you get in the red.
Proceed forward until the walkway bends.
Get behind a pillar and take out any Squawkers below you can.
If they’re in hiding, move forward toward the escalator and aim down on them.
Head down.
Get behind the nearest support pillar but don’t actually take cover.
The Squawkers are going to appear on the upper floor to your left. Focus on keeping them away for now.
When you don’t have to worry about Squawkers getting an angle on you, peak out with the Midas and take out the sniping Icarus. There are only two but the Squawkers will resupply for awhile.
The real potential problem here is running low on ammo. Save your Midas for the Icarus. If it looks like you’re getting low either allow some Squawkers to get to the bottom floor or rush your way to their level. Just be sure to use your cover.
Scene 11-1 Doorway
Use the riot glass that appears to take cover from the first wave of enemies.
There are a lot of grenades lying around so feel free to use yours.
Get behind the pillars near the top of the escalator and fire down on the enemies below. Having the Thumper as a Mind Slave is very handy here.
Move down to the lower level and cross over.
Fire up at the Squawkers and Thumper that appear.
Try not to use the silver terminals for direct cover because you can lose a lot of bullets into them when trying to fire from behind.
Head up the escalators and clear out anyone left.
Move toward the elevator to begin the last fight in this scene.
Squawkers will appear above you but don’t get distracted.
Look down the right escalator. A Squawker and Thumper will try to get in close to you.
Take them out, then the Squawkers above.
A rocket Furie will appear. Focus on it.
Now the entire wave pattern begins again. It’s a good idea to keep as many Mind Slaves as you can to pull attention away from you because there are no citizens to Hack if Jim and Rebecca get defeated.
New Squawkers appear above but again they’re there to distract. Watch for the Squawker and Thumper coming up the left escalator.
After them is another Furie and the last Squawkers on the third floor.
Scene 12-0 Echoes
While there are a few more quirks to fighting Lyle this time around he’s still nothing to fear.
There are a couple of ways to win this fight but what follows is my preferred strategy.
Leave the shotgun and move right behind some bookshelves to grab the Midas.
Fire on Lyle as you work your way around the outside until you reach the Red Cobalt.
Now switch to Rebecca.
Have her pick up the shotgun.
The reason for this setup is that Lyle seems to focus most of his attention on Rebecca. Since she’ll be in closer, let her use the Hammer.
With Lyle focused away from you, don’t worry so much about cover as getting precision headshots with your loadout.
If Lyle turns on you, dive behind cover.
Periodically throughout the fight a standard Furie will show up. Take it out before turning back on Lyle.
After another ungodly amount of bullets, Lyle will be defeated.
This is it. The final fight.
For the first stage of this fgight rush over and grab the Red Stutter.
Quickly switch to Rebecca and have her grab the Red Hammer.
Now go back to Jim. Again, Rbeca will draw most of the attention so she needs the close-range weapon.
Make note of where the gun rack is and try not to forget its relative location.
Here’s the pattern for this first sequence:
Let loose into Gardner as much as you can.
Rebecca will get wounded.
Let Gardner charge you. When he’s just over 2/3 of the way to you, dive away.
Heal Rebecca.
If he charges you, dodge again, then
Restock at the gun rack.
Continue this process until Gardner is knocked down. Use this time to restock or get Rebecca a better gun if you chose not to before.
When the second round starts make sure that you don’t have Gardner’s attention then head straight for the nearest rocket Furie. Don’t worry, they’re not there to attack you.
Whittle one down then take direct control of it.
Use the Furie’s rockets to break through the glass around the outer wall and to destroy the red panels behind them. The rockets have a limited range so you need to be moderately close. Getting really close can actually result in breaking the glass and destroying the panel in one shot.
The other Furies will try to destroy you so just focus on attacking the panels.
If you run out of rockets or are destroyed switch to Jim.
Double check you’ll be safe to turn your back on Gardner then immediately take control of another Furie. Somehow Jim and Rebecca are actually able to take care of themselves without you this time.


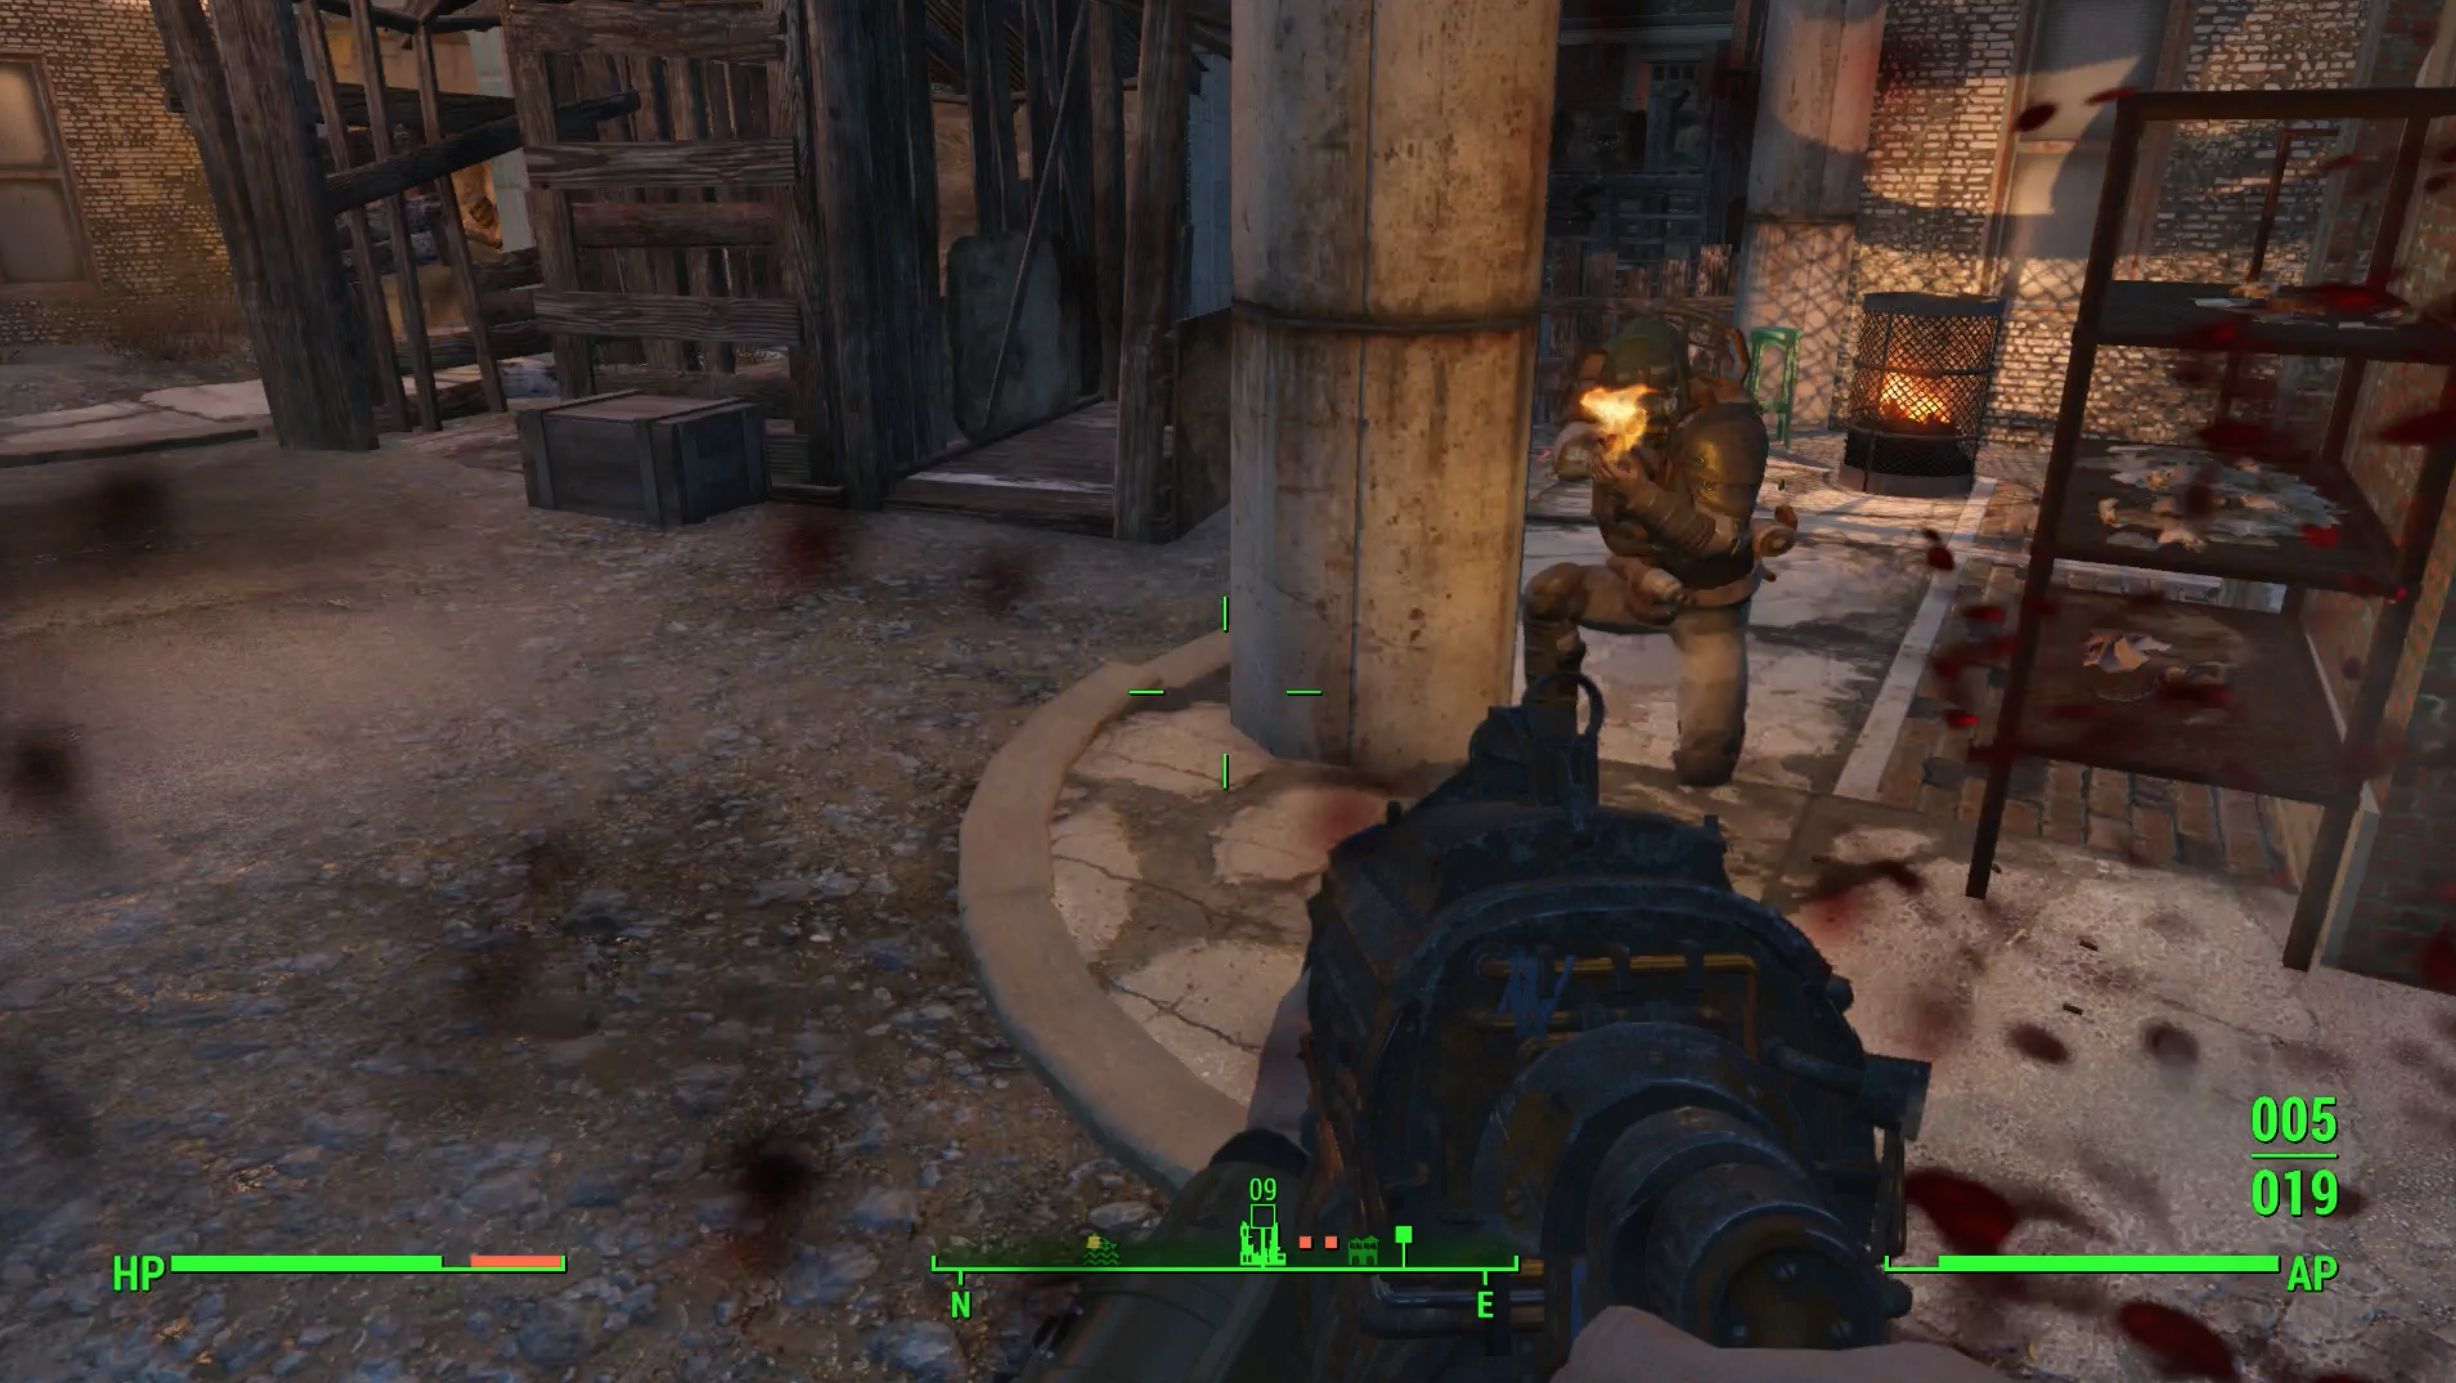 Fallout 4: Rogue Courser walkthrough
 4 Free Magnificent Marvel Games For Android
 Windows 10 Can Auto-Remove Software Against Your Will
 How to Complete GTA 5 Online Series A Funding Heist : Weed
 How to Stream or Broadcast Gameplay videos on PS4 using Twitch