Siegfried Line is map many players look at the same way in terms of what to do. Mediums and fast tanks in the field to play aggressive, TDs/snipers support the field, and everyone else sit on the outside of town waiting for the enemy to make a move. This mindset might seem correct but is quite the opposite for putting yourself in a position to do a ton of damage and have your team easily win. playing the town aggressive while defending the field will allow your team to take control of the main cover from SPGs on the map while taking a large chunk of the enemy out. Both sides of the map are almost identical tactic wise the main differences are the bases with side 1 being flat with specific routes and side 2 being more hilly with no obstacles.
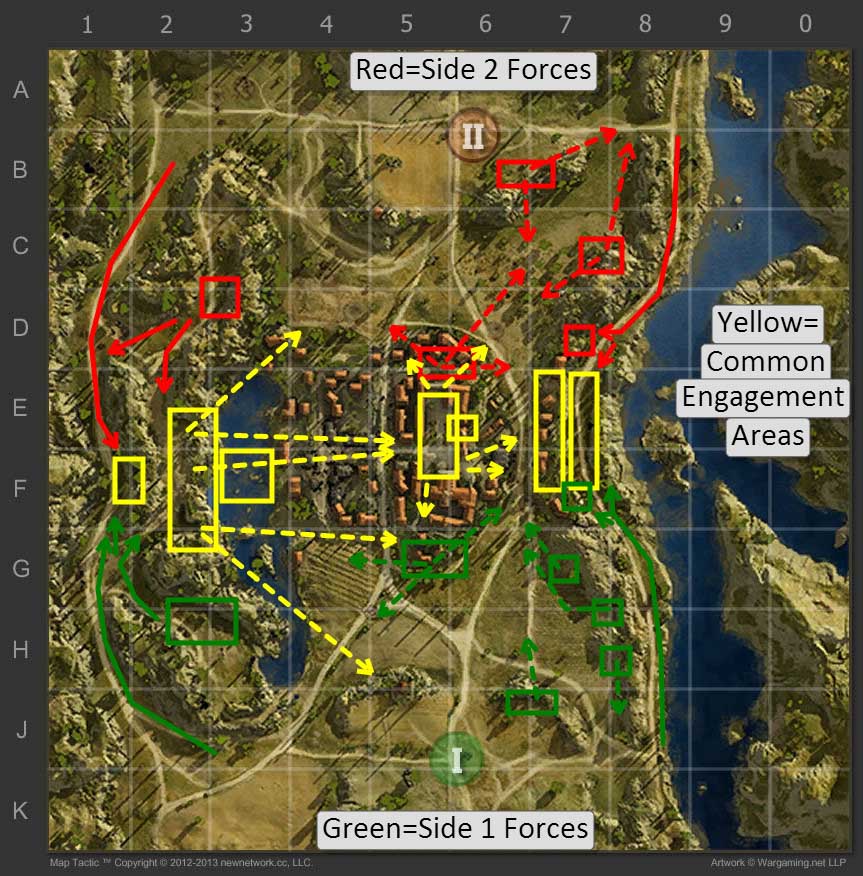
The red routes are initial routes/locations used for side two on the map while the green routes/locations are for side one. Yellow refers to “shared” locations that are typically engagement areas which are fought over by both teams. Solid routes are initial routes taken from the spawn to the front lines.
This map you see below was drawn up using MapTactic which is a very easy to use tool for making strategies for World of Tank maps. It works directly in your browser and has no cost to use it.

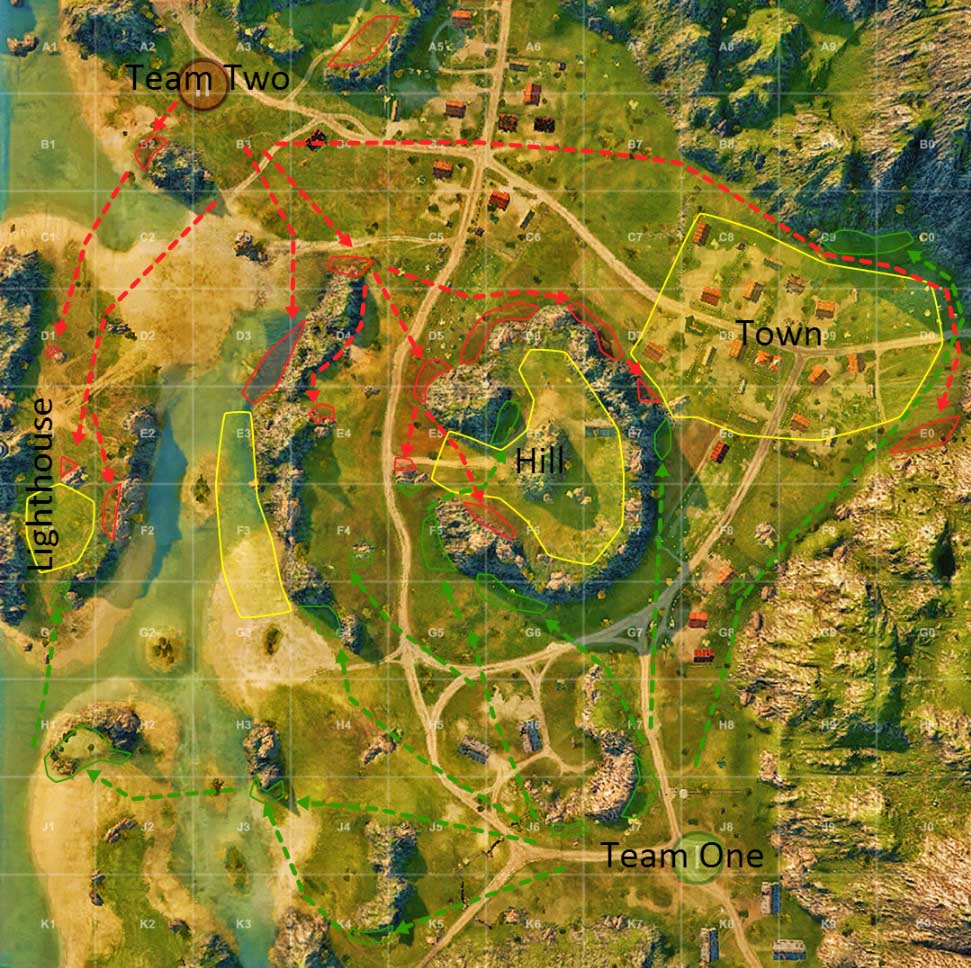
The field has limited cover to move to as you reach the center of the map. The outlined green circles mark good places to set up against oncoming enemies foolish enough to push across the field. J3/J4 are great for mobile tanks to set up in relative cover and spot incoming enemies for those in the 6 line. Depending on how the match goes you can either move up after a few minutes pass or fall back to base and head through town.
The F5/G6 positions are good for TDs and heavies who have accurate guns to set up and fire on any enemies pushing south. Both provide cover from SPG fire and allow you to take out players who rush. Later on you can either push up the 5 line if the field is semi-cleared or head through town.
This area of the town spans the 6-7 lines of the map. For side 1 you have the option of setting up in what looks to be the safer spots in F6/F7 which allow you to peak out and shoot enemies pushing towards you. However F6 can be hit by SPG fire and forces you to leave cover to hit enemy tanks set up on their side of town. Taking the fight to them by pushing into the horizontal road in E6/F6 marked in yellow traps the enemy outside of the town in the north. Pushing to E7 on the backside of the building is also an option if your team has people heading to the E6/F6 horizontal road. From here your team can defend against a push and also slowly pick off the enemy. Entering the horizontal road is easiest through the eastern entrance.
This area of the town spawns from the 8 line to the 0 line and is a bit more open than the west field. Pushing into the E8 yellow outline is better than setting up outside of the town in south since it allows you to support the E6 position and also firing into F0. F9/F0 is a bit more difficult to push north from and should play conservative at first and then push if the enemy has a smaller force on this side of the town. While pushing through town it is best to push to E8/E9 so that both sides of your team’s town forces and support each other.
Playing as a SPG on this map provides you with limited areas to set up. Setting up from the 7 line to the 0 line will give you the most protection unless a scout zips down the 0 line. From here you can hit some spots in town and the entire field. Setting up in the 3 line to the 6 line allows you to hit different town locations and also defensive locations in C6/D5.
Much like side 1 the field provides limited cover for advancing tanks heading south but provides adequate defensive locations to squash enemy tanks heading north. Mobile tanks can set up in C2/B4 in decent cover and spot incoming tanks while the locations in C6/D5 can be used by heavy/TD snipers to pick off enemies. Later on the 5/6 line can push south through the 5 line if the field is relatively safe and the mobile tanks can head south through the field.
Much like side 1 you can chose the “safer” option of setting up in E6/D7 which will lead to you being pinned in a bad location and flanked. Or you can push into the E6/F6 horizontal road and/or into the F7 yellow area to prevent the enemy from making it into the town. This side it is viable to enter both from the west and east entrances of the horizontal road. Pushing on side 2 is more critical to victory since you will prevent the enemy from using the F8 position against you.
Playing aggressive from this side is easier since you can straddle the 9/0 line(do not drive down the road on the edge of the map) and make it to the backside of the F9/F0 building. This location allows tanks here to support the other side of the town if enemies advance and pins F9/F0 enemy forces in a bad position since rounding the corners for them will spell certain doom.
Setting up as a SPG on this side of the map provides many more locations than the southern side. Setting up in A5/A6 will give better shots into the field and 5/6 line along with hitting F9. Moving over to A9/A0 will open up shots into F6 and the backsides of the enemy’s defensive locations in the field.
The option to set up further south in the B/C lines is also viable since you can easily back down the slopes if spotted and enemy SPGs will have a difficult time hitting you. This is mainly to counter any scouts that zip north through the 0 line into base allowing you to run away to friendlies in the D line.
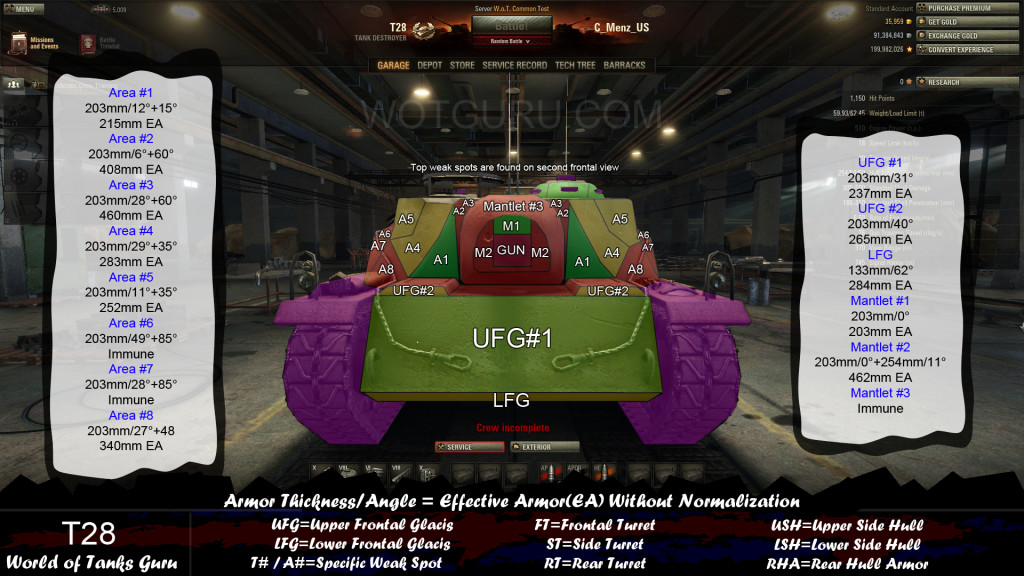 Weak Spot Guide: T28 - World of Tanks Guru
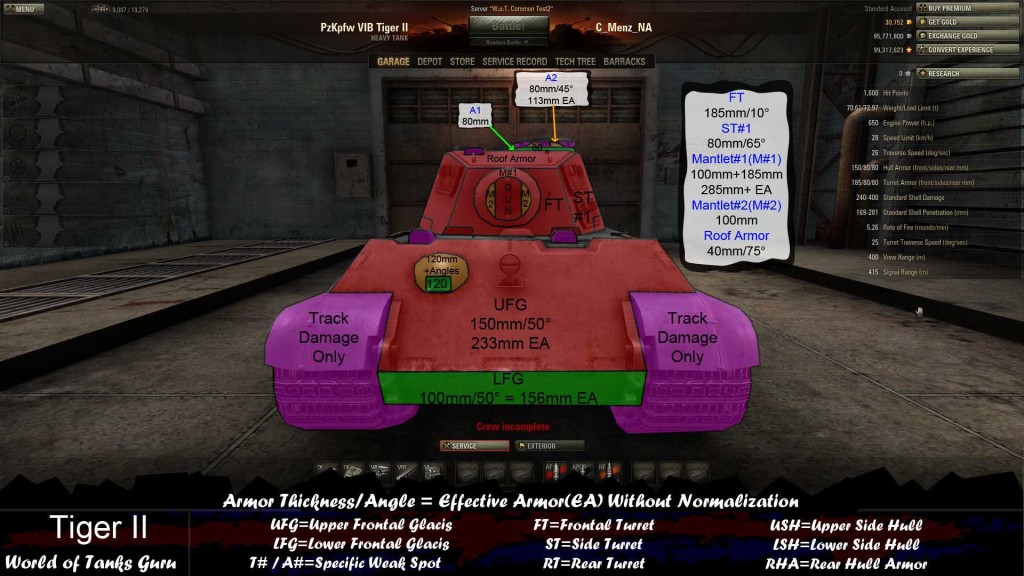 Weak Spot Guide: PzKpfw VIB Tiger II - World of Tanks
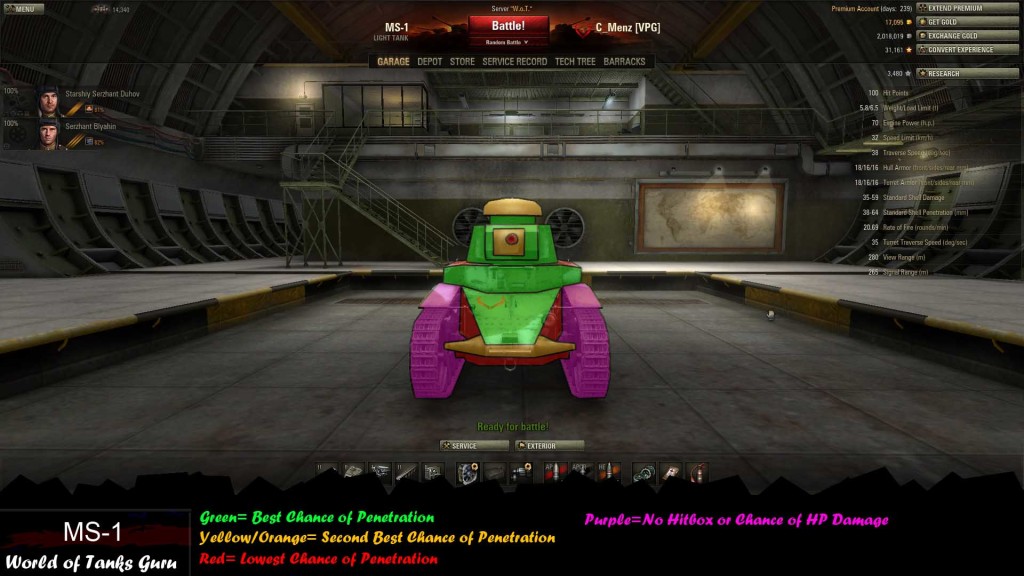 Weak Spot Guide: MS-1 - World of TanksMap Strategy: Abbey - World of Tanks
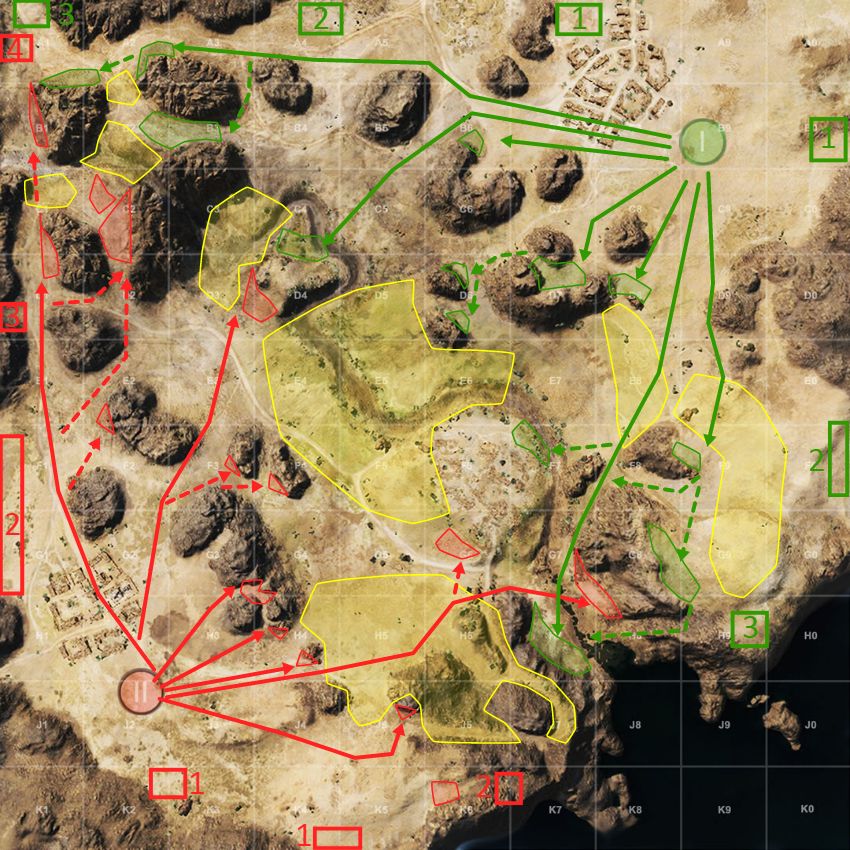 Map Strategy: El Halluf - World of Tanks