
Wolfenstein: The Old Blood guide is not only a richly illustrated compendium of knowledge for the players new to the lore, but also a complete compilation of gameplay hints and a list of locations of collectibles which otherwise could be overlooked even by experienced players. This guide is split into several main chapters. The first one describes the overall game and gameplay mechanics for players who just start their adventure with Wolfenstein. The next chapters consist a complete walkthrough. There you will learn how to beat the game on the highest difficulty level (Uber), along with pictures and maps helpful in navigation. Further on, the guide details individual collectibles scattered across the game world. Each one is accompanied by a description and its precise location in the game. PC players may also find it useful to look up the chapter about the game's technical aspect. In that chapter you can find the game's system requirements and a commentary on its performance.
Wolfenstein: The Old Blood guide contains:
Jacek "Ramzes" Winkler ()
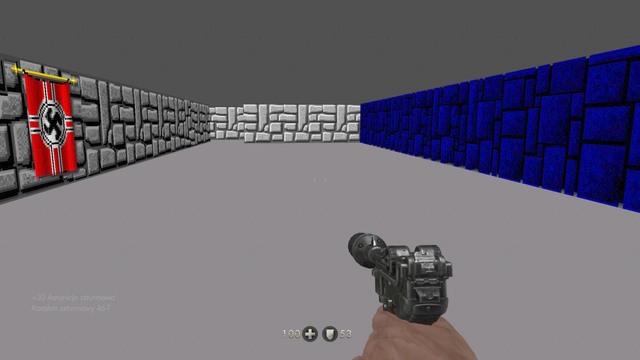
Key
Action

Movement

Reload

Knife

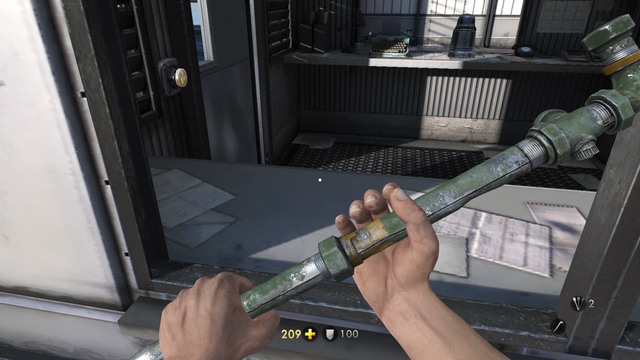
Pipe

Pistol

46-T Assault Rifle

Bombenschuss

Schockhammer

Kampfpistole

Next/Previous weapon

Last used weapon

Jump

Sprint

Crouch

Use

Dual-wield On/Off

Throw a grenade

Map

Alternative fire mode of the left hand weapon

Alternative fire mode of the right hand weapon
Journal

Take cover/Peek out

Shoot

Aim

Knife throw/Melee attack
Key
Action

Movement/Sprint

Rotate camera, look around

Dual-wield On/Off

Alternative fire mode of the right hand weapon

Map

Alternative fire mode of the left hand weapon

Use/Reload

Previous weapon
Jump

Crouch

Peek out/Take cover

Throw a grenade/Select weapon

Aim

Shoot
Journal

Pause
At any time you can open the journal menu. Here you can find not only mission objectives, but also your trophies and perks. Perks in The Old Blood are unlocked by completing certain objectives, such as killing a number of enemies with a certain weapon or collecting enough aid kits or pieces of armor. Below there is a complete list of perks along with descriptions and requirements.
Perk's icon
Perk's name
Perk's description

Eagle Eye
Shows markers on the map pointing toward collectibles. Requirements: kill 20 commanders.
Reload mash
Mashing reload button will speed up reloading. Requirements: kill 20 enemies with the last round in a clip.
Carry heavy machinegun
Allows you to carry a heavy machinegun (available in weapon selection menu). Requirements: kill 200 enemies with this weapon.

Quick turn
Automatically aims at an enemy standing behind you when you make a turn by 180 degrees. Requirements: kill 50 enemies from behind a cover.
Schockhammer clip upgrade
Increased Schockhammer clip capacity by 6 bullets. Requirements: kill 50 enemies with this weapon.
Bombenschuss clip upgrade
Increased Bombenschuss clip capacity by 6 bullets. Requirements: kill 50 enemies with this weapon.
Ammunition upgrade
Increased quantity of picked ammunition by 20%. Requirements: kill 100 enemies with dual-wielded weapons.
Grenade belt
Increased capacity of grenades carried by 2. Requirements: kill 3 enemies with a single grenade.
Armor upgrade I
You can reload the armor. Requirements: collect 100 helmets.
Armor upgrade II
Increases the maximum armor by 25 points. Requirements: increase your current armor to 200 points.
Kampfpistole ammo storage upgrade
Increased Kampfpistole clip capacity by 3 bullets. Requirements: kill 50 enemies with this weapon.

Tough skin
Reduces damage received in melee combat. Requirements: smash 10 heads with a pipe.
Health upgrade I
Increases health regeneration by 30%. Requirements: increase your current health to 200 points.

Health upgrade II
Increases health regeneration by 5 points. Requirements: increase your current health to 250 points.
Health upgrade III
Increases maximum health by 25 points. Requirements: kill 5 enemies in row while having extra health.

Vampire
Increases health on executing an enemy. Requirements: kill 25 enemies with silent executions.
This is the introduction to the game. Here you are going to learn the controls and overall gameplay mechanics. As soon as you take control of your character follow Wesley. While he is showing his documents, take a look around the room to find several letters that reveal some information about the story.
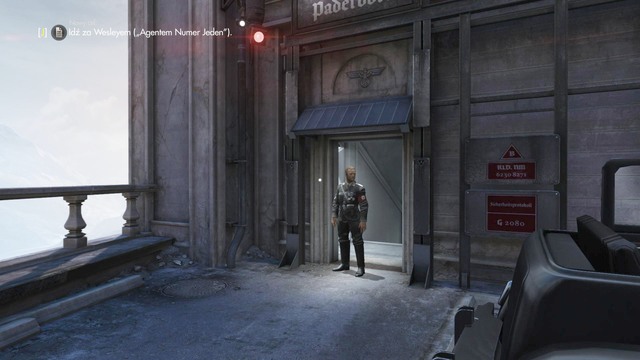
Go through the gate and give your documents to the guard. After a brief cut-scene keep following Wesley.
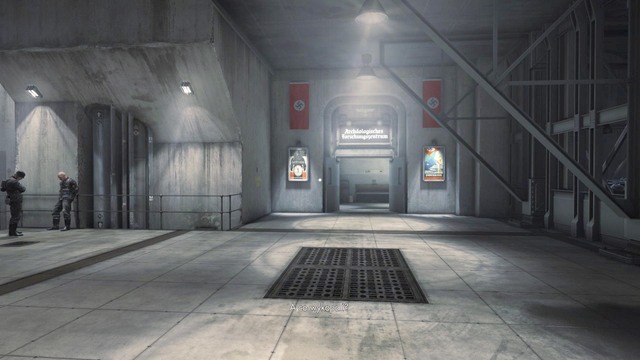
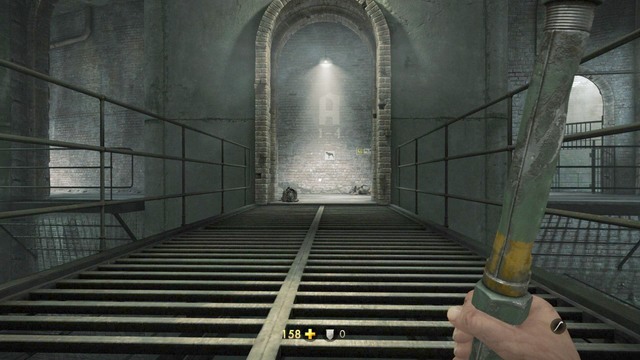
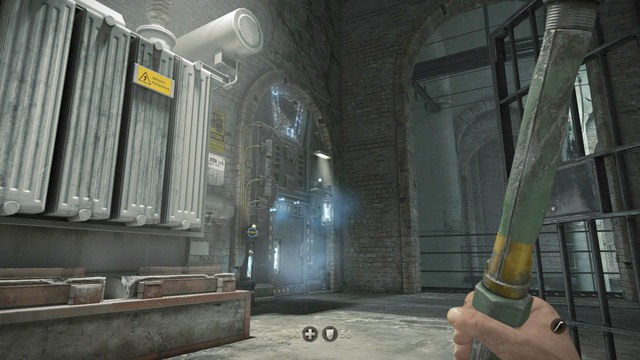
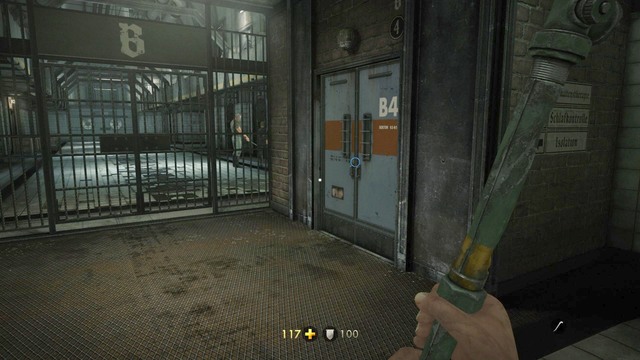
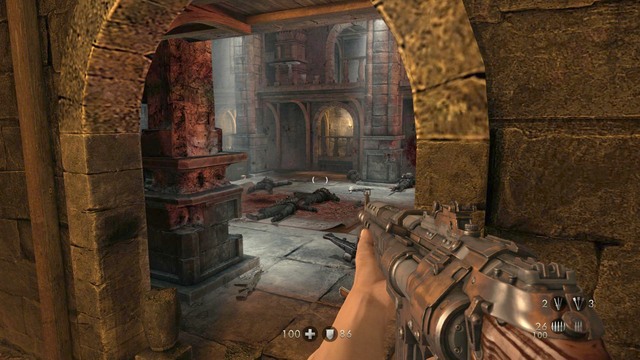
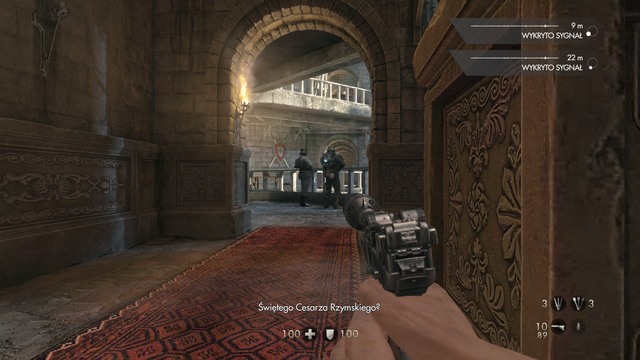
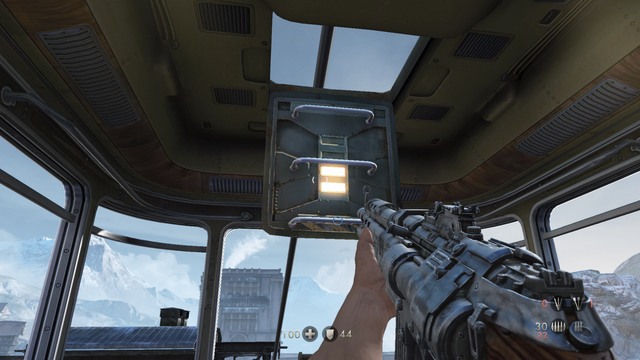
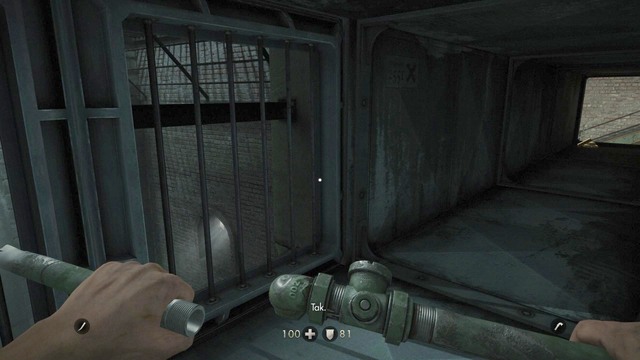
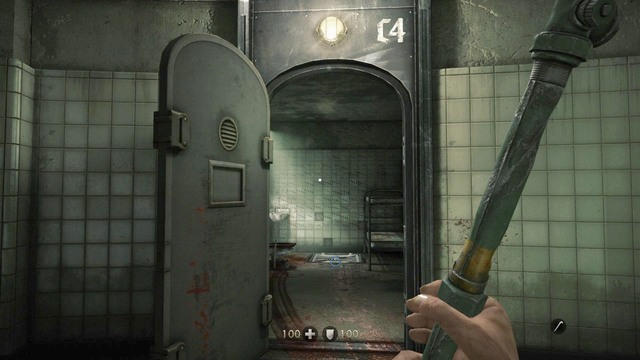
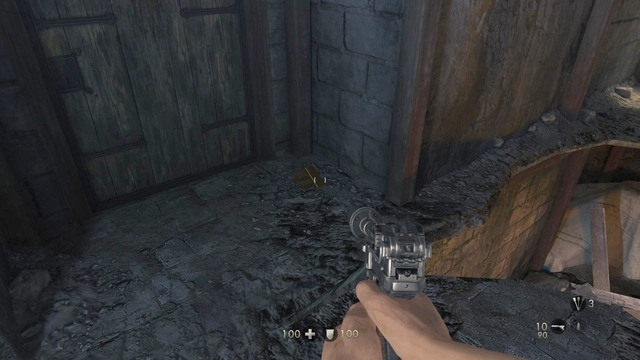
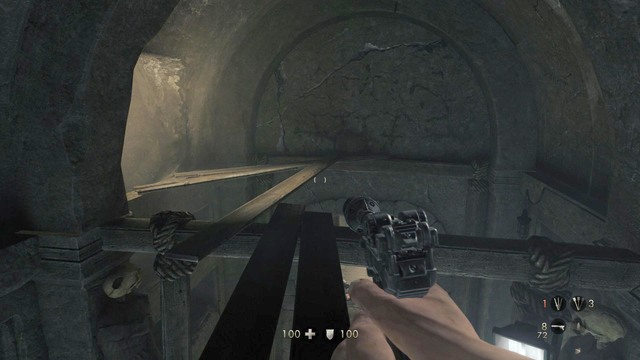
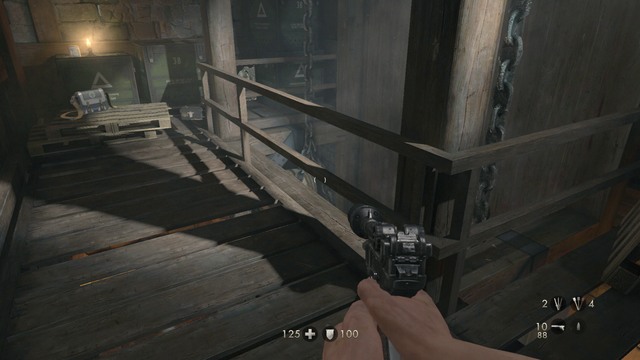
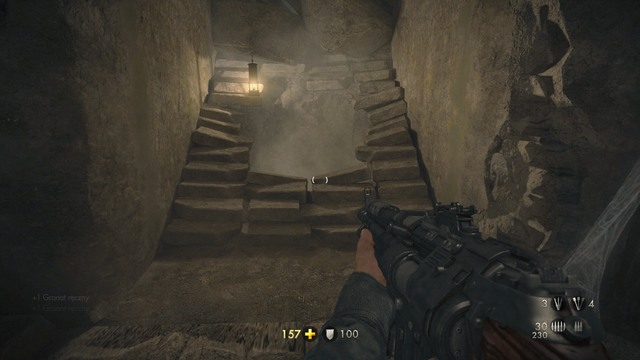
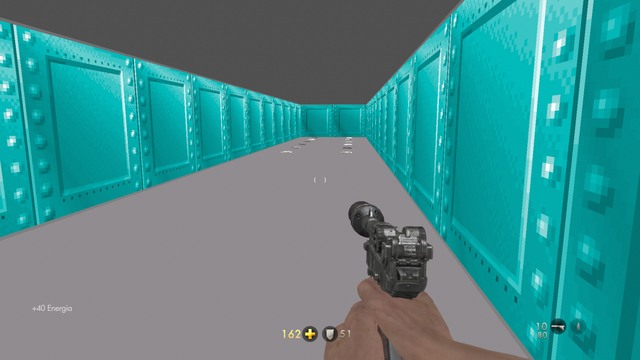
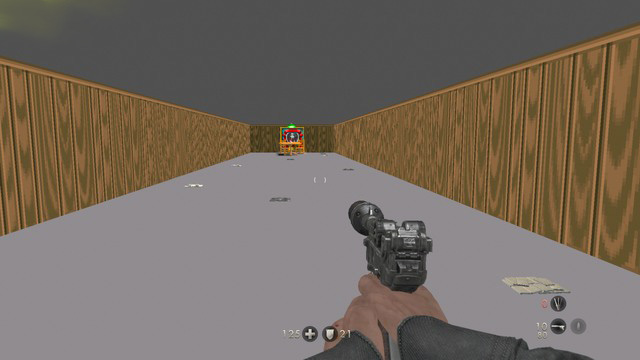
Follow Wesley to the railway, and once it has reached its destination, go out and head toward the exit shown in the picture. At the end of the corridor enter the elevator and go down to the lower level. Now the game will provide you with key information about combat.

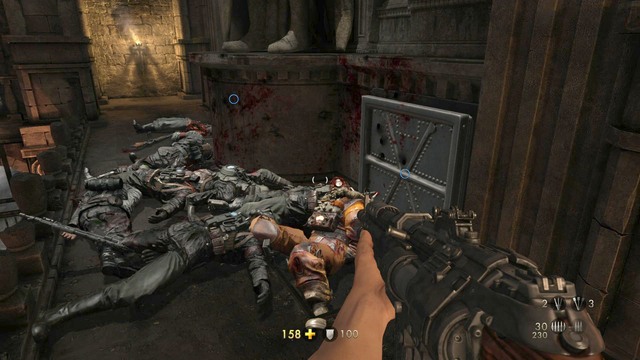
In the next room you will see two guards, whom you have to kill. You can do this silently or traditionally. Sneaking is an important gameplay element, so it is good to learn it right now. Approach the guard from behind and press the button as prompted on the screen, in order to silently eliminate the man. You can also take the second option and simply shoot the guard in the head.
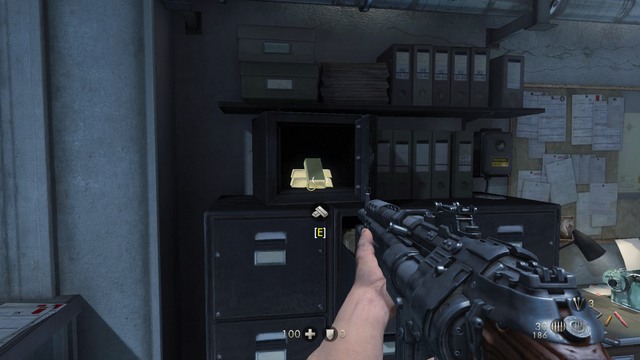
Regardless of how you do this, after killing the two guards you should look around the room to replenish supplies. At this moment you can unlock you first perk (Health upgrade I). In order to get it you have to collect most of the aid kits in the room quickly enough for your health bar to reach value 200. Here you will also find an ester-egg referring to Skyrim.
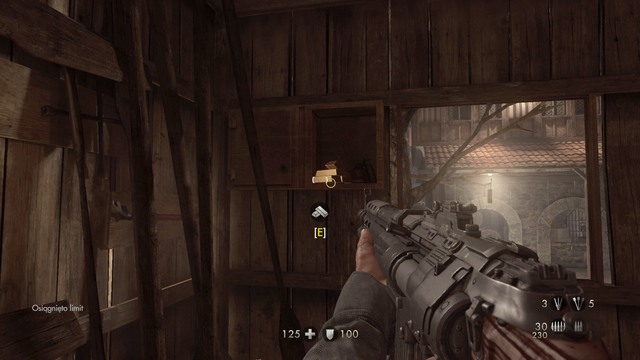
While Wesley is talking, use the time to replenish your armor (helmets, vests). On the wall between the two rooms you will find a big shotgun hanging there - take it to unlock the new weapon. The same is true for the machineguns lying on the floor.

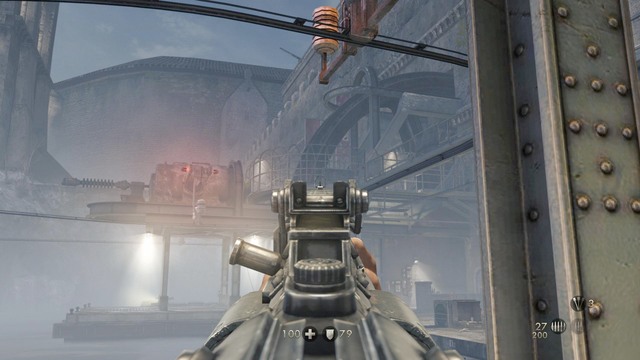
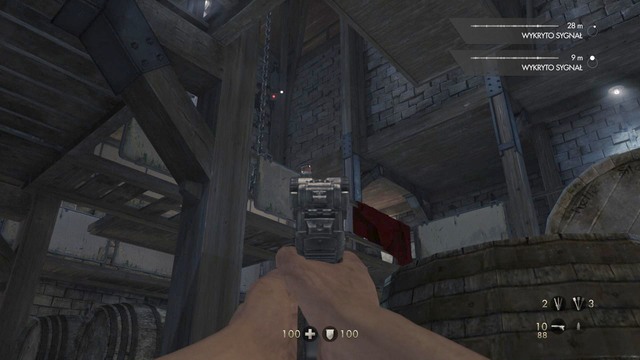
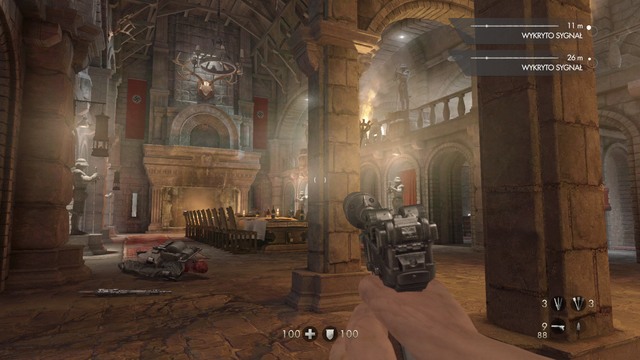
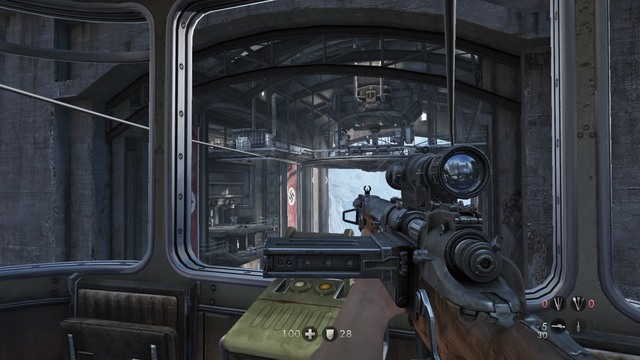
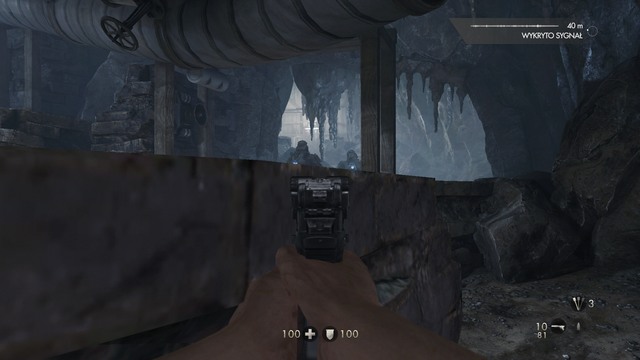
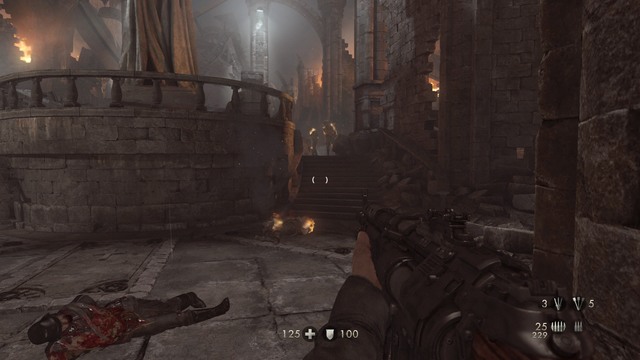
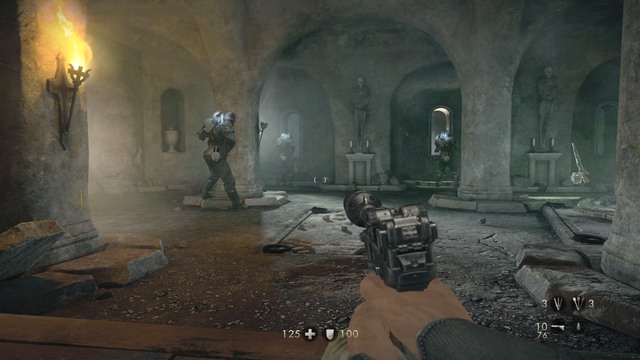
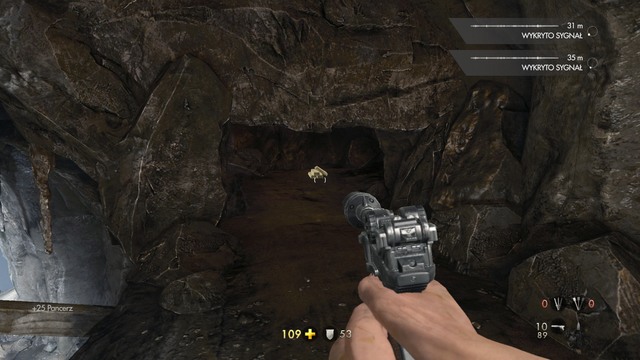
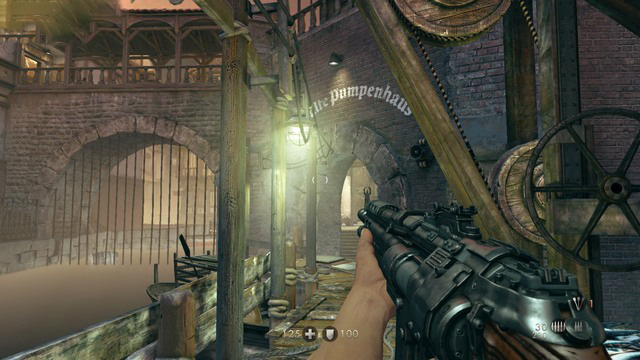
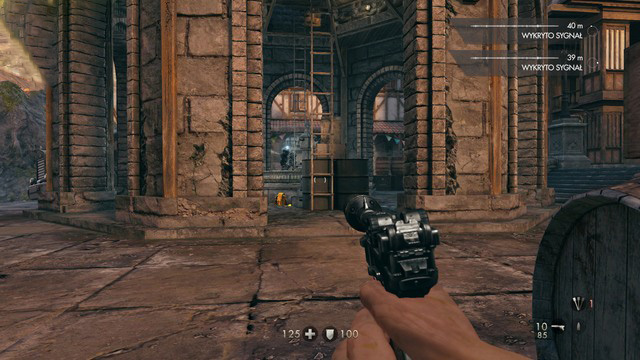
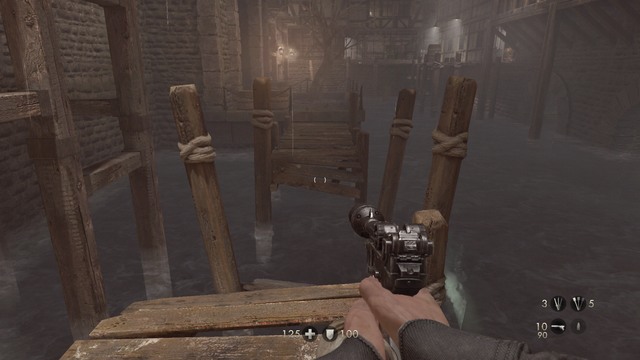
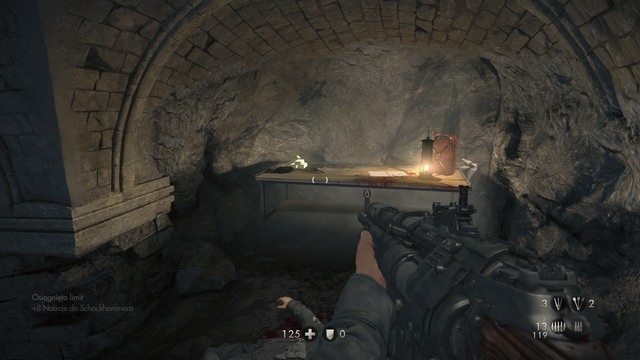
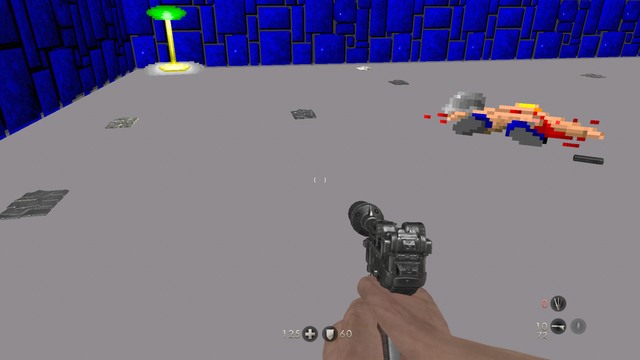
When you have collected enough supplies and are ready to move on, approach the radio in the middle of the bigger room, and use it. Now you will face a rather tough fight (depending on the difficulty level). Hide in the porch on the right or the one on the left (see the picture), so that the Nazis could not attack you from both sides. You have to be careful, though, of grenades that may be blowing around you quite often.
Most of the enemies is simply going to charge at you, so keep you weapon ready. After the attack, leave the room, and you will be able to see snipers lying in wait on elevated platforms. Once you eliminate them you will be free to proceed to the next level.

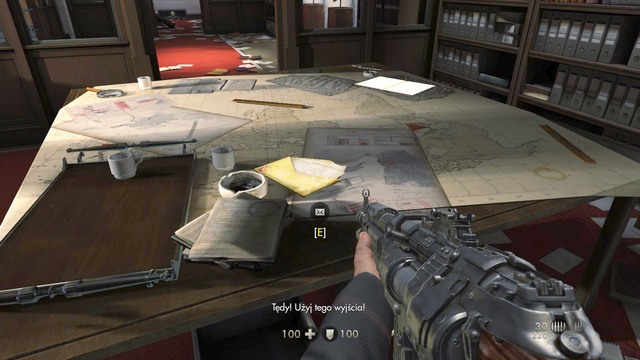
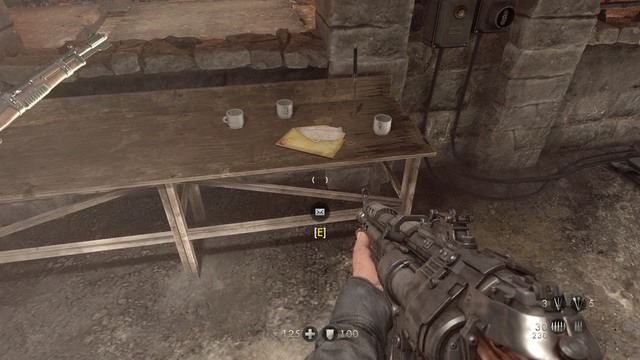
After replenishing supplies, climb up the ladder lowered by Wesley. On the upper floor, on the right, you will find a collectible letter from the prologue - it will be lying on the table. After collecting this, follow Wesley and proceed to the next level.

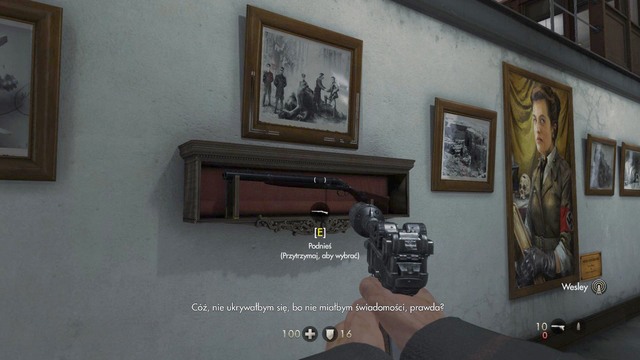
As soon as you take control of your character go to the recess, as seen in the picture, and pick up the letter lying on the floor. It gets unlocked in your trophies menu. After that approach the bars and talk to Wesley.
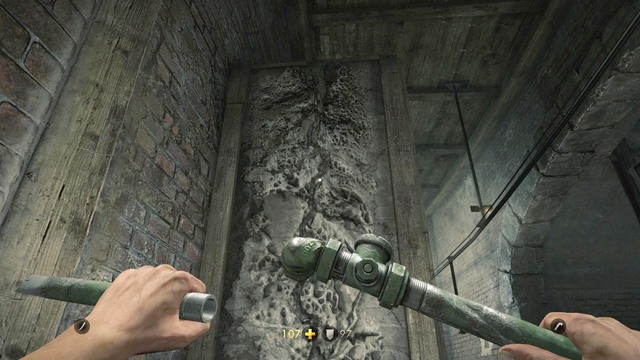
After the conversation approach the pipeline in the room and try to climb up. When you fall down, pick up the pipes from the floor and approach the white room, then start climbing again.
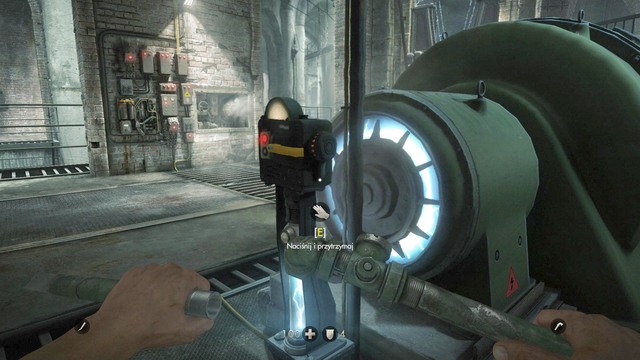
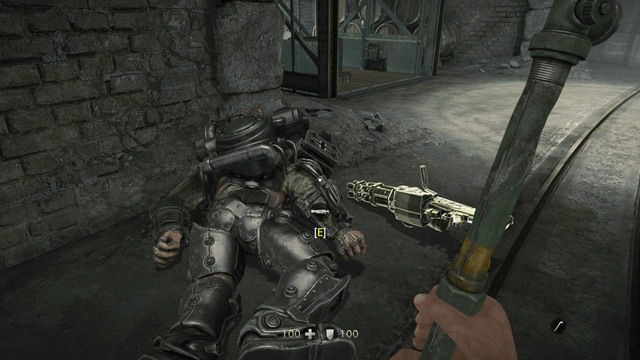
At the top you will encounter a supersoldier, who cannot be killed with conventional weapons. You have two options: either sneak past him or turn off his power supply and execute him.
The best method here is execution, so approach the generator, as seen in the picture, and hold the button prompted on the screen to turn off the power. After doing that you have a couple of seconds until the generator turns back on, so quickly get behind the soldier's back and perform execution.
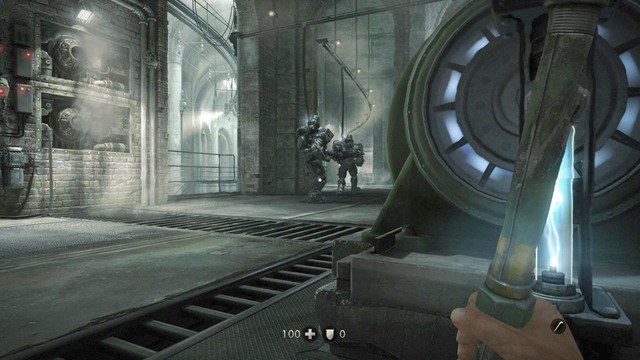
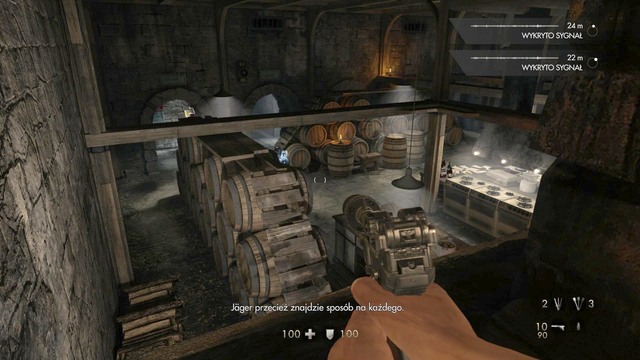
When you find yourself in the situation presented in the picture, wait until one of the supersoldiers does a full circuit and returns to his starting position. As soon as he turns his back at you, use the generator seen in the picture and perform an execution on him. Follow this pattern until you get to the main door, and proceed to the next level.
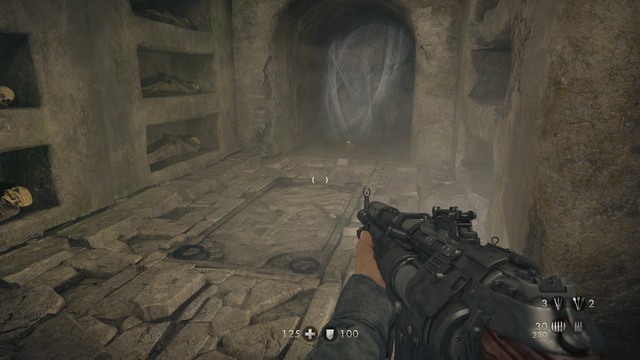
In the next part of the prison approach the map hanging on the wall there and update it. Here you will also find some useful supplies, so take them and head on. You will encounter a couple of dogs. Use sneaking ability to get past them, preferably eliminating them one by one from up close.
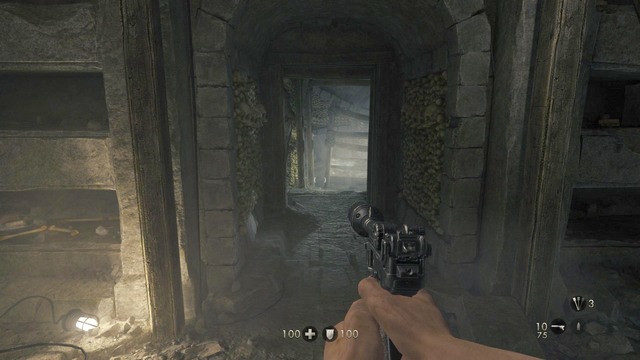
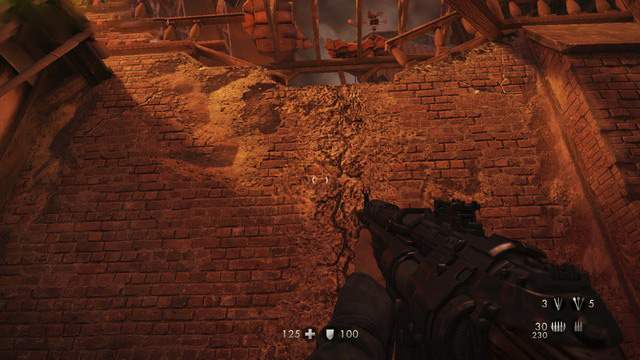
In the next portion of the stage you will encounter supersoldiers. Approach the generators and execute them the same way as before. After getting to the end of the corridor, turn off the generator by the door, as seen in the picture, and walk through the door. On the other side, jump on the pipeline and then jump down from its far end.
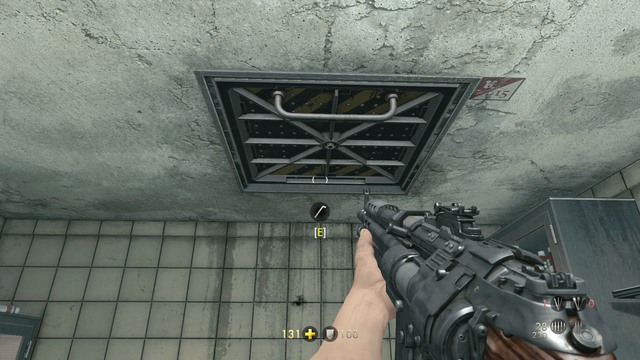
Down there you will see a white climbable wall. In the vent shaft on the left you will find the first piece of gold. The path on the right will take you to the main room.
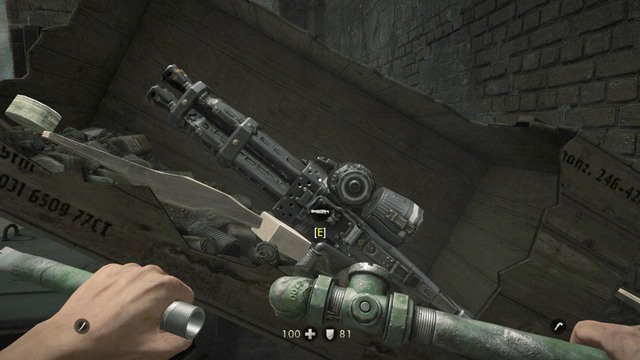
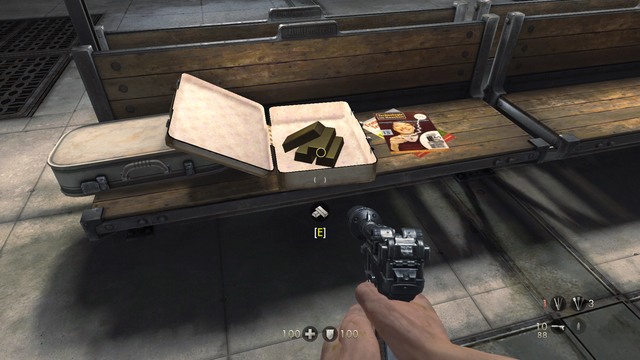
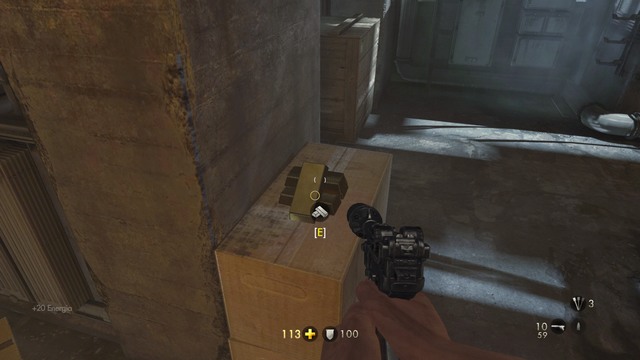
After leaving the vent shaft, you will see two supersoldiers. Once they both turn their backs at you, jump down the shaft and go to the left, where two generators stand. While still undetected, turn off one of them and approach the deactivated soldier to execute him. The other one can be killed with the weapon from the box (depicted in the picture), or you can do it as previously, eliminating him silently. Regardless of how you do this, after killing the soldiers go to the far end of the corridor, and walk through the door.
After using the door, crouch down and walk across the metal bridge to the place depicted in the picture. Silently eliminate the sleeping dog, so not to alarm the supersoldier. In front of the dog there is a whole that leads safely to the next room.
In the next room, you will see a deactivated supersoldier lying on the floor. You should execute him, because as soon as you turn on the power, which you need to do in order to escape, the soldier will attack you. After doing that, go at the back of the elevator, turn on the power, then get inside and go to the next floor. It is a good idea to take the weapon from the dead soldier, so pick it up before heading up.

When the elevator stops, go outside and start shooting at the supersoldier there. Aim at the battery at his back to eliminate him much faster. In order to minimize the potential damage taken, hide in the opening on the right, so that the soldier could not hit you.
After killing or walking past two soldiers, go back to the elevator, and see a climbable white wall there. Up there you will find the second piece of gold for your collection. After picking that up, walk through the corridor to the far end of the building, and take the map from the wall, as seen in the picture.
In the next room jump down when the dog seen in the picture turns his back at you, and use the A wall to hide. Wait again until the dog does a circuit and silently execute it from behind. Repeat these steps with the other dog, then go into the recess and destroy the wall to move on.
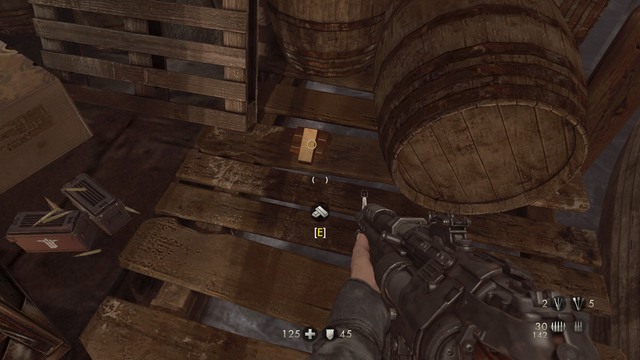
Once in the sewers, go to the far end in order to find another piece of gold. After collecting that, follow the adjoining corridor toward the exit. There, you should sneak and execute all the dogs in these rooms. Do not get spotted by the soldier on the bridge.
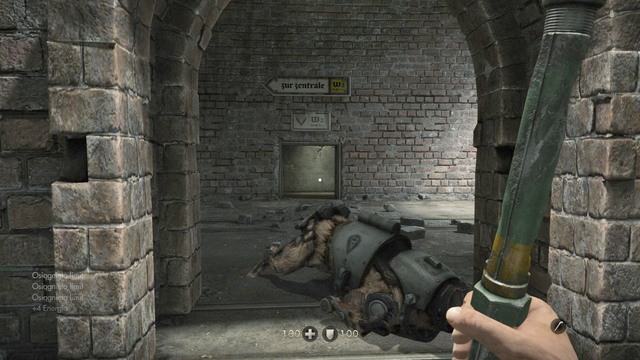
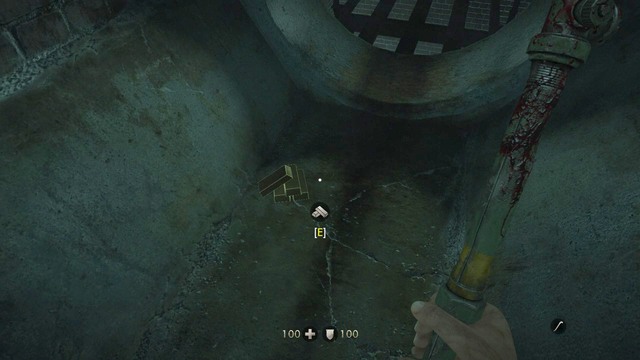
The E furnace, as seen in the picture, will lead you to the room with another piece of gold. After picking that up, approach the exit and use the stairs to proceed to the next location.
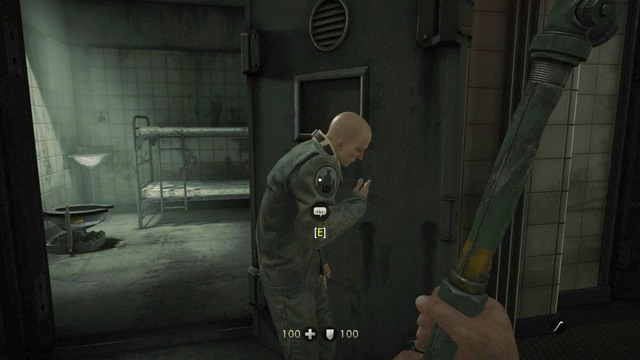
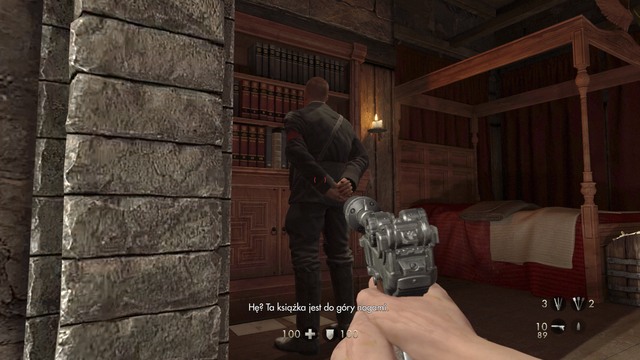
The next part of the compound is the asylum. Approach the patient, as seen in the picture, and talk to him to unlock a new character entry in your trophies menu.
After the conversation go to the far end of the corridor and open the door there, then do a slide in order to get to the other side. There, on the wall on the right, you will see another map. Collect it and head toward the only door that is open, and use the hatch in the floor.
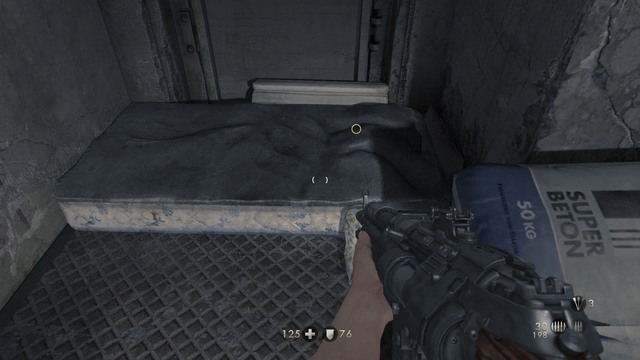
Down on the lower floor you will see a bed. Using this bed launches a nightmare in which you can play early Wolfenstein games. More information about this level can be found in the secrets section.
Leave the room and head toward the door. Once it is open, a Nazi soldier will attack you. Mash the attack button as quickly as possible to eliminate him. After killing the soldier, use the vent shaft in the ceiling in order to get to the other side of the compound.

Once you jump down, take cover so to avoid contact with the giant mechanical dog. When you notice the dog going through the main gate, run toward the door on the right and get to the upper level. No matter if you are sneaking or not, the dog will sniff you out and try to attack you. The best way to avoid it is to run to the hatch.
Now you will stand before a choice on how to proceed. You can either enter the room guns blazing or eliminate the opponents like a professional assassin, silently. Note that taking the first approach will result in commanders calling for an army of reinforcements, whom you will have to deal with.
The first commander is depicted in the picture. Jump down and execute him, then pick up his weapon and eliminate the guard in the other room by shooting him in the head.
On the right you will find a map of the location - take it before planning your next step. No matter how you chose to kill the enemies, head to the bridge, as seen in the picture. On the bench you will find another weapon, Kampfpistole.
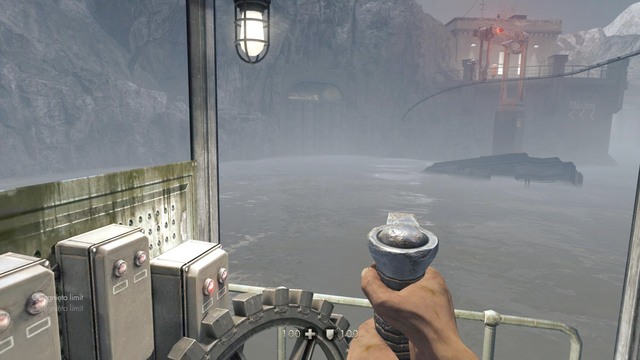
After picking that up, approach the generator and turn on the boat power. On doing that you will be attacked by several Nazis, so keep your gun ready and eliminate them. A good idea is to stay on the bridge and watch your right flank. This way you can kill the enemies at minimum risk.
After killing all the enemies, replenish supplies and health, then jump into the boat. When you manage to start it, use the MG onboard. On your way shoot all enemies in sight. Target the military drones first, because they are the most dangerous. Once you get across, jump out of the boat and use the hatch there to conclude the first chapter.
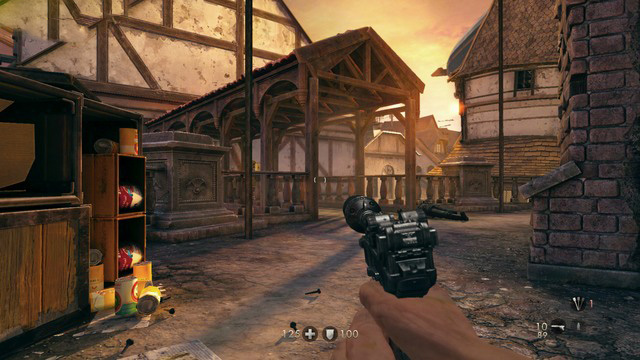
Once you set your foot on the ground, you will have two options. Actually, it does not really matter, which one you choose, since either way you will have to perform the same two steps. Approach the wall on the right in the middle of the location to find a map hanging there. After collecting it head left and use the lever to open the gate on the other side of the canal.

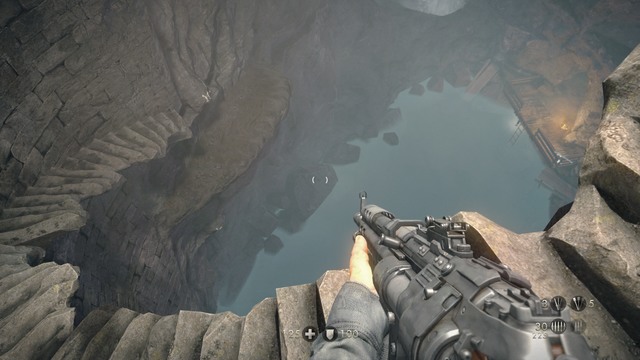
Sail there until you reach the rocks. The place presented in the picture leads to the upper level, from where you will get inside the tower.
Once inside, eliminate all the enemies there. One of the soldiers drops a Shockhammer - a new weapon you can pick up. Head forward and walk through the door. When you get to the upper level, walk across the metal catwalk and unlock the first mechanism of the gate.
Using the lever will open the door leading to the very bottom. On the square you will be attacked by some enemies, so keep your gun ready.
After killing the enemies, get on board of the boat and sail toward the recess, where you can start a mechanism. After sailing to the next location, you will see a marker pointing at two commanders. You can eliminate them silently or loudly. However you do this, head on to the main gate on the right to find a new weapon, Bombenschuss.
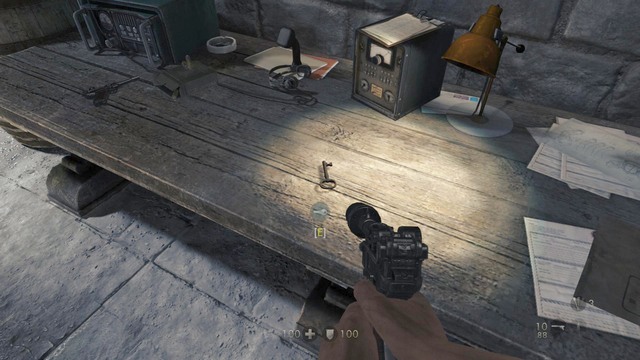
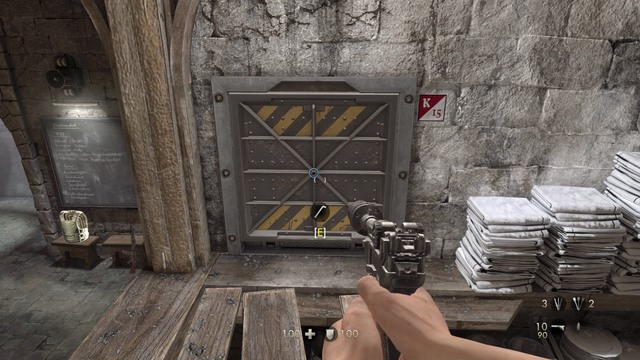
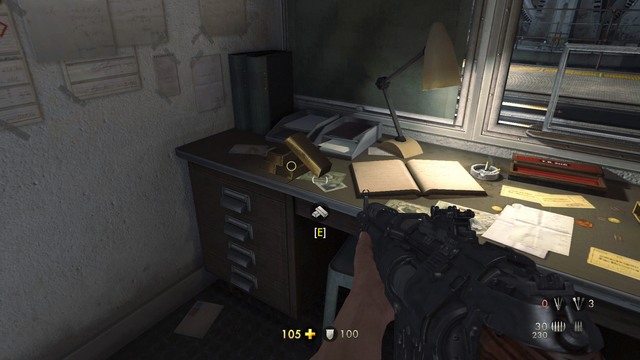
Next to the main gate you will find a room with the key needed to open the door. Pick it up from the table and open the door.
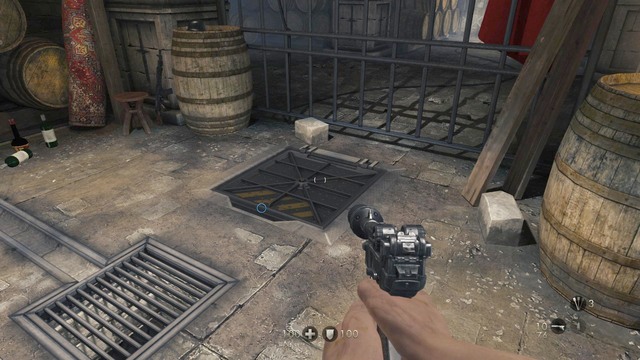
In the next room kill all the enemies and use the hatch seen in the picture, in order to get to the other side.
In the catacombs silently kill the first enemy, so not to alarm the entire garrison. After eliminating him, look to the right to see a map by the coffin.
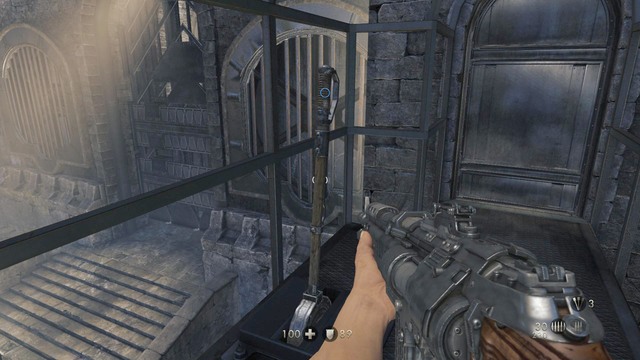
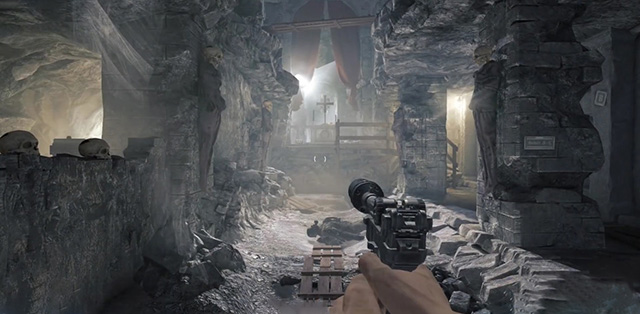
Keep heading upstairs until you get to the place presented in the picture. Right after jumping over the gap, follow the ledge to the upper floor. Climb up the pipeline at the end, and you will find an elevator there.
Use the elevator and do some more climbing until you reach a storage room. There you will have to deal with two commanders, so it is a good idea to eliminate them silently. The above picture presents a perfect opportunity to take out one of them. Wait here until the commander does a full circuit, and kill him with a shot in the head.
Proceed to the main room on the right and kill all the enemies there. Open the door at the end and get beneath it with a slide. At the end of the metal corridor you will see a lever that unlocks the main gate to Wolfenstein. As soon as you open it, walk down and kill all the enemies inside, then head toward the entrance and open the gate.
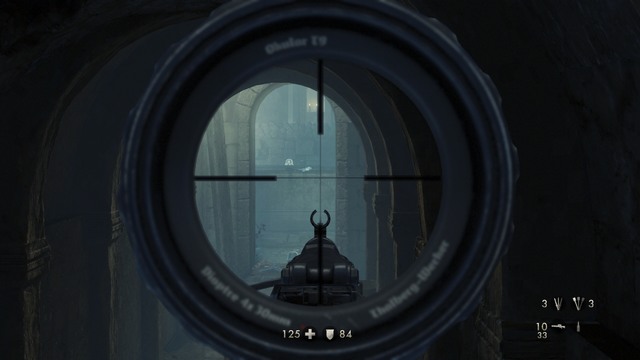
At the very beginning of the chapter you have to fight a supersoldier (see the picture). The best tactics against him is to find a cover, as you can see in the picture, and shoot the battery on his back. On the left you there is a stone pillar and a box, which can serve as fine covers from enemy fire - use them.
As soon as the supersoldier gets close enough, peek out and shoot the battery on his back. One concentrated burst should briefly stun him. While he remains inactive, run to the opponent and execute him. It will not kill the soldier, but it will tear out a fragment of his armor, so when he gets re-activated, aim at the weak spot you created to deal massive damage and quickly eliminate the enemy.
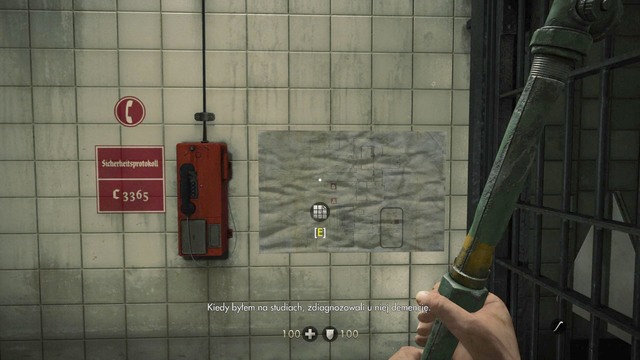
After eliminating the soldier, a couple of weaker enemies will attack you. Deal with them as quickly as you can, and go to where they came from. There you will find yourself in a small room. On the wall on the right side there is a map, so make an update and use the lever nearby.
After using the lever approach the place shown in the picture or the one on the opposite side. Enemies will start charging at you, and this is the best place to defend yourself. Watch out for enemy grenades and keep an eye on your right flank.
Fight your way through the waves of enemies until you get to one of the gates you managed to open. No matter which one you choose, it will lead you to the same place. After eliminating all the enemies enter the vent shaft as seen in the picture to get to the next location.
Once you get there, you will be able to choose how to attack the Nazis. There are two commanders in this room, so it is a good idea to eliminate them silently.
In the spot shown in the picture you will find three enemies. One of them can be seen in the picture - you can eliminate him with a headshot. Two others are talking in front of you. Wait until they split up and take them out one after another. After killing the three enemies, go to where the first one you killed lies. Behind the wall you will see the first commander - eliminate him.
Once the first commander is out, go to the other side of the room, and kill the other one. Watch out for the heavy soldier patrolling the place. You can easily kill him right after eliminating the second commander - you just need to take one, accurate shot at the gas cylinder on his back with a sniper rifle, as seen in the picture.
After that go to the upper level and find the vent shaft shown in the picture.
Once you get to the other side of the location, peek out the wall to see the first enemy there. Take him out with a headshot, and move on to the first room on the right. In this room you will notice a commander facing away from you, so you can eliminate him silently.
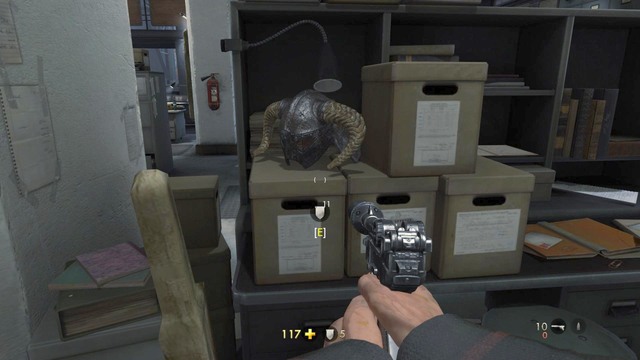
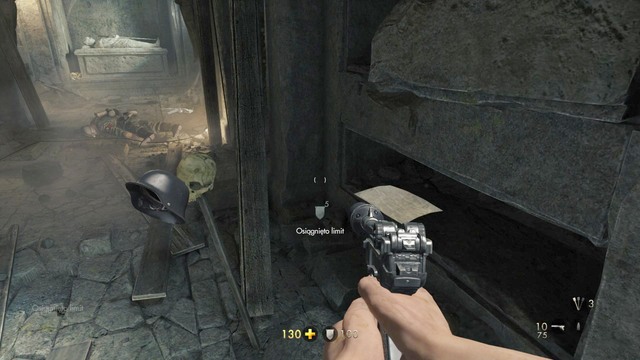
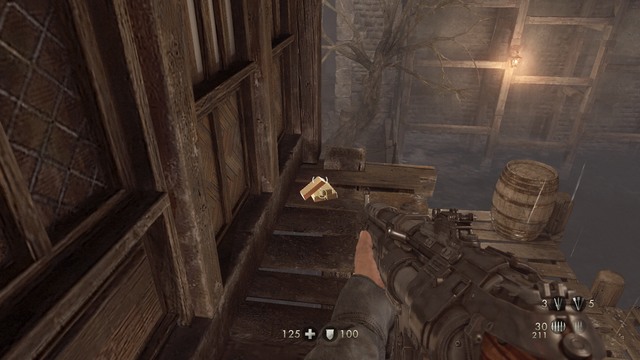
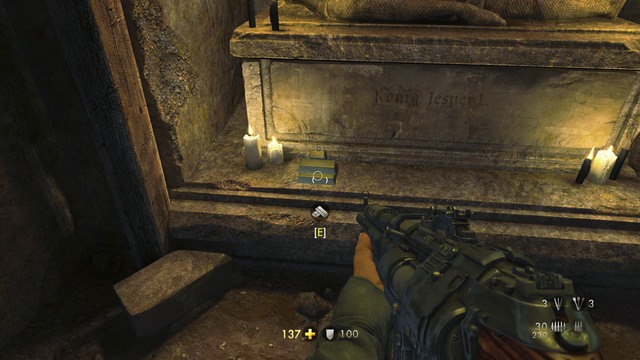
Before you leave the room, approach the shelf and open a secret passage. In that room you will find a piece of gold and a letter.
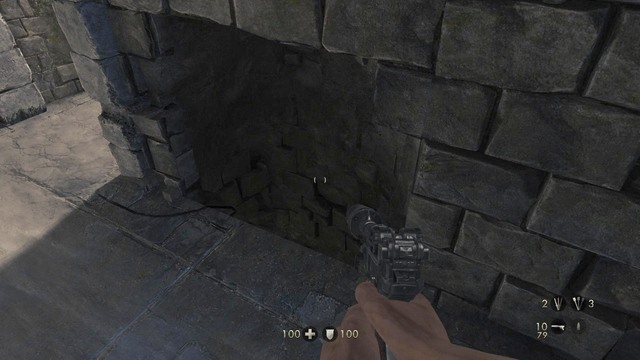
Go back to the hall and silently kill the sleeping dog, and then eliminate his master, who is facing away from you. Before you move on, pick up the map lying on the dresser on the right. In order to move on, you have to crouch and get inside the fireplace. Here, you can easily destroy the wall with a pipe.
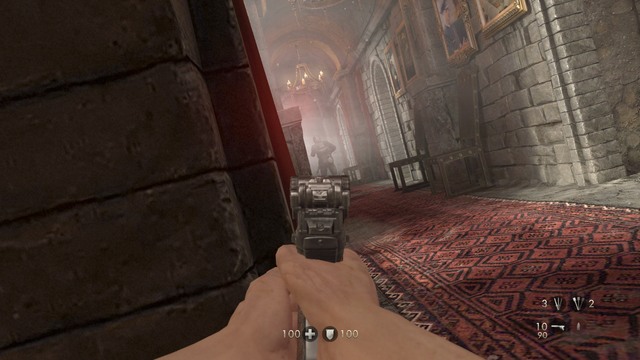
Once you get to the next location, you will reach the place shown in the picture. Wait until the enemies finish the conversation and split up, then take out the one who stayed with a headshot. While still sneaking, stick to the next corner and wait until the soldier starts walking toward you. Attack him from the cover for a silent kill, then move to the next room.
When you get to the place shown in the picture, kill the guard who is walking around, and head to the corridor on the left. At its far end you will encounter the first commander, whom you should kill silently. Once he is gone, head upstairs, where you will find a guard and the second commander.
After killing all the enemies, head to the corridor and destroy the wall, in order to proceed to the next location. Go through the vent shaft, then take out the sniper rifle and kill the enemy by the MG. From here you can take down all attacking enemies on the other side of the room.
Walk down the corridor until you get to the spot shown in the picture, and use the recess in the wall to get to the next room.
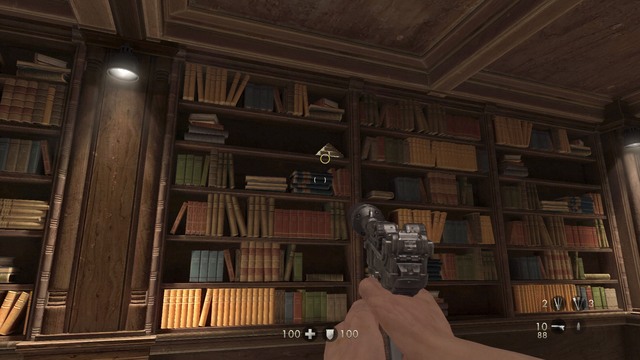
In the library, again you have to eliminate two commanders. The first one is in front of you, and the other one on the upper floor. Take down the soldier patrolling the place, so you could approach the first commander undetected. Then use the closest stairs to reach the upper floor. The other stairs are guarded by a heavy soldier, and it is impossible to walk past him without setting off the alarm.

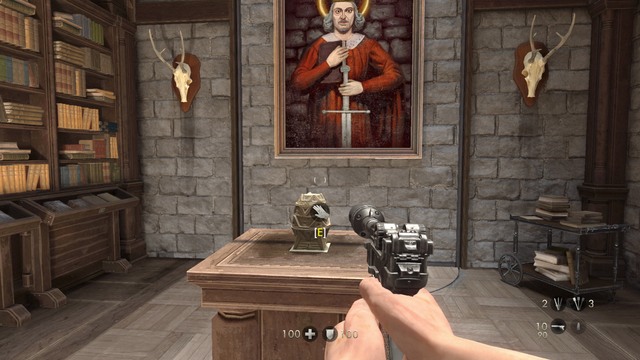
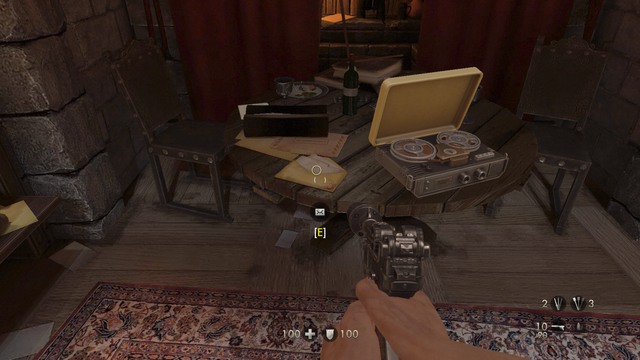
Whichever way you dealt with the enemies, head to the upper floor, and approach the statuette and the picture in the middle of the room. You will hear that this is some kind of mechanism and a secret room is behind the wall.
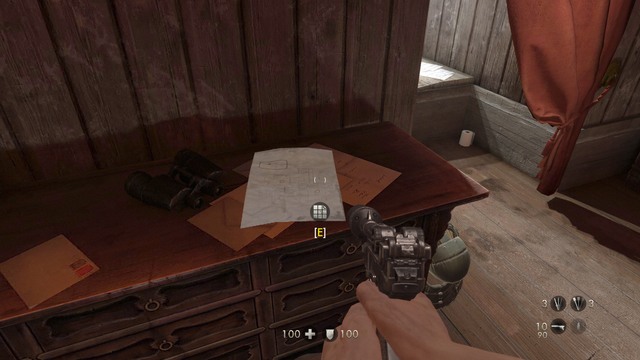
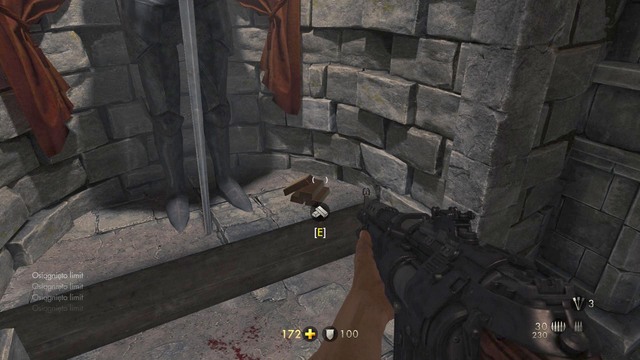
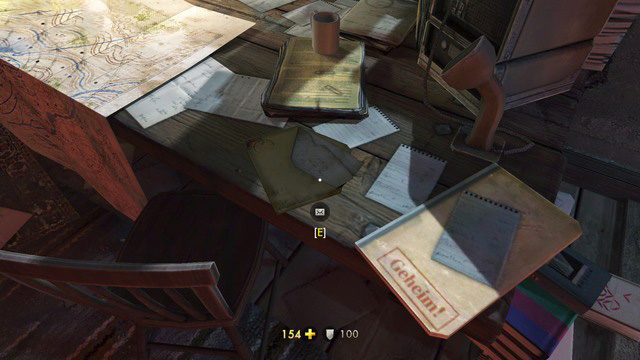
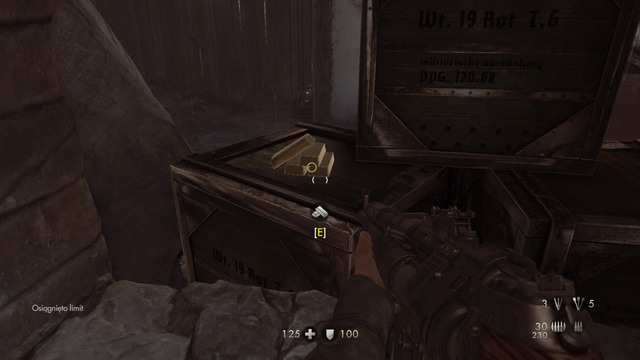
Turn around and go to the left. In the display cabinets by bookshelves there is a key that will open the room. There you will find some weapons, a letter, and a piece of gold.
Once you have collected all the things you need, head to the corridor on the other side of the hall and use the entrance. On the other side you will find Wesley - talk to him.
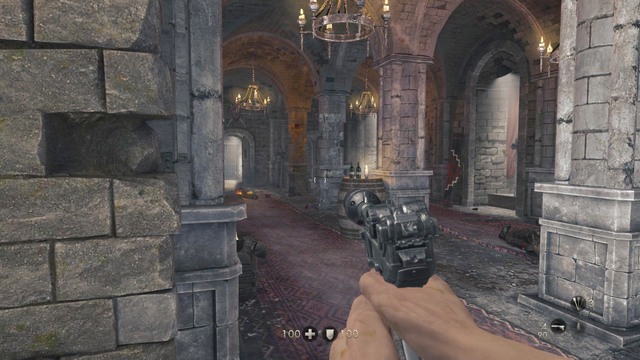
After a brief cut-scene go forward and up the stairs to the upper floor (see the picture). Here you will find a weapon needed to kill the next group of enemies. Since the attackers are many, stand by the stairs on the next floor and wait there as they charge at you. Most importantly, watch out for the Nazis coming from below as well as heavy soldiers. In case of trouble, fall back to the stairs and throw a grenade to eliminate a couple of enemies at one.
After killing all of them go back to the middle of the location and try talking to Wesley (this will unlock a character entry in the trophies menu), then go to the corridor that leads to the next room. At the end of the road use the elevator to conclude the third chapter.
Use the elevator hatch, then crawl out of the shaft. Silently eliminate the guard roaming there and head to the bridge.
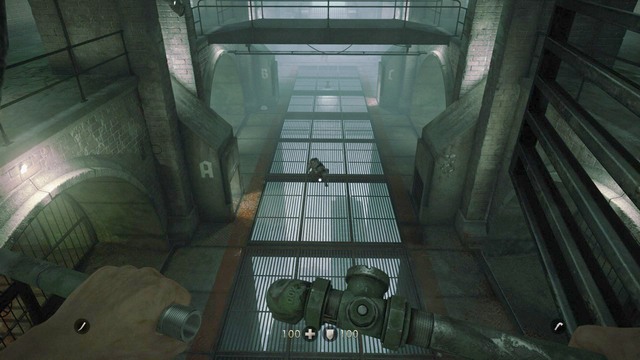
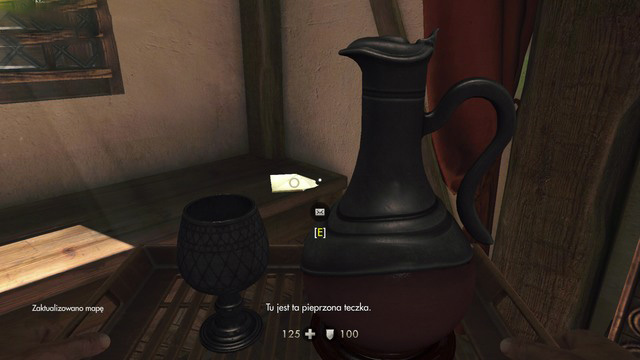
While keeping to the right, sneak past the supersoldier, and get to the place shown in the picture. At the end of this way you will see the first commander, whom you should eliminate silently. The other one is down the same path. He is at the end of the rail station. Here you will also find a map lying on a bench. Take it and backtrack to the booth in the middle of the station.

If you are tired of sneaking, eliminate the supersoldier and all the guards, then climb up the stairs to the top of the booth and get inside through the roof. Inside you will find a piece of gold and the rail power switch. You can exit through the door next to you. Keep your gun ready, because you will be attacked by enemies.
After the fight head to the train and start it, in order to leave Wolfenstein. On the way the train will be stopped, and you will have to deal with enemies on the other side. Pull out your sniper rifle and start picking the targets one by one, in order to avoid potential damage.
After the fight use the hatch to get onto the train's rooftop, and use the sniper rifle to eliminate enemy shooters on the other side. As soon as you deal with them, use the rope to get to the train in front of you.
After getting there kill all the enemies afar using the sniper rifle. First of all, eliminate those behind MG's. You can shoot canisters and gas cylinders to effectively neutralize enemies.
After a brief cut-scene get out of the sinking train, and swim up to the bank. At the end of the road use the pipes to climb to the upper level. Up there start sneaking, and get behind one of the soldiers show in the picture. Eliminate the other one with a headshot before he walks outside the cave.
Your task is to kill all the enemies in this location. They are lead by a commander. Wait by the wall and shoot the commander on the footbridge right in the head. After doing that go to the center and pick up the location map from the table. Once you have collected it, approach the white wall and start climbing to the upper level.
Follow the corridor until you get to the place shown in the picture, then silently eliminate the guards. It is important not to be noticed by the MG operator upstairs. After doing that go through the narrow path on the right, and only from there kill the MG gunner. The shot will alarm the rest of the Nazis, so stay where you are until things calm down, then move on.
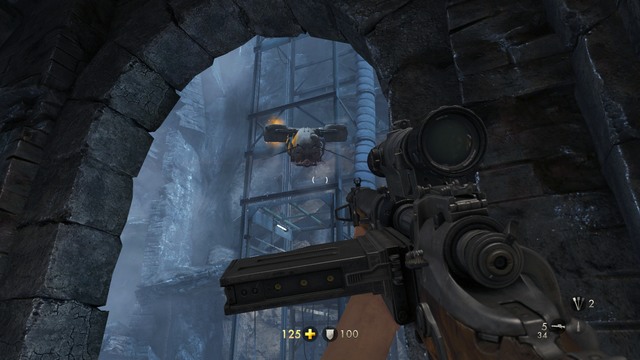
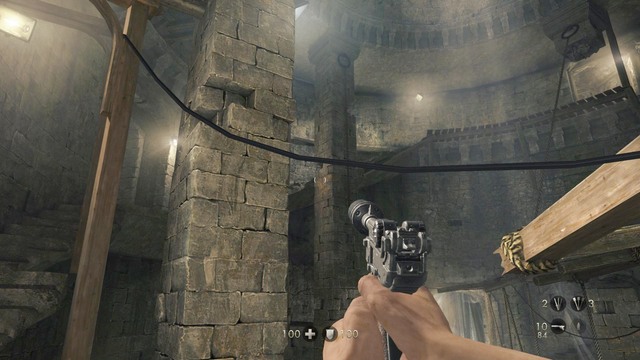
After killing the supersoldier in your way and eliminating the commander, go under the arcades and keep destroying combat drones on your way to the elevator. Once there, follow the cliff until you reach a climbable wall. Up there sprint and jump over the gaps.
At the end of the road go through the door and start shooting at the combat drones. After destroying all of them walk across the metal footbridge to the next location. When you get to an elevator, open the hatch and ready up the machine gun. On leaving the elevator you will be attacked by several Nazis. As soon as you eliminate them, enter the room on the left to find a map.
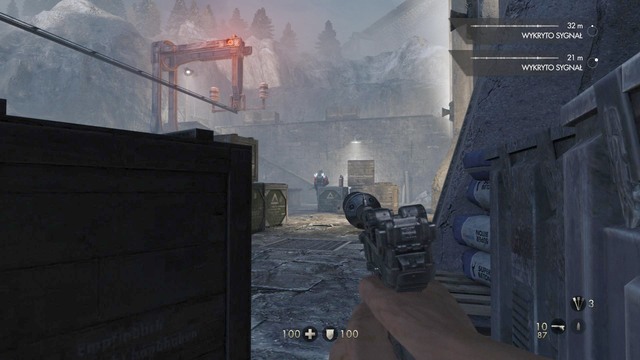
Replenish your supplies and leave the building. You will find yourself in the place where you started the game. A lot of enemies will attack you, snipers included. Stand by a metal cover - in no case should you use concrete walls (they get destroyed quickly, leaving you without a cover). First, kill the snipers on the elevated platforms, then take on the ground troops.
As soon as you deal with the wave of the Nazis, replenish your supplies, and get to the booth in the center of the bridge. Approach it from the right and use the pipes to get inside. Take the useful items from there, and exit through the roof.

Get your sniper rifle ready, and while using the cover of the roof, kill all incoming enemies. First, destroy the drones, then the ground troops.
After that, collect ammunition and health regeneration, and go to the place shown in the picture, i.e. the booth on the left. At this point you will be attacked by a mechanical dog, and this is the best place to fight it. The dog cannot reach you, if you stay between the booth and the damaged car.
Take out your shotgun and stand in the corner. Shoot at the mechanical dog as long as you can. If the dog goes back to its place (behind the car), you just need to take a few steps forward to provoke it for another attack. Remember that every time you do that you have to quickly go back to the corner or you will die in seconds.
After the fight replenish the supplies from the things scattered across the bridge, and hide in the place shown in the picture. Take up you sniper rifle and shoot the Nazis in the heads. After the fight approach the ladder on the left and move to the next location.
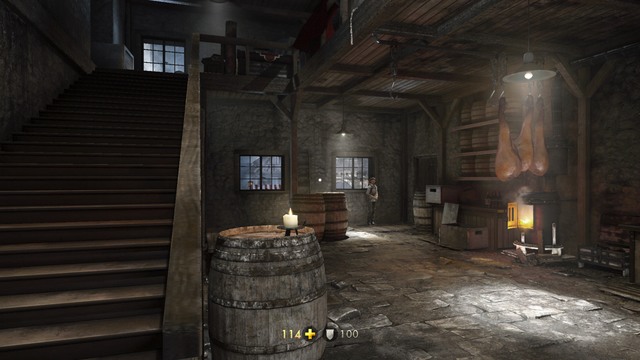
In the place where you meet the drunkard, you will find the village location map lying on the left. Pick it up and knock at the inn doors next to you.
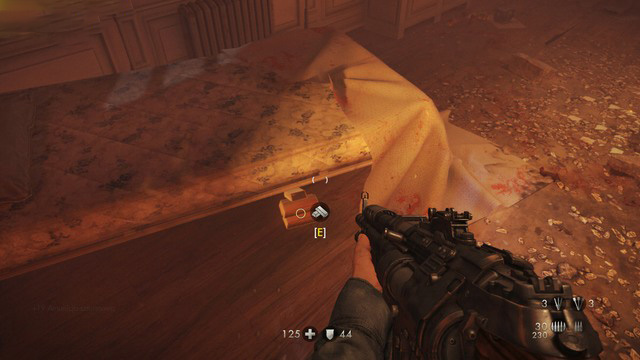
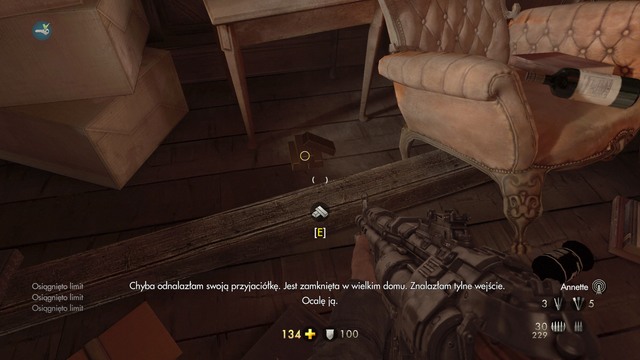
As soon as you see what happened to Anette, stand in the spot shown in the picture, in order to maximize your chances. The enemies will be jumping through the window, so you will have a clean position to shoot them. You can also stand by the window and shoot the approaching enemies. However you do this, kill all the enemies and backtrack to the hatch.

After the interaction with the hatch, you will have to fight Rudi. In order to defeat him quickly and safely, take out the sniper rifle and shoot the generators on his back. Upon receiving a certain amount of damage, the generator powering up Rudi's armor will briefly shut off. At this moment run there and execute him.
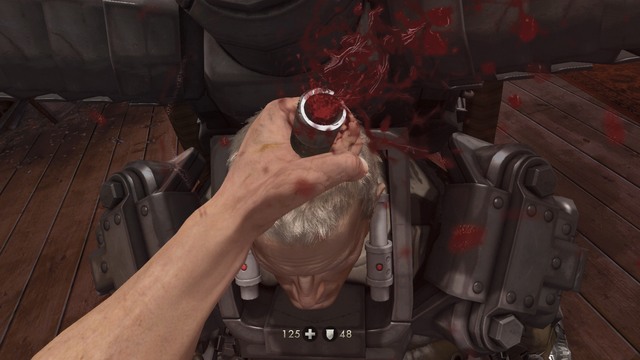
Repeat these steps several times, and when you have finally destroyed his body armor, take out your shotgun and shoot at the weak spot. At the end, approach Rudi and perform the final execution, then go back to Anette.
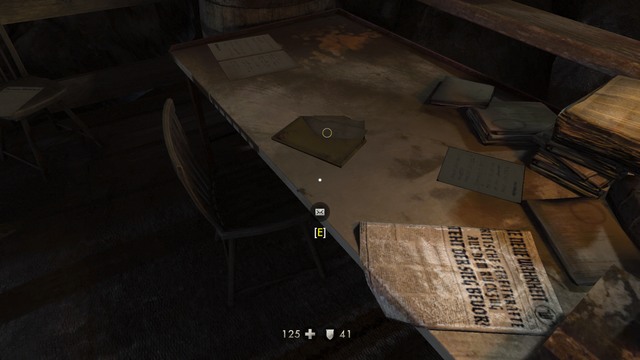
When you get inside the cave, approach the table next to you and collect the letter lying there. On the other side you will find an orange bag with Annette's things, so take it before getting into the boat.
After a brief cut-scene take the headphones and help hide the boat with Anette. When you get out of the boat, approach the table on the left to find a map.
After replenishing supplies head on through the alley until you get to the place shown in the picture. It is a good idea to first silently eliminate the commanders, and only then, the rest of the Nazis.
Move to the right side and jump into the elevator. On the other side of the canal there is a ladder that will take you to the bank undetected.
The first commander is dead ahead in the alley (picture). This way will take you to the stairs leading to the first floor and the balcony, where you can see the second commander. Simply shoot him in the head to eliminate the risk of setting off the alarm.
After killing the enemies, go to the place shown in the picture in order to proceed to the next location. Inside you will see the first floor is flooded - there is a piece of gold on the floor under the water. After collecting it, climb up the stairs to the second floor.
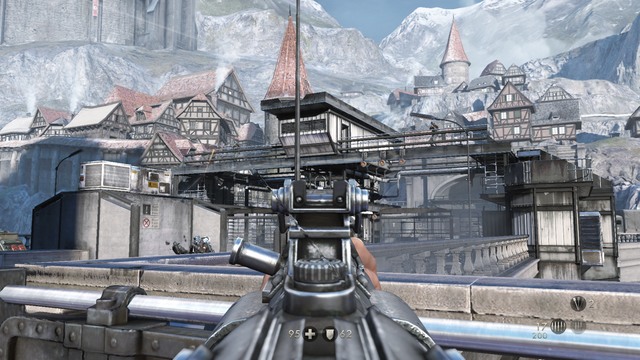
When you get to the place shown in the picture, arm yourself with the machine gun and shoot down all the enemies charging from under the roof. When things calm down, approach the broken window at the end, and enter the building.
When you jump out of the building on the other side, on your left you will find a map - collect it and move on. The alley you will take you to a big square with a tower in the center. Two supersoldiers are roaming by the tower. Instead of picking up a fight with them, go to the right side and avoid them. At the end of the road you will see the first commander.
The second commander is on the upper level, you can eliminate him from below. Approach the ladder inside the tower and use it to climb up. Approach the window and zip down the line to get to the building on the other side.
Around the next corner you will see the second commander. Silently eliminate him and follow the same path, then jump down to the street at the end of the road.
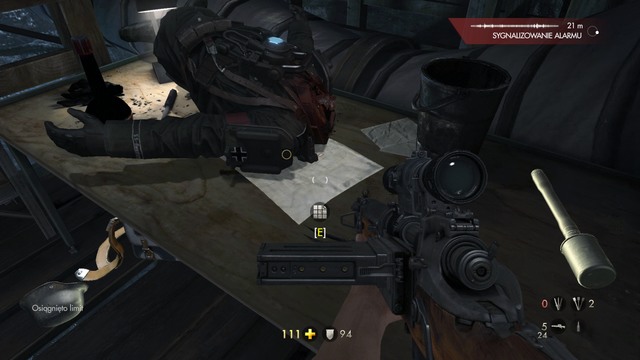
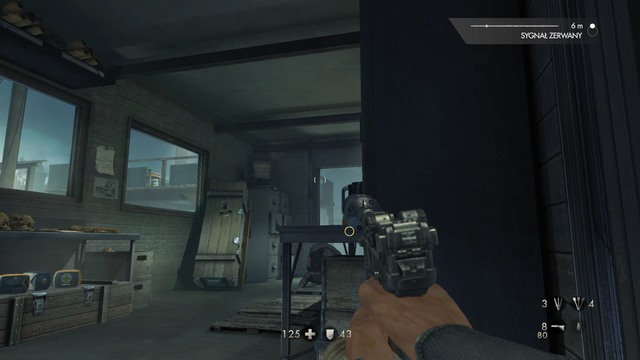
Walk past the market stands until you meet the familiar drunkard. Listen to him for a moment to unlock a new character in the trophies menu. After that walk around the stands until you get to a building. After a conversation search the area around the door. Here you will find a stone with a gate key underneath it (picture).
Go through the gate and head to the second entrance on the back of the building. After getting there, approach the wall on the left to find the location map hanging there. After a brief conversation with the contact, take the clothes from the box and open the hatch in the floor. Jump into the water and swim to the place shown in the picture. Use pipes to climb up to the surface.
After getting outside the tavern, start sneaking and take out the two dogs. Then go inside the tavern, wear the apron hanging on the hook, take the wine, and go to Helga. To get to her, you have to climb the stairs shown in the picture and get to the other side of the tavern.
In Helga's room by the window you will find a letter for your collection. Take it before the cut-scene starts, unless you want to start over the whole section. During the conversation with Helga drink a few sips of the wine, and the fifth chapter will conclude.
The chapter begins with a meeting with good old zombies. Take out the pipe and start smashing the enemies' heads. At one point zombies will start charging at you, so you should eliminate them as quickly as possible.
Follow the narrow corridor, as seen in the picture, and at the end of the road push aside the obstacle to unblock the way ahead. In the inn approach the chest, and collect the weapons you previously put there. As soon as you regain control of your character, kill the zombie charging at you, and go upstairs.
Now, when you have your weapons back, fighting zombies should be easy. The best and fastest way to take out a zombie is shooting it in the head. Before you go upstairs, collect the map hanging on the wall.
Fight your way through more zombies using the tactic described before. When you leave the burning building, you will find yourself in front of a long corridor with a closed gate at its end.
Take out a grenade and approach the closed gate. A dozen or so zombies will come out of there charging at you, so throw a grenade under their feet and move back to a safe distance. Kill the remaining zombies the usual way, i.e. by shooting them between the eyes.
Farther corridors are filled with zombies too. Fight through them until you get to the boat. Before you jump into it, though, use the map lying on the barrel. Near the boat there is also the only letter in this location, left by Anette.
Kill the charging zombie and pick up the weapon it drops. This unlocks the new weapon, sawn-off. If you look around, you can find some ammunition to it. However, this weapon is not really recommendable, because of it low capacity. It is better to use a standard rifle and aim at the heads.
Go to where the zombie came out of, and you will get to the place seen in the picture. Here you can see the exit - the gate ahead of you. Fight through enemies and jump into water to swim under the gate.
When you make your way on the surface using the pipes, look down to find the location map. You will have two ways to choose, but the choice is just cosmetic. In both cases you will encounter heavy resistance. A safe place where you can shoot the enemies from, is the closest pillar on your way. First, eliminate the heavy soldier, because otherwise he will charge at you, and he is really dangerous at close distance.
After dealing with the enemies, proceed to the staircase and go to the upper floor. Enter the room where Anette is and help her fight off the zombies.
As soon as you help Anette, look through the open window. You will notice a rope hanging there, which you should use to get to the other side. Take down Kessler, who is starting to transform, and jump into the water. In order to get to the mech seen in the picture, you need to dive under the bridge.
When you get to the mech and can control your character again, destroy the gate and deal with the charging zombies. If one of the enemies manages to jump at the mech, you have to go outside and kill it, otherwise it will kill you.

When you get to the second bridge, go out of the mech and shoot down the ropes holding the drawbridge. Before you go back to the mech, dive into the water on the right side of the bridge to find a piece of gold on the bottom.
After picking that up use the mech to destroy the gate and proceed to the next location. Deal with the zombies charging at you, then leave the mech and start sweeping the area.
First, collect the map on the right. As soon as you can jump into the water and dive, in order to get to a narrow passage you can swim through. When you get out to the surface on the other side, you will see the map lying there.
Go back to the mech and move through the next parts of the location. Destroy all gates, and by no means leave the mech behind. The next gate must be opened manually. Enter the small, stone room and pull the lever in there. Before you head back to the mech, pick up the letter on the table on the right.
After finding all the collectibles here, go back into the mech and destroy the wooden gate blocking your way. On the other side, you will find a building on the left and a metal gate. This can be opened only with the key lying on the table in the aforementioned room.
When you open the gate, be ready for an endless wave of zombies. Try to eliminate them by headshooting them with your rifle, and when it gets safe, proceed to the next part of the location.
You have reach another lever on the opposite site. Smash through more zombies, and when you manage to open the gate for the mech, get inside it and follow the left corridor to the next gate. Destroy all the enemies on your way, and at the end approach the passage seen in the picture to conclude the seventh chapter.
When you can control your character again, approach the two Nazis who are talking, and wait until they go away. While still sneaking take out the suppressed pistol and go to the left.
You will reach the place seen in the picture. Wait until one of the previously met enemies turns his back at you, and take him out with a knife.

After killing the enemy enter the building in front of you. Here you will encounter the first commander. The other one can be seen through the window, so this is the best opportunity to take out both of them at the same time. In this building there is also a map hanging on the wall and a letter lying on the table.
After killing all the Nazis and collecting the secrets walk across the bridge to the other side of the location. In order to deal with the overwhelming enemy, crouch down by the entrance and take them out with the sniper rifle. A couple of soldiers will charge at you, so it is best to start from them.
Pick up the piece of gold in the crypt, and head over to the other side, where you will find a climbable wall. After getting there go back to the entrance and now take the other way. At the end you will find a generator, which you should shut down before using the door.
The next location consists of a couple of corridors. On the left side of the first one there is a map. Before you head on, pick it up. At the end of the corridor you will find an elevator that will take you to the lower level.
As soon as you exit the elevator, you will notice a commander patrolling this area. The best way to eliminate him is to use the climbable wall next to the elevator.
This way you will get to the commander without raising an alarm. If you choose the other way, you will not only have to go around the entire location, but also fight Nazis on the way, including the supersoldier, as seen in the picture.
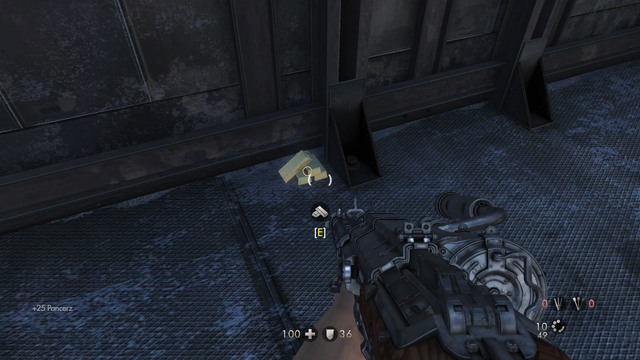
No matter how you choose to deal with the enemies, follow the corridor and at its end turn off the generator powering the door. In the next location, silently kill the Nazis who are facing you away, then head to the crypts. Before that, however, pick up the map lying on the table on the left.
On your way through the corridors seen in the picture you will be attacked by Nazi zombies. Take out a quick-fire weapon and aim at their weak spot - the head.

After going through the crypt filled with zombies, you will get to round stairs. Before you jump down, approach the place seen in the picture, and jump onto the stairs on your right. At their end you will find a piece of gold.

Follow the narrow path along the rift in the floor until you get to a hexagonal room. Start the mechanism in the center and arm yourself with two shotguns.
Your next task is to survive an endless wave of zombies, until the last stone door shuts. It is important to shoot them in the right moment, so you did not waste two shots on one opponent. There are some supplies around you, so if you happen to receive critical damage, look around for aid kits.
During the fight move around the circle - do not stand in one place - and avoid the hexagon in the center. Each time you make a half-turn look at the opening door. If you notice a clear path, immediately dash there. Before you go through the next door, look to the left. There you will find the last piece of gold for your collection. As a reward for collecting all of them you receive gold pistols.
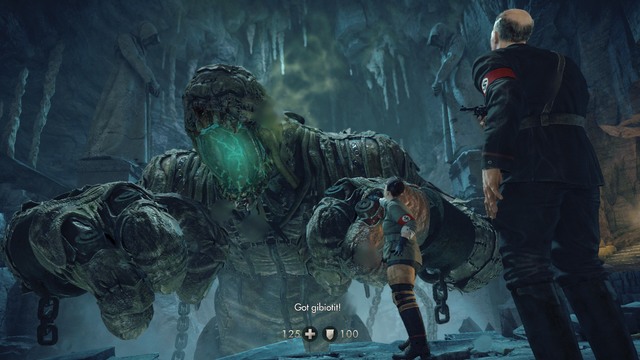
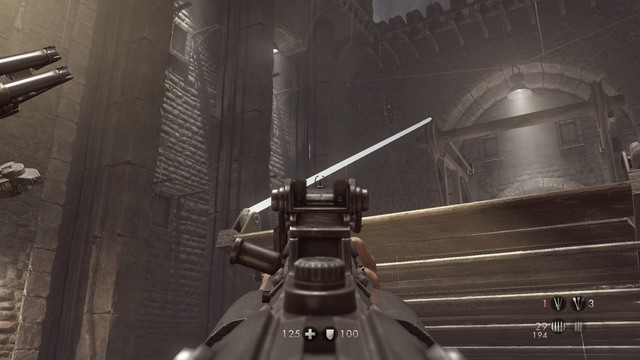
When you regain control of your character, the final boss fight awaits you. Before you fire a shot, replenish your supplies. The boss will not start a fight until you hit him first. Go to the upper floor, crouch in the corner, then take a shoot right into the boss' glowing mouth with a sniper rifle (the highest damage).

The boss has three attacks, and the fight consists of two stages. The first attack is an arm swing over the wall. It is easy to dodge simply by crouching. The second one is a fist blow. This is by far the deadliest attack. It is hard to dodge and deals a lot of damage.
However, there is a repeatable pattern you can follow. The first blow comes to the opposite of your current position, whereas the second one is aimed directly at you. Right after the first attack start running toward the spot where the hit fell, in order to minimize the risk of being hit with the second blow.
During the boss fight, Nazis will be jumping off the ledge, so the best spot for you is in the corner on the upper floor balcony. You just need to aim at the Nazis' heads while crouching. This way you will achieve two key goals. The first one is eliminating the potential danger from enemy fire, and the other, preventing the killed opponents from turning into Nazi zombies (headless opponents do not turn).
After the fight go down and approach Helga. Take out any weapon and shoot her, then pick up the documents. Now the only thing left is to watch the ending. Congratulations!
 Piece of gold #1
The first piece of gold is in the vent shaft on the right. The way on the left leads to the main hall, where you encounter two supersoldiers.
 Piece of gold #2
The second piece of gold can be found in the corner on the right, next to the gate. Wait until the supersoldier goes back, then you will be able to pick it up easily.
 Piece of gold #3
The third piece of gold is close to the elevator on the lower floor. Approach the white wall as seen in the picture, and the piece of gold is at the very top, by the grid.
 Piece of gold #4
The fourth piece of gold is in the sewers. Before you enter the small corridor, walk around the sewer to locate another entrance - the piece of gold lies next to it.
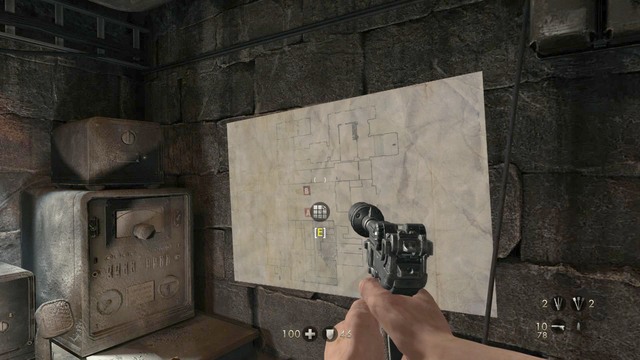
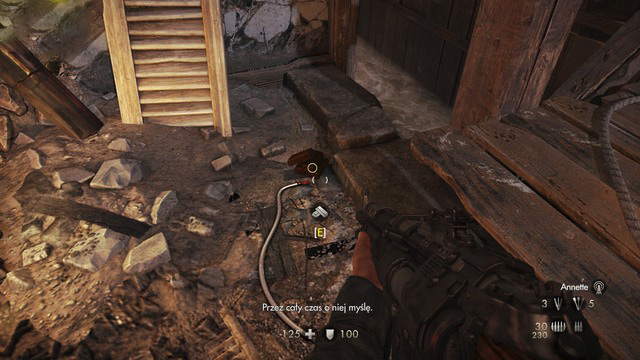
 Piece of gold #5
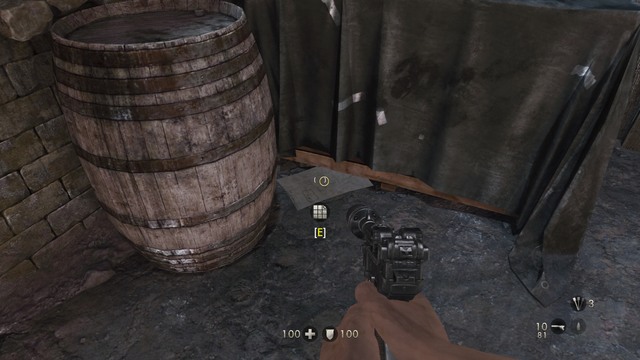
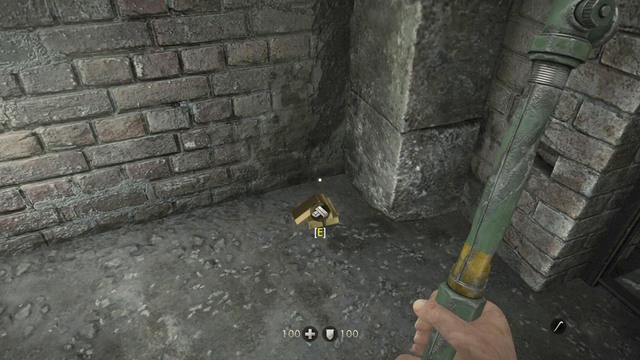
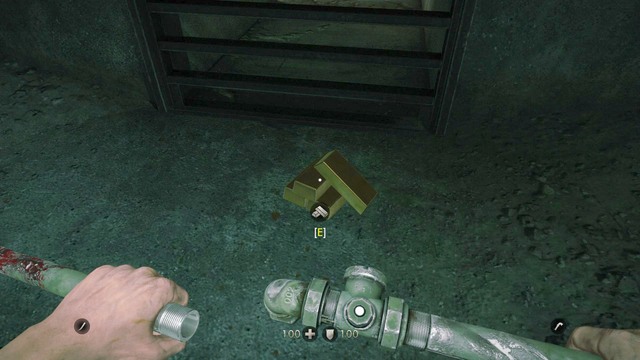
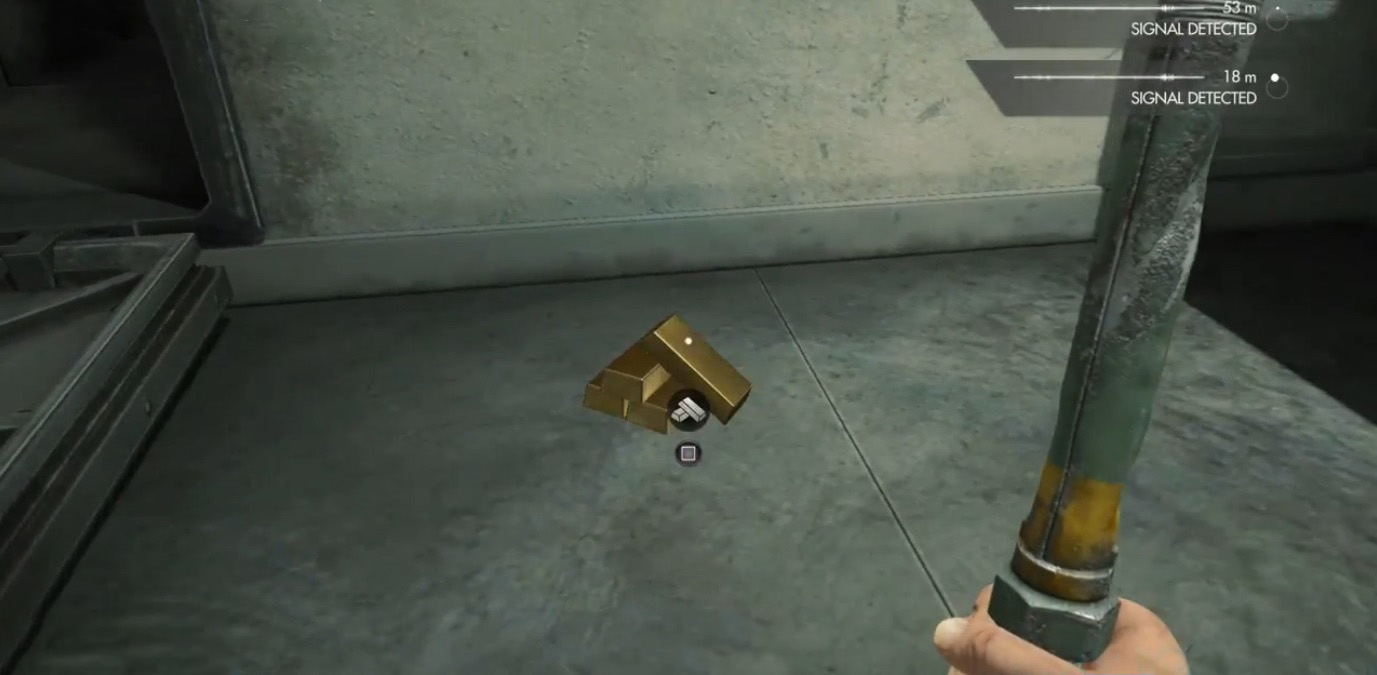
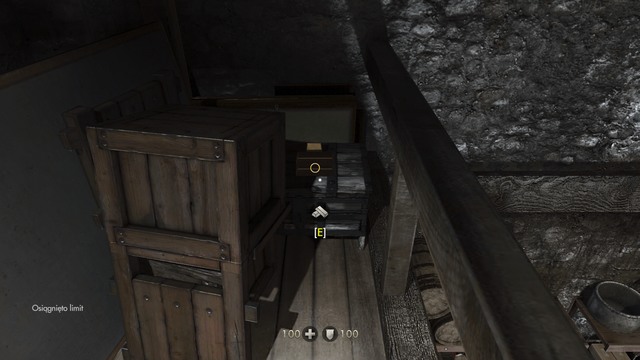
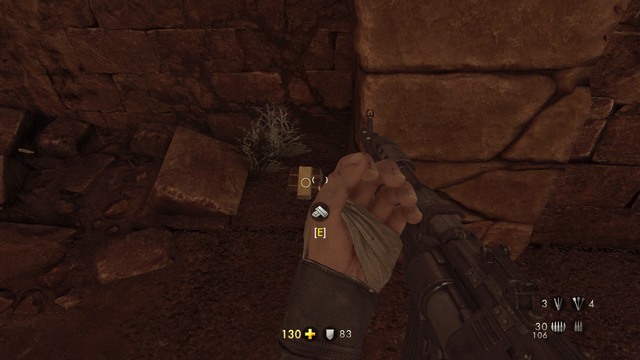
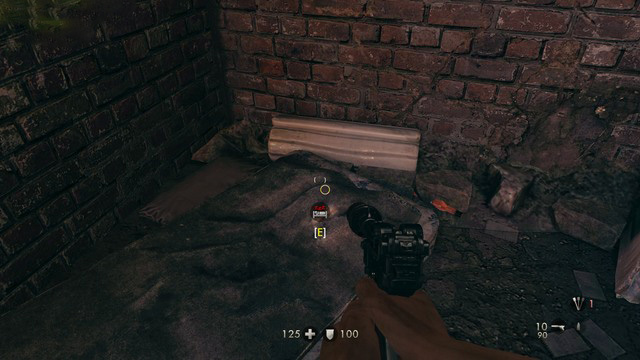
After leaving the sewers and eliminating the dogs, head toward the first recess on the right. In the next room there is the fifth piece of gold. The recess is marked with letter E.
 Piece of gold #6
The sixth piece of gold is in a small room. You can collect it after you were attacked by a mechanical dog and managed to escape through a vent shaft to the upper floor. Instead of going forward, go back.
 Piece of gold #7
 Piece of gold #7
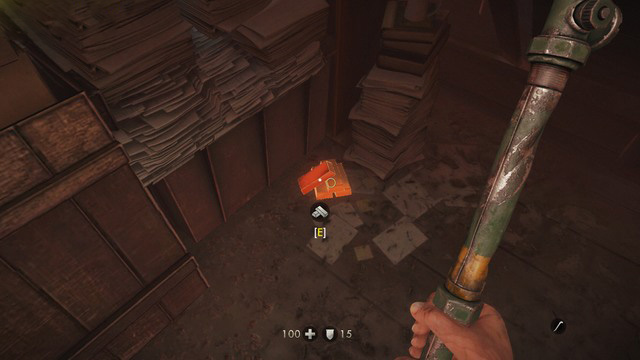
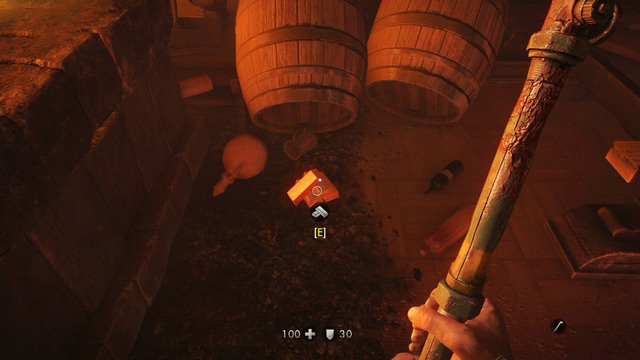
The seventh piece of gold is well hidden. The first picture shows the place from where you can get to the location with the collectible. Go to the room behind the commander seen in the picture, and climb up the stairs. On the far end you will find a bridge leading to the other side. Keep walking until you find a turn right and the place shown in the second picture. Smash the wooden boxes there and enter the small passage behind them. There you will find the seventh piece of gold.
 Piece of gold #8
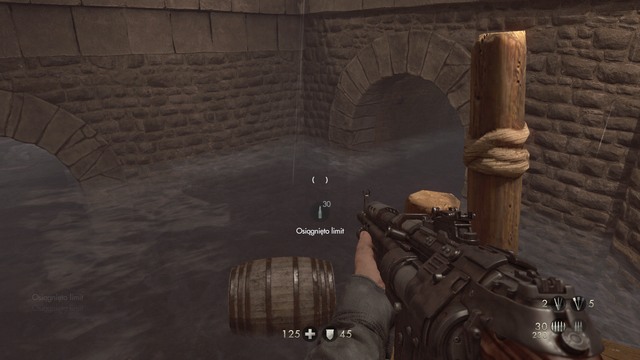
The eighth and last piece of gold is near the boat power switch. Walk across the bridge to the other side, and you will find the piece of gold lying on a bench.
 Picture #1
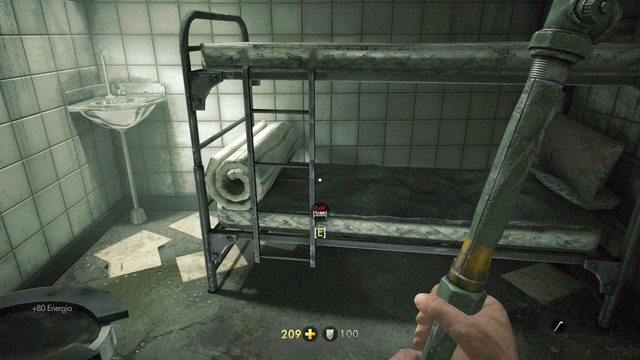 Picture #2
The place where you can lay in bed is shown in the picture #2. In order to get there you have to walk through the whole in the floor, seen in the picture #1. This room is the only exit from the asylum, so you cannot miss it. Right after you fall down, you will notice a bed.
 Letter #1
The first letter is in the Prologue. After killing the attacking Nazis and climbing up the ladder, instead of going after Wesley, look to the right to see the letter lying on the table.
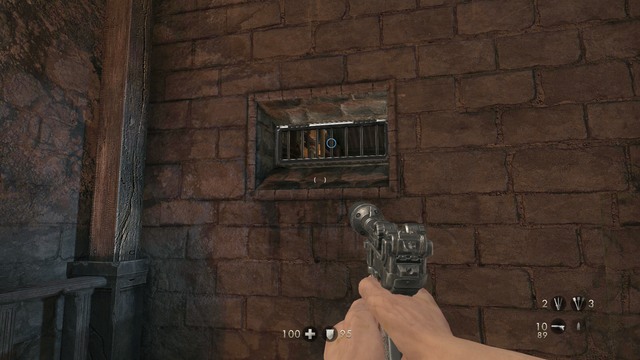
 Letter
The only letter in this chapter is in the starting point, where you have to approach prison bars and talk to Wesley. You will find the letter in a small gap in the wall on the right.
 Piece of gold #9
The piece of gold can be collected in the situation presented in the picture. When you open the gate, jump into the water and swim there. Instead of staying on the surface, dive, and in the midway you will notice a gold bar lying on the bottom.
 Piece of gold #10
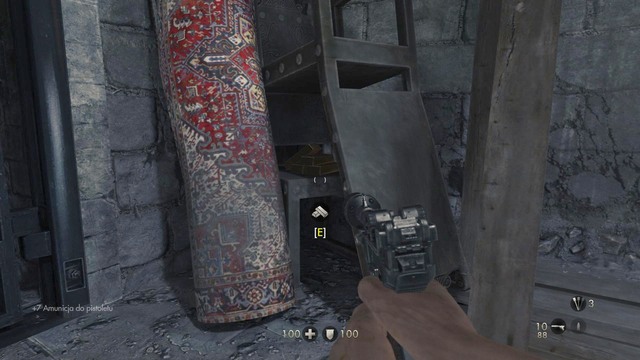
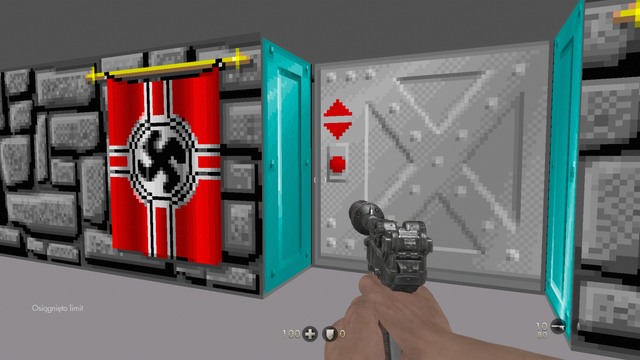
The gold bar number 10 can be found when you enter the location with commanders. After docking the boat, turn left toward the main gate, and then right at the first opportunity. You will reach the place shown in the picture - the gold bar is behind the red carpet.
 Piece of gold #11
Right after collecting the tenth piece of gold you will be able collect also the eleventh. Leave the room where you found the piece of gold #10, and follow the corridor to the opposite room. Here you will find the key needed to proceed with the story. Go through the door and up the stairs, where you will find a whole in the floor. Before you jump down, follow the ledge to the far side of the corridor, and you will find the piece of gold in the corner.
 Piece of gold #12
After jumping into the water you will notice a white wall ahead of you. Climb up and eliminate the patrolling soldier, then take the first turn right (the entrance is seen in the picture). At its far end you will find a corridor boarded up. Smash all the boards (shoot or melee attack) and crouch down to proceed. At the end you will find a piece of gold lying there.
 Picture #1
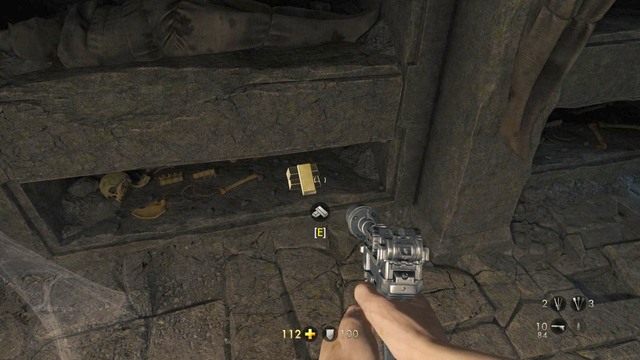 Piece of gold #13
In the situation presented in the picture go to the corridor on the left. Keep going upwards and at the first opportunity turn right. On the right you will see a piece of gold lying on the floor.
 Piece of gold #14
Right after you pick up the piece of gold #13, go up on the plank. At the end of a narrow tunnel look down and jump off the ledge, then go to the end of the tunnel. There you will find the piece of gold #14.
 Piece of gold #15
In the next location, where you eliminate two commanders, approach the recess seen in the picture, and jump down. At the end of the path you will find the fifteenth piece of gold.
 Piece of gold #16
The last piece of gold can be found on taking the second path in the first location. Right after you get to the cliff and climb up the white wall on your way to the tower, go through the window, and on the right you will see the piece of gold lying by the statue.
 Nightmare
The bed is in the place shown above. Open the gate and swim toward the recess. After getting on the surface on the other side, you will find a bed where you can lay down.
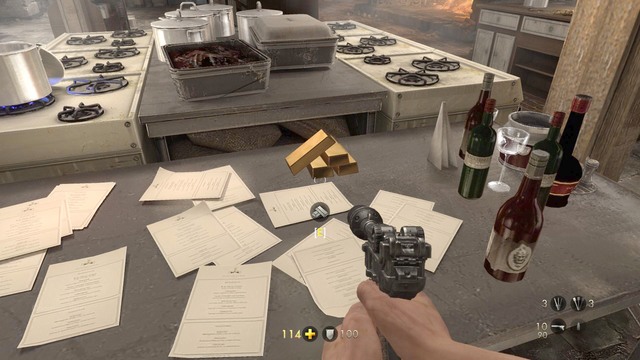 Piece of gold #17
The first piece of gold in this chapter can be found right at the start. While in the kitchen, go to the center of the room to find the gold lying on the table.
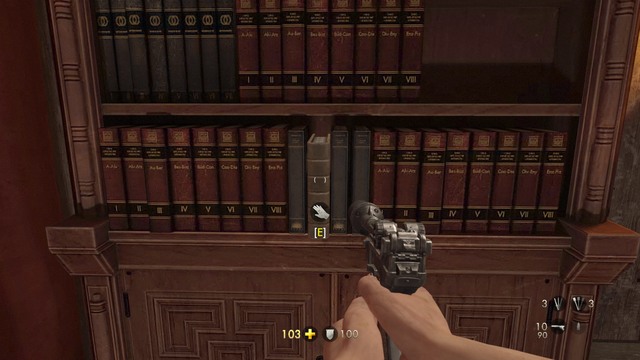 Piece of gold #18
The second piece of gold is in the second location. After killing the commander approach the bookshelf and press the book. This will open a secret room, where the eighteenth piece of gold is.
 Piece of gold #19
In the next location you will see a long corridor. Halfway to its far end there is an entrance to the main room, the library. Before you enter, however, follow the corridor to its end to find a piece of gold in the corner.
 Piece of gold #20
Another three pieces of gold are in the same room. Two are on shelves. The above picture shows the location of piece of gold #20.
 Piece of gold #21
The next piece of gold is on the opposite of the piece number 20. This one too is on a shelf, as seen in the picture.
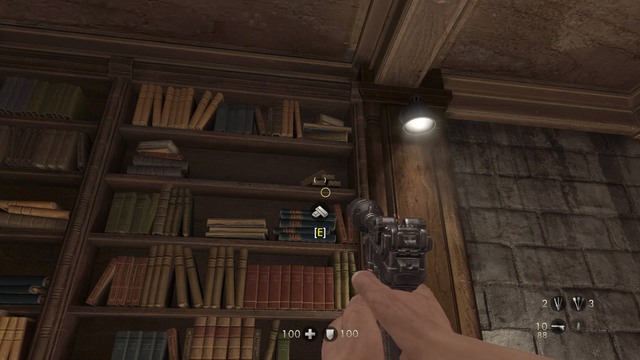
 Picture #1
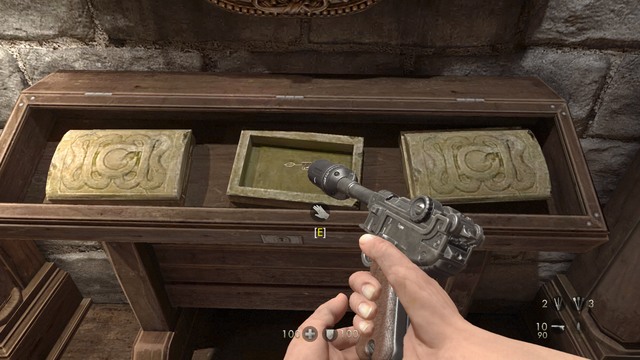 Picture #2
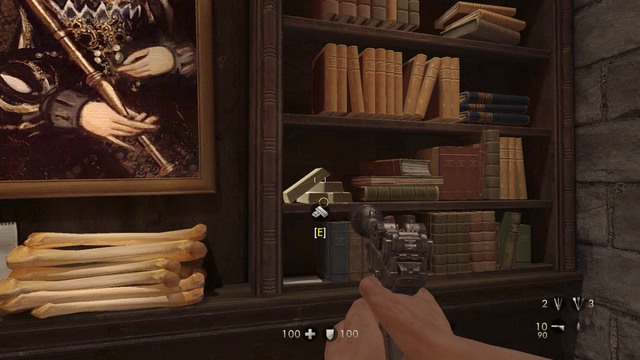 Piece of gold #22
In order to reach the gold number 22 you have to take several steps. Approach the main entrance with the painting (Picture #1) to find out that you need a key to open the secret mechanism. Next, turn right and approach the wall. There you will find a showcase (Picture #2) with the key inside. Take the key, then go back to the wall with the picture, and open the secret passage. Inside, there is the piece of gold #22.
 Piece of gold #23
After leaving the library on the upper floor, there is a corridor leading to Wesley on the left. Before you go there, however, go to the other side until you reach the far end of the corridor. Next to the boxes there is a piece of gold.
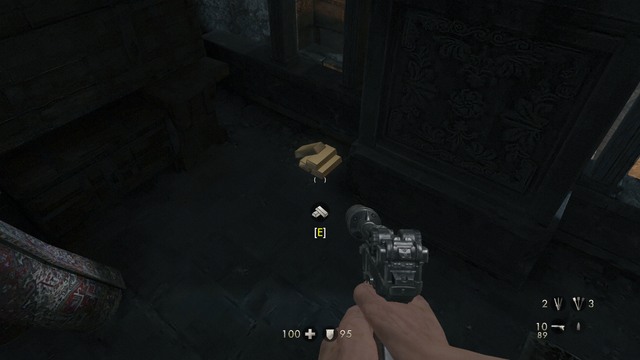
 Picture #1
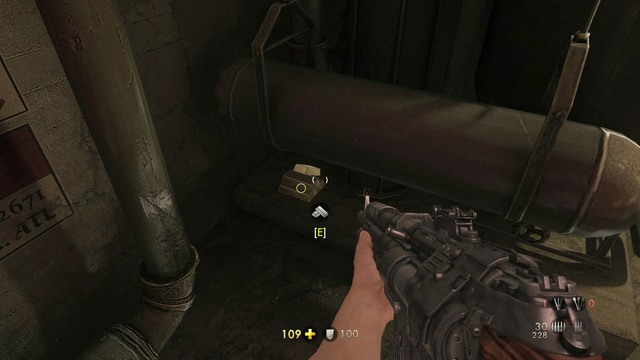 Piece of gold #24
After eliminating enemies near Wesley, approach the room where Rudi run to. In the kitchen's ceiling you will find a hatch (Picture #1), which will take you to the next piece of gold (Picture #2).
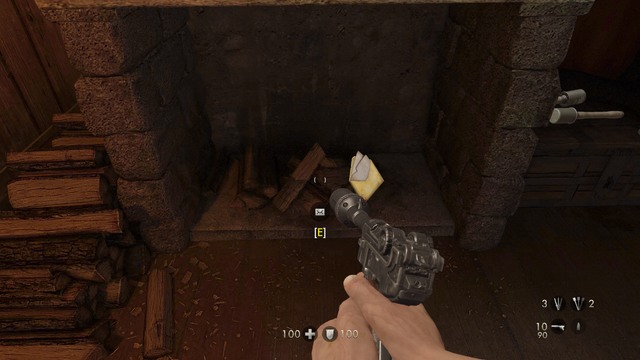 Letter #3
The letter is in the fireplace in the commander's first chamber. Here you will also find the secret passage behind the library, opened with the book.
 Letter #4
The next, fourth letter is in the library behind the secret passage. Just as in the case of the piece of gold #22, you have to reach it by opening the passage with the key found in the showcase.
 Picture #1
In order to reach the bed you need to use the passage next to the second commander. When you get to the place shown in the picture, jump down to find the bed.
 Piece of gold #25
After exiting the elevator go to the rail station. On the left there is a piece of gold lying on the bench.
 Piece of gold #26
The next piece of gold is in the booth where the train is started. Approach the desk on the left, and take it.
 Piece of gold #27
The piece of gold #27 can be found while restoring power to the train. Instead of entering the building, walk around it to find the piece of gold lying on the floor.
 Piece of gold #28
The piece of gold #28 can be collected right after getting to the surface. There is a guard on the way, and the path behind him leads to the gold shown in the picture. In order to collect it you have to make a slide to the other side.
 Picture #1
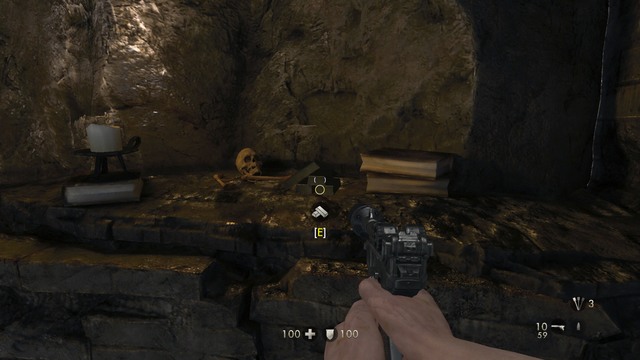 Piece of gold #29
The piece of gold #29 is on the rock shelf. In order to get there leave the elevator and climb up the white wall on the left (Picture #1). On the top you will find the piece of gold (Picture #2).
 Piece of gold #30
The thirtieth piece of gold is in the room between two locations. It can be collected when you have to jump over gaps under the bridge. The piece of gold lies on the boxes near the pillar.
 Piece of gold #31
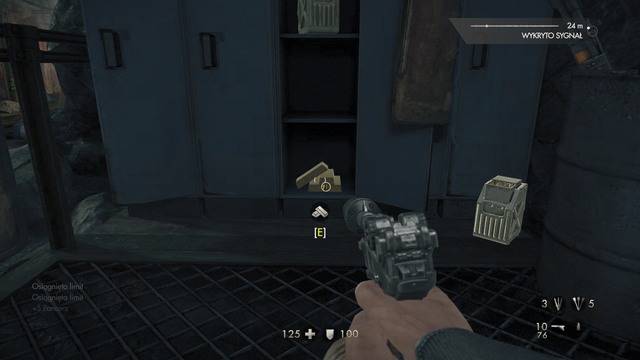
On leaving the elevator, head to the small room on the right. After eliminating the Nazis, look into the safe, as shown in the picture. Inside, you will find the piece of gold #31.
 Piece of gold #32
The piece of gold #32 can be found in Anette's inn. Before you go towards the door, climb up the stairs. Here, you will not only find the piece of gold, but also a bed with another nightmare.
 Nightmare
Upon getting inside Anette's inn, climb up the stairs, and look to the left. Next to the box there is a bed, where you can have another nightmare.
 Letter #5
After leaving together with Anette and Kessler, you will reach the cave with the boat. Before you jump onboard, look for a letter, which lies on the table on the right.
 Piece of gold #33
The first piece of gold in this chapter is on the balcony by the second commander.
 Picture #1
The piece of gold #34 is in the place shown in the picture #1. Enter the corridor in front of you to get to the flooded cellar. The piece of gold is on the bottom.
 Picture #1
 Piece of gold #35
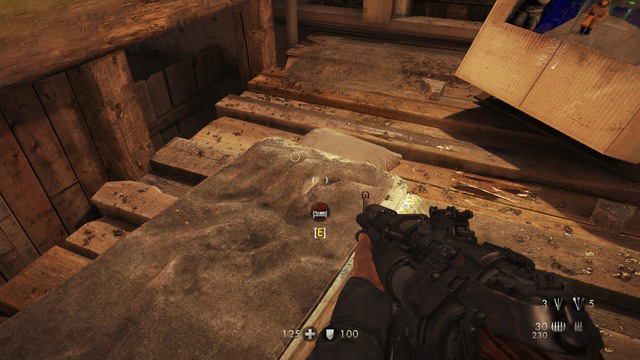
After you walk under the roof and enter the building, go to the right. There is a sofa by the window, and a piece of gold on its top.
 Piece of gold #36
In the same building, go to the main exit, i.e. the window through which you have to leave, and while facing it, turn around. On your left, you will find a box and a piece of gold lying on the beam behind it.
 Picture #1
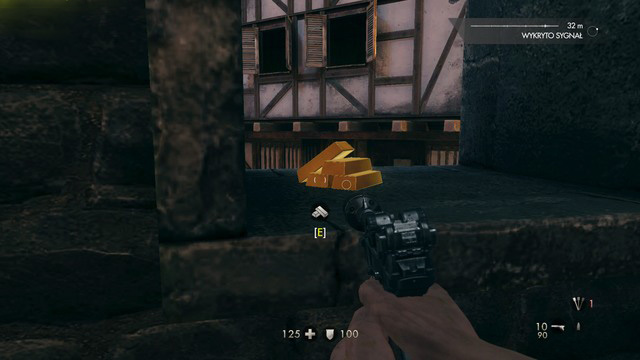 Piece of gold #37
In the center of the location (Picture #1) there is a tower you can climb up using the ladder, as seen in the picture. On the top of it in the window there is another piece of gold.
 Piece of gold #38
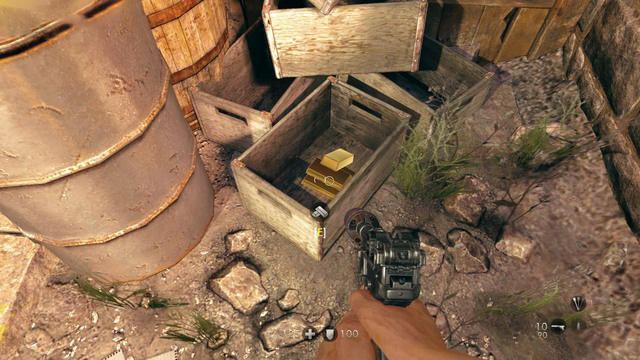
After picking up the key from under the stone and opening the gate, instead of going right into the cellar, go to the end of the alley to find a piece of gold lying in a box.
 Piece of gold #39
Right after picking up the piece of gold #38 you will have an opportunity to collect another one. Enter the cellar where you meet the contact. Before you talk to her, look around the room to find the piece of gold #39 and a letter lying on the table.
 Piece of gold #40
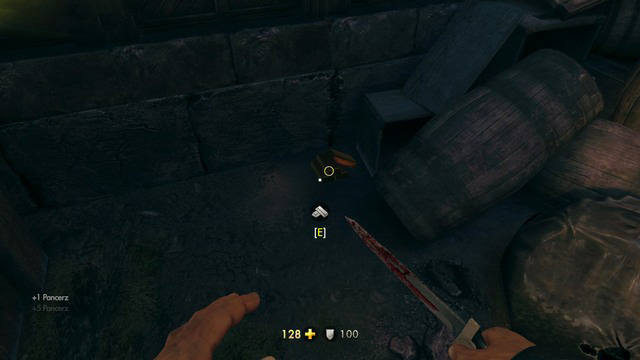
The piece of gold #40 is found by the door to the inn where you meet Helga. Before you go to her, kill all the dogs, and approach the outhouse on the left. On its right side next to the barrels, there is the last piece of gold in this chapter.
 Nightmare
The bed where you can experience another nightmare is near the market stands. While going to the inn, turn right, and the bed is on your left.
 Letter #6
The letter #6 is in the inn where you meet the contact. Here, you will also find the piece of gold number #39, and the letter is next to it, lying on the table.
 Letter #7
The seventh letter is by the window in Helga's Office. Before you talk to her and put down the wine, pick up the letter.
 Piece of gold #41
Right after waking up and climbing up the stairs, follow the corridor to the other side of the roofing to find a piece of gold lying on the floor by the window. You have to pick it up before jumping down and attacking the Nazi zombie.
 Piece of gold #42
After jumping down and attacking the first Nazi zombie, go down the stairs. You will encounter two other zombies. When you eliminate them, before leaving the building approach the bar on the left to find the piece of gold on the floor behind it.
 Piece of gold #43
The next piece of gold can be found in the next building, up the stairs on the upper floor. In the last room on the first floor there is a bed with the piece of gold beneath it.
 Picture #1
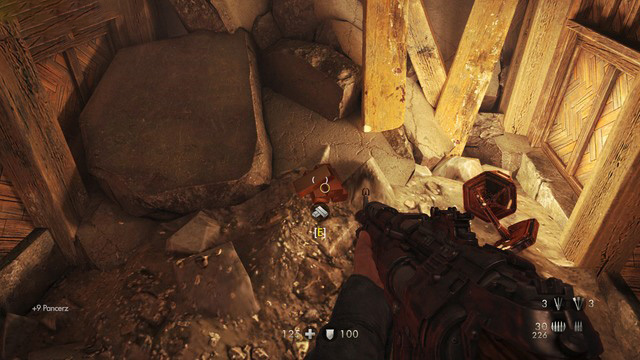 Piece of gold #44
In the next location, instead of going toward the gate, look to the right, and find the place seen in the picture #1. Jump into the water and use the ladder on the other side. There you will find another piece of gold.
 Piece of gold #45
Right after collecting the nugget #44, go outside the room and head to the right. You will see a broken gate in the distance, where you should go. Jump into the water and swim across the canal, and at its far end you will find a ladder on the left. When you get out of the water, turn left behind the building, and at the road's end by the wooden bridge you will find another piece of gold.
 Piece of gold #46
Follow the same path, and before you cross the bridge you will find yourself in the place shown in the picture. Behind you there is a bed, where you can have another nightmare, and on the other side of the canal there is the piece of gold #46. Make a long jump from where you are standing in order to reach it.
 Picture #1
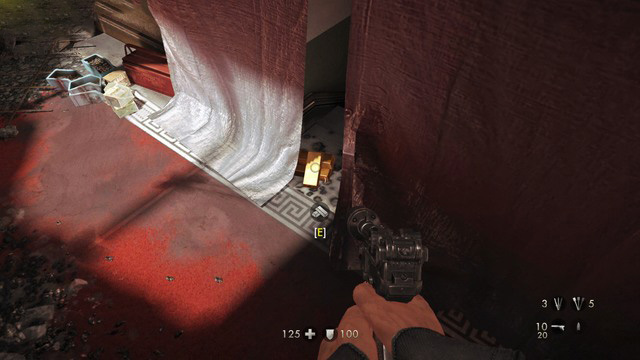 Piece of gold #47
After climbing up the wall shown in the picture #1 turn left, and in the middle of the corridor you will reach the place shown in the picture #2. Between the curtains there is another piece of gold.
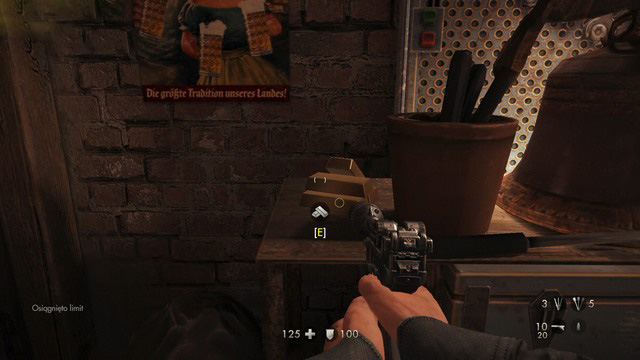 Piece of gold #48
Right after collecting the piece of gold #47 follow the corridor into the center of the room on the opposite, and you will see a dresser on the right side. Next to plant pot there is the last piece of gold in this chapter.
 Nightmare
The bed that lets you experience another nightmare can be found on the bridge in the place shown in the picture with the location of the piece of gold #46.
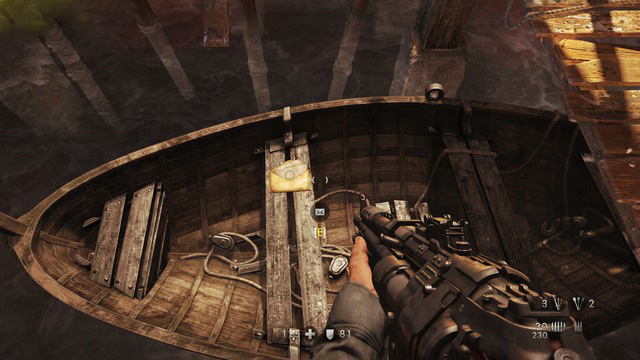 Letter #8
The letter number 8 is in the boat, on which you travelled with Anette and Kessler. You have to discover it for the sake of the story, so you cannot miss the letter lying there.
 Picture #1
Piece of gold #49 is on the left from the bridge seen in the picture, on the bottom of the canal.
 Picture #1
Piece of gold #50 is on the other side of the bridge seen in the picture. You just need to jump to the other side from the place seen in the picture #1 in order to reach it. On the other side on the left there are three boxes, one of which conceals the piece of gold.
 Piece of gold #51
Piece of gold number 51 is on the small bridge near the canal. In order to get there you have to perform a couple of jumps starting from jumping onto the barrel.
 Piece of gold #52
Another piece of gold is next to the building and the stairs, you cannot miss it.
 Piece of gold #53
The piece of gold number 53 is near the house where you have to use the lever. While in that house, approach the window on the left, and you will notice the piece of gold lying on boxes.
 Piece of gold #54
Another piece of gold is in the building right next to the piece of gold #52. Go to the upper floor in the building and head left. The piece of gold is in the drawer near the window.
 Piece of gold #55
Right after walking through the next gate in this location, go outside the mech, and head to the building on the left. In the first room by the armchair there is the piece of gold #55.
 Piece of gold #56
The next and last piece of gold in this chapter can be collected right after opening the metal gate with the key. Fight your way through zombies until you get to the U-turn. The piece of gold under the small roofing in the right.
 Picture #1
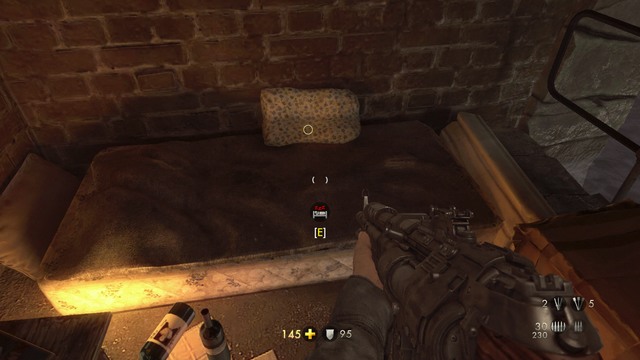 Nightmare
In order to get to the bed shown in the picture #2, you have to swim across the canal seen in the picture #1. The picture #1 shows the location of the piece of gold #51.
 Letter #9
The ninth letter is in the room with the lever that opens the gate. The letter is lying on the desk by the window.
 Piece of gold #57
The first piece of gold in this chapter is inside the crypt on the other side of the location. Use the bridge to get there.
 Piece of gold #58
The piece of gold #58 can be found within the crypt seen in the picture. When you jump down, follow the narrow corridor, and at its end you will find the piece of gold.
 Piece of gold #59
Right after getting to the next location approach the lockers on the right, and in one of them you will find the piece of gold #59.
 Piece of gold #60
The piece of gold number 60 is where you killed the hidden commander. You have to follow the footbridge to the upper floor or use the white climbable wall at the start of the location (next to the elevator). The piece of gold is lying on the table on the left.
 Piece of gold #61
Note!
The piece of gold 61 is in the place where you are after collecting the piece of gold #62. Pick that up before going for the piece of gold 61!
Right after jumping to the next location you will see three Nazis facing you away. When you eliminate them, go up the stairs on the left, and turn right. You will reach the place shown in the picture, and at the end of the corridor you will see the piece of gold.
 Piece of gold #63
The piece of gold #63 can be collected right after finishing off the commander and collecting the piece of gold number 60. Walk down the catwalk, and then go along the corridor toward the door. In the midway you will find a recess on the left. Jump into the water and swim to the other side. In the bottom of the cave you will find the piece of gold.
 Picture #1
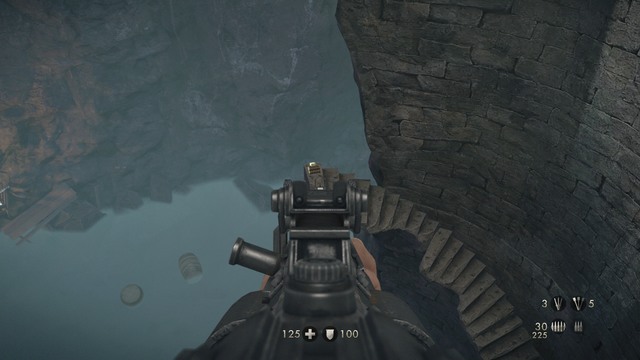 Piece of gold #63
The picture #1 shows the only opportunity for collecting the piece of gold. Before you jump down, follow the stairs to the left. You will see more stairs (Picture #2) with the piece of gold at their end.
 Piece of gold #64
The picture shows the situation when you have to face off an endless wave of Nazi zombies. You must also wait until the stone gate opens. As soon as it does, dash to the corridor, but before going through the next door look to the left to find the last piece of gold. As a reward for collecting them all you will receive gold pistols.
 Picture #1
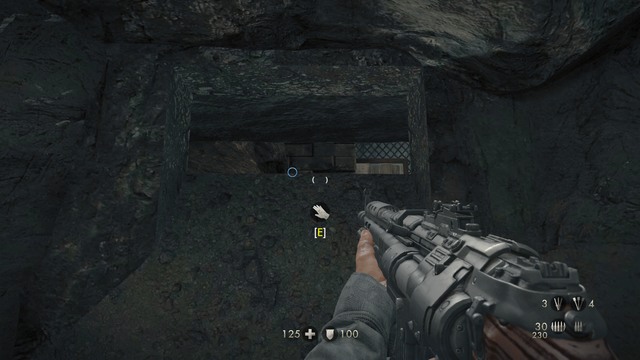 Picture #2
Right after collecting the piece of gold number 61, turn around, and go to the end of the corridor. You will find yourself in the place shown in the picture #1. When you jump down, approach the hole seen in the picture #2, and on the other side there is the bed that lets you experience the last nightmare.
 Letter #10
The last letter is in the beginning of this chapter, in the house where one of the commanders is. The letter is lying on the table.
 The first nightmare
The first nightmare can be experienced in the asylum, when you find the bed shown in the picture. Interacting with it moves you inside a nightmare set within a Wolfenstein 3D level. The nightmare is available in the first chapter, entitled Prison.
 Inside the nightmare
In the nightmare you have to find the exit. The secondary objective is to collect all the silver plates scattered throughout the entire level. While exploring, keep in mind two main rules. The first is to walk along the walls and examine them one by one. Doing this will reveal secret rooms, where you can find not only ammunition and armor, but also silver plates needed to unlock a collectible character.
 Commander is the strongest opponent in the nightmare
While exploring, you will be encountering enemies. These are dogs (which are actually more dangerous than guards), guards armed with pistols, and commanders with automatic rifles. The above map shows locations of all silver plates, items, and aid kits. In the first nightmare there are 62 silver plates - collecting them unlocks a collectible sentry from nightmare.
 The bed #2
The bed can be found in the passage where you get by the boat, near the main entrance to Wolfenstein castle. The boat itself is on the right. When you get to the place shown in the picture, you will be able to experience the second nightmare. The second nightmare is in the second chapter, entitled Docks.
 Minigun is one of the weapons hidden in the nightmare.
In this nightmare follow the same rules as is in the first one. While exploring the area, keep close to walls so not to miss any secret room. As in the case of the first one, your task is to find the exit and silver plates. All these are marked on the map, so you can find every secret in the nightmare.
 One of the secret rooms
The above picture shows the place where you can get using a secret passage. There are many of those, and each one is marked on the map. In the place in the picture there are also silver plates needed to unlock the collectible character. In order to unlock the sentry with a rifle you have to collect all 66 silver plates.
 The secret passage to a nightmare
The third nightmare is in the third chapter, entitled Wolfenstein Keep. After reaching the vent shaft, you will get to the place seen in the picture. In order to find the bed, you have to jump over the crash barrier. There, on the lower floor, you will find the bed.
 The silver plates are needed to unlock the collectible character
As in the previous nightmares, keep to the walls, while exploring the area. At any time you may find a secret passage, marked on the above map. While exploring, watch out for enemies.
 A closed gate
The above picture shows one of the closed gates in this nightmare. Behind it there is the exit and the rest of the silver plates. In order to open it, you have to collect the key marked on the map. After collecting all 40 silver plates you will unlock another collectible sentry character.
 The bed is in the inn.
The nightmare number 4 is in the fourth chapter, entitled Escape. In order to start the nightmare, you have to get inside the inn, as seen in the picture. Before you go after Anette to the exit, climb up the stairs seen in the picture, there is the bed and on the left.
 Silver plates
As in the previous nightmares, your objective is to find the exit. While doing this you can also unlock another collectible character after finding a number of silver plates, as seen in the picture. Follow the same rules as stated in the case of the previous nightmares. You can use the map to find extra ammo or health before fighting a commander.
 The elevator takes you to the exit
After collecting all the silver plates marked on the map, pick up the key, and go to the elevator seen in the picture. After waking up, you will unlock a new collectible character. The requirement is to collect all 73 plates.
 The bed #5
The nightmare number 5 is in the fifth chapter, entitled Wulfburg. The bed itself is by the inn's entrance. While on the square with market carts, take the first turn left, to get to the nightmare starter.
 Two commanders
As in the case of the previous nightmares, while exploring the area, keep your weapons out. The above picture shows the place where you have to fight two commanders. A commander is very tough. The best tactic to kill them both, is to use cover (the red wall, as shown in the picture) and peek out while they are reloading. This way you will avoid potential damage and a mission failure. After collecting all the silver plates marked on the map, head to the exit - you will unlock another collectible character.
 Nightmare #6
The sixth nightmare can be experienced in the sixth chapter. The bed is on the bridge, where you also find the piece of gold #46, as shown in the picture.
 Nightmare
While playing another Wolfenstein 3D mission, follow exactly the same rules as before. Explore the entire map looking for secret passages, marked on the map. To fight enemies you will need weapons and ammo, which can be taken from killed enemies and in the hidden rooms. After collecting all 18 silver plates and the key, head to the elevator, as marked on the map, in order to leave the nightmare. This way you will unlock another collectible character, the red sentry from nightmare.
 The bed #7
The last but one nightmare is in the seventh chapter, entitled Old Town. In order to reach the bed shown in the picture, you have to swim across the canal near the bridge. When you get there, get out of the water, and you will find yourself close to the place.
 The key that opens the exit
While exploring the nightmare, follow the same rules as before. Eliminate opponents, collect ammo, and search every corner. The above map should help you find all secret passages and the key that opens the pathway to the elevator. After collecting all 16 silver plates marked on the map pick up the key and head to the exit. This way you will unlock another collectible character, the white sentry from nightmare.
 The way to the nightmare
The eight nightmare is in the last chapter, entitled Dig Site. Right after collecting the piece of gold number 61, turn around and go to the far end of the corridor. You will find yourself in the place shown in the picture. After jumping down, approach the passage, and on the other side you will find a bed starting the last nightmare.
 The boss of the nightmares
The eight and last nightmare is a boss fight. He is much tougher than guards and commanders known from previous chapters. In order to defeat him, take out the automatic rifle, then open the first door, and hide behind a wall. At the beginning of the fight you will not be able to hurt the boss, as he is too far. Wait patiently as he gets close enough, and while still behind a cover, start shooting. Shoot with short bursts, because of low clip capacity and large recoil. After winning the fight approach the dead and collect the key as seen in the picture. Before you get to the exit, collect all 10 silver plates marked on the map. When you wake up, you will receive the last collectible character, Hans Gross.
Wolfenstein: The Old Blood is a standalone expansion to the successful Wolfenstein: The New Order. This first person shooter is powered with id Tech 5 engine, based on OpenGL technology. This guide was prepared with PC version on a computer with Intel Core i5 4460 processor, AMD Radeon R9270x 2GB graphics card, and 8GB RAM. The game features just enough graphics settings to adjust it to various configurations. Because of the outdated drivers and low V-RAM, the above system, was unable to maintain stable 60 frames per second on the highest settings and FullHD resolution (1920x1080). The highest (Ultra) settings were non-playable despite reaching 30 FPS (because of too low video card memory). The optimum comfort (60 FPS) was achieved on high settings (lowered anti-aliasing). Taking under consideration that the same engine was used in The New Order, such drastic frame drops reflect badly on the game's optimization. However, after setting the options right, so to enjoy smooth gameplay, there were no errors, stuttering, or frame drops. Users of Nvidia graphic cards can use system acceleration with CUDA cores, which can be turned on in display settings.
This Wolfenstein: The Old Blood guide was prepared using PC version with the following configuration:
The above configuration allowed for smooth gameplay in Wolfenstein: The Old Blood with appropriate graphics settings. Throughout the entire gameplay no frame drops or graphics errors occurred.
Minimum requirements:
Recommended requirements:


 Warhammer 40,000: Space Marine Game Guide & Walkthrough
 World of Warcraft: Warlords of Draenor Game Guide & Walkthrough
 World of Warships Game Guide & Walkthrough
 WildStar Game Guide & Walkthrough
 Wargame: European Escalation Game Guide & Walkthrough