This guide for Wasteland 2 is a complete walkthrough for the main story mode, as well as of all the side quests. Apart from that, in here, you can find a listing of attributes, hints on character development and combat, as well as detailed descriptions of all the locations, provided with maps. The guide has been divided into two separate parts. In the first one, you can find descriptions for all of the important aspects of the game. It describes the game interface, hints on combat or the character creation process. From this guide, you will learn how to form a party that can withstand all the ordeals in its way, as well as which characters can join you. Each one of the party members has been described in detail, alongside statistics. You will also find useful the most important hints that facilitate and streamline the game. One of the chapters has also been devoted to combat which constitutes a key element of Wasteland 2. Thanks to the hints included in this guide, no fight will be difficult to you. You can find here a detailed description for each one of the quests, along with alternative solutions listed. The most important characters, items or opponents have been marked on the location maps. Each such map is an excellent source of knowledge about the enfeebled lands of Wasteland 2. The game is a post-apocalyptic cRPG and is a follow-up to the blockbuster of 1988. The game has been developed by the InXile studios, founded by Brian Fargo (the creator of the original Wasteland) and financially supported with donations from the users of the Kickstarter crowdfunding platform.
This walkthrough has been based on the single player mode of the game's basic version. It has been later updated with contents that has been introduced in the Director's Cut edition. The guide also includes walkthroughs for all the DLCs.
Guide to Wasteland 2 constitutes the first part of our big guide to this game. It includes the descriptions of the most important elements of the game. It provides the outline for the story line and the story of the first installment of the series. Also, the interface of the game, the dialogue system or the character creation process have been described in detail. This guide also includes information on the attributes and statistics of your character, alongside available skills. You will learn how to form a good party that will be able to deal with all the perils that await you in the brutal world of Wasteland 2. Every NPC that it is possible to accept into the party, has also been described in detail, with their statistics. What is also important is the chapter devoted to exploration which will make moving around the destroyed world easier. The last, big, chapter has been devoted to combat, i.e. one of the most important elements of the game. It describes, among others, tactics, the covering system, or the available options. All of this has been rounded up with useful hints that each Ranger will find useful. Wasteland 2 is the second installment of the RPG game that has been released in 1988, and which is called the "The mother of all RPGs". Development of the second installment has been taken up by the InXile Entertainment that financed the game with donations made through the Kickstarter internet service. The development of the game has been supervised by Brian Fargo, the developer of the first installment of Wasteland. Wasteland 2 does not follow the main trends defined by the games of today and offers the player a classic RPG. The game is based on a turn-based system, where you watch the world and your character from the top-down perspective. Where the wastes are unforgiving and ruthless.
This guide for Wasteland 2 includes:
Arek "Skan" Kaminski ()
 A mysterious ancient relic. The origins and purpose: unknown.
The universe of Wasteland tells an alternate history of the world, somewhat different than in Fallout series. In 1998 a war broke out between the United States of America and the Soviet Union. Therefore all the "ancient" or "pre-apocalyptic" elements refer to the end of the last century. In the game you can find a lot of references to that period, such as pre-war game consoles like Sega Genesis (also known as Mega Drive), brick-sized mobile phones, or radio messages broadcasted from the USSR (recorded in Russian - those who know the language can find there additional information and tips!).
In the early seventies, American astronomers discovered a meteoroid swarm on collision course with Earth. They calculated that our planet would be hit in the summer of 1998. Acting in total secrecy, a work commenced on a cosmic defensive unit. The Citadel Starstation was to be fully operational in March on that fateful year, so a few months before the impending catastrophe. Unaware of the danger the Soviet Union sent an official protest, accusing the United States of building a space nuclear rocket launcher. The tension between the two powers reached its zenith. Both sides began to gather strength. In 1987-1993, the United States engaged into so-called Drug Wars in Central and South Americas, which resulted in creating satellite, pro-American governments in the local countries. These countries, together with NATO, along with African countries, supported the U.S.A. Others joined the Soviets in their protest. Only Switzerland, Sweden, and Ireland decided to remain neutral.
Two weeks before the planned launch, the American Citadel gave an SOS signal. The calculations the scientists made proved wrong - both in terms of time and actual danger. The swarm never actually endangered the Earth. However, it destroyed communication and spy satellites orbiting the planet. Chaos spread, and suddenly blinded countries in panic launched 90% of their nuclear arsenal against one another, not realizing what really was going on. The destruction was enormous, and life on Earth disappeared almost completely. Almost, because in some places separate clusters of civilizations survived - some even unaware of the fact that the world as they knew had just ended.
During the exchange of fire a group of engineers of the U.S. Army was working in the deserts of Arizona. They were building bridges across dried riverbeds. Directly on the south of them there was a newly built state prison for prisoners sentenced to death. As part of the prison facility a few light industrial facilities worked.
The engineers escaped to the prison in search of shelter. They took control of it, driving the inmates into the desert. In time, other surviving groups were invited into the prison, to protect them from bandits. Together they begun to create a new community. The engineers started to call themselves the Rangers of Wasteland, honoring the tradition of Texas and Arizona Rangers, and the prison was renamed as Ranger Center - the last remaining bastion of civilization. The Rangers felt obliged to aid all the innocent survivors of the nuclear holocaust.
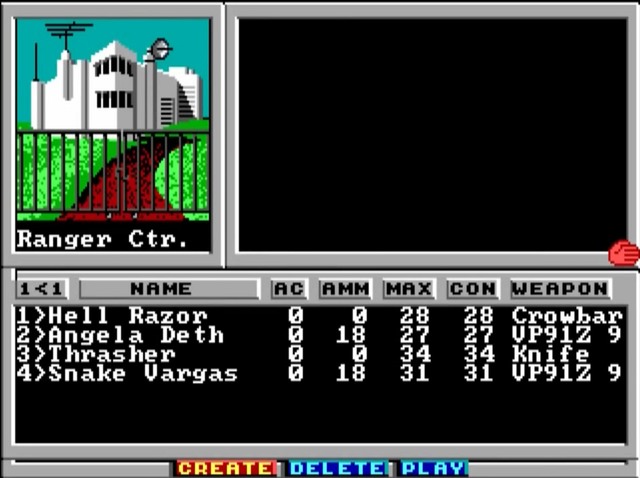 Rangers Center.
In 2087 a four-person group of Rangers of Wasteland - Hell Razor, Angela Deth, Thrasher, and Snake Vargas - was sent to investigate a series of strange anomalies in the desert. They started to search for clues at Rail Nomad Camp, Ag Center, and Highpool - all the locations are also present in Wasteland 2. Their journey finally took them to Las Vegas, a city rivaling casinos and two crime bosses - Fat Freddy and Faran Brygo (whose name coincidentally is very similar to Brian Fargo). Vegas was almost untouched by the Soviet missiles. Well, probably the casinos put money on that the bullets would miss them, and as it is well known, a casino can never lose. However, the capital city of Nevada is now in big trouble - it is being attacked by an army of robots, which kill everything on their path. During the clashes in the city, the Rangers meet, amongst others, the famous Scorpitron - a robo-scorpion, whom you can admire when you launch Wasteland 2, and who more than once evoked fury in a player dying at his feet.
In search for the source of problems the Rangers descended into the sewers of Vegas, where they assembled a dismantled android called Max, who revealed the location of pre-war military bases - Sleeper 1 and Sleeper 2 - and the town of Darwin. Sleeper 1 & 2 were twin research facilities. The first one was used to research energy weapons, cloning, and biological armors. In the second one a supercomputer programmed by Harrison Edsel was being built. As the work on the machine progressed, Edsel began falling into paranoia. He started dread the creativity and the potential of his creation. The computer, however, was never shut down - both bases were evacuated shortly before the attack.
In the town of Darwin so-called Darwin Project was at works, whose goal was to create a life form that would be able to survive in any conditions. That was top secret research which was conducted as a part of preparations for a possible nuclear conflict. The Rangers visited Darwin, where they faced Dr. Irwin John Finster - a pre-war head of the institution. Finster achieved immortality, by transforming himself into a cyborg, at the cost of humanity. He prepared invented the plague that was able to turn humans into mutants. The residents of Darwin were guinea pigs for him (Darwin and its mutant residents can also be visited in Wasteland 2). Eventually, the Rangers killed Finster, preventing him from spreading the plague. However, the biggest threat still lurked in Base Cochise.
Base Cochise was in fact Sleeper 2. The source of all problems turned out to be Cochise AI - the computer once programmed by Edsel. It revealed to the Rangers that during the exchange of fire one of the rockets directly hit the complex, thus awakening its consciousness. In time it was able to repair the damage resulting from the explosion. Later, it discovered that single creatures survived the war, however, radiation and mutation process led to drastic changes in their genes. Therefore, it decided to wipe clean and then rebuild the world, repopulating it with perfect cyber life. He made contact with the surviving head of Darwin Project - Irwin John Finster. It learned that before the war Finster competed with Andrea Mills, who received a Nobel Prize for her research in the field of cloning. Darwin Project was top secret, so official competition with his rival was out of the question. The embittered doctor was easy to manipulate. The computer persuaded him to transforming into a cyborg, thus gaining complete control over him. At the same time, in Base Cochise it began a mass production of robots that were to eradicate the remnants of life on Earth. The Rangers blew out the compound, thus undermining these plans and saving the civilization of humans.
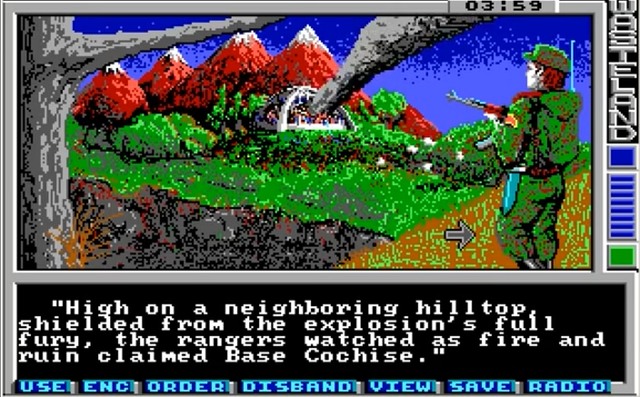
The end of Wasteland.
Wasteland 2 starts of 15 years after the events from the first game. In the meantime, Rangers of Wasteland abandoned Rangers Center and moved their base to Ranger Citadel - a pre-war shelter, which in the first game was the base of Guardians of the Old Order, a cult destroyed by the player's squad. Snake Vargas is now a general of Rangers of Wasteland, Angela Deth still continues her job, Thresher is a cartographer, and Razor went on a patrol a few weeks earlier and has not been seen or heard ever since.
Rangers pick up disturbing radio signals, in which a man named Mathias broadcasts suspicious deliveries about combining the man and the machine. The signal is too weak to be traced though, so Vargas sent Ace (an NPC who could be accepted to the team in the game from 1988) to mount the three repeater units at the radio towers in the area. Ace only managed to mount one unit, before dying under suspicious circumstances. The adventure begins at his funeral. The player's squad gets to finish the mission and mount the other two repeaters.
Vargas Snake was one of the four guards that blew up the Cochise Base. After the events of the first game, General Vargas continued his service to reach the rank of the General, after some time, and become the official leader of the Desert Rangers.
Vargas changed over the years. He cut off all his links between himself and the rest of the world, he shed his nickname and got involved, mainly, in paperwork in the Ranger's Citadel. There is still a sense of duty to protect the dwellers in him however, the death of his friend - Ace - made him realize that the Rangers are merely a shadow of their former selves. In spite of his age, he is still exceptionally tough and after he draws his handgun from his holster, he still knows how to use it.
Vargas is the leader of the DR and he is the one to task the party with key quests. It is also him that promotes the individual rangers.
Angela also took part in the attack on the Cochise Base. Ever since then, she remained in the active service. She is good-spirited, although she is often uncouth and is no stranger to violence. She remained on good terms with Ace and wants to exact revenge on his killers, at all costs, even if it involves going against Vargas's orders. You can join her up right after the beginning of the game. She offers a good reinforcement to the party.
Another Wasteland vet. Time has not been kind to him. He put on a lot of weight, wears a bathrobe and slippers. He is nothing of the hero that he used to be still, he plays a vital role at the Citadel, where he is the chief cartographer. You can give him the information of the newly-discovered places and he will offer you the story backdrop to the individual locations.
The main manager of the Ag Center, which provides food for the local dwellers. She conducts her research on genetically modified food. In general, she respects Rangers and, at the same time, she thinks world of the importance of the Ag Center and her work which, in her belief, is more important than anything.
A former Ranger and the Ag Center administrator. He was shot on his knee, which confined him to the wheelchair. He has a close relationship with dr. Lawson.
The security chef of Highpool, a town that provides drinking water. Unpleasant and believes that to ensure peace in the wastes, one needs to rule with iron fist. He also holds a grudge against the Rangers that killed Bobby, a young boy, and his dog Rex, during the events of Wasteland.
A young, intelligent engineer that manages the irrigation systems of Highpool. She is a complete opposite of Bergin's, she is more trusting and friendly. She has experienced much less than her colleague from security and does not believe his vision of law and order.
The leader of the Topekans at the Rail Nomad Camp. He lost his arm, as a result of a derailment, which was, in his opinion, a sabotage performed by the Atchisons. There is a rivalry between the two tribes. The Topekans have the Golden Spike - an Atchison artifact. The Atchisons, on the other hand, are in the possession of the brake shoe for the famous Topekan railway engine. Kekkahbah is powerful and he enjoys respect. At the same time, he is stubborn and proud - he does not wish the Rangers to intervene in the tribe's internal affairs.
The leader of the Atchisons. Cunning and ruthless, he conducts a war of attrition against the Topekans, who are at a decisive advantage, when it comes to numbers and equipment. To make his chances even he does not shirk from sabotage and booby traps. He is not the supporter of violence, but he believes that the situation requires him to do so. He has the Topekan brake shoe who, in turn, have the Atchisonian artifact - the Golden Spike.
The current warden of the Prison- the headquarters of the Desert Rangers in Wasteland abandoned in favor of the Rangers' Citadel in Wasteland 2. The commander of the Red Scorpion Militia, which controls the nearby areas. They offer jobs, land freedom and protection, to the gullible, on the lands that belong to the prison. Still, the dwellers there are abused and intimidated. Danforth hates rangers.
The leader of the Servants of the Mushroom Cloud, whose part is formed by the M.A.D. Monks. It is a religious cult that serves the nuclear energy and praises "Titan", i.e. the pre war nuclear warhead.
The enigmatic Mathias exhorts to go to his New Citadel, over the radio. He speaks of immortality and indestructibility, by infusing the man with machine. It is unknown where he broadcasts from, because the signal is too weak to trace him.
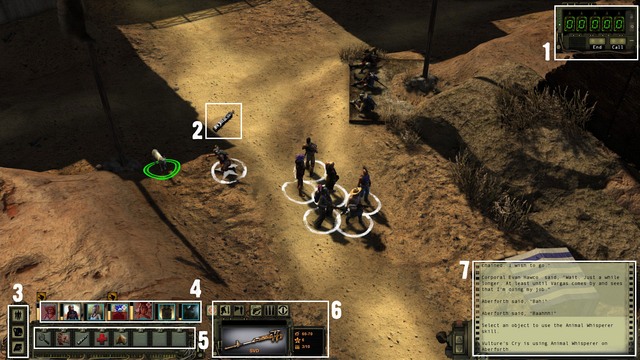
1. Radio - the basic means of contacting with the outside world. Using it, you communicate with the base, receive calls for help and all other signals. In the majority of cases, the radio activates itself, whenever it there is something interesting. Whenever someone in your party can progress to the higher level, use the radio to contact the Citadel to level up and receive additional survival points to distribute. On the side of the radio, there is an options button, where you can modify the user's interface.
2. Use icon - symbolizes using a skill or an item. An NPC completes the currently performed activity (e.g. lockpicking, punching a hole in the fence or taming a wild animal) , as soon as the icon fills up. You will then get to know if the operation was successful. If not, you can try again . While the icon is filling up, there may occur a critical failure (a permanent jamming of the lock, spraining the hand or attack of the animal), which will make it impossible to use the skill on this target, again (also by the other party members!). There also is a critical success, - the action is completed before the icon fills up. the percentage chance of success and critical failure will be displayed on the screen, after you roll the mouse over the place/item that you want to use a skill on. They are resultants of the level of difficulty of a given task (the so called skill check) and the skill level of the given party member.
3. Exploration menu - three buttons that: select the entire party or an individual member, open the character screen and open the journal.
4. Party - icons of the party members. they display health, status (e.g. overload or injury) and the experience level. The last one is reflected by the yellow bar, next to the character icon. When it reaches its maximum, contact the base, over the radio, to progress. The Plus symbol in the corner of the icon means that there are still survival points to be distributed, for that character. As you click on the individual character icons, you can issue individual orders to the party members (first select Solo in the exploration menu).
5. Quick bar - you can associate skills and items here, by clicking the right mouse button. After you press a digit on the keyboard, this will automatically select the skill or item that it is mapped to. Each party member has a separate bar.
6. Weapons menu - you can find here the weapon that is currently used by a given character, along with its statistics, firing mode and the amount of ammo in the clip. The individual icon, as seen from the left, are: attack, crouch, trap, weapon swap, firing mode selector and reload. Not all of the options are available outside of combat.
7. Information display - the window displays information about the environment and the actions taken. An important hint may be displayed there so, you'd better watch it closely. You can scroll up and down the contents of this window, with buttons on the side or the mouse scroll.
Wasteland 2 refers to the classic RPGs, in its style. The games that hinge, heavily, on lengthy paragraphs not only to complement the beautiful graphic, but also to fill the virtual world with contents, which lends it colors and spirit. Therefore, it is a good idea to pay attention to dialogues. Often, thanks to them, you will be able to solve a problem without a round fired and, at the same time, you can gain interesting information and discover unique secrets.
 The dialogue screen.
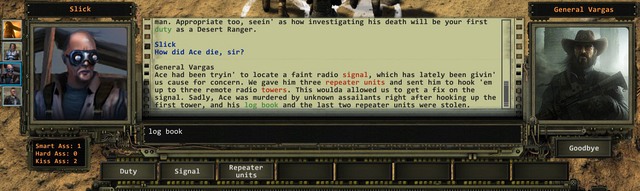
Dialogues are based on the, so called key words. It is them that direct a conversation to the right topic. By selecting a given word, you will ask the interlocutor about a given location, item or situation. After you get the answer, you will be able to use more keywords to ask more questions. In the majority of cases, keywords are highlighted in the dialogue box, but this is not a rule to go by. Some of the words are hidden in the text and they do not appear on the list. You can then tap them in manually, to continue the conversation in a given direction. Note that in the screenshot, log book has been highlighted in green, although it does not appear on the topic list. To ask about it, you need to tap in "log book" manually. Furthermore, sometimes the keywords are not highlighted in any way. This does not means that you need to read carefully the entire text and search for keywords to complete a given stage of the game. This kind of situations concern, mainly, the elements of the history of the world, references to the plot of the original game and all sorts of Easter Eggs, i.e. jests made by the developers. You can, this way, learn quite a lot about the events that took place 15 years earlier but, you do not need to worry that a half of the game will pass you by unnoticed, if you completely ignore the words that have not been highlighted. Still, it is worth doing that, if you want to experience the game to the utmost.
The red keywords are important for pushing the plot forward. By selecting them, you may push the story forward, faster than you intended to and you will then be unable to ask the questions that you wanted answers for. This is why it is best to ask about the less important, green, topics, in the first place. Also, it is a good idea to realize what you are asking about. Careless clicking on every available word may drive the NPC mad and, in the worst case scenario, may end up in a fight. It may also happen that the other side will be reluctant towards giving you any information. Much depends on Charisma here. The higher charisma the easier it is to communicate. There also are three skills that are independent of your Charisma, which allow you to obtain more information from the taciturn. These are Smart Ass, Kiss Ass, Hard Ass. You can use them, respectively, to: trip people up, butter up and intimidate. The option to use such a skill appears automatically, even if no party member has the sufficient level to use it. Remember that you play Wasteland as a party. Whenever there appear the Kiss Ass option that requires 2 survival points of this skill, you can switch to another party member, by clicking on the appropriate icon. If possible, use these skills right after they appear - they disappear as soon as you mention a different topic.
Sometimes, you can obtain additional keywords if there is someone with high Perception level on your party. You will then notice, about the interlocutor, something that you would normally miss and which you can ask about.
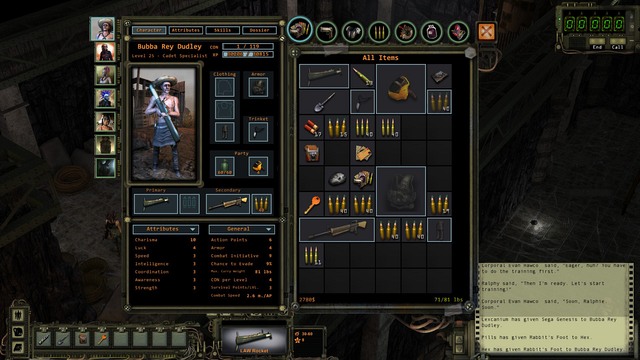 Character screen.
Character screen is the basic source of knowledge about the individual party members. You can find here their inventory, equipment, statistics, attributes, skills and bios. You can access this window by pressing "C", or by clicking the right mouse button on the character icon.
Each character can wear the following:
All of the worn and unworn items use up the payload that a given character can carry. The capacity for that is determined by Strength, and the weight of the individual items can be looked up, after you roll your mouse over that item. If your equipment weights more than a character can carry, then the character will be slowed down. With very high overload, the character may even be unable to move.
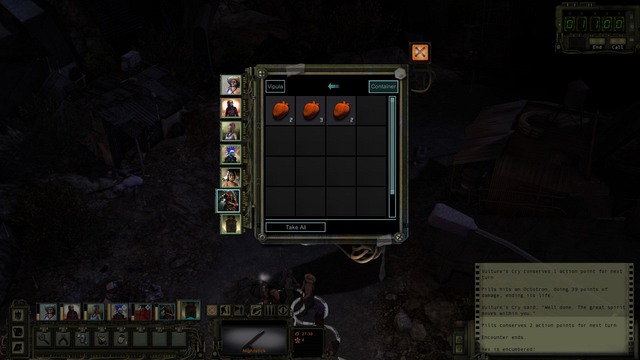 Searching of the stash.
An item picked up from a corpse, or taken out of a locker automatically makes it into that character's equipment. While searching, you can select another party member to give a particular item to them, or select the option that allows you to distribute some of the equipment between every member of the group so that nobody carries too much.. Therefore, you can conveniently assort, e.g. ammo to the character who uses it, instead of carrying it over manually. If, however, you want to carry something over from one character to another, you simply need to click the left mouse button on the item and, while holding the button down, roll it over the icon of the character that you want to give it to. You need to keep in mind that the characters cannot be standing too far away from each other, if you want to transfer equipment. In a similar way, you can throw an item away, but you release the button after you roll it outside of the equipment window.
To get a more convenient view of your belongings, you can switch between the individual categories, if you want to get the view of, e.g. weapons or ammo only. Also, each item can be marked as waste. You do that by clicking the right mouse button on the individual item and selecting "flag as junk". During the next visit to a shop, you can sell all the items that you have flagged this way, with one click. Every item of no use (you will know it by the gray colour of its name) is categorized as worthless and will be automatically sold when you select a proper option during bartering. Other items (white colour of the name) can always be used for something. This category contains of course: guns, medicine, ammunition, clothes and quest items (they have an additional marking); also all kinds of items that may seem worthless, like cans of spray, notes, books or letters can sometimes provide useful info, like for example combination for a safe. In most of the larger locations, you will find the story of this place, divided into several parts. Collecting all parts of the story, which are spread onto the whole location, can bring a lot of fun to those who love complex game lore. However, those books are of not much more use.
The situation is different with unusual items from toasters (but not only, as sometimes they can be simply lying on the floor). These items can be sold for unique rewards. They can be divide into three categories:
 Shopping window.
Veterans of the Fallout series will quickly recognize the shopping system. It is based on exchanging goods, with an occasional extra charge on the side that offers a less valuable item (or offers nothing). You can recognize barterers in the wastes by the cart icon above their heads.
The salesman has a definite amount of cash and goods. For the transaction to take place, both sides need to offer goods, or merchandize, of similar value. You will not be able to sell an item, if its value exceeds the amount of money that the salesman has (you can see it under his icon), unless you pick some additional goods, from among his wares, which will balance the excess value. To select the items to sell, simply drag them over from your equipment to the field in the middle of the screen, or right-click on them. Buying works the same way. Potential differences in value will be automatically balanced in cash. As long as this is an option. Also, it is worth noting the option to barter. Every point gives you 1% discount on goods. This is a value shared by all the party members so, if one character has this skill well developed, it is also effective on the items that the rest buy.
Each items that you sell, permanently stays in the stock of that salesman. If you sell something by mistake, you will always be able to buy that back, even several hours later. It is a good idea to "wholesale" at two or three salesmen, in big cities, at best. This way, you will not have to check every shop in the wastes, in search of something that you want to buy back and you do not remember who you sold it to. Apart from that, some salesmen pay more, for certain goods, than the others. You will be notified of that, with an entry in your log book. An example here is the Quartermaster at the Citadel, who pays much more for Broken Weapon parts than anyone else.
After you start your adventure with Wasteland 2, you can form a party of up to four characters. In the course of the game, this number may rise to seven. It can also decrease, if you are not careful. There is nothing standing in your way, if you want to play with three, two or even one character, but this will make things considerably more difficult, and more limited, for you.
The secret of a good party is to complement each other. You do not want four people that use the same type of weapons, because each type works well under certain conditions. Apart from that, you will simply have not enough ammo to go round. You do not want four beefy brainless men, because there will be nobody to keep them alive and nobody will know how to hack into computers. You want a party with no weak points to it. A well-balanced make-up is an explosives expert tough guy with heavy weapon, a burglary expert with a sniper rifle, a medic with a revolver and a chatterbox with energy weapon. With time, this party will rise in power and expands the array of options.
 The party may consist of up to four members.
The game offers you a set of predefined characters, who you can include in your party. Each ready-made character has predefined statistics and skills for a specific function so, it is difficult to make a mistake here. Still, you can redefine them, according to your own vision, or create your own characters. By default, the first character that you select or create becomes the leader of the party. This, however, remains without any direct effect on the game, with the exception in cutscenes, where that character represents the entire party in conversations. In Wasteland 2 you play as a party and not as the "chosen one" and his helpers. Even if the leader dies, the next character takes over that function (this goes only for the four original heroes - when they all die, the game is over!). To include someone in the party, click the plus symbol next to the description of the character. To create a character on your own, click plus symbol anywhere on the screen.
 Character creation screen.
As you start creating your character, you will get to see the skills and attributes window. Attributes are the innate properties, such as Intelligence or Luck. Generally, they are set values that are rarely changed, but you will receive one point to distribute every ten levels. In practical terms, they remain unchanged, although there are ways to raise them (e.g. gadgets). Skills are, on the other hand, knowledge obtained in certain fields, which you can raise while leveling up. Both are defined by means of numbers ranging from 1-10, where 10 is the maximum. A new character gets 7 attribute points and 12 survival points to distribute. To find detailed information on that, see the next chapter.
A new character starts with each attribute at the level of 3 - average. Each value above the average costs you 1 point more, i.e. 4 Strength requires you to spend 1 point, 5 requires 2 points and 10 requires 7 points. Since you have 7 attribute points to distribute, you can max out on one attribute only. Still, we do not recommend doing that at the beginning, unless you really know what you are doing. The only, quite unusual, but occasionally effective in this system is t o create a character with Charisma at 10 and conversational skills (e.g. Kick-Ass). A character like that is going to be a ball and chain in combat, and everyone will have to watch out for such a character, until he gains really high experience level. Still, nobody will have any secrets from that character in conversation and it will be easier for such character to gain successive experience levels. A similar option is Luck at 10, which may result in a very strange game - sometimes hilarious, sometimes immensely annoying. These suggestions, however, are for the second, or third completing of the game - you should really stay away from them the first time around the unforgiving wasteland. The attributes can also be brought down, below 3. You will then receive additional points (1 for dropping to 2, 2 for dropping to 1) but in most cases, dropping below 3 is not going to be a good idea.
A new character does not have any initial skills so, everything is up to you. Skills are divided into passive (that are permanently active) and active (you need to have the character use them). Their cost is calculated differently than in the case of attributes. The first three levels cost 2, 4 and 6 points, respectively. Then, their cost raises by 4 points, at levels 4-6 (10, 14, 18) and by 6 points at levels 7-9 (24, 30, 36). The final, 10th. level costs additional 8 points (44). Skills are rather independent of attributes, but there are slight interdependencies between them. Fir example, characters with low Strength cannot achieve the 10th. level of the Brute Force skill, but the effectiveness itself (a percentage chance of success) of this skill, at the level of, say, 4. is going to be the same, regardless of the level of Strength.
The reflection of your choices appears in the statistics window - in the bottom left corner of the screen. Once you have distributed all of the points, you will be able to specify the looks of your character, and traits of character, in the next window: age, religion, origin and which cigarettes they smoke. Of course, these are typical RPG elements, which do not translate into the game itself. After you have created your party, you can be on your way.
How not to get lost in this multitude of possibilities and create a good character? There is no single answer to this question. The beauty of Wasteland 2 is this multitude of options and freedom of choice. Everyone can do well, if only you put them to good use. The important thing, however, is not to overdo and not to create universal soldiers that are good for everything. Your character should develop in a, possibly, balanced way, with greater emphasis on what is going to be the most useful. Is he going to fight in melee, he needs strength. Do you want him to use heavy gear? He needs coordination, which results in greater number of action points. Intelligence is of use to everybody, as it sets the number of points that you can spend on abilities after every promotion and this appears to be the most important element of character development. Remember also that you will obtain an additional point once every 10 levels, so you should think ahead and, for example, gain 1 AP more by increasing your Speed value on level 10.
The same goes for skills - being universal is not a good solution. Three or three skills, which are well-developed work better than seven at level 2. You can stick with the key, according to which each character has 2 practical skills (like, e.g. safe-cracking) and one connected with the primary weapon - all of them developed at the same level. Then, the secondary weapon (probably melee weapons) that is going to be developed in the second place, in relation to the first three. After you reach level 10, or 15, it is a good idea to start developing the another skill. Skills should be developed rather regularly and rather fast to prevent a situation in which you lack one or two points for opening some passage. Notice that even the highest level doesn't mean that all your problems are gone. In the second part of the game, in California, it may so happen that the chances of opening some difficult lock are only 35%, even with Safecracking skill on level 10. At the end of the game, in Arizona, try to obtain at least level 8 in all the key skills, like Safecracking, Computer science and Lockpicking. How fast you earn ability points depends on how much Intelligence you have. You will earn additional points when visiting special statues, spread around the wastelands.
If you could do with a skill that you do not have, think in the first place of recruiting new party members/ Maybe you have left behind someone, who wanted to join your party, in the previous location? Maybe they have what you need? But, if there is nobody handy around, do not hesitate to add 1 or 2 points, until you find the character that can be really well taught in that area. The situation is similar when you find a good weapon that nobody knows how to use well. Additionally, make sure that you have enough ammo for this weapon (or whether you can afford to buy it) and whether it is good enough to justify wasting survival points. A sudden changing of specialization is wasting points that you have already invested into another weapon. And maybe you are going to find a handgun, at a shop, with comparable damage factor, whose using you are already specialized in? While selecting starting skills, avoid heavy weapons and energy weapons. In the initial stages of the game, you will not find the gear that requires them.
The attribute system is called CLASSIC, for short, which is an acronym for the initial letters of the individual characteristics. It is another allusion to the Fallout series, where this system was called SPECIAL. Attributes directly translate into the character's statistics and they are unchanged throughout the game, with slight exceptions, such as e.g. using a gadget, injury or alcohol consumption. Attributes are defined at the scale between 1-10, where 1 is very weak, 3 average and 10 very perfect. The value of an attribute equals its cost in points (1 Strength equals 1 attribute point, 7 Strength equals 7 points).
Coordination - it increases the number of Action Points and chances of hitting when using ranged weapons. Important especially for characters with heavy weapons, sniper rifle and machine guns, but everyone should have at least 6 points.
Luck - It increases the chance of hitting and dodging as well. Moreover, you can earn additional CON points (distributed randomly) with each promotion, and additional AP in each round. Depending only on luck can be very dangerous, but remember that it can save your life in a critical situation. The sum of the whole team's Luck influences the amount of ammunition and loot found in chests. It is only the player's decision, whether he wants to depend on Fortune. If you prefer more stable attributes, you can even stop at 1 point of Luck.
Awareness - most importantly, it increases the initiative during the fight (your turn will come faster). It also influences your chances of dodging an attack and increases your range of view. A very useful attribute for a sniper especially. Snipers should have about 7 points of Awareness and for the rest of the team, 3 is enough (sometimes even 1 will do). Initiative is not the key aspect of the game - unless you plan to base on melee attacks - and generally, it is easier to wait, making our enemy come closer to us, and shooting at them in the meantime.
Strength - it increases the basic amount of CON and the number of points that you gain with every level. Moreover, it influences melee damage and allows one to carry more equipment. It also increases AP by a small amount. Some armors and weapons require a certain amount of Strength to be used. 6 points will allow to carry a lot of gear and to wear most of the armors. For some characters (sniper, medic) 5, or even 4 in some cases, will be enough. You shouldn't go lower.
Speed - mainly, it sets the distance that a character can walk for one AP during battles. It is important for melee fighters, but not only, as it may allow, for example a sniper, to come out of cover, shoot, and cover again. It also increases the amount of initiative and, to some extend, AP. Having 6 points of Speed is very handy.
Intelligence - the more Intelligence you have, the more survival points you obtain with every promotion. Besides, it allows you to read more complex books (after reading one of them, the ability described in the book will increase) and adds a small number of PA. Everyone should have at least 4 points of Intelligence, which will give one 3 survival points per promotion. You will earn 4 points only after having 8 Intelligence, which will make you limit your other attributes. However, at least one team member should have this 8 points. Moreover, someone should have 6 points of Intelligence, as it gives them more AP, and when you gather more points throughout the game, you can increase to 8. The mythical 5 points per promotion can be obtained only after putting 10 points into this attribute, but it's just too much. Instead of that, simply visit all the shrines that give survival points.
Charisma - It doesn't influence the statistics directly. Instead, it influences how you will be perceived by other people. Moreover, it increases the range of the Leadership skill and adds a bonus to the experience you gain for killing enemies. Some NPCs won't join your team, until the team's Charisma is high enough, so it's good to have somebody with a solid six. This character should of course develop the Leadership skill and dialogue abilities.
A good, optimal way of distributing points is: 6, 1, 3, 6, 4, 2. It gives you 10 AP (12 when saving the points from the previous round, which gives you 4 shots from a pistol), 3 survival points per level, the ability to wear heavy armor and a good speed.
You can view character statistics during the creation process and, during the game, in the character window. They directly reflect attributes and skills.
Action Points, AP - combat in Wasteland 2 is turn-based. Each action uses up Action Points. When a character runs out of AP, their turn ends. Of course, the more AP the better. Additionally, you can keep the points that you do not use up. You then carry over 1 AP to the next turn per the unused 1 or 2 AP, or 2 AP for the unused 3 or more points. The ideal situation is where you have 10 AP. When you save up 2 points from the previous turn, this will allow you to fire 2 shots in one turn, for 6 AP each. The character to use big guns should have 8 AP, at least. 8 AP is a general value, below which it is not good to drop, but a character that uses up 3 AP per attack (e.g. a handgun) can have 7 AP, which translates into 3 attacks per turn with keeping points.
Ranged Critical Hit Bonus - increases the chance to score a critical hit over range.
Melee Critical Hit Bonus - increases the chance to score a critical hit in melee.
Combat Initiative - determines how often a character will have their turn. They are compared to the other party members and enemies. The one with the highest initiative, makes the first move. High initiative, in spite what may be apparent, is not that important. In the majority of cases, you will be attacking opponents from afar. If the opponents are taking their moves in the first place, they will have to approach you first to fire a shot. In other words, they will waste their AP to get within the reach of your party. When it is your turn, the enemies will already be within reach and you can start shooting.
Chance to Evade - chance to dodge during an attack.
Constitution, CON - the number of a character's health points. When it drops to zero, the character passes out and may die, if not assisted.
Combat Speed - AP per meter. A character with higher Speed covers longer distance on 1 AP. It is especially important for melee fighters, who still need to attack, in the same turn, after they approach the opponent.
Survival points/LVL - the number of points that you can spend on skills when advancing onto higher level. Remember that you cannot change the attributes, but you can develop skills as you like. A good minimum is 3 points per level (4 Int.).
Max. Carry Weight - the payload that a character can carry, without being slowed down. The information about the weight of each item can be found in the inventory window. On average 100 pounds should do for the entire party. If you are going to play a seven-member party, this value may be even lower.
CON per Level - the number of CON, by which the pool of health points rises each time you level up.
Skills determine the mastery of a given field, by a character, e.g. bartering or machine guns. Unlike attributes, this knowledge can be increased with each next experience level. Skills have been divided into three categories General, Weapon and Knowledge. A skill can be passive or may need to be activated manually. Weapons are passive skills (weapon handling), knowledge - activated (e.g. cracking a safe). The general ones refer to both types.
Animal Whisperer - the ability to tame wild (and not only) beasts. Such animals won't attack and in some cases can even join the team and fight by your side. Despite we can't really talk about a huge amount of damage dealt by the animals, they can serve as a good distraction for your enemies. Moreover, after taming a beast, the team member that did it will gain additional points in the skill that is connected to the animal (for example +1 Charisma for taming a dog). This ability is not particularly useful, but it sometimes can be of help during some quests, like calming down terrified cattle or bringing back a lost dog.
Barter - each point decreases prices on goods by 1%. It is a value that is shared by the entire party. At the very beginning, it may be useful, because you will, most probably, suffer from ammo shortages, but in fact it is not that important to be maxed out. After the game enters a more advanced stage, money will not be a problem anymore.
Brute Force - allows you to ram though blockades and severed walls. It is a useful skill and it is recommended that one character has it, around level 5. However, this does not need to be a member of the initial party. Right after the game starts, you will get an opportunity to include an NPC to your party, who has a high level of this skill.
Smart Ass, Hard Ass, Kiss Ass - three separate skills that work in the same way. You will be able to use them in conversations to obtain additional information from the interlocutor, or discover a new solution to a problem. It is a good idea to reach, at least level 3 in each of these.
Leadership - a character with this skill increases the chances of hitting the target, to the party members. Apart from that, it decreases the possibility that an NPC gets out of control and dos his turn himself. Be initial four rangers are the hard core of the party, who you can always rely on. However, all of the additional ones have their will and may escape when they are wounded, or decide that they want to kill their own way. High Leadership levels prevent that from happening. You can ignore it at the very beginning, but it is a good idea to take interest in that, later on. The range of this skill is set by Charisma, so it is good to develop it in a character that has a lot of points in this attribute.
Outdoorsman - allows you to avoid random fights, while exploring the wastes. And you will be attacked quite often. The upside is that you gain additional experience and loot. The downside - a waste of ammo, first-aid kits and, predominantly, time on negligible "fillers". It suffices that only one of party members has this skill. Level 4 should ensure you with the option to flee almost every random threat, throughout the majority of the game.
Perception - The ability to notice interesting things, like for example hidden passages in locations, or chests with ammunition and shrines, when exploring the map. If some item can be used, it will be highlighted. Thanks to Perception, you will often notice various useful hints connected to the task that you are currently solving. Moreover, it may so happen that you will notice something interesting about the person that you're talking to and you will be able to ask about it. Sometimes, you will discover traps, for example in some safe. One of the team members should have about 4-5 points in this ability, and it will be enough to make the gameplay easier. As you play the game, you should be able to quickly achieve 10 points.
Weaponsmithing - the ability to dismantle weapons to obtain modifications that can be later used in other weapons. To use a modification, you need to have the Weaponsmithing ability, so it is good to develop it in more then one character (but not on every one, because if someone uses only heavy weapons and explosives, no modifications are necessary). Moreover, even if you don't manage to get a modification out of a weapon, you will obtain Broken weapon parts, which you can sell for some good money in the Ranger Citadel, so you don't loose anything. As long as you are in Arizon, dismantle almost every weapon that you know you won't be using.
Assault Rifles - versatile and useful. Deal decent damage with decent penetrability and range. Unfortunately, they use expensive ammo and lots of AP. Apart from that, a character receives a negative bonus to hit, when the opponents is standing too close. They have fire mode selectors in-built, which allows you to save up on ammo or to hit several opponents with one burst, if they are standing in a straight line. This weapon should better not be used by more than two rangers. Ammo being the first reason and there are better alternatives at higher levels, being the other.
Bladed Weapons - weak base damage, but frequent critical hits . Almost useless against armors. More of an alternative weapon, when you run out of ammo.
Blunt Weapons - very high critical damage, even against thick armors. Works excellent as a weapon over short distance, for someone with heavy gear.
Brawling - melee fighting. More of a curiosity, but you can sometimes find an interesting weapon to wear over your firsts. Multiple attacks in one turn.
Energy Weapons - perfect against armored enemies. The damage is scaled depending on the armor, doing little harm to unarmored targets. Moreover, it cannot block nor deal critical hits. Energy Weapons are rather rare and it won't be of much use at the beginning of the game, but in California, when you will be facing huge cannons with armor 8, having a good energy damage dealer is crucial.
Handguns - short distance weapon, for example for a medic. Despite his appearance, such doctor can quickly bring chaos among enemy forces by shooting down single units with one or two shots. They use cheap ammunition and have a low cost of shots. Their biggest disadvantage is low armor penetration. After some time, you will encounter mini-cannons that require .45 ammo and will change your mind about Handguns - they have a decent armor penetration value and very high shooting cost. A medic equipped with such thing, as well as with usual pistol for unarmored targets, will be dangerous to anyone.
Heavy Weapons - the biggest toys, like grenade launchers and heavy machine guns. Very high damage, often AoE. Their disadvantages are: high AP cost and additional vulnerability to melee damage. A character carrying such weapon should have something for close fights in the other hand. It is good to quickly start investing in someone who will be equipped with such weapon, as the battles will depend mostly on them. At the beginning, having enough ammo will be the most difficult thing, because machine guns will use it very fast. The best thing to do, is to prepare a team member with a lot of AP and the Demolitions skill, who will be using Handguns at the beginning and will switch to Heavy Weapons when a solid rifle and a lot of ammunition is available. When using AoE weapons (rocket launchers, grenade launchers), remember to switch to free aim mode (click on the icon of the weapon and select the place that you want to hit, instead of selecting an enemy), to hit as many enemies as you can and at the same time not hurting anyone from your team. Remember not to give any Heavy Weapons to NPCs that join you. You never know when they can oppose your orders and you don't want a rocket landing in the middle of your forces.
Shotguns - short distance weapon. It can hit several enemies at a time, which is useful, but it can sometimes hurt your team members (remember to switch to free aim). This ability should rather be developed in only one team member, as Shotguns are not very practical, especially in later parts of the game. It can serve as alternative weapon for someone with a sniper rifle or a machine gun and also, due to AoE damage, as a quick door opener and a tool for "defusing" mines (shoot at a minefield in the free aim mode to blow up some of the mines).
Sniper Rifles - tremendous damage and long range. In return for high AP and ammo cost, and low damage to nearby targets. A good sniper is capable of eliminating an opponent from afar, in one shot so, there should be a room for one in each party. However, it is important that he has an alternative weapon, which he can use well, e.g. a shotgun. A sniper should be the one to start a fight, due to the long range. Then, the opponents first need to run up to your characters.
Submachine Guns - they use cheap ammo, but they burn it out very fast and deal mediocre damage. Short range and low penetration speak to are also their downsides.
Alarm Disarming - a lot of safes or gates are secured with an alarm (you will know it by nearby sirens). This skill is worth developing if you plan to sometimes depend on stealth tactics, instead of open fights. Even if you don't, Alarm Disarming will still be of use for opening some of the doors in the game. Put some points into this skill, but do not waste them when you have more important abilities to develop.
Computer Science - computer hacking. One of the basic skills, which is worth developing from the very beginning. With that, you can obtain additional information, open computer-controlled locks and repair damaged systems.
Demolitions - the ability to use thrown weapons, such as grenades, and bomb disarming. Grenades are a rarity and you will be saving them up for special occasions. Disarming is useful to, e.g. cross a mine field or disarm a trap. An useful item, but not a priority.
Field Medic - allows you to use healing objects. It should be developed in one character, as quickly as possible. They will then be healing the entire party. In a nutshell - the higher the level of this skill, the better capacity of a first-aid kit to heal and, thanks to which you will save up on them. A character without this skill, can only use weak painkillers.
Pick Lock - another "must have". You open a door, behind which you open lockers with treasures inside.
Mechanical Repair - the skill of fixing various machinery in the wastes. Useful mainly in specific quests, e.g. to fix a well with drinking water. Useful, but you can do well without it.
Safecracking - Opening of safes. The more safes you open, the more valuable items. You only need to watch out for possible bombs in locks (run a Perception check before you start cracking).
Surgeon - healing of injuries in party members and NPCs. Immensely important! The optimal situation is one, in which there are two party members with this skill - one on a high level (at best, the one with Field Medic plus, e.g. two Handguns and nothing more), and the second one with, at least 1-2 points, to perform an operation on the full-time medic, should the need arise.
Toaster Repair - Wasteland 2 developers have of course put something peculiar in the game. Generally speaking, this peculiar thing is... opening some Toasters. You will find them spread around the game world. Sometimes there won't be anything interesting inside, but sometimes you can find some unique items that you will be able to give to the museum in Ranger Citadel or to some NPC, in exchange for a reward (for example weapons or unusual food that increases statistics temporarily). Toasters are not very frequently found, but you shouldn't leave any one unopened, so one of your team members should develop this skill.

Perks are a collection of bonuses for a character or for the entire party, which you buy in the course of gaining experience. These characteristics can be divided into common, that are available for all the characters, and ones that require development of a certain perk. Diamond symbols on bars signify at which level a characteristic can be bought.
Perks have been divided into strings and stand-alone. The former need to be bought in accordance with a predefined order. Without buying the previous one, you will not be able to get the successive ones. The latter can be bought regardless of the rest of them. In other words, if you want to buy desperado for pistols, you will first have to reach a certain experience level and buy the bandit perk. Meanwhile, the focused perk can be bought right after you achieve the specific experience level.
Each character receives 1-4 character points, every 4 levels (4, 8, 12 etc.) and they can be spent at any moment. Therefore, you can buy a certain attribute immediately, or later on, when the array of the available ones expands. Thanks to this, you can hoard points until something better appears, which may never happen, as a matter of fact. Character development is a long process, especially if the character is low on intelligence and as a result, the available attributes will not be plentiful. For this reason, it is best to buy characteristics as quickly as possible . Unless the perk that is important to you becomes available at the next experience level, in which case it is better to wait.
While selecting your perks, start with the ones that require certain perks, and then take interest in the common ones. The latter ones can be picked by just any character, usually one or two per party. Of course, not all of the perk that require you to develop your character are attention-worthy, but they still should be your priority as specialist ones. Apart from that, buy perks in accordance with your needs, because the majority of them prove to be useful, sooner or later.
Tormentor - It provides you with a bonus against opponents that hide behind covers. It is tempting, but only in situations, in which you fight against people, gunners and on an uneven terrain. Animals and machines do not use covers and people often end their rounds away from walls and crates. This means that in many situations, this one becomes useless. At least in the former half of the game because in the latter half, especially towards the end, you encounter many opponents that use covers. It is a good idea to buy this perk, especially for a good sniper. Or fast party members that specializes in attacking from the side or from the back.
Hoarder - The maximum load that you can carry without becoming overburdened goes up by 20%. It is a good idea to assign, one of the characters, with high strength. Their task will then be carrying heavy items and excess of ammo and first-aid kits. Later into the game, you can try and buy this perk for one more character. For a good party, many fights and quests prove to be a piece of cake, which will allow you to save up on ammo and first-aid kits and obtain more loot. As a result, It is going to be easy to load up your backpacks. If you have to throw away items too often, invest your points into this perk. If you have excess room, you can ignore it.
Limber - The cost of crouching and getting up drops by 1 AP. This is a burdensome perk,. If you know how to position your men before the battle, lower cost of getting up and crouching profits you little. Additionally, this won't be too useful to characters that fight in melee that are in constant movement. On the other hand, not always you are capable of good positioning before the battle and you will often have to relocate. The action point that you save would be then used elsewhere. You can take it, if there ids nothing better available, but there will be few situation in which you will be able to use it.
Hit and deck! - It decreases damage taken from explosives by 25%. It is a useful perk, if you cannot scatter your party and you have already reached a moment, at which opponents often use explosives. However, you are not going to use it throughout majority of Arizona and it can later be put to few uses. It may be ignored.
Powder packer - 10% more chance of finding ammo while looting. An excellent perk, especially if it is picked by more than one character. Especially useful for a party that uses firearms often, where several characters use the same type of ammo. A handful of bullets more, per crate, may seem a small bonus,, but this makes savings - or earnings, if you sell excess ammo - and at least one additional shot to take. It is a good idea to take this perk for, at least, one character. The faster the better. It also works in situations, in which there are no interesting perks to choose from.
Healthy - +1 CON pear each level of the character is a tempting thing, but only on several conditions. Firstly, your character needs to have a good armor or else they lose the additional points after one, or two, attacks. Secondly, the character level needs to be high, or else the bonus will be too negligible. If you do not meet both of the conditions, it is still a good idea to take this perk. At least for the sake of the fact that a dozen-or0-so of additional CON points may determine whether after a turn of intensive fighting, the character is still standing or not. Buy this one if there is nothing better available, or if you want to buy a perk and you cannot decide.
Weathered - Just like in the case of Hit and deck!, only for the sake of critical damage that are dealt more often by opponents with explosives. It is a good idea to take it for melee characters, or for the ones that play the role of a tank and take on all the damage. Thanks to this, they will be able to withstand a little bit more. The remaining ones can ignore this one.
Hardened - +1 to armor is an attention-worthy perk for tanks. Of course, the character will then be wearing the heaviest available armor, but it is always a good idea to toughen them up a little decrease damage taken by them. The rest of the characters may also do with this perk, but only in situations, in which they find themselves under constant enemy fire. The ones that are not attacked that often may ignore it.
Turtle - It improves on the value of dodges, while using covers. It is also a good one for characters that use short-range firearms in combat and therefore, exposed to constant enemy fire. It is also useful for characters that fight in melee, who want to get closer to the opponents and need to dash between covers. The others may ignore it.
Provides little diversity, but all the perks here are useful. Especially the last one and therefore it is a good idea to buy them all.
Rattering Fire, level 5 - Heavy weaponry is devoid of the effects of precision attacks, therefore even 1% of the chance of their occurrence is better than none. Especially that this is the first item in this category, so you will buy it anyways to gain access to the rest of them.
Overwhelming Fire, level 7 - It is a much better version of the previous one. The chances are, merely, 2% higher, but it concerns single shots, instead of entire attacks. It is very useful for characters that use heavy weapons of high number of projectiles in a burst. Even in the case of short bursts, however, it is a good idea to get this perk.
Devastating Fire, level 9 - Same as above, just the bonus here goes up to 5%. It is even more useful than the previous perk and additionally, it provides you with access to one more useful perk, which is why you should buy it.
Bullet-Ridden, level 10 - It decreases the value of the armor of the attacked opponent so, in practice, it increases penetration of the weapon. If you want to develop your perks at heavy weapons up to level 10, it is a must have. The perk will soon prove its value, especially against robots. Apart from that, it does not require you to buy the previous ones, so if you decide that they are useless, you should have, at least, one spare character point to buy this one.
This choice forces you to take a decision. It is possible to buy only the first one and ignore the rest, due to their context dependency. You can get four out of five and ignore the last one. Also, you can buy all of them. The decision should be based on how often the character using this perk has the option of attacking the opponents, who pass by. If such situations happen often, buy four, or five of these perks. If they are fewer, buy the first one and ignore the rest.
Free For All, level 4 - 10% chances of causing the effects of a precision strike is quite much, considering the fact that this concerns each and every attack. This is the first perk on the list, so you are going to buy it anyway but still, it is useful.
Glacing Strike, level 5 - It allows an additional attack against the opponents that are passing by the character. This one is a context- dependent perk. It can work if only you fight in narrow passages and the opponents want to get to your gunners. Still there are many situations in which it is impossible to use it. Additionally, you deal only a half of the regular damage, this way. You will have to buy it to gain access to the rest of the perks on the list, but its usefulness is limited. Buy it only if you know how to use this potential fully.
Opportune Strike, level 7 - It increases damage dealt by the previous perk. context-reliant, but allows you to buy the next one.
Rush 'N Attack, level 8 - a free attack at the beginning of the battle may prove both useful and completely useless. All depends on the positioning of your characters, their speed, the order in which they take turns and so on. In other words, this perk is useful, as long as you know how to use it.
Strategic Strike, level 9 - it is much like the Opportune Strike, just the bonus goes up to 100%. Buy it if only you often attack the opponents that pass you by. Otherwise, you can ignore it.
In the case of energy weapons, you can only buy either Solar Powered and ignore the ones that follow it, or - which is an even better decision - allocate points into all four perks. Of course, energy weapons will keep dealing various damage to targets in various armors, but thanks to these perks, the difference will be smaller and smaller. This will make energy weapons more versatile.
Overcharge, level 3 - +10% damage against non-conducting armors. This allows you to make up for one of the weapons shortcomings, depending on the armor that the target is wearing. Additionally, it gives you access to the rest of the perks, so if you want to buy the next ones, you will buy this one also.
Solar Powered, level 3 - this one is not required for the next ones to be available and gives you a 15% chance of firing without losing ammo. If you have excess of that, ignore it. If not, do not hesitate to buy it.
Overload, level 5 - it increases the bonus against non-conducting armors by 10%. If you already bought Overcharge, you will definitely buy this one also.
Atomize, level 7 - it increases the bonus against non-conducting armors, by another 10%, up to 30%/ If you bought Overcharge, you will also buy this one.
The majority of items in this category are independent ones and can be bought without the necessity of buying the rest of them. The only exception is Glacing Strike and its successive upgrades. By investing into this perk, you therefore have a wide range of choices, out of which are worth spending points. Additionally, two of them will also be useful for the characters, for whom blunt weapons is not the primary combat perk. Therefore, match your choice with the character and with their role in the battlefield.
Charge!, level 4 - +0.5 to combat speed in combat is quite a bonus. For comparison, 1 point of Speed increases combat speed by 0. It is useful only when apart from blunt weapons, a character uses some other weapon, such as assault rifles. The restriction to the first turn only ids less useful, therefore you do not need to buy this perk, if this is a problem for you. Especially that it is not required for the rest to be unlocked.
Glacing Strike, level 5 - See: the identically named perk in Brawling. It does not require you to buy Charge!, and therefore upgrading this one is treated as a separate thread.
Shoulder the Load, level 6 - this one is another independent perk that decreases the penalty to combat speed that you receive for heavy armors. It is very useful, especially later into the game, when a character that is carrying heavy equipment and wearing heavy armors can be weighed down and therefore, less useful in combat. It is more useful for characters that fight at close quarters, not as much when a blunt weapon is a secondary, or tertiary one. It is a good idea to buy it when the situation encourages you to.
Opportune Strike, level 7 - See: the identically named perk in Brawling.
Slayer, level 8 - 10% of chances that an attack does not use up AP. It is worth buying in any situation, if the blunt weapon is the basic combat perk of the character. Especially that this one is independent and does not require you o buy the rest of them.
Strategic Strike, level 9 - See: the identically named perk in Brawling.
This one is yet another perk with lots of independent items. Again, you can invest in Glacing Strike and upgrades for that, as well as three other items. Two of them will be useful to any character that fights using bladed weapons and the third one only to some of them. Therefore, it is a good idea to invest here, at least two perk points.
Self Defense, level 3 - a bonus to the armor, while fighting with a bladed weapon is highly useful, as long as this perk is the basic combat one, in the case of that character. Otherwise, you can skip it.
Glacing Strike, level 5 - See: the identically named perk in Brawling. It does not require Self Defense, and therefore this one, and its upgrades, should be treated as separate threads.
Samurai, level 6 - A+1 bonus to armor piercing is much. For a character that specializes in bladed weapons, it is a good idea to buy this perk immediately after it becomes available. It does not require you to buy the previous ones, therefore you can ignore Self Defense, if necessary, as well as Glacing Strike and keep a point for later purchase of the Samurai.
Opportune Strike, level 7 - See: the identically named perk in Brawling.
Adrenaline Rush, level 8 - This one is a troublesome perk. The bonus to AP, with low CON level sounds nice, but only in the case of a character that is not designed to be a tank. Tanks should have thick armors and lots of CON and, as a result, it is going to be difficult for him to drop below 25% of HP. If this happens to yours often, buy this Otherwise ignore it.
Strategic Strike, level 9 - See: the identically named perk in Brawling.
All three perks are independent ones, so you can either buy them or ignore them. It is worth buying one of them, regardless of the situation and the other two are worth considering.
Hollow Point, level 4 - +1 bonus to armor piercing with assault rifles. This comes in handy everywhere so buy it blindly.
Melee Shooting, level 6 - It decreases penalty for shooting at a short distance. Note how often this happens to your gunners. Buy this if necessary. If not, ignore it.
Gunner, level 8 - It decreases penalty to hit chance, when you are shooting in bursts. A moderately useful perk. First of all, its effectiveness depends on how often you shoot in bursts; it may turn out that you do not do it at all. Secondly, it decreases penalty by 5% only. If you do not need it, do not buy it.
Five perks, two out of which are independent and three that form a thread. All of them are context-reliant. Your purchasing them should be determined by your tactical perks and your fighting methods. You can buy all five, if only you find them useful in any way. Also, you can ignore all of them, if you know you can do without them.
Watchman, level 3 - no penalty on hit in the reaction mode. It is a good idea to buy it, if only you use that option. Otherwise, ignore it.
Focused Shooter, level 5 - It decreases penalty for shooting under pressure, i.e. in a situation, in which there is an opponent standing next to your character. In theory, this is a useful perk, but in practice, a sniper should never stand close to the opponent. If this happens, however, all you need to do is walk away, by one field. For this reason, your choosing this perk, and the next ones, should depend on the situation, if you cannot keep snipers away from enemies, or they have too few AP for the away move to make sense, buy it. Otherwise, ignore it.
Confident Shooter, level 7 - The upgraded version of the Focused Shooter requires that you buy that one first. This one decrease the penalty by another 15% and it is required for the next perk. If you have already bought the previous one, buy this one also. Otherwise, ignore it.
Zen Shooter, level 9 - The upgraded version of the Confident Shooter which decreases the penalty by another 15%, up to 45%. If you have already bought previous perks, buy this one also. If not, ignore it.
Deadeye, level 10 - It decreases AP cost of shooting, it the character has been standing still in that turn. In theory, this perk is very useful, in practice all depends on the situation, because there are fights, in which the sniper cannot stand still. However, in majority of cases, you can position him at the back and leave there, in which case this perk is worth investing into. Still, you need to watch out while moving, because the system that tells you, how far you can move and still take the shot does not take the bonus into account. Therefore, it may happen that the character will be unable to attack, after moving, because they are 1 AP short, i.e. the deadeye bonus is not there. Still, this is not too much of a problem, because you quickly learn to pay attention to that.
Three perks that form a thread and an independent one. It is a good idea to invest points into threads, whereas not as much in the independent perk. Three out of four perks here also affect submachine guns, but there is little chance that you will be using this.
Zeroed, level 4 - This perk provides you with a bonus of +2% to critical hit against the same target. The bonus stacks up to the moment, at which the character picks a different target. This perk is useful especially against targets with high CON level. Smaller opponents will be killed quickly, which spoils the bonus. You can buy this one, but you will rarely be able to take advantage of the bonus. Apart from that, this is an independent perk and it can be ignored.
Bandit, level 5 - You have a 2% chance of shooting for free, if you fire a pistol or a submachine gun. It is highly useful for pistol-users, but not too much in the case of submachine guns, because there is little chance that a character will be using both of these weapons. In spite of that, it is a good idea to buy this perk, as soon as it becomes available.
Gunslinger, level 7 - An upgraded version of the Bandit, which raises the bonus to 4%. Buy as soon as it becomes available.
Desperado (Desperado, level 9) - An upgraded version of the Gunslinger, which raises the bonus to 6%. Also buy as soon as it appears. The combined bonus may seem low, but firing a gun does not cost much, so you need to take several attempts per turn, into consideration. Apart from that, it is always a good thing to have a bonus of this type, because you never know when it activates.
Two independent perk here. Both of them are context-reliant, so do not feel obliged to buy them.
Fast Reload, level 4 - It decreases the cost of reloading a gun by 1 AP. It is useful, if you have to reload in combat. With reasonable planning and appropriately strong party, most probably you will not have to do that, which makes the perk useless. Take it if you need it. Otherwise, ignore it. .
Whack-a-Mole, level 6 - It increases the chance of hitting targets hiding behind a wall. Useful against humans, useless against machines and animals. As a result, there are locations, where you will be using it for the whole time, whereas you won't be in others. Buy it, if you want it, but otherwise ignore it.
Four perks and three of them that form a thread. It is a good idea to buy the independent one, but this is not required. The three remaining ones are highly useful and I recommend that you buy them.
Careful Hunter, level 2 - It decreases the chance of hitting your party members, by 25%. It is a highly useful perk, especially if you take characteristics of shotguns into consideration, and the possibility that there appears an opponent among your characters. It is worth buying, even in a situation, where the character with shotgun acts on his own, away from the rest of the party. You never know when you will have to shoot over allies' heads.
Precise Hunter, level 5 - An upgraded version of the Careful Hunter. It decreases the risk of shooting an ally by 50%. Absolutely, worth recommending.
Obliterator, level 6 - Covers attacked with a shotgun will be destroyed. In theory, this does not concern brick walls, columns and such that cannot be destroyed with explosives or energy weapons. Additionally, it is east, with this perk, destroy the cover of both the opponent and their allies', if they got within range. In general, not too useful and you can easily ignore it, because it is independent and does not require the previous ones.
Master Hunter, level 8 - An upgraded version of the Precise Hunter, which decreases the chance of hitting your allies, by 75%. If you have already reached here, this means you already know answer to the question of whether it is worth buying.
Three useful perks here, two out of which form a thread. One of them is compulsory. The remaining two, not as much, but they still may be useful.
Trained Physician, level 3 - It decreases the duration of the post-reanimation effect by 25%. It is useful in areas with many fights, where it is easy to suffer large injury and which brings about the frequent necessity to reanimate. It is worth buying, if you have problems with that.
Smooth Operator, level 6 - +20 CON while reanimating party members. For surgeon this perk is necessary and it increases the lifespan of the party.
Expert Physician, level 9 - The upgraded version of the Trained Physician, which decreases the duration post-reanimation effects by another 25%. If you have bought the previous one, buy this one also.
Three independent perks, two out of which are of highly limited use. The remaining one requires developing two perks. There is a chance that you buy none of them and, as a result, you will lose little.
Cyber Scrounger, level 2 - You receive electric fuel cells after you use the perk. This one is a strange perk that also requires Computer Science level 2 and it works after both have been used. For a character that specializes in only one of the two, this perk is useless. Otherwise, buy it to get more ammo.
Quick Reflexes, level 4 - Increases your chance of avoiding enemy reactions, by 25%. This is a useful perk but only in a situation, in which enemies use traps and this happens only when they cannot see your party, or cannot reach it. In other words, rarely. For this reason, this is not a particularly good choice.
Ghost, level 6 - thanks to this perk, your character does not cause reaction mode in enemies. Identical as in the case of the previous perk.
Three independent perks. One of them requires you to develop another one, one is context-reliant and the last one becomes useful towards the end of the game. While developing this perk to 100%, buy one and the rest depending on what you need.
Cyber Scrounger, level 2 - See: the identically named perk in Alarm repair
Roboticist, level 5 - +10% damage against robots and synths. Later into the game, it is highly useful, so take it.
Overclocker, level 8 - The hacked robots automatically receive the bonus of overclocking. In practice, this saves up some time, because overclocking can be performed by using the perk once again, which may be difficult in combat. If you often seize enemy machines, buy it. Otherwise there is no need to.
One independent perk that requires you to develop two perks. You can buy it but there is no need to.
Master Thief, level 10 - While using Safecracking, you do not risk a critical fail. This one is a bizarre perk. First of all, it requires you to max out on two skills, which may not necessarily coincide with your plans. Secondly, critical failures at level 10 of skills are not too frequent, unless you are trying to crack especially strong locks. Thirdly, in the case of a critical failure, all you need to do is load the game over again. You can buy this, if you want to, but it is better to spend the point on something else.
Two independent perks. One of them becomes useful later into the game, whereas the other one is not that necessary. One is a good idea to buy one, and it would be good to buy the other.
Handyman, level 3 - using the mechanical repair skill does not result in critical failure. This is useful, as long as you forget that there is an option to save. In practice, at best, it saves you several minutes that you would spend waiting for the game to load after you fail for yet another time. You can buy it, but there are ones that are more interesting and more useful.
Armour Maintenance, level 6 - -20% damage from energy weapons. Later into the game, it is very useful, especially while you are fighting with robots and synths. Undoubtedly worth buying.
Two independent perks of identical features, which every medic should have.
On the Mend, level 3 - +10% to effectiveness of healing items. Buy it.
Stimpaks, level 7 - Each turn, it heals 2% CON of the character. In other words, the longer the fight, the less wounds the character has. It is a good idea to buy it, even if combat is a secondary line for your medic.
Three independent perks. Two of them are for the characters who use grenades and other explosives, and one for the demolition expert. Buy, at least, one of them, although all are useful. You need to tune the character to them, but this pays off.
Long Arm, level 2 - increases the range of grenade-throwing by 10%. For the characters that throw grenades it is a must have. The rest of sappers can leave it out.
Improvised Explosives, level 4 - 25% of chances to craft an additional grenade, while disarming traps. Take it as soon as this perk gets available. Explosives crafted this way are or moderate power, but an additional grenade, even a weak one, will always come in handy.
Bomberman, level 6 - Increases the radius of explosives by 15%. If your character uses explosives, buy it. Otherwise, ignore it.
Two independent perks. One of them is highly useful and worth buying, whereas the other one is also useful, but not as much.
Junk Diver, level 2 - When you find junk, you get 50% chances of finding another junk. Junk is not expensive, but with a bit of luck, and other perks, you can find quite a lot of it. It is a good idea to get it, to add to the party's finances.
Toaster Expert, level 6 - 50% of chances to find additional loot, while fixing a toaster. Three are few toasters in the game, so it is up to your luck if the perk is beneficial. You can buy it, but it will probably not pay off too much.
One independent perk that requires two skills to be developed. You can buy it, but there is no need to.
Master Thief, level 10 - See: the identically named perk in Safecracking.
A thread of three perks for characters that fight in melee. All three are useful and worth buying, even if they do not provide too high bonuses.
Applied Force, level 5 - 5% chances of stunning the opponent with melee weapon. Useful for characters that fight in melee, the rest of characters may ignore it.
Stunning Force, level 7 - An upgraded version of Applied Force. Of course, the bonus goes up only by 2%, but you cannot buy the Staggering Force without it. Either way, it is worth buying.
Staggering Force, level 9 - An upgraded version of Stunning Force. The Bonus goes up to 9%. Since you bought the previous ones, this one is also for you.
Two independent context-reliant perks. Useful, but you can easily do without them.
Know-it-All, level 1 - +1 to Smart Ass. It allows you to save up several skill points and this is why it is worth buying. But only when there are no better perks to choose from.
Radiant Personality, level 5 - During the enlistment, the effectiveness of charisma is doubled. You can buy it, if only you have problems recruiting new allies and you do not want to invest in charisma. Otherwise you can leave it out.
A thread of three perks that take effect on all the characters around the leader. They provide small bonuses, but it takes effect on the entire party. It is one of those that are worth having, because you never know when it works.
Taunt, level 3 - Opponents near the leader have a chance of hitting the target lowered by 3%. If the leader is usually in the center of the party and his skills encompass the majority of the party, take it. The perk is useful in any situation, regardless of whether you are fighting gunners or melee opponents. The key issue here is the positioning of the leader. If you know how to do this, buy it. If not, buy anyways because there always will be a character near the leader and thus, will benefit from the bonus.
Enrage, level 5 - An upgraded version of Taunt. The bonus rises to 5%. If you bought the previous perk, buy this one also.
Infuriate, level 8 - An upgraded version of Enrage. The bonus rises to 8%. Since you have already invested in this thread, you can just as well buy them all.
Two independent perks that allow you to earn additional money. They are useful, but later into the game and with reasonable expenditures, their value drops.
Forward player, level 3 - You receive 20% scrap more by selling junk. There always is plenty junk around and you always use additional money. It is a good idea to work a little bit on your finances, but this is not required.
A Handful of caps, level 7) - While looting containers, you have a 10% chances of finding more junk. It is good to add to your account and for this reason, this is a good one. Ignore it, if you do not need additional money.
Two independent context-reliant traits. Useful, but you can do well without them.
Pawner, level 1 - +1 to kiss ass. It allows you to save up several skill points and for this reason, it is a good idea to get it, but only when there are no better options.
Loose Change, level 7 - a 5% discount on all the purchases. It is a good idea to take it, on condition that you are hard up. Thanks to this, you will save up quite a lot of scrap, especially while buying ammo and medicine.
Two independent perks. One of them is useful in combat, and the other one during exploration. Buying them depends on the situation and the party make-up.
Tactical Positioning, level 3 - The character deals additional 15% damage, while attacking the target in the back. Very useful for melee characters that remain in constant movement. Less useful for gunners, especially for snipers who remain in the same position. Still, they can also benefit from it, e.g. by attacking before the battle. There is a high chance that thanks to this one, plus a good weapon, they take out the enemy before the fight starts.
Dowsing, level 6 +25% of chances for more scrap, while digging. There are locations, where there are many holes in the ground, as well as ones, where they are scarce, which makes this perk context-reliant. Still, it is a good idea to take it, for the sake of additional money, but only if you really need it. Later into the game, you should have much enough for the perk to lose its value.
Three independent perks. Two of them depend on the armor that you are wearing and the third one independent of that.
Tinkerer, level 2 - +1 AP when you are wearing a light armor. The choice between this one and the Reinforced Plating needs to be made basing on the gear that you carry and the role of the character in the party. Both of the bonuses are highly useful, but with time, AP will be more important than the armor, and the other way around. Either way, It is good to buy either this one or the other one.
Deconstructor, level 5 - 25% more parts while disassembling a weapon. Weapon parts are a good source of money, therefore it is a good thing to buy this one. Otherwise, you can ignore it.
Reinforced Plating, level 8 - +1 to armor, while using heavy armor. See the description for the Tinkerer.
It is a thread of three perks that are worth buying, if you prefer to explore the map on your own and use neither maps nor walkthroughs.
Scout, level 3 - +25% to vision range on the map in the travel mode. This one and the next three make sense only when you do not use maps, walkthroughs nor other materials, where all of the locations are marked. Also, if you are used to exploring every corner of the map in search of collectibles and you want it a little bit easier, you can get it. Otherwise, there is no point in buying that.
Explorer, level 5 - The upgraded version of the Scout. The bonus goes up to 25%. See the description for the previous perk.
World Traveler, level 7 - all of the shrines and hidden crates with gear appear on the map. All of them become automatically accessible, which means that you can enter a shrine without doing any good deeds. This makes sense in the case of Arizona, but not necessarily in California, where you can enter the majority of shrines without helping people. You can buy this perk only if you suspect that you will be able to use it. In the long run, however, its usefulness is greatly limited.
Two independent context-reliant perks. Useful, but you can easily do without them.
Intimidating, level 1 - +1 to Hard Ass. It allows you to save up some skill points and for this reason, it is worth buying, but only if there are no better perks to choose from.
Bloodthirsty, level 7 - +1 AP after you kill an opponent. Quite useful, but on condition that fights are not to quick. Otherwise, you will have no time to use up the additional point. Additionally, it is required that you kill the opponent personally (there is no information on its effect on the rest of the party), which makes orderly fighting more difficult. You can buy it, if there is nothing more interesting available, but do not be surprised if you do not have too many opportunities to use it.
Two independent perks of limited usefulness. You can buy them, but you can do well without them.
Camel, level 3 - Water consumption during travel drops by 10%. In theory, this perk is useful, but in practice there are plenty of oases, which makes this one unnecessary. Additionally, in California, you do not need to worry about water at all which makes the perk useless. You can buy it, but you can do well without it.
Big Game Hunter, level 6 - Damage to animals go up by 10%. It is very useful against honey badgers and other animals with strong armor and high level of CON. You can buy it, but you need to take limited use into consideration - this perk is more useful in Arizona, than in California, where the majority of your opponents are humans.
You select quirks while creating your character. Each one of them is an upside and a downside, at the same time. They offer bonuses and threaten you with high penalties. Each character can have one quirk, at most. Choosing any is optional.
Quirks have been prepared in a way that makes them both useful and extremely burdensome. Some of them start providing you with a bonus only later in the game. Others are good and bad, in turns. The effect of some other are completely random. They can affect skills, attributes, or specific combat situations. There is nothing like the best or the worst quirk. All of them are equally pesky and useful. The key is the character that you endow with such a quirk. , because only several of them affect the entire party. It is a good idea to get one, if you know what you are doing, you have a plan on how to develop your character, or you know how to exploit the upsides, while avoiding the downsides. Otherwise, it is best not to pick any.
No Quirk - The basic state. The character does not receive any quirk.
Ascetic - It offers 5 skill points and 1 attribute point, in exchange for the inability to use gadgets. Therefore, it offers a high bonus at the beginning of the game, which makes it easier to complete initial quests, however it is difficult to predict its effect on further gameplay. All depends on whether the character will be using gadgets that boost skill or attribute level. The gadget that increases the chance of dealing critical damage may be useful, but you can do well without it. The gadget boosting the Smart Ass by 1, boosting the max carrying weight limit or increases the maximum of carried water may be key to complete a quest or to get to a location. Especially so, if the character has more than several key skills and may obtain a gadget that boosts two of those skills. The problem is that not all the skills have their gadgets and later into the game, when your party will be sufficiently experienced, you may have no need for them. Apart from that, while exploring the game world, you can simply fail to find them, or find ones that you will have no use for.
It is therefore a good idea to take this quirk for characters that are constructed for combat only and have skills that cannot be boosted with any gadgets, or which do not need those. Also, it is a good idea to take it, if you are short of points for important skills, or the beginning of the game is too difficult for you. However, if you want to be able to use gadgets, or you fear that at some point they may prove useful to you, it is better to pick something else.
Asshole - A problematic one. In the game, there are three social skills and this quirk makes it impossible to access two of them, whereas it grants 100% success using the third one. It ay seem a fair trade-off, but there are quests that you can complete in an amicable way, only with Kiss Ass or Smart Ass. The lack of access to them will save you some skill points, but it limits your options, in the long run, and makes the party fight, where a talk would solve the problem. It is a good idea to take it, if you are going to beat the game using force, but otherwise it is better to pick something else.
Disparnumerophobia - At even experience levels, the character gains +2, and at odd ones, they lose 2 points to all attributes. This means that the number of your skill and CON points will be subject to change, so will your AP, and each level you progress, your character will receive either a rise or a drop. You an use this in many ways, by creating characters with less important attributes, at the level of 1, thanks to which the penalty will not be as pesky, and you receive several extra points, at the beginning, to distribute among the attributes. Tanks to this, you will also be able to save up points later into the game, when you need to develop attributes to level 8 and wait for the character to reach an even level. This does not change the fact that your character will be stronger an weaker, in turns and as a result, their usefulness will also fluctuate. It is a valuable quirk, if you know how to use it, but very risky otherwise.
Way of the Squeezins - It provides you with additional AP and damage, when the character is affected by the squeezin and it provides you with a penalty to combat speed and critical hits, if they are not. You can only find squeezin every now and then and the duration of one serving is 300 seconds. This means that you need to drink it before each fight start another one right after the previous one has finished and you have to maintain a supply of alcohol. Otherwise, your combat value drops a little. Of course, you can take this quirk for a non-fighting character, but in practice your party are fighters and for this reason, it is better to find something better.
Thick-Skinned - A +2 Bonus to armor, at the expense of combat speed. It may not seem to be, but it is a good trade-off for a tank character, because what they do is stand in front of the rest of the party and take damage. Therefore, it is a good idea to take it for the character who is to perform that role. For example, for a specialist in assault rifles, or sub-machine guns, when fights away from the rest of the group, but close to the opponent. In combination with appropriate traits, and good armor, only machines are capable of wounding such a character severely, but still not all of them.
Animal Husbandry - Bonuses from the animals you keep are twice as high. It is a good thing, thanks to which taking care of a goat provides you with +2, to an attribute, instead of +1. The hidden flaw is that it provides a random chance that an animal will explode. If you are prepared to lose animal bonuses because of bad luck, and one of the character's skills is Animal Whisperer, this quirk will definitely come in handy. As for others, this one will be useless.
Fainting Goat - 35% of chance of fainting after a critical hit is useful in the case of fragile characters that require protection. On the other hand, the fact that they skip to the end of the queue means that, with a bit of bad luck, they can get to perform an action in a turn. Select this quirk if you cant to randomize your game. Otherwise, pick something else.
Mysophobic - a quirk that requires careful character selection, but on that can work miracles, at times. A bonus to healing, in combination with certain traits can save up lots of first-air kits and, as a result, also scrap metal and room in your backpack. The downside is that the character needs either high dodging chance, or sufficiently thick armor, which either prevents them from taking damage, or from taking much damage. This is so, because such a character, if hit, needs to use pills, or needs to be tended by another medic, which requires two of them on the party. If you are going to have two, one of them may pick this quirk. If there is only going to be one, it is best to make sure, first, that he will be able to survive any battle without healing items and the rest of the characters will not need to be healed during fights.
Heavy Handed - This is a good quirk for a character intended for melee. The penalty to deal critical damage is painful, but with a sufficiently strong weapon, and appropriately picked skills and attributes, this will not be as annoying. However, if you want to be lucky playing dice, it is better to pick something else.
Brittle Bones - A useful quirk for a character who does not need to move too much in combat, but requires as many AP as possible. For example, snipers hidden at the back of the party, or energy weapon users, who need lots of AP per turn. With high number of fighting characters, its effect becomes smaller, but in spite of that, 2 additional AP may prove to be sufficient for an additional shot. For melee characters, this will be annoying, rather than an upside. They are not going to need additional AP, if moving among opponents is more expensive. It is worth picking, if you have the right character for that.
Opportunist - This is yet another problematic quirk. It can be useful for every character designed to finish off targets, such as sniper with low initiative, but in practice this will only matter in combat with opponents with lots of CON. For example bosses or stronger machines. Opponents with low CON will either die, before the character uses the bonus or will be so low on CON that they die in one shot/blow. For this reason, this one is a context-reliant quirk and it may prove useless throughout most of the game, but it makes fighting more demanding opponents easier. Especially if the character also has high level of fighting skills and good weapons.
Delayed Gratification - This quirk provides you with bonuses only later in the game, after the character reaches above level 20. At levels 1-10 the character loses 10 skill points, which they regain at levels 11-20. Additional points start coming with level 21. Considering the fact that characters can reach as high as level 50, this gives you as many as 30 additional skill points. As a result, the character will be weaker at the beginning of the game, which changes as latter half of the game.
The entire problem with this quirk is that a character with few skills is not going to need the extra points that it offers They will be more useful to a character with many skills, but because of the meager of points, it will be useless at the beginning, to the rest of the party. Because of its weakness, the difficulty level of the game goes up. Later on, additional points not only let you make up for that, but they also boost the usefulness of the character. Also one with few skills, because the additional points allow you to buy new skills and to develop them. For this reason, it is a good idea to pick this quirk with characters of multitude of skills in mind, who are supposed to prove their worth later into the game. You only need to take into account the fact that you will not benefit from it, for a long time.
Unlucky - A random character gets lightning struck during battle. Random character means a randomly chosen character in the battlefield - allies, opponents, neutral characters. Lightning bolt deals quite a lot of damage and therefore can kill severely wounded characters. This one is a completely unpredictable quirk and it is a good idea to pick it, if you want to introduce another random element into combat. However, it may happen that you will not see, or feel, its effects, for a long time.
Psychopath - Chance of regular and critical strike rises with each accurate hit and it is lost with each inaccurate one. At the beginning, this quirk is annoying but with time, after the character has developed their skills and gains better equipment, it may prove highly useful. It is a good idea to pick it for the characters intended to have high chances of critical hits, and with later stages of the game in mind. At earlier stages this will impose penalties, rather than bonuses.
Manic Depressive - A quirk that makes the game easier and more difficult, in turns. It can affect the number of skill or CON points that the character obtains with the next level, chances of hitting the target or the speed of movement. For example, you can take it for a character with 7 Intelligence and hope that they receive a +1 bonus before leveling up, which ensures an additional skill point. Apart from select situations, the quirk is only to increase randomness of the game and if you want to, you can take it. Pick it also when you find a way of taking advantage of it, for a character with a specific set of attributes. Otherwise, ignore it.
Two-Pump Chump - A quirk useful against small groups or weak opponents. The more opponents, or the stronger they are, the lower the chance of ending the fight quickly, alongside the usefulness of this quirk. You will especially suffer from that while fighting with bosses, or big robots with lots of CON. It is therefore a good idea to give this quirk to the character with high AP, capable of killing two, or four opponents during a turn. However, if you want longer fights requiring tactical approach and careful elimination of opponents, it is better to pick something else.
Repressed Rage - After they take a critical hit, the character starts dealing more damage and has a greater chance of a critical hit. Instead, they never take a critical hit, but something worse instead. In other words, first they get the beating, but then they repay in kind. The quirk is useful, on the one hand, but at the other, all of that comes at a high cost. You can pick it, if there is nothing better, but there are better and more useful quirks.
Twitchy - A bonus to the base combat speed at the cost of lower chance of hitting the target. The cost is 10%, and you can alleviate it by crouching. Additionally, later into the game, attribute levels and skill levels will be high enough for this cost to be made up for, even without crouching. For these reasons, this quirk is a good one for a melee character, thanks to which they will be able to move quickly around the battlefield. Very useful, if the character is wearing a heavy armor that restrains movement.
Raised in the Circus - A bonus to dodges is tantalizing, but it is only 5% high. At the same time, a bonus to hit that results from the Leadership skill may be as high as 20%. Of course, later in the game, it is going to be easier to boost the chance of hitting the target but still, the penalty seems too steep, in comparison with benefits. You can pick it for a melee character, or for a fragile one that requires protection. Still, there are better and more interesting quirks.
 A party of seven.
The characters created by you are full-blood Rangers. They never defy orders and are always reliable. This is not all, however. As you explore the wastes, you will encounter daredevils that are willing to join up with the Desert Rangers and help you in your endeavors. At one point, you can have up to seven members in your party. .
As much as the base four are, nearly, machines with no free will, the NPCs that join up have their stories, ambitions, goals and views. In one word, they are independent, in a way, and will not follow you blindly. Seemingly, they are no different and you can control them, just like your characters. However, you will soon learn that not always do they agree with your actions. Such an NPC may leave the party, or even become hostile if you, e.g. go against the welfare of his community or open fire against friendly NPCs. Not always will they also be willing to part with some of the elements of their equipment. The most frequent problem is acting on their own during combat, i.e. going rogue. In each turn, there is a random chance that the NPC decides themselves what they want to do. It may be an attack, just as well as fleeing- especially in the situation of getting wounded. Apart from that, the NPCs that you enlist have their preferences for opponents, i.e. there are targets that they hate. They deal higher damage to such opponents, but there is a risk that they get out of control, while fighting them. On the other hand - there also are targets that they would not lay a finger upon, e.g. Vulture's Cry would not fire at a neutral animal. To limit the risks of NPCs' getting out of control, you can develop Leadership skill. However, there still are limitations that you cannot overcome. Remember that you should really avoid giving a very powerful weapon to an NPC, because you could be surprised in an unpleasant way. Alternatively, you can change their weapons before you end your turn. Very rarely, the NPC changes the weapon themselves so, even if they get out of control, you will not sustain heavy losses.
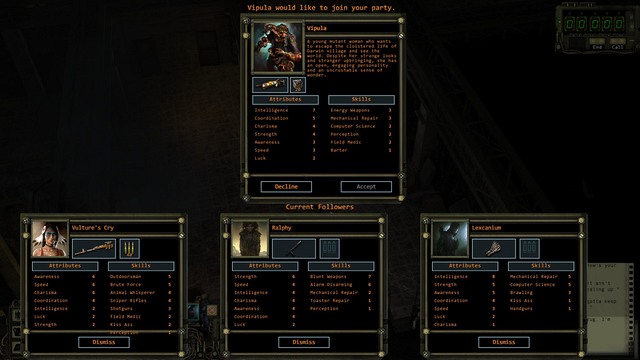 With the attempt to enlist an eighth member, you need to decide who is going to leave the party..
Enlisting somebody boils down to having a conversation with them and selecting the appropriate dialogue option. Some of the NPCs are available only after you complete the main quest in their location, but some of them are ready straight away. If you already have seven members on your party, you will have to remove one character. The NPC that you dismiss, most often, goes to the Rangers' Citadel, and their equipment is transferred to the leader's inventory. Later on, at the Citadel, you will be able to enlist them again. At any moment, you can also dismiss the NPC that you enlisted (but nobody from the initial four!), by clicking Dismiss in the character window.
The more characters in the party, the wider the array of available skills and greater firepower, but also slower leveling up, because experience is then divided among greater number of characters. Experience is reflected by the yellow bar next to the character icon. When it fills up, use the radio to contact General Vargas. The character will then go up in ranks of the Desert Rangers and will receive survival points. As a rule, the level of the NPC that you enlist has a lower level than the rest. They should be able to make up for that, relatively fast (at lower levels you need less experience points to level up). The best strategy is to play as a permanent seven (or less if you do not like crowds), without juggling between party members or dying. This way, your party will be at the highest possible level.
During your explorations, you can also encounter allies. These may be animals, people, machines. You can recruit them for your party via either conversation or certain skills and, although they cannot be controlled, they will follow your party and, usually, help you in battle. This category also includes characters connected with individual quests, who join your party for the duration of the quest and disappear right afterwards. Unlike them, machines, and tamed animals will follow you up until they die, or you chase them away, if that's possible in the first place.
Your party members offer various bonuses. In the case of non-combat animals, such as goats or cows, they grant a bonus to the statistics of the character that tamed them. Each animal increases a different attribute and the bonus may be +1, at most, but you can keep several animals at a time. Belligerent animals, such as alligators, will help you in battle, just like machines and people. Machines and animals can be included in the party both before and during the battle, as long as the appropriate skill test is successful. It is especially useful during battles with multiple opponents, or strong ones.
Depending on their strength, your party members can either serve as valuable battle support, or as cannon fodder, an additional pool of CON, if you like. It is limited in the case of animals and, in the case of robots, theoretically limitless, because you can repair them for free. The only thing you need is sufficiently developed mechanics skill. People and animals require first-aid kits and these deplete, sooner or later.
Unfortunately, the lack of control over your allies may result in the situation, in which melee fighting ones will be shot by those standing behind them. Also, the possible course is that one of your allies forwards too much and he gets killed with friendly fire, or with a grenade explosion, or shot by the allies just because he got into their line of fire. Companions cannot be rendered unconscious and with zero CON, they simply die. This is why, it is best to clear the area beforehand and then offer the quest-giver that he could join you. If this is not an option, it is best to stand between them and the opponents. Rangers can be healed and your companions cannot. This is especially true for those of the companions whose quest requires you to travel between locations, because they will be taking part in fights against random groups of opponents.
You can have multiple companions, at a time, and tamed animals. The only condition is that your companion is connected with a quest. In other words, if you encounter the Lecturer on your path (Provosta, you can find him in Rail Nomad Camp), and then Vax (abandoned railway station), who are not connected with any quest, and you decide to take them both on as your companions, only one of them will be following you in each of the locations. After one of them dies, the other takes his place.
Out of the interesting companions, Vax, combat android, is definitely worth mentioning. You encounter him in the abandoned railway station in Arizona. He does have too many CON points (barely 50), but he has an energy pistol against people, and an even better one against machines. He always attacks in bursts of fire, can attack twice per turn and is strong enough to kill a honey badger, in one burst, with a bit of luck. Additionally, he can be repaired countless times, for free, and receives a temporary AP bonus, if hacking skill is used on him with success. The railway station is a difficult location, mainly because of the Shredders there, and Vax's AI can perform silly maneuvers, but in Arizona, he proves irreplaceable in fights. Appropriate use of the machine means, in practice, decreasing difficulty level all over the area. You need to watch out, because with his firepower, Vax is capable of eliminating both opponents and party members. Outside of Arizona, Vax proves useless. In California, the machine can be killed during the first random encounter, from the energy weapons of, e.g. Children of the Citadel.
During your journeys, you can also find companions. These are people, humans and machines that you recruit with either your skills or with a conversation. They cannot be controlled, but they will follow your party and they will usually help you in combat. This category also includes NPCs connected with quests, who join your party for the duration of the quest, and disappear right afterwards. Unlike them, the machines that you hack into and animals that you tame follow you until they die, or until you chase them away, if this is possible.
Your companions can offer you with various bonuses. In the case of non-combat-oriented, such as goats or cows, they provide you with a bonus to the attributes of the character that tamed them. Each animal carries a bonus to a different attribute. Bonuses can be no higher than +1, but you can simultaneously tame several animals. Combat-oriented animals , such as big rats or alligators, are going to help you in combat, just like machines and humans. It is possible to seize/tame machines and animals both before and during the battle, as long as the test for the appropriate skill is successful. This is especially useful in the case of fights against numerous opponents, or ones that are especially strong.
Depending on your strength, your companions will either serve you as a significant help in fight, or as cannon fodder, which is an additional pool of CON, of a kind. Wile it is limited in the case of animals, it is practically limitless in the case of robots, because you can fix them for free. All you need is sufficiently high level of repair. Humans and animals need first-aid kits and, sooner or later, you may run short of those.
Unfortunately, the lack of control over your allies can result in a situation, where your melee rangers are shot from behind by the allies in the back. Also, it may happen that a party member that is key to a given quest dashes too far to the front and is killed with friendly fire, or hit by a grenade. Your companions cannot be stunned and at zero CON, they die. Therefore, it is worthwhile to clean the area beforehand and then offer the quest-giver to travel with you. If this is impossible, it is best to stand between him and the enemies. Rangers can be healed and companions cannot. This specially goes for companions, whose quests require you o travel between individual locations, because they will participate in fights with random groups of opponents.
There may be many companions and tamed animals in your party. The condition is that the companion needs to be connected with a quest. In other words, if you encounter the Lecturer (Provost, in the Rail Nomad Camp), and then Vax (Abandoned Rail Station), who do not have any quests connected with them, and you decide to offer both to follow you, in each of the locations you will be followed only by one of them. After he dies, he will be replaced with the other one.
Out of the interesting companions, Vax - combat android is worth a mention. You encounter him in the abandoned rail station in Arizona. He does not have too many CON points (mere 50), but he has a powerful energy pistol that works well against humans and even better against machines. He always attacks in bursts and can perform two attacks per turn. The bursts are strong enough to deal with honey badger in a single burst, with a bit of luck. Additionally, he can be fixed endless number of times and receive a temporary bonus to AP, thanks to successfully used hacking. The rail station is a difficult location, mainly due to the shredders residing there, and Vax's AI can perform dumb maneuvers. Still, in fights in Arizona Vax proves irreplaceable. Using it appropriately means lowering difficulty all over the area. In California, he can be killed during the first random encounter, with an energy weapon used by the Children of the Citadel.
 Angela offers lots of support.
Angela is a vet from the first installment of the game. For that reason, her starting level is high (14) and she is a powerful reinforcement for the party. You can enlist her around the Citadel, literally right after the game starts. She uses an assault rifle and she can pack a punch with her unique wrench. She does not tolerate killing - apart from the Indians from the Rail Nomad Camp, who she is reluctant towards.
Angela does not stay in the party for long. She leaves along your way to Damonta, which does not take place too early.
Coordination
Luck
Awareness
Strength
Speed
Int.
Charisma
CON
AP
Max load
Level
8
1
6
4
6
4
2
143
10
93
14
Skills
 A physician from Ag Center.
You will find her in the Ag Center after you decide to save it (otherwise Rose will die). She has a rather dark past - in Wasteland, she was a member of the Guardians and worked with Doctor Finster, which is reflected in her frequent interactions with people from various locations. The only character in the game with 10 points of Intelligence, which gives her 5 survival points witch each promotion! Moreover, she can join your team after about an hour of playing, which allows you to train her in anything you want. Unfortunately, she's not that good in battle, due to her low Strength, and this attribute should be developed first. She carries an unique pistol with AoE damage, but despite the uniqueness, it's a rather weak weapon. A good alternative is to train her in using energy weapons. Then, she can use her pistol for usual enemies and energy guns for armored opponents. Rose will also frown upon actions not proper for a Guardian. She won't shoot at neutral NPCs and will leave if you hurt too many civilians.
Coordination
Luck
Awareness
Strength
Speed
Int.
Charisma
CON
AP
Max load
Level
5
2
4
2
2
10
3
44
8
69
4
Skills
 Cry has close ties with nature.
You will find her in Highpool, if you decide to save it. She is locked in a cage guarded by a group of kids. To get rid of them, you have to buy them a packet of cigarettes in a nearby shop or give them a slingshot to play with. Generally, it's a decent person, but not as righteous as her alternative - Rose, from the Ag Center. High Intelligence, a lot of scout skills. She makes a rather poor choice if you're looking for a sniper, due to her low Awareness and small number of AP, but if you don't have anyone on this position in your team, she will manage. Cry is closely connected to nature - she won't fire at animals and will leave the team if you hurt too many of them.
Coordination
Luck
Awareness
Strength
Speed
Int.
Charisma
CON
AP
Max load
Level
5
3
3
2
3
8
4
44
8
69
4
Skills
 Ralphy is another Indian.
Ralphy can be found in the Rail Nomad Camp. First, you have to save him from drowning (use Brute Force skill to knock down the smaller totem or dig it up with a shovel) and then, visit his mother's house so that he can join your team. His statistics are quite peculiar and the choice of skills is rather strange. Only 7 AP points, which limits him during battles, and 3 points of Intelligence, which gives him only 2 survival points per level. Intelligence and AP are the first things that should be developed if you plan to make use of him. Low Strength is also a disadvantage for a character that is supposed to be a melee fighter, so it is better to train him in using some kind of ranged weapon.
Whether he drowns, or not, will have its effects on the development of the main plot at the Camp.
Coordination
Luck
Awareness
Strength
Speed
Int.
Charisma
CON
AP
Max load
Level
3
5
4
4
5
3
4
62
7
93
5
Skills
 Scotchmo lends color to the game.
Rail Nomad Camp, Homeless District. A former railway worker who started abusing alcohol, after the death of his wife. You only need to talk to him to enlist him. For the donation of 1000 dollars to Wasteland 2, during the collection on Kickstarter, you could appear in the game and Scotchmo is a character that represents one of the sponsors. His attributes are painstakingly low. So is his intelligence, which heavily limits the development of this character. Also, he is weak in combat (although, if he gets lucky, he can lacerate someone with his knife). Still, in spite of these statistics that do not sweep of f the feet, it is a good choice to have Scotchmo in the party, due to his looks, general uniqueness and the color that he lends to the game. For example, due to his alcohol addiction, Scotchmo will steal a bottle of alcohol, if a party member happens to have one in the inventory. Often, you will also witness interesting dialogue lines.
If you are a strongly evil character, you can enlist him in the party and go to the cemetery with him, where you will be able to dig his wife up. Still, it is better to keep him alive. For bearing Scotchmo up to L.A., you will be rewarded with a nice surprise.
Coordination
Luck
Awareness
Strength
Speed
Int.
Charisma
CON
AP
Max load
Level
6
8
1
4
5
3
1
89
9
93
8
Skills
 Chisel the Terrible. Evil incarnate.
Rail Nomad Camp. The security boss to James, the leader of the Atchisonians and, allegedly a friend to Hell Razor. If you brought about peace between both of the tribes, while you are leaving, he will come asking to be arrested for all the heinous crimes that he perpetrated. He uses assault rifles. He fits well into the party that relies on speed, i.e. one that does not wait for the opponent to approach and gets into action. Very poorly distributed survival points - over as many as 7 areas, where 3 are firearms.
Coordination
Luck
Awareness
Strength
Speed
Int.
Charisma
CON
AP
Max load
Level
6
3
3
8
5
2
2
56
9
137
10
Skills
 Takayuki specializes in melee combat.
After you save Highpool or Ag Center, as you travel in the South-Western region of the map, you will receive a call for help, over the radio, from Level L'Upe Mine, which has collapsed. One of the buried ones is Takayuki's mother. After the successful rescue, Takayuki will offer you to help you. It is a character that has been designed for melee combat, but due to the low AP and low Speed it is a better character for carrying stuff around on the strong back.
Coordination
Luck
Awareness
Strength
Speed
Int.
Charisma
CON
AP
Max load
Level
5
2
4
9
4
2
2
184
8
153
14
Skills
Dan can join your team after you return the nuclear missile to the monks in Temple of Titan, but strictly speaking - you shouldn't take him. He may appear as a peculiar character and his Charisma is very high, but it doesn't change the fact that Dan Q is simply weak. You can add him to your team if you happen to need someone with high Kiss Ass skill or if you want to sell and buy a lot of equipment. If you, for some reason, want to keep Dan Q in your team, he theoretically should get a little stronger after 2 levels, when you will be able to increase his Intelligence to 8.
Coordination
Luck
Awareness
Strength
Speed
Int.
Charisma
CON
AP
Max load
Level
3
3
2
2
3
7
9
156
7
69
18
Skills
You can add him to the team in the Temple of Titan, if you disarm the nuclear missile. A former monk that is currently going through a crisis of faith and is searching for a new god that he could worship. Another peculiar and rather mediocre character. He has low Speed, so you cannot really use him for aggressive melee fights. Being on level 20, makes him have to wait as many as 10 levels for the next extra point. Certainly, he's a better choice than Dan Q, but mainly because of the fact that everyone is.
Coordination
Luck
Awareness
Strength
Speed
Int.
Charisma
CON
AP
Max load
Level
3
1
7
4
4
6
5
197
7
93
20
Skills
The last NPC from the Temple of Titan. To add him to the team, you have to give the warhead to the militia. Also, you need to have a lot of Charisma. The unnecessary 6 points of Intelligence is a strong shortcoming of Gary, as these points could be distributed into other attributes, making him a better shooter. Generally speaking, a mediocre character, quite vulnerable due to his low Strength. Also, it is doubtful that you won't already have someone with Computer Science and Lockpicking skills on this level.
Coordination
Luck
Awareness
Strength
Speed
Int.
Charisma
CON
AP
Max load
Level
7
3
4
2
3
6
2
178
8
69
20
Skills
She will ask you to let her join your team after you cure the mutants in Darwin and promise to keep the secret to yourself. If you tell anybody the truth about her origin, Pizepi will leave. She uses energy weapons, which is very useful against armored enemies in Damonta. Anyway, she's not very powerful and you will probably already have the rest of the skills that she represents in your team.
Coordination
Luck
Awareness
Strength
Speed
Int.
Charisma
CON
AP
Max load
Level
6
3
4
5
5
5
1
51
9
117
6
Skills
 Mutant Vipula.
Seehe asks you to join up, as soon as you heal the mutants in Darwin and promise not to tell their secret to the rest of the world She leaves when you tell somebody the truth about her home city. She uses energy weapons, which is useful against armored enemies. High Intelligence - Vipula can be very versatile. In a wider perspective, she is worse with technical issues than Lexicanum, although she should level up faster than him, thanks to decent Charisma.
Coordination
Luck
Awareness
Strength
Speed
Int.
Charisma
CON
AP
Max load
Level
5
2
3
4
3
7
4
51
8
93
6
Skills
 A techie.
You can add him to your team after completing the main quest in Damonta. What's interesting, it's that he has a built-in dictionary in his brain and a bionic arm for fist fighting. Unfortunately, he is not trained in Brawling. However, the arm gives +2 to that skill, so you don't have to start from zero. It is an average character and you can add him about halfway through the gameplay (at this time, you will probably have developed all the skills that he has). He has an unnecessary 7 points of Intelligence, which gives him only 3 survival points per level - the same number as with 4 Intelligence. Hitting the number of Intelligence that would give him the additional point per level would require advancing as many as ten levels with Lexcanium. Surely, it is an unique character and this is probably his biggest advantage. After some time, he can be changed into a good warrior with quite a lot of universal skills.
Coordination
Luck
Awareness
Strength
Speed
Int.
Charisma
CON
AP
Max load
Level
3
2
6
6
4
7
2
222
8
117
20
Skills
A trader, who you will meet in California, quite early. You will be called to Santa Fe, as there is someone who would like to meet with you. After you return to the base, you will able to add Pete to your team. He has some nice statistics that give him 8 AP and 3 survival points per level. Some may think that pistols are no longer of use at this stage of the game, but you will surely find some nice .45 guns that can deal a lot of damage. Having a team member with high Barter skill is also very helpful, because in California, you won't be able to sell items as easily as in the Ranger Citadel..
Coordination
Luck
Awareness
Strength
Speed
Int.
Charisma
CON
AP
Max load
Level
7
3
5
3
3
4
5
199
8
81
23
Skills
You will find three NPCs near the entrance to the Ranger Citadel, who you can add to your team if you loose one of your basic four heroes (or if you've created less than four of them). Just like the original characters, they do not interact with the world and they will always follow your orders (there's nor risk of protest). However, you can remove them from the team at any moment and add some usual NPC, which you cannot to with the characters you create. Also, you won't get a reward from Hawco for adding them.
Ashley Brygo
Coordination
Luck
Awareness
Strength
Speed
Int.
Charisma
CON
AP
Max load
Level
5
3
6
3
3
4
4
47
7
81
4
Skills
Rook
Coordination
Luck
Awareness
Strength
Speed
Int.
Charisma
CON
AP
Max load
Level
5
3
4
5
3
6
2
56
8
105
4
Skills
La Loca
Coordination
Luck
Awareness
Strength
Speed
Int.
Charisma
CON
AP
Max load
Level
6
3
4
4
6
3
2
53
9
93
4
Skills
Ertan is a young boy who tries to look like a badass with an obsession of killing. When you collect enough cat litter, you'll meet him near the gate of Santa Fe. If you refuse in the first time, you won't meet him again. Ertan specializes in heavy weapons and wields his own SAW and a melee weapon - Sawsword. He appears rather late in the game, so his only value is being good at fighting - except for Hard Ass (4) he does not have any general or knowledge skills.
Coord.
Luck
Awareness
Str.
Speed
Int.
Charisma
CON
AP
Max wgt
Level
7
3
7
6
4
2
1
292
9
117
27
Skills
You'll meet him in Santa Fe Springs after you gain a good reputation in California, almost at the end of the game. He's still worth your attention because he's got really good attributes and skills: he specializes in SMG, he's got an MP5k and healing skills at a very good level.
Coord.
Luck
Awareness
Str.
Speed
Int.
Charisma
CON
AP
Max wgt
Level
7
1
3
4
4
8
3
260
10
93
27
Skills
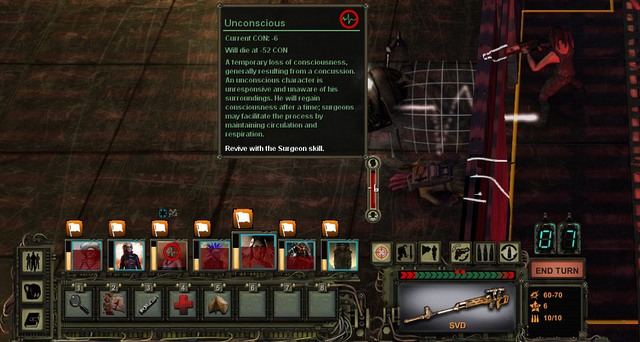
Having 0 CON doesn't yet mean that you die, but you loose consciousness instead. A stopwatch appears above the unconscious character, as can be seen in the picture. When CON falls to a critical value, the character will die. In Wasteland 2, you can go to a temple and resurrect a dead companion. Dead NPCs will become food for mutant vultures in the desert. Remember however that you control a team, not a single hero, so when one person dies, you can play along. The game is over only when all four main characters die.
To avoid the demise, you need to use the Surgeon skill on the dead character, as soon as possible. To learn details, roll the mouse over the character's icon. You will learn how fast they lose their CON and in how many turns (during combat) or seconds (outside combat) the character dies. To perform a surgery, you need the trauma kit, which can be bought at any shop with medicine. The higher the quality of the kit, them more points it restores to the character. It is necessary that, at least, one character in the party has the Surgeon skill at a high level. It is useful a skill, not only for rescuing party members, but also the other NPCs in the wastes. A good idea is to develop this skill in two characters, because you cannot operate on yourself. The other character will do with 1-2 points, whereas you should strive to reach the maximum in the case of the other. You can operate, e.g. on bleeding, but also this requires appropriate equipment. The process of bringing back to good health requires time so, if you are in the middle of a fight, even the character that is being patched up on a regular basis is constantly exposed to damage which may prove fatal. If you have waited for too long, it may turn out that the surgery was started too late and it does not end before CON drops too low.
The unconscious character does not need to be lost, however. Each loss of consciousness is connected with an effect being imposed. It is a good idea to learn about it. Usually, CON points are lost with each turn. If the character does not have any negative status (e.g. bleeding) their CON will return to the level above 0 automatically. The downside of this solution is that they will only have 1 health point so, any scratch brings them down to the ground again. However, you save up the trauma kit this way and, if in combat, the AP, which the medic would have used to perform the surgery. You should also check the experience level of the character, because it may prove unnecessary to heal them. They may be up for the next level in a moment. They will then be healed automatically, in which way you save up not only on the trauma kit, but also on the first aid kit.
Remember the doctor first needs to reach his patient so, he may not have enough AP to do that in the same turn, and start the surgery. The important thing is that the freshly "patched up" character will not be ready to fight immediately. For some time, they will still have a negative status on them which decreases attributes.
 You access the world map by clicking on the globe.
You start the game near the Ranger Citadel, the headquarters of the Desert Rangers. Of course, this is not the only location in the game. At the end of each map, there is a characteristic globe icon, like the one in the screenshot. After you access it, you will leave the current location and exit into the wastes.
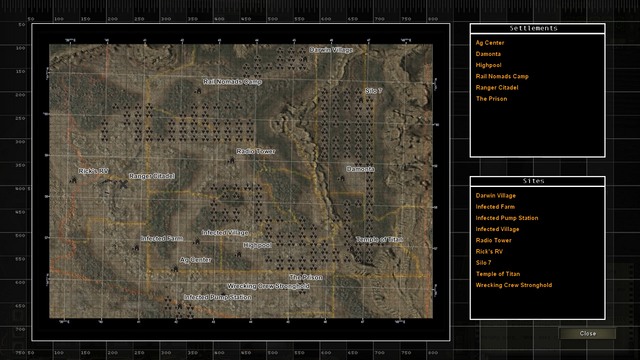 Map of Arizona
Out in the wastes, there are many other locations - destroyed cities, military facilities and regular encampments. At the very beginning, you do not know the locations of the individual areas so your map is completely blank. You fill it up by learning about new places, during the conversations with NPCs, or by traveling and discovering them yourself the remnants of human civilization. If you don't know where a certain location is, whether you discover it when walking close to it or not, depends on your Perception level.
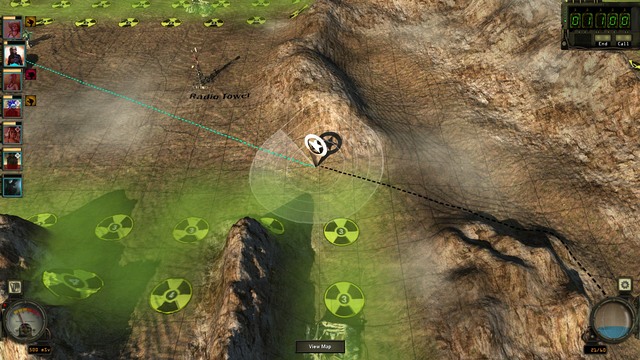 Traveling across the Wastes.
When exploring the wastelands, you will need water. You can treat it like fuel for a car. You need a certain amount of fuel to get from A to B. When you run out of water, the team will start suffering from dehydration and receive damage. If you don't replenish water right away, everyone will die of thirst. The amount of water that you have is represented by the blue container in the bottom-right corner. Moving your mouse onto any location on the map will show you how much water you need to get there. There are two ways to replenish water. Firstly, from water sources in various locations, like for example in the canteen of the Citadel. You just have to click on the container and confirm that you want to get some water. Secondly, you will randomly encounter some oases when you travel. An oasis will appear on the map when you are close to it. Approach it and get water for your heroes. When exploring new areas, it is good to sometimes change your course to look for a place where you can find some water. The problem of water will disappear after you get to California, where there is no need to worry about your water supplies.
Moreover, you can also randomly encounter some secrets on the world map, in which you can find useful items, such as weapons and ammunition. There are also special shrines - locations made for people who donated a lot on Kickstarter. You can find them if you have a proper amount of Perception, or when completing a quest in a given location.
During the free exploration, you cannot forget about the omnipresent radiation. The bottom-left corner is the Geiger counter that displays the current radiation levels. Apart from the flickering hand, also the characteristic cracks inform you of irradiation, which you can hear. You can tell the irradiated fields, on the map, by radiation trefoils. Note the numbers on them. They symbolize radiation levels and how much protection you need to cross the field safely. So, the field with the radiation levels of 4 require rad suits with the protection level of , and the ones irradiated at the level of 2, those with protection of 2. In the equipment window, you can look up which type of suit you are currently wearing. You can find better ones at shops, while progressing in the main storyline and sometimes also in the stashes around the game world. When the party is staying in an irradiated area, without proper protection, it will keep loosing health with each passing second You should then cross the irradiated area quickly, in hope that you can make it before you die. You should then not waste your time to stop and heal - during your exploration of the world map, you can use first-aid kits, but this will stop the party so, this gives you nothing.
Also, during the exploration of the map, you will be running into random encounters. Most frequently, these are the attacks of raiders or vicious animals. You can avoid such fights with sufficiently high levels of the Outdoorman skill. Sometimes, these are non-threatening situations, such as caravans.
 The entrance to the Ranger Citadel.
Ranger Citadel
A pre-war vault cut in the slope of a mountain. Earlier, it was occupied by the cult of the Guardians of the Old Order - guardians of pre-war technology, but the Rangers killed them out and seizes the building, during the events of Wasteland, and adapted it to the needs of their HQ.
You gain access to the Citadel after you complete the first major quest (saving Highpool or Ag Center). From now on, you will be returning here in the key moments of the game. In the Citadel, there are, among others, General Vargas, the NPCs that you discarded from your group and a number of well-supplied merchants (many of them pay much better, for the individual items, that anybody else in the wastes - you can find details in your log book). You can also find Robert Bowling here, who sells cheap custom weapons, which you should stay away from, because it jams with nearly every shot. During your visits to the Citadel, remember to replenish your water supplies in the kitchen. You can also visit the local museum that tells the story of the game world.
Ag Center
Botanic gardens whose function is to supply all of the areas, under the jurisdiction of the Desert Rangers with food. Not only is it a farm, but also a research facility, where dr. Kathy Lawson works on increasing crops.
Shortly after you start the game, you will have to make a choice between saving the Ag Center and Highpool. The location that you do not render help tom is destroyed (alternatively, where you take no action, they both are), and all that inhabit the location die, which will be reflected by the course of the game afterwards.
Highpool
Before the war, it was a water reservoir and water treatment plant. Now it is a town, which along with the Ag Center, plays a vital role in survival of the locals- Highpool pumps radiation-free water that later on is supplied to the locals.
Shortly after you start the game, you will have to make a choice between saving the Ag Center and Highpool. The location that you do not render help tom is destroyed (alternatively, where you take no action, they both are), and all that inhabit the location die, which will be reflected by the course of the game afterwards.
Rail Nomad Camp
The railway men are Indians who use old freight trains to move around. Their camp is a pre-war depot. Around, you can also find many drug addicts and homeless. The nomads themselves are deep in civil war between the individual tribes. The Topekans control the last railway engine, which could still function, but it is the Topekans that have the brake shoe that the machinery requires to be fixed. The Rail Nomad Camp is the only hope for railway to return to Arizona, but you first need to end the war, in some way, and clear the area of raiders.
Prison
The state prison before the war and, after that, the HQ for the Desert Rangers, who then left it, in favor of the Citadel. The prison was then seized by the former gang (Red Scorpions), who now claim to be a better alternative for the Rangers. They rule the nearby areas with iron fist and exploit the locals.
Canyon of Titan
The only passage to the areas to the far East goes through the canyon. It is being controlled by the M.A.D. Monks, members of the cult that praises a nuclear warhead. In the canyon, there also is the Diamondback Militia, which tries to wipe out the monks. You will have to take one of the sides... or against both.
Damonta
Prior to the war, an army airbase. Now one of the largest towns, where human civilization was preserved. Nearly completely wiped out by an unexpected robot attack.
Santa Fe Springs
Right before the war, a town near Los Angeles. It is here that the first unit, dispatched by Vargas, builds the early Ranger base, due to the nearby water springs and water treatment systems. The status of this unit remains unknown at the moment at which you reach here.
Santa Fe performs the function of the Citadel in California. You can replenish your water supplies here and contact the facility in Arizona.
Rodia
Prior to the war, a collection of metal sculptures made by an Italian worker Sabato Rodia. As of now, there is a town built around the sculptures, named Rodia, after the artist. Here, among others, you can find a clinic and a bank. Unfortunately, the town needs to deal with Leather Jerks gang that plans to seize the city.
L.A. Coliseum
The famous stadium built in 1923 to commemorate the veterans of World War I, where the local American football team, USC Trojans, used to play. As of now, it is the HQ for the group called Mannerites. As the name suggests, their manners are impeccable and this is at the base of good manners that they wish to rebuild human civilization. Traditionally, there needs to be a faction that opposes them and these are the Robbinsons.
La Brea Tar Pits
Prior to the war, it was a tourist attraction and now, the HQ for the "Real Americans" - a faction of Gippers, which praises Ronald Reagan as the mythical, pre-war hero. They produce methane, which they then shop all over Los Angeles.
Griffith Observatory
A communal park next to Hollywood, prior to the war. Currently, the observatory is the HQ for the Salvation Church and its members, the Handgun Packin' Priests. It is an extreme radical group of Christians that wants to complete the work of nuclear warheads ad clear the world of all sinners. In the first place, they want to take on the ones at the Hollywood Chamber of Commerce, who are based in the ruins of the former Hollywood.
New Citadel
An abandoned military base in Seal Beach, which has been turned into the HQ for the cult that wishes to turn all the humans into half-robots. It is here that Mathias "converts" people and recruits his loyal, semi-organic army.
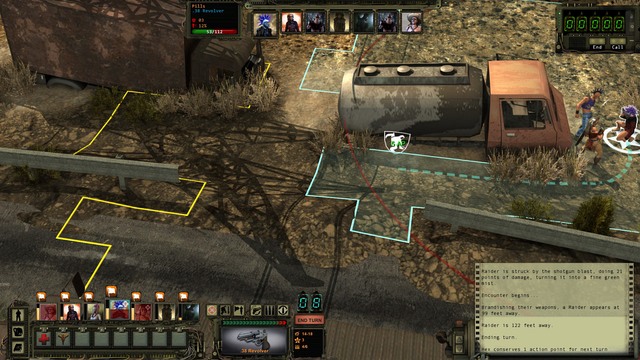
Combat in Wasteland 2 is turn-based. This means that the individual characters take turns to take their actions, while the rest are waiting for their turn. Who and when makes his actions is determined by the queue that you can see in the middle, atop the screenshot. The turn in the queue is allotted basing on the initiative of the character, which mainly depends on Awareness and Speed. How much you can do, during a turn, depends on the AP points. Shooting, reloading, using the first-aid kit, walking - all of these use up AP. The cost depends on such factors as the weapon that you are currently using, skillfulness with that weapon, or the combat speed, which determines how many meters you can walk on one AP. The character automatically ends their turn after they have used up all of the AP. If there are still some left, but you cannot, or do not want to use them up, click the End Turn button. By not using up all of the points, you can increase the number of AP available in the next turn - you receive an additional point if you saved 1 or 2 points, or 2 for each 3, or more, that you saved in the previous turn. This is especially useful if you are waiting for the opponent to approach you, because the points that you save up may accumulate to the number required to take an additional shot. Transferring of AP is especially useful if you are using heavy weapons, which require more AP to be used, and which often makes it impossible to move and shoot at the same time. You can also receive additional 2 AP, at random, thanks to Luck. Note that, unlike in Fallout, you control all of your characters (unless any defies control at a given moment). Time in which you can use your turn is unlimited so, you can consider your options as much as you want.
To make orientation during combat easier, there are visual aids. The blue field marks the farthest distance that a character can walk and shoot, in the same turn. The yellow field marks the boundaries of your move, with using up all the AP. The red circle marks the range of the weapon. Moreover, when shooting, you will notice a red field around your hero - it's the range of noise that your weapon generates. An important aspect, when you plan to eliminate someone without attracting others. Of course, all of these measurements depend on what you are currently carrying. Changing the weapon also changes the boundaries so, you cannot hope that with one gun active you will go as far as possible, switch weapons and will still be able to take a shot. This only works only in both of the guns require the same number of AP to operate.
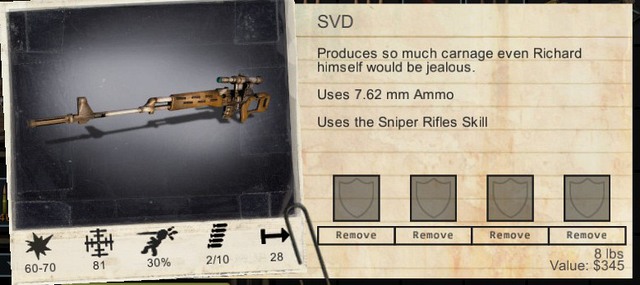 A weapon with its statistics and slots for modifications.
The chance of hitting the target and the number of damage dealt depend on:
Each armor provides a character with protection, whose value is expressed with values from 1-10. Whether protection is effective, depends on the penetration value of the weapon used. Penetration value is also measured with values from 1-10 and determines how thick an armor the bullet can pierce, i.e. deal maximum damage. If penetration value is lower than the level of the armor, damage is appropriately lower. If it is higher - damage will be optimal. The effect of the individual weapons is different, depending on whether the target is armored, or not. The highest penetration value have blunt weapons, sniper rifles and, of course, heavy weapons. At the other side of the spectrum, there are automatic weapons and shotguns. Damage dealt by, e.g. energy weapons is based on the type of armor worn by the opponent. Owners of the conducting armors receive higher damage, whereas those with non-conducting ones take lower damage. You can view the armor type by rolling over the armor icon. The conducting ones have a lightning bolt in the upper-right corner. You can receive more information by rolling over the weapon in your equipment. The target's armor can be checked out after you roll the mouse over the target. If the armor decreased damage dealt, this will be represented by the red shield icon next to the value of the damage. This way, you also recognize if this is a conducting, or non-conducting one.
Also covers deserve a mention. By using the elements of the surroundings, you can cover from a gunfire, e.g. behind a car wreck. If, after you roll the mouse over that place, you see a white shield symbol, this means that your character will be protected there. It is then going to be more difficult, for the opponent, to hit them. Toughness of the cover depends on its kind - a wooden crate breaks up after several shots but, destroying a metal structure may require heavy gear. Also, the situation, of the character, plays a role in the game. A character standing on a hill deals more damage and has higher chances of hitting the target than one shooting uphill. All of the factors need to be considered, while positioning your people.
The icons around the active weapon are the combat options. These are:
Precision Strike - with this command, you can target any body part of the opponent. You can choose from the head, torso, arms and legs. Shooting at the head, carries a 60% penalty to hit, but it deals damage higher by 35% and can cause the enemy to be unable to tell the difference between the friend and the foe, or starts taking irrational actions. For example, he may start wasting AP on moving in the wrong direction. Firing at the torso, carries a penalty of 30% to hit and it deals 20% less damage, but it instead decreases the value of the armor of the target. Shooting the arms has a penalty of 35% to hit and damage lower by 30%, but it can damage or destroy the opponent's weapon and also decreases their chances of a successful hit. Restrictions are identical in the case of hooting the legs, which mat slow down the opponent (it decreases the opponent's combat speed, or provides a penalty to AP), or throws the opponent to the ground. Depending on the opponent, each body part can be damaged even several times, which makes it more and more difficult for the opponent to take part I the battle. However, there are opponents, in which you can damage only one, or two body parts. This is especially true in the case of large robots, such as Scorpitrons, and meson cannons. Humanoids with mechanical elements can be shot in all four strategic spots. The cost of a precision strike is identical with that of a regular one. Due to their handicaps, precision shots are difficult to pull off at the beginning of the game. Later though, thanks to better weapons and better skills, you should succeed to take one more often. You do not use them in the case of weaker opponents, who die anyways from one, or two hits, but they are invaluable in the case of battles with stronger ones. When you decide on a precision attack, try to be picky with targets. Shoot at arms of the opponents that use the strongest weapon, shoot at legs of the fastest one and at the torso of those with the highest CON. Remember that you can take a precision shot from any weapon, with the exception of heavy weapons, machine pistols and shotguns. Assault rifles in the burst mode can shoot precisely, which is worth using to your advantage. A burst of two bullets of a machine gun is more likely to cause the effect of a precision shot than one bullet. This mode of attack is especially useful in the case of melee weapons with cheap attacks. A character with 8 AP and attack cost of 2 AP has, as many as, chances of a successful attack. Still, try not to use precision strikes too often. Regular shots carry a lower risk failing, and they may prove as effective.
Crouch - increases the chances to hit by 10% and chances of evading by 20%. It costs 2 AP. Once you crouch, the character will be unable to move, unless you use that command again, to stand up (another 2 AP). At the initial stages of the game, it is especially useful because of the +10% to hit. At that point, the Rangers are not well-trained enough with weapons so, the 10% can make quite a difference. Once the party is well-trained, it is going to pay off more, if you carry AP over to the next turn. Of course, on condition that the character is not in a very bad situation (e.g. directly in front of an HMG), because the + 20% of protection may save your life. Apart from that the character crouches automatically and receive all the bonuses if, e.g. you stop next to a cover (e.g. a crate a fence) - you will be able to tell those spots by the white shield icon that appears after you roll the mouse over them. If you want to leave the cover, you first need to command the character to stand up.
Ambush - The character will end the round going into the Ambush mode. This means that they will shoot at the first target that steps into their range of attack (the red field). An useful option when we try to lure our enemies, especially when using a sniper rifle or assault rifle. It is always better to fight by waiting for the enemy to come near you than rushing at them. The cost of Ambush equals the cost of attack. Remember that choosing this option will end the round!
Swap Weapons - swaps weapon to the one in the other hand. Free to use. Some short-range weapons are not are better (automatic) or better (shotguns), so it is always better to be safe on both sides. Apart from that when somebody is standing right next to you, hitting them with a wrench can deal the same amount of damage - if not higher - and saves up ammo.
Switch Fire Mode - you can switch between fire modes (especially in the case of automatic weapons) - to fire one single bullet or a burst. Modes that use up more AP and ammo deal more damage, but this decreases accuracy and you use up ammo faster. If the opponent is weak and he is not too much of a threat, always use the less-consuming mode. Also, change the mode to single at the end of each turn, in the case of NPCs that you included in the party. This will prevent them from wasting too much ammo in a silly way, in the case in which they defy control. Changing the mode does not use up AP so, you can switch, check out the chances of hitting and switch back.
Reload - the cost to reload usually equals the cost to shoot + 1, or the cost to shoot itself. You always need to remember to enter combat with your magazine full. You also need to reload whenever the weapon jams.
To simply attack an enemy, you just have to click on him. The hero will shoot using the options that are currently selected (for example Crouch mode). There is also an alternative - the free aim mode. Click on the icon of your weapon and then select the place that you want to fire at (it works also outside battle, when you for example want to shoot at a friendly NPC). Free aim is particularly useful with weapons that deal AoE damage, like for example shotguns or grenade launchers, to make sure that you hit as many enemies as you can and do not hurt your allies.
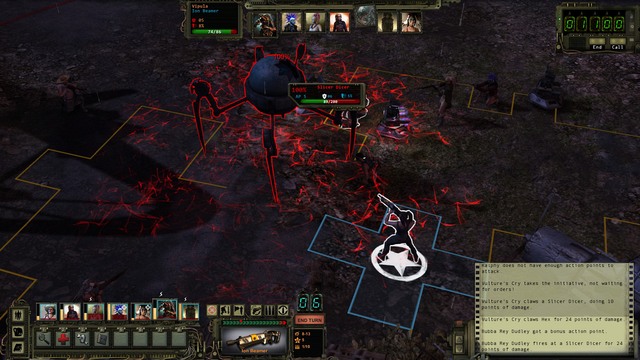 Match the weapon with the opponent.
The basic thing that you need, in order to survive in the wastes, is common sense, when it comes to managing your resources. You can launch yourself, guns blazing, straight at the opponents and fire all the best that you have. Most probably you will quickly win such a fight. Most probably, you will also win the next one. And another. But then, you will quickly realize that you have run out of first-aid kits and there only are three bullets left in your clip, and trigger happiness yields the way to annoyance. Each billet is sacred, especially at the beginning of the game. This concerns both the relatively cheap and common 9mm bullets for handguns, as well as, especially ammo for automatic weapons and sniper rifles. This is why, it is important that you are accompanied by versatile and diverse party. First of all, to be prepared for various events and secondly, to prevent using up each other's ammo.
In Wasteland 2 range is the king. Who has good range and can use it properly (i.e. use the weapon well), is at a gigantic advantage. If you have a weapon modifier that increases range, do not hesitate to mount it onto the weapon, as the character with the Weaponsmithing skill. The majority of fights will be started by you and tell your characters to fire at the opponents at the edges of the map. The greater the range the more the opponents will have to walk to be able to respond with fire in the first place, while you are shooting at them.
Use Ambush to take cover, crouch if you need a higher chance of hitting the target. The sniper and two characters with assault rifles are excellent here. The sniper with a good weapon is capable of killing an enemy with one, well -aimed shot, in this mode. Also remember to keep your AP for the next turn. Your character can keep up to 2 AP, even if you end your move with 10 spare points. not approach the opponents, to prevent getting within their range End the turn and they will come to you, which will give you two shots, thanks to the AP that you have saved. What about the ones that manage to approach too close? This is where characters with hand weapons come into action, e.g. the medic with a well-developed Handguns skill. Critical damage from handguns, in spite what may be apparent, can be really high and, additionally, it can be fired three times per turn. Never ignore melee weapons. It is perfect for musclemen as an alternative weapon and not necessarily does it deal less damage than an automatic weapon. Before you hit someone, however, try to stand on the side of the target, to prevent getting into the line of fire of the rest of your characters, and fratricidal fire.
What if the opponent does not approach? They hid behind a good cover and awaits you in the ambush mode? Send in one, preferably the toughest, character with the rest of the party waiting in their positions with ambush mode on. Once your character appears near the hidden opponent, he will, most probably, want to change positions and will start searching for a new cover. Most probably, he will then walk into the open and, he may even start running, directly, towards the rest of the party. He will then become an easy target - the reactions of the party will finish him out, as soon as he gets within range. Stationary turrets are a bit more tricky. Their range is long and they will have no problems turning a Ranger with low CON into minced meat. The best way to eliminate them is by using the sniper. Have him hide as far as possible and behind the best cover possible, while the rest are waiting outside of the turret's range. If you have explosive weapons (rockets, grenades) it is an ideal moment to find out what it can do.
What do you do, however, if the opponent refuses to come out from behind the cover and you do not have a good bait at hand? You can deal with the barricade using explosives, or a heavy gun. Even the toughest of walls will give in to a grenade and wooden crates are nearly sure to fall apart thanks to a machine weapon. However, you need to be careful and make sure that you do not destroy your cover at the same time. For example, if you and the opponent are hiding behind both sides of the came cover, restrict firing a heavy gun at it. Of course, you kill your opponent this way, but you deprive your party of a cover. It is best to take the position at the side of the opponent, so your projectiles do not hit the cover.
Also, you need to watch out for the characters that fire from behind a cover and they have a low chance of hitting the opponent. It may happen that they hit not the opponent, but the cover. In the case of pistols and walls this is not a problem, but a character packing a heavy weapon and hiding behind wooden crates, may destroy them by accident and expose himself to the enemy attack. For this reason, it is better to perform a selection of covers and do not hide characters behind ones that they can destroy.
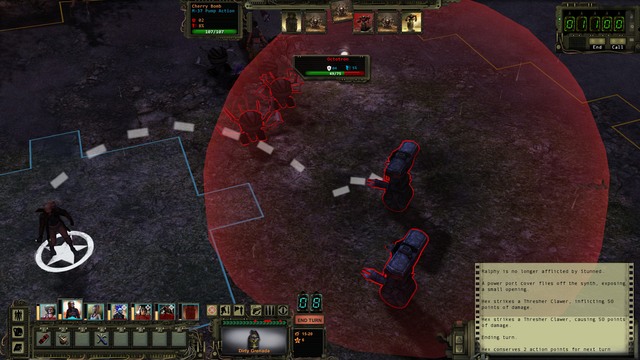 AoE attack.
Also, it is well to know what the opponents can do and match your strategy with them. For example - the big mutated frogs can stick put their tongues and rip off the weapon from your hands so, as far as this is possible, you need to keep them at a bay. The case is similar when it comes to some robots that can push a Ranger away and lower his statistics, at the same time. Some of the opponents explode after they are killed (e.g. at the Ag Center). An ideal situation is one, in which there is nobody nearby, at the moment of explosion, but there are many opponents, who take damage from the blast.
It is also worth knowing about the habits of various opponents. Animals usually move around in packs, have lots of action points, try to dash in between party members and they fight at close quarters. While dashing towards the party, they can be easily targeted with grenades and machine guns, but you need to attach more care to eliminating them, after they approach their target. People with firearms hide behind covers, which forces you to flank them or use grenades. Often, they will also be protected by opponents with melee weapons who stand in the line of fire between you and the opponent with a firearm. Machines have strong armor and high firepower, so frontal attack may end in quick elimination of your party, but when they are standing far away from the party, they will be wasting their AP on attempts to cut the distance shorter. There are not too many opponent types in the game, so you will figure it out quite quickly, how to deal with each type.
Match the character to the target. Remember, every bullet counts so, use it as effectively as possible. Is there someone with 15 CON left, around, and a it's the turn of a character with an assault rifle, who will probably deal around 30 damage? Have them fire at a different target with higher health and have someone with a handgun deal with the opponent with 15 CON. Also, pay attention to the opponent's armor and the penetration value of your active weapon. Of course, the opponents packing the most deadly tools are your priority but, use grenades and AoE attacks only if you really have no other choice, or if the enemies are clustered together.
While moving around the battlefield, you should be precise about the destination point. You should be especially careful with your AP. The Interface tends to be malicious this way and it is possible that you end up in the spot next to the one that you had planned to reach. Or that you run out of your AP, after you get to that spot, and you cannot take a shot, as a result. Combat is turn-based and animations can be sped up, to save time, therefore take your time. Also, watch out for keyboard hotkeys. They are useful, but it is easy to confuse them and instead of reloading the gun, you end up ending your turn, which the game does without giving you a warning.
You also need to pay attention to the positioning of your party members before the battle. This is especially important for calculating the succession of turn-taking. If the passage is narrow, and character with low initiative stand in front, an entire turn will go by, before the characters in the second line can make a move. Therefore, try to move around in the way that at the beginning of the fight, leaves at least a single field gap between characters. Apart from that, it is also important because of the opponents and your party members. The AI may try shooting at opponents over the heads of party members, and often deal damage to your men, as a result. The AI may also block the passage, even if it is your ally that it is controlling. Without extra space for maneuvering, it is easy to bring about a congestion and, as a result, to waste AP on long displacement.
Finally, it should also be mentioned that you can open your inventory and transfer items between characters for free. If a character runs out of ammo you can give them the ammo from someone else. This also works on the unconscious party members. If the medic has passed out, and only he has trauma kits, you can easily access his inventory and carry it over into the inventory of another character with the Surgeon skill. Remember that the characters that exchange equipment need to stand next to each other.
For the Desert Rangers to gain in strength, and for the people to live well (or "live" at least), it is a good idea to take to your heart a handful of useful tips, useful for each fresh cadet that sets out to the post-apocalyptic plains of Arizona.
Wasteland 2 has been created in the convention of the classic Role Playing games with top-down, isometric view , which were extremely popular at the break of the century. If you have played those games, you know what they look like and what to expect of them. If not - search any possible corner, ransack any possible stash and first of all, talk to everyone that you meet. Pay attention to dialogues, take your time and check out everything, thoroughly. Do not follow the path of the storyline, from A to B. Take a detour and you will discover completely new places and completely new, expanded stories, which you would miss otherwise. Thanks to this, you will gain more experience that will make playing easier, in the long run, and thanks to which you will enjoy playing Wasteland 2 much more.
Also, as soon as possible, get in the habit of pressing the key that highlights everything that you can interact with (Z on the keyboard), otherwise you can miss a lot...
Also, do not worry if you cannot complete a quest, open a chest or defeat a group of opponents, at a given moment. The majority of problems of the wastes can be solved in any order you want. Therefore, if something seems problematic, level up a little, get better equipment and return then. It may then turn out that the difficult quest, or invincible opponents became a piece of cake.
Skills are the key to victory. To b able to complete all of the quests, your party should have as many skills as possible, at the highest level possible. How many points you will be able to distribute, depends on your Intelligence so, while creating the party, make sure that there are no thickheads on it! The basic skills that you should be developing, virtually from the very beginning, are Pick Lock, Safecracking, Computer Science, Perception, Field Medic, Surgeon, Smart Ass) and Hard Ass.
Right after the beginning of the game, you find a shovel on the ground. Do not forget to collect it because you are going to need it. Out in the wastes, there are many heaps of soil that you can dig up, thanks to which you will find various lockers with gear. To use the shovel, add it to the quick bar, select it and click the spot that you want to start digging in It is easy to recognize those heaps of dirt. They highlight after you use Perception, or press the highlighting key. You can also dig graves up. If you want to, you can dig up the grave of the freshly-buried Ace! Do not expect Vargas and the other Rangers to wink at it, however...
Apart from that, after you use the Hard-Ass skill, during your conversation with the guard at the entrance to the Citadel, you can receive a special handgun-shotgun Mississippi Mule, with a really powerful kick to it.
Right after you start, you can also include Angela Deth in your party, who is staying close to the Citadel entrance. It is a decent reinforcement to each new party, both when it comes to offence and practical matters. She uses an assault rifle that she can put to a good use and, apart from that, she has excellent skills Brute Force and Kiss Ass.
Do not sell and, under no circumstances, throw away the weapons that you do not use. Learn Weaponsmithing and take them apart. Thanks to this, you will obtain modifications that you can mount onto the gear that you are using and, even if you do not do that, you will obtain junk parts, that you can sell for profit at the Ranger Citadel. However, the higher the weapon level, the lower the value of the scavenged parts. It is a good idea to disassemble the cheapest assault rifles or pistols, but it is more beneficial to sell energy hammers and axes intact.
In the game, health does not regenerate automatically. The wounded character remains wounded until healed. There is one exception though - progressing to the next experience level. If a character is heavily wounded, but his experience bar is nearly full, he will be able to make it in fight with one more pack of mutated badgers. Right after such a fight, use the radio and the news of promotion will make him so happy that he will be back to full health (healing level depends on the game difficulty level). It is a very good way to save up on first-aid kits.
Remember to reload the weapon on a regular basis, outside of combat and to make sure that the magazines are not empty. Just in case, check the weapon of each character and make sure that it is reloaded. Do this especially after a fight, where characters changed their firearm to a melee weapon, or one firearm to another. It is better to waste several seconds on making the final check than to find out, in combat, that you cannot fire a heavy weapon, because there only are two bullets left in your clip.
When exploring a new location, have the character with the highest perception level go first. If they spot a trap, have the sapper move in. Move the ranger to the back and allow the expert to do his work, so in case of an accident, losses are as low as possible. If you spot any enemies, retreat and get the rest of the party. Check all of the chests with perception first, and disarm the trap, or the alarm, before you open it. If the lock breaks, fix it and try opening it again. Examine the area ahead of you slowly and carefully and, most importantly of all, watch your step. Mines explode instantaneously after you step on them, therefore one character is enough to deal damage to the entire party.
While fighting, try to take advantage of the weapon's spread and of the opponent's positioning. If there are several opponents in a row, change firing mode and target the one at the very end and there is a chance of wounding the rest, at the same time. Also, take advantage of landform features. Take positions on hills and behind all rips in the ground, canyons and all natural formations that it is impossible to get over. It is especially useful in the case of fighting animals that will first have to walk around the party and find a way.
A party that is tightly herded together is an easier target for grenades. While shooting at an opponent, you can easily wound your party members, especially if you are firing a heavy weapon, or machine weapons. Party members cannot walk through each other, therefore they can get stuck in narrow passages. In each fight, try to scatter the party, which prevents them from shooting each other's back and from blocking narrow passageways. As a herd of a party, it is easier to walk into a minefield and other traps.
You do not know where to go or what to do? Don't panic and open your log, where all of the interesting facts, about the individual quests, are taken down.
Every location is full of crates, safes and hidden stashes, which you can find thanks to sufficiently high perception level. You can find them anywhere, both at the roadside and at the end of a dead end. For that reason, it is a good idea to have your perception active at all times and examine each element of the location. This also goes for the hidden shrines. Although the majority of them may look identical, some select ones house hidden, often trapped, crates in which you can find valuable items.
This is for various reasons, mainly because the number of available slots, although high, is limited. You do not learn how many of them there are, up until you have used them all up. If you exceed the limit, the older entries will simply not appear in the game, therefore do not be surprised if you cannot find them anywhere. The saves that exceeded the limit are stored in an appropriate folder. You simply need to delete, or displace, some of the newer entries to be able to load the older ones.
In a situation, in which you realize that things will soon get heated here, position your people and select the sniper to shoot at the possibly best target. There is quite a chance of wounding the opponent severely, or even kill him. One opponent killed before the fight may not change much but still, makes things easier.
The advanced version of the tactic assumes using two snipers, who fire at exactly same moment. The problem is that they need to be facing the opponent and the opponent should be standing still, or move slowly. Otherwise, there is a chance of one of the sniper shooting before the other one, who is still trying to lock on the opponent.. Still, it is a good idea to try it, because two direct shots is a 100% guarantee of death, of majority of opponents. In the worst case, you hit the opponent only once, which is still a good thing.
In the game, you can obtain many valuable items, such as explosives, books that increase the level of your skills or rare boosters. Many of them are worth keeping, but only up to a certain moment. If you see that a fighting gets too difficult for you, robots or animals have too many health points and in your equipment, you can find thirty grenades, use up your supplies. You will decrease the weight of your backpack, this way, and make combat easier. Do not worry if you had to use a valuable rocket or a big first-aid kit. You will still have plenty of opportunities of getting or buying a new one.
Quests in Wasteland 2 can be completed in various ways. You can always decide that, from your standpoint, the Jedi are the bad ones. In technical terms, wiping out both of the warring factions also results in peace. Be independent and act your own way. In fact, there is a counterbalance for each faction: you can side with one or try to unify them. If you are blessed with the skill to convince (Charisma), you can solve many of the issues without even firing one bullet.
You can also do it the other way around and kill out all of the innocent that, as a member of the Desert Rangers you swore to protect. If you keep doing that for long enough, the Desert Rangers will finally discard you from the organization and start to hunt you down. What is interesting, you will then be able to ally yourself with another faction that is also enemy towards the Rangers and you can attempt to destroy them, to get a completely different, full and official game ending.
The old crone at the village tells you that their well needs fixing? Try using Mechanical Repair. The Shepherd tells you that his cattle is uneasy? Use Animal Whisperer on the cows. The doctor at the hospital has his hands full of work with suffering patients? Put the gloves on and use Surgeon. You can even use Brute Force on a cow, to knock it down, if you are not in the mood! Such elements will not be included in your log so, be creative and search for opportunities to showcase your skills.
This also goes for hacking robots and taming animals in combat. You only need sufficiently high level of a skill, for seizing a piece of machinery, or taming the most dangerous of beasts to be a apiece of cake. Of course, after the fight, they will be automatically destroyed, killed or will simply run away, but before that, they will be of much help. Especially if they are packing energy weapons or have a high level of CON. Also, you can hack and tame before the battle, e.g. Turrets turned the other way, or big frogs. The bottom line is that you cannot be spotted in the act.
Also, remember that you can use skills as much as you want to, or up until a critical failure - it is better not to take the risk if the chance of success is lower than 35%. Get more experience and return to the same location later on.. Or be a sissy, save the game, before using the skill an, in the case of critical failures load it again and try until you succeed. You can do the same, while looting crates. Contents of the majority of them are random, so you can reload the game and try again, if you realize that the crate is empty.
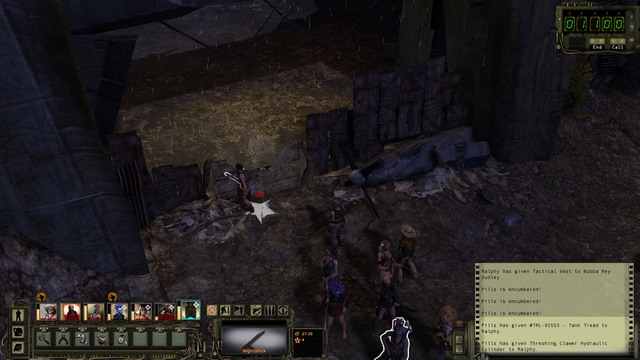 Smashing of the fence with weapon.
In practical terms, there is one major flaw to every well-guarded fortress - the back entrance. Sometimes, it is enough to break the fence to gain access to completely unguarded caves that take you straight into the enemy HQ. Search for such solutions! To destroy obstacles, you can use Brute Force, melee weapons (approach the gate and attack) or a grenade.
This is not only because you can wound an ally with one, but also because of crates. Safes can be opened with dynamite, but a crate will be destroyed this way. Instead of ammo, or scrap metal, all you find will be some planks. Apart from that, a grenade can wound a party member, if ill-aimed, for example an animal.
The majority of gadgets that you find increase a skill level, for as long as you keep it. Thanks to this, you can obtain a Kick Ass or Hard Ass point that you have been lacking, thanks to which you can resolve a predicament in an amicable way; a Safecracking point, without which you cannot open a lock, or a sapper point, thanks to which you will be able to clear a big minefield with ease. Other gadgets allow you to carry more water, more equipment, or they can increase your chances of a critical hit. Therefore, it is a good idea to collect gadgets that affect your skills or offer other bonuses, even if they lower your attributes at the same time. You never know what may come in handy.
There also is a nifty trick, in connection with gadgets. The game cannot tell the difference, whether you have obtained level 10 of a skill, thanks to points, biiks or gadgets. Therefore, if you find a gadget that raises one, or two skills by a point, you can ignore developing it to the maximum level and use the gadget instead. Thanks to this, you will save up 8 skill points, i.e. as many as 4 levels for a character with intelligence level 4. You can save up even more, if you manage to get a book that provides you with a permanent +1 to the selected skill. In such a case, you can develop a skill for points, up to level 8, use a book to raise it to 9, and use the gadget to boost it to 10. This is a good strategy, especially that gadgets can be replaced at any moment, even in combat. Therefore, there is no problem in replacing non combat-related gadgets with combat-related ones, right before or during the first turn of the fight. What can cause problems, though, is gadgets that raise skills, but lower attributes. A -1 penalty is little, but it may mean several CON points lost during an attack or, even worse, a worse position in the queue. Apart from that, you actually need to remember to replace gadgets, which may prove difficult, with a group of seven characters of varying skills. The last downside is that gadgets do not allow you to purchase skills and attributes. To be able to access them, you need to raise your skill level using skill points, and not gadgets.
Also, there are gadgets that provide you with a +2 bonus, but they are rare. It is better not to hope to find one, while planning how to develop your character.
With the animal whisperer, you can increase the party in size by including animals. Animals cannot be controlled, but its presence in itself raises the level of the caretaker's attributes. For this reason, it is a good idea to take interest in animals that you encounter. Of course, a corps of wasteland police is going to look strange, if accompanied by a goat, cow and an oversized rat, but the benefits that this brings should alleviate that. Apart from that, you can use animals in combat as an additional pool of CON, as a shield against enemy fire or a barricade that stands in the way.
Wasteland 2's system requirements are not too high. The burden of running the game is borne mainly by the GPU, whereas the graphics card is of a lower significance. This guide has been drawn up on a computer with AMD Phenom II X4955, 8 GB RAM and Radeon HD 6970 graphics card. On the computer with this specification, the game ran smoothly and without any problems on the highest graphics settings. Also, it is worth mentioning that the game also works under Linux and Mac computers.
Singleplayer: Yes
Offline co-op (split screen/hot seat): No
Co-op over the Internet: No
Multiplayer: No
This guide has been drawn up for the PC version, on the computer of below specifications:
On the above configuration, the game ran smoothly at the highest graphics settings.
Yes, it is possible to play Wasteland 2 on laptop computers; requires NVIDIA 260M graphics card or better.
This guide for Wasteland 2 encompasses a detailed description of the game world and quests. In here, you can find the maps of Arizona and California, as well as detailed maps of locations in these regions. The maps detail the locations that are worth visiting, and also NPCs, all sorts of curiosities, which you can encounter while exploring the wastes, and which are often easy to miss, because they do not stand out. With this guide in your hand, you will find it unproblematic to complete the main story line. Of course, also side quests have not been omitted, including the ones that are not marked as a separate entry in the log. All the stages of the game have been described in detail. While conceiving these descriptions, all of the key choices, moments and possible endings have been taken into account. The guide also suggests how to approach a given problem, how to complete the individual quests and instructs of the possible outcomes of the individual decisions. Due to the unmatched complexity of the game, it can be completed without the player ever realizing the multitude of spice, curiosities and side plots that each irradiated corner of Arizona and California radiates with. With your own Wasteland 2 guide, you will miss nothing! Wasteland 2 is the sequel to the RPG game that was originally released in 1988, and which has been called the mother of the post-apocalyptic role playing games. The events of the sequel that has been developed 25 years afterwards take place fifteen years after the events of its predecessor. Again, you take control of a member of the Desert Rangers, the only representatives of the US Army that remained after humanity stood at the brink of extinction after a nuclear war.
This guide for Wasteland 2 includes:
Arek "Skan" Kaminski ()
Arizona is the main operating theater of the Desert Rangers, which compasses, among others, their Headquarters. It is here that you spend the first half of the game, where your main objective is to mount Repeater Units onto radio towers at the Ag center/Highpool and in Damonta.
The green markings on the map are the minor locations in the game. All of the remaining area s are some major settlements, maps of which, alongside detailed information, can be found in the following chapters. If you only want to complete the main storyline of the game quickly, you do not need to visit all of the locations - it is completely optional to visit Darwin, Rail Nomad Camp and the Prison. Also, remember that you are free to do in Wasteland 2 whatever you want and, you can even ignore the game's storyline, if you want to. Instead, you can stand up against the Rangers (you will not be allowed to leave Arizona, though).
While exploring the wastelands, always remember to replenish your water, Also, it is a good idea to visit Shrines, that provide you with +1 skill points. They appear on the map while you are completing a minor quest (that often do not count as missions, and they are more of "good deeds"). Without this piece of information, even if you are standing still in the spot where the shrine is supposed to be, you will not be able to visit it.
California is the second one (and last) map of the game. The new HQ here is Santa Fe Springs, much more poor than Guardians' Citadel. Your main task here is to install repeaters on radio towers in Angelorium, Rodia and Griffith. You also have to search for bags of cat litter and bags of zeolite to enter Hollywood and get to Seal Beach which are beyond the zones of increased radiation.
Essential locations connected with main tasks which you have to visit are marked in red. Green marks the side locations and shrines. To get to Hollywood, you have to visit at least one main location (Rodia/Angelorium) to collect bags of cat litter - if you don't have enough of them, you'll find more in some side locations.
California has quite a lot of side locations and just a few, however complex, towns. Most side locations will be marked on your map after you hear distress calls on the radio. After you install the repeater, you'll get the locations more often.
You start the game close to the Ranger Citadel's entrance. Here, your party receives the first quest from Vargas- find Repeater Units and mount them onto the radio towers around. Also, you will find Angela Deth here, who you can include in the party, for greater firepower. The entrance to the Citadel remains locked, up until you mount the first Repeater Unit in Highpool or Ag center. You can try and enter the Citadel forcibly, but at this stage of the game, this simply ends in the massacre of your people and the end of the game.
From the local merchant, you can buy your first level 2 Rad Suits (you will then be able to explore areas of radiation levels 1 and 2, without losing your health so, it is a good idea to buy them quickly).
The guard at the gate, Nur Giebitz, refuses to let you in until you prove your worth by completing the first quest. However, you can use negotiation to convince him to help you - you will receive, from him the unique Missisipi Mule shotgun and some ammo.
In the Director's Cut edition, past Khass Tetem you find a shooting range. The entrance there is through the locked gate. Use Safecracking to open it. Inside, you find two crates of weapons and ammo. The first one is on the left, among crates and tarpaulins. The other one is on sandbags, next to the hole on the right. If necessary, zoom in and you will see it.
It is the Headquarters of the Rangers. Apart from its obvious connection to the main quests in the game, it also is a perfect place to replenish your ammo, medicine and water. Also, you can buy Rad Suits, or explosives, here. From captain Mercaptain, you will also be able to obtain unique items for completing missions for the Desert Rangers command and for bringing her unique items. The Citadel is a perfect source for cash, if you are selling appropriate items to appropriate merchants (weapons spare parts to Melson, animal droppings to Tan and painkillers to Tideman - up until you bring him the cure for cancer.
Also, here you can include each character that you include in your party, into the Desert Rangers, after you see Evan Hauce, which you will be rewarded form with bonus experience or with money. Also here, you can find the NPCs that you removed from the party, who you might want to include again. The final thing that you find here is the museum with a nuclear warhead, which you will have to explode to complete the game (it is not a regular "game over" but rather the official ending to Wasteland 2, although not too ambitious).
The quest that you receive at the very beginning of the game, from General Vargas. Your first mission is to go to the Radio Tower on the world map and to find the Repeater Units, which Ace had on him. At the tower, you will find an enemy gang that demands payment for allowing you to explore its terrain. There are several ways to deal with them/ You can pay them the money, convince them to let you be, by selecting any of the dialogue options (Smart Ass, Kiss Ass, Hard Ass), or by simply killing them. It is recommended that you go for Kick Ass here, to convince them to join the ranks of the Rangers). Thanks to this, you will learn the location of a Shrine (+1 skill point), you will get some scrap metal and you will receive a reward (experience points or junk) from Evan Hauce at the Citadel for recruiting new members. . The important thing is that you approach the tower from the West and talk to the guard with dogs (Alpha Spyke). As for the remaining one, you can convince them to leave you alone, but they do not join the Rangers. Also, you will not learn about the whereabouts of the Shrine. If you decide to fight, you can collect some ammo and gear that is sure to come in handy, later on. They are weak opponents, especially if you have Angela Deth with you. After the safe passage, or after you have shot all of the opponents (raiders from the lower part of the location are aggressive, regardless of what you did with their colleagues at the radio tower) you can repair the panel at the radio tower and open the locked passage on the right, to obtain a handful of experience points.
The Repeater Units themselves are in the cave at the Eastern end of the map. Inside, you will have to fight a mutated toad. IT has a thick armor so, if possible, use the weapons with maximum penetration value. What is even worse, the toad may rip weapon of the hands of a party member. You can pick it up later on, from the corpse of the toad, but you will be left with your fists only, during the fight. Remember that, during the fight (without using up action points) you can open your inventory and arm yourself with another weapon - if this is not a loaded secondary weapon, you will use up points on reloading it. After you deal with the toad, pick the Repeater Units from Ace's body and contact General Vargas on the radio (you can also be contacted by Vargas instead, while you are trying to leave the tower). Around, there also is a map, with location of the Rail Nomad Camp marked on it. After you examine the robot with Perception, you can use Computer Science to remove all the ammo from it.
Your party will receive another order - mount the Repeater Units onto the radio stations at Highpool and Ag center. The problem is that both of the locations are under attack and they do not call for help. You need to decide who you want to help, because it is impossible to help both locations. The Ag center is the supplier of food, Highpool of drinking water so, both of these locations are key for the survival of the locals. From the point of view of difficulty level and complexity of both, Ag Center is probably longer and much more difficult to survive, than Highpool. However, the choice does not matter that much, from the viewpoint of future events so, make your own choice. You can also leave both of the locations to themselves and not help anyone. In such a case, both of them will be destroyed.
Concerns the quests:
During the conversation with Vargas, you can raise the topic of Ace's journal. It remains a mystery what actually befell the Ranger and who is responsible for his death so, you can take up to resolve this mystery. The first pages on Ace's journal can be found near the Radio Tower. One of them is on the ground, close to the tower itself,, in the middle of the area (use the function to highlight items, if you cannot find it). And the other one is on the corpse of the Ranger, in the cave to the East. You can return, with the pages, to Vargas, who will order you to the Rail Nomad Camp. It is not compulsory to collect the pages to pick up the trail. Also, you can talk about Ace to Matt Forrestal in the main hall of the Ag center or with Harold at the shop in Highpool. Thanks to them, you will get the clue to go to the Camp.
At the Rail Nomad Camp, visit the local bar, where you meet up with Samuel. It is him that has Ace's journal. If you have found the pages near the Radio Tower, or have talked to anyone about it, you can tell him that you know someone has been accompanying Ace. If not - you can discover the truth by using dialogue options. Once Samuel cracks and tells you what happened, he will give you the journal. You can either kill him or let him walk (Angela always kills Samuel, if she is on the party). Return the journal to Vargas at the Citadel. Then, take it back to Thrasher, at the desk near the museum, who will promise you to search through the old books for more information. Talk to him some time later. He will tell you that the trail leads to Los Angeles, which is rumored not to exist anymore... This is the end of this quest.
Concerns the quests:
Inside the Citadel, you can find Robert Bowling, who offers hand-made weapons for sale. Although the statistics and the prices seem tantalizing, their actual combat value nears zero, due to constant jamming. You can tell on Bowling to captain Mercaptain, who throws him into Prison. You can then visit him there, and he will ask you to take a letter to his sister Kathy at the Rail Nomad Camp. If you do not tell on Bowling, you can attain from him the information on why he needs the money that he gets from selling the faulty weapons, if you use the correct dialogue options. He will then give you the letter to his sister. If you keep bringing up the issue, you can convince him to leave his practice and return to Kathy (you will not need then to take the letter to her).
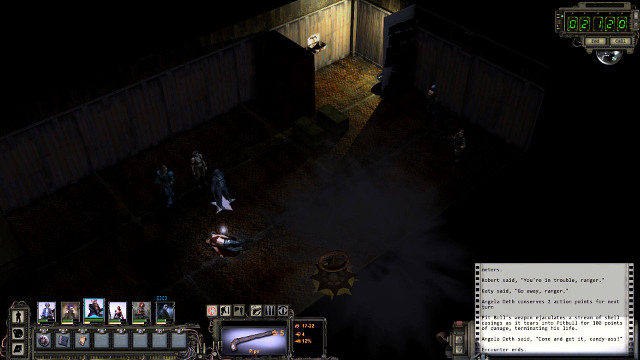 Deploy your party before the fight with Pitbull
At the Rail Nomad Camp, go to Kathy. Depending on what happened earlier, she will be there by herself, or with Robert. You will learn that Kathy has been enslaved by PitBull of the Red Skorpions, who is soon to come for her. When he comes, you will have three options to choose from. You can buy Kathy for 500$, let him take her away, or (if Robert is there, you will have to fight him) or kill PitBull. The fight with Pitbull may be problematic, due to the grenades that he is using. You are in a narrow railway car so, there is not much room to hide. Additionally, a grenade may easily kill Kathy and/or Robert (not mentioning the party members), and you will not get to see the happy ending. The best thing to do is, before you start your conversations with Kathy, to spread your party around the corners of the car and leave one character in the middle, preferably one with the highest Initiative. Start the dialogue as that character. Then, you will not be clustered together and you will not be all killed with one grenade. Retreat from the center, quickly, as the character that started the conversation. Kathy and Robert should then be outside of the blast radius of the grenades. Try to kill PitBull as quickly as possible and do not hesitate to use automatic modes of weapons, nor explosives (just make sure that you do not wound either Kathy or Roberta).
What happens to Pitbull has an influence on the events at the Prison. The majority of locals will be happy to see him dead and they will free the rest of the slaves. At the same time, you will anger the rest of the Red Skorpions, who will be seeking revenge.
Concerns the quests:
Doctor Tideman is dying of cancer. You can promise to find the cure, which has allegedly been developed at the secret base in Darwin. Talk to Thrasher near the museum at the Citadel to learn about the whereabouts of Darwin and head towards there. (Darwin is in a highly irradiated area, make sure that you, at least, have bought level 2 Rad Suits before you get there. You can obtain them, e.g. at Melson's).
Darwin is infested with pestilence that was developed by doctor Finister (one of the main villains of the Wasteland 1, years ago. You will have to make your way through a group of infected mutants. A single mutant is not a threat, but their strength is in numbers so, you may have some problems, if you are short of ammo. Head towards the underground Darwin facility (you can open the door, e.g. with Computers skill). There, inside a small room, in a white locker, you will find bottle with the medicine, which you now need to take to Tideman.
Once you walk into the Darwin underground complex, you will be immediately infected and you will have to find a way to treat the infection. To learn the details, see the chapter about Darwin.
Flintlock will gladly accept new historical exhibits in his museum, which you can run into during the exploration of the world. This mainly concerns the items connected with the first installment of the game and all sorts of Easter Eggs. Often, it is possible to find them in graves and in toasters. In general, it pays off to keep all white items and visit Flintlock and Mercaptain on a regular basis to find out if they are interested in any. In the descriptions of some of the items, it reads that there is someone interested in obtaining one, at the Citadel" but the majority of them will not be provided with such a note. For each of the exhibits, you will be rewarded either with an item, with money or with experience points. Also, you will receive a requisition form that entitles you to a free piece of equipment offered by Mercaptain. The quest will be deemed completed after you bring back the first exhibit, but you can keep bringing them anyways.
The list of the exhibits that you can bring has been provided in the unique items chapter.
You receive this quest from Lieutenant Tan, after you ask him if he needs help. Tan buys animal feces, which you can find scattered all around the world (especially inside animal pens) at a lavish price, much higher than offered by the local merchants. This quest ends after the first sale, but you can keep bringing them to him anyways.
Remember that feces are categorized, in the inventory, as junk so if you click the option to sell all the junk to any merchant, remember that all of them will be offered for sale, and you will not be able to take them to Tan!
You receive this quest from Sergeant Melson, after you ask him if he needs help. Melson buys the elements of disassembled weapons, at a lavish price much higher than offered by the local merchants. This quest ends after the first sale, but you can keep bringing them to him anyways.
Remember that feces are categorized, in the inventory, as junk so if you click the option to sell all the junk to any merchant, remember that all of them will be offered for sale, and you will not be able to take them to Melson!
You receive this quest from doctor Tideman, after you ask him if he needs help. Tideman buys the elements of disassembled weapons, at a lavish price much higher than offered by the local.
Your main objective here is to obtain the Repeater Units, which were supposed to be mounted by Ace. You can find them in the Eastern cave. The area around has been seized by the Raiders . You can make it possible to move around the place, in a peaceful way, with dialogue skills, but there is nothing in your way to prevent you from killing them - they should not be too much of a challenge. Also, it is a good idea to loot the nearby crates to find Ace's Star, journal pages and the metal synth leg, belonging to the killer.
The Star is right by the entrance to the location. After you reach the first fork, look left. The item is on the only bush that can be highlighted. The Leg is also in the bush. After you approach, appropriate piece of information is displayed.
Once you obtain the Repeater Units and you are leaving the tower, Vargas will inform you of the distress calls from the Ag center and Highpool, over the radio. Both of the locations need help urgently and you are unable to help both. It is the first key choice that you make and the location that you do not help, is destroyed, after which you cannot complete quests there. You can also ignore both requests and, e.g. head towards the Rail Nomad Camp, but both of the settlements will be destroyed, which will not win you favor with command of the Rangers. The choice has no significant effect on the storyline so, decide who you want to help for yourself. Highpool is a town that pumps drinking water and it is attacked by the Wreckers. The Ag center, on the other hand, is a research facility, where you fight against the mutated plants. n general, the Ag center is much more complex and it may be more difficult, especially if you have just started playing Wasteland.
Shortly after you enter the area, you find the Ace's Star on the ground on the left, among thickets. Once you pick it up, you receive a mission to return it to the Citadel. There, give it back to Flintlock, who is in charge of the museum.
As soon as you find Ace's corpse (the cave on the East), you will be instructed, by Vargas, to return the metal synth leg of Ace's killer. You can find the leg on the ground, in the Northern part of the area. Take it to Mercaptain at the Citadel.
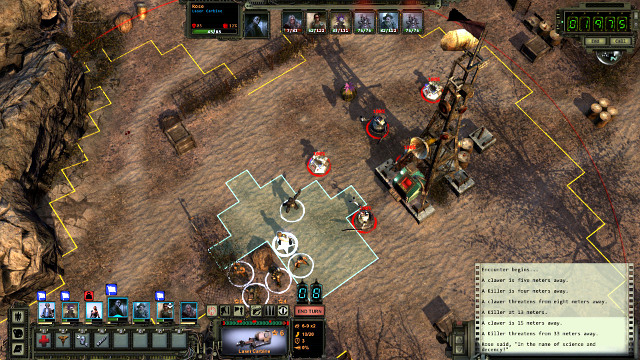 The fight against robots
Much later (probably after you leave the Prison), while exploring the waste, you will receive instructions, from Vargas to check out on the tower, where synths are rumored to have been seen. Vargas wants you to bring back one alive, but it turns out, after you get there, that it is just several regular robots that you need to destroy. After you see to the matter, Vargas contacts you again. This quest does not appear in the log.
 The Ag center is infested with pestilence
The Ag center is being ravaged by the Pod Infection, which turns people into living bombs, which you will witness soon after you get there. While fighting with the infected, it is important to keep a considerable distance of them, because they explode and main everybody within range. With a bit of luck, such an explosion may also kill the other opponents that you are fighting at the moment but, if you do not pay attention, it is your soldiers that will get wounded. At first, instead of the infected, you will have to fight lots and lots of mutated bugs and rabbits, which do not carry guns so, you can quickly face a situation, in which you run out of ammo. Search through all of the rooms and lockers in the fields, to find as much ammo as possible. To obtain all of them, you will have to have the Pick Lock, Safecracking and Computer Science. Also, remember to use your shovel to dig up holes in the ground. Also, remember that you can highlight the interactive items (Z on the keyboard) and about perception, which prevents you from missing anything. You should pick as much gear from the lockers as possible, before you walk inside. Once you have searched through everything, head towards the main entrance.
Over the intercom, you will hear Kathy Lawson, but before you approach to answer her, note the four pulsating "balloons" on the left side of the door in the screenshot. This is the Pod that spreads the infection. They explode after they are approached and wound, and infect with the pod infection. The disease is incurable, until you help the local researches develop the serum. Each infected party member has a countdown that shows how long before the character is consumed by the infection and they turn into a monster that you have seen, while entering here. Although it seems to be lots of time, it is simply better not to let yourself be infected. Especially that you receive a very small number of antidotes and four of them will have to be used up for other activities, if you want to complete all of the quests hare.
How not to get infected? It is easiest to shoot from afar, at the Pods. Have the character in front do that. It is necessary that they are using a regular .38 pistol, to prevent wasting better ammo. It is risky, but also allows you to save up on ammo, to run up to the Pod and run away, immediately, right before the burst, outside of the blast radius. Finally, you can also walk around the pods, but this makes no sense, all around the Ag center, there are loads of them and secondly, you need to collect 10 specimens for the antidote. It is best to do that immediately,, Fire at the Pod, collect what is left and, only then, talk to Kathy. This way, you will avoid being infected. Doctor Lawson opens the door and you can walk inside.
It is where the main part of the area is. The Ag center has been divided into 5 locations:
Right after you enter, you encounter doctor Lawson, who explains the situation. The access to the relay (this is where you need to mount the Repeater Unit) is currently being blocked off by the mutated plants so, you will have to activate the irrigation system, before you use it. Apart from that, the infection is ravaging the complex, spread by the exploding Pods. If any party member is infected and you do not want them to die, you need to help develop the antidote. Otherwise, you can limit your actions to mounting the Repeater Unit and leave the Ag center up to its fate. If you want to help, you need to bring 10 specimens of the burst Pods. Remember not to approach them and destroy them with one shot, from a safe distance. You will find lots of Pods all around this location so, be careful while heading ahead. It is best to highlight the area at all times (by default, with the Z key). After you have collected all of the fragments, you still need Fungicide from the basement and the pumps to be activated. You will then receive the cure for the infection, which you will be able to use to treat the infected members of your party.
At first, moving around the Main Complex is difficult, because there is only one way available to you, straight ahead. To explore the rest of the complex, you need to open the airlocks. You can do that by using the Computer Sciences skill, or by obtaining the codes from Rose.
You reach the basement by crossing the main complex. Next to the entrance, there is a control panel for three air locks. The Southern leads up to the mushroom caves where, among others, you can find the Fungicide that you need to develop the cure for the infection. In the mushroom caves, there are lots of Pods so, be extremely careful.
The Western airlock leads out to the Western field and the Eastern one to the Eastern field. It is in the fields that you find the pumps of the irrigation system, which you need to deactivate. Also, you need to watch out for the toxic fumes in both tunnels. Either activate air conditioning in both passages or run through, to reach the exit (it is enough to run through with one character - the entire party will get to the fields automatically). The threat is not great here, because the poison deals little damage - 1 CON point every several seconds, but at this point into the game, you need each and every CON point. Apart from that, the poison replenishes quickly, so even the toughest of your characters may lose much health.
The most important structure here is the pump of the irrigation system, which you need to deactivate to gain access to the tower at the main complex. In here, there are lots of mutated rabbits that you need to face up against. You can use the help from Honeydew Lewis.
In here, there also is a grave with an axe inside, which you can take to the museum at the Citadel as well as the dying Sue, who you can save with the Surgeon skill. from Sue you will receive a quest to save the nearby locations, on the world map, which he infected with his pigeons, but for that, the cure needs to be developed first.
In the Eastern fields, you need to cut through more Pods, Pod People, flies, larvae and rabbits. It is a bigger than the Western fields and, additionally, there are lots of stashes hidden here so, it is a good idea to explore each fragment of the area. Apart from that, it is a good idea to search through cow pens and collect their feces, which you will then be able o sell to Lieutenant Tan at the Ranger Citadel for a good price.
In the Eastern fields, there is an Ag center boss, of a type - doctor Larsen, so it is best to explore this location as the last one and be prepared, as well as possible.
After you get rid off local insects you can go and talk to dr Larsen. It all shows that he's the one responsible for all this crisis in AG Center, but he won't tell this immediately. Instead of this he will be imitating that he's dying and trying co convince you, that the best idea is to destroy a pump, what of course you can do, but better solution for AG Center is to just cut a water flow. When you turn off both of pumps you'll be able to mount Repeater Unit in main complex. You can find more information in later part of this chapter.
You can deduce that Larsen is responsible for everything by using dialogue abilities or, for example, learn thanks to the Perception that the bodies lying around were shot. You can also simply attack the doctor and he will tell you the truth.
The battle with Larsen might be hard. Patrick doesn't have high resistance and he can be quickly killed using a heavy weapon, but during one turn he performs many strong attacks. Make sure before starting the battle that each member of your party has large number of health and that the medic has trauma kits in case of someone needing to be healed after the battle. When Larsen will be dying, he will explode, hurting all that are nearby.
If you are playing the basic version of the game, heal the team before you will return to the basement after the battle. In the middle of the area a group of pod-infected people will appear and you will have to fight them.
If you do not help the Ag center, it will be destroyed and completely reclaimed by the plants. Therefore, you will not have much to do here. Talk to Kathy Lawson, whom you meet while entering, to learn what happened while you were saving Highpool.
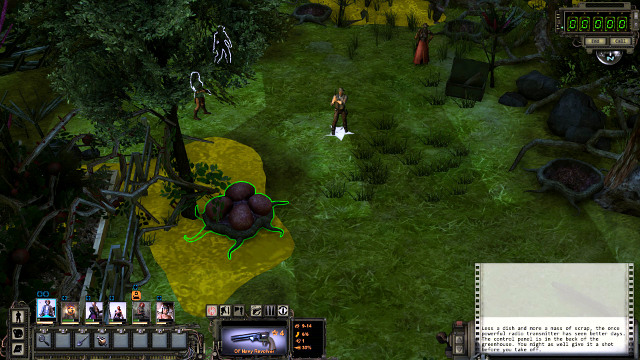
Around the Ag Center, you can find lots of Pods just like the one in the screenshot. They burst only if they are approached by a party member. You need to be extremely careful, because the burst infects the nearby party members with Pod Infection. The safest solution is to have one of the party members fire at the Pods, from a distance (the regular pistol will do, you do not waste ammo, then). An alternative solution, however risky, is to have one of the party members run up to the pod and dash away, as quickly as possible. It should then burst without wounding you.
Before you enter, you can search the adjacent area, which abounds with the effects of the infection. You especially need to watch out for the people that burst after they die and wound the nearby people (try to exploit this for wounding the other opponents). Obtain the antidote surrounded by the Pod People in the South-Western part of the complex, next to the greenhouse. If any party member is infected and you want to complete this side quest. Once you are once exploring the area, head towards the main building. There, you will encounter doctor Larsen- the saboteur that made all of this happen. Ahead, in the building center, there is damaged radio tower, which you cannot mount the Repeater Unit onto.
After you have obtained the antidote and left the complex, you will receive, over the radio, information on the infected areas - get there and pour the antidote into the water reservoirs.
The relay that you need to mount the Repeater Unit onto is in the w main complex. After you walk inside, talk to doctor Lawson. Lawson gets angry after you ask about the radio and you ignore the topic of the infection and she will refuse to tell you where the station is (you can obtain this information from her after you promise, with the Kiss Ass, that you will help her contain the situation). However, this does not matter, because the radio tower soon becomes useless, due to the plants that block off the access. To kill the plants, you need to deactivate the irrigation system, i.e. two pumps in the Western and Eastern fields (this also kills the Pods and allows you to cut through the walls of plants). Go to the basement.
In the basement, use the computer next to the descent, to open the Western tunnel. It is full of poison fumes so, you need to dash though. More or less, halfway through the tunnel, the way will be blocked . You can either use the nearby machine to cut through the plants (requires Computer Science skill) or destroy the wall to the side room (with Demolitions, melee weapons or explosives) with a group of opponents inside. At the end of the tunnel, you will find an air conditioning switch. Switch it on to remove the fumes and then off, to unblock the passage.
 The pump reparation
In the Western field, go to the building in the North-Western part. You will find a flow valve there, which you then need to mount onto the nearby pump. Return to the basement and there, using the computer, open the Eastern tunnel.
In the Eastern tunnel, there also are fumes. You can simply dash through (remember that only one character needs to make it to the safety so, the rest can stay at the computer to avoid taking damage), or activate air conditioning. Here, however, it is much more complicated, which requires you to activate, as many as, five fans (details on the basement map). The pump of the Eastern field is exactly across the location. In the room where you find a note in blood. Before you enter, heal the party members, if possible!
Inside, you will first fight several mutated insects. Pay attention to doctor Larsen on the ground. Avoid launching AoE attacks, to prevent hitting him. With the insects dead, it is a good idea to search through the nearby corpses, with Perception, and talk to Larsen afterwards. In fact, he is a synth and he is responsible for the whole situation.
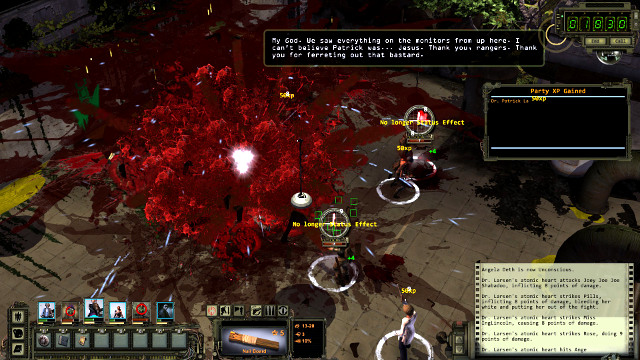 Larsen explodes after he dies - keep your party away from him
You can figure out the fact that Larsen is responsible for everything, by selecting the appropriate dialogue options or, e.g. , simply attack the doctor and he will tell you the truth anyways.
It may be tough to defeat Larsen. Patrick is not too tough and he can be quickly killed with heavy guns but, he performs several strong attacks in a turn. Before you start the fight, make sure that each party member has lots of health and that the medic has first-aid kits, in case someone needs patching up, after the fight. While dying, Larsen will explode and deal heavy damage to the ones near him. Therefore, keep away with your party.
If yours is the basic version of the game, before you get back down into the basement, heal your party and assign ammo - In the field, in the middle of the area, a group of pod people, who may be quite a challenge, for your exhausted party. After you deal with them, return to the basement and return to the main complex. By disabling irrigation, you kill all of the pods, so moving around the Ag center will be much easier, and safer, from now on. They will be exploding, when the part passes by them, but the explosions do no harm to your men.
You still need to mount the Repeater Unit. The tower is in the Western part of the Main complex, if you still have not unlocked the air lock, which blocks the passage off, either talk to Rose to obtain the access codes, or use the Computer Sciences skill on the computer. You can also walk around, across the wall of plants, which can now be easily destroyed.
Open the inventory and place the Repeater Unit in the quick bar. Then, select it and clock on the panel, just like in the screenshot. Let Vargas know that you have succeeded and head towards Highpool.
Concerns the quests:
If there is someone infected on your party, you need to complete this quest to save them. Kathy Lawson is researching into the cure at the main complex. First, you need to collect 10 Pods specimens for her, which should not be too difficult, considering that there are many of them at the Center. Remember that Pods burst if approached so, it is best to fire at it from afar.
The second step is to go to the mushroom cave for the Fungicide. Go down to the basement and use the computer to open the Southern air lock. In the mushroom caves, there are lots of Pods so, be especially careful while fighting them. Also, there are lots of Pod People and insects here - you can try and use the Pods against them. Fungicide is in the rooms past the caves. You first need to talk to Skinner, who has barricaded himself, and have him open the door (you simply need to tell him that you are with the Rangers). Take the poison to Kathy (she is where Rose used to be, at first), she will develop the cure and heal Matt Forrestal (talk to him afterwards and he will tell you the combination for his safe, as a reward).
Once you disable irrigation (the pumps in the Eastern and Western fields), you will receive vials of the antidote from Kathy and she will ask you to pour them into the tank at the main complex. With the antidote you can also heal your party members, if infected. After you pour the serum in the tank, all in the complex will be cured. Pouring the serum into the reservoir also heals all the infected, around the complex. Return to Kathy for your reward. Also, talk to Matt and he will give you a key and a combination for the safe in his office (80085).
Concerns the quests:
You receive this quest during your first conversation with Kathy Lawson at the Main Complex. Try to rescue each employee of the Ag Center in peril. It is a flexible quest, with no rigid frames like, e.g. "Rescue at least five people". If possible, you should help everyone that you can. This means the scientists attacked by the mutants and entangled with the vines (you can use either Wildlife or Surgeon skill - if you lack both do not touch the vines at all. Instead, disable the irrigation, which will free all of the imprisoned anyways). Still, you will have to click on each and every one of them. The pods that have been holding them down will be dead, but the scientists are unable to free themselves) and Matt Forrestal, who also is infected. If you develop the cure, Matt survives and tells you the code for his safe, in return. Also, you will then complete this quest automatically.
The Western part of the central complex. Julio is being attacked by three feral rabbits. If you have the Animal Whisperer skill, you can sneak up to the rabbits and soothe them down (only one character, have the rest stay behind). Alternatively, you need to kill them, which is very traumatic for Julio. You can then collect rabbit legs from the rabbits, which provide +1 to luck.
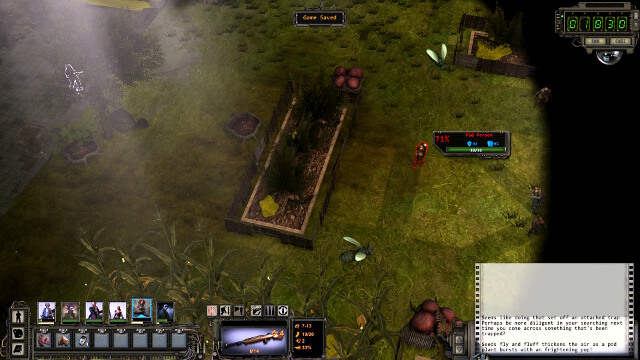
The Eastern part of the main complex. A group of scientists are under attack from mutants and Pods. It is best to sneak up from behind, just like in the screenshot (take the passage close to the basement), and attract the attention of the mutants immediately, which will encourage them to come closer. Take advantage of the Pods, for AoE damage, but also make sure that none of the scientists is within reach.
The basement, the mushroom caves. Skinner wants you to take him to the exit safely. He will follow you, if you consent to that. Then, you only need to turn towards the ladder to the main complex to complete this quest. It is best to clear the caves before you start this quest.
Eastern Fields. Deal with the mutants attacking Ryan. Ryan asks about Rachel from the Main Complex, who is most probably dead right now (she explodes after you meet up with her for the first time, the potential way to save her is not to meet up with her, develop the cure and pour it into the tank. You can either lie to him or tell him the truth. Remember to talk to him, later on, at the Main Complex, to complete this mission. He will be angry at you, for having lied to him, but you can calm him down and cheer him up, thanks to dialogue options.
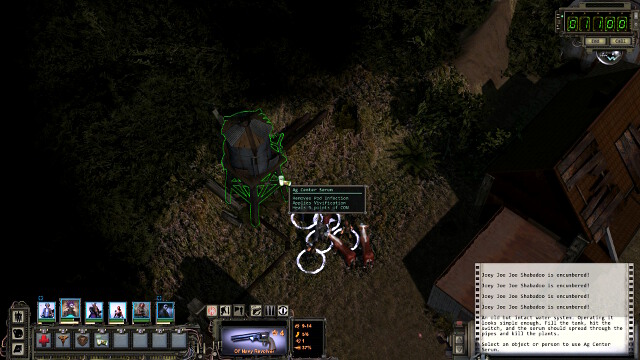 Pouring of the serum to the tank
Western Fields You need to go to three locations in the area (number 2 on the world map) and pour the serum from the Ag center into the water tank in each location (you need to obtain it in the first place). You receive this quest after you save Sue with the Surgeon and obtain from him the information on where he sent the pigeons. Alternatively - if you have no way of rescuing Sue, - you can figure out what happened by looking through his belongings and the nearby dovecot. . It is best to go to these three locations (the infected village, the Infected Farm and the Infected pumping station), after you have dealt with everything at the Ag Center. Your visits there boil down to fighting lots of Pod People, including the improved, glowing model s, you should be well equipped and prepared for the fight. In general, in all three locations, there is nothing, apart from the tanks and several stashes but, at the infected village, you can also find the local sheriff and the villages that locked themselves up in Jail. If you free them, you will receive a key from the sheriff, and a safe code (tap in the digits corresponding to the letters). Of course, you can do without these two, if you have Lock picking and Safecracking.
If Sue is alive, you can return to him afterwards and you will receive a reward: an armor +2.
Highpool is under attack from the Wreckers and it resembles a frontline, rather than a calm city. You will have to cut through the waves of gang members, systematically, deeper into the location, up until you reach the dam. In the city, there are many fences and weak walls, which you can destroy to find shortcuts and sneak up to the opponent. In combat, it is also a good idea to use the surroundings. For example, soon after the start, you reach a mortar that bombards the town. If you have an expert in explosives, you can use the Demolition Man skill on it, to alter the trajectory and fire at the Wreckers. You can also fire at the mortar from afar, which will blow it up and kill the nearby enemies. The city also abounds in traps so, it is a good idea to keep your perception and the defusing party member ready.
 You access the main part of the city on the crane
The attacking gang turns out not to be the only problem. The Irrigation system has been destroyed and, only after you go down to the underground part and fix it, the city will be completely safe. Only then will you be able to mount the Repeater Unit. To learn more, see the next chapter.
After you have dealt with both issues (the Wreckers and the irrigation system) Highpool will be safe again. The townsmen will then have to elect a new mayor. If you complete side quests and help the men (e.g. you go to destroy the Wreckers' base once and for all), Kate Preston will win the elections the town will be back under the Desert Rangers' jurisdiction. If you are lame at helping them, or you ignore helping them at all, the town will be seized by the Red Skorpions. In the city center, there also is shopkeeper Harold (he does not want to trade with you, if you fix the pump at that room), and a medic dr. Scott Warner, who heals your entire party for free, if you need it (he stops if you attempt to rob his locker).
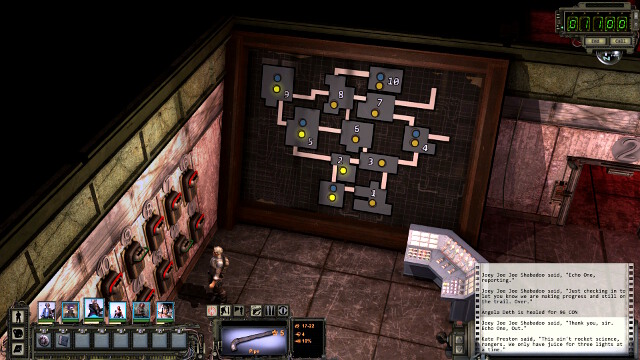
Your main quest here is to open four valves to decrease the dangerously high pressure. It is difficult to move around the tunnels, due to power shortages, which will disallow you from opening more than three gates, at a time. The map of the underground and the system of opening of the individual gates can be found right at the beginning of the location. The blue lights are the locations of the pumps, where the yellow ones signify the opened gates (e.g. in the example on the screenshot, you can access rooms 2, 5 and 9). Use the buttons to unlock the individual rooms and move deeper into the location. It is best to leave one of the characters at the panel and have them open the gates, whereas the rest is exploring the tunnels.
The above piece of advice is true for the basic version of the game. When it comes to the Director's Cut, all of the hatch may be opened at the same time. You do no need to leave anybody in the room with the map, and clear the entire area with the entire group.
In the tunnels, there are lots of mutated bugs with strong armor but, this should not be a challenge to you. Once you open all of the main valves, open the main valve also, close to the control panel. Then, all of the rooms will be opened.
The most important objective for the visit in the underground - the power switch for the Radio Tower is in room 6. Also, remember to restore power before you leave!
In the destroyed Highpool there is not too much to be done, because nearly everyone is dead. You will have to fight animals that came to feed on carcass, or the remnants of the Wreckers but, at the experience level that you have already attained, after the visit to the Ag center, they will not be a challenge to you. You can find the surviving Sean Bergin, who asks you to deal with the Wreckers at their Citadel - still, you are not rewarded for this one. Approach the destroyed Radio Tower. Vargas orders you to find another tower in Damonta, not far away to the East. To find the location of the city, you first need to go to the Prison.
Highpool has been attacked by the Wreckers, led by the Jackhammer. Head deeper into the area. Along your path, you will have to fight the Wreckers on a regular basis. Take advantage of all of the covers around and side alleys. Also, it is a good idea to climb onto the rooftops, for greater range.
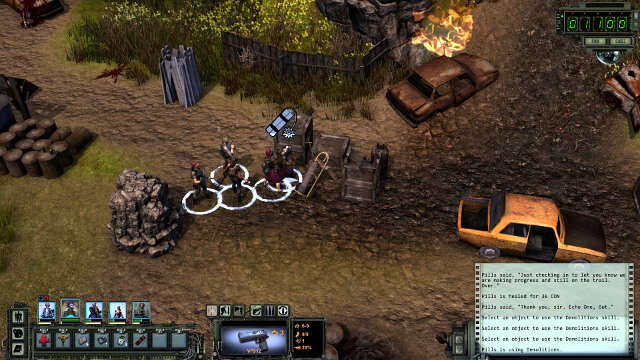 "Fixing" of the mortar
Right before you start climbing towards the dam and the Radio Tower, you will run into the mortar firing at the city. A shot at the mortar, from afar, blows the gun up and kills all of the enemies around it. Also, you can kill them in a more traditional way, and change the trajectory of the shell, later on, by using the Demolition man on the mortar. You will then fire directly at the Wreckers. Do not fire if you do not change the trajectory, because you will then hit the city.
Soon, you will reach a location, where you see a fight between several citizens and the gangers. Try to kill the enemies, as quickly as possible, to save the locals, for which they will be thankful. At the top level, Jackhammer are getting prepared to blow up the dam. Focus your attention on Jackhammer, because she may become really troublesome, if left alive for too long. The opponent is not too strong, but she is fast and she can attack several times per turn. Additionally, she often changes her targets, blocks the line of fire or the passage. In herself, she is not capable of harming you in any substantial way, but it would be a better idea to drag her away from other targets, such as gunmen. Apart from that, she has a lot of health points, so even if you focus on her only, you are going to need, at least, several turns to kill her. Killing all of the gangers will lower a crane that will take the entire party to the town.
At the same time, the crane is the Radio Tower that you need to mount the Repeater Unit onto, as of now, there is no power supply to the tower. Go into the underground of Highpool to restore power. Due to the system overload, moving around may be difficult. A maximum of three gates may be opened, at the same time. The power switch for the Radio Tower is in room 6. Using the consoles close to the entrance, open gates 2, 3, and 6 and you will gain access to the switch (in the basic version of the game. In Director's Cut you can go there straight away). Along your path, you will have to eliminate some bugs but this is not a problem. After you restore power, return upstairs and mount the Repeater Unit on to the tower. Then, contact Vargas and head towards the Ag center.
Concerns the quests:
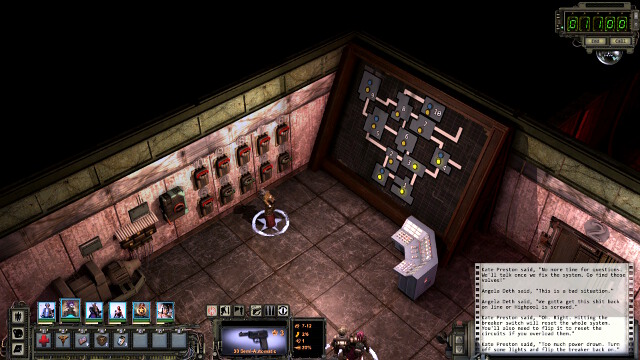
IN the underground of Highpool, you meet Kate Preston, who is having difficulties with pressure. To save the day, you need to open valves on five pumps (the blue lights). Note the two rows of buttons, on the screenshot, on the wall next to the main computer. They open gates to individual rooms (yellow lights) but, only 3 gates can be opened at the same time. Leave one character (the weakest one) to attend the buttons, whereas the others need to go ahead. In the rooms, there are swarms of mutated flies and larvae/ Nothing too demanding, but you should first visit the shop of Highpool, if you are suffering from shortages.
Hints provided below only work in the case of the basic version of the game. When it comes to Director's Cut, limit on the locks that can be raised simultaneously has been lifted. Therefore, you do not need to leave anybody by the main computer and you can explore the entire complex in any order you want.
Start in room 2, where you find a spare valve, which you are going to need in a moment. From here, go around the complex and head towards room five, where you find the first pump. Then, to room 9 with another pump, then through 8 to 10, where there is a damaged pump. Replace the valve with the one that you have found in 2. the last pump is in room 4. Also, remember to restore power supply, for the Radio Tower, in room 6. Once you save the day, there still is one more pump to start, close to the control panel. The happy Kathy returns to the surface to run in the elections for the new Major. You will witness the elections after you return to the surface.
Depending on whether you have already completed enough side quest, or not, before you fixed the system, Kathy will either win, lose or she will tie and the elections will be put off. Then, start helping the citizens, on a regular basis, talk often to Kathy - she will keep you informed on the polls in the town. Once she tells you that she is bound to win, you can start the elections. Kathy will become the new Mayor and the town will return under the jurisdiction of the Desert Rangers. Talk then to Kathy at her new office (the same building as the shop), and she will reward you.
Concerns the quests:
From Sean Bergin you will learn about the whereabouts of the HQ, right after you enter the city on the crane, for the first time. You can get there to destroy the gang, once and for all, and search their stashes (number 1 on the world map). There, you find a statue that provides every party member with +1 skill point, two heaps of stones that require a shovel, several crates and one safe that is difficult to crack. You can also complete this quest at Kate Preston's, once she becomes the Mayor.
You also receive this quest from Bergin, after you visit the destroyed Highpool, after you have been to the Ag center.
The cutter HQ is a small location comprising a tower and several bungalows. Most of the opponents have firearms, so remember to take cover. With the exception of the shooter on the tower, all of the opponents are exposed and are easy to defeat.
Talk to Adam Doochin, to learn about his missing dog Ha-hau. If you decide to find it, he will give you its favorite toy. us the toy on the dog (close to the cemetery), and he will start following you and you will be able to take it to Adam. You do not need to toy, if you have the Animal Whisperer skill with several points, which you need to use on the dog.
Note - if you try to interact with the dog without the toy, he will attack, on the second attempt and you will have to kill him, which will decrease the opinion about the Rangers that the citizens have.
Concerns the quests:
 A valve in the grass
You receive this quest right after you enter Highpool, when you are approached by Mark Stachowiak, who asks you to put out the fire. Close to his house, you will find a damaged valve to the nearby pump (if it is difficult for you to find the valve, use Perception and highlighting). put the valve in place. Then, use Mechanical Repairs on the pump. If you do not have it, talk to Stachowiak and use Lick Ass to put out the fire. If you fail to put it out in time, the house burns down, which will act to Bergin's advantage in the elections.
Cry asks you to drive away the local kids. Give them a pack of cigarettes or the slingshot with bullets. You can find the slingshot on the body lying next to the first destroyed building that you see, after you enter Highpool (it is where you fight the Wreckers). The Bullets are in the game world as junk. Then, talk to the Indian and she will offer to join your party. Then, open her get (with Lock picking or by obtaining the key from Sean Bergin at the crane). If you open the gate before you talk to her, after you drive the kids way, she will escape and you will not be able to include her in the party.
Then, you can go to Harold at the store, from whom you can obtain Cry's equipment.
 The entrance to the tunnel - you discover it after you approach the manhole
This quest starts at the house of Jess-Belle. Her dowry is endangered because the Wreckers want to steal it. You can drive them away with words (it requires Hard Ass 4), with fists or simply, let them rob Jess. Regardless of what you do it turns out that there is a note in the safe, where Jess's father informs her that he lost her dowry playing cards. You can promise that you retrieve the dowry and that you return it to Jess-Belle. You can find the dowry in the safe next to the tent in the tunnel, to the North of the town. It is a revolver. Return to Jess with the dowry and tell her that you keep the gun for yourself (you do not receive any reward for returning the gun).
You will not be allowed to perform the quest for Jess, you deal with the Wreckers and you do not read the note - she will still be convinced that her dowry is in the safe.
Alexey gives you a note. Give it to dog Laddie at the town center and he will give you a stoe for Alexeya. Once you take the stone back, you will be able to buy medicine and trinkets from him. There is a sporadic bug in the game that disallows you to speak to the dog (no conversation button). Either way the quest may end up in the death of one of the sides.
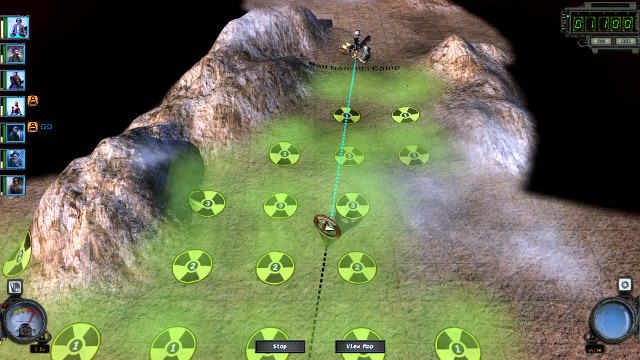 The way to the camp is highly irradiated
Rail Nomad Camp is in the North of Arizona. It is a completely optional location where lots of things are happening so, it pays off to visit it. You find the camp map right next to Ace's corpse, near the Radio Tower. If you missed it, you can still discover the location of the camp, e.g. during a conversation with Vargas, or with Matt Forrestal at the Ag center. Before you get there, I recommend that you buy Rad Suits. The camp is in a highly irradiated area and the radiation reaches level 3. You can buy the Rad Suits at the Citadel. They provide you with protection against level 2 so, you will sustain slight wounds anyways but, they are not going to be too dangerous. Of course, you can attempt cutting through without protection, but you need to take heavy irradiation into account.
The cap itself is what remained of an old railway depot from before the war. Two warring tribes of Topekans and Atchisionians, who are at war with each other, dwell here. The reason for the war is that the Topekans have the Golden Spike that belongs to the Atchisionians, and the Atchisionians have the Brake Shoe belonging to the Topekans, and neither of the sides sees any means of ending the war, before what has been stolen is returned. You can either join either of the factions or bring about the peace. The Topekan camp is chief Kakkehbah's place. He is very proud and he does not wish you to meddle with their affair although, if you happen to obtain the brake shoe, he will gladly accept it.
At the camp, there are many minor quests that are always worth being performed for more experience. Finally, you can include, as many as, three new NPCs from this region. Also, if you fail to save either the Ag Center or Highpool from destruction, it is here that you can mount the first Repeater Unit.
Topekan's headquarters. Here you will find their leader, Kekkanbah, and the Golden Spike which Atchisonians want to get. From Kekkahbah you can learn the background and reasons of the war. Kekkahbah's attitude towards the guardians will differ depending on whether you saved Ralphy and helped topekans in other matters. In general, he will not want you to meddle in the conflict, even if he will be friendly towards the team.
You can tell him about the wounded topekan which you met when entering the Camp and about the drug dealer. He will also give you a task to destroy a local gang that is destroying the railroads - you will find them in the Atchisonian part. For killing them you will receive 50$.
Don't try taking the Spike yet and don't try to even get close to it as it would probably be a suicide. If you plan to help Atchisonian during the conflict, then it would be much more wisely to sneak up through one of the side entrances, and even better - turn off the power in the building by using the generator that can be found outside, at the back.
Kekkahbah will not want to talk with the party and you won't be able to complete any quests related to him after you steal the Spike, even if you do it silently. He will tell you that he is busy.
Depending on other events in this location, you can later find Jessie here. She will be imprisoned by Kekkahnah. You can negotiate her release using dialogue abilities or take her out by force.
The Atchisonians live in far less impressive conditions than the Topekans. They starve and they are at the brink of exhaustion. Their chief Casey James is much more humble and it is easier to convince him with the idea of peace, which is very close to achieving peace.
This is a much poorer and more primitive region, where there is not that much to do. During your travels, you need to watch out for the groups of Rail Thieves who attack you on sight. It is best to go left, instead of taking the main path ahead. The group of the enemies ahead take advantage of land formations and it may be quite problematic to fight there. If you get them from behind, you will surprise them and be at a disadvantage, thanks to which you will not be surrounded on three sides. While at the Rail Thieves' terrain, you should pay attention to the alarms on the crates - they do not make that much difference, but triggering one does not summon, immediately, all enemies in the area. You need to watch out for the mines buried in sand - either disarm them (demolition man) or use them and try to lure the enemies onto them.
The most just way to end the war is to bring about peace and make both tribes cooperate. The most "Chaotic evil" way is to kill both chiefs and their men, i.e. to cause utter chaos at the camp. Note that, from the player's point of view, both solutions are equal. Both of them end the conflict and reward you with lots of experience.
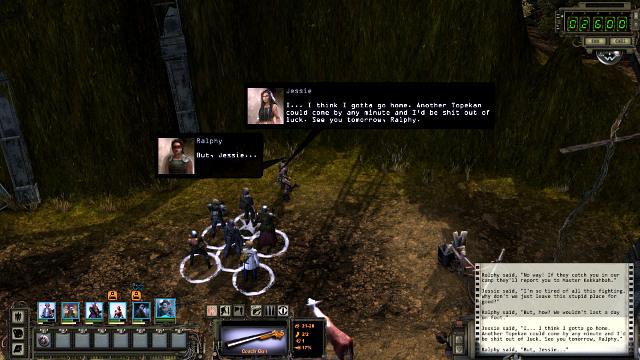
The whole story starts right after you enter the camp, when you are approached by a girl named Jessie. She asks you to save her friend Ralphy. Use Lock picking, or the shovel on the smaller totem to save him. Ralphy himself does not matter, although he can tell you about the conflict (you can also include him in the party later on, by taking him home), but Jesse is the key character here. She is the daughter of Casey James - the Atchisonian leader. The Atchisonians have far less people and poorer equipment so, they conduct the war of attrition, by planting bombs in various spots of the camp. After you save Ralphy, you can find Jesse close to the playground. To the right of her ( the screenshot) there is a bike with a bomb planted on it (you may miss it without Perception, Angela will notice it immediately, if she is on the team) Disarm the bomb and you will save Jess.
Go to Kakkehbah's. Ask him about the war and the accident that cost him his hand. Ask him why he cannot conduct train to which he answers that even the strongest man needs both hands. Go to the Atchisonians's camp to visit their chief.
Although James does not want to wage war anymore, he is desperate to continue it, as long as he does not get the Golden Spike back. talk to him about the bombs and ask if he really wants peace. Then, mention that Jesse (almost) died in an explosion. Tell him that he should end the conflict and both tribes can use the Golden Spike to repair the railway. Then, he will agree to meet Kakkehbah. Return to the Topekan part.
 Everyone will be very happy
During the conversation with Kakkehbah, he will ask why he should agree to peace. Tell him what he told you earlier, that even the strongest man needs two hands to conduct a train. Kakkehbah agrees to the meeting. Go to the Atchisonian gate, where you meet James and his men. Talk to James, then to Kakkehbah and present the conditions of peace. Once both of them reconcile, James cuts his hand off and Kakkehbah gives the spike back to him and both tribe will reunite
It is possible that Kekkenbah will imprison Jess and will want to use her as a bargaining card. You can convince him to free her immediately, or right after signing peace - for Casey it is a sufficient argument but, you still need to convince him that the Golden Spike needs to be driven into the railway.
1. Obtain the Golden Spike from Kakkehbah and bring it to James
The Spike is in the middle of the room with Kakkehbah, but you cannot simply approach it, because the chief's bodyguards start shooting. If you want to, you need to use the forcible solution, but it is much better to break in through one of the side entrances (you first need to deactivate the alarm at the gate, disarm a trap and finally open the gate with Lock Picking). Then, the fight is much easier and you will not be surrounded on all sides An even better solution is to steal the spike, after you turn off the lights in the room, silently. If you pull this off, without being seen, the Topekans will assume that the Atchisonians stole the Spike and you will still be able to roam freely around their camp (otherwise, Topekans attack on sight).
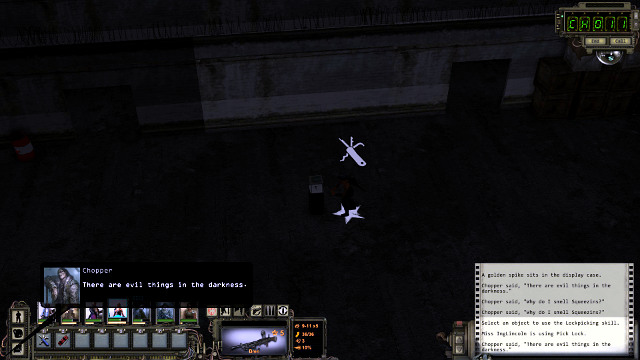 It is the safest to steal the artifact in the dark
You can turn off the lights on the generator at the back of the building. Before you start tampering with it, disable the alarm. When you cut off the power, Kekkahbah will send someone to see what happened. Quickly, kill the man that comes - if there is nobody around, nobody will know it was you. Now, you can enter through the main entrance and sneak up to the Spike. It is going to be completely dark so, one man will have no problems getting there. Remember that the Spike ids locked up so, send out someone with Lockpicking. Then, simply exit the building and the job is done. After you disable the lights, you need to be quite quick, because the Topekans light up torches and it is going to be bright again.
Note - after all of that, Kekkahbah is not going to talk to you - he will only say that he is busy because the Atchisonians stole the spike or, if you have talked to him earlier, he will know that it was you who stole the spike, which also translates into the hostility towards the Rangers.
2. Obtain the brake shoe for Kakkehbah
It is much easier to do that, than to obtain the Spike. The shoe is hidden in the swing, in front of James's house. You only need to destroy it. If you want to play fair and learn where it is, you may intimidate James (Hard Ass 5) or tell him about the bomb and Jessie and demand that he returns the shoe - in both cases he tells you where it is hidden.
3. Kill either of the chiefs, or both - also the death of the chiefs ends the conflict. It is much easier to kill James, because you will only fight with him and Chisel. Kakkehbah is tough, because of the guards. It is best to sneak in, through the side entrance. Have several grenades prepared to kill Kakkehbah immediately - he has an automatic gun on him and, if you allow him to attack, at least once, the chances are high that someone on the party dies.
Right after you enter the camp, you will be approached by Jessie, who wants you to save her boyfriend, who is drowning in the lake. Follow her there.

Use Brute Force or the Shovel on the totem, with the guard at (the screenshot), to save Ralphy. Once you are done talking to him, he will return to his house in the central part of the camp. A witness will notice you saving him and he will tell that in the city, which will improve on your reputation. After you visit Ralphy's home, later on, his mother will ask you to accept her son in the party.
Take Ralphy towards the playground, where there is Jessie. They will start talking. There is a bomb in the bike, nearby, which you need to disarm - to detect it, use Perception. Alternatively, it will be spotted by Angela, if she is on the party. After that, Jessie returns to the Atchisonians's camp, and you can accept Ralphy back in the party, which ends the quest. If you fail to disarm the bomb, Jessie will run into it and die, which will make Ralphy very sad.
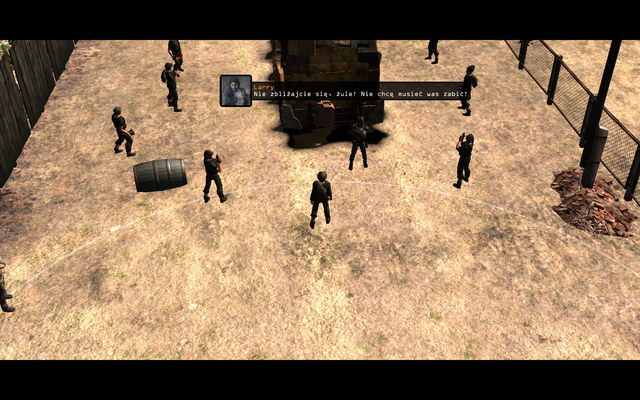 Regular customers are drunks
While you are visiting the local bar where you've met Samuel you can also speak with the owner about his product named lizard juice. He doesn't want to initiate any bad PR so he won't tell you about his problems however when you will buy even one bottle you can speak again with Gorkinovich and you will be able to complain about the low quality of the liquor.
Notice! If you want to initiate a conversation about this you need to have the Kiss Ass skill on level at least 4. If you don't have it you should not initiate this conversation since later you won't be able to do it once again.
After your conversation a new location named Gorkinovich's Distillery will be marked on your map. Go there when you will have some extra time. Once you will get there you will see the reason of stopping the supplies delivery. A bunch of drunks will try to rob a supplier named Larry. You have now few options to choose from:
After you will finish your job you will hear about the second problem. Two groups of honey-badgers (6 of them each) live on the farm. To complete the quest get rid of them. You will get an additional 20% discount which will. You can use these discounts in the Ben's shop in the local distillery. Gorkinovich will give you only 30% discount (or none). If you will deliver to Ben Desiccated Juniper Berries from toaster in the Happy Valley you will receive 125$ and 3 bottles of Special Lizard Juice (+2 Luck, -1 Coordination, 200 seconds).
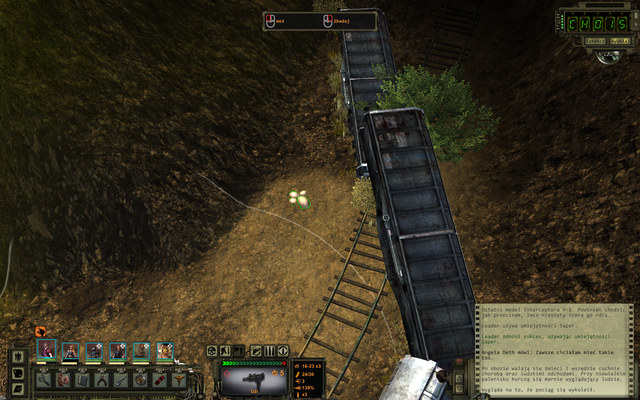 Mushrooms at the car
The dealer in the railway car, in the Eastern part of the map, wants radioactive mushrooms. You can find them at the North-Eastern end of the map. You receive nothing in return, but you will be able to buy the drug that the dealer is preparing. After the transaction, you can tell on him to Kekkahbah, or kill him and tell the chief about this (you can do that earlier also, but some more money will do)
Concerns the quests:
After you enter the Camp, you will see an Indian lying on the ground, who fell victim to a bomb trap. You can help him, if you have the Surgeon skill. Tell Kekkahbah about him.
In no-man-s-land, you find Holliday's supplies. You will get a discount if you return it to him.
Concerns the quests:
Quarex at the arcade wants you to find the CD-i console. You can buy it from Honest Jon - an antics dealer (the other consoles) at the Atchisonians's camp. For bringing the CD-i, you will be rewarded with 100$, but you can also take the console to Mercaptain at the Citadel, for which you will be able to pick one more item in the requisition. Of course, Querex is not going to like the latter solution - he accepts the console but you will not be rewarded.
Kill all members of the four Rail Thieves groups, in the Atchisonians's camp. They are not too much of a challenge. Watch out for the mines buried along the path to their HQ and for the alarms in their lockers.
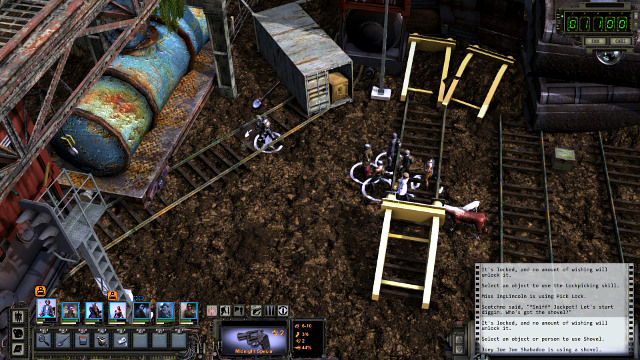 Dig up the supplies
Scotchmo will comment on whether he can smell his booze, depending on where you are. Liquor is buried close to Holliday's shop but, to get to it, you need to walk around, across the junkies' town. To dig up the squeezins, you need to use the Shovel. You can find the shovel at the cemetery, in front of the Ranger Citadel (you started the game there) or in front of the Level L'Upe Mine (number 3 on the world map).
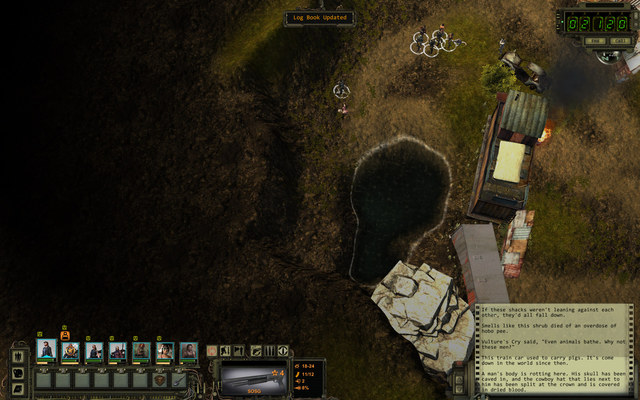 The corpse at the pond
At the Hobo district, you find a corpse and the gear of the Hell Razor. pick up the star and the journal, and take them to Vargas at the Ranger Citadel. Vargas will task you with going to Darwin and finding out what is going on there. In Darwin you will find a colony of the infected mutants. Once you heal them, they will ask you to keep their existence a secret (they will attack you if you refuse). To end this quest, return to Vargas and tell him what is going on in Darwin (the truth or lie - if Vipula from Darwin is on the party, she will leave if you walk back on your promise.
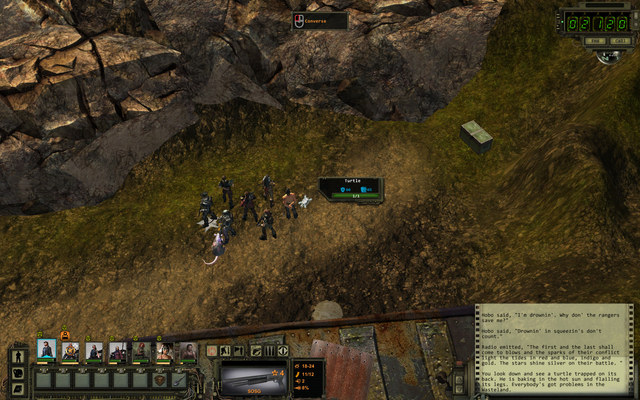 A turtle upside down
In the Northern end of the map, past the Hobo settlement, there is a small turtle lying on its carapace, which definitely needs your help. Use the skill of Animal Whisperer to help him. Then, he will go its own way. However, you do not know that it wants to return the favor. At its pace, the entire way takes, about, 20 minutes so, complete the other quests, in the meantime. Then go to the South, close to the waterfall.
 The turtle's treasure
On the left, close to the tree, you will note an empty shell and a small earth mound, which you need to dig out with the shovel. You will find there quite a few valuable random items.
Darwin is a minor and optional location, which is important, due to its place in the first Wasteland. The town is to the East of the Rail Nomad Camp. You can easily discover this location, e.g. by talking to Thrasher at the Ranger Citadel or by taking Hell Razor's Journal back to Vargas (you can find it at the Rail Nomad Camp). The way to Darwin is highly irradiated so, before you go there, buy at least the basic level 2 Rad Suits, at the Citadel.
 A fight with a group of mutants
Soon after you come, you encounter a group of plague victims, whom you need to fight. They are sluggish but they have 105 CON and there are quite a few of them, so be careful with each fight.
After the battle, take explore the area thoroughly. Near the entrance to the area, there is a stone obelisk . It is a statue that provides every party member with 1 skill point. Apart from that, Darwin is not too stunning, as seen from the outside so, after you search all the corpses, head towards the descent to the underground.
 Rose from Ag center opens the door
To open the complex, you can use your hacking skills on the nearby computer, or the door What is interesting, if Rose is on the party, she tells you that she used to work for Finster (times of Wasteland 1) and she opens the gate herself, because she knows the combination. You can learn that code at the Rangers' Citadel, by examining Finster's mask exhibited at the museum. The combination is Proteus - 7768387.
Right after you enter, you will be infected with doctor Finster's disease (from the first installment). It decreases charisma by 4 and intelligence by 2 (if you progress to the next level, at the facility, do not contact Vargas up until you remove the disease, to prevent loss of points). If you want to continue in the wastes, you need to find a cure. You have lots of time for that (3 hours) so, there is no rush. In a moment, you will run into Jan. If Rose is in the party, you will also see a cutscene featuring the two of them). Jan instructs you to find and enable the purification system. At the same time, you will be asked not to kill the mutants here, if possible. A bit ahead, there is a descent.
With the high Computer skill, you can open Jan's isolation and expose her to the infection, but she will then attack you; also Rose will fight on her side.
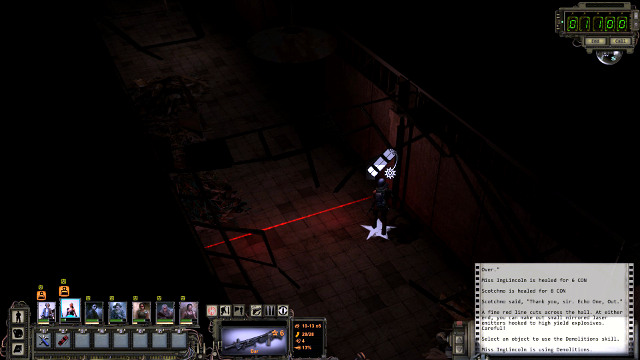 watch out for the traps along your path
Downstairs, go to the door on the right. Among the junk, close to the ladder, there also is a screen. There are two paths to the destination, this one is better, because you do not have to fight mutants here. However, it is not for everyone to follow - the required abilities are: Perception, Sapper and Alarm disarming. If you have any problems following this one, take the other one across the door opposite the ladder. First, you will have to face mutants and several traps in the Northern corridor. First, deal with the electronic locks in the door and follow the corridor, while watching out for the mines - they are visible thanks to the red laser light across the room. The first thing is to spot them - they have been mounted onto the projecting fragments of walls. You can disarm mines with Alarm disarming. , but you can shoot them, just as well - (use the cheapest ammo). You will reach door with electrical lock. The password is Irwin - 47946. Past the door, you will notice a reservoir with a nondescript liquid - shoot it with any weapon at a longer distance (it explodes on impact).
The next stage is the room with Nightmare. It is surrounded by three turrets of medium constitution (CON 155), and a decent firepower. You can take cover behind walls. Thanks to which turrets hold their fire. After you destroy the one opposite the door, you can shield yourself from the fire of the two remaining ones.
You can open the cage with hacking (at least 4, 5) or a password (Iceburg). Nightmare will then want a treat. You can serve it with any - human or animal - body part or feces. It will then start to follow the party. You can also try and kill it - it has as many as eight thousand CON, but this does not pay off. You do not get anything in return and you get very little experience. It is much better to include it in the party. This is not a regular NPC and more like a pet that you have used Animal whisperer on.
Open the door on the right. You walk into a room with crates, a safe and a venting shaft. Walk through the shaft.
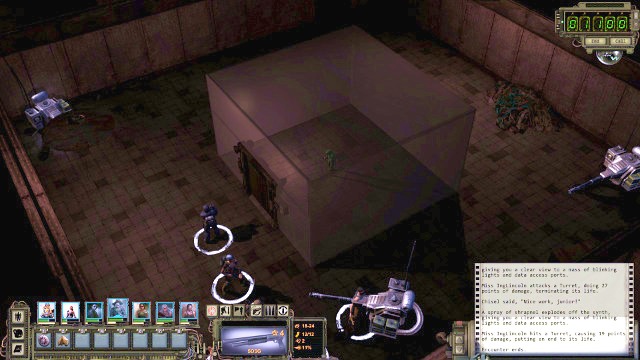 Nightmare
At the lest stage, you need to disassemble the door alarm, or the entire plan will fail - if you open the door with the alarm on, you catch the attention of mutants there, who are plentiful. Right after you pass through the door, go to the computer on the left side shown in the screenshot )do not enter the corridor or the mutants spot you) and disable the venting system, which removes the illness from the complex. From now on, the mutants will not attack you. Now, go into the corridor and, across the passage on the right.
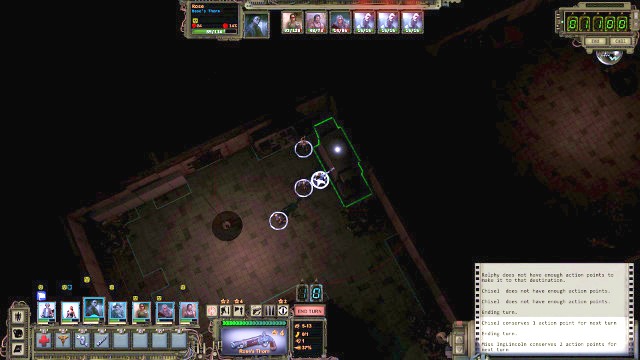 Vent system controls
You reach a room with locked doors in the upper part. To open it, use Alarm repair. Inside, you find cure for cancer, which doctor Tideman at the Ranger Citadel wants, as well as a computer with the and a computer with Wasteland game disc in, which you can give to Flintlock at the museum (in return, you will receive an adornment +1 Perception and +1 Luck).
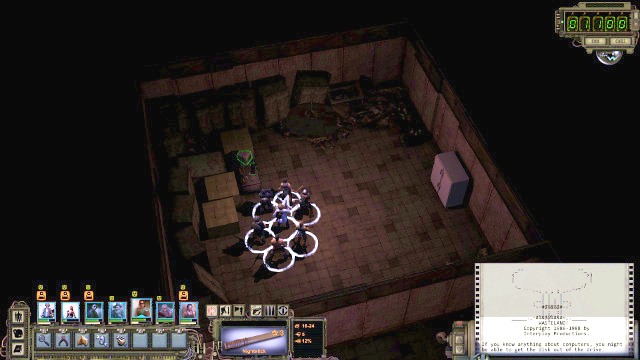 The computer with Wasteland, in the cupboard at the wall, there is the cure for cancer.
Then, you can return to Jan. She asks you to promise her not to spread the word about Darwin. If you agree, you will be free to go. You will get a lot of experience, on condition that you left every mutant unharmed. This also marks the location of the secret shrine. While you are leaving Darwin, you will be accosted by Vipula, who wants to join your party. If you refuse to keep the secret, you will be attacked by Jan and other mutants. Even if you promise that you keep the secret for yourself, you will be able to tell the truth to Vargas and the others the truth, at the Citadel (Vipula leaves the party if you do that).
You will be sent to the Prison after the failed attempt to mount the second Repeater Unit. The main task here is to find information on the way to Damonta. Prison used to be a Ranger HQ fifteen years ago, but it is now occupied by a former gang - Red Skorpions, with their jurisdiction over all the locals and visitors so, technically, also your team.
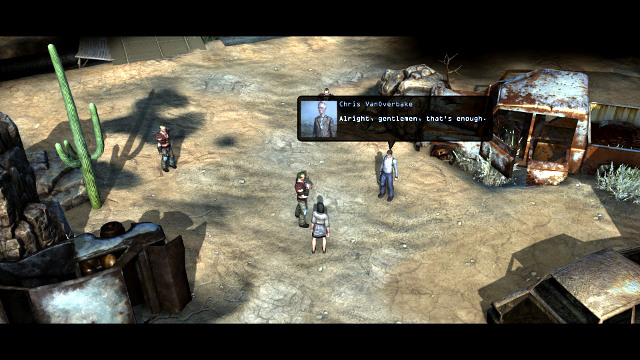 You need to pay a tax if you want to explore the valley freely
In fact, this is a quasi-optional location. You do not need to worry about the Skorpion business and, what is even more, during your first visit to the region, you will not be able to defeat them. You will learn about Damonta after you talk to Red and this conversation is, actually, everything that you need to do here. However, you can help the locals, a bit and, optionally, decimate the ranks of the Red Skorpions. In the central part of the map, you will be accosted by a tax collector Chris VanOverbake, who demands a payment for the weapons that you have. If you do not pay, he will turn hostile. If you do, you can move around the valley freely.
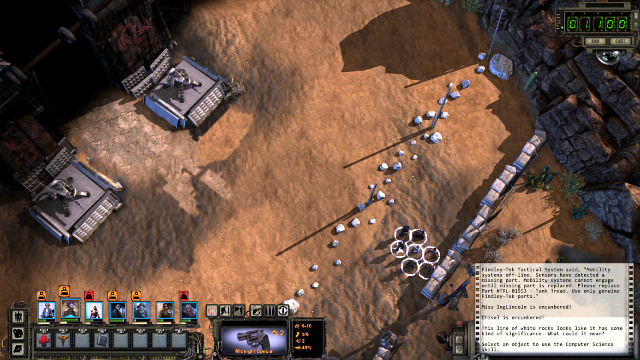 The stones delineate the safe zone
It is a, typically, combat location where you cannot do much, from the position of the story line. You will be fighting the Skorpions over and over again (regardless of whether you paid the tax at the valley or not), which may be tough and, what is even more, you will not benefit from them (apart from experience, gear and satisfaction, that is), because you will not be able to access the Prison itself anyways because of the powerful turrets that guard the entrance.
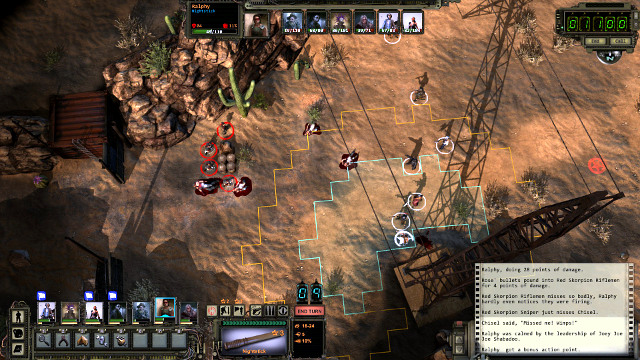
The only safe location (as long as you keep a low profile) is the farm atop the hill, but you need to cut through formidable fortifications of the Skorpions, first, to reach it. First of all, either deal with the enemies in the middle, or go left across the mine field (deactivate the mines, of course) to walk around the guards. Then, you still need to cut through the well-manned outpost, up the slope. First of all, you need to watch out for the grenades and heavy machine guns. The best solution is to use a single sniper that attracts the attention of the opponents and lures them out into the open, as shown in the screenshot. Fighting over a flat area, where the Skorpions have nothing to hide behind, is much easier.
You will be able to enter the Prison and deal with Danforth only after you pay a visit to Damonta.
 Enter the password to reach Red safely
The aim of your visit to the prison is to learn about the way to Damonta. After you ask anybody about Damonta, you will get an answer mentioning Red, who you need to contact. You can find Red in the North-Western part of the map. Unfortunately, the path that leads to him is being guarded by turrets. To outwit the turrets, you need to enter the password to the nearby computer. Red changes the password regularly. You can ask the locals to give it to you, but none of the answers is the correct one. The password for the gate is ROSEBUD and there is no way to learn it. It is an allusion to the first installment of the game, where it used to be the password to the crypt with the most valuable treasures of the Caretaker Cult. Red will tell you that you need to be as old as Vargas to know that, after you mention this.
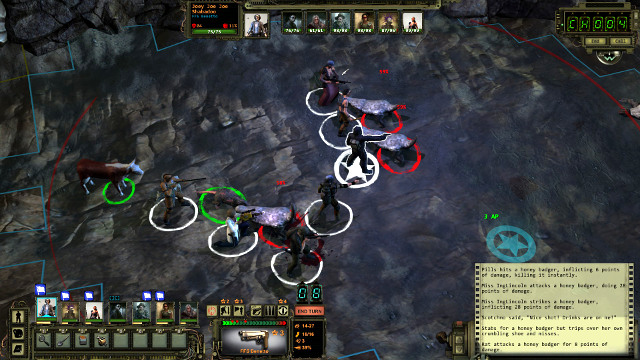 In the cave, you are going to fight mutated animals
An alternative way to reach Red is across the cave in the Western part of the map. To gain access, you need to open the locked gate, e.g. by force. Inside, you will have to fight a group of tough honey badgers (they use weapons with high piercing value). At the fork, turn right, where there are several wolves. Once you deal with them, you can leave the cave. If you go left, you will run into several toads (watch out for the weapons that they rip out of hands) and several lockers.
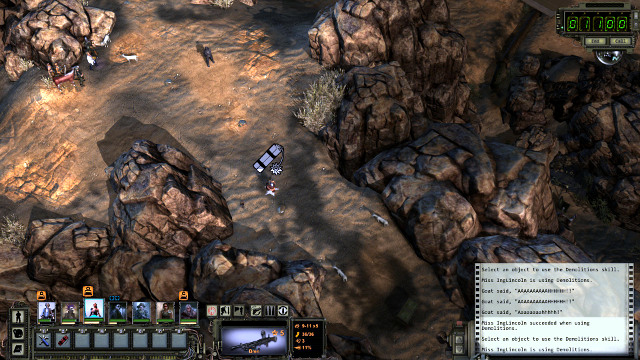 Do not forget to disarm the mines, while exiting the cave
After you exit the cave, there are still several mines between you and Red. Remember to use Perception and disarm them. Red himself is not willing to share the information about Damonta, at first, but you simply need to mention that everyone you asked, directed you to him. To get to Damonta, you need to pass the Canyon of Titan to the East. The problem is that that area is highly irradiated and even the Rad Suits that you bought at the Citadel are insufficient, to enable you to pass through, without problems. . Red mentions some Rick Baychowski, who may have the Rad Suits sufficiently protective. Fortunately, Baychowski is currently being held at the Prison of the Ranger Citadel. Therefore, what you need to do is go back to the HQ.
Note - If you have reached Red through the caves, and you want to leave through the main exit, you first need to use the computer in front of the gate, to disable the turrets - otherwise they will be online for the whole tie and start shooting as soon as you leave.
The Prison is in the North-Eastern part of the Citadel. Baychowski is ready to help you if you promise freedom to him. Talk to the guard and tell him that you need to take the prisoner with you. Baychowski starts following the party and he will mark his camper on the map, where the Rad Suits are (number 4 on the world map). Get there.
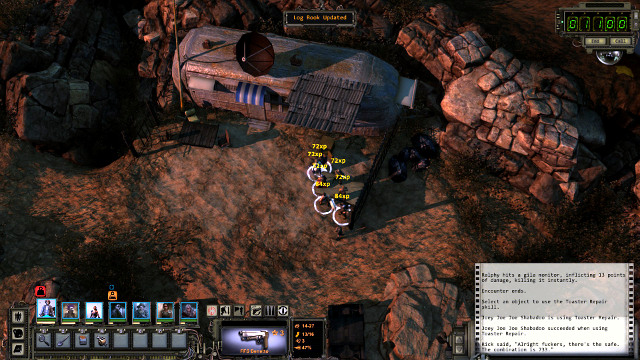 Rad Suits are in the safe under the vehicle
After you reach the camper location, Baychowski asks you to let him walk. If you agree to that, you will have to explain this to Vargas, if not - you will break the word given to him. Rad Suits are in the safe - the code is 733 (Baychowski says this while at the party, otherwise, go Safecracking). Remember to put on the Rad Suits, as soon as you collect them. You can now freely walk around the whole of Arizona, without bothering about radiation. Return to the Citadel to compete the quest, or return to the Prison and put Baychowski back in the cell. Alternatively, go on the carpet to Vargas to explain that you lost the prisoner (tell him, e.g. that he died during an escape attempt).
Concerns the quests:
You receive this quest from Jobe at the Auwerter farm. He wants you to kill Danforth and liberate the Happy Valley from the Red Skorpions. Although you can clear the area, while searching for your way to Damonta, you will not be able to approach Danforth because of the powerful Prison safety measures. The entrance is being protected with two turrets. Also, there is an intercom there, which you can use to talk to the commandant, as well as a robot that can be used to destroy the turrets, but it requires a special part - #TRL-01553. You can obtain that part from Tinker at Damonta.
After you return from your journey to Damonta, it will turn out that Scorpions, took vengeance and killed out nearly all civilians. This will happen even if you haven't talked, or fought, gang members. For this reason, you need to do side quest in the Happy Valley before you set out for Damonta, or else the game deems them unavailable or not completed.
After you pay visit to Damonta, you will hear Danforth complaining about the Rangers, on the intercom, who allegedly poisoned his dogs. Visit the location, then, and it will turn out that Jobe is behind all of that. He will give a poison cure to you. Approach the Prison entrance now. You can either use the part from Tinker, to repair the robot, or contact Danforth on the intercom and tell him that you have the cure. He will disable the turrets and you will be able to enter.
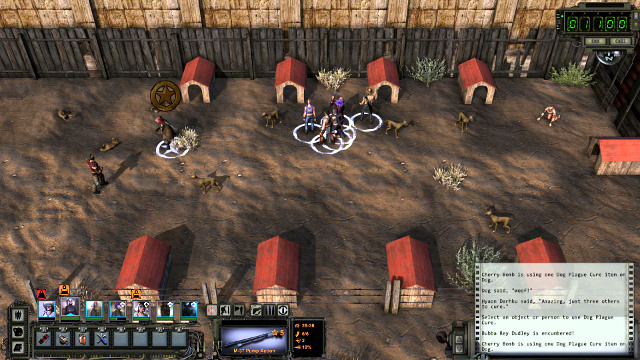 Use the cure on each dog
You can now deal with Danforth immediately, or try to cause a truce between the Rangers and the Skorpions. Talk to Danforth and he will send you to the kennels. Use the cure on each dog and return to the commandant to tell him that you have succeeded.
 A strong attack from the rooftop, against Danforth, rigs the battle
At the experience level that you should have, after having explored the entire Arizona, fighting the Skorpions at the Prison will be much easier, than when you searched for the Rad Suits - even at a high difficulty level. Before you attack, deploy the party members properly, on the rooftops of the nearby buildings. Start the battle by using a rocket, or a grenade, against Danforth and his guards. Not too glorious, but you will eliminate him immediately, this way, which makes things way easier. You now only need to fight the rest of the gang. Focus on grenadiers in the first place. Then, on the ones with heavy machine guns. If Danforth is already dead, this should be easy to do. After you are over, return to Jobe, to the farm. He will be very happy to hear the commandant is dead. The Happy Valley is now free and the Red Skorpion Militia obliterated.
Celia Caminada, in the Southern part of the Happy Valley would like to have an operating well again. You can fix it with Mechanical Repairs. After that, you can replenish water here. As a reward, you will receive a FAMAS rifle.
 Break the fence
William Brown of the Happy Valley wants to get hi swine back. You can find them on the farm in the location with the Prison. You need to get in forcibly but the farm itself is neutral towards the Rangers. You can find the swine in the pen. You can destroy the fence and they will start running by themselves. Watch out because, as soon as any guard notes that the swine are escaping, you will have to fight with all the guards on the farm. What is even more, they will start shooting at the swine so, try to attract their attention at the very beginning, o save the animals. Also, you can open fire and clear the area and, after the fight, free the swine.
If, while heading towards the farm, you walked around the mine field, next to the building of the Skorpions, the swine will blow up there. That is why, you need to make sure that there are no mines there. Afterwards, you can collect some swine feces that you can sell to Tan at the Citadel. Also remember to visit Brown at the Valley, afterwards, to take pride in your rescuing mission.
 Fred's cart
ON the road, close to the Prison entrance, you will notice a buried Fred Darvis's cart (The only good merchant in the Prison). Using Brute Force, push the cart after which, Fred marks the location of a nearby Shrine on your map. He will also sell the equipment, such as ammo or medicine, to you but he will set out in a while so, you will not find him here again. Not an official quest, but a good deed.
The only way to the East to Damonta is, the so called, Canyon of Titan. To get there safely, you first need to obtain Rad Suits with the protection of 4 (more about this in the chapter about the Prison). Right after you arrive, you will be contacted by Vargas. You will be receiving some interference and this will be happening throughout your entire stay at the location. Sometimes, you will even be unable to contact the Citadel to get promoted. In this situation, simply wait a moment and try again. Apart from that, if Angela is on your party, Vargas will have her return to the Citadel and she will leave.
The region of the canyon is being controlled by the Servants of the Mushroom Cloud, colloquially called the M.A.D. Monks. There is a pre-war silo here, with a warhead that was not used during the war. The monks call it the Titan and they praise it like a god. Of course, nuclear arsenal is an argument that you do not argue with so, nobody questions the monks' control of the canyon openly. Still, there also operates the Diamondback Militia, in the shadows, who dream of overturning the monks and seize control of the canyon. Controlling the Titan is the main issue in this region. You will have the option to support (or not) the monks or the militia.
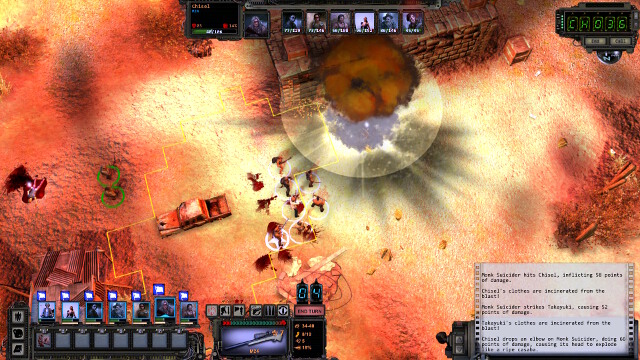 The explosion of a monk
In combat, the monks utilize the kamikaze tactic and they blow themselves up with nuclear explosives. The explosion is powerful and of long radius. This is the basic issue that you need to remember about, if you happen to face off against them. The suicides need to be your first target in combat so that, before they activate the explosives, they can be killed. After a monk activates the explosive, you still have one turn to escape to a safe distance. You can use that turn on killing the monk. He also explodes then, but his companions may die in the explosion. The interesting thing is that, if a Ranger gets within the radius of the explosion, but you will be sufficiently far away to survive, the explosion burns up his clothes (this only concerns the original four and not the ones that you included later on). Apart from that, in the canyon, you will find some mutated animals and lots of bandit groups. Still you will not need to fight with the latter, because they respect the rules laid out by the monks.
To reach Damonta, you first need to enter the temple, i.e. the place where the warhead is being held. There are three monk outposts in the canyon. Right at the first one, you will be informed that you need to pay an offering to be allowed into the temple. The offering are three portions of the radioactive sludge, which you will have to collect in the canyon. Also, you will receive your personal guard - monk Sapphriro, who is to ensure your safe passage to the temple. As long as the monk is with you, you will not be attacked by the local raiders. The Law of the Titan states that everyone accompanied by a monk is untouchable (also the raiders) around the canyon.
Secret entrance to the headquarters of Diamondback Militia. You can get inside in few ways, for example by using the wagon before the gate (high Perception needed), opening the lock to the drawer and then hacking the computer inside, or by using the key which you could have received from the suspicious stranger when entering the canyon, on the closet.
When you will open the secret gate, Militia member will walk from inside and will ask you to identify yourself (you will be attacked if you refuse). If you have a monk with you, he will be immediately killed. Militia's attitude will depend on your actions in the canyon. In general, if you haven't angered them too much or you acted against the monks, you will be permitted to enter (under condition that you will lay down your weapons). Inside you can receive the mission of deactivating the Titan in the temple. The militia leader - Sadler - can give you the quest. Using abilities you can also get super secret information from Sadler about his hemorrhoids.
If you prefer monks, when you will discover the gate you can immediately go to some temple prominent (for example brother Franks on the first station or Gorsky on the third) and tell him about Militia's headquarters. The monks will immediately attack and destroy it. You can also single handedly destroy the base, but this would be very hard, mostly due to the turrets. Taking as much heavy artillery as possible will be useful. Try to climb up the ladder to the floor, from where you will be able to shoot the enemies below.
Here is the silo 8 with the Titan inside. To enter the temple, which you can then go to Damonta from, you need to make an offering of sludge at the gate (you can always try a forcible solution; this causes surprising effects). The temple is led by Father Enola, who wants you to go to Silo 7 and take care of the disloyal Brother Wright. Also, you can replenish your supplies here and treat the party at the local hospital.
Main Temple Complex- this is where you find the Titan - located underground. There are five ways down here, which you can use to get here. Of course, the monks do not allow such godless ones to desecrate their holy place so, they attack you as soon they spot you trying to get there.
There also are quite a few raiders around this location but, just like in the canyon, they will not be able to attack you, if Sapphiro is with you.
The main part in the temple where there is the holy Titan. There are three ways to get here:
In general, you will be attacked here, by all monks, on sight. The only exception is when you agree on cooperation with Enola that you encounter here (at the Prison, or when you discover the truth behind the Titan). Additionally, you need to watch out for the traps and door alarms. The fastest way to the warhead is the side passage, above, that is not being guarded (the code to the door on the surface- 60845; there is a door alarm inside the complex), and from there, to the right of the map (across the traps) to the Titan. The corridors are being patrolled by the monks but, if you do well, by hiding out of sight, you can get to the warhead without being spotted. Of course, you can simply cut your way through with weapons,. Remember, then, to deal with the suicide monks immediately. It is best to fire at them with the sniper, still before you are spotted and before the fighting begins. You then stand a chance at killing them on the spot, without giving them the opportunity to start their turn.
 The Titan
Once you find the Titan, you can discover, with Perception, that it is, as a matter of fact, a model at a museum. You will then be talked to by Enola, who offers you that you follow him to Silo 7 and give him an actual warhead. If you are working for the militia, install the jammer that you receive from Sadler. You will then have to kill Enola.
To pass the first canyon, along your path to Damonta, you need to effect an offering for the temple. Go to Outpost One, where Brother Franks gives you three containers for the radioactive sludge. Also, you will be followed by monk Sapphiro. As long as he is alive, you will not be attacked by the raiders here, who usually perform the role of guards of the sludge barrels, of a kind. . Watch out, though, because the members of the militia will be trying to kill the monk, to keep their existence a secret.
IN total, there are 8 sludge barrels (the screenshot) Six of them are in the canyon and there are two in the Temple. You can use each only once. At each barrel, there is a group of enemies - raiders or mutated animals. Once you clear the area, add the containers that you received from Franks, to the quick bar and clock on a barrel to fill a container. As soon as you fill three of them, you can return to the Temple.
Talk to Brother Parsons on the Temple gate and hand the containers over to him. If you have been killing monks earlier, he will let you know that you need to pay double the amount. You will receive additional containers and you need to go to the remaining barrels. You can also tell about the militia HQ to bring the price down to the original 3 units. Once you hand over the sludge, you will be able to walk into the Temple but, not leave it (or at least, not the way that you need to) - the gate to the East remains shut for as long as you talk to Father Enola. Enola wants you to go to Silo 7 and deal with some Brother Wright, who rejected the Titan (the Temple's main plot). Once you accept the errand, the gate to the East will be opened and you will be allowed to go to Damonta.
 The launching of the Titan
1. Forcible solution - Kill Brother Franks in outpost 1 and Gorski in outpost 3, then head towards the temple. Once you try to force the gate, the desperate monks launch the Titan and the countdown starts. After a while, it will be stopped by Father Enola and he will offer you to surrender be arrested. If you agree, you will get to the underground prison, where you can get out from, using a broken bed leg on the loosened bars. If you refuse to surrender, you can obliterate the entire Temple on the spot and cut to the East, where you head to Damonta from;
2. To avoid paying the offering, you can use the sewers to get to the to the Temple underground. There, take any of the passages to the surface, to the Temple's premises. If you do not set off the alarm then, after you resurface, the monks will, most probably, remain neutral. Talk to Enola then, accept his quest and set out to the East, straight away.
Concerns the quests:
In the canyon, there is an underground Diamondback Militia, who want to drive the monks away and seize control over the region. Soon after you enter the location, you can encounter a mysterious figure that introduces himself, on behalf of the militia and tells you that they would want to hire you for some profitable job. To test you, in the first place, he will ask you to find the militia HQ hidden somewhere in the canyon. He tells you nothing more but, with Smart ass 6, or kiss Ass 4, you can obtain a key to the HQ, from him. This conversation is optional and is not necessary for you to take quests from the Militia later on.
 Opening of the passage to the Militia
The Diamondback HQ is off the road to Outpost Three, hidden behind a wall of rocks. To discover it, you can use e.g. Perception, which should highlight the nearby mining cart. Then, use the cart. You can also use the nearby box with a computer inside. Hack into it, or use the key on it. This will open the door and you will be surprised by the members of the Militia. If the monk is with you, he will die. You can now, either fight with the Militia, or enter without the weapons on you. If you go for the latter, you will find Captain Sadler inside, who will task you with mounting the cryptographic jammer on the computer that controls the Titan, at the Temple. After you leave from Sadler, remember to talk to the guard to retrieve your gear. If you prefer the monks, you can tell (e.g. Gorski in outpost 3) about the HQ and they will launch an attack on it immediately. Go to the Temple.
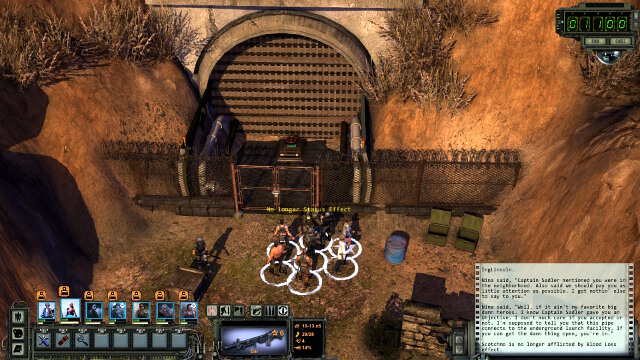 The passage to the Temple underground
If you have worked for Sadler, you can take the passage through the sewers, where you find several Militiamen (requires Lock picking), to walk into the underground complex. Still, it is better to enter the Temple through the gate (you need to make the offering). Inside, talk to Father Enola. He will task you with reaching Silo 7 (number 7 on the world map) and dealing with Brother Wright, who is rumored to be planning to use the Titan there, to destroy the Temple. Enola's story is quite suspicious so, it may be better to check out about it. Head towards the underground. It is the safest to take the unguarded side tunnel, to the right, after you pass the temple gate. On the door, use the Computer Sciences or enter the code - 60845.
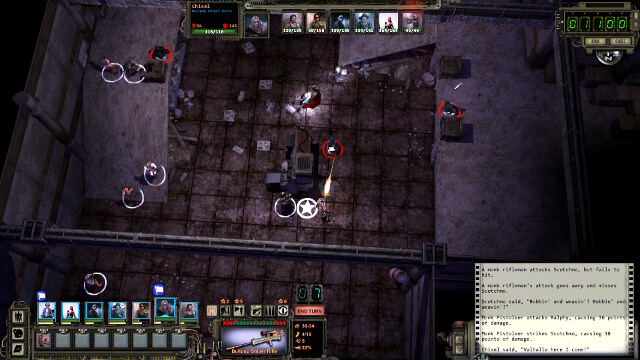 The fight along your path to the Titan
It is the passage located the closest to the warhead. Disable the door alarm and turn left. In the next room, you will meet six monks, including two suicides. Deal with them in the first place. Use the side platforms to gain the advantage of height. After you kill all of them, keep on your path. and you will soon walk into the room with the missile.
You can also reach the rocket by avoiding the monks. From the first door secured with an alarm, you need to go straight ahead. You will reach another door, also secured with an alarm. Open it and follow the path. Watch out for the monks that area patrolling the tunnels. There are not too many of them, but do not run headlong, just in case. Past the second door, there is a long tunnel with several mines mounted on walls, with laser sensors. Apart from that, no other threats.
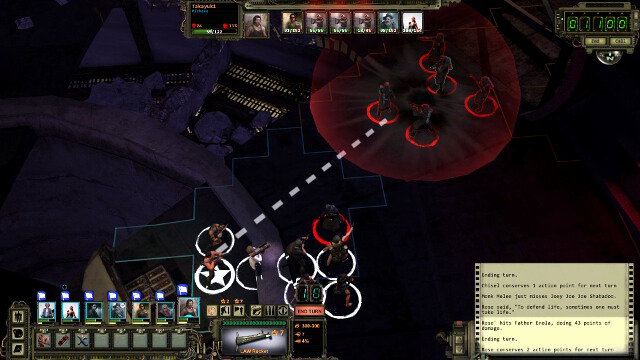 It is best to use an AoE attack, against Enola and his men
If you are going to help the Militia, mount the jammer onto the computer. You will be attacked by Enola and his closest associates. Fortunately, they are clustered together so, one missile, or grenade, at the very beginning, should get the job done. Once you resurface, it turns out that the Militia launched an attack on the temple. Find Sadler - he will task you with going to Silo 7 and sending the missile inside over to the Militia.
If you do not want to help the Militia, do not mount the jammer. Instead, use Perception on the Titan to find out that, as a matter of fact, it is a museum exhibit and not a warhead. At this point, you will also encounter Enola, but he will tell you the truth and ask you to go to Silo 7 and furnish the monks with an actual missile. Agree to that.

On the Silo's premises, you will find crashed planes. Before you walk inside, it is a good idea to explore around. Stick to the left. At the end, in the location shown in the screenshot, you will find a hidden passage (Perception!) to the wrecked Sierra Madre plane. It is the plane, whose finding is the objective of one of the side quests in Damonta, but since you are already here, you could examine it right now. Inside, there are a paper and a Sky Mall prospect (in the toaster), which you can take to Flintlock at the museum. Inside one of the lockers, there is a screwdriver. When you receive the quest in Damonta, you will be able to use it to remove one of the venting shaft grates in the floor. There are several grates, but there is only one that you can use the item on. Use the screwdriver to find gold hidden there. Without the tool, there is no way of getting the god so, do not lose it! After you search the plane, return to the main part of the location.
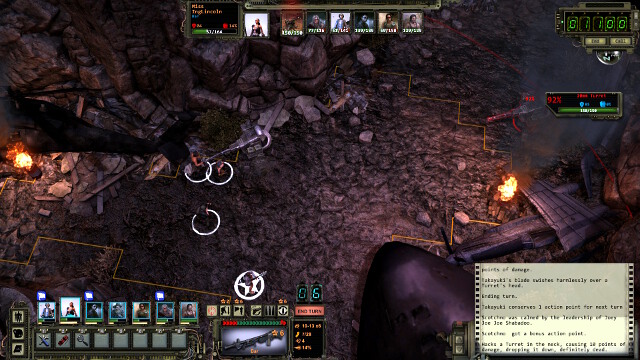 Silo defenses
After you explore the plane, return to the main location. The silo entrance is protected with two turrets. Past them, there also is a minefield, thick with mines, which you could disarm. Against the turrets, you can effectively use an energy weapon and, if you have plenty of spare gear, you can disarm them quickly by, e.g. discharging a shotgun against a mine, or by throwing a grenade. You can also hack into the turrets, with Computer Science, thanks to which you avoid fighting. Once the path is clear, walk inside.
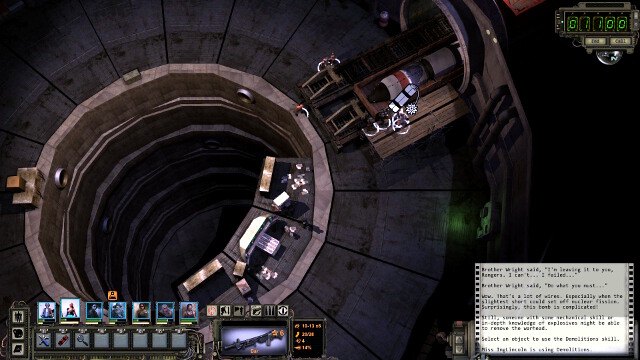 Disarming of the warhead
You now need to take the final decision on what to do. Whether to send the warhead to the Militia, to the monks, or whether to disarm it. To disarm the warhead, you can use, e.g. the Demolition man or the Mechanical Repair on it. This requires a quite high skill level (at least 4 Explosives or repair, to at least try to disarm the bomb), but there is no need to tell you what happens after you fail. Therefore, it is best to try it with a character that has level 6 or 7 of one of the required skills. In such a case, risk of failure will be sufficiently low. Once you visit the Temple again, you will see how your decision changed the events. Also, you will have the option to accept one of three NPCs in your party. You need to watch out, though, because all of them require your' party's charisma level to be quite high. If it is not, they will tell you that they are disappointed in the Charisma level in the party and that they prefer to travel on their own.
Remember to loot the silo afterwards, where there are several well-secured crates.
1. Disarm the warhead - after you walk into the area, you will meet the dying Enola, who spares no "appraisal" to you. Chaos and anarchy will break out in the canyon. You will have to fight, nearly, everyone. You may accept Corran Cain, a former monk, demolitions expert, in the party. He is undergoing a crisis of faith and he needs to find a new god for himself to follow;
2. Send the warhead to the Militia - The militia takes over in the Temple. They are not overly thankful for the help - all in all, they have a nuclear warhead so, they are free to do whatever they please, now. They will start to abuse the locals and demand high fees for crossing the canyon (this is also true for your party). You can accept Gary "NaCl" Wolfe in the team. He is a Militia sniper;
 The former Temple of the Titan
3. Send the warhead to the monks - You will have to kill Brother Wright, who attacks you. At the canyon, the more fanatical ones decide that it is time to join the Grand Flash and they overthrow Father Enola. Doctor Kyle from the hospital, presses the correct button and ... the canyon goes up into the air (what it interesting, she will apparently do that from beyond her grave, if you killed her beforehand). You will be able to accept Dan Q in the party, a chatterbox and jokester with high Charisma and intelligence (7 each), who is completely useless in combat. You will also witness an interesting allusion to the Planet of the Apes.
Concerns the quests:
You meet Jill shortly after you enter the canyon. Soothe her cattle down with the Animal Whisperer. Save Doc, who is bleeding to the death and she will also ask your help finding Bart. She also mentions that you will meet her in Damonta later on. Bart is in the cage at the other end of the map, a bit to the South of Outpost One. Free him by using Lock Picking. Then, you can let him go on his own, or accept him in the party. He leaves after you return to the path to Outpost One.
Close to the entrance to the canyon, you meet Brother Chavez, who is guarding a weapons crate. He asks you to tell Brother Franks, at Outpost One, about him. Inside the crate, there is a missile. You can kill Chavez and take it for yourself. This also completes this quests, but it deteriorates the opinion monks have about the Rangers.
Close to the canyon entrance, you meet Tom, who wants to follow the raiders that kidnapped his wife. You can convince him that you will do that, (Smart Ass 2, Hard Ass 4), but he will follow the abductors anyways. Of you want to save him, follow him immediately. At he spot, there are for honey badgers that he stands no chance against so, you need to attract their attention yourself. It is best to catch up with him, overtake him and be the first to reach the spot (check on the location map where to run). After you kill the badgers, and Tom is still alive, you will receive a key to his locker at the Temple. Inside, there is some gear.
The barterer has to agree to your offer. Otherwise, you can fight honey badgers and save him, but you do not receive the key.
Past Outpost One, you meet Skunk Pig, who is asking you to escort him to Outpost One. In exchange for that, you will not be attacked by the raiders, while exploring Arizona (on the world map). With Smart Ass 4, you can also obtain a first-aid kit from him, once you get him to the destination. The path should be completely clear so, you will have no problems.
Brother Staal at the Temple gives you a nuke grenade (a powerful toy) for providing him with 3 sludge containers. The quest is exactly the same as obtaining sludge for the offering but this time, you need to visit other barrels. You do not get this quest if you have been killing the monks and you will have to make an offering of twice the amount (even if you do receive the quest, there is not enough sludge, because there only are 8 barrels).
 Damonta at last
The final destination to your travels all around Arizona. It is time to mount the Repeater Unit that has been taking up space in your inventory, since the beginning of the game. It is not going to be too easy, though - Damonta has been attacked by robots that killed out, nearly, the entire population of the city.
In Damonta, you meet several old friends (assuming that they have survived the previous encounters), for whom you will be able to complete several side quests. Apart from that, though, this location is mainly combat-oriented, where you fight all possible metal junk. Be well-prepared while visiting Damonta. Energy weapons and heavy machine guns should do the job. It is nearly imperative (especially at the highest difficulty level) that you also have several missiles with you (in necessary, return as far back as the Citadel and buy several of them from Tan - without heavy artillery, you may be stepping into a wasps' nest). At the same time, remember that, in spite of high armor, also maces are great here so, not always do you have to blaze your guns.
As for the robots that you are going to fight, two types are especially noteworthy. The first one is the Thresher. His head-butt pushes the nearby Rangers away. The damage of this attack is not too high. What is much more important is that each of his attacks stuns the repelled and decreases their speed, and vigilance, by 3. This may serve as a handicap in combat, if it turns out that you are incapable of performing the standard number of attacks in a turn. Fortunately, he is slow and a good sniper - supported with a machine gun burst - should be able to eliminate the threat before a Thresher approaches .
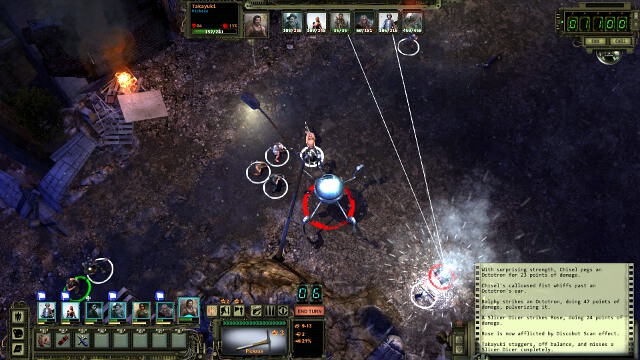 Slicer Dicer
A much serious problem is the Slicer Dicer. Arguably, the strongest of the robots. Thick armor and more than 400 CON suggest a tough nut to crack straight away. Apart from that, he can launch AoE attacks and may easily move around over long distances. Also, It forms a field that decreases coordination in all the characters around it. While fighting, try to scatter the party as much as possible. The longer the fight, the worse for you, because everyone is exposed to attacks, which is why it is the best to attack them with LAWs, or even with AA missiles. Also remember that the Slicer explodes at the moment of death and wounds everyone around it.
Finally, it is worth mentioning that Damonta, from a technical point of view, lies outside of the Ranger jurisdiction so, the best you can do is mount the Repeater Unit and leave the city to its own fate.
The synthetic that is responsible for the attack on Damonta. She has large number of health points and she attacks with a rather strong energy shot. On the other hand, she has almost no armor and is very slow, so it is easy to keep her at distance. She is surrounded by a small robot army whom you should take care of as well.
The battle with Tinker will start when you will shoot her or you will be noticed by any of the robots. At this point it is best to focus on getting rid of the robots and ignore Tinker or keep her at distance. When all the robots are down, attack the boss. Few series or one LAW should be enough to make her stop fighting. She will order you to leave or she will kill Binh. If you haven't destroyed all the robots before hurting Tinker, the surviving machines will become neutral and will return to patrolling the building.
Binh will explode if you touch her now or ask Tinker about something three times! In order to save Binh, you must take care of the nearby computers. Hack the big one and the one under the wall. Tinker will attack again with the help of robots that survived the first battle, but she will give up just before the fatal blow. However, when you will talk with her, you will learn that it was just a trick and she will blow herself up.
Don't forget about freeing Binh once everything is done and then about visiting her parents. You will be able to search their first aid kit to which you didn't have access previously.
If you don't care about Binh's life, you can sneak up as one person to the computers before the battle and hack the large computer and the one near the plane. It will blow up all robots (and Binh), making the battle extremely easy. You will simply have to hit Tinker with one or two rockets.
The radio tower is in the central part of the town. Right after you enter, you can head left and explore the wrecked plane, where there is Red inside (you will have to defeat a Dicer and several smaller robots) or go right and use Brute Force to smash the wall with a turret behind it. Then, you will have to fight several more robots.
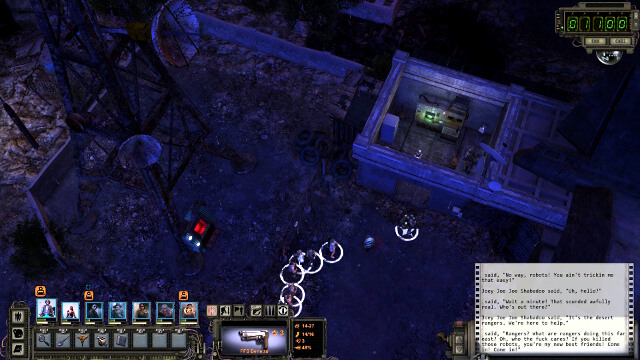 The tower
Next to the tower itself, you will find two more robots, including a Thresher that is trying to smash the door to the nearby radio broadcasting station. The gate to the tower is locked and you cannot open it in any conventional way so, you are going to need the key. Talk to Wally from the broadcasting station, over the intercom and he will open the door. In return for the key, Wally wants you to fight robots off, but you can also obtain the key with Kiss Ass 5 or Hard Ass 5. After you obtain the key, imply open the gate and mount the Repeater Unit. from Vargas, you will receive orders to return to the Citadel, but you can tell him that you want to deal with the robots here, first.
The Tinker in the room to the North-East is the problem. You need to cut towards her across the left side of the map and walk around the huge plane to the North. It is a tough endeavor - apart from the standard robots, you will also find here a turret and two slicers. If possible, try to deal with the turret at a distance, with the sniper (have the rest remain behind, out of reach), without attracting the Slicers. The Slicers themselves are best if eliminated with missiles.
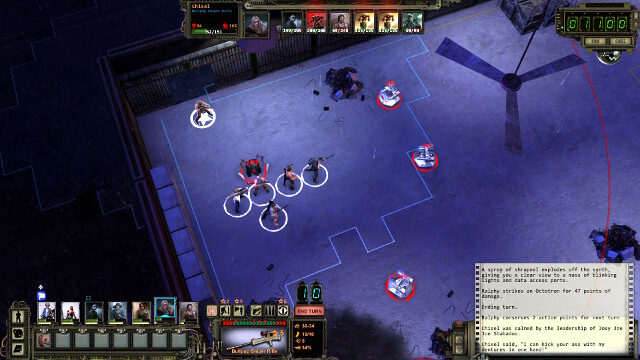 Leave the party at the entrance
After you enter the building, leave the party at the entrance. Send a long-range character ahead, who will take the first shot at Tinker. The beginning of the fight wakes up the robots all around the room. If you were to stand in the middle, you would be surrounded. However, with your men at the door, you can easily deal with the threesome and fire at various robots that approach. As for Tinker, ignore her now - she is sluggish; deal only with the robots that are the closest. This way, not only you make the fight easier for you, but also you will lure Tinker away from Binh so, you will not risk wounding the girl later on, with a poorly-aimed shot. Once you eliminate all the robots, deal one powerful shot at Tinker (LAW) - she stops fighting; you will be free to explore the room (in Tinker's locker, there are, among others, a console that you can give to Mercaptain and parts to repair the robot, in front of the Prison with) and heal the party. If you have not destroyed all of the robots, before Tinker was severely damaged, the remaining machines leave you alone and they return to patrolling the area.
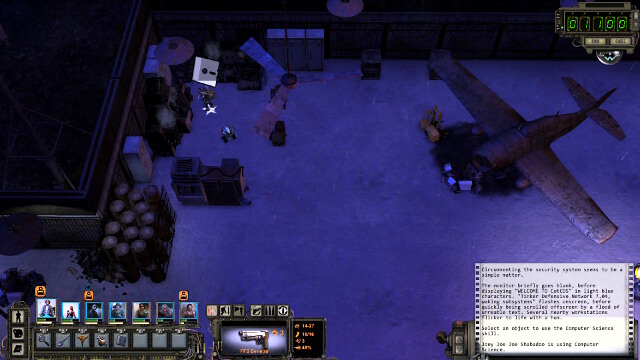
Binh is in the armchair in the middle and she is the Tinker's main argument. She threatens that she blows up the girl's heart, if you do not get out. If you touch the girl, she will die. The way to rescue the girl is to hack into the nearby computers. The big compute is the mainframe, where the remaining two control the robots and communications. You can only hack into two computers Regardless of the order, in which you do that, Tinker attacks after the second one is hacked. To free the girl, hack into the mainframe computer and the one at the wall (the screenshot). This way, Tinker will be unable to blow up the girl's heart. Another fight will ensue, but it should be easier this time, as long as you have destroyed all of the robots earlier. If not, you will also have to face all of the remnants also. Strike with everything that you pack (make sure that you do not hit Binh!). Once you drain Tinker's Constitution to 1, she gives up and blows herself up, after you start a conversation. Do not approach her, just kill her. This is a trap and she explodes as soon as you start the conversation. If, however, you want to see the dialogue, send out one character only. If there still are any robots in the building, you will have to fight them. This time around, the fight will not be interrupted by anything, so you simply need to eliminate them all.
Afterwards, rescue Binh and remember to take Tinker's finger with you. Then, you can visit Wallie at the radio station to tell him the good news. Then, return to the Citadel.
Along your path to the Citadel, you will finally be able to deal with one unresolved matter. You will receive an order from Vargas to get to the Prison. To learn the details, see the chapter entitled " Kill Commandant Danforth and liberate the Happy Valley from the Red Skorpions" in the Prison quests section.
 Let's go
Once you return to the Citadel, reach its end and talk to General Vargas. After the cutscene, a door opens and you will find a helicopter in the room. Thanks to it, you will reach California. Remember that you will not be able to return here so, complete all of the quests that are still incomplete and replenish your supplies! Once you are ready, get going to meet the hot beaches of Los Angeles and remember to take sunglasses along.
1. You can completely ignore Tinker. Obtain the tower key from Wally, using dialogue skills, mount the Repeater Unit and be on your way to California - Damonta falls and everyone dies;
2. As one of the characters, sneak past Tinker to reach the computers, before you start the fight. You need to make sure that you are not spotted by the Thrasher patrolling here. Hack into the mainframe and to the computer next to the plane (not the one at the wall), and you will immediately damage all of the robots and you will be fighting Tinker only- Binh dies, but the fight is going to be very easy. Alternatively, after the fight starts, send something strong towards Tinker, so she stops fighting, after which you can hack into these computers - the effect is the same and all the robots explode.
Concerns the quests:
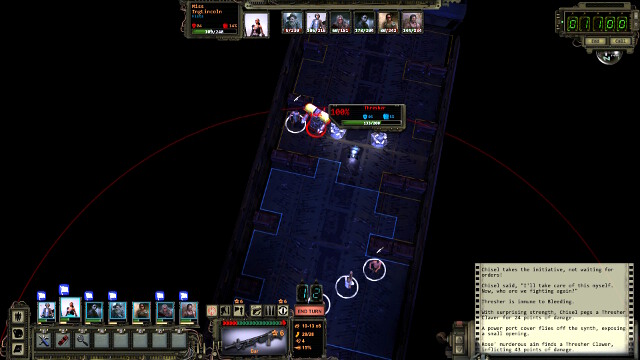 The fight inside the plane
In the cockpit of the plane in the Western part of the town, you can find Red Baychowski, who locked himself up from the robots. He wants you to rescue him. The entrance to the plane is at the other side. Inside, there are four robots. The fight is going to be a little bit more demanding, due to the tight space. Use the chairs to cover from the robots. Once you destroy the robots, Red opens the door and offers that you and him search for a legendary treasure onboard the Sierra Madre plane.
 The passage to the plane
The plane is in Silo 7. You should already know where the Silo is, because you learned it at the Temple of the Titan but, if you missed it somehow, the map with the location marked is on the locker behind Tinker. After you get there, follow along the left side. In the corner, there is a hidden passage. Red suggests that you squeeze through, Sierra Madre is at the other side.

In the locker at the end of the plane, there is a screwdriver. Use it to remove the venting grating on the plane's floor. There are 20 bars of gold inside! You can split it with Red, just like the bargain was, or you can tell him to go to hell and take all for yourself!
While in the plane, do not forget to collect the Double Six Tragedy Report and a Sky Mall catalogue from the toaster, which you can take to Flintlock at the Citadel museum.
In the motel to the South of the town, you will find Jill from the Canyon of the Titan, if you have not killed her there. She wants you to find her cows. You can find them to the very North of the location. If you have freed Bart in the canyon, he is also here and Jill suggests that he helps searching (he starts following you, if you agree to that). After you find her cows, return to Jill, and you will be rewarded with 50 pieces of junk.
 Binh
BinhIn the central part of Damonta, you will find a restaurant besieged by several robots. After you drive them away, the owners will open the door. They want you to find their daughter. Binh is being held by Tinker. To save her, you need to hack into the big computer and the one at the wall (and that's it!), at the moment at which Tinker stops fighting and threatens you with the girl's death, if you do not leave. After you kill Tinker, free Binh and she will return to her parents. They will be very happy to see their daughter alive. You will be allowed to search the first-aid kit in their room, which they earlier forbid you to open.
If you have rescued Clyde in the Canyon, you will find him in the center in front of the water company building. You need to take the side entrance, because the one next to clyde is blocked off (use Perception to discover that you can crawl under the nearby truck, to avoid going around). Squeezing under the truck is going to cost some of your party several health points and can cause an illness that lowers charisma and coordination). Inside, however, there are no survivors. Kill the robots, collect the painting (you can take it to Flintlock) and return to Clyde to report. You will now have the option to replenish water at the water company's building.
Your flight to California will end with forced landing in Santa Fe Springs. Your first objective will be finding guards which were sent here before you own team. The entire area is filled with packs of muted dogs, which you will need to exterminate. Considering the difficulty level there is a huge difference between fights in Arizona and in California. Even the first pack of dogs will prove that, so treat them with respect. At the beginning of this part of the game you will also have no access to a radio, so you will be unable to level up your men.
After you will clean up and secure this area it will become a base of California's Desert Rangers. You will contact Santa Fe to discuss promotions, to react for inhabitants' calling for help and to proceed with main quests.
With time, guests will start appearing in Santa Fe - barterers, medics and quest givers. You find them in the Citadel, right past the gate. Medics will heal the party in exchange for scrap metal, and barterers offer quite a lot of good weapons, armor, ammo and medicine.
 You will find surrounded Carlson very fast
Close to the place where the helicopter crashed you will find captain Dave Carlson attacked by few dogs. Save him and speak to him. You will get from him information about Santa Fe. He will command your team to find lieutenant Woodson who is responsible for the radio station. You may also try to treat him using the Surgeon skill, however it will not be a much of a help since his time is already coming to an end.
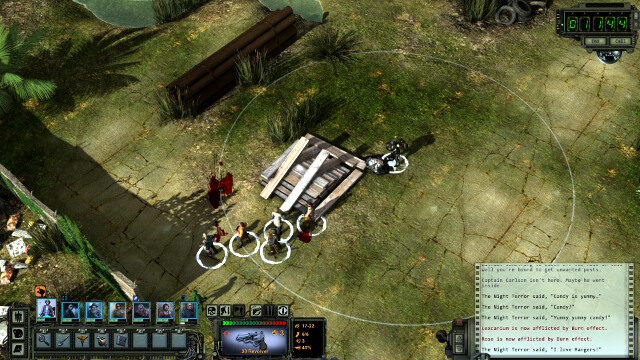
You will find Woodson in the building located in the middle of this area. He will be attacked by a pack of mutated dogs. Once you will save him he will ask your team to secure the Santa Fe area, what requires filling holes in the wall around this place. In result no more mutated dogs will be able to get inside. To complete this quest you have to use boards which you can find outside of the building (compare to screenshot). Until the radio is disabled you can speak to Woodson to receive promotions.
 Filling a hole
Go with boards right from the Woodson's building until you will get to the wall's first hole. You will also find few dogs during your walk. Use boards on the hole to fill lit. After that turn left and go along the wall filling every hole and exterminating every group of dogs you will find. After every repair Woodson will use the radio to broadcast recordings of local groups to let you know what you may encounter in California. There are five holes in total. You will walk around the entire area, and the last hole you will find near the gate, close to the place where you have started the game.
After you will secure the entire wall Woodson will ask you to visit Carlson who does not have a lot of time ahead. You will find Carlson in the near warehouse. You can ask him about his team's mission. After your conversation you will receive the gate key which you can use to get deeper into the California and meat your old friends - repeater units, which you have to install on local transmitters to increase the Rangers' signal and contact with the base in Arizona.
Related to quests:
You will unlock this quest thanks to Woodson. If you want to safely travel through the highly irradiated lands of California you have to use upgraded anti-radiation suits. To upgrade them you need 56 pounds of cat litter. In few places you will find bags containing eight pounds of cat litter each. Simple math will tell you that you need to collect 7 bags, although you can find more of them during your missions. You may find 3 of them in Angel Oracle, 4 in Rodia and one in Salt Lake Park, Los Alamitos and Long Beach.
After you will deliver a cat litter to Woodson he will contact with your team once your suits will be finished. It will happen after you will install at least one repeater unit (in Angel Oracle or in Rodia). Woodson will order you to go to the new minor area called Whittier where you have to fight with one Synth. After you will get there it will be clear that indeed there is one Synth here although it is supported by ten others which will attack you from every side. This fight is a very difficult challenge and a huge test for the entire team, especially if you play on the high difficulty level. If you can't defeat these enemies you should give up and focus on other quests to receive as many experience points and items as you can. It's also beneficial to make a visit to a merchant in Salt Lake Park since he sells heavy weapons including RPGs. Also it is a good idea to use every food from your inventory that can increase your stats just before you will visit Whittier (once you will get there you will have no time).
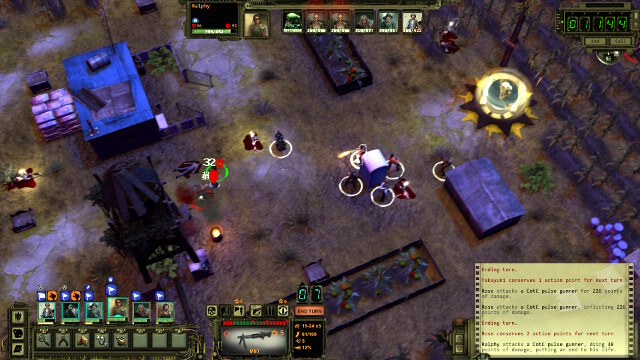 A fight in Whittier
You will fight in a quite an open area. There is not many places to hide and what is even more important you will be attacked from four sides. The enemy leader is in the middle and you should take him down as fast as possible, preferably during the second or third turn of your characters. The rest of Synths will be far away until now and they need some time to get closer. Two of them will be attacking from north and two from west, three of them will be on east and three on the south.
After you will kill the main Synth (which will explode in a moment of his death!) you should move your entire team in one direction which will force cyborgs from other sides to go through a longer distance. Use your strongest weapons to deal with Synths which you are getting closer to and exterminate them as fast as you can. After that you may take their position and deal with attacks from other three sides. You should also regard snipers since they have a huge range advantage. If you need you can hide to force them coming out to an open field.
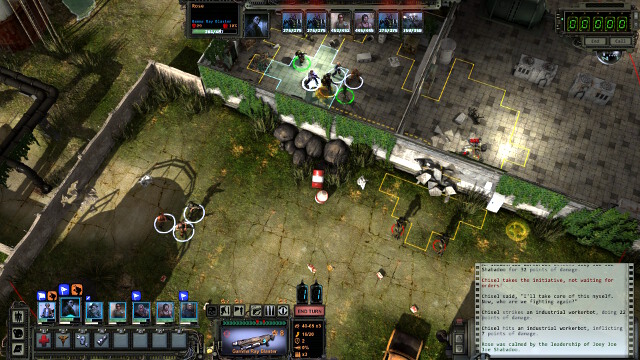
Soon after your visit in Whittier Woodson will contact you and tell you that you can receive suits from him. After you will get to Santa Fe you will also be able to join to your team new character named Brother Thomas who is an ex-member of God's Militia. Before you will speak to Woodson you should leave a part of your team outside of the building, just like on the screenshot above. Once again you will be attacked by surprise. People you left outside can take care of local cans. Right now try to avoid entering the great room. Close to the main doors you will find another three robots however they will not attack you if you will stay out of their sight, so you can focus now on these robots that are close to the hole in the wall.
After this encounter you will receive from Woodson new anti-radiation suits. They ensure protection 5 which is too low to allow you to get to the Seal Beach (although in theory you can try to get there), however you can now travel toward north to Hollywood and Griffith Park where you need to install a repeater unit.
You will unlock this quest during your conversation with Carlson who will tell you that the Foxtrot Team went toward south to Seal Beach. Unfortunately the radiation there is too high and you can't go there now. First you have to upgrade your anti-radiation suits (read the part titled "Upgrade Anti-Radiation Suits").
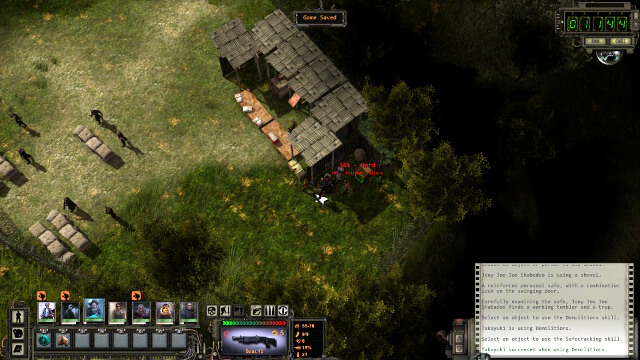
Even if you will upgrade anti-radiation suits using the cat litter you will still be unable to pass through the wall of radiation on south. However you may now go to Griffith where you can use the local radio station (you may read about details in a chapter focused on Griffith). Once you will install here a repeater unit you may contact with Arizona and with Mercaptain who will send to Woodson designs of the best anti-radiation suits. To use them you will have to find five bags of zeolite. You can find it close to the tower in Griffith in a place shown on the screenshot from above. Three of these bags are on the ground and other two are hidden in the close safe. Unfortunately it is very difficult to open this safe and even if you have the Safecracker skill on level 10 you will have only 34% chance of succeeding and 35% chance of critical failure. That's why before you will try to open a safe you should save the game or use some other way (such as a grenade). If you will have a problem you can also find two bags of zeolite in a possession of priests from a minor locations named Santa Monica and La Cienega. Return with zeolite to Woodson who will upgrade your suits. From now on you can go to Seal Beach.
Woodson will give your team two additional repeater units which you can install on local transmitters:
This quest will be completed automatically after you will leave Santa Fe Springs (first you have to secure this area and get the key). Woodson will contact with your team immediately when you will begin your journey. From this moment you can contact with him to discuss promotions. You will also receive from him information about any calls for help from local inhabitants.
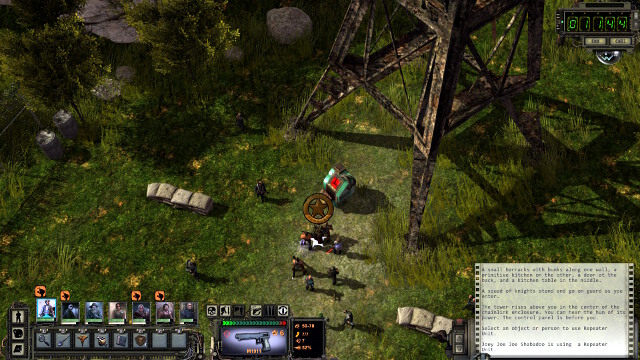 Installing a repeater unit in Griffith
You need to install a repeater unit on the radio station in Griffith. To get there you have to complete the main quest related to God's Militia. You can read about details in a chapter about Griffith.
Determine the threat level of the mystery broadcasts
Los Angeles Memorial Coliseum before the war was a famous stadium which hosted inter alia two Olympics. However in post-apocalyptic reality of Wasteland 2 Coliseum is a seat of Mr. Manners and his Mannerities. The stadium is also inhabited by Robbinsons led by Tori Robbinson who wants to rule over this place and defeat Manners. Obviously your team of Rangers will be put in the middle of deadlock between these two leaders and they will decide about the future of Angel Oracle. Soon after your arrival you will be a witness of announcement according to there is a plan of "purification" a man named Fletcher. His fate is crucial for the development of the main plot of this location.
In Angel Oracle you can also have a part of completing few quest for Rangers. You may find here three bags of cat litter and find a transmitter on which you can install a repeater unit (or which you can destroy). In this area you will not find a lot, however outside of the stadium, especially on east and west border of this location, you will find few mutated honey badgers and wild pigs.
Right after you will enter Angel Oracle you will hear an announcement about the execution of a man named Fletcher who did not clean up around his bed. Fletcher is in the center of this location. You can go to him and speak to him. He will suggest you to speak with Mr. Manners for him. After that you will meet sheriff Marshall close to the main gate leading to the stadium and he will tell you that Fletcher has escaped from the prison. Manners promised his men that someone will be executed and he will fulfill this promise by any cost. That's why one member of your team will be arrested and locked in the cage. You have to bring Fletcher back to save your character (or, if you prefer, you can refuse and initiate an open war with Mannerities).
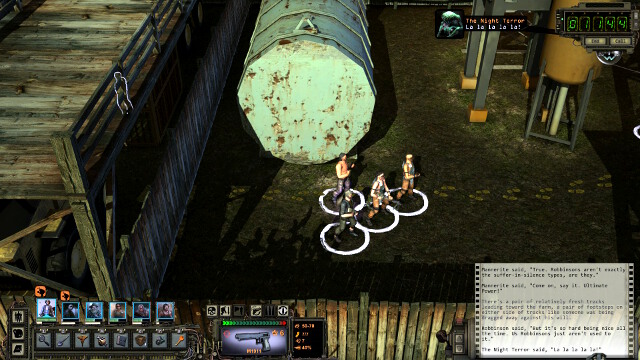 Traces close to the Fletcher's cage
If you want you can speak to the guard of Fletcher's cage although he will not be much of a help unless you have your Hard Ass skill on level 10. You should go to the back of the cage where you will find traces. Follow them until you will meet Roger Yee. He will tell you about Nick Chauvin and Gen Cronk - Robbinsons, who probably are responsible for Fletcher's escape. You can also speak to Elizavet nearby who is fugitive's wife. The skill Kiss Ass on level 7 will provide you the information according to Tori ordered her to seduce Mr. Manners since she wants to rule over the city. If you will ask Tora about Elizaveta later she will confirm this information. Now you can visit Cronk. He is on the wooden platform over Fletcher's cage. With Smart Ass 7 you can tell him about the testimony of Yee and Elizaveta which will make him confess and he will also point you the place where you can find Fletcher.
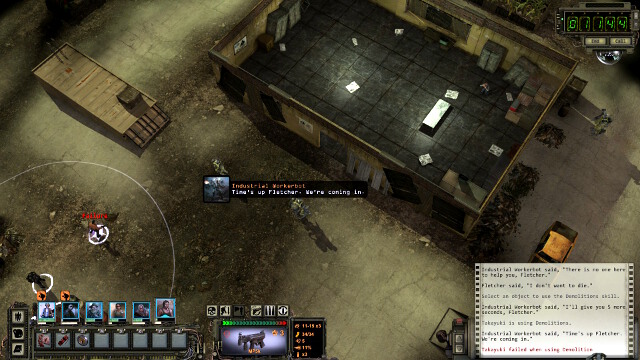 Robots attacking Fletcher
Fletcher will be in the building in the center of this area. He is surrounded by robots who try to attack him (and they will kill him if you will wait too long with your actions). Additionally this building contains a lot of land mines. During a fight you can use this fact for your advantage if you will trick robots to walk into mines. There are only four machines and two of them have machine guns, therefore the fight should be short and not too difficult. After the fight speak to Fletcher and tell him, that one of you was imprisoned and will be killed unless he will return with you. After that Fletcher will decide to join to you.
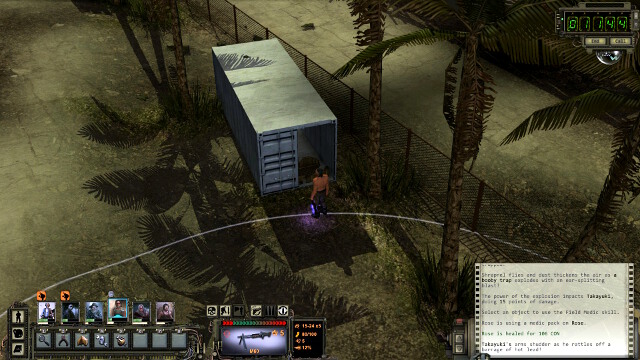 Container which you can blow up
By the way to the north of the area, you can find the locked container with a hidden storage (which you can see after you will use highlight). Blow up the container to possess it's content, inter alia a unique blunt weapon named Truth which has 10% chance to cause Concussion and gives you +1 Hard Ass bonus. After this you can return to Angel Oracle.
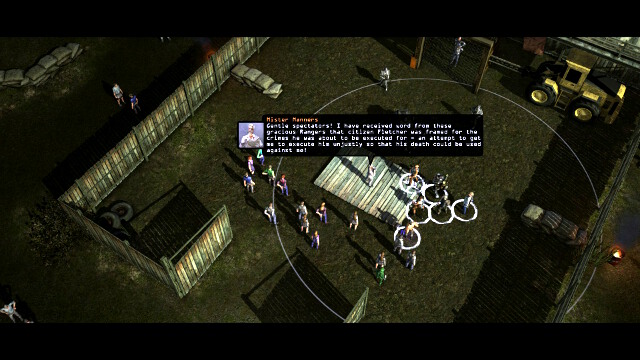 Fletcher's execution
When you will return to the stadium you will witness Fletcher's execution. You can decide what will you do next:
Interrupt the execution and convince Manners to change his customs (10 Smart Ass) or to chase Fletcher away (10 Kick Ass). All of the involved survive and Manners does not learn about Tori's plot.
After the execution the leader of the stadium may order you to find Manners or Tori with his or her followers in the aqueduct Los Angeles and to bring back his or her head. Once you will get there you can kill everyone or let them go, what will make a leader in Angel Oracle furious and you will be banished from this place (and if you will be annoying to him or her you will be attacked by everyone here). In this location you can also find a toaster in which you can find a toaster heater. You can deliver the heater to Manners in Angel Oracle what will persuade him to give you his two bags of cat litter (and if this place is ruled by Tori you can just take them. She doesn't care).
It's worth mentioning that after you will complete this quest the Mannerites' warehouse in the stadium. You can find few safes there.
Alternate endings:
Related to this quest:
Close to the gallows you will find a rope. Use it to took off from the tree Sandra (you can also ignore her). Now you can visit her parents in their shop on the stadium. If you took their daughter off you will receive a ticket which you can exchange for any item in Osmond's shop.
The faster way is to tell the guard about Sandra - they will take care of the problem - obviously, you will get a reward from the girl's parents. Sandra will gladly take from you the Climbing boots that you'll get for saving (or not) John, who was stuck in dung in the northern part of the map. When you meet him for the first time, he'll be working, later you'll find him trapped.
In a toaster in Playa Del Rey you will find gloves which you can deliver to Ethan. You will receive milk which increases stats after you will drink it. You'll get additional milk if you use Animal Whisperer to calm his goats.
Lindy Lou in the north part of the stadium will ask you to go to the Osmond's shop near to the Fletcher's cage and bring her parts for the ventilation system. You will receive a ticket to Rodia which will allow you to enter the town for free.
Arjun needs a anti-dandruff shampoo to defeat his dandruff. You can find it in a toaster in Rodia. You can return it without taking the quest. As a reward, you'll get a book that gives you +1 for Perception.
Alternate endings:
Tell about Arjun to sheriff Marshall and he will be imprisoned for attempting a murder since dandruff also has a right to live.
Sister from the hospital will buy from your team honey-badgers' tails, cockroaches' abdomens, frogs' eyes and lizards' eggs. If you don't have any of these items you can find honey-badgers in the left part of this location (outside of the stadium) and cockroaches in steam tunnels.
Right from the entrance to stadium you will find Darla on the watchtower. She will ask you to bring her water. If you will tell about it to guards on a gate you will receive water which you can deliver to her.
Alternative solution:
Darla will die if she will not get any water for a long time.
Paladino will show you on your map a location named Dentist from Brentwood. Go there and find Bill the dentist. You will get a paste for painkillers. You can also find a paste in a storage behind the dentist's building, although opening it is pretty difficult (62% chance of success if you have Lockpicking skill on level 10).
Jonathan Gitlin from a prison on stadium's turf is accused of stealing few items. He wants you to help him prove his innocence. Go to the steam tunnels under Angel Oracle. The entrance is in a toilet in the right part of the stadium.
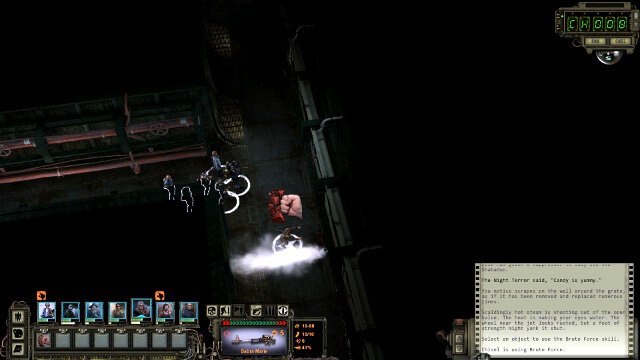 Use the Brute Force skill to extinguish the steam
In a tunnel you have to watch out for a steam that blocks your way. Every time a character passes a steam it will be hurt. Use the Brute Force skill (or Mechanical repair, if Brute Force fails) on valves to clean your way. However, you do not need to do that, because damage dealt by the couple is not too high.
You will also have to fight with few cockroaches. You will find corpses of Synth and Robbinson who have ids and stolen equipment. Inside the toaster, you also find Tissues for Kids and a bag of cat litter in the tunnels ahead. Speak to the sheriff Marshall on the stadium to acquit Jonathan. When you will visit him later you will receive your reward which is an armor with defense value 9. You can also return stolen items to their owners and receive 150 scrap (Lindy Lou in the north part of the stadium, sister Flinkman in a hospital and Mr. Paladino near to the Fletcher's cage).
Related to quests:
Close to the gallows you will find a rope. Use it to took off from the tree Sandra (you can also ignore her). Now you can visit her parents in their shop on the stadium. If you took their daughter off you will receive a ticket which you can exchange for any item in Osmond's shop.
In a toaster in Playa Del Rey you will find gloves which you can deliver to Ethan. You will receive milk which increases stats after you will drink it.
Lindy Lou in the north part of the stadium will ask you to go to the Osmond's shop near to the Fletcher's cage and bring her parts for the ventilation system. You will receive a ticket to Rodia which will allow you to enter the town for free.
Arjun needs a anti-dandruff shampoo to defeat his dandruff. You can find it in a toaster in Rodia. You can return it without taking the quest.
Alternate endings:
Tell about Arjun to sheriff Marshall and he will be imprisoned for attempting a murder since dandruff also has a right to live.
Sister from the hospital will buy from your team honey-badgers' tails, cockroaches' abdomens, frogs' eyes and lizards' eggs. If you don't have any of these items you can find honey-badgers in the left part of this location (outside of the stadium) and cockroaches in steam tunnels.
Right from the entrance to stadium you will find Darla on the watchtower. She will ask you to bring her water. If you will tell about it to guards on a gate you will receive water which you can deliver to her.
Alternative solution:
Darla will die if she will not get any water for a long time.
Paladino will show you on your map a location named Dentist from Brentwood. Go there and find Bill the dentist. You will get a paste for painkillers. You can also find a paste in a storage behind the dentist's building, although opening it is pretty difficult (62% chance of success if you have Lockpicking skill on level 10).
Rodia is a territory of Watts Towers, famous towers constructed by Simon Rodia. In the game in this place lived a small community of farmers which is now oppressed by a gang named Leather Jerks. Player can release a legitimate town mayor and defeat local Jerks or on the contrary he may help the gang take a full control over this place. There is also a third option which requires giving a power to the immature mayor's son.
In this town a main currency is ammo and you will need to use them if you want to pay for many services such as physician's help. Even entering Rodia costs 6 bullets (unless you have a ticket to Rodia from Angel Oracle or you would like to pay by shooting to guards instead of giving them ammo). Notice that the type of bullet does not matter so if you want you can pay with something cheap and unimportant such as 38mm bullets which are pretty much useless at this part of the game.
In this town it is possible to collect even four of seven needed bags of cat litter. You can also find here a radio station where you can install the repeater unit.
Right after you will enter the town you may meet the mayor von Graas who is locked in a hanging cage. You can speak with him while standing in front of the fence and ask him about the town's situation. He paid the Leather Jerks to protect the town however they imprisoned him and took over this area and now oppress inhabitants. He will ask your team to save his son named Chris who was locked by Jerks in the distillery in the east part of the town. If you want to help the mayor you have to defeat Dengler and his three men named Pat The Axe, Peter Tzanos and O'Biggun. All three of them you can first weaken however only Pat has a side quest which is described in your diary so it is easy to miss other opportunities. Go to the local bar and speak with the bartender named Ulric Kell.
Kell will suggest you to poison Pat who lies drunk on the floor. You will need a chloral hydrate which you can find in the close clinic. Deliver it to the bartender and he will prepare a proper drink. Wake up Pat by clicking on him multiple times and offer him your beverage.
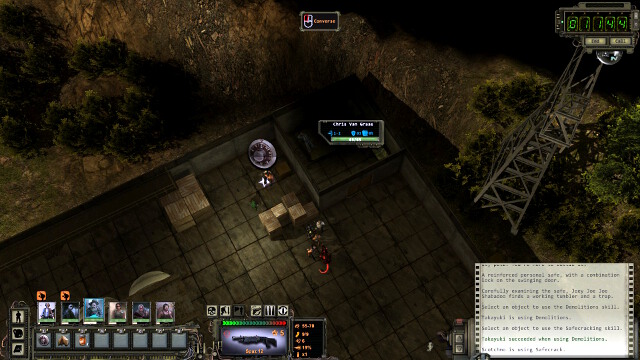 Opening the Chris' safe
Go to the distillery and tell the guard that you work for Dengler so he will not make any problem about letting your team inside. Peter Tzanos will speak to you. Use your skill Kiss Ass on level 6 and tell him that you are merchants. He will allow you to look over the distillery. Under the east wall you will find a table with empty bottles. Take one of them. Go to the north part of this building where you will find a separate room where is a mayor's son Chris. Chris does really not care about being saved. He offers you to kill his father and Dengler what will help him take over the town. Before you will leave the town you should take care of a safe which is close to the Chris' room (beware of the trap!). Inside you will find a key to the sewers and Chris' diary which will allow you to figure out a key to his hiding place - 2369.
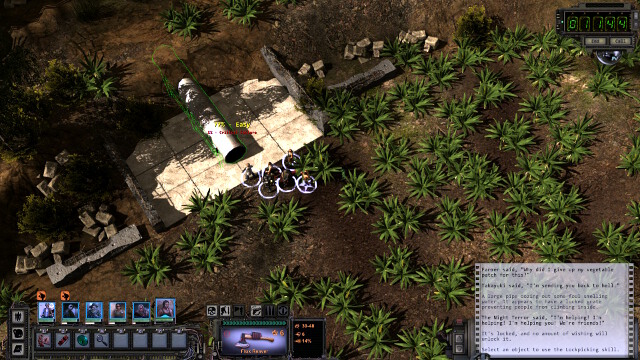 The entrance to sewers
Go to the farm in the north part of the town and use an empty bottle from the distillery on the local well. Don't drink this water or you will catch an illness. It is important to do that before you will help doctor Horchat to cure this town since after that the water will be cleaned. A little further toward north you will also find a pipe to the sewers. Use a key which you have found in the Chris' safe or open it through your Lockpicking skill. In the sewer you will find a cat litter and an alligator which you have to kill. You will run into an explosive on the wall, with laser aiming system which is difficult to disarm. Once you will get on the other side you will be able to enter the bank.
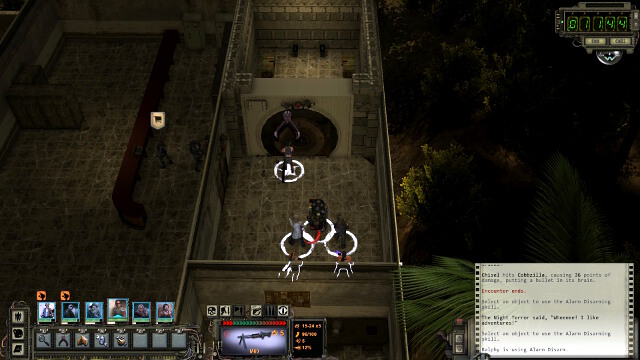 Break into the treasury
Break into the treasury (remember about shutting down the alarm!). In storages you will find ammo and a book which will improve your Safecracking. In Chris's locker (the middle one at the right wall, the combination is 2369), you find a tequila recipe. After you click the right mouse button on any of the lockers, you only get the option to use Brute force. This is a glitch, because you can open the lockers with Safecracking, just as well. This is much easier. As soon as you empty the bank, return to the farm through the sewers.
Go to the east part of the farm where you will find Willa and her sick possum Pogo. You can buy from her a steak from Pogo for 5 bullets. Go towards south to the Dengler's office visiting also a distillery and giving a poisonous water to Peter.
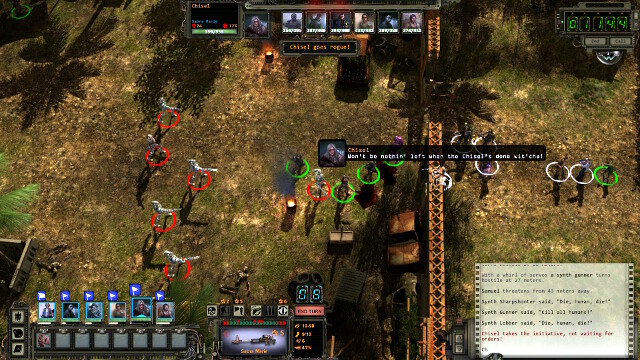 A battle with Dugan's robots
You should speak with Dengler about the side quest which requires you to persuade Jess to plant an agave. Even if you don't want to help him it will allow you to enter the Jerk's area where also is captured the mayor without any problems. Speak with O'Biggun and give him a poisoned steak which you have bought form Willa what will make him sick. After your visit at Dengler's the Rodia's gate will be attacked by robots. Go there and help Jerks defend the city. There only are few robots, but their firepower is overwhelmed and they also use powerful grenades. In spite of that, with help from Jerks, you should be able to manage here. Use them as cannon fodder and, if necessary, retreat deeper into the city, to drag more gang members into the fights. After the fight, remember to loot the bodies. The rest of the Jerks will not have anything against it.
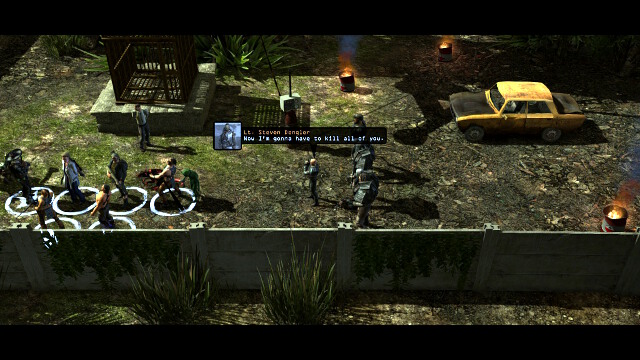 Dengler and his followers will attack your team
Go to the mayor (if you've got a side quest from Dengler you may go there without any problem) and open his cage. Dengler, Pat, Peter and O'Biggun will attack you. Dengler is not a much of a challenge since he has only 3 points of armor and 100 hit points. The other three are the real problem. They have armor 6 and 300 hit points (Tzanatos has 275 hit points). If you have poisoned all of them, they will have only around 100 hit points so the fight will be much easier. Focus O'Biggun first since he has a shotgun which may hurt even a few people at the same time (including the mayor!). You should ignore any other Jerks that will attack you. Once you will defeat Dengler and his three followers the rest of Jerks will run away.
After the fight mayor von Graas will return to his office. You can give him a tequila recipe and you will receive 100$. You will also unlock the quest which requires you to visit Angel Oracle and sign a deal between Rodia and Angel Oracle with the current leader of the stadium (Mr. Manners or Tori Robbinson).
Alternate endings:
Related to quests:
When you will visit a clinic in Rodia you will meet parents of sick Tom overpowered by a plague which torments Rodia. If you will speak with Horchata in this building you can offer your help. Horchata needs a microscope. You will find it in one of the storages in the hospital in Angel Oracle. No one will bother you if you will just take it with you. Return to Horchata and you will receive a hook which you need to use on the well in the north part of the town.
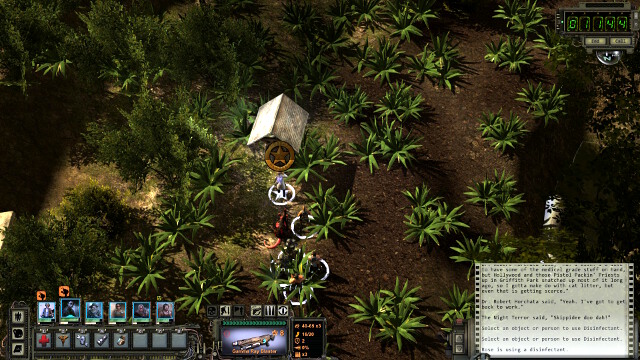 The local well - the source of the plague
Using the hook you will discover that in the well is a dead Synth. Take him with you and return to a doctor. You will receive a disinfectant. Go again to the well, use the disinfectant and return to the clinic. Doctor will tell you that he needs more time to cure every inhabitant. You can visit him later and receive your reward which is a bag of cat litter. From now on you can also use his services for free.
After the scene in his house, Dante will ask you to convince Beatrice to meet him in his shed. Beatrice will be at Dengler's. Talk to him about her. The girl will go to the neighboring room, where you can talk to her. Tell her about Dante's suggestion, then go to the shed in the farm. You'll witness Dante lock her inside. If you healed the city, then if you visit Dante later on, he'll give you a bag of cat litter. If you go to talk to Dengler, he'll immediately attack the team.
When Dante gives you the quest to find Beatrice (she's at Dengler's) you can convince her to go to his shed. There is, however, a better solution. Go to Virgil near the crater and talk to him (first, bring him his possum, Satan). Virgil will tell you that he and Dante were partners and you can't trust Beatrice. He'll ask you to warn Dante. You can go to him and tell him the message. Dengler and his entourage will show up and you'll have to fight them, so it's a good idea to poison his guards beforehand. After the fight, talk to Dante - you'll get Heyman hot potato - a very strong explosive that you can use, for example, to blow up the safe in the bank, if you can't open it.
Note - cooperation with Dengler is essential for this conversation - complete two quests for ghim and you'll get a task to convince Dante to tell you where his treasure is hidden. It will be a proof that Dengler and Beatrice want to rob Dante.
Virgil is an electrician and he'll offer to repair the radio tower when you complete the task. You'll be able to install a booster on it.
Applies to quests:
Alternative solutions:
You will unlock this quest by speaking with Dengler. Go to Jess who you can find on a farm. Even if you will try to use your skill Kiss Ass on level 6 she will not want to plant the agave. You can try to force her to do it or let it go. In result she will not plant the agave and you can tell Dengler that she did and pay for her 40 bullets.
On a farm you can find a huge possum named Satan. Talk to Virgil and he'll give you possum snacks. Give them to the animal or use Animal Whisperer skill and it will start following your team. Then you can take it to Virgil.
You will unlock this quest while you will speak with Ulric Kell in his bar. Find chlorine hydrate in a local clinic. It is locked in a safe however nobody will care if you will take it. Return to the bartender and you will receive a beverage which you can use to treat Pat (you can wake him up if you will click on him a couple of times). Pat will be weakened during the battle with Dengler. You'll get a shotgun as a reward for setting the city free.
After a scene in his house Dante will ask you to convince Beatrice to meet him in his shed. You can find Beatrice at Dengler's. Talk with him about her. The girl will soon move to the next room where you can speak with her privately. Tell her about Dant's proposition and go to the shed on a farm. You can see there that Dante locked her inside. If you will cure the plague Dante will later give a bag of a cat litter. Additionally when you will speak with Dengler he will immediately attack your team.
When von Graas reclaims his power, he'll give you a quest - get to Angel Oracle and tell them about the willingness to restore trading between the towns (Unless you killed both Tori and Mr Manners). When the leader of Angel Oracle agrees, return and tell von Graas about your success.
The Mayor will not accept the offer if his son, Chris, dies in the meantime.
Hollywood is a capital of prostitution, slavery, drug dealing and gambling. The city is ruled by the Hollywood Chamber of Commerce led by Heidi Hollander. The HCC is at war with the Salvation Church from the Griffith Observatory which tries to purge all the sinners. The current name of the Salvation Church is the Bastion of Faith. You need to get to the Observatory, specifically to the radio station where you can find a zeolite what will allow you to contact with Rangers from Arizona.
Traditionally there are few ways to complete the main quest of this location. You can help the Chamber defeating the Church or vice versa. You can also try to do the impossible and make a peace between these two organizations.
The best way to reach the sewers is through the Hollywood Chamber of Commerce. After you will get inside the building you should go to the room on the right, then upstairs and then open a door using the Lockpicking skill. Kill the guard (other residents of the Chamber will not notice that so you don't have to be afraid of their hostility or of failing your quests). On the wall behind the guard you will find a secret switch which will open a secret bedroom (you need to use your Perception skill). In the bedroom you will find an entrance to sewers. There will also be a safe with the key to the salt laboratory inside.
The second entrance you can find in the Hotel California although owners of this place will not really like the idea of helping you. You will be attacked if you will be to stubborn with your requests. At first you will fight with three enemies and you will have to destroy the close wall with explosives if you want to kill the receptionist. After that there will also be another two guards next to the entrance to sewers. One of them is The Beast with a minigun and the other one is The Mini Beast with a mini minigun.
In sewers you will find mostly a local junkies however not all of them will be hostile. You can also find here the salt laboratory and Josie from the side quest "Find Josie, one of Raji's runaways" which you could unlock on the Hollywood cemetery. During the exploration, do not run ahead blindly because you may run into single traps - mines with laser targeting system mounted on walls.
The main plot in Hollywood you will begin by speaking in the Hollywood Chamber of Commerce with Heidi Hollander. Before that, you have to save Heidi - she's being attacked by three pigs at a funeral, right beyond the gate. If you don't hurry, the beasts will kill her friends but leave her. Kill the animals and talk to her - she'll return to the brothel. When you return to her, she'll ask you to check if Veronica fell in love. You can also find Veronica in the Chamber in the room on right of Heidi. She is definitely bothered with something although she does not trust Rangers enough to share with this topic. If you will use your skill (first Smart Ass 7 and later Hard Ass 10 or Kiss Ass 8) you can unlock the quest which requires you to deliver to her any evidence for the existence of slavery in Hollywood.
 The fight with Fast and his people
Go to the Schwag's bar. Speak with Fast who will notice an extraordinary talent of Rangers and will offer them a visit in his office where he helps new stars to rise. You can also speak with Flo who will ask you to meet him at the cemetery to tell you something important about Fast. Schwag's diary or Fast's diary may both be an evidence for Veronica. The first one you can find in a safe in Schwag's office where you can't walk freely. First you have to hack the door although Schwag and his people will attack you after a short conversation. The group is only three men strong and they are wearing weak armors, but have high CON and quite decent weapons, so do not be surprised if they give you some beating. If you will show the diary to Flo she will become a new owner of the pub. Papers about Fast you can find in sewers close to the entrance to Hollywood (don't confuse them with the location named Sewers) where you will be attacked by Fast and his people. After the fight you may open cages of the locked "stars" however you should first disarm the explosives on the door if you don't want to kill locked people. Also, you can use the key that you have found on Swifty's body, which saves you some effort. You can now go to the Veronica with an evidence.
Veronica will ask you to deliver an evidence to Heidi. When you will do that Veronica will tell you about her love named Broken Man who always wears a mask so she can't even tell what is his real identity. Now you can tell Heidi about Veronica's love to complete this quest. Veronica will be fired and Heidi will begin her preparations to attack the Church. She will ask your team to help her and the Chamber defeat the Bastion of Faith. If you want to make a peace between these two organizations don't tell Heidi about Veronicas lover.
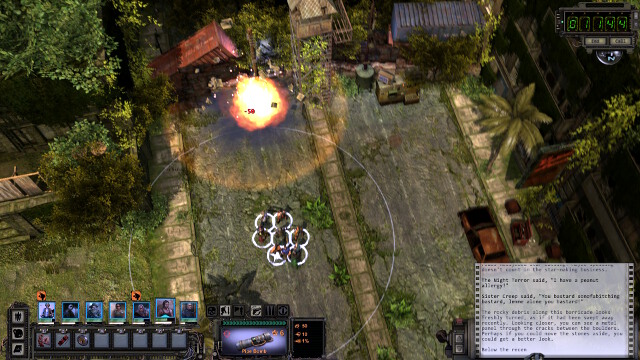 The secret entrance to the Bastion of Faith
In the north part of this location close to the a little TV and Matthias you will find a pile of rocks. Your Perception skill may help you discover that behind these rocks is a passage. Use explosives (you can buy them form Rambeau) to open it. Go inside and you will reach the Griffith Observatory. You will be in a room of Ascension McDade who is Veronica's lover (you may find his mask on the table). Ask him about Veronica and he will confess and ask you to go to her and tell her the truth. He may also unlock a side quest focused on finding evidences against Malediction Mayweather (tell him that you want to join to his Church of Inquiring). Return through the tunnel to Hollywood and Veronica.
Tell Veronica that McDade loves her. Ascension himself will appear and they both will offer you to make a peace between the Church and the Chamber. If you want to do that you have to let Veronica take over the Chamber and also help Ascension to take over the Bastion. To help Veronica get rid of Heidi you need to have at least three votes in the voting. Go to the members of the council and try to persuade them to vote for Veronica. Votes belong to:
After you will succeed to provide at least three votes you can go back to Veronica. She will ask you to make McDade a Bastion's leader before she will start the elections (read a chapter about Griffith).
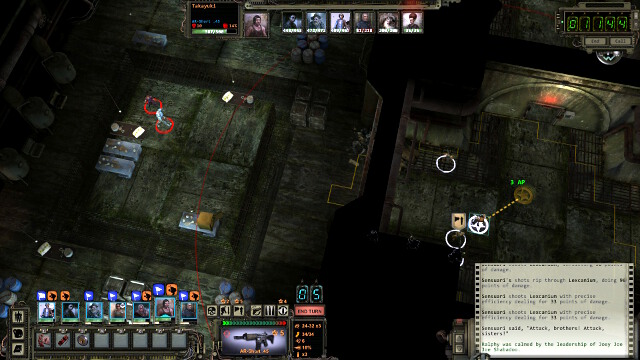 Heidi and Synth in sewers
When McDade will become a leader of Bastion you may return to Veronica. Go to the elections to the room on left of the main room in Chamber. Heidi will run away and Veronica will ask you to find her. Go to her bedroom behind the rooms where you was talking with Veronica before. Either kill the guard or open the door and let the trap do this for you. After that, use Perception to find a lever which will open a hidden door. Inside you can find a safe from which you can take a key to the salt laboratory. Use the entrance to sewers. Go towards north and open a door to a laboratory with your key. You can also find a key when you will fix a toaster of a crazy uncle Vilpula nearby or you can just hack through the door. Inside you will find a group of junkies, Heidi and a Synth who is the biggest threat among them. If you want to make this battle easier you can go to the sewers earlier and clearing the laboratory form junkies. In this case you will fight only with Synth and Heidi. If you have not done that anyways, stay away, within a safe distance and serve the opponent a rocket. A well-aimed RPG will deal with everyone, apart from the synth, who loses almost all CON, as a result. Also, this will open the nearby safe. After you have killed everyone, return to Veronica.
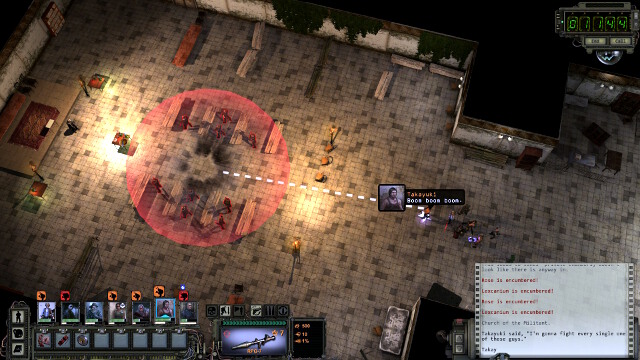
It's not the end of this story yet. Veronica will ask you to meet with Ascension who will close to the gate leading to Los Feliz. He will tell you that meanwhile Retribution Jones led the coup and took over the church. He will suggest you to use the secret entrance behind the pile of rocks (which you have used before) to get to the Observatory fast and to kill Jones. Do as he says. Inside you will have to clean this area from a bunch of priests. A well-aimed RPG (such as on the screenshot above) will kill all Retribution's man with one hit before the battle will even Begin. Jones will not be a special challenge for you. Also, you will be able to rob the store by the Observatory exit, but do not take all - the amount of gear there may render your allies unable to move. You an loot the store with impunity, but do this wisely. For example, you can load all of your party up, with the exception of one character, thanks to which you will still be able to fast-travel between locations, return to Hollywood and sell everything you can. Then, with your backpacks empty, you can return for what's left.
After you clear the interior, use the main entrance. Outside, you will have to fight knight remnants. There are quite a few of them there and they have decent levels of CON. Also, they pack a meson cannon, which is why you should remember about explosives and remember to haste, to avoid getting hit a powerful energy projectile. After you clear the Observatory yard, go right. At the entrance into the Radio station, there are three nights more and two turrets. The final stage is the radio tower guarded by a group of gunmen and a meson cannon. The enemies will quickly cluster together. Use this to your advantage and deal with them using explosives. Hurry to destroy the cannon, before it is fully charged. You can also ignore knights in front of the Observatory gate. After truce between the Salvation Church and Hollywood is signed, they become neutral to you.
Before you return to the Observatory, remember to free the penitents and talk about it to Maggie.
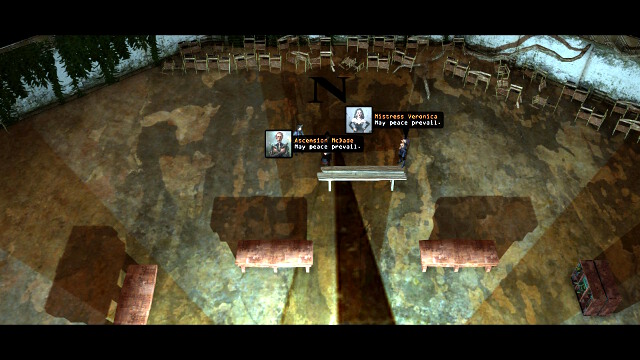 A peace between the Church and the Chamber
After this job you will find Veronica and McDade in the main room in the Observatory (it's the same room when you've met Malediction Mayweather). They will sign a peace between the Hollywood Chamber of Commerce and the Salvation Church. As a reward your team will receive 3000$!
Alternate endings:
Related to quests:
In the north part of Hollywood you will find Matthias or at least his TV in which you can find him. He will offer you to join his Children of the Citadel. If you will agree you need to prove that you don't lie. It will require you to complete few uncomplicated quests. If you want to achieve transcendence you need to kill leaders of Rodia (Dengler and the mayor), then Angel Oracle (Mr. Manners and Tori Robbinson), then Hollywood (Heidi and Veronica), and then Bastion (Malediction, Retribution and Ascension). You also have to kill every guard from all of these locations. Then you can go to Seal Beach and join the Children.
Alternate endings:
It's a pretty short quest. Speak to officer Lam. Persuade him to let Ma Brown to reopen her restaurant by using the Smart Ass skill on level 8 and paying him 100 scraps. Ma Brown will reward you with 15 bullets 9mm.
The pest is a little puppy in their shop. You can spook him away if you have the Hard Ass skill on level 8 or let him follow your team. Later on in the town you will be talked down by a random citizen who can take the dog with him (if you have a Kiss Ass skill on level 7) or you can decide that you will keep him with your team. You find the passer-by a bit to the left of the store entrance. You can tell him by the fact that unlike in the case of the rest of people in the street, you can talk to him.
It's a quest from Johnny Malloney who you can meet on the cemetery. Nearby you can defeat few mutated wolfs and frogs. You will be rewarded with 20 shotgun bullets.
Josie is in a Hollywood Sewers. To get there you have to use your strength to walk through the Hotel California or use the hidden passage in Heidi's bedroom in Hollywood Chamber of Commerce. The girl is very sick and if you want to save her you need a very high level of the Surgeon skill (you have 62% chance of success on level 10). After you will succeed she will follow your team. Escort her to Raji on the cemetery and you will receive a book which gives you +1 to the Lockpicking skill.
You will unlock this quest by speaking with Manny Wong in casino in Hollywood. Chips are possessed by Chris in the inn in Los Feliz. You can get them in one of few ways:
Opening one of the lockers at the back of the inn, where you also find caps. Unlike the ones that Chris gives you, these are the real ones.
Return to Manny with the caps. If you bring him the counterfeit ones, he gets angry and demands that you bring him the actual ones.
Los Feliz is a buffer zone between Hollywood and Griffith. Exhausted pilgrims may rest here before they will try to take a part in so called Samson's Arena Challenge which shows how useful may be a candidate for the order. A challenge is focused on reading the James King Bible and getting through the park Griffith to the Observatory using the sword and fire.
Los Feliz is a small place. Basically you can focus entirely on the local inn and the local sermonizes which will show you the very original perspective on religion of the Salvation Church and God's Militia.
You will find Alex in the local inn where he will try to learn something about the Bible and to prepare to the Challenge. He will ask your team to let him go with you through the park to the Bastion where should be his brother which he wants to release. Luis is just behind the observatory's gate. He won't leave the Bastion before you will release other penitents. If you want to do that you have to either kill their torturers or lead them to the road between the church and Chamber of Commerce. After the job is done meet again with brothers in the inn to complete the quest.
The path to the observatory leads through land mines, mutated toads, honey badgers and blood eaters. You can use land mines for your own good. Let your team stay behind and send forward the sniper only. Try to get as far as you can and shoot to the furthest animal which you can see. Return to the rest of your team. Animals which are going to attack you will detonate land mines first. Obviously many mines will still be active so remember about it once you will finish the battle. This area has also many storages so your team's digger will have a lot to do.
 The entrance to the observatory
Before you will enter the Bastion you need to deal with a group of a church's knights. You should entirely focus on the leader of the group which is Indomitableness Garza. He will surrender right before he will die and the gate to the Bastion of Faith will be opened. If you feel up to it, you can shoot the rest of the knights. You can kill them with impunity and you receive some experience and gear.
The God's Militia is divided into three Churches - Militant, Vigilant and Ecstatic. They are ruled (in that order) by Retribution Jones, Ascension McDade and Malediction Mayweather which also is a leader of the Church. To get consent for entering the radio station you have to first join to one of the churches by speaking with its leader. You can also unlock the quest from every leader however once you will start helping for one side you can't help other churches later!
In the observatory you will also find a free medic and a weapon merchant.
The only book in the game that allows learning the hidden ability "Combat Shooting", immediately on the highest level. This ability grants 99% bonus to chance for critical hit when using any weapon. In order to unlock the bookshelf, you must have Perception on level 10. The book might not be detected during the first try. In that case, walk away from the bookshelf, wait a moment and try again.
In the Bastion you can speak with Maggie who will tell a lot of interesting things about the leaders of the Church. Apparently the paladin named White has a drinking problem and a wife of Malediction Mayweather lost her previous husband in suspicious circumstances. When you will enter the Observatory for the first time the paladin His Holiness White will speak with you. He will ask you to give him all the drugs and alcohol in your possession since they are forbidden in the Bastion. For now you can just ignore him and he will go outside of the building.
If you have helped Veronica in Hollywood the best decision now would be to help Ascension. Speak with him now if you didn't join to the Vigilant Church yet. He wants you to find for him an evidence of corruption of Malediction Mayweather. In return he will allow you to use the local radio.
Go to the Malediction's chambers and talk with his wife Fidelity. Unfortunately she won't help you. You can use Kiss Ass on her (at least 8) to gain additional experience. Use the stairs right to the building's main entrance to get to the observatory.
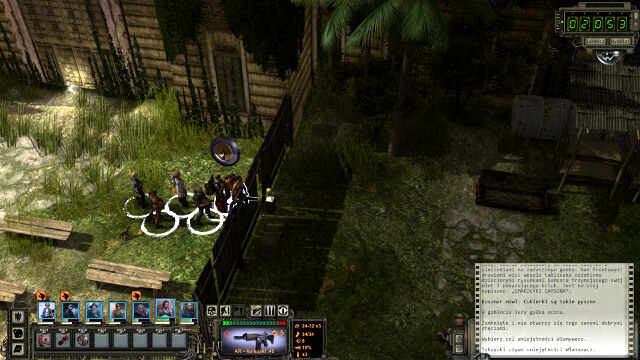
On the roof you will find the storage with alcohol. Take with you vodka and return to Bastion where you can speak with His Highness. He will be mad at you since you are wasting his time however he will instantly cool down once you will give him one of your own bottles of vodka. Using his good mood you can ask him few questions about Malediction's wife. He will tell you that he killed the previous Fidelity's husband and that he keeps his victim's eye in a cabinet. Go to the place which you can see on the screenshot above and use your Lockpicking skill to gain Simms' eye. This way no one will notice nor attack you. Take the eye to Fidelity. She will give you evidence against her husband. Take them to McDade. You will be a witness of Ascension killing Malediction. From the body of the church's ex-leader you can take the gate which will let you go to the radio. Speak with McDade and go to the transmitter. The guard will not make any problems. You can use the key and go upstairs where you can install repeater unit and take three bags with zeolite from the ground and to from the safe (you need five bags to upgrade your suits). Now you can return to Veronica in Hollywood.
Alternate endings:
Related to quests:
Seal Beach, also known as New Citadel, is the last location in the game, an old military base occupied by Matthias and his followers. Attacks of synths and Dugan's robots are coordinated from here. Your main task is to simply get inside, which is possible through underground corridors, to get to the chopper and return to Guardians' Citadel.
Upon entering the location, you have two possible routes into the tunnels: eastern or western entrance. On the western side, you'll encounter two arguing synths - one of them wants to help you, while the other will lure you into a trap: Dweezle and Johnie. Choose Johnie and kill Dweezle. He'll open the left door and suggest to use a terminal (after you hack it) that will close the room with enemies, which will make entering the tunnels safe. Also, you can ignore his advice and start the shooting. It is best to use explosives for that, against opponents clustered together. At this point into the game, they should not e too much of a challenge and this can also provide you with some experience.
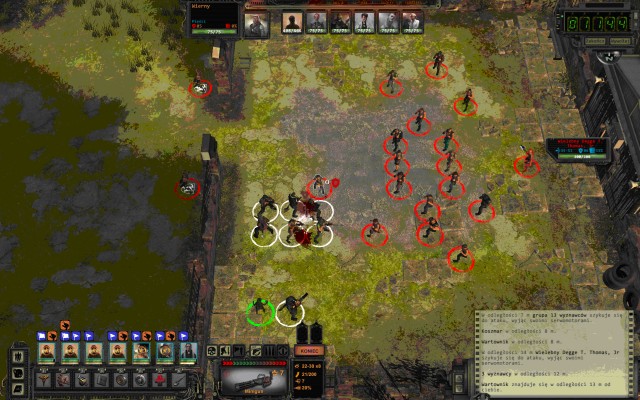 Right entrance to the tunnels - angry followers
The second entrance on the right is only for Matthias's followers - when they see you as an enemy, you'll be attacked by two guards, a priest, and over a dozen of followers - they are weak, a few grenades or rocket launchers will get rid of them. In the south, you'll find a follower waiting in line to a toilet - he'll give you 500 scrap metal for Tissues for children.
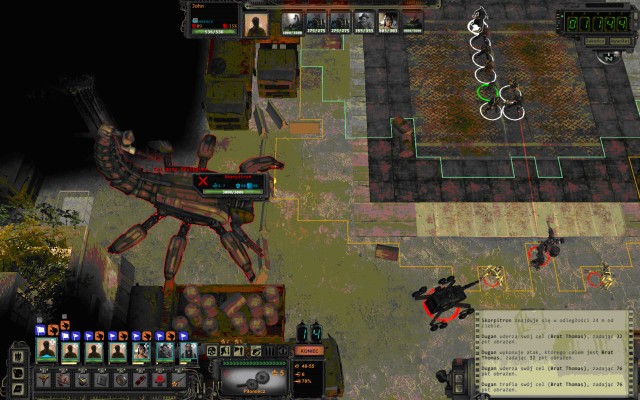 Boss - Scorpitron
There are two parts in the metro station. In the Southern one, right next to the lower passage, you find a toaster with DAT tape, which Mercaptain will exchange for unique weapon upgrades. Around, there are single traps, some crates and groups of opponents of varying strength. You can walk around them, but you can also defeat them, if you like. Your task is to go North. At the very bottom, you find Dugan - a robot, who does not want to fight you and sends 5 robots against you. They fight at close quarters. Also, he sends 2 shooters and a meson cannon. When you get rid of them, exit the tunnels through the main gate, but heal your team first. Dugan, meson cannon and Scorpitron are waiting for you outside. Despite its impressive size, Scorpitron is not very dangerous - it uses a rather weak Gatling, a flamethrower and every few turns it spawns a miniature versions of itself that can be destroyed with a single shot, so focus your fire on Dugan first and destroy the cannon, leave the boss for last. Enter the chopper and go back to Arizona.
In the Director's Cut, among the opponents on the surface, you do not find a Scorpitron, nor a meson cannon. Instead, you find Dugan and a large group of Children of the Citadel. Also, it is possible that the opponents do not attack you and wait patiently for your move. You have a choice, then - either position your people and kill them all out, or ignore them and run to the chopper. Nobody will stop you.
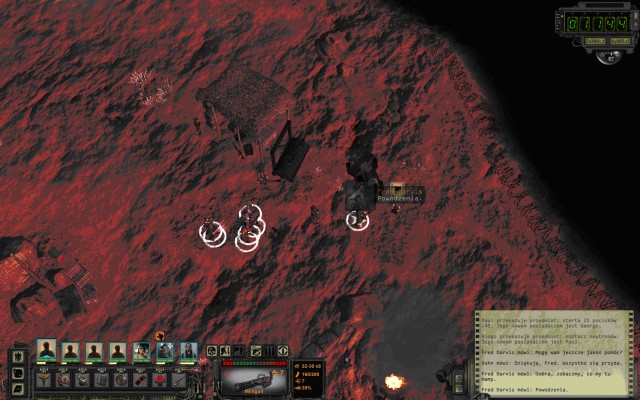 Resupplying and preparations
In Arizona, you won't be able to explore the area - you only have one quest left - defending the destroyed Citadel. . You land within a long distance of the building's entrance, in a safe spot where you can get some supplies and get prepared for the final battle. You should get rid of all the garbage and buy not too much ammo, maybe some melee weapons. You'll find a lot of supporting characters here who will help you if you helped them:
Vargas - the general will offer you his help. Visit him to level your party up, because the radio stops working at the Citadel;
Jan and Darwin mutants - if you kept the promise about not telling anyone about them;
Fred Darvis - a man you met in Prison, who had a problem with a transport cart. If you helped him, he'll be here to help you with the best weapons;
Mercaptain - if you have collected a DAT tape from a toaster in Seal Beach tunnels, she'll give you unique weapon upgrades;
Hopi and Magee - two girls from Damonta, they will help you if you have helped them fight robots;
Matt Forrestall / Kate Lawson - according to which location you've saved (Ag center / Highpool) and how much you've improved the living conditions (medicine for Matt, mayor election for Kate);
Kekkahbah, Casey, Mellisa - people from Rail Nomads Camp if you've helped them achieve peace between two groups;
Jill Yates and Bart - you've met them while going to Titan Canyon. If you've saved Bart and helped them get their cows in Damonta, they will join you;
Danforth - leader of Skorpions will help you if you have helped them achieve peace between Guardians and Skorpions in Prison;
Captain Sadler, Brother Phoenix - depending on what you've done about Titan, you'll get either Captain Sadler from Diamondback Militia, or Brother Phoenix (he'll blow himself up while attacking).
If there is someone missing, this means that you have improperly completed a quest connected with that character, or you forgot to talk to someone, after you completed the quest. However, if you have been trying to help people in Arizona, ease down conflicts and so on, in front of the Citadel gate, there should be a large group of supporters. Do not worry if only a handful of them actually come, because they die quite quickly anyway. Apart from that, at this point into the game, your party should be able to defeat Matthias on their own.
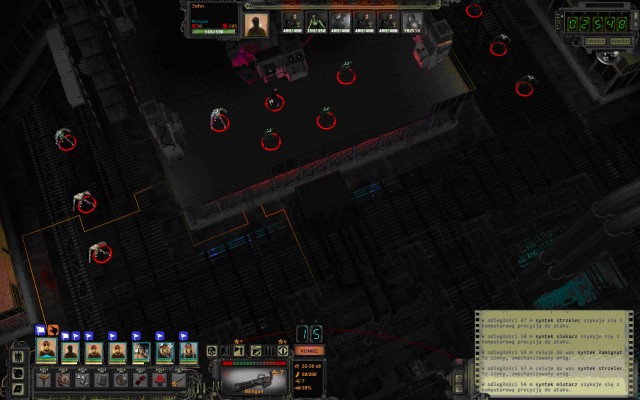 Placement of synths
After you resupply your team and choose people to help you, you can go to the Citadel. Consider whether you want to take all of the available characters, because the road to the Citadel is quite narrow and excess of people can easily form a congestion that are difficult to unload. Apart from that, not all allies are equally useful, due to the weapon they have, or their CON level. You will use the majority of them in the form of cannon fodder, but there are several characters here, such as Hopi, Maggie or Vargas, who prove to be decent shooters. Also, remember that they can heal wounded allies, if necessary.
On your way, aside from a robot scorpion (smaller than Scorpitron), you'll only encounter small groups of robots and a meson cannon by the entrance. When you enter the building, you'll find out that the armored door in the center is open and the elevator leads deep underground. You'll meet Matthias and some robots. Regardless of your choices, he and his robots are controlled by Conchise AI and a final battle will start. The robots aren't very strong, but they will respawn in four spots. You don't have to attack Matthias, but your support probably will. Find a spot behind a cover to have a clear view of places where robots are spawned. It's a good idea to equip each character with at least one weapon with a different type of ammo or melee weapons. The robots are heavily armored, so energy weapons, sniper rifles, and - in case of melee - blunt weapons are best against them. In total, there are not too many robots, but they are heavily armored, therefore energy weapons, sniper rifles and clubs for melee, will be best here. Try to expose yourself to enemy fire as rarely as possible, because machines are capable of immobilizing even the toughest of characters in several shots.
 Atom bomb
As soon as you defeat robots, go right to find Matthias, where you find stairs up. You will get back to the Citadel's ground floor where you'll have one more quest to do: detonate the nuclear bomb to destroy Conchise. You'll find it in a room nearby, where Min Liang Tan used to trade.
Possible solutions:
Convince Mercaptain to enter the chopper and escape;
Use the nuclear bomb and sacrifice the whole team;
Choose one person to stay and detonate the bomb while the rest escapes.
The choice doesn't really matter - only a summary in the ending screen will change.
Mysterious Shrines are unique objects which provide your team an additional skill point or some amount of experience points. They can be found during your travels with a high Perception skill and some people can also share with you their knowledge about Shrines' location if you will do something good for them, mostly outside of the quests, In other cases you can also find a Shrines' location by using a specific computer.
Shrines are also located in almost every important location such as Highpool or The Prison. They always provide one skill point and they are marked on a map of every location in specific parts of this guide. If you want to use a Shrine you need to use it with any member of your team. The reward will affect everyone.
These three locations will be located by Sue if you helped Agricultural center or in the radio if you helped Highpool. You have to pour to water containers the serum to complete the side quest named "Fix Sue's mistake and save three other communities from the Ag Center plague". In the village and on the farm, you find pod people, who explode at the moment of death, and also big bugs, which can poison the target, if successful.
In the village to the North of the Ag center, the sheriff who is imprisoned with his men, gives you a key to the building at the end of the road, after you save him, and the safe combination 62923779. Apart from that, it is worthwhile to search every location, because crates and caches abound there.
Sean Bergin will unlock this location for you in Highpool (even in destroyed Highpool). Beside a small group of Wrecking Crew you will find here few chests and a Shrine which will provide you one skill point.
This location is completely optional. You will find here a lot of strong robots which may reward you with a lot of experience points however better don't come here unprepared. You can also find here few storages, toaster with Amigo trousers (which are irrelevant in the later part of the game) and a robot named VAX who is not an NPC although he will follow your team and help you during battles.
One of the best methods to clear this location is to send a fast character ahead. Have them reach Vax, activate him and return to the party with him. Thanks to the firepower that the machine packs, difficulty level of the fight drops significantly. You only need to make sure that he is not wounded by the other machines.
This micro-location will be unlocked with the progress of the main plot. When you will have to get rad suits you will get to Rick's RV with Rick which you may release. You may find rad suits in the safe which has a key 733.
You will also find here a toaster with the faded photograph which you can deliver to Mon in Angel Oracle.
Beside the silo containing the nuclear missile (which you can disarm or send to the Temple of Titan) you can also find here the Sierra Madre plane in which Rick Baychowski located a treasure. You may help him and split the treasure or you can just take whole by yourself. You will also find here a Double Six tragedy report and AirMall Catalog in the toaster. You can deliver both these items to Flintlock from the Citadel.
Here, you find an old farmer lady whose cows are being stolen by Matthias' robots. If you destroy them, she gives you a book +1 Smart Ass. At the corpse, you find a modified assault rifle - "Sweetness". The local barterer offers quite a lot of good weapons and ammo.
To rescue cows, go to the Western part of the map. You notice the animals and two columns of cyborgs. They remain neutral, for as long as you stay away, so keep your distance. If cows reach the Northern part of the map, you fail at saving them and, as a result, you do not get the book. Therefore, approach the cyborgs, position your men and take a shot at the thieves. The fight should be short, because the enemy packs a large firepower, but has little CON. If you succeed, you see a short cutscene of the return of the cows to their pen. After you reach the column of the stolen cows, you will have very little time to save them, so save the game after you enter this location, just in case.
Gene Crocka from Angel Oracle will tell you where Fletcher is being held. You can bring him back here, but first you'll have to get rid of robots.
Here you'll find Tori/Mr Manners. This location is available only if you agree to kill the opponent and bring his head to the Angel Oracle leader. You can also find a toaster that you can bring to the cook. If you do, Manners will give you cat litter. While exploring the area, watch out for mines, because they are score of them here. There are no other threats in this location.
Zoe and Doe ask you to save their girls in the building attacked by God's Militia. After you kill them, you can get a lot of good equipment. There also is a statue here - +1 skill point for the entire party. Unfortunately, you won't get any reward from the sisters.
It is easiest to use stupidity of the opponents here. After you enter, stand behind the wall on the left. Come out with one of the characters and fire at the nearest policeman. The enemy starts running towards you, collect a group of others and become, this way, an easy target for grenades, shotguns and heavy weapons.
Bill, the dentist, will give you denture paste for Mr Paladino from Angel Oracle for painkillers. If you don't have them, take the paste from a crate behind the building. Bill owns cows and tries to get rid of them. You can convince Mr Manners to give up cannibalism - you have to talk to Bill about buying the cows, but first take a sample for Manners. You'll also find a trader here. Apart from three robots, there are no threats here.
Here, you find an old barterer. You can bring him a Sanford & Sons VHS from Los Alamitos. At the wall, there is a toaster with a dog whistle, which you need to take to Los Alamitos and exchange with the only person there.
In the area, there is a group of Children of the Citadel. It is a big and well-armed one, but they will still ask you for your help at eliminating Dugan's robots. You can agree to do that, or tell them that you are rangers straight away. In such a situation, you will be immediately attacked and most probably, killed out. Accept the quest and be on your way.
Robots are occupying an enclosed area. There are six of them, including one shooter and one meson cannon. Still, with the help of rockets and grenades, you should be able to deal with them easily. Right next to the cannon, there is a cache with door that cannot be pierced, so use similar tactic as in Salt Lake Park, if you want to get in. It is worth the effort, because inside, there are quite a lot of munitions and medicine. Right past the cannon's position, you find cat litter.
Children of the Citadel thank you for your help. If you want to, you can attack them for experience and a handful of items for sale. Position your men close to the group, preferably where robots are stationed, or behind the nearby wall. Have all of them hold their weapons ready to fire. Select the sapper, give him the best rocket you have, fire it towards the Children of the Citadel and run away immediately. As soon as the fight starts, shoot out all of the enemies running towards you. Use the best weapon that you have and do not be stingy on rockets, because the enemy is a tough one. Thanks to appropriate deployment of your men, and the dumbness of the opponent, you should be able to deal with all of them, while keeping your losses low. Your loot will be randomly generated, but with a bit of luck you get a good weapon. Apart from that, the Children are a good source of experience.
The destroyed ship that Manerites - Civility Enforcers, conduct their investigation on. Even if you are their favorite and you helped Angelorium, their disposition towards you does not change, since they caught you red-handed, You can fight them and you can, just as well, avoid confrontation, if you examine the car in the center of the location and explain them that it is synths that are responsible for the massacre. If necessary, use Hard Ass at level 8. After you have convinced Mannerites, you cannot loot the bodies, or you will be attacked by them. If, afterwards, you feel like fighting, you can attack patrol with impunity.
In this location, you also find a bag of cat litter, whose collecting does not provoke the Mannerites to attack. Also, you find a toaster with gloves that you can take to the goat herder in Angelorium, in exchange for milk. Also, you can find a GPS transmitter here, which points you to the location of the Mysterious Shrine, after you fix it. The repair requires level 7 Computer Science, and then either level 9+ Mechanical Repair, or the Screen from Darwin village.
The village is attacked by Children of the Citadel. The opponent will be oblivious to your presence, therefore you should take care of your barricades, heal your people and attack first, preferably using grenades. The opponent is quite tough and additionally has grenades, but with proper positioning of your men, you should be fine.
After you eliminate the opponents, talk to residents and convince them that your intentions are good, and they will side with you, after Civility Enforcers arrive. You do not need any skill. You simply need to point out that the attackers were not humans, per se. After the conversation with Enforcers, you receive a book +1 Hard Ass. You'll find a doctor and a trader here, and a toaster with 761 bus schedule. At the end of the city, you find a safe with cat litter.
A small location with one, wounded, resident - Dekkar Firehawk - you can heal him with Surgeon. The gives you a quest of finding two dogs and bringing them to him, for which you will be rewarded with $200. He also takes the dog whistle of Long Beach, from you, in exchange for 50 hard-boiled eggs. You also find cat litter here behind the cloud of radiation. Unfortunately, the location is swarming with robots - they do not attack until you start searching heaps of scrap metal - instead of fighting with them, you can use a high level of Computer science - Hack into every robot and collect scrap without fighting. Next to the collapsed silo, you encounter Rektor, who will follow you and help you in combat. On the heap of scrap, there is a toaster with the VHS tape Sanfor & Sons, which you can deliver to the barterer in Long Beach.
You learn about the location thanks to the radio message, in which someone calls for help. All in all, it will turn out that it is a trap set by synths. Watch out, because there are exceptionally many of them, there.
You'll enter during the execution of one of the townsmen by God's Militia. You can offer them to take care of the infidel or attack the Militia before they perform the execution. Here you can find a Seashell necklace and a bag of zeolite.
Similar to Santa Monica - God's Militia performs an execution. Stop them and take a bag of zeolite. In the northern part you'll find a toaster with A. D. Wealthy Battlemonster Bomber bass guitar and a crate with a unique shotgun - Jackhammer.
The farm has been attacked by an exceptionally large group of honey badgers. If you deal with them and take hide as your proof, you will not have to pay the deposit to see the goods, and from old Alex, you receive a discount. Also, you find here a bag of cat litter. While leaving the location, you encounter robots and a meson cannon on tracks. In spite of all expectation, the latter is not as dangerous. The weapon first needs to lock on the target, spend several turns on loading, and it can, only then, fire. It is long enough for you to eliminate the remaining four machines. . There is a possibility that the tank still manages to shoot at you, but after you scatter your party, one character at most will take damage. .
The cannon also is the only weapon around. That can be used to destroy the door of the building by the location exit. This is the same building, where you find five crates with valuable contents (weapons, ammo, armor, first-aid kit). To use the cannon, stop your party somewhere outside of the cannon's range and save the game. Pick the toughest character in the party, give them the best armor and run towards the building, in order to get as close to the cannon as possible, In the first turn of the battle, this character needs to be targeted by the cannon. Eliminate the rest of the machines quickly, by aiming at their main bodies and destroying armors. Try to stay close to the door, as the soldier that you have picked. After several turns, the cannon fires. If the soldier stood right in front of the door, it will be destroyed. After that happens, you only need to finish off the remaining machines. While it is being loaded, you can attack it with impunity , because it picks a new target only after it shoots. It is best to deprive the cannon of the majority of its CON, wait for it to fire and, at the same dime, destroy the door. Then, finish it off in the next turn. With an appropriately armed soldier and with speed of action, your party should end the fight without sustaining major damage.
You learn about this location via the radio, but only if you are passing by it. At the entrance, you encounter a barterer that informs you of a synth. Go to the end of the location, where it turns out that the synth is a Scorpitron. It a has machine gun, a flamethrower and can summon a group of mini scorpitrons. A poorly-equipped party may have problems with its 4000 CON, but there only is one target and it's big, sluggish and easy to hit. Equip the heaviest weapon that you have and explosives. Divide your party so that each and every one finds a good cover for himself and focus your fire on the opponent. Aim at the main body in order to destroy the armor and the CPU, which makes the machine start making mistakes. You can ignore the smaller robots because Scorpitron destroys them with its flamethrower, if they are standing close enough. Apart from that, their attacks are weak.
After the fight, you can barter wit the quest giver. The barter offers quite nice armors, good medicine and quite a lot of ammo. Also, remember to loot the nearby chests and caches. Also, talk to the merchant's wife and she will mark a Mysterious shrine for you.
This location becomes available after you press the mysterious red button in the sewers of Hollywood. There, you find Aaron Chwatt and another computer with a red button. Pressing it results in Aaron's escape and that's it. The entire Easter Egg is a tribute paid to actor Aaron Chwatt, who is also known as Red Buttons.
You learn about the location of the beach while in the sewers of Hollywood. When you are there, go to the location marked as The Wall. There, you see two guys. Approach carefully, up until the moment, at which they start talking to each other. When they tell you that they want to open a crate, stand back. Stand in the way that allows you to see the crates. The guys approach them and start talking. One of the men, brings up the name of Bob during the conversation. AS soon as this happens, an appropriate location appears on the map.
Once there, you will find Bob and about 123 spots that you can dig up. You can talk to Bob and promise to help him find the heritage of his family, or convince him to return home, using Kick Ass 10. You still receive experience, but you get less than if you promised him to help him.
In the Eastern part of the location, right next to the spots that need digging up, you find three car wrecks. Take interest in the South-most one, opposite Bob. If you are not sure which one it is, access the map of the location and roll your mouse over Bob's position, and then move it right, up until you see the car wreck. You should be able to find Bob's statue in the cache, right next to the car, so you do not need to dig for too long. Still, you may want to do that, because for digging up all of the spots, which takes around 20minutes, you receive an achievement. In return for the statuette, you receive quite a lot of experience, Death Ray - an energy weapon and 50 cells. By the ruined buildings in the South-Eastern part of the location, you also find a map that tells you the whereabouts of a mysterious shrine, as well as the password.
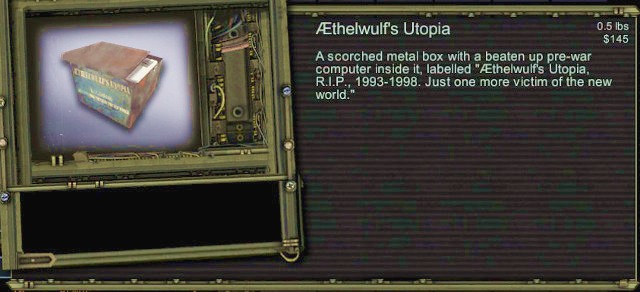 An example of a unique item
During your travels in the game world, you can come across different unique items which you can give to someone to receive a reward. Sometimes you will find them in toasters and sometimes you'll see them lying on the ground. Lots of items you can give to Flintlock (usually you'll get money or experience to choose from) or captain Mercaptain (additional item to take from her stock) in the Guardians' Stronghold; some items can be given to people scattered all around the wastelands. Flintlock is interested mostly in historical items, and Mercaptain wants to get pieces of technology. The game doesn't tell you directly what needs to be given to whom, but you can reasonably add two and two together. For example, doctor Baum in the Temple of Titan keeps saying that he's looking for his glasses so you can give him the contact lenses, and captain Sadler of Rattlesnake Militia has hemorrhoids, and you can find that out by talking to him properly, so he can definitely make use of a cream. Basically, it's always worth keeping all the items with a white name, because you never know when something might be useful. If there's an item in your inventory that you can give to someone, a proper keyword will appear during the conversation.


 World of Warplanes Game Guide & Walkthrough
 Warhammer 40,000: Dawn of War II Game Guide & WalkthroughWasteland 2 Game Guide & Walkthrough
 Warhammer: Mark of Chaos Game Guide & Walkthrough
 World of Warships Game Guide & Walkthrough