
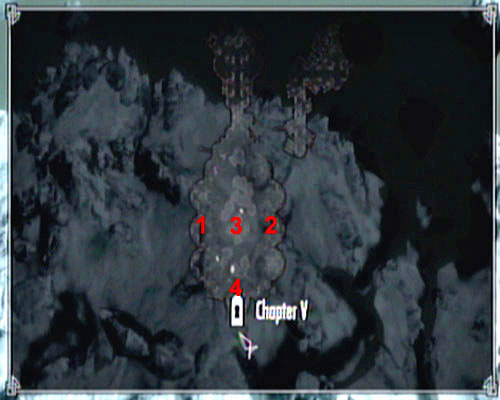
This guide to contains a thorough and checked compendium containing All the information you need on The Elder Scrolls V: Skyrim - Dragonborn. Here's what you can find inside:
The guide is also richly illustrated and written in an easy to understand way, making it easy to navigate.
The guide contains the following color markings:
Red refers to NPCs, though it's also used to mark enemies, wild animals and monsters.
Blue refers to names of locations, both the main ones which appear on the world map and the secondary ones, like single houses or dungeon levels.
Green refers to all items which you can find during the game, which land in the inventory upon collecting
Orange refers to Shouts, Words of Power and other skills and spells.
Maciej "Czarny" Kozlowski
Translated to English by Jakub "cilgan" Lasota
In order to play Dragonborn, you will have to meet a few conditions. First of all, you of course have to download the expansion and launch the game on the account assigned to it.
The new quest will become available only if you have already completed The Way of the Voice main mission, meaning you've reached The Horn Of Jurgen Windcaller.
If you've already done the above, head to any city in the game and wait for two cultists (that way you will begin the main story of the expansion). Alternatively, you could head to Windhelm and speak with a man named Gjolund Salt-Sage at the docks. He will take you to a new land, though you won't activate the story itself (of course there's always a chance you will meet the mentioned cultists there and everything will go well).
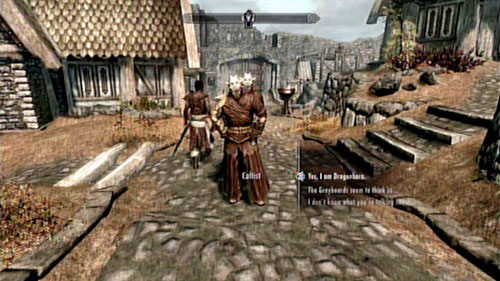
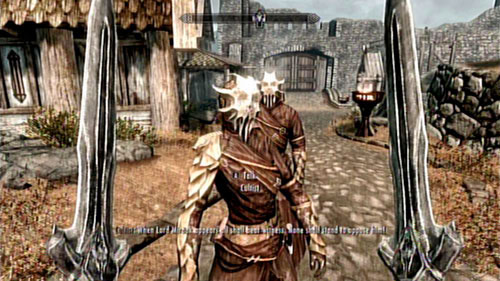
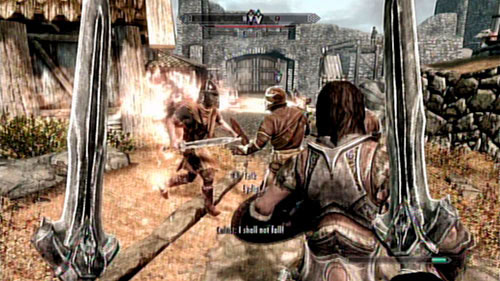
The Cultists will ask you if you really are the Dragonborn. Regardless of what answer you give them, you will be attacked. The fight itself isn't really hard - the local guards will probably come to help you. The enemies aren't too tough, though they can cast some powerful spells - keep that in mind. After dealing with the threat, search their bodies to find the Cultist's Orders. Pick it up. If you're running low on cash, you can always sell the rest of their things - they're worth some gold.
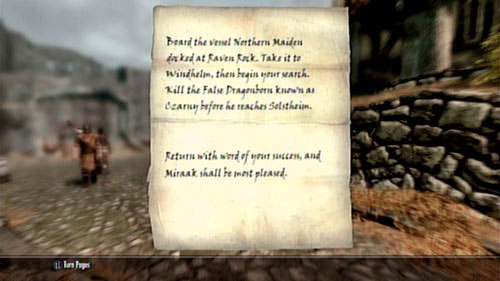
With the letter in your hands, you can now read it to learn that a certain mysterious Miraak has passed a death sentence on you. The assassins came here to murder you, as according to them you are a false Dragonborn. Of course you can - and should! - follow their trail. The letter states that the assassins came to Skyrim onboard the Northern Maiden, currently moored in Windhelm. You should get onboard and sail to the distant island of Solstheim, where your would-be assassin probably is.
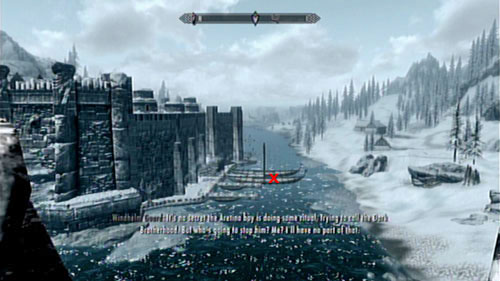 X - Gjolund Salt-Sage
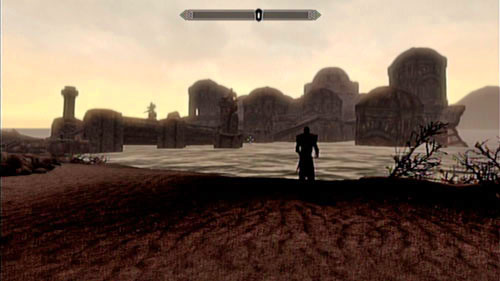
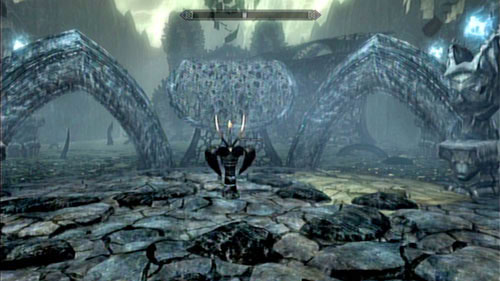
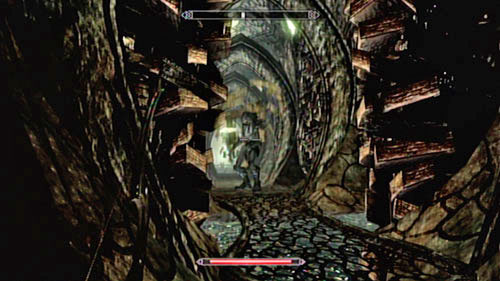
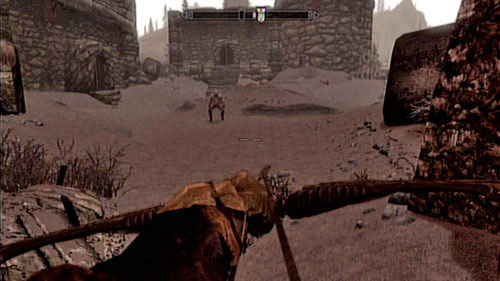
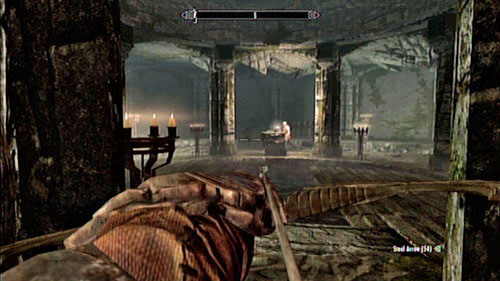
Head to Windhelm and search for the proper ship in the docks. You can head there using fast travel or on foot, which you should of course know very well of. After getting there, head to meet with captain Gjolund Salt-Sage - he can be found on the first boat from the shore (as seen in the above screenshot). Speak with him to learn that he indeed took two foreigners with him lately and that... he never wants to return to Solstheim again.
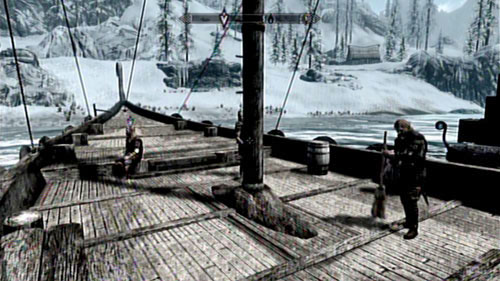
You can make the captain listen to you in three ways. You can use Persuade, Intimidate or bribe him (which will cost you 500 gold). Regardless of your choice, the end result will be the same and you will end up in the city of Raven Rock. The main part of the new adventure will begin here.
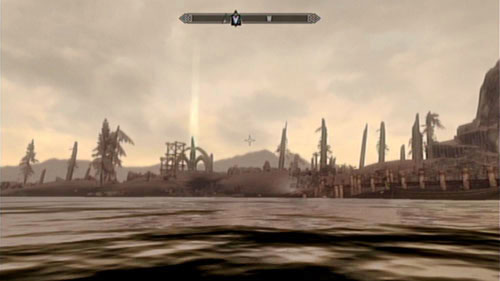
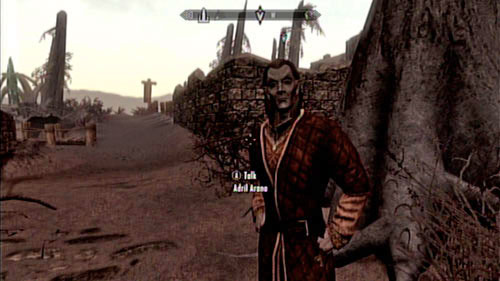
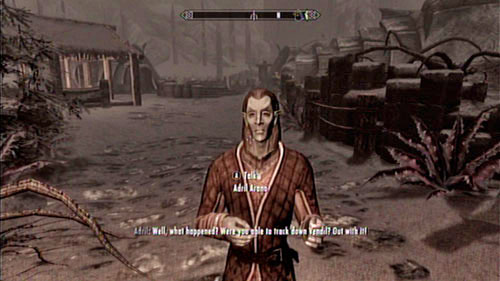
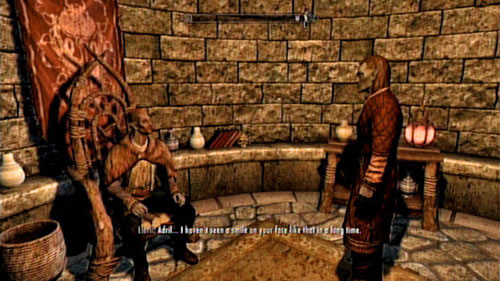
After landing in Raven Rock, a Dark Elf - Adril Arano - shall approach you. You will learn that he's the deputy of the local lord named Morvayn. You will come across both of them quite often - they're moderately positive characters, so try not to get in their way.
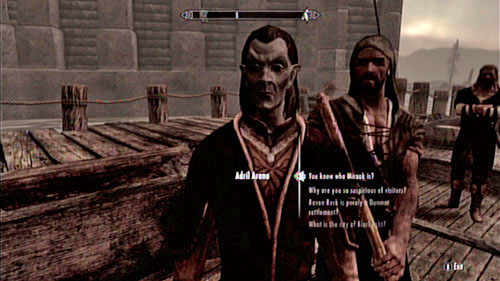
During the conversation with Adril you will be able to choose one of three dialogue options - the choice however doesn't matter here. If you want to, ask the man about the area - if you ask about Miraak, you should get an indirect answer about a certain "shrine" (see: Investigate the Shrine). He won't give you any more useful information - unless of course you're interested in the political situation of Morrowind or Solstheim.
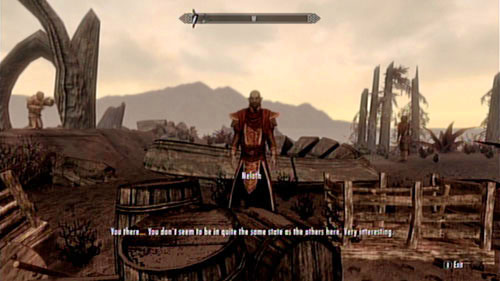
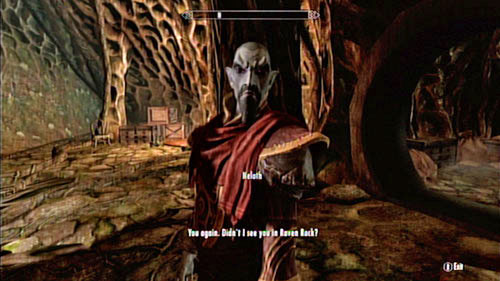
The shrine mentioned by Adril is in fact an Earth Stone located on a small promontory south of the city. Go there and you should come across and old dunmer - Neloth. He will tell you that the man you are looking for - Miraak - is dead for quite some time. Ask him about what's going on in the temple to learn that most of the villagers have been possessed by a mysterious power which orders them to build monuments like that. The old building known as the Temple of Miraak might give you a clue. You should head there right now (see: Reach the Temple of Miraak).
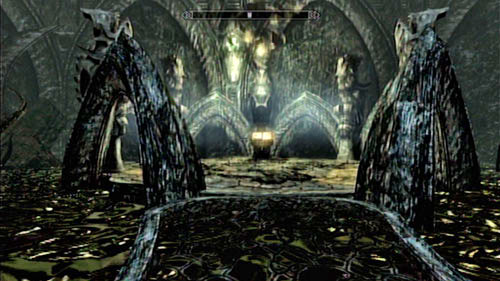
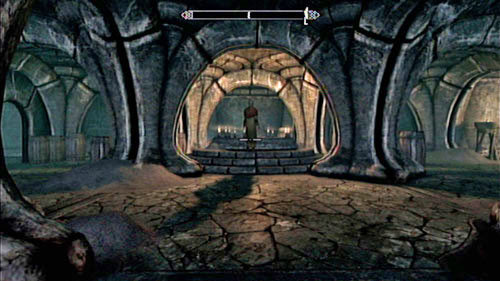
This mission can be activated by speaking to Adril Arano in Raven Rock - just ask him about Miraak. Some characters living in the city might initiate this mission as well, if only you ask them. Regardless of how you begin the mission, your task will be examining the Earth Stone, built on a peninsula beside the village (screen above). Go there and you should be approached by Neloth, who will tell you that mysterious powers have been in control of the village for some time now. They order ordinary people to get out of their houses and build strange monuments - just like the one you're standing before right now.
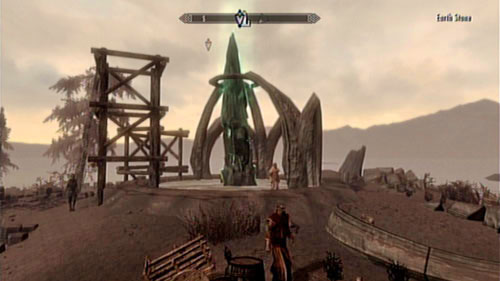
A certain clue in this madness might be the mysterious construction known as the Temple of Miraak. It seems that both events - the assassination attempt and the strange behavior of the villagers - are somehow connected. You should head to the distant construction and search it for further clues.

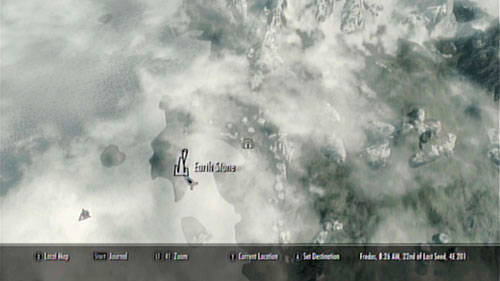
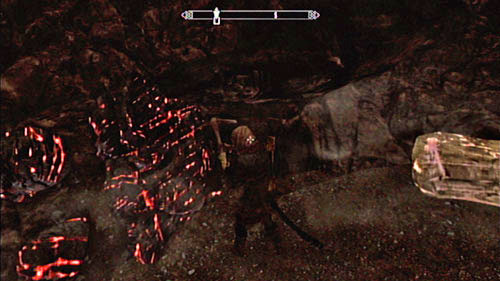
There are two way of reaching the Temple of Miraak. You can either make your way though the freezing path towards the middle of the island (a fine passage can be found between the ruins of Kagrumez and the Altar of Thrond) or... sleep somewhere. As you're asleep, you will magically be taken to one of the great rocks (e.g. the Earth Shrine) or to the Temple itself. The first option is however more convenient - you can always do some extra quests on visit interesting locations on your way.
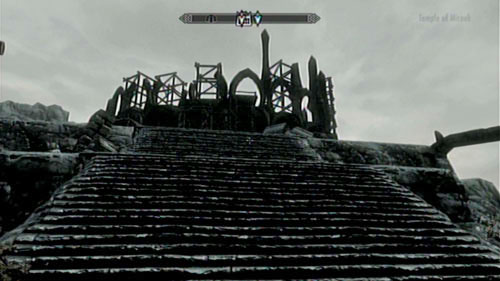
When you reach the large construction, speak to Frea - she's the only one in the area who isn't haunted. That way you will finish the current mission and begin a new one - The Temple of Miraak.
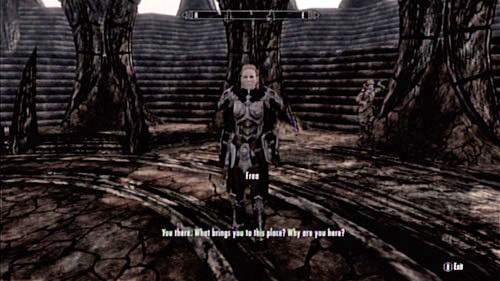
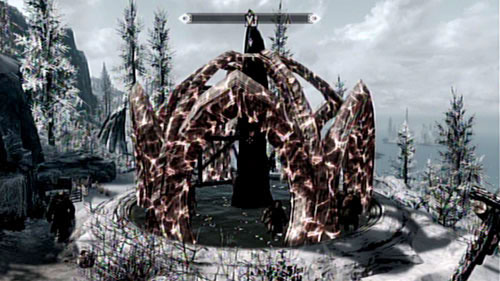
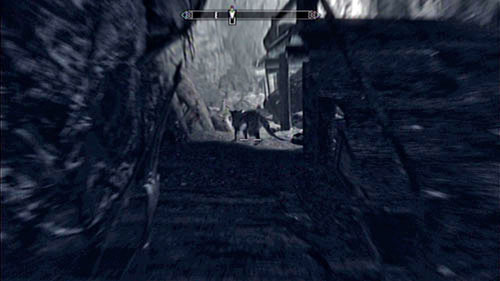
The Temple of Miraak is a very peculiar place - all the workers who are building it are somehow possessed. Only one person seems to be free of the curse - a warrior named Frea. Stand in the middle of the construction and the woman will approach you. She will tell you that the curse affected most of the villagers - only single villages managed to defend themselves from Miraak's magic. The goal of the Nord is finding the source of the magic and destroying it. Apparently you have a common interest, so head inside the Temple together.

Before you manage to do anything, the gate will open and two Cultists will head out. Help Frea fight them and head down to the catacombs together. A hard and long passage awaits you.
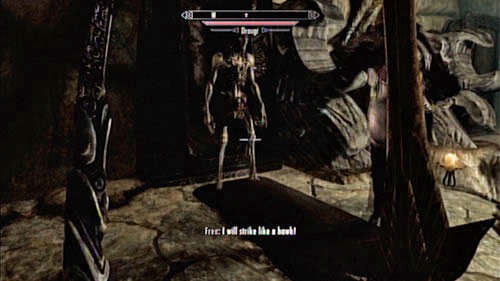
Head inside the Temple Miraak together with the warrior and take a look around the rooms - you should find some valuable items and a treasure chest. Afterwards head to the deeper part of the dungeon. Behind the corner, there are two Cultists - try eliminating them, but at the same time try avoiding the trap (there's a pressure plate in the middle of the room). If you approach the coffins o both side of the path, Draugrs will appear - one still alive and one dead. You will have to deal with the as well.
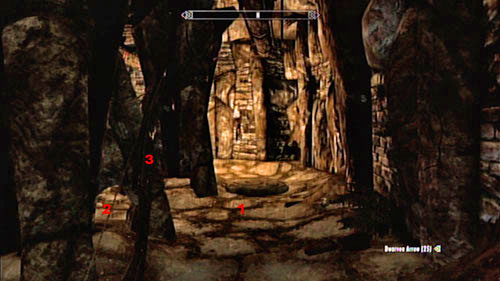
Head further past the room with the altar (you can find two soul gems there) and head into the corridor. Tow unpleasant traps await you here. The pressure plat in front of you is easy to notice - the one on the lest is harder to spot. That's why you will have to head through this location in a zigzag - two steps forward, two steps to the left and two more forward (screen above). That way you will avoid all potential dangers.
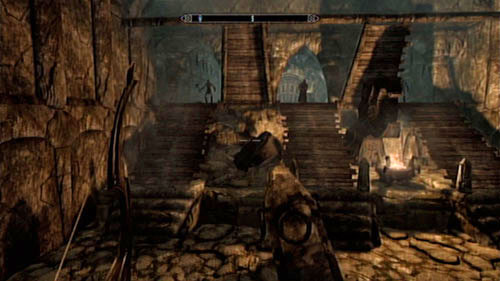
The large cave which you will now enter is full of dangers. It would be good to save your game now. As you approach the stairs, two Draugrs will appear, including a Deathlord (who can pull out your weapon with a Shout!). What's worse, three more Cultists will run out - their magic projectiles can be quite dangerous. Luckily you have Frea with you, she can withstand quite some damage and is quite the fighter. Help her fight the enemies and head to the lower level of the dungeon.
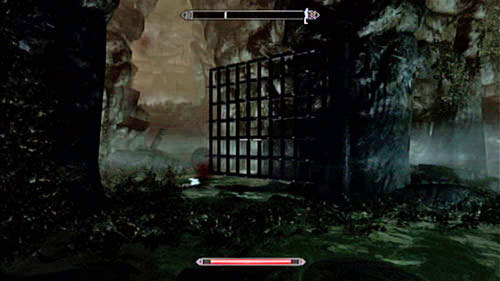
Push the switch by the grate and head into the next cave. Here you will also have to fight a single Draugr (he's lurking in a niche on the right), followed by a fight with as many as four (one is sleeping on a throne). Head further, search the chest inside the small room on the left and avoid the floor trap which is waiting to hurt you.
Head further and you will reach a fork in the road with tons of Draugrs lurking in the area. Have Frea go first (she's immortal) and eliminate the enemies from behind (if you're good at sneaking, they might even not notice you). You can also lure the monsters into traps - that way you will eliminate them fast and elegantly.
Regardless of which corridor you follow, you will eventually end up in the exact same place - the choice is just illusive. Just be sure to avoid the fire trap while getting out of the tunnels - it can end up rather badly (especially that Frea doesn't care about such trivial matters and walks wherever she wants).
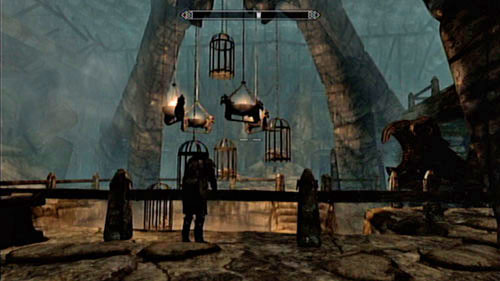
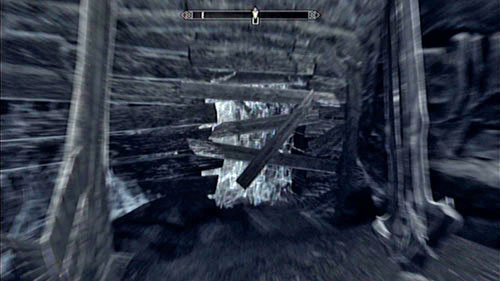
Head inside the next room and be ready for a sprint - deadly pendulums hang from the ceiling and only you can get past them (by using the Whirlwind Sprint Shout). Avoid the deadly blades and push the lever at the end of the room. That way you will turn off the trap and open the gate to the further part of the location.
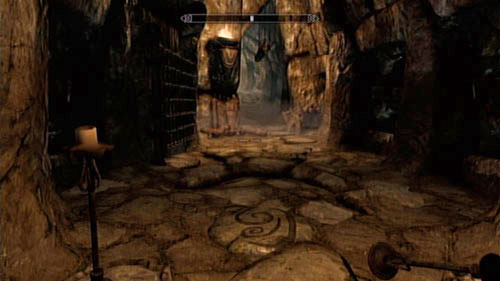
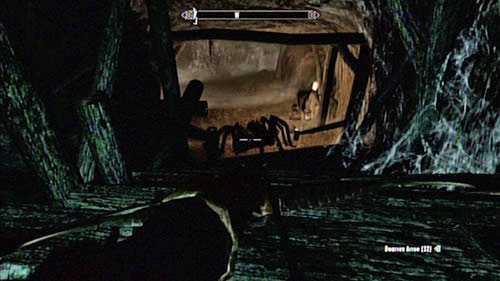
Inside the next chamber, use the lever (on the left, inside the small corridor) and approach the newly opened gate. Look out - even though the bridge will draw bridge won't make a sound, the bones hanging from the ceiling can make quite a noise (therefore drawing the enemy's attention). Even if you manage to cross the location silently, Frea will give away your position right away, making the fight with the two Draugrs and the powerful Cultist inevitable. Additionally the room is spiked with traps shooting projectiles in different directions - you will surely be hit by a couple poison arrows. Congratulate your companion - good job.
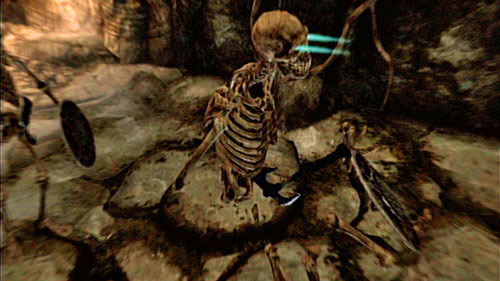
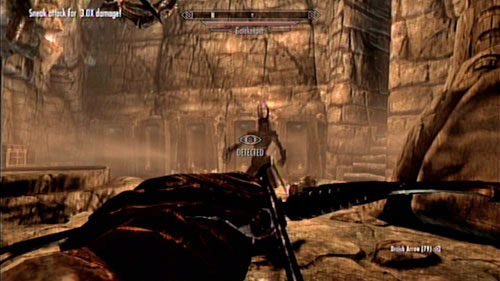
Cross the cave and approach the door - they lead to Temple of Miraak Sanctum. Stand in the middle of the hanging corridor and wait for the army of Skeletons (there are really tons of them) which will approach you. Remember that they are very stupid - if you crouch in the darkness and start shooting at them with the bow (one after another), they shouldn't note anything. Kill all the enemies and approach the corner from behind which they came. Afterwards wait for two Draugrs to get out of their coffins and eliminate them (look out for the pressure plate!).
Inside the next room you will come across two Cultists and a pair of Draugrs - the first two can be easily eliminated from a distance, as they will come out from the other side of the room. The undead shouldn't cause you too much trouble - they're really rather weak. Move onwards while looking out for a pressure plate (thanks Frea!) and head to the niche with a Word of Power (Dragon Aspect). Learn it and Draugrs will come out of the nearby coffins - including one Gatekeeper, capable of overwhelming his enemies with a special Shout. Defeat the weaker enemies in the first place - otherwise they will bury you under attacks. Afterwards fight the main enemy while healing yourself and using the most powerful skills you have. Search his body to obtain the Temple of Miraak Key. Search the chest by the wall and open the gate using the obtained key.
In the following rooms you won't find anything particularly interesting - unless you want to have a dinner with a thousand year old group of undeads. In one of the further rooms, Frea will tell you that you have apparently reached a dead end. In reality, all you have to do is push the lever in the corridor beside (loot the room beforehand - you can find some interesting treasures here).
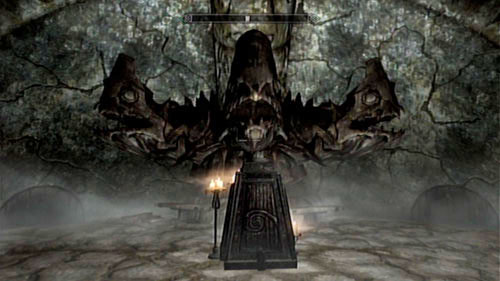
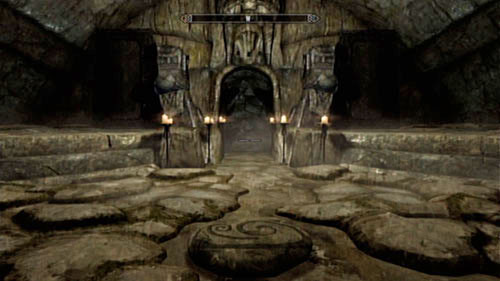
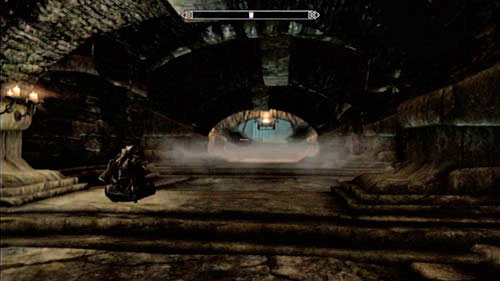
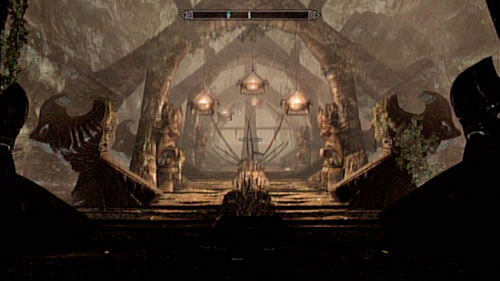
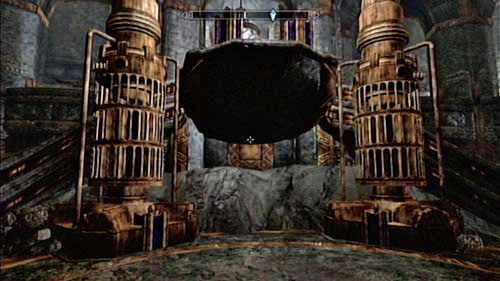
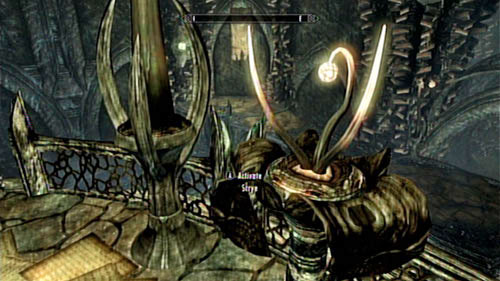
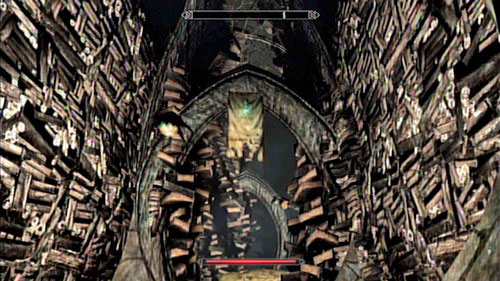
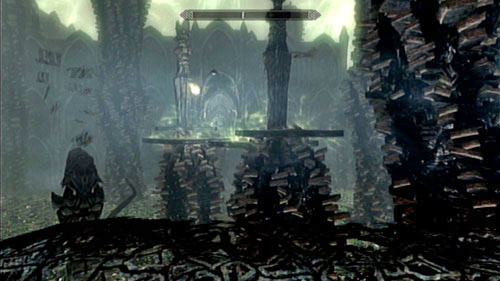
Frea will lead you to the recently unlocked passage. Follow the woman until you both reach a strange monument with three fish mouths (screen above). Use the lever right in front of the statue and go to the lower level. Move onwards across the linear corridors and use the next button. Head to the very bottom of the cave (apparently spiral staircases never go out of fashion) and through the wooden door. That way you will reach a large room with a creepy staircase.
On the stairs you will come across four Draugrs, who you should eliminate from a distance (silent assassination are recommended, as they can pose a threat when in a group). At the top there's a Draugr Death Overlord - a relatively strong enemy capable of using powerful shouts. You should try to provoke him to attack Frea - that way you will be able to go round him and attack from behind.
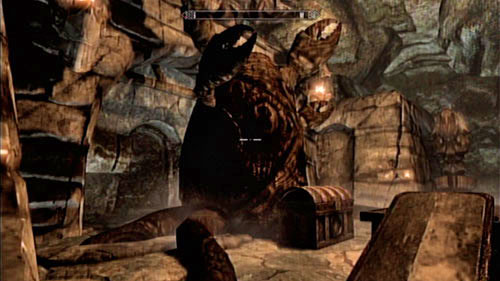
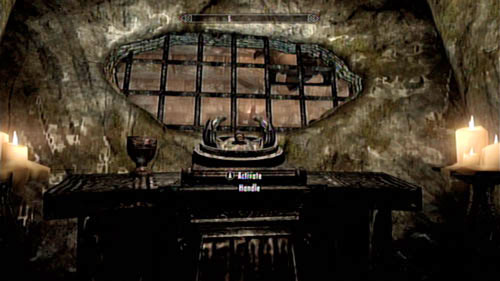
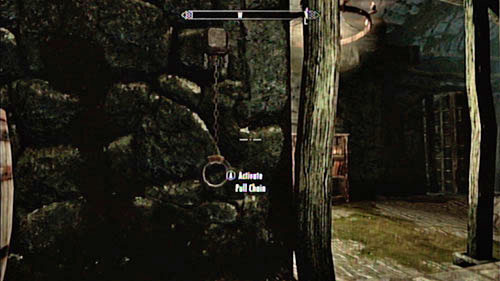
After dealing with him, take a look around the area. Right beside the sarcophagus from which the monster came you will find a treasure chest and a mysterious sculpture. Go round it and pull the chain hanging from the wall. Afterwards cross the gate and continue onwards.
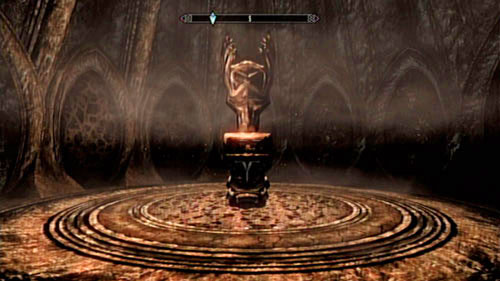
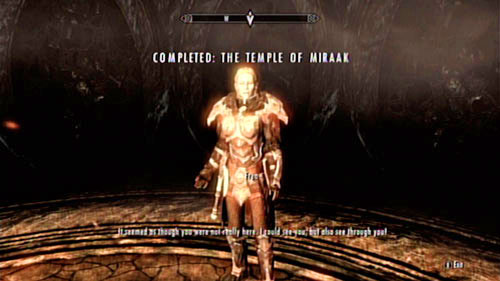
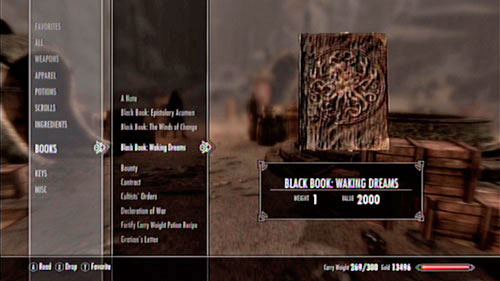
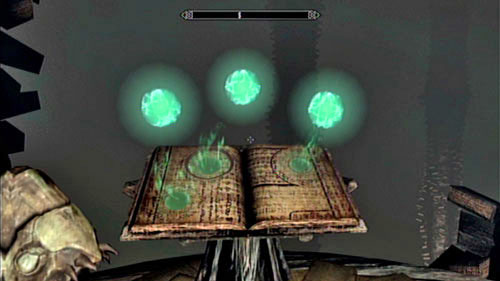
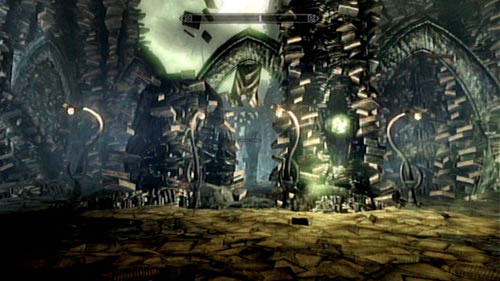
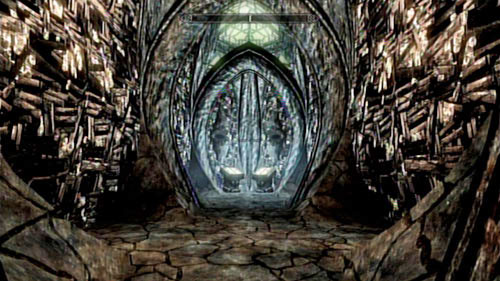
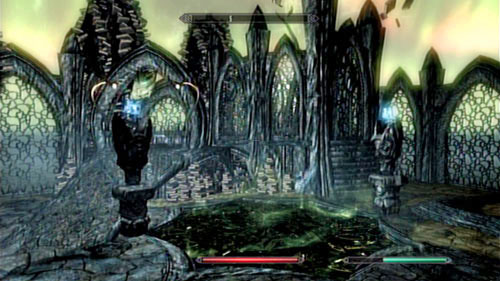
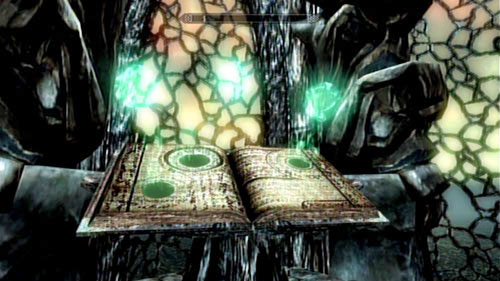
At the end you will find a peculiar round room with a pedestal in the middle. On it lies the Black Book: Waking Dreams. Pick it up to be transported to the mysterious dimension of Apocrypha.
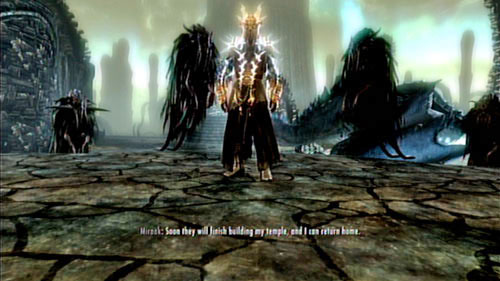
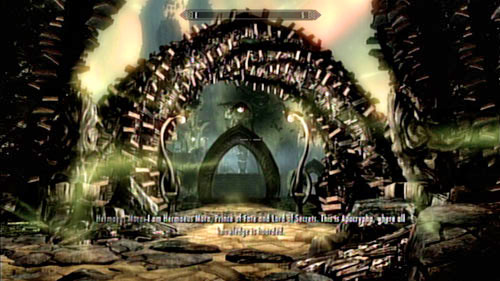
As you reach for the book, you will be moved to Apocrypha, where you will meet with Miraak himself. Apparently you have interfered the powerful mage in his work. The man will quickly stun you and after some boasting, move you back to the realm of the living. The scene is not interactive, so you can't influence it in any way.
After returning from the unfamiliar realm, you will end up back in the strange round room. Talk with Frea about what you saw in the other dimension and accept her help. That way you will finish the current mission and begin the next one - The Fate of the Skaal.
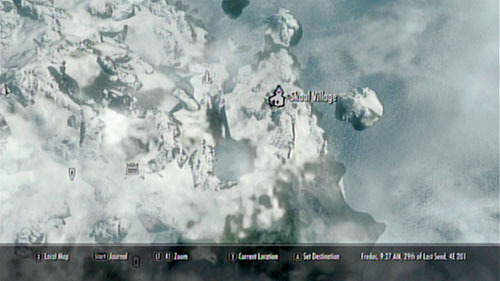
Follow Frea to the exit. As you reach the surface, the woman will draw your attention to the nearby Wind Stone. Approach it to unlock it on the world map (you will return here later on in the game) for now, head to the Skaal Village, where the brave warrior will lead you.
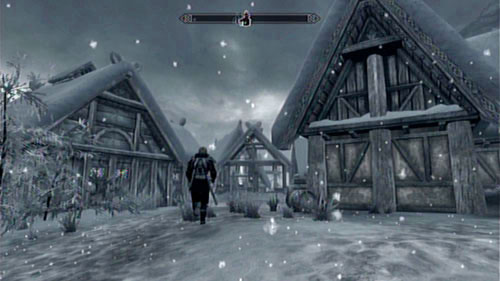
When you get there (the journey shouldn't be problematic), wait for your companion to speak with the elders. Afterwards approach them yourself and explain what happened.
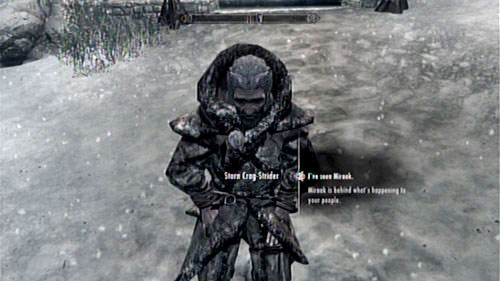
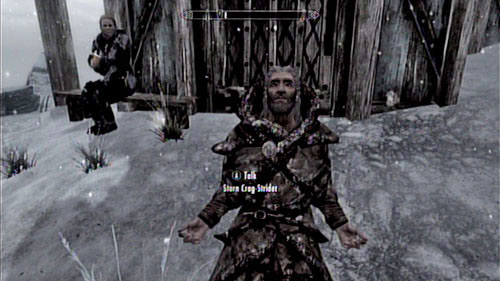
The Skaal leader is an old Nord - Storn Crag-Strider. As a shaman and sage, he has gained knowledge of other dimensions and Miraak's plans. During the conversation (regardless of the chosen dialogue options) you will learn that your enemy is a Dragonborn as well. Long ago, he was imprisoned in the land Apocrypha and is now planning to return. The only way of returning to Solstheim is building enough temples dedicated to him. That's why some of the islanders became haunted by him and strange constructions are being built throughout the land. In order to destroy them (and therefore thwart his plans) you have to learn a new Shout, which is possible only in the Saering's Watch.
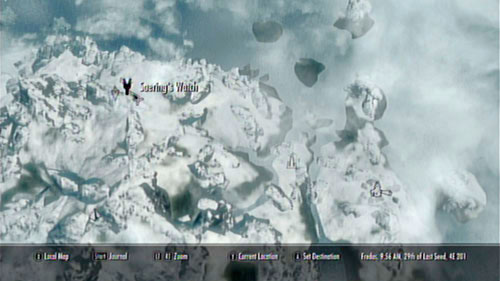
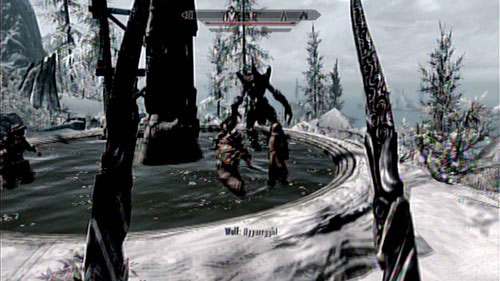
Head out from the Skaal Village and go north-west - you can either head to the Wind Stone and continue onwards in the same direction or follow the shore and swim to the Glacial Cave in the north (and afterwards climb to the top). Regardless of which path you choose to follow, eventually you will reach the Saering's Watch, where you will most likely witness a fight between a group of Draugrs and a Dragon.
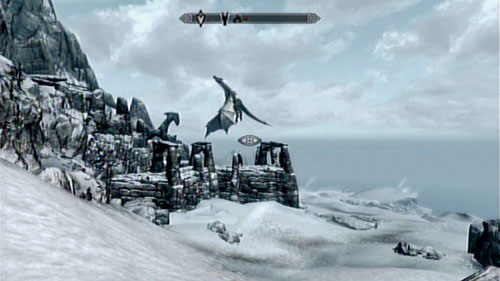
Eliminate the enemies and take a look around the nearby building to fins some treasures and chests. Afterwards go up the stairs to the top of the building and learn the new Shout - Bend Will. Don't forget to look inside the chest by the altar and collect two magical swords found inside - even though being rather weak on their own, the spells casted on them can be useful to any mage.
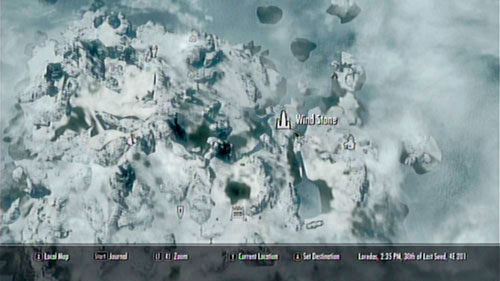
Head to the Wind Stone by using the fast travel option (if you haven't been there yet, move to Skaal Village and go west). As you reach it, activate the new Shout - Bend Will - using the soul gained from the Dragon. Afterwards approach the building and use the newly learned skill.
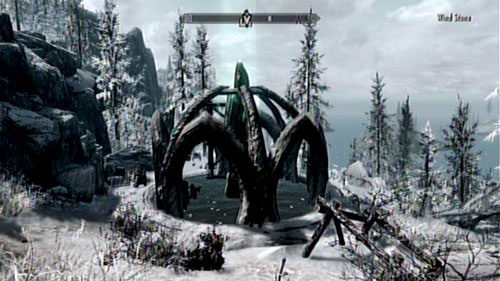
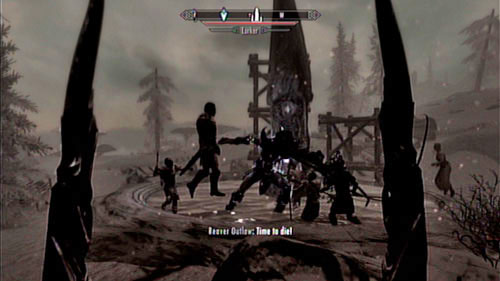
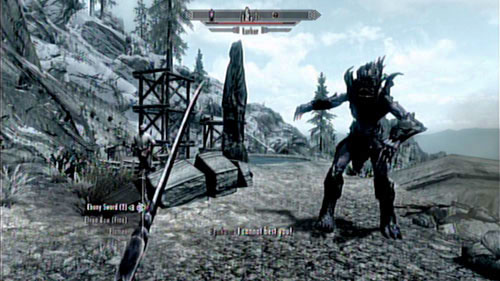
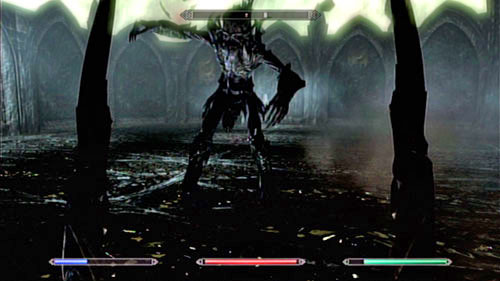
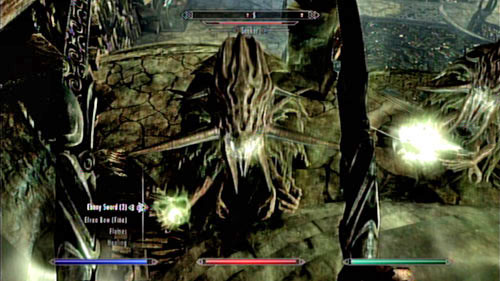
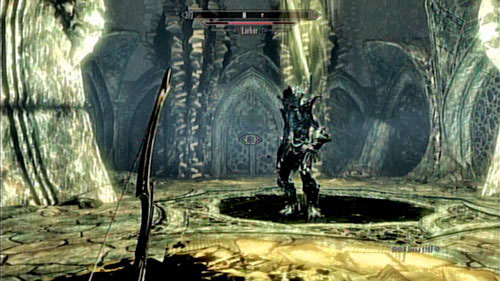
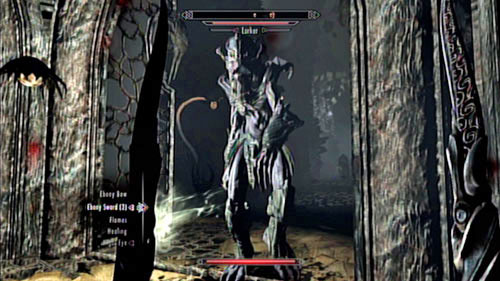
Shout at the statue in the middle of the construction to make it whole crumble and a dangerous Lurker to appear. The local workers will attack it, but they don't stand a chance on their own - help them in the fight to save the Skaal Village.
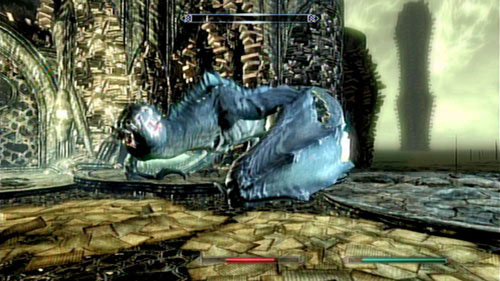
The issue here is simple - you have to defeat the beast which you have unintentionally summoned. Don't even try to hide and use any assassination skills, as your enemy is too smart for that. You don't however need to charge at him on your own - that's the role of the villagers who will attack anyway (just make sure Fanari Strong-Voice doesn't die, as she's needed in A new source of Stalhrim!). you can kill the beast using the bow or spells. However nothing stands in the way of a direct face to tentacle fight should you prefer it - however it's a less convenient solution.
After defeating the beast, approach the disenchanted obelisk to learn a new Word of Power - North Wind. Afterwards return to the Skaal Village and tell the old shaman what has happened.
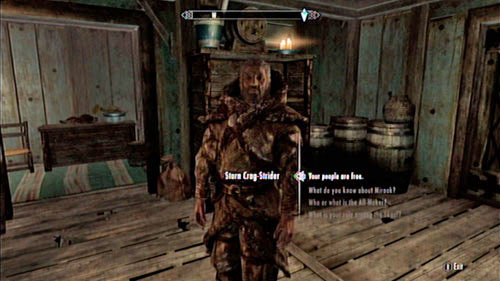
Return to the Skaal Village and search for Storn Crag-Strider (he's most likely in his house - the Shaman's Hut). Speak to him to end the current mission and begin two more - Cleansing the Stones and The Path of Knowledge. The order in which you complete them doesn't matter you will have to finish both of them eventually.
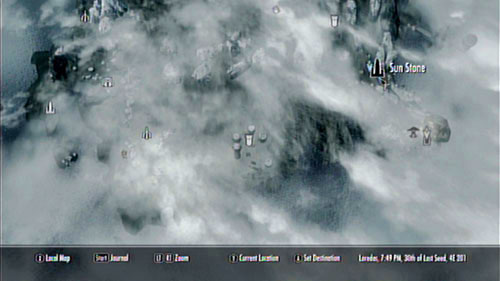
The Sun Stone can be found halfway between Ashfallow Citadel and Tel Mitryn. Head there and use the Bend Will Shout on the obelisk in the middle. That way you will summon a Lurker and make the local Bandits (who have been busy with building up until now) to run away. You will have to fight the monster on your own - now one will help you, unless by accident.
After dealing with the threat, touch the cleansed obelisk to learn the Sun Flare. It's a quite powerful magic skill which will help you fight big groups of enemies.
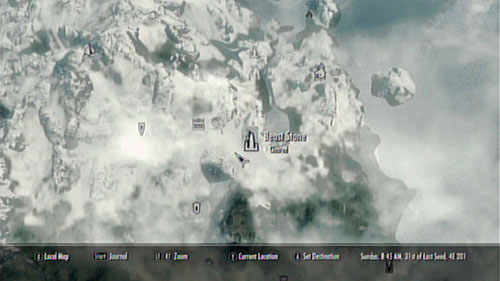
The Beast Stone can be found right next to the Temple of Miraak - just head a bit to the east (a pillar of light should lead you). Once there, use Bend Will and wait for the construction to collapse. A Lurker will appear somewhere in the area and the nearby Rieklings will run away to a safe distance. If you have problems defeating the beast, force it to attack them - they shouldn't have any problems with it.
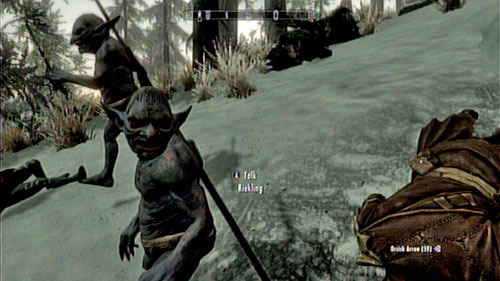
Touch the obelisk in the middle of the destroyed construction to learn a new skill - Conjure Werebear (it allows you to summon a powerful ally). Look out, as you can only use it once (afterwards you will have to renew it by touching the obelisk again).

You should remember the Earth Stone - it stands right beside Raven Rock, on a small peninsula. Approach the construction and use Bend Will - it will crumble and a Lurker will appear nearby (it's possible that he will be joined by another one who's hunting nearby). Luckily you have to would-be constructors to help you - three of them are rather tough Redoran Guards. Together, you should be able to deal with them.
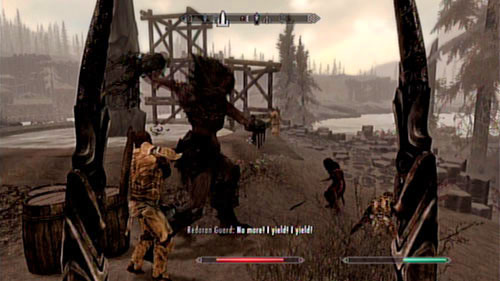
After dealing with the threat, touch the obelisk to learn a new skill - Bones of the Earth. After using, it protect the caster by absorbing 80% of physical damage for 30 seconds. As every stone-power, it has to be renewed after each use (in the location it comes from).
Reaching this stone is by far the least comfortable. You need to head to the Bloodskal Barrow (The Final Descent mission) and head north. As you see the pillar of light coming from the stone, take a look around for a path on the right (you need to follow the shore). Follow it and you will reach your destination. Use the Bend Will Shout and wait for the temple to crumble.
Fighting the Lurker might be rather difficult - only some of the constructors will decide to help you. There's also a chance that a Dragon will join the fight - attacking both you and your enemy (its soul however will be absorbed by Miraak, so don't hope for a profit!). Fight wisely and make use of healing potions and you should be alright.
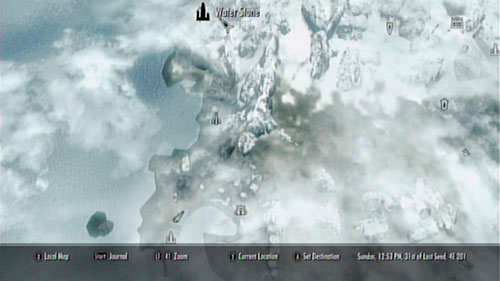
After dealing with all threat, approach the obelisk to learn the Waters of Life. It's capable of restoring 300 health points to all nearby characters, but you can only use it once and afterwards have to renew it at the Water Stone.
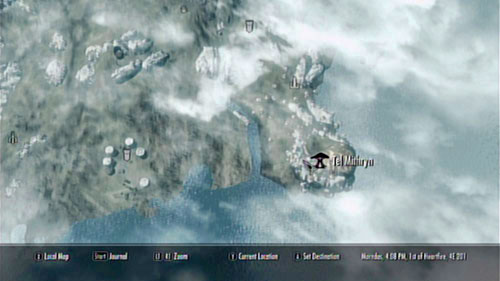
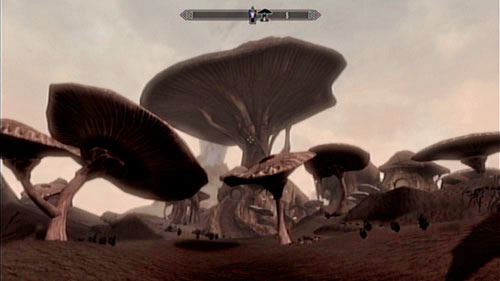
The wizard Neloth can be found at his impressive property - Tel Mithryn. The building (or rather a castle built of mushrooms) is located at the south-east edge of the island. It's rather hard to miss, being a large stronghold reaching to the sky. On the main courtyard you will most likely come across his maid and apprentice (his name is Talvas Fathryon and he's connected with the From the Ashes mission). In the local "apothecary" you can meet Elynea Mothren - a skilled mushroom specialist.
Neloth lives in the biggest of the mushrooms - the one in the middle of the courtyard. Head inside and let the magic stream take you - that way you will reach the upper level of the building. Search for the old man there and speak to him.
He will tell you that the secret of Miraak can be learned only by finding and examining the Black Books. Curiously, Neloth is in possession of one of them in his warehouse, however he won't let you see. You need to follow him to the Dwemer castle of Nchardak of obtain one of the volumes.
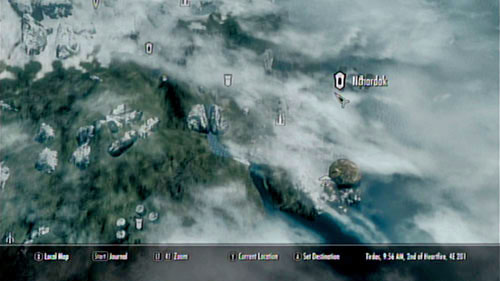
Head out of Tel Mithryn and follow the wizard. Don't worry if you run across some monsters on your way - Neloth is powerful enough to deal with most of them using one or two spells. The journey should therefore go smoothly. As you reach Nchardak (a small island at the eastern edge of Solstheim), be ready for a fight - the location is inhabited by Bandits.
You rather won't be able to avoid a direct fight - even if you prefer a silent approach (by sneaking and assassinating them), Neloth will charge and smash them to pieces. He's immortal, so you don't have to worry about him.
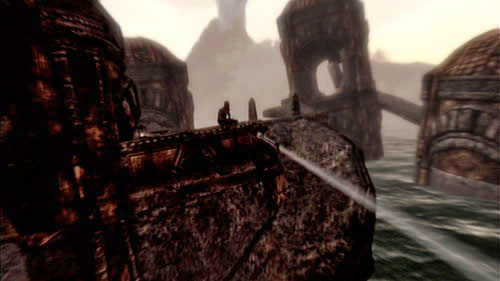
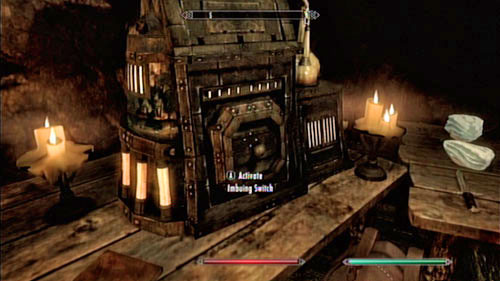
Eventually you should reach a large gate which leads to the casemates of Nchardak. Beside the entrance there's a peculiar panel into which you have to put the Control Cube. Luckily your companion has such a device, so you will be able to enter.
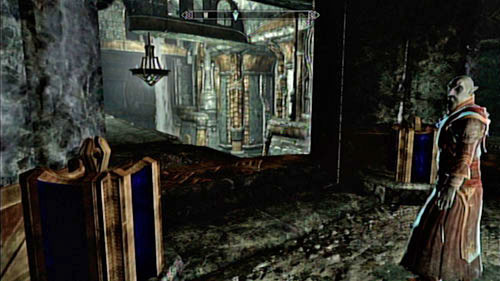
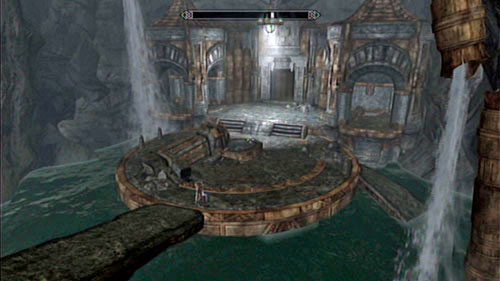
Head to Nchardak together with Neloth and take a look at the Black Book hidden beneath the floor - no magic is capable of getting it to the surface. The only way of obtaining it is using the mechanisms of the building. In order to do that, you have to head down to the Great Chamber, the entrance to which will be opened by the mage. Take the elevator down and get ready for a really loooong exploration.
Follow the mage and listen to his monologue. You will learn that in order to restore energy to the upper level you will have to turn on the pumps. They can be activated only by using the Control Cubes - unfortunately Neloth has only one, while you will need as many as five of them. You will have to find the others (which pretty much limits to following the mage and listening to his orders).

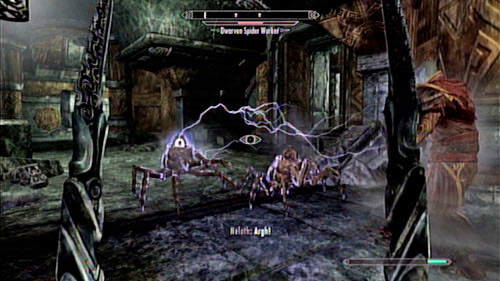
Head to the location pointed by the mage and use the Cube on the pedestal. That way you will open the door leading to the Nchardak Workshop. On the left side of the room you will find another pedestal with the second Cube (and a mechanism setting off a fire trap). Pick up the device and head deeper into the castle. Below you will come across two Dwemer Spiders - they won't pose any threat to such a powerful team as yours.
Cross the platform and put the Cube on one of the two pedestals at the end of the room. That you will clear the room of some of the water (its level will fall) and will be able to go down to the ground. By doing so you will however also activate two Dwemer Spheres and one Spider - don't worry, as Neloth will deal with them on his own.
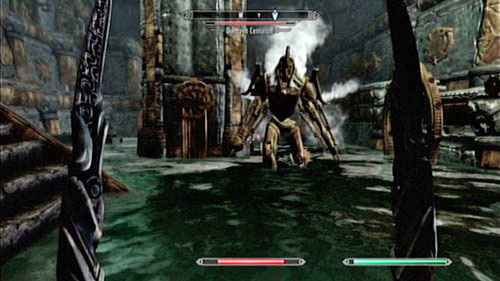
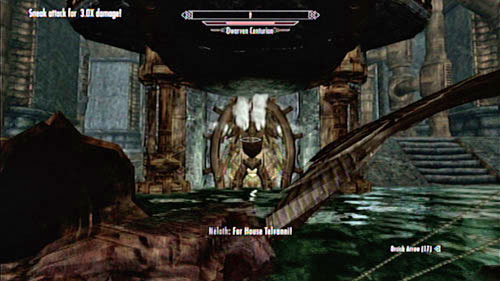
Afterwards go down and put the Cube on the red pedestal - that way you will unveil a staircase leading to the upper level (which won't cost you the device, as the red pedestals don't "hold" them). Head to it through the passage on the left and... defeat the large Dwemer Centurion who will come to life.

Place the Cube on the best button to raise the drawbridge which was blocking the passage and head to the next room together with the mage. Take a look around the pick up the next Cube from the room on the left (it will also activate four Dwarven Spiders). Defeat the enemies and return to the room where you fought with the Centurion.
Head to the other side of the room and open the door. Neloth will tell you that reaching the further part of the dungeon is possible only with the water on a higher level. Return to the blue pedestal where you left the Cube and pick it up. Afterwards swim through the neuralgic point and head to the next room.
Inside there are two Dwemer Ballistas and a Dwarven Spider. Eliminate the threats and head to the small niche on the right to find another one of the Cubes. Pick it up and the large Centurion standing behind you will attack you (and the whole room will be flooded as well). Kill the giant enemy and head up the stairs - there you will find a red pedestal onto which you should put the just obtained Cube.
Cross the lowered bridge and return to the main room of the fortress (Nchardak Great Chamber). Approach the two pedestals (those which you saw at the beginning) and place two Cubes on them. That way you will lower the water level, but also summon a group of enemies - two Dwemer Spheres and a couple Spiders. Kill them and head to the lower level, which was flooded before. There, defeat two Ballistas and enter the location known as Nchardak Aqueduct.
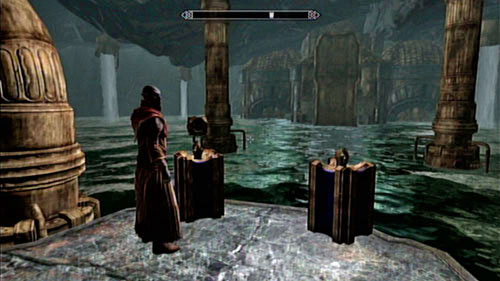
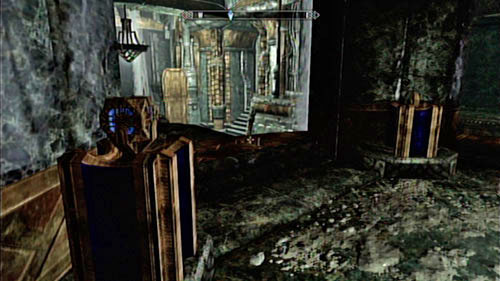
In order to cross the aqueduct, you will have to lower three draw bridges. They can be controlled by a special mechanism placed right behind you, by the stairs. Enter the control room and take a look at the three buttons. In order to solve the puzzle, you have to place the Cube on the pedestal on the right and then on the left one (screen above).
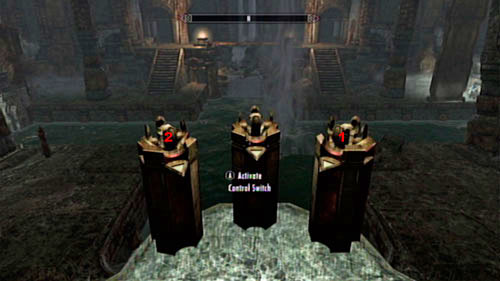
Activate the machine to lower the bridges and launch an attack on the room - Spiders and Spheres will start coming from everywhere. It's best to let Neloth go first - he's strong enough to be able to deal with every threat (plus he's immortal). After getting rid of the enemies, cross the three platforms to reach a room with a blue pedestal (on the right). Place the Cube on it to lower the water level. The mage will now leave you - you will have to cross the rest of the location on your own.
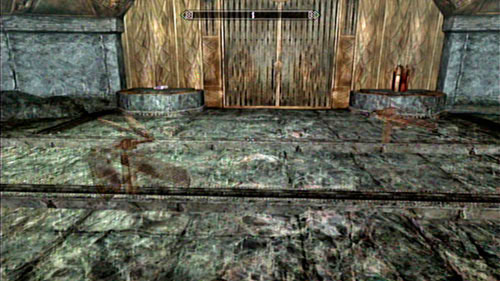
Go below to the part of the room which was flooded up until now. Use the Cube on the pedestal in front of you and go through the door. Look out for the trap in the floor in the middle of the room and stand in front of the swinging blades. The easiest way of getting past them is using the Whirlwind Sprint Shout, though it's not required. Once on the other side of the dangerous mechanism, use another Cube on the next button and head to the small room with the last, fifth Cube. Look out not to step onto a trap when picking it up - poisoned arrows aren't anywhere close to being nice!
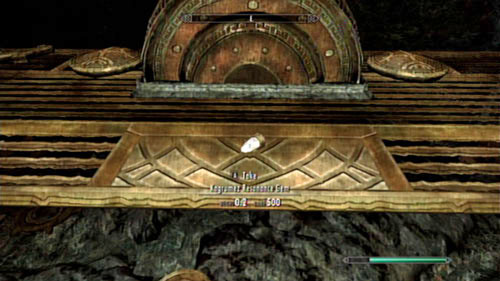
Return to Neloth and take the Cube which you have previously left in the Aqueduct. Before leaving the room, head into the room in the north-east to find a Kagrumez Resonance Gem which will come in handy in the unmarked mission Kagrumez (see the proper chapter of this guide).
Return to the Great Chamber and place three Cubes on the pedestal by the pumps - that way you will lower the water level. Afterwards pick up one of the Cubes from the upper floor and place it on the pedestal beside the last, fourth pump. That way you will unlock access to the Black Book. Before being able to reach it, you will have to fight a large Centurion who you have woken up with your actions. After defeating him, take a look around the room in which he was sleeping - there are some treasure to be found there.
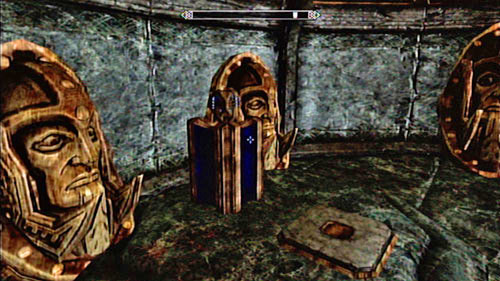
Notice! At the very bottom of the chamber, there's a secret, locked and flooded room. In order to reach it, turn on the two pumps and head to the small room which has been unveiled therefore. There, place another Cube on the proper device and head onto the shallow ground. Inside one of the towers you should find a door activated with the red pedestal (if you're missing Cube, take one from the upper level). Head inside the room and take the artifacts.
This is the last and easiest part of the mission. Return to the reading room (where the Black Book is) and press the button by which Neloth is standing. That way you will open the device in which the book has been locked - you will be finally able to use it. You will activate another mission - Gardener of Men.
After obtaining the Black Book in Nchardak, you can finally read it. Approach the pedestal with the volume and read it. The mage Neloth, who's been supporting you until now, won't help you this time, as a journey to the realm of Apocrypha is "too dangerous" for him (as he states). You're on your own.
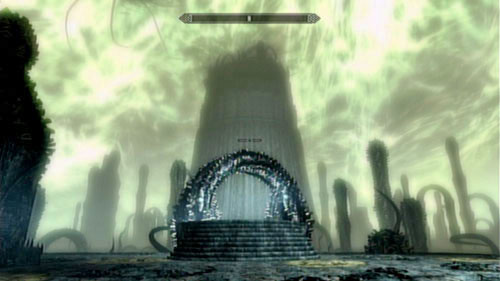
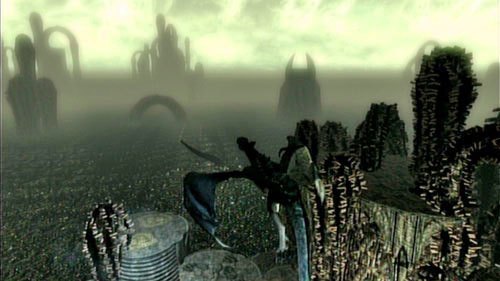
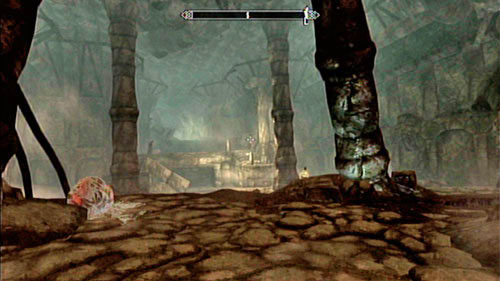
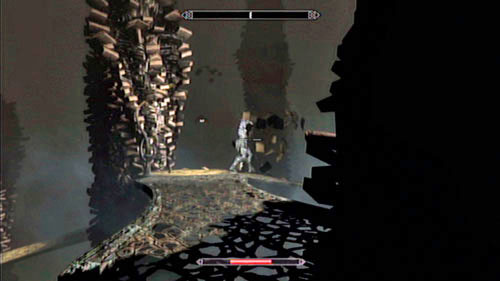
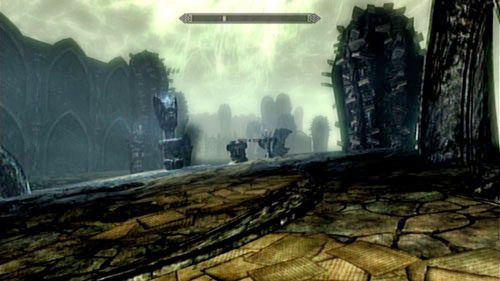
Inside the world dominated by Hermaeus Mora, you will first of all have to get used to the untypical structure of the levels. Everything is prone to change here and the whole area is in fact a large labyrinth. Its first part is by far the most complicated - approach the organic button (scyre) in the middle of the platform on which you're standing and use it. Enter the moving corridor and cross it to the other side (the one of the right).
On the next island, search for another button, use it and head back to the corridor (however instead of crossing it, stand in one place and let the tunnel turn). In the middle of the location, a bridge leading to the shining book will be created. Head there and use the mysterious book (that way you will reach Chapter II).
After reaching a tunnel with moving grates, cross is to the other side and turn the lever. Get ready for a hard fight - you will have to face two Seekers and a Lurker. It's best to eliminate the two first in the first place and leave the enormous beast for later (projectiles fired by the Seekers can be very dangerous). After getting rid of them all, use the next button and cross the newly opened gate. Behind it you will see a book-gate to Chapter III.
In the next room you will have an unpleasant meeting with two Seekers - you won't be able to avoid confronting them. The beasts are rather fast and capable of shooting deadly magic projectiles - try not to fall into the water during the fight (it will end very baldy). After dealing with the tentacle creatures, go up the stairs to the upper level. There you will come across yet another moving tunnel - in order to leave the location as fast as possible, cross it. If you however want to collect some treasures, you can always check out the local islands (look out for monsters!).
In the corridor you will come across two Seekers - you should already know how to fight them. Go through the gate (activated with the organic button) and head to the end of the tunnel. When you reach the exit, the whole construction will turn around and you will have to fight a Lurker. Defeat him and head past the corpse to the next tunnel. It will turn yet again. You will end up in a location with a organic button - use it and cross the few consecutive, linear locations.
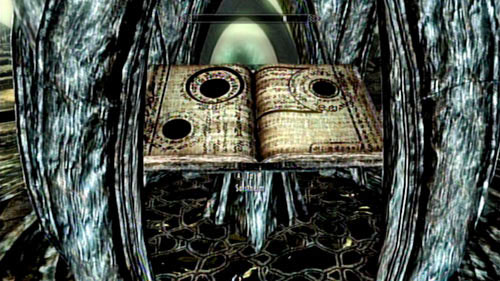
The further part of the level consists of straight corridors, ponds with tentacles and a couple Seekers. By the end of the path you will come across a book leading to Chapter IV. Use the lever and approach the book standing in the middle of the strange "hill". It's the Epistolary Arumen. Use it and Hermaeus Mora will appear.
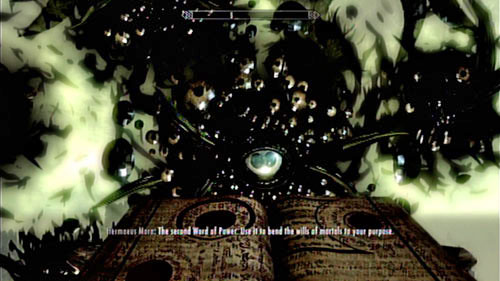
Regardless of your choices during the conversation with the Daedric god, you will learn the second Word of Power of the Bend Will Shout. You will also have no choice regarding the price you have to pay for it - one way or another, you will have to return to the Skaal Village and unveil the secret of the villagers to the monster. Before heading there however, choose one of three powers offered by Hermaeus Mora:
Choose one of them, use the book once again and you will be moved back to Nchardaku.
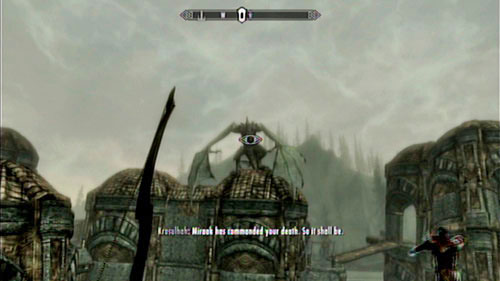
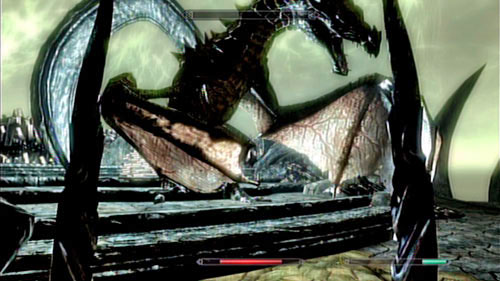
After leaving the dungeons of Nchardak, you will be attacked by a large dragon - Krosulhah. Neloth will help you in the fight, so it shouldn't take last too long (or be particularly difficult). In return for defeating the beast, you will be able to absorb its soul and unlock the second Word of the Bend Will Shout - it will come in handy later on in the game.
Move to the Skaal Village - either with fast travel or on foot. After getting there, look for the shaman - Storn Crag-Strider. Tell him everything that you know, hand over the Black Book and watch what happens. Remember - from now on, until the end of the main story of the game, you won't be able to complete any mission for the Skaal (they won't speak to you)!
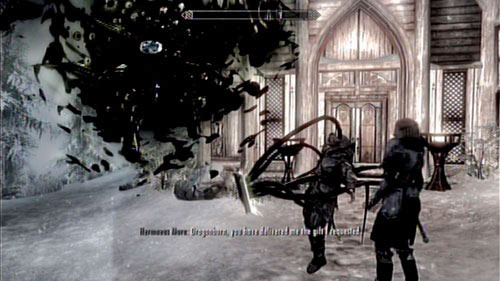
This part of the mission is completely not interactive. After giving the Book to the shaman, he will head to the middle of the village and let Hermaeus Mora possess him. As a result of his sacrifice, you will learn the last Word of the Bend Will Shout and the old man will die. Now you just have to defeat Miraak inside his own prison - Apocrypha - as part of the next mission: At the Summit of Apocrypha. Prepare well for it - it's the last mission of the main story!

Open the magic panel, head to Shouts and unlock Bend Will to learn the final mystery of your enemy. If you don't have a dragon soul, hunt for one in the wilderness of Skyrim (but not in Solstheim, or else Miraak will steal the soul for himself!).
If no dragon seems to appear you're getting bored of searching for one, head to a location where a fight in inevitable (for example because of a story-related mission). It should speed things up.
Completing this part of the mission is a matter of seconds. Head to the inventory and search for the proper Black Book. Remember that their magic properties are active only on Solstheim - if you're in the land of the Nords, you should sail back to the haunted island.
Read the cursed pages and you will be transported to the realm of Apocrypha. The end is near!
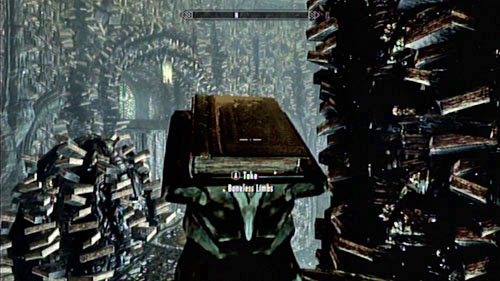
The first level of Apocrypha is very easy - just climb the stairs in front of you and read the book which leads to Chapter II. The further part is by far more interesting. Follow the only possible path to the top of the next set of stairs (eliminating two Seekers on your way) and take the Boneless Limbs form the pedestal. That way you will create a staircase at the end of the big room and will be able to head to Chapter III (by using the next book).
In the opposite room, there are two Seekers - try killing them before they manage to divide (silent assassinations might come in handy). At the same time, look out for the tentacle ponds - they can cause you serious damage, but luckily their range is limited. After getting past these obstacles, go up the stairs and take the Delving Pincers. That will open the gate found right by the book leading to Chapter II (which you have already visited - no reason to head back!).
Inside the newly opened room, use the button and cross the corridor. Climb up and enter the vast room with a couple bridges (look out not to fall down!) On the left you will find an organic button which will let create a passage to a room with a treasure (also note the chest standing on one of the bridges - it contains some valuables). On the pedestal at the southern edge of the location you will find a book called Prying Orbs. Pick it up to open a passage to Chapter IV (the corridor with a "chilly" wind).
Inside the next room you will have to fight with two Seekers - if you eliminate them fast enough, you shouldn't have any problems (they become more dangerous once "divided"). Enter the corridor in front of you. Theoretically, there are two paths leading to the further part of the level, but as you will probably learn soon, only one is accessible (the second will "fold up" and disappear). Head in the designated direction and defeat another Seeker who's waiting for you in the room at the end of the tunnel (if you get lost anywhere - turn around).
Go up the stairs and pick up the last book Gnashing Blades. The second corridor (the one on the right) will be attached to the location. Cross it and pay a surprise visit to the two Seekers. Head further and climb the stairs to use the button at the top. Afterwards return to the tunnel from which you came - this time it will lead to a completely different place. Get ready to fight a Lurker.
With the beast down (you've fought many up until now, so this one shouldn't be particularly difficult), head to the button to the left of the entrance door. Use it to open the gate to a treasure room. Afterwards use the next switch (beside the "storeroom") and move on. Not that if you had used the mechanism in a different order, you wouldn't be able to collect the treasures!
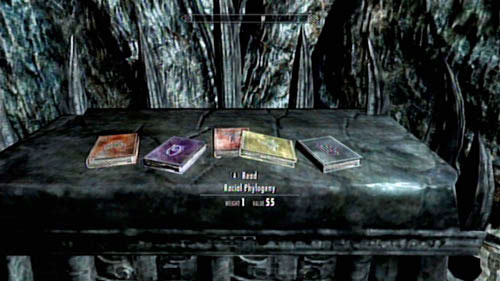
 From the left: Delving Pincers, Boneless Limbs, Prying Orbs, Gnashing Blades.
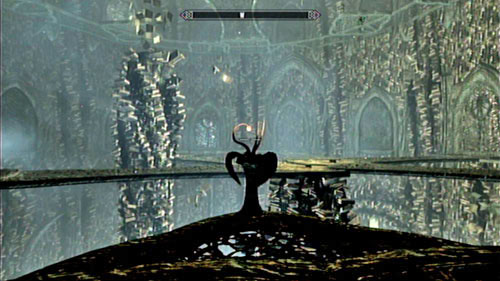
Go through the gate and use the book which will take you to Chapter V. You will be moved to a large room with four pedestals. Kill the two Seekers that lurk here and place the Books found before on the proper shelves (as seen in the above screenshot). Therefore, you will be able to activate a portal and create a passage to Chapter VI.
After reaching the top of the stairs, you will be attacked by a giant Dragon - Sahrotaar. As he lands beside you, don't try to fight him, but instead use the Bend Will Shout. That way you will tame the beast and will be able to get on its back. Before doing so, approach the wall to learn one of the Words of the Dragon Aspect Shout.
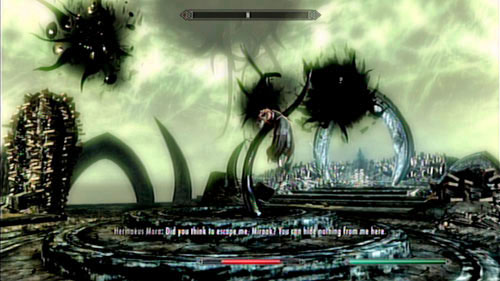
Mount Sahrotaar and fly to the tower where Miraak lives. Note that on your way you can eliminate a few Seekers on one of the islands - it's however not required. Surely you have noticed that the dragon follows a predetermined path, so sooner or later you will reach your nemesis. Your arrival will surprise him, giving you the chance of dealing the first blow.
The fight will follow a patter - when Miraak's health falls down to a certain level (around 30%), he will teleport to an inaccessible point on the map and drain the soul of one of the nearby Dragons (therefore curing his wounds). The process will repeat four times - the last one to die will be Sahrotaar, who might try to attack you before that (using Bend Will again will kill him).
The tactic against Miraak is quite easy - stay as close to him as possible and attack in close combat (he's far more dangerous during a ranged fight). The enemy can use multiple spells - especially electricity - but isn't great in a normal fight. IF only you have a couple healing potions and are able to fight, you should be fine.
When Miraak is left with very little health and there are no more Dragons in the area, Hermaeus Mora will appear and kill him. That way the main story of Dragonborn will come to an end. Before leaving the unfriendly land of Apocrypha, search the enemy's body and use the book in the middle of the room for an additional prize. You will be able to use the obtained dragon souls (11 in total) to get back badly distributed skill points. This very handy option can be used as many times as you like (by returning to the location).
Notice! This mission will become available after completing Unearthed!
In the last room of Kolbjorn Barrow you will find the Black Book - the real gate to the realm of Apocrypha. Pick it up and you will be moved to the land of Hermaeus Mora. Strange rules are in force here - you're safe only within the light. Whenever you leave the light, you will start receiving damage. Note that the only source of light are the strange fireflies. Follow them to reach the gate behind the stairs. Alternatively, you can use a torch or another source of light - they work just as well.
You will reach a long, dark corridor. On its sides there are dangerous tentacles and in the middle a few Seekers and a Lurker. Kill the enemies from a distance (remember to avoid the dark areas!) and once they're down, run through the tunnel in front of you. After getting to the end, you will reach a illuminated pedestal where you will have to fight with a Lurker. Try not to leave the light and defeat the monster as fast as possible (don't enter the pond from which its came, it's highly dangerous!).
With the monster dead, approach the shelf with the Black Book. Open it to face an uneasy choice regarding a new power:
Name
Effect
Secret of Strength
Power attacks cost no Stamina for 30 seconds
Secret of Arcana
Spells cost no magicka for 30 seconds
Secret of Protection
You take half damage for 30 seconds
After deciding on one of the options, use the book once again and return to Kolbjorn Barrow. If you ever want to change your choice, just return to Apocrypha (by activating Filament and Filigree).
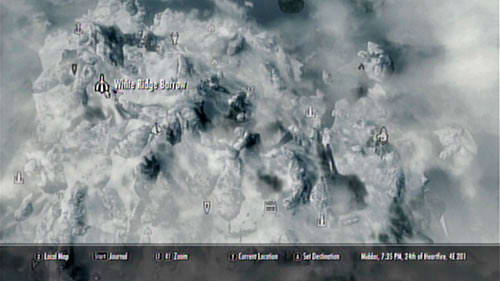
In order to reach this Book (and activate the mission), you have to head deeper into the White Ridge Barrow in the far north of Solstheim (on your way there you will have to fight our way through Moesring Pass. The dungeon isn't a nice place - by the very entrance you will come across corpses of Bandits. Deep in the cave you will be attacked by Albino Spiders and their more dangerous brothers - Flame Spiders. Defeating them shouldn't cause you too much trouble. Look out for the pulsating eggs - if you get too close to them, more enemies will hatch. Sneaking can stop that from happening, so thieves have an advantage here.

Reach the large room with three bridges and pull the chain by the middle one. That way you will lower the grate which will let you reach a big cave. Go below, deal with a couple more Spiders and Bandits and turn right. In the caves you will find lodes of precious stones and a passage to the further part - White Ridge Sanctum.
Form the cave that you just entered, you can exit using three paths - all filled with enemies. The corridor on the right leads to a treasure and a quite considerable lode of rubies - I'd definitely recommend checking it out. On the left you will find a mine (more rubies) and a cell with a strange machine which you can use to manufacture Spiders (nearby there's also a tunnel filled with spider-web and some enemies behind it). The Spider Recipe can be found lying on the desk beside the machine used to produce them.
The proper exit is however the middle one - also covered by spider-web. The Bandit protecting it has a key for the cell with the strange machine - just in case you have problems with breaking the lock.
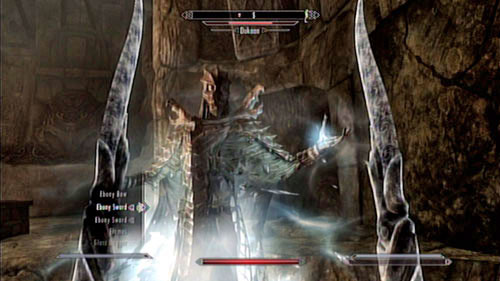
In the cave to which you came now there is powerful Dragon Priest - Dukaan. He mainly uses frost spells: he can cast powerful spells and slow you down by freezing your character. IF you have a Resist Frost Potion, be sure to use it. Try not to step away from the enemy for one moment and deal as much damage as possible - note however that he's almost completely resistant to his own element.
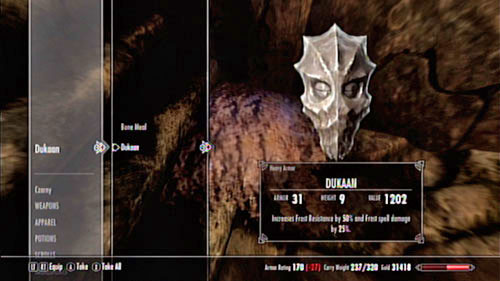
After dealing with the threat, approach the wall with the Word of Power and learn the Cyclone Shout. Don't forget to collect the Mask that the enemy will drop - it gives you 50% frost resistance and increases damage you deal with this element. Afterwards take a look into the treasure chest and grab the Black Book in front of you.
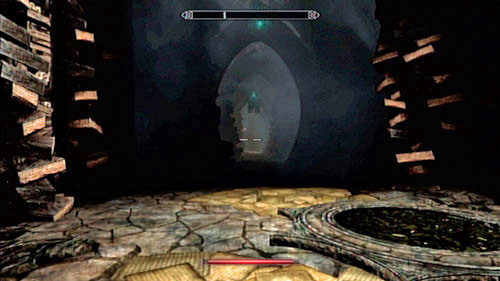
Strange rules are in force in the dimension inside the book. If you head out of the light and enter the shadow, the dark realm of Apocrypha will start sucking out your life. Therefore you will have to follow the fireflies and not get off the only possible path (alternatively you could use a torch or other source of light). At first it isn't hard - you just need to move forward, wait for your "guides" and avoid the deadly tentacles.
Things get harder later on - at some point you will come across three Seekers waiting in the darkness. If you can sneak well, you can pretty well ignore them - don't start an unnecessary fight. If not, kill them using a bow - if you run to them and start slashing with your sword, you will surely die (in fact the darkness will kill you faster than the enemies).
The further part of the realm consists of more corridors and... two Lurkers. The light is very dim here, so fighting them would almost surely end up with your death. It's best to just ignore them completely and quickly run through the rest of the path. Sneaking won't do the trick here - it's too slow and you will die in the darkness. A quick run seems to be the best possible solution.
After reaching the Black Book, you will be able to choose one of three options:
Name
Effect
Seeker of Might
Combat skills are all 10% more effective
Seeker of Sorcery
All spells cost 10% less magicka, enchantments are 10% more powerful
Seeker of Shadows
Stealth skills are all 10% more effective
Before leaving the realm of Apocrypha, take another look inside the container beside the Book - you should find some useful items there.
In order to reach this Book, you will have to complete Reluctant Steward. Only afterwards Neloth of Tel Mithryn will let you access the room in which you enchant staffs (screen above). Open the book to move to the dangerous land of Apocrypha.
The first level is merely a vestibule - just cross the corridor and activate the switch to open the door to Chapter II. Things get much more interesting there. Go forwards until you reach a big room with two Seekers. Defeat them and get to the upper level of the construction. Use the organic button, quickly run onto the platform which will appear in front of you and immediately jump onto the next one. The pace is very important here - if you fall down, you will have to start everything from the beginning.
Jump across some more platforms and run onto the next "tongue". As you reach the other side of the pit, turn left and take a look inside the treasure chest. Afterwards turn around 180 degrees and approach the book which leads to Chapter III, where more attractions are waiting for you.
Head out of the building and climb onto the roof (proper paths can be found on both sides of the construction). Turn on the switch and head onto the unlocked island. Head further and kill the Lurker inside the room. Afterwards take a look at the small niche illuminated by two plants (screen above). Inside you will find the book-gate to Chapter IV.
After using the Book, you will be almost immediately attacked by a Seeker. Kill him and use the switch in front of you. Afterwards return to Chapter III and unlock the passage to further volumes. You can do it by getting onto the upper level and pressing the next button there (where you fought with a Lurker). It will open a gate in the middle of the room.
Head inside the cell and turn right - at the end of the short, twisting corridor you will find a switch. Use it and enter the newly opened tunnel. Defeat the Seeker who's hiding there and get to the end of the location. There you will find books leading to Chapters V and VI. Use the first one to visit the next level.
In the new location, kill the next Seeker and use the button in front of you. That way you will open a passage to a room with five skill Books which will let you learn the secrets of all schools of magic. After satisfying your hunger of knowledge, return to Chapter III and head to Chapter VI.
Chapter VI to is very small. At the edge of the room you will find Book-gates leading to Chapters VII and VIII. Visit the first one and defeat (as usual, it seems) the Seeker to use the button. Afterwards return to the transition chapter and jump into number VIII.

Right after using the Book, you will be attacked by a Seeker - deal with him and get on the bridge in front of you. When the Lurker gets out of the pond, shoot him from a safe distance or kill in any other way. Use the button in the middle of the room (look out for tentacles!) and cross the long corridor leading to the Black Book. Before taking a look into it, collect the treasures lying around.
Here are the possibilities that Hermaeus Mora give you:
Name
Effect
Mora's Agony
Summons a field of writhing tentacles that poison foes
Mora's Grasp
Freezes the target between Oblivion and Tamriel for 30 seconds, making them immune to all damage
Mora's Boon
Fully restores your health, magicka, and stamina
In order to begin this mission, you have to go to the mine in Raven Rock and descent to its lowest level. It can be accessed in one way only - by helping Crescius Caerellius in The Final Descent. During this mission you will obtain one of the Black Books, crucial for the plot of the expansion. The mysterious volume will take you to the realm of Apocrypha, ruled by the crazy Daedric god - Hermaeus Mora.
After arriving in the dark dimension of the mad god, you should see a bridge and a path to the very top in front of you. You however shouldn't hope for an easy passage - if you don't hurry, you will be ripped apart by the tentacles. On your way you will be also attacked by a Seeker - the current mission will activate then. Kill the enemy and head towards hill.
Go past the pond with a tentacle and take the Soul Gems from the pedestal. Afterwards turn on the switch and enter the rather uncomplicated labyrinth. The thing's easy - you need to move onwards (at best collecting more Soul Gems while you're at it) and turn on the switches you pass by. A Seeker will stand in your way, but you should be fine if you avoid the tentacle pond. Remember to heal up and prepare for a fight before entering the last room of the labyrinth. You will have to face a powerful Lurker, who's not an easy enemy.

During the fight with the Lurker, try to lead out as many powerful attacks as possible. At first you can also fire some surprise projectiles - the enemy should lose some health before figuring out who's attacking him. Sooner or later however, you will have to fight him directly - at this point a couple health potions will come in handy, as the beast can use some really deadly skills.
With the monster dead, approach the switch on the right and push it. That way you will open the door on the left (behind the door). Collect the valuables found there (including a few Black Soul Gems!) and use the next switch. Additionally, if you read the Worlds and philosophy which lies nearby, you will be able to learn a few new tricks with two-handed weapons.
Head to the newly unlocked passage and take a look inside the container there. Afterwards open the mysterious book lying on the pedestal. At this point the mission will end and you will have to make a decision regarding the desired power:
Name
Effect
Scholar's Insight
Reading skill books gives you an extra skill point
Companion's Insight
Your attacks, shouts, and destruction spells do no damage to your followers when in combat
Lover's Insight
Do 10% more damage and get 10% better prices from people of the opposite sex
After making a choice, you will be moved back to the mines of Caerellius and will be able to continue your journey.
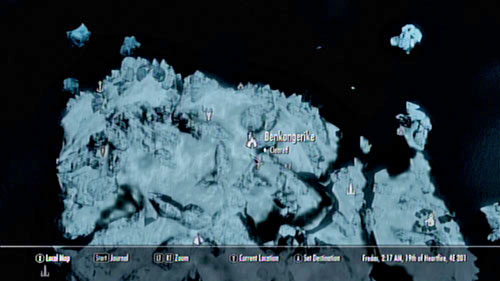
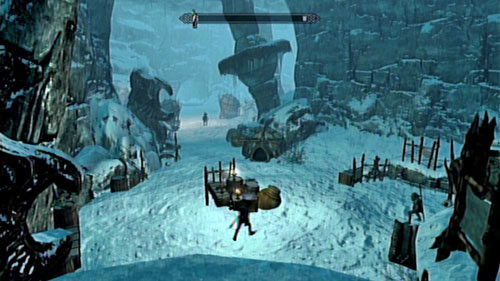
The Black Book can be found in the cave of Benkongerike - north Solstheim. The cave is inhabited by Rieklings, who have built themselves a real village here. Fighting your way through the cave might be a bit difficult - mainly because of the number of enemies (sneaking and assassination are by far the best methods here).
Sooner or later you will reach a large room with a puzzle - the proper order of the pillars is as follows: eagle, fish, fish, snake. After dealing with the puzzle, head to the room with the Word of Power (The Cyclone Shout) and afterwards to the room in which the Black Book is (on the right, behind a small tunnel).
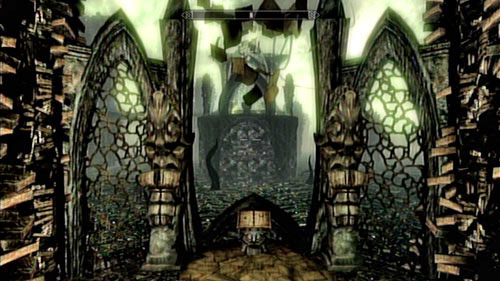
On the first level of the realm of Apocrypha, go forward along the only possible path until you reach the Book-portal leading to Chapter II. Defeat the Lurker there and make a decision - if you turn right, you will reach Chapter III and if you go left, Chapter IV. The first is optional - the place will contain a couple treasures guarded by a Seeker - the second one is required for completing the mission.
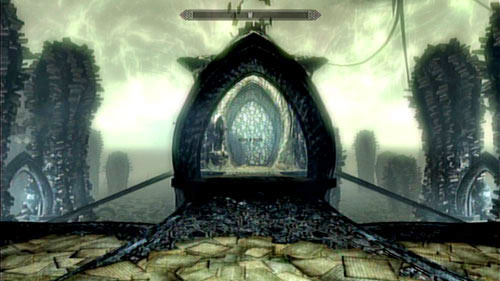
In Chapter IV you will have to defeat two Seekers and solve an easy puzzle. There are seven chamber in the room - three on the left, three on the right and one in the middle (see: the map below). In order to reach the exit, you will have to open the gate to the middle alcove on the right (the button can be found right beside) and push the lever. It will open the gate to the opposite room - inside it you will have to pull another lever. Therefore you will gain access to the middle room , where the last mechanism is - it open the passage to Chapter V . Before going there, take a look inside the other rooms - some of them might contain skill books.
Chapter V is a simple straight corridor at the end of which there's the Black Book you're looking for. Use it and you will be able to choose one of three powers:
Name
Effect
Bardic Knowledge
Summons a spectral drum that plays for 300 seconds, improving Stamina Regen for you and nearby allies
Black Market
Summons a Dremora merchant for 15 seconds (sells magic armours and weapons, buys everything)
Secret Servant
Summons a Dremora butler for 15 seconds to carry your excess items

Notice! This mission will be available only after completing Reluctant Steward!
After finding a new steward - Drovas Relvi - for Neloth, it would seem that you have helped both men. Unfortunately, as it turns out rather fast, being good isn't always the right way. In Raven Rock you will be approached by a Mogrul to whom the mage's servant owes money - 1000 gold. As the Dark Elf is currently away (and because of you), you will have to pay his debt.

There are a few ways in which you can complete this mission. You can pay Mogrul and therefore end the conflict - that's the easiest way. If you're low on money, you can travel to Tel Mithryn and collect 250 gold from Drovas in this case you have to ask Mogrul for a bit more time). You can also try threatening the man - it should lower the total amount by half. Eventually you can kill the Orc and his bodyguard - that way you will however have to pay a fine at the city guards (unless of course you kill them silently).
If you don't complete this mission relatively fast, the impatient Orc will start sending bandits on you. It's a good chance to earn some money, especially that they won't be too dangerous.

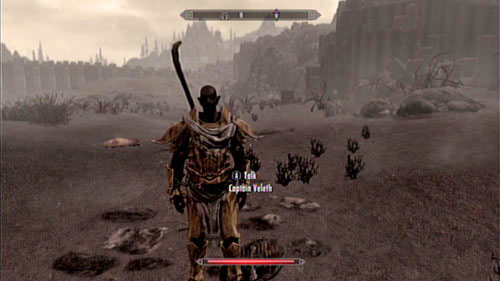
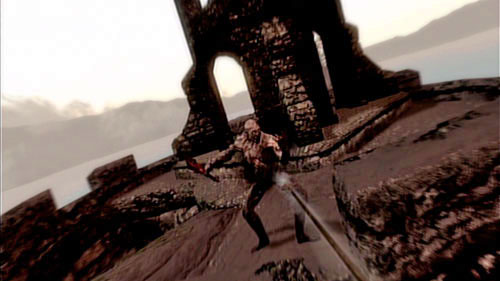
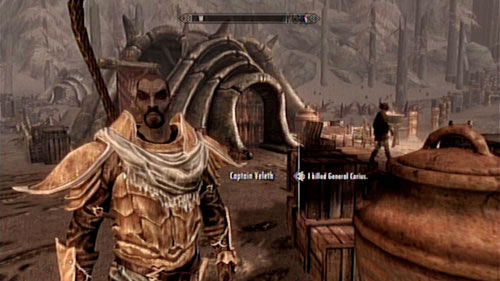
This mission begin quite surprisingly. After leaving the city of Raven Rock and heading south, you will see a Dunmer fighting against a few Ash Spawns. You should of course help the man and defeat the beast with him. Just keep in mind that the monsters are really powerful and might kill you if you're not careful.
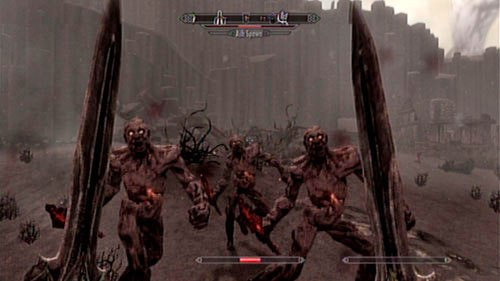
The mission will be activated the moment you begin the fight. You will receive it even if you decide to run away and leave Captain Veleth (that's his name) alone. Don't worry - he's immortal, so no harm will happen to him. You can therefore approach the mission multiple times.
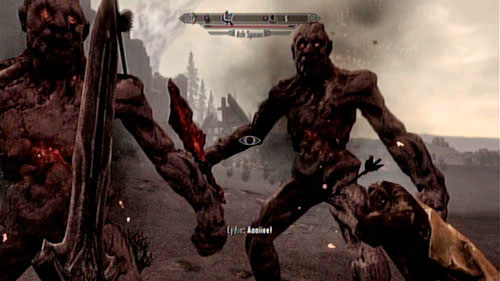
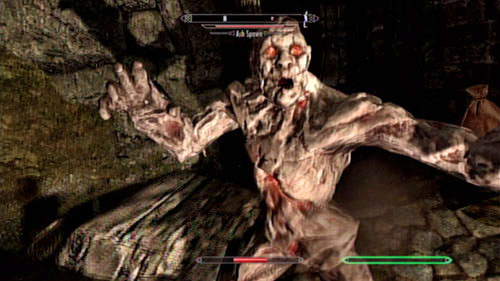
The objective is easy - help Captain Veleth kill the Ash Spawns. The monsters are using small flaming daggers, capable of dealing high damage. They however aren't very fast, so you can kill them from a distance. Try isolating them - if they surround you, you will surely die. Remember that you can always hope for help from the Dark Elf - his attacks are quite powerful as well, plus he can sustain considerable damage.
Regardless of whether you helped or he managed to kill the monsters himself (which however is unlikely), you will complete this part of the mission and unlock the further. You won't receive any prize for now, there is one at the end however.
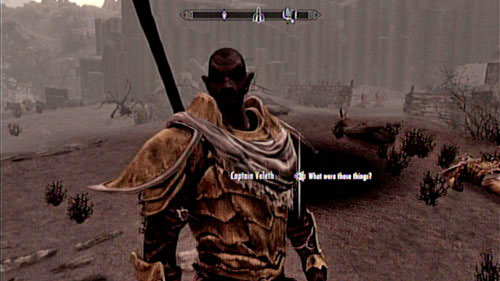
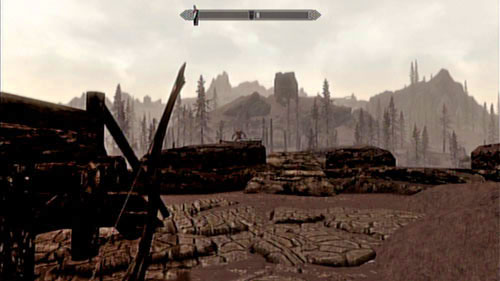
After getting rid of the Ash Spawns, you can speak with the saved Dunmer. He will tell you that he's the leader of the city guards and some of his men went to investigate Attius farm, never to come back. As there are corpses of Dark Elves beside your location, you can presume that something bad has happened with them. That's why you should accept the mission from Captain Veleth and help him in his investigation.
All traces seem to point to Attius farm (located a bit to the south) as the source of the mysterious monsters. You however don't have to go there directly - just search the corpses of the Ash Spawns and take a letter - Declaration of War.
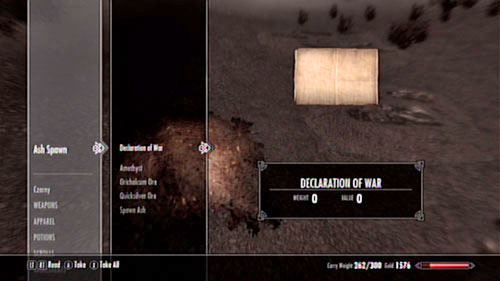
Despite the name of the mission, you don't necessarily have to go to Attius farm. You should however approach the corpses of the Ash Spawns and pick up a letter - Declaration of War. This part of the mission will be completed and the next one will begin. However before approaching it, collect all the useful items found by the enemy corpses - you should be able to find some valuables. Nearby there's also the corpse of a Dunmer Guard - chances are you will find something useful beside him as well.
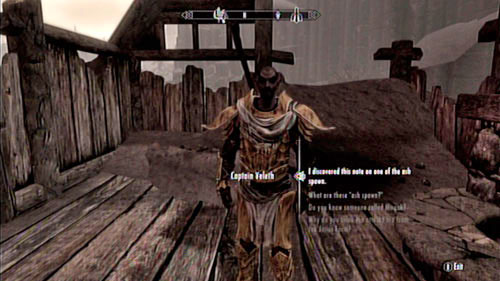
Since you have obtained the Declaration of War, hand it over to Captain Veleth who's standing right beside you. He will tell you that the author of the threat is General Falx Carius. What's curious about it is that according to local news he has died over 200 years ago. You will have to investigate the situation and provide proper evidence to the quest giver. The letter has been sent from Fort Frostmoth, so that's where you should head right now.
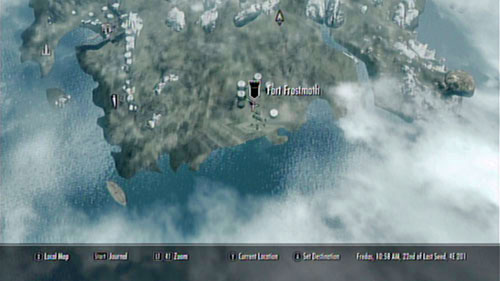
Completing the main and most important part of the mission will take you quite some time. Head east towards Fort Frostmoth. On your way you can pay a visit to Kolbjorn Barrow and begin the side mission Unearthed. Regardless of whether you decide to do that, eventually you should reach your destination. The main entrance to the fort is in the south, however before using it you should clear the local building of Ash Spawns - that way you will secure your back. One monster can be found in the tower in the south east, while the second one by the sea, nearby the old docks.
After taking care of those enemies, you can head into the fort itself. Don't rush in, instead try shooting a few enemies from a distance and draw them away from the walls (otherwise you will be surrounded and shot to death. Ash Spawns come in two kinds - the weaker kind prefers direct combat, while the stronger ones will attack you from a distance (using destruction spells). The second kind should be eliminated in the first place.
After clearing the area of all threats, head to the western door of the keep (the only one which doesn't require a key). Head inside and be ready for a fight with two Ash Spawns. If you lose a considerable amount of health while fighting them, take a look into the room on the right - you should find a health and stamina potion there. On the left you can find an East Empire Trading Company chest, the content of which is very valuable, though the lock can cause you some problems. If you have the time, you can also loot the other rooms. Sooner or later you will however have to move onwards, which will having to choose between the corridors on the right and left.
On the left you will find a room with stairs leading up and a ladder. If you climb it, you should end up outside the fort, on one of the otherwise inaccessible towers. There you will come across two Ash Spawns and a small chest with some valuables. There's nothing more here - you have to return to the fort and continue with the exploration.
Inside the fort, head to the previously ignore corridor. You should come across two more enemies who shouldn't cause you too much trouble. After dealing with them, take a look around the room. There are four exits - one in the west, two in the north and one in the east (the last one requires a special key - we will return here later on). Let's take a look at them in that order. The western door is covered in spider-web: if you swing something sharp at it, you should destroy it and be able to move on deeper into the location.
In the cave, you will have to look out for the common Albino Spiders. They're best eliminated from a distance - they don't have too much health, but can deal serious damage in a direct fight. After getting rid of them, approach the nearby loads of heartstones and rubies and collect as many as you can (if you don't have a pickaxe, you can obtain one in the further part of the catacombs).
Heading out of the cave, go to the left of the northern passages. It's protected by a master level lock - it's worth breaking it and taking a look around the cell (there's quite a lot of valuable inside). The right of the corridors isn't so problematic - it can be found in the small niche to the right of the just opened grate. When heading down, you will reach the lower level of the fort. You should note a couple coffins and one Ash Spawn. Between the ruined furniture you should find a pickaxe - priceless when collecting precious metals.
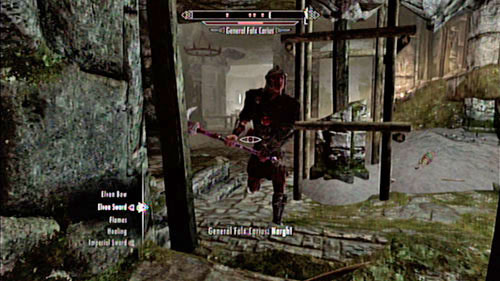
Enter the room with the big amount of coffins and candlesticks. In the very middle of the room you will find a bag and inside a key do the so far locked part of the castle (Fort Frostmoth Key). Take the item and head to the last of the passages - the one with the locked door. Go up the stairs to the first floor and get ready for a difficult fight. General Falx is a rather demanding enemy - the powerful hammer that he's using can quickly put you out. What's worse, he's accompanied by three Ash Spawns, which makes the whole battle no joke. That's why by far the best way of eliminating the enemies are stealth kills - either with a bow or a knife. If you haven't invested in proper skill trees, try using some distracting spells (e.g. summons) or such which deal high damage. If your character is a straightforward warrior, you should just stock up on health potions and slash your way through.
Getting rid of General Falx will end this part of the mission. You can now return to Veleth and give him a report. Before doing that however, you should search the bodies of your enemies and take all the valuables from the chest at the edge of the room. Nobody said you can't, right?
Since you have completed the mission, the only thing left is to collect your reward. Return to Raven Rock and search for Captain Veleth - he can usually be found around the city square. Tell him everything you know to receive a quite generous pay which additionally depends on your level.
Level
Reward (gold)
1-29
1500
30-39
2500
40-49
5000
50-59
7500
60+
10000
When you speak with Captain Veleth again, you will receive yet another mission - this time far less complicated. You will have to find an illegal alcohol stash (Locate the Raven Rock Stash).
Notice! This mission can be completed only after March of the Dead and The Final Descent!
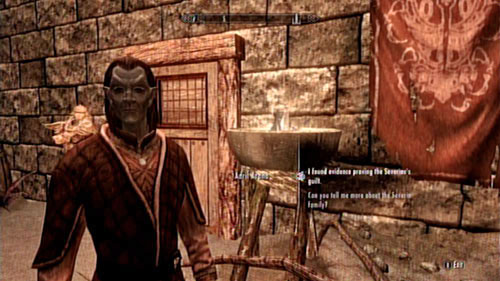
Enter Raven Rock and wait for Captain Veleth to approach you. He will tell you that Adril Arano - the Dunmer who greeted you on the island - is requesting your assistance. The worried man can be found walking around town, usually in one of the streets or at Morvayn Manor. Speak to him to learn of his dire situation - the hated Ulen family has returned to Solstheim. Your mission will be identifying the members of the family and serving them justice. Maybe Geldis Sadri is in possession of some useful information regarding them.
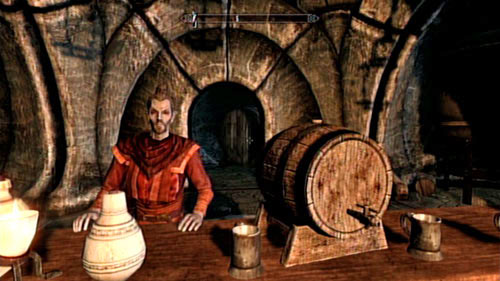
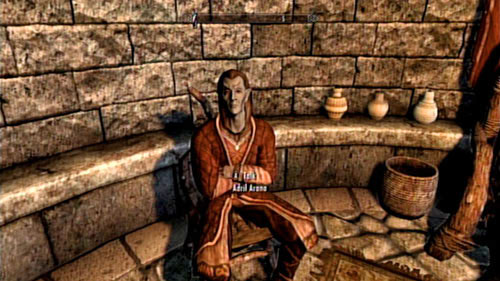
In Raven Rock you can find a tavern called The Retching Netch. Geldis Sadri is the bartender there - and as every good one, he knows all the local gossip. Head to the lower level of the tavern and speak with the owner of this "cozy" place. The clever man will suggest that you should try sneaking to the Ulen Ancestral Tomb and wait for a member of the family to appear there.
If you ask Geldis about the tavern's specialty, you will receive an additional mission - Distribute Sadri's Sujamma. Take a look into it if you're running low on gold.
Ulen Ancestral Tomb can be found in Raven Rock, right by the southern gate. If you head there during the day, you won't come across any obstacles. During night-time you will have to use lockpicks. After getting inside, wait for a mysterious character to enter the catacombs. No need for hiding afterwards - approach the woman and speak to her. Don't try killing her - she's immortal, so you will just waste arrows.
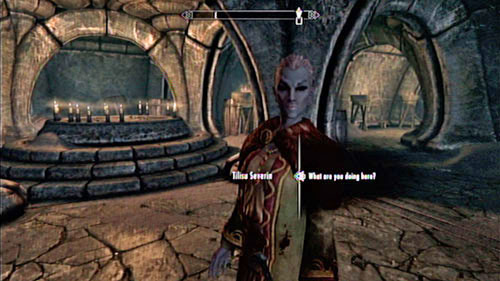
After identifying the woman who visited the Ulen Ancestral Tomb, you can speak to her. Tilsu Severin - that's her name - is a very sly Elf. Whatever you say, she will turn it around and make you look like a fool. You won't be able to do anything (including killing her), so return to Adril Arano to give him a report. Find him on one of the street of Raven Rock or in Morvayn Mannor.
Tell Adril of what happened and you will receive another task - you need to head to Severin Manor and find proof that their members made contact with the Ulen family. The second councilor will give you a key, using which you will be able to enter the house of the supposed traitors.
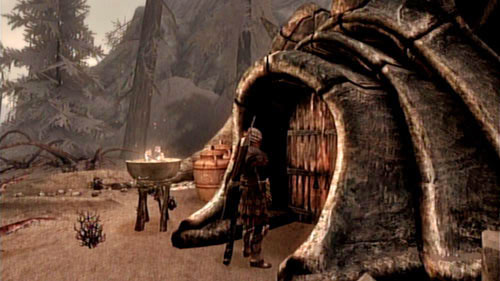
Severin Manor can be found at the very edge of town - right by the descent to the Earth Stone. Head inside (using the key received from Adril) and you will be attacked by all the inmates. If you have Sneak developed high enough, you can silently kill or.. spare them all, stealing only the evidence without drawing anyone's attention. In the latter case, remember that you will be only putting the execution off in time - the same characters will be met during the later part of the mission and killing them is part of the story.
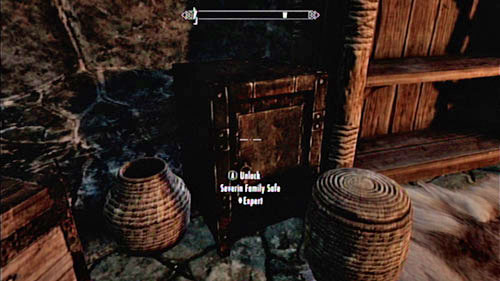
The evidence can be found in the sleeping rooms (the one with the manikins). Open the lock with a lockpick or using the key which is in possession of Mirri Severin (you can either kill or steal from her). Inside the safe, search for The Ulen Matter and take it. Afterwards return to Adril Arano and hand over the obtained evidence. Before doing that, you should take a look around the mansion - there are lots, literally lots of treasure to be found there.
The title of this objective says it all - you have to deliver the obtained evidence (which you acquired in Severin Manor) to the quest giver. Adril Arano will quickly read the letter and tell you to "pay a visit" to the Ashfallow Citadel, where the enemies of the current councilor lives. In order for you not to feel lonely, a city guard will accompany you. Head to the point which Adril marked on your map and get ready for a rather hard fight with a large group of enemies.
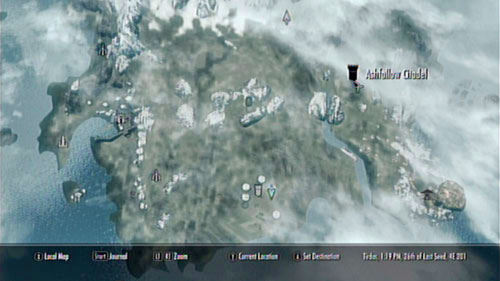
Head out of Raven Rock and go east - Ashfallow Citadel, where you need to get, is found at the other edge of Solstheim. If you have already been there, you can use fast travel - otherwise you're in for a rather long trip across ashy plains. When you approach the main gate of the castle, be especially cautious - there are two Morag Tong assassins (a clan of assassins) lurking nearby. Killing them shouldn't cause you too much trouble - they have very little health points and light armors.
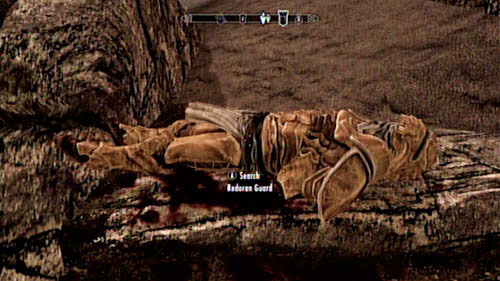
Approach the gate and you should find the corpse of a Redoran Guard on the stairs - it's the one who was supposed to accompany you. As that part of the plan went rather wrong, your only option is heading inside the castle and murdering everyone inside. However if you have some interest in mining (or blacksmithing), you should also take a look at the loads of heartstones which can be found beside the citadel.
Head inside the stronghold and note the East Empire chest on a shelf on the left. Afterwards go down the round stairs and defeat the Morag Tong assassin who' standing there. Cross the tunnel which the enemy was protecting and sneak to the further part of the underground. There you will have to face two more assassins - you should defeat them easily. Search the room on both sides of the corridor and take form them everything that might come in handy (note that there's a safe in the room on the right). Afterwards pull the chain to open a passage to the next level of the catacombs (the switch can be found on the wall inside the room with the altar and alchemy table).
Here you will have to fight with three assassins - one is sitting on the gate, while the two others are training. Eliminate them and use two more switches. The first one can be found right beside the gate, while the second in the short corridor on the right (look out for snares!). Head to the next corridor and get ready for some gymnastics - there are tons of traps placed on the floor. Jump between them and enter the room on the right. Here you will also have to look out for pressure plates - avoid them and pull the two chains found on the stone pillars. That way you will create a passage to the big room at the end of the tunnel. Go there and get ready for the final fight with the enemies of Councilor Morvayn.
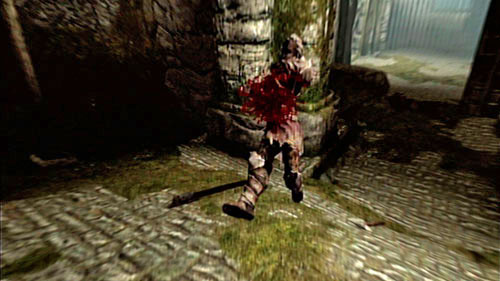
There are three enemies in the room - two Morag Tong assassins and Vendil Severin. Kill the last one is the objective in this mission. The man doesn't have too much health, but he's skilled at using two daggers and can cause you some problems. It's probably best to begin with taking care of one of the assassins (at best the one with the bow) and afterwards take care of the other opponents. If you're skilled at stealth, you should be able to do it with no problem. If you've chosen a different specialization, you can always go for a direct fight - drawing out one enemy at a time (they're less dangerous in doors). Keep in mind that the enemies are as vulnerable to traps as you are - luring them into the spiked corridor is a great idea.
After taking care of them, search their bodies and the chest and return to the quest giver. The mission is nearing its end.
After taking care of business at the Ashfallow Citadel, you can return to Raven Rock. Adril Arano at one of his favorite places and report back to him. The man will be sad because of the death of the Redoran Guard, but you can cheer him up with the news of Vendil Severin's death. Now for the hard-earned reward.
Completing this part of the mission will take you just a couple seconds. Follow Adril Arano to Morvayn Manor and listen to his conversation with the Councilor (you can notice that they seem to be good friends). In the end the Councilor will speak to you directly - listen to him closely!
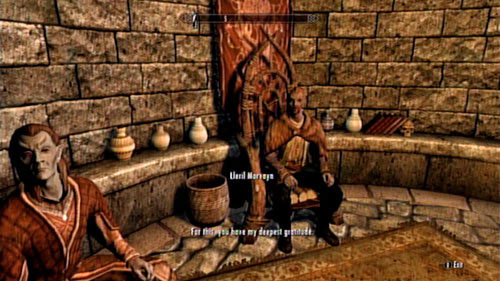
Speak to Councilor Morvayn to end the mission and receive an appropriate payment (depending on your level). What's more, in return for your deeds you will be rewarded with the Severin Mansion (which you should know fairly well by now). Inside you will find a smithing suite, alchemy lab, arcane enchanter and many, many more things. Apparently you've become one of the most important people in Solstheim!
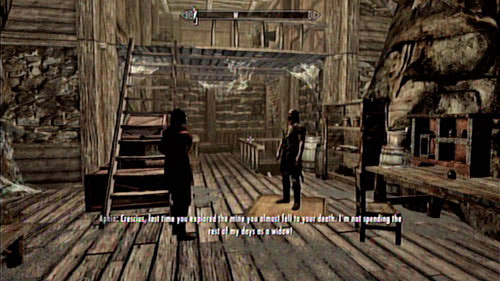
You will receive this mission in the mine in the northern part of Raven Rock. It's inhabited by an old miner - Crescius Caerellius - and his wife. If you speak with the old man, you should learn that the place has been long shut up. The cause of such situation is the disappearance of the previous owner - the great grandfather of Crescius himself. The desperate man will ask you to head down into the mine and find the corpse of his ancestor, who most likely died there. Who can refuse such a request?
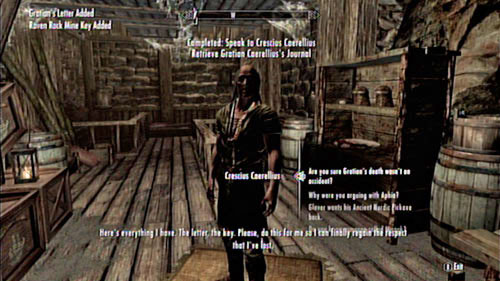
The first part of the mission is fairly easy - you just have to ask the man of all the details regarding the mine and its former owner. After using up all the possibilities, you will receive Gratian's Letter and Raven Rock Mine Key. Equipped with those two items, you can head down the mine on which the house of Crescius Caerellius was built.
Go past the quest giver and down the stairs. Keep going down as deep as possible - that way you will reach the main level of the mine. The path branches here - if you turn left, you will come across a Skeever and eventually reach a dead end. The corridor on the right is by far a better choice. If you want, you can take a look inside the trough beneath the stairs, though you won't find anything there beside a Frostbite Spider.
Head onwards along the platforms. You should come across three more spiders on your way, one after another. Kill them and move further along the corridor. The deeper part of the mine has been boarder up. On the other side you should be able to see lots of spider-webs. If you swing your sword the boards should get destroyed, allowing you to move onwards. Note that there's a East Empire Company chest here, the content of which will surely come in handy. When you're done collecting valuables, turn towards the steel gate and open it using the key received from Crescius.
Cross the gate and head down to the next cave. Be cautious when doing it - there's a Draugr resting in one of the side niches. One way or another, there still will be one more danger waiting for you - a trap set in the further part of the underground. Try not to walk into it!
In the next cave you will come across three Draugrs - two sleeping and one patrolling the area. Despite what it might seem, fighting them can be quite hard - some enemies are capable of using spells and have a considerable amount of life. That's why you should start off by silently killing the two sleeping ones and leave the third one for the end. It's by far the easiest way of dealing with this threat.
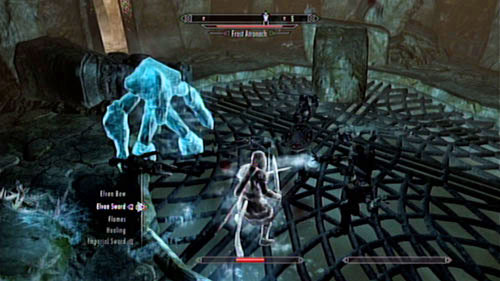
Move onwards and you will come across a suspiciously looking room. It's quite specious and its central point is surrounded by a couple thrones with sleeping Draugrs. Head to the middle of the room and all the enemies will wake up to attack you. As there are five of them and at least one of them is capable of casting powerful spells (including Conjure Frost Atronach), you should avoid a direct fight. Instead, try eliminating the enemies one by one, at best while they're still asleep (a bow and stealth skills might come in handy). After dealing with them, look inside the chest standing in the corner of the room - you should be able to find a big mount of precious items inside, assuming you can break the lock (master level).
The next room will let you catch your breath - it's full o useful items, contains an alchemy set and a lore of stalhrim. If you're in possession of one of the special pickaxes (Ancient Nordic Pickaxe), you will be able to obtain a few pieces of the precious material. The easiest way of obtaining one Is completing Retrieve Ancient Nordic Pickaxe.
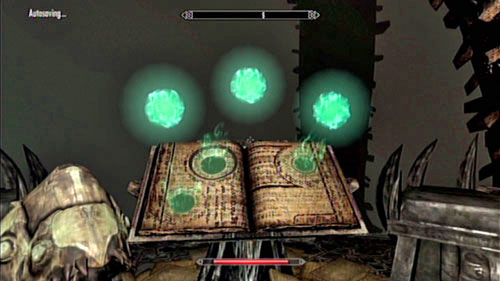
After resting and filling up your pockets, you can head further. In the corridor leading to the further part of the catacombs you will find a magic trap - in order to avoid the deadly lightning, you have to pull out the soul stones from the pedestal. The faster you do it, the less health you will lose. Keeping as much life as possible is very important, as in the next room you will have to fight three more Draugrs - including two Draugr Deathlords. Fighting them will be very difficult unless you separate them and fight them one at a time. Being able to fight at a distance will come in handy here - you just might be able to eliminate the threat before they even reach you (the enemies aren't too fast).

After the fight, head towards the small waterfall. Behind it you will find a passage to a room with another stalhrim lore and some valuables (in vases). Afterwards return to the room in which you fought with the Draugr Deathlords and head to its upper level. Go across the wooden walkbridge and activate the device found opposite to the enchanting table (also note the chest found there). That way you will unlock the door in front of you. Go through it and turn left to find the Ice Spike magic book. Afterwards turn 180 degrees and head up the platform.

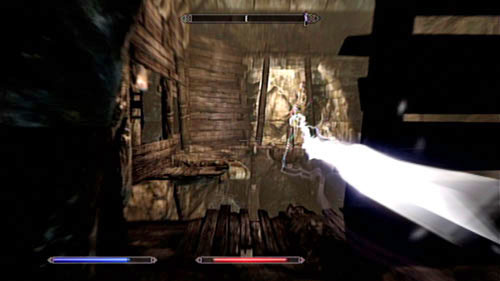
There's another trap waiting for you here - lightning will try to hit you from time to time. Hide behind the wooden cover and wait for the proper moment, use Whirlwind Sprint and jump to the soul stone which shoots lightning - if you pick it up, the trap will stop working.
In the further part of the underground you will be in for a rather nasty surprise - three pressure plates, pressing which will result in a series of deadly projectiles. Try avoiding the trap and approach the door at the end of the corridor to find a treasure chest. Afterwards head back and search for a side corridor (it's rather hard to notice and a torch should come in handy). Go through the twisty and narrow corridor and you should reach a rather big cave.
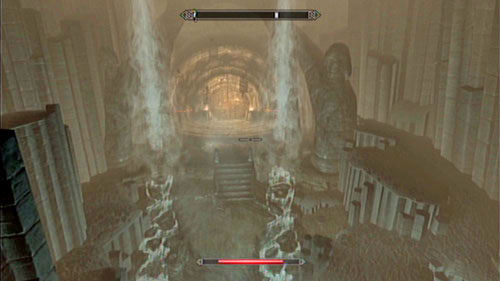
Jump down and approach the skeleton which rests by the large gate - it's Gratian Caerellius himself. Search the remains to obtain Gratian's Journal and the peculiar Bloodskal Blade. Take a look at the current of the underground river - by its estuary you will find a treasure chest. Note that the cave in which you found yourself has no exit - you have been trapped!

As you have probably noticed, you are trapped - just like Gratian who lying by your feet. The dead man's journal can give you some hints. Read the notes and you might be able to solve the puzzle.
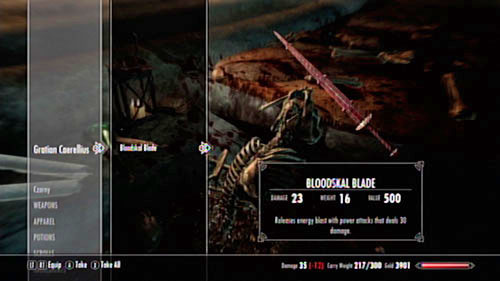
Gratian's Journal contains a hint - the magical sword (Bloodskal Blade) which you found by the remains seems to have peculiar properties. In fact, in emits a deadly beam of energy in the direction in which it is swung. It's rather obvious that it's the key to the puzzle and your key to freedom.
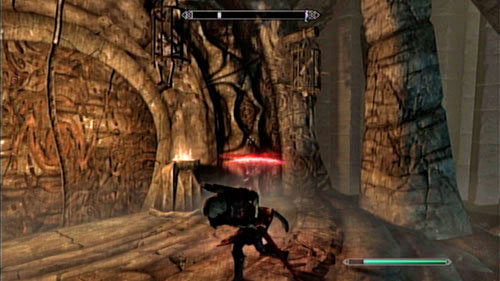
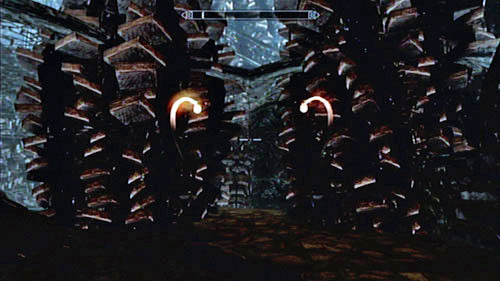
Stand in front of the large gate and take a closer look at it. On its sides you should see a narrow red beams of light. Equip the Bloodskal Blade and swing it at the red points to activate the opening mechanism. Keep repeating this operation until all the holes are hit and the gate opens.
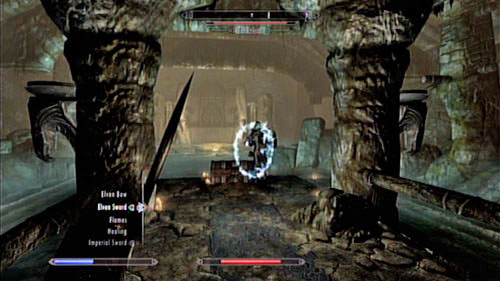
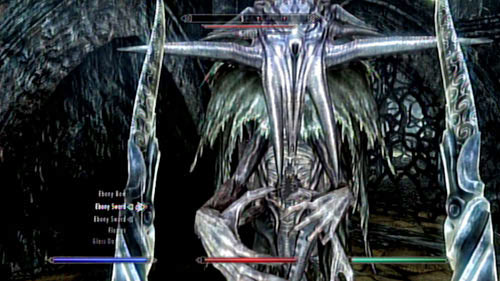
Cross the magic door and you will reach a corridor with lots of pendulums. Use the Whirlwind Sprint and get across. That way you should end up in a big room filled with water. In its middle there's a chest which seems to be too tempting. Approach it to cause the Dragon Priest Zahkriisos to appear. Fighting him is quite challenging - the enemy can protect himself using spells, he's very fast and casts powerful lightning. Keep drinking health potions, use resist shock potion if you have one and kill the enemy. The key to victory is pushing him to a wall - he don't be that dangerous without the ability to move.
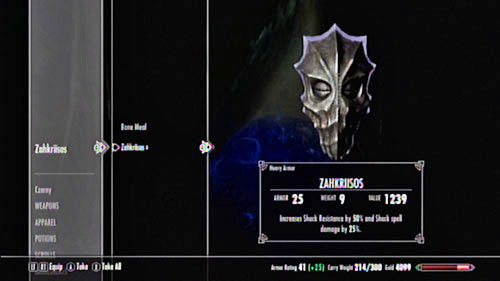
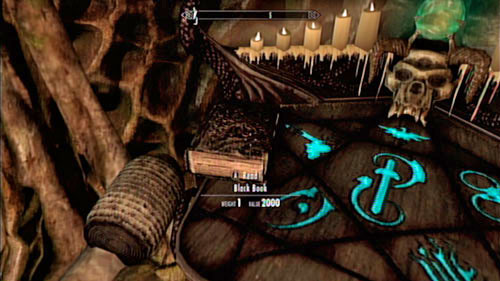
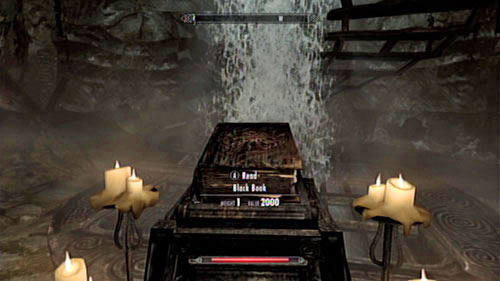
After you defeat the Priest, pick up his mask - it provides a 50% Shock resistance and increases damage from such spells by another 25%. Approach the altar at the end of the room to learn one of the Word of Power - Dragon Aspect. Afterwards head through to the room on the right (parallel to the one with the pendulums and take all the valuable from there. Note that there's a Black Book resting on the pedestal - read it and you will be moved to the mysterious world of Apocrypha.
In the psychedelic world of Hermaeus Mora you will have a rather easy task - you need to get to the other side of the level. You will have to look out for the deadly tentacles on your way (they appear on both sides of the footbridge) and defeat a Seeker. When you get attacked by him, the side mission - Black Book: The Winds of Change - will begin.
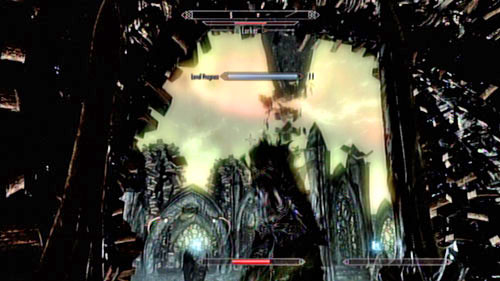
Get past the tentacle pond and collect the soul stones from the pedestal. Afterwards turn on the switch and enter the complicated labyrinth. The case is easy here - you need to move onwards, collect valuable on your way and push all switches. A Seeker will cross your path at some point, but if you don't enter the next tentacle pond you should be just fine. Before entering the room with which the labyrinth ends, heal up your wounds and get ready for a fight. You will have to face a powerful Lurker, who's not an easy enemy.
During the fight with the Lurker you have to focus on leading out as much powerful attacks as possible. At first you can also fire some surprise projectiles - the enemy should lose some health before even noticing where it's being attacked from. Sooner or later you will however have to fight it directly - at this point some health potions will definitely come in handy, as the beast has some quite deadly skills.

With the monster dead, approach the switch on the right and use it. That way you should unlock a door on the left (behind the stairs). Collect the valuables found there (including some black soul stones!) and use the next switch. Additionally, if you read the Worlds and philosophy book nearby, you will be able to learn some new tricks with two-handed weapons.

Head to the newly unlocked passage and take a look inside the container found there. Afterwards open the mysterious book lying on the pedestal. At this point Black Book: The Winds of Change will come to an end and you will have to make an uneasy choice:
Name
Effect
Scholar's Insight
Reading skill books gives you an extra skill point.
Companion's Insight
Your attacks, shouts, and destruction spells do no damage to your followers when in combat.
Lover's Insight
Do 10% more damage and get 10% better prices from people of the opposite sex.
After choosing your destiny, you will be moved back to the mine of Caerellius (Bloodskal Barrow) and will be able to continue your journey.
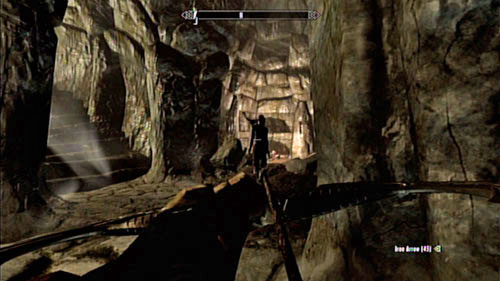
After shaking off the unpleasant feeling and noticing that you're back in the normal world, head towards the round stairs leading to the mine entrance. Go through the door and turn on the device which will open the secret passage. You will end up in a cave inhabited by three bandits. Eliminate them and search their goods - you might come across something useful there. Afterwards head to the exit and catch some fresh air, as you're back to the surface!
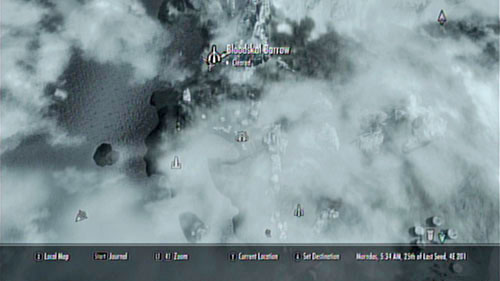
You have surely noticed that the journey through the mines took quite some time and threw you far from Raven Rock. Indeed, you ended up far in the north, in Bloodskal Barrow. You can't use fast travel to return to the city, as there are too many bandits in the area. Eliminate them and head to the quest giver. On your way, be sure to check all the rooms inside the castle - there are some valuable to be found inside.
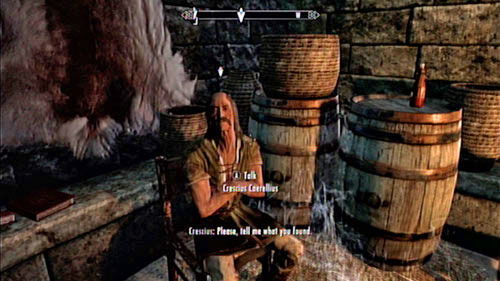
Crescius Caerellius can be found in his house beside the port in Raven Rock. Enter the building and speak with the old man. You might not understand the importance of what you have done - thanks to you, Solstheim will be revived. The ebony mine will be reopened and boost trade in the whole area. New villagers, merchants and artisans will soon arrive, and all thanks to you. Congratulations!
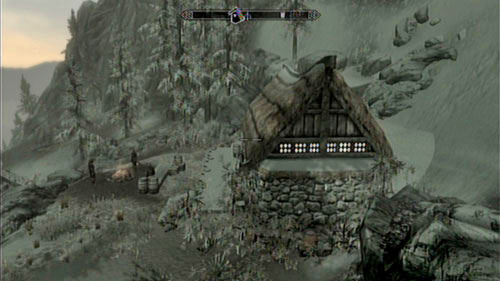
Notice! You can begin this mission only after completing Ask Deor About Baldor's Disappearance.
Thanks to the fact that you helped the Skaals in The Fate of Skaal, you have earned their trust - which means that you can complete some additional missions for them. You can begin the first one if after seven days you pay a visit to the village and listen to the conversation between Deor Woodcutter and Fanari Strong-Voice. You should learn that the local blacksmith - Baldor Iron Shaper - has gone missing somewhere in the icy wilderness (see: Ask Deor About Baldor's Disappearance). Your mission will be finding the man - in order to do that, you will have to ask them about the missing man and afterwards head out to look for him.

The blacksmith is being held in the Abandoned Lodge north-east of Raven Rock (map above). Reaching it shouldn't cause you too much trouble - head out through the southern gate and go past Kolbjorn Barrow to afterwards head to north. When you reach the destination, you will be attacked by three Thalmor Soldiers. Defeating them is a piece of cake - especially if you surprise them. By the corpse of one of them you should also find the abandoned lodge key - using it, you will be able to head inside the building.
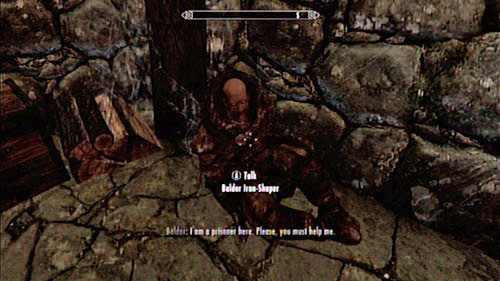
Head inside the hut and to the basement using the stairs on the left. In the corner of the room you should notice the blacksmith you're looking for - luckily he's alright. Free him to learn that a certain Elf Ancarion desires to learn the secret of Stalhrim: even through the has the map showing the resources, he doesn't know how to use it to forge weapons. This art is known only t the blacksmiths of the Skaal Village, hence the kidnap. Head out to find the greedy elf and take retrieve the priceless map.
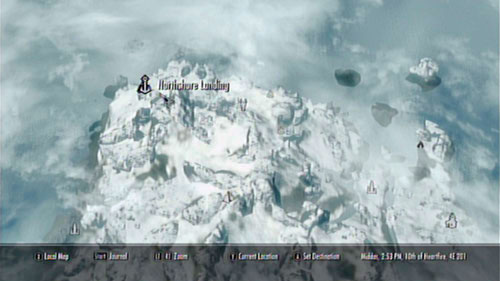
Ancarion can be found at the very north of Solstheim - inside the location known as Northshore Landing. There's no easy passage there - the optimum path seems to lead west from Glacial Cave or north of Water Stone. Whichever you choose, you will eventually reach a small camp at the shore and a inconspicuous boat. Onboard you will find three Thalmor soldiers and the abductor you're looking for.
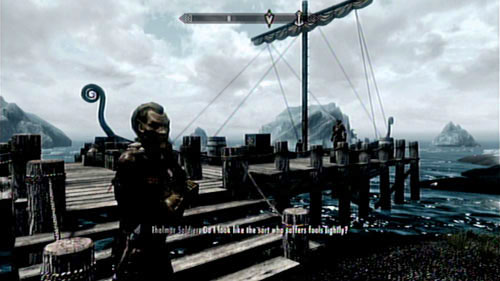
There's a few ways of solving the problem - you can kill all the enemies at once and retrieve the Stalhrim Source Map from Ancarion's corpse - that's however the most brutal option. Alternatively, you can steal it from the Elf and end the mission without starting the fight. If you however decide to speak with the Thalmor agent, you will have to choose:

Regardless of your choice, you have to return to the Skaal Village and inform Baldor of the turn of events. Before giving him back the map, be sure to read it first - that way you will learn the Stalhrim Source locations
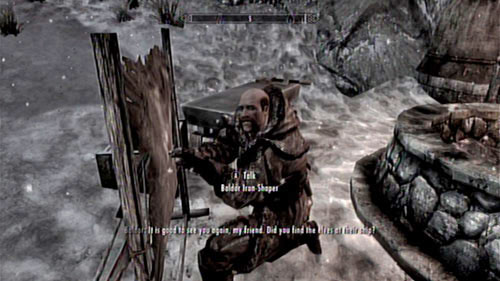
After completing the main part of the mission, you can return to the Skaal Village and give Baldor the Stalhrim Source Map. In return for your help, he will reach you how to smith Stalhrim, which is a very useful skill. However keep in mind that if you want to use it, you have to be familiar with ebony (which requires Smithing on at least level 80). It's therefore a bonus for highly developed characters.
Additionally you will unlock a new mission - The Lost Legacy. In order to activate it, listen to the old man who will approach you after you're done talking with Baldor.
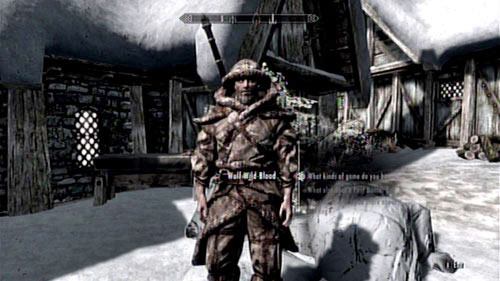
After freeing the Skaal Village from Miraak's influence (see: The Fate of the Skaal), approach the hunter named Wulf Wild-Blood (he's usually forging weapons by his workshop). The man will tell you that his brother has gone missing some time ago and the locals claim that the poor man has become a werewolf. Regardless of his fate, you should head out to find him.
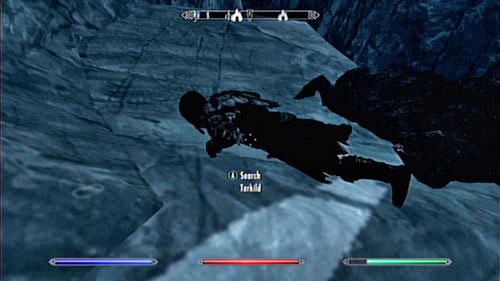
Torkild (that's his name) can be found in random places - that's why you can have some troubles with locating him. During your travels, look for small groups of half-naked men - the boy will be amongst them. Upon meeting with him, he will attack you (probably changing to a werewolf). Kill him - unfortunately it's unavoidable - and search his corpse.
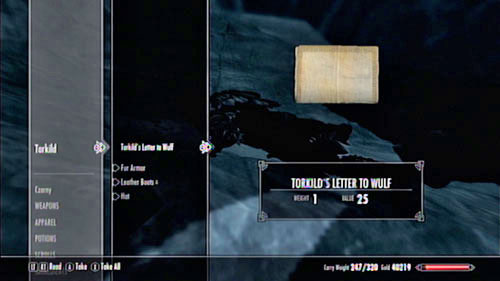
Take a look at the corpse and take the Letter to Wulf. Read it to learn that he has found an ancient and mysterious power in the wilderness of Solstheim, a power which apparently was too much for him to bare. The change caused him to become a lunatic, which you could have experienced a moment ago. There's nothing left but to return to the quest giver and tell him the sad news.
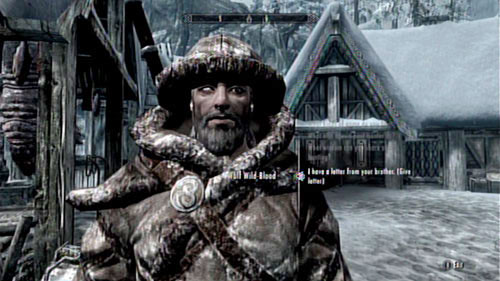
Return to the Skaal Village and tell Wulf about the fate of his brother. Hand him over the letter and explain the situation. In return, he will teach you what he knows about surviving in the wilderness, that is increase your combat skills by one point (Archery, Block, One-handed, Two-handed and Heavy Armor). As you can see, the reward is worth the trouble.
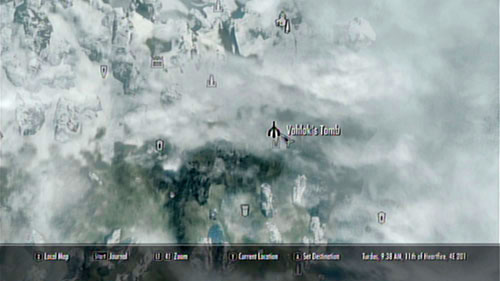
Notice! You can begin this mission only after completing A New Source of Stalhrim!
As you end the plot of Baldor Iron-Shaper in Skaal Village, you will be approached by an odd old man - Tharstan. He will describe himself as a historian who has discovered an ancient tomb underneath the island. He's too weak and faint to go there on his own, but if accompanied by a true adventurer... After all, such caves are full of treasures and... hordes of undead.
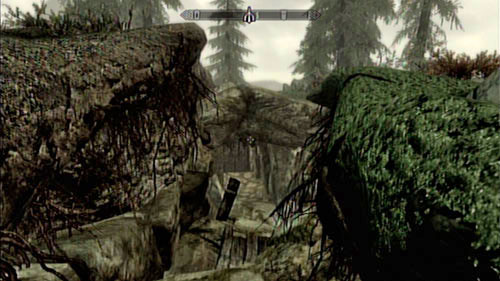
The ancient ruins - Vahlok's Tomb - can be found in the eastern part of the island, north-east of Ashfallow Citadel. Spotting it isn't easy - it can be found in a small ditch in the middle of the plain (screen above). Head inside and speak with the quest giver.
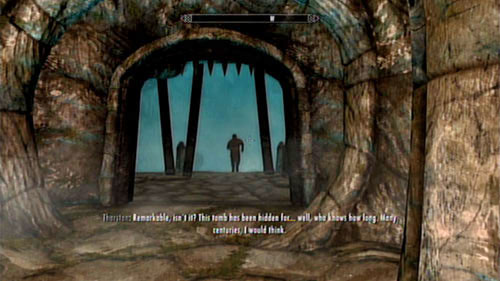
After heading into the cave, you will be approached by Tharstan who will tell you of his discovery. Apparently, the tomb is much bigger that he imagined. But heroes like you are made to face such challenges, aren't they? Head into the main chamber and take a look around - another adventure awaits you, apparently.
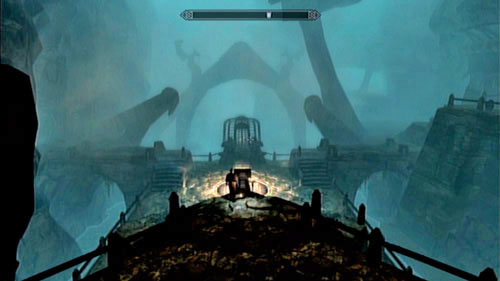
There is a puzzle to be solved in the main chamber. At the top of the stairs you will see a lonely statue with a switch at its base. Press it to make the altar in the middle to open and flames to start blazing out of it. As you might have figured it out already, you need to bring one of the nearby Draugrs to the very middle of the fire trap and press the button to therefore make a sacrifice. By doing so you will open the gate on the left and will be able to access the further part of the dungeon.
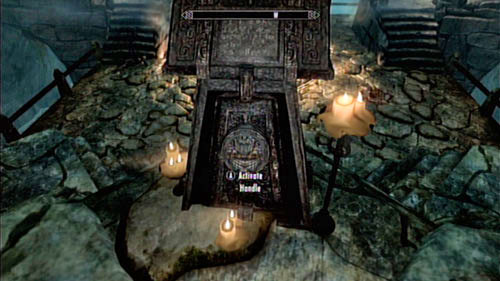
(Don't know how to bring a monster to the altar? On Xbox you need to press and hold the A button, while on the keyboard the E button)
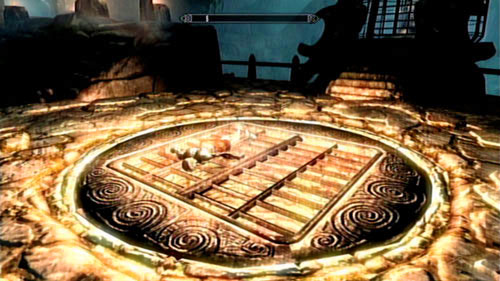
Head into the corridor on the left and go down. Go through the door into the room with four sleeping Draugrs. You could ignore them on your own (by, for example, sneaking by silently), but Tharstan isn't the subtle type and will surely wake them up. Send the monsters back to Sovngard and kill one more in the vestibule beside. Afterwards pull the chain and had through the iron gate.
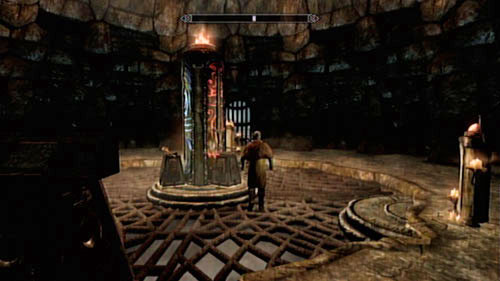
The next room brings yet another puzzle. In the middle of the room you should see a strange pillar and three pedestals around it. Note that each side of the pillar has a different weapon carved into it - a sword, bow and a mage staff (you will also find the proper weapons below the pillar itself). The solution of this puzzle is rather easy - just use the proper equipment on the right pedestal: sword on one of them, bow on the second and a fire spell on the third. That way you will unlock a passage to the further part of the tomb (screen below).
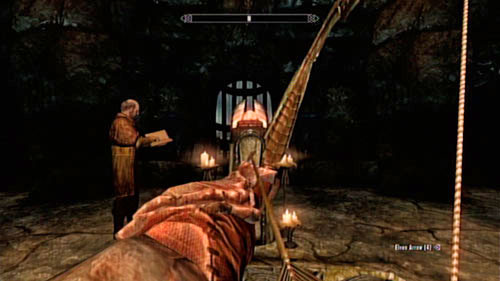
Head into the next room to make four Draugrs come out of their coffins - including one Deathlord. You shouldn't hope for any help from the scared historian - he will just run away, leaving you alone to face the danger. Defeat the enemies and take half of the amethyst claw from the body of the strongest one. Afterwards search the chests behind the large coffin and read the Word of Power of the Battle Fury Shout from the wall in front of you.
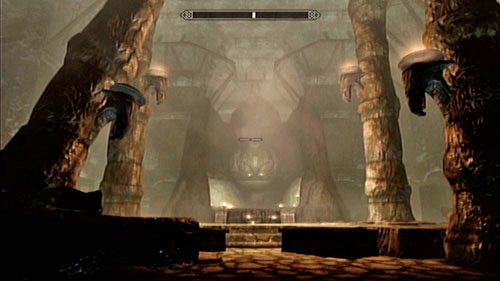
Note that the coffin on the left has a hidden passage in it. Head inside and cross the tunnel to return to the main chamber. Make another sacrifice and take a look into the corridor on the right - you haven't been there yet. Search the treasure chest (on the right) and head into the room with another puzzle.
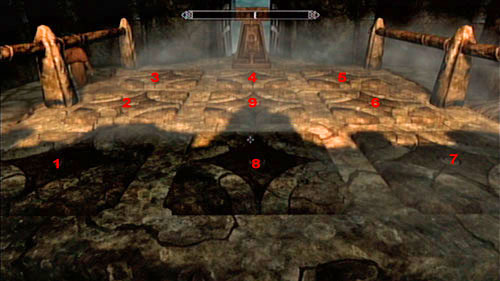
You need to go across the pressure plates in a given order marked above. Start with the plate on the left and then go round the whole construction, ending with the plate in the middle. That way you will open the gate and come across five Draugrs - including one Deathlord (from whom you should take the second half of the amethyst claw).
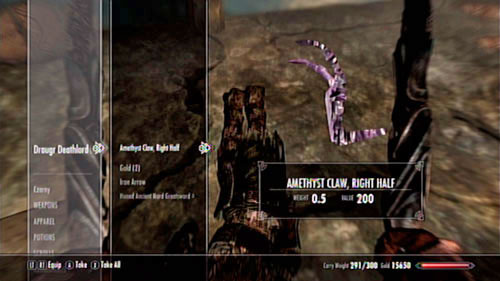
Learn the second Word of Power of Battle Fury and familiarize with the treasure found right below the large plate. Afterwards enter the coffin on the left side of the room and - just like before - return to the main chamber.
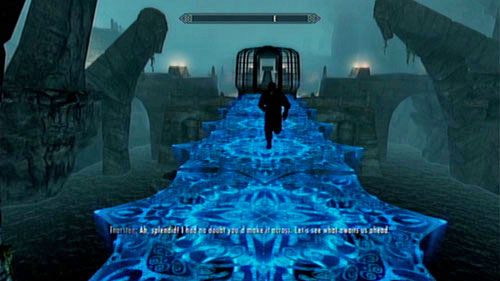
After returning to the main chamber, approach the cage in the middle. On both sides of it you should find panels which can be fitted with the amethyst claws. Use them and enter the opened cage. Inside, use the switch found on the pedestal and quickly cross the magical path that will appear before you (look out, as it's a sort of a labyrinth and note a straight road!).
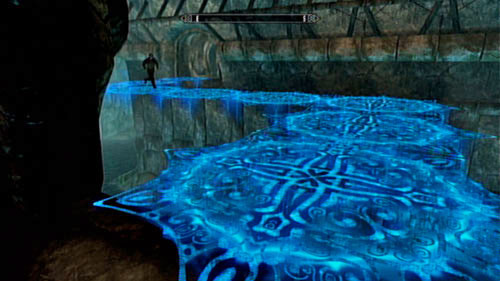
When you reach the other side, a bridge back will be created - using it, Tharstan can join you. Move onwards and use the switch to activate another passage (look out not to fall - there's a whole bunch of monster below!). In the further part of the tomb you will come across two more bridges, with each one being a bit more difficult than the previous (given "blocks" disappear faster).
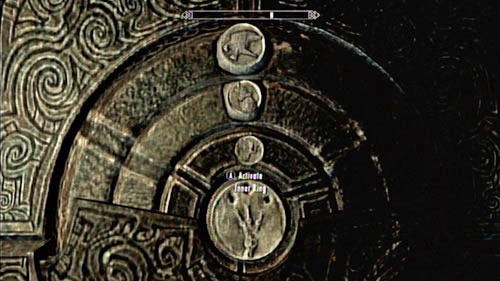
After crossing all the magical bridges, you will reach a room with a puzzle-door. You have to turn the rings so that the door displays, in order: an eagle, a wolf and a dragon (screen above). After arranging the symbols properly, put both pieces of the amethyst claw into the hole in the middle and open the gate. Inside you will have to face Vahlok.
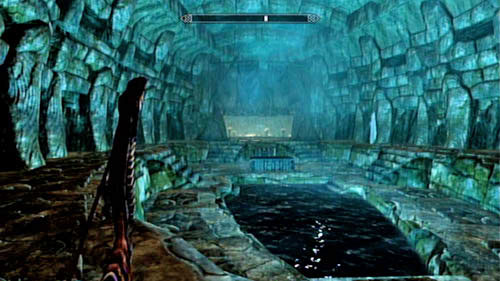
Be careful as you step inside the tomb chamber - the floor is covered with pressure plates which activate flamethrowers - you will burn immediately if you're not careful enough. The thing is that if you approach the middle of the room, Vahlok - the lord of the tomb - will jump out of the coffin. The Dragon Priest uses fire spells, so he will probably cover himself with a barrier and summon a Flame Atronach at the very beginning of the fight.
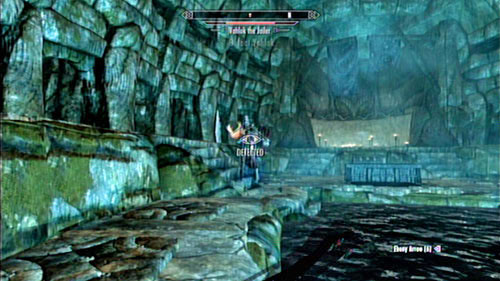
The enemy has surprisingly little health points - at least for a Dragon Priest. If you're a good assassin (with high Sneaking), you can kill the enemy with a few arrows - he will most likely focus on Tharstan, so you can surely fire a few deadly shots (the historian is immortal - don't worry about him). If you prefer other methods of persuasion, you can always use them - just remember to avoid fire-based spells as he's almost completely resistant to them.
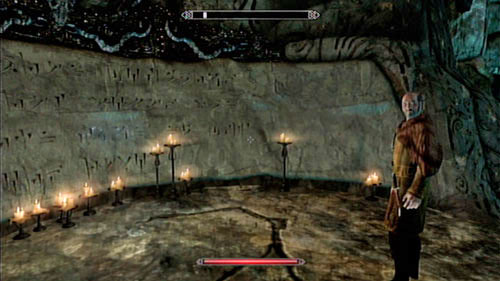
When you defeat Vahlok, approach the wall with the last Wall of Power for Battle Fury. Take a look into the chest beside the wall and afterwards speak with your quest giver. He will give you 1000 gold - which, unfortunately, is the only prize you will receive for this mission.
Note that Vahlok doesn't leave any dragon mask behind - apparently he wasn't as important as one could think.
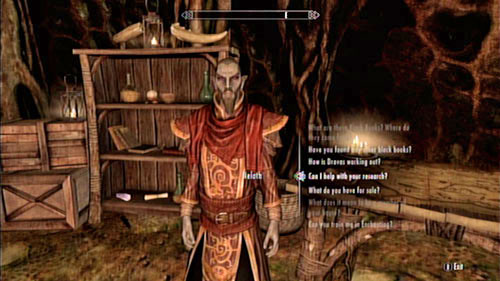
Notice! This mission will be available only after you complete Path of Knowledge!
This mission can be completed repeatedly. Neloth, as every rich and self-important nobleman has a weakness for collecting rare items. The mage of Tel Mithryn especially likes magic staffs - but only those created by the legendary Azra. They can be found in different dungeons and tombs spread throughout Skyrim. A list of locations can be found below:
Bloodlet Throne - southeast of Falkret, in the mountains;
Boulderfall Cave - west of Shor's Stone;
Broken Helm Hollow - southeast of Riften;
Eldersblood Peak - south of Morthal;
High Gate Ruins - halfway between Solitude and Dawnstar;
Embershard Mine - northwest of Helgen;
Falkreath Watchtower - north of Falkret;
Mara's Eye Pond - southwest of Windhelm;
Sightless Pit - south of Winterhold;
Yngvild - northeast of Dawnstar.
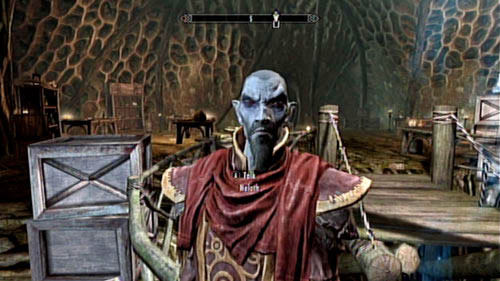
In return for each of the staffs you will receive a prize in the form of... another staff, created by Neloth himself - it's not always a fair trade, as the staffs you find can be weaker than those offered by the mage of Tel Mithryn.
You won't receive any additional prize for collecting all of the items, so it's not worth the time.

Notice! This mission will be available only after you complete Path of Knowledge!
Neloth needs a very untypical ingredient for his experiments - the Briarheart. The item can be dropped only by Forsworn Briarhearts, who replace their organs with them. There aren't many of them in Skyrim, but you can find a few in locations such as Bard's Leap Summit, Lost Valley Redoubt or Sundered Towers.
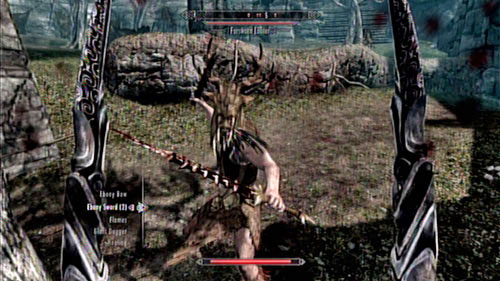
Note that you don't even have to kill a Forsworn Briarhearts - just steal from him. If you take away his most vital organ, he will immediately die without making any noise.
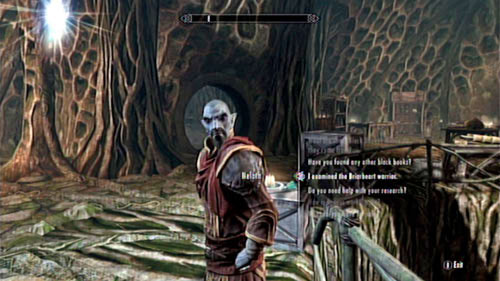
After completing the mission, return to the mage of Tel Mithryn. He will take out memories out of the Briarheart and reward you with a given (not very high) amount of gold. Don't worry, as completing mission for Neloth is profitable in long term - it will let you unlock some more advanced (and lucrative) quests.
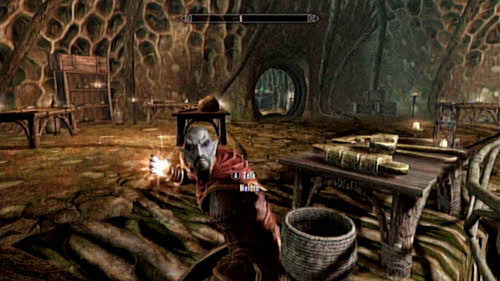
Notice! This mission will be available only after you complete Path of Knowledge!
Meet with Neloth in Tel Mithryn and ask him about his latest work. The mage will offer you to test out his latest spell - which is supposed to increase the vitality of the enchanted person. Of course there's always a risk that it won't work exactly as intended, but what would be science without risk (as a certain GLaDOS liked to think)?
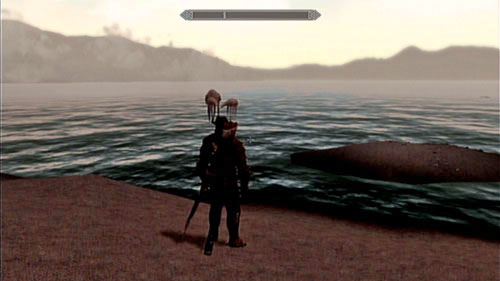
Let the mage cast his spell on you and you will receive a permanent bonus of 25 point to your health. Don't be happy too soon - if you get any contact with water, you will receive an identical penalty. Return to Neloth for help!
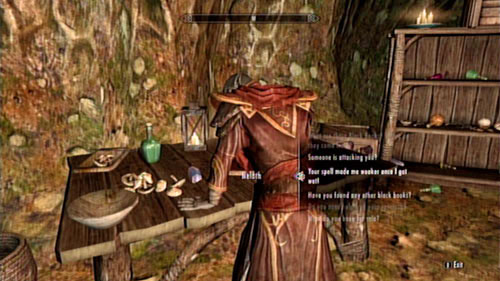
Return to the tower in Tel Mithryn and tell the mage of the side effects that you experienced. Neloth will moan a bit, but eventually take off the spell and pay for your trouble (as an old miser, he will only give you a few coins). Even though the spell turned out to be completely useless, it was still worth the try, right?
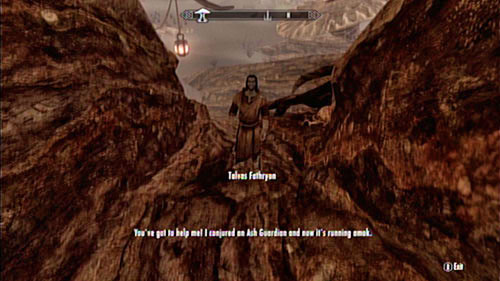
Notice! This mission will be available only after you complete Path of Knowledge!
After completing any of the side mission in Tel Mithryn and return after some time, you should be approached by Talvas. The terrified apprentice will ask you for help - in the result of a failed experiment, he summoned a powerful Ash Guardian who now wrecks havoc in the region. You need to kill the monster before master Neloth notices what happened (Talvas will draw away his attention).
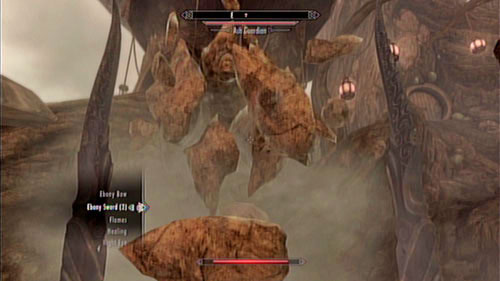
The monster is surprisingly weak - he can use some medium range spells, but has very little health, so you will easily defeat him. After the fight, return to the tower in Tel Mithryn and tell the worried apprentice that everything's over.

Meet with him at the top of Tel Mithryn to end the mission. In return you will receive a magic staff - the Minor Staff of Turning - and additionally will be able to trade with Talvas, take him to your team or even train Conjuration.
If his behavior has made a exceptionally bad impression on you, you can always tell Neloth - however that way you won't be able to ask Talvas to join your team.
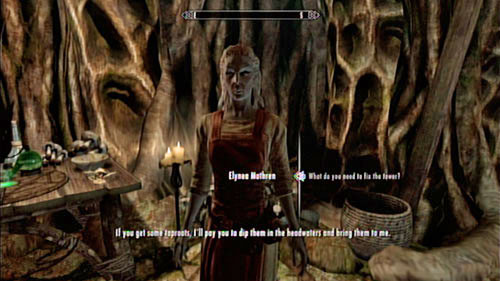
Notice! This mission will be available only after you complete Path of Knowledge!
Speak to Elynea Mothren in her apothecary (the tower to the left of Tel Mithryn) and the woman will share her concerns with you. Master Veloth will fire her if the sick mushrooms aren't cured fast (after all, they are the mage's house). The only cure is a solution created from a certain very rare alchemic ingredient known as taproot. It can be obtained only from the best alchemists or... from the corpse of a deadly nymph Spriggan. These creatures however aren't very common.

The situation seems to be dire, but there is one place in which you can find exactly three taproots. You need to head to the furthest edge of Solstheim - to a small island in the north (a bit away from the Frossel cave). You can find as many as three Spriggans there - fighting them can be quite problematic, but it's surely easier than searching for the rare ingredient on your own.
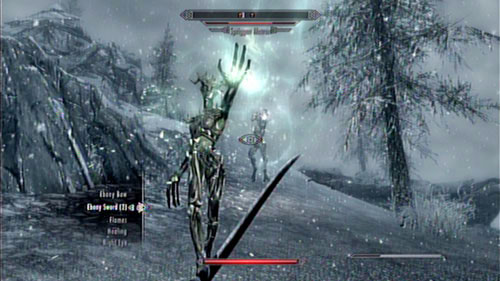
Collecting the roots is only the beginning of the mission - you need to prepare them properly, which will be the task in the further part of this mission.
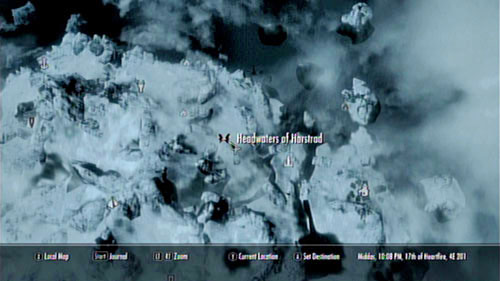
The taproots are useless on their own - for them to have the proper power, you have to soak them in a sacred spring. There is only one such place in Solstheim - Headwaters of Harstrad. This place can be found west of Wind Stone and southeast of Benkongerike (screen above).
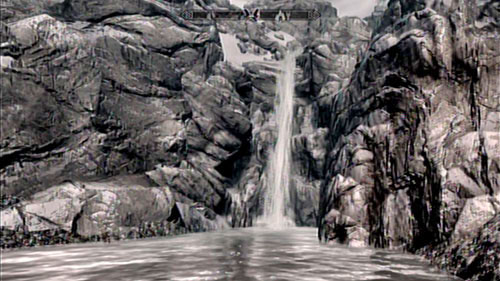
Head there and kill another Spriggan who's guarding the area - defeat her and approach the waterfall. Go through the wall of water and head inside the cave behind it. Inside you will come across a deadly Spriggan Earth Mother, who has lots of health points and a very powerful attack. In fact you don't need to fight her - just soak the taproot in the water (you do it by "using" the river).
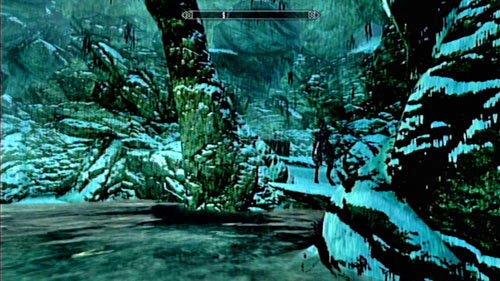
At the back of the cave you can find a treasure chest - in order to reach it, you will have to defeat the guard. She's very vulnerable to fire attacks and resistant to physical damage, which should be a big hint for you.
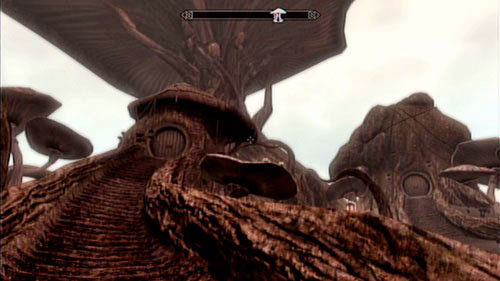
Return to Tel Mithryn and meet with the alchemist. The woman will be happy to accept the soaked taproots from you - she will keep two for herself and give back one to you. Use the root and plant it in the sick tree. That way you will cure the whole construction and everybody will be able to sleep well. Therefore you will also save poor Elynea from being fired.
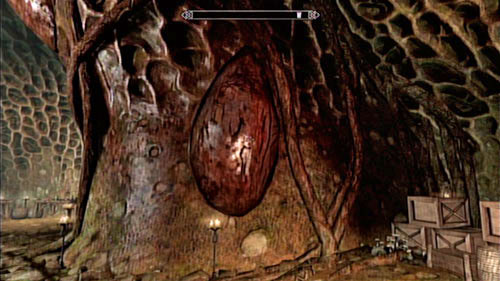
Head out of the apothecary and into the main tower of Tel Mithryn (the one in which master Veloth works). Use the magic teleport which will take you upstairs and turn right. On the wall you should see a giant, swollen abscess. Use the soaked taproot on it and wait for the effects. Afterwards you will be able to return to Elynea and give her the happy news - the mushroom has been cured.
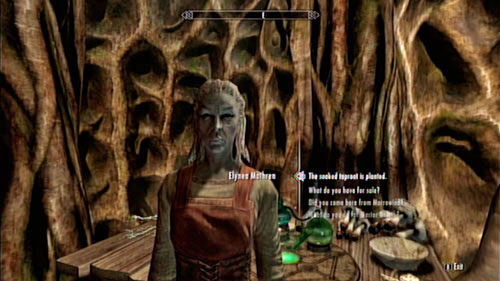
Return to the apothecary and tell Elynea that everything's done. In return you will receive two Potions of Well-Being which restore health, magicka and stamina. The quality of the potion depends on the level of your character - the higher it is, the more powerful the potion is.
At this point the mission ends - who would have thought that renovating your house might be so problematic?
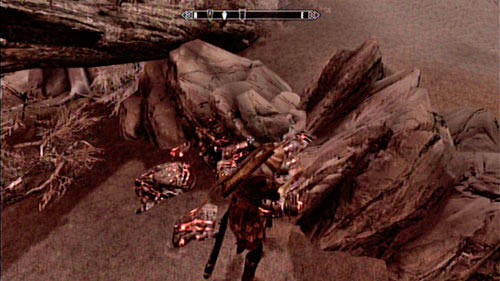
Notice! This mission will be available only after you complete Path of Knowledge!
Neloth from Tel Mithryn is a rather busy Dunmer - he doesn't have time for such trivial things as obtaining new samples for his experiments. The things is, he ran out of Heart Stones - a rare material which can be obtained like precious metals - from deposits spread throughout the island. If you want, you can help the mage obtain one of such Stones. Solstheim has many sources from which you can obtain it:
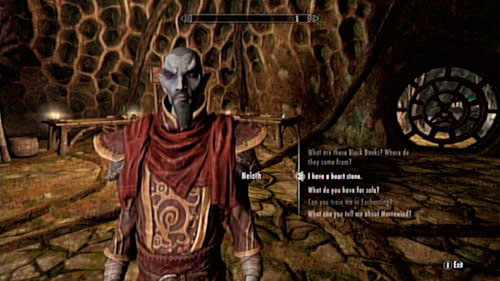
After obtaining at least one Heart Stone, you can return to Neloth and collect a (modest) reward. By aiding the mage you have not only helped science, but also opened access to a couple other missions in Tel Mithryn. Some of them will be connected with the stone that you brought and Ash Spawns.
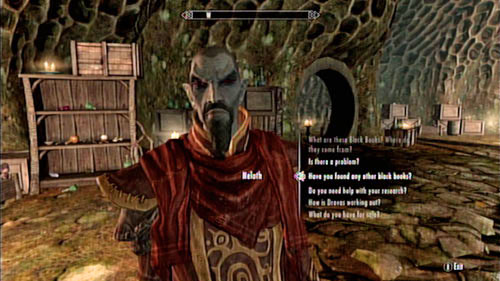
Notice! This mission will be available only after you complete Path of Knowledge!
This mission can be completed repeatedly - every time you ask Neloth if he heard of any new Black Books, he will direct you to an appropriate cave or tomb. The location of the book is random, but the mage will always mark its location on your map.
Black Books can be found in:
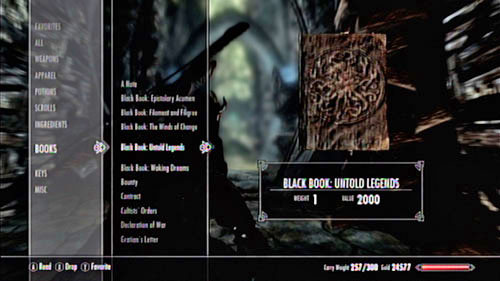
It's worth to take a look into the mission, as in return for each Book you will receive 1000 gold. At the same time you will complete mission from the Black Books group (described in this guide). Unfortunately you won't receive any additional prize for collecting all the books.
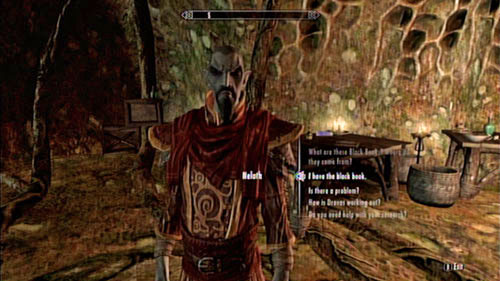
After obtaining the Black Book, return to Tel Mithryn and meet with Neloth. The mage will reward you generously - you will receive 1000 gold and will be able to keep the treasure (the mage will copy the book instead of taking it from you). It's worth to complete this mission numerous times - the payment is the same and the requirements not so high.
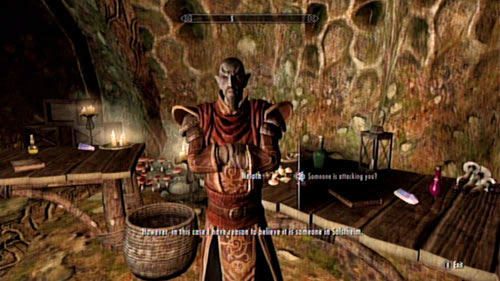
Notice! This mission will be available only after you complete Healing a House and Reluctant Steward!
The repeated attacks of Ash Spawns are becoming hard to find accidental. Master Neloth thinks that someone might want to kill him and that's why he's sending the monster onto Tel Mithryn. If you want, you can help the mage. He will give you Neloth's Ring of Tracking thank to which you will be able to locate where the monsters are coming from.
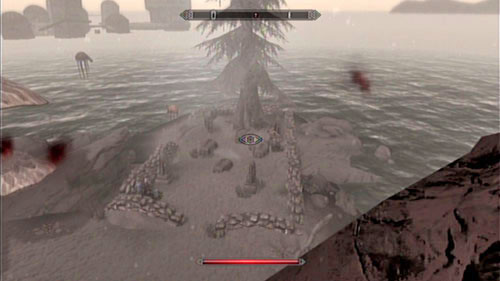
Put on the ring and head out of Tel Mithryn. Head northeast (a couple hundred steps from the tower) an you should come across a small cemetery. Head closer to notice a pink glow. Move closer to it and fight with an Ash Spawn. Take a look into the glowing coffin and take the heartstone and staff. That should be enough for Neloth.
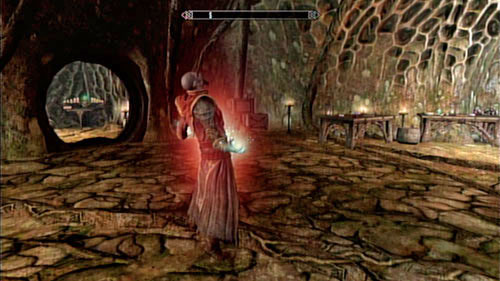
Inform the mage of your discovery and he will tell you of a certain failed experiment conducted on his former apprentice Ildari Sarothril. Master Neloth implanted the girl with a heartstone in place of her real organ - just like Forsworn Briarhearts do. Unfortunately the procedure didn't go as planned and the woman died. Since her body isn't in the coffin, she must have raised from the dead and wants take revenge on her former teacher.
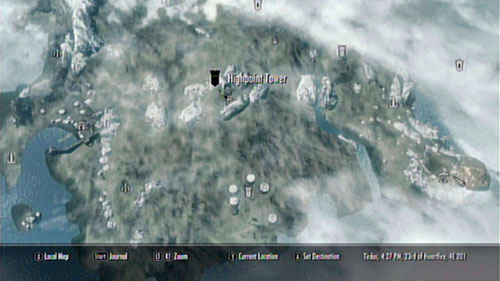
The undead woman hides inside Highpoint Tower - halfway between Raven Rock and the Ashfallow Citadel. You will be attacked by two Ash Spawns at the very entrance and it won't be any easier inside.
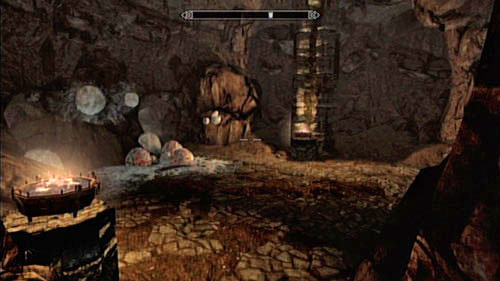
There is only one path you can follow inside the tower - downwards. Go down the round stairs until you reach a small cave. The path will branch here - if you turn left, you will come across lots of spiders and reach a cave with treasures - on the walls you will find various lodes (including sapphires and rubies). After filling up your pockets (you will need a pickaxe!), turn into the right branch of the corridor. Pick up the soul stone which drives the trap and defeat a few more Ash Spawns. In the further part of the dungeon you will come across an identical setting - a trap and enemies.
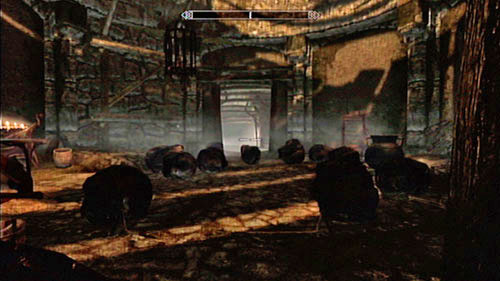
When the corridor ends, you will enter a small hall with two traps which you should try to avoid - one is magical and the second consists of falling boulders. In the next room you will see a fork in the road - on the right there are prison cells (you can free a prisoner there) and on the left a passage to the further part of the dungeon. Saving the prisoner isn't required, but it's always good to help a fellow soul.
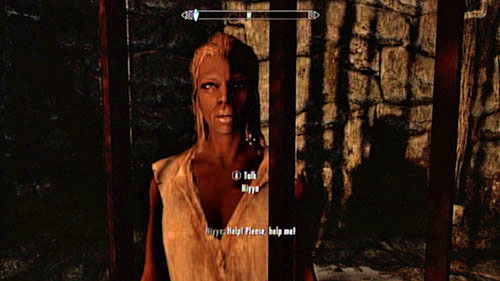
Follow the corridor while keeping an eye for more enemies and precious stones (apparently there used to be a mine here). Eventually you will reach a large cave in which Ildari summons the Ash Spawns and Ash Guardians. Kill the demons and the undead Elf will run away - head onto the wooden construction and chase her.
Note that the shelves around contain quite a lot of alchemic ingredients and magic artifacts - it's worth to take care of them.
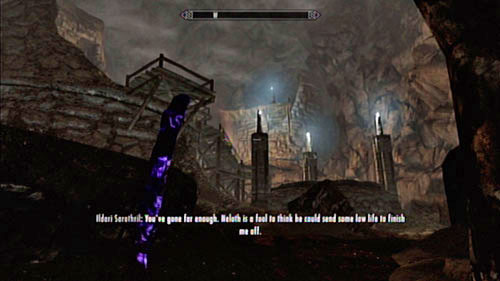
The further path is rather straightforward - more corridors and monsters. Eventually you will reach a vast room with two fire traps - they will note you even if you're a master at sneaking. Quickly run through the room and head onto the second floor. That's where Ildari resides. Before attacking her, switch off the pillars of fire - they are more dangerous than the enemy herself.
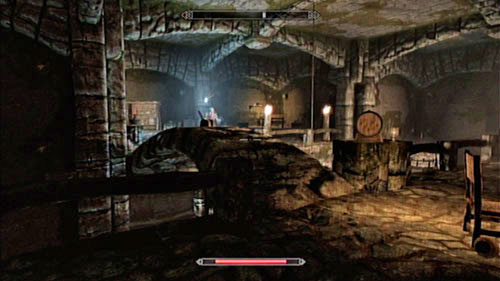
Fighting the witch isn't very hard - although she knows some useful spells (mainly shock and fire-based), her low health makes her an easy victim. When she falls down to the ground, approach her corpse and tear out her heart (!).
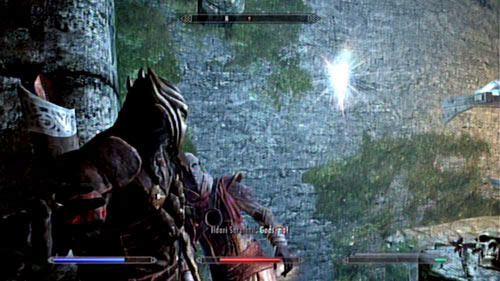
Before leaving the room, be sure to search it thoroughly - in the corner you should see a treasure chest and on the shelf some valuables. If you read the witch's notes, you will learn that she's the one who resurrected General Falx Carius (March of the Dead).
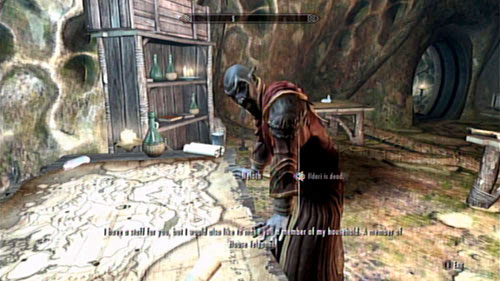
Master Neloth, thankful for solving his problems, will let you join the house of Telvanni, which is a very big distinction. Additionally you will receive a powerful staff, useful when fighting with a couple enemies at the same time. Still, it means a lot less than being a part of the ancient and renowned family - who knows what benefits it might bring you in the future?
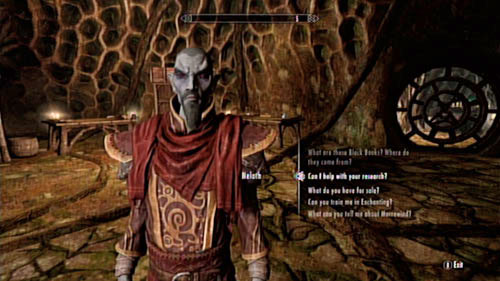
Notice! This mission will be available only after you complete Path of Knowledge!
Master Neloth of Tel Mithryn is hungry and angry - apparently his steward isn't fulfilling her obligations. At first it might seem like a trivial matter, but if you look deeper into the case, it will turn out that no one has seen the woman for quite some time. Speak with Elynea Mothren to learn that she should have returned from Raven Rock a couple hours ago. A marked showing the position of Varona should appear on your map.
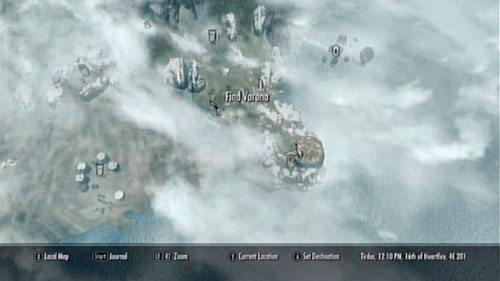
Head out of Tel Mithryn and go northwest. On the hills nearby Ashfallow Citadel you should come across three Ash Spawns standing beside the corpse of the woman. Kill the beasts and examine the corpse. Unfortunately, she has been dead for some time and you can't help her. You can only return to Neloth and tell him that he's not getting any dinner today.
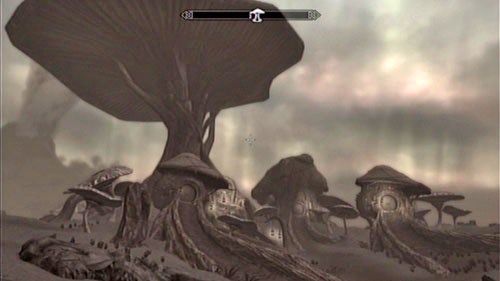
If you return to Tel Mithryn and tell the mage what happened, he will hardly show any irritation. He couldn't care less about the death of the woman, but about the lack of a servant - a lot more. In order to satisfy the soulless mage, you will have to find him a new servant. In order to do that, head out to Raven Rock to look for anyone eager.

Head to The Retching Netch and speak with the man named Drovas Relvi - he can be found sitting on a chair on the first floor. Surprisingly, he will be more than happy to accept your offer - he will rush out of the tavern and run to Tel Mithryn. Seems like there's nothing more you can do apart from telling Neloth about the success of your mission.
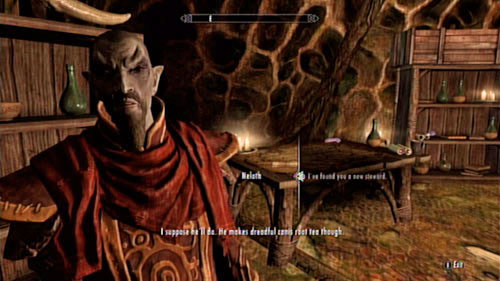
Return to the mushroom tower and report to the mage. Surprisingly, he will not only reward you with a fair amount of gold, but also let you use the enchanting table. Apparently the lack of tea and food has a good effect on the character of the otherwise gruff mage.
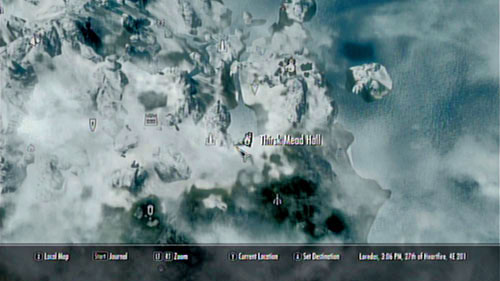
Notice! This mission will be cancelled if you accept Retaking Thirsk!
When you approach Thirsk Mead Hall, you should be approach by one of the monsters and asked to follow him. Enter the building to meet the Riekling Chief, who - surprisingly - can speak human. The resolute leader will ask you to help him with some of the most problematic matters.
Keep in mind that the goals of Rieklings are completely different from the ones of Nords - by helping one side of the conflict, you will automatically irritate the other.
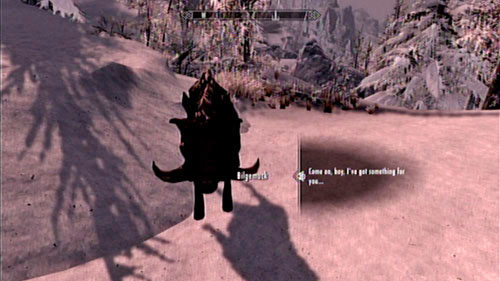
The first part of the mission is relatively easy - you need to find the beast known as Bilgemurk and feed it. If you don't have any meat, hunt down some horkers which can be found lying on beaches of Solstheim - that should do the trick. Afterwards head north of Thirsk Hall (southwest of Skaal Village) and approached the creature, which will turn out to be a boar. Give him some of the meat - you can do it by starting a conventional "conversation".
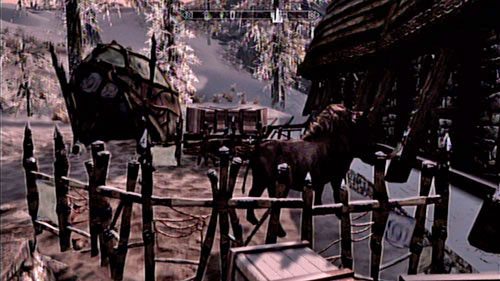
After feeding the animal, it will start following you. Return to Thirsk Hall and head towards the small tents in its southern part. Bilgemurk should head into his croft on his own. Apparently the beast has been somehow tamed by the Rieklings and serves as a guardian.
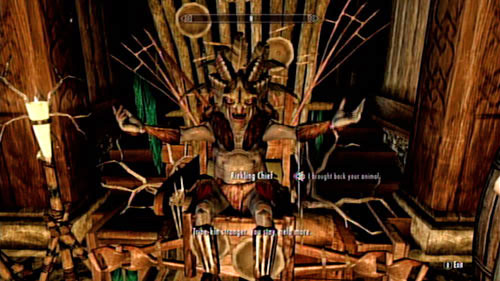
The Riekling Chief will be happy to learn of the return of his favorite pet. That's however not the end of the attractions that he has prepared for you. It turns out that the village ran out of a plant called scathecraw. It's a very important ingredient, crucial for religious ceremonies of Rieklings. You have to obtain 10 pieces of the plan and bring it back to Thirsk Hall.
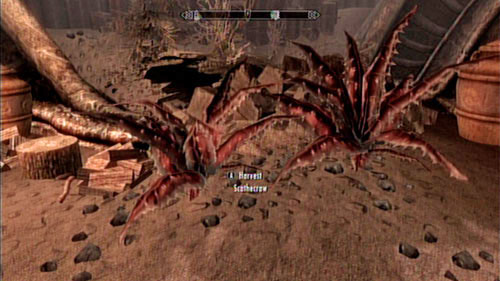
You're lucky - scathecraw is by far the most popular plant on Solstheim. It can be found in the southern wilderness of the island and at a few alchemists (one lives in Raven Rock and the second on in Tel Mithryn). Obtaining ten pieces shouldn't cause you any trouble - just look for large red bushes growing on the ashy soil. Also note that apparently the whole of Raven Rock is covered with it - it's likely to be used as decoration.
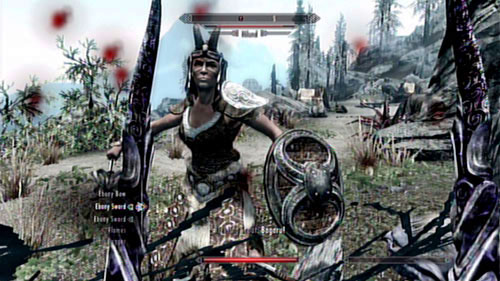
After giving ten scathecraws to the Chief, he will give you the last mission - you have to kill the Nords who want to recapture Thirsk Hall. You will be accompanied by a small group of Rieklings - they are quite good warriors, so fighting the weakly equipped soldiers shouldn't cause you any trouble (you however cannot hope to solve this matter quietly - trying to sneak will fail). The Nords can be found in a small camp in the east, known as Bujold's Retreat.
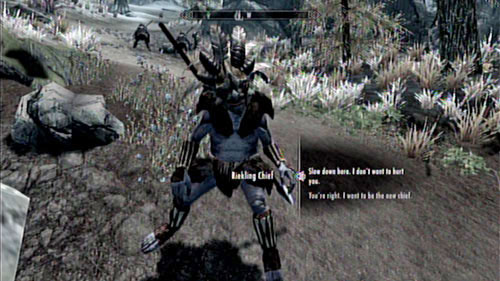
Before you manage to walk away from the battlefield left from the Nord camp, you will be approached by the Rieklings Chief (who bothered to come to you personally). The old dodger has figured out that you're too powerful and will likely want to take over Thirsk Hall (and therefore become the new chief). There is only one solution of this uncomfortable situation - and honorable duel!
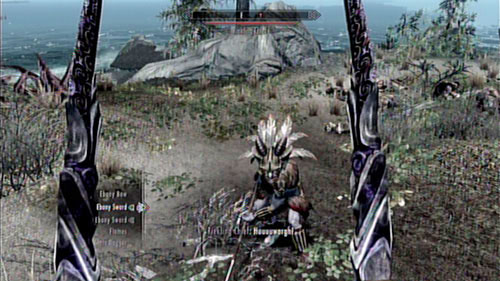
The fight with the Chief won't be too long - he's not much more powerful than ordinary Rieklings. Even though he can deal quite some damage with his spear, he's delicate enough for you to crush his bones easily. A few good attacks should solve the matter in a brutal and final matter.
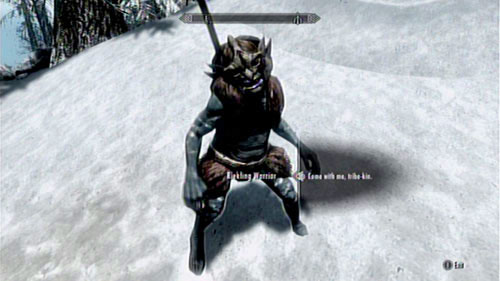
The death of the Chief ends the current mission. Note that by winning in the duel, you gain control of Thirsk Hall - what's more, all the villagers became you servants. You can ask any of them at any given moment to accompany you. That's however not all! You can hope for help from your servants as you're fighting monsters throughout Solstheim - there's a chance that a few of them will appear out of nowhere and fight for you.

Notice! This mission will be cancelled if you accept The Chief of Thirsk Hall!
In Bujold's Retreat, speak with the warrior who's walking around the camp - that's Bujold. She will tell you that the former Nord settlement on Solstheim - Thirsk Hall - has been taken over by Rieklings. The exiled villagers found shelter in the makeshift camp in which you're standing. Even though they want revenge, they lack the battle spirit. If you could help them in their fight, perhaps they could return to their homes.
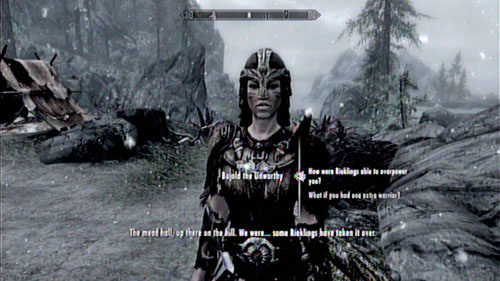
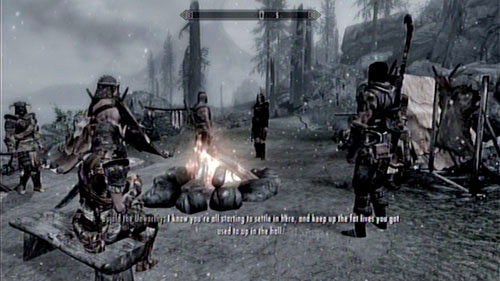
After heading out the Bujold's encouraging speech, head together to the Thirsk Hall (a bit to the west). Prepare yourself for a fight on your way - the enemies are very high in numbers, so they can cause you some trouble. If you have some potions increasing resistance to physical damage, you should use them. It's also a good time to save your game - there won't be time for that later on.
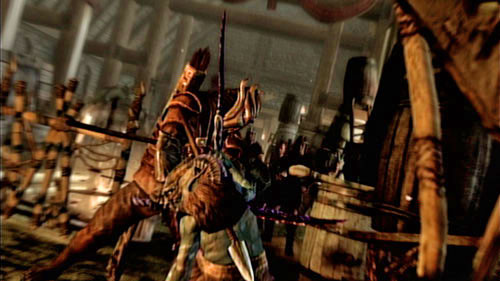
There's a total of nineteen enemies, which makes for a rather big pack. The Nords from the camp will help you in the fight, but let's face the truth - they're not good warriors. Their only advantage is the fact that they're immortal - after receiving otherwise deadly damage, they will be temporarily put out of the fight and start regenerating their life. Therefore, you will most likely have to fight with most of the enemies on your own (even though Bujold's group will eventually win even without your participation).
With the commotion over and all the Rieklings killed, Bujold will approach you and start a conversation. The woman will make you her deputy and ask for help in an ancient ritual - as a leader who has covered her honor with shame, she has to erase the stain. It can only be done by contacting her ancestors - only then the burden of defeat will be taken away.
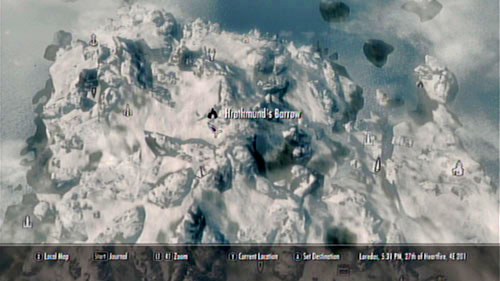
Head out of Thirsk Hall and follow Bujold. If you don't want to run to Hrotmund's Barrow on your own feet, use the fast travel option and wait for an hour or two there by setting a camp. When the warrior arrived at the destination, you will learn that you will meet with the ghost-guardian of Thirsk inside the tomb. Don't worry, you don't have to fight anyone - just witness the ceremony.
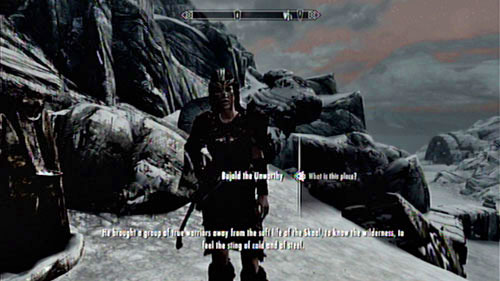
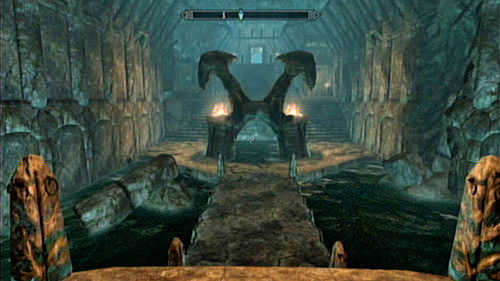
Head into Hrotmund's Barrow together with Bujold and go to the other side of the room (the water will move away from your feet as you move). After the warrior calls in the spirit, the Thirsk guardian will deny giving her his blessing - regardless of the Hall being recaptured. The woman will be mad and decide to keep the position, despite what her ancestors think.
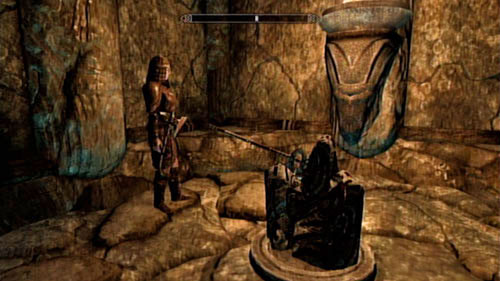
You will have to choose which side to support. You can agree with Bujold and tell her that you will lie to the villagers in Thirsk Hall (see: further part of this chapter) or... oppose her and follow the will of the ghost (see: Defeat Bujold). In the latter case, the woman will turn on you and attack - her death will be inevitable (you will be able to kill her without any problems).

Agreeing with the leader will end the current mission, but will not mark the end of your adventure. Return to Thirsk Hall and speak with Kuvar - Bujold's husband. You will have to make an uneasy decision - if you tell the truth (i.e. admit that the spirit rejected her as the leader), you will cause Bujold to be exiles from the village. If you lie, everything will return to normal and the Nord woman will keep her position. One way or another, you won't receive any prize.
Regardless of your choice, you still can complete side mission for the villagers in the Hall:
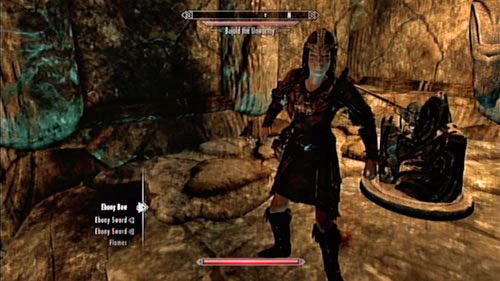
If you have opposed Bujold and decided to follow the will of the Thirsk spirit, you will have to kill the warrior. The fight itself won't be hard - her weapon (a common axe) doesn't inflict large damage and she's rather weak herself. A couple attacks should be enough to bring her down. Don't let her begging for mercy fool you - it's just a trick (she will turn on you even if you decide not to kill her). Only her death will end the mission.
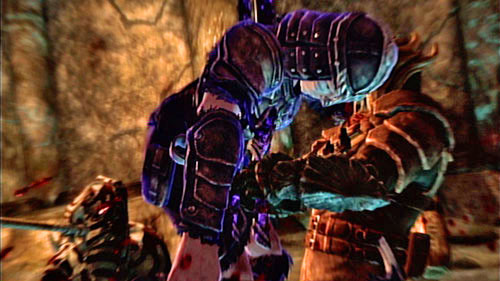
After returning to Thirsk Hall, you will have to explain yourself. Kuvar will ask why you didn't bring Bujold back. There are two possibilities: if you tell the truth, you will be exiled from the Thirsk (but despite the Nord's threat, you will be able to return there and complete side missions). If you tell the man that you don't know what happened with his wife, you won't face any consequences.
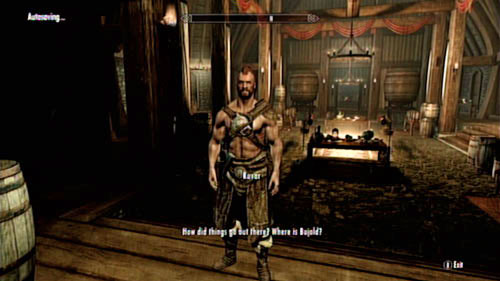
Regardless of your choices, you can still complete side missions for the villagers of the Hall:
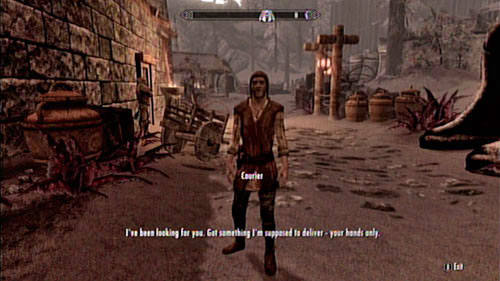
In order to begin this mission, you have to go to Kolbjorn Barrow and speak with the Dark Elf who will introduce himself as Ralis Sedarys. You can find him in the middle of a excavation, southeast of Raven Rock (a bit from Attius farm). On your way there you can expect to be attacked by a few Ash Spawns who are connected with March of the Dead.
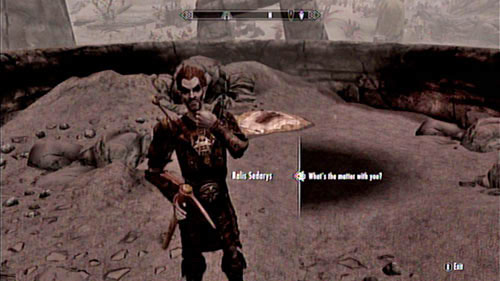
Meet with the troubled man who will offer you a deal - if you pay for the expensive excavation, a part of the discovered artifacts will be yours. It's a very profitable deal, however one requiring quite some money. For starters - 1000 gold.
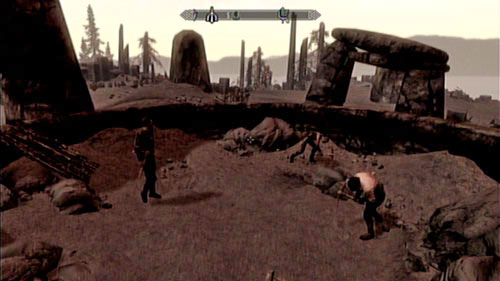
If you have spare 1000 gold, you should invest them in the excavations of Kolbjorn Barrow. Approach Ralis Sedarys and give him the money. At this point the amateur archaeologist will head out to Raven Rock to hire workers. You won't receive any news from him for about a week - if you decide to visit Kolbjorn Barrow in the meantime, you should see that everything's going in the right direction. You can sleep in the workers' camp or speak with them, but it won't give you anything useful.
Organizing an excavation is a tedious and time-consuming work - Ralis needs some time to take care of everything. Move on to other things and wait for a week (try earning some gold, as you will need it). When a week goes by, head to Raven Rock and wait to be approached by a courier. He will give you a message from Ralis - you're needed in Kolbjorn Barrow as fast as possible - apparently something important has happened.
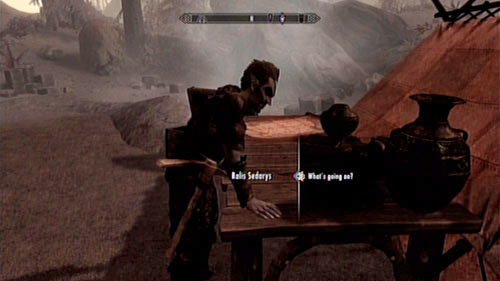
Head to Kolbjorn Barrow to meet with Ralis. He will tell you that all the workers have been killed by an army of Draugrs who came out of the unveiled ruins. What's rather obvious, the excavations cannot continue with undead roaming the area. There's only one thing you can do - you have to go into the dungeon and eliminate the threat.
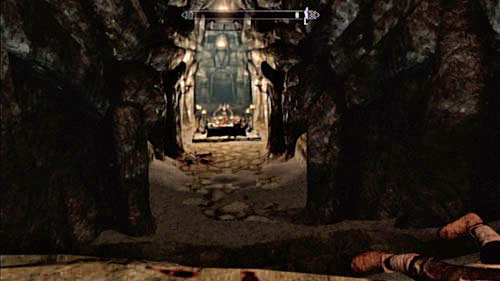
The objectives of this mission are easy - you have to go down into the tomb and kill all the enemies found there. Completing it shouldn't cause you too much trouble - the first enemy can be found in the corridor and the rest in the room in the middle of the catacombs. Be careful, as the number of Draugrs is very high and they're led by a Draugr Deathlord (though not very strong). Try to fight them one at a time - if they won't be able to surround you, their numerical superiority won't do them any good. Focus on the main enemy, as he's the main threat.
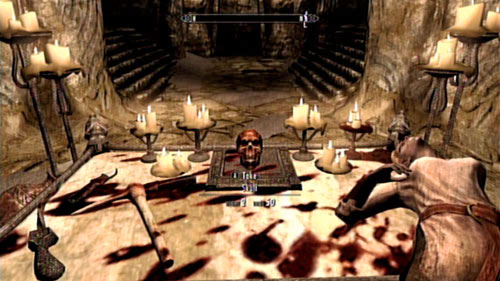
In order to head to the further part of the dungeon, you will have to open the door at the end of the room. Do to that, you have to approach the altar and take off the red skull. That way you will activate a mechanism which will open the door. Behind you will find rare boots - Ahzidal's Boots of Waterwalking (which actually let you walk on water and are a part of a bigger set).
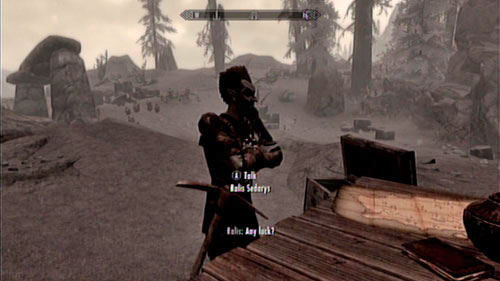
Head to the surface of Kolbjorn Barrow and speak with Ralis Sedarys. Tell her about your discovery and that the Draugrs are back to their original state (that is: dead). The man will be happy, but will also inform you that further excavations will require a larger contribution. In order to continue with the works, you will need 2000 gold.

Just like before, you have to collect a quite a sum - this time 2000 gold. If you don't have such funds, you can complete some more missions or trade. Most gold can be obtained for completing March of the Dead, but you will obtain quite a lot during Served Cold as well. A real gold mine is Locate the East Empire Pendants for Fethis Alor in Raven Rock - in order to complete it, you will however have to gather quite a bit of East Empire Pendants.
After collecting the required sum, meet with Ralis and give him back the money. Just like before, finding workers will take him some time.
Like before, after paying the required amount you have to wait for the result of the excavations. More or less after a week you should be approached by a courier - he should find you if you appear in Raven Rock or other big city. Accept the letter from Ralis and head to the excavation site. Apparently nothing can go according to plan.
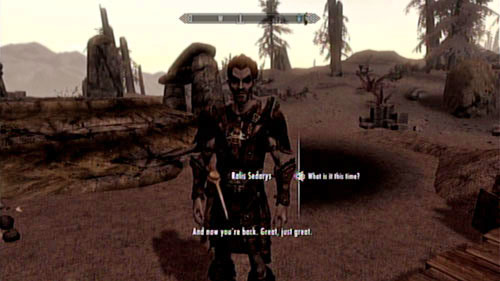
The case is easy - return to Kolbjorn Barrow and speak with Ralis. The Dark Elf will tell you that most of the miners have been killed by Draugrs - again. You will have to go down, eliminate the monsters and rescue the miners (if there are any left alive). Your investment in the excavation cost the life of some people, but success has its prize.
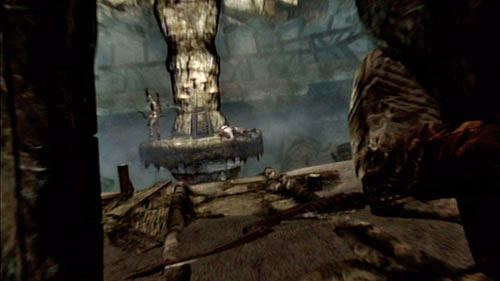
Enter the Kolbjorn Barrow and turn right to find a chest with an easy lock. Afterwards cross the corridor on the left and head down into the room which you know from your previous visit. Eliminate five Draugrs found here (they shouldn't be a threat) and go through the door to the next room. Note that a Draugr Deathlord is standing on the platform in the middle - eliminate him from a distance (at best silently) or by using spells (you rather won't reach him and he's good with the bow).
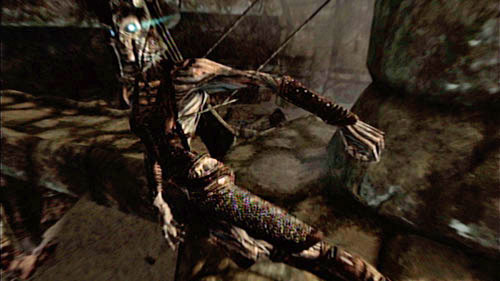
Return to the room below and kill three Draugrs who lurk there (two are sleeping in the niches in the wall). Pull the lever and get rid of the next Draugr Deathlord who will come out of the just opened room. Search the new area and use another chamber to unlock a passage to the further part of the dungeon.
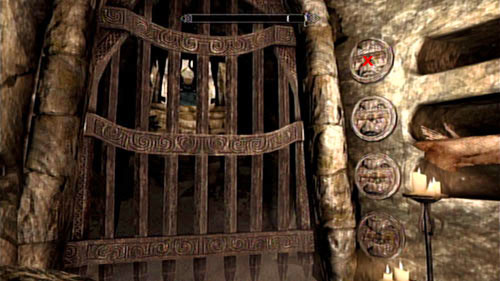 X - the right switch
Head to the new room and look at the floor by the entrance to the next one - there's a trap there. Jump above it and approach the locked gate. To the right of them you will see four switches - the first one from the top is the right one (the others shoot arrows or open only part of the passage). Head through the gate and get ready for a fight - as much as four Draugrs will attack you. As the gate behind you will close, you won't have anywhere to run!
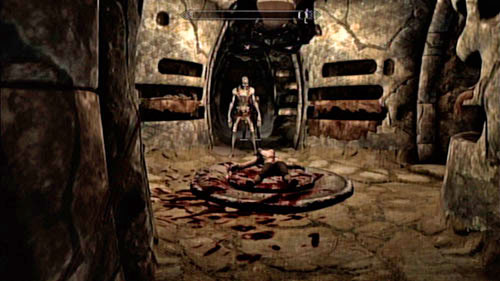
Kill all the enemies and examine the corpse on the floor (that way you will complete Search for the missing miners). Before leaving the location, head into the corridor in the front and search for a switch by the candles. Use it to open a passage into a room with a precious ring - Ahzidal's Ring of Necromancy.
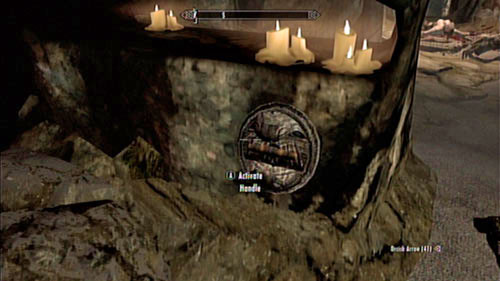
Even though you can probably head the Dragonborn song in the distance (suggesting the presence of a Word of Power), you won't be able to reach its location for now. Return to Ralis and report to him.

This mission can be completed during Clear the Draugr from Kolbjorn Barrow. As you fight your way through the barrows, look for corpses of miners - Bradyn can be found in the room with Draugrs sleeping in the walls and Mirel on the floor of the room from where there is "no escape" (very end of the dungeon). Search the corpses of both of them to complete the mission. Beside the woman you can find a letter - Mireli's letter to mother - however there isn't any mission associated with it.
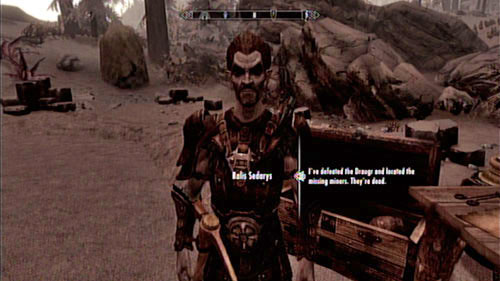
Ralis is a hard one - the death of the miners won't make an impression on him. The clever Elf will suggest hiring some bodyguard along with the next group of miners - which will of course cost quite a bit. If you have 3000 gold, you can pay for the third excavation phase. This time the workers will be properly protected and everything (at least in theory) should go smooth.
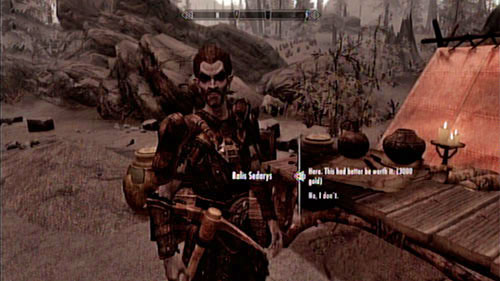
The business is going well, but the cost is increasing as well. Hiring workers and proper guards is a challenge in itself and additionally it costs quite a lot. If you have 3000 gold, give it to Ralis and... wait another week to see what happens. If you don't have the money, complete some quest or rob some characters. Main story missions and side ones like March of the Dead, Served Cold or Locate the East Empire Pendants for Fethis Alor in Raven Rock are especially profitable.
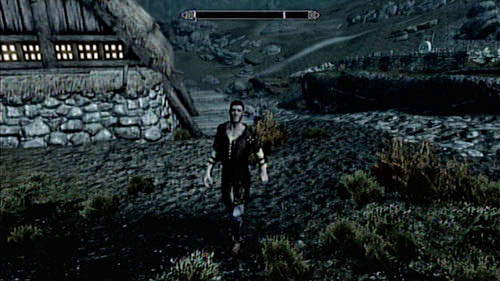
Similarly to before, after a week of waiting you can expect a courier with a message from Ralis. The letter will once again contain rather dire news - things at Kolbjorn Barrow aren't going well again. Return to the location to see what happened. Apparently some malicious deity isn't too fond of this project.
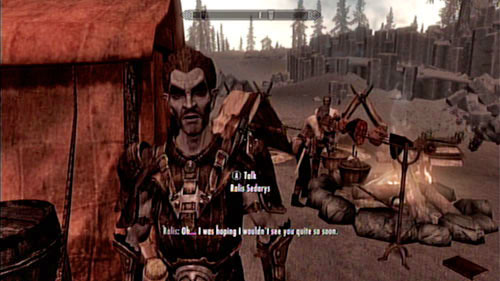
Meet with Ralis in the camp by Kolbjorn Barrow. This time some of the miners survived the Draugr attack (yes, they came from the barrows again), but the mercenaries who were supposed to protect them mostly died. You have to head into the dungeon once again and clean up the mess by killing off the monsters lurking within. You will visit the same locations once again, but this time you will get a bit deeper than before.

Head inside the barrows and you will me almost immediately attacked by two Draugrs. Defeat them and head onwards through the well-known corridors (you will come across a few more enemies on your way). Note that additional chests or locked doors have appeared in some places - it's worth to take a look at them and collect some additional treasures.

Eventually you will reach a new part of the barrows - opposite to the place where you found Bradyn the last time you were here. Kill the Draugrs who stand in your way and head down the stairs. There you will come across another zombie and a Draugr Scourge - a relatively powerful undead mage. Get rid of him and defeat two more enemies afterwards. That's all of them.
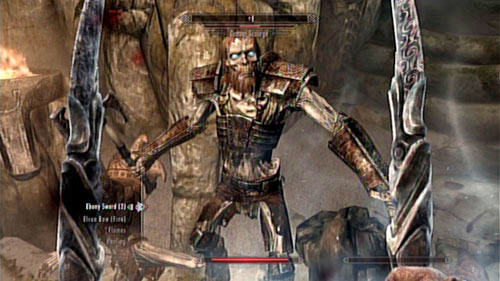
If you like searching for treasures, note the pressure plates found on the floor with the two last Draugrs. Press all of them to open a door leading to a room with a precious ring - Ahzidal's Ring of Arcana. If that still doesn't satisfy your hunger, return to one of the previous chambers (nearby the place where you found Bradyn) and pull the chain. That way you will unlock a secret stash with Ahzidal's Gauntlets of Warding.
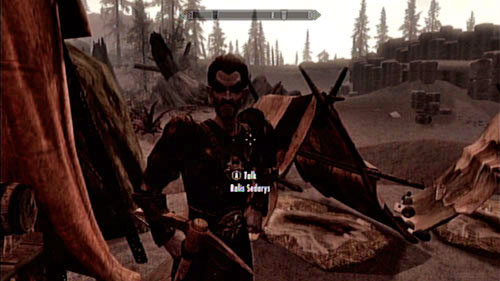
Return to Ralis and report to him. The excavations in Kolbjorn Barrow have a rather bad opinion - a dozen people have already died here. That's why the next phase will be much more expensive - you need to collect as much as 5000 gold. Luckily, it's the last investment that you will have to make - the end is near!
Give Ralis 5000 gold and focus on something else for a week. It's a big sum, but the thing is worth the money. If you're low on cash, do some mission or trade with the merchants in Raven Rock. As I have mentioned before, the most lucrative missions are March of the Dead, Served Cold and Locate the East Empire Pendants for Fethis Alor in Raven Rock.
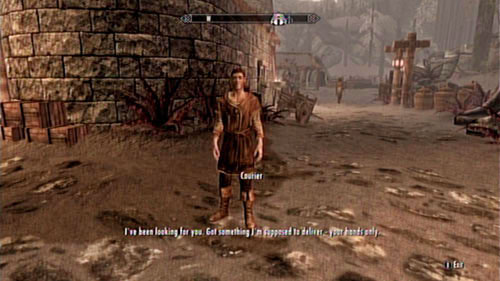
One week after your last visit in Kolbjorn Barrow (and investing a proper sum of gold) you will be approached by a courier with a letter from Ralis. The young man is just as irritated as you are - without any shame he states that it's the last message he will ever deliver from the mysterious excavation. Luckily you have reached the last stage of this mission, so further correspondence won't be needed.
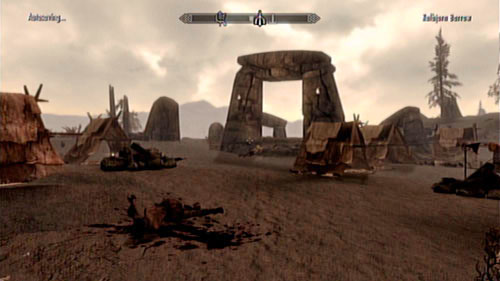
Once you reach Kolbjorn Barrow, you will come across traces of a battle. The whole area is covered with corpses of miners and Ralis is nowhere to be seen. If you head inside his tent and read his notes The Journal of Ralis Sedarys - Volume 23, you will learn of his secret - the excavations were used for a dark ceremony to wake up Ahzidal - a powerful undead whom Ralis apparently serves. The death of the miners and guards was a part of a bigger plan - a sufficient sacrifice was needed.
You should head to the dungeon and face with Ralis and his dark master.
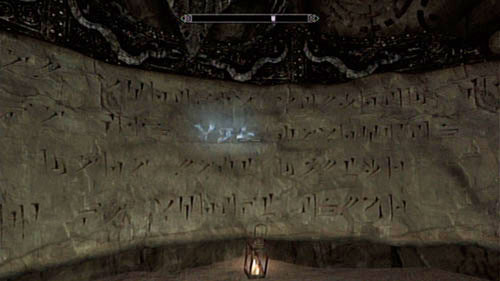
Inside the first, well known corridors you shouldn't come across any enemies. Note however, that the wall with the Word of Power which was until now covered (but you could hear its "calling") has been unburied in the meantime. Using it you will be able to learn a new Shout - Cyclone. Use this chance and continue exploring the barrows.
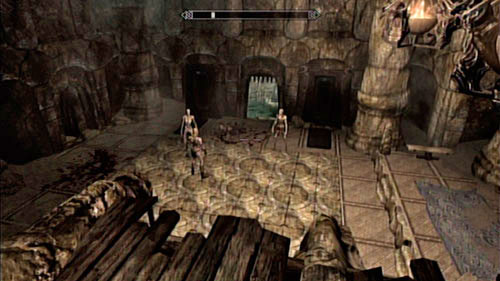
Enter the platform on which Ahzidal's Boots of Waterwalking used to stand and head towards the right. Kill three Draugrs there and go into the room in which you walked along pressure plates (screen above). Here you will have to fight with three more undead.
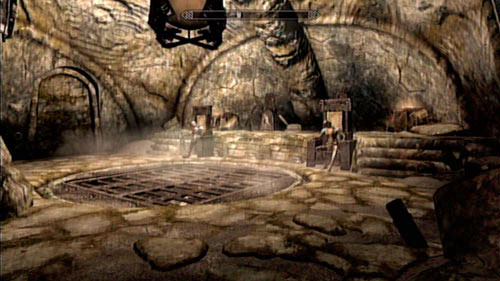
Move onwards and you will reach a room with three Draugrs sitting on thrones. Kill them and solve an easy puzzle with turning pillars. Place them so they both show a fish (and pull the lever) to open a room with the very useful Ahzidal's Armor of Retribution. Hide it in your equipment, return to the pillars and turn them both to eagles. That way you will unlock a passage to the further part of the dungeon.
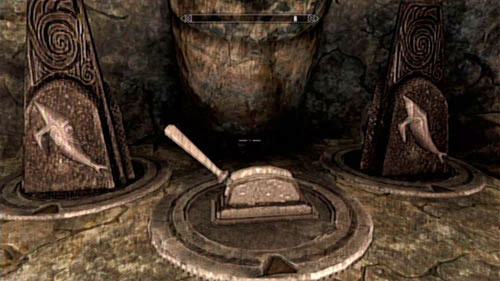
Head below, defeat four Draugrs (you can set fire to the liquid in which they're standing) and approach the next puzzle. Place the pillars so that both show a snake and pull the chain (if you do it wrong, you will turn on a flamethrower and die in a rather brutal fashion!). therefore you will gain access to another of Ahzidal's artifacts - Ahzidal's Helm of Vision. While you're at it, try not to stand on the pressure plate found inside the room and... yet another trap set off by taking it. Note that beside there's a quite big lode of Stalhrim - you should take a look at it.
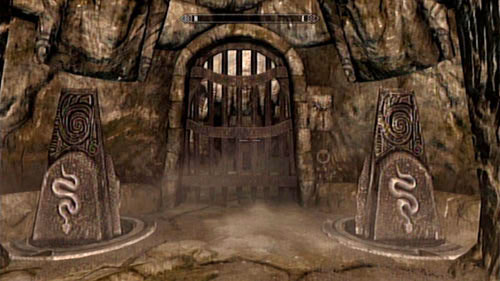
When you're done collecting the treasures, turn around 180 degrees and approach the next room. Inside you will see Ralis, who's just about to be finished with the incantation summoning Ahzidal. A fight is inevitable!
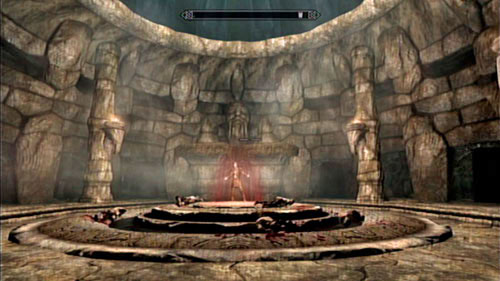
The fight with the Dragon Priest is very difficult - that's why you should use a trick to defeat him. You will surely note that there are a couple Draugrs helping him - each time you kill one of them, more will appear immediately. What's worse Ahzidal himself can resurrect fallen servants - quite fast you will be flooded by an army of undead. The only way to defeat him is luring him out of the room and killing in an isolated place. Ranged attacks will surely come in handy here (especially stealthy ones), as well as running away to previous corridors. Without his minions, the demon will become far less dangerous.
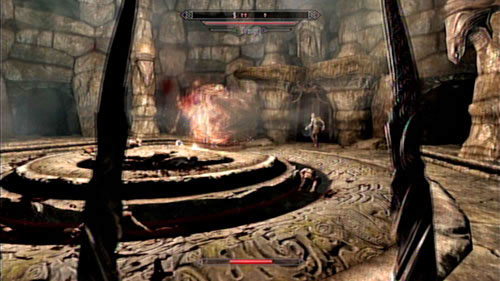
The enemy can use a wide range of destruction spells - he especially likes those based on fire. If you have a fire resistance potion, you should use it. Don't however try defeating the enemy with his own weapon - Ahzidal is almost completely resistant to powers that he's using.
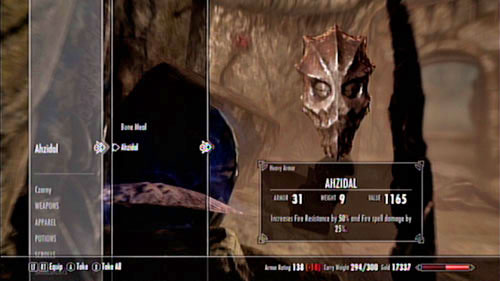
After you defeat the demon, take his Mask form his corpse. It increases your fire resistance by 50% and fire damage by another 25%. It's quite a treat for every mage using such spells.
With your new equipment in hand, return Ahzidal's tomb to confront Ralis.
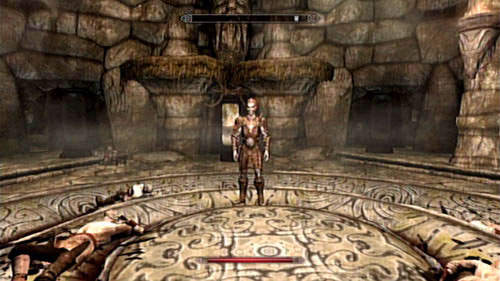
In the middle of the room in which Ahzidal was resting you will find Ralis, standing between the corpses of miners. The archeologist will tell you that upon arriving to Kolbjorn Barrow, he started hearing strange voices telling him to dig up the catacombs. It's the lord of the dungeon who possessed the poor Elf and made him kill the workers and he wasn't aware of what he was doing. Your task is to judge him.
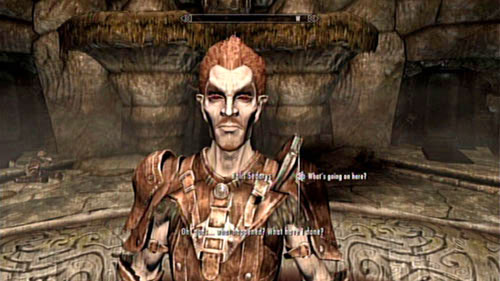
If you decide to punish Ralis, he will turn on you and attack - you should be able to kill him without much trouble (in his equipment you will be able to find one of the magic pickaxes - Ancient Nordic Pickaxe). Forgiving his sins will make him return to Retching Netch in Raven Rock and become an unique companion who you can take with you to any location.
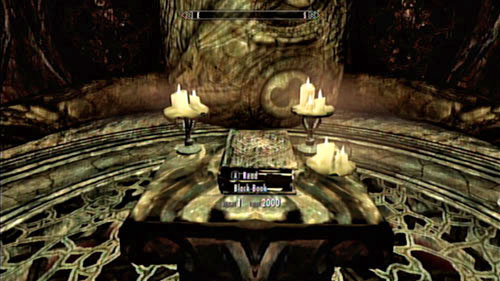
Remember to check out the room behind Ahzidal's alter before heading back to the surface - you can find there some treasure and a Black Book which begin Black Book: Filament and Filigree.
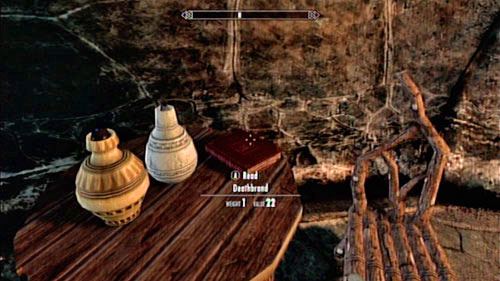
This mission becomes available only after you reach 36th level. In order to begin it, you should read a book called Deathbrand - you can find a few copies of it in Solstheim. Their locations are as follows:
Steward's House in Tel Mithryn - on a shelf by the bed;
Fort Frostmoth - on a shelf in the room where General Falx Carius is;
Haknir's Shoal - in the equipment of one of the pirates;
Morvayn Manor in Raven Rock- in the upper floor bedroom, by the bed;
Temple in Raven Rock - on the lower floor, in a room on the right, on a table;
Tel Mithryn - on a shelf by the magical "elevator" and on one of the tables;
The Retching Netch - in the bedroom in the northern part of the building, on a shelf;
Skaal Village - in the Greathall.
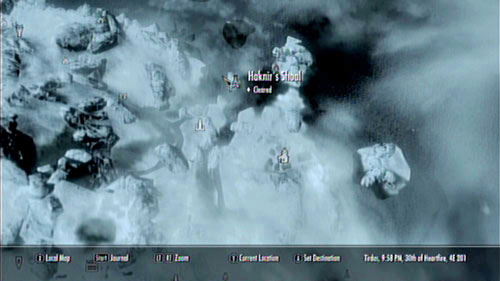
Pick up the book to activate the mission - but only if you have reached level 36. Alternatively, you can head to Haknir's Shoal and find the Deathbrand Helm in a chest - that way you will avoid the part with searching for the books.
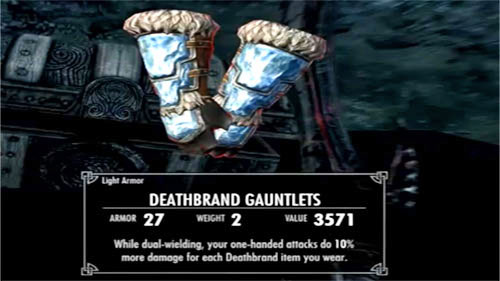
Using the treasure map which you found by the pirate leader in Deathbrand Helm, you shouldn't have problems with finding four parts of the ancient armor. Below are the locations:
Boots - in a chest west of Tel Mithryn, on the shore;
Helm - in a pirate camp in Haknir's Shoal, in an ancient chest;
Gauntlets - in a ditch south of Northshore Landing (see: A New Source of Stalhrim), opposite to the Rieklings camp, beside Bristleback Cave;
Armor - in a chest north of the Earth Stone (on the shore).
After obtaining the last part of the set, in the chest you should also find a key to Gyldenhul Barrow. That's where the last part of the mission will take place.
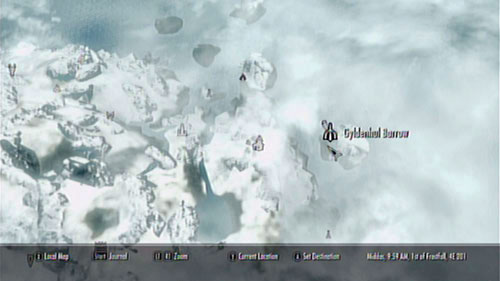
Gyldenhul Barrow can be found east of Skaal Village, on an island. Upon reaching this location, you will be attacked by Bandits - they are however the least challenge that you will face. Head inside the building, dig through the lore of Stalhrim found on the right (if you don't have a special pickaxe, complete Retrieve the Ancient Nordic Pickaxe).
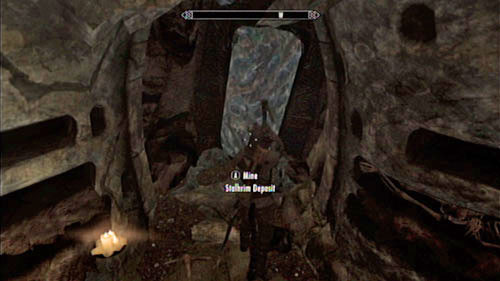
Head through the mysterious corridor hidden behind the wall of Stalhrim, go through the gate and enter the dungeon. In the room in which you will arrive you can find lots of treasures - gold and other useful items. If you try to pick up any of them, the gate behind you will immediately shut - apparently there's no way back. The only thing you can do now is head inside the tomb of Haknir Death-Brand.

Behind the throne of the dead pirate you will find an unique sword - the Bloodscythe. Pick it up and the ghost of the pirate will appear in the room and immediately attack you. Defeat him as fast as possible, as otherwise he might call in a few minions - members of his crew. Luckily you don't have to fight them - only Haknir is the required target (his minions will disappear when you kill the Captain).
After killing the enemy, take the second sword - Soulrender - from his corpse. It's a very useful weapon which might come in handy.
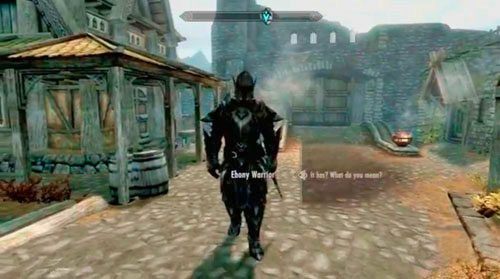
After reaching level 80, in one of the cities you should be approach by a peculiar character - the Ebony Warrior. He will tell you that he's been searching for years for a worthy opponent. Only death form the hands of such a powerful warrior like you will let him reach Sovngard. Apparently you will be the who gets the honor of killing him.
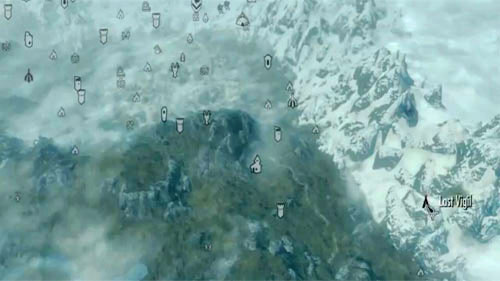
Go to the Last Vigil found southeast of Shor's Stone and northeast of Riften (screen above). That's where you will meet with the Ebony Warior. The fight will begin with your first attack, so it would be good to begin with a stealthy one.
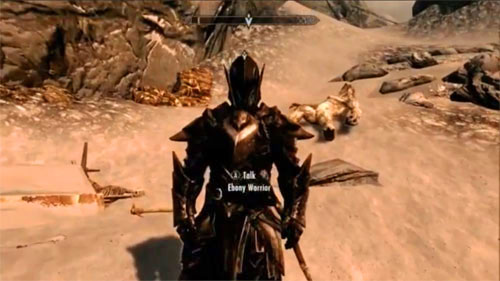
The fight isn't easy - your enemy is supremely armored, can deal great damage with his Ebony Sword (which additionally drains life) and knows shouts which can send you flying. Don't try fighting him on distance - his bow is surprisingly powerful, dealing both physical and ice damage. What's even worse, he's also 50% resistant to fire, ice and shock - mages can have a tough time here.

The best tactic is bringing along a very powerful companion (Serana will do just fine) and convincing a Dragon to help you (by using the Bend Will Shout). If the Ebony Warior has to fight three enemies at once, he will become a much easier target. You can also boost your abilities by using the Dragon Aspect Shout. It's also a good idea to make use of the special abilities offered by the Black Books.

After completing The Fate of Skaal, wait for a few days and head to the Skaal Village. After getting there, you should hear Deor Woodcutter and Fanari Strong-Voice talking about the disappearance of the local blacksmith - Baldor Iron-Shapera. When their dialogue ends (and the mission activates), ask the man about the circumstances of the artisan's disappearance. That way you will end the current mission and begin a new one - A New Source of Stalhrim.
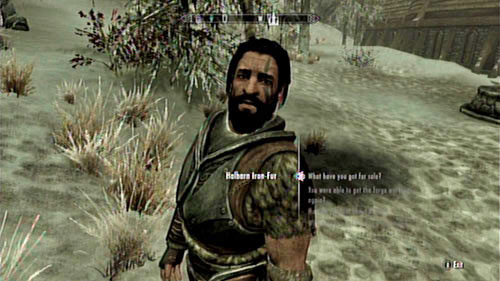
Notice! You can complete this mission only after finishing Retaking Thirsk!
Speak with the blacksmith Halbarn in Thirsk Hall to learn that lots of materials are needed to rebuild the forge. Collecting the required amount can take you quite some time, as they are rather rare. What's more, in order to mine the precious Stalhrim, you will need a special tool (it can be obtained during Retrieve the Ancient Nordic Pickaxe).
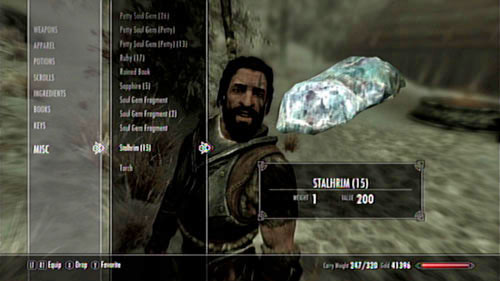
The locations where you can find Stalhrim are:
Obtaining 15 Ebony Ingots will also take you a while. There are basically three sources of this material:
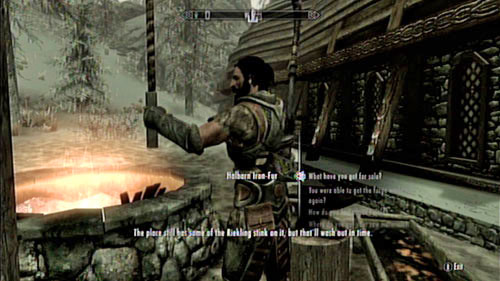
Bring Halbarn the required resources to end the mission. Note that from now on the man will become an ordinary blacksmith with whom you can trade. What's more, if you have the Amulet of Mara, you will be able to marry him (both homo and heterosexuals).
Notice! You can complete this mission only after finishing Retaking Thirsk!
Meet with Hilund in Thirsk Hall and talk with her about hunting. The woman will then ask you to bring her 50 Riekling Spears. Though such an amount might seem astonishing, in reality you shouldn't have any problems with obtaining it. Just head to one of the many Riekling seats (e.g. Benkongerike or Frossel), kill the enemies and take their gear. If that's not enough, you can take a look into the Riekling huts - spears are a valuable loot there.
After obtaining the proper amount of spears, return to the quest giver and collect your gold reward (depending on your level). I you have the Amulet of Mara, you will be able to marry her (both homo and heterosexuals).
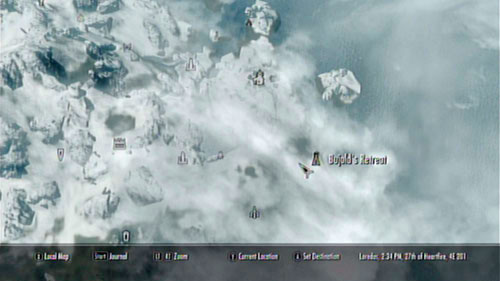
You can receive this mission in Bujold's Retreat after speaking with Elmus. The old distiller will tell you that ever since Thirsk Hall has been taken over by Rieklings, the Nords are running low on alcohol. They seem to especially like one kind - the ashfire mead. It can be obtained in the Hall or... at Geldis Sadry in the Retching Netch in Raven Rock (he appears there randomly).
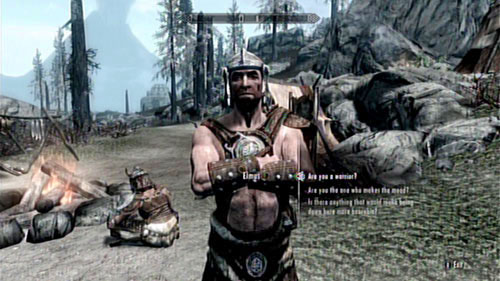
After obtaining a bottle, return with it to Elmus and collect your reward (the amount depends on your level).
Note that completing Retaking Thirsk will cancel this mission. The Nords won't be needing an more alcohol since the distiller can access his laboratory.
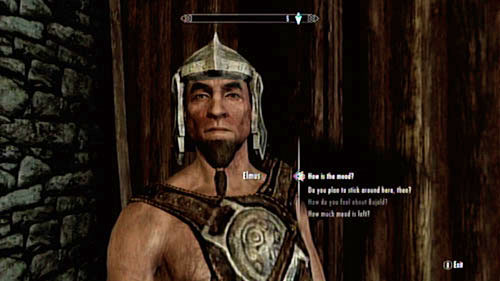
Notice! This mission can be completed only after finishing Retaking Thirsk!
Obtaining Juniper Berries for Elmus of Thirsk Hall can cause you some trouble - the plant doesn't grow anywhere on Solstheim. In order to obtain it, you will have to return to Skyrim and look for it nearby Riften or in the basin between Kartwasten and Sundered Towers (western part of the map). Some alchemists can also sell this rare ingredient. If you bring even one piece to Elmus, you will complete the mission and receive an amount of gold depending on your level.
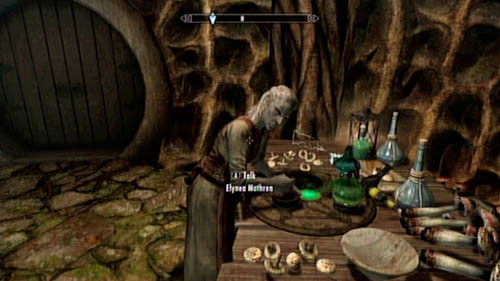
This mission can be completed multiple time. The apothecary from Tel Mithryn has problems with alchemic resources. If you bring her the items (chosen randomly), you will receive a prize. Some of them can be bought from other alchemists, but most you will have to obtain on your own (for example by hunting the proper kinds of animals).
The quality of the prize depends on your level.
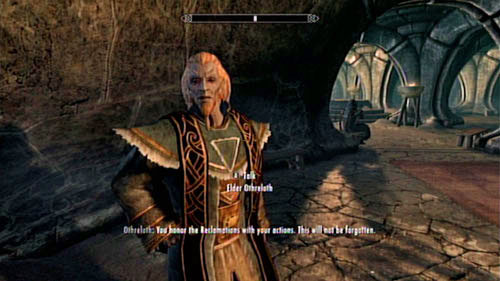
Head inside the Temple in Raven Rock to be greeted by Elder Othreloth - the local priest. He will tell you that the tomb has been overrun by an army of Ash Spawns. If you manage to get rid of them, you do the villagers a favour - both those alive and dead. In order to complete the mission, take the key form the priest and head to the underground. Opposite of the stairs you should see a door, behind which the monsters are waiting.
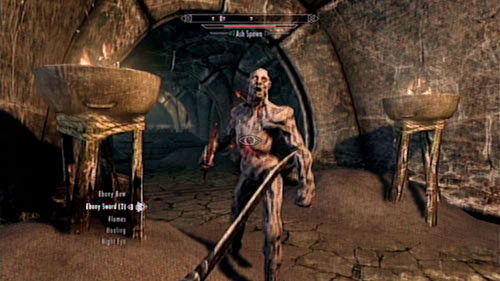
The tomb is inhabited by a whole army of Ash Spawns - they're really high in numbers. You don't have a chance in a direct fight - fighting a dozen of them at the same time is a challenge which even the mightiest hero might not take on. That's why you should focus on stealth kills - hide in a dark corner and kill the enemies using a bow. It's by far a more comfortable solution - all others will likely result in the fast death of the main hero.
If you don't have the required sniping skills, you can always retreat to previous locations and regenerate your health - the enemies come in waves, so you will have a moment to heal your wounds. When they are all dead, return to the quest giver and collect your prize.
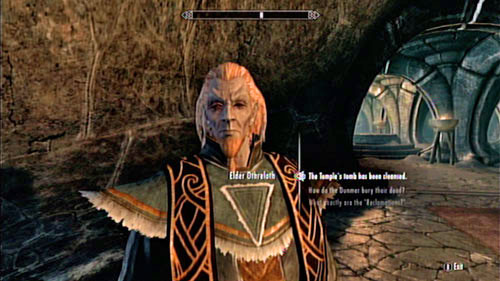
After as short conversation with Othreloth you will receive a payment - around 250 gold. It's a very miserable reward, but don't worry - you should have found plenty of valuables and resources by the corpses of the Ash Spawns. Don't hesitate to take them - you do deserve something, don't you?
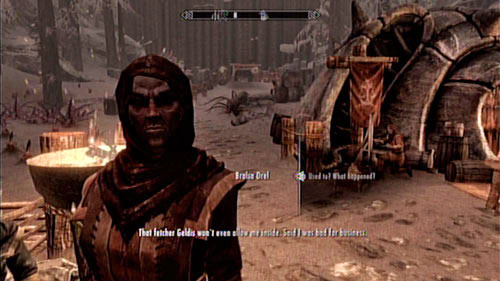
Notice! You can complete this mission only after finishing Cleansing the Stones!
On the main square of Raven Rock you will come across a Dunmer named Bralsa Drel. The woman was once a skilled miner, but she started drinking and she went downhill. What's worse, Geldis Sadri - the owner of the nearby tavern The Retching Netch - doesn't let her drink inside his property.
If you were touched by the story of the Elf-drunk, you can try convincing the bartender to let her back.
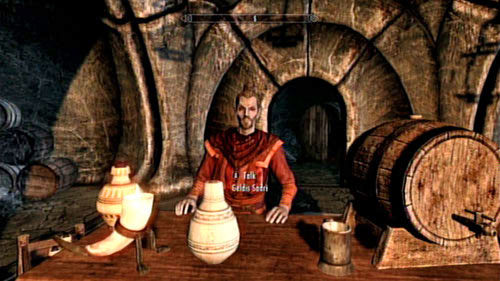
He will tell you that Bralsa used to be the wealthiest person in town - unfortunately, she spent everything she had over the years on alcohol. Geldis is convinced that if she stops drinking, the will become a better person. Unfortunately you have your interest in her returning to her addiction. That's why you have to either intimidate, convince or bribe the man and therefore complete the mission. There's no way of supporting the bartender in his noble cause - you can complete the mission only by making Bralsa welcomed at Geldis' inn again.
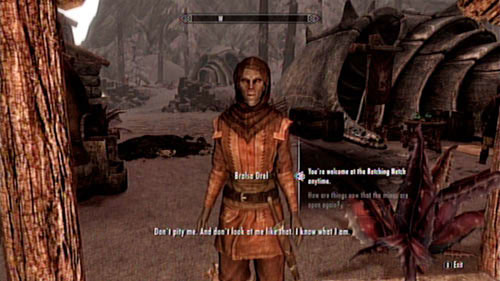
Since you have already persuaded Geldis to let Bralsa drink till passes out (you bastard!), return to her to collect your prize. It's generated randomly - you will obtain a useful item depending on your character's level.
Next time you come across a drunk Bralsa, you should think about your behaviour.
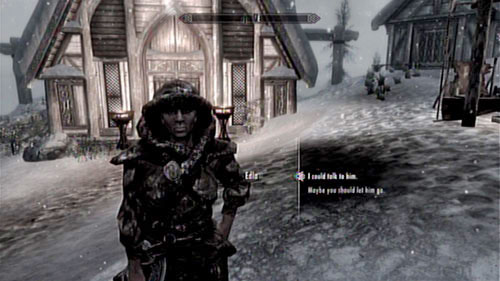
This mission can be activated by speaking with Edla in the Skaal Village. The woman will tell you that her adolescent son wants to leave the village and explore the world. It's a very dangerous dream, so his mother is very worried about him. Of course, as a known adventurer, you can convince the young man to let go of his plans - that way you will make the woman happy and earn her gratitude.
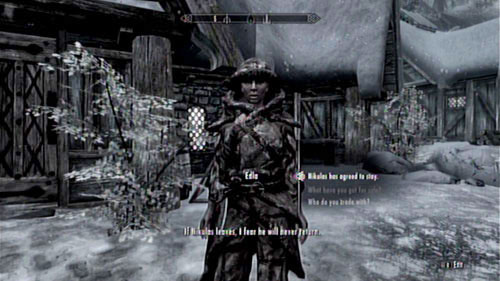
Nikulas can be found inside the village - usually he walks along the streets or sits on a bench by the entrance. There are a few ways of convincing him to stay:
Regardless of which option you choose, the young man will decide to stay in the village for some time. Now you have to tell his mother about everything and collect your prize.
After completing the objective, meet with Edla and receive her gratitude. The reward might not be rich - it's just some herbs and alchemic ingredients - but it's better than nothing. And you can live knowing that you saved the young man from a certain death - the frosty plains of Solstheim aren't a place for such a beginner.
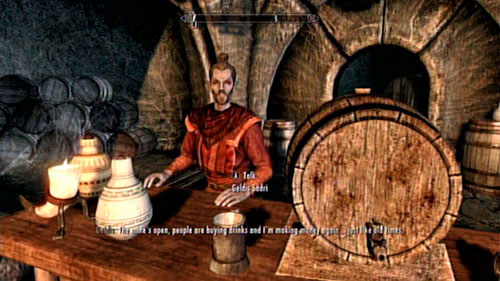
Head inside the Retching Netch found in the centre of Raven Rock. Go downstairs and speak to the bartender named Geldis Sadri. The man will ask you to run a small advertisement campaign - you have to take a walk around town and give away ten bottles of his sujamma to pedestrians. Don't try giving it to his employees - you will only make them mad, as they cannot drink during working hours. If you make use of it yourself (for example by getting drunk like a pig) you shouldn't worry: Geldis has an unlimited amount of these.
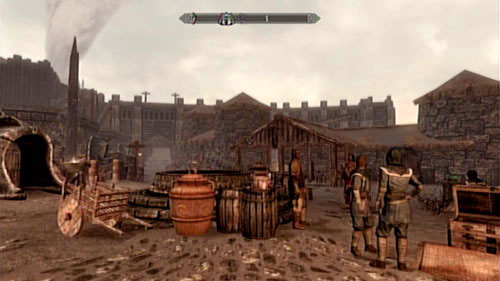
Take a walk around Raven Rock and give away the bottles of sujamma to the local villagers. Those who will accept your gift are:
If you can't reach one of them, go to sleep - on the next day you will be able to go to the same people and give them a second bottle. After completing the task, return for your payment.
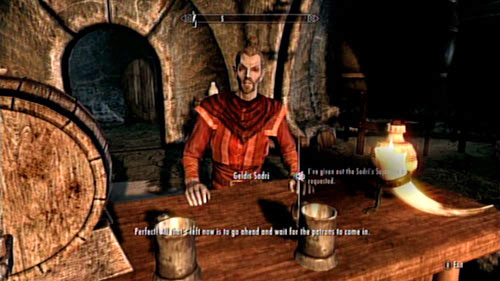
After getting the whole city drunk using Sadri's alcohol, you can return to the Retching Netch and tell the bartender of your success. At this point you will receive a payment depending on your current level and end the mission.
It is widely known that advertising is the basis of trade - apparently you have a talent for it!
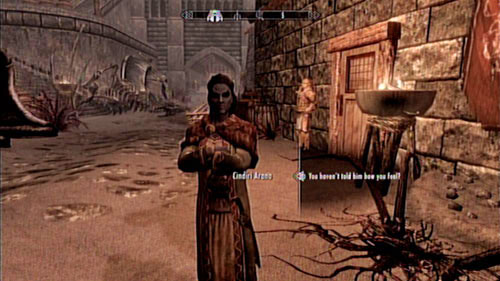
In order to receive this mission, you have to speak with the wife of Adril Arano - Cindiri Arano. She can be found at The Retching Netch or at the streets of Raven Rock. She will tell you that the ship carrying her book has sunk nearby the shore. If you manage to retrieve the precious volume - the Lusty Argonian Maid Folio - you will be handsomely rewarded.
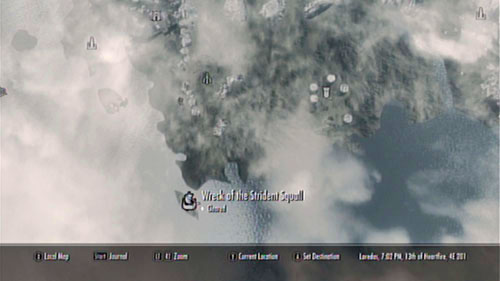
The wreck can be found at the southern shore of the island, nearby Old Attius Farm. Bandits have made camp around it - in order to get inside and retrieve the precious book, you will have to defeat them. Don't worry - they aren't very strong, so fighting your way through them shouldn't be a problem.
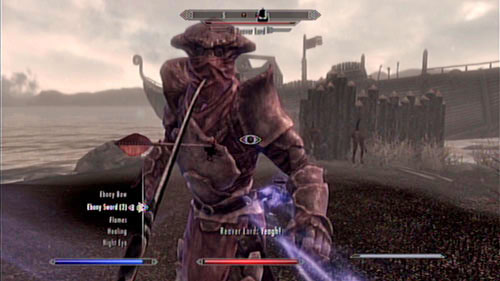
Once onboard the ship, head below deck and search for the treasure chest with the Lusty Argonian Maid Folio. Look around the area to find an East Empire chest - its content will come in handy during Locate the East Empire Pendants for Fethis Alor in Raven Rock.
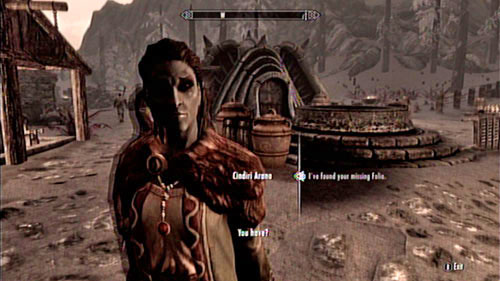
Return to Raven Rock and give Cindiri Arano her book back. She will in return give you a magical item, the quality of which depends on your level. Despite that what you did for the woman might seem like not a great achievement, indeed the whole coast will be glad that you took care of the group of dangerous bandits. Apparently small acts can sometimes develop into great deeds - you just need some good will.
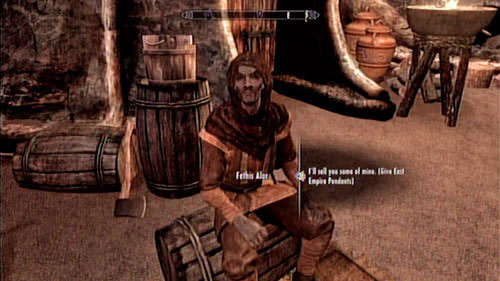
This is the most lucrative mission that you can complete on the island of Solstheim. Fethis Alor from Raven Rock will pay you 500 gold for each East Empire Pendant that you bring him. This type of pendants can be found in the Empire chests spread throughout the land. Below there is a full list:
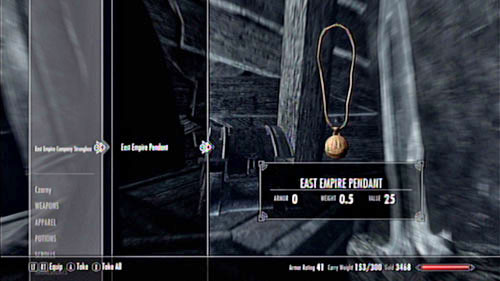
Locations not marked on the map:
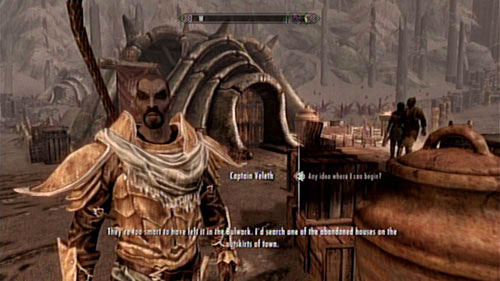
If you have completed March of the Dead, you can help Captain Veleth fight alcoholism amongst his people. Your task is locating the stash in which guards are hiding illegal alcohol. The task isn't very hard - it's rather obvious that they have hidden the alcohol on their usual patrol path. To find it, head out of Raven Rock and go towards the Earth Stone.
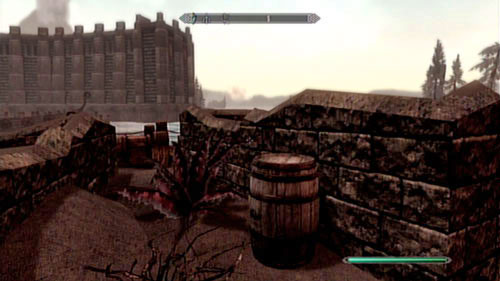
Around the middle of the road, between destroyed houses, you will find a barrel with the beverage (screen above). Open it to discover the secret and return to the quest giver to collect your prize.
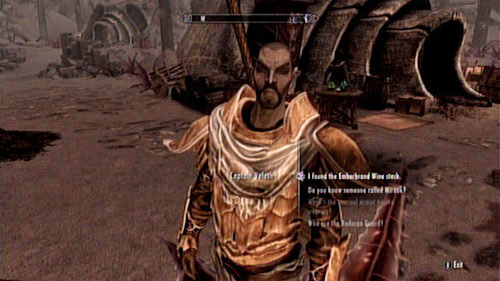
You have found the illegal stash, so not go report to Captain Veleth. Speak with him (he's usually somewhere around the main square of Raven Rock). That way you will end the mission and receive a small prize in gold.
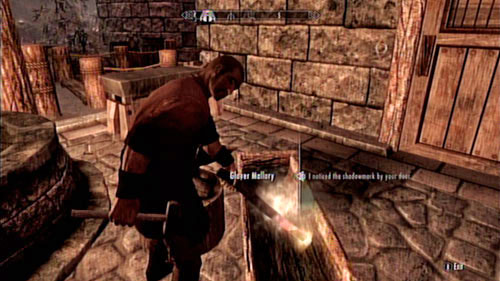
Notice! This mission becomes available only after you join the Thieves Guild during Taking Care of Business (see the guide to The Elder Scrolls V: Skyrim - College of Winterhold and Thieves Guild). You also need to have the Thieves Guild armor and speak with Delvin Mallory and Vex.
This mission has been prepared with the members of the Thieves Guild in mind. In order to start it, speak with the blacksmith at Raven Rock - Glover Mallory. The man will tell you that his former partner stole his recipe for the Improved Bonemold Armor. Such insult cannot go unpunished!

Glover's apprentice, Esmond Tyn, can be found far in the north, in the Castle Karstaag Caverns. Getting there isn't easy - the caves have to be approached from the south (through the mountains). By the waterfall you should find a small trough. Inside there's a whole army of Rieklings, while on the ice island right by the entrance - the corpse of the poor man. Search his corpse to find the bonemold formula - you can return to the quest giver.
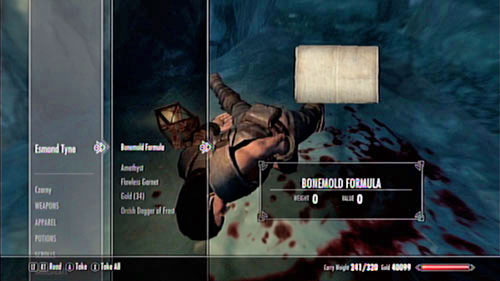
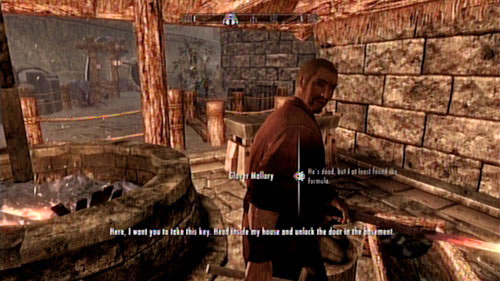
Return to Raven Rock and speak with Glover Mallory. The man will be sad to hear that his former partner is dead and will take back the formula. In return you will receive the key to his basement - inside you can find tons of useful items. It was a really lucrative mission!
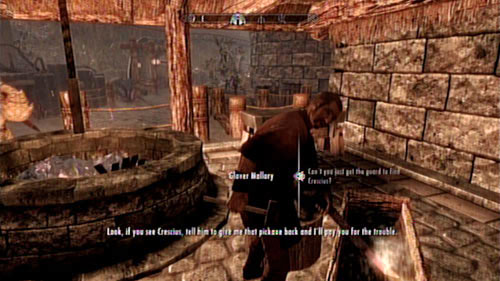
A relatively easy mission which can be completed in a matter of seconds. To receive it, speak with the blacksmith in Raven Rock - Glover Mallory - who's the brother of Delvin Mallory from Riften. The man will ask you to bring him the Ancient Nordic Pickaxe which is in possession of Crescius Caerellius. You will soon learn that he's the owner of the ebony mine. Head there and go inside. The gate can be found in the northern part of the city Raven's Rock Mine.
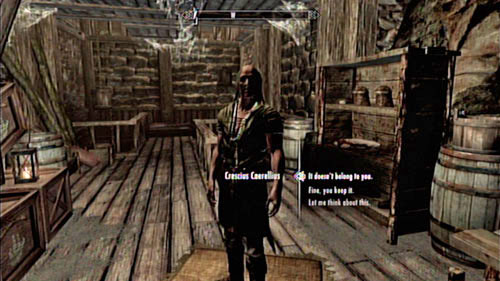
Head down into the mine to witness an argument between the marriage - apparently Crescius can't communicate with his wife. Ask him what happened and you will receive the side mission The Final Descent. Accept it and mention about Mallory's pickaxe - you won't have too much trouble with getting it back. Afterwards take it back to the quest giver. In return, you will receive... the artifact itself. Don't underestimate it - it lets you mine the precious stalhrim. There are only a few such items in Solstheim!
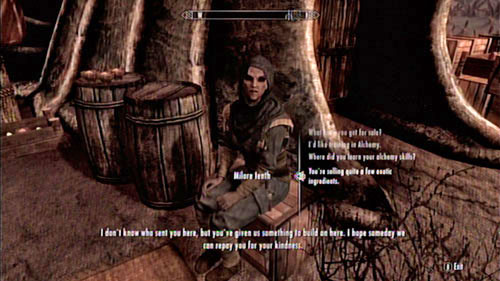
In the city of Raven Rock you can meet a merchant named Milore Ienth. The woman sells alchemic ingredients and is an alchemist herself, but she's missing one very rare ingredient - the netch jelly. It can be extracted from a freshly hunted netches - the flying armored creatures capable of using simple magic. They can be found in small groups on the island of Solstheim and are the targets of hunters from Skaal Village.
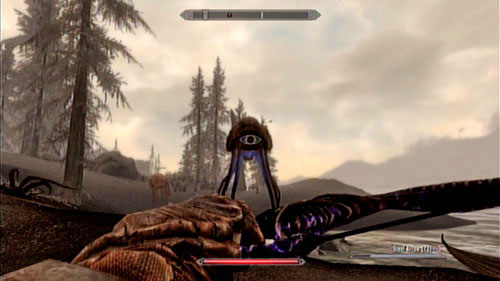
If you don't consider yourself a hunter, you can always rob the citizens of Raven Rock - some of them has netch jelly in their storages (it's randomly divided between houses). A much more interesting solution is to hunt down the creatures and obtain the ingredient yourself (you will need five samples).

Netches can be found mostly on the western and southern edges of Solstheim - a few can be found northwest of Raven Rock and the rest between Tel Mithryn and the mentioned city. The creatures like the proximity of water, so most of them will be near the shore. Be careful, as despite the appearance, these creatures can use powerful magic and might kill you easily!
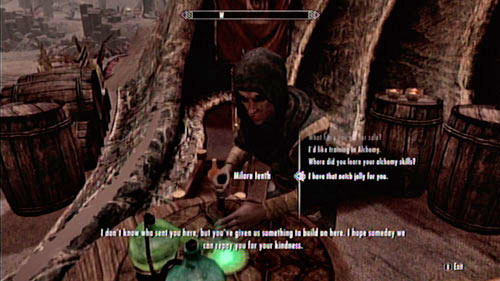
After obtaining five samples of netch jelly, return with them to Milore Ienth and collect your prize. You will most likely be rewarded with a few strong potions that will help you in your further adventures. For the future, remember that netches are friendly creatures (just like for example mammoths) and hunting them is cruel and completely unjustified.
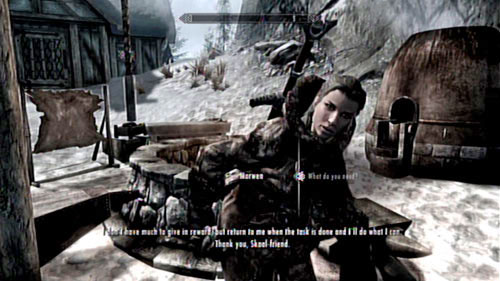
In the Skaal Village you can find a woman named Morwen - she usually works by the forge. The warrior is in mourning after the loss of her mother - she didn't have time to say goodbye to her. However if someone could take the necklace to the tomb of her mother - Nera - her conscience would be clean. In order to help her, you should head out to the city of Falkret in Skyrim and speak with the Priest Runil. He can be found in the Hall of the Dead or on the streets of the village.
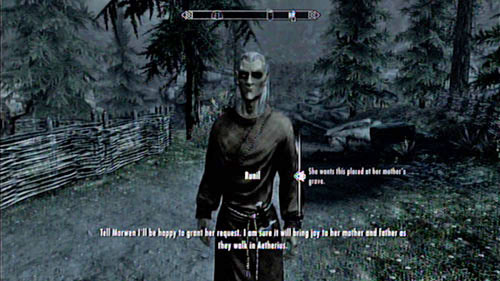
Once you're there, meet with the Elf and give him the necklace. The old priest will put it in the right place and thank you for your favor (on behalf of the dead). You can now return to Morwen.
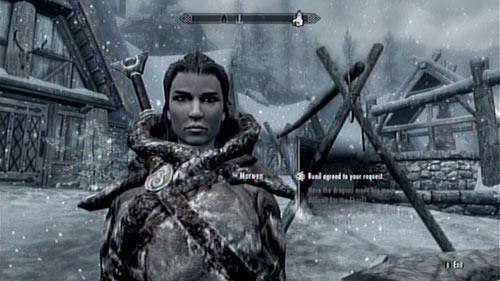
The woman can be found in the same place that you left her - apparently nothing has changed in the Skaal Village. In return for completing the mission you will not only receive the woman's gratitude, but also part of her equipment. As Morwen was once a very skilled warrior, you shouldn't complain about its quality. Additionally, if you have the Amulet of Mara, you can marry her (both homo and heterosexual).
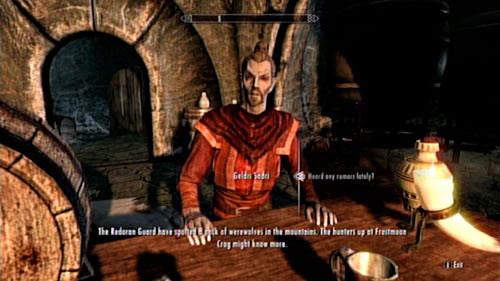
When you meet with Geldis Sadri at the Retching Netch in Raven Rock, ask him if he has heard any interesting gossip lately. The bartender will tell you of werewolves who are supposed to be demolishing the area of Frostmoon Crag. The people living in that cave will probably be able to tell you more - head there to speak with them.

The cave can be found halfway between the Abandoned Lodge and the Altar of Thrond - that is southwest of Temple of Miraak. Once you get there, the hunters will immediately ask you to leave their premises. If you hesitate for too long, they will change into werewolves and try to kill you.
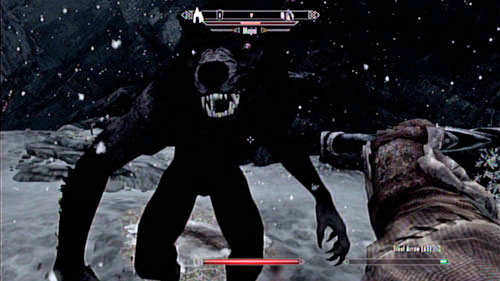
The key to victory is defeating the enemies before they can change - it takes a couple second, during which the monsters are completely defenseless. With their transformation over, they will surely cause you more trouble. Luckily there are only four enemies, so you should be alright.
Notice! If you're a werewolf yourself, they will greet you honorably and peacefully. You can even trade with them - they have some useful artifacts.
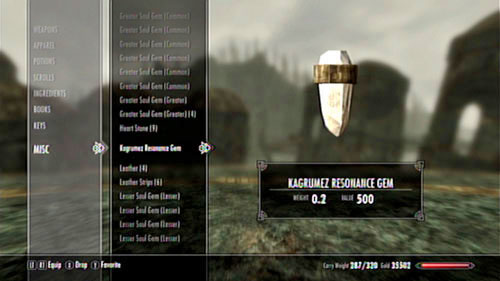
It's in fact isn't a mission (it doesn't appear in your journal) but an interesting addition - at the same time it's interesting and quite complicated. In order to experience it, you will have to obtain at least two Kagrumez Resonance Gems. Below are their locations:
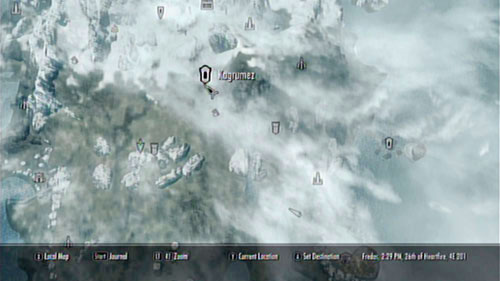
After obtaining at least two stones, head to the ruins of Kagrumez - you will find it to the south of the Temple of Miraak. Take the elevator down and deal with three Bandits who inhabit the underground. By their leader you will find more Gems. As you should already have four, you will be able to solve the below puzzle.
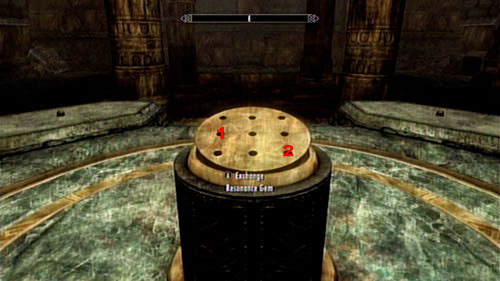
If you place two stones like shown above, you will be surrounded by a metal cage. When your "cell" opens, you will be attacked by a whole bunch of Dwemer machines - you need to destroy them. Once the rooms is filled with scrap-metal, head into the corridor on the left - it's a Dwemer forge (inside you can find lots of useful blacksmith tools).
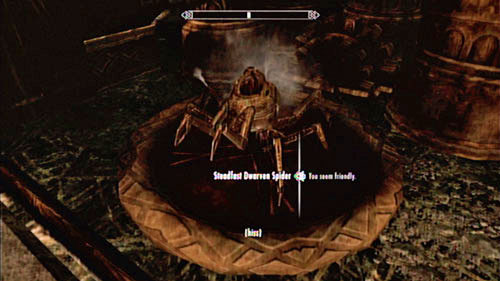
If you pull the lever in the middle of the room, you will open a stash with a friendly mechanical spider. At this point the real mission will also activate - Find Resonance Gems across Solstheim to complete the Kagrumez Trials.
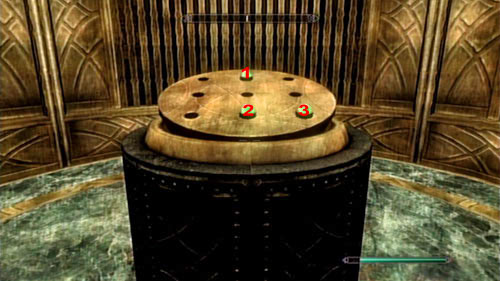
Arrange the resonance gems as shown in the above screenshot. You will be once again locked in a cage (this time a bigger one) and the room will be filled with flames and an army of machines. In order to break free, you need to defeat all the enemies - only then the trap will turn off and you will be able to move on.
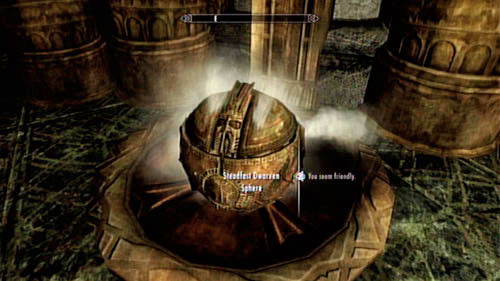
Enter the forge in which you came across the friendly Spider. You will surely notice that the door which was locked before is now open. Head through it and enjoy the treasures. Afterwards pull the level and meet with another friendly machine - this time a sphere. Greet it and return to the main room to solve the puzzle.
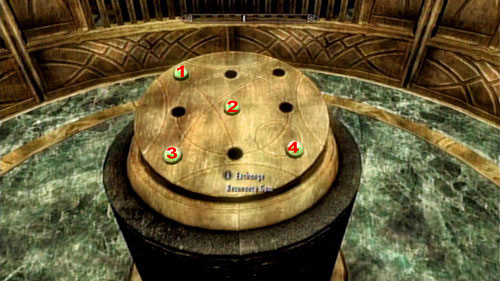
Set the stones as seen above and you will once again (this time for the last time) fall into a trap. The room will be flooded by poisonous water and a few more machines - spiders, spheres and ballistas. Deal with the close range enemies as fast as possible and afterwards move to those who use ranged attacks (be sure not to fall into the water!). Once you take care of them, head through the forge to the last room.
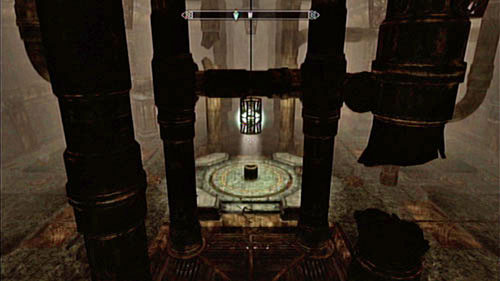
Beside the destroyed centurion you will find lots of treasures and valuables and beside the platform by the furnace - a mediocre bow. If you turn left, you will enter a room with a chair - apparently Kagrumez was once used as a coliseum - all the chairs face the arena on which you just fought.
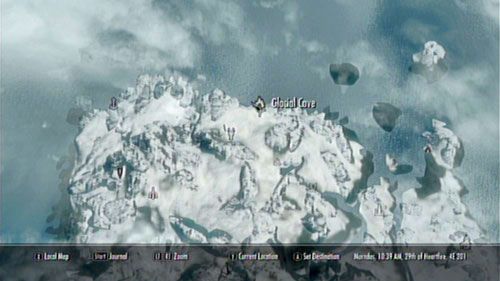
This unmarked mission is one of the biggest challenges offered by Skyrim: Dragonborn. Its course is rather untypical - firstly you have to go to the Glacial Cave in the north and obtain Karstaag's skull (you will have to defeat three Rieklings on your way). It's the easiest part of the mission.
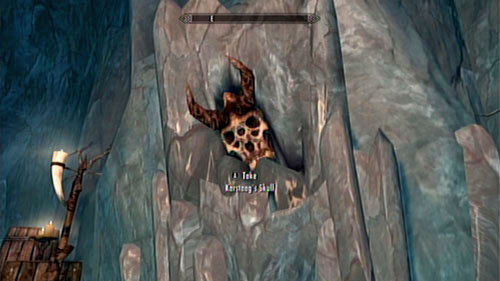
There are two paths leading to the throne room in which Karstaag rests. The first one - Castle Karstaag Ruins - requires you to break the master-level lock which might be very challenging. If you lack patience or skills with the picklock, choose the second option - Castle Karstaag Caverns.
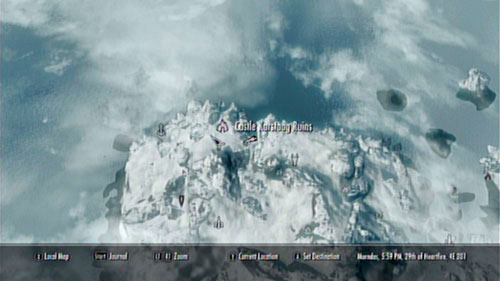
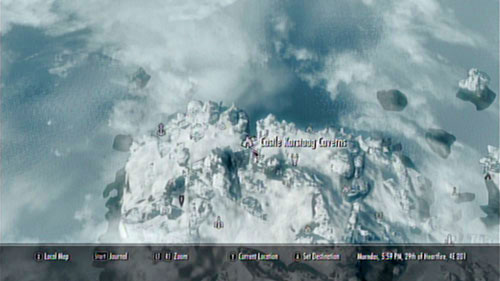
If you chose the path through the cave, you will have to fight your way through a large city inhabited by Rieklings. It shouldn't cause you too much trouble - the enemies are numerous, though the construction of the area is very easy and you won't get lost (while you're at it, you can also complete Recover the Bonemold Formula for Glover Mallory). Just head onwards all the time and kill the enemies on your way until you reach the throne room - the room which you would have reached at once if you had broken the lock.
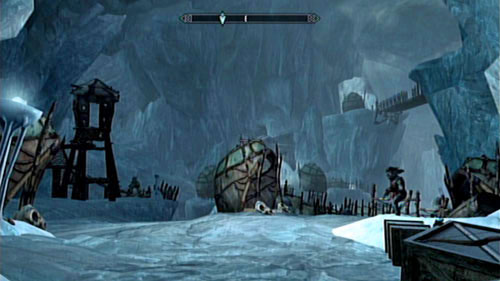
Stand in front of the throne on which the skeleton of Karstaag rests and place the skull found in the Glacial Cave on it. Afterwards immediately move away to a safe distance - the ghost of the monster will resurrect, causing an enormous explosion which can kill you. You will have to fight for your life - Karstaag will immediately attack you.
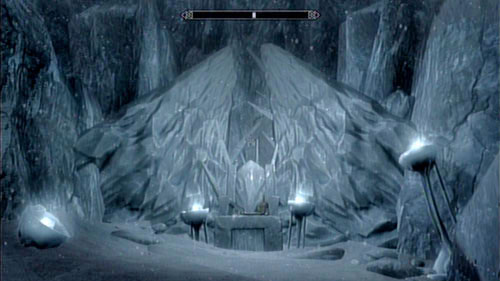
The beast from the north is one of the toughest and most difficult enemies in the game. The beast is completely resistant to ice, poison and disease and also absorbs most of shock damage. Increased vulnerability to fire isn't a big consolation - Karstaag is constantly surrounded by a cloak of ice which deals rather high damage (therefore fighting him will be made very difficult) and has powerful attacks. The cave is small so you won't be able to run away from the enemy, so you will have to fight him in an ordinary way. If you have some potions protecting from ice and physical damage, be sure to use them as otherwise you rather don't have a chance. It's also a good idea to bring companions - you however have to keep in mind that they will likely die after receiving a single hit. The best way of defeating the enemy is reaching 100 level in Sneaking - that way you will receive a perk which allows you much easier assassinations. Shouts and special skills provided by the Black Books will also come in handy.
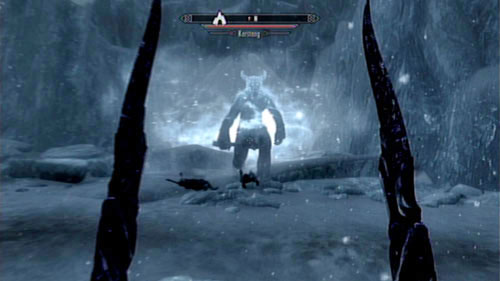
In return for defeating the beast, you will receive an unique power - summon Karstaag. The mighty beast will fight for you - which pretty much means winning every fight. There is however one limitation - you can only use it three times before it becomes unavailable.
Even in the frosty land of Solstheim you will find some place for love. There are three characters who you can marry after meeting certain requirements. They are:
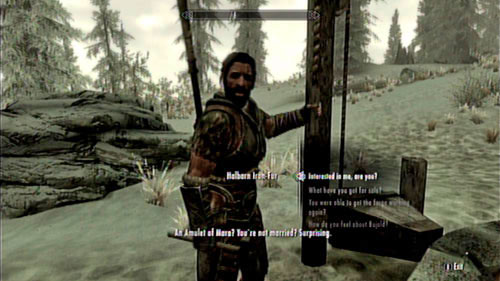
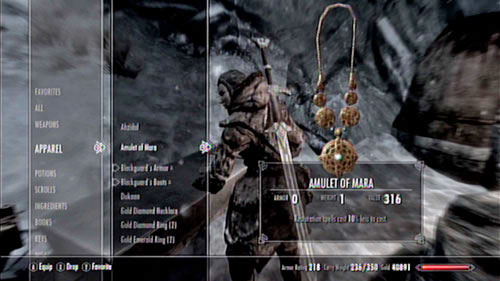
In order to propose, you have to speak with the priest of Mara - Maramal - and buy an Amulet of Mara from him. He can be found in the temple in Riften or at The Bee and Barb. After buying the item, put it one and speak with the person you want to marry.
Note that there is a full tolerance regarding marriages of different races and sexes (including homosexual marriages).


 The Crew Game Guide & Walkthrough
 The Elder Scrolls Online Game Guide & Walkthrough
 The Elder Scrolls V: Skyrim Game Guide & Walkthrough
 Test Drive Unlimited Game Guide & Walkthrough
 The Next Big Thing Game Guide & Walkthrough