
This guide to Starbound includes all of the necessary information connected with the game, .e. the basic gameplay information, the description of survival for several days and a voluminous database connected with the matters like crafting of tools, the types of the planets that you visit or the weaponry available in the game. The whole guide has been divided into five separate parts devoted to a specific topic. The first part of the guide includes all of the basic information for new players. In that chapter, you can find, among others, a description of game's interface, information about races, combat mechanics and controls. The second part is a walkthrough for the first 5 days, of a kind. It focuses on all the basic mechanics of the game and presents a relatively optimal way to learn the rules of the game and prepares the player to leave the initial planet. The third chapter focuses on the crafting system and the kinds of items, and materials available in the game. The fourth chapter concerns the exploration of planets. What you can find there is, e.g. information on biomes, enemy types NPC types and boss battles. The final chapter is concerned with interplanetary travels, the way in which spaceships work and the special abilities, called Techs
This guide to Starbound includes:
This guide has been drawn up basing on the beta version of the game. It will be supplemented on a regular basis, as soon as new updates appear.
Patryk "Irtan" Grochala ()

Movement/S - crouch

Jump


Interact with the environment/NPC

Interact with the foreground/Attack (with weapon equipped)

Interact with the background/Attack(with weapon equipped)

Select a single block

Crafting window

Inventory window

Journal

Codex window

Highlight interactive elements

Switch the active equipment

Drop the item in your hand

Swap items in the bar L/R

HUD on/off

Change the expression on your characters face
In the game, there are no standard difficulty levels. Instead, you can choose one of the available modes, which creating a new character. These modes influence only the penalty for the death of your character, and on the opponents and the availability of resources.
For the new players, the Normal mode is recommended. The death in Starbound is a quite frequent occurrence, especially at the initial stages, which is why it is best mode to start your adventure.
The Hardcore mode is similar to the previous one, where the difference is that you lose all of your equipment after you die. You can retrieve your equipment if you return to the place where your character died. The only item that always remains in the inventory is the Matter Manipulator.
Permadeath is recommended only for the experienced players. The character that dies in this mode is automatically deleted and you cannot play with it anymore.
Starbound's interface is lucid and easy to use. Since the pointer of the mouse is active at all times, most of the interface elements are active. In the upper-left corner, you can find the character bar, which displays health, energy, and possible effects. In the upper portion of the screen, there is the shortcut bar where you can place various items for quick access. In the upper-right corner of the screen, there is the windows bar, which you can activate with your mouse, and the number of Pixels that you have.
 The effect of health regeneration
In Starbound there are two types of effects: positive and negative. You can acquire them by coming into contact with a specific type of blocks, attacks of some of the monsters, eating an appropriate item, etc.
Below, you can find a list of the main types of effects that you can experience in the game. The red color corresponds to negative, and green to the positive effects.
Icon
Name
Description

Burning
Deals damage from fire, per second, for the duration of 5 seconds. A character with this effect glows in dark and moves a bit faster.

Freezing
Appears when the level of the character's temperature drops to zero. The screen becomes white and the player receives damage for the whole time. You can remove this effect by warming the character, e.g. at the Campfire.

Glowing
The player's character emits an intensive glow around itself. Especially useful underground. This effect can be acquired after you use the Yellow Stim Pack.

Health Regeneration
Regenerates your character's health bar. The speed of the regeneration depends on the effect's source. The example items that provide this effect are Bandage and Red Stim Pack.

Jump Boost
The effect that increases the height of the character's jump. Very useful while travelling across the planet's surface. You receive it after you use the Blue Stim Pack.

Melting
A negative effect that you receive after you come into contact with lava. Deals 100 damage per second.

Poisoned
The character is poisoned and slowly loses his health. This effect disappears after several seconds. The best idea is to use Bandage or Red Stim Pack, to alleviate the effects of poisoning.

Speed Boost
This effect allows you to run faster and jump higher. It can be achieved by consuming the Grim Stim Pack.

Sugar Rush
A positive effect that you can acquire after you consume the appropriate kind of food, like e.g. Banana Bread or Lollypop. It increases the speed of your character, while running, and allows you to jump 25% higher. It lasts for 15 seconds.
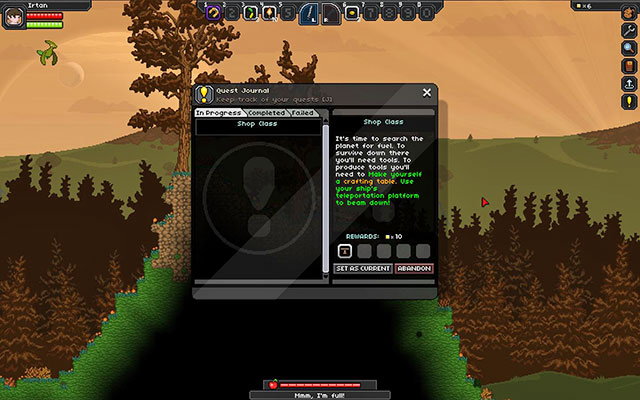 The journal
Quests in Starbound, are an excellent way to obtain Pixels, materials, and even rare items, like, e.g. weaponry or special technologies. All of the information about the active and completed missions can be found in the Quest Journal, which you open by pressing J or by clicking on the golden exclamation mark icon on the tab bar.
In the game, there exist both ready-made quests, which are connected, first of all, with the storymode, and the ones generated by the game itself, which are usually less complicated but, they are infinite in number.
NOTE! The current game version has not yet been implemented with quest system. The only quests available are the introductory ones, which you receive after you start a new game.
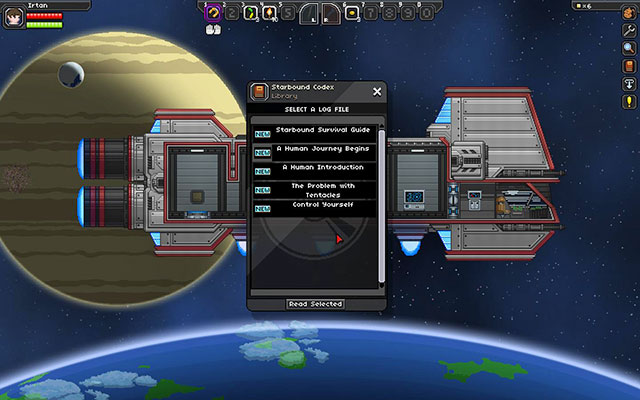 The repository of knowledge
The Codex is a collection of all the notes, texts and information that you amass during your travels across the galaxy. You can find there the history of races or of the NPCs, information on monsters, types of planets, etc. All of the entries are automatically transferred to the Codex. To access it, press L or click on the book icon in the tab panel.
 Snap!
Snap!Combat is an inseparable element of the game. The abundance of enemies that you encounter during your travels will be hostile towards you. For that reason, you should always carry a weapon around.
The basics of combat are easy to master. Before you will be able to attack, you need to select your weapon. It needs to be placed in the shortcut bar L/P or under any of the numerical shortcuts (1-9). After you have selected the weapon, it will be highlighted and it appears in your hands, ready to use. You attack with the LMB or the RMB. Additionally, if you use a firearm or the bow, you need to target the enemy with the mouse pointer.
In the game, there also exists division into the right and the left hand. This means that, if an item can be held in one hand, it only takes one of the hands. For example: in your left hand, you can place a one-handed sword, and a flashlight in the right, to illuminate your way across a dark cave. You can also use two swords at the same time or use the dagger and the revolver. You only need to remember to place the weapon in the L (LMB) or R (RMB) shortcut.
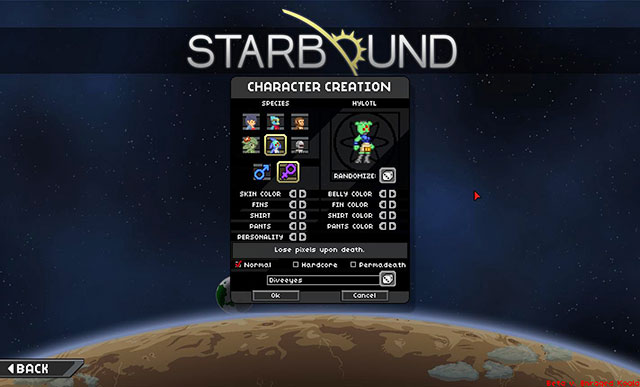 The character creation screen
There are 6 playable races in the game. Each one has different looks, ha a different set of class armors and weaponry, food and the type of spaceships. Although the races are limited, at the beginning, only to their own styles, later on into the game, you can unlock the styles of the remaining races.
The available races:
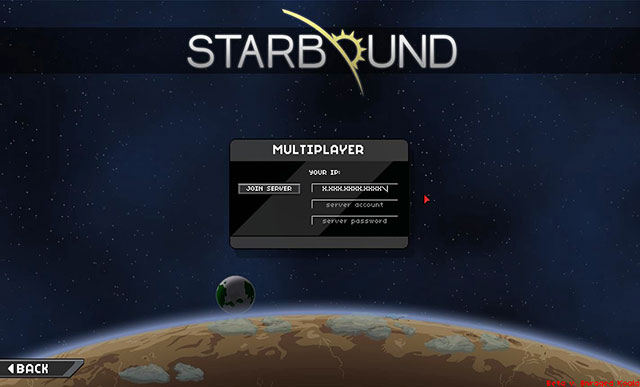 This is not the actual IP
Apart from the single player mode, you also receive the opportunity to player in the multiplayer mode. Multiplayer is similar to the single player mode.
The game does not have permanent servers controlled by the developers, and only privately-owned servers created by the players. The number of the players on a server is unlimited and the game world is the same for each one of the players, which is a copy of the host's world. This means that the actions in the multiplayer mode are carried over to the host's single player mode.
During multiplayer games, you can use the chat function. There are 3 main channels: Universe chat, Planet chat and Party chat. The first one concerns all of the players on the server, the second one concerns the ones on the same planet and the third one is for the players in the same team.
Joining the server: The only thing you need to do is enter the IP address supplied by the host, in the server address window and, if necessary the server password and the server account name. Then click the Join Server button, to join the game.
Start own server: Activate the server by clicking Start Starbound Server in the game launching screen. Wait for the server to load on all of the necessary information, start the game and select the multiplayer mode. The only thing left for you to o now is enter the local IP (127.0.0.1)in the server address window and click Join Server. If you want someone else to join your server, you need to supply them with your public IP address.
 The background changes sometimes
Starbound has an open-world structure and it is difficult to draw up any walkthrough. The game focuses on the exploration of the infinite, constantly generated world, where the storyline is created by the player. In spite of tat, beginning in Starbound can be, sometimes, overwhelming, which is why this guide includes the optimal walkthrough for the first five days in the game world.
It is worth pointing out, who this guide is exactly, aimed at and what it includes. The survival guide will be, first of all, useful for the new players, who have just started their first adventure with Starbound. Although there is some sort of an in-game tutorial, it is not as detailed and does not provide that much information on the game mechanics. All of these basics have been included in this guide and the more detailed description of all the mechanics and functions can be found in the remaining chapters of this guide.
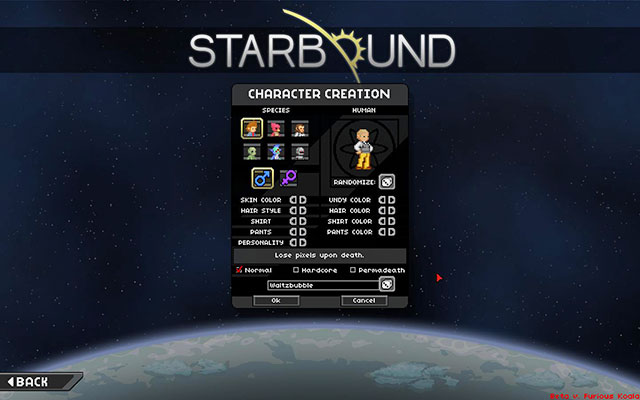 The character creation screen
Before you start a new adventure, you need to create your character that you will be crossing the boundless galaxy as. You only need to select one of the game modes (Single player or Multiplayer), and click the empty character slot. This way, you will be transferred to the character creation screen.
While creating your character, you can select one of the 6 available races. Your avatar's looks and the starting clothes. Then, you need to enter the name and select one of the difficulty levels: Normal, Hardcore or Permadeath. Finally, you need to lick Ok and select the slot with the newly-created character to enter the game.
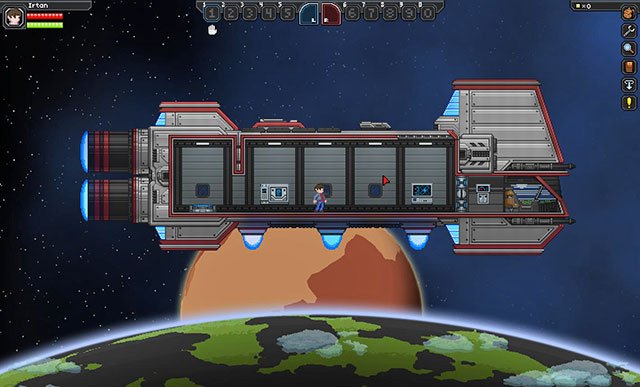 The beginning of the adventure
Welcome, intergalactic traveler, to your new ship! Its looks should better be appropriate, because this is the only available means of transport. Unfortunately, as for now, it is out of fuel and it is drifting towards the nearby planet. Fortunately enough, this planet has a life-supporting atmosphere and it is relatively safe there. An ideal place to make a new start.
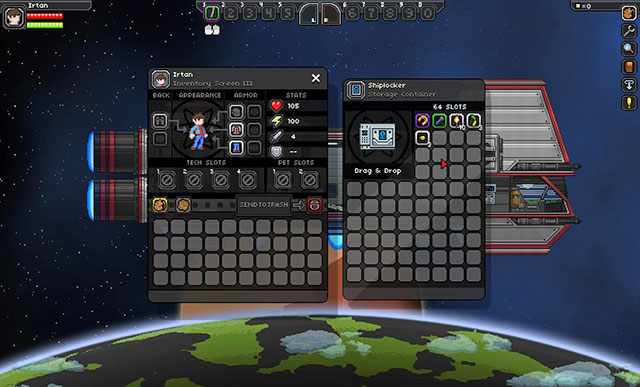 A few useful items
You have probably already noticed that you have received your first quest. It is a quest from the tutorial, which is going to accompany you for the next 5 days on the new planet. Follow the instructions and approach the Shiplocker, located to the right and open it with the interaction key (E or MMB). Then, carry the items there to your inventory (Shift + LMB). Put the Flashlight, 10x Torch and Matter Manipulator in the shortcut bar, and the weapon either in the L or R shortcut. Throw the remaining items into the backpack. Accept the new quest and use the Teleportation Pad on the left, to teleport to the planet's surface.
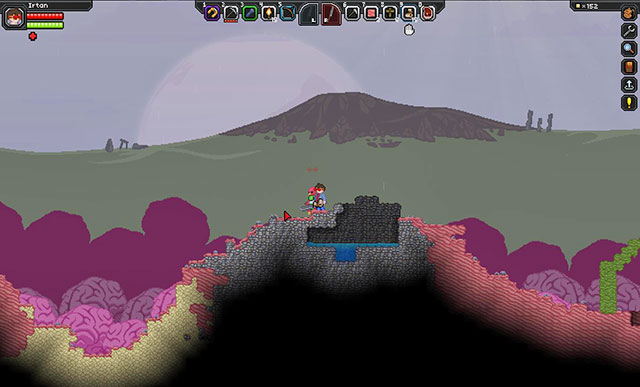
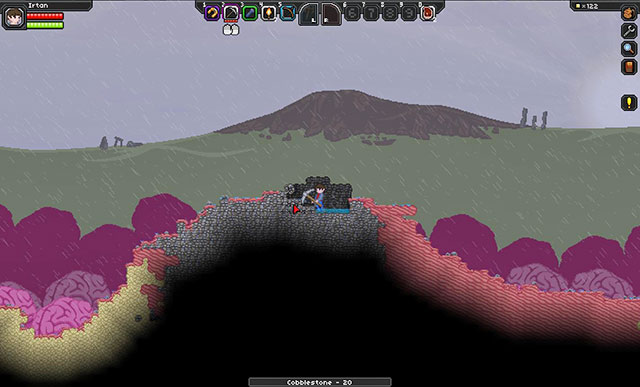
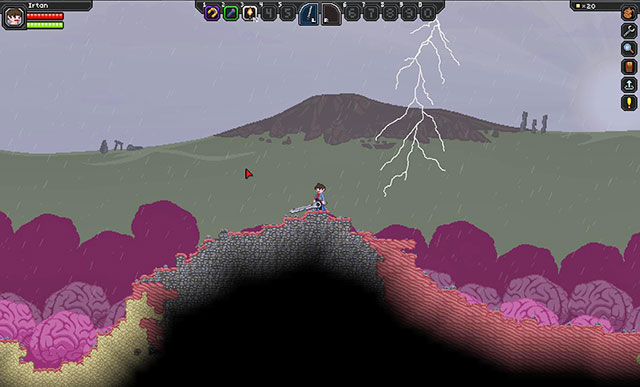 The planet welcomes you with thunders and rain
Each player starts on a different planet, which is why the aspects such as biomes, opponents, whereabouts of resources and the looks of the planet will differ from those, which you can see in the screenshots. In spite of that, all of the hints and steps, contained in this guide, are universal for each of the initial planets and races.
The basics for survival on an unknown planet is building a safe shelter and this is what is going to be the main objective of the first day on the surface of the planet. This is important, because at night, there appear opponents that the initial weapon may not be sufficient for.
 Matter Manipulator is a versatile device
Start by finding a, relatively, flat surface, as close to the place of teleportation as possible. Thanks to this, you will be able to travel quickly between the ship and your base. Mark the area of your future plot with Torch, by selecting it in the shortcut bar and clicking the LMB n the selected spot on the ground. You now need one material - wood. Go right or left, until you find several trees. To cut down a tree, you only need to equip the Matter Manipulator and hold down the LMB on the tree trunk. After a short moment, the tree will fall and it will drop the chunks of Unrefined Wood for you to collect. Collect some 100-200 chunks and some soil from the area, to level the construction site. Then,, return to the marked area and start building. Te night is nigh.
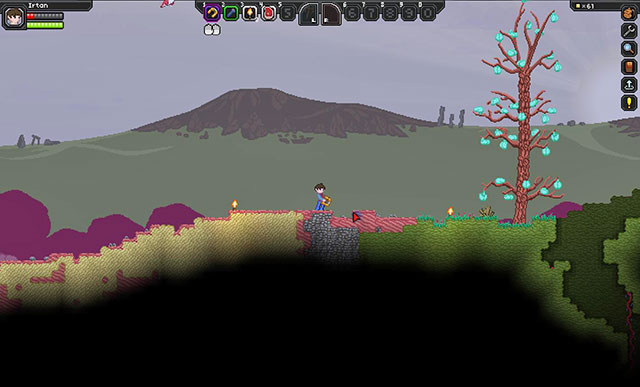
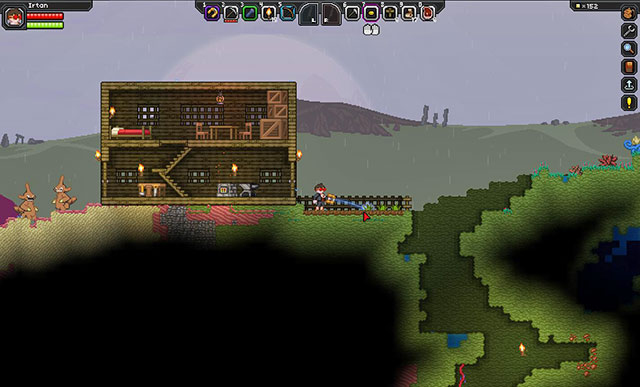
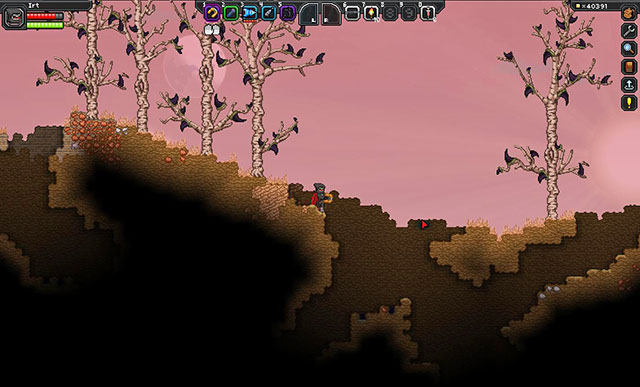
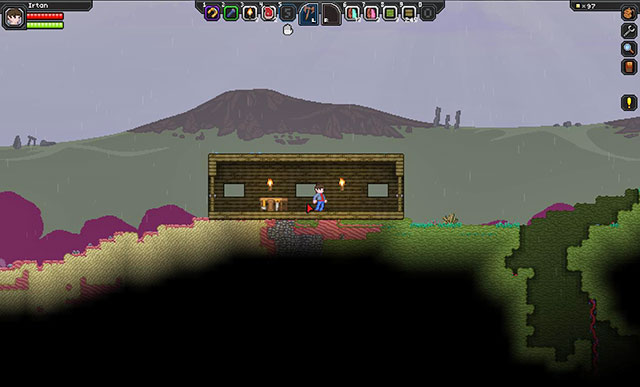 There is no place like home
Start the work by turning the entire wood that you have collected, into Wood Planks. To do that, open the crafting window (C) and highlight the Wood Planks, and press the Craft button. After you craft planks, you can start building your first house. Do not worry too much about the looks. For the first day, 4 wall, the ceiling and the door is enough to separate yourself from the dangers of night (an example in the above screenshot).
There are two ways in which you can situate the blocks: in the foreground, i.e. in the plane where is the ground that you walk on, and in the background. The blocks in the background do not block your character and they serve mainly decorative purposes. The objects in the foreground can be put in the r place by clicking the LMB in the selected spot, if you want to put them in the background- RMB. The same goes for removing them with the Matter Manipulator. You can also place single blocks by pressing the Shift + LMB/RMB combination.
Once you have built the floor, the ceiling and all the walls, you only need to fit door in. For that, you need a Wooden Crafting Table. Open the crafting window and highlight this item. Then click the Craft button. Position the Wooden Crafting Table in the middle of the house and activate it (E or MMB). Thanks to this, you will gain access to more items. Craft 2x Wooden Door and fit them into the walls on the left and on the right. Congratulations! You have just built your firs house and ensured yourself with shelter for the night.
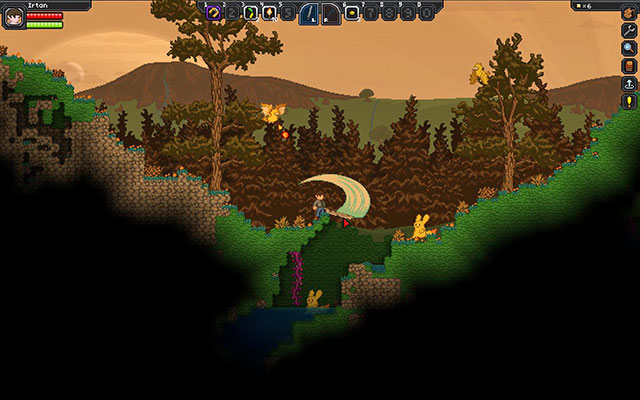
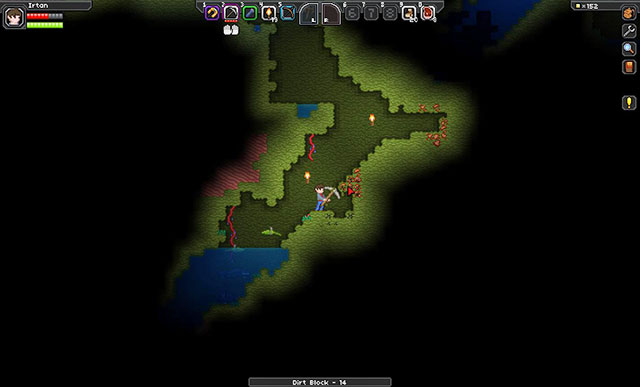
 The wild vines
On day one, you have learned the basics of the crafting system and placing blocks/ Day two is devoted to hunting and combat.
Your character has his needs and hunger is one of the. The hunger meter appears, every now and then, at the bottom of the screen and it shows how hungry your character is. The hunger level drops at the rate of, around 10% per 4 minutes of the real time. Once the meter drops to zero, the character will start to take damage until he dies or eats something. For that reason, you always need to carry some form of food around with you and make sure that the hunger meter does not drop below 25%.
The best weapon for hunting is the bow. However, to craft it, you need 10x Unrefined Wood and Plant Fibre, which you can find in the numerous caves.. Plant Fibre resembles a regular vine hanging down from the wall. Cut down one of the vines, with the Matter Manipulator, and open the crafting window. Highlight one and craft a Hunting Bow. Then, place it in the shortcut bar.
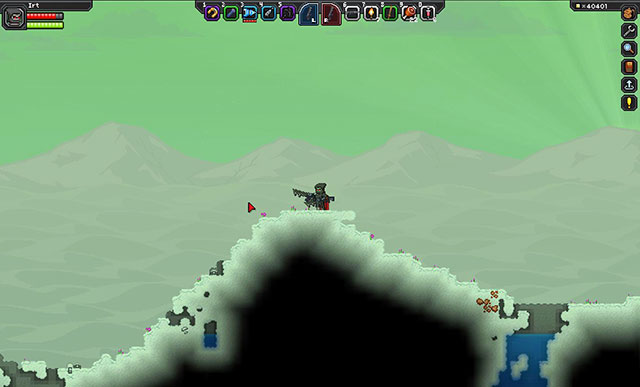
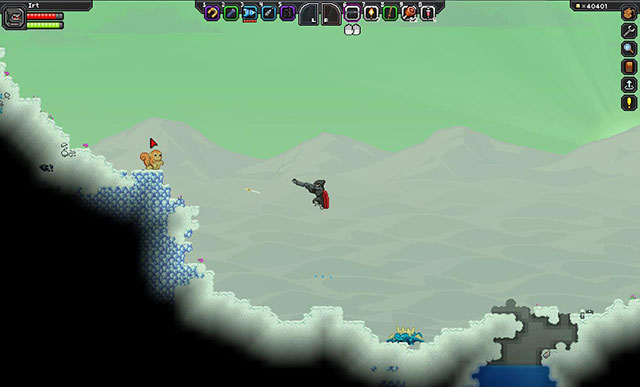
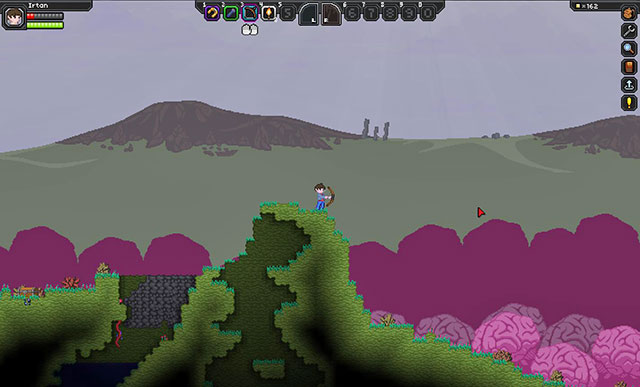 The archer taking his position
Before you go hunting, you should learn several things about hunting and shooting. To use the bow, you only need to select it from the shortcut bar, or the L/R quick bar, and hold down the LMB and release after the string is drawn. The longer you are holding down the button, the farther away the arrow will fly, and the higher the damage. If you release the arrow in the ideal moment (the bow's flash) you will receive damage bonuses to your shot and the range.
Although the bow is definitely stronger than the initial melee weapon, there are situations in which you need to draw your blade and square off against the enemy. As much as bows increase your chances of obtaining food and the pelt of the animals that you kill, you do not receive Pixels, i.e. Starbound's in-game currency, for that. For that reason, if you need meat and hide, it I better to kill the opponents with melee weapons, for the sake of the valuable Pixels.
The fight with melee weapons is similar to that with the bow. To attack, you need to place the weapon in the shortcut bar, or in the quick L/R shortcut bar, and click LMB or RMB, to land a single blow. You need to watch out, however, because fighting an aggressive opponent deals damage to your character and some opponents use special attacks, like e.g. the charge, belching fire or ranged attacks.
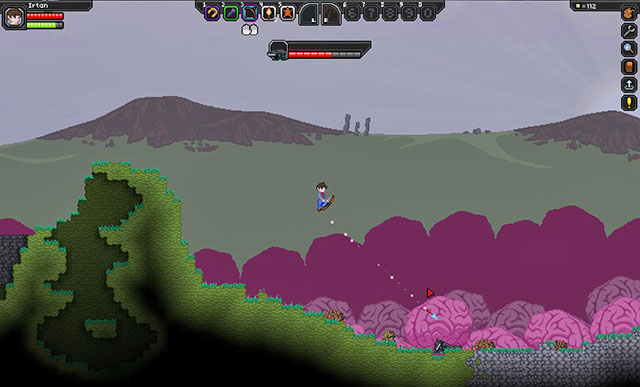 This arrow will probably miss its target
After you have learned about the combat system, you can go hunting. The monsters should be plentiful, regardless of which way you go. A regular animal should fall after 3 charged arrows. Keep killing animals until you have gathered 5-10 Raw Alien Meat. Then, return to your cozy cottage.
Unfortunately, raw meat is inedible, which is why you need to cook it. For that, you are going to need a Campfire. To create it, you are going to need 10x Unrefined Wood and a Torch. Place the campfire on the ground and activate it. Put the Raw Alien Meat in the campfire's right window and press the Cook button. After a while, you will receive tasty bits of Cooked Alien Meat. Eat some and leave the rest for later. You do not need to worry about shelf life. In Starbound food never goes off.
 Digging with this tool takes ages
On the second day of the game, you learned the basics of combat with the bow and melee weapon., to gather food and cook the simplest dishes to satisfy hunger. On the third day, you will craft your first tools, visit dark caves and play the miner a bit.
Although the Matter Manipulator is a very useful tool, which has many useful functions, it unfortunately operates quite slowly, especially when it comes to mining for resources. For that reason, there exist tools that, usually, serve one purpose, but they are the best one for the job, out of all the tools.
In the first place, we will focus on crafting tools. To craft all of them, you are going to need 55x Cobblestone, but mining for this amount with the Matter Manipulator is going to be time-consuming. As for now, collect 10 chunks. Cobblestone can be found on the surface and in most caves. After you have gathered enough, return to your cottage and use the Wooden Crafting Station. Find a Stone Pickaxe and craft one (10x Cobblestone and 20x Wood Planks). This is the simplest of pickaxes, but it will do for deposits at small depths.
 Much better now
With your new tool in your hand, it is time to go back to the quarry. Collect the remaining 45 Cobblestone and take them to the Wooden Crafting Table. Craft a Stone Axe (10x Cobblestone and 15x Wood Planks) and a Stone Hoe (10x Cobblestone and 12x Wood Planks). Leave the remaining materials for later. Stone Axe is ideal for chopping trees and the Stone Hoe is required for soil cultivation, which is going to be covered later on.
It is time to go deep underground. The aim of this endeavor is to find several materials, like: coal, copper and iron. The exact number of the materials that you need are: 36-56 Iron Ore, 134 Copper Ore and, around 100-200 Coal.
Before you go-a-mining, it is a good idea to prepare several things. First of all, you need to make sure that you have, at least, 5 bits of Cooked Alien Meat on you Then, collect around 40-60 Plant Fibre form the vines and craft them into Bandage, in the crafting screen. You should have 10-15 bandages. They are very useful, because they regenerate your health after they are used. The final important thing is the Torches. To craft 2 torches, you are going to need one Unrefined Wood and a lump of Coal, which you can find on the surface or in shallow caves. Prepare, around, 20 torches and go.
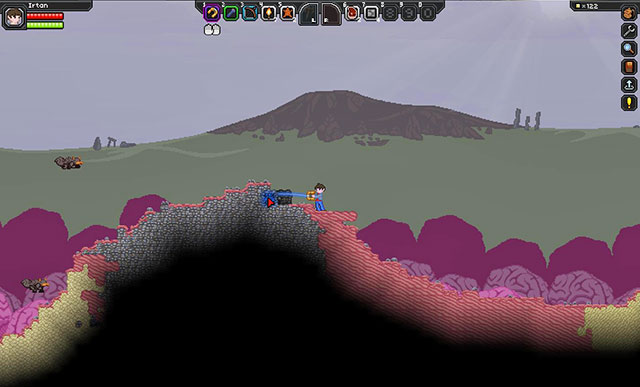
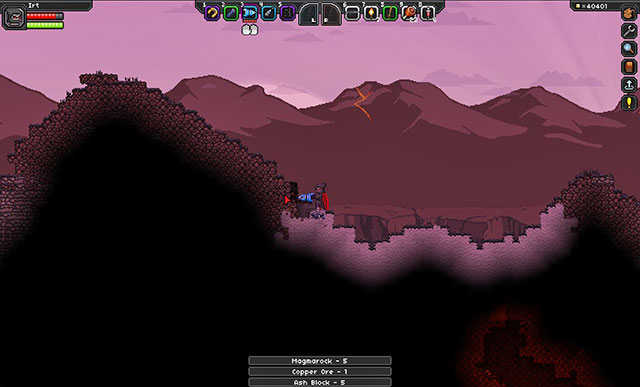
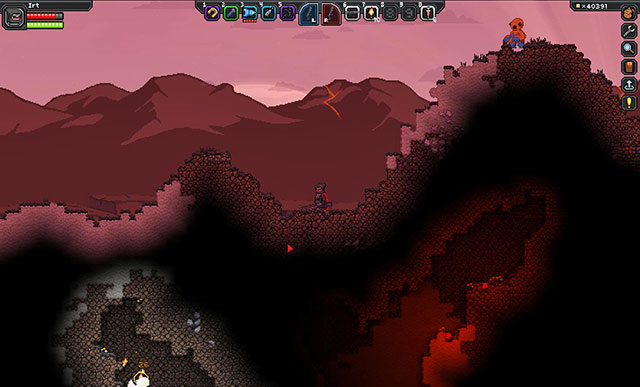
 A deposit of copper
The amount of ores, and their distribution is different from planet to planet. It is possible that on your planet, you will find most of the ores that you need near the very surface, although such deposits are, usually, not abundant. The best method is to start digging. The deeper you dig, the more rare ores you will find. It is best to find a cave and go to its bottom. Where you start digging and get over to the successive caves. Use the torch to mark your path and illuminate the area, while digging. For the needs of the regular movement, use the Flashlight.
It may take some time to mine all of the ores but, they are going to be necessary later in the game. There should not be much problems finding Coal. You can easily find it, in abundance, on the surface. The same goes for Copper Ore. What may be the most problematic is the Iron Ore. It is not that abundant near the surface and in shallow caves, but to find larger deposits, you need to dig deeper. Try not to dig too deep, because you can encounter some more demanding opponents there, than on the surface. If you take any damage, remember that you have the Bandages on you. They will allow you to regenerate the character's health, best before the battle.
Once you have collected the necessary ores, return to the surface and take them to your cottage.
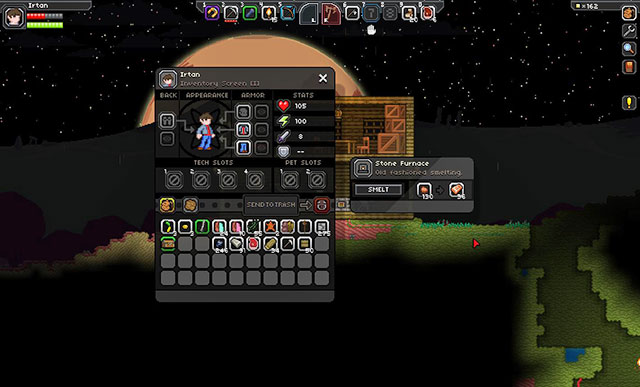 IT is time to smelt your acquisitions
On the previous day, we have focused on the crafting of the basic tools and items, as well as on mining foe ores from the depths of the planet. On day 4, we are going to focus on smelting the ores that you have acquired, crafting your first armor and weapons, as well as on cultivating the soil.
It is time to put the materials, which you have acquired, into use. Start by crafting two important pieces of equipment: Stone Furnace (25x Cobblestone and a Campfire) and Iron Anvil (8x Iron Bar). You obtain the Iron Bar after smelting 2x Iron Ore in the Stone Furnace (Press Smelt). You are going to need 16x Iron Ore, to create one Iron Anvil. Then, place it in your cottage and throw in the rest of the lumps (Copper Ore and Iron Ore) into the Stone Furnace. It may take some time to smelt them into bars.
What you need at current is the armor. Your first armor may not be too astonishing, but this is better than nothing and you are going to need it to craft a better armor in the future. Collect the smelted bars and approach the Iron Anvil. To craft a full armor set off copper (Copper Helmet, Copper Chestpiece and Copper Graves), you are going to need 67x Iron Bar, i.e. 134 Iron Ore. Their armor and the weapons are crafted in the same way as the rest of the items. Activate the item and find the abovementioned armor pieces. Click on each one of them and press Craft. Do the same to craft the weapon. Select one of the available kinds of weapons (Broadsword is very good for beginners) and click Craft again. Remember that you cannot make weapons off Copper, only with Iron. Depending on what kind of weapon you select, you are going to need 2 to 20 Iron Bars.
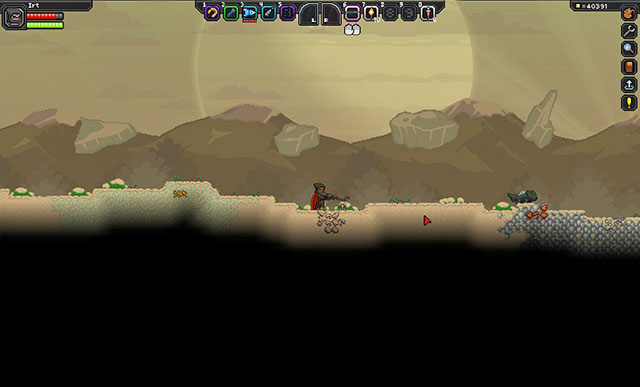
 The backside garden
You should be able to kill monsters with the new weapon without any problems, in one blow. The copper armor will absorb some of the damage that you receive. Since you are done with the safety measures, you can now take to creating a garden for yourself. Cultivation of soil in Starbound is not too complicated and it will provide you with constant flow of food. To cultivate soil, you are going to need a Stone Hoe, Seeds and a bit of a grassland. You have already crafted the Stone Hoe, and you received sees at the very beginning of the game, from the ship's storage. Now you only need to find some grassland, best if it is close to the house and use the Stone Hoe (LMB) on it, to clear it and prepare for sowing. Now you only need to select the seeds from the shortcut bar (each race has different seeds, e.g. Corn Seed or Banana Seed), and place it in the initially prepared soil, with the Matter Manipulator (the above screenshot). It is ready now. Now you only need to wait. The entire process may take between 10 minutes and 2 hours, depending on the individual plant. Once the plant ripens, click on it (E), to harvest 1-2 seeds and the edible part of the plant (e.g. Banana, Carrot or Corn). The process can be repeated over and over again, because you will be always receiving seeds from the plants that you harvest. You can also sow them aboard your ship, to have a constant access to food.
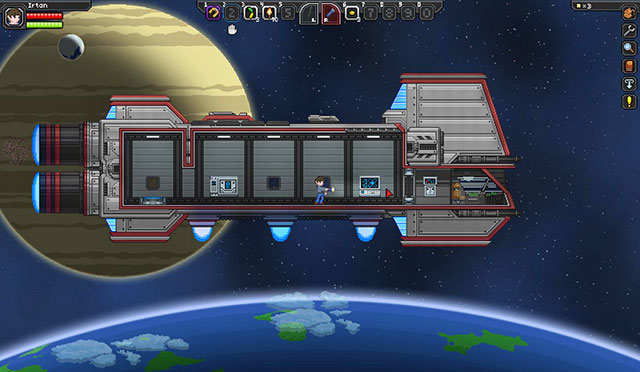
 The human ship
You have already learned to control your character, the process of distributing the blocks and of crafting new tools, you have set out for hunting, learned about the hunger system, fought dangerous opponents and even learned about mining and gardening. There is the final lesson to be learned. On day 5, you will learn everything that there is to know, about the most important element in Starbound - the spaceship.
So far, in your explorations, you have been restricted to one planet only. The world of Starbound is much more than that, however. In the game, there are hundreds of thousands of procedurally generated stellar systems. Each system has a number of unique planets, with their own biomes, gravity, monsters and dwellers. All of this has been divided into 5 sectors of separate difficulty levels. As of now, you are staying at your starting planet in the Alpha sector but, the problem with lack of fuel, which you had before, is non-existent anymore. If only you want to, you can start the engines and fly off to another planet or a completely different system.
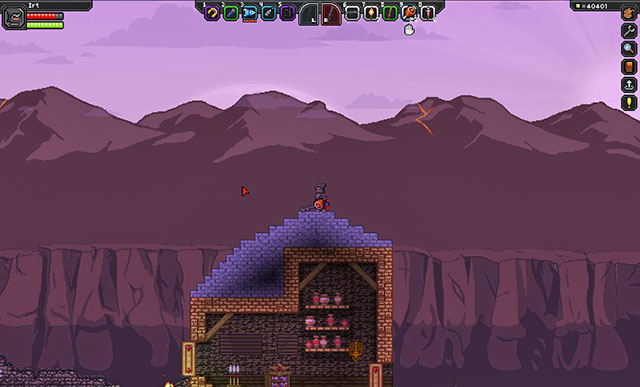
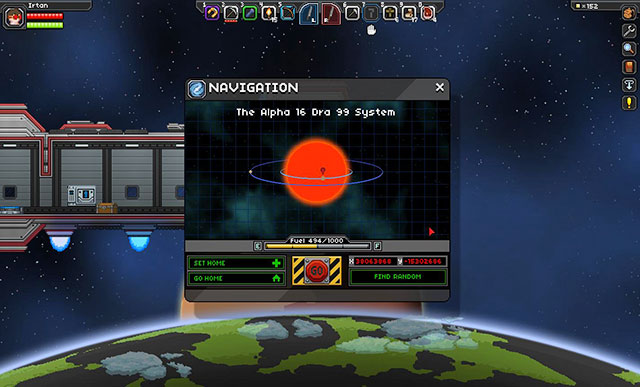 You are quite close to the Sun
Start by returning to your ship. To do that, click on the teleportation symbol next in the tab bar on the right. You need to be standing at the planet's surface to be able to teleport.. Once you are back aboard, walk on to the ship's bridge on the right. Right in front of the pilot's chair, you will notice a white panel with a gauge - Fuel Hatch. This is where you place the fuel supplies, which are then converted into fuel units, which you need for interplanetary journeys. At this moment, you have access to the basic kind of fuel- Coal. One lump of coal corresponds to 2 fuel units. To reach the neighboring planet, you are going to need 50 fuel units, and the journey to another stellar system, or sector, takes 200 fuel units. From the coal that you have mined earlier, you should obtain 200-400 fuel units. Although this amount is sufficient to get to another stellar system, it is a good idea to top the tank up. Some of the planets have, relatively, small deposits of coal, which is why it is safer to travel with large supply of fuel. The tank can hold, up to, 1000 fuel units, which corresponds to 500 lumps of coal. To add fuel, activate the panel, put coal into one of the slots and [press the Fuel button.
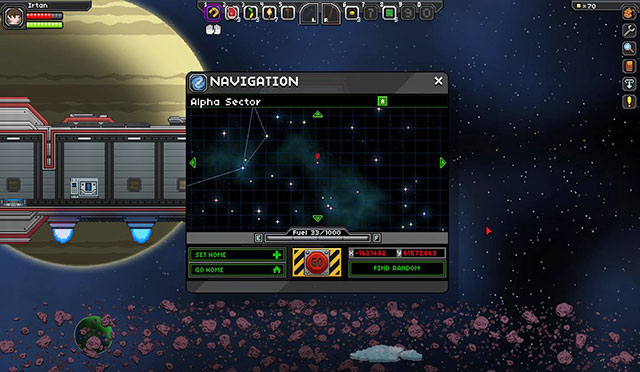
If you have refueled and the engine is ready to go, the only thing you need to do is learn about the basics of the Navigation Console. To activate it, click on the pilot's chair. The navigation panel has several interesting functions. The first one of them is Set Home. This allows you t o specify one planet as your main base and save the location, thanks to which you will be able to return there after you select Go Home. Another function is the map of the galaxy. Thanks to the map, you can learn about the nearby planets and mark your destination manually. The final function is the panel of coordinates. There are two coordinates: X and Y. If you have the exact coordinates of a planet, you can enter them here, find the specific planet and set it as your destination. It is also possible to select random coordinates, by pressing Find Random.
This is all of the information necessary to handle the ship. If you are going to check out the other planets, and you want to return to your start planet in the future, remember that you can mark it with the Set Home function.
The above description has only presented the basic elements of the game mechanics. The world of Starbound is immense, filled with thousands of diverse planets. Each one of them is different and worth visiting. All of them have unique undergrounds, treasures and elite opponents. If the planetary exploration is not what you want from the game, you can always return to your starting planet. Focus on building grand structures , crafting better weaponry or exploration of the underground world. Starbound is like a huge playground and it is only up to you, the player, which swing you take a ride on.
So, what's next? There are many ways that you can take at this stage of the game. These are only the few select options.
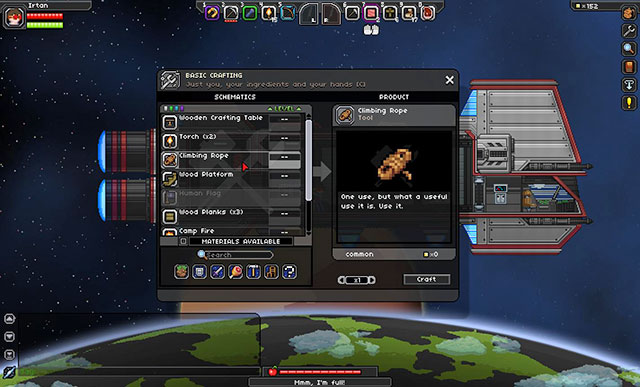 Item crafting window
Crafting of items is one of the key elements in Starbound. Crafting accompanies you as you take the first steps on the surface of the planet. Even if you do not want to focus entirely on exploring the world, you are going to need various tools and they are easiest to be hand-crafted.
To craft new items, you need three things: the appropriate workstation (e.g. the Wooden Crafting Table, Iron Anvil), blueprints and materials. This concerns, mainly the more complicated tools. When it comes to the easier ones,, like e.g. Torch or Camp Fire, they can be hand-crafted, without the workstation. The rarest of items require the abovementioned blueprints. You can find them in chests all around the universe.
The crafting process can be very easy, or it can be incredibly complicated and time-consuming, depending on the required materials. For example, if you want to craft a simple torch, you only need a lump of coal and a piece of unprocessed wood. There are more complicated items, though, like the Wiring Tool. To craft it, you need a special workstation (Wiring Station) and a considerable amount of materials (Circuit Board, Laser Diode, 20x Titanium Panel, 10x Copper Bar, 10x Silver Bar, 10x Gold Bar). Thanks to this, crafting is not restricted to combining several small objects into one, but is rather a multi-step process that allows you to craft thousands of various items.
To start crafting, you only need to open the crafting window (C) and highlight the appropriate item. The types of the available items depend on the type of the workstation that you are using (or the lack thereof). The higher the level of a given workstation, the more various items can be crafted with it. After you roll the mouse over an item, a list of the required materials appears. If you have all the necessary materials, you can highlight the item and click the Craft button to create it.
All of the items are divided into 6 main categories: Blocks, Armor, Weapons, Food, Tools and Furniture. The descriptions of these categories can be found below.
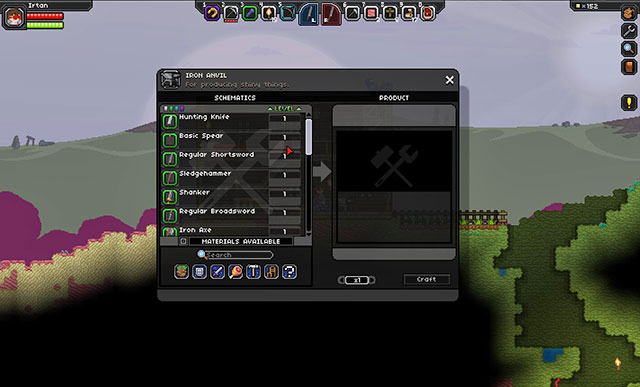 The iron melee weapons
The world of Starbound is a dangerous place and, to survive in it, you are going to need some sort of a weapon. Fortunately, they are plentiful in the game and you receive the first one right at the beginning of the game. The better ones can be crafted off various metals, found in chests or received in the form of a reward, for defeating enemies.
Each race has 6 categories of weapons, which it can craft with the appropriate materials. The level of these weapons depends on the iron that they were crafted in. All of the remaining weapons, apart for the small number of rare weapons, are generated by the game and have various statistics, and features.
In the game, there are melee weapons and ranged weapons. Melee weapons are the most common type, they deal a lot of damage and are easy to craft but, during fight, it is exposed to the opponents attacks. The second kind are ranged weapons, they are safer to handle, but they require energy during the battle and they cannot be crafted.
 Dual swords
The basic type of weapon, which is available since the beginning of the game, is the melee weapons, e.g. two-handed swords, axes or spears. They are easy to use because they do not require too much accuracy and do not consume energy during battle.
In the game, there are the following categories of melee weapons:
 Bullseye
An alternative for the blades are the ranged weapons. As the name suggests, they allow you to attack at a distance and they do not require you to approach the enemy. However, unlike the regular melee weapons, ranged weapons consume some of the energy with each shot. For that reason, the energy also plays the role of ammo for firearms.
Unlike melee weapons, ranged weapons cannot be crafted. The exception here are the regular bows, which you can obtain at the very beginning of the game. Still, they are slow and quite weak, due to which they are more useful for hunting monsters for food than for regular fight. All of the remaining ranged weapons can be bought from merchants, received as a reward for killing special monsters or from high-level chests.
In the game, you can find the following types of ranged weapons
 As sword and ham. What more does one need?
Each living creature requires food and the same goes for the characters controlled by the player. To fill up the blinking hunger meter, you eat just any type of food. You need to make sure that you use the correct type of food. Some of the foods can be poisonous for dome races.
The basic type of food is the Raw Alien Meat, which you can obtain by killing monsters that dwell planets. However, you cannot eat the meat raw and you first need to process it. To cook single foods, you use a Cooking Station, like e.g. Campfire or Nanostove. After you cook Raw Alien Meat, you receive Cooked Alien Meat, which you can nourish on and save yourself from starvation.
There also are more complicated dishes. Apart from satisfying hunger, they can also provide you with various useful effects, like e.g. Health Regeneration or Sugar Rush. To prepare such dishes, you need two things: the recipe and a Crafting Station (Wooden Cooking Table, Kitchen Counter etc.). Each race receives its starting recipes. The remaining ones can be found while exploring the planets. If you have an appropriate recipe, you only need to gather the ingredients and craft the dish at the Crafting Station, just like you would craft any other item. The more complicated dishes usually replenish more hunger meter than the regular cooked meat.
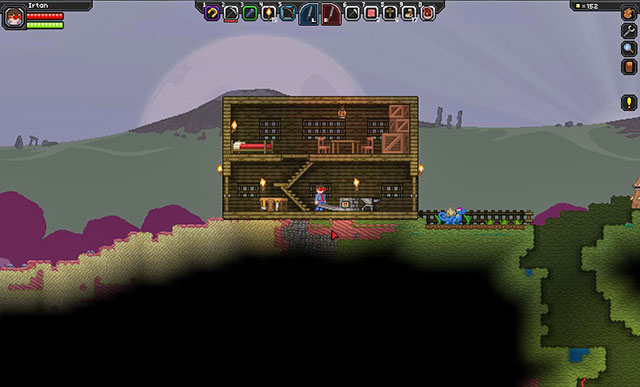 An example of a well-furnished house
The furniture are another type of the items available in the game. Most of them perform only decorative functions, but some can also hold the other items (Containers), heal the characters (Beds) or help craft items (Crafting Stations).
There are hundreds of various pieces of furniture, which are divided into styles. Each race has its own architectonic style and furniture set. Apart from that, you can also find special styles underground, on planet surfaces, or by crafting them from appropriate metals and blueprints.
The most important pieces of furniture:
 Diamond drill in action
Weapons are useful for fighting monsters, armor protects you and tools allow you to manipulate the surrounding world. Each type of tools performs a certain function and it is required to make progress in the game world.
Just like weapons and armors, also tools have their levels. The level determined is by the type of metal that has been used to craft the tool. The higher the level, the higher the effectiveness of the tool.
Many activities in the game world require appropriate tools. If you want to cultivate soil, you need the Stone Hoe, to chop trees, you need a Stone Axe, to paint the walls of your house, you need the Paint Tool. Some of the tools can perform multiple actions, like e.g. the Stone Pickaxe can be used for both digging and chopping trees.
There are several kinds of tools:
 An example of a high-level armor of the Apex race
The basic piece of clothing, which you receive at the beginning of the game, is not the best protection against the hordes of the enemies that you will have to face. For that reason, at the very beginning, you should better equip yourself with a basic armor.
The main use of armor in Starbound, is to provide protection and add passive skills to statistics, such increasing health, regeneration of energy or heat. Each kind of armor has its own bonuses and statistics. Some of the armors are better for short range combat (high protection), whereas the other are preferred for ranged combat (high energy/regeneration of energy).
Armors are not generated by the game and they do not have random statistics, just like in the case of weapons. You can find them underground,, in chests, buy from merchants or craft on your own.
Armors are divided into 4 modules, each one with its own slot:
Armors can be divided into several types: Clothing, Basic armor, Racial armor and Vanity armor. All of them have been described in the following sub-chapters.
Clothing is the basic type of armor and, at the same time, the weakest one. Each character starts in the race clothes, selected in the character selection screen. The clothes sets are identical, when it comes to statistics and they only differ in looks.
Each element of the basic apparel requires 20x Fabric and the Yarn Spinner. You can also color the clothes with an appropriate Dye.
The basic armors that can be crafted with the ores available I the Alpha sector. All of the armors are identical, for each one of the races, and they have the same statistics. They also are an ingredient for the high-level racial armors, like e.g. the Copper Armor is required to craft the Iron Armor.
Name
Health
Protection
Heat
Energy
Energy regeneration
Materials
Copper Armor
8
8
3
0
8
67x Copper Bar
Silver Armor
25
23
5
0
25
67x Silver Bar, 60 Pixels
Gold Armor
53
43
3
1
53
67x Gold Bar, 800 Pixels
Platinium Armor
118
110
3
1
118
67x Platinium Bar, 1600 Pixels
Racial armors can be crafted from one of the 10 types of the level irons. Each race has 10 sets of such armors, with their own style and passive abilities for the full set.
At the beginning of the game, you can only craft the armors of your own race but, with time, you can discover the armors of the remaining races and craft them also.
Special bonuses for the full sets of racial armors:
Vanity armor are the armors that perform the aesthetic functions. You can place them in the vanity slot, to get the appropriate looks without removing the old armor.
Some of the decorative elements of the armors have special bonuses. For example: Oxygen Tank enables you to breath underwater and in the space and the Lantern Stick illuminates the surrounding, without the necessity to activate the flashlight or the torch. The majority of them, however, are only for the looks.
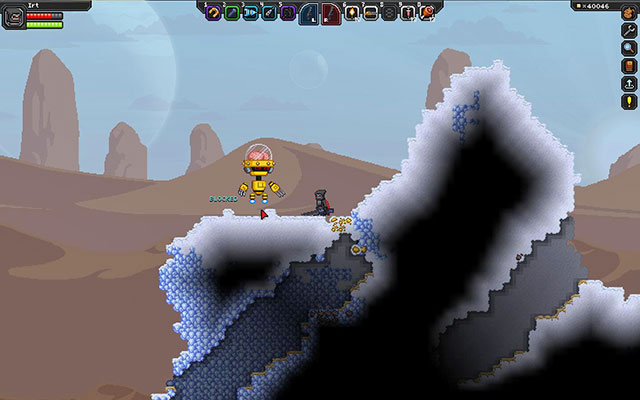
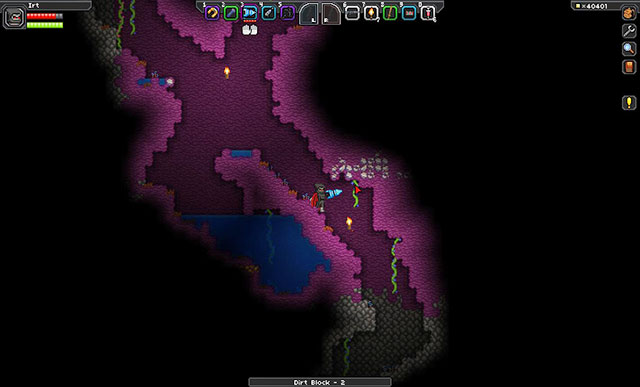 The best ores are deep underground
Metals can be found on the surface of each planet. The type depends on the level of the planet and, partially, on its biome. Iron is, predominantly, used for crafting various weapons, armors, tools and some types of furniture.
Metals are, usually deep underground, although you can also find them close to the surface, in small amounts. After you mine the metal, you get its raw form, i.e. the Ore. To smelt metal into a more useful form, you simply need to put it in the Stone Furnace, Thanks to which you will receive Bars.
Metals can be divided into 3 main categories: Tool ores, Fuel ores and Tier ores.
The most common type of ores. They are, above all, used for crafting low-level armors, weapons and the majority of tools. You can find them already in the Alpha sector. The armors crafted off these ores are required to craft racial armors of the same level.
Icon
Name
Occurrence
Description

Copper
Starting with the Alpha sector
Copper can be found on nearly every planet. It is the most basic ore, used to craft basic armors and tools.

Silver
Used to craft second-level tools and the basic types of armor.

Gold
Another ore level. Gold is used to craft tools and third-level armors.

Platinium
A Quite rare ore. Can be found, in small amounts, at low depths. Used to craft fourth-level armors.

Diamond
It is not an ore, although it works in the same way as the above resources. In the Alpha sector, it can be found in trace amounts and it is used to craft the highest-level tools.
Apart from the good old Coal, all of the ores in this category are used only to power your ship. The higher the ore's level, the more fuel units you receive from one cell. The abovementioned coal can also be used to craft Torches and alloys.
Icon
Name
Occurrence
Description

Coal
Starting with the Alpha sector
The basic ore. You can use it as fuel for the ship, to craft alloys or as an ingredients in some of the blueprints. One lump yields 2 fuel units.

Uranium
Starting with the Beta sector
The second fuel type in the game. One lump corresponds to 4 fuel units.

Plutonium
Starting with the Alpha sector - Asteroids
IN sector X - planets
Quite unique ore. You can find it in the first sectors only on asteroids. It usually is inside the asteroids. Due to which you need special equipment to mine it, like e.g. Diamond Pickaxe/Diamond Drill. One lump corresponds to 6 fuel units.

Solarium
W sector X
The rarest type of fuel. It can only be found on the high-level planets in sector X. One lump corresponds to 8 fuel units.
All of the ores in this category are used to craft the higher levels of racial armors, weapons and furniture. The level of each one of the ores corresponds to the level of the planet, thanks to which you can determine what kind of armoring you need on that planet.
There are 5 kinds of pure ores and 5 types of alloys. Each alloy is a higher level of the preceding type of metal. While crafting alloys, you need a bar of the previous level and Coal.
Icon
Name
Level
Occurrence
Description

Iron
1
Starting with Alpha sector
The basic type of ore. You can find it nearly everywhere and it is used to craft armors, weapons, the first tool and many more.

Steel
2
Iron alloy
An iron and coal alloy. You can use it to craft armors, weapons, level-two furniture and few other items.
Titanium
3
Starting with the Gamma sector
It appears as late as in the Gamma sector. It is used to craft weapons, armor and level-three furniture.

Durasteel
4
Stop Titanium
The last one of the ores, before sector X. You can craft it into level-four equipment and furniture, and the renown Grappling Hook.

Aegisalt
5
In sector X
The first ore available in sector X. can be found on level-five planets.

Ferozium
6
Aegisalt alloy
Another alloy. You can use it to craft armors, weapons and level-six furniture.

Cerulium
7
In sector X
Can be found on level-seven planets. Can be used to craft items of the same level.

Violium
8
Cerulium alloy
Another alloy. Used solely to craft level-eight equipment and furniture.

Rubium
9
In sector X
The last type of pure ore. Used to craft armors, weapons and level-nine furniture.
Impervium
10
Rubium alloy
The highest-level ore. Used solely to craft level-ten equipment and furniture.
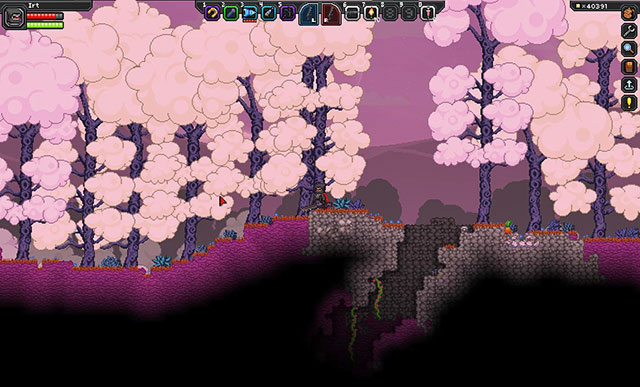 An example of a forest planet
Planets are the main environment of the game. This is where most of the game takes place. Each celestial body has its own atmosphere, biome, temperature, weather conditions, etc. All of them are also generated by the game, thanks to which it is impossible to find two identical ones.
The difficulty level of the game is based on the level of the planets and sectors. As of now, the level of the planet corresponds to the sector in which that planet is located. This means that all of the planets in the Beta sector have level 2. The exception is sector X, where there are planets of levels ranging 5-10. The level of the planet, first of all, determines the level of the ores and the strength of the monsters that occupy that planet, but also the types of the special biomes, as well as the quality of weapons and armory that you can find there.
There are the following features to each of the planets:
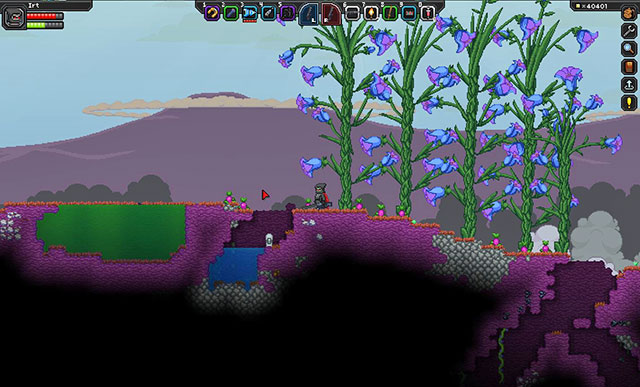 Flowers on the right and poisonous swamps of the left
Each planet has the appropriate type of biome. These constitute the planet's environment and determine such aspects as temperature, kinds of blocks, plants and monsters. A planet may have only one main biome, and also many smaller sub-biomes, which cover some area of the planet.
Biomes have been divided into four main categories, which determines the temperature prevalent on that planet.
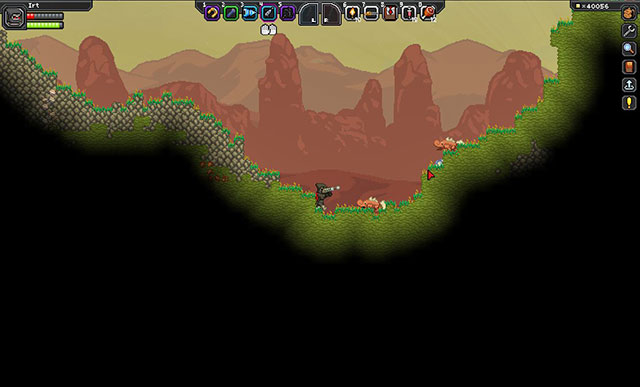
 A book example of a savannah
These are the most common and, usually, the most dangerous, biomes. Their climate is moderate and they are warm during the day but, at night the temperature may drop to negative values , which may result in the freezing of the main character.
Types of warm biomes: Arid, Barren, Forest, Grasslands, Jungle, Ocean, Savannah.
 You need to watch out for the lakes of lava
They usually are arid lands of high temperature. These biomes can be very dangerous for the inexperienced travelers.
Types of hot biomes: Desert, Magma, Tentacle, Volcanic.
 Warm clothes are required here
There always is a negative temperature in these biomes, due to which you need to get appropriately prepared, by getting sufficiently warm clothes or a lot of fire.
Types of cold biomes: Arctic, Snow, Tundra.
 Even here, you can find monsters
The most dangerous kind of biomes. Apart from the critically low temperature, they also do not have the atmosphere of their own, and, which follows - there is no air. A character that teleports to such a biome, without proper equipment, not only will start freezing very quickly, but also will start to suffocate, due to the lack of oxygen, in a way similar to swimming underwater. If you stay for longer in such a biome, you are going to need special equipment, e.g. the Survival System.
Types of biomes with no atmosphere: Asteroid Field, Moon.
 The process of constructing "something" off the colorful soil
Blocks are the basic elements that the world of Starbound is created from. Apart from the items. Everything here is constructed of the single blocks, like the surfaces of planets, buildings, undergrounds, etc. each block also has its own properties and most of them can be used to craft other blocks or items, like e.g. ores.
All of the blocks in the game can be grouped under three main categories:
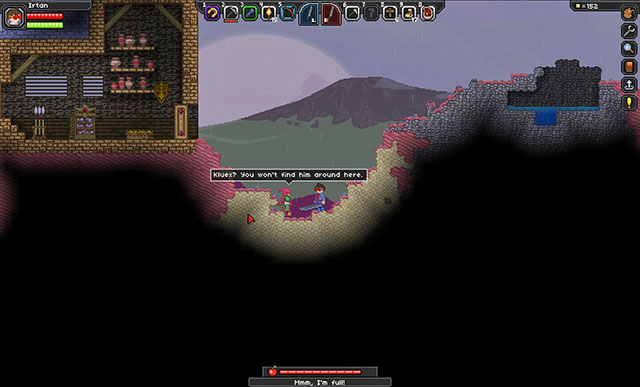 The first contact with locals
NPCs are the characters that dwell in the game world. You can find them on various planets and the majority of them are staying in cities of the individual races or at smaller estates. They can usually offer a few lines of text but, there also are merchants among them, who can sell various items to you, as well as characters connected with missions. Each NPC is a representative of one of the races and is generated by the game, with the exception of several unique characters.
 Playing with space dogs
The monsters that dwell on planets are the basic opponents in the game. The majority of those monsters are generated by the game, thanks to which each planet has its own kinds of monsters. Their features depend on the level of the planet, its biome and its coordinates.
All the monsters come in two versions: Baby and Adult. The adult are the fully grown, most common, form. The younger monsters are the weaker versions of their adult counterparts and only in this form they can be caught and trained for your companions.
Bosses are the special type of enemies that you can encounter in the game world, or summon with the special items. Each one of them requires an appropriate preparation, a well-thought through strategy and appropriate weaponry and armor.
Apart from the main bosses, in the game, you can also encounter mini-bosses. Just like monsters, these opponents are generated by the game and they can appear on the surface of a planet or in some undergrounds. They usually are much more powerful than the regular monsters but, not s dangerous as the main bosses. Once a mini-boss is defeated, there is a chance that it drops an unique type of weapon.
The penguin lord in his fullestThe first one of the available bosses in the first sector. You can summon him towards the end of the introductory missions.
This boss looks like a typical flying saucer with a penguin in the cockpit. It is quite big and attacks, mainly, with laser rays, capable of destroying blocks and ground slams. He also sends out large numbers of minions in the form of penguins with firearms. And explosives, as well as tanks.
Requirements to summon: Distress Beacon (10x Iron Bar, 2x Silver Bar, 10x Copper Bar, 100x Wood Planks, 150 Pixels)
Reward: Molten Core
Strategy: Since it is the first boss in the game, and also one appearing towards the end of the introductory missions, it can be quite a problem, mainly because the players summon him to complete the mission, without proper preparation. Therefore, before you use the Distress Beacon, craft for yourself, at least, the full set of the Iron Armor and an Iron Hunting Bow. Also, you are going to need a Pulse Jump Tech, to jump over the pesky minions, which the boss sends out. Once you are ready, find a relatively flat and open area and deploy the beacon. After the boss appears, focus all of your attention on him. Keep shooting your bow at him and jump over the minions. Try to stay in motion, for the whole time, to prevent being surrounded by too many minions. The battle is quite long and, as long as you are avoiding the penguins, the boss himself should not be too much of a challenge. If there are too many opponents, try to eliminate some of them at a distance or block them off with a wall of blocks.
 Is the damaged robot blocking off an attack?
The boss in the Beta sector. It looks like a big robot with his brain inside a glass jar. He attacks with regular attacks, when close, and with the flame thrower, at a distance.
Requirements to summon: Inactive Robot (105x Steel Bar, Artificial Brain, 1650 Pixels)
Reward: Processor
Strategy: It is one of the easiest bosses in the game. Before you start the battle, however, arm yourself with the full set of the Steel Armor and a steel weapon of your choice as well as the Steel Hunting Bow or a firearm. Once you find the appropriate spot for the fight, deploy the robot and activate it. The safest method of fighting is to keep at a distance and fire the bow, or the firearm at the opponent. Unfortunately, the boss is quite quick and you can quickly make it within the range of his flames. For that reason, it is a good idea to use the environment. The robot tends to have problems with small holes in the ground and, if he falls into one, he may be incapable of jumping out. Use this to conduct fire at a safe distance, while aiming at his head. You can also defeat the boss with melee weapons but, you need to be prepared to take additional damage from fire.
There also is a smarter and safer method of fighting. You only need to build a small "chimney" off the single blocks of soil, stacked on top of the other on a flat area. Then, put the robot at the bottom, between two walls and activate him. Now, you only need to climb onto the chimney and keep firing at the robot from above. The walls need to be quite tall, so that you stay out of the robot's reach.
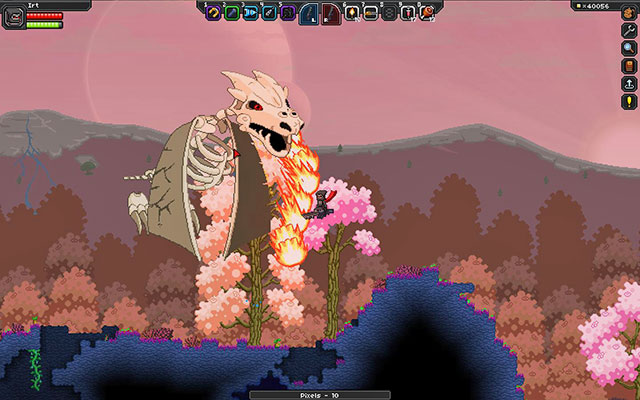 I wonder where he take s the fire from...
The Bone Dragon is the boss assigned to the Gamma sector. It is a quite big flying skeleton-dragon, whose main weapon is belching fire. Fire explodes after it comes into contact with the surface and it leaves there flames that are capable of dealing damage to you.
Requirements to summon: Decoy Princess (50x Titanium Bar, 100x Wood Planks, 20x Fabric, 2000 Pixels)
Reward: Dragon Bone
Strategy: With the Bone Dragon, the situation is similar to the other bosses in Starbound, it is best to fight them with a ranged weapon. Just like the first boss, the Bone Dragon floats in the air for the whole time. For that reason, it is quite difficult to fight with the melee weapon, especially without the appropriate Techs that increase your jumping height. The best solution is to arm yourself with a firearm. If you do not have one, or it is too weak, use the Titanium Hunting Bow. Then, find, or form a flat landmass and summon the dragon with the Decoy Princess. The enemy, in general, is using one attack only, which is belching fire. The problem is that its fire explodes once it comes into contact with the ground and inflicts considerable damage and leaves flames afterwards. The trick is that you keep a safe distance from the boss, to be able to dodge. Keep firing at the dragon and, after it belches fire, dodge, run under it and run towards the opposite end. For the whole time, watch out for fire that its attacks leave. You can also build a ceiling, of durable blocks, to ensure yourself with some protection.
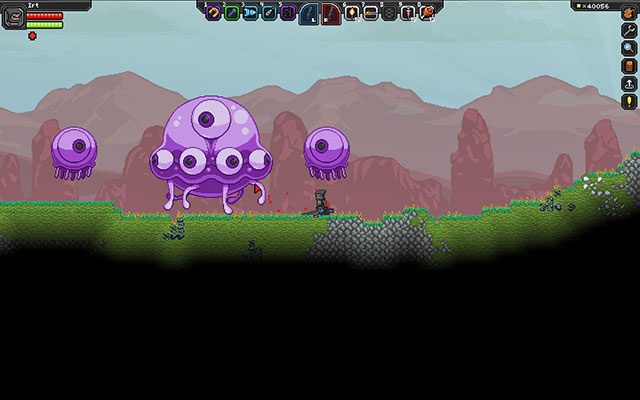 A gummy bear and its minions
As of now, it is the last boss available in the game. It is assigned to the Delta sector, and it looks like a pink medusa with eyes, which is capable of jumping over the surface. It attacks by launching goo in all directions, which then sticks to all surfaces and explodes after some time. As if this is not enough, the boss is also accompanied by two jumping-eyeball minions.
Requirements to summon: Peanut Butter Trap (40x Durasteel Bar, 700 Pixels)
Reward: Endomorphic Jelly
Strategy: Jelly can be an irritating opponent, mainly due to its two minions. There are two strategies here: you can focus on the boss only, or eliminate the minions in the first place, to be able than to take to Jelly. Although highly time-consuming, it is a safer option to eliminate the minions - Slime Eyeballs in the first place. Prepare a flat area, best with blocks placed above the surface in several spots, and summon the boss. The hanging blocks should block off the medusa but, the minions will still be able to make it through. Lure one of the eyeballs into one corner of the arena and eliminate it either with the melee weapon or the firearm. Do the same for the other one. After you have cleared the area, you can focus on the boss itself. Keep a safe distance and watch out for the exploding goo, which the boss shoots out in the air. Without its minions, the boss should not pose a threat to you.
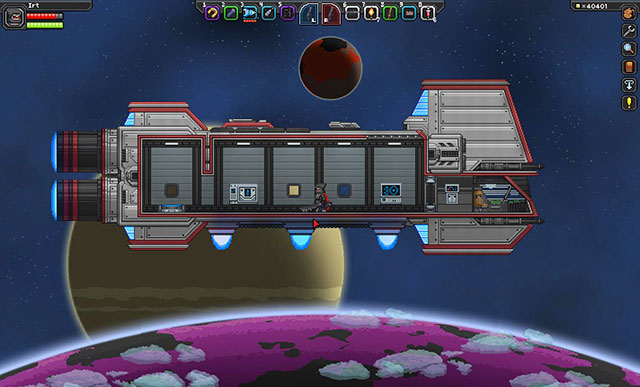
The spaceship of the human raceFor travelling around the galaxy, you are going to need a means of transport - the spaceship. In Starbound they are both a form of travelling and also a safe headquarters and the spawning point after an unfortunate demise. Each one of the available races has its own kind of ship but, the difference is only visual.
The interior of the ship is subject to some rules that you need to know:
Each spaceship has 5 basic devices onboard. They perform various roles and cannot be dismounted from the ship. These are the descriptions of the individual elements:
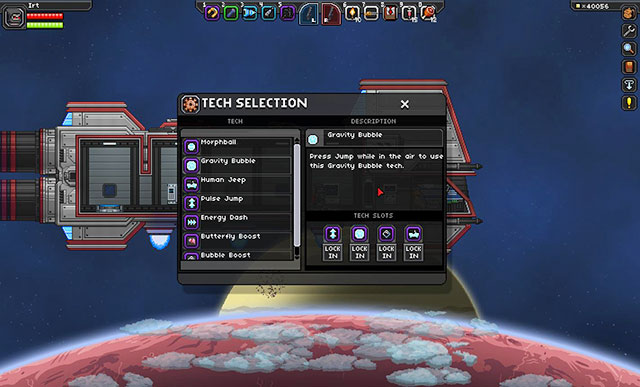 The Techs assignment window
Techs are abilities, of a kind, which you can find spread around the game world. Each character can use them and exchange for the useful abilities that aid them in battle and during planet exploration. An example of such an ability is the Pulse Jump, which allows the character to perform a double jump. You need to remember, though, that each Tech uses up some energy and it cannot be activated when the energy supplies are rained.
Before you will be able to use the special ability, Tech needs to be assigned to the appropriate slot in the Tech Station, which is located aboard spaceships. Then, you only need to select the ability in the character window. Each character only has 4 slots for Techs and only one ability can be used at a time.
The below table lists all the Techs in the game, alongside with their descriptions.
Icon
Name
Description
Controls

Bubble Boost
Boosts the character towards the front and during the jump. Also, it ensures beautiful bubbles.
Jump (Space) in any direction + hold down Space

Butterfly Boost
Allows you to move, up in the air, in any direction. While in mid-air, the character is enclosed in a pink bubble and leaves trail in the form of butterflies.
Jump (Space) in any direction + hold down Space

Energy Dash
Speeds up run in the selected direction. Also, works in mid-air.
Double-click left(A)or right(D)

Glitch Mech
Summons a Glitch mech on which you can move and fight.
Press F

Gravity Neutralizer
Allows you to levitate and move horizontally in the air.
Double jump (Space)

Gravity Bubble
Creates a blue gravitational bubble around your character which rises up into the air, while allowing slight movement to the left and to the right. The bubble disappears after energy runs out.
Double Jump (Space)

Human Car
Summons a human car. Increases the speed of exploration.
Press F

Human Jeep
Summons human jeep. Increases the speed of exploration.
Press F

Human Mech
Summons human mech on which you can move around and fight.
Press F

Morphball
Changes your character into a small ball, which can roll over flat surfaces and get through gaps. In the same form, you can also place mines that explode after several seconds, or on contact with the opponent.
Press F
LMB/RMB - to place mine

Pulse Jump
Allows you to double jump in the air
Double Jump (Space)

Random Blink
Teleports the character into any location on the screen.
Press F

Rocket Jump
Shoots the character up, to the height of 31 blocks. You need to be standing on the ground before the jump.
Up (W) + Jump (Space)

Skyrail Rider
Allows you to move over Skyrails.
Press F and jump onto a Skyrail

Targeted Blink
Teleports the character into any location selected with the mouse. You cannot teleport through solid blocks.
Press F
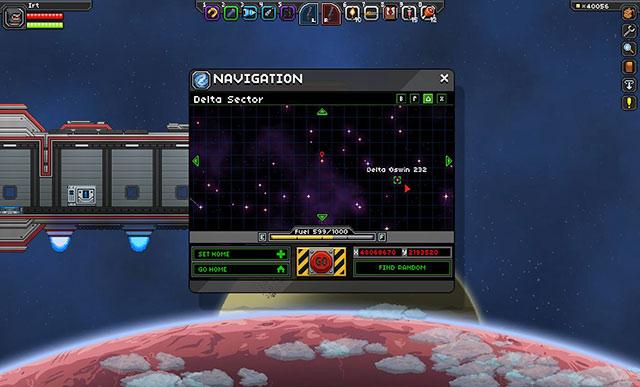
 So many planets...
Each stellar system, planets, moons, etc. have unique coordinates. Each coordinates have two values X and Y, and they are required to get to a specific destination. The digits of the coordinates need to be entered in the appropriate fields (X and Y) on the navigation screen. There also is an option of selecting random coordinates by pressing the "Find random" button, under the fields for coordinates.
Apart from operating on the complicated coordinates, to move across the galaxy, you can use an easier method of determining the destination. All you need to do is use the galaxy map, select the appropriate stellar system and celestial body, and then to start your engines. This method is useful only in the case of the random exploration of the galaxy and it is a good idea to take down the coordinates of the more interesting planets, so that you can return to them later on.
Finally, it is worth adding that, although the stellar systems and planets are generated procedurally, the coordinates are unchangeable. This lets you share the coordinates of planets with the others, thanks to which the players can visit exactly the same places in their own worlds.
 The navigation window
Sectors are vast spaces in the cosmos that contain all of the stellar systems, which can be visited by the player. Each sector represents a different difficulty level and you can gain access to the successive sectors by defeating the main boss of the previous sector.
As of now, there are 5 sectors. Their descriptions have been included below.
The starting point for each character. It has the lowest difficulty level and opponents at level 1.
New biomes: Aradi, desert, forest, moon, snow.
New deposits: Coal, Copper, Iron, Steel, Silver, Gold, Platinum, Diamond, Plutonium.
The second sector in the game. It has planets and enemies at level 2. You can gain access to it after you create and use the Starmap Upgrade MK2.
New biomes: Jungle, savannah.
New deposits: Uranium.
The Gamma Sector is the third of the available sectors. It has planets and enemies at level 3. You can gain access to it after you use the Starmap Upgrade MK3.
New biomes: Grasslands.
New deposits: Titanium, Durasteel.
It has planets and enemies at level 4. To get there, you need Starmap Upgrade MK4.
New biomes: Magma, tentacles, tundra, volcanic.
New deposits: None.
As of now, this is the last sector in the game. It has planets and enemies at the levels ranging 5-10.
New biomes: None.
New ores: Aegisalt, Ferozium, Cerulium, Violium, Rubium, Impervium, Solarium.
Starbound is a fully 2D game, which has an effect, among others, on its relatively low system requirements. In spite of the game's open structure and a huge world with many details, each one of them can be disassembled, destroyed and replaced. For this reason, the game imposes certain requirements, when it comes to RAM and the CPU. This guide has been drawn up on an Intel Core i7-2600k PC computer, with 8 GB RAM and the AMD Radeon HD 6900 GPU. While playing on the computer with the specification given above, even the slightest drops in framerate did not occur.
Single player: Yes
Offline Co-op (split screen/hot seat): No
Co-op over the internet: No
Multiplayer: Yes, unlimited number of players.
This guide has been drawn up basing on the PC game version, of the below specification:
On the computer with the above specification, the game ran flawlessly, in all of the possible situations
 S.T.A.L.K.E.R.: Clear Sky Game Guide & Walkthrough
 Stronghold: Crusader II Game Guide & Walkthrough
 Star Wars: TOR - Rise of the Hutt Cartel Game Guide & Walkthrough
 StarCraft II: Heart of the Swarm Game Guide & Walkthrough
 Shadowrun Returns Game Guide & Walkthrough