
The game guide Star Wars: The Old Republic contains everything that concerns all the eight classes from the very beginning till leaving the starting planet. There are four starting planets, each for two classes. That is why the guide is divided into four large parts.
Before each part there is the "Hints" chapter. It is common to all four parts. Here, you will find valuable hints concerning the gameplay. Getting acquainted with it is crucial for everyone who has started playing the game, and particularly for those who don't have any experience in playing MMO games.
Each of the four parts contains five chapters that describe: places, two classes and their main missions, side missions, and the location of datacrons. You can find more details below:
Authors: Piotr "Ziuziek" Deja & Anna Deja (translation)
We will not discuss the controls in detail, however, we will discuss several interesting options you may find useful. Press ESC and choose "Preferences" to enter the Options Panel.
There are a lot of options whose default settings should not be changed because they simply are convenient. Of course, you can alter each option according to your preference. Below are the options to which you should pay special attention:
These are a lot of options whose default settings should not be changed because they simply are convenient. Of course, you can alter each option according to your preference. Adjusting the interface is recommended as you broaden your knowledge about the game and gain the next levels. Below are the options to which you should pay special attention:
[Tooltip] Enable Companion Comparative Tooltips - an extremely useful option, thanks to which items (when you place RMB on them in your inventory) will be compared to both your items (the ones you're wearing) and your companion's.
The character panel is accessed by pressing C. You can switch between your character tab and your companion tab.
After or while accomplishing a certain class mission, a companion will join you (see the table below). He or she will level up together with you and will help you in the missions, but their effectiveness depends on Affection.
Class
Mission
Companion
Planet
Bounty Hunter
House Cleaning
Mako
Hutta
Imperial Agent
Change of Plans
Kaliyo
Hutta
Sith Warrior
The Final Trial
Vette
Korriban
Sith Inquisitor
A Map for the Future
Khem Val
Korriban
Jedi Knight
Weapon of a Jedi
T7-01
Tython
Jedi Consular
Rajivari's Legacy
Qyzen Fess
Tython
Trooper
The Separatist Stronghold
Aric Jorgan
Ord Mantell
Smuggler
Hitting Where It Hurts
Corso Riggs
Ord Mantell
Further class missions will bring the next companions (four maximum, including the first who joined you).
Map panel is accessed by pressing M.
There are several means of travel. We don't have traveling on foot in mind (later you can use vehicles to make going on foot faster) - apart from this way of traveling there are three other ways to move from one place to another quickly.
If you sustain too many injuries from enemy attacks or if you fall down from a high level, you'll die. Fortunately, death in the Star Wars: The Old Republic is not permanent, but a little bothersome. Below there is everything you should know about what happens after your character dies:
The great majority of your abilities is intended to be used in combat. Remember to purchase abilities from trainers as you gain the next levels. The combat type strictly depends on your character's class and can change after choosing one of the two subclasses (the guide doesn't include this topic). Each class has a mirror counterpart in the opposing side:
Light Side
Dark Side
Combat type
Trooper
Bounty Hunter
Range combat
Smuggler
Imperial Agent
Ranged combat with taking cover
Jedi Knight
Sith Warrior
Melee combat
Jedi Consular
Sith Inquisitor
Melee and medium range combat
Before you engage in any combat (sometimes, of course, you have to fight), make sure there's a chance of winning it. Always look at the information about the type of opponents (shown by their name) - enemies with silver plates [+], elite [*] and bosses [#] are of the more challenging kind.
The level plays a major role here - if you're level 10 while the enemy [#] 6, then you'll manage to defeat him. But if you're level 6 and the enemy [*] 9, then it's unlikely to assume you'll win on your own. In the second case gain some experience points to at least reach level 8.
It's best to test abilities and read their descriptions. There are, for example, boosting abilities that should be used before the fight, e.g. (also including hiding behind Cover for Smuggler and Imperial Agent). It's worth using them before a really challenging combat.
The idea of combat is that, as in the majority of MMO games, you should create your most effective "chain" of using subsequent abilities and take into consideration the damage they inflict, changes in stats and all timers (Cooldown, Activation, Channeled), depending on the situation.
Some abilities regenerate slowly or deal considerable damage but during a certain period of time. For example, if you can see a group of two weak enemies with a stronger one and a grenade will kill the weak ones at once, then that's what you should use at the beginning of the fight. This is only an example, as every ability opens new possibilities.
In the majority of places there are a lot of unfriendly "mobs", namely, rather weaker enemies alone or in groups. Sometimes it's necessary to fight with them if you want to get somewhere, but not always - there are many paths you can go in order to avoid most of them.
Item Panel is accessed by pressing I or B.
Mission Log is accessed by pressing L.
You should keep in mind that in some missions the dialogue options give you Light or Dark Side Points, and also add or subtract your companion friendship points (Affection). If you need more information, see the character development. You receive all these points after you've completed a mission (not during the conversation). Each conversation can be stopped by pressing ESC if you want to repeat it. However, if you finish it you won't be able to reverse your decision.
In missions you often receive various kinds of items (Mission Items), but usually you don't use them in any way. However, sometimes there are missions that require you to use a particular item. In such a situation remember about the "Mission Items" tab at the bottom in the inventory panel. You will find all mission items there. Click RMB on an item to use it and hold LMB to drag it (e.g. to quick access bar). It's likely that before using it you need to point at something (an item or an NPC).
Each mission begins with a conversation with an NPC or examining an item. You can refuse completing a mission in both cases. (Refuse Quest during the conversations or Cancel in the case of datapads).
After fulfilling the last mission objective you will get various kinds of rewards:
Remember that the sole accomplishment of all class and side missions will not get you all Codex entries!
It's closely connected with missions. After some of them you may or may not receive e-mails with rewards (it's shown at the top right corner of the screen by default). If you notice that you have a message, go to the nearest mailbox to receive it, and take items or credits if there are any.
As you travel across the planets you acquire the knowledge of the Star Wars universe (Codex). You will find it in the Mission Log (press L and click on "Codex" tab). There are several kinds of entries, and you can also get them for performing various actions. Below there's a detailed list:
You should know that completing all missions on a particular planet (class and side) does not mean that you will obtain all Lore items. Sometimes you need to look deeper in a forest or a tunnel. All places where you will find these items were given in the "Places" chapter.
ATTENTION! Some Codex entries that are on a list of those you can obtain on Hutta, Korriban, Tython or Ord Mantell:
These entries are not covered in the guide.
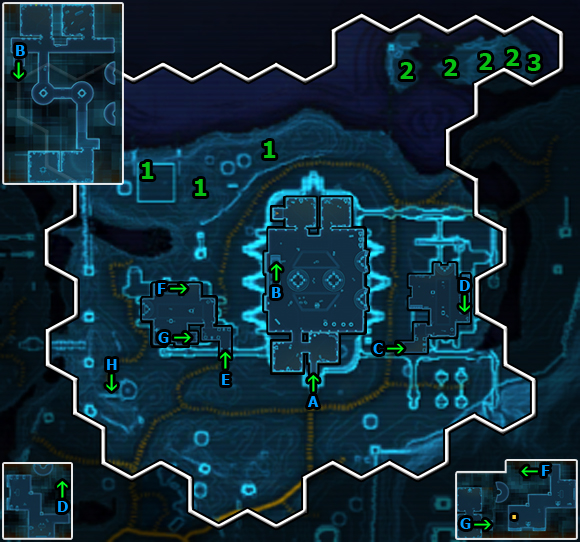
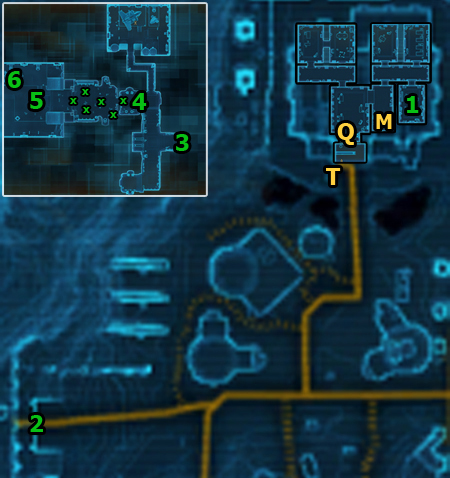
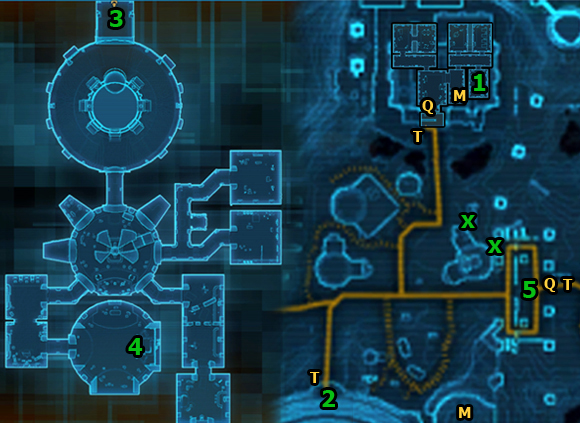
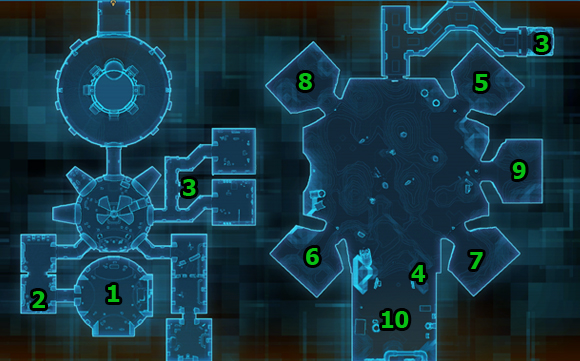
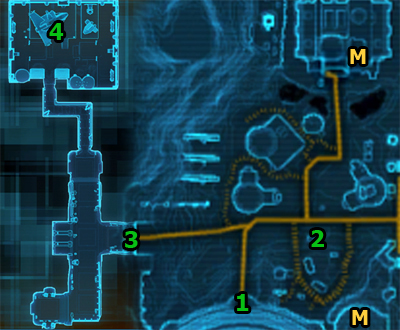
![[M]: Medical Droids (medical assistance and Respawn points) - Hutta - Places - Star Wars: The Old Republic - Game Guide and Walkthrough](https://game.lhg100.com/Article/UploadFiles/201512/2015121709475471.jpg)
[M]: Medical Droids (medical assistance and Respawn points)
[Q]: Quick Travel Points
[T]: Taxis
This chapter acquaints the player with the secrets of every Hutta area. It does not cover the areas through which you enter through the green force field (story areas, group areas, etc.). In each location description there are:
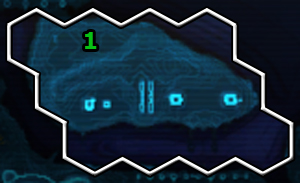
(01): Jiguuna
(02): Evocii Swamp
(03): The Bog
(04): The Eastern Grime
(05): The River Lands
(06): The Rustyards
(07): Eastern Rustyards
(08): Fa'athra's Palace
(09): Drainage Isle
(10): The Old Muckworks
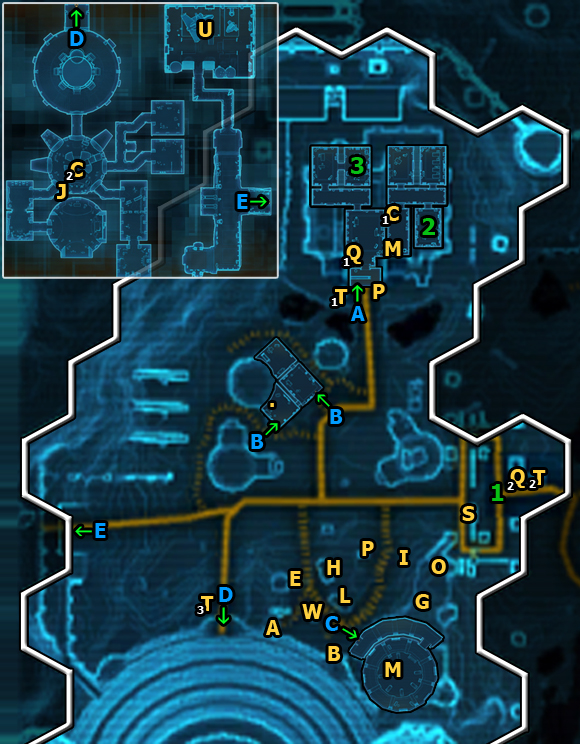
After leaving The Poison Pit you'll discover Jiguuna, which will result in getting about 30 XP and a Codex entry - Locations: Jiguuna - worth 45 XP.
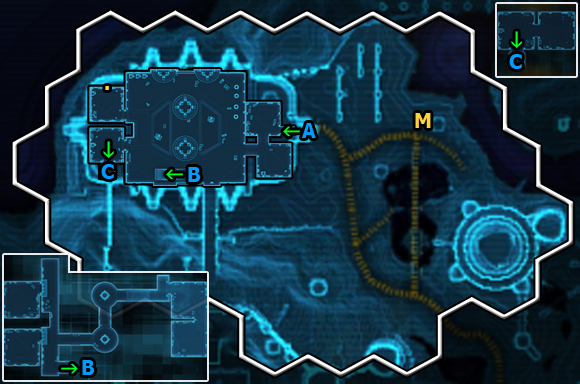
ENTRANCES / EXITS
[A]: The Poison Pit
[B]: Geer's House
[C]: Jiguuna Medical Bay
[D]: Nem'ro's Palace (Codex entry - Locations: Nem'ro's Palace - 100 XP)
[E]: Jiguuna Spaceport
SERVICES / ITEMS
[Q1]: Quick Travel Point (Poison Pit Cantina)
[Q2]: Quick Travel Point (Nem'ro's Bazaar)
[T1]: Taxi (Poison Pit Speeder)
[T2]: Taxi (Jiguuna Speeder)
[T3]: Taxi (Nem'ro's Palace Speeder)
[.]: Security Chest - chests you can search
[I]: Item Modification Station
[P]: Mailbox
[U]: Space Shuttle - will take you from Hutta
[J]: Jukebox
TRAINERS
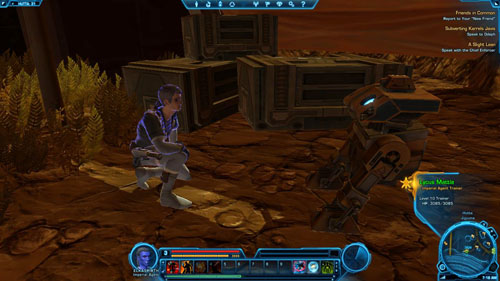
[A]: Lycus Mattle (Imperial Agents Trainer)
[B]: Zinny (Bounty Hunters Trainer)
VENDORS / ASSISTANCE
[C1]: Sliver (Cantina Vendor)
[C2]: Blarnak (Cantina Vendor)
[E]: Medliuna (Medium Armor Vendor)
[G]: Yerk (Specialty Goods)
[H]: Hurdoc (Heavy Armor Vendor)
[L]: Vince (Light Armor Vendor)
[M]: Medical Droid (Medpacs and Stims, item repair, Respawn Point)
[O]: Dorheek (Social Items Vendor)
[S]: Bekhaj (Stims Vendor)
[W]: Barlen (Weapons Vendor)
OTHER
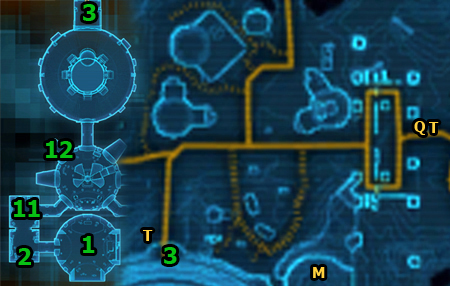
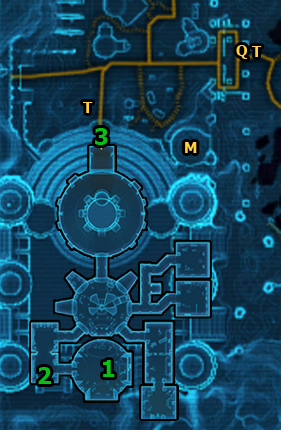
[1]: The only town exit.
[2]: Class starting point - Bounty Hunter.
[3]: Class starting point - Imperial Agent.
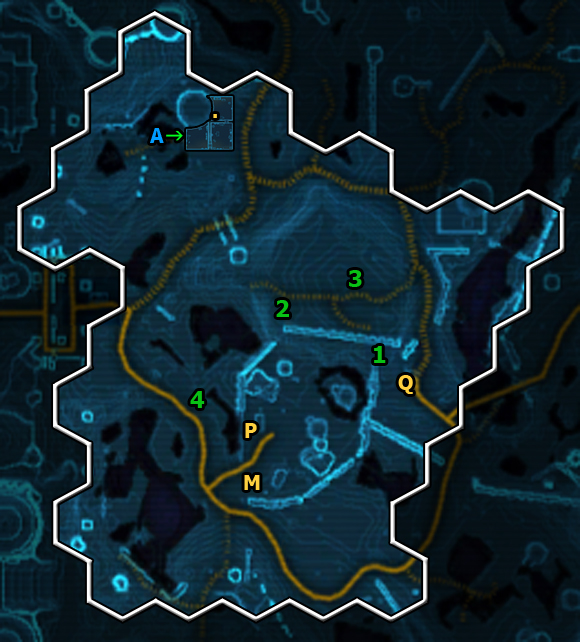
For discovering this location you will receive 150 XP, and after a short stroll you'll also obtain two Codex entries: Locations: Hutta Swamps - 160 XP and Organizations: Bog People - 45 XP.
ENTRANCES / EXITS
[A]: Nokril's Hideout
SERVICES / ITEMS / VENDORS / ASSISTANCE
[Q]: Quick Travel Point (Evocii Workcamp)
[P]: Mailbox
[.]: Security Chest - chests you can search
[M]: Medical Droid (Medpacs and Stims, item repair, Respawn Point)
OTHER
[1]: In spite of appearances, you can cross here between one part of Evocii workcamp and the other.
![[2]: Evocii Totem (Lore Object) - examining the totem will result in obtaining a Codex entry - Lore: Evocii History - 300 XP - (02) Evocii Swamp - Places - Star Wars: The Old Republic - Game Guide and Walkthrough](https://game.lhg100.com/Article/UploadFiles/201512/2015121709475699.jpg)
[2]: Evocii Totem (Lore Object) - examining the totem will result in obtaining a Codex entry - Lore: Evocii History - 300 XP.
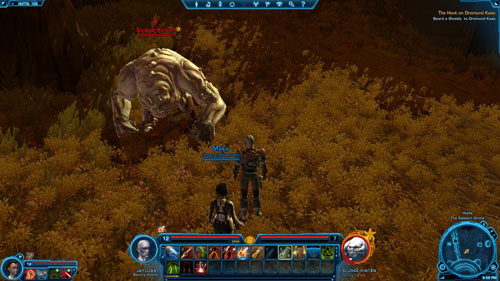
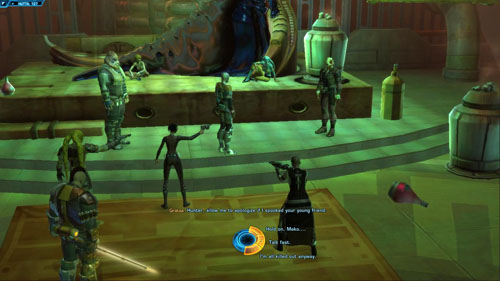
![[3]: Grahur [*] - a bounty hunter camping near the fire - (02) Evocii Swamp - Places - Star Wars: The Old Republic - Game Guide and Walkthrough](https://game.lhg100.com/Article/UploadFiles/201512/2015121709475674.jpg)
[3]: Grahur [*] - a bounty hunter camping near the fire. You can kill him and search his body (he's not a very challenging enemy).
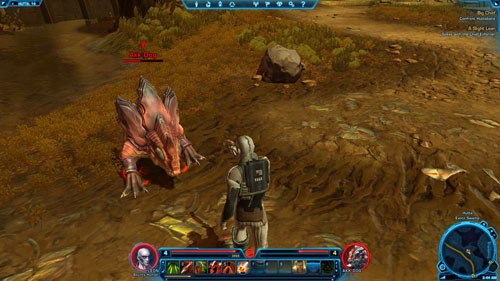
![[4]: Akk Dog - one of the places you can find these animals - (02) Evocii Swamp - Places - Star Wars: The Old Republic - Game Guide and Walkthrough](https://game.lhg100.com/Article/UploadFiles/201512/2015121709475687.jpg)
[4]: Akk Dog - one of the places you can find these animals. Kill one and you'll obtain a Codex entry - Bestiary: Akk Dog - 300 XP. Don't confuse them with Swamp Snarlers!
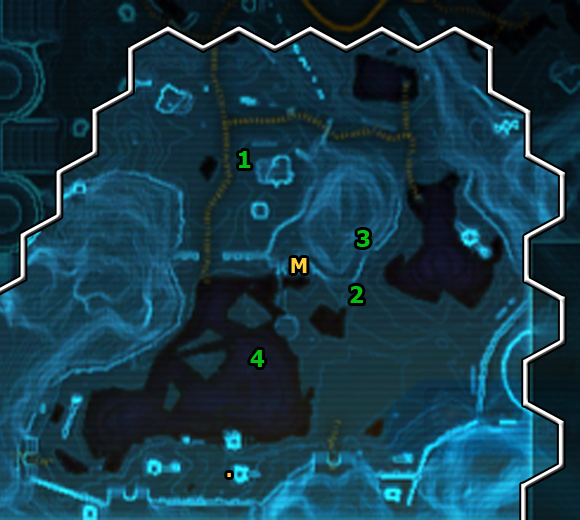
For discovering this location you will receive 202 XP.
ITEMS / ASSISTANCE
[.]: Security Chest - chests you can search
[M]: Medical Droid (Medpacs and Stims, item repair, Respawn Point)
OTHER
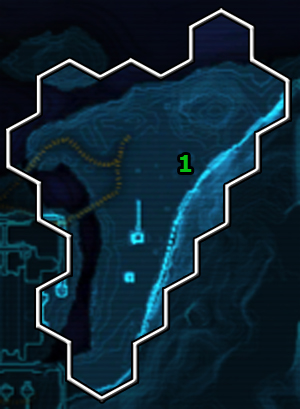
[1]: Evocii Totem (Lore Object) - examining the totem will result in obtaining a Codex entry - Organizations: Renegade Evocii - 45 XP.
![[2]: Evocii Totem (Lore Object) - examining the totem will result in obtaining a Codex entry - Lore: Evocii Exile - 300 XP - (03) The Bog - Places - Star Wars: The Old Republic - Game Guide and Walkthrough](https://game.lhg100.com/Article/UploadFiles/201512/2015121709475788.jpg)
[2]: Evocii Totem (Lore Object) - examining the totem will result in obtaining a Codex entry - Lore: Evocii Exile - 300 XP.
![[3]: Datacron 1/3 - for more information (how to get to it) see the](https://game.lhg100.com/Article/UploadFiles/201512/2015121709475719.jpg)
[3]: Datacron 1/3 - for more information (how to get to it) see the "Datacrons" chapter. For discovering it you will get 550 XP, +2 to Aim and unlock a Codex entry: Achievements - Datacron: Galactic History 01 - The Architects.
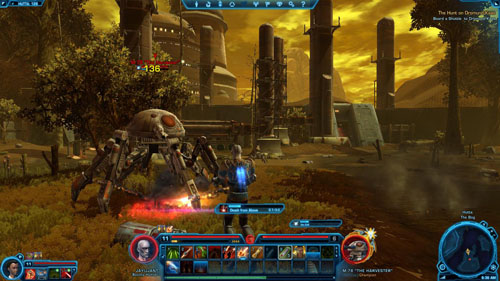
![[4]: M-78](https://game.lhg100.com/Article/UploadFiles/201512/2015121709475753.jpg)
[4]: M-78 "Harvester" [#] - a powerful droid and an extremely difficult enemy at the same time. Without a companion or other players it's pointless to even attempt to fight him.

For discovering this location you will receive 265 XP.
SERVICES / ITEMS / ASSISTANCE
[Q]: Quick Travel Point (Chemical Marsh)
[T]: Taxi (Rust Yards Speeder)
[P]: Mailbox
[.]: Security Chest - chests you can search
[M]: Medical Droid (Medpacs and Stims, item repair, Respawn Point)
OTHER
[1]: Evocii Totem (Lore Object) - examining the totem will result in obtaining a Codex entry - Lore: Evocar - 300 XP.
![[2]: Evocii Totem (Lore Object) - examining the totem will result in obtaining a Codex entry - Lore: Evocii Tribes - 300 XP - (04) The Eastern Grime - Places - Star Wars: The Old Republic - Game Guide and Walkthrough](https://game.lhg100.com/Article/UploadFiles/201512/2015121709475807.jpg)
[2]: Evocii Totem (Lore Object) - examining the totem will result in obtaining a Codex entry - Lore: Evocii Tribes - 300 XP.
![[3]: Sludge Kintan [*] - a huge beast that can be found under a big tank - (04) The Eastern Grime - Places - Star Wars: The Old Republic - Game Guide and Walkthrough](https://game.lhg100.com/Article/UploadFiles/201512/2015121709475889.jpg)
[3]: Sludge Kintan [*] - a huge beast that can be found under a big tank. It's not as dangerous as it looks, but its blows can throw you character away.
For discovering this location you will receive 265 XP.
ENTRANCES / EXITS
[A]: Abandoned Farmhouse
[B]: Sewer Maintenance Tunnels (Heroic area - recommended traveling with other players or a companion)
[C]: The second exit of the Sewer Maintenance Tunnels leading to The Rustyards.
ITEMS
[.]: Security Chest - chests you can search
OTHER
[1]: B3-4T Disposal Droid [#] - an exceptionally dangerous droid. Don't try to attack him if there are no other players with you or at least your companion - in the latter case your character's minimum level should be 8 or even 9 (plus abilities suitable for this level). Also keep some Medpacs handy and use all boosting abilities before the fight.
![[2]: Datacron 1/3 - for more information (how to get to it) see the](https://game.lhg100.com/Article/UploadFiles/201512/2015121709475835.jpg)
[2]: Datacron 1/3 - for more information (how to get to it) see the "Datacrons" chapter. For discovering it you will get 550 XP, Matrix Shard (valuable item) and unlock a Codex entry: Achievements - Datacron: Galactic History 03 - The Battalions of Zhell.
For discovering this location you will receive 267 XP and a Codex entry - Locations: Rust Yardss - 390 XP.
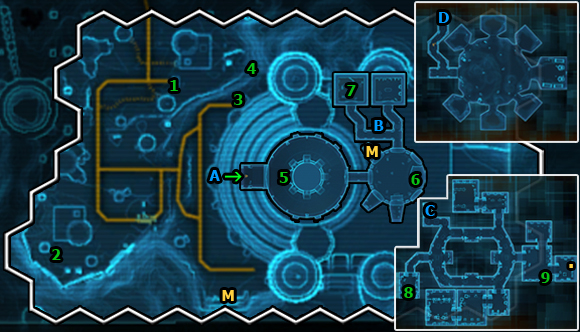
ENTRANCES / EXITS
[A]: Gas Mining Facility
[B]: Gas Mining Facility - Level 2 (stairs)
[C]: Gas Processing
[D]: Gas Processing - Level 2 (stairs)
[E]: Mining Operations (Heroic area - recommended traveling with other players or a companion, concerns the second building level and the basement)
[F]: Mining Operations - Level 2 (stairs)
[G]: Basement - Level 2 (stairs)
[H]: Sewer Maintenance Tunnels (Heroic area - recommended traveling with other players or a companion) - map in a previous section
ITEMS
[.]: Security Chest - chests you can search
OTHER
[1]: Vicious Chemilizard [+] - one of the places you can find these animals. Kill one and you'll obtain a Codex entry - Bestiary: Chemilizard - 300 XP.
![[2]: Xuuva Mutant - one of the places you can find these animals - (06) The Rustyards - Places - Star Wars: The Old Republic - Game Guide and Walkthrough](https://game.lhg100.com/Article/UploadFiles/201512/2015121709475954.jpg)
[2]: Xuuva Mutant - one of the places you can find these animals. Kill one and you'll obtain a Codex entry - Bestiary: Xuuva Mutant - 300 XP.
![[3]: Datacron 1/3 - for more information (how to get to it) see the](https://game.lhg100.com/Article/UploadFiles/201512/2015121709475998.jpg)
[3]: Datacron 1/3 - for more information (how to get to it) see the "Datacrons" chapter. For discovering it you will get 550 XP, +2 Presence and unlock a Codex entry: Achievements - Datacron: Galactic History 02 - Ancient Civilizations.
For discovering this location you will receive 262 XP.
OTHER
[1]: Bounty Hunter D'nar [*] - mechanical cyborg-bounty hunter. Has many abilities but isn't a challenging opponent.

For discovering this location you will receive 333 XP.
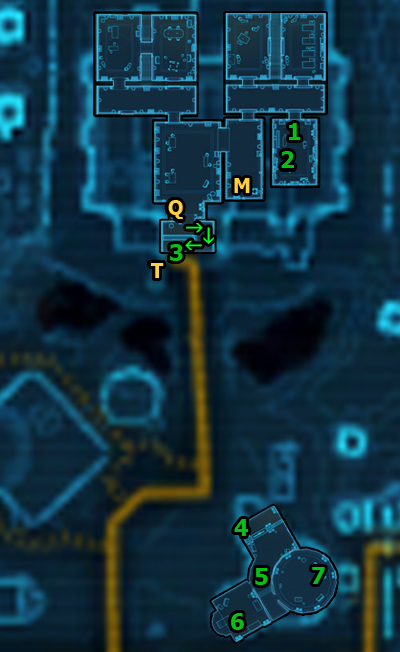
ENTRANCES/EXITS
[A]: Fa'athra's Palace (Codex entry - Locations: Fa'athra's Palace - 450 XP)
[B]: Elevator (can take you to Palace level 2 and 3)
[C]: Elevator (can take you to Palace level 1 and 3)
[D]: Elevator (can take you to Palace level 1 and 2)
ITEMS / ASSISTANCE
[.]: Security Chest - chests you can search
[M]: Medical Droid (Medpacs and Stims, item repair, Respawn Point)
OTHER
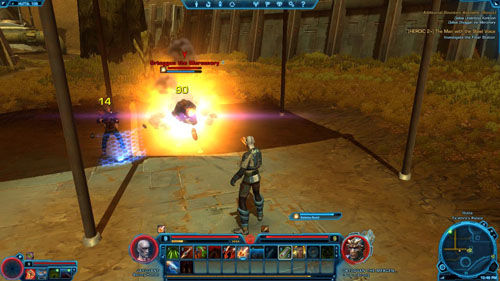
[1]: Ortoggen the Mercenary [+] - a mercenary and also one of the NPCs you need to kill in a mission: Additional Bounties Available (Bonus) (for Bounty Hunter). Start the combat with killing his companion and then get rid of the mercenary himself. You shouldn't have any trouble with that.
![[2]: Bashrar the Smuggler [+] - the second mercenary - (08) Fa'athra's Palace - Places - Star Wars: The Old Republic - Game Guide and Walkthrough](https://game.lhg100.com/Article/UploadFiles/201512/2015121709480082.jpg)
[2]: Bashrar the Smuggler [+] - the second mercenary. He doesn't differ much from his predecessor. He's one of the NPCs you need to kill in a mission: Additional Bounties Available (Bonus) (for Bounty Hunter).
![[3]: Underboss Korkresh [+] - the third mercenary - (08) Fa'athra's Palace - Places - Star Wars: The Old Republic - Game Guide and Walkthrough](https://game.lhg100.com/Article/UploadFiles/201512/2015121709480016.jpg)
[3]: Underboss Korkresh [+] - the third mercenary. The only difference in the case of this bounty hunter is that he uses melee attacks. Yet, he's not very challenging. He's one of the NPCs you need to kill in a mission: Additional Bounties Available (Bonus) (for Bounty Hunter).
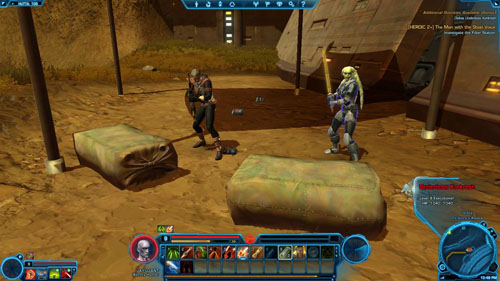
![[4]: Using this way makes it far quicker to get close to Fa'athra's Palace - (08) Fa'athra's Palace - Places - Star Wars: The Old Republic - Game Guide and Walkthrough](https://game.lhg100.com/Article/UploadFiles/201512/2015121709480126.jpg)
[4]: Using this way makes it far quicker to get close to Fa'athra's Palace.
![[5]: Hutt (Lore Object) - reading the plates will result in getting a Codex entry - Species: Hutt - 495 XP - (08) Fa'athra's Palace - Places - Star Wars: The Old Republic - Game Guide and Walkthrough](https://game.lhg100.com/Article/UploadFiles/201512/2015121709480143.jpg)
[5]: Hutt (Lore Object) - reading the plates will result in getting a Codex entry - Species: Hutt - 495 XP.
![[6]: Fa'athra's Throne (Lore Object) - having a look at one of the bottles will result in getting a Codex entry - Persons of Note: Fa'athra the Hutt - 450 XP - (08) Fa'athra's Palace - Places - Star Wars: The Old Republic - Game Guide and Walkthrough](https://game.lhg100.com/Article/UploadFiles/201512/2015121709480169.jpg)
[6]: Fa'athra's Throne (Lore Object) - having a look at one of the bottles will result in getting a Codex entry - Persons of Note: Fa'athra the Hutt - 450 XP.
![[7]: Varl (Lore Object) - reading the datapad lying on the table will result in getting a Codex- Lore: Varl - 495 XP - (08) Fa'athra's Palace - Places - Star Wars: The Old Republic - Game Guide and Walkthrough](https://game.lhg100.com/Article/UploadFiles/201512/2015121709480162.jpg)
[7]: Varl (Lore Object) - reading the datapad lying on the table will result in getting a Codex- Lore: Varl - 495 XP.
![[8]: Gajoru, The Vault Guardian [*] - one of the stronger palace guards, needs to be killed in the side mission: Return of the Warrior - (08) Fa'athra's Palace - Places - Star Wars: The Old Republic - Game Guide and Walkthrough](https://game.lhg100.com/Article/UploadFiles/201512/2015121709480109.jpg)
[8]: Gajoru, The Vault Guardian [*] - one of the stronger palace guards, needs to be killed in the side mission: Return of the Warrior.
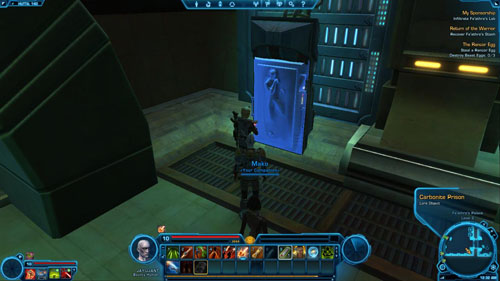
![[9]: Carbonite Prison (Lore Object) - having a look at the carbonite will result in getting a Codex entry - Lore: Carbonite Freezing - 400 XP - (08) Fa'athra's Palace - Places - Star Wars: The Old Republic - Game Guide and Walkthrough](https://game.lhg100.com/Article/UploadFiles/201512/2015121709480153.jpg)
[9]: Carbonite Prison (Lore Object) - having a look at the carbonite will result in getting a Codex entry - Lore: Carbonite Freezing - 400 XP.
For discovering this location you will receive 247 XP.
OTHER
[1]: Putrid Chemilizard [#] (Boss) - a huge lizard surrounded with toxic fumes. It's an exceptionally difficult boss, so without a companion or other players it's pointless to even attempt to fight him.

For discovering this location you will receive 190 XP.
Area of Heroic type - recommended traveling with other players or a companion.
ENTRANCES / EXITS
[A]: Old Muckworks (Codex entry - Locations: The Old Muckworks - 400 XP)
[B]: Old Muckworks - Level 2 (stairs)
[C]: Old Muckworks - Basement (elevator)
ITEMS / ASSISTANCE
[.]: Security Chest - chests you can search
[M]: Medical Droid (Medpacs and Stims, item repair, Respawn Point)
Each mission description is divided into several smaller parts. It should be observed that the following legend does not concern the next section - "Shortcuts (main and side missions)". The list of missions is given in chronological order, that is, the order you receive them. Also, the level of a particular mission is shown before its name (L). Here is all information that is essential to read before you start using the missions description.
The exact description of a mission is here. Sometimes it's divided into several different places you will visit, and each of them has its own map.
In the missions descriptions there are all dialogues that can have any impact on the game mechanics. It is given in the Points / Rewards column. The Effect column specifies what kind of effect your reply will have (there can also be a letter referring to the next dialogue mentioned), while under Reply there is the answer's line.
If any dialogue is missing it means that it doesn't matter which reply you choose (of course, except for the aspects related to developing your character in terms of the story). If a reply doesn't have any effect or doesn't result in getting any points or rewards, then there will be no suitable column in the table.
#
Reply
Effect
Points / Rewards
Reply number
One out of the two or three replies your character can give.
Effect of the chosen reply, and if it leads further - a letter of the next dialogue is given
+x to Light / Dark Side,
+x / -x to companion's Affection,
other Rewards
# - a letter indicating the dialogue order. Some replies can lead to different dialogues
If a mission contains a small bonus quest, then a complete list of them is given right before the mission description. Bonus mission objectives are given along with the mission objectives (class or side) with which such a mission is connected.
The list of rewards includes: XP, credits, items and Codex entries. You can receive all these items for completing a mission. Sometimes you'll get one out of the two depending on your class, other times you'll have to choose one from several items (these are separated by a slash - "/").
The chapter presents a list of all main, side, bonus and tutorial mission objectives that take place on the planet Hutta. The list is arranged in such a way as to minimize the time necessary for the sole running and visiting the same areas.
Most often the next side missions can or should be done (because of your character's level) while doing the next main missions (Class). That is why all mission objectives are divided into main missions.
You should observe that there are no issues connected with the Codex here - these can be found in the "Places" chapter. Moreover, there are no side Heroic mission objectives. Their descriptions are at the end of the side missions chapter - "Hutta".
Gauntlet [mission start] - Braden
Death Mark: Fa'athra Gang [mission start] - Nem'ro Bounty Droid
Gang Warfare [mission start] - Lew Brell
Mark Quick Travel Point (Poison Pit Cantina) and Taxi (Poison Pit Speeder) outside
[+] Death Mark: Fa'athra Gang - Defeat Fa'athra's Gangsters: 0/6
Gang Warfare - Speak to Rex Geer
[+] Gauntlet: Clear out Vexx's Safehouse (Bonus) - Eliminate the Hired Outlaws: 0/3
Gauntlet - Search for information on Vexx
Gang Warfare [mission end] - Speak to Lew Brell
Gauntlet [mission end] - Return to Braden
The Last Flight [mission start] - Braden
Dreams of Korriban [mission start] - Gianna
Tools of the Trade [mission start] - Xenteel
Dreams of Korriban - Speak to Mekks
The Last Flight - Go to Vexx's Hangar
[+] The Last Flight / Sending a Message (Bonus) - Defeat Vexx's Crew: 0/15
The Last Flight - Speak to Vexx
The Last Flight - Defeat Vexx and Take His ID Tags
Teleport to Quick Travel Point (Poison Pit Cantina)
Dreams of Korriban [mission end] - Speak to Gianna
The Last Flight [mission end] - Return to Braden
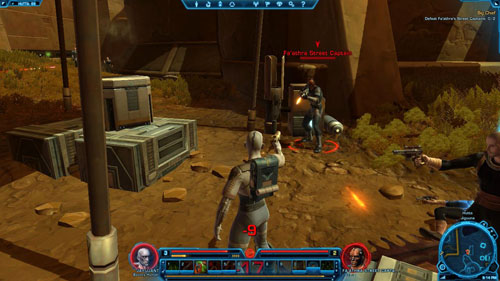
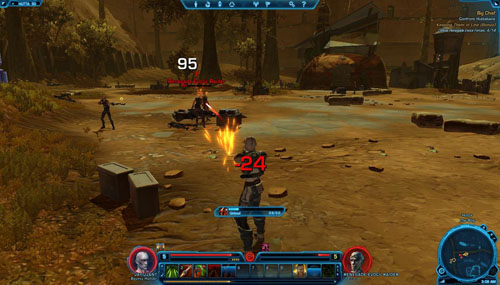
Big Chief [mission start] - Mako
Big Chief - Defeat Fa'athra's Street Captains: 0/2
Tools of the Trade [mission end] - Report to Zinny
Mark Taxi (Nem'ro's Palace Speeder)
Big Chief - Speak to Nem'ro the Hutt
A Slight Lean [mission start] - Morsel
Mark Quick Travel Point (Nem'ro's Bazaar) and Taxi (Jiguuna Speeder) by the town
A Slight Lean [mission end] - Speak with the Chief Enforcer
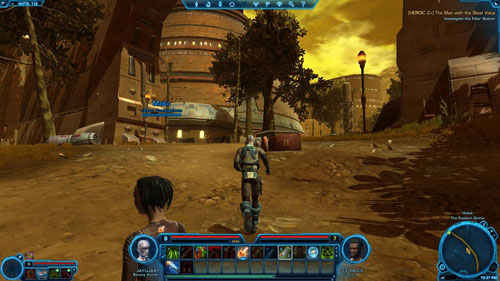
The Man With Steel Voice [HEROIC +2] [mission start] - Geric
Trophy Hunter [mission start] - Var'soonta
Mark Quick Travel Point (Evocii Workcamp)
Protection [mission start] - Donal
Trophy Hunter - Find Black Death's Speeder
[+] Trophy Hunter: Hunting Party (Bonus) - Destroy Hunting Droids: 0/6
Trophy Hunter [optional mission end]- Open the Speeder Cockpit
[+] Big Chief: Keeping Them in Line (Bonus) - Defeat Renegade Evocii Forces: 0/14
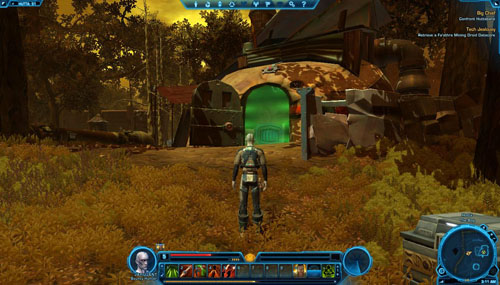
Tech Jealousy [mission start] - Datapad
Big Chief - Confront Huttsbane
[o] Big Chief - Defeat Huttsbane and Take His Head
[o] Big Chief - Defeat the Other Evocii
Big Chief - Use your Personal Holocom
Tech Jealousy - Retrieve a Fa'athra Mining Droid Datacore
Teleport to Quick Travel Point (Evocii Workcamp)
Tech Jealousy [mission end] - Report to Doctor Terrab
[o] Trophy Hunter [mission end] - Return to Var'soonta
Go to Jiguuna gate and then take a Taxi to Nem'ro's Palace Speeder
Big Chief [mission end] - Return to Nem'ro the Hutt
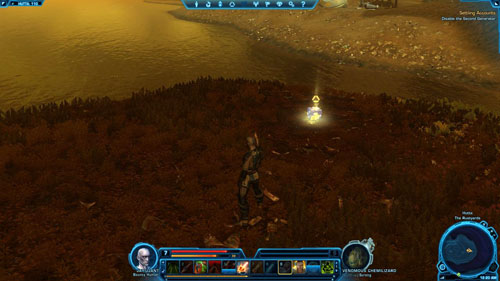
Settling Accounts [mission start] - Nem'ro the Hutt
Settling Accounts - Speak to Juda
To Boom or Not to Boom [mission start] - Getzo
Subtle Sabotage [mission start] - Rudd
Leave the palace and take a Taxi to Jiguuna Speeder
To Boom or Not to Boom - Plant the Pulse Explosives
Factory Recall [HEROIC +2] [mission start] - Gedron Hix
[+] Protection - Defeat Fa'athra's Goons: 0/10
Protection - Retrieve the Lockbox
Spicecraft Down [mission start] - Datapad (is in the south)
[+] Spicecraft Down: River Monsters (Bonus) - Defeat the Chemilizards: 0/10
[+] Spicecraft Down - Collect Spice Containers: 0/20
Spicecraft Down [mission end] - Deliver the Spice to Tilvik
Protection [mission end] - Speak to Donal
Subtle Sabotage [mission end] - Deliver the Datapad to Peblak
Mark Quick Travel Point (Chemical Marsh) and Taxi (Rust Yards Speeder) in the camp
Keeping Secrets [mission start] - Kraay
Industrial Raiders [mission start] - Rand
[+] Keeping Secrets: Terminating Contracts (Bonus) - Defeat Fa'athra's Industrial Guards: 0/9
[+] Industrial Raiders: Stopping the Runners (Bonus) - Defeat Fa'athra's Rust Runners: 0/12
[+] Industrial Raiders - Collect Exhausted Power Units: 0/4
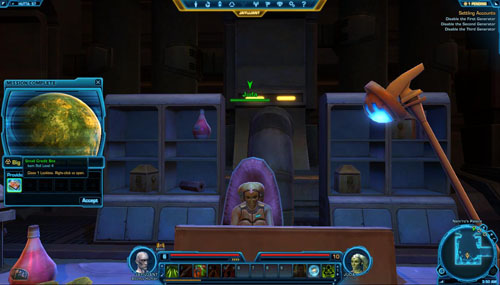
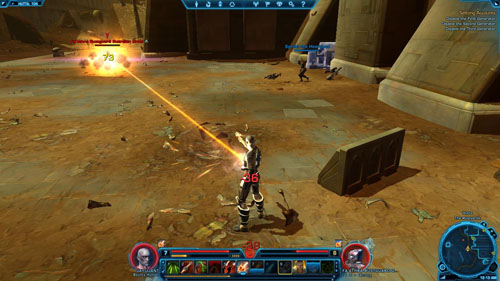
Settling Accounts - Disable the First Generator
Settling Accounts - Disable the Third Generator
Settling Accounts - Disable the Second Generator
Keeping Secrets - Open Zeven's Holding Cell
[+] [o] Keeping Secrets - Deactivate Enslaved Miners' Shock Collars: 0/5
Industrial Raiders - Charge the Power Units
Settling Accounts - Find Yalt
Settling Accounts - Speak to Yalt
[o] Keeping Secrets - Return to Zeven's Holding Cell
Teleport to Quick Travel Point (Chemical Marsh)
Keeping Secrets [mission end] - Return to Kraay
Industrial Raiders [mission end] - Speak to Rand
Take a Taxi to Nem'ro's Palace Speeder
To Boom or Not to Boom [mission end] - Return to Getzo
[o] Settling Accounts - Speak to Yalt's Wife
Settling Accounts - Return to Nem'ro the Hutt
Settling Accounts - Speak to Nails
Settling Accounts - Defeat Nails
Settling Accounts [mission end] - Return to Nem'ro the Hutt
House Cleaning [mission start] - Nem'ro the Hutt
House Cleaning - Speak to Juda
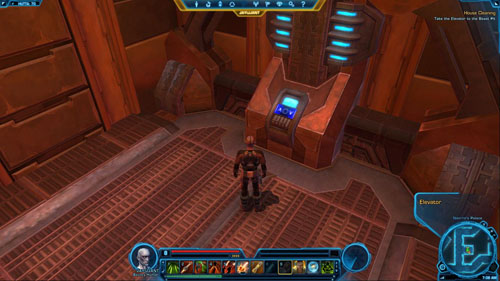
House Cleaning - Take the Elevator to the Beast Pit
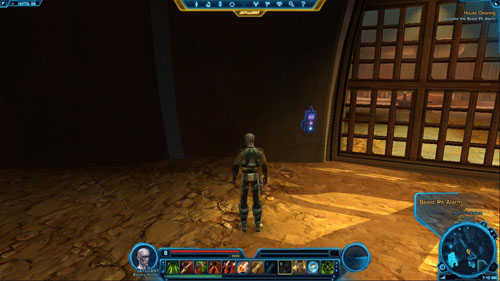
House Cleaning - Activate the Beast Pit Alarm
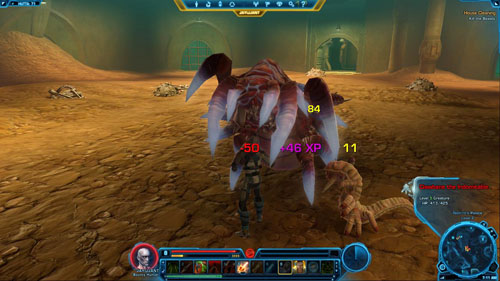
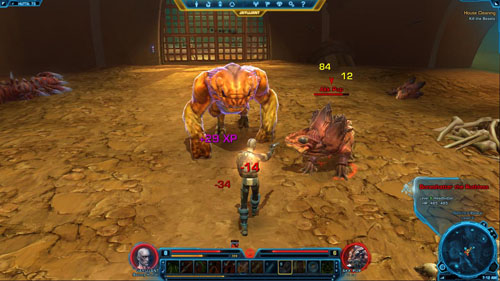
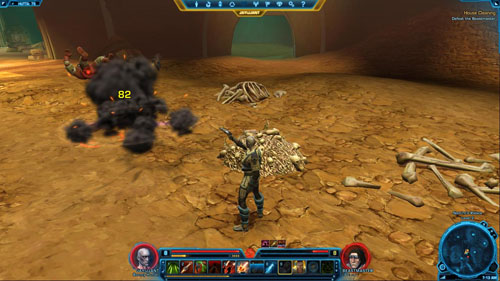
House Cleaning - Kill the Beasts
House Cleaning - Defeat the Beastmaster
House Cleaning [mission end] - Return to Nem'ro the Hutt
My Sponsorship [mission start] - Nem'ro the Hutt
My Sponsorship - Speak to Juda
The Rancor Egg [mission start] - Urgrec
Take a Taxi to Jiguuna Speeder
Return of the Warrior [mission start] - Burnok
Take a Taxi to Rust Yards Speeder
Unfinished Business [mission start] - Cy Krolo
[+] Unfinished Business: Finish Some More Business (Bonus) - Dispatch Fa'athra's Forces: 0/18
My Sponsorship: Additional Bounties Available (Bonus) - Defeat Ortoggan the Mercenary
My Sponsorship: Additional Bounties Available (Bonus) - Defeat Bashrar the Smuggler
My Sponsorship: Additional Bounties Available (Bonus) - Defeat Underboss Korkresh
Unfinished Business - Use Transmitter Switch on Cleaning Probe X010
Unfinished Business - Use Transmitter Switch on Cleaning Probe F7
Unfinished Business - Use Transmitter Switch on Cleaning Probe G44
[+] The Rancor Egg: Lizard hunting (Bonus) - Defeat Chemilizards: 0/6
[+] The Rancor Egg - Destroy Beast Eggs: 0/3
The Rancor Egg - Steal a Rancor Egg
Return of the Warrior - Thaw Out Oren Ward
My Sponsorship - Infiltrate Fa'athra's Lab
My Sponsorship - Speak to Republic Scientist Albea
My Sponsorship - Defeat Rarsk and Take the Sponsorship Token
My Sponsorship - Defeat Rarsk's Men
My Sponsorship - Speak to Albea
Return of the Warrior - Recover Fa'athra's Stash
Teleport to Quick Travel Point (Chemical Marsh)
Unfinished Business [mission end] - Return to Cy Krolo
Take a Taxi to Jiguuna Speeder
Return of the Warrior [mission end] - Return to Burnok
The Rancor Egg [mission end] - Return to Urgrec
My Sponsorship [mission end] - Return to Nem'ro the Hutt
Escaping Hutta [mission start] - Nem'ro the Hutt
Item Modification [mission start] - Nem'ro the Hutt
[o] Better Days [mission start and end] - Mako
Item Modification [mission end] - Activate the Lore Object to Learn about Modification
Escaping Hutta [mission end] - Take a Shuttle to the Imperial Fleet
Clear out Vexx's Safehouse (Bonus)
Speak to Braden
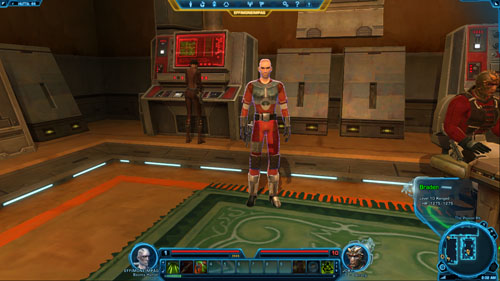
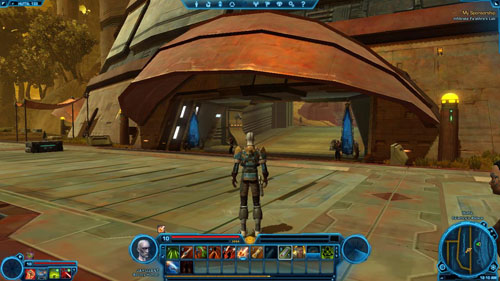
You begin your adventure as a Bounty Hunter in The Poison Pit in [1]. Speak to Braden in [2] if it didn't happen automatically. You'll receive the first mission objective, and also a Codex entry - Persons of Note: Braden (Bounty Hunter) - worth 45 XP.
Search for information on Vexx
Run out of the main room and talk to NPCs about two side missions. Remember to mark Quick Travel Point (Poison Pit Cantina) before you get outside and once you've exited the place (there's a door in [3]) mark Taxi (Poison Pit Speeder) on the right. The entrance to Vexx's hideout is in [4]. Watch out for enemies on the way, especially Fa'athra Street Captains.
Eliminate the Hired Outlaws: 0/3
Regenerate your health if it isn't full. You will receive a bonus mission after killing the first out of three Hired Outlaws in [5]. Also, get rid of the two remaining ones - in [6] and [7] - and you'll complete the mission and receive 55 XP.
![You'll notice a Datapad on the table in [7] - (L03) Gauntlet - Bounty Hunter - Star Wars: The Old Republic - Game Guide and Walkthrough](https://game.lhg100.com/Article/UploadFiles/201512/2015121709480252.jpg)
You'll notice a Datapad on the table in [7]. Take it with you and then go back to Braden.

Return to Braden
Once you've returned you'll complete the mission and get the next one. In the meantime it's good to do a class mission (described on the next page of the guide): Tools of the Trade and also finish side missions.
Sending a Message (Bonus)
Go to Vexx's Hangar
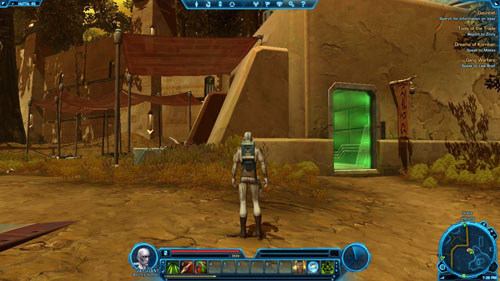
You start this mission in [1], in The Poison Pit. Go outside and head west to the spaceport in [2].
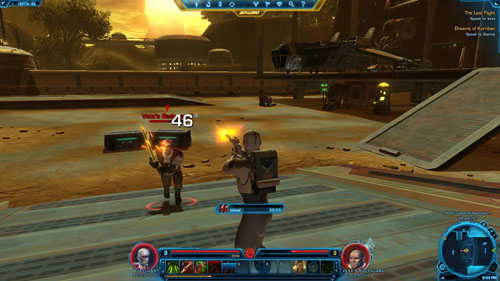
Defeat Vexx's Crew: 0/15
You will appear in [3]. Turn right and then go through the green force field in [4], to enter the story area. Before you get to Vexx [+], you'll have to force your way through his bodyguards - Vexx Thugs and Vexx Mercenaries.
In the hangar there are six groups of three enemies marked with a letter [x]. You'll deal with all of them easily - but still, after each fight use Recharge and Reload ability to regenerate your health. Kill at least fifteen enemies to complete the bonus mission and receive 175 XP.

Speak to Vexx
On the way leading to Vexx [+] there will be a Vexx's Bodyguard [+] in [5] who uses melee weapons. This is the first stronger enemy, so have a rest before you attack him and use the most powerful abilities.
After the fight use the ramp on the right. Then go to Vexx's [+] space shuttle. Again use the Recharge and Reload ability and then speak to Vexx [+] in [6]. At the end of the chat you can choose one from three options.
A
Reply
Effect
1
Quick-draw, hmm? [Wound him.]
You'll wound the enemy and it will be easier to defeat him.
2
You're an idiot.
-
3
Look, calm down.
-

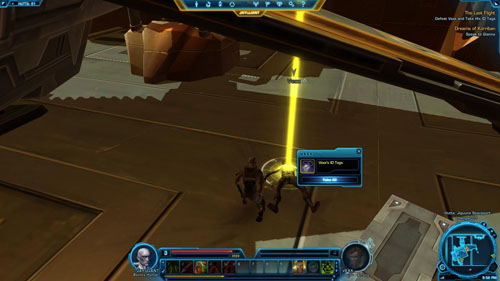
Defeat Vexx and Take His ID Tags
Vexx [+] should not cause you much trouble, but remember that he can stun your character. When you kill him, search his body and take Vexx's ID Tags.
Return to Braden
It's time to return to the cantina. If you marked the Quick Travel Point inside, then use the ability Quick Travel (Poison Pit Cantina) to instantly find yourself there (you must run inside the hangar first to make this ability accessible). All that remains is to run to the room occupied by Braden and his team in [1].
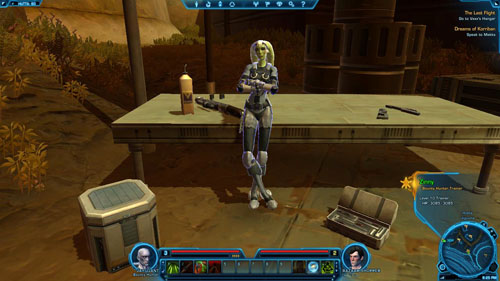
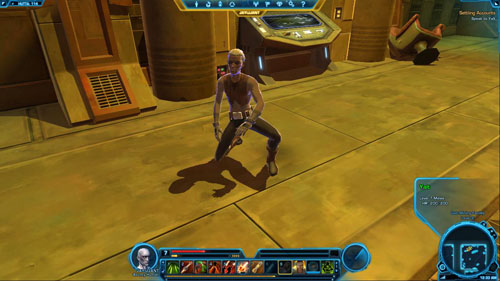
![When you reach level 2 it's crucial that you speak to Xenteel in [1] (sitting in an armchair in The Poison Pit) - (L02) Tools of the Trade - Bounty Hunter - Star Wars: The Old Republic - Game Guide and Walkthrough](https://game.lhg100.com/Article/UploadFiles/201512/2015121709480484.jpg)
When you reach level 2 it's crucial that you speak to Xenteel in [1] (sitting in an armchair in The Poison Pit).

Report to Zinny
Go out of the building and head south. Among the stalls you'll find Zinny in [2]. She is a trainer and you can purchase abilities for your character from her. Visit Zinny whenever you reach another level and when you're nearby, as without new abilities you won't be able to defeat the more difficult enemies.
Keeping Them in Line (Bonus)
Defeat Fa'athra's Street Captains: 0/2
You'll begin the mission in [1], in the cantina. Things don't look so well but you can't give up. You need to find a way to arouse the big boss, Nem'ro the Hutt's interest. Exit the cantina and start looking for Fa'athra's Street Captains [+]. You have to kill two to receive the next mission objective - the captains are wandering around the area, they are, among other places, in [x].
Speak to Nem'ro the Hutt
Then go to [2] and remember to mark Taxi (Nem'ro's Palace Speeder) on the way. Next, enter the big boss's palace and you will appear in [3].
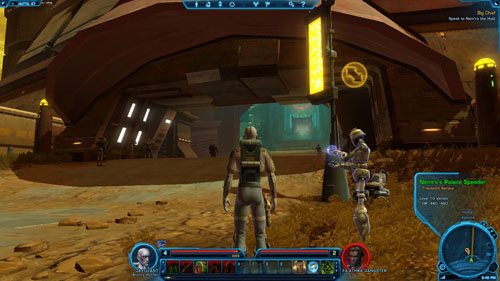
Once inside the palace run upstairs. Then go through the bar in [4], and appear before Nem'ro the Hutt. Speak to him to receive the next mission objective. You will also get a Codex entry - Persons of Note: Nem'ro the Hutt - worth 100 XP.
![Go out of the palace and go east, to the town exit in [5] - (L06) Big Chief - Bounty Hunter - Star Wars: The Old Republic - Game Guide and Walkthrough](https://game.lhg100.com/Article/UploadFiles/201512/2015121709480591.jpg)
Go out of the palace and go east, to the town exit in [5]. Remember to mark Quick Travel Point (Nem'ro's Bazaar) and Taxi (Jiguuna Speeder) on the way.
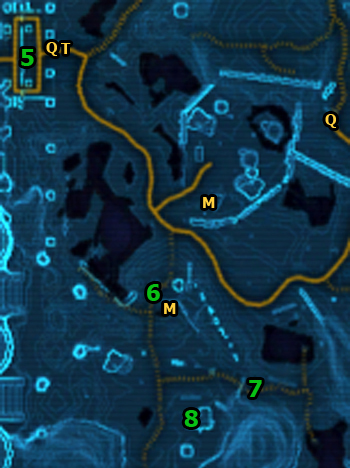
Defeat Renegade Evocii Forces: 0/14
You should focus your attention on the Evocii workcamp in the east - there's Quick Travel Point (Evocii Workcamp) you should mark. You can get to the village of the rebellious Evocii from the north (the gate in [6]) or east (the gate in [7]).
The second option means fewer enemies. On the other hand, it's worth taking measures to restore order in the camp and kill at least fourteen rebellious Evocii. There are three kinds of opponents: the weakest Evocii Insurgents, medium tough Renegade Evocii Raiders and the strongest, using melee attacks Renegade Evocii Hunters.
Kill fourteen enemies before executing the next mission objective - you'll complete the bonus mission and receive 285 XP.
Confront Huttsbane
The hut in which you will find the commander of the rebellious Evocii - Huttsbane - is in [8]. Go inside and have a conversation with him and his father. You will have to make a choice now. You can agree to take some other killed Evocii Warrior's Head or start fighting with Huttsbane. The details are in the tables below.
A
Reply
Effect
Points / Rewards
1
We negotiating here?
Further conversation stage - C
-
2
I don't care.
Further conversation stage - B
-
3
You got a raw deal, true.
Further conversation stage - C
-
B
Reply
Effect
Points / Rewards
1
Wrong thing to say. [Attack]
Fight with Huttsbane
+50 to Dark Side
2
I'm still listening.
Further conversation stage - C
-
3
No more chitchat. [Attack]
Fight with Huttsbane
+50 to Dark Side
C
Reply
Effect
Points / Rewards
1
I see a flaw.
Further conversation stage - D
-
2
Pretty sneaky.
Further conversation stage - D
-
3
I prefer bloodshed. [Attack]
Fight with Huttsbane
+50 to Dark Side
D
Reply
Effect
Points / Rewards
1
Hmm... all right.
Peaceful solution
+50 to Light Side
2
Only if I can hack it off.
Fight with Huttsbane
+50 to Dark Side
3
No substitutes. [Attack]
Fight with Huttsbane
+50 to Dark Side
Defeat Huttsbane and Take His Head
Defeat the Other Evocii
If you didn't choose the peaceful solution then prepare for a fight. Huttsbane is quite a dangerous enemy, and there are also several of his people around. He can inflict some serious damage, so first of all get rid of him. Then finish the remaining Evocii off. After the fight take Huttsbane's Head from the commander's corpse.

Use your Personal Holocom
Regardless of the choice you've made, press the button on the screen to talk to Mako. After the conversation you'll get a new Codex entry - Lore: The Great Hunt (Bounty Hunter) - worth 160 XP.
Return to Nem'ro the Hutt
Finish all side missions if you there are any to be done in this area. Then go on foot or use the Quick Travel ability to go to [5]. From there take a Taxi to get to Nem'ro's palace. Enter through the door in [2] and find the big boss in [4] (first map). Talk to him to complete this mission and receive the next.
Speak to Juda
You begin in [1]. Run to [2] to talk to Juda, sitting at the desk. You will get Small Credit Box as the payment for the previous mission. Open the package in your inventory, and head for the palace exit in [3]. Take a Taxi to get to the town gate.
A long way to the east awaits you. You can shorten it if you marked the Quick Travel Point (Evocii Workcamp) in the Evocii workcamp. Next, cross the bridge in the east (shown in the picture below), and then follow the road to the camp in The Eastern Grime. Once you're there remember to mark Qucik Travel Point (Chemical Marsh) and Taxi (Rust Yards Speeder). Then go to [4] and you'll find yourself in a new location.
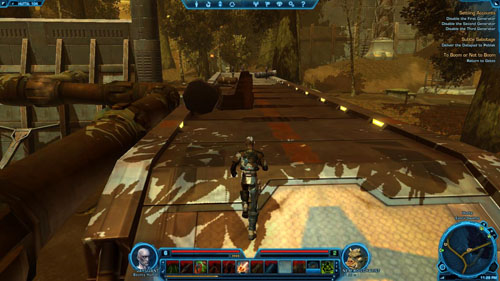
![Around the mining facility and inside it watch out first of all for Fa'athra Rustguard Guardian Droids [+] - these are dangerous enemies who together with other enemies can quickly kill you - (L07) Settling Accounts - Bounty Hunter - Star Wars: The Old Republic - Game Guide and Walkthrough](https://game.lhg100.com/Article/UploadFiles/201512/2015121709480660.jpg)
Around the mining facility and inside it watch out first of all for Fa'athra Rustguard Guardian Droids [+] - these are dangerous enemies who together with other enemies can quickly kill you. Don't fight with them if other enemies are attacking you and it'll be best if you simply avoid them.
There are also suicide-droids (Fa'athra Blasting Droid) here, which will run up to you and explode. You should eliminate them first, and it'll be best if you use abilities that can immobilize enemies. If you manage to destroy such a droid near other enemies, its explosion will painfully wound them.
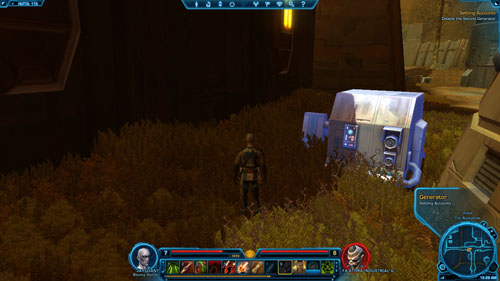
Disable the First Generator
Your mission is to switch off three generators, shown in the pictures below. All of them are protected by the abovementioned druids, as well as guards. The first generator is in [5] - approach it and switch it off.
Disable the Third Generator
After disabling the first generator it'll be best to find the third - it's in [6]. Once you've turned it off, don't run around the building from the north - come back south between a smaller and a larger building.
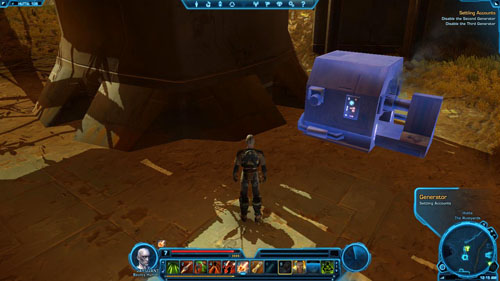
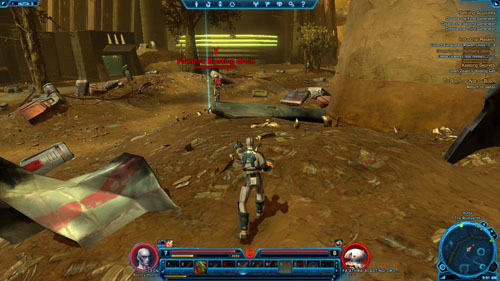
Disable the Second Generator
Go past the mining facility entrance and head for [7]. The second and at the same time the last generator is there. Disable it and then enter the building through the gate in [8].
Find Yalt
Go through the first and second room and you'll reach a large hall. The stairs in [9] are your destination. You'll get to the second level of the facility. Watch out for enemies - there are plenty of them here. Carefully move forward and don't engage into combat with everybody at the same time. Defeat three enemies by the stairs in [9] and go upstairs. Defeat three guards to the right of the stairs and enter the room in [10].

Speak to Yalt
You must kill more enemies here (Fa'thra Bruiser) before you can talk to Yalt, who's hiding behind the table. The enemies can also be hiding here and your character might not see them. Move yourself right or left to be able to attack. Apart from that, the enemies will not be a problem.
Afterwards talk to Yalt. During the conversation you will have several options. You can either kill him right away or let him delete the money from Fa'athra's account in exchange for sparing his life (though you can still kill him after that). See the tables below the picture for details.
A
Reply
Effect
Points / Rewards
1
No deal. [Kill Yalt]
Killing Yalt
+50 to Dark Side
2
Deal.
Further conversation stage - C
-
3
That really only helps you.
Further conversation stage - B
possible additional credits
B
Reply
Effect
Points / Rewards
1
Try it.
Further conversation stage - C
Medium Credit Box (about 750 credits)
2
I'm no thief.
Further conversation stage - C
-
3
Can't do it. [Kill Yalt]
Killing Yalt
+50 to Dark Side
C
Reply
Effect
Points / Rewards
1
Sure.
Sparing Yalt's life
+50 to Light Side
2
I gave you my word.
Sparing Yalt's life
+50 to Light Side
3
Too trusting. [Kill Yalt]
Killing Yalt
+200 to Dark Side
Speak to Yalt's Wife
Return to Nem'ro the Hutt
Regardless of the decision you have taken, you will need to return to Nem'ro. If you completed all side missions in this area and there's nothing more to keep you here, teleport to Quick Travel Point (Chemical Marsh) or go there on foot - to [4].
Then use a Taxi to get to Nem'ro's palace. Enter through the door in [3]. If you spared Yalt, then go to Nem'ro in [11] at once. If you killed him - first talk to his wife in [12].

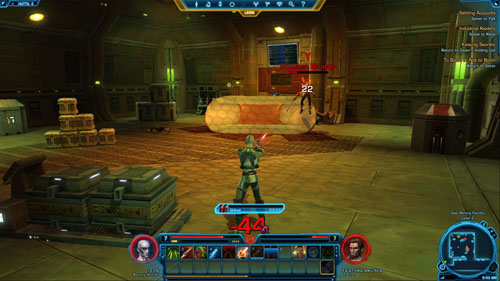
Speak to Nails
Defeat Nails
When you enter the room in [11], you'll be accosted by Nails [+] - an assassin hired by Terro Blood. It doesn't matter what you say - the conversation will end in a fight anyway. She's not a difficult enemy - use your most powerful abilities and watch out for her freezing attack, which can stun your character for a while.
Return to Nem'ro the Hutt
Then run into the room in [2] to finally speak with Nem'ro the Hutt.
Speak to Juda
You begin in [1]. Run to [2] to talk to Juda, sitting at the desk. You will get Small Credit Box as the payment for the previous mission - open the package in your inventory, and you'll get some credits.
Take the Elevator to the Beast Pit
Then run to [3]. Go through the green force field to enter the story area, and then enter the elevator and use the button on the right. Choose Nem'ro's Palace Level 2 as your target area.
Activate the Beast Pit Alarm
Once you're in the pit, follow the winding corridor to the large cave with cages. Run forward to the button in [4], next to a huge gate opposite the entrance. Press it to activate the alarm.
Kill the Beasts
It could have been expected that Nem'ro would want to enjoy himself at your expense and make a gladiator out of you. You don't have a choice, you must defend yourself against the beasts that will get out of the cages.
There are three rounds. In each you'll have to defeat one great beast (in the following order: Clawbane the Indomitable [+], Boneshatter the Ruthless [+] and Fleshripper the Unkillable [+]) and two smaller ones. The first group will go out of the cage in [5]. During the combat try to move back and keep your distance for as long as possible.
Try to kill two smaller beasts using a ranged attack and then focus your fire on the big one. Do it in the first and the next rounds. In the second round the beasts will come from the cages in [6] and [7], while in the third from those in [8] and [9]. It's best to fight in the middle of the arena - thanks to that it will take longer for the next enemies to get to you. Be careful! The last large beast, Fleshripper the Unkillable [+], can throw you away with powerful blows.
In truth, the real problem is that the rounds come one after another at once, so you don't have much time to regenerate your health. That's why, after you've killed each beast use the Recharge and Reload ability immediately to restore as much heath as you can before the next round (before one of the beasts interrupts using the ability). Do the same after killing the last beast (in the third and the last round).
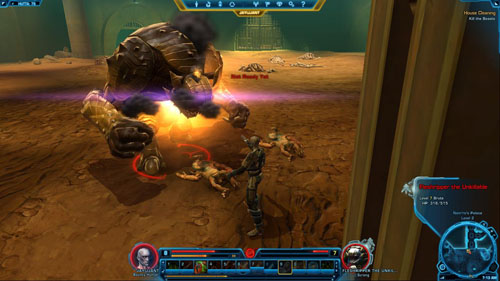
Defeat the Beastmaster
In comparison with the beasts, the Beastmaster is a piece of cake, provided you've regained your health. He'll run out of his room in [10]. Defeat him, go to the elevator in [3] and use the button to go to Nem'ro's palace level 1.
Return to Nem'ro the Hutt
Now you should return to the big boss, who hasn't gone anywhere (which would probably be hard) and is still in [1]. Talk to him to claim the rewards for completing this mission and receive another one.
Additional Bounties Available (Bonus)
Speak to Juda
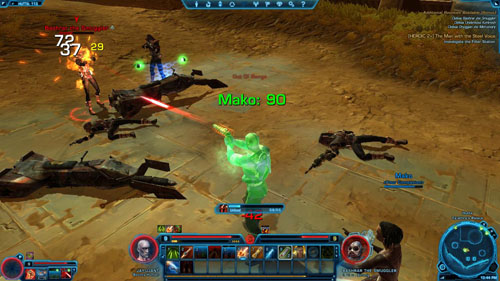
You begin in [1]. Run to [2] to talk to Juda, sitting at the desk. You will get Small Credit Box as the payment for the previous mission - open the package in your inventory, and you'll get some credits. Soon after that you'll be accosted by Mako, who wants to join you.

This is the first Companion for the Bounty Hunter class. Regardless of your consent you will receive a new Codex entry - Persons of Note: Mako (Bounty Hunter) - worth 450 XP. Go to the palace exit in [3] and then use a Taxi to go to The Eastern Grime (Rust Yards Speeder).
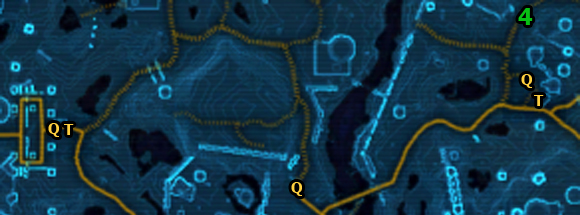
![Once you've arrived, go southeast to enter the Fa'athra's palace area (the gate is in [4]) - (L09) My Sponsorship - Bounty Hunter - Star Wars: The Old Republic - Game Guide and Walkthrough](https://game.lhg100.com/Article/UploadFiles/201512/2015121709480991.jpg)
Once you've arrived, go southeast to enter the Fa'athra's palace area (the gate is in [4]). The only more challenging enemies in this area are Fa'athra Guardians [+] and Fa'athra Enforcers [+], but you'll deal with them easily anyway. Just don't fight with too many enemies simultaneously!
Defeat Ortoggan the Mercenary
Instead, focus on accomplishing the bonus mission that requires you to kill three mercenaries. The first - Ortoggen the Mercenary [+] - is standing with his companion in [5]. Begin the fight with killing the latter and then get rid of the mercenary. He should not cause you much trouble.
Defeat Bashrar the Smuggler
The second mercenary, Bashrar the Smuggler [+], is waiting for you to the southwest of this area, and to be more exact - in [6]. As usual, quickly kill his companion and then defeat Bashrar.
Defeat Underboss Korkresh
The last mercenary is to the left of the palace entrance, so first you must run upstairs. Go past the entrance and head for [7]. Contrary to the rest of smugglers, Underboss Korkresh [+] uses melee attacks. Yet, this won't be a problem. You will receive 490 XP for completing this bonus mission.
Infiltrate Fa'athra's Lab
The main gate is located in [8]. Inside there are a lot of Lore Objects - see the "Places" chapter for details). Don't forget about side missions if you have any in your log.
There are a lot of opponents in the palace but most of them are weak. Only Fa'athra Palace Lieutenants [+] and Fa'athra Palace Overlords [+] can be a little challenging, but still it isn't something you can't deal with. Go to the elevator in [9] and press the button to go to Fa'athra's Palace - Level 2. You will appear in [10]. Force your way through the corridor full of enemies and enter the story area in [11]. You will receive a new mission objective.

Speak to Republic Scientist Albea
Defeat the first and second group of enemies (Fa'athra Brutes, Fa'athra Kidnappers and a bit more challenging Fa'athra Manhunter [+]), then go to the room in [12]. You'll find Albea there - talk to her. Your replies will have an impact on Mako, so consult the tables below the picture.

A
Reply (Albea)
Points / Rewards
1
Be quiet!
-
2
Stay calm.
+15 to Affection: Mako
3
Mako, ID this woman.
+40 to Affection: Mako
B
Reply (Albea)
Points / Rewards
1
Get ready.
-
2
No talking.
-1 to Affection: Mako
3
It's going to be okay.
+15 to Affection: Mako
C
Reply (Rarsk)
Points / Rewards
1
Try it.
+15 to Affection: Mako
2
This is fun!
-
3
I tried to be nice.
+15 to Affection: Mako
Defeat Rarsk and Take the Sponsorship Token
Defeat Rarsk's Men
The conversation will be interrupted by Rarsk [+] - a bounty hunter whom Nem'ro gave his sponsorship instead of you. After a quick chat you'll start fighting him and his men (Mercenaries). Get rid of them quickly, and then finish Rarsk [+] off - he's much more of a talker than a fighter. Search his body after the fight and take Sponsorship Token.
Speak to Albea
Talk to Albea for the last time. Because Rarsk came here to kill her you can finish the task for him and claim the reward or let Albea go. Remember that your replies will have an impact on Mako. See the following tables for details.
A
Reply
Effect
Points / Rewards
1
Aren't you a bounty?
Further conversation stage - B
-
2
I don't care.
Letting Albea go
+15 to Affection: Mako, +50 to Light Side, about +90 credits in an e-mail after a few hours
3
You need to get off Hutta.
Letting Albea go
+15 to Affection: Mako, +50 to Light Side, about +90 credits in an e-mail after a few hours
B
Reply
Effect
Points / Rewards
1
It's a paycheck.
Further conversation stage - C
-1 to Affection: Mako
2
Not if you say no.
Letting Albea go
+40 to Affection: Mako, +100 to Light Side, about +90 credits in e-mail after a few hours
3
Sure I am. [Kill Albea]
Killing Albea, Further conversation stage - D
-30 to Affection: Mako, +100 to Dark Side, additional mission
C
Reply
Effect
Points / Rewards
1
Have it your way.
Letting Albea go
+15 to Affection: Mako, +50 to Light Side, about +90 credits in an e-mail after a few hours
2
I wasn't serious.
Letting Albea go
+50 to Light Side, about +90 credits in an e-mail after a few hours
3
Times change. [Kill Albea]
Killing Albea, Further conversation stage - D
-30 to Affection: Mako, +100 to Dark Side, additional mission
D
Reply
Points / Rewards
1
Toughen up.
-
2
Speak when you're spoken to.
-1 to Affection: Mako
3
You want some?
-30 to Affection: Mako
If you decided to kill Albea, then you will receive a new main mission - Albea's Bounty and Albea's Body will appear in your inventory. You will finish the mission on a different planet (Dromund Kass) (that is why it isn't covered in the guide).
Return to Nem'ro the Hutt
If you don't have any other side missions to accomplish in the palace, take the elevator to level 1 in [10] and head for the exit. Then run to the nearest Taxi (or use the Quick Travel ability). Drive up Nem'ro's palace, enter through the gate in [3] and then go to [1]. A long conversation awaits you here. In some cases your replies will have an impact on Mako - see the tables below the picture for details.
A
Reply
Effect
1
Tarro is cheating.
-
2
Mako, what do you think?
+15 to Affection: Mako
3
You're an official?
-
B
Reply
Effect
1
He's too scared to do that.
-
2
I'll punish him anyway.
+15 to Affection: Mako
3
Blast your stupid rules!
-
C
Reply
Effect
1
First things first.
+15 to Affection: Mako
2
You bet we will.
+40 to Affection: Mako
3
Enough about Braden.
-30 to Affection: Mako
D
Reply
Effect
1
Let's go then.
+15 to Affection: Mako
2
Thanks, bone face.
-
3
Nice meeting you, Grataa.
-
![You begin in [1] - (LC) Better Days - Bounty Hunter - Star Wars: The Old Republic - Game Guide and Walkthrough](https://game.lhg100.com/Article/UploadFiles/201512/2015121709481113.jpg)
You begin in [1]. After leaving the story area from the corridor in [2] you'll be accosted by Mako. She'd like to talk to you. Do it when a mission symbol appears above her. The reply you'll choose will have an impact on your companion (see the tables below the picture for details). After the conversation the mission will be completed.
A
Reply
Effect
1
This isn't a favor.
-
2
Don't mention it.
+15 to Affection: Mako
3
[Flirt] What's it mean to you?
+40 to Affection: Mako
B
Reply
Effect
1
I was lucky he found me.
+15 to Affection: Mako
2
Are you sure it was Braden?
-
3
Great. Can we get to work now?
-30 to Affection: Mako
Rewards:
2510 XP.
Item Modification
Activate the Lore Object to Learn about Modification
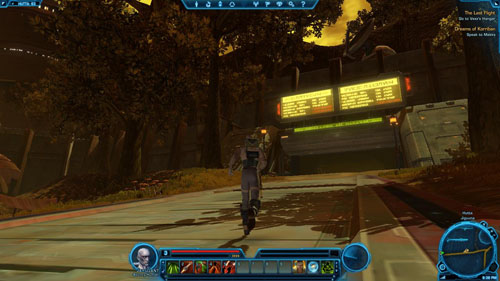
While doing the last mission on Hutta it is worth completing a Tutorial mission, which is about item modification. From [1] go to [2] and read the sign shown in the picture below.
You will receive a Codex entry - Game Rules: Item Modification - worth 45 XP. You'll also complete a Tutorial mission, receive 885 XP and Fortitude Enhancement 2. This item, as well as Reflex Mod 1, can be put into your weapon, thus making it more powerful. To do it use the station next to the sign.

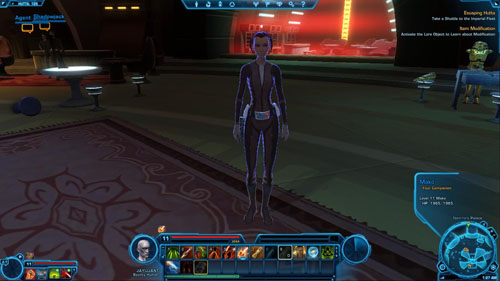
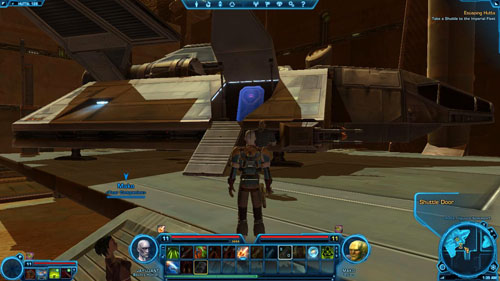
Take a Shuttle to the Imperial Fleet
It's time to leave Hutta. Run to the spaceport in [3], then go north, to a shuttle that will take you from this planet. Use the door in [4] and choose Imperial Fleet as your destination. Once you're on the Imperial Fleet you'll complete this mission and receive the next one. Let the big hunt begin!
Each mission description is divided into several smaller parts. It should be observed that the following legend does not concern the next section - "Shortcuts (main and side missions)". The list of missions is given in chronological order, that is, the order you receive them. Also, the level of a particular mission is shown before its name (L). Here is all information that is essential to read before you start using the missions description.
The exact description of a mission is here. Sometimes it's divided into several different places you will visit, and each of them has its own map.
In the missions descriptions there are all dialogues that can have any impact on the game mechanics. It is given in the Points / Rewards column. The Effect column specifies what kind of effect your reply will have (there can also be a letter referring to the next dialogue mentioned), while under Reply there is the answer's line.
If any dialogue is missing it means that it doesn't matter which reply you choose (of course, except for the aspects related to developing your character in terms of the story). If a reply doesn't have any effect or doesn't result in getting any points or rewards, then there will be no suitable column in the table.
#
Reply
Effect
Points / Rewards
Reply number
One out of the two or three replies your character can give.
Effect of the chosen reply, and if it leads further - a letter of the next dialogue is given
+x to Light / Dark Side,
+x / -x to companion's Affection,
other Rewards
# - a letter indicating the dialogue order. Some replies can lead to different dialogues
If a mission contains a small bonus quest, then a complete list of them is given right before the mission description. Bonus mission objectives are given along with the mission objectives (class or side) with which such a mission is connected.
The list of rewards includes: XP, credits, items and Codex entries. You can receive all these items for completing a mission. Sometimes you'll get one out of the two depending on your class, other times you'll have to choose one from several items (these are separated by a slash - "/").
The chapter presents a list of all main, side, bonus and tutorial mission objectives that take place on the planet Hutta. The list is arranged in such a way as to minimize the time necessary for the sole running and visiting the same areas.
Most often the next side missions can or should be done (because of your character's level) while doing the next main missions (Class). That is why all mission objectives are divided into main missions.
You should observe that there are no issues connected with the Codex here - these can be found in the "Places" chapter. Moreover, there are no side Heroic mission objectives. Their descriptions are at the end of the side missions chapter - "Hutta".
Claim Your New Identity [mission start] - Keeper
Death Mark: Fa'athra Gang [mission start] - Nem'ro Bounty Droid
Gang Warfare [mission start] - Lew Brell
Mark Quick Travel Point (Poison Pit Cantina) and Taxi (Poison Pit Speeder) outside
[+] Death Mark: Fa'athra Gang - Defeat Fa'athra's Gangsters: 0/6
Gang Warfare - Speak to Rex Geer
[+]Claim Your New Identity: Live No Witnesses (Bonus) - Eliminate Fa'athra's Thieves: 0/3
Claim Your New Identity - Recover the Stolen Tribute
Gang Warfare [mission end] - Speak to Lew Brell
Claim Your New Identity [mission end] - Return to Jheeg
Soiree [mission start] - Jheeg
Dreams of Korriban [mission start] - Gianna
Dreams of Korriban - Speak to Mekks
Mark Taxi (Nem'ro's Palace Speeder) and use it to go to Poison Pit Speeder
Dreams of Korriban [mission end] - Speak to Gianna
Take a Taxi to get back to Nem'ro's Palace Speeder
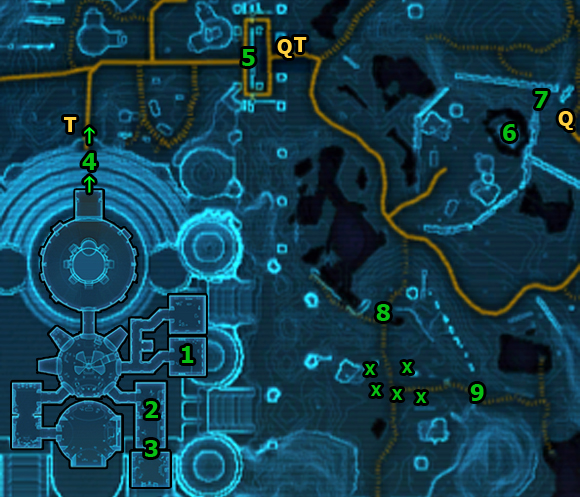
Friends in Common [mission start] - Linh
Soiree - Speak to Nem'ro
Soiree - Speak to Karrels Javis
Soiree - Go to the Palace Suite
Soiree - Disable Nem'ro's Hidden Surveillance: 0/3
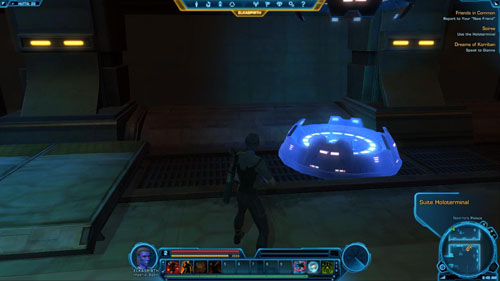
Soiree [mission end] - Use the Holoterminal
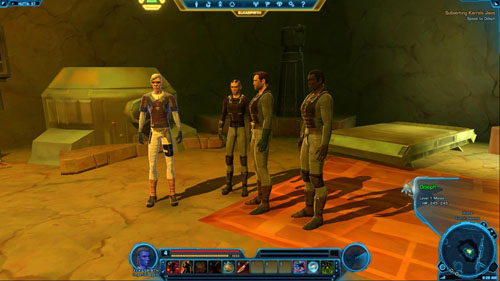
Subverting Karrels Javis [mission start] - Keeper
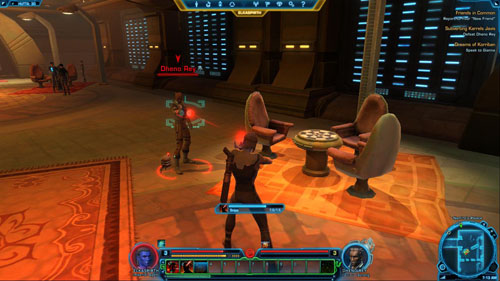
Subverting Karrels Javis - Speak to Karrels Javis
Subverting Karrels Javis - Speak to Dheno Rey
[o] Subverting Karrels Javis - Defeat Dheno Rey
Subverting Karrels Javis - Speak to Karrels Javis
A Slight Lean [mission start] - Morsel
Friends in Common [mission end] - Report to Your "New Friend"
Mark Quick Travel Point (Nem'ro's Bazaar) and Taxi (Jiguuna Speeder) by the town gate
A Slight Lean [mission end] - Speak with the Chief Enforcer
The Man With Steel Voice [HEROIC +2] [mission start] - Geric
Trophy Hunter [mission start] - Var'soonta
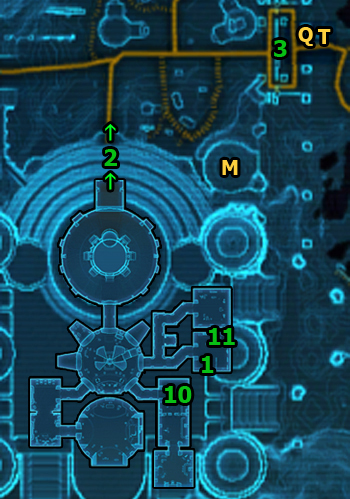
Subverting Karrels Javis - Speak to Odeph
Mark Quick Travel Point (Evocii Workcamp)
Protection [mission start] - Donal
Trophy Hunter - Find Black Death's Speeder
[+] Trophy Hunter: Hunting Party (Bonus) - Destroy Hunting Droids: 0/6
Trophy Hunter [optional mission end]- Open the Speeder Cockpit
[+] Subverting Karrels Javis: Marked Evocii (Bonus) - Defeat Renegade Evocii Forces: 0/18
Tech Jealousy [mission start] - Datapad
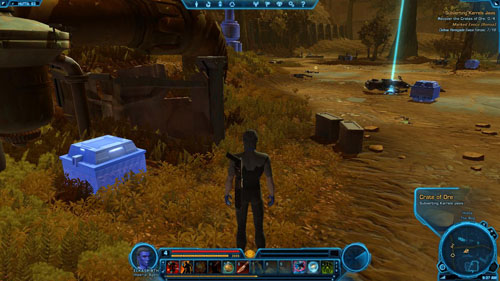
Subverting Karrels Javis - Recover the Crates of Ore: 0/4
Tech Jealousy - Retrieve a Fa'athra Mining Droid Datacore
Teleport to Quick Travel Point (Evocii Workcamp)
Tech Jealousy [mission end] - Report to Doctor Terrab
[o] Trophy Hunter [mission end] - Return to Var'soonta
Go to Jiguuna gate and then take a Taxi to Nem'ro's Palace Speeder
Subverting Karrels Javis - Return to Karrels Javis
Subverting Karrels Javis - Speak to Kaliyo Djannis
Subverting Karrels Javis [mission end] - Use the Holoterminal
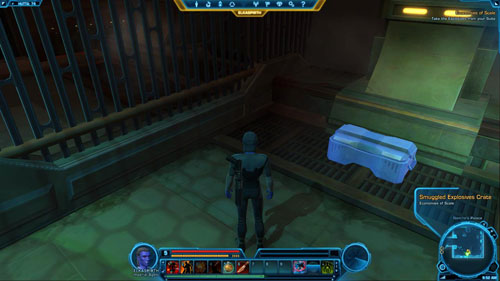
Economies of Scale [mission start] - Nem'ro the Hutt
Economies of Scale - Take the Explosives from your Suite
To Boom or Not to Boom [mission start] - Getzo
Subtle Sabotage [mission start] - Rudd
Exit the palace and take a Taxi to Jiguuna Speeder
To Boom or Not to Boom - Plant the Pulse Explosives
Factory Recall [HEROIC +2] [mission start] - Gedron Hix
[+] Protection - Defeat Fa'athra's Goons: 0/10
Protection - Retrieve the Lockbox
Spicecraft Down [mission start] - Datapad (located in the south)
[+] Spicecraft Down: River Monsters (Bonus) - Defeat the Chemilizards: 0/10
[+] Spicecraft Down - Collect Spice Containers: 0/20
Spicecraft Down [mission end] - Deliver the Spice to Tilvik
Protection [mission end] - Speak to Donal
Subtle Sabotage [mission end] - Deliver the Datapad to Peblak
Mark Quick Travel Point (Chemical Marsh) and Taxi (Rust Yards Speeder) in the camp
Keeping Secrets [mission start] - Kraay
Industrial Raiders [mission start] - Rand
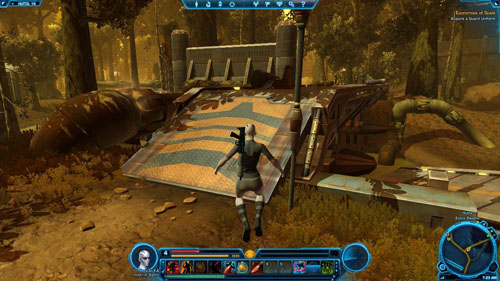
[+] Economies of Scale - Acquire a Guard Uniform
[+] Keeping Secrets: Terminating Contracts (Bonus) - Defeat Fa'athra's Industrial Guards: 0/9
[+] Industrial Raiders: Stopping the Runners (Bonus) - Defeat Fa'athra's Rust Runners: 0/12
[+] Industrial Raiders - Collect Exhausted Power Units: 0/4
Keeping Secrets - Open Zeven's Holding Cell
[+] [o] Keeping Secrets - Deactivate Enslaved Miners' Shock Collars: 0/5
Industrial Raiders - Charge the Power Units
Economies of Scale - Gain Access to the Drill Chamber
Economies of Scale - Open the Mine Shaft
Economies of Scale - Plant the Explosives
Economies of Scale - Destroy the Droid Reinforcements
[o] Keeping Secrets - Return to Zeven's Holding Cell
Teleport to Quick Travel Point (Chemical Marsh)
Keeping Secrets [mission end] - Return to Kraay
Industrial Raiders [mission end] - Speak to Rand
Take a Taxi to Nem'ro's Palace Speeder
To Boom or Not to Boom [mission end] - Return to Getzo
Economies of Scale - Speak to Karrels Javis
Economies of Scale - Claim Karrels's Reward
Economies of Scale - Speak to Targen
Economies of Scale - Defeat Targen's Gang
Economies of Scale - Claim Karrels's Reward
Economies of Scale [mission end] - Use the Holoterminal
Change of Plans [mission start] - Keeper
Change of Plans - Slice Karrels's Security Terminal
Change of Plans - Defeat Karrels Javis's Bodyguards
Change of Plans - Speak to Karrels Javis
[o] Change of Plans - Defeat Karrels Javis
Change of Plans - Speak to Toth'lazhen
Change of Plans [mission end] - Use the Holoterminal
Change of Plans [mission end] - Speak to Kaliyo Djannis
The New Truth [mission start] - Keeper
The Rancor Egg [mission start] - Urgrec
Take a Taxi to Jiguuna Speeder
Return of the Warrior [mission start] - Burnok
Take a Taxi to Rust Yards Speeder
Unfinished Business [mission start] - Cy Krolo
[+] Unfinished Business: Finish Some More Business (Bonus) - Dispatch Fa'athra's Forces: 0/18
[+] The New Truth: Leave no Trace (Bonus) - Disable Fa'athra Security Cameras: 0/6
[+] The New Truth - Acquire the Access Codes: 0/2
Unfinished Business - Use Transmitter Switch on Cleaning Probe X010
Unfinished Business - Use Transmitter Switch on Cleaning Probe F7
Unfinished Business - Use Transmitter Switch on Cleaning Probe G44
[+] The Rancor Egg: Lizard hunting (Bonus) - Defeat Chemilizards: 0/6
[+] The Rancor Egg - Destroy Beast Eggs: 0/3
The Rancor Egg - Steal a Rancor Egg
The New Truth - Access Fa'athra's Archives
[o] The New Truth - Defeat Nohn Veyaiko and His Elite Guards
The New Truth - Download the Holorecordings
Return of the Warrior - Thaw Out Oren Ward
Return of the Warrior - Recover Fa'athra's Stash
Teleport to Quick Travel Point (Chemical Marsh)
Unfinished Business [mission end] - Return to Cy Krolo
Take a Taxi to Jiguuna Speeder
Return of the Warrior [mission end] - Return to Burnok
The Rancor Egg [mission end] - Return to Urgrec
The New Truth - Speak to Toth'lazhen
The New Truth [mission end] - Speak to Keeper via Holoterminal
Nothing Is Ever Easy [mission start] - Keeper
Nothing Is Ever Easy - Go to the Jiguuna Spaceport
Nothing Is Ever Easy - Use Your Personal Holocom
Nothing Is Ever Easy - Intercept the Red Blade
Nothing Is Ever Easy - Speak to the Red Blade
Nothing Is Ever Easy - Defeat the Red Blade
Nothing Is Ever Easy [mission end] - Speak to the Red Blade
Leaving Hutta [mission start] - Red Blade
Item Modification [mission start] - Red Blade
Item Modification [mission end] - Activate the Lore Object to Learn about Modification
Leaving Hutta [mission end] - Take a Shuttle to the Imperial Fleet
Leave No Witnesses (Bonus)

Speak to Keeper
You begin your adventure as an Imperial Agent in The Poison Pit in [1]. Speak to Keeper in if it didn't happen automatically. You'll receive the first mission objective, and also a Codex entry - Persons of Note: Keeper (Imperial Agent) - worth 45 XP.
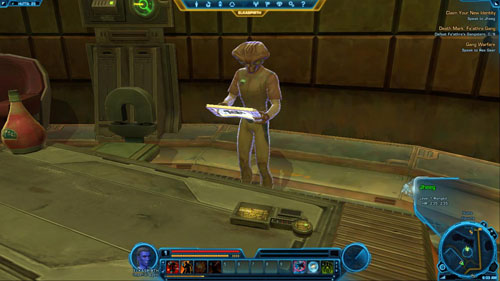
Speak to Jheeg
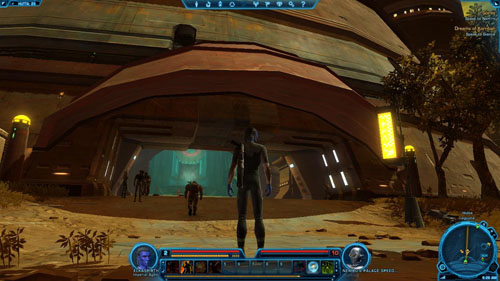
Run out of the main room and talk to NPCs about two side missions. Remember to mark Quick Travel Point (Poison Pit Cantina) before you get outside and once you've exited the place (there's a door in [2]) mark Taxi (Poison Pit Speeder) on the right. Then go to an apartment in [3]. Inside talk to Jheeg.
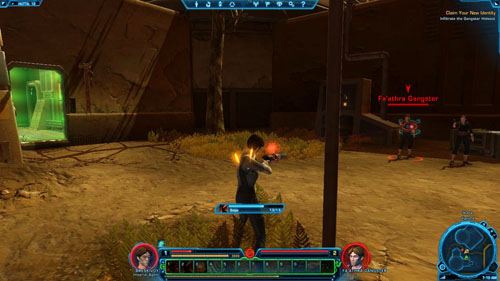
Infiltrate the Gangster Hideout
Your next mission is to break in gangster hideout. The hideout entrance is in [4]. Watch out for enemies on the way, especially Fa'athra Street Captains.
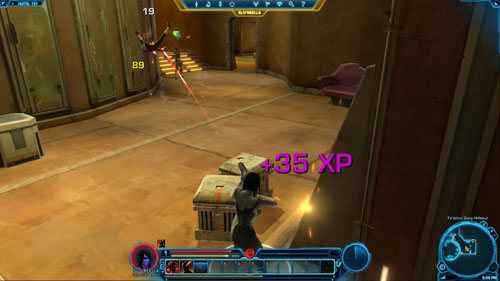
Eliminate Fa'athra's Thieves: 0/3
Regenerate your health if it isn't full. You will receive a bonus mission after killing two out of the three Fa'athra's Thieves in [5]. Also, get rid of the last one in [6] and you'll complete the mission and receive 255 XP.
Recover the Stolen Tribute
You'll notice Stolen Cargo in [6]. Take it with you and then go back to Jheeg.
Return to Jheeg
Once you've returned you'll complete the mission and get the next one.

Speak to Nem'ro
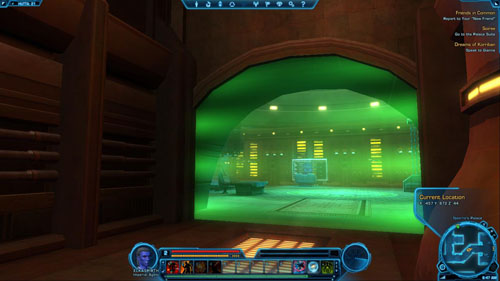
You start the mission in [1], in Jheeg's house. Go outside and go to [2]. Remember to mark Taxi (Nem'ro's Palace Speeder) on the way. Next, enter the big boss's palace through the entrance in [2] and you will appear in [3].
Speak to Karrels Javis
Once inside the palace run upstairs. Then go through the bar in [4]. Talk to Karrels Javis there and then to Nem'ro. Give him Nem'ro's Gifts and then speak to Javis once more. You'll receive the next mission objective and also get a Codex entry - Persons of Note: Nem'ro the Hutt - worth 100 XP.

Go to the Palace Suite
Go back to the bar and find a corridor leading to a room in [5], which has been assigned to you. Now you must get rid of the bugs.
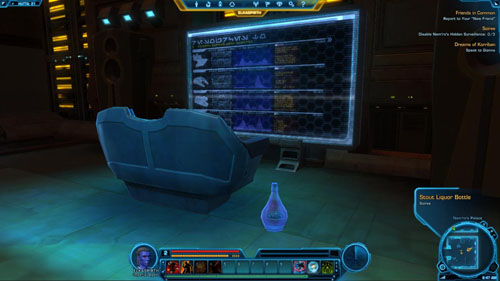
Disable Nem'ro's Hidden Surveillance: 0/3
The first bug is in a lamp on the table on the left [6].
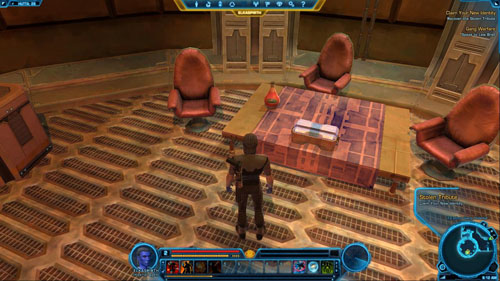
![The second bug is inside the table with a round chessboard [7] - (L04) Soiree - Imperial Agent - Star Wars: The Old Republic - Game Guide and Walkthrough](https://game.lhg100.com/Article/UploadFiles/201512/2015121709481340.jpg)
The second bug is inside the table with a round chessboard [7].
![The third and the last bug is inside the bottle on the floor in front of you [8] - (L04) Soiree - Imperial Agent - Star Wars: The Old Republic - Game Guide and Walkthrough](https://game.lhg100.com/Article/UploadFiles/201512/2015121709481384.jpg)
The third and the last bug is inside the bottle on the floor in front of you [8].
Use the Holoterminal
To complete the mission, use the holoterminal in [9]. You'll finish the mission and get another one. Meanwhile it's good to do a class mission Friends in Common.
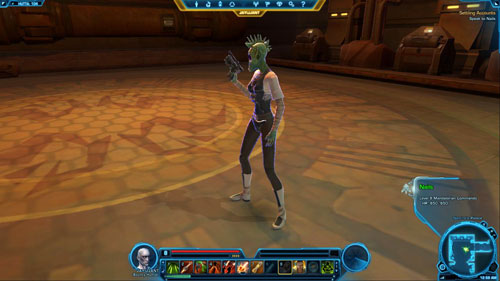
![Once you're inside the palace it's essential to talk to Linh in [1] (standing in the bar in Nem'ro Palace) - (L02) Friends in Common - Imperial Agent - Star Wars: The Old Republic - Game Guide and Walkthrough](https://game.lhg100.com/Article/UploadFiles/201512/2015121709481452.jpg)
Once you're inside the palace it's essential to talk to Linh in [1] (standing in the bar in Nem'ro Palace).

Report to Your "New Friend"
Go out of the palace and turn right at once. Downstairs you'll find Lycus Mattle in [2]. He is a trainer and you can purchase abilities for your character from him. Visit Lycus Mattle whenever you reach another level and when you're nearby, as without new abilities you won't be able to defeat the more difficult enemies.
Marked Evocii (Bonus)
Speak to Karrels Javis
Speak to Dheno Rey
You start in your room in [1]. Go to Karrels Javis, who's exactly where you last saw him - in [3]. However, in [2] Dheno Rey will stand in your way. He'll demand some credits from you. You can solve it in many ways (also depending on the sex) - see the tables below the picture for details.

A
Reply (Sex)
Effect
Points / Rewards
1
What do you want?
Further conversation stage - B
-
2
[Flirt] Don't you like me? / You're pushing it.
Further conversation stage - B
-
3
You scum. [Attack]
Fight with Dheno Ray
+50 to Dark Side
B
Reply (Sex)
Effect
Points / Rewards
1
Take some of my credits.
Giving credits to Dheno Ray
-
2
[Flirt] Be nice to a lady. / You won't talk.
Fight with Dheno Ray / Further conversation stage - C
-
3
You forced my hand. [Attack]
Fight with Dheno Ray
+50 to Dark Side
C
Reply (Sex)
Effect
Points / Rewards
1
Excellent.
Further conversation stage - D
-
2
[Flirt] We go well together.
Further conversation stage - D
-
3
Moron.
Fight with Dheno Ray
+50 to Dark Side
D
Reply (Sex)
Effect
Points / Rewards
1
No thanks.
Dheno Ray pardons the debt
+50 to Light Side
2
Sounds like fun.
Dheno Ray pardons the debt
+50 to Light Side
3
Forget it.
Fight with Dheno Ray
+50 to Dark Side
Defeat Dheno Rey
If you decided to fight with Dheno Rey, then you should know he's not a challenging enemy. You'll defeat him easily.
Speak to Karrels Javis
Finally, you can go straight to Karrels Javis in [3]. Talk to him and offer your assistance. Then go out of the palace through the door in [4] and go east, to the town exit in [5]. Remember to mark Quick Travel Point (Nem'ro's Bazaar) and Taxi (Jiguuna Speeder) on the way.

Speak to Odeph
A long way to the east awaits you. Reach [6] and enter the hut. The conversation with Odeph and the guards will begin automatically. You can earn some Light Side points - see the table below the picture.
A
Reply
Points / Rewards
1
I want to talk to him.
-
2
Step away from him.
+50 to Light Side
3
How's that going?
-
Defeat Renegade Evocii Forces: 0/18
It's essential that you get over the wall in [7] and mark Quick Travel Point (Evocii Workcamp). You can get to the village of the rebellious Evocii from the north (the gate in [8]) or east (the gate in [9]).
The second option means fewer enemies. On the other hand, it's worth taking measures to restore order in the camp and kill at least eighteen rebellious Evocii. There are three kinds of opponents: the weakest Evocii Insurgents, medium tough Renegade Evocii Raiders and the strongest, using melee attacks Renegade Evocii Hunters.
Kill eighteen enemies before executing the next mission objective - you'll complete the bonus mission and receive 1040XP.

Recover the Crates of Ore: 0/4
While you are killing enemies keep looking at the map. Find four Crates of Ore marked with "x". Try to kill the last enemy in the bonus mission before you take the last crate.
Return to Karrels Javis
Speak to Kaliyo Djannis
Finish all side missions if you there are any to be done in this area. Then go on foot or use the Quick Travel ability to go to [5]. From there take a Taxi to get to Nem'ro's palace. Enter through the door in [4] and find Karrels Javis w [3]. You'll also meet Kaliyo Djennis.

Use the Holoterminal
All that's left to do is to return to your room in [1] and use the holoterminal to finish this mission.
Take the Explosives from your Suite
The first task is to take the Explosives from your room in [1]. Afterward exit the palace through the gate in [2] and take a Taxi to the town gate in [3].

A long way to the east awaits you. You can shorten it if you marked the Quick Travel Point (Evocii Workcamp) in the Evocii workcamp. Next, cross the bridge in the east (shown in the picture below), and then follow the road to the camp in The Eastern Grime. Once you're there remember to mark Qucik Travel Point (Chemical Marsh) and Taxi (Rust Yards Speeder). Then go to [4] and you'll find yourself in a new location.
![Around the mining facility and inside watch out first of all for Fa'athra Rustguard Guardian Droids [+] - these are dangerous enemies who together with other enemies can quickly kill you - (L07) Economies of Scale - Imperial Agent - Star Wars: The Old Republic - Game Guide and Walkthrough](https://game.lhg100.com/Article/UploadFiles/201512/2015121709481631.jpg)
Around the mining facility and inside watch out first of all for Fa'athra Rustguard Guardian Droids [+] - these are dangerous enemies who together with other enemies can quickly kill you. Don't fight with them if other enemies are attacking you and it'll be best if you simply avoid them.
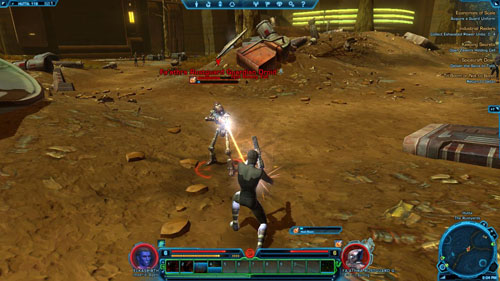
There are also suicide-droids (Fa'athra Blasting Droid) here, which will run up to you and explode. You should eliminate them first, and it'll be best if you use abilities that can immobilize enemies. If you manage to destroy such a droid near other enemies, its explosion will painfully wound them.
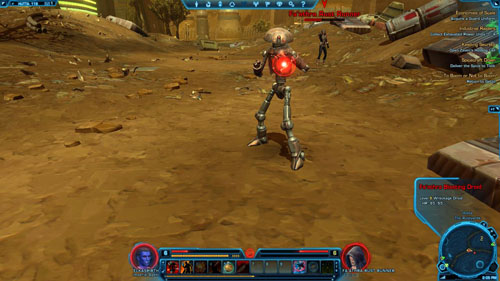
Acquire a Guard Uniform
Avoiding fight here isn't an option (especially if you are doing any side missions along the way). So, keep your eyes open and look for a yellow beam of light that can appear above the corpse of one of the defeated opponents. Search this body and take Guard Disguise.
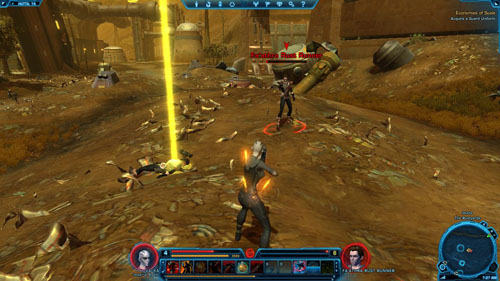
Gain Access to the Drill Chamber
Go through the first and second room and you'll reach a great hall. The stairs in [6] are your goal. They will take you to the second level of the facility. Watch out for enemies, because there are plenty of them here. Carefully move forward without engaging into combat with everybody at the same time. Defeat three enemies at the stairs in [6] and go upstairs.
![When you appear in [7], defeat three guards to the right of the stairs - (L07) Economies of Scale - Imperial Agent - Star Wars: The Old Republic - Game Guide and Walkthrough](https://game.lhg100.com/Article/UploadFiles/201512/2015121709481707.jpg)
When you appear in [7], defeat three guards to the right of the stairs. Then use the bridges around big generators to get to the other side. There will be a lot of enemies on the way. Also, be careful not to fall! Your goal is the platform in [8].
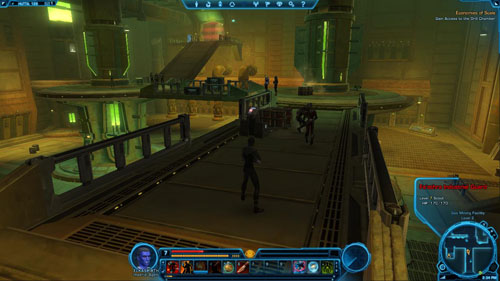
Once you get near the scanner, open the inventory panel and put on the acquired Guard Disguise (located in the "Mission Items" tab in the inventory panel). This way you can pass through the force field and go to[9].
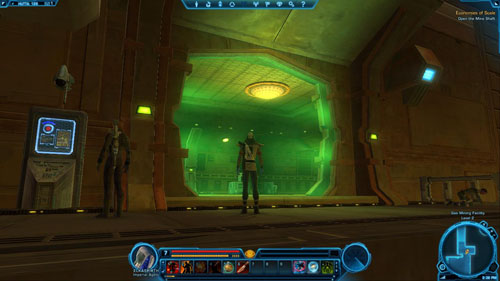
Open the Mine Shaft
Once you're there put your armor back on, then open the mine shaft in [9]...

Plant the Explosives
...and then plant the explosives under the hatch. Unfortunately, after a few moments droid reinforcements will appear here. Of course, you must destroy them.
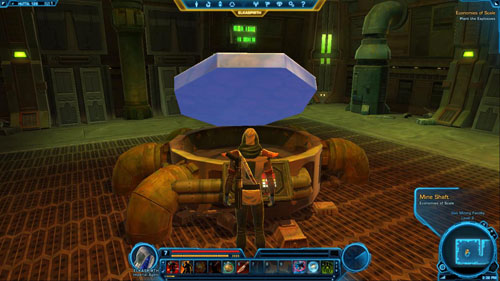
Destroy the Droid Reinforcements
You must destroy two Mining Droids and one SP-3R Excavation Droid [+]. Fight them in the given order and keep some Medpacs handy. Especially watch out for the SP-3R Excavation Droid [+], as it will throw a lot of grenades at you. Use abilities that cause explosions (bombs and grenades) because the droids are particularly sensitive to them.
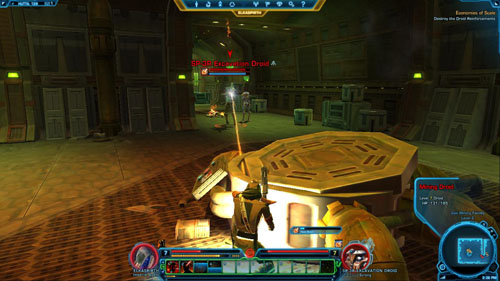
Speak to Karrels Javis
If you completed all side missions in this area and there's nothing more to keep you here, teleport to Quick Travel Point (Chemical Marsh) or go there on foot to a camp in The Eastern Grime. Then use a Taxi to get to Nem'ro's palace. Enter through the door in [2] and then go to [10] (on the first map). You'll talk to Karrels there and receive a new mission objective - getting your reward.
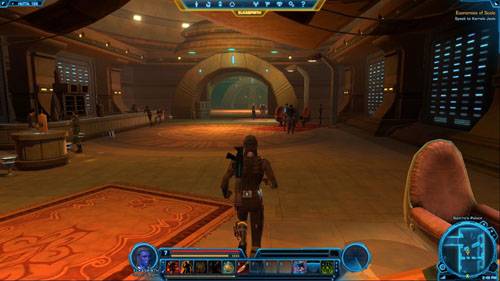
Claim Karrels's Reward
Speak to Targen
Run to [11]. When you enter the room you'll be stopped by Targen's gang. The conversation with their leader will end in a fight anyway, but you can earn some Light or Dark side points. See the tables below the picture for details.
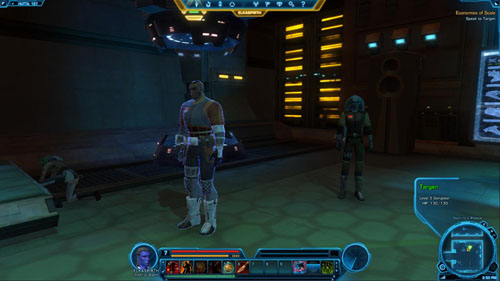
A
Reply
Effect
Points / Rewards
1
Yeah.
Further conversation stage - B
-
2
What's this all about?
Further conversation stage - B
-
3
Bad move. [Attack]
Fight with Targen and his gang
+50 to Dark Side
B
Reply
Effect
Points / Rewards
1
Oh?
Fight with Targen and his gang
-
2
Then let's deal.
Fight with Targen and his gang
+50 to Light Side
3
You're in trouble now.
Fight with Targen and his gang
-
Defeat Targen's Gang
You won't have any trouble with winning the fight - the enemies are weak. A grenade will kill two helpers, while Targen and Luunti won't be fighting long.
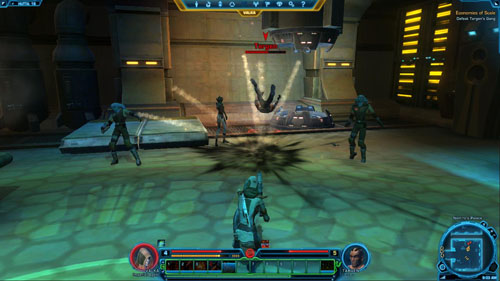
Claim Karrels's Reward
Finally, you can open a box that's on the table and claim your reward. It's a melee knife - Hutta Gangster's Knife.
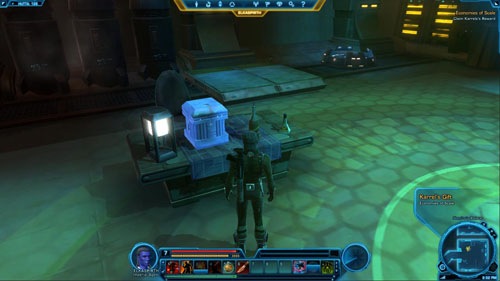
Use the Holoterminal
Use the holoterminal in [11] to complete this mission and receive then next.
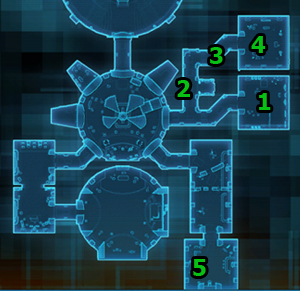
Slice Karrels's Security Terminal
After receiving a device (Security Spike) run from [1] to [2]. There is a computer there. Use the device on it. Thanks to that the cameras won't be able to record anything.
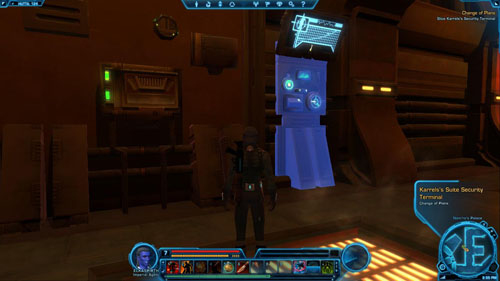
Defeat Karrels Javis's Bodyguards
There are two of them in the corridor in [3] and they won't be a problem. Kill them and then go to Karrels Javis's room.
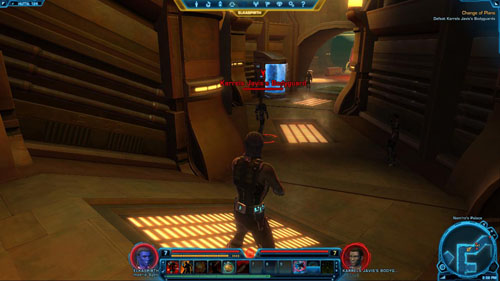
Speak to Karrels Javis
Karrels Javis is in [4] and once you visit him a conversation will start. It may end in different ways. You can start a fight with Karrels Javis or intimidate him to prevent him from attacking you. See the table below the picture for details.

A
Reply
Effect
Points / Rewards
1
It had to be done.
Further conversation stage - B
-
2
I can help you.
Further conversation stage - C
-
3
Time to die.
Fight with Karrels Javis
+100 to Dark Side
B
Reply
Effect
Points / Rewards
1
It's a shame it came to this.
Fight with Karrels Javis
+100 to Dark Side
2
You need to go into hiding.
Further conversation stage - C
-
3
I'm going to win.
Fight with Karrels Javis
+100 to Dark Side
C
Reply
Effect
Points / Rewards
1
They weren't both killed.
Further conversation stage - D
+100 to Dark Side
2
Don't make their mistake.
Fight with Karrels Javis
+50 to Dark Side
3
Fine. Then die.
Fight with Karrels Javis
+100 to Dark Side
D
Reply
Effect
Points / Rewards
1
Run, and don't come back.
Blackmailing Javis
+50 to Light Side
2
Do what I say or the kid dies.
Blackmailing Javis
+50 to Light Side
3
Not much. [Attack]
Fight with Karrels Javis
+100 to Dark Side
Defeat Karrels Javis
If Karrels Javis [*] attacked you, you'll have to fight. He's a very difficult enemy - don't attempt the combat if your level is lower than 7. Even when you have an appropriate level remember about Medpacs. Choose suitable cover and use your most powerful abilities.
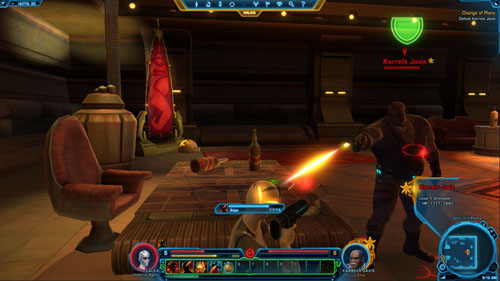
Speak to Toth'lazhen
Regardless of how the conversation with Karrels Javis ended, run to [5] to speak to Toth'lazhen. Next, return to your room in [1].
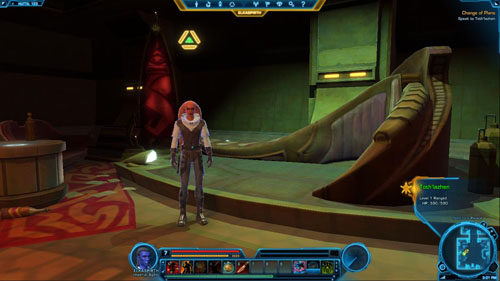
Use the Holoterminal
Speak to Kaliyo Djannis
Once again you'll be accosted by someone in your bedroom - it will be Kaliyo Djannis, who will instantly be employed by the Empire - at your side as your Companion. You'll also accomplish this mission and get another one.

Leave no Trace (Bonus)
![From [1] go to the palace exit in [2] and then use a Taxi on the left to go to The Eastern Grime (Rust Yards Speeder) - (L10) The New Truth - Imperial Agent - Star Wars: The Old Republic - Game Guide and Walkthrough](https://game.lhg100.com/Article/UploadFiles/201512/2015121709481928.jpg)
From [1] go to the palace exit in [2] and then use a Taxi on the left to go to The Eastern Grime (Rust Yards Speeder).
![Once you've arrived, go southeast to enter the Fa'athra's palace area (the gate is in [3]) - (L10) The New Truth - Imperial Agent - Star Wars: The Old Republic - Game Guide and Walkthrough](https://game.lhg100.com/Article/UploadFiles/201512/2015121709481992.jpg)
Once you've arrived, go southeast to enter the Fa'athra's palace area (the gate is in [3]). The only more challenging enemies in this area are Fa'athra Guardians [+] and Fa'athra Enforcers [+], but you'll deal with them easily anyway. Just don't fight with too many enemies simultaneously!
![You can also make entering the palace easier - look for a gentle slope you can climb - you'll find one in [4] - (L10) The New Truth - Imperial Agent - Star Wars: The Old Republic - Game Guide and Walkthrough](https://game.lhg100.com/Article/UploadFiles/201512/2015121709482004.jpg)
You can also make entering the palace easier - look for a gentle slope you can climb - you'll find one in [4].
![The main gate is located in [5] - (L10) The New Truth - Imperial Agent - Star Wars: The Old Republic - Game Guide and Walkthrough](https://game.lhg100.com/Article/UploadFiles/201512/2015121709482003.jpg)
The main gate is located in [5]. Inside there are a lot of Lore Objects - see the "Places" chapter for details). Don't forget about side missions if you have any in your log.

Disable Fa'athra Security Cameras: 0/6
A true agent covers the tracks of his activity. To do it, you must disable six Fa'athra cameras, located in places marked by [x] on the map. Switch off the cameras during the walk in the palace. It's best to stick to the left wall all the time and disable the cameras on the way.
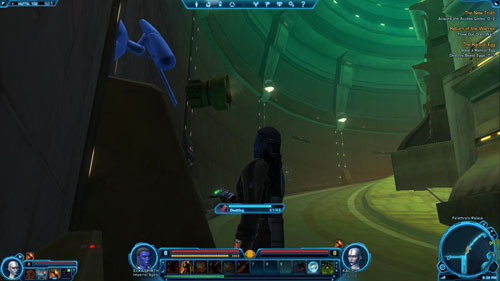
Acquire the Access Codes: 0/2
There are a lot of opponents in the palace but most of them are weak. Only Fa'athra Palace Lieutenants [+] and Fa'athra Palace Overlords [+] can be a little challenging, but still it isn't something you can't deal with. Remember that you'll find Access Codes in the corpses of the former only. Search the bodies and look for yellow beams of light.
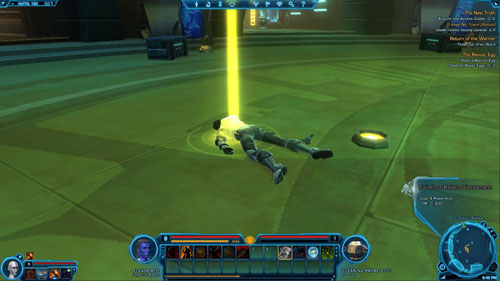
Access Fa'athra's Archives
You will be carrying out both abovementioned objectives while looking for the elevator that's in [6]. Use it to go to Fa'athra's Palace Level 2.
![After you've found yourself in [7], force your way through the corridor full of enemies to [8] and enter the story area - (L10) The New Truth - Imperial Agent - Star Wars: The Old Republic - Game Guide and Walkthrough](https://game.lhg100.com/Article/UploadFiles/201512/2015121709482116.jpg)
After you've found yourself in [7], force your way through the corridor full of enemies to [8] and enter the story area. Approach the supercomputer in [9] and start working on it.
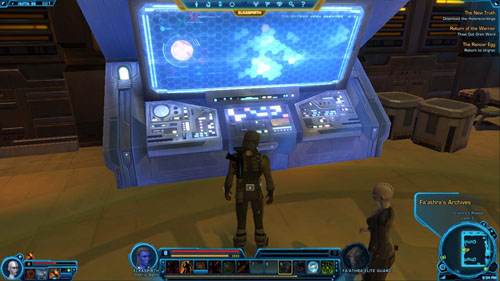
After a while you'll be accosted by Nohn Veyaiko. You'll have to talk to him and try to bring him round with words - and if that's no good - use force. Your replies will also have an impact on your companion. See the tables for details.
A
Reply
Effect
Points / Rewards
1
You've met before?
Further conversation stage - B
+15 to Affection: Kaliyo
2
Let's keep it casual.
Further conversation stage - B
-
3
I'm not backing down.
Fight with Nohn Veyaiko
+50 to Dark Side, +15 to Affection: Kaliyo
B
Reply
Effect
1
Let's bargain.
Further conversation stage - C
2
You can't beat me..
Fight with Nohn Veyaiko
3
I'll still kill you.
Fight with Nohn Veyaiko
C
Reply
Effect
Points / Rewards
1
I'm not kidding.
Further conversation stage - D
-1 to Affection: Kaliyo
2
Are you going to help or not?
Further conversation stage - D
-1 to Affection: Kaliyo
3
Fine. [Attack].
Fight with Nohn Veyaiko
+50 to Dark Side, +15 to Affection: Kaliyo
D
Reply
Effect
Points / Rewards
1
You sure?
Further conversation stage - E
+50 to Light Side, +15 to Affection: Kaliyo
2
Come work for Nem'ro.
Further conversation stage - E
+50 to Light Side
3
Then I have to kill you.
Fight with Nohn Veyaiko
+50 to Dark Side
E
Reply
Effect
1
Excellent.
-
2
A pleasure doing business.
-
3
Whatever.
+50 to Light Side
Defeat Nohn Veyaiko and His Elite Guards
If you didn't convince Nohn Veyaiko [+], you'll have to defeat him and his three guards (Fa'athra Elite Guards). Taking into consideration that now you have a companion - Kaliyo -the fight will not cause you any trouble.
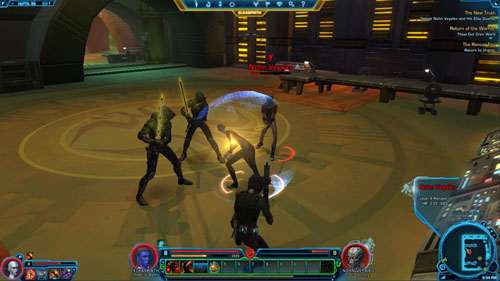
Download the Holorecordings
Approach the computer in [9] and start breaking in. After a while Kaliyo will approach you and give you a different idea. You can destroy all data or make a copy for yourself. Your replies will have an impact on Kaliyo. See the tables below the picture for details.

A
Reply
Points / Rewards
1
You have some information?
-
2
What?
-
3
Quiet.
-1 to Affection: Kaliyo
B
Reply
Points / Rewards
1
And you're concerned?
+15 to Affection: Kaliyo
2
Won't that strengthen us?
-
3
So what?
-
C
Reply
Effect
Points / Rewards
1
No taking chances.
Deleting the recordings
+50 to Dark Side, +40 to Affection: Kaliyo
2
Let's erase it.
Deleting the recordings
+50 to Light Side, -1 to Affection: Kaliyo
3
We''ll chance it. It'll be fun.
Making a copy
+50 to Light Side, +15 to Affection: Kaliyo
If you make a copy you'll receive an item - Holorecordings, which is a mission item connected with one of the further missions.
Speak to Toth'lazhen
If you don't have any other side missions to accomplish in the palace, take the elevator to level 1 in [7] and head for the exit. Then run to the nearest Taxi (or use the Quick Travel ability). Drive up Nem'ro's palace, enter through the gate in [2] and then go to [10]. A conversation awaits you here. In some cases your replies will have an impact on Kaliyo - see the tables below the picture for details.

A
Reply
Points / Rewards
1
This disc has answers.
-
2
I did.
-
3
For enough credits, sure.
+15 to Affection: Kaliyo
B
Reply
Points / Rewards
1
Thank you.
-
2
Can I help any more?
-1 to Affection: Kaliyo
3
Whatever.
-
Speak to Keeper via Holoterminal
All you need to do is complete the mission. Go back to your room in [1] and use the Holoterminal on the left to talk to Keeper. Your replies will have an impact on Kaliyo - see the tables below the picture.

A
Reply
Points / Rewards
1
Good to hear.
-
2
Then he's done with us?
-
3
"Our" work?
+15 to Affection: Kaliyo
B
Reply
Points / Rewards
1
Right.
-
2
"Walked out on?"
+15 to Affection: Kaliyo
3
Finally!
-
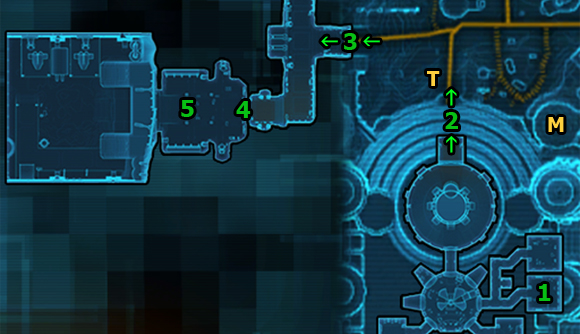
Go to the Jiguuna Spaceport
It's time to leave your apartment on Hutta. Run from [1] to palace exit in [2], and then left, to the gate leading to the spaceport in [3].
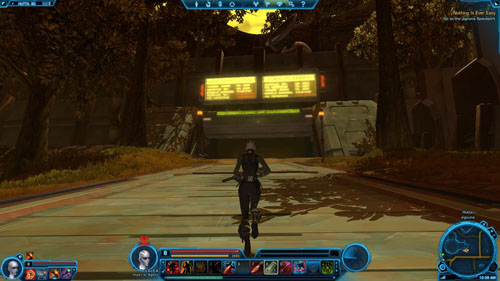
Use Your Personal Holocom
Once you're inside, Jheeg will report to you through the holocom. Click the button on the screen. Your replies can have an impact on Kaliyo - see the table below the picture.

A
Reply
Points / Rewards
1
Got it.
-
2
That's murder.
-1 to Affection: Kaliyo
3
I blame you.
-
Intercept the Red Blade
Next, head for fork, turn left and then right. Go through the green force field in [3] and go to [4], where you'll meet the real Red Blade.
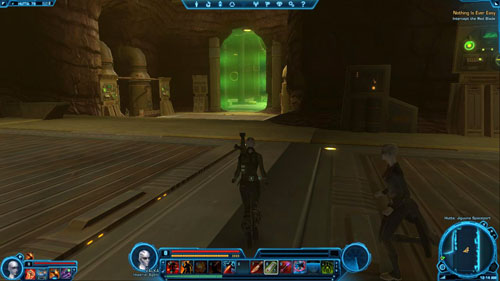
Speak to the Red Blade
You'll be accosted by Red Blade and regardless of your replies everything will end in a fight. However, you can try to steer the conversation in such a direction as to persuade Red Blade to give you his weapon (Red Blade Carbine). Moreover, your replies will have an impact on Kaliyo - see the tables below the picture for details.

A
Reply
Points / Rewards
1
What?
-
2
I am the blade.
+15 to Affection: Kaliyo
3
At last, the mysterious fool.
-
B
Reply
Effect
Points / Rewards
1
This is all a mistake.
Further conversation stage - C
2
You could be pretending, too.
Fight with Red Blade
+15 to Affection: Kaliyo
3
I don't need to. [Attack]
Fight with Red Blade
+50 to Dark Side, +15 to Affection: Kaliyo
C
Reply
Effect
Points / Rewards
1
I was forced into it.
Further conversation stage - D
+15 to Affection: Kaliyo
2
It was in your honor.
Further conversation stage - D
-
3
Nevermind.
Fight with Red Blade
D
Reply
Effect
Points / Rewards
1
This is real.
Getting Red Blade's weapon and Fight with him.
2
It depends.
Fight with Red Blade
-
3
Forget it.
Fight with Red Blade
+15 to Affection: Kaliyo
Defeat the Red Blade
Regardless of your reply you'll have to defeat the real Red Blade [*]. Don't ignore the fight and keep Medpacs handy. Also, don't hesitate to pull back if you're close to death. In spite of these difficulties you and Kaliyo will manage to defeat the boss.
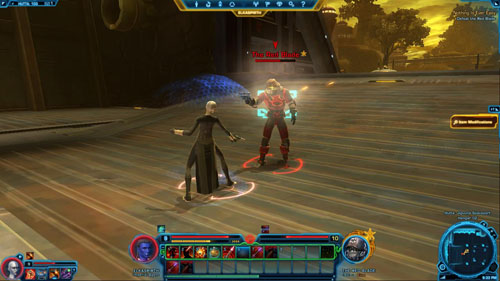
Speak to the Red Blade
The last mission objective is to talk to Red Blade. Do it and you'll get two new missions - class and tutorial.

Item Modification
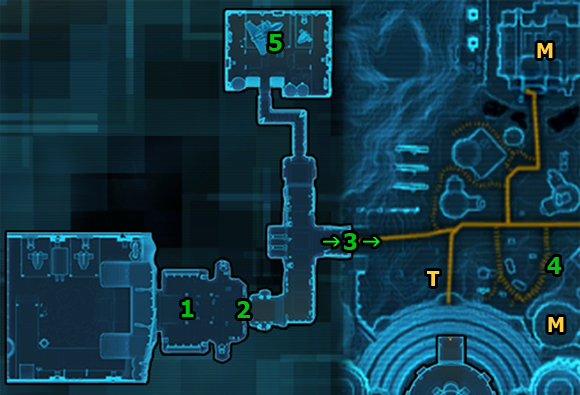
Activate the Lore Object to Learn about Modification
While doing the last mission on Hutta it is worth completing a Tutorial mission, which is about item modification. From [1] go to the story area exit in [3] and then exit the spaceport through the gate in [3]. Then find the item modification station in [4] and read the sign next to it.
You will receive a Codex entry - Game Rules: Item Modification - worth 45 XP. You'll also complete a Tutorial mission, receive 885 XP and Fortitude Enhancement 2. This item, as well as Reflex Mod 1, can be put into your weapon, thus making it more powerful. To do it, use the station next to the sign.
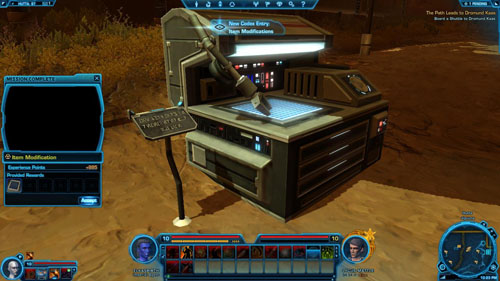
Take a Shuttle to the Imperial Fleet
It's time to leave Hutta. Run to the spaceport in [2], then go north, to a shuttle that will take you from this planet. Use the door in [5] and choose Imperial Fleet as your destination. Once you're on the Imperial Fleet you'll complete this mission and receive the next one. Your career as an Imperial Agent has just begun!
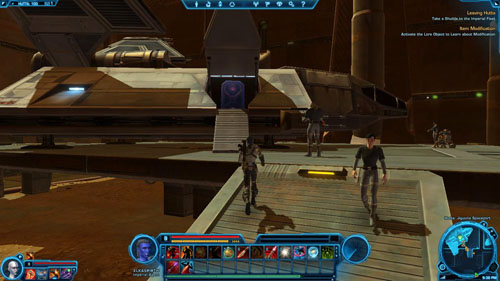
After leaving the planet during the first visit to any cantina you'll have a chance to talk to Kaliyo (if you want you can even go back to Hutta to do it). Your answers will have an impact on Kaliyo. See the tables below the picture for details. After the conversation the mission will be completed.

A
Reply
Effect
1
You enjoy fighting, don't you?
-
2
I bet you miss Hutta.
+15 to Affection: Kaliyo
3
That planet was disgusting.
+15 to Affection: Kaliyo
B
Reply
Effect
1
We'll make a fine team.
+15 to Affection: Kaliyo
2
[Flirt] Good times, indeed.
-
3
Just learn to follow orders.
-1 to Affection: Kaliyo
Rewards:
2510 XP.
Each mission description is divided into several smaller parts. The list of missions is given in chronological order, that is, the order you receive them. However, you might do them in a different sequence (see the "Shortcuts" section for the optimal order). Also, the level of a particular mission is shown before its name (L), as well as a note whether it is a [HEROIC] mission. Here is all information that is essential to read before you start using the missions' description.
The exact description of a mission is here. Sometimes it's divided into several different places you will visit, and each of them has its own map.
In the missions descriptions there are all dialogues that can have any impact on the game mechanics. It is given in the Points / Rewards column. The Effect column specifies what kind of effect your reply will have (there can also be a letter referring to the next dialogue mentioned), while under Reply there is the answer's line.
If any dialogue is missing, it means that it doesn't matter which reply you choose (of course, except for the aspects related to developing your character in terms of the story). If a reply doesn't have any effect or doesn't result in getting any points or rewards, then there will be no suitable column in the table.
#
Reply
Effect
Points / Rewards
Reply number
One out of the two or three replies your character can give.
Effect of the chosen reply, and if it leads further - a letter of the next dialogue is given
+x to Light / Dark Side, +x / -x to companion's Affection, other Rewards
# - a letter indicating the dialogue order. Some replies can lead to different dialogues.
If a mission contains a small bonus quest, then a complete list of them is given right before the mission description. Bonus mission objectives are given along with the mission objectives (class or side) with which such a mission is connected.
The list of rewards includes: XP, credits, items and Codex entries. You can receive all these items for completing a mission. Sometimes you'll get one out of the two depending on your class, other times you'll have to choose one from several items (these are separated by a slash - "/"). If there is a [*] next to the reward, it means that it is a very valuable item.
![Before you go out of The Poison Pit talk to Nem'ro Bounty Droid in [1] - a small robot you'll find on the right, near the building exit - (L01) Death Mark: Fa'athra Gang - Hutta - Star Wars: The Old Republic - Game Guide and Walkthrough](https://game.lhg100.com/Article/UploadFiles/201512/2015121709482316.jpg)
Before you go out of The Poison Pit talk to Nem'ro Bounty Droid in [1] - a small robot you'll find on the right, near the building exit.
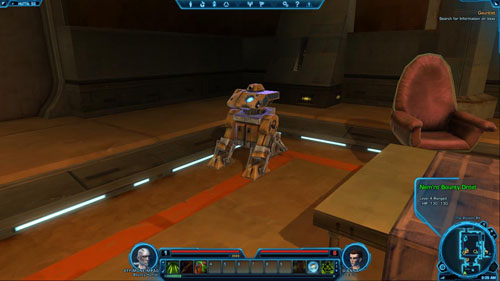
Defeat Fa'athra's Gangsters: 0/6
You don't have to worry about this mission - just keep killing Fa'athra Gangsters on the way, while performing other missions. It'll be easy to find and kill six of them, thanks to which the mission will be completed automatically.
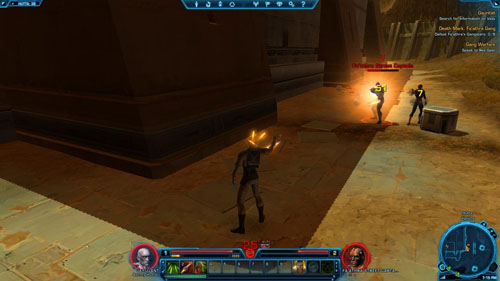
![Before you leave The Poison Pit, talk to Lew Brell in [1] - a black mercenary sitting on the couch on the left - (L01) Gang Warfare - Hutta - Star Wars: The Old Republic - Game Guide and Walkthrough](https://game.lhg100.com/Article/UploadFiles/201512/2015121709482356.jpg)
Before you leave The Poison Pit, talk to Lew Brell in [1] - a black mercenary sitting on the couch on the left. Agree to help him.

Speak to Rex Geer
Rexa Geer's house is nearby. The entrance is in [2]. At the front door and in the room on the left defeat gangsters (there's also a chest here you should search), and then go to Rex Geer, who's standing in [3]. Talk to him - you'll have to decide whether you prefer to get the money and not worry about the prisoner, or keep your word and release the mercenary's brother.
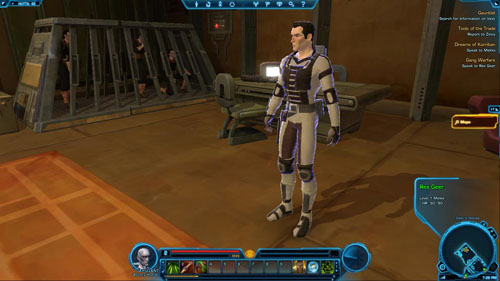
A
Reply
Effect
Points / Rewards
1
Fine, keep him and pay up.
Taking the bribe
+50 to Dark Side, +5 credits
2
No. Let him go.
Releasing mercenary's brother
+50 to Light Side
Speak to Lew Brell
Regardless of the choice you've made, return to Lew Brell in [1] and speak to him.
![When your character reaches level 2, drop by in The Poison Pit and find Gianna in [1] - (L02) Dreams of Korriban - Hutta - Star Wars: The Old Republic - Game Guide and Walkthrough](https://game.lhg100.com/Article/UploadFiles/201512/2015121709482431.jpg)
When your character reaches level 2, drop by in The Poison Pit and find Gianna in [1]. Talk to her and offer your assistance.

Speak to Mekks
Exit the cantina and go west, to the spaceport in [2]. Inside, look for Mekks in [3] and talk to him. You will have to decide - either you kill the father and hand the boy to his mother, who wants to send him to the Sith planet, or lie to her and tell her that the boy has already gone to the Sith planet with his father.

A
Reply
Effect
Points / Rewards
1
No. [Kill him]
Sending the boy to Korriban
+100 to Dark Side
2
All right. I'll lie for you.
Leaving the son with his father
+100 to Light Side
Speak to Gianna
Regardless of the choice you've made, return to Gianna in [1] and speak to her to finish this mission and claim your rewards.
![You will get this brief mission from Morsel in [1] - (L04) A Slight Lean - Hutta - Star Wars: The Old Republic - Game Guide and Walkthrough](https://game.lhg100.com/Article/UploadFiles/201512/2015121709482451.jpg)
You will get this brief mission from Morsel in [1]. You will qualify to receive it only after having the first conversation with Nem'ro the Hutt in the mission Big Chief (Bounty Hunter) or Soiree (Imperial Agent). After receiving the mission, exit the palace (the door is in [2]).
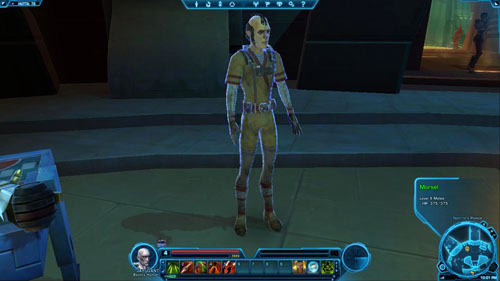
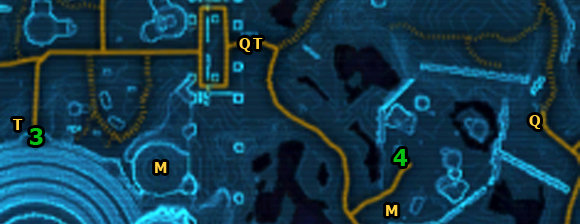
Speak with the Chief Enforcer
From [3] go on foot or by means of transport (if you can use them) to [4]. There - in Evocii workcamp - you'll meet the Chief Enforcer who's causing trouble. Talk to him and select the kind of warning. You can threaten to kill him if he doesn't stop making fun of Morsel or choose a more polite warning. Regardless of the choice you've made, the mission will be completed.
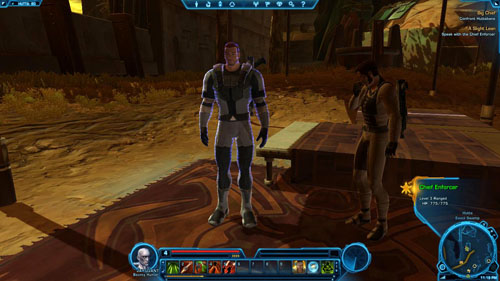
A
Reply
Effect
Points / Rewards
1
Next time you die.
Threatening to kill him
+50 to Dark Side
2
No, don't worry about it.
Ordinary warning
+50 to Light Side
Hunting Party (Bonus)
![In the Evocii workcamp go to the hut in [1] - (L05) Trophy Hunter - Hutta - Star Wars: The Old Republic - Game Guide and Walkthrough](https://game.lhg100.com/Article/UploadFiles/201512/2015121709482505.jpg)
In the Evocii workcamp go to the hut in [1]. Inside, talk to Twi'lek - Var'soonta - and offer your help.

Find Black Death's Speeder
Destroy Hunting Droids: 0/6
Head south and watch out for the opponents and animals along the way. Black Death's speeder is in [2] and is surrounded by Hunting Droids. Coming from the north you'll run into two, while by the speeder there will be two groups of three. Try not to fight with all of them at the same time and you shouldn't have a problem. Destroy at least six to perform the bonus mission and receive 745 XP.
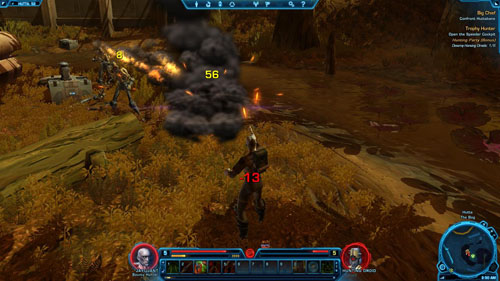
Open the Speeder Cockpit
Locate the panel on the speeder and then use it to open the cockpit and talk to the pilot - Black Death. At the end of the conversation you have two options. You can turn a blind eye to Black Death's wrongdoings and let him to continue killing the Evocii, or tell him to stop, and then warn or kill him (see the tables below the picture for details). Regardless of the choice you've made, you'll get a Codex entry - Organizations: Czerka Corporation - worth 45 XP.

A
Reply
Effect
Points / Rewards
1
Works for me. [Take bribe]
Taking the bribe
+100 to Dark Side, +37 credits to Rewards, mission end
2
Stuff your credits.
Further conversation stage - B
+50 to Light Side
B
Reply
Effect
Points / Rewards
1
Your head. [Kill him]
Killing Black Death
+50 to Dark Side
2
Nem'ro is angry.
Warning Black Death
+50 to Light Side
Return to Var'soonta
If you didn't take the bribe, you'll have to go back to Var'soonta in [1] and talk to him to complete this mission.
![In the rebel Evocii camp you'll find a body of a bounty hunter in [1] - (L05) Tech Jealousy - Hutta - Star Wars: The Old Republic - Game Guide and Walkthrough](https://game.lhg100.com/Article/UploadFiles/201512/2015121709482526.jpg)
In the rebel Evocii camp you'll find a body of a bounty hunter in [1]. There'll be a Datapad next to him that you should have a look at. Next, accept the mission.

Retrieve a Fa'athra Mining Droid Datacore
The nearest Fa'athra Mining Droid [+] is exactly south of the southern exit of the rebellious Evocii village - in [2]. Another one is in [3], while the rest - in the south among the swamps. These droids are a little more powerful opponents, but if you have full health you should deal with them easily.
It's important that you don't fight with a droid and other enemies (there are some among the swamps). After destroying a droid, search his remains and take the Droid Datacore. If there's no yellow beam of light coming up from the remains, it means that a different droid has the Droid Datacore.
Report to Doctor Terrab
Doctor Terrab is standing in the Evocii workcamp in the north. You can find him in [4]. Talk to him and give him the datacore to complete this mission and receive rewards.

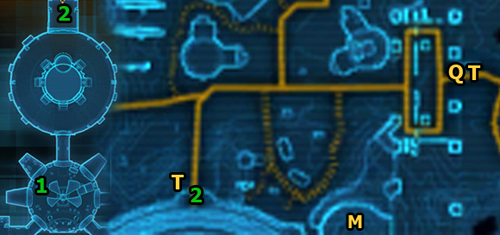
You will qualify to receive this mission after completing the Big Chief (Bounty Hunter) or Subverting Karrels Javis (Imperial Agent) mission. In order to get it, talk to Getzo in [1]. As usual, offer your help. Once you receive Pulse Explosives leave the palace through the door in [2]. Take a taxi to get to the town gate.

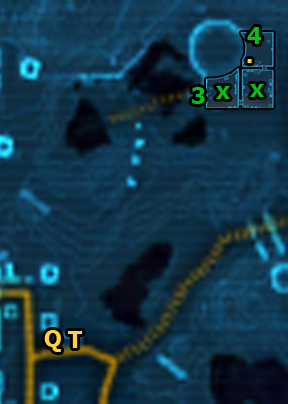
Plant the Pulse Explosives
Head north on foot to get to Nokril's hideout. The building entrance is in [3]. On the way, watch out for enemies - especially Bogmen Skinners [+]. In both the first and second room you will also have to defeat three Guard Droids marked with [x], but this shouldn't be a problem.
![There's a chest you should search in the last room and also Eel Tank in [4] where you should plant the explosives - (L07) To Boom or Not to Boom - Hutta - Star Wars: The Old Republic - Game Guide and Walkthrough](https://game.lhg100.com/Article/UploadFiles/201512/2015121709482791.jpg)
There's a chest you should search in the last room and also Eel Tank in [4] where you should plant the explosives. After a while, Nokril's hologram will appear. He wants to know who gave you this mission. You can either refuse, or agree to his terms.
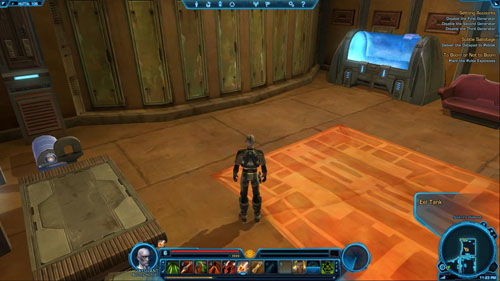
A
Reply
Effect
Points / Rewards
1
No way. [Leave the bomb as is]
Leaving the bomb
+50 to Dark Side
2
Absolutely. [Dump the bomb]
Deactivating the bomb
+50 to Light Side
Return to Getzo
Whatever decision you made, you need to return to Getzo. Go to [1] and talk to him. Then claim your reward.
You will qualify to receive this mission after completing the Big Chief (Bounty Hunter) or Subverting Karrels Javis (Imperial Agent) mission. In order to get it, talk to Rudd in [1]. As usual, offer your help. Once you receive Rudd's Datapad leave the palace through the door in [2]. Take a taxi to get to the town gate.

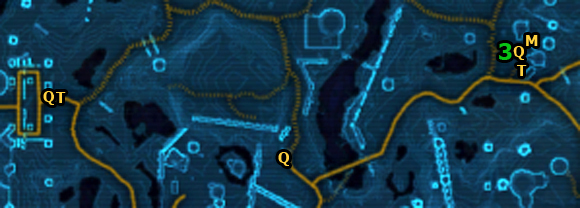
Deliver the Datapad to Peblak
A long way to the east awaits you. You can shorten it if you marked the Quick Travel Point (Evocii Workcamp) - teleport there and then cross the bridge in the east. After that, follow the road to the camp in The Eastern Grime. Once you're there remember to mark Quick Travel Point (Chemical Marsh) and Taxi (Rust Yards Speeder) but above all - talk to Peblak in [3]. The mission will be completed.
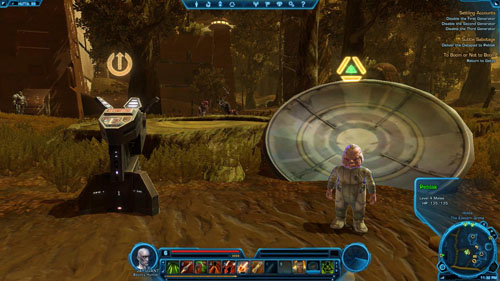
![In the eastern part of the Evocii workcamp you'll meet a man named Donal in [1] - (L07) Protection - Hutta - Star Wars: The Old Republic - Game Guide and Walkthrough](https://game.lhg100.com/Article/UploadFiles/201512/2015121709482742.jpg)
In the eastern part of the Evocii workcamp you'll meet a man named Donal in [1]. Talk to him and agree to drive the goons away from his killed brother's farm.

Defeat Fa'athra's Goons: 0/10
Retrieve the Lockbox
To reach the farm, just follow the road north. You'll see the first three opponents (Fa'athra Goons) in [2] by the wall of the homestead you must clear. Kill them and go inside through the door in [3] (they are just around the corner).
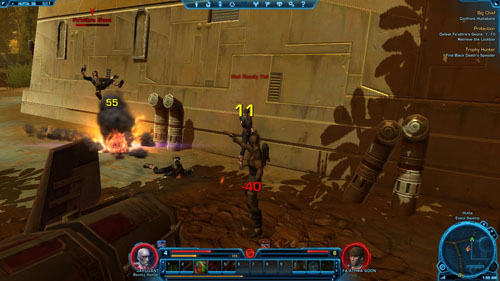
In both the first and second room there are three Fa'athra's Goons waiting for you. Beat them and then focus your attention on the ventilation shaft in [4]. Climb the crates to search it and then take Dusty Lockbox.
![The last enemy to defeat is in the third room in [5] together with the leader - Fa'athra's Goon Booss [+] - (L07) Protection - Hutta - Star Wars: The Old Republic - Game Guide and Walkthrough](https://game.lhg100.com/Article/UploadFiles/201512/2015121709482812.jpg)
The last enemy to defeat is in the third room in [5] together with the leader - Fa'athra's Goon Booss [+]. Be sure to regenerate your health before the fight. First, quickly get rid of the ordinary opponent and then kill the boss.
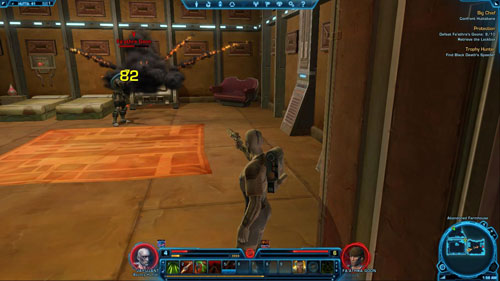
Speak to Donal
After completing these two objectives go back to [1] (watch out for enemies on the way) and talk to Donal to complete this mission.
River Monsters (Bonus)
![To begin this side mission, you need to find a Datapad (watch out for Fa'athra Patrol Droids [+] hidden in the bushes in this area) - (L06) Spicecraft Down - Hutta - Star Wars: The Old Republic - Game Guide and Walkthrough](https://game.lhg100.com/Article/UploadFiles/201512/2015121709482833.jpg)
To begin this side mission, you need to find a Datapad (watch out for Fa'athra Patrol Droids [+] hidden in the bushes in this area). The Datapad is [1] by the pillar next to the polluted river. Look through it and accept the mission.
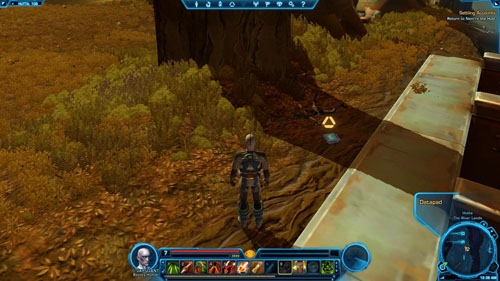
Defeat the Chemilizards: 0/10
Discovering twenty containers will be easy, but it will be much more difficult to do the bonus mission and kill ten Infected Chemilizards, who inhabit the polluted river. There aren't many of them, so use the maps in the guide - the animals are marked with [x]. But be careful when fighting their more powerful varieties - Mutant Chemilizard [+]. After killing ten lizards you'll perform this mission and receive 745 XP. It's good to know that these reptiles become your enemies only for the duration of the mission. Once you complete it, they'll attack only if you attack first.
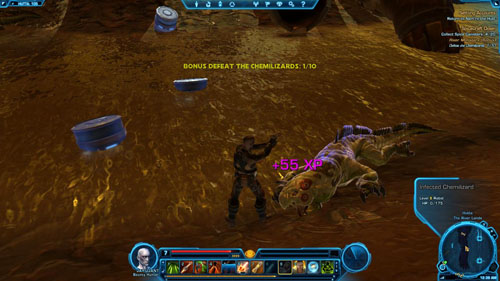
Collect Spice Containers: 0/20
Head south, killing the lizards and looking for the spice containers. There are a lot of them, in each container there can be from one to four Intact Spice Canisters. Search in the vicinity of [2], [3], [4] and [5]. After completing the bonus mission and finding twenty containers all you need to do is claim your rewards.
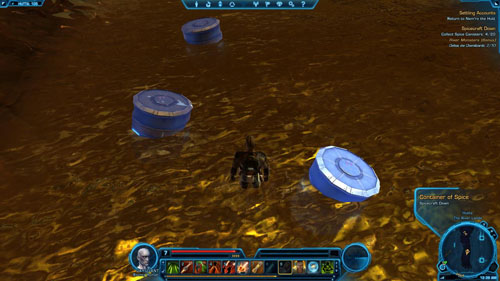
Deliver the Spice to Tilvik
You can do this at Tivlik's, whom you can find in [6], near Quick Travel Point (Evocii Workcamp). Talk to him and you'll accomplish this mission.
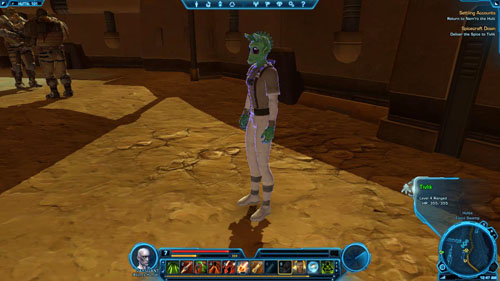
Terminating Contracts (Bonus)
![You'll receive this mission after a conversation with Kraay, who's standing in his hut in [1] - (L07) Keeping Secrets - Hutta - Star Wars: The Old Republic - Game Guide and Walkthrough](https://game.lhg100.com/Article/UploadFiles/201512/2015121709482959.jpg)
You'll receive this mission after a conversation with Kraay, who's standing in his hut in [1]. Offer your help, and after receiving the Shock Collar Removal Device head north to get near the mining facility.
![Around the mining facility and inside watch out first of all for Fa'athra Rustguard Guardian Droids [+] - these are dangerous enemies who together with other enemies can quickly kill you - (L07) Keeping Secrets - Hutta - Star Wars: The Old Republic - Game Guide and Walkthrough](https://game.lhg100.com/Article/UploadFiles/201512/2015121709482917.jpg)
Around the mining facility and inside watch out first of all for Fa'athra Rustguard Guardian Droids [+] - these are dangerous enemies who together with other enemies can quickly kill you. Don't fight with them if other enemies are attacking you and it'll be best if you simply avoid them.
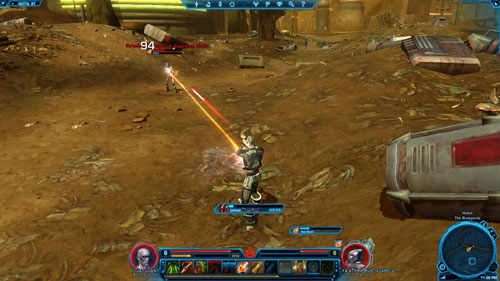
There are also suicide-droids (Fa'athra Blasting Droid) here, which will run up to you and explode. You should eliminate them first, and it'll be best if you use abilities that can immobilize enemies. If you manage to destroy such a droid near other enemies, its explosion will painfully wound them.

Defeat Fa'athra's Industrial Guards: 0/9
After killing the first Fa'athra Industrial Guard you'll receive a bonus mission. You'll need to kill nine enemies of this type. Don't worry about this mission at all - in the mining facility (its entrance is in [2]) there are lots of them. You won't have any trouble killing at least nine, which will result in earning 390 XP. Enter the building using the door in [2].
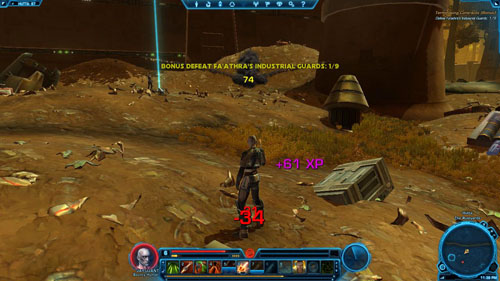
Open Zeven's Holding Cell
You need to get to the other side of the large hall. There are a lot of enemies, also the droids mentioned above, so be careful. Your mission is to get to the elevator in [3], which will take you to the basement.
In the basement there won't be any enemies. Run to [4], use the panel to open Zeven's holding cell and then talk to him. It will turn out that either you rescue him and the rest of the prisoners, or nobody - you need to make a decision.
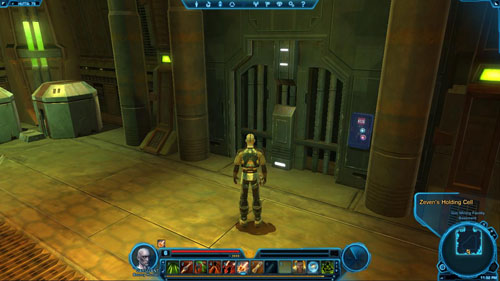
A
Reply
Effect
Points / Rewards
1
Too much trouble. [Kill him]
Killing Zeven, do the last mission objective
+100 to Dark Side
2
Everyone gets free.
Rescuing Zeven and the rest of prisoners, additional mission objectives
+100 to Light Side
Deactivate Enslaved Miners' Shock Collars: 0/5
If you decided to release the prisoners, you have to use an item given to you by Kraay - Shock Collar Removal Device - to do it. Open the inventory panel and the "Mission Items" tab at the bottom. Come closer to one of the Enslaved Miners, click RMB on him, and then RMB on the device icon (you can also drag it to the quick access bar).
You need to free five miners in this way - you can release them "on the way" while doing other main or side missions. The miners are marked with [x] on the map. Two are in the basement while the rest is upstairs - take the elevator in [3] and search two northern rooms. Watch out for the guards there! First deal with them, and then release the miners.
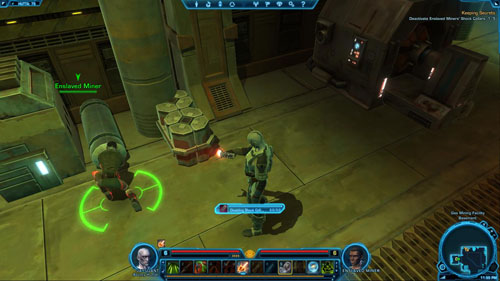
Return to Zeven's Holding Cell
In accordance with the mission objective, go back to the elevator in [3] and use the panel by the door in [4] again. Then talk to Zeven one last time.
Return to Kraay
If you freed or killed Zeven, all you need to do now is to exit the mining facility and return to Kraay, who is in [1]. Talk to him and take the reward for completing the mission.
Stopping the Runners (Bonus)
![You'll receive this mission after a conversation with Rand, who's sitting in his hut in [1] - (L07) Industrial Raiders - Hutta - Star Wars: The Old Republic - Game Guide and Walkthrough](https://game.lhg100.com/Article/UploadFiles/201512/2015121709483048.jpg)
You'll receive this mission after a conversation with Rand, who's sitting in his hut in [1]. Offer your help, and then head north, in the vicinity of [2], to collect batteries.
![Around the mining facility and inside watch out first of all for Fa'athra Rustguard Guardian Droids [+] - these are dangerous enemies who together with other enemies can quickly kill you - (L07) Industrial Raiders - Hutta - Star Wars: The Old Republic - Game Guide and Walkthrough](https://game.lhg100.com/Article/UploadFiles/201512/2015121709483089.jpg)
Around the mining facility and inside watch out first of all for Fa'athra Rustguard Guardian Droids [+] - these are dangerous enemies who together with other enemies can quickly kill you. Don't fight with them if other enemies are attacking you and it'll be best if you simply avoid them.

There are also suicide-droids (Fa'athra Blasting Droid) here, which will run up to you and explode. You should eliminate them first, and it'll be best if you use abilities that can immobilize enemies. If you manage to destroy such a droid near other enemies, its explosion will painfully wound them.

Defeat Fa'athra's Rust Runners: 0/12
After killing the first Fa'athra Rust Runner you'll receive a bonus mission. You'll need to kill twelve enemies of this type. It's essential to note that you won't come across Fa'athra Rust Runners inside the mining facility, and later you might lose this bonus mission. That's why, it's best to kill twelve of them before you enter the building. You'll earn 390 XP for completing this mission.
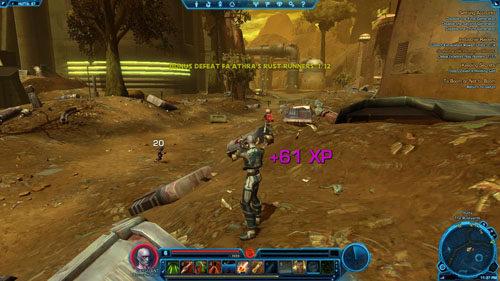
Collect Exhausted Power Units: 0/4
Along with carrying out the abovementioned mission objective, keep collecting the Exhausted Power Units. There are many in the vicinity of [2] and some of them are marked on the map with [x]. Once you have collected all, enter the mining facility through the door in [3].
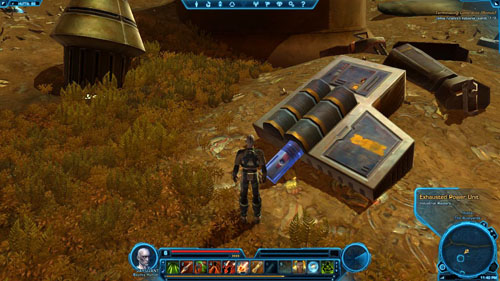
Charge the Power Units
Go through the first and second room and you'll reach a large hall. Your destination is the stairs in [4]. They will take you the second level of the facility. Watch out for enemies, as there are a lot of them here. Carefully move forward without engaging into any fight with all enemies simultaneously. Defeat three enemies by the stairs in [4] and go up.
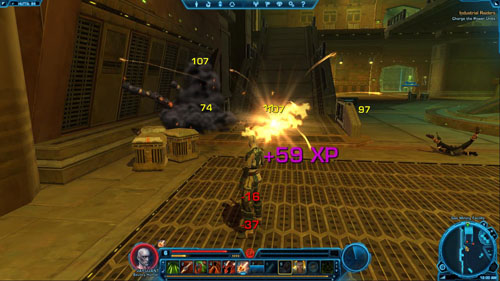
Immediately on the right there will be another group of three opponents. Kill them and run into the room on the left. By the wall in [5] there's a power unit you should use. After a while, a Fa'athra Foreman will appear. He'll start begging you to help him identify the ones who are stealing the energy - that is, among others, your employers. Otherwise, Fa'athra will kill his family.
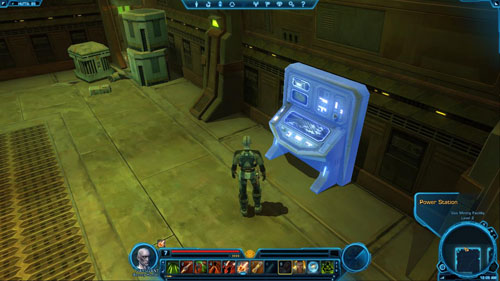
A
Reply
Effect
Points / Rewards
1
Fine, for your family.
Saving the family and turning Rand in
+50 to Light Side
2
I work for the settlers.
Keeping your word to Rand
+50 to Dark Side
Speak to Rand
Regardless of the choice you've made, return to Rand in [1] and speak to him to claim the reward for completing this mission.
Lizard hunting (Bonus)
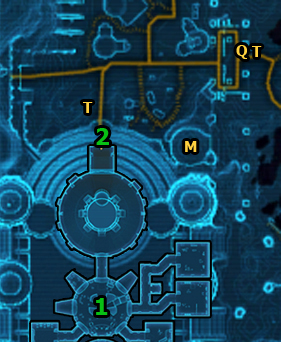
This mission can start only after completing the mission House Cleaning (Bounty Hunter) or Change of Plans (Imperial Agent). To get it talk to Urgrec, who's standing by the bar in [1]. Your replies will have an impact on your companion (see the tables below the picture), but not on the mission itself.

A
Reply (Class)
Effect
1
Yeah.
- / -
2
Here and there. / Who are you?
-1 to Affection: Mako / +15 to Affection: Kaliyo
3
Not by choice.
- / -
B
Reply
Effect
1
What do you need?
-
2
Good.
+15 to Affection: Mako / +15 to Affection: Kaliyo
3
Hurry it up.
-1 to Affection: Mako / +15 to Affection: Kaliyo
C
Reply
Effect
1
Let's talk money.
+15 to Affection: Mako / +15 to Affection: Kaliyo
2
Sounds fun.
- / -
3
Should I be worried?
-1 to Affection: Mako / -1 to Affection: Kaliyo
D
Reply
Effect
1
Hey, there's money.
+15 to Affection: Mako / +15 to Affection: Kaliyo
2
Sure.
- / -
3
No way. [Refuse quest]
- / -
Offer your assistance in obtaining Rancor's egg and when you get the Portable Incubator run north to the exit in [2]. Use a Taxi to get to The Eastern Grime (Rust Yards Speeder).
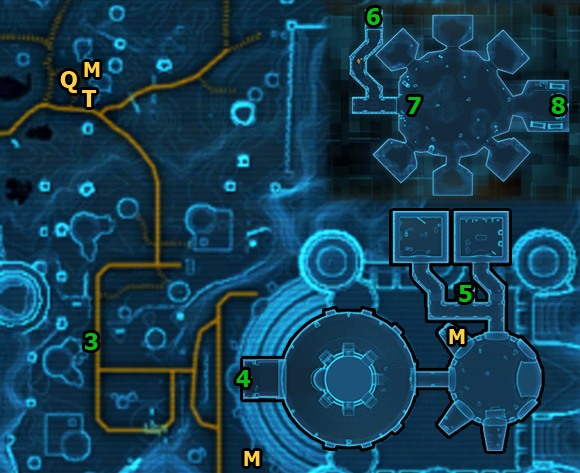
Run south to enter Fa'athra's palace. There are many enemies of different kind wandering around the area, but only the Fa'athra Guardians [+] and Fa'athra Enforcers [+] are challenging. Go to [3] and then to the Fa'athra's Palace entrance in [4].

There are a lot of opponents in the palace but most of them are weak. Only Fa'athra Palace Lieutenants [+] and Fa'athra Palace Overlords [+] can get on your nerves. Go to the elevator in [5] and press the button to go down to the third level. You'll appear in [6].

Defeat Chemilizards: 0/6
Run through the corridor to a large arena in [7], full of lizards. There are stronger Vicious Chemilizards [+]and slightly weaker Toxic Chemilizards here. Defeat six mutant reptiles to complete the mission and earn 1090 XP.
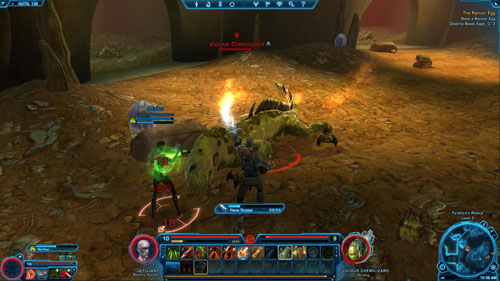
Destroy Beast Eggs: 0/3
Destroying three eggs won't also be a problem, simply because there are lots of them on the arena (as well as in the cages both on the left and right side). Break three eggs, and then focus on the last mission objective.
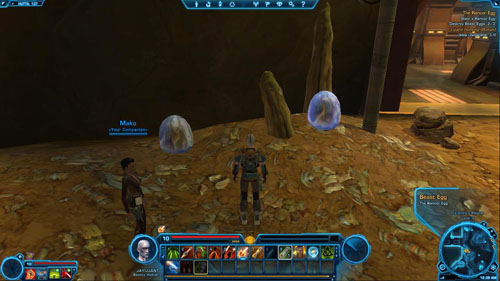
Steal a Rancor Egg
Make your way through the arena to the other side, opposite the entrance to the room. Defeat the enemies, who were there (including one Fa'athra Palace Lieutenant [+]), then open the container with Rancor egg in [8] and take it (Incubated Rancor Egg).
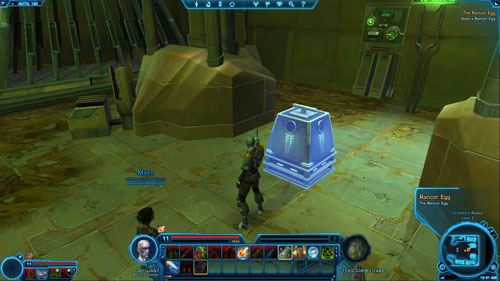
Return to Urgrec
If there's nothing else left to do in the palace, return to Urgrec in [1] (on the first map) to get your rewards. The replies you give during the conversation can have an impact on your companion - see the tables below for details.
A
Reply
Effect
1
Take it.
- / -
2
This was great. / As promised.
- / -
3
This thing scares me.
-1 to Affection: Mako / -1 to Affection: Kaliyo
A
Reply
Effect
1
Are you surprised?
+15 to Affection: Mako / +15 to Affection: Kaliyo
2
Got any other jobs?
- / -
3
Don't bother calling me again.
- / -
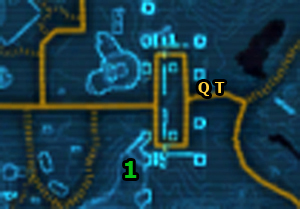
This mission can start only after completing the mission House Cleaning (Bounty Hunter) or Change of Plans (Imperial Agent). To get it talk to Burnok, who's standing in the market in [1]. Your replies will have an impact on your companion (see the tables below the picture). After the conversation, take a Taxi to The Eastern Grime.

A
Reply (Class)
Effect
1
Someone who likes credits? / I wouldn't be so sure.
+15 to Affection: Mako / +15 to Affection: Kaliyo
2
I don't know what you mean.
-
3
Uh, not really.
+15 to Affection: Mako / +15 to Affection: Kaliyo
B
Reply
Effect
1
Carbonite?
-
2
So he's not that impressive.
-1 to Affection: Mako / +15 to Affection: Kaliyo
3
Uh, Fa'athra's so funny.
-1 to Affection: Mako / +15 to Affection: Kaliyo
C
Reply
Effect
1
Okay.
-
2
For the money.
+15 to Affection: Mako / +15 to Affection: Kaliyo
3
I'd do it to spite Fa'athra.
+15 to Affection: Mako / +15 to Affection: Kaliyo
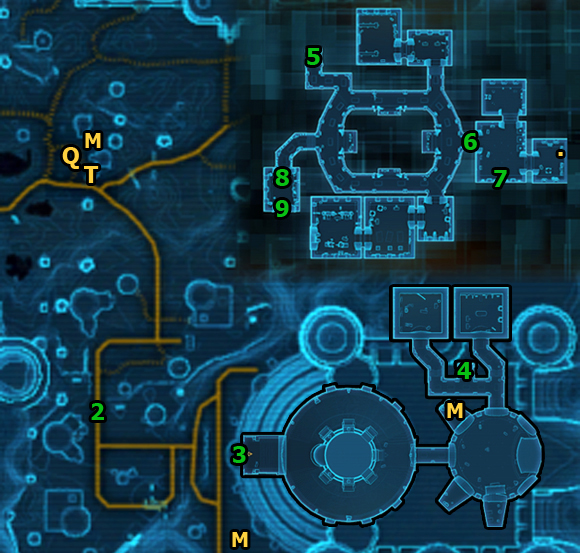
Thaw Out Oren Ward
Run south to enter the Fa'athra's Palace. There are many enemies of different kind wandering around the area, but only the Fa'athra Guardians [+] and Fa'athra Enforcers [+] are more challenging. Go to [2] and then to the Fa'athra's Palace entrance in [3].

There are a lot of opponents in the palace but most of them are weak. Only Fa'athra Palace Lieutenants [+] and Fa'athra Palace Overlords [+] can get on your nerves. Go to the elevator in [4] and press the button to go down to the second level.
![You'll appear in [5] - (L10) Return of the Warrior - Hutta - Star Wars: The Old Republic - Game Guide and Walkthrough](https://game.lhg100.com/Article/UploadFiles/201512/2015121709483488.jpg)
You'll appear in [5]. Upstairs, make your way through the corridor full of enemies to the room in [6]. Kill all the enemies, use the panel in [7] to thaw out Oren Ward. Have a brief conversation with him. Your replies will have an impact on your companion (see the tables below the picture for details). You will also receive Key to Fa'athra's Stash.
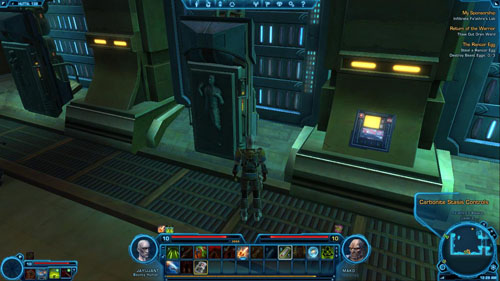
A
Reply (Class)
Effect
1
Show some gratitude. / Quiet!
+15 to Affection: Mako / -1 to Affection: Kaliyo
2
Your friend sent me.
- / -
3
Don't worry.
+15 to Affection: Mako / -1 to Affection: Kaliyo
B
Reply
Effect
1
Calm down.
-
2
Boy, you're dumb.
-1 to Affection: Mako / +15 to Affection: Kaliyo
3
Just listen to me!
-1 to Affection: Mako / +15 to Affection: Kaliyo
Recover Fa'athra's Stash
In the next room there's a chest you can search. Go back through the corridor to the other side of the palace and run into the room in [8]. Your character has to have full health, because a bit more challenging opponent is waiting for you here - Gajoru, The Vault Guardian [*]. Keep some Medpacs handy and use the boosting abilities before the fight. After getting rid of the enemy, search the big chest in [9] and take Fa'athra's Stash.
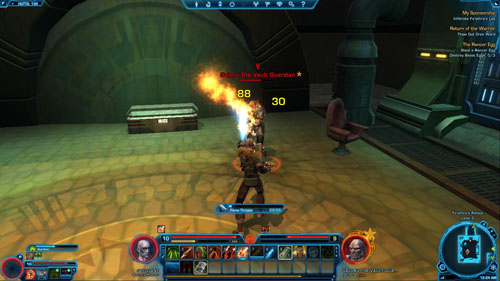
Return to Burnok
If there's nothing else left to do in the palace, return to Burnok in [1] (on the first map) to claim your rewards. Remember that your reply may have an impact on your companion - see the table below for details.
A
Reply (Class)
Effect
1
All in a day's work. / Glad to hear it.
+15 to Affection: Mako / +15 to Affection: Kaliyo
2
It's what I do best.
- / -
3
It's all about the money.
- / -
Finish Some More Business (Bonus)
This mission can start only after completing the mission House Cleaning (Bounty Hunter) or Change of Plans (Imperial Agent). You will receive it Cy Krolo, whom you can find in [1]. Talk to him, offer your assistance and you'll get Transmitter Switch. Remember that your replies can have an impact on your companion (see the tables below the picture).

A
Reply
Effect
1
If it's crazy, I'm in.
-1 to Affection: Mako / +15 to Affection: Kaliyo
2
Credits, you say?
- / -
3
Hmm, I dunno...
+15 to Affection: Mako / +15 to Affection: Kaliyo
B
Reply
Effect
1
The plan didn't work?
- / -
2
Where do I come in?
+15 to Affection: Mako / +15 to Affection: Kaliyo
3
That's ridiculous.
-1 to Affection: Mako / +15 to Affection: Kaliyo
C
Reply
Effect
1
I'm on it.
- / -
2
Guess I'll give it a shot.
+15 to Affection: Mako / +15 to Affection: Kaliyo
3
No chance. [Refuse quest]
- / -
Dispatch Fa'athra's Forces: 0/18
Run to [2] to enter the Fa'athra's palace area. There are many enemies of different kind wandering around the area, so you won't have a problem with killing eighteen of them - which is also the bonus mission objective. The only more challenging enemies in this area are Fa'athra Guardian [+] and Fa'athra Enforcer [+], but you'll deal with them easily anyway. Just don't fight with too many enemies simultaneously!
![Head north and then east to [3] - (L09) Unfinished Business - Hutta - Star Wars: The Old Republic - Game Guide and Walkthrough](https://game.lhg100.com/Article/UploadFiles/201512/2015121709483420.jpg)
Head north and then east to [3]. Eventually, you'll reach Fa'athra's Palace. The entrance is in [4]. You should have already killed eighteen enemies on the way. You'll earn 490 XP.

There are a lot of opponents in the palace but most of them are weak. Only Fa'athra Palace Lieutenants [+] and Fa'athra Palace Overlords [+] can be a little more challenging, but still, you'll get rid of them easily.
Use Transmitter Switch on Cleaning Probe X010
Clear the throne room in [5] and look for the first cleaning probe that should be around here somewhere. Approach the Cleaning Probe X010, select it by clicking RMB, open the inventory panel, choose the "Mission Items" tab, then click RMB on the Transmitter Switch that Cy Krolo gave you.
Use Transmitter Switch on Cleaning Probe F7
The second robot is in a room in [6]. Go there running north and clear the room of enemies. Locate the Cleaning Probe F7 (wandering around here and there) and then use Transmitter Switch on it.
Use Transmitter Switch on Cleaning Probe G44
The last robot - Cleaning Probe G44 - is in the next room in [7]. Head there, go past the elevator, finish off enemies, then use the Transmitter Switch on the last probe.
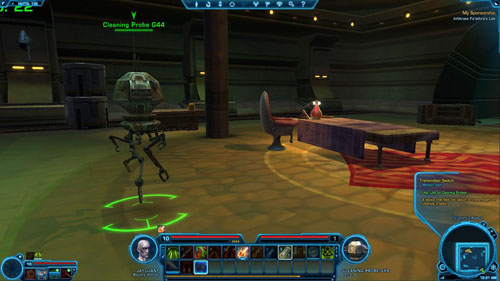
Return to Cy Krolo
If there's nothing else left to do in the palace, return to Cy Krolo in [1]. Talk to him and claim your rewards for completing the mission.
![This Heroic mission will be given to you by Geric, the old man with a steel voice, who's sitting in the Evocii workcamp in [1] - (L05) [HEROIC +2] The Man With Steel Voice - Hutta - Star Wars: The Old Republic - Game Guide and Walkthrough](https://game.lhg100.com/Article/UploadFiles/201512/2015121709483532.jpg)
This Heroic mission will be given to you by Geric, the old man with a steel voice, who's sitting in the Evocii workcamp in [1]. Agree to help him. You'll get a Canister of Purifying Chemicals. The old man wants you to purify the river using very strong chemicals.
![Investigate the Filter Station - (L05) [HEROIC +2] The Man With Steel Voice - Hutta - Star Wars: The Old Republic - Game Guide and Walkthrough](https://game.lhg100.com/Article/UploadFiles/201512/2015121709483547.jpg)
Investigate the Filter Station
Your first task is to travel far to the north to The Old Muckworks (through The River Lands location). You must get to [1] to water filtering station. Watch out for numerous and often dangerous enemies along the way - Renegade Evocii Reavers [+], Renegade Evocii Killers [+] and, above all, Renegade Evocii Firebrands [*]. When you reach the place you will get a new mission objective.
Speak to Bow-La
Talk to Bow-La standing in [2]. She'll tell you that if you put the chemicals into the river, the villagers will die, as they won't have anything to drink. Now you must decide what to do next. Your choice will influence the mission progress and will also result in earning Dark or Light Side points.
![A - (L05) [HEROIC +2] The Man With Steel Voice - Hutta - Star Wars: The Old Republic - Game Guide and Walkthrough](https://game.lhg100.com/Article/UploadFiles/201512/2015121709483664.jpg)
A
Reply
Effect
Points / Rewards
1
Better to clean the water.
Putting the chemicals into the river
+50 to Dark side
2
Yes, I'll protect the people.
Saving the villagers
+50 to Light side
Destroy the Southeast Filter Control Valve
Destroy the West Filter Control Valve
Destroy the Northwest Filter Control Valve
Destroy the Northeast Filter Control Valve
If you decided to protect the villagers, you will need to destroy four valves: in [3], [4], [5] and [6]. There can be opponents wandering around. Also, watch out for the Sliced Turrets [+]. Most enemies are in [7]. If you want to avoid the fight, simply don't come near them. Also, look out for individual patrolling enemies and groups of them in the bushes around the tanks.
![Speak to Bow-La - (L05) [HEROIC +2] The Man With Steel Voice - Hutta - Star Wars: The Old Republic - Game Guide and Walkthrough](https://game.lhg100.com/Article/UploadFiles/201512/2015121709483600.jpg)
Speak to Bow-La
After destroying the valves go back to Bow-La in [2] and talk to her. It doesn't matter what you say. Then, skip the mission objective described below and do the next.
Apply Chemicals to the Filter Station
If you decide to purify the river by using the chemicals, the mission will be much easier. The filter station is right next to [7]. Pour the chemicals in and then go back to Geric (it's most convenient to teleport to Quick Travel Point (Evocii Workcamp).
![Speak to Geric - (L05) [HEROIC +2] The Man With Steel Voice - Hutta - Star Wars: The Old Republic - Game Guide and Walkthrough](https://game.lhg100.com/Article/UploadFiles/201512/2015121709483633.jpg)
Speak to Geric
Talk to Geric in [1]. If you didn't apply the chemicals, then the mission will end at this point. But if you did, you'll get Geric's Secret Map and the last mission objective. You'll need to find a hidden cache with goods.
Find the Hidden Cache
You'll have to go back to the north, this time, heading for [8]. Once you're there, defeat Fa'athra Enforcer Droid [+], and then search the contents of the cache in [8]. The mission will be completed.
![1 - (L05) [HEROIC +2] The Man With Steel Voice - Hutta - Star Wars: The Old Republic - Game Guide and Walkthrough](https://game.lhg100.com/Article/UploadFiles/201512/2015121709483641.jpg)
Clean Up The Factory (Bonus)
![Another Heroic mission is much more challenging - other players or companion's help will be necessary - (L05) [HEROIC +2] Hostage Situation - Hutta - Star Wars: The Old Republic - Game Guide and Walkthrough](https://game.lhg100.com/Article/UploadFiles/201512/2015121709483667.jpg)
Another Heroic mission is much more challenging - other players or companion's help will be necessary. In the latter case your character's minimum level should be 8. Find Foreman Rhamm in [1] by the big, old factory, talk to him and accept the mission.
![Eliminate Renegade Evocii: 0/16 - (L05) [HEROIC +2] Hostage Situation - Hutta - Star Wars: The Old Republic - Game Guide and Walkthrough](https://game.lhg100.com/Article/UploadFiles/201512/2015121709483670.jpg)
Eliminate Renegade Evocii: 0/16
The factory entrance is right next to you - in [2]. It'll be very difficult inside, since there are a lot of enemies waiting for you. Watch out for Renegade Evocii Invaders [+], Renegade Evocii Brutes [+], and, above all, for Renegade Evocii Slayers [*]. Try not to fight with the latter and with other opponents at the same time. If you do, then attack the weaker ones first. After killing the first enemy you'll get a bonus mission. Kill sixteen enemies to accomplish it and earn 630 XP.
![Find the Factory Security Terminal - (L05) [HEROIC +2] Hostage Situation - Hutta - Star Wars: The Old Republic - Game Guide and Walkthrough](https://game.lhg100.com/Article/UploadFiles/201512/2015121709483620.jpg)
Find the Factory Security Terminal
Your first destination will be the stairs in [3]. Find it in the large hall and, watching out for enemies, go to the second level of the factory. Once you're there start going up on the piers that surround the big generators. Be careful not to fall off!
![Defeat the next enemies, watching out especially for Renegade Evocii Slayers [*] - (L05) [HEROIC +2] Hostage Situation - Hutta - Star Wars: The Old Republic - Game Guide and Walkthrough](https://game.lhg100.com/Article/UploadFiles/201512/2015121709483773.jpg)
Defeat the next enemies, watching out especially for Renegade Evocii Slayers [*]. Clear both rooms in the eastern part of the second level, and then use the terminal in [4] to turn the power on.
![Get to the Basement - (L05) [HEROIC +2] Hostage Situation - Hutta - Star Wars: The Old Republic - Game Guide and Walkthrough](https://game.lhg100.com/Article/UploadFiles/201512/2015121709483747.jpg)
Get to the Basement
Go back downstairs (you can simply jump down, but be careful not to fall straight into the enemies) and head for [5]. Go through the green force field. On the left in [5] there's an elevator that will take you to the basement.
![Defeat the Evocii Mastermind - (L05) [HEROIC +2] Hostage Situation - Hutta - Star Wars: The Old Republic - Game Guide and Walkthrough](https://game.lhg100.com/Article/UploadFiles/201512/2015121709483781.jpg)
Defeat the Evocii Mastermind
Once you're downstairs, use all your boosting abilities and make sure you have some Medpacs within reach. A fight with Evocii Mastermind [#] in [6] awaits you here. The leader of the renegade Evocii is a tough enemy who uses many dangerous attacks, so use all of your most powerful abilities.
![Release the Hostages - (L05) [HEROIC +2] Hostage Situation - Hutta - Star Wars: The Old Republic - Game Guide and Walkthrough](https://game.lhg100.com/Article/UploadFiles/201512/2015121709483772.jpg)
Release the Hostages
After getting rid of the commander, use the panel on the right on the wall - in [7] - to free the hostages. Go back upstairs by the elevator in [5] and head for the factory exit in [2].
![Return to Foreman Rhamm - (L05) [HEROIC +2] Hostage Situation - Hutta - Star Wars: The Old Republic - Game Guide and Walkthrough](https://game.lhg100.com/Article/UploadFiles/201512/2015121709483778.jpg)
Return to Foreman Rhamm
All you need to do now is to talk to Foreman Rhamm in [1] about your reward and the next mission. It's best to accept it right away (see the next page).
Clearing Out The Tunnels (Bonus)
![This is the next Heroic mission and at the same time another given by Foreman Rhamm in [1] - (L06) [HEROIC +2] Hostage Situation Cleanup - Hutta - Star Wars: The Old Republic - Game Guide and Walkthrough](https://game.lhg100.com/Article/UploadFiles/201512/2015121709483774.jpg)
This is the next Heroic mission and at the same time another given by Foreman Rhamm in [1]. You will qualify to receive it after completing the Hostage Situation [HEROIC +2] mission. Once you've agreed to destroy the first Evocii space shuttle ever built, you'll get Detonite - the explosives thanks to which the very space shuttle will be the first and the last.
Destroy Reprogrammed Turrets: 0/5
Run to [2]. This is where the way leading to the factory roof begins. There will be some barricades with opponents (Renegade Evocii Killers [+], Renegade Evocii Reavers [+] and more dangerous Renegade Evocii Firebrands [*], who attack with grenades exploding with fire flames), and turrets - (Sliced Turrets [+], and then only Reprogrammed Turrets [+]).
After you've destroyed one of the latter, you'll will receive a bonus mission - destroying five Reprogrammed Turrets [+] (you'll earn 745 XP). The turrets are marked with [x] on the map. There are not very durable but they have high firepower.
![Find the Rooftop Access - (L06) [HEROIC +2] Hostage Situation Cleanup - Hutta - Star Wars: The Old Republic - Game Guide and Walkthrough](https://game.lhg100.com/Article/UploadFiles/201512/2015121709483894.jpg)
Find the Rooftop Access
Make your way to the bridge in [3]. The further you go, the stronger enemies you encounter. Cross the bridge - on the left, behind the green force field you'll notice a corridor that will take you to Evocii space shuttle.
![Defeat Baranj and his Turrets - (L06) [HEROIC +2] Hostage Situation Cleanup - Hutta - Star Wars: The Old Republic - Game Guide and Walkthrough](https://game.lhg100.com/Article/UploadFiles/201512/2015121709483816.jpg)
Defeat Baranj and his Turrets
Before you destroy it, however, you'll have to defeat the boss of this mission - Baranj the Starseeker [#] in [5]. Turrets that will appear here will be an impediment - they're not durable, so start the fight with destroying them as soon as possible. Then, take care of the boss, who's throwing grenades. Keep Medpacs handy and use all boosting abilities.
![Plant the Detonite on the Ship - (L06) [HEROIC +2] Hostage Situation Cleanup - Hutta - Star Wars: The Old Republic - Game Guide and Walkthrough](https://game.lhg100.com/Article/UploadFiles/201512/2015121709483805.jpg)
Plant the Detonite on the Ship
The most pleasant part of the mission remains to be done, namely, planting the explosives. Go under the space shuttle and put the explosives on its bottom in [6], and then quickly move away. After watching the explosion, follow the corridor to return to [4].
![Return to Foreman Rhamm - (L06) [HEROIC +2] Hostage Situation Cleanup - Hutta - Star Wars: The Old Republic - Game Guide and Walkthrough](https://game.lhg100.com/Article/UploadFiles/201512/2015121709483855.jpg)
Return to Foreman Rhamm
You can either go back to Foreman Rhamm in [1] on foot, or jump off and commit suicide to be respawned at the medical center. Foreman Rhamm will be nearby. In both cases, talk to him about completing the mission and take the rewards.
Clearing Out The Tunnels (Bonus)
![This is the most difficult mission of all Heroic missions on Hutta - (L07) [HEROIC +2] Factory Recall - Hutta - Star Wars: The Old Republic - Game Guide and Walkthrough](https://game.lhg100.com/Article/UploadFiles/201512/2015121709483881.jpg)
This is the most difficult mission of all Heroic missions on Hutta. Other players or companion's help will be necessary. In the latter case your character's minimum level should be 8. You'll receive the mission from Gedron Hix standing in [1]. Accept it and then go down to the tunnels using the entrance in [2]. It's right behind Gedron Hix, on the right.
![Defeat Fa'athra Tunnel Forces: 0/18 - (L07) [HEROIC +2] Factory Recall - Hutta - Star Wars: The Old Republic - Game Guide and Walkthrough](https://game.lhg100.com/Article/UploadFiles/201512/2015121709483851.jpg)
Defeat Fa'athra Tunnel Forces: 0/18
After killing the first enemy in the tunnels, you'll receive a bonus mission. You'll need to kill eighteen enemies (people and/or animals). If you want to break through the tunnels, then you'll have no other choice than to keep killing. Eventually you'll complete this mission and earn 1220 XP.
![The most dangerous are Fa'athra Security Commanders [*] along with their lizards (if they are there then kill them first with a powerful attack) - (L07) [HEROIC +2] Factory Recall - Hutta - Star Wars: The Old Republic - Game Guide and Walkthrough](https://game.lhg100.com/Article/UploadFiles/201512/2015121709483923.jpg)
The most dangerous are Fa'athra Security Commanders [*] along with their lizards (if they are there then kill them first with a powerful attack). Watch out for them in the distance and whenever you encounter one make sure make sure you have full health before you start the fight. Also watch out for Fa'athra Tunnel Rats [+] and Fa'athra Security Officers [+] - a little weaker enemies, but still of potential threat.
![Sabotage the Security Junction Boxes: 0/4 - (L07) [HEROIC +2] Factory Recall - Hutta - Star Wars: The Old Republic - Game Guide and Walkthrough](https://game.lhg100.com/Article/UploadFiles/201512/2015121709483934.jpg)
Sabotage the Security Junction Boxes: 0/4
The first mission objective won't be difficult, because the junction boxes are virtually everywhere. The four closest on the map are marked with [x]. Destroy them to get further mission objectives.
![Destroy Faa'hras Security Droids: 0/2 - (L07) [HEROIC +2] Factory Recall - Hutta - Star Wars: The Old Republic - Game Guide and Walkthrough](https://game.lhg100.com/Article/UploadFiles/201512/2015121709483908.jpg)
Destroy Fa'a'hra's Security Droids: 0/2
Defeat Industrial Engineers: 0/4
Destroy Fabrication Units: 0/3
After you've reached the fork in w [3] you must decide if you want to go and find a Datacron located in [4]. If yes, then first you'll need to force your way through a lot of enemies to get to [5]. A difficult boss awaits you there - a powerful B3-4T Disposal Droid [#]. Don't try to attack him if there are no other players with you or at least your companion - in the latter case your character's minimum level should be 8 or even 9 (plus abilities suitable for this level). Also keep some Medpacs handy and use all boosting abilities before the fight.
![Once you've destroyed the droid, you can search a chest under the opposite wall - (L07) [HEROIC +2] Factory Recall - Hutta - Star Wars: The Old Republic - Game Guide and Walkthrough](https://game.lhg100.com/Article/UploadFiles/201512/2015121709483952.jpg)
Once you've destroyed the droid, you can search a chest under the opposite wall. On the right, in a dead end you'll find the Datacron. It's likely that on your way back to [3] you'll need to defeat all the enemies one more time, provided they haven't managed to respawn yet.
![Your next task is to break through the tunnel to the second exit in [6] - (L07) [HEROIC +2] Factory Recall - Hutta - Star Wars: The Old Republic - Game Guide and Walkthrough](https://game.lhg100.com/Article/UploadFiles/201512/2015121709483969.jpg)
Your next task is to break through the tunnel to the second exit in [6]. Go outside and head for the factory entrance in [7].
![You don't have to worry about the first two targets - the factory is full of Faa'hras Security Droids [*] and Faa'hras Industrial Engineers [+] protecting the fabrication units, which are your target as well - (L07) [HEROIC +2] Factory Recall - Hutta - Star Wars: The Old Republic - Game Guide and Walkthrough](https://game.lhg100.com/Article/UploadFiles/201512/2015121709483940.jpg)
You don't have to worry about the first two targets - the factory is full of Fa'a'hra's Security Droids [*] and Fa'a'hra's Industrial Engineers [+] protecting the fabrication units, which are your target as well. Each clash will be challenging and the droids are especially dangerous. That's why begin the fight only with full health.
![You must destroy three fabrication units - two are on this level, two in the basement (the elevator in [8] can take you there), and two on the second floor (the stairs in [9] lead there) - (L07) [HEROIC +2] Factory Recall - Hutta - Star Wars: The Old Republic - Game Guide and Walkthrough](https://game.lhg100.com/Article/UploadFiles/201512/2015121709483933.jpg)
You must destroy three fabrication units - two are on this level, two in the basement (the elevator in [8] can take you there), and two on the second floor (the stairs in [9] lead there). The units are marked on the map with [o]. There's also a chest you can search on the second floor, but first, you'll have to fight with two droids and one engineer at the same time - it might be hard.
![Return to Gedrox Hix - (L07) [HEROIC +2] Factory Recall - Hutta - Star Wars: The Old Republic - Game Guide and Walkthrough](https://game.lhg100.com/Article/UploadFiles/201512/2015121709483901.jpg)
Return to Gedrox Hix
After completing all objectives return to Gedron Hix to claim the rewards.
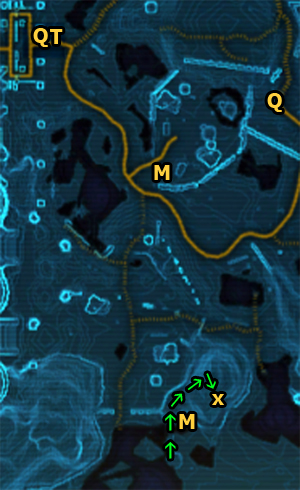
The first Datacron is located on a hill. To get to it you must go south of Evocii camp to the beginning of the road marked by arrows on the map above. Locate an overturned metal pillar and use it to climb on the hill.
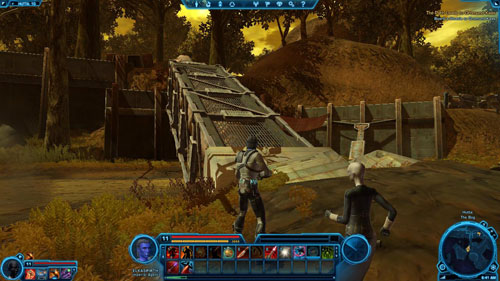
Turn right and start to climb - be careful not to fall down! You will have a hard time here before you find a way up.
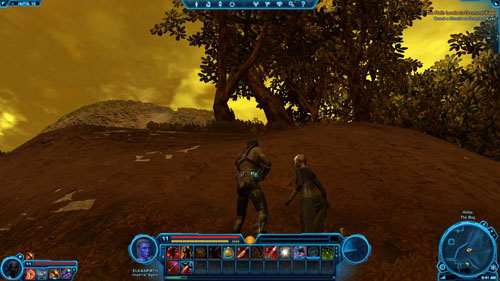
Datacron is hidden on the lower, southern hill level on which you need to jump down - before you do it, however, locate the Datacron itself.
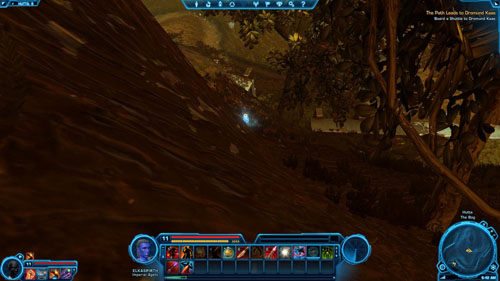
Trees can be an obstacle in this action, so make sure the place you're about to jump down on is the right one.
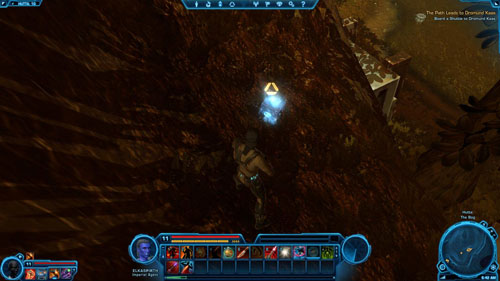
Rewards: +2 Aim, Codex entry - Achievements - Datacrons: Galactic History 01 - The Architects - 550 XP
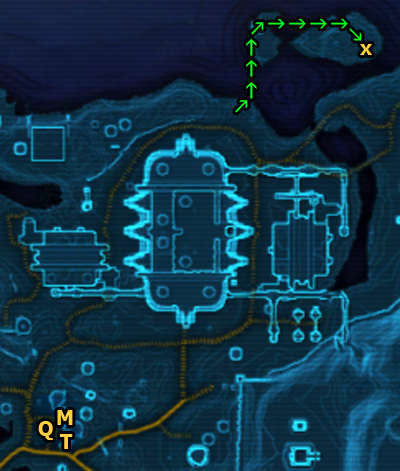
The second Datacron is virtually exactly in the upper right corner of the map. Go to The Rustyards and find a long pipe to the north of the factory. It leads to a small island. Climb the stone and then jump on the pipe (arrows mark the beginning of the way).
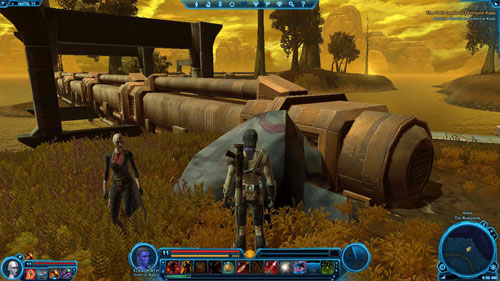
Jump on exactly on the middle of the pipe and run forward till you reach a bend. You will see a Vicious Chemilizard [+] on the ground to the right. Kill it just in case.

At the end of the pipe there's a difficult point, as it's easy to fall down (which also means you need to go back to the beginning of the road). Position yourself on the largest plane but instead of jumping from the edge, jump half a meter before it on the generator between the pipes shown in the picture below.
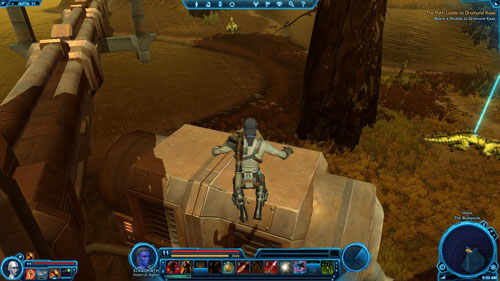
Now you need to perform a second jump, a little easier, but you can still fall. This time jump from the edge perpendicularly to the second pipe.

When you're on the second pipe, perpendicular to the previous one, hold (by default) W and S keys to run forward and left. This way you can be sure you won't fall down.

When you reach the place where you can jump on the middle of the pipe - do it and run forward. Right before the pipe ends there's a Vicious Chemilizard [+] on the right. You have to defeat it if you want to get the Datacron.
The last Vicious Chemilizard [+] and the Datacron are on the east side of the hill.
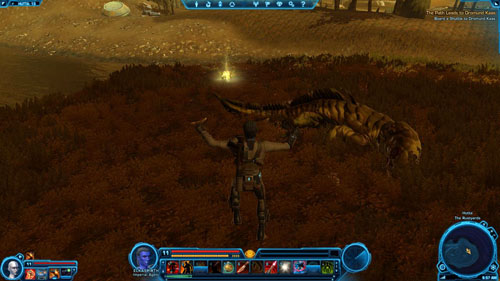
Rewards: +2 Presence, Codex entry - Achievements - Datacron: Galactic History 02 - Ancient Civilizations - 550 XP
![Obtaining this Datacron is also a part of the side mission (L07) [HEROIC +2] Factory Recall - Galactic History 03 (Matrix Shard) - Datacrons - Star Wars: The Old Republic - Game Guide and Walkthrough](https://game.lhg100.com/Article/UploadFiles/201512/2015121709484247.jpg)
Obtaining this Datacron is also a part of the side mission (L07) [HEROIC +2] Factory Recall. If you're not interested in it, use one of the two tunnel entrances. The first is in [1], right behind Gedron Hix.
![The second entrance can be found in The Rustyards and is in [2] - Galactic History 03 (Matrix Shard) - Datacrons - Star Wars: The Old Republic - Game Guide and Walkthrough](https://game.lhg100.com/Article/UploadFiles/201512/2015121709484288.jpg)
The second entrance can be found in The Rustyards and is in [2].
![The most dangerous enemies in the tunnels are Fa'athra Security Commanders [*] along with their lizards (if they are there then kill them first with a powerful attack) - Galactic History 03 (Matrix Shard) - Datacrons - Star Wars: The Old Republic - Game Guide and Walkthrough](https://game.lhg100.com/Article/UploadFiles/201512/2015121709484299.jpg)
The most dangerous enemies in the tunnels are Fa'athra Security Commanders [*] along with their lizards (if they are there then kill them first with a powerful attack). Watch out for them in the distance and whenever you encounter one make sure make sure you have full health before you start the fight. Also watch out for Fa'athra Tunnel Rats [+] and Fa'athra Security Officers [+] - a little weaker enemies, but still of potential threat.
![After you've reached the fork in w [3] there will be more enemies on the road leading to the Datacron - Galactic History 03 (Matrix Shard) - Datacrons - Star Wars: The Old Republic - Game Guide and Walkthrough](https://game.lhg100.com/Article/UploadFiles/201512/2015121709484266.jpg)
After you've reached the fork in w [3] there will be more enemies on the road leading to the Datacron. Break through to [4], where a difficult boss awaits you - a powerful B3-4T Disposal Droid [#]. Don't try to attack him if there are no other players with you or at least your companion - in the latter case your character's minimum level should be 8 or even 9 (plus abilities suitable for this level). Also keep some Medpacs handy and use all boosting abilities before the fight.
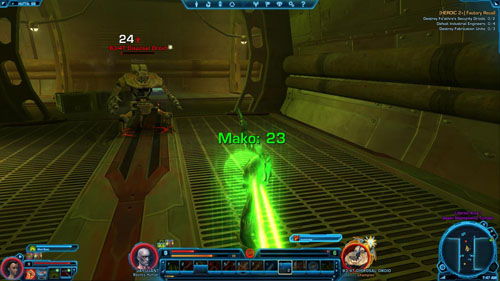
Once you've destroyed the droid, you can search a chest under the opposite wall. On the right, in a dead end you'll find the very Datacron. It's likely that on your way back to [3] you'll need to defeat all the enemies one more time, provided they haven't managed to respawn yet.

Rewards: Matrix Shard, Codex entry - Achievements - Datacrons: Galactic History 03 - The Battalions of Zhell - 550 XP
![[M]: Medical Droids (medical assistance and Respawn points) - Korriban - Places - Star Wars: The Old Republic - Game Guide and Walkthrough](https://game.lhg100.com/Article/UploadFiles/201512/2015121709484210.jpg)
[M]: Medical Droids (medical assistance and Respawn points)
[Q]: Quick Travel Points
[T]: Taxis
This chapter acquaints the player with the secrets of every Korriban area. It does not cover the areas through which you enter through the green force field (story areas, group areas, etc.). In each location description there are:
(01): Valley of the Dark Lords
(02): Sith Academy
(03): Lower Wilds Outskirts
(04): Wilds Laboratory
(05): Lower Wilds
(06): Trooper Encampment
(07): Tomb of Marka Ragnos
(08): Sacred Ruins (Tomb of Naga Sadow)
(09): Departure Shuttle
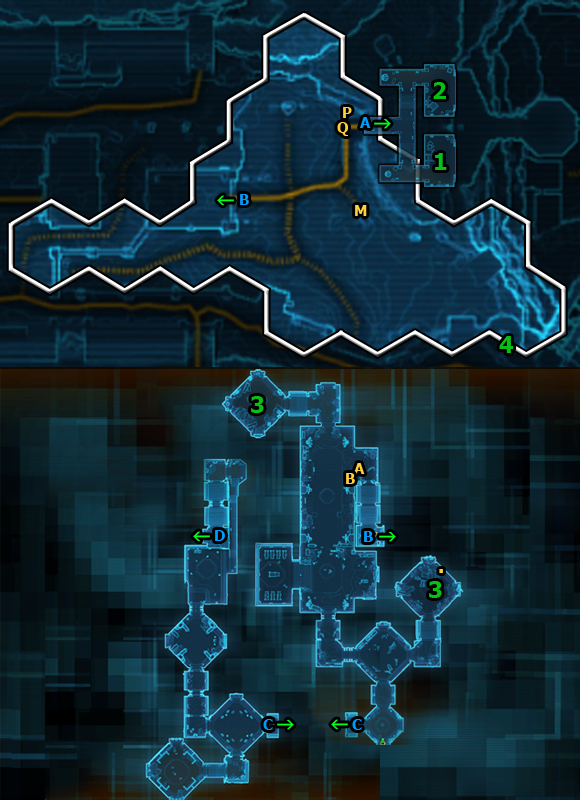
For discovering this location (after you exit Korriban Arrival Port) you will receive 30 XP, and when you get down the stairs you'll also obtain a Codex entry - Locations: Valley of the Dark Lords - 45 XP.
ENTRANCES / EXITS
[A]: Korriban Arrival Port
[B]: Tomb of Ajunta Pall (Codex entry - Locations: Tomb of Ajunta Pall - 45 XP)
[C]: Tomb of Ajunta Pall - Upper Level (stairs)
[D]: Sith Academy (exit to the next location)
SERVICES / ITEMS / TRAINERS / VENDORS / ASSISTANCE
[Q]: Quick Travel Point (Oddworld Orientation)
[P]: Mailbox
[.]: Security Chest - chests you can search
[M]: Medical Droid - Medpacs and Stims, item repair, Respawn Point
[A]: Veshta (Sith Warrior Trainer)
[B]: Gesen (Sith Inquisitor Trainer)
OTHER
[1]: Class starting point - Sith Warrior.
[2]: Class starting point - Sith Inquisitor.
[3]: K'lor'slug Broodwatcher [+] - after killing the beast you'll obtain a Codex entry - Bestiary: K'lor'slug - 45 XP. Of course, these overgrown insects can be also found in other places.
![[4]: Datacron 1/3 - the way leading to the datacron starts in a different area - (01) Valley of the Dark Lords - Places - Star Wars: The Old Republic - Game Guide and Walkthrough](https://game.lhg100.com/Article/UploadFiles/201512/2015121709484302.jpg)
[4]: Datacron 1/3 - the way leading to the datacron starts in a different area. For more information see the "Datacrons" chapter. For discovering it you will get 550 XP, +2 to Endurance and unlock a Codex entry: Achievements - Datacron: Galactic History 15 - Mandalore.
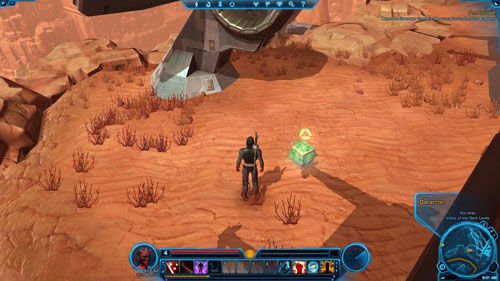
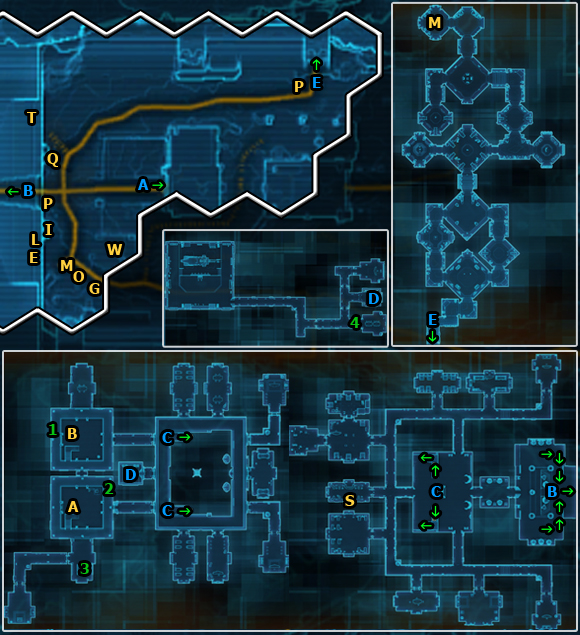
For discovering this location you will receive 106 XP.
ENTRANCES / EXITS
[A]: Tomb of Ajunta Pall - Upper Level (stairs and exit to the Valley of the Dark Lords)
[B]: Sith Academy
[C]: Sith Academy - Level 2 (stairs)
[D]: Sith Academy - Level 3 (elevator)
[E]: Tomb of Naga Sadow (Codex entry - Locations: Tomb of Naga Sadow - 400 XP)
SERVICES / ITEMS
[Q]: Quick Travel Point (Sith Academy)
[T]: Taxi (Sith Academy)
[.]: Security Chest - chests you can search.
[I]: Item Modification Station
[P]: Mailbox
[J]: Jukebox
TRAINERS
[A]: Overseer Rance (Sith Warrior Trainer)
[B]: Lord Samus (Sith Inquisitor Trainer)
VENDORS / ASSISTANCE
[E]: Nareen (Medium Armor Vendor)
[G]: Harlas (Specialty Goods)
[L]: Stawas (Light Armor Vendor)
[M]: Medical Droid (Medpacs and Stims, item repair, Respawn Point)
[O]: Lieutenant Li'lith (Social Items Vendor)
[W]: Private Xanta (Weapons Vendor)
[S]: P-3B2 (Stims Vendor)
OTHER
[1]: Admission to the Sith Academy (Lore Object) - examining the cube glowing in green (you need to go up the stairs to the second level of this room) will result in obtaining a Codex entry - Lore: Admission to the Sith Academy - 160 XP.
![[2]: Slavery in the Empire (Lore Object) - examining the cube glowing in green (you need to go up the stairs to the second level of this room) will result in obtaining a Codex entry - Lore: Slavery in the Empire - 160 XP - (02) Sith Academy - Places - Star Wars: The Old Republic - Game Guide and Walkthrough](https://game.lhg100.com/Article/UploadFiles/201512/2015121709484462.jpg)
[2]: Slavery in the Empire (Lore Object) - examining the cube glowing in green (you need to go up the stairs to the second level of this room) will result in obtaining a Codex entry - Lore: Slavery in the Empire - 160 XP.
![[3]: Sith Titles (Lore Object) - having a look at the cone on the shelf will result in obtaining a Codex entry - Lore: Sith Titles - 160 XP - (02) Sith Academy - Places - Star Wars: The Old Republic - Game Guide and Walkthrough](https://game.lhg100.com/Article/UploadFiles/201512/2015121709484436.jpg)
[3]: Sith Titles (Lore Object) - having a look at the cone on the shelf will result in obtaining a Codex entry - Lore: Sith Titles - 160 XP.
![[4]: The Dark Council (Lore Object) - reading the sign will result in obtaining a Codex entry - Organizations: The Dark Council - 45 XP - (02) Sith Academy - Places - Star Wars: The Old Republic - Game Guide and Walkthrough](https://game.lhg100.com/Article/UploadFiles/201512/2015121709484422.jpg)
[4]: The Dark Council (Lore Object) - reading the sign will result in obtaining a Codex entry - Organizations: The Dark Council - 45 XP.
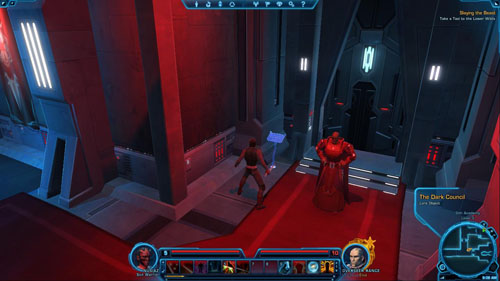
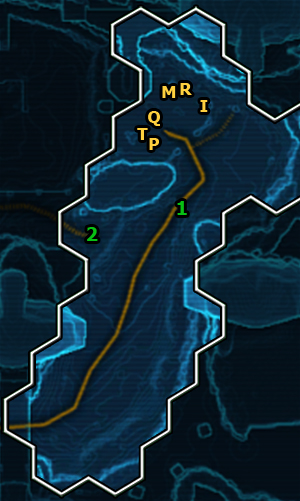
For discovering this location you will receive 102 XP, and you'll also obtain a Codex entry - Locations: The Wilds - 225 XP.
SERVICES / VENDORS / ASSISTANCE / ITEMS
[Q]: Quick Travel Point (Lower Wilds)
[T]: Taxi (Lower Wilds Skyhopper)
[P]: Mailbox
[.]: Security Chest - chests you can search
[I]: Item Modification Station
[M]: Medical Droid (Medpacs and Stims, item repair, Respawn Point)
[R]: Sergeant Resik (Armor Vendor)
OTHER
[1]: Tuk'ata - one of the places you can find these animals. Kill one and you'll obtain a Codex entry - Bestiary: Tuk'ata - 225 XP.
![[2]: Datacron 2/3 - for more information (how to get to it) see the](https://game.lhg100.com/Article/UploadFiles/201512/2015121709484507.jpg)
[2]: Datacron 2/3 - for more information (how to get to it) see the "Datacrons" chapter. For discovering it you will get 550 XP, +2 do Willpower and unlock a Codex entry: Achievements - Datacron: Galactic History 16 - The Alaskan Conflicts.

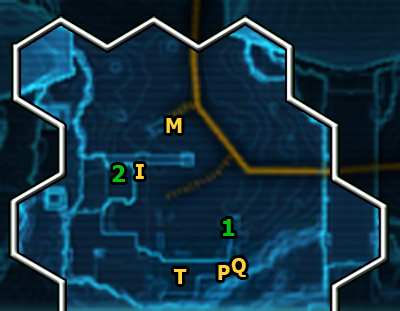
For discovering this location you will receive 106 XP.
SERVICES / ITEMS / VENDORS / ASSISTANCE
[Q]: Quick Travel Point (Field Research Area)
[T]: Taxi (Field Research Area Skyhopper)
[P]: Mailbox
[I]: Item Modification Station
[M]: Medical Droid - Medpacs and Stims, item repair, Respawn Point.
OTHER
[1]: Elevator that will take you to Taxi and Quick Travel Point.
![[2]: Tuk'ata (Lore Object) - examining the body of the beast will result in obtaining a Codex entry - Bestiary: Tuk'ata - 225 XP (if you killed a Tuk'ata earlier you might already have this entry) - (04) Wilds Laboratory - Places - Star Wars: The Old Republic - Game Guide and Walkthrough](https://game.lhg100.com/Article/UploadFiles/201512/2015121709484502.jpg)
[2]: Tuk'ata (Lore Object) - examining the body of the beast will result in obtaining a Codex entry - Bestiary: Tuk'ata - 225 XP (if you killed a Tuk'ata earlier you might already have this entry).

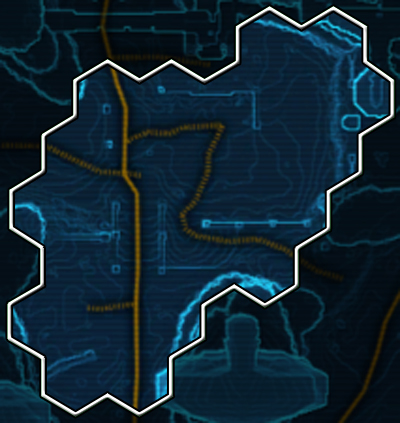
For discovering this location you will receive 200 XP.
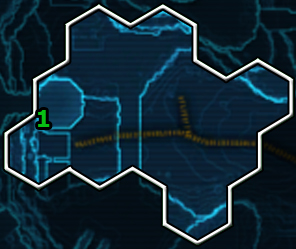
For discovering this location you will receive 200 XP.
OTHER
[1]: Manical Commander Tynes [*] - a mad commander. He has a lot of abilities and is a very challenging enemy. Keep Medpacs handy and use all boosting abilities before the fight.
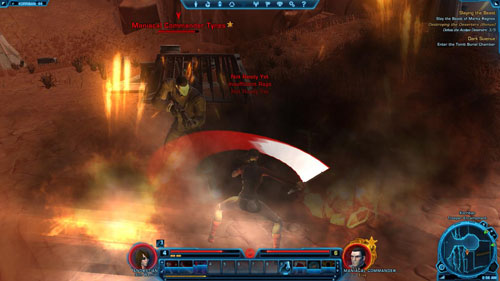
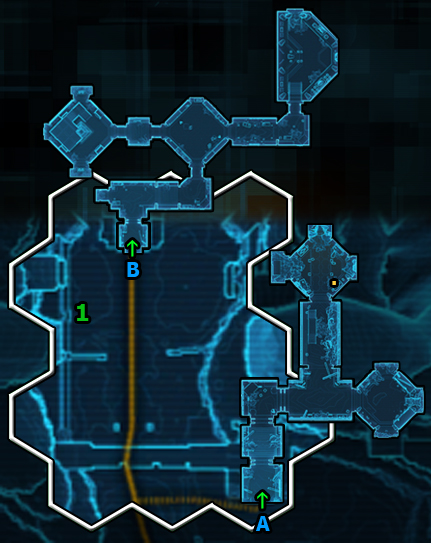
For discovering this location you will receive 200 XP, you'll also obtain a Codex entry - Locations: Tomb of Marka Ragnos - 225 XP.
ENTRANCES / EXITS
[A]: Tomb of Marka Ragnos - The Reliquary
[B]: Tomb of Marka Ragnos - The Burial Grounds
ITEMS
[.]: Security Chest - chests you can search
OTHER
[1]: Colonel Bakash [+] - along with his two colleagues - start the fight with them first. Keep some Medpacs handy and use all boosting abilities before the fight.

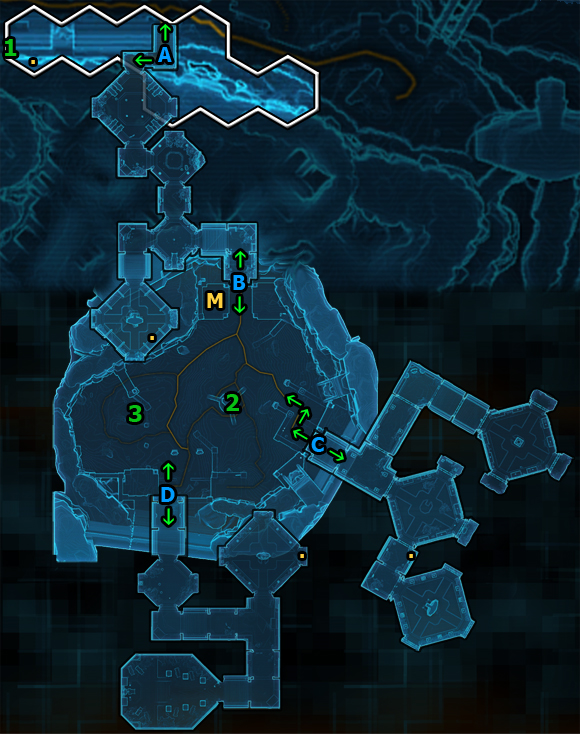
For discovering this location you will receive 280 XP.
On the southern ends of this area, in the tombs, there are Heroic areas connected with particular missions.
ENTRANCES / EXITS
[A]: Tomb of Tulak Nord - The Antechamber (Codex entry - Locations: Tomb of Tulak Nord - 300 XP)
[C]: Tomb of Tulak Nord - Ruined Atrium
[C]: Tomb of Tulak Nord - Machine Vault
[D]: Tomb of Tulak Nord - The Archives
SERVICES / ITEMS / ASSISTANCE
[.]: Security Chest - chests you can search.
[M]: Medical Droid - Medpacs and Stims, item repair, Respawn Point.
OTHER
[1]: Elevator located on the borders of two areas: Sith Academy and Sacred Ruins that will take you to a metal pier. You'll find a chest there you can search.
![[2]: Slave Rebellion Leader [*] - a medium challenging boss - (08) Sacred Ruins (Tomb of Naga Sadow) - Places - Star Wars: The Old Republic - Game Guide and Walkthrough](https://game.lhg100.com/Article/UploadFiles/201512/2015121709484729.jpg)
[2]: Slave Rebellion Leader [*] - a medium challenging boss. Start with killing his colleagues, then focus on him. If your level is low enough (e.g. 4), you might expect and item* of exceptional quality.
![[3]: Datacron 3/3 - for more information (how to get to it) see the](https://game.lhg100.com/Article/UploadFiles/201512/2015121709484703.jpg)
[3]: Datacron 3/3 - for more information (how to get to it) see the "Datacrons" chapter. For discovering it you will get 550 XP, Red Matrix Shard and unlock a Codex entry: Achievements - Datacron: Galactic History 17 - The Duinuogwuin Contention.
[4]: Legacy of Tulak Hord (Lore Object) - having a look at the stone altar will result in obtaining a Codex entry - Lore: Legacy of Tulak Hord - 390 XP.
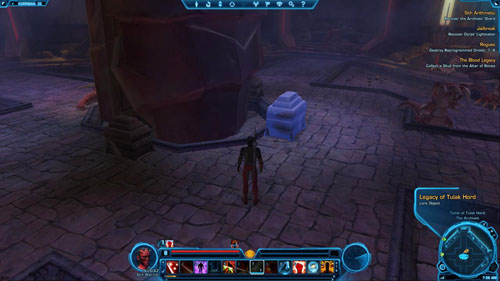

For discovering this location you will receive 272 XP.
SERVICES
[U]: Space Shuttle - will take you from Korriban
Each mission description is divided into several smaller parts. It should be observed that the following legend does not concern the next section - "Shortcuts (main and side missions)". The list of missions is given in chronological order, that is, the order you receive them. Also, the level of a particular mission is shown before its name (L). Here is all information that is essential to read before you start using the missions description.
The exact description of a mission is here. Sometimes it's divided into several different places you will visit, and each of them has its own map.
In the missions descriptions there are all dialogues that can have any impact on the game mechanics. It is given in the Points / Rewards column. The Effect column specifies what kind of effect your reply will have (there can also be a letter referring to the next dialogue mentioned), while under Reply there is the answer's line.
If any dialogue is missing it means that it doesn't matter which reply you choose (of course, except for the aspects related to developing your character in terms of the story). If a reply doesn't have any effect or doesn't result in getting any points or rewards, then there will be no suitable column in the table.
#
Reply
Effect
Points / Rewards
Reply number
One out of the two or three replies your character can give.
Effect of the chosen reply, and if it leads further - a letter of the next dialogue is given
+x to Light / Dark Side, +x / -x to companion's Affection, other Rewards
# - a letter indicating the dialogue order. Some replies can lead to different dialogues.
If a mission contains a small bonus quest, then a complete list of them is given right before the mission description. Bonus mission objectives are given along with the mission objectives (class or side) with which such a mission is connected.
The list of rewards includes: XP, credits, items and Codex entries. You can receive all these items for completing a mission. Sometimes you'll get one out of the two depending on your class, other times you'll have to choose one from several items (these are separated by a slash - "/").
The chapter presents a list of all main, side, bonus and tutorial mission objectives that take place on the planet Korriban. The list is arranged in such a way as to minimize the time necessary for the sole running and visiting the same areas.
Most often the next side missions can or should be done (because of your character's level) while doing the next main missions (Class). That is why all mission objectives are divided into main missions.
You should observe that there are no issues connected with the Codex here - these can be found in the "Places" chapter. Moreover, there are no side Heroic mission objectives. Their descriptions are at the end of the side missions chapter - "Korriban".
Arm Yourself [mission start] - Overseer Tremel
Arm Yourself - Speak to Overseer Tremel
Mark Quick Travel Point (Offworld Orientation)
[+] Arm Yourself: Reclaiming the Valley (Bonus) - Kill K'lor'slug Foragers: 0/6
K'lor'slug Infestation [mission start] - Sergeant Cormun
[+] K'lor'slug Infestation - Kill K'lor'slug: 0/6
K'lor'slug Infestation - Detonate the Explosives
K'lor'slug Infestation [mission end] - Return to Sergeant Cormun
Imperial Edict [mission start] - Datapad
[+] Imperial Edict - Defeat Tomb Looters: 0/10
Arm Yourself - Enter the Armory
Arm Yourself - Retrieve the Sith Warblade
Arm Yourself: Ajunta's Ancient Army (Bonus) - Defeat Ancient Droids: 0/10
Arm Yourself - Exit the Armory
[+] Arm Yourself: Test Your New Blade (Bonus) - Kill K'lor'slugs: 0/6
Imperial Edict - Recover Artifacts: 0/3
Imperial Edict [mission end] - Report to Sergeant Rikel
Mark Quick Travel Point (Sith Academy)
Learning From the Best [mission start] - Assistant Overseer Loun
Arm Yourself - Report to Overseer Tremel's New Location in the Sith Academy
Arm Yourself - Speak to Vemrin
Arm Yourself [mission end] - Report to Overseer Tremel's New Location in the Sith Academy
Judge and Executioner [mission start] - Overseer Tremel
Judge and Executioner - Speak to Jailer Knash
[o] Judge and Executioner - Defeat Solentz
[o] Judge and Executioner - Speak to Jailer Knash
[o] Judge and Executioner - Defeat Devotek
[o] Judge and Executioner - Speak to Jailer Knash
Judge and Executioner [mission end] - Return to Overseer Tremel
Slaying the Beast [mission start] - Overseer Tremel
Learning From the Best [mission end] - Speak to Overseer Rance
Allegiance [mission start] - Inquisitor Arzanon
Allegiance - Scan and Defeat Acolyte Initiates: 0/4
Allegiance [mission end] - Return to Inquisitor Arzanon
Slaying the Beast - Take a taxi to the Lower Wilds
Mark Quick Travel Point (Lower Wilds)
Experimental Needs - [mission start] - Acolyte Krevan
[+] Experimental Needs - Collect Bone Marrow Samples: 0/5
Experimental Needs [mission end] - Talk to Lord Varacen
Dark Science [mission start] - Lord Renning
Dark Science - Speak to Apprentice Malora
Take the elevator up to mark Quick Travel Point (Field Research Area) and Taxi (Field Research Area)
Lost Supplies [mission start] - Datapad
[+] Lost Supplies: Clearing the Camps (Bonus) - Defeat Crazed Forces: 0/15
Lost Supplies - Recover the South Code Cylinder
Lost Supplies - Recover the East Code Cylinder
Lost Supplies - Recover the West Code Cylinder
Dark Science - Enter the Tomb Burial Chamber
Dark Science - Collect a Plump K'lor'slug Larva as Bait
Dark Science - Plant the Bait to Summon the Tuk'ata
Dark Science - Recover the Mutant Tuk'ata Brain
Lost Supplies - Recover the North Code Cylinder
Slaying the Beast - Explore the Tomb of Marka Ragnos
[+] Slaying the Beast: Destroying the Deserters (Bonus) - Defeat the Acolyte Deserters: 0/5
Slaying the Beast - Meditate at the Ancient Sith Carving
Slaying the Beast - Slay the Beast of Marka Ragnos
Teleport to Quick Travel Point (Field Research Area)
Dark Science [optional mission end] - Return to Lord Renning or Apprentice Malora
[o] Dark Science [mission end] - Return to Lord Renning
Lost Supplies - Open the Research Supply Crate
Take a Taxi to (Sith Academy)
Lost Supplies [mission end] - Take the Supplies to Sergeant Garus
Slaying the Beast - Return to Overseer Tremel
Slaying the Beast - Speak to Dolgis
Slaying the Beast - Defeat Dolgis
Slaying the Beast - Speak to Dolgis
Slaying the Beast [mission end] - Return to Overseer Tremel
A New Master [mission start] - Overseer Tremel
The Blood Legacy [mission start] - Overseer Ragate
Purity [mission start] - Lord Abaron
Purity - Scan Inquisitor Arzanon
Purity - Scan Lord Solence
[HEROIC 2] Armed and Dangerous [mission start] - Mission Board
Teleport (if you can) to Quick Travel Point (Sith Academy)
A New Master - Speak to Darth Baras
A New Master - Speak to Phyne
[o] A New Master - Defeat Phyne
[o] A New Master - Defeat Teeno
[o] A New Master - Defeat the Acolytes: 0/2
[o] A New Master - Speak to Phyne
A New Master - Speak to Darth Baras
Purity - Scan Lord Cestus
Purity - Scan Overseer Ragate
A New Master - Speak to Overseer Tremel
A New Master - Defeat Overseer Tremel
A New Master - Speak to Overseer Tremel
Purity [mission end] - Return to Lord Abaron
A New Master - Return to Darth Baras
Sith Arithmetic [mission start] - Darth Baras
Jailbreak [mission start] - Inquisitor Urinth
Jailbreak - Speak to Jedi Quorian Dorjis
[HEROIC 2+] The Hate Machine [mission start] - Ephran Zell
Rogues [mission start] - Datapad
[+] Rogues - Destroy Reprogrammed Droids: 0/8
[+] Rogues: Make an Example (Bonus) - Defeat Escaped Slaves: 0/15
Sith Arithmetic - Retrieve the Antechamber's Shard
Jailbreak - Retrieve Dorjis's Equipment
Sith Arithmetic - Retrieve the Machine Vault's Shard
Sith Arithmetic - Retrieve the Archives' Shard
Commit suicide and then teleport to the nearest Medical Center
Jailbreak - Recover Dorjis's Datalog
Jailbreak - Recover Dorjis' Lightsaber
Teleport to Quick Travel Point (Sith Academy)
Jailbreak - Speak to Jedi Quorian Dorjis
Jailbreak [mission end] - Return to Inquisitor Urinth
Sith Arithmetic - Return to Darth Baras
Sith Arithmetic - Defeat Klemral
Sith Arithmetic - Defeat the Acolytes
Sith Arithmetic - Speak to Klemral
[o] Sith Arithmetic - Retrieve the Antechamber's Shard
[o] Sith Arithmetic - Retrieve the Machine Vault's Shard
[o] Sith Arithmetic - Retrieve the Archives' Shard
Sith Arithmetic [mission end] - Return to Darth Baras
The Final Trial [mission start] - Darth Baras
The Final Trial - Talk to Vette
[+] The Blood Legacy: Ritual Cleansing (Bonus) - Kill Shyrack Maulers: 0/6
The Blood Legacy - Collect a Skull from the Altar of Bones
The Blood Legacy - Soak the Skull in the Blood Pool
The Blood Legacy - Defeat the Bloodfiend
The Blood Legacy [mission end] - Return to Overseer Ragate
Rogues [mission end] - Speak to Inquisitor Jarobi
Grave Robbing [mission start] - Sentry Yashia
[+] The Final Trial: Eliminate the Competition (Bonus) - Eliminate Competing Acolytes: 0/12
Grave Robbing - Find the Acolyte's Remains
Creeping Hunger [mission start] - Seh-run
The Final Trial - Make Vette Activate the Hidden Switches: 1/4
Grave Robbing - Return to Sentry Yashia
Teleport (if you can) to Quick Travel Point (Sith Academy)
Creeping Hunger - Speak to Overseer Prithor
Grave Robbing [optional mission end] - Take the Remains to Naman Fal
Wait upstairs till the elevator goes down, to the very bottom. Then, jump and let yourself get killed. You'll teleport right at the Sith Academy.
[o] Creeping Hunger [mission end] - Feed the Poisoned Meal to Seh-run
[o] Creeping Hunger [mission end] - Feed the Special Meal to Seh-run
The Final Trial - Make Vette Activate the Hidden Switches: 2/4
[o] Grave Robbing [mission end] - Claim the Relic
The Final Trial - Make Vette Activate the Hidden Switches: 3/4
The Final Trial - Make Vette Activate the Hidden Switches: 4/4
The Final Trial - Enter the Forbidden Cavern
The Final Trial - Talk to Vemrin
The Final Trial - Defeat Vemrin
The Final Trial - Talk to Vemrin
The Final Trial: Naga Sadow's Honor Guard (Bonus) - Defeat Ancient Droids: 0/8
The Final Trial - Enter the Reliquary
Item Modification (Tutorial) [mission start] - after acquiring the lightsaber
The Final Trial: Sadow's Servants (Bonus) - Defeat the Entombed Warriors
The Final Trial - Exit the Forbidden Cavern
Teleport (if you can) to Quick Travel Point (Sith Academy)
Item Modification (Tutorial) [mission end] - Activate the Lore Object to Learn about Modification
The Final Trial - Return to Darth Baras
The Final Trial - Talk to Eskella
[o] The Final Trial - Defeat Eskella
[o] The Final Trial - Defeat the Acolytes: 0/2
The Final Trial [mission end] - Return to Darth Baras
Leaving Korriban [mission start] - Darth Baras
Go to Dromund Kaas [mission end] - Board a Shuttle to the Imperial Fleet
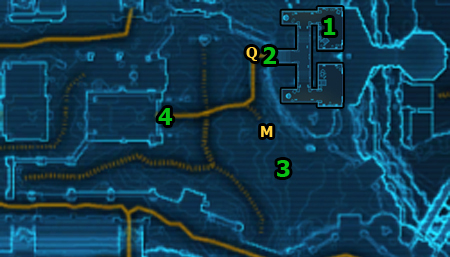
Speak to Overseer Tremel
You begin your adventure as a Sith Warrior in [1]. You'll be greeted by Overseer Tremel, who will be your first Master. After the conversation go to the building exit in [2]. It's necessary that you mark the opposite Quick Travel Point (Offworld Orientation).

Kill K'lor'slug Foragers: 0/6
Go down the stairs. Before you start carrying out the further mission objective, explore the area in [3]. There are many K'lor'slug Foragers around. Kill one to receive a bonus mission. Then kill five more overgrown insects to complete it. You'll gain 125 XP.
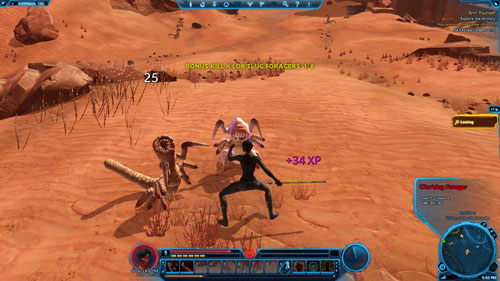
Then go the Ajunta Pall (Tomb of Ajunta Pall) tomb entrance. The door is in [4].
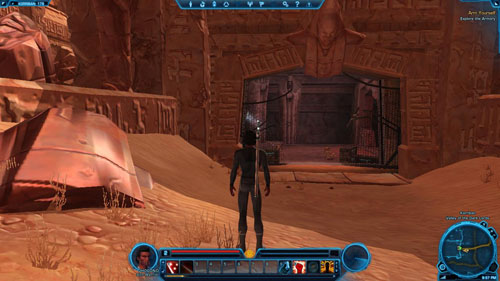
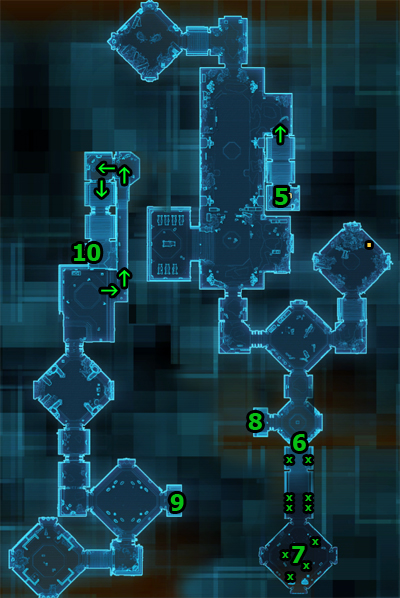
Enter the Armory
You'll find yourself in [5]. Go down the stairs. You'll notice a trainer - Veshta. If you've reached level 2 or 3, it's necessary for you to buy new abilities from her. Go deep into the tomb to [6], defeating insects and thieves on the way - watch out for a little more challenging Tomb Looter Guards [+].

Retrieve the Sith Warblade
Go through the green gate in [6] to enter the story area. Move forward to [7], and then watch the cutscene. You'll complete a special mission - Blade of the Ancients. The reward will be a better quality lightsaber - Sith Warblade. It's best to equip your character with it right away.
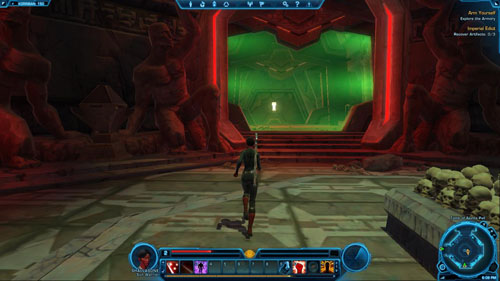
Defeat Ancient Droids: 0/10
Once you get the sword, a powerful Ancient Droid using melee attacks, together with three weaker Droid Sentries attacking from a distance, will appear in the hall. You'll also receive a bonus mission - destroying them. Though you can run away, it's better to destroy these and the next enemies in the corridor (they are marked with [x] on the map) - thanks to that you'll accomplish the bonus mission and get 255 XP. Remember that once you exit the armory you will no longer be able to do it.
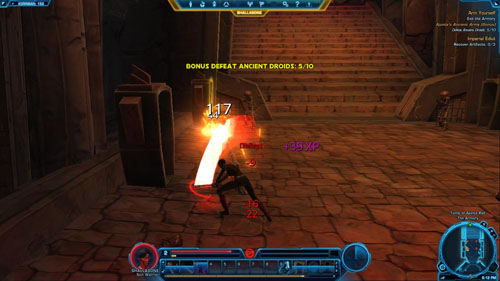
Exit the Armory
After getting rid of the droids, exit the armory through the door in [6] and then go up the stairs to the left in [7] to the second tomb level. You'll appear in [8].
Kill K'lor'slugs: 0/6
After a while you'll get one more, third, bonus mission that will require you to test your blade. In order to do it, you must kill six, already familiar, K'lor'slugs (of any kind). You'll gain 255 XP for that. Watch out for Tomb Looter Guards [+], Tomb Looter Brutes [+] and big K'lor'Slug Cripplers along the way. Head for the tomb exit in [9] (you'll need to cross a metal pier on the way).
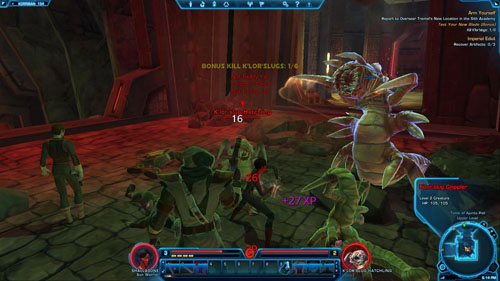
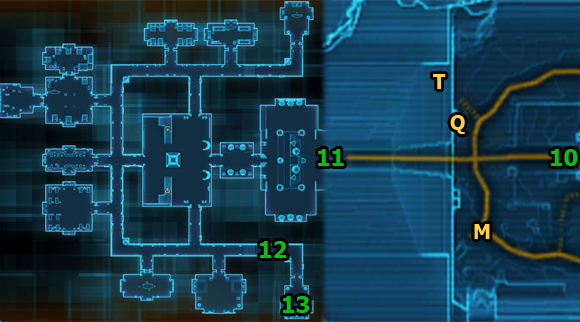
Report to Overseer Tremel's New Location in the Sith Academy
After leaving the tomb you'll find yourself in [10]. Go to the Sith Academy entrance in [11]. On the way remember to mark on the map: Taxi (Sith Academy) on the right and Quick Travel Point (Sith Academy) by the opposite stairs. Enter the academy and run to [12]. On the way you should take an interest in the class mission Learning From the Best.
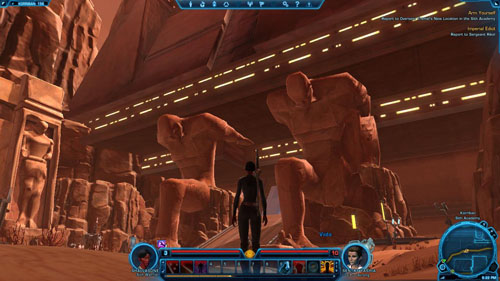
Speak to Vemrin
After entering the story area, you'll be accosted by Vemrin and Dolgis after a while. Even though your replies will not have any impact on the course of events, you can earn some Dark Side points. See the table below the picture.

A
Reply
Points / Rewards
1
Don't insult me.
-
2
Wow, you're unfriendly.
-
3
Prepare to be crushed.
+50 to Dark Side
Report to Overseer Tremel's New Location in the Sith Academy
Now all you need to do is to go to [13] and finally talk to Overseer Tremel. You'll also meet his daughter and get the next main mission.
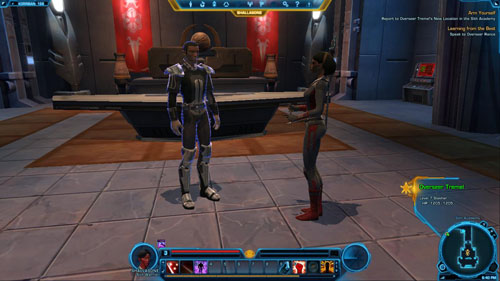
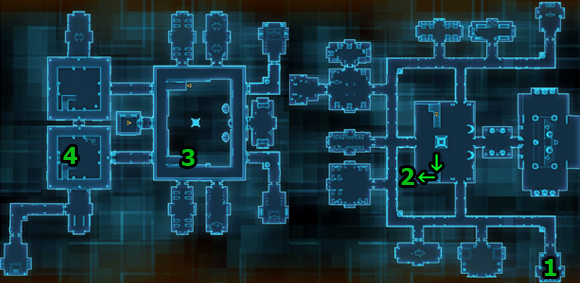
This short mission will acquaint you with the second trainer on Korriban. Immediately after you've entered the academy, talk to Assistant Overseer Loun, who's standing in [1]. Sithka will show you the way to the trainer. Go to meet him now.

Speak to Overseer Rance
Climb the stairs in [2] to get to the second academy level. Once you're upstairs, in [3], run forward. Go to [4] and talk to Overseer Rance. This way, you'll perform this mission. You should also purchase all the skills you can. Go back to the trainer whenever you reach a level and the academy is on your way (e.g. when you're about to finish a main mission).
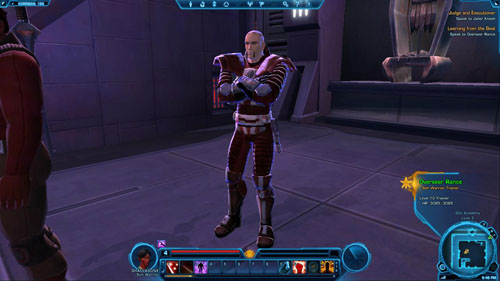

You begin this mission shortly after the conversation with Overseer Tremel. You'll have to interrogate three prisoners and decide about their fate.
Speak to Jailer Knash
Exit Tremel's chamber in [1] and go to the chamber where the prisoners' cells are located ([2]). Right after you enter, you'll start a conversation with Jailer Knash. You should know that you'll be additionally rewarded by Overseer Tremel for every correct answer.
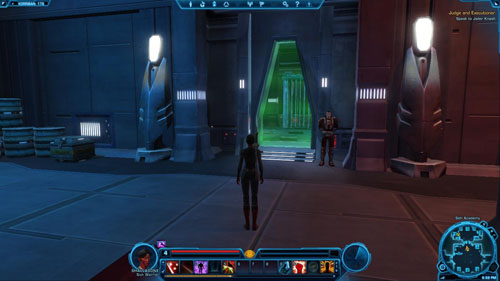
After a while you will have to judge the first prisoner - an assassin named Solentz. You can kill her at once, or in honorable combat or employ her as an assassin of the Empire (see the table below the picture for details).

A
Reply
Effect
Points / Rewards
1
Execution. [Kill her]
Executing Solentz
+100 to Dark Side
2
Arm her.
Fight with Solentz
+50 to Dark Side
3
The Empire needs assassins.
Employing Solentz, the best option
+100 to Light Side
Defeat Solentz
Speak to Jailer Knash
If you chose the second option, you'll fight with Solentz. She has a weapon but she won't be a challenging opponent. Kill her and then talk to Jailer Knash.

The second prisoner is Devotek. You can kill him in honorable combat (it's the prisoner's wish), leave him in jail or carry out an instant execution (see the table below the picture for details).

B
Reply
Effect
Points / Rewards
1
Jailer, give him a sword.
Fight with Devotek
+50 to Dark Side
2
Continue to rot.
Leaving Devotek in jail
+50 to Light Side
3
No, you die. [Kill him]
Executing Devotek, the best option
+100 to Dark Side
Defeat Devotek
Speak to Jailer Knash
If you fulfilled Devotek's wish, you'll fight with him. It's a pure formality - you'll kill him easily. After the fight talk to Jailer Knash.
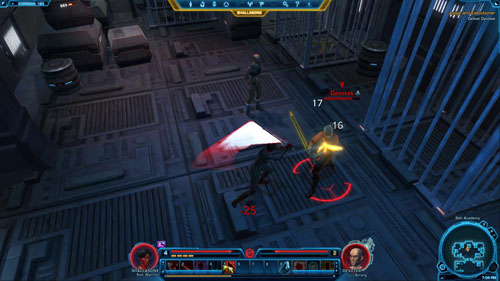
The last prisoner is Brehg. You can leave him in prison, free or subject to torture (see the table below the picture for details).

C
Reply
Effect
Points / Rewards
1
Leave him in chains.
Leaving Brehg in jail
+50 to Dark Side
2
Set him free.
Releasing Brehg
+100 to Light Side
3
Bleed him until he relants.
Torturing Brehg, the best option
+100 to Dark Side
Return to Overseer Tremel
After making a decision, you'll briefly talk to Jailer Knash and then all that's left to do is to return to Overseer Tremel's chamber in [1] and evaluation of the choices you made. After receiving the next main mission, exit the Sith Academy through the door in [3].
Destroying the Deserters (Bonus)
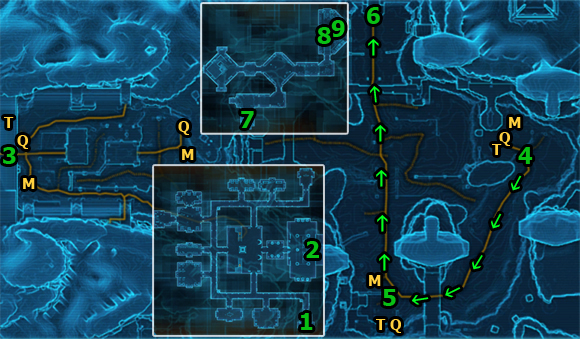
Take a taxi to the Lower Wilds
A long walk awaits you in this mission. During the journey you will explore most of the Korriban planet. You begin in [1]. Go to [2] to exit the Sith Academy and find yourself in [3]. Head for the Taxi (Sith Academy) in the north (marked with [T] on the map) and then go on a trip to a new location - Lower Wilds Outskirts - that is, Taxi (Lower Wilds).

Explore the Tomb of Marka Ragnos
After arriving in the vicinity of [4] you should mark Quick Travel Point (Lower Wilds), which is right next to the taxi. Then start to follow the path shown by green arrows on the map - unfortunately, you can't take a shortcut here. It's good to know that there are many side missions you can receive in the newly discovered areas.
![Along the way, it will be good to stop at [5] and look for side missions and, above all to take the elevator up to the metal pier - (L06) Slaying the Beast - Sith Warrior - Star Wars: The Old Republic - Game Guide and Walkthrough](https://game.lhg100.com/Article/UploadFiles/201512/2015121709485243.jpg)
Along the way, it will be good to stop at [5] and look for side missions and, above all to take the elevator up to the metal pier. There's Taxi (Field Research Area) and Quick Travel Point (Field Research Area) there. You should definitely mark both on the map.
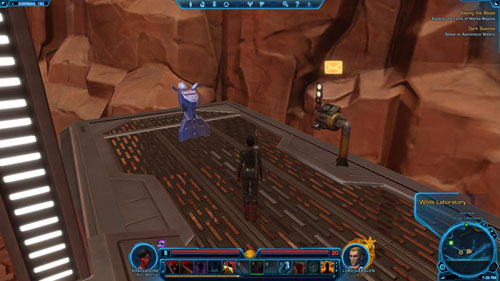
Go back downstairs and head north. Finally, after a long journey, you'll manage to get to the gate leading to the Tomb of Marka Ragnos. They are located in [6].
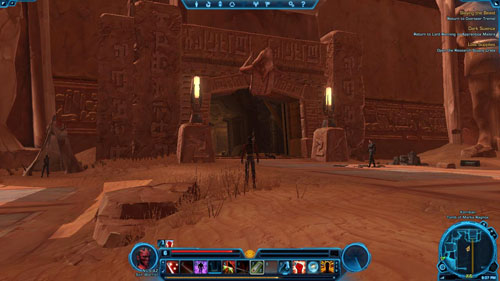
Defeat the Acolyte Deserters: 0/5
You'll appear in the tomb in [7] and you'll have to get to [8]. But before you reach the place, you'll have to force your way through the armies of renegade acolytes. After killing one of them you will receive a bonus mission. Kill five acolytes to complete it and you'll earn 745 XP. Acolytes are not very challenging - watch out only for Exiled Acolytes [+] and Banished Warriors [+].
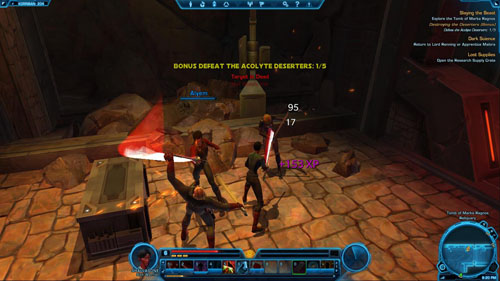
Meditate at the Ancient Sith Carving
Head to [8] and go through the green force field to the story area. Get some Medpacs ready, use boosting skills and then read the inscription carved in a large stone slab in [8].
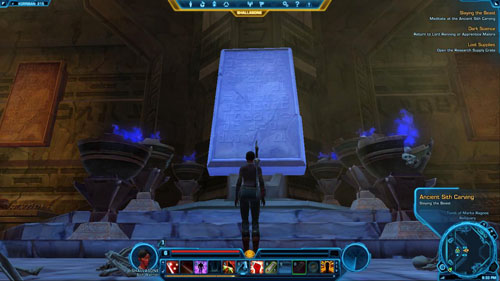
Slay the Beast of Marka Ragnos
After a while a huge beast - The Beast of Marka Ragnos [*] - will appear in [9]. It's also the boss you'll need to defeat. The monster can stun and bring you down on your knees. If your level is the same as the beast's, you used boosting abilities and you have the abilities that correspond to your character's current level - then you should be fine. After slaying the monster, you'll obtain a Codex entry - Bestiary: The Beast of Marka Ragnos (Warrior) - worth 300 XP.

Return to Overseer Tremel
Speak to Dolgis
Go back to the exit from [7] and use Taxis or teleport at once to Quick Travel Point (Sith Academy). Go inside through the door in [3] and then run to Overseer Tremel's chamber in [1]. Before you reach it, you'll be accosted by Dolgis. It doesn't matter what you answer - the conversation will end in a fight anyway.
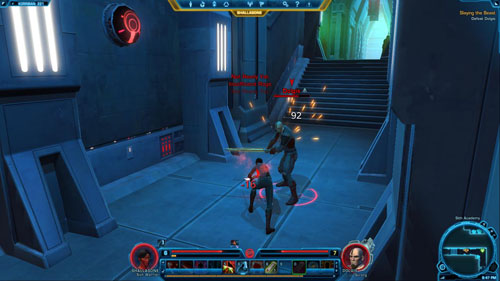
Defeat Dolgis
Speak to Dolgis
Dolgis is a weak opponent. Unless you don't have full health, you'll defeat him with ease. Then you'll have to decide what to do with him - you can kill him, let him go, or perhaps spare him and get some money for it (see the tables below the picture for details).

A
Reply
Effect
Points / Rewards
1
You earned this. [Kill him]
Killing Dolgis
+50 to Dark Side
2
Don't cross me again.
Sparing Dolgis
+100 to Light Side
3
Then buy your life.
Further conversation stage - B
-
B
Reply
Effect
Points / Rewards
1
Now go.
Sparing Dolgis for money
+50 to Light Side,<br>+54 credits to reward
2
They'll do nicely.
Sparing Dolgis for money
+50 to Light Side, <br>+54 credits to reward
3
Fool. [Kill him]
Killing Dolgis
+100 to Dark Side
Return to Overseer Tremel
Now you can talk to Overseer Tremel w [1] to finish this mission and receive the next.
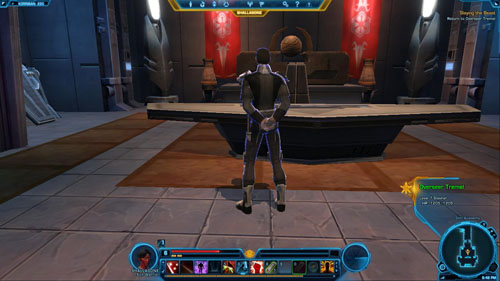

Speak to Darth Baras
You begin this mission in [1], in Overseer Tremel's chamber. Run into the hall and climb the stairs in [2] to get to [3] - the Sith Academy second level. Once you're there, go to Darth Baras's chamber in [4]. Pass through the green force field to enter the story area.
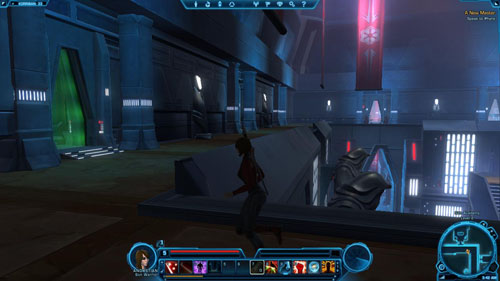
Speak to Phyne
Before you manage to talk to him, you will be accosted by a group of four young acolytes (including Phyne and Teeno). They will want to prove themselves. You can send them after your rival - Vemrin, refuse, or test them in a fight. See the table below the picture for details.

A
Reply
Effect
Points / Rewards
1
Consider me nodding.
Encouraging the acolytes to fight with Vemrin
+50 to Dark Side
2
This isn't how I'll handle it.
Sparring with the acolytes, new mission objectives
-
3
Are you capable?
Sparring with the acolytes, new mission objectives
-
Defeat Phyne
Defeat Teeno
Defeat the Acolytes: 0/2
If you choose the second or third answer, you'll need to fight with Phyne, Teeno (leave these for later) and two Acolytes. You'll defeat the whole group easily.
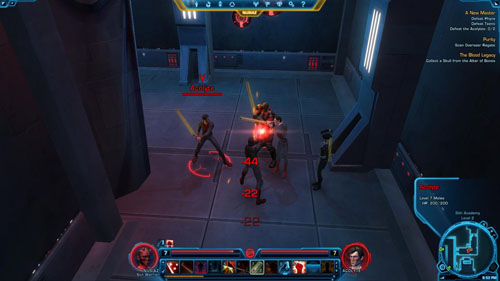
Speak to Phyne
After winning the fight, talk to Phyne and then make a final choice. You can send the acolytes after Vemrina or advise against it. See the table below the picture for details.
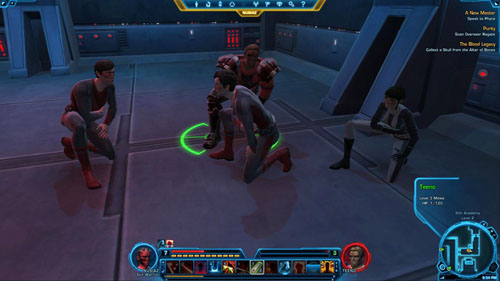
A
Reply
Effect
Points / Rewards
1
Yes. Give it up.
Advising against fighting Vemrin
+50 to Light Side
2
Go ahead. Try killing him.
Encouraging the acolytes to fight with Vemrin
+50 to Dark Side, +3x Basic Medpac in an e-mail
3
Vemrin's nothing.
Encouraging the acolytes to fight with Vemrin
+3x Basic Medpac in an e-mail
Speak to Darth Baras
Enter Darth Baras's chamber in [5]. The conversation with him and Vemrin will start automatically. Your new master has the first mission to give you - killing the previous one -Overseer Tremel. You will also obtain a Codex entry - Persons of Note: Darth Baras (Warrior) - worth 390 XP. Moreover, you can get some Dark or Light Side points. Look below the picture for details.

A
Reply
Points / Rewards
1
Of course.
-
2
If I have to.
+50 to Light Side
3
My dream come true.
+50 to Dark Side
Speak to Overseer Tremel
Go back downstairs (there's no need to use the stairs - simply jump down on the first level) and go to Overseer Tremel's chamber in [1]. Your former master is sitting behind a desk. Before you begin a conversation with him (which, regardless of your answer, will end in a fight), have a rest, get some Medpacs ready just in case, and use boosting abilities.
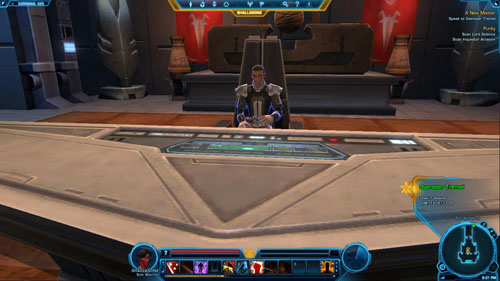
Defeat Overseer Tremel
Overseer Tremel [*] is quite a challenging opponent, so if you don't prepare yourself adequately, you might lose the fight. Remain cautious and use your most powerful abilities.
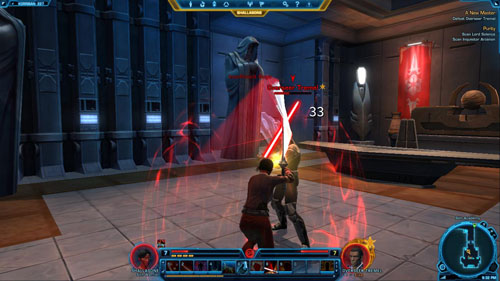
Speak to Overseer Tremel
After the fight talk to the kneeling Overseer Tremel. You will have two options - you can either save your former master or kill him. See the tables below the picture for details.
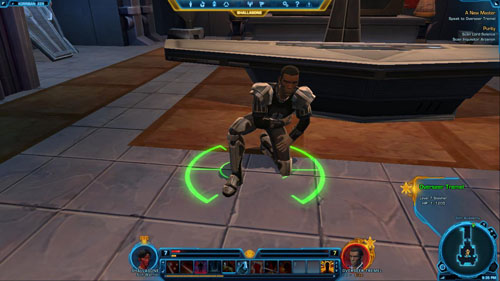
A
Reply
Effect
Points / Rewards
1
You fought well. [Kill Tremel]
Killing Overseer Tremel
+50 to Dark Side
2
I just need your hand.
Further conversation stage - B
-
3
You sicken me. [Kill Tremel]
Killing Overseer Tremel
+150 to Dark Side
B
Reply
Effect
Points / Rewards
1
I'm saving you.
Sparing Tremel
+150 to Light Side, +3x Basic Medpac in an e-mail
2
Your choice.
Sparing Tremel
+100 to Light Side, +3x Basic Medpac in an e-mail
3
Okay, then die. [Kill Tremel]
Killing Overseer Tremel
+100 to Dark Side
Return to Darth Baras
Regardless of the choice you've made, the former master's hand will appear in your inventory (Overseer Tremel's Hand). Take it to Darth Baras in [5]. You'll complete this mission and get another one.
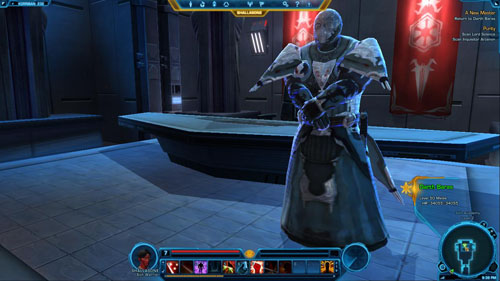
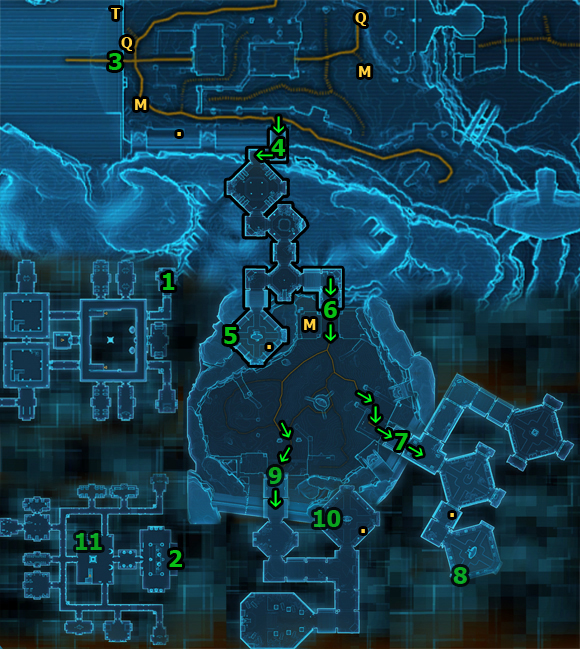
Retrieve the Antechamber's Shard
You begin this mission in [1], in Darth Baras's chamber. Exit the chamber, jump over the balustrade to the lower hall level and then head for the Sith Academy exit in [2]. Then, from [3] go to [4] - to the Tomb of Tulak Hord entrance - The Antechamber.
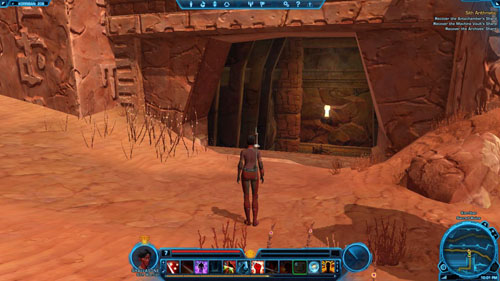
Inside you will be attacked by runaway slaves, but they're not dangerous. However, you should watch out for Reprogrammed Droids [+]. Head to the south of the tomb, and then turn right and make your way to the room in [5]. There are Shylack Howlers [+] wandering around - don't fight with all of them at the same time and you'll be fine. Next, search the sarcophagus on the right in [5] and take the shards lying on it - Antechamber Shard.
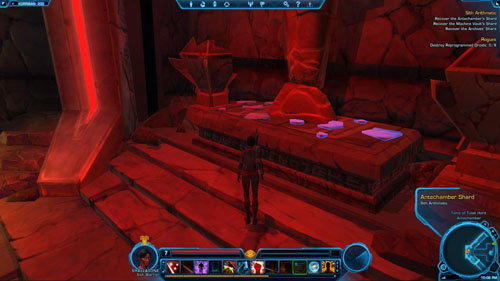
Retrieve the Machine Vault's Shard
Go to the tomb exit in [6]. You will find yourself in the Tomb of Tulak Hord - Ruined Atrium - a large, ruined square. Here, some more slaves will stand in your way, as well as Reprogrammed Guard Droids [+]. Try to go around the middle of the atrium, as there is a boss there. Run to the right, following the arrows, to the Tomb of Tulak Hord entrance in [7] - The Machine Vault.
![Run to [8] - right into the larger room and then turn right - (L08) Sith Arithmetic - Sith Warrior - Star Wars: The Old Republic - Game Guide and Walkthrough](https://game.lhg100.com/Article/UploadFiles/201512/2015121709485507.jpg)
Run to [8] - right into the larger room and then turn right. This path will take you to the room with shards, though it's possible that first you will have to deal with some Shylack Shriekers [+] that are flying around this place. If nothing else is standing in your way, search the altar on the right and take the shards (Machine Vault Shard).
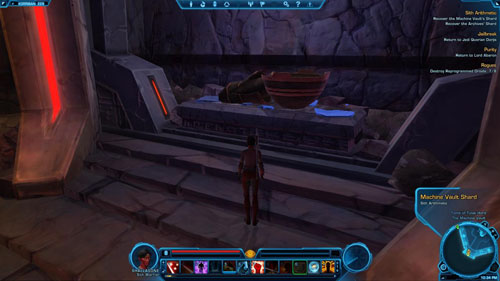
Retrieve the Archives' Shard
Run out of the tomb, go around the middle of the atrium and go left to [9]. There is the Tomb of Tulak Hord gate - The Archives, which you should use.
![Keep close to the left wall while breaking through armies of slaves and a few Reprogrammed Guard Droids [+] - (L08) Sith Arithmetic - Sith Warrior - Star Wars: The Old Republic - Game Guide and Walkthrough](https://game.lhg100.com/Article/UploadFiles/201512/2015121709485635.jpg)
Keep close to the left wall while breaking through armies of slaves and a few Reprogrammed Guard Droids [+]. Head for the hall in [10] and defeat a few groups of K'lor'slugs of various kinds there. Search the chest on the right, and then take the Archives Shard from the altar on the left, in [10].
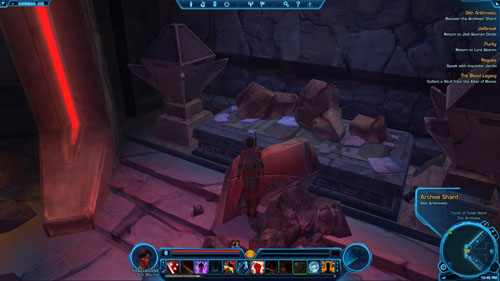
Return to Darth Baras
If you don't have any other missions to complete in this area, go back on foot to the Sith Academy, or teleport to Quick Travel Point (Sith Academy). Enter through the door in [3] and then go up the stairs in [11]. Run to Darth Baras's chamber in [1].

Defeat Klemral
Defeat the Acolytes
Immediately after you've entered the story area, Klemral and several Akolytes will bar your way. Regardless of your reply, the conversation will end in a fight, although it's going to be just a straightforward skirmish.
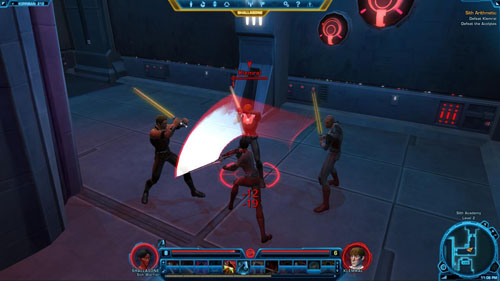
Speak to Klemral
After winning the battle you'll need to talk to Klemral. You have several options - you can kill him, ignore him or give him the shards (see the tables below the picture for details). Keep in mind, however, that if you give him the shards, you'll have to acquire them again!
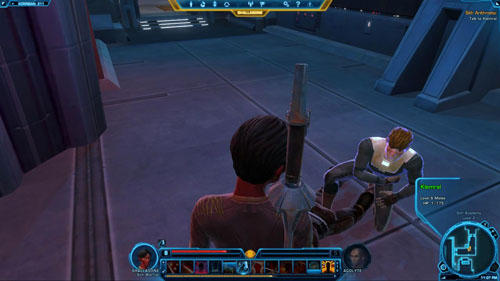
A
Reply
Effect
Points / Rewards
1
I'll handle that. [Kill him]
Killing Klemral
+100 to Dark Side
2
You could run.
Further conversation stage - B
-
3
Take mine. [Give shards]
Further conversation stage - C
+50 to Light Side
B
Reply
Effect
Points / Rewards
1
Go back to the tomb.
Ignoring Klemral
-
2
Take mine. [Give shards]
Further conversation stage - C
+50 to Light Side
3
I'll handle that. [Kill him]
Killing Klemral
+100 to Dark Side
C
Reply
Effect
Points / Rewards
1
You'll owe me.
Giving Klemral the shards
-
2
It's a gift. Between friends.
Giving the shards as a gift
+50 to Light Side
3
Pay me.
Selling the shards
+330 credits (altogether)
Retrieve the Antechamber's Shard
Retrieve the Machine Vault's Shard
Retrieve the Archives' Shard
If you decided to give back the shards, you'll need to go to the tombs and get them once more (Antechamber Shard, Machine Vault Shard and Archives Shard). Once you have them in your possession, return to Darth Baras.
Return to Darth Baras
If you have the shards, you can finally speak with Darth Baras in [1], finish the mission and get another one. If you spared Klemral, you'll have a chance to earn some Dark or Light Side points.
A
Reply
Effect
Points / Rewards
1
He deserves to be here.
Sparing Klemral
+50 to Light Side
2
His training should end.
Sparing Klemral
-
3
Kill him.
Killing Klemral
+50 to Dark Side

Eliminate the Competition (Bonus)
Naga Sadow's Honor Guard (Bonus)
Sadow's Servants (Bonus)
Item Modification (Tutorial)
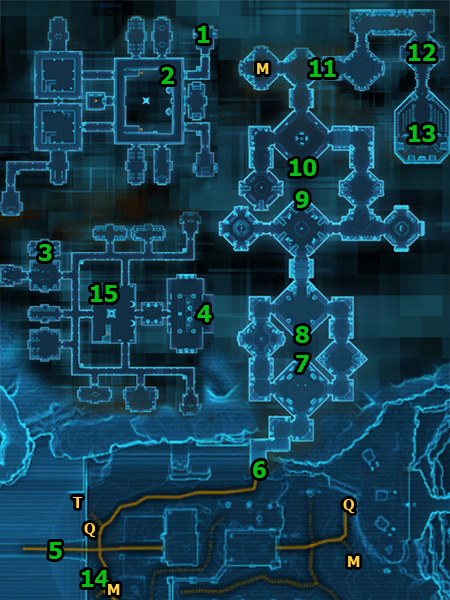
Talk to Vette
You begin this mission in Dartha Baras's chamber in [1]. Run to [2], jump down on the first academy level and then go to the jail in w [3]. You will meet Vette, who after a short conversation will join you as your first companion. During this conversation your answers may earn you some Dark Side points - see the tables below the picture for details.

A
Reply
Effect
1
Don't ask questions.
-
2
That's correct.
-
3
You just earned another shock.
+50 to Dark Side
B
Reply
Effect
1
Obey my every command.
-
2
Don't be silly.
-
3
No, you aren't. [Shock Vette]
+50 to Dark Side
It is worth noting that one of the rewards for completing A New Master mission - Tremel's Ring - is an item that you can give Vette. This way, you will gain +54 points of her Affection. After the conversation, you will obtain a Codex entry - Persons of Note: Vette (Warrior) - worth 450 XP.
Leave the Sith Academy through the exit in [4], and when you are in [5] head for [6]. There is another tomb to be explored - Tomb of Naga Sadow. Go inside using the door shown in the picture below.
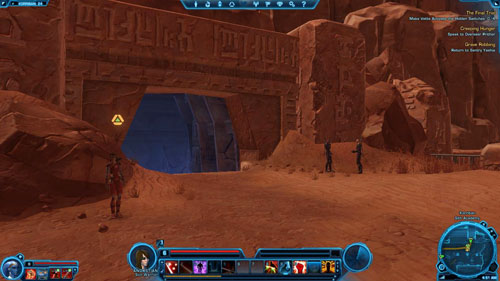
Eliminate Competing Acolytes: 0/12
Inside, there are a lot of enemies, most of which are the acolytes who are competing with you. You'll have to kill them. When you kill the first, you'll receive bonus mission. Kill twelve to complete it and gain 1625 XP - do it while carrying out the main mission, namely, looking for the switches. As usual, there are weaker and stronger acolytes (Rival Acolytes [+], Aspiring Acolytes [+]) - watch out only for the latter.
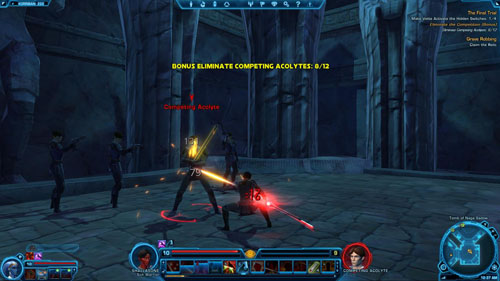
Make Vette Activate the Hidden Switches: 0/4
Keep killing the acolytes and the search for the lever. The first is hidden in the statue in [7]. Then run to the north of the tomb using the path on the left or right - it doesn't matter which one you choose.
![The second switch will be in a destroyed urn in [8] - (L11) The Final Trial - Sith Warrior - Star Wars: The Old Republic - Game Guide and Walkthrough](https://game.lhg100.com/Article/UploadFiles/201512/2015121709485706.jpg)
The second switch will be in a destroyed urn in [8]. Next, make a 180-degree turn and keep running forward.
![In this way, you will find the third switch in [9], hidden in the ruined sarcophagus - (L11) The Final Trial - Sith Warrior - Star Wars: The Old Republic - Game Guide and Walkthrough](https://game.lhg100.com/Article/UploadFiles/201512/2015121709485767.jpg)
In this way, you will find the third switch in [9], hidden in the ruined sarcophagus. Head for the corridor in the east.
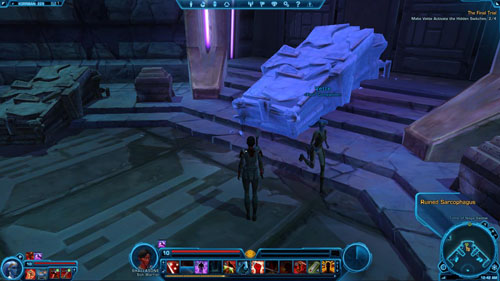
Once you've entered the large hall, turn left to find the fourth and the last switch. It's in [10], hidden in the coffin with armor.
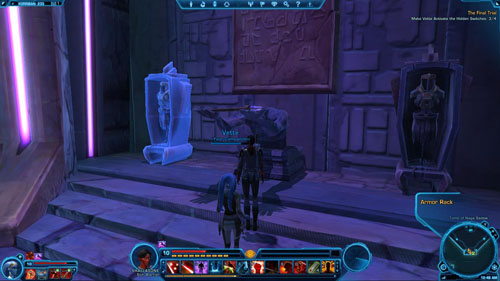
Enter the Forbidden Cavern
Talk to Vemrin
After activating all the switches, head north and then east to the story area in [11]. Watch out for, among other enemies, Ancient Droid Patrollers [+]. Use boosting abilities and have a rest. Then pass through the green force field. You will be stopped by Vemrin [*]. Regardless of your answer, your rival will start the fight.

Defeat Vemrin
Talk to Vemrin
Vemrin [*] might be a challenging opponent, but with Vette's help you'll defeat him with ease. It's important that you have full health before the fight. As soon as he loses the battle, talk to him. You will have several options to choose from.
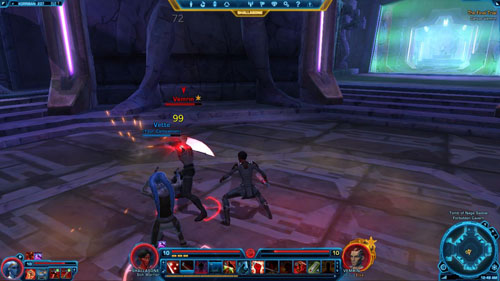
You can tell him he was pathetic, or that he fought well, or kill him instantly. Once you're done with him, Vette will begin to open the door. Both during the conversation with Vemrin and after his death your replies can have an impact on Vette - see the tables below the picture for details.
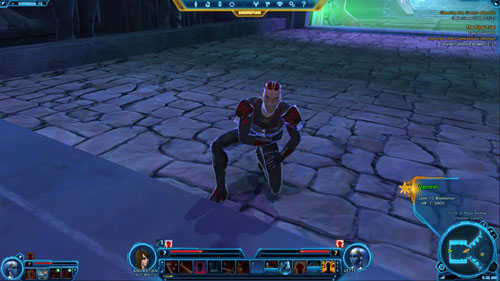
A
Reply (Vemrin)
Effect
Points / Rewards
1
You were weak. Pathetic.
Killing Vemrin
+100 to Dark Side
2
You fought well.
Praising and killing Vemrin
+50 to Light Side
3
Enough. [Kill Vemrin]
Killing Vemrin
+100 to Dark Side
B
Reply (Vette)
Points / Rewards
1
Back to business.
-
2
Thanks.
-
3
I didn't ask. [Shock Vette]
-1 to Affection: Vette, +50 to Dark Side
C
Reply (Vette)
Points / Rewards
1
Keep the comments to yourself.
-
2
Appreciate it.
+15 to Affection: Vette
3
Shut up. [Shock Vette]
-1 to Affection: Vette, +50 to Dark Side
Defeat Ancient Droids: 0/8
You need to get to [13], but your way will be blocked by some droids - the weaker Ancient Droid Sentries and a bit more challenging - Ancient Droid Watchers [+]. After destroying the first droid you will receive a bonus mission, and after destroying another eight you'll complete it and get 1625 XP. Watch out especially for a room in [12], as there are a few more powerful droids there.
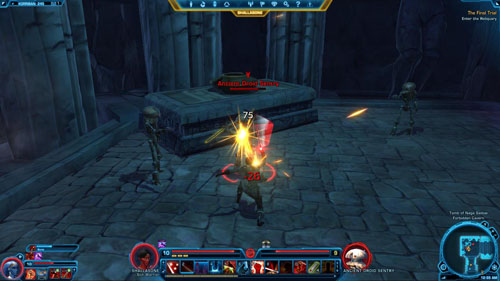
Enter the Reliquary
Having forced you way through the droids and the room in [12] you'll eventually enter [13]. You'll watch a cutscene and finally get the longed-for lightsaber (Ancient Lightsaber*), weapon modification (Might Mod 1*), and also a Codex entry - Lore: Sith Weapons - worth 495 XP. You will get all this in the form of an automatically carried out mission: A Fitting Weapon.

Defeat the Entombed Warriors
But it's not the end of struggles. Quickly equip your character with the new weapon, as Entombed Guardians will start emerging from the nearby coffins. Of course, you can run towards the exit, but it's better to stand in front of the stairs and kill the enemies one by one. Killing all eight will result in completing a bonus mission and receiving 1625 XP. Indeed, new Entombed Guardians will appear to replace the dead ones, but you won't be fighting with more than three opponents at the same time.
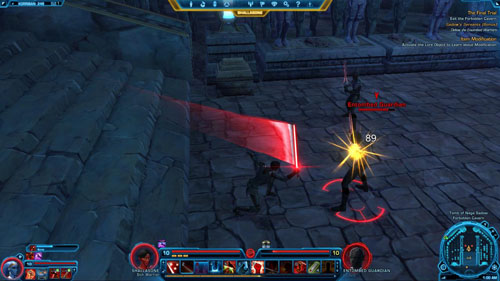
Exit the Forbidden Cavern
Now you can leave the cavern. No one will stand in your way and if you no longer have anything to do in the tomb, teleport to Quick Travel Point (Sith Academy). However, don't go inside the Sith Academy just yet.
Activate the Lore Object to Learn about Modification
Instead, locate the item modification station in [14]. Read the sign next to it and you'll obtain a Codex entry - Game Rules: Item Modifications - worth 45 XP, and also a weapon modification and 885 XP. Fortitude Enhancement 2* you've just acquired, as well as Might Mod 1* can be put into your lightsaber - use the station to do it. Enjoy having an even more powerful weapon!
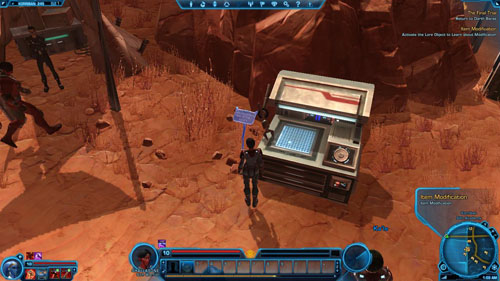
Return to Darth Baras
Talk to Eskella
Enter the Sith Academy through the door in [5]. When you reach [4] go up the stairs in [15]. Then, head for Darth Baras's chamber in [1]. Once you've passed through the green force field, Overseer Tremel's daughter - Eskella - will stand in your way. The conversation will develop in various ways depending on whether you killed her father or not. If you did, then the fight will be unavoidable. If you, however, spared Overseer Tremel, have a look at the possibilities you have (the tables below the picture).

A
Reply (Tremel is alive)
Effect
1
Be more specific
Further conversation stage - B
2
He's not dead
Further conversation stage - C
3
Listening to rumors, Eskella?
Fight with Eskella
B
Reply (Tremel is alive)
Effect
1
Your father is alive.
Further conversation stage - C
2
Maybe. [Show Tremel's ring]
Fight with Eskella
3
Stay out of my affairs.
Fight with Eskella
C
Reply (Tremel is alive)
Effect
Points / Rewards
1
If you must.
Allowing Eskella to kill her father
+50 to Light Side
2
Spare him.
Advising Eskella not to kill her father
+50 to Light Side
3
I don't think so.
Fight with Eskella
-
Defeat Eskella
Defeat the Acolytes: 0/2
If you killed Eskella's father, then you have to fight with her and two Acolytes. Yet, this fight won't be hard - finish the Acolytes off with an area attack and then focus on the fight with Eskella [+].

Return to Darth Baras
Now you can talk to Darth Baras in [1]. Remember that during the conversation your replies will have an impact on Vette - see the tables below for details.
A
Reply
Points / Rewards
1
Of course he did.
+15 to Affection: Vette
2
I tried to spare him.
-
3
The fool is worm food.
-1 to Affection: Vette
B
Reply
Points / Rewards
1
Command me, my lord.
-1 to Affection: Vette
2
I rush to your service.
-1 to Affection: Vette
3
It's about time.
+15 to Affection: Vette
C
Reply
Points / Rewards
1
Yes, master.
-1 to Affection: Vette
2
I'm glad to get off Korriban.
-
3
My regards to the Dark Lord.
+15 to Affection: Vette

Board a Shuttle to the Imperial Fleet
You will begin the last, brief mission on Korriban in Darth Baras's chamber in [1], of course. Run to [2], jump over the rail to fall down on the first level of the academy hall, and then exit the academy through the door in [3]. Once you're in [4] run south and then east, to [5]. There's a shuttle there you should board. Choose Imperial Fleet as your destination. Once you're on the Imperial Fleet you'll complete this mission.
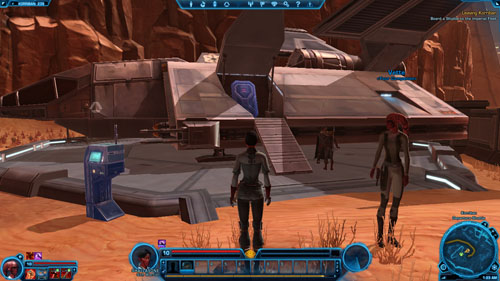
After leaving the planet, Vette will want to speak with you at the nearest cantina. Do it and then see the tables below for details.

A
Reply
Effect
Points / Rewards
1
Learn to obey.
Further conversation stage - B
+1 to Affection: Vette
2
Enjoy this. [Shock Vette]
End of conversation
-30 to Affection: Vette
3
Of course. [Remove Collar]
Further conversation stage - C
+120 to Affection: Vette
B
Reply
Points / Rewards
1
You get to live.
-
2
Rewards come later.
-
3
Watch your tone. [Shock Vette]
-30 to Affection: Vette
C
Reply
Points / Rewards
1
See that you don't.
-
2
Don't worry about it.
+15 to Affection: Vette
3
Next time you die.
-
2510 XP.
Each mission description is divided into several smaller parts. It should be observed that the following legend does not concern the next section - "Shortcuts (main and side missions)". The list of missions is given in chronological order, that is, the order you receive them. Also, the level of a particular mission is shown before its name (L). Here is all information that is essential to read before you start using the missions description.
The exact description of a mission is here. Sometimes it's divided into several different places you will visit, and each of them has its own map.
In the missions descriptions there are all dialogues that can have any impact on the game mechanics. It is given in the Points / Rewards column. The Effect column specifies what kind of effect your reply will have (there can also be a letter referring to the next dialogue mentioned), while under Reply there is the answer's line.
If any dialogue is missing it means that it doesn't matter which reply you choose (of course, except for the aspects related to developing your character in terms of the story). If a reply doesn't have any effect or doesn't result in getting any points or rewards, then there will be no suitable column in the table.
#
Reply
Effect
Points / Rewards
Reply number
One out of the two or three replies your character can give.
Effect of the chosen reply, and if it leads further - a letter of the next dialogue is given
+x to Light / Dark Side, +x / -x to companion's Affection,<br>other Rewards
# - a letter indicating the dialogue order. Some replies can lead to different dialogues
If a mission contains a small bonus quest, then a complete list of them is given right before the mission description. Bonus mission objectives are given along with the mission objectives (class or side) with which such a mission is connected.
The list of rewards includes: XP, credits, items and Codex entries. You can receive all these items for completing a mission. Sometimes you'll get one out of the two depending on your class, other times you'll have to choose one from several items (these are separated by a slash - "/").
The chapter presents a list of all main, side, bonus and tutorial mission objectives that take place on the planet Korriban. The list is arranged in such a way as to minimize the time necessary for the sole running and visiting the same areas.
Most often the next side missions can or should be done (because of your character's level) while doing the next main missions (Class). That is why all mission objectives are divided into main missions.
You should observe that there are no issues connected with the Codex here - these can be found in the "Places" chapter. Moreover, there are no side Heroic mission objectives. Their descriptions are at the end of the side missions chapter - "Korriban".
Of Mind and Matter [mission start] - Overseer Harkun
Of Mind and Matter - Speak to Overseer Harkun
Mark Quick Travel Point (Offworld Orientation)
[+] Of Mind and Matter: Cleanse the Valley (Bonus) - Kill K'lor'slug Foragers: 0/6
K'lor'slug Infestation [mission start] - Sergeant Cormun
[+] K'lor'slug Infestation - Kill K'lor'slug: 0/6
K'lor'slug Infestation - Detonate the Explosives
K'lor'slug Infestation [mission end] - Return to Sergeant Cormun
Imperial Edict [mission start] - Datapad
[+] Imperial Edict - Defeat Tomb Looters: 0/10
Of Mind and Matter - Enter the Sacrificial Chamber
Of Mind and Matter - Speak to Spindrall
Of Mind and Matter - Defeat Spindrall's Acolytes
Of Mind and Matter - Speak to Spindrall
[+] Of Mind and Matter: Prove Your Worth (Bonus) - Kill K'lor'slug Cripplers: 0/6
Imperial Edict - Recover Artifacts: 0/3
Imperial Edict [mission end] - Report to Sergeant Rikel
Mark Quick Travel Point (Sith Academy)
A Fighting Chance [mission start] - Assistant Overseer Markan
Of Mind and Matter [mission end] - Report to Overseer Harkun's New Location in the Sith Academy
The Plight of Acolyte [mission start] - Overseer Harkun
The Plight of Acolyte - Speak to Inquisitor Zyn
The Plight of Acolyte - Interrogate Alif
The Plight of Acolyte - Speak to Inquisitor Zyn
The Plight of Acolyte [mission end] - Speak to Overseer Harkun
A Little Knowledge [mission start] - Overseer Harkun
A Fighting Chance [mission end] - Speak to the Sith Inquisitor Trainer
Allegiance [mission start] - Inquisitor Arzanon
Allegiance - Scan and Defeat Acolyte Initiates: 0/4
Allegiance [mission end] - Return to Inquisitor Arzanon
A Little Knowledge - Take a taxi to the Lower Wilds
Mark Quick Travel Point (Lower Wilds)
Experimental Needs - [mission start] - Acolyte Krevan
[+] Experimental Needs - Collect Bone Marrow Samples: 0/5
Experimental Needs [mission end] - Talk to Lord Varacen
Dark Science [mission start] - Lord Renning
Dark Science - Speak to Apprentice Malora
Take the elevator up to mark Quick Travel Point (Field Research Area) and Taxi (Field Research Area)
Lost Supplies [mission start] - Datapad
[+] Lost Supplies: Clearing the Camps (Bonus) - Defeat Crazed Forces: 0/15
Lost Supplies - Recover the South Code Cylinder
Lost Supplies - Recover the East Code Cylinder
Lost Supplies - Recover the West Code Cylinder
Dark Science - Enter the Tomb Burial Chamber
Dark Science - Collect a Plump K'lor'slug Larva as Bait
Dark Science - Plant the Bait to Summon the Tuk'ata
Dark Science - Recover the Mutant Tuk'ata Brain
Lost Supplies - Recover the North Code Cylinder
A Little Knowledge - Enter the Monument Chamber
[+] A Little Knowledge: Reward Failure Accordingly (Bonus) - Defeat the Acolyte Deserters: 0/5
[+] A Little Knowledge: Silence the Screechers (Bonus) - Kill Shyrack Screechers: 0/4
A Little Knowledge - Retrieve the Ancient Holocron
A Little Knowledge - Defeat the Beasts
A Little Knowledge - Retrieve the Ancient Holocron
Teleport to Quick Travel Point (Field Research Area)
Dark Science [optional mission end] - Return to Lord Renning or Apprentice Malora
[o] Dark Science [mission end] - Return to Lord Renning
Lost Supplies - Open the Research Supply Crate
Take a Taxi to (Sith Academy)
Lost Supplies [mission end] - Take the Supplies to Sergeant Garus
A Little Knowledge [mission end] - Return to Overseer Harkun
The Secret of Tulak Hord [mission start] - Overseer Harkun
Jailbreak [mission start] - Inquisitor Urinth
Purity [mission start] - Lord Abaron
Purity - Scan Overseer Ragate
The Blood Legacy [mission start] - Overseer Ragate
Purity - Scan Inquisitor Arzanon
Purity - Scan Lord Solence
[HEROIC 2] Armed and Dangerous [mission start] - Mission Board
Teleport (if you can) to Quick Travel Point (Sith Academy)
Purity - Scan Lord Cestus
Purity [mission end] - Return to Lord Abaron
Jailbreak - Speak to Jedi Quorian Dorjis
[HEROIC 2+] The Hate Machine [mission start] - Ephran Zell
Rogues [mission start] - Datapad
[+] Rogues - Destroy Reprogrammed Droids: 0/8
[+] Rogues: Make an Example (Bonus) - Defeat Escaped Slaves: 0/15
The Secret of Tulak Hord - Retrieve the Antechamber's Tablet
Jailbreak - Retrieve Dorjis's Equipment
The Secret of Tulak Hord - Retrieve the Machine Vault Tablet
The Secret of Tulak Hord - Retrieve the Archives Tablet
Commit suicide and then teleport to the nearest Medical Center
Jailbreak - Recover Dorjis's Datalog
Jailbreak - Recover Dorjis' Lightsaber
Teleport to Quick Travel Point (Sith Academy)
Jailbreak - Speak to Jedi Quorian Dorjis
The Secret of Tulak Hord - Return to Overseer Harkun
The Secret of Tulak Hord - Speak to Lord Zash
The Secret of Tulak Hord [mission end] - Return to Overseer Harkun
Martial Law [mission start] - Overseer Harkun
Jailbreak [mission end] - Return to Inquisitor Urinth
Martial Law - Report to the Combat Training Room
Martial Law - Speak to Balek
Martial Law - Defeat Balek and Wydr
Martial Law [mission end] - Return to Overseer Harkun
Rogues [mission end] - Speak to Inquisitor Jarobi
A Map for the Future [mission start] - Overseer Harkun
[+] A Map for the Future: Crush Your Rivals (Bonus) - Defeat Rival Acolytes: 0/12
Grave Robbing [mission start] - Sentry Yashia
Grave Robbing - Find the Acolyte's Remains
Creeping Hunger [mission start] - Seh-run
Grave Robbing - Return to Sentry Yashia
Teleport (if you can) to Quick Travel Point (Sith Academy)
Creeping Hunger - Speak to Overseer Prithor
Grave Robbing [optional mission end] - Take the Remains to Naman Fal
Wait upstairs till the elevator goes down, to the very bottom. Then, jump and let yourself get killed. You'll teleport right at the Sith Academy.
[o] Creeping Hunger [mission end] - Feed the Poisoned Meal to Seh-run
[o] Creeping Hunger [mission end] - Feed the Special Meal to Seh-run
A Map for the Future - Collect the Rod of Hate
[o] Grave Robbing [mission end] - Claim the Relic
A Map for the Future - Collect the Rod of Fury
A Map for the Future - Collect the Rod of Wrath
A Map for the Future - Collect the Rod of Despair
[+] A Map for the Future: Naga Sadow's Wardens (Bonus) - Destroy Ancient Droids: 1/10
A Map for the Future - Place the rods at their alter: 0/4
A Map for the Future - Meditate at the Alter
A Map for the Future - Enter the Dashade's Chamber
A Map for the Future - Speak to the Dashade
A Map for the Future - Defeat the Dashade
A Map for the Future - Speak to the Dashade
A Map for the Future - Find a Way Through the Debris Wall
A Map for the Future: The Final Obstacle (Bonus) - Slay the Terentatek Mauler
A Map for the Future - Retrieve the Ancient Map
Teleport (if you can) to Quick Travel Point (Sith Academy)
[+] The Blood Legacy: Ritual Cleansing (Bonus) - Kill Shyrack Maulers: 0/6
The Blood Legacy - Collect a Skull from the Altar of Bones
The Blood Legacy - Soak the Skull in the Blood Pool
The Blood Legacy - Defeat the Bloodfiend
The Blood Legacy [mission end] - Return to Overseer Ragate
A Map for the Future - Return to Overseer Harkun
A Map for the Future [mission end] - Speak to Lord Zash
Go to Dromund Kaas [mission start] - Apprentice Ortosin
Item Modification (Tutorial) [mission start] - Apprentice Ortosin
Go to Dromund Kaas - Defeat Apprentice Ortosin
Go to Dromund Kaas - Defeat the Thugs
Item Modification (Tutorial) [mission end] - Activate the Lore Object to Learn about Modification
Go to Dromund Kaas [mission end] - Board a Shuttle to the Imperial Fleet
Cleanse the Valley (Bonus)
Prove Your Worth (Bonus)
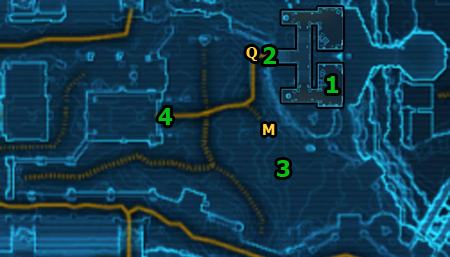
Speak to Overseer Harkun
You begin your adventure as a Sith Inquisitor in [1]. You'll be greeted by Overseer Harkun, who will be your first Master. After the conversation go to the building exit in [2]. It's necessary that you mark the opposite Quick Travel Point (Offworld Orientation).
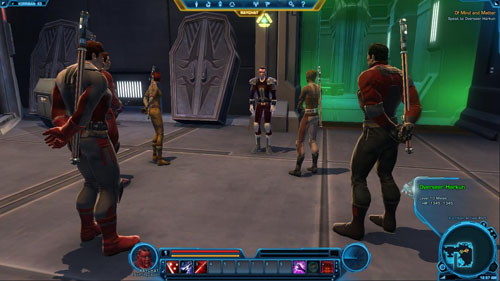
Kill K'lor'slug Foragers: 0/6
Go down the stairs. Before you start carrying out the further mission objective, explore the area in [3]. There are many K'lor'slug Foragers around. Kill one to receive a bonus mission. Then kill five more overgrown insects to complete it. You'll gain 125 XP.
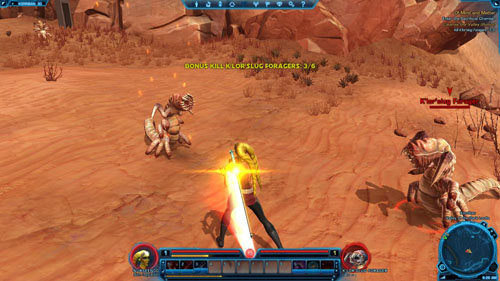
Then go the Ajunta Pall (Tomb of Ajunta Pall) tomb entrance. The door is in [4].
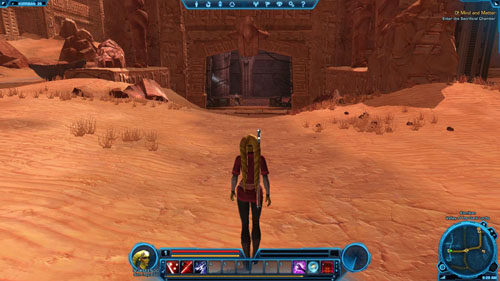
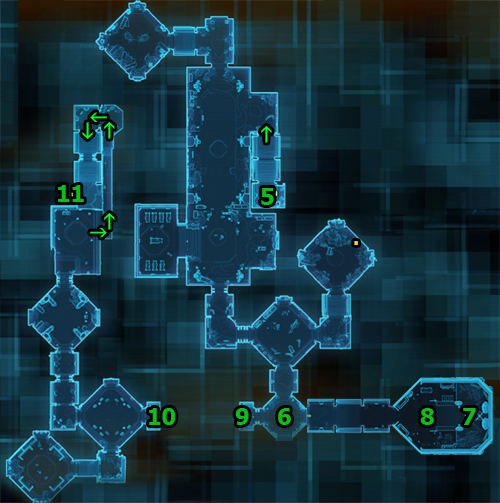
Enter the Sacrificial Chamber
You'll find yourself in [5]. Go down the stairs. You'll notice a trainer - Gesen. If you've reached level 2 or 3, it's necessary for you to buy new abilities from her. Go deep into the tomb to [6], defeating insects and thieves on the way - watch out for a little more challenging Tomb Looter Guards [+].
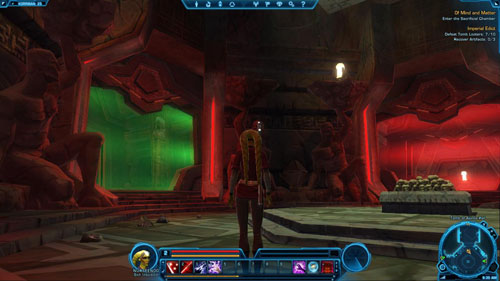
Speak to Spindrall
Go through the green gate in [6] to enter the story area. Move forward to [7].
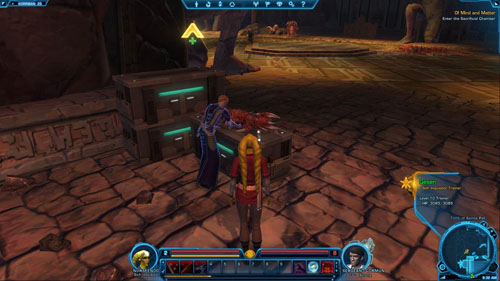
Eventually, you'll reach Spindrall, with whom you should speak. It doesn't matter what you say - you'll receive a new mission objective, which will be your first trial.
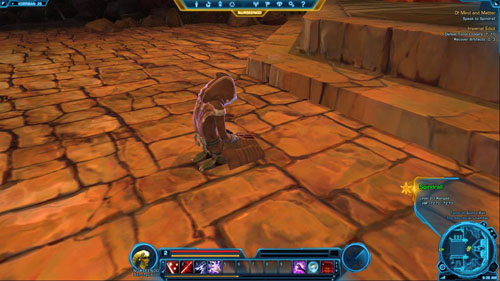
Defeat Spindrall's Acolytes
Go down to [8] and get ready for the fight with Spindrall's Acolytes. You won't be attacked by more than two acolytes at a time (despite the fact that the rest is near), which will simplify the fight a lot.
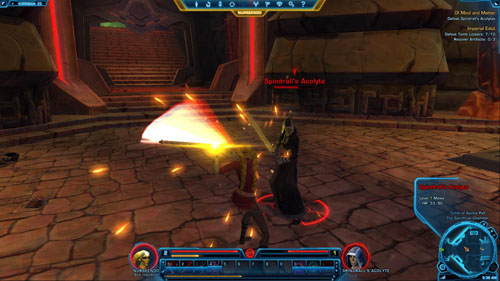
Speak to Spindrall
After getting rid of the acolytes, go back to [7] to talk to Spindrell one last time and get a Hand-carved Tablet. Then exit the chamber through the door in [6] and go up the opposite stairs in [9] to the second tomb level. You'll appear in [10].
Kill K'lor'slug Cripplers: 0/6
After a while you'll get the second bonus mission that will require you to prove your worth. In order to do it, you must kill six bigger K'lor'slugs Cripplers - you'll gain 390 XP for that. Watch out for Tomb Looter Guards [+] and Tomb Looter Brutes [+]. Head for the tomb exit in [11] (you'll need to cross a metal pier on the way).
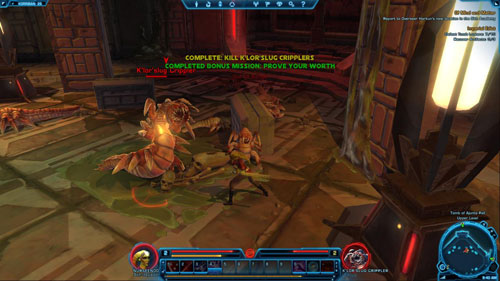
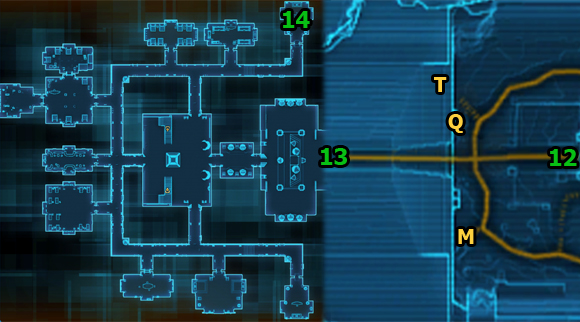
Report to Overseer Harkun's New Location in the Sith Academy
After leaving the dungeons you'll find yourself in [12]. Go to the Sith Academy entrance in [13]. On the way remember to mark on the map: Taxi (Sith Academy) on the right and Quick Travel Point (Sith Academy) by the opposite stairs. Enter the academy and run to [14]. On the way you should take an interest in the class mission A Fighting Chance.
![Go to [14] to finally talk to Overseer Harkun - (L03) Of Mind and Matter - Sith Inquisitor - Star Wars: The Old Republic - Game Guide and Walkthrough](https://game.lhg100.com/Article/UploadFiles/201512/2015121709490154.jpg)
Go to [14] to finally talk to Overseer Harkun. You'll complete this mission and receive another.
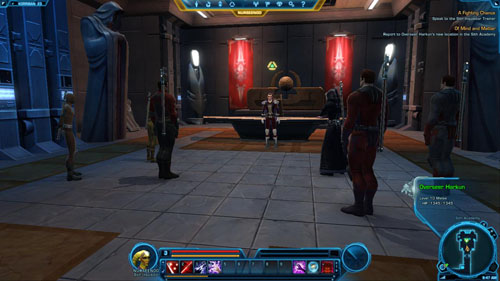
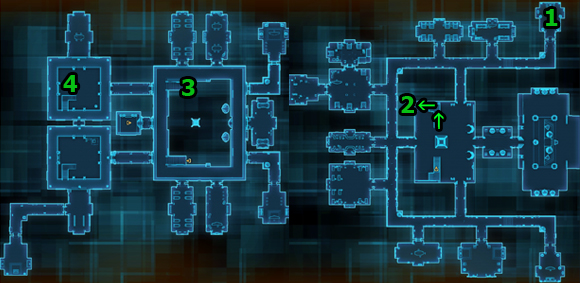
This short mission will acquaint you with the second trainer on Korriban. Immediately after you've entered the academy, talk to Assistant Overseer Markan, who's standing in [1]. He'll show you the way to the trainer. Go to meet him now.

Speak to the Sith Inquisitor Trainer
Climb the stairs in [2] to get to the second academy level. Once you're upstairs, in [3], run forward. Go to [4] and talk to Lord Samus. This way, you'll perform this mission. You should also purchase all the skills you can. Go back to the trainer whenever you reach a level and the academy is on your way (e.g. when you're about to finish a main mission).


Speak to Inquisitor Zyn
You begin this mission shortly after the conversation with Overseer Harkun. You'll have to interrogate a prisoner. Exit Harkun's chamber in [1] and go to the interrogation chamber in [2].
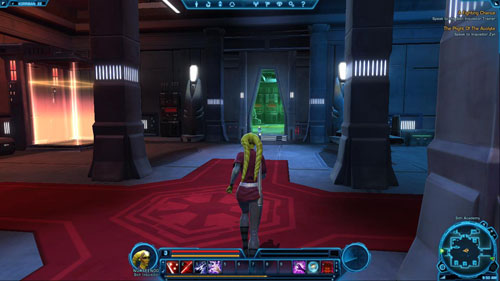
Once you're there, talk to Inquisitor Zyn, who's at the end of the room. He'll tell you to interrogate a prisoner lying nearby.

Interrogate Alif
The less suffering you want Alif to be exposed to, the longer the conversation. You can earn 100 Dark Side points but it's possible to conduct this conversation without it - see the tables below the picture for details.

A
Reply
Effect
Points / Rewards
1
I'm your friend.
Further conversation stage - B
-
2
Don't resist.
Further conversation stage - C
-
3
Shriek in pain! [Shock Him]
Further conversation stage - D
+50 to Dark Side
B
Reply
Effect
Points / Rewards
1
I'm your only out.
Further conversation stage - E
-
2
Don't do this.
Further conversation stage - C
-
3
So suffer. [Torture Alif]
Further conversation stage - D
+50 to Dark Side
C
Reply
Effect
Points / Rewards
1
Do the right thing.
Further conversation stage - E
-
2
Work with me.
Further conversation stage - E
-
3
This might sting. [Shock him]
Further conversation stage - D
+50 to Dark Side
D
Reply
Effect
Points / Rewards
1
Give me what I want.
Further conversation stage - I
-
2
Sing.
Further conversation stage - K
-
3
Clarify, please. [Shock him]
End of conversation
+50 to Dark Side
E
Reply
Effect
Points / Rewards
1
I don't believe you.
Further conversation stage - F
-
2
I'm on your side.
Further conversation stage - G
-
3
Pain it is. [Shock him]
Further conversation stage - D
+50 to Dark Side
F
Reply
Effect
Points / Rewards
1
No he won't.
Further conversation stage - G
-
2
Don't do this to yourself.
Further conversation stage - G
-
3
Okay. [Torture]
Further conversation stage - D
+50 to Dark Side
G
Reply
Effect
Points / Rewards
1
I don't believe in it.
Further conversation stage - H
-
2
I'm warning you.
Further conversation stage - H
-
3
Smart idea. [Shock him]
End of conversation
+50 to Dark Side
H
Reply
Effect
Points / Rewards
1
You have my word.
End of conversation
-
2
Oh, all right.
End of conversation
-
3
No way. [Shock him]
Further conversation stage - D
+50 to Dark Side
I
Reply
Effect
Points / Rewards
1
Really?
Further conversation stage - J
-
2
Tell me more.
Further conversation stage - J
-
3
How dare you. [Torture]
End of conversation
+50 to Dark Side
J
Reply
Effect
Points / Rewards
1
Relax.
End of conversation
-
2
It's no use struggling.
End of conversation
-
3
I'm done playing! [Torture]
End of conversation
+50 to Dark Side
K
Reply
Effect
Points / Rewards
1
Just kidding.
Further conversation stage - I
-
2
Something happy.
Further conversation stage - L
-
3
Squel! [Torture]
End of conversation
+50 to Dark Side
L
Reply
Effect
Points / Rewards
1
The killer's name, first.
Further conversation stage - I
-
2
Was it so hard?
Further conversation stage - I
-
3
Louder! [Torture]
End of conversation
+50 to Dark Side
Speak to Inquisitor Zyn
After the interrogation, return to Inquisitor Zyn and talk to him. During the conversation you will be able to earn Dark or Light Side points - see the tables for details. You can convince the inquisitor to protect Alif or simply not worry about it.
A
Reply
Effect
Points / Rewards
1
Done so soon?
No protection
-
2
What are you going to do?
Further conversation stage - B
-
3
What about Alif?
Further conversation stage - C
+50 to Light Side
B
Reply
Effect
1
You call yourself Sith?
Further conversation stage - C
2
Protect him.
Further conversation stage - C
3
Okay, I understand.
No protection
C
Reply
Effect
1
You're weak.
Further conversation stage - D
2
But he'll die.
Further conversation stage - D
3
I suppose.
No protection
D
Reply
Effect
1
I don't believe that.
Further conversation stage - E
2
You're coward.
Further conversation stage - E
3
Protect him or else.
No protection
E
Reply
Effect
Points / Rewards
1
Oh, all right.
Providing protection
-
2
Isn't there anything else?
Providing additional protection
+50 to Light Side
3
As long as he's safe.
Providing protection
-
Speak to Overseer Harkun
All that's left to do is to return to Overseer Harkun's chamber in [1] and hear the evaluation of your results. After receiving the next main mission, exit the Sith Academy through the door in [3].
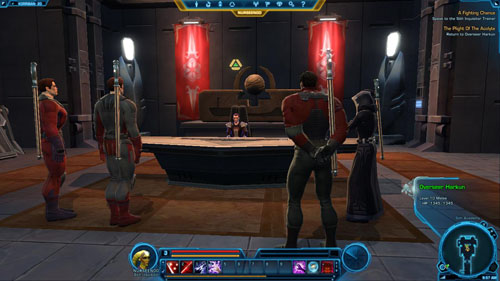
Reward Failure Accordingly (Bonus)
Silence the Screechers (Bonus)
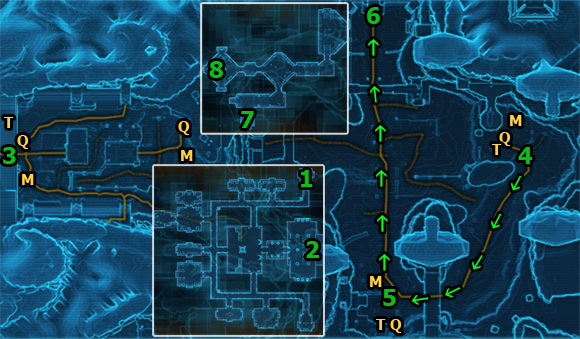
Take a taxi to the Lower Wilds
A long walk awaits you in this mission. During the journey you will explore most of the Korriban planet. You begin in [1]. Go to [2] to exit the Sith Academy and find yourself in [3]. Head for the Taxi (Sith Academy) in the north (marked with [T] on the map) and then go on a trip to a new location - Lower Wilds Outskirts - that is, Taxi (Lower Wilds).
Enter the Monument Chamber
After arriving in the vicinity of [4] you should mark Quick Travel Point (Lower Wilds), which is right next to the taxi. Then start to follow the path shown by green arrows on the map - unfortunately, you can't take a shortcut here. It's good to know that there are many side missions you can receive in the newly discovered areas.
![Along the way, it will be good to stop at [5] and look for side missions and, above all to take the elevator up to the metal pier - (L05) A Little Knowledge - Sith Inquisitor - Star Wars: The Old Republic - Game Guide and Walkthrough](https://game.lhg100.com/Article/UploadFiles/201512/2015121709490447.jpg)
Along the way, it will be good to stop at [5] and look for side missions and, above all to take the elevator up to the metal pier. There's Taxi (Field Research Area) and Quick Travel Point (Field Research Area) there. You should definitely mark both on the map.
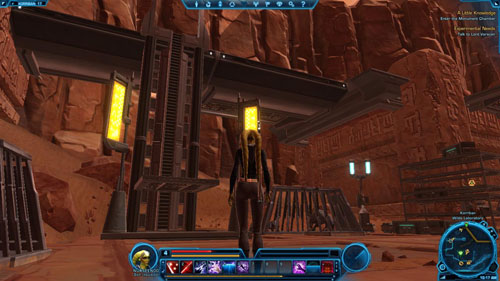
Go back downstairs and head north. Finally, after a long journey, you'll manage to get to the gate leading to the Tomb of Marka Ragnos. They are located in [6].
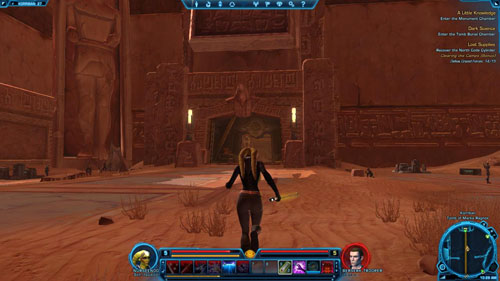
Defeat the Acolyte Deserters: 0/5
You'll appear in the tomb in [7] and you'll have to get to [8]. But before you reach the place, you'll have to force your way through the armies of renegade acolytes. After killing one of them you will receive a bonus mission. Kill five acolytes to complete it and you'll earn 745 XP. Acolytes are not very challenging - watch out only for Exiled Acolytes [+] and Banished Inquisitors [+].
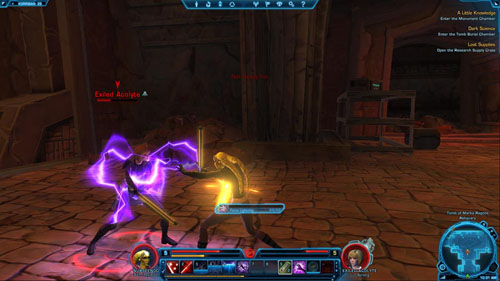
Kill Shyrack Screechers: 0/4
When you enter the hall in [8], Shyrack Screechers will stand in your way. Although you can go past most of them, killing four will result in completing a bonus mission. You'll gain 745 XP for that (kill one to get the mission).
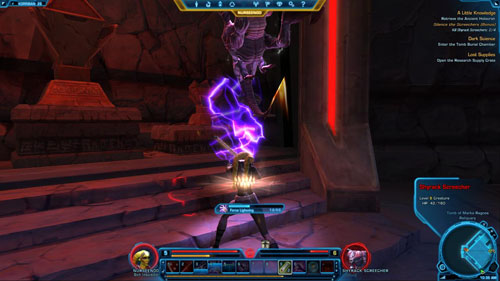
Retrieve the Ancient Holocron
Go up the stairs in [8] and find a glowing cone. Regenerate your health and examine it.
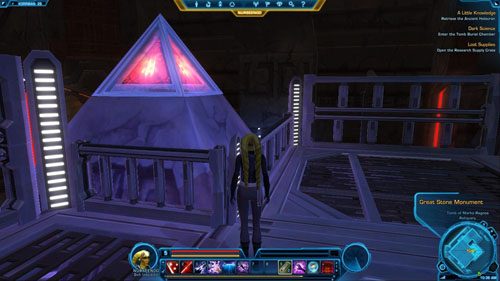
Defeat the Beasts
Retrieve the Ancient Holocron
Whichever option you choose - you'll have to kill the beasts, anyway. If you have full health, it won't be a problem. Defeat the beasts and then try to examine the cone again. The second dialogue option is the right one.
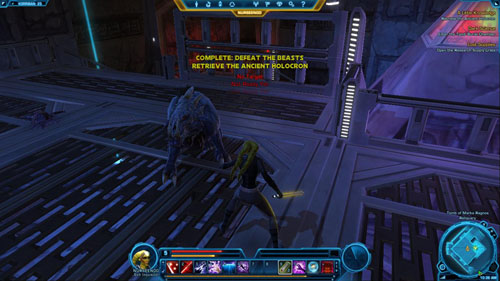
A
Reply
Effect
1
[Offer blood to it]
-
2
[Shoot lightning at it]
The right answer
3
[Meditate on the light side]
-
Return to Overseer Harkun
Go back to the exit from [7] and use Taxis or teleport at once to Quick Travel Point (Sith Academy). Go inside through the door in [3] and then run to Overseer Harkun's chamber in [1]. Talk to him to finish this mission and receive the next.
Retrieve the Antechamber's Tablet
You begin this mission in [1], in Overseer Harkun's chamber. Exit the chamber and head for the Sith Academy exit in [2]. Then, from [3] go to [4] - to Tomb of Tulak Hord entrance - The Antechamber.
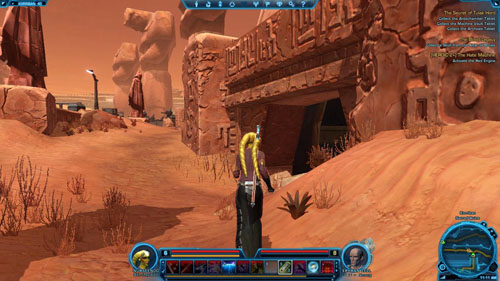
Inside you will be attacked by runaway slaves but they're not dangerous. However, you should watch out for Reprogrammed Droids [+]. Head to the south of the tomb, and then turn right and make your way to the room in [5]. There are Shylack Howlers [+] wandering around - don't fight with all of them at the same time and you'll be fine. Next, read the text on the stone slab in [5] and copy it (Antechamber Text).
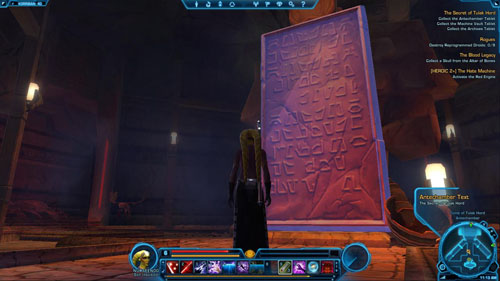
Retrieve the Machine Vault Tablet
Go to the tomb exit in [6]. You will find yourself in the Tomb of Tulak Hord - Ruined Atrium - a large, ruined square. Here, some more slaves will stand in your way, as well as Reprogrammed Guard Droids [+]. Try to go around the middle of the atrium, as there is a boss there. Run to the right, following the arrows, to the Tomb of Tulak Hord entrance in [7] - The Machine Vault.
![Run to [8] - right into the larger room and then turn right - (L07) The Secret of Tulak Hord - Sith Inquisitor - Star Wars: The Old Republic - Game Guide and Walkthrough](https://game.lhg100.com/Article/UploadFiles/201512/2015121709490564.jpg)
Run to [8] - right into the larger room and then turn right. This path will take you to the room with shards, though it's possible that first you will have to deal with some Shylack Shriekers [+] that are flying around this place. If nothing stands in your way, read the text on a stone slab in [8] and copy it to the inventory (Machine Vault Text).
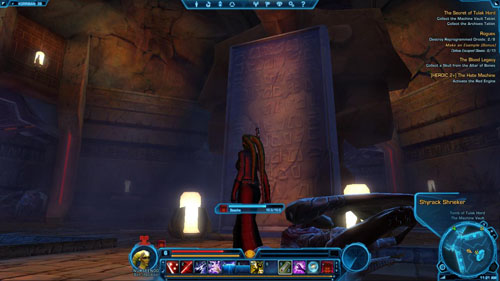
Retrieve the Archives Tablet
Run out of the tomb, go around the middle and go left to [9]. There is the Tomb of Tulak Hord gate - The Archives, which you should use.
![Keep close to the left wall while breaking through armies of slaves and a few Reprogrammed Guard Droids [+] - (L07) The Secret of Tulak Hord - Sith Inquisitor - Star Wars: The Old Republic - Game Guide and Walkthrough](https://game.lhg100.com/Article/UploadFiles/201512/2015121709490543.jpg)
Keep close to the left wall while breaking through armies of slaves and a few Reprogrammed Guard Droids [+]. Head for the Tomb of Tulak Hord entrance - The Archives in [10] and defeat a few groups of K'lor'slugs of various kinds there. Search the chest on the right, then read the text on the stone slab in [10] and copy it to your inventory (Archives Text).
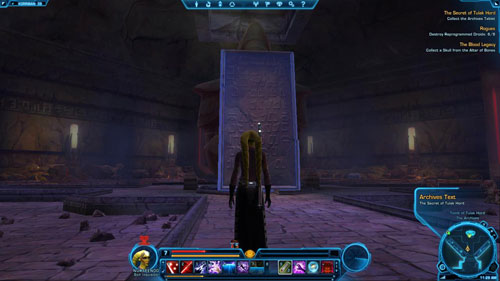
Return to Overseer Harkun
Speak to Lord Zash
If you don't have any other missions to complete in this area, go back on foot to the Sith Academy, or teleport to Quick Travel Point (Sith Academy). Enter the Sith Academy through the door in [3] and then go to [1]. Along the way, you'll finally get to meet Lord Zash, with whom you'll chat for a moment. You'll obtain a Codex entry - Persons of Note: Lord Zash (Inquisitor) - worth 390 XP.

Return to Overseer Harkun
Go to [1] and speak with Overseer Harkun. You'll complete this mission and receive another along with rewards.
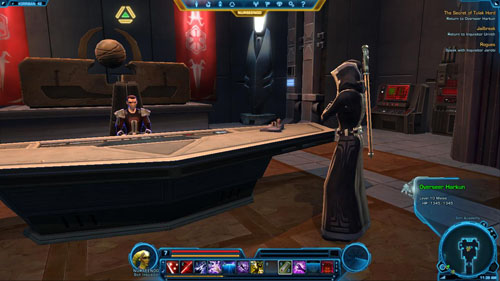
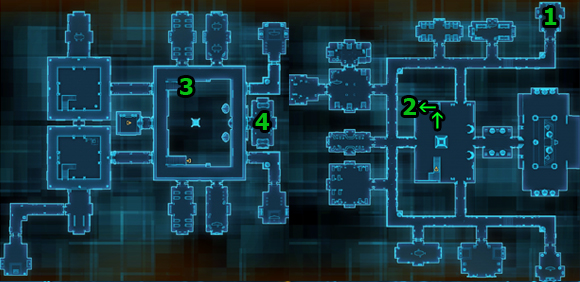
Report to the Combat Training Room
You begin this mission in [1], in Overseer Harkun's room. Run into the hall and climb the stairs in [2] to get to [3] - the Sith Academy second level. Once you're there, go to the combat training room in [4]. Pass through the green force field to enter the story area.
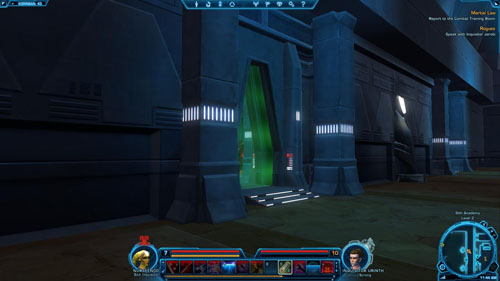
Speak to Balek
It turns out that your training is supposed to kill you. It doesn't matter what you say in the conversation with Balek - it will end in a fight anyway.
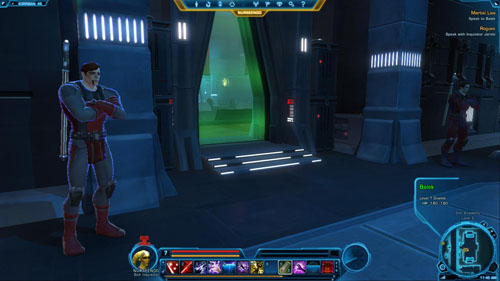
Defeat Balek and Wydr
Balek and Wydr aren't challenging opponents. You'll defeat them with ease and then you'll have the last mission objective to carry out.

Return to Overseer Harkun
Go back downstairs (there's no need to use the stairs - simply jump down on the first level) and go to Overseer Harkun's chamber in [1]. Of course, he'll be very surprised that you're still alive. Lord Zash will intervene in a moment, so you can expect rewards.
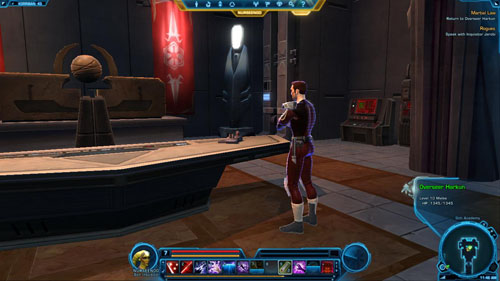
Crush Your Rivals (Bonus)
Naga Sadow's Wardens (Bonus)
The Final Obstacle (Bonus)
![You begin this mission in Overseer Harkun's chamber in [1] - (L11) A Map for the Future - Sith Inquisitor - Star Wars: The Old Republic - Game Guide and Walkthrough](https://game.lhg100.com/Article/UploadFiles/201512/2015121709490662.jpg)
You begin this mission in Overseer Harkun's chamber in [1]. Exit the Sith Academy through [2]. Once you've reached [3] go to [4]. There is another tomb to be explored - Tomb of Naga Sadow. Go inside using the door shown in the picture below.
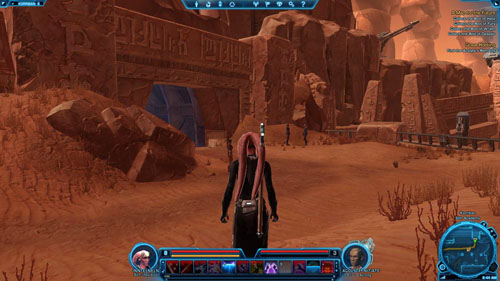
Defeat Rival Acolytes: 0/12
Inside, there are a lot of enemies, most of which are the acolytes who compete with you. You'll have to kill them. When you kill the first, you'll receive bonus mission. Kill twelve to complete it and gain 1625 XP - do it while carrying out the main mission, namely, looking for the rods. As usual, there are weaker and stronger acolytes (Rival Acolytes [+], Aspiring Acolytes [+]) - watch out only for the latter.
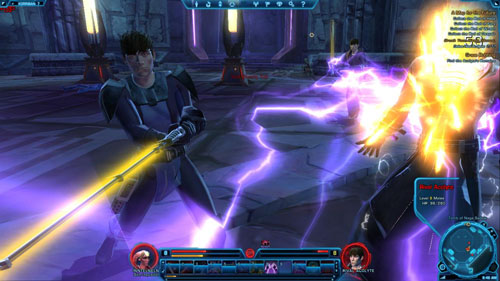
Collect the Rod of Hate
Keep killing the acolytes and the search for the rods. You'll find the first in the left corridor. Take the Rod of Hate from [5] and run north.
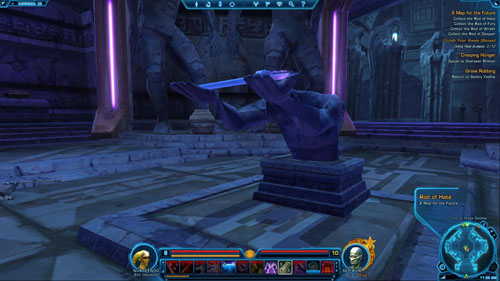
Collect the Rod of Fury
Turn left at the fork, as there in [6] you'll discover the Rod of Fury. Take the second rod and go east and then north.
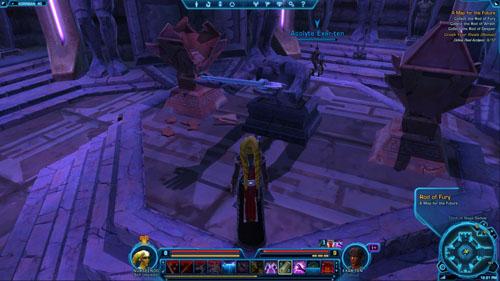
Collect the Rod of Wrath
Go down the stairs on the left to another hall and pick the rod that is on the right (Rod of Wrath in [7]).
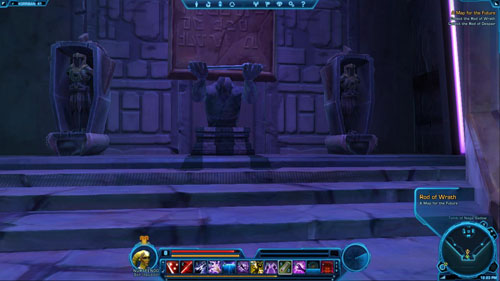
Collect the Rod of Despair
Run into a small room in [8] and collect the last rod - Rod of Despair - and then you can head straight north, to [9].
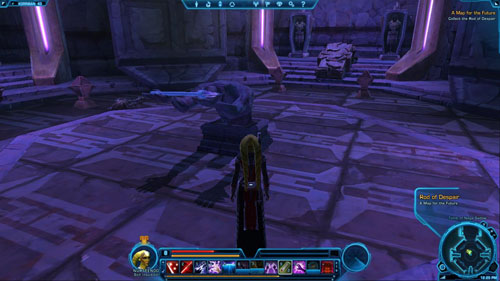
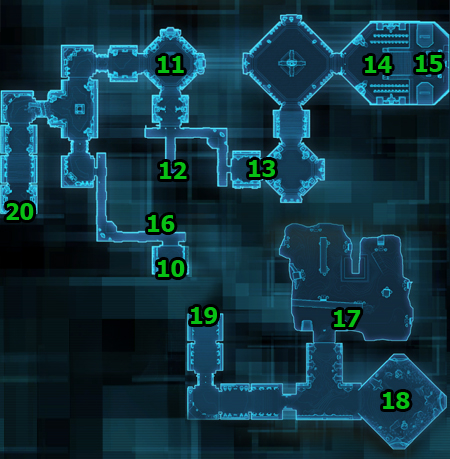
Destroy Ancient Droids: 0/10
You'll get to a new location - Dashade Chamber and you'll appear in [10]. The fight with droids who guard this place will be unavoidable. After destroying the first droid you will receive a bonus mission. Destroy ten and you'll complete it and get 1625 XP. Watch out especially for Ancient Droid Sentinels [+]. Keep going to the room in [11], killing the droids on the way. Droids are very challenging, so regenerate health after each battle.
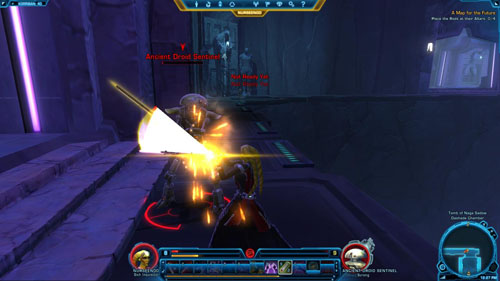
Place the rods at their altar: 0/4
Clear the room in [11] of all droids and then examine each of the four altars. This will let you place the rods at them.
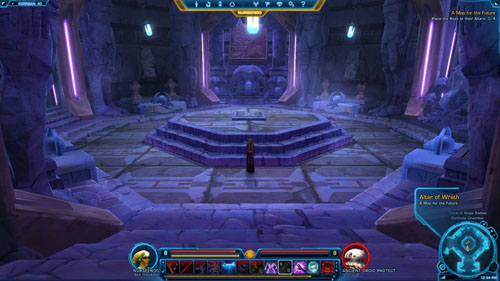
Meditate at the Alter
Position yourself in the middle of the room in [11], on the stone slab and then examine it. The meditation will be very painful, but when it's over Dashade's chamber will be open.
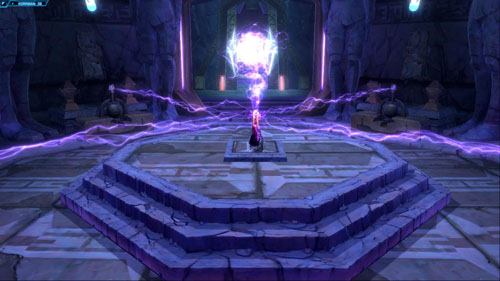
Enter the Dashade's Chamber
Speak to the Dashade
For now, no one will stand in your way. Go to [12], where you'll find Khem Val, a representative of the Dashade race. After a short conversation, you'll begin to fight.

Defeat the Dashade
Khem Val [+] is not a dangerous opponent. Full health and powerful abilities is all you need to win.
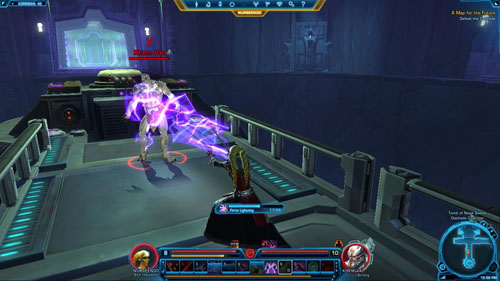
Speak to the Dashade
Once you've defeated Khem Val, talk to him, and the ancient creature will become your companion. You'll also obtain a Codex entry - Persons of Note: Khem Val (Inquisitor) - worth 450 XP.
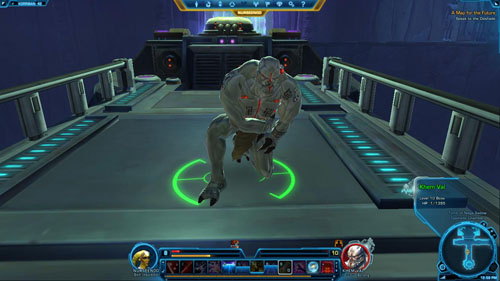
Find a Way Through the Debris Wall
Now you should both run to [13]. Your companion will help you in making the wall that is blocking the access to the next room disappear. Go inside and start fighting with enemies. Your goal is the room with a map for the future. Run to [14].
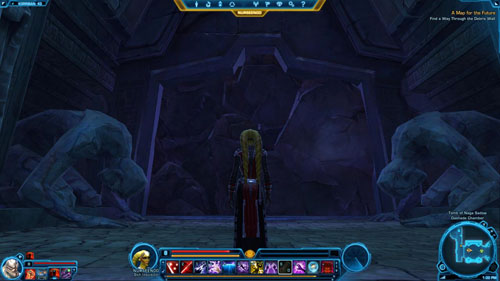
Slay the Terentatek Mauler
On the way to the map there's a huge beast - Telentatek Mauler [*] - in [14]. Slaying the monster is also a bonus mission objective, that's why it's best to first restore your health and then attack the beast. With Khem Val's help you'll defeat it easily and then gain 1625 XP.
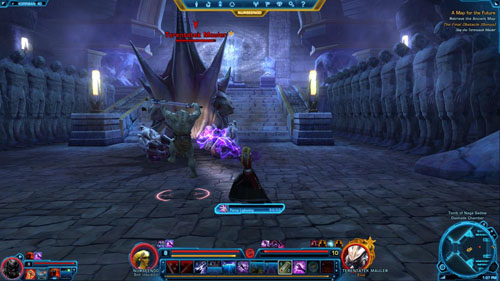
Retrieve the Ancient Map
All you need to do now is to retrieve the map (Ancient Map) from the altar in [15].
![If you wish, you can hunt another monster - go to [16] - (L11) A Map for the Future - Sith Inquisitor - Star Wars: The Old Republic - Game Guide and Walkthrough](https://game.lhg100.com/Article/UploadFiles/201512/2015121709490999.jpg)
If you wish, you can hunt another monster - go to [16]. Stand by the edge and choose an appropriate place to jump down - one of the vertical beams right below you. This way, you won't kill yourself.
![A huge K'lor'slug Glutton [*] is in his nest in [17] - (L11) A Map for the Future - Sith Inquisitor - Star Wars: The Old Republic - Game Guide and Walkthrough](https://game.lhg100.com/Article/UploadFiles/201512/2015121709490953.jpg)
A huge K'lor'slug Glutton [*] is in his nest in [17]. With Khem Val's help you'll defeat the monster, but it will be a long and arduous struggle. Except for the boss, there's nothing interesting in this place.
![If you want to get out of here on foot, go to the stairs in [18] - (L11) A Map for the Future - Sith Inquisitor - Star Wars: The Old Republic - Game Guide and Walkthrough](https://game.lhg100.com/Article/UploadFiles/201512/2015121709490936.jpg)
If you want to get out of here on foot, go to the stairs in [18]. Climb them and you'll appear on the first level of this place in [19].
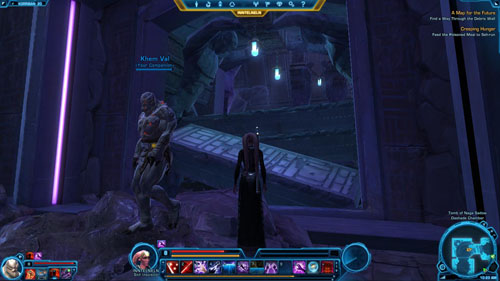
Return to Overseer Harkun
If you no longer have anything to do in the tomb, it's best to use the Quick Travel ability and teleport to Quick Travel Point (Sith Academy). Enter the Sith Academy through the door in [3] and then run straight to Overseer Harkun in [1]. When Lord Zash appears, you'll have to reply to Overseer Harkun. You can earn Dark or Light Side points - see the table below the picture.
A
Reply
Points / Rewards
1
Deal with it.
+50 to Dark Side
2
Your were a good teacher.
+50 to Light Side
3
Talk all you want.
+50 to Dark Side
Speak to Lord Zash
Lord Zash has officially chosen you as her apprentice, so run to the stairs in [20] (see the first map) and go up. Then head to Lord Zash's chamber in [21] and talk to your new master. All there's left to do is to leave the planet. Run to the exit to speak with Ortosin, who will bar your way.
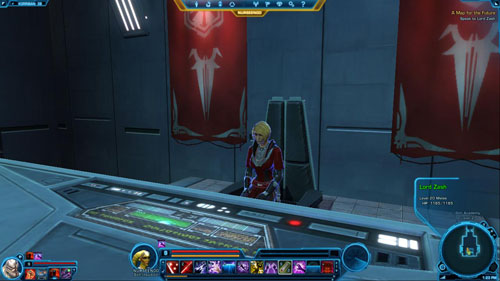
Item Modification (Tutorial)
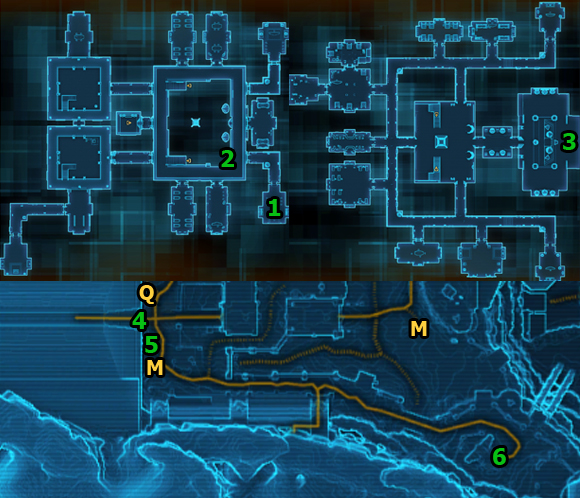
Defeat Apprentice Ortosin
Defeat the Thugs
The next mission will begin with a fight with Apprentice Ortosin [+] and his two Thugs. With Khem Val's help it will be easy to defeat the opponents. From [1] run to the hall and jump down on a lower level. Then exit the Sith Academy through the door in [2].
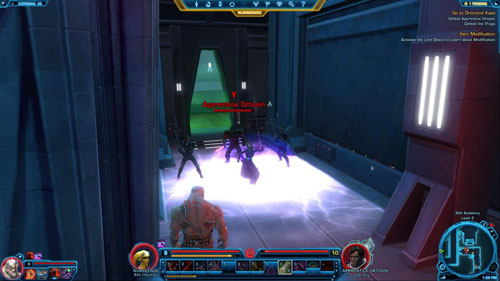
Activate the Lore Object to Learn about Modification
Once you've appeared in [3] go to [4] to find the item modification station. Read the sign next to it and you'll obtain a Codex entry - Game Rules: Item Modifications - worth 45 XP, and also a weapon modification and 885 XP. Fortitude Enhancement 2* you've just acquired, as well as Resolve Mod 1* can be put into your lightsaber - use the station to do it. Enjoy having an even more powerful weapon!

Board a Shuttle to the Imperial Fleet
Run south and then east to [5]. There's a shuttle there you should board. Choose Imperial Fleet as your destination. Once you're on the Imperial Fleet, the mission will be completed.
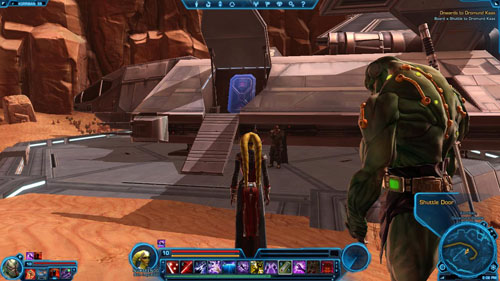
After completing A Map for the Future mission, go to the Sith Academy cantina (it's in [1] on the first level). When you reach it, talk to Khem Val. Your reply will have an impact on the companion - see the table below the picture.
A
Reply
Points / Rewards
1
There're better things to eat.
+15 to Affection: Dashade
2
I'll enjoy beating you again.
-
3
Silence, monster.
-1 to Affection: Dashade
2510 XP.
Each mission description is divided into several smaller parts. The list of missions is given in chronological order, that is, the order you receive them. However, you might do them in a different sequence (see the "Shortcuts" section for the optimal order). Also, the level of a particular mission is shown before its name (L), as well as a note whether it is a [HEROIC] mission. Here is all information that is essential to read before you start using the missions' description.
The exact description of a mission is here. Sometimes it's divided into several different places you will visit, and each of them has its own map.
In the missions descriptions there are all dialogues that can have any impact on the game mechanics. It is given in the Points / Rewards column. The Effect column specifies what kind of effect your reply will have (there can also be a letter referring to the next dialogue mentioned), while under Reply there is the answer's line.
If any dialogue is missing, it means that it doesn't matter which reply you choose (of course, except for the aspects related to developing your character in terms of the story). If a reply doesn't have any effect or doesn't result in getting any points or rewards, then there will be no suitable column in the table.
#
Reply
Effect
Points / Rewards
Reply number
One out of the two or three replies your character can give.
Effect of the chosen reply, and if it leads further - a letter of the next dialogue is given
+x to Light / Dark Side, +x / -x to companion's Affection, other Rewards
# - a letter indicating the dialogue order. Some replies can lead to different dialogues.
If a mission contains a small bonus quest, then a complete list of them is given right before the mission description. Bonus mission objectives are given along with the mission objectives (class or side) with which such a mission is connected.
The list of rewards includes: XP, credits, items and Codex entries. You can receive all these items for completing a mission. Sometimes you'll get one out of the two depending on your class, other times you'll have to choose one from several items (these are separated by a slash - "/"). If there is a [*] next to the reward, it means that it is a very valuable item.
![To get this mission, talk to Sergeant Cormun, who is defending himself from K'lor'slugs behind a pile of crates in [1], and agree to help him (to make orientation easier - [3] is the tomb entrance, while [4] is the passage leading further in the tomb - (L01) Klorslug Infestation - Korriban - Star Wars: The Old Republic - Game Guide and Walkthrough](https://game.lhg100.com/Article/UploadFiles/201512/2015121709491156.jpg)
To get this mission, talk to Sergeant Cormun, who is defending himself from K'lor'slugs behind a pile of crates in [1], and agree to help him (to make orientation easier - [3] is the tomb entrance, while [4] is the passage leading further in the tomb.
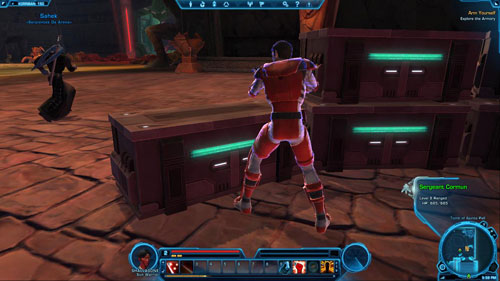
Kill K'lor'slugs: 0/6
The first mission objective is to kill six bugs. There are smaller K'lor'slug Broodlings and slightly larger, more dangerous K'lor'slug Burrowers. It doesn't matter which ones you kill - slay those who stand in your way to the burial room with explosives.
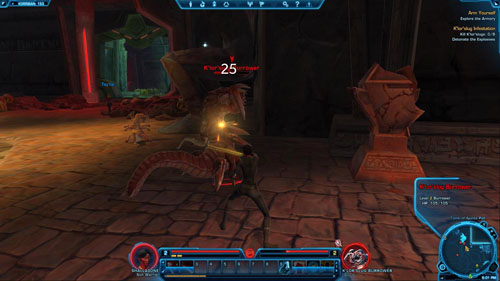
Detonate the Explosives
Keep heading for [2] exterminate all the bugs that come across your blade. Detonate one of the two explosives located in the middle of the burial room. By the left explosive there's a huge K'lor'slug Broodwatcher [+] (a little tougher opponent), while on the right five K'lor'slug Broodlings. Make a decision with whom you want to fight (you don't stand a chance of fighting with all at the same time) and then use one of the two Explosive Detonators.
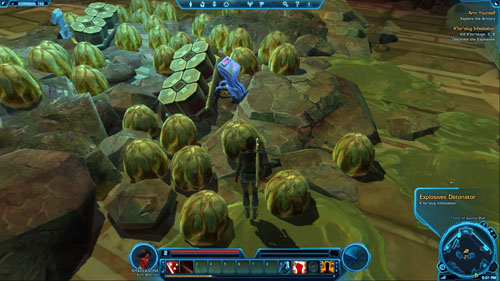
Return to Sergeant Cormun
All that's left to do is to go back to Sergeant Cormun in [1] to claim your rewards.
![You will receive this mission not from an NPC, but when you pick and read a Datapad lying nearby the skeleton in [1] - (L03) Imperial Edict - Korriban - Star Wars: The Old Republic - Game Guide and Walkthrough](https://game.lhg100.com/Article/UploadFiles/201512/2015121709491107.jpg)
You will receive this mission not from an NPC, but when you pick and read a Datapad lying nearby the skeleton in [1]. Once you accept it, start carrying out the mission objectives.

Defeat Tomb Looters: 0/10
The first part of the mission will be accomplished easily while you're on your way to [2] - the stairs that will take you to the second level of the tomb. Defeat the looters, watching out for a little tougher Tomb Looter Guards [+] and Tomb Looter Brutes [+].
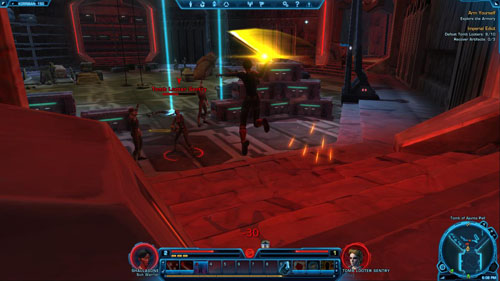
Recover Artifacts: 0/3
Climb the stairs in [2] and you'll appear in [3]. Head for the burial room in [4]. There are a lot of chests there and each has an Artifact hidden inside. There will be no problem in acquiring three such items, but first, defeat a group of three looters. Decide whether or not you want to fight with the rest (including the Tomb Looter Brutes [+]).
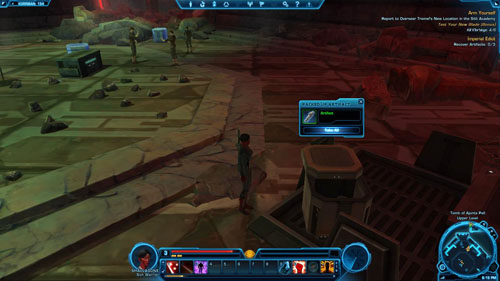
Report to Sergeant Rikel
All that's left to do is to claim your reward. Go north, to the tomb exit in [5]. Watch out for the large K'lor'Slug Cripplers along the way, cross the metal bridge and exit in [5]. You'll appear in [6]. Go to [7] and talk to Sergeant Rikel about the completed mission. A Codex entry will be an additional reward for this mission - have a look below the picture.

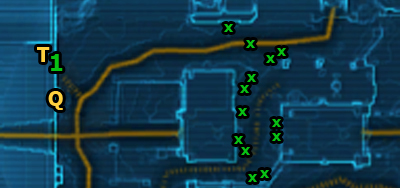
You can get this side mission only after completing the mission: Judge and Executioner (Sith Warrior) or The Plight of Acolyte (Sith Inquisitor). You'll get it from Inquisitor Arzanon in [1]. Agree to help him and you'll receive a special item - ID Scanner - that will help you distinguish the real acolytes from the false ones.
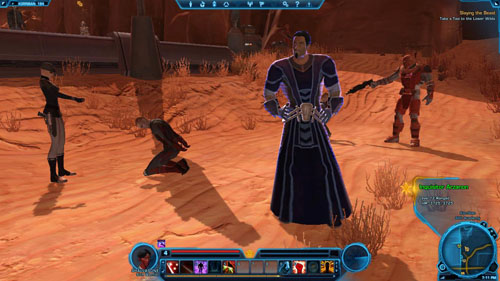
Scan and Defeat Acolyte Initiates: 0/4
Look for Acolyte Initiates marked with [x] on the map. There are plenty of them around here, some are standing, others are praying. Open the inventory panel and click on the "Mission Items" tab at the bottom. Then click RMB on any acolyte, and then RMB on ID Scanner. If this one isn't a traitor, you will need to look further.
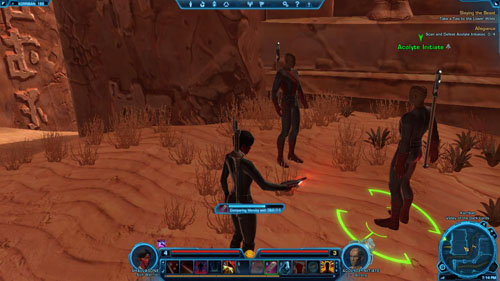
The second method is to drag the ID Scanner to the quick access bar at the bottom of the screen, click RMB on any acolyte and then LMB on the ID Scanner icon. Whichever method you use, keep checking the acolytes till you discover and kill four traitors.
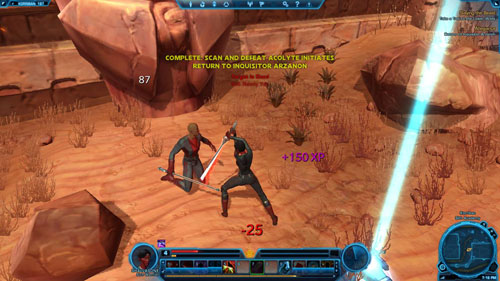
Return to Inquisitor Arzanon
Go back to Inquisitor Arzanon in [1]. Speak with him about the mission you've completed and claim your rewards.
![As soon as you reach this place, talk to Acolyte Krevan, who is waiting in [1] - (L06) Experimental Needs - Korriban - Star Wars: The Old Republic - Game Guide and Walkthrough](https://game.lhg100.com/Article/UploadFiles/201512/2015121709491332.jpg)
As soon as you reach this place, talk to Acolyte Krevan, who is waiting in [1]. Agree to help him and you'll get a mission that requires you to collect five bone marrow samples.

Collect Bone Marrow Samples: 0/5
Head south and kill Tuk'ata along the way. Their largest populations are in the places marked with [X]. These beasts aren't very dangerous, but be careful not to be attacked by several herds - then you can have trouble. Watch out especially for the Raging Tuk'ata [+] - this animal type is the most powerful.
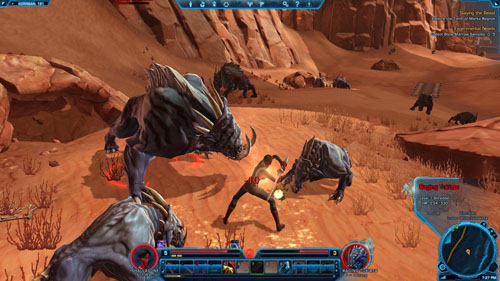
After killing any Tuk'ata, keep looking for a yellow beam of light. If one does appear above Tuk'ata body, it means that you'll find a Bone Marrow Sample inside it. Note that not all killed animals will have such a sample, so keep hunting till you collect five samples.

Talk to Lord Varacen
Once you have gathered five samples, go to Wilds Laboratory and find Lord Varacen in [2]. Talk to him to claim the reward.
![When you're in Wilds Laboratory, it's necessary that you speak with Lord Renning, who's in [1] - (L06) Dark Science - Korriban - Star Wars: The Old Republic - Game Guide and Walkthrough](https://game.lhg100.com/Article/UploadFiles/201512/2015121709491427.jpg)
When you're in Wilds Laboratory, it's necessary that you speak with Lord Renning, who's in [1]. The cruel scientist will tell you about his experiment. You'll be able to help him if you agree. So do it to get the mission.
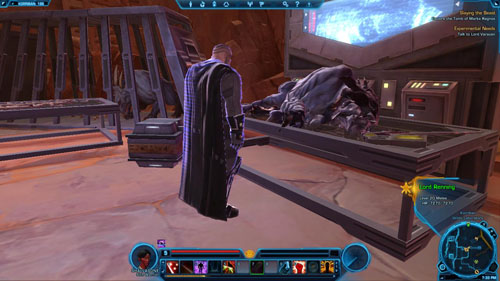
Speak to Apprentice Malora
Before you go in search of the mutant animal brain, talk to Apprentice Malora in [2]. She will tell you the scientist is mad and will ask you to bring the brain to her, which will help her modify it and thus discredit Lord Renning. At the end of the mission you'll need to take a decision, but for now start looking for the mutant animal.

Enter the Tomb Burial Chamber
Head north. You'll mainly come across mad renegade soldiers along the way. Most of them are just ordinary enemies, but do watch out for Psychotic Officers [+]. Go up the short stairs to the right to get to the gate in [3] that will take you inside the tomb.
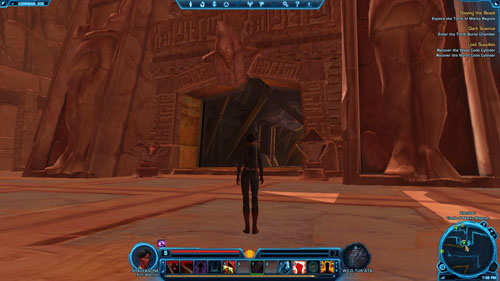
Collect a Plump K'lor'slug Larva as Bait
You will find yourself in [4], in the tomb - watch out for K'lor'slug Burrowers crawling out of the ground. Start with collecting the bait - kill K'lor'slug Brood Mother [+], and then at least one Plump K'lor'slug Larva - there are a lot of them in the room in [5]. Search the larva's body and take it (Plump K'lor'slug Larva).
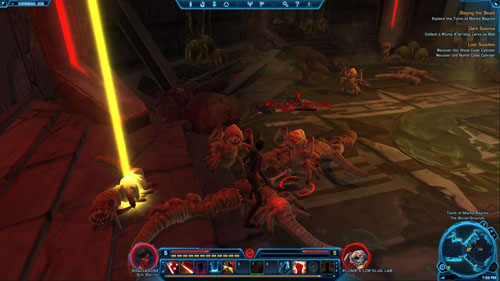
Plant the Bait to Summon the Tuk'ata
After that, head for [6]. Get some Medpacs ready just in case, use boosting abilities and then place the K'lor'slug larva in the chest in [6]. This will lure the mutant out of its hiding place.

Recover the Mutant Tuk'ata Brain
All that's left to do is to defeat it. You won't have a problem with that, though you will probably lose a lot of health. After killing the Mutant Tuk'ata [+], take the brain from the monster's corpse (Mutant Tuk'ata's Brain) and search the chest in this room.
Return to Lord Renning or Apprentice Malora
Leave the tomb through the gate in [3] and go back to Wilds Laboratory in the south. Now you must decide. If you want to bring an end to insane experiments conducted by the mad scientist - Lord Renning - then give the brain to Apprentice Malora in [2]. The other option is to give it to Lord Renning in [1], and then either telling him the truth about Malora, or not (see the tables below the picture for details). Regardless of the decision you take, the mission will be accomplished.

A
Reply (Apprentice Malora)
Effect
Points / Rewards
1
As am I.
Giving the brain to Apprentice Malora
+50 to Light Side, +79 credits to rewards
2
I don't have it yet.
-
-
A
Reply (Lord Renning)
Effect
Points / Rewards
1
Here's the brain.
Giving the brain to Lord Renning, Further conversation stage - B
+50 to Dark Side
2
Give me more time.
-
-
B
Reply (Lord Renning)
Effect
Points / Rewards
1
Just my fee.
Not telling about Malora's betrayal
+50 to Light Side
2
Malora is a traitor.
Telling about Malora's betrayal
+100 to Dark Side
Return to Lord Renning
If you gave the brain to Apprentice Malora, you will still have to go back to Lord Renning in [1] and talk to him.
Clearing the Camps (Bonus)

In the Lower Wilds you'll come across a Datapad lying by the rocks in the east. It's in [1] - watch the recorded message in which Sentry Tavon illustrates the situation. Your task is to recover fours cylinders.
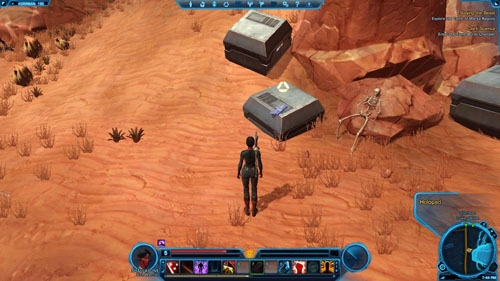
Defeat Crazed Forces: 0/15
The main opponents in the area will be mad renegade soldiers. When you kill the first one, you'll get a bonus mission. In the majority of cases they are just ordinary enemies, but watch out for Psychotic Officers [+]. Once you've killed fifteen enemies you'll complete the bonus mission and earn 745 XP.
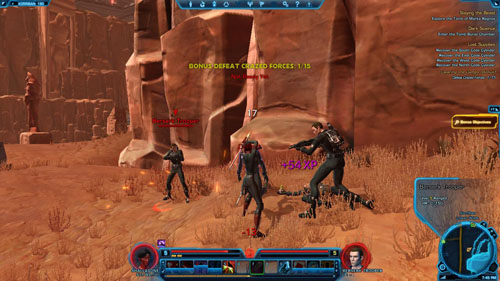
Recover the South Code Cylinder
While killing the crazed soldiers, keep looking for the cylinders with codes. The first - South Camp Code Cylinder - will be in [2]. Clear the area and then get the codes.
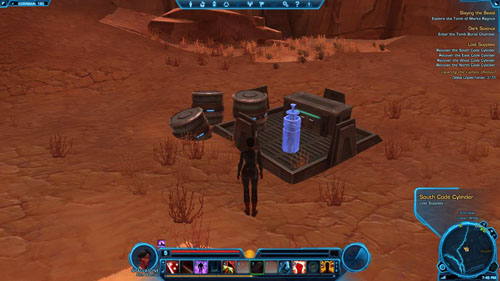
Recover the East Code Cylinder
The next codes will be obtained once you've picked East Camp Code Cylinder in [3]. Get rid of all enemies in the area so that they won't disturb you in taking the codes out or sneak up in such a way as to avoid the fight.
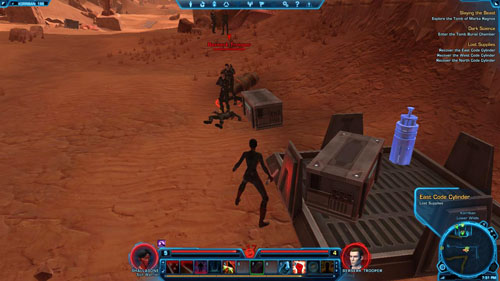
Recover the West Code Cylinder
Go west, to a new location - Trooper Encampment. There are a lot of soldiers, but you can simply avoid them. However, you won't avoid killing the group by the cylinder. Take West Camp Code Cylinder from the cylinder in [4], leave the camp and head north.
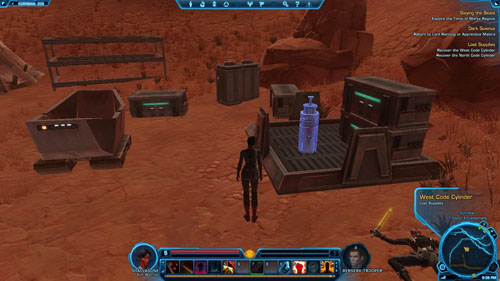
Recover the North Code Cylinder
The last part of the code remains to be recovered. Run to [5] and take North Camp Code Cylinder from the cylinder. Now you have all codes, so start going back to the south.
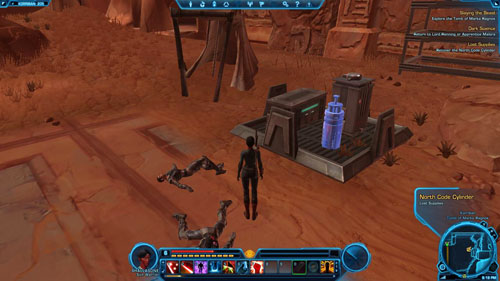
Open the Research Supply Crate
Go back to [1] and look for the crate you can now open. Do it to take Research Supplies. Now all that's left to do is to deliver them and claim your rewards.
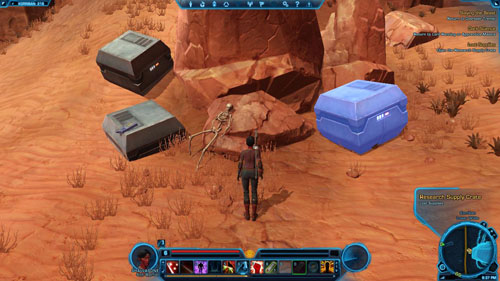
Take the Supplies to Sergeant Garus
To do it, it's best to take a taxi in the south or use the Quick Travel ability (provided you don't have anything else to do in the Lower Wilds) to teleport to Quick Travel Point (Sith Academy). Once you're there, find Sergeant Garus in [6] and talk to him - give him the supplies and pick up the reward.
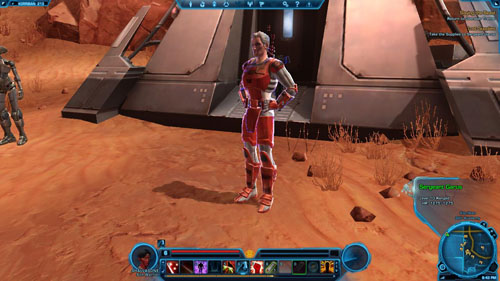
![After you've completed the class mission: Slaying the Beast (Sith Warrior) or A Little Knowledge (Sith Inquisitor) you'll be able to speak with Lord Abaron in [1] - (L07) Purity - Korriban - Star Wars: The Old Republic - Game Guide and Walkthrough](https://game.lhg100.com/Article/UploadFiles/201512/2015121709491652.jpg)
After you've completed the class mission: Slaying the Beast (Sith Warrior) or A Little Knowledge (Sith Inquisitor) you'll be able to speak with Lord Abaron in [1]. If you agree to help him, you'll receive a side mission, together with a Holocron Blood Scanner - a device that will allow you check the percentage of blood purity present in the teachers.
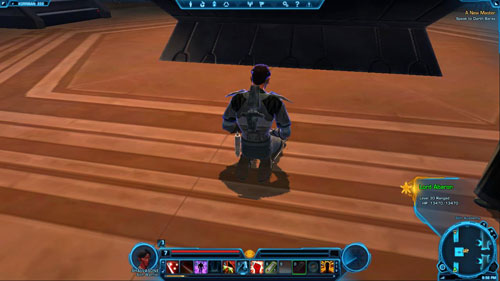
Scan Overseer Ragate
The closest person to scan is Overseer Ragate - she's in [2]. Run to her and once you're near, click RMB on her. Open the inventory panel and click on the "Mission Items" tab at the bottom and RMB on the Holocron Blood Scanner icon. The second method is to drag the Holocron Blood Scanner to the quick access bar at the bottom of the screen, click RMB on the teacher and then LMB on the device icon on the bar. Use one of the methods to check Overseer Ragate's blood purity.
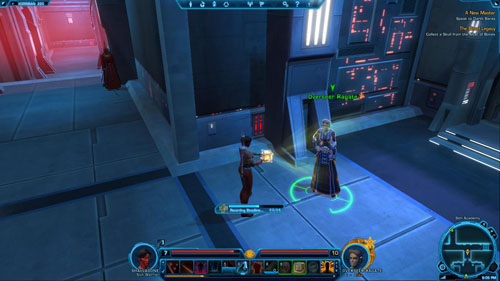
Scan Lord Cestus
Go back to the hall and go up the stairs in [3] or [4] to the second level of the Sith Academy. Head for the lecture room in [5], where you'll find Lord Cestus. Scan him to check his blood purity and then go back to the hall.
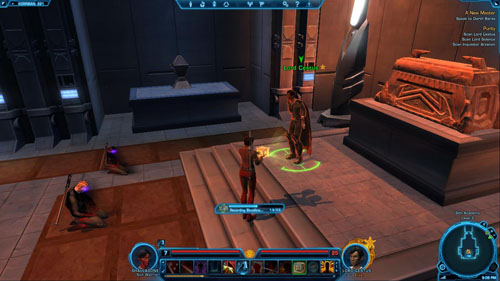
Scan Inquisitor Arzanon
Go outside through the gate in [6]. Once you've found yourself in [7], go north. Nearby in [8] there's Inquisitor Arzanon (you may have completed a side mission for him not so some time ago). Use the Holocron Blood Scanner to check his blood purity.
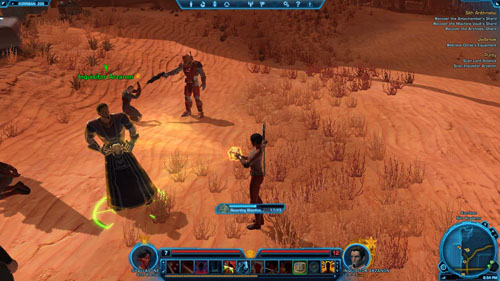
Scan Lord Solence
The last person you need to test is Lord Solence in [9]. Go to Sacred Ruins and then to Departure Shuttle. Cross the bridge and run up using the entrance on the left. Walk around the space shuttle, find Lord Solence in [9] and use the scanner on him.
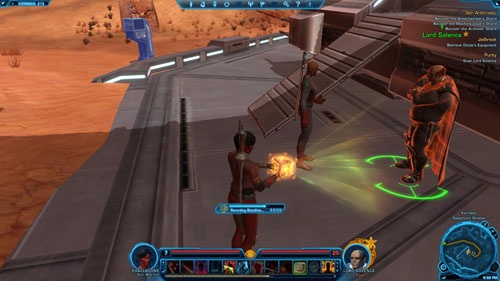
Return to Lord Abaron
Now you can return to the Sith Academy and speak with Lord Abaron in [1]. You'll receive an additional reward for this mission - a Codex entry (see below).
![You receive this mission from Inquisitor Urinth in [1] - (L08) Jailbreak - Korriban - Star Wars: The Old Republic - Game Guide and Walkthrough](https://game.lhg100.com/Article/UploadFiles/201512/2015121709491757.jpg)
You receive this mission from Inquisitor Urinth in [1]. You can do it only after you've completed a class mission: A New Master (Sith Warrior) or A Little Knowledge (Sith Inquisitor). Inquisitor Urinth will tell you to talk to an imprisoned Jedi, whose mind has been slightly modified by the Sith.

Speak to Jedi Quorian Dorjis
The plan is to help Jedi Quorian Dorjis "escape" and give the Republic false information. Run to [2] to talk to a prisoner who's sitting in an energy cage. Unfortunately, he doesn't want to escape till he gets his equipment back. You must help him with that.
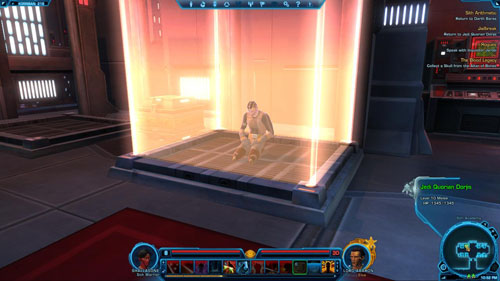
Retrieve Dorjis's Equipment
Head for the Sith Academy exit in [3]. Once you're in [4] go south to [5] (the arrows above can help). You must break through Tomb of Tulak Hord - Antechamber to the big square - Tomb of Tulak Hord - Ruined Atrium. Watch out for enemies on the way - larger groups of slaves and above all for Reprogrammed Droids [+].
![Exit the tomb through the door in [6] - (L08) Jailbreak - Korriban - Star Wars: The Old Republic - Game Guide and Walkthrough](https://game.lhg100.com/Article/UploadFiles/201512/2015121709491884.jpg)
Exit the tomb through the door in [6]. You need to get to [7] (go around the well and the boss with his helpers in [8]) and search the urn on the right, where you will find the first item - Jedi Quorian Dorjis's Comlink.
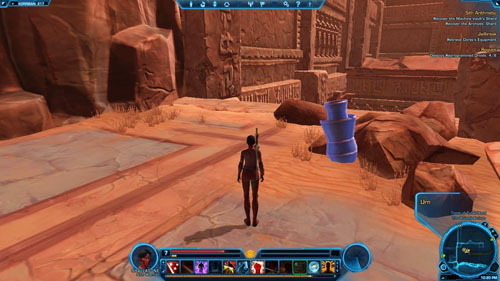
Recover Dorjis's Datalog
The other items are owned by Slave Rebellion Lookouts in the middle of the antechamber (by and in the vicinity of the well). You'll find them, for example, in [8] and [9]. If you want to attack the enemies at the well, then turn on boosting abilities and keep some Medpacs handy. First, get rid of two Renegade Engineers as soon as possible and then focus on the Slave Rebellion Leader [#] (a boss). After the fight, search the bodies of the fallen enemies. You'll find Jedi Quorian Dorjis's Datalog in one of them.
Recover Dorjis' Lightsaber
All that's left to find is the lightsaber. One of the enemies in this area will have it. Run to [9] and get rid of a small enemy group (Renegade Trooper and two Slave Rebellion Lookouts). One of them will have Jedi Quorian Dorjis's Lightsaber you should take with you, of course.
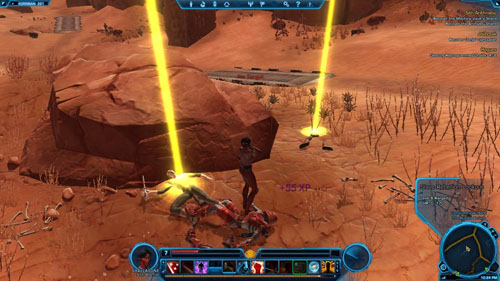
Speak to Jedi Quorian Dorjis
If you no longer have anything to do in this area, go back to [6], pass through the Tomb of Tulak Hord - The Antechamber and exit through the door in [7]. Then, head for the Sith Academy, that is, to the entrance in [4]. Once you have found yourself in [3] go to [2] and talk to Jedi Quorian Dorjis. At the end of the conversation you can choose whether or not to tell him the truth about the Inquisitor Urinth's plan. See the table below the picture for details.

A
Reply
Effect
Points / Rewards
1
You don't have to understand.
Sticking to Inquisitor's plan
+100 to Dark Side
2
This is all a setup.
Telling Quorian Dorjis the truth
+100 to Light Side
Return to Inquisitor Urinth
Regardless of the decision you've taken, run to Inquisitor Urinth in [1] and talk to her about the accomplished mission to get rewards.
Make an Example (Bonus)
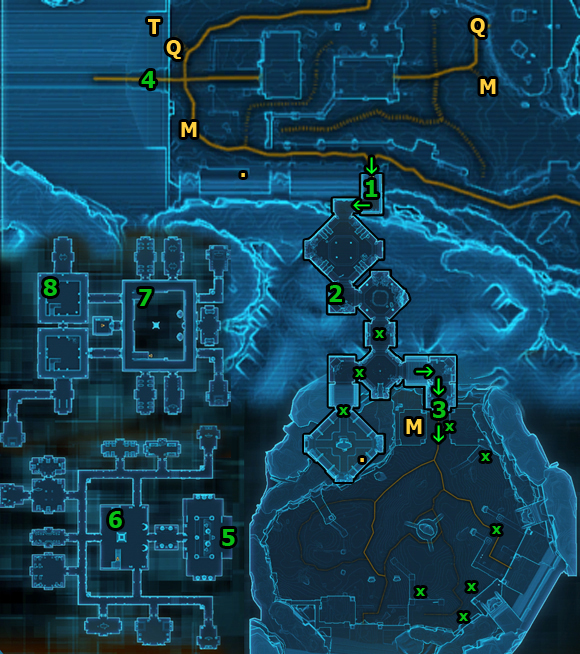
In order to receive this mission, you have to complete one of the class missions: A New Master (Sith Warrior) or A Little Knowledge (Sith Inquisitor) first. Go to Tomb of Tulak Hord - The Antechamber (entrance is in [1]) and locate a Holopad inside, in [2]. Watch the transmission recorded by Apprentice Peyterra and you'll get the mission.
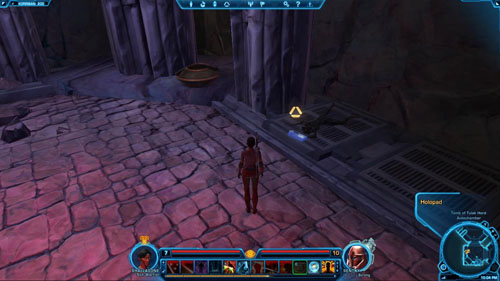
Destroy Reprogrammed Droids: 0/8
One could say that this side mission is a background for other side or main missions, as it's only about killing enemies. The first, main objective is to destroy six droids (Reprogrammed Droids [+] or Reprogrammed Guard Droids [+]). These more challenging enemies are marked with [x] on the map. Have a look at another mission objective described below.

Defeat Escaped Slaves: 0/15
After killing the first slave, you'll receive a bonus mission. You need to kill fifteen slaves, including Slave Rebellion Fighters, Renegade Troopers etc. Keep defeating the opponents while heading for the exit in [3] and kill the rest outside. You'll gain 980 XP for completing this bonus mission.
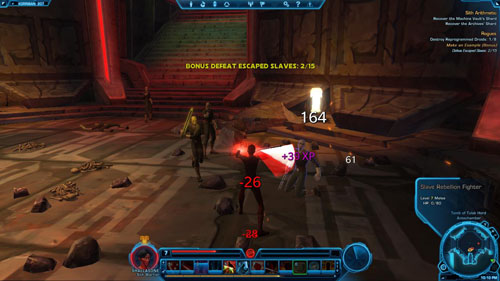
It is worth noting that most likely you won't be able to kill all the droids while exploring only the tomb itself. That's why, you'll need to search for them in the Tomb of Tulak Hord - Ruined Atrium area. But first, kill the slaves and only after that destroy the last droid.
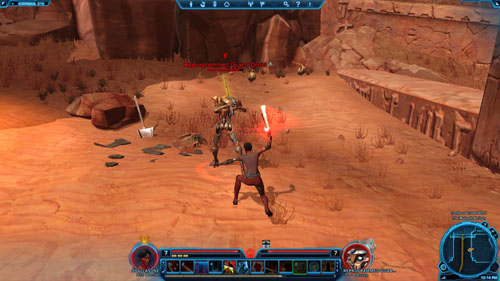
Speak to Inquisitor Jarobi
After you've carried out both mission objectives, go back to [3], through the Tomb of Tulak Hord - The Antechamber to [1] and then head for the Sith Academy through the entrance in [4]. Once you have found yourself in [5], run to the stairs in [6] and go up. Once you've appeared in [7] go to [8]. Find Inquisitor Jarobi and talk to him about the completed mission.
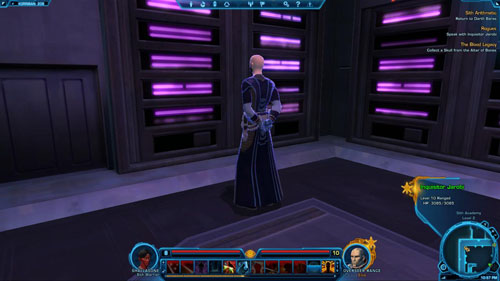
Ritual Cleansing (Bonus)
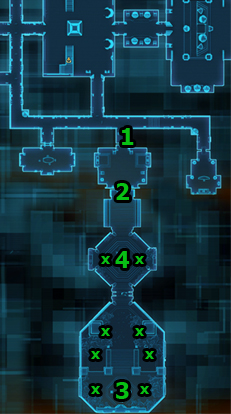
In order to receive this mission, you have to complete one of the class missions: Slaying the Beast (Sith Warrior) or A Little Knowledge (Sith Inquisitor) first. You'll get it from Overseer Ragate, who's standing in the Sith Academy in [1]. You should note, however, that some requirements will be necessary to complete this mission: your character's level has to be high enough and you need your companion's help, or other players have to help you.

Kill Shyrack Maulers: 0/6
Go through the door in [2] to the group area and go down the stairs. There are Shyrack Maulers [+] wandering around the room. They're challenging enemies, so don't even attempt to fight with more than one at the same time. After killing the first, you'll receive a bonus mission - killing six beasts (they're marked with [x] on the map) and a Codex entry - Bestiary: Shyrack - worth 390 XP. Kill six monsters to complete the mission and gain 870 XP.
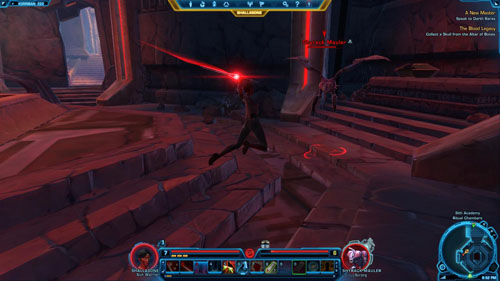
Collect a Skull from the Altar of Bones
Head south to [3]. Approach the altar and remove a Ritual Skull. Remember to regenerate your health along the way using appropriate abilities (depending on a class).
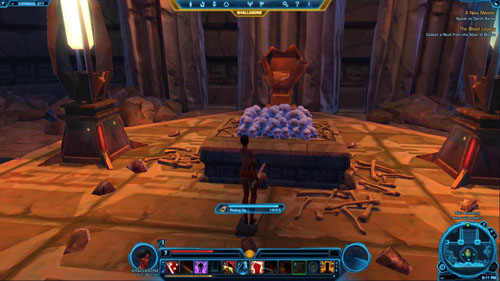
Soak the Skull in the Blood Pool
Go back to the previous room and if the Shyrack Maulers [+] have managed to be get reborn, it's necessary to kill them so that they won't disturb you in the fight you're about to face. Position yourself in the Blood Pool in [4], open the inventory panel and the "Mission Items" tab, then click LMB on the Ritual Skull icon to soak it in blood. Once it happens, immediately run to hide by any room wall.
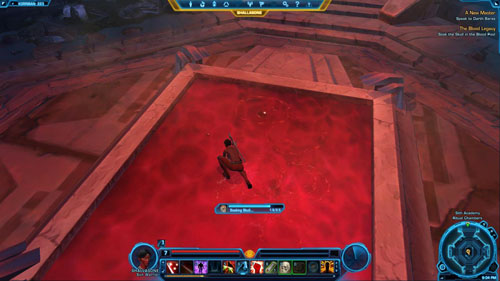
Defeat the Bloodfiend
Moving away from the pool will make the boss - The Bloodfiend [*] - not to attack you at once, so you'll have some time to get prepared. Keep Medpacs handy, use boosting abilities and then attack. The Bloodfiend [*] is a very challenging opponent, that's why you should use the most powerful special abilities. Also, make sure that they correspond to your character's level.
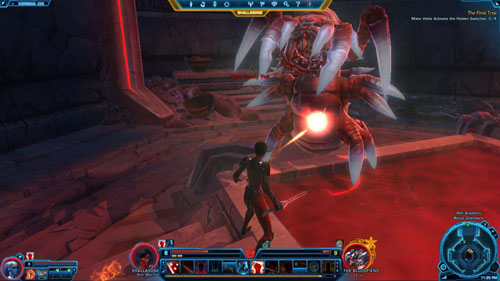
Return to Overseer Ragate
Search the creature's corpse and take the Blood Soaked Skull. Now you need to return to Overseer Ragate in [1] and talk to her about the mission you completed. You can also ask her a few questions regarding your future.
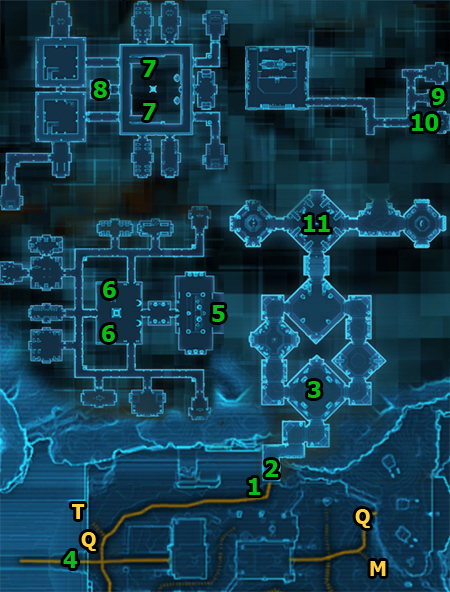
You can do this side mission only after completing one of the class missions: Sith Arithmetic (Sith Warrior) or The Secret of Tulak Hord (Sith Inquisitor). You'll get it from the guard standing in [1] - Sentry Yashia. As usual, agree to help her.

Find the Acolyte's Remains
The tomb entrance (Tomb of Naga Sadow) is right nearby in [2]. Use it and then find Acolyte's Remains) in [3]. Take them with you and get back to the exit in [2].
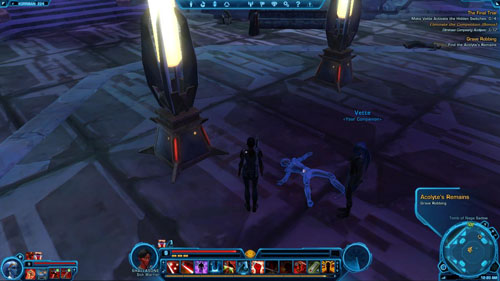
Return to Sentry Yashia
Speak with Sentry Yashia in [1] once more. The guard will suggest that you should take the remains to the acolyte's father who's in the Sith Academy.
Take the Remains to Naman Fal
Go inside the academy through the door in [4]. Once you've found yourself in [5], go up the stairs in [6] and then from [7] go to [8]. Use the elevator to go up to the third academy level. You'll appear in [9]. Naman Fal is just around the corner, in [10]. Talk to him and then decide whether to tell him the truth about his son's mediocre results, or lie that his son has almost succeeded (see the table below the picture for details).

A
Reply
Points / Rewards
1
Yes, sir.
-
2
You share, then I will.
-
3
What's it worth to you?
+70 credits
B
Reply
Effect
Points / Rewards
1
No, he failed hard.
Telling the truth about the son's failure
+50 to Dark Side, + Warrior's Gloves / Inquisitor's Gloves (depending on a class)
2
[Lie] He almost made it.
Lying about the son's results, mission end
+50 to Light Side
Claim the Relic
If you told the truth, you must return to the Tomb of Naga Sadow in [1] and get to [11]. Watch out especially for Rival Acolytes [+] and Aspiring Acolytes [+] along the way. After getting to [11], search the big pillar in the middle of the room and remove the Mysterious Crystal. You'll find extra items there and the mission will be accomplished.
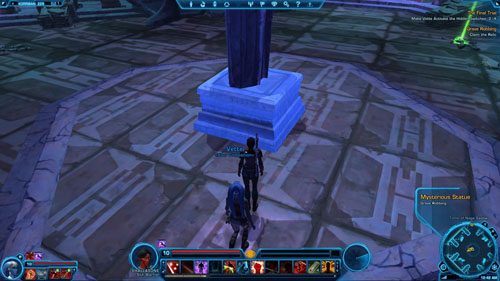
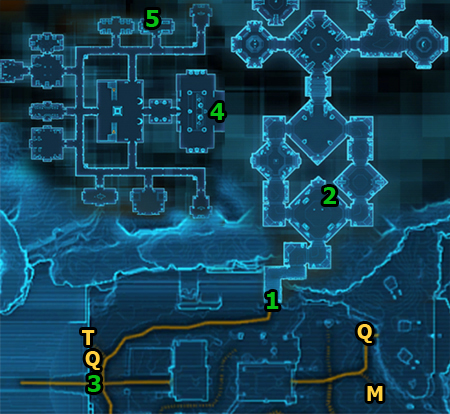
You can do this side mission only after completing one of the class missions: Sith Arithmetic (Sith Warrior) or The Secret of Tulak Hord (Sith Inquisitor). Enter the Tomb of Naga Sadow through the door in [1] and then locate Seh-run, hiding in [2] and talk to him.
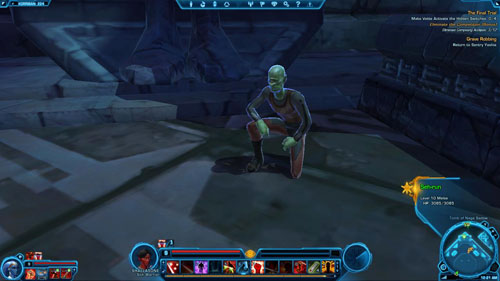
Speak to Overseer Prithor
Exit the tomb and head for the Sith Academy entrance in [3]. Once you've found yourself in [4], run to [5] and talk to Overseer Prithor, who's looking at the cages. At the end of the conversation you'll have to make a choice: either you feed a special meal to the beast to make it grow in strength, or you give him a poisoned meal to kill him (see the table below the picture for details).
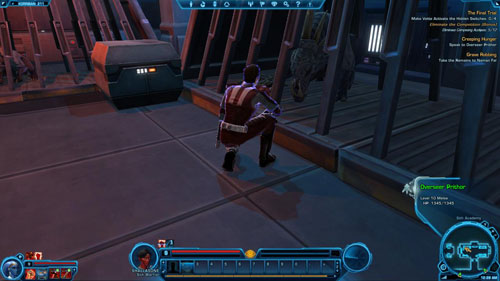
A
Reply
Effect
Points / Rewards
1
I'm feeding it.
Feeding the special meal to the beast
+50 to Dark Side
2
She-run can't continue
Feeding the poisoned meal to the beast
+50 to Light Side
Feed the Poisoned Meal to Seh-run
Feed the Special Meal to Seh-run
Regardless of the decision you've taken, go back to the Sith Academy exit in [4]. Once you're in [3], run to the Tomb of Naga Sadow entrance in [1]. Talk to Seh-run in [2] and give him either Overseer Prithor's Special Meal or Overseer Prithor's Poisoned Meal to complete this mission.
![This is a Heroic mission, which means that without other players or companion's help (and an appropriate character's level) it's pointless to do it - (L08) [HEROIC 2] Armed and Dangerous - Korriban - Star Wars: The Old Republic - Game Guide and Walkthrough](https://game.lhg100.com/Article/UploadFiles/201512/2015121709492247.jpg)
This is a Heroic mission, which means that without other players or companion's help (and an appropriate character's level) it's pointless to do it. You'll receive it after you've turned on the Mission Board, which is in [1] by a space shuttle. Read the mission descriptions and then accept it.
![Defeat and Search Lord Sundar - (L08) [HEROIC 2] Armed and Dangerous - Korriban - Star Wars: The Old Republic - Game Guide and Walkthrough](https://game.lhg100.com/Article/UploadFiles/201512/2015121709492288.jpg)
Defeat and Search Lord Sundar
A long journey awaits you. Go inside the Tomb of Tulak Hord - The Antechamber through the door in [2] and get to the other end of the tomb, to [3]. Go to Tomb of Tulak Hord - Ruined Atrium, and then head for [4], to the Tomb of Tulak Hord entrance - The Archives. Once you're there, locate the green force field in [5] and go through to get to the story area.
![The first opponents you will meet here are Mind-Controlled Troopers [*] in [6] - (L08) [HEROIC 2] Armed and Dangerous - Korriban - Star Wars: The Old Republic - Game Guide and Walkthrough](https://game.lhg100.com/Article/UploadFiles/201512/2015121709492265.jpg)
The first opponents you will meet here are Mind-Controlled Troopers [*] in [6]. They are dangerous, so you need good preparation. Moreover, there are a lot of other enemies (aside from the abovementioned troopers) in the room - Mind-Controlled Engineers [+] and Damaged Guard Droids [+].
![The latter are switched off for now, but as soon as you attack them they'll start to fight - (L08) [HEROIC 2] Armed and Dangerous - Korriban - Star Wars: The Old Republic - Game Guide and Walkthrough](https://game.lhg100.com/Article/UploadFiles/201512/2015121709492367.jpg)
The latter are switched off for now, but as soon as you attack them they'll start to fight. It's important that you get rid of all enemies in the room - located especially in [7] and [8] - before you start to fight with the boss. However, don't attack the four droids by the altar (two on the left and two on the right) and the two engineers in front of the altar, as also in this case Lord Sundar [*] will attack you.
![Only when you are absolutely sure there's no one else in the room but Lord Sundar [*] and his six helpers, use boosting abilities and quickly kill two Mind-Controlled Engineers [+] in [9] - (L08) [HEROIC 2] Armed and Dangerous - Korriban - Star Wars: The Old Republic - Game Guide and Walkthrough](https://game.lhg100.com/Article/UploadFiles/201512/2015121709492399.jpg)
Only when you are absolutely sure there's no one else in the room but Lord Sundar [*] and his six helpers, use boosting abilities and quickly kill two Mind-Controlled Engineers [+] in [9]. Then focus on the boss. It's possible that Damaged Guard Droids [+] won't even join the fight, so remember not to attack them first. Yet, if any awakens, defeat him fast and get back to the fight with the boss. Don't forget to use Medpacs.
![After getting rid of Lord Sundar [*], and the rest of enemies who will attack you (for example, the awoken Damaged Guard Droids [+]), search his body - (L08) [HEROIC 2] Armed and Dangerous - Korriban - Star Wars: The Old Republic - Game Guide and Walkthrough](https://game.lhg100.com/Article/UploadFiles/201512/2015121709492363.jpg)
After getting rid of Lord Sundar [*], and the rest of enemies who will attack you (for example, the awoken Damaged Guard Droids [+]), search his body. Take Lord Sundar's Signet Ring and exit the room through the force field in [5].
![Deliver Lord Sundars Ring - (L08) [HEROIC 2] Armed and Dangerous - Korriban - Star Wars: The Old Republic - Game Guide and Walkthrough](https://game.lhg100.com/Article/UploadFiles/201512/2015121709492302.jpg)
Deliver Lord Sundar's Ring
All that's left to do is to go back, following the familiar path, to the Tomb of Tulak Hord exit - The Antechamber in [2]. After you've exited the tomb, turn left and run to Mission Dropbox - a panel located in [10]. Put the ring inside. You'll complete this mission and receive rewards.
![1 - (L08) [HEROIC 2] Armed and Dangerous - Korriban - Star Wars: The Old Republic - Game Guide and Walkthrough](https://game.lhg100.com/Article/UploadFiles/201512/2015121709492380.jpg)
![This is a Heroic mission, which means that without other players or companion's help (and an appropriate character's level) it's pointless to do it - (L08) [HEROIC 2+] The Hate Machine - Korriban - Star Wars: The Old Republic - Game Guide and Walkthrough](https://game.lhg100.com/Article/UploadFiles/201512/2015121709492393.jpg)
This is a Heroic mission, which means that without other players or companion's help (and an appropriate character's level) it's pointless to do it. You'll receive it from Ephran Zell in [1], who's working by the sarcophagi in Tomb of Tulak Hord - The Antechamber. Talk to him and offer your assistance.
![Activate the Red Engine - (L08) [HEROIC 2+] The Hate Machine - Korriban - Star Wars: The Old Republic - Game Guide and Walkthrough](https://game.lhg100.com/Article/UploadFiles/201512/2015121709492402.jpg)
Activate the Red Engine
Run south, to the tomb exit in [2]. Go to Tomb of Tulak Hord - Ruined Atrium, and then head for [3], to the Tomb of Tulak Hord entrance - The Hate Machine. Once you're inside, locate the green force field (it's right on the left once you've entered) and pass through to get to the story area.
![Move closer to the altar in the middle of the large hall (in [4]) and activate it - (L08) [HEROIC 2+] The Hate Machine - Korriban - Star Wars: The Old Republic - Game Guide and Walkthrough](https://game.lhg100.com/Article/UploadFiles/201512/2015121709492493.jpg)
Move closer to the altar in the middle of the large hall (in [4]) and activate it. Immediately run to [5]. Now, you'll have to deal with three waves of K'lor'slugs. Remember to instantly restore your health after each wave (as much as you can).
![Slay the Klorslugs - (L08) [HEROIC 2+] The Hate Machine - Korriban - Star Wars: The Old Republic - Game Guide and Walkthrough](https://game.lhg100.com/Article/UploadFiles/201512/2015121709492484.jpg)
Slay the K'lor'slugs
Quickly use all boosting abilities. The first wave will appear in [5], it will consist of several K'lor'slug Bloodwurms and two K'lor'slug Bloodfeasters. The latter use ranged attacks and they're very efficient in that, so it's vital that you deal with them first. You won't have any trouble with the rest of the bugs. Regenerate your health after the fight and prepare for the next.
![The second wave will come out of [6] - (L08) [HEROIC 2+] The Hate Machine - Korriban - Star Wars: The Old Republic - Game Guide and Walkthrough](https://game.lhg100.com/Article/UploadFiles/201512/2015121709492446.jpg)
The second wave will come out of [6]. It's going to be more difficult here unless you defeat four K'lor'slug Bloodfeasters on time. Run towards them as soon as you can to minimize the damage from their ranged attacks. Kill them all, restore your health again and get ready for the last battle.
![Two K'lor'slug Bloodfeasters and K'lor'slug Bloodqueen [*] will emerge from [7] - (L08) [HEROIC 2+] The Hate Machine - Korriban - Star Wars: The Old Republic - Game Guide and Walkthrough](https://game.lhg100.com/Article/UploadFiles/201512/2015121709492457.jpg)
Two K'lor'slug Bloodfeasters and K'lor'slug Bloodqueen [*] will emerge from [7]. The key to success is to quickly go past the queen and first deal with the K'lor'slug Bloodfeasters.
![Then, take care of the K'lor'slug Bloodqueen [*] - the queen shouldn't be a difficult enemy to defeat without her](https://game.lhg100.com/Article/UploadFiles/201512/2015121709492429.jpg)
Then, take care of the K'lor'slug Bloodqueen [*] - the queen shouldn't be a difficult enemy to defeat without her "friends". However, keep some Medpacs handy.
![Retrieve the Tablet - (L08) [HEROIC 2+] The Hate Machine - Korriban - Star Wars: The Old Republic - Game Guide and Walkthrough](https://game.lhg100.com/Article/UploadFiles/201512/2015121709492404.jpg)
Retrieve the Tablet
After killing the queen, have a look at the altar in [4], which is now open. There's Red Engine Tablet you should take. You'll obtain a Codex entry - Lore: The Red Engine - worth 390 XP.
![Return to Ephran Zell - (L08) [HEROIC 2+] The Hate Machine - Korriban - Star Wars: The Old Republic - Game Guide and Walkthrough](https://game.lhg100.com/Article/UploadFiles/201512/2015121709492482.jpg)
Return to Ephran Zell
All that's left to do is to exit the tomb and go to [2] through the ruined atrium. Once you're in the Tomb of Tulak Hord - The Antechamber - go to [1]. Speak with Ephran Zell about the mission you've just accomplished to receive your rewards.
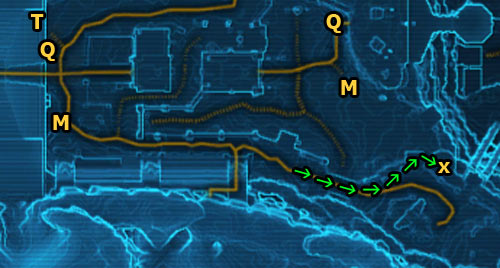
Starting area: Departure Shuttle
Target area: Valley of The Dark Lords
It's not hard to get to the first Datacron, which is located on the borders of the Valley of the Dark Lords and Departure Shuttle areas. Although the Datacron is in the former area - don't let that mislead you. Start by heading towards the Departure Shuttle area (beginning of the way is marked by arrows on the map above).
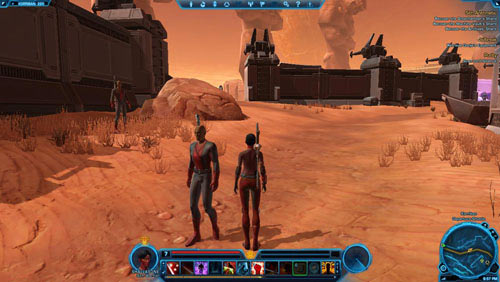
Go past the space shuttle and take a look at the metal pier on the left.
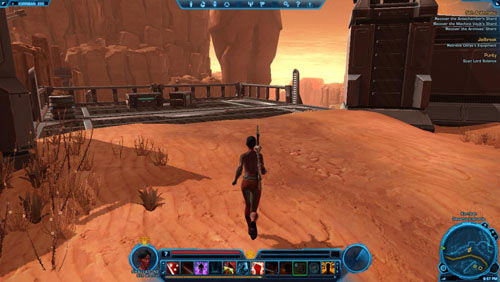
Go there and find a place where the wall on the right ends. You can cross between the wall and the terrace - just be careful not to fall off!
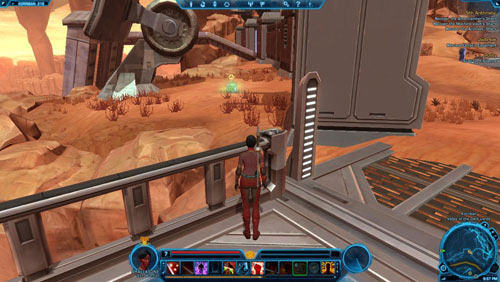
The Datacron is hidden right behind the abovementioned wall.
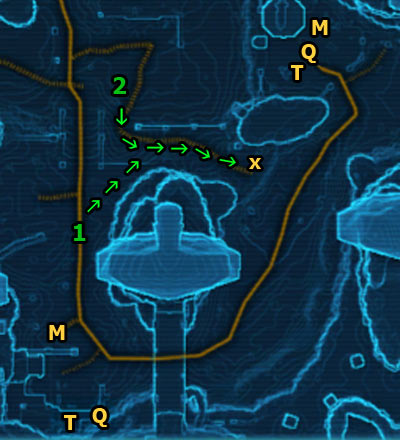
Rewards: +2 Endurance, Codex entry - Achievements - Datacrons: Galactic History 15 - Mandalore - 550 XP
Starting area: Lower Wilds Outskirts
Target area: Lower Wilds
The way you discover the second Datacron is similar to the first one - even though it's located in the Lower Wilds Outskirts area, you can only access it from another area - Lower Wilds. First go to either [1] or [2].
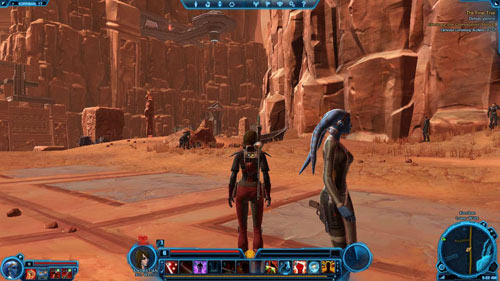
Then start heading east (north or southeast).
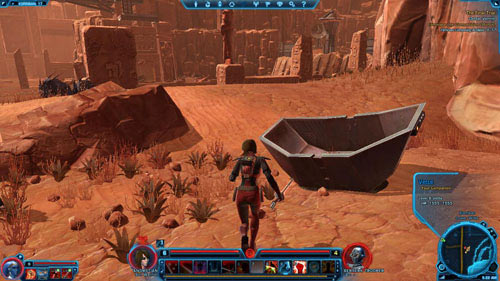
You might be passing by wild Tuk'ata on the way, but these are not dangerous enemies. Keep going east.
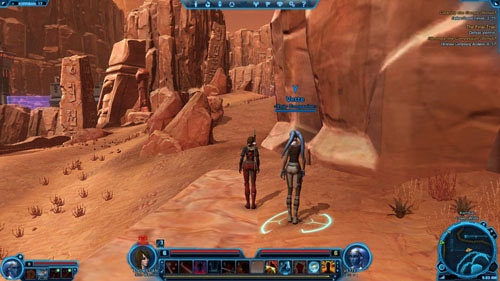
After a while you should notice a purple beam of light. Move closer to its source.
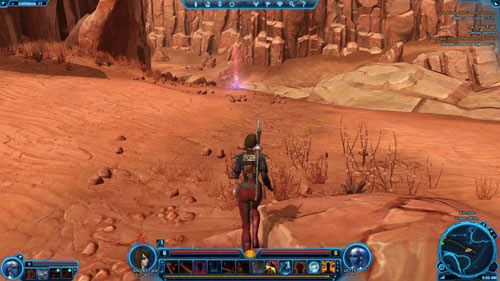
The Datacron is just by the rock edge.

Rewards: +2 Willpower, Codex entry - Achievements - Datacron: Galactic History 16 - The Alaskan Conflicts - 550 XP
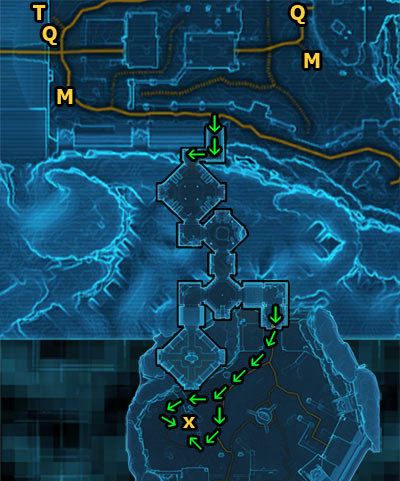
Starting area: Sacred Ruins (Tomb of Tulak Hord - Ruined Atrium)
Target area: Sacred Ruins (Tomb of Tulak Hord - Ruined Atrium)
It also won't be hard to get to the last Datacron. All you need to do is to make your way through the Tomb of Tulak Hord - The Antechamber to the ruined square (Tomb of Tulak Hord - Ruined Atrium).
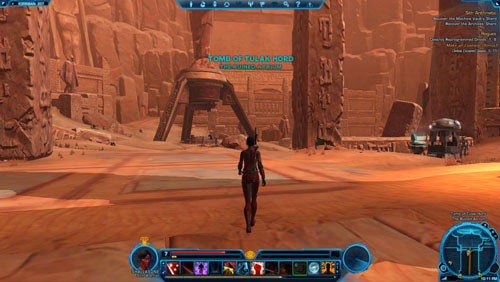
Once you're there, start going southwest. Then choose left or right path. If any enemies stand in your way, defeat them. Next, search the spot behind the short wall.
There will be the third and the last Datacron there.
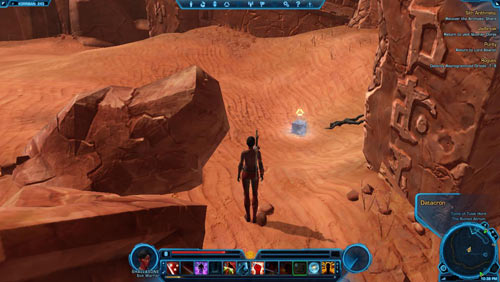
Rewards: Red Matrix Shard, Codex entry - Achievements - Datacrons: Galactic History 17 - The Duinuogwuin Contention - 550 XP
![[M]: Medical Droids (medical assistance and Respawn points) - Tython - Places - Star Wars: The Old Republic - Game Guide and Walkthrough](https://game.lhg100.com/Article/UploadFiles/201512/2015121709492668.jpg)
[M]: Medical Droids (medical assistance and Respawn points)
[Q]: Quick Travel Points
[T]: Taxis
This chapter acquaints the player with the secrets of every Tython area. It does not cover the areas through which you enter through the green force field (story areas, group areas, etc.). In each location description there are:
(01): Master's Retreat
(02): The Gnarls
(03): Tythos River Delta
(04): Jedi Temple
(05): Kalikori Village
(06): The Matriarch's Summit
(07): The Hollows
(08): Elarian Trail
(09): Lower Kaleth
(10): Upper Kaleth
(11): Tythos Ridge
(12): Tythos River Valley
(13): The Forge
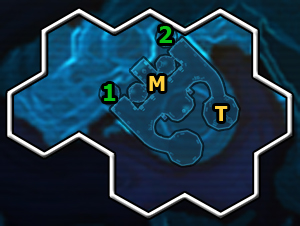
You don't get any XP for discovering the very first location.
SERVICES / ASSISTANCE / VENDORS
[T]: Taxi (Master's Retreat)
[M]: Medical Droid - Medpacs and Stims, item repair, Respawn Point
OTHER
[1]: Class starting point - Jedi Knight
[2]: Class starting point - Jedi Consular
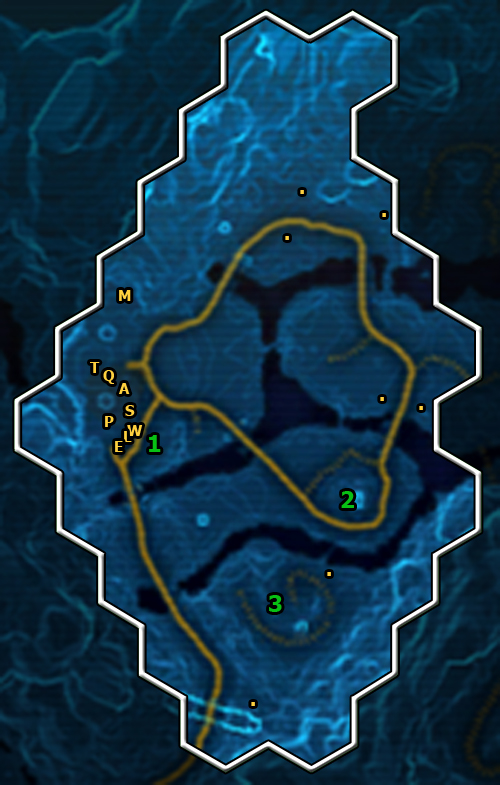
For discovering this location you will receive 30 XP. When you go deep into the area, you'll also obtain a Codex entry - Locations: The Gnarls - worth 45 XP.
SERVICES / ITEMS
[Q]: Quick Travel Point (The Gnarls)
[T]: Taxi (Gnarls Outpost Speeder)
[.]: Security Chest - chests you can search
[I]: Item Modification Station
[P]: Mailbox
TRAINERS
[A]: Master Travin (Jedi Knight Trainer)
[B]: Master Liv'trai (Jedi Consular Trainer)
VENDORS / ASSISTANCE
[E]: Dekay (Medium Armor Vendor)
[L]: Tager'na (Light Armor Vendor)
[M]: Medical Droid (Medpacs and Stims, item repair, Respawn Point)
[S]: Adi'son (Stims Vendor)
[W]: Nad'alin (Weapons Vendor)
OTHER
[1]: Young Uxibeast - one of the places you can find these animals. You don't need to kill them - just get a little closer and you'll obtain a Codex entry - Bestiary: Uxibeast - 45 XP.
![[2]: Ancient Jedi Statue (Lore Object) - reading the sign by the great statue will result in obtaining a Codex entry - Lore: Rediscovering Tython - 160 XP - (02) The Gnarls - Places - Star Wars: The Old Republic - Game Guide and Walkthrough](https://game.lhg100.com/Article/UploadFiles/201512/2015121709492888.jpg)
[2]: Ancient Jedi Statue (Lore Object) - reading the sign by the great statue will result in obtaining a Codex entry - Lore: Rediscovering Tython - 160 XP.
![[3]: Cha'naugh [*] - one of the Flesh Raider leaders - (02) The Gnarls - Places - Star Wars: The Old Republic - Game Guide and Walkthrough](https://game.lhg100.com/Article/UploadFiles/201512/2015121709492852.jpg)
[3]: Cha'naugh [*] - one of the Flesh Raider leaders. Deal with him after you've killed his subordinates. It shouldn't be difficult to defeat the boss.
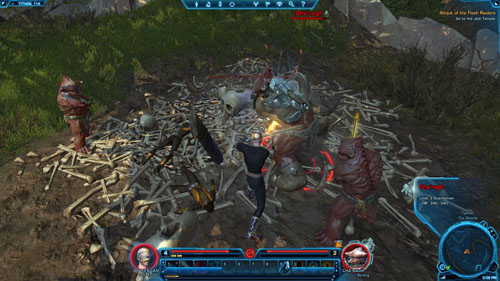
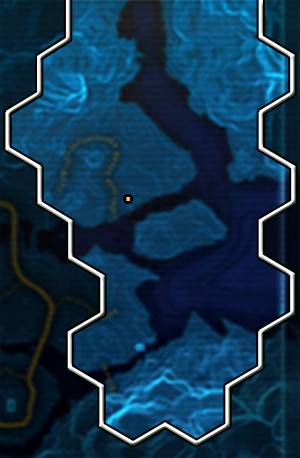
For discovering this location you will receive 30 XP.
ITEMS
[.]: Security Chest - chests you can search
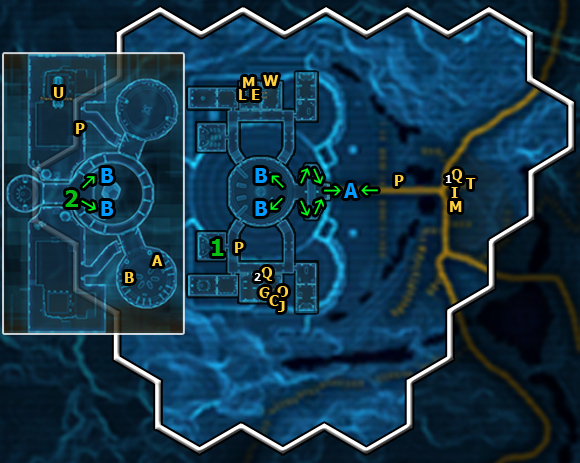
For discovering this location you will receive 65 XP.
ENTRANCES / EXITS
[A]: Jedi Temple (Codex entry - Locations: Jedi Temple - 160 XP)
[B]: Jedi Temple - Level 2 (stairs)
SERVICES / ITEMS
[Q1]: Quick Travel Point (Jedi Temple)
[Q2]: Quick Travel Point (Jedi Temple Cantina)
[T]: Taxi (Jedi Temple)
[I]: Item Modification Station
[P]: Mailbox
[U]: Space Shuttle - will take you from Tython
[J]: Jukebox
TRAINERS
[A]: Master Muheeda (Jedi Knight Trainer)
[B]: Master Wettle (Jedi Consular Trainer)
VENDORS / ASSISTANCE
[C]: Jujuin (Cantina Vendor)
[E]: Benay (Medium Armor Vendor)
[G]: Shiden (Specialty Goods)
[H]: Master Jormin (Heavy Armor Vendor)
[L]: Lenks (Light Armor Vendor)
[M]: Medical Droid (Medpacs and Stims, item repair, Respawn Point)
[O]: Beejinz (Social Items Vendor)
[W]: Fermin (Weapons Vendor)
OTHER
[1]: Jedi Training (Lore Object) - having a look at the chair in the lecture room will result in obtaining a Codex entry - Lore: Rebuilding the Jedi Order - 160 XP.
![[2]: Jedi Council (Lore Object) - reading the sigh by the big gate will result in obtaining a Codex entry - Organizations: Jedi Council - 45 XP - (04) Jedi Temple - Places - Star Wars: The Old Republic - Game Guide and Walkthrough](https://game.lhg100.com/Article/UploadFiles/201512/2015121709492904.jpg)
[2]: Jedi Council (Lore Object) - reading the sigh by the big gate will result in obtaining a Codex entry - Organizations: Jedi Council - 45 XP.
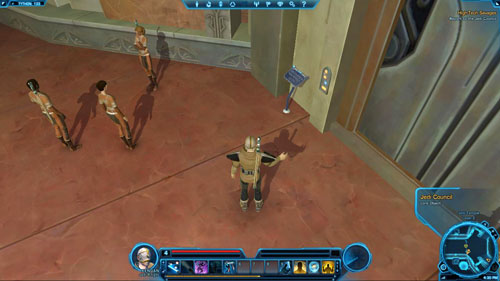
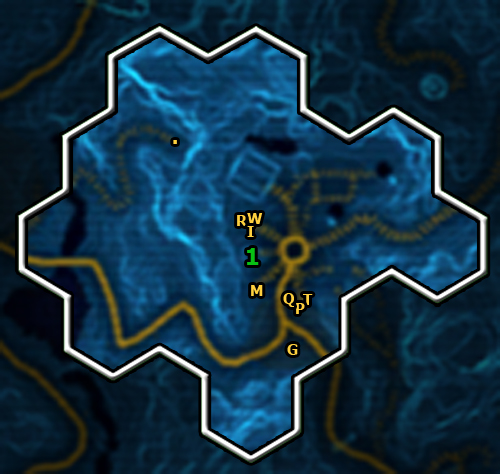
For discovering this location you will receive 103 XP. When you go deep into the area you'll also obtain a Codex entry - Locations: Kalikori Village - worth 225 XP.
SERVICES / ITEMS
[Q]: Quick Travel Point (Kalikori Village)
[T]: Taxi (Kalikori Village)
[.]: Security Chest - chests you can search
[I]: Item Modification Station
[P]: Mailbox
VENDORS / ASSISTANCE
[G]: Dorsil (Specialty Goods)
[R]: Dendim (Armor Vendor)
[W]: Badmil (Weapons Vendor)
[M]: Medical Droid (Medpacs and Stims, item repair, Respawn Point)
OTHER
[1]: Twilek (Lore Object) - reading the sign at Twi'leks' house will result in obtaining a Codex entry - Species: Twi'lek - 160 XP.
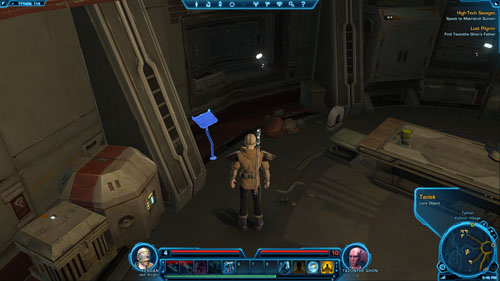
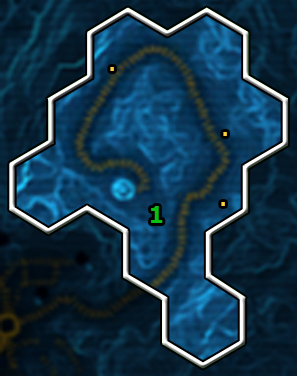
For discovering this location you will receive 150 XP.
ITEMS
[.]: Security Chest - chests you can search
OTHER
[1]: Mar'garvok [*] - one of the Flesh Raider champion. If your character's level is at least the same as the boss's, then you'll defeat him easily. Remember about boosting abilities before the fight and keep some Medpacs handy.

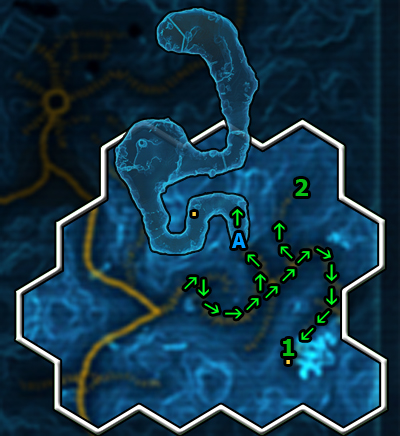
For discovering this location you will receive 150 XP.
ENTRANCES / EXITS
[A]: Upper Hollows
ITEMS
[.]: Security Chest - chests you can search
OTHER
[1]: Flesh Raider Chief Shaman [+] - one of the Flesh Raider champions. Deal with him after you've killed his subordinates. It shouldn't be difficult to defeat the boss.
![[2]: Bloodskin [*] - another Flesh Raider champion - (07) The Hollows - Places - Star Wars: The Old Republic - Game Guide and Walkthrough](https://game.lhg100.com/Article/UploadFiles/201512/2015121709493065.jpg)
[2]: Bloodskin [*] - another Flesh Raider champion. He can push you away with sweeping blows and is generally a challenging enemy. Don't start fighting with him if you're not level 9, if you don't have abilities that correspond to this level, and if you don't have a companion. If you do have the latter, you'll defeat the Bloodskin [*] easily.
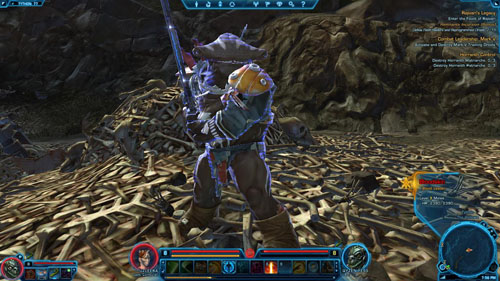
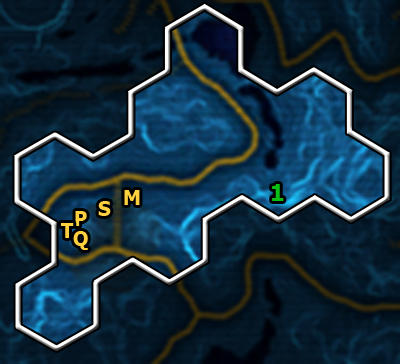
For discovering this location you will receive 150 XP.
ENTRANCES / EXITS
[A]: Entrance to Waterfall Cave (leads to Tythos River Valley)
VENDORS / ASSISTANCE / ITEMS / SERVICES
[Q]: Quick Travel Point (Elarian Trail)
[T]: Taxi (Forward Camp Speeder)
[P]: Mailbox
[.]: Security Chest - chests you can search
[M]: Medical Droid (Medpacs and Stims, item repair, Respawn Point)
[S]: Kejik (Stims Vendor)
OTHER
[1]: Datacron 1/3 - for more information (how to get to it) see the "Datacrons" chapter. For discovering it you will get 550 XP, +2 to Endurance and unlock a Codex entry: Achievements - Datacron: Galactic History 09 - The Force Wars.
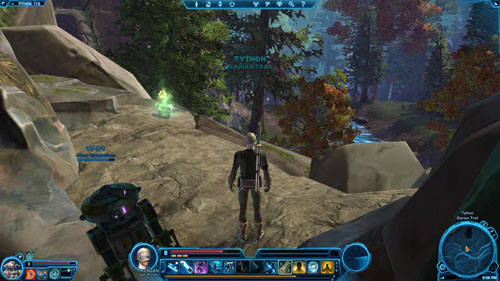
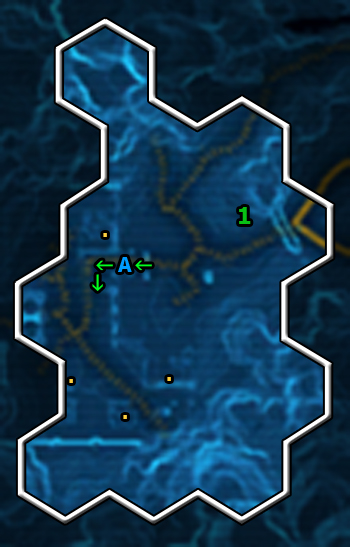
For discovering this location you will receive 147 XP. When you go deep into the area, you'll also obtain a Codex entry - Locations: Ruins of Kaleth - worth 300 XP.
ENTRANCES / EXITS
[A]: Stairs leading to Upper Kaleth.
ITEMS
[.]: Security Chest - chests you can search
OTHER
You will be fighting with many different kinds of droids across the whole Lower Kaleth area. Destroying the first (any) will result in getting a Codex entry - Bestiary: Tythonian War Droid - worth 300 XP.
![[1]: Greater Guid [+] - one of the places you can find these animals - (09) Lower Kaleth - Places - Star Wars: The Old Republic - Game Guide and Walkthrough](https://game.lhg100.com/Article/UploadFiles/201512/2015121709493108.jpg)
[1]: Greater Guid [+] - one of the places you can find these animals. Kill one and you'll obtain a Codex entry - Bestiary: Guid - 390 XP.
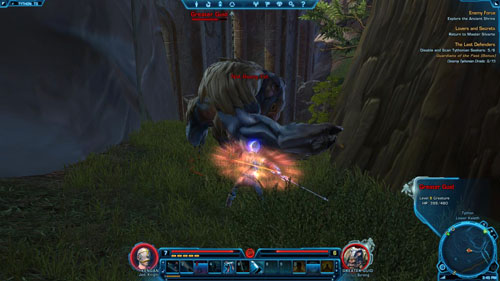
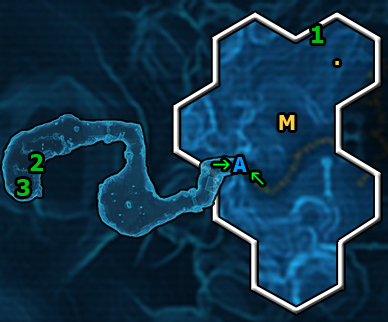
For discovering this location you will receive 260 XP.
There is a Heroic area in this location - a cave Chamber of Speech. Once you reach the end of the cave ([2]) you'll get a Codex entry - Locations: Chamber of Speech - 495 XP.
ENTRANCES / EXITS
[A]: Chamber of Speech
ITEMS
[.]: Security Chest - chests you can search
OTHER
[1]: Datacron 2/3 - for more information (how to get to it) see the "Datacrons" chapter. For discovering it you will get 550 XP, +2 to Willpower and unlock a Codex entry: Achievements - Datacron: Galactic History 10 - The Tion Cluster.
![[3]: Tythonian Lore Guardian [#] - a large battle droid - (10) Upper Kaleth - Places - Star Wars: The Old Republic - Game Guide and Walkthrough](https://game.lhg100.com/Article/UploadFiles/201512/2015121709493181.jpg)
[3]: Tythonian Lore Guardian [#] - a large battle droid. This boss doesn't have any special attacks. With either companion or other players' help you'll defeat him with ease.
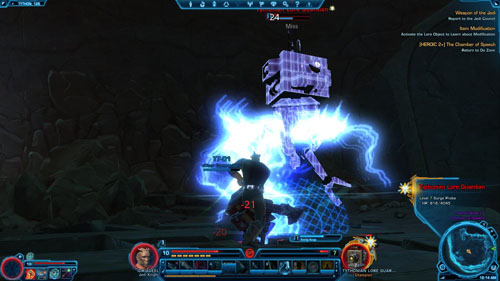
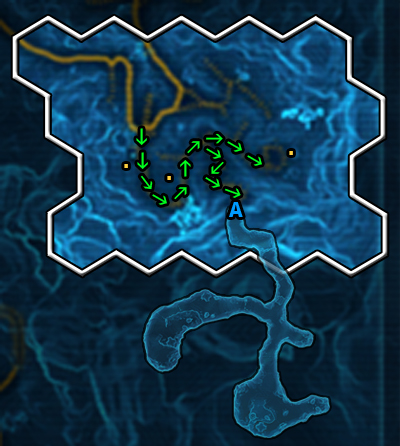
For discovering this location you will receive 262 XP.
ENTRANCES / EXITS
[A]: Flesh Raider Cave
ITEMS
[.]: Security Chest - chests you can search
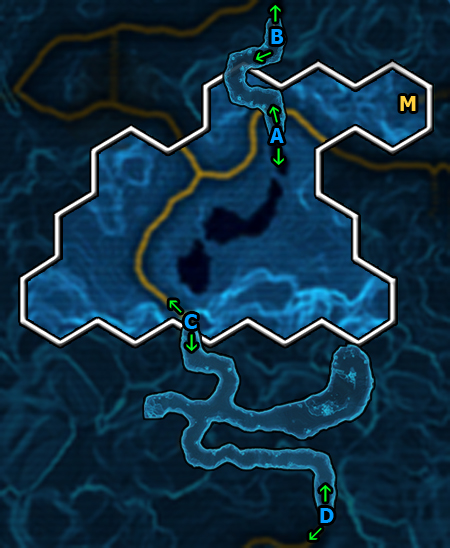
For discovering this location you will receive 270 XP.
ENTRANCES / EXITS
[A]: Mountain Pass
[B]: Passage to the Elarian Trail area
[C]: Waterfall Cave
[D]: Passage to The Forge area
ITEMS
[M]: Medical Droid (Medpacs and Stims, item repair, Respawn Point)
OTHER
[1]: Horranth Matriarch [+] - one of the places you can find these animals. Kill one and you'll obtain a Codex entry - Bestiary: Horranth - 450 XP.

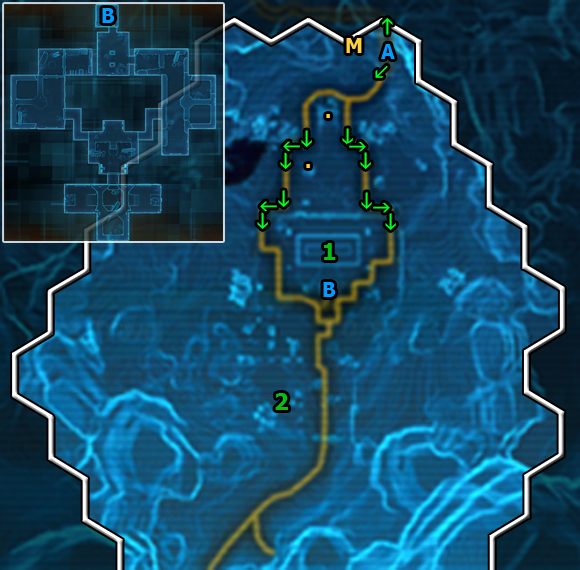
For discovering this location you will receive 295 XP.
ITEMS
[.]: Security Chest - chests you can search
[M]: Medical Droid - Medpacs and Stims, item repair, Respawn Point
OTHER
[1]: Flesh Raider Conquest Droid [#] - a gigantic battle droid. He's accompanied by two Flesh Raider Tech Savants. This is not the kind of enemy you can fight alone - even having a companion won't help. You need to either gain a higher level on different planets, or seek other players' assistance.
![[2]: Datacron 3/3 - for more information (how to get to it) see the](https://game.lhg100.com/Article/UploadFiles/201512/2015121709493303.jpg)
[2]: Datacron 3/3 - for more information (how to get to it) see the "Datacrons" chapter. For discovering it you will get 550 XP, Blue Matrix Shard and unlock a Codex entry: Achievements - Datacron: Galactic History 11 - The Tionese Face the Hutt Empire.

Each mission description is divided into several smaller parts. It should be observed that the following legend does not concern the next section - "Shortcuts (main and side missions)". The list of missions is given in chronological order, that is, the order you receive them. Also, the level of a particular mission is shown before its name (L). Here is all information that is essential to read before you start using the missions description.
The exact description of a mission is here. Sometimes it's divided into several different places you will visit, and each of them has its own map.
In the missions descriptions there are all dialogues that can have any impact on the game mechanics. It is given in the Points / Rewards column. The Effect column specifies what kind of effect your reply will have (there can also be a letter referring to the next dialogue mentioned), while under Reply there is the answer's line.
If any dialogue is missing it means that it doesn't matter which reply you choose (of course, except for the aspects related to developing your character in terms of the story). If a reply doesn't have any effect or doesn't result in getting any points or rewards, then there will be no suitable column in the table.
#
Reply
Effect
Points / Rewards
Reply number
One out of the two or three replies your character can give.
Effect of the chosen reply, and if it leads further - a letter of the next dialogue is given
+x to Light / Dark Side,<br>+x / -x to companion's Affection,<br>other Rewards
# - a letter indicating the dialogue order. Some replies can lead to different dialogues
If a mission contains a small bonus mission, then a complete list of them is given right before the mission description. Bonus mission objectives are given along with the mission objectives (class or side) with which such a mission is connected.
The list of rewards includes: XP, credits, items and Codex entries. You can receive all these items for completing a mission. Sometimes you'll get one out of the two depending on your class, other times you'll have to choose one from several items (these are separated by a slash - "/").
The chapter presents a list of all main, side, bonus and tutorial mission objectives that take place on the planet Tython. The list is arranged in such a way as to minimize the time necessary for the sole running and visiting the same areas.
Most often the next side missions can or should be done (because of your character's level) while doing the next main missions (Class). That is why all mission objectives are divided into main missions.
You should observe that there are no issues connected with the Codex here - these can be found in the "Places" chapter. Moreover, there are no side Heroic mission objectives. Their descriptions are at the end of the side missions chapter - "Tython".
Attack of the Flesh Raiders [mission start] - Darrin Weller
Attack of the Flesh Raiders - Speak to Darrin Weller
Attack of the Flesh Raiders - Take a Speeder to the Gnarls
Mark Quick Travel Point (The Gnarls)
Early Lessons [mission start] - Master Relnex
[+] Attack of the Flesh Raiders - Defeat Flesh Raiders:
Captured Padawans [mission start] - Flesh Raider Cage
[+] Captured Padawans: The Flesh Raider Menace (Bonus) - Defeat Flesh Raiders: 0/15
[+] Captured Padawans [mission end] - Free Captured Padawans: 0/6
Early Lessons - Find the Missing Students
[o] Early Lessons - Defeat Flesh Raiders: 0/10
[o] Early Lessons - Destroy Flesh Raider Supplies: 0/3
Attack of the Flesh Raiders - Click on your Holocom Button
Attack of the Flesh Raiders - Secure the Gnarls Cavern
[+] Attack of the Flesh Raiders: Halt the Assault (Bonus) Defeat Flesh Raiders: 0/10
Attack of the Flesh Raiders - Talk to Callef
Attack of the Flesh Raiders - Defeat Flesh Raider Predators
Attack of the Flesh Raiders - Defeat Callef
Attack of the Flesh Raiders - Speak to Unaw Aharo
Commit suicide to respawn in the Medical Center in The Gnarls
Early Lessons [mission end] - Return to Master Relnex
Attack of the Flesh Raiders - Go to the Jedi Temple
[+] Attack of the Flesh Raiders: Clear the Path to the Jedi Temple (Bonus) - Defeat Flesh Raider Lurkers: 0/4
Combat Leadership: Mark I [mission start] - Liam Dentiri
Combat Leadership: Mark I - Activate and Destroy Mark I Training Droids
Combat Leadership: Mark I [mission end] - Return to Liam Dentiri
Mark Quick Travel Point (Jedi Temple) and Taxi (Jedi Temple)
The Arm That Holds the Saber [mission start] - Aven
Attack of the Flesh Raiders - Use your Personal Holocon
Mark Quick Travel Point (Jedi Temple Cantina)
Attack of the Flesh Raiders - Speak to Master Satele Shan
High-tech Savages [mission start] - Master Satele Shan
High-tech Savages - Report to the Jedi Council
The Arm That Holds the Saber [mission end] - Speak with Master Muheeda
High-tech Savages - Get Supplies from Master Orgus's Chambers
Mark Quick Travel Point (Kalikori Village) and Taxi (Kalikori Village)
Lost Pilgrim [mission start] - Tazonthe Ghon
Strength of the Flesh Raiders [mission start] - Vederiat Ayon
High-tech Savages - Speak to Matriarch Sumari
The Thousand Steps [mission start] - Yuleph Phan
[+] The Thousand Steps: Clear the Mountain Path (Bonus) - Defeat Flesh Raider Slavers and Slavemasters: 0/4
The Thousand Steps - Light the First Signal
The Thousand Steps - Light the Second Signal
The Thousand Steps - Light the Third Signal
The Thousand Steps - Light the Fourth Signal
The Thousand Steps - [mission end] Speak to Kolovish
Strength of the Flesh Raiders - Speak to Odumis Mer
[+] High-tech Savages: Low-Tech Methods (Bonus) - Defat Flesh Raiders: 0/9
[+] Strength of the Flesh Raiders: Thin the Flesh Raider Ranks (Bonus) - Defat Flesh Raiders: 0/15
[+] [o] Strength of the Flesh Raiders - Retrieve the Elixir: 0/5
[+] [o] Strength of the Flesh Raiders - Destroy the Elixir: 0/5
Lost Pilgrim - Find Tazonthe Ghon's Father
High-tech Savages - Recover a Key from a Flesh Raider Warmaster
High-tech Savages - Unlock the Tech Cache
High-tech Savages - Take Weapons or Sabotage the Tech Cache
Commit suicide to respawn in Kalikori Village
Lost Pilgrim - [mission end] Return to Tazonthe Ghon
[o] Strength of the Flesh Raiders [mission end] - Speak to Vederiat Ayon
[o] Strength of the Flesh Raiders [mission end] - Speak to Odumis Mer
High-tech Savages - Return to Matriarch Sumari
High-tech Savages - Speak to Saylew
High-tech Savages [mission end] - Speak to Ranna Tao'Ven
Enemy Force [mission start] - Ranna Tao'Ven
Take a taxi to Taxi (Jedi Temple)
Combat Leadership: Mark II [mission start] - Liam Dentiri
Combat Leadership: Mark II - Activate and Destroy Mark II Training Droids
Combat Leadership: Mark II [mission end] - Return to Liam Dentiri
Lovers and Secrets [mission start] - Master Silvarte
Hero Worship [mission start] - Padawan Fia
Hero Worship [mission end] - Speak to Jedi Till'in
The Last Defenders [mission start] - Jedi Till'in
Mark Quick Travel Point (Elarian Trail) and Taxi (Forward Camp Speeder)
Lovers and Secrets - Speak to Moracen
[+] The Last Defenders: Guardians of the Past (Bonus) - Destroy Tythonian Droids: 0/15
[+] The Last Defenders - Disable and Scan Tythonian Seekers: 0/6
Flesh Eating Baby [mission start] - Backpack
Flesh Eating Baby - Gather Guid Meat: 0/3
Flesh Eating Baby - Return to the Flesh Raider Baby
Enemy Force - Explore the Ancient Shrine
Enemy Force: Guards of the Leader (Bonus) - Defeat Flesh Raider Adept Initiates: 0/10
Enemy Force - Confront the Flesh Raider Ravager Chieftain
Enemy Force - Defeat Flesh Raider Ravagers
Enemy Force - Defeat the Flesh Raider Ravager Chieftain
Enemy Force - Speak to Master Bela Kiwiiks
Enemy Force - Plant a Device In Sector 01
Enemy Force - Plant a Device in Sector 02
Enemy Force - Plant a Device in Sector 03
Enemy Force - Use Your Personal Holocom
Commit suicide to respawn in Elarian Trail
The Last Defenders [mission end] - Return to Jedi Till'in
Take a taxi to Taxi (Kalikori Village)
Enemy Force [mission end] - Return to Master Orgus
The Face of the Enemy [mission start] - Master Orgus
Flesh Raider Fact-finding [mission start] - Master Wix
New Recruit [mission start] - Trea Kobbeth
Take a taxi to Taxi (Jedi Temple)
Combat Leadership: Mark III [mission start] - Liam Dentiri
Combat Leadership: Mark III - Activate and Destroy Mark III Training Droids
Combat Leadership: Mark III [mission end] - Return to Liam Dentiri
Flesh Eating Baby [mission end] - Speak to Master Quilb
Take a taxi to Taxi (Kalikori Village)
[+] The Face of the Enemy: Clear Out Tythos Ridge (Bonus) - Defeat Flesh Raiders:
Pilgrim Medicine [mission start] - Datapad
[+] Pilgrim Medicine - Collect Manka Cat Teeth: 0/6
New Recruit - Find Viyo's Satchel
Flesh Raider Fact-finding - Examine the Salvage Idol
The Face of the Enemy - Shut Down the Energy Shield
The Face of the Enemy - Speak to Ranna Tao'Ven
Flesh Raider Fact-finding - Examine the Bone Idol
Flesh Raider Fact-finding - Examine the Flesh Idol
Teleport to Quick Travel Point (Kalikori Village)
Flesh Raider Fact-finding [mission end] - Report to Master Gehnso or Master Wix
Pilgrim Medicine [mission end] - Report to Bahlea
[o] New Recruit [optional mission end] - Return to Trea Kobbeth
The Face of the Enemy - Disable Toxin Mine One
The Face of the Enemy - Disable Toxin Mine Two
The Face of the Enemy - Disable Toxin Mine Three
The Face of the Enemy [mission end] - Return to Ranna Tao'Ven
Dark Temptations [mission start] - Ranna Tao'Ven
Take a taxi to (Jedi Temple)
Combat Leadership: Mark IV [mission start] - Liam Dentiri
Combat Leadership: Mark IV - Activate and Destroy Mark IV Training Droids
Combat Leadership: Mark IV [mission end] - Return to Liam Dentiri
[o] New Recruit - Speak to Master Strayen
Lovers and Secrets [optional mission end] - Return to Master Silvarte
Take a taxi to Elarian Trail - Taxi (Forward Camp Speeder)
[o] Lovers and Secrets [mission end] - Return to Moracen
Commune With the Light [mission start] - Flingeld
Commune With the Light - Meditate at the Meditation Crystal
Commune With the Light - Levitate the Giant Rock
Commune With the Light [mission end] - Speak to Flingeld
Dark Temptations - Infiltrate the Flesh Raider Stronghold
Dark Temptations - Speak to Laotah
[+] Dark Temptations: Scars on the Dark Side (Bonus) - Defeat Flesh Raider Savage Adepts: 0/10
Dark Temptations - Recover Laotah's Lightsaber
Dark Temptations - Use Your Personal Holocom
Dark Temptations - Speak to Ranna Tao'Ven
[o] Dark Temptations - Defeat Scout Chief Moorint
[o] Dark Temptations - Defeat Saylew
[o] Dark Temptations - Defeat Eseni
Commit suicide to respawn in Elarian Trail
[o] New Recruit - Light the Signal Fire
Teleport to Quick Travel Point (Kalikori Village)
[o] New Recruit [optional mission end] - Speak to Trea Kobbeth
Dark Temptations - Speak to Ranna Tao'Ven
Dark Temptations - Speak to T7
Dark Temptations [mission end] - Use Your Personal Holocom
Weapon of the Jedi [mission start] - T7
Take a taxi to Taxi (Jedi Temple)
Combat Leadership: Mark V [mission start] - Liam Dentiri
Combat Leadership: Mark V - Activate and Destroy Mark V Training Droids
Combat Leadership: Mark V [mission end] - Return to Liam Dentiri
Take a taxi to Elarian Trail - Taxi (Forward Camp Speeder)
Horranth Control [mission start] - Sedni Maruk
[HEROIC 2+] The Chamber of Speech [mission start] - Do Zonn
[+] Horranth Control: Egg smashing (Bonus) - Smash Horranth Eggs: 0/10
Horranth Control - Destroy Horranth Matriarchs: 0/3
Horranth Control - Destroy Horranth Patriarchs: 0/3
Commit suicide to respawn in Elarian Trail
Horranth Control [mission end] - Return to Sedni Maruk
Weapon of the Jedi - Investigate the Forge Entrance
[+] Weapon of the Jedi: Remnants Invasion (Bonus) - Defeat Flesh Raiders and Reprogrammed Trail Droids: 0/15
[+] Weapon of the Jedi: Forge Ahead (Bonus) - Defeat Flesh Raider Feral Adepts: 0/15
Weapon of the Jedi - Head to the Ancient Forge
Weapon of the Jedi - Talk to Bengel Morr
Weapon of the Jedi - Defeat Flesh Raider Feral Adepts
Weapon of the Jedi - Defeat Bengel Morr
Weapon of the Jedi - Speak to Bengel Morr
Weapon of the Jedi - Speak to Master Orgus
Weapon of the Jedi - Construct Your Lightsaber
Item modification (Tutorial) [mission start]
Weapon of the Jedi: Putting Your New Weapon to Use (Bonus) - Defeat the Forge Guardian
Teleport to Quick Travel Point (Jedi Temple)
Item modification (Tutorial) [mission end] - Activate the Lore Object to Learn about Modification
Weapon of the Jedi [mission end] - Report to the Jedi Council
Seeking Darkness [mission start] - Jedi Council
Seeking Darkness [mission end] - Board a Shuttle to the Republic Fleet
Halt the Assault (Bonus)
Clear the Path to the Jedi Temple (Bonus)
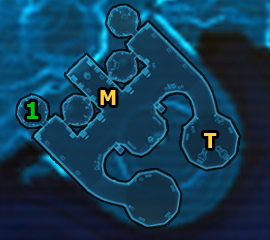
Speak to Darrin Weller
You begin your adventure as a Jedi Knight in [1]. To receive another order, talk to Darinn Weller, who is standing beside the console (unless the conversation started automatically).
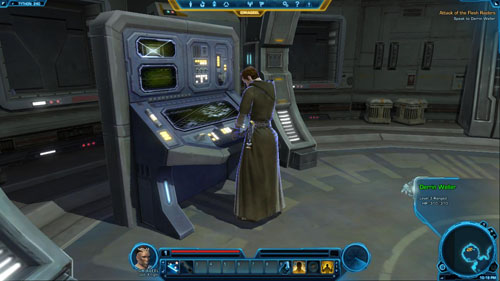
Take a Speeder to the Gnarls
Run to the [T] and talk to the robot by the taxis. This is the first taxi terminal you will mark on this planet - Taxi (Master's Retreat). Choose the only possible option - The Gnarls - as your destination area.
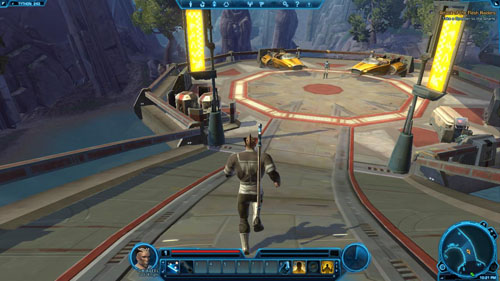
![You'll appear in [3] - (L01) Attack of the Flesh Raiders - Jedi Knight - Star Wars: The Old Republic - Game Guide and Walkthrough](https://game.lhg100.com/Article/UploadFiles/201512/2015121709493437.jpg)
You'll appear in [3]. Once you've arrived at the place, it's necessary to mark Quick Travel Point (The Gnarls), which is right next to the stairs leading down.

Defeat Flesh Raiders: 0/10
Your task is to kill ten Flesh Raiders of any kind. There are plenty of them in the area and they don't pose a serious threat - unless they're in big groups. Eliminate these enemies while doing other side missions until your kill ten of them.
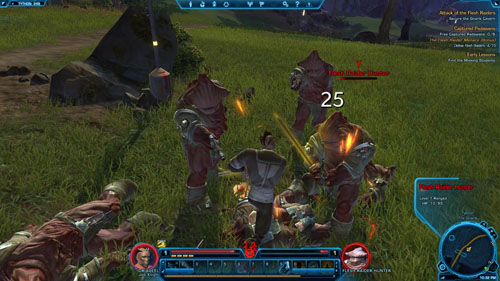
Click on your Holocom Button
We don't need to explain this mission objective. Talk to the master via the Holocom to get another mission objective.
Secure the Gnarls Cavern
If you have finished all other side missions in this area, or you don't wish to do so, go to the cave entrance in [4]. You'll enter the story area and your task will be to get to [5].
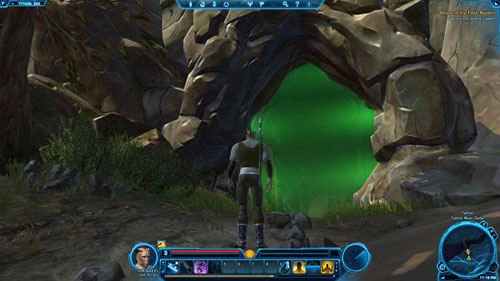
Defeat Flesh Raiders: 0/10
Start killing enemies - when you kill the first, you'll receive a bonus mission. You'll defeat ten Flesh Raiders in the cave without too much trouble. Expect 125 XP for completing the bonus mission.
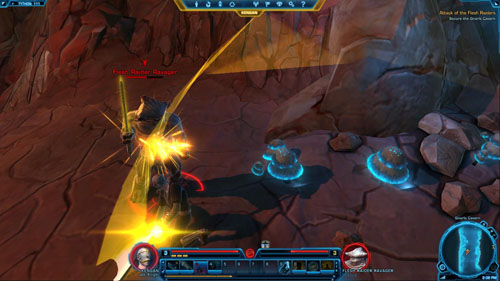
Talk to Callef
After getting to [5], you'll start a conversation with Callef. Though the conversation will end in a fight anyway, your reply can earn you some Light or Dark Side points. See the table below the picture for details.
A
Reply
Points / Rewards
1
I'm asking you to surrender.
+50 to Light Side
2
Can I join you?
-
3
No, you're done. [Attack]
+50 to Dark Side
Defeat Flesh Raider Predators
Defeat Callef
Whichever option you've chosen, defeat his two helpers first. Then, deal with Callef [+] himself. This won't be a hard fight - you can use an area ability to quickly knock down two Flesh Raider Predators. Callef [+] is also not a difficult opponent.
Speak to Unaw Aharo
Talk to the wounded Unaw Aharo and then with Orgus Din, who'll appear here. You'll obtain a Codex entry - Persons of Note: Orgus Din (Knight) worth 160 XP, as well as the next mission objective. Exit the cave.
In the meantime, it's worth getting interested in new abilities (provided your character's level is higher than 1). Go to [6] and purchase the abilities from Master Travin. Then follow the path leading south to the large stone gate in [7].

Go to the Jedi Temple
Defeat Flesh Raider Lurkers: 0/4
After passing through the gate, begin to walk along the path that will lead you to the Jedi Temple, your new destination. You'll come across white varieties of Flesh Raiders - the Flesh Raider Lurkers along the way. Kill four to complete the bonus mission and earn 125 XP.
Use your Personal Holocon
Eventually, you'll manage to get in front of the temple entrance in [8]. Then you'll receive a new mission objective (you can start a different class mission even before you enter the temple). Press the button on the screen to talk to Master Satele Shan, who will request a face-to-face conversation. You will obtain a new Codex entry - Persons of Note: Satele Shan - along with 100 XP.
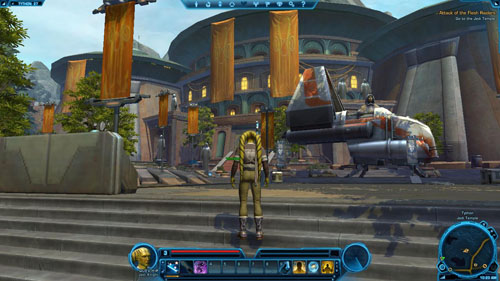
Speak to Master Satele Shan
Enter the temple through the door in [8] and visit the cantina (it's a must). There's Quick Travel Point (Jedi Temple Cantina) that you should mark on the map. Then go to [9]. Go through the green field to enter the story area and talk to Master Satele Shan. You'll finish the main mission and receive the next.

![To get this mission, talk to Aven, who's standing in [1] - (L02) The Arm That Holds the Saber - Jedi Knight - Star Wars: The Old Republic - Game Guide and Walkthrough](https://game.lhg100.com/Article/UploadFiles/201512/2015121709493572.jpg)
To get this mission, talk to Aven, who's standing in [1]. He will advise you to see a Jedi master who is also a trainer.
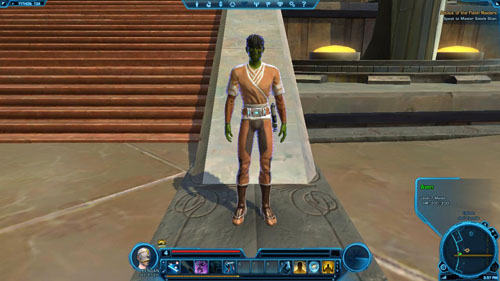
Speak with Master Muheeda
All you need to do is to go inside the temple in [2] and then go up the stairs in [3]. You'll appear on the second level of the temple in [4]. Head for [5] to find Master Muheeda. Talk to him to open the ability shop and complete this mission. Buy all abilities and visit the master each time you reach a level or when you return to the temple after completing a main mission.
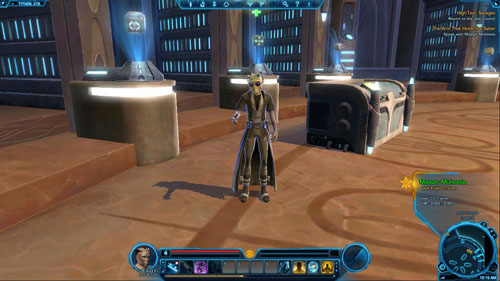
Low-Tech Methods (Bonus)
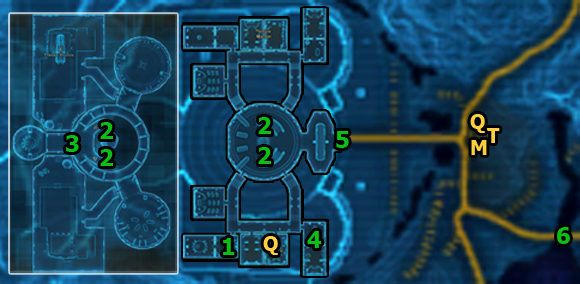
Report to the Jedi Council
You will begin this mission by introducing yourself to the Jedi Council. Go from [1] to the stairs in [2] and use them. Then examine the great gate in [3] that leads to the council hall and enter. After the conversation you will receive the next mission objective.

Get Supplies from Master Orgus's Chambers
Jump down when you reach the hall and quickly go to [4]. After entering the story area, search the metal Supply Cabinet near the second chamber entrance. Soon you'll speak with Master Orgus and get another mission objective, as well as two Minor Power Adrenales.
![Exit the temple through the gate in [5] and head for the bridge to [6] (see the picture below) - (L05) High-tech Savages - Jedi Knight - Star Wars: The Old Republic - Game Guide and Walkthrough](https://game.lhg100.com/Article/UploadFiles/201512/2015121709493602.jpg)
Exit the temple through the gate in [5] and head for the bridge to [6] (see the picture below). Keep following the path shown on the first and the second map. After a short journey you'll reach Kalikori Village.
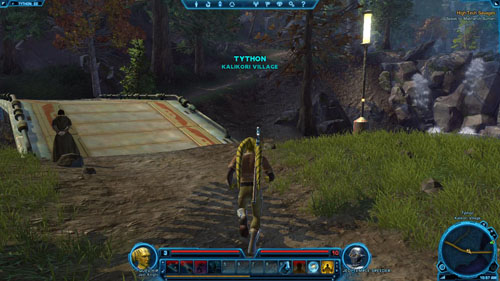
![Once you're in the village, it's necessary to find and mark Quick Travel Point (Kalikori Village) and Taxi (Kalikori Village) - marked with [Q] and [T] on the map respectively - (L05) High-tech Savages - Jedi Knight - Star Wars: The Old Republic - Game Guide and Walkthrough](https://game.lhg100.com/Article/UploadFiles/201512/2015121709493655.jpg)
Once you're in the village, it's necessary to find and mark Quick Travel Point (Kalikori Village) and Taxi (Kalikori Village) - marked with [Q] and [T] on the map respectively.
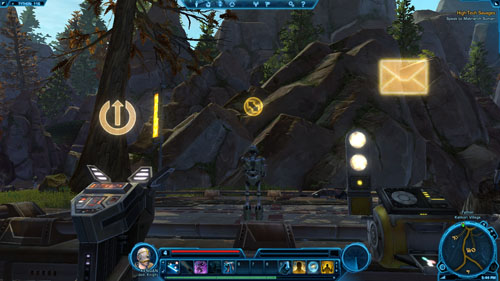
Speak to Matriarch Sumari
It won't be difficult to get to Martriarch Sumari, as the Twi'lek leader occupies the biggest house in the village - to the left of the village entrance. Go inside through the green force field in [7].
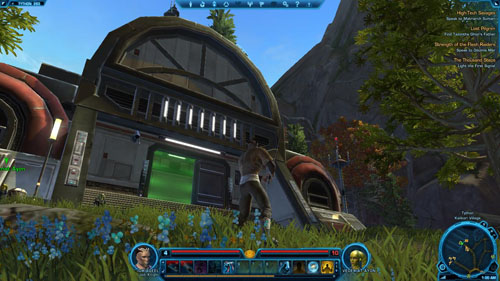
Inside, talk to Martriarch Sumari. You will receive a new mission objective. Before you leave the village, it's good to think about doing some side missions.
![Next, use the destroyed village exit in [8] to head south to The Hollows - (L05) High-tech Savages - Jedi Knight - Star Wars: The Old Republic - Game Guide and Walkthrough](https://game.lhg100.com/Article/UploadFiles/201512/2015121709493786.jpg)
Next, use the destroyed village exit in [8] to head south to The Hollows.
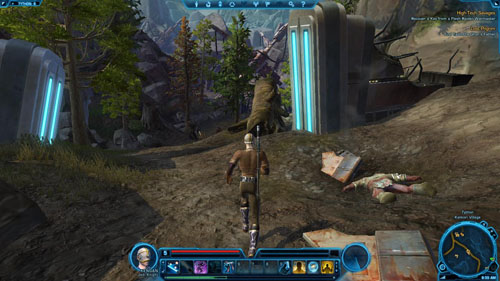
Defat Flesh Raiders: 0/9
You'll be fighting with the Flesh Raider forces on the way, but try to avoid Flesh Raider Boneguards [+] and Flesh Raider Shamans [+] - they're not only stronger, but also they don't count as far as the list of the enemies you must kill is concerned. It's best to kill your enemies as soon as you notice them. Keep doing so till you carry out the mission objective. You'll get 175 XP.
Recover a Key from a Flesh Raider Warmaster
To perform this task, you need to travel for quite a long time till you get to the cave entrance in [9].

Then break through the cave full of Flesh Raiders. Watch out especially for Flesh Raider Shamans [+]. When you reach [10], your health should be fully restored, as you'll need to defeat Flesh Raider Warmaster [+]. Afterwards search his body and take the key (Flesh Raider Gate Key).
Unlock the Tech Cache
The key will open the gate in [10]. Use the panel on the right.
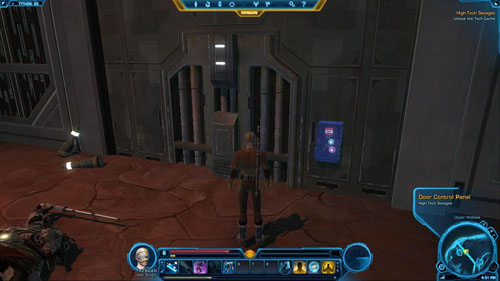
Take Weapons or Sabotage the Tech Cache
Now you must make a choice. Either you take the weapons (Flesh Raider Weapons) and give them to Twi'leks, or you commit sabotage and destroy the cache. See the tables below the picture for details. After that, you'll free the allied T7-01, who will join you while you'll be carrying out the next mission objective.
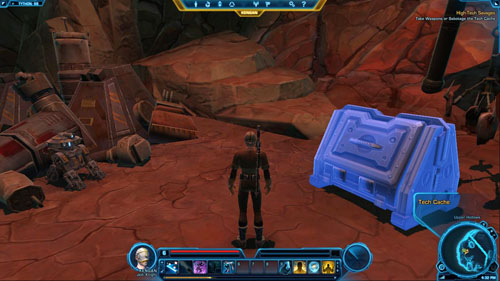
A
Reply
Effect
Points / Rewards
1
[Take it for the villagers]
Taking the weapons
+50 to Light Side
2
[Sabotage it to kill enemies]
Destroying the weapons
+50 to Dark Side
3
[Leave it alone]
-
-
Return to Matriarch Sumari
Speak to Saylew
If you no longer have anything to do in The Hollows, go to Kalikori Village - you can simply teleport to Quick Travel Point (Kalikori Village). Then go to Martriarch Summari's house in [7] and talk to Saylew. You will have an opportunity to gain some Dark or Light Side points here (see the tables below the picture for details) - but only if you took the weapons with you.
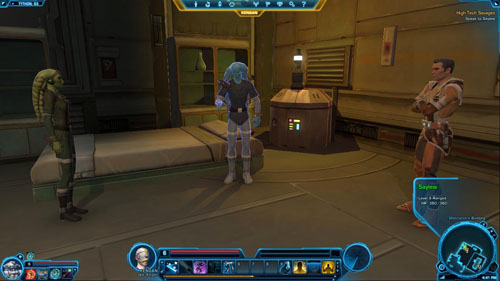
A
Reply
Effect
1
I'm sorry for your loss.
-
2
Getting your weapons.
Further conversation stage - B
3
Shut your mouth.
-
B
Reply
Effect
Points / Rewards
1
You'll die chasing revenge.
Giving the weapons to Ranna
+50 to Light Side
2
Ranna's in charge here.
Giving the weapons to Ranna
+50 to Light Side
3
Take them. [Give weapons]
Giving the weapons to Saylew
+50 to Dark Side
C
Reply
Points / Rewards
1
I found this droid, master.
-
2
Do you know T7?
-
3
He's all yours.
-1 to Affection: T7-01
Speak to Ranna Tao'Ven
Regardless of the decision you've made, talk to Ranna Tao'Ven to complete this mission and receive the next.

Guards of the Leader (Bonus)
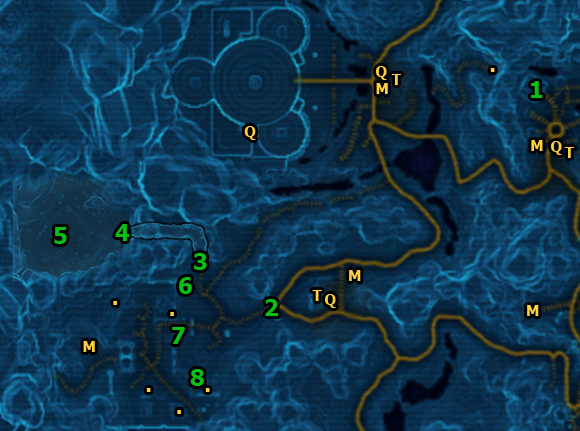
Explore the Ancient Shrine
You begin this mission in [1]. Go to Elarian Trail - your first task is to reach Quick Travel Point (Elarian Trail) and Taxi (Forward Camp Speeder), which are located there. It's necessary to mark them on the map before you go any further.
![Go west, to Lower Kaleth through the gate in [2] - (L06) Enemy Force - Jedi Knight - Star Wars: The Old Republic - Game Guide and Walkthrough](https://game.lhg100.com/Article/UploadFiles/201512/2015121709493874.jpg)
Go west, to Lower Kaleth through the gate in [2]. This place is overrun by ancient droids. Watch out especially for Tythonian Watchers [+] - they can turn the force field on. Get to the cave entrance (Meditation Tunnel) in [3] and go inside.
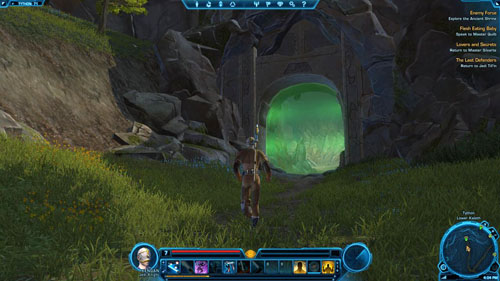
Defeat Flesh Raider Adept Initiates: 0/10
A lot of Flesh Raider Adept Initiates will stand on your way. They're not very challenging opponents. Kill ten to complete the bonus mission and earn 510 XP. Head for the cave exit in [4]. You'll find yourself in Ancient Shrine.
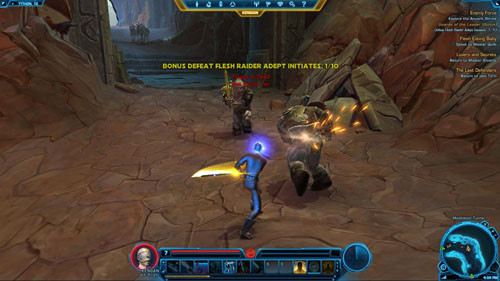
Confront the Flesh Raider Ravager Chieftain
Approach the leader in [5] - Flesh Raider Ravager Chieftain [*] - and talk to him. Your replies won't matter because you'll have to fight anyway.
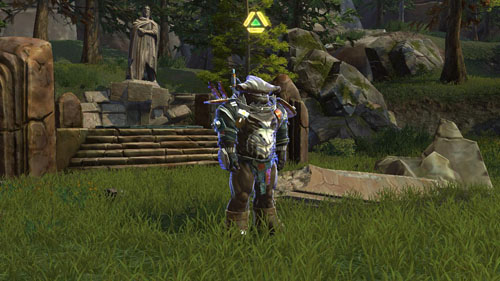
Defeat Flesh Raider Ravagers
Defeat the Flesh Raider Ravager Chieftain
First, quickly get rid of several Flesh Raider Ravagers and then focus on the Flesh Raider Ravager Chieftain [*]. He's not that dangerous without his helpers. Defeat him and wait for Master Bela Kiwiiks to appear here in a while.
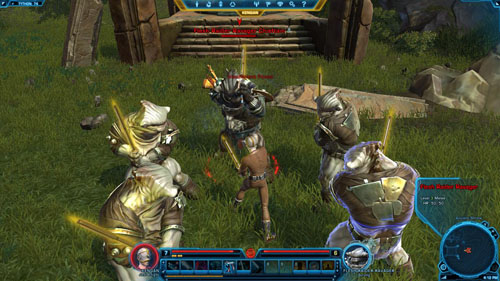
Speak to Master Bela Kiwiiks
Talk to Master Bela Kiwiiks. You'll get three transmitters (Surveillance Sensors) and you'll be requested to deploy them in different places in the ruins. You will also obtain a Codex entry - Lore: Holocron - worth 390 XP. Go back to the cave in [4] and come out in [3].

Plant a Device In Sector 01
Run out of the cave and go up the hill on the right. Climb up the wall and find a wall section in [6], where you can plant the first device.
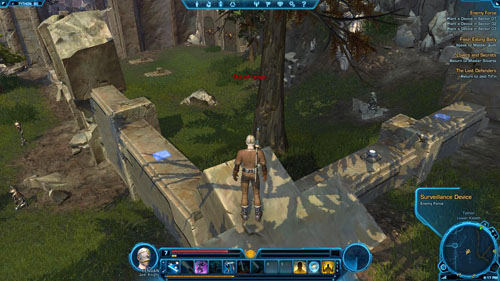
Plant a Device in Sector 02
Then head south until you can go to the upper level of the ruins. The place to plant the second device is between the first and the second stairs - in [7]. Place the transmitter on the wall and go back down.
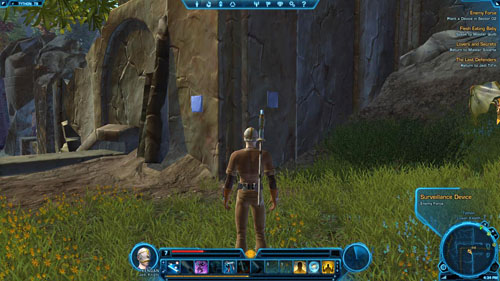
Plant a Device in Sector 03
The last transmitter has to be put on the second level of the ruined building in [8]. You can get upstairs using the destroyed wall on the right. After planting the last device, you'll receive a new mission objective.
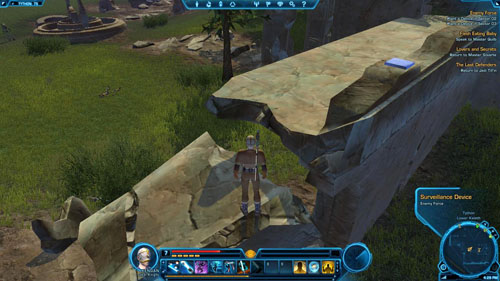
Use Your Personal Holocom
Reply to Master Orgus's message to get the last mission objective.
Return to Master Orgus
You can either go on foot to the nearest taxi and go to Kalikori Village, or teleport to Quick Travel Point (Kalikori Village) - if you can. Once you're there, enter the building in [1], locate Master Orgus inside and talk to him. You'll get your rewards and another class mission.

Clear Out Tythos Ridge (Bonus)
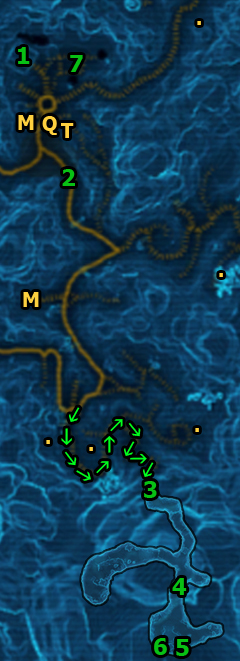
Master Orgus Din will give you this mission. You'll start in [1], in Kalikori Village. Head south - through the gate in [2] and then through The Hollows until you reach Tythos Ridge.
Defeat Flesh Raiders: 0/15
Of course, there is a bonus mission that requires you to exterminate some Flesh Raiders. There are really lots of them here. Watch out especially for Flesh Raider Deathwatchers who can slow you down. Don't worry about this mission - you'll accomplish it while carrying out other objectives and when you do, you'll earn 285 XP.
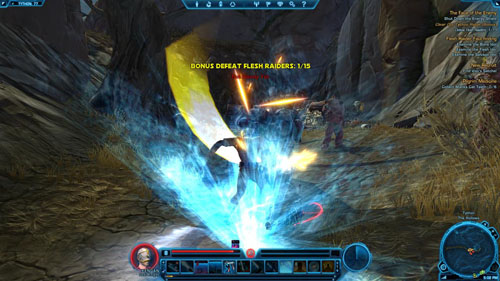
Shut Down the Energy Shield
Head for the entrance to the large cave in [3]. To reach it, you'll have to take a winding route - follow the arrows on the map above in order not to wander around needlessly.
![Once you're inside, go to [4] - (L06) The Face of the Enemy - Jedi Knight - Star Wars: The Old Republic - Game Guide and Walkthrough](https://game.lhg100.com/Article/UploadFiles/201512/2015121709494039.jpg)
Once you're inside, go to [4]. Defeat enemies along the way and pass through the green force field to enter the story area. Here you have to watch out especially for Flesh Raider Boneguards [+] who can stun you.
![Go to [5] approaching from the left side of the large rock that is in the middle of the cave - (L06) The Face of the Enemy - Jedi Knight - Star Wars: The Old Republic - Game Guide and Walkthrough](https://game.lhg100.com/Article/UploadFiles/201512/2015121709494076.jpg)
Go to [5] approaching from the left side of the large rock that is in the middle of the cave. There is a button there that is used to disable the force field, but you should know that if you press it and exit this place, you'll no longer be able to fight the boss who's waiting nearby. If you're not interested in this fight, press the button and skip the next paragraph.
![The Flesh Raider leader - Flesh Raider Chieftain [*] - is in [6] - (L06) The Face of the Enemy - Jedi Knight - Star Wars: The Old Republic - Game Guide and Walkthrough](https://game.lhg100.com/Article/UploadFiles/201512/2015121709494085.jpg)
The Flesh Raider leader - Flesh Raider Chieftain [*] - is in [6]. This is a very dangerous opponent. In general, if you're even thinking about starting the fight, your character's level has to be at least 8. What's more, it will be necessary to purchase and use Basic Fortitude Stim just before the fight (also, make sure your equipment is new and/or repaired - go shopping to find better armor parts or weapons).
Turn on Force Might and Saber Ward and then attack with Force Leap. Use Master Strike, Riposte, Slash during the fight, while Strike only to increase the Focus stat. Following this advice should result in defeating the Flesh Raiders leader.
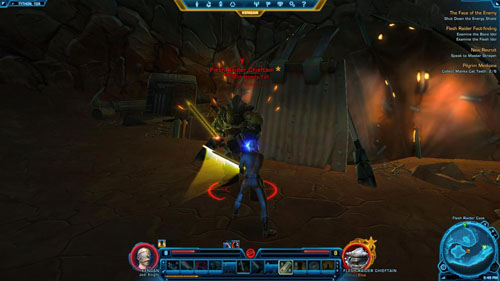
Speak to Ranna Tao'Ven
If there's nothing else to do in Tythos Ridge, go to Kalikori Village - you can simply teleport to Quick Travel Point (Kalikori Village) or go through The Hollows on foot. Then go to [1] and talk to Ranna Tao'Ven.
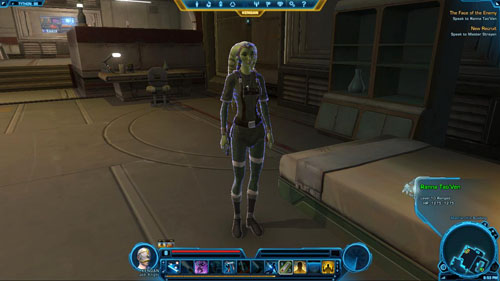
Disable Toxin Mine One
Disable Toxin Mine Two
Disable Toxin Mine Three
It turns out that Flesh Raiders placed some toxic mines on the field. You need to defuse them. Go out of the house quickly and run to [7]. When you find yourself on the field you'll notice all the three mines.
![After disarming each mine, a Flesh Raider Saboteur [+] will appear, whom you'll need to kill, of course - (L06) The Face of the Enemy - Jedi Knight - Star Wars: The Old Republic - Game Guide and Walkthrough](https://game.lhg100.com/Article/UploadFiles/201512/2015121709494198.jpg)
After disarming each mine, a Flesh Raider Saboteur [+] will appear, whom you'll need to kill, of course. These enemies aren't challenging. Disable the mines and get rid of the enemies. Finally, return to Ranna Tao'Ven in [1].
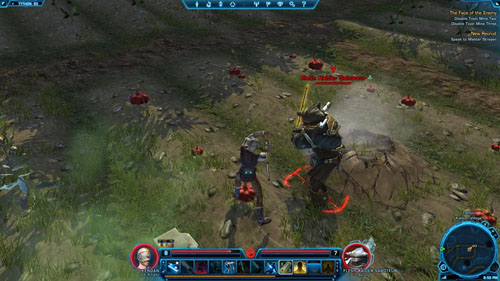
Return to Ranna Tao'Ven
The new Twi'lek leader is still in the same place. This time, however, the conversation can get quite interesting. If you play as a male character, you can have a brief affair with Ranna Tao'Ven. If you play as a female character you can perform a sisterly ritual with the Twi'lek leader and become her sister. In both cases, you'll receive Tython Commendation, but also Dark or Light Side points. See the tables below the picture for details. The first table set refers to a female character and the other - to a male character.

A
Reply
Effect
1
It's very generous.
End of conversation
2
Jedi don't need rewards.
Further conversation stage - B
3
So am I.
End of conversation
B
Reply
Effect
1
Look to your people.
End of conversation
2
You can handle it.
Further conversation stage - C
3
I'm here for you.
Further conversation stage - C
C
Reply
Effect
1
You're confused by grief.
End of conversation
2
What makes you say that?
Further conversation stage - D
3
I know what you mean.
Further conversation stage - D
D
Reply
Effect
Points / Rewards
1
Friendship is good enough.
End of conversation
+50 to Light Side
2
My code forbids it.
End of conversation
+50 to Light Side
3
Yes, I'd like that.
Sisterly ritual with Ranna Tao'Ven
+50 to Dark Side

A
Reply
Effect
Points / Rewards
1
That's what Jedi do.
End of conversation
-
2
Because I care about people.
End of conversation
-
3
[Flirt] I do it for you.
Further conversation stage - B
+50 to Dark Side
B
Reply
Effect
Points / Rewards
1
[Flirt] I know enough.
Further conversation stage - C
-
2
Nevermind. I should go.
End of conversation
-
3
[Flirt] But I want to.
Further conversation stage - C
+50 to Dark Side
C
Reply
Effect
Points / Rewards
1
[Flirt] I hope not.
Further conversation stage - D
-
2
Yes, but we can be friends.
End of conversation
+50 to Light Side
3
[Flirt] We deserve more.
Further conversation stage - D
-
D
Reply
Effect
Points / Rewards
1
[Flirt] Who cares?
Flirting with Ranna Tao'ven
+50 to Dark Side, Tython Commendation
2
No, I shouldn't.
End of conversation
+50 to Light Side
3
[Flirt] I can't help myself.
Flirting with Ranna Tao'ven
+50 to Dark Side, Tython Commendation
Use Your Personal Holocom
After a while, Master Orgus Din will want to talk to you through the holocom. This conversation will finish the mission and you'll get the next one. Also, you'll have an opportunity to confess that you've flirted/had a sisterly ritual with Ranna Tao'Ven (if it came to that).
A
Reply
Effect
Points / Rewards
1
Bengel Morr contacted me.
-
-
2
I disobeyed the Jedi code.
Admitting to flirting
+50 to Light Side
3
I'm bored out of my mind.
-
-
Scars on the Dark Side (Bonus)
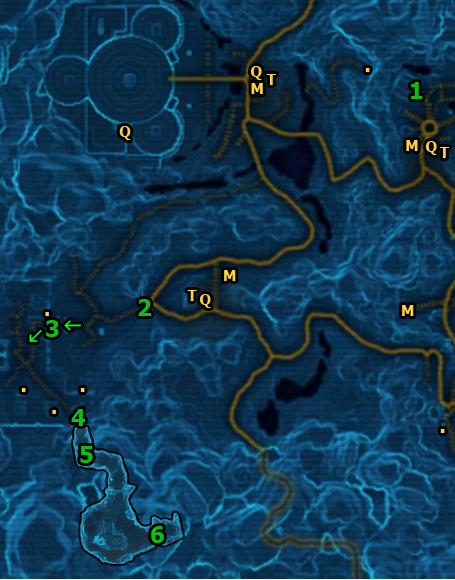
Infiltrate the Flesh Raider Stronghold
The mission begins in [1]. Take a taxi to get to Taxi (Forward Camp Speeder), and once you've arrived at the place, go on foot to Lower Kaleth. Go through the gate in [2], go up the stairs in [3], and head for the cave entrance in [4]. Along the way, watch out for Tythonian Guardians [+] (they have force fields) and Berserk Tythonian Guardians [+] (their probes can slow down and electrify you).
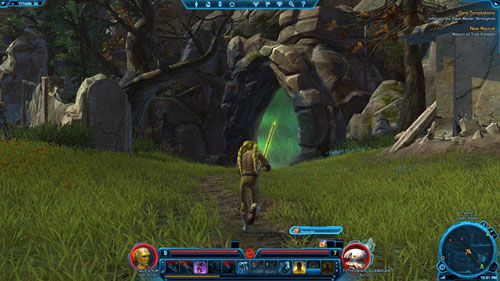
Speak to Laotah
Enter the cave in [4] (Forsaken Den) and go to [5]. Talk to the wounded Laotah. You can gain a lot of Dark Side points - see the table below the picture for details.
A
Reply
Points / Rewards
1
Then I have to stop them.
-
2
Have you seen their leader?
-
3
If they can do it, so can I!
+150 to Dark Side
Defeat Flesh Raider Savage Adepts: 0/10
There will be some medium tough Flesh Raider Savage Adepts along the way. Defeat ten to complete a bonus mission and receive 745 XP. The cave is full of enemies. Moreover, it's unlikely that you'll be forced to fight with more than one group at the same time. Head for [6].

Recover Laotah's Lightsaber
In [6] there is Flesh Raider Savage Adept and the leader - Flesh Raider Bladewielder [+], who can push you away. Get rid of the weaker one first and then deal with the leader. He's not a very powerful enemy, yet, it's good to keep some Medpacs handy and have at least level 6 (along with the abilities that correspond to that level). After the fight, search the leader's corpse and take Laotah's Broken Lightsaber.
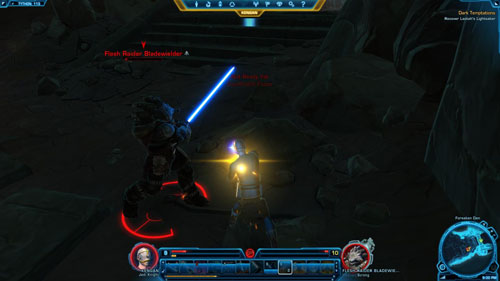
Use Your Personal Holocom
Press the button on the screen to receive the message and then proceed to the next mission objective.
Speak to Ranna Tao'Ven
If you no longer have anything to do in Upper Kaleth, go to Kalikori Village - you can simply teleport to Quick Travel Point (Kalikori Village) or commit suicide and then take a taxi to get there. After that go to [1] and talk to Ranna Tao'Ven. There will be an unexpected twist, as well as an opportunity to earn some Dark or Light Side points - see the tables below the picture for details.
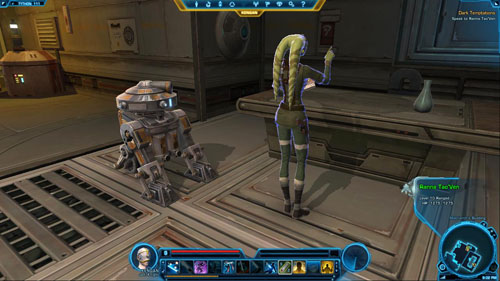
A
Reply
Points / Rewards
1
He'll kill you anyway.
+50 to Light Side
2
[Force Persuade] Go in peace.
+100 to Light Side
3
I've heard enough. [Attack]
+50 to Dark Side
Defeat Scout Chief Moorint
Defeat Saylew
Defeat Eseni
If you chose the last option in the previous dialogue, you'll have to fight with three Twi'leks - Eseni, Saylew and Chief Scout Moorint. They are not challenging opponents, so you'll get rid of all of them quickly.
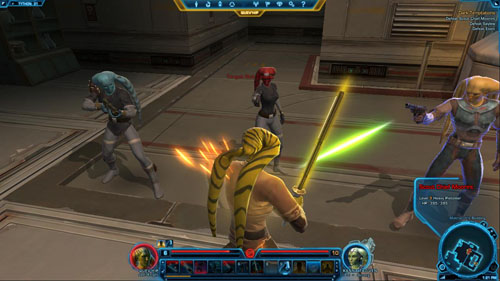
Speak to Ranna Tao'Ven
After the incident talk to Ranna Tao'Ven once more. You can forgive her, decide what kind of penalty she'll get (second dialogue option) or punish her yourself (third dialogue option). Everything is connected with earning either Dark or Light Side points - see the tables below the picture for details.
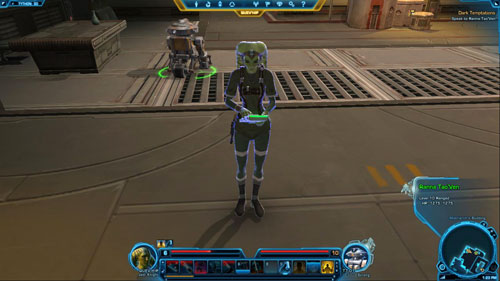
A
Reply
Effect
Points / Rewards
1
I forgive you, Ranna.
Forgiving Ranna Tao'Ven
+50 to Light Side
2
Your crimes are great.
Further conversation stage - B
-
3
Being sorry won't save you.
Further conversation stage - C
-
B
Reply
Effect
Points / Rewards
1
Turn yourself in.
Ranna Tao'Ven will turn herself in
+50 to Light Side
2
I want you gone from Tython.
Ranna Tao'Ven will leave the planet
+50 to Light Side
3
Pay me to forget this.
Demanding a payment from Ranna Tao'Ven
+50 to Dark Side, 2x Primitive Stone Ornament
C
Reply
Effect
Points / Rewards
1
Run for your life.
Threatening to kill her
+50 to Dark Side
2
You earned this. [Hit Ranna.]
Hitting Ranna Tao'Ven
+100 to Dark Side
3
No. [Kill Ranna]
Killing Ranna Tao'Ven
+150 to Dark Side
Speak to T7
Another mission objective is to communicate with T7-01 - a small robot, who has already joined you once before. From now on he'll become your companion for good. After the conversation you'll get a Codex entry - Persons of Note: T7-01 (Knight) - worth 450 XP.
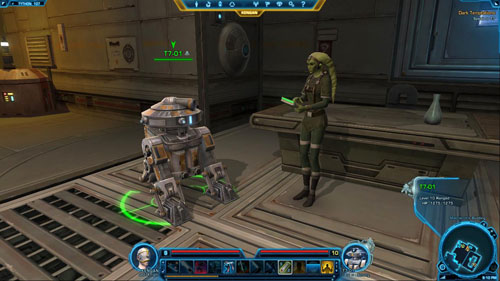
Use Your Personal Holocom
The last mission objective is to have a conversation via the holocom with another droid. He'll give you information about the next mission.
A
Reply
Points / Rewards
1
It's an emergency.
-
2
Oh, no reason.
-
3
Shut up and transmit.
-1 to Affection: T7-01
Remnants Invasion (Bonus)
Forge Ahead (Bonus)
Putting Your New Weapon to Use (Bonus)
Item modification (Tutorial)

Investigate the Forge Entrance
You must find Master Orgus Din. You start in [1] - it's best to take a taxi to Elarian Trail (Forward Camp Speeder) and then go on foot to the cave entrance (Waterfall Cave) in [2]. Go inside.
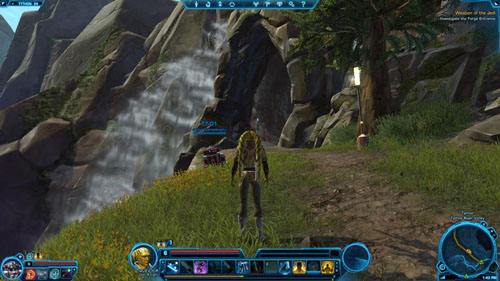
Defeat Flesh Raiders and Reprogrammed Trail Droids: 0/15
There are quite a lot of droids and Flesh Raiders in the cave. After you've killed the first one, you'll get a bonus mission. Kill fifteen to complete it and gain 335 XP. Just watch out for Flesh Raider War Leaders [+], though they'll be located mostly in the ruins you're on the way to right now. Head for the cave exit in [3].
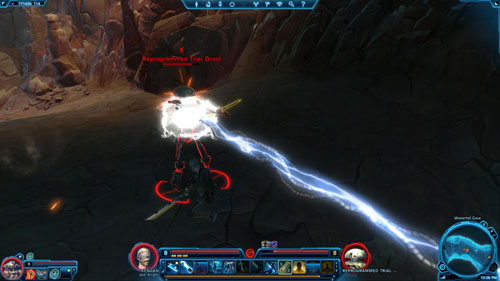
![Once you've found yourself in The Forge, follow the path shown by the arrows - go up the big stairs and then get to the entrance to another cave in [4] (Forge Entrance) - (L09) Weapon of the Jedi - Jedi Knight - Star Wars: The Old Republic - Game Guide and Walkthrough](https://game.lhg100.com/Article/UploadFiles/201512/2015121709494417.jpg)
Once you've found yourself in The Forge, follow the path shown by the arrows - go up the big stairs and then get to the entrance to another cave in [4] (Forge Entrance).
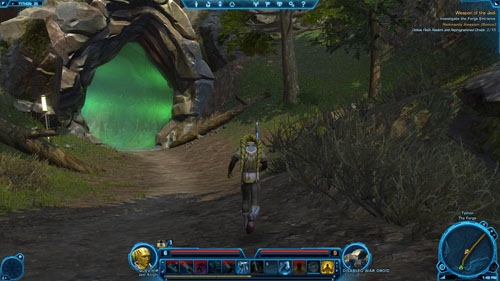
Defeat Flesh Raider Feral Adepts: 0/15
The only opponents in the second cave are medium challenging Flesh Raider Feral Adepts. Kill fifteen to complete the bonus mission and gain 780 XP. Keep killing the enemies while getting to the cave exit in [5].
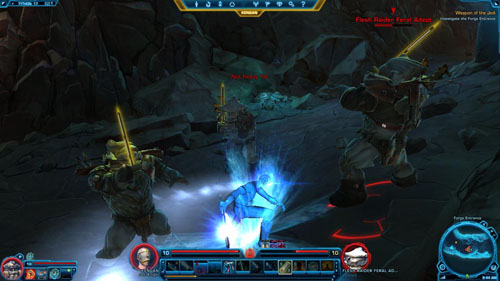
Head to the Ancient Forge
Talk to Bengel Morr
You'll appear in The Ancient Forge. Head for the ancient shrine in [6]. At this point it's good to know that if you fall down the chasm on the left or right side, you'll kill yourself. Bengel Morr will bar your way. Although the conversation will end in a fight anyway, your replies will have an impact on T7-01. Expect some Dark or Light side points as well. See the tables below the picture for details.
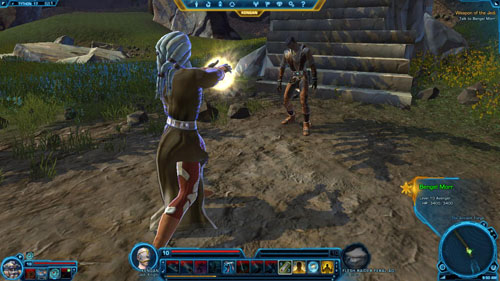
A
Reply
Effect
Points / Rewards
1
Tell me why you hate us.
Further conversation stage - B
+50 to Light Side
2
No. I'll stop you.
Further conversation stage - B
+50 to Light Side, +15 to Affection: T7-01
3
Enough. [Attack]
Fight with Bengel Morr
+50 to Dark Side, -1 to Affection: T7-01
B
Reply
Effect
Points / Rewards
1
We'll never give up.
Fight with Bengel Morr
+15 to Affection: T7-01
2
This is about revenge?
Fight with Bengel Morr
-
3
Then he deserves death.
Fight with Bengel Morr
+50 to Dark Side, -1 to Affection: T7-01
Defeat Flesh Raider Feral Adepts
Defeat Bengel Morr
Turn on Force Might and Saber Ward quickly and then use Force Sweep to swiftly get rid of Bengel Morr's [*] helpers (weaker enemies). Then flood him with your most powerful abilities (Master Strike, Riposte, Slash). Use Strike only to increase the Focus stat.

Speak to Bengel Morr
Talk to the defeated opponent - it will turn out that he'll have proposition for you. However, if you accept it, you'll earn Dark Side points. See the tables below the picture for details - if you join forces with Bengel Morr you will also receive Lightsaber Construction Parts.
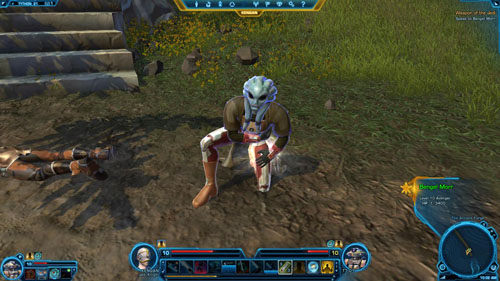
A
Reply
Points / Rewards
1
You misguided.
+15 to Affection: T7-01
2
Me?
-
3
Wonderful - now die.
-1 to Affection: T7-01
B
Reply
Effect
Points / Rewards
1
Rest now. [Knock him out]
Knocking Bengel Morr out
+100 to Light Side, +15 to Affection: T7-01
2
We have a deal.
Deal with Bengel Morr, Further conversation stage - C
+100 to Dark Side, -1 to Affection: T7-01, Lightsaber Construction Parts
3
No thanks. [Kill him]
Killing Bengel Morr
+100 to Dark Side, -1 to Affection: T7-01
C
Reply
Points / Rewards
1
[Lie] That's right.
+40 to Affection: T7-01
2
You don't remember?
-
3
[Lie] You were shot.
-
Speak to Master Orgus
Now you must have a brief conversation with your master, but first - revive him (he's lying by the stairs leading to the shrine). Your replies can have an impact on T7-01 - see the table below the picture for details.
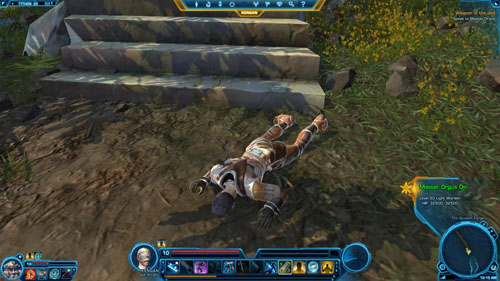
A
Reply
Points / Rewards
1
Thank you, Master.
+15 to Affection: T7-01
2
Forge?
-
3
Terrific - more chores.
-1 to Affection: T7-01
Construct Your Lightsaber
Go up the stairs to [7]. Upstairs you'll obtain a Codex entry - Locations: The Forge - worth 495 XP. Next, explore the ancient station that is used to construct lightsabers. It's time to forge one for yourself.
Attention! If you made a deal with Bengel Morr, you will have additional options. See the table below the picture for details. After the whole operation you will receive (in the form of a completed Weapon of the Light Jedi or Weapon of the Dark Jedi mission) a new lightsaber - Light Jedi Lightsaber or Dark Jedi Lightsaber (equip it right away) and Might Mod 1*.
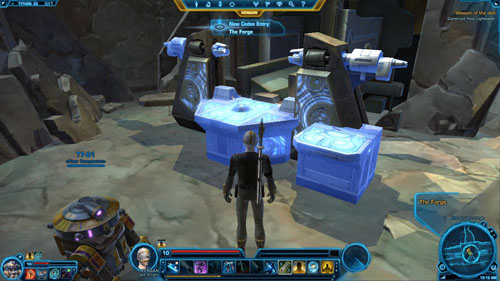
A
Reply
Effect
Points / Rewards
1
[Make a Jedi lightsaber]
Ordinary lightsaber (blue)
+50 to Light Side
2
[Use Bengel Morr's knowledge]
Using Bengel Morr's knowledge (green)
+50 to Dark Side
3
I can't decide
-
-
Defeat the Forge Guardian
As soon as you get your new sword, a huge beast will appear at the bottom of the stairs - Forge Guardian [*]. It's worth killing him, as it's the bonus mission objective. The boss can stun, he's strong and tough, but you should be able to defeat him. You'll gain 980 XP for completing the bonus mission.
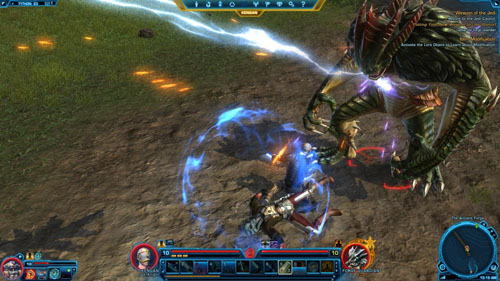
Activate the Lore Object to Learn about Modification
Teleport to Quick Travel Point (Jedi Temple) and find the item modification station in [8]. Read the sign next to it and you'll obtain a Codex entry - Game Rules: Item Modifications - worth 45 XP, and also a weapon modification and 885 XP. Fortitude Enhancement 2* you've just acquired, as well as Might Mod 1* can be put into your lightsaber - use the station to do it. Enjoy having an even more powerful weapon!
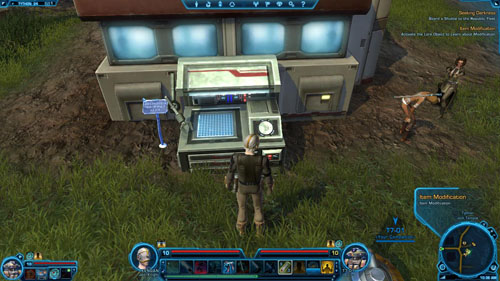
Report to the Jedi Council
Enter the Jedi Temple through the door in [9] and then go up the stairs in [10] to the second level. Once you're there, examine the door leading to the Jedi Council seat in [11]. You're about to have a conversation during which your replies can have an impact on T7-01 - see the tables below the picture for details. You'll finish this mission and get the next.
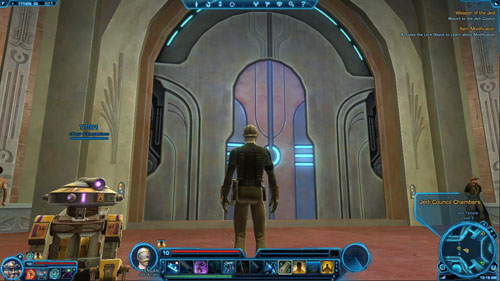
A
Reply
Points / Rewards
1
Let's tighten our defenses.
-
2
We should go to war.
-
3
Don't call me Padawan.
-1 to Affection: T7-01
B
Reply
Points / Rewards
1
They need our support
+50 to Light Side
2
We should take control.
-
3
Force them off Tython.
+50 to Dark Side
C
Reply
Points / Rewards
1
This is a great honor, Master.
+15 to Affection: T7-01
2
What's my next mission?
-
3
Finally!
-1 to Affection: T7-01
D
Reply
Points / Rewards
1
That's a fine idea.
+40 to Affection: T7-01
2
Let's not go that far.
+15 to Affection: T7-01
3
No thanks.
-1 to Affection: T7-01
E
Reply
Points / Rewards
1
My work here is done.
-
2
I can't wait to leave here.
-1 to Affection: T7-01
3
What, no parade?
-1 to Affection: T7-01
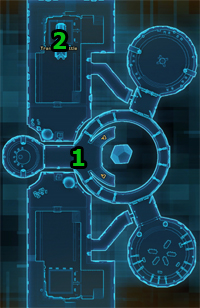
Board a Shuttle to the Republic Fleet
The last mission on Tython will begin in [1], on the second level of the Jedi Temple. Run to [2] and board the space shuttle to the Republic Fleet. Once you've arrived, you'll complete the mission and receive another class mission.
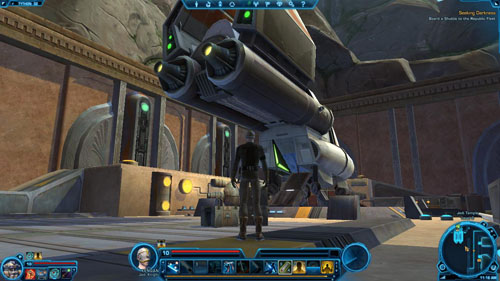
After leaving Tython go to any cantina to be able to talk with T7-01. During the conversation your replies will have an impact on your small companion - see the table below the picture for details.

A
Reply
Points / Rewards
1
I like working with you too.
+15 to Affection: T7-01
2
You didn't like Tython?
-
3
We are not partners.
-1 to Affection: T7-01
B
Reply
Points / Rewards
1
I like your enthusiasm.
+15 to Affection: T7-01
2
You'll get your chance.
+15 to Affection: T7-01
3
Just settle down.
-1 to Affection: T7-01
2510 XP.
Each mission description is divided into several smaller parts. It should be observed that the following legend does not concern the next section - "Shortcuts (main and side missions)". The list of missions is given in chronological order, that is, the order you receive them. Also, the level of a particular mission is shown before its name (L). Here is all information that is essential to read before you start using the missions description.
The exact description of a mission is here. Sometimes it's divided into several different places you will visit, and each of them has its own map.
In the missions descriptions there are all dialogues that can have any impact on the game mechanics. It is given in the Points / Rewards column. The Effect column specifies what kind of effect your reply will have (there can also be a letter referring to the next dialogue mentioned), while under Reply there is the answer's line.
If any dialogue is missing it means that it doesn't matter which reply you choose (of course, except for the aspects related to developing your character in terms of the story). If a reply doesn't have any effect or doesn't result in getting any points or rewards, then there will be no suitable column in the table.
#
Reply
Effect
Points / Rewards
Reply number
One out of the two or three replies your character can give.
Effect of the chosen reply, and if it leads further - a letter of the next dialogue is given
+x to Light / Dark Side,<br>+x / -x to companion's Affection,<br>other Rewards
# - a letter indicating the dialogue order. Some replies can lead to different dialogues
If a mission contains a small bonus mission, then a complete list of them is given right before the mission description. Bonus mission objectives are given along with the mission objectives (class or side) with which such a mission is connected.
The list of rewards includes: XP, credits, items and Codex entries. You can receive all these items for completing a mission. Sometimes you'll get one out of the two depending on your class, other times you'll have to choose one from several items (these are separated by a slash - "/").
The chapter presents a list of all main, side, bonus and tutorial mission objectives that take place on the planet Tython. The list is arranged in such a way as to minimize the time necessary for the sole running and visiting the same areas.
Most often the next side missions can or should be done (because of your character's level) while doing the next main missions (Class). That is why all mission objectives are divided into main missions.
You should observe that there are no issues connected with the Codex here - these can be found in the "Places" chapter. Moreover, there are no side Heroic mission objectives. Their descriptions are at the end of the side missions chapter - "Tython".
The Path of a Jedi [mission start] - Master Syo Bakarn
The Path of a Jedi - Speak to Master Syo Bakarn
The Path of a Jedi - Take the Taxi to the Gnarls
Mark Quick Travel Point (The Gnarls)
Early Lessons [mission start] - Master Relnex
Captured Padawans [mission start] - Flesh Raider Cage
[+] Captured Padawans: The Flesh Raider Menace (Bonus) - Defeat Flesh Raiders: 0/15
[+] Captured Padawans [mission end] - Free Captured Padawans: 0/6
The Path of a Jedi - Recover the Northeast Hologram
The Path of a Jedi - Recover the Northwest Hologram
Early Lessons - Find the Missing Students
[o] Early Lessons - Defeat Flesh Raiders: 0/10
[o] Early Lessons - Destroy Flesh Raider Supplies: 0/3
The Path of a Jedi - Recover the Southeast Hologram
The Path of a Jedi - Recover the Southeast Hologram
Commit suicide to respawn in the Medical Center in The Gnarls
Early Lessons [mission end] - Return to Master Relnex
[+] The Path of a Jedi: Clear the Path to the Jedi Temple (Bonus) - Defeat Flesh Raider Lurkers: 0/4
Combat Leadership: Mark I [mission start] - Liam Dentiri
Combat Leadership: Mark I - Activate and Destroy Mark I Training Droids
Combat Leadership: Mark I [mission end] - Return to Liam Dentiri
Mark Quick Travel Point (Jedi Temple) and Taxi (Jedi Temple)
Wisdom of Elders [mission start] - Hallen
Mark Quick Travel Point (Jedi Temple Cantina)
Wisdom of Elders [mission end] - Speak with Master Wettle
The Path of a Jedi [mission end] - Report to the Master Yuon Par
Pilgrims [mission start] - Master Yuon Par
Pilgrims - Speak to Bashenn
Mark Quick Travel Point (Kalikori Village) and Taxi (Kalikori Village)
Lost Pilgrim [mission start] - Tazonthe Ghon
Strength of the Flesh Raiders [mission start] - Vederiat Ayon
The Thousand Steps [mission start] - Yuleph Phan
[+] The Thousand Steps: Clear the Mountain Path (Bonus) - Defeat Flesh Raider Slavers and Slavemasters: 0/4
The Thousand Steps - Light the First Signal
The Thousand Steps - Light the Second Signal
The Thousand Steps - Light the Third Signal
The Thousand Steps - Light the Fourth Signal
The Thousand Steps - [mission end] Speak to Kolovish
Strength of the Flesh Raiders - Speak to Odumis Mer
[+] Strength of the Flesh Raiders: Thin the Flesh Raider Ranks (Bonus) - Defat Flesh Raiders: 0/15
[+] [o] Strength of the Flesh Raiders - Retrieve the Elixir: 0/5
[+] [o] Strength of the Flesh Raiders - Destroy the Elixir: 0/5
Lost Pilgrim - Find Tazonthe Ghon's Father
Pilgrims - Find Nalen Raloch's Camp
Pilgrims - Search for Rajivari's Holocron
Pilgrims: Survival of the Fittest (Bonus) - Defeat Flesh Raiders: 0/6
Pilgrims - Escape the Collapsing Cave
Commit suicide to respawn in Kalikori Village
Lost Pilgrim - [mission end] Return to Tazonthe Ghon
[o] Strength of the Flesh Raiders [mission end] - Speak to Vederiat Ayon
[o] Strength of the Flesh Raiders [mission end] - Speak to Odumis Mer
Take a taxi to Taxi (Jedi Temple)
Pilgrims [mission end] - Report to the Master Yuon Par
Trails in Kaleth [mission start] - Master Yuon Par
Combat Leadership: Mark II [mission start] - Liam Dentiri
Combat Leadership: Mark II - Activate and Destroy Mark II Training Droids
Combat Leadership: Mark II [mission end] - Return to Liam Dentiri
Lovers and Secrets [mission start] - Master Silvarte
Hero Worship [mission start] - Padawan Fia
Hero Worship [mission end] - Speak to Jedi Till'in
The Last Defenders [mission start] - Jedi Till'in
Mark Quick Travel Point (Elarian Trail) and Taxi (Forward Camp Speeder)
Trails in Kaleth - Search for the First Blade
[+] The Last Defenders: Guardians of the Past (Bonus) - Destroy Tythonian DroidS: 0/15
[+] The Last Defenders - Disable and Scan Tythonian Seekers: 0/6
Trails in Kaleth - Inspect the Stone Carving
Lovers and Secrets - Speak to Moracen
Flesh Eating Baby [mission start] - Backpack
Flesh Eating Baby - Gather Guid Meat: 0/3
Flesh Eating Baby - Return to the Flesh Raider Baby
Trails in Kaleth - Activate and Destroy Combat Training Droids: 0/3
Trails in Kaleth - Return to the Stone Carving
Commit suicide to respawn in Elarian Trail
The Last Defenders [mission end] - Return to Jedi Till'in
Teleport to Quick Travel Point (Jedi Temple Cantina)
Trails in Kaleth - Return to Master Yuon Par
Trails in Kaleth - Speak to Master Syo Bakarn
Trails in Kaleth [mission end] - Return to Master Yuon Par
Hunter's Eye [mission start] - Master Yuon Par
Flesh Raider Fact-finding [mission start] - Master Gehnso
Flesh Eating Baby [mission end] - Speak to Master Quilb
Combat Leadership: Mark III [mission start] - Liam Dentiri
Combat Leadership: Mark III - Activate and Destroy Mark III Training Droids
Combat Leadership: Mark III [mission end] - Return to Liam Dentiri
New Recruit [mission start] - Trea Kobbeth
Take a taxi to Taxi (Kalikori Village)
Pilgrim Medicine [mission start] - Datapad
[+] Pilgrim Medicine - Collect Manka Cat Teeth: 0/6
New Recruit - Find Viyo's Satchel
Flesh Raider Fact-finding - Examine the Salvage Idol
Hunter's Eye - Explore the Flesh Raider Cave
Hunter's Eye - Investigate the Stone Markers
[o] Hunter's Eye - Defeat Allia
[o] Hunter's Eye - Defeat Twi'lek Pilgrims
Hunter's Eye - Examine the Ancient Altar
Flesh Raider Fact-finding - Examine the Bone Idol
Flesh Raider Fact-finding - Examine the Flesh Idol
Teleport to Quick Travel Point (Kalikori Village)
Flesh Raider Fact-finding [mission end] - Report to Master Gehnso or Master Wix
Pilgrim Medicine [mission end] - Report to Bahlea
[o] New Recruit [optional mission end] - Return to Trea Kobbeth
Take a taxi to Taxi (Jedi Temple)
Hunter's Eye [mission end] - Report to the Master Yuon Par
The Footsteps of the Fallen [mission start] - Master Yuon Par
[o] New Recruit - Speak to Master Strayen
Combat Leadership: Mark IV [mission start] - Liam Dentiri
Combat Leadership: Mark IV - Activate and Destroy Mark IV Training Droids
Combat Leadership: Mark IV [mission end] - Return to Liam Dentiri
Lovers and Secrets [optional mission end] - Return to Master Silvarte
Take a taxi to Elarian Trail - Taxi (Forward Camp Speeder)
[o] Lovers and Secrets [mission end] - Return to Moracen
The Footsteps of the Fallen - Access the North Terminal
The Footsteps of the Fallen - Access the East Terminal
Commune With the Light [mission start] - Flingeld
Commune With the Light - Meditate at the Meditation Crystal
Commune With the Light - Levitate the Giant Rock
Commune With the Light [mission end] - Speak to Flingeld
The Footsteps of the Fallen - Access the South Terminal
Commit suicide to teleport to Elarian Trail
[o] New Recruit - Light the Signal Fire
[o] Teleport to Quick Travel Point (Kalikori Village)
[o] New Recruit [optional mission end] - Speak to Trea Kobbeth
Take a taxi to Taxi (Jedi Temple)
The Footsteps of the Fallen [mission end] - Report to the Master Yuon Par
Rajivari's Legacy [mission start] - Master Yuon Par
Combat Leadership: Mark V [mission start] - Liam Dentiri
Combat Leadership: Mark V - Activate and Destroy Mark V Training Droids
Combat Leadership: Mark V [mission end] - Return to Liam Dentiri
Take a taxi to Elarian Trail - Taxi (Forward Camp Speeder)
Horranth Control [mission start] - Sedni Maruk
[HEROIC 2+] The Chamber of Speech [mission start] - Do Zonn
[+] Horranth Control: Egg smashing (Bonus) - Smash Horranth Eggs: 0/10
Horranth Control - Destroy Horranth Matriarchs: 0/3
Horranth Control - Destroy Horranth Patriarchs: 0/3
Commit suicide to respawn in Elarian Trail
Horranth Control [mission end] - Return to Sedni Maruk
Rajivari's Legacy - Search for Qyzen Fess
[+] Rajivari's Legacy: Remnants Incursion (Bonus) - Defeat Flesh Raiders and Reprogrammed Trial Droids: 0/15
Rajivari's Legacy: Twi'lek Trouble (Bonus) - Defeat Twi'leks: 0/12
Rajivari's Legacy - Defeat the Twi'lek Guards
Rajivari's Legacy - Free Qyzem Fees
Rajivari's Legacy - Speak to Qyzem Fees
Rajivari's Legacy - Enter the Fount of Rajivari
[+] Rajivari's Legacy: Hunting High and Low (Bonus) - Defeat Flesh Raider High Shamans: 0/5
Rajivari's Legacy - Speak to the Guardian
Rajivari's Legacy - Investigate the Fount of Rajivari
Rajivari's Legacy - Speak to the Wounded Twi'lek
Rajivari's Legacy - Investigate the Fount of Rajivari
Rajivari's Legacy [mission end] - Speak to Rajivari
The Forge [mission start] - Rajivari
[+] The Forge: Crystal Cavern Cleansing (Bonus) - Kill Cavern Horranths: 0/12
The Forge - Gather a Lightsaber Crystal
The Forge - Defeat the Dark Beast
The Forge - Craft Your Lightsaber at the Forge
Item modification (Tutorial) [mission start]
The Forge - Confront Nalen Raloch
The Forge - Defeat Nalen Raloch
[o] The Forge - Defeat Henni
[o] The Forge - Defeat Keth
The Forge - Speak to Nalen Raloch
Teleport to Quick Travel Point (Jedi Temple)
Item modification (Tutorial) [mission end] - Activate the Lore Object to Learn about Modification
The Forge [mission end] - Report to the Jedi Council
An Afflicted Master [mission start] - Master Yuon Par
Balance [mission start and end] - Qyzen Fess
An Afflicted Master [mission end] - Board a Shuttle to the Republic Fleet
Clear the Path to the Jedi Temple (Bonus)
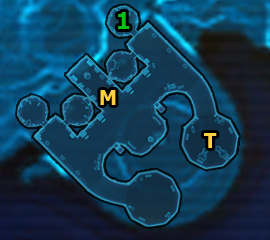
Speak to Master Syo Bakarn
You begin your adventure as a Jedi Consular in [1]. To receive another order, talk to Master Syo Bakarn, who is standing beside the console (unless the conversation started automatically).
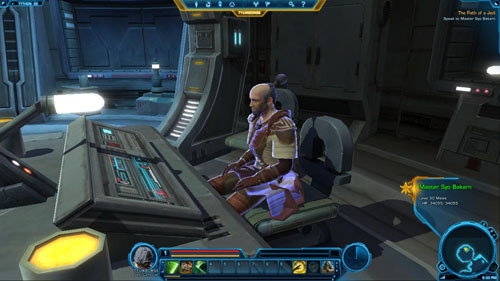
Take the Taxi to the Gnarls
Run to the [T] and talk to the robot by the taxis. This is the first taxi terminal you will mark on this planet - Taxi (Master's Retreat). Choose the only possible option - The Gnarls - as your destination area.
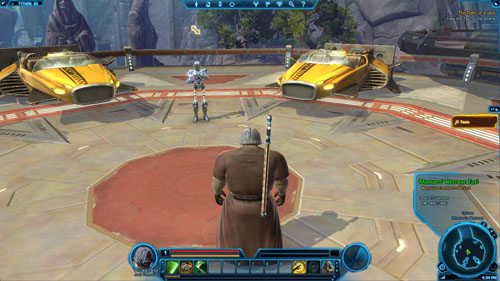
![You'll appear in [3] - (L01) The Path of a Jedi - Jedi Consular - Star Wars: The Old Republic - Game Guide and Walkthrough](https://game.lhg100.com/Article/UploadFiles/201512/2015121709494646.jpg)
You'll appear in [3]. Once you've arrived at the place, it's necessary to mark Quick Travel Point (The Gnarls), which is right next to the stairs leading down. Your task is to reach four holograms located on the bridges (it doesn't matter which dialogue options you choose during the conversations with the holograms).
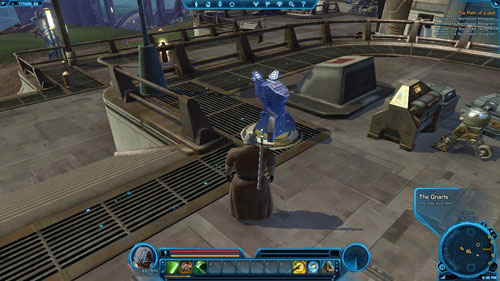
Recover the Northeast Hologram
The first is on the bridge in [4]. Head northeast, going past the Flesh Raiders or fighting with them, and after reaching the bridge investigate the oval hologram. You'll take Master Garon's Hologram.
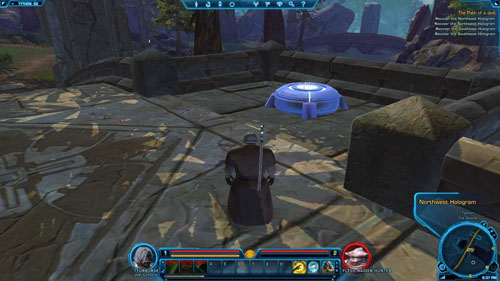
Recover the Northwest Hologram
Follow the road leading east to get to the second bridge. Investigate the hologram in [5] to take Master Brin's Hologram.
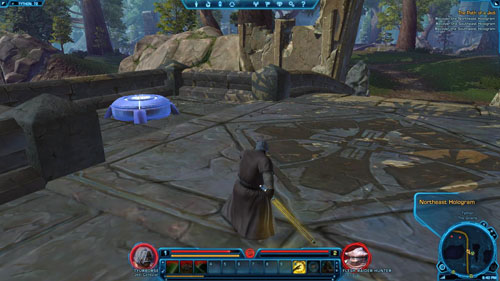
Recover the Southeast Hologram
The third bridge is exactly in the south - in [6]. Go there and take Master Ters's Hologram from the bridge.
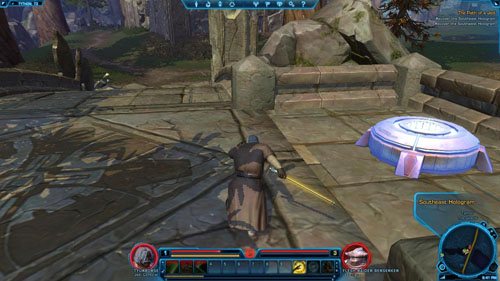
Recover the Southwest Hologram
Next, go west to reach [7] - both the last bridge and the last hologram. The latter, however, appears to have been stolen. After a while you'll get a new mission objective.
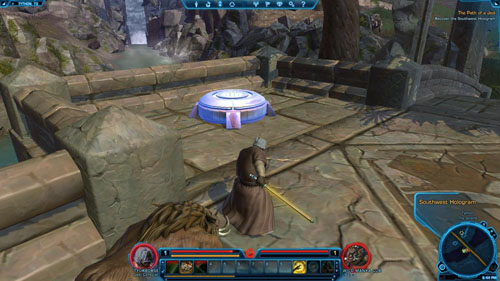
In the meantime, it's worth getting interested in new abilities (provided your character's level is higher than 1). In order to do it, go to [8] and purchase abilities from Master Liv'trai. Then follow the path leading south, to the large stone gate in [9].

Defeat Flesh Raider Lurkers
Begin to walk along the path that will lead you to the Jedi Temple in [10], your new destination. You'll come across Flesh Raider Lurkers along the way. Kill four enemies of this kind to complete a bonus mission and earn 125 XP.
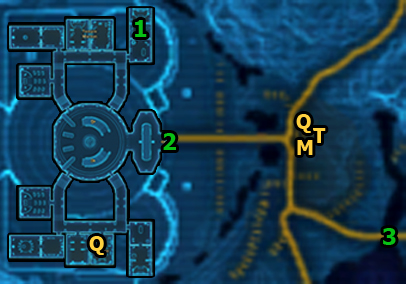
Report to the Master Yuon Par
Once you get to [10], enter the Jedi Temple (you can start a different class mission even before you enter the temple) - before you do it, however, it's necessary to mark Quick Travel Point (Jedi Temple) and Taxi (Jedi Temple) on the map. Inside, visit the cantina and mark Quick Travel Point (Jedi Temple Cantina).
![Enter the room in [11] to complete the mission and talk to Master Yuon Par - (L01) The Path of a Jedi - Jedi Consular - Star Wars: The Old Republic - Game Guide and Walkthrough](https://game.lhg100.com/Article/UploadFiles/201512/2015121709494813.jpg)
Enter the room in [11] to complete the mission and talk to Master Yuon Par. You will receive a new main mission.
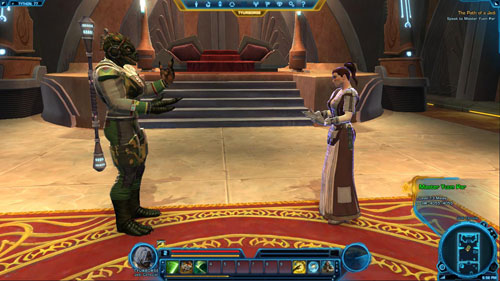
![To get this mission, talk to Hallen, who's standing in [1] - (L02) Wisdom of Elders - Jedi Consular - Star Wars: The Old Republic - Game Guide and Walkthrough](https://game.lhg100.com/Article/UploadFiles/201512/2015121709494808.jpg)
To get this mission, talk to Hallen, who's standing in [1]. She will advise you to see another Jedi master, who is also a trainer.
Speak with Master Wettle
All you need to do is go inside the temple in [2] and then go up the stairs in [3]. You'll appear on the second level of the temple in [4]. Head for [5] to find Master Wettle. Talk to him to open the ability shop and complete this mission. Buy all abilities and visit the master each time you reach a level or when you return to the temple after completing a main mission.
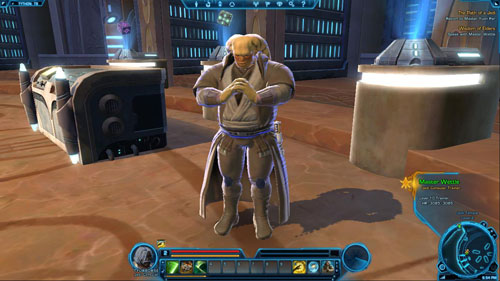
Survival of the Fittest (Bonus)
You begin this mission in [1]. Exit the temple through the gate in [2] and head for the bridge in [3] (see the picture below). Keep following the path shown on the map below. After a short journey you'll get to Kalikori Village.

![Once you're in the village, it's necessary to find and mark Quick Travel Point (Kalikori Village) and Taxi (Kalikori Village) - marked with [Q] and [T] on the map respectively - (L04) Pilgrims - Jedi Consular - Star Wars: The Old Republic - Game Guide and Walkthrough](https://game.lhg100.com/Article/UploadFiles/201512/2015121709494945.jpg)
Once you're in the village, it's necessary to find and mark Quick Travel Point (Kalikori Village) and Taxi (Kalikori Village) - marked with [Q] and [T] on the map respectively.
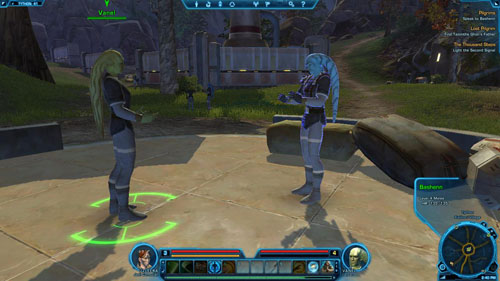
Speak to Bashenn
In the village center, on the oval square in [4], there are three Twi-leks. One of them is called Bashenn and he's the one you need to talk to. You'll be able to earn some Dark or Light Side points - see the table below the picture for details.
A
Reply
Points / Rewards
1
But he could be in danger.
+50 to Light Side
2
The Jedi would be very grateful...
+50 to Light Side
3
You're making me very angry.
+50 to Dark Side
Find Nalen Raloch's Camp
Before you leave the village, it's good to think about doing some side missions. Next, use the destroyed village exit in [5] to head south to The Hollows.
![Your task is to get to the cave in [6] - (L04) Pilgrims - Jedi Consular - Star Wars: The Old Republic - Game Guide and Walkthrough](https://game.lhg100.com/Article/UploadFiles/201512/2015121709494935.jpg)
Your task is to get to the cave in [6]. You'll be fighting with different varieties of Flesh Raiders along the way, including the stronger Flesh Raider Boneguards [+] and Flesh Raider Shamans [+] - watch out especially for the latter.
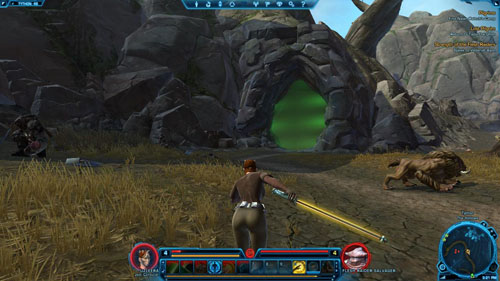
Search for Rajivari's Holocron
For now, you don't need to worry about any enemies in the cave (Nalen's Camp) - there's no one here. Simply run to [7] and have a look at the small glowing cube (holocron). After a while Nalen Raloch will appear here. He'll trigger an earthquake and the cave will start to collapse.
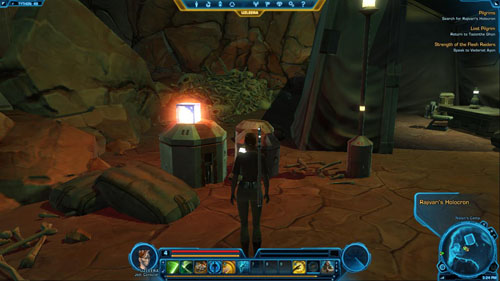
Defeat Flesh Raiders: 0/6
Escape the Collapsing Cave
In spite of appearances, you don't have to hurry - deal with two Flesh Raider Seekers, who will come running at you. You'll defeat another two in [8], and the last two by the exit in [9]. Killing six enemies means completing a bonus mission, which will result in gaining 230 XP. Exit the cave through [6].
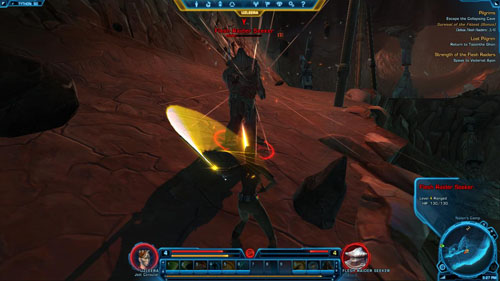
Report to the Master Yuon Par
If you no longer have anything to do in The Hollows, go to the Jedi Temple - you can simply teleport to Quick Travel Point (Jedi Temple) (or first to Quick Travel Point (Kalikori Village) if you want to finish any side missions). Then enter the Jedi Temple through the gate in [2]. Run to [1], to the Master Yuon Par's chamber to talk to her and complete the mission.

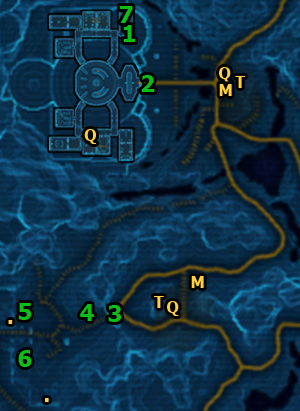
Search for the First Blade
You begin this mission in [1]. Exit the Jedi Temple through the gate in [2] and then head south - to Elarian Trail. Your first task is to reach Quick Travel Point (Elarian Trail) and Taxi (Forward Camp Speeder), which are located there. It's necessary to mark them on the map before you go any further.
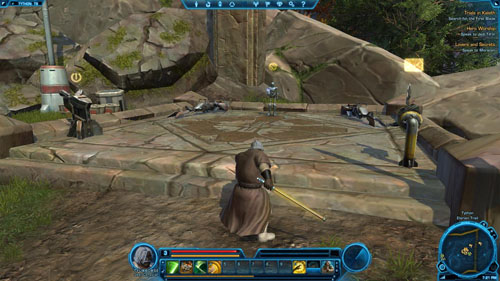
Inspect the Stone Carving
Go west, to Lower Kaleth through the gate in [3]. This place is overrun by ancient droids. Watch out especially for Tythonian Watchers [+] - they can turn the force field on. Right on the right in [4] you will find the stone carving you should examine.
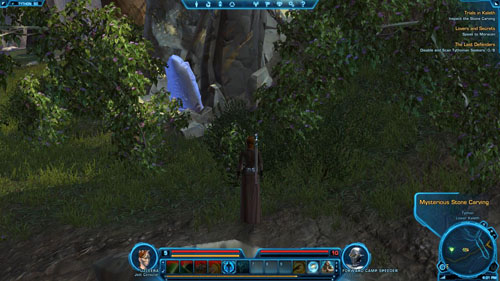
Activate and Destroy Combat Training Droids: 0/3
You will receive a new mission objective - defeating three Ancient Combat Training Droids [+]. These opponents will appear once you've activated one of the consoles that can be found in [5] and [6] (in the latter there's an entire row of consoles).

After using a console, you must wait a while to be able to do it again or you need to use a different one. Ancient Combat Training Droids are not tough opponents, which means you'll defeat three of them (one after another) with ease - at most, regenerate your health between the battles.
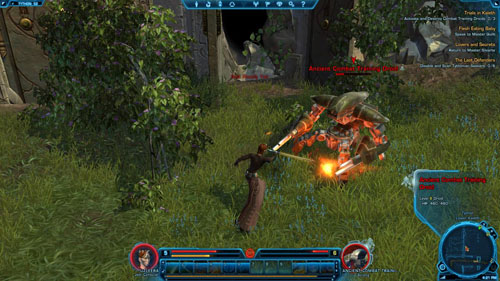
Return to the Stone Carving
Go back to [4] and inspect the stone carving one more time. You will receive Hilt of the "First Blade" - information you came here looking for (about the "first blade").
Return to Master Yuon Par
Speak to Master Syo Bakarn
You can either go on foot to the nearest taxi and then go to the Jedi Temple, or teleport to Quick Travel Point (Jedi Temple) - if you can. Once you're there, enter the temple through the door in [2] and go to [1]. You'll meet Master Syo Bakarn. Speak with him to obtain a Codex entry - Persons of Note: Syo Bakarn (Consular) - worth 45 XP.
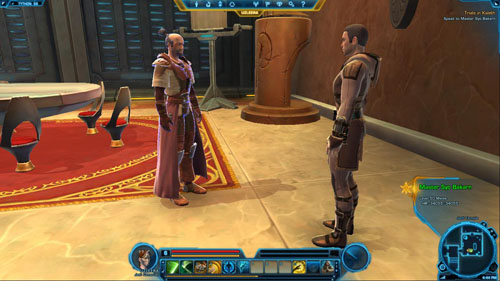
Return to Master Yuon Par
All that's left to do is to go back to Master Yuon Par, who's standing in [1] accompanied by Qyzen Fess. Talk to them to finish the mission and get another one.
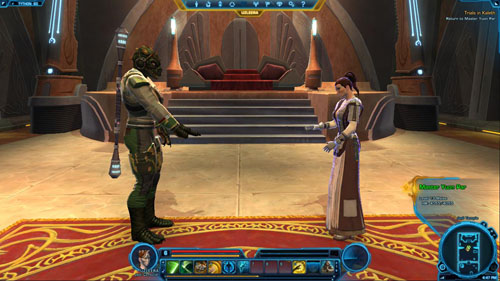
![You'll start this mission in [1] - (L06) Hunters Eye - Jedi Consular - Star Wars: The Old Republic - Game Guide and Walkthrough](https://game.lhg100.com/Article/UploadFiles/201512/2015121709495135.jpg)
You'll start this mission in [1]. Go to the temple exit in [2] and then take a taxi [T] to Kalikori Village. Then head south, through The Hollows to get to Tythos Ridge. You'll need to fight with many Flesh Raiders on the way. There are really lots of them here. Watch out especially for Flesh Raider Deathwatchers who can slow you down.
Explore the Flesh Raider Cave
Head for the entrance to the large cave in [3]. To reach it, you'll have to take a winding route - follow the arrows on the map above in order not to wander around needlessly.
![Watch out especially for Flesh Raider Boneguards [+] once you're inside the cave - (L06) Hunters Eye - Jedi Consular - Star Wars: The Old Republic - Game Guide and Walkthrough](https://game.lhg100.com/Article/UploadFiles/201512/2015121709495116.jpg)
Watch out especially for Flesh Raider Boneguards [+] once you're inside the cave. Run to the story area entrance in [4]. Go through the green force field and get to [5] to receive another mission objective.
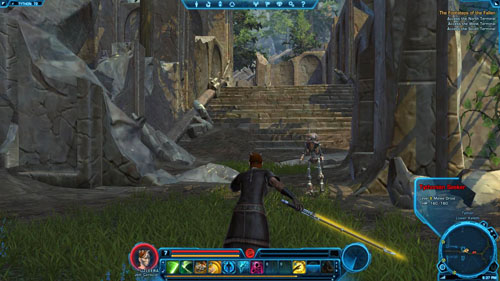
Investigate the Stone Markers
Run up to the large stone with signs in [6] and examine them. Soon, Allia together with a few Twi'leks will appear here. There are two ways to have this conversation - convince the Twi'leks with words/payment to resign from the fight, or simply kill them - see the tables below the picture for details.
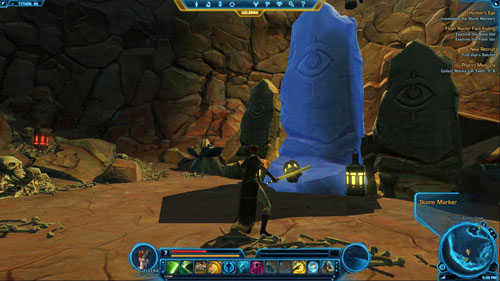
A
Reply
Effect
Points / Rewards
1
Listen. Nalen is insane.
Avoiding the fight, Further conversation stage- B
-
2
I can offer credits instead.
Avoiding the fight: Offering payment
+100 to Light Side
3
I'm keeping it. [Attack]
Fight with the Twi'leks
-
B
Reply
Points / Rewards
1
Let me help him.
+50 to Light Side
2
Do you know where he is?
+50 to Light Side
3
Just leave.
-
Defeat Allia
Defeat Twi'lek Pilgrims
If you didn't choose either of the peaceful solutions, you'll need to defeat Allia and two Twi'lek Pilgrims. These are very weak opponents, so you'll get rid of them without a problem.
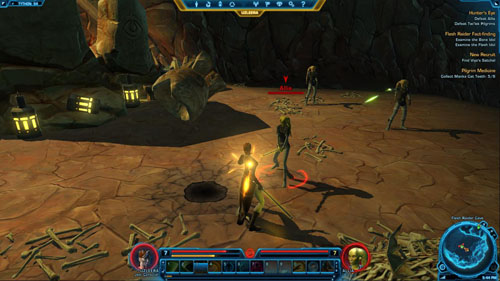
Examine the Ancient Altar
After a while Qyzen Fess will appear in the cave. Your next task will be to examine the ancient altar in [7].
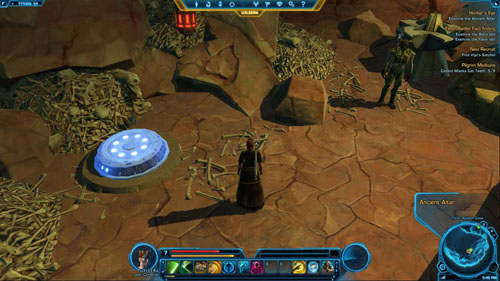
Report to the Master Yuon Par
If there's nothing else to do in Tythos Ridge, teleport to Quick Travel Point (Jedi Temple Cantina) or go to The Hollows and commit suicide to appear in Kalikori Village. Once you're there, take a taxi to get to the Jedi Temple. Enter through the gate in [2]. Go to [1] and talk to Master Yuon Par.
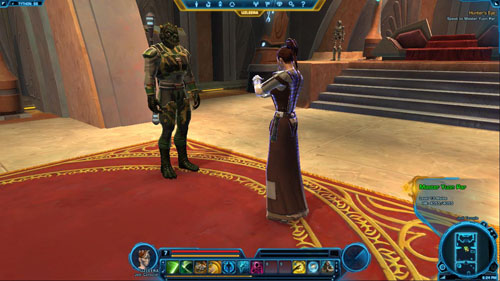
![The mission begins in [1] - (L06) The Footsteps of the Fallen - Jedi Consular - Star Wars: The Old Republic - Game Guide and Walkthrough](https://game.lhg100.com/Article/UploadFiles/201512/2015121709495288.jpg)
The mission begins in [1]. Run out of the temple through the gate in [2] and take a taxi to get to Elarian Trail. Then, go through the gate in [3] (you'll find yourself in Lower Kaleth) and go up the stairs in [4] (shown in the picture below). Along the way, watch out for Tythonian Guardians [+] (they have force fields) and Berserk Tythonian Guardians [+] (their probes can slow down and electrify you).
Access the North Terminal
Head north. The northern terminal in [5] is protected by a Tythonian Guardian [+] and several Tythonian Seekers, though you can try to go around them. Climb the hill on the left - it's the only place from where you can get to the ruins and pass through the hole in the wall to inspect the first terminal. You will acquire Cahel Tse's Holorecord.
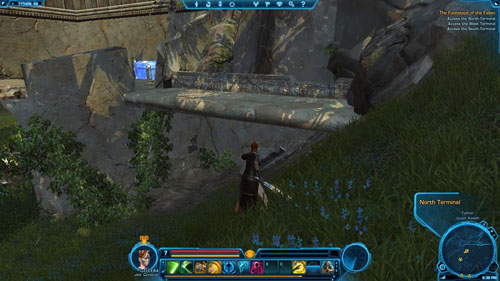
Access the East Terminal
Go back south. There is another terminal in the building in [6]. It's protected by a Tythonian Guardian [+]. Defeat him and get to the terminal. You'll receive Vadria Tallion's Holorecord.
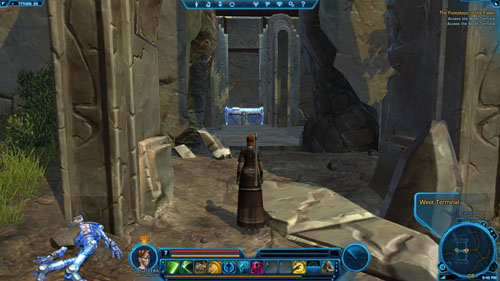
Access the South Terminal
You can access the last terminal, hidden in the ruins in [7] without a fight - going around the droids that are nearby. Examine the last terminal and you will receive Orth Quane's Holorecord.
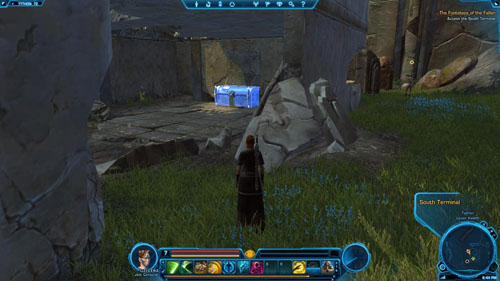
Report to the Master Yuon Par
If you no longer have anything to do in Lower Kaleth or Upper Kaleth, teleport to Quick Travel Point (Jedi Temple Cantina) or commit suicide when you're in Lower Kaleth to appear next to a taxi in Elarian Trail (take it to go to the Jedi Temple and enter through the gate in [2]). Inside the temple, go to [1] and talk to Master Yuon Par.
Twi'lek Trouble (Bonus)
Remnants Incursion (Bonus)
Hunting High and Low (Bonus)
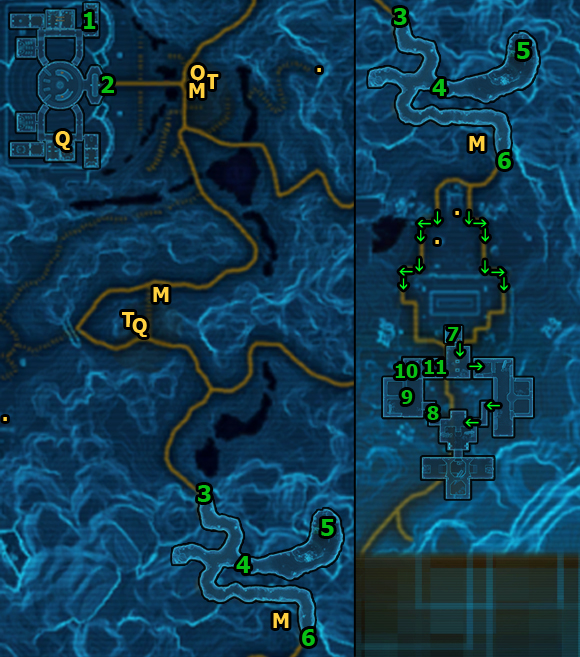
Search for Qyzen Fess
You need to find Qyzen Fess. You start in [1]. Exit the temple through the gate in [2] and take a taxi to Elarian Trail (Forward Camp Speeder). Then go on foot to the cave entrance (Waterfall Cave) in [3]. Enter the cave.
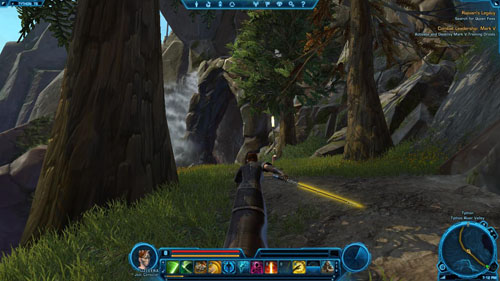
Defeat Flesh Raiders and Reprogrammed Trial Droids: 0/15
You'll be fighting with Flesh Raiders and Reprogrammed Trial Droids along the way. These are not difficult enemies - just keep killing them until you get rid of fifteen. You'll complete the bonus mission and get 335 XP. You'll be fighting with these enemies till the end of the mission that is currently being described. Keep getting rid of them while carrying out the mission objectives mentioned below.
![Enter the story area in [4] through the green force field - (L07) Rajivaris Legacy - Jedi Consular - Star Wars: The Old Republic - Game Guide and Walkthrough](https://game.lhg100.com/Article/UploadFiles/201512/2015121709495445.jpg)
Enter the story area in [4] through the green force field.
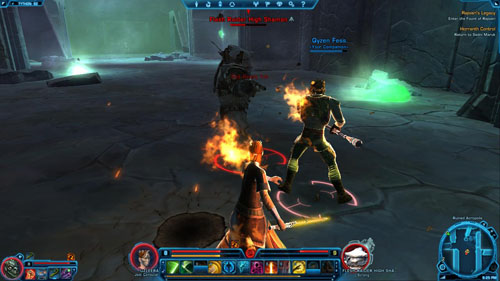
Defeat Twi'leks: 0/12
This part of the cave is overrun by hostile Twi'leks. They are not challenging opponents, but if you're about to die - rest before the next fight. Keep killing the enemies while getting to [5] - after you've killed twelve, you'll accomplish the bonus mission and get 390 XP.
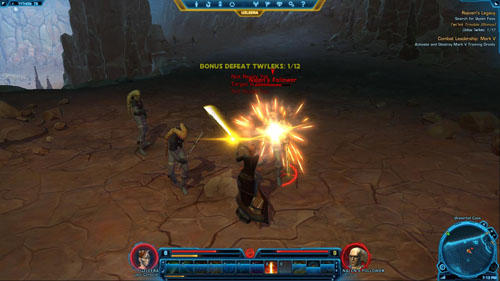
Defeat the Twi'lek Guards
There are two Twi'lek Guards and one Twi'lek Sentry [+] waiting for you in [5]. It's necessary to rest and use boosting abilities before the fight. If you do it, there won't be any problems with winning the fight.
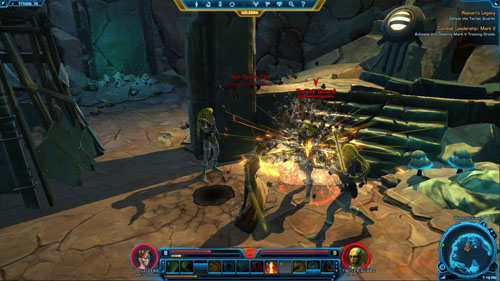
Free Qyzem Fees
Then look at the large cage nearby. Open it to release Qyzen Fess.
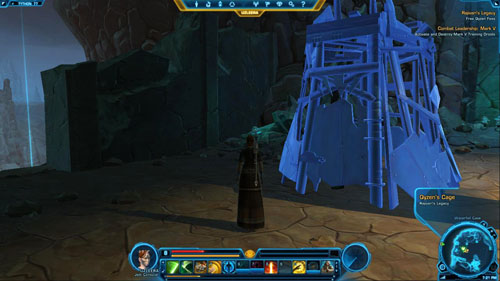
Speak to Qyzem Fees
After a short conversation Qyzen Fess will become your first companion and you'll obtain a Codex entry - Persons of Note: Qyzen Fess (Consular) - worth 450 XP. Go back to the entrance to the story area in [4].
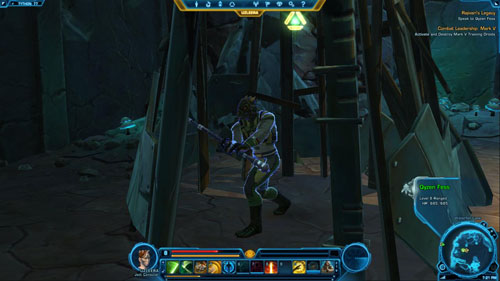
Enter the Fount of Rajivari
You need to reach the cave exit in [6] and then follow the path shown by the arrows. Watch out especially for quite tough Flesh Raider War Leaders [+]. Go up the big stairs on the left or right and then climb another stairs till you get in front of the small building in [7]. There are hidden stairs there that lead to the Ruined Acropolis.
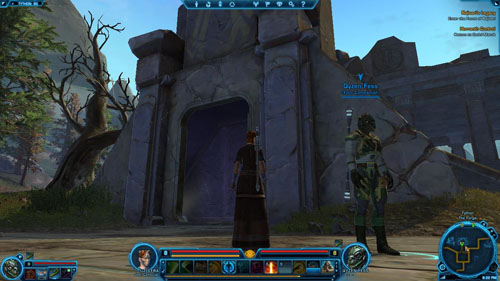
Defeat Flesh Raider High Shamans: 0/5
Inside there are a lot of individual Flesh Raider High Shamans [+]. They can set you on fire, but still, you'll defeat them easily because now you have a companion at your disposal. Kill five enemies of this kind to complete the bonus mission and get 335 XP.
Speak to the Guardian
Follow the arrows to get from [7] to [8]. Once you're there, talk to the kneeling Guardian. Your reply will have an impact on Qyzen Fess (see the table below the picture).
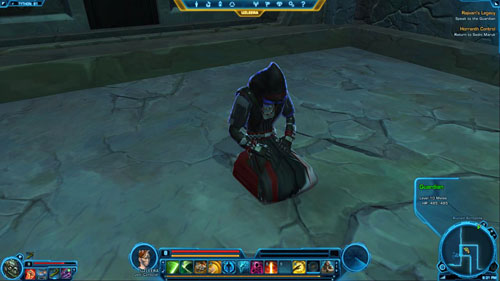
A
Reply
Effect
1
Yes, I am resolute.
+15 to Affection: Qyzen Fess
2
Sacrifice is foolish.
-1 to Affection: Qyzen Fess
3
Make my ally pure.
+15 to Affection: Qyzen Fess
Investigate the Fount of Rajivari
Speak to the Wounded Twi'lek
Go to [9] and talk to the wounded Twi'lek, who's lying on the floor. Unless you choose the last dialogue option, a Crippling Pain effect will be cast on you. It will make your character unable to run. The effect lasts two minutes and it's best not to wait but keep carrying out the next mission objectives. The reply can also have an impact on your companion - see the table below the picture.

A
Reply
Effect
1
I must heal your pain.
+15 to Affection: Qyzen Fess
2
Do what you must.
+15 to Affection: Qyzen Fess
3
I won't show you mercy.
-
Investigate the Fount of Rajivari
Go to the next room and examine the green stone in [10]. Choose one of the replies (it can have an impact on your companion - see the table below the picture) and then get ready for another effect - Cyanogen Gas Poisoning, which will make your character's health get reduced to 25% maximum.
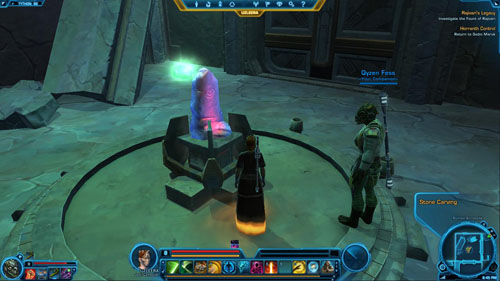
A
Reply
Effect
1
[Attack the stone]
+15 to Affection: Qyzen Fess
2
[Try to stop the gas]
-
3
[Meditate and endure it]
+15 to Affection: Qyzen Fess
Speak to Rajivari
Do not worry about the effects and head for the last room - the one in [11]. Get closer to the Rajivari spirit and talk to him. Your replies will have an impact on your companion and you can also gain some Light Side points. See the tables below the picture for details. The conversation will end the mission. Immediately after that, either exit the Ruined Acropolis on foot, or commit suicide to respawn in the nearest medical center.

A
Reply
Effect
Points / Rewards
1
If it must be done.
Deciding to arrest Nalen
+50 to Light Side
2
I'd like to help you pass on.
Deciding to arrest Nalen, Further conversation stage - B
-
3
Give me your wisdom instead.
Desire for getting Rajivari's knowledge
+50 to Dark Side, -1 to Affection: Qyzen Fess
B
Reply
Effect
Points / Rewards
1
Your vision led to suffering.
Deciding to arrest Nalen, Further conversation stage - C
-
2
Another Nalen? You idiot.
Deciding to arrest Nalen
+50 to Light Side
3
You already made us stronger.
Deciding to arrest Nalen, Further conversation stage - C
+15 to Affection: Qyzen Fess
C
Reply
Points / Rewards
1
I can see how you suffer.
+100 to Light Side
2
How will you be remembered?
+100 to Light Side
3
The Jedi's fate is our own.
+100 to Light Side, +15 to Affection: Qyzen Fess
Crystal Cavern Cleansing (Bonus)
Item modification (Tutorial)
![After leaving the Ruined Acropolis [1] head for the cave in the south (Forge Entrance) in [2] - (L08) The Forge - Jedi Consular - Star Wars: The Old Republic - Game Guide and Walkthrough](https://game.lhg100.com/Article/UploadFiles/201512/2015121709495506.jpg)
After leaving the Ruined Acropolis [1] head for the cave in the south (Forge Entrance) in [2]. Go through the green force field to enter the story area.
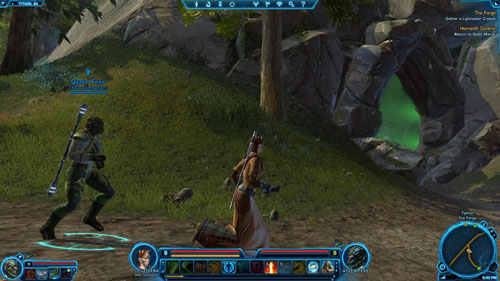
Kill Cavern Horranths: 0/12
Watch out for Ancient Tythonian Defender [+] inside, but also hunt some Cavern Horranths. Killing twelve of these animals will result in completing the bonus mission and earning 440 XP. Keep killing the little beasts and heading for [3].
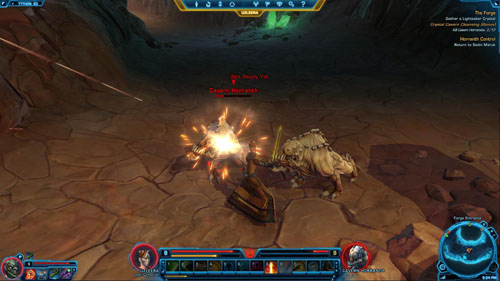
Gather a Lightsaber Crystal
Climb a small hill in [3] and then get closer to the flashing green crystal. Take the Lightsaber Crystal out, but before you do it make sure you have full health.
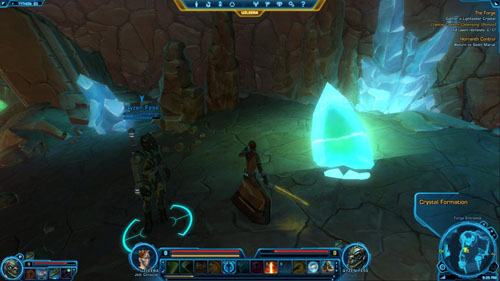
Defeat the Dark Beast
Immediately after you've taken the crystal, Dark Beast [*] will appear in [4]. It's a giant monster that can set you on fire and throw you away with powerful blows. It's necessary to keep some Medpacs handy and to use your most powerful abilities. If you're level is lower than 7, then you probably won't manage to kill the beast.
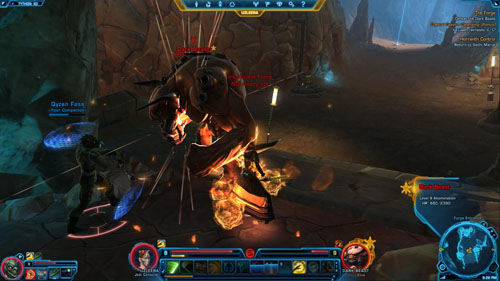
Craft Your Lightsaber at the Forge
After killing the beast, go to the cave exit in [5] and then climb the stairs to the forge in [6] (it's good to know at this point that if you fall down the chasm, you'll kill yourself). Once you are at the top you'll get a Codex entry - Locations: The Forge worth 495 XP.
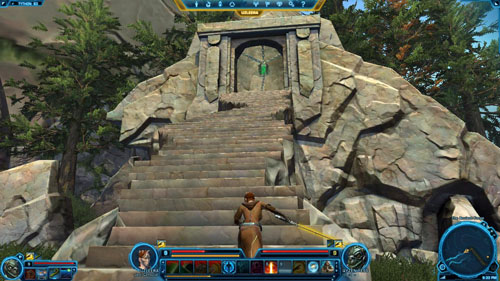
Use the forge to craft your lightsaber. After forging the weapon, you'll get a new weapon Lightsaber (equip your character with it right away), Resolve Mod 1* and a Codex entry -Lore: Jedi Weapons - worth 495 XP.
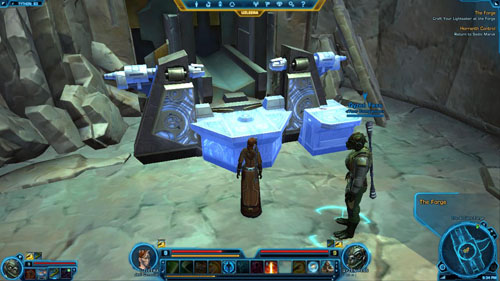
Confront Nalen Raloch
Have a rest, use boosting abilities and then carefully go down the stairs to [7]. There's Nalen Raloch standing there with whom you need to talk. The conversation will end in a fight, of course. Yet, the more peacefully you've conducted the conversation, the bigger the chance that Henni and Keth will not join the fight. See the table below the picture for details.
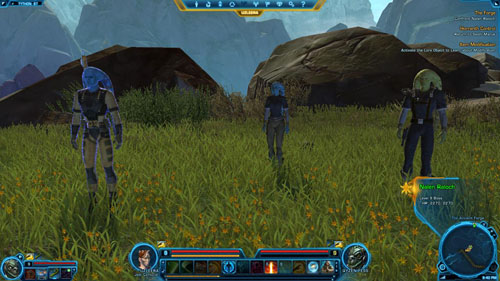
A
Reply
Effect
1
Stop lying to yourself.
Fight with Nalen Raloch only
2
Surrender. Please.
Fight with Nalen Raloch only
3
So be it.
Fight with everybody
Defeat Nalen Raloch
Defeat Henni
Defeat Keth
Quickly defeat Henni and Keth (two weaker opponents) and then fight with Nalen Raloch [*]. He's quite a tough and strong opponent, but with Qyzen Fess's help you should deal with him easily.
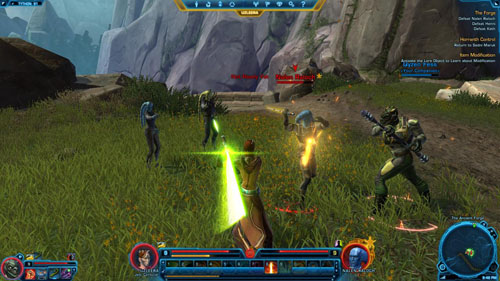
Speak to Nalen Raloch
Then start the conversation with the kneeling and achy Nalen Raloch again. You can spare or kill him - the choice is yours and it will have an impact on your companion. See the tables below the picture for details.
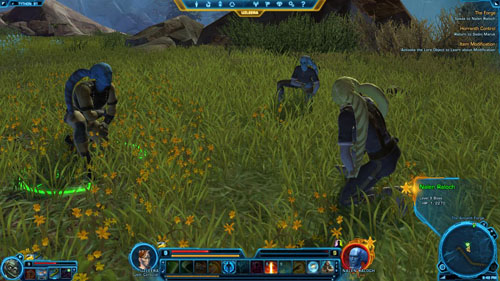
A
Reply
Effect
Points / Rewards
1
The Jedi Council must decide.
Sparing Nalen, Further conversation stage - B
-
2
I'll take him prisoner.
Sparing Nalen, Further conversation stage - B
+100 to Light Side
3
He has to die.
Killing Nalen, Further conversation stage - C
-
B
Reply
Points / Rewards
1
You can ask for my help.
-1 to Affection: Qyzen Fess
2
[Force Persuade] Have hope.
+15 to Affection: Qyzen Fess
3
Find your own strength.
+15 to Affection: Qyzen Fess
C
Reply
Points / Rewards
1
Death will protect his legacy.
+100 to Dark Side
2
Rajivari's knowledge must die.
+100 to Dark Side, +15 to Affection: Qyzen Fess
3
This is what he deserves.
+100 to Dark Side, +15 to Affection: Qyzen Fess
D
Reply (Qyzen Fess)
Points / Rewards
1
I'm the what?
-
2
No, you must be mistaken.
+15 to Affection: Qyzen Fess
3
But I'm not Trandoshan.
-
E
Reply (Qyzen Fess)
Points / Rewards
1
You do me honor, Qyzen.
+15 to Affection: Qyzen Fess
2
Then, thank you.
+15 to Affection: Qyzen Fess
3
I like the sound of this.
-1 to Affection: Qyzen Fess
Activate the Lore Object to Learn about Modification
Teleport to Quick Travel Point (Jedi Temple) and find the item modification station in [8]. Read the sign next to it and you'll obtain a Codex entry - Game Rules: Item Modifications - worth 45 XP, and also a weapon modification and 885 XP. Fortitude Enhancement 2* you've just acquired, as well as Might Mod 1* can be put into your lightsaber - use the station to do it. Enjoy having an even more powerful weapon!
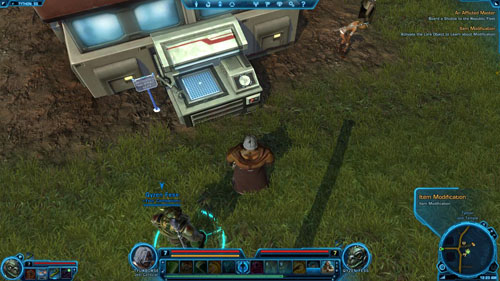
Report to the Jedi Council
Enter the Jedi Temple through the door in [9] and then go up the stairs in [10] to the second level. Once you're there, examine the door leading to the Jedi Council seat in [11]. You're about to have a conversation during which your replies can have an impact on Qyzen Fess - see the tables below the picture for details. You'll finish this mission and get the next.
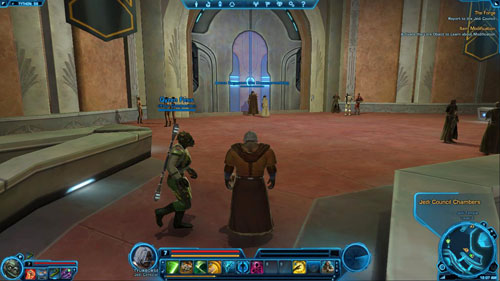
A1
Reply (Nalen is dead)
Points / Rewards
1
I saved his legacy.
-
2
Circumstances forced my hand.
-
3
He was far too dangerous.
+15 to Affection: Qyzen Fess
A2
Reply (Nalen is alive)
Points / Rewards
1
I regret it came to violence.
-1 to Affection: Qyzen Fess
2
Will Nalen live?
-
3
I always do good work.
+15 to Affection: Qyzen Fess
B
Reply (Nalen is alive)
Points / Rewards
1
Train him as a Jedi.
+50 to Light Side, -1 to Affection: Qyzen Fess
2
Release him to his people.
-1 to Affection: Qyzen Fess
3
Keep him prisoner.
+50 to Dark Side, +15 to Affection: Qyzen Fess
C
Reply
Points / Rewards
1
I didn't have Nalen's burdens.
-1 to Affection: Qyzen Fess
2
Others helped me.
+15 to Affection: Qyzen Fess
3
I'm stronger than that.
+15 to Affection: Qyzen Fess
D
Reply
Points / Rewards
1
I was her last student?
+15 to Affection: Qyzen Fess
2
We must act.
-
3
And now she's dying!
-1 to Affection: Qyzen Fess
E
Reply
Points / Rewards
1
I won't let her die.
+15 to Affection: Qyzen Fess
2
I will do so.
-
3
How can I be any help?
-1 to Affection: Qyzen Fess
![After completing The Forge mission, go to the cantina in [1] (in the Jedi Temple) to talk to Qyzen Fess - (LC) Balance - Jedi Consular - Star Wars: The Old Republic - Game Guide and Walkthrough](https://game.lhg100.com/Article/UploadFiles/201512/2015121709495741.jpg)
After completing The Forge mission, go to the cantina in [1] (in the Jedi Temple) to talk to Qyzen Fess. During the conversation your replies will have an impact on your companion - see the tables below the picture for details.
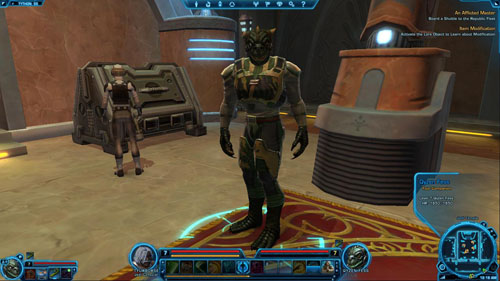
A
Reply
Points / Rewards
1
The honor is mine.
+15 to Affection: Qyzen Fess
2
This will be a tough journey.
-
3
I'm really not your "Herald".
-
B
Reply
Points / Rewards
1
Explain this "score" again.
-
2
Focus on getting it back.
+15 to Affection: Qyzen Fess
3
Don't be so melodramatic.
-30 to Affection: Qyzen Fess
2510 XP.

Board a Shuttle to the Republic Fleet
The last mission on Tython will begin in [1], on the second level of the Jedi Temple. Run to [2] and board the space shuttle to the Republic Fleet. Once you've arrived, you'll complete the mission and receive another class mission.
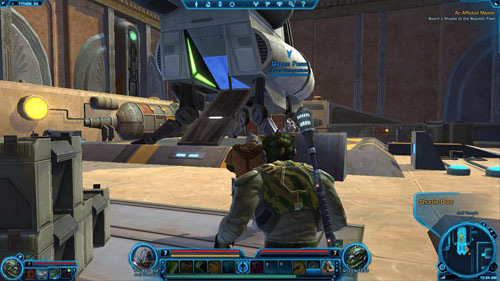
Each mission description is divided into several smaller parts. The list of missions is given in chronological order, that is, the order you receive them. However, you might do them in a different sequence (see the "Shortcuts" section for the optimal order). Also, the level of a particular mission is shown before its name (L), as well as a note whether it is a [HEROIC] mission. Here is all information that is essential to read before you start using the missions descriptions.
The exact description of a mission is here. Sometimes it's divided into several different places you will visit, and each of them has its own map.
In the missions descriptions there are all dialogues that can have any impact on the game mechanics. It is given in the Points / Rewards column. The Effect column specifies what kind of effect your reply will have (there can also be a letter referring to the next dialogue mentioned), while under Reply there is the answer's line.
If any dialogue is missing, it means that it doesn't matter which reply you choose (of course, except for the aspects related to developing your character in terms of the story). If a reply doesn't have any effect or doesn't result in getting any points or rewards, then there will be no suitable column in the table.
#
Reply
Effect
Points / Rewards
Reply number
One out of the two or three replies your character can give.
Effect of the chosen reply, and if it leads further - a letter of the next dialogue is given
+x to Light / Dark Side, +x / -x to companion's Affection, other Rewards
# - a letter indicating the dialogue order. Some replies can lead to different dialogues.
If a mission contains a small bonus quest, then a complete list of them is given right before the mission description. Bonus mission objectives are given along with the mission objectives (class or side) with which such a mission is connected.
The list of rewards includes: XP, credits, items and Codex entries. You can receive all these items for completing a mission. Sometimes you'll get one out of the two depending on your class, other times you'll have to choose one from several items (these are separated by a slash - "/"). If there is a [*] next to the reward, it means that it is a very valuable item.
![Talk to Master Relnex standing in [1] and agree to help him - (L02) Early Lessons - Tython - Star Wars: The Old Republic - Game Guide and Walkthrough](https://game.lhg100.com/Article/UploadFiles/201512/2015121709495879.jpg)
Talk to Master Relnex standing in [1] and agree to help him. You'll get a bonus mission along with the transmitter (Signal Beacon).
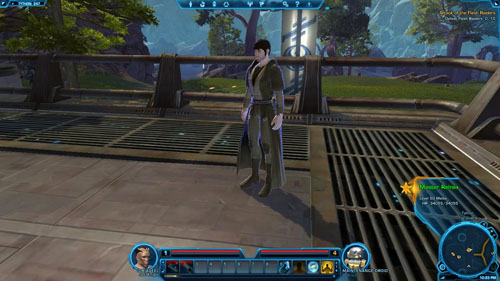
Find the Missing Students
The students can be found in [2], but in order to get to them you'll need to go under the rock in [3] and then go in the river. Then stick to the rocks to the left and run up the hill as soon as it's possible.

Eventually, you'll find the three students. Talk to Padawan Avitla in [2] and give her Signal Beacon - near the end of the conversation you'll have to choose between the Dark Side (and additional objectives) and Light Side. See the table below the picture for details. Whichever reply you choose, you'll obtain a new Codex entry - Species: Flesh Riders - worth 100 XP.
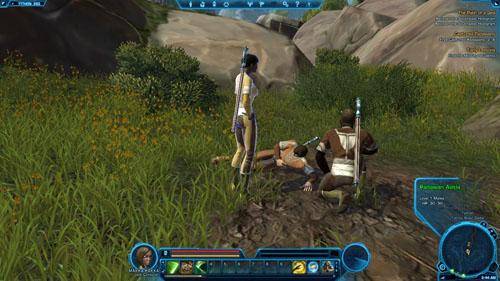
A
Reply
Effect
Points / Rewards
1
You're going home - now.
Peaceful solution
+50 to Light Side
2
Let's get revenge.
Additional mission objectives
+50 to Dark Side
Defeat Flesh Raiders: 0/10
If you choose the Dark Side, you need to kill ten Flesh Raiders and also destroy their three supply depots. Search for the depots while fighting with groups of enemies and try not to fight with more than one at a time.
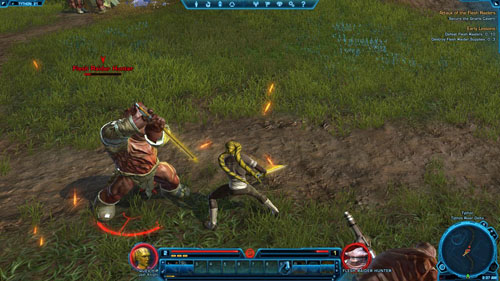
Destroy Flesh Raider Supplies: 0/3
The Flesh Raider supply depots are in various places - some of them are marked on the map with [x]. Set fire to three of them.

Return to Master Relnex
After you've completed the previous mission objectives, or chosen the Light Side, all you can do now is to return to Master Relnex in [1] and claim your rewards.
The Flesh Raider Menace (Bonus)
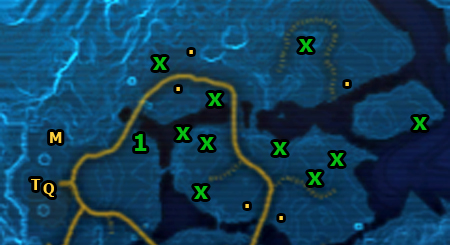
To get this mission, you must find one of the Flesh Raiders cages. The nearest is in [1] - open it to get the mission.
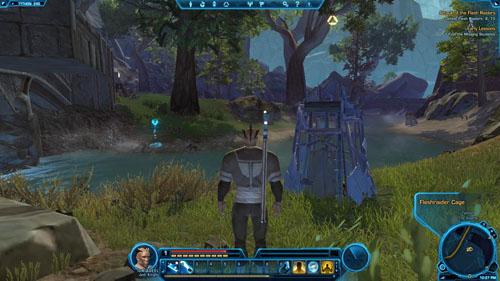
Defeat Flesh Raiders: 0/15
When you kill the first Flesh Raider, you'll get a bonus mission. Kill fifteen to complete it and gain 115 XP. There are plenty of these enemies in the area.

Free Captured Padawans: 0/6
The prisoner cages (Fleshrider Cages) are located in The Gnarls and Tythos River Delta, so it will be easy to find six of them. Some of the cages are marked with [x] on the map, however, you can find the cages in other places as well.
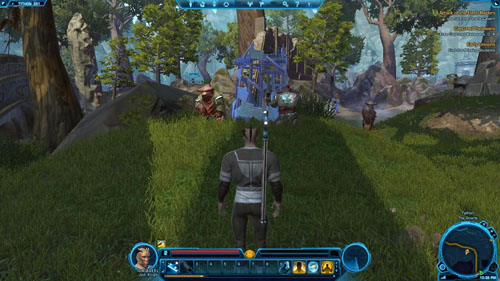
There will be at least several enemies around each cage. This will make is easier for you to complete the mission that will be available when you kill one of the enemies. You'll earn 115 XP for killing fifteen Flesh Raiders.
![You'll get this mission from Liam Dentiri, who is standing in the square in [1] - (L02) Combat Leadership: Mark I - Tython - Star Wars: The Old Republic - Game Guide and Walkthrough](https://game.lhg100.com/Article/UploadFiles/201512/2015121709495994.jpg)
You'll get this mission from Liam Dentiri, who is standing in the square in [1]. Talk to him and accept his proposal to test the training droids.

Activate and Destroy Mark I Training Droids
You can fight with the droids in one of the several squares in front of the temple. There is a small console that activates the droids on each square. The consoles are marked with [x] on the map above.
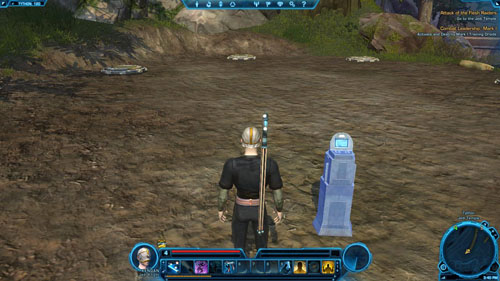
When you turn on the console, three Mark I Training Droids will appear. You'll need to destroy them, which won't be a problem because they're not very challenging opponents.

Return to Liam Dentiri
Then return to Liam Dentiri to claim your rewards.
Clear the Mountain Path (Bonus)
![You can get this mission only after you've completed (depending on a class) Attack of the Flesh Raiders or The Path of a Jedi mission and you'll receive it from Yuleph Phan, who's in [1] - (L04) The Thousand Steps - Tython - Star Wars: The Old Republic - Game Guide and Walkthrough](https://game.lhg100.com/Article/UploadFiles/201512/2015121709500049.jpg)
You can get this mission only after you've completed (depending on a class) Attack of the Flesh Raiders or The Path of a Jedi mission and you'll receive it from Yuleph Phan, who's in [1]. Agree to participate in the ritual and you'll acquire Burning Brand with which you'll be able to light several altars.
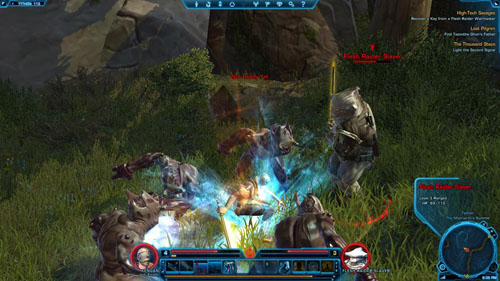
Defeat Flesh Raider Slavers and Slavemasters: 0/4
While carrying out the objectives described below, you'll come across the Flesh Raider forces. After killing the first one you'll receive a bonus mission with the objective mentioned above. Kill four Flesh Raider Slavers or Flesh Raider Slavemasters to complete it and gain 175 XP. Be careful and try to avoid Flesh Raider Manglers [+] (they're a little stronger).
Light the First Signal
You must light four altars by the path that surrounds the hill. The altars are marked on the map and shown in the pictures below. The first altar is in [2].
Light the Second Signal
The second altar is in [3].
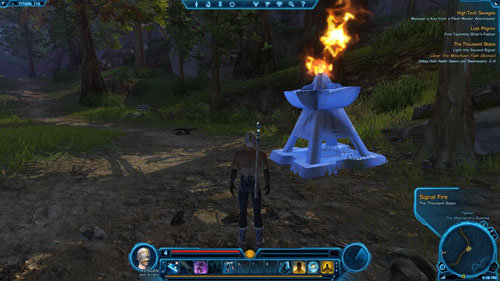
Light the Third Signal
The third altar can be found in [4] ...
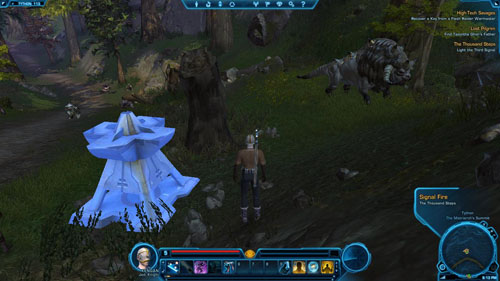
Light the Fourth Signal
... and in [5] you'll light the last one.
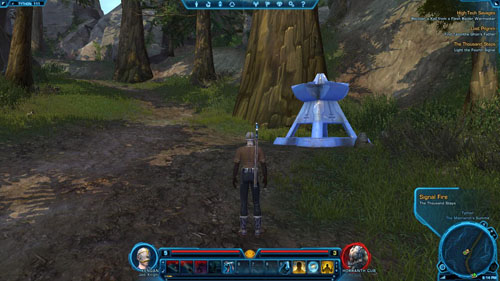
Speak to Kolovish
Now you need to get to the tower in [6]. Go inside and then up the winding stairs.
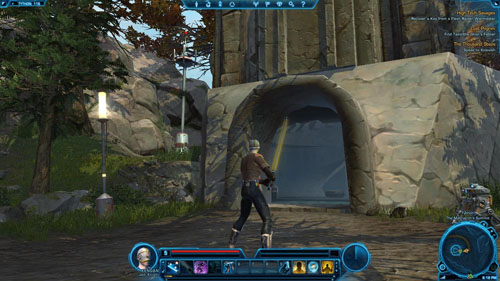
Talk to Kolovish on the balcony. You'll finish the mission and receive rewards.
Kalikori Village / The Hollows
![You can get this mission only after you've completed (depending on a class) Attack of the Flesh Raiders or The Path of a Jedi mission and you'll receive it from Tazonthe Ghon, who's standing in [1] - (L04) Lost Pilgrim - Tython - Star Wars: The Old Republic - Game Guide and Walkthrough](https://game.lhg100.com/Article/UploadFiles/201512/2015121709500161.jpg)
You can get this mission only after you've completed (depending on a class) Attack of the Flesh Raiders or The Path of a Jedi mission and you'll receive it from Tazonthe Ghon, who's standing in [1]. Talk to him and agree to help.
Find Tazonthe Ghon's Father
Go south to The Hollows. You'll be fighting the Flesh Raider forces along the way, however, try to avoid the slightly stronger Flesh Raider Boneguards [+] and Flesh Raider Shamans [+]. Locate the Datapad lying in [2] and watch the recorded broadcast.
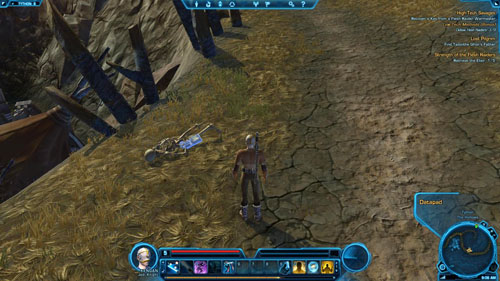
Return to Tazonthe Ghon
If you no longer have anything to do in The Hollows, go to Kalikori Village - you can simply teleport to Quick Travel Point (Kalikori Village). Now all that's left to do is to return to Tazonthe Ghon in [1] and speak with him. There are two ways to complete this mission - see the table below.
A
Reply
Points / Rewards
1
It wasn't about revenge
+50 to Light Side
2
They're all dead...
+50 to Dark Side
Bonus mission
Thin the Flesh Raider Ranks (Bonus)
Kalikori Village / The Hollows
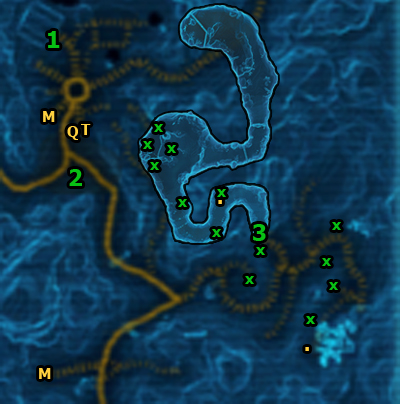
You can get this mission only after you've completed (depending on a class) Attack of the Flesh Raiders or The Path of a Jedi mission and you'll receive it from Vederiat Ayon. The Twi'lek representative is standing in [1]. Talk to her and offer your help with destroying the substance produced by the Flesh Raiders.
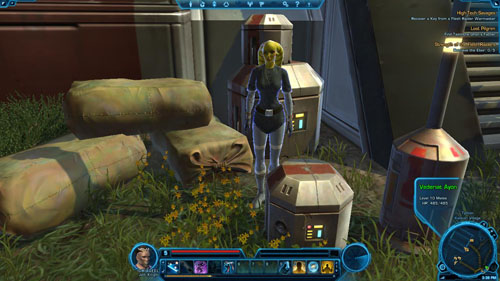
Speak to Odumis Mer
Odumis Mer is nearby in [2]. Talk to him - the mission objective depends on the choice you're about to make. Also, you'll gain either Dark or Light Side points. See the table below the picture for details.
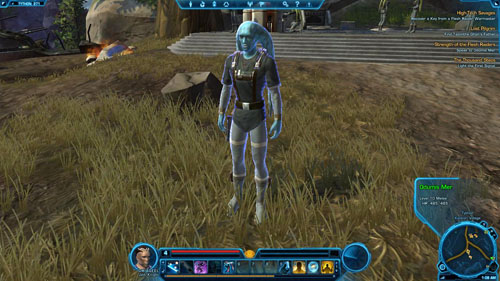
A
Reply
Effect
Points / Rewards
1
The Elixir must be destroyed.
Destroying the substance
+50 to Light Side
2
Elixir for credits. Deal.
Retrieving the substance
+50 to Dark Side, +48 credits to rewards
Defat Flesh Raiders: 0/15
You'll be fighting with the Flesh Raider forces on the way, but try to avoid Flesh Raider Boneguards [+] and Flesh Raider Shamans [+], as they are stronger and they don't count as far as the list of enemies you must kill is concerned. Focus on the weaker enemies. When you kill fifteen, you will receive 285 XP.
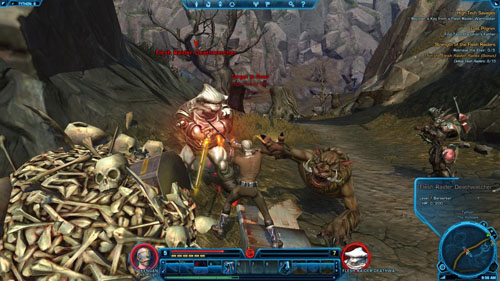
Retrieve the Elixir: 0/5
Destroy the Elixir: 0/5
Regardless of what you need to do, both objects (small pools with red substance that needs to be to destroyed, or containers with the substance, namely Flesh Raider Elixir) can be found in many places in The Hollows, also in some caves in the north and south (some of these locations are marked on the map with [x]). Retrieve or destroy the substance while doing other missions. The first picture shows the container you should take with you, the other - the pool to be destroyed.
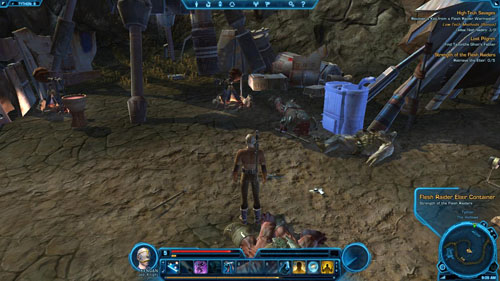
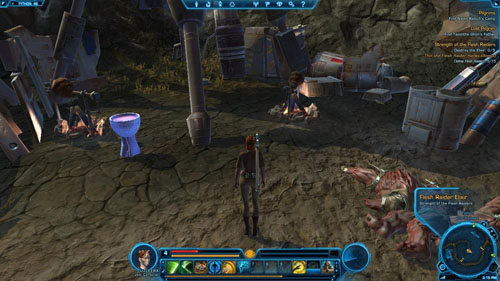
Speak to Vederiat Ayon
Speak to Odumis Mer
If you no longer have anything to do in The Hollows, go to Kalikori Village - you can simply teleport to Quick Travel Point (Kalikori Village). Then go to one of the two NPCs. If you decided to retrieve the elixir, go to Odumis Mer in [2] to claim your reward. If you destroyed it - talk to Vederiat Ayon w [1].
![You can get this mission only after you've completed (depending on a class) High-Tech Savages or Pilgrims mission and you'll receive it from Liam Dentiri, who is standing in the square in [1] - (L04) Combat Leadership: Mark II - Tython - Star Wars: The Old Republic - Game Guide and Walkthrough](https://game.lhg100.com/Article/UploadFiles/201512/2015121709500250.jpg)
You can get this mission only after you've completed (depending on a class) High-Tech Savages or Pilgrims mission and you'll receive it from Liam Dentiri, who is standing in the square in [1]. Talk to him and accept his proposal to test the training droids.

Activate and Destroy Mark II Training Droids
You can fight with the droids in one of the several squares in front of the temple. There is a small console that activates the droids on each square. The consoles are marked with [x] on the map above.
![When you turn on the console, Mark II Training Droid [+] will appear - (L04) Combat Leadership: Mark II - Tython - Star Wars: The Old Republic - Game Guide and Walkthrough](https://game.lhg100.com/Article/UploadFiles/201512/2015121709500368.jpg)
When you turn on the console, Mark II Training Droid [+] will appear. You'll need to destroy him, which won't be a problem because it's not a challenging opponent.
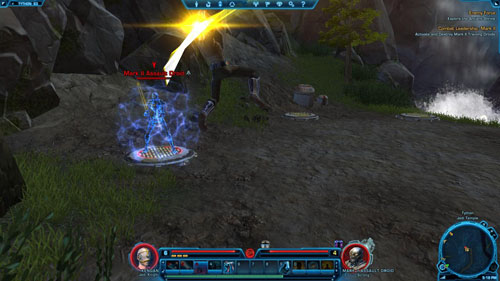
Return to Liam Dentiri
Then return to Liam Dentiri to claim your rewards.
You can get this mission only after you've completed (depending on a class) High-Tech Savages or Pilgrims mission. Go to [1] and talk to Master Silvarte, who's standing by the bridge. Agree to help him.

Speak to Moracen
Head west to Lower Kaleth. Try to avoid Tythonian Watchers [+] who can activate the force field. You'll find Moracen and her beloved in [2]. Talk to them.
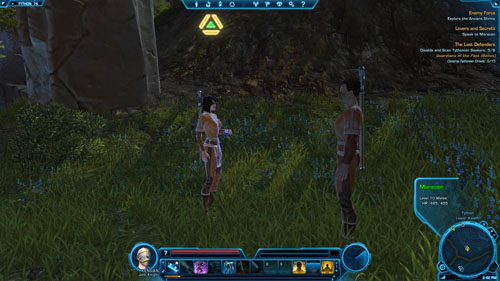
Return to Master Silvarte
Go back to Master Silvarte in [1] and speak with him. You will be able to either tell the truth about the lovers, or cover up for them and lie. See the table below for details. If you lied, you'll get another mission objective.
A
Reply
Effect
Points / Rewards
1
They are lovers.
Telling the truth about the lovers
+50 to Light Side
2
They are innocent.
Lying about the lovers, new mission objective
+50 to Dark Side
Return to Moracen
If you decided to cover up for the lovers, you will need to return to them. Go to [2] and talk to Moracen one last time. There will be many options: you will be able to take a crystal that can change the lightsaber color or not, persuade the lovers to end their affair or wish them all the best. The conversation can begin in two different ways (A1 or A2) - depending on what you told Moracen earlier. See the tables below for details.
A1
Reply
Effect
Points / Rewards
1
Of course.
Taking the crystal
Yellow Fortitude Crystal
2
Give up the crystal.
Taking the crystal
+50 to Dark Side, Yellow Fortitude Crystal
3
Forget about the crystal.
Further conversation stage - B
-
A2
Reply
Effect
Points / Rewards
1
I seek nothing.
Further conversation stage - B
-
2
Just what you offered before.
Taking the crystal
+50 to Dark Side, Yellow Fortitude Crystal
3
Just letting you be corrupted.
Taking the crystal
+50 to Dark Side, Yellow Fortitude Crystal
B
Reply
Effect
Points / Rewards
1
End this love, Spanios.
Refusing to take the crystal and suggesting that the lovers end the affair
+50 to Light Side
2
I wouldn't dream of that.
Refusing to take the crystal and letting the lovers continue the affair
+50 to Dark Side
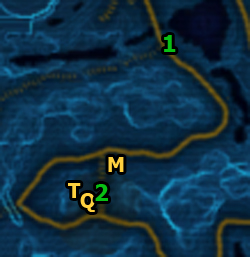
You can get this mission only after you've completed (depending on a class) High-Tech Savages or Pilgrims mission. Go to [1] and talk to Padawan Fia, who's standing by the river. Agree to help her. If you let Padawan Fia persuade you to do this task by giving you some money, you'll also receive 57 credits.
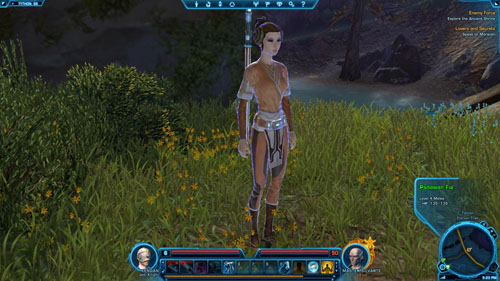
Speak to Jedi Till'in
Now you just need to go to [2] and find Jedi Till'in. Give him the message and listen to what he has to say. You'll receive another side mission.
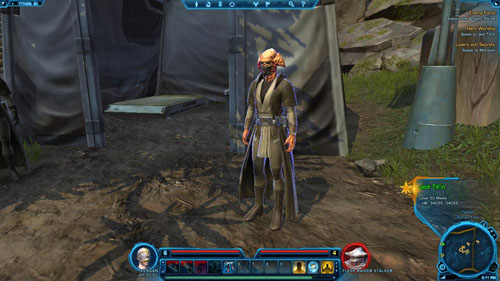
Guardians of the Past (Bonus)
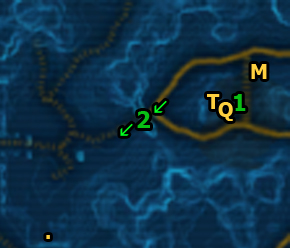
You can get this mission only after you've completed Hero Worship mission. You'll receive it after the conversation with Jedi Till'in, who's standing in the camp in [1]. You'll get a Droid Scanner to scan droids.

Destroy Tythonian DroidS: 0/15
Doing this mission while completing other ones is the most convenient way. Attack the droids by the gate in [2], which leads to the Lower Kaleth area. After you've destroyed the first, you'll get a bonus mission. Kill fifteen droids of various types (trying to avoid the Tythonian Watchers [+], who can turn the power field on) to gain 285 XP. Scan the droids after each battle - read the description of the next mission objective.
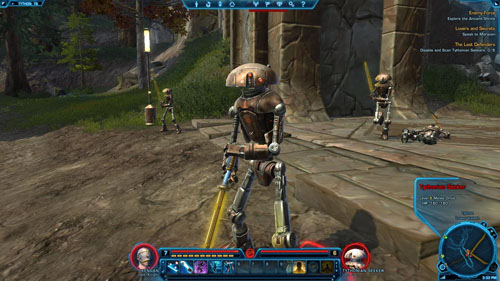
Disable and Scan Tythonian Seekers: 0/6
After defeating the droids, open the inventory panel and click on the "Mission Items" tab at the bottom. Then click RMB on the defeated droid remains (remember that it has to be a Tythonian Seeker), and then click RMB on the Droid Scanner.
The second method is to drag the Droid Scanner to the quick access bar at the bottom of the screen, click RMB on a droid and then RMB on the Droid Scanner icon. Whichever method you use, gather the data on six droids. The nearest groups of droids are marked with [x] on the map. Remember that after a while the remains of the defeated droids disappear!

Return to Jedi Till'in
After scanning six droids go back to Elarian Trail - you can simply teleport to Quick Travel Point (Elarian Trail) or let yourself get killed to respawn in the medical center. Then speak with Jedi Till'in in [1] to complete this mission.
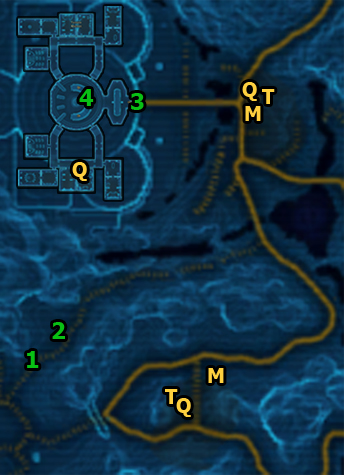
You can get this mission only after you've completed (depending on a class) High-Tech Savages or Pilgrims mission. Locate a backpack in [1] - Flesh Raider Backpack. Inside, there's a Flesh Raider baby.
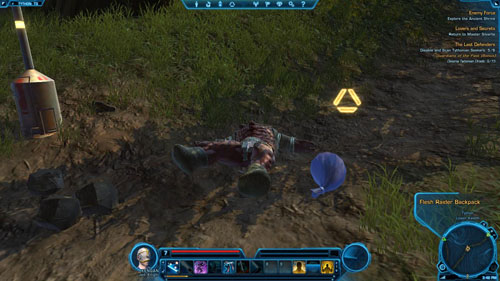
Gather Guid Meat: 0/3
If you want the baby to survive, you must gather some Greater Guid [+] meat. There are quite a lot of these animals in the vicinity of [2] - kill them and collect three meat portions (Guid Meat). It is worth mentioning that after killing the first enemy of this kind you will get a Codex entry - Bestiary: Guid - worth 390 XP.
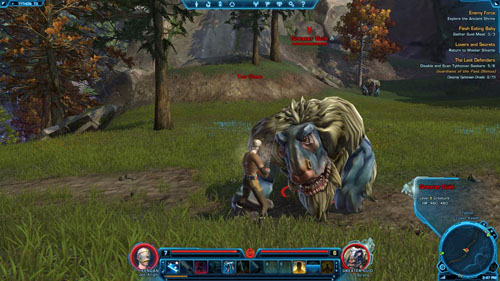
Return to the Flesh Raider Baby
Go back to the backpack. After feeding the baby with the meat you can take her with you (Flesh Raider Baby).
Speak to Master Quilb
The last task is to take the backpack with the baby to the temple. Go inside through the gate in [3] or teleport to Quick Travel Point (Jedi Temple Cantina). Inside, locate Master Quilb in [4] in the main hall and talk to him to complete this mission.
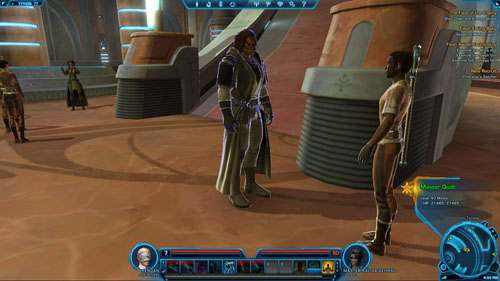
![You can get this mission only after you've completed (depending on a class) Enemy Force or Trials in Kaleth mission and you'll receive it from Liam Dentiri, who is standing in the square in [1] - (L05) Combat Leadership: Mark III - Tython - Star Wars: The Old Republic - Game Guide and Walkthrough](https://game.lhg100.com/Article/UploadFiles/201512/2015121709500559.jpg)
You can get this mission only after you've completed (depending on a class) Enemy Force or Trials in Kaleth mission and you'll receive it from Liam Dentiri, who is standing in the square in [1]. Talk to him and accept his proposal to test the training droids.

Activate and Destroy Mark III Training Droids
You can fight with the droids in one of the several squares in front of the temple. There is a small console that activates the droids on each square. The consoles are marked with [x] on the map above.

When you turn on the console, four Mark III Training Droids will appear. You need to destroy them. They're not particularly tough or powerful, however, they can quickly deal a lot of damage when in a group. That's why you need to hurry.
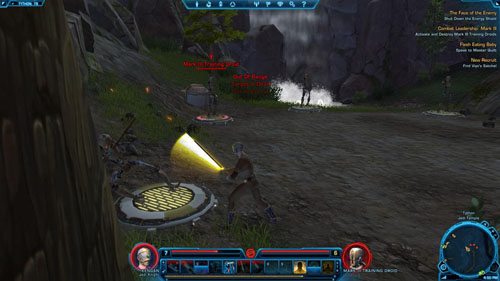
Return to Liam Dentiri
Then return to Liam Dentiri in [1] to claim your rewards.
You can get this mission only after you've completed (depending on a class) Enemy Force or Trials in Kaleth mission. You'll receive it from Trey Kobbeth, who's in her hut in [1].
Find Viyo's Satchel
Head south - through the gate in [2] and then via The Hollows until you reach the Tythos Ridge. Once you're there, follow the arrows. The winding road will take you to Viyo's satchel in [3]. Search it and expect a conversation. You're about to decide whether one of the Flesh Raiders will be able to learn the Force. See the table below the picture for details.
A
Reply
Effect
Points / Rewards
1
I'll try.
Teaching the Flesh Raider
+50 to Light Side
2
He has to die.
Killing the Flesh Raider
+50 to Dark Side
Speak to Master Strayen
If you chose the first option, you'll get other mission objectives - you'll need to go to the Jedi Temple in [4] on foot, by taxi or teleporting to Quick Travel Point (Jedi Academy Cantina) and go up the stairs in [5]. Find Master Strayen on the second level in [6] and talk to him. You will receive Master Strayen's Medallion.
Light the Signal Fire
Exit the Jedi Temple and head south via Elarian Trail to the Tythos River Valley area. Locate the place in [7] where you can light the signal fire. Do it and you'll speak with Viyo and Flesh Raider.

Speak to Trea Kobbeth
Return to Trea Kobbeth
If you no longer have anything to do in Tythos Ridge, go to Kalikori Village - you can simply teleport to Quick Travel Point (Kalikori Village) or go through The Hollows / Elarian Trail on foot. Talk to Trea Kobbeth to complete the mission and get your rewards.
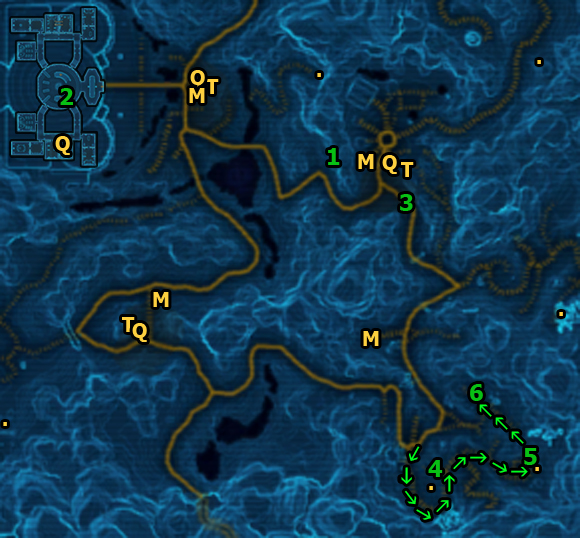
You can get this mission only after you've completed (depending on a class) Enemy Force or Trials in Kaleth mission. You can receive it from two NPCs. The first one, Master Meeb Wix is in Kalikori Village in [1] ...
![while the second, Master Kalisa Gehso is in the Jedi Temple in [2] - (L06) Flesh Raider Fact-finding - Tython - Star Wars: The Old Republic - Game Guide and Walkthrough](https://game.lhg100.com/Article/UploadFiles/201512/2015121709500716.jpg)
... while the second, Master Kalisa Gehso is in the Jedi Temple in [2]. Talk to either of them and agree to help.
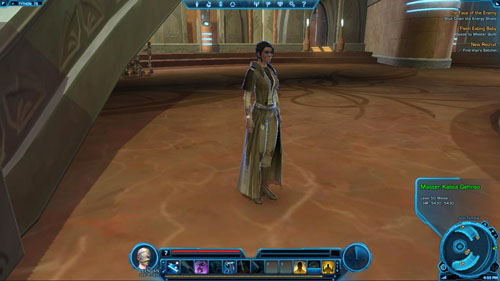
Examine the Salvage Idol
Head south - through the gate in [3] and then via The Hollows until you reach the Tythos Ridge. Follow the path shown by the arrows till you get to [4]. Watch out especially for the Flesh Raider Deathwatchers who can slow you down. The first statue is in [4] - defeat the enemies and examine it.
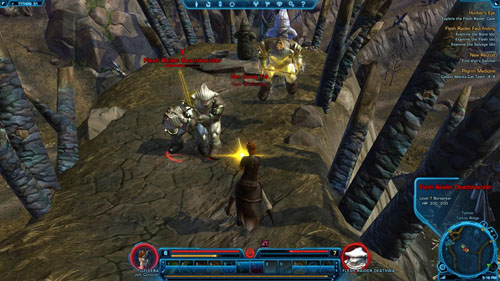
Examine the Bone Idol
Run further, following the arrows, till you reach a small Flesh Raider village. Try to get to the bone statue in [5] undetected. If you fail - defeat the enemies that could disturb you. Watch out for Flesh Raider Boneguards [+] who could stun you.
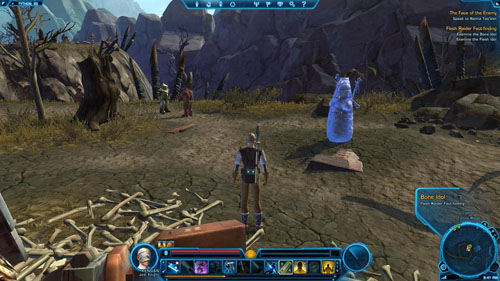
Examine the Flesh Idol
You need to examine the last statue, which is in [6]. Slide down the slope (the arrows show the way). Get rid of all enemies in the area and then inspect the last statue.
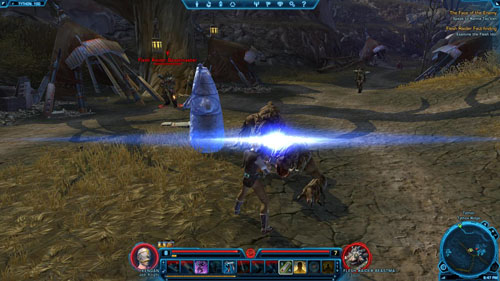
Report to Master Gehnso or Master Wix
You can speak with either Master Wix in [2], or Master Gehnso w [1] - choose the one that's closer. You'll complete the mission and get the rewards.
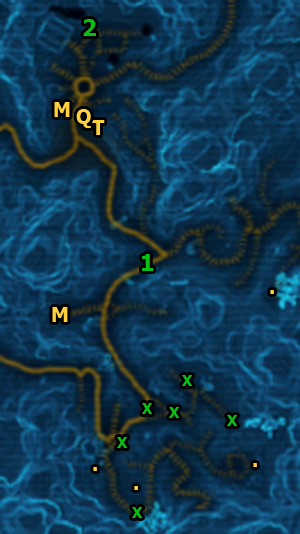
You can get this mission only after you've completed (depending on a class) Enemy Force or Trials in Kaleth mission. You'll get it after you've found a Datapad in [1] in the Tythos Ridge area.
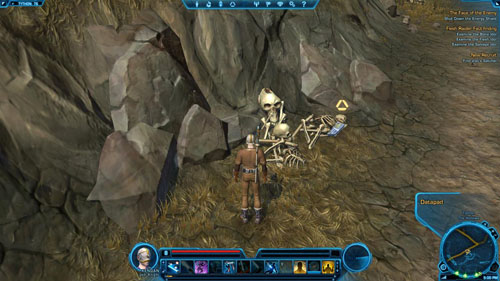
Collect Manka Cat Teeth: 0/6
You must collect six portions of Savage Manka Cats teeth (Massive Tusk). They can be found, for example, in the spots marked with [x]. The animals will always be accompanied by Flesh Raider Beastmasters and other enemies, so don't fight with everybody at the same time.
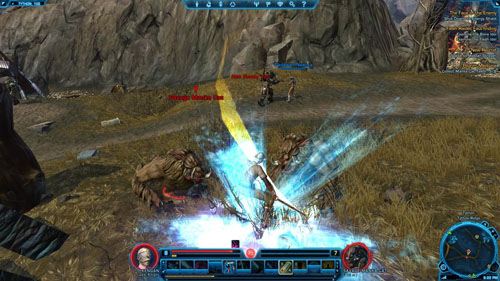
After killing each group, look out for yellow beams of light that can (but don't have to) come out of the bodies of the killed Savage Manka Cats. If the beam has a different color, it means that there are no teeth to pick from this animal corpse.
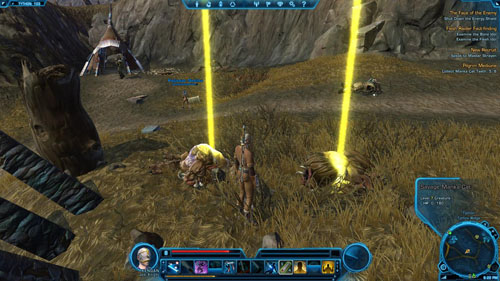
Report to Bahlea
If you no longer have anything to do in Tythos Ridge, go to Kalikori Village - you can simply teleport to Quick Travel Point (Kalikori Village), or go via The Hollows on foot. Find Bahley's house [2] and talk to her to complete the mission and get your rewards.

![You can get this mission only after you've completed (depending on a class) The Face of the Enemy or Hunter's Eye mission and you'll receive it from Liam Dentiri, who is standing in the square in [1] - (L06) Combat Leadership: Mark IV - Tython - Star Wars: The Old Republic - Game Guide and Walkthrough](https://game.lhg100.com/Article/UploadFiles/201512/2015121709500986.jpg)
You can get this mission only after you've completed (depending on a class) The Face of the Enemy or Hunter's Eye mission and you'll receive it from Liam Dentiri, who is standing in the square in [1]. Talk to him and accept his proposal to test the training droids.
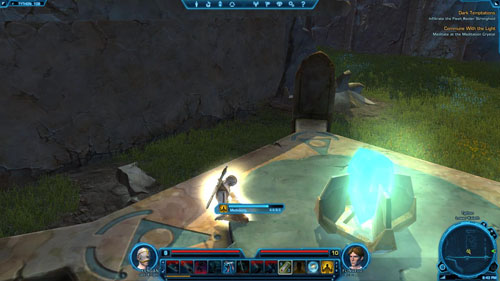
Activate and Destroy Mark IV Training Droids
You can fight with the droids in one of the several squares in front of the temple. There is a small console that activates the droids on each square. The consoles are marked with [x] on the map above.

When you turn on the console, two Damaged Mark IV Training Droids will appear. You need to start fighting with them instantly. Attack them all the time till they fall - again, acting fast is the key to win this battle.
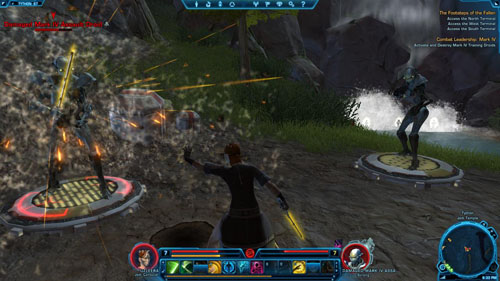
Return to Liam Dentiri
Then return to Liam Dentiri to claim your rewards.
![You can get this mission only after you've completed (depending on a class) The Face of the Enemy or Hunter's Eye mission and you'll receive it from Flingeld, who's meditating in [1] - in the Upper Kaleth ruins - (L07) Commune With the Light - Tython - Star Wars: The Old Republic - Game Guide and Walkthrough](https://game.lhg100.com/Article/UploadFiles/201512/2015121709500919.jpg)
You can get this mission only after you've completed (depending on a class) The Face of the Enemy or Hunter's Eye mission and you'll receive it from Flingeld, who's meditating in [1] - in the Upper Kaleth ruins. Use the arrows to get to Flingeld.
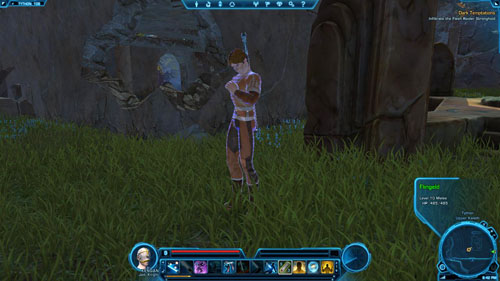
Meditate at the Meditation Crystal
Agree to help him. Then run to [2] and meditate by the large green crystal.
Levitate the Giant Rock
After that make the giant rock in [3] levitate. Point at it and wait for a short while.
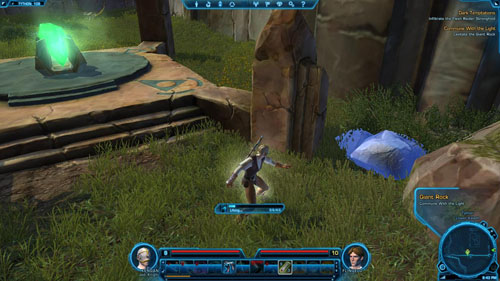
Speak to Flingeld
It turns out that there's nothing interesting under the rock. So, all that's left to do is to talk to Flingeld in [1], which will also mean completing the mission. At the end of the conversation you will be able to either choose to cover up for Flingeld or tell his master the truth. See the table for details.
A
Reply
Effect
Points / Rewards
1
He's lying.
Telling the truth
+50 to Light Side
2
Yes, I volunteered.
Lying
+50 to Dark Side
![You can get this mission only after you've completed (depending on a class) Dark Temptations or The Footsteps of the Fallen mission and you'll receive it from Liam Dentiri, who is standing in the square in [1] - (L08) Combat Leadership: Mark V - Tython - Star Wars: The Old Republic - Game Guide and Walkthrough](https://game.lhg100.com/Article/UploadFiles/201512/2015121709501036.jpg)
You can get this mission only after you've completed (depending on a class) Dark Temptations or The Footsteps of the Fallen mission and you'll receive it from Liam Dentiri, who is standing in the square in [1]. Talk to him and accept his proposal to test the training droids.

Activate and Destroy Mark V Training Droids
You can fight with the droids in one of the several squares in front of the temple. There is a small console that activates the droids on each square. The consoles are marked with [x] on the map above.
![When you turn on the console, one Mark V Commando Droid [*] will appear - (L08) Combat Leadership: Mark V - Tython - Star Wars: The Old Republic - Game Guide and Walkthrough](https://game.lhg100.com/Article/UploadFiles/201512/2015121709501032.jpg)
When you turn on the console, one Mark V Commando Droid [*] will appear. This is a strong and tough opponent, that's why it's good to do this mission when you already have a companion (T7-01 or Qyzen Fess).
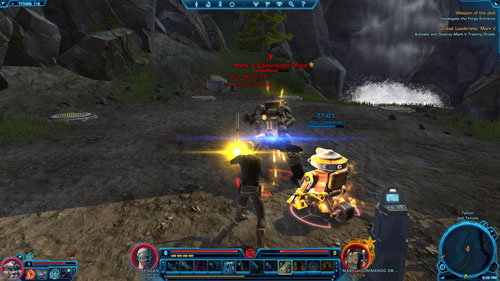
Return to Liam Dentiri
Then go back to Liam Dentiri to claim your rewards.
Egg smashing (Bonus)
![You can get this mission only after you've completed (depending on a class) Dark Temptations or The Footsteps of the Fallen mission and you'll receive it from Sedni Maruk, who's in [1] - (L07) Horranth Control - Tython - Star Wars: The Old Republic - Game Guide and Walkthrough](https://game.lhg100.com/Article/UploadFiles/201512/2015121709501098.jpg)
You can get this mission only after you've completed (depending on a class) Dark Temptations or The Footsteps of the Fallen mission and you'll receive it from Sedni Maruk, who's in [1]. Talk to him and agree to hunt Horranths - remember that your replies can have an impact on the companion (but it only applies to T7-01) - see the tables below the picture for details.

A
Reply
Effect
1
Sounds important.
Further conversation stage - C
2
And you are?
Further conversation stage - B
3
Get to the point.
Further conversation stage - C
B
Reply
Points / Rewards
1
No shame in that.
+15 to Affection: T7-01
2
So you failed.
-1 to Affection: T7-01
3
Tell me what's needed.
-
C
Reply
Points / Rewards
1
Absolutely.
+15 to Affection: T7-01
2
I'm not happy about this.
+40 to Affection: T7-01
3
Not interested [Refuse quest]
-
Smash Horranth Eggs: 0/10
While doing the two mission objectives described below, don't forget to smash Horranth eggs. They are virtually everywhere, but you need to look around (some are marked on the map with [x]). Destroy ten Horranth eggs with a powerful kick to complete this bonus mission and get 335 XP.
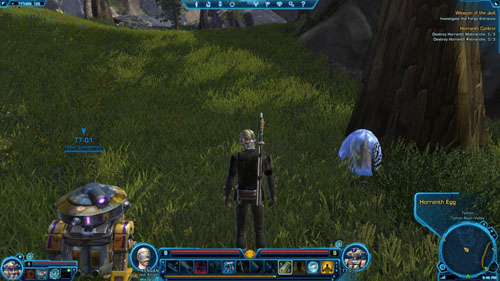
Destroy Horranth Matriarchs: 0/3
Horranth Matriarchs [+] can be found in the area of [2] - go there and kill three animals. Try not to fight with more than one at the same time.

Destroy Horranth Patriarchs: 0/3
You can hunt Horranth Patriarchs [+] in [3]. After killing six animals and destroying ten eggs you can return to claim your reward.

Return to Sedni Maruk
Return to Sedni Maruk in [1] and speak with him. Your reply can have an impact on the companion (but it only applies to T7-01) - see the table below for details.
B
Reply
Points / Rewards
1
I found a lot of eggs, too.
-
2
This area is important to us.
-
3
Didn't do it for you.
-1 to Affection: T7-01
Speechless (Bonus)
![This is a Heroic mission, which means that it's pointless to do it without other players or companion's help - (L07) [HEROIC 2+] The Chamber of Speech - Tython - Star Wars: The Old Republic - Game Guide and Walkthrough](https://game.lhg100.com/Article/UploadFiles/201512/2015121709501167.jpg)
This is a Heroic mission, which means that it's pointless to do it without other players or companion's help. You can get it only after you've completed (depending on a class) The Face of the Enemy or Hunter's Eye mission and you'll receive it from Do Zonn, who's standing in the camp in [1] (in Elarian Trail).
![Go to Lower Kaleth and climb up the stairs in [2] - (L07) [HEROIC 2+] The Chamber of Speech - Tython - Star Wars: The Old Republic - Game Guide and Walkthrough](https://game.lhg100.com/Article/UploadFiles/201512/2015121709501125.jpg)
Go to Lower Kaleth and climb up the stairs in [2]. Then find an overturned column in the building in [3] and climb it up to (you'll find yourself in Upper Kaleth). Next, head for [4], to the cave (Chamber of Speech) entrance.
![Defeat Droids: 0/30 - (L07) [HEROIC 2+] The Chamber of Speech - Tython - Star Wars: The Old Republic - Game Guide and Walkthrough](https://game.lhg100.com/Article/UploadFiles/201512/2015121709501163.jpg)
Defeat Droids: 0/30
You'll be attacked by Tythonian Chamber Guards [+] and their mini-droids - Tythonian Droid Tenders (the latter heal themselves and their allies). Also, watch out for the huge Tythonian Chamber Sentinels [*]. You'll get a bonus mission - killing thirty droids. Do it while carrying out the mission objective described below. You'll gain 870 XP for completing the bonus mission.
![Recover Power Cells: 0/4 - (L07) [HEROIC 2+] The Chamber of Speech - Tython - Star Wars: The Old Republic - Game Guide and Walkthrough](https://game.lhg100.com/Article/UploadFiles/201512/2015121709501147.jpg)
Recover Power Cells: 0/4
After destroying each group of robots, search their remains. You need to collect four Power Cells, which will be found most likely in the Tythonian Chamber Sentinels [*] remains - look out for the yellow beams of light. Keep collecting the power cells and head for [5].
![Activate the Ancient Computer - (L07) [HEROIC 2+] The Chamber of Speech - Tython - Star Wars: The Old Republic - Game Guide and Walkthrough](https://game.lhg100.com/Article/UploadFiles/201512/2015121709501244.jpg)
Activate the Ancient Computer
Watch out for the two groups consisting of two Tythonian Chamber Guards [+] and one Tythonian Chamber Sentinel [*]. These will be the last enemies to fight in this place. Then activate the ancient computer in [5]. At the end of the conversation will have to decide what kind of ancient knowledge you'll retrieve. See the table below the picture for details.
![A - (L07) [HEROIC 2+] The Chamber of Speech - Tython - Star Wars: The Old Republic - Game Guide and Walkthrough](https://game.lhg100.com/Article/UploadFiles/201512/2015121709501263.jpg)
A
Reply
Effect
Points / Rewards
1
Maravada.
Knowledge of construction
+50 to Light Side
2
Avamarivash.
Knowledge of war
+50 to Dark Side
An optional challenge is the fight with a powerful droid - Tythonian Lore Guardian [#], who can be found in [6]. The boss doesn't have any special attacks, so with T7-01 / Qyzen Fess or other players' help you'll deal with him easily.
![Return to Do Zonn - (L07) [HEROIC 2+] The Chamber of Speech - Tython - Star Wars: The Old Republic - Game Guide and Walkthrough](https://game.lhg100.com/Article/UploadFiles/201512/2015121709501255.jpg)
Return to Do Zonn
Teleport to Quick Travel Point (Elarian Trail) and talk to Do Zonn in [1] to complete this mission and claim your rewards.
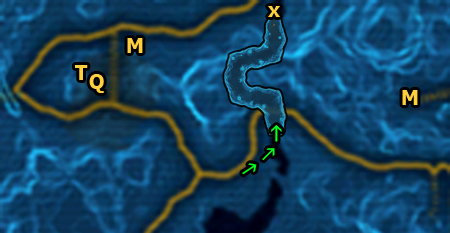
The first Datacron is hidden in front of the cave entrance, except that you can't reach it. That's why, you need to find another way in. Go north to Tythos River Valley and find the river.
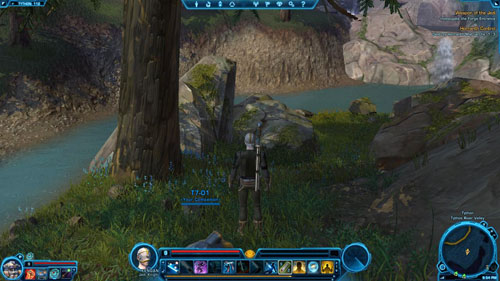
Go in the water and turn left. The river will take you to the cave entrance (Mountain Pass).
![Watch out for animals inside, especially Cave Manka Cats [+] - Galactic History 09 (+2 Endurance) - Datacrons - Star Wars: The Old Republic - Game Guide and Walkthrough](https://game.lhg100.com/Article/UploadFiles/201512/2015121709501217.jpg)
Watch out for animals inside, especially Cave Manka Cats [+]. Keep following the only path and getting rid of all opponents till you reach the second cave exit.
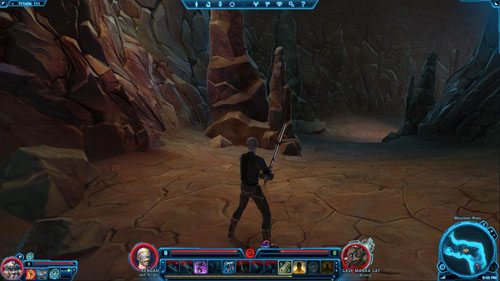
The Datacron is hidden next to the second cave exit - on the left.

Rewards: +2 Endurance, Codex entry - Achievements - Datacrons: Galactic History 09 - The Force Wars - 550 XP
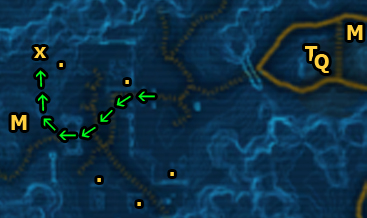
Go to Lower Kaleth and climb up the big stairs (the beginning of the way is shown by arrows). Once you've found yourself on the higher level, look for the building on the right.
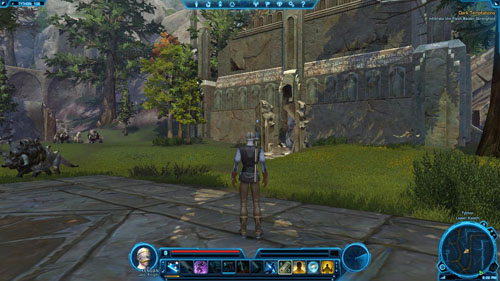
Go inside and jump on the overturned column. Climb it up to get to Upper Kaleth.
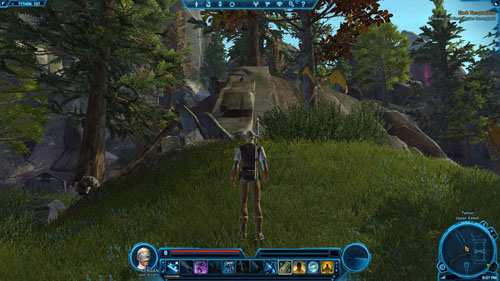
When you step on the grass, look a little to the right - there is another overturned column there, on which you can jump. Do it but be careful not to fall off!
Climb the widest column wall till you are able to step onto the hill. You should have already noticed the gleaming Datacron from a distance.
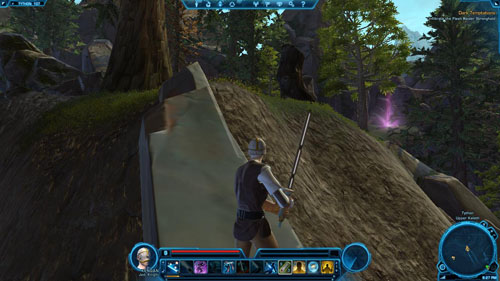
Run up to the Datacron lying under the statue and take it.
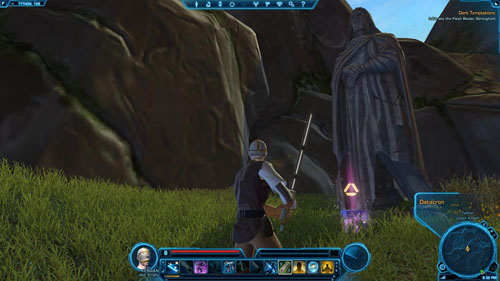
Rewards: +2 Willpower, Codex entry - Achievements - Datacron: Galactic History 10 - The Tion Cluster - 550 XP
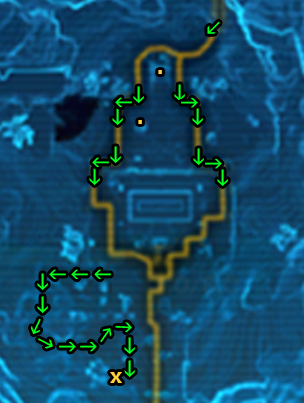
The journey to find the last Datacron begins in Tythos River Valley. Go through the Waterfall Cave to The Forge area. Climb the first and then the second stairs to get to the highest level of the forge. Run south, looking closely at the ruined wall on the right.
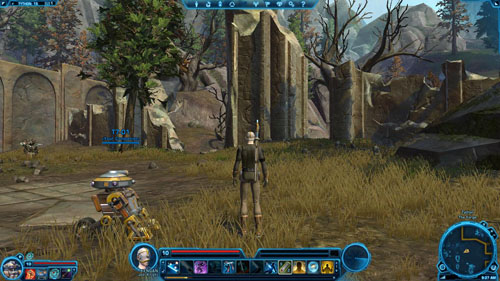
When you find a breach in the wall, use it and run, following the arrows on the map above. You'll be fighting with Flesh Raiders along the way.

Defeat the first group, turn left and then left once more.
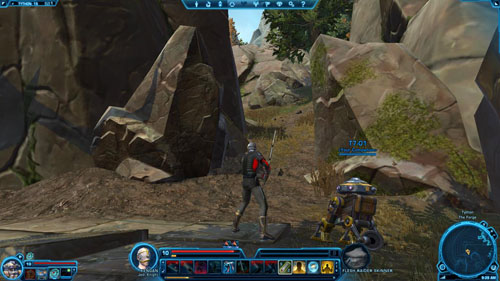
You'll find yourself in a hidden Flesh Raider camp. Be careful - on the way to the first ruins a Flesh Raider War Leader [+] will stand in your way.
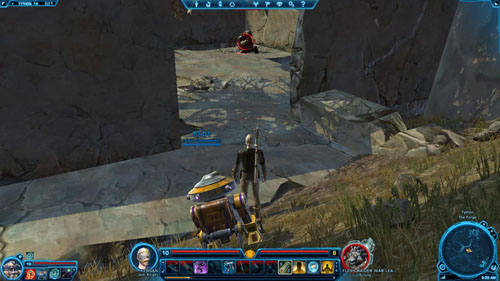
Watching out for the enemies, reach the wall opposite the camp entrance. The further road leads to the ruins on the right.
![Before you can take the last Datacron, you'll have to defeat another Flesh Raider War Leader [+] - Galactic History 11 (Matrix Shard) - Datacrons - Star Wars: The Old Republic - Game Guide and Walkthrough](https://game.lhg100.com/Article/UploadFiles/201512/2015121709501456.jpg)
Before you can take the last Datacron, you'll have to defeat another Flesh Raider War Leader [+].
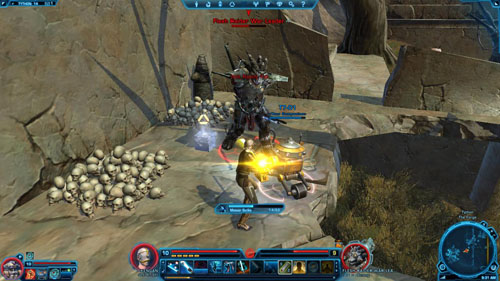
Pick up the Datacron lying by the piles of skulls.
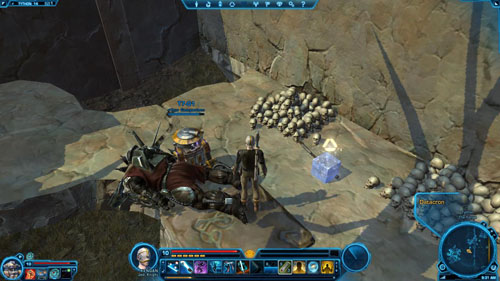
To get out of here, look for the sloping column on the other side of the camp. Run on it and then jump down on the other side.
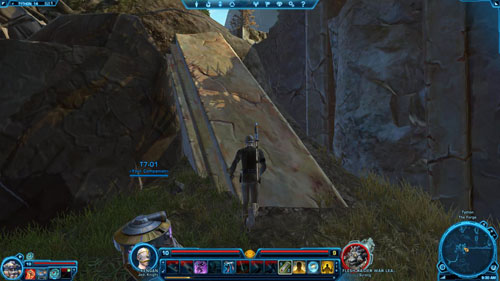
Rewards: Blue Matrix Shard, Codex entry - Achievements - Datacrons: Galactic History 11 - The Tionese Face the Hutt Empire - 550 XP
![[M]: Medical Droids (medical assistance and Respawn points) - Ord Mantell - Places - Star Wars: The Old Republic - Game Guide and Walkthrough](https://game.lhg100.com/Article/UploadFiles/201512/2015121709501528.jpg)
[M]: Medical Droids (medical assistance and Respawn points)
[Q]: Quick Travel Points
[T]: Taxis
This chapter acquaints the player with the secrets of every Tython area. It does not cover the areas through which you enter through the green force field (story areas, group areas, etc.). In each location description there are:
(01): Drelliad Village
(02): Fort Garnik
(03): Talloran Village
(04): Northern Talloran
(05): Mannett Shore
(06): Mannett Point
(07): Avilatan Badlands
(08): Lava Flow Overlook
(09): Oradam Peninsula
(10): Savrip Shore
(11): Savrip Island
(12): Mount Avitalan
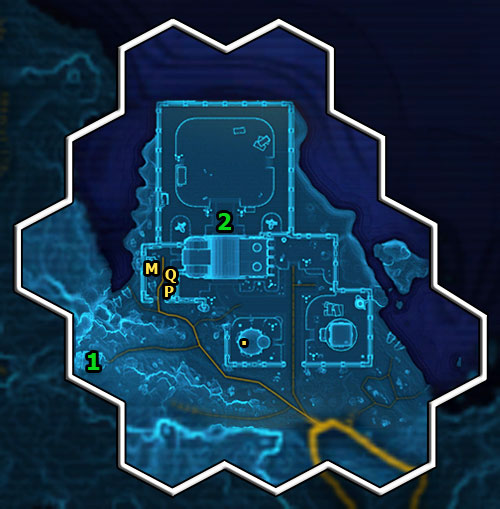
You don't get any XP for discovering the very first location. However, when you go deep into the area, you'll obtain a Codex entry - Locations: Drelliad Village - worth 45 XP.
SERVICES / ASSISTANCE / ITEMS
[Q]: Quick Travel Point (Drelliad Village)
[P]: Mailbox
[.]: Security Chest (chests you can search)
[M]: Medical Droid - Medpacs and Stims, item repair, Respawn Point
OTHER
[1]: Class starting point - Trooper
[2]: Class starting point - Smuggler
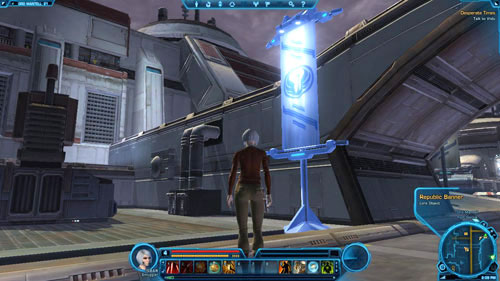
For discovering this location you will receive 105 XP. When you go deep into the area, you'll also obtain a Codex entry - Locations: Fort Garnik - worth 100 XP.
ENTRANCES / EXITS
[A]: Avilatan's Rest Cantina
[B]: Interrogation Center
[C]: Fort Garnik Spaceport
SERVICES
[Q1]: Quick Travel Point (Fort Garnik)
[Q2]: Quick Travel Point (Avilatan's Rest Cantina)
[T]: Taxi (Fort Garnik Speeder)
[I]: Item Modification Station
[P]: Mailbox
[U]: Space Shuttle (will take you from Ord Mantell)
[J]: Jukebox
ASSISTANCE / VENDORS
[M]: Medical Droid (Medpacs and Stims, item repair, Respawn Point)
[G]: Corporal Hurwell (Specialty Goods)
[E]: Triank (Medium Armor Vendor)
[H]: Specialist Tos (Heavy Armor Vendor)
[W]: Ordnance Officer Oordu (Weapons Vendor)
[O]: Shamuillan (Social Items Vendor)
[C]: Ryn (Cantina Vendor)
TRAINERS
[A]: Lieutenant Forris (Trooper Trainer)
[B]: Wentell Pron (Smuggler Trainer)
OTHER
[1]: Rodian (Lore Object) - examining the terminal by the wall will result in obtaining a Codex entry - Species: Rodian - 100 XP.
![[2]: Republic Banner (Lore Object) - having a look at the Republic banner will result in obtaining a Codex entry - Organizations: Republic Military Ranks - 45 XP - (02) Fort Garnik - Places - Star Wars: The Old Republic - Game Guide and Walkthrough](https://game.lhg100.com/Article/UploadFiles/201512/2015121709501554.jpg)
[2]: Republic Banner (Lore Object) - having a look at the Republic banner will result in obtaining a Codex entry - Organizations: Republic Military Ranks - 45 XP.
[3]: Refugees of War (Lore Object) - reading the sign will result in obtaining a Codex entry - Lore: Refugees of War - 100 XP.
![[4]: You can climb the rocks here if you want to get to, among other places, the Lava Flow Overlook area - (02) Fort Garnik - Places - Star Wars: The Old Republic - Game Guide and Walkthrough](https://game.lhg100.com/Article/UploadFiles/201512/2015121709501536.jpg)
[4]: You can climb the rocks here if you want to get to, among other places, the Lava Flow Overlook area.
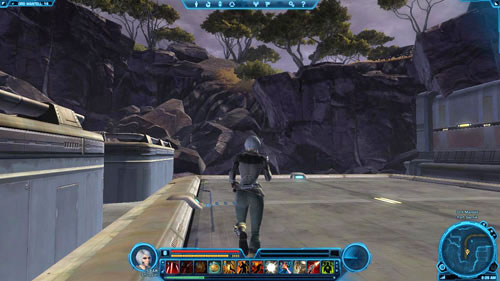
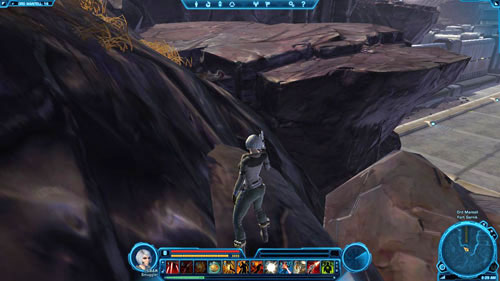
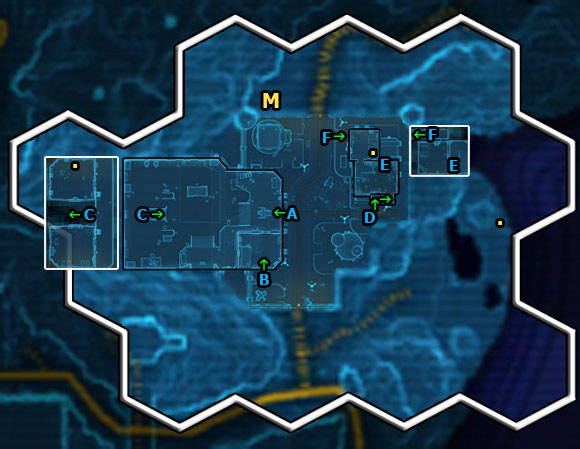
For discovering this location you will receive 150 XP. When you go deep into the area, you'll also obtain a Codex entry - Locations: Talloran Village - worth 100 XP.
ENTRANCES / EXITS
[A]: Talloran Central Warehouse (main entrance)
[B]: Talloran Central Warehouse (side entrance)
[C]: Talloran Central Warehouse - Offices (stairs)
[D]: Separatist Safe House
[E]: Separatist Safe House - Basement (stairs)
[F]: Separatist Safe House - Basement (stairs)
ASSISTANCE / ITEMS
[M]: Medical Droid (Medpacs and Stims, item repair, Respawn Point)
[.]: Security Chest (chests you can search)
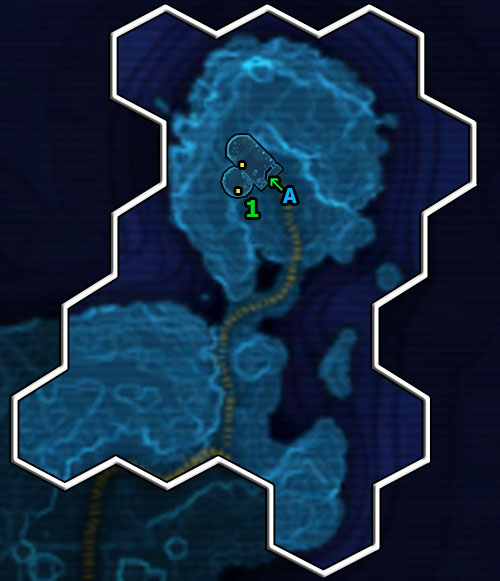
For discovering this location you will receive 200 XP.
ENTRANCES / EXITS
[A]: Separatist Relay Hub
ITEMS
[.]: Security Chest (chests you can search)
OTHER
[1]: Greater Gapillian Grazer [+] - one of the places you can find these animals. Kill one to obtain a Codex entry - Bestiary: Gapillian Grazer - 160 XP.

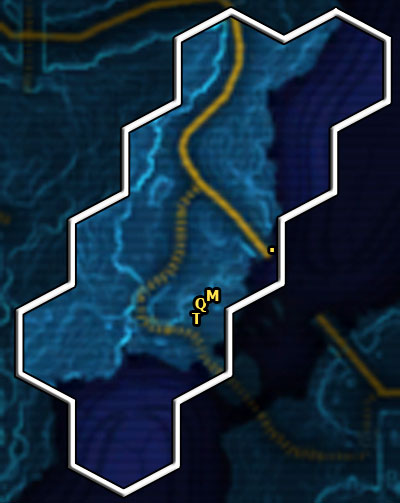
For discovering this location you will receive 260 XP.
SERVICES/ ASSISTANCE / ITEMS
[Q]: Quick Travel Point (Falks Reach)
[T]: Taxi (Falks Reach Speeder)
[.]: Security Chest (chests you can search)
[M]: Medical Droid (Medpacs and Stims, item repair, Respawn Point)
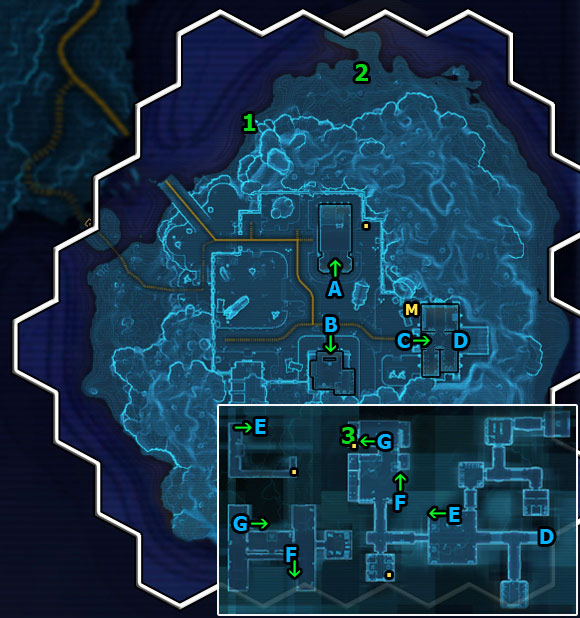
For discovering this location you will receive 270 XP. When you go deep into the area, you'll also obtain a Codex entry - Locations: Mannett Point - worth 300 XP.
ENTRANCES / EXITS
[A]: Mannett Point Vehicle Hangar
[B]: Mannett Point Medical Center
[C]: Separatist Base
[D]: Separatist Base - Level 2 (elevator)
[E]: Separatist Base - Security Checkpoint (stairs)
[F]: Separatist Base - Training Rooms (stairs A)
[G]: Separatist Base - Training Rooms (stairs B)
ASSISTANCE / ITEMS
[M]: Medical Droid (Medpacs and Stims, item repair, Respawn Point)
[.]: Security Chest (chests you can search)
OTHER
[1]: Shallow Bay Razoronn [+] - one of the places you can find these animals. Kill one to obtain a Codex entry - Bestiary: Razoronn - 400 XP.
![[2]: Captain Ethen Remak [*] and Datacron 3/3 - the valuable Datacron is guarded by Captain Ethem Remak [*] - (06) Mannett Point - Places - Star Wars: The Old Republic - Game Guide and Walkthrough](https://game.lhg100.com/Article/UploadFiles/201512/2015121709501669.jpg)
[2]: Captain Ethen Remak [*] and Datacron 3/3 - the valuable Datacron is guarded by Captain Ethem Remak [*]. If your level is the same as his, then some Medpacs will do. For discovering this datacron you will get 550 XP, Red Matrix Shard and unlock a Codex entry: Achievements - Datacron: Galactic History 14 - The Fall of Tion.

![[3]: Separatist Base Captain [*] - if you want, you can get to the Separatist Base Captain's chamber and kill him - (06) Mannett Point - Places - Star Wars: The Old Republic - Game Guide and Walkthrough](https://game.lhg100.com/Article/UploadFiles/201512/2015121709501611.jpg)
[3]: Separatist Base Captain [*] - if you want, you can get to the Separatist Base Captain's chamber and kill him. Even though he can slow you down, he's not a challenging enemy (your character's level should be at least 6 before you start the fight).
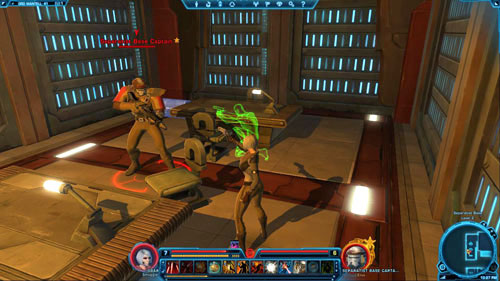
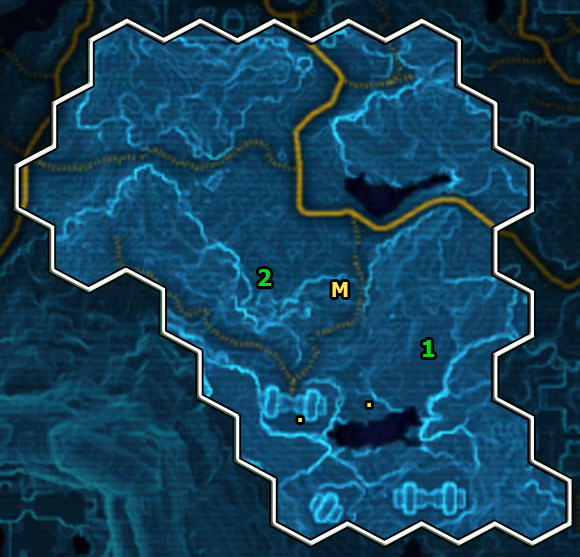
For discovering this location you will receive 260 XP.
ASSISTANCE / ITEMS
[M]: Medical Droid (Medpacs and Stims, item repair, Respawn Point)
[.]: Security Chest (chests you can search)
OTHER
[1]: Champion Jax Stug [*] and Specialist Dev Farkus [+] - if you want to defeat the pair, start with killing the latter. Even if you die, you can instantly respawn next to Champion Jax Stug [*]. If your character's level is the same as the boss's, you'll easily win this battle.
![[2]: Demolition Chief Vash Taggen [*] - another separatist boss - (07) Avilatan Badlands - Places - Star Wars: The Old Republic - Game Guide and Walkthrough](https://game.lhg100.com/Article/UploadFiles/201512/2015121709501701.jpg)
[2]: Demolition Chief Vash Taggen [*] - another separatist boss. Try to fight him when your character's level is at least 6 and there won't be any problems.
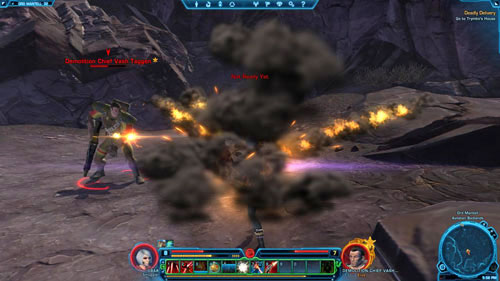
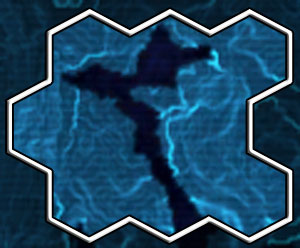
You don't get any XP for discovering this location. You can reach it, for example, from Fort Garnik - read this location description (the entrance is in [4] on the map of the fort).
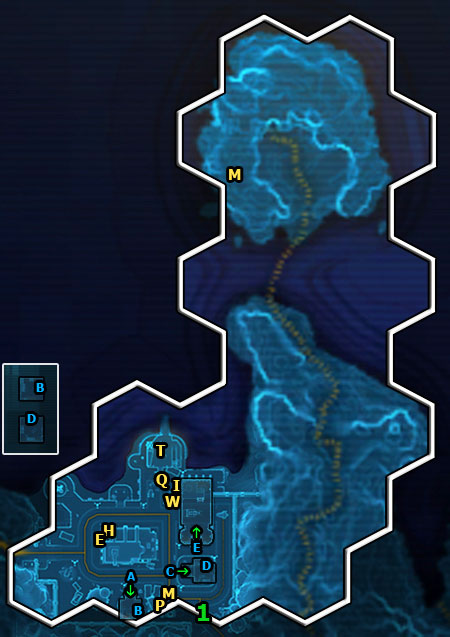
You don't get any XP for discovering this location. However, when you go to the main village gate in [1], you'll obtain a Codex entry - Locations: Oradam Village - worth 400 XP.
It's good to know that there is an island with a hidden Empire base in the north. If you play as a Smuggler or Trooper you won't be able to get there (this place is for other classes).
ENTRANCES / EXITS
[A]: Gizmel's Home
[B]: Gizmel's Home - Upper Level (stairs)
[C]: Oradam Village Workshop
[D]: Oradam Village Workshop - Upper Level (stairs)
[E]: Oradam Vehicle Hangar
ASSISTANCE / VENDORS / SERVICES
[Q]: Quick Travel Point (Oradam Village)
[T]: Taxi (Oradam Village Speeder)
[I]: Item Modification Station
[P]: Mailbox
[M]: Medical Droid (Medpacs and Stims, item repair, Respawn Point)
[E]: Mairoy (Medium Armor Vendor)
[H]: Gagesk (Heavy Armor Vendor)
[W]: Ordnance Officer Shurs (Weapons Vendor)

You don't get any XP for discovering this location.
ASSISTANCE
[M]: Medical Droid (Medpacs and Stims, item repair, Respawn Point)
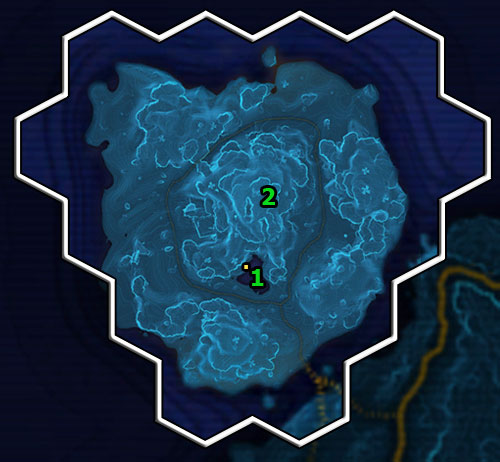
For discovering this location you will receive 300 XP. When you go deep into the area, you'll also obtain a Codex entry - Locations: Savrip Island - worth 450 XP.
This is a Heroic location. We recommend traveling with a companion or other players.
ITEMS
[.]: Security Chest (chests you can search)
OTHER
[1]: Savrip Champion [#] - if you wish to defeat the huge beast, first eliminate a Separatist Recon Scout [+] and two Separatist Expedition Leaders [*]. Only then can you start fighting with Savrip Champion [#]. The monster is extremely powerful and tough. He can also jump very high. When he lands on the ground, a shock wave that can throw you aside is created. After you've defeated the boss, you'll obtain a Codex entry - Bestiary: Savrip - 450 XP.
![[2]: Datacron 1/3 - for more information (how to get to it) see the](https://game.lhg100.com/Article/UploadFiles/201512/2015121709501893.jpg)
[2]: Datacron 1/3 - for more information (how to get to it) see the "Datacrons" chapter. For discovering it you will get 550 XP, +2 Aim and unlock a Codex entry: Achievements - Datacron: Galactic History 12 - The Birth of the Republic.
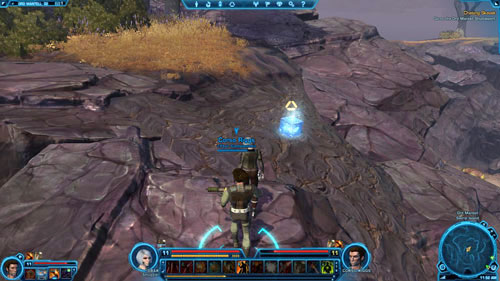
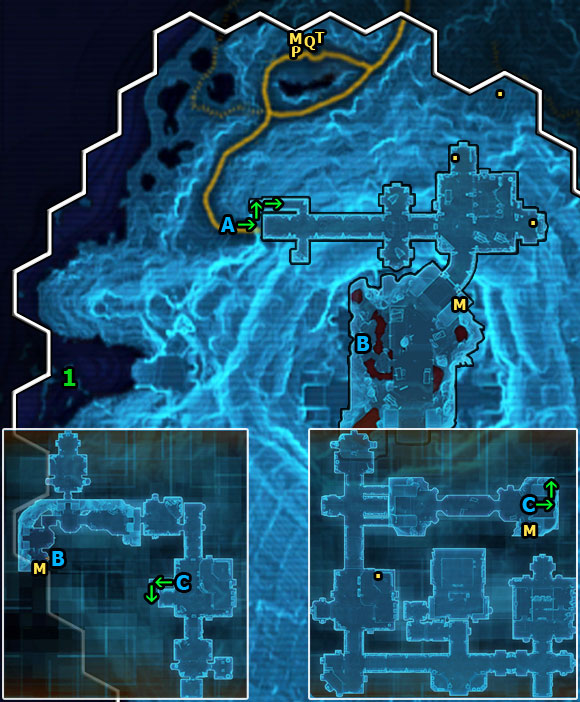
For discovering this location you will receive 333 XP. When you get closer to the separatist stronghold entrance, you'll also obtain a Codex entry - Locations: Separatist Stronghold - worth 495 XP.
ENTRANCES / EXITS
[A]: Separatist Stronghold
[B]: Separatist Stronghold - Level 2 (elevator)
[C]: Separatist Stronghold - Level 3 (corridor)
SERVICES/ ITEMS / ASSISTANCE
[Q]: Quick Travel Point (Volcano Camp)
[T]: Taxi (Volcano Camp Speeder)
[P]: Mailbox
[.]: Security Chest (chests you can search)
[M]: Medical Droid (Medpacs and Stims, item repair, Respawn Point)
OTHER
[1]: Datacron 2/3 - for more information (how to get to it) see the "Datacrons" chapter. For discovering it you will get 550 XP, +2 do Presence and unlock a Codex entry: Achievements -Datacron: Galactic History 13 - The First Great Schism.
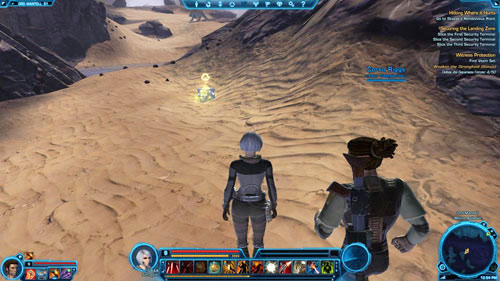
Each mission description is divided into several smaller parts. It should be observed that the following legend does not concern the next section - "Shortcuts (main and side missions)". The list of missions is given in chronological order, that is, the order you receive them. Also, the level of a particular mission is shown before its name (L). Here is all information that is essential to read before you start using the missions description.
The exact description of a mission is here. Sometimes it's divided into several different places you will visit, and each of them has its own map.
In the missions descriptions there are all dialogues that can have any impact on the game mechanics. It is given in the Points / Rewards column. The Effect column specifies what kind of effect your reply will have (there can also be a letter referring to the next dialogue mentioned), while under Reply there is the answer's line.
If any dialogue is missing it means that it doesn't matter which reply you choose (of course, except for the aspects related to developing your character in terms of the story). If a reply doesn't have any effect or doesn't result in getting any points or rewards, then there will be no suitable column in the table.
#
Reply
Effect
Points / Rewards
Reply number
One out of the two or three replies your character can give.
Effect of the chosen reply, and if it leads further - a letter of the next dialogue is given
+x to Light / Dark Side, +x / -x to companion's Affection, other Rewards
# - a letter indicating the dialogue order. Some replies can lead to different dialogues.
If a mission contains a small bonus mission, then a complete list of them is given right before the mission description. Bonus mission objectives are given along with the mission objectives (class or side) with which such a mission is connected.
The list of rewards includes: XP, credits, items and Codex entries. You can receive all these items for completing a mission. Sometimes you'll get one out of the two depending on your class, other times you'll have to choose one from several items (these are separated by a slash - "/").
The chapter presents a list of all main, side, bonus and tutorial mission objectives that take place on the planet Ord Mantell. The list is arranged in such a way as to minimize the time necessary for the sole running and visiting the same areas.
Most often the next side missions can or should be done (because of your character's level) while doing the next main missions (Class). That is why all mission objectives are divided into main missions.
You should observe that there are no issues connected with the Codex here - these can be found in the "Places" chapter. Moreover, there are no side Heroic mission objectives. Their descriptions are at the end of the side missions chapter - "Ord Mantell".
Hit the Ground Running [mission start] - Gearbox
Hit the Ground Running - Speak to Gearbox
Clearing the Air [mission start] - Sergeant Blyes
Mark Quick Travel Point (Drelliad Village)
[+] Hit the Ground Running: Take Back Drelliad Village (Bonus) - Dispatch the Separatist Forces: 0/10
Clearing the Air - Disable Signal Jammer Alpha
Clearing the Air - Disable Signal Jammer Beta
Hit the Ground Running - Destroy the Missile Launcher Cache
Hit the Ground Running - Use Your Personal Holocom
Clearing the Air - Disable Signal Jammer Delta
Clearing the Air [mission end] - Return to Sergeant Blyes
Snipe Hunt [mission start] - Wesner
[+] Snipe Hunt: Blinding the Enemy (Bonus) - Defeat Separatist Forces: 0/8
Snipe Hunt - Defeat Separatist Snipers: 0/3
Snipe Hunt [mission end] - Speak to Commander Vray
Best of the Best [mission start] - Sergeant Jaynes
Best of the Best [mission end] - Talk to Lieutenant Forris
Mark Quick Travel Point (Fort Garnik), Quick Travel Point (Avilatan's Rest Cantina) and Taxi (Fort Garnik Speeder)
Hit the Ground Running - Report to Commander Tavus
Hit the Ground Running - Speak to Private Farn
Hit the Ground Running - Report to Commander Tavus
Hit the Ground Running [mission end] - Speak to Commander Tavus
The Spy [mission start] - Gearbox
Mercy [mission start] - Sergeant Hurd
Unsafe Safe Houses [mission start] - Holovid Intelligence Hub
Mercy - Speak to Yael
Scavenger Hunt [mission start] - Alma
[+] Mercy - Loot the Stolen Medicine: 0/2
[+] The Spy: Clean Up Talloran (Bonus) - Defeat Separatist Henchmen: 0/10
Unsafe Safe Houses - Disable Separatist Datalink Alpha
Scavenger Hunt - Find Alma's Heirloom
Scavenger Hunt - Speak to Ebenga
The Spy - Find Bellis
The Spy - Use Your Personal Holocom
Unsafe Safe Houses - Disable Separatist Datalink Bravo
The Spy - Retrieve Bellis' Field Box
The Spy - Speak to Lin
The Spy - Retrieve Bellis' Field Box
[+] Scavenger Hunt: Praying on Thieves (Bonus) - Eliminate the Scavengers: 0/8
Scavenger Hunt - Search the Scavenger's Salvage
[+] Unsafe Safe Houses: Stop the Raiders (Bonus) - Defeat Separatist Forces: 0/10
Unsafe Safe Houses - Destroy the Satellite Dish Relay
[o] Commit suicide to appear in the Medical Center in Oradam Village
[o] Scavenger Hunt [mission end] - Return to Ebenga
Teleport to Quick Travel Point (Avilatan's Rest Cantina)
[o] Scavenger Hunt [mission end] - Return to Alma
Mercy [mission end] - Return to Yael or Sergeant Hurd
The Spy - Return to the Republic Command Center
The Spy [mission end] - Speak to Fuse
The Ambush [mission start] - Fuse
The Ambush - Speak to Mirru
The Ambush - Use Your Personal Holocom
[+] The Ambush: Counter-Insurgency (Bonus) - Eliminate the Separatist Forces: 0/10
The Ambush - Disable the First Bomb
The Ambush - Disable the Second Bomb
The Ambush - Disable the Third Bomb
Commit suicide to appear in the Medical Center in Fort Garnik
The Ambush - Return to Republic Command Center
The Ambush - Speak to Private Farn
The Ambush [mission end] - Speak to Commander Tavus
Mannett Point [mission start] - Commander Tavus
Victims of War [mission start] - Lieutenant Xorem
Lost Son [mission start] - Ellis
Unsafe Safe Houses [mission end] - Speak to Communications Officer Sulan
[+] Victims of War: Ending the Insurgency (Bonus) - Defeat Separatist Forces: 0/12
Bridging the Gap [mission start] - Commander Bragan
Mark Quick Travel Point (Falks Reach) and Taxi (Falks Reach Speeder)
The Untold Story [mission start] - Lamalla Rann
[+] The Untold Story: Time For Some Payback (Bonus) - Eliminate Separatist Forces: 0/20
Bridging the Gap - Defeat Separatist Rocket Gunners: 0/3
[+] Mannett Point: Bringing the Battle to Them (Bonus) - Defeat Separatist Battlers: 0/8
Mannett Point - Speak to Wraith
[+] Bridging the Gap - Destroy Weapons Caches: 0/4
Victims of War - Find Doctor Jaen Kett
Mannett Point - Disable the Force Field Generator
Mannett Point - Speak to Jex
Mannett Point - Disable the Force Field Generator
Mannett Point - Locate the ZR-57
Mannett Point - Speak to Separatist Officer Dalern
Mannett Point - Locate the Separatist Commanders
Mannett Point - Talk to Separatist Commander Bol
Mannett Point - Defeat Separatist Commander Bol
Mannett Point - Defeat Separatist Commander Saphrro
Mannett Point - Defeat Separatist Commander Vyru
Mannett Point - Download the Data
Lost Son - Find Paul
The Untold Story - Find Waxx
[o] The Untold Story - Loot the Holodiscs: 0/2
Teleport to Quick Travel Point (Falks Reach)
The Untold Story [mission end] - Return to Lamalla Rann
Bridging the Gap [mission end] - Return to Commander Bragan
Take a taxi to Taxi (Fort Garnik)
Victims of War [mission end] - Return to Lieutenant Xorem
Lost Son [mission end] - Return to Ellis and Iero
Mannett Point - Return to the Republic Command Center
Mannett Point [mission end] - Speak to Needles
Oradam Village [mission start] - Needles
Generator Problems [mission start] - S3E3
Generator Problems - Find Engineer Celestra
[+] Generator Problems: Punish the Saboteurs (Bonus) - Dispatch the Separatist Saboteurs: 0/12
Generator Problems - Recover Liquid Coolant: 0/5
Generator Problems - Recover a Hydrospanner
Generator Problems - Recover a Multitool
Generator Problems - Recover a Turbohammer
Generator Problems [mission end] - Return to Engineer Celestra
Republic Roulette or Republic Roulette: Questionable Ethics [mission start] - Ensign Dregg
[o] Republic Roulette - Speak to Ensign Peters
[o] Republic Roulette - Use the Race Starter Panel
[o] Republic Roulette - Watch Your Runner Run
[o] Republic Roulette - Collect Mortar Shells: 0/3
[o] Republic Roulette [mission end] - Return to Ensign Peters
Mark Quick Travel Point (Volcano Camp) and Taxi (Volcano Camp Speeder)
Oradam Village - Recover an Albozene Pack
Oradam Village - Recover a Vimidone Pack
Oradam Village - Recover a Medical Injector
Hail the Liberators [mission start] - Odar
Mark Quick Travel Point (Oradam Village) and Taxi (Oradam Village Speeder)
Oradam Village - Speak to Zak
Oradam Village - Use Your Personal Holocom
Take a taxi to Taxi (Fort Garnik)
[o] Republic Roulette: Questionable Ethics [mission end] - Report to Ethics Officer Drage
Hail the Liberators - Find Odar's Daughter
Hail the Liberators - Speak to Kellik
Take a taxi to Taxi (Oradam Village)
Hail the Liberators [mission end] - Return to Odar
Take a taxi to Taxi (Fort Garnik)
Oradam Village - Return to the Republic Command Center
Oradam Village - Speak to Lieutenant Virk
[o] Oradam Village - Defeat Lieutenant Virk
[o] Oradam Village - Defeat Ensign Jarix
[o] Oradam Village - Defeat Virk's Henchmen
Oradam Village [mission end] - Return to Lieutenant Jorgan
The Separatists' Stronghold [mission start] - Lieutenant Jorgan
Witness Protection [mission start] - Milo Phipps
Witness Protection - Speak to Lieutenant Bendick
Securing the Landing Zone [mission start] - Captain Xuss
Take a taxi to Taxi (Volcano Camp)
Securing the Landing Zone - Speak to Sergeant Vandal
[+] Witness Protection: Weaken the Stronghold (Bonus) - Defeat the Separatist Forces: 0/50
Alliance Of Evil [mission start] - Agent Burne
Alliance Of Evil - Access the Computer Terminal
Securing the Landing Zone - Slice the First Terminal
The Separatists' Stronghold - Use Data Spike on Separatists' Comm Console
The Separatists' Stronghold - Use Your Personal Holocom
[+] Alliance Of Evil - Defeat Separatist Leaders: 0/4
[+] Alliance Of Evil - Defeat Separatist Vanguards: 0/4
Securing the Landing Zone - Slice the Second Terminal
Witness Protection - Find Veem Set
Witness Protection - Open the Holding Cell
Witness Protection - Speak to Veem Set
Securing the Landing Zone - Slice the Third Terminal
Securing the Landing Zone - Destroy the Landing Pad Anti-aircraft Guns: 0/2
Alliance Of Evil [mission end] - Contact Agent Burne via the Comm Station
The Separatists' Stronghold - Find Havoc Squad
The Separatists' Stronghold - Talk to Commander Tavus
The Separatists' Stronghold - Defeat Colonel Vorr
The Separatists' Stronghold - Defeat the Imperial Soldiers
Teleport to Quick Travel Point (Fort Garnik)
Securing the Landing Zone [mission end] - Return to Captain Xuss
[o] Witness Protection [mission end] - Return to Lieutenant Bendick
[o] Witness Protection [mission end] - Return to Milo Phipps
The Separatists' Stronghold - Return to the Republic Command Center
The Separatists' Stronghold [mission end] - Report to General Vander
New Assignment [mission start] - General Vander
Airing Grievances [mission start and end] - Lieutenant Jorgan
New Assignment [mission end] - Take the Shuttle to the Republic Fleet
Take Back Drelliad Village (Bonus)
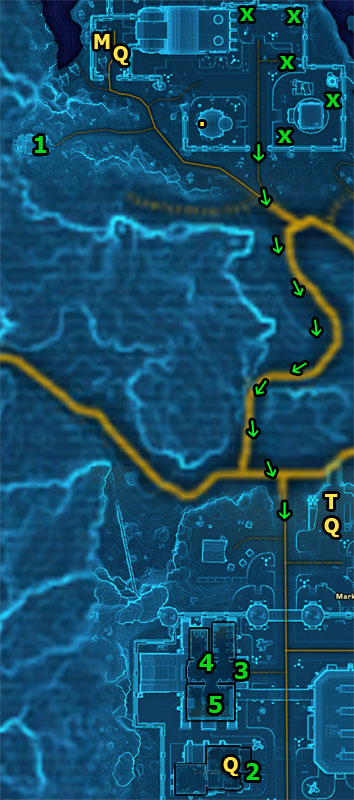
Speak to Gearbox
You begin your adventure as a Trooper in [1] - in the damaged transporter. Your first task will be to talk to Gearbox (unless it happened automatically). Speak with him to get the next mission objective.

Exit the transporter and start heading for Drelliad Village. Remember to mark Quick Travel Point (Drelliad Village) marked on the map with [Q]. Then force your way trough the separatist barricade and enter the village.
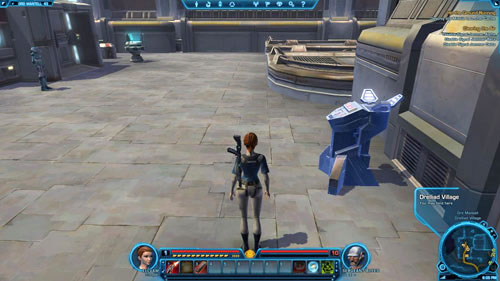
Dispatch the Separatist Forces: 0/10
While you'll be carrying out the next main and side mission objectives, the separatists will stand in your way more than twice. Kill ten to complete the bonus mission and gain 255 XP. The mission is about killing enemies of the following three types only: Separatist Scouts, Separatist Roughnecks and Separatist Sympathizers. Watch out especially for Separatist Heavy Gunners.
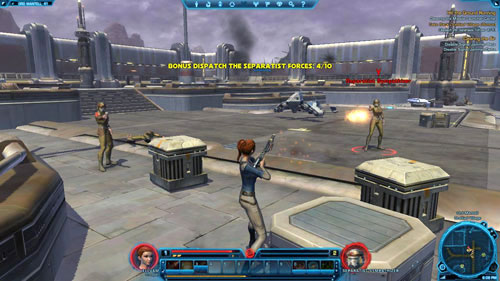
Destroy the Missile Launcher Cache
Your main goal is to destroy the missile launcher cache. There are several such chests in the village and they are all marked with [x] on the map. Be careful, as near each chest there's a group of separatists. Select one and smash it to get another mission objective.
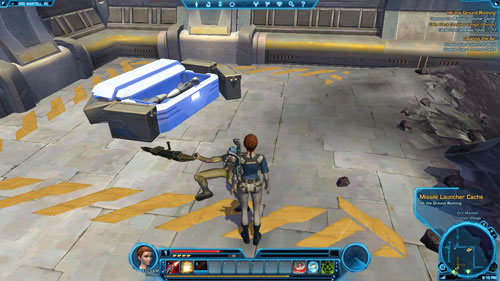
Use Your Personal Holocom
Simply press the button on the screen to talk to Gearbox via the holocom.
Report to Commander Tavus
Go south to Fort Garnik. Watch out for the separatist forces along the way, especially for Separatist Liberation Droids [+]. Once you've arrived at the fort, it's necessary to run on the platform on the left and mark Quick Travel Point (Fort Garnik) and Taxi (Fort Garnik Speeder) on the map. Also, think about doing the class mission Best of the Best.
![Another quick travel point is in the cantina (the entrance is in [2]) - (L02) Hit the Ground Running - Trooper - Star Wars: The Old Republic - Game Guide and Walkthrough](https://game.lhg100.com/Article/UploadFiles/201512/2015121709501987.jpg)
Another quick travel point is in the cantina (the entrance is in [2]). Go there and mark Quick Travel Point (Avilatan's Rest Cantina) on the map.
![Then, head for the entrance to the Republic Command Center in [3] - (L02) Hit the Ground Running - Trooper - Star Wars: The Old Republic - Game Guide and Walkthrough](https://game.lhg100.com/Article/UploadFiles/201512/2015121709501942.jpg)
Then, head for the entrance to the Republic Command Center in [3]. Go through the green force field to enter the story area.
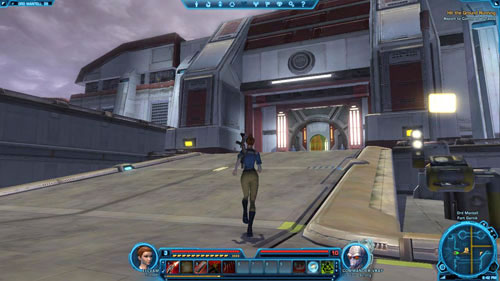
Speak to Private Farn
Soon after you've entered, you'll be accosted by Private Farn in [4]. He'll have a brief chat with you. It doesn't matter what you say.
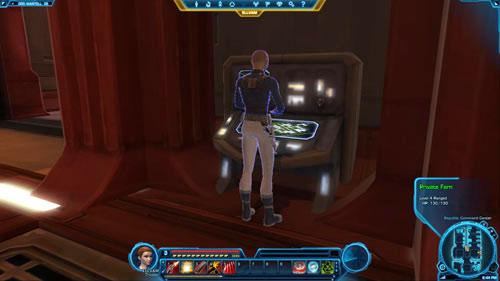
Report to Commander Tavus
Speak to Commander Tavus
All you need to do now is to go to the next room in [5] and talk to Commander Tavus. You'll complete this mission and receive the next.

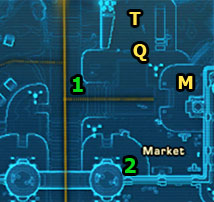
You'll be able to get this mission only after you've reached level 2. Speak with Sergeant Jaynes in [1] (on the way to Fort Garnik) to receive it.

Talk to Lieutenant Forris
Lieutenant Forris is literally a few steps away - in [2]. Speak with him to open the ability shop and complete this mission. Buy all abilities and visit the master each time you reach a level or when you return to the fort after completing a main mission.
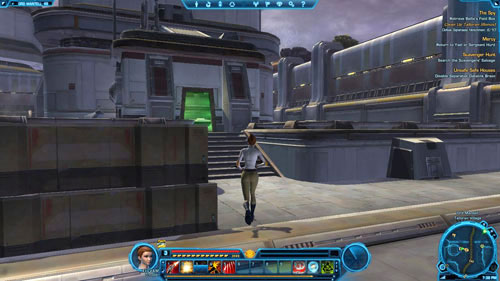
Clean Up Talloran (Bonus)
![You begin the mission in [1] - (L05) The Spy - Trooper - Star Wars: The Old Republic - Game Guide and Walkthrough](https://game.lhg100.com/Article/UploadFiles/201512/2015121709502010.jpg)
You begin the mission in [1]. Exit the Republic command center through the door in [2] and then go to the gate in [3]. Exit Fort Garnik and head for Talloran Village - to the gate in [4].
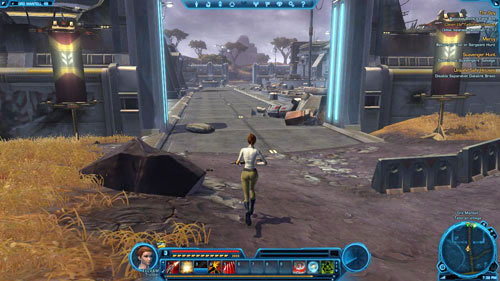
Defeat Separatist Henchmen: 0/10
When you reach the village, you can start doing the bonus mission. You need to kill ten separatist Separatist Henchmen. During the hunt watch out especially for Separatist Commandos [+] (who throw mines) and Separatist Armsmasters [+] (can slow you down).
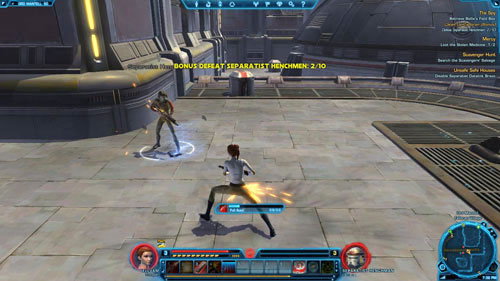
Find Bellis
Go to [5], where you were supposed to meet the Republic spy. Unfortunately, Bellis will be already dead. Examine his body to proceed to the further part of the mission.
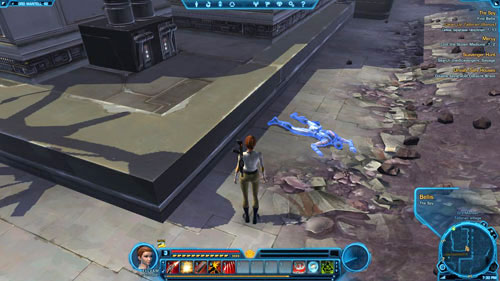
Use Your Personal Holocom
Press the button on the screen to turn on the holocom and talk to Arik Jorgan.
Retrieve Bellis' Field Box
Afterward, go to [6] and find a small house. Pass through the green force field to get inside (Bellis' Home) and then climb the stairs in [7] leading to the second level of the house (Bellis' Home - Upper Level).
Speak to Lin
In [8] you'll find Lin, who's sitting behind a desk. You must convince her to give you Bellis's device. Regardless of the chosen replies you'll get access to the box eventually. However, you can do it in a more or less pleasant way as far as Lin is concerned (which also means getting Light or Dark Side points). See the tables below the picture for details.
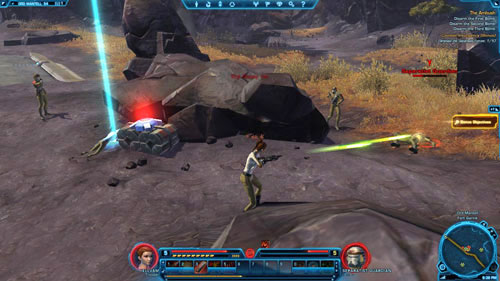
A
Reply
Effect
Points / Rewards
1
I'm very sorry.
Further conversation stage - C
-
2
Bellis was a hero.
Further conversation stage - B
-
3
I don't have time for this!
Further conversation stage - C
-
B
Reply
Effect
Points / Rewards
1
We need your help, ma'am.
Further conversation stage - C
-
2
Please just give me the box.
Further conversation stage - C
-
3
You're really pushing me.
Further conversation stage - F
+50 to Dark Side
C
Reply
Effect
Points / Rewards
1
Your husband wanted to help.
Further conversation stage - D
-
2
I didn't kill Bellis!
Further conversation stage - D
-
3
You're about to be next.
Further conversation stage - F
+50 to Dark Side
D
Reply
Effect
Points / Rewards
1
Bellis died helping our cause.
Further conversation stage - E
-
2
You're being naive.
Further conversation stage - E
-
3
That's it. I've had enough.
Further conversation stage - F
+50 to Dark Side
E
Reply
Points / Rewards
1
Again, I'm very sorry.
+50 to Light Side
2
You should get out of here.
+50 to Light Side
3
You don't know the half of it.
-
F
Reply
Points / Rewards
1
Just doing my job.
-
2
You should get out of here.
+50 to Light Side
3
You don't know the half of it.
-
Retrieve Bellis' Field Box
After the conversation, have a look at the big box in [9]. Bellis's device (Field box) is inside - take it.
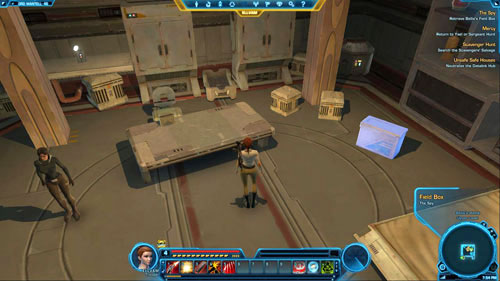
Go down to the first floor. Two Separatist Ambushers will appear here but you won't have any problems with defeating them.

Return to the Republic Command Center
If there's nothing else left to do in Talloran Village or you don't want to do any side missions right now, teleport to Fort Garnik using the quick travel ability - to Quick Travel Point (Fort Garnik) or Quick Travel Point (Avilatan's Rest Cantina). Then enter the Republic Command Center through the door in [2].
Speak to Fuse
Run to [1], where you'll talk to Fuse and finish the mission. You'll receive rewards along with the next class mission.
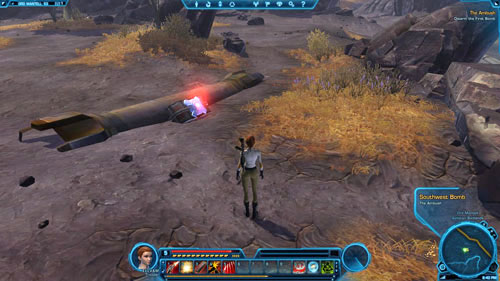
Counter-Insurgency (Bonus)
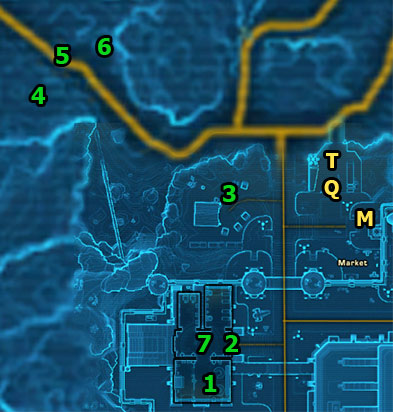
Speak to Mirru
You start this mission in [1], of course. Exit through the door in [2] and then leave Fort Garnik through the gate in [3]. You'll find Mirru in [4]. Talk to him - you have to get information about the separatist attack out of him, but the way you'll do it will result in earning Light or Dark Side points (see the table below the picture for details).
A
Reply
Points / Rewards
1
Fine, take some of my money.
+50 to Light Side
2
We'll arrange a reward later.
+50 to Light Side
3
I'm done talking.
+50 to Dark Side
Use Your Personal Holocom
Then press the button on the screen to talk with Arik Jorgan via the holocom. Once again your reply can get you some Light or Dark Side points. See the table below for details.
A
Reply
Points / Rewards
1
Yes, sir!
+50 to Light Side
2
Nothing like a good challenge.
+50 to Light Side
3
Not my mission, or my problem.
+50 to Dark Side
Eliminate the Separatist Forces: 0/10
Go northwest right away. The bombs, deployed in [4], [5] and [6], are protected by groups of separatists. Killing ten of them will also mean completing a bonus mission, and you need to get rid of them anyway if you want to defuse the bombs. You'll gain 390 XP for eliminating ten separatists.
Disable the First Bomb
There are four separatists by each bomb. The first bomb is on the left - in [4]. Get closer and examine it. This will disable the bomb.
Disable the Second Bomb
The second bomb is by the road in [5].
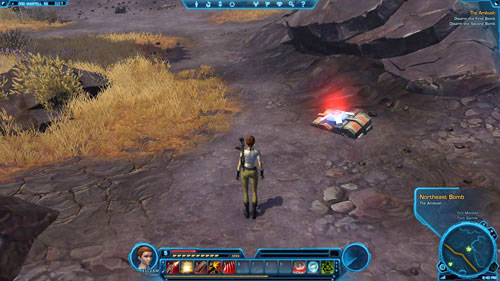
Disable the Third Bomb
Finally, the third bomb is on the right, in [6].
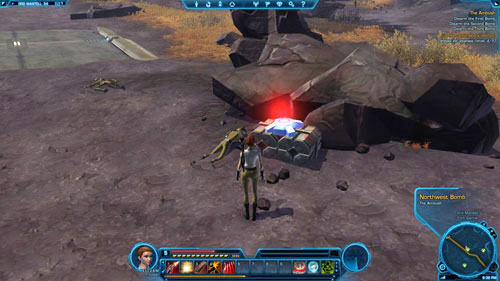
Return to Republic Command Center
After defusing all the three bombs, it's best to simply let a group of separatists kill you (just not too far from Fort Garnik). This way, you'll be able to respawn in the medical center inside the fort. Head for the Republic Command Center in [2] and enter the building.
Speak to Private Farn
Inside, you'll be accosted by Private Farn in [7]. The private will complain about one of the commanders. Your replies will not affect the course of the story, though you can get some Dark or Light Side points. See the table below the picture for details.

A
Reply
Effect
1
I'd be glad to help.
End of conversation
2
We'll see if I have time.
End of conversation
3
I've heard enough.
Further conversation stage - B
B
Reply
Points / Rewards
1
Here, take some credits.
+50 to Light Side
2
Extra combat will do you good.
+50 to Dark Side
3
Don't bother me again.
+50 to Dark Side
Speak to Commander Tavus
After that, go to the commanders' room in [1] and speak with Commander Tavus. Before the end of the conversation you have to decide whether to report Lieutenant Virk to the commander (second dialogue option in the table below the picture), or not. Your choice will have an influence on how Lieutenant Virk will behave towards you in the near future. Apart from that, you'll accomplish the mission and receive another one, naturally.

A
Reply
Points / Rewards
1
Yes, sir.
-
2
I need to report a corruption.
+100 to Light Side
3
Sounds easy.
-
Bringing the Battle to Them (Bonus)
![This class mission will begin exactly where you finished the previous one - in the Republic Command Center in [1] - (L07) Mannett Point - Trooper - Star Wars: The Old Republic - Game Guide and Walkthrough](https://game.lhg100.com/Article/UploadFiles/201512/2015121709502225.jpg)
This class mission will begin exactly where you finished the previous one - in the Republic Command Center in [1]. Exit through the door in [2]. You need to get to the Mannett Shore area and then to Mannett Point. Although you can choose an ordinary way (through the gate in [3] and then southeast), you can also use a shortcut.
In order to do it, go to [4] and jump over the rail. Then follow the rocks all the way down, but be careful not to fall off! Thanks to that you'll find yourself in Mannett Shore sooner. Get to [5] and mark Quick Travel Point (Falks Reach) and Taxi (Falks Reach Speeder) on the map. Go through the shallows to enter the Mannett Point area.
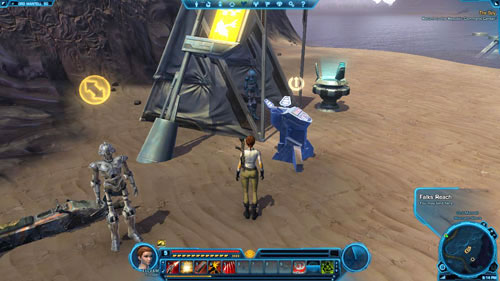
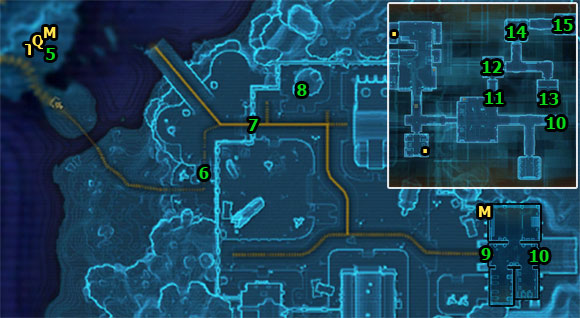
Defeat Separatist Battlers: 0/8
From this moment on you can start carrying out the bonus mission that requires you to kill eight Separatist Battlers. These enemies are everywhere - on the beach, in the town and in the separatist base, which you'll reach soon. Simply kill them on the way. You'll gain 745 XP for completing the bonus mission.

Speak to Wraith
When you get to the beach, turn left to go up the stairs in [6] leading to the town (have a look at the picture below). Along the way (and also later, inside the separatist base) watch out especially for Separatist Captors [+] (they can catch and pull your character to themselves) and Separatist Troopers [+]. Moreover, some robots can also get on your nerves: Separatist Surveyor Droids [+] on the beaches and Separatist Freedom Droids [+] in the town.
![Enter the town through the gate in [7] - (L07) Mannett Point - Trooper - Star Wars: The Old Republic - Game Guide and Walkthrough](https://game.lhg100.com/Article/UploadFiles/201512/2015121709502344.jpg)
Enter the town through the gate in [7]. Right on the left there's a house where Wraith is hiding. Go through the green force field in [8] to enter the area story.
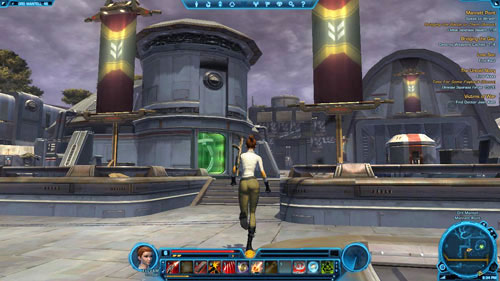
Inside, talk to Wraith standing by the console. Your replies won't matter. You will receive a new mission objective.

Disable the Force Field Generator
Exit the house and go to [9]. There is the entrance to the separatist base. Use it but watch out for Separatist Freedom Droid [+] who's guarding it.
![Inside the Separatist Base defeat a Separatist Trooper [+] and then go to the elevator in [10] - (L07) Mannett Point - Trooper - Star Wars: The Old Republic - Game Guide and Walkthrough](https://game.lhg100.com/Article/UploadFiles/201512/2015121709502334.jpg)
Inside the Separatist Base defeat a Separatist Trooper [+] and then go to the elevator in [10]. Press the blue button to go down to Separatist Base - Level 2.
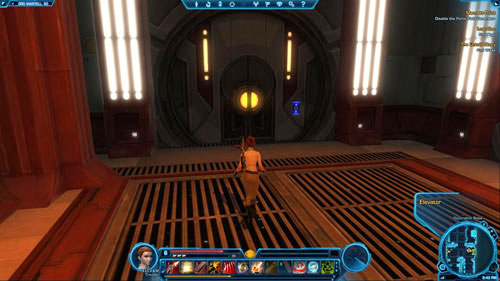
Run through the corridor. When you reach the large hall - turn right. You'll get to the green force field in [11]. Pass through and then go to [12].
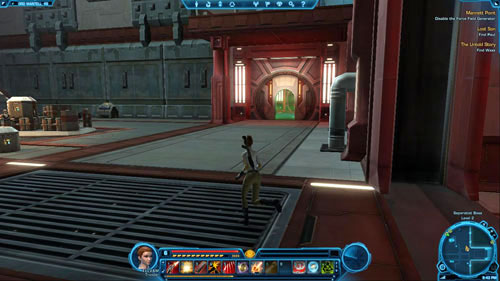
Speak to Jex
You'll come across several wounded separatists, including Jex, with whom you'll have a conversation. You can finish the separatists off, release them, or force them to give you some money. Remember that your replies will get you Light or Dark Side points - see the tables below the picture for details.

A
Reply
Effect
Points / Rewards
1
Very well.
Letting the separatists go
+100 to Light Side
2
Mercy has a price - so pay up.
Further conversation stage - B
-
3
I never leave an enemy alive.
Killing the separatists
+100 to Dark Side
B
Reply
Effect
Points / Rewards
1
That will do.
Letting the separatists go
+50 to Dark Side, +45 credits
2
Forget it. I won't hurt you.
Letting the separatists go
+50 to Light Side
3
Not good enough. [Attack]
Killing the separatists
+150 to Dark Side, +45 credits
Disable the Force Field Generator
The door leading to the next corridor will stand open. On the way further you'll only come across Separatist Battlers, who will be easy to defeat. Get to the computer in [13], get rid of the enemies and then use it to disable the force field generator.
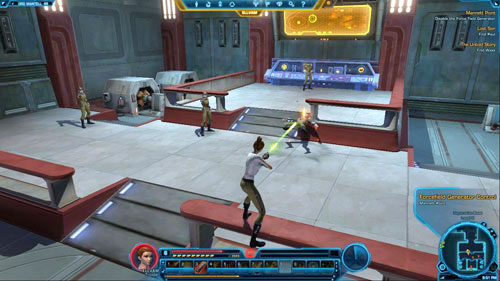
Locate the ZR-57
Speak to Separatist Officer Dalern
Go back to the corridor and run to [14]. There is Separatist Officer Dalern here, with whom you'll have a conversation. After a while, Wraith will join it. At the end you'll be able to choose one out of the three replies - the number of Dark Side points you can get will depend on your choice (see the table below the picture).

A
Reply
Points / Rewards
1
It's your call.
-
2
We should interrogate him.
+50 to Dark Side
3
Yeah, kill him.
+100 to Dark Side
Locate the Separatist Commanders
Talk to Separatist Commander Bol
Then go to [15]. Before you enter the room, in which there are three commanders, make sure that you have full health. Also, use boosting abilities and only then go inside. The conversation with Separatist Commander Bol will start automatically. Regardless of what you reply, the conversation will end in a fight.
Defeat Separatist Commander Bol
Defeat Separatist Commander Saphrro
Defeat Separatist Commander Vyru
You need to defeat three separatist commanders - Separatist Commander Bol [+], Separatist Commander Saphrro and Separatist Commander Vyru. Start with killing the last two, as they are weaker. Keep some Medpacs handy just in case. The fight won't be difficult.
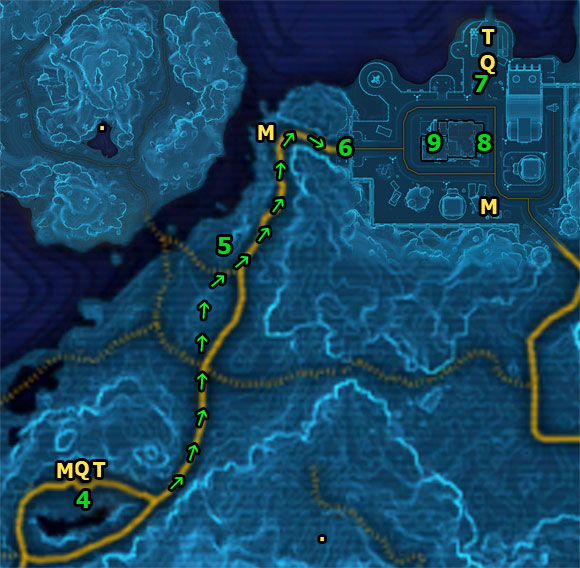
Download the Data
After you've defeated the commanders, use the computer on the left to download the data. Separatist Data will appear in your inventory.
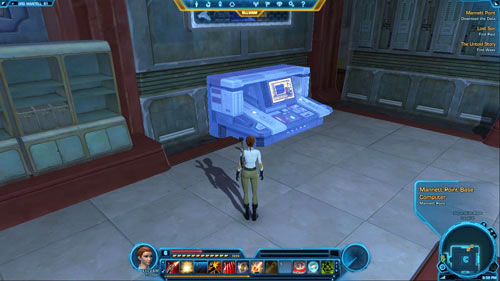
Return to the Republic Command Center
Speak to Needles
Go back to Fort Garnik. Depending on which side missions you still need to complete, teleport to Quick Travel Point (Avilatan's Rest Cantina) or commit suicide and then go on foot. Naturally, you also have taxis at your disposal. When you arrive at the fort, go through the gate in [2] and head for [1] to talk to Needles about the next class mission.

![The mission begins in [1] - (L06) Oradam Village - Trooper - Star Wars: The Old Republic - Game Guide and Walkthrough](https://game.lhg100.com/Article/UploadFiles/201512/2015121709502447.jpg)
The mission begins in [1]. Exit the Republic base through the door in [2]. When you're in Fort Garnik, go through the gate in [3]. A long journey awaits you (follow the path shown by the arrows). You need to travel across the Avilatan Badlands area to the camp by the volcano in [4] and mark Quick Travel Point (Volcano Camp) and Taxi (Volcano Camp Speeder). This way, you won't have to run too much in the next mission.
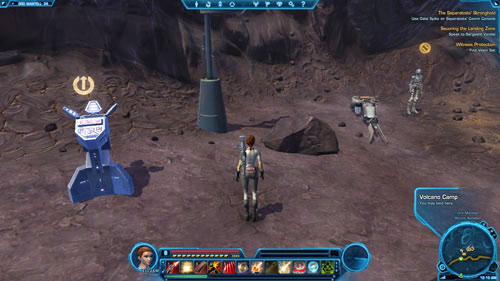
Recover an Albozene Pack
Recover a Vimidone Pack
Recover a Medical Injector
Go north to get near [5]. Once you've arrived at the place, start the hunt. The local enemies have three items you must recover. First of all, hunt Beach Scavengers and Scavenger Lookouts.
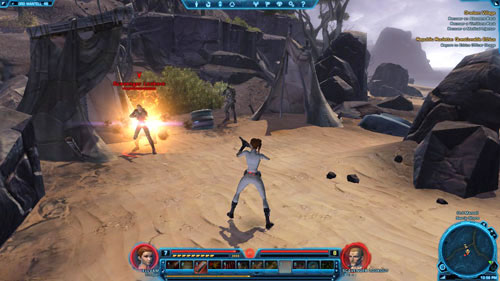
Look out for the yellow beams of light that can (but don't have to) come out of the bodies of the dead enemies. A yellow beam means that the fallen opponent has one of the items you're looking for. Collect all three (Albozene Pack, Vimidone Pack, Medical Injector) to proceed to the next mission objective.
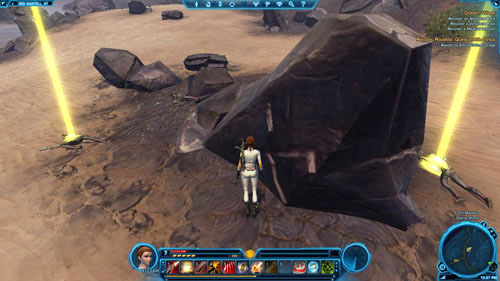
Speak to Zak
After collecting all three items (or even when you are still in the middle of doing it) keep going north and follow the way shown by the arrows. Get to the Oradam Village entrance in [6]. Next, go to [7] to mark Quick Travel Point (Oradam Village) and Taxi (Oradam Village Speeder) on the map.

Once you've done it, enter Zak's house (Zak's Home). Locate the door in [8] and use it to enter the story area.
![Zak and his ill wife are in [9] - (L06) Oradam Village - Trooper - Star Wars: The Old Republic - Game Guide and Walkthrough](https://game.lhg100.com/Article/UploadFiles/201512/2015121709502555.jpg)
Zak and his ill wife are in [9]. Speak with Zak - your task is to get information about the separatist bomb out of him. Additionally, you can give him and his wife the items you've acquired earlier, so that they can be healed. Or, you might choose not to do it at all. Remember that your replies and choices will earn you Dark or Light Side points - see the tables below the picture for details.
A
Reply
Effect
Points / Rewards
1
Help me and I'll cure you.
Further conversation stage - B
-
2
Here - this will heal you both.
Healing Zak and Jaller
+100 to Light Side
3
Enjoy dying, then.
Further conversation stage - B
-
B
Reply
Effect
Points / Rewards
1
Here - take this injector.
Healing Zak and Jaller
+50 to Light Side
2
Fair enough, here's the cure.
Healing Zak and Jaller
+50 to Light Side
3
Traitors receive no mercy.
Refusing to help
+150 to Dark Side
Use Your Personal Holocom
After the conversation press the button on the screen to talk Arik Jorgan via the holocom. Then, head for the apartment exit in [8]. Before you leave, however, you'll have to defeat three Separatist Assassins. It won't be hard to get rid of them.
Return to the Republic Command Center
Speak to Lieutenant Virk
Take the recently marked taxi in the northern part of Oradam Village to go to Fort Garnik. Once you've arrived at the place, enter the Republic Command Center through the door in [2]. In the hallway in [10] there will be Lieutenant Virk - he's the one Private Farn was complaining about. The conversation can develop in different ways, depending on whether near the end of The Ambush mission you reported the lieutenant - all the details are below the picture.
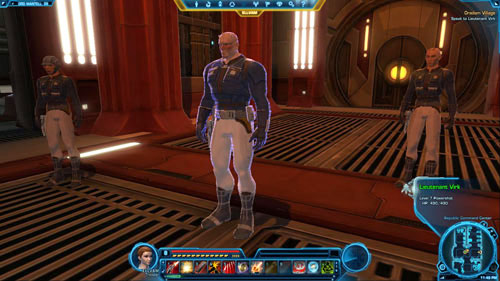
If you reported Lieutenant Virk, you can ignore him or start the fight with him and his companions.
A
Reply
Effect
1
Are we done here?
Ignoring Virk
2
I'm not afraid of you.
Ignoring Virk
3
I'll take you on right now.
Fight with Virk
If you didn't report Lieutenant Virk, then apart from the two options mentioned above, there's a possibility to get some money from him. In addition, your replies can earn you some Dark or Light side points. See the tables below for more details.
A
Reply
Effect
1
That'd be great!
Further conversation stage - B
2
Keep talking, I'm listening.
Further conversation stage - B
3
You can't bribe me, Virk.
Further conversation stage - C
B
Reply
Effect
Points / Rewards
1
I agree.
Accepting Virk's offer
+50 to Dark Side, +54 credits to rewards
2
Do I get a medal, too?
Accepting Virk's offer
+50 to Dark Side, +54 credits to rewards
3
Sounds desperate to me.
Further conversation stage - D
-
C
Reply
Effect
Points / Rewards
1
I don't rat out my comrades.
Ignoring Virk
+50 to Dark Side
2
Just leave me alone, okay?
Ignoring Virk
+50 to Dark Side
3
You're going down, Lieutenant.
Further conversation stage - D
-
D
Reply
Effect
Points / Rewards
1
Okay, I'll take the offer.
Accepting Virk's offer
+50 to Dark Side, +54 credits to rewards
2
I'm not afraid of you.
Fight with Virk
+50 to Light Side
3
Bring it on.
Fight with Virk
+50 to Light Side
Defeat Lieutenant Virk
Defeat Ensign Jarix
Defeat Virk's Henchman
If for any reason you decided to deal with the corrupt lieutenant yourself, prepare for the fight with him (Lieutenant Virk [+]) and his two helpers (Ensign Jarix and Virk's Henchman). As usual, get rid of the weaker helpers first and then fight with the lieutenant. The fight won't be difficult, but it's good to keep some Medpacs handy.

Return to Lieutenant Jorgan
Now you need to go back to the commanders' room in [1] to speak with Arik Jorgan about the next class mission. This mission will be accomplished and you'll receive the rewards, of course.

Attention! After completing the mission, it's necessary to go to the item modification station (the nearest one is in [11]). Use the station to put one of the rewards for the mission (Reflex Mod 1*) into another (Republic Command Carbine*). Equip your character with the new and more powerful carbine right away!
![This mission also begins in the Republic Command Center in [1] - (L10) The Separatists Stronghold - Trooper - Star Wars: The Old Republic - Game Guide and Walkthrough](https://game.lhg100.com/Article/UploadFiles/201512/2015121709502660.jpg)
This mission also begins in the Republic Command Center in [1]. Exit through the door in [2]. It's time to visit the separatists in their main base - a stronghold hidden inside the volcano. Take a taxi to go to Taxi (Volcano Camp Speeder) marked in the last mission.
![Head for the Separatist Stronghold entrance in [3], shown in the picture below - (L10) The Separatists Stronghold - Trooper - Star Wars: The Old Republic - Game Guide and Walkthrough](https://game.lhg100.com/Article/UploadFiles/201512/2015121709502621.jpg)
Head for the Separatist Stronghold entrance in [3], shown in the picture below. The door leading to the stronghold is on the left. You'll come across a lot of different types of opponents both on the way and inside the base. Watch out especially for Separatist Monitor Droids [+], Separatist Commanders [+], Separatist Officers [+] (they fire short bursts and then throw grenades). These enemies are on all three levels of the stronghold.
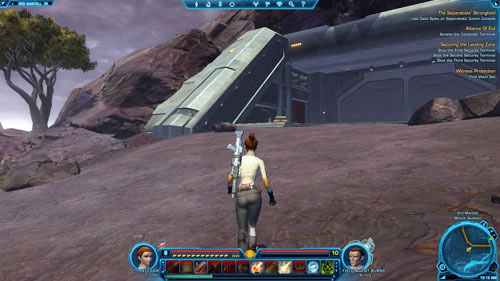
Make your way through the network of corridors to get to an open yard surrounded by lava. Once you're there, find the elevator in [4], which will take you to Separatist Stronghold - Level 2. Apart from the abovementioned enemies, you'll face new ones on the second level - Separatist Tech Officers (they send electrifying probes) and Separatist Vanguards [+] (big enemies armed with heavy weapons who can push you away).

Use Data Spike on Separatists' Comm Console
You task is to use the piers to get to [5]. There is the entrance to the room with the separatists' communication console. Go through the green force field to enter the story area.
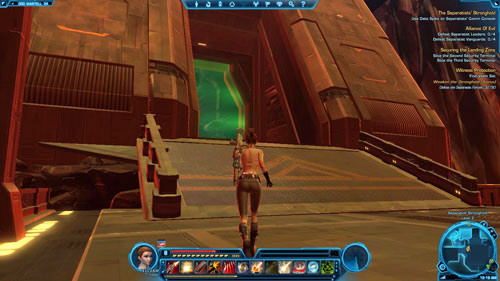
It must be underlined at this point that this is a very difficult area. There are Imperial Supervisors (who can slow you down and send electrifying probes) and Imperial Officers [+] here. Even if your character's level is 8, the fights will be extremely hard and almost impossible to be won. Moreover, the further you go, the more difficult it gets.
![So if you can't manage to defeat all these enemies, at least try to eliminate those near [6] or [7] - (L10) The Separatists Stronghold - Trooper - Star Wars: The Old Republic - Game Guide and Walkthrough](https://game.lhg100.com/Article/UploadFiles/201512/2015121709502767.jpg)
So if you can't manage to defeat all these enemies, at least try to eliminate those near [6] or [7]. Then use boosting abilities and prepare some Medpacs. Run up to the console in [8] as quickly as possible and use it - don't pay attention to any enemy fire. You should be able to finish the hacking process before you get killed - then simply teleport to the medical center.

Use Your Personal Holocom
After the respawn, click the button on the screen to speak with Arik Jorgan via the holocom. You'll receive new mission objectives. Now, you need to make your way to the corridor in [9]. It will take you to Separatist Stronghold - Level 3. When you get there, watch out also for a new type of enemies - Separatist Supervisors (can slow you down).
Find Havoc Squad
You need to go through the whole stronghold to get to [10]. Pass through the green force field to enter the story area.
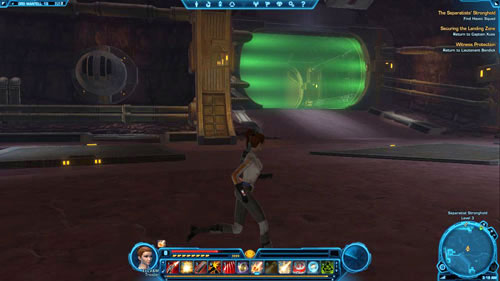
Talk to Commander Tavus
There will be several small rooms full of enemies before you get to [11]. Regenerate your health and prepare Medpacs. Next, approach the Havoc squad and Commander Tavus, with whom you'll automatically start the conversation. It turns out that all members of the Havoc squad... went over to the Empire side. Naturally, the conversation will end in a fight.

Defeat Colonel Vorr
Defeat the Imperial Soldiers
You need to defeat several Imperial Soldiers (use an area attack to get rid of all of them) and Colonel Vorr [+] (fight with him after you've killed the soldiers). You'll win this fight easily.
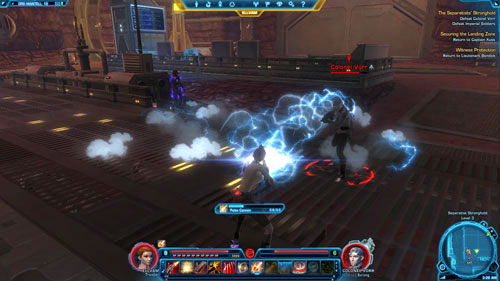
Return to the Republic Command Center
Report to General Vander
After the fight it's best to immediately teleport to Quick Travel Point (Fort Garnik) or Quick Travel Point (Avilatan's Rest Cantina) and then go inside the Republic Command Center through the door in [2] (see the first map in the mission description). Go to the commanders' room in [1] and speak with General Vander and Arik Jorgan. The latter will become your first companion. You'll also get the last, brief mission on this planet.
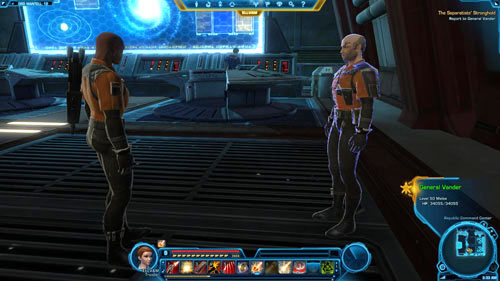
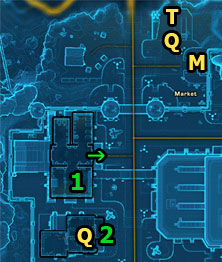
After completing The Separatists' Stronghold mission, your new companion - Aric Jorgan - will want to talk to you. Go from [1] to [2] - to the cantina (Avilatan's Rest Cantina). Go to the main room and start speaking with Aric Jorgan. During the conversation your reply will have an impact on the companion - see the table below the picture for details.

A
Reply
Points / Rewards
1
Welcome aboard.
+40 to Affection: Aric Jorgan
2
Still angry?
+15 to Affection: Aric Jorgan
3
You're in my world now.
-1 to Affection: Aric Jorgan
B
Reply
Points / Rewards
1
I agree, that was unfair.
+15 to Affection: Aric Jorgan
2
You kind of deserved it.
-
3
Get over it.
-
C
Reply
Points / Rewards
1
Glad to hear it.
+15 to Affection: Aric Jorgan
2
The Deadeyes?
-
3
How good are you at cleaning?
-1 to Affection: Aric Jorgan
2510 XP.
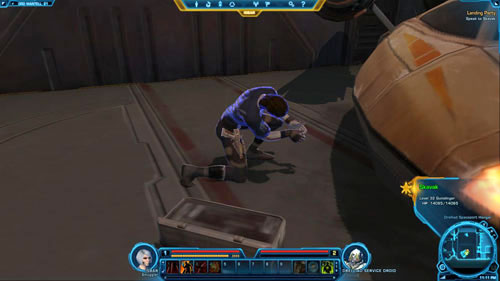
Take the Shuttle to the Republic Fleet
You begin in [1]. Exit the base through the door in [2]. Go to the shuttle port, namely to the big entrance in [3].
![Then run to [4] - (L10) New Assignment - Trooper - Star Wars: The Old Republic - Game Guide and Walkthrough](https://game.lhg100.com/Article/UploadFiles/201512/2015121709502881.jpg)
Then run to [4]. Take the space shuttle to leave the Ord Mantell planet, thus completing the last class mission.
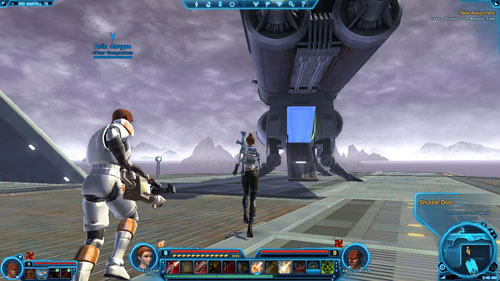
Each mission description is divided into several smaller parts. It should be observed that the following legend does not concern the next section - "Shortcuts (main and side missions)". The list of missions is given in chronological order, that is, the order you receive them. Also, the level of a particular mission is shown before its name (L). Here is all information that is essential to read before you start using the missions description.
The exact description of a mission is here. Sometimes it's divided into several different places you will visit, and each of them has its own map.
In the missions descriptions there are all dialogues that can have any impact on the game mechanics. It is given in the Points / Rewards column. The Effect column specifies what kind of effect your reply will have (there can also be a letter referring to the next dialogue mentioned), while under Reply there is the answer's line.
If any dialogue is missing it means that it doesn't matter which reply you choose (of course, except for the aspects related to developing your character in terms of the story). If a reply doesn't have any effect or doesn't result in getting any points or rewards, then there will be no suitable column in the table.
#
Reply
Effect
Points / Rewards
Reply number
One out of the two or three replies your character can give.
Effect of the chosen reply, and if it leads further - a letter of the next dialogue is given
+x to Light / Dark Side, +x / -x to companion's Affection, other Rewards
# - a letter indicating the dialogue order. Some replies can lead to different dialogues
If a mission contains a small bonus mission, then a complete list of them is given right before the mission description. Bonus mission objectives are given along with the mission objectives (class or side) with which such a mission is connected.
The list of rewards includes: XP, credits, items and Codex entries. You can receive all these items for completing a mission. Sometimes you'll get one out of the two depending on your class, other times you'll have to choose one from several items (these are separated by a slash - "/").
The chapter presents a list of all main, side, bonus and tutorial mission objectives that take place on the planet Ord Mantell. The list is arranged in such a way as to minimize the time necessary for the sole running and visiting the same areas.
Most often the next side missions can or should be done (because of your character's level) while doing the next main missions (Class). That is why all mission objectives are divided into main missions.
You should observe that there are no issues connected with the Codex here - these can be found in the "Places" chapter. Moreover, there are no side Heroic mission objectives. Their descriptions are at the end of the side missions chapter - "Ord Mantell".
Landing Party [mission start] - Skavak
Landing Party - Speak to Skavak
Mark Quick Travel Point (Drelliad Village)
Clearing the Air [mission start] - Sergeant Blyes
[+] Landing Party: Take Back Drelliad Village (Bonus) - Dispatch the Separatist Forces: 0/10
[+] Landing Party - Destroy the Remote Control Stations: 0/3
Clearing the Air - Disable Signal Jammer Alpha
Clearing the Air - Disable Signal Jammer Beta
Landing Party - Disable the Targeting Computer
Clearing the Air - Disable Signal Jammer Delta
Clearing the Air [mission end] - Return to Sergeant Blyes
Landing Party - Defeat the Separatist Ambush
Landing Party [mission end] - Speak to Corso Riggs
Desperate Times [mission start] - Corso Riggs
Snipe Hunt [mission start] - Wesner
[+] Snipe Hunt: Blinding the Enemy (Bonus) - Defeat Separatist Forces: 0/8
Snipe Hunt - Defeat Separatist Snipers: 0/3
Snipe Hunt [mission end] - Speak to Commander Vray
Legitimate Business [mission start] - Tweeta
Legitimate Business [mission end] - Report to Wentell
Mark Quick Travel Point (Fort Garnik), Quick Travel Point (Avilatan's Rest Cantina) and Taxi (Fort Garnik Speeder)
Desperate Times - Talk to Viidu
Desperate Times - Speak to Viidu
Hungry for Information [mission start] - Viidu
Mercy [mission start] - Sergeant Hurd
Unsafe Safe Houses [mission start] - Holovid Intelligence Hub
Mercy - Speak to Yael
Scavenger Hunt [mission start] - Alma
[+] Mercy - Loot the Stolen Medicine: 0/2
[+] Hungry for Information - Defeat Separatist Forces: 0/8
Unsafe Safe Houses - Disable Separatist Datalink Alpha
Scavenger Hunt - Find Alma's Heirloom
Scavenger Hunt - Speak to Ebenga
Hungry for Information - Find Reki's Safe House
Hungry for Information - Speak to Reki
Unsafe Safe Houses - Disable Separatist Datalink Bravo
[+] Scavenger Hunt: Praying on Thieves (Bonus) - Eliminate the Scavengers: 0/8
Scavenger Hunt - Search the Scavenger's Salvage
[+] Unsafe Safe Houses: Stop the Raiders (Bonus) - Defeat Separatist Forces: 0/10
Unsafe Safe Houses - Destroy the Satellite Dish Relay
[o] Commit suicide to appear in the Medical Center in Oradam Village
[o] Scavenger Hunt [mission end] - Return to Ebenga
Teleport to Quick Travel Point (Avilatan's Rest Cantina)
[o] Scavenger Hunt [mission end] - Return to Alma
Mercy [mission end] - Return to Yael or Sergeant Hurd
Hungry for Information - Return to Viidu
Hungry for Information - Speak to Syreena
Hungry for Information [mission end] - Return to Viidu
Security Breach [mission start] - Viidu
Victims of War [mission start] - Lieutenant Xorem
Lost Son [mission start] - Ellis
Unsafe Safe Houses [mission end] - Speak to Communications Officer Sulan
[+] Victims of War: Ending the Insurgency (Bonus) - Defeat Separatist Forces: 0/12
Bridging the Gap [mission start] - Commander Bragan
Mark Quick Travel Point (Falks Reach) and Taxi (Falks Reach Speeder)
The Untold Story [mission start] - Lamalla Rann
[+] The Untold Story: Time For Some Payback (Bonus) - Eliminate Separatist Forces: 0/20
Bridging the Gap - Defeat Separatist Rocket Gunners: 0/3
[+] Bridging the Gap - Destroy Weapons Caches: 0/4
Security Breach - Disable the North Power Relay
Security Breach - Disable the East Power Relay
Lost Son - Find Paul
The Untold Story - Find Waxx
[o] The Untold Story - Loot the Holodiscs: 0/2
Commit suicide to appear by the Separatist Base entrance
Victims of War - Find Doctor Jaen Kett
Security Breach - Disable the South Power Relay
Security Breach - Find Reki's Treatise on Bird Watching
Security Breach - Open the Security Door
Security Breach: You Can't Hide Forever (Bonus) - Defeat Separatist Forces: 0/15
Security Breach - Infiltrate the Separatist Base
Security Breach - Access the Separatist Computer
[o] Security Breach - Defeat Gorry and 4-SEN
Teleport to Quick Travel Point (Falks Reach)
The Untold Story [mission end] - Return to Lamalla Rann
Bridging the Gap [mission end] - Return to Commander Bragan
Take a taxi to Taxi (Fort Garnik)
Victims of War [mission end] - Return to Lieutenant Xorem
Lost Son [mission end] - Return to Ellis and Iero
Security Breach - Return to Rendia Freight
Security Breach - Speak to Syreena
[o] Security Breach - Defeat Bracco
[o] Security Breach - Defeat Bracco's Thugs
[o] Security Breach - Speak to Syreena
Security Breach [mission end] - Return to Viidu
Deadly Delivery [mission start] - Viidu
Item Modification (Tutorial) [mission start] - Viidu
Deadly Delivery - Speak to Corso Riggs
Item Modification (Tutorial) [mission end] - Activate the Lore Object to Learn about Modification
Generator Problems [mission start] - S3E3
Generator Problems - Find Engineer Celestra
[+] Generator Problems: Punish the Saboteurs (Bonus) - Dispatch the Separatist Saboteurs: 0/12
Generator Problems - Recover Liquid Coolant: 0/5
Generator Problems - Recover a Hydrospanner
Generator Problems - Recover a Multitool
Generator Problems - Recover a Turbohammer
Generator Problems [mission end] - Return to Engineer Celestra
Republic Roulette or Republic Roulette: Questionable Ethics [mission start] - Ensign Dregg
[o] Republic Roulette - Speak to Ensign Peters
[o] Republic Roulette - Use the Race Starter Panel
[o] Republic Roulette - Watch Your Runner Run
[o] Republic Roulette - Collect Mortar Shells: 0/3
[o] Republic Roulette [mission end] - Return to Ensign Peters
Mark Quick Travel Point (Oradam Village) and Taxi (Oradam Village Speeder)
Deadly Delivery - Go to Trymbo's House
Deadly Delivery - Speak to Loonda
Hail the Liberators [mission start] - Odar
Mark Quick Travel Point (Volcano Camp) and Taxi (Volcano Camp Speeder)
Deadly Delivery - Speak to Trymbo
Deadly Delivery - Open the Storage Unit
Take a taxi to Taxi (Fort Garnik)
[o] Republic Roulette: Questionable Ethics [mission end] - Report to Ethics Officer Drage
Hail the Liberators - Find Odar's Daughter
Hail the Liberators - Speak to Kellik
Take a taxi to Taxi (Oradam Village)
Hail the Liberators [mission end] - Return to Odar
Take a taxi to Taxi (Fort Garnik)
Deadly Delivery [mission end] - Deliver the Chemicals to Viidu
Hitting Where it Hurts [mission start] - Viidu
Witness Protection [mission start] - Milo Phipps
Witness Protection - Speak to Lieutenant Bendick
Securing the Landing Zone [mission start] - Captain Xuss
Take a taxi to Taxi (Volcano Camp)
Securing the Landing Zone - Speak to Sergeant Vandal
[+] Witness Protection: Weaken the Stronghold (Bonus) - Defeat the Separatist Forces: 0/50
Alliance Of Evil [mission start] - Agent Burne
Alliance Of Evil - Access the Computer Terminal
Securing the Landing Zone - Slice the First Terminal
[+] Alliance Of Evil - Defeat Separatist Leaders: 0/4
[+] Alliance Of Evil - Defeat Separatist Vanguards: 0/4
Securing the Landing Zone - Slice the Second Terminal
Witness Protection - Find Veem Set
Witness Protection - Open the Holding Cell
Witness Protection - Speak to Veem Set
Securing the Landing Zone - Slice the Third Terminal
Securing the Landing Zone - Destroy the Landing Pad Anti-aircraft Guns: 0/2
Alliance Of Evil [mission end] - Contact Agent Burne via the Comm Station
Hitting Where it Hurts - Go to Skavak's Rendezvous Point
Hitting Where it Hurts: Stop the Weapons Trade (Bonus) - Defeat Separatis Arms Dealers: 0/5
Hitting Where it Hurts - Speak to Separatist Leader Dareg
Hitting Where it Hurts - Defeat Separatist Leader Dareg
Hitting Where it Hurts - Defeat Morant
Hitting Where it Hurts - Defeat Dareg's Bodyguards
Hitting Where it Hurts - Speak to Morant
Teleport to Quick Travel Point (Fort Garnik)
Securing the Landing Zone [mission end] - Return to Captain Xuss
[o] Witness Protection [mission end] - Return to Lieutenant Bendick
[o] Witness Protection [mission end] - Return to Milo Phipps
Hitting Where it Hurts - Find Syreena
Hitting Where it Hurts [mission end] - Speak to Syreena
Chasing Skavak [mission start] - Syreena
Chasing Skavak - Go to the Ord Mantell Shuttleport
Chasing Skavak - Speak to Xo'ru
Chasing Skavak - Defeat Xo'ru
Chasing Skavak - Defeat Kindin
Chasing Skavak [mission end] - Take the Shuttle to the Republic Fleet
Take Back Drelliad Village (Bonus)
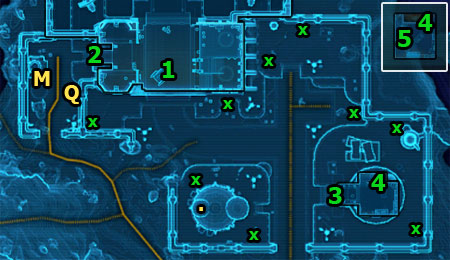
Speak to Skavak
You begin your adventure as a Smuggler in [1] - in the Drelliad Spaceport Hangar. Your first task will be to talk to Skavak (unless it happened automatically). Speak with him to get the next mission objective.
Exit the hangar through the door in [2]. Remember to mark Quick Travel Point (Drelliad Village) marked on the map with [Q]. Then force your way trough the separatist barricade and enter the village.
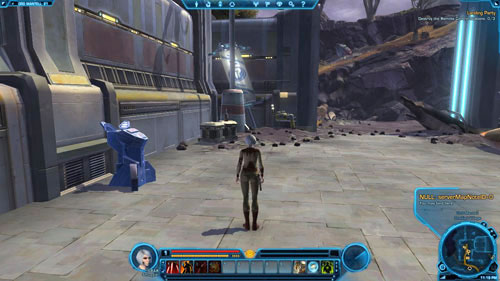
Dispatch the Separatist Forces: 0/10
While you'll be carrying out the next main and side mission objectives, the separatists will stand in your way more than twice. Kill ten to complete the bonus mission and gain 255 XP. The mission is about killing enemies of the following three types only: Separatist Scouts, Separatist Roughnecks and Separatist Sympathizers. Watch out especially for Separatist Heavy Gunners.
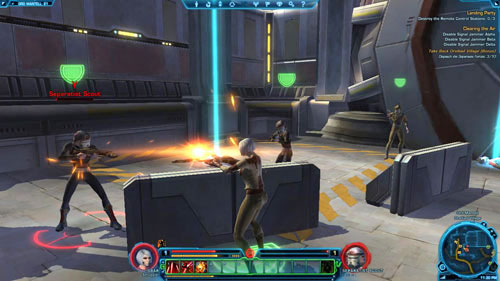
Destroy the Remote Control Stations: 0/3
Your main goal is to destroy three high remote control stations (glowing in blue). They are marked with [x] on the map. There are a lot of them in the village - destroy them while carrying out side mission objectives. Near each station there's a group of separatists - deal with them first.
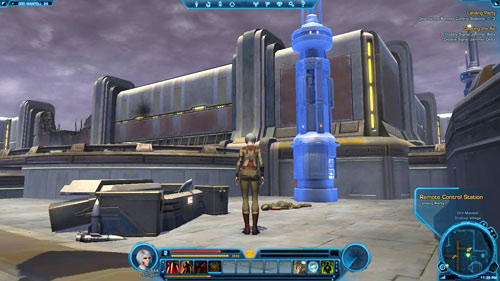
Disable the Targeting Computer
After destroying the control stations, go to [3] and pass through the green force field to enter the building with the computer.
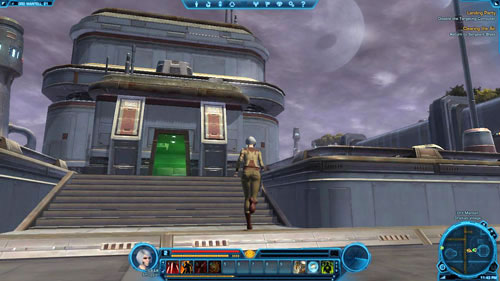
After you've entered, defeat several enemies who will be right in front of you. There won't a problem with that. Next, go up the stairs on the left in [4] to the second floor of the building.
![Examine the computer in [5] - (L02) Landing Party - Smuggler - Star Wars: The Old Republic - Game Guide and Walkthrough](https://game.lhg100.com/Article/UploadFiles/201512/2015121709502913.jpg)
Examine the computer in [5]. Your character will turn it off in a subtle way. Then go down the stairs in [4] and go through [3] to get outside. Return to the hangar in [2] on foot (it's better to leave the Quick Travel ability for later).
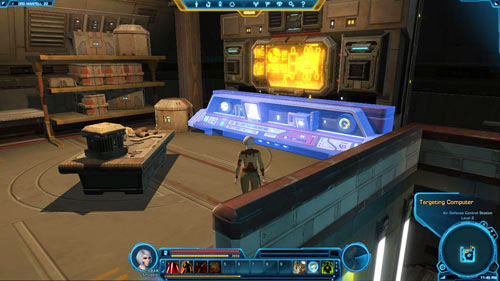
Defeat the Separatist Ambush
Once you've entered the hangar, quickly hide somewhere and start to shoot at two Separatist Cadets - only after you've eliminated them, deal with the Separatist Gunner [+] (a little stronger opponent).
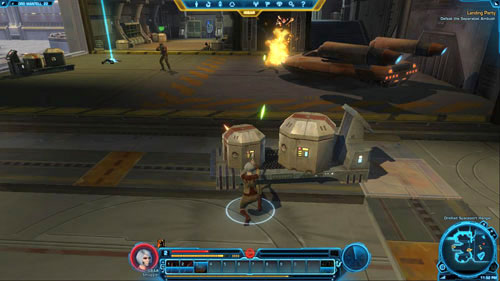
Speak to Corso Riggs
After you've executed the mission objective, all you need to do is to talk to Corso Riggs, who's lying on the ground in [6]. The conversation will end the mission and you'll receive another one.
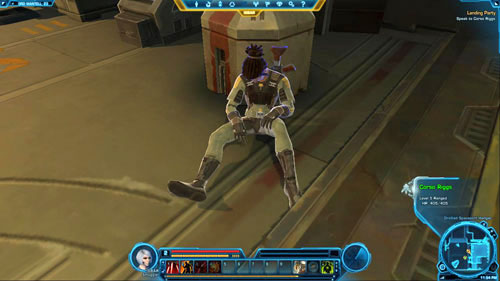
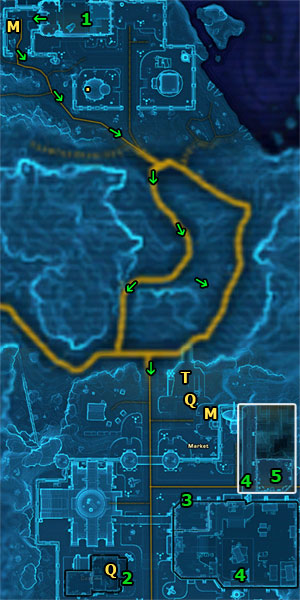
Talk to Viidu
You begin in [1]. Go south to Fort Garnik and watch out for the separatist forces along the way, especially for Separatist Liberation Droids [+]. Once you've arrived at the fort, it's necessary to run on the platform on the left and mark Quick Travel Point (Fort Garnik) and Taxi (Fort Garnik Speeder) on the map. Also, think about doing the class mission Legitimate Business.
![Another quick travel point is in the cantina (the entrance is in [2]) - (L04) Desperate Times - Smuggler - Star Wars: The Old Republic - Game Guide and Walkthrough](https://game.lhg100.com/Article/UploadFiles/201512/2015121709502969.jpg)
Another quick travel point is in the cantina (the entrance is in [2]). Go there and mark Quick Travel Point (Avilatan's Rest Cantina) on the map.
![Enter the storehouse (Rendia Freight) through the green force field in [3] - (L04) Desperate Times - Smuggler - Star Wars: The Old Republic - Game Guide and Walkthrough](https://game.lhg100.com/Article/UploadFiles/201512/2015121709502943.jpg)
Enter the storehouse (Rendia Freight) through the green force field in [3].
![Once you're inside, go up the stairs in [4] to the second level of the warehouse (Rendia Freight - Offices) - (L04) Desperate Times - Smuggler - Star Wars: The Old Republic - Game Guide and Walkthrough](https://game.lhg100.com/Article/UploadFiles/201512/2015121709503090.jpg)
Once you're inside, go up the stairs in [4] to the second level of the warehouse (Rendia Freight - Offices).
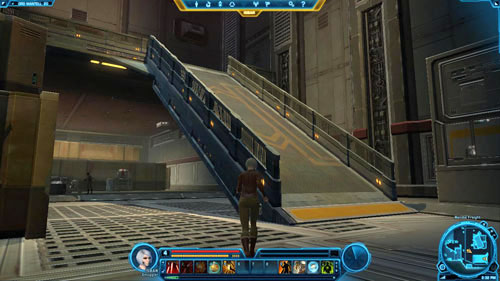
Speak to Viidu
Finally, go to [5] and talk to Viidu to complete the mission and get another one.

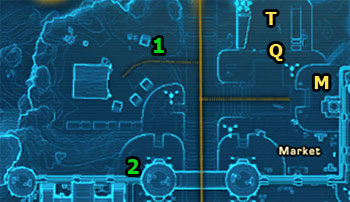
You'll be able to get this mission only after you've reached level 2. Speak with Tweeta in [1] (on the way to Fort Garnik) to receive it.

Report to Wendell
ndell is literally a few steps away - in [2]. Speak with him to open the ability shop and complete this mission. Buy all abilities and visit the master each time you reach a level or when you return to the fort after completing a main mission.

![You begin the mission in [1], in the Rendia Freight warehouse - (L05) Hungry for Information - Smuggler - Star Wars: The Old Republic - Game Guide and Walkthrough](https://game.lhg100.com/Article/UploadFiles/201512/2015121709503084.jpg)
You begin the mission in [1], in the Rendia Freight warehouse. Jump down on the lower level and then head for the exit in [2]. You must get near the gate leading to Talloran Village in [4]. Exit Fort Garnik through the gate in [3].

Defeat Separatist Forces: 0/8
Before you speak with Reki, you'll need to prove your devotion to the Republic cause. In order to do it, start hunting the separatist forces - kill eight (droids and Separatist Guardsmen do not count). During the hunt watch out especially for Separatist Commandos [+] (who throw mines) and Separatist Armsmasters [+] (can slow you down).
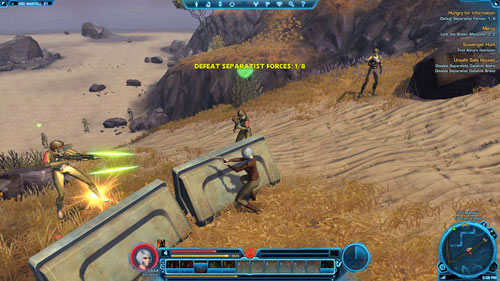
Find Reki's Safe House
Only now can you look for one of the entrances to the large warehouse (Talloran Central Warehouse) - you can enter through the side door in [5] or the main door in [6]. The enemies inside will put up resistance, but you can also go around them.
![Find the stairs in [7] and climb them to get to the second level (Talloran Central Warehouse - Offices) - (L05) Hungry for Information - Smuggler - Star Wars: The Old Republic - Game Guide and Walkthrough](https://game.lhg100.com/Article/UploadFiles/201512/2015121709503154.jpg)
Find the stairs in [7] and climb them to get to the second level (Talloran Central Warehouse - Offices).
![Then pass through the green force field in [8] to enter the story area - (L05) Hungry for Information - Smuggler - Star Wars: The Old Republic - Game Guide and Walkthrough](https://game.lhg100.com/Article/UploadFiles/201512/2015121709503121.jpg)
Then pass through the green force field in [8] to enter the story area.
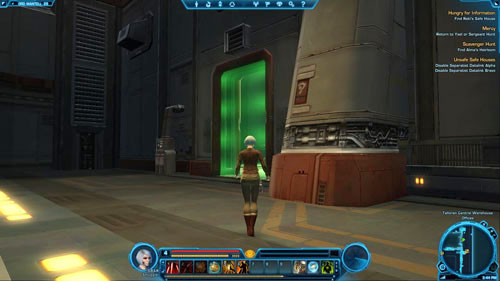
Speak to Reki
The conversation with Reki in [9] will begin automatically and your replies will not matter. You'll get the information you need and after the conversation you'll also obtain a Codex entry - Lore: Smuggling 101 (Smuggler) - worth 300 XP.

Return to Viidu
Speak to Syreena
If there's nothing else left to do in Talloran Village or you don't want to do any side missions right now, teleport to Fort Garnik using the quick travel ability - to Quick Travel Point (Fort Garnik) or Quick Travel Point (Avilatan's Rest Cantina). Then enter the Rendia Freight warehouse in [2] and go to [10]. The conversation with Syreena will start automatically. If you play as a male character, you can flirt with her, but don't expect anything more than that.

Return to Viidu
Now, climb the stairs in [11] to the upper level of the warehouse and then go to [1] to speak with Viidu. You'll complete the class mission and receive the next.

You Can't Hide Forever (Bonus)
![You begin in [1] with Empty Datapad - (L07) Security Breach - Smuggler - Star Wars: The Old Republic - Game Guide and Walkthrough](https://game.lhg100.com/Article/UploadFiles/201512/2015121709503160.jpg)
You begin in [1] with Empty Datapad. Exit Viidu's office, jump down on the lower level and then exit through the door in [2]. You need to get to the Mannett Shore area and then to Mannett Point. Although you can choose an ordinary (through the gate in [3] and then southeast), you can also use a shortcut.
In order to do it, go to [4] and jump over the rail. Then follow the rocks all the way down, but be careful not to fall off! Thanks to that you'll find yourself in Mannett Shore sooner. Get to [5] and mark Quick Travel Point (Falks Reach) and Taxi (Falks Reach Speeder) on the map.
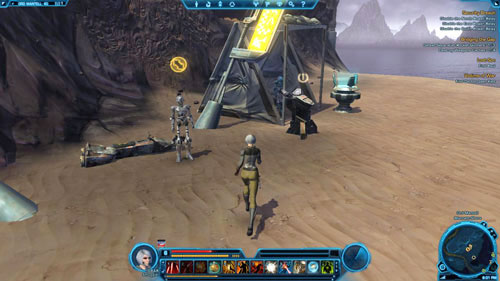
![Then go to [6] - cross the water and the beach to get to the stairs leading to the town (have a look at the picture below) - (L07) Security Breach - Smuggler - Star Wars: The Old Republic - Game Guide and Walkthrough](https://game.lhg100.com/Article/UploadFiles/201512/2015121709503271.jpg)
Then go to [6] - cross the water and the beach to get to the stairs leading to the town (have a look at the picture below). Along the way (and also later, inside the separatist hideout) watch out especially for Separatist Captors [+] (they can catch and pull your character to themselves) and Separatist Troopers [+]. Moreover, some robots can also get on your nerves: Separatist Surveyor Droids [+] on the beaches and Separatist Freedom Droids [+] in the town.
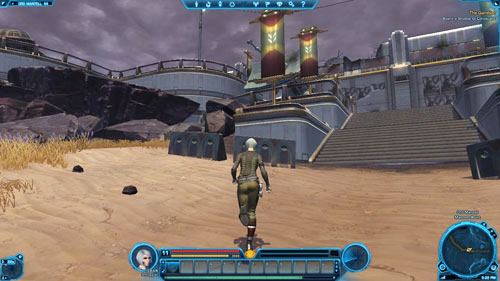
Disable the North Power Relay
Your first task is to disable three power relays. There are enemies by each of them - individual and stronger opponents or weaker but in groups. The first power relay is in [7] - right to the left of the town entrance.
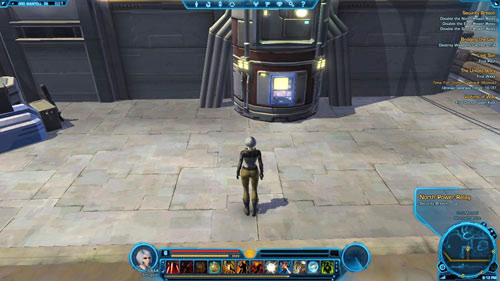
Disable the East Power Relay
You'll find the second power relay behind the big building in [8]. There is also a chest that you can search there.
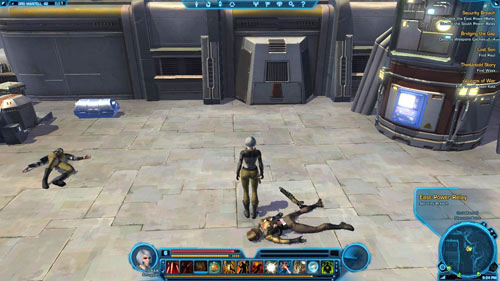
Disable the South Power Relay
The last power relay is in [9] - right next to the house you'll have to enter soon.
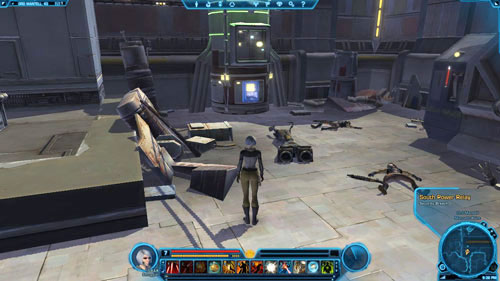
Find Reki's Treatise on Bird Watching
After turning off the power relays, go inside Reki's former house through the door in [10]. Pass through the green force field to enter the story area.
![Next, locate Rekis treatise on bird watching - it's in [11], on a long table in one of the rooms - (L07) Security Breach - Smuggler - Star Wars: The Old Republic - Game Guide and Walkthrough](https://game.lhg100.com/Article/UploadFiles/201512/2015121709503213.jpg)
Next, locate Reki's treatise on bird watching - it's in [11], on a long table in one of the rooms.
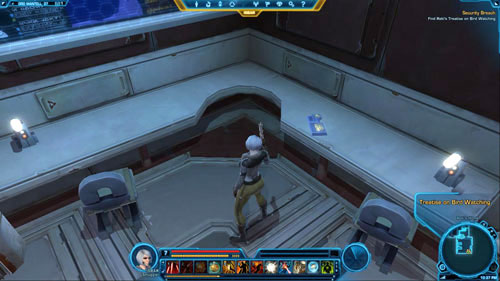
Open the Security Door
Leave the room and open the security door in [12].
![Go down to the basement using the stairs in [12], go through and then go up the second stairs in [13] - (L07) Security Breach - Smuggler - Star Wars: The Old Republic - Game Guide and Walkthrough](https://game.lhg100.com/Article/UploadFiles/201512/2015121709503304.jpg)
Go down to the basement using the stairs in [12], go through and then go up the second stairs in [13]. Open another door to go outside. You'll find yourself in [14].
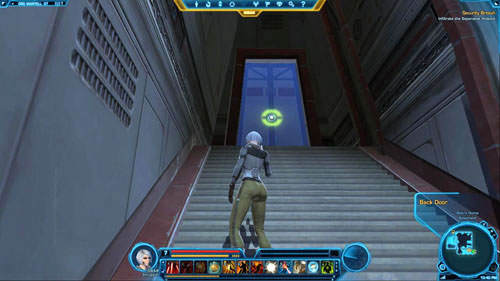
Defeat Separatist Forces: 0/15
Now you can start carrying out the bonus mission that requires you to kill fifteen separatists. The enemies are outside and inside the base. During the fight watch out especially for Separatist Specialists [+] and Separatist Battle Droids [+]. You'll gain 1040 XP for completing this bonus mission.
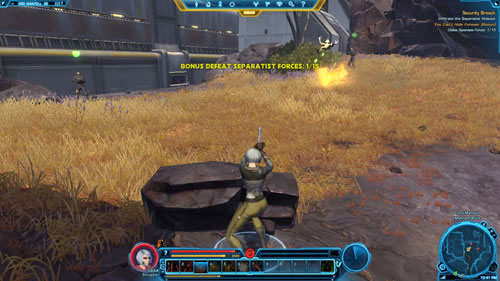
Infiltrate the Separatist Base
Go to [15] - there's the entrance to Separatist Hideout there. Then you'll have to travel through a long corridor full of enemies. Eventually, you'll reach a large hall in [16]. In the middle there's a dangerous Separatist Eliminator Droid [+] - but you don't have to fight with him.
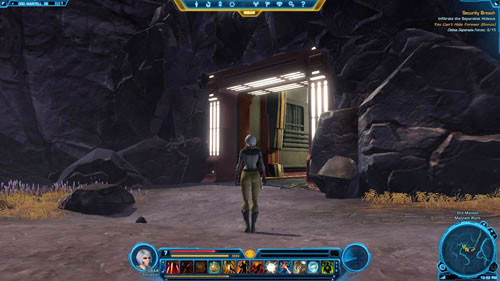
Access the Separatist Computer
You don't need to use the stairs - just jump down on the Separatist Hideout - Level 2. Come closer to the big computer in [17] and hack into it. You will be nailed by one of the separatists. You can conduct the conversation in such a way as to avoid the fight - see the tables below the picture.
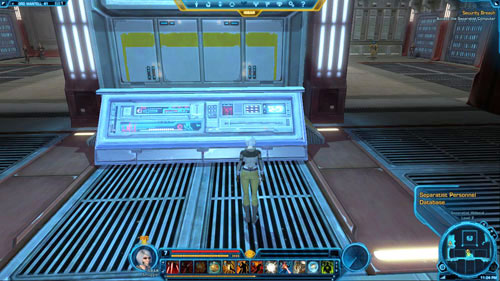
A
Reply
Effect
Points / Rewards
1
We must be under attack!
Further conversation stage - B
-
2
Is that what smells?
Fight with Gorry and 4-SEN
-
3
That's too bad. [Attack]
Fight with Gorry and 4-SEN
+50 to Dark Side
B
Reply
Effect
Points / Rewards
1
Your droid's malfunctioning.
Avoiding the fight
+50 to Light Side, Minor Reflex Adrenal
2
Never trust a droid.
Fight with Gorry and 4-SEN
+50 to Light Side
3
Enough, already. [Attack]
Fight with Gorry and 4-SEN
+50 to Dark Side
Defeat Gorry and 4-SEN
If you did lead to the fight with Gorry and 4-SEN [+], then first kill the human and then the droid. The fight won't be difficult, though it's best that your character's health is full.
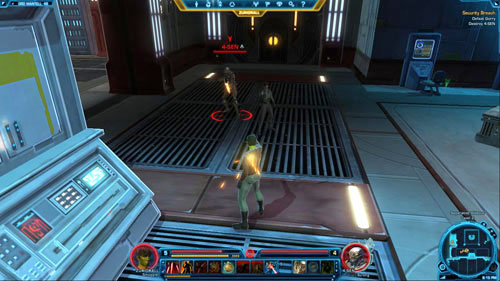
Return to Rendia Freight
Regardless of whether you fought or not, a separatist datapad will appear in your inventory (Encrypted Separatist Data). Go back to Fort Garnik. Depending on which side missions you still need to complete, teleport to Quick Travel Point (Avilatan's Rest Cantina) or commit suicide and then go on foot. Naturally, you also have taxis at your disposal. Enter the warehouse through the gate in [2] (have a look at the first map in the mission description)
Return to Viidu
Speak to Syreena
On the way to Viidu's room, you'll be accosted by Syreena, Bracco and his thugs in [18]. Your reply will either lead to a fight with all of them, or not. See the table below the picture for details.

A
Reply
Effect
Points / Rewards
1
Let's bluff them.
Avoiding the fight
+50 to Light Side
2
Who wants the first beat-down?
Fight with Bracco
+50 to Dark Side
3
I could really use credits.
Avoiding the fight
+50 to Dark Side
Defeat Bracco
Defeat Bracco's Thugs
Speak to Syreena
If at the end of the previous dialogue you chose the second option, get ready for the fight with Bracco [+] and several Bracco's Thugs. These are extremely weak enemies, and the fight will finish just as quickly as it began (deal with Bracco [+] at the end). After the fight talk to Syreena one last time.

Return to Viidu
Climb the stairs in [19] to the second level of the warehouse. Then visit Viidu's room in [1] and speak with him. You'll complete the mission, get the next one and also receive your rewards.

Item Modification (Tutorial)
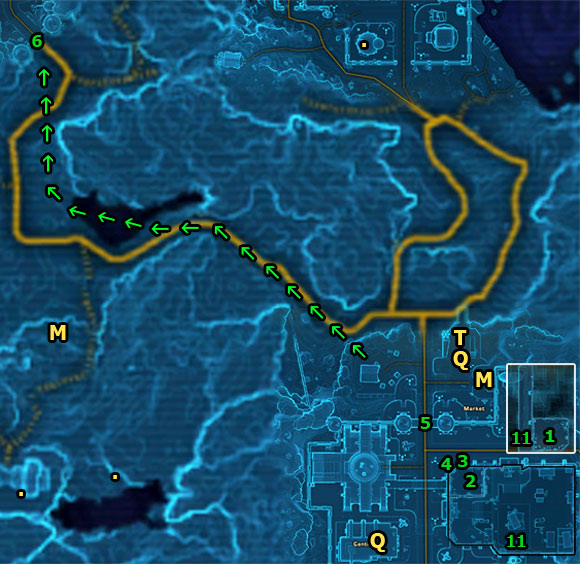
Speak to Corso Riggs
Once the mission has started - in [1], as usual, leave Viidu's office and jump down on the warehouse first floor. Go to [2] - there's Corso Riggs waiting for you there. Talk to him and you'll get a new weapon - Flashy blaster and Reflex Mod 1*.

Activate the Lore Object to Learn about Modification
Exit through the door in [3] and turn left immediately. Nearby, in [4] there's the item modification station. Read the sign next to it and you'll obtain a Codex entry - Game Rules: Item Modifications - worth 45 XP, and also a weapon modification and 885 XP. Fortitude Enhancement 2* you've just acquired, as well as Might Mod 1* can be put into your blaster - use the station to do it. Equip your character with the new and more powerful weapon right away!
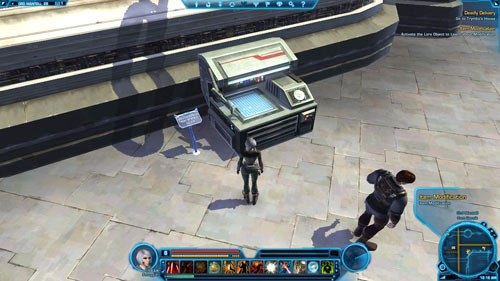
It's time to focus on the major mission objective, which is a long journey. Exit Fort Garnik through the gate in [5] and then head west. You'll have to travel through the Avilatan Badlands area to Oradam Peninsula. The third and the last village on this planet is your destination. Along the way, watch out especially for Separatist Saboteur Leaders [+] (can set you on fire) and Separatist Overseers [+]. Get to the Oradam Village entrance in [6].
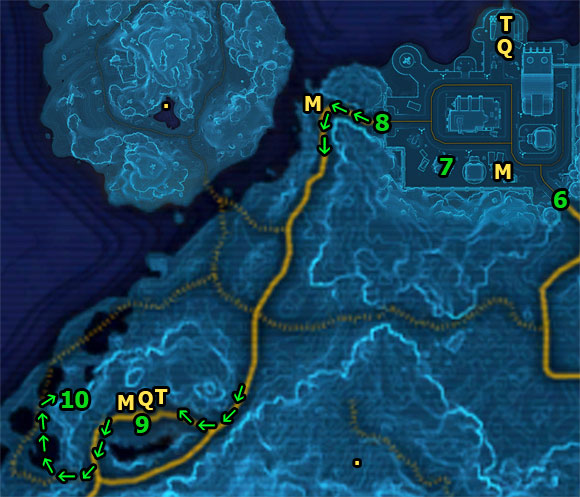
Then head north to mark Quick Travel Point (Oradam Village) and Taxi (Oradam Village Speeder) on the map.
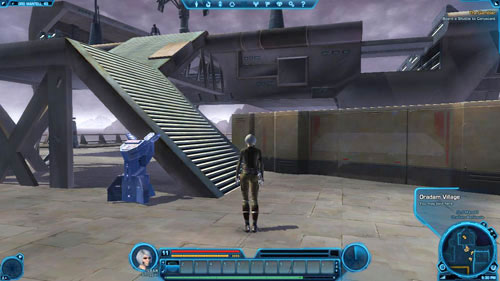
Go to Trymbo's House
Go to Trymbo's house entrance in [7]. Pass through the green force field to enter the story area.
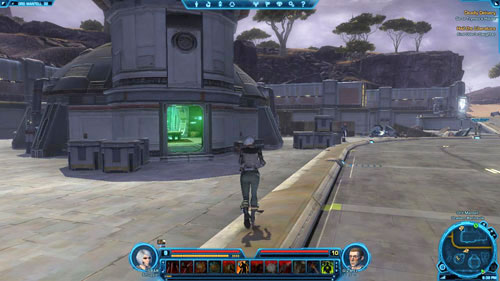
Speak to Loonda
Inside, you'll have a quick chat with Trymbo's wife - Loonda. It turns out that her husband is not at home - he has gone for a walk on the beach. You need to find him, then.

Speak to Trymbo
Exit the village through the first [6] or the second [8] gate. Go south, to the camp by the volcano in [9]. Along the way (and later also on the beach) watch out especially for Scavenger Leaders [+] and Separatist Overseers [+]. There's the last quick travel point and a taxi there - Quick Travel Point (Volcano Camp) and Taxi (Volcano Camp Speeder) - mark them on the map.
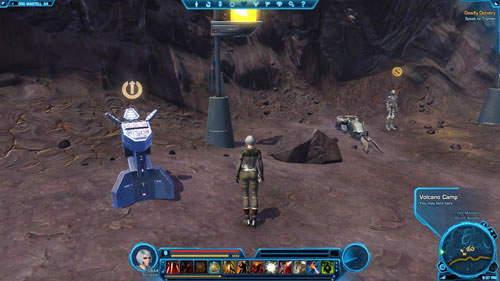
Exit the camp and follow the path shown by the arrows on the map to go down on the beach and get to Trymbo. He's hiding among the rocks in [10]. Speak with him.

Open the Storage Unit
After you've finished the conversation, open the storage unit on the right to take Chemical Canister.
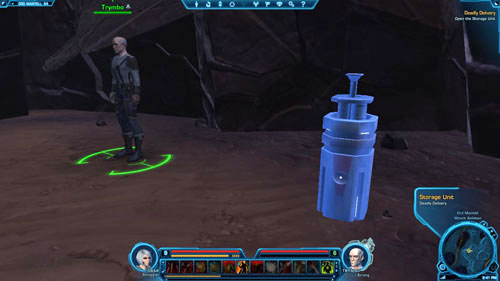
Deliver the Chemicals to Viidu
All that remains to be done is to deliver the chemicals to Viidu. It's close to the taxi you've recently marked - Taxi (Volcano Camp Speeder) - so take it to go to Fort Garnik. Then go to the warehouse through the door in [3] and up the stairs in [11] to get to the second level of the warehouse. Speak with Viidu to complete the class mission and receive the next.

Stop the Weapons Trade (Bonus)
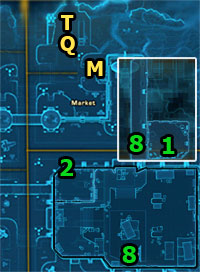
Go to Skavak's Rendezvous Point
This mission also begins in the Rendia Freight warehouse in [1]. Jump down on the lower level and exit through the door in [2]. It's time to visit the separatists in their main base - a stronghold hidden inside the volcano. Take a taxi to go to Taxi (Volcano Camp Speeder) marked in the last mission.
![Head for the Separatist Stronghold entrance in [3], shown in the picture below - (L11) Hitting Where it Hurts - Smuggler - Star Wars: The Old Republic - Game Guide and Walkthrough](https://game.lhg100.com/Article/UploadFiles/201512/2015121709503597.jpg)
Head for the Separatist Stronghold entrance in [3], shown in the picture below. The door leading to the stronghold is on the left. You'll come across a lot of different types of opponents both on the way and inside the base. Watch out especially for Separatist Monitor Droids [+], Separatist Commanders [+], Separatist Officers [+] (they fire short bursts and then throw grenades) . These enemies are on all three stronghold levels.
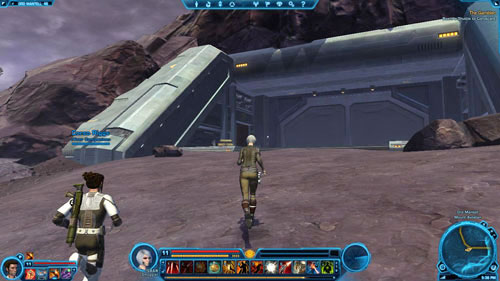
Make your way through the network of corridors to get to an open yard surrounded by lava. Once you're there, find the elevator in [4], which will take you to Separatist Stronghold - Level 2.
![Apart from the abovementioned enemies, you'll face new ones on the second level - Separatist Tech Officers (they send electrifying probes) and Separatist Vanguards [+] (big enemies armed with heavy weapons who can push you away) - (L11) Hitting Where it Hurts - Smuggler - Star Wars: The Old Republic - Game Guide and Walkthrough](https://game.lhg100.com/Article/UploadFiles/201512/2015121709503562.jpg)
Apart from the abovementioned enemies, you'll face new ones on the second level - Separatist Tech Officers (they send electrifying probes) and Separatist Vanguards [+] (big enemies armed with heavy weapons who can push you away). Your task is to use the piers, corridors and rooms to get to the corridor in [5]. It will take you to Separatist Stronghold - Level 3.
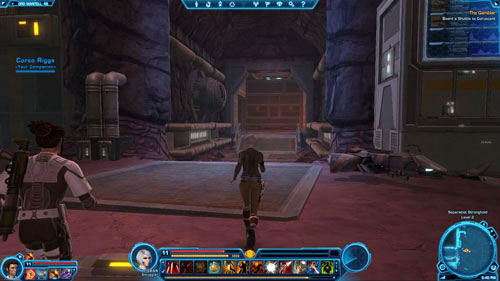
Once you're there, watch out also for Separatist Supervisors who can slow you down. You must visit almost every place in the stronghold to get to [6]. Go through the green force field to enter the story area.
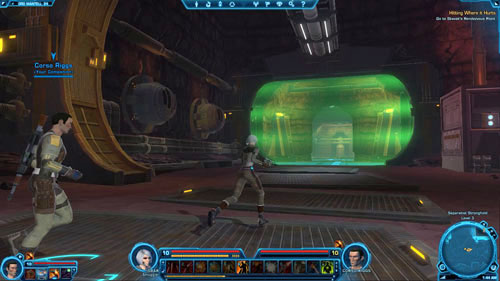
Defeat Separatis Arms Dealers: 0/5
Here, above all, you must watch out for Separatist Arms Dealers [+] who can pull you to themselves - these are the most powerful enemies of all. On the other hand, killing five enemies of this kind will result in completing the bonus mission (1090 XP). Go to [7] and be careful when you get to the hall to which the corridor has led you. There are enemies virtually everywhere.

Speak to Separatist Leader Dareg
After getting to [7], make sure you have full health and then talk to Separatist Leader Dareg. It doesn't matter what you say, as the conversation will end in a fight anyway.

Defeat Separatist Leader Dareg
Defeat Morant
Defeat Dareg's Bodyguards
You must fight with the leader's bodyguards (Dareg's Bodyguards), his second in command - Morant and also, of course, with Separatist Leader Dareg [+] himself. The latter should be the last person you fight with. It won't be difficult to defeat all three separatists, especially because Corso Riggs will be helping you.

Speak to Morant
After the fight, the only survivor will be Morant. Talk to him but remember that your replies will have an impact on your companion (you can also gain some Dark or Light Side points). You must decide whether to spare Morant, or kill him.

A
Reply
Effect
Points / Rewards
1
Stop!
Further conversation stage - B
-
2
This feels wrong.
Further conversation stage - B
-
3
Orders are orders.
Killing Morant
+100 to Dark Side, +15 to Affection: Corso Riggs
B
Reply
Effect
Points / Rewards
1
So recruit him.
Sparing Morant
+100 to Light Side
2
Think about this.
Sparing Morant
+100 to Light Side
3
Fine, you win.
Killing Morant
+100 to Dark Side, +15 to Affection: Corso Riggs
Find Syreena
After the conversation with Morant it's best to immediately teleport to Quick Travel Point (Fort Garnik) or Quick Travel Point (Avilatan's Rest Cantina) and then go inside the Rendia Freight warehouse through the door in [2] (see the first map in the mission description). Climb the stairs in [8] and then go to Viidu's office in [1].
Speak to Syreena
You'll catch Syreena red-handed. Prepare for the conversation with her, and then with Corso Riggs. Remember that your replies will have an impact on your companion and that they also might gain you some Dark or Light Side points. You can kill or save Syreena, you can also force her to give you some extra money. It is worth adding that the conversation may have a slightly different course depending on your character's sex. All options and relations are presented in the tables below the picture.
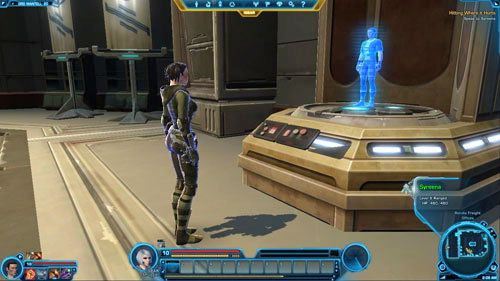
A
Reply
Effect
Points / Rewards
1
I guess we do.
Sparing Syreena
+100 to Light Side
2
I want more.
Further conversation stage - B
+75 credits
3
No need. [Kill her]
Killing Syreena, Further conversation stage - D
+100 to Dark Side
B
Reply
Effect
Points / Rewards
1
Don't mind if I do.
Sparing Syreena, Further conversation stage - C
-
2
Smart move.
Sparing Syreena, Further conversation stage - C
-
3
Still not enough. [Kill her]
Killing Syreena, Further conversation stage - D
+150 to Dark Side
C
Reply (Female)
Effect
Points / Rewards
1
You're kidding, right?
Further conversation stage - E
-
2
What about Viidu?
End of conversation
-
3
Who cares what you think?
End of conversation
-1 to Affection: Corso Riggs
C
Reply (Male)
Effect
Points / Rewards
1
Me neither.
End of conversation
+15 to Affection: Corso Riggs
2
What about Viidu?
End of conversation
-
3
Who cares what you think?
End of conversation
-1 to Affection: Corso Riggs
D
Reply (Female)
Points / Rewards
1
Why not?
-
2
Even if you had to?
-
3
Don't be such a baby.
-1 to Affection: Corso Riggs
D
Reply (Male)
Points / Rewards
1
It was justice.
-
2
She knew too much.
-1 to Affection: Corso Riggs
3
Watch your mouth.
-30 to Affection: Corso Riggs
E
Reply
Points / Rewards
1
The jury is still out.
-
2
You're so cute.
+15 to Affection: Corso Riggs
3
Good guess.
-1 to Affection: Corso Riggs
At the end of the conversation - regardless of the choices you've made - you'll receive a pass allowing you to leave the planet (Shuttle Pass). You'll complete the class mission and receive the next, which will also be the last one on this planet.
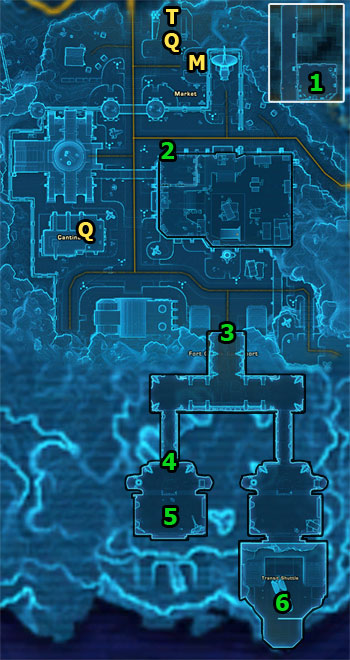
Go to the Ord Mantell Shuttleport
You begin in [1]. Exit the office and jump down on the lower level. Then, exit the warehouse through the door in [2]. Go to the shuttle port, namely to the big entrance in [3].
![Turn right at the fork and go through the green force field in [4] to enter the story area - (L11) Chasing Skavak - Smuggler - Star Wars: The Old Republic - Game Guide and Walkthrough](https://game.lhg100.com/Article/UploadFiles/201512/2015121709503755.jpg)
Turn right at the fork and go through the green force field in [4] to enter the story area. Make sure you have full health.
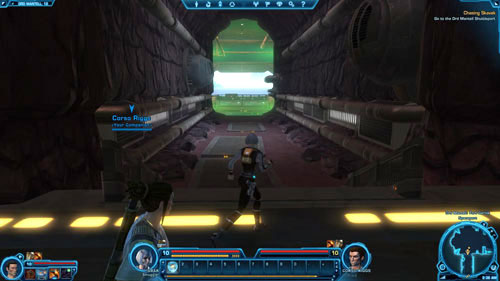
Speak to Xo'ru
Go to [5]. Your way will be barred by Xo'ru and Kindin. They'll want to talk to you. It doesn't matter what you answer - the conversation will end in a fight anyhow.

Defeat Xo'ru
Defeat Kindin
Yet, don't expect a great challenge. Kill Kindin first and then the stronger Xo'ru [*] - you shouldn't have any problem with that.
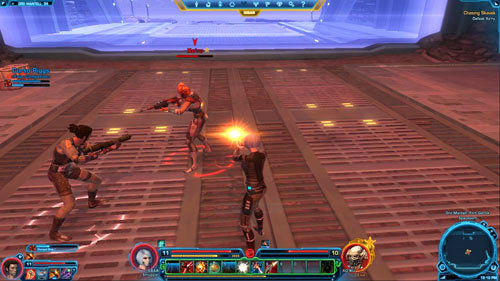
Take the Shuttle to the Republic Fleet
The only thing you can do now is to exit the story area through the force field in [4] and then go to [6]. Take the space shuttle to leave the Ord Mantell planet, thus completing the last class mission.
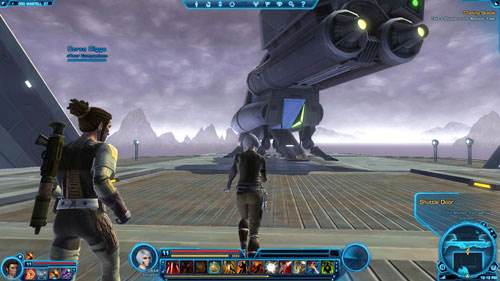
After leaving Ord Mantell, go to any cantina to speak with Corso Riggs. During the conversation your reply will have an impact on the companion - see the table below the picture for details.

A
Reply
Points / Rewards
1
It's a great life.
+40 to Affection: Corso Riggs
2
You've done this before?
+15 to Affection: Corso Riggs
3
It's hard life.
-1 to Affection: Corso Riggs
2510 XP.
Each mission description is divided into several smaller parts. The list of missions is given in chronological order, that is, the order you receive them. However, you might do them in a different sequence (see the "Shortcuts" section for the optimal order). Also, the level of a particular mission is shown before its name (L), as well as a note whether it is a [HEROIC] mission. Here is all information that is essential to read before you start using the missions descriptions.
The exact description of a mission is here. Sometimes it's divided into several different places you will visit, and each of them has its own map.
In the missions descriptions there are all dialogues that can have any impact on the game mechanics. It is given in the Points / Rewards column. The Effect column specifies what kind of effect your reply will have (there can also be a letter referring to the next dialogue mentioned), while under Reply there is the answer's line.
If any dialogue is missing, it means that it doesn't matter which reply you choose (of course, except for the aspects related to developing your character in terms of the story). If a reply doesn't have any effect or doesn't result in getting any points or rewards, then there will be no suitable column in the table.
#
Reply
Effect
Points / Rewards
Reply number
One out of the two or three replies your character can give.
Effect of the chosen reply, and if it leads further - a letter of the next dialogue is given
+x to Light / Dark Side, +x / -x to companion's Affection, other Rewards
# - a letter indicating the dialogue order. Some replies can lead to different dialogues.
If a mission contains a small bonus quest, then a complete list of them is given right before the mission description. Bonus mission objectives are given along with the mission objectives (class or side) with which such a mission is connected.
The list of rewards includes: XP, credits, items and Codex entries. You can receive all these items for completing a mission. Sometimes you'll get one out of the two depending on your class, other times you'll have to choose one from several items (these are separated by a slash - "/"). If there is a [*] next to the reward, it means that it is a very valuable item.
![You can get this side mission from Sergeant Blyes, who is hiding behind the barricades in [1] - (L02) Clearing the Air - Ord Mantell - Star Wars: The Old Republic - Game Guide and Walkthrough](https://game.lhg100.com/Article/UploadFiles/201512/2015121709503753.jpg)
You can get this side mission from Sergeant Blyes, who is hiding behind the barricades in [1]. Speak with him and agree to help.
Disable Signal Jammer Alpha
Your task will be disable three signal jammers in Drelliad Village. There will be a small group of opponents near each of them. All you need to do is to defeat the enemies and then destroy the jammer. The first is in [2] to the left of the destroyed village entrance.
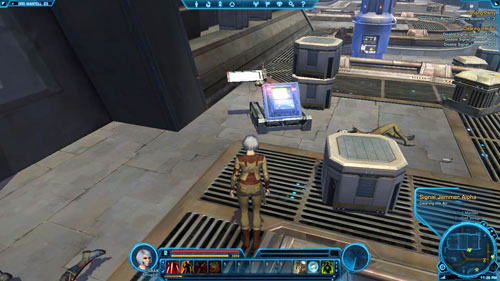
Disable Signal Jammer Beta
The second signal jammer can be found in the northern part of the village - in [3].
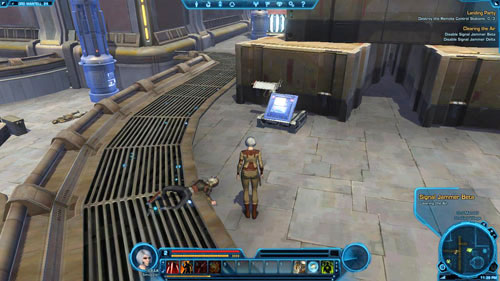
Disable Signal Jammer Delta
The third and the last one is in [4], by one of the small houses (inside the house there's a chest you can search).
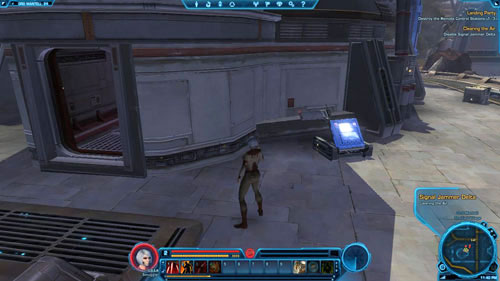
Return to Sergeant Blyes
After you've disabled all three jammers, go back to Sergeant Blyes in [1] to complete this mission and get your rewards.
Blinding the Enemy (Bonus)
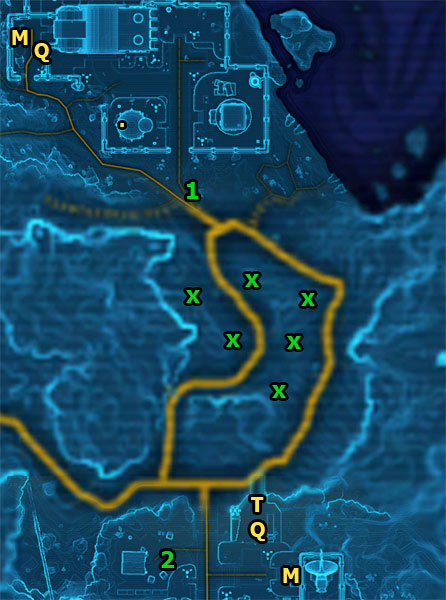
You can get this mission only after you've had the conversation via the holocom in the Hit the Ground Running (Trooper) mission, or after you've completed the Landing Party (Smuggler) mission. To receive it, speak with Wesner who's hiding in [1] and agree to help him.
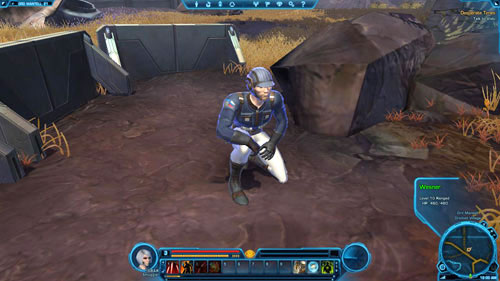
Defeat Separatist Forces: 0/8
Your main task will be to hunt snipers, but while doing it you can also accomplish a bonus mission - kill eight enemies (including the snipers). The most common enemies in the mission area will be Separatist Field Scouts. Completing the bonus mission will result in getting 380 XP.
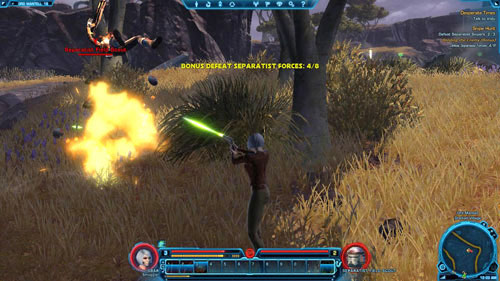
Defeat Separatist Snipers: 0/3
Separatist Snipers are in different places in the south - on the road to Fort Garnik. These places are marked with [x].
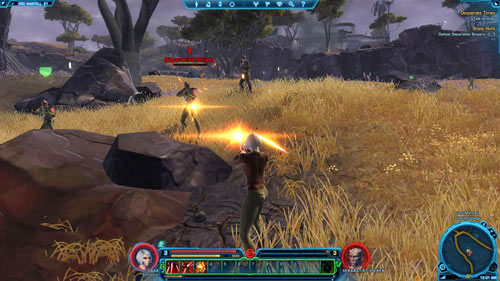
Speak to Commander Vray
After killing eight opponents, including three snipers, go south to Fort Garnik and find Commander Vray in [2] in a small camp. Talk to him to complete the mission and get your rewards.


You can get this mission only after you've completed the class mission - Hit the Ground Running (Trooper) / Desperate Times (Smuggler). Speak with Sergeant Hurd in [1] to receive it.
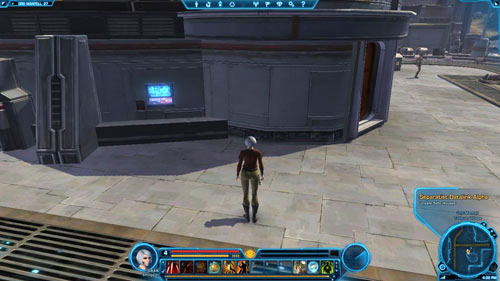
Speak to Yael
Then run to the Fort Garnik eastern exit in [2] and speak with Yael in [3]. Although the reply you'll give at the end of the conversation will have no impact on the course of the mission, it might get you some Dark or Light Side points. See the table below the picture for details. After the conversation you'll obtain a Codex entry - Species: Cathar - worth 100 XP.
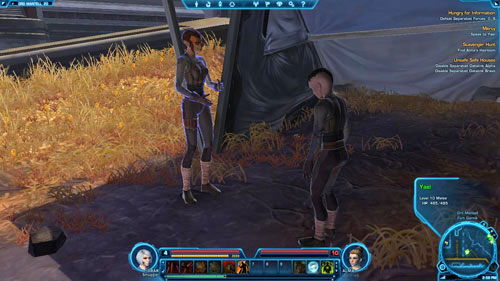
A
Reply
Points / Rewards
1
Okay, you win.
+50 to Light Side
2
No deal. [Threaten the child]
+100 to Dark Side
Loot the Stolen Medicine: 0/2
Go to the Talloran Village. Enter through the gate in [4]. In the village watch out especially for Separatist Armsmasters [+] (can slow you down) and Separatist Commandos [+] (they throw mines). The latter have the stolen medicine - they can be found (among other places) in the spots marked with [x] on the map in the mission description.
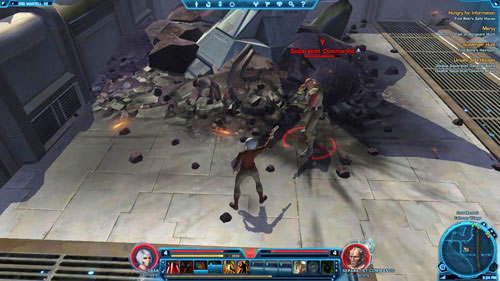
After each fight look out for the yellow beams of light - if there is one above the enemy corpse, then he has the medicine. Collect two portions of medicine (Stolen Medicine) this way.
Return to Yael or Sergeant Hurd
If there is no longer anything to do in Talloran Village, teleport to Quick Travel Point (Fort Garnik) or Quick Travel Point (Avilatan's Rest Cantina). Now you must take a decision. If you want to take the medicine to Sergeant Hurd, go to [1]. If you prefer to give it to Yael - go to [3]. See the tables below for details. Giving the medicine to either of them will result in ending this side mission.
A
Reply (Yael)
Points / Rewards
1
Here you go.
+50 to Light Side
2
[Lie] Not yet.
-
A
Reply (Sergeant Hurd)
Points / Rewards
1
Here you go.
+50 to Dark Side, +37 credits do Rewards
2
[Lie] Working on it.
-
Stop the Raiders (Bonus)
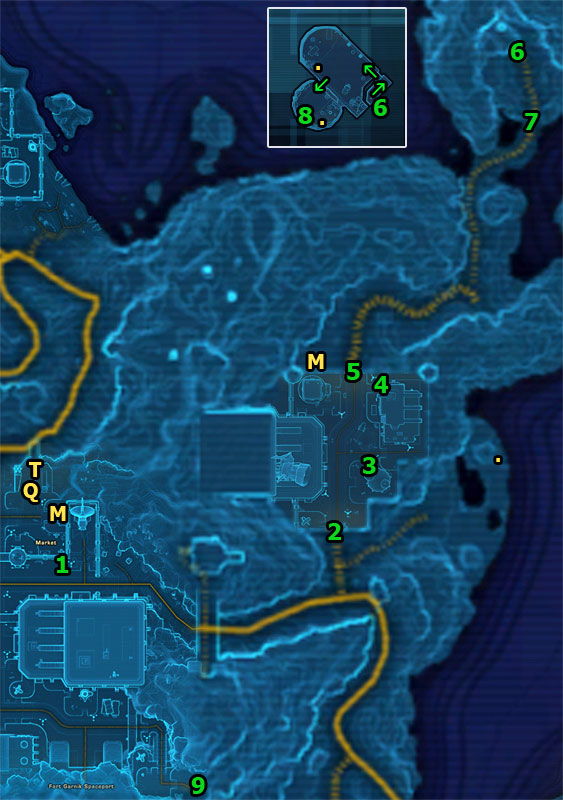
You can get this mission only after you've completed the class mission - Hit the Ground Running (Trooper) / Desperate Times (Smuggler). Examine Holovid Intelligence Hub in [1] and click "Accept" to receive this mission.
![Go to the Talloran Village and enter through the gate in [2] - (L05) Unsafe Safe Houses - Ord Mantell - Star Wars: The Old Republic - Game Guide and Walkthrough](https://game.lhg100.com/Article/UploadFiles/201512/2015121709503902.jpg)
Go to the Talloran Village and enter through the gate in [2]. In the village watch out especially for Separatist Armsmasters [+] (can slow you down) and Separatist Commandos [+] (they throw mines).
Disable Separatist Datalink Alpha
Your first task is to disable two separatist devices. The first datalink is located on the small building wall in [3] and is surrounded by enemies, of course. Turn it off and then take care of the second one.
Disable Separatist Datalink Bravo
The second datalink is in [4] and it's also hanging on the building wall (except that the building is much bigger). After you've disabled the two devices, exit the village through the second gate in [5].
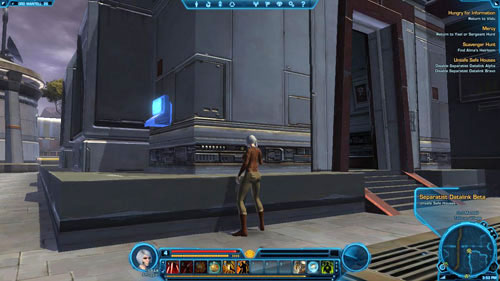
Defeat Separatist Forces: 0/10
Your destination is the building with separatist transmitter. The building entrance is located in another area - Northern Talloran - in [6]. Go there, eliminating enemies along the way and watching out especially for Separatist Raider Chiefs [+]. When you get to [7] start to clear the approaches of the base - kill ten enemies to complete the bonus mission and gain 390 XP.
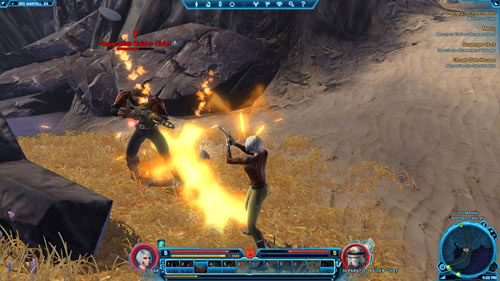
Destroy the Satellite Dish Relay
Enter the building through the door with the transmitter in [6]. Eliminating the enemies, get to the computer room in [8]. It is guarded by Separatist Raider Chief [+]. Defeat the enemy and then hack into the computer.

Speak to Communications Officer Sulan
If there is no longer anything to do in Northern Talloran or Talloran Village, teleport to Quick Travel Point (Fort Garnik) or Quick Travel Point (Avilatan's Rest Cantina). Once you're back in the fort, find Officer Sulan who is in [9] (you'll have to go up the stairs to get to him). Talk to him to complete the mission and get your rewards.
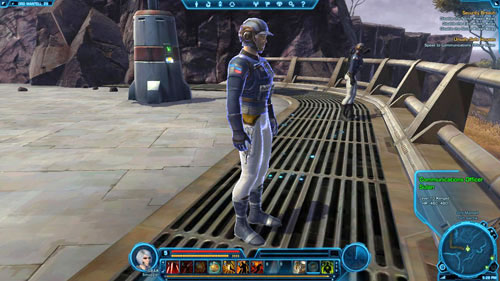
Praying on Thieves (Bonus)
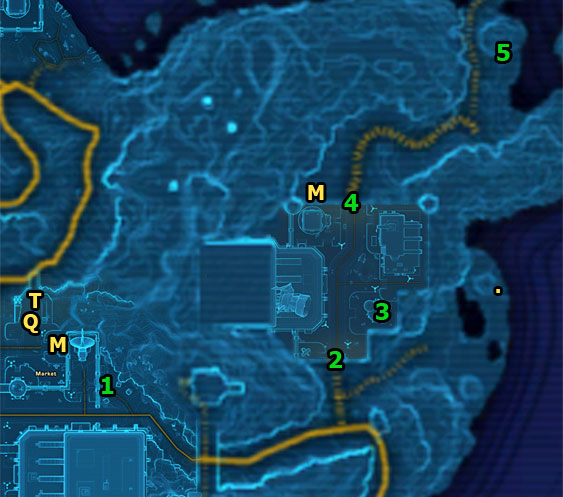
You can get this mission only after you've completed the class mission - Hit the Ground Running (Trooper) / Desperate Times (Smuggler). To receive the mission, speak with Alma in [1] and agree to help her.
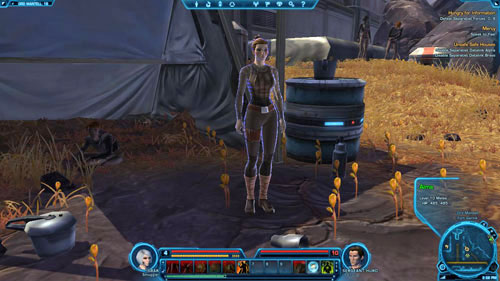
Find Alma's Heirloom
Go to Talloran Village and enter through the gate in [2]. In the village watch out especially for Separatist Armsmasters [+] (they can slow you down) and Separatist Commandos [+] (they throw mines). Find Alma's house in [3] and go inside.
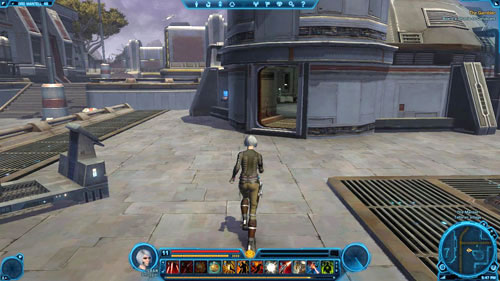
Speak to Ebenga
Inside you'll meet Ebenga. He'll tell you that Alma is really an imperial spy and her necklace is a data collection device. He will also tell you where the "heirloom" is now.

Eliminate the Scavengers: 0/8
Exit Talloran Village through the gate in [4] and run to [5]. There are many different types of enemies here. Watch out especially for Separatist Raider Chiefs [+]. After killing the first scrap collector you'll get a bonus mission. Kill eight to complete it and receive 630 XP.
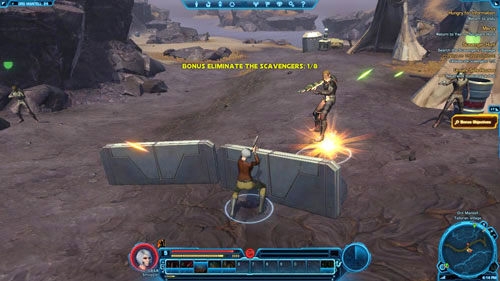
Search the Scavenger's Salvage
Get to [5], defeat the enemies and search the crate shown in the picture. Stolen Heirloom will appear in your inventory.
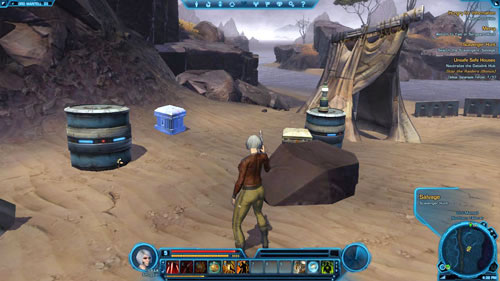
Return to Ebenga or Alma
If there is no longer anything to do in Northern Talloran or Talloran Village, you must decide whom you'll give the heirloom (see the tables below for details). If you prefer to give it to Ebenga, commit suicide to respawn right by the gate in [4]. Then go to the house in [3] and give Ebenga the heirloom. If you prefer to give it to Alma, teleport to Quick Travel Point (Fort Garnik) or Quick Travel Point (Avilatan's Rest Cantina) and then go to [1]. Find Alma and speak with her. Whoever you chose, the mission will be carried out.
A
Reply (Ebenga)
Points / Rewards
1
Here you go.
+50 to Light Side
2
[Lie] No, not yet.
-
A
Reply (Alma)
Points / Rewards
1
Yes.
+50 to Dark Side
2
[Lie] Sorry, no necklace.
-
Ending the Insurgency (Bonus)
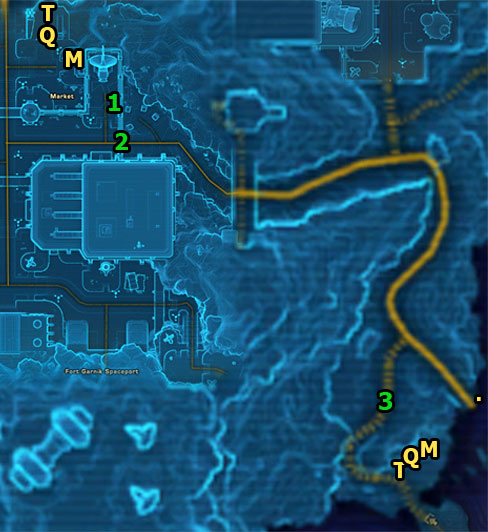
You can get this mission only after you've completed the class mission - The Ambush (Trooper) / Hungry for Information (Smuggler). Speak with Lieutenant Xorem in [1] to receive it.
Defeat Separatist Forces: 0/12
You must go to Mannett Point. Exit through the gate in [2] and run to [3] to the Mannett Shore area. This is where - near [3] - you can start to hunt separatists (there aren't any special types of opponents among them). Kill twelve to complete the bonus mission and gain 510 XP.
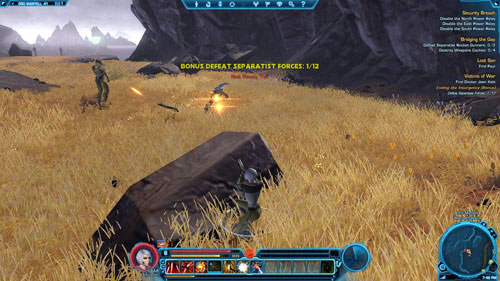
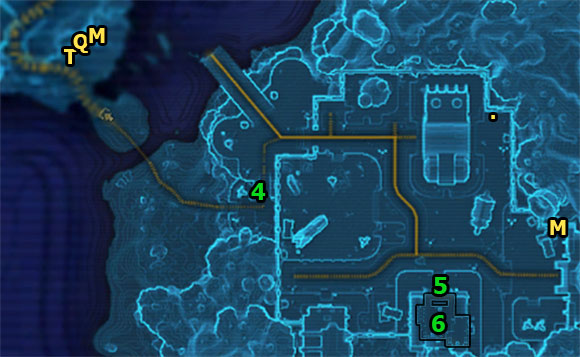
Find Doctor Jaen Kett
Next, cross the shallows, step on the beach and locate the stairs in [4] leading to the town. As usual, there will be some fights here. Watch out especially for Separatist Captors [+] (they can catch and pull your character to themselves) and Separatist Troopers [+]. Moreover, some robots can also get on your nerves: Separatist Surveyor Droids [+] on the beaches and Separatist Freedom Droids [+] in the town. Locate the entrance to the medical center in [5]. The doctor you are looking for is there.
![Run inside and speak with the doctor in [6] - (L06) Victims of War - Ord Mantell - Star Wars: The Old Republic - Game Guide and Walkthrough](https://game.lhg100.com/Article/UploadFiles/201512/2015121709504192.jpg)
Run inside and speak with the doctor in [6]. It doesn't matter what you reply - Jaen Kett won't leave the medical center. After the conversation with the doctor you will get a list (Jaen Kett's List) and a Codex entry - Lore: Split by Rebellion - worth 300 XP.

Return to Lieutenant Xorem
Now all that is left to do is to return to Lieutenant Xorem in [1]. Teleport to Quick Travel Point (Fort Garnik) or Quick Travel Point (Avilatan's Rest Cantina) (you can also take a taxi). Talk to the lieutenant and decide whether the Republic soldiers are to take only the doctor (second option), or also the orphans from the center (first option). You will receive Dark / Light Side points and rewards for the completed mission.
A
Reply
Points / Rewards
1
We can't leave anyone behind.
+100 to Light Side
2
Forget the kids.
+100 to Dark Side

You can get this mission only after you've completed the class mission - The Ambush (Trooper) / Hungry for Information (Smuggler). To receive it, speak with Ellis and Iero who are in front of the tent in [1].

You must go to Mannett Point. Run to [2] - to the Mannett Shore area.
![Cross the shallows, step on the beach and locate the stairs in [3] that are leading to the town - (L06) Lost Son - Ord Mantell - Star Wars: The Old Republic - Game Guide and Walkthrough](https://game.lhg100.com/Article/UploadFiles/201512/2015121709504266.jpg)
Cross the shallows, step on the beach and locate the stairs in [3] that are leading to the town. As usual, there will be some fighting here. Watch out especially for Separatist Captors [+] (they can catch and pull your character to themselves) and Separatist Troopers [+]. Moreover, some robots can also get on your nerves: Separatist Surveyor Droids [+] on the beaches and Separatist Freedom Droids [+] in the town.
Find Paul
Go to [4]. There is the entrance to the separatist base - use it. Watch out for Separatist Freedom Droid [+] who is guarding it.
![Inside the Separatist Base defeat a Separatist Trooper [+], and then go to the elevator in [5] - (L06) Lost Son - Ord Mantell - Star Wars: The Old Republic - Game Guide and Walkthrough](https://game.lhg100.com/Article/UploadFiles/201512/2015121709504233.jpg)
Inside the Separatist Base defeat a Separatist Trooper [+], and then go to the elevator in [5]. Press the blue button to go down to Separatist Base - Level 2.
![Run to [7] - through the corridor and the big hall, and then turn right to get into one of the training rooms - (L06) Lost Son - Ord Mantell - Star Wars: The Old Republic - Game Guide and Walkthrough](https://game.lhg100.com/Article/UploadFiles/201512/2015121709504208.jpg)
Run to [7] - through the corridor and the big hall, and then turn right to get into one of the training rooms. Along the way, watch out especially for Separatist Troopers [+] and Separatist Propaganda Officers [+]. You'll find Paul in the room in [6]. Speak with him. At the end of the conversation, you'll need to choose whether to comply with his request or not (which is connected with gaining Dark or Light Side points - see the table below the picture for details).
A
Reply
Points / Rewards
1
Have these credits.
+100 to Light Side
2
Return home, I insist.
+50 to Dark Side
Return to Ellis and Iero
Regardless of whether you received a ring from Paul (Paul's Ring), or not, teleport to Quick Travel Point (Fort Garnik) or Quick Travel Point (Avilatan's Rest Cantina) (you can also take a taxi). Run to [1] and speak with Ellis and Iero to complete the mission.

You can get this mission only after you've completed the class mission - The Ambush (Trooper) / Hungry for Information (Smuggler). Speak with Commander Bragan who's hiding in [1] to receive it.
![Cross the shallows, step on the beach and locate the stairs in [2] that are leading to the town - (L05) Bridging the Gap - Ord Mantell - Star Wars: The Old Republic - Game Guide and Walkthrough](https://game.lhg100.com/Article/UploadFiles/201512/2015121709504247.jpg)
Cross the shallows, step on the beach and locate the stairs in [2] that are leading to the town. As usual, there will be some fighting here. Watch out especially for Separatist Captors [+] (they can catch and pull your character to themselves) and Separatist Troopers [+]. Moreover, some robots can also get on your nerves: Separatist Surveyor Droids [+] on the beaches and Separatist Freedom Droids [+] in the town.
Defeat Separatist Rocket Gunners: 0/3
Separatist Rocket Gunners are in different places. The terrace in [3] is one of them. There are three enemies of this type there. Regenerate your health if you are wounded and then attack and kill all the enemies. You'll carry out the first mission objective.
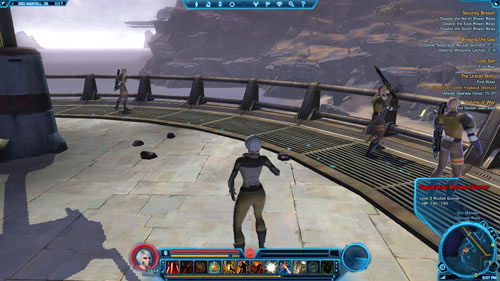
Destroy Weapons Caches: 0/4
It's time to destroy the weapon caches. There are a lot of them in the town (the town gate is in [4]). Have a look at the map - the caches are marked with [x]. Get rid of four caches and watch out for the local enemies.
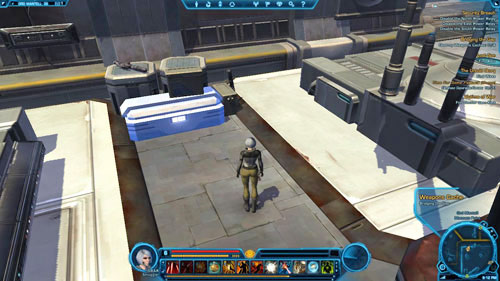
Return to Commander Bragan
You can commit suicide, teleport to Quick Travel Point (Falks Reach) or go there on foot. Then go to [1] and speak with Commander Bragan to complete the mission and receive your rewards.
Time For Some Payback (Bonus)
![Speak with Lamalla Rann standing on a beach in [1] to get this mission - (L04) The Untold Story - Ord Mantell - Star Wars: The Old Republic - Game Guide and Walkthrough](https://game.lhg100.com/Article/UploadFiles/201512/2015121709504381.jpg)
Speak with Lamalla Rann standing on a beach in [1] to get this mission.

Eliminate Separatist Forces: 0/20
Cross the shallows, step on the beach and locate the stairs in [2] that are leading to the town. In the meantime, you'll be fighting with some enemies. Kill twenty separatists to complete the bonus mission and gain 510 XP. Watch out especially for Separatist Captors [+] (they can catch and pull your character to themselves) and Separatist Troopers [+]. Moreover, some robots can also get on your nerves: Separatist Surveyor Droids [+] on the beaches and Separatist Freedom Droids [+] in the town.

Find Waxx
Go through the town gate in [3] and then go to [4]. There is the entrance to the separatist base - use it. Watch out for Separatist Freedom Droid [+] who is guarding it.
![Inside the Separatist Base defeat a Separatist Trooper [+], and then go to the elevator in [5] - (L04) The Untold Story - Ord Mantell - Star Wars: The Old Republic - Game Guide and Walkthrough](https://game.lhg100.com/Article/UploadFiles/201512/2015121709504382.jpg)
Inside the Separatist Base defeat a Separatist Trooper [+], and then go to the elevator in [5]. Press the blue button to go down to Separatist Base - Level 2.
![Run to [6] - through the corridor and big hall, and then turn right - (L04) The Untold Story - Ord Mantell - Star Wars: The Old Republic - Game Guide and Walkthrough](https://game.lhg100.com/Article/UploadFiles/201512/2015121709504340.jpg)
Run to [6] - through the corridor and big hall, and then turn right. You'll reach the stairs that will take you to the higher level. Along the way, watch out especially for Separatist Troopers [+], Separatist Propaganda Officers [+] and Separatist Base Commanders [+].
![Once you're upstairs, go to [7] and enter the small room where you will find Waxx - (L04) The Untold Story - Ord Mantell - Star Wars: The Old Republic - Game Guide and Walkthrough](https://game.lhg100.com/Article/UploadFiles/201512/2015121709504345.jpg)
Once you're upstairs, go to [7] and enter the small room where you will find Waxx. Talk to him and decide if you just want to leave him or take the holodiscs by force (it's connected with gaining Dark or Light Side points, as well as the possibility of an additional mission objective). See the table below the picture for details.
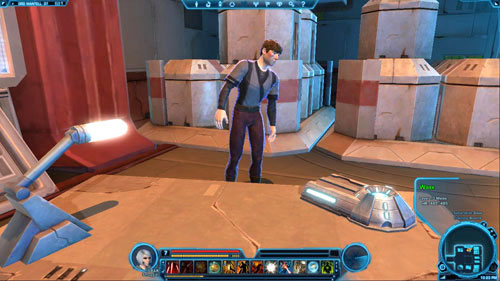
A
Reply
Points / Rewards
1
Fine' I'll tell her.
+50 to Light Side
2
The discs - now.
+50 to Dark Side
Loot the Holodiscs: 0/2
If you threatened Waxx, he'll tell you that he doesn't have the holodiscs. So you need to hunt Separatist Propaganda Officers [+], who do. There are several enemies of this type in the base - some are marked with [x] on the map in the mission description.

Keep killing the officers and search their bodies till two Holodiscs appear in your inventory (look out for the yellow beams of light coming out of the corpses of the officers - only these have the holodiscs).
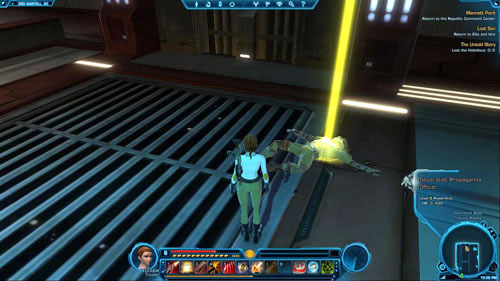
Return to Lamalla Rann
Whatever decision you have taken, go back to Lamalla Rann to get your reward. Teleport to Quick Travel Point (Falks Reach) or go on foot to Mannett Shore. Then, speak with Lamalla Rann in [1]. You'll complete the mission and get the rewards.
Punish the Saboteurs (Bonus)
![Talk to S3-E3 standing in [1] and offer your help to get this mission - (L07) Generator Problems - Ord Mantell - Star Wars: The Old Republic - Game Guide and Walkthrough](https://game.lhg100.com/Article/UploadFiles/201512/2015121709504449.jpg)
Talk to S3-E3 standing in [1] and offer your help to get this mission.
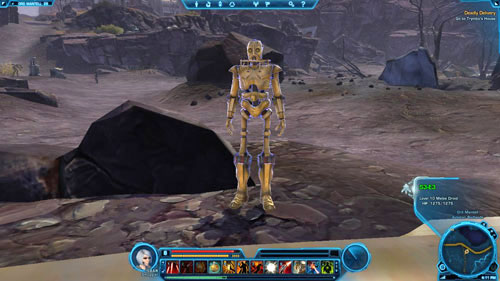
Find Engineer Celestra
Although this side mission has a bonus mission - don't do it yet. Just go to [2] as quickly as you can. You'll find Engineer Celestra by the generator. Along the way, watch out especially for Separatist Saboteur Leaders [+], who can set you on fire. Speak with the engineer to proceed to the next part of the mission.
Dispatch the Separatist Saboteurs: 0/12
Only now can you start eliminating the enemies - you have to do it anyway if you want to recover the items that Engineer Celestra needs. Kill twelve enemies near the generator to complete the bonus mission and get 870 XP.
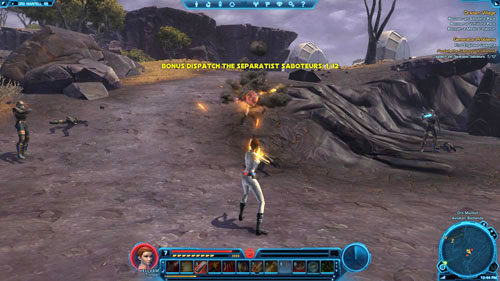
Recover Liquid Coolant: 0/5
Recover a Hydrospanner
Recover a Multitool
Recover a Turbohammer
After each fight you've won, it's necessary to check if there are any yellow beams of light coming out of the bodies of dead enemies. If you see the yellow beams, search the corpses. Together there are eight items you need to recover, that's why the search will be long and arduous. Keep killing the enemies and searching their bodies till you recover the full set of items (Hydrospanner, Multitool, Turbohammer and 5x Liquid Coolants).
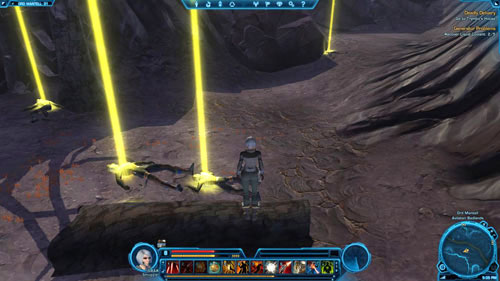
Return to Engineer Celestra
Go back to Engineer Celestra in [2] and give her all the items to finish the side mission and receive the rewards.
![Talk to Ensign Dregg in [1] and have a look at the table below the picture - you can receive one of the two missions, depending on what you reply - (L07) Republic Roulette - Ord Mantell - Star Wars: The Old Republic - Game Guide and Walkthrough](https://game.lhg100.com/Article/UploadFiles/201512/2015121709504552.jpg)
Talk to Ensign Dregg in [1] and have a look at the table below the picture - you can receive one of the two missions, depending on what you reply. Choosing one excludes doing the other, so think carefully before you make a choice. If you want to accomplish the Republic Roulette mission, select the first dialogue option.

A
Reply
Effect
Points / Rewards
1
All right.
Receiving the Republic Roulette mission
+50 to Dark Side
2
I'm reporting this.
Receiving the Republic Roulette: Questionable Ethics mission
+50 to Light Side
Speak to Ensign Peters
If you agreed to participate in the game, talk to Ensign Peters in [2]. You will have to choose whether you want to risk and run through the minefield yourself, or place a bet on one of the three contestants (see the table below the picture for details). After the conversation you'll obtain a Codex entry - Lore: Ruled by Corruption - worth 495 XP.

A
Reply
Effect
1
I'll run myself.
Placing the bet on yourself
2
I'll place a bet.
Placing the bet on one of the contestants
Use the Race Starter Panel
If you put the bet on one of the competitors, use the panel by the tent in [3].
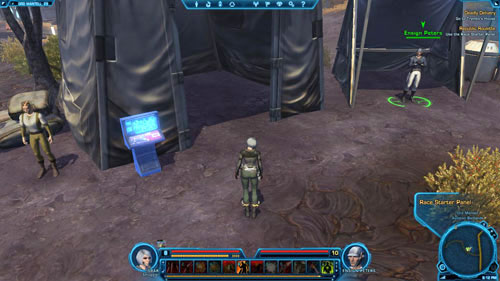
Watch Your Runner Run
Then, watch your contestant's race - you just need to wait. There are obviously two possibilities - either the contestant makes it safely to the tents, or dies when he/she steps on a mine.
Collect Mortar Shells: 0/3
If you placed the bet on yourself, you can expect a bigger prize, but the risk will be greater. Go in the vicinity of [4] and start to collect Mortar Shells. Keep your fingers crossed for your character each time she/he collects a shell, because if there's an explosion, you'll wake up in the medical center in [5] and lose the bet. Collect three mortar shells to proceed to the last mission objective.
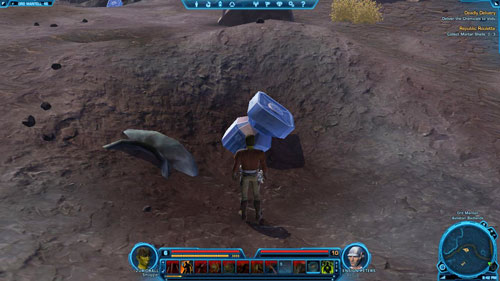
Return to Ensign Peters
Whether you or another runner was lucky in the race through the minefield or not, the last thing to do is to go to Ensign Peters in [2] and speak with him to complete the mission. Attention! If you or the runner you placed the bet on "lost", you won't get any money.
![Talk to Ensign Dregg in [1] and have a look at the table below the picture - you can receive one of the two missions, depending on what you reply - (L07) Republic Roulette: Questionable Ethics - Ord Mantell - Star Wars: The Old Republic - Game Guide and Walkthrough](https://game.lhg100.com/Article/UploadFiles/201512/2015121709504581.jpg)
Talk to Ensign Dregg in [1] and have a look at the table below the picture - you can receive one of the two missions, depending on what you reply. Choosing one excludes doing the other, so think carefully before you make a choice. If you want to accomplish the Republic Roulette: Questionable Ethics mission, select the second dialogue option.

A
Reply
Effect
Points / Rewards
1
All right.
Receiving the Republic Roulette mission
+50 to Dark Side
2
I'm reporting this.
Receiving the Republic Roulette: Questionable Ethics mission
+50 to Light Side
Report to Ethics Officer Drage
To report the "roulette", which is about placing the bets on the refugees who run through the minefield, return to Fort Garnik on foot and enter the Avitalan's Rest Cantina through the door in [2], or teleport inside right away - to Quick Travel Point (Avitalan's Rest Cantina). Then enter the room and talk to the Ethics Officer Drage in [3] to complete the mission.

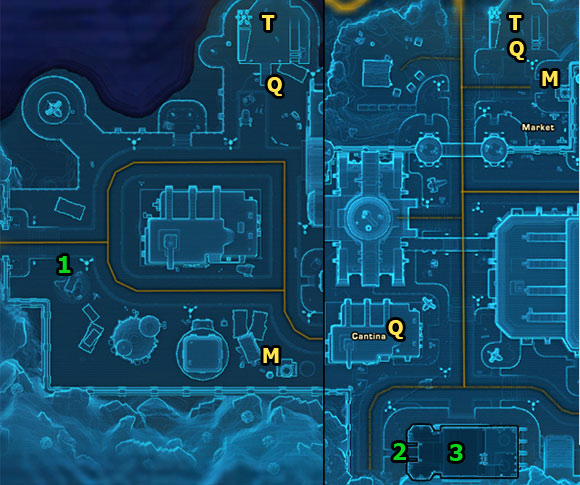
You can get this mission only after you've completed the class mission - Mannett Point (Trooper) / Security Breach (Smuggler). Speak with Odar in [1] to receive it.
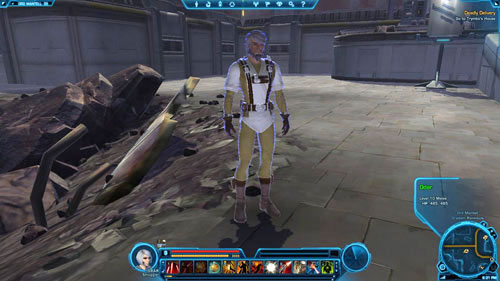
Find Odar's Daughter
Take a taxi in Oradam Village to get to do Taxi (Fort Garnik). Then run to [2], where the prisoners are being interrogated.
Speak to Kellik
Go inside and start a conversation with Kellik in [3]. You must decide if you want to free his daughter, or if you prefer to take the bug that's hidden in the daughter's ring (Qo'el's Ring) and give it to her father. See the table below the picture for details.

A
Reply
Effect
Points / Rewards
1
Will do.
Cooperating with the soldiers
+50 to Dark Side
2
Absolutely not
Freeing the daughter
+50 to Light Side, 1x Minor Medpac
Return to Odar
Regardless of the choice you've made, take a taxi to go back to Taxi (Oradam Village) and then run to Odar in [1]. Talk to him to complete the mission and get the rewards.
Weaken the Stronghold (Bonus)

You can get this mission only after you've completed the class mission - Oradam Village (Trooper) / Deadly Delivery (Smuggler). Speak with Milo Phipps in [1] to receive it. The mission will be quite controversial, as you'll need to release a pirate-killer who may be useful for the Republic.

Speak to Lieutenant Bendick
Then run to [2] to speak with Lieutenant Bendick. He will ask you to kill the pirate, who murdered his family. You'll decide what to do later - for now, take a nearby taxi to go to Taxi (Volcano Camp Speeder).

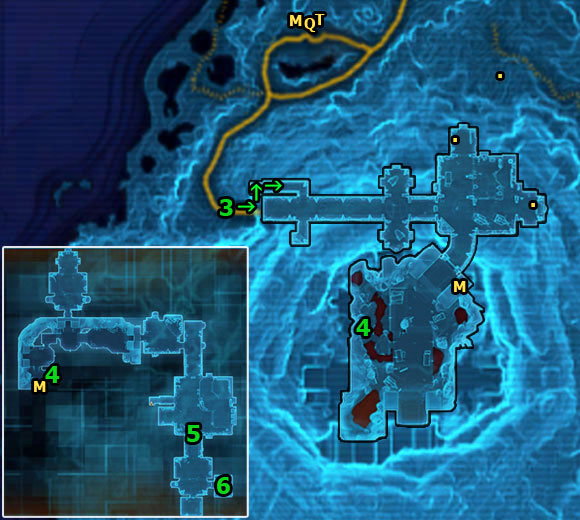
Defeat the Separatist Forces: 0/50
This is the longest of all bonus missions on this (and also on the remaining) starting planet, as you're required to kill as many as fifty opponents of any kind. On the other hand, due to the fact that you have to penetrate three levels of the large separatist stronghold, you don't need to worry that there won't be enough enemies. After killing fifty enemies you'll gain 1090 XP for completing the bonus mission.
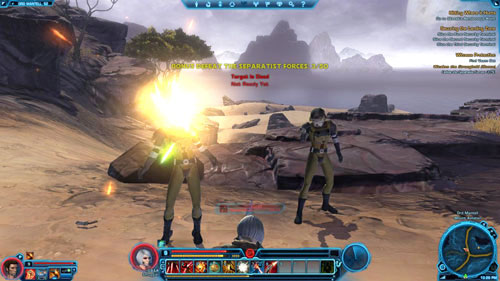
You'll come across a lot of different types of opponents both on the way and inside the base. Watch out especially for Separatist Monitor Droids [+], Separatist Commanders [+], Separatist Officers [+] (they fire short bursts and then throw grenades). These enemies are on all three stronghold levels. Head for the Separatist Stronghold entrance in [3], shown in the picture below. The door leading to the stronghold is on the left.

Make your way through the network of corridors to get to an open yard surrounded by lava. Once you're there, find the elevator in [4], which will take you to Separatist Stronghold - Level 2. Apart from the abovementioned enemies, you'll face new ones on the second level - Separatist Tech Officers (they send electrifying probes) and Separatist Vanguards [+] (big enemies armed with heavy weapons who can push you away).
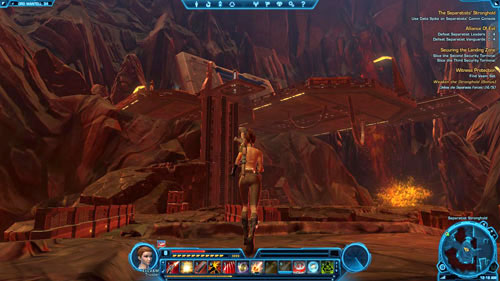
Find Veem Set
Make your way through the second level of the stronghold to [5] and go through a very wide green force field.
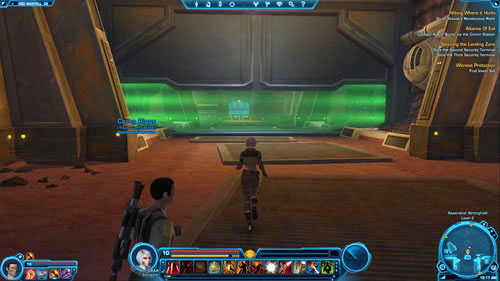
Open the Holding Cell
You can fight with the enemies here, but you can easily go around most of them as well. Anyway, go to [6] and use the panel on the right to open Veem Set's cell.
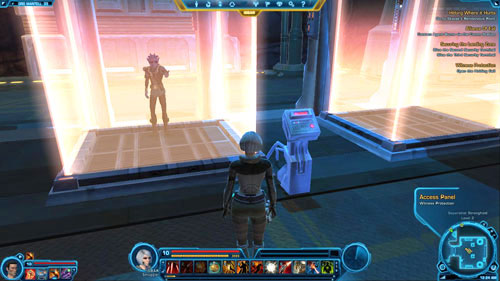
Speak to Veem Set
Once you've opened the cell, talk to the pirate. Regardless of what you reply, eventually you'll have to decide whether to let him go or kill him (see the tables below the picture for details). Your decision is connected with Dark or Light Side points, but not with the rewards for completing the mission. Make a decision to proceed to the last mission objective.

A
Reply
Effect
Points / Rewards
1
Go!
Releasing Veem Set
+100 to Light Side
2
No, you're dead.
Killing Veem Set
+100 to Dark Side
A
Reply
Effect
Points / Rewards
1
No, I was out of line.
Releasing Veem Set
+100 to Light Side
2
Yes.
Killing Veem Set
+100 to Dark Side
Return to Milo Phipps
Return to Lieutenant Bendick
Teleport to Quick Travel Point (Fort Garnik) or exit the stronghold and get to Taxi (Volcano Camp Speeder). Use it to get to the fort. Depending on what you did with the pirate, you need to return to one of the two NPCs to complete the mission (have a look at the first map in the mission description). If you released the pirate, run to Milo Phipps in [1], but if you killed him, go to the Lieutenant Bendick in [2]. Either way, the mission will be accomplished.

You can get this mission only after you've completed the class mission - Oradam Village (Trooper) / Deadly Delivery (Smuggler). Speak with Captain Xuss in [1] to receive it. Take a nearby taxi to go to Taxi (Volcano Camp Speeder).

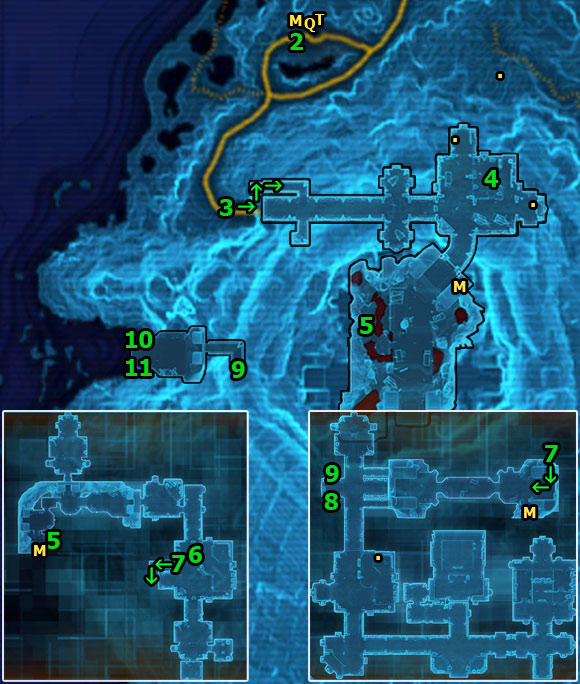
Speak to Sergeant Vandal
After reaching the camp by the volcano find Sergeant Vandal in [2] and talk to him to get further mission guidelines. You must visit the separatists at their main base - a stronghold hidden inside the volcano.

You'll come across a lot of different types of opponents both on the way and inside the base. Watch out especially for Separatist Monitor Droids [+], Separatist Commanders [+], Separatist Officers [+] (they fire short bursts and then throw grenades) . These enemies are on all three stronghold levels. Head for the Separatist Stronghold entrance in [3], shown in the picture below. The door leading to the stronghold is on the left.

Slice the First Terminal
Inside, locate the first terminal on Separatist Stronghold - Level 1 - in [4]. Kill the local enemies, and then slice the first terminal.
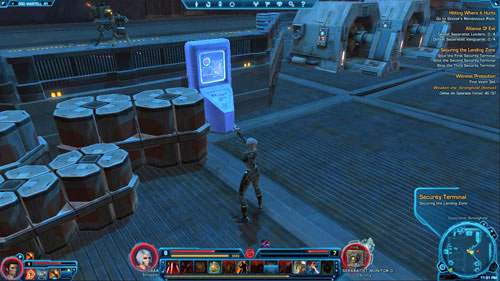
Then go to exit to an open yard surrounded by lava. Once you're there, find the elevator in [5], which will take you to Separatist Stronghold - Level 2. Apart from the abovementioned enemies, you'll face new ones on the second level - Separatist Tech Officers (they send electrifying probes) and Separatist Vanguards [+] (big enemies armed with heavy weapons who can push you away).

Slice the Second Terminal
The next terminal is in [6]. Don't forget about the enemies mentioned in the previous paragraph when you are slicing the terminal. The last one is on the last level of the stronghold.
![Make your way to the corridor in [7] - (L09) Securing the Landing Zone - Ord Mantell - Star Wars: The Old Republic - Game Guide and Walkthrough](https://game.lhg100.com/Article/UploadFiles/201512/2015121709504849.jpg)
Make your way to the corridor in [7]. It will take you to Separatist Stronghold - Level 3. Here, you should also watch out for Separatist Supervisors who can slow you down.

Slice the Third Terminal
Locate the third and the last terminal in [8]. Slice it and then make a 180-degree turn.
![Right in front of you in [9], there is a green force field - (L09) Securing the Landing Zone - Ord Mantell - Star Wars: The Old Republic - Game Guide and Walkthrough](https://game.lhg100.com/Article/UploadFiles/201512/2015121709504965.jpg)
Right in front of you in [9], there is a green force field. Go through to appear in the story area. Run through the corridor to the landing.

Destroy the Landing Pad Anti-aircraft Guns: 0/2
The Landing Pad Anti-aircraft Guns are protected by weaker Separatist Sentries and a little stronger Chief Separatist Overseers [+]. There aren't many of them here - you'll clear the area and destroy two anti-aircraft guns in [10] and [11] easily. Once you've done it, you can wait for the transporter - a lot of the Republic soldiers will get off.
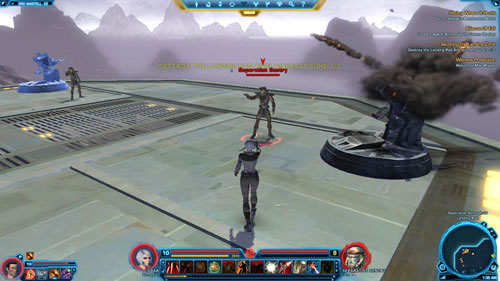
Return to Captain Xuss
Teleport to Quick Travel Point (Fort Garnik) or leave the stronghold and get to Taxi (Volcano Camp Speeder). Take it to get to the fort. Then run to [1] (see the first map in the mission description) to speak with Captain Xuss. You'll complete the mission and get the rewards.
![To get the mission, speak with Agent Burn in [1] and agree to help him - (L09) Alliance Of Evil - Ord Mantell - Star Wars: The Old Republic - Game Guide and Walkthrough](https://game.lhg100.com/Article/UploadFiles/201512/2015121709504975.jpg)
To get the mission, speak with Agent Burn in [1] and agree to help him.

You'll come across a lot of different types of opponents both on the way and inside the base. Watch out especially for Separatist Monitor Droids [+], Separatist Commanders [+], Separatist Officers [+] (they fire short bursts and then throw grenades) . These enemies are on all three stronghold levels. Head for the Separatist Stronghold entrance in [2], shown in the picture below. The door leading to the stronghold is on the left.

Access the Computer Terminal
Go to [3] to find the computer terminal. Defeat the guards (droids and soldiers) standing beside the terminal and then access it. You will receive new mission objectives.
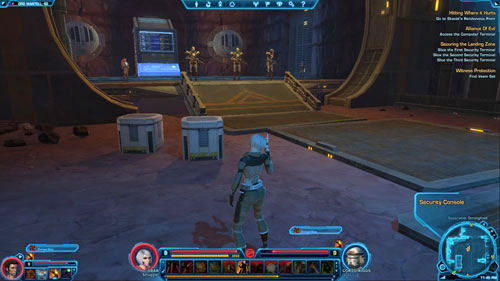
Then go to exit to an open yard surrounded by lava. Once you're there, find the elevator in [4], which will take you to Separatist Stronghold - Level 2. Here you should also watch out for Separatist Tech Officers (they send electrifying probes).

Defeat Separatist Leaders: 0/4
Defeat Separatist Vanguards: 0/4
These opponents can be found in the spots marked with [x] on the map, on the second level of the stronghold. Separatist Leaders can be killed with a single shot, however, each has a huge bodyguard next to him, armed with a heavy weapon and able to push you away. You will find such four pairs with ease.
![Make your way to the corridor in [5] - (L09) Alliance Of Evil - Ord Mantell - Star Wars: The Old Republic - Game Guide and Walkthrough](https://game.lhg100.com/Article/UploadFiles/201512/2015121709505006.jpg)
Make your way to the corridor in [5]. It will take you to Separatist Stronghold - Level 3. Here, also watch out for Separatist Supervisors who can slow you down.
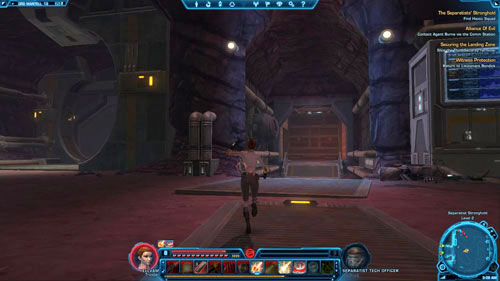
Contact Agent Burne via the Comm Station
The communication console is in [6]. Get to it using the bridges and corridors on the third level of the separatist stronghold. Use the console to contact Agent Burn and complete this mission. You will receive the rewards right away - you don't have to go anywhere else.
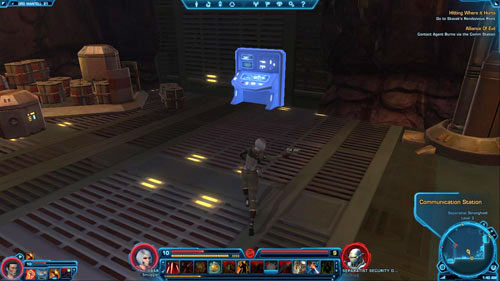
![This is a Heroic mission, which means that it's pointless to do it without other players or companion's help - (L05) [HEROIC 2+] Cutting Off the Head - Ord Mantell - Star Wars: The Old Republic - Game Guide and Walkthrough](https://game.lhg100.com/Article/UploadFiles/201512/2015121709505055.jpg)
This is a Heroic mission, which means that it's pointless to do it without other players or companion's help. To get it, you need to examine one of the terminals located in different spots (Republic Communications Terminal) and then click "Accept". The nearest terminal is in Oradam Village in [1].
![Go west, from Oradam Peninsula to Savrip Shore - (L05) [HEROIC 2+] Cutting Off the Head - Ord Mantell - Star Wars: The Old Republic - Game Guide and Walkthrough](https://game.lhg100.com/Article/UploadFiles/201512/2015121709505030.jpg)
Go west, from Oradam Peninsula to Savrip Shore. Then cross the shallows to get to Savrip Island in [2]. Of course, there will be separatists there - you'll have to fight, among other enemies, with Separatist Recon Officers [+] (can slow you down), Separatist Recon Scouts [+] and Separatist Expedition Leaders [*] (the strongest).
Kill Savrip Chieftains: 0/5
First of all, focus on the huge Savrips, including Mantellian Savrips [+], who can stun, and Savrip Chieftains [*], who can push you away with powerful blows. Killing the latter is the main mission objective - find and kill five to carry it out. Provided you have full health before each fight and you use the companion or other players' help, it will be easy. The opponents are everywhere - look out for the next groups and fight till you complete this mission objective.
![Return to the Republic Comm Terminal - (L05) [HEROIC 2+] Cutting Off the Head - Ord Mantell - Star Wars: The Old Republic - Game Guide and Walkthrough](https://game.lhg100.com/Article/UploadFiles/201512/2015121709505086.jpg)
Return to the Republic Comm Terminal
It's best to commit suicide to instantly respawn in the medical center to the west of Oradam Village - in [3]. Go through the gate in [4] and then examine the terminal in [1] to finish the mission and get your rewards.
Wild Savrip Hunting (Bonus)
![This is a Heroic mission, which means that it's pointless to do it without other players or companion's help - (L07) [HEROIC 2+] Buying Loyalty - Ord Mantell - Star Wars: The Old Republic - Game Guide and Walkthrough](https://game.lhg100.com/Article/UploadFiles/201512/2015121709505011.jpg)
This is a Heroic mission, which means that it's pointless to do it without other players or companion's help. You'll get it from Gizmel, who's standing in front of his house in [1] (in Oradam Peninsula).
![Go west, from Oradma Peninsula to Savrip Shore - (L07) [HEROIC 2+] Buying Loyalty - Ord Mantell - Star Wars: The Old Republic - Game Guide and Walkthrough](https://game.lhg100.com/Article/UploadFiles/201512/2015121709505038.jpg)
Go west, from Oradma Peninsula to Savrip Shore. Then cross the shallows to get to Savrip Island in [2]. Of course, there will be separatists there - you'll have to fight, among other enemies, with Separatist Recon Officers [+] (can slow you down), Separatist Recon Scouts [+] and Separatist Expedition Leaders [*] (the strongest).
Kill Savrips: 0/10
First of all, focus on the huge Savrips, including Mantellian Savrips [+], who can stun, and Savrip Chieftains [*], who can push you away with powerful blows. Killing ten Savrips of the first (and only this) type - Mantellian Savrips [+] - will result in completing a bonus mission and gaining 745 XP.
![Locate the Shipment and its Droid Escort - (L07) [HEROIC 2+] Buying Loyalty - Ord Mantell - Star Wars: The Old Republic - Game Guide and Walkthrough](https://game.lhg100.com/Article/UploadFiles/201512/2015121709505139.jpg)
Locate the Shipment and its Droid Escort
The main objective is to locate the shipment that is intended to help the inhabitants of Oradam Village. Find the DK-9 droid in [3] and talk to him. It turns out the aid is really drugs. You must decide whether to take the shipment with you, or destroy it right here and right now (in the first case, you'll receive Spice Shipment, in the second - a Codex entry - Lore: Underworld Influences - worth 495 XP). See the table below for details.
![A - (L07) [HEROIC 2+] Buying Loyalty - Ord Mantell - Star Wars: The Old Republic - Game Guide and Walkthrough](https://game.lhg100.com/Article/UploadFiles/201512/2015121709505137.jpg)
A
Reply
Effect
Points / Rewards
1
I'll do it.
Taking the spice shipment
-
2
No. Destroy it.
Destroying the spice shipment
+50 to Light Side
Return to Gizmel
It's best to commit suicide to instantly respawn in the medical center to the west of Oradam Village - in [4]. Go through the gate in [5] and then run to Gizmel in [1]. Talk to him - if you have the spice shipment, you will be able to give it to Gizmel or destroy it right before his eyes. See the tables below for details.
A
Reply
Effect
Points / Rewards
1
Will do.
Further conversation stage - B
-
2
Absolutely not
Further conversation stage - B
-
3
Money. Now.
Giving the shipment to Gizmel
+50 to Dark Side
B
Reply
Effect
Points / Rewards
1
Take it.
Giving the shipment to Gizmel
+50 to Dark Side
2
No. [Destroy spice]
Destroying the spice shipment
+50 to Light Side
Clear the Beach (Bonus)
![This is a Heroic mission, which means that it's pointless to do it without other players or companion's help - (L07) [HEROIC 2+] Destroy the Beacons - Ord Mantell - Star Wars: The Old Republic - Game Guide and Walkthrough](https://game.lhg100.com/Article/UploadFiles/201512/2015121709505166.jpg)
This is a Heroic mission, which means that it's pointless to do it without other players or companion's help. You'll get it from Travi Pott, who's standing in a small camp in [1] (in Savrip Shore).
![Defeat Scavenger Lookouts: 0/6 - (L07) [HEROIC 2+] Destroy the Beacons - Ord Mantell - Star Wars: The Old Republic - Game Guide and Walkthrough](https://game.lhg100.com/Article/UploadFiles/201512/2015121709505185.jpg)
Defeat Scavenger Lookouts: 0/6
Go south and eliminate Scavenger Lookouts near [2]. Kill six to complete the bonus mission and get 745 XP. Along the way, watch out especially for Scavenger Leaders [+] who are extremely tough.
![Cross the shallows in [3] to get to Savrip Island - (L07) [HEROIC 2+] Destroy the Beacons - Ord Mantell - Star Wars: The Old Republic - Game Guide and Walkthrough](https://game.lhg100.com/Article/UploadFiles/201512/2015121709505169.jpg)
Cross the shallows in [3] to get to Savrip Island. Of course, there will be separatists there - you'll have to fight, among other enemies, with Separatist Recon Officers [+] (can slow you down), Separatist Recon Scouts [+] and above all Separatist Expedition Leaders [*]. Watch out also for huge Savrips, including Mantellian Savrips [+], who can stun, and Savrip Chietftains [*], who can push you away with powerful blows.
Destroy the Southeast Beacon
You must find and destroy four beacons. There will be a group of Savrips near each of them - defeat them first. The southeast beacon is in [4].
![Destroy the Northeast Beacon - (L07) [HEROIC 2+] Destroy the Beacons - Ord Mantell - Star Wars: The Old Republic - Game Guide and Walkthrough](https://game.lhg100.com/Article/UploadFiles/201512/2015121709505117.jpg)
Destroy the Northeast Beacon
Go north. The northeast beacon can be found in [5].
![Destroy the Northwest Beacon - (L07) [HEROIC 2+] Destroy the Beacons - Ord Mantell - Star Wars: The Old Republic - Game Guide and Walkthrough](https://game.lhg100.com/Article/UploadFiles/201512/2015121709505125.jpg)
Destroy the Northwest Beacon
Run west to get to the third (northwest) beacon which is located in [6].
![Destroy the Southwest Beacon - (L07) [HEROIC 2+] Destroy the Beacons - Ord Mantell - Star Wars: The Old Republic - Game Guide and Walkthrough](https://game.lhg100.com/Article/UploadFiles/201512/2015121709505130.jpg)
Destroy the Southwest Beacon
The last, southwest, beacon is in [7] - destroy it after you've killed the nearby Savrips.
![Return to Sergeant Travi Pott - (L07) [HEROIC 2+] Destroy the Beacons - Ord Mantell - Star Wars: The Old Republic - Game Guide and Walkthrough](https://game.lhg100.com/Article/UploadFiles/201512/2015121709505182.jpg)
Return to Sergeant Travi Pott
Now, simply commit suicide. You'll respawn right next to Travi Pott in [1]. Talk to her to complete the mission and get the rewards.
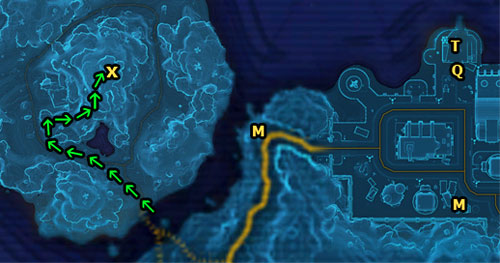
Starting area: Savrip Shore
Target area: Savrip Island
The first Datacron is hidden on the mountain, located in the middle of Savrip Island. It is also a Heroic area, so you need to be careful (we recommend traveling with a companion or other players). Get to the island, following the way shown by the green arrows on the map and keep going further. Go past a small lake on the right.
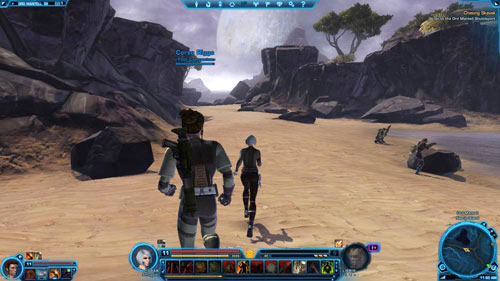
You can get to the top of the mountain from several places. The spot described in the guide is one of the most convenient ones. Get to the place shown in the picture below and start climbing the mountain in the northern direction.
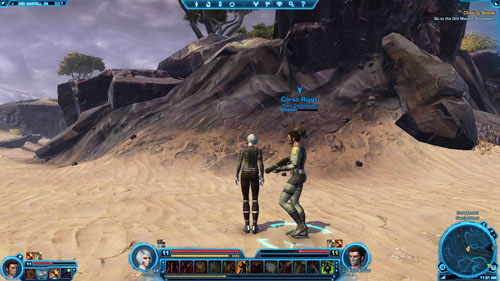
Then go on the rock shown in the picture below ...
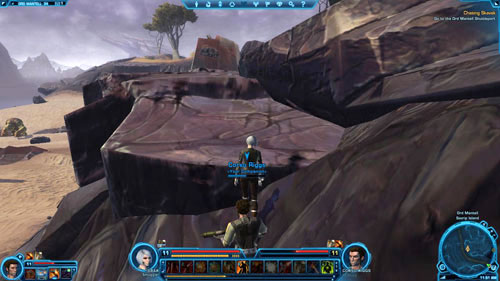
... and then immediately turn east and start running on the yellow grass, just as it's demonstrated by the green arrows.
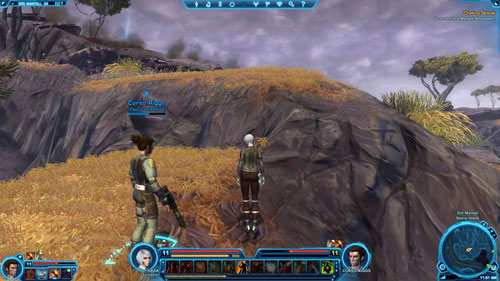
You'll reach a low rocky ledge. Jump on it.
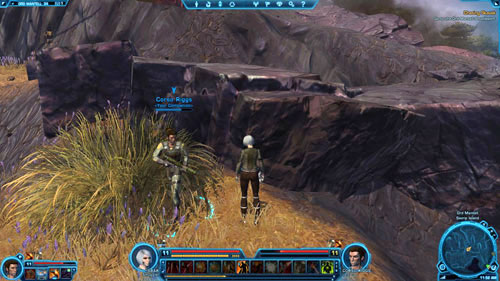
Then simply keep climbing higher and higher ...
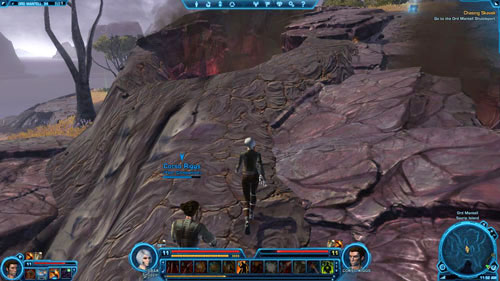
... till you notice the Datacron you can finally take with you.
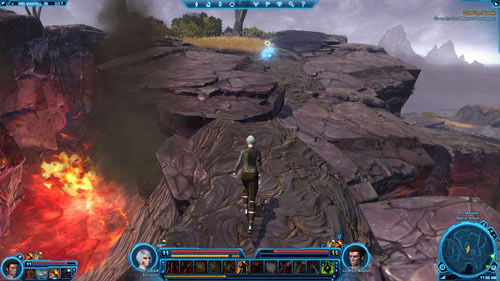
Rewards: +2 Aim, Codex entry - Achievements - Datacrons: Galactic History 12 - The Birth of the Republic - 550 XP
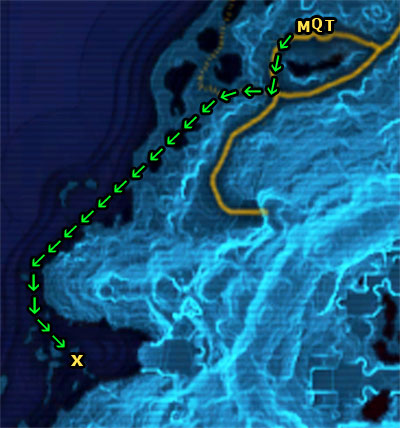
Starting area: Mount Avilatan
Target area: Mount Avilatan
The only thing that is required to obtain this Datacron is patience, as you'll need to travel for quite a long time. Assuming that you set off from the camp by the volcano (there are Quick Travel Point (Volcano Camp) and Taxi (Volcano Camp Speeder)), run southwest.
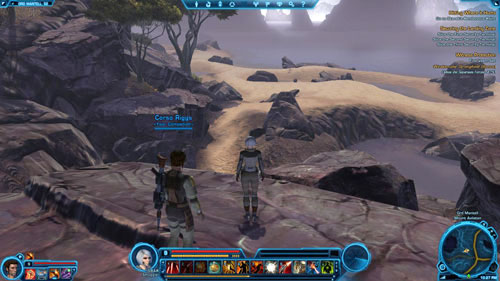
Keep following the path shown by the green arrows all the time. You won't come across any enemies along the way.
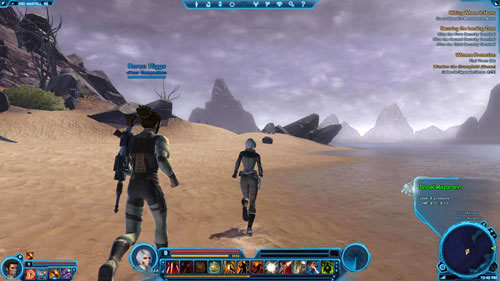
Go into the small bay and turn southeast.
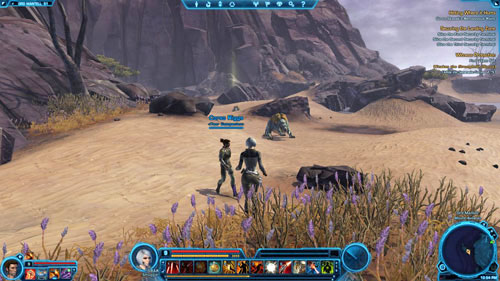
The Datacron is hidden behind one of the dunes.

Rewards: +2 Presence, Codex entry - Achievements - Datacron: Galactic History 13 - The First Great Schism - 550 XP
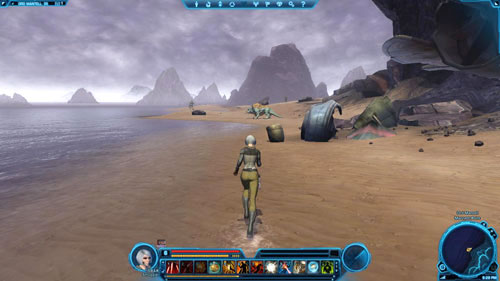
Starting area: Mannett Shore
Target area: Mannett Point
As far as this Datacron is concerned, patience (another long journey) will not be the only requirement. Your character's level has to be at least 6. Assuming that you set off from Mannett Shore (here the green arrows begin), go in the water to get to the other side, under the destroyed bridge shown in the picture below.
Run along the beach following the arrows.
Some Separatist Surveyor Droids [+] can stand in your way. These are quite challenging enemies, so don't fight with a few of them simultaneously.
![In the distance, you should be able to see a beam of light coming out of the Datacron, as well as Captain Ethen Remak [*] - Galactic History 14 (Matrix Shard) - Datacrons - Star Wars: The Old Republic - Game Guide and Walkthrough](https://game.lhg100.com/Article/UploadFiles/201512/2015121709505357.jpg)
In the distance, you should be able to see a beam of light coming out of the Datacron, as well as Captain Ethen Remak [*]. He's quite a tough boss, so it's necessary to use boosting abilities and keep some Medpacs handy during the fight. As we've mentioned above - your character's level should be at least 6.
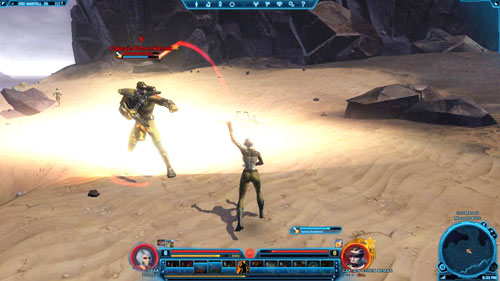
After dealing with the captain nothing else will prevent you from taking the last Datacron out of the container (see the picture below).
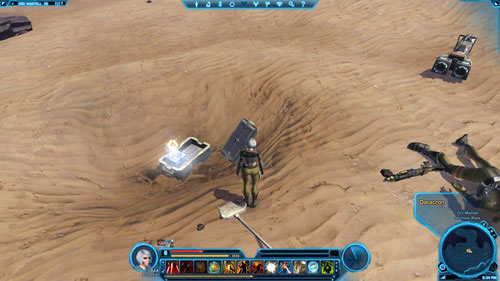
Rewards: Red Matrix Shard, Codex entry - Achievements - Datacrons: Galactic History 14 - The Fall of Tion - 550 XP


 Star Wars: The Old Republic Game Guide & Walkthrough
 Star Wars: Battlefront Game Guide & Walkthrough
 Sacred 2: Fallen Angel Game Guide & Walkthrough
 Sacred 3 Game Guide & Walkthrough
 Sid Meiers Civilization V - Gods & Kings Game Guide & Walkthrough