
This unofficial guide for Risen 3: Titan Lords is a thorough compendium of knowledge about the complex game by Piranha Bytes studios. It goes into detail, describing the contents of the game and answers the most important questions that may arise, while completing the game. The guide has been divided into several big chapters. The initial chapters of this guide contain lots of useful hints revolving around the most important elements of the gameplay. Apart from the general set of hints, also tips concerning effective melee and ranged combat, as well as combat with magic. The guide also includes information on character development (description of the main attributes and a full list of all the proficiencies), obtaining glory points earning and spending money, pickpocketing, assembling the crew, joining factions, exploration of the game world or crafting. Definitely, the majority of this guide concentrates on the thorough walkthrough for all the quests available in the game. Quests have been divided into smaller groups, with respect to their importance (main and side quests) and locations, where you complete them. Still, apart from the basic set of quests, you can also find, in this guide, crew quests, connected with the individual crew members. Walkthroughs for the individual quests include information on how to unlock them, activities that you need to perform to complete them, possible choices to make and rewards for completing them. Helpful, while learning about the contents of the guide, are numerous screenshots and detailed maps of the locations that you visit. Apart from that, this guide includes the world map and maps with all the locations of the available teleporters marked. The final chapters of this guide include a list of the most important NPCs that you can encounter here. What is meant here are the skill trainers, traders and teachers of spells. Apart from that, this guide includes a full list of legendary items and fragments of unique weapons.
This guide for Risen 3: Titan Lords includes:
Jacek "Stranger" Halas ()
Guide to Risen 3 : Titan Lords was prepared based on the PC version of the game. The contents of the PC version of the game coincides with that of the console version - you can find information about achievements / trophies of those versions in this guide as well.
Excluding a somewhat linear beginning of Risen 3, the game offers a great deal of freedom with the character development, as well as with quest completion and exploration. The order in which the description of the islands is presented in the guide is purely random - you can visit the presented locations way earlier / later in the game, based on your own preferences. What is more, you can revisit the locations at any given time (to collect treasures you weren't able to pick up earlier, for instance).
In the walkthrough section of this guide, the following markings were used:

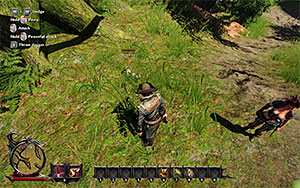
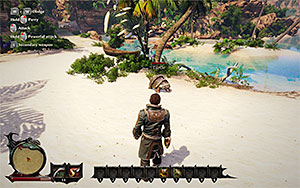
Character movement

Zoom in / zoom out

Walk

Sprint

Jump

Sneaking (after unlocking the prerequisite ability)

Weapon mode

Main action

Secondary action

Foul Play (after unlocking the prerequisite ability)

Astral Vision (after unlocking the prerequisite ability)

Reload

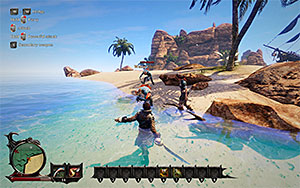
First item from the quickbar

Second item from the quickbar

Third item from the quickbar

Fourth item from the quickbar

Fifth item from the quickbar

Sixth item from the quickbar

Seventh item from the quickbar

Eight item from the quickbar

Ninth item from the quickbar

Tenth item from the quickbar

Inventory

Map
Journal

Character screen

Quick Save

Quick Load
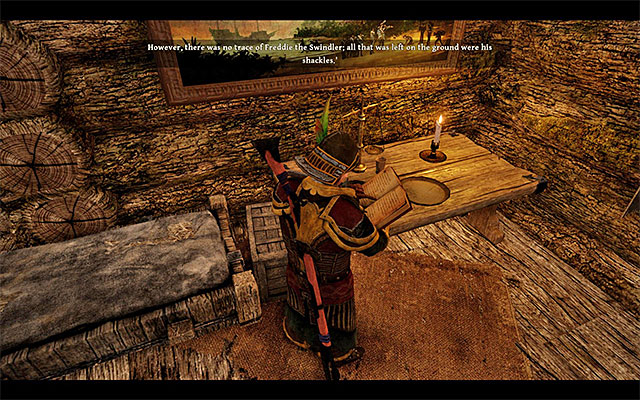 The books that you find may hint you to valuable hidden treasures
The actual game of Risen 3 starts at the moment at which you lose your soul, which is an unenviable fate. Thanks to the hints, you will quickly find your way in the new situation.
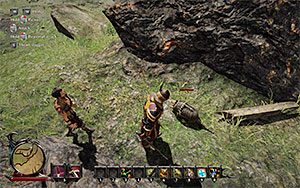
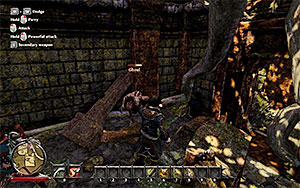
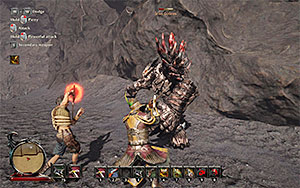
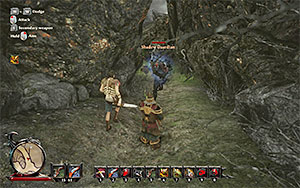
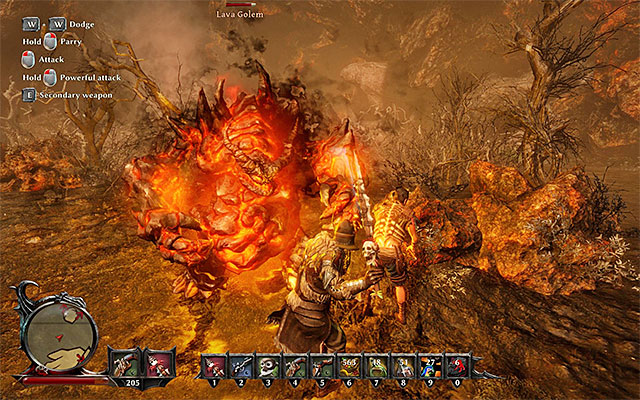 Blocking is very important, especially in fight with a stronger opponent
Melee combat in Risen 3, although it may be demanding, becomes easier after you implement some simple rules:
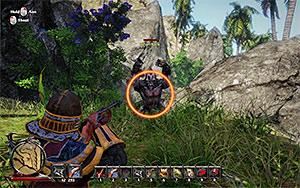
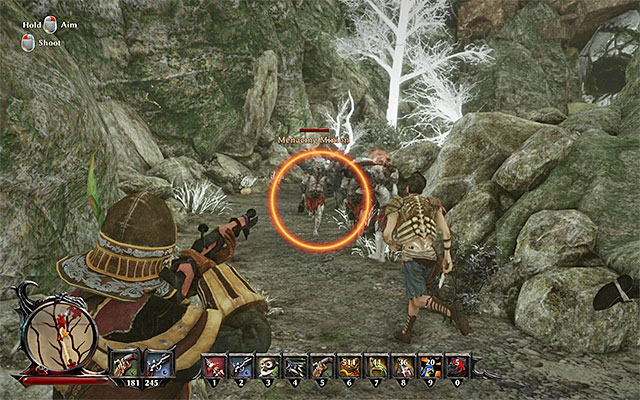 Muskets are the best for attacking opponents at long distance
At first glance, there seem to be many upsides to ranged combat, in Risen 3, although it is limited in a variety of ways. These are the most important issues connected with this fighting style:
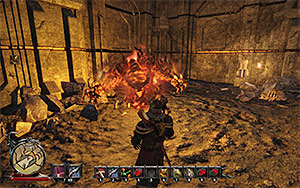
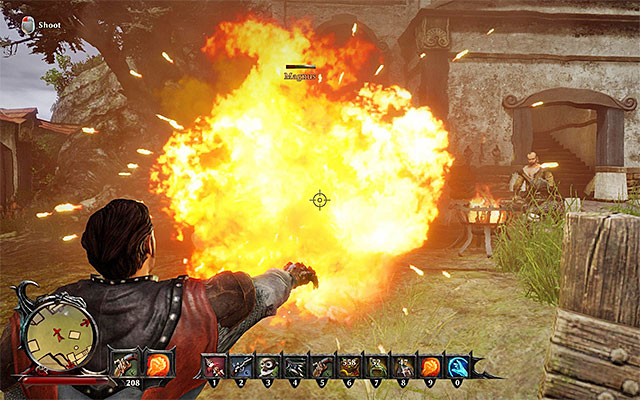 There are many spells in the game and some of them are not used in combat
Magic plays a vital role in Risen 3. You can well use it to win fights, although it is most useful in other situations, e.g. when you want to boost your character's defenses. These are several things that are worth knowing:
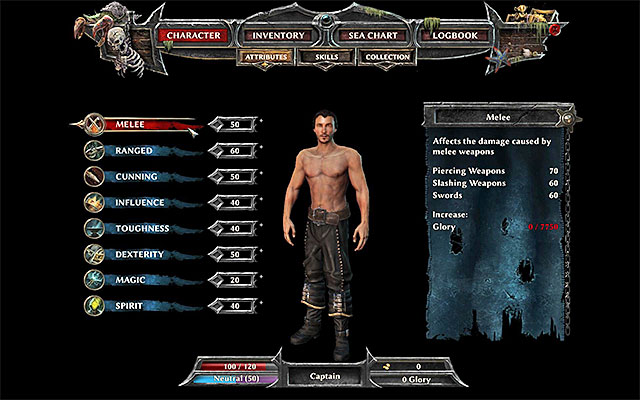 Develop those of the attributes that are going to prove to be most useful
Character development in Risen 3 takes place in two different ways. First of all, there are eight main attributes that you can raise, whether by spending glory points (to learn more, see the next page of this chapter), or by obtaining unique magical items (note - only a legendary item can raise the value of a given attribute, or a talent, permanently). These attributes are:
To sum up:
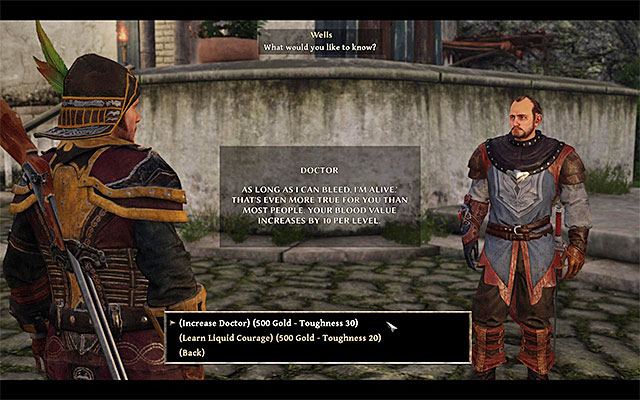 An example trainer
Another way to develop your character is unlocking new skills that are connected with the attributes named above. There are several tens of skills in the game and there is only one way to learn them, i.e. learning them from trainers. You can find a complete list of trainers, and the skills they are proficient at, in the chapter entitled Trainers. Below, you can find a list of skills, along with a short commentary on the usefulness of each (some are very helpful, whereas the other ones completely worthless).
Note - Each training costs several hundred or thousands gold pieces. Therefore, you should first focus on the ones that you consider the most useful to you, because it is highly probable that you will not have enough money to learn them all.
The name of the proficiency
Development levels
Commentary
Piercing Weapons
3
This proficiency increases the development rate of the Piercing attribute.
Unlock all three levels if you like using this type of melee weapon.
Slashing Weapons
3
This proficiency increases the development rate of the Slashing attribute. Unlock all three levels if you like using this type of melee weapon.
Swords
3
This proficiency increases the development rate of the Swords attribute. Unlock all three levels if you like using this type of melee weapon.
Riposte
1
This proficiency unlocks the skill of counterattacking in melee. It is a highly useful function and, as a result, it is a good idea to buy this one, early into the game.
Blade Dancer
1
This proficiency increases the speed of the attacks that you land. It is a good idea to obtain it if you favor standard attacks over their slower counterparts that are to be charged first.
Fencing Master
1
This proficiency allows you to extend your combos. It is a good idea to take interest in it, if you like weakening your opponents with series of attacks.
Swordmaster
1
This proficiency increases damage from melee attacks, by 20%. It is a good idea to unlock it as soon as possible, because the increase in strength of attacks is considerable.
Blacksmith
1
This proficiency unlocks the skill of crafting, upgrading and repairing melee weapons in smithies. It is a useful one, especially if your character specializes in melee combat.
Shadow Hunter
1
This proficiency increases damage dealt in combat against Shadows. It is exclusive for the Demon Hunters' faction and it is a good idea to take interest in it because, by default, many Shadows are tough.
Undead Bane
1
This proficiency increases damage dealt in combat against the undead. You can unlock it, although this is not a priority.
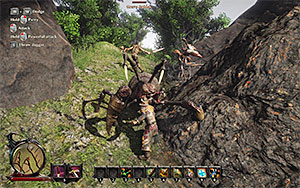
Spider Hunter
1
This proficiency increases damage dealt in combat against spiders. It is exclusive to the faction of the natives. I recommend against buying this one, because you do not fight spiders that often and even the largest specimens are not too strong.
Pirate
1
This proficiency increases damage dealt in combat against sea creatures. It is exclusive to the Natives and you can unlock it, although it is not a priority.
The name of the proficiency
Development levels
Commentary
Pistols
3
This proficiency increases the development rate of the Pistols attribute. Unlock all three levels if you like using this type of secondary weapons.
Critical Hit
3
This proficiency increases the development rate of the Critical Hit attribute. Unlock all three levels as quickly as possible, because the increased critical damage is one of the key upsides of ranged combat.
Shotguns
3
This proficiency increases the development rate of the Shotguns attribute. Unlock all three levels if you like using this type of ranged weapons.
Crossbows
3
This proficiency increases the development rate of the Crossbows attribute. Unlock all three levels if you like using this type of secondary weapons.
Daggers
3
This proficiency increases the development rate of the Daggers. Unlock all three levels if you like using this type of secondary weapons.
Muskets
3
This proficiency increases the development rate of the Muskets. Unlock all three levels if you like using this type of ranged weapons.
Gunsmith
1
This proficiency unlocks the skill of crafting, repairing and upgrading ranged weapons at crafting stations. It is a very useful skill, especially to characters that favor ranged combat.
Blazing Barrels
1
This proficiency speeds up weapon reloading. It is an immensely useful skill because, in the case of many weapons, reloading takes lots of time by default.
Big Game Hunter
1
This proficiency doubles the chance of scoring a critical hit, against large monsters. try to unlock this skill as quickly as possible, thanks to which it will be easier to defeat the most demanding opponents.
Knifer
1
This proficiency doubles the chance of scoring a critical hit, with thrown daggers. Take interest in this skill only if you like using daggers.
The name of the proficiency
Development levels
Commentary
Bladeproof
2
This proficiency increases the development rate of the Bladeproof attribute. It should be most interesting to warriors but, it is not only them that will profit from it.
Bulletproof
2
This proficiency increases the development rate of the Bulletproof attribute. It is not that important to buy this skill, because you do not fight against opponents, with firearms, too often.
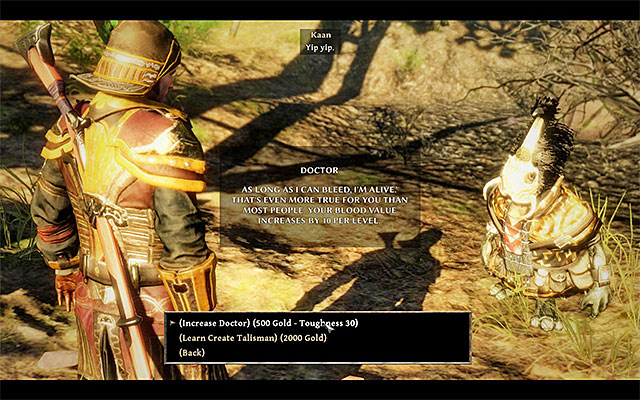
Doctor
5
This proficiency increases the development rate of the Doctor attribute and, as a result, increases the rate of regenerating your character's health bar. This skill is important for the warrior, although characters that favor ranged combat and fighting with spells should also unlock, at least, 1-2 levels.
Resist Magic
3
This proficiency increases the development rate of the Resist Magic attribute. It is a good idea to unlock all three levels, because opponents that wield magic, nearly always, pose a threat to your character.
Liquid Courage
1
This proficiency improves on the effectiveness of Painkillers. Unlock it only if you are often healing yourself this way.
Glutton
1
This proficiency makes healing with Provisions more efficient, by 25% and it is to be used by the Crystal Mages because, even if the bonus is added, it is the poorest form of regenerating health points.
Drinker
2
This proficiency makes healing with liquor more efficient. It is worth considering, unless you have a surplus of healing supplies and/or you are always accompanied by Bones, in your travels (he can heal you for free).
Distiller
1
This proficiency unlocks the skill of using distilleries, i.e. allows you to distil liquor. Consider buying this skill only if you heal your character, with liquor, on a regular basis and, as a result, you suffer frequent shortages.
Indestructible
1
This proficiency unlocks the option of spontaneous regeneration of the health bar. It is not too useful a skill, because the easier and faster way to do that is heal with, e.g. provisions, which are plentiful in the game.
Intimidate
3
This proficiency increases the development rate of the Intimidate attribute. It is a good idea to unlock three levels although, it is worth knowing that intimidation, during conversations, frequently results in negative souls points being awarded.
The name of the proficiency
Development levels
Commentary
Voodoo Magic
3
This proficiency increases the development rate of the Voodoo Magic attribute. It is exclusive to the native faction and unlocking all three levels is recommended only if you are playing as the mage.
Crystal Magic
3
This proficiency increases the development rate of the Crystal Magic attribute. It is exclusive to the Crystal mages and unlocking all three levels is recommended only if you are playing as the mage.
Rune Magic
3
This proficiency increases the development rate of the Rune Magic attribute. It is exclusive for the Demon Hunters faction and unlocking all three levels is recommended only if you are playing as the mage.
Master Mage
2
This proficiency cuts down cooldown times on spells. It is a skill highly recommended to all those, who use magic, especially that default cooldown times on spells are long.
Battlemage
1
This proficiency allows you to chain attacks into longer attacks. It is an interesting skill if you are playing as a character that combines the properties of a mage and a fighter.
Spell Dancer
1
This proficiency increases the speed of casting spells and it is exclusive to the Crystal Mages faction. Unfortunately, it only affects those of the spells that are used in melee combat. If you do not use this kind of magic, ignore this one.
Alchemy
3
This proficiency increases the development rate of the Alchemy attribute. It is recommended to unlock higher levels only if you are interested in meddling into alchemy.
Focus
3
This proficiency increases the development rate of the Astral Vision attribute. In my opinion, this one is useless and not worth attention.
Brew Potions
1
This proficiency unlocks the skill of brewing potions. Buy this one only if you are interested in this matter and/or you do not want to spend money, and time, on finding or buying potions.
Create Talisman
1
This proficiency unlocks the skill of enchanting various talismans (rings, amulets, etc.). It is a good idea to unlock it later into the game, because you will then already have all the necessary ingredients.
Craft Spells
1
This proficiency unlocks the skill of creating your own spells. Unfortunately, these are disposable spells. Still, every mage should take interest in this skill.
Ritual Master
1
This proficiency extends duration of potion effectiveness, by 50%. Buy this skill if you are going to use potions, e.g. to enhance your character's combat, or defensive skills.
Vision of the Adventurer
1
This proficiency enriches the Astral vision attribute with the ability to detect traps, switches and quest items. It is exclusive for the Demon Hunters faction and natives. I recommend against wasting gold on improving Astral Vision.
Vision of the Alchemist
1
This proficiency enriches the Astral vision attribute with the ability to notice alchemical ingredients. It is exclusive to the faction of natives and to Crystal Mages. I recommend against wasting gold on improving Astral Vision.
Vision of Blood
1
This proficiency enriches the Astral vision attribute with the ability to notice living things. I recommend against wasting gold on improving Astral Vision.
Vision of Death
1
This proficiency enriches the Astral vision attribute with the ability to notice the undead. It is exclusive for the native faction. I recommend against wasting gold on improving Astral Vision.
Vision of Gold
1
This proficiency enriches the Astral vision attribute with the ability to notice valuable items. It is exclusive to the faction of demon hunters and Crystal mages. I recommend against wasting gold on improving Astral Vision.
Vision of Magic
1
This proficiency enriches the Astral vision attribute with the ability to notice magical items. It is exclusive to the faction of Crystal Mages. I recommend against wasting gold on improving Astral Vision.
Vision of the Shadows
1
This proficiency enriches the Astral vision attribute with the ability to notice Shadows (a type of monsters). It is exclusive to the faction of demon Hunters and Crystal Mages. I recommend against wasting gold on improving Astral Vision.
Vision of the Fighter
1
This proficiency enriches the Astral vision attribute with the ability to notice weapons. It is exclusive to the faction of Demon Hunters and the natives. I recommend against wasting gold on improving Astral Vision.
The name of the proficiency
Development levels
Commentary
Carnivore
1
This proficiency unlocks the skill of health regeneration with raw meat. It is not too helpful, because meat can be cooked. Apart from that, you can heal yourself in many different ways (also free of charge).
Vegetarian
1
This proficiency doubles the healing properties of plants and it is exclusive to the faction of Crystal mages. Consider buying it only if you pick plants on a regular basis (it is not worth buying them).
Shadow Eater
1
This proficiency unlocks the skill of health regeneration thanks to demon meat and it is exclusive to the faction of Demon Hunters. In my opinion there are more important skills than this one so, even if you want to buy it, postpone it until later.
Prospector
1
This proficiency provides you with the skill to find a greater number of ore and gold in mines. This is not a priority, although you can consider buying it, if you occupy yourself with smithing.
Skinning
1
This proficiency unlocks the skill of skinning monsters. Skinning is a good way of making money so, the money that you spend on this skill come back to you, with time.
Take Teeth
1
This proficiency unlocks the skill of collecting teeth dropped by some monsters. Collecting teeth is a good method of making money so, the money that you spend on this skill come back to you, with time.
Pull Claws
1
This proficiency unlocks the skill of taking claws of some monsters. Pulling claws is a good method of making money so, the money that you spend on this skill come back to you, with time.
Take Horns
1
This proficiency unlocks the skill of collecting horns dropped by some monsters. Collecting horns is a good method of making money so, the money that you spend on this skill come back to you, with time.
Pull Trophies
1
This proficiency unlocks the skill of collecting trophies dropped by some of the monsters. Collecting trophies is a good method of making money so, the money that you spend on this skill come back to you, with time.
The name of the proficiency
Development levels
Commentary
Sneak
1
This proficiency unlocks the skill of sneaking. It is very helpful, while stealing items from NPC houses and required to complete several side quests so, it is a good idea to buy it, at first opportunity.
Silver Tongue
3
This proficiency increases the development rate of the Silver Tongue attribute. It is a good idea to unlock it because, thanks to developed persuasiveness, you will be able to obtain additional rewards and end some quests in a more interesting way.
Master Thief
3
This proficiency increases the development rate of the Pickpocketing attribute. The list of the NPCs, whose pockets can be picked, is not too long, but you can steal some valuable items from many NPCs. Therefore, it is worthwhile to unlock successive levels.
Haggler
3
This proficiency decreases price of goods for sale (up to 15%). The differences in price becomes noticeable only in the case of the best items so, you do not need to buy the higher levels right at the beginning of the game.
Monkey Trainer
1
This proficiency unlocks the skill of controlling monkeys. Although it may not seem so, it is a useful skill because there are many locations with treasures, in the game world, which can only be reached by a monkey. As a result, it is a good idea to buy this skill early into the game.
Safecracker
3
This proficiency increases the development rate of the Lockpicking attribute. I recommend that you start buying the successive levels quite early, because complex locks require this attribute developed to a quite high level (even as high as 110-120 points).
 You always get to know about the number of glory points that you are awarded
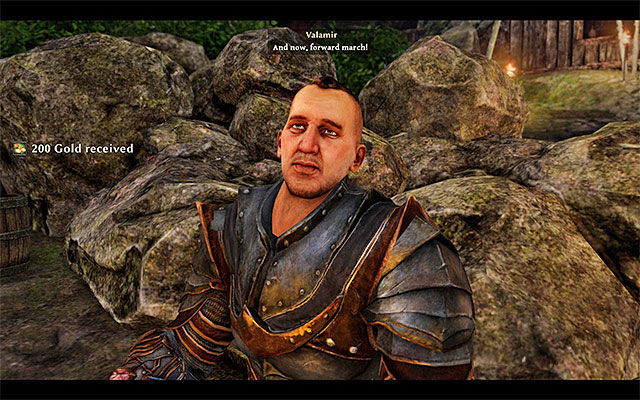
To a large extent, character development in Risen 3 is based on gathering and spending Glory Points. You dispose of them just like of currency, which you spend on raising statistics in eight main categories - melee, ranged, cunning, influence, toughness, dexterity, magic and spirit. Only after you have reached a sufficiently high level, in a given category, you will be able to train the skills that you want to, for gold, with trainers. This is why, it is a good idea to make sure that you have enough glory points on you, at any time.
A prudent solution which I recommend, is to go to the Fog Island, to its South-Eastern part. There, you will find one of the legendary items - Freddy's Shackles. This item ensures you with a bonus, of 10%, to the Glory Points that you obtain. If obtained at the beginning of the game, where there still are lots of monsters and side quests, provides you with a huge bonus to character development. A detailed description of how to find the item can be found in the chapter entitled Legendary Items - Fog Island.
The most obvious way to be awarded Glory Points is completing quests that you receive from NPCs. Talk to them. Nearly all of them have some job for you. After you have completed a quest, remember to return to the questgiver - apart from gold, or some other reward, you will sometimes also receive Glory Points. Eliminate all beasts that you run into - apart from quests, this is the basic source of Glory Points. Also, you receive some, after you visit an island for the first time.
There is a separate screen to spend Glory points on. Thanks to the convenient system, you can raise the value of each statistic by 5 points, where each successive progression costs you more. In the bottom-right corner of the screen, you can see the ratio of all the Glory Points available to spend, to the price to progress for the next time in the currently selected category. Categories marked in gold are available to be raised, whereas the ones that are grayed-out are too expensive for you, as of now. If you consume herbs that raise a statistic by 2 points, try not to exceed thresholds of the next level. For example, your progress with values of 55 and 59 are just as costly. Always consume herbs and potions that increase statistics, after you progress, not before. This way, you will pay less for them.
I recommend against spending all glory points all at once. It is a good idea to have some spare points. While exploring the game world, you will encounter many trainers and some of the more unique skills can be learned only from a handful of them. After it turns out that you are several, e.g. dexterity, points short to buy a skill, you will be able to use up the Glory Points that you have saved up to make up for that.
Similar to the previous games of the series in Risen 3: Titan Lords you will almost never have too much of cash and it's difficult for your hero to gather wealth. In addition many items and services are very expensive (you can read more about this topic in the chapter What to spend money for?). Underneath you will find tips about making money, both general and very specific (such as meeting particular NPCs).
 You can acquire gold mainly through the completing quests and exploring the game's world.
Two main sources of income in Risen 3 are pretty obvious:
Remember! The Nameless Hero needs a picklock to open a chest. You can find more on this topic in the chapter What to spend money for?
Remember! Don't forget about the possibility of using the spell scrolls of Parrot Flight and the ability of Monkey Trainer to reach the treasures seemingly inaccessible.
 Sell items you have found BUT only if you know you won't need them.
While studying your environment you don't have to look only for gold. Our main hero can make use of different equipment you can find, such as weapons, precious ornaments, spell scrolls or resources. The reason of it is that in Risen 3 there are no limitations related to how much can you bear - involving neither weight, nor the amount of slots in your inventory. You can get rid of the item you have found by selling it to the local merchant. However you HAVE TO do it carefully, since some objects from your inventory may be very helpful in further parts of the game. You should keep recipes for potions, alchemic components and also magic rings that can increase most important abilities of your hero. I think the safest thing you can do is to sell all the unnecessary weapons, outfit and also items like brooms, knives and forks. You can as well consider selling unimportant magic scrolls or provisions. Instead of using food much better way to regenerate your health bar is using the alcohol (such as rum) and taking with you on your adventures the NPC called Bones who possesses the healing spell.
Remember! Merchants from the game's world can buy from the Nameless Hero any amount of equipment. You can use that and get rid of unnecessary items using only the specific shopkeepers. It will help you buy back some important item if you sold one by an accident.
 The game allows you to pickpocket some NPC's and steal from their houses.
An interesting way to get rich is stealing from the NPC's you can meet. Unfortunately the game allows you only to pickpocket specific characters which you can recognize during the conversation, when you can find the dialogue option of Pickpocketing. Pickpocketing will end up with success if your Pickpocket skill at the moment is higher than vigilance of your interlocutor. Most of the NPC's has their vigilance close to 100 points, which means that pickpocketing requires from us a lot of investment. Unfortunately even the successful theft almost never ends up giving the Nameless Hero any valuable items.
Much more profitable is stealing treasures from the NPC's houses. In many buildings you can find valuable items in chests or even in sight. NPC's obviously try to protect their possessions. You can try to avoid their security and just run into the room in hope you will find something precious fast enough, but the better solution is to use Sneak skill (which you have to learn first). Additionally it is better to wait for the night, when most of the NPC's goes to sleep, since sneaking will not help you if the Nameless Hero will stay in someone's sight.
 Many of the killed monsters will leave you some interesting "souvenirs".
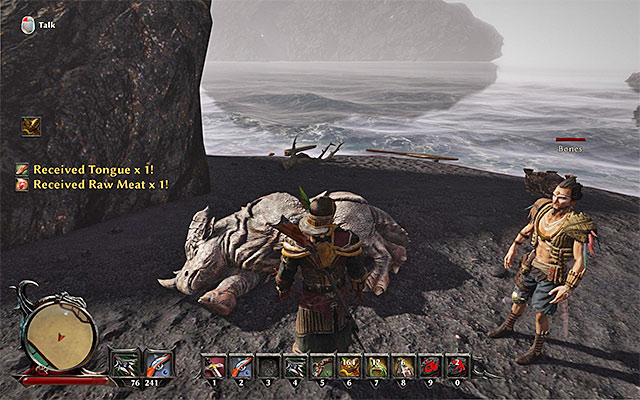
Another way of getting cash is gathering many kinds of trophies that you can find after defeating monsters during your adventures. For example you can find mussels after fighting the crabs or tongues from the bodies of alligators. You can sell or save your trophies for later, since you may want to use them to craft magic scrolls or potions. Unluckily your hero is not a well-trained hunter and as the result can't get all kind of trophies at the beginning of the game. It will be a good decision to change it and even in the earliest parts of the game to develop your skills by taking some lessons from one of the hunters you can find in the realm, such as Bronach living near the hut in the forest in the Calador. It is especially beneficial since you can't go back to once killed monsters in later parts of the game and if you will not have needed abilities you will lose a potential trophies for ever. It's a good thing to start collecting trophies as soon as it's possible.
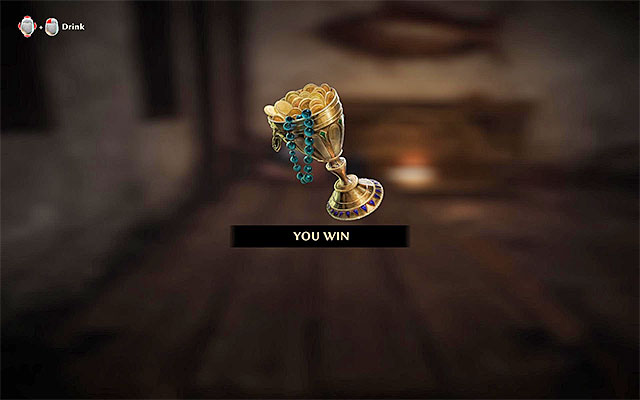 Winning in mini-games gives a chance to earn some gold very fast.
In many villages and towns you will visit during your adventures you can find NPC's offering you a possibility of playing some mini-games. All of them are thoroughly described in the chapter Mini-games, however their common feature is that they are quite easy (or even very easy) to win. You should play especially in these kinds of competition that you will have to be a part of if you want to finish few of the side quests. In these situations rewards are much higher and often they rewards reach even few hundred gold pieces. Additionally since time to time there appears an opportunity to get some bonus gifts (including legendary items). Casual variants of competition are not as profitable, since they mostly offer rewards not higher than few dozens of gold pieces.
Remember! While playing mini-games the Nameless Hero often has to gamble his own money. You should save your game before you try to be sure you will not lose too much of your property.
 You can bring some characters items that they are looking for.
Apart from described earlier general ways of making money you can also search for specific opportunities for easy and fast income. Underneath you can find few examples:
 Taking lessons from teachers requires a lot of gold.
In the previous chapter you could learn about the difficulties you may experience related to earning gold in the Risen 3. Obviously it means you should carefully judge and plan every expense and avoid wasting your precious property. I recommend to spend almost entire money for the unlocking new skills offered by teachers. Contrary to all appearances every training is quite expensive. Basic training costs about 500 gold pieces, but more complicated lessons can require even 2000 gold pieces.
In the other parts of this guide you will find knowledge about teachers and where can you find them, although you shouldn't visit them in random order. Training needs to fit to your play-style (so for example melee warrior should learn a lot about fighting in hand-to-hand combat) and your additional skills which you find interesting (such as alchemy or blacksmithing). It's worth mentioning that few of the abilities can actually help you to get larger amount of gold. You should notice especially these:
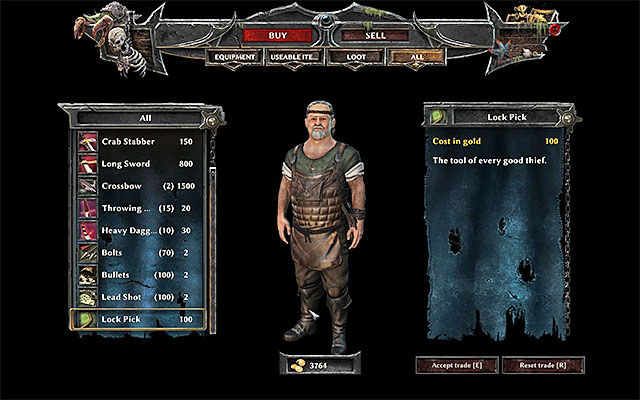 You should buy the lock pick as soon as possible.
Merchants in the game are not a useless addition, however I recommend to use their services as little as possible, especially at the first part of the game. I don't recommend buying new weapons, outfits, food, potions or herbs since you can all of these things easily get thanks to completing quests and find them when you carefully explore the islands.
Remember! I suggest to develop the skill Haggler from the Thievery category. Unlocking this skill on every three levels will allow you to lower the prices of every merchandise by 15% and will allow you to buy more items at lower prices.
One of the most important items you need to buy is definitely the lock pick which you should buy even during the first few hours of the game. In the Calador you can buy the lock pick from Wilson, Kramer or Travis, on the Kila Island you can buy it from Buddy or Quinn and on the Taranis Island you can buy it from Rumold, Gadi or Agila. You will have to often visit merchants if you are going to focus on using the ranged weapons (such as muskets, guns, pistols, crossbows or throwing knifes) since you will have to bear a lot of extra ammunition and you will not find enough of it during your adventures. Remember to return to the merchants that can offer you the ammunition at the lowest price since it will help you to save even few hundred gold pieces during bigger transactions.
It's also worth mentioning that few merchants can sell you the special legendary items that may increase your abilities and attributes permanently. They are obviously very expensive and you should buy them at the further parts of the game, also considering only the ones that will be useful for your hero.
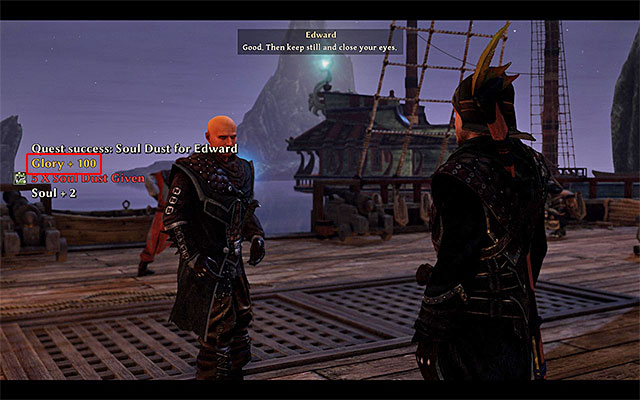
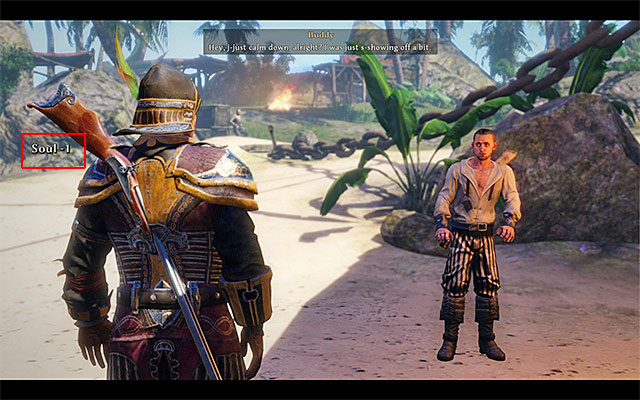 Most of the time you will change your Soul during a conversation with the NPC's.
One of the novelties of the Risen series introduced in Risen 3 is the built-in morality (or karma) system which is represented by gathered by your hero Souls. At the beginning of the game the Nameless Hero has the neutral status of 50 Souls. Helping others and showing towards them positive attitude in specific situations (almost exclusively limited to conversation scenes) will allow you to get bonus Souls (with the limit of 100 Souls). However being harsh and following the aggressive attitude towards others will end up with losing your Souls (although you can't fall below 0 Souls).
Soul system is not really related with any important consequences and will not affect how the newly met NPC's will behave towards your hero. The only important difference is the fact that after reaching high amount of Souls Mendoza may decide to separate from your team, from the other hand - after losing a huge amount of Souls you may be left by Edward. If you don't want to lose any of these allies nor you don't want to fail quests they may offer then you should keep your Souls in balance, don't neither loose them too much, nor collect them. Try to keep your score between 30 and 70 Souls.
Remember! If you will accidentally gain or lose to many Souls and you don't want to be abandoned by Mendoza nor Edward, you should avoid any sort of contact with them until you will change the amount of your Souls to preferable level.
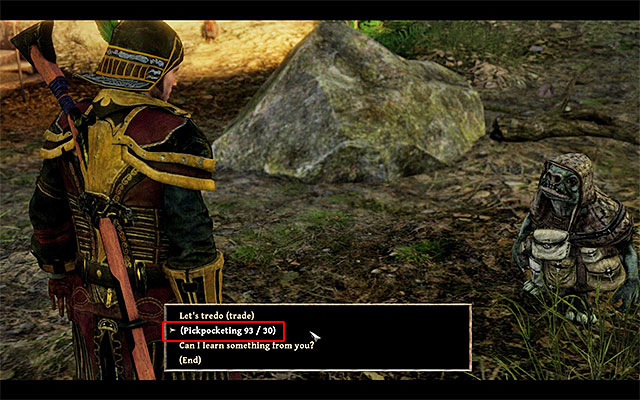
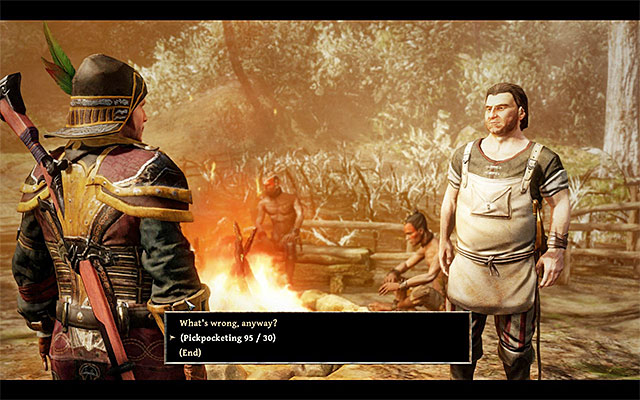
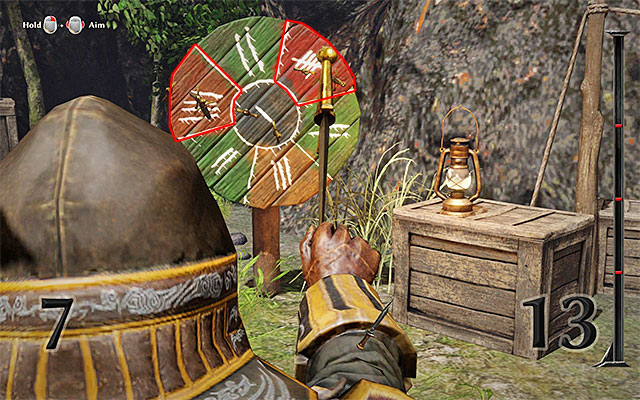
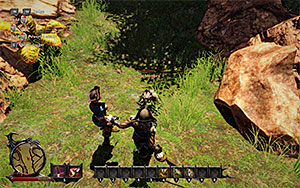
Pickpocketing in the Risen 3 works quite similar to the previous game from the series, so it also stands out from the other computer RPG games. You can't steal for every NPC you will meet, instead you can steal only from the few characters that creators of the game have chosen. During the conversations you will find the dialogue option of pickpocketing including what chances of success do you have. You can see the example of how this dialogue option looks on the screen above.
If your character has a higher number of pickpocketing points, than the one specified by the game (in the example above, it is 30 points), the action will always be successful. If, however, your value is lower than the one required, in most cases this results in a situation, where you are attacked by the NPC. I recommend that you attempt pickpocketing only after you have developed this skill to an appropriate level, so you can always be sure of success.
Of course I recommend investing in your Dexterity from the beginning of the game since this attribute increases your Pickpocketing skill. Also you can find teachers who will be able to teach you the Master Thief ability, which increases how fast you can learn the Pickpocketing.
Remember! If you lack of only few points necessary to steal from someone successfully, check if you have in your equipment for example any ring, amulet or potion that can help you temporarily increase your Pickpocketing skill.
The below table lists all of the characters whose pockets you can pick:
Character name
Location
The required number of pickpocketing points for the action to be succesful
Flynn
Antigua
30 points
Ramon
Antigua
90 points
Zak
Antigua
60 points
Connor
Calador - the Demon Hunters' Citadel
60 points
Logan
Calador - Bran's Farm
40 points
Fenn
Calador - the farm in the mountains and the Demon Hunters' Citadel
90 points
Glen
Calador - Fishing village
30 points
Kramer
Calador - the pub
50 points
Yvette
Calador - the pub
50 points
Mason
Calador - the pub and the Demon Hunters' Citadel
120 points
Harry
Kila - Pirate beach
60 points
Quinn
Kila - Pirate beach
80 points
Bahati
Kila - natives' village
30 points
Kamil
Kila - natives' village
60 points
Guard
Kila - natives' village
90 points
Holtby
Tacarigua
90 points
Osorio
Tacarigua
30 points
Rodriguez
Tacarigua
60 points
Garelt
Taranis - the mine
40 points
Kefkir
Taranis -Valamir's mine
90 points
Hardwick
Taranis - Mages' camp
120 points
Roderich
Taranis - Mages' camp
30 points
Safi
Taranis - the harbor
70 points
Dakila
Skull Island
90 points
Gray
Skull Island
40 points
Hermingo
Skull Island
20 points
Domingo
Fog Island
50 points
Hull
Fog Island
60 points
Mortimer
Fog Island
20 points
Famir
Isle of Thieves -goblin camp
60 points
Kaan
Isle of Thieves -gnome camp
120 points
Nanuk
Isle of Thieves -gnome camp
30 points
Zeki
Isle of Thieves -gnome camp
40 points
 The best way is to steal from houses during the night time since it decreases a chance of being detected.
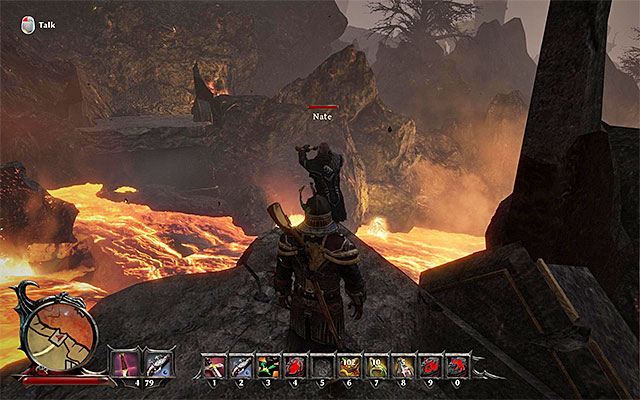
Stealing from the environment in Risen 3 is not very restrictive. You should remember that anything you can find under the sky is considered by the game as "common goods" and you don't have to be afraid of taking them since you will not experience any negative consequences. Limitations are related only to items being in buildings both public (such as taverns) and private (such as houses), although empty buildings and huts are open for exploration. If you will try to steal from any of the restricted areas it may ends up with the word of warning or attacking the Nameless Hero by surrounding NPC's.
Fortunately you can make stealing objects from forbidden areas much easier thanks to the few tricks. I recommend to learn as fast as you can (for example with the help of Nate from Calador) the ability of Sneak. After you will activate this ability you may walk quietly. It is still possible that someone will notice you. That's why it's the best for you to wait for the night, when most of the NPC's goes to sleep and it is possible that you will be able to avoid few guards left on their watch.
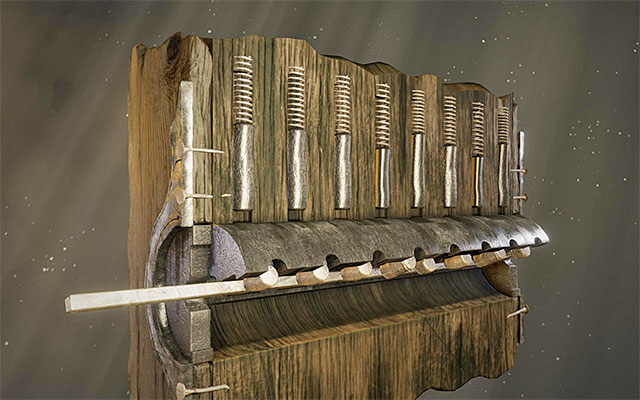 Complex locks require more time using the picklock
Locked chests hiding treasures are quite a different story. If you want to open a chest you have to possess the picklock which you can buy from few merchants. You have to also level up your Lockpicking higher than the level of the lock, otherwise you will not be able to open it. If you will fulfill both of these conditions you will get an access to the very easy mini-game which involves opening the lock by determining the right order of moving the triggers.
Remember! If you lack of only few points necessary to use your picklock successfully, check if you have in your equipment for example any ring, amulet or potion that can help you temporarily increase your Lockpicking skill.
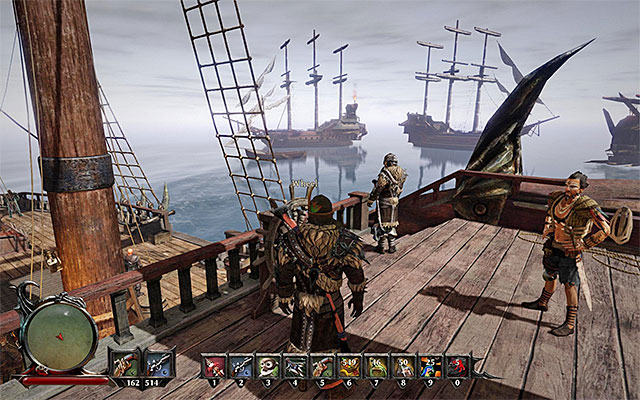 You can meet your crew after you return to your ship
You are not all alone in your fight, because you have your loyal crew with you. However, they need to be gathered, first. Each one of the companions can back you up in fight, but some of them make themselves useful in some other way. At the beginning, you can form a crew of, up to, three members. Some of the NPCs are picky and they will join you only after you get a bigger ship.
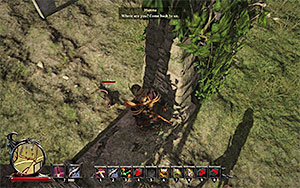
1) Bones- your first and the most loyal companion. It is bones that brings you back to life and he accompanies you from the very beginning of the game. On the ship, he makes a remark, whenever there is someone with something to say. In combat, he heals your character, which makes him one of the most useful companions. Bones joins the crew automatically, at the Crab Coast.
2) Edward - a young warrior that wants to join the ranks of Demon Hunters which he, ultimately, manages to do. Edward readily accepts Soul Dust that you find in the afterworld and, for each 5 units, he raises your humanity level by 2 points. He is staying in the pub on Antigua. The way to include Edward into the crew can be found in the walkthrough for the Sign Edward On crew quest.
3) Horas - an envoy of the Guards, he can be found at the campfire to the North-West of the Inquisition HQ on Tacarigua. He is willing to join you even if you still do not have a bigger ship. Apart from being a back up in combat, Horas lacks any other, useful skills. To learn how to include Horas into the crew, see the walkthrough for A Follower of Magic quest.
4) Patty - your character's older sister, she is staying on the beach on Kila. Patty does not have any additional skills, but there is a number of quests connected with her, thanks to which you can earn some gold. To learn how to include Patty into the crew, see the walkthrough for Sign Patty On.
5) Mendoza - you encounter the late Inquisition leader, during your visit to the afterlife however, this is not too complex a conversation. You get another opportunity to meet him after you walk onto the ghost ship floating near the South-Western part of Taranis. Although the Inquisitor is a ghost, he can wound opponents just as well as the rest of the crew. Additionally, you can sell soul dust, which you find in the afterlife, to him. For each 5 units you receive 200 gold. To learn how to include Mendoza into the crew, see the walkthrough for The Inquisitor quest.
6) Jaffar - the adventurer gnome can be found at the Mages' HQ on Taranis. After he joins you, Jaffar will present you with some gold that he managed to steal, every now and then. Also, visiting every new isle will be profitable to you, in the same way. Also, Jaffar is skillful at finding pouches of gold, scattered here and there. Also, he picks, for you, the items dropped by the killed enemies (where his skills are exactly the same as that of your character's - e.g. Jaffar cannot collect beast tongues if you cannot). This makes him one of the most useful companions. To learn how to include Jaffar into the crew, see the walkthrough for the Sign Jaffar On quest.
7) Saddec- a representative of the natives who joined pirates. Saddec abuses liquor, but this can be profitable, in a way - every now and then, he will present you with a potion that expands the Astral Vision temporarily. As the only one of your companions, Saddec is the only one that uses firearms and that is why he is most useful, whenever the opponents are busy fighting you. To learn how to include Saddec into the crew, see the walkthrough for the Sign Saddec On.
8) Jake / Neron / Kane (unavailable as companions) - a former captain of one of the ships that you take as your own (of the natives, Crystal Mages and Demon Hunters, correspondingly). You can have several conversations with them but, they do not go ashore with you (this changes towards the end of the game).
9) Polly (unavailable as a companion) - your character's personal parrot which, not entirely, may be a crew member but, after several conversation with Polly, the location of the best armor in the game is marked on your map.
Apart from exploring the world and completing quests, in Risen 3 you can also play three types of minigames. They are not too complicated and they usually earn you some gold so, you should not ignore them. However, you need to know that, in many cases, you need to make a bet with your gold, before you can start playing. This is why, it is recommended that you save your game beforehand. This will allow you to "trick" the opponent, in the event of a failure and will safeguard you from losing your money.
Note - Minigames can be played, mainly in the encampments of Calador Bay, as well as on Kila and Taranis. To learn more about the NPCs that are willing to play with, see walkthroughs for the side quests in the abovementioned locations.
The first of the available minigames is knife throwing. Each contestant (your character and an NPC) takes five throws and, to win the minigame, after the fifth round ends, you need to have scored more points than your opponent. With each throw, you can score between zero (if you miss the target) to five points. I recommend that you aim at the portions for which you receive 4 or 5 points (they have been marked in the above screenshot from an example match). After you are done aiming, you still need to throw the knife, at the correct moment, i.e. when the blue bar on the right is in position. Depending on when you press the throwing key/button, the knife flies straight ahead, slightly up or slightly down.
Note - Do not worry if you do not do well after the initial 2-3 throws, and you will be losing with your opponent. The level of the AI opponents changes and, after several excellent throws, the rest of them can be completely missed.
 Tap buttons in accordance with the displayed icons
Another one of the available minigames is arm wrestling and, in order to complete it, you need to tap keys/buttons correctly. After you start the minigame, start tapping the buttons that are displayed at the edges of the screen (in the case of the PC version, these are the WSAD directional keys). At some point, you will have to start tapping rapidly one key, specified by the game. If you press that key the sufficient number of times, you will win the minigame.
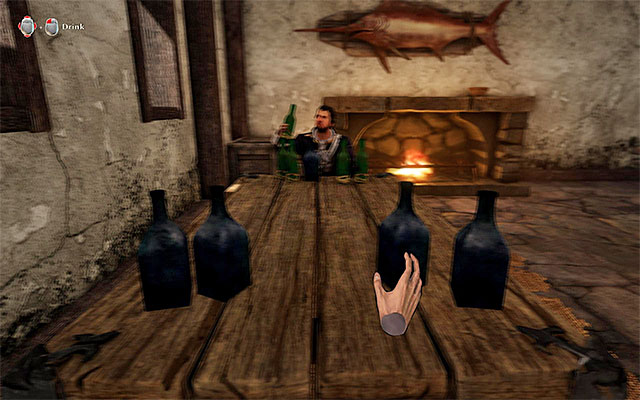 Quickly, select the successive interactive bottles
The last of the available minigames is an liquor drinking rush, in large quantities. The rules of this game are, definitely the easiest to grasp, because all you need to do is grab the bottles on the table, one after another. Try to be accurate here, because you may tip the bottle over, otherwise. You win the game after you grab all of the bottles (and dring up what's inside) before your opponent does.
While exploring the game world, apart from the "regular" NPCs, you will also meet representatives of various factions who are trying to represent the interests of those factions. At the beginning, the game does not favor any of the factions, although you will have to join one of them, as the game progresses. The "playable" factions in the game are:
Note - selecting a faction is an irreversible decision. However, this is not to say that you need to break all relationships with the rest of them, because they are not hostile towards each other. After you join a faction, you get the opportunity to complete several unique quests, exclusive to that faction, to learn several unique spells and gain access to unique outfit elements.
 Demon Hunters' HQ
Demon Hunters have their headquarters in Calador Bay and it is a stunning citadel. You can join this faction after you have performed all of the actions, while completing the "New Allies" main quest at the Calador Bay, i.e. as a result of the meeting with Druid Eldric and confirming your will to subject yourself to the initiation rite. After you join the Demon Hunters, you will gain access to several new quests and to new elements of the outfit. Apart from that, the offer of some of the trainers will be expanded and you will get an option to learn Rune Magic from the select hunters.
 The Natives' HQ
Natives are based on Kila in a vast village. You can join the faction after you have performed all of the activities, while completing the "New Allies" man quest on Kila, i.e. after you meet with the tribe chief Hirutu and confirm that you want to undergo the initiation rite. After you join the Natives, you will gain access to several new quests and to new elements of the outfit. Apart from that, the offer of some of the trainers will be expanded and you will get an option to learn Voodoo Magic from the select tribesmen.
 The Crystal Mages' HQ
Crystal Mages are based on Taranis in a big encampment located in the central part of the isle. You can join the faction after you have performed all of the activities, while completing the "New Allies" man quest on Kila, i.e. after you meet with General Magnus and confirm that you want to undergo the initiation rite. After you join the Crystal Mages, you will gain access to several new quests and to new elements of the outfit. Apart from that, the offer of some of the trainers will be expanded and you will get an option to learn Crystal Magic from the select guards and mages.
 The Inquisitors are one of the additional factions and you will encounter them, among others, on Tacarigua
The rest of the factions in the game play a much smaller role, although you need to gain their support to complete the "Pirate Alliance" main quest, given to you by Admiral Alvarez, who is staying on Antigua. Among others, this means the Inquisitors staying on Tacarigua and the Fog Island, who are lead by Commandant Sebastiano. To learn more about the remaining factions, see the walkthrough for the quest mentioned above.
 A river of lava in the Calador Bay is one of the barriers that you cannot cross, at first
After you complete several introductory quests at the Crab Coast, you gain access to a small vessel (a ship). From now on, you are free to visit all isles, in any order you want (with the exception of the Skull Island that is connected with the game's finale). Usually, there are no boundaries to your exploration. Still, there are three exceptions:
These three locations are connected with the game's storyline and it is impossible to reach them without joining one of the factions and completing The Ancient Knowledge quest. Any attempts to get there are futile, because the game returns you, automatically, to the closest "permissible" location.
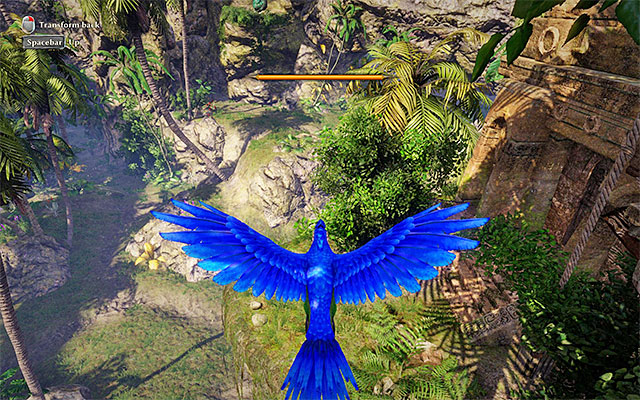 It is very useful an option to turn into the parrot, thanks to which you can reach the seemingly inaccessible locations
Apart from the above, the world of Risen 3 can be explored without any restrictions, where it is worthwhile to remember several hints:
 An example of an unique herb
While exploring the game world, apart from standard loot, you can also find many rare items, which provide you with valuable bonuses. What is meant here, is primarily unique herbs, whose consumption raises the select attributes of your character, permanently. The bonus is always awarded for a specific statistic and the increase, itself, is not high (2 points). Still, it is worthwhile to be on a lookout for such rarities. Below, you can find a table listing the locations, where you can find such items, along with descriptions of the bonuses that they provide.
Note - Do not sell unique herbs, because additional attribute points are always of use. You can sell them, however, if you completely do not care about developing a given attribute (e.g. a Mage attribute, in the case of playing as a fighter).
Item name
Effect
Location
Bloodcap
+2 to Spirit
Antigua - The cave with the crystal portal.
Bloodcap
+2 to Spirit
Calador - close to the river of lava, where the golem is.
Bloodcap
+2 to Spirit
Calador - deadlands in the Eastern part of the bay, close to one of the cottages
Bloodcap
+2 to Spirit
Kila - around the great gate guarded by Baraka.
Bloodcap
+2 to Spirit
Kila - The temple in the Forbidden Valley. Only the monkey can reach the plant (requires Monkey Trainer)
Bloodcap
+2 to Spirit
Fog Island - The shipwreck in the Northern part of the isle.
Bloodcap
+2 to Spirit
Isle of Thieves - The cave close to the main goblin camp.
Hero's Crown
+2 to Toughness
Antigua - Deadlands in the Northern part of the isle. only the monkey can reach the plant (requires Monkey Trainer).
Hero's Crown
+2 to Toughness
Calador - The location guarded by the golem.
Hero's Crown
+2 to Toughness
Calador - The Northern part of the forest, close to the waterfall.
Hero's Crown
+2 to Toughness
Kila - Around the gate guarded by Baraka.
Hero's Crown
+2 to Toughness
Tacarigua -Hawke's camp.
Hero's Crown
+2 to Toughness
Taranis - Near the North-Western monolith
Hero's Crown
+2 to Toughness
Crab Coast - The den of the Dragon Snapper.
Hero's Crown
+2 to Toughness
Isle of Thieves - The northern beach guarded by a Leviathan.
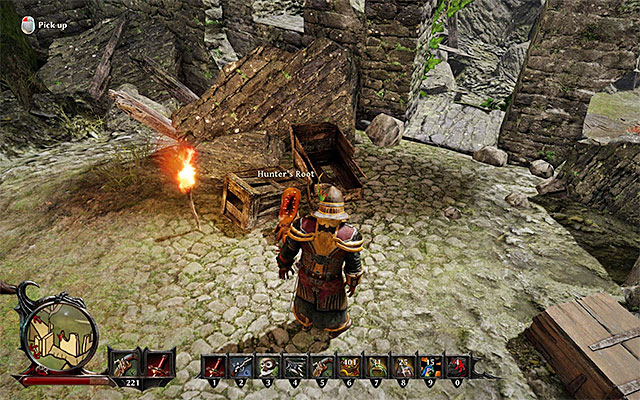
Hunter's Root
+2 to Ranged
Calador - The circle in the mountains that is guarded by an Ore Golem.
Hunter's Root
+2 to Ranged
Calador - The hunters' chalet.
Hunter's Root
+2 to Ranged
Kila - The central part of the forbidden valley.
Hunter's Root
+2 to Ranged
Kila - behind one of the waterfalls, where there is an alligator
Hunter's Root
+2 to Ranged
Tacarigua - next to the tombs in deadlands
Hunter's Root
+2 to Ranged
Taranis -Sharp's cave.
Hunter's Root
+2 to Ranged
Crab Coast - near the portal, in the temple (near the one that the first Shadow Lord appears at).
Hunter's Root
+2 to Ranged
Fog Island - the ruins in the Eastern part of the isle
Shadow Fire
+2 to Cunning
Antigua - next to the entrance to the cave with crystal portal
Shadow Fire
+2 to Cunning
Calador - the ring in the mountains guarded by an Ore Golem.
Shadow Fire
+2 to Cunning
Kila - The Northern part of the jungle.
Shadow Fire
+2 to Cunning
Kila - the ledge above the water, in the Forbidden Valley. You can reach the herb only by using the Parrot Flight spell.
Shadow Fire
+2 to Cunning
Tacarigua - The cave with the crystal portal
Shadow Fire
+2 to Cunning
Taranis - The den of the Shadow Lord in the deadlands.
Shadow Fire
+2 to Cunning
Taranis - next to the entrance to the cave with the crystal portal (the one that you reach with Zacharias)
Shadow Fire
+2 to Cunning
Fog Island - a gift from Domingo.
Shadow Fire
+2 to Cunning
Fog Island - next to the stone circle.
Shadow Fire
+2 to Cunning
Isle of Thieves - on the islet in the Eastern part of the map
Soul Lichen
+2 to Magic
Antigua - next to the entrance to the cave with the crystal portal.
Soul Lichen
+2 to Magic
Calador - The tavern rooftop.
Soul Lichen
+2 to Magic
Kila - Spider cave.
Soul Lichen
+2 to Magic
Kila - The spider caves neighboring the den of Margoloth (Oracle).
Soul Lichen
+2 to Magic
Kila - In the chamber with the crystal portal and the Shadow Lord.
Soul Lichen
+2 to Magic
Tacarigua - The cave in the upper part of the pass.
Soul Lichen
+2 to Magic
Taranis -Paul's encampment.
Soul Lichen
+2 to Magic
Taranis -Nergal's basement.
Swordthorn
+2 to Melee
Antigua - Deadlands in the Eastern part of the isle.
Swordthorn
+2 to Melee
Calador - The Northern part of the forest, near the location of the Ore Golem.
Swordthorn
+2 to Melee
Kila - The area to the East of the spider cave.
Swordthorn
+2 to Melee
Tacarigua - The mountain watchtower. The plant can only be reached by the monkey (requires Monkey Trainer).
Swordthorn
+2 to Melee
Taranis - the cave below the Mages' encampment.
Swordthorn
+2 to Melee
Taranis - The den of the golem that you visit with Walker
Swordthorn
+2 to Melee
Fog Island - Mountain areas in the Northern part of the isle.
Swordthorn
+2 to Melee
Isle of Thieves - The area Southwards of the Eastern golem Encampment.
Thief's Herb
+2 to Dexterity
Antigua - The Northern part of the harbor town.
Thief's Herb
+2 to Dexterity
Calador - The big grassland in the Eastern part of the bay.
Thief's Herb
+2 to Dexterity
Calador - The termite den in the Northern part of the map.
Thief's Herb
+2 to Dexterity
Kila - Near the temple in the Forbidden Valley.
Thief's Herb
+2 to Dexterity
Tacarigua - Near Rosco's encampment.
Thief's Herb
+2 to Dexterity
Taranis - Near the Southern monolith.
Thief's Herb
+2 to Dexterity
Taranis -Nergal's basement in the Mages' encampment.
Thief's Herb
+2 to Dexterity
Crab Coast - The island, where there is a legendary item, among others.
Thief's Herb
+2 to Dexterity
Isle of Thieves - The ledge in the South-Eastern part of the isle.
Tree Strangler
+2 to Influence
Calador - next to the entrance to the cave with crystal portal.
Tree Strangler
+2 to Influence
Calador - The ruins of the castle in the Western part of the bay.
Tree Strangler
+2 to Influence
Kila - near the gate guarded by Baraka.
Tree Strangler
+2 to Influence
Tacarigua - The area to the North-West of the lighthouse.
Tree Strangler
+2 to Influence
Taranis -Sharp's encampment.
Tree Strangler
+2 to Influence
Taranis - The ledge close to the harbor.
Tree Strangler
+2 to Influence
Crab Coast - The temple.
Tree Strangler
+2 to Influence
Isle of Thieves - The cave close to the Eastern goblin encampment.
Although present in Risen 3, crafting system is not as developed as the one, e.g. in Skyrim or the other RPG games. However, this is not to say that you should ignore this element of the game, because the gear that you craft yourself, can either be used by yourself, or sold to traders, for high profit. Below, you can find the most important activities, in connection with crafting, which elaborates on the major assumptions of the system and mentions possible requirements, which must be met in the first place.
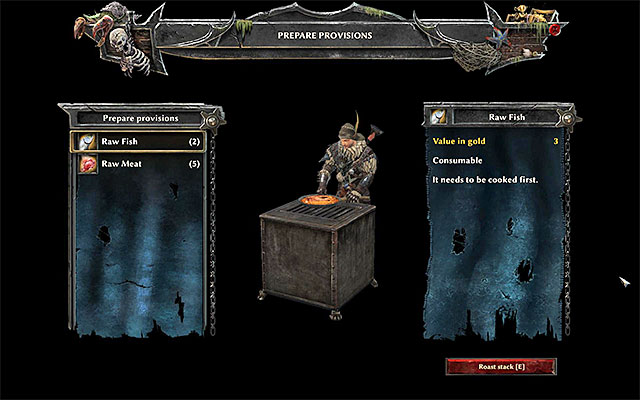 You can prepare meat to be eaten, by cooking it
Arguably, the easiest activity, connected with crafting, is the option to prepare meat, which you obtain in the game world to be eaten (from the monsters that you kill, or that you find during free exploration). You do not need any additional skills, and only interact with a campfire, or stove and confirm that you want to cook meat. Thanks to this, you will obtain Provisions and you will be able o use it to heal your character.
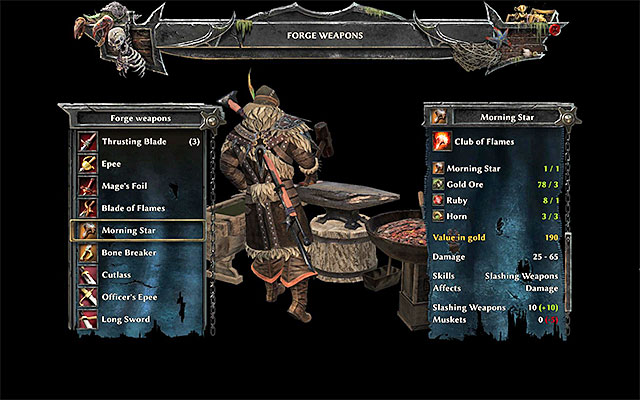 Melee weapons forging window
One of the more complex categories, connected with crafting, is smithing. You become a blacksmith only after you learn an appropriate skill (Blacksmith). from now on, you will be able to interact with forging stations that you find in smithies, among others. After you use the forging station, you can craft a completely new weapon, out of the elements that you find (to learn more, see the chapter concerned with weapon quests), or upgrade an already owned one. Before you forge a new item, you should first see the parameters of the upgraded item and consider how useful it is going to be to you. What speaks for this solution is that, most usually, to craft an upgraded item, you need rare items (e.g. black pearls or gold ores).
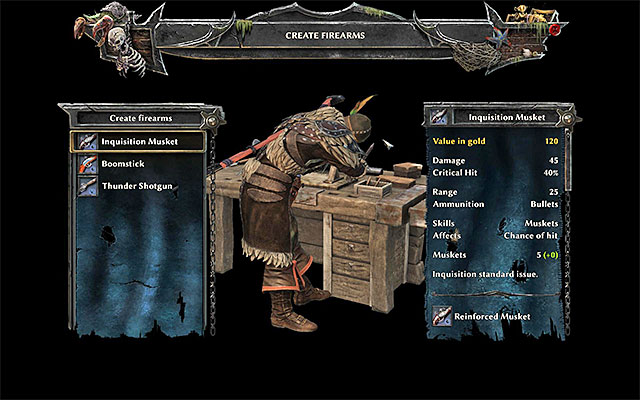 Firearms creation window
What is closely connected to smithing is gunsmithing. Also here, you need to train your character. Thanks to obtaining the Gunsmith ability, you will be able to interact with Workbenches to upgrade the guns that you already own. Just like in the case of the smith, mentioned above, it is a good idea to take a look at the statistics of the gun, whose upgrading you are interested in. This is so, because you will often need rare items to craft better firearms.
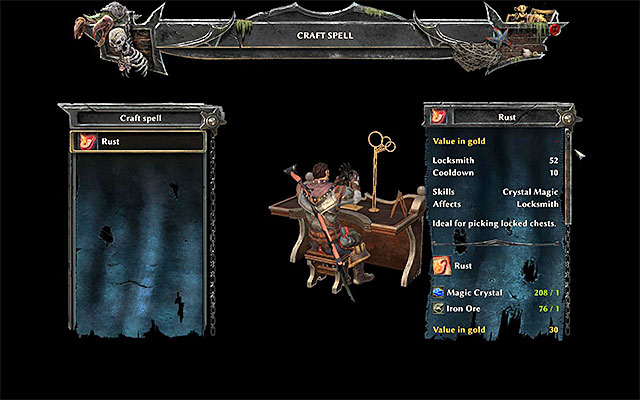 Crafting scrolls will allow you to avoid bearing the costs of buying them
A branch of crafting that is quite important is the option to craft scrolls, because there are many various spells, available in the game. Also in this case, you need an appropriate skill, i.e. Craft Spells. Additionally, your character must be learned in the specific field of magic (e.g. Crystal Magic) and own required ingredients. It is worth noting here that you can only craft disposable spells, and not spells that can be permanently added to the list of available attacks.
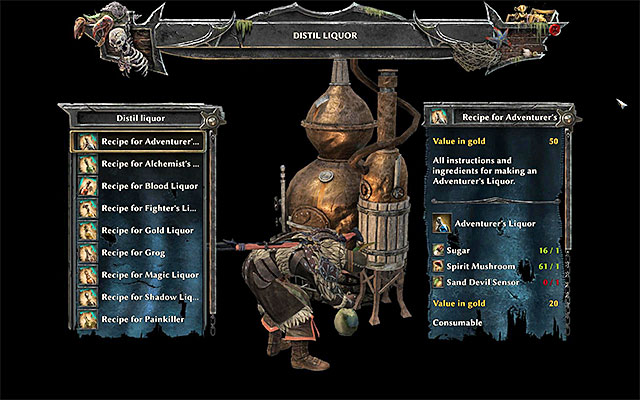 You can distil liquor
In Risen 3, liquors are a good way of healing your character. As a result, it is a good idea to take interest in learning the Distiller skill. Thanks to this, you will be able to interact with distilling stations. Unfortunately, apart from the appropriate ingredients (you can either find them in the game world or buy from traders), to distil liquor, you also need to own Recipes. You can obtain them, as a result of exploration of the area, you can receive them as rewards for completing some quests, or buy them.
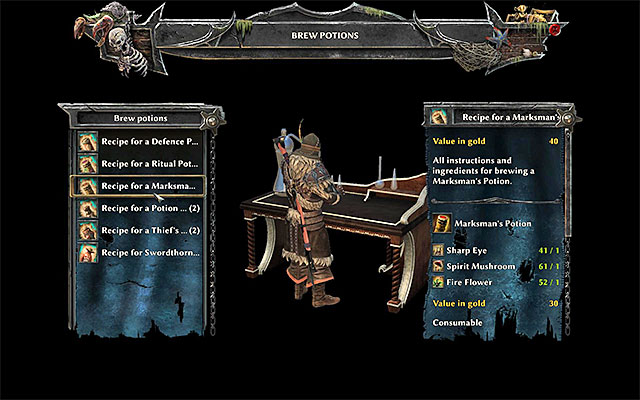 The potion brewing window
To the abovementioned liquors, potions are closely related. Thanks to learning the Brew Potions skill, you gain access to preparing them and their major advantage is that they are highly diversified. Depending on what you need, you can brew potions that will raise your character's statistics (temporarily or permanently) or increase your toughness. Just like in the case of liquors, you need to own ingredients and recipes connected with the individual potions.
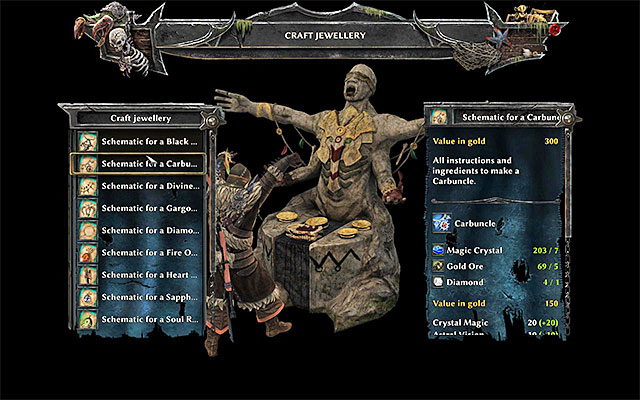 Talisman creating window
The final important category is crafting of various magical items and, in this case, you are required to learn the Create Talisman skill. Thanks to unlocking this proficiency, you can craft all sorts of rings and amulets. The requirements are, in this case, very similar to the ones mentioned above - apart from the required ingredients, you also need the Schematic of the item that you want to craft. Schematics can be found throughout the game world, receive as rewards for completing quests or buy from traders.
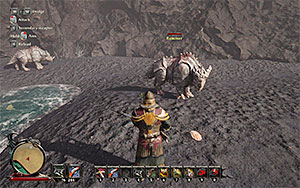
In the below table, you can find a list of all the creatures that you can encounter throughout the game. It includes both beasts that are hostile towards your character by default, as well as ones that do not attack, as long as you leave them alone (e.g. farm animals).
Note - this list does not include hostile NPCs nor bosses. The latter, due to their unique character, are always described in walkthroughs for the individual quests.
Alligator
Disposition: hostile
Commentary: Alligators lurk in water, which makes them difficult to notice. Try and do not let yourself be surprised by them, because they deal lots of damage and they are agile, as for their size. Try to eliminate them at long range and encourage them to turn on your companion.
Glory points for elimination: 200
Armadillo
Disposition: neutral
Commentary: -
Glory points for elimination: 10
Black Ghoul
Disposition: hostile
Commentary: Ghouls often appear around unexpectedly and you need to be ready, to defend yourself immediately.
Glory points for elimination: 100
Cave Bat
Disposition: hostile
Commentary: According to their name, you encounter these huge bats, mainly, in caves. They del considerable damage and often operate in groups so, eliminate them one after another.
Glory points for elimination: 100
Claw Monkey
Disposition: hostile
Commentary: Monkeys are often capable of attacking at long range. Apart from that, they often operate in packs so, try to eliminate them one after another.
Glory points for elimination: 50 (regular) or 100 (blue)
Demonic Warrior
Disposition: hostile
Commentary: demonic Warriors are very similar to their living counterparts. Avoid their melee attacks.
Glory points for elimination: 100

Duck
Disposition: neutral
Commentary: Ducks drop Raw Chicken Drumsticks.
Glory points for elimination: 10
Firebird
Disposition: hostile
Commentary: These big birds often attack, in a way that is difficult to block. Dodge or keep them at bay.
Glory points for elimination: 100
Giant Crab
Disposition: hostile
Commentary: Launch strong attacks at the exposed parts of the body. Also, try to tip the crab over, which makes it defenseless.
Glory points for elimination: 100
Giant Rat
Disposition: hostile
Commentary: Rats are easy to kill and they drop Raw Meat.
Glory points for elimination: 50
Ghoul
Disposition: hostile
Commentary: Ghouls often appear around unexpectedly and you need to be ready, to defend yourself immediately.
Glory points for elimination: 100
Goblin
Disposition: hostile
Commentary: They are agile and operate in groups so, you should not ignore them. They drop random items.
Glory points for elimination: 50
Gorilla
Disposition: hostile
Commentary: They are tough and that is why they should not be ignored and you need to watch out in fight (parrying and dodges).
Glory points for elimination: 200
Grave Spider
Disposition: hostile
Commentary: This variety of spider is much bigger, which makes it very dangerous. Remember that all spiders not only attack in groups, but also spit venom at a distance.
Glory points for elimination: 200
Hellhound
Disposition: hostile
Commentary: Hellhounds are very agile so, you cannot use slow attacks, because there is high probability that you will fail, as a result.
Glory points for elimination: 50
Iron Golem
Disposition: hostile
Commentary: Golems are very tough and they deal lots of damage (attacks with upper limbs and ground smashes). It is a good tactic to weaken them whenever they are occupied with your companion. When defeated, they drop random items.
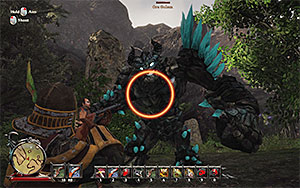
Glory points for elimination: 400
Jaguar
Disposition: hostile
Commentary: Jaguars are very quick and, for obvious reasons, they attempt dealing (high) melee damage. Rely on dodges and parrying, or attack at long range.
Glory points for elimination: 100
Jungle Spider
Disposition: hostile
Commentary: Spiders often appear around unexpectedly and you need to be ready to fend off immediately. Apart from that, they may spit venom at long range.
Glory points for elimination: 50

Large Jungle Spider
Disposition: hostile
Commentary: This variety of spider is much bigger, which makes it very dangerous. Remember that all spiders not only attack in groups, but also spit venom at a distance.
Glory points for elimination: 200
Lava Golem
Disposition: hostile
Commentary: Golems are very tough and they deal lots of damage (attacks with upper limbs and ground smashes). It is a good tactic to weaken them whenever they are occupied with your companion. When defeated, they drop random items.
Glory points for elimination: 400
Leviathan
Disposition: hostile
Commentary: Leviathans deal very high damage and, in spite of their size, they can move around quickly (and also perform dangerous charges). Therefore, you need to master dodging and/or ranged combat.
Glory points for elimination: 200
Lindworm
Disposition: hostile
Commentary: Due to the fact that they have wings, they can move around quickly. Apart from that, they deal high damage and are quite tough. Therefore, you need to rely on your best attacks.
Glory points for elimination: 400
Lynx
Disposition: hostile
Commentary: Lynxes are very quick and, for obvious reasons, they attempt dealing (high) melee damage. Rely on dodges and parrying, or attack at long range.
Glory points for elimination: 100
Minion
Disposition: hostile
Commentary: Minions are very similar to their living counterparts that you encounter in the game. You should be most wary of the monsters that can handle magic. Minions drop Shadow Weapons.
Glory points for elimination: 100
Monkey
Disposition: neutral
Commentary: -
Glory points for elimination: 10
Monitor Lizard
Disposition: hostile
Commentary: Monitors are very tough and they deal lots of damage. Avoid their relatively slow attacks and rely on the charged attacks, to deplete their health points quickly.
Glory points for elimination: 200
Ore Golem
Disposition: hostile
Commentary: Golems are very tough and they deal lots of damage (attacks with upper limbs and ground smashes). It is a good tactic to weaken them whenever they are occupied with your companion. When defeated, they drop Iron Ore.
Glory points for elimination: 400
Panther
Disposition: hostile
Commentary: Panthers are very quick and, for obvious reasons, they attempt dealing (high) melee damage. Rely on dodges and parrying, or attack at long range.
Glory points for elimination: 100
Rammer
Disposition: hostile
Commentary: As the name suggests, this beast behaves like a rhino and attempts to trample your character. The key to defeating it is to dodge frequently.
Glory points for elimination: 200
Rat
Disposition: neutral
Commentary: -
Glory points for elimination: 10
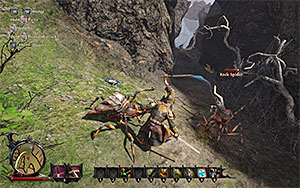
Rock Spider
Disposition: hostile
Commentary: Spiders often appear around unexpectedly and you need to be ready to fend off immediately. Apart from that, they may spit venom at long range.
Glory points for elimination: 50

Sand-Devil
Disposition: hostile
Commentary: These monsters are highly dexterous so, dodge frequently and rely on quick attacks.
Glory points for elimination: 50
Scavenger
Disposition: hostile
Commentary: These big birds often attack, in a way that is difficult to block. Dodge or keep them at bay.
Glory points for elimination: 50
Shadow Guardian
Disposition: hostile
Commentary: Guardians are tough and fast, as for their size and they deal considerable damage. This means that you need to watch out, while fighting them.
Glory points for elimination: 200
Silverback
Disposition: hostile
Commentary: Silverbacks are the strongest variety of gorilla. This monster is high on toughness and, for obvious reasons, deals lots of damage. You should especially watch out in melee (parrying and dodging).
Glory points for elimination: 400
Skeleton
Disposition: hostile
Commentary: Skeletons are similar to the living warriors that you encounter in the game. Therefore, they are good in melee and can quickly deplete much of your health.
Glory points for elimination: 100
Snapper
Disposition: hostile
Commentary: These monsters are quite strong and they deal lots of damage in melee. Fortunately, they nearly always operate alone.
Glory points for elimination: 100 (regular Snapper) or 200 (Dragon Snapper)
Soul Eater
Disposition: hostile
Commentary: These monsters are very strong and they deal lots of damage in melee. Fortunately, they nearly always operate alone.
Glory points for elimination: 200
Swamp Golem
Disposition: hostile
Commentary: Golems are very tough and they deal lots of damage (attacks with upper limbs and ground smashes). It is a good tactic to weaken them whenever they are occupied with your companion. When defeated, they drop random items.
Glory points for elimination: 400
Termite
Disposition: hostile
Commentary: These monsters are quite adroit so, you need to dodge to the sides regularly and rely on quick melee or ranged attacks. Also, watch out for the discernibly stronger Termite Warriors.
Glory points for elimination: 50 (Worker) or 100 (Warrior)
Turkey
Disposition: neutral
Commentary: Turkeys drop Raw Chicken Drumsticks.
Glory points for elimination: 10
Turtle
Disposition: neutral
Commentary: Turtles drop Raw Meat).
Glory points for elimination: 20
Water Lizard
Disposition: hostile
Commentary: These monsters are quite agile so, dodge to the sides often and rely on quick attacks. They often operate in packs so, try to attack them one-by-one.
Glory points for elimination: 100

Warrior
Disposition: hostile
Commentary: Undead warriors behave in a way that resembles their living counterparts.
Glory points for elimination: 100
Warthog
Disposition: neutral or hostile
Commentary: The domesticated animals do not attack you. The wild variation is mare aggressive and it is a good idea to dodge from their charges. They drop Raw Meat.
Glory points for elimination: 50
The image above represents the map of the world. All of the most important location you can visit are marked on it.
Three important things to remember:
1) The option to quick travel around the world is available only after you've finished the initial main quest, on the Crab Coast.
2) You can revisit each of the main locations any times you want. It's recommended if you, for instance, unlocked a new thief ability, allowing you to open treasure chests that you previously weren't able to.
3) The Skull Island becomes available only towards the end of the game, i.e. some time after you progress to the fourth chapter of the game's story line.
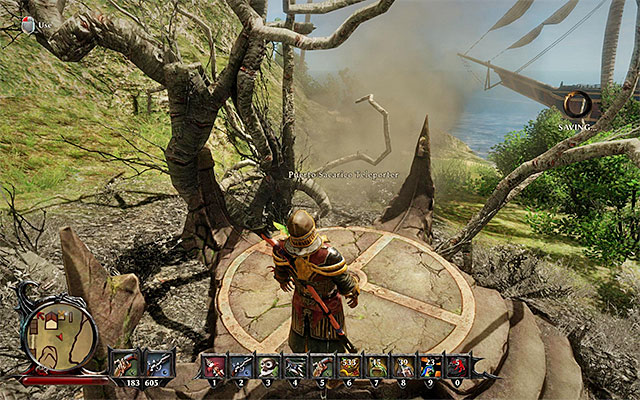 An example teleporter
Risen 3 features the system of fast travels within a given location (usually, within a single isle). At first, you do not have access to this option and therefore, you need to take appropriate actions to unlock it. In each main location, (with the exception of the Caribbean Coast), you can find one, or several, inactive teleporters. You can unlock successive teleporters with the teleportation stones, mentioned below. After you activate a given teleporter, you can select it from the level of the area map and get to it immediately. Of course, this is very helpful, when you need to reach, e.g. the other end of an isle and you do not want to waste time on walking there. ON the next pages of this chapter, you will find the map of the main locations, with marked locations, where you activate teleporters.
Note - Your character cannot teleport if in combat with someone son you cannot use teleporters, e.g. to flee a dangerous spot.
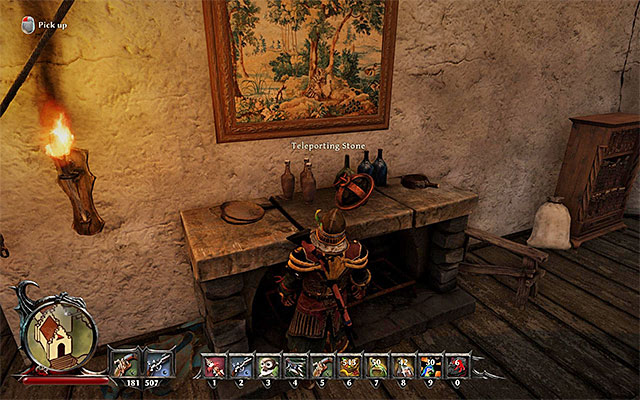 An example teleporting stone
I have already mentioned that Teleporting Stones are used to activate teleporters. One stone can be used to activate one teleporter of your choice. The good news is that, in the game world, there are more teleporting stones than there are teleporters so, you will never get into a situation, in which you need to search for one, specific, stone. If you do not want to search for the stones on your own, you can use the below table, with locations of each specified.
LOCATION NAME
THE SPOT, WHERE THE STONE IS HIDDEN
Antigua
Blood Oath Square to the East of Alvarez's place.
Antigua
Deadlands in the Northern part of the isle. To obtain the stone, you need to use the monkey (requires Monkey Trainer).
Antigua
Alvarez's place.
Calador
Hunters' chalet in the forest.
Calador
Bran's farm.
Calador
The circle in the mountains, in the Northern part of the bay, which is being guarded by the Ore Golem.
Calador
The windmill, next to Ernesto's farm.
Calador
The fishing village.
Kila
Chani's cottage, in the Forbidden Valley.
Kila
Leonard's cottage on the desert island.
Kila
A small desert island, in the North- Eastern part of the map - the stone is on the hillock with monsters..
Kila
Pirate encampment.
Kila
The first chamber of the temple in the Forbidden Valley.
Kila
The Eastern beach that you reach through the spider cave.
Kila
A ledge high above, in the Forbidden Valley, where you find the murdered Native Damaka, among others.
Tacarigua
The cave that you visit at the request of Pipkin, among others.
Tacarigua
The altar to the South-East of Puerto Sacarico.
Tacarigua
The tower in the mountains.
Taranis
The cottage at the lake, in the central part of the isle.
Taranis
The cottage to the West of the Mages' encampment.
Taranis
One of the buildings in the harbor.
Taranis
An islet in the Northern part of the map (the one with the buried treasure on it, among others)
Taranis
The gnome area in the Mages' encampment.
Taranis
The area around the big circle near the Mages' encampment.
Taranis
The beach next to the harbor.
Taranis
Near the North-Western monolith.
Crab Coast
The Eastern islet, i.e. the one with a legendary item on it, among others.
Skull Island
The main camp.
Skull Island
The canyon in the central part of the isle.
Fog Island
Mortimer's camp.
Fog Island
Nathan's camp.
Fog Island
Inquisition's camp.
Fog Island
North-Eastern part of the isle - near the location of one of the treasures.
Fog Island
The ruins in the Eastern part of the isle.
Fog Island
The mountainous area in the Northern part of the isle.
Fog Island
Shipwrecks in the South-Western part of the isle.
Isle of Thieves
The Northern isle close to the location, where you start the exploration of the Isle of Thieves
Isle of Thieves
The Eastern goblin encampment.
Isle of Thieves
The Western goblin encampment.
The above map presents Calador bay and the black dots on the map mark the places, where you find the teleporters that can be activated, From the moment at which you activate a given teleporter, you can select it from the level of the map of the bay, regardless of where you are.
Note - You will be able to reach the teleporter in the Eastern part of the Calador Bay, only after you progress to the third chapter of the game's story line.
The above map presents Kila isle and the black dots on the map mark the places, where you find the teleporters that can be activated, From the moment at which you activate a given teleporter, you can select it from the level of the map of the isle, regardless of where you are.
Note - You will be able to reach the teleporters in the Forbidden Valley and in the Den of the Oracle, only after you progress to the third chapter of the game's story line.
The above map presents Taranis isle and the black dots on the map mark the places, where you find the teleporters that can be activated, From the moment at which you activate a given teleporter, you can select it from the level of the map of the isle, regardless of where you are. Also, it is worth noting that you can reach all of the teleporters right during your first visit to the Taranis isle.
The above map presents Fog Island and the black dots on the map mark the places, where you find the teleporters that can be activated, From the moment at which you activate a given teleporter, you can select it from the level of the map of the Fog Island, regardless of where you are. Also, it is worth noting that you can reach all of the teleporters right during your first visit to the Fog Island.
The above map presents Isle of Thieves and the black dots on the map mark the places, where you find the teleporters that can be activated, From the moment at which you activate a given teleporter, you can select it from the level of the map of the Isle of Thieves, regardless of where you are. Also, it is worth noting that you can reach all of the teleporters right during your first visit to the Isle of Thieves.
The above map presents Tacarigua isle and the black dots on the map mark the places, where you find the teleporters that can be activated, From the moment at which you activate a given teleporter, you can select it from the level of the map of the Tacarigua isle, regardless of where you are. Also, it is worth noting that you can reach all of the teleporters right during your first visit to the Tacarigua isle.
The above map presents Antigua isle and the black dots on the map mark the places, where you find the teleporters that can be activated, From the moment at which you activate a given teleporter, you can select it from the level of the map of the Antigua isle, regardless of where you are. Also, it is worth noting that you can reach all of the teleporters right during your first visit to the Antigua isle.
The above map presents Skull Island and the black dots on the map mark the places, where you find the teleporters that can be activated, From the moment at which you activate a given teleporter, you can select it from the level of the map of the Skull Island, regardless of where you are. Also, it is worth noting that you can reach all of the teleporters right during your first visit to the Skull Island.
The map above contains references to all of the major locations you will visit while you are on Crab Coast, doing the main quests of the game's storyline. Red points indicate quests starting locations, while green ones show the areas you will visit while completing them.
Note - it is recommended to check out the map connected with the additional quests from Crab Coast, as many of the main and optional quests are closely tied together.
How to unlock the quest: Automatically after beginning the game.
Quest giver: -
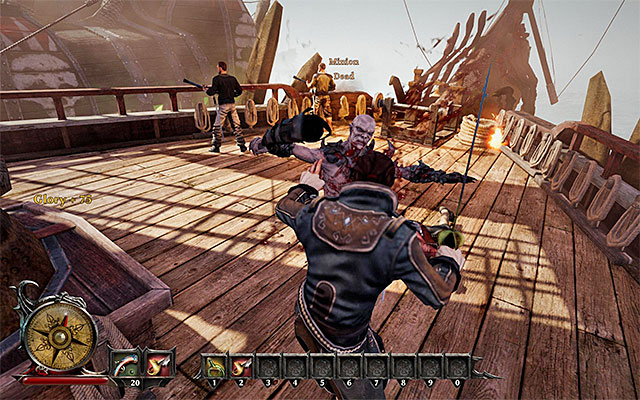 Practice countering and attacking.
While doing a rather short prologue, you will learn about the selected (not all of them!) elements needed to properly control your character. Move from your starting location, approach to the barricaded passage and press the jump key / button. After finding yourself out on the main deck, press the button displayed on the screen twice to do a dodge.
Draw out your sword and attack the Minion. Carefully read through the information appearing on the screen, showing you various tips, which will allow you to learn about the basics of parrying attacks, and throwing your own attacks (it can be a single attack, or a series of them). After defeating the Minion (you will earn 75 Glory Points for each and every one of them) run to the cannon located on the left side and press the action secondary weapon usage key / button (being pistol at the very moment).
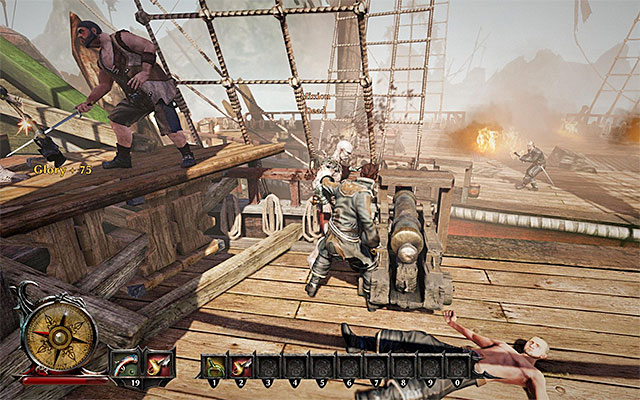 Attack the monsters one after another, while training yourself in the art of melee fighting.
Attack the next Minion and, after eliminating him, wait for a cutscene to show on the screen. After finding yourself out on the deck of a neighboring ship, continue attacking its crew. In accordance with the game's suggestion, you should practice throwing out your stronger attacks now, which require you to hold a certain key / button for a while. Unfortunately, and quite obviously, this method is quite risky, as your attack can be interrupted. If it successfully lands, you will deal a lot more damage this way. Eliminate all the enemies located on the deck.
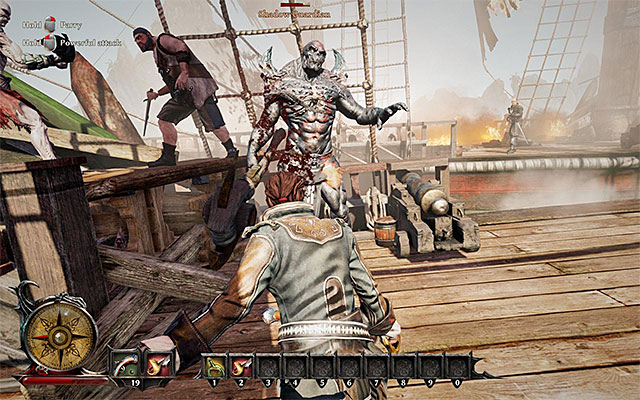 Try to dodge the enemies' attacks and help yourself with rum if you are taking a lot of damage.
At the very end of the prologue, you will encounter a Shadow Guardian. This foe is incomparably stronger than regular enemies you've faced before. Practice parrying attacks and dodging enemy attacks to the side. Attack the enemy whenever he misses his hits, continuously depriving him of his health. If you suffer major wounds, press the key / button responsible for selecting Rum from the quickbar. It will allow you to heal a part of your character's health bar. Defeating the Shadow Guardian (220 Glory Points) will end the prologue, which, as it appears, was only a nightmare.
Rewards for completing the quest:
How to unlock the quest: Automatically after completing the "Prologue".
Quest giver: Patty (point 1 on the map)
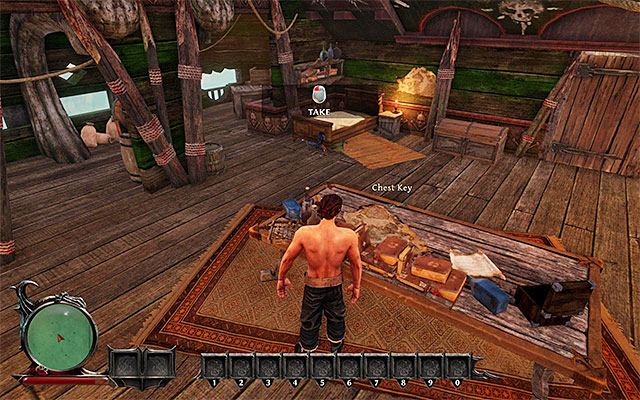 You will need a key to open the chest.
At the very beginning, listen to the conversion with Patty - main character's sister. After regaining control over the Nameless Hero, search through the captain's cabin of the ship docked near the Crab Coast (point 1 on the map). Examine the main table and collect the Chest Key. Afterwards, approach the chest, open it and collect Steelbeard's Blade, Duelling Pistol, Black Tricorne Hat, Good Coat, Provisions, Rum and Bullets.
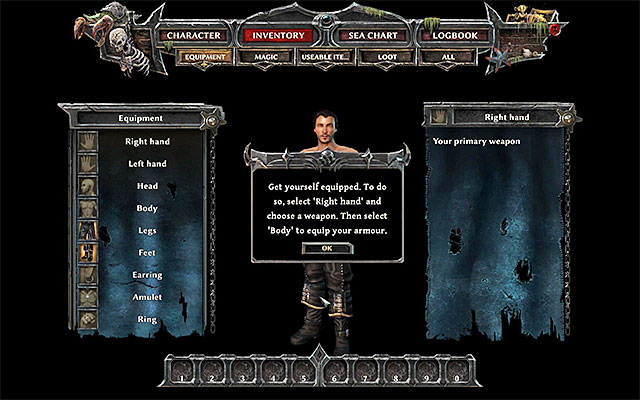
Before you leave the captain's cabin, it would be wise to equip all the items you've just collected. Open up your inventory (above picture) and start selecting the items from the left side, adding them to the list of active items. It is recommended to drag Provisions to the quick bar, located on the bottom of the screen, so that you have an easy access to heal your character whenever the situation calls for it. After completing the process of equipping the Nameless Hero (you will be rewarded with 100 Glory Points) exit the captain's cabin, which will complete the current quest.
Rewards for quest completion:
How to unlock the quest: Automatically after completing the main quest "Ready for the Island".
Quest giver: Patty (point 2 on the map)
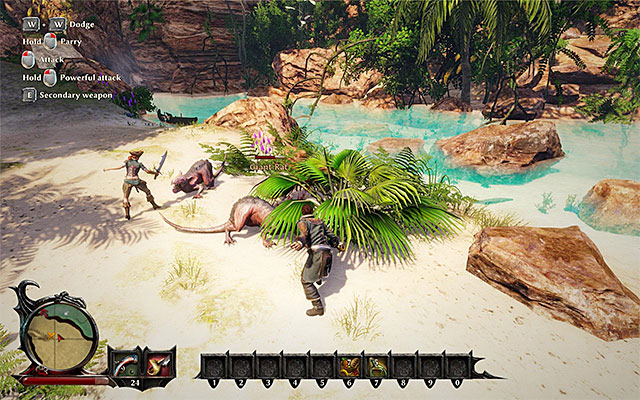 Overgrown rats aren't any threat for you.
Note - Patty has joined your party. During your journey to the temple you can count on various cutscenes with her, as well as an assistance in battle, which she will surely provide.
The quest begins on the beach of Crab Coast (point 2 on the map). After listening to the conversation with Patty, you can start exploring the coast or depart in the direction of the temple. If you've chosen the latter, go along the pathway located to the West of your starting location (point 2a on the map). At the very beginning of your journey you will encounter Giant Rats. They are easy to get rid of, and you will earn 50 Glory Points for killing each of them.
Note - distancing from the path leading to the temple will activate a cutscene of a conversation with Patty. She will try to convince you to focus solely on the main quest, but you can ignore her and start exploring the Crab Coast at this very moment (you will be able to in the latter part of the game as well).
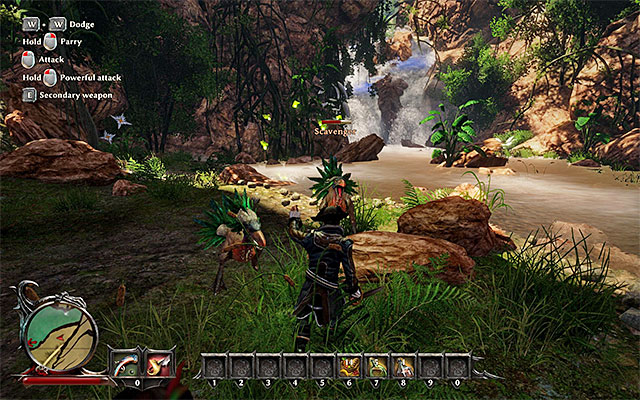 Use your dodges to prevent yourself from taking any unnecessary damage while fighting Scavengers.
As soon as you enter the jungle, the first chapter of the game will officially start and you will be immediately attacked by a group of Scavengers. Those large birds are extremely agile. As they can easily interrupt your attacks, don't even bother to use your charged ones. Instead, try to rely on parrying their attacks, dodging and the usage of ranged weaponry. Each Scavenger killed is worth 50 Glory Points. After killing them, yet another cutscene with Patty will activate. She will suggest to examine the body of a pirate near the river, which is connected with an optional quest "Race Against the Unknown Opponent".
Note - the description of the optional quest mentioned above can be find in a separate section of this guide. It's worth to take care of it immediately, as the further parts of this quest will be completed along the path to the temple.
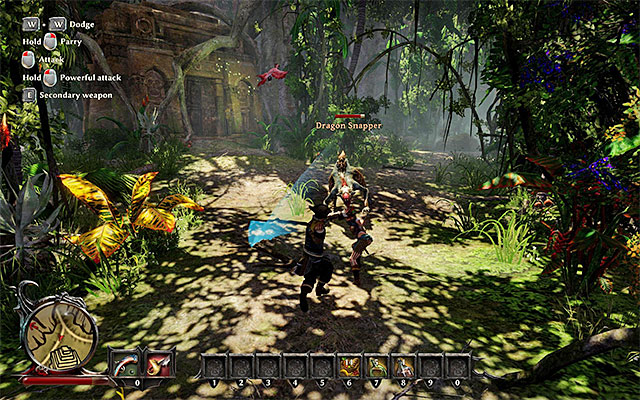 The giant monster can be either avoided or killed.
Continue your journey along the main path, leading to the temple. The main character will stumble upon a huge monster called Dragon Snapper. If you want to kill this beast, you will complete an optional quest "Take Out The Dangerous Carnivore". If you don't want to risk it, you can simply avoid the monster using your sprint. It is recommended to take care of the foe (each enemy of that type will give you 200 Glory Points), as it's worth to explore the area and complete various tasks connected with "Race Against an Unknown Opponent" optional quest.
 Felling the tree is fortunately not a problem.
If, according to the given suggestion, you've eliminated the enemy, it's worth to take an interest in a template located nearby (point 2b on the map). In accordance to Patty's suggestion, approach the temple's closed doors and pull the lever to open them. Inside you will find a chest with Gold, Crystal Torch and Book. Leave the temple and depart to the West. After reaching a blocked passageway (point 2c on the map) approach a Rotten Tree and press the button shown on the screen to cut it down. You can now cross the makeshift bridge.
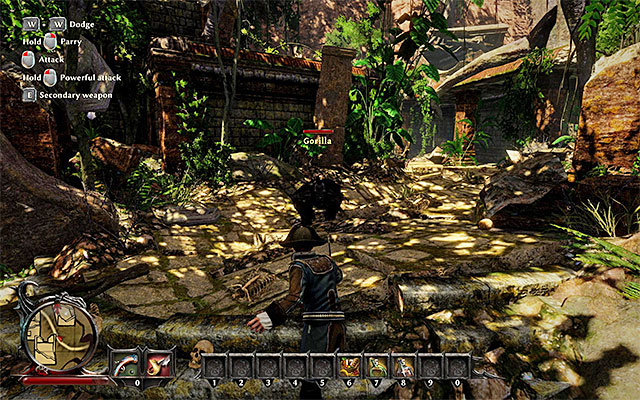 Try not to lose too much of your energy while fighting with the Gorilla.
The heroes will soon reach a destroyed village (point 2d on the map). You will have to defeat quite a difficult foe, called Gorilla, here. If it is possible, try to attack the enemy from a safe distance, using your pistol. Otherwise, rely on parry and dodge. The good news is that you will be awarded 200 Glory Points after killing the beast. You can now examine the rest of the village (watch out for the Ghouls and Monkeys) and collect a lot of different treasures (a powerful Rain of Fire spell, for instance), or go to the North without exploring anything.
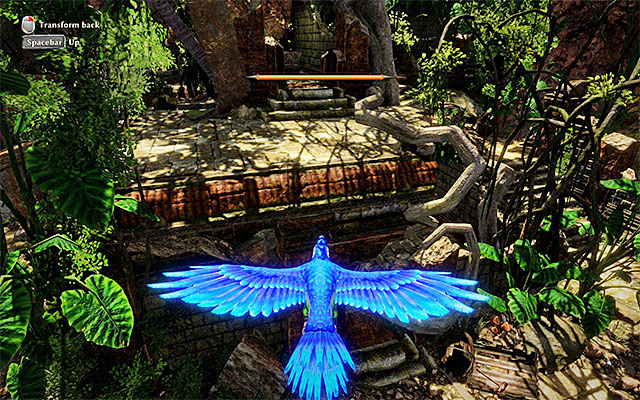
After reaching the Northern part of the village, Patty will suggest you to complete the next part of the tutorial. This time, the plan is to reach a seemingly inaccessible top shelf (point 2e on the map). You can do this by activating the Parrot Flight spell - the scroll needed to cast it can be found in one of the nearby chests. Drag the scroll on the quickbar, activate it and, after turning yourself into a parrot, try to get to the shelf (shown on the above picture). The mentioned shelf contains the next Parrot Flight scroll and a chest with a Sparkling Gold Ring, Rum and 116 pieces of Gold. Additionally, you will be awarded 100 Glory Points for trying out the spell.
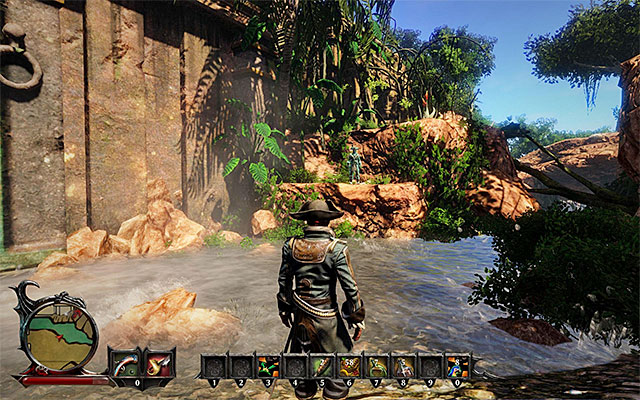 The place in which you will start climbing.
Get back to Patty and continue your journey to the North. The nearby glade (point 2f on the map) is occupied by three Pirates - confronting them is a part of an optional quest "Race Against an Unknown Opponent". After dealing with the pirates, listen to the conversation with Patty, concerning the discovery of the temple's entrance (you will have to do it alone, unfortunately). Depart to North-East, arriving at a shelf, on which, once more, a ghost of a pirate will appear (point 2g on the map). You will have to climb yourself up, until you reach the side entrance to the temple.
Note - there's a campfire in the pirates' encampment, and you can use it too cook your freshly acquired raw meat.
Note - Patty will leave your party for a short time, so don't forget that in the upcoming battles you will have to deal with the enemies on your own.
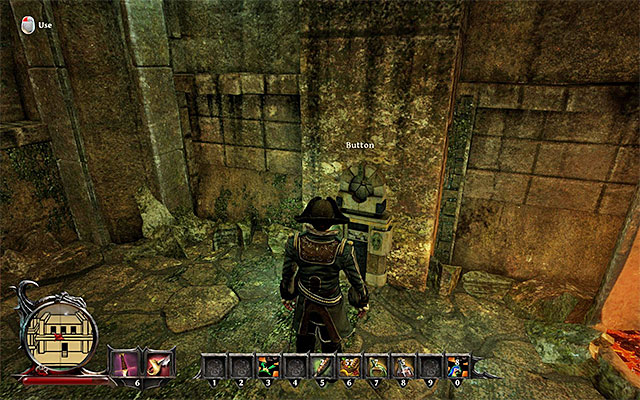 A button.
Brace yourself, because as soon as you enter the temple, the Nameless Hero will be attacked by a group of Giant Rats. Don't let the enemies to corner you and heal your character whenever its needed. In the next chamber you will stumble upon a dead pirate - pick up the Throwing Daggers lying near him. Soon after this, you will arrive at a hall with mechanism controlling the drawbridge (200 Glory Points). Press the button (100 Glory Points; point 2h on the map) and go outside to let Patty rejoin your party.
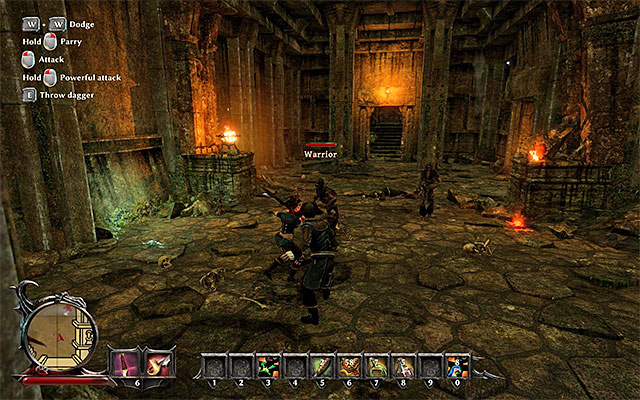 Kill all the enemy warriors.
Begin your march in the direction of the North temple hall (100 Glory Points). You will encounter a group of Warriors here, but they aren't stronger than the pirates you've met a while ago. Each enemy you defeat will award you with 100 Glory Points - if you defeat all of them you will be given 100 Glory Points as well. You can spend some time exploring the surrounding rooms and corridors of the temple (most of them alone, with the help of Patty, unfortunately), or continue with your journey to the North.
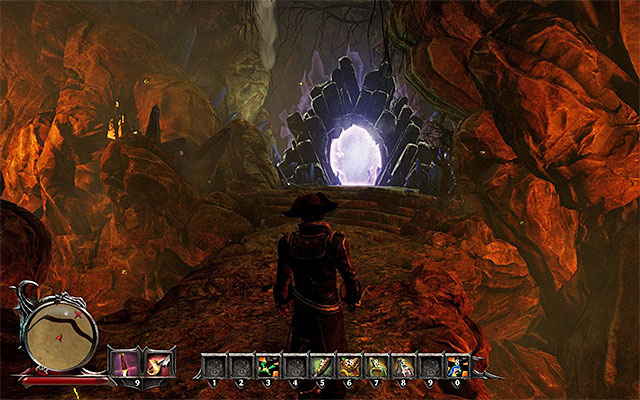 The Portal.
After reaching the new bridge (point 2i on the map), a group of Hellhounds will block your way - defeating them is a part of an optional quest "Creatures from Hell". After dealing with the devil's spawn, continue going to the North. A linear path will lead you to a portal and the quest will be completed.
Note - Patty will now permanently leave your party. This isn't the only serious change, as you will lose all your character's attributes and abilities upon death.
Rewards for completing the quest:
How to unlock the quest: Automatically after completing the main quest "Hunting for Treasure".
Quest Giver: Bones (point 3 on the map)
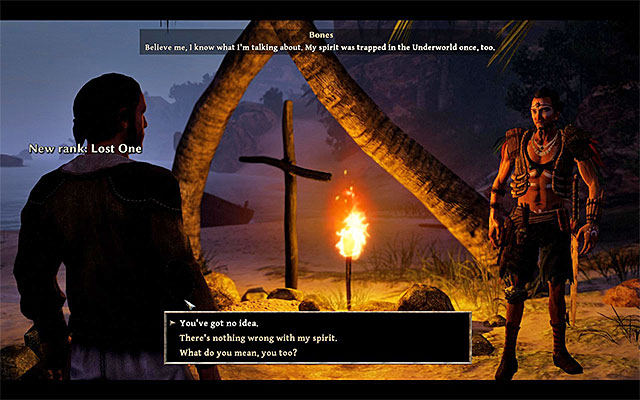 Conversation with Bones.
The quest begins with a conversation with Bones on the beach (point 3 on the map), from which you will learn that he resurrected your character from the dead. During this conversation it is recommended to select the dialog options with care, as they will impact the Soul parameter of Nameless Hero. It's a characteristic symbolizing the humanity level of the main character. For example, if you express concern for the crew during the conversation will award you with positive soul points and improve your humanity level, whereas being harsh towards Bones will result in being awarded the negative soul points and a minor loss of your humanity.
Note - besides this very quest, an additional main quest called "Only Worth Half as Much" was unlocked. It's a very long quest, connected with visiting the headquarters of the three main fractions of the game.
Note - the recent death of your character means a few interesting things and changes to the game. The Nameless Hero has lost the title of a captain, as well as all of his attributes and abilities. Only a small portion of his equipment and attire was left (all of the remaining items from the inventory were left intact). From this moment onwards you will be able to develop your character by accumulating Glory Points. An Astral Vision mode was unlocked as well.
Note - Bones just joined your party.
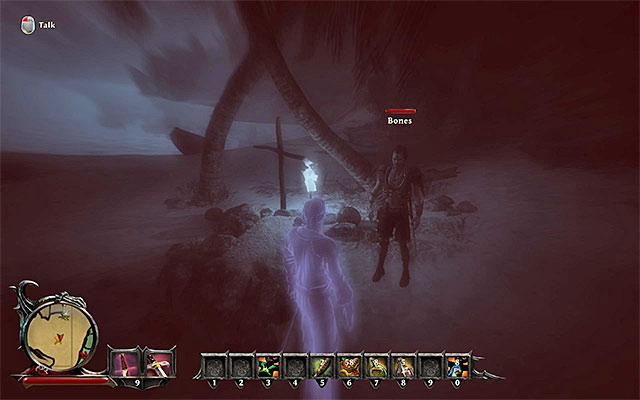 Astral Vision will help you with exploration in the future.
After completing the first conversation with Bones, you will be able to complete two important activities. First things first, you will be offered to spend your accumulated Glory Points to increase the attributes of Nameless Hero (you don't have to spend all of them at once, though). Secondly, you will be able to try out the Astral Vision, which will prove helpful when searching for various objects of surroundings. At the time a very basic version of it is available to you, but as the game progresses, you will be able to further expand the ability.
Note - it is recommended to speak with Bones again to use all of the possible dialogue options. It will allow you to unlock two more main quests called "Report for Admiral Alvarez" and "New Allies", as well as two optional quests connected with the Crew - "Find Jack the Lighthouse Keeper" and "Find Patty".
 Interact with the steering wheel of the boat and select the destination.
To leave the Crab Coast you will have to talk to Bones at any given time and the option to get back to his Sloop (100 Glory Points). After finding yourself on the boat, interact with the steering wheel, which should bring out the map of the world.
Note - as was mentioned in the introduction to this guide, you are given a full freedom of choice concerning the order of quest completion and visiting various main locations. Select the place which interests you the most and go to the corresponding section of the guide.
Rewards for completing the quest:
How to unlock the quest: Automatically after completing the "Hunting for Treasure" quest.
Quest giver: Bones (point 3 on the map).
It's an immensely broad quest, which you will complete by doing the main campaign of the game. The plan requires to you visit the headquarters of the three main fractions in the world of the game with the hope of restoring the soul of the main character. The fractions can be visited in any order you like and each is connected with at least a few more main quests. These are the possible choices:
Note - after selecting the fraction you want to start with, go to the corresponding section of the guide (main quests of the Calador bay, for instance) and read through the further description. Additionally, there you will find all the information you need in order to complete the quests connected with a given fraction.
How to unlock the quest: through a conversation with Bones (in any given moment).
Quest giver: Bones
Note - this quest can be unlocked in any given moment, more specifically during a conversation with Bones. After the quest is added to your Journal, you can begin completing the further parts of the quest chain.
It's an immensely broad quest, which you will complete during the second chapter of the main campaign. The plan requires you to gain support of the three main fractions in the world of the game. The fractions headquarters can be visited in any given order - you will have to earn the trust of each and every one of them. The main fractions are as follows:
Note - after selecting the fraction you want to start with, go to the corresponding section of the guide (main quests of the Calador bay, for instance) and read through the further description. Additionally, there you will find all the information you need in order to complete the quests connected with a given fraction.
The above map contains the reference points to all of the locations visited during your journey on the Crab Coast, while doing the additional quests. The red points symbolize the starting points of additional quests, whereas the green ones show the locations visited during the completion of the quests.
Note - it is recommended to check out the map connected with the main quests of Crab Coast, as many of the main and optional quests are closely connected.
How to unlock the quest: Automatically during the main quest "Hunting for Treasure".
Quest Giver: Patty (point 1 on the map)
 A dead pirate.
The chance to start this additional quest appears during the main quest of the storyline "Hunting for Treasure", associated with reaching the ancient temple. After eliminating one of the monster groups (point 1 on the map), Patty should suggest the Nameless Hero to examine the body of a dead pirate, located near the river (point 1a on the map). Go to the place and search the body, acquiring 23 piece of Gold, Cheap Liquor and a Pistol as well.
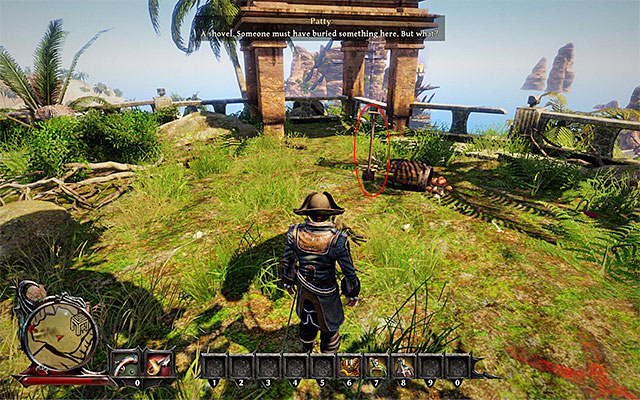 The hiding place of the shovel.
Go to the small glade located to the South of the body of a dead pirate (point 1b on the map). After reaching it, locate the Shovel and pick it up. Take position near the red X mark painted on the ground and press the appropriate key / button to interact. Wait for the Nameless Hero to dig up a hole (100 Glory Points). Search the hole, collecting 1080 pieces of Gold from it.
 You can make the fight a lot easier by using the Rain of Fire scroll.
The next part of this quest can be completed after reaching the glade located to the South of the main temple (point 1c on the map). You will stumble upon a group of three hostile Pirates here, which you must obviously defeat. You can make the fight a lot easier by using the Rain of Fire scroll, which you should have found in the village. If you don't have the spell, or don't want to use it, rely on your ordinary attacks, remembering to take the targets one by one. You will be awarded 100 Glory Points for killing each pirate, as well as another 100 Glory Points for defeating all of them. Afterwards, search through the bodies of killed enemies.
 A dead captain.
The last activity to complete during this optional quest is to examine the dead body of Captain Rawlings. It's located inside one of the temple halls (point 1d on the map), inside of which you will fight with two Warriors. Additionally, you will find Rum and 254 pieces of gold by searching the body of the captain. Speak with Patty to end this mission.
Rewards for completing the quest:
How to unlock the quest: Automatically during the main quest "Hunting for Treasure".
Quest giver: - (point 2 on the map)
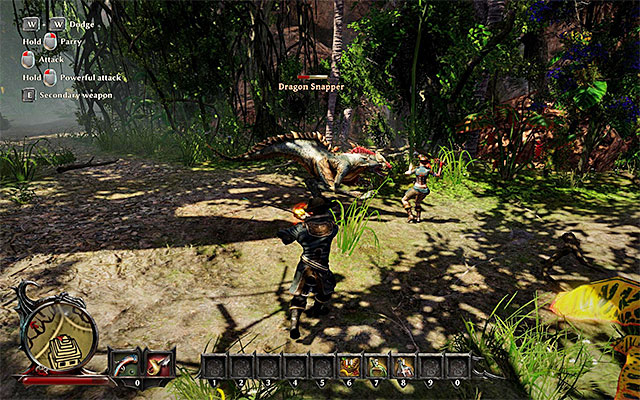 Attack the beast whenever it turns towards Patty.
The chance to complete this quest will appear during the main quest of the storyline "Hunting for Treasure", associated with reaching the ancient temple. During your trip, your party will stumble upon a huge beast called Dragon Snapper, which must be killed. Use the fact that Patty will frequently draw the attention of the monster to your advantage and throw your charged attacks at the foe without the fear of it interrupting you. Optionally, you can use magic and / or ranged weaponry.
Rewards for completing the quest:
How to unlock the quest: Automatically during the main quest "Hunting for Treasure".
Quest giver: - (point 3 on the map)
 Watch out for the Hellhounds swift attacks.
The chance to complete this quest will appear during the main quest of the storyline "Hunting for Treasure", associated with reaching the ancient temple. Just before you reach the portal, your party will be attacked by a group of Hellhounds. After the battle beings, try to weaken one of the enemies. Avoid the swift attacks of Hellhounds, be it by the use of parrying or dodging. For killing each of the hounds you will earn 50 Glory Points.
Rewards for completing the quest:
The above map contains the reference points to all of the locations visited during your journey on the Calador Bay, while doing the main quests. The red points symbolize the starting points of quests, whereas the green ones show the locations visited during the completion of the quests.
Note - it's recommended to check out the map associated with the additional quests from Calador, as many of those are connected with the main quests of the storyline.
How to unlock the quest: automatically after meeting any of the Demon Hunters.
Quest giver: -
 The entrance to the Citadel.
This quest can be given to you by a variety of NPCs. You will have to meet one of the Demon Hunters located in the Calador Bay. It could, for instance, be Nate, who you will meet in a fishing village, close to the starting point in this location. Regardless of the source from which you've learned about the Demon Hunter's Citadel and / or druid named Eldric, after reaching the main entrance to the Citadel (point C on the map) you will be awarded with 100 Glory Points. Approach the Eastern section of the Citadel and speak with Eldric, ending the quest as well.
Rewards for completing the quest:
How to unlock the quest: automatically after completing the "Hunting for Treasure" quest, which is done during your stay on the Crab Coast.
Quest giver: Bones
 Eldric
This quest was unlocked before you've even reached the Calador Bay. It was done during the completion of the Prologue to the main campaign, or more specifically when the main character was brought back to life by Bones. This quest is associated with visiting the headquarters of the three main fractions in the game, in hope to restore the soul of the Nameless Hero. Druid named Eldric (point 2 on the map) is one of the NPCs you must meet, as he represents the interests of the Demon Hunters. Speak with Eldric, from whom you will receive additional main quests connected with the fraction.
Note - meeting Eldric is not synonymous with joining with the Demon Hunters. This type of choice will be given to you in the future.
Note - Eldric is one of the ability trainers in the game. You can ask him, during your conversation, for a training (you have to pay for it, obviously).
Note - if you are inside of headquarters of a different fraction, go to the appropriate section of this guide (main quests of the Kila Island or main quests of the Taranis Island).
Rewards for completing the quest:
How to unlock the quest: Through conversation with Bones (in any given moment).
Quest giver: Bones
 Eldric will ask the Hero for help.
As was previously mentioned in the Crab Coast main quests section, this quest can be unlocked in any given moment of the game, by talking with Bones. The quest is composed of three different parts, and the part associated with the Demon Hunters faction can be done while you are in the Calador Bay. You must meet with the druid Eldric, located in the Demon Hunter's Citadel (point 2 on the map). During the conversation offer your services to the druid. Eldric will ask the Nameless Hero to support the Demon Hunters, who suffered grievous wounds during the encounter with the Shadow Lord.
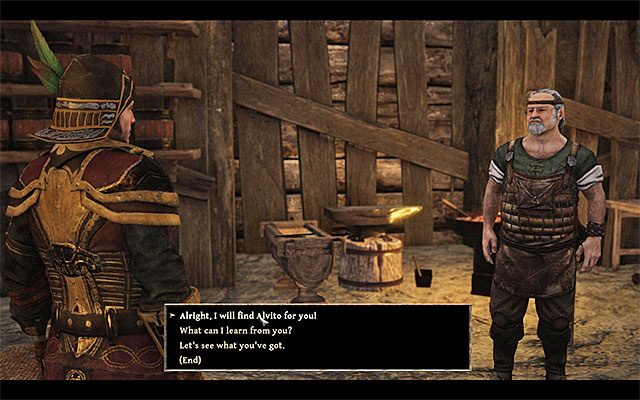 Wilson is looking for his missing assistant.
Before you leave the Demon Hunter's Citadel, go inside the room with a smith called Wilson (point 2a on the map). During the conversation, the man will ask the Nameless Hero to find his missing assistant Alvito, suggesting you to start your search from the nearby inn, and to examine the abandoned mine, located to the North from the Citadel.
 Hanna can be found on the graveyard.
After leaving the Citadel, it's recommended that you set your steps towards a graveyard located to the North. Here you will meet Hanna (point 2b on the map), who is a ghost. It's worth trying to speak with her - you will learn that she can't rest in peace, because her amulet was stolen. You can react to this confession in three different ways:
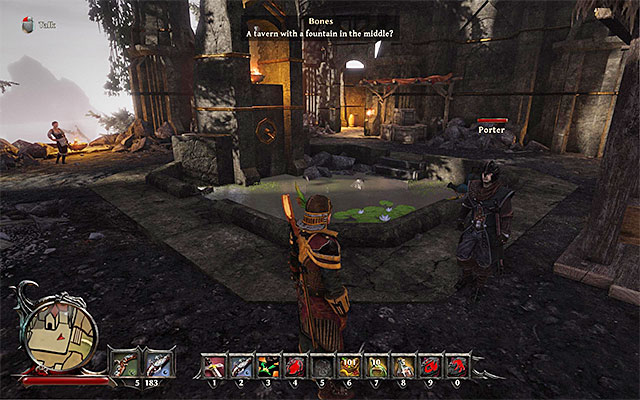 Porter
Afterwards, go to the tavern located to the West from the Demon Hunter's Citadel (point 2c on the map). You should be able to notice Porter right before the entrance to the tavern - speak with him about the stolen amulet. Porter will tell you that he gave the amulet to Yvette. The Hunter won't be having any problems with giving Hanna back her amulet, but it's the Nameless Hero who will have to convince Yvette to give the item back.
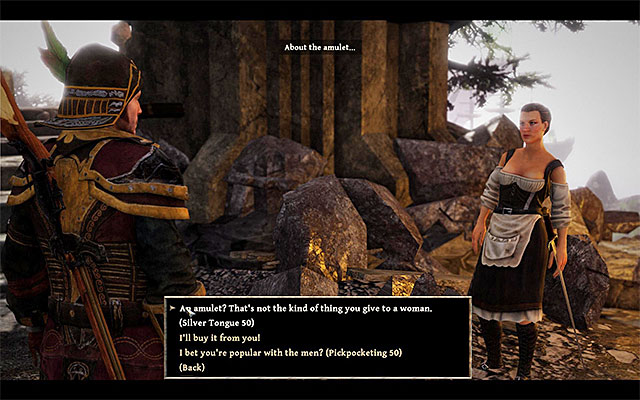 The amulet can be retrieved in a few ways.
Approach Yvette and start the conversation. It's good to take a positive approach towards Yvette at the very beginning and give her 30 pieces of gold. As for the amulet, you can retrieve it in a three different ways:
Before you finish your conversation with Yvette, ask her about Alvito, Wilson's assistant. The woman will confirm that Alvito went to the abandoned mine located to the North of the tavern.
 Keeping the amulet for yourself is the best method.
After collecting the amulet (Yvette's Amulet) (100 Glory Points) you can now go back with it to Hanna. You can choose three options mentioned above - you can give the amulet to Hanna (100 Glory Points), persuade her and keep the amulet for yourself (100 Glory Points), or provoke a fight (100 Glory Points for every Skeleton killed). The best method is the second one, obviously, because you will end the quest and you will be able to keep the amulet for yourself (it improves some of the stats associated with magic and alchemy). Regardless of your decision, go back to Porter and inform him about solving the problem. Thanks to that, you will earn 200 Glory Points, as well as 200 pieces of gold (Porter will go back to the Citadel).
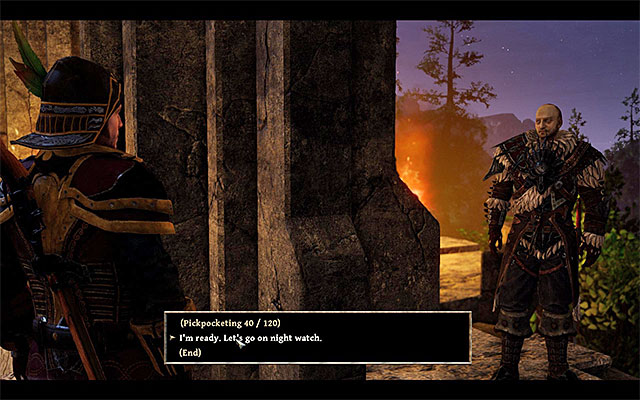 You can depart on patrol only during the night.
Near the tavern you will stumble upon another Demon Hunter named Mason (point 2d on the map) - agree to his proposition for a joint patrol. To be able to depart on the mission, you must talk to Mason late at night. After the patrol starts, go after Mason and be ready to eliminate a few groups of monsters - they will most certainly consists of Scavengers, Minions and a Shadow Guardian, who you should be extra careful off (attack him when he's fighting your allies). After the patrol end, you will receive 100 pieces of gold and 300 Glory Points (excluding the points you've earned for killing the mobs, obviously). Afterwards Mason will return to the Citadel.
After completing all of the tasks in the tavern and on the graveyard, you should depart to the North. In a close vicinity to the cemetery you will find the entrance to the abandoned mine, which can be seen on the above screenshot (point 2e on the map). Do not rush with going through it, as there are Scavengers and Black Ghouls nearby. You should approach them with caution, especially because they may operate in groups.
 Alvito is dead.
Enter the mines and start eliminating the nearby Skeletons. A lone Skeleton poses no real threat, but don't ever try tackle a number of them at once. After securing the cave, locate the corpse of Alvito - examine them, thanks to which you will earn 100 Glory Points and Alvito's Notes. You can now leave the caverns. Return to Wilson in the Citadel (point 2a on the map) and pass the bad news to the smithy. You will be rewarded with 200 Glory Points and 200 pieces of gold for your efforts.
Note - from this moment onwards, you will be able to collect Iron Ore for Wilson. For each piece of ore you bring him, you will be rewarded with 25 pieces of gold.
 Cyril is located in the area swarmed with monsters.
Afterwards, go further into the North. It's recommended to stick to the central part of the map during your journey, as the Western path (the one running near the water) is "protected" a lot harder by the monsters. Look for a Demon Hunter called Cyril along the way (point 2f on the map) - speak with him as soon as you find him. From Cyril you will learn about the fallen soldiers and asked to get to their bodies, to retrieve their personal belongings.
Note - Cyril is a dealer as well. You can now examine his offer - or do so later, when he goes back to the Citadel.
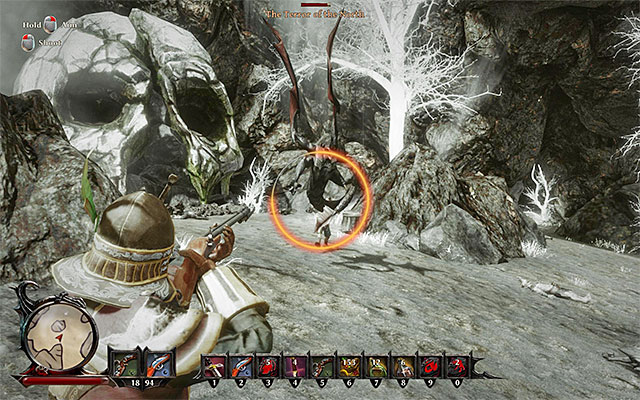 There's a mini boss awaiting to take care of.
Make sure that you're well prepared to the upcoming battles and go towards an elevation to the North (point 2g on the map). Eliminate a few Black Ghouls and Minions along the way, and, after reaching the elevation, get rid of the Skeletons. If you try to examine the bodies of the fallen Demon Hunters, a mini boss called Terror of the North will appear. Try to be mobile and on the move at all times during combat - the creature is very mobile. Use the best weapons or magical attacks, because the foe is extremely durable. After defeating the Terror of the North, you will get rewarded with a rather skimpy 100 Glory Points.
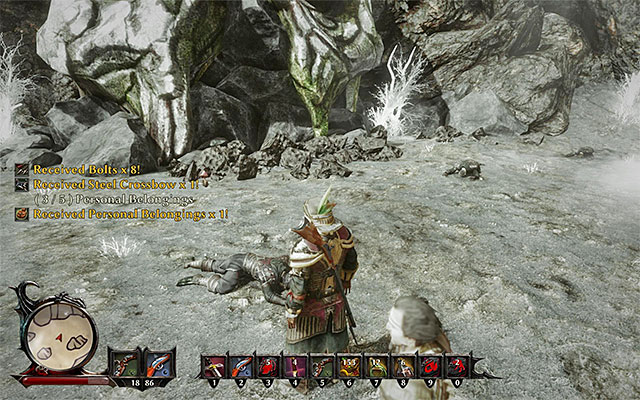 Examine all the 5 bodies.
Only after you've secured the whole hill try to approach the corpses and examine them for their Personal Belongings, and other valuable items (a crossbow, for instance). There are 5 bodies to examine and you will receive 100 Glory Points as a reward. You can now go back to Cyril (point 2f on the map) to speak with him. The Demon Hunter will begin a proper burial ceremony - afterwards, you will be given 100 Glory Points, Cyril will go back to Citadel and you will receive yet more 200 Glory Points.
 You will find Fenn near the graves of the murdered villages.
Head yourself in the direction of a small farm, located to the East from the place you've met Cyril. After reaching the place, you will learn that the farm was completely destroyed. Find a Demon Hunter named Fenn nearby (point 2h on the map) and initiate a conversation. From the Hunter you will learn, that Iona survived the attack and you will be asked to find her.
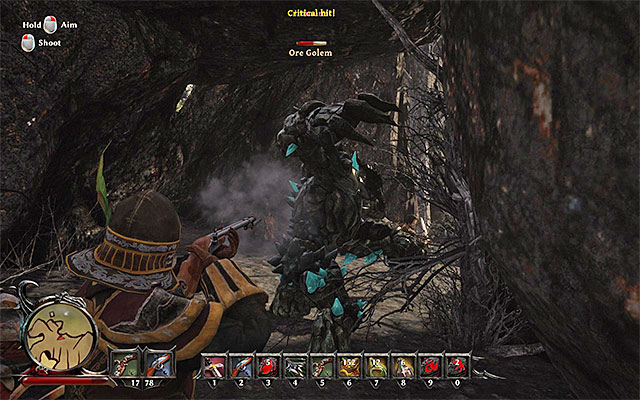 You can fight the golem or try to sneak by him.
Iona hides to the North of your actual position (point 2i on the map). It's best to get there by a narrow passageway located near the destroyed farm. During your trip your party will stumble upon some smaller enemies, but the biggest threat can be found near a magic circle. Here you will find an Ore Golem. You can try to sneak by and avoid fighting it, but as you will be coming through this area soon, it's best to just eliminate it now. The golem is obviously extremely strong, so just focus on avoid its attacks and try to find a safe moment to throw your own attacks (from a safe range, or when the enemy focuses itself on your ally). Good news is that for defeating the golem you will be rewarded with plenty of experience - 400 Glory Points.
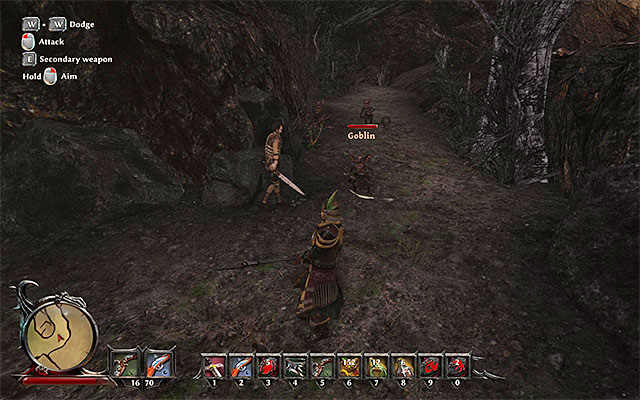 The passageway leading to Iona.
Finish your journey to Iona, by killing a few Goblins located on the path. After a short conversation with Iona, you will all set off in the direction of the tavern (point 2d on the map). You have to move directly to the South, because going off the road will result in Iona refusing to continue going with Nameless Hero. Leading Iona back to the tavern will give you a reward - 100 Glory Points. It's crucial to go to Fenn as well (point 2h on the map) to tell him good news. The Hunter will go back to the Citadel and you will be given 300 Glory Points and 150 gold.
 The passageway leading to the castle ruins.
Now it's a good time to examine the ruins of the castle, located in the Western part of the Calador Bay (point 2j on the map). After reaching the encampment (point 2k on the map) you will meet a Demon Hunter named Winter. It's good to speak with and invite him to join you in your mission to murder Shadow Lords, who is hiding in the ruins of the castle.
Note - Winter can die during the trip, so it's good to keep an eye on him and keep him safe, helping him whenever he is surrounded by a bigger group of enemy monsters. Keeping him alive isn't necessary to finish the quest, but you will earn additional rewards if you can do that.
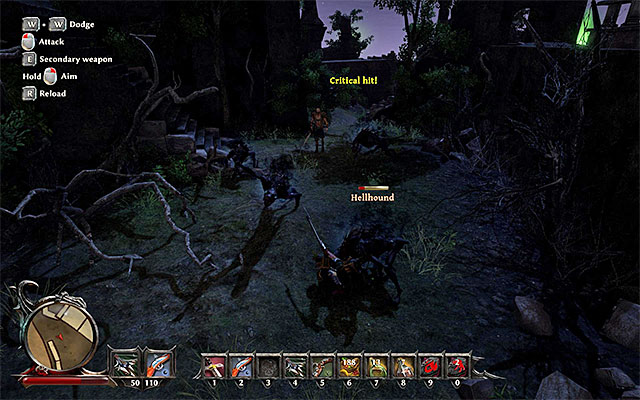 Eliminate the enemies by cooperating with your party.
Crossing the castle is very linear, as the place in which the Shadow Lord is hidden can be accessed by a single passageway only. Depending on your preferences, you can either go after Winter all the time, or try to examine the nearby ruins thoroughly. As far as the threats go, you will face Minions, Skeletons, Hellhounds and Black Ghouls in the ruins of the castle. You have fought each of those enemies in the past, so you should have no problems, but watch out for places with larger enemy groups.
The hideout of Shadow Lord of Cowardice can be found in the Northern part of the castle (point 2l on the map). It's a good idea to prepare properly before the fight with the boss. Patch your character up and heal any wounds sustained in previous battles, and add some medications or healing scrolls to the quickbar. You can also climb up the castle walls (as can be seen on the above screenshot), to take a good firing position for your ranged attacks, but it's not necessary.
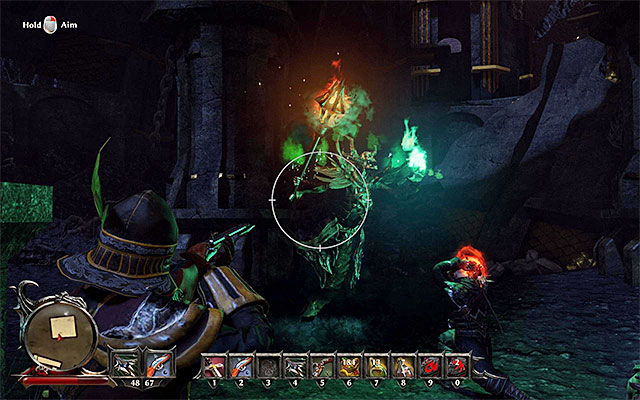 Shadow Lord can be attacked either from up close, or with ranged attacks.
After starting your encounter with the Shadow Lord, it's advised to take out his underlings first. After the boss is the last enemy standing on the battlefield shift your focus onto him. If you prefer melee combat to fight him, focus on dodging his attacks and try to find an opening to attack him with charged attacks. If you, however, like to attack from afar, it's wise to use strong spells and / or muskets, which allow you to keep your safe distance. You will be rewarded with 500 Glory Points for defeating the Shadow Lord.
 Speak with Winter (if he has survived) and examine the body of the Shadow Lord.
Before you leave the castle ruins, it's a good idea to do something. First things first, speak with Winter (if he wasn't accompanying you during the charge on the castle, get back to the campfire), and you will earn 2 tomes of Ancient Knowledge and 200 Glory Points. Examine the dead body of the Shadow Lord as well, picking up a Shadow Scepter and a Black Heart, which will come in handy during the Crew Quest "Black Magic Experiments".
Note - if Winter died, you will not be getting the extra Glory Points and Tomes of Ancient Knowledge, but nothing else will really change.
Note - in the castle ruins there's a grimoire associated with the main quest of the storyline "The Ancient Knowledge". Go to the description of this quest in this guide to learn more about it.
 It's good to give a proper report to Eldric.
As you have helped all the Hunters, it's a good idea to come back to Eldric located in the Citadel (point 2 on the map) and give a scrupulous report about each and every step you took. For helping each of the Demon Hunters you've met, the druid will reward you with 200 gold and 100 Glory Points, so you will be getting 600 Glory Points and 1200 gold. Besides, you will be given a set of special rewards at the very end.
Attention - you can finish this quest only if you've already met Admiral Alvarez on Antigua, when completing the "Report for Admiral Alvarez" quest. Completing it also means joining one of the three main factions available in the game (demon hunters, natives or guardians) and it is an IRREVERSIBLE decision. After joining the demon hunters, you will unlock a lot of new quests and other attractions connected to this faction (like for example buying rune magic spells), BUT you won't be able to join any other faction. You should consider this decision well and choose the faction that suits your game style best.
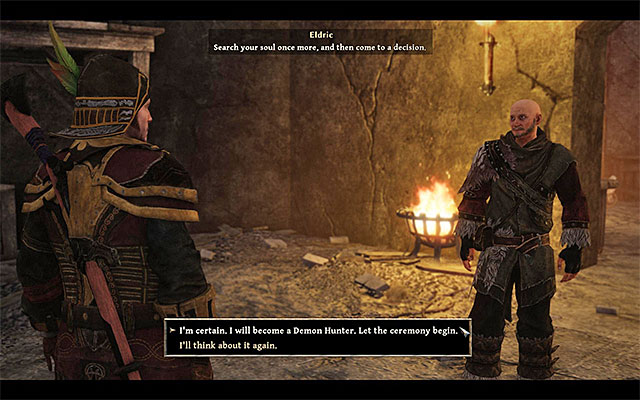 The decision about joining the demon hunters is irreversible!
If you want to join the demon hunters and you meet all the requirements (completing the tasks described on this page and meeting Alvarez), you can now talk to druid Eldric and tell him about you wanting to take the initiation process. The Nameless Hero will join the demon hunters faction and will obtain the lowest rank - Scout.
Rewards
How to unlock the quest: Through conversation with Eldric.
Quest giver: Eldric (point 2 on the map).
You will get this quest during the conversation with Eldric.During the conversation with Eldric, located in the Demon Hunter's Citadel (point 2 on the map), you will learn about the existence of tomes of Ancient Knowledge, which can come in handy in the restoration of the Nameless Hero's soul. You will be send to the castle ruins located to the West of the Citadel, where a grimoire containing valuable information is hidden.
 The entrance to the room with the grimoire.
The trip to ruins was thoroughly described in the walkthrough section of the main quest "New Allies", because the same ruins (point 2j on the map) need to be visited in the quest to murder the Shadow Lord of Cowardice (point 2l on the map). Depart on your journey to find the grimoire only if you've already defeated the Shadow Lord. Start in the same spot you've killed the beast in and head towards the Western stairs. The destination is one of the buildings located on the castle grounds (point 2m on the map) - you will have to slay a few Minions and Skeletons along the way.
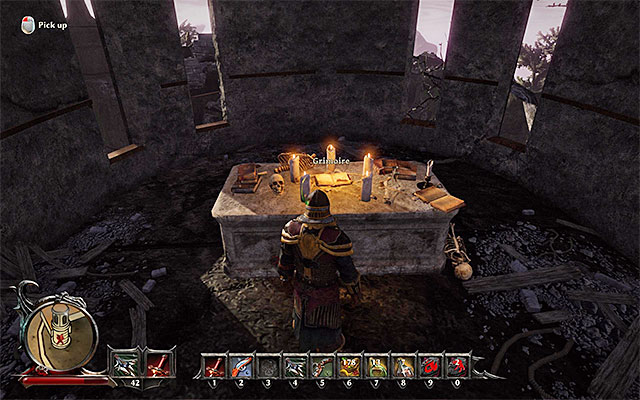 And here's the grimoire you've been looking for.
After entering the above mentioned building, use the stairway leading to the upper floor. Examine the whole floor, and you should soon be able to reach the altar on which the Grimoire is located (200 Glory Points). You can now leave this location. Go back to Eldric (point 2 on the map) and give him the grimoire. In return, you will be given some rewards.
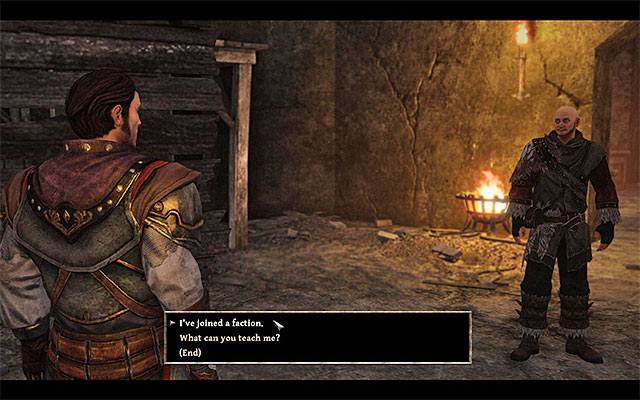 Tell Eldric about joining one of the factions
Talk to Eldric again, after you've joined one of the main factions in the game (demon hunters, natives or guardians). Listen to what he has to say about the grimoire and the ritual that may be helpful in regaining the Nameless Hero's soul. The second chapter of the plot will be completed and you will move on to the next chapter.
Rewards:
How to unlock: Talk to Alvarez (Antigua)
Quest giver: Alvarez
 Make it to the ship and talk to the captain
This quest can be started during your stay on Antigua, namely after meeting Admiral Alvarez and completing an initial task for him. Alvarez asked the hero to gather new allies that would help to destroy pirate fleet. One of the factions that you need to visit are the demon hunters from Calador.
After reaching Calador, you can head to the Citadel right away (letter C on the map) or talk to Kane, who is the captain of the ship of this faction, first. The ship is located to the south of the fishing village (number 1 on the map) and you can reach it by swimming or sailing one of the boats near the shore. When you reach it, Find Kane and talk to him. He will tell you that he's not interested in fighting pirates for the moment. Kane may change his mind if a person with high reputation presents a good plan of action to him.
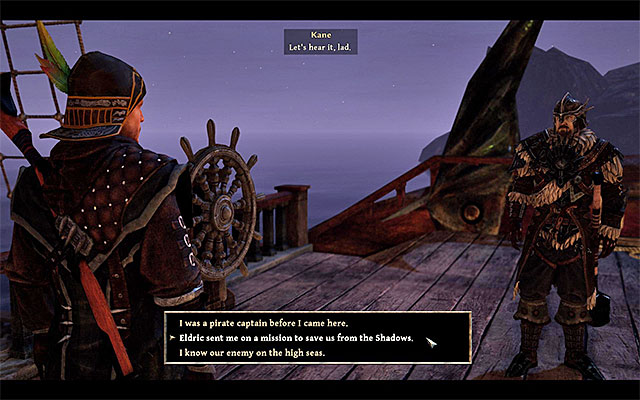 After joining the demon hunters, you can take control over the ship
Talk to Kane again, after you decide to join the demon hunters. What's interesting, you only need to be a Scout to take command over the ship. During the conversation with Kane, you will become the new captain of the demon hunters' ship.
Attention - from this moment, you can allow people to join your crew (before, some of them wouldn't join you, as you only had a small ship belonging to Bones).
Rewards:
Way to unlock the quest: Talk to Eldric.
Quest giver: Eldric (point 2 on the map)
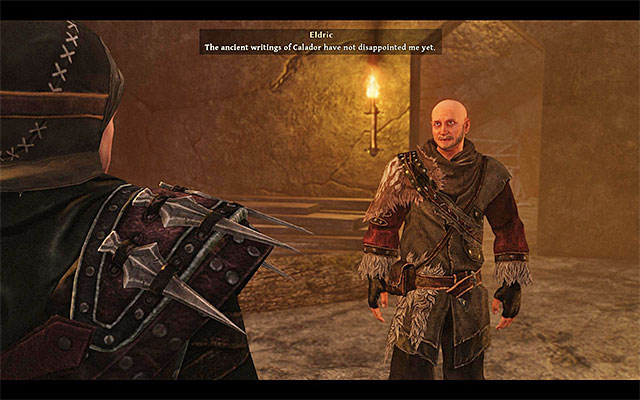 You receive this quest during the conversation with Eldric
This is the main quest of the third chapter of the game's story line, which you can unlock after completing the "The Ancient Knowledge" main quest, i.e. after you meet up with druid Eldric right after you have joined one of the three factions (and visited Admiral Alvarez). In order to add this quest to your journal, you need to meet up with Eldric (point 2 on the map) again and talk to him about the title ritual.
This quest is very complex, because there are many activities that you need to perform, to prepare for the ritual and many of them are going to take you lots of time. Therefore, the description of the quest has been divided into several smaller quests and these are:
Note - in the case of quests connected with the other locations within the game world, you need to see the other parts of this walkthrough (e.g. main quests on the Kila isle to find the walkthrough for the Sign Chani On quest).
Note - return to reading the walkthrough for this quest only after you have performed all of the activities of the abovementioned quests, i.e. when you are fully prepared for the Spirit Ritual.
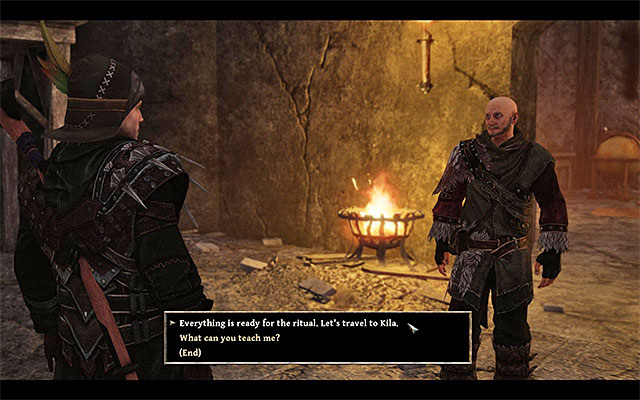 Confirm that you are ready to go to Kila.
Make sure that you have met all of the five requirements that have been described above, in detail. Only then, return to Eldric (point 2 on the map). Report to him and confirm that you want to go to the den of the Oracle on Kila, in order to perform the ritual (1000 Glory Points).
Note - again, see the chapter concerned with main quests ob the Kila isle, because it is there that the Spirit Ritual is going to take place.
Way to unlock the quest: Talk to Eldric.
Quest giver: Eldric (point 2 on the map)
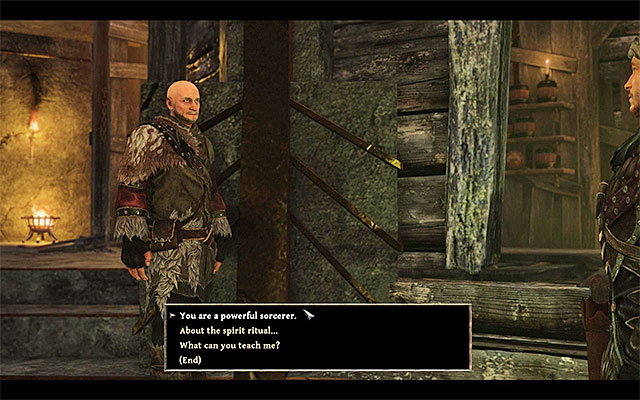 Talk to Eldric about his way to help with the ritual
You can unlock this quest after you have progressed to the third chapter of the game's story line so, after you have started the "The Spirit Ritual" main quest. From druid Eldric (point 2 on the map) you will learn that the ritual can be performed by three characters with powerful magical capabilities. Eldric is a such character, but he does not agree to help you straight away. Instead, you will first have to offer him help eliminating monsters in the Eastern part of the Calador Bay.
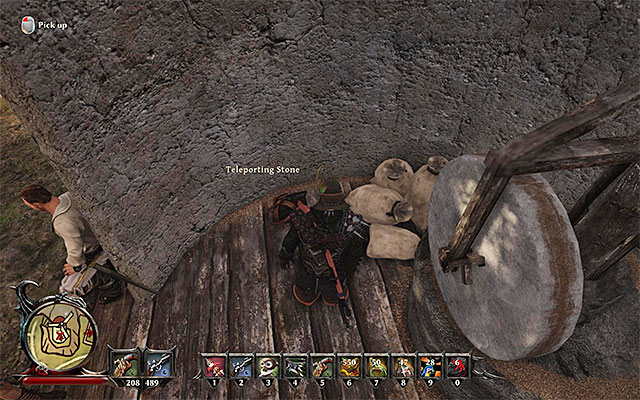 An example teleportation stone
Before you reach the den of the Shadow monsters, you will have to gain access to the Eastern part of the bay. It is inaccessible at the moment, because access to it has been blocked by the damaged bridge over lava. Listen to Eldric's plan that assumes the necessity to activate all of the teleporters around the main part of Calador, in order to form some sort of a magical net. As you probably expect, the lucky man to perform this quest is you.
Before you set out to find the teleporters, you need to make sure that you have, at least, four Teleporting Stones on you. You can find them in different parts of the game world and one stone can be used to activate any given teleporter. If you already have the stones, you can skip this step. Otherwise, you need to take a look around to find them. You can, for example, search for them at the Calador Bay, and rely on the journal to find them. The example locations of the nearby stones are:
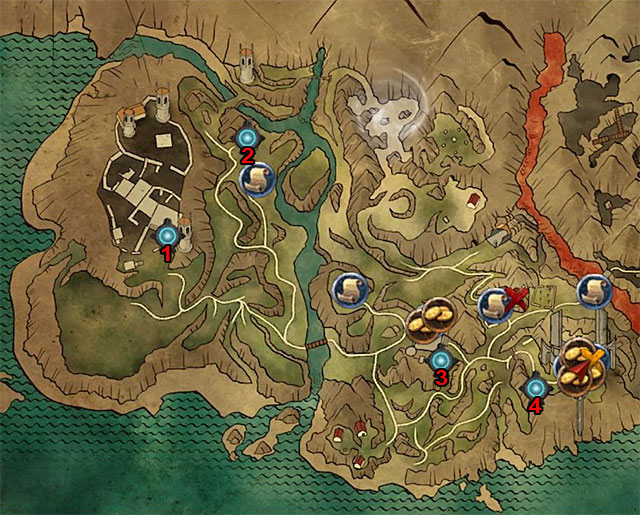
After you have obtained, at least, four stones, you can reach the teleporters (points 2n on the map) and activate them. The locations of the teleporters have been presented in the above screenshot:
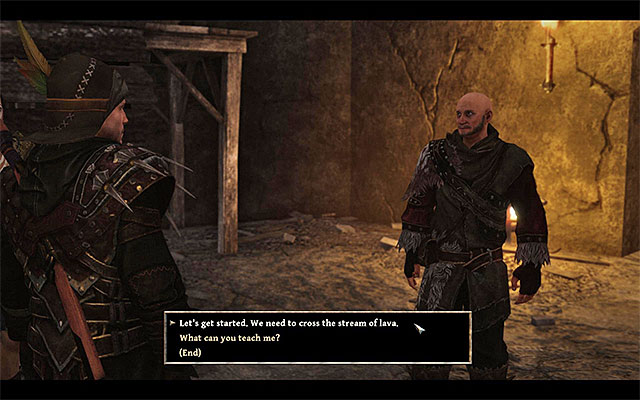 Tell Eldric that you have activated all of the teleporters and head towards the Eastern part of the bay
After you have activated all four teleporters, return to Eldric (point 2 on the map) and tell him about that (400 Glory Points). Exhaust all of the dialogue options, thanks to which a group of demon Hunters, commanded by Eldric will be able to set out to the Eastern part of the Calador Bay. At this point, you will see several cutscenes and after that, you will appear at the newly-unlocked teleporter in the eastern part of the bay (point 2o on the map) (200 Glory Points).
Note - At any point, you can return to the areas in the central and in the Western parts of the bay. The easiest way to do that is teleport, although you can also get over the bridge, over the lava river, thanks to the Parrot Flight spell.
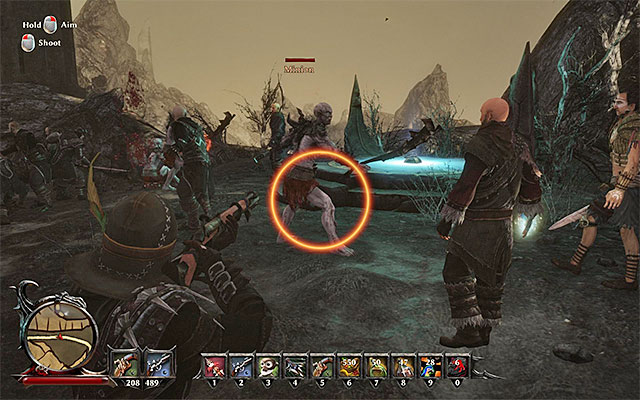 Eliminate the group of monsters
You need to get prepared because, right after the conversation, the will appear Minions around the teleporter. Fortunately, it is easy to eliminate the monsters, because the fights are participated by all the Demon Hunters. If you want to obtain experience points, try to eliminate them yourself. After the fight (100 Glory Points) Eldric and the other warriors go to the Northern camp (point 2p on the map). You can either join them straight away, or explore the newly found area to the South and to the East of here.
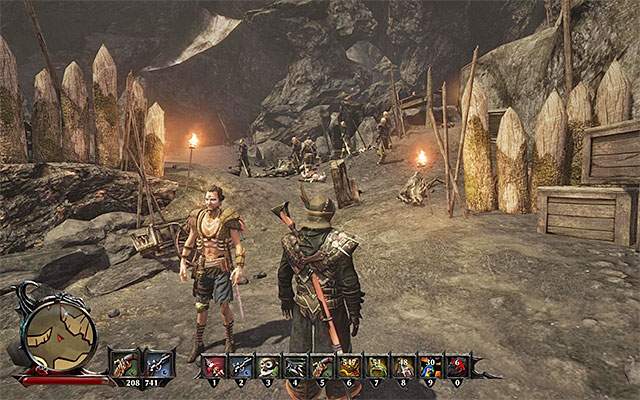 Demon Hunters' camp
I have already mentioned that the Demon Hunters are stationed close to the teleporter (point 2p on the map). I strongly recommend that you take their help while crossing the North-Eastern part of the bay, especially that none of them should die, during the fights. After you get prepared, find Eldric and confirm that you want to head towards the nearby den of the Shadow Lord.
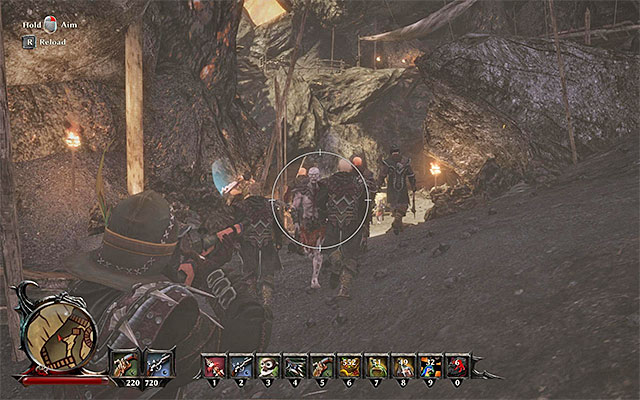 Help the hunters kill the demons
Along your path, eliminate all of the monsters around. These are going to be, mainly Hellhounds, Skeletons and Minions. In the case of the minions, you should especially pay attention the ones that wield magic and try to eliminate them in the first place. The route is linear and you do not need to explore the side corridors right now (you can take to it later on).
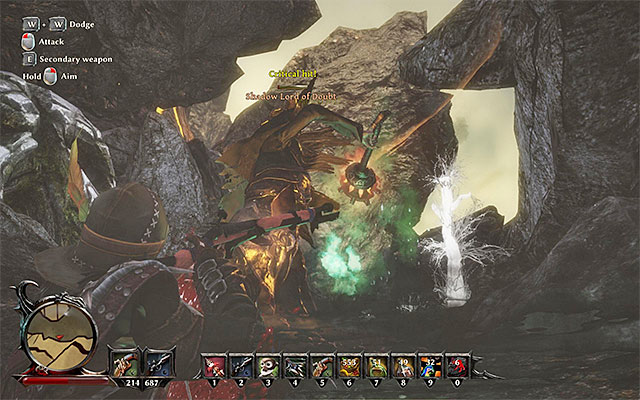 The Shadow Lord
Along your path, you will run into a Lindworm and it is best if you kill it yourself to obtain 400 Glory Points. A bit ahead, there is the den of the Shadow Lord of Doubt (point 2r on the map). For obvious reasons, he is very tough but, thanks to the help from the Hunters, you do not need to fight him by yourself. Keep running a lot, dodge the Lord's attacks and wait for opportune moments to land strong blows. After you have eliminated the Shadow Lord, you will be rewarded with 600 Glory Points.
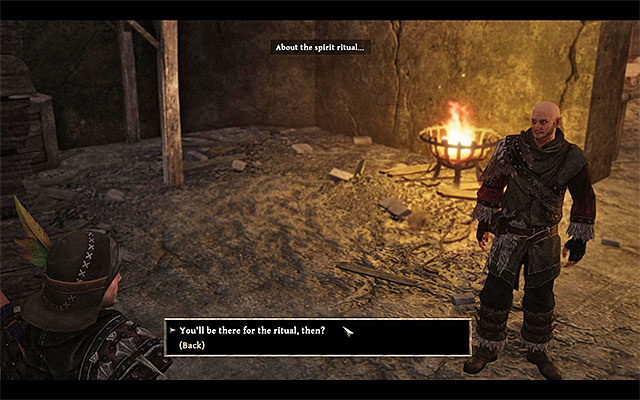 Meet up with Eldric after his return from the Citadel
After you have killed the Shadow Lord, talk to Eldric again. He will ask you to destroy the nearby Crystal Portal (point 2s on the map) and to learn how to do that, see the walkthrough for the "The Realm of the Shadows" quest, in the chapter "Other Quests".
Return to Eldric again, after you have destroyed the portal. Wait for the druid to return to the Demon Hunters' Citadel (point 2 on the map). Meet him there for the last time, during this quest, thanks to which you will obtain Eldric for the ritual.
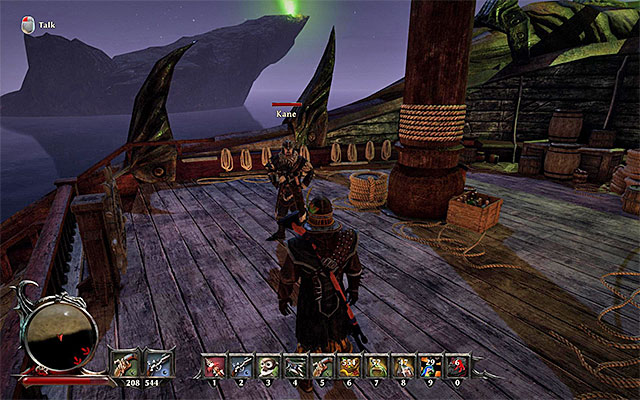 Kane s aboard the Demon Hunters' ship
Note - if you have earlier joined the faction of the Natives or the faction of the Crystal Mages, do one more thing, after you have recruited Eldric. Go aboard the ship of the Demon Hunters, moored at the Calador Bay, which is commanded by Kane (point 1 on the map). During the conversation with Kane extort him to join your fleet, thanks to which you will receive 400 Glory Points.
Rewards for completing the quest:
Way to unlock the quest: Talk to Eldric.
Quest giver: Eldric (point 2 on the map)
 Question Eldric about the mage from the Kila isle
You can unlock this quest after you have progressed to the third chapter of the game's storyline so, after you have started the "The Spirit Ritual" main quest. From druid Eldric (point 2 on the map), you learn that you need three people with powerful magic, for the ritual. One of them is voodoo witch Chani and to find her, you need to go to Kila.
Note - the rest of the description of this quest is in the chapter concerned with the main quests on Kila.
Way to unlock the quest: Talk to Eldric.
Quest giver: Eldric (point 2 on the map)
 Question Eldric about the mage from the Taranis isle
You can unlock this quest after you have progressed to the third chapter of the game's storyline so, after you have started the "The Spirit Ritual" main quest. From druid Eldric (point 2 on the map), you learn that you need three people with powerful magic, for the ritual. One of them is the mage Zacharias and to find her, you need to go to Kila.
Note - the rest of the description of this quest is in the chapter concerned with the main quests on Taranis.
Way to unlock the quest: Talk to Eldric.
Quest giver: Eldric (point 2 on the map)
 From Eldric you learn where you can find the scroll with the spell
You can unlock this quest after you have progressed to the third chapter of the game's storyline so, after you have started the "The Spirit Ritual" main quest. From druid Eldric (point 2 on the map), you learn that you need a powerful spell, for the ritual, which has not been written down in the grimoire that you found in the second chapter of the game. The druid suggests that you look for it in the ruins of the ancient city, in the Eastern part of the Calador Bay, over the lava river.
 The city ruins
You unlock access to the Eastern part of the bay, during the "Recruit Eldric" main quest. Once you get there, head towards the city ruins (point 2q on the map). I recommend that you approach the ruins from South-East, because it is the unproblematic way. Also, you could reach the destination from the North-West, but you would have to deal with the Soul Eater and also use the Parrot Flight scroll, to get to the ledge above.
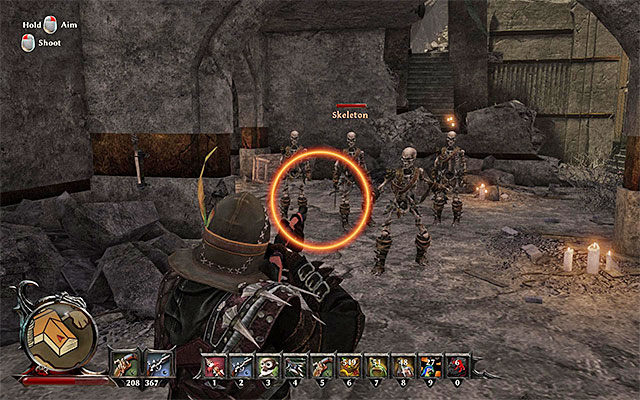 Eliminate the monsters in the ruins
Both in the ruins, and around them, there are about ten Skeletons and several Minions. A good idea is to use AoE attacks here e.g. some good spells), but you can also run around the area and wait for opportune moments to attack single monsters. Regardless of how you fight, do not let the monsters corner you, because it may be difficult to get out of the trap.
 The location where you find the scroll
The scroll that you are looking for (Nekroimortar) is at the altar at the lower level of the Western building of the ruins. After you have collected it (100 Glory Points) you can leave immediately or explore the ruins, where you find several valuable treasures. Return to Eldric who, depending on your progress with the rest of the main quests, will be most probably staying at the path to the den of the Shadow Lord (point 2p on the map) or at the Demon Hunters' Citadel (point 2 on the map). Tell him that you have found the spell.
Rewards for completing the quest:
Way to unlock the quest: Talk to Eldric.
Quest giver: Eldric (point 2 on the map)
 You need to go and find the spot for the ritual
You can unlock this quest after you have progressed to the third chapter of the game's story line so, after you have started the "The Spirit Ritual" main quest. From druid Eldric (point 2 on the map), you learn that the ritual needs to be performed at the correct spot that is isolated from the rest of the world thanks to magic and that it is you that need to find such a spot. The location that you are looking for is on Kila and this is where you need to get.
Note -the rest of the description of this quest is in the chapter concerned with the main quests on Kila.
The above map contains the reference points to all of the locations visited during your journey on the Calador Bay, while doing the additional quests. The red points symbolize the starting points of additional quests, whereas the green ones show the locations visited during the completion of the quests.
Note - it is recommended to check out the map connected with the main quests of Calador Bay, as many of the main and optional quests are closely connected.
How to unlock the quest: Through conversation with Burke's Manifestation.
Quest giver: Burke's Manifestation (point 1 on the map).
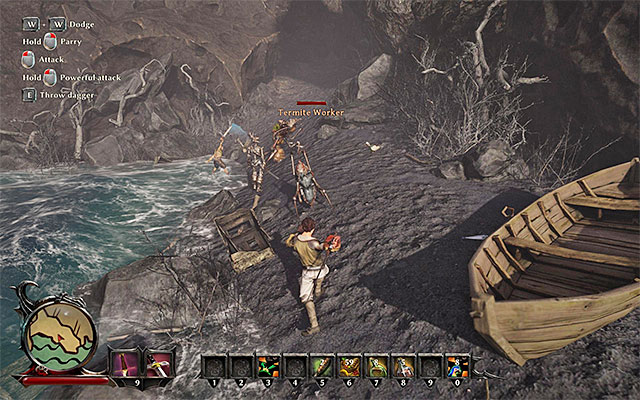 Get rid of all the Termites.
After reaching a small beach (point 1 on the map), you should be able to notice a friendly Burke (Burke's Manifestation), fighting with a group of Termite Workers. Help Burke out to get rid of the monsters, which shouldn't pose a problem. Remember to use the fact that the Termites will focus their attention on two other characters besides the Nameless Hero (Burke and the actual party member). For each killed Termite you will be given 50 Glory Points, and an additional reward for killing them all - 100 Glory Points.
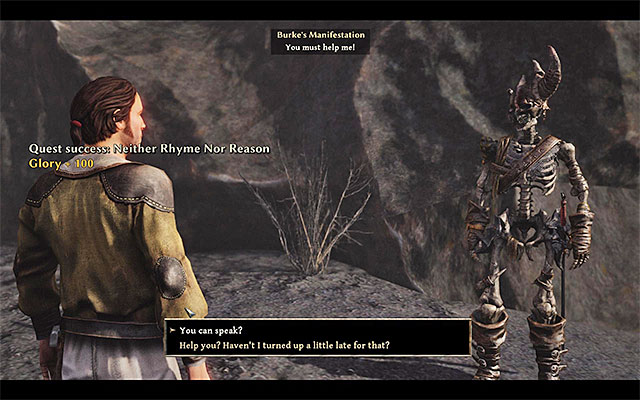 Speak with Burke and promise to help him.
After the fight end, get closer to Burke (Burke's Manifestation) and speak with him. You will learn from him, that his current form is a result of a failed experiment. You will immediately be asked to join the expedition to the Demon Hunter's Citadel, aimed at restoring Burke's original form.
Note - if you agree to his terms, Burke will temporarily join your party. Don't count on using him in your future fights, however, as he will leave the party immediately should you stray off your path leading to the Demon Hunter's Citadel. You can also order him to wait for the Nameless Hero if you don't want to complete this mission right now.
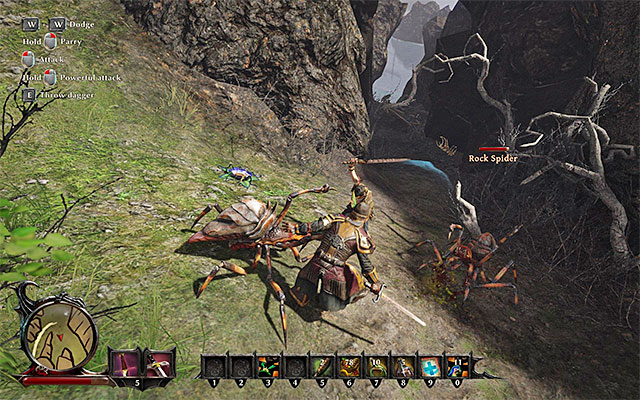 During your trip to the Citadel, your party may fall onto some spiders.
Depart with Burke to the North, taking a narrow pathway leading towards the areas of the Demon Hunter's Citadel (point 1a on the map). You need to watch out, as your party will surely stumble upon a group of Rock Spiders along the way. The spiders can easily take a huge chunk of your health, as well as spit acid from afar, so you should be extra careful. For each slain creature you will get 50 Glory Points. Note - don't stray off the main road, because to the East you can find a den of a huge Grave Spider - this foe can pose a serious threat to the inexperienced hero.
 Connor
After reaching the Citadel, you can speak with the nearby Demon Hunters about the current state of Burke's, although its entirely optional and up to you. The most important thing to do here is to find a room, located on the ground floor, in which Connor runs his shop (point 1b on the map). During the conversation with Connor, he will speak about a magic formula needed to heal Burke - invest 300 gold to but it (don't worry though, as you will get back your investment quite soon). In the inventory of the Nameless Hero you will find a cure called Burke's Magic Formula.
Note - Connor is a dealer as well as a trainer, so don't be hasty with the conversation.
 Burke is healed.
Speak with Burke and give him the magical formula (200 Glory Points). Leave the room and head to the Southern part of the Citadel. Locate the stairway leading to the upper floor of the building. After going through them, approach the healed Burke, located on the floor. The Demon Hunter will give you 400 gold for your efforts, meaning that you will earn 100 gold (the formula's cost was 300 gold).
Rewards for completing the quest:
How to unlock the quest: Through conversation with Angus.
Quest giver: Angus (point 2 on the map).
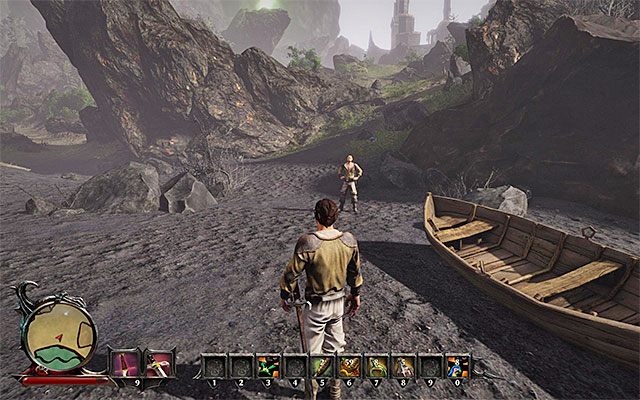 The meeting point with Angus.
After reaching the main beach (point 2 on the map), you will be stopped by Angus, who will inform the Nameless Hero about the dangers lurking in the area and will suggest to leave the bay. You don't have to listen to him, obviously. Instead, ask each and every available question to Angus and let him the party to the fishing village located nearby (point 2a on the map).
Rewards for completing the quest:
How to unlock the quest: Through conversation with Nate.
Quest giver: Nate (point 3 on the map).
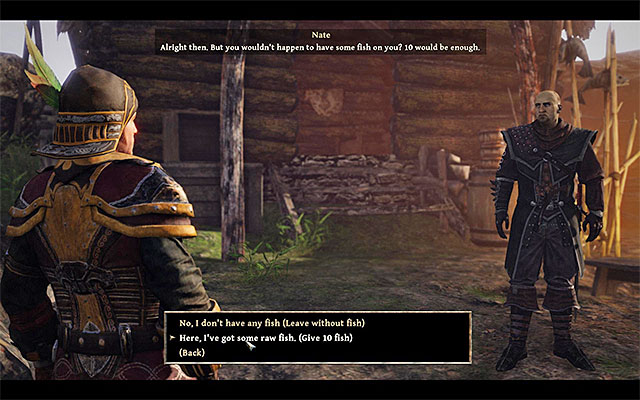 If you've collected the raw fish, it's good to give them to Nate.
Meet with a Demon Hunter located in the fishing village, called Nate (point 3 on the map). During the conversation, you will learn that Nate is planning to get to the Demon Hunter's Citadel. It's worth to accept his invitation to get there together. Nate will ask the Nameless Hero if the character has 10 Raw Fish with him. If you don't have them, nothing bad will happen, because you will depart on your journey. If you have the needed amount of fish (search the fishing village, as well as the coast to the South of it, or complete the side quest for Glen), it's worth to give them to Nate. This way you will be rewarded with a Soul point, and you will be given additional gold on the destination of your trip.
Note - Nate is one of the ability trainers. You can ask him for a paid training during your conversation with him.
 The journey to the Citadel can either go smooth, or be filled with monster fights.
Regardless of your choice, follow the Demon Hunter to the North-East. Keep a close distance to Nate, and be prepared to face off a few groups of Scavengers on your trip (unless you killed them alone in the past). Nate will stop from time to time and whenever that happens, try to ask him some additional questions. The quest will end after you've reached the Citadel (point 3b on the map).
Note - Nate won't be coming back to the fishing village in the future, so if you want him to train you, you will have to find him again (he will be either in the Citadel or to the North of it).
Rewards for completing the quest:
How to unlock the quest: Through conversation with Glen.
Quest giver: Glen (point 3 on the map).
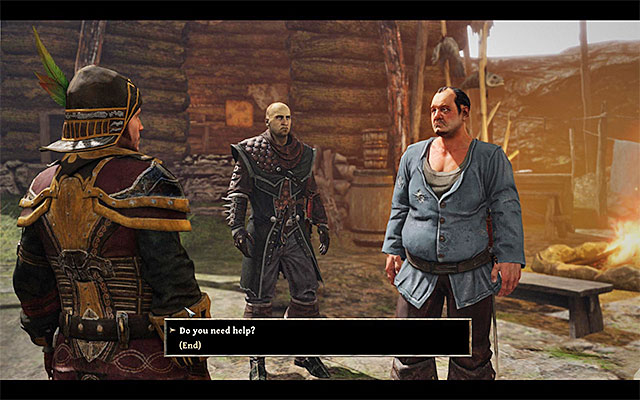 Glen's place of residence.
Meet with a fisherman called Glen, located in the village (point 3 on the map). During the conversation you will learn about the problem of monsters lurking on the nearby beach, which make the fishing a lot more difficult. Offer your help in the beasts extinction.
Note - there's a chance that you've killed all of the monsters before you even started your conversation with Glen and accepted the quest. In that case, after the conversation ends, speak with Glen again and claim your reward.
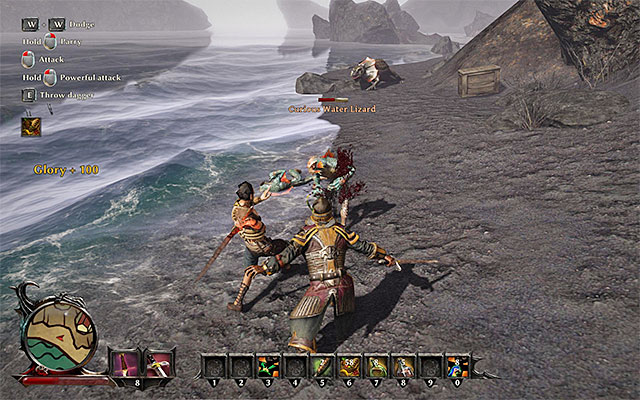 Watch out for the swift attacks of the Lizards.
Leave the village and start your hunt on the shore located to the South of it (points 3a on the map). First, you will probably stumble upon a two Curious Water Lizards. You have to be careful, as those monsters are moving and attacking swiftly, dealing a substantial amount of damage in the process. Rely on your dodges and try to parry the attacks, or you can just focus on a ranged combat. For each Lizard slain you will be getting 100 Glory Points, as well additional 100 Glory Points for killing both of them.
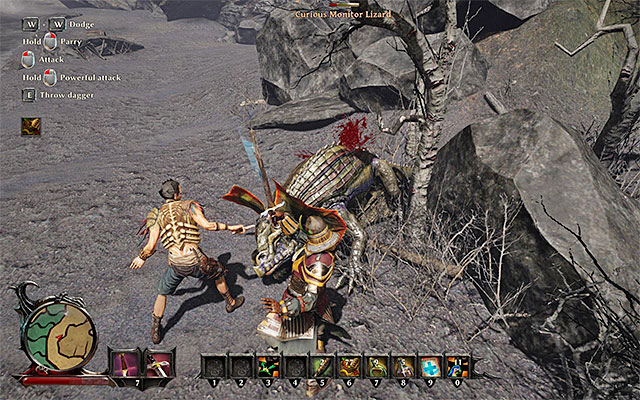 It's a good idea to use charged attacks on the huge Lizards.
A little further away there are two more enemies - Curious Monitor Wizards, which are the bigger version of the previous foe. Try to attack those beats one by one. Use the fact that they are way slower, and try to launch some charged attacks at them. It's more important to do so, because those monsters are quite durable. Each slain Lizard will give you 200 Glory Points, as well as additional 100 Glory Points for killing both of them.
You can now go back to Glen and inform him about securing the beach. The fisherman will give you a choice for your reward. It's worth to refuse any reward at all, as you will get a two Soul points for doing that, as well as 150 Glory Points. If you are a materialist and can't live without a physical reward, you can choose between 100 gold and 10 Raw Fishes (the fishes may come in handy if you want to do a side quest called "The Long March").
Rewards for completing the quest:
How to unlock the quest: automatically after collecting the Treasure Map.
Quest giver: (point 4 on the map).
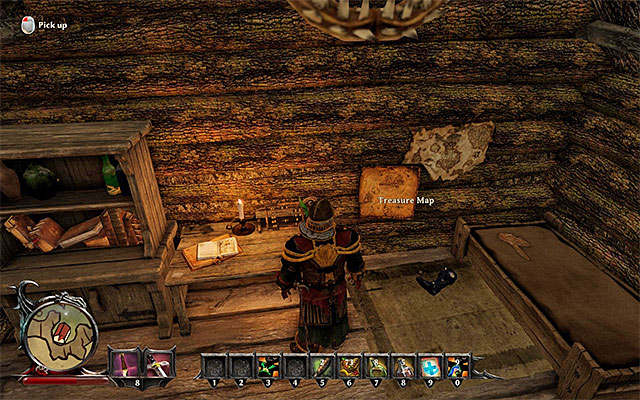
Inside one of the huts in the fishing village (point 4 on the map), you will find a Treasure Map visible on the above screenshot. Taking it from the wall will lead you to unlock the quest described in this section.
Note - before you depart on your treasure hunting, make sure that you have a Shovel in your inventory. You can either buy this item or find it in the game world (in the other part of the village, for instance).
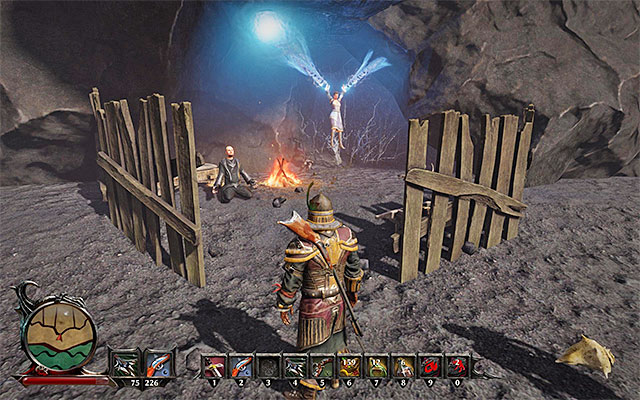 The encampment of the mage Tirion.
The treasure you are looking for is located on the beach, to the West from the village (point 4a on the map). It's not advised to try to get the treasure with an underleveled character, as you have to fight Golems on your way there. The destination of your trip is the encampment located on the beach. You will find a mage called Tirion here, who has Jill imprisoned - you must defeat this mage for the side quest "Dangerous Liaison". After you've emerged victorious from the fight, search for a big red cross (X) on the ground and use your shovel on it. Dig out the treasure and examine the contents of the chest - there should be 100 gold and a Schematic for a Fire Opal inside.
Note - the encampment has a hidden legendary item inside.
Rewards for completing the quest:
How to unlock the quest: automatically after finding the Modern Pirates book.
Quest giver: (point 5 on the map)
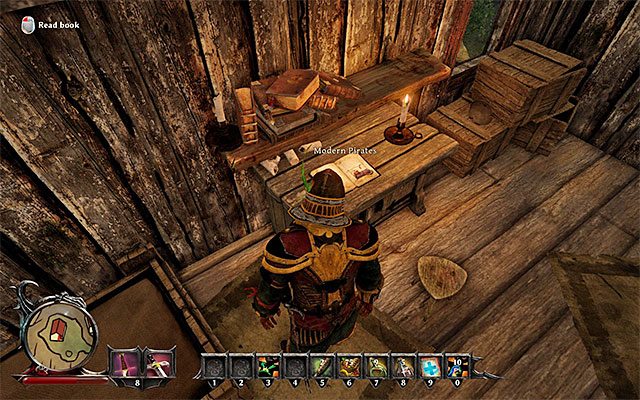 The place in which you can find the book.
One of the hats in the fishing village (point 5 on the map) has a Modern Pirates book hidden. Examining the contents of the book will allow you to find about the location of one of the legendary items in the game. If you want to continue this quest, you will have to go on the Kila Island.
Note - the further description of this quest can be found in the section for the Kila Island Side quests.
How to unlock the quest: Through conversation with Killian.
Quest giver: Killian (point 6 on the map).
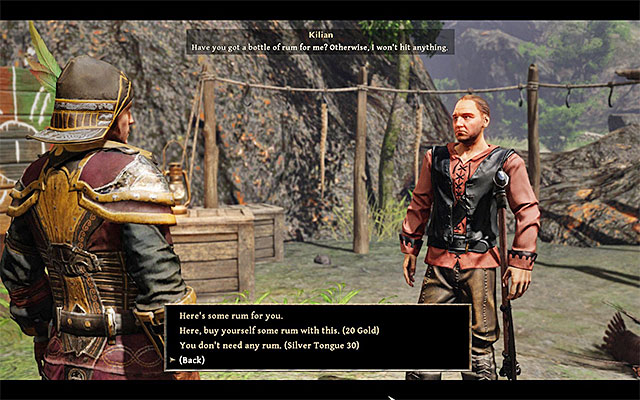 You can pay Killian, give him some Rum or just persuade him.
Speak with Killian located in the village (point 6 on the map). During your first encounter with that man, you will be asked to get a bottle of Rum for him. You can react in a three different ways for this request:
Regardless of your choice, you will be able to start a side quest called "A Good Throw", which is associated with a throwing knife challenge.
Rewards for completing the quest:
How to unlock the quest: Through conversation with Killian
Quest giver: Killian (point 6 on the map).
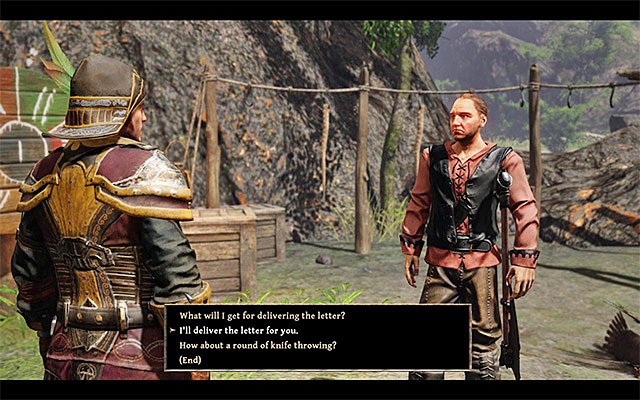 Killian will ask the Nameless Hero to deliver a letter.
Meet with Killian, located in the fishing village (point 6 on the map). The man will ask you to deliver a letter addressed to Harry for him. If you agree to this task, the mentioned letter (Letter to Harry) will appear in your inventory. If you want to continue this quest, you will have to go to the Kila Island.
Note - the further description of this quest can be found in the section for the Kila Island Side quests.
How to unlock the quest: Through conversation with Killian
Quest giver: Killian (point 6 on the map).

After completing the side quest called "On a Knife Edge", speak with Killian again, who can be found in the fishing village (point 6 on the map). During the next conversation you will be able to accept a throwing knife challenge, although the quest will be unlocked only when you decide to play for real gold.
The rules for this mini-game are really simple. You have 5 throws at total, and you need to have more points after all of them than Killian managed to accumulate. For each throw you can get from zero (if you won't manage to hit the shield at all) to five points. It's recommended to aim at the areas giving 4 or 5 points (they are marked on the above screenshot). After you're done aiming at the target, you have to throw the knife at the right moment - do so when the blue bar is in the proper place. According to the moment the key / button responsible for throwing was pressed, the knife will go straight ahead, or a little to the up / down.
If you've managed to collect more points than Killian, you will be given 250 gold (excluding the 100 gold you will get either way) extra from completing the quest (it's a one-time only bonus, you will be given "only" 100 gold for future victories).
Note - before you begin the challenge, it's good to practice during a free mini-game. The basics of this game were described in a separate section of this guide.
Rewards for completing the quest:
How to unlock the quest: Through conversation with Cisco
Quest giver: Cisco (point 7 on the map)
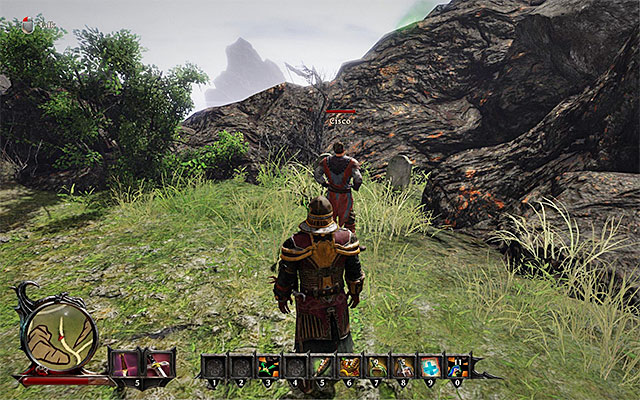 The place in which Cisco can be found.
Cisco can be found standing near graves, to the East from the fishing village (point 7 on the map). The Nameless Hero will discover that the guard wanted to rob the graves. You can react to this in two ways:
Depending on your choice, a separate quest will be unlocked, associated with Cisco. The choice modifies your Soul parameter slightly as well.
Rewards for completing the quest:
How to unlock the quest: automatically after completing a side quest "Cisco".
Quest giver: (point 7 on the map).
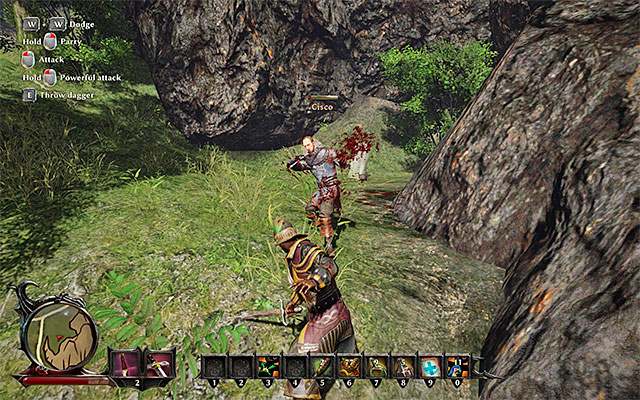 The most extreme variant is to defeat Cisco in direct combat.
This quest will be unlocked after you've met Cisco (point 7 on the map),but only if you chased him away from grave digging. Follow Cisco to the North, looking out for a group of Scavengers, who might appear in the area. Cisco will stop after reaching a new set of graves (point 7a on the map). Approach him and initiate another conversation. You can act in a three different ways:
Rewards for completing the quest:
How to unlock the quest: automatically after completing a side quest "Cisco".
Quest giver: (point 7 on the map).
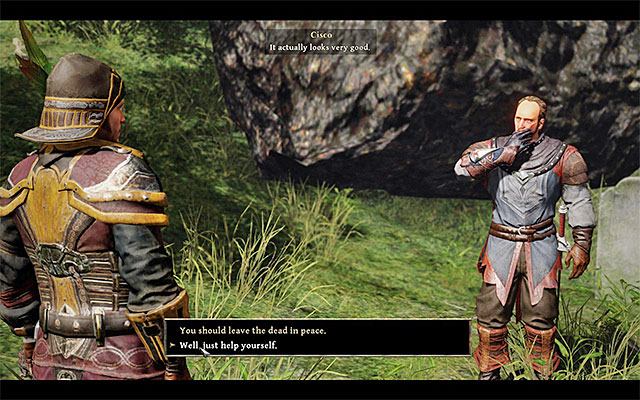 You can allow Cisco to rob the graves one more time, or stand up to him.
The quest will be unlocked after you've met Cisco (point 7 on the map), but only if you allowed him to rob the graves. Follow Cisco to the North, looking out for a group of Scavengers, who might appear in the area. Cisco will stop after reaching a new set of graves (point 7a on the map). Approach him and initiate another conversation. You can either allow him to rob the graves one more time or try to stand up to him.
Rewards for completing the quest:
How to unlock the quest: Through conversation with Henrik
Quest giver: Henrik (point 8 on the map)
 You must agree to a honorable duel.
Meet with a Demon Hunter named Henrik (point 8 on the map), who will be inside of the Citadel, or training just outside the main entrance. During the conversation, talk about the desire to learn some new abilities. Henrik won't be willing to help the Nameless Hero, unless the character proves that he's proficient in melee combat. Make sure that you are absolutely ready and accept the honorable duel (it's going to be one on one, without any party members).
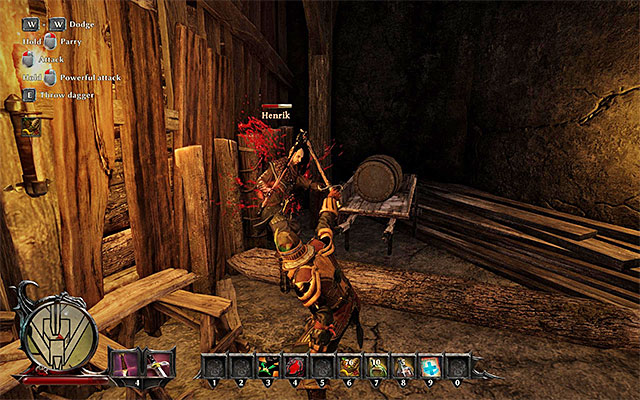 You can launch your charged attacks with your melee weapon, or attack Henrik from afar using your ranged weaponry.
After the duel starts, focus on dodging the powerful (and rather slow) attacks of Henrik. As he is a good warrior, a single hit from him can take out half or even more from your health bar. Besides this, you must watch out for his foul play tricks. As far as attacking Henrik goes, if you are using a melee weapon, try to focus on charged attacks, which are unlikely to be interrupted by Henrik. Ranged weaponry does wonders during this fight, especially because Henrik will try to heal himself whenever he has lost a big chunk of health. A quick usage of your gun, or throwing a knife can successfully interrupt him in that. Winning the duel ends the quest.
Note - during the duel, try not to attack any other Demon Hunter present in the area, as you can provoke them to attack you.
Note - you cannot die during this fight. If you lose most of your health from Henrik's attacks, you will be knocked unconscious and after regaining it, you will be able to try again.
Note - Henrik is a dealer as well, so it's wise to examine his offer before the fight.
Rewards for completing the quest:
How to unlock the quest: Through conversation with Henrik
Quest giver: Henrik (point 8 on the map).
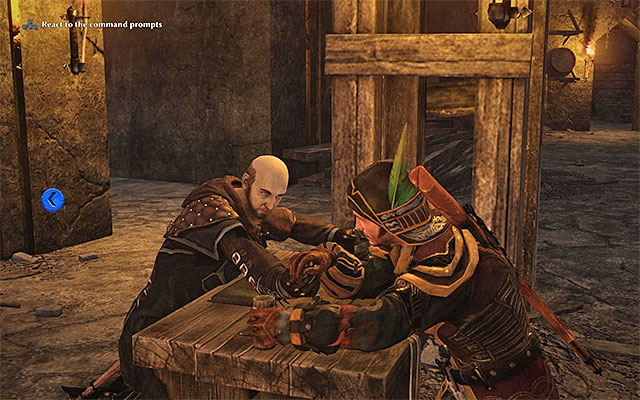 Press the buttons in accordance to the icons displayed on the screen.
Demon Hunter Henrik can be found, during the night hours, near the table for arm-wrestling, inside the Citadel (point 8 on the map). After initiating the conversation, you will be able to suggest him to participate in a mini-game, betting 100 gold at the same time. Mini-game of arm-wrestling is rather simple. At the beginning you need to press the keys / buttons in accordance to the icons displayed on the edges of the screen (in case of the PC version of the game, it's about pressing the directional buttons - WSAD). At some point you will additionally need to rhythmically press one single button. If you press it enough times, you will win the mini-game.
Note - you can compete in this min-games how many times you want, but the maximum amount of gold possible to win in this game is only 10 pieces.
Rewards for completing the quest:
How to unlock the quest: Through conversation with Wilson
Quest giver: Wilson (point 9 on the map).
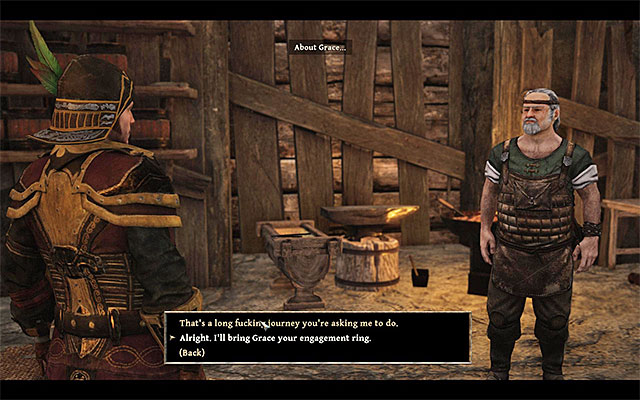 After you've agreed to the task, you will be given the ring.
Meet with the smith named Wilson, who should be in hi workshop, in the Demon Hunter's Citadel (point 9 on the map). During the conversation you can agree to take up the task for Wilson, to take Wilson's Engagement Ring to his chosen one. Grave lives on the Antigua Island.
Note - You should read the chapter from our guide that includes the description of side quests related to Antigua Island where you can also find the part related to Grace.
 Confirm that you delivered the ring to Grace
After you will visit Grace on Antigua Island you may return to Wilson and confirm that you succeeded to deliver his ring to Grace. The blacksmith will be glad and he will give the Nameless Hero a unique gift.
Rewards for completing the quest:
How to unlock the quest: Through conversation with Nikodim
Quest giver: Nikodim (point 10 on the map).
 Nikodim
There's several ways to unlock this quest, but the best one is to simply meet with Nikodim, located near the mill on the Ernesto's farm (point 10 on the map). This route is even more important, given the fact that thanks to this approach, a more "supreme" version of this quest will be activated. You will learn from Nikodim, that a valuable golden candle holder went missing from the farm, and that Nikodim himself is accused of stealing it. The man pleads you to clear his name, as well as suggests you to examine the wagon located near the entrance to the farm.
 Ernesto
Before you depart to find the candle holder, it would be a good idea to speak with other characters present on the farm. Ernesto (point 10a on the map) is the owner of the farm. During the conversation you will learn that he is uncertain of Nikodim's fault in the crime. This character will also ask you to find his family heirloom.
 Mira
MiraMira is Ernesto's maid and you should be able to meet her in the central part of the farm (point 10b on the map). During the conversation, Mira will suggest you an alternative way to complete this quest. The woman will ask the Nameless Hero to accuse Nikodim of the theft as soon as the player finds the candle holder. This will allow the maid to become the heir of Ernesto's farm - the current heir is Nikodim himself.
Note - focus on finding the lost candle holder. Accusing someone of the crime will come later, when you will get back with the treasure.
Note - Mira is one of the ability trainers. You can ask her for a paid training during your conversation.
Look around the Southern entrance to the farm, being near the place where you can find Ernesto. The above screenshot shows the wagon you seek - right next to it you can find Suspicious Tracks. Examine the tracks and listen to the comment made by the Nameless Hero, from which you will learn to go to the West.
 You must cross the cemetery and go to the North.
It's hard to get lost during this quest, as each interactive point is connected by a string of coins scattered around the area. Head East, and after getting to the cemetery, change your direction to the North. Cross the cemetery, and you should soon be arriving at the crossroads (point 10c on the map). Take care of the Black Ghouls in the area and go to the right branch of the crossroads, the one leading towards a river of lava.
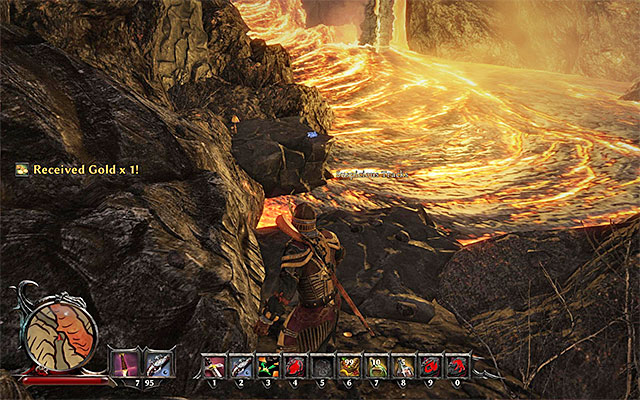
Take care, as your party should soon be attacked by a Hellhound. Eliminate the beast and continue your march. Stop right at the place which can be seen on the above screenshot. It's worth to save your game now, as you can easily die here if you're not careful. Use your sprint to gain momentum and press the key / button responsible for jump at the right moment. It will allow the Nameless Hero to avoid contact with the lava. All you have to do now is to climb up the nearby shelves.
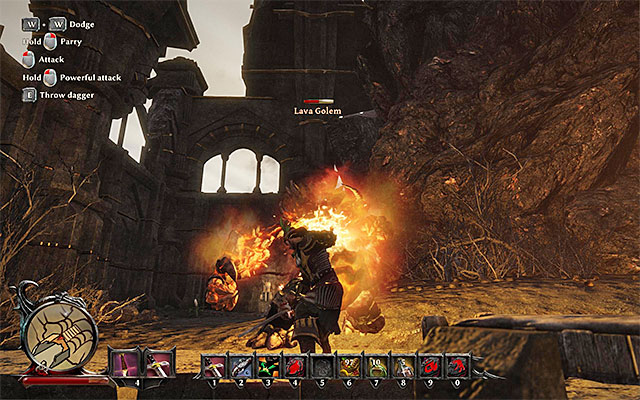 Try to weaken the golem when it's occupied attacking your party member.
Remain vigilant, because as soon as you get near the staircase, you will be attacked by a group of Menacing Goblins. By defeating all of them you will be given 100 Glory Points. A bigger challenge awaits you at the top of the staircase - you will have to face a Lava Golem. This foe deals massive amounts of damage, that's why it's even more important to avoid his attacks (look out for his ground slam attacks, for instance). If it's your first encounter with this type of a golem, you must know that he can protect himself from ranged attacks for a limited amount of time. You will get 400 Glory Points for defeating him.
Note - if you can't handle the golem no matter what, try to run past him, grab the artifact and run away from him as fast as possible.
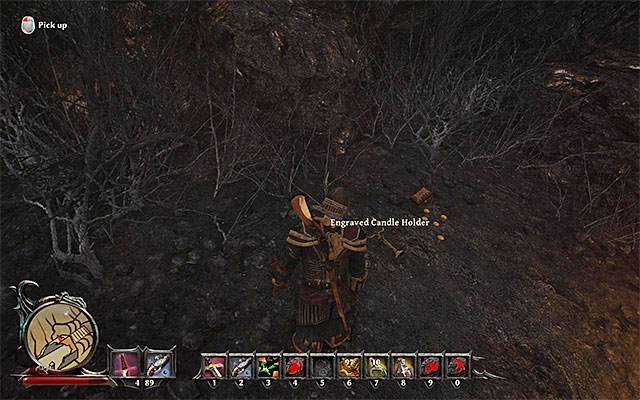 The place you can find the Candle Holder at.
The missing Engraved Candle Holder is located to the right of the stairs, through which you get to the upper floor, where you've fought the golem (point 10d on the map). After collecting the item (200 Glory Points) go to the West and find a lever, which blocks the exit from the "arena" (you can go back using the same route you've come here, naturally).
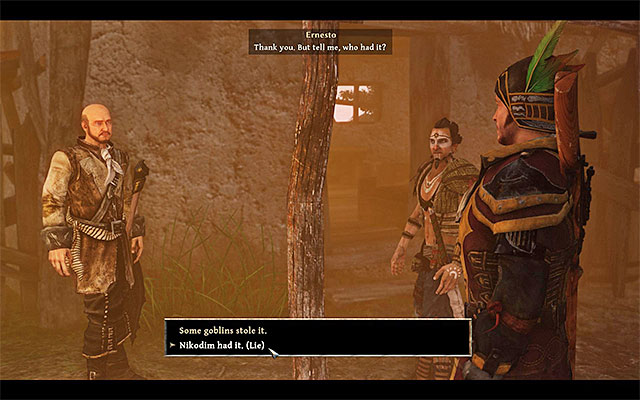 During the conversation with Ernesto, you will have to make your decision.
Go all the way back to the farm and speak with Ernesto (400 Glory Points). The quest can be finished in two ways:
Note - if you've chosen the first option, Mira will be mad at Nameless Hero and you will lose the ability to train from her. That's why it's crucial to train before making any decisions.
Rewards for completing the quest:
How to unlock the quest: Through conversation with Mira
Quest giver: Mira (point 10 on the map).
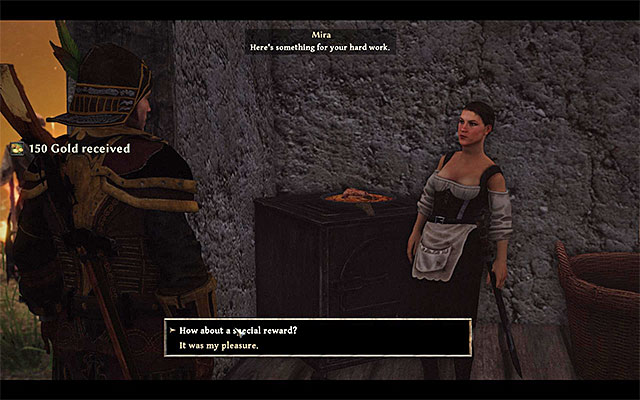 Talk about the special reward.
This mission is directly connected with the side quest "Ernesto's Engraved Candle Holder", which was about finding a stolen candle holder. If you decided to lie and told Ernesto that it was Nikodim who stole the treasure, Mira (point 10 on the map) will be very pleased. During the conversation with the woman you can talk about "a special reward". Meet Mira at night time, and the Nameless Hero will spend the night with her.
Rewards for completing the quest:
How to unlock the quest: Through conversation with Moe
Quest giver: Moe (point 11 on the map).
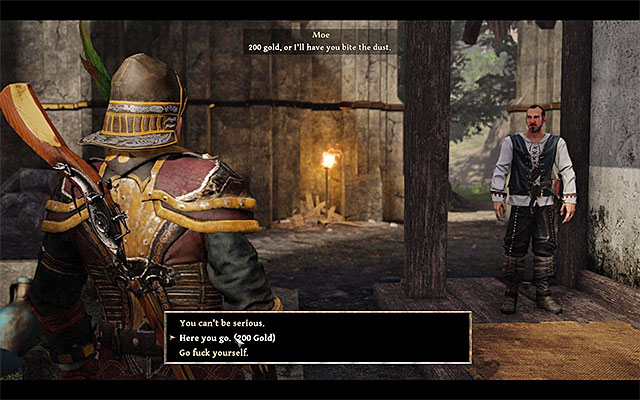 You can give Moe gold or lead to a confrontation.
Moe can be seen near the entrance to the tavern (point 11 on the map). If you try to enter the building, he will stop the Nameless Hero and will request payment. You can react to this in two ways. If you don't want any problems, you must the man 200 gold.
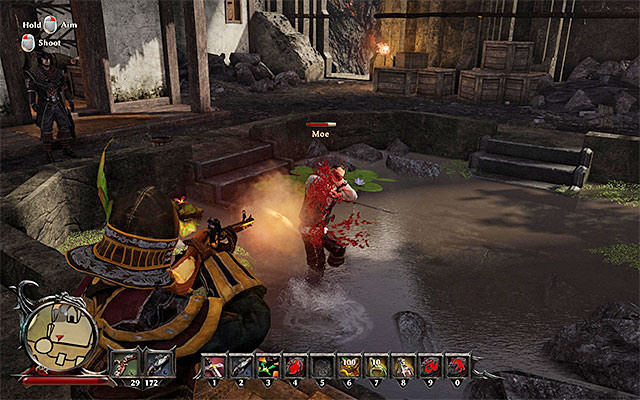 The only way for an easy win is to keep Moe at distance.
As always, the better solution is to provoke Moe into fighting you. After the duel begins, focus on dodging Moe's strong attacks, because he's a strong warrior, capable of dealing large amounts of damage. Depending on your fighting style, you can try to counterattack him with your melee attacks, or keep him at a safe distance, while attacking him with your ranged weapons and / or magic. Defeating Moe (he will only be knocked out) will end this quest and will unlock the possibility to train with him.
Note - during the duel, try not to hit any of the bystanders by accident, as you will provoke them to attack you, making the fight a lot harder.
Note - if you've already fought Moe, then after winning the duel you can use your Intimidation ability to force the man to share the gold he made from taking tribute. However, it's only possible to do so if you have your Intimidation developed to at least 90 points.
Rewards for completing the quest:
How to unlock the quest: Through conversation with Kramer
Quest giver: Kramer (point 12 on the map).
 Swiftly select the interactive bottles.
Kramer can be found in the tavern (point 12 on the map) and will suggest the Nameless Hero to participate in a mini-game focused on drinking alcohol. If you want to get involved in this activity, you will have to bet 100 gold. The mini-game is trivial - you must select the bottles on the table as fast as you can. If you manage to select all of the bottles before Kramer does it, you will win.
Note - Kramer is a dealer himself, so you should check his offer before / after the competition.
Rewards for completing the quest:
How to unlock the quest: Through conversation with Travis
Quest giver: Travis (point 12 on the map)
 Travis will be willing to participate in the mini-game only during the night hours.
Travis can be found in the tavern (point 12 on the map), which he is the owner of. During the first conversation, you should talk about spending the night. You will learn that you either have to pay a standard price (100 gold), or you can participate in a drinking duel - if you win, you will have free accommodation. This mini-game can only be done during the night hours. When it's the right time, find Travis again - he should be by one of the tables - and accept the duel. The hole mini-game is trivial - you must select the bottles on the table as fast as you can. If you manage to select all of the bottles before Travis does it, you will win.
Rewards for completing the quest:
How to unlock the quest: Through conversation with Bran
Quest giver: Bran (point 13 on the map).
You can buy provisions or decline Bran's offer.Bran is located on the farm, to the North from the fishing village (point 13 on the map) and during the conversation he will offer the player to buy swine from him. If you agree to the bargain, you will learn that, unfortunately, the previous price (250 gold) jumped to 400 gold. You can accept the proposition of buying Provisions, resign from the trade, or try to Intimidate Bran into lowering the price. To do the last one, you will need at least 60 points in Intimidate, and by doing so you will lower the price to 300 gold.
Note - if you won't be willing to buy provisions from Bram during your first encounter, you won't get a change later on in the game. You don't have to despair though, as the man's offer isn't very attractive (provisions can be collected during world exploration).
Rewards for completing the quest:
How to unlock the quest: Through conversation with Tirion
Quest giver: Tirion (point 14 on the map).
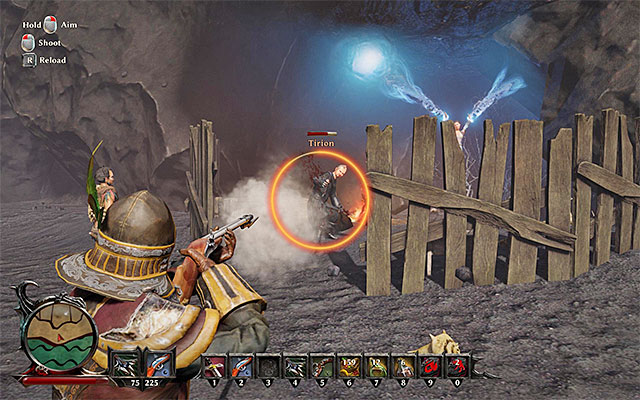 Try to interrupt the mage from throwing powerful spells at you.
During the exploration of the beach, you should arrive at a small encampment, in which a mage called Tirion holds Jill a prisoner. During the initial conversation you will learn, that Tirion plans to sacrifice the girls and he will attack the player as well. After the fight begins, concentrate on interrupting the mage each time he starts casting his spells. Tirion is fortunately a rather fragile character, so you should be able to kill him rather quickly. (300 Glory Points)
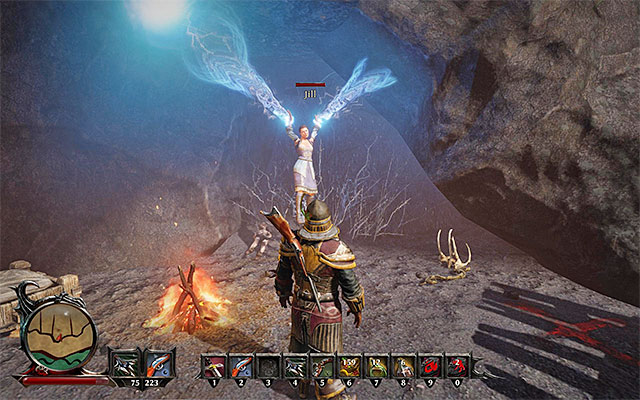 Rescue Jill.
After the fight examine the body of the dead Tirion, thanks to which you will get 180 gold and a Reign of Fire scroll. Afterwards, approach Jill and press the key / button responsible for interaction to set the woman free. At the very end the you will have 3 ways to end the quest :
Note - inside of Tirion's encampment, you will find a legendary item, as well as a treasure associated with the side quest called "The Treasure on the Beach of Calador".
Rewards for completing the quest:
How to unlock the quest: Through conversation with Bronach
Quest giver: Bronach (point 15 on the map).
 You can meet Bronach inside of the hunters hut.
Bronach can be found inside of the hunters hut, together with two other hunters (point 15 on the map) and during your conversation you can accept his offer for a joint hunt. Follow Bronach and be ready to kill a group of monsters on your way.
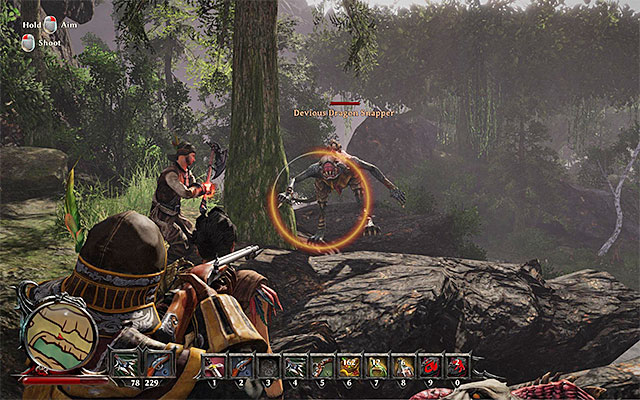 There are three big shots to eliminate.
The goal of this mission are the three Devious Dragon Snapper, located near the river, to the North of the hunters hut (point 15a on the map). As you already know, those monsters are extremely dangerous in melee combat, but fortunately for you, you will have two allies by your side. Each slain monster will give you 200 Glory Points, as well as another 200 Glory Points for killing all three of them. At the very end speak with Bronach again. If you have the Silver Tongue ability developed to at least 30 points, you talk about the trophies from the previous hunts, thanks to which you will get 3 Teeth and 3 Claws.
Note - Bronach is one of the ability trainers. You can talk about paid training during your conversation.
Note - if you have killed the enemies alone, it's still worth to go back to Bronach to take the same rewards. The only difference is that he didn't help you with eliminating them.
Rewards for completing the quest:
How to unlock the quest: Through conversation with Idrico
Quest giver: Idrico (point 16 on the map).
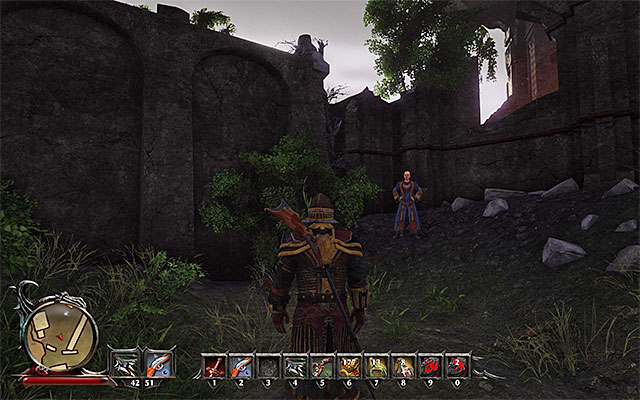 If you can't find Idrico, make sure that he didn't get knocked out fighting the monsters.
The mage called Idrico can be found in the ruins of an old castle (point 16 on the map), which you probably already visited in your quest to kill Shadow Lord and finding grimoire (main quests from the Calador Bay). During your conversation with Idrico, you will learn about his planned incantation. The plan is to summon stronger and stronger monsters, until the one controlling them all can be summoned, and then killed. You can agree to help him with the experiment. Before you make any decisions, make sure that you're healed, because it's going to be a tough fight.
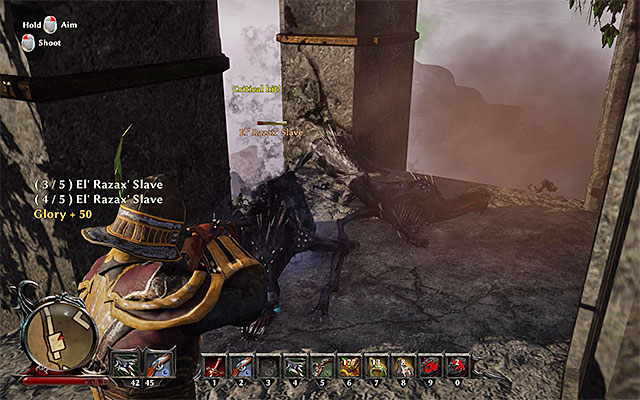 Take care, because the beasts are swift.
The battle consists of three different parts, and at the beginning you will have to defeat 5 beasts called El' Razax's Slave. Those creatures are very similar to Hellhounds - there's however a slight difference in the amount of enemies you have to face at once this time. If you can, try to attack those monsters one by one, especially from afar, and use the local ruins to keep away from the monsters (to heal yourself, or to use your ranged attacks without the risk of suffering any injuries). Each slain beast gives you 50 Glory Points.
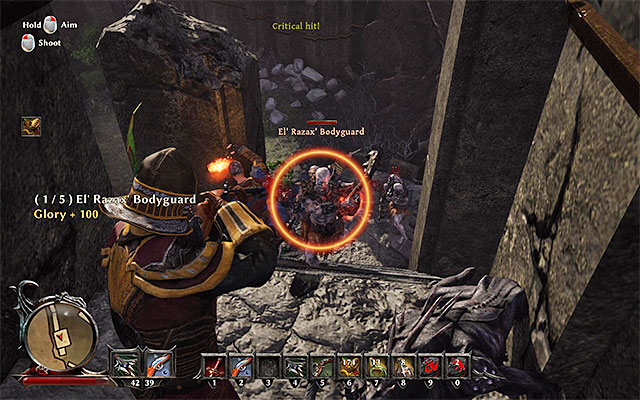 To defeat the bodyguards, use your ranged attacks and spells.
The second phase of the battle throws another group of five monstrosities at you - this time El' Razax's Bodyguards. They, in turn, are very similar to Minions in their behavior and skill set. As those monsters will be trying to engage you in melee combat, focus on parrying their strikes, as well as on dodges, or try to keep them at a safe distance so you can attack them with ranged attacks and / or spells. Each one gives you 100 Glory Points.
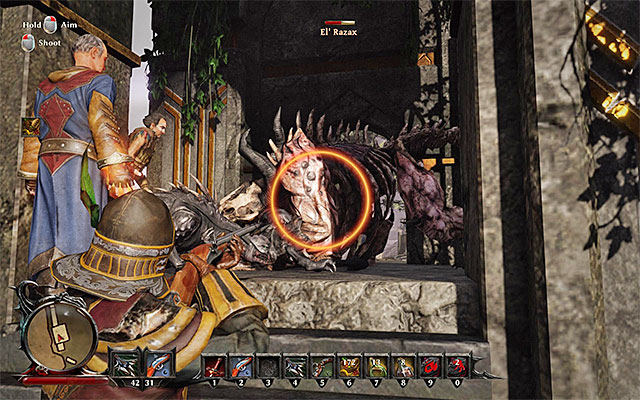 Position yourself up in narrow passages.
The final phase is the big boss, El' Razax. He's a giant, and at the same time a rather mobile monster, who can easily kill you in direct combat. Try to attack the monster to attack your allies, and use the huge size of the monster against it, positioning yourself in narrow passages, in which the beast will be constantly blocked. After the fight comes to an end, speak with Idrico to get your rewards.
Rewards for completing the quest:
Way to unlock the quest: Automatically, after you find the Faded Diary (Taranis isle).
Quest giver: -
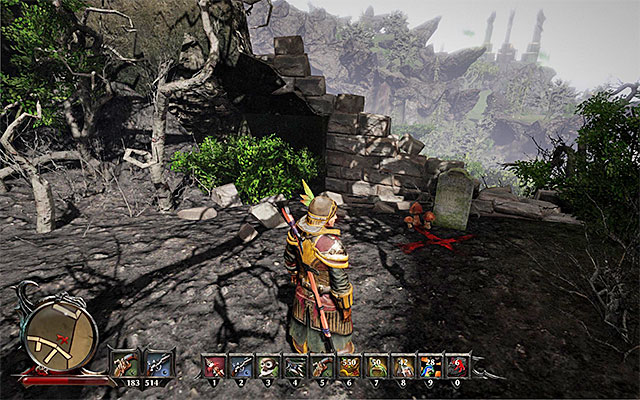 The treasure is in the ruins that you visit to kill the Shadow Lord
You could unlock this quest during your stay on the Taranis isle, i.e. after you have located the diary inside one of the caves. After you return to Calador bay, you can complete this quest. To do that, you need to go to the ruins in the Western part of the map, i.e. to the location that you visit to kill the Shadow Lord, among others and obtain the grimoire. During the exploration of the ruins, stop after you reach the location marked as X, painted on the ground (point 17 on the map).Use the spade to dig up the treasure and take a look into the chest, where you find, among others, a Ruby and an Ornamental Belt (it is one of the legendary items).
Rewards for completing the quest:
Way to unlock the quest: Talk to Lumbrok (Taranis isle).
Quest giver: Lumbrok
 A farmstead
You could unlock this quest during your stay on Taranis. This took place after the meeting with Lumbrok at the local mages headquarters. The nameless One was asked to find rare delicacies and one of them is the Delicious Ham, which you need to go to Calador bay for. After you reach the bay, go towards the farmstead in the central part of the isle (point 13 on the map).
 Sneak into the cottage and steal the ham
You need to steal the ham from the farm so, use the Sneak skill and press the sneaking key/button. Enter the cottage and turn your attention to the chest there. Open the chest and steal the ham (100 glory points). You can now return to Taranis.
Note - Do not let yourself be spotted by Bran or Logan, while stealing, because they will attack you, otherwise.
How to unlock this quest: Speak with Grace (on Antigua Island).
Quest Giver: Grace
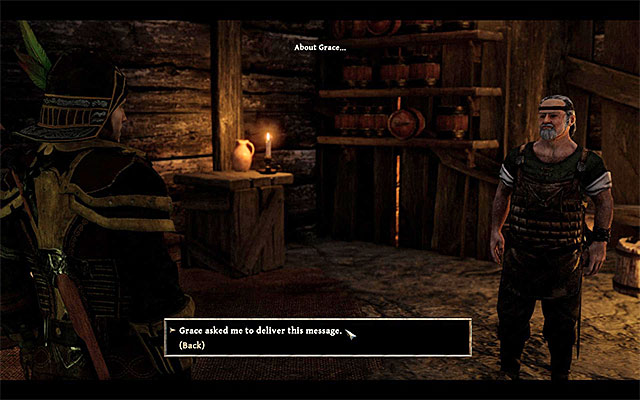 Deliver to Wilson a message from Grace
You could unlock this quest when you were visiting the Angua Island, to be more precise - after you delivered to Grace the engagement ring from Wilson (as a part of the side quest "The Engagement Ring"). The woman asked you to deliver a message to the blacksmith in return. Now you can return to Wilson in the Citadel of the Demon Hunters (map location 9) and give him a note.
Rewards for completing this quest:
How to unlock: talk to Magnus (Taranis)
Quest giver: Magnus (number 12 on the map)
Attention - this quest is only available after joining the guardians!
 You can either buy iron ore or steal it
This quest can be unlocked after joining the guardians and after meeting General Magnus on Taranis. He gives you a very long side quest and one of its parts is Gordon asking you to visit the Calador bay. You are to meet Wilson, a blacksmith who can be found in the Demon Hunters Citadel (number 9 on the map). Talk to him and say that you want to buy some Pure Iron Ore. You can act in three ways:
Attention - return to Taranis with the ore, to deliver it to Gordon.
How to unlock: Talk to Drake.
Quest give: Drake (number 18 on the map)
Attention - this quest is available only after you join the demon hunters!
 The Nameless Hero has to help the demon hunters in order to advance among them
You can start this quest after joining the demon hunters faction. Completing it results in being promoted to Demon Hunter rank. To make it so, you have to meet Drake, who should be somewhere on the ground floor of the Citadel (number 18 on the map). Ask Drake about the promotion and you will learn that you need to complete some tasks for smith Wilson, before you become a Demon Hunter.
Attention - From the moment you join the demon hunters, you can learn rune magic spells from Drake. Moreover, he can teach you some new skills.
Attention - Drake can give you two more side quests, but completing them is not necessary to be promoted.
 Listen to what Wilson has to say
Wilson can be found in one of the rooms in the Citadel (number 9 on the map). Start a conversation and offer him your services. Wilson will send you to look for five Books of Evil that entangle the minds of their owners. Two of them can be found in Calador, one on Antigua and two more on Taranis.
Attention - Wilson can also teach the hero rune magic spells.
 Travis will tell you something about the book owners
Head to an inn located north-west of the Citadel and talk to two persons named by Wilson. From talking to Yvette (number 11 on the map), you will learn basically nothing. Travis (number 12 on the map) however, will tell you some interesting things. You will learn about Mick, who escapes during the night and about the fact that he recently got a delivery of rotten meat from farmer Bran.
 Mick
MickMick can be found in the inn, but talking to him want get you closer to obtaining the book. If you want to follow Travis' suggestion, you can wait until the night comes. After returning to the inn in the night, you will see Mick leaving the building. If you follow him, you will reach a place where he has build an altar (number 8b on the map) and you will have to defeat him in a fight. Watch out for his strong attacks and remember to dodge and parry. After killing Mick (150 glory points) you can search his body to find Mick's Notes and 30 gold.
 Mick's hideout
You don't have to follow Mick, as you can find the hideout by yourself, during the day, and you won't have to fight him. No matter which option you choose, you should approach the altar and take the Book of Evil that lies there (200 glory points).
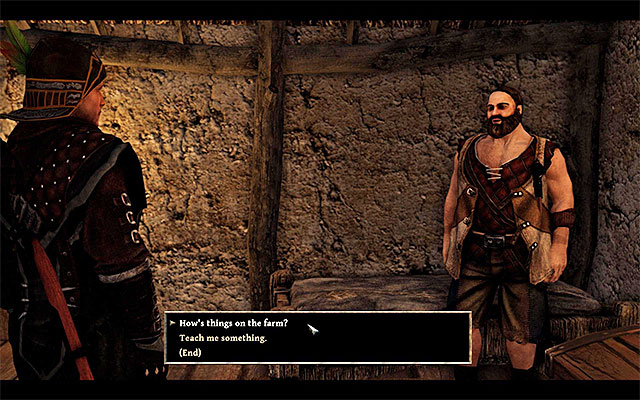 Talk to Bran and Logan several times
Now, head towards a farm located to the north of Mick's hideout (number 13 on the map). When you reach it, talk to Bran and ask him about the meat. Bran will send you to Logan, who also lives on the farm (50 glory points). After you are sent back, talk to Bran again. At the end, talk once again to Logan and force him to give you the Book of Evil (200 glory points). After obtaining it, you can tell Logan that you work for demon hunters and he will give you additional 50 gold.
Attention - For the next three books, you have to head to Antigua and Taranis, so now move to the chapters that describe the side quests in these locations. Return to Calador when you have all the books.
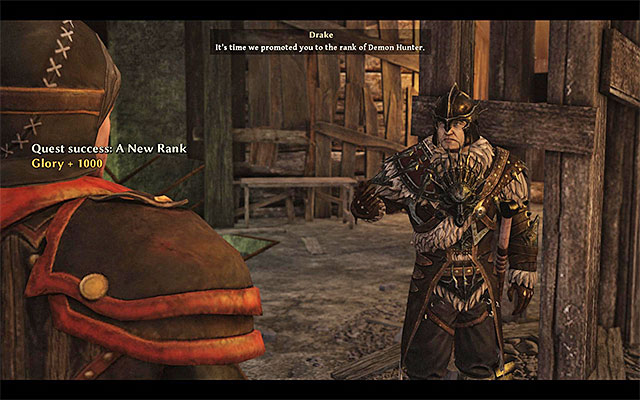 Give the books to Wilson and return to Drake
When you have all the books, go back to Wilson in the Citadel (number 9 on the map). Give him the volumes and you will receive 400 glory points, 400 gold and 2 x Tome of Ancient Knowledge. Meet with Drake (number 18 on the map) once again and wait until you are promoted to a Demon Hunter.
Rewards:
How to unlock: Talk to Drake.
Quest giver: Drake (number 18 on the map)
Attention - this quest is available only after you join the demon hunters!
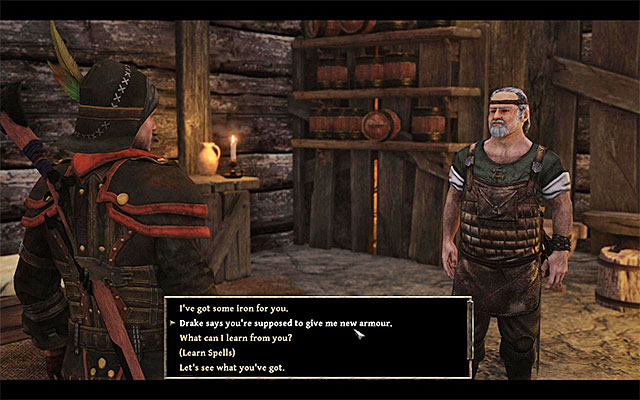 Wilson will give the Nameless Hero a new armour
This quest starts automatically after completing the "A New Rank" side quest, which means being promoted to a Demon Hunter. Drake (number 18 on the map) will send the hero to Wilson (number 9 on the map). Head to the smith and talk to him to obtain new equipment.
Rewards:
How to unlock: Talk do Drake.
Quest giver: Drake (number 18 on the map)
Attention - this quest is available only after joining the demon hunters!
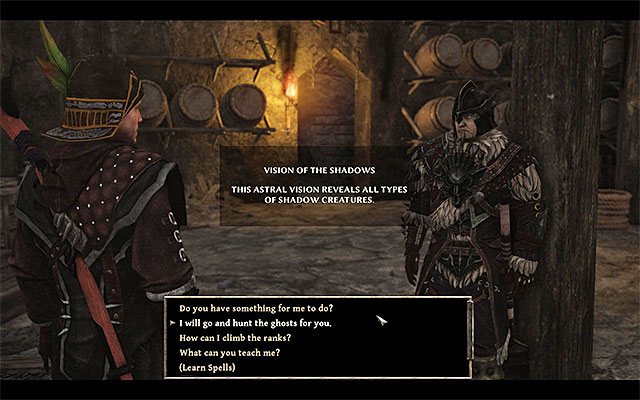 You have to go search for ghosts
This quest can be started after joining the demon hunters faction and you have to meet Drake, who should be somewhere on the ground floor of the citadel (number 18 on the map), to unlock it. During the conversation, Drake will ask you to locate and banish six evil ghosts that inhabit the woods in the west part of Calador. Drake will teach the hero the Vision of the Shadows skill for free and it will be helpful in finding the ghosts.
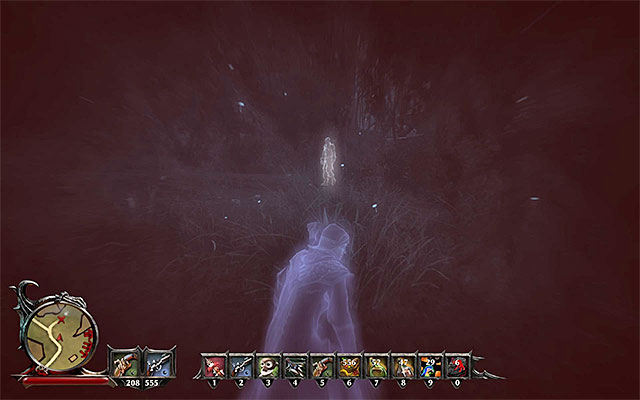 Astral Vision is helpful when searching for the ghosts, but you don't have to use it
To find the Horrified Ghosts, you have to head to the western part of Calador. They are located near a hunting cabin (number 18a on the map). If you want to follow Drake's suggestion, you can go there in the night or use Astral Vision with the new enhancement, but you will be able to locate the ghosts quite easily without that.
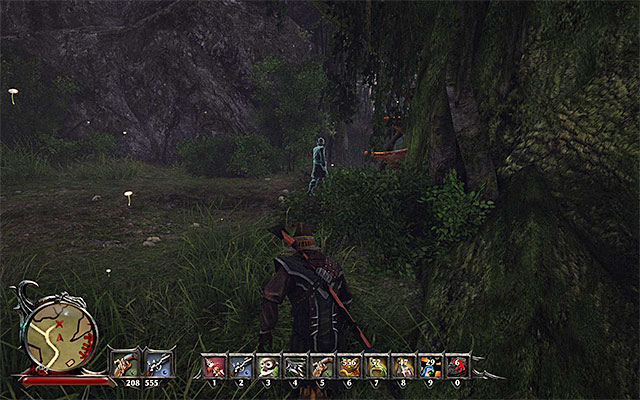 Stop near the ghost and wait until he starts walking
It is a VERY IMPORTANT information that you cannot be spotted by any ghost, as it will make the disappear and you will fail the quest. Fortunately, their field of view is not very wide. Start from placing yourself in some distance from the ghost and wait until he begins his march.
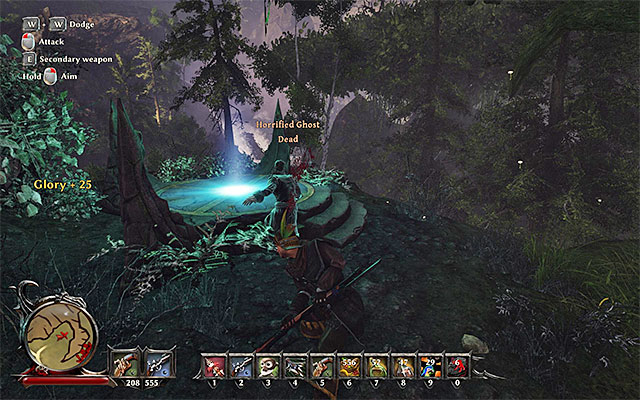 Sneak to each ghost and attack them
When the ghost starts moving, approach him as fast as you can. You don't have to use stealth stance, but only avoid sprinting. Sneak to the ghost from behind and eliminate it using a melee or a ranged attack. You have to get rid of six ghosts this way. For every successful action, you will earn 25 glory points. After completing the quest, talk to Drake again.
Attention - from now on, Drake can teach you a new spell - Summon Shadow Warrior.
Rewards:
How to unlock: Talk to Mason.
Quest giver: Mason (number 8 on the map)
Attention - this quest is available only after joining the demon hunters!
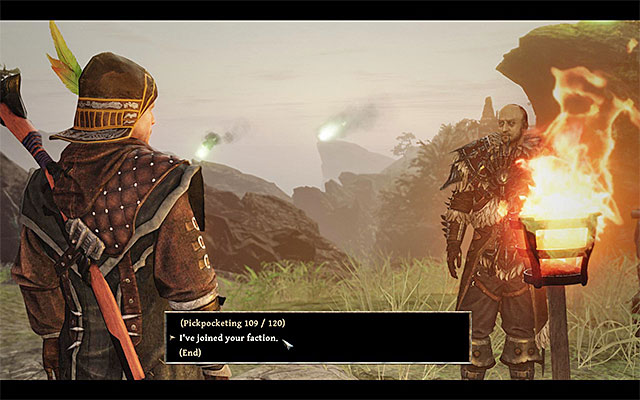 Mason stands at the entrance to the Citadel
Mason can be found near the entrance to the Citadel (number 8 on the map) and it is good to talk to him after you join the demon hunters. Mason will tell you about plunderers that have their hideout nearby and you will be asked to get rid of them.
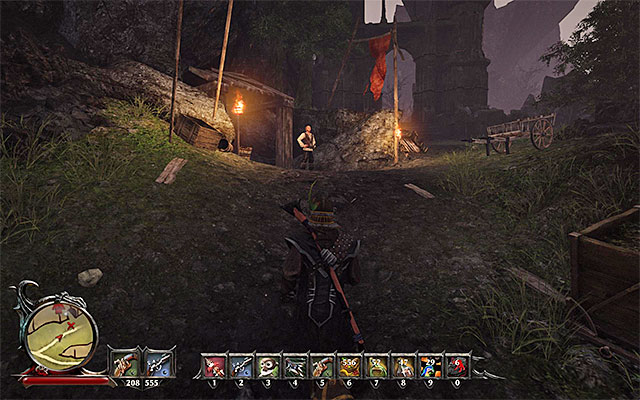 Lloyd at the entrance to the mine
The bandits can be found in a mine located north of the Citadel (number 8a on the map). You will see Lloyd standing near the entrance. If you want to, you can talk to him, but don't agree to enter the mine in his company, as you will be ambushed and the risk of being badly hurt will increase. It is best to take advantage of his initial hostility towards the Nameless Hero and attack him right away (100 glory points).
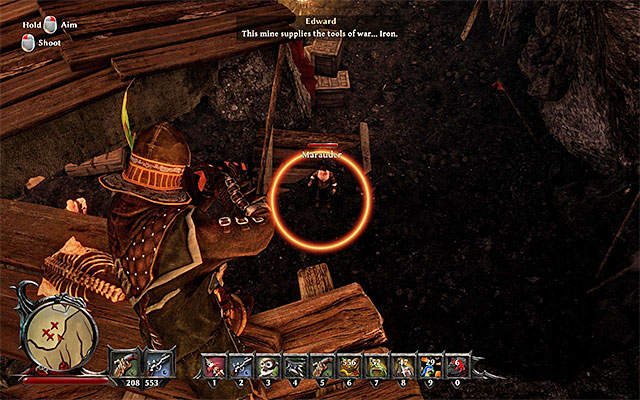 The rest of the bandits are inside the mine
There are three more Marauders in the mine. If you can, use ranged attacks from above them. You will earn 100 glory points for killing each opponent and 200 more glory points for eliminating them all. You can now return to Mason (number 8 on the map) and tell him about your success.
Rewards:
Way to unlock the quest: Talk to Yakov.
Quest giver: Yakov (point 19 on the map)
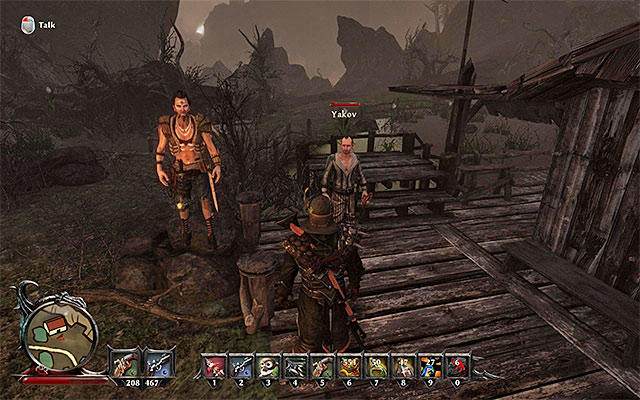 Yakov
YakovYou get the opportunity to unlock this quest after you have progressed to the third chapter of the game's story line, i.e. after you have gained access to the Eastern part of the Calador Bay (the areas at the other side of the lava river). You need to reach a small cottage in the deadlands (point 19 on the map) where you meet Yakov, among others.
Note - depending on decision taken, this quest may not even appear in your journal. Still, it is not a good idea to ignore it, just because of that.
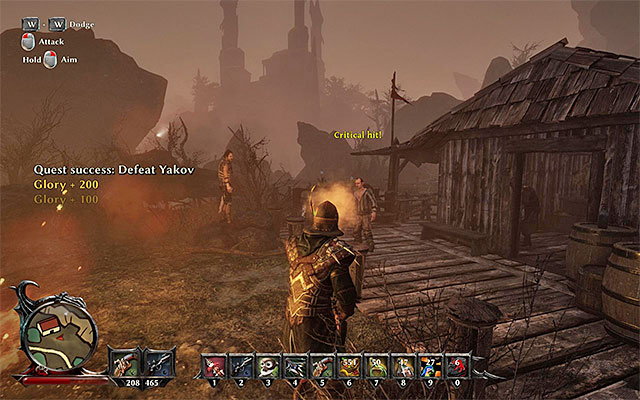 You can resolve the conflict amicably or beat Yakov
During a conversation, Yakov convinces you to buy Yakov's Lucky Spoon from him. You can spend 50 gold pieces on that. Talk to Yakov again and you will learn that you have been gypped. There are three ways in which you can react to that.:
Rewards for completing the quest:
Way to unlock the quest: Talk to Becca.
Quest giver: Becca (point 19 on the map)
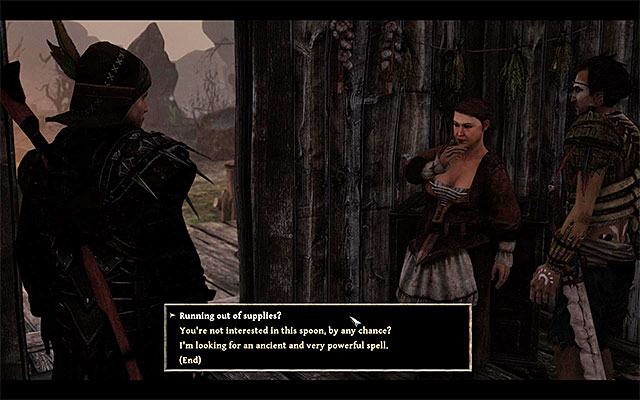 Becca
BeccaYou get the opportunity to unlock this quest after you have progressed to the third chapter of the game's story line, i.e. after you have gained access to the Eastern part of the Calador Bay (areas at the other side of the lava river). You need to reach a small cottage in the deadlands (point 19 on the map). Enter the cottage and talk to Becca, who asks you to eliminate monsters in the area. .
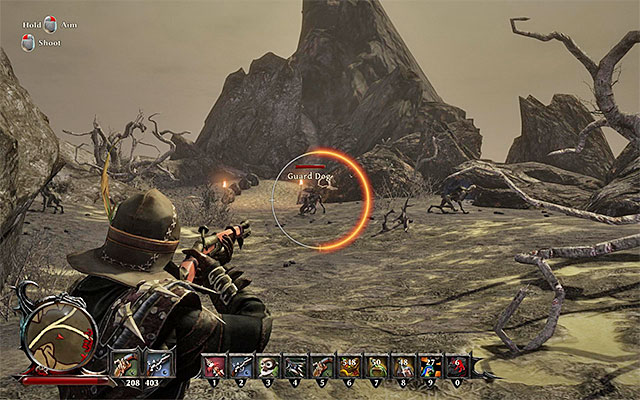 You can find the monsters in front of the lighthouse
Head South-West, towards the lighthouse. The monsters are staying in front of the lighthouse (point 19a on the map). You need to eliminate four Guard Dogs, i.e. Hellhounds and two Bone Guardians, i.e. minions. It should not be difficult to you, to kill all the monsters but, it is a good idea to attack them one-by-one. You can now return to Becca and tell her that you have eliminated the threat.
Rewards for completing the quest:
Way to unlock the quest: Talk to Graham.
Quest giver: Graham (point 19 on the map)
 Graham
You get the opportunity to unlock this quest after you have progressed to the third chapter of the game's story line, i.e. after you have gained access to the Eastern part of the Calador Bay (areas at the other side of the lava river). You need to reach a small cottage in the deadlands (point 19 on the map). You should run into Graham here and he will ask you to pick Crisp Turnips for him, from the nearby fields.
Note - if you cannot find Graham near the cottage, it is best to change the time of the day, thanks to which you will not have to run around the deadlands to find him.
 An example turnip that can be picked
You need to pick six Crisp Turnips and for that, you need to visit the small fields in the deadlands (point 19b on the map). After you are done, return with the turnips to Graham.
Rewards for completing the quest:
Way to unlock the quest: Talk to The Nameless One.
Quest giver: The Nameless One (point 21 on the map)
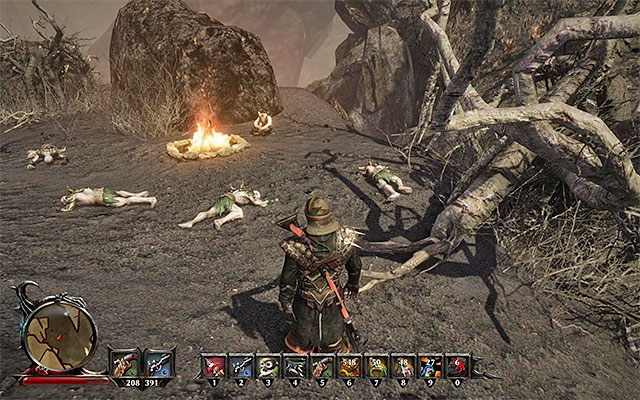 You can find the protagonist of the previous installments of the game, at the campfire
You get the opportunity to unlock this quest after you have progressed to the third chapter of the game's story line, i.e. after you have gained access to the Eastern part of the Calador Bay (areas at the other side of the lava river). While exploring the deadlands, you will run into a campfire with dead monsters around it (point 21 on the map). Talk to The Nameless One, i.e. the protagonist of the previous installments of the game. You can ask the Nameless One many interesting questions (about Patty, among others), or have a drink with him which will end this short quest.
Rewards for completing the quest:
The above map contains the reference points to all of the locations visited during your journey on the Kila Island, while doing the main quests. The red points symbolize the starting points of main quests, whereas the green ones show the locations visited during the completion of the quests.
Note - it is recommended to check out the map connected with the side quests of Kila Island, as many of the main and optional quests are closely connected.
How to unlock the quest: -
Quest giver: -
 The rope bridge leading to the Natives Village.
Most of the main quest done on the Kila Island are connected with the Natives Village. The headquarters of the Natives is located in the central point of the island (point N on the map). The easiest way to enter the village is to go through the main rope bridge, although you can also look around and locate a small passageway leading to a nearby cliff. The thing worth noting is the fact, that you can explore the village without any restrictions, as the Natives have a neutral attitude towards the Nameless Hero.
Note - you can also gain access to the Natives Village by completing the side quest "Unexpected Effect" with Borbor.
Rewards for completing the quest:
How to unlock the quest: automatically by completing the quest "Hunting for Treasure", which is done during your time on the Crab Coast.
Quest giver: Bones
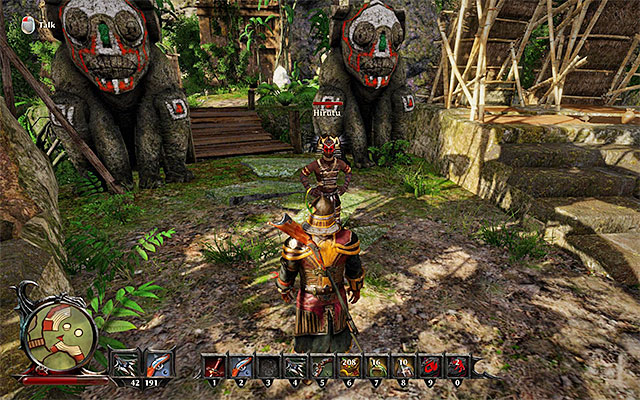 Hirutu
The quest is unlocked way before you even get to the Kila Island. It was done during the introduction to the proper campaign, or to be more specific, just after the main character was brought back to life by Bones. This quest is associated with visiting the headquarters of the three main fractions of the game, in hope of retrieving the soul of the Nameless Hero. A shaman called Hirutu (point 2 on the map) is one of the characters who you must speak with, as he represents the interest of the Natives. Have a conversation with Hirutu, after which you will be able to get another main quests associated with the mentioned fraction.
Note - meeting Hirutu is not synonymous with joining with the Natives. This type of choice will be given to you in the future.
Note - if you are inside of headquarters of a different fraction, go to the appropriate section of this guide (main quests of the Calador Bay or main quests of the Taranis Island).
Rewards for completing the quest:
How to unlock the quest: through conversation with Bones (at any given moment).
Quest giver: Bones
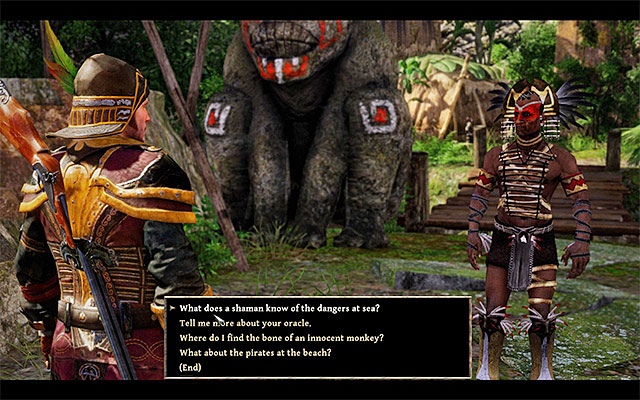 You will have to complete a couple of tasks for the Natives.
As it was mentioned before in the Crab Coast's main quest section, this quest can be unlocked in any given moment of the game, and it is done through a conversation with Bones. This quest is divided into three main parts, and the one associated with the Natives can be done during your stay on the Kila Island. You need to meet with a shaman called Hirutu, who can be found in the Natives Village, in the jungle (point 2 on the map). During the conversation, offer your services in resolving the local problems to the shaman. Afterwards, Hirutu will send you to meet with Tenya.
Note - during your first conversation with Hirutu, you can use your Intimidation skill, provided that you have developed it to at least 40 points. Thanks to that, you will be given 2 Gold Ores.
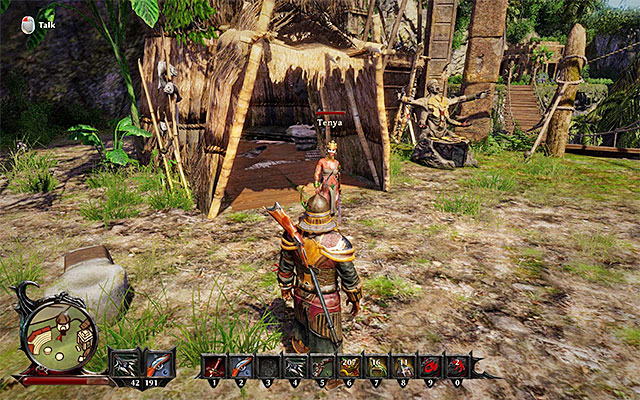 Tenya
TenyaYou can find Tenya close to the location in which you've met the shaman (point 2a on the map). By having a conversation with her you will learn, that you can help her with gathering the resources needed to construct the Scepter of the Ancestors. Tenya will send the Nameless Hero to three stone tablets, each containing the instructions about the things that must be done in order to gather the necessary components.
Note - Tenya is also an ability trainer and a dealer.
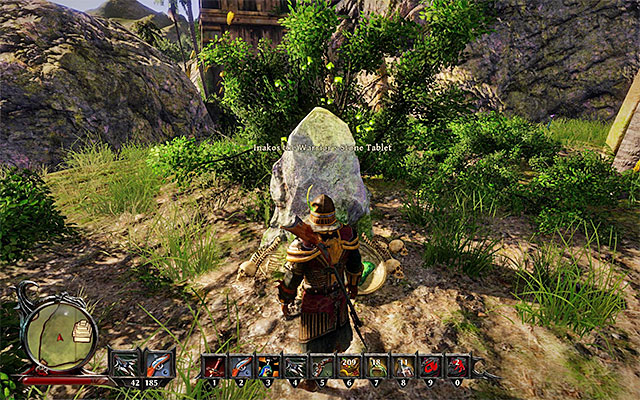 One of the stone tablets.
The stone tablets are located in various parts of the jungle (points 2b on the map) and you can visit them in any order you want to. After reaching each one of them, you need to interact with it and let the Nameless Hero read the message written on it. By visiting all three of the stone tablets, the journal of the Nameless Hero will be updated with four reference points associated with the Scepter of the Ancients.
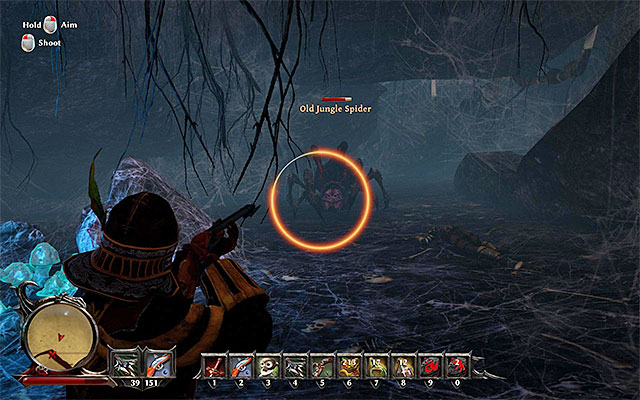 Kill the Panther.
It's recommended to start off with the task requiring you to kill the panther located in the jungle. You need to get to the North-Eastern section of the jungle (point 2c on the map). Locate the panther (Strong Panther) and kill it (gaining 300 Glory Points in the process), remembering about dodging the attacks of the beast during the fight. After killing the animal, examine the body and collect it's heart (Panther Heart) (100 Glory Points).
 One of the entrances to the spiders cave.
The next task, that you must complete, is to collect the leg of a spider. To do so, you much visit a spiders cave located in the Eastern part of the island. There are two entrances leading to the cave (points 2d on the map) - one of them is in the Eastern jungle, the second is located near the pirate camp on the beach. You can choose whichever suits you more.
You must eliminate the big spider.After entering and beginning your exploration through the cave, you must be careful of various kinds of spiders you will encounter inside of it. Your main goal is to get inside the cavern, in which the Old Jungle Spider is lurking (point 2e on the map). After engaging the huge spider in combat, remember about constantly dodging its attacks. Avoid his attempts to use his venom on your, as well as the smaller monsters, which will probably aid it in battle. After you emerge victorious (for which you will be rewarded with 200 Glory Points), examine the monster's carcass to collect its leg (Sturdy Spider Leg) (100 Glory Points).
 The best method to get to the pearl is to swim there.
The next trial is associated with the acquisition of a pearl (Shimmering Pearl). You have to reach a small creek located in the North-Western part of the pirates beach (point 2f on the map). The easiest way to achieve that is to simply swim there, allowing you to avoid the rocks, which would block your way if you were to try to get there by going in a straight line.
 You must find the right shell and open it from your inventory menu.
The area surrounding the pearl is guarded by a group of Water Lizards and Sand Devils, although you should have no problem eliminating such weak enemies as of now. After getting rid of the obstacle, start picking up the Shells and examine them from your inventory menu. In my case, the sought Shimmering Pearl was inside one of the shells located in the South-Western part of the creek. (100 Glory Points).
The last task you need to complete for Tenya is to locate a Huge Chuck of Jade. Remain in the creek in which you've found the pearl and go North (point 2g on the map). Enter the water and swim all the way towards the area marked on the map. You need to locate the passage between rocks, which can be seen on the above screenshot. Swim to the shore, eliminate the Sand Devil and locate the Huge Chunk of Jade (100 Glory Points).
 Give all of the Scepter's components to Tenya.
Because you have collected all the components needed to construct the Scepter of the Ancestors, you can go back to the village and speak with Tenya again (point 2a on the map). For each component of the Scepter you will be given 200 Glory Points and 500 Gold, summing up to 800 Glory Points and 2000 Gold for all of them. Besides that, you will be given special rewards. After the meeting with Tenya is finished go back to Hirutu and inform him that you delivered the components of the Scepter to Tenya.
Note - This quest can only be completed when you have previously met Admiral Alvarez on Antigua during the main quest "Report for Admiral Alvarez". Completing this also means that you join one of the three factions (the Demon Hunters, the Natives, or the Mages), which is an IRREVERSIBLE DECISION. Joining with the Natives unlocks many new quests and activities related to this faction (e.g. buying voodoo spells), BUT you will not be able to join any other faction. Therefore, you should carefully consider that decision and choose the faction that best fits your preferred play style.
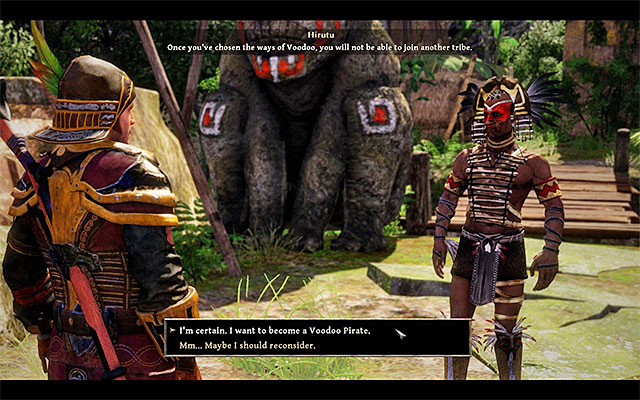 Once made, the decision to join the Natives is irreversible!
If you want to side with the Natives and you have met all the requirements (the activities described here plus meeting Alvarez), you can again talk to Hirutu the chief and confirm that you want to proceed with the rites of passage. The Nameless Hero will be accepted to the Natives and get the lowest rank of a Voodoo Pirate.
Rewards for completing the mission:
Unlocking the quest: Talk to Alvarez (Antigua island).
The quest giver: Alvarez
 Get on board of the ship and talk with Jake, who knows the Nameless Hero
You may have unlocked this quest during your stay on Antigua island, specifically after meeting with Admiral Alvarez and doing an opening quest for him. Alvarez asked the main hero to acquire new allies, who would lend their hand with destroying a fleet of pirate ghost ships. One of the factions you can ask for help are the Natives from Kila island.
After reaching Kila island, you can either immediately head to the Natives Village (N on the map) or first talk to Jake, the captain of a floating vessel that belongs to this faction. The ship lays at anchor near the pirates beach (point 1 on the map), where you can either swim to or use one of the boats by the shore. Once you get on board of the ship, find Jake and talk to him. Jake knows the Nameless Hero but is not willing to pass the command on the vessel on him neither to take care of the ghost ships problem. Jake may change his mind, if the Nameless Hero improves his reputation among the ship's crew, so after he recovers a part of his soul and gain the support of the Natives on Kila.
 After joining with the Natives you will be able to take command over the ship
Meet Jake again after you have decided to join the Natives. Interestingly, you do not have to wait until you are promoted to a Voodoo Master, so you can do that while still being a Voodoo Pirate. As a result of the meeting with Jake, the main hero becomes the new captain of the Natives Ship.
Note - Since that moment, you can permanently add to your company people who are interested in joining the Nameless Hero's crew (previously, some of them did not want to join the protagonist, because he only had a small sloop that belonged to Bones).
Rewards for completing the quest:
Way to unlock the quest: Talk to Baraka.
Quest giver: Baraka (point 3 on the map)
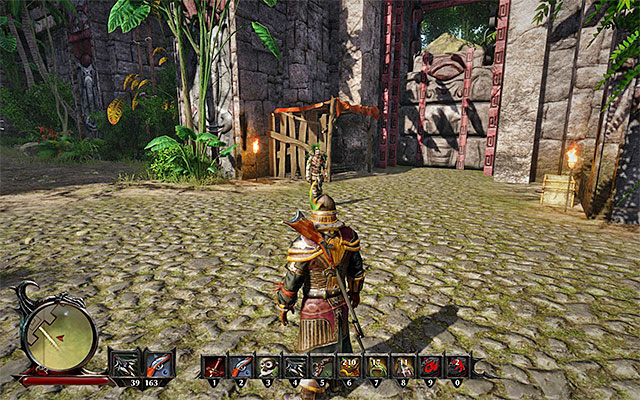 Guards the gate
Baraka is one of the natives and his job is to guard the large gate (point 3 on the map) to the Forbidden Valley. He will refuse to let you in, before you obtain Ancient Knowledge.
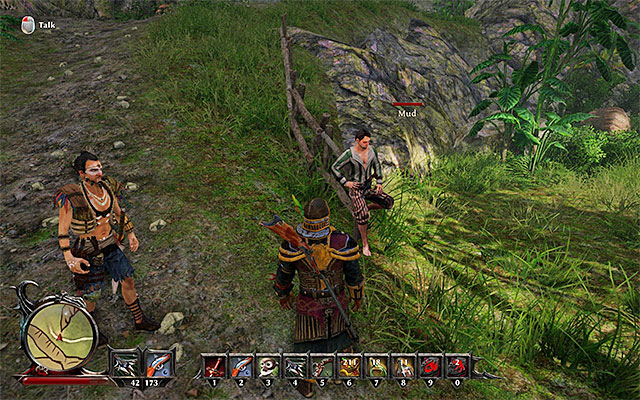 Mud is very irritating
To the South-East of the gate guarded by Baraka, you meet Mud (point 3a on the map), who joins your party without asking. Mud wants you to accompany him to the temple in the Forbidden Valley, where he can obtain its riches. He is a very irritating "helper". Mud is not going to take part in fights and he only accosts you, every now and then.
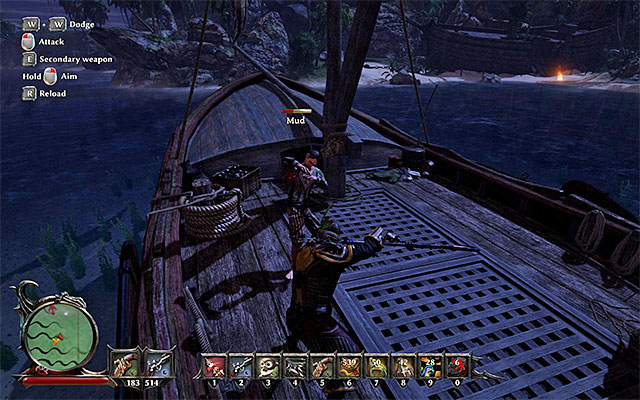 You can pay Mud to go away, or mug him
Of course, you can allow Mud to follow you around. Still, if he annoys you, there are three ways to solve this problem. The first option is to leave Kala but, this is only a temporary solution, because he joins you again, after you return to the isle. The second option is to give 1000 gold pieces to Mud, to make him go away. This variant becomes available only after some time. The final, third option is to mug Mud several times (at best in melee) and threaten him to kill him. The guy leaves your party for good, but you are punished with several negative soul points.
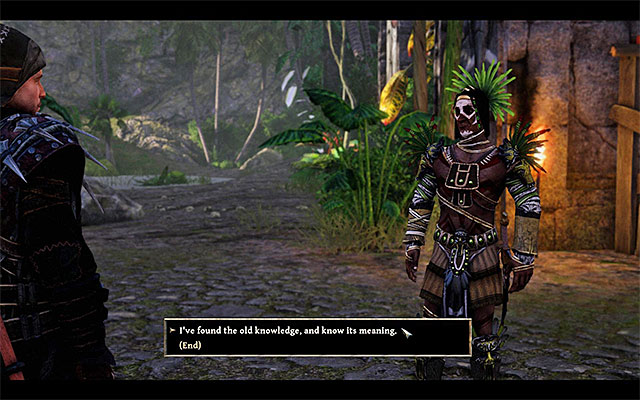 Baraka lets you through only after you progress to the third chapter
Meet up with Baraka again, only after you have progressed to the third chapter of the game's story line, i.e. after you have completed the "The Ancient Knowledge" main quest in Calador. Let the Native know that you have learned the ancient knowledge and you will be admitted into the Forbidden Valley.
Rewards for completing the quest:
Way to unlock the quest: Talk to Eldric (Calador Bay).
Quest giver: Eldric
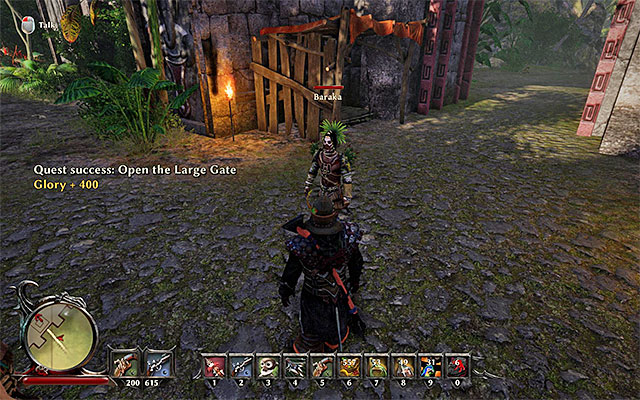 You can reach the location, where Chani is, after you have opened the Large Gate
You could unlock the quest in the Calador Bay after you have progressed to the third chapter of the game's story line and after you have started preparations for the spirit ritual. One of three people that need to take part in the ritual, is a voodoo witch Chani and she is staying on Kila., Chani's cottage is in the Forbidden Valley that is inaccessible, by default and therefore you need to open the large gate in the jungle (point 3 on the map). To learn how to do that, see the walkthrough for the "Open the Large Gate" main quest.
 Chani's cottage in the Forbidden Valley
After you have gained access to the Eastern part of the isle, head towards the cottage in the Forbidden Valley (point 4 on the map). Around, there mainly are weak monsters, but you should watch out for Alligators and Grave Spiders. After you have reached the cottage, talk to Chani. From her, you will learn more about the problems of the locals, with the Oracle. Apart from that, it will turn out that Chani is not going to help you with the ritual, unless you help her first. First, two main quests become active - "Lost in the Forbidden Valley" and "Speak to the Oracle". To complete this quest, you only need to complete the former, i.e. find the lost Native Damaka.
 Return to Chani after you have completed two quests at the Forbidden Valley
After you have found Damaka, you will receive another quest from Chani - "The Oracle's Soldiers". Your task is to kill the overgrown spiders. It is compulsory to complete this quest also, because this is the only way in which you can secure Chani's help. After you complete the quest, meet up with Chani again. Ask her to take part in the spirit ritual, which she will finally agree to.
Note - I recommend that, before you leave Kila, you also visit the temple in the Forbidden Valley. Thanks to this, you will complete the "The Right Place" main quest.
 Jake is aboard the Natives' ship
Note - If you joined the Demon Hunters or the Crystal mages earlier, after you recruit Chani, you need to do one more thing. Reach the Natives' ship that is moored close to the pirate beach, on the Kila isle, which is commanded by Jake (point 1 on the map). During the conversation with Jake force him to join your fleet, which will earn you 400 Glory Points.
Rewards for completing the quest:
Way to unlock the quest: Talk to Eldric (Calador Bay).
Quest giver: Eldric
 You need to receive the quest to meet with the Oracle, from Chani
You could unlock this quest at the Calador Bay, after you have progressed to the third chapter of the game's story line and started your preparations for the spirit ritual. One of the requirements for the ritual to take place, is to find an appropriate location, which is to be separated from the rest o the world with magic. This means the Oracle's den on the Kila isle. You can reach the Oracle's den thanks to completing the "Speak to the Oracle" main quest that you receive from Chani (point 4 on the map). See the walkthrough for this quest to learn more.
 You need to meet up with Margoloth
You can attempt doing this quest after you have defeated Margoloth (The Oracle) at her den (point 4i on the map). This has been described in the walkthrough for the "Speak to the Oracle" main quest. Winning the battle with Margoloth automatically starts a cutscene of a conversation with the Oracle. During the conversation, bring up the topic of your character's soul and assure that the locals are no threat to Margoloth. As a result, set out to find another Titan Lord, who is responsible for this whole mess.
 The Shadow Lord of Discord
The Shadow Lord of Discord is staying at the chamber that neighbors the Oracle's den (point 4j on the map). You can find with him, without any additional help, or leave to the surface, in the first place and rejoin an ally to the party. Just like in the case of fights with the other lords, remain in constant movement, avoid the Lord's strong attacks and land the best blows you can. After you have defeated the monster (600 Glory Points) also remember to examine his body to obtain the Raw Black Heart.
Note - In the place where the Shadow Lord of Discord is staying, there also is a crystal portal, connected with the "The Realm of the Shadows" quest. It is a good idea to smash it, while you are here.
 Meet the Oracle again
You can now return to Margoloth. Let the Oracle know that the Titan Lord has been neutralized and ask her to lend the den for the spirit ritual. This is the end of this quest.
Note - You can leave Margoloth's den in two different ways - by activating the nearby teleporter or by crossing the quite vast spider caves.
Rewards for completing the quest:
Way to unlock the quest: Talk to Chani.
Quest giver: Chani (point 4 on the map)
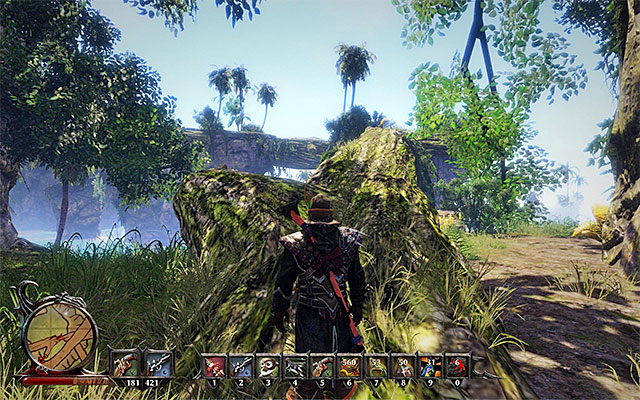
You can unlock this quest during your conversation with Chani at the Forbidden Valley (point 4 on the map) and it is compulsory to complete it, in order to complete the "Recruit Chani" main quest. The voodoo witch asks you to find the lost warrior named Damaka and, as a result, you need to go find him. It is not easy to reach the warrior's possible staying place (point 4c on the map) because you need to reach a ledge high above that seems to be inaccessible. Start Northwards of Chani's staying place (point 4b on the map). Locate the tree shown in the above screenshot, climb it and go West.
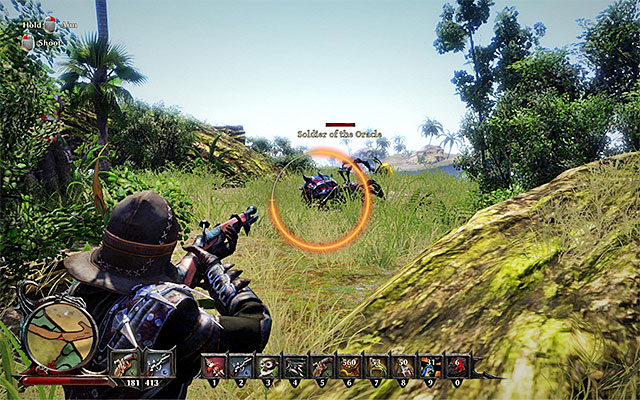 Among others, you will have to defeat a big spider
Along your path, eliminate the Jungle Spiders. Also, be prepared to eliminate a Soldier of the Oracle, i.e. one of the big spiders connected with another quest from Chani, which you receive a bit later. Of course, the spider is tougher and deals more damage so, rely on strong attacks and do not forget to take frequent dodges. Also, do not let the monsters push you off the ledge, because a fall from this height means a certain death.
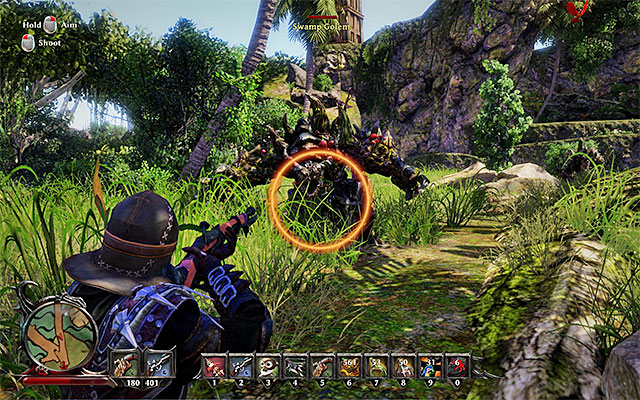 Watch out for the golems
After you have secured the first ledge, walk over another big tree, onto the ledge to the South of here. You need to be very careful here, because there are, among others, two Swamp Golems. It is optional to eliminate the golems but, if you decide to do it, attack them one-by-one and remember to stay away from the edge at all times.
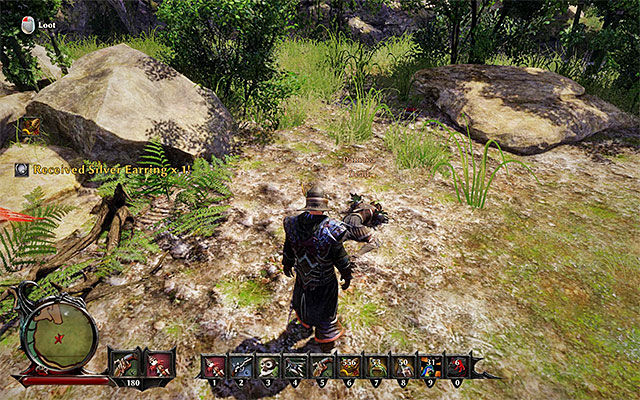 The dead Damaka
Regardless of whether you killed the golems, or not take a look around, in the spot indicated by the game (point 4c on the map). You will find several dead natives here and, unfortunately, Damaka is one of them. Examine his corpse and return to Chani (point 4 on the map) to let her know about the death of the warrior. You will receive another quest from her.
Rewards for completing the quest:
Way to unlock the quest: Talk to Chani.
Quest giver: Chani (point 4 on the map)
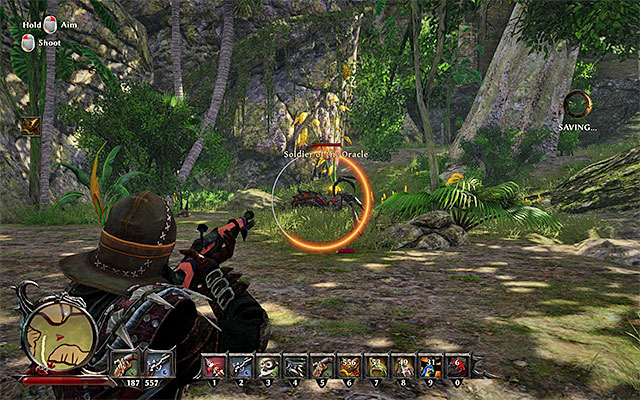 The first soldier of the oracle
This quest unlocks after you have completed the "Lost in the Forbidden Valley" main quest. During your conversation with Chani (point 4 on the map) you will be asked for another favor, i.e. murdering five title Soldiers of the Oracle, which are overgrown spiders. You can reach the hideouts of the spiders in any order you want. The first Soldier of the Oracle on the grassland, close to Chani's cottage (point 4d on the map). During the fight with the spider, remember to dodge frequently and to remain in constant movement. IT is also important to eliminate the smaller spiders quickly. For each soldier, you will receive 200 Glory Points.
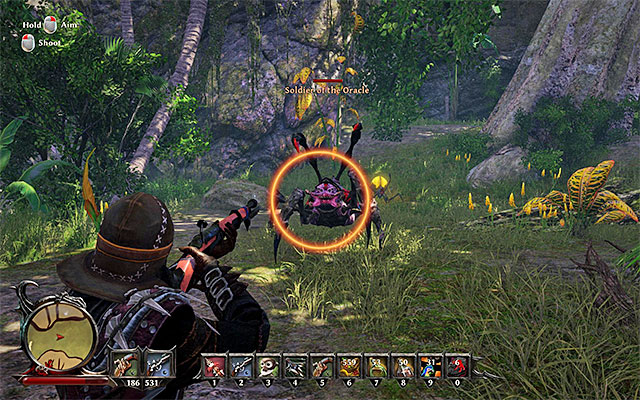 The second soldier of the oracle
The second Soldier of the Oracle is on a quite big grassland in the Northern part of the Forbidden Valley, to the West of the temple entrance. (point 4e on the map).
 The third soldier of the oracle
The third Soldier of the Oracle is a bit more difficult to find. The monster is staying on a small ledge in the Southern part of the Forbidden Valley (point 4f on the map). The only way to get to the ledge is to walk over the huge fallen tree.
 The fourth soldier of the oracle
The fourth Soldier of the Oracle is also on a ledge high above, which you can reach over the fallen tree (point 4g on the map). You may have killed this monster during your search for Damaka, while completing the previous quest from Chani.
 The fifth soldier of the oracle
The last, fifth, Soldier of the Oracle is staying on a ledge above, in the central part of the Forbidden Valley (point 4h on the map). Just like in the case of the previous two spiders, you need to find a fallen tree to walk over. After you have eliminated all of the spiders, return to Chani (point 4 on the map).
Note - you can now complete another main quest - "Recruit Chani". You simply need to ask her to help with the ritual, during the last conversation that you have.
Rewards for completing the quest:
Way to unlock the quest: Talk to Chani.
Quest giver: Chani (point 4 on the map)
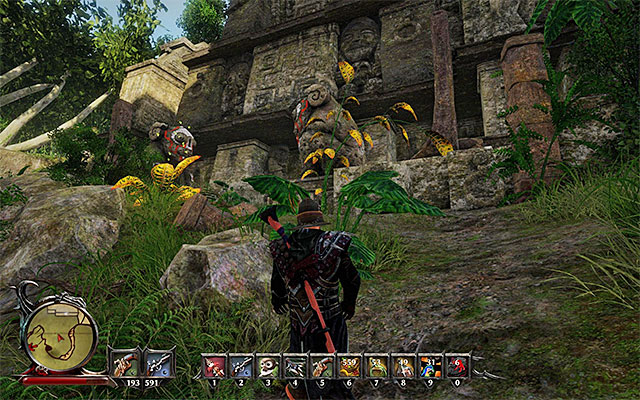 The temple
You can unlock this quest during your conversation with Chani at the Forbidden Valley (point 4 on the map). It is required to be completed, if you want to complete the "The Right Place" quest, connected with fining an ideal spot to perform the spirit ritual. During the conversation with Chani, you will learn about the option to meet with the Oracle and reaching her den is the primary objective of this quest. First, reach the main entrance of the local temple located in the North-Eastern part of the valley (point 4a on the map). The entrance is being guarded by a group of Jungle Spiders, but they are not too much of a threat.
Note - before you walk into the temple, it is a good idea to get prepared a bit because, in several minutes, you will have to handle a quite difficult boss battle. Make sure that you have lots of supplies, such as healing supplies, ammo scrolls, etc.
 The sarcophagus with statue
After you enter the temple, take the first turn to the left. Kill the Jungle Spider and open the Sarcophagus, where there is a Jade Statue. Collect the statue and return to the main corridor. Keep vigilant here, because there is a strong Guardian around, among others. It is necessary that you rely on the option to hop back and consider retreating out of the temple, to ensure yourself more space.
 Say goodbye to Mud
After you eliminate the Guardian, reach the first big chamber in the temple and kill the Large Jungle Spider. If you still have not got rid of Mud (the moment at which he joins the party has been presented in the walkthrough for the "Open the Large Gate" quest) he will now leave you and start searching the temple on his own. You will receive 3 positive soul points and 400 Glory Points for bringing Mud to the temple.
 The pedestal
In the main chamber of the temple, find the pedestal and place the jade statue, which you have just collected, on it. This will unlock a new passage so, climb to the ledge above and go ahead. Take your time, while crossing the temple, because you will soon be attacked by another Guardian, who is additionally accompanied by Black Ghouls. Eliminate all of them, try to attack them one-by-one and do not let yourself be cornered.
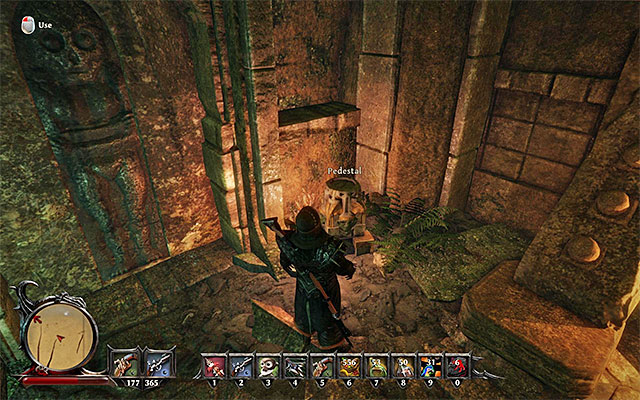 The second pedestal
After you have secured the area, find another Jade Statue on the boulder, next to one of the campfires. Collect it, walk into the next chamber and, just like before, put the statue on the pedestal. Go ahead and eliminate the Rock Spider among others. After you walk into the next, bigger chamber, a fragment of the floor collapses and you will automatically start the fight with Margoloth, i.e. The Oracle.
Note - if you have the Monkey Trainer skill, along your path to the den, you can set the monkey out and reach several additional treasures, thanks to it.
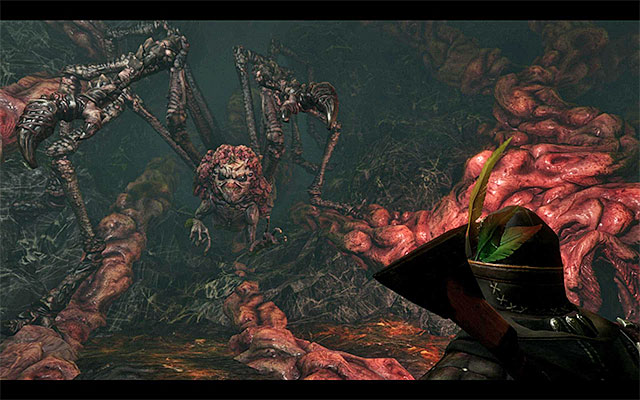 Margoloth
First of all, several words about the battle with Margoloth. The party member will not take part in the battle. This does not mean that you cannot count on him for his backup, because you can, e.g. temporarily summon magical ally, thanks to rune magic. In order to win the fight, you need to drain Margoloth's entire health bar, on the top of the screen. It is optional to eliminate all of the other spiders, although their presence will be obstructing you, to a greater or lesser extent, from landing your attacks.
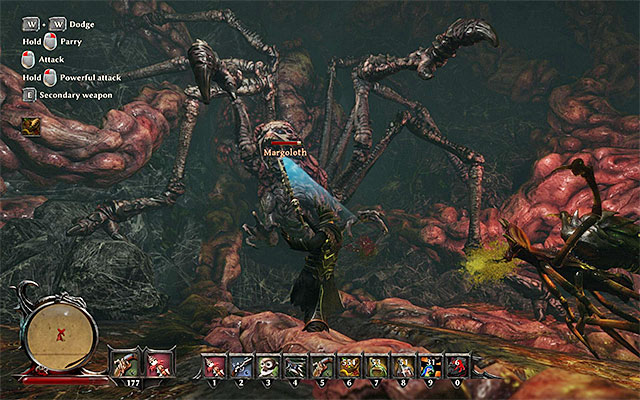 Melee fight is not a good idea
Margoloth's health bar can be drained in several ways. Using melee weapon is, definitely, the worst idea, because the Oracle will be able to block the majority of your attacks and also land her own, strong attacks, which drains your character's health.
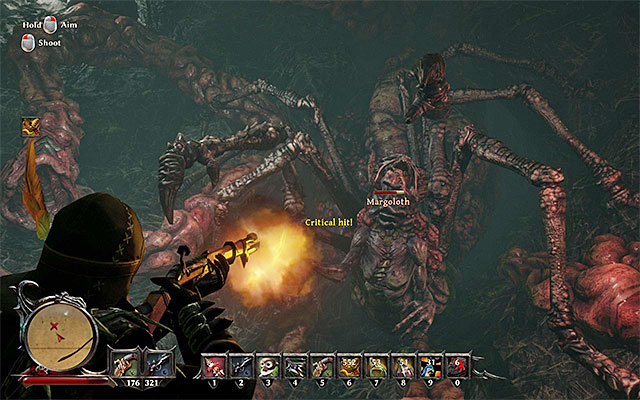 It is best to attack the Oracle at long range
A much better way to weaken Margoloth is to attack her at a long range. Personally, I recommend that you use the musket, which ensures you with the comfort of firing from afar. Just as well, you can use the shotgun (come closer then) or any offensive spells. In the latter case, I recommend that you use AoE spells, so you can also attack the other monsters.
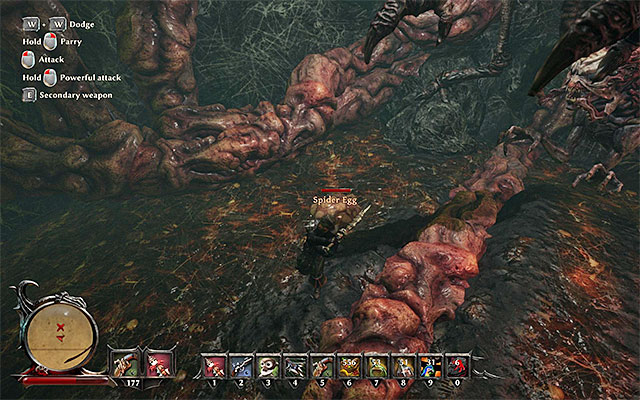 An example egg
As I have already mentioned, you will be (quite effectively) obstructed from attacking Margoloth by the spiders that keep incoming into the den (killing them only brings in another wave). If you want to, you can search out opportunities to smash the "harmless" spider eggs, although the bad news is that it is not as easy as it may seem.
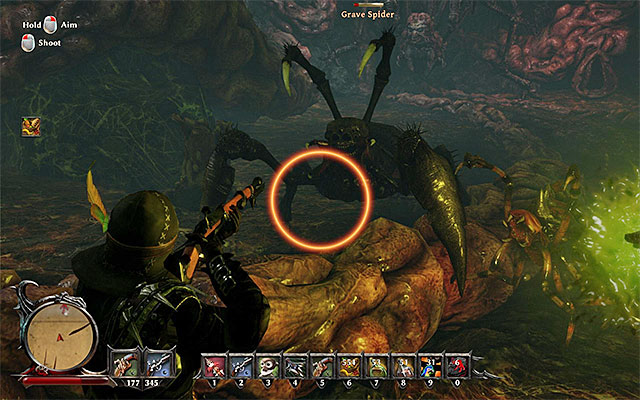 Eliminate, mainly, the larger spiders
As for the monsters that accompany Margoloth, I recommend that you only focus on the elimination of the Grave Spiders, because they pose the greatest threat. If possible, try to ignore the rest of the spiders, to avoid making the battle longer. A very good way to deal with the spiders is summon the magical ally. I recommend that you use spells of the rune magic, such as Summon Hellhound or Summon Shadow Warrior.
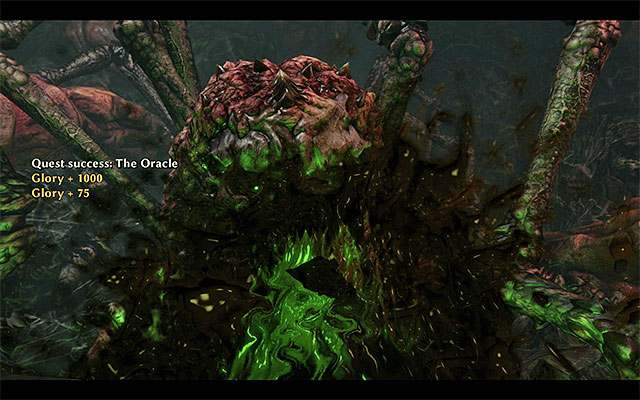 You need to defeat Margoloth
Continue attacking Margoloth. A very important thing is to prevent the Oracle from healing herself in any way. As soon as you notice that Margoloth is (partially) trying to heal herself, attack her with ranged weapon or spells, to prevent that. Draining Margoloth's entire health bar ends the battle and completes this quest. You can now talk to the Oracle and return to the "The Right Place" main quest.
Rewards for completing the quest:
Way to unlock the quest: Talk to Eldric (Calador Bay).
Quest giver: Eldric
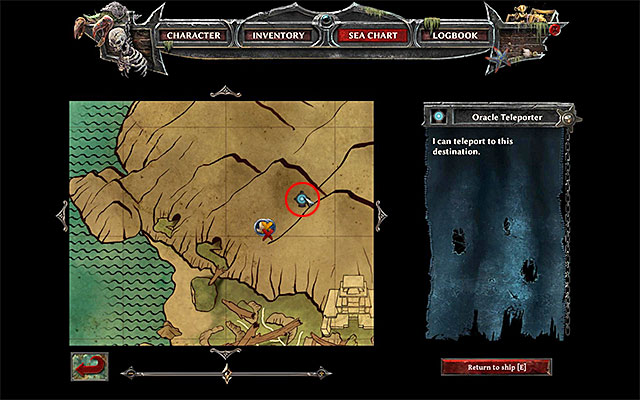
This is the main quest in the third chapter of the game's story line, which you may have unlocked in Calador Bay, after talking to druid Eldric. You can finish this quest after you have made preparations for the spirit ritual (recruiting three powerful mages, obtaining the scroll with the spell and finding the Oracle's den). To continue, you need to get to Kila. Your destination is Margoloth' den (point 4i on the map). The easiest way to get there is use the teleporter neighboring the den (the above screenshot), but you can just as well, cross the temple in the Forbidden Valley.
 Join the other characters in Margoloth's den
After you have reached the den, approach the characters staying here and initiate the conversation with Eldric to have him start the ritual (400 Glory Points). The final of the ritual is quite unexpected. Listen to the conversation with Nekroloth, which ends this quests and progresses the game to the fourth chapter of the game's story line.
Rewards for completing the quest:
The way to unlock the quest: Talk to Bones.
Quest giver: Bones
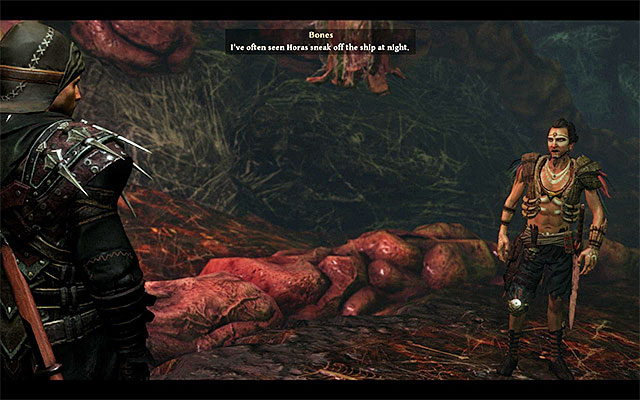 Talk to Bones and to Margoloth
You can unlock this quest after you have completed the third chapter of the game's main story line so, after you have performed all of the actions connected with the soul ritual in the den f the Oracle on Kila (point 4i on the map). Remain in the den. First of all, talk to Margoloth about the appearance of Nekroloth. Then, talk to Bones (He may either be in the den of the Oracle, or on the ship of your character, near the Pirate Bay). He will single out Horas as the traitor and the one that helped Nekroloth realize his plans. Meeting Bones unlocks this quest.
 Demand your promotion within the ranks of the faction that you have chosen
BEFORE you take to finding Horas, it is a good idea to complete a small quest, first of all, i.e. return to the HQ of the faction that you gave joined in the third chapter of the game. Talk to the character that you have met earlier, during the quests connected with your promotion in the ranks of the faction (Drake at the Calador Citadel in the case of the Demon Hunters, Hirutu on Kila in the case of the Natives or Magnus on Taranis, in the case of the Crystal Mages). Ask them to get promoted to the higher rank and receive new elements of your outfit (2000 experience points).
Note - you now need to see the chapter concerned with the main quests on the Taranis isle, because this is where Horas fled.
The above map contains the reference points to all of the locations visited during your journey on the Kila Island, while doing the additional quests. The red points symbolize the starting points of additional quests, whereas the green ones show the locations visited during the completion of the quests.
Note - it is recommended to check out the map connected with the main quests of Kila Island, as many of the main and optional quests are closely connected.
How to unlock the quest: through conversation with Hawkins.
Quest giver: Hawkins (points 1 on the map)
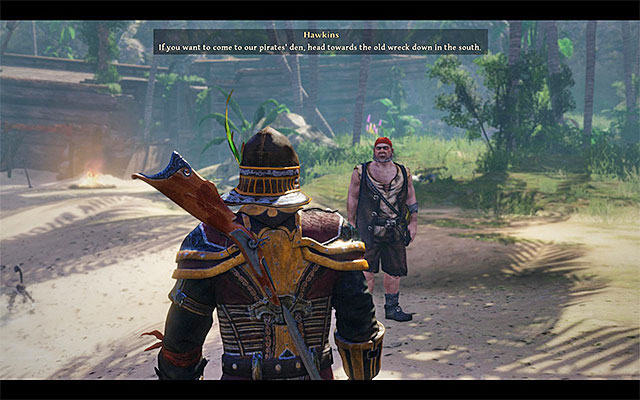 Hawkins
After getting to the pirates beach you need to locate Hawkins, which can either be near the shore, or by the ship wreckage (points 1 on the map). The conversation with Hawkins can begin only if he is not talking to himself at the moment. Otherwise, you will need to wait a few in-game hours and try again. Hawkins will recommend the Nameless Hero to meet with a native called Borbor, who, for unknown reasons, is watching the pirates from a nearby vantage point.
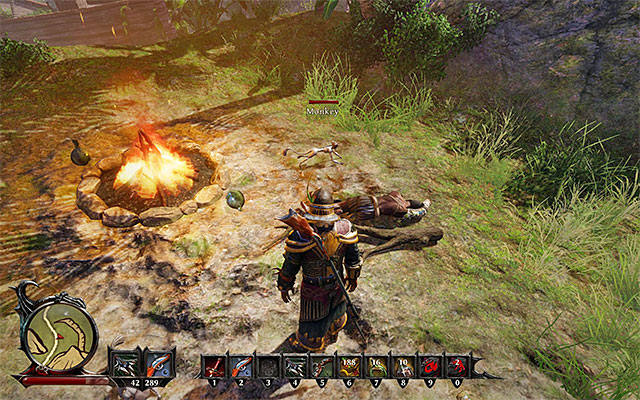 You will find the Native near a campfire.
Borbor's camp is located to the South of the beach (point 8 on the map). Initiate the conversation with the native, during which you will note that he drank to much booze. If you have your Silver Tongue ability developed to at leas 20 points, then you can persuade Borbor to give two bottles of Cheap Liquor to the Nameless Hero. Additionally, you can accept his offer to the natives headquarters located on the Kila Island together.
Note - Borbor is an ability trainer.
Rewards for completing the quest:
How to unlock the quest: through conversation with Hawkins.
Quest giver: Hawkins (points 1 on the map)
 Follow Hawkins and be ready to eliminate the spiders.
After getting to the pirates beach you need to locate Hawkins, which can either be near the shore, or by the ship wreckage (points 1 on the map). The conversation with Hawkins can begin only if he is not talking to himself at the moment. Otherwise, you will need to wait a few in-game hours and try again. During the meeting, tell Hawkins that he has hallucinations. After a brief conversation, the pirate will start his march through places, in which he hears voices and you must accompany him in this. It's a very simple quest, although you might have to kill a few Jungle Spiders, lurking in the area surrounding the pirate encampment. After reaching the last stop speak with Hawkins again. Before you finish the quest, you can use your Silver Tongue skill and persuade Hawkins to give you 150 Gold as a reward for helping him, but you will need 70 points in the skill to do so.
Rewards for completing the quest:
How to unlock the quest: through conversation with Booze.
Quest giver: Booze (point 2 on the map)
 Booze is standing near the ship wreckage.
After reaching the pirates beach, approach the big shipwreck. Locate Booze (point 2 on the map) and get closer to him to initiate the conversation. You will learn from Booze about a recent rebellion on the ship and you will notice that the man has lost some of his senses. Booze will ask the Nameless Hero to find out about the reasons for the delays in the deliveries of some valuable ingredients, what a man named Harry should be responsible for.
 Listen to Harry's plan.
Harry can be either found a little to the North from the shipwreck, or inside the nearby encampment (points 6 on the map). Initiate the conversation and bring up the topic of the ingredients demanded by Booze. (200 Glory Points). Harry will tell you that the ingredients are nothing else as spiders eggs, which are really hard to acquire. The pirate will tell you about his secret plan to outsmart Booze, by delivering him the Firebird Eggs, which are very similar to the ones he requested. The quest to acquire the eggs will be given to the Nameless Hero, obviously.
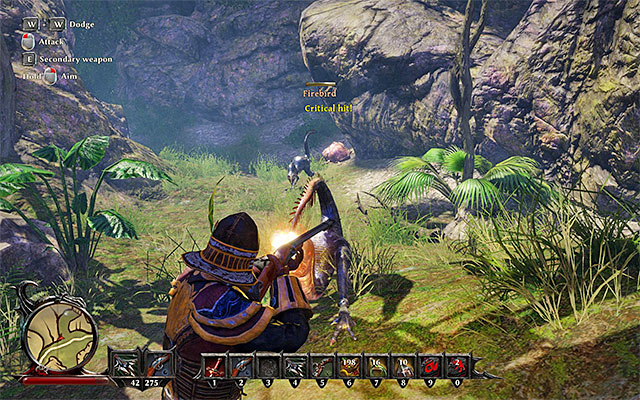 Defeat the Firebirds protecting the eggs.
Go to the jungle located to the South-West from the pirates beach and start the exploration. You will encounter a couple of Firebirds here, protecting and preventing the access to their eggs (point 2a on the map). Attack the beasts, remembering to avoid their somewhat swift attacks (dodges, parrying and ranged combat). After you've emerged victorious, approach the Firebird Eggs and collect all three of them (100 Glory Points). Afterwards, get back to Booze (point 2 on the map) and give the eggs to the man (200 Glory Points).
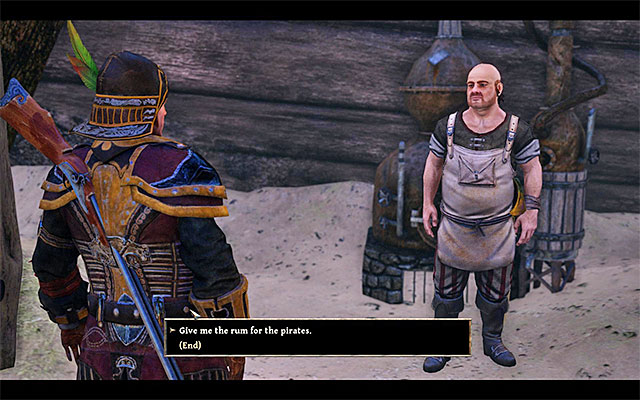 Booze will ask the Nameless Hero to deliver Rum to all the pirates inside the camp.
As Booze needs some time to prepare Rum, you will need to visit him again no sooner than next day (you can use the option to sleep, if you're impatient). Booze will give 8 bottles of Rum to the Nameless Hero and will ask him to redistribute it along the pirate camp.
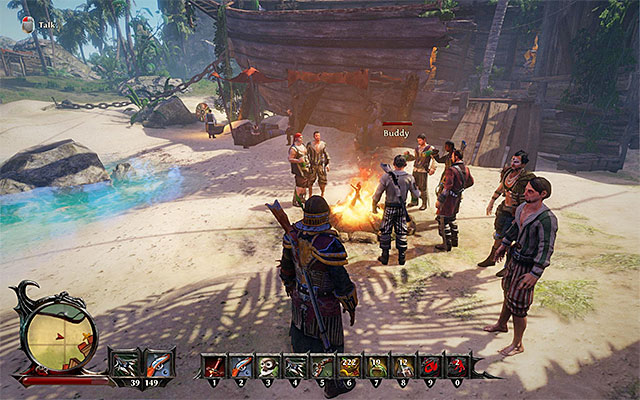 Join the pirates standing near the campfire.
The pirates, which you must visit, are Harry (point 6 on the map), Quinn (point 3 or 4 on the map), Colby (point 7 on the map), Buddy (point 3 on the map) and Cunningham (point 5 on the map), who, as the only one, will decline to consume it. After visiting the mentioned pirates wait for them to gather near the campfire by the beach (close to Booze) and join them (200 Glory Points).
Note - you can give Rum to other pirates (Saddec, for instance), but you won't gain anything by doing so.
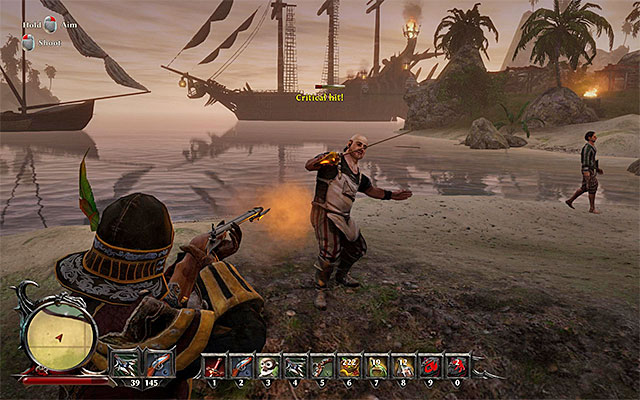 You must defeat Booze in direct combat.
As it turns out during the meeting, Booze planned to poison all the other pirates. Brace yourself, as you will be forces to face Booze in direct, full-fledged encounter. Rely on your dodges and try to parry his attacks, or try to keep him at distance (by using your ranged weapons and / or magic). After defeat (175 Glory Points), Booze will lose consciousness and, as a result, will return to his full, healthy mental state and the quest will be completed.
Note - during your duel, be careful not to attack any of the bystanders, who will be watching as you two fight. It can force the enemy to attack you, making the fight a lot harder, if not impossible.
Note - from this very moment you can revisit Booze to either train from him, or to trade with him.
Rewards for completing the quest:
How to unlock the quest: through conversation with Buddy.
Quest giver: Buddy (point 3 on the map)
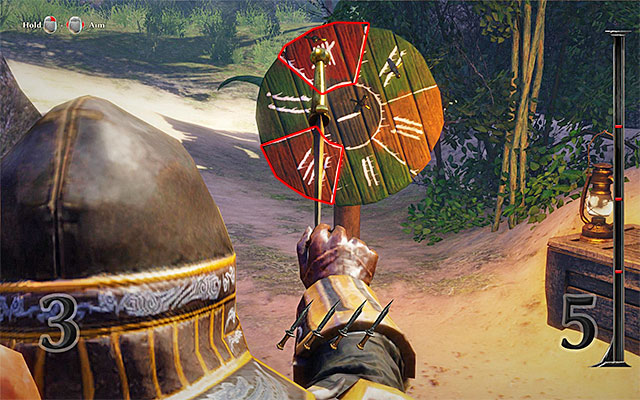
After reaching the pirates beach, approach the large wreckage of a ship. Afterwards, find Buddy (points 3 on the map) and speak with him. During the initial part of the conversation, you can make use of your Intimidation skill (you need at least 30 point in it) to frighten Buddy, for what you will be given Rum (and 1 negative point to your Soul). In the latter part of the meeting, you can accept his proposal to participate in a knife-throwing duel.
The rules of the mini-game are fairly simple. You have 5 throws at total, and you need to score more points than Buddy after you ran out of them. For each throw you can gain points ranging from zero (if you miss the shield) to a total of five (the places were marked on the above screenshot). After you are done aiming at the shield, you will have to make the throw in the appropriate moment, or to be more specific, when the right blue bar is in the right place. Depending on the moment you've pressed the key / button associated with the throw, the knife will fly straight ahead, or a little upwards / downwards.
If you have accumulated more points than Buddy did, you will receive, aside from the standard 100 gold for winning the challenge, a legendary item - Monocle.
Note - before you begin the real duel, it's a good idea to practice the mini-game a bit. The rules of it were described in the appropriate section of this guide.
Note - Buddy is also a trainer, as well as a dealer.
Rewards for completing the quest:
How to unlock the quest: through conversation with Buddy.
Quest giver: Buddy (point 3 on the map)
 Buddy will ask the Nameless Hero to help him with regaining access to the water supply.
After reaching the pirates beach, approach the large wreckage of a ship. Afterwards, find Buddy (points 3 on the map) and speak with him. During the initial part of the conversation, you can make use of your Intimidation skill (you need at least 30 point in it) to frighten Buddy, for what you will be given Rum (and 1 negative point to your Soul). In the further part of the conversation, ask him about the limited water supply. Buddy will tell you, that the natives are protecting the supply of fresh water, and you will be asked to help them solve the problem.
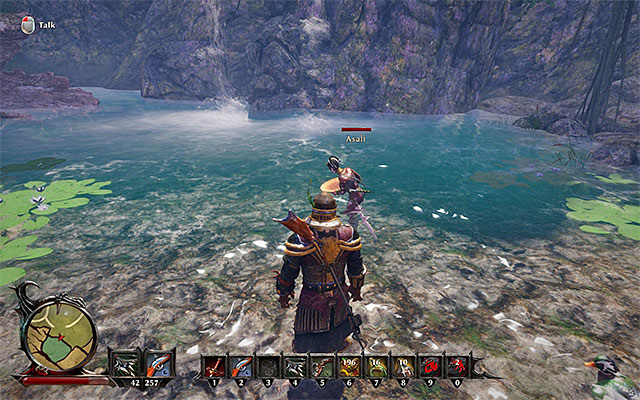 Asali's meeting place.
Embark on a journey to the jungle until you reach a big water tank, in a close vicinity to a waterfall (point 3a on the map). You will meet Asali here, and she is the woman you need to speak with in order to provide the pirates with the supply of fresh water. The conflict can be resolved in three different ways. Two of them allow provide you with a little "shortcut". You can either convince Asali to change her mind (you need to have at least 100 points in Silver Tongue ability) or give her a donation of 700 gold.
If you can't, or don't want to use the aforementioned methods, you can provide Asali with a symbol of friendship. Get back to Buddy (point 3 on the map) and ask him what could be such a symbol. The pirate will mention a golden bowl, which currently is in Cunningham's possession. If you want to, you can speak with Cunningham (point 5 on the map) about the bowl, but he will demand 250 gold for it. As a result, it's better to just steal the item. Look around the ship wreckage and find the place shown on the above screenshot, in which you will be able to climb up.
 The item you seek.
Cross the above deck of the shipwreck and find a small hole, through which you can jump into the storage room. Find a Rusty Key hidden somewhere here, which you will need in order to get out of here, as well as the Special Golden Bowl (100 Glory Points). You can now go back to Asali and give her the treasure.
Regardless of the approach you've chosen, Asali will allow the pirates to gather the water from the source. You can now speak with Buddy for the last time to end this quest.
Rewards for completing the quest:
How to unlock the quest: through conversation with Quinn.
Quest giver: Quinn (points 3 or 4 on the map)
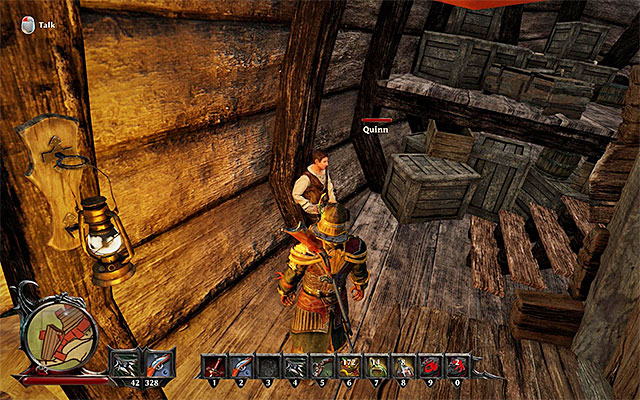 During the day, Quinn can be found inside the shipwreck - in the night he will stand near the knife-throwing shield.
After reaching the pirates beach locate Quinn. During the day you can find him inside of the shipwreck, on the pirates beach (point 4 on the map), and during the night he trains with knives by the knife-throwing shield (point 3 on the map). During the conversation Quinn will ask you to meet his brother Flynn, living on Antigua - you need to remind him of Quinn's part of the family inheritance.
Note - You have to travel to Antigua Island now. Therefore you should read the chapter from our guide that includes the description of side quests related to this place.
Note - Quinn is also a trainer, as well as a merchant.
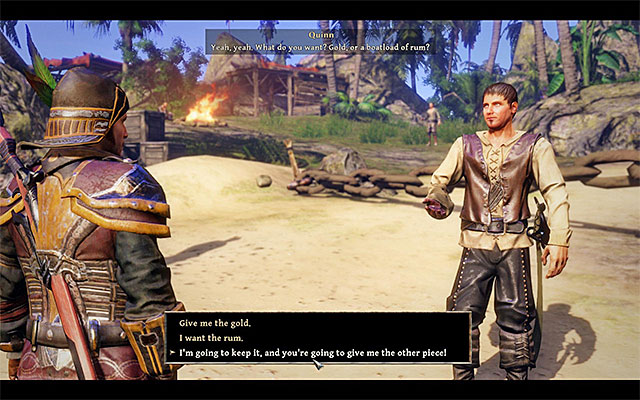 You should necessarily choose the dialogue option that allows you to get the sword's hilt
If you have earned the sword's blade from Flynn during your visit on Antigua Island you can return to Kila Island and inform Quinn about it. It will allow you to finish your quest with three different options:
Rewards for completing the quest:
How to unlock the quest: through conversation with Quinn.
Quest giver: Quinn (point 3 on the map).
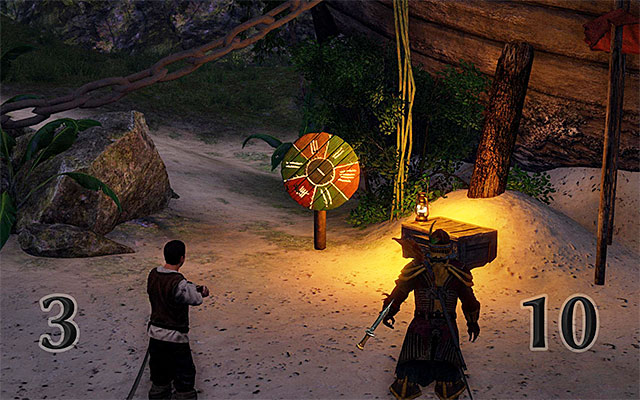 Accumulate more points to win the mini-game.
During the nigthly hours, you will find Quinn near the knife-throwing shield, located near the wreckage of a ship (point 3 on the map). During the conversation, you can propose a knife-throwing duel - it's a mini-game, which was thoroughly described in the side quest called "Streamlined". You must win the mini-game to complete the quest.
Rewards for completing the quest:
How to unlock the quest: through conversation with Cunningham.
Quest giver: Cunningham (point 5 on the map)
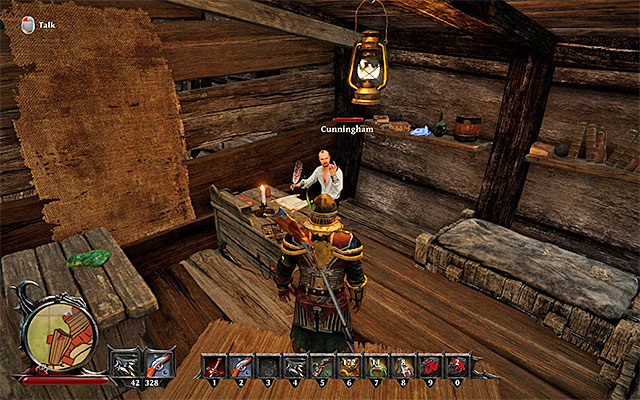 Cunningham is inside his cabin.
After arriving at the pirates beach, enter the wreckage of a ship. Cunningham can be found inside of one of the cabins (point 5 on the map) - speak with him after you've found him. During the conversation Cunningham will ask the Nameless Hero to aid him in his search of a rare plant, which is located in a seemingly inaccessible place. The physician will give a Parrot Flight scroll to the character and will direct him at the place, in which the wanted plant can be found.
Note - Cunningham is also an ability trainer.
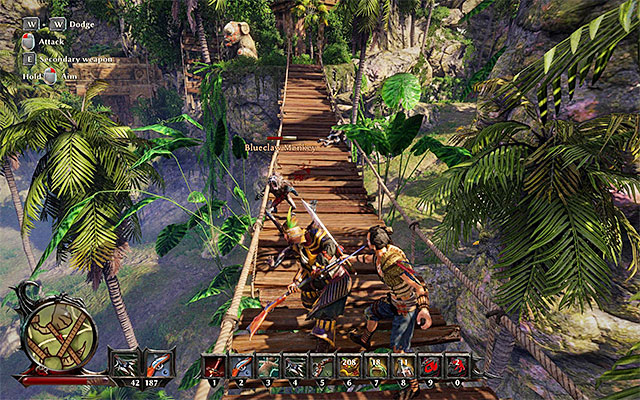 Use the rope bridge and get rid of the monkeys.
Go to the natives village located in the jungle. After reaching the place, start crossing the nearby rope bridges. You must get to a ledge located to the West of the wanted plant (point 5a on the map). During your journey to the mentioned ledge, you will have to kill a couple of Blueclaw Monkeys and a Gorilla - you should be especially careful about the latter enemy.
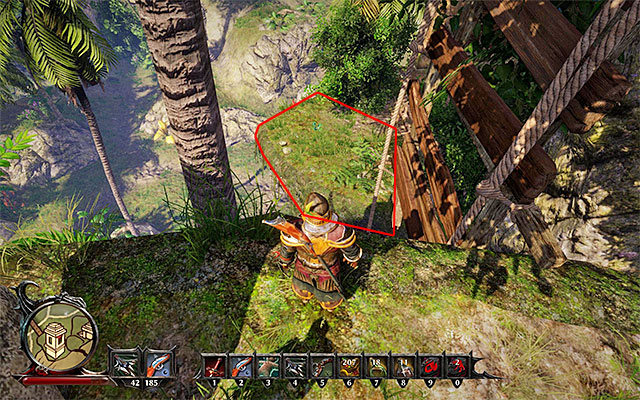
After clearing the area of the monsters, stand directly in the place shown on the above screenshot, on the edge of the ledge, directly to the West of the ledge containing the wanted plant.
 Turn yourself into a parrot and fly all the way to the plant.
Afterwards, use the Parrot Flight scroll, which you were given by Cunningham. Drag the spell on your quickbar and activate it in order to turn yourself into a parrot. All you have to do now is to get safely to the indicated shelf. Land on it and collect the plant named Camellia Sinensis. (100 Glory Points). Carefully jump down and get back to Cunningham (point 5 on the map) with the newly acquired plant.
Rewards for completing the quest:
How to unlock the quest: through conversation with Harry.
Quest giver: Harry (point 6 on the map)
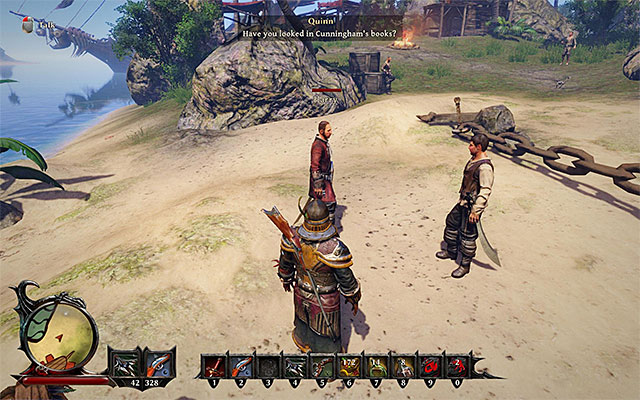 You can find Harry on the beach.
After reaching the pirates beach locate Harry (point 6 on the map) and speak with him. During the conversation, Harry will ask the Nameless Hero to find his buddy named Douglas, who went missing in some unexplained circumstances. Harry believes that it was Booze who murdered Douglas, but he has no proof to support his thesis.
Note - Harry is also an ability trainer, as well as a merchant.
 The spiders cave entrance.
Depending on your personal preferences, you can ask the people around the pirates beach about Douglas, or depart on a search mission immediately. There are several paths leading to his place of residence. I would recommend going through the spiders cave. The entrance to the mentioned caves can be found to the South-East of the pirates encampment on the beach (point 6a on the map).
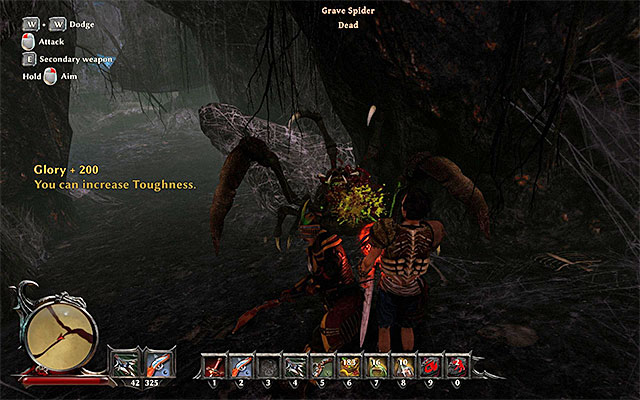 Watch out for the bigger spiders.
As it can be expected, you will run into several kinds of spiders inside of the caves. As far as the elimination of "normal" Rock Spiders, or Jungle Spiders won't cause you any problems, you must watch out for the bigger and stronger ones. During your encounter with Grave Spiders and Large Jungle Spiders you must remember about dodging their attacks (especially to avoid getting hit by their acid spit) and keeping your distance away from them.
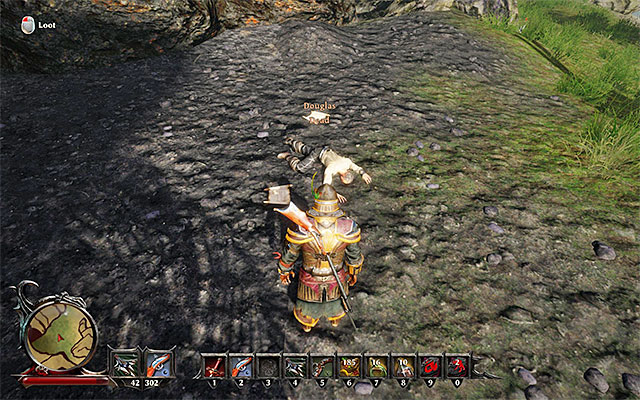 Douglas' body is located near the Eastern exit.
You must reach the Easternmost exit of the spiders cave, because it's precisely where you will stumble upon the dead body of Douglas (point 6b on the map). (100 Glory Points). Taking advantage of the opportunity, collect a pair of scrolls (Healing, Crystal Torch) lying by the body. You can now go all the way back to Harry (point 6 on the map) and pass the bad news. Harry will also suggest to inform Booze about Douglas' fate, but it's not required to do so and you won't be rewarded in any way for doing so.
Rewards for completing the quest:
How to unlock the quest: through conversation with Killian (Calador Bay).
Quest giver: Killian
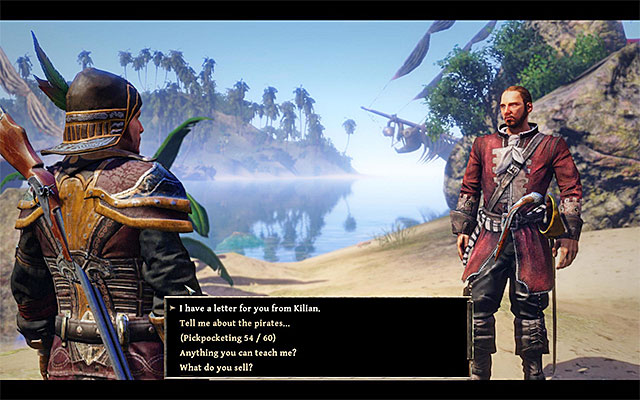 You have to deliver the letter to Harry.
This quest can be unlocked during your stay at the Calador Bay, or to be more specific, just after meeting with Killian, located in the fishing village (go to the Calador Bay side quest section for more details). After reaching the Kila island, you will have a chance to finish the quest. To do so, you must find Harry, who should be on the pirates beach (point 6 on the map) and speak with him, in order to deliver the letter.
Note - if you want to, you can, contrary to Killian's warnings, open the letter from your inventory and read it. It won't impact the ending of the question, nor the rewards you receive for its completion.
Rewards for completing the quest:
How to unlock the quest: through conversation with Harry.
Quest giver: Harry (point 6 on the map)
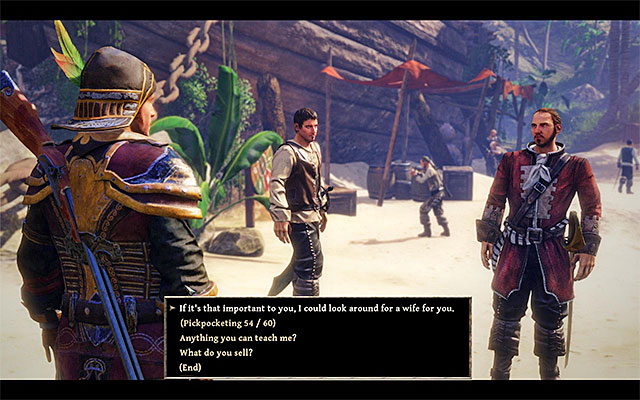 Meet with Harry after bringing Miamiti to the pirates beach.
This quest is unlocked only after you have completed another side quest called "Better Safe Than Sorry", or to be more specific, after bringing Miamiti to the pirates beach. Find Harry (point 6 on the map), who should automatically lock the Nameless Hero in a conversation. Harry will ask the main character for some help in his courtship towards Miamiti. The plan assumes giving the girl a rare flower - you must start of by meeting with Cunningham (point 5 on the map) who will indicate its location.
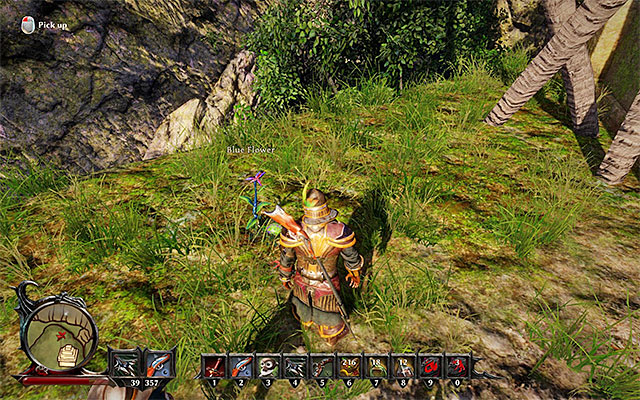 The Blue Flower.
The sought gift for Miamiti is a Blue Flower, and you can find it in the North-Eastern part of the native village (point 6c on the map). To reach the destination in which the flower can be found, you need to cross a long rope bridge (100 Glory Points). Return with the flower to Harry to complete the quest a receive your reward.
Rewards for completing the quest:
How to unlock the quest: through conversation with Colby.
Quest giver: Colby (point 7 on the map).
 Colby
ColbyColby can be found near the pirate encampment on the beach (point 7 on the map). During the conversation with the pirate, you will learn that he lost the respect of his kin. Colby wants to regain it. The Nameless Hero will be asked to compete in a honorable duel with Colby, and to lose it on purpose, for the man to prove that he is still a capable warrior.
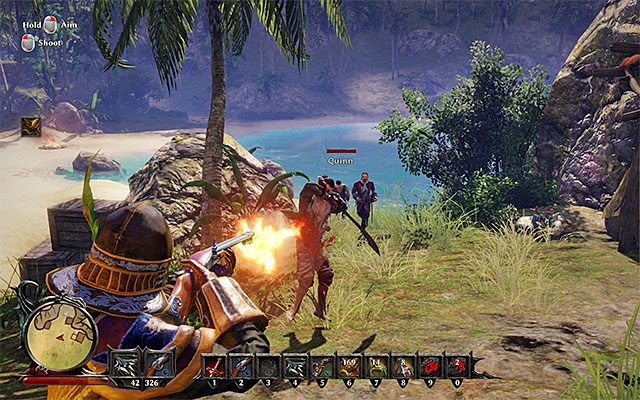 The pirate should be attacked from afar.
After engaging Colby in a honorable duel (no one from your team will take part in it), you can behave in two different ways. The first variant assumes defeating Colby in a fight, deviating from his request. If you want to take this approach, you will have to be extremely careful about Colby's attacks, as they deal a tremendous amounts of damage and an inexperienced player can easily get himself killed. As always, rely on your dodges and try to parry his attack, as well as attack him from afar (ranged weapons, magic). If you manage to defeat him, you will be given 250 Glory Points.
Note - during the duel try not to attack any other bystander pirates observing the encounter. By doing this (attacking them) you can attract unwanted attention and make the fight very difficult, or even impossible.
Note - Colby is an ability trainer as well.
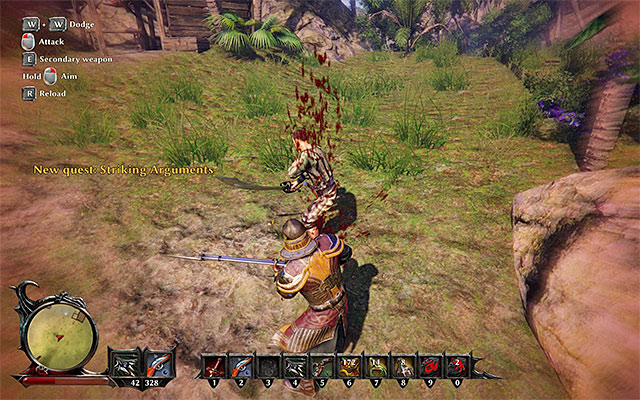 It's better to let Colby win, as it will unlock another quest.
The second option assumes getting defeated by Colby on purpose, i.e. playing the fight his way. If you select this approach, you won't even have to attack the pirate - all you will have to do is to wait patiently for Colby to empty the Nameless Hero's health bar completely. By doing so, you will be given Rum and you will unlock another side quest called "Precious Silverware", associated with delivering Colby various treasures. .
Rewards for completing the quest:
How to unlock the quest: through conversation with Colby.
Quest giver: Colby (point 7 on the map).
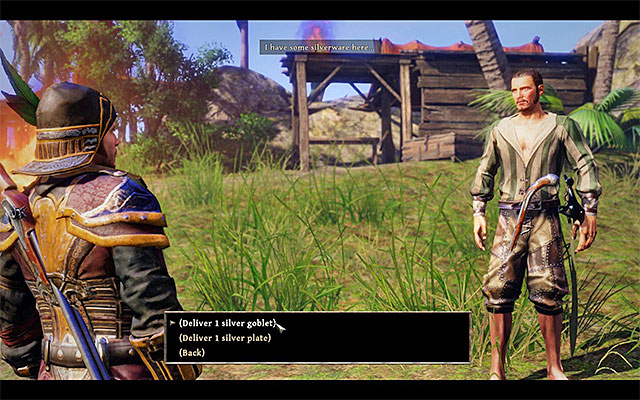 Exchange silverware for gold.
This mission is closely connected with a side quest called "Striking Arguments", which was about having a honorable duel with Colby, staying in the pirates encampment (point 7 on the map). If, during that quest, you let Colby win that duel (and went on with his plan), he will be willing to further cooperate with the Nameless Hero. You can bring silverware to him and exchange them for gold - in a quite favorable exchange :
This quest ends after you deliver the ten silver goblets and ten silver plates.
Rewards for completing the quest:
How to unlock the quest: through conversation with Borbor.
Quest giver: Borbor (point 8 on the map).
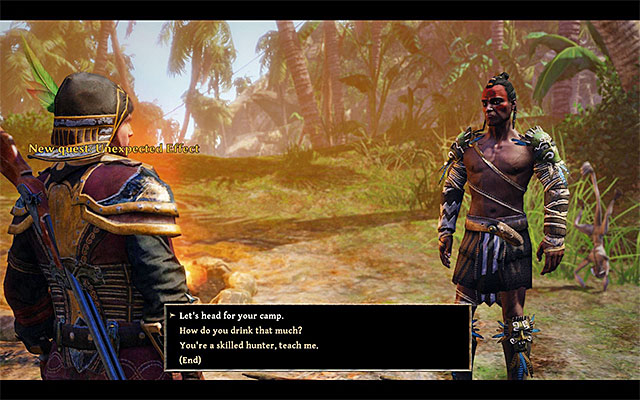 Confirm that you are ready to depart to the natives village.
Borbor can be found near a lit campfire, to the South from the pirates beach (point 8 on the map) and meeting him is a part of a side quest called "Speak to the Native, Borbor". During the conversation with Borbor you can accept his proposition for a joint expedition to the natives headquarters, located in the central part of the island. Borbor will temporarily join your party, and after accepting his terms you will depart on your journey.
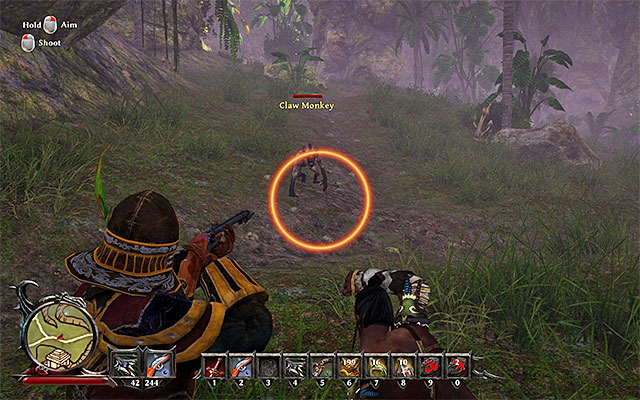 Attack the monsters that threaten Borbor's safety.
While you continue to follow Borbor in his tracks, you must be always ready to eliminate any and all nearby monsters, which you can stumble upon on your journey. As the native isn't the strongest fighter in the game, he won't be taking a direct participation in combat and you will have to protect him each time.
Note - if you don't want to threaten Borbor's safety and the risk of him dying, you can "clear" the main pathways of jungle before you embark on a joint journey.
 The journey's destination.
During the journey, Borbor will want to stop for a longer while twice, first time near the waterfall (point 8a on the map), and the second time after reaching the second part of the jungle (point 8b on the map). Each time you will have to speak with him, and convince him to continue the journey. The quest is over as soon as you reach an elevation (point 8c on the map), with a rope bridge leading directly to the natives headquarters.
Rewards for completing the quest:
How to unlock the quest: through conversation with Tadashi.
Quest giver: Tadashi (point 9 on the map).
 The place in which you can find Tadashi.
Tadashi can be found inside the jungle, near the main natives encampment (point 9 on the map). After starting the conversation, ask him about teaching the main character in the hunting skills. Tadashi will be reluctant to do so, at least before the Nameless Hero proves his worth, by killing two powerful monsters - an alligator and a warthog.
Note - if you killed both of those monsters before speaking with Tadashi, you can inform the native of the fact to end the quest.
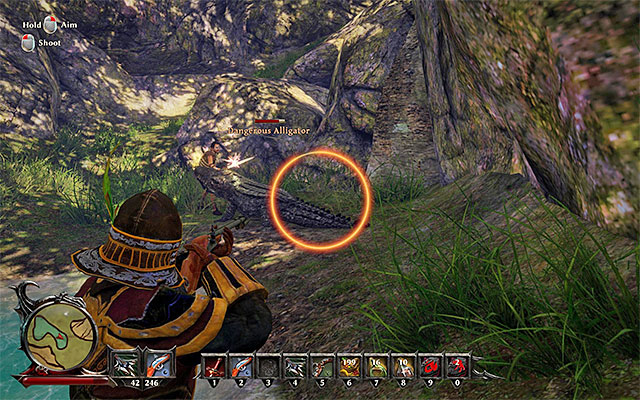 The Dangerous Alligator.
Both animals you seek can be found to the South of the waterfall, near which you can find Asali. Stay near the water, and after a short while you will reach a smaller water reservoir (point 9a on the map). Here you will encounter a Dangerous Alligator. After the encounter starts, remember about dodging the beast's attacks, as each one of them take a huge chuck of Nameless Here's health bar. (300 Glory Points).
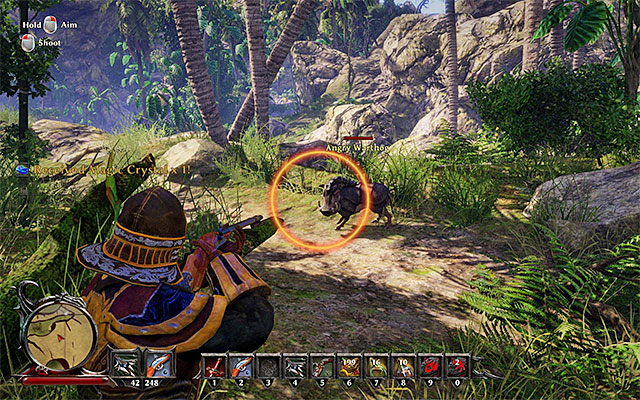 And the second beast - Angry Warthog.
Stay in the place in which you've just killed the alligator and go along the passageway to the North-East (point 9b on the map). Watch out for a single trap laid along the way - you can either avoid it or mash the indicated button as fast as possible to get out of it. Fortunately, the Angry Warthog is a lot easier to defeat (150 Glory Points). You can now go back to Tadashi. Collect your reward and examine the new training possibilities with him.
Rewards for completing the quest:
How to unlock the quest: through conversation with Hirutu.
Quest giver: Hirutu (point 10 on the map).
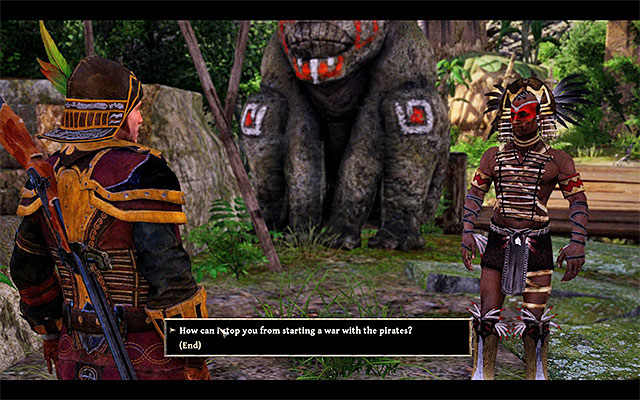 Speak with Hirutu about the problem with the pirates.
After reaching the natives village, speak with their chieftain Hirutu (point 10 on the map) and ask him about the conflict between the natives and the pirates, who settled on the island. You will learn, that the natives are planning an invasion, and want to get rid of the pirates, sacrificing them all afterwards. You can offer your services in order to calm the conflict.
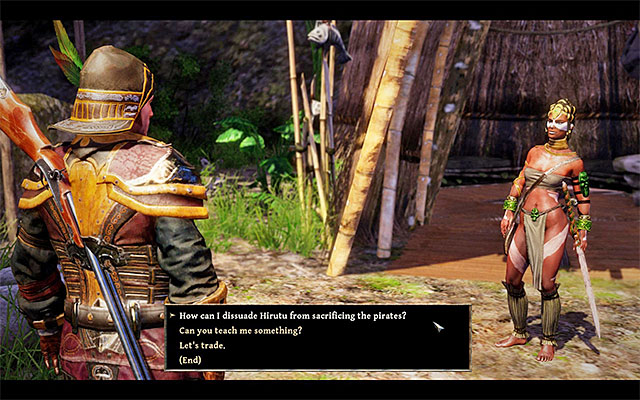 Speak with Tenya about the pirates.
Afterwards, speak with Tenya, who you can find near the shaman's meeting place (point 10a on the map). During the conversation ask her about the conflict with the pirates, learning that Tenya want to resolve the conflict in a peaceful manner. The woman has a clever plan ready, to use the Voodoo magic to take control over one of the natives and use him to convince the chieftain to change his mind. The first thing to do is to acquire Makoto's hair, who is the native on which you will use the voodoo doll a little later.
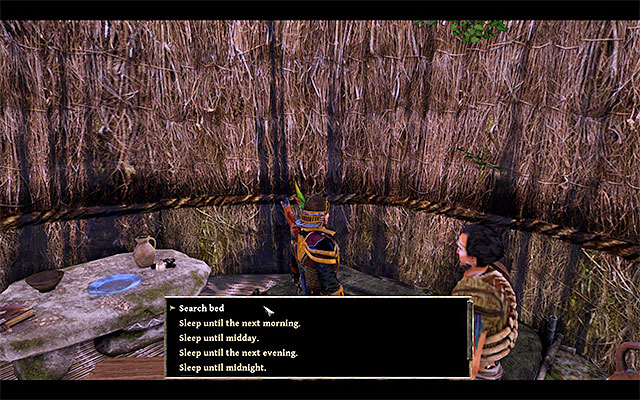 Examine the bed.
The hut belonging to Makoto can be found a little to the South from the place you've met Tenya at (point 10b on the map) and you can reach it without any problems. After arriving at the hut, you should take interest in the bed - examine it to acquire Hair. You can now go back to Tenya and give her the required item (100 Glory Points). The woman will give you the Voodoo Doll of Makoto.
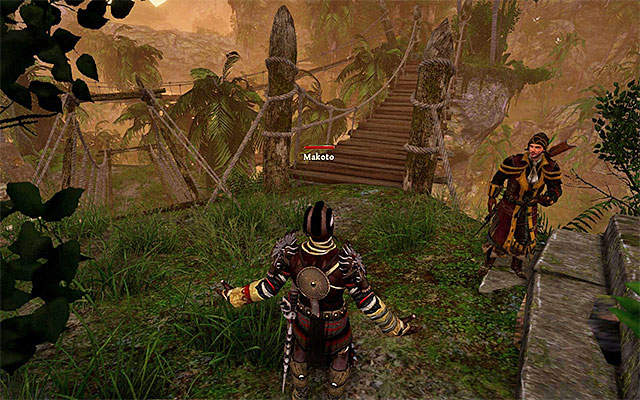 Drag the voodoo doll to your quick bar and use it.
Head East now, and after a short while you should locate Makoto (point 10c on the map). Open up the inventory of the main character and drag the recently acquired voodoo doll on your quickbar (just as you do with other scrolls). Active the doll, which will automatically allow you to seize control over Makoto.
Note - the voodoo doll works only if you are close enough to Makoto!
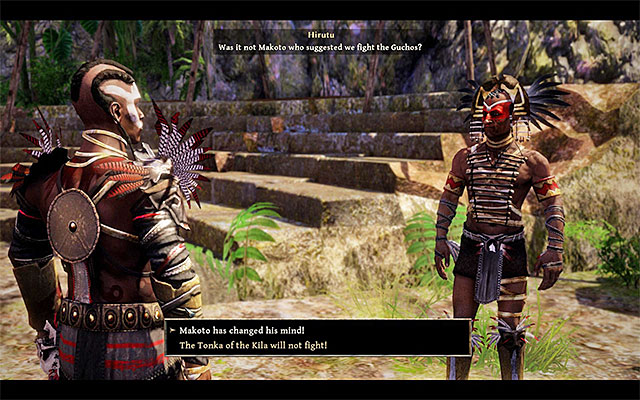 Speak with Tenya and Hirutu.
Afterwards, start with meeting Tenya again (point 10b on the map), and after that speak with the chieftain Hirutu (point 10 on the map). You won't be able to immediately divert the chieftain from his plan to attack the pirates, but he will change his mind if he hears meaningful arguments from three other natives. It means that you have to hold three new conversations, and you should start off by speaking with Tenya again.
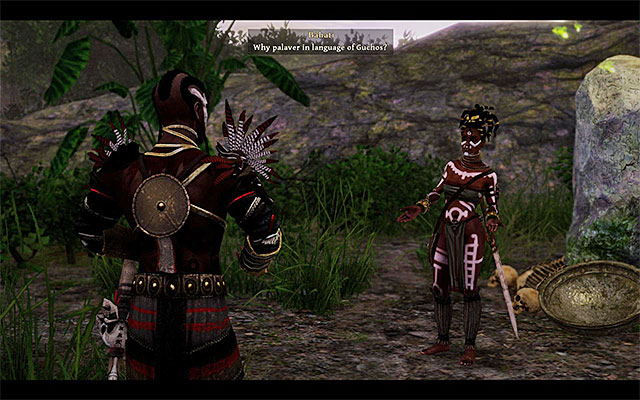 Kamil and Bahati are the next natives you must speak with.
The second person you must speak with is Kamil, who can be found near the bridge leading to the natives village (point 10d on the map). Finally, go meet with Bahati, who can be found in the North-Eastern part of the village (point 10e on the map). In both those situations you don't have to plan the development of the conversation - all you have to do is have a conversation.
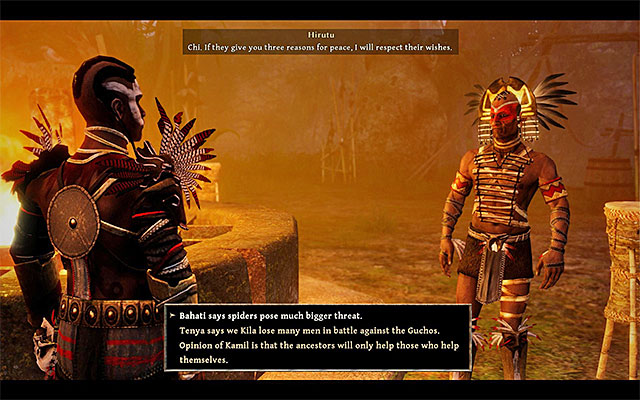 Tell the chieftain about the natives' opinions.
You can now go back to Hirutu (point 10 on the map) and start the conversation, by presenting the opinions of natives you've spoken to (Tenya, Kamil, Bahati). After hearing them, the chieftain will be forced to change his mind and will abandon his plan to sacrifice all of the pirates. You can now go back to the place in which you've "left" the Nameless Hero and start a conversation with him in order to get back to his body. Meet with Hirutu for the last time and collect the extra reward from him.
Rewards for completing the quest:
How to unlock the quest: through conversation with Ixil.
Quest giver: Ixil (point 11 on the map).
 Ixil
IxilThe native called Ixil can be found in the central part of the village (point 11 on the map). During the conversation you will be given the opportunity to deliver provisions (Delivery of Provisions) to Baraka, who guards the Western gate to the Forbidden Valley.
Note - Ixil is also an ability trainer.
 Speak with Baraka.
Reach the gate located to the North-West from the village (point 15 on the map) and initiate a conversation with Baraka. During the meeting, you will be given to choices to react accordingly. If you tell the truth, that it was Ixil who prepared the food, Baraka will immediately sense a trap and will be able to tell that the food was poisoned. If you lie to him, telling him that the food is a gift from the women of the village, Baraka will consume the food. Fortunately, the native won't die as a result of poisoning. Go back to Baraka the next day and speak with him again. Regardless of your approach, Baraka will want to get revenge on Ixil, and you will unlock a side quest associated with it.
Rewards for completing the quest:
How to unlock the quest: through conversation with Miamiti.
Quest giver: Miamiti (point 12 on the map).
 The location in which you can find Miamiti.
Examine one of the smaller ledges (cross the rope bridge) located in the North-Eastern part of the natives village (point 12 on the map) - thanks to that, you will be able to find Miamiti. Speak with her - during the conversation you will learn, that the girl wants to leave the village and join the pirates located on the beach. You can now help her to make that plan a reality.
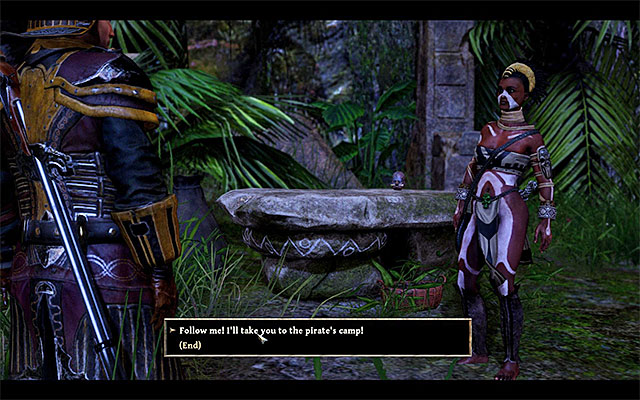 You must meet with Miamiti during the night.
You can only decide to help Miamiti run away from the village after you've completed the side quest called "Booze's Befuddled Mind", or to be more specific, after restoring Booze's senses. Meet with Miamiti during the nightly hours (use the bed if you don't want to wait) and confirm that you are ready to begin the march.
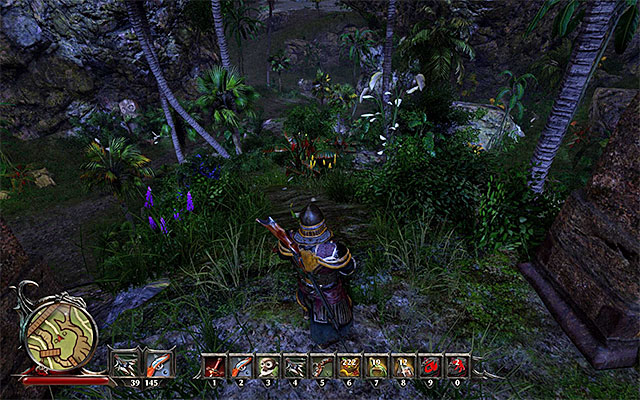 The alternative exit from the natives village.
According to the information you've received from Miamiti, you can't allow the guards from the village to spot you. Therefore, don't even think about going through the main entrance to the village, but, after crossing a number of rope bridges, look around for an alternative descent from the hill (point 12a on the map). It's not guarded by anyone.
Note - in the further part of the game you can be question about Miamiti by Kamil, who is guarding the main bridge leading to the village. You can either tell him the truth about helping the girl, or simply lie (resulting in positive / negative soul points).
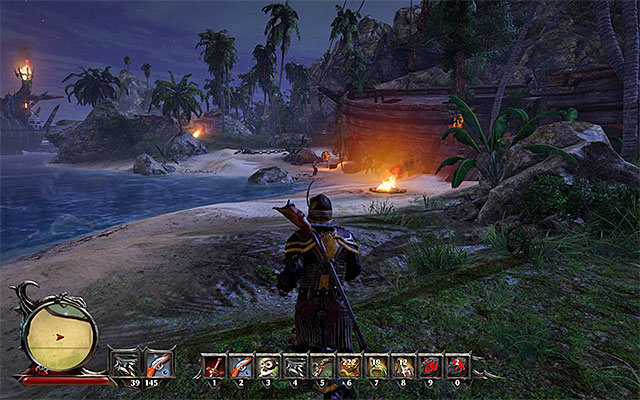 Reach Miamiti on the pirates' beach.
After descending the hill, head towards the pirates beach (point 12b on the map). If you haven't yet secured both sections of the jungle, be prepared to encounter several monsters along the wait - try to protect Miamiti at all costs. After reaching the destination, listen to the conversation, in which the girl will thank the Nameless Hero for helping her out.
Rewards for completing the quest:
How to unlock the quest: through conversation with Pamir.
Quest giver: Pamir (point 13 on the map).
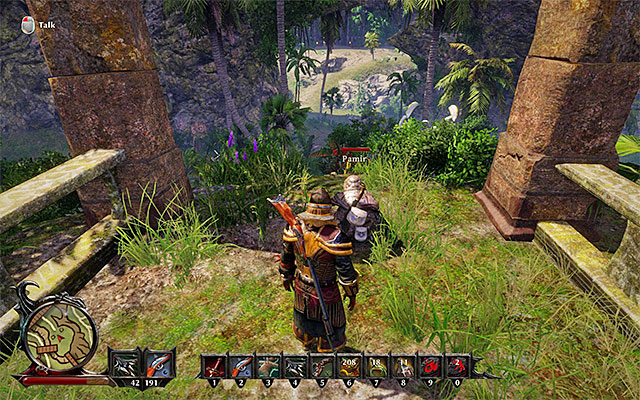 Pamir
PamirA gnome named Pamir stand on a small elevation, near the natives village (point 13 on the map) and you can cut a small talk with him. During the conversation, Pamir will ask the main character to help him retrieve a valuable earring, which was stolen by monkeys. After expressing the will to complete the task, you will additionally have to accept the willingness to march behind Pamir.
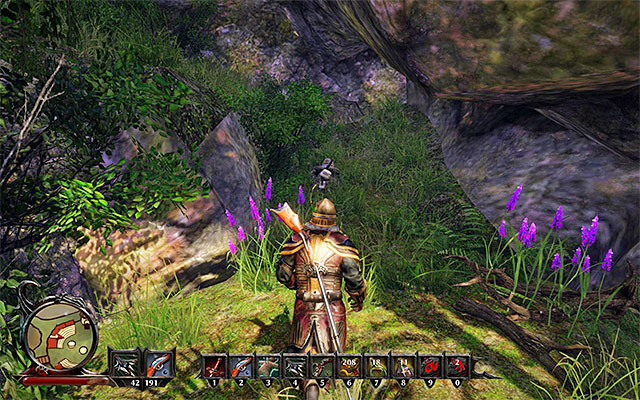 The area surrounding the caves of the monkeys.
Follow Pamir and be ready to encounter the jungle monsters, which you can (and probably will) encounter during your march. The destination point is the cave of the monkeys (point 10a on the map), located exactly below the main section of the natives village. Another conversation with Pamir should begin here, and it can lead to two different conclusions. If you've already learned the ability called Monkey Trainer, you will be able to advance to the further part of the quest (the description can be found below). Otherwise, you will have to meet one of the trainers who can teach you the skill.
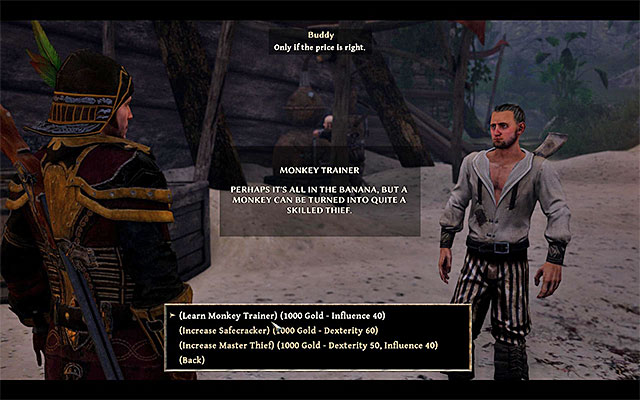 Buddy is one of the trainers, who can teach the Nameless Hero the ability to control monkeys.
If you don't have the Monkey Trainer ability at your disposal, you can meet, for instance, with Buddy, located on the pirates beach (point 3 on the map), and ask him to teach you that. Unlocking this ability requires you to pay 1000 gold, and to have the Influence attribute developed to at least 40 points.
 Control the monkey to reach the place in which the earring lies.
Whether you had access to the Monkey Trainer ability, or if you had to unlock it first, make sure that you are near the monkey cave (point 10a on the map). Open up your inventory screen, select the Monkey from it and drag it on the quickbar. Press the appropriate key / button to seize control over the monkey. Enter the cave, collecting the Small Earring along the way. Get back to the main character, regain control over it and give the earring back to Pamir.
Rewards for completing the quest:
How to unlock the quest: through conversation with Patty.
Quest giver: Patty (point 14 on the map)
 Find Patty on a small island.
Swim to a small island, located to the North from the pirates beach and find Patty there (point 14 on the map). During the conversation, ask her about Slim, the man who sold the treasure map to the siblings, and who is indirectly responsible for the death of the main character.
Note - you can skip the conversation with patty and go to Slim's place of residence.
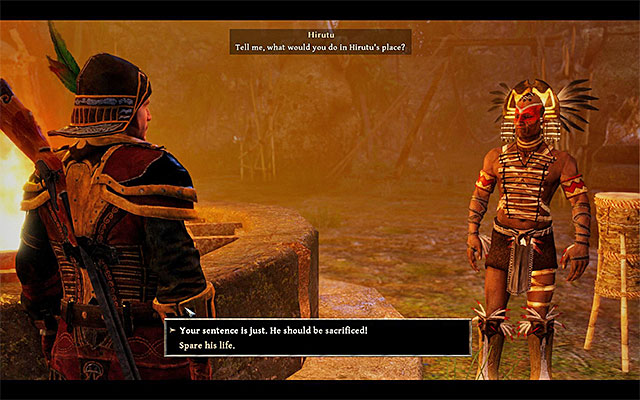 Slim is a prisoner of the natives.
You won't have to look for Slim very far, as the man was taken a prisoner by the natives and is currently held in one of their huts in the village (point 14 on the map), waiting to be sacrificed. Speak with Slim. Regardless of the your decision - you can either save the man or let him die - you must wait before you complete a side quest called "On the Warpath), or to be more specific, until you resolve the conflict between the pirates and the natives.
You can either let Slim die or stand up for him.After completing the side quest "On the Warpath", speak with the natives chieftain, Hirutu (point 10 on the map) and ask him about the prisoner called Slim (100 Glory Points). The chieftain will ask the Nameless Hero what to do with the prisoner. You can either let the natives sacrifice Slim (3 negative soul points), or stand up for him and rescue the man (3 positive soul points). Regardless of your decision, inform the pirate of his future (if Slim was rescued, he can be found on the pirates beach).
Note - if Patty is not currently by your side, it's worth to inform her about the whereabouts of Slim.
Rewards for completing the quest:
How to unlock the quest: through conversation with Baraka.
Quest giver: Baraka (point 15 on the map)
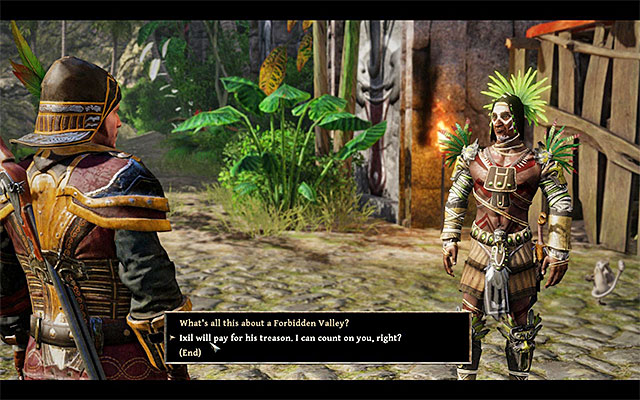 You must accept the plan to murder Ixil.
You can unlock the quest by speaking with Baraka, protecting the gate to the Forbidden Valley, but no sooner than after completing another side quest called "A Delectable Meal". Baraka will want you to murder Ixil, to get revenge on the man who wanted to poison him. Listen to Baraka's plan and take the amulet from the shaman (Baraka's Amulet), which will be used to outsmart Ixil.
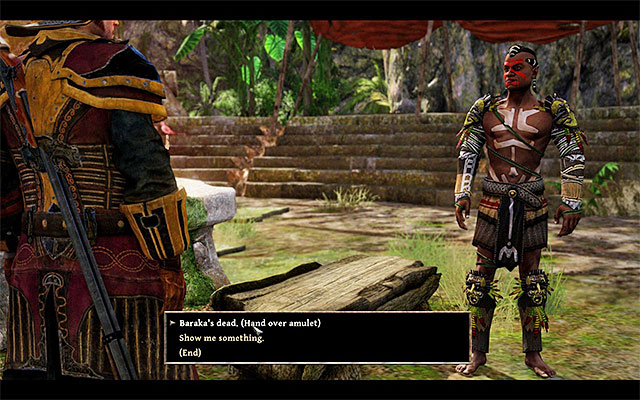 Speak with Ixil and give him Baraka's Amulet.
Go back to the natives village and speak with Ixil again (point 11 on the map). Give the man the amulet you've received from Baraka. Ixil will want to see the body of Baraka for himself, and will depart in the direction of the large gate. Don't attack Ixil just yet, but continue following his trails.
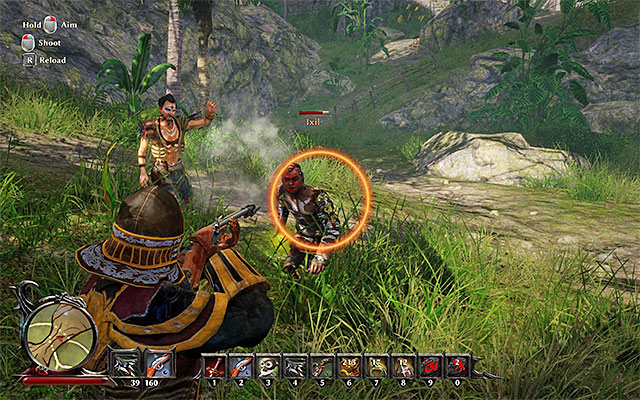 Wait for Ixil to get away from the village and attack the man.
Ixil will stop to the South-East from the large gate (point 15a on the map). After you've noticed that the man has stopped, approach him and, after a brief conversation, start the encounter. If you can, try preventing the man from invoking his spells, as they can weaken your party considerably. Murder Ixil and go back to Baraka to tell him the good news.
Note - from obvious reasons, Ixil won't be able to teach the Nameless Hero anymore, so if you want to learn some skills associated with the man, buy them before this quest.
Note - you can tell the chieftain Hirutu about the fact that Ixil is dead, but aside from a short conversation it won't change anything.
Rewards for completing the quest:
How to unlock the quest: through conversation with Leonard.
Quest giver: Leonard (point 16 on the map)
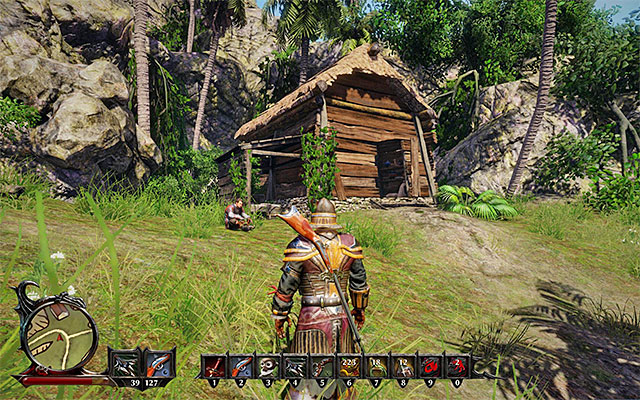 You can find Leonard near a small hut.
The guard named Leonard can be found near a hut, located in the middle of a small island (point 16 on the map), to which you will have to swim on your own. The man will ask the Nameless Hero to help him in the retrieval of lost equipment, promising some valuable crystals for the effort.
Note - Leonard is also a merchant.
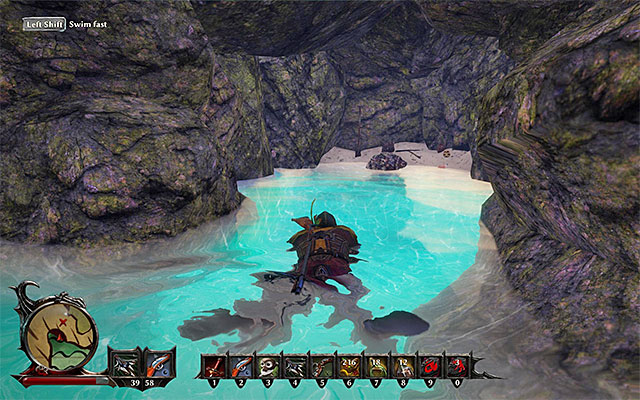
After the conversation ends, go in the direction of a small creek, located to the South-West from the place you've met Leonard (point 16a on the map). After reaching the creek, get rid of the monsters, jump into the water and swim to the place shown on the above screenshot. Collect Leonardo's Equipment (100 Glory Points) and get back with it to the quest giver.
Rewards for completing the quest:
How to unlock the quest: through conversation with Cole.
Quest giver: Cole (point 17 on the map)
 Cole can be found near the shore.
Cole can be found in the Eastern part of a small island, located to the North from Kila (point 17 on the map - you can reach it without any problems). The man will ask the Nameless Hero to get rid of some strong monsters.
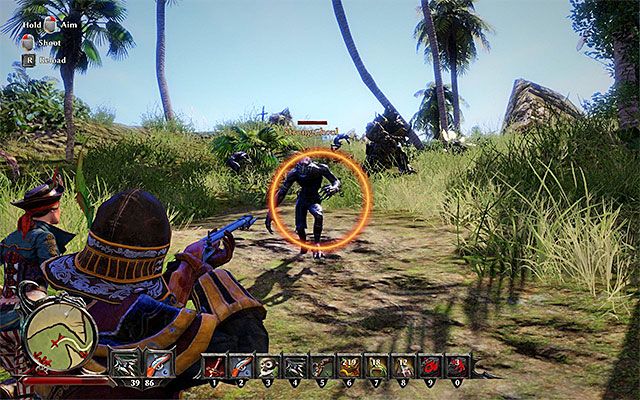 You have to murder 5 ghouls.
Strong Ghouls can be found in a glade, in the central section of the island (point 17a on the map) and you can reach the glade from the Eastern side. If you can, try to lure the monsters one by one, to simultaneously fight two of them at most. As always, rely on your dodging / parrying skills, especially because the beasts are extremely agile. For each Ghoul you defeat you will gain 100 Glory Points.
Note - there's also a Swamp Golem located on the glade, who is EXTREMELY durable. You can attack the monster, but it's not required in order to complete the described quest.
Rewards for completing the quest:
Way to unlock the quest: Talk to Lumbrok (Taranis isle).
Quest giver: Lumbrok
 The wine chest is next to the shipwreck
You could unlock this quest while on the Taranis isle. It was after the conversation with Lumbrok at the local mages headquarters. The nameless one was asked to locate rare delicacies and Aromatic Wine is one of them, which you need to go to Kila for. Reach the pirate beach and find the chest near the place where Booze and Saddec are (point 2 on the map). Open the chest and collect the wine (100 glory points). You can now return to Taranis.
Way to unlock the quest: Automatically, after you find the book (Swordmaster) (Taranis isle).
Quest giver: -
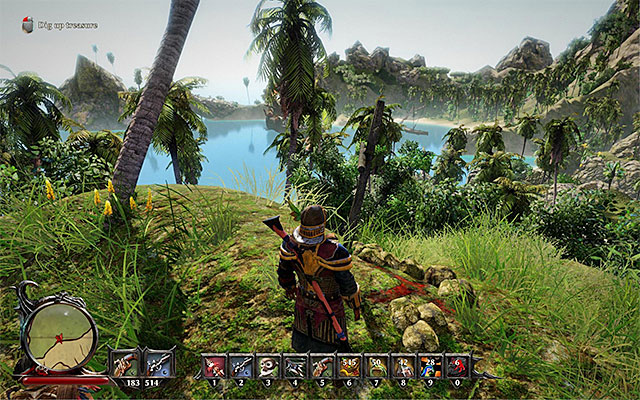 Near the treasure, there are monsters
You could unlock this quest while on the Taranis isle, i.e. after you found the mages HQ and found an interactive book on the upper floor. The treasure has been hidden on an islet that neighbors Kila (point 18 on the map), which you can easily swim to. You need to climb the highest hill and deal with the beasts that have been named in the walkthrough for the "All Cats Are Grey By Night" side quest (you complete that quest in the same location). After you have secured the area, find the X on the ground and use the shovel to dig up the treasure. In the chest, there are 120 gold pieces and the Tattered Scabbard), among others (it is one of the legendary items).
Rewards for completing the quest:
How to unlock this quest: Speak with Flynn (on Antigua Island).
Quest Giver: Flynn
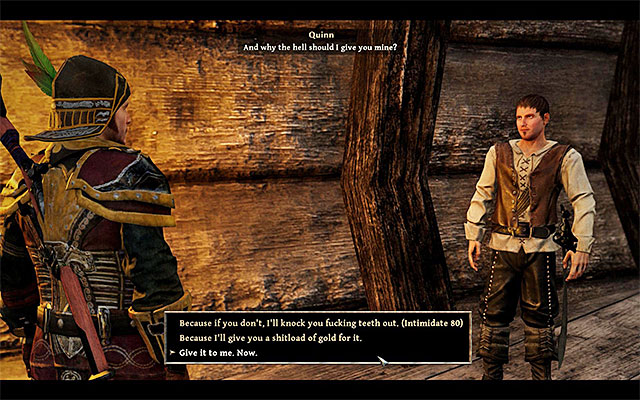 Force Quinn to give you the sword's hilt
This quest is related to side quest named "Shattered Inheritance" which you could unlock when you spotted Flynn on Antigua Island. Flynn suggested the Nameless Hero returning to Quinn and taking back from him his part of the sword. Find Quinn on the pirates' beach (map location 3 or 4) and ask him about giving you the Hilt: Wound Tearer. You can buy the hilt from Quinn for 200 gold pieces or take it for free by threatening him thanks to your Intimidate ability if you have it at least on the level 80 (you will receive 200 Glory Points).
Notice! From now on you can return to Antigua Island with the hilt and meet again with Flynn.
Unlocking the quest: Talk to Hirutu.
The quest giver: Hirutu (point 10 on the map)
Note - This quest becomes available after you join the Natives!
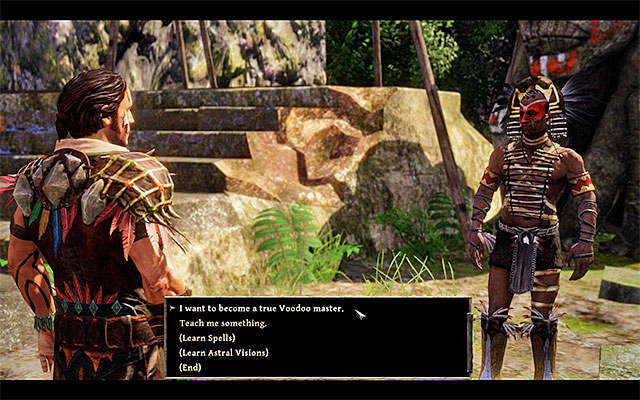 Hirutu instructs you what to do in order to rank up in the Natives hierarchy
This quest is unlocked after you join the Natives. The objective is to rank up from a Voodoo Pirate to a Voodoo Master. In order to do that, you first need to meet Hirutu the chief, in the center of the Village (point 10 on the map). The chief tells you that in order to rank up in the Natives hierarchy, the hero has to do all the tasks given by Tenya.
Note - From the moment you join the Natives you can learn magic spells and other abilities from Hirutu.
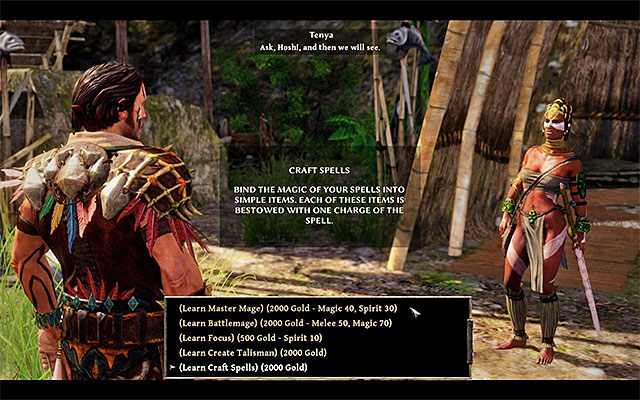
Tenya stands near the chief (point 10a on the map). She wants the Nameless Hero to prove himself at voodoo magic. BEFORE you go searching for the three people mentioned by Tenya, make sure that the hero has Craft Spells proficiency from Magic category unlocked. This is vital, as it is necessary to complete the quest. If you have not yet learned the proficiency, you can unlock it e.g. with Tenya's help (the picture above) - it costs 2,000 gold, but does not require any main attributes to be developed.
Note - Go through all dialogue options, while talking with Tenya. One of the topics concerns bringing the woman all Quartz you find. Regardless of the type of Quartz you have, you will get 20 gold and 5 Glory Points for it.
Note - From the moment you join the Natives, Tanya can teach the hero voodoo magic spells.
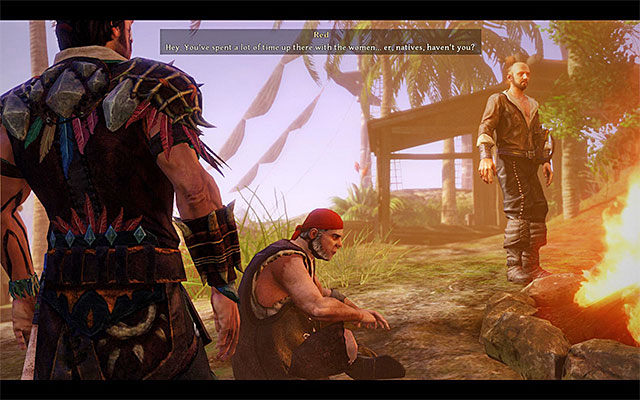 Red uses voodoo magic against the Nameless Hero
One of the three characters you have to meet is pirate Red, who can likely be found on the east side of the pirate beach (point 7 on the map). Approach Red to start the meeting. It is going to have an unexpected ending, as the protagonist blacks out and goes back to full strength only after a couple days later.
 Cunningham, Bones, and Tenya are explaining the situation to the hero
You have to talk to three characters about your physical condition. First, talk to Cunningham (point 5 on the map), who helped the Nameless Hero after he got "confused". Next, meet Bones, who may be following the hero or waiting for him on the currently used vessel. Finally, go back to Tenya in the Natives Village (100 Glory Points), who will give you the Potion of Oblivion. All the three conversations suggest that Red used voodoo magic against the Nameless Hero to temporarily take control over his body. Finding the pirate is your next objective.
Note - In order to finish Red's quest, you have to travel now to Tacarigua island, so use a boat and go to the Side Quests - Tacarigua chapter. As for the remaining stages of this quest, you have to meet two other characters on Antigua and Taranis islands.
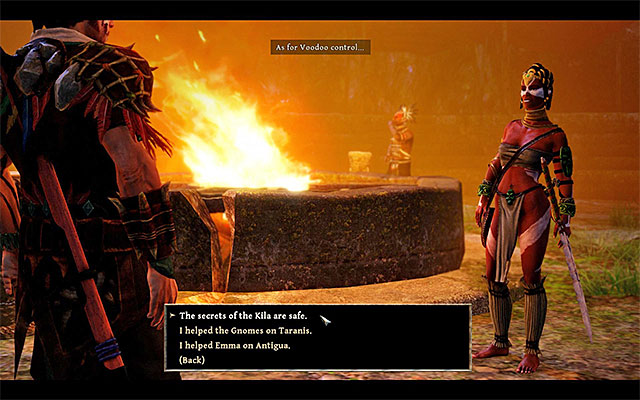 Give Tenya the report about all three situations
Go back to Kila only in the final part of the quest, namely, after you have done business with Red (Tacarigua), Emma (Antigua), and Abbas (Taranis). Report Tenya (point 10a on the map) about all three endeavors. As a reward, you will get 18 Jades, 5 Gold Ores, 3 Pearls, and 1,600 Glory Points. You can now go to Hirutu and ask him to promote you to a Voodoo Master.
Note - From this moment you can learn new voodoo spells from Tenya.
Rewards for completing the quest:
Unlocking the quest: Talk to Kamil
The quest giver: Kamil (point 19 on the map)
Note - This quest becomes available after you join the Natives!
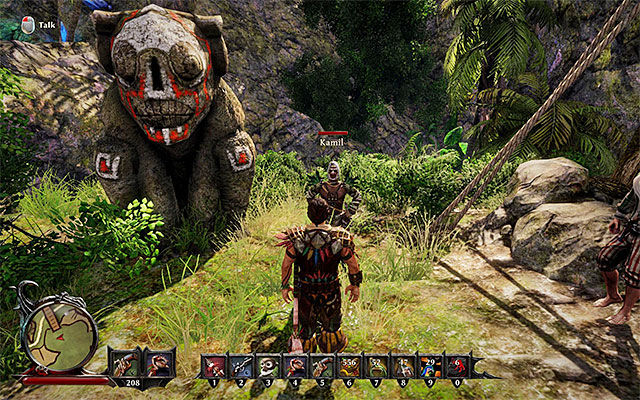 Kamil sends you for a search of a stolen treasure
This quest can be unlocked after you join the Natives. To do it, you need to meet Kamil. He is guarding a bridge to the Natives Village (point 19 on the map). The character will ask you to find a precious Idol, which has been stolen from the Natives. Kamil suggests you should question the pirates on the eastern beach, near the treasure hiding spot.
Note - During your conversation with Kamil, you can use Silver Tongue proficiency, if you have at least 30 points ascribed to it. As a result, you will get a Sapphire.
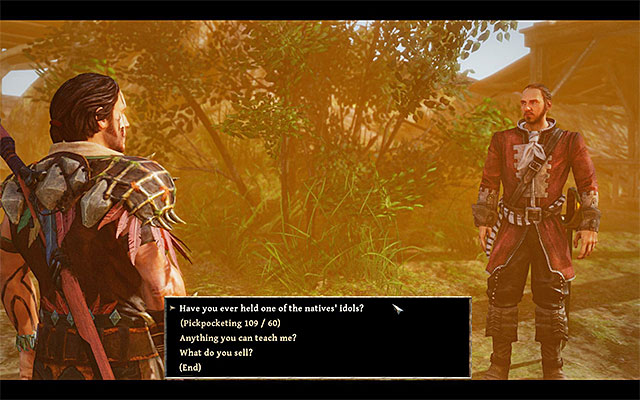 Talk to Harry, Colby, and Cunningham
For this quest you have to meet four pirates on the beach; talk to them in the following order: Harry (point 6 on the map - he occasionally changes his position), Colby (point 7 on the map), and Cunningham (point 5 on the map). Each of the characters tells you that Buddy is a specialist at finding treasures.
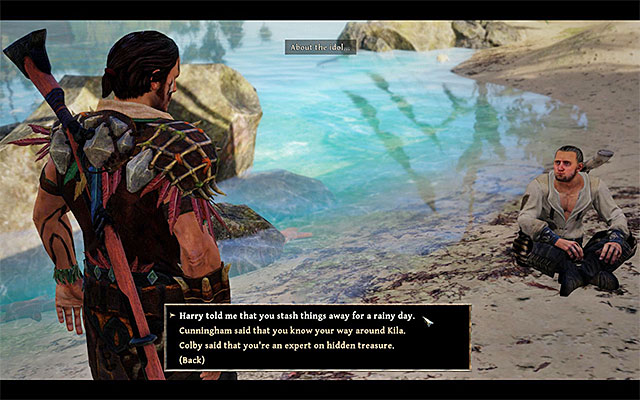 Meet Buddy as the last one
Finally, go to Buddy, who should be somewhere by a dart board (point 3 on the map). While talking to Buddy, it is important that you mention the other three conversations (200 Glory Points). This way you will make him share the information about the location of the treasure you are after. Buddy will offer you an alternative solution of the quest, namely, to deliver the Idol to him. You do not have to make that decision right now.
Note - Before you head for a treasure hunt, make sure you have a shovel in your inventory. It can be bought or found in the game's world.
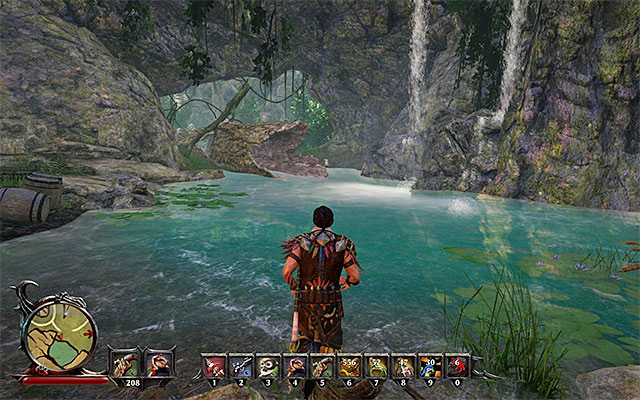 Start near the small lake
The treasure you are looking for is on a small hill on the south of the island (point 19a on the map). Start looking at the waterhole, where Asali is. Take the path that leads on the south-east and then turns to north-east. Beware, as it may be necessary to walk past a rope trap on your way (if you accidentally walk into it, at least try to quickly press the button/key marked on the screen).
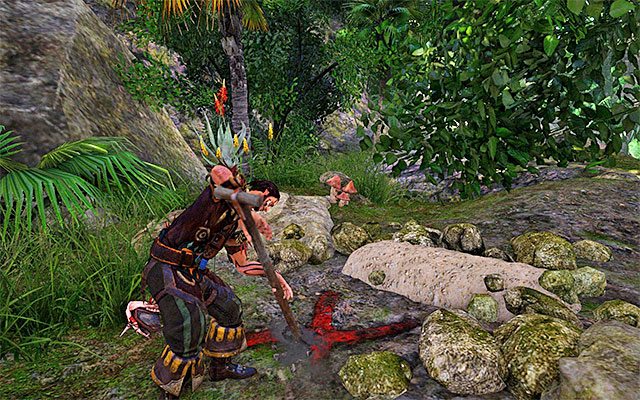
The treasure hiding spot can be recognized by a huge X mark painted on the ground, as shown at the picture above. Use a shovel to dig it out (100 Glory Points). From the chest take 150 gold, an Old Letter, and the Precious Idol you were looking for.
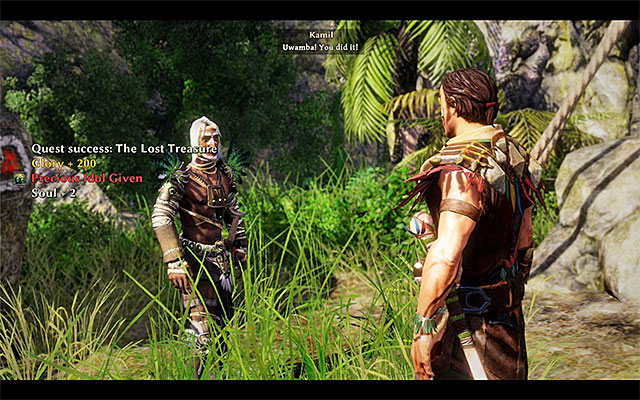 You can give the Idol to either Buddy or Kamil
As I noted earlier, this quest can be concluded in two ways. If you want to, you may go back to Buddy (point 3 on the map) and give the treasure to him, gaining gold in return. If you prefer to be fair toward the Natives, return to Kamil (point 19 on the map). The native will reward you with a voodoo spell.
Rewards for completing the quest:
Way to unlock the quest: Automatically, after you find Modern Pirates (Calador Bay).
Quest giver: -
 Defeat the spiders near the treasure at the Forbidden Valley
You can unlock this quest in Calador Bay, i.e. after you have found an appropriate book in the fishing village. After you reach Kila, you need to go to the Forbidden Valley, which becomes available after you progress to the third chapter of the game's story line (to learn more, see the walkthrough for the "Open the Large Gate" main quest). After you get to Forbidden Valley, go to its North-Western part (point 20 on the map). You need to watch out, because by default, there is a Soldier of the Oracle, here, among others. It is not as easy to defeat as the regular spiders.
 Find the X mark
After you have secured the area, search out the red X mark on the ground. Use the shovel there and dig up the treasure chest. You can now open the chest, where there is, among others, Pirate Flag (it is one of the legendary items).
Rewards for completing the quest:
Way to unlock the quest: Talk to Crouse.
Quest giver: Crouse (points 21 on the map)
 You can find Crouse on the beach
You can unlock this quest only after you progress to the third chapter of the game's story line, because this is when the Forbidden Valley, in the Western part of the map, becomes available. Explore the beach that neighbors the valley and you will find the shipwrecked Crouse there (point 21 on the map). He will ask you to show him the way out of the valley.
 Your destination is the Large Gate in the jungle
After Crouse starts following you, go to the East, towards the large gate that separates the jungle from the valley (point 15 on the map). Of course, you should protect the man by dealing with the monsters that you encounter. After you cross the gate, talk to Crouse (he may not do that himself) and listen to the conversation that ends this short quest.
Rewards for completing the quest:
The above map contains the reference points to all of the locations visited during your journey on the Taranis Island, while doing the main story quests. The red points symbolize the starting points of main quests, whereas the green ones show the locations visited during the completion of the quests.
Note - it is recommended to check out the map connected with the side quests of Taranis Island, as many of the main and optional quests are closely connected.
How to unlock the quest: -
Quest giver: -
 The mages camp.
Most of the main quests from the Taranis Island are associated with the Mages Camp. The crystal mages headquarters is located in the central section of the map (point M on the map). The large Western gate leads to the encampment. Additionally, it's worth knowing, that some areas of the encampment (the building in which the most powerful mages reside, for instance) are initially unavailable. The only way to gain access to the additional locations, is to complete the main quest called "Visiting Rights".
Note - Baker can also lead you inside of the Mages Camp, during the side quest called "Tour of Taranis".
Rewards for completing the quest:
How to unlock the quest: automatically after completing the main story quest called "Hunting for Treasure", which is done during your stay on the Crab Coast.
Quest giver: Bones
 Magnus
The quest is unlocked way before you even get to the Taranis Island. It was done during the introduction to the proper campaign, or to be more specific, just after the main character was brought back to life by Bones. This quest is associated with visiting the headquarters of the three main fractions of the game, in hope of retrieving the soul of the Nameless Hero. General Magnus (point 2 on the map) is one of the characters who you must speak with, as he represents the interest of the Natives. Have a conversation with Magnus, after which you will be able to get another main quests associated with the mentioned fraction.
Note - meeting Magnus is not synonymous with joining with the Crystal Mages. This type of choice will be given to you in the future.
Note - if you are inside of headquarters of a different fraction, go to the appropriate section of this guide (main quests of the Calador Bay or main quests of the Kila Island).
Rewards for completing the quest:
How to unlock the quest: through conversation with Bones (at any given moment).
Quest giver: Bones
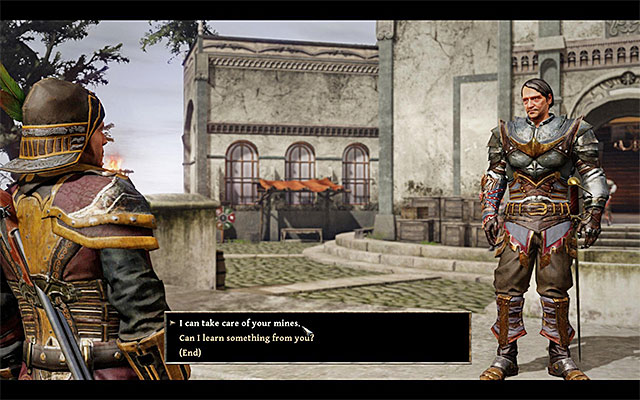 You will have to complete a couple of tasks for the mages.
As it was mentioned before in the Crab Coast's main quest section, this quest can be unlocked in any given moment of the game, and it is done through a conversation with Bones. This quest is divided into three main parts, and the one associated with the Crystal mages can be done during your stay on the Taranis Island. You need to meet with a general Magnus, who can be found in the central part of the Mages Camp (point 2 on the map). During the conversation, offer your services in resolving the local problems. Your first task will be to check the causes of a delay in the delivery of some crystals from the local mine.
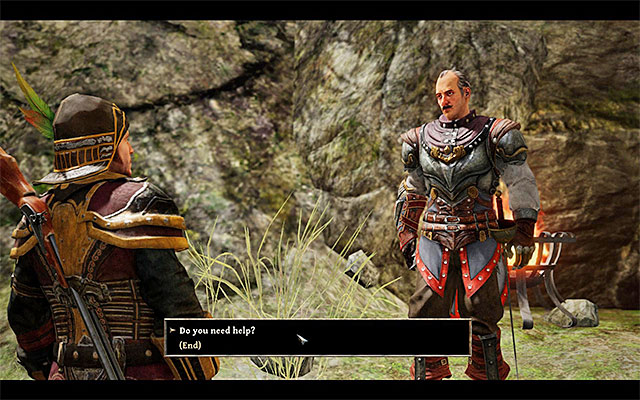 Offer your help during the meeting with Frink.
You can now go to Frink, who should be standing by one of the entrances to the mines, in the North-Western section of the Mages Camp (point 2a on the map). During the conversation with Frink, offer the man your services in the delivery of the mentioned crystals.
Note - during the meeting with Frink, you can answer his question correctly. Thanks to that, you will be able to complete a small side quest called "Clear Rules".
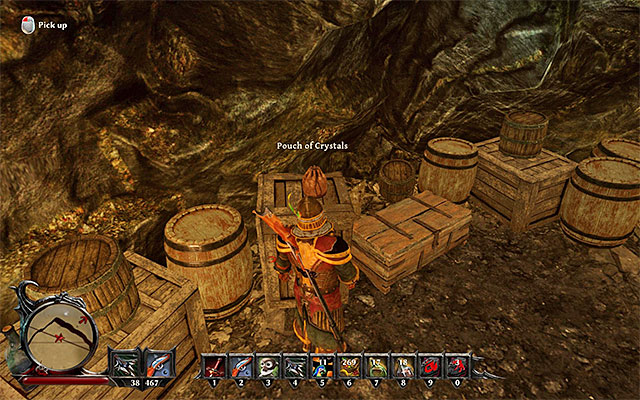 A sample pouch.
In the mine neighboring with the mages encampment, you will find four Pouches of Crystals (points 2b on the map). As the mine isn't a very expanded location, you should have no trouble to locate each one of them, in order to collect them (no one guards them as well). For each pouch you find you will be given 100 Glory Points.
Note - before you leave the mines, you can also talk with Garelt, responsible for the transportation delay. It's not mandatory, but this way you can unlock a side quest associated with this character.
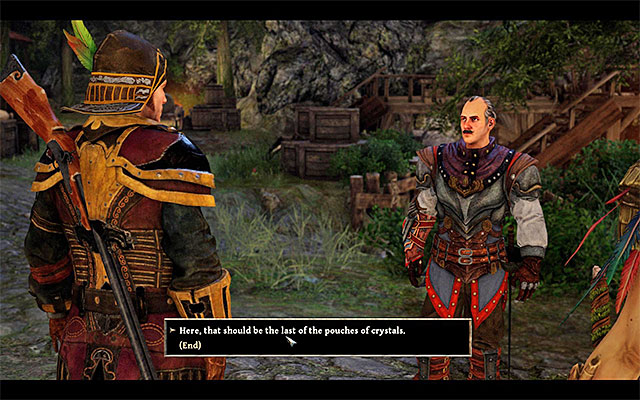 You must give the pouches to Frink.
Leave the mines and get back to Frink (point 2a on the map) to deliver the pouches with the crystals. In return, you will be rewarded with 200 Glory Points and 100 Gold. It's necessary to speak with general Magnus now (point 2 on the map) and boast about your achievements (300 Gold). Doing so, will allow the main character to enter the main section of the Mages Camp, and you will be able to complete the main quest called "Visiting Rights" (200 Glory Points).
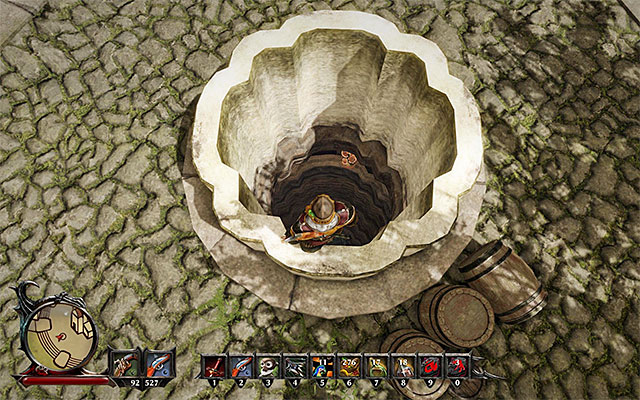
 The well and the entrance to the caves in Nergal's basement.
Stay at the Mages Camp for a while and try to locate a vast cave system, located directly below the main building of the mages (point 3 on the map). The mentioned cave can be accessed in two different ways. The first variant assumes you to jump into the well located in front of the building. After a long fall, you will land in the water, without the threat of any fall damage. The second one assumes you to get into the mages building, get into the basement, in which you will find Nergal and to find a ladder located in the back of the basement. Regardless of your taken approach, examine the basement (you can complete a side quest here). Go back to Magnus and tell him about the crystals in the basement - for that you will be rewarded with 200 Glory Points and 200 Gold.
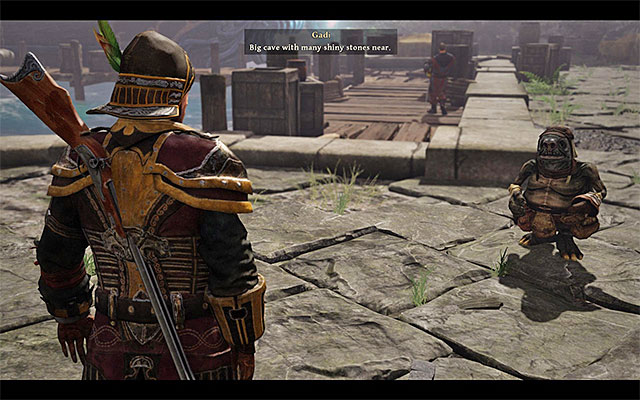 Gadi will tell you about the new cave with the crystals.
Go back to the harbor, in which you began your journey on the Taranis Island. Find a gnome named Gadi, who should be working near a ship decked in the harbor (point 2c on the map). From him you will learn about a goblin cave nearby, with a vast resources of crystals hidden in it.
 The cave can be accessed from the Southern path.
The goblin cave has two different entrances (points 2d on the map). The more obvious entrance is located to the West from the harbor, near the beach. The less obvious one is located near the path leading from the harbor to the mages encampment. It's located near a waterfall. The selection of an entrance doesn't change anything, and regardless of your choice you will have to keep in mind that you will stumble upon several monsters on your way (fortunately, they are mostly weak and very weak enemies).
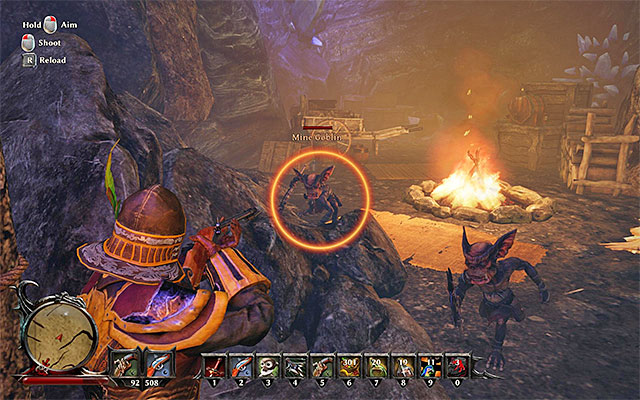 During your exploration through the caves, watch out for goblins, other monsters, as well as traps.
After entering the goblin caves start searching them. You will have to kill a total of 10 Mine Goblins, and for each of them you will be given 50 Glory Points. Don't underestimate them, as they are agile and quite deadly in groups. Besides, it's not the only threat, as there's several of Termite Workers and Termite Warriors awaiting you in the caves, as well as a number of traps. The traps are mostly consisting of a wire stretched near the ground, and the best method is to simply avoid them (if you fail to avoid it, mash the indicated button / key as fast as possible to avoid getting damaged).
After securing the cave (100 Glory Points) go back to Magnus (point 2 on the map), from who you will receive 200 Glory Points and 300 Gold. Meet with Gadi once more and tell him that the cave is now secured (200 Glory Points).
 You should be able to find Valamir near the entrance to the cave.
Afterwards, I would recommend you to head straight for the next mine, located to the North-West from the mages encampment. After leaving the encampment (through the Western gate), turn to the appropriate direction and start eliminating the encountered monsters (Scavengers and Spiders). You should soon reach the miners encampment and you will have to speak with a guard named Valamir here (point 2e on the map). From him you will learn that a couple of gnomes in the mines need your help.
Note - Valamir is also an ability trainer.
 Faris
FarisAfter entering this cave, you can meet the gnomes in any given order, but according to Valamir's suggestion, it would be wise to speak with Faris (point 2f on the map) first. This gnome is located in the uppermost section of the mine, and to get to him you will have to continue taking the right passageways after you've entered the cave. Faris is the superior of all of the gnomes, and he can provide you with some valuable information on who you should help. Besides that, you will be asked to find a missing gnome named Rami.
Note - Faris is also an ability trainer.
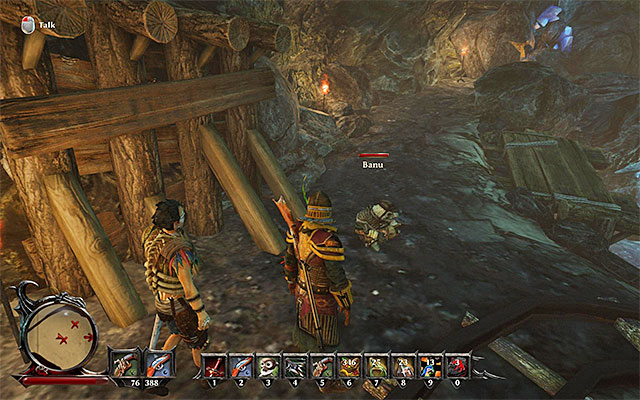 Banu is one of the gnomes inside of the cave.
The gnome named Kefkir is located in the Western section of the mine (point 2g on the map) and during a brief conversation you will learn that he is stealing the crystals. The next person on your list is a gnome named Noedu (point 2h on the map), but he won't be needing the Nameless Hero's help (although you must remember about using every dialog option available with him). A little further into the mine you will meet Banu (point 2i on the map), who will inform you about the monsters lurking in the mines. You can also ask Banu if he saw Rami anywhere.
Note - Banu is an ability trainer as well.
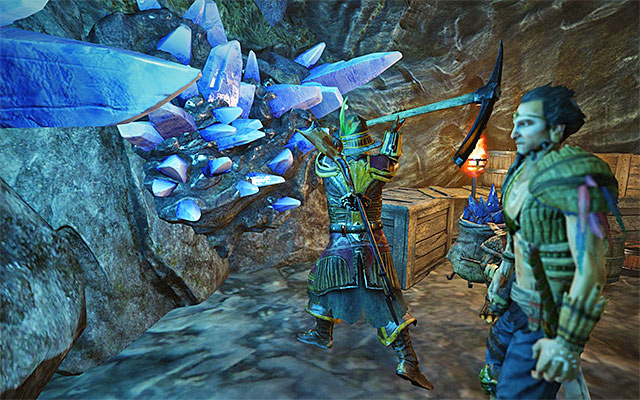 Crystals for Vega can be retrieved from Kefkir, or by mining them with a pickaxe.
Near your current position you should also find a gnome named Vega (point 2j on the map). He will inform you that he was robbed by Kefkir. The problem can be resolved in two ways. The first variant assumes you to meet Kefkir and take 5 Magic Crystals from him. You can:
The second variant assumes you to collect the crystals on your own. You may have already found them in the game world, or were given them during other quests. You can also use the pickaxe on one of the nearby Crystal Veins. Regardless of your approach, give the crystals to Vega and you will be given 20 Gold and 100 Glory Points.
 The entrance to the spiders territory.
Get to the lower level of the mines and locate the Eastern corridor, leading to an area filled with spiders. Here you will have to deal with 5 Voracious Rock Spiders (50 Glory Points for each) and one Spawn Spider. You must be extra careful when dealing with the lone enemy, relying on your dodges, and avoiding his acid spit at all costs (100 Glory Points will be given upon his defeat and 200 Glory Points for defeating all of the spiders). Besides this, you will stumble upon several "normal" spiders (Rock Spider), but their elimination isn't mandatory.
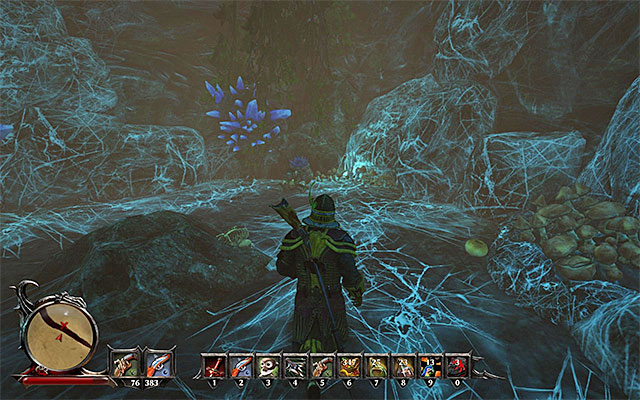 It's best to speak with Rami after you've secured the cave.
The gnome named Rami, previously mentioned by Faris, is hiding in the Eastern section of the area flooded with spiders (point 2k on the map). It's recommended to meet with the gnome only after you've secured the area, as he will automatically follow the Nameless Hero (100 Glory Points). You must escort Rami all the way back to Faris (point 2f on the map) and during your journey you can just ignore gnome's suggestions about the route of your march. The reward for rescuing Rami is 100 Glory Points and 20 Gold.
As you have done every activity in the mines already, you will need to report to a number of different characters. Start with meeting with Faris (point 2f on the map) (50 Glory Points). Afterwards, go back to Valamir (point 2e on the map). The standard reward is 200 Glory Points and 200 Gold, but if you've developed your Intimidation skill to at least 100 points, you can demand a bigger payment (+150 Gold). Finally, go back to Magnus in the mages camp (point 2 on the map), to receive 200 Glory Points and 300 Gold from him.
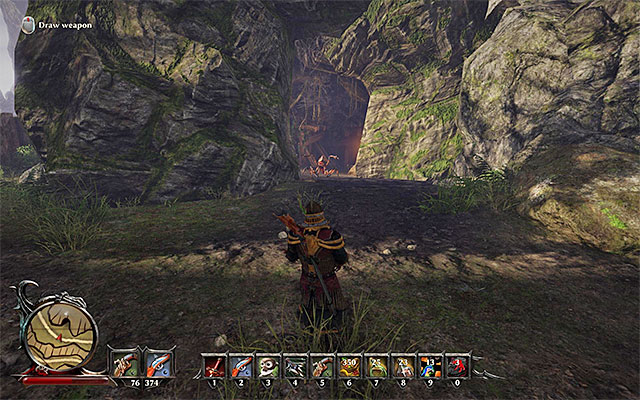
The last one from the mines you have to visit, which is associated with a quest commissioned by Magnus, is the one located to the West from the Mages Camp (point 2l on the map). The entrance to the cave is located by the main route and can be seen on the above screenshot. Get rid of a group of several Rock Spiders and head inside. Afterwards, examine the dead body of Collins, and you will find out that all of the characters inside of the cave were murdered by the monsters.
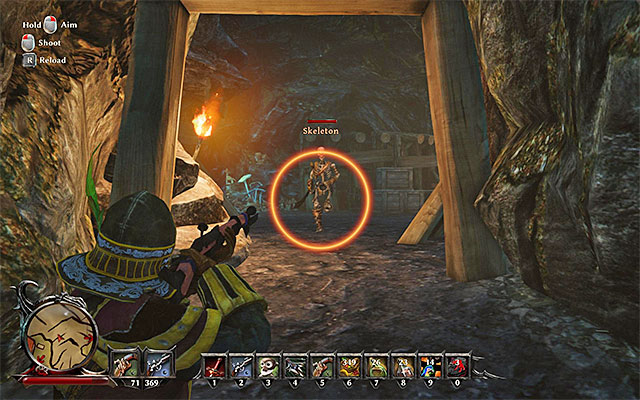 There are quite powerful monsters lurking in the mine.
The mine is quite small and you will have to examine it thoroughly, as you must kill all the enemies inside of it in order to complete the quest. There are five Hellhounds, five Skeletons and another five of Minions. You should be extra careful when fighting the Skeletons, as they are quite skilled and they can, besides attacking you, dodge your own strikes. You will be rewarded with 200 Glory Points for putting out all the enemies in this specific mine.
 Report to Magnus one last time.
You can now leave the mine and go one final time to the Mages Camp to meet with Magnus. Tell him that the mine was secured, and the general will reward you with 400 Glory Points and 300 Gold. Additionally, you will be given a special reward for your hard work.
Attention - you will be able to finish this quest only if you've already met Admiral Alvarez on Antigua, when completing the "Report for Admiral Alvarez" quest. Moreover, completing it means joining one of the three available factions (demon hunters, natives or guardians) and it will be an IRREVERSIBLE DECISION. If you join the guardians, you will unlock a lot of new quests and other attractions connected to this faction, like for example buying crystal magic spells, BUT you won't be able to join any other faction. You should consider this decision well and choose the faction that suits your game style best.
 The decision about joining the guardians is irreversible!
If you want to join the crystal mages and you meet all the requirements (completing the tasks described on this page and talking to Alvarez), you can talk to Magnus once again and tell him about you wanting to take the initiation process. The Nameless Hero will join the guardians and will receive the lowest rank - Cadet.
Rewards:
How to unlock the quest: through conversation with Downes.
Quest giver: Downes (point 3 on the map)
 Downes won't let the main character inside of the Mages Camp just yet.
Downes can be found in the central section of the Mages Camp (point 3 on the map). The person is guarding the entrance to the main building, reserved for the most important Crystal Mages. Downes won't be willing to let the Nameless Hero inside, unless the hero won't show a special permission. The only person who can give you one such thing is general Magnus himself (point 2 on the map), but you first have to earn his respect.
 Meet with Dawnes again after receiving permission from Magnus.
Despite what you might initially think, gaining Magnus' respect isn't very hard and it won't take much of your time. All you have to do is to examine the mine neighboring the Mages Camp, as a part of the main story quest called "New Allies". After delivering the crystals from the mine, you have to speak with Magnus again and ask him for permission to enter. The general will do as you ask, so you will now have to go to Downes and unlock the passageway leading to the mages headquarters.
Rewards for completing the quest:
How to unlock the quest: through conversation with Erasmus.
Quest giver: Erasmus (point 4 on the map)
 Erasmus can be found on the upper floor of the mages building.
A mage named Erasmus can be found on the upper floor of the main mages building (point 4 on the map), access to which you can be granted after completing the main story quest "Visiting Rights". During the somehow long conversation with Erasmus, you will learn about the mechanisms of the titular reactor and you will unlock another quest associated with it. Erasmus will ask the Nameless Hero for two things - to locate a gnome called Kasim, who went missing with a pair of a very valuable stones, and to find a third monolith stone on the Tacarigua Island.
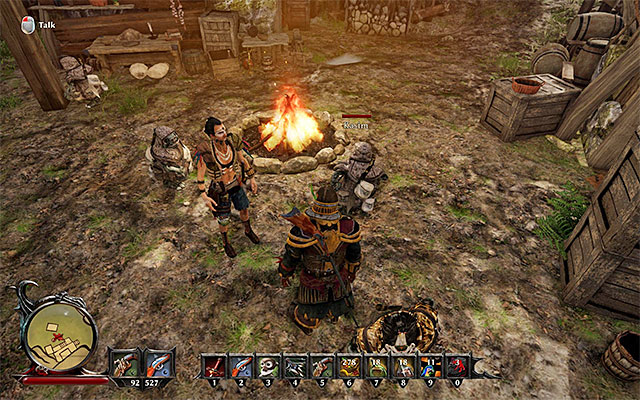 You can find Kasim in the mages encampment.
The first thing you need to do is to solve the problem with Kasim, especially because you won't have to leave the mages encampment to do so. Look around the camp and find the mentioned gnome (point 4a on the map) and have a conversation with him. During the meeting, use a clever suggestion to convince Kasim that someone else wants to acquire the stones, which he has in his possession.
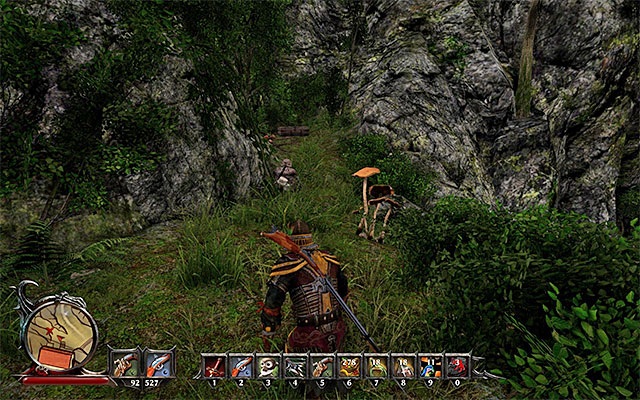 Follow Kasim until he reaches his hidden stash.
Afterwards, the gnome, according to the plan, will depart in the direction of his secret stash, to check whether his monolith stones are still in his possession. Follow his footsteps, remembering to keep a safe distance, so that he won't notice you and run away. After a short while the gnome will reach a chest located to the North from the encampment (point 4b on the map). Confront the gnome (100 Glory Points), who won't be causing any problems while you take 2 Monolith Stones from the chest (200 Glory Points). Go back to Erasmus and give him the stones.
Note - if you want to complete the further part of the quest given by Erasmus, you will have to go to the Tacarigua Island. Go to the main story quest section associated with the island to proceed.
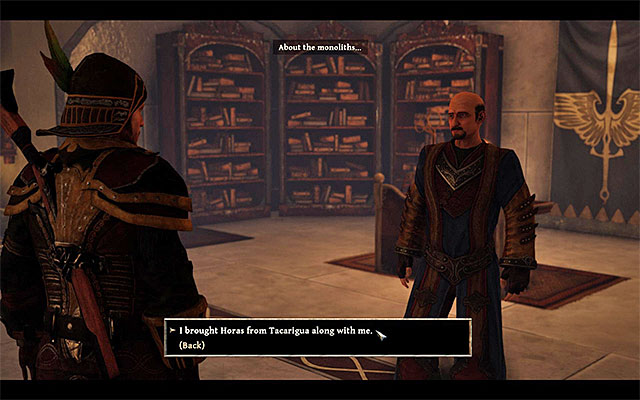 Tell Erasmus that you have obtained the third monolith stone
After you return from Tacarigua, receive the Monolith Stone from Horas (to learn more, see the walkthrough for "A Follower of Magic" main quest) and take it back to Erasmus (point 4 on the map). During the conversation with the mage, tell him that you have obtained the third stone.
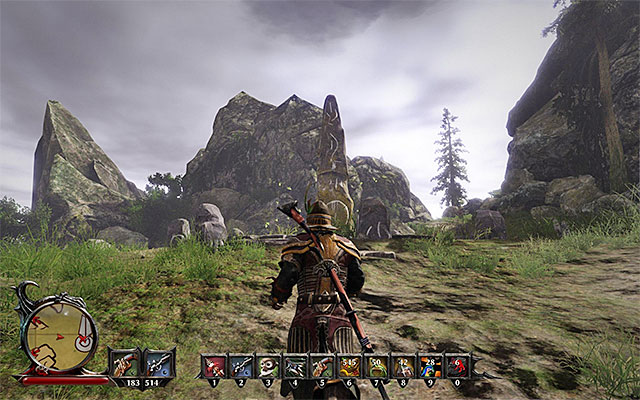 The Eastern Monolith
Since you already have all three stones, you can start visiting monoliths all around Taranis isle. The Eastern one is close to the harbor (point 4c on the map) and you need to watch out, because there are Scavengers around, among others. After you have secured the area, interact with the monolith and put the stone in place (200 glory points).
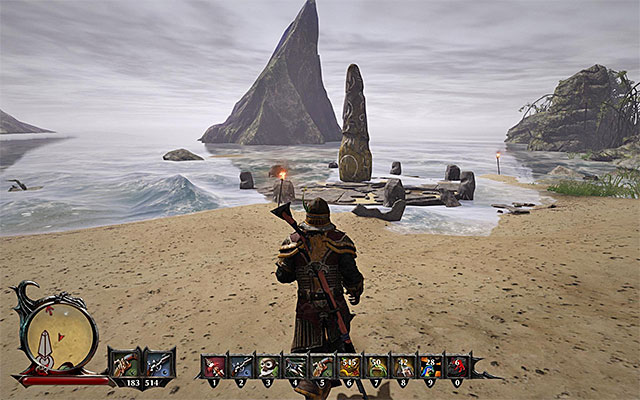 The Southern monolith
The next monolith is in the Southern part of the isle (point 4d on the map). Just like the previous one, it is being guarded by monsters, but it should not be too problematic to eliminate them. Slide the stone into the monolith (200 glory points).
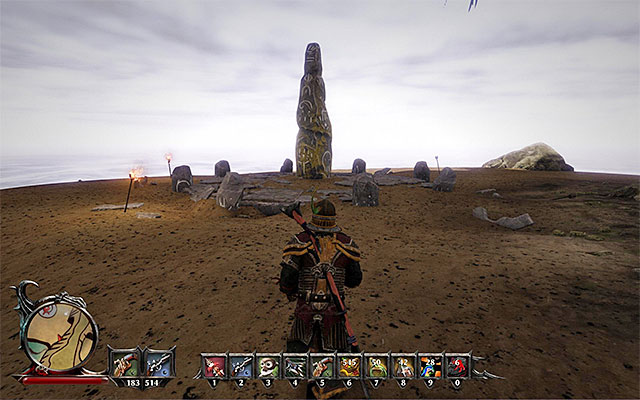 The Northern monolith
The last one of the monoliths is located in the North-Western part of Taranis (point 4e on the map). Both the area and the path that leads up to it, are being patrolled by various monsters. Activate the monolith by sliding the stone in (200 glory points).
It is a good idea to return to Erasmus now (point 4 on the map) and tell him that all three monoliths are now active. You will be rewarded with 1000 gold pieces.
 Meet Erasmus once again after you will get to the third chapter of the game
I recommend you to return to Erasmus (map location 4) only after you will get to the third chapter of the main plot since only then you will be able to finish this quest. Tell Erasmus about activating all three monoliths and watch the cut scene which presents the turning on of the reactor. Once you will finish talking with Erasmus you will participate in a new conversation, however this time you will speak with the most important mage named Zacharias. More information about this character you will find in the description of a main quest named "Recruit Zacharias".
Rewards for completing this quest:
How to unlock the quest: through conversation with Erasmus.
Quest giver: Erasmus (point 4 on the map)
 Erasmus will ask the hero to find out what happened to one of his cadets.
A mage named Erasmus can be found on the upper floor of the main mages building (point 4 on the map), access to which you can be granted after completing the main story quest "Visiting Rights". During the somehow long conversation with Erasmus, you will learn that he send one of his cadets to the Tacarigua Island with the task to acquire a Monolith Stone. The mage will ask the hero to find out what happened to his apprentice Horas.
Note - you now need to head for the Tacarigua isle so, go now to the chapter with main quests in that location.
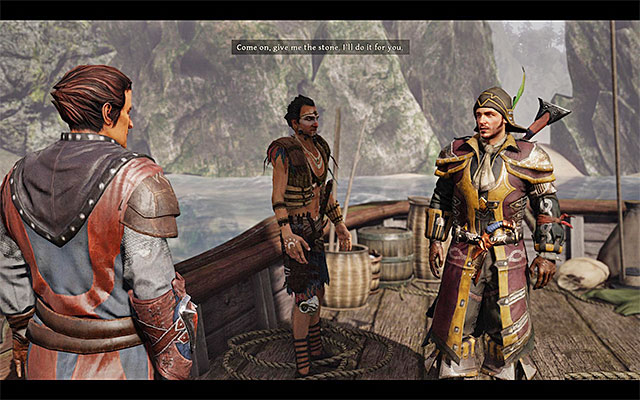 Horas asks you to do him a favor
After you return, with Horas, from Tacarigua, talk to the follower. He will asks you to deliver a Monolith Stone to Erasmus in his behalf.
Note - it is a good idea to exhaust all of the dialogue options, during the conversation with Horas. This will unlock a Crew quest entitled "A Friendly Turn".
Rewards for completing the quest:
How to unlock: Talk to Alvarez (Antigua).
Quest giver: Alvarez
 Neron commands the ship of the Crystal Mages
This quest is unlocked during your stay on Antigua, namely after meeting Admiral Alvarez and completing a task for him. Alvarez asked the hero to gain new allies, who would help to destroy a fleet of pirate ships. One of the factions that can be of help are the Crystal Mages from Taranis.
After reaching Taranis, you can head to the headquarters of the Crystal Mages right away (letter M on the map) or talk to Neron, who commands the ship of this faction. The ship is located in the port (number 1 on the map). The captain will tell you that he is not interested in fighting the pirates at the moment. Neron may change his mind if the Nameless Hero gains more reputation, as well as the support of the Crystal Mages from Taranis.
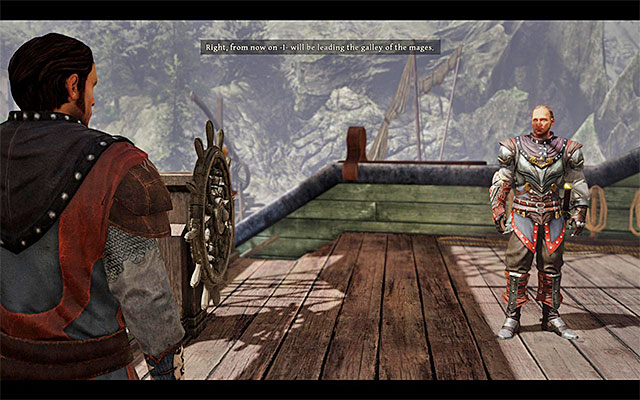 After joining the Guardians, you will be able to take control over the ship
Talk to Neron again after you decide to join the Guardians. What's interesting is that you don't have to wait until you have the Guardian rank, as you can still be a Cadet. During the conversation with Neron, you will be promoted to the new captain of the ship.
Attention - from this moment, you can allow people to join your crew (before, some of them wouldn't join you, as you only had a small ship belonging to Bones).
Rewards:
Way to unlock the quest: Talk to Eldric (Calador Bay).
Quest giver: Eldric
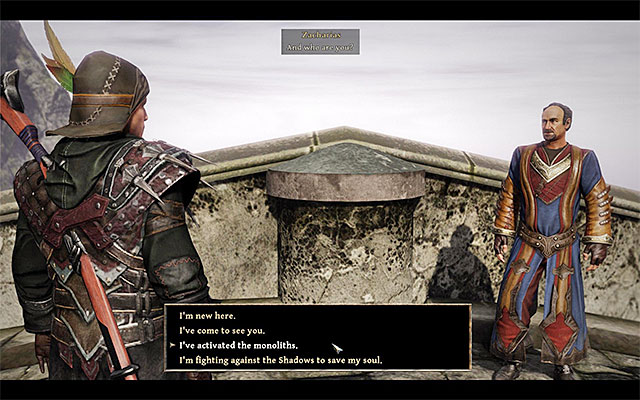 You can meet up with Zacharias after the reactor has been activated
You may have unlocked this quest on Calador, after you have progressed to the third chapter of the game's story line and started your preparations for the spirit ritual. The Crystal Mage Zacharias is one of the people that need to participate in the ritual. You will meet him automatically, after you complete the "The Reactor" main quest (point 5 on the map), i.e. after you have taken all of the actions aimed at starting the reactor.
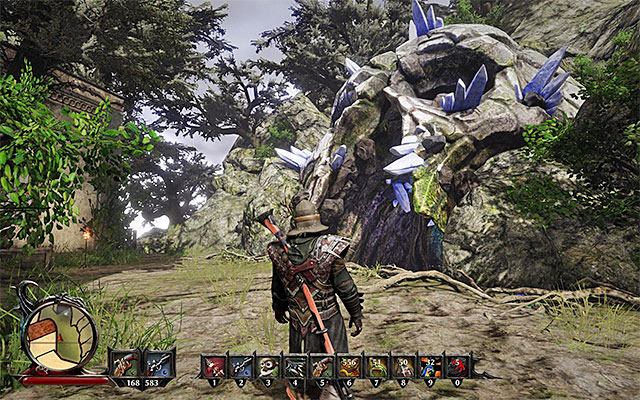 The entrance to the cave with the crystal portal
During the conversation with Zacharias mention the magic device that he has found and is currently trying to examine. Follow the mage to the North-East. After several moments you will reach the entrance to the cave with the crystal portal (point 5a on the map). Your character will make Zacharias realize that forces of Shadow are involved. In spite of all warnings, you will be asked to start the inactive portal in the cave and, until you do that, Zacharias refuses to take part in the spirit ritual.
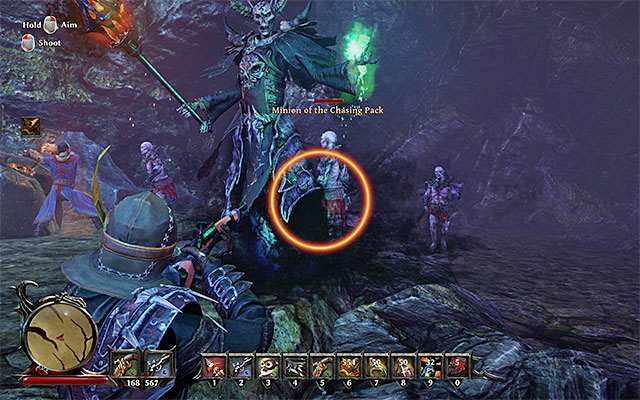 Watch out for the golem
Enter the cave and start exploring it. Along your path, you will have t eliminate several Rock Spider, although you should have no difficulties eliminating them. A bit ahead, you will run into an Iron Golem) and you need to be careful here, because the golem is very tough and deals lots of damage (avoid, mainly, its powerful ground slams).
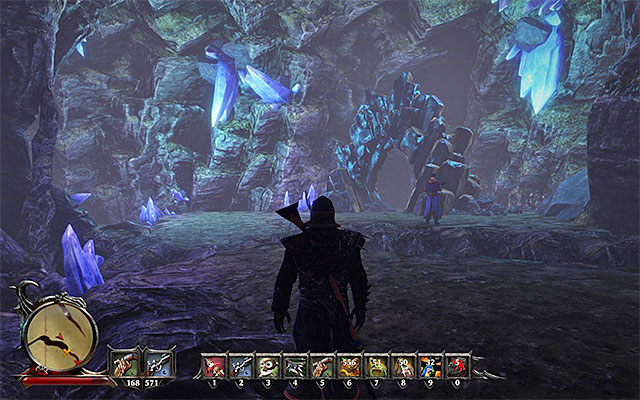 The Portal
You need to reach the spot, where there is the inactive crystal portal (point 5b on the map) and this is where you meet Zacharias again. Talk to the mage who, at the end of your meeting, starts the portal. Approach the portal and interact with it where, instead of destroying the portal, take the decision of crossing it to enter the Underworld. (600 Glory Points).
 Tao
TaoAfter you walk into the Underworld collect the Soul Dust around, and talk to Tao, who is the guardian of the Isle of the Dead. You will not have any influence on the course of the conversation (your answers may only slightly affect your soul factor). After the end of the conversation, you will return to the world of the living (200 Glory Points) so, talk to Zacharias again. You will learn from him that, in the actuality, your character disappeared for several hours.
Attack the shadow lord and watch out for his helpersPrepare yourself for a surprise, because soon there will appear the Shadow Lord of Hunting in the cave and he will be accompanied by seven Minions of the Chasing Pack. I recommend that you start by eliminating, at least, some of the minions, so you do not end up surrounded by lots of opponents. Only after the number of the opponents goes down, attack the Shadow Lord and remember to remain in constant movement, and to perform dodges frequently. For defeating the Shadow Lord, you will be rewarded with 600 Glory Points. Also, do not forget to examine his body to collect the Raw Black Heart.
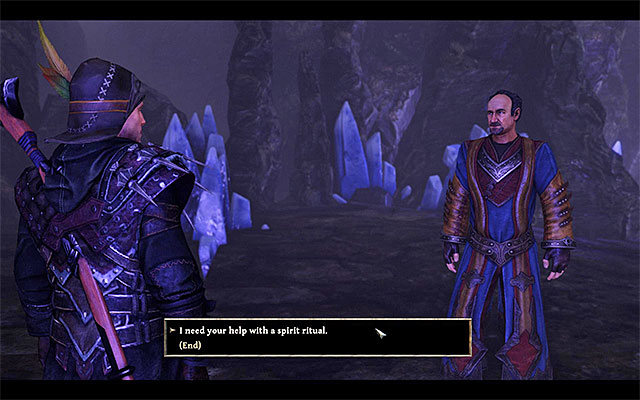 Ask Zacharias to take part in the ritual
Do two things now. First, talk to Zacharias and ask him to take part in the spirit ritual. Secondly, approach the portal and destroy it (500 Glory Points), thanks to which you will perform the fourth action necessary to complete the "The Realm of the Shadows" quest.
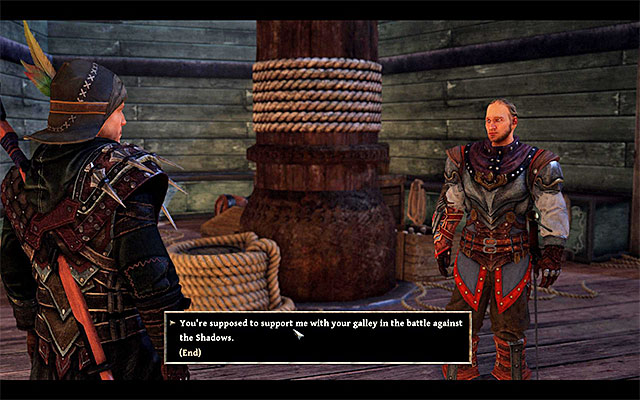 Neron is staying on the ship of the Crystal Mages
Note - If you have joined the faction of the Demon Hunters or the Natives, after you recruit Zacharias, do one more thing, i.e. reach the ship of the Crystal Mages, moored in the harbor on Taranis, which is commanded by Neron (point 1 on the map). During the conversation with Neron, have him join your fleet, which will earn you 400 Glory Points.
Rewards for completing the quest:
The way to unlock the quest: Talk to Bones.
Quest giver: Bones
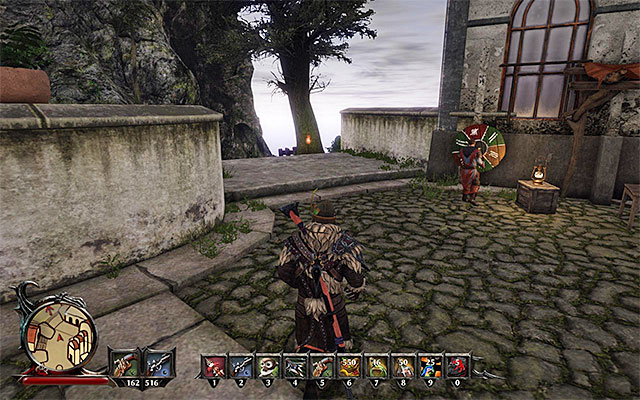 Take the path to the North of the Mages' HQ
You could have unlocked this quest after the end of the third chapter of the game's story line, i.e. after you have taken all of the actions connected with performing the soul ritual in the Oracle's den, on Kila. Additionally, you are required to have talked to Margoloth and to Bones. Traitor Horas is hiding on Taranis isle and, after you get there, go to the Mages' encampment. Take the path leading Northwards of the camp and soon, you will reach the location, where Horas is hiding (point 6 on the map).
 You need to defeat the Ore Titan here
After you have made it to the place, where Horas is staying, you will watch a short cutscene of the conversation that you and him are having. Then, you will have to face the boss where, instead of Horas you will first have to defeat an Ore Titan, who appears in the arena near the Mages' camp (point 5 on the map).
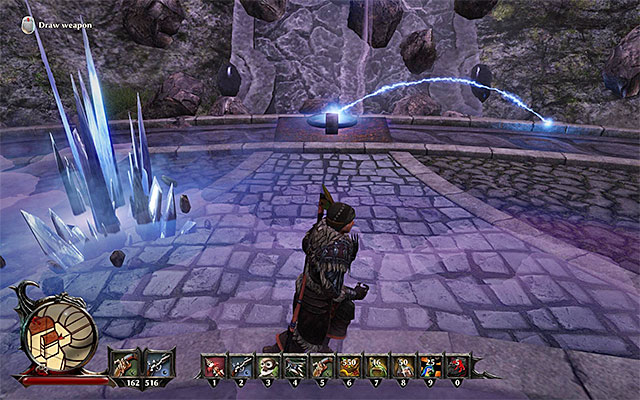 Dodge the titan's slow attacks and the spikes sliding from under the ground
The duel with the titan is much easier than it may seem, at first. This does not mean, however, that you can underestimate the monster and not react to its actions. First of all, you should dodge from the strong melee attacks of the titan and do not approach, if not necessary. Also, you are not completely safe at a distance, either, because there are spikes coming from under the ground, every now and then. Fortunately, the game warns you of the spots in which the spikes appear so, you will always get enough time to get away from them.
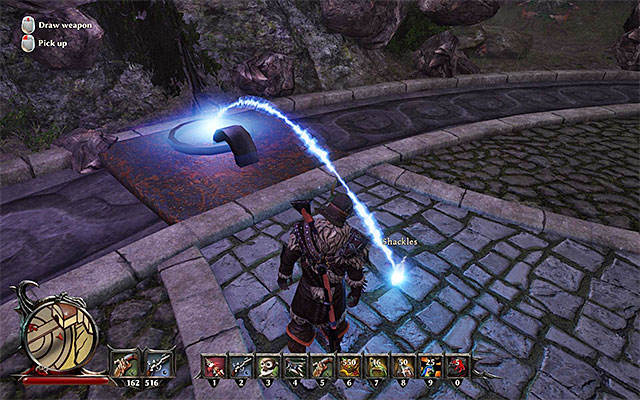
Do not attempt any standard attacks, because it is not the point of the battle, to deplete the titan's health bar. What you need to do is capture it. Around the arena, there are five interactive Shackles and an example one has been shown in the above screenshot.
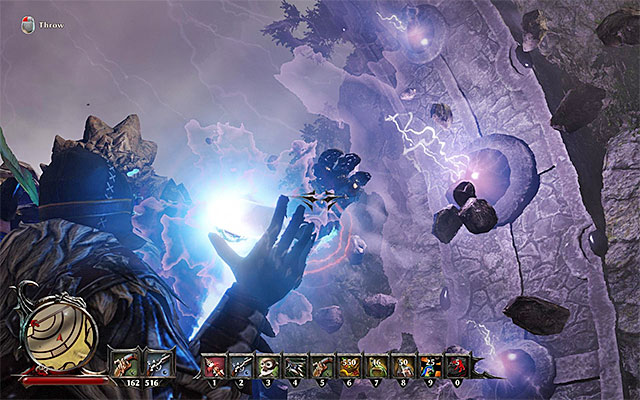 Aim at the boss's limbs
Pick up the magical shackle and turn towards the boss. You need to wait for the titan to stand near your character and start its swipe with one of its limbs. Quickly, aim then at that limb and press the throwing key/button. If you have aimed and your throw well, it will attach itself to the titan.

Repeat the above pattern with three other limbs. You need to aim the last, fifth shackle at the area around the monster's spine, which has been presented in the above screenshot. Binding the titan properly ends the battle (1000 Glory Points).
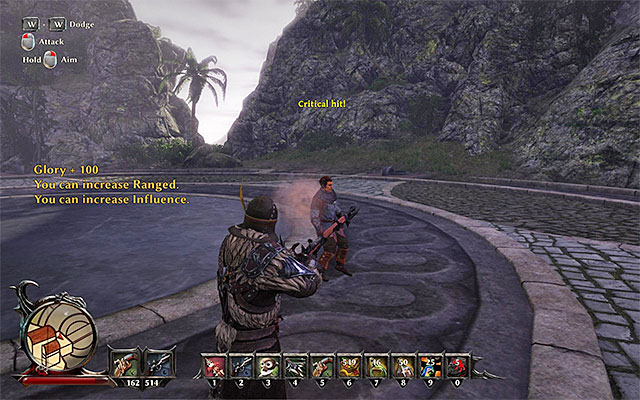 You need to kill Horas
After you have defeated the titan, you automatically watch the cutscene of the conversation with Horas and the dialogue options that you select have no bearing on how the conversation ends (you can only obtain either positive, or negative soul points). You need to fight Horas. Fortunately, he is a weak opponent, who prefers melee combat (keep at a distance from him and perform frequent dodges) so, it is not going to be difficult to win.
Note - remember to search Horas's corpse, because he has several valuable items on him.
Rewards for completing the quest:
The above map contains the reference points to all of the locations visited during your journey on the Taranis Island, while doing the additional quests. The red points symbolize the starting points of additional quests, whereas the green ones show the locations visited during the completion of the quests.
Note - it is recommended to check out the map connected with the main quests of Taranis Island, as many of the main and optional quests are closely connected.
How to unlock the quest: through conversation with Marbuk.
Quest giver: Marbuk (point 1 on the map)
 You can find Marbuk in the harbor.
A mage called Marbuk can be found in the harbor (point 1 on the map) and he will probably be the first person you meet after coming to Taranis Island. During the conversation, the man will suggest the Nameless Hero to go on a nearby hill and speak with Baker, who can lead him to the mages encampment.
 Baker can be found on a small hill and he can lead the Nameless Hero to the mages encampment.
According to the guidelines given to you by Marbuk, reach the small hill neighboring the harbor (point 2 on the map) and initiate a conversation with Baker. During the conversation you can either express your desire to explore the island on your own, or accept his proposal of a joint expedition to the mages encampment. The second option is obviously the better one.
Rewards for completing the quest:
How to unlock the quest: through conversation with Marbuk.
Quest giver: Marbuk (point 1 on the map)
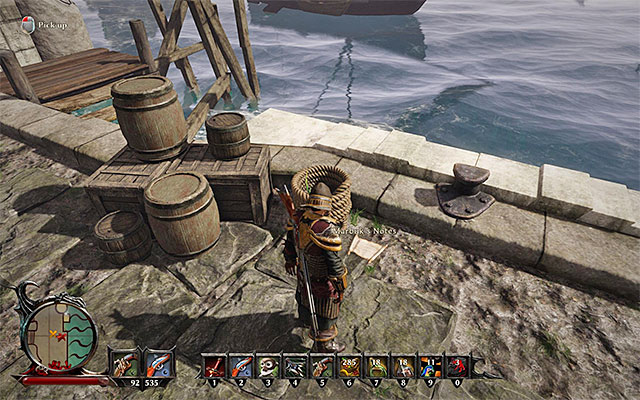 A sample page.
Go back to Marbuk who should be in the harbor (point 1 on the map) after you've explored the Taranis Island a bit and do some of the quests. The mage should have a new quest ready for you and it's about collecting a number of pages of his notebook, scattered around the harbor area. You have to collect 7 pages (Marbuk's Notes) and all of them can be found near the harbor. You can use your journal to find them, but you should be good even without it. After you've collected all of them, go back to Marbuk to end the quest.
Rewards for completing the quest:
How to unlock the quest: through conversation with Baker.
Quest giver: Baker (point 2 on the map)
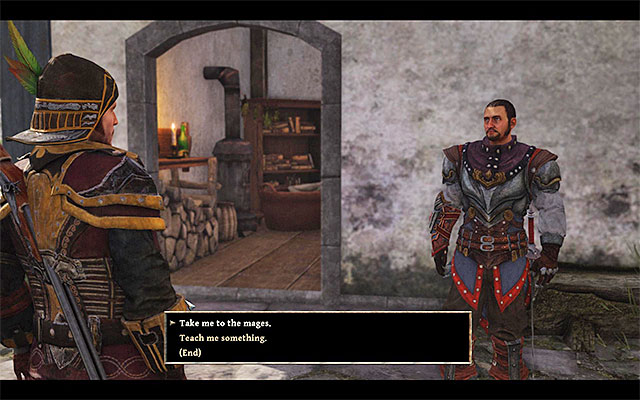 You must confirm your willingness to travel to the mages encampment.
The guard named Baker can be found on a small hill neighboring the harbor (point 2 on the map). You can meet this man either during your own journey, or by doing the side quest called "Speak to Baker", given to you by Marbuk. Baker will propose you a joint expedition to the mages encampment, and it's a good idea to accept it.
Note - Baker is also an ability trainer.
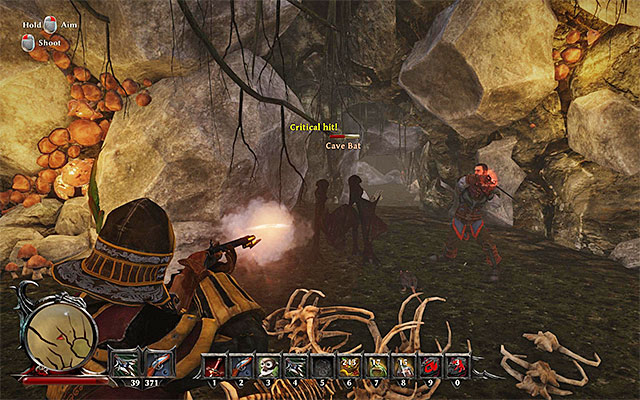 You can examine the cave and take care of the bats.
Shortly after you begin your march, Baker will stop and suggest you to examine the nearby cave (point 2a on the map). You can skip this step, but it's worthwhile to check the cave, because you will be able to get some additional experience points, as well as items. Inside the cave there are four bats (Cave Bat), and by killing each one of them you will be given 100 Glory Points. During the encounter, try to avoid their swift attacks and stand in narrow passages, so they won't be able to surround you. After the fight is over (100 Glory Points) examine the cave, or immediately go outside to continue your journey.
Note - if you want to gain experience points for killing monster, don't let Baker kill them. The last hit must always come from the Nameless Hero or a permanent party member.
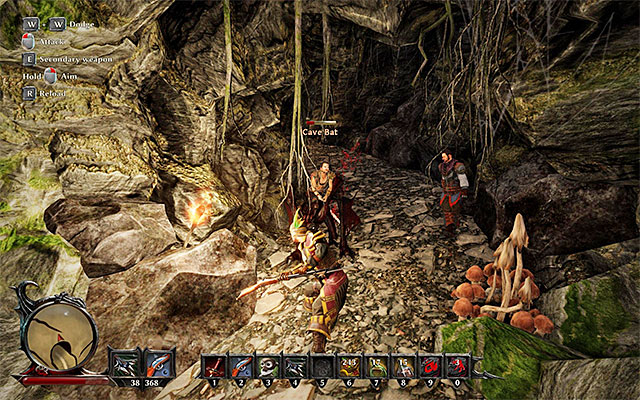 There are other monsters in this cave.
After a short while you will have to make up your mind again. You can either choose the longer route, leading through the canyon (point 2b on the map), avoiding the more demanding encounters with the enemies (you will probably have to deal with Scavengers only). The second option is to go through the cave (point 2c on the map). This way it's almost certain to encounter additional Cave Bats, as well as Rock Spiders.
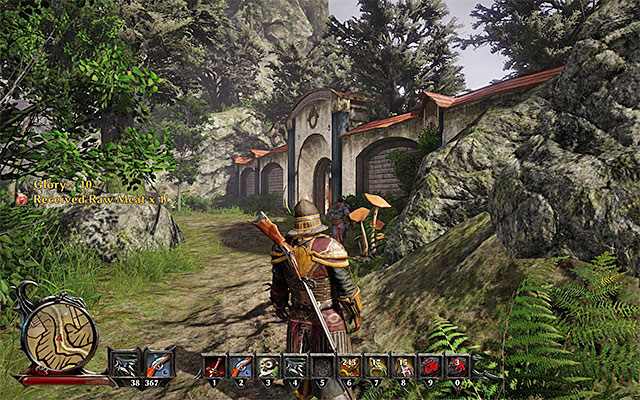 The entrance to the mages encampment.
Regardless of your decision, you should soon reach the mages encampment (point 2d on the map). Listen to what Baker has to say during the last conversation, which will end the quest.
Rewards for completing the quest:
How to unlock the quest: through conversation with Rumold
Quest giver: Rumold (point 3 on the map)
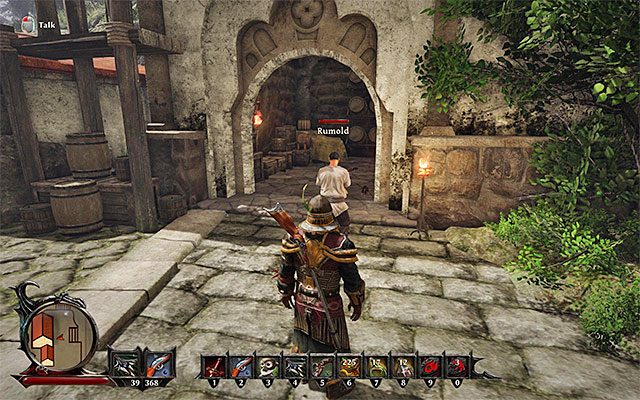 Rumold
Rumold can be found standing in front of the warehouse entrance in the harbor (point 3 on the map). During the conversation with the man, you will have to decide if you want to help to resolve the problem with harbor thieves. Rumold suspects the gnomes to be the one responsible for that, but he still asks the Nameless Hero to investigate and find the culprit.
Note - Rumold is also a dealer.
 Approach the boxes stored in the harbor at night.
As the theft has place during the night hours, you will have to wait for the time of the day to shift. If you don't want to wait for it, you can use any bed and fast-forward the time a few hours. After it's the night already, approach the boxes stored in the harbor (point 3a on the map) and interact with them, to begin your night watch task.
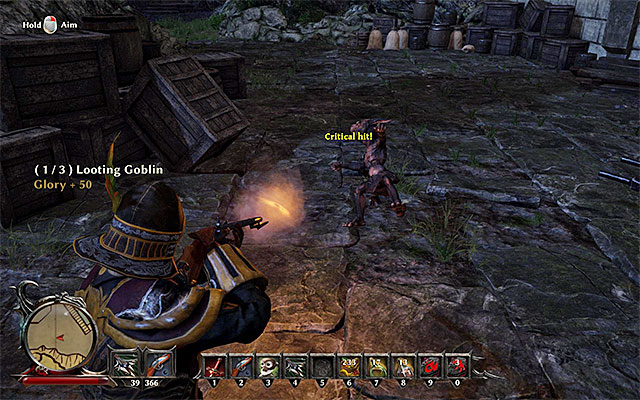 You must get rid of all of the pesky goblins.
The game will show a short cutscene, during which you will learn that the one responsible for the theft are the Looting Goblins. Attack the monsters, which, fortunately, aren't the strongest foes in the game. For each goblin you kill you will be given 50 Glory Points, and there are a total of 3 of them to be killed (100 Glory Points). Afterwards, wait for the day and go back to Rumold (point 3 on the map), to tell him about your discovery. The man will let you decide if you want to be given gold or the contents of the chest as a reward. I would recommend selecting the chest, as it contains a couple of valuable magical crystals.
Rewards for completing the quest:
How to unlock the quest: through conversation with Gadi
Quest giver: Gadim (point 4 on the map)
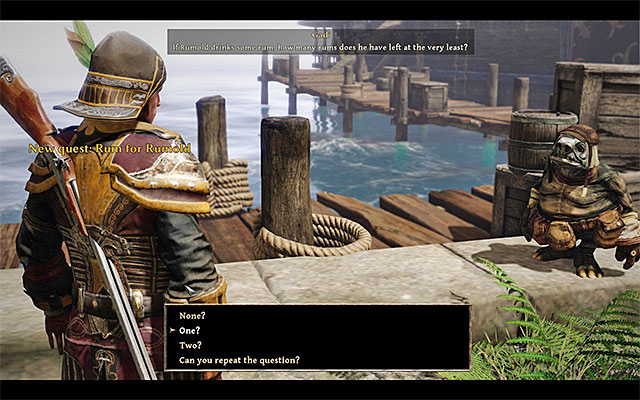 The right answer is "One".
During your stay in the harbor, you will meet a gnome named Gadi, who works as a box carrier (the character is constantly moving) (point 4on the map). During your meeting, Gadi will propose the Nameless Hero solving an easy word riddle, associated with the side quest. The answer to the question asked by Gadi is "One".
Note - Gadi is also an ability trainer, as well as a merchant.
Rewards for completing the quest:
How to unlock the quest: automatically by finding a Treasure Map.
Quest giver: - (point 5 on the map)
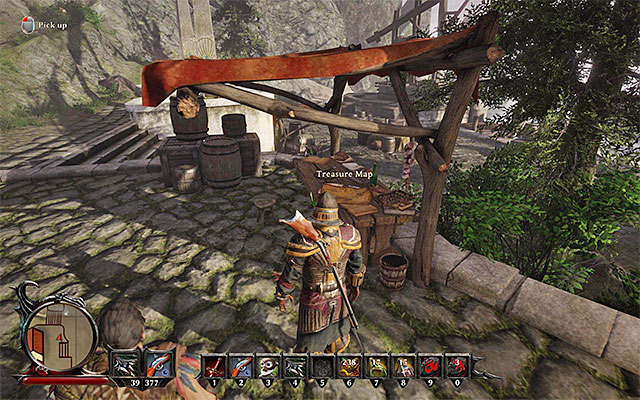
During your stay in the harbor, look for a Treasure Map (point 5 on the map), hidden in the Eastern section of the Taranis Island - the location can be seen on the above screenshot. The map is lying on a wooden bench, in front of a warehouse. By picking up the map, you will unlock the side quest described in this section.
Note - before you set on the journey to retrieve the treasure, make sure that you have a Shovel in your inventory. This item can be either bought, or found in the world.
 You will have to get to the Southern part of the jungle.
The treasure you are looking for is buried in the Southern part of the jungle (point 5 on the map). Remain vigilant, as during your trip to the treasure you are surely to stumble upon a huge Grave Spider. Locate the place with a big red cross painted on it and use a shovel, to dig out the sought treasure. Examine the contents of the chest, in which you will find 90 Gold, a Diamond and a Schematic for a Ring of Magic.
Rewards for completing the quest:
How to unlock the quest: through conversation with Vetranio.
Quest giver: Vetranio (point 6 on the map)
 You can find Vetranio working near the entrance to the Mages Camp.
After reaching the Mages Camp, you can stumble upon a freshman recruit Vetranio (point 6 on the map). By default, he is consumed with his work, near the main entrance to the mages encampment (he is constantly on the move though). During the meeting, the Nameless Hero will get a Broom and will be asked by the man to find a person willing to do chores in the mages encampment warehouse.
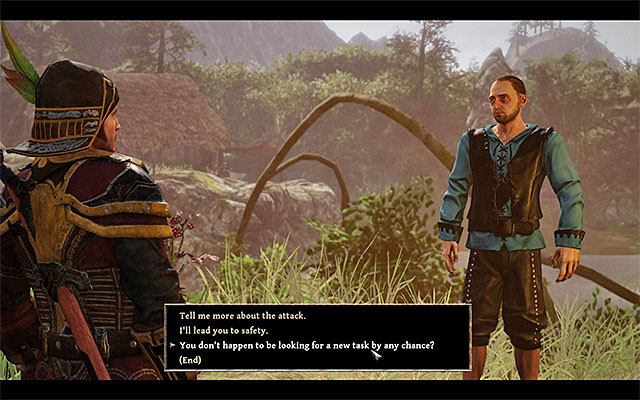 Tokel is the ideal candidate for the job.
The ideal candidate for the warehouse cleaning is a man named Tokel, which can be found on a small island, in the middle of the lake, to the South from the Mages Camp (point 11a on the map). It's worth mentioning, that you will save that man during the side quest called "One Made It", given to you by Kjeld. You can offer Tokel the work during your first meeting, but he will be able to take on the job only after you've safely escorted him to the encampment. Give the Broom you just received to Tokel and inform him Vetranio, that you've found his successor.
Rewards for completing the quest:
How to unlock the quest: through conversation with Paula.
Quest giver: Paula (point 7 on the map)
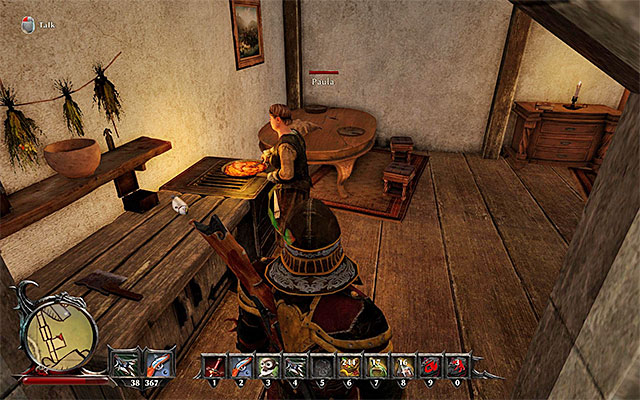 Paula can be found in the kitchen.
Paula can be found inside of one of the smaller buildings, located near the entrance to the Mages Camp (point 7 on the map). During the conversation, the woman will complain about the weird noises coming from outside her house. Promise to help her and head out to the back of the building. Locate the Loud Armadillo and kill the harmless creature (30 Glory Points). You can now inform Paula that the problem was solved.
Rewards for completing the quest:
How to unlock the quest: through conversation with Talbot
Quest giver: Talbot (point 7 on the map)
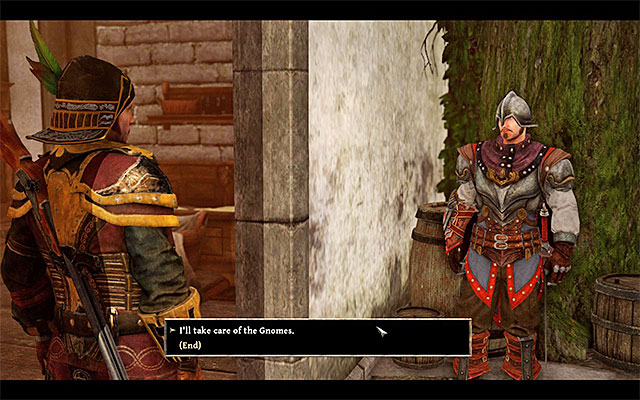 Talbot will ask the Nameless Hero to locate a pack of gnomes.
After some time has passed since you've completed a side quest called "Paula Hears Noises", go back near Paula's house, located by the entrance to the mages encampment (point 7 on the map). If you run into a watchman named Talbot, he will initiate a conversation with the main character and will ask the hero to locate a pack of gnomes, inhabiting Taranis Island. You will get Talbot's List from him, containing a list of the gnomes.
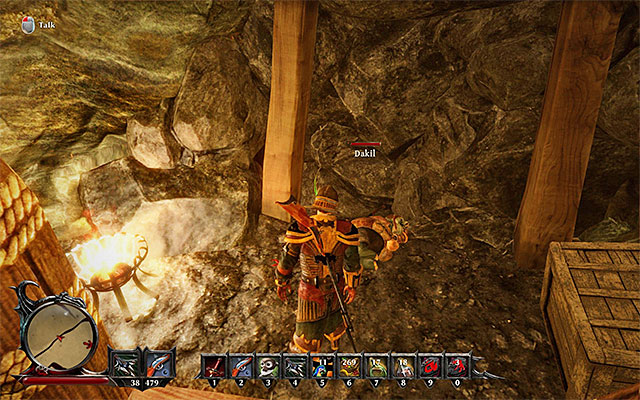 Dakil
DakilYou have to find three gnomes. The first one, Dakil, can be found in a mine, neighboring the mages encampment (point 15a on the map). It's best to visit the mine while doing the main quest called "New Allies".
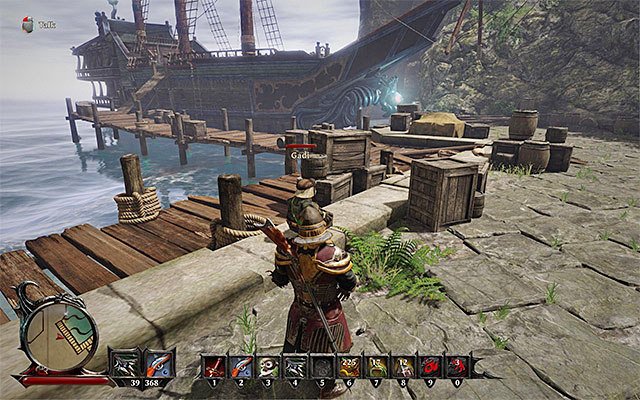 Gadi
GadiTime for the second gnome, Gadi. He can be found in the harbor, in the Eastern part of the map (point4 on the map) - it's the location you've landed after you reached Taranis Island.
 Faris
FarisThe last of the gnomes is Faris. This character can be found in a mine located to the North-West from the mages encampment (point 7a on the map). It's best to visit the mine while doing the main quest called "New Allies".
Go back to Talbot and inform him of the gnomes' location. For each gnome you find, you will be given 100 Glory Points and 20 Gold. Besides this, you will be given a separate reward at the end of the quest.
Rewards for completing the quest:
How to unlock the quest: through conversation with Lami.
Quest giver: Lami (point 8 on the map)

 The well and the entrance to Nergal's basement.
The quest can be activated by several means, although if you want to unlock the latter part of it, you will have to reach Lami first. The mentioned gnome can be found inside of a cave, located just below the mages camp (point 8 on the map). The cave can be accessed by two different means. The first one is to jump into a well located in front of the mages building - after a long fall you will land in water. The second option is to get inside the mages building (you need to complete a main quest called "Visiting Rights" first), go in the basement of Nergal and locate a ladder leading to the cave.
 Lami can be found in the cave.
Both ways mentioned above will allow you to reach a rather narrow cave, inside of which you should find Lami without breaking a sweat. Speak with the gnome to officially unlock this quest. Lami won't be happy about the Nameless Hero informing Abbas about his fate, fearing his anger. If you've developed Silver Tongue ability to at least 70 points, you will be able to convince Lami to give the last delivery to the Nameless Hero - thanks to that, you will be given 6 Magic Crystals and 2 Diamonds. Otherwise, the conversation will be terminated.
 Ledges you have to climb.
The only way to leave the cave is to locate a set of ledges, which the Nameless Hero can climb. You should soon arrive at a ladder, which will lead you to Nergal's headquarters, and from here you shouldn't have problems with reaching the exit. Note - if you weren't given the access to the mages building yet, be prepared to be thrown out of it soon.
 Gnome Abbas
Abbas is located in the central section of the mages encampment, or to be more specific, in the area which was separated for gnomes (point 17 on the map). During the conversation with Abbas, despite Lami's objections, it's worthwhile to share the information about his location. Abbas will ask the Nameless Hero to rescue his apprentice from the caves, and it will unlock another quest at the same time. If you've mentioned the last delivery topic while speaking with Lami, you can bring out the topic during the conversation with Abbas and behave in three ways:
Note - the alternative way to unlock this quest is to meet with Abbas. This way, the order of the activities you must do will be reversed, as you will have to depart to look for Lami after you've spoken with Abbas.
Note - you can barter with him, as well as pay him for sharing some of the gossips.
Rewards for completing the quest:
How to unlock the quest: through conversation with Frink.
Quest giver: Frink (point 9 on the map)
 The correct answer is "The word of the mages is law".
Frink can be found in the North-Western section of the mages camp, as well as near one of the entrances to the mine (point 9 on the map). The character is associated with one of the main quests of the Taranis Island, but you can do a small side quest as well. During the conversation with Frink, you can ask him about the rules obligatory to the watchmen. Frink will want to test the Nameless Hero if he listened to him. The correct answer to the asked question is the section dialogue option - "The word of the mages is law".
Rewards for completing the quest:
How to unlock the quest: through conversation with Agila.
Quest giver: Agila (point 10 on the map)
 You have to speak with a watchman named Agila.
A watchman named Agila can frequently be found in the central section of the mages camp, near the entrance to the main building (point 10 on the map). Speak with the woman and listen to what she has to say. Agila will offer you to rob three mages from the encampment from their magic crystals. You can start with the quest as soon as possible, or spend some additional gold and buy a couple of hints from Agila about getting to each of the mages' stashes (it's not required if you're going to use this guide).
Note - Agila is a merchant as well as an ability trainer.
 The descent leading to the basement.
All three of the mages you need to steal from can be found in the main building of the mages. Remember that you need to complete a main quest called "Visiting Rights" in order to gain access to the building itself. It's recommended to start off with the mage Nergal - to do so, locate a stairway leading to the basement and go downstairs (point 16 on the map).
 Nergal's chest.
You must reach Nergal's Chest, which is located in the room neighboring a chamber in which the mentioned mage works. As the main character doesn't have access to that room, you can try to resolve this problem in two ways. The first option is to barge into the room and plunder the chest as fast as possible, before the mage is able to notice main character's actions. The second one is way better and it assumes the usage of stealth, by using the Sneak ability from the Thievery category. Enter the stealth mode (by pressing appropriate key / button), which will allow you to sneak to the room with the chest unnoticed. Regardless of your choice, collect Nergal's Pouch of Crystals from the chest (200 Glory Points).
 Lumbrok
The second mage associated with Agila's quest is Lumbrok, and you should be able to find him on the second floor of the main building of mages (point 16 on the map). During the conversation with Lumbrok, bring out the topic of his private chamber, learning that it is protected all the time by a watchman. The good news is, that you will be able to avoid any contact with the guard, as Lumbrok will send the Nameless Hero to pick one of his books.
 During the conversation with the guard, mention that Lumbrok send you to grab his book.
Locate the stairway leading to the upper floor, which will allow you to reach the place protected by the guard (Room Guard). During the conversation mention that Lumbrok send you to grab his book - you will need to tell him the proper name of the book (Metaphysical Transcendence - the first dialogue option).
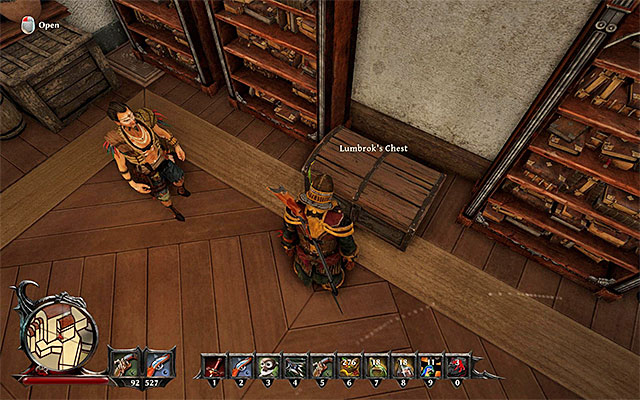 Lumbrok's chest.
You can now enter the chamber and plunder it without much effort. Collect the book (Metaphysical Transcendence), which the mage asked you to bring to him, as well as examine the contents of his chest (Lumbrok's Chest) and steal Lumbrok's Pouch of Crystals (200 Glory Points). You can now go back to Lumbrok and give him the book. As a reward you will be given 100 Glory Points and 10 Gold.
Note - there's a legendary item inside of Lumbrok's Chest, a book called Vague Promises.
 Speak with Faruco about his valuables.
The last of the "rich" mages is Faruco, and similar to Lumbrok, you can meet him on the upper floor of the main mages building (point 16 on the map). After initiating a conversation with Faruco, ask the mage about his valuables. The mage will tell you that he hid them inside of a chest, and the key was handled to a gnome called Zakir.
Note - Faruco is also an ability trainer.
 Ask Zakir about the key.
Zakir, according to the time of the day, can be found in various places inside of the mages encampment, but he can often be found dragging boxes, near the entrance to the camp (point 6 on the map). Ask the gnome, who won't be willing to tell you that he has the key. You can either pay the gnome 30 Gold or use your Silver Tongue Ability to convince him to tell you that Vetranio has the key.
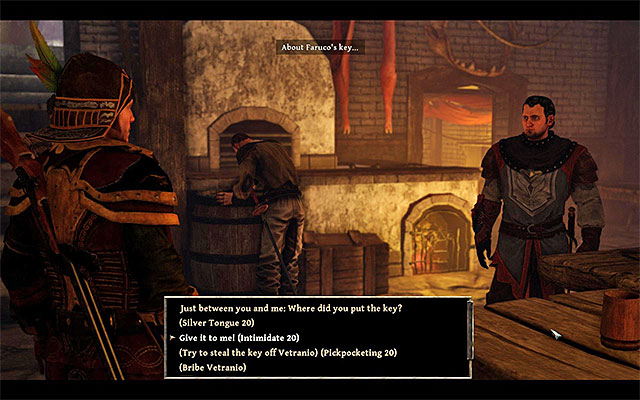 You can interrogate Vetranio, but you won't get the key this way.
In accordance to the time of the day, Vetranio should be near the entrance to the mages encampment, near the warehouse or the tavern. Speak with the man and demand him to handle the key to you. You will learn that the man doesn't have the key either. You can either leave Vetranio alone, or drill the topic a little further. If you've chosen the latter option, you will have to either bribe him, steal from him or use Silver Tongue ability. Unfortunately, you won't get anything from doing that.
Meet with the gnome Zakir for the last time, who, after another quarrel, will give Faruco's Key to the Nameless Hero.
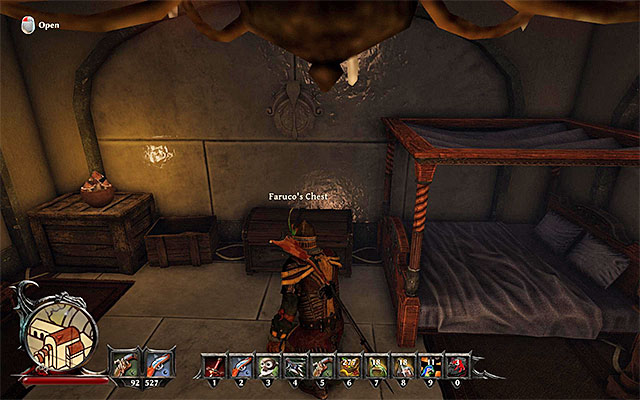 Faruco's Chest.
You can now go to the main building again (point 16 on the map). Faruco's chamber is on the upper floor and unauthorized people have no access here. You can, analogously to what you have done with Nergal's Chest, barge into the room and plunder it, or to use your Sneak, and search through the chamber without breaking a sweat. Faruco's Pouch of Crystals are located in his left chest (200 Glory Points).
After you've done it all, go back to Agila (point 8 on the map) and inform him of all thefts.
Note - in Lumbrok's Chest there's a hidden earring, called Zakir's Auri Culci, which is associated with the side quest of the gnome Zakir.
Rewards for completing the quest:
How to unlock the quest: through conversation with Kjeld.
Quest giver: Kjeld (point 11 on the map).
 Kjeld
KjeldKjeld can be found near the entrance to the tavern, in the central section of the mages encampment (point 11 on the map). From Kjeld you will learn, that he is a fisherman, as well as the sole survivor from the attack on his farm. The Nameless Hero will be asked to find out what happened with the rest of Kjeld's friends, whom he had left during his escape from the farm.
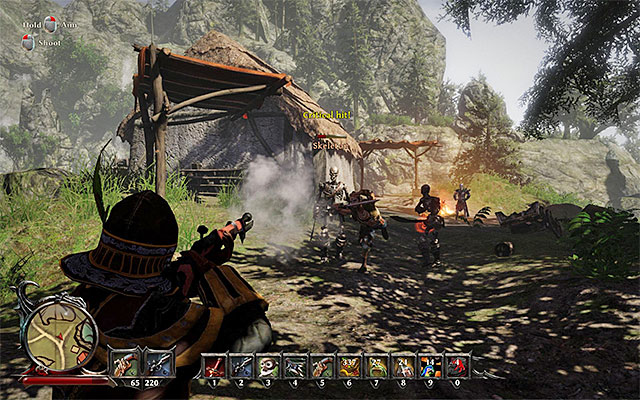 Deal with the monsters and find the woman's body hidden in the hut.
Leave the mages encampment and go to South-West. At the beginning try to reach the hut located near the lake (point 23 on the map). You will encounter Skeletons, as well as Minions near the hut, and it's very likely that you will have to take care of them all. Eliminate all of the monsters and enter the hut - inside you will find the body of dead Lina. Examine her body (200 Glory Points).
 Swim to a small island to meet with Tokel.
Afterwards, swim to a small island, located in the center of the local lake (point 11a on the map). After arrival, you will stumble upon Tokel, who was able to get away during the monsters attack on the farm. Promise to help the man and immediately depart in the direction of the mages encampment (100 Glory Points). During your trip you will need to take care of Tokel, because there's a high chance that there are Water Lizards nearby, which must be eliminated as quickly as possible.
Get back all the way to Kjeld (point 11 on the map). Inform him about rescuing and escorting Tokel safely back to the camp, as well as about Lina's death.
Note - during the conversation with Tokel (in the place you've found him, and / or after escorting him back to the camp) you can suggest a little task for him, which is associated with a side quest called "The Cleaner", received from Vetranio.
Rewards for completing the quest:
How to unlock the quest: through conversation with Magnus.
Quest giver: Magnus (point 12 on the map).
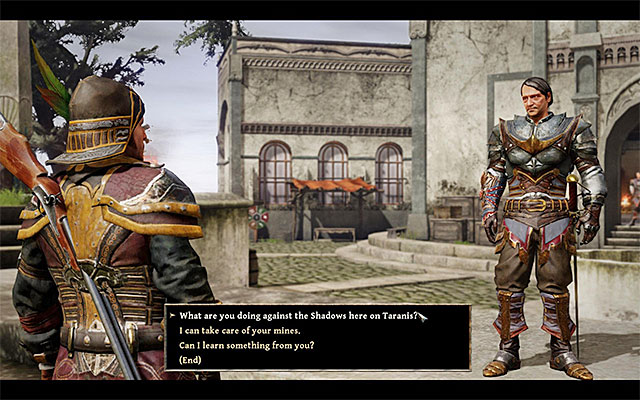 Ask Magnus about the activity of Shadows.
General Magnus is a character which you will have to meet with many times while doing main quests, but he can also offer you some of side quests as well. During the conversation with Magnus, bring out the topic of the monsters activity on the island, thanks to which you will learn that one of the Shadow Lords has his lair in the area. Magnus will show you the place in which you can find the mentioned creature.
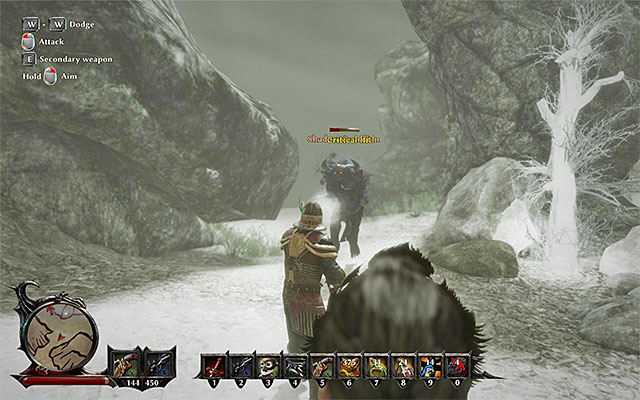 Shadow Guardians are the most troublesome enemies you encounter here.
Shadow Lord has his lair in the Deadlands, located in the South-Western section of the Taranis Island (point 12a on the map) and you can reach them from different sides. The Deadlands itself are, unfortunately, protected by a large amount of strong creatures, such as Skeletons, Minions, Hellhounds and Cave Bats. The foe you should watch out for the most is a gargantuan Shadow Guardian - try to avoid their swift and strong attacks, relying on your dodges and / or ranged attacks.
 The Shadow Lord himself.
After reaching the lair of Shadow Lord of Betrayal, get rid of Hellhounds accompanying him as quickly as possible, and after the lord is alone shift your attention upon him. Try to remain in motion all the time, trying to throw some of your melee attacks, or rely on ranged combat. For defeating the creature you will receive 600 Glory Points. Also, don't forget to examine the fallen lord's body, and collect a Raw Black Heart. Afterwards, go back to Magnus (point 12 on the map) and pass on the good news.
Note - Black Heart can be used to lengthen the health bar of the main character. You can find detailed description about this topic in the one of the quests of the crew called "Black Magic Experiments".
Note - Shax can help you in your quest to defeat the Shadow Lord. He will join your party upon the beginning of the side quest called "Forgotten Treasures".
Rewards for completing the quest:
How to unlock the quest: through conversation with Wells.
Quest giver: Wells (point 13 on the map).
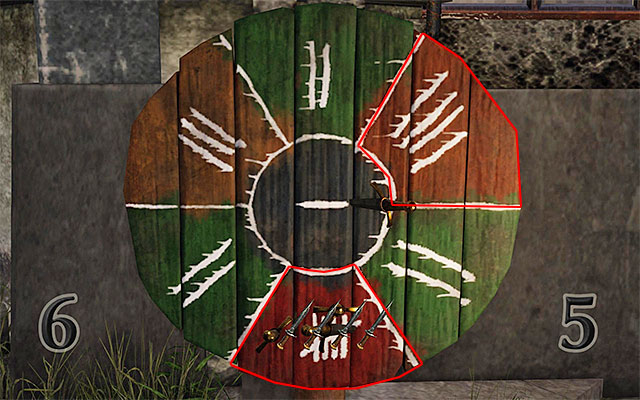
A watchman named Wells can usually be found near the knife-throwing shield, in the Northern section of the mages camp (point 13 on the map). You can speak with the man and suggest a knife-throwing duel.
The rules for this mini-game are really simple. You have 5 throws at total, and you need to have more points after all of them than Wells managed to accumulate. For each throw you can get from zero (if you won't manage to hit the shield at all) to five points. It's recommended to aim at the areas giving 4 or 5 points (they are marked on the above screenshot). After you're done aiming at the target, you have to throw the knife at the right moment - do so when the blue bar is in the proper place. According to the moment the key / button responsible for throwing was pressed, the knife will go straight ahead, or a little to the up / down.
If you have managed to accumulate more points than Wells did, you will complete the quest.
Note - Wells is also an ability trainer.
Rewards for completing the quest:
How to unlock the quest: through conversation with Stanley.
Quest giver: Stanley (point 13 on the map).
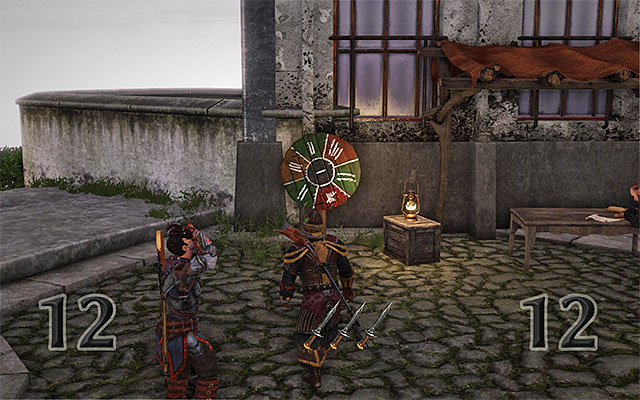 Accumulate more points than Stanley is able to.
In the morning hours, near the knife-throwing shield in the mages camp (point 13 on the map) you should be able to meet Stanley, and you can suggest a little knife-throwing duel. The rules of the mini-game were described, among others, in the description of a side quest called "Throwing Education". Win the mini-game to complete the quest.
Rewards for completing the quest:
How to unlock the quest: through conversation with Roderich.
Quest giver: Roderich (point 14 on the map)
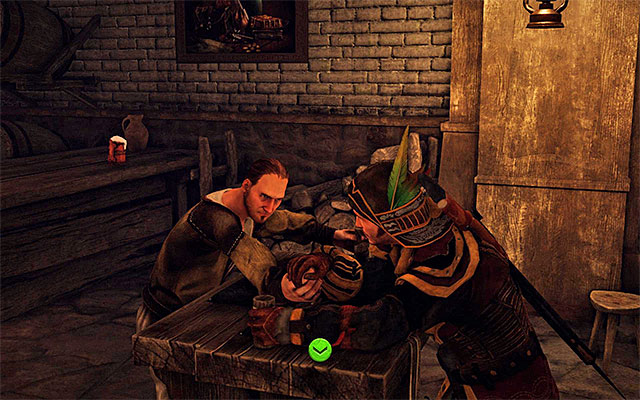 Press the buttons in accordance to the shown icons.
Roderich can be found in the tavern, located in the mages camp (point 14 on the map), but only in the evening hours he will be at the arm-wrestling table. After initiating a conversation with the man, you can propose Roderich to take part in an arm-wrestling mini-game, putting 300 Gold at stake at the same time. The arm-wrestling mini-game is rather simple. In the very beginning you just have to press the appropriate keys / buttons in accordance to the icons shown on the sides of the screen (in the case of the PC version of the game, you will have to use movement keys - WSAD). At some point in time, you will have to rhythmically press a single, selected key / button. If you press the key / button a sufficient number of times, you will win the mini-game.
Note -before you put your gold at stake, it's recommended to start by learning the rules of the mini-game.
Rewards for completing the quest:
How to unlock the quest: through conversation with Hardwick.
Quest giver: Hardwick (point 14 on the map)
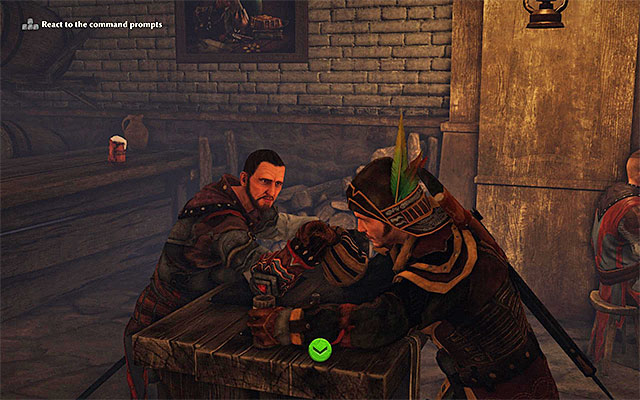 Press the keys / buttons in accordance to the icons shown on the screen.
You will have to wait until Hardwick decides to go to the tavern in the mages camp and will stop by the arm-wrestling table (point 14 on the map). It should occur about halfway through the day, and if you don't want to wait, you can always use the bed to fast-forward time. After initiating a conversation with the man, you can propose Hardwick to take part in an arm-wrestling mini-game, putting 300 Gold at stake at the same time. The arm-wrestling mini-game is rather simple. In the very beginning you just have to press the appropriate keys / buttons in accordance to the icons shown on the sides of the screen (in the case of the PC version of the game, you will have to use movement keys - WSAD). At some point in time, you will have to rhythmically press a single, selected key / button. If you press the key / button a sufficient number of times, you will win the mini-game.
Rewards for completing the quest:
How to unlock the quest: through conversation with Downes.
Quest giver: Downes (point 14 on the map)
 Downs will appear in the tavern in the later part of the game.
You can unlock this side quest after, in the early morning hours, a man called Downes appears in the tavern (point 14 on the map). At first, the character is busy protecting the entrance to the main building of the mages, and he will be able to leave his post only after you've completed a main quest called "Visiting Rights". After initiating a conversation with the man, you can propose Downes to take part in an arm-wrestling mini-game, putting 200 Gold at stake at the same time. The arm-wrestling mini-game is rather simple. In the very beginning you just have to press the appropriate keys / buttons in accordance to the icons shown on the sides of the screen (in the case of the PC version of the game, you will have to use movement keys - WSAD). At some point in time, you will have to rhythmically press a single, selected key / button. If you press the key / button a sufficient number of times, you will win the mini-game.
Note - if you have developed your Silver Tongue ability to at least 40 points, you can convince Downes to take part in the further rounds of the mini-game. Unfortunately, you can only win 15 gold this time.
Rewards for completing the quest:
How to unlock the quest: through conversation with Gordon.
Quest giver: Gordon (point 14 on the map)
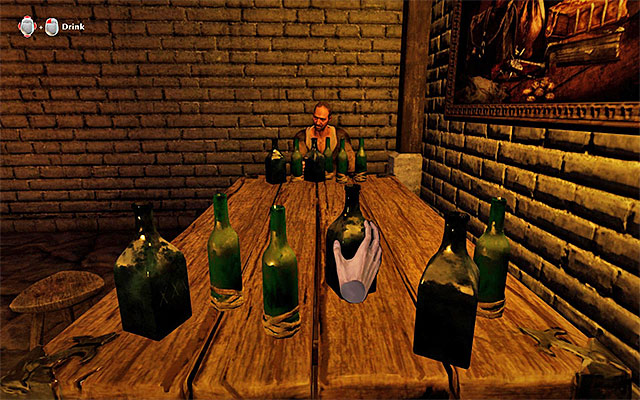 Swiftly select the interactive bottles.
Wait for the night hours and go to the tavern located in the mages encampment. With a little bit of luck, you will find Gordon hidden at the back of the tavern (point 14 on the map) and you will be able to convince him to participate in a mini-game focused on drinking alcohol. If you want to get involved in this activity, you will have to bet 200 gold. The mini-game is trivial - you must select the bottles on the table as fast as you can. If you manage to select all of the bottles before Gordon does it, you will win.
Rewards for completing the quest:
How to unlock the quest: through conversation with Frink.
Quest giver: Frink (point 14 on the map).
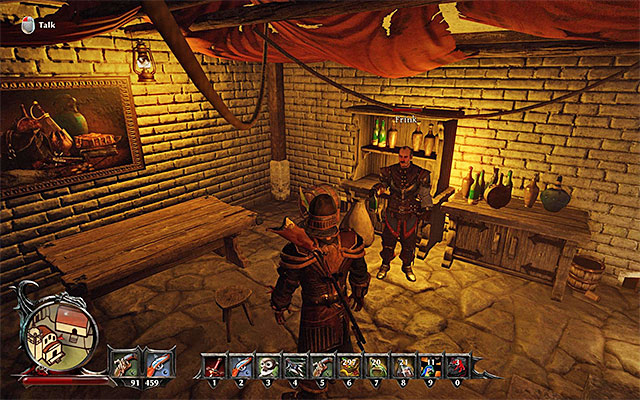 Frink comes by to the tavern in the evenings.
Visit the tavern in the mages camp in the evening hours and head towards a small room on the back of the tavern. With a little bit of luck, you will met a watchman named Frink here (point 14 on the map) and you will be able to convince him to participate in a mini-game focused on drinking alcohol. If you want to get involved in this activity, you will have to bet 200 gold. The mini-game is trivial - you must select the bottles on the table as fast as you can. If you manage to select all of the bottles before Frink does it, you will win.
Rewards for completing the quest:
How to unlock the quest: through conversation with Garelt.
Quest giver: Garelt (point 15 on the map).
 Garelt
Garelt can be found in the mind neighboring the mages encampment (point 15 on the map) and you should meet this character during your trip to recover pouches containing crystals, associated with the main quest called "New Allies". The speaker will blame a gnome named Dakil for all the delays in the crystal delivery.
Note - during the conversation with the Nameless Hero, Garelt will convince the character to steal a few crystals. You can either complain about Garelt to Frink, and receive 30 Gold or a positive soul point for the act. Doing this won't cancel the quest described in this section. In the further part of the game you will learn that Garelt, as part of his punishment, was deprived his weekly salary by Magnus.
 Knocking Dakil unconscious is one of the possible choices of behavior.
Embark on a journey to the deeper parts of the mine. Given the fact, that the mine itself is rather small, you should find Dakil without breaking a sweat (point 15a on the map). You can force the gnome back to work by three different ways:
Regardless of your chosen approach, ask Dakil to empty his pockets (Magic Crystal). Go back to Garelt and inform him that Dakil returned back to his work.
Rewards for completing the quest:
How to unlock the quest: through conversation with Nergal.
Quest giver: Nergal (point 16 on the map)
 A descent leading to the basement.
A mage called Nergal can be found in the basement of the main mages building (point 16 on the map), and the descent leading to the basement is located below the main stairs. During the conversation the main character will be asked by the mage to find and deliver several rare herbs, which apparently cannot be collected by the gnomes working for the mage.
Note - Nergal is an ability trainer, as well as a dealer.
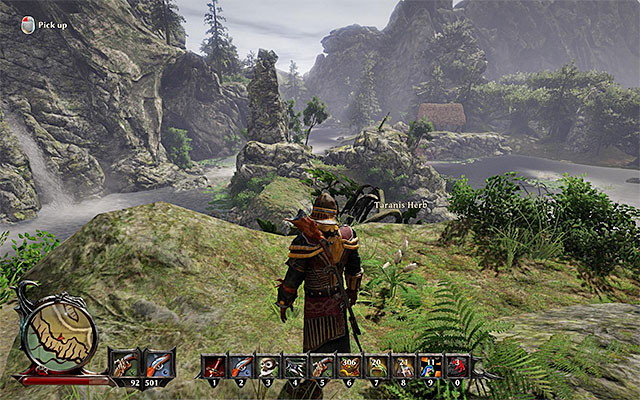
Your task is to locate Taranis Herb (which can be seen on the screenshot presented above). The mentioned herbs are growing around the lake located in the central section of the island (point 16b on the map). Depending on your personal preferences, you can either look for them on your own, or help yourself with the map markers (set the quest as active). To complete the quest you must find at least 5 of those herbs (100 Glory Points). There's plenty more of them in the area, but it's not required to collect more than 5 pieces.
Afterwards, go all the way back to Nergal and deliver the herbs, which will reward you with a... banana. It's necessary to speak with the mage again to receive a proper reward.
Rewards for completing the quest:
How to unlock the quest: automatically after finding a book (Swordmaster).
Quest giver: - (point 16 on the map).
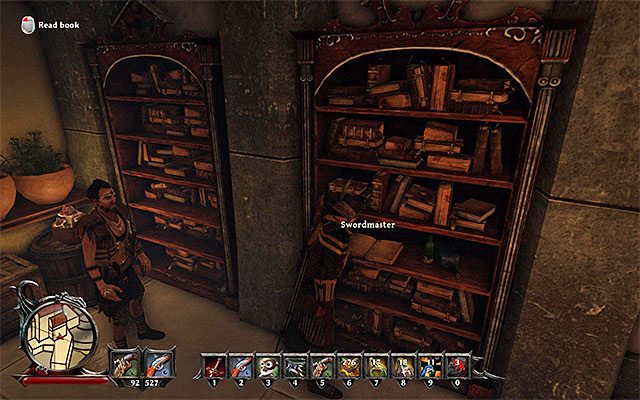 Read the book.
Arrive at the main building of the mages (point 16 on the map) and enter it, which is possible only if you've completed a main quest called "Visiting Rights". Go upstairs and locate a book (Swordmaster). Reading it will unlock a quest, associated with a certain treasure.
Note - the treasure is located on the Kila Island, that is why you have to go to the section with side quests from that location to learn more about the quest.
How to unlock the quest: automatically after finding a book (Magical Legends).
Quest giver: - (point 16 on the map)
 Read the book.
Arrive at the main building of the mages (point 16 on the map) and enter it, which is possible only if you've completed a main quest called "Visiting Rights". Go upstairs and locate a book (Magical Legends). Reading it will unlock a quest, associated with a certain treasure.
Note - the treasure is located on the Tacarigua Island, that is why you have to go to the section with side quests from that location to learn more about the quest.
How to unlock the quest: automatically after finding a Treasure Map.
Quest giver: - (point 16 on the map).
 Collect the map.
Arrive at the main building of the mages (point 16 on the map) and enter it, which is possible only if you've completed a main quest called "Visiting Rights". Go upstairs, locate a Treasure Map and take it with you, which will unlock a quest, associated with a certain treasure.
Note - before you embark on your journey to recover the treasure, make sure that you have a Shovel in your inventory. You can either buy the item or find in the game world.
 Northern islet.
The treasure you seek was buried on a small islet, located in the Northern section of the map (point 16 on the map). It's recommended to start at the mages encampment, and select a pathway leading to the North. After reaching the shore, jump into the water and swim all the way to the mentioned isle.
 Find an X sing on the islet.
You should be extremely cautious, as the islet is inhabited by two very strong monster - a Leviathan and a Swamp Golem. If you intend to fight them both, you should prepare beforehand and attack them one by one - don't even think about fighting them both at the same time. Otherwise it's just better to just swim around the monsters and avoid the confrontation. Locate the place in which a red X sign was painted and use your Shovel to start digging the treasure. Examine the contents of the chest, which will contain 120 Gold and a Schematic for a Big Rock.
Rewards for completing the quest:
How to unlock the quest: through conversation with Bisi.
Quest giver: Bisi (point 16 on the map).
 Teach Bisi a new saying.
During your stay in the main mages building (point 16 on the map), you can stumble upon a gnome named Bisi (he travels across the whole mages encampment). During the conversation with the mentioned gnome, you can teach him a little linguistic lesson (picking the first dialogue option in the appropriate moment).
Rewards for completing the quest:
How to unlock the quest: automatically after finding Zakir's Auri Culci.
Quest giver: - (point 16 on the map).
 You must first recover the key to Faruco's Chest.
You can unlock the quest only during the side quest called "The Private Store", given to you by Agila. You must complete all steps leading to the acquisition of the key to Faruco's Chest. The chest itself is located on the upper floor of the mages building (point 16 on the map), and, besides Crystals, you will find Zakir's Auri Culci inside of it (100 Glory Points).
 Give the earrings to Zakir.
You must now locate the gnome who should be given the recently found treasure. Zakir, depending on the time of the day, resides in various sections of the mages encampment, but your best bet is to find him carrying boxes, near the entrance to the camp (point 6 on the map). Speak with Zakir and give him the earring.
Rewards for completing the quest:
How to unlock the quest: through conversation with Downes.
Quest giver: Downes (point 16 on the map).
 You can either beat Downes up or give him the crystals.
Sometime after completing the side quest "The Private Store", you can be stopped by Downes while trying to enter the main mages building (point 16 on the map). Downes will suspect the Nameless Hero to carry a large amount of Magic Crystals and he will demand the character to hand some of them to him. You can react to this in two ways - give Downes 6 Magic Crystals (2 positive souls points) or engage him in combat. In the latter case try to avoid his melee attacks. Fortunately, Downes isn't the toughest opponent, so it will be quite easy to defeat him (he will lose consciousness).
Note - during the duel try not to attack any nearby watchmen, who will be watching the fight. Doing so may provoke them to attack you.
Rewards for completing the quest:
How to unlock the quest: through conversation with Abbas.
Quest giver: Abbas (point 17 on the map)
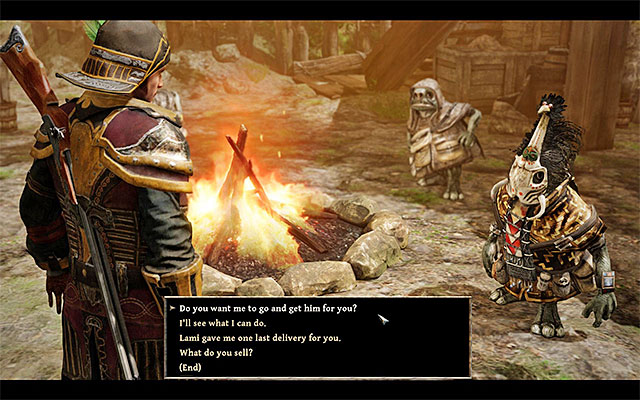 Abbas will ask the Nameless Hero for help.
You can unlock this quest during the conversation with a gnome named Abbas, located in the mages encampment (point 17 on the map). Unfortunately, you will have to complete a side quest called "The Missing Gnome" first, or to be more specific find a gnome named Lami, who fell into the well and is hiding in the caves below the encampment. Abbas will ask the Nameless Hero to rescue his subordinate from the cave.
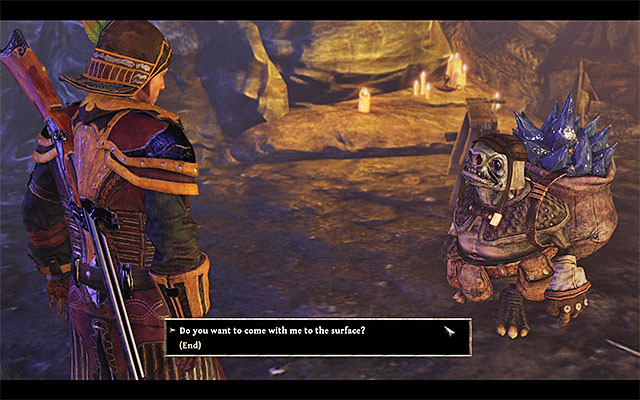 Lami decided to stay in the cave.
After the conversation is finished, head towards Lami (point 8 on the map). Just as you did before, you must reach him by jumping to the well, or by going through the basement of the mages building. During the conversation, Lami will tell the Nameless Hero that he decided to stay in the cave for the rest of his life. Leave the cave and inform Abbas about Lami's decision.
Rewards for completing the quest:
How to unlock the quest: through conversation with Raka.
Quest giver: Raka (point 15 on the map).
 Raka's hiding place.
A gnome called Raka can be found near the main pathway leading from the harbor to the mages encampment (point 18 on the map). During the conversation you will learn, that Brown, who accompanied him during their travel, has lost his mind, and is sitting in the cave, preventing the gnome from reaching him.
 Brown can be found in the cave.
Get inside the cave. If it's your first visit to this place, be prepared to eliminate a few Cave Bats (attack them one by one and use the narrow passageways to prevent them from surrounding you). Otherwise, begin tracking Brown down as soon as possible (point 19 on the map). During the conversation with Brown you won't have to work hard to convince Brown - all you have to do is to tell him that he inhaled some of the hallucinogenic mushrooms and send him back to the mages encampment. In parallel with this, you will unlock a new, short quest.
Rewards for completing the quest:
How to unlock the quest: through conversation with Brown.
Quest giver: Brown (point 19 on the map)
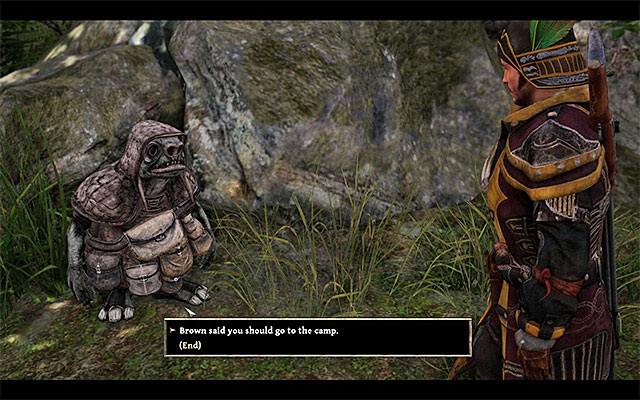 All you have to do is to speak with Raka again.
It's a very short and easy quest, which can be unlocked during the conversation with Brown, during the side quest called "Crazy Homis". Brown can be found in the cave located to the South of mages encampment (point 19 on the map). After the conversation ends, leave the cave and go back to a gnome named Raka, who gave you the previous mission. The conversation with the gnome will finish the quest (and Raka will go to the mages camp).
Rewards for completing the quest:
How to unlock the quest: through conversation with Brian.
Quest giver: Brian (point 20 on the map)
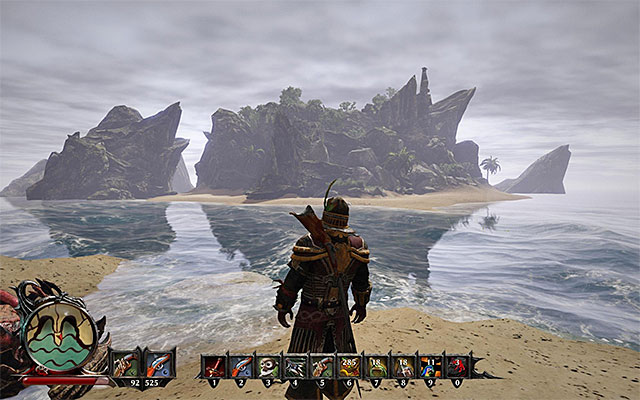 You must swim to this little islet.
In the South-Eastern section of the map, there's a small islet, to which you can effortlessly swim. Start the exploration of the island, eliminating Sand-Devils and Dragon Snappers standing on your way. You should be extra careful when traveling through the North-Easter section of the map, where a Leviathan can be found. If you are not powerful enough, you can run past the beast (note - the beast itself is quite fast) or try to swim away.
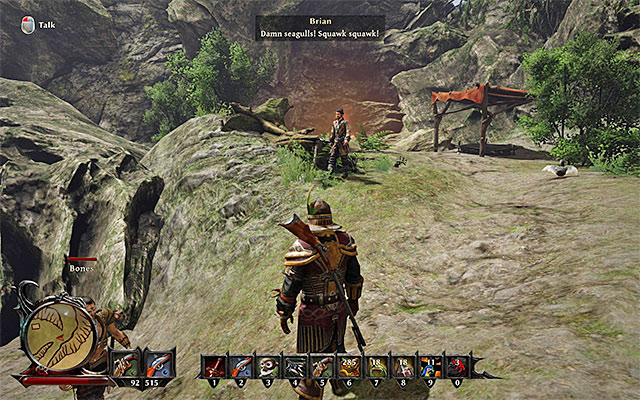 Brian can be found in the encampment on the hill.
Ultimately you must reach a small hill, in the central section of the island, where a castaway named Brian can be found (point 20 on the map). At the very beginning of the conversation, it is wise to accept his proposition of trade and give him Cheap Liquor and Provisions for 300 Gold. In the latter part of your meeting, you will learn, that Brian isn't interested to return to society. Instead, you will be asked to find a cave in which Brian can live permanently.
Note - the trading offer given to you by Brian is a one-time only offer. If you don't have the required amount of provisions and / or alcohol, you should acquire those items before you meet with the castaway - otherwise you will miss the chance to earn some easy money.
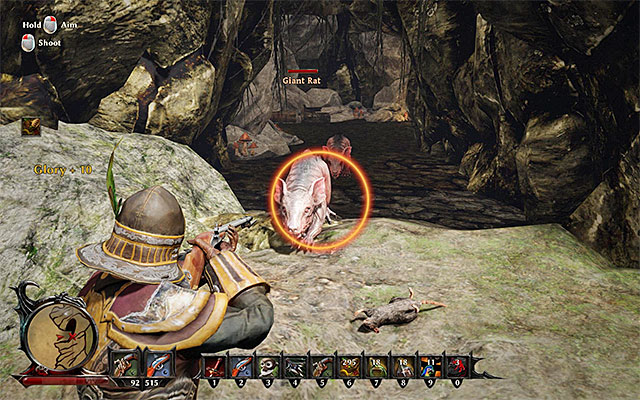 The entrance to the rats' cave.
The cave which Brian dreamed of is located in the Western section of the island (point 20a on the map) (100 Glory Points). Inside the cave you will find 4 Giant Rats, but despite their looks and size, they are of no threat to you. For each rat you kill you will be given 50 Glory Points, and for eliminating all 4 of them you will receive 100 Glory Points. Go back to Brian and tell him about the cave.
Note - it's recommended to examine the cave before leaving it, as there's a legendary item hidden inside.
Rewards for completing the quest:
How to unlock the quest: through conversation with Sharp.
Quest giver: Sharp (point 21 on the map).
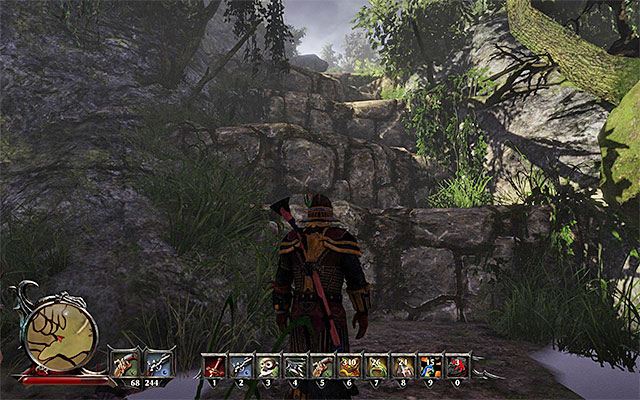
A demon hunter named Sharp can be found on a seemingly impossible to reach ledge, in the Western section of Taranis Island (point 21 on the map). Begin your march East of the demon hunter place of residence and look for the ledges shown on the above screenshot. You can climb them up, which will allow you to get to Sharp. Speak with the hunter, learning that a valuable artifact was hidden in the area.
Note - Sharp is also an ability trainer.
Head towards the entrance to the cave, located to the North from the place in which you've found Sharp. During your trip be ready to eliminate a few of Rock Spiders, Forest Spiders, as well as Cave Bats. Enter the cave and, according to Sharp's suggestion, go along the pathways located on the right side, which will allow you to reach a gulf mentioned by the hunter (point 21a on the map). The only way to get the Nameless Hero to the other side is by turning him into a parrot, by using the Parrot Flight spell.
Note - if you lack the Parrot Flight scroll you can either look around in the area to collect it, or simply buy it from a vendor in the mages camp.
Note - if the Parrot Flight spell fails you will fall into the water, and you will have to go back all the way to the upper section of the cave, eliminating a couple of strong enemies on your way.
 Artifact's place.
Just as you land on the new rock ledge, get rid of some Giant Rats in the area. Remember, that for a time being you are fighting alone, without your party member, that is why you must be extra careful when eliminating the enemies. Travel across a rather linear pathway leading through the caves, thanks to which you should soon arrive at the place in which the item you are looking for (Bone Grinder) is hidden (point 21b on the map). (100 Glory Points). Depending on your personal preferences, you can go back to the gulf and turn into a parrot or jump to a small hole (there's a risk of sustaining minor injuries).
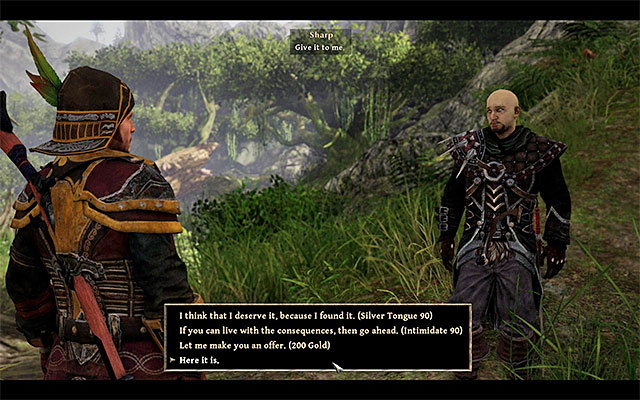 You can either give the blade to the demon hunter, or try to keep it for yourself.
After the blade was acquired, go back to Sharp. You can finish this quest in three different ways:
Rewards for completing the quest:
How to unlock the quest: automatically after finding a Faded Diary
Quest giver: - (point 22 on the map).
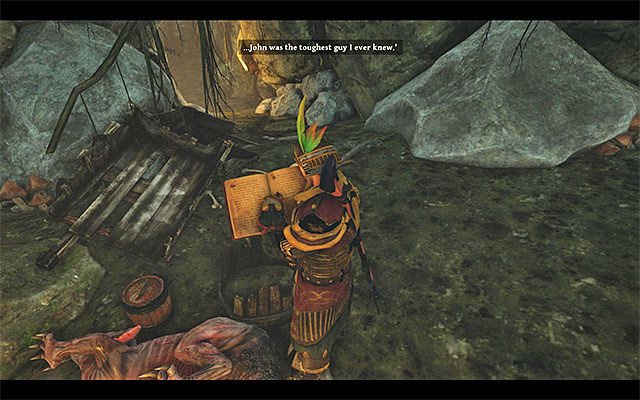 Examine the cave neighboring the camp in which the demon hunter Sharp can be found.
This quest can be unlocked by reading the content of the Faded Diary, which can be acquired from a cave located in the Western section of the island (point 22 on the map). Reaching the cave containing the diary isn't easy, as you are required to climb as well. You can find more detailed information about this quest in the description of a side quest called "From Days of Yore", associated with the retrieval of a blade for Sharp. By getting familiar with the contents of the diary, you will unlock a new quest.
Note - the treasure is hidden on the Calador Island, and you should head to the side quests of that location.
How to unlock the quest: automatically after finding a Treasure Map
Quest giver: - (point 23 on the map).
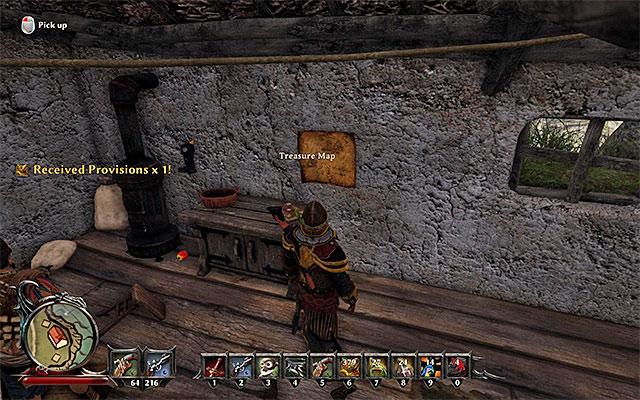 Enter the hut and tear the map off the wall.
Treasure Map can be found in a hut, near the lake in the central section of Taranis Island (point 23 on the map), which you will visit during the side quest called "One Made It", given to you by Kjeld. Get rid of the monsters outside of the hut, enter the building and tear the map off the wall. Acquisition of the map will lead you to unlock the quest described in this section.
Note - before you set on the journey to retrieve the treasure, make sure that you have a Shovel in your inventory. This item can be either bought, or found in the world.
 The treasure can be found near the Shadow Lord's lair.
The treasure you are seeking was buried in the South-Western section of the island, or to be more specific, in the Deadlands, occupied by one of the Shadow Lords and his underlings (point 23a on the map). First of all, deal with the rest of the enemies (killing the Shadow Lord isn't mandatory). Afterwards, look around for a red X painted on the ground and use your shovel to retrieve the treasure. Examine the contents of the chest to collect 50 Gold, Gold Ore, Golden Goblet and an Emerald.
Rewards for completing the quest:
How to unlock the quest: through conversation with Walker.
Quest giver: Walker (point 24 on the map).
 Walker
Walker can be found near the crossroads, to the South of the hut near the lake (point 24 on the map), and during the conversation you will learn about the goblins attack on his encampment. You can promise to help Walker in resolving the problem. After confirming your readiness, follow his lead.
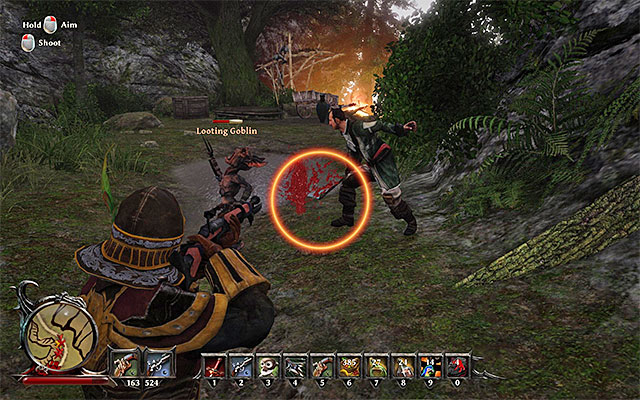 Kill all the goblins.
Walker's encampment is located to the South of the place in which you've started the quest (point 25 on the map). In the encampment there's a total of 6 Looting Goblins you need to take care of them, but you shouldn't have any problems with eliminating them. For defeating each goblin you will get 50 Glory Points. After you've won the battle, speak with Walker again to receive your rewards.
Note - Walker is also an ability trainer. You can as well express the desire to embark on another hunting, and unlock another side quest.
Rewards for completing the quest:
How to unlock the quest: through conversation with Walker.
Quest giver: Walker (point 25 on the map).
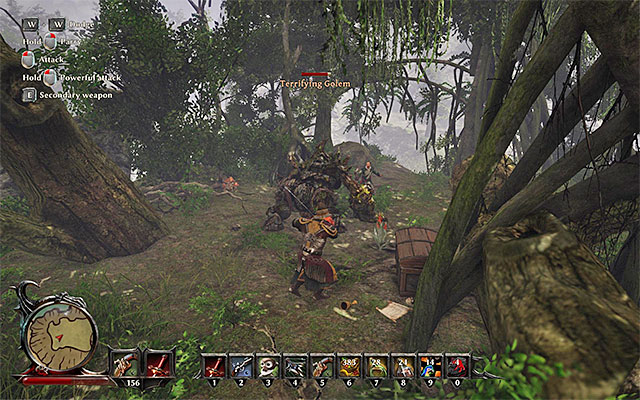 It's worth to weaken the golem whenever it targets your allies.
This quest can be given to you by a hunter named Walker, but only after you've completed the "Destroyed Camp" side quest. Meet with Walker in his encampment (point 25 on the map) and express the desire to embark on another hunt. Follow Walker to the West, reaching a Terrifying Golem lair after a short while (point 25 on the map). It's a very durable monster, so don't be discouraged if defeating him will take you some time. It's important to dodge golem's attacks, especially his powerful ground slams. It's best to attack the monster whenever he is targeting your allies. Don't overdo your dodges and don't prolong the fight, to not cause the premature death of Walker. After you've won the encounter, speak with the hunter and plunder the lair.
Rewards for completing the quest:
How to unlock the quest: through conversation with Morrison.
Quest giver: Morrison (point 26 on the map).
 Morrison
Morrison can be found in the Southern section of the map, near one of the pathways leading to wilderness (point 26 on the map). During the conversation with Morrison, he will ask the Nameless Hero to find 5 mushrooms. The main hero will sense the fact that giving the mushrooms to the man isn't the best idea and an alternative solution to this quest will unlock (you will find more about it below). Apart from that, during your first encounter with Morrison you are able to use your Intimidate skill, developed to at least 50 points. It will allow you to force Morrison to hand over 200 Gold.
 A sample mushroom.
Stay on your actual path and finish your march to the West (point 26 on the map). You should be extra careful, as the route to collect mushrooms is blocked by a pack of Skeletons, Minions and Hellhounds. After killing off all the monsters (watch out for Minions - this specific breed wields magic!) start searching for the mushrooms (Dark Mushroom). You can locate them on you own, or use the map markers to ease your job a little. You have to acquire 5 of them at total (100 Glory Points).
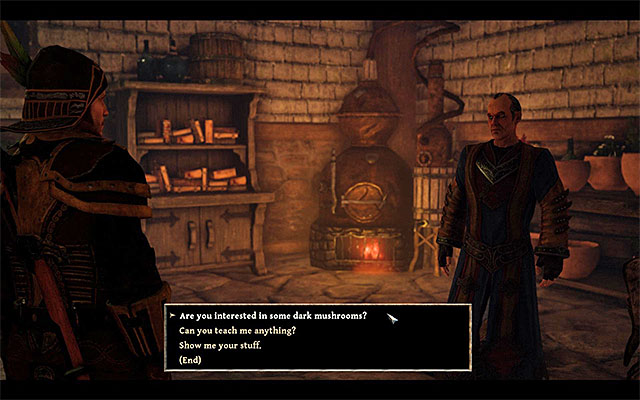 The best solution is to give the mushrooms to Nergal.
As it was mentioned before, the quest can be finished in two ways. The first one is to give the mushrooms to Morrison (point 26 on the map) and it will give you a negative soul point in the process. A lot better solution is to go a mage called Nergal, located in the basement of the main mages building (point 16 on the map). The mage will take the mushrooms from you and you will be given a positive soul point.
Rewards for completing the quest:
How to unlock the quest: through conversation with Shax.
Quest giver: Shax (point 27 on the map).
 Shax can be found near the swamps.
Shax is a friendly creature, balancing between the world of the living and the Underworld. This character can be found near the swamps, in the Southern section of the island (point 27 on the map). During the conversation Shax will ask the Nameless Hero to help him with the retrieval of his belongings, which are held in a chest in the wilderness. If you accept his request, he will temporarily join the party and give the Nameless Hero a Shax's Chest Key.
 The chest can only be examined after you've defeated the Shadow Lord.
Shax's Chest can be located to the North of this quest's starting place (point 28 on the map), or to be more specific, in the location where one of the Shadow Lords is (Shadow Lord of Betrayal). If you haven't killed the enemy yet, you will have to do it before you can examine the contents of the chest. From Shax's Chest you will collect Shax's Bequest. Speak with him to unlock another side quest.
Note - the lair of the Shadow Lord is best visited during the completion of a side quest "The Shadow Lord of Betrayal", given to you by Magnus. Shax can help you to defeat the powerful enemy - it comes with a certain risk, but your companion shouldn't die on this duel with the Shadow Lord.
Rewards for completing the quest:
How to unlock the quest: through conversation with Shax.
Quest giver: Shax (point 28 on the map)
 You can do some additional quest for Shax.
This quest is automatically unlocked after completion of the side quest called "Forgotten Treasures". During the conversation with Shax (point 28 on the map) you will be asked to deliver his belongings to his sister Paula, which resides in mages camp (point 7 on the map).
Note - if you use teleportation to get back near the camp, remember about the proposition of Shax before you teleported, as you will have to go back to him eventually. If you decide for a journey on foot, Shax will join you and will leave your party when approaching the mages encampment entrance.
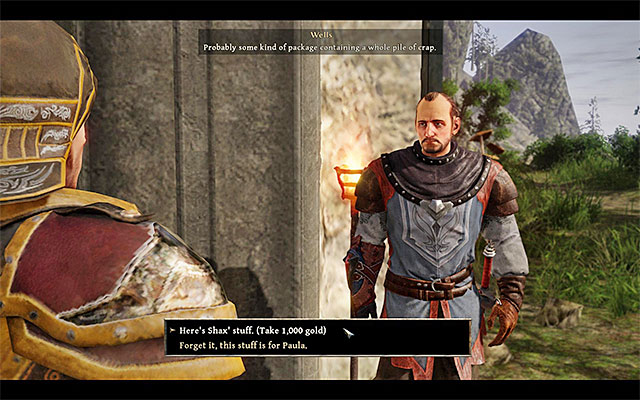 One of the possibilities is to give Shax belongings to Wells.
If you try to enter the mages encampment, the main character should be stopped by the watchman Wells, who found out about his travel to the wilderness. Wells will want to buy Shax's belongings from the Nameless Hero, and he is willing to offer 1000 Gold for that. If you agree for that, you can either forgive the quest at all, or go back to Shax and speak with him for the last time. He will attack the main character and you will be given another negative points (100 Glory Points).
 You can give Shax's belongings to his sister, Paula.
A solution which is a lot better than the previous one, is to decline the proposal of selling the belongings to Wells (2 positive souls points). After the meeting is finished enter a hut located near the main entrance to the mages camp and find Paula. Initiate a conversation with her and give her the items belonging to her brother. The woman will ask the Nameless Hero to deliver her gratitude to Shax. Meet with Shax again and finish the quest, receiving 3 positive soul points in the process.
Rewards for completing the quest:
How to unlock: Talk to Erasmus
Quest giver: Erasmus (number 16 on the map)
Attention - this quest is available only after joining the Guardians
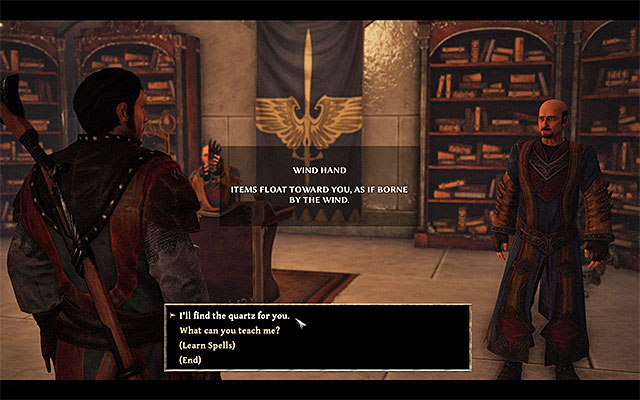 Erasmus will send the hero to search for quartz
After you join the crystal mages, talk to Erasmus, who should be on the first floor of the main building (number 16 on the map). During the conversation, you will be asked to obtain three different types of Quartz. The mage will give the hero the Wind Hand spell, which will be useful in obtaining them. Erasmus will suggest talking to Ilvar, from the mage camp, to unlock new skills connected with Astral Vision. These skills are not necessary to complete the quest, but they will make it easier to located the Quartz.
Attention - after joining the Guardians, you can learn spells and skills from Erasmus.
 Shadow Quartz
To complete this quest, you have to visit Taranis, Kila and the Calador bay. It is obviously best to start from Taranis, where you can find Shadow Quartz. Head to the Deadlands, located in the south-western part of the map. Watch out for the monsters living there. Start to collect Shadow Quartz by lifting it or using the Wind Hand spell, received from Erasmus (drag the spell onto your quick bar). This spell will allow you to collect items that are far away and it is useful when gathering Quartz from trees or ceilings.
Attention - you don't need to collect all the Quartz. To complete the quest, you will need only five of each type.
 Astral Quartz
To collect Astral Quartz, you have to reach the Kila island. If you don't want to wait until the territories behind the big gate guarded by Baraka are unlocked, you can explore the caves in the eastern part of the map. The entrance to the caves is located near the pirates' beach and in the first part of the jungle.
 Gold Quartz
Now, head to the Calador bay. It is best to collect Gold Quartz from the ruins in the western part of the map, as you won't have to wait until the eastern part is unlocked.
After you've collected at least five samples of each type of Quartz (Shadow, Astral and Gold), return to Erasmus and give it to him. You have to wait one day until Erasmus prepares the new spell and it is good to use a bed at least once. Return to the mage and he will be able to teach you something new.
Attention - after the quest is completed, you can still deliver Quartz to Erasmus. You will obtain 40 gold and 5 glory points for each.
Attention - From now, Erasmus can teach the hero a new spell - Wave of Energy.
Reward:
How to unlock: Talk to Erasmus
Quest giver: Erasmus (number 16 on the map)
Attention - this quest is available only after joining the Guardians!
 Ilvar
IlvarThis quest is unlocked when completing another side quest connected to the mages - "Crystals in the Shadows". Erasmus (number 16 on the map) will tell the hero to talk to Ilvar. The purpose of this is to find a way to obtain skills connected to Astral Vision. You will most probably find Ilvar on the ground floor. Talk to him and you will learn how to obtain the skills needed.
Reward:
How to unlock: Talk to Ilvar.
Quest giver: Ilvar (number 16 on the map)
Attention - this quest is available only after joining the Guardians!
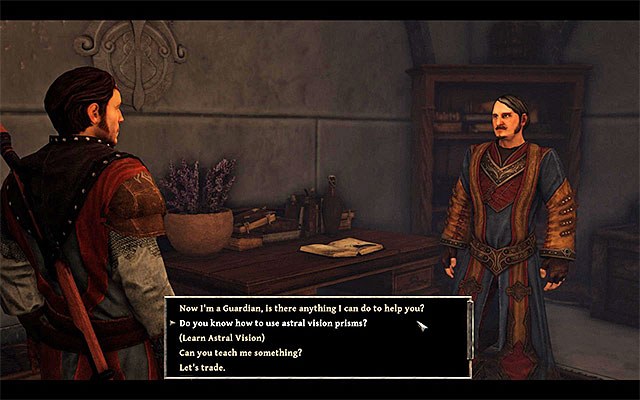 Ilvar will tell you where to learn the new skills
It is best to start this quest when completing the "Speak to Ilvar" task, but it is not necessary. You have to talk to Ilvar, who should be somewhere on the ground floor of the mage quarters (number 16 on the map). You will learn about the possibility of obtaining the skills needed to improve your Astral Vision. The mage will also show you where to look for them.
Attention - after joining the Guardians, Ilvar can teach you new spells. He can also teach you a new skill - Vision of Blood. It is not necessary to complete this quest, but it may be useful during the exploration of the world.
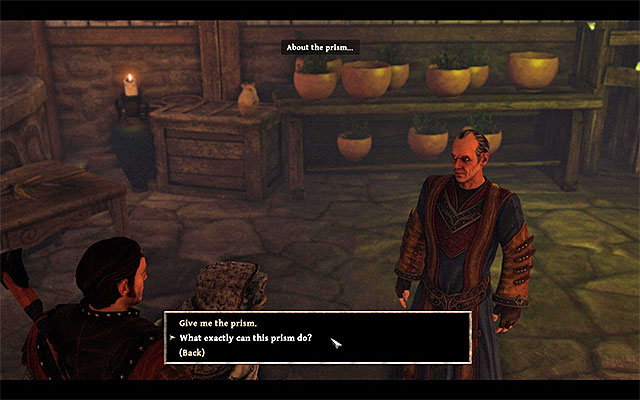 Talk to Nergal and then to Hiwi
One of the prisms needed to unlock new skills is in the hands of mage Nergal, who can be found in the basement of the mage quarters (number 16 on the map). The mage won't give you the prism and you cannot obtain it using neither Pickpocketing nor Silver Tongue. After the conversation, talk to a gnome - Hiwi. (100 glory points). Give him a Raw Fish (100 glory points) and you will receive the prism in return. You will also learn Vision of the Alchemist (200 glory points).
Attention - you can find a Raw Fish during the exploration or for example buy it in a tavern.
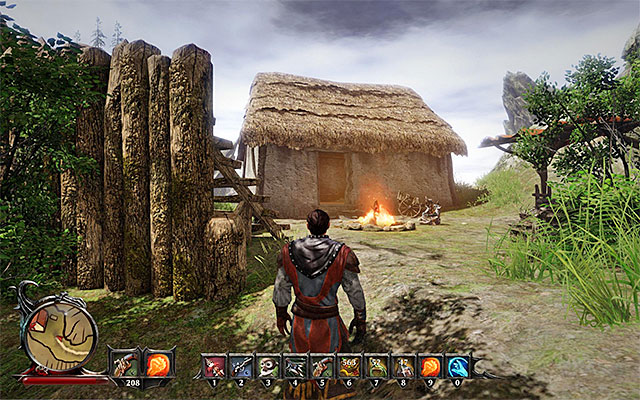 The hut that you need to explore
General Magnus can give you some info about the location of the next prism. Magnus can be found in the central part of the camp (number 12 on the map). He will tell you that the item should be in the hands of one of the foremen in a nearby mine. After talking to Magnus, head west. You have to reach a hut located near one of the mines (number 16c on the map). Take the prism from the hut and you will unlock the Vision of Gold skill (100 glory points). Tell Magnus about you finding the prism and you will obtain (200 glory points).
Attention - to find the third prism, you have to head to Antigua, so now, proceed to the chapter that describes the side quests in this location.
After returning from Antigua with the third prism, talk to Ilvar once again, to complete the mission.
Reward:
How to unlock: talk to Magnus.
Quest giver: Magnus (number 12 on the map)
Attention - this quest is available only after you join the Guardians!
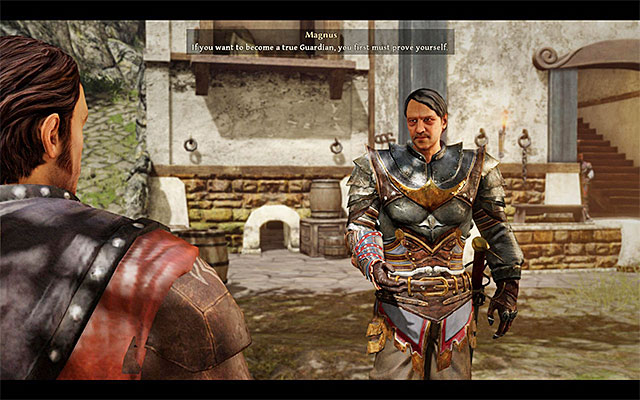 Ask Magnus about the ways of advancing
You can start this quest after joining the Guardians and it will promote you from a Cadet to a Guardian. To make it so, you have to meet talk to Magnus (number 12 on the map). During the conversation, ask about the promotion and you will unlock the quest and learn what you have to do.
Attention - click all the dialogue options, as Magnus will give you 200 gold.
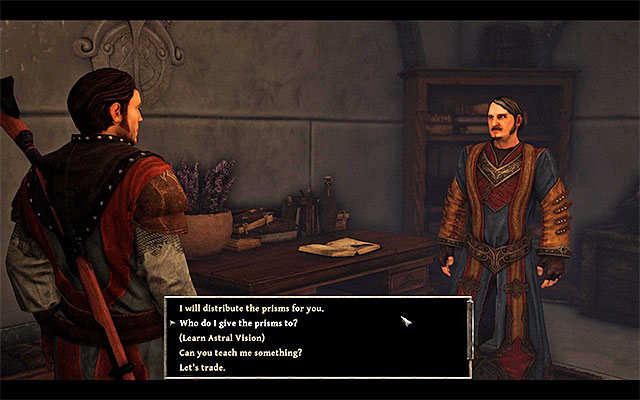 Ilvar has a small task for the hero
One of the characters that you can help is Ilvar, who can be found on the mage quarters (number 16 on the map). During the conversation with Ilvar, ask him whether he has a quest for you. Ilvar will give you five Ilvar's Prism Stones and you are to distribute them among some people in the camp.
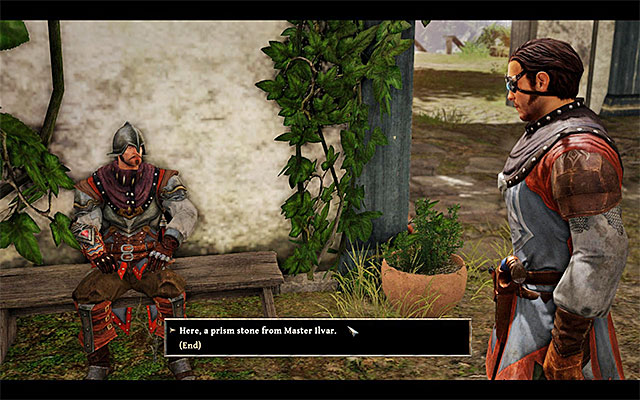 Talbot is one of the persons who should receive a Prism
Wells, Hardwick and Talbot are moving around the camp, but they can be usually found near the target board (number 13 on the map), in the tavern (number 4 on the map) or near the main gate (number 7 on the map). There won't be any problems with giving them the Prisms. It is worth mentioning that when talking to Wells, you can ask him to pay you for the Prism. This way, you will earn 100 gold. Tell Talbot to ask for a promotion and you will obtain some Grog, and 2 magic crystals.
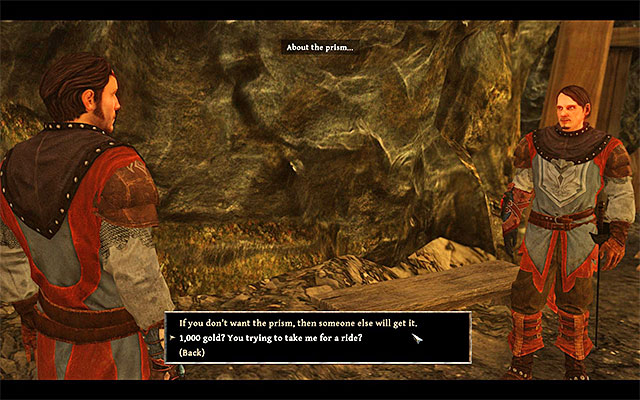 Garelt may cause you trouble if you've complained about him earlier
The fourth person who has to receive a Prism is Garelt, who can be found in a mine, near the mage camp (number 15 on the map). If you haven't caused any trouble to him during the "New Allies" quest, he will accept the Prism right away. However, if you have complained about him to Frinc, Garelt will be angry with you. The situation can be resolved in two ways. You can pay him 1000 gold, but it's quite a lot of money, so it would be better to go back to Magnus and tell him about Garelt blackmailing you (100 glory points). You will receive Magnus' Repeal, which you need to show to Garelt (200 glory points).
The last person on your list is Cox. You won't find him in the camp, but in a mine located to the west of the mage quarters (where you were killing monsters earlier). The entrance to the mine is shown on the picture above (number 12d on the map). After entering the mine, find Cox and give him the Prism (200 glory points). The guard will give you 3 magic crystals. You can now return to Ilvar and tell him about completing the task. The mage will give you 10 magic crystals and teach you Vision of the Shadows.
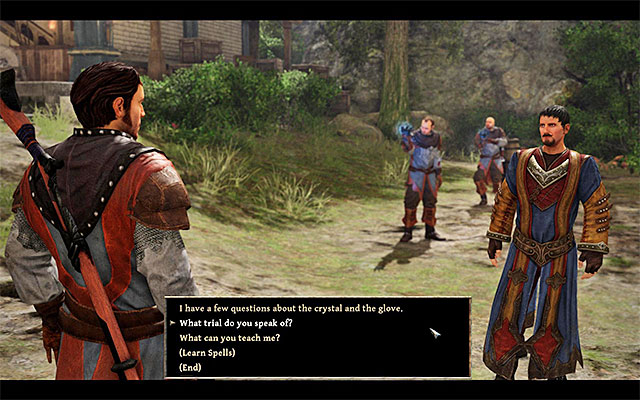 You have to agree to participate in Mauricio's first trial
The next person that you need to talk to is a mage named Mauricio. This character spends his time teaching cadets (number 12b on the map). However, in the evening, you should look for him in the mage quarters (number 16 on the map). When talking to Mauricio, tell him that you are a cadet and take part in the first trial.
Attention - During the conversation, it is good to purchase the Fire Fist spell, as it will be helpful in completing the trial.
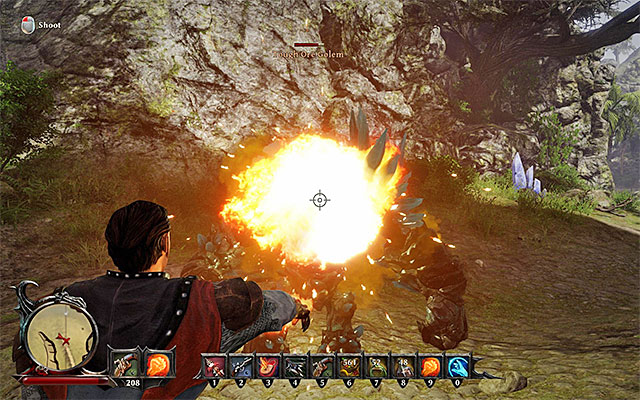 You can defeat the golem in any way that you want
Mauricio's trial consists of killing a Tough Ore Golem, which can be found north of the mage camp (number 12e on the map), with a narrow mountain path leading to him. The easiest method to weaken the golem is to use the Fire Fist spell that Mauricio suggested you to buy. However, it is not necessary to win, because you can use for example cold weapon. Don't use firearms, as they are of poor value when fighting golems. Remember about dodging the enemy's strong attacks, particularly when he slams the ground. After defeating the golem (600 glory points), return to Mauricio and tell him about your victory. You will receive 10 magic crystals. Ask Mauricio about the next task and you will start the "Waterproof" quest.
Attention - in order to become a Guardian, you have to complete the "Waterproof" quest as well.
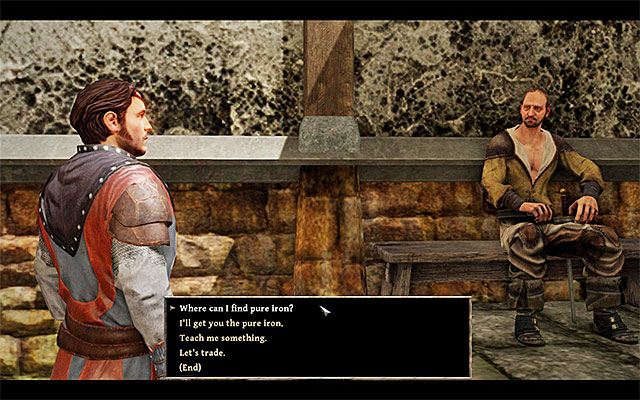 Gordon will have a new task for the hero
The third person that Magnus told you about is Gordon, a local blacksmith. You can usually find him in his house in the mage camp (number 12c on the map). Tell Gordon that you are a cadet and offer him your service. Gordon will send you to Calador to buy some Pure Iron Ore and will give you 1000 gold for this purpose.
Attention - Info about buying Pure Iron Ore can be found in the chapter about Calador side quests.
After obtaining Pure Iron Ore, return to Gordon to give it to him and you will receive 200 glory points, 100 gold and 10 magic crystals.
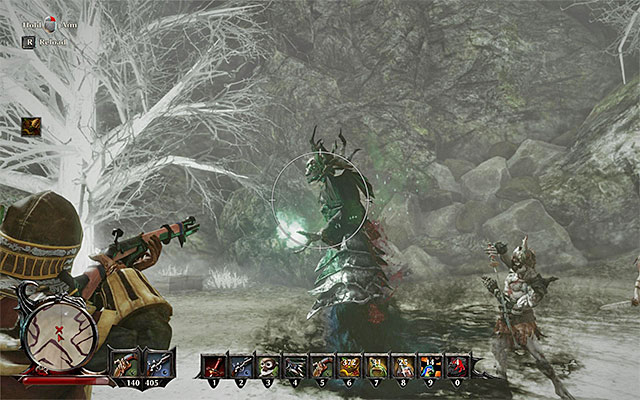 The Lord of Betrayal can be found in the south-western part of Taranis
You can earn Magnus' respect by defeating the Lord of Betrayal, who stays on the Taranis island. The creature has its liar in the south-western part of the area (number 12a on the map). More info about it can be found in the description of the "The Shadow Lord of Betrayal" quest.
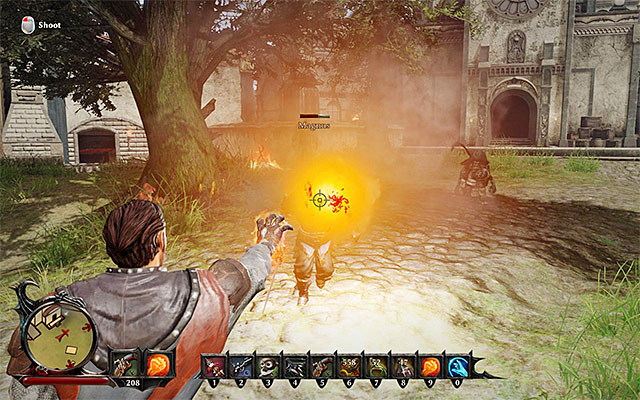 Spells that you've bought may be useful in defeating Magnus
Magnus himself can be challenged into a duel during the conversation. If you decide to fight him, focus on dodging his strong melee attacks. Stay on the move, no matter whether you fight hand-to-hand or from distance. Perform your attacks in series, without pauses, especially when Magnus has low health. It will prevent him from regenerating his health bar. Defeating Magnus will earn you 200 glory points.
Attention - during the fight, be careful not to attack any other people that are watching. It may cause them to attack the Nameless Hero.
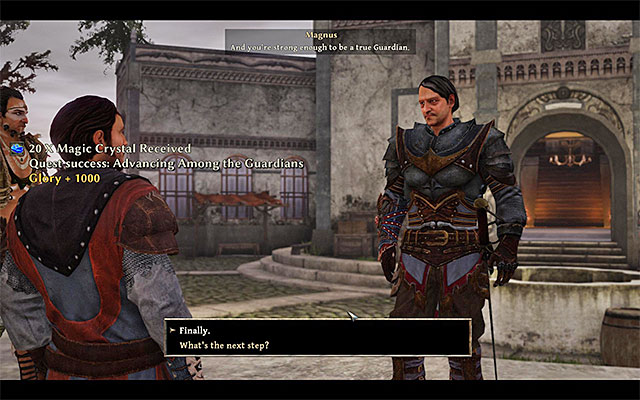 The hero can now be promoted to a Guardian
After completing all of the tasks described above, return to Magnus (number 12 on the map) and ask him whether you can now be a Guardian. Magnus will agree and you will be promoted.
Rewards:
How to unlock: Talk to Magnus.
Quest giver: Magnus (number 12 on the map).
Attention - this quest is available only after joining the Guardians!
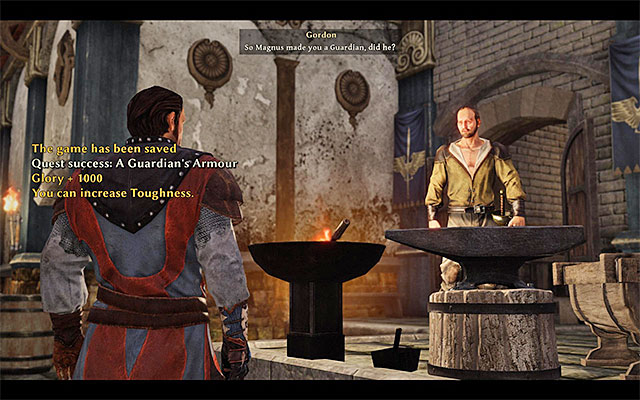 Gordon will give the hero a new armor
This quest starts automatically after completing the "Advancing Among the Guardians", which means being promoted to a Guardian. Magnus (number 12 on the map) will tell you to speak with Gordon (number 12c on the map). Go to him and start a conversation, to obtain an armor.
Rewards:
How to unlock: Talk to Wells.
Quest Giver: Wells (13 on the map)
Attention - this quest is available only after joining the Guardians!
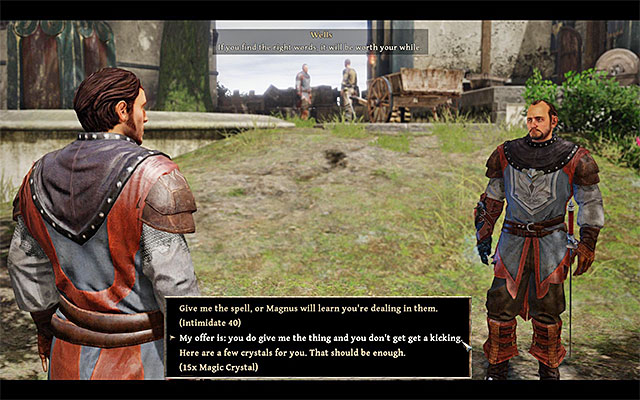 The best way to obtain the scroll is to steal it
This quest can be started after joining the Guardians. In order to unlock it, talk to Wells. He spends most of the time near the target board (number 13 on the map), but he might be in a different part of the camp as well. From the conversation, you will learn that Wells has the Rust spell, which is helpful in opening locks. The spell can be obtained in several ways:
Rewards:
How to unlock: Talk to Mauricio.
Quest Giver: Mauricio (number 16 on the map)
Attention - this quest is available only after joining the Guardians!
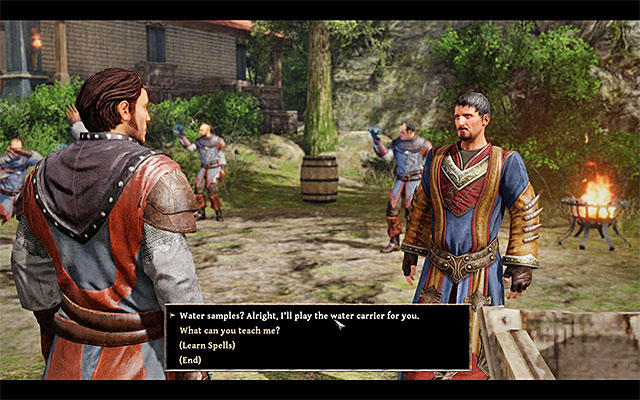 Ask Mauricio for another task
This quest can be unlocked when completing the "Advancing Among the Guardians" quest, namely after defeating the golem. Return to Mauricio, who should be either in the mage quarters (number 16 on the map) or outside the building. Ask him for another challenge. This time, your task will be to reach three different water sources and take samples.
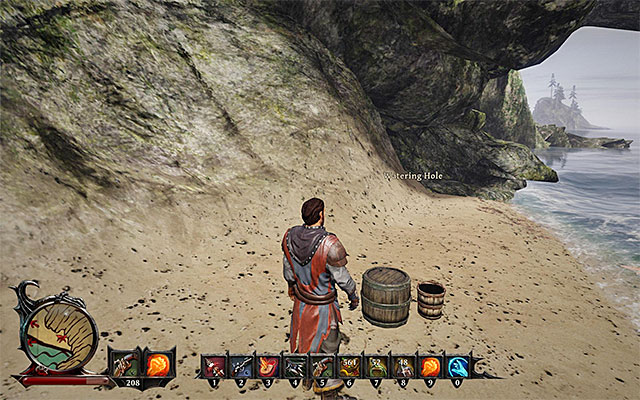 The sample from the beach
You have to gather samples from three watering holes in Taranis (number 16d on the map) and you can visit these places in any order. The easiest water source to reach is the one on the beach, in the south-eastern part of the map, as it is located not far from the port. There might be some monsters nearby, but they should be easy to defeat. Collect the first sample (Saltwater) (100 glory points).
 The sample from the waterfall
To collect the second sample, head to the waterfall in the central part of the map. To reach it, you have to either go through a goblin cave or approach it from the north, taking the path near the cliff. Gather the second sample (Pure Water) (100 glory points).
 The sample from the wastelands
Lastly, head to a watering hole located in the south-western corner of Taranis. You will reach a wasteland, so you have to be careful, as they are inhabited by powerful creatures and the watering hole is located near the liar of one of the Shadow Lords. You will find it near a shipwreck. Collect the last sample (Indefinable Sludge) (100 glory points).
Return to Mauricio with all the samples and give it to him. The Mage will tell you to meet him the next day, so it is good to use a bed at least once to make the process quicker. Talk to Mauricio again and you will receive an additional reward.
Attention - from now on, Mauricio can teach the hero a new spell - Hail of Shards.
Rewards:
Unlocking the quest: Talk to Hirutu (Kila island)
The quest giver: Hirutu
Note - This quest becomes available after you join the Natives!
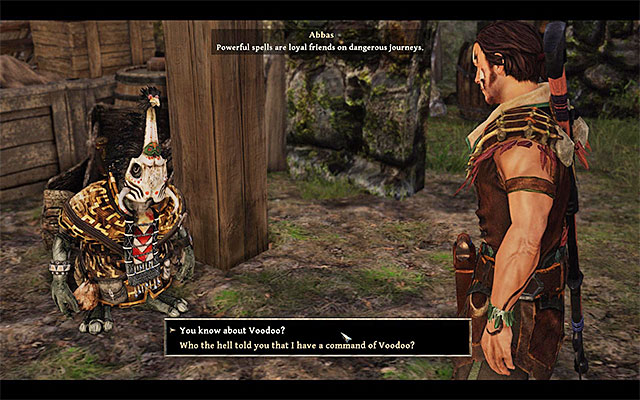 Abbas resides in the section of the camp separated for gnomes
You may have unlocked this quest during your stay on Kila island, specifically after meeting with Hirutu the chief. In one stage of the quest you have to visit Taranis island with purpose of locating the leader of the "little people", voodoo specialists. The character you are looking for is Abbas, the leader of gnomes on Taranis. Abbas can be found in the mages camp, specifically in its section separated for gnomes. (point 17 on the map). Meet the gnome, who will ask the Nameless Hero for help with solving a problem of false accusations of stealing that are being put on gnomes. He will give you a Bunch of Nose Hairs, needed for completing the quest.
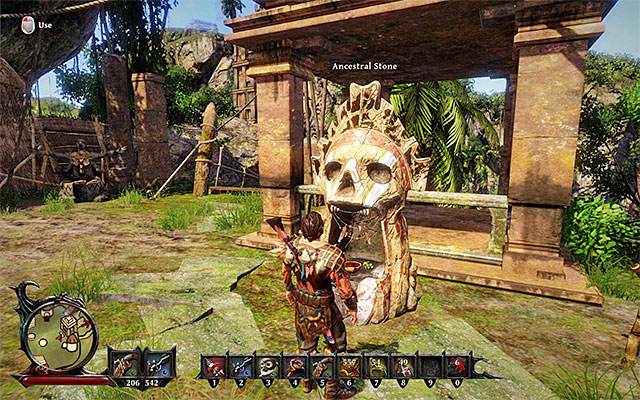
The next step is poorly explained in the Nameless Hero's journal. You have to craft a voodoo doll. Before you do anything, double check if your hero has Craft Spells proficiency from Magic category, because without it you cannot do a thing. If you do not have this skill, visit a trainer (e.g. Tenya on Kila island) and pay for the training (2,000 gold).
If you do have Craft Spells proficiency, you can now start looking for an Ancestral Stone, which is a sort of a workshop for crafting voodoo spells. I recon the most convenient solution is to briefly return to Kila island and use the Stone in the Natives Village, near Tenya (picture above).

Interact with the Ancestral Stone, and from the list choose the Bunch of Nose Hairs, which you have recently acquired. In order to prepare a Voodoo Doll of Bisi, you have to possess four ingredients:
If you possess all the required ingredients, confirm that you want to create a voodoo doll. Select it right in your inventory (Magic tab) and drag to the quick access bar.
 Use voodoo magic on Basi
You can now go back to the mages camp on Taranis. This time, enter the main building (point 16 on the map). Look for a gnome named Bisi, who usually stays somewhere on the ground floor or the first floor. Approach the gnome and activate the previously prepared voodoo doll (select the right item from the quick access bar). Performing this action will give you control over Bisi.
 The place where you should put away the book
Playing as Bisi, start by meeting a mage Lumbrok, who should be somewhere on the first floor of the building (200 Glory Points). Lumbrok will give you several tasks, the first one being to put away a book Astra Orbits, which he does not need any more. Go down to the ground floor and start examining the book shelves on the right. Interact with the last one (the one closest to the building exit), to put the book away (100 Glory Points).
Note - While controlling Bisi, you can have additional conversations. They often are humorous and may result in getting extra items (of little value, though). In some cases, you will have an option of stealing from your interlocutor - it is good to use that, since right now you do not have to possess any special skills in order to succeed in stealing.
 Ilvar's room
Go back to Lumbrok and listen to the details of the next objectives. This time Bisi is asked to take an important document from the room that belongs to a mage Ilvar. Apart from the document (Bill of Loading) pointed by Lumbrok (100 Glory Points) you can also take Crystals, Reactors, a book Titans!, but it is not necessary to do that. Take the document back to Lumbrok (100 Glory Points).
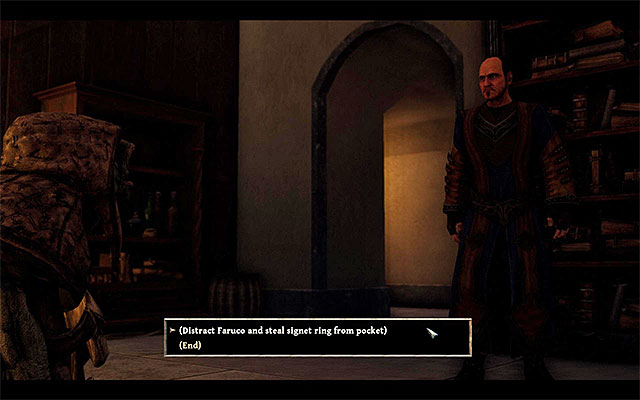 Steal the ring using the appropriate dialogue option
The last task Lumbrok gives you is to steal a signet ring from a mage Faruco. Since Faruco has the ring on himself, first you have to find him (he should be on the ground floor or the first floor of the building). Start a conversation with the mage and then select Steal dialogue option. Carrying the newly obtained Signet Ring return to Lumbrok (100 Glory Points).
 Meet Erasmus
After giving the ring to Lumbrok, a cut-scene should launch automatically. You will see a conversation between Erasmus and Lumbrok (400 Glory Points). Wait until the conversation is over, and then talk to Erasmus. You have to accuse Erasmus of stealing and mention that gnomes are falsely accused of that (200 Glory Points). As a compensation, Erasmus gives you 500 gold. You have now done all you had to do as Bisi, so go back to the place where you "left" the Nameless Hero, and retake control over him.
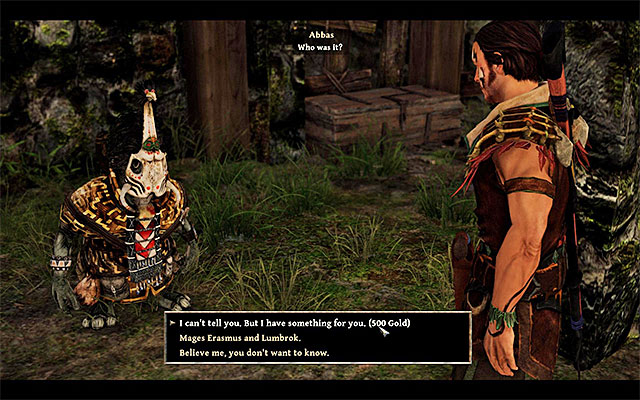 Meet Abbas again
Finally, meet the gnome Abbas again (point 17 on the map) and tell him that the problem is solved. Depending on your preferences you can tell Abbas that Bisi got 500 gold from Erasmus and give it to him, or keep the gold for yourself. In the first case, Abbas will give you 350 gold.
Note - If you have not yet completed the remaining stages of this quest, you have to visit Tacarigua and Antigua islands. Otherwise, you may return to Kila, to have the concluding conversation with Tenya.
How to unlock: Talk to Drake (Calador).
Quest giver: Drake
Attention - This quest is available only after you join the demon hunters!
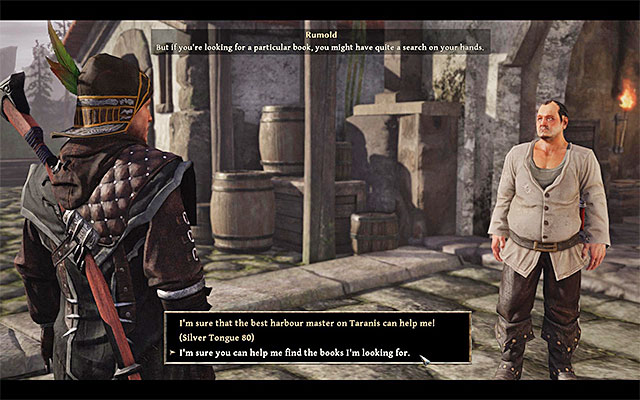 Talk to Rumold
You started this quest during your stay in Calador, after meeting Drake in the Citadel. One of the parts of this task consists of visiting Taranis to search for two out of five Books of Evil. After reaching Taranis, you have to first locate the books. Talk to Rumold, who can be found in the port (number 3 on the map). You can earn his help in three way:
No matter of how you choose to behave, Rumold will need about one day to locate the books. Use a bed at least once, to make the process quicker. Return to Rumold the next day and listen to what he has to say (50 glory points).
You can collect the books in any order, but it is advisable to start from the one located in the southern part of the map. After reaching the shore, jump into the water and swim to the island shown on the picture above.
 Enter the cave and talk to Brian
Start exploring the island, avoiding or eliminating the monsters. You have to reach a cave located in the western part of the island (number 20a on the map). In the cave, you will see Brian, who is the owner of one of the Books of Evil. He won't give you the book until you deliver him a few mussels.
Attention - don't waste your time on attacking Brian, as you won't obtain the book this way.
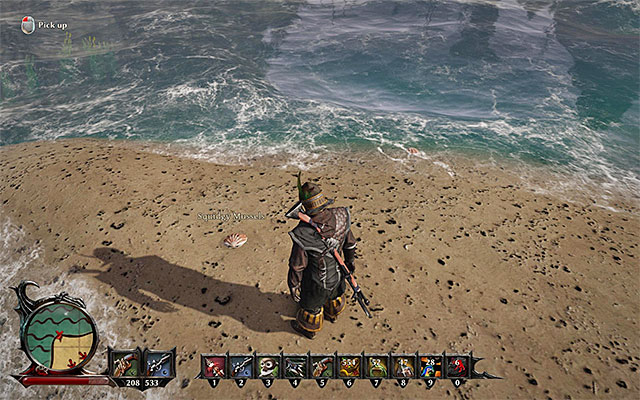 A mussel for Brian
Leave the cave and start to collect Squidgy Mussels that can be found nearby (number 3b on the map). You have to gather three of them, but watch out for the monsters that may not always be easy to defeat. When you have all the mussels, return to Brian and trade them for a Book of Evil (300 glory points).
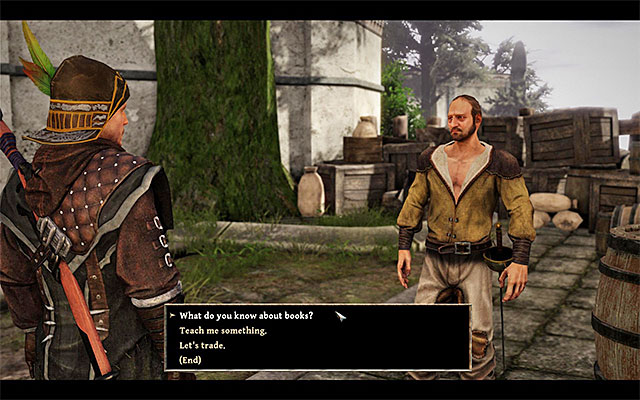 Talk to Gordon
Make your way to the mage camp located in the central part of Taranis. After reaching the place, explore the eastern part of the camp and find smith Gordon (number 12c on the map). During your conversation with him, ask bout the books, which will make Gordon tell you about Stanley's weird behaviour. Then, buy Stanley's Key Chest from Gordon, for 100 gold.
 The chest that you're looking for
Stanley's chest can be found at the back of Gordon's house (number 3c on the map). Open it using the key and take a Torn-out Page out of it (50 glory points). Return to Gordon with the piece of paper and talk to him.
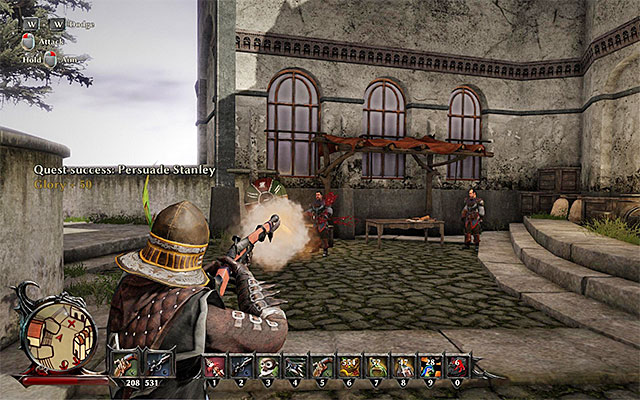 You can either intimidate Stanley or defeat him in a fight
Gordon will suggest that you meet with Stanley. He can be near the smith's house or in some other part of the camp. Talk to Stanley about the page that you've found. You can now act in three ways:
No matter how you choose to act, you will obtain the Book of Evil and 300 glory points.
Attention - If you choose to fight Stanley, be careful not to attack any other people nearby, as it may cause them to attack you.
Attention - If you haven't finished the part of the quest on Antigua yet, you have to go there now. Otherwise, return to Calador with all five books and give them to Wilson.
Way to unlock the quest: Automatically, after you find Zakir's Auri Culci.
Quest giver: - (point 29 on the map)
 Reach the very top of Zacharias's tower
You can unlock this quest if you meet two requirements. First, you need to complete the "Bring Zakir's Auri Culci Back" side quest. Secondly, you need to progress to the third chapter of the game's story line. Only then, Zacharias's tower, in the Eastern part of the Mages' camp, becomes accessible. Go to the tower (point 29 on the map), climb the stairs to the very top and find Zakir's Auri Culci (100 Glory Points).
 Once again, give the auri culci back to the pirate
You now need to locate the gnome that the trinket belongs to. Zakir, depending on the time of the day, may be staying in different parts of the Mages' camp, but most frequently, you can meet him carrying crates close to the camp entrance. (point 6 on the map). Talk to Zakir and give the item back.
Rewards for completing the quest:
The above map marks all of the locations that you visit during your stay on the Fog Island, while completing side missions. The red points symbolize starting points for the individual quests, where as the green ones symbolize the areas that you visit while completing these quests.
Note - the visit to the Fog Island is not compulsory, but I recommend against skipping this step, because you can obtain many interesting items in this location and apart from that, you will obtain many experience points.
Note - the Fog Island is a DLC. If it is impossible for you to visit this part of the world, make sure that you have additional content installed/unlocked.
Way to unlock the quest: Talk to Bones (at any point of the game).
Quest giver: Bones
 You complete this quest during the conversation with Bones
This is a very short quest and in order to complete it, you need to have a short conversation with Bones. You can do that at any point of the game, e.g. right after you meet Bones for the first time (after he brings you back to life at the Caribbean Coast). During the conversation, Bones will want to tell the Nameless One about the dread he has recently had. You need to listen to what he has to say to learn about the Fog Island.
Rewards for completing the quest:
Way to unlock the quest: Talk to Venturo.
Quest giver: Venturo (point 1 on the map)
 Venturo is standing on the beach
The inquisitor Venturo is staying on the Eastern beach (point 1 on the map) and most probably, he is the first character that you meet after you reach the island. During the conversation, you will be asked, by Venturo to take an expedition with him to find Rodrigo. It is worth noting here that, during the meeting with Venturo you can use Silver Tongue, developed to, at least, 80 points and have him share with you some of his equipment. In such a situation, Venturo will allow you to choose whether you want 200 gold pieces or Hunting Musket. I recommend that you take the musket because, even if you do not play a ranged character, you will be able to sell it for profit later on.
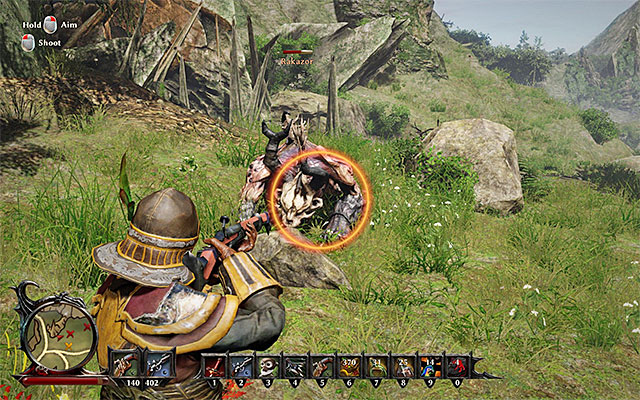 There is a very strong soul eater to defeat
Towards the end of the conversation with Venturo, confirm your readiness to take the journey. Go East to reach a small encampment after a while (point 2 on the map). You need to be VERY careful here, because there is a powerful Soul Eater - Rakazor at the camp. The beast is very agile so, the key to succeeding here is dodging properly and remaining in constant movement. For eliminating the monster, you will be rewarded with 200 glory points.
 The dead Rodrigo
Explore the encampment that used to be occupied by the Soul Eater, thanks to which you will find the corpse of the murdered Rodrigo. Examine the corpse and talk to Venturo again, who should be around. The man will offer the Nameless one to go to the Inquisitor Encampment ad you will be able to do that as a part of the next quest.
Rewards for completing the quest:
Way to unlock the quest: Talk to Venturo.
Quest giver: Venturo (point 2 on the map)
 Confirm that you want to go to the Inquisitors' staying place
You can unlock this quest after you complete the side quest "The Terror of the East", i.e. after you have dealt with one of the soul eaters and found Rodrigo's corpse. Talk to Venturo again, who should be staying in the encampment (point 2 on the map). Confirm that you want to go, with Venturo to the Inquisitors staying place, on the nearby hill.
 The area of the entrance to the Inquisitors' encampment
Follow Venturo and take the path to the South. Soon, you will reach your destination (point 2a on the map) and this short quest will be completed..
Note - from now on, you can exchange goods with Venturo and ask him to train you. You will always find Venturo in the Northern part of the Inquisitors' encampment.
Rewards for completing the quest:
Way to unlock the quest: Talk to Carlos.
Quest giver: Carlos (point 3 on the map)
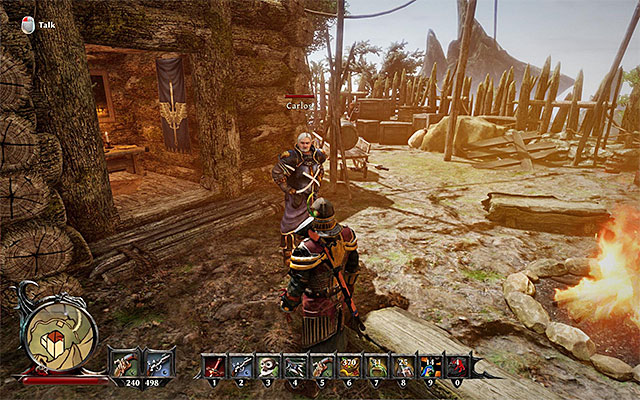 Carlos
Commandant Carlos is the leader of the Inquisitors on the Fog Island. You will find him in the Inquisitors' encampment, atop the hill, in the central part of the map (point 3 on the map), which it is best to reach while completing the side quest: "The Commandant". From Carlos, you can receive a quest to kill five Soul Eaters. Before you set out to search for the monsters, you can use Silver Tongue during the conversation with Carlos, developed to, at least, 90 points. Thanks to this, you will receive 200 gold pieces to prepare for your jour journey with. .
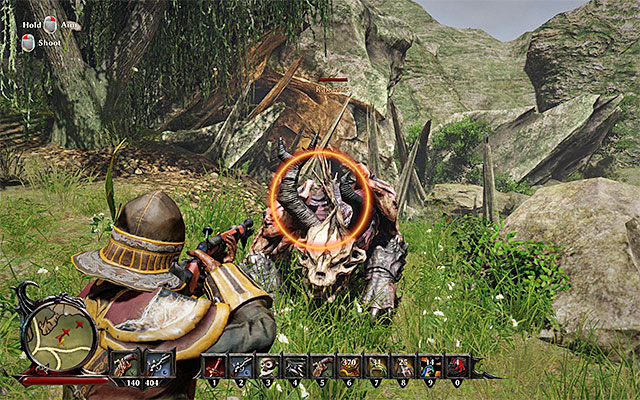 Rakazor is staying close to the Inquisitors' encampment
You can reach the dens of the individual soul eaters in any order that you want . The one that is the closest to you is Rakazor (point 2 on the map), which you have probably slain already, while completing the side quest "The Terror of the East" (200 glory points). If you have skipped that quest, I recommend that you now take interest in it.
Fletcher and Hull are standing next to the campfireI recommend that you now go to the North-East of the Inquisitors' camp and locate the campfire with Fletcher and Hull next to it (point 3a on the map). Talk to them and learn about their phobia towards...ducks. They will even ask you to help them kill out the ducks at the nearby stream.
Note - Hull is a trainer.
Note - It is not required to meet up with the Inquisitors, to complete this quest.. However, I recommend that you do not skip that, because by helping Fletcher and Hull out, you will complete a part of another side quest- "The Scattered Soldiers". This also goes for the rest of the Inquisitors that you meet in the future.
GO towards the stream (point 3b on the map). If you want to, you can kill the six Peaceful Ducks, as you were asked, but this is not compulsory. It is much more important to attack the Suspicious Duck, shown in the above screenshot, which turns into soul eater Raxkarok. Quickly, skip back and start the standard fight with the monster, thanks to which you kill it (600 glory points).
You can now return to the Inquisitors (point 3a on the map). Talk to them and give them the news of your having disposed of the soul eater. Fletcher will give 200 gold pieces to you, but only if you have also killed the peaceful ducks (you will also lose a soul point). Also Hull gives 200 gold pieces to you, where you can additionally intimidate him (Intimidate - developed to, at least 40 points) and obtain another 80 gold pieces.
 Diaz and Hector are standing next to the ruins
The next spot that is worth visiting is the ruins located in the Eastern part of the island (point 6 on the map). Keep appropriate precautions here, because there are quite a few Skeletons along the path to the ruins and in the ruins themselves. Find two inquisitors- Diaz and Hector in the ruins. Talking to them will reveal that they are in love with the same woman.
Note - You can barter with Diaz and arm-wrestle with Hector (side quest "The Braggart").
Circe, i.e. the camouflaged soul eaterThe woman that the two are in love with is Circe who is standing nearby (point 3c on the map). Meet up with Circe. Whether you are immune to her courtship or you start flirting with her does not matter right now. In both cases, the mysterious woman asks you to murder both of the men.
 You can do everything as Circe asks...
Only now, you need to take an important decision. If you do not mind being a figurehead in a larger game, you can do what Circe asks. You need to kill both of the Inquisitors and you can attack, after you have more conversations with them or take them by surprise. In both cases, you need to keep in mind that Diaz and Hector are quite tough and skillful in melee. For defeating the inquisitors, you receive 200 glory points.
Return to Circe and tell her that you have murdered the Inquisitors (200 glory points). The Nameless One will spend a night with the woman. On the next day, it will turn out, however, that Circe is Soul Eater Xora Rul. What is even more, you will have to take her on without the majority of your gear. In such a situation, it is best to get away and get dresses, while the other party member is fighting the monster.
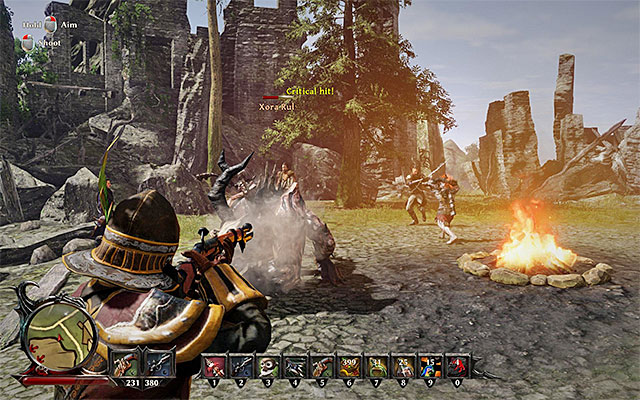 ...or see through her without murdering the Inquisitors
A much better way to complete this quest is to see through the plot by the monster. To do that, start a conversation with the Inquisitors and tell them that Circe wanted you to kill them. Return to the woman, then, confront her and refuse to kill her admirers. Circe will then turn into Xora Rul, BUT you come prepared for that. Eliminate the monster and Diaz and Hector will help you.
Regardless of how you behaved, you need to kill Xora Rul for which you receive 600 glory points. During the fight, you should additionally watch out for the Minions, and leave them for the very end. If Diaz and Hector are still alive, you can meet up with them. From Diaz, you will receive 50 gold pieces, and from Hector 120 gold pieces.
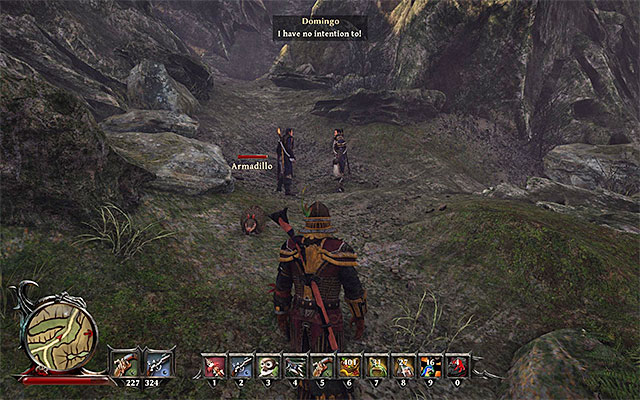 Domingo and Gonzales are close to the den of the soul eater
Leave the ruins and go towards the North-Eastern part of the island. Along your path, try to take the way that will allow you to meet up with two more Inquisitors - Domingo and Gonzales (point 3d on the map). From Domingo, you will receive the unique Shadow Fire herb (a permanent bonus to Cunning). As for Gonzales, he will warn you of the presence of another soul eater around. During the conversation with Gonzales you can also lie and convince him that you are a member of the crew. Thanks to this, you will receive Iron Ring.
Note - Gonzales is also a trainer.
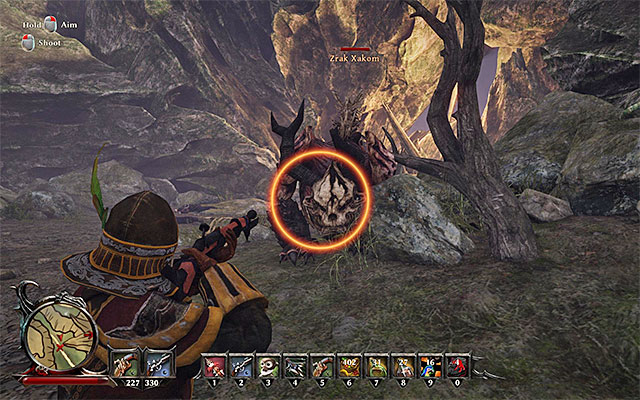 Is not waiting aimlessly and attacks you straight away
The soul eater's den is Westwards, close to the location that you met the Inquisitors in (point 3e on the map). Attack Zrak Xakom and deal with the beast in the customary way (600 glory points). I recommend that you return to the Inquisitors and talk to Gonzales once again, because he will reward you with 200 gold pieces for slaying the monster.
 Talk to Nathan sitting at the campfire
The last beast is staying in the valley, in the South-Eastern part of the Fog Island. After you get there, find a small encampment at the water, in the first place, thanks to which you will find Nathan (point 3f on the map). Talk to the Inquisitor, who will direct you towards the beast that you are looking for.
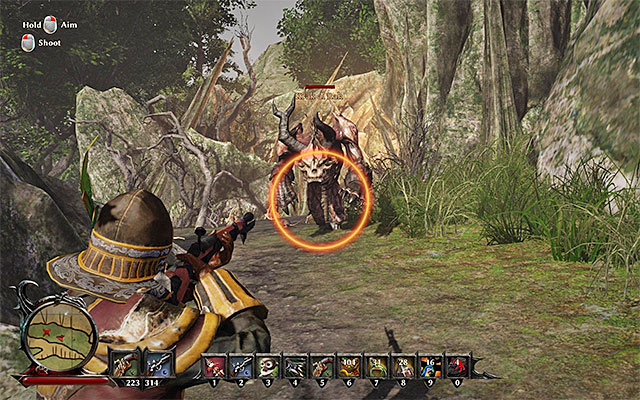 The hiding place of the last soul eater
The final soul eater is hiding to the North of where you met up with Nathan (point 3g on the map). Attack Krak al Rah and utilize the same tactic as in the case of the rest of the monsters. For eliminating the monster, you will be rewarded with, as many as, 1600 glory points. Before you leave this location, return to Nathan, and note that one of his companions returned to his previous form. You will be rewarded by Nathan with 200 gold pieces, and after you talk to Nemo, you will receive 100 glory points.
You now only need to return to Carlos (point 3 on the map) and confirm having killed all of the monsters.
Note - Thanks to having killed the monster, you now have the option to train with Nathan.
Rewards for completing the quest:
Way to unlock the quest: Talk to Venturo.
Quest giver: Venturo (point 4 on the map)
 It is easy to complete this quest
You can start this quest right after you have unlocked the side quest "Paths to the Afterlife". Meet up with Venturo again (point 4 on the map) and he will ask you to find his colleagues and render help to them. In spite of what may seem, this is an easy quest, because you only need to perform all of the actions that within the constraints of the quest concerning the soul eater. While completing this quest, you will meet up with Fletcher and Hull (point 3a on the map), Diaz and Hector (point 6 on the map), Domingo and Gonzales (point 3d on the map), as well as with Nathan (point 3f on the map).
After you have completed the quest connected with the soul eater, return to Venturo and report to him about the individual soldiers on the list.
Rewards for completing the quest:
Way to unlock the quest: Talk to Balthazar.
Quest giver: Balthazar (point 5 on the map)
 Reach the stone circle
Balthazar is a ghost and you can meet him at the stone circle in the central part of the island (point 5 on the map). During your conversation with Balthazar your character will note the his interlocutor is seemingly hiding something important from him. This will unlock this quest, during which you will have to find and examine a number of traces left all around the island.
 Explore the beach in search of the message in a bottle
Of course, you can reach the abovementioned clues in any order that you want. I recommend that you first go to Eastwards of the location, where you met the ghost. Explore the beach (point 5a on the map) and find the Weathered Message in a Bottle. Apart from collecting the bottle, it is a good idea to open it, from the level of the inventory and read the message.
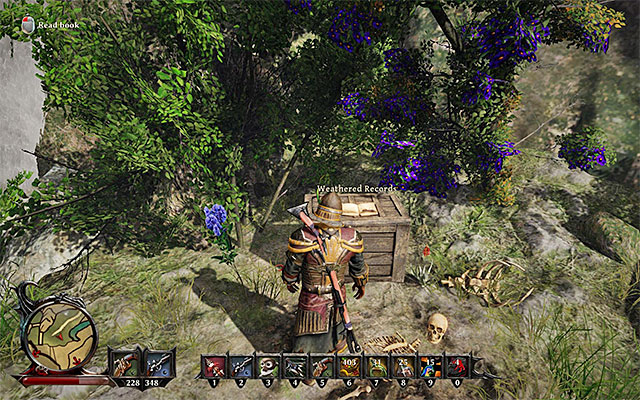 The journal is on a small rocky ledge
Now, go Southwards of the location where you met Balthazar. You need to reach a small ledge (point 5b on the map), either along the path or by climbing. find the Weathered Records here and learn its contents.
 The note is in the ledge of the soul eater
To find the next document, go to the South-Western part of the isle. You need to reach the ledge of soul eater Zrak Xakom (point 5c on the map), connected with the side quest "Paths to the Afterlife". After you have eliminated the monster, find A Protector's Notes on the ground. Pick it up (200 glory points) and read it from the level of the inventory.
 Near the place where you find the skull, there is a golem. You can either kill him or walk around him.
The last of the objects that you need to locate is in the valley, in the South-Eastern part of the isle (point 5d on the map). Along your path there, watch out for the Water Lizards and for the Swamp Golem that is staying around. If you do not feel up to it, you can sneak, or run, past the golem. Explore the area and collect Calypso's Skull from the ground (100 glory points).
You can now return to Balthazar (point 5 on the map), but do that only after you have eliminated all five of the soul eaters, while completing the side quest "Paths to the Afterlife" (thanks to this, you will not have to meet the ghost again).
 Meet with Balthazar again
During the conversation with Balthazar, show to him the skull that you have found and learn that Calypso was his daughter. If you have found all of the documents, you can reveal to him that you learned about his secret (100 glory points). You can unlock the final part of the conversation only if you have defeated all of the soul eaters. This will allow you to chase away the ghost, from the isle. Balthazar does not object to that and allows you to ask the last question:
Note - It would be a good idea to visit Venturo at the Inquisition camp and tell him that you have thwarted Balthazar's plans. Thanks to this, you will be rewarded with 300 gold pieces.
Rewards for completing the quest:
Way to unlock the quest: Talk to Hector.
Quest giver: Hector (point 6 on the map)
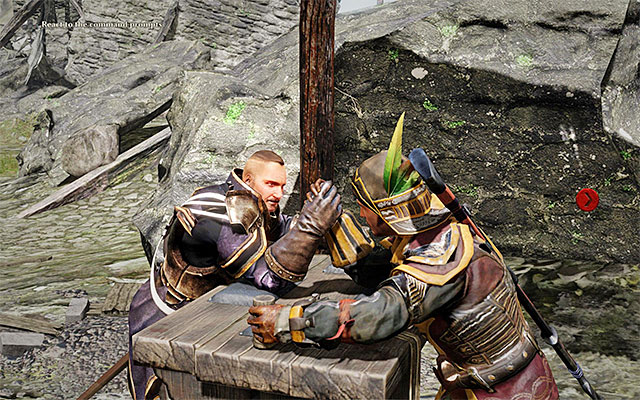 Tap the keys that appear on the screen
Hector is one of Inquisitors and you will find him, with Diaz, in the ruins located in the Eastern part of the isle (point 6 on the map). After you start the conversation, you can offer Hector to participate in a minigame, and stake 100 gold pieces. The minigame consists in arm-wrestling and it is very easy. At first, you need to tap the keys/buttons that appear at the edge of the screen (in the case of the PC version, these are the directional WSAD keys). At some point, you will be also required to tap, rhythmically, one selected key. If you tap that key enough times, you will win the struggle.
Note - Hector may die during the side quest "Paths to the Afterlife" so, just in case, it is better to play the minigame at the first opportunity you get.
Rewards for completing the quest:
Way to unlock the quest: Talk to Mortimer.
Quest giver: Mortimer (point 7 on the map)
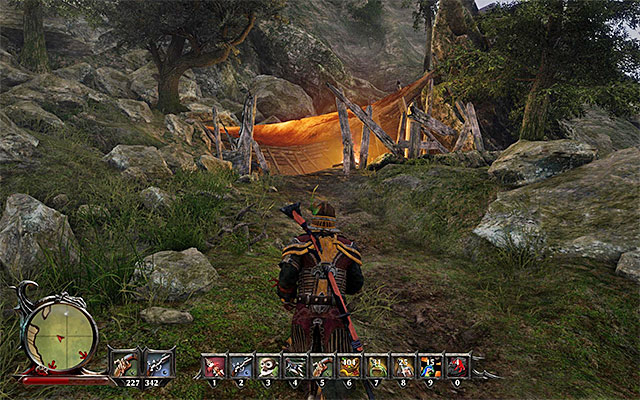 Search for the campfire at the big mead
In the central part of the isle, you should notice a small encampment that neighbors a mountain slope (point 7 on the map). Reach the encampment and talk to the elderly sailor Mortimer. You can listen to the man's entire story and receive a Ruby or ask him for an abbreviated version. Towards the end of the meeting, there appears an opportunity to complete a short quest of escorting Mortimer to the Inquisitors' encampment on the isle.
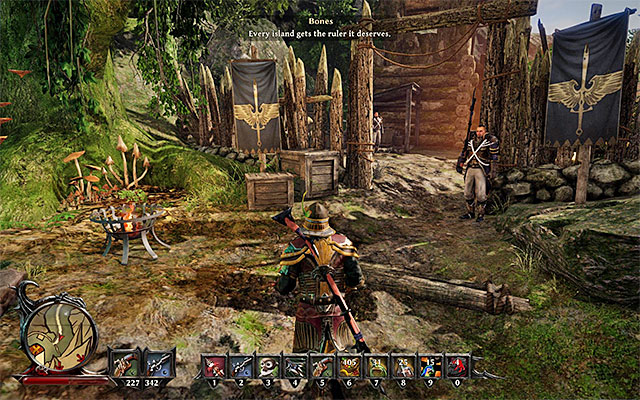 Escort Mortimer to the Inquisitors' encampment
After you confirm that you want to start the journey, head towards the Inquisitors' camp (point 2a on the map), by going Northwards first and then taking a turn to the West. Depending on how well you have cleared the area, you may need to eliminate several monsters along your path, like e.g. Scavengers and Snappers. After you reach your destination, this quest ends and you will unlock a new quest connected with the treasure hidden by Mortimer.
Rewards for completing the quest:
Way to unlock the quest: Talk to Mortimer.
Quest giver: Mortimer (point 3 or 7 on the map)
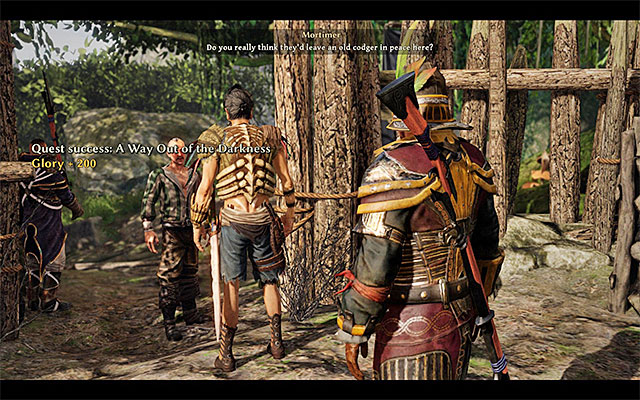 Helping Mortimer is the best way to find the treasure
You can unlock this quest in two different ways. The first one is escorting Mortimer to the Inquisitors' camp (point 3 on the map) during quest "A Way Out of Darkness". Towards the end of that quest, you will learn the location of the treasure. An alternative way is to make Mortimer reveal the treasure location, still while staying at his camp (point 7 on the map). To do that, you need to select an appropriate dialogue option, murder Mortimer (100 glory points) and examine his corpse.
Note - the other variant is not recommended, because you will then miss the opportunity to obtain more glory points and additional soul points.
 The spot where the treasure has been buried
Mortimer's treasure is in the North-Eastern part of the isle (point 3h on the map), where it is easy to reach it, because there is a path leading up to it. In the same way as earlier, watch out for the monsters, including various spiders. Take the rope bridge and find the red X mark on the ground. You need to use the Shovel her, to dig up the treasure. open the chest with 500 gold pieces inside, among others.
Note - If you do not have the Shovel on you, you can search for it around the game world, or buy it from someone.
Rewards for completing the quest:
The above map presents the whereabouts of all the locations that you visit, during your stay on the Isle of Thieves, while completing side quests. The green points mark the areas that you visit while completing these quests.
Note - It is not compulsory to visit the Isle of Thieves but, I recommend against skipping this step, because you can gain lots of good items and experience points here.
Way to unlock the quest: Talk to Bones (at any point into the game).
Quest giver: Bones
 You complete this mission during the conversation with Bones
It is a very short quest, for the completion of which you only need to talk to Bones for a while. You can do that at any point of the game, e.g. right after you meet with Bones for the first time (after he restores you at the Crab Coast). During the conversation, Bones raises the topic of the Isle of Thieves, which you need to ask him about.
Rewards for completing the quest:
Way to unlock the quest: Talk to Ulvi or Kaan.
Quest giver: Ulvi (point 1 on the map) or Kaan (point 2 on the map)
Ulvi is one of the possible quest givers hereYou can activate this quest in two different ways. The more obvious one is to meet gnome Ulvi.
He is staying on the Northern beach (point 1 on the map), i.e. in the spot, where you most probably start the exploration of the isle. During your conversation with Ulvi, you will learn about the problems with goblins and you will be asked to take n errand to the gnome headquarters. What is interesting, even if you demand that Ulvi shows you one of the goblin encampments, he will take you to the village anyways (along your path, you will run into some monkeys that are easy to kill).
 Kaan is the chef of the tribe
In the village, you need to meet up with the chief of the tribe Kaan (point 2 on the map). You can do that after the journey with Ulvi ends, or skip meeting him and reach the gnome village on your own. Kaan will give you more detailed information, concerning this quest. The plan assumes that you retrieve the four artifacts that have been stolen by the goblins (aura culci), and which are very valuable to the gnomes. The basic problem here is that you will not be allowed to kill any goblin, while completing this quest.
Note - during the conversation, Kaan will be able to take you to the staying place of Kalil's, i.e. the gnome that has been hiding near the Western goblin encampment. You can agree to that and follow Kaan (20 Glory Points) or find Kalil on your own (more about this further in the walkthrough).
Note - It is a good idea to unlock Sneak, before you set out for the goblin encampment. This will help you IMMENSELY obtain the artifacts, while staying undetected at the same time.
Note - Kaan is also a trader of abilities.
 Ulvi will give hints on infiltrating the camp, to the Nameless One
Goblin encampments can be visited in any order but, I recommend that you start with the North-most one. Return to the beach, where you started the exploration of the isle and find Ulvi again (point 2a on the map). During the conversation with the gnome, ask him about the best way to steal the first artifact from the goblin encampment.
Note - You can sneak into any of the four encampment at any time of the day. Do not expect things to be easier during the night, because goblins do not go to rest.
Note - After you approach each one of the four goblin encampments, your current companion leaves the party temporarily. Paradoxically, this will help you reach the spot where the artifact is being kept, while staying undetected at the same time.
According to the information that you receive from Ulvi, it is a good idea to take advantage of the fact that the goblin encampment is close to water. Go North, jump into the water and swim up to the encampment from the North. After you get out of water, enter the Sneak mode, as quickly as possible, and approach the artifact (Seer of Worlds) shown in the above screenshot (point 2b on the map). Collect it (100 Glory Points) and use the option to swim to get away safely.
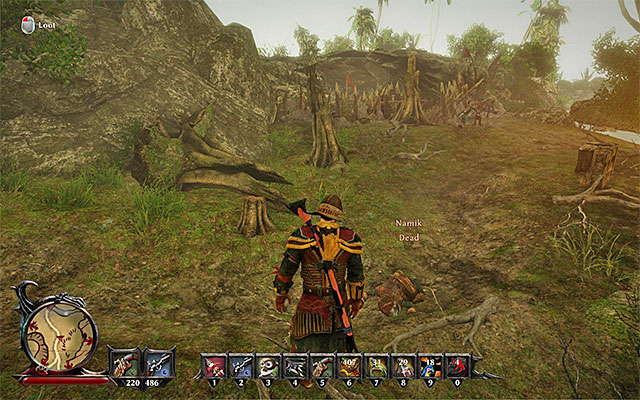 The dead gnome
Next, go to the goblin base on the Eastern side of the map. Start by finding Kalil (point 2c on the map), that Kaan might have lead you up to. Talk to Kalil and, just like in Ulvi's case, ask him about the best way to infiltrate the goblin encampment safely. Enter the area occupied by the goblins and find the dead Namik around (point 2d on the map), who you learned about during the conversation. Examine the corpse and obtain the note (Mission), which it is best to read, from the inventory level.
I recommend that you approach the second artifact (point 2e on the map) from the South. Climb the rocks and reach the hole shown in the above screenshot. Find the Liana here and interact with it. After you climb down, start sneaking and locate the second artifact (Skull Thumper) (100 Glory Points). After you collect it, use the liana again and leave the encampment. It is a good idea to return to Kalil (point 2c on the map). Tell him that you have retrieved the artifact and found Namik's corpse. You will receive 157 gold pieces from the gnome.
 Melih
MelihThe next camp is located in the South-Western part of the island. Close to the goblin encampment, you will meet gnome Melih (point 2f on the map) and it is a good idea to ask him about the possible ways to steal the artifact, just like in the case of the previous gnomes. If you are friendly towards Melih, he will give you rum. apart from that, you can convince the gnome to give a Long-barreled Pistol) to you.
It is best to obtain the artifact (point 2g on the map) in either of two ways. The first option assumes that you approach the place where the artifact is being kept from the North. Along your path, you would have to climb over the rocks, jump over a small chasm and sneak past shaman Sudi shown in the above screenshot. Note - You need to approach very closely to the shaman. Otherwise, you will be spotted by the other, regular, goblins to the East of here!
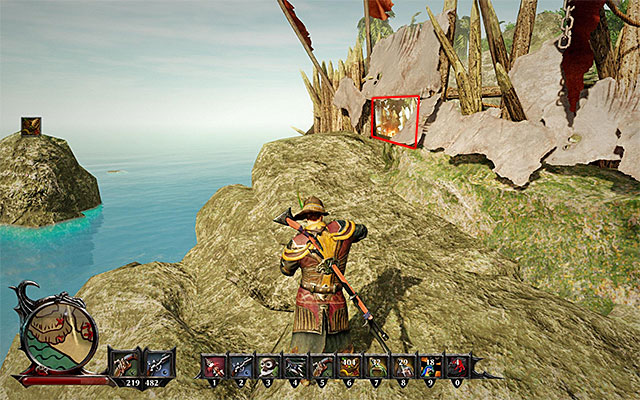
The other option is available only if you have unlocked the Monkey Trainer skill. If so, you can swim around the goblin encampment and approach it from the South. Then, you need to locate the small hole shown in the above screenshot and send your monkey inside. Regardless of the path you have taken, your primary task is to obtain the third artifact (Opinion Amplifier) (100 Glory Points).
 Famir
FamirThe last, fourth encampment is located in the Southern part of the map and to the South of it, you should meet gnome Famir (point 2h on the map). Talk to him and listen to his idea of quiet infiltration the place where the fourth artifact is.
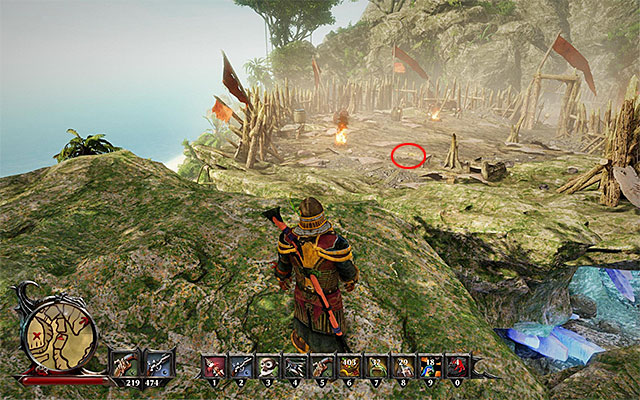
Yu need to walk around the goblin encampment (point 2i on the map) from the South and then, From the East. Take the path with crystals growing around it and reach the spot, where it is possible to climb to the ledges above. After you reach the topmost one, make it over to the East, a bit, and stand in the spot shown in the above screenshot. Run up and take a jump over the chasm. After you do that, sneak into the location where there is the artifact (Gnome's Sceptre) (100 Glory Points).
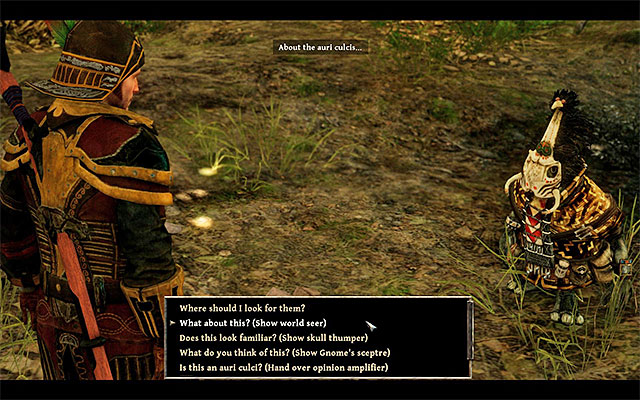 Give all of the artifacts to Kaan
Return to the gnome village and meet up with Kaan again (point 2 on the map), to hand over all of the four artifacts. IF you have managed not to kill any goblin, you will now receive a total of 1000 Glory Points and 300 gold pieces. What is interesting, the quest is not over yet. Kaan suggests that you meet up with Ulvi (the "Speak to Ulvi" side quest). Now you will learn a little bit more about the goblin king from him, who you need to locate and kill.
Note - From now on, you will have to avoid confronting goblins from all four encampments. It is worth noting here that you will meet no shamans there, now. Unfortunately, your current companion will still refuse to enter the goblin encampments so, you are all on your own.
 The entrance to the cave complex is being watched by Leviathans, among others
You now need to reach the South-Eastern part of the isle. You can start in the location, where you have visited the fourth encampment and go East. Along your path, eliminate the Sand-Devils and The Giant Crabs, among others. Stop after you approach the entrance to the cave complex (point 2j on the map). You need to watch your step here, because it is being guarded by two Leviathans, including one connected with "The Gnome Eater" side quest. They deal lots of damage (you should, first of all, watch out for their charges!) so, rely on dodges and strong attacks. After you have secured the area, start the exploration of the caves.
Climb onto the ledges above and explore the caves, while heading Northwards, more or less. Watch out for the traps set all around the caves, dodge from them or tap quickly the key/button displayed on the screen, after they activate. Apart from that, in the caves, you can encounter Giant Rats and Cave Bats, but they are easy to defeat. The entrance to the main goblin encampment has been shown in the above screenshot (point 2k on the map).
 The goblin king
Enter the encampment and start eliminating the goblins, one after another. After a while, you will reach the location, where there is the Goblin King (point 2l on the map). Fortunately, this monster is just a little bit tougher than the rest of the goblins although, it is worth knowing that he may attacks your party at a long range. For defeating the goblin king, you will be rewarded with 500 Glory Points.
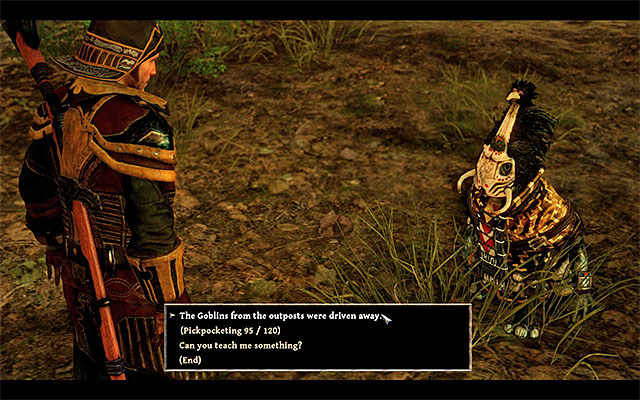 You can end this quest only after you have eliminated all of the goblins on the isle
You can now return to gnome Kaan (point 2 on the map) and claim your reward for killing the goblin king, which is 500 gold pieces. This is not the end of the quest, though! It disappears from your log only after you have completed the abovementioned "Speak to Ulvi" quest, as well as the two following ones, tasked to you by Ulvi - "Goblin Plague" and "Intrusion in the North". In general, this means obliterating all of the goblins that occupy the four encampments that you visited earlier.
After you complete all three quests, meet up with Kaan for the last time and let him know that you have secured the entire island.
Rewards for completing the quest:
Way to unlock the quest: Talk to Kaan.
Quest giver: Kaan (point 2 on the map)
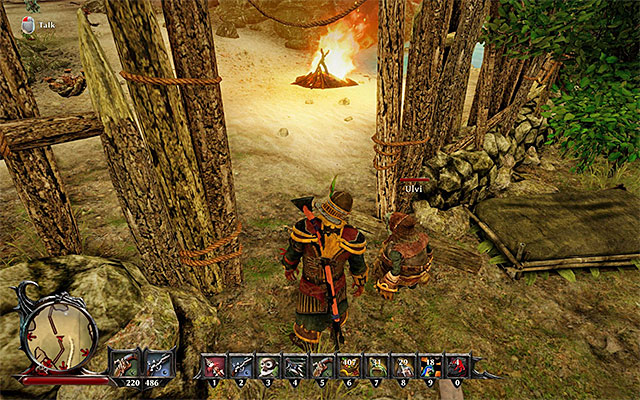 Return to the Northern beach, where there is Ulvi
You can unlock this quest after you have supplied Kaan (point 2 on the map) with all four artifacts, while completing the "Goblin Invasion" side quest. You will be tasked, by Kaan, with murdering the goblin king and with meeting up with Ulvi again. To do that, you need to return to the Northern beach (point 1 on the map) and find the gnome. Ulvi will thank you for retrieving the artifacts and provide you with several items.
Rewards for completing the quest:
Way to unlock the quest: Talk to Ulvi.
Quest giver: Ulvi (point 1 on the map)
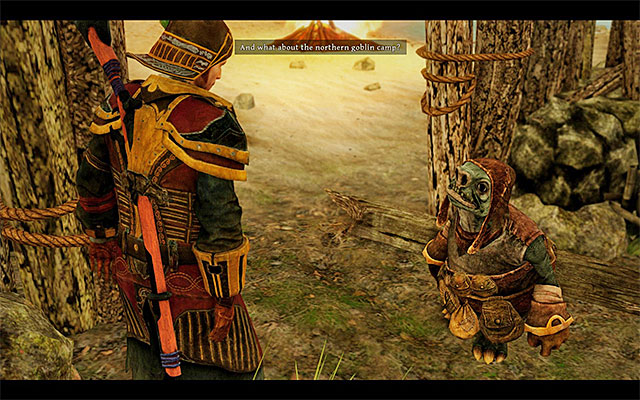 Ulvi wants the scouts eliminated
The chance at unlocking this quest appears, for the first time, after you meet up with chief Kaan, while completing the "Goblin Invasion" side quest. Again, find Ulvi on the Northern beach (point 1 on the map) and talk to him. The gnome asks you to eliminate four scouts, in the Northern goblin encampment (point 2b on the map). DO NOT ATTACK THE SCOUTS immediately, because you first need to steal the artifacts from all four encampments, without killing anyone (lo learn more, see more in the walkthrough for the Goblin Invasion quest). The earliest that you could take interest in eliminating all of the goblins, is after you return the stolen artifacts to Kaan and receive a quest to kill the goblin king, from him.
 There are four (weak) scouts to eliminate here
Enter the Southern encampment, from which you stole one of the artifacts earlier (point 2b on the map). There are four Goblin Scouts here, and you should have no problems eliminating them (note - you cannot rely on your companion for help here!). After you have secured the encampment, return to Ulvi and report to him.
Rewards for completing the quest:
Way to unlock the quest: Talk to Ulvi.
Quest giver: Ulvi (point 1 on the map)
 Ulvi asks you to eliminate all of the goblins
You get the chance at starting this quest after you supply chief Kaan with the four artifacts, while completing the "Goblin Invasion" quest. Again, find Ulvi on the Northern beach (point 1 on the map) and talk to him. The gnome thanks you for retrieving the artifacts and wants you to clear the encampments, which you have just visited, of the goblins that are staying there.
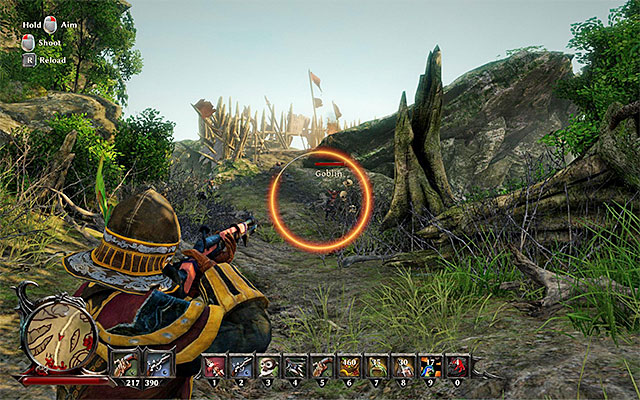 Reach successive encampments and kill goblins
You need to visit three encampments, where you have earlier stolen the artifacts from. These are the ones located in the Western (point 2e on the map), South-Western (point 2g on the map) and Southern (point 2i on the map) part of the isle. In each of the camps, there are several goblins to kill (note- you cannot rely on your party member for backup) and you need to eliminate a total of 14 monsters this way. After you have secured the encampments, return to Ulvi and report to him.
Rewards for completing the quest:
Way to unlock the quest: Talk to Akila.
Quest giver: Akila (point 3 on the map)
 Akila
AkilaThe gnome named Akila is in the village in the central part of the map (point 3 on the map). At the beginning of the conversation, Akila steal several coins from the Nameless One and you can point that out. Later on, you will be asked to supply the goblin with the title lucky coin which has been stolen from him by Fidur.
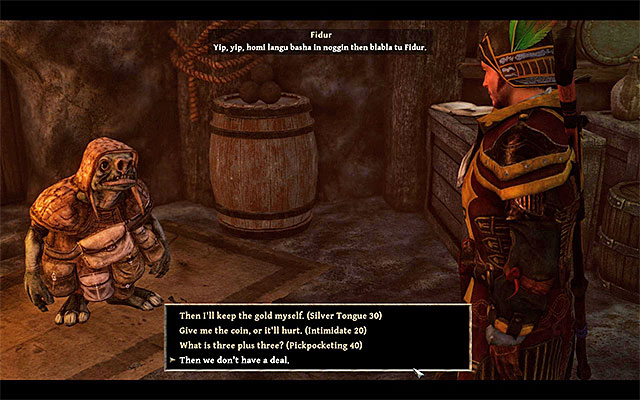 There are several ways in which to retrieve the coin
Fidur should be in one of the households, in the Southern part of the gnome village (point 3a on the map) and you need to meet up with him. You can retrieve the Lucky Coin in four different ways:
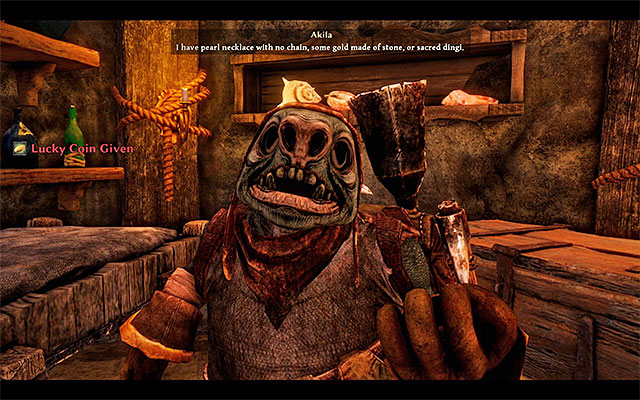 Return the coin to the owner
You can now return to Akila (point 3 on the map) and return the coin. The gnome allows you, then, to pick your reward.
Note - Along your way back to Akila, do not meet up with the gnome named Golmu (the western part of the gnome village). He will steal the coin from you and you will have to return for it unnecessarily (you can do this if you want to receive extra 100 Glory Points).
Rewards for completing the quest:
Way to unlock the quest: Talk to Malik.
Quest giver: Malik (point 4 on the map)
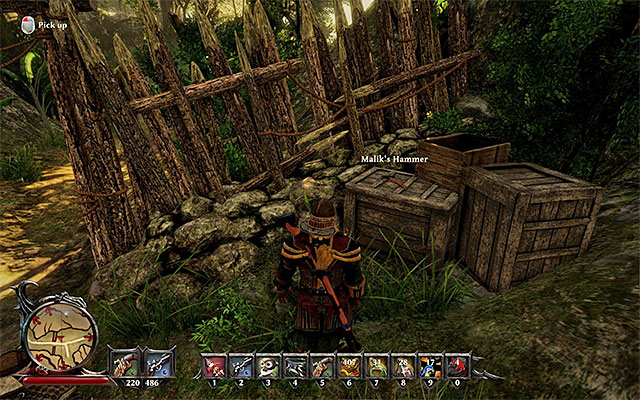 Malik's hammer
Gnome Malik can be found next to one of the Western village exits, in the central part of the map (point 4 on the map). During your conversation with the gnome, you will learn that he lost his hammer. This quest is very easy, because Malik's Hammer is in a nearby crate. Collect it and return it to the owner.
Rewards for completing the quest:
Way to unlock the quest: Talk to Malik.
Quest giver: Malik (point 4 on the map)
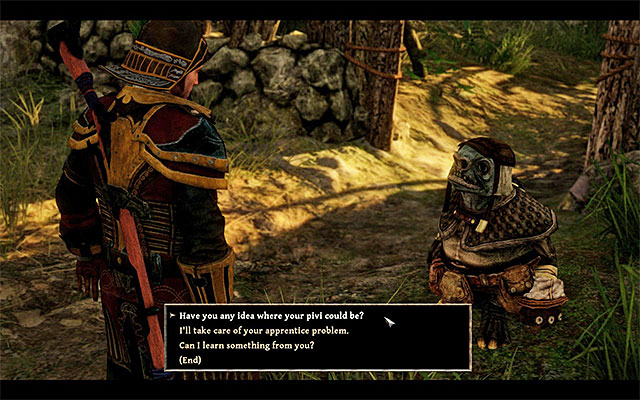 Question Malik about the missing worker
Gnome Malik can be found next to one of the Western village exits, in the central part of the map (point 4 on the map). During your conversation with the gnome, you will learn that his helper Dowi went missing. Ask about the probable whereabouts of the missing gnome and go for the search.
Note - Malik is also a skill trainer.
 The cave entrance
Take the Northern exit from the gnome village and take the first turn to the right to take the path to the North-Eastern hill (it may prove necessary to kill several monkeys along your path). You should be able to locate a cave entrance here (point 4a on the map) and you need to walk inside.
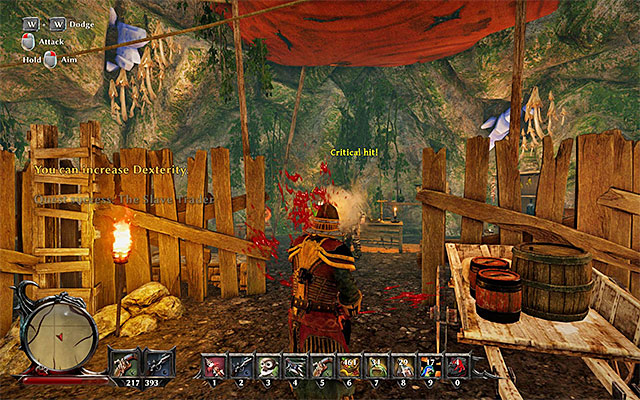 You can buy out the gnome or kill out the slave hunters
Reach the location, where there is Russel (point 4b on the map). During the conversation, you will learn that he is a slave trader and that he has imprisoned Dowi. There are two different ways, in which to rescue the gnome. The first one is the power play. Unfortunately, in this case, apart from Russel you also need to defeat his Bodyguard, who is using firearms, to top of all that (400 Glory Points). An alternative solution is to pay the slave hunter for the gnome. In this case, it is not a good idea to agree to the first offer (500 gold pieces), and intimidate Russel around (the second dialogue option), which will bring the price down to 200 gold pieces (200 Glory Points).
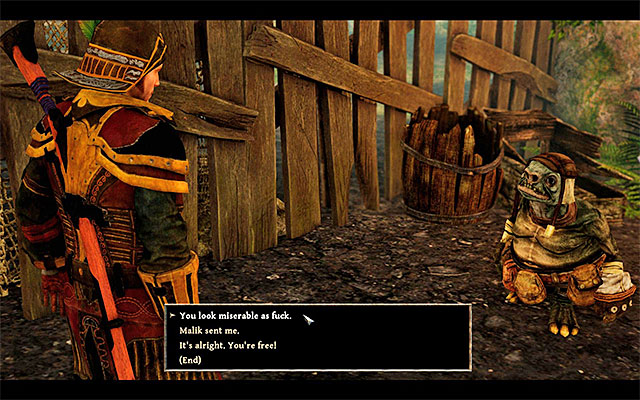 Dowi
DowiRegardless of whether you killed Russel or you made a deal, approach the captured Dowi and tell him that he can return to the village (100 Glory Points). You also need to return to Malik (point 4 on the map) and let him know that you have freed his helper.
Rewards for completing the quest:
Way to unlock the quest: Talk to Zeki.
Quest giver: Zeki (point 5 on the map)
 Zeki
ZekiGnome Zeki is in the southern part of the village in the middle of the isle (point 5 on the map).At the beginning of the conversation, you can prove your mastery of the Pickpocketing skill, developed to the level of, at least, 40 points and steal a Spoon from Zeki, which will win you his respect (if you want to obtain positive soul points, return the item to the gnome, or keep it for yourself, if you want to receive negative soul points). Later into the conversation, the Nameless One will be asked for help at eliminating the goblins in the gnome tomb.
 In the tomb, there are six goblins
The entrance to the tomb is behind Zeki's back. The tomb has several levels, but you should have no problems navigating around here. In the tomb there are six Dishonourable Goblins to eliminate, which is very easy. After you have killed the goblins, you can plunder the tomb, or return to the gnome straight away. Zeki will allow you to pick your reward. You can pick gold only, the pot only, or intimidate him (with the skill developed to the level of, at least, 60 points) and demand that he gives you both (negative soul points).
Rewards for completing the quest:
Way to unlock the quest: Talk to Trawi.
Quest giver: Trawi (point 6 on the map)
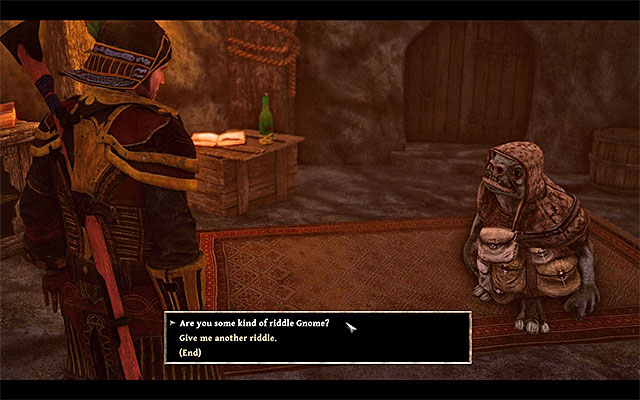 There are three puzzles to solve
Gnome Trawi is in the village in the central part of the isle (point 6 on the map). He should be staying in one of the homes to the South. Right at the very beginning of the conversation Trawi speaks the first puzzle, but you will be unable to provide him with the solution. Still, you can agree to give answers to the remaining three puzzles. The correct answers are:
For resolving the puzzles, the gnome rewards you with lots of valuable items.
Rewards for completing the quest:
Way to unlock the quest: Talk to Gabu.
Quest giver: Gabu (point 7 on the map)
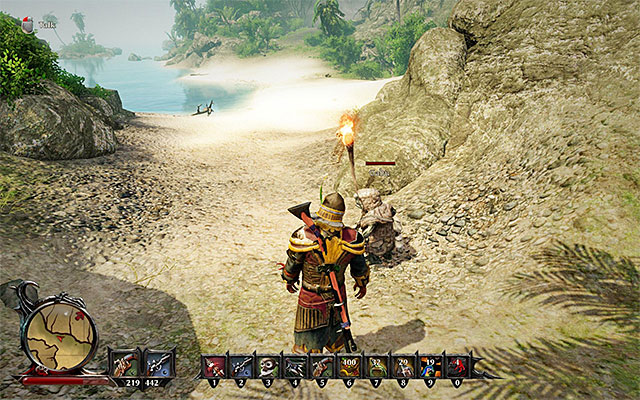 Gabu
GabuGnome named Gabu s in the Southern part of the map, close to one of the goblin encampments (point 7 on the map). During the conversation with Gabu you will be asked to eliminate the title gnome eater.
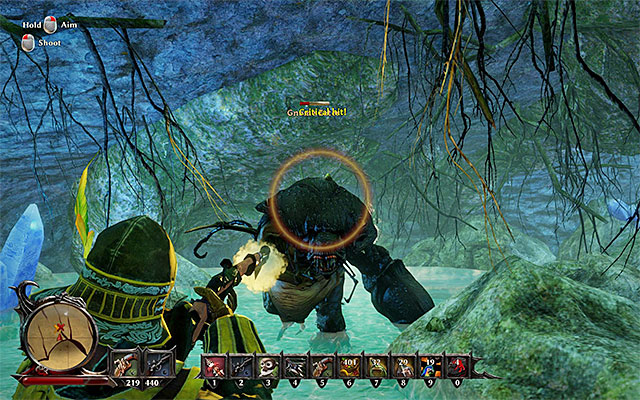 The gnome eater is a leviathan
The beast that you need to slay is hiding to the North-West of where you have met Gabu (point 7a on the map) and during the quest, it turns out that The Gnome Eater is nothing more than a leviathan. Therefore, you should remember to dodge from charges and the other powerful blows landed by the monster. At the same time, wait for opportunities to land strong melee and ranged attacks. It is worth adding here that there also is another Leviathan around so, if you do not want to fight both of them, at the same time, lure the gnome eater away somewhere to the West. After you win the fight, talk to Gabu. Typically, he will offer you with mere 20 gold pieces, but you can demand more. In such a situation, it is required that you have the Intimidation skill, or Silver Tongue developed to the level of, at least, 70 points.
Rewards for completing the quest:
The above map marks all of the locations that you visit, during your stay on the Tacarigua isle, while completing main quests. The red points mark the starting points for the individual quests, whereas the green ones mark the area s that you visit, while completing them.
Note - I recommend that you also see the map connected with side quests on the Tacarigua isle, because many of the side and main quests overlap.
Way to unlock the quest: Talk to Erasmus (Taranis isle)
Quest giver: Erasmus
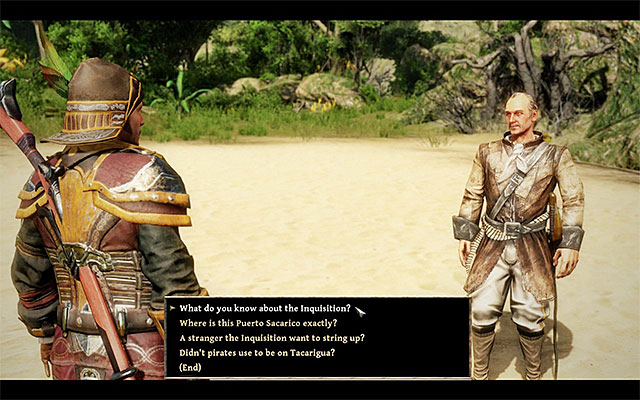 Along your path to the staying place of the missing apprentice, you can talk to Jack
You can unlock this quest while on the Taranis isle, i.e. during the conversation with Erasmus that is staying at the mages HQ. He asks the Nameless One to find his apprentice, Horas, who is in possession of one of the monolith stones (for detailed information, see the chapter with main quests on Taranis). After you get to the Tacarigua isle, you get the opportunity to complete the quest. This first thing worth doing is meeting up with the lighthouse ward, Jack, whom you can find on the beach, near the starting point (point 1 on the map). You will learn from him how you can get to Puerto Sacarico. At the same time, you will get to know that the isle has been taken over by the Inquisition.
 Puerto Sacarico
The town of Puerto Sacarico is in the Western part of the isle and you can get there without major problems. Follow the main paths, walk around the camp of deserter Vasco and cross the mountainous areas. Of course, you need to eliminate several monsters, along your path and you should be most cautious about Minions and Ghouls. You can enter the town either through the Western or the Northern gate and whichever you choose, does not matter (200 glory points).
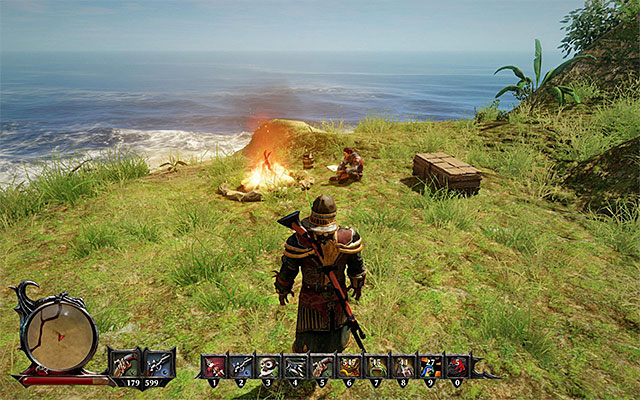 Horas's staying place
Cross Puerto Sacarico and head South-Westwards. After you exit the town, you need to watch out for single monsters. Still, there are no monsters around that would be particularly strong. Ultimately, you need to reach a small encampment, where apprentice Horas is hiding (point 1b on the map). Start a conversation with Horas, who will tell you that he has been accused of theft by Sebastiano, and that he is currently hiding from the Inquisitors. Towards the end of the conversation, you can ask Horas to your ship to accompany you to Taranis (400 glory points + 100 glory points at the moment at which you leave Tacarigua).
Note - You can now return to the chapter with Taranis main quests and read the rest of the walkthrough for this quest.
Way to unlock the quest: Talk to Erasmus (Taranis isle)
Quest giver: Erasmus
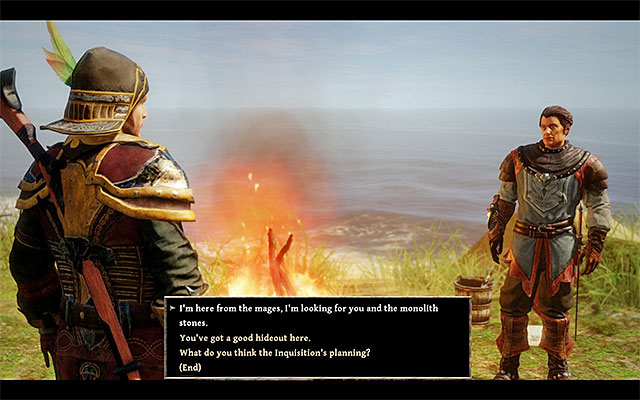 Horas has the last monolith stone on him
You can unlock this quest while on the Taranis isle, i.e. during the conversation with Erasmus that is staying at the mages HQ. Just to remind you, Erasmus asks your help at finding three Monolith Stones. To get the first one, you need to go to Tacarigua. The item is in possession of Horas, who is hiding to the West of the town of Puerto Sacarico (point 1b on the map). To learn more about this quest, see the walkthrough for the "A Follower of Magic" main quest.
Note - After you find Horas, you can return to Taranis with him. After you do, go back to the chapter with the walkthrough for the main quests on the isle.
The above map marks all of the locations that you visit, during your stay on the Tacarigua isle, while completing side quests. The red points mark the starting points for the individual quests, whereas the green ones mark the areas that you visit, while completing them.
Note - I recommend that you see the map concerning the main quests on the isle, because many of the main and side quests overlap.
Way to unlock the quest: Talk to Jack.
Quest giver: Jack (point 1 on the map)
 Talk to Jack
Jack is on the beach in the central part of the isle (point 1 on the map), close to the location, where you start to explore it. During the conversation, you will learn that the Inquisition forces have taken control over the isle and you will be asked to see into the current situation in Puerto Sacarico. Jack also suggests that you meet a Vasco, and points you to the exact location.
 Vasco's encampment
Head North-West. Vasco is staying in a small encampment near a mountainous path (point 4 on the map) and it is a good idea to bring up all of the available topics (100 glory points). Thanks to this, you will learn that the man deflected and also, a new side quest will be unlocked - "Vasco's Stuff".
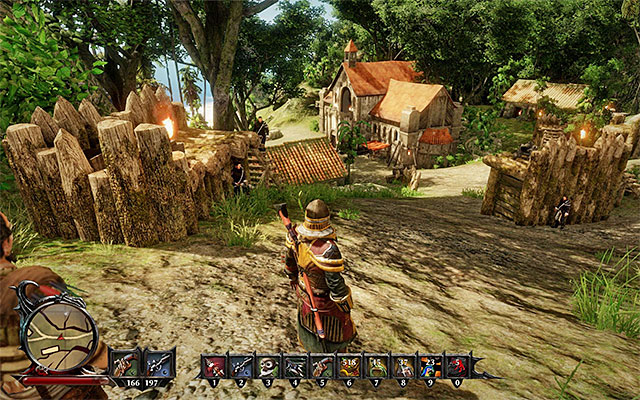 Puerto Sacarico
Head Westwards, towards Puerto Sacarico (point 1d on the map). Of course, you need to watch out along your path because, especially while crossing mountainous areas, you will encounter several stronger monsters. After you reach the city, meet commandant Sebastiano (point 10 on the map) and exhaust all of the dialogue options. Return to Jack and report to him.
Rewards for completing the quest:
Way to unlock the quest: Talk to Jack.
Quest giver: Jack (point 1 on the map)
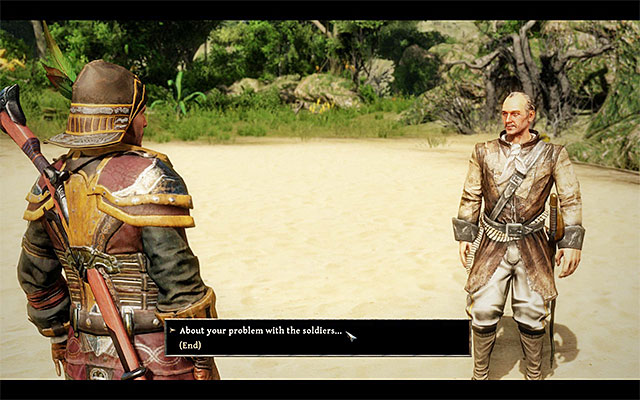 Jack asks you to do him a favor
Jack is staying on the beach in the central part of the isle (point 1 on the map), close to where you start the exploration of this location. During the conversation, Jack complains about two soldiers of the Inquisition, who have seized the nearby lighthouse. The man wants you to drive the Inquisitors away, so he can return to performing his duties.
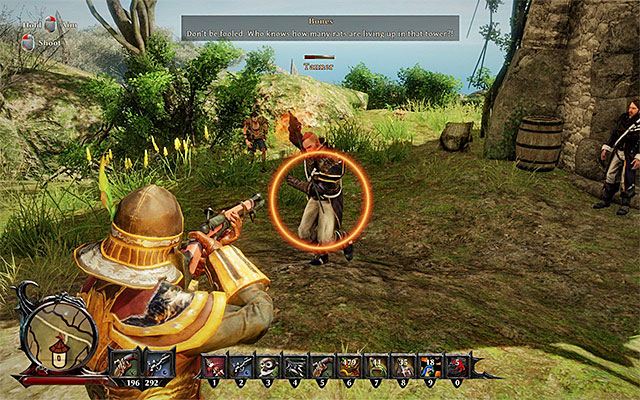 You need to defeat Tanner in a direct fight
Head towards the lighthouse on a small hill, to the North-West of where Jack is (point 1a on the map). After you get there, talk to Tanner, in the first place. During the conversation, you may use the Silver Tongue skill, developed to the level of, at least 60 points. Still, you gain measly 50 gold pieces for that. Regardless of the dialogue options that you pick, the only to put the Inquisitor back in his place is to defeat him in fight. Since Tanner attempts melee attacks, dodge or rely on ranged attacks. After you have defeated the inquisitor, (do not worry - he only passes out) (200 glory points) send him back to the beach.
Note - Tanner is also a skill trainer.
Note - During the fight with Tanner, do not attack Holtby, because this may unnecessarily provoke him to join the fight.
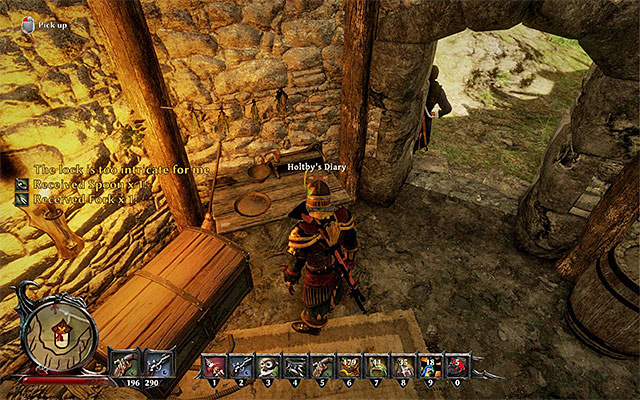 Holtby's diary is inside the lighthouse
Approach Holtby and have a quite fruitless conversation with him. After the meeting, enter the lighthouse and locate Holtby's Diary on one of the tables. Collect it and read it from the inventory level.
 Cave entrance
Descend from the hill and locate the cave entrance at the foot (point 1b on the map). You need to watch put, because there are Claw Monkeys and Scavengers around, among others. What is even more, after you enter the cave, you may also be attacked by several Ghouls, which are quite nimble and deal considerable damage (wait for the ghouls to leave, if you do not want to fight in narrow passages).
 There is a tough flying monster to defeat here
First of all, there is a big Cruel Lindworm inside. Try to remain in constant movements, while fighting the beast, and do not let yourself be cornered by it (you can lure it outside of the cave) and use the best attacks that you pack. After you defeat the monster, start the exploration of the cave, where you will find several Termite Warriors and Termite Workers). Continue along your path across the cave and watch out for the tripwire. Try to jump over it, or spring it and press quickly the indicated key/button.
Note - If you have already complete the "Wet Behind the Ears" quest, you will not encounter the flying beast, in the cave, again.
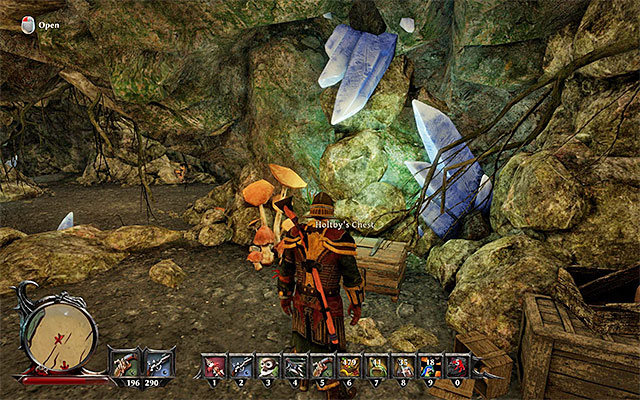 Holtby's chest
You need to reach the last location in the cave (point 1c on the map), because it is here that you find Holtby's Chest. Open the chest and collect the Stolen Goods from it (100 glory points). You can now return to Holtby (point 1a on the map) and present him with the evidence - items from the chest and the diary. The Inquisitor admits to having robbed Jack (200 glory points). Have Holtby give you the gold (250 gold pieces) and send him back to the beach (200 glory points).
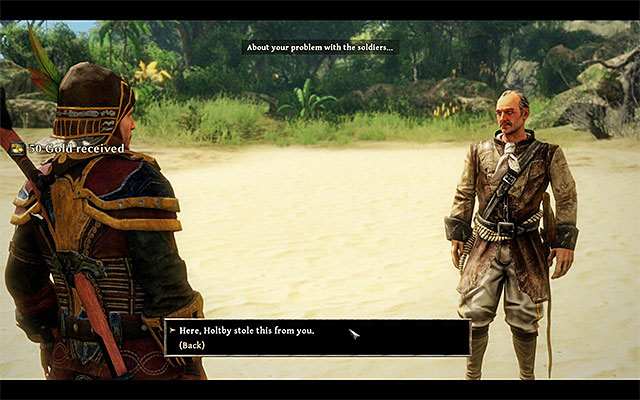 Give the stolen goods back to Jack
Finally, you need to return to Jack (point 1 on the map). Let the man know that you have dealt with the problem with the Inquisitors near the lighthouse and return the stolen goods to him, which you have collected from the chest in the cave.
Note - On the beach, you can meet up with Holtby again. Thanks to using the Intimidate skill on him, developed to, at least, 50 points you will receive a Sparkling Gold Ring from him.
Rewards for completing the quest:
Way to unlock the quest: Talk to Pipkin.
Quest giver: Pipkin (point 2 on the map)
 The cave entrance
You can find Pipkin near the campfire in the central part of the map (point 2 on the map). The man asks you to reach the treasure that he hid, defeat the monster that guards it and bring back to him the items that are inside the chest. After the conversation ends, you can follow the path of the coins on the ground, or simply head towards the destination straight away. Your destination is the cave entrance to the North of where you met Pipkin (point 1b on the map).
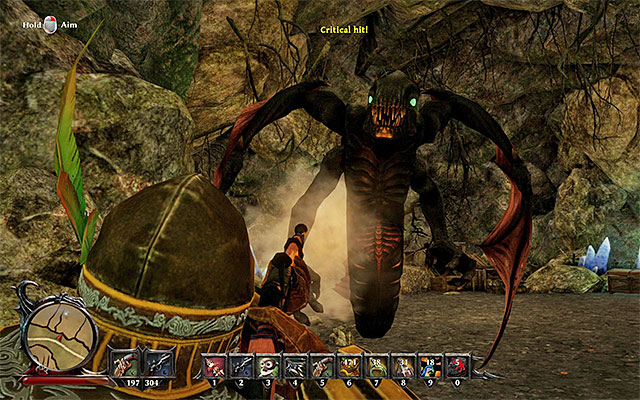 There is a tough flying monster to defeat here
At the beginning of the cave exploration, you need to watch out for the agile Ghouls, which additionally deal considerable damage. A much serious threat us up ahead - a Cruel Lindworm. Try to remain in constant movements, while fighting the beast, and do not let yourself be cornered by it (you can lure it outside of the cave) and use the best attacks that you pack. For defeating the best, you will be rewarded with, as many as, 600 glory points.
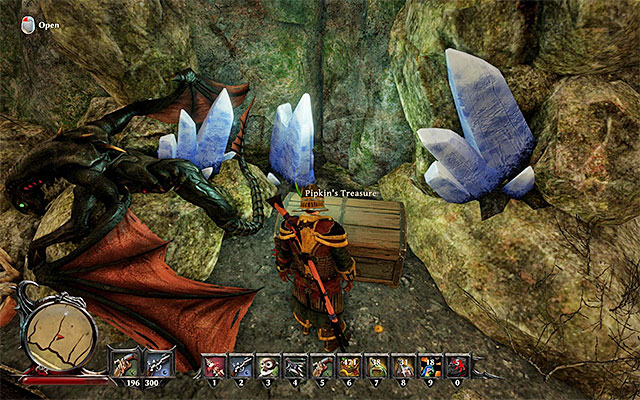 Find Pipkin's chest and collect all the items that you find inside
Take a look around the location, in which you fought the mini-boss (point 2a on the map) and locate Pipkin's chest. From the chest, collect Bananas, 4 bottles of Grog, 3 bottles of Rum and 300 gold pieces. You can now return to Pipkin (point 2 on the map) and do either of the following:
Rewards for completing the quest:
Way to unlock the quest: Automatically, after you have found the Treasure Map.
Quest giver: - (point 3 on the map)
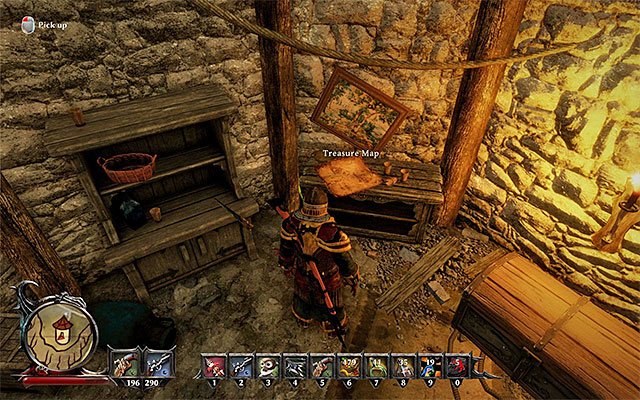 The treasure map is in the lighthouse
You will find the Treasure Map inside the lighthouse, on a hillock, in the central part of the isle (point 3 on the map). Thanks to obtaining the map you will unlock this quest.
Note - before you go searching for the treasure, make sure that you have a Shovel on you. You can either buy it or find it in the game world.
 The location where you dig up the treasure
The treasure is buried in the Eastern part of Tacarigua. You need to reach Deadlands that are occupied by a multitude of strong monsters. Get at the back of the dilapidated tower, in the deadlands (point 3a on the map) and find the red X symbol on the ground. Use the shovel here and, after you dig up the chest, see what's inside. There are, 90 gold pieces and a Pearl , among others.
Rewards for completing the quest:
Way to unlock the quest: Talk to Vasco.
Quest giver: Vasco (point 4 on the map)
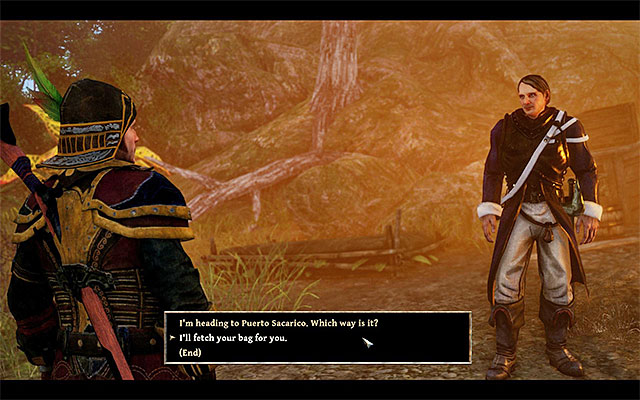 Agree to find Vasco's stuff
Inquisitor Vasco s near the mountainous path in the central part of the map (point 4 on the map). During the conversation with Vasco, you will learn that he is a deserter and asks you to find his belongings. Himself, he does not want to go and get them, because there are strong monsters around there.
Note - Vasco may die, as a result of decisions that you have taken, while completing "Death to the Deserters".
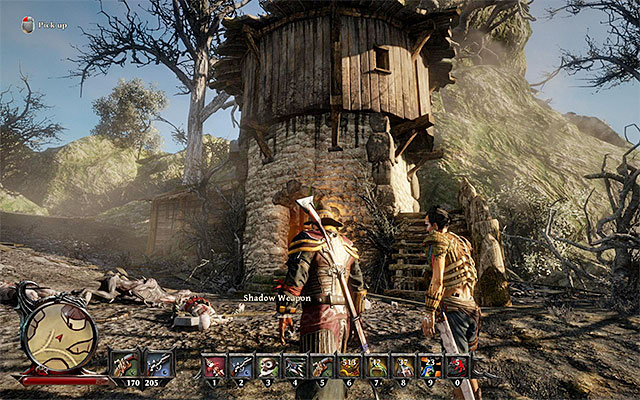 The tower, where there is Vasco's bag
After the conversation, head North-Westwards. Along your path, you need to be prepared to eliminate, among others, several Hellhounds and Minions. Stop after you reach a single building. (point 6 on the map). Enter the building and find Vasco's Bag. You can now return to Vasco with the bag.
Note - In the tower, there is, among others, governor Di Fuego's corpse, which is connected with "Di Fuego's Corpse" quest.
Rewards for completing the quest:
Way to unlock the quest: Talk to Severin.
Quest giver: Severin (point 5 on the map)
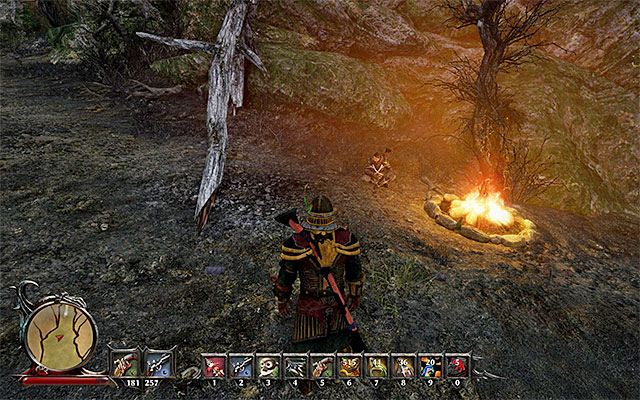 Severin
Inquisitor Severin can be found near the mountainous path in the Northern part of the map (point 5 on the map). During the conversation with Severin, you will learn that he is a deserter. You will offer to help the man eliminate ten shadows (monsters) staying around. Confirm that you are ready to start and follow Severin.
Note - Severin also tells you that there is a crystal portal in the Northern part of the isle. You can see to destroying it later on. To learn more about this, see the chapter entitled Miscellaneous quests, in the walkthrough for the "The Realm of the Shadows" quest.
Note - Severin may die as a result of your decisions taken during "Death to the Deserters".
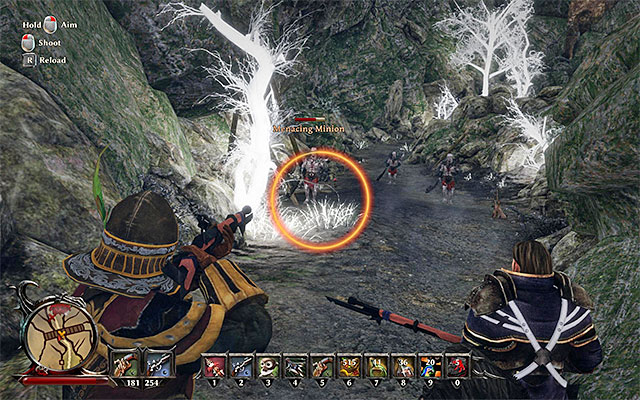 In total, you need to defeat 10 monsters
The main objective of this quest are 10 Menacing Minions. They attempt a fight at short range so, dodge or keep them at a distance. For defeating each one of them, you will be rewarded with 100 glory points. Apart from the minions, you should also watch out for the other monsters, e.g. Hellhounds and for Black Ghouls. It is entirely optional to eliminate them. After you have dealt with all of the minions, talk to Severin again, to conclude this quest.
Rewards for completing the quest:
Way to unlock the quest: Automatically, after you find the corpse.
Quest giver: - (point 6 on the map)
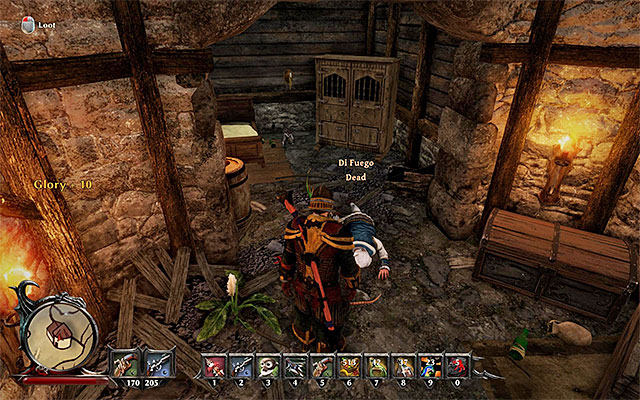 Examine the governor's corpse
You can unlock this quest after you reach a small tower in the central part of the map (point 6 on the map). Enter the building and examine the corpse of the late governor Di Fuego. Thanks to this, you will determine that he was died by the Point of a Sword and your task here is to determine who the murderer is.
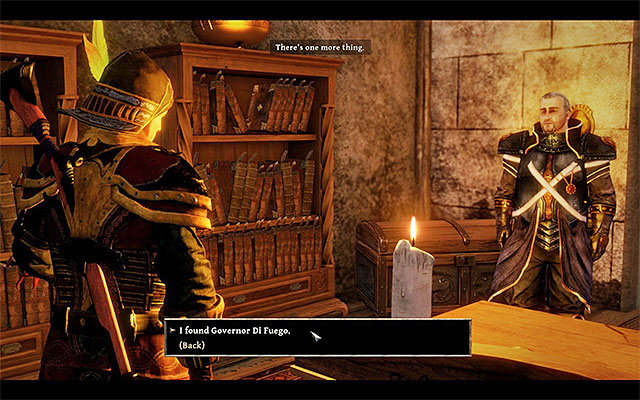 Talk to Sebastiano
I recommend that you, first of all, reach Puerto Sacarico and head towards the governor's estate, which is currently being occupied by commandant Sebastiano (point 10 on the map). You will be able to talk to the commandant only after you have completed the "The Commandant of Tacarigua" side quest. After you have gained access to Sebastiano, talk to him and raise the topic of the murdered governor. The commandant will be reluctant towards admitting his guilt, although you have found out that the Inquisitor sword has been used.
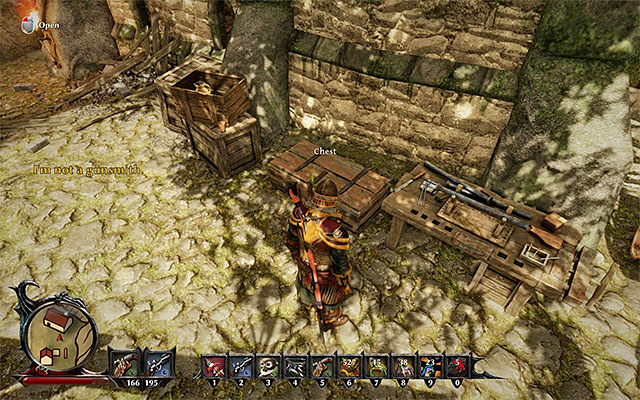 The chest with the broken sword
All in all, you need to perform three actions, which will help you impeach Sebastiano for the governor's death. First of all, explore the area to the East of the commandant's house (point 6b on the map). Find the chest and take the Broken Sword.

Wait for nightfall and go to the governor's house again (point 10 on the map). Use the Sneak skill, by pressing the appropriate key/button. You need to sneak to the upper floor that is occupied by Sebastiano during the day. Find the chest shown in the above screenshot and use a lockpick to open it (fortunately, it is poorly secured). Collect the Sebastiano's Execution Order from the chest.
Note - If you haven't been lockpicking yet, and you do not own a lockpick, you need to buy one. It can be bought, among others, from Jack (the keeper of the lighthouse).
 Question one of the night watch members
The last thing to do is talking to any Nightwatch member. Ask him about the circumstances of the governor's death.
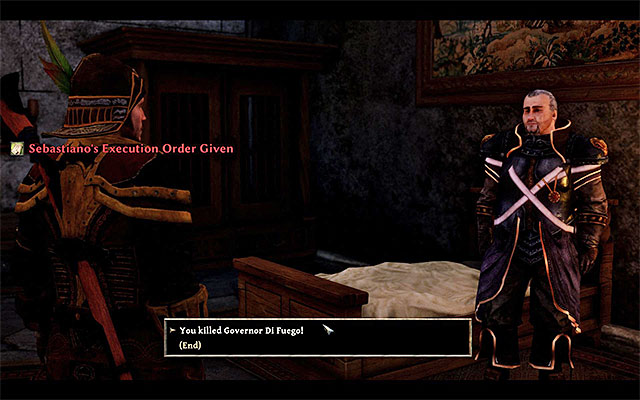 Meet with Sebastiano again
You can now return to the commandant's house (point 10 on the map) and talk to him again. Present Sebastiano with all the evidence that you have gathered (the broken sword, the document and the testimony of a nightwatch member), thanks to which he will admit to having killed the governor. There are two ways in which you can react to this news, i.e. break all of the relationship with Sebastiano (cancels the "Death to the Deserters" side quest -) or simply end the conversation.
Rewards for completing the quest:
Way to unlock the quest: Automatically, after you find the Treasure Map.
Quest giver: - (point 6 on the map)
 The treasure map in the lighthouse
You will find the Treasure Map inside a small tower in the mountains, in the central part of the map (point 6 on the map). Enter the building and rip it off the wall. Thanks to this, you will unlock this quest.
Note - Before you go searching for the treasure, make sure that you have a Shovel on you. You can either buy it or find it in the game world.
Explore the countryside and find the X symbolThe treasure has been buried in the backcountry, to the North-West of this quest's starting point (point 6a on the map). Locate the red X symbol on the ground and use the Shovel to dig up the treasure. Among others, in the chest, there are 80 gold pieces, Sapphire, Ruby and Schematic for a Sapphire.
Rewards for completing the quest:
Way to unlock the quest: Talk to Osorio.
Quest giver: Osorio (point 7 on the map)
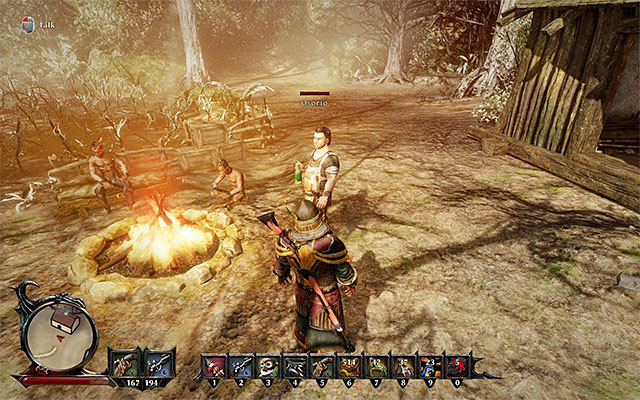 Osorio
Osorio is staying at the farm in the backcountry, in the North-Western part of Tacarigua (point 7 on the map). During the conversation with Osorio you can bring up the topic of his former occupation and his farm, and use the Silver Tongue skill, developed to the level of, at least, 40 points. Thanks to this, you will obtain 2 bottles of Rum. He will also ask you to find a big bird that stole his gold.
Note - Osorio also is a trader.
Go South and, after a while, you will reach Puerto Sacarico. Cross the town and turn South-Eastwards. Along your path, you should be prepared to eliminate several Giant Crabs and Sand-Devils, which you should not have too many problems with. Explore the area thoroughly (point 7a on the map) and climb to the ledges, in the location shown in the above screenshot. Approach the interactive liana and grab on to it.
 Continue climbing until you reach the encampment
Keep climbing so, grab on to ledges and use interactive lianas, in turns. Eventually, you need to reach the ledge high above, where the man named Hawke has his encampment (point 7b on the map). Talk to Hawke and ignore his puzzles. The man confirms that he stole the gold, but he does not want to give it back.
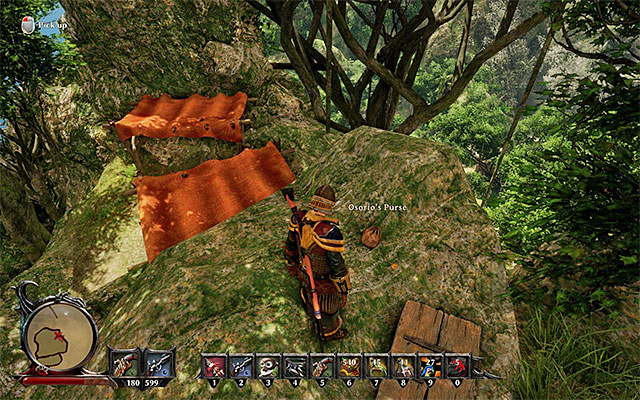 You can climb to reach the ledge above, or turn into the parrot
The treasure is on the topmost ledge neighboring the encampment. You can easily climb over it but, if you do not want to struggle too much, you can also turn into the parrot and fly there. Pick up the Osorio's Purse (100 glory points) and return to Hawke to finish the conversation. If you are good in heart, you can give rum to Hawke and, if you do not shirk from obtaining a negative Soul point, you can use the Intimidate skill, developed to the level of, at least, 40 points. For using the skill, you will receive a Silver Plate from the man and 20 gold pieces.
 Return the purse to Osorio
End the conversation with Hawke, whose finale is quite hilarious. You now need to return to the farm in the Northern part of the map (point 7 on the map) and, if you do not want to use teleportation, remember that you need to be very careful, while jumping down to the ledges below and to grab on to lianas. This quest ends after you return the purse to Osorio.
Rewards for completing the quest:
Way to unlock the quest: Talk to Roquefort.
Quest giver: Roquefort (point 8 on the map)
 You can pick one of several reasons, for which you want to see the commandant
At the attempt to enter the governor of Puerto Sacarico's house (point 8 on the map) you will be stopped by Roquefort. He does not want to let you see commandant Sebastiano, until you provide him with a good reason to. There are several ways, in which to solve this problem:
Rewards for completing the quest:
Way to unlock the quest: Talk to Rodriguez.
Quest giver: Rodriguez (point 9 on the map)
 Rodriguez
You can meet Rodriguez In the central part of Puerto Sacarico (point 9 on the map). During the conversation, you will learn that the Inquisitor lost his trust for commandant Sebastiano, who has not been himself, since his return from the cave with the crystal portal. As a result, Rodriguez asks you to obtain an appropriate document, thanks to which he will be able to leave Tacarigua safely.
Note - Rodriguez is also a trader and a trainer of skills.

To obtain the document that Rodriguez is asking for you need to wait until nightfall. Enter the governor's house in the central part of the town (point 10 on the map) and start sneaking (you need an appropriate skill developed). Sneak to the first floor, i.e. to the room where Sebastiano is staying during the day. Examine the desk in the middle (the above screenshot) and collect the Redeployment Order. You can now leave the building and meet up with Rodriguez.
Note - if you have not been granted an audience with Sebastiano, the building may be guarded by Roquefort, even at night. In such a situation, you should first complete the "The Commandant of Tacarigua" side quest.
Note - If you do not have the Sneak skill you can also try running to the first floor and pilfer the document from the desk quickly.
Rewards for completing the quest:
Way to unlock the quest: Talk to Sebastiano.
Quest giver: Sebastiano (point 10 on the map)
 You can initially confirm that you are going tom murder the deserters
Commandant Sebastiano is staying in the former house of the late governor of Puerto Sacarico (point 10 on the map) and you can gain access to him, thanks to completing the "The Commandant of Tacarigua" side quest. During the conversation, the man will also bring up the topic of deserters and will ask you to track them down, and eliminate them.
Note - The sole fact that this quest is added to your journal does not mean that you need to kill the deserters. You can cancel this quest, later on during the game, or complete it without killing the other characters.
 You can either kill Vasco or let him walk
Deserter Vasco is staying in the central part of the isle (point 4 on the map). After you find him, it is best to start a conversation with him, so as to have a choice. Of course, you can attack Vasco and, in such a situation, you need to start avoiding his strong melee blows (250 glory points). An alternative solution is to spare his life, in exchange for a bribe of 200 gold pieces (250 glory points).
Note - If you are going to kill Vasco, try to complete the quest connected with him - "Vasco's Stuff" - sufficiently early.
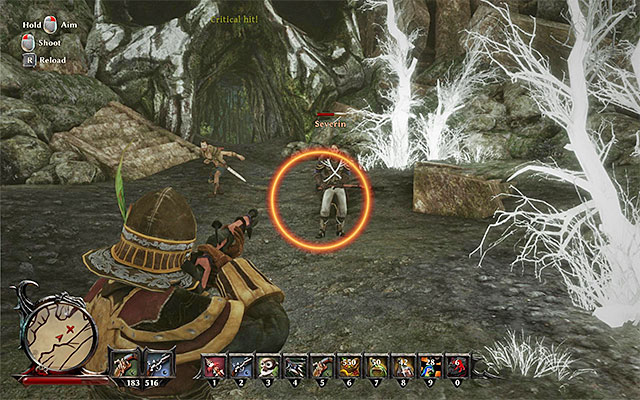 Also, murdering Severin is not compulsory
By default, deserter Severin is staying near the path into the mountains (point 5 on the map) but, if you have already completed another quest connected with him, he may also be at the entrance to the cave with the crystal portal. Also in this case, it is a good idea to talk to him first. If you want to murder Severin you need to avoid his strong ranged attacks , by dodging, by attempting to prevent him from using his arms, with melee attacks (275 glory points). An alternative is to let Severin live and to tell him to stay in hiding (250 glory points).
Note - If you are going to kill Severin, try to complete the quest connected with him - "Menacing Shadows" - sufficiently early.
 Report to the commandant
Regardless of what you did, in relation with the deserters above, you still need to return to commandant Sebastiano and report to him (point 10 on the map). Give him a full report, confirm that you have killed the deserters, or lie to him (the commandant will not realize that he is being lied to).
Rewards for completing the quest:
Way to unlock the quest: Talk to Sebastiano.
Quest giver: Sebastiano (point 10 on the map)
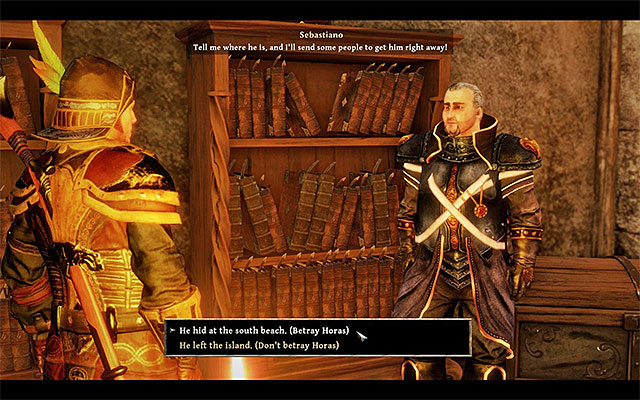 You can either reveal Horas's whereabouts or keep it for yourself
Commandant Sebastiano is staying in the house of the late governor of Puerto Sacarico (point 10 on the map) and you can gain access to him after you have completed the "The Commandant of Tacarigua" side quest. During the conversation, the man will bring up the topic of the theft, for which Horas is responsible. The commandant wants you to help him locate the mage apprentice.
Horas is staying in an encampment to the West of the town (point 10a on the map) and to learn more, see the walkthrough for the "A Follower of Magic" main quest. You can do either of two things here:
Rewards for completing the quest:
Way to unlock the quest: Automatically, after you find the book (Magical Legends) (Taranis isle).
Quest giver: -
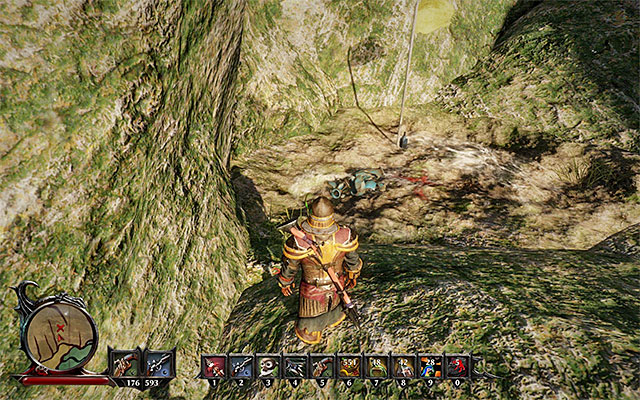 The spot where you dig up the treasure
You can unlock this quest during your stay on Taranis, i.e. after you have unlocked the main mages HQ and explored the first floor. After you reach Tacarigua, examine the rocks next to the beach in the central part of the isle (point 11 on the map). Stop next to the X symbol on the ground and use the Shovel to dig up the treasure. You can open the chest to find a Vial, among others (it is one of the legendary items).
Rewards for completing the quest:
Way to unlock the quest: Talk to Rosco.
Quest giver: Rosco (point 12 on the map)
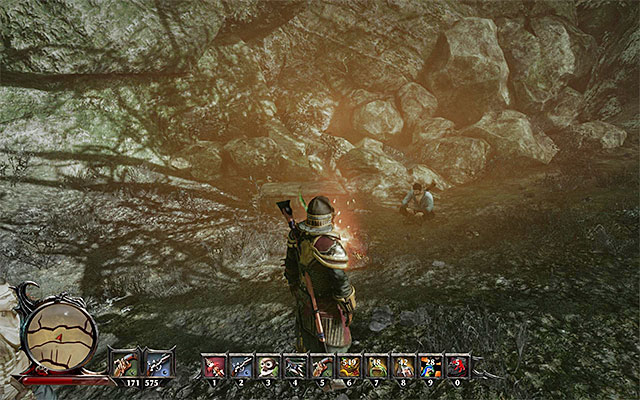 Rosco
RoscoYou can find Rosco next to the fire in the deadlands, in the eastern part of the map (point 12 on the map). You need to be very careful, because this part of the isle is being occupied by much stronger monsters, such as Minions, Skeletons, Golems, Grave Spiders and Hellhounds. Talk to Rosco, who will offer you to search for a big treasure with him. After you confirm your interest in the treasure, follow Rosco and be prepared to eliminate the beasts in your way. Soon, you will reach a different location in the deadlands (point 13 on the map), which automatically unlocks several more side quests, connected with the treasure.
Rewards for completing the quest:
Way to unlock the quest: Talk to Rosco.
Quest giver: Rosco (point 13 on the map)
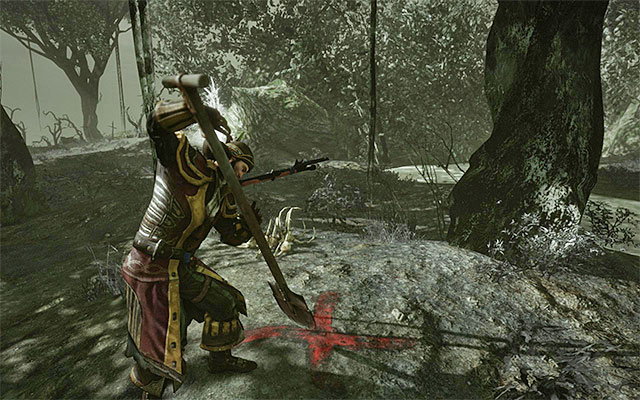 The spot where you dig for the chest
This quest is unlocked right after you complete the "Unfathomable Riches" side quest, i.e. after you have reached the location, where the treasure is buried, with Rosco (point 13 on the map). After you listen to the conversation with Rosco locate the red X symbol on the ground (point 13a on the map). You need to use the Shovel (the one that you have received from the man, or your own) and open it afterwards. Unfortunately, in the chest, there only is a Rusty Fork. Return to Rosco. During the net conversation, the man brings up the matter of the treasure proper and you will receive another quest.
Rewards for completing the quest:
Way to unlock the quest: Talk to Rosco.
Quest giver: Rosco (point 13 on the map)
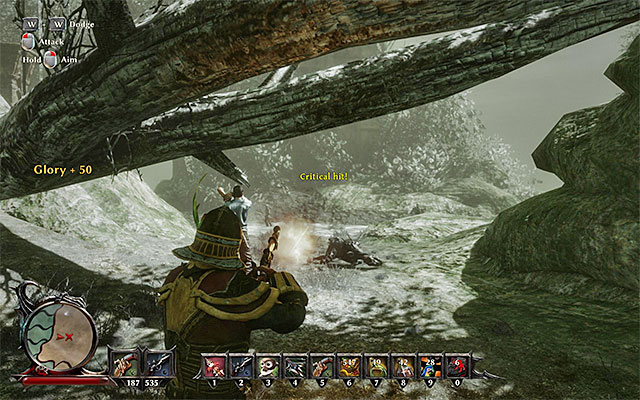 Another X symbol on the ground
This quest becomes available right after you have completed the "A Stately Chest" side quest, i.e. after you have located and examined the first chest mentioned by Rosco. Talk to the man again (point 13 on the map) and he will apologize for the mistake. He will then point you to the proper chest. This time, you need to go alone and go East (point 13b on the map). Just like earlier, after you reach the location with the X symbol on the ground, use the shovel and open the chest that you dig up. Also this time, you will not make much profit, because there is only a Hand Mirror inside. Return to Rosco, listen to the conversation and wait for another side quest to become active.
Note - close to where the treasure has been buried, there is the den of one of the Shadow Lords so, you need to be extremely careful. To learn more about this creature, see the walkthrough for the "The Shadow Lord of Madness" side quest.
Rewards for completing the quest:
Way to unlock the quest: Talk to Rosco.
Quest giver: Rosco (point 13 on the map)
Follow Rosco and eliminate the mobsters in your wayThis quest becomes available after you have completed the "Parting of Ways" side quest, i.e. after you have found, and examined, the second chest that Rosco points you to. Talk to Rosco again (point 13 on the map) and set out to find the treasure, for the last time. Along your path, eliminate all of the monsters that you stumble across and reach an islet in the southern part of the deadlands (point 14 on the map). This quest ends as soon as the ghost of Ramirez appears, which unlocks the last quest connected with finding the great treasure.
Rewards for completing the quest:
Way to unlock the quest: Talk to Ramirez.
Quest giver: Ramirez (point 14 on the map)
 You can choose your reward
This quest becomes available right after you have completed the "Close Enough to Touch" side quest, after you have followed Rosco to the treasure for the last time. This quest is added to your journal after Ramirez appears unexpectedly and sends his son to the afterlife. During the conversation, you will have to answer to the question asked by Ramirez, which will affect what kind of a reward you receive. This is what you can do (the first dialogue option only makes the conversation longer):
Rewards for completing the quest:
Way to unlock the quest: Automatically, after you find the Shadow Lord of Madness.
Quest giver: - (point 15 on the map)
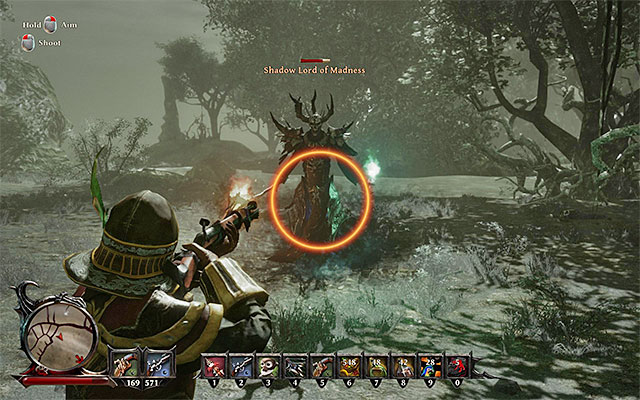 The Shadow Lord
The den of the Shadow Lord of Madness is in the deadlands, in the Eastern part of Tacarigua (point 15 on the map) and, still along your way to the monster, you need to watch out for the strong beasts that are occupying deadlands, including Minions, Skeletons, Golems, Grave Spiders and Hellhounds. After you reach the den of the Shadow Lord of Madness eliminate the Hellhounds that accompany him and, only then, focus on him. Try to remain in constant movement and wait for opportunities to land well-aimed blows in melee. Examine the Shadow Lord's corpse after you win the fight and collect the Raw Black Heart).
Note - You can use the Raw Black Heart to extend your health bar. To learn more about this, see the walkthrough for the "Black Magic Experiments" Crew quest.
Rewards for completing the quest:
Way to unlock the quest: Automatically, after you find the book (Pirate Stories).
Quest giver: - (point 16 on the map)
 Read the book
While exploring deadlands in the Eastern part of the map, you can reach a location with several tombs in it (point 16 on the map). Find a book (Pirate Stories). After you read it, you will gain access to a side quest connected with a treasure.
Note - The treasure is on Antigua so, see the chapter with side quests in this location.
Unlocking the quest: Talk to Hirutu (Kila island)
The quest giver: Hirutu
Note - This quest becomes available after you join the Natives!
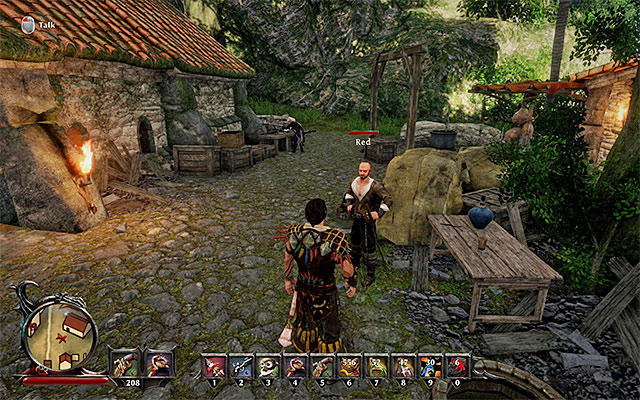 You can find Red in Puerto Sacarico
You may have unlocked this quest during your stay on Kila island, specifically after meeting with Hirutu the chief. In one stage of the quest you have to visit Tacarigua, however, you should do that only after meeting Red on Kila. The quest's objective is to catch Red, who used voodoo magic against the Nameless Hero and now wants to share its secrets with the Inquisition. Red can be found in a town Puerto Sacarico, located in the west of Tacarigua (point 8 on the map). The man will confess to the deed only after a long conversation. From this meeting you will also learn that it is Roquefort who has to drink the Potion of Oblivion, and to do that it is necessary to use voodoo magic.
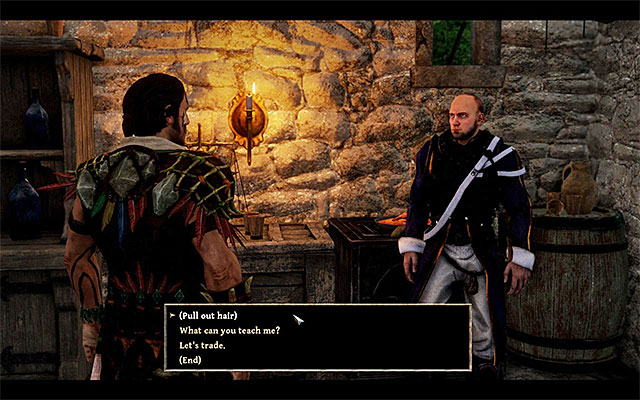 Get Jose's hair
However, you do not need to meet with Roquefort right now - it would bring you nothing anyway. Instead, enter one of the nearby houses and start a conversation with Jose (point 9 on the map). During the conversation with Jose select the option Pull out hair so to obtain A Strand of Hair. You can now conclude the meeting.
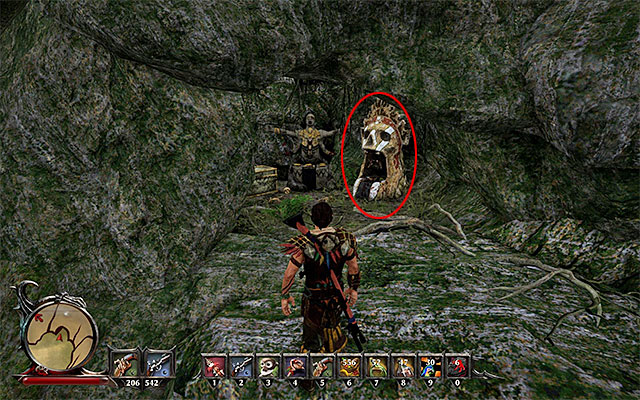
The next step is poorly explained in the Nameless Hero's journal. You have to craft a voodoo doll. Before you do anything, double check if your hero has Craft Spells proficiency from Magic category, because without it you cannot do a thing. If you do not have this skill, visit a trainer (e.g. Tenya on Kila island) and pay for the training (2,000 gold).
If you do have Craft Spells proficiency, you can now start looking for an Ancestral Stone, which is a sort of a workshop for crafting voodoo spells. An Ancestral Stone is in a small cave in the north-east from Puerto Sacarico (point 7 on the map), as depicted in the picture above. Of course you do not have to use that particular Ancestral Stone, as it may be any one, e.g. the one on Kila island, near Tenya.
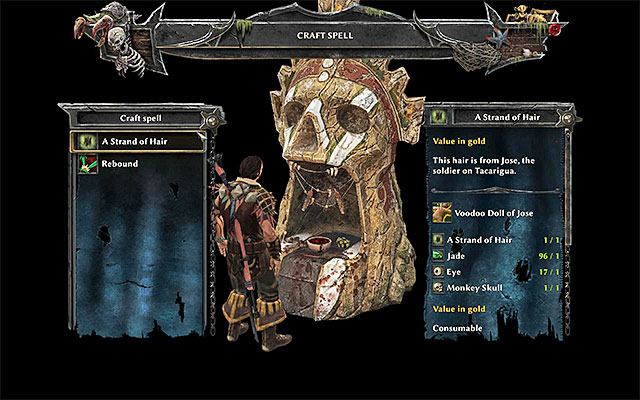
Interact with the Ancestral Stone, and from the list choose A Strand of Hair, which you have recently acquired. In order to prepare a Voodoo Doll of Jose, you have to possess four ingredients:
If you possess all the required ingredients, confirm that you want to create a voodoo doll. Select it right in your inventory (Magic tab) and drag to the quick access bar.
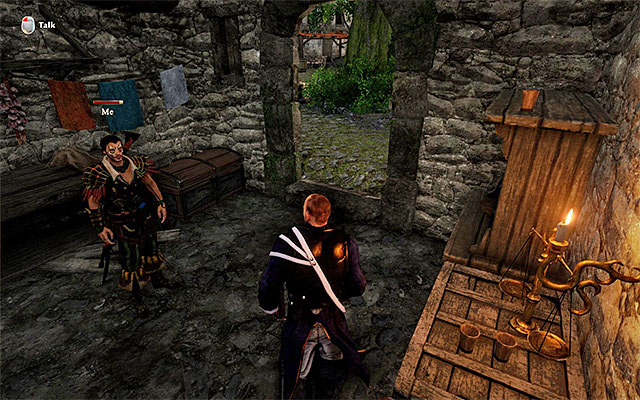 Take control over Jose
Go back to the building where Jose is (point 9 on the map) and activate the previously prepared voodoo doll (select the right item from the quick access bar). Performing this action will give you control over the cook.
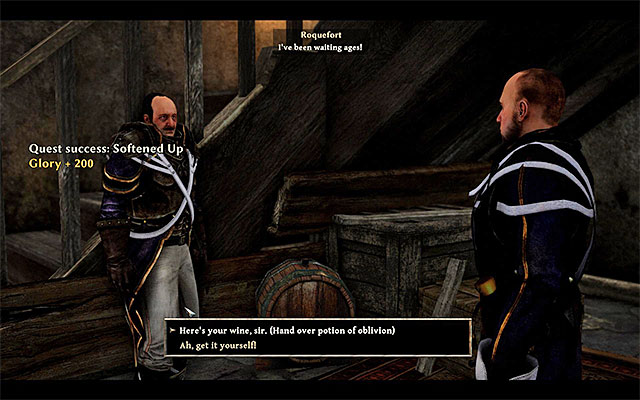 Give Roquefort the potion
Playing as Jose you can now go to the building on the west-side of the compound (point 8 on the map), the residence of Sebastiano. Here, look for Roquefort and start a conversation with him in order to give him the Potion of Oblivion you received from Tenya (700 Glory Points). This action will make Roquefort lose his knowledge of voodoo magic that he learned from Red. Go back to the place where you "left" the Nameless Hero, and retake control over him.
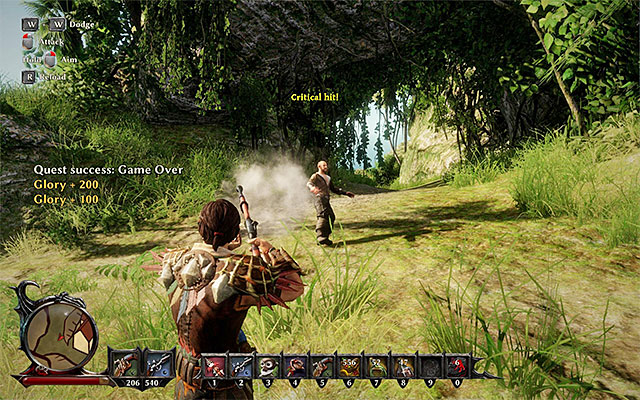 You can either let Red go or kill him
Your visit to Tacarigua ends with the decision what to do with Red (point 8 on the map). During your meeting with Red you can either let the pirate go (adds soul points) or kill him (removes soul points). If you chose the first option (200 Glory Points), you can use Intimidate skill, provided it has at least 20 points ascribed to it, to get rum. Choosing the violent solution will not result in combat immediately, because first you go away from the town in order not to alarm the Inquisition. Jose is a rather weak opponent, still you should avoid his melee attacks (300 Glory Points).
Note - If you defeat Jose in combat, examine his corpse - he has a valuable voodoo magic spell schematic.
Note - If you have not yet completed the remaining stages of this quest, you have to visit Antigua and Taranis islands. Otherwise, you may return to Kila, to have the concluding conversation with Tenya.
The map which you can find above contains references to every location you can visit when you are on the Antigua Island and when you try to complete main quests. The red points represent locations where you can unlock main quests and the green points represent areas you will visit while completing these quests.
Notice! I recommend viewing the map related to side quests from Antigua Island as well, since many of main quests and side quests will entwine.
How to unlock this quest: Speak to Bones (any time you want).
Quest Giver: Bones
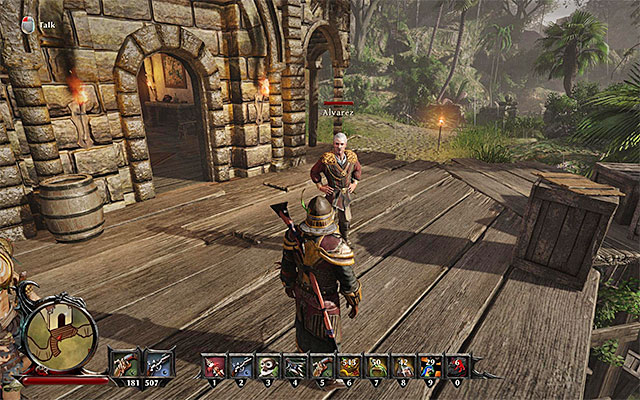 Alvarez
You can unlock this quest during any conversation with Bones, even during your visit on Crab Coast. According to the information that you will get from Bones the admiral Alvarez expects a report from your expedition. You may focus on this quest after you will arrive to the Antigua Island. At first you need to reach the port town. Go to the building toward north (map location 1) in front of which you can find Alvarez. When you will get closer to him he will initiate the conversation. The Nameless Hero will report to him and unlock the new main quest which requires defeating monsters living in the town.
Rewards for completing this quest:
How to unlock this quest: Speak to Alvarez.
Quest Giver: Alvarez (map location 1)
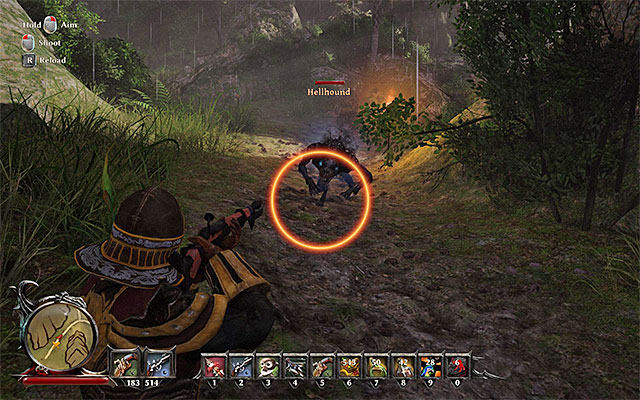 You could kill few monsters when you were headed towards the town for the first time
You can unlock this quest during your meeting with the admiral Alvarez (map location 1) after you will complete the main quest named "Report for Admiral Alvarez". During your conversation your hero will be asked by Alvarez to defeat some demonic monsters that are living in the port town. Basically you need to eliminate few groups of Hellhounds. You could defeat two of these groups while you were traveling to the town for the first time. They were guarding the path near the beach (map location 1a) and on the town's main square (where was the murdered gunsmith called Donovan) (map location 1b). For killing one Hellhound you will receive 50 Glory Points and for eliminating every monster from a group you will receive additional 100 Glory Points.
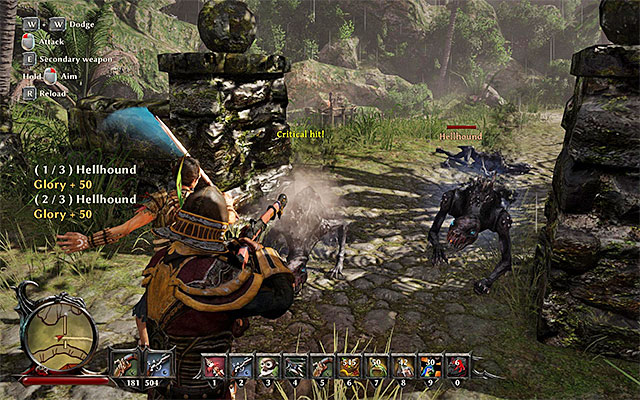 Travel towards east from the Alvarez's mansion
Another group of Hellhounds surrounds the Blood Oath Square which can be found east of the place where you meet Alvarez (map location 1c). In this area you need to eliminate three monsters.
Notice! When you will win this battle it is beneficial to find Zac east of this location and to tell him that this area is safe now. You will be rewarded with 100 gold pieces.
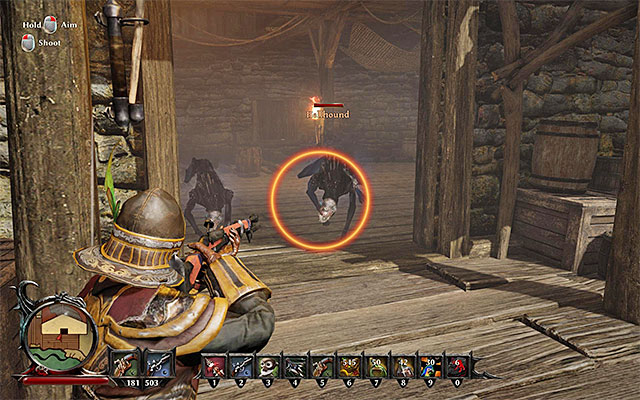 Hounds in the south warehouse
You can find the next group of Hellhounds inside the warehouse in the south part of the town (map location 1d). You have to eliminate only two monsters here.
Notice! After you will eliminate these monsters you may want to release Flynn which is imprisoned in the warehouse. This character is related to a side quest and you can also trade with him.
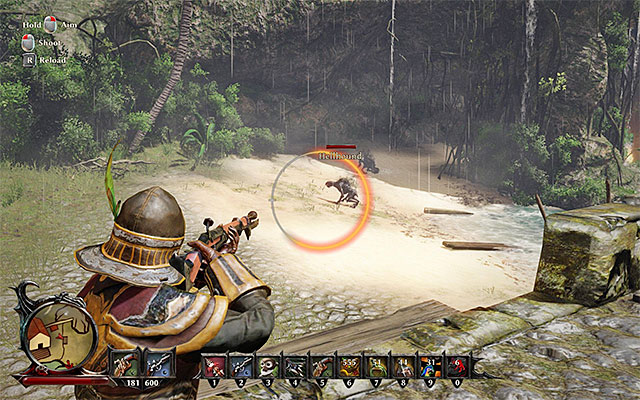 Monsters are on a small beach
The last group of Hellhounds can be found on a small beach located toward east of the port town (map location 1e). You have to defeat two monsters here.
After you will eliminate every Hellhound you should return to Alvarez and report him about the entire situation. For defeating every group of Hellhounds you will receive 100 gold pieces and 200 Glory Points, so you will collect 500 gold pieces and 1000 Glory Points in total. Additionally you will receive bonus reward after you will finish the entire quest.
Notice! If you did not meet members of the game's main organizations it is a good idea to focus on this right now. Only this way you may come closer to completing the new main quest named "Pirate Alliance" unlocked by Alvarez.
Rewards for completing this quest:
How to unlock: Talk to Alvarez.
Quest giver: Alvarez (number 1 on the map).
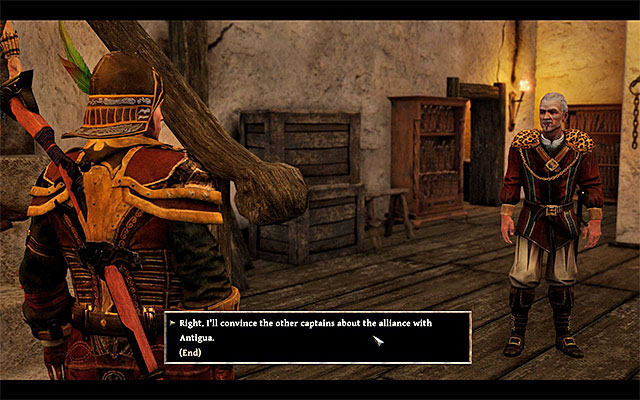 You have to start visiting the main factions in the game
This task starts after completing the "Chaos in Harbour Town" quest, which means eliminating all the monsters in the port for Alvarez (number 1 on the map).
Your character will learn from the Admiral about the necessity to obtain new allies and their ships, so you can face the pirate ghost ships, commanded by Crow, together. What you need to do is take command of the ships belonging to five different factions, which means:
 The Demon Hunters' vessel
1) Demon Hunters - the HQ of the Demon hunters is the Citadel in Calador Bay. If you decide to join that faction, you will be able to take control of the ship of that faction, as early as in the second chapter of the storyline. If you have joined any of the remaining factions (the Natives, or the Crystal Mages), you will have to wait until the third chapter, and meet up with the captain of the Demon Hunters' ship, to take command, only then.
 The Natives' vessel
2) The Natives) - The Natives' HQ is the island in the jungle on Kila. If you decide to join that faction, you will be able to take control of the ship of that faction, as early as in the second chapter of the storyline. If you have joined any of the remaining factions (demon Hunters, or the Crystal Mages), you will have to wait until the third chapter, and meet up with the captain of the Natives' ship, to take command, only then.
 The Crystal Mages' vessel
3) The Crystal Mages - The Crystal Mages' HQ is the encampment on the Taranis isle. If you decide to join that faction, you will be able to take control of the ship of that faction, as early as in the second chapter of the storyline. If you have joined any of the remaining factions (Demon Hunters, or the Natives), you will have to wait until the third chapter, and meet up with the captain of the Crystal Mages' ship, to take command, only then.
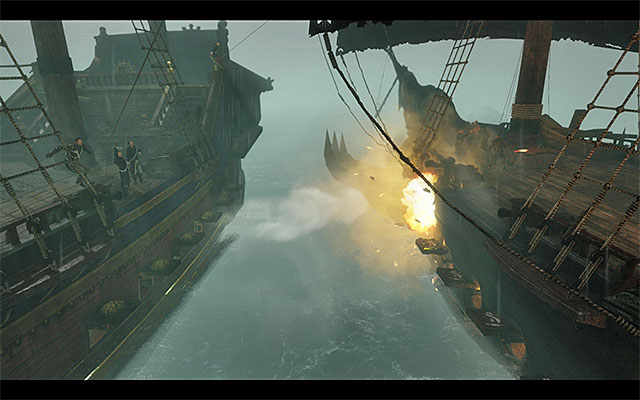 You can obtain the Inquisition's vessel by winning a naval battle
4) The Inquisition - The Inquisition's HQ is located in the Tacarigua isle and it is being led by commandant Sebastiano. You will not be allowed to include the vessel of that faction, into your fleet, straight away. The only way to do that is to defeat Sebastiano in a naval battle. This has been described in the walkthrough for the "Sea Battle Against Sebastiano" quest, in the chapter entitled Other Quests.
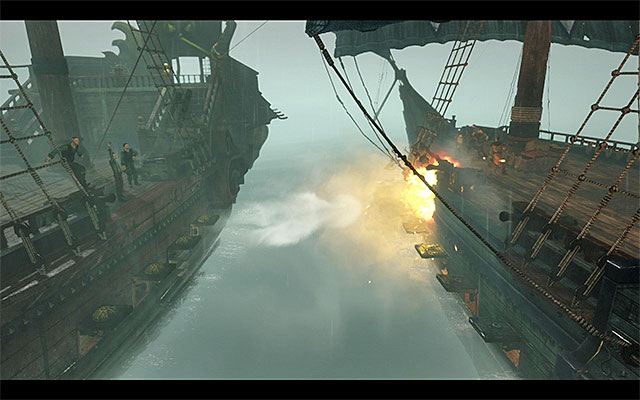 the vessel of the renegade pirates can be won in a naval battle
5) The Renegade Pirates - The renegade Pirates are led by Morgan. The only way to obtain the vessel of the renegade pirates is to defeat them in a naval battle. This has been described in the walkthrough for the "Sea Battle Against Morgan" quest in the chapter concerned with miscellaneous quests.
Note- You can find the descriptions of the activities, connected with the vessels of the Demon Hunters, the Natives and Crystal Mages, in the chapters with the main quests in the Calador Bay, the Kila isle and Taranis. As for the Inquisition and renegade pirates, you need to see the chapter entitled "Other Quests" and read the walkthroughs for naval battles against Sebastiano and Morgan.
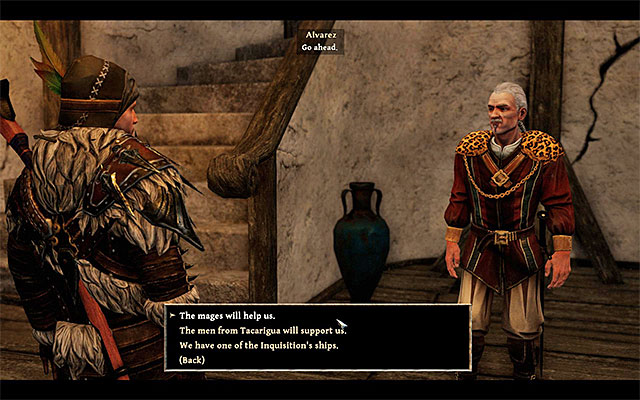 Meet up with Alvarez after you have obtained all of the vessels
After you have obtained all five of the abovementioned ships, you can return to Antigua and meet up with Alvarez again (point 1 on the map). Report to him about the successful quest, which will earn you 200 Glory Points and 500 Gold Pieces For each vessel that you seized. Since you already have the full fleet under your command, you can take interest in the "Sea Battle Against Crow" quest that has been described in the chapter entitled "Other Quests" (of course, only if you have already managed to unlock it).
Rewards for completing the quest:
The map which you can find above contains references to every location you can visit when you are on Antigua Island and you try to complete side quests. The red points represent locations where you can unlock main quests while the green points represent areas you will visit during completing these quests.
Notice! I recommend viewing the map related to main quests from Antigua Island as well since many of main quests and side quests will entwine.
How to unlock this quest: Speak to Ramon.
Quest Giver: Ramon (map location 1)
 You will find Ramon when you will be on your way to the town
This quest will be probably the first one that you will complete after you will come to Antigua Island because you will meet Ramon on your way to the port town (map location 1). Speak with him and offer him a joint expedition to the town, since there are many monsters in this area. When you will confirm that you are ready to go you will start you journey towards east.
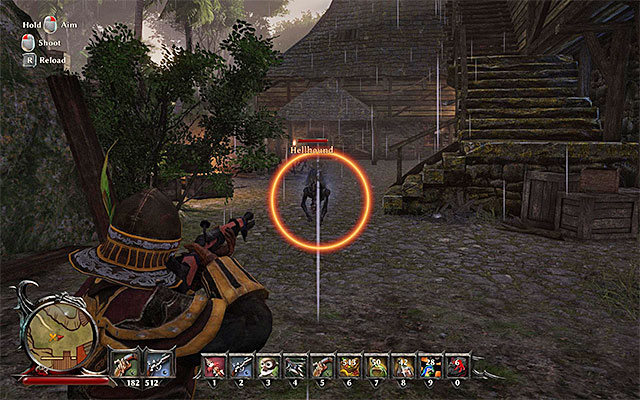 Kill every monster in this area
You destination is the main town square in the west part of the town (map location 2). You have to eliminate a group of Hellhounds. Since they are rather weak you shouldn't have any problem with this challenge. After you will secure this area you should speak to Ramon and finish this quest. If you will use every available dialogue option you will also unlock two new side quests.
Notice! From now on you can trade with Ramon and learn from him new abilities.
Rewards for completing this quest:
How to unlock this quest: Speak to Ramon.
Quest Giver: Ramon (map location 2)
 The wanted demon hunter is named Edward
Your chance to unlock this quest will appear right after you will complete the side quest named "Bring Ramon Into the Harbour Town", so right after you will take Ramon to the town. Find the guard near the warehouse in the port town (map location 2) and speak to him. During your conversation you will find out that in the town stays a demon hunter. Head to the local tavern (map location 4). The wanted man is named Edward and depending on the time of a day you will find him in front of the tavern or inside it. You need to speak with Edward to complete this quest and to unlock another one.
Rewards for completing this quest:
How to unlock this quest: Speak to Ramon.
Quest Giver: Ramon (map location 2)
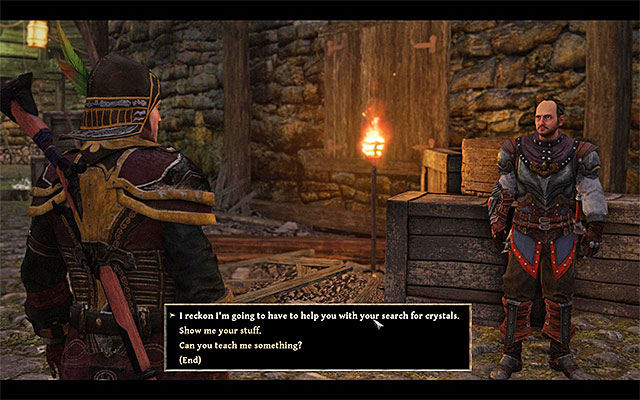 Offer your help with Ramon's search for Crystals
Your chance to unlock this quest will appear right after you will complete the side quest named "Bring Ramon Into the Harbour Town", so after you will take Ramon to the town. Find the guard near the warehouse in the port town (map location 2) and speak to him. During your conversation you will find out that he desires to find three Crystals which are hidden somewhere on Antigua Island. You can offer your help with locating them.
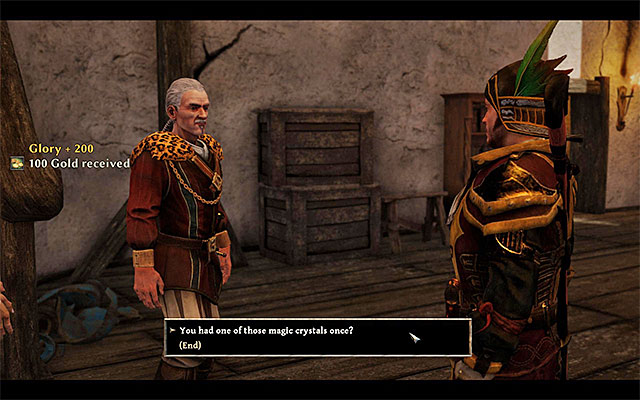 The Crystal from Alvarez
First of all you should go towards a big building in the north part of the port town (map location 2a). In this place you have to contact with the admiral Alvarez (it is also a part of the main quest named "Report for Admiral Alvarez"). During your conversation with the admiral you should ask him to give the Nameless Hero the admiral's Crystal. Luckily it will not cause additional problems.
 Dead Butch
The second Crystal you will find on the Blood Oath Square which is toward east of the place where you met Alvarez (map location 2b). You have to be careful since you can find in this place three Hellhounds. After you will eliminate all of them you should look over this area for the Butch's body. Loot the corpse and you will find few items including the Crystal.
 Explore the second floor of the warehouse and plunder the Flynn's chest
To find the third (and also the last) crystal you need to go the warehouse located in the southeast part of the town (map location 3). Choose the stairs leading towards the building's damaged second floor. You will find there the Flynn's Chest and you can take from it the last Crystal (you will also receive 100 Glory Points). You can return now to Ramon (map location 2) and deliver him all your Crystals.
Rewards for completing this quest:
How to unlock this quest: Speak to Flynn.
Quest Giver: Flynn (map location 3)
 Kill every monster and release Flynn
This quest focuses on saving Flynn which is imprisoned in the warehouse located in the south part of the town (map location 3). After you will get there it is possible that you will have to eliminate two Hellhounds however they shouldn't be much of a challenge for you. After you will secure this area you should come close to Flynn and press your Action Key to release him.
Notice! Flynn is a merchant.
Notice! You can speak with Flynn after you will rescue him. If you have you Silver Tongue ability at least on level 50 you can use it to receive the Small Box.
Rewards for completing this quest:
How to unlock this quest: Speak to Quinn (on Kila Island).
Quest Giver: Quinn
 You can take the sword's blade or listen to Flynn's plan
You could unlock this quest on Kila Island after your meeting with Quinn from the pirates' beach. He asked the Nameless Hero to find Flynn and to take away from him his family's inheritance. You can find Flynn in the warehouse in the port town (map location 3). You can find more details about how to find him and how to rescue him in the description of the side quest named "Storage". During your conversation with Flynn mention the Quinn's request. Flynn will reveal to you that bringing to Quinn their family's souvenir will not be beneficial to you since it is a part of a very valuable sword. You may now choose between two ways:
Notice! Choosing the quest related to the sword doesn't really matter since both options will lead you to the opportunity of taking the sword for yourself.
How to unlock this quest: Speak to Flynn.
Quest Giver: Flynn (map location 3)
 You can agree to deliver the sword's hilt to Flynn
This quest is related to the side quest named "Shattered Inheritance" which means taking away from Flynn (map location 3) his family's souvenir and bringing it to Quinn. During your conversation with Flynn you will find out that he has one of two parts of precious sword - it's Blade. Flynn will ask the Nameless Hero to consider another way of solving this family business. His plan includes traveling back to Kila Island, taking the hilt from Quinn and bringing it back to Flynn. This quest will be unlocked only if you will agree to his offer.
Notice! Choosing the quest related to the sword doesn't really matter since both options will lead you to the opportunity of taking the sword for yourself.
Notice! If you agreed to help Flynn then you have to travel to Kila Island. Read the chapter which includes the description of side quests related to this location.
 Once again meet Flynn and finish collecting the sword's pieces
After you will take the hilt from Quinn on the Kila Island you should return to the Antigua Island and meet with Flynn once again (map location 3). Tell him that the hilt is in your possession and you will receive the Blade: Wound Tearer as well.
Rewards for completing this quest:
How to unlock this quest: Speak to Wilson (on Taranis Island).
Quest Giver: Wilson
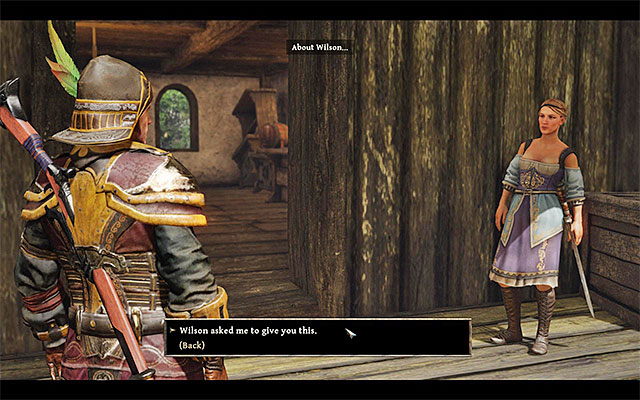 Deliver the ring to Grace
You could unlock this quest during your visit on Taranis Island during a conversation with Wilson in the Citadel of the Demon Hunters. This blacksmith asked the Nameless Hero to deliver the engagement ring (the same as in the quest's name) to the lady of his heart. Her name is Grace and you can find her in the central part of the port town (map location 4). After you will speak to her you may give her the Wilson's Engagement Ring (you will receive 200 Glory Points). She will thank you and ask you to deliver to Wilson her note (Grace's Message). It will unlock the new side quest.
Notice! If you didn't unlock this quest earlier and you will speak to Grace first she will ask your hero to speak with Wilson and the quest will take you more time.
How to unlock this quest: Speak to Grace.
Quest Giver: Grace (map location 4)
 Agree to deliver a message for Wilson
You can unlock this quest when you will complete the side quest named "The Engagement Ring", so it requires you to bring to Grace (map location 4) the engagement ring. The lady will accept your gift and she will ask your hero to deliver her note (Grace's Message) to Wilson.
Notice! You can find the description of the next part of this quest in the chapter focused on the side quests related to the Kila Island.
How to unlock this quest: Speak to Edward.
Quest Giver: Edward (map location 5)
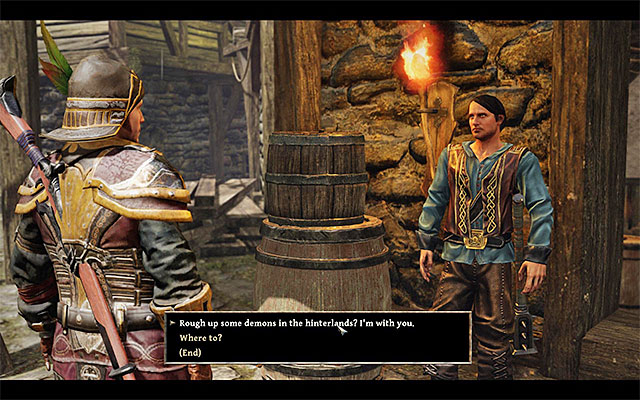 Confirm that you are ready to begin your journey
You can find the demon hunter named Edward inside the tavern (or just in front of the tavern) in the port (map location 5). The best idea is to meet this character while you will be completing the side quest named "Find the Demon Hunter on Antigua" that you can take from Ramon, however it is not essential. During the conversation you may say that you would like to join Edward on his quest to the backcountry where he plans to defeat few demonic creatures.
 You have to kill five demonic beasts in total
Follow Edward towards north. You need to eliminate five Demonic Warriors. You will find them all near the main path (map location 5a). These monsters are not especially difficult to defeat, however it will be easier to face them if you will focus on fighting with one monster at a time and if you will try to avoid their attacks as much as it's possible. You also should be ready to deal with few Hellhounds that may appear during the fight. After you will destroy every Demonic Warrior in this location you should speak to Edward which you can now recruit to your team. You will find more information about this topic in the description of a crew test "Sign Edward On".
Rewards for completing this quest:
How to unlock this quest: Speak to Spencer.
Quest Giver: Spencer (map location 6)
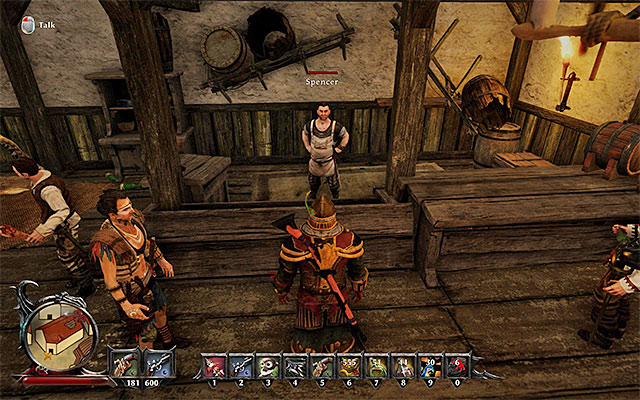 Spencer is a bartender from a local tavern
Spencer is a bartender in a tavern located in the port town (map location 6). During your conversation with Spencer your hero will be asked to check if Emma is all right. Nobody saw her since monsters have appeared.
Notice! Spencer is also a merchant.
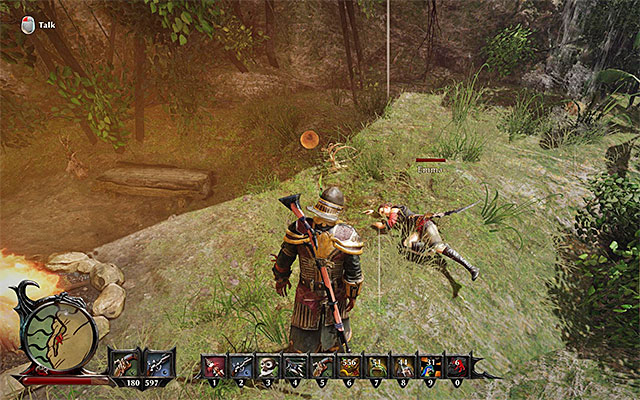 You will find Emma on the east beach
Exit the port town and head towards the southeast direction. If you did not complete yet the main quest "Chaos in Harbour Town" then you have to be prepared to eliminate two Hellhounds nearby. You will find Emma in the small camp (map location 7). Speaking to this character will finish this quest and you will unlock another one.
Rewards for completing this quest:
How to unlock this quest: Speak to Emma.
Quest Giver: Emma (map location 7)
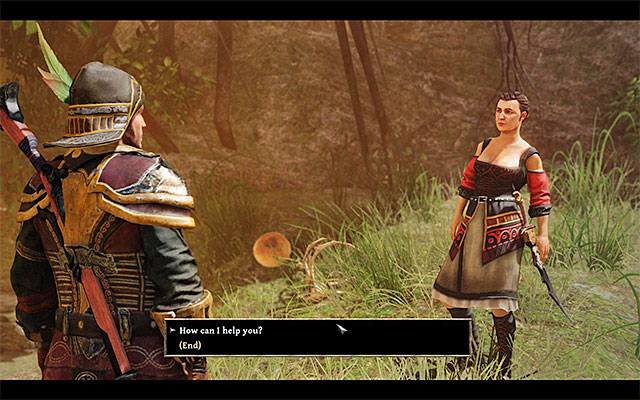 You have to find ingredients that are necessary to make a medicine
You can unlock this quest after you will get to the camp located near the east beach where you can speak with Emma (map location 7). It will be the best idea to do that while completing the side quest called "Lost at the Eastern Beach", however it is not necessary. During your conversation with Emma she will tell you about the possibility of making the voodoo medicine necessary to cure her from her illness, however she needs you to deliver her few important ingredients to do so.
 An exemplary mushroom
Stay in the area where you have found Emma and start to explore the beach (map location 7a). In this part of the island you need to find and gather seven Rotten Mushrooms (you will receive 100 Glory Points).
 You will find bones that you need on the graveyard
Now you have to get to the cemetery located toward west from the port town (map locations 7b). In this location you need to find and gather five Mouldy Bones (you will receive 100 Glory Points).
 Meet Emma one more time
Since you probably have all the necessary ingredients already you can meet Emma again. She should already move to her hut (map location 7c). Give her every ingredient you have found and finish your quest this way.
Notice! From this moment you can trade with Emma and learn from her new abilities.
Rewards for completing this quest:
How to unlock this quest: It will unlock automatically after you will find the Treasure Map.
Quest Giver: none (map location 8)
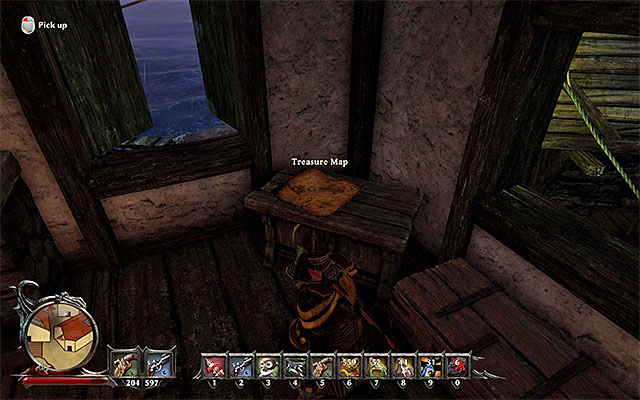 The map is on the second floor of the tavern
Go to the town port and during the night sneak to the second floor of the tavern (map location 8). You have to use the Sneak ability otherwise you may be spotted by Pirates from this area and they will probably attack you instantly. Find the Treasure Map which you need to take. Once you will receive the map you will unlock this quest.
Notice! Before you will start your treasure hunting adventure you should be sure that you have the Shovel in your inventory. You can buy this item or find it in your travels.
 The X mark is well hidden
Exit the tavern and head to the northwest. The treasure is buried between the Alvarez's building and the local graveyard (map location 8a). Find the red X mark painted on the ground and use your Shovel to dig out the treasure. Now you can open the chest and draw from it few items such as 50 gold pieces and the Iron Ore.
Rewards for completing this quest:
How to unlock this quest: Speak to Lumbrok (on Taranis Island).
Quest Giver: Lumbrok
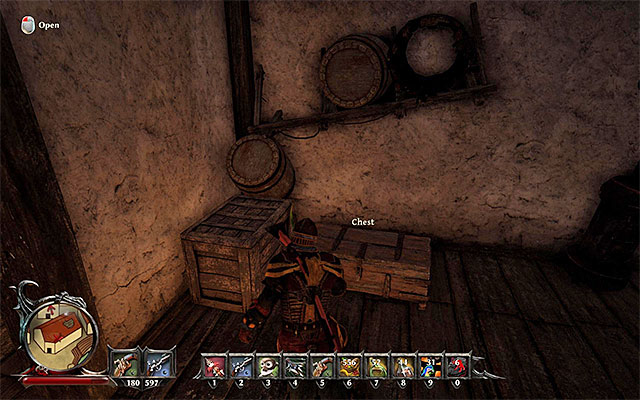 Sneak into the second floor of the tavern and find the chest containing the delicacy you are looking for
You could unlock this quest during your visit on Taranis Island after you met Lumbrok in the local mages' camp. The Nameless Hero was asked to locate few rare delicacies including Dainty Mussels. If you want to get them you need to go to the Antigua Island. In the port town you need to sneak to the second floor of the tavern (map location 8). Remember to use your Sneak ability otherwise you may be spotted by Pirates from this area and they will probably attack you instantly. Find the chest containing Dainty Mussels and take them with you (you will receive 100 Glory Points).
How to unlock this quest: Speak to Griffith.
Quest Giver: Griffith (map location 9)
 Griffith's camp
You can find Griffith in the small camp located toward the southeast direction of the port town (map location 9). During your conversation with Griffith he will tell you that he was banished from the town and he will ask you to help him get some of his stuff which he left behind.
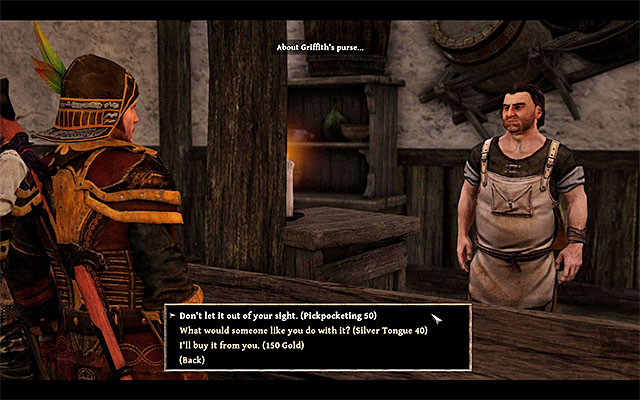 You can buy the purse or get it some other way
At first I recommend to get to the tavern located in the port town (map location 6). After you will get there you need to speak with the bartender named Spencer and ask him about the Pirate's Purse which belongs to Griffith. You may now receive this item in one of three ways:
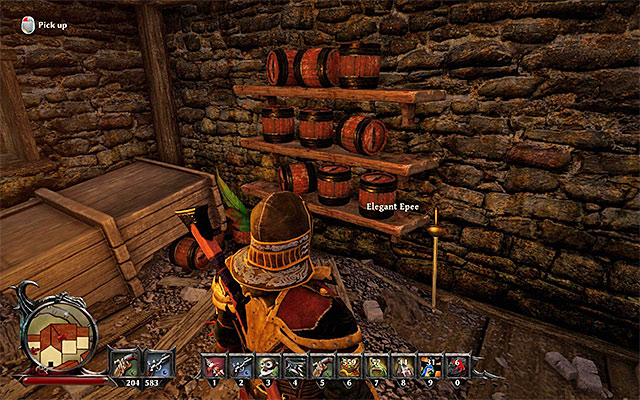 Explore the storeroom in the building in the port
The second item belonging to Griffith is a sword named Elegant Epee. This item is hidden in the storeroom in the building which you can find in the port town (map location 9a). You can get inside this building by using the door located near the main square. The storeroom is not protected so you can take the sword without any problems.
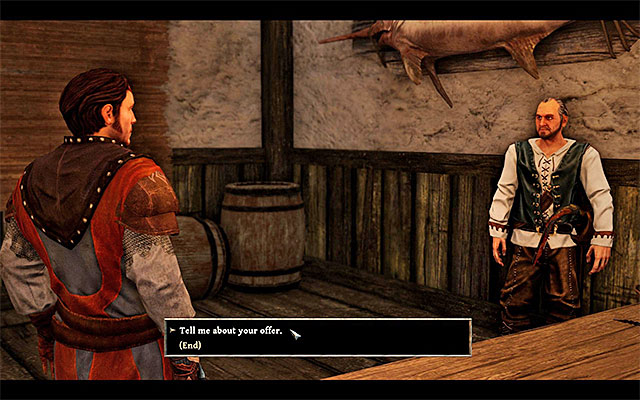
The last item you are looking for is the Heavy Package and it is definitely the most difficult one to find. You need to get to the warehouse located in the port town (map location 3). The Heavy Package is not on the ground floor nor on the highest floor which you can get by the stairs. You have to get to the seemingly inaccessible middle floor instead and to do so you need to use the scroll of Parrot Flight. You can cast this spell in two places:
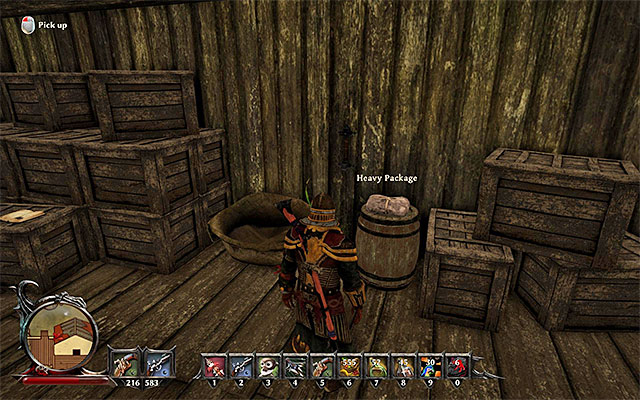 The Heavy Package
Apart of which way did you choose you should be able to get to the middle floor of the warehouse. Explore this floor to locate the Heavy Package (you will receive 100 Glory Points). Now you can go back to Edward and deliver him items he was looking for. You can be rewarded in a few ways. The most beneficial one is to let Edward to keep all of his items which will result in two bonus Souls. If you prefer to get your reward you will get really nothing special instead of Souls.
Notice! During your last meeting with Edward you can provoke him to start a fight with you if you will push him to give you a better reward. If you will beat him you will receive 300 Glory Points and you will lose few Souls as well, nevertheless you will not receive any new item from that.
Rewards for completing this quest:
How to unlock this quest: It will unlock automatically after you will find the Pirate Stories (on Tacarigua Island).
Quest Giver: none
 The place with the hidden treasure
You could unlock this quest during your visit on Tacarigua Island after you have found the book titled the Pirate Stories where you can read about the location of the hidden treasure. The treasure is buried in the desolation on the north part of Antigua Island (map location 10) and during your travel there you will have to defeat a lot of strong enemies. After you will get to your destination you need to find the red X mark painted on the ground and to use Shovel on it. Now you can look inside the chest containing inter alia 150 gold pieces and the damaged armor named Damaged Cuirass which is one of the legendary items.
Rewards for completing this quest:
How to unlock: Talk to Ilvar (Taranis).
Quest giver: Ilvar
Attention - this quest is available only after joining the Guardians!
Find Mac in the tavernThis quest can be started during your stay on Taranis, namely after meeting Ilvar in the mage quarters. Ilvar tells you about 3 Prisms and one of them can be found on Antigua. After reaching the island, head to the tavern located in the port (number 6 on the map). Find Mac and talk to him. You will temporarily receive a Prism with the Vision of Magic skill. You can act in three ways.
 One of the items - you can use the enhanced astral vision, but it is not necessary
No matter what variant you choose, Mac will ask you to use the Vision of Magic to find some magic items hidden in the port. They are: a Hammer from the tavern (number 6 on the map), a Tankard from a house in the south-eastern part (number 9a on the map), a Fork from a building in the north (number 6a on the map) and a Broom from a warehouse in the west (number 3 on the map) (it is located on the middle floor of the warehouse; use the stairs inside the building). Return to Mac with all the items and you will receive 200 glory points and 200 gold.
Attention - you can now return to Taranis and finish the quest.
Unlocking the quest: Talk to Hirutu (Kila island)
The quest giver: Hirutu
Note - This quest becomes available after you join the Natives!
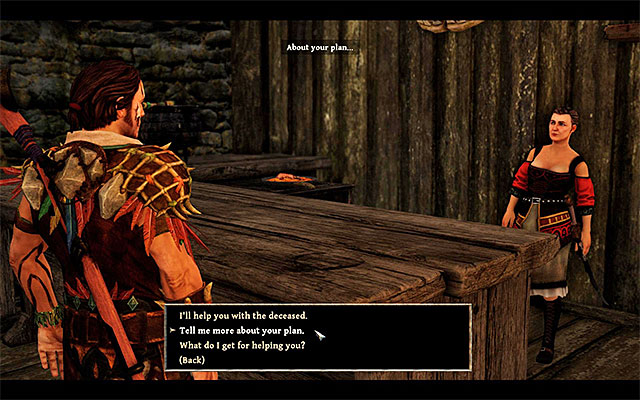 Emma may be on the beach or in the port town
You may have unlocked this quest during your stay on Kila island, specifically after meeting with Hirutu the chief. In one stage of the quest you have to visit Antigua island to find another person who knows voodoo magic. The character you are looking for is Emma. Originally, she stays on the eastern beach (point 7 on the map), however, after completing a side quest "Lost at the Eastern Beach", she moves to her hut (point 7c on the map). Actually, I recommend doing all Emma related quests, in order that she regained her full strength. Meet with the woman and listen to her plan of bringing a dead person to life. You will have to help her with a voodoo experiment.
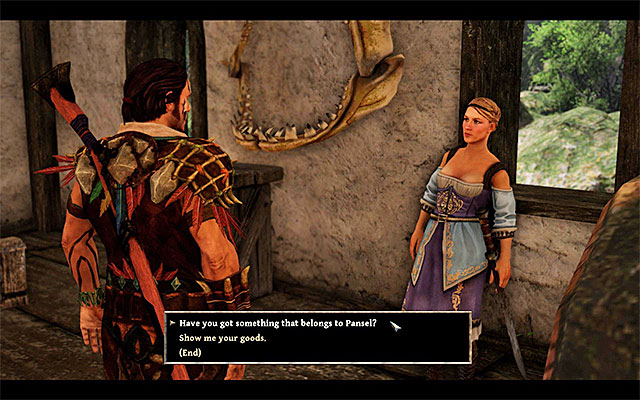 Get Pansel's underwear during a conversation with Grace
After meeting Emma, go out of her house and head north. In the port town look for Grace (point 4 on the map), and accordingly to the instructions Emma gave you, ask the woman for a Pansel's private belonging. Grace will give the Nameless Hero Pansel's Underwear (100 Glory Points).
The next step is poorly explained in the Nameless Hero's journal. You have to craft a voodoo doll. Before you do anything, double check if your hero has Craft Spells proficiency from Magic category, because without it you cannot do a thing. If you do not have this skill, visit a trainer (e.g. Tenya on Kila island) and pay for the training (2,000 gold).
If you do have Craft Spells proficiency, you can now start looking for an Ancestral Stone, which is a sort of a workshop for crafting voodoo spells. An Ancestral Stone is in Emma's hut (point 7c on the map), as depicted in the picture above. Of course you do not have to use that particular Ancestral Stone, as it may be any other, e.g. the one on Kila island, near Tenya.

Interact with the Ancestral Stone, and from the list choose Pansel's Underwear, which you have recently acquired. In order to prepare a Voodoo Doll of Pansel, you have to possess four ingredients:
If you possess all the required ingredients, confirm that you want to create a voodoo doll. Select it right in your inventory (Magic tab) and drag to the quick access bar.
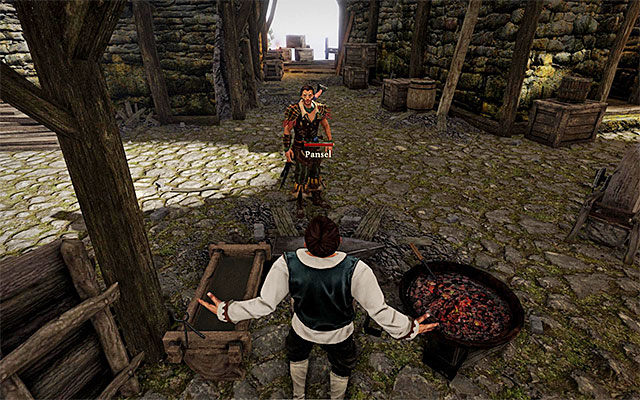 Take control over Pansel
Go back to the building where you met Grace (point 4 on the map), and look for Pansel. Activate the previously prepared voodoo doll (select the right item from the quick access bar). Performing this action will give you control over Pansel.
 Spencer
Playing as Pansel return to Emma (point 7c on the map) and tell her that you have managed to use voodoo magic on the man (200 Glory Points). Listen to the remaining part of the plan and start off by going to the tavern in the western part of the port town (point 6 on the map). After you get to the tavern, talk to the bartender Spencer.
Note - While controlling Pansel, it is good to run through all dialogue options in every conversation, as it may lead to hilarious comments or get you extra items (of little value, though).
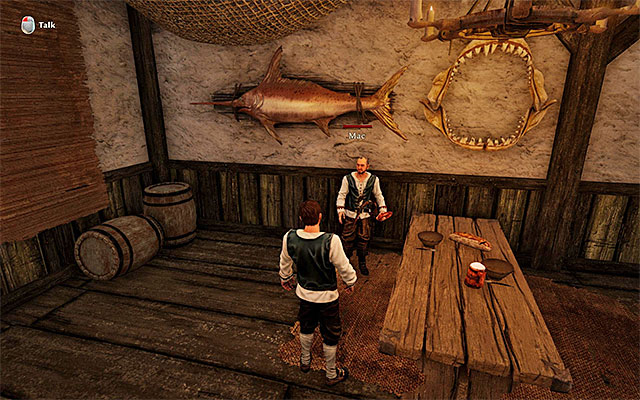 Mac
MacAfter meeting Spencer you may talk to others in the tavern, however, it is totally optional. The most important thing, is to find Mac there. He possesses An Old Hat, which, after a longish conversation, will be passed on to you (100 Glory Points).
 You will find a shovel on the cemetery
Now go and talk with Grace (point 4 on the map) about the missing shovel. You can now head to the cemetery in the west from Alvarez' residence (point 7b on the map). Here, look for the Worn Shovel and take it (100 Glory Points). Return to Emma (point 7c on the map) and give her the two items. You have now done all you had to do as Pansel, so you can jump right back to your body.
 Go with Emma to the cemetery and witness the result of the experiment
Talk to Emma once again and confirm your readiness to take part in the experiment (100 Glory Points). The test must be done at night, so if it is a wrong time of the day, you should use a bed. Go with Emma to the cemetery (point 7c on the map) and witness the result of the experiment. The attempt at bringing Fred to life is only partially successful, as he is deprived of intelligence. Hear the conversation with Emma and receive the Broken Necromancy Stone of Blessing. That is all for the visit on Antigua.
Note - If you have not yet completed the remaining stages of this quest, you have to visit Tacarigua and Taranis islands. Otherwise, you may return to Kila, to have the concluding conversation with Tenya.
How to unlock: Talk to Drake (Calador).
Quest giver: Drake
Attention - This quest is available only after joining the demon hunters!
 Zak stands in front of Alvarez's house
You start this quest by talking to Drake in the Citadel in Calador. One of the parts of this task consists of visiting Antigua, to find a Book of Evil. The person who has it is Zak, who can be found near the entrance to Alvarez's house in the northern part of the port (number 2a on the map). He won't be willing to give the book to the Nameless Hero, but he will suggest taking part in a ritual of summoning. You have to agree to this idea.
 Head to the graveyard
The ritual can be conducted only during the night, so use a bed if you need to. Talk to Zak and confirm your willingness to take part in it. Head to a graveyard located to the west of the place where you've started the quest (number 7b on the map).
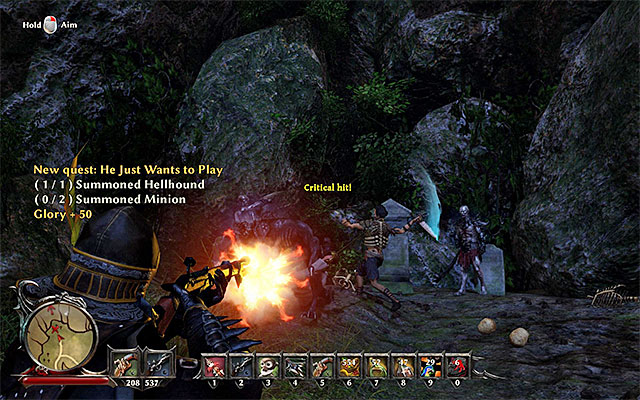 Kill all of the summoned monsters
Be ready to fight, because during the unsuccessful ritual, a Summoned Hellhound and two Summoned Minions will appear. It is good to start from eliminating the Hellhound and then proceed to the rest of your enemies. After the battle (100 glory points), talk to Zak once again and take the Book of Evil (200 glory points).
Attention - If you haven't completed the rest of this quest (on Taranis) yet, you need to go there now. Otherwise, return to Calador with all the books and give them to Wilson.
The above map presents all of the locations that you visit during your stay on the Skull Island, while completing main quests. The red dots mark the starting locations for the individual quests and the green ones mark the locations that you visit, while completing them.
Note - I recommend that you also see the map of the side quests on the Skull Island, because many of the main and the side quests overlap.
Note - you gain access to the Skull Isle as late as towards the end of the game, i.e. after you win the naval battle against Crow, in the "Sea Battle Against Crow" quest. The walkthrough for that quest can be found in the chapter entitled "Other Quests".
The way to unlock the quest: Talk to Bones (after you defeat Crow's fleet).
Quest giver: Bones
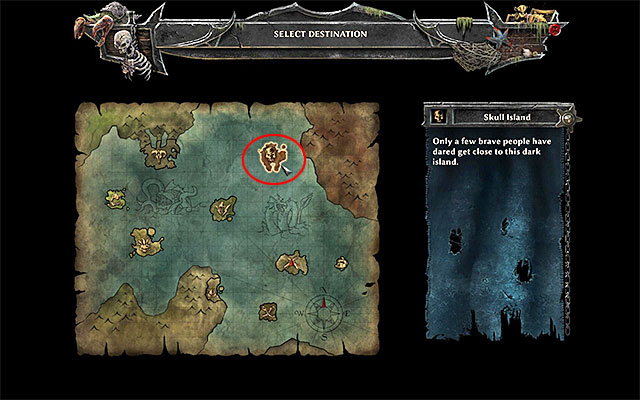
You can unlock this quest after you have defeated captain Crow, during the "Sea Battle Against Crow" quest, whose description can be found in the chapter entitled "Other Quests". After the victorious battle, listen to the conversation with Bones, who tells you about a map found on Crow's ship, with the location of the Skull Island marked. This means that, from now on, you can visit the Skull Island, because it has been added to the world map (the above screenshot).
Note - The cruise to the Skull island is not a one-way-trip, Even if you head there immediately, you can leave it at any moment and visit the rest of the locations, in the game world, again.
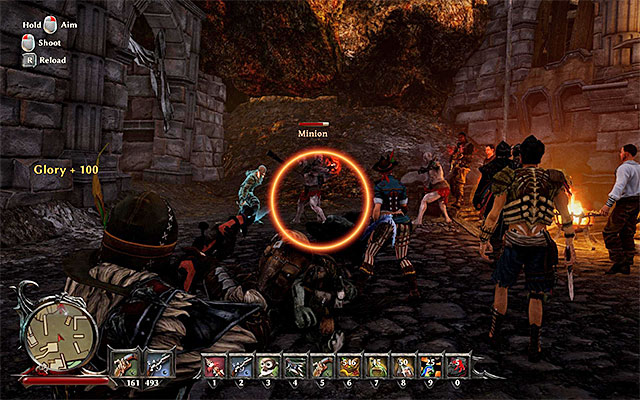 Help the ally get rid of Shadows
After you reach the Skull Island (point 1 on the map), interact with the boat to get to the shore (point 1a on the map). Almost immediately, your allies will be attacked by a group of monsters (mainly minions) so, join the fights and help them eliminate the threat of the hostile beasts.
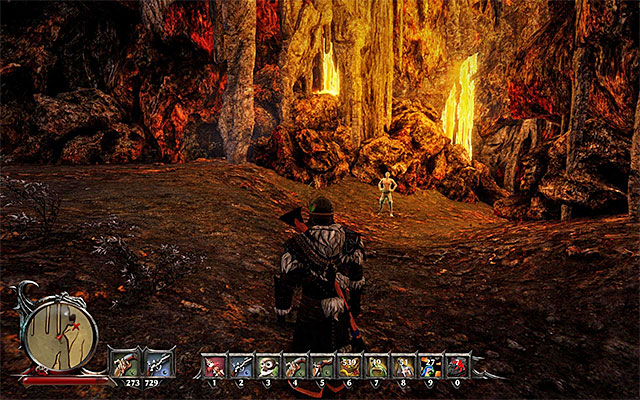 The spot, where you find the Nameless One's spirit
You need to head Northwards of the camp and, of course, you should expect your character to be attacked by tougher, or weaker opponents, along his path. Your destination is the entrance to the cave in the Northern part of the Skull Island (point 2 on the map) where you encounter... My Spirit. Listen to the conversation with the spirit, in the course of which you learn that you will have to rescue three friendly mages, imprisoned by Nekroloth. You do this, while doing the "Reunion" quest.
 Nekroloth is staying in the cave
After you have completed the "Reunion" main quest, you can enter the cave, at which you earlier met your character's spirit. This way, you will reach Nekroloth's hideout, where the final battle against him starts.
NOTE - BEFORE you enter the cave, to start the battle with the final boss, you should GET WELL PREPARED for this battle, especially that it may be participated by another crew member. First of all, you should get lots of medicine, as well as supplies connected with your playing style (ammo for firearms, scrolls, etc.)
NOTE - after you start the final quest of the game YOU WILL NOT BE ABLE TO COME BACK outside. Apart from that, Risen 3 does not offer any New Game Plus mode so, after the end of the battle with the final boss, the game will be, simply, over. Therefore, make sure that you have saved the game, just in case, before the fight with Nekroloth and that you have completed all of the side quests, and also checked out on all the side activities (if you are interested in them).
Rewards for completing the quest:
The way to unlock the quest: Talk to My Spirit.
Quest giver: My Spirit (point 2 on the map)
 One of the bridge accesses
This quest becomes available thanks to the meeting with My Spirit at the cave entrance, on in the Northern part of the Skull Island (point 2 on the map). You need to rescue Zacharias, Chani and Eldric, who have been imprisoned by Nekroloth. You can reach these characters in any order that you want. I recommend that you start by making it over to the Southern part of the isle, i.e. to the bridge over the Berserker Pass (point 2b on the map). You can access the bridge, by approaching it from either Western or Eastern side (points 2a on the map) and, regardless of the path that you have taken, you will have to eliminate lots of monsters.
 Zacharias's prison
After you walk onto the bridge, deal with the Minions guarding it and find the stairs to the upper level of the bridge. You will find the imprisoned mage Zacharias here. Interact with him to free him (500 Glory Points).
Now, you need to go to rescue Chani and, to do that, head towards the Western part of the isle, i.e. towards the Tower of Torture shown in the above screenshot (point 3a on the map). The tower is surrounded by lava rivers but, you can walk past them by walking over the narrow planks, or by using the Parrot Flight scroll.
 The lever that unlocks access to the Tower of Torture
By default, the tower is closed, but you can access it in an easy way. Locate the stairs to the balconies above, eliminate the Skeletons here and find the interactive lever that you can pull. You can now return downstairs and take the entrance that has been shown in the short cutscene.
Enter the tower and kill the skeleton. Stand in the spot shown in the above screenshot. You first need to climb the destroyed pillar and then, to the ledge above. After you get there and see the cutscene of the tower's interior, pull the lever. Do not worry - the path across the tower is much less complicated than you might have first expected.
 Walk through the central tower
Take the left corridor and get prepared for a fight with a Shadow Guardian. If your character does not handle melee combat well, it is a good idea to backtrack to the area with the lever, you have more room. After you have eliminated the guardian, go ahead. Head towards the central tower, i.e. the one with the horizontal planks at. Thanks to the lever that you have just pulled, you are now able to walk over one of such planks.
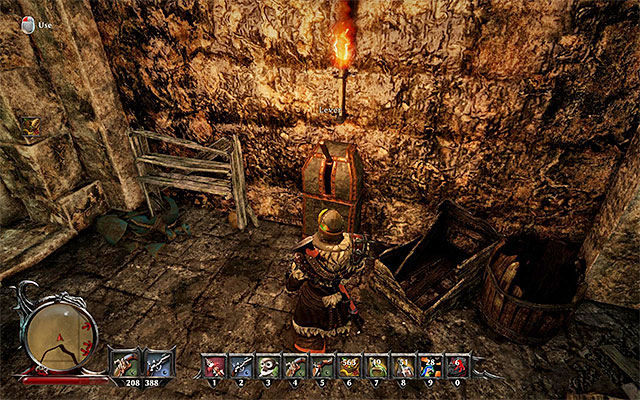 The second lever
Cross the central tower, take the second metal plank and eliminate the Black Ghoul. At the wall, there is another lever that you need to interact with.
After you use the lever, turn by 180 degrees and cross the central tower again. After you are back at the other side, turn right and locate the stairs to the lower level of the Tower of Torture. Explore the lower level and find another lever to pull.
 Enter the central tower again
Using the lever gives the planks, at the central tower, another turn. Remain on this level and explore the nearby corridors. Thanks to this, you will reach the plank that you have just turned. Walk over it and enter the central tower again. Remain here, for a moment and locate another lever on the wall, next to the stairs.
Remain on this level, after you pull the lever in the central tower and use another metal plank to leave. Again, you need to locate the newly-opened way at the stairs, which has been shown in the above screenshot. Take the stairs to descend to a lower level.
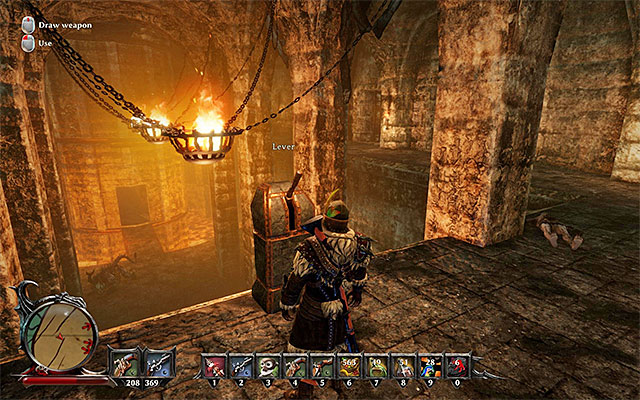 The last lever
If you have taken the correct stairs, you should reach the upper balconies above the cell with Chani inside. Around, there are Skeletons, Minions and Ghouls, although none of them pose a threat to you. Examine the abovementioned balconies and find the last lever. Pulling this one opens the cell.
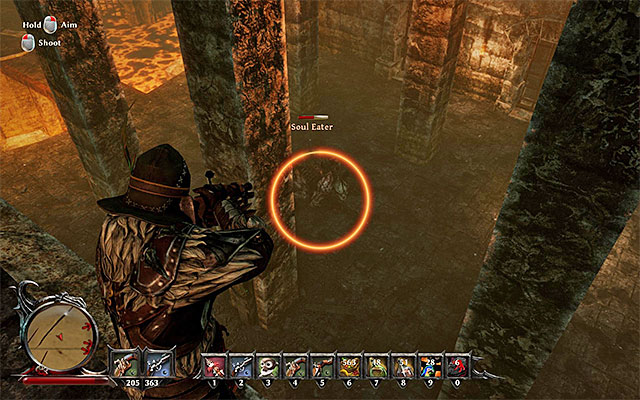 It is a good idea to attack the Soul Eater at a distance
The entrance to the cell is being guarded by a Soul Eater and, if possible, attack it from the balconies, because it will not be able to defend, in any way. The quickest way to reach the bottom level of the Tower of Torture is to use the Parrot Flight spell, although you can just as well, return to the central tower and take the spiral stairs to the bottom.
 Chani's prison
After you have dealt with the Soul Eater, enter the cell with Chani inside (point 3 on the map). Interact with the voodoo witch to liberate her (500 Glory Points).
Finally, you need to find Eldric and this may be the most problematic of your tasks, because his holding place is best hidden. First, you need to reach the islet shown in the above screenshot in the North-Eastern corner of the map (point 2e on the map). Along your path to the isle, you should watch out for the Swamp Golem and a Soul Eater among others. Walk around them or defeat them in direct combat.
Take the path to the highest hill of the islet and deal with Skeletons, and Minions along your path. Apart from that, you will also have to eliminate, at least, one Shadow Guardian. After you reach the ruins atop the hill, explore them. You need to locate a very well hidden manhole shown in the above screenshot, which has a ladder connected to it (point 2f on the map). After you take the ladder, you will get to a huge cavern.
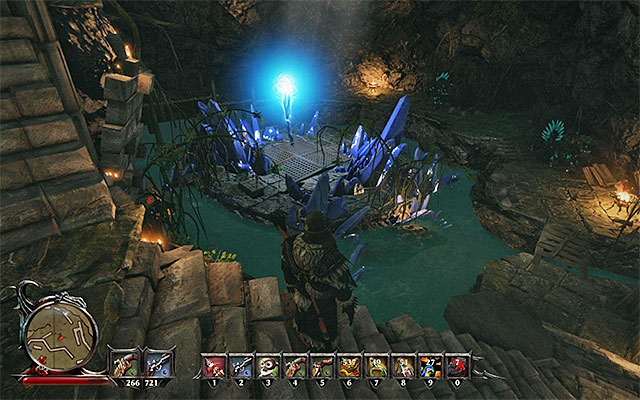 Walk around the golems, or kill them. Then free Eldric
Start the exploration of the cave, eliminate the skeletons and Ghouls. Soon, you will reach the chamber, where Eldric is being held. You can first kill the two nearby Ore Golem or walk around them and reach the ally to free him (500 Glory Points). After you listen to the conversation with Eldric reach the lever and pull it, which will allow you to leave the cavern.
You can now return to My Spirit (point 2 on the map) to reunite with it. This also concludes this quest.
Rewards for completing the quest:
The way to unlock the quest: Automatically, after you complete the "Evil's Refuge" main quest.
Quest giver: - (2 on the map)
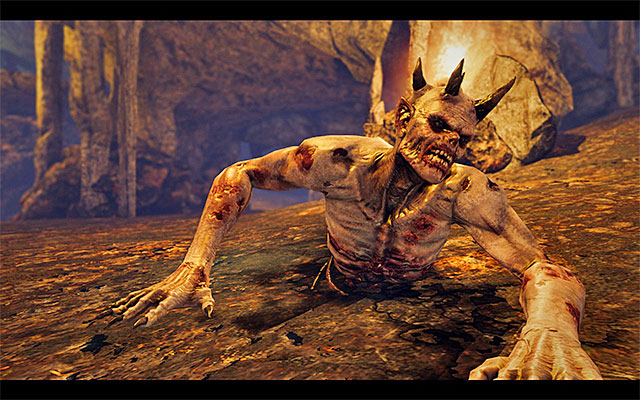 Nekroloth takes on the form of the Titan of Death
This is the final quest of the game that unlocks automatically, after you complete the "Evil's Refuge" quest, i.e. at the moment at which you reach Nekroloth's hideout. After a short conversation, Nekroloth turns into the Titan of Death and the duel with the final boss starts. During the fight, you will be controlling the Nameless One's spirit.
NOTE - from the moment, at which you start this quest, YOU WILL NOT BE ABLE TO RETURN back outside. Apart from that, Risen 3 does not offer any New Game Plus mode so, after the end of the battle with the final boss, the game will be, simply, over. Therefore, make sure that you have saved the game, just in case, before the fight with Nekroloth and that you have completed all of the side quests, and also checked out on all the side activities (if you are interested in them).
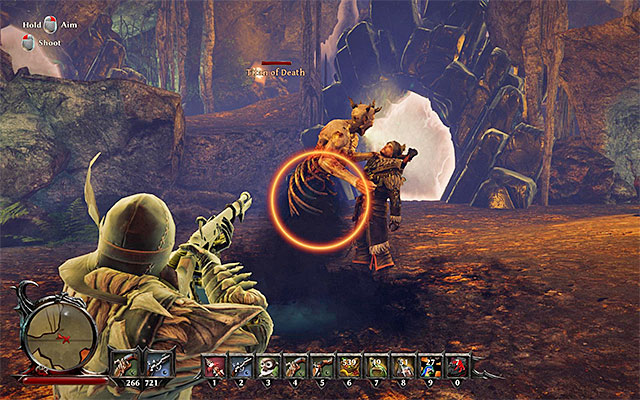 Attack the titan as soon as he attempts to feed on the Nameless One
Right after the fight starts, you will learn one of its most important features. The Titan of Death will be trying to feed on the motionless body of the protagonist, on a regular basis. You need to prevent him from doing that because, as a result of that, you will be losing your health points. Fortunately, to stop the process of feeding on the body, you only need one attack which, for at least a dozen-or-so seconds will discourage the boss from doing that.
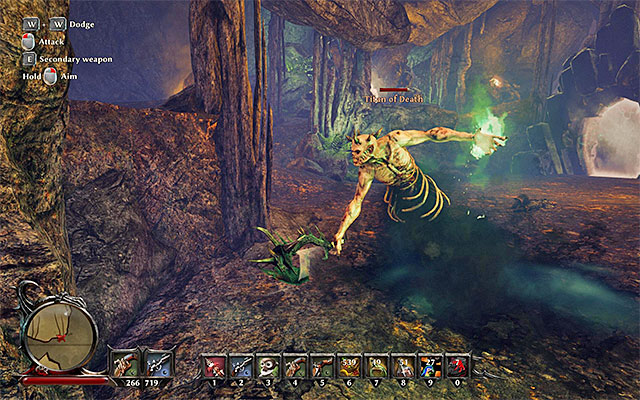 Dodge melee and ranged attacks of the boss
After you attract the attention of the Titan of Death, you need to perform attacks with consideration, because for obvious reasons, the Titan's attacks are very strong. While at close quarters, the opponent will try using his blade and, at a longer range, he will be shooting magical green projectiles, towards the Nameless One. Just like in the case of all the other fights with mighty opponents, rely on dodging and parrying, while staying in constant motion. At the same time, search for opportune moments to launch your favorite attacks.
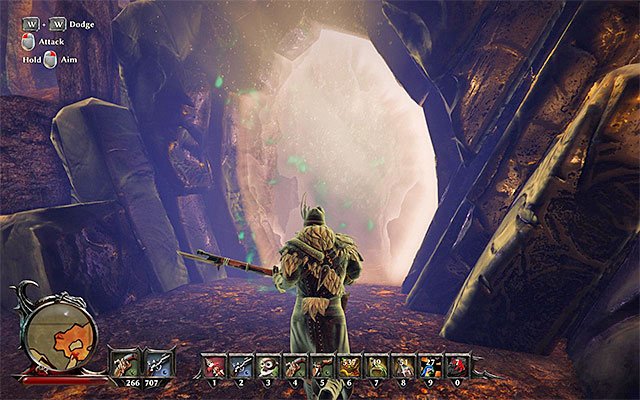 Use crystal portals to catch up with the boss
After the boss loses, about, a third of his health, the duel will be enriched with several additional elements. The Titan of Death will, from now on, mainly try to snatch the body of your character and attempt to feed on him in seclusion. To move faster around the cavern, use the crystal portals around - pass through them up until you locate the boss.
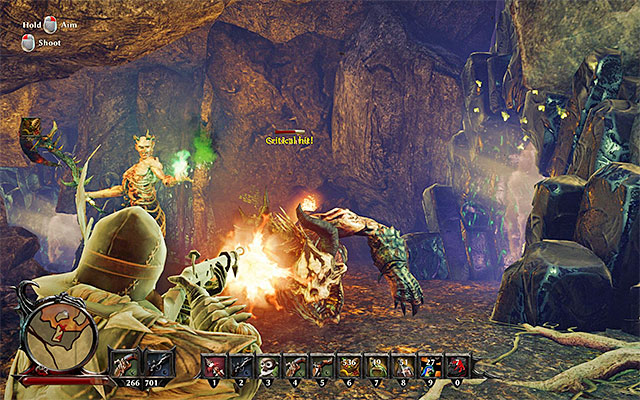 First of all, watch out for the soul eaters
A much more serious handicap now is that monsters start appearing around. As much as eliminating the weak Hellhounds is always easy, the Soul Eaters are not that easy to kill. What is even more, they deal much more damage. In spite of that, I recommend that you eliminate the additional beasts only if they pose an immediate threat to the Nameless One, e.g. as a result of cornering him. The reason is that, after you kill the creatures, soon there appear new ones to replace them. This means that spending too much time on killing them makes the fight longer (and makes the risk of losing more real).
It is worth noting, at this point, that there is a major facilitation to the boss battle - in the central part of the cave, there is a spire of light shown in the above screenshot. Crossing that spire regenerates your character's health. This is a good alternative for the standard healing supplies. You can make the battle easier for you, by using spells like Summon Hellhound or Summon Shadow Warrior from rune magic. The summons have a visible input into distracting the creatures that accompany the boss.
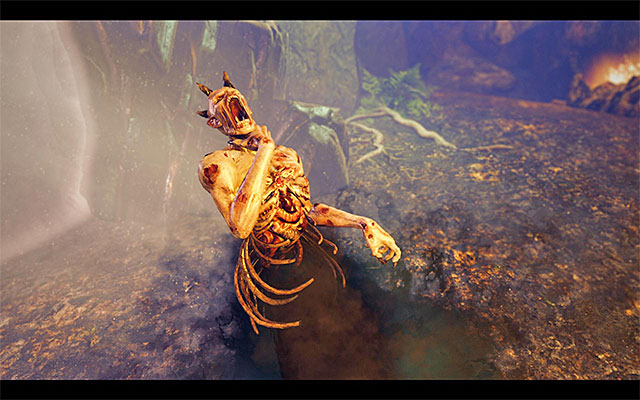 You need to drain the Titan of Death's entire health bar
In order to complete the final battle, you need to deprive the Titan of Death of the entire health bar so, as I have already mentioned, it is best to spend as much time, weakening him, as possible and attack the rest of the monsters only if necessary. You can now watch the cutscenes that end the game.
Rewards for completing the quest:
The above map presents all of the locations that you visit during your stay on the Skull Island, while completing main quests. The red dots mark the starting locations for the individual quests and the green ones mark the locations that you visit, while completing them.
Note - recommend that you also see the map of the side quests on the Skull Island, because many of the main and the side quests overlap.
Note - you gain access to the Skull Isle as late as towards the end of the game, i.e. after you win the naval battle against Crow, in the "Sea Battle Against Crow" quest. The walkthrough for that quest can be found in the chapter entitled "Other Quests".
The way to unlock the quest: Talk to Kane.
Quest giver: Kane (point 1 on the map)
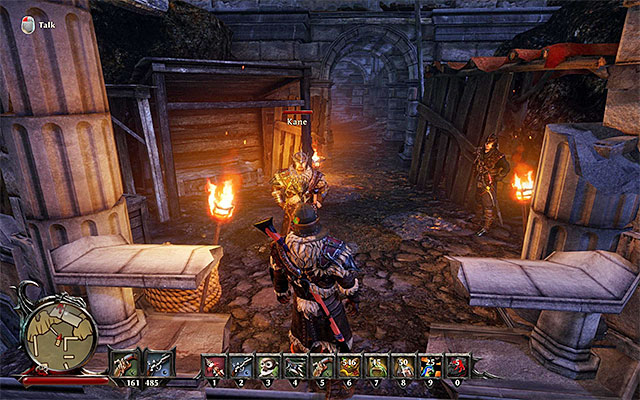 Kane
KaneYou can unlock this quest during your conversation with Kane who is staying in the camp in the central part of the isle (point 1 on the map). From Kane, you learn about the necessity to destroy weapon depots belonging to monsters. You will learn their whereabouts (they are scattered all around the Skull Island) and you will be sent to meet up with Jake.
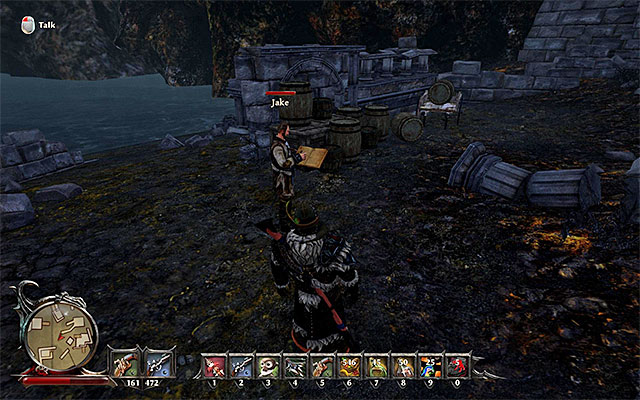 Jake
JakeJake is also staying in the camp (point 1b on the map). He, on the other hand, asks you to eliminate a number of monsters gathered near the weapon depot close to the camp. This will allow the allied forces to obtain weapons, thanks to which it will be easier for them to get deeper into the island.
 The most difficult opponent is the Shadow Guardian
The monsters mentioned by Jake, are staying in close proximity of the cam, to the North-East (point 1c on the map). First of all, you will have to eliminate nine Cruel Ghouls. They are not too demanding, although it is best to eliminate them one-by-one and avoid being surrounded by more than two ghouls. Apart from that, you need to eliminate a Shadow Guardian and this is the monster that you need to watch out for the most and whose eliminating is not going to be that easy. For eliminating all of the monsters, apart from the standard Glory Points you will also be rewarded with 200 Glory Points.
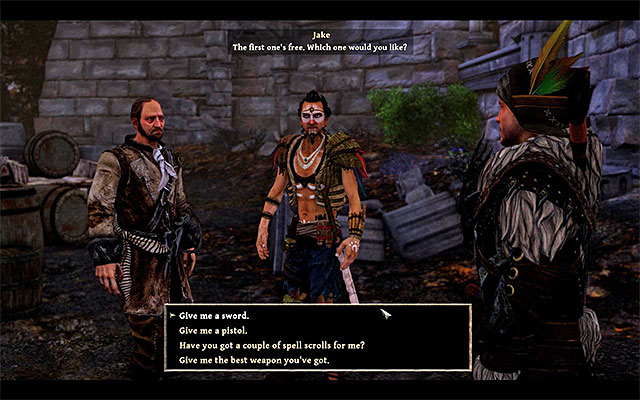 You can pick your reward for defeating the monsters
You can now return to Jake (point 1b on the map) and tell him that you cut the way to the weapon depot. From now on, you will have the option to trade with Jake. Apart from that, he will allow you the choice of your reward. You can choose from:
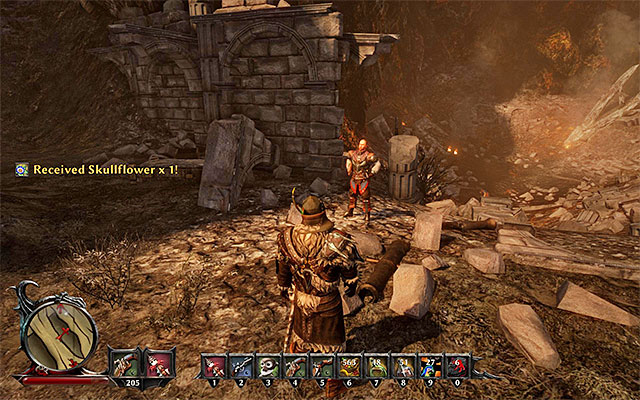 Neron
NeronYou can reach the rest of the weapon depots in any order that you want. I recommend that you now go to the big canyon to the North of two towers, where you find Neron (point 1d on the map). During the meeting with Neron you will learn that mage Focalor went insane and murdered all around him. At the moment, he is staying at the local weapons depot.
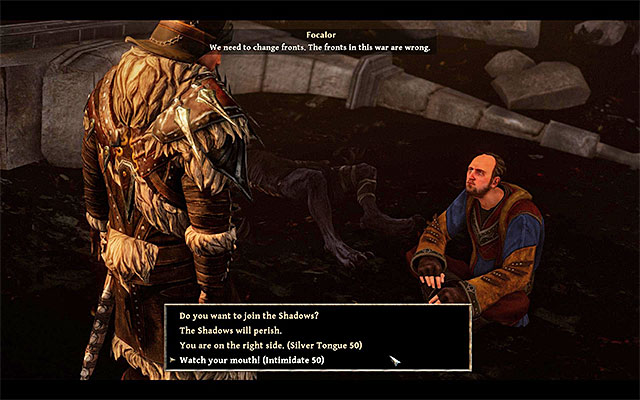 You can use special dialogue option, during the conversation with Focalor, but this will change little
After the meeting with Neron, approach Focalor (point 1e on the map). During the conversation with him, you can choose if you want to attack him straight away, ask him several questions first or use the Silver Tongue or Intimidate skill. It is worth adding that in the latter two cases, the unique dialogue options become available only if these skills are developed at least, to 50, 90 and 120 points.
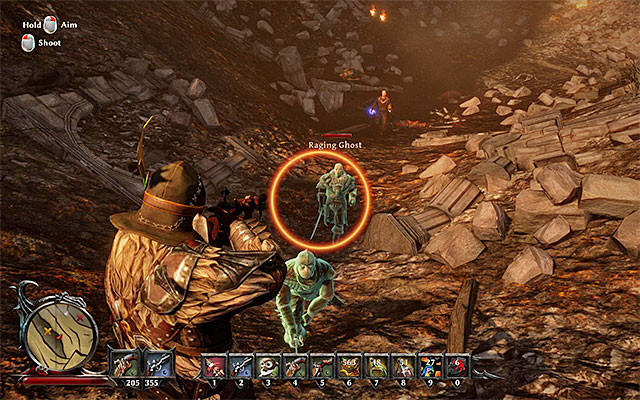 You need to fight a more, or less demanding fight
If you have chosen one of the standard options to behave, this will result in a fight, where you need to deal with Focalor and two Raging Ghost (200 Glory Points). IN such a situation, I recommend that you first attack the mad mage, which will prevent him from casting powerful spells. IF you have depleted all of the dialogue options, connected with the Silver Tongue and Intimidate skills, Focalor will not attack you and, as a result, it will only be necessary to eliminate the two ghosts. If Focalor survived the fight, talk to him and receive 250 Gold Pieces from him. Otherwise, return to Neron straight away. Also from him, you may receive 250 Gold Pieces as a reward for making the local weapons depot available.
Note - from now on, you can train with Neron and trade with him.
 The location where you find Gray
I recommend that you now take to exploring the Eastern part of the Skull Island and find Gray (point 1f on the map) around here. From him, you will learn that there is a Shadow Lord and his minion ghosts staying in this part of the isle. It is worth adding that, if your Intimidate skill is developed to the level of, at least, 100 points, you can take advantage of that and obtain 250 Gold Pieces.
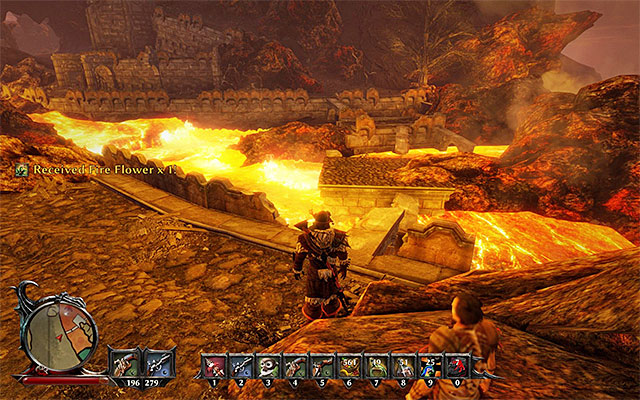 You can use the islets in the lava river...
After the conversation with Gray, you can do either of two things. If you do not want to fight the ghosts, you can walk around them. The easiest way to do that is to jump over ledges next to the lava river (point 1g on the map), although you can also start to the North of the den of the Shadow Lord and head South from there.
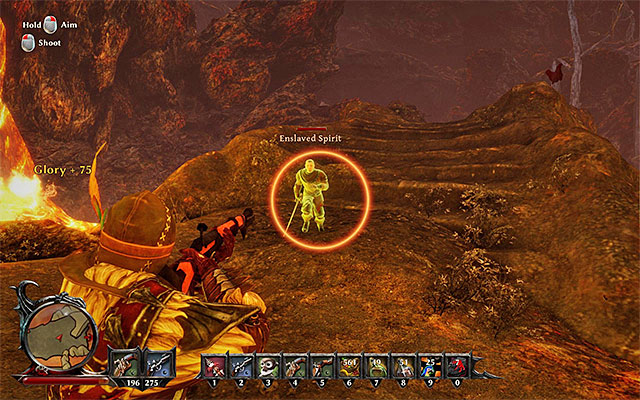 ... or take the min bridge guarded by ghosts
If you have nothing against eliminating several additional monsters, a much better solution is to reach the nearby bridge over the lava river (point 1h on the map). Around, there also are Enslaved Spirit. In most cases, eliminating them is not too much of a problem, although you need to try and eliminate fast those of the ghosts that use magic. For each eliminated ghost, you will be rewarded with 75 Glory Points.
 defeat the Shadow Lord of Slavery
Regardless of which path you have taken, your destination is the area that Gray pointed you to (point 1i on the map), because this is where the Shadow Lord of Slavery is. During the fight with the Shadow Lord, rely on dodges and do not forget to use your best attacks. Kill the monster (600 Glory Points), collect his Raw Black Heart and return to Gray (point 1f on the map) to report to him. You will be rewarded with 300 Gold Pieces.
Note - From now on, you can trade with Gray.
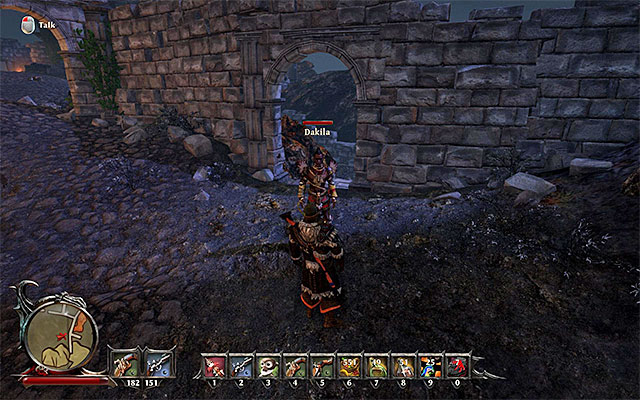 Dakila
Now, head towards the Northern part of the Skull Island. Locate the local named Dakila (point 1j on the map) and talk to him. You will learn that the last weapons depot is being guarded by an immortal spirit that cannot be defeated in any conventional way. Dakila Suggests that you obtain a magical item that you can chase the spirit away with.
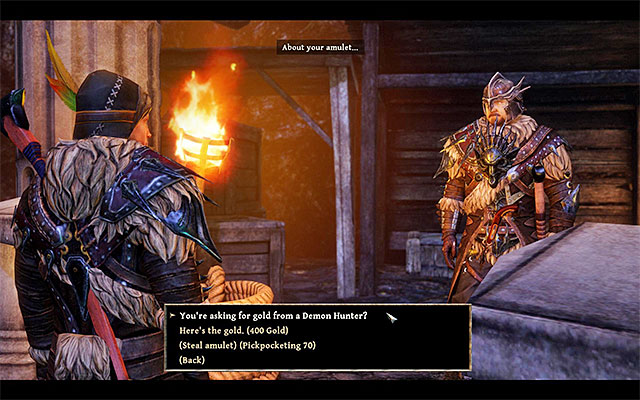 There are several ways, in which you can obtain the amulet
You now need to return to Kane, i.e. the man that tasked you with the quest (point 1 on the map). Ask him if he knows any way to weaken the immortal spirit. You will learn that ha is in the possession of an appropriate amulet (Kane's Protection Amulet). There are three ways in which you can obtain this item:
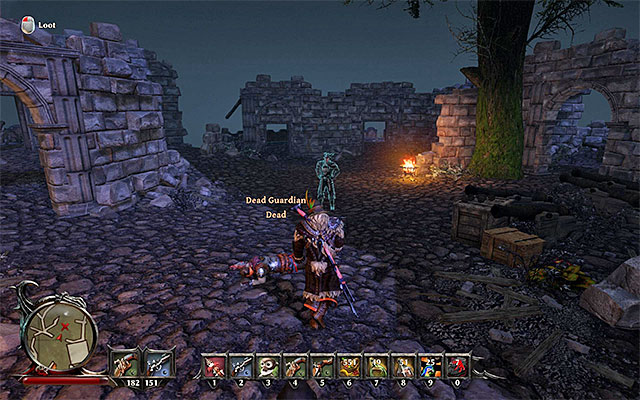 Meet the ghost only after you have obtained the amulet
With Kane's amulet on you (50 Glory Points) return to where you have met Dakila and go to the North a bit, to reach the ruins with the immortal spirit (point 1k on the map). Approach Asmoday and listen to the conversation with him. After it ends, a battle ensues and, in the first place, it is a good idea to attack the Asmoday's Bodyguard that is a Shadow Guardian. Only then, weaken the spirit which, thanks to the amulet from Kane can be defeated (300 Glory Points). Tell Dakila the good news and claim your reward of 200 Gold Pieces.
Since you have already secured all of the weapons depot, meet with Kane for the last time (point 1 on the map). Return the amulet to him (50 Glory Points) and report to him.
Rewards for completing the quest:
The way to unlock the quest: Talk to Kane.
Quest giver: Kane (point 1 on the map)
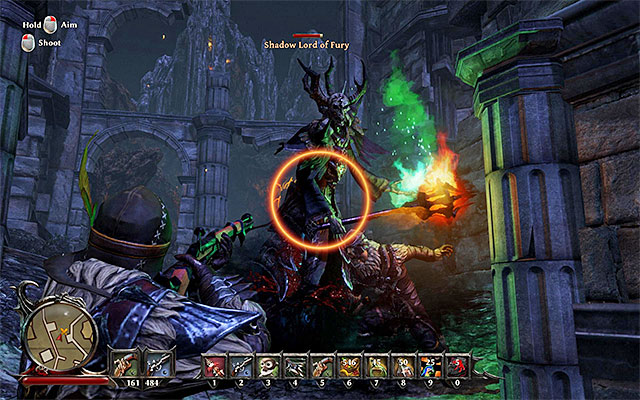 Focus on eliminating the Lord of Fury
You can unlock this quest during your conversation with Kane who is staying in the camp in the central part of the isle (point 1 on the map). Kane will offer you to join an expedition to defeat monsters guarding the two nearby towers. You need to agree to join the assault group. The monsters can be found to the North of the starting point (point 1a on the map). Here, you need to mind the Shadow Lord of Fury) the most, because he is a serious threat, for obvious reasons. Just like in the case of the fights with the previous Lords of Shadows, remain in movement, rely on dodges and use your best attacks. After you have defeated the Shadow Lord (200 Glory Points) remember to collect his Raw Black Heart.
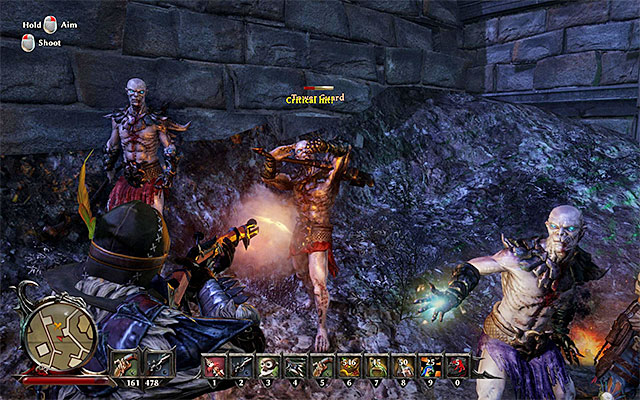 Watch out for the magic-wielding minion
Apart from the Lord of Fury, you also need to defeat three Tower Guards. They are minions but, only one of them uses magic and he is the one that should die in the first place. For defeating all the guardians, you will receive a bonus of 100 Glory Points. You can now talk to Kane and end this quest.
Rewards for completing the quest:
The way to unlock the quest: Talk to Rodas.
Quest giver: Rodas (point 2 on the map)
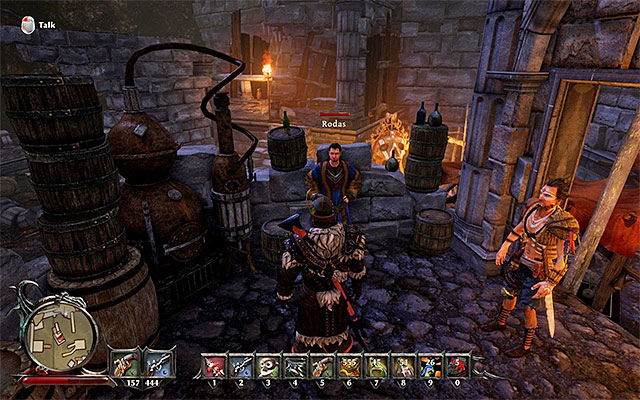 Rodas
RodasYou can find Rodas in the main camp in the central part of the isle (point 2 on the map). He may task you with two quests and the first one is to obtain meat of the specific monsters which, after being improved, will be good to eat.
Note - Rodas is also a trader and a trainer.
 The two towers
The monsters are staying to the West of the location, where you met up with Rodas (point 2a on the map), but you cannot reach them by walking in a straight line. Instead, you need to take the path to the North, which takes you to the two towers (point 1a on the map). If you have completed the "To Victory" side quest for Kane, it is safe here. Otherwise, you should expect a group of monsters here, with the Shadow Lord of Fury among them.
 Search through the corpses of the ghouls that you defeat
Enter the Western tower (the one on the left) and climb up the stairs/ Find the tower's exit that leads towards the path towards the monsters that you are looking for. After you get to the location mentioned by Rodas, start killing Gorged Ghouls. IT is not too difficult to eliminate them, BUT it is highly important that you search through their corpses. Thanks to this, you will obtain rashers of Shadow Meat and, in total, you need to obtain eight pieces. You can now return to Rodas (point 2 on the map) and give him the meat, which will unlock a new quest. .
Rewards for completing the quest:
The way to unlock the quest: Talk to Rodas.
Quest giver: Rodas (point 2 on the map)
 Kidlat
This quest becomes available automatically after you complete the "Experimental Nutrition" side quest, i.e. after you give the edible variation of monster meat to Rodas (point 2 on the map). The mage is going to need help preparing this meat and, as a result, you will be sent on an errand to find an expert in this field. Fortunately, you do not need to search too far away, because that man that you need to talk to is a local Kidlat who is also staying in the camp.
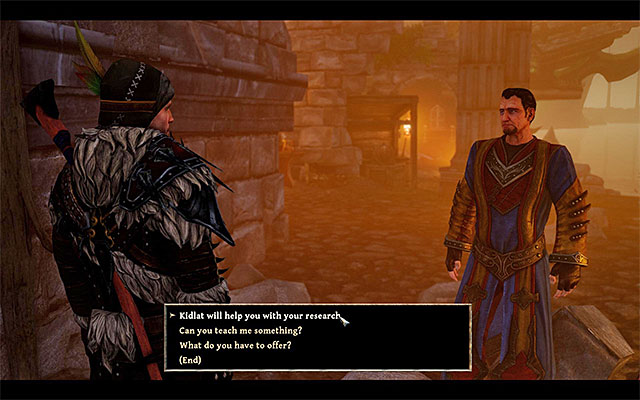 Meet with Rodas again
After you ask Kidlat for help and he agrees (100 Glory Points) return to Rodas. He is going to need around one day to prepare the purified meat so, use the bed at least once. Meet up with Rodas again. He will give you the meat, which ends this quest.
Rewards for completing the quest:
The way to unlock the quest: Talk to Bruce.
Quest giver: Bruce (point 3 on the map)
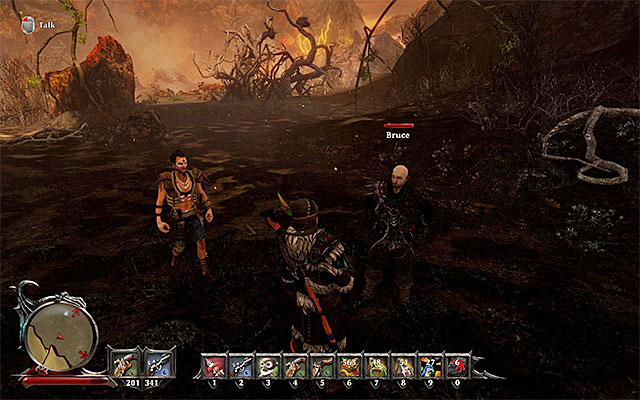 Bruce
BruceYou can find Bruce in the canyon in the Eastern part of the Skull Island (point 3 on the map). During the conversation with the slow Demon Hunter, you will learn that he plans on hunting down a Shadow Lord and you will have the option to travel with him to the monster's den.
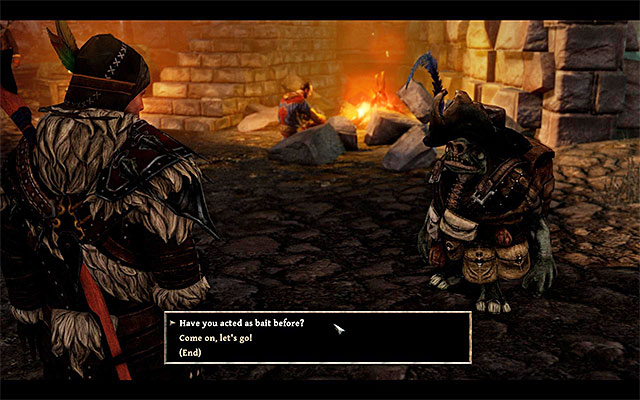 You can ask Jaffar to be the decoy
Bruce suggests, during the conversation that the chances of finding the Shadow Lord rise if a gnome is used as a decoy. If you have signed Jaffar on (the "Sign Jaffar On" crew quest), you can now find him in the central camp (point 1 on the map) and ask him to join you for the hunt. However, it is not necessary to do that and you can take to finding the Shadow Lord immediately.
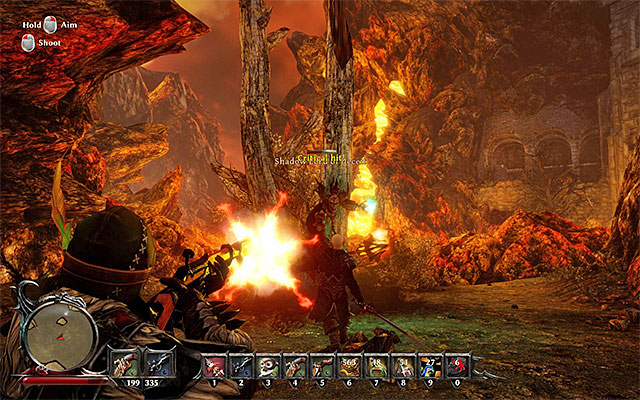 Start attacking the Shadow Lord
Follow Bruce, listen to several conversations, along your path and eliminate the monsters in the canyon. After several moments, you will fall into a trap (point 3a on the map) even if you Jaffar asked to join you. Attack the Shadow Lord of Deceit, remember to remain in constant movement, dodge and use the strongest attacks. After you have defeated the Shadow Lord, examine the corpse and collect the Raw Black Heart. Talk to Bruce for the last time to complete this quest.
Rewards for completing the quest:
How to unlock the quest: through conversation with Bones (at any given moment after your first voyage with the sloop).
Quest giver: Bones (point 1 on the map).
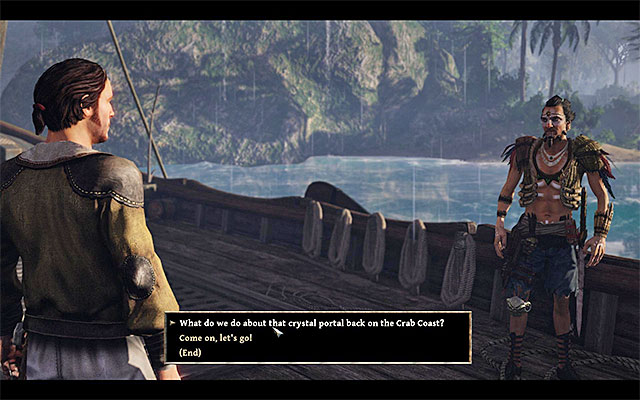 You must speak with Bones to unlock this quest.
The chance to unlock this quest arises after finishing your first journey on board of the sloop, or to be more specific, after leaving the Crab Coast. After initiating a conversation with Bones, there will be a new line on the dialogue list, associated with the portal found on the Crab Coast. Select this option to learn more about the portals, and to unlock the described quest.
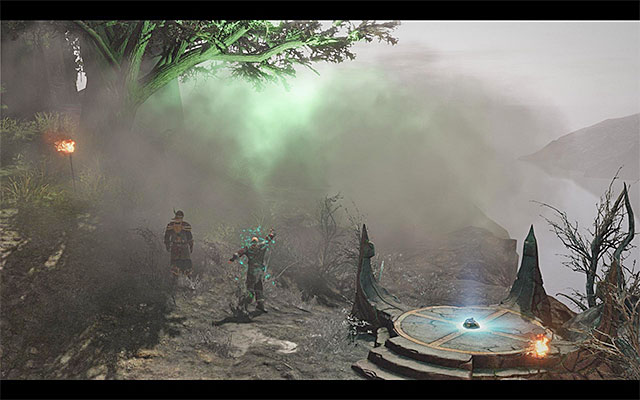 Eldric will teach the Nameless Hero how to destroy portals.
Bring up the world map and go to Calador Bay. After reaching the place, go to the Demon Hunter's Citadel and meet with a druid named Eldric. During the meeting bring up the topic of Crystal Portals. Thanks to that, Eldric will teach the Nameless Hero a spell to destroy those portals (200 Glory Points).
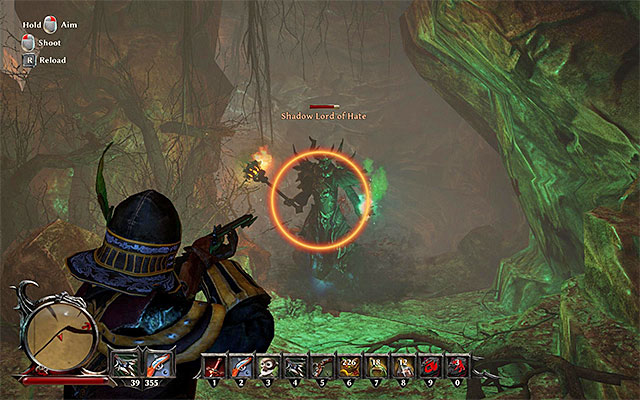 You will meet a Shadow Lord near the portal.
One of the portals suitable to be destroyed is located on the Crab Coast, to which you can go back at any given moment. You will have to make your way to the temple in the jungle one more time, or to be more specific, to a place where the Nameless hero was killed at the beginning of the game. In accordance to your expectations, you will meet Shadow Lord of Hate here. Notice that the Shadow Lord is quite agile for his size, so you will have to use your dodges a lot, especially if you plan on to use your melee attacks. Rely on your ally as well, who will be able to divert the enemy attention from you. For defeating the Shadow Lord you will be given 600 Glory Points. Examine the body to recover the Raw Black Heart.
Note - the Black Heart can be used to extend your health bar. More on this topic can be found in the description of a crew quest called "Black Magic Experiments".
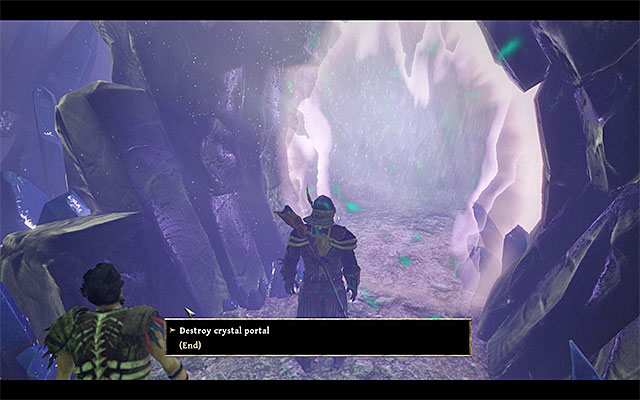 Approach the portal and destroy it.
Approach the portal and get rid of a Black Ghoul, which will appear nearby. You can now interact with the portal and destroy it (500 Glory Points). You can leave the place through a newly unlocked passageway behind the portal.
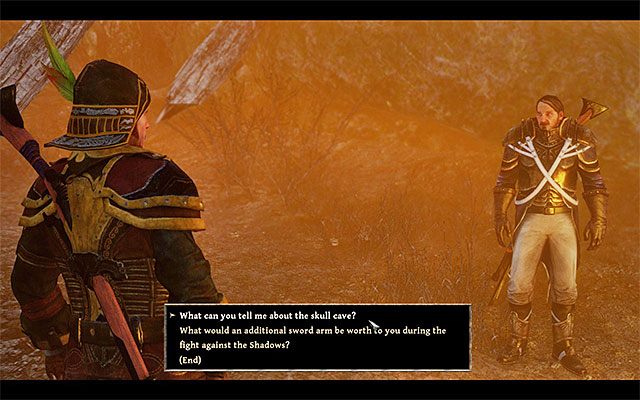 You can learn about the crystal portal, e.g. from Severin
Another crystal portal is located on Tacarigua isle. Explore the central part of the isle and find a mountainous path to the North. Along the path, you will meet inquisitor Severin that you can learn about the existence of the portal from (of course, it is optional to meet up with Severin).
I recommend that you complete "Menacing Shadows" side quest, tasked to you by Severin. It will allow you to approach the entrance of the cave, with the portal inside, safely. It is located to the North of the location in which you met Severin and it has been shown in the above screenshot.
 Deal with the ghouls and destroy the portal
After you enter the cave, remain on the main path and eliminate the Minions that you encounter. Ultimately, you need to reach a bigger cavern, where you need to start by dealing with all the Black Ghouls. While fighting them, remain in constant movement and run around the entire cave. After you have secured the area, approach the portal and interact with it to destroy it (500 glory points).
 The entrance to the cave
The next portal you may find when you will get to the Antigua Island. Basically you have to get to the north part of the island. You can accomplish that by traveling through the villages and desolation. During the journey you will have to eliminate enemies such as Minions and Black Ghouls. Also you can meet the very strong enemy named Lindworm (thou you can bypass it as well). Your destination is the giant skull-shaped object that is kind of built into the waterfall. Pass the waterfall and enter the new huge dungeon.
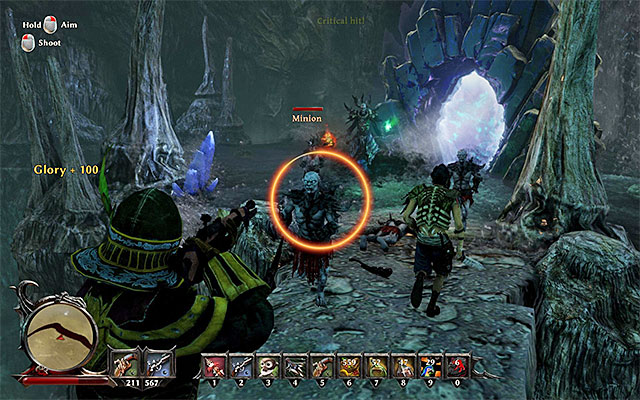 In the cavern with the portal you will meet, among other enemies, Shadow Lord of Greed
During the travel through the caves you need to eliminate encountered Minions. The portal itself is protected by the mighty Shadow Lord of Greed. Before you will attack this monster you should focus on clearing this place from the common enemies. Use your strongest abilities during your duel with Shadow Lord and don't let him to drive you into a corner. Your reward for defeating this opponent will be 600 Glory Points. You should search his body as well and loot him for the Raw Black Heart. Now you can get to the portal and destroy it (you will receive 500 Glory Points).
Notice! It is beneficial to inform the admiral Alvarez about your victory over the Shadow Lord. After that you will receive 1000 Gold Pieces.
 Entrance to the cave with the portal on Calador Island
After you will get to the third chapter of the main plot you will be able to destroy the portal on Calador Island. You can find it in the cavern in the northeast part of the island, behind the river of lava. Entering the cave is a part of completing a main quest from Calador Island named "Recruit Eldric". After you will kill the Shadow Lord and speak to the druid named Eldric you should head to the cave (you will recognize the entrance thanks to the giant skull).
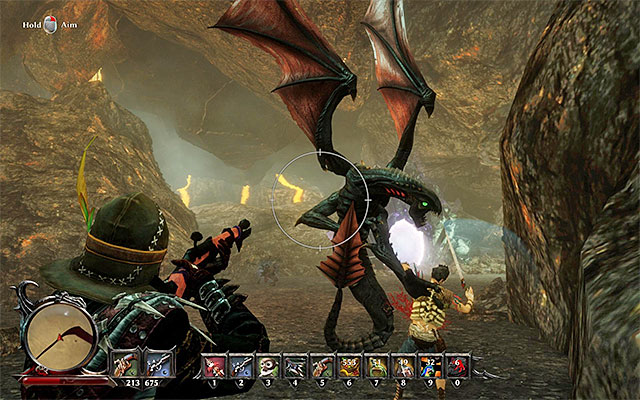 An access to the portal is protected by Ghouls, Hounds and Lindworm
The journey through the cave is quite linear and during your march you need to eliminate few Black Ghouls. These monsters are very agile and deal quite some damage so you should fight them one at a time. Near to the crystal portal there are also few Hellhounds and Lindworm. Try to remain in motion and dodge strong attacks of Lindworm. After you will secure the cave go to the crystal portal and destroy it. You will receive 500 Glory Points.
 The portal is in a chamber with the Titan Lord
In the third chapter you can also go to the (inaccesible before) portal on Kila Island. This portal you can find in the Shadow Lord of Discord's chamber which you can find next to the Margoloth's lair. The best thing to do is to visit this place while you will be completing the main quest name "The Right Place". Destroy the portal to receive 500 Glory Points.
 The portal is in the cave where you can find Zacharias
The last crystal portal you can also find during the third chapter of the game. You have to get on Taranis Island and start completing the main quest named "Recruit Zacharias". Now you have to go to the portal located by Zacharias, survive a journey to the outer world and defeat the Shadow Lord of Hunting which will appear in the cave. Only after that you can destroy the portal and receive 500 Glory Points.
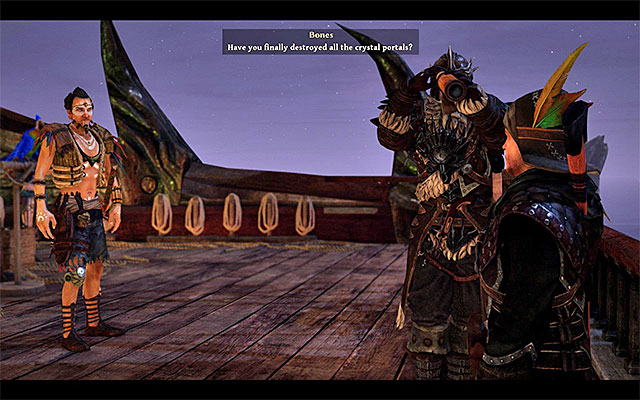 Speak to Bones to finish this quest
When you will speak to Bones you should inform him about destroying all of the crystal portals. It will allow you to complete this quite long quest.
Rewards for completing this quest:
How to unlock: Talk to Bones (after gaining control over one of the factions' ship)
Quest giver: Bones
 Bones will tell you about a big sea monster
A chance to start this quest will appear short after becoming the captain of one of the ships. After completing your first journey on the ship, Bones should talk to you automatically. He will tell you about a monster that terrorizes the citizens of the local islands. You will encounter the beast during your second journey (no matter the destination) and you will be forced to fight it.
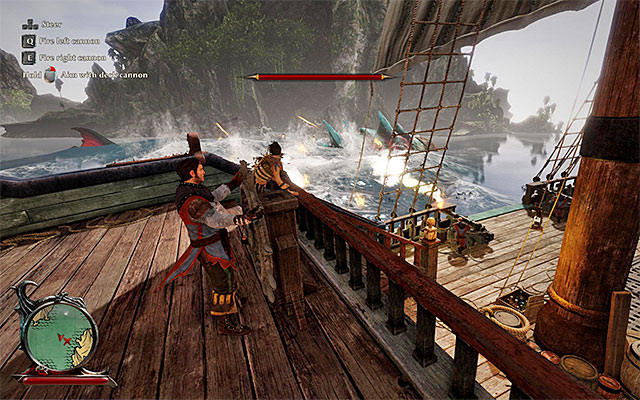 You can place the ship parallel to the monster and fire the cannons
It is a very unusual quest, as you will be completing it while steering your ship. While doing so, avoid crashing into the rocks or the monster. You can spot the beast yourself or listen to Bones, who will report its position. The monster can be weakened in two ways. You can try to place the ship parallel to it and fire the cannons located on the sides.
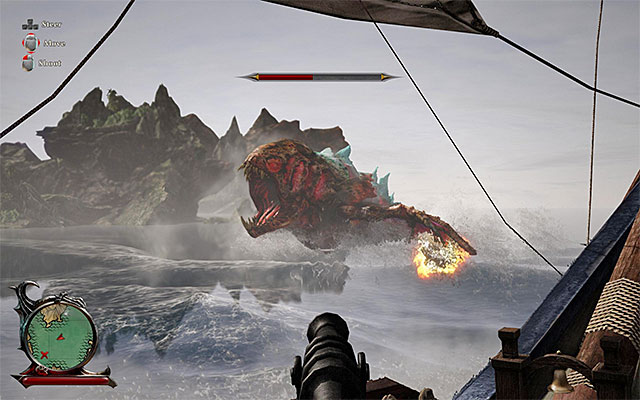 The cannon on the prow of the ship will do well
A good idea is also to use the cannon on the prow of the ship, especially if the beast is located in front of your ship. Also, you can fire it yourself and it doesn't take long to reload.
 Attack the beast until its health bar is empty
Continue attacking the monster and remember to avoid any crashes. When the beast's health bar is empty, you will complete the quest.
Reward:
How to unlock: Talk to Bones (after joining one of the main factions)
Quest giver: Bones
 Bones will warn the hero about renegade pirates' plan of attack
You can start this quest short after receiving the "Pirate Alliance" quest from Admiral Alvarez and joining one of the main factions. Bones will automatically initiate a conversation with the hero and inform him about Morgan's plan of attack. The battle will take place the next time you use your ship (no matter the destination) and you will have to complete this mission.
 Quickly defeat the pirate
When the fight starts, you will gain control over the Nameless Hero and you should focus ONLY on quickly killing the pirate who placed an explosive barrel on your ship, during the cut-scene. Use the best attacks you have, as it is important to eliminate him quickly.
 Approach the barrel and take it
After killing the pirate, run towards the Gunpowder Bomb as fast as you can, take it and throw it overboard. You have to make it before it explodes.
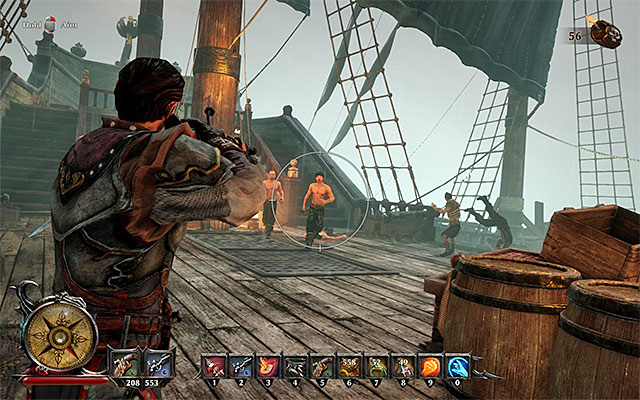 Perform strong attacks to quickly eliminate the pirates
Next, you will have to deal with two groups of pirates. The first one consists of two enemies and the second one of three of them. It is best to use strong attacks, because the key to success is to finish each fight very quickly. Like before, you have to get rid of a Gunpowder Bomb after eliminating your enemies.
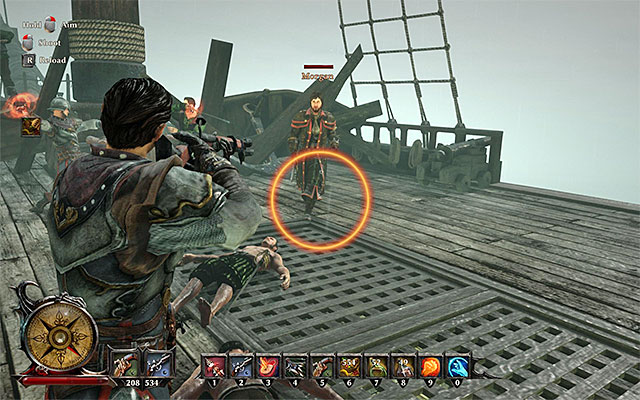 Watch out for Morgan's strong attacks
After getting on the enemy's ship, eliminate the next group of pirates (you don't need to hurry this time). At the end, you will be facing Captain Morgan. He fights very well with a sword, so you have to stay on the move, perform dodges and parry. Don't let Morgan block you in a corner or some narrow passage and weaken him gradually. Defeating Morgan (100 glory points) will end the quest and you will take command over renegade pirates.
Rewards:
Way to unlock the quest: Talk to Bones (after you progress to the third chapter of the game).
Quest giver: Bones
 Bones warns you that there appeared another sea monster
You get the opportunity to receive this quest soon after you progress to the third chapter of the game's story line, i.e. after you start preparations for the spirit ritual. After you have already taken one ship journey, you should be accosted by Bones. You will learn that there appeared another gigantic beast in the nearby waters. You will encounter the beast after you use the ship again (regardless of your destination) and you will have to complete this quest.
 Avoid the green projectiles
This quest is more difficult than the "Attack on the High Seas" quest. This time, the sea monster is going to try to sink your ship by launching big green projectiles. You can limit the risk of colliding with such a projectile, first of all, by avoiding situations in which your ship is coming right at the monster. In most cases, you will not have enough time, then, to change the course. Always try to approach the beast in slalom.
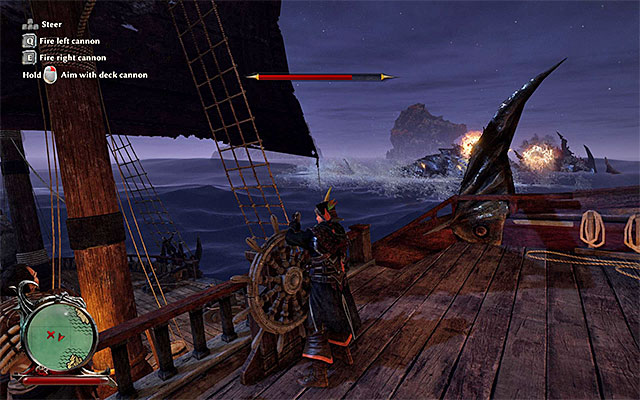 Using side cannons will deprive the monster of its health bar faster
The fact that the monster attacks the ship means that it is vital for the battle to be as short as possible. I recommend against using the prow cannon, because it does not pack enough firepower. Instead, position yourself parallel to the monster and fire side cannons. Continue up until you drain the monster's entire health bar.
Rewards for completing the quest:
Way to unlock the quest: Talk to Bones (after you progress to the third chapter of the game).
Quest giver: Bones
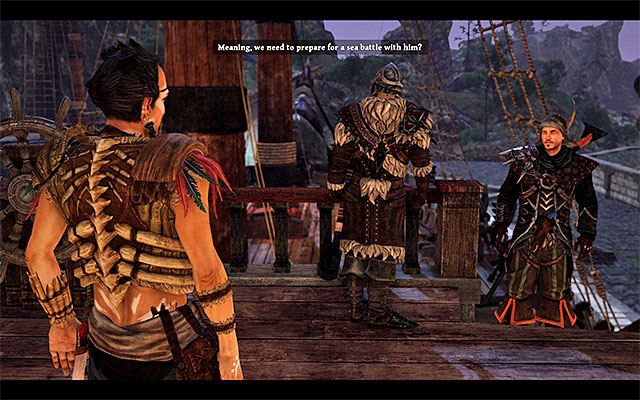 Bones warns you of the actions of the Inquisition
You get the opportunity to receive this quest soon after you progress to the third chapter of the game's story line, probably after you already recruited everyone for the spirit ritual. During one of the conversations with Bones, you learn that commandant Sebastiano (the leader of the inquisition, whom you met on Tacarigua) is preparing an attack on your fleet. It will be carried out the next time that you use the ship (regardless of the destination) and you will have to play this quest, as a result.
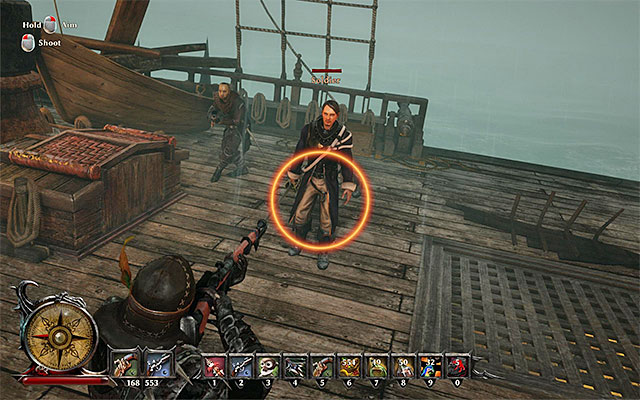 Kill the two soldiers
After the sea battle starts, wait until you gain control of your character and attack the two Soldiers. Remember that, you should keep running around, while fighting, dodge and try to parry blows, in the case of melee combat. Also, do not allow yourself be surrounded, because it is going to be difficult to get out of many narrow passages.
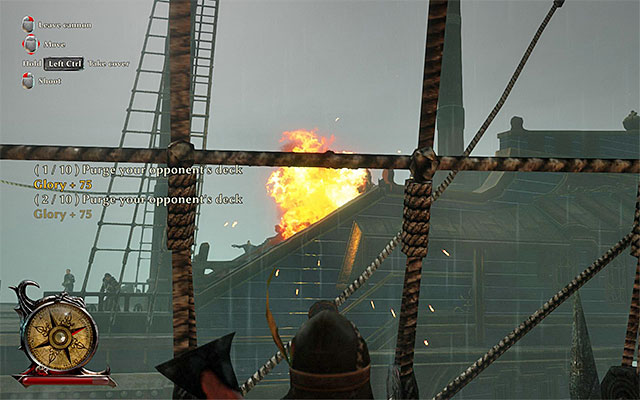 Attack the opponents that use cannons and avoid taking damage
The next part assumes that you attack the enemy ship. Run up to one of the two interactive cannons and start firing. First of all, aim at those of the enemies that are also using cannons. Apart from that, a very important issue is that you hold down the key/button for covering, for several seconds. Do that whenever a shot towards your character is fired. If you ignore to do that, or are too slow, you will lose some of your health. After you have eliminated the gunners, deal with the remaining, armless, soldiers. In total, there are 10 NPCs to kill (200 Glory Points).
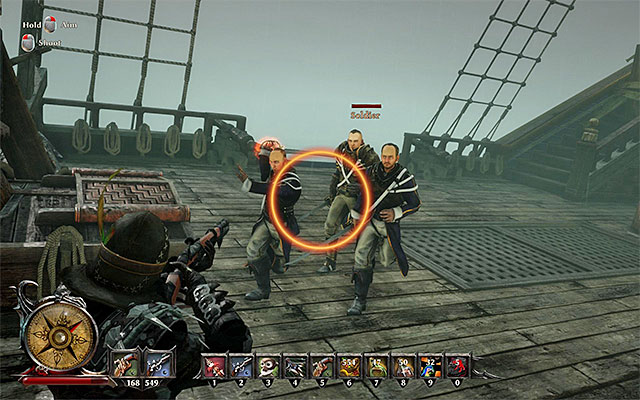 Eliminate soldiers of the Inquisition
Wait for your character to aboard the enemy ship and attack the groups of Soldiers. Just like earlier, you need to keep moving around and dodge the quite strong attacks in melee.
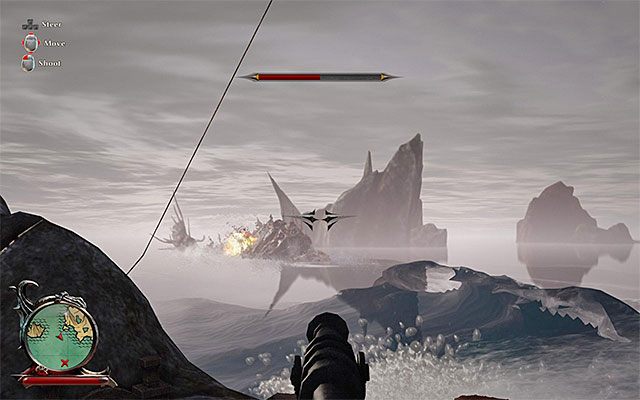 You need to defeat Sebastiano in a duel
Finally, you will have to fight a duel with Sebastiano. He deals quite a lot of damage so, keep running around and dodging, as well as parrying the commandant's blows, if necessary. Defeating Sebastiano (75 Glory Points) ends this quest and you take over the Inquisition's ship.
Rewards for completing the quest:
Way to unlock the quest: Talk to Bones (after you progress to the third chapter of the game).
Quest giver: Bones
 You are up to meet a sea monster
You get the opportunity to receive this quest soon after you progress to the third chapter of the game's story line, probably after you already recruited everyone for the spirit ritual. Additionally, you need to have completed the "Gigantic Threat". During one of the conversations, Bones warns you against a gigantic sea monster. The encounter with the beast takes place after you use the ship again (regardless of the destination) and you will have to play this quest, as a result.
 Remember to avoid the green projectiles
This quest is even more difficult than the "Gigantic Threat" itself, because this sea monster is much more aggressive. First of all, try to avoid the huge green projectiles that the monster spits, thanks to changes in course. Just like in the previous battle, do not try to sail towards the beast in a straight line, because you will expose yourself to attacks.
Try attacking the monster also at long rangeNot only does this monster spit projectiles, but can also ram into your ship, after it submerges. You can limit such occurrences in two ways. First of all, each time that the monster submerges, try to sail ahead, as fast as possible, instead of taking slow turns. Secondly, it is recommended that you attack at a long range, using the cannon mounted on the prow. This will make the battle longer, but allows you to keep the ship's health at a safe level. Use the side cannons only if the beast approaches close to the ship, by itself. Draining the monster's health ends the battle.
Rewards for completing the quest:
The way to unlock the quest: Automatically, after you complete "The Traitor" main quest (Taranis isle).
Quest giver: Horas
 From Horas, you will learn about the plans of the Crow's fleet
You can unlock this quest towards the end of the "The Traitor" quest , which you do on the Taranis isle. Just to remind you, the aim of the quest is to get Horas, the traitor and to defeat the titan that he summons. After you defeat the titan, you will watch a cutscene of the conversation with the mage. From Horas, you will learn that you can fight a naval battle with ghost ships, commanded by Crow, a piece of information confirmed by Bones, during a conversation.
You cannot start the battle with Crow right away and this does not happen automatically, after you sail into the sea, a thing that happened in the case of the Inquisition and the renegade pirates. First of all, you need to meet two requirements:
1) Destroy all crystal portals - you can find the description of the steps that you need to take, in the chapter entitled "Other Quests, in the walkthrough for the "The Realm of the Shadows" quest.
2) Include five vessels in your fleet - These are the ships of the Demon Hunters, the Natives, the Crystal Mages, the Inquisition and the renegade pirates. You can find the description of the steps that you need to take in the chapter with the main quests on the Antigua isle, in the walkthrough for the "Pirate Alliance" quest, given to you by Alvarez.
If you have met both requirements, go aboard your ship, interact with the steering wheel and select "Attack Crow's fleet of ghost ships" (the above screenshot).
Note - if you want to check on your progress, you can select Report from the list. Your character will tell what may be missing.
 Complete the QTE event to dodge properly
Pick any destination and wait for the cutscene, of the beginning of the battle with Crow's fleet, to load. After you regain control of your character, walk to the right a bit and hop over the obstacles. After you get to the main deck, go ahead. Be prepared to double-tap the key/button displayed on the screen, because this is the only way to escape death.
 Eliminate minions along your way
Kill the first Minion and keep going, while using the secondary weapon to cut your way through. Attack the minions and wait for another cutscene, of boarding Crow's ship.
 Do not let the guard launch strong attacks
First, you will have to defeat a, quite, numerous group of minions so, remember to stay in motion for the whole time and not to let yourself be cornered. After you defeat the minions, you will be attacked by a Shadow Guardian. You need to be even more careful here, because the beast is quite agile and deals high damage. Depending on your playing style, rely either on frequent dodges or parrying the opponent's attacks. Heal yourself only if your character's health drops below 50%.
 You need to defeat Crow
Finally, you will have to face off against Crow, i.e. the captain of the ghost ships. In spite of what you might expect, he is not too demanding, especially if you are fighting at a distance and prevent him from landing melee attacks. After you defeat Crow, this quest will be over. Apart from that, from now on, you can visit the Skull Island so, go to the chapter with the main quests in that location.
Rewards for completing the quest:
How to unlock the quest: through conversation with Bones (at any given moment).
Quest giver: Bones
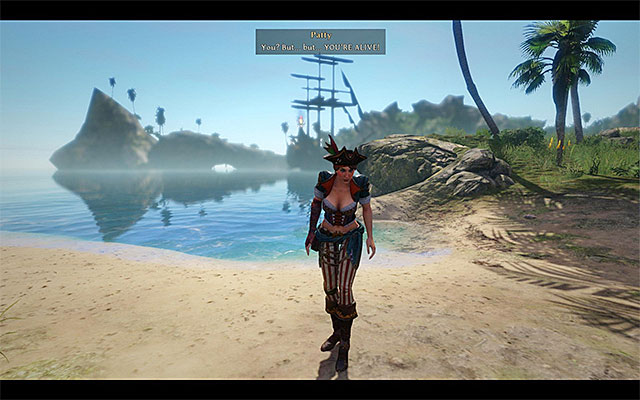 Patty can be found on a small island, neighboring Kila.
This quest can be activated in any given moment and place. You can add the quest to your journal by speaking with Bones in any moment you like, as well as by speaking with the pirates located on the beach, on the Kila Island. Patty is hiding on a small island, located to the North of the mentioned beach (jump into the water and swim all the way to the island). Approach Patty to start a short cutscene.
Rewards for completing the quest:
How to unlock the quest: through conversation with Bones (at any given moment, after your first journey with the sloop) or after using the bed for the first time.
Quest giver: Bones
 A sample bed.
The chance to add this quest to your journal will come around after your first journey aboard the sloop, or to be more specific, after leaving the Crab Coast. After initiating a conversation with Bones, the man will suggest the main character to get some rest. To do so, you must find a bed (in one of the houses on the dry land or inside a cabin on some larger ship) and use it.
Note - you can also skip the conversation with Bones, and interact with any bed from your own will. Regardless of your approach, a scene from the Afterlife will commence.
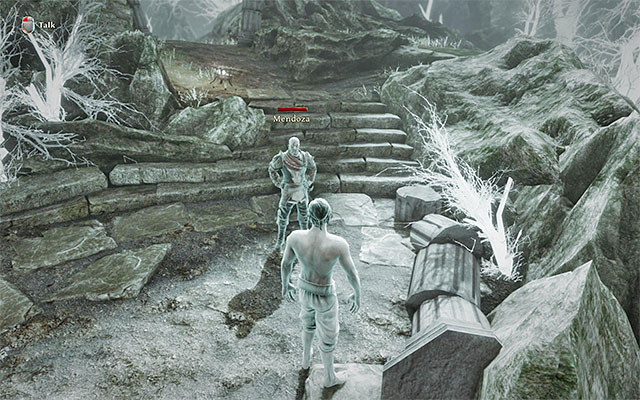 Mendoza
Instead of showing you the standard rest options, the game will send the Nameless Hero to the Afterlife (Underworld; 200 Glory Points). Here, you must locate Mendoza and speak with the ghost of the pirate. Regardless of your conversation choices, you will soon leave this place
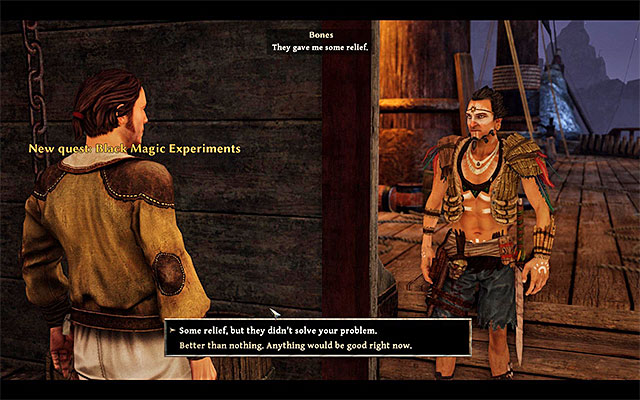 Speak with Bones yet again.
After returning to the land of the living, initiate another conversation with Bones. Tell him about the nightmares troubling you at night, and about meeting Mendoza while being in the Afterlife. This way you will learn more about the Afterlife. Bones will tell the main character about the ways of accumulating the positive and negative soul points, and will suggest him to find a shaman and acquire a Black Heart.
Note - if you mentioned Mendoza during the conversation with Bones, you will unlock another crew-related quest called "The Inquisitor".
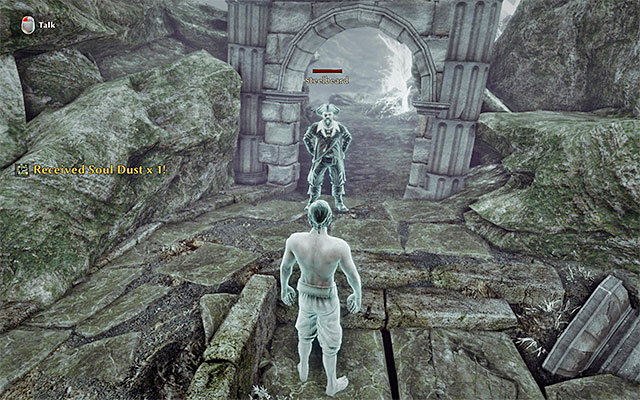 During one of your visits to the Afterlife, you will be able to meet Steelbeard.
From this moment on, during your next attempts to try to use the bed, from time to time you will be transferred to the Afterlife. Each of those encounters will be short and without much content, but you will be able to collect Soul Dusts scattered around the area. After you wake up, you can talk to Mendoza about that (one of the crew members possible to recruit).
From the undead inquisitor, you will learn that he is willing to buy the dust from the Nameless One. The rate is five units of soul dust per 200 gold pieces.
During the successive vision, the Nameless One will also run into more unique characters with whom to talk. These are Steelbeard, who is the protagonist's father, Ursegor, who is the Titan Lord, and also Mara and Slayne.
Note - If you have not found/included Mendoza into the crew (see the walkthrough for "The Inquisitor" crew quest) simply continue collecting soul dust and don't sell it during your meetings with merchants.
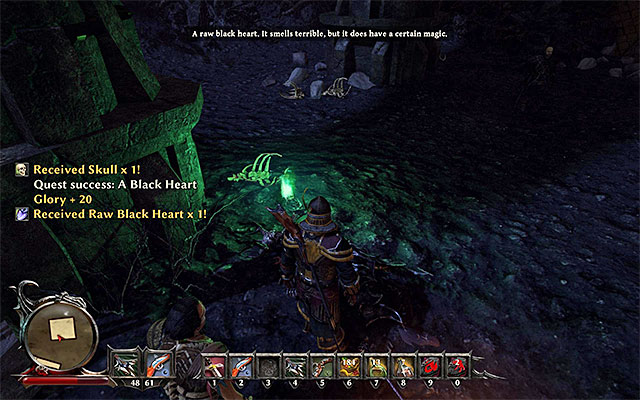 The Black Heart can be found inside each of the Shadow Lords bodies.
As it was mentioned before, Bones, after your first Afterlife encounter, will suggest you to find a Black Heart and a shaman. A black heart (Raw Black Heart) can be collected by eliminating any of the Shadow Lords, or to be more specific, some sort of a boss enemy (those monsters are sometimes associated with some of the main and side quests). Each of the lords lefts one heart and Bones will suggest you to collect them.
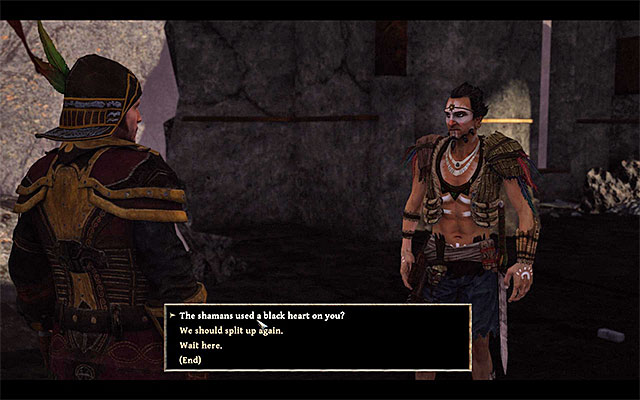 Bones, although reluctantly, will direct the Nameless Hero to his hideout.
During the mentioned conversation with Bones (after collecting the first black heart), it's worth asking the man about one of the black hearts the man has in his possession, which he left for himself on a "dark hour". Convince the ally to tell you to location in which the artifact is hidden. You will also learn that you will have to reach Bones' hideout located in Tacarigua. Additionally, you will be given an Old Chest Key in order to open the chest containing the black heart.
After you reach Tacarigua, you need to head towards the Northern part of the isle, i.e. you need to get close to the entrance of the cave with the crystal portal inside. Around, you will meet Severin (you do not need to talk to him) and a number of monsters, e.g. Minions. After you have secured the area, find the Hidden Chest shown in the above screenshot and use the key to open it. From the chest, collect, first of all, the Raw Black Heart (200 glory points). Of course, it is a good idea to let Bones know that you located his stash and that you took the heart.
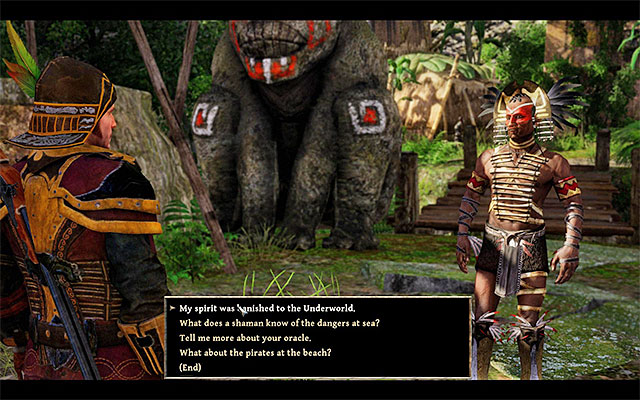 Speak with Hirutu about the trapped soul of the main character.
As far as the shaman goes, the person who can help the Nameless Hero is none other than the natives chieftain, Hirutu, living on the Kila Island. After reaching the natives village, you can talk with the mentioned chieftain (200 Glory Points) and ask him to help you. The shaman will confirm that he can help the main character.
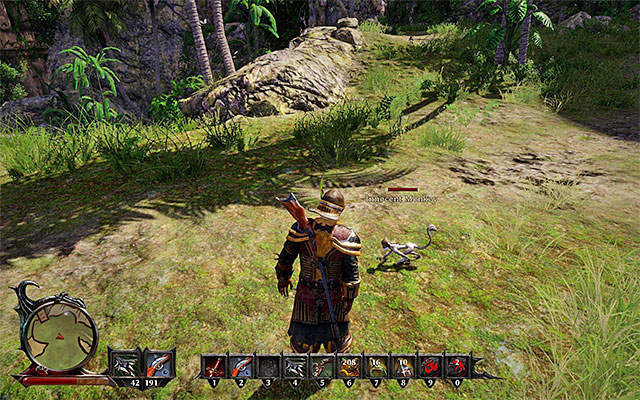 A sample monkey.
Shaman Hirutu, besides the mentioned Raw Black Heart, requires the bones of an innocent being. The chieftain will suggest you to find an Innocent Monkey, and to kill it in order to collect its bones (Bone of an Innocent Monkey). You can look for monkey around the village, near the rope bridge leading to the village, or speak with Bahati, located in the village, in order to but the bones from her. After you've acquired the bones, go back to the shaman.
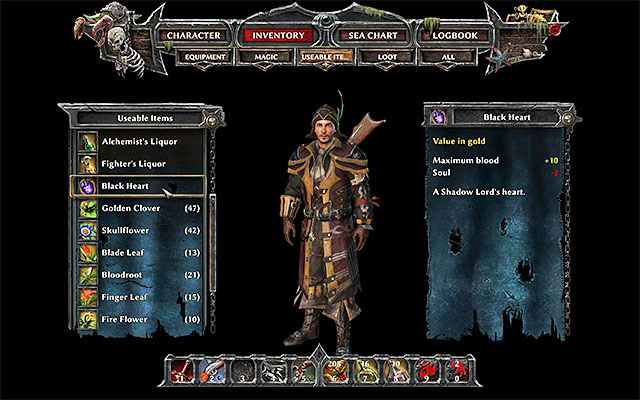 Select the cleansed black heart from the inventory.
Hirutu can perform the black heart cleansing ritual infinite number of times, provided that you have the necessary ingredients to do so. Each time the shaman needs one Raw Black Heart and a Bone of an Innocent Monkey. It allows him to prepare a cleansed black heart (Black Heart) (200 Glory Points). Whether you want to consume the heart is all up to you - you will be given a bigger health bar (Blood), increased by 10 points and you will receive 2 negative soul points. I would recommend you to do so immediately - even if you plan on accumulating the positive soul points, losing only 2 of them by getting your health bar bigger isn't much of a problem.
Rewards for completing the quest:
How to unlock the quest: through conversation with Saddec
Quest giver: Saddec
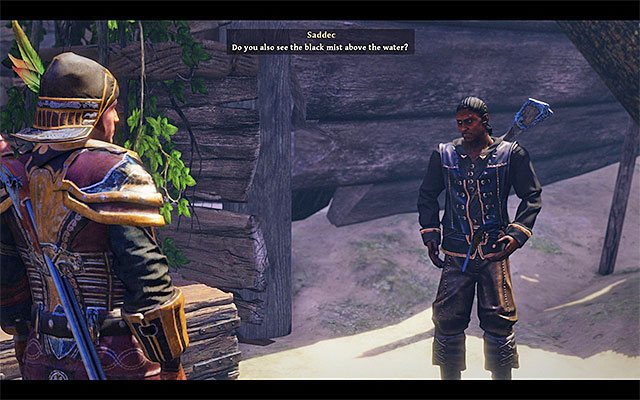 Saddec can be found near the shipwreck, on the pirates beach.
During your stay on the Kila Island, you can meet with Saddec. He can be found near the shipwreck, on the pirates beach. Speak with the man. During the conversation you will be given a drink (Fighter's Liquor), and you will learn that the man is interested with joining the Nameless Hero's crew. Unfortunately, Saddec can't leave Kila right now, as he must take care of the Sick Booze, who saved his life in the past.
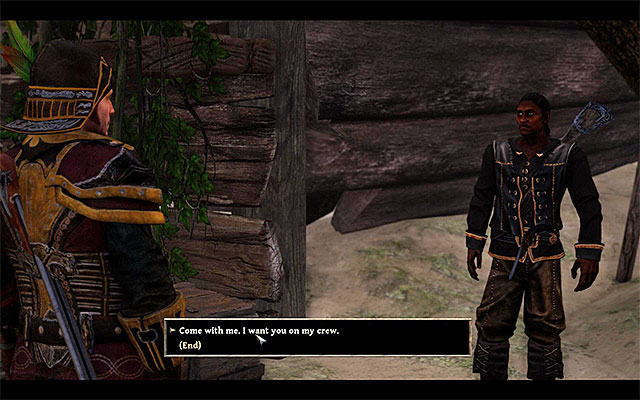 You can invite Saddec for joint journeys, but you can only do that after you have access to your own ship.
You will be able to recruit Saddec only when Booze's mental capabilities are fully restored, which will allow Saddec to leave this location. You will need to complete a side quest called "Booze's Beffudled Mind". After you've done it, speak with Saddec again and invite him for a joint journey. The man will agree, but only if the Nameless Hero has access to his own ship (Bones' sloop can't be used for that). Otherwise, you will have to meet with Saddec in the future.
Attention - When Saddec is on board of your ship, talk to him again. This will allow you to start a quest called "I Spy, With My Little Eye..."
Rewards:
How to unlock the quest: through conversation with Patty
Quest giver: Patty
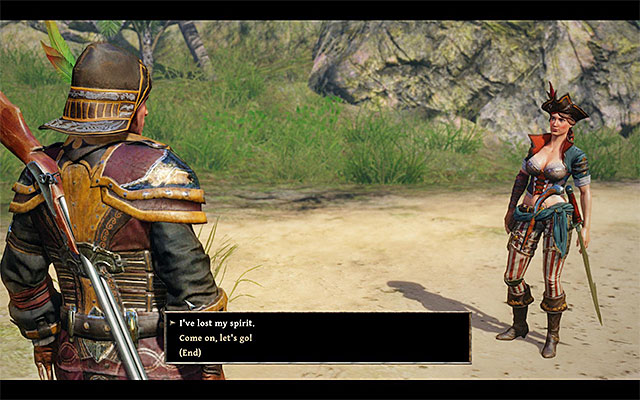 You can invite Patty for joint journeys, but you can only do that after you have access to your own ship.
This quest can only be unlocked after you've located Patty, or to be more specific after you've completed the crew quest called "Find Patty". Patty is hiding on a small island, located to the North of the pirates beach on Kila Island. During the conversation you can invite her for a join journey. The woman will agree, but only if the Nameless Hero has access to his own ship (Bones' sloop can't be used for that). Otherwise, you will have to meet with Patty in the future.
Note - Patty can accompany the main character in his quests, even if doesn't have access to his own ship, but only with the quest related to Kila Island.
Rewards for completing this quest:
How to unlock the quest: through conversation with Bones.
Quest giver: Bones.
 You must speak with Bones to unlock this quest.
This quest can be unlocked during the completion of another side quest called "Black Magic Experiments" from the crew quests. After your first visit in the Underworld, and meeting Mendoza, initiate another conversation with Bones. Inform the man that you've met Mendoza during your stay in the Underworld. From Bones you will learn that Mendoza's ship was recently seen near the Taranis Island and it would be a good idea to explore this trail.
After swimming all the way to Taranis Island, you now have to reach its South-Western corner, or to be more specific, the Deadlands, occupied by one of the Shadow Lords. Examine the coast thoroughly, thanks to which you should be able to locate a moored ship near the coast, which can be seen on the above screenshot. Swim to the boat and interact with the ladder to get on the deck.
 Find Mendoza's Soul Shard and speak with the dead Inquisitor.
After reaching the deck of the ghost ship, find Mendoza's Soul Shard somewhere here and pick it up (100 Glory Points). Wait for Mendoza to appear and listen to the conversation with the character, during which the Nameless Hero will make Mendoza realize that he has to serve him now. It's worth noting, that Mendoza won't be able to become a full-fledged party member until the main character has his own ship at his command (Bones' sloop does not count).
Note - Mendoza may leave your crew for good and this may happen if you manage reach high values with your character's Soul parameter, i.e. around 90-100 points. After you approach Mendoza, you will learn then that he retrieved his soul fragment and he disappears. After you talk to Bones on this, you will learn that he did not want Mendoza to be a bad influence on him and gave the soul fragment to the Inquisitor.
Rewards for completing the quest:
How to unlock the quest: through conversation with Jaffar.
Quest giver: Jaffar
 Jaffar can be found in the mages encampment, on the Taranis Island.
The chance to unlock and complete this quest will appear after reaching the crystal mages encampment, located on the Taranis Island. After reaching the camp, search for a gnome called Jaffar and speak with him. Jaffar will ask the Nameless Hero to aid him in pull his subordinate Ali to the watchmen (Guardians).
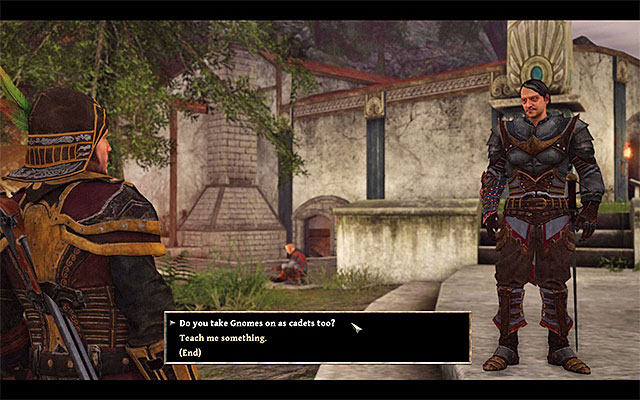 Meet with Ali and general Magnus.
Begin by searching for Ali, who should be hiding nearby, and promise the man to help him - it will make the gnome join the party temporarily. Afterwards, speak with general Magnus, who should be near the entrance to the main mages building. From Magnus you will learn that the watchmen don't recruit gnomes, but he can change his mind if Ali will prove his worth (100 Glory Points).
 Let Ali win the duel with the Nameless Hero.
Speak with Ali and accept the plan to have a honorable duel. The only way to prove the gnome's value is to lose the fight on purpose. After the fight starts, do not attack Ali at all, but allow him to empty the health bar of the Nameless Hero (the hero looses consciousness for a short while). You can now go back to Magnus, who should be willing to recruit a new cadet. Finally, go to Ali and Jaffar and pass on the good news.
Rewards for completing the quest:
How to unlock the quest: through conversation with Jaffar.
Quest giver: Jaffar
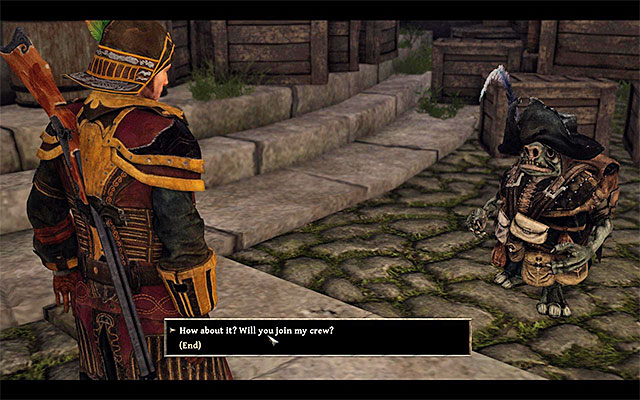 Jaffar
During your stay on the Taranis Island, you can go to the mages encampment and find a gnome named Jaffar there (he should be standing near the main building). Speak with the man and offer him to join the crew of the Nameless Hero. Jaffar won't be willing to join you before the character does not meet the following requirements:
Attention - After Jaffar joins the crew, it is good to talk to him from time to time and check if he managed to steal from someone in the meantime. You can take all the goods for yourself.
Rewards:
Way to unlock the quest: Talk to Horas.
Quest giver: Horas
 Horas asks you to meet up with Faruco
You can unlock this quest after you take the journey with Horas from Tacarigua to Taranis. To learn more, see the chapter with main quests in Taranis, and more precisely, the walkthrough for the "A Follower of Magic" quest. After you have returned to Taranis, talk to Horas. He will ask you to meet up with mage Faruco on his behalf, in order to receive another quest.
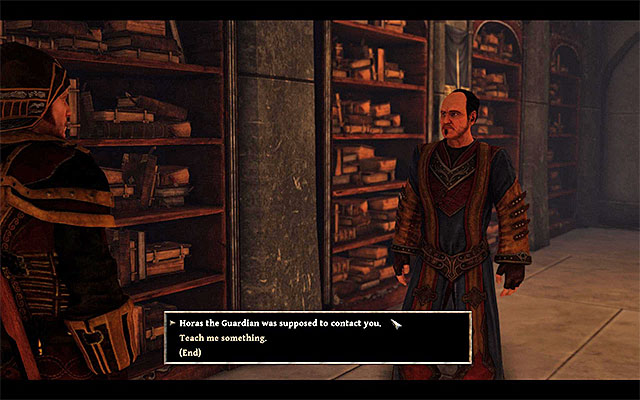 Faruco is staying at the mage HQ on Taranis
Go to the mages HQ on Taranis and walk into the biggest building. Inside, find mage Faruco, who should be somewhere at the building's first floor. Tell Faruco that you come from Horas. Just as expected, you receive a new crew quest, connected with obtaining Rock Crystals.
Rewards for completing the quest:
How to unlock this quest: Speak to Faruco.
Quest Giver: Faruco
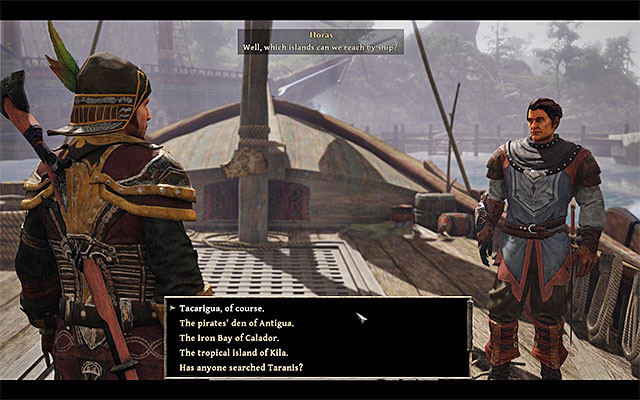 Inquire Horas about people you need to meet and places where you can find them
You can unlock this quest after you will complete the crew quest named "A Friendly Turn" and you will meet Faruco on the Taranis Island after you will be asked to do so by Horas. Faruco will give you a quest. You need to deliver Rock Crystals to mages. At first you should go to Horas and inquire him about guards that were sent to bring the Crystals and where you can find them (choose every dialogue option from the list). It will allow you to determine that you have to visit Calador, Kila Island and Antigua Island.
Notice! From now on you can deliver to Horas every Rock Crystal that you will find. For each one of them he will pay you 100 gold pieces. However I recommend to keep them in your inventory since in the further part of the game you will be able to use them for the interesting quest which you can take from Faruco.
 You can find Cisco in the tavern or toward south of it
You can visit guards sent to find the Rock Crystals in any order you would like. I suggest to start with a visit in Calador and to look for Cisco. This character should initially stand next to a gravestone toward south of the tavern however if you completed the quest named "Peace and Quiet" or "A Big Haul" then Cisco will be waiting inside the tavern instead. Speak with him and he will give you 5 Rock Crystals (you will also receive 100 Glory Points).
 Go to the little island located near to Kila Island
Now swim to Kila Island. You are looking for a guard named Leonardo. You can find him on a much smaller island located toward the northwest of the Kila Island (in the same place you can for example find Patty). Again all you need to do is to speak with Leonardo and to take from him 5 Rock Crystals (you will also receive 100 Glory Points).
 You will find Ramon in the port town or near the road leading to it
The last place you need to visit is Antigua Island where you can find a guard named Ramon. If this is your first visit in this place then you can find Ramon near the main road leading to the port town. From the other hand if you have met Ramon earlier and you helped him got into the port you will be able to find him next to the warehouse located in the west part of the town. Speak to Ramon and tell him about resources that you need. This way you will get 3 Rock Crystals (you will also receive 100 Glory Points).
Now you can return to Taranis Island and speak to Horas. Your interlocutor tells you that he will deliver your Crystals by himself and this way your quest will be completed.
Notice! Nevertheless I recommend to speak to the mage Faruco once again since he will unlock a new quest for the Nameless Hero.
Rewards for completing this quest:
How to unlock this quest: Speak to Faruco.
Quest Giver: Faruco
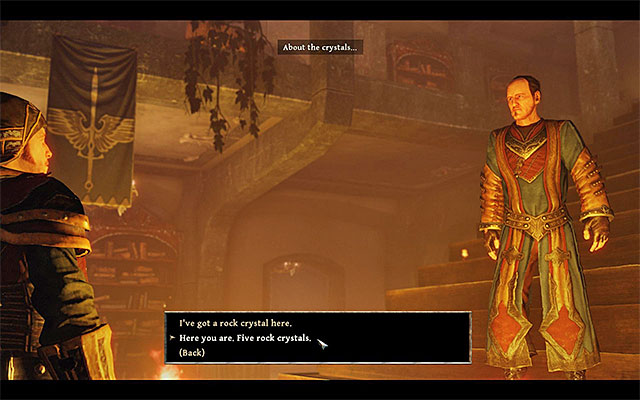 You can deliver Rock Crystals to Faruco
You can unlock this quest after you will complete the crew quest named "Magical Efficiency" so after you will meet with every person that possesses Rock Crystals. You can now go again to the mages' camp on Taranis Island and talk with the mage named Faruco. This character will ask you to deliver him new Rock Crystals and for every one of them he will pay your hero 200 gold pieces.
Notice! It's good to know that Faruco pays you more gold for Crystals than Horas so you should bring them only to him.
How to unlock this quest: Speak to Edward.
Quest Giver: Edward
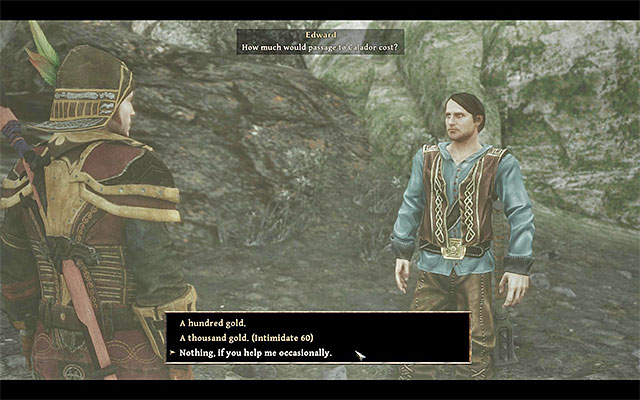 First you need to help Edward with killing few monsters
The demon hunter Edward stays in the port town on Antigua Island and at first he will not be interested in joining to the Nameless Hero's crew. You can change his mind if you will complete a side quest related to Edward named "The Shadow Creatures in the Backcountry". After you will deal with monsters you should speak again to Edward and invite him to your team. What is interesting beside the basic invitation (third dialogue option which will also give you two Souls) you can also demand from him to pay you for entering your ship. Normally he will pay you 100 gold pieces but if you will use the Intimidate ability on at least level 60 he will give you even 300 gold pieces.
Attention - Edward may leave the crew for good if your Soul parameter is very low (about 0-20 points). If you've lowered this parameter and don't want to loose Edward, avoid talking to him until it is higher again.
Rewards for completing this quest:
How to unlock: Talk to Edward.
Quest giver: Edward
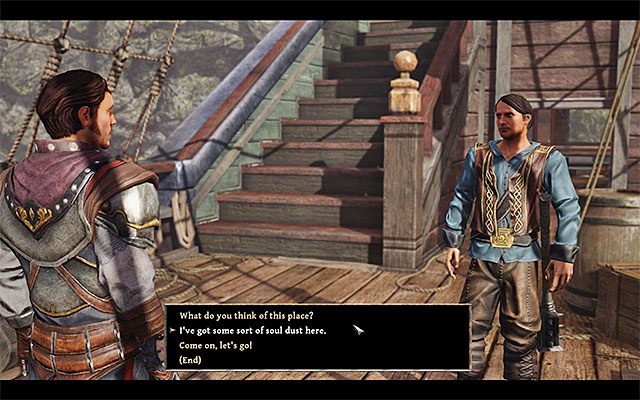 Edward can buy Soul Dust from the hero
This task can be started after completing the "Sign Edward On" task, which means after Edward, the demon hunter, joins the Nameless Hero's crew. Talk to him and tell about the Soul Dust that you've found when you were in the Underworld. From now on, you can sell the Soul Dust to Edward. Now you can give Edward five Soul Dusts (if you don't have them enough you should return to this character later) and receive two Souls as your reward. This will complete this quest.
Rewards for completing this quest:
Attention - Soul Dust may also be sold to another member of your crew - Mendoza.
How to unlock: talk to Edward.
Quest giver: Edward
 You can help Edward learn about his family
You will be able to start this quest after you complete two requirements. Firstly, Edward has to be a member of your crew (more info about that in the description of the "Sign Edward On" quest). Secondly, the hero has to join the demon hunters faction (more on that in the description of the "New Allies" quest in Calador).
If you've completed the tasks described above, Edward should talk to you after the ceremony of joining the demon hunters (otherwise, seek him out on your ship). Edward will tell you that he wants to learn something about the history of his family and you will be asked to find trace of his ancestors.
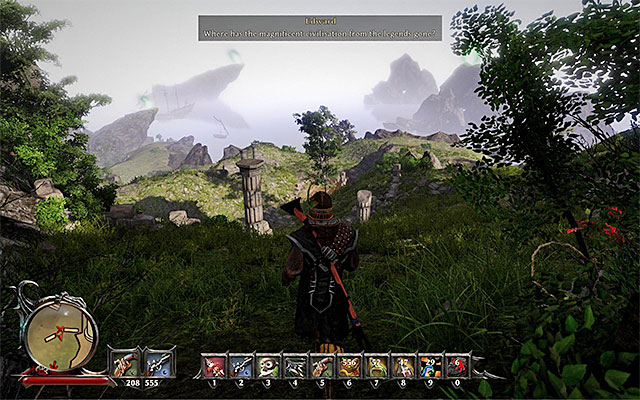 Explore the area around the castle
Before you start doing the task, make sure that Edward follows you (if you have a companion already, send him back to the ship and take Edward with you). Head to the south-western part of Calador. You have to reach the area with a small camp, south of the ruins that you've visited when hunting the Shadow Lord and collecting the grimoire. When you're in the right place, Edward will talk to you (200 glory points).
 Reach the ruins of the house
Listen to what Edward has to say and then follow him, heading to a large meadow. This area is occupied by Scavengers and Rammers, so you should be careful not to be ambushed. You will reach a place where the ruins of Edward's uncle's house can be found. That's the end of this quest, but you can now start another quest connected to Edward (more on that in the description of the "Edward's Birthright" quest).
Rewards:
How to unlock: Talk to Edward.
Quest giver: Edward
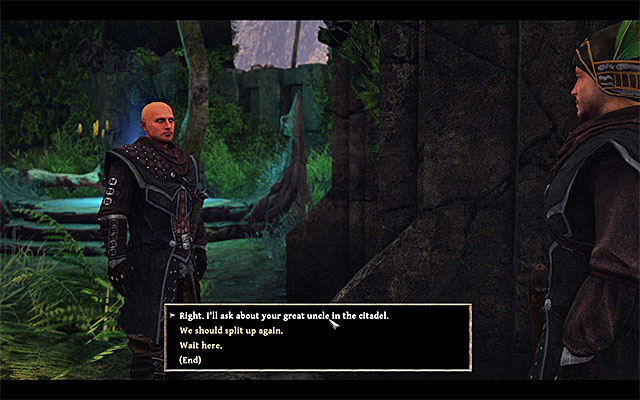 Offer your help with asking the demon hunters about Randolph
You can start this quest after completing the "Edward's Family History" quest, which means after searching Calador with Edward and finding the ruins of his uncle's, Randolph, house. Make sure that Edward is still an active member of your team and offer him your help in finding information about Randolph in the Citadel.
Attention - Head to the Citadel only after unlocking this quest (make sure that you have the right entry in your quest log). Otherwise, the dialogue options about Randolph and Edward will not be available.
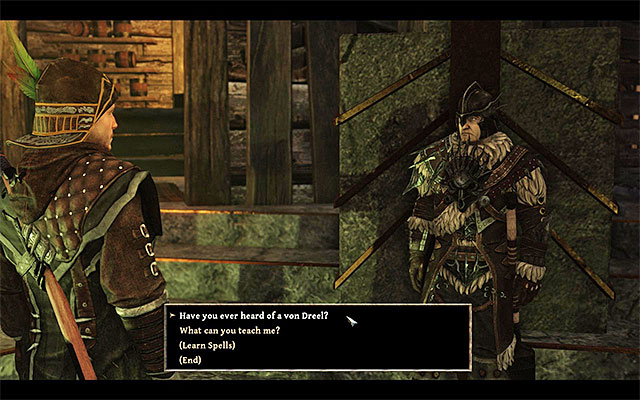 Drake is the hunter that you need to talk with
After reaching the Citadel, talk to Drake, who should be somewhere on the ground floor of the building. Ask Drake if he knows anything about Randolph and wait until he finds a books with more specific info about him. You will start a quest consisting of finding Randolph's treasure.
Rewards:
How to unlock: Talk to Drake.
Quest giver: Drake
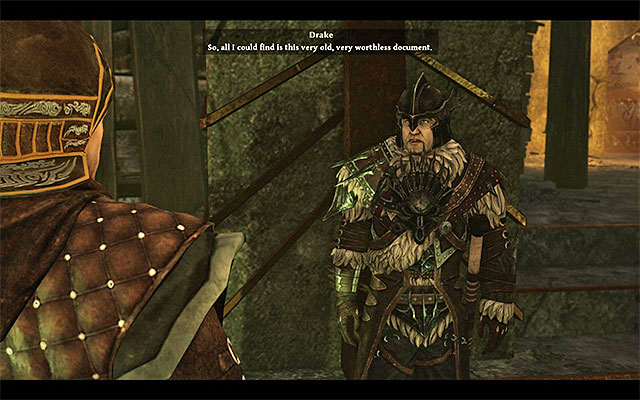 Drake will tell you about the treasure
You can start this task after completing the "Edward's Birthright" quest (after meeting Drake in the Citadel). From talking to the hunter, you will learn about Randolph's treasure. Talk to Edward (if he doesn't follow you, you will find him on your ship) and take him with you to search for the treasure.
The treasure is located in the northern part of Calador. After leaving the Citadel, head north and stay on the path leading to the mountains. Search for a fallen tree that makes a passage over the river.
 The location of the treasure
Crossing the river will allow you to reach a high rock shelf. Find an X painted on the ground and use a Shovel to dig out a chest (100 glory points). You can open the chest and take out 805 gold and Deed of Ownership (50 glory points). Talk to Edward to give him the document and finish the quest.
Rewards:
Way to unlock the quest: Talk to Mendoza.
Quest giver: Mendoza
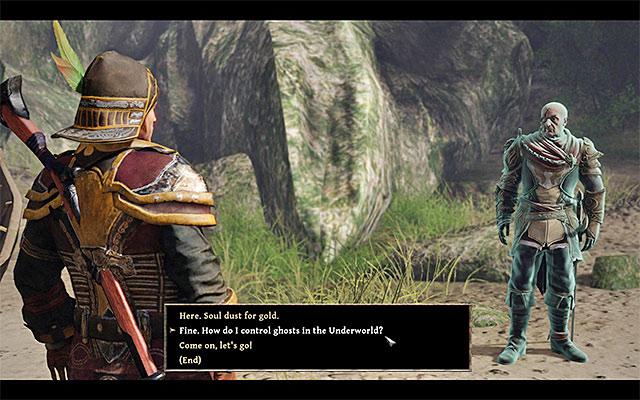 Bring up the issue of the lost soul, during the conversation with Mendoza
After Mendoza joins your crew (more about this in the walkthrough for the crew quest "The Inquisitor"), you can have a long conversation with him, about the protagonist's lost soul. Towards the end of the conversation, you will learn that you will be able to contact anyone in the Underworld. In each case, you need tome personal belonging of the person you want to contact.
Note - may leave your crew permanently and it may happen if you manage to raise your soul factor to high levels, i.e. around 90-100 points. After you come close to Mendoza, you will learn that he received his soul shard back and he disappears. If you talk to Bones about this, you will be able to figure out that he did not want Mendoza to be a bad influence to your character and that he transferred his soul shard over to the ghost. If you increase the soul level and you do not want the current quest to be canceled, avoid Mendoza up until the moment, at which your soul parameter goes down again.
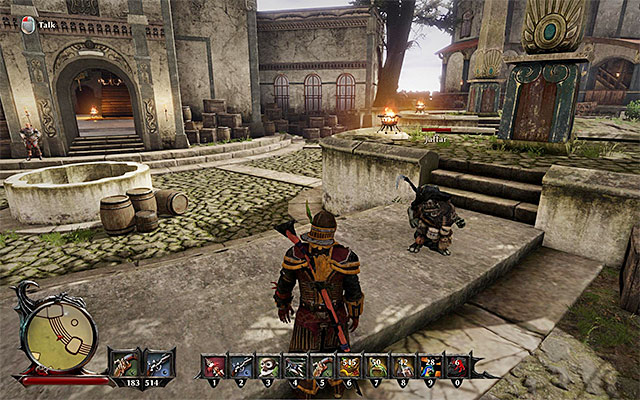 Jaffar
One of the people that you can contact is captain Steelbeard, i.e. the father of your character. Summon him, while talking to Mendoza, and you will learn that gnome Jaffar who lives on Taranis has Steelbeard's hat. Reach Taranis and go to the Mages' camp in the center of the isle. Find Jaffar. During the conversation, you can demand that the hat be returned to you immediately, which will earn you negative points, or explain to Jaffar the situation (positive soul points). Regardless of what you did, you will receive the Old Steelbeard's Hair from the gnome (200 Glory Points).
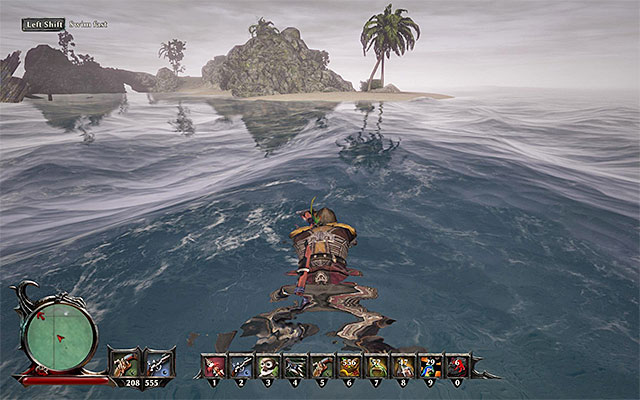
After you have obtained the hair, go to rest thanks to which, during your next visit to the Underworld, you mill meet up with Steelbeard. During the conversation, you will learn that to get his treasure, you need to go to Taranis. After you sail your ship there, Head towards the Northern part of the map (the area to the North of the Mages' camp) and swim up to the islet shown in the above screenshot. Deal with the monsters here and find the X mark on the ground. Dig up the treasure chest (100 Glory Points) and collect all the Purses.
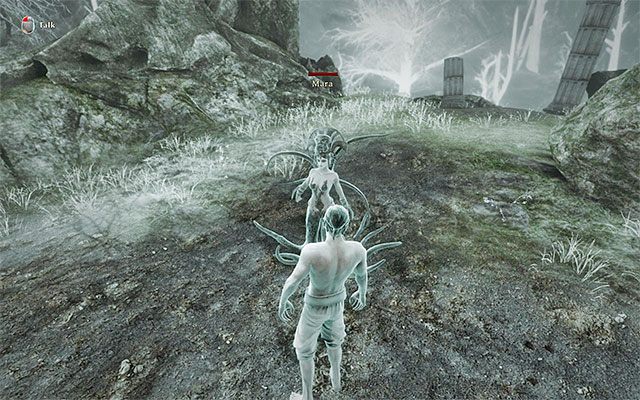 You can encounter Mara during one of your visits to the underworld
During the conversation with Mendoza you can bring up the topic of contacting a ghost and allow the Inquisitor to be creative and suggest the ghost you can talk to. Mendoza singles out Mara, i.e. the Titan Lady. If you have not yet talked to Mara go to sleep and, if you did, listen to Mendoza's hints. Regardless of the situation, in which you talked to Mara, you will learn about a treasure on an islet neighboring Kila.
After you get to the isle, head towards the islet, in the North-Eastern corner of the map, thanks to which you will find the Fragment of Destroyed Mara shown in the above screenshot (200 Glory Points). After you use the bed, you will meet up with Mara again. Your character will ask her for more help, thanks to which he receives 5 Soul Dust (100 Glory Points).
 Garcia will have to reveal the treasure's location
If, while exploring the game world, you have found a Golden Brooch, during the conversation with Mendoza, you will learn that it belonged to Captain Garcia. Next time you use the bed, you will meet up with Garcia in the Underworld. The pirate will have to share information on the location of his treasure. You will receive detailed instructions and directed towards Kila.
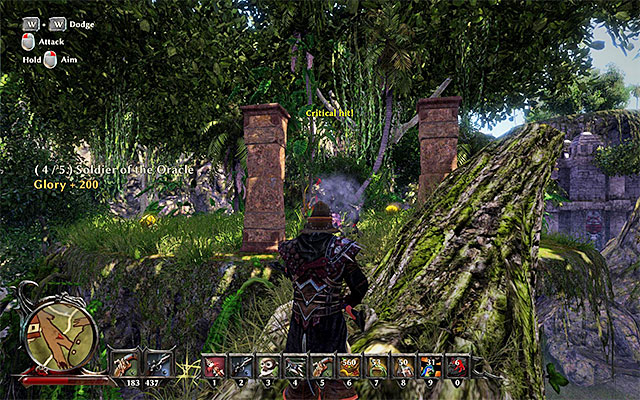
You can start searching for Garcia's treasure only after you have progressed to the third chapter of the game's story line, because it has been hidden in the Forbidden Valley, In the Western part of the isle, across the large gate. The passage to the valley unlocks as a result of progress in the game. After you get to the valley, start exploring the central part. Find a big, fallen tree leading to the ledge with altar (the above screenshot). Before you examine the altar, eliminate the monsters here, including one Soldier of the Oracle.
 Examine the altar and defeat monsters
Approach the Unusual Stone Shrine, interact with it and say the password that you received from Garcia in the Underworld (Garcia is the strongest!). This will make several Skeletons appear, so hop back and deal with the undead. After the fight, approach the altar and collect the Greedy Monkey (100 Glory Points).
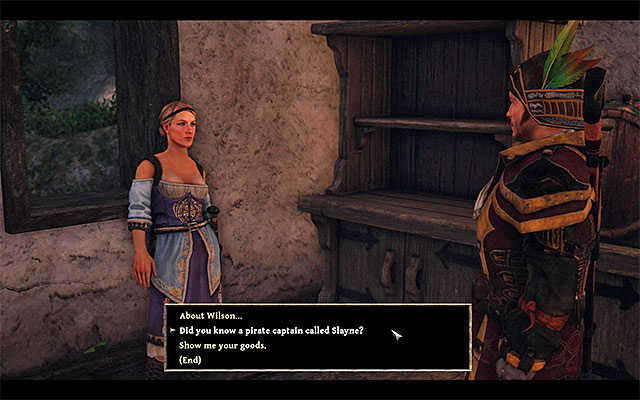 Talk to Grace about Slayne
After you start the "Pirate Alliance" main quest, given to you by Admiral Alvarez on Antigua, while talking to Mendoza you can bring up the matter contacting the undead pirate captains. Singles out Slayne as a potential candidate and tells you to go to Grace, who maintained intimate relations with him. You will find Grace on Antigua in the blacksmith's building. Talk to the woman to receive Slayne's Handkerchief (200 Glory Points).
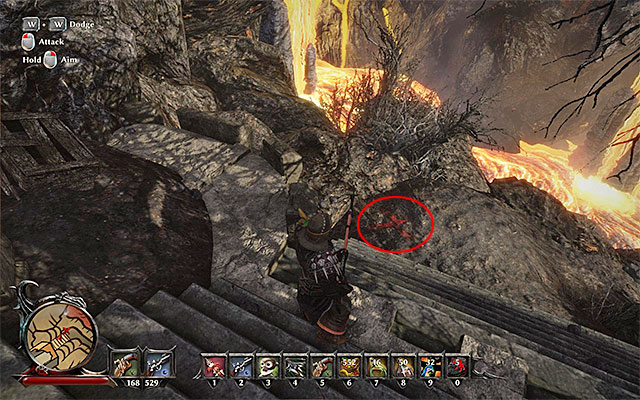
After the conversation with Grace, go to sleep to meet up with Slayne in the Underworld. You will have the captain share information about the treasure that you need to head to Calador for. The treasure is to the North of the Demon Hunters' Citadel, i.e. next to the path shown in the above screenshot that neighbors the lava river. Find the red X mark and use the shovel to dig up the treasure (100 Glory Points). You can now plunder Slayne's, chest collect several valuable items and a Love Letter.
 Find the camp at the beach on Tacarigua
During one of the conversations with Mendoza you can ask him to contact you with a Titan Lord. As a result, Mendoza points you to the artifact connected with Lord Ursegor. To get the item, you will have to get to Tacarigua. After you do, stay on the beach, where you start the exploration of the isle and go West. Soon, you will reach a small encampment on the beach. Explore it and collect, from the chest, Ursegor's Flaming Eye (200 Glory Points).
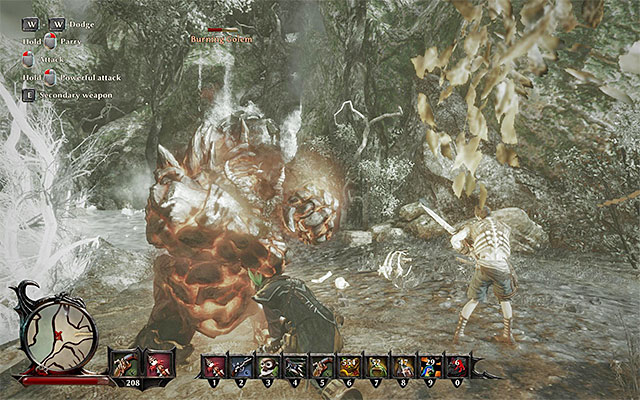 The golem is staying in the Northern part of Antigua
Go to sleep now, which will allow you to meet up with Ursegor in the Underworld. Make the Titan Lord ensure your character with support. You will learn that Ursegor can summon a powerful monster, thanks to which you will gain in strength. Return to the ship and head towards Antigua. After you get there, go to the deadlands in its Northern part. Close to the entrance to the cave with crystal portal, you will run into a Burning Golem. During the fight with the golem, rely on melee weapons, or magic and remember, of course, about dodging his strong blows (especially the charged ground slams). For defeating the monster, you will be rewarded with 500 Glory Points.
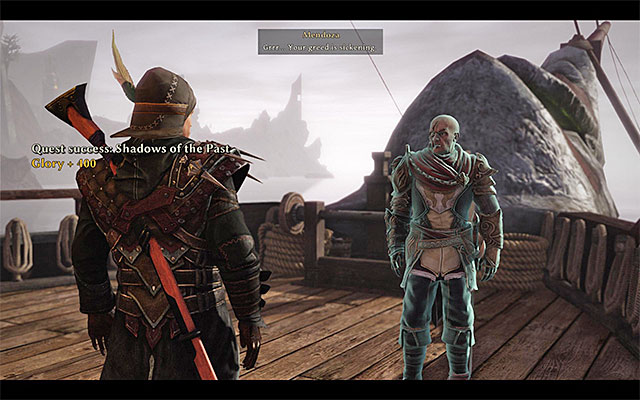 Complete the quest by talking to Mendoza
If you have performed all of the above actions correctly, you can talk to Mendoza again, thanks to which you will end this quest.
Rewards for completing the quest:
Way to unlock the quest: Talk to Saddec
Quest giver: Saddec
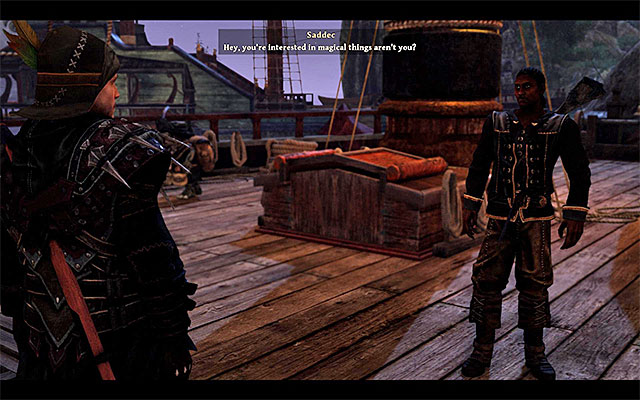 Accost Saddec on a regular basis
You get the option to start this quest after you complete "Sign Saddec On" crew quest, i.e. after Saddec joins your crew, after you meet him on Kila. You can talk to Saddec on a regular basis, thanks to which you will receive valuable potions from him. These are Shadow Liquor, Blood liquor, Alchemist's Liquor, Death Liquor, Gold Liquor, Magic Liquor and Adventurer's Liquor. After you receive all of the items, the quest will be concluded.
Rewards for completing the quest:
The way to unlock the quest: Talk to Patty
Quest giver: Patty
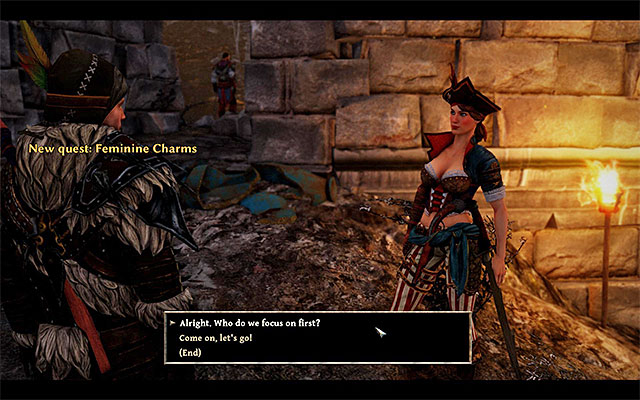 You need to talk to Patty to unlock this quest
You get the opportunity to unlock this quest some time after Patty has joined the crew, as a result of the completion of the "Sign Patty On" quest. During one of the conversations with his sister, your character will be able to bring up the topic of her feminine charms that she could use to win certain advantages. Patty will point to Colby as the first character that she could charm and encourage him to share his wealth.
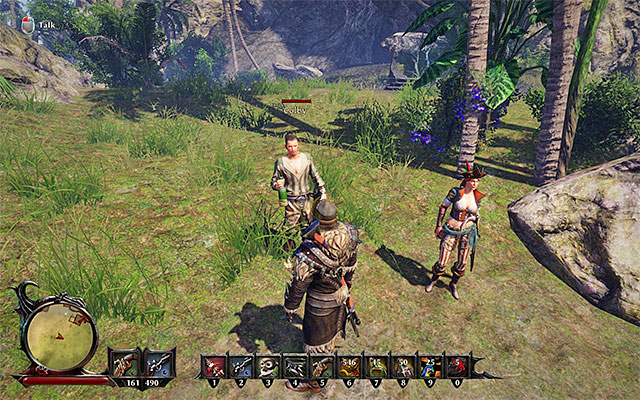 Colby is staying at the Pirate Beach
Reach Kila and it is necessary that you ask Patty to join the active crew. Go to the Pirate Beach with Patty, find Colby there and listen to the conversation with him. During that conversation, Patty will learn about the whereabouts of a treasure (200 Glory Points).
 Go towards the river
Talk to Patty in a way that adds the information about the treasure to your journal. To find the treasure, you need to get to the Crab Coast, i.e. to the location where the game started. Again, go towards the temple in the jungle (Patty may, but she does not need to accompany you). After you reach the temple entrance, go left.

Climb down from the hill and reach the river. Approach the Western waterfall and watch out for the alligator that may be hiding around. Find the red X mark shown in the above screenshot. Use the Shovel here to dig up the treasure (100 Glory Points). You can now open the chest and collect the 1109 Gold Pieces. At the first opportunity, tell Patty that you have managed to locate the treasure.
 You can find Patty near the tavern
I recommend that you now head towards the Calador Bay. After you get there, Patty should talk to your character automatically, about another opportunity and set out to find one, alone. Go ashore and reach the tavern in the central part of the bay. You will find Patty near the tavern's Western exit (200 Glory Points).
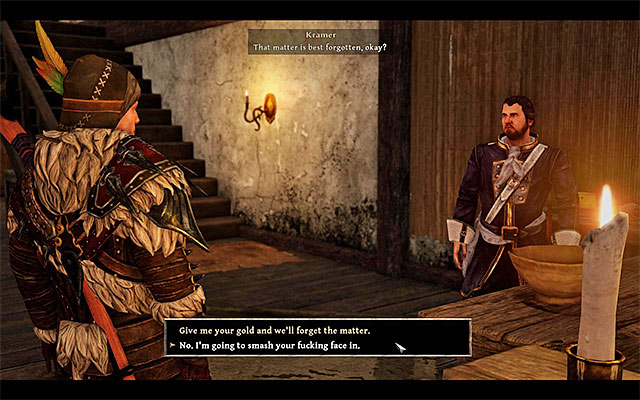 Kramer
During the conversation with Patty, you will find out that she has been molested by Kramer. Head towards the tavern, find the man and talk to him. After a short conversation, there will start a fight, but it will not be too difficult to defeat Kramer (it is a good idea to fight at a distance, or parry his attacks). For defeating Kramer you will be rewarded with 400 Glory Points and 850 Gold Pieces. You can now tell Patty that the man received his lesson.
Note - During the fight with Kramer, make sure that you do not attack the other people in the tavern, by accident. This may, unnecessarily, provoke them to join the fight.
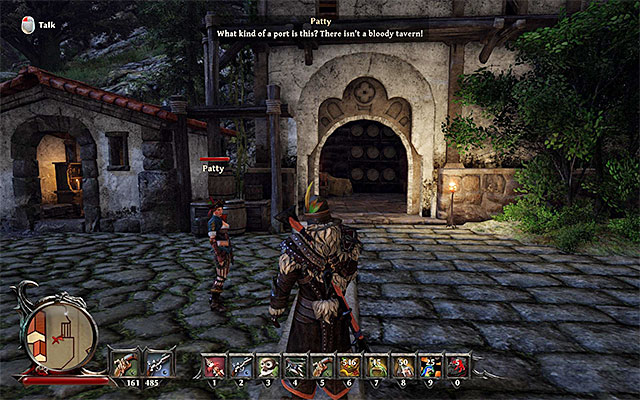 Patty is standing next to the harbor storage
Another location that is worth visiting is Taranis. Just like in the case of the Calador Bay, after you get there, Patty will automatically talk to you and she will go for the treasure hunt herself. Go ashore and remain in the harbor. You can find Patty in front of the storage that belongs to Rumold (200 Glory Points).
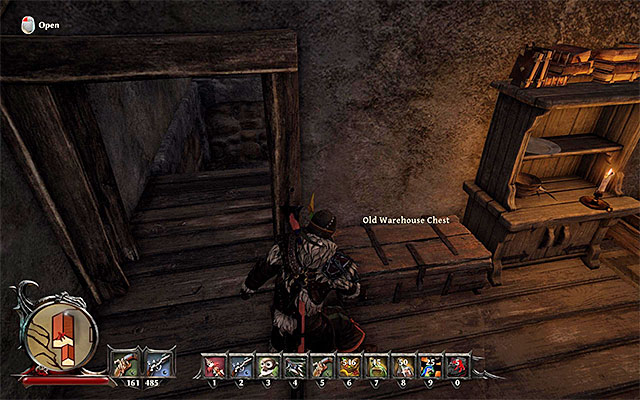
During the conversation, you will receive, from Patty, Rumold's Old Key, where the man keeps his most valuable treasures. Since you need to perform a theft, you need to wait until the nightfall and make sure that you have the Sneak skill. Start sneaking (the "crouch key/button), enter the storage and sneak to the upper floor, carefully. The chest is in the bedroom shown in the above screenshot. From there, you can steal 540 Gold Pieces (100 Glory Points). Leave the storage and tell Patty that the operation was successful.
Note - If Rumold spots you, escape from the storage and try to defeat the hostiles again (they will only pass out).
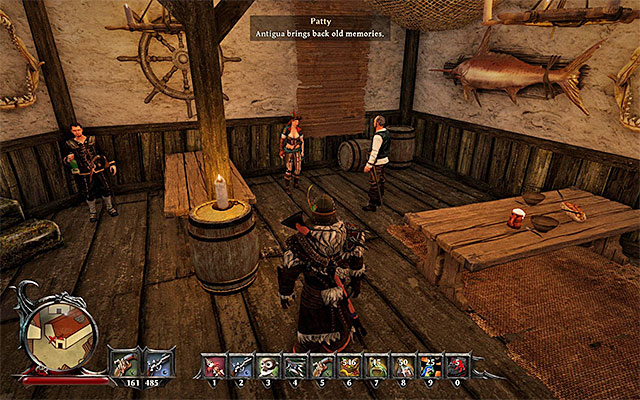 You can find Patty at the tavern
Finally, head towards Antigua. Just like earlier, let Patty leave the ship and then, find her in the harbor town. Patty is staying at the tavern and you need to talk to her (200 Glory Points), thanks to which you will learn that she has learned the location of another treasure.
Leave the harbor town and take the path towards the deadlands to the North. If you still have not secured this part of the isle, you need to watch your step, because you can encounter Skeletons, Minions and Black Ghouls, among others. Along your path, keep an eye out for a fork and take the path to the left so, take the easy climb. Stop exactly Northwards of the, seemingly, inaccessible Romanov's treasure (activate the quest in your log, to learn the location), in the spot shown in the above screenshot.
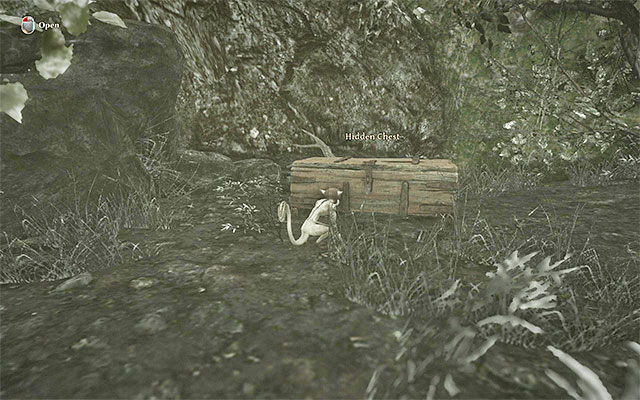
The only way to obtain the treasure is to use the Monkey Trainer skill and if you still do not have it, you need to visit an appropriate trainer first. Set the monkey and use it to pass through the small hole. Reach, as the monkey, the chest shown in the above screenshot (Hidden Chest). Collect the 945 Gold Pieces from inside (100 Glory Points). Return to your character, with the monkey, and tell Patty that you have found the treasure, thanks to which you will complete this quest.
Rewards for completing the quest:
In Risen 3: Titan Lords, just like in the previous installment, it is possible to forge unique variations of melee weapons. This requires appropriate preparations and exploring the select locations in the game world but, as a reward for your endeavors, you gain access to unique melee weapons of excellent parameters. I recommend against skipping these quests, even if you specialize in ranged weapons, or magic, because each of the unique weapons is of high value and you can sell it for high profit.
 An example blade of one of the unique weapons
In the case of each of the unique weapons described here, the pattern of action is the same. You first need to obtain the elements of the unique weapon, i.e. the Blade and the Hilt. Most of these items can be found during free exploration of the game world, but you can receive some of them as a reward for completing side quests.
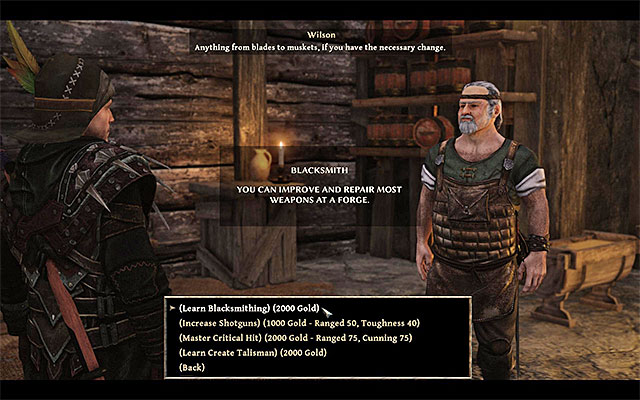 You need to learn Blacksmithing
Apart from obtaining the blade and the hilt, you also need to unlock the Blacksmithing skill. To do that, you need to go to one of the trainers (e.g. Wilson of the Demon Hunters' Citadel in the Calador Bay) and pay for the training. This skill will cost you 2000 Gold Pieces.
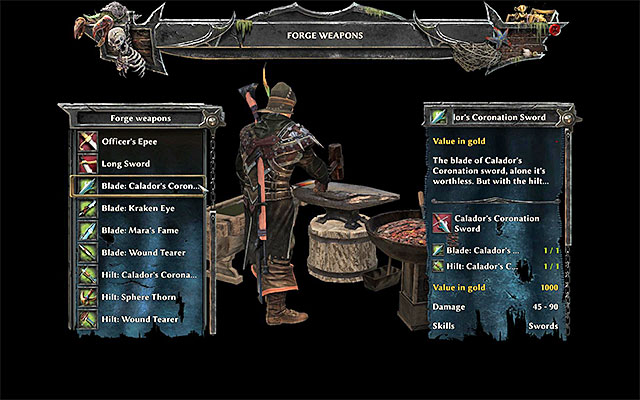 Use the anvil
Only after you have met the above requirements, you can use one of the forges in the game world (among others, you can find them at Wilson's at the Citadel, or at Gordon's in the Mages' encampment on Taranis). After you interact with the Anvil, select the blade, or the hilt of the weapon and confirm that you want to forge the unique item. From now on, you can either use the weapon or sell it.
Note - To find the elements of the unique weapons, you can help yourself with your log. After you have found one of the two elements, you can activate the log entry, connected with the specific weapon, thanks to which the game will point to you the fragment that you are missing.
The way to unlock the quest: Automatically, after you have found one of the elements of the sword.
Quest giver: -
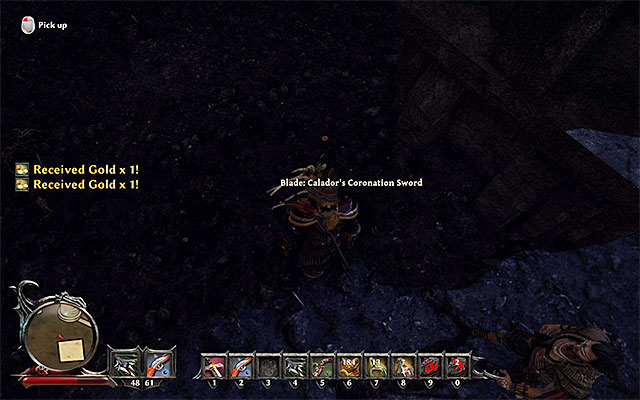 You can find the blade close to the location, where you defeat the Shadow Lord
The Blade: Calador's Coronation Sword can be found during your stay at the Calador Bay. It is in the ruins of the castle in the Western part of this location, i.e. in the area where you fight the Shadow Lord of Cowardice. After you have defeated the Shadow Lord, take a look around to find the item (100 Glory Points).
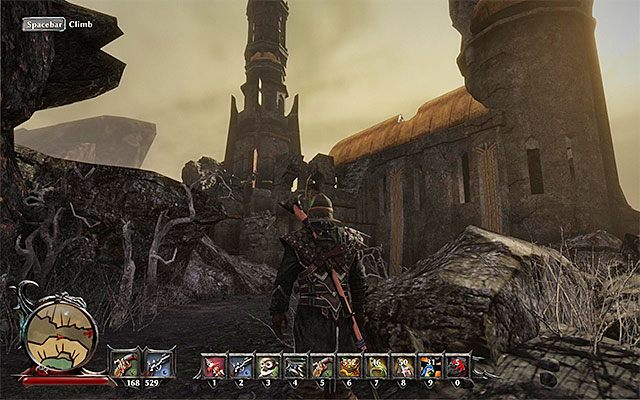 The ruins in the Eastern part of Calador
The Hilt: Calador's Coronation Sword is in the ruins in the Eastern part of the Calador Bay. It is the area across the lava river, which you unlock after you progress to the third chapter of the game's story line (preparations for the soul ritual).
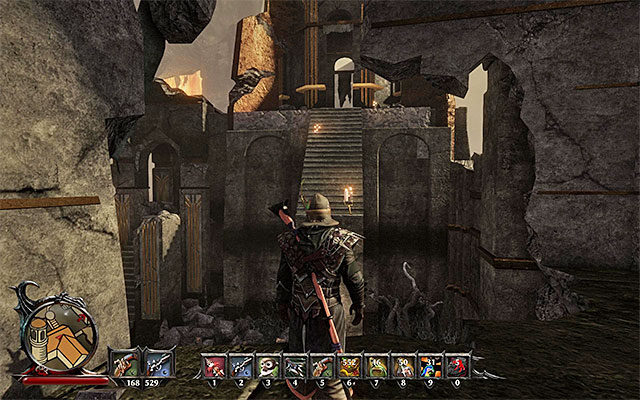
After you walk into the ruins, locate the stairs to the upper level. Stand in the spot shown in the above screenshot and use Parrot Flight scroll to reach the seemingly inaccessible stairs. Climb up the stairs and approach the altar, where there is the hilt, among others (100 Glory Points).
You can now use any Anvil and forge the sword. Its main parameters are:
Rewards for completing the quest:
The way to unlock the quest: Automatically, after you have found one of the sword's parts.
Quest giver: -
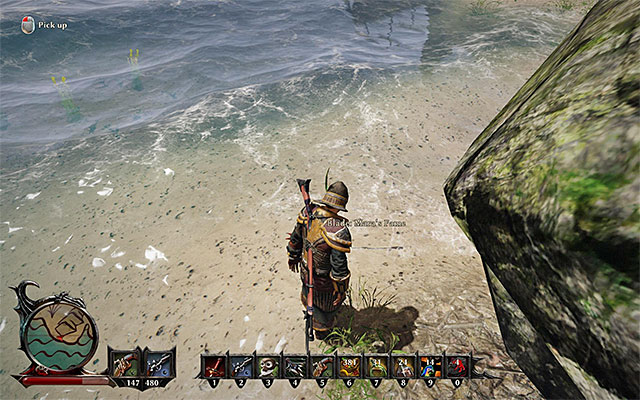 You can find the blade close to Shax's camp
The Blade: Mara's Fame can be found during your stay on Taranis. It is in the water, right next to the swamps and the monolith in the Southern part of the isle. Close to that location, there is Shax, i.e. a friendly character that there are several side quests connected with. Approach the blade and collect it (100 Glory Points).
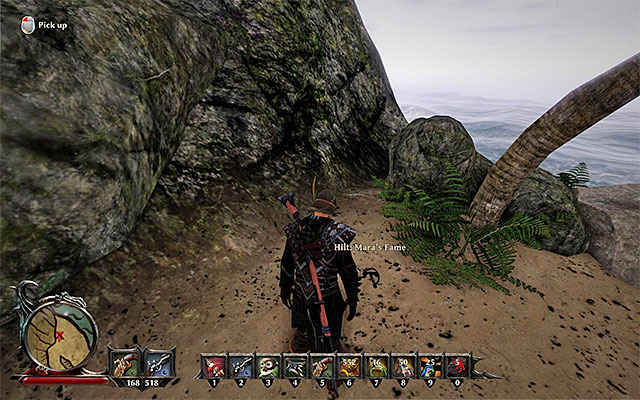 You can find the hilt on the beach
The Hilt: Mara's Fame is in the North-Eastern part of the Taranis isle. Follow the coastline and eliminate the monsters here. You will notice the hilt next to one of the palm trees, where the beach ends (100 Glory Points).
You can now use any Anvil and forge the sword. Its main parameters are:
Rewards for completing the quest:
The way to unlock the quest: Automatically, after you have found one of the sword's parts.
Quest giver: -
 The blade is at the lava river
The Blade: Sphere Torn is in the Eastern part of the Calador Bay. It is the area across the lava river, which you unlock after you progress to the third chapter of the game's story line (preparations for the soul ritual). After you have gained access to this part of the bay, go North, i.e. towards the camps occupied by monsters. Reach the North-most point and find the blade at the lava river (100 Glory Points).
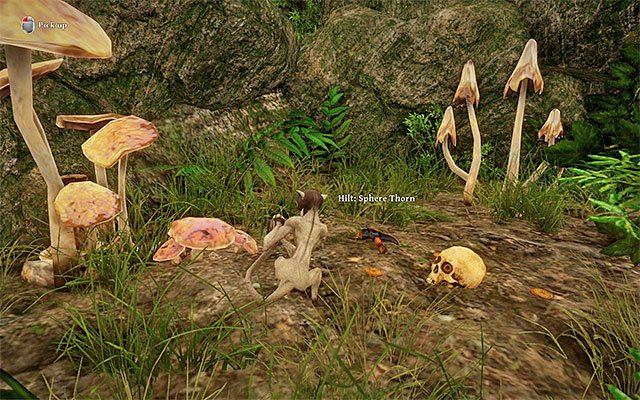 Only the monkey can reach the hilt
The Hilt: Sphere Torn can be found on the Tacarigua isle. First, reach Puerto Sacarico and examine the area around the building in the Northern part of the town. You should notice a small opening. Only the monkey can squeeze through so, you need to have the Monkey Trainer skill unlocked. Collect the hilt to activate the quest (100 Glory Points).
You can now use any Anvil and forge the sword. Its main parameters are:
Rewards for completing the quest:
The way to unlock the quest: Automatically, after you have found one of the sword's parts.
Quest giver: -
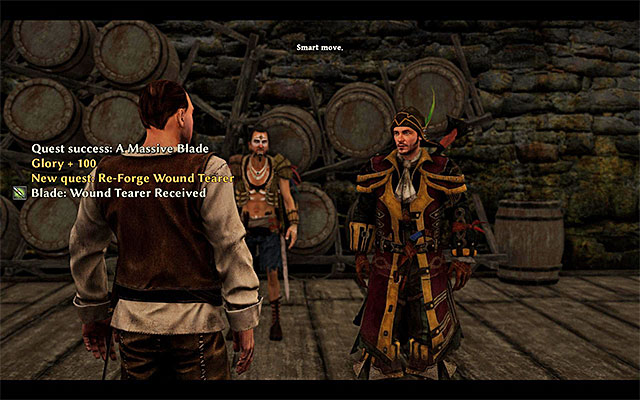 Flynn has the blade on him
The Blade: Wound Tearer is in the possession of Flynn's who lives on Antigua. You can obtain this items while doing the "Fragile Past Sins" quest (100 Glory Points).
 The hilt is in the possession of Quinn's
The Hilt: Wound Tearer) is owned by Quinn who lives on Kila. You can obtain this item while doing the "Fragile Past Sins" side quest (100 Glory Points).
You can now use any Anvil and forge the sword. Its main parameters are:
Rewards for completing the quest:
The way to unlock the quest: Automatically, after you have found one of the sword's parts.
Quest giver: -
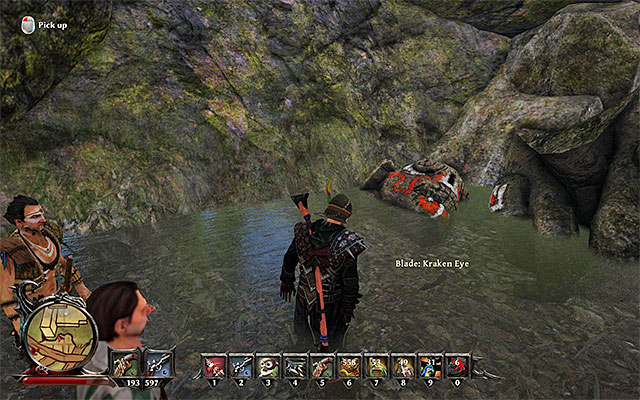 The blade is in the Forbidden Valley
The Blade: Kraken Eye) can be found on Kila. You need to gain access to the Forbidden Valley (the Eastern part of the isle, past the huge gate), which takes place after you have progressed to the third chapter of the game's story line. Explore the valley to find the blade in the water (100 Glory Points).
 Reach the cave with the crystal portal
The Hilt: Kraken Eye is on Taranis. However, you first need to progress to the third chapter of the game's story line so, you need to unlock the option of meeting with Zacharias. The artifact is in the cave that the mage mentions, the one that you visit to examine the crystal portal.
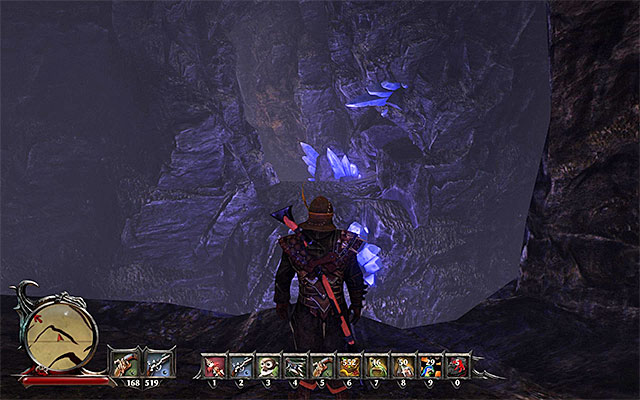
After you enter the cave, reach the first fork and go left, i.e. the one that DOES NOT lead up to the portal. Follow the linear path and stop in the spot shown in the above screenshot. You need to use the Parrot Flight scroll here, to get past the chasm. Finish the exploration of the cave, kill the single spider and find the hilt (100 Glory Points).
You can now use any Anvil and forge the sword. Its main parameters are:
Rewards for completing the quest:
The above map contains references to all the places in which you can find ability trainers, living in the Calador Bay. Each one of them can teach the Nameless Hero from one to few different abilities (albeit for a price, of course).
Two things worth noting - some of the trainers may be mobile, and the map show a few markers of the same trainer, meaning their different spots. In some situations, you can only use the trainer's services after you've done a quest associated with them.
 Nate can be found in various places.
Nate is one of the Demon Hunters and he can be first encountered in the fishing village (point 1a on the map). After you've met him for the first time, he will move to Demon Hunter's Citadel alone, or with the help of the main character (point 1b on the map). However, you can't be certain to meet him there each time, as he will be moving between the Citadel and a destroyed bridge to the North of it, near the river of lava (point 1c on the map).
During your conversation with Nate, you can ask him for training. He specializes in the following abilities:
Note - you can sell Raw Fish to Nate. Each fish will give you 15 gold and 3 Glory Points.
Drake should be somewhere near the entrance to the Citadel.Drake is one of the Demon Hunters and he can be found inside the Citadel. Typically, you can find him at the entrance (point 2 on the map), but he can change his position slightly based on the time of the day.
During your conversation with Nate, you can ask him for training. He specializes in the following abilities:
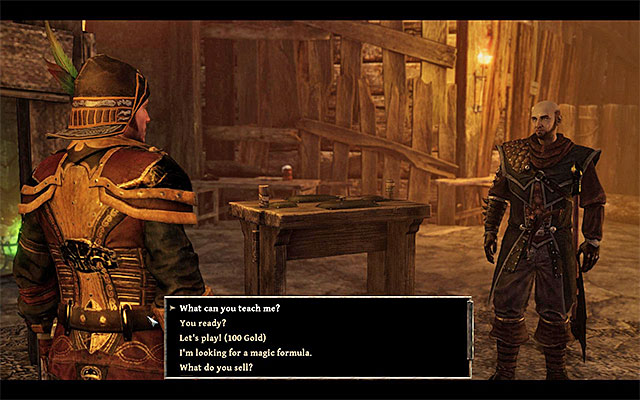 Henrik will train you only after you've defeated him in battle.
Henrik is one of the Demon Hunters and, as a result, he can be found inside of the Citadel. Based on the time of the day, you can find him at the arm-wrestling table (point 3a on the map) or training in front of the Citadel (point 3b on the map).
At first, Henrik won't be interested in training your character any new abilities. The only way to change his attitude is to challenge him to a duel and defeat him, which is the objective of a side quest called "Friends Brawl". He specializes in those abilities:
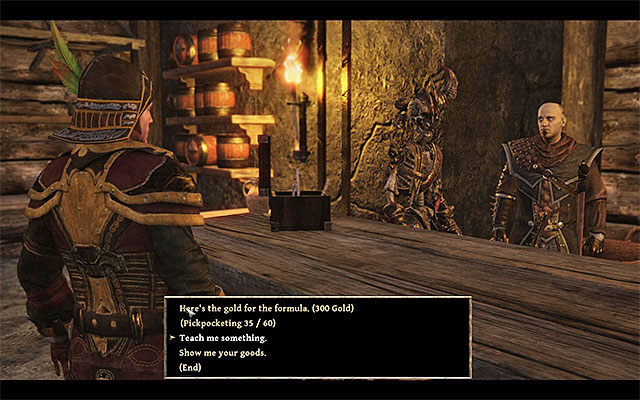 Connor runs a shop inside the Citadel.
Connor is one of the Demon Hunters and he can be found inside the Citadel. Typically, you can find him at his shop (point 4 on the map), but he can change his position slightly based on the time of the day.
During your conversation with Connor, you can ask him for training. He specializes in the following abilities:
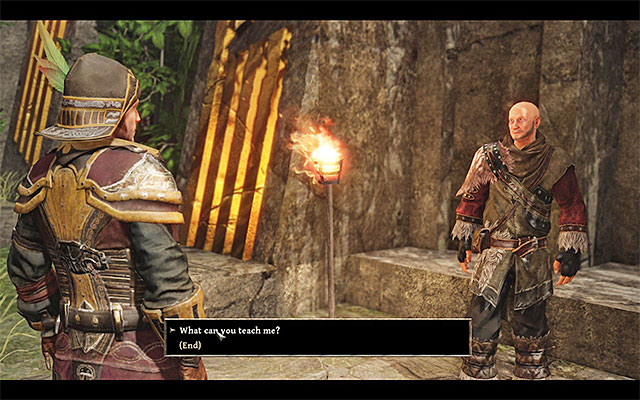 You will visit Eldric during many of your main quests.
Eldric is a druid living inside of the Citadel, alongside his fellow Demon Hunters. You can typically find him in the Eastern part of the Citadel (point 5 on the map), but based on the time of the day his position might differ slightly.
During your conversation with Eldric, you can ask him for training. He specializes in the following abilities:
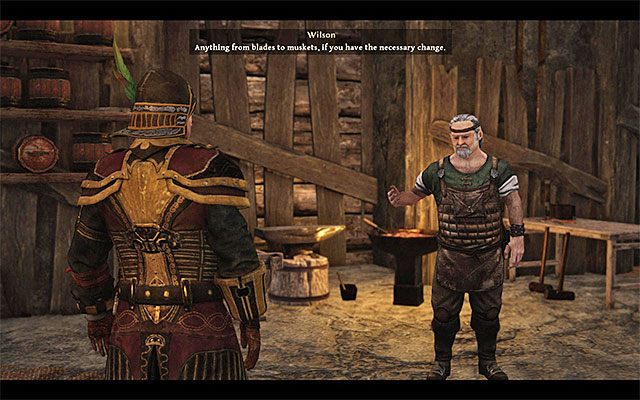 Wilson spends most of the time inside of his workshop.
Wilson is a blacksmith living inside the Citadel, alongside the Demon Hunters. You can typically find him inside of his workshop, in the central part of the building (point 6 on the map), but based on the time of the day his position might differ slightly.
During your conversation with Wilson, you can ask him for training. He specializes in the following abilities:
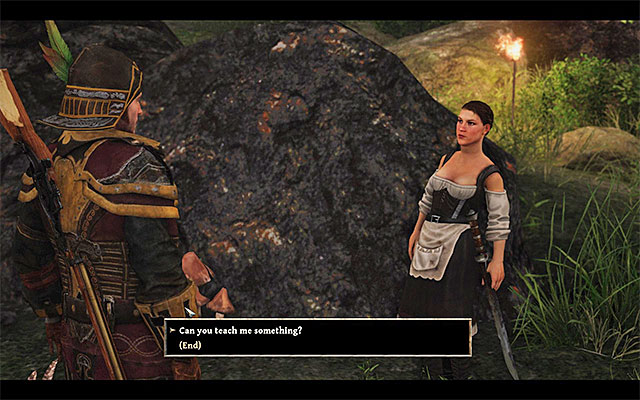 Mira can be found on Ernesto's farm.
Mira is a maid on the farm belonging to Ernesto (point 7 on the map).
During your conversation with Mira, you can ask him for training. He specializes in the following abilities:
Note - if you complete the side quest "Ernesto's Engraved Candle Holder" not to her liking, she won't be willing to train you anymore!
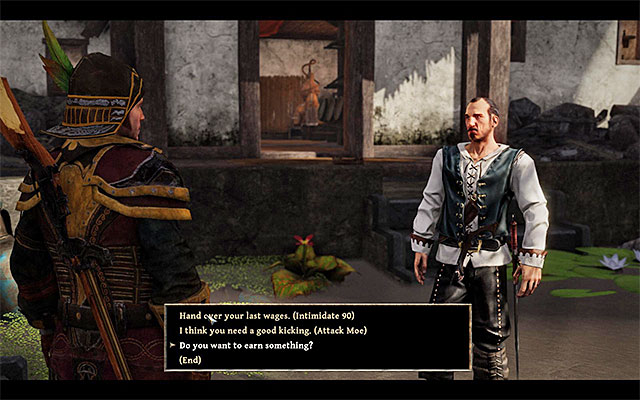 You can train with Moe only after your first encounter with the man.
Moe can be found near the tavern (point 8 on the map) and, during your first encounter with the man, he will request a payment from the Nameless Hero (a side quest "Road Toll"). Further interaction with this character will be available only after you've paid him, or defeated him in battle.
During your conversation with Moe, you can ask him for training. He specializes in the following abilities:
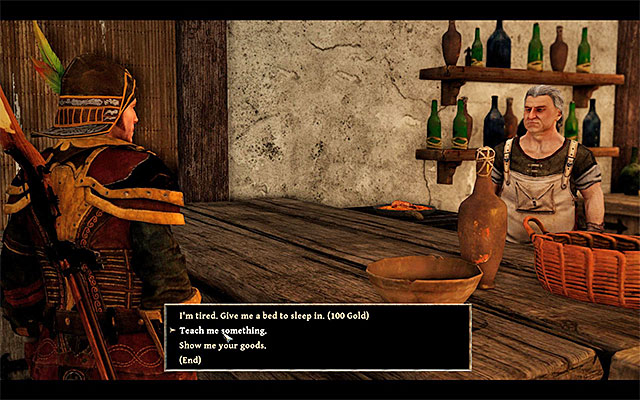 Travis can be found near the bar, or near the table with the mini-game.
Travis can be found inside the tavern (point 9 on the map), located to the West from the Demon Hunter's Citadel.
During your conversation with Travis, you can ask him for training. He specializes in the following abilities:
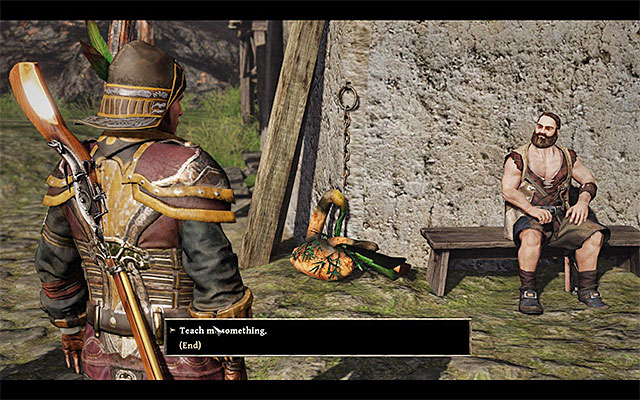 Bran can be found on his farm.
Bran can be found on his small farm, located to the North of the fishing village (point 10 on the map).
During your conversation with Bran, you can ask him for training. He specializes in the following abilities:
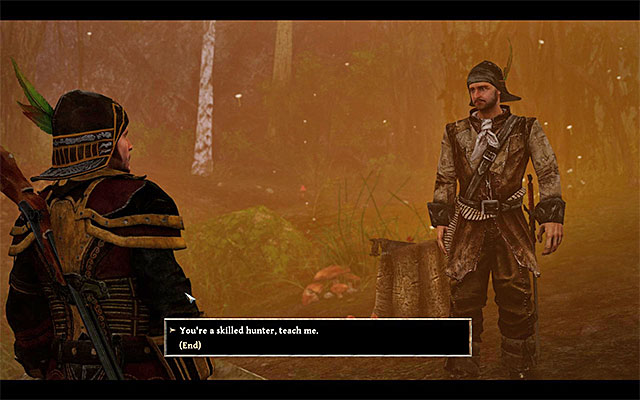 Bronach lives in the forest.
Bronach is a hunter and he can be found near his hunting hut, located in the forest (point 11 on the map).
During your conversation with Bronach, you can ask him for training. He specializes in the following abilities:
The above map contains references to all the places in which you can find ability trainers, living on the Kila Island. Each one of them can teach the Nameless Hero from one to few different abilities (albeit for a price, of course).
Two things worth noting - some of the trainers may be mobile, and the map show a few markers of the same trainer, meaning their different spots. In some situations, you can only use the trainer's services after you've done a quest associated with them.
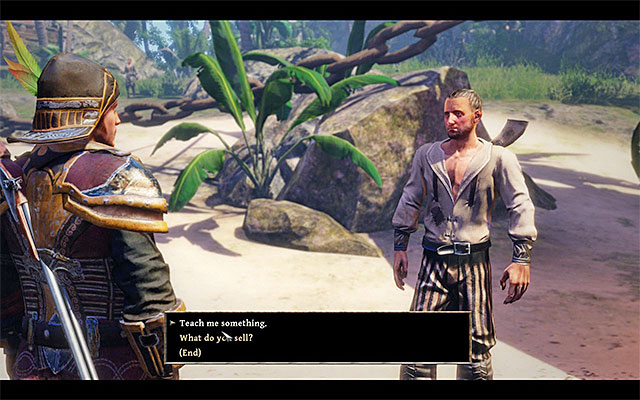 Buddy is also a dealer, and he organizes knife-throwing events.
Buddy is one of the pirates, and he can be found near the shipwreck on the beach (point 1 on the map).
During your conversation with Buddy, you can ask him for training. He specializes in the following abilities:
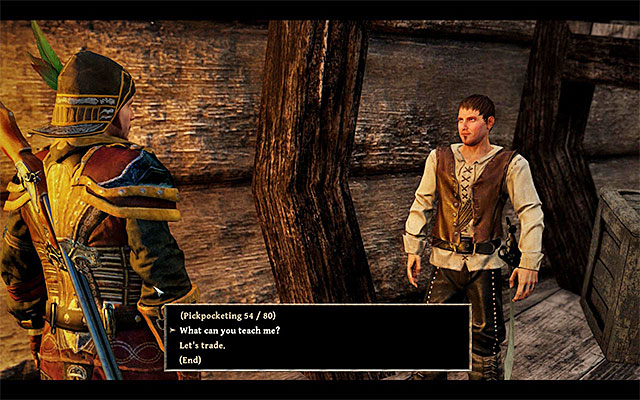 Quinn can be found near the shipwreck.
Quinn is one of the pirates. During the day, he can be found inside of the shipwreck on the beach (point 2 on the map), and during the night he can be found near the knife-throwing shield (point 2 on the map).
During your conversation with Quinn, you can ask him for training. He specializes in the following abilities:
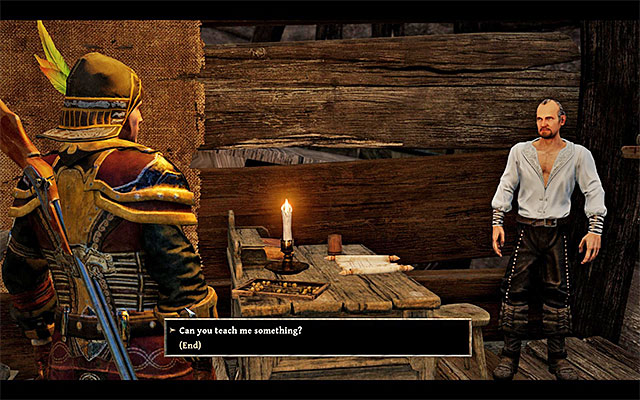 Cunningham can be found inside of his cabin.
Cunningham is a doctor, and, regardless of the time of the day, he can be found inside of his cabin, in the shipwreck on the pirates beach (point 3 on the map).
During your conversation with Cunningham, you can ask him for training. He specializes in the following abilities:
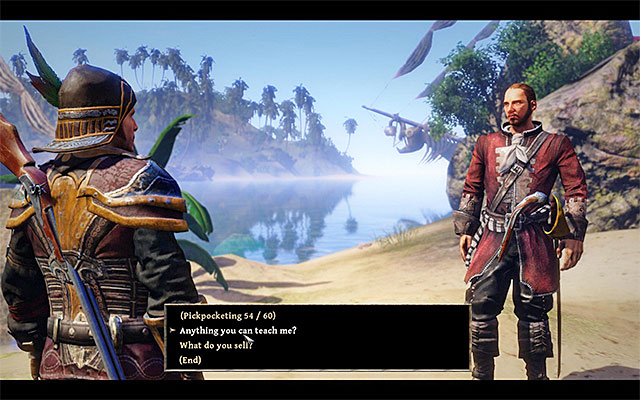 You can find Harry on the pirates beach.
Harry is one of the pirates and he can be found on the beach neighboring the shipwreck (point 4a on the map) or inside of a small camp (point 4b on the map).
During your conversation with Harry, you can ask him for training. He specializes in the following abilities:
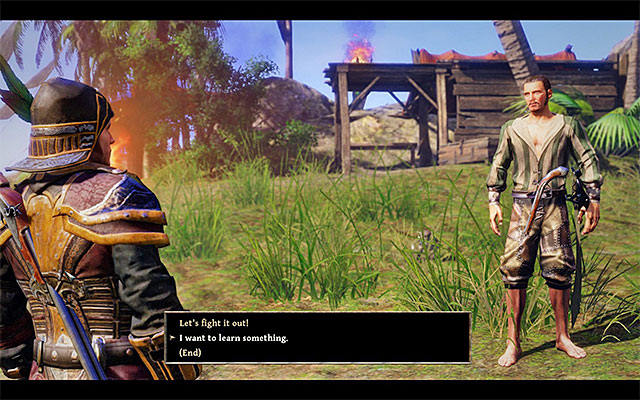 Look around the encampment on the pirates beach.
Colby is one of the pirates and he can be found on the beach neighboring the shipwreck and inside a small camp (point 5 on the map).
During your conversation with Colby, you can ask him for training. He specializes in the following abilities:
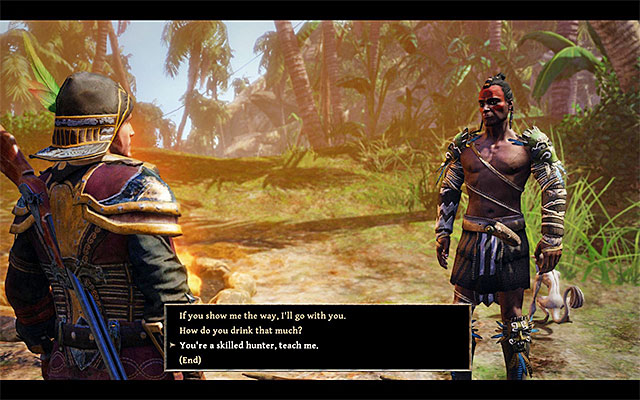 Initially Borbor can be located near the pirates beach.
Borbor is one of the local natives. This man can initially be met near a campfire to the South of the pirates beach (point 6a on the map). In the latter part of the game (after doing the side quest "Unexpected Effect"), Borbor will move to the main headquarters of the natives (point 6b on the map).
During your conversation with Borbor, you can ask him for training. He specializes in the following abilities:
 Tadashi will share his knowledge only after you've hunted two strong monsters.
Tadashi is one of the natives, and you will meet him in the second part of the jungle, near the main encampment (point 7 on the map).
Unfortunately, in the beginning Tadashi won't be willing to share his knowledge with the Nameless Hero. The only way to convince him to change his mind is to hunt a pair of monsters indicated by the native and it is done while completing the side quest called "Big White Hunter". The mentioned character specializes in the following abilities:
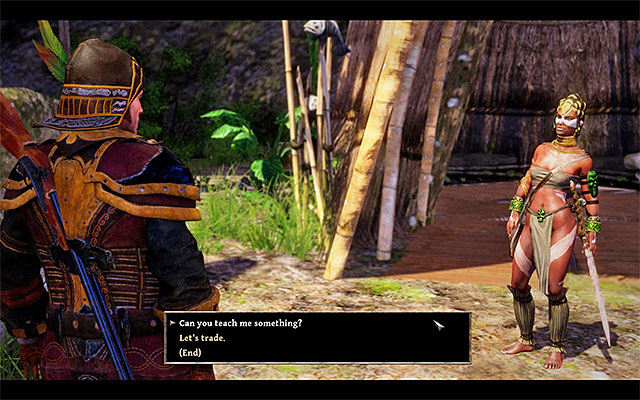 Tenya can be found in the main section of the natives village.
Tenya can be found in the main section of the natives village (point 8 on the map).
During your conversation with Tenya, you can ask her for training. She specializes in the following abilities:
 Ixil is located in the natives village.
Ixil can be found in the main section of the natives village (point 8 on the map).
During your conversation with Ixil, you can ask him for training. He specializes in the following abilities:
Note - after completing the side quest "The Reckoning" you won't be able to learn from Ixil anymore. If you care about learning from the man, do so before deciding to complete the mentioned quest.
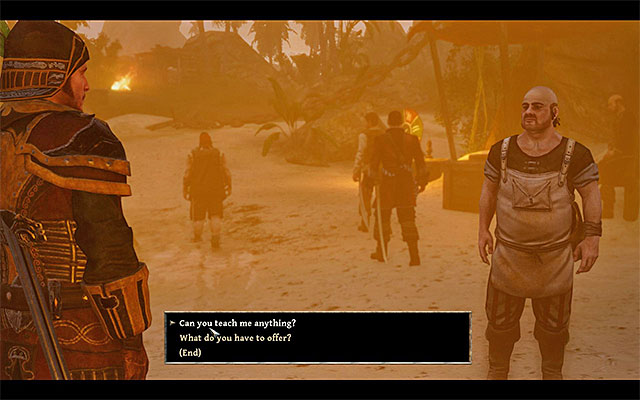 You must first complete a side quest associated with Booze.
Booze is one of the pirates and he can be found near the shipwreck (point 10 on the map).
Initially, Booze won't be even interested in teaching the main character anything. The only way to change his mind is to complete a side quest called "Booze's Befuddled Mind", allowing Booze to regain his senses. The character specializes in the following skills:
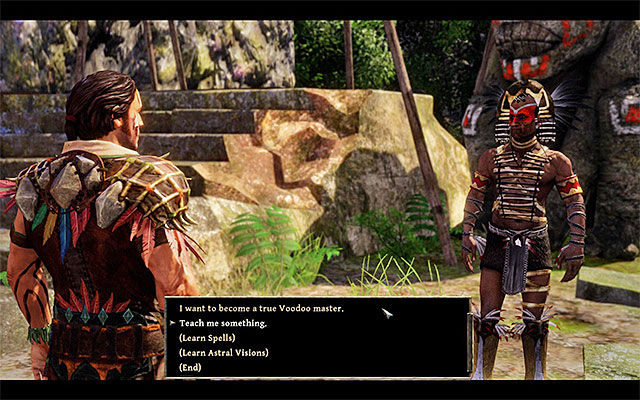 You must join with the Natives in order to train with Hirutu
Hirutu is the chief of the Natives, and he can be found in the central part of the village (point 11 on the map). Note - you can train with this person only after you join with the Natives.
During a conversation with Hirutu you can ask him to train the Nameless Hero. He specializes in following abilities:
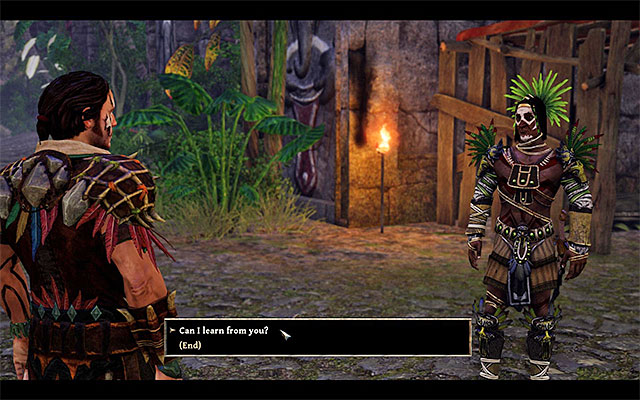 Baraka stands watch at the great gate
Baraka can be found by the great gate in the north-west from the Natives Village (point 12 on the map). Note - you can train with this person only after you join with the Natives.
During a conversation with Baraka you can ask him to train the Nameless Hero. He specializes in following abilities:
The above map contains references to all the places in which you can find ability trainers, living in the Taranis Island. Each one of them can teach the Nameless Hero from one to few different abilities (albeit for a price, of course).
Two things worth noting - some of the trainers may be mobile, and the map show a few markers of the same trainer, meaning their different spots. In some situations, you can only use the trainer's services after you've done a quest associated with them.
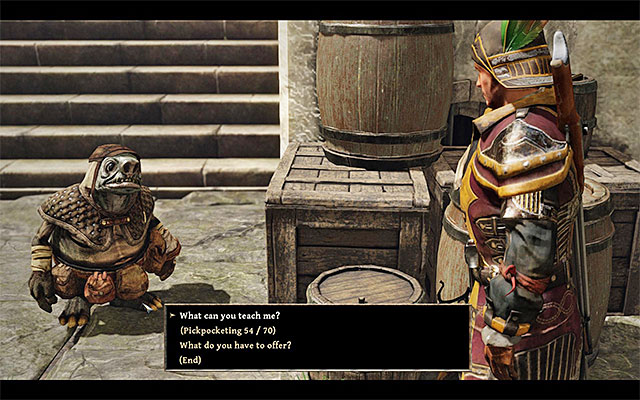 Safi can be found while you are at harbor.
Safi is a gnome, who can be found in a small harbor, in the Eastern part of the island (point 1 on the map). This character changes his position often, so the point on the map symbolizes only the approximate location of the character.
During your conversation with Safi, you can ask him for training. He specializes in the following abilities:
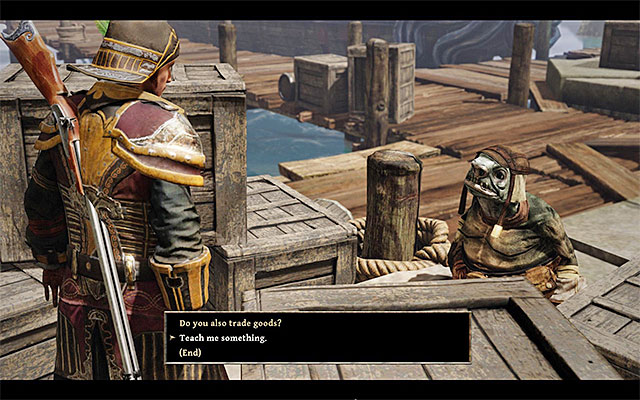 Gadi is busy carrying boxes.
Gadi is a gnome, who can be found in a small harbor, in the Eastern part of the island (point 2 on the map). This character changes his position often, so the point on the map symbolizes only the approximate location of the character.
During your conversation with Gadi, you can ask him for training. He specializes in the following abilities:
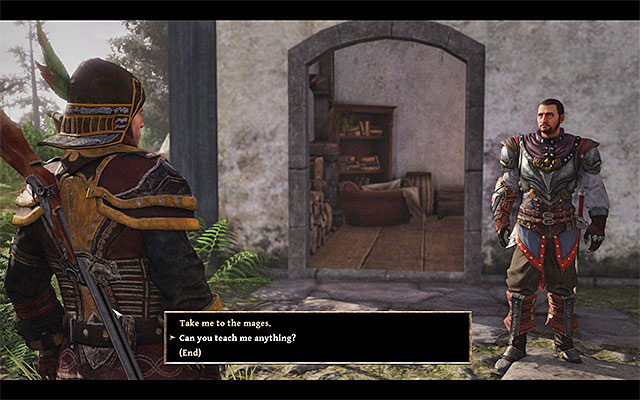 Baker can be found in a number of places.
Baker is a watchman and, at least at the beginning, he can be found on a small hill, neighboring a harbor (point 3a on the map). After you've met him for the first time, he will move together with the main character to the mages encampment (point 3b on the map).
During your conversation with Baker, you can ask him for training. He specializes in the following abilities:
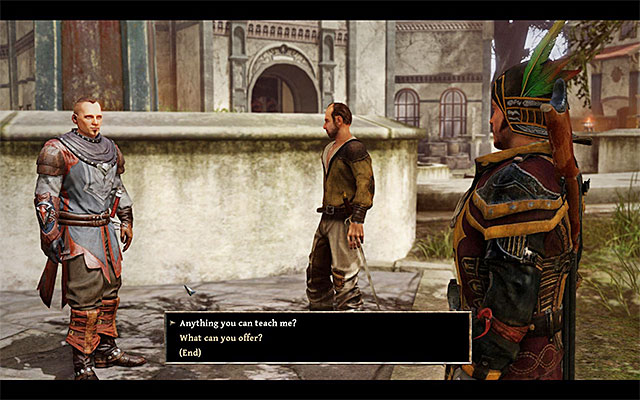 Agila can be found near the entrance to the main mages building.
A watchman named Agila can be found in the central part of the mages encampment, near the entrance to the main building (point 4 on the map). This character often changes its location, so the point on the map symbolizes only the approximate location of the character.
During your conversation with Agila, you can ask him for training. He specializes in the following abilities:
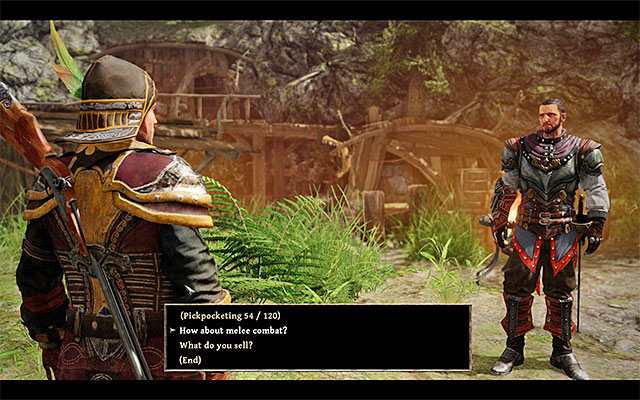 Hardwick can be found near the warehouse and tavern.
Hardwick travels all around the mages camp, but he can often be found near the warehouse (point 5a on the map) or in the tavern (point 5b on the map). This character often changes its location, so the point on the map symbolizes only the approximate location of the character.
During your conversation with Hardwick, you can ask him for training. He specializes in the following abilities:
 Magnus can be found in the central plaza.
General Magnus can be found in the central plaza of the mages camp (point 6 on the map).
During your conversation with Magnus, you can ask him for training. He specializes in the following abilities:
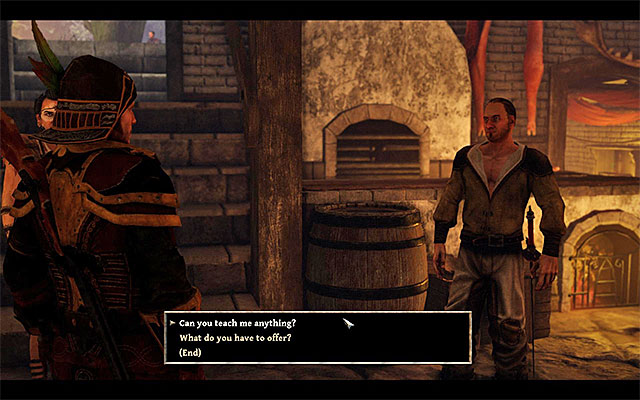 Look for Roderich in the tavern.
Roderich can be found in the tavern in the mages camp (point 5b on the map).
During your conversation with Roderich, you can ask him for training. He specializes in the following abilities:
 One of the places in which you can find Mauricio is the training ground.
A mage named Mauricio, depending on the time of the day, can be found teaching recruits at the training ground (point 7a on the map) or is inside the mages building (point 7b on the map). If you don't have access to the mentioned building, you will have to wait for the man to leave the building.
During your conversation with Mauricio, you can ask him for training. He specializes in the following abilities:
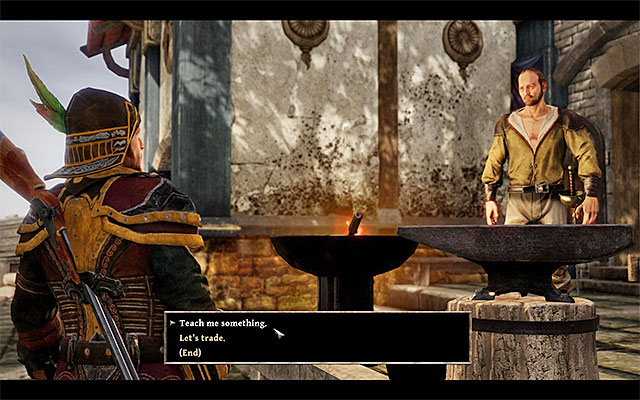 Gordon should be working under the sky.
Gordon is a blacksmith, and this character can be found in the Easter section of the mages camp (point 8 on the map).
During your conversation with Gordon, you can ask him for training. He specializes in the following abilities:
 Enter the Eastern building.
Stanley is a gunsmith, and this character can be found in the Eastern part of the camp (point 8 on the map).
During your conversation with Stanley, you can ask him for training. He specializes in the following abilities:
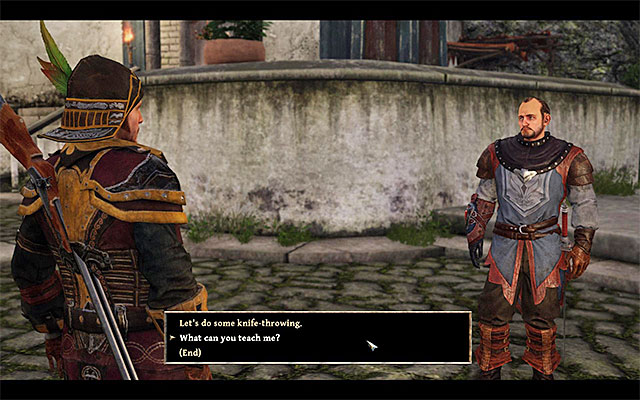 Wells can be found near the knife-throwing shield.
Wells can be found near the knife-throwing shield, in the mages camp (point 9 on the map).
During your conversation with Wells, you can ask him for training. He specializes in the following abilities:
 Examine the ground floor of the mages building.
Ilvar can often be found on the ground floor of the mages building (point 10 on the map). You won't have access to the building at the beginning, and you will have to complete a main quest to get inside.
During your conversation with Ilvar, you can ask him for training. He specializes in the following abilities:
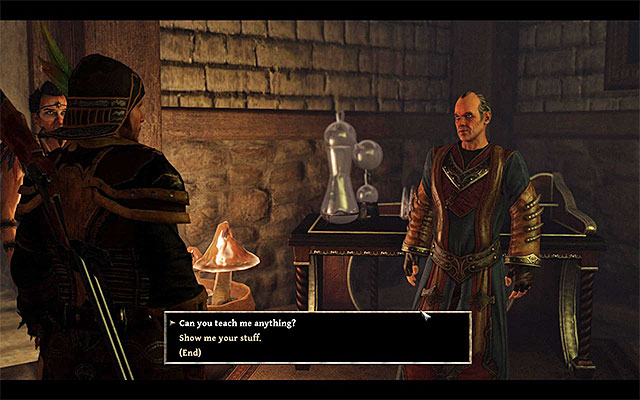 Nergal spends his whole day in the basement.
Nergal can always be found in the basement of the main building (point 11 on the map), to which a stairway is leading. You won't have access to the building at the beginning, and you will have to complete a main quest to get inside.
During your conversation with Nergal, you can ask him for training. He specializes in the following abilities:
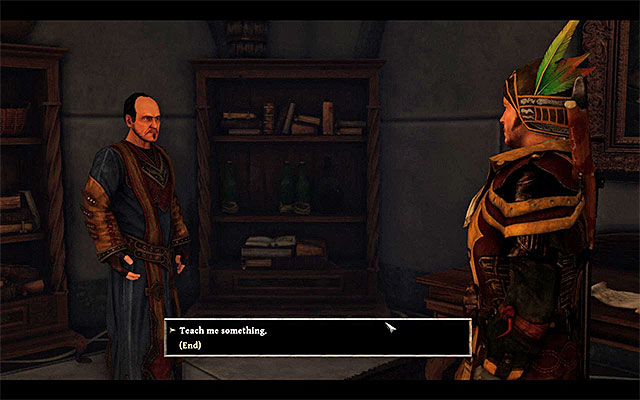 Faruco should be on the upper floor of the mages building.
Faruco can be found on the upper floor of the mages building (point 10 on the map). You won't have access to the building at the beginning, and you will have to complete a main quest to get inside.
During your conversation with Faruco, you can ask him for training. He specializes in the following abilities:
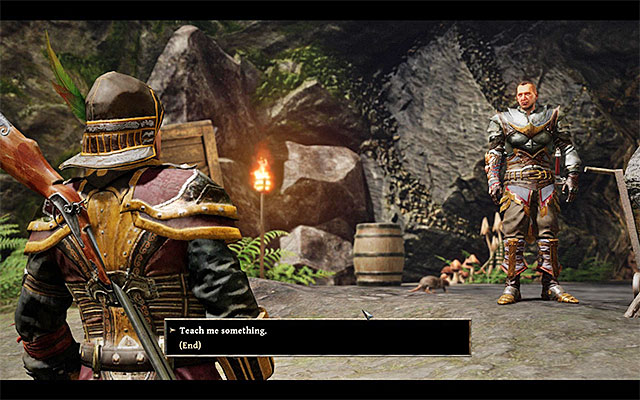 Valamir can be found in the mining village.
A watchman named Valamir can be found in a mining village, located to the North-West from the mages camp (point 12 on the map).
During your conversation with Valamir, you can ask him for training. He specializes in the following abilities:
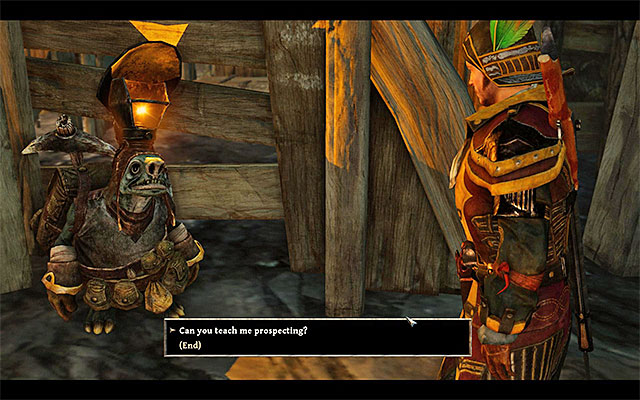 Faris is working on the upper floor of the mine.
A gnome named Faris can be found inside of the mine, located to the North-West from the mages camp (point 13 on the map).
During your conversation with Valamir, you can ask him for training. He specializes in the following abilities:
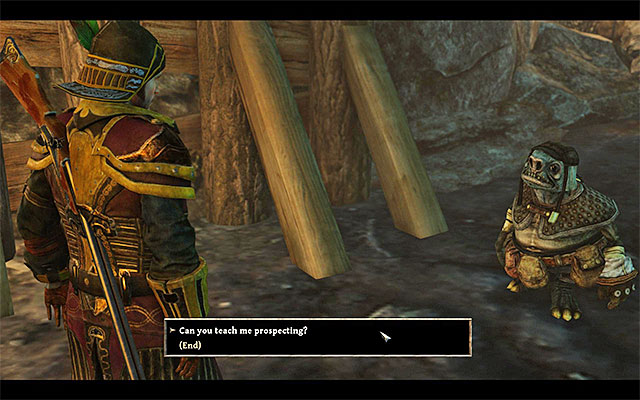 Banu is working on the lower floor of the mines.
A gnome named Banu can be found inside of the mine, located to the North-West from the mages camp (point 14 on the map).
During your conversation with Banu, you can ask him for training. He specializes in the following abilities:
 To reach Sharp you will have to climb your way up.
Sharp is a demon hunter, and this character can be found on one of the stone ledges in the Western section of the island (point 15 on the map).
During your conversation with Sharp, you can ask him for training. He specializes in the following abilities:
 You can train with Walker only after you've secured his camp.
Walker is a hunter located in the camp, in the Southern section of the island (point 16 on the map). This character will appear in the camp and will express the willingness to train Nameless Hero only after you've completed a side quest called "Destroyed Camp", associated with Walker.
During your conversation with Walker, you can ask him for training. He specializes in the following abilities:
 You have to join the guardians if you want to learn from Erasmus
Erasmus can usually be found on the first floor of the mages' building (number 10 on the map) - you can learn from him after you join the crystal mages.
When talking to Erasmus, you can ask him to teach you the following skills:
The above map marks the locations of trainers, who stay on the Fog Island. Each of the trainers can teach the Nameless One from one to several skills (of course for a payment).
Two important notes - Some of the trainers may move around so, in such a situation, there are several markings on the map. In extreme situations, taking advantage of a trainer's services becomes available only after, e.g. you have completed a quest.
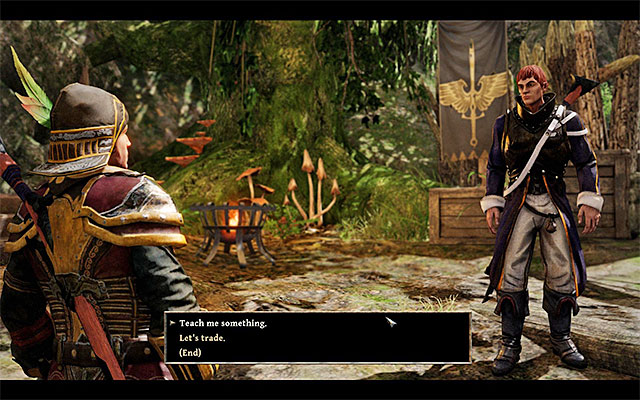 After you complete two side quests, Venturo reaches the Inquisitors' camp
Venturo is an Inquisitor and it is in the camp of that faction, in the central part of the map (point 1 on the map), that you can find him. At first, Venturo is staying on the Western beach and only after you complete the side quests "The Terror of the East" and "The Commandant" that he reaches the Inquisitors' camp and becomes an active trainer.
During the conversation with Venturo, you can ask him to train you. He specializes in the following:
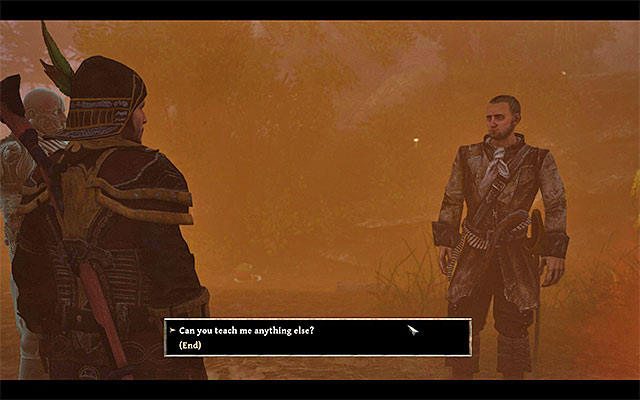 You can find Hull in the forest at the campfire
Hull is an Inquisitor and you can find him at the campfire in the Northern part of the isle (point 2 on the map), close to the hiding place of one of the Soul Eaters.
During the conversation with Hull, you can ask him to train you. He specializes in the following:
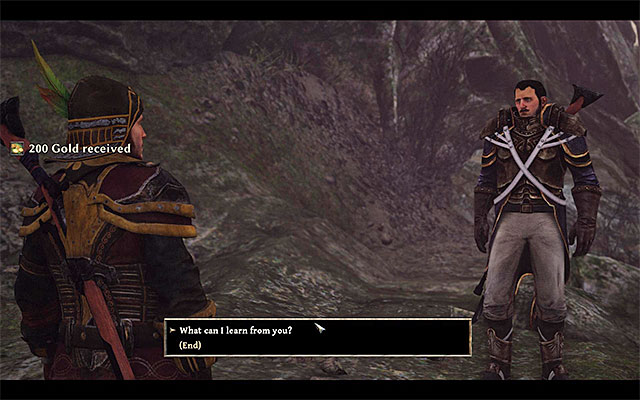 Gonzales is guarding one of the paths
Gonzales is an Inquisitor and you can find him next to the path in the South-Western part of the isle (point 3 on the map), near the hiding place of one of the Soul Eaters.
During the conversation with Gonzales, you can ask him to train you. He specializes in the following:
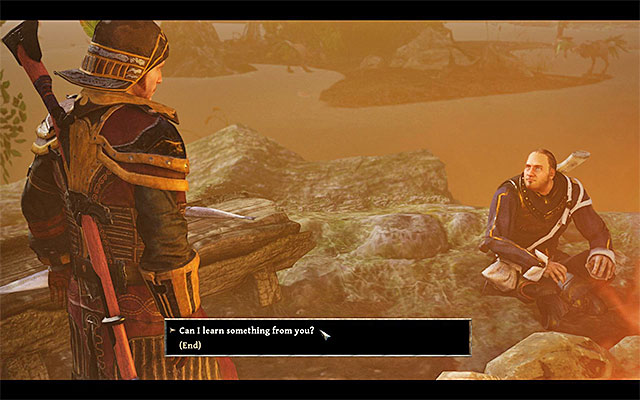 Nathan will be able to train you only after you kill the soul eater
Nathan is an Inquisitor and you can find him in a small encampment in the valley in the South-Eastern part of the isle (point 4 on the map). By default, he cannot train you. The only way to change this, is to kill the nearby Soul eater, while completing the side quest "Paths to the Afterlife".
During the conversation with Nathan, you can ask him to train you. He specializes in the following:
The above map presents the whereabouts of Skills Trainers, throughout the Isle of Thieves. each trainer may teach you one or several skills (at a charge, of course).
Two important notes - some trainers may relocate and, in such a situation, there are several dots, marked in the same way, on the map. In some cases, it is possible to make use of the services provided by a trainer, only after you e.g. have completed a quest.
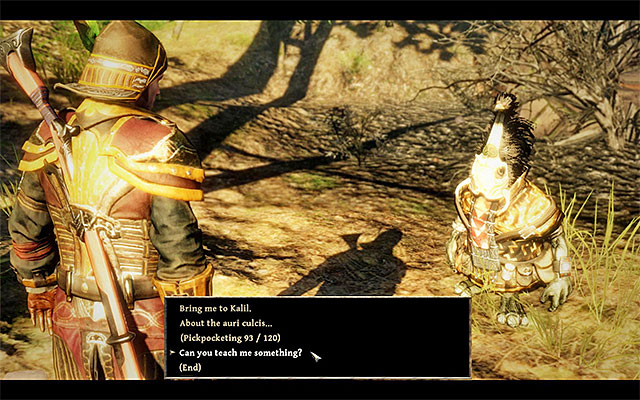 Kaan is standing in the village
Kaan is the leader of the gnome tribe and you can always find him in the central part of their village. (point 1 on the map).
During the conversation with Kaan, you can ask him to train the Nameless One. He specializes in the following:
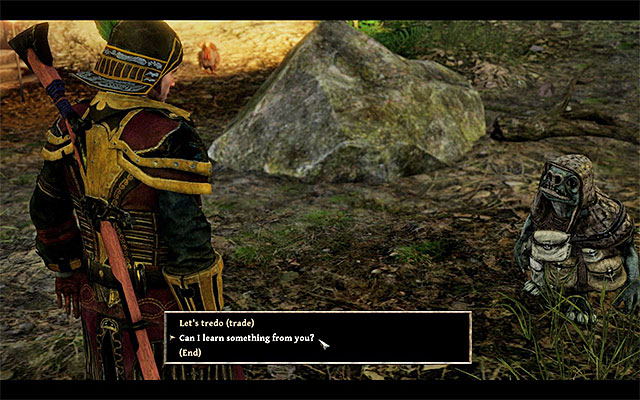 You will find Nanuk at the gnome village
Gnome Nanuk is staying in the village in the middle of the Isle of Thieves (point 2 on the map).
During the conversation with Nanuk, you can ask him to train the Nameless One . He specializes in:
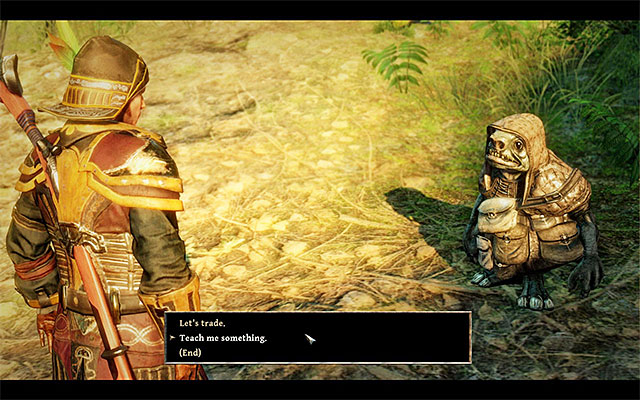 Take a look around the village
Gnome Mimak is staying in the village in the middle of the Isle of Thieves (point 3 on the map).
During the conversation with Mimak, you can ask him to train the Nameless One. He specializes in:
 Malik is working at the western palisade
Gnome Malik is staying in the village in the middle of the Isle of Thieves (point 3 on the map), i.e. next to one of the Western village exits.
During the conversation with Malik, you can ask him to train the Nameless One . He specializes in:
The above map provides whereabouts of individual trainers on Tacarigua. Each trainer may teach you one or several skills (in return for a payment, of course).
Two important notes - Some of the trainers may move around the isle and therefore, there are several dots with identical markings, to remedy that. In extreme situations, a trainer's services become available only after you gave completed a quest.
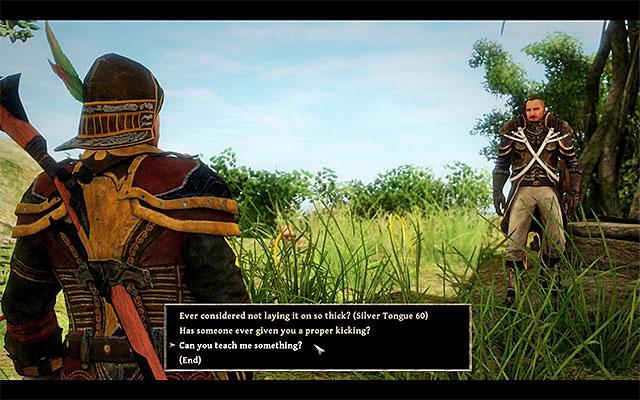 Tanner can be staying in several different locations
Tanner is a soldier of the inquisition and you will, initially, meet him near the lighthouse on the hill in the central art of the isle. (point 1a on the map). As a result of the events in the "Kicking Ass" quest, Tanner may have to move to the nearby beach (point 1b on the map).
During the conversation with Tanner, you can ask him to train you. He specializes in the following:
 Rodriguez is in town
Inquisitor Rodriguez is in the central part of Puerto Sacarico (point 2 on the map).
During the conversation with Rodriguez, you can ask him to train you. He specializes in the following:
 Jose is working in the kitchen
Inquisitor Jose is in the kitchen of one of the buildings in Puerto Sacarico (point 3 on the map).
During the conversation with Jose, you can ask him to train you. He specializes in the following:
The map which you can see above represents places where you can find teachers from Antigua Island. They may help you learn new abilities. Every teacher can teach the Nameless Hero at least one ability for an adequate price.
Two important things - some teachers may wander around this area. That's why we put on the map few identical marks. Sometimes you will have to (for example) complete some specific quest before you will be able to learn from a teacher.
 Ramon may teach you only after he will get to the town
You will meet the guard named Ramon on the road connecting the beach and the port town. At first he will not be interested with training your hero. The only way you can change his mind is to complete the side quest named "Bring Ramon Into the Harbour Town" which is related to him. Only after you will complete this quest you can look for Ramon near the warehouse (map location 1).
During your conversation with Ramon you may ask him to teach the Nameless Hero something. He specializes in following abilities:
 First you have to cure Emma
At first you will meet Emma on the east beach however you can learn from her only after she will move to her house in the port town (map location 2) and when you will complete the side quest named "Emma's Hellswill" which is related to her.
During your conversation with Emma you can ask her to teach the Nameless Hero something. She specializes in following abilities:
The above map presents the whereabouts of trainers on the Skull Island. Each trainer can teach you from one to several different skills (for a price, of course).
Two important notes - some trainers may move around, in which situation, on the map, there are several dots marked in the same way. In extreme situations, it becomes possible to use a trainer's services only after you gave completed a quest.
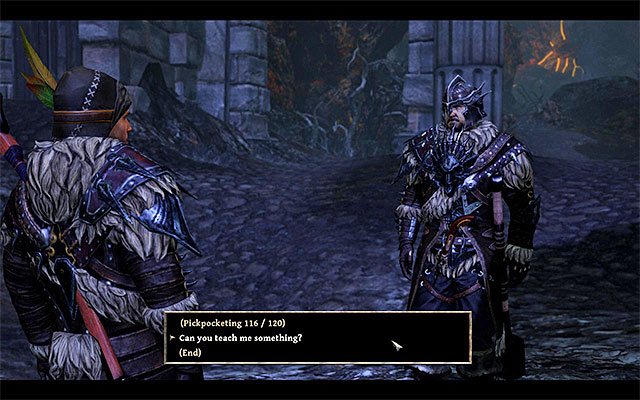 Kane is staying at the camp
Kane is the commander of the Demon Hunters' ship but, after he arrives on the Skull Island, he will be staying at the camp (point 1 on the map).
During the conversation with Kane You can ask him to train you. He specializes in the following:
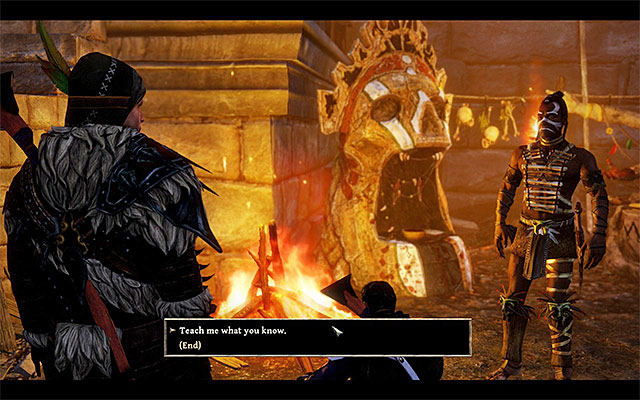 Kidlat should be at the campfire
Kidlat is one of the Natives and you should find him sitting at the campfire in the main camp (point 2 on the map).
During the conversation with Kidlat you can ask him to train you. He specializes in the following:
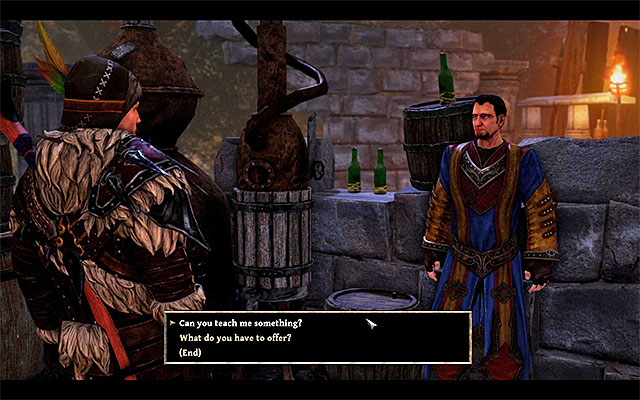 Take a look around the main camp to find Rodas
You can find Rodas in the main camp (point 2 on the map). Every now and then, he changes his location, but it should not be difficult to find him.
During the conversation with Rodas you can ask him to train you. He specializes in the following:
 Neron agrees to train you only after you solve the problem with Focalor
Neron is staying in the canyon, in the central part of the Skull Island (point 3 on the map). At first, he is not interested in training you, but you can change it if you complete one of the parts of the "The Minions' Weapons Store" quest, i.e. by solving the problem with the maddened mage Focalor.
During the conversation with Neron you can ask him to train you. He specializes in the following:
On the map above, places where you can find people that teach spells can be found. In Calador, those persons are demon hunters, who teach rune magic. Unlocking new spells is available only after joining the demon hunters (more about that in the description of the "New Allies" quest in Calador). Moreover, every teacher has to be paid and the currency in this case are Ancient Knowledge stone tablets, which can be found during the exploration of the world or obtained as reward for completing quests.
Attention - Some teachers can move around the area and in such case, there are several dots with the same number on the map.
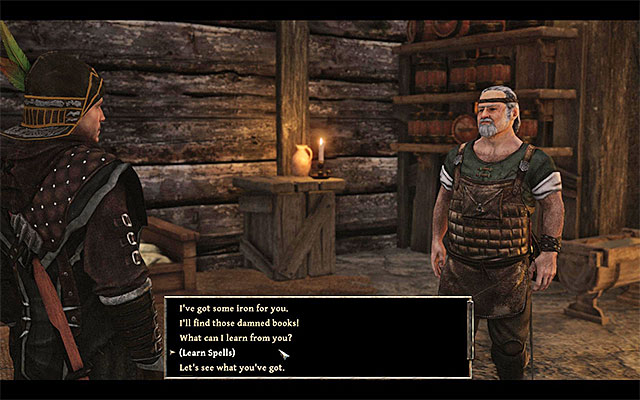 Wilson can be found on the ground floor of the Citadel
Wilson always stays in one of the rooms on the ground floor of the Citadel (number 1 on the map).
When talking to Wilson, you can ask him to teach you the following spells:
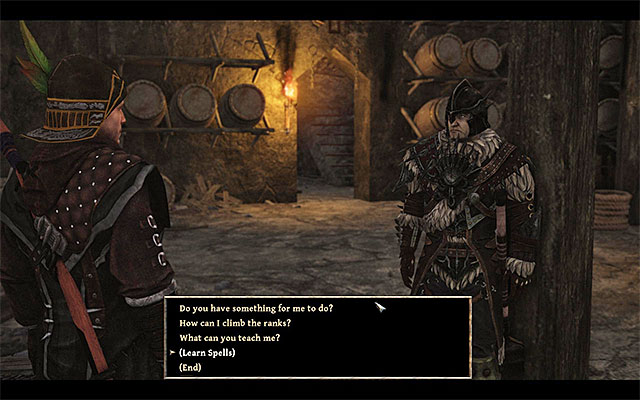 Drake is inside the Citadel
Drake can be found inside the Citadel (number 2 on the map), but he changes his position quite often.
When talking to Drake, you can ask him to teach you the following spells:
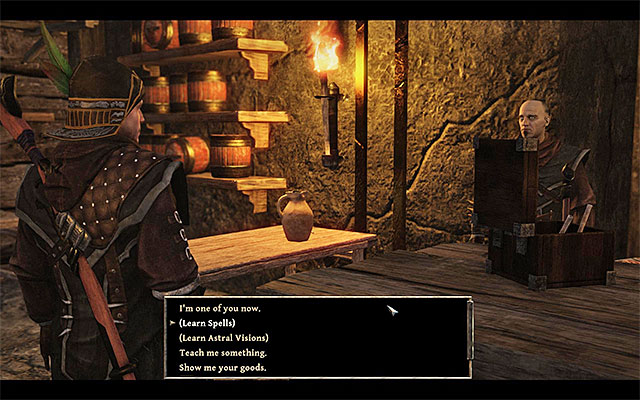 Connor runs a shop in the Citadel
Connor can be found in a small room in the Citadel, in which he runs a shop (number 3 on the map).
When talking to Connor, you can ask him to teach you the following spells:
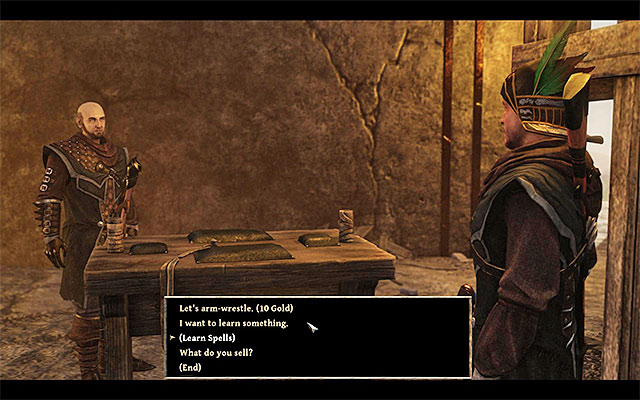 You will find Henrik inside the Citadel or training outside
Henrik, depending on the time of the day, may be either in the Citadel (number 4 on the map) or outside it (number 5 on the map).
When talking to Henrik, you can ask him to teach you the following spells:
The above map has links to places where you can find people who can teach the protagonist new spells. As far as Kila island is concerned, they are the Natives who wield voodoo magic. Unlocking new voodoo spells is only possible after joining with the Natives (more about that can be found in the description of the quest "New Allies"). Besides, each teacher requires a payment in the form of Jades, which can be found in the game's world, excavated in caves with a pickaxe, or received as a reward for completing quests.
Note - Some teachers may roam around; in that case, there are several dots with the same symbol on the map.
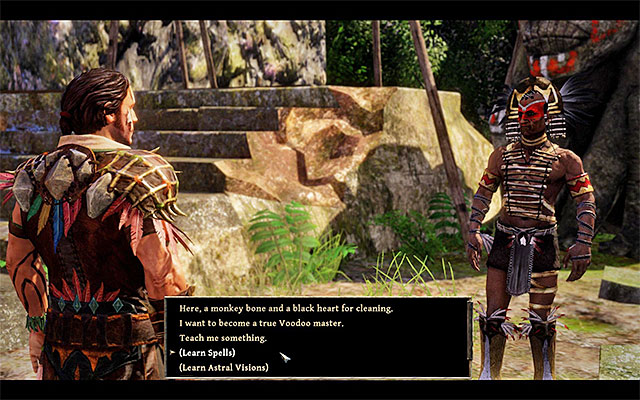 Hirutu is the chief of the Natives Village
Hirutu is the chief of the Natives Village and stays in its center (point 1 on the map).
While talking with Hirutu you may ask him to teach the Nameless Hero the following spells:
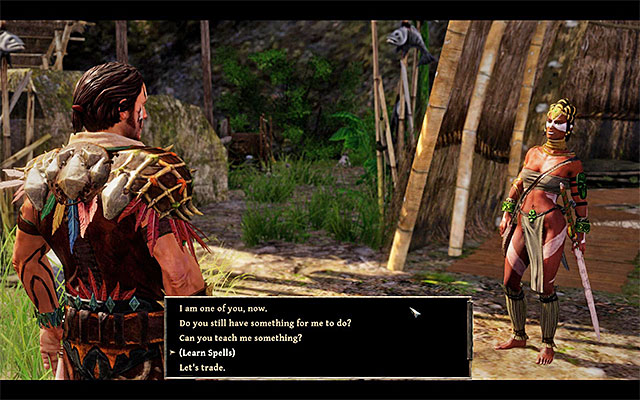 Tenya is in the center of the village
Tenya is a woman from the Natives Village and stays in its center (point 2 on the map)
While talking with Tenya you may ask him to teach the Nameless Hero the following spells:
On the map above, you can find places where spell teachers are located. People who can teach magic in Taranis are Crystal Mages. Unlocking new spells from the crystal magic school is available only after joining the Guardians (more on that in the description of the "New Allies" quest). Moreover, every teacher needs to be paid and the currency in this case are magic crystals, which you can find during the exploration of the world or earn by completing quests.
Attention - Some teachers can move from one place to another. In this case, several dots with the same number are marked on the map.
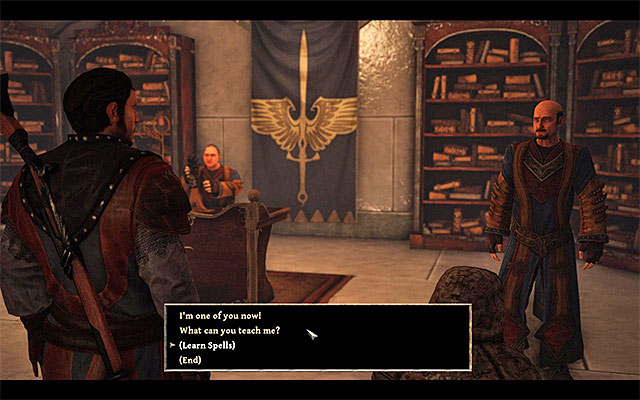 Erasmus can be found in the mage quarters
You will find Erasmus in the main mage building (number 1 on the map).
When talking to Erasmus, you can ask him to teach you the following spells:
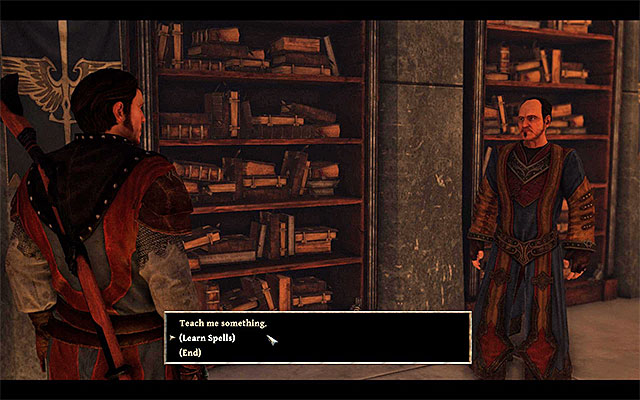 Faruco stays in the mage quarters
Faruco can be found in the main mage quarters (number 1 on the map).
When talking to Faruco, you can ask him to teach you the following spells:
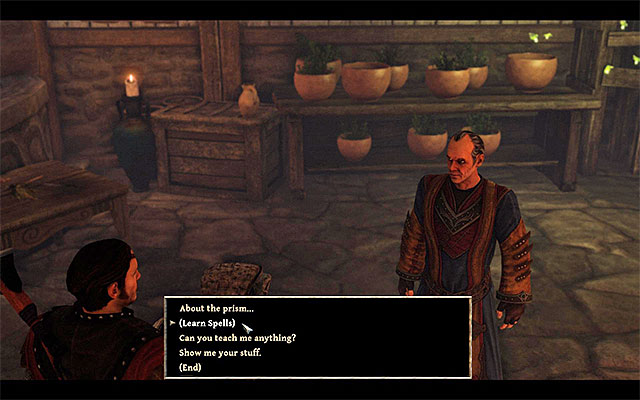 Nergal can be found in the basement
Nergal stays in the main mage building, in the basement (number 2 on the map).
When talking to Nergal, you can ask him to teach you the following spells:
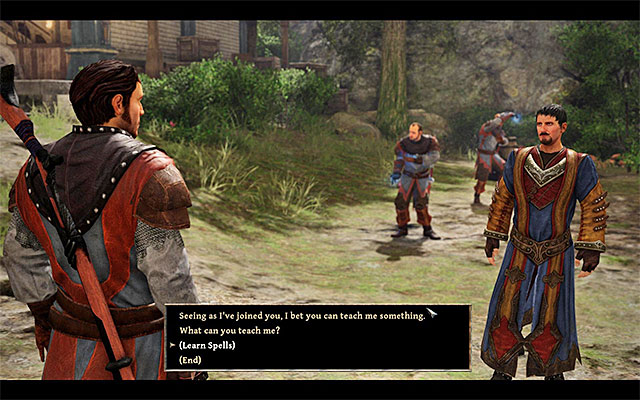 Mauricio moves around the camp
Mauricio moves from one place to another, but he can usually be found in the main building (number 1 on the map) or on the training square (number 3 on the map).
When talking to Mauricio, you can ask him to teach you the following spells:
The above map contains references to all the places in which you can find merchants, living in the Calador Bay. Each one of them specializes in a few different types of goods (melee weapons, attire, etc.), but there are ones who have a vast offer as well.
Two things worth noting - some of the dealers may be mobile, and the map show a few markers of the same dealers, meaning their different spots. In some situations, you can only use the dealers' services after you've done a quest associated with them.
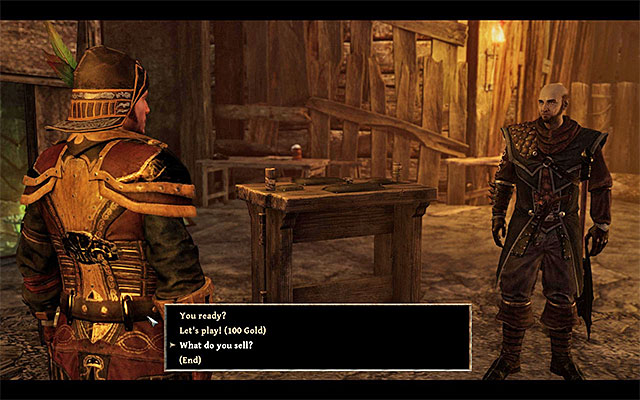 Henrik
Henrik is one of the Demon Hunters and, as a result, he can be found inside of the Citadel. Based on the time of the day, you can find him at the arm-wrestling table (point 1a on the map) or training in front of the Citadel (point 1b on the map).
Henrik offer contains some of the rare artifacts (talismans), as well as Runes associated with Rune Magic.
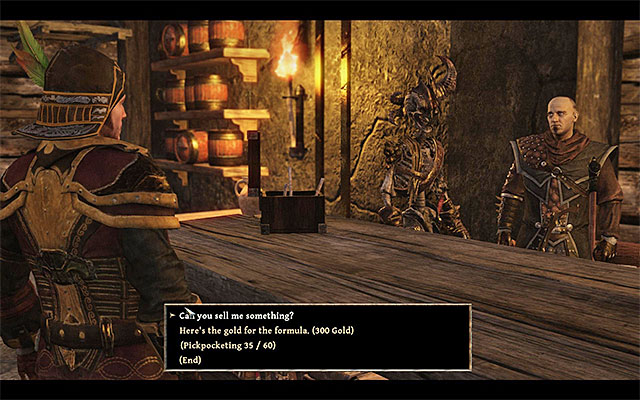 Connor
Connor is one of the Demon Hunters and he can be found inside the Citadel. Typically, you can find him at his shop (point 2 on the map), but he can change his position slightly based on the time of the day.
Connor's offer contains mostly elements of attire, provisions, and Runes associated with Rune Magic.
Attention - From the moment you join the demon hunters, Connor will be interested in buying all the Quartz that you find. No matter what type of Quartz you bring, you will receive 20 gold and 5 glory points for each.
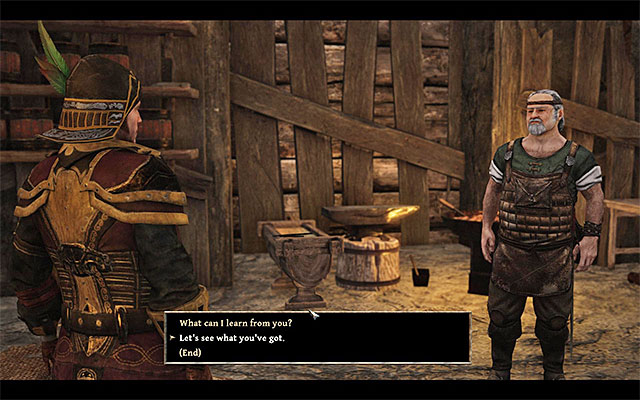 Wilson
Wilson is a blacksmith living inside the Citadel, alongside the Demon Hunters. You can typically find him inside of his workshop, in the central part of the building (point 6 on the map), but based on the time of the day his position might differ slightly.
Wilson's offer contains mostly melee weapons, ranged weapons, belts and ammo. Besides, you can buy lockpicks at his place.
Note - from the moment of completion a quest associated with finding the missing assistant of Wilson (Alvito - his corpse can be found in the nearby mine), you can bring Iron Ore to the smith. For each one of them he will give you 25 gold.
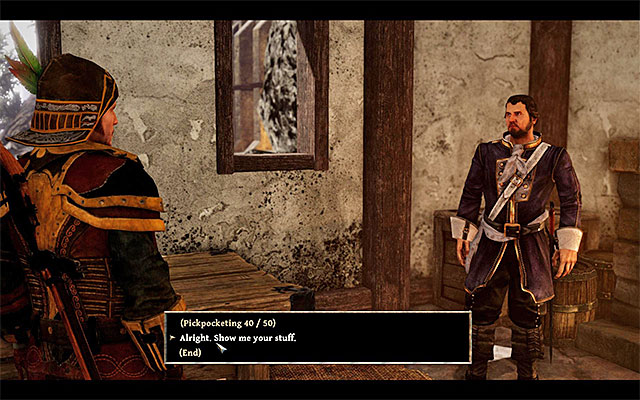 Kramer
Kramer can be found in the tavern, located to the West of the Citadel (point 4 on the map).
Kramer's offer contains mostly melee weapons, talismans, belts and ammo. Besides, you can buy lockpicks at his place.
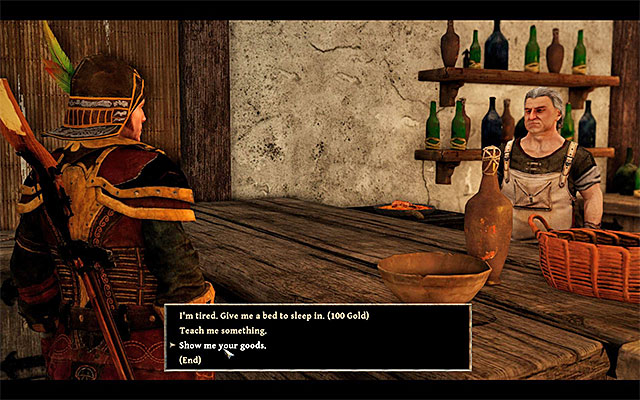 Travis
Travis can be found inside the tavern (point 4 on the map), located to the West from the Demon Hunter's Citadel.
His offer contains mostly potions and herbs. Besides, you can buy lockpicks at his place.
Note - during the conversation with Travis, you can buy a room in the tavern. It will cost you 100 gold, but completing a side quest associated with him will award you with free nights at his tavern.
 Cyril
CyrilCyril is one of the Demon Hunters. At first, you will meet him on the Northern part of the map (point 5a on the map), but after completing a quest associated with getting to the murdered Hunters, he will move to the Citadel (point 5b on the map).
His offer contains mostly potions, small items and Runes.
The above map contains references to all the places in which you can find dealers, living on the Kila Island. Each one of them specializes in a few different types of goods (melee weapons, attire, etc.), but there are ones who have a vast offer as well.
Two things worth noting - some of the dealers may be mobile, and the map show a few markers of the same dealers, meaning their different spots. In some situations, you can only use the dealers' services after you've done a quest associated with them.
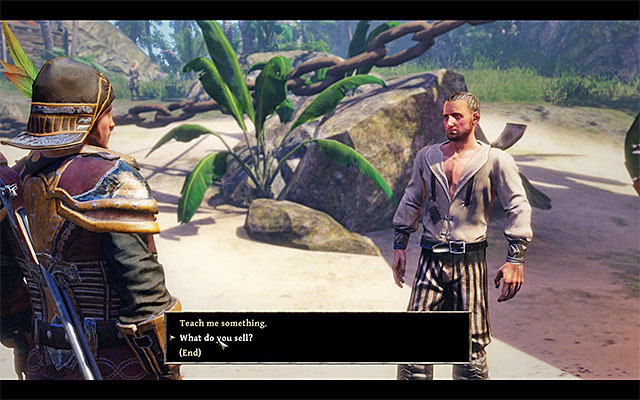 Buddy
BuddyBuddy is one of the pirates and he can be found near the shipwreck on the beach (point 1 on the map).
Buddy's offer contains mostly melee weapons. Additionally, you can buy Lockpicks from him.
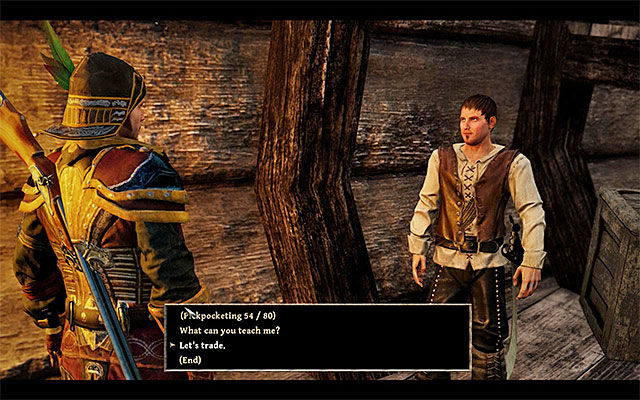 Quinn
QuinnQuinn is one of the pirates. During the day, he can be found inside of the shipwreck on the beach (point 2 on the map), and during the night he can be found near the knife-throwing shield (point 2 on the map).
Quinn's offer contains mostly melee and ranged weapons, elements of attire, ammo, and small items. Additionally, you can buy Lockpicks from him.
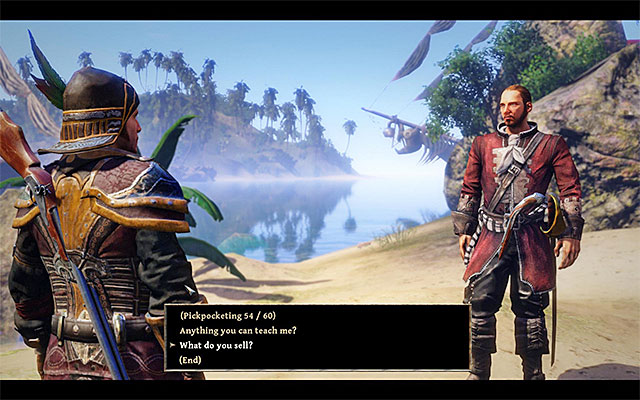 Harry
HarryHarry is one of the pirates and he can be found on the beach neighboring the shipwreck (point 3a on the map) or inside of a small camp (point 3b on the map).
Harry's offer contains mostly elements of attire.
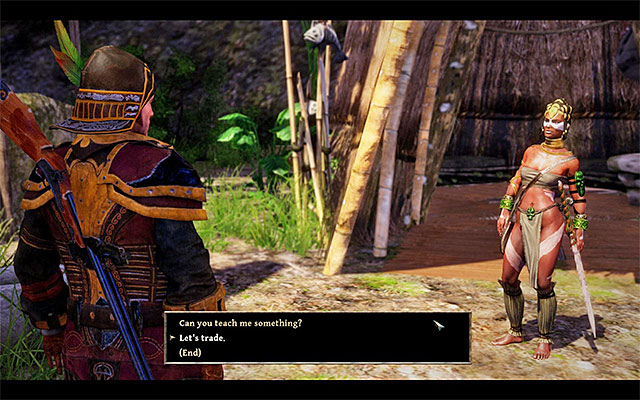 Tenya
TenyaTenya can be found in the main section of the natives village (point 4 on the map).
Tenya's offer contains mostly various talismans, potions, small items and voodoo scrolls.
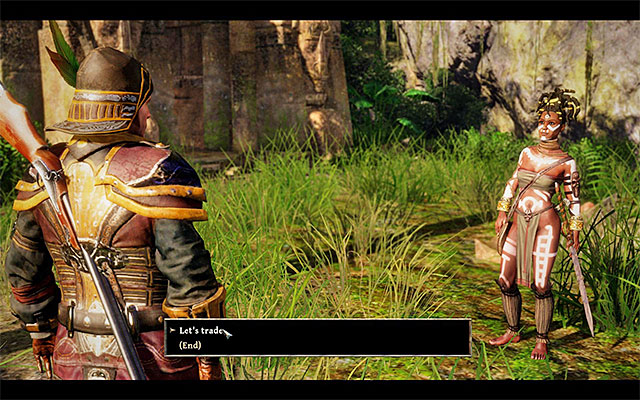 Bahati
Bahati can be found in the North-Eastern part of the native village (point 5 on the map).
Bahati's offer contains mostly various talismans, potions, recipes, small items and voodoo scrolls.
Note - if you want to, you can tell Bahati a couple of stories and earn a small amount of Glory Points.
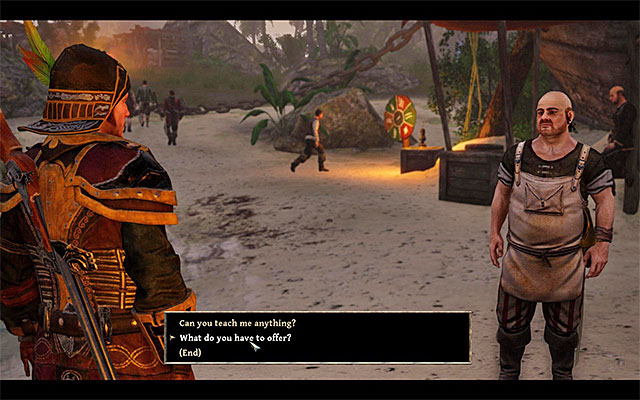 Booze
BoozeBooze is one of the pirates and he can be found near the shipwreck (point 6 on the map).
Initially, Booze won't be even interested in teaching the main character anything. The only way to change his mind is to complete a side quest called "Booze's Befuddled Mind", allowing Booze to regain his senses.
Booze's offer contains mostly provisions, alcohols, small items and recipes.
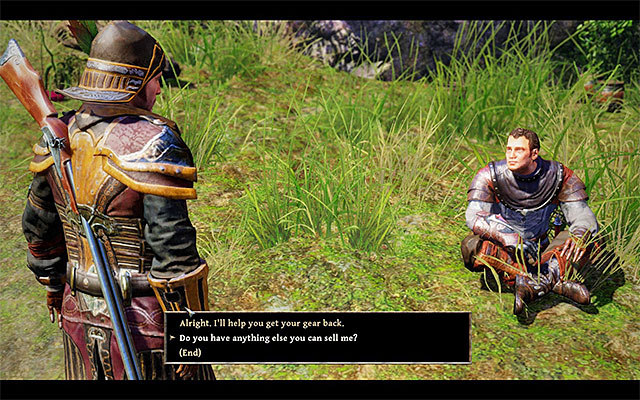 Leonardo
Leonardo is a guardian located in the central part of a small island neighboring Kila (point 7 on the map).
Leonardo's offer contains mostly potions, small items and crystal magic scrolls.
The above map contains references to all the places in which you can find merchants, living in the Taranis Island. Each one of them specializes in a few different types of goods (melee weapons, attire, etc.), but there are ones who have a vast offer as well.
Two things worth noting - some of the dealers may be mobile, and the map show a few markers of the same dealers, meaning their different spots. In some situations, you can only use the dealers' services after you've done a quest associated with them.
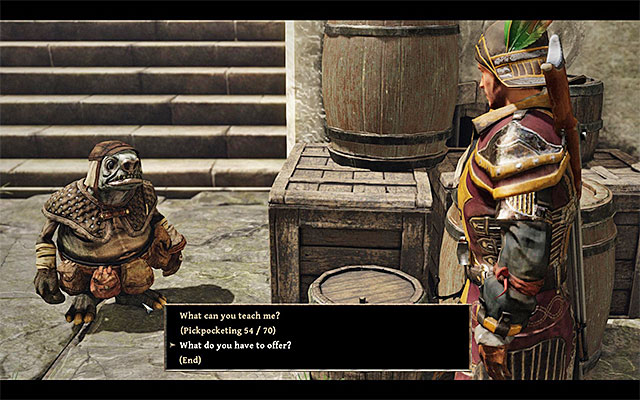 Safi
SafiSafi is a gnome, who can be found in a small harbor, in the Eastern part of the island (point 1 on the map). This character changes his position often, so the point on the map symbolizes only the approximate location of the character.
Safi's offer contains provisions, alcohols and recipes.
 Rumold
Rumold spends most of his time by standing near the warehouse in the harbor, in the Easter section of the island (point 2 on the map).
Rumold's offer contains provisions, alcohols and small items. Besides, you can buy lockpicks at his place.
 Gadi
GadiGadi is a gnome, who can be found in a small harbor, in the Eastern part of the island (point 3 on the map). This character changes his position often, so the point on the map symbolizes only the approximate location of the character.
Gadi's offer contains elements of attire, ammo and small items. Besides, you can buy lockpicks at his place.
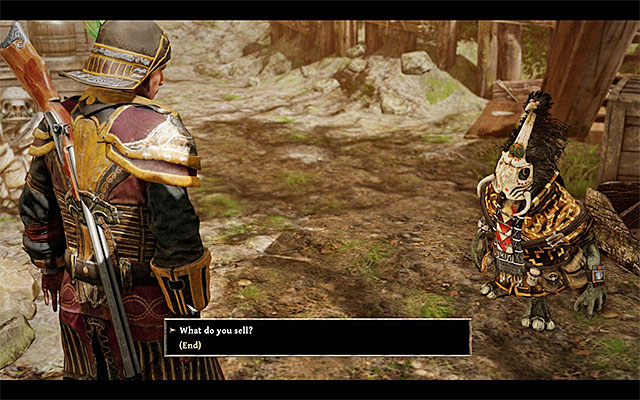 Abbas
AbbasAbbas is a gnome, which can be found in the mages camp. This character can be seen in the section of the mages camp which was separated for the gnomes (point 4 on the map).
Abbas' offer contains provisions, ammo and small items.
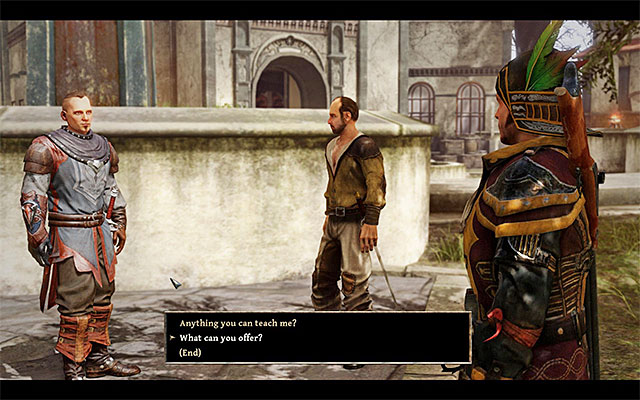 Agila
AgilaA watchman named Agila can be found in the central part of the mages encampment, near the entrance to the main building (point 5 on the map). This character often changes its location, so the point on the map symbolizes only the approximate location of the character.
Agila's offer contains talismans, potions, small items, as well as crystal magic scrolls. Besides, you can buy lockpicks at his place.
 Hardwick
Hardwick travels all around the mages camp, but he can often be found near the warehouse (point 6a on the map) or in the tavern (point 6b on the map). This character often changes its location, so the point on the map symbolizes only the approximate location of the character.
Hardwick's offer contains various elements of attire.
 Roderich
Roderich can be found in the tavern in the mages camp (point 6b on the map).
Roderich's offer contains mainly provisions, drinks and recipes.
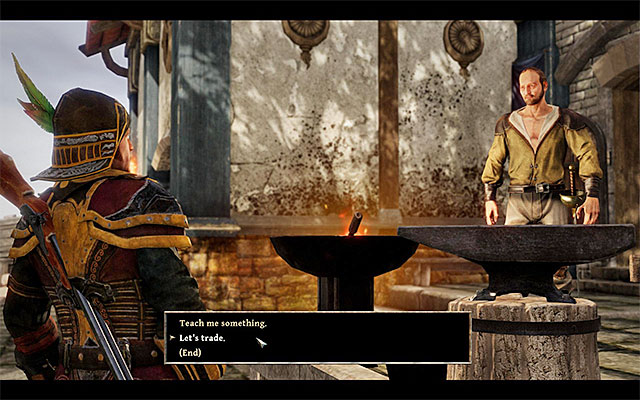 Gordon
Gordon is a blacksmith, and this character can be found in the Easter section of the mages camp (point 7 on the map).
Gordons' offer contains mainly melee and ranged weaponry.
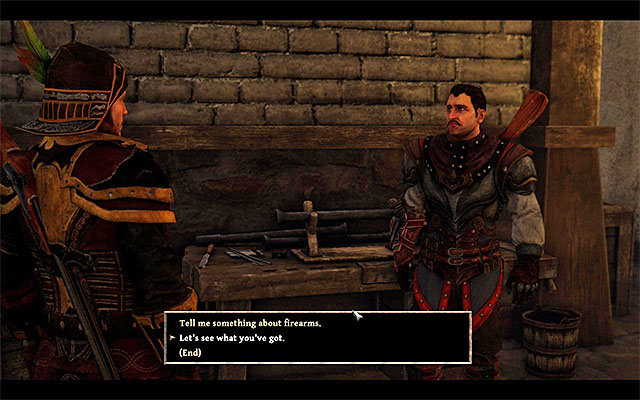 Stanley
Stanley is a gunsmith, and this character can be found in the Eastern part of the camp (point 7 on the map).
Stanley's offer contains mainly ranged weaponry and ammo.
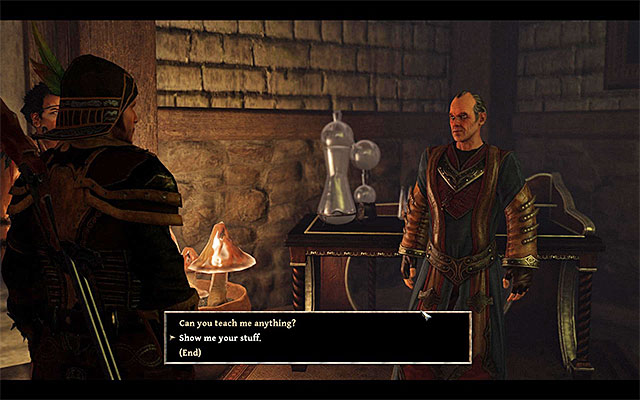 Nergal
Nergal can always be found in the basement of the main building (point 8 on the map), to which a stairway is leading. You won't have access to the building at the beginning, and you will have to complete a main quest to get inside.
Nergal's offer contains mainly talismans, herbs, recipes, as well as Crystal Magic scrolls.
 Lumbrok
Lumbrok can be often found on the upper floor of the mages building (point 9 on the map). You won't have access to the building at the beginning, and you will have to complete a main quest to get inside.
Lumbrok's offer contains mainly potions, small items, as well as Crystal Magic scrolls.
The above map presents the locations of traders, who are staying on the Fog Island. The majority of these traders, specialize in selling several types of goods, (e.g. melee weapons or outfits), although there are also ones whose stock is wider.
Two important notes - some of the traders may move around the map and because of that, several identical markings have been put on the map. In extreme situations, you can trade with some after you have completed a certain quest.
 Venturo
Venturo is an Inquisitor and it is in the camp of that faction, in the central part of the map (point 1 on the map), that you can find him.
At first, Venturo is staying on the Western beach and only after you complete the side quests "The Terror of the East" and "The Commandant" that he reaches the Inquisitors' camp, at which point he becomes an active trader. His offer includes mainly ranged weapons, supplies ammo and drinks.
 Diaz
DiazDiaz is one of the Inquisitors and you can find him in the ruins located in the Eastern part of the isle (point 1 on the map), right next to the staying place of one of the soul eaters.
Diaz's offer includes, mainly, outfit elements, supplies and liquor . Apart from that, you can buy lockpicks from him.
Note - Diaz may die during the side quest "Paths to the Afterlife" so, you need to be careful, if you want to take advantage of his services, later into the game.
The above map presents the locations of traders, who are staying on the Fog Island. The majority of these traders, specialize in selling several types of goods, (e.g. melee weapons or outfits), although there are also ones whose stock is wider.
Two important notes - some of the traders may move around the map and because of that, several identical markings have been put on the map. In extreme situations, you can trade with some after you have completed a certain quest.
 Nanuk
NanukGnome Nanuk staying in the village in the middle of the Isle of Thieves (point 1 on the map).
Nanuk offers mainly melee weapons.
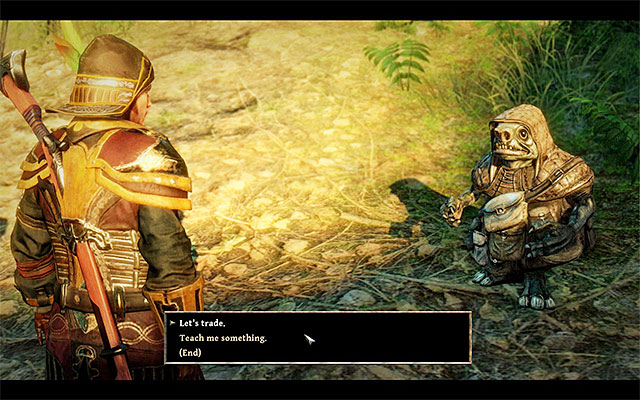 Mimak
MimakGnome Mimak staying in the village in the middle of the Isle of Thieves (point 2 on the map).
Mimak's stock encompasses, mainly, ranged weapons, supplies, liquor and ammo apart from that, you can buy lockpicks from him.
The above map presents references to the locations where you find traders, on Tacarigua. The majority of these traders, specialize in selling several types of goods, (e.g. melee weapons or outfits), although there are also ones whose stock is wider.
Two important notes - some of the traders may move around the map and because of that, several identical markings have been put on the map. In extreme situations, you can trade with some after you have completed a certain quest.
 Jack
JackJack is the keeper of the lighthouse and, although you can initially meet him at the beach, later into the game you can meet him near the lighthouse. (point 1 on the map).
At first, Jack is not interested in trading with you. To change that, you need to complete the "Kicking Ass" side quest, i.e. to drive away the inquisitors near the lighthouse. Only then can you meet up with Jack and mention bartering. Jack's offer consists, mainly, of talismans, outfits, liquor and ammo. Apart from that, you can also buy lockpicks.
 Osorio
Osorio is staying on the farm in the backcountry, in the North-Western part of the map (point 2 on the map).
Osorio offers mainly melee weapons, elements of outfits and ammo.
RodriguezInquisitor Rodriguez is in the central part of Puerto Sacarico (point 3 on the map).
Rodriguez mainly offers melee weapons, firearms and ammo.
 Jose
JoseInquisitor Jose is in the kitchen of one of the buildings in Puerto Sacarico (point 4 on the map).
Jose mainly offers liquor.
Note - During the conversation with Jose, you can use the Intimidate skill developed to the level of, at least 30 points. Thanks to this, you will receive a Fish, grog and 2 pieces of Meat, for free.
The map which you can see above represents places where you can find merchants from Antigua Island. Most of them specializes in selling few kinds of merchandises (such as melee weapons or outfits) although there are also merchants without a very diverse assortment.
Two important things - some merchants may wander around this area. That's why we put on the map few identical marks. Sometimes you will have to (for example) complete some specific quest before you will be able to trade with a merchant.
 Ramon
RamonYou will meet the guard named Ramon on the road connecting the beach and the port town. At first he will not be interested with trading with your hero. The only way you can change his mind is to complete the side quest named "Bring Ramon Into the Harbour Town" which is related to him. Only after you will complete this quest you can look for Ramon near the warehouse (map location 1) and choose the dialogue option responsible for trading.
Ramon's assortment is focused on talismans, potions, trinkets and scrolls of Crystal Magic. You can also buy from him a picklock.
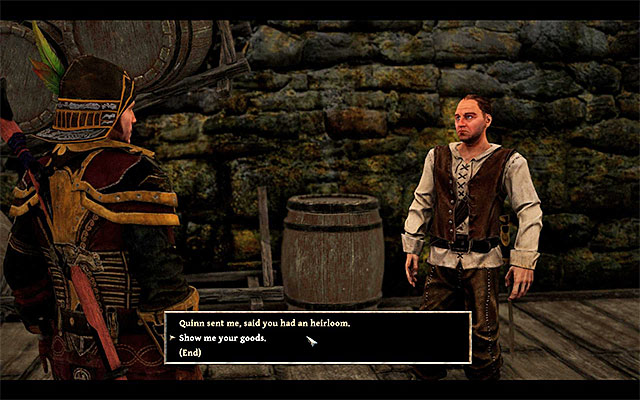 Flynn
FlynnYou will meet Flynn in the warehouse in the port town (map location 2) and you will have to release him while completing the side quest named "Storage". Only after you will release Flynn you can trade with him. Remember that this character often changes his location nevertheless you can always find him near the warehouse.
Flynn's assortment is focused on firearms, outfits and trinkets. You can also buy from him a picklock.
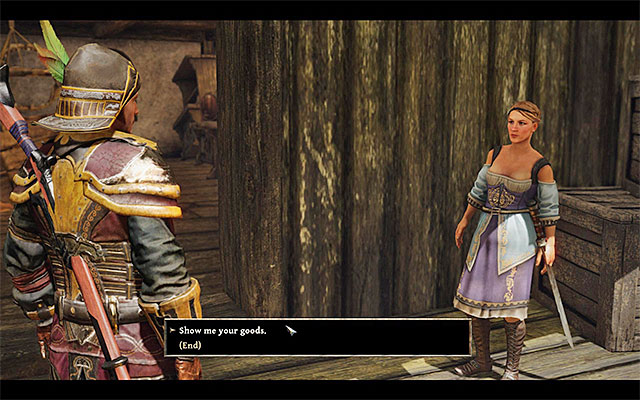 Grace
GraceYou will meet Grace near the blacksmith's place in the port town (map location 3) and at first she will not be interested in showing you her goods. The only way to change her mind is to force her assistant named Pansel to work. You should be able to meet him inside the building. You can persuade him to return to his duties if you cleared the surrounding area from monsters (in other words when you will complete the main quest named "Chaos in Harbour Town"). It is worth to mention that he will give you the sword named Pansel's Master Sword.
Grace's assortment is focused on firearms and ammunition.
Notice! During your conversation with Pansel you may use the Intimidate ability if you have it at least on level 30. He will be frightened enough to give you additional 40 gold pieces.
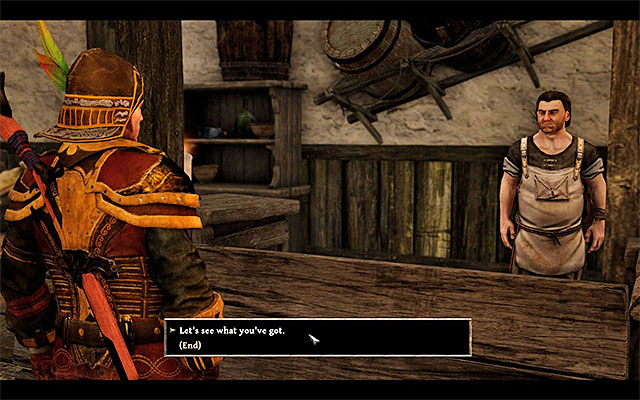 Spencer
Spencer is a bartender in the tavern located in the port town (map location 4).
Spencer's assortment is focused on eatables, alcohol and trinkets.
Notice! If you have your Intimidate ability at least on level 40 you can cow him with the perspective of demolishing his tavern. He will give you the Painkiller.
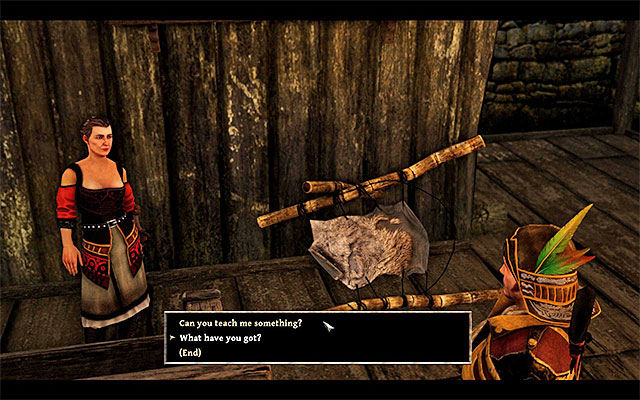 Emma
EmmaYou will meet Emma for the first time on the east beach, however you will be able to trade with her only when she will move to her house in the port town (map location 5) and after you will complete the side quest named "Emma's Hellswill" which is related to her.
Emma's assortment is focused on talismans, potions, trinkets, recipes and scrolls of voodoo magic.
The above map presents references to the locations where you find traders, on the Skull Island. The majority of these traders, specialize in selling several types of goods, (e.g. melee weapons or outfits), although there are also ones whose stock is wider.
Two important notes - some of the traders may move around the map and because of that, several identical markings have been put on the map. In extreme situations, you can trade with some after you have completed a certain quest.
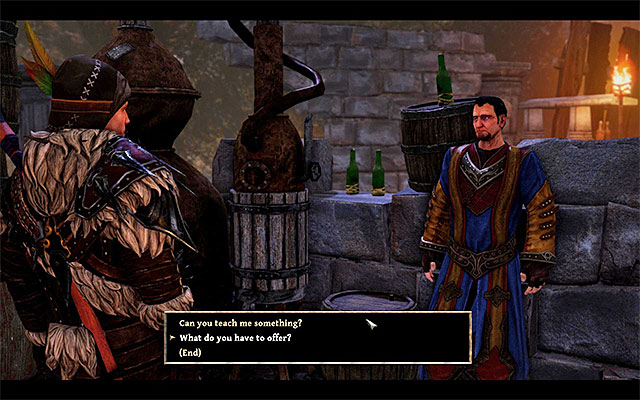 Rodas
RodasYou can find mage Rodas in the main camp, in the central part of the isle (point 1 on the map).
Rodas offers mainly supplies and ammo. Apart from that, you can also buy lockpicks from him.
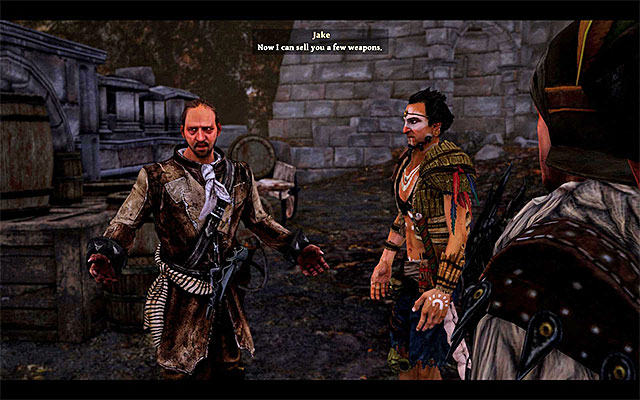 Jake
JakeYou can find Jake in the main camp, in the central part of the isle (point 2 on the map). At first, he does not want to trade with you and the only way to change it is to complete one of the parts of the "The Minions' Weapons Store" quest connected with Jake, i.e. elimination of the monsters at the nearby weapons depot.
Jake mainly offers melee weapons, firearms, supplies, small items and ammo.
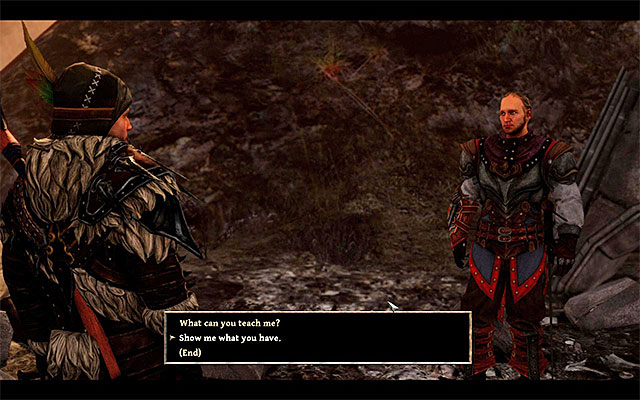 Jake
JakeNeron is staying in the canyon in the central part of the Skull Isle (point 3 on the map). At first, he is not interested in trading with you, but you can change it if you complete one of the parts of the "The Minions' Weapons Store" quest, i.e. by solving the problem with the maddened mage Focalor.
Neron mainly offers talismans, potions and Crystal Magic scrolls.
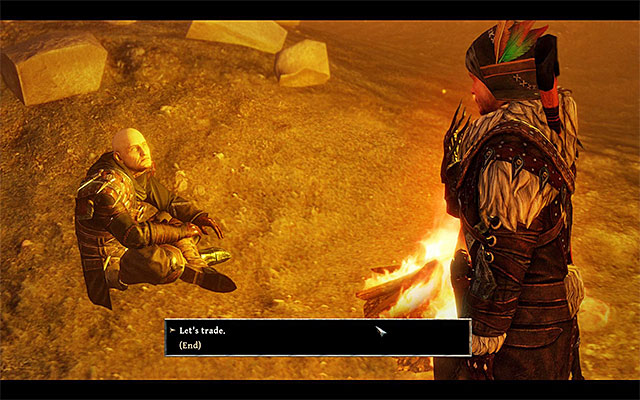 Gray
GrayGray is in the Eastern part of the Skull Island, close to one of the lava rivers (point 4 on the map). At first, he is not interested in training you, but you can change it if you complete one of the parts of the "The Minions' Weapons Store" quest, i.e. dealing with the Shadow Lord of Slavery.
Gray offers, throwing knives, supplies and liquor.
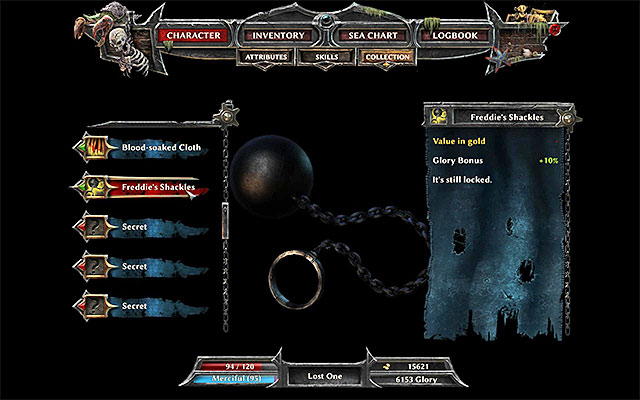 Freddie's Shackles is one of the best legendary items
In Risen 3, you can set out again for the legendary items hunt. These are unique artifacts that are displayed in a separate inventory tan, after you obtain them, and they permanently boost the select attributes or skills of your character. You do not need to wear the legendary items, because they all take a passive effect. Also, you do not need to worry that you will inadvertently sell them, because they do not appear on the list, while trading.
A full list of legendary items, and the locations that you can find them in, can be found on the following pages of this guide. Below, I have included a short list of those of the artifacts, which it would be to obtain as soon as possible, because they provide the best bonuses:
The above map contains references to all of the locations of legendary items (blue dots) while you are on the Crab Coast. It's worth noting, that some of those items are hard to, or even impossible to get at first. It can be like that because of a necessity to defeat a powerful enemy guarding the treasure, or lacking an ability which is required to retrieve it.
 The route leading to the chest with the legendary item.
Item stats : +10 to Bulletproof attribute
The legendary item is hidden in a chest, located on an island to the East from the main part of the Crab Coast (point 1 on the map). You must, obviously, swim to the island on your own and locate the route leading up the hill.
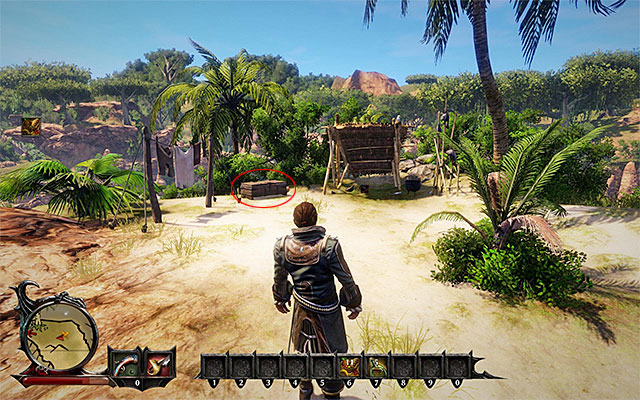 The chest
On your route to the treasure, you will stumble upon a group of Scavengers - it's a good tactic to attack those monsters one by one. You must get to a small encampment located on the hill, in the central part of the island. Open the chest (you don't need lockpicks) and take 100 gold, as well as the legendary item - Hardened Crab Shell. You will also receive 400 Glory Points for that.
The above map contains references to all of the locations of legendary items (blue dots) while you are on the Calador Bay. It's worth noting, that some of those items are hard to, or even impossible to get at first. It can be like that because of a necessity to defeat a powerful enemy guarding the treasure, or lacking an ability which is required to retrieve it.
 Search the Southern part of the Demon Hunter's Citadel.
Item stats : +10 to Critical Hit attribute
The legendary item is located on a shelf, in the Southern part of the Demon Hunter's Citadel (point 1 on the map), near the stairway leading to the upper floor. You can collect the Booze for Aiming without any problems, and you will be given 400 Glory Points as well.
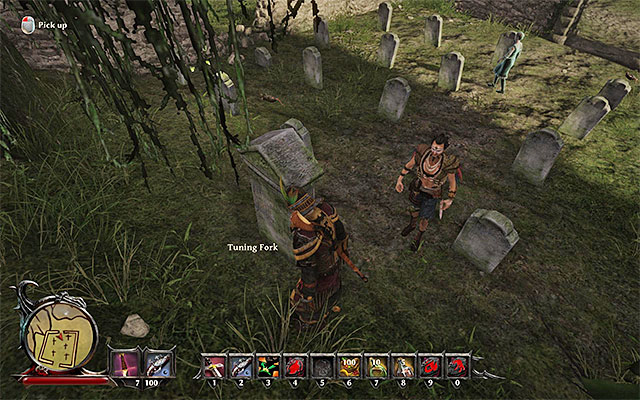 Check the cemetery.
Item stats: +5 to Spirit attribute
This legendary item is hidden behind one of the graves, in the Northern part of the cemetery (point 2 on the map). The cemetery is located to the North from the Demon Hunter's Citadel. The Tunning Fork can be collected without any problems, and you will be given 400 Glory Points as well.
 You will have to win this arm-wrestling mini-game to get the legendary item.
Item stats: +10 Daggers attribute
This legendary item is a reward for completion of the side quest called "The Muscle Man". The quest is about arm-wrestling with Henrik, who can be found inside the Demon Hunter's Citadel (point 3 on the map) in the night hours. Defeat him and claim your reward, as well as 400 Glory Points.
 Search the insides of the hut.
Item stats: +10 Lockpicking attribute
This legendary item is located inside a hut in the mountains (point 4 on the map). It's a farm, which was attacked by the enemies, where you meet Fenn. Broken Lock Pick can be collected without problem, and you will be awarded 400 Glory Points as well.
 Before you collect the legendary item, you must first get rid of the mage Tirion.
Item stats: +10 Slashing Weapons attribute
This legendary item is located inside the encampment on the beach, where the mage Tirion and his prisoner Jill can be found. You must kill the mage first, which is a part of a side quest called "Dangerous Liaison". After securing the area, locate the Intractable Liana lying on the ground, getting 400 Glory Points as well.
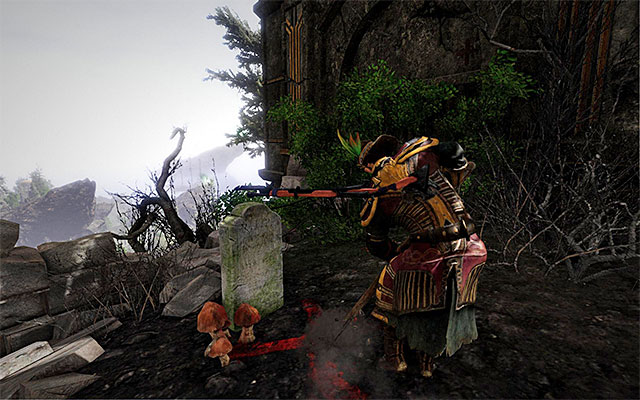 You need to dig up a chest buried in castle ruins
The item's functioning: +5 points to Toughness attribute
The legendary item is in the chest buried in the castle ruins, in the Western part of the map (point 6 on the map). You find that chest while completing quest "John's Treasure". After you dig up the chest, take the Ornamental Belt from it. You will also be rewarded with 400 glory points.
 You will receive the artifact as a gift from Wilson
Item Effect: +10 points to the Piercing Weapons ability
This legendary item is possessed by the blacksmith Wilson (map location 7). You can find him in the Citadel of the Demon Hunters. The blacksmith will give the Diamond Grinder to the Nameless Hero as a reward for completing for him the side quest named "The Engagement Ring". You will also receive 400 Glory Points.
 Go to the lighthouse on desolation
Item Effect: +10 points to Crossbows ability
You can find this legendary item in the lighthouse in the east part of Calador Island (map location 8). You will be able to go there after you will unlock the third chapter of the game's main plot, to be more specific - after you will unlock the main quest named "Recruit Eldric". Once you will get to the lighthouse you need to go to its lowest level where you can take the Crankshaft. For taking this artifact you will also receive 400 glory points.
The above map contains references to all of the locations of legendary items (blue dots) while you are on the Kila Island. It's worth noting, that some of those items are hard to, or even impossible to get at first. It can be like that because of a necessity to defeat a powerful enemy guarding the treasure, or lacking an ability which is required to retrieve it.
 You must win a mini-game of knife-throwing in order to get the legendary item.
Item stats: +10 to Astral Vision attribute
This legendary item is a reward for completing a side quest called "Streamlined". The quest is about winning a mini-game with Buddy, associated with knife-throwing. Buddy can be found on the pirates beach (point 1 on the map), just by the shipwreck. The reward for acquiring the legendary artifact is 400 Glory Points.
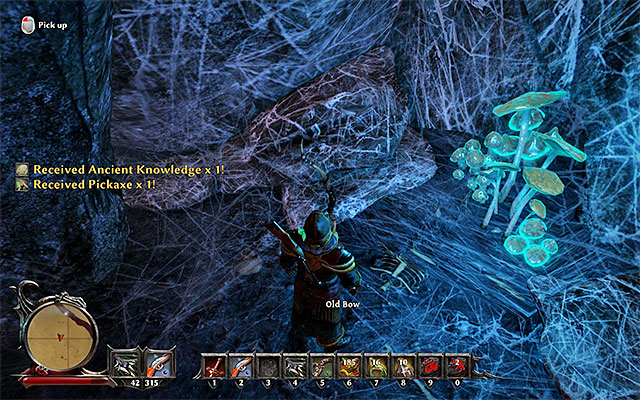 Search the spiders cave thoroughly.
Item stats: +10 to Muskets attribute
This legendary item can be found during your journey through the spiders cave, located to the South of the pirates beach. Examine the Eastern part of the cave (point 2 on the map), being careful about the nearby enemies. The Old Bow can be collected without any problems and you will also gain 400 Glory Points for it.
 Get rid of the monster first or quickly collect the item.
Item stats: +10 to Alchemy attribute
The legendary item can be found on the Eastern beach, on which you will arrive by going through the spiders cave. There's a Silverback gorilla near the item, and you can either kill the beast or just simply snatch the item and run away. Collect the Pestle and you will also receive 400 Glory Points.
 Reach the tomb on the hill and dig up the chest
The item's functioning: +10 points to Swords.
This legendary item is in the chest buried on the hill of an islet neighboring Kila (point 4 on the map). You find the chest while completing quest "The Swordmaster's Treasure". Eliminate the monsters around and only then, dig up the chest. Take the Tattered Scabbard that you find inside. You will also be rewarded with 400 glory points.
 The paw is offered by Bahati for sale
The item's functioning: +10 points to Voodoo Magic.
This legendary item can be found among the items offered for sale by Bahati, i.e. one of the women that live in the village of the locals in the central part of the isle (point 5 on the map). By default, the Black Cat's Paw should be 1800 gold pieces, but you can buy it at a lower price, if you have developed appropriate skills. Buying the artifact will gain you 400 glory points.
 The flag is hidden in the chest with a treasure
Item Effect: +10 points to Intimidate ability
This legendary item is hidden in the chest which is buried in the ground. You can find it while completing the side quest named "Capt'n Finch's Treasure". You can find the chest in the northwest part of the Forbidden Valley (map location 6) on the Kila Island, however you will be able to do that only after you will get to the third chapter of the game. You have to use a Shovel to dig out the chest with the artifact. Once you will get the Pirate Flag you will also be rewarded with 400 Glory Points.
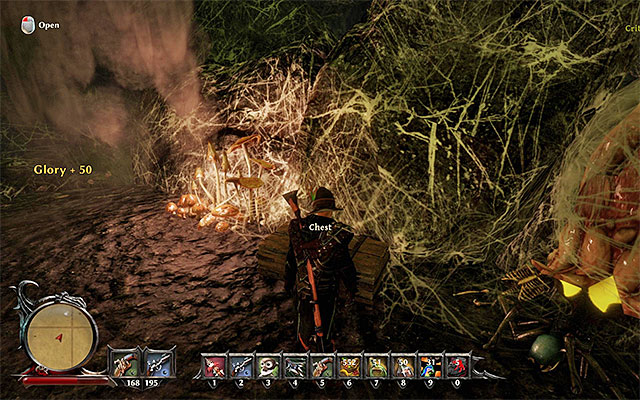 Defeat the golem and loot the chest inside spiders' caves
Item Effect: +5 points to the Ranged ability
You can find this legendary item in the chest from spiders' cave in the northwest part of the island (map location 7), to be more specific - in the area next to the Margoloth's lair. It means that you can get the artifact only after you will get to the third chapter of the game. During the exploration in mentioned caves you have to go to their highest level. Find the cavern with the Iron Golem and defeat him. After that locate a chest with a treasure. You may now take the Glass Eye and receive 400 glory points.
The above map contains references to all of the locations of legendary items (blue dots) while you are on the Taranis Island. It's worth noting, that some of those items are hard to, or even impossible to get at first. It can be like that because of a necessity to defeat a powerful enemy guarding the treasure, or lacking an ability which is required to retrieve it.
 You will have to win a drinking mini-game in order to get the goods.
Item stats : +10 to Pickpocketing attribute
This legendary item is a reward for completing the side quest called "Nightcap". The quest requires you to win a drinking mini-game with Gordon, who can be found in the tavern, in the mages encampment, during the night hours (point 1 on the map). Defeat him in the mini-game, claim the item and 400 Glory Points.
 The only way to get your hands on this item is to gain access to Lombruk's chamber.
Item stats : +5 to Influence attribute
This legendary item lies hidden in a private chamber of a mage named Lombruk, in the main mages building (point 2 on the map). You can gain access to the room only through a side quest called "The Private Store" (you won't be able to get there outside the quest), given to you by Agila. After reaching the chamber check the contents of the chest, from which you will be able to collect a few Magic Crystals as well. The chest contains a book - Vague Promises - which is the legendary item you were looking for. Additionally, you will be given 400 Glory Points for collecting the legendary artifact.
 You will have to swim to a small islet.
Item stats : +10 to Resist Magic attribute
In comparison to the South-Eastern section of the map, there's a small islet here, which you can easily swim to (point 3 on the map). Start exploring the island, getting rid of Sand-Devils and / or Dragon Snappers, which you surely should stumble upon soon.
 The artifact is hidden in the rats' cave.
In the Western section of the mentioned islet, there's an ascension to a cave, flooded with Giant Rats and Cave Bats. Get rid of the pesky beasts and carefully and thoroughly scan the entire cave. You should soon be able to locate the Blood-Soaked Cloth. Additionally, you will be given 400 Glory Points for collecting the legendary artifact.
 Find the crate near the waterfront
The item's functioning: +10 points to Silver Tongue
This legendary item is in the North-Eastern part of Taranis. Go along the beach and you should notice an opened wooden crate (point 4 on the map). Examine the crate and you will obtain the Blue Quill. For obtaining this artifact, you will be rewarded with 400 glory points.
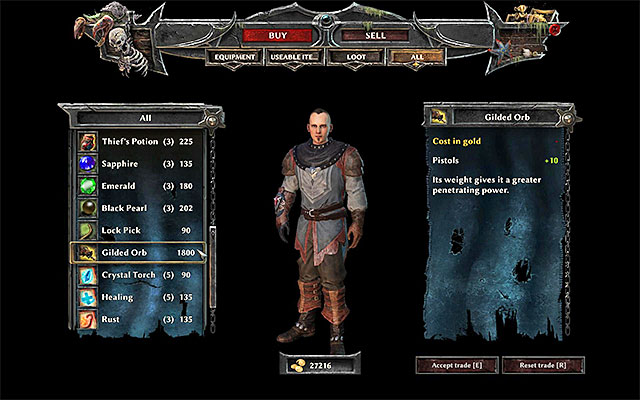 You can buy the Gilded Orb from Agila
Item Effect: +10 points to the Pistols ability
This legendary item you can buy in the shop of Agila, an inhabitant of the mage's camp that you can find on Taranis Island (map location 5). Depending on the time of the day you can find Agila in various places near the main square, for example in the tavern. The Gilded Orb will initially cost 1800 gold pieces, however you can reduce this price if you developed necessary abilities. If you will buy this artefact you will also receive 400 Glory Points.
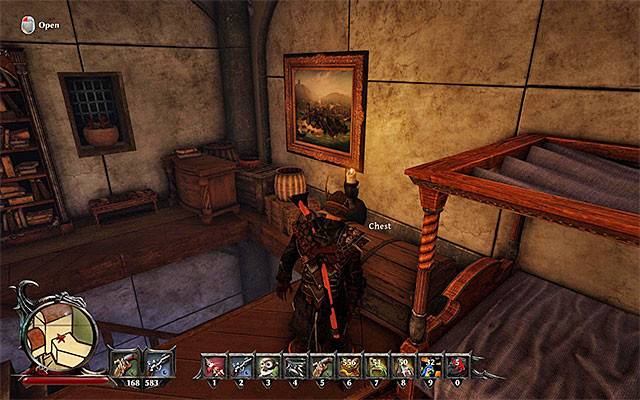 Look into the chest in the Zacharias's tower
Item Effect: +10 points to the Crystal Magic ability
This legendary item is hidden in the Zacharias's tower in the east part of the mages' camp (map location 6). You can visit this tower only after you will get to the third chapter of the game's main plot, so only after you will initiate your preparations to the soul's ritual. After you will get to the tower you need to go to its upper floor and open a chest which you can find here. You can now take out the Sun Crystal and you will also receive 400 glory points.
 You have to complete a quest for Lumbrok to receive this legendary item
Item Effect: +10 points to the Rune Magic ability
This legendary item is a reward for completing the quest named "The Gourmet". You can unlock this quest during a conversation with the mage named Lumbrok, which you can find in the main mage's seat (map location 7. To complete this quest you have to deliver to Lumbrok four delicacies from different parts of the world. Your reward will be Small Stone Tablet and 400 glory points.
The above map presents the whereabouts of legendary items (the blue dots) that you can find while staying on the Fog Island. It is good to know that some of the legendary items are difficult to get, at first, or completely inaccessible. This may be the result of the necessity to defeat a very strong monster, first that is guarding access to the treasure, or to open a locked chest.
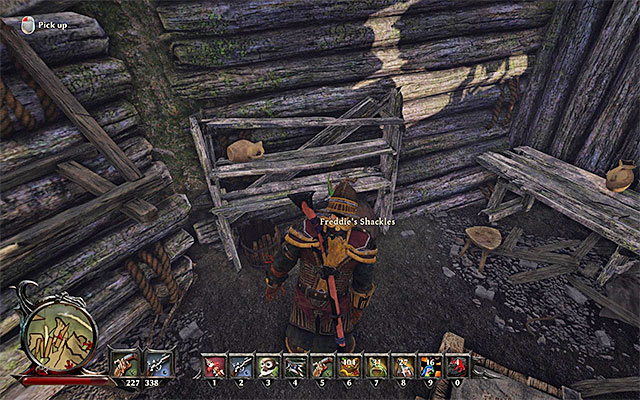 Take a look into one of the wreckages
Item's functioning: +10% to glory points
The legendary items has been hidden in the South-Western part of the Fog Island, i.e. in the area with several shipwrecks. Explore all of the wreckages and, at the same time, watch out for the traps in this area. Collect the Freddie's Shackles, thanks to which you will obtain 400 glory points.
Note - the shackles are one of the best legendary items. Thanks to the bonus to the glory points you can develop your character faster so, it is best to obtain this one as early into the game as possible.
The above map presents the whereabouts of legendary items (the blue dots) that you can find while staying on the Fog Island. It is good to know that some of the legendary items are difficult to get, at first, or completely inaccessible. This may be the result of the necessity to defeat a very strong monster, first that is guarding access to the treasure, or to open a locked chest.
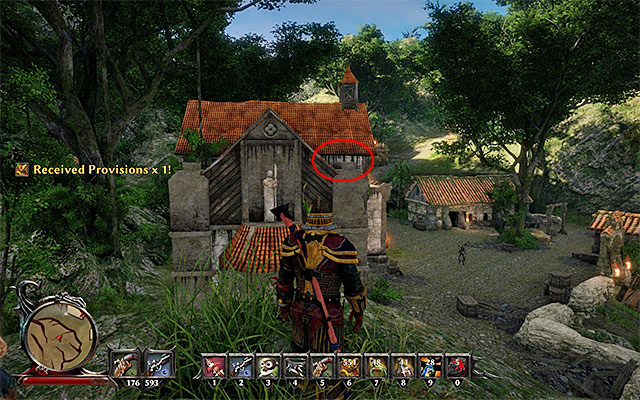 This is where you turn into a parrot
The item's functioning: +10 to Shotguns
The legendary item has been hidden on the rooftop of the governor's building, in Puerto Sacarico (point 1 on the map). It seems impossible to obtain it, but you can reach it in two different ways. The first variant assumes that you use the Parrot Flight spell. You need to turn into the parrot after you stand on the rocks, to the South of the governor's building.
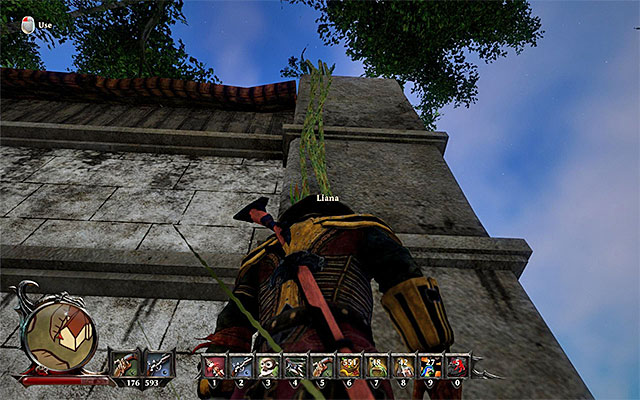 The Liana
The second variant assumes that you examine the walls of the building and find an interactive liana, which you can climb onto. Regardless of what you did, find The Target and collect it, thanks to which you will receive 400 glory points.
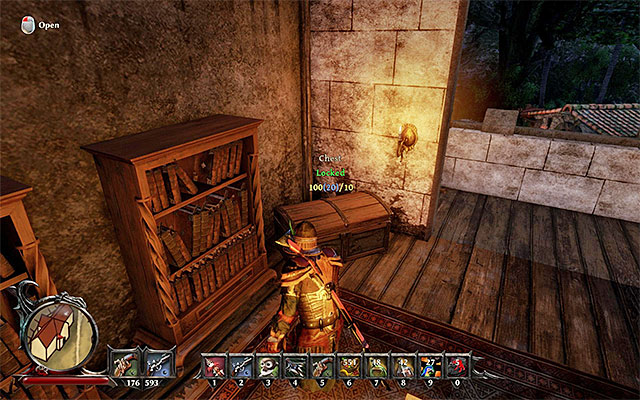 The chest is at the upper level of the governor's building
The item's functioning: +5 to Cunning attribute
This legendary item has been hidden on the first floor of the governor's building in Puerto Sacarico (point 2 on the map). During the day, this place is occupied by commandant Sebastiano therefore, you need to enter the building at night. It is necessary that you sneak to prevent being spotted. Open the chest with a lockpick (fortunately, it is very poorly secured) and collect the Plan of Holm the Great. For obtaining the artifact, you will be rewarded with 400 glory points.
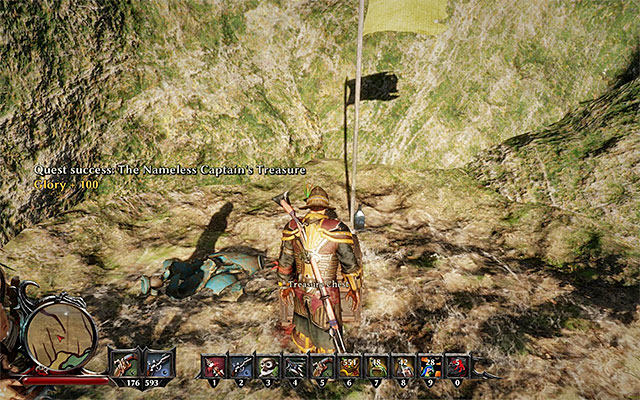 The vial is in the chest with the buried treasure
The item's functioning: +5 to Magic attribute
This legendary items has been buried under the ground, in the chest that you find while completing the "The Nameless Captain's Treasure" side quest. The chest has been buried near the beach in the central part of the map (point 3 on the map). You need to use the Shovel to dig it up and open it. For obtaining the Vial you will be additionally rewarded with 400 glory points.
The map which you can see above represents places where you can find legendary items (marked as a blue dots) during your visit on Antigua Island. You should know that few of them are very difficult (or even impossible) to get because (for example) you have to defeat a very strong monster that protects the treasure or you have to open a complex lock to open a closed chest.
 Sneak into the room containing the legendary item
Item Effect: +5 points to the Dexterity skill
You can find this legendary item on a shelf on the first floor in the main Alvarez's building (map location 1). Your hero is not allowed to get inside the room with the artifact so if you want you can steal it and try to run as fast as you can. However I recommend to use your Sneak ability to avoid being spotted. Taking the Finger Bone will be rewarded with additional 400 Glory Points.
 Explore the port
Item Effect: +5 points to your Melee skill
This legendary item is hidden in the port on Antigua Island (map location 2). Walk through some wooden boards, jump from the right place to the (luckily shallow) water and look for the sword named Glass Sword. As a reward for finding this artifact you will receive 400 Glory Points.
 Dig out the treasure chest
Item Effect: +10 points to you Bladeproof skill
You can find this legendary item in the chest buried in the ground. You can find that chest as a result of completing the side quest named "Happy Pirate's Treasure". The treasure is hidden deeply into the wilderness in the north part of Antigua Island (map location 3). Getting this armor named Damaged Cuirass will be rewarded with 400 Glory Points.
The PC version of Risen 3 is a game of relatively low system requirements. They are only a bit higher than those for Risen 2 and the reason is that the engine of the game has only been slightly improved, in comparison with the previous installment. Even after graphic details are set to high, the frame rate remains high and the game slows down, slightly, only during the most crowded battles. Apart from that, RAM memory requirements of the game are also limited and even after an extended instance of playing, there are no problems loading locations. Unlike its predecessors, which were rich in bugs, Risen 3 is devoid of any major ones. The occasional bugs concern only the model of the game world's physics, or levitating characters, but there are no major bugs connected with blocking the currently completed quests.
Singleplayer: Yes
Offline co-op (split screen/hot seat): No
Co-op over the Internet: No
Multiplayer: No
This guide has been drawn up on the PC version, on the computer of below specifications:
On the system with the above specs, the game ran smoothly, in high resolution and with high graphics details.
Yes, it is possible to play Risen 3 on laptop computers.


 Reus Game Guide & Walkthrough
 Rise of the Tomb Raider Game Guide & Walkthrough
 Runaway 2: The Dream of the Turtle Game Guide & Walkthrough
 Red Dead Redemption Game Guide & Walkthrough
 Resident Evil 6 Game Guide & Walkthrough