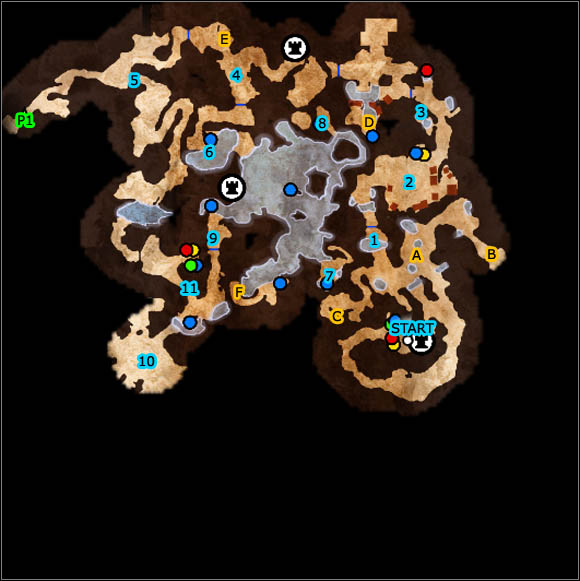
Introduction
Here's a guide of the game Overlord II. You will find there some general information about walkthrough, weaponry, armor, Tower of Netherworld and different ways of passing the game. The guide doesn't lack for descriptions of passing main and side quests or handy tips, which will simplify finding the hidden artifacts.
Information about important places is marked in blue (look for [1] in the text). Orange is a colour which informs you about artifacts (look for [A] in the text). While searching for details of passages to different locations look for green ([P1] in the text). Significant information or special tips are written in bold.
Maciej "Sandro" Jalowiec
1. Always check the boxes, chests, containers etc. There's no need to mention such obvious matters as searching for health potions or mana elixirs. You must look for Lifeforce, crystals and weapons which are necessary to play the game;
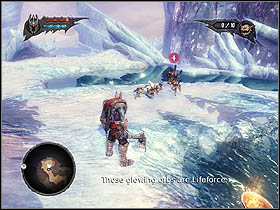
2. There are four types of the Lifeforce: brown, red, green and blue. They are responsible for a production of your Minions. In other words, by collecting the Lifeforce you provide yourself with the army;
3. If you think the Lifeforce make a problem to you (especially the lack of them), invest in a helmet called The Evil Eye. Thanks to it each collected orb counts twice;
4. The most economical method is to take control over minds of residents of conquered towns. The weapon and the Lifeforce are being produced then in the villages and you can gain large amounts of money;
 Never enough money!
5. The weapon and the armor can be produced in the villages (you should take control over minds of residents and make them produce armor) or can be gained from defeated enemies. It's an important tip to remember because well armed brown Minions are more effective in a fight and gain experience quickly;
6. Always let Browns go first and keep some of the red ones behind. The red Minions will hurt the enemies from a distance and support their mates in front at the same time. It's good to place Blues exactly between Reds and Browns, just behind brown. When one of the warriors dies, the blue Minions revive him;
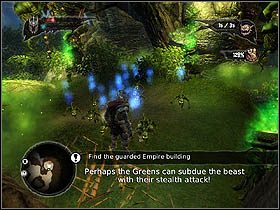
7. Use the green Minions to attack if you have a chance to surprise the enemy by appearing behind him;
8. Your horde of Minions can include no more than 50 helpers. You start with 15. It's possible to get further 30 by searching for the elements of Minions' totem (there are 6 totems, each of them increase the number of the horde by 5). Details about the totem are available in chapter Minion Burrows. You'll get the last five Minions by forging the helmet called The Infernal Commander;
9. Try to quit after you have reached the new teleport where the autosave is done. Otherwise you can meet some annoying situations, in which some paths are blocked and there's no possibility to cross them because the teleport on the other side hasn't been opened yet;
10. If you are not healthy enough or you have a lack of mana and the way to the teleport is blocked, look for health potions and mana potions. The authors have predicted that inconvenience and have located proper objects in proper places, without which it would be impossible to pass the game.
The whole game is based on commanding Minions. Minions are divided into four types. They differ from each other in appearance, features and skills.
Browns love melee fighting. That's the type of Minions you receive at first. Browns should be the first to get the weapon and the armor which you would find in the world of the game. They can deal with the most of the enemies. However, Browns do badly in combat with bigger enemy such as Gargantuan.
Brown Minions can ride wolves what helps them in a fight. What is more, because of that skill they can jump over a gap and get to places which are out of reach of the Overlord.
Reds are the only ones who can hurt the enemies from a distance. They hurl the fireballs into enemies. The balls not only take away the energy in a traditional way but also set the enemies on fire - your foe loses a lot of energy in a few seconds then. In addition, Reds can put out the fire barriers. If we are talking about health, they seem to be weaker than Browns but stronger than Blues.
Reds can ride salamanders. Their fighting efficiency grows with salamanders (those animals spit out the fire).
Greens are silent assassins. They are invisible to enemies if they don't move. What's more, they hurt much stronger when they attack from behind. This means that players with a bit of imagination can use Greens to set a trap for enemies. However, their frontal attack isn't as successful as that one, which we can see while watching Browns in action. Green Minions are able to remove a vapour of the poison from the barricades. Their health is similar to the Reds' one.
Greens can ride spiders. Thanks to them they are able to walk on the walls. It can be useful to lead the playthrough.
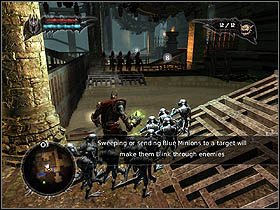
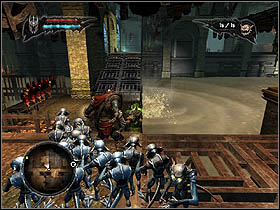
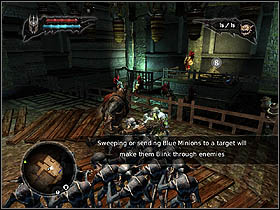
Blues are the last type of Minions, which you can unlock. Blues can revive killed Minions and this is their most important skill. It's wise to keep 5 to 10 Blues as a support for other Minions. In addition, Blues are the only ones who can swim. Thanks to that skill there's a possibility to get to plenty of inaccessible locations, neither for other Minions nor for the Overlord. What's more, the blue Minions are invisible while you use the Sweep option, then Minions can move alone, without the Overlord. Unfortunately, Blues are awful in combats.
Blues cannot ride any animals.
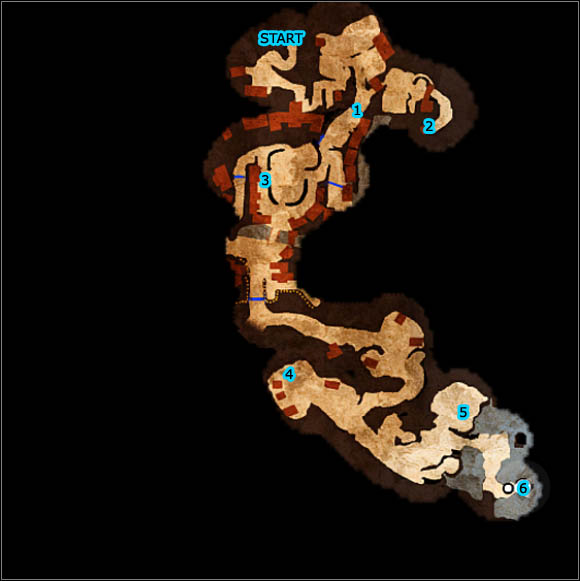
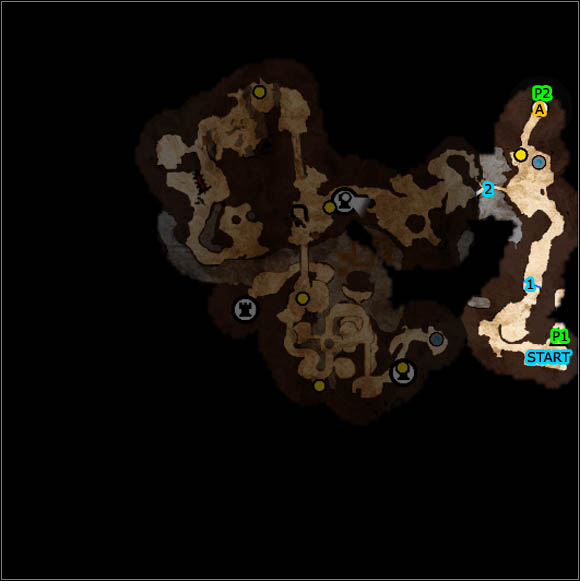
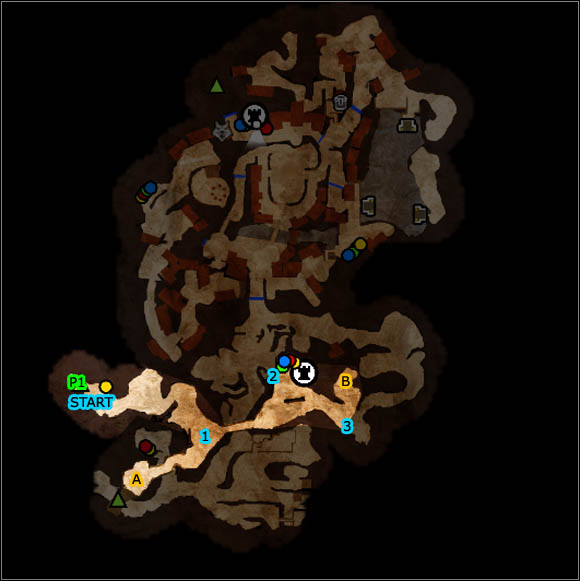
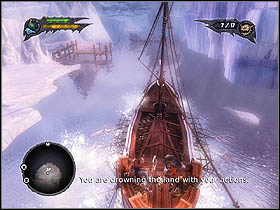
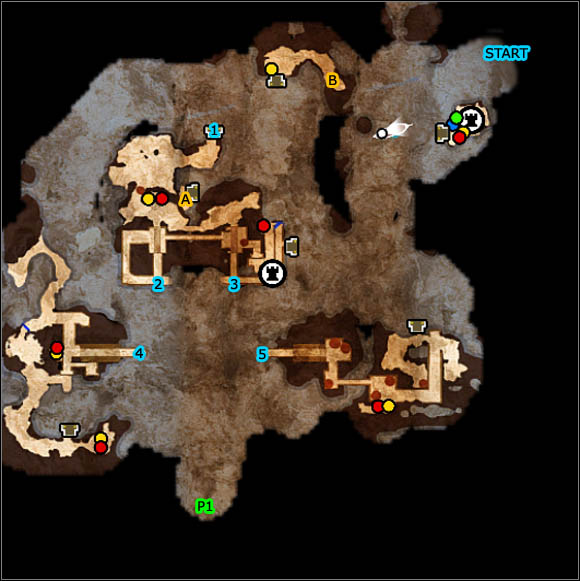
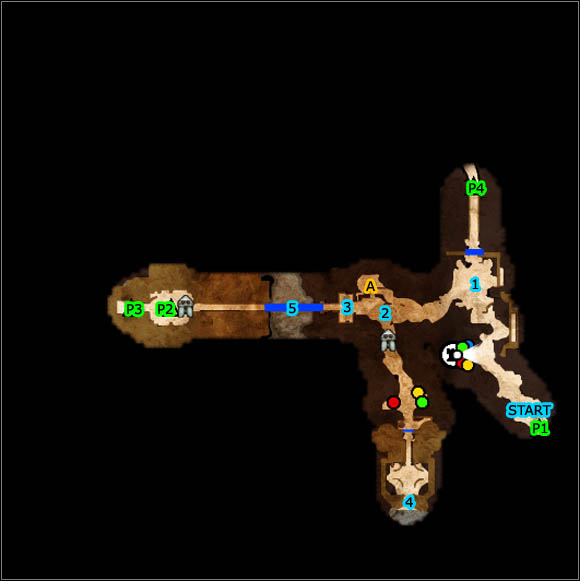
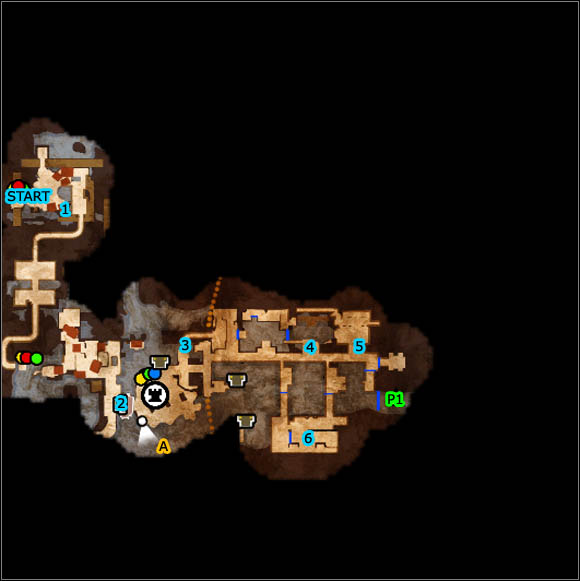
Map key:
Important locations
1. The drunk guard of Nordberg Town;
2. The children's hideout, the place where you will find some disguises for Minions;
3. The great firework;
4. The Empire's Catapult;
5. Yeti, the monster;
6. The frozen lake.
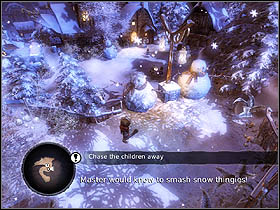
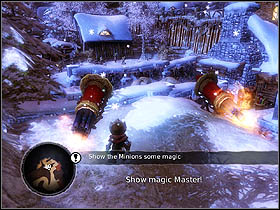
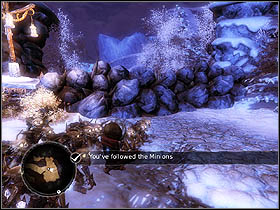
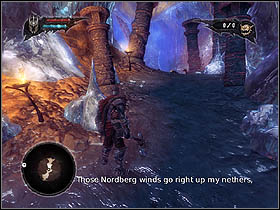
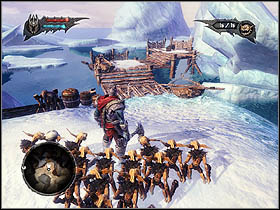
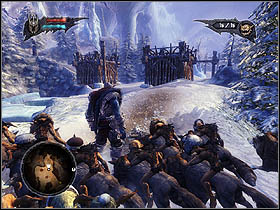
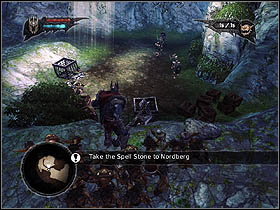
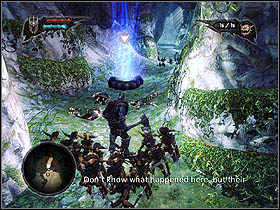
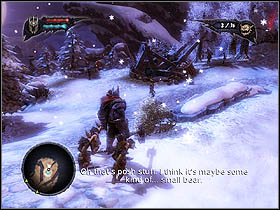
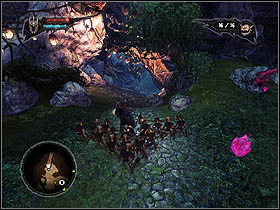
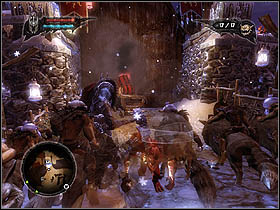
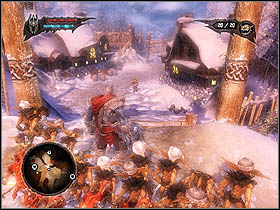
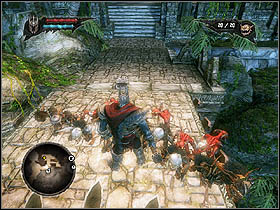
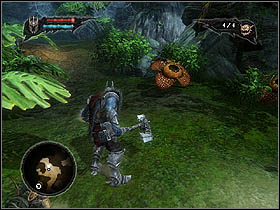
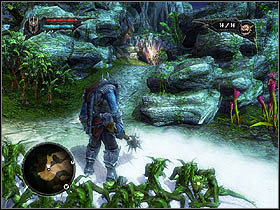
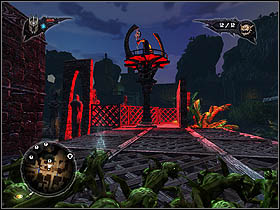
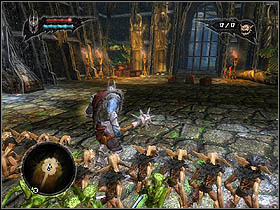
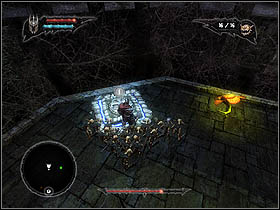
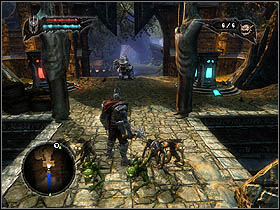
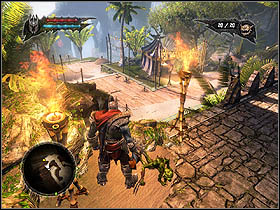
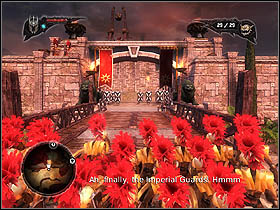
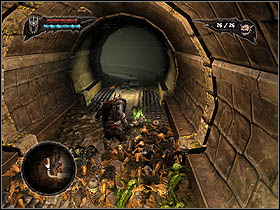
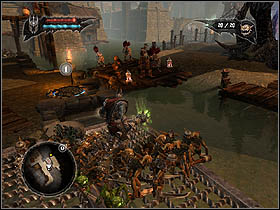
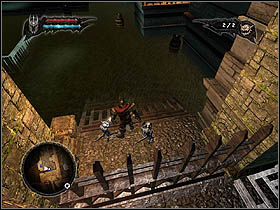
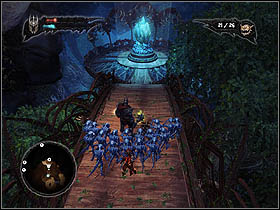
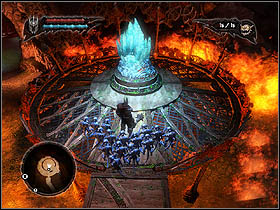
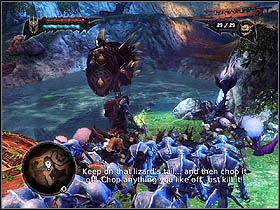
At first - cold steel. Destroy the snowmen with your club (default key responsible for hit - Space), then follow the escaping children. Use the magic (default key - Alt) to fire the rockets, which you would find nearby.
Go further so you can get your first Minions. Head for the exclamation mark which is shown on the radar, on the bottom left hand corner of the screen.
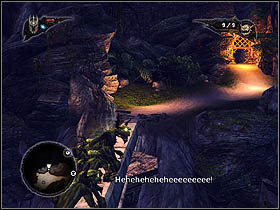
Continue the journey until you've got to the closed gate. The guard [1], despite the fact that he's drunk, won't let you enter the city. Fortunately the girl called Kelda will help you.

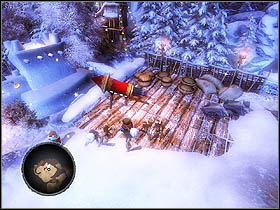
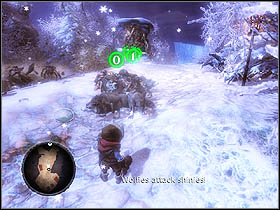
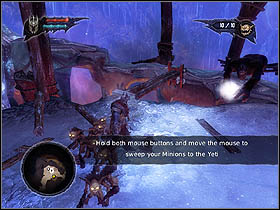
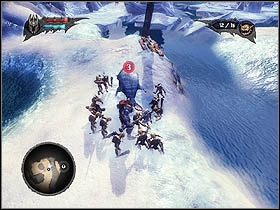
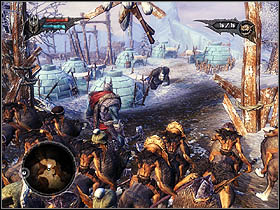
Follow Kelda, she will lead you to the snowy fortress, which is built by some local kids. Command your Minions to get to the building and attack the children (click at the same time the left and the right mouse button). After you have got rid of the enemies, fire the rocket which is nearby. (Or: If you get rid of the enemies, fire the rocket which is nearby).
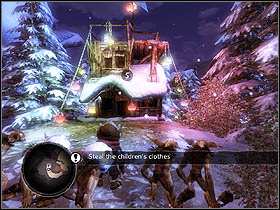
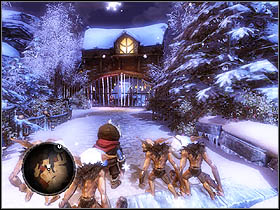
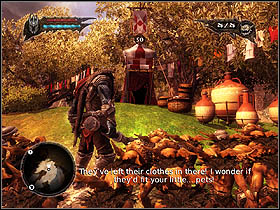
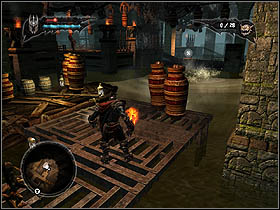
The rocket will destroy the barricade so you will be able to go to the next part of the level. On your way you will see a hut, where children will be hiding [2]. Command your Minions to steal children's clothes (push Shift and click the left mouse button). After you've done this, come back to the guarded (by the drunken man) gate.
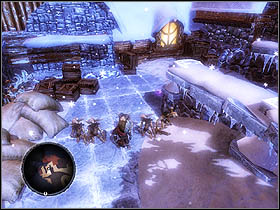
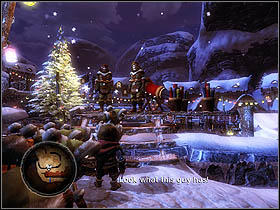
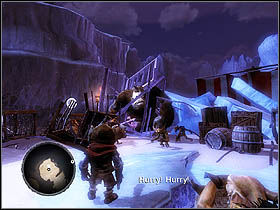
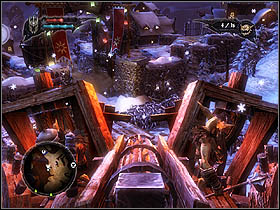
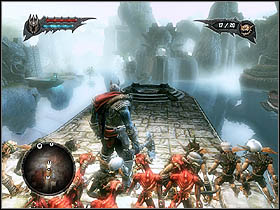
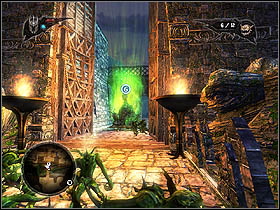
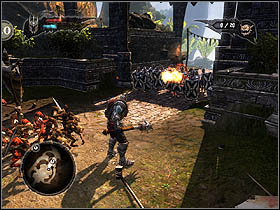
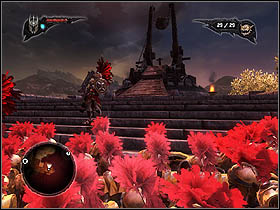
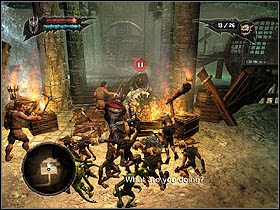
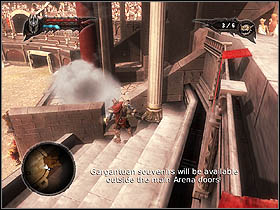
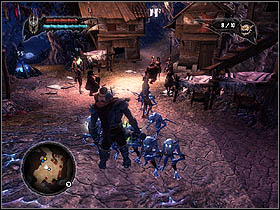
You will get to the city. Head for the rocket [3]. It is placed in the centre. Use the magic to fire the fireworks which are located near the guards. There will be a chaos for a while and the cut-scene will turn on in a moment. When it has finished, follow Kelda to the walls. There you will see another movie.
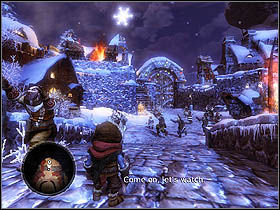
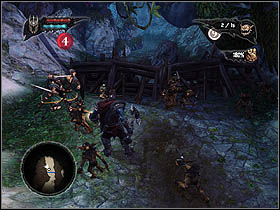
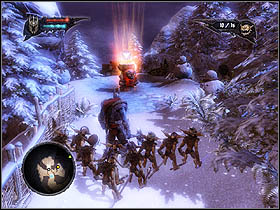
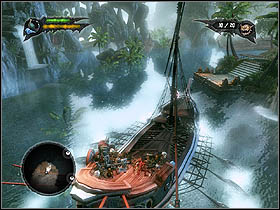
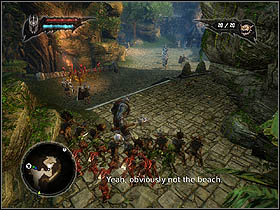
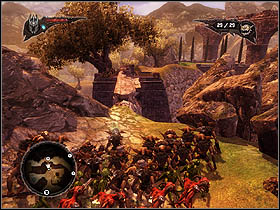
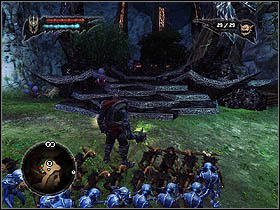
After you have finish watching the cut-scene, you'll be outside the city. Turn left to get away from Imperial forces. You will meet other Minions and a few legionnaires on your way. Don't engage yourself, make your Minions fight the enemy soldiers instead (click the left mouse button).
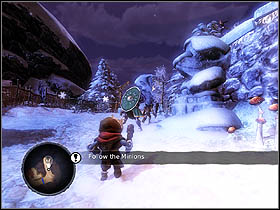
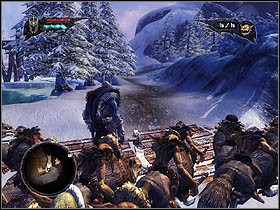
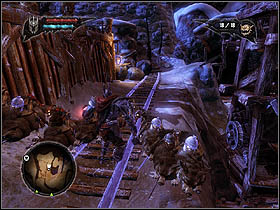
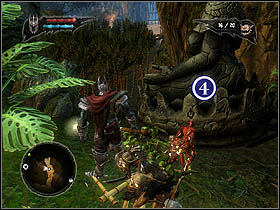
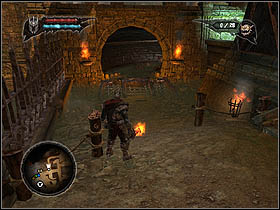
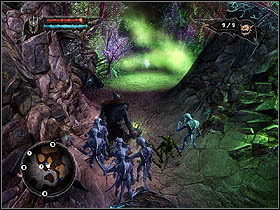
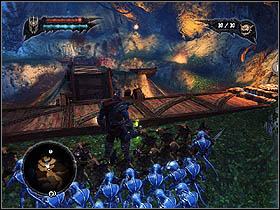
Go ahead all the time and get rid of a small legionnaires' camp. You'll notice that the path which you should follow has been blocked by the pile of stones.
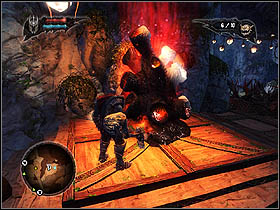
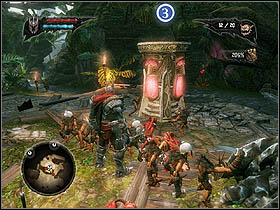
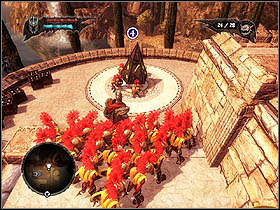
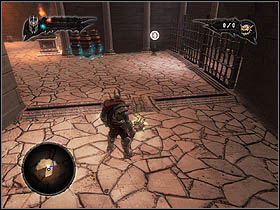
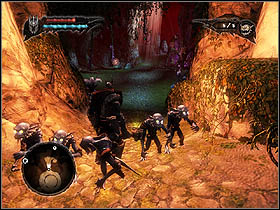
![You should use the catapult which is located nearby to remove the pile [4] - Main quests - Prologue - Main quests - Overlord II - Game Guide and Walkthrough](https://game.lhg100.com/Article/UploadFiles/201512/2015121618425531.jpg)
You should use the catapult which is located nearby to remove the pile [4]. Send 10 Minions to the catapult and then sit at the controls of it. At first, you should eliminate soldiers who are following the track on the right, and then you can turn the catapult and destroy the pile of stones, which bars your way.
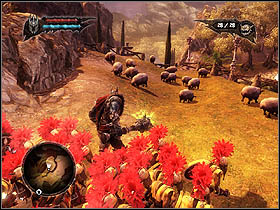
Now you can follow the path. You will meet some wolves on your way. Your Minions can ride wolves so incorporate them into your army.
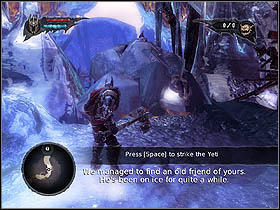
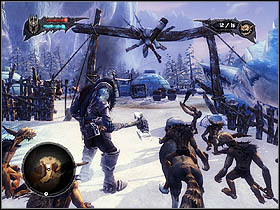
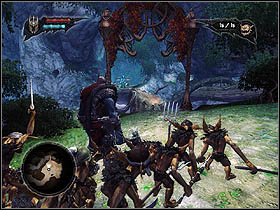
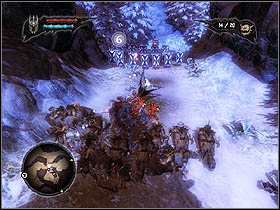
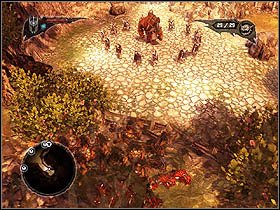
You'll get to the next camp of The Empire. Get rid of the enemy soldiers (you won't get to the archers on your own but Minions which ride wolves can do it easily) and free Yeti [5], who is in one of the cages nearby.
Yeti will clear your way to the next stage. Kill all of the enemy soldiers and then follow Yeti. Get to the ice rink [6] with him to finish the first level of the game.
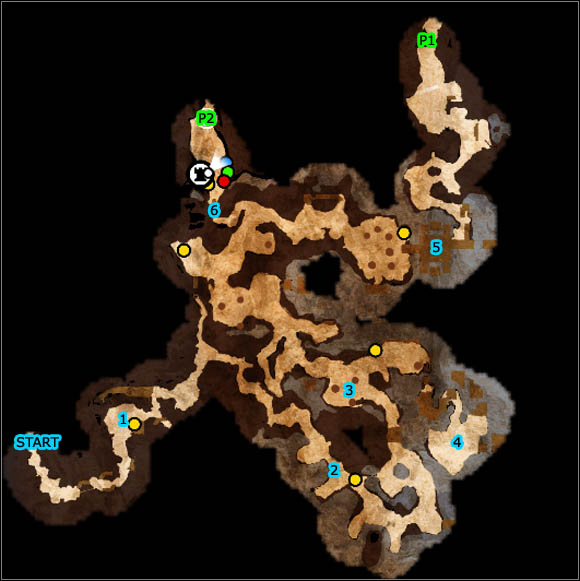
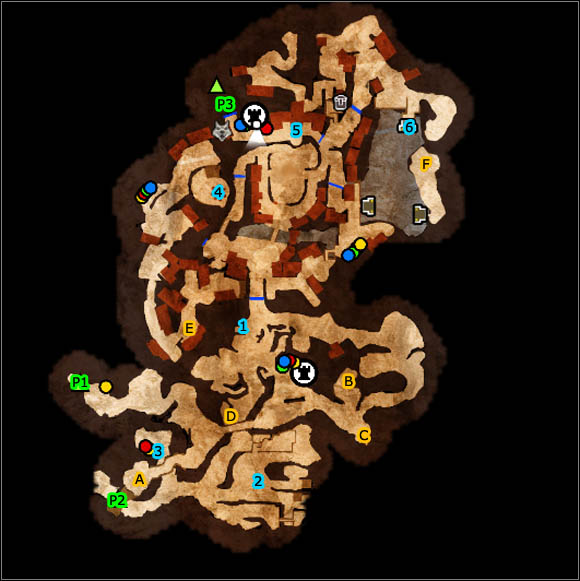
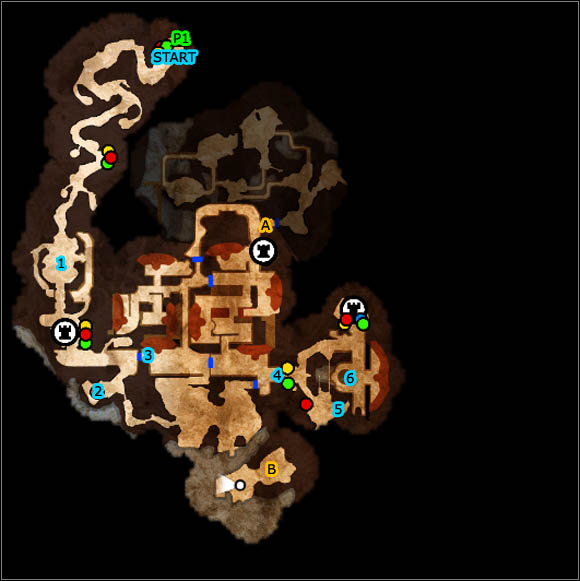
Map key:
Important locations
1. The cleft, encounter Yeti, the monster;
2. Baby seals;
3. Wolves in cages;
4. Baby seals, encounter with elves;
5. A fight with Yeti;
6. Bridge (can be opened from the north).
Passages
P1. Passage to Nordberg Sanctuary;
P2. Passage to Nordberg Town.
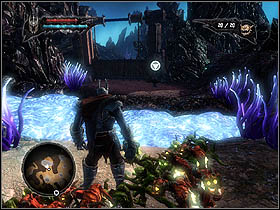
It's high time to become the real Overlord. Follow your Minions. When you've got to the chasm, destroy the barrels with your axe. They are on the bridge on the left, and then pass the bridge to cross the chasm.

Free Yeti by crushing the ice. Then call your Minions over using Minion spawning pit nearby.
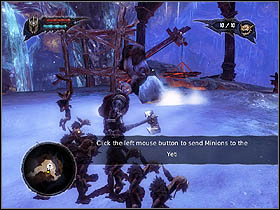
Notice that Yeti's leg sticks in a piece of ice. Command Minions to attack it. You can help them by using your axe.
Yeti will jump over the chasm and will begin to hurl ice into you [1]. Destroy the nearby crane so that Minions can approach to the monster and banish Yeti from staying in the cave.
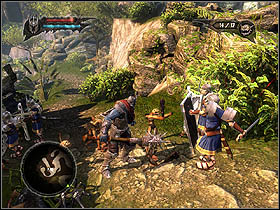
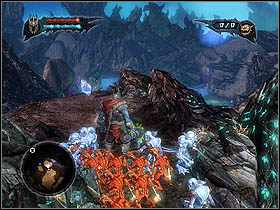
You'll find the exit on the right. Exit the cave and follow Yeti. You'll reach the place where you'll meet baby seals [2]. Command your Minions to eliminate all of the seals. Then you'll find some health, which should be collected by Minions and left in front of the Overlord.
Move on, and persist in eliminating baby animals (you should collect at least 30 Lifeforce orbs). Don't pay any attention to Yeti who seats nearby. After another cut-scene which should have turned on in the meanwhile, yeti don't make any problems at least at the moment. What's more, the pass to the next stage will be opened.
On the right you'll see a bridge. Here are some barrels. Command Minions to destroy them and bring the gold found inside the barrels.
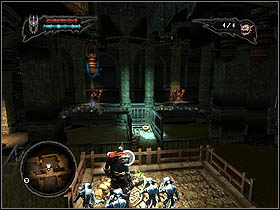
Go further. You shouldn't meet any difficulties. Follow the path and kill animals which you encounter. You'll get to human's camp, where you'll find some wolves in the cages [3]. Destroy the cages and the igloo, kill the people and command Minions to sit astride wolves.

The path leads to a harbour. Destroy another igloo; ransack the whole camp situated next to the water, then send 4 Minions to a knob which is located near the coast. It enables you to close the swing bridge and get to a group of baby seals. Kill all the animals, grab the health and defeat elves that are approaching [4]. After that you can find some magic energy. Collect it.
That place is ideal for you to complete the side quest. It's about killing all the babe seals.
It's time to come back because Yeti has already opened the pass to the next part of the stage. Further steps are as easy as the previous ones. Ransack and slaughter everything what moves, collect money and every other objects which you will find in the boxes, igloo etc. at once.

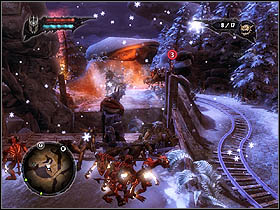
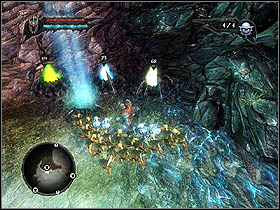
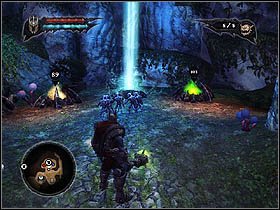
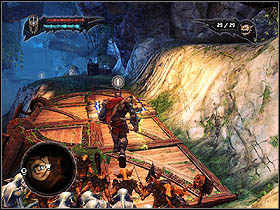
![At the end of your journey you will find a harbour and the first boss who you have to defeat - that's the monster, Yeti [5] - Main quests - Hunting Grounds - Main quests - Overlord II - Game Guide and Walkthrough](https://game.lhg100.com/Article/UploadFiles/201512/2015121618425856.jpg)
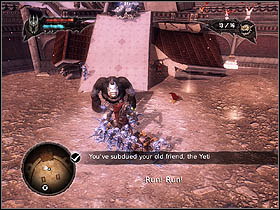
At the end of your journey you will find a harbour and the first boss who you have to defeat - that's the monster, Yeti [5]. When you have approached to him, command your Minions to attack him. It would be better if you attacked Yeti aside. Then you would avoid punches.
Yeti will be jumping from one suspended boat to another. The boats are located on the left and right side of the harbour. As you meet that kind of situation the elves approach to you. Command your Minions to destroy each of the poles the boat is suspended to and where Yeti has jumped into, then 'take care' of the elves. When the poles have been destroyed the boat drops so Yeti comes back to the harbour and then you have a possibility to punch him.
After a while you'll have to repeat the whole strategy with the second boat. If you manage with that boat, Yeti won't have a possibility to escape so you will get an opportunity to kill him.
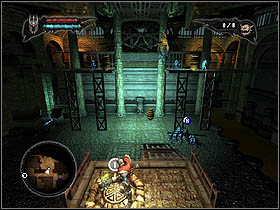
Now you can go further from the harbour. Later you will meet some legionnaires and fishermen on your way. Kill them all, grab their belongings then get to nearby cave [P1]. You'll have to leave your wolves here.
Map key:
Important locations
1. Barricade;
2. Entrance to the Sanctuary.
Artifacts
A. Spell stone, giving you the Target spell.
Passages
P1. Passage to Hunting Grounds;
P2. Passage to Nordberg Town.
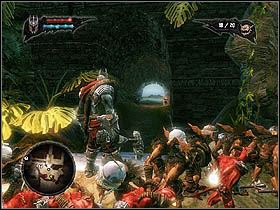
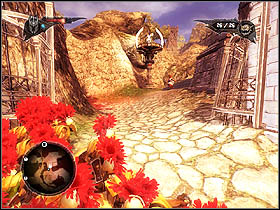
Start with eliminating nearby enemies. Keep walking through the caves and you will get to the barricade [1]. Kill the guards who stand next to it and destroy the barricade.
Go further. You'll reach the bridge which leads to the sanctuary [2]. Keep away from that place for that moment and walk through other caves. Then you'll find the magic, Spell Stone [A]. Chose some Minions to carry it and head for the exit of the cave [P2].
Map key:
Important locations
1. Empire soldiers;
2. Fire barricade;
3. Fire barricade.
Artifacts
A. Totem part;
B. Health upgrade.
Passages
P1. Passage to Nordberg Sanctuary.
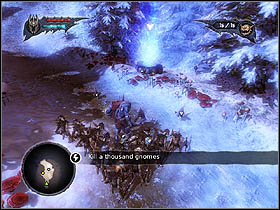
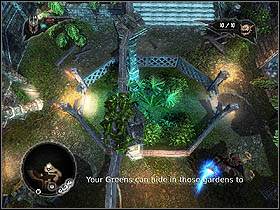
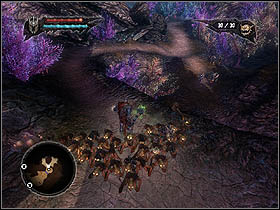
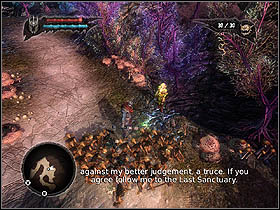
Outside you'll see the spell stone lying on the ground, just next to you. At first, fight the gnomes which you will find there and pick up the spell stone. Gnomes are really annoying because they collect the Lifeforce before you can get them. Therefore, try to kill them as quickly as you can. In addition, the side quest will activate automatically. It's about killing a thousand of Gnomes.
Command your Minions (5 is enough) to take the spell stone after the fight. Keep going. Head for the group of legionnaires [1]. Defeat them, then send your Minions to the next magical object [A]. It's a Command Upgrade, thanks to which your army will be larger.
Pass the bridge. After you have passed the bridge, the teleport appears. Put there all of the spell stones you have found during your journey.
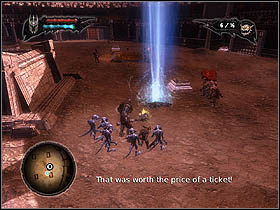
You will gain some extra powers - taking control over minds and killing with the use of magic. Send your Minions to stop the civilians, and then take control over their minds by pushing Alt (the default load of keyboard). Remember, if you push Alt to long, the civilian will die. Take control over minds of 3 civilians. Kill other threesome.
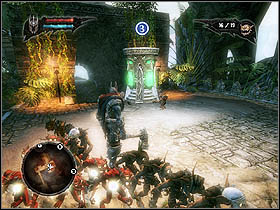
Destroy nearby barricade at the end. You will find one more magical object behind it - it upgrades the health of The Evil Master [B]. Tell your Minions to take it to the teleport. Use the teleport to get to the Tower.
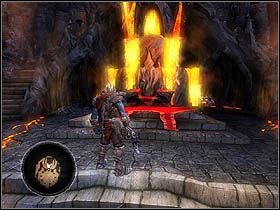
You'll visit The Dark Tower for the first time. Start with acceding the throne as the Overlord.
Take your time visiting your new abode. Go to the Minion Burrows, Private Quarters and the bottom of The Tower. More information about those places you'll find in a separate chapter, at the end of the guide.
At the end listen to the citizen of Nordberg, who wants to meet you (while being on the throne you will have the option which allows you to accept the meeting). He will tell you something about some plans of Imperial Expansion. If you are ready push space to approach to Nordberg
More information about The Tower in chapter The Netherworld Tower.
Map key:
Important locations
1. Minion possession stone;
2. Sanctuary entrance;
3. Red Minions;
4. Driads;
5. Minion possession stone;
6. Great statue.
Artifacts
A. Spell stone adding the Halo spell;
B. The harp;
C. Mana upgrade (in a crystal);
D. Red Minion Hive.
Passages
P1. Passage to Hunting Grounds;
P2. Passage to Nordberg Town.
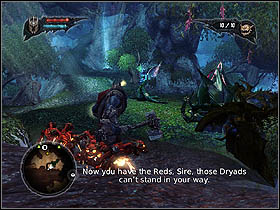
You will appear round the Nordberg town indeed, but you won't n be able to storm the town. You have to take control over red Minions first. They can hurl fire balls. To do that you have to go to the sanctuary. You should know the way because you've already been there.
Just next to the entrance to the cave [P2] in which the sanctuary is located there is a stone. The magical power of stone will help you to walk in the enemy territory [1]. Command the Minions to attach themselves to the stone then use some magic to it. Thanks to that you will take control over one of the Minions.
Tell your Minions to pass the bridge and go to the sanctuary [2]. Don't go straight to the driad who guards the entrance. Follow the narrow path on the right.
You have to defeat the driad now. You have to attack in a traditional way to kill the driad. When her health is low she still lives. She will be protecting herself by hiding behind some leaves. You won't be able to hurt her then. The nearby flower will open instead! Destroy it to kill the driad.
After you've killed the driad, use the magic or come back to the Overlord. Thanks to that you will take control over the Evil Master. Pass the bridge and get to the sanctuary. Pass by the place where the driad were sitting some time ago.
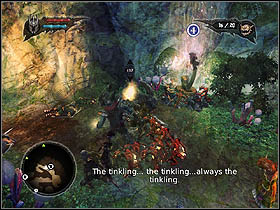
You will meet a lot of bloodthirsty plants. Try to attack them from distance as often as you can - red Minions can do that and you will take control over them soon. Go further; the way in sanctuary is quite easy.
You'll meet other driads but don't fight with them. You will need the Reds to succeed.
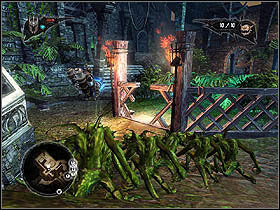
Walk through the passage on the right. Slide down and kill all the gnomes you have met there.
Cross the water and head for the thorny barricade. Your Minions will have to stay behind because there's no bridge for them.
![You will meet Reds next to the thorny barricade [3] - Main quests - Nordberg Sanctuary (once again) - Main quests - Overlord II - Game Guide and Walkthrough](https://game.lhg100.com/Article/UploadFiles/201512/2015121618430371.jpg)
You will meet Reds next to the thorny barricade [3]. After red Minions have destroyed the barricade go to the next part of this level.
After a short cut-scene follow the corridor. Destroy following blockades and ransack everything on your way.
Use the lift to get to the higher level of the sanctuary. Go ahead; eliminate all your opponents (now you can attack from a distance! The driads you've met earlier [4] are not a problem for you now) and steal the goods of the local people.
![You'll get to the harp [B] eventually - Main quests - Nordberg Sanctuary (once again) - Main quests - Overlord II - Game Guide and Walkthrough](https://game.lhg100.com/Article/UploadFiles/201512/2015121618430375.jpg)
You'll get to the harp [B] eventually. You'll find the teleport on your further way so you will be able to teleport the harp to your abode by using that gate.
You'll find the magic stone [5] later. It's the same kind of stone which you've found next to the entrance to the sanctuary. Use it to take control over one of the Minions.
Send the Minions to the small passage which is placed opposite the possession stone. Go to the lift and go up as fast as you can. Thanks to that even the Overlord will be able to use the lift. Resume controlling the Evil Master so you'll be able to use the lift again and go down. Once the Overlord reaches the place previously visited by Minions, beat all the elves nearby and continue your journey.
You'll meet the three driads on your way. Set the gathering point for your Minions (default key 'Q') and let them hurl the fire balls into driads. After you've weakened the threesome, command the Minions to destroy the flower (it grows on the left) to destroy the enemies finally.
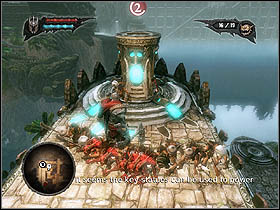
Destroy the thorny barricades and damage the statue [6] which is behind them with your axe. You'll find the crystal in the statue and crumble it. Then you'll find the artifact. It should be taken to the Dark Tower because then the artifact will upgrade the Overlord's mana supply. Meanwhile you will be watching the cut-scene.
The fallen statue will create a kind of bridge. You'll get to the exit of that stage by walking on it. Command your Minions to take the mana upgrade and the hive [D] which will enable you to recruit Reds to the teleport.
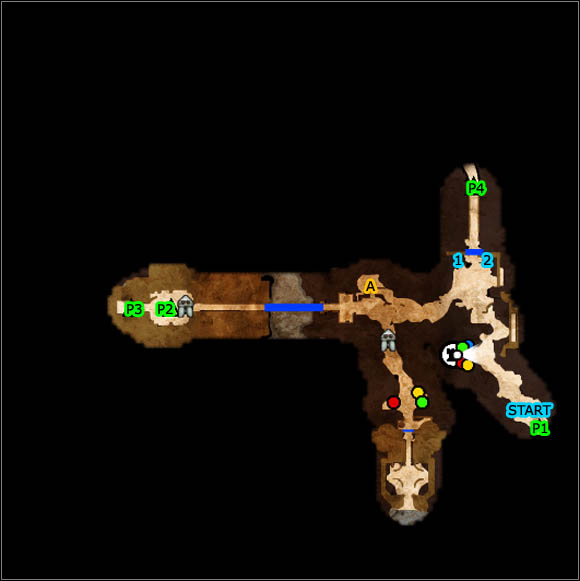
Map key:
Important locations
1. The ballista;
2. Mine;
3. Wolves in cages;
4. Temple;
5. Town hall, Borius;
6. Raft (can be pushed by Blues).
Artifacts
A. Totem part;
B. Health upgrade;
C. Forge stone;
D. Totem part (under stones, use explosives to obtain it);
E. Mana upgrade (accessible with green Minions);
F. Health upgrade (accessible with blue Minions).
Passages
P1. Passage to Nordberg Sanctuary;
P2. Passage to Hunting Grounds;
P3. Passage to Nordhaven.

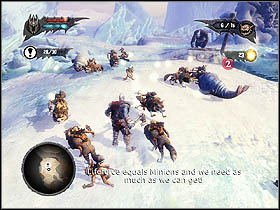
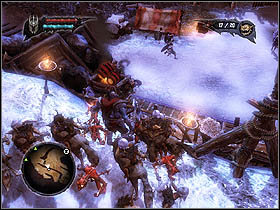
Your red and brown Minions can attack the Nordberg. Call 5 or 6 Reds and the Browns up. Use the Reds to put out the fire barricades and the Browns to destroy it finally. Destroy the one next to the teleport and then back away quickly to get out of reach of ballista's range.
There's a group of soldiers standing nearby the teleport with their leader. At first, eliminate the leader (he is quite tough), then set the gathering point for red Minions near the enemy force. After Reds have burnt the soldiers go further. This is the kind of tactic that you should use for beating all the enemy forces.
You'll find a fire barricade just behind the already beaten force. Get rid of it and then transport the artefact [C] to the teleport which is located behind the destroyed barricade. Thanks to the artefact you will be able to create a forge in your Tower.
You have to come round the ballista. There's a gate which leads to the further part of the map near to the artefact you have already found. Use the passage. You will encounter other enemy forces on your way indeed, but you won't have any difficulties in beating them because of your red Minions and their fire balls.
![You'll get to the ballista [1] finally - Main quests - Nordberg Town (siege) - Main quests - Overlord II - Game Guide and Walkthrough](https://game.lhg100.com/Article/UploadFiles/201512/2015121618430619.jpg)
You'll get to the ballista [1] finally. Let your 5 Minions to get to it, and then use the control panel. Use the catapult to knock out all the soldiers in sight (there are quite a lot of them). Pay attention to their equipment. They have square shields in the opposite to the forces you have met till now. These soldiers are more resistant to fire so be careful with them!
Once you have defeated all your opponents, follow the railway line to the further part of the map.
![You will get to something similar to a mine [2] - Main quests - Nordberg Town (siege) - Main quests - Overlord II - Game Guide and Walkthrough](https://game.lhg100.com/Article/UploadFiles/201512/2015121618430642.jpg)
You will get to something similar to a mine [2]. At first, destroy the nearby barricade. Just set fire to it.
You'll find some wolves for your Minions behind the barricade [3] and... the passage to the Hunting Grounds level [P2]. Don't care about it now, however.
Take the wolves with you and return to the mine. You'll meet the enemy force on your way but don't be afraid - first send your Minions which can ride the wolves to separate the soldiers and then you can kill them in a traditional fight.
Once you reach the mine, notice that the entrance is blocked. Use the knob which is located on one of the buildings to set the trolley with explosives free (Minions on wolves can easily and quickly do it). The trolley will stop in front of the barricade which separates you from the mine. Command the Reds to set fire to the trolley to destroy the barricade.
You'll find here another regiment of the Empire troops. Beat it and then use the next knob which you'll find on your way. The trolley with explosive won't reach the next barricade (it should be destroyed) because it is located too high. Chose 4 Minions and command them to push the trolley.
When the trolley reaches the end of the railway line, set fire to it. You'll destroy the barricade then and get to the next part of stage. Go ahead to the next knob. This is the last one. Thanks to it you'll receive the trolley with dynamite needed to open the gate to Nordberg.
Eliminate all nearby archers. They would try to prevent you from pushing the trolley to the gate. Command your brown Minions to kill the archers and go back to the trolley to push it towards.
You'll find a pile of stones next to the archers. If you leave the trolley next to the pile and then fire it, the explosion will destroy the barricade. There's a command upgrade [D].
Once the explosives are transported next to the gate, fire them and then run quickly to the ballista. Use it to eliminate all the archers and enemy soldiers who will be going out of the town.
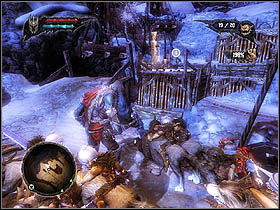
Get in to the town after the fight and turn left. You will encounter some enemies who block the passage with some bombs. But don't give up! It's not a big problem for your Reds. Command them to kill the most important throwers. Then you will be able to go further.
Borius will escape but there's still hope. Destroy the columns of nearby temple [4]. Push the remains of the temple down to destroy the barricade located on a bridge.
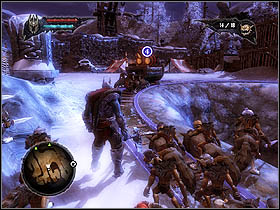
Pass the bridge to the next part of the level. Cross the central place and then head for the enemy ballista. You will be following a narrow path (you've been there in a Prologue). It's already occupied. You should approach to it though and Command your red Minions to kill the operator. Then eliminate nearby archers of the Empire.
Pass platforms where you have found the archers and the ballista and you'll get to the narrow bridge. It can be used only by Minions. Command them to pass the bridge and push the container which they will find there. This is the way you will immobilize Borius [5] (governor of Nordberg). There's a lift at the end of the platform landing. Thanks to it you will be able to approach the defeated Borius.
Borius is lying under the fallen statue. He depends on your mercy. You can kill or arrest him. It's your choice.
Once you solve the case of Borius take control over the town. You have to push the space key while being nearby the entrance of the town hall to be in power. Then you should talk to Kelda - she will become your first mistress.
There'll appear the teleport in the town thanks to which you will move to your Tower.
Map key:
Important locations
1. First tar pit;
2. Second tar pit;
3. Third tar pit;
4. Village;
5. Ship trapped in ice;
6. Fourth tar pit.
Passages
P1. Passage to Nordberg Town;
P2. Passage to Everlight Reef.

Come back to the Tower after you've taken control of the Nordberg and listen to one of the citizens of the town. He will tell you something about the criminals who walk around the port. Come back to Nordberg, pass the gate near to the teleport and head for the water.
Once you are outside [P1] go ahead and eliminate all the opponents on your way and grab their goods.
You'll encounter three tar pits on your way [1] [2] [3]. There are some gnomes in each of them. Command the Reds to fire the pits. The tar will be burning then.
The second pit is empty but you can fill it by using the nearby knob. If you fire all the pits, head for the village [4]. It's in the next part of the stage.
![The ship [5] is held by the ice in one place - Main quests - Nordhaven - Main quests - Overlord II - Game Guide and Walkthrough](https://game.lhg100.com/Article/UploadFiles/201512/2015121618431010.jpg)
The ship [5] is held by the ice in one place. You have to get rid of ice then. You can do it in two ways: fire the fourth tar pit [6] or take control over minds of the villagers. You'll find further information about the second way later. Thanks to it you will set the ship free and fix all the hunk.
You'll find only one miserable wretch in the village. However, behind the buildings you'll find the barricades which separate you from another villagers, bandits and gold. Destroy the barricades and take control over minds of the peasants.
Map key:
Important locations
1. island harbor;
2. Place for first keystone;
3. Place for second keystone;
4. Place for third keystone;
5. Place for fourth keystone.
Artifacts
A. Totem part (destroy the barricade with your ship to get to it);
B. Health upgrade;
Passages
P1. Passage to Everlight Jungle.
Having a ship you will be able to get to elves' land - Everlight. Prepare 11-12 brown Minions for that quest. Save the rest of Minions as the Reds. Let your brown Minions use the ship (10 are required) and take the helm. The Reds will take up positions on the prow and will be ready to hurl the fire balls.
Sail away from the water mines and a couple of elves. If you encounter a barricade moor the ship on the left and destroy the barricade from the land.
You will reach Everlight after passing the barricade. Sail towards to the southern part of the map. The passage [P1] which is located there will be closed. The elves will be removing the keystones from their places. Your task is to place them again.
Sail to the canal which is located on northern west. This is how you'll get to the harbour [1] where you'll be able to moor (the harbour is on the right).
Once you leave the ship and begin the exploration of the land (island indeed), you'll find the first keystone quickly. Put it on a right place [2] while crossing the narrow tunnel.
Keystones turn on the lifts. Continue the journey till you have encountered the second keystone. To get it you have to blow up the shipwreck which blocks your way. Red Minions can fire all nearby explosives.
![Put the second keystone in the right place [3] and then go back to your ship using the nearby tunnel - Main quests - Everlight Reef - Main quests - Overlord II - Game Guide and Walkthrough](https://game.lhg100.com/Article/UploadFiles/201512/2015121618431269.jpg)
Put the second keystone in the right place [3] and then go back to your ship using the nearby tunnel.

Meanwhile you will be watching cut-scene. The water barricade will be shown. It will be marked as a exclamation mark on a map. Board the ship and sail to the barricade.
After you've approached to it, the elves' ship breaks it and starts to sail around the island (you've already visited it). Try to set the ship in parallel with elves' one in a short distance. Thanks to that the Reds will be able to fire the sails of the enemy ship. When the sails are burnt set your ship, side to side with the enemy ship and go boarding. The conquered ship is much faster than yours. Sail into the bay the elves sailed from.
Moor on the left and leave the ship. Go towards and eliminate all the sirens on your way. Use the lift to go up and take the keystone. The keystone lets the lift working.
![You'll find the right place for the keystone [4] upstairs but you'll have to look for a new way to your ship because the lift will be out of order then - Main quests - Everlight Reef - Main quests - Overlord II - Game Guide and Walkthrough](https://game.lhg100.com/Article/UploadFiles/201512/2015121618431320.jpg)
You'll find the right place for the keystone [4] upstairs but you'll have to look for a new way to your ship because the lift will be out of order then. The nearby path leads to the beach. There you'll find a shipwreck. Defeat the sirens and blow up the shipwreck. Then you'll easily get to your ship.

It' time for the fourth and the last time keystone. If you go back a little bit (to the northern east) and break the barricade made of stones (acceleration is required - click the left mouse button quickly to activate it) you'll get to the keystone. Look for goods while being on the land and prevent your Minions from getting drunk.
The way to the keystone is quite easy but you will encounter plenty of elves. You'll find some Minion spawning pits on your way. Change the Browns into Reds so you'll be able to fight the enemies easily. When you've reached the keystone, command the Minions to take it through the tunnel to the right place [5] for it.
The gate will be opened. Board the ship and sail to the next level [P1].
Map key:
Important locations
1. First fat nymph;
2. Pond (only Overlord can go through it);
3. First big panda bear;
4. Green Minions;
5. Fat nymphs;
6. Statue blocking the passage.
Artifacts
A. Forge stone;
B. Spell stone, giving you the Halo spell.
Passages
P1. Passage to Everlight Facility.
Search all the boxes, then set your Minions free from the cocoon. You will be attacked by the spiders but they are not demanding opponents. You have to find other Minions. There's only one way - go to the further part of the stage.
Pay attention to the stairs leading upstairs while walking. Minions won't get there but the Overlord will. You'll find a lot of gold there.
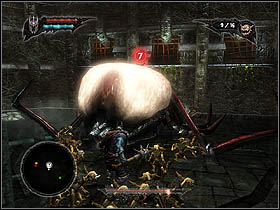
You'll sometimes easily beat spiders by destroying huge yellow-brown flowers. After you've found 10 of your Minions continue the journey. You'll reach something similar to an arena. There you'll have to engage in combat with a strong enemy.
The chubby nymph [1] who is here is blocking the passage to the next stage. If you kill her, the power surface of the gate will turn off. At first, to kill the nymph you should hit the landings she will be landing on. Every time you fling the nymph down from the landing you have to punch her a little bit, and then go backward to avoid the knock. At the end you have to eliminate all the reinforcements such as spiders or elves. Repeat the operation till you kill her

Go further after you've killed the nymph. You'll find the teleport - the Minion spawning pit on your way. You'll notice the barricades based on toxic vapours. You won't break the barricade without the green Minions. You'll find the forge stone [A] slightly further. You can take it to the teleport - it can be useful in the Forge.
Keep looking round. On your right you should find a small lake [2] and the path on the other side of the lake. Leave your Minion on the ground and cross the water on your own. The path leads to the hive of Greens so it's worthy to go for a walk.
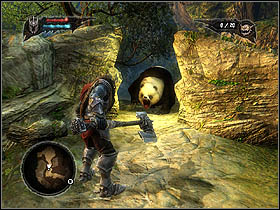
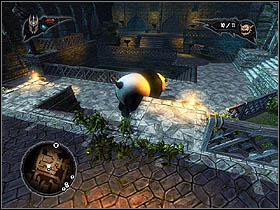
You'll encounter three enormous pandas [3] on your way. Try to stick to the narrow paths. Thank to that you'll avoid the attacks of pandas and you'll be able to attack them (the Overlord's range is quite good). Don't go away to fill the health/mana level because the pandas will revive themselves as well. Treat each of pandas the same way so you could easily get to the green Minions.
![You can visit the northern part of the map and set the rest of your crew free with the Greens [4] - Main quests - Everlight Jungle - Main quests - Overlord II - Game Guide and Walkthrough](https://game.lhg100.com/Article/UploadFiles/201512/2015121618431501.jpg)
You can visit the northern part of the map and set the rest of your crew free with the Greens [4]. You'll meet some fat nymphs on your way [5] - you have to kill them to get to the further part of the stage. Treat them like the first one.
After you've set the rest of the crew free you have to go back to the teleport. To do that you'll have to remove the elves' monument [6] from your way. It's not a problem, just say a word and the Minions will do everything.
There are two barricades with the toxic vapours next to your teleport. Command the green Minions to destroy them. You'll find the Spell Stone [B] behind one of them. The Spell Stone will increase your mana level and add a new spell after taking it to the teleport. There will be the passage to the next level behind the another barricade [P1].
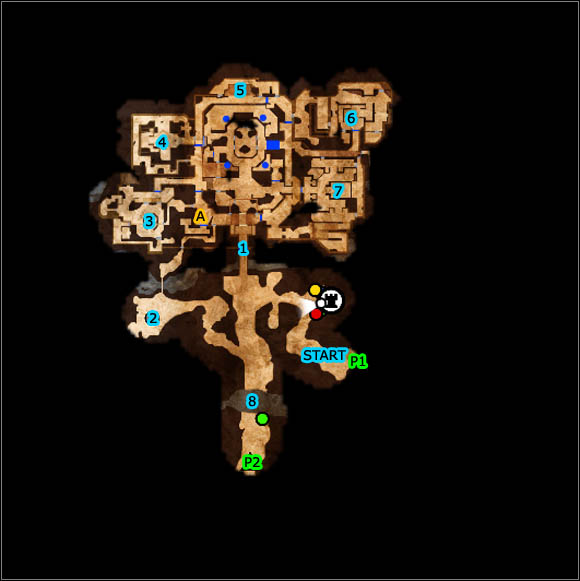
Map key:
Important locations
1. Fortress entrance;
2. Minion possession stone;
3. Gardens;
4. Judging Juno (cut-scene);
5. First Sentinel;
6. north-eastern part of the fortress;
7. south-eastern part of the fortress;
8. The river (only the Overlord can cross it).
Artifacts
A. Green Minion hive.
Passages
P1. Passage to Everlight Jungle;
P2. Passage to Everlight Temple Outskirts.
Go ahead and activate another teleport. There's quite big castle of Empire nearby. The main gate [1] is closed so you'll have to be smart and clever to get inside and steal the hive of green minions.
If you look carefully you'll notice a narrow path which leads to the west.
![You'll find the Minions possession stone [2] there - Main quests - Everlight Facility - Main quests - Overlord II - Game Guide and Walkthrough](https://game.lhg100.com/Article/UploadFiles/201512/2015121618431510.jpg)
You'll find the Minions possession stone [2] there. Thanks to it you'll become one of your Minions. Take care of the Greens only, then use the stone.
There's a narrow path leading to the Empire's Castle nearby. Kill all the gnomes and get to the castle as a green Minion. Kill the first guard and turn left. There you'll find the green hive [A].
There are lots of nooks where the gold is hidden in the Castle. Look carefully at the map and check all the chambers and the corridors of the fortress out.
You can encounter some difficulties now. Why? You have to carry out the hive. You'll find the passage to the next stage on the right. Use it to get to other section of the fortress - I mean gardens [3]. Pass the narrow bridge and find the passage to lower level.
You'll encounter some dangerous guard downstairs. They are called Liquidators. It is said that you can hide behind the spinney and become invisible for the Liquidators. However, my advice is: kill both of those strong opponents. You have to attack them from behind.
There is a small room near the gardens. You'll find there some green Minions. Visit this place every time you've lost your Minions.
There's another dangerous opponent. It's difficult to defeat him because he doesn't move so you can't attack him in a traditional way. You can use the gnomes to attract enemy's attention. You can set them free by pushing the button which is located near the cage. While the Liquidator is occupied with the gnomes, jump onto his back and kill him.
Open the gate after the fight by using the knob on the left. Go ahead. Open the gate to take the green hive closer to the exit.
Pay attention to the passage which is located in the nearby wall. Use it to get to the further part of the level and watch the cut-scene [4]. You'll encounter the Liquidator on your way. Kill him.
You'll get to the yard guarded by the Sentinels [5]. They can detect and kill immediately all magical creatures (for example your Minions). Their range of sight is as big as the red light is. Go ahead and use the niche on the left to avoid the red light.
You'll find the entrance to the higher level on the left side of the pavement. There you'll see the tower of the one of the Sentinels. Destroy the tower to kill him. This is how you can clear the way for the hive.
Go further. You'll find the passage to the north-eastern part of the castle on the left side of the pavement [6]. To open the next gate you have to pass all this part of the castle. Fortunately this way is quite easy.
This will be the last gate. Put the hive in the lift and go south. You have to kill other Sentinels. This is a must. You'll get to the south-eastern part of the fortress [7].
You have to be very smart to beat the Sentinels. Pay attention to some legionnaires at the yard - you can kill them in a traditional way or set the panda free from the cage where it is sitting and let it to beat the legionnaires.
It doesn't matter which way of killing you chose. The goods at the yard are yours. Delight yourself with the treasure.
Further way leads to the central yard. It's guarded by the Sentinels. You'll be able to attack the opponents surprisingly by hiding behind the bushes. Kill them and destroy the other four towers (avoid the red light you encounter once or twice) so that the lift with the hive could run down.
Take the hive to the teleport, come back to the Overlord's body and then command your Minions to go to the pits near to the teleport. They are useless now.
Look at the map. There's a small river in the south [8] and a barricade with the poison beyond it. Cross the water, call the green Minions (there's a Minion spawning pit nearby), break the barricade and go further to the next part of the Everlight world [P2].
Map key:
Important locations
1. First group of enemies;
2. Second group of enemies;
3. First keystone;
4. Second keystone;
5. Bridge leading to the temple.
Artifacts
A. Spell catalyst.
Passages
P1. Passage to Everlight Facility;
P2. Passage to Everlight Temple;
P3. Passage to Everlight Temple;
P4. Passage to Everlight Town.
![Go ahead till you've encounter the force of Empire [1] - Main quests - Everlight Temple Outskirts - Main quests - Overlord II - Game Guide and Walkthrough](https://game.lhg100.com/Article/UploadFiles/201512/2015121618431814.jpg)
Go ahead till you've encounter the force of Empire [1]. Eliminating the opponents is not a big deal but be careful with the Liquidator. There's a similar group of enemies nearby [2]. Kill them all and grab the artefact [A]. It will develop your magical skills.
There's a passage at the end of the path and a red keystone nearby it [3]. Take it with you and go back and turn to the side corridor. You'll have to remove the monument which is blocking the way.
![You'll find the second keystone [4] not far away but it's blue - Main quests - Everlight Temple Outskirts - Main quests - Overlord II - Game Guide and Walkthrough](https://game.lhg100.com/Article/UploadFiles/201512/2015121618431951.jpg)
You'll find the second keystone [4] not far away but it's blue. You have to defeat one mini boss first to be able to use the keystone. Attack him from behind with Greens if you can.
Take both keystones (red and blue) and return to the place where you've found the red one. You'll encounter one force of the Empire on your way. Try to get through to the centurion who sits behind the enemy soldiers and kill him on your own.
After the fight put the keystones in the right places to make a bridge [5] which leads to the next stage.
You'll be attacked by spiders on the bridge but they shouldn't be a problem for you. Go further and you'll get to quite big room. Don't stand at the central point of it! At first send you Minions to scour the boxes and the barrels. After you've cleared the room stand on the central point of the room [P2].
The Overlord and the Minions will fall and get to the Spider Queen apartment.
Map key:
Important locations
1. Room with gold;
2. Lift.
Artifacts
A. Mana upgrade.
Passages
P1. Passage to Everlight Temple Outskirts.
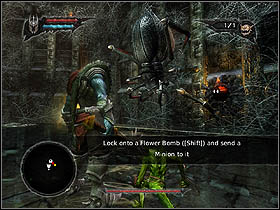
The fight will be difficult and, as I've noticed, it's possible to win if you use the gamepad instead of the keyboard and the mouse. At first, as a Overlord, stand in the central point on a button (thanks to that the sluices will be opened and the water will be flowing to the room) and send one of your Minions to collect the flower lying next to the edge of the platform you're standing at. After the Minion has done what you've told, command it to approach to the sluices from which the water is flowing.
So, you have to command by using the Sweep option - you can do it by clicking the left and the right mouse buttons simultaneously. It didn't work - the game didn't react to the combination of mouse buttons and Shift key (to make the Minion hold the flower all the time). It's possible to take control over the Minion fully only by using the gamepad.
After the flower has come apart and given off the characteristic smell, the Queen approaches to it - straight to the water stream which throws her to the arena. It's your chance to punch the Queen a little. I advise you to use the Browns and the Reds.
It's not enough because the Spider Queen will go back. You'll have to push the button located in the middle of the platform to attract her attention again. You have to push all the remaining four buttons located around the room at first. Then the water will be flowing again and you will be able to repeat the strategy of throwing the Queen on to your platform.
For the third time the Queen will be crouching near one of the buttons and won't let anybody to approach to it. But there are still some flowers. You have to do it like that - throw the flower somewhere near the platform so the spider will stop guarding the button. At the time push all the buttons in the room. Then entice the spider near to the sluices with the flower and open the sluices. The Queen lands on the platform and lies on her back. You can punch her then. Repeat the strategy till the death of the Spider Queen.
Now it's time to get out of the Queen's Tower. Command your green Minions to mount the nearby spiders. The Greens can walk on walls while riding spiders. Pay attention to the look of the walls surrounding you - the spider webs creates quite visible "path", on which you will find some shiny buttons. It's important to make the Minions step on each button while walking on the walls - thanks to that the lift [2] will go up.
The tower is divided into some levels. I advise you to search each of them. You can find there some gold [1] and the artefact [A], which will increase your mana supply if you take it to the teleport ( you can easily find it here). You'll find the exit on the top.
Map key:
Important locations
1. Button on the wall;
2. Button on the wall.
Artifacts
A. Spell Catalyst.
Passages
P1. Passage to Everlight Facility;
P2. Passage to Everlight Temple;
P3. Passage to Everlight Temple;
P4. Passage to Everlight Town.
It's time to go to the Everlight town. Gather as many green Minions as you can before visiting the town. Go to the gate of the town (almost at the very beginning of the stage), first eliminating two Liquidators encountered on your way and commanding the Minions to mount the spiders.
You'll open the gate of the city, if you push both of the buttons [1] [2] situated on the walls (the same like those in the lift). Greens will easily do it so command them to push the buttons and come into the town [P4].
Map key:
Important locations
1. Town entrance;
2. Minion possession stone;
3. Knob which opens the gate;
4. Entrance to the town hall's yard;
5. Explosives;
6. Temple.
Artifacts
A. Totem part;
B. Spell Catalyst (can be obtained with Blues).
Passages
P1. Passage to Everlight Temple Outskirts.
You'll encounter some forces of the Empire on your way. If you don't have a good armor and weapon you will have some serious difficulties possibly. Remember to eliminate the archers all the time. There will be a possibility to call some Minions in the middle of the way, more or less. But you don't have to fight with the force now. You can leave it behind and eliminate when it's necessary.
You'll get to the town's gate [1]. Unfortunately, there are plenty of enemies. Walk upstairs to the wall on the left so that you can weaken the opponents. You can send your Minions from that place to destroy the tent where the legionnaires come from. The Empire will lose the reinforcement then.
Come back to the Minion spawning pits where you can call your Minions. It is all to the good because the spiders are there too. Command your Greens to mount the spiders and attack the centurion (he stand on a platform, you'll reach him if you go on the wall).
The army without the commander is weak. Eliminate it with the Reds.
After you've passed the first gate, you have to open another. However, it's possible to open the door only from the inside. Use the Minion possession stone [2] to impersonate one of your Minions. Then walk the side path to the town and open the gate [3].


Now you can visit the town. You'll encounter some legionnaires but they are not strongest than those you've met in front of the gate to the village. It's important to notice the teleport and Minion spawning pits there. You'll find the artefact [A] next to the teleport. Thanks to it you will increase the number of your Minions (plus 5).

The new landlady of the town and a new mistress are waiting for you on the east. Come into the central yard of the town (the door [4] will close behind you then). Eliminate the first five of the soldiers of the Empire.
Notice that there are some landings above the water. Your Minions can pass them. Command the Minions to do it and to kill the archers. Do the same with the tents to detach the enemy from the reinforcement.
You can weaken the next group of the opponent standing on the right if you set your Minions behind the enemy soldiers. Then tell your Minions to accelerate and attack the soldiers. Finish the work of destruction with the Overlord and his weapon.
The group on the left is much tougher in my opinion. However, notice the barrels with the explosives on the right [5]. Try to send one or two of your Minions to set some bombs just behind the enemies. It's quite suicidal but it may works.
There's the centurion at the end. You can kill him with some magic for example. If you want, try to kill him at first if you can control the Reds from the other side of the battlefield.
You will have to make a decision after you've killed the centurion - you can kill the landlady or take control over her mind. It doesn't matter what you chose. You have to destroy the temple [6] where the landlady stands anyway.
Take control over the town at the end. Go to the town hall, approach to the mistress and chose the right option.
Map key:
Important locations
1. City gates;
2. Catapult fort;
3. Landing;
4. Tent with Imperial Guards' uniforms;
5. Minion possession stone.
Passages
P1. Passage to Nordberg Sanctuary;
P2. Passage to Nordberg Town.
If you take control over the Everlight, you will be able to visit that region. The new mistress, Juno, will give you some information about the Empire Heartlands.
Call five red Minions and Browns. Head for the land and kill all the Imperial soldiers. You'll encounter one enemy force. Set your Minions on the pier and approach the enemies on your own. If they start to chase you, come back to your Minions as fast as you can. The enemy soldiers can't use their battle line on the narrow pier so it will be easier to fight with them. After you've eliminated the legionnaires, kill the archers and go further.
You'll reach the gate to the town [1]. Unfortunately, it's closed. Turn to the side path leading to the Empire's fort [2].
There's a catapult in the fort. Pay attention to the blockade made of stones. Approach to the blockade and wait till the catapult hurls the stone into you. Then walk away from the blockade to avoid being hit by the stone. The stone missile will break the blockade to the further part of this stage.
You'll find quite big stone just behind the barricade. You can hide behind it before the catapult's range. You'll find a small bridge on your way. There you'll encounter another Imperial force. If you approach the group of soldiers and then go back quickly the catapult's missile will reach the enemies. Two missiles eliminates all the opponents.

On the other side of the bridge you'll find the knob. Thanks to it you'll lower the swing-bridge [3] which leads to the further part of the stage. Use the knob and cross the swing-bridge. Then you'll be out of catapult's range. Go forward to activate the first Overlord's teleport in the Empire. There's the artefact [A] which increases the number of Minions (plus 5) nearby.
Follow the path to the south. You'll get to the tent where you will find the uniforms of Imperial guards [4]. Disguise 16 of your brown Minions as guardsmen.
There's the Minion possession stone nearby [5] which lets you to take control over one of the Minions. Send at least 16 of your Minions to the stone and use magic to impersonate one of them.
There's a blockade nearby and a hole near to it. The Minions can use the hole. Pass it and pull down the nearby bridge.
The bridge leads to the part of the map where you've been to. Dressed like the guardsman you will be able to get to the fort with the catapult.
Let your Minions use the catapult and destroy the gate of the town (on the right), the barricade which the Overlord has left behind (on the left), and the approaching enemy soldiers (in the middle). The enemies will be gathering in front of the entrance to the fort.
After the vast majority of the enemies have died, return to the Overlord's body. Before you pass the destroyed gate you'll have to do two things. Grab the artifact [B] from the fort to your teleport. You will develop your forge then.
The second thing is to kill the lambs located in the middle of the map. You'll gain some Lifeforce then. They can be quite useful. Head for the town [P1].
Map key:
Important locations
1. Stone road entrance;
2. Minion possession stone;
3. Gargantuan;
4. Tent with uniforms;
5. Meadow;
6. Drearius' manor;
7. Sedan chair.
Artifacts
A. Spell Catalyst.
Passages
P1. Passage to Empire Harbor.
Go forward. You'll reach the place where you can step on the stone path [1] but keep yourself from doing it. The Sentinel is observing that place so any magical creature won't get a chance to follow this path.
Chose the highland, narrow path instead. You'll get to the small clearing. It's a perfect place of the teleport!

Higher you'll find another Sentinel - destroy his tower. Then use the nearby Minion spawning stone [2] to take control over one of his Minions.
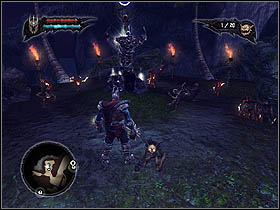
Use the Minions to get to the opposite side of the main path. Pass the decrepit arch then follow the path. You'll see unusually strong and big opponent beneath, the Gargantuan [3].
![Get to the tent [4] to get the guards uniforms - Main quests - Empire Heartland - Main quests - Overlord II - Game Guide and Walkthrough](https://game.lhg100.com/Article/UploadFiles/201512/2015121618432859.jpg)
Get to the tent [4] to get the guards uniforms. Then approach to the super soldier I've already meant. The enemy will try to ran into you. Take up the position next to the nearby gate so the Gargantuan will hit against it.
The opponent should hit the gate vigorously and open it. You'll find the column of another Sentinel there. Destroy it and kill all the nearby soldiers. Clear your way from your way but watch out for another two Sentinels.
Get to the nearby clearing [5]. Here you'll find some difficulties because of the Sentinels' towers which are almost indestructible. That's not enough. There's a super soldier walking around and a catapult which keeps the eye on everything.
Keep the majority of your Minions away from the Sentinels. Then command one of your Minions to make charging super soldier destroy Sentinels' towers.
After the towers have been destroyed, retreat and return to the Overlord's body. While controlling the Evil Master, come into the mansion of Drearius with your army [6]. It's located next to the destroyed Sentinel's towers.
![Take the Spell Catalyst [A] to the teleport and then return to the Drearius' mansion - Main quests - Empire Heartland - Main quests - Overlord II - Game Guide and Walkthrough](https://game.lhg100.com/Article/UploadFiles/201512/2015121618432926.jpg)
Take the Spell Catalyst [A] to the teleport and then return to the Drearius' mansion. Destroy the columns on the right and left side of the yard. This is a way to get to stairs to the higher level.
Kill the archers there. Command your Minions to destroy the columns in the middle. The centre (they'll have to pass a narrow passage to do that). That's how you will open the passage to the back of the mansion. You'll find some gold, weapon, the Sedan Chair [7] and Drearius in the flesh. Tackle with him by killing him or taking control over his mind. Command your 4 Minions to hold the Sedan Chair and get in it.
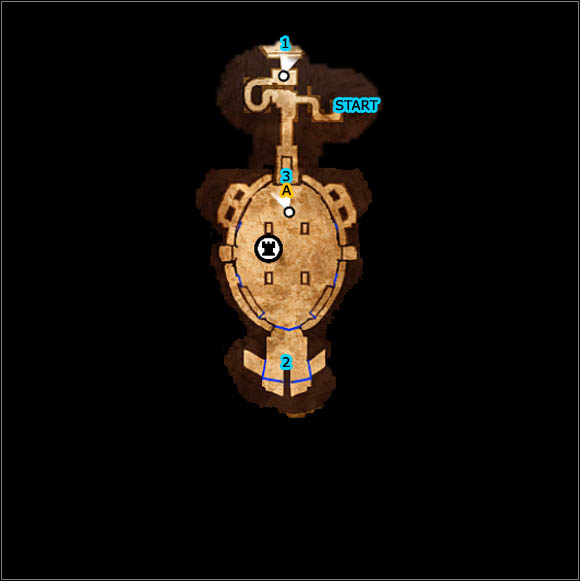
Map key:
Important locations
1. Knob;
2. harbor and button;
3. Sewer entrance;;
4. Minigame number 1;
5. Minigame number 2;
6. Large group of enemies.
Artifacts
A. Spell Catalyst.
Passages
P1. Passage to Empire Arena.
Stand up, flick the dust from your body and go forward. You'll find a small building on the right - destroy it and use the knob [1] located inside to open the nearby gate. You have to destroy analogous building on the left and then pass the ruins to get to reach the target.
Pass the gate and enter the canals. On the opposite side of the tunnel you'll find another knob, another gate to open and another kind of the opponent-frogs. These creatures are quite effective in killing Minions. Fortunately, some punches of the Overlord can kill frogs. Open the following gate and go forward.
You'll get to something similar to the seashore. Destroy the buildings to make a passage to the bridge. The game will be saved when you will stand on the bridge.
![You'll notice the harbour and the button below [2] - Main quests - Empire Sewers - Main quests - Overlord II - Game Guide and Walkthrough](https://game.lhg100.com/Article/UploadFiles/201512/2015121618433105.jpg)
You'll notice the harbour and the button below [2]. Step on the button to block the sailing barges. Command your Minions to attack the nearby boat. The barges which doesn't move are like a bridge for you. Pass one of them and get to the teleport.
Pay attention to the artefact [A] which is in the water. If you have blue Minions you will be able to fish it out and take to your Tower.
You'll find the passage to the flooded caves in the water near to the teleport. Prepare lots of Browns and go to clear the guard crossbowmen from the nearby caves.
Eliminate all the opponents to get to the barge. There's a problem - you can't use the raft. It have to be pushed by the Blues and you don't have a possibility to get them now. Return to the exit of the caves. The nearby grille will open and you'll be attacked by a small group of guardsmen. Kill them and use the knob to open the canals.
![The entrance to the canals [3] is near to the entrance to the caves - Main quests - Empire Sewers - Main quests - Overlord II - Game Guide and Walkthrough](https://game.lhg100.com/Article/UploadFiles/201512/2015121618433123.jpg)
The entrance to the canals [3] is near to the entrance to the caves. You have to leave Your Minions here because the canals are partly filled with the water.
You'll encounter two small groups of guardsmen while searching the canals. Eliminate them of course. There's a high risk that they will badly harm you. Remember that you always can exit the canals and go to the teleport, where you can heal yourself.
Search the canals. You should find the container surrounded by a blue aura. This means that the blue Minion is inside it. Damage the monument to set the Minion free.
Push the button to open the grille. You'll find the descent to the water behind it. Get into the water and open the rest of containers to get more Minions.
Use the passage between the rungs - your Minions can pass it, turn right and get to the reel which is needed to open the next grille.
![You'll get to quite interesting place [4] - Main quests - Empire Sewers - Main quests - Overlord II - Game Guide and Walkthrough](https://game.lhg100.com/Article/UploadFiles/201512/2015121618433228.jpg)
You'll get to quite interesting place [4]. Pushing the button located on the floor you'll drop the containers. It's your business to drop the containers with the blue Minions into the precipice between the soldiers of the Empire. That's the way you can gain some extra Minions. Then command them to step on the other button to open the next grille. You'll be able to go to the further part of the stage then.
![Another level is quite interesting too [5] There's a button on the ground and the knob nearby - Main quests - Empire Sewers - Main quests - Overlord II - Game Guide and Walkthrough](https://game.lhg100.com/Article/UploadFiles/201512/2015121618433278.jpg)
Another level is quite interesting too [5] There's a button on the ground and the knob nearby. Pushing the button means that the pincers upside tighten and lift the thing located beneath the pincers. Use those mechanisms to catch four Minions and to drop them into the precipice between two noticeable platforms. Each operation like that ends the life of the Minion but your Blues can revive the dead.
Open the next gate with 12 Minions. You'll find another containers with blue Minions behind it (what's more, if you lose your Minions, there will be some new containers).
There's a water basin nearby you, and on the other side of it you'll see a force of guardsmen. Use Sweep (click the left and the right mouse buttons at the same time) to command the Minions to walk between the opponents. They won't know what's going on. Tel your Minions to go to the button and to open the gate which separate you from the rest of the level.
Pass the gate. You'll stand behind your enemies. Pass by them and go to the further part of the level.
![Use the invisibility of your Minions to pass by the enemies [6] - Main quests - Empire Sewers - Main quests - Overlord II - Game Guide and Walkthrough](https://game.lhg100.com/Article/UploadFiles/201512/2015121618433362.jpg)
Use the invisibility of your Minions to pass by the enemies [6]. You'll find the descent on the right but if you look around carefully you'll notice a narrow passage on the left, which can be used by Minions. They will reach the button which kills all your opponents nearby.
Go forward after all of the opponents died. You'll encounter some guardsmen on your way but they won't make any difficulties. Follow the corridor and you'll return to the path you've come. Send the Minions (12) to push the button to open the gate.
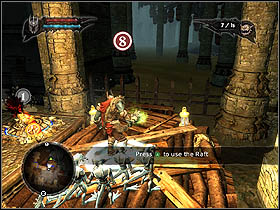
Then go to the barge - the one you've left because of the lack of the blue Minions. Let your minions to use the raft and sail forward [P1]. You'll have to board later and kill the soldier who will be blocking your way.
Map key:
Important locations
1. Marius, Solarius;
2. Dungeons;
3. Columns.
Artifacts
A. Blue Minion hive.
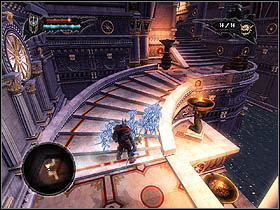
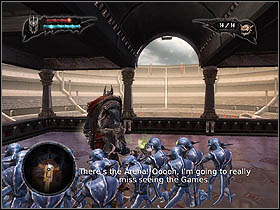
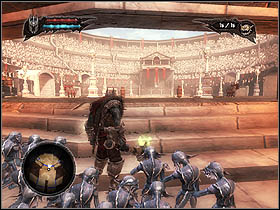
You'll get to much nicer district. Go upstairs and collect each thing you've found. You'll get to stairs leading to something what looks like VIP's box in the local arena.
![You can get to the next part of the level from here [1] - Main quests - Empire Arena - Main quests - Overlord II - Game Guide and Walkthrough](https://game.lhg100.com/Article/UploadFiles/201512/2015121618433564.jpg)
You can get to the next part of the level from here [1]. You'll see a cut-scene after which you'll get to the dungeons [2]. Set your Minions free and open all the grilles. You'll find some boxes with mana and health potions in other cells. What's more, it's worthy to take control over local gladiators' minds. It can be useful later. It's possible that you'll encounter some guardsmen while visiting the dungeons. Just kill them.
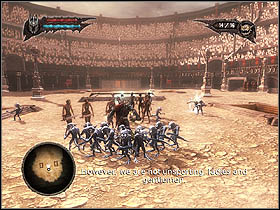
Walk into the arena with your army. The guardsmen will destroy the containers with your Minions. Your task is to revive as many of the Minions as you can. Notice that there are plenty of boxes, containers and chests around the arena. Search them, if you lack health, mana or Minions.
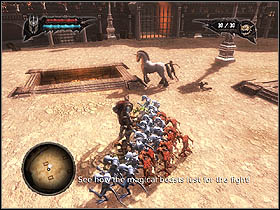
It's time for the first round. You will be attacked by several slaves. To tell the truth, they are not serious opponents. I advise you to take control over their minds. You will use them as a cannon fodder during the upcoming fights.
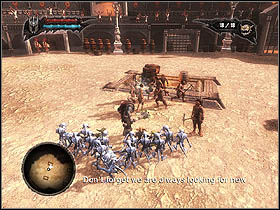
The second round: unicorns. Those creatures are extremely prone to the fire so it would be good to gather some red Minions. The containers with the Reds inside are located around the arena (to get them you have to blow up the red barrels - it will open the passage).
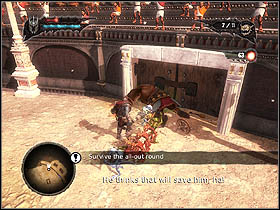

Round three: Gargantuan, the supersoldier you've already met. Throw at him all the cannon fodder you have - the gladiators. Greens can help here too if they will attack the enemy from behind.
Round four: a big combat with everyone. You'll meet slaves (you can beat them at first), unicorns and Gargantuans. I advise you to kill the opponent in that order. Kill the super soldiers with blocks of stone located round the arena. Try to set the Overlord so that the charging enemy will hit the rock located behind your hero. The enemy will be dazed then and you will easily hurt him.
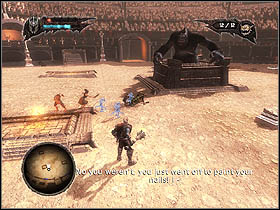
Your last opponent is Yeti. You can't beat him in a traditional way. Yeti will hurl the barrels with explosives into you. Take the position in front of the door, next to the red columns (and seats for VIPs) so the explosion will destroy the door and you will be able to get to the stands. Great!

You'll find some containers with Browns in the stands. Set the Minions free and command them to destroy the red columns [3] which supports the VIPs stands. There are four columns but the Minions can destroy only two of them. You have repeat the stratagem on the opposite side of the arena so that everything will be destroyed.
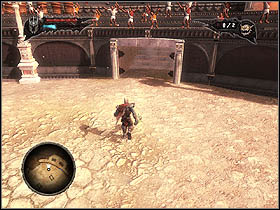
Once you've destroyed all the columns you'll see a cut-scene. After the cut-scene you'll noticed that Yeti isn't willing to fight.
You can kill him by "overcharging with magic" or by taking control over his mind - do whatever you want. Then command your minions to pick up the blue hive [A]. Take it to the place which is illuminated by bright, blue light. The teleport will appear then. You will be able to teleport yourself to the Tower by using the teleport that has just appeared. That's how you end the quest in the capital of the Empire.
Map key:
Important locations
1. Knob;
2. Village;
3. Knob;
4. Village of possessed people;
5. Slope;
6. Entrance to the huge batch of bright ooze;
7. Piece of the Towerheart hidden behind the flames;
8. Piece of the Towerheart hidden behind the toxic vapours;
9. Gate;
10. Enormous snail, the last piece of the Towerheart;
11. Path (opened by a Gargantuan).
Artifacts
A. Spell stone, giving you the Minion spell;
B. Spell Catalyst;
C. Mana upgrade;
D. Health upgrade;
E. Totem part;
F. Spell Catalyst.
Passages
P1. Passage to Wasteland Sanctuary Town.
You start near your teleport. Follow the one available path and collect the piece of the Towerheart.

Search the surroundings. You'll get to wide area covered by shiny substance. Your Blues can come into it and smash it. The Overlord and other minions shouldn't even approach to the substance - it can kill them. You'll find the artefact [A] between the clusters of the ooze.
Search the area. You should get to several damaged buildings. You'll find some money there.

You'll find the next two artefacts nearby. One of them, the spell catalyst [B] is behind the toxic vapours. Command your Greens to fetch the artefact.
The mana upgrade [C] can be found between flames. The red Minions will help you to bring it.
It's time to go further. Notice that there's the knob [1] behind one of the cluster of the mentioned ooze. You can pass the ooze in the company of Blues. Command your Minions to open the gate by using the knob.
You'll get to the village [2]. You can ransack it and gain some gold. However, the most important is that the Minion spawning pits will be opened so you will be able to call the Minions.

There's a barricade out of the village. Destroy it and go forward. You'll find another piece of the Towerheart. Command the Blues to get it.
Pay attention to the fact that you can call red Minions here. You just have to get through the killing ooze. It's easy because of the company of the blue Minions. Call 8-10 Reds.
You have to use the knob [3] to open the gate which separates toy form the next part of the stage. To get to it you have to get through the puddle full of the damn ooze and then the flames. Chose only Blues and tell them to get to the ooze. Set the gathering point there so the Minion wouldn't move. Then command the Reds to get through the protected area and the flames. Let them use the knob and then command all the Minions to come back. Go further.

You'll get to another village. The local population is not only hostile but also mad. Kill the opponents and ransack the place.
You'll find a platform next to the village. It's surrounded by the blue ooze. Command the Reds to take up positions on the platform so that they will be able to attack the snails easily. Tell the blue Minions to get into the ooze. If you command them to use the narrow path opposite, they'll fetch the artefact [D].
Command the Blues to use the knob. That's how you will open the passage to the next part of the stage. You'll get to the huge chasm and the stone which circles above it. Once the stone approaches you and your minions, get on it and eliminate all the snails which are there.
You'll have an opportunity to collect another piece of the Towerheart and get to next part of the level while flying on the stone. The teleport will open after you've reached the ground and the game will be saved then.

The further way leads through the village of possessed people [4]. There's no sense in fighting with them - there are plenty of them. Destroy the nearby barricade instead. You'll find the command upgrade [E] (it increases the number of your Minions) behind it and another piece of the Towerheart.
The further way leads through the open gate. You'll find some soldiers of the Empire and the elf behind it. Kill the legionnaires and listen to the elf.
![Follow the elf and watch out for the ooze that falls form the slope [5] (on your left) - Main quests - Wasteland Main - part 2 - Main quests - Overlord II - Game Guide and Walkthrough](https://game.lhg100.com/Article/UploadFiles/201512/2015121618434145.jpg)
Follow the elf and watch out for the ooze that falls form the slope [5] (on your left). You won't gain anything interesting then but remember the place.
The elf will take you to the local sanctuary. You'll watch the cut-scene. After it follow the elf. He will take you to the already visited village of possessed people.
The elf will open the gate to the next part of the level. Walk through the gate so you'll get to place filled with the harmful for the Overlord ooze [6]. Use the nearby pit to call the Blues (it's good to have only Blues at this moment).
Let the Minions go 2 meters in front of the Overlord - he won't be hurt then. You'll find the majority of the pieces of the Towerheart in the area. Some of them are behind the flames [7] or toxic vapours [8].

Notice that in the middle of the area there are Minion spawning pits - call two green Minions and two Reds to get to all of the pieces you're looking for.
You'll find there something similar to the ruins of a stronghold. It's guarded by several enemies but they're not a big deal for you. There's the spell catalyst in the ruins [F].
![Once you've reached 11 out of 12 pieces of the Towerheart, the elf will guide you to the gate [9] - Main quests - Wasteland Main - part 2 - Main quests - Overlord II - Game Guide and Walkthrough](https://game.lhg100.com/Article/UploadFiles/201512/2015121618434219.jpg)
Once you've reached 11 out of 12 pieces of the Towerheart, the elf will guide you to the gate [9]. He will open it so that you will be able to fetch the artefact.
There's only one problem. The last piece of the Towerheart is guarded by quite tough opponent - the enormous snail [10]. You can defeat it without your Minions' help. Your enemy is slow. You can attack it from behind and from one side. Then you'll harm the snail without suffering any damages. If you kill the opponent, take the last piece of the Towerheart.
You'll encounter some forces of the Empire after the fight with the snail. Hide in the blue Minions' pit - the enemy soldiers won't approach. There'll appear the Gargantuan too. Try to pass by that creature and get to the path which the Gargantuan has already followed [11]. You'll encounter a barricade but some punches. Yes, that will do nicely.
There you'll encounter another Gargantuan. Command your Minions to use the knob to open the nearby gate.
Go forward, follow the mountain path partly covered by the blue ooze.

You'll encounter another blockade on your way - that's not a big deal for the Overlord. Then you'll meet three soldiers of the Empire. If you don't want to fight with them, use the magic.
![Notice that there's a slope covered by the thick ooze [5] behind the soldiers - Main quests - Wasteland Main - part 2 - Main quests - Overlord II - Game Guide and Walkthrough](https://game.lhg100.com/Article/UploadFiles/201512/2015121618434305.jpg)
Notice that there's a slope covered by the thick ooze [5] behind the soldiers. The ooze isn't dangerous so you can slip off the slope. Then go to the local sanctuary [P1].
Map key:
Important locations
1. Queen Fay
Passages
P1. Passage to Wasteland Main;
P2. Passage to Wasteland Sanctuary Depths.
Enter the sanctuary and go ahead to the Fay. [1]. Watch the cut -scene and command your Minions to take the Towerheart. Head for the lift [P2].
Map key:
Important locations
1. First shrine;
2. Gnomes;
3. Second shrine;
4. Elves on a platform;
5. Pond (place, where you can harm the Salamander King);
6. Bay (place, where you can harm the Salamander King);
7. Bay (place, where you can harm the Salamander King).
Artifacts
A. Spell Catalyst;
B. Mana upgrade.
Passages
P1. Passage to Wasteland Sanctuary Town.
After the lift has reached the right place, go out and take the artefact to the nearby shrine [1]. Command your Minions to put the artefacts next to the shrine and use the magic to charge it.
But you'll encounter some difficulties - the shrine will break down and the Towerheart will be stolen by the Gnomes.

Search the area. You'll find the spell catalyst [A] and the teleport here.
![You'll find some gnomes and the Towerheart not far away [2] - Main quests - Wasteland Sanctuary Depths - part 1 - Main quests - Overlord II - Game Guide and Walkthrough](https://game.lhg100.com/Article/UploadFiles/201512/2015121618434544.jpg)
You'll find some gnomes and the Towerheart not far away [2]. Command the Minions (blue ones) to pick up the heart and put the nearby monument on the place where you've found the Towerheart.

Attention! If you want to complete the side quest (Kill a thousand gnomes), rise your hands and don't touch the monument! Get to the water as an Overlord instead. The fire gnomes will try to approach the Overlord but they'll die if they get to the water. That's how you can kill thousand gnomes without any effort at all. Just leave the Overlord in the water and go make yourself a sandwich or take a nap. This may take a while.
![You'll get to another shrine later [3] - Main quests - Wasteland Sanctuary Depths - part 1 - Main quests - Overlord II - Game Guide and Walkthrough](https://game.lhg100.com/Article/UploadFiles/201512/2015121618434693.jpg)
You'll get to another shrine later [3]. You'll have to charge the Towerheart there. Everything will break down again and you'll get to the room surrounded by flames.
You'll be attacked by fiery salamanders. Fight with them till the flames will have faded. Notice that salamanders explode before they die. Try not to stand near salamanders while killing them.
Go to the next part of the level after the flames have faded. You'll find there some elves holding your artefact [4]. You won't be able to approach them because they'll be standing on a platform suspended in air. You'll find the teleport and the Minion spawning pits nearby.
There are two buttons near the elves' platform. Gather a small group of Minions (you should already have 35 of them). It's good to have some Blues and Browns (because of the fiery salamander which live around). Command several Minions to stand on one of the buttons and stand on the second one with the rest of your Minions. When both of the buttons are pushed, the platform will go down.
After the platform has reached the ground, elves will approach you. Give them a trashing and use their platform to get the artefact.
You'll find the Towerheart upside. Command your Minions to take it to the shrine. Use some magic to the Towerheart.
The Salamander King will join battle. Use the nearby pit to get out of there and watch out for the rolling opponent. Pass the lake [5] - the Salamander King is keen on attacking you but he will fall into water. Chose this moment to hurt him.
After the king has got out of the water he will go forward. Follow him. You'll get to something like a track for the salamanders. You'll find the button associated with the nearby bridge. Push it and the bridge will be in good condition. The Salamander King will try to destroy it by rolling so be careful.
Pass the bridge and command your Reds to go downstairs and get to the next button which is associated with another bridge. As you can see on the pictures, you can do it with the Overlord as well.
The further way leads to the bridge over the water. Push the button. You'll be able to pass the bridge then. Pass it and observe the Salamander King - the enemy will fall into the nearby bay [6]. Punch him as long as you can (till he escapes). Go to the next part of the level afterwards.

You'll get to another teleport. Go further. Follow the narrow path.
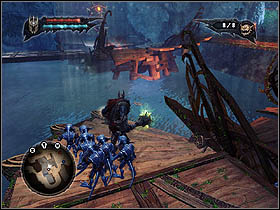
Get to the next part of the level and watch out for the rolling Salamander King. You'll find some Minions spawning pits. Call for some Blues. Go forward minding the opponent. You'll find the descent leading to the water - send the blue Minions to get into the water and destroy the platform. The Salamander King will roll over it.
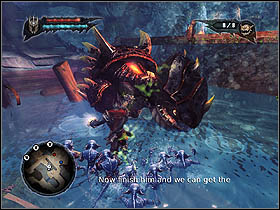
![Your enemy will fall into the water [7] and you'll gain the opportunity to eliminate him - Main quests - Wasteland Sanctuary Depths - part 2 - Main quests - Overlord II - Game Guide and Walkthrough](https://game.lhg100.com/Article/UploadFiles/201512/2015121618434840.jpg)
Your enemy will fall into the water [7] and you'll gain the opportunity to eliminate him. After the king has fallen apart, crush his head to retrieve the Towerheart and gain the access to some smaller salamanders. The red Minions can ride them what will be quite useful in a moment.
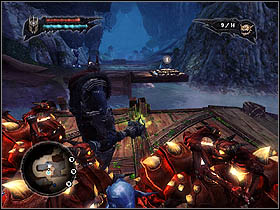
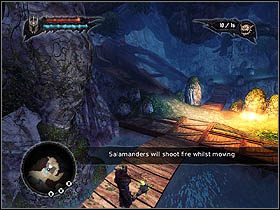
Command your red Minion to mount the salamanders (the more the better) to continue the journey. You have to push the button to open the bridge. Your Reds can roll through the track situated on your left. That's the way they will push the button. Use it to get to the next part of the level.
Send your Reds on the salamander in front of you so they will be able to eliminate the archers. Try to eliminate them as quick as you can because their arrows explode. You can lose a lot of energy if you get struck.
There will be some bombs dropped from time to time but you can easily avoid them.

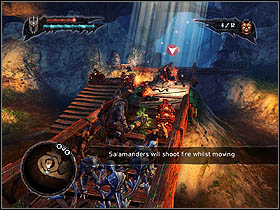
You'll get to the last shrine finally. Charge your artefact there. Everything will break down again.
You'll find the artefact there [B]. Y advise you to take it to the nearest teleport.
Take the Towerheart to the beginning of that level. The way leads through the regions you've been to but they are occupied by the Imperial forces now. Try to eliminate them with your Reds.
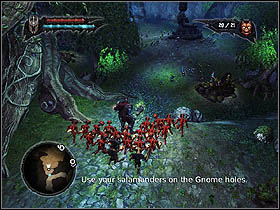
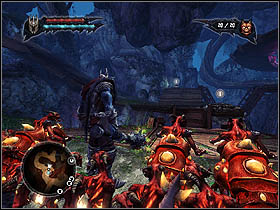
You should appear near the gnomes. Here you can check how the red Minions riding the salamanders can close the gnomes pits . Go forward anyway.
To get to the beginning of the level [P1] you have to use the Reds and the salamanders. Command them to roll to the button and push it. The further way is quite easy. Get to the lift so that you can return to Queen Fay.
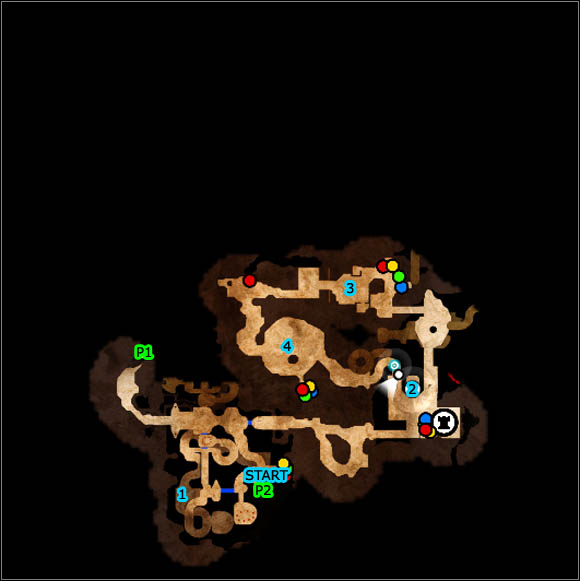
Map key:
Important locations
1. Statues
2. Queen Fay;
3. Driads;
4. Unicorns.
Passages
P1. Passage to Wasteland Main;
P2. Passage to Wasteland Sanctuary Depths.
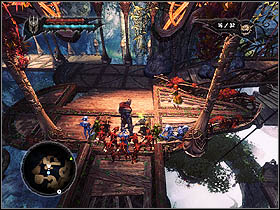
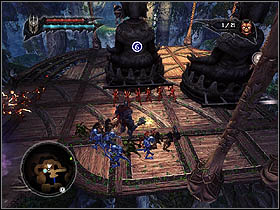
The Empire got to the Sanctuary. Turn left to get to the Queen. You'll get to the group of enemy soldiers if you pass the platforms and stairs. Move the monuments [1] to restrain them and to prevent the enemy archers from attacking you for a while.
You'll encounter the centurion on your way later. The fight at this level shouldn't be a big problem for you especially you have some Reds. Elves will help you with fighting your opponents. The further way is quite easy. Approach Fay, the Queen [2].
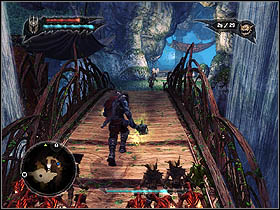
You'll find the teleport and the Minions spawning pits here. Call for some red, brown and blue Minions. Approach the Queen then and watch the cut-scene.
Set your Minions 3-4 meters in front of the Queen. Approach her and use some magic to her. It would be great if you didn't stop. If not, you'd have to repeat the process. Your Minions will be defending you against the elves who will come there.
The forest creatures will notice what's going on and they'll decide to take the Queen from you. Chase her and eliminate all the elves and driads [3] on your way. The Reds are required to succeed because they can kill two of the driads that stands above the others by hurling the fireballs.
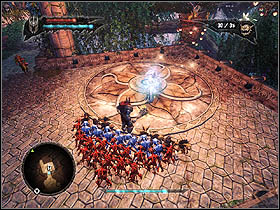
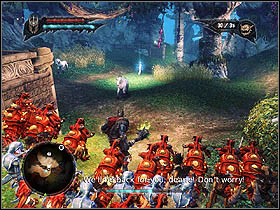
You'll get to the next part of the level after you've eliminated the driads. Approach the Queen and use the magic. Once Fay is taken away from you, go further. You'll encounter some unicorns [4] on your way. You will easily defeat them if you've got some Reds (riding the salamanders that you can find on your way).
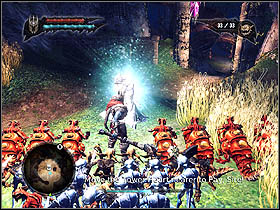
Use some magic to the Queen after the fight with the unicorns. She will be taken away again. Chase her. You'll come back to the place where everything begins. Eliminate the elves who defend Fay.
Take all the Fay's energy. After you've finished the Queen will go to your teleport. You can let her enter the teleport. She'll become the third mistress of the Overlord (her new name: Dark Fay) then. You can kill her as well by using the magic - she'll become the mistress either (her new name: Ghost Fay). It's your choice.
After the quest the mistresses will offer their services which you can use in the last attack on the Empire.
If you chose Kelda (on the left), you'll get the combat support - wolves. Browns can ride them.
If you chose Fay (in the middle), you'll get the combat support - salamanders. Reds can ride them.
If you chose Juno (on the right), you'll get the combat support - spiders. Greens can ride them.
If you've made up your mind and then want to change your choice go to the Overlord's apartment. You can choose which women will be titled as the First Mistress. You chose the combat support at the same time as you entitle the woman to be the First Mistress. You can change the kind of the combat support during the last quest.
In my opinion, the salamanders are the best. Thanks to them you gains mobile, tough army that is able to attack from a distance.
Map key:
Important locations
1. First catapult hill;
2. Second catapult hill;
3. Third catapult hill, Empire fort.
Artifacts
A. Spell Catalyst;
B. Health upgrade.
Passages
P1. Passage to Empire City.
Start with listening to the Gnarl in your Tower. After you've done that move to the capital of the Empire. Call some Reds, Browns and Blues.
Follow the only available path and command your Minions to carry the Towerheart. You'll find some pits on your way so use them to call for the support you've chosen before.
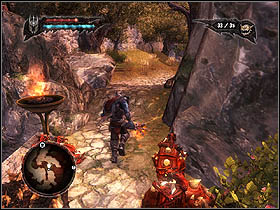
You'll get to something similar to a mine. Eliminate all your enemies nearby and go further.

![You'll get the first hill with the catapult [1] - Main quests - Empire Hills - Main quests - Overlord II - Game Guide and Walkthrough](https://game.lhg100.com/Article/UploadFiles/201512/2015121618435281.jpg)
You'll get the first hill with the catapult [1]. It's well defended. Send your red Minions first to eliminate the archers on the right. Then command Blues and Reds to take positions 5-6 meters from the legionnaires. Command the brown Minions to attack the enemy force and take up arms to help them.
If you defeat the first force the second one will come. Eliminate it as you will have done it with the first one. After you've killed all the opponents put the Towerheart at the appointed place.

The catapult will appear. Use it to beat the enemy forces which approaches you. There'll be a lot of them so you will have a big job to do. Destroy the watchtowers at the end.
Once the fight ends, go downhill to get to the clearing which was full of the enemy last time. You'll find the Gargatuan's tent there (I advise you to fight with him on your own so that he won't trample your Minions) and the Spell Catalyst [A].
Pass the bridge and go east. You'll get to the next hillock behind which you'll encounter another opponent - the bomb thrower. Eliminate it and command your minions to take positions on the hill. Try to attract the nearby enemies. The Reds will be able to hurl the fire balls into the enemy force then.
You'll find buildings of the Empire and another enemy force nearby. Kill the centurion (on the left) by using Target spell and your Red Minions.
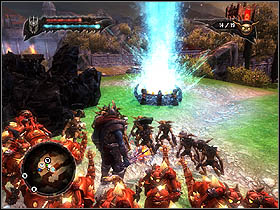
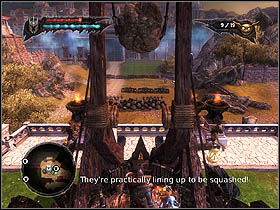
Once you've killed the centurion, the enemy force escapes. Kill the runaways, destroy the tent and put the Towerheart on the next hill with the catapult [2].
Eliminate all the archers as fast as you can. Then you will notice that the enemy siege towers are coming. Destroy them.
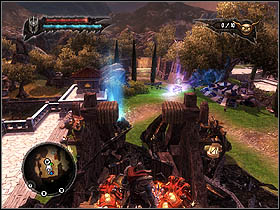
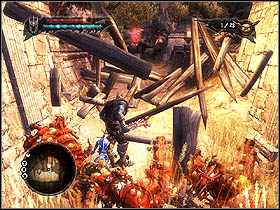
Remember to defeat the infantry which will try to prevent you from getting to the next level. Do it with the use of the catapult.
There'll be the barricade behind the soldiers. Destroy it on your own - it's a trap. You can lose a lot of your Minions if they will be nearby.
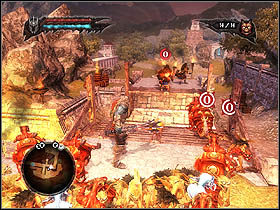

There will be the enemy throwers on the left and the right side of the passage. Send one Minion (blue is the best one) to catch one bomb and set it in the middle of the enemy force that stands on your way. Do the same to destroy the barricade on your right. Thanks to that you'll eliminate the throwers of the Empire (to kill some of them you'll need your red Minions to hurl the fire balls into them) and you'll get the artefact [B].
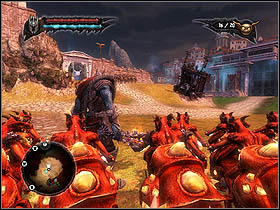
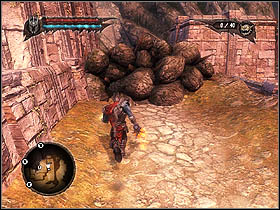
The further way leads through the clearing you've already shelled with the catapult. You'll encounter the enemy force there so I advise you to retreat and use the catapult to shell it. Another hill with the catapult [3] is in the middle of the Empire fort. To get to it go by the buildings from the right ( go on your own). You'll find the stone barricade there. Stand next to it and the catapult will hurl the stone shell into you so the barricade will be destroyed. You have to be fast - the stone has to eliminate the barricade, not the Overlord!
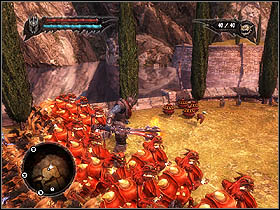
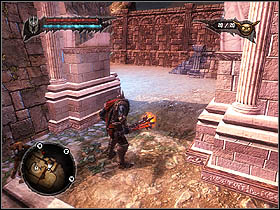
Once the way is clear, command the Minions to enter the just opened passage. You'll find some bombs there. Tell your Minion to take one of them and put it next to the door which separates you from the centre of the fort.
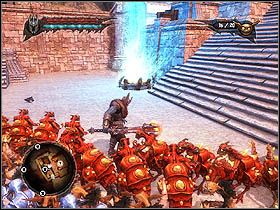
When the door are open get inside with your Minions. The force that is inside will get into panic so it will be easy to eliminate it. If enemy soldiers oppose you, command Browns and some Reds and Blues to attack them.
Put the Towerheart in the middle of the fort. Thanks to that another catapult will appear. Use it to open the gate. The Towerheart will be charged automatically then and all you will have to do is to fire the shell.

After you've opened the gate a lot if enemy forces will get out of the town. Eliminate the towers and the archers who stand there at first. You have the explosive shells now do the fight should be quite easy and pleasant. After you've killed the archers, shell the infantry that is approaching heading for the fort.
Once you've beaten the infantry head for the gate of the town. You'll encounter Marius on your way. This guy will talk for a while and disappear as usually. He will leave two Gargantuans this time. I advise you to return to the fort and eliminate them with use of the catapult . If they will be following you, pull them into the fort. Thanks to that you will be able to heal yourself continuously and your mana level will be restocked. After you've finished the battle get to the town [P1].
Map key:
Important locations
1. First shrine;
2. Second shrine;
3. Third shrine;
4. Debris, that has to be blown up;
5. Fourth shrine.
Passages
P1. Passage to Empire Hills;
P2. Passage to Emperor's Palace.
Turn left (you can destroy the nearby building and get the support of the animals if you want) to avoid the archers' arrows. Head for the first shrine [1]. You'll encounter the enemy force and one thrower. Try to ignore the last one and eliminate the force as fast as you can. Command your blue Minion to put one little bomb between enemy soldiers.
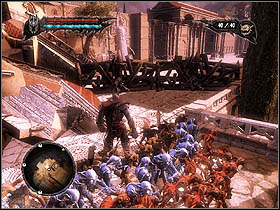
The water in the shrines changes people into brainless zombies. Kill all the mad people and destroy the shrine.
Go east. Break the barricade located near the rubble and go further. That's how you will open the teleport.
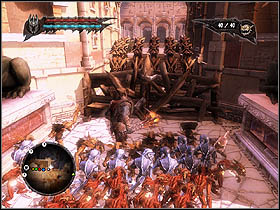
![The passage to the second shrine [2] is blocked - Main quests - Empire City - Main quests - Overlord II - Game Guide and Walkthrough](https://game.lhg100.com/Article/UploadFiles/201512/2015121618435640.jpg)
The passage to the second shrine [2] is blocked. Break the blockage with your axe. Command the blue Minion to put a bomb between the nearby enemy legionnaires.
The shrine is guarded by two throwers and Gargantuans. You will easily beat the Gargantuans if you lead the charging opponents into the columns (they will be dazed for a moment so you'll be able to kill them quickly). Eliminate the throwers in the traditional way. You'd better leave the Minions behind so that they won't disturb you.
Destroy the shrine after the fight.
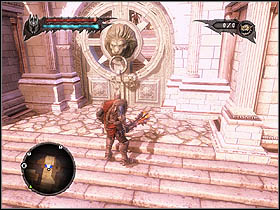
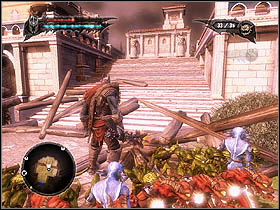
The next location is occupied by the throwers. Kill them on your own. Go north then. You'll find the closed door there. The throwers will hurl some bombs into you. Take one of them and put in front of the door. The explosion will open the door.
There are some archers with explosive arrows behind the door. Send some Minions there to eliminate the threat.
![If you go north, you'll get to the third shrine [3] - Main quests - Empire City - Main quests - Overlord II - Game Guide and Walkthrough](https://game.lhg100.com/Article/UploadFiles/201512/2015121618435785.jpg)
If you go north, you'll get to the third shrine [3]. If you turn right, you'll find the building which you can destroy (marked in red on the map. Destroy it to open the passage to the next part of the level.
You'll reach the crossing then. There's your teleport next to that crossing. Use the nearby bombs to blow up the rubble [4] which is located there (you need 2 barrels of explosives).
![You'll get to the last shrine [5] and the Solarius palace without any difficulties then - Main quests - Empire City - Main quests - Overlord II - Game Guide and Walkthrough](https://game.lhg100.com/Article/UploadFiles/201512/2015121618435759.jpg)
You'll get to the last shrine [5] and the Solarius palace without any difficulties then. Marius will call some people who will drink the water from the shrine. This means that you'll have some troubles with mad people. I advise you to take control over minds of villagers to eliminate the threat and gain some allies who will help you to beat your enemies.
Destroy the fourth shrine and go to the Solarius' palace after the fight [P2].

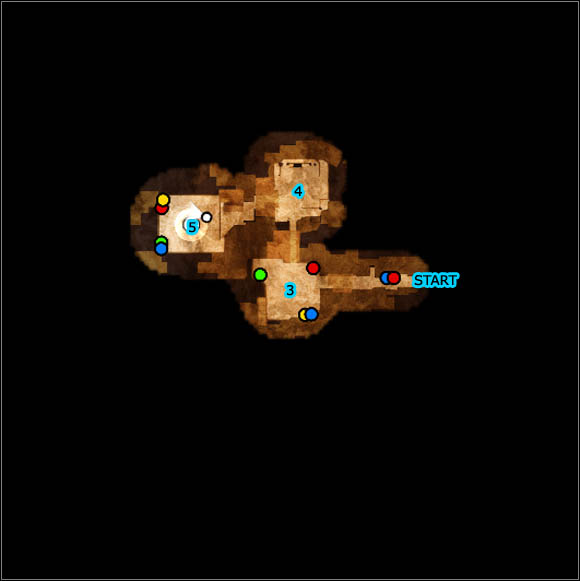
Map key:
Important locations
1. Teleport, Minion holes;
2. Solarius' magic room;
3. First Devourer fight;
4. Second Devourer fight;
5. Third Devourer with, final confrontation with Solarius.
Passages
P1. Passage to Empire City.
![Drop in the first apartment on the right [1] - Main quests - Empire Palace - Main quests - Overlord II - Game Guide and Walkthrough](https://game.lhg100.com/Article/UploadFiles/201512/2015121618435885.jpg)
Drop in the first apartment on the right [1]. You'll find the teleport and Minion spawning pits there. Take some Reds and blues with you.
The door in the main corridor will open as you approach them.
You'll encounter some guard crossbowmen behind the door. They are not difficult opponents. If they hit you, go back to the teleport and regenerate your health. There's the enemy force in the passage nearby. Command your Browns and some Reds and Blues to attack the force. Support your Minions with your weapon.
The further way is quite simple. You'll encounter some opponents in other rooms but they won't make any problems. Finally, you'll get to the room where Solarius focuses all his magical energy [2].
Watch the cut-scene. The leader of the Empire will send a monster called Devourer against you. Follow him and let your Blues go first. They will be eliminating the shiny ooze which is harmful for the Overlord.
The fight against this monster is easier [3] than the combat against the Spider Queen. Call plenty of Reds and some Blues and Greens. You have to watch out for the monster's mouth. It would be great if any of your Minions didn't get into his mouth.
What's more, you have to send your Minions to destroy the bubbles situated on the monster's body. Repulse the attacks of the mad people on your own. Reds and Greens should easily destroy a lot of bubbles. It will make the monster angry so that he will move to another square [4].

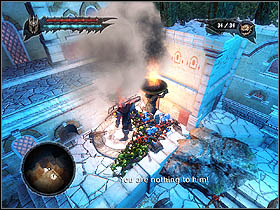
On the second square you have to repeat the stratagem based on destroying monster's bubbles. The only one problem is that there will be plenty of enemy soldiers. The archers with their explosive arrows can be a big problem for you there so I advise you to eliminate them at first. Command your Minions to do that.
If you are lacking in health, search the barrels situated in the corner of the square.
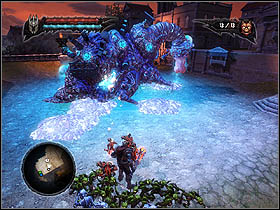
![After you've destroyed the bubbles, Devourer will move to the third square [5] - Main quests - Empire Palace - Main quests - Overlord II - Game Guide and Walkthrough](https://game.lhg100.com/Article/UploadFiles/201512/2015121618435961.jpg)
After you've destroyed the bubbles, Devourer will move to the third square [5]. Continue destroying of the bubbles there. The problem is that the one of the bubbles is located on the monster's head and you won't reach it from the ground. Fortunately, the Devourer lies his head down on the ground from time to time so you'll have a possibility to damage the bubble. Try to fight quickly because monster will be splitting out some muck such as unicorns, frogs etc.
After you've destroyed all of the bubbles, Devourer will split out the emperor Solarius. You have to use magic to him to kill him (as you did with Queen Fay). If the health of the opponent decreases to 25% the monster will absorb the emperor and you'll have to destroy all new bubbles. Thanks to that the Devourer will split out the Solarius again and you'll have a possibility to take away a part of his energy. Repeat the stratagem till the emperor dies. You have to use some magic to him at least 4 times to kill the emperor.
As the emperor dies the story is over and the evil triumphs. The Evil Master surrounded by his mistresses can relax and take care of his goods finally. In other words - you've finished the game Overlord II, congratulations!

Map key:
Important locations
1. The cleft, encounter Yeti, the monster;
2. Baby seals;
3. Wolves in cages;
4. Baby seals, encounter with elves;
5. A fight with Yeti;
6. Bridge (can be opened from the north).
Passages
P1. Passage to Nordberg Sanctuary;
P2. Passage to Nordberg Town.
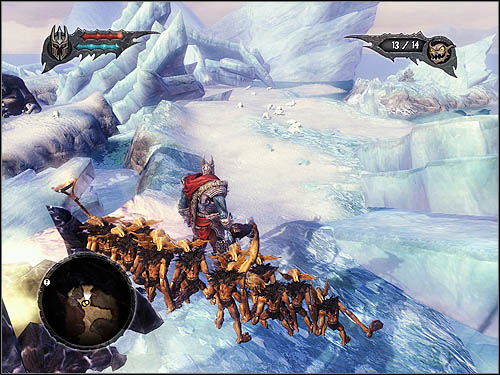
There's a group of baby seals in the Hunting Grounds level. Pay attention to the places marked as [2] and [4]. Remember that you can always visit those places ( exit the Hunting Grounds, go somewhere and return). The seals should revive so will kill more than a hundred (what's required)
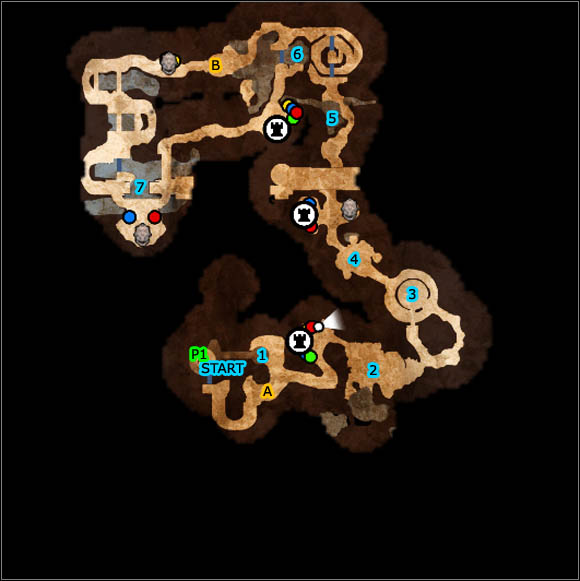
Map key:
Important locations
1. First shrine;
2. Gnomes;
3. Second shrine;
4. Elves on a platform;
5. Pond (place, where you can harm the Salamander King);
6. Bay (place, where you can harm the Salamander King);
7. Bay (place, where you can harm the Salamander King).
Artifacts
A. Spell Catalyst;
B. Mana upgrade.
Passages
P1. Passage to Wasteland Sanctuary Town.

The task is given quite early but I advise you to wait with it. When you've get to Wasteland Sanctuary Depths, look for the pit where the fire gnomes come from [2] in large numbers. Set the Overlord in the nearby lake. The fire gnomes will try to approach the Evil Master but they'll die because of the water. As I said, there's plenty of the gnomes so wait as long as there will be a thousand of the dead gnomes.

Map key:
Artifacts
A. Totem part;
B. Health upgrade;
C. Forge stone
D. Totem part (under stones, use explosives to obtain it);
E. Mana upgrade (accessible with Greens);
F. Health upgrade (accessible with Blues).
Passages
P1. Passage to Nordberg Sanctuary;
P2. Passage to Hunting Grounds;
P3. Passage to Nordhaven.
Before you start this task I advise you to unblock all kinds of the Minions - you'll be able to get to each part of the map only then. If you have that possibility the task is much easier than before.
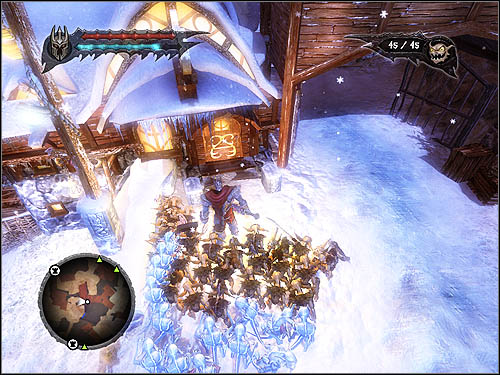
If you want to destroy the village, you have to kill 100 villagers. At first, kill those wandering around the streets, then eliminate people in the huts. You need only one blow of an axe to open the door of the hut. Then the occupants run out of the hut. Kill them and command your Minions to get inside, ransack the house and destroy it.
There are some houses which you cannot enter. They are marked on the map in dark red colour. The destructive attitude brings immediate but limited benefits like: gold, weapon and Lifeforce.
Don't kill people, just take control over their minds. At first do it with the people who wander around and then those in the huts. Destroy the doors of the huts to get people out of the houses. Don't destroy the houses.
There are some houses which you cannot enter. They are marked on the map in dark red colour. The dominant attitude brings constant benefits like gold, weapon and Lifeforce. You have to take control over people's minds at first so that you will be able to enjoy fully.
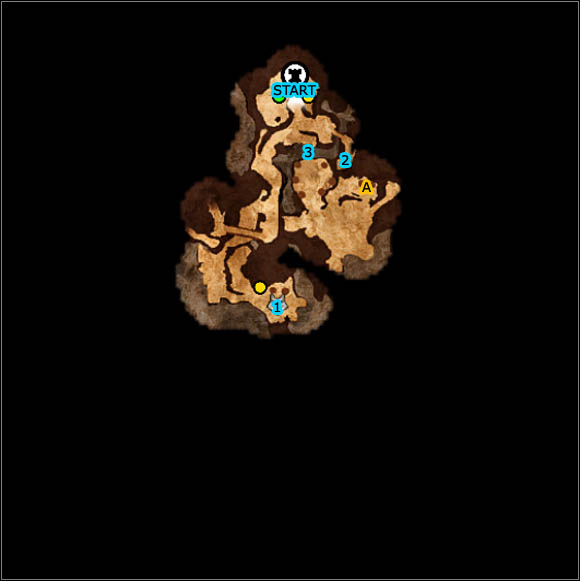
Map key:
Important locations
1. Wolves;
2. Knob;
3. Commune bridge.
Artifacts
A. Spell Catalyst.
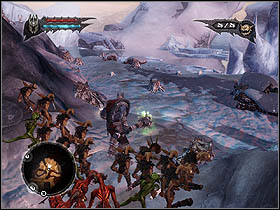
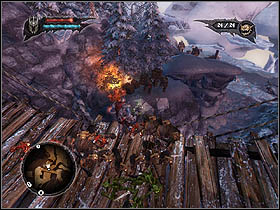
One of the Nordberg dwellers will tell you about the elves commune which is located near your town.
Move to the area of the commune. Call the Browns and5 red Minions and go forward. At first, destroy the barricade located on the right. You'll find a path (it forks off, you'll find some weapon and gold in the nooks) behind it. It leads to the water animals and the camp of people. You'll encounter some wolves there [1], which will be useful in the further part of this quest. Watch out for the javelin throwers located on the mountains.
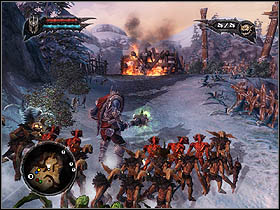
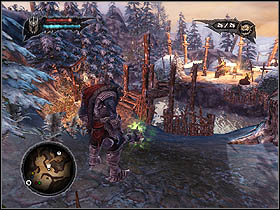
Command your Browns who ride wolves to go back to the teleport. There's another barricade there. It's fire barricade this time. Tell your Reds to destroy it and command The Browns to jump over the precipice which is situated there. There's a knob on the opposite side of the chasm[2]. Use it to open the gate to the commune [3].

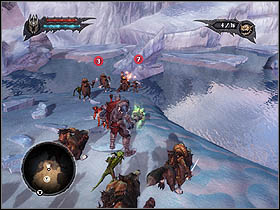
It's time to play now. Defeat the elves and the fat water nymph ( try to hit her with your weapon only, then attack her all together). You'll find the Spell Catalyst there [A]. Now you can chose: kill the population or take control over minds of the villagers.
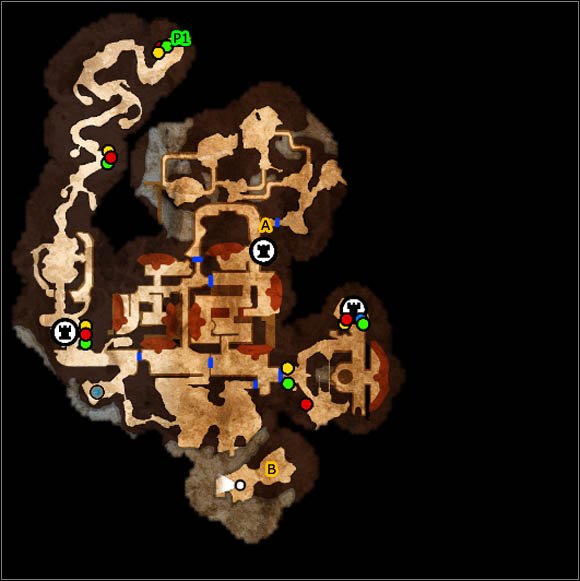
Map key:
Artifacts
A. Totem part;
B. Spell Catalyst (accessible with Blue Minions).
Passages
P1. Passage to Everlight Temple Outskirts.
Before you start this task I advise you to unblock all kinds of the Minions - you'll be able to get to each part of the map only then. If you have that possibility the task is much easier than before. In Everlight's case it's important to accomplish the side quest associated with this village (side quest: Everlight Rebellion). Once you've accomplished it, you'll get the access to all of the nooks of the town.
If you want to destroy the village, you have to kill 100 villagers. At first, kill those wandering around the streets, then eliminate people in the huts. You need only one blow of an axe to open the door of the hut. Then the occupants run out of the hut. Kill them and command your Minions to get inside, ransack the house and destroy it.
There are some houses which you cannot enter. They are marked on the map in dark red colour. The destructive attitude brings immediate but limited benefits like: gold, weapon and Lifeforce.
Don't kill people, just take control over their minds. At first do it with the people who wander around and then those in the huts. Destroy the doors of the huts to get people out of the houses. Don't destroy the houses.
There are some houses which you cannot enter. They are marked on the map in dark red colour. The dominant attitude brings constant benefits like gold, weapon and Lifeforce. You have to take control over people's minds at first so that you will be able to enjoy fully.
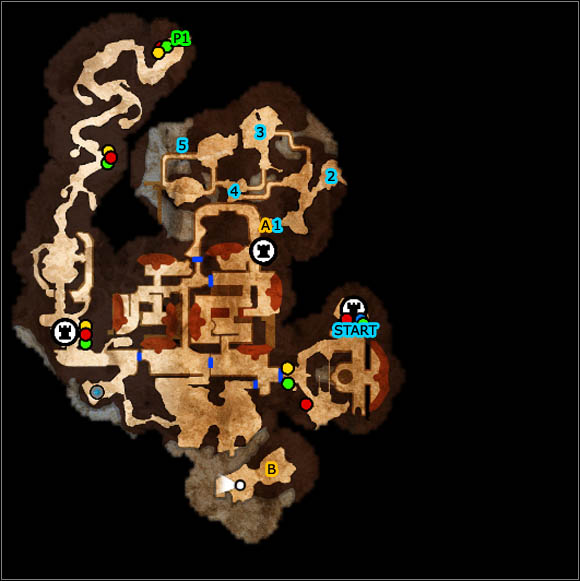
Map key:
Important locations
1. entrance to the rebels' hideout;
2. Spiders;
3. Bomb throwers;
4. Bomb throwers (explosive and poisonous);
5. Platform;
Artifacts
A. Totem part;
B. Spell Catalyst (accessible with blue Minions).
Passages
P1. Passage to Everlight Temple Outskirts.
The woman from Everlight will ask you for listening to her. You'll get some information about the riot which is being organized by the elves. Go to the town to stop the enemies.
Command some Browns and Reds to kill the opponents. You can send some Blues to do that if you have them.
Notice that the paths which lead to the beach and to the jungle are blocked. Follow the only one available path to the door [1] which is next to the teleports. You'll have to blow up two barricades on your way. It's not a problem because there are some barrels with explosives next to them.
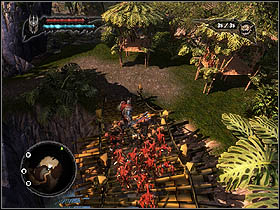
![The path leads to the spiders [2] (Greens can ride on them) and to platforms with elven bomb throwers [3] - Side quests - Everlight Rebellion - Side quests - Overlord II - Game Guide and Walkthrough](https://game.lhg100.com/Article/UploadFiles/201512/2015121618440302.jpg)
The path leads to the spiders [2] (Greens can ride on them) and to platforms with elven bomb throwers [3]. Destroy the platforms and fall back, so you won't get hit by bombs thrown by elves hiding behind a stone barrier.
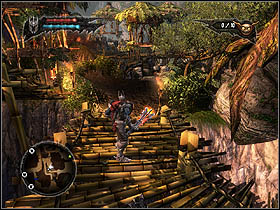
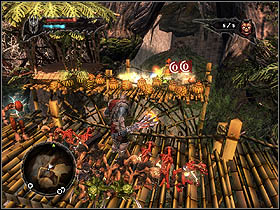
The bombs explode after several seconds. Pay attention to the stone barricade located on the left. You can destroy it but you need some speed and reflex. After the throwers have thrown the bombs, send one Minion to pick up the bomb and put it in front of the barricade. The Minion will die but the end justifies the means.
You'll have to do the same with the next nearby barricade. Send the green Minion to accomplish that suicidal mission because of the poisonous charge which is here [4].
You'll have to break another barricade which is located not so far away. Use the bombs thrown by the enemies again.
The last group of enemies is standing on the platform [5], next to the bridge which you can pass. I advise you to command your Greens riding on the spiders to attack the bridge (there's a spider web on the left on a rock; your Minions can use it).
You can beat the rebels in two ways. Take control over them by using the magic or kill them. It's your choice.
The more artefacts you keep in the Forge, the more things you can forge. There's a list of all the armors and weapons with their descriptions.
Name
Description
Minion Axe
Default weapon, available from the beginning.
The Apocalyptor
One of the best weapons, third hit inflicts fire damage.
The Beast Master
A weapon that inflicts extra poison damage. The poison needs some time to take health, so the fights may get a little long.
The Berserker
A great weapon, but think twice before you forge it, as it requires rare Dark Crystal.
The Executioner
Stronger impacts in comparison with the default weapon. And it is so cheap!
The Mad Batter
Slightly better than the default axe. Allows you to knock your enemies back.
The Reaper
Quite unusual weapon, as it steals health for the Overlord. Not so good against bosses and Empire soldiers in formations though.
The Smooth Slicer
A blade better than the Minion Axe, Executioner and Mad Batter.
The Scorcher
A fire weapon, quite useful against elves and legionnaires.
The Warlock
A weapon for sorcerers - each kill gives you some mana. The damage inflicted by this weapon, however, is quite low.
Name
Description
Minion Helmet
Default helmet. Nothing special about it.
The Evil Eye
Thanks to this helmet, every Lifeforce orb counts as two. Forge without hesitation!
The Infernal Commander
Awesome defense, serves also as a command upgrade.
Name
Description
Elemental Armor
Medium defense, but it's still better than the default armor. Increases health as a single health upgrade.
Infernal Armor
The best armor you can forge. Increases Overlord's health like two health upgrades.
Minion Armor
Default armor. Nothing significant about it.
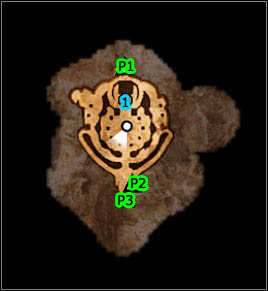
Map key:
Important locations
1. Overlord's throne;
Passages
P1. Passage to Private Quarters;
P2. Passage to Foundations;
P3. Passage to Minion Burrows.
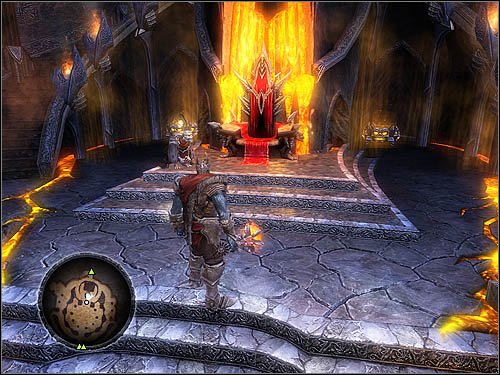 The throne.
The most important place in the Evil Master's abode. You'll spend most of the time here. The Throne Room is a place where you can look through available quests and chose the areas where you want to get to by the teleport. You can save the game there. All these options are available if the Overlord sits on the throne.
 Stairs leading to the private apartment.
 Once the Overlord stand in a light circle, a stone flies right next to him. You can use it to get to Minion Burrows or Foundations.
What's more, the Throne Room is something like the junction. You can get to other rooms from the Throne Room. You'll find stairs behind the throne. They lead to the Overlord's apartment. The passages to the Forge and Burrows are opposite the throne.
In Nodrberg Sanctuary you'll find the harp. Thanks to it there will be a band which will give a concert of sung poetry on demand of the Evil Master.
Map key:
Important locations
1. Totem;
2. Browns Minion hive;
3. Green Minion hive;
4. Blue Minion hive;
5. Red Minion hive;
6. Cemetery.
Passages
P1. Passage to Throne Room.
The Burrows is the place where you can observe your Minions. You can familiarize yourself with their appearance, names, armament and armors. It's not an extremely important option but it' good to know that something like this exists.
You can resurrect your dead soldiers there (you can do it in the cemetery located on the south of the Burrows). Every time you want to revive someone you have to pay in other Minion. The price depends on the level of the experience of the Minion you want to resurrect.
 The higher the Totem, the more Minions you can have.
There are the command upgrades and the hives of each kind of the Minions in the Burrows. You can train every type of Minions in the hives (Browns, Reds, Blues and Greens). At the beginning you have the brown one. You have to find the rest of them. You have to look for command upgrades as well because each of them increases the amount of your Minions (plus 5).
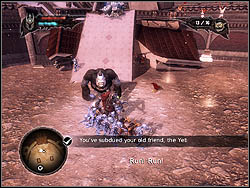
You'll find the red Minions' hive in the Nordberg Sanctuary level. You'll encounter it after you've destroyed the monument, near the centre of sanctuary.
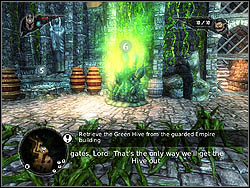
You'll find the green Minions' net in the Everlight Facility. After that, impersonate the green Minion and get to the nearby fortress to see the hive.
The blue Minion's hive is located in the Empire Arena. You have to beat the Yeti so that the hive appears on the arena. Then you'll be able to take it to the teleport.
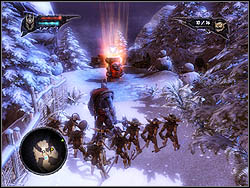
You'll find the first command upgrade on the suburbs of the Nordberg (Nordberg Town level). There's a bridge nearby the just opened teleport. You'll find the artefact behind it.
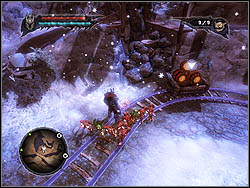
The next command upgrade you'll find in Nordberg Town. Go for a walk to the mine where you can get the trolley with explosives which is necessary to blow up the gate of the town. Push the trolley so that it will stop at the first turn, next to the pile of stones. Set your Reds near the explosives then. They should fire the trolley automatically. After the explosion the stones disappear and you will see the command upgrade.
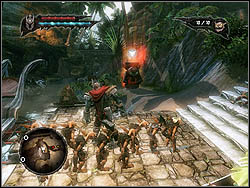
The third command upgrade is in Everlight Reef level. There's an island with a bay on the north. You can get there from the north. It's blocked by the barricade indeed, but if your ship speeds up and rams the barricade you'll get the command upgrade.

The fourth command upgrade is located in Everlight (Everlight Town level). You can open the teleport after you've entered the town and before the fight with the landlord of the village. There's another command upgrade nearby.
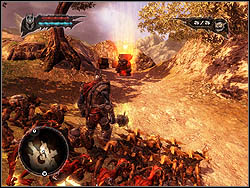
The fifth command upgrade is in Empire Harbor. You'll find it just next to the first and the only teleport in here.
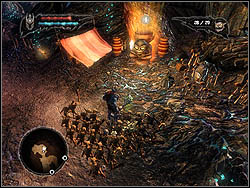
The sixth command upgrade is located in Wasteland Main. You'll find it nearby the first village of possessed people, behind the barricade.
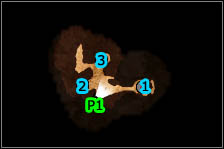
Map key:
Important locations
1. Forge;
2. List of forged weapons and armors;
3. Crane (Minion hives' upgrades).
Passages
P1. Passage to Throne Room.
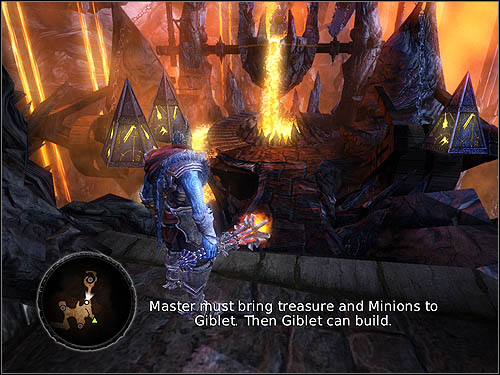 Here you can produce armor and weapons...
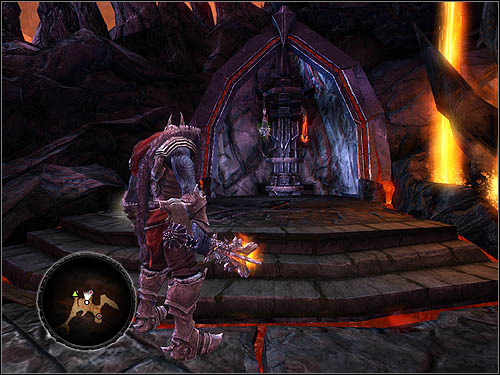 ...and here you can browse forged items.
The Forge is a place where you can do three things. At first, you can produce weapon and armory for the Overlord or browse around the just made products. The Forge requires special artefacts to widen the variety of the stuff. You'll find more information about where you can find these artefacts at the end of the subsection.
What's more you can upgrade your Minions' hives here. The Minions from the upgraded hive are more effective in killing and can gain higher levels of experience. Each hive starts at 0 level. The highest level is 4.
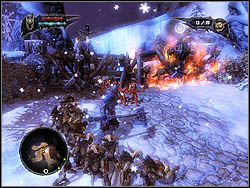
The first forge stone is in Nordberg Town level. Eliminate the first force of the Empire and destroy the barricade behind it before you'll attack the town. You'll find the stone behind the barricade.

The second forge stone is located in Everlight Jungle level. Look around after you've opened the teleport here.

The third one is situated in Empire Harbor level. You'll find it in the fort with the catapult. You'll have to send some Minions dressed up like guardsmen there.
Map key:
Important locations
1. Overlord's centre of magic;
2. List of available decorations;
3. Mistresses.
Passages
P1. Passage to Throne Room.
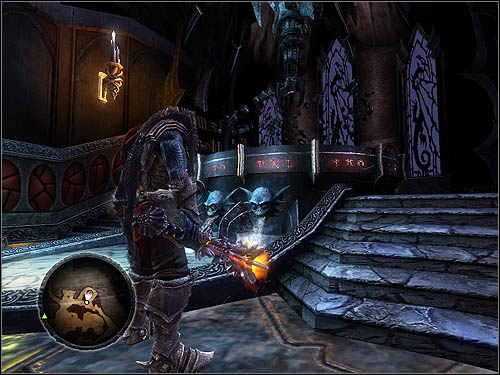 Here you can modify your apartment.
 Overlord's Mistresses. You choose, who will be the First Mistress.
The Overlord's Private Quarter is a place where you can modify. The number of mistresses and the fact which of them is the First Mistress decides on the access to the additional elements such as: carpets, beds etc. If you have some money, try to buy all the available elements associated with the right mistress. You'll need about 4 thousands for that. You'll be rewarded with a nice cut-scene then...
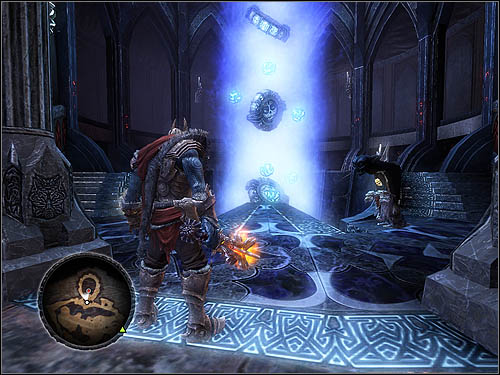 A place, where you can learn something about your spell and upgrade them.
The spells are the most important for the playthrough. You'll find some information about them in the apartment. You can check which spells are available and the level on which they actually are here.
You have to find the right Spell Stone to make the given spell (Target, Halo or Minion) accessible. To increase the experience level of the spell you must have the Spell Catalyst.

The first stone relates to the Target spell. You'll find it in Nordberg Sanctuary, next to the passage to the Nordberg Town level.

The second stone relates to the Halo spell. It's located in Everlight Jungle behind one of the poisonous barricades near the teleport.
The third spell stone relates to the Minion spell. You can find in the Wasteland Main level. It's between the piles of the shiny, harmful to the Evil Master ooze.
The first spell catalyst is located in the side quest based on killing all the people and the elves in the Nordberg Commune level. The catalyst is on the hill, near the fat nymph.
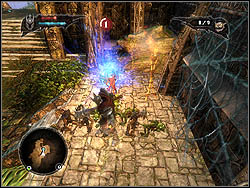
The second one is in Everlight Temple Outskirts level, just next to the bridge which leads to the Spider Queen's temple.
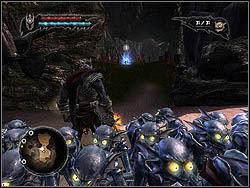
The third catalyst is situated in Everlight Town. There's a small island on the south. You'll find the artefact there. You'll need blue Minions to take it to the teleport.
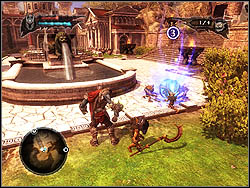
The Fourth catalyst is near the Drearius mansion in the Empire Heartland level.
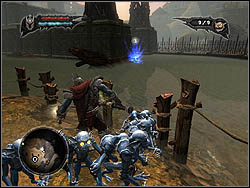
The fifth one is in Empire Sewers, next to your teleport. You need Blues to get to it.
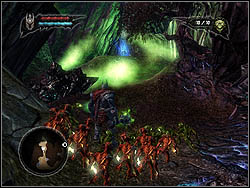
The next one is located in Wasteland Main, almost at the beginning of the level. The catalyst is hidden in one of the nooks so you'll need some Greens to transport it to the teleport.
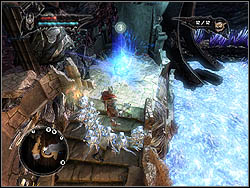
Another spell catalyst is in the Wasteland Main too. You'll find it between the ruins of the fortress situated next to the pile of the blue, shiny and harmful to the Overlord ooze.
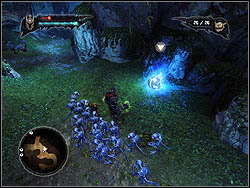
The eighth spell catalyst is located in Wasteland Sanctuary Depths. You can find it after the charging the Towerheart in the first encountered shrine.
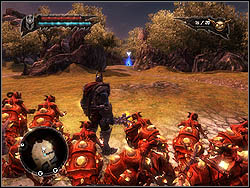
The last spell catalyst is in Empire Hills on the clearing. You'll find it after you've used the catapult.
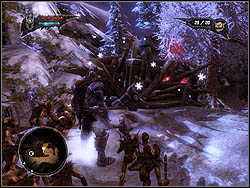
The first upgrade is in the Nordberg Town behind the barricade located near the first teleport.
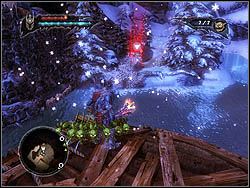
The second one is in Nordberg Town too. It's in the northern-east. Command Blues to get to it.
The third one is in Everlight Reef, on a small island on the north.
You'll find the fourth health upgrade in Wasteland Main, near the mad people's village. Command Blues to transport the artefact.
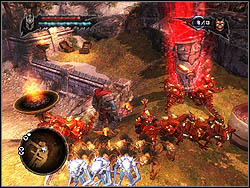
The last health upgrade is in Empire Hills. It's located near the trap prepared by the throwers of the Empire (after the second use of the catapult).
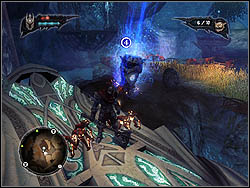
The first mana upgrade is on Nordberg Sanctuary. Destroy the monument and the crystal that remains. There's the artefact in the crystal.
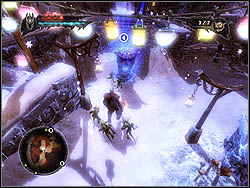
The second one is in Nordberg Town in the west. You need Greens to get to the artefact.

You'll find the third one in Everlight Temple after you've killed the Spider Queen. Go up to the top, use the lift. Search the room on the north.

The fourth artefact is almost at the beginning of the Wasteland Main, between flames.
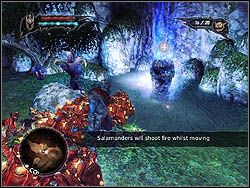
You'll get the last one after you've defeated the Salamander King in Wasteland Sanctuary Depths. The artefact will be on your way home.
The game can be passed in two ways. The first way is to destroy everything, what stands in Overlord's path. The second one is a so called 'domination'. It consists in overwhelming minds of week people (e.g. inhabitants of towns).
 An example of Overlord prizing domination above destruction.
If You care about your Overlord's character (so called 'Alignment'), you've got to know there are few moments in the game when particular behavior affects the personality of your Overlord.
Mission/Situation
Destructive behavior
Dominant behavior
Side quest: Kill a hundred baby seals
Complete the mission - kill a hundred baby seals
Ignore the mission
Side quest: Kill a thousand gnomes
Complete the mission - kill a thousand gnomes
Ignore the mission
Decision about Nordhaven's fate
Torch the fourth bin with pitch
Overwhelm minds of Nordhaven's inhabitants
Conquer Nordberg
Kill Borius, the administrator
Overwhelm Borius' mind
Side quest: Control Nordberg Town
Kill off all inhabitants, destroy houses
Overwhelm minds of inhabitants
Side quest: Nordberg Commune
Kill all Nordberg Commune members
Overwhelm minds of Nordberg Commune members
Conquer Everlight
Kill the Governess
Overwhelm Governess' mind
Side quest: Control Everlight Town
Kill off all inhabitants, destroy houses
Overwhelm minds of inhabitants
Side quest: Rebellion in Everlight
Kill rebels in Everlight
Overwhelm minds of rebels
Finding Drearius and his wife
Kill Drearius and his wife
Overwhelm minds of Drearius and his wife
Defeat Yeti monster on the arena (level: Empire Arena)
Kill the Yeti monster
Overwhelm mind of the Yeti monster (and shrink monster)
Accept Queen Fay as a mistress
Kill Queen Fay (by overloading with magic)
Let Queen Fay enter the teleport
Accidentally met inhabitants and slaves
Kill met inhabitants and slaves
Overwhelm minds of met inhabitants and slaves
Accidentally met innocent animals (sheep, rabbits, etc.)
Kill off Animals
Ignore Animals
Audiences in Overlord's Tower
Reject propositions
Accept propositions
There's a question: what meaning does it have for a play? Well, if you prefer destructive behavior, your sorcery will become a mighty weapon with time. In general your character manages with everything in battle better than dominant character. On the other hand, destructive behavior causes a situation when you can be attacked by civilians, slaves, etc. They aren't any of tough enemies, but they always can constitute a small danger.
Overlord preferring dominant behavior is weaker in ordinary battle than destructive Overlord. In exchange for this it can in a flash overwhelm minds of inhabitants and slaves. What's more, people "seized" by dominant Overlord more likely stick up for Overlord.
To find out more about results of Overlord's behavior, I recommend You to acquint with chapters dedicated to collateral missions: Control Nordberg Town and Control Everlight Town.
 Omerta: City of Gangsters Game Guide & WalkthroughOverlord Game Guide & WalkthroughOutlast: Whistleblower Game Guide & Walkthrough
 Orcs Must Die! 2 Game Guide & WalkthroughOutlast Game Guide & Walkthrough