Welcome to my guide through the newest part of the Need for Speed series. Carbon, what it is, everyone sees - some are adoring it, some other criticize, but no one can stop playing it. After all it's quite an expanded game and it can cause problems for less experienced drivers. In the text below I will try to reveal the most important things about virtual racing just to decrease the number of riddles you will be facing in Palmont City.
To make it more clear, I have split the guide into few parts. I will start bringing you into the "Career Mode" and all that comes with it, all the problems you can face. Then I will take a closer look to the cars you can drive in the game, and in the end I will write a few words about the other game types, that Need for Speed Carbon offers to us. In the very beginning I invite you to take a look at some basic advice, which will hopefully help you with your first contact with the world of asphalt and canyons.
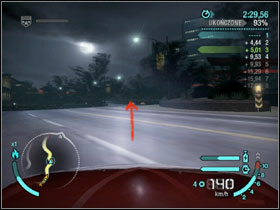
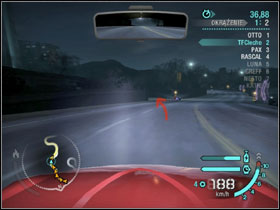
For the beginning: Carbon is a skill based game in which speed and smoothness of driving values the most. And smoothness depends in many ways on how fast the game is running on your PC. Of course, when you switch on all of the graphics excellences, Carbon will look stunning, but lets get back to Earth. Without at least 40 frames per second (you may use programs like FRAPS to get the number of FPS Your PC is having) the gameplay could be in some ways more difficult. Therefore I highly recommend you to spend a few minutes optimizing graphic details to your PC and I also encourage you to disable additional effects such as motion blur. Yeah, I know that the Star Wars-like animation actually looks impressive, but nothing reduces the visibility in the way it does.
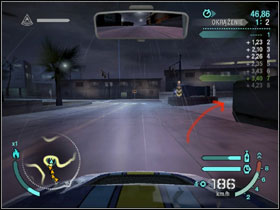
It's important especially, when you realise that you probably won't reach first place without using the nitrous. Some keyboards have strange blockade which is making some in-game key combinations impossible to use, like left arrow plus Shift. And as we go on, if you did bound nitrous with Shift key you will be unable to use it while turning left, when you steer using the arrows. And after all, even if Carbon, contrast to Most Wanted, gives the reasonable gameplay with the keyboard, I still recommend you to buy a gamepad. It makes your racing smoother, and even in-game menu is adapted for pad-based, console style navigation.
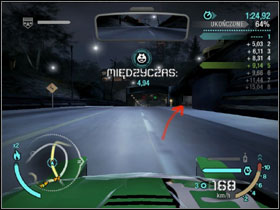
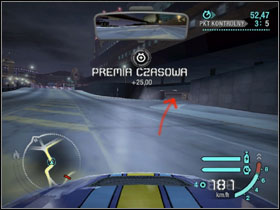
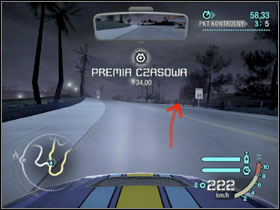
During the race, your nitrous meter will slowly fill up. The trick is to never let it fill up completely. When it does, you basically lose the "filling up" ability and you cannot use the nitrous boost as frequent as you could.
And all other mail boxes, bus stops etc. Indeed, in Carbon we don't have any serious damage model, which can inflicts on our car's performance, but every collision with any obstacle will slow you down. And scything a row of street lamps can bring your speed back to not.
It's definitely worth to spend some time tuning the car to our own style of driving. Even if the setups are not playing as big role as they did in Most Wanted, the difference between understeer and oversteer is still huge and easy to see. It's also clear that on winding tracks you must pay more attention to acceleration, and when the track will have more long straights, then it's wise to use higher speed. There is no magic, it's only about spending some time on testing different setups to find one suitable for us and our own car. More about tuning in the "Tuning Section".
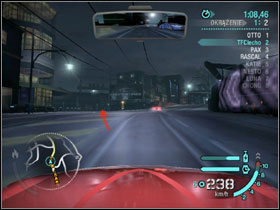
Like in the real life, in Carbon it's better to look one corner ahead to keep everything under control. But it's at least as important to choose best camera view. The perspective, from which you will see the corners. There is no one best option and strong players prefer different cameras. I personally use the one from the front hood, but it's only a matter of getting used to the view you choose.
I personally prefer using the manual gearbox. I know that it may sound abstract to some of you, but it has many positives. Changing the gears manually allows for example to start more smoothly, but the most value is the possibility to reduce precisely speed before cornering. In fact, you don't have to even touch brakes most times, when using manual gearbox. Proper gear shift will do the trick. And without any additional circumstances you will ALWAYS reduce to the same speed. Having this effect on automatic gearbox, when you must brake in front of every corner is actually harder and requires more practice. Also, proper gear reduction with manual gearbox allows us to simply "throw" the car into the corner with great speed, like it's possible to do with the handbrake, but the "drift" is much easier to control and also much more effective.
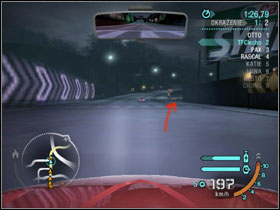
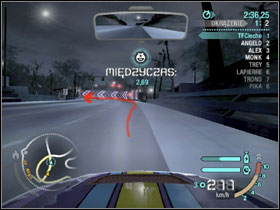
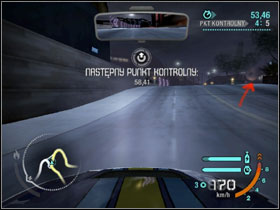
It's very important to learn the corners. In Carbon the tracks are modular, which means that they are built with the same section of curves put together in different sequences. It means that, when we get familiar with separate corners, racing will become easier. Of course those combinations may be tricky, but while reading the tracks' descriptions you will easy find that many corners - especially the most difficult ones - reduplicates on more than one track.
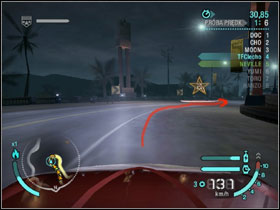
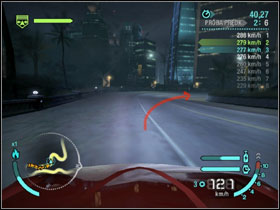
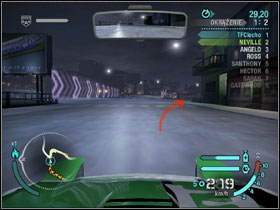
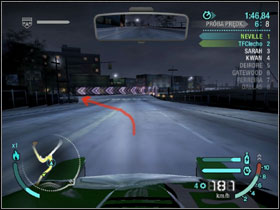
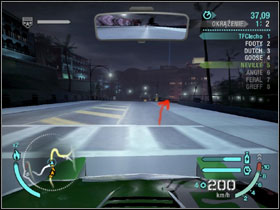
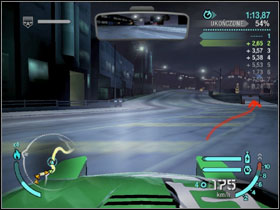
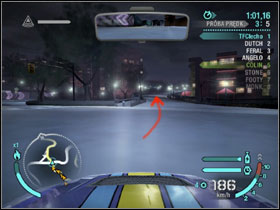
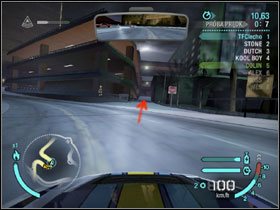
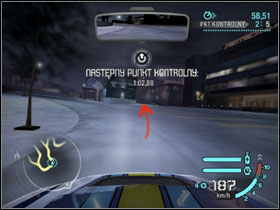
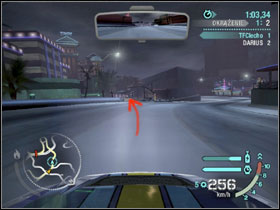
It's the main gametype and it will have the most attention in my guide for obvious reasons. It can be surprising, but the plot is reasonably good and it's definitely worth to follow. Especially if you're Fast & Furious fanatic. The story starts exactly, when it ended in Most Wanted. You made it to jump over the bridge leaving mad cops behind and your silver & white M3 left under the black sun dawning. To Palmont City, precisely. The place we found up to be the origin of our nameless driver. The place, where he started to show his skills in streetracing and became famous. It is also the place, where, few years ago, he as the only one evaded from police trap during a race. His ex-girlfriend Nikki hardly made it to only throw a mysterious bag filled with cash into his car. After that, he disappeared and though he won't be seen in Palmont again.

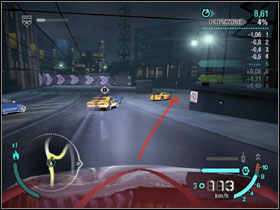
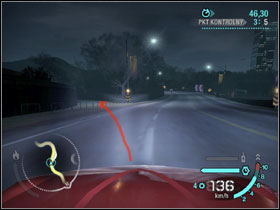
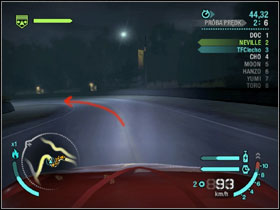
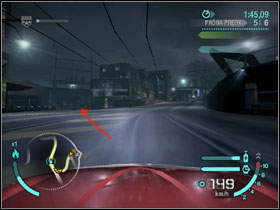
Frankly, Palmont won't greet you the way you wish to. There will be no fiesta or parties, only Cross sitting on our tail! From now when the game starts and our first task is to escape our good old friend from Most Wanted. To be honest, you won't be able to evade his chase... he won't catch you. The only goal in this race is to get it to the end of track, where Your BMW will crash into truck loaded up with wood. Whatever you will do, the run always ends the same way.
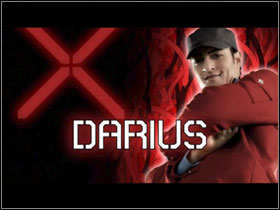
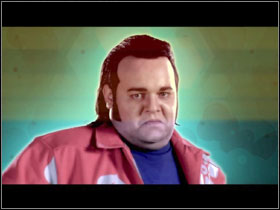
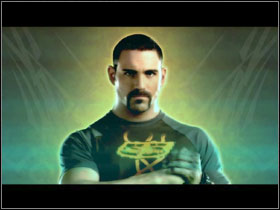
This is the moment, when mysterious Darius appears for the first time. His companion is our ex-girlfriend. It seems like these two have some kind of deal with Cross and after a little chat he will let you free. But still you will have no car, and for the help with avoiding jail Darius wants you to work back the cash he thinks you moved out from Palmont. How can this be completed? It's quite obvious - on the street's!
After another few cut-scenes Nikki will guide you through the basic rules of the city. At first you will get to know that Palmont is split between the gangs, which fight for the territory in the street races.
In the end it will be time for our favourite part - car choose! In general we have three classes: exotic, tuner and muscle. Every class have it's own set and some other characteristics. For example, tuner cars (mostly Japanese) have great grip and handle extremely well in the corners, exotics (European supercars) are the combination of speed and agility, and muscle cars in typical American way impress with their top speed and acceleration, but the word "corner" is uncommon to them.
In fact, the class choose is subjective in many ways and depends mostly on your driving style. If you're natural born drifter and maniac of high speeds, you should choose muscles. In opposition, if someone prefers tight cornering, then the tuners will meet his expectations. Exotic cars are something between those two. Your starting choice will also determine the sequence of unlocking the bonuses and your starting section. In every district we have a gang using specified car class and we will have to take down the boss of our own class at first.
To be different from all other guides promoting exotics to be the one and only right class, I chose tuners. It's not a secret that my sympathy to Mitsubishi Lancer also took part :) One or another, when you finally choose your car you will have to do a test race.
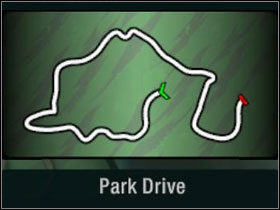
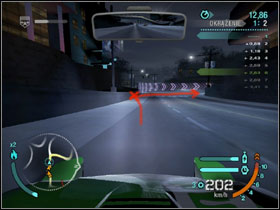
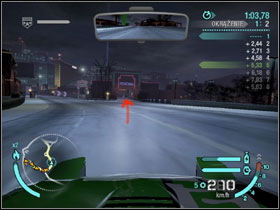
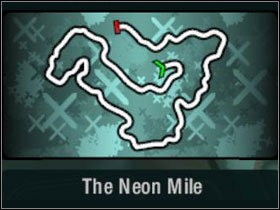
Nothing difficult, thought. Very fast, short and easy sprint, able to make in a little above one minute. At the beginning, leave the shortcut on the left (#1) - it looks tasty, but it has a little elevation, which will take your car to the air, forcing you to lose speed instead of gain. After you pass long, left corner another shortcut will appear (#2) - this one is worth using. And right after its exit we will have another one, just before the finish line (#3). Look out for the exit - this corner is tighter than it looks.
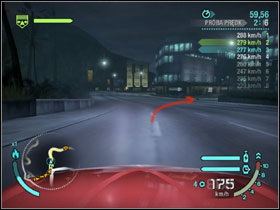
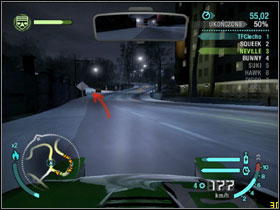
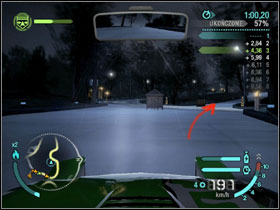
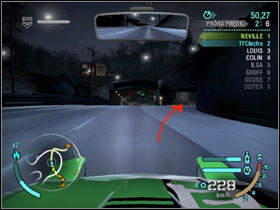
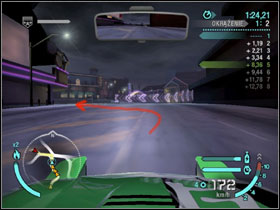
After you crush your opponents Nikki and Neville will take you to Salazar Street to show you the basics of using the wingers. I won't explain it here, instead of that you should read the exact part of the guide. When the short lesson ends, Nikki will drive away, and you and Neville will engage into a pursuit. Police! The faster you evade, the better it looks - I bet the Most Wanted driver in the city doesn't want to start his career with a ticket. But hey, we're on a highway. It makes it a lot easier - just drive ahead using top speed of your car and that will be enough to left the cops way back. It's time to say hello to our hideout. In it we can manage our team (see the "Team" part), pimp up our ride or see the territory map. But it's no time to chill now, let's start racing.
It's the main gametype and it will have the most attention in my guide for obvious reasons. It can be surprising, but the plot is reasonably good and it's definitely worth to follow. Especially if you're Fast & Furious fanatic. The story starts exactly, when it ended in Most Wanted. You made it to jump over the bridge leaving mad cops behind and your silver & white M3 left under the black sun dawning. To Palmont City, precisely. The place we found up to be the origin of our nameless driver. The place, where he started to show his skills in streetracing and became famous. It is also the place, where, few years ago, he as the only one evaded from police trap during a race. His ex-girlfriend Nikki hardly made it to only throw a mysterious bag filled with cash into his car. After that, he disappeared and though he won't be seen in Palmont again.
Type: Circuit
Number of laps: 2
Prize: Brakes - level 1 street package
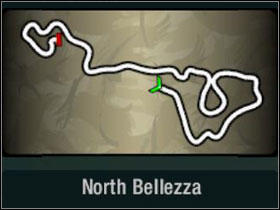
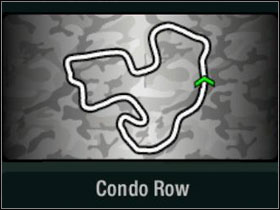
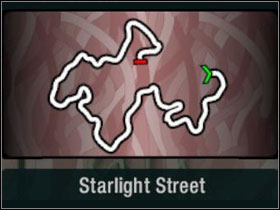
As always, first track won't be most difficult one. Main is a typical circuit on which it is most important to keep the maximum speed as long as it's possible - and drive smoothly. After first corner go on the right side (#1) and try to keep your speed through the next corners. There is only one shortcut on the track (#2) and it's definitely worth using, but look out! In the middle of it there is a jump on the opposite side, so it's important to drive onto it straight and without any rapid moves to avoid being thrown on the wall right after the landing.

Type: Sprint
Reward: Body - package 1
Another easy track, mostly long, soft corners. It prefers smooth and calm driving style. Right about the start you should make your life easier by avoiding the piece of concrete someone has put into the track (#1). In the "garden part" you can earn few meters by cutting the corners, and just before the long corner there will be a shortcut (#2), very helpful in our goal, which is winning the race. Nothing difficult then, but just before the finish we can use another shortcut, kind of hard to see (#3), which will let us avoid tight corner.
Type: Speedtrap
Reward: Nitro and tyres - level 1 street package
Speedtraps have its own rules. It's the type of races, when "shorter ways" not always mean "better ways" - especially, when our car doesn't have proper acceleration. The most important thing is to drive extremely smoothly. The track itself is not very hard to learn, but in few places it gives us the opportunity to choose, which way we want to go. Just after first two corners we have a choose to cut out some distance using "jumppad" on the right (#1), or going around the corners on the left. Generally there is no difference, which option you will take, because although the straight before the jumppad will allow you to accelerate to higher speed than in the corners, the landing will always take away some part of it. After the reversion we will find another back street (#3), but you shouldn't use it without higher acceleration, which you don't have at this point. Right after the exit we have a radar, so it's better to drive smoothly through the right corner. It's easy to make, when you stay inside the corner. And if you run out of time, you can always use another shortcut (#3), which appears just after we enter the highway. But look out - it has two parts and while driving between them you must remember to correct your course a little to the left.
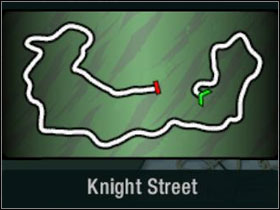
Type: Toolboth
Reward: Hood - package 1
Toolboth races are the ones in which we won't race with the opponents, but only with time that always run out. Well, later in the game you will also face the police. Knight Street is a track in which you will find many corners known from Lincoln Boulevard (look Race #2). Especially the very ending is almost identical. After the start there are few long, soft corners. They are very easy to make, when you remember to take them out from outside to inside, like in Formula 1 (#1). After the highway you will enter the "garden part" with familiar shortcut (#2). Then it will be all the same like in the race number 4.
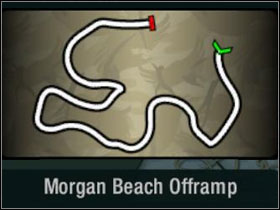
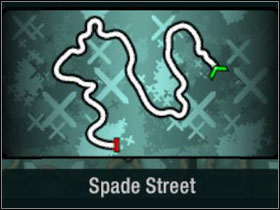
Type: Canyon sprint
Reward: Roof scoops
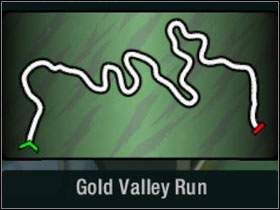
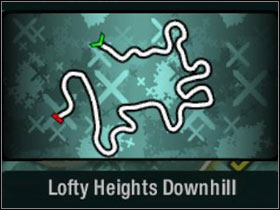
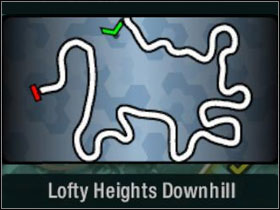
First canyon race could be a little obnoxious to less experienced players. The track consist series of tight 180-turns covered with solid wall or - that's the most dangerous thing - a barrier, through, which we can fall out to the canyon. So there's no place for errors, but don't lose your spirit. It's not as difficult as it looks. Do you remember what I told you about previous track? The rule is exactly the same here. Entering the corner, you must drive from its outside to the inside, making it through the "top" of the corner and going out to the outside again. This skill is principle for smooth driving in the canyons, so it's worth to take some time to practice. When you finally learn what it's it about, Gold Valley Run won't be a problem at all for you.
After the race there will be a cut-scene in which we will say hello to another team member - Sal. This little trembling guy is a scout, he also know how to tune cars, so Autosculpt option will be unlocked. And he's our fan also - what else would you want?
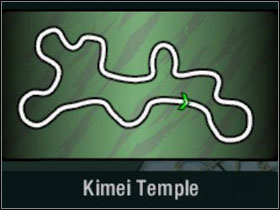
Type: Drift
Reward: Rims - package 1
Kimei it's the first drift around. I won't write too much about those races. From few reasons. First, the tracks themselves and the main concept is easy and straight like Mongol's hair. The only difference is the number and configuration of corners (mostly long reverses). Second, there are no shortcuts or any other surprises able to make our life more difficult. The goal is simple - try to stay in the drift as long as possible, scoring as many points as you could. If you use manual gearbox, then its good to try to say in as low gear as possible - this will help keeping speed, while the "red" areas are to be used for acceleration.
Type: Sprint
Reward: Suspension - level 1 street package
It's a little longer track (about three minutes) and also first with so many shortcuts on it. The start is well known from other races - a little straight with a shortcut just after it (#1). Try to avoid colliding with your opponents while crossing the street! Then we have some 90-degree corners - the best way to get through them is like on (#2). Another important corner is this tight 180-degree reversal. If we don't know how to make through it properly, then it will be emergency braking or just hitting the wall. But you also have guides :) The method for corners like that is as follow - while entering it, drive close to its outside and then rapidly cut the corner in it's middle. In that way the kind of corners will quickly became friendly, especially, when we realise that we can make this manoeuvre with high speed. Then another 90-s await us, ended up with long left turn and at last some straight. After it we have a soft turn and pursuit breaker (#3), which we can throw on our opponents. The tight left will be next, but also an entrance to the shortcut, that generally doesn't make our route any shorter (#4). But its second part is worth looking. Few corners later we will encounter another two shortcuts - a "downhill" ended with jump (#5) and hard to see backroad leading us right, which let us to cup a long corner. Right before the reversion we will have another shortcut (#6) and then we will enter the "garden part", which we know from few other tracks. Now only some tight corners separates us from the finish... you've made it :)

Type: Circuit
Number of laps: 2
Reward: Spoilers - package 1
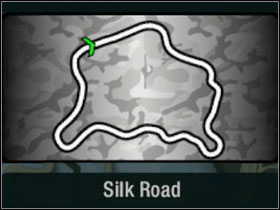
At this point it's good to start watching out for the police. The cops like it much to stay hidden in the shortcuts. Silk Road is a track the best players can complete in under one minute, but we don't have proper car to do so for sure. Let's then focus on beating our opponents. The track is fast, quite easy, but very curvy. In the beginning there are two jumps - make sure you land straight, otherwise it's easy to end up on a wall. Then we will encounter familiar shortcut (#1) and a combination of well-known corners after it. Next there will be a long reversal and few leaned corners. You should watch out for them, although they are easy itself, it's also easy to make a mistake on them. After that, there will be only one place worth writing left - the shortcut (#3) hidden behind a wooden gate. If you decide to use it, make sure you have proper speed to force the gate! you can also let it be and use only the second part of the shortcut (#3).
Type: Drift
Reward: Vinyls - flame
First organic drift, which doesn't take place on a closed track, but on a normal road - in this case it's a canyon. The track is basically a group of reversals and nothing more. But there is one catch - most of corners don't have concrete walls, but only barriers (#1), so we must watch out and try not to fall out into the canyon. It's good to try to stay inside the corners during the drift.

Type: Sprint
Reward: Turbo - level 1 street package
Fast and light sprint, a good one to relax after few more difficult tracks. Basically it's a mix of previous races, so it's no point of repeating. In the beginning we have a long straight and a tunnel (stay on the right), and after that we have our well known 90-s. Then we will find a shortcut (#1), but I won't recommend it. The exit is very tight and it's not worth the efforts. Next there is a reversed part of Chinatown Tram with 180-degree corner, but this time to the right. It doesn't change the way you should drive through it anyway. Then we pass the dinosaur and get into a combination of learned curves from Silk Road. When you make it to the crossing, cut out the reversal (#2) and you will be on another long straight. Don't use the ramps (#3), they can only make you loose speed. Now it's the "garden part" with this very useful shortcut (#4). Also remember that you can drive straight through the series of corners (#5).
Type: Speedtrap
Reward: Turbo - level 1 pro package
Like in every speedtrap, this one is also mostly about driving smoothness. The start is in our well known garden, but pay attention to the reversal somebody put a radar in. The key to reach high speed is attacking the corner in its second part (#1). Then we will encounter very difficult combo of three curves. Most important thing is to make it right from the first one (#2) - strong braking and cutting it out should give us enough space to drive through the next ones (#3 and #4). Coming up next is a long straight and well known shortcut (#5), very helpful in reaching high speed on the next radar. Try to avoid hitting the trees. Then cut the corner next to the news-stand and it will lead you just to the next straight. After fifth radar there is another shortcut (#7) and then only a straight will separate you from the finish line.
Type: Circuit
Number of laps: 2
Reward: Gearbox - level 1 pro package
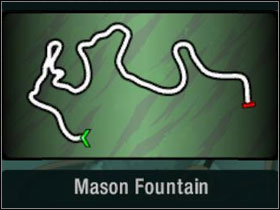
Personally, I dislike this track, but I know that some guys can't live without it. It's our "garden part" putted all together. Just after start turn rapidly and enter first shortcut (#1). It will help you avoiding two not so easy corners. Then there are two parts of a straight separated with a reversal and combination of corners known from Mason Fountain. First we have to get around the tower (Race #11 - #1) just to get into another set of difficult curves (Race #11 - #2, #3, #4). Then the track will run identically like Mason Fountain, so we can use the same shortcut (Race #11 - #5). After the straight we will have to pass the double left corner, the easiest way to make through it is on (#2).

Type: Sprint
Reward: Nitrous - level 1 race package
It's no philosophy about this race if you read the reversing "lessons". Whole track is one big set of reverses with different difficulty levels. Smooth driving from outside to inside will guarantee the success, and players, who had bought pads to play will bless them now.
Type: Drift
Number of laps: 2
Reward: Suspension - level 1 pro package
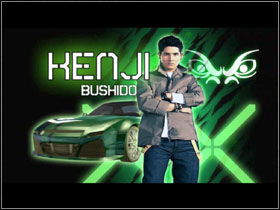
Drift is drift, there are no combinations or shortcuts. So there is also no point of chit-chatting, you should rather go to the garage to do some setup before facing out first boss - Kenji from Bushido.
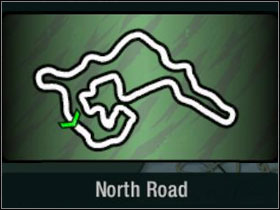
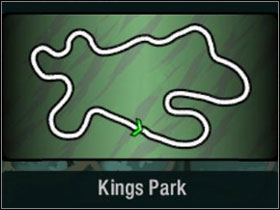
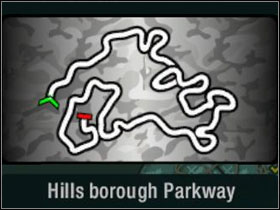
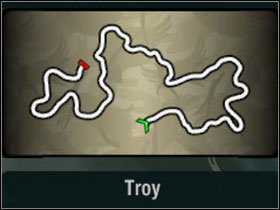
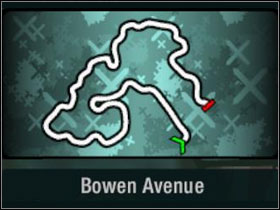
Part 1: North Road (Circuit, 2 laps)
Part 2: Canyon duel
Reward: Mazda RX-7
Better late than never. After few hours of driving it's time to face first great challenge - beating Kenji. But him and his RX-7 are not the most difficult opponents out there. Personally I think he's the easier boss, without any matter to order of completing districts. Part one of the race is North Road. Our familiar leaned curves will lead us from the start. After them we won't encounter tight reversals, but a jump known from Park Drive (#1). Next part of the track is also like "the best of district" - we can drive through the reversal or use the shortcut to cut it out (#2). It's the matter of your choice - without the shortcut the course will be a little longer, but then you can reach higher speed. Then we will see this lovely tyre, which we can throw at Kenji's head (#3). A straight and an easy set of corners will lead us to known combination of 90-s. You know what to do. Then you will pass another common shortcut (this one with tight exit - #4) and only a piece of straight will separate you from the end of the first lap.
When we finally make it to the finish line, it will be time for canyon duel. Those races have two parts. In the first we are the one, who chase the escaping boss, then the roles switch but the goal is still the same - be as close to the opponent as possible, scoring points for the meters. The tracks are all similar - combination of reversals. It's important to remember few things about the canyon duels. First - you can lose not only by points, but also by falling out from the track. So look out. Same if we stay way behind our opponent. And one MOST important things. Canyon duel is one race with two parts, so if after completing the first one you wish to restart the second part, you will be forced to start all over again from the very beginning. I know it's stupid, but blame EA for that :) And another useful advice - if your opponent gets close too much to your rear bumper, good idea is to... brake just in front of him, forcing him to hit our car. He will lose points for that. And after all, Kenji is not the most difficult rival, so after a few minutes you will receive a reward of Mazda RX-7 and gain control over Downtown. It's time to prove our domination in the race war.
Type: Circuit
Number of laps: 2
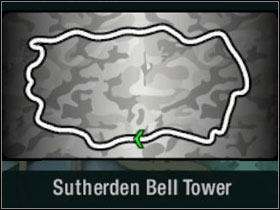
Race wars are very specific type of races. All of the drivers take place in them, so it's around 20 cars on the starting line and you are the only one left without your wingers. Also race wars are usually held on a longest tracks from specific districts and it proves with Sutherden Bell Tower. Luckily, the race itself isn't very difficult. It basically has three parts and all of them should be common to you after reading and completing all tracks from Downtown. First we have the highway part, then the garden, the city, where we encounter our well known 90-s and the dinosaur, and a part from Chinatown Tram in the end. The lap takes about two minutes, so it's a long track - and we have to complete two laps. There are three shortcuts, but only one of them is useful. It's the one in the garden (#1). Then we will find next one in the city (#2) - we know it, for example, from the race with Kenji. This time there is no point in using it, and in the end of the shortcut there is a dangerous jump. It's better to go straight on to the finish. In the "Chinese" part look out for the jumps - remember to drive on them straight to avoid hitting the wall after landing. Right after the second jump we will have another shortcut (#3). Then it will be only the looooong straight on which our 1 and 2 level cars can easily accelerate to max speed. We're done with Downtown, time to advance to the next district.
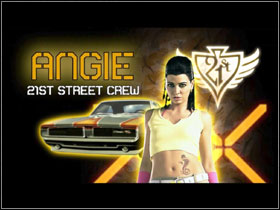
This part of the town is owned by Angie and her lads from 21st Street. They prefer muscle cars, so we can expect mostly fast raced tracks with long straights, where one little mistake can blew up whole race. Too bad that we can't expect a romance :) But hey - you can't have everything, you want :)
Type: Toolbotch
Reward: Vinyls - stripes
Make yourself familiar with this track - it shows us what type of challenges we have to expect within the second district. Before all - long straights, soft curves and only few difficult corners and reversals. Also shortcuts will be very important due to them allowing us to accelerate to higher speeds. And when we are racing with muscle cars, it's all about speed. Right after first checkpoint we have an entry into first shortcut (#1), which helps us avoiding a nasty corner. Then cut all curves bravely and keep on the right side while entering the highway - the route will become a little shorter. After that go straight on and advance to the next shortcut (#2), this one will help us in entering a tight reversal. No miracles here, you have to brake and cut the corner to it's edge. Only straight road will separate you from the finish at this point, but you can still use another shortcut (#3). Look out for the jump just before the line!

Type: Circuit
Number of laps: 2
Reward: Nitrous and tyres - level 2 street package
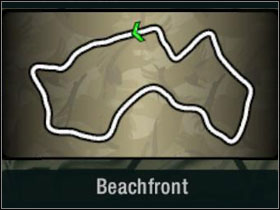
Another track that is liked and often played online. It's very fast and easy, but requires great precision to drive it properly. What is typical in Beachfront is the specify type of corners (#1). While entering them, you have to drive to the outside and then cut them out near the top of it, so you can make it with high speed. It's important, because you can earn some seconds over muscle cars there. After a combination of these corners we have our familiar shortcut (#2). Then few easy corners and a jump right behind one of them (look out), and right after that another shortcut (#3). There's only one tight corner before the finish (similar to those after the start), and then you will enter the finishing straight, which you can also cut out using the back road between the buildings (#4). Watch out for the jump just before the finish line!
Type: Sprint
Reward: Metallic painting
Fast sprint, for less then two minutes. In fact there are only two places here worth writing. First one is the tight reversal (#1). The key to make it properly is to cut the previous corner in the way to make it possible to jump on the outside and brake it to the inside. Right after that we have a shortcut, so quickly drive on the outside and ride into the back street on full throttle (#2). After we enter the highway, let's stay on the left side without entering the tunnel (it's ended with a long, high and impressive jump, causing us lose much speed), and then cut out the corner near the trees without braking (#3). Pass the next corner in the same way and it will be only straight with an easy reversal that separates you from the finish.
Then we will have another cut-scene, in which we can see an arguing between Nikki and Darius. The reason of it is... us, so it looks like the old love still burns? Whatever, let's focus on the racing now.
Type: Speedtrap
Reward: Exhaust tips
It's one of these track on which we can't find any difficult places, but it can cause many problems. Why? Because on that kind of tracks smooth driving means a lot, and when I say "smoothness", I also mean avoiding the lamps, mail boxes and such. We have only one shortcut (#1), which lets us go straight through the islet. All other corners are typical "from inside to outside" like, and you don't have to even brake on them. Shortcut maniacs can also use the one before a reversal (#2), but it really doesn't matter because of this long straight making us able to accelerate to max speed.
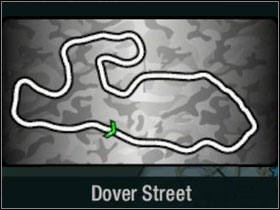
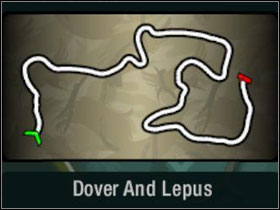
Type: Circuit
Reward: Chrome painting
This is one of my favourite tracks on which me and Kenji's RX-7 totally owned muscle cars, adding them over a dozen of seconds. Apart from most of the tracks, you won't find any shortcuts on Dover and it all depends on racing from start to finish as fast as possible. The most difficult moment is the starting "S" sequence - three combinated corners, and bad entering into one of them automatically throws us at a wall in the second one (#1). Then drive below the cookie and this will be an easy part, but remember to get through those easy corners from outside to inside. Only this method allows us to close our speed counter on this part of the track. The corner in the middle of the track, after the straight is also like a devil in disguise. It's like an "S", which you must cut in the middle of it's first part, so you will go through the second straightly (#2). After we enter the main straight, remember to not use the tunnels. That's all.
Type: Sprint
Reward: Spoilers - package 2
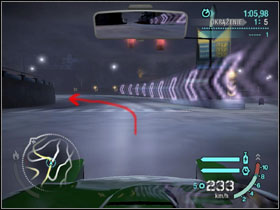
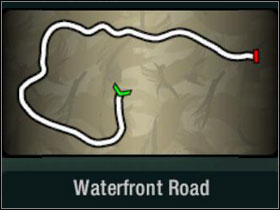
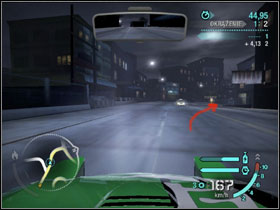
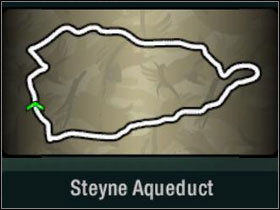
Easy and fast track. It starts with long, easy corners. Then we enter the aqueduct and this is the place to watch out. We must choose our route in the way that will make us drive between the "gates". Advanced players will take it from outside to inside, but if you are a less experienced Carbon driver, just go through the middle. While leaving the aqueduct look on the map to catch the moment to turn right. Then we will have wide road with only soft corners on it and a familiar shortcut through the islet (#1). And then we will have the highway, designed for high speed and acceleration ;) In fact, on this track avoiding the traffic is the bigger problem than Waterfront Road itself.
Type: Speedtrap
Reward: Sugar varnish
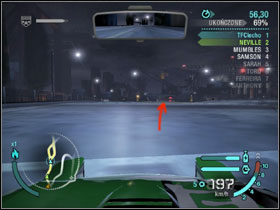
To not make it boring, this track actually IS difficult. It's easy to encounter the police (especially, when you complete the game same way as I do - racing through the districts without giving any attention to pursuit indicators). The track itself is curvy, nasty and won't let you make any mistake. At the beginning avoid the tunnel entrance and go through the first radar. You can also try to use the tunnel's jump to fly across the radar with higher speed, but that's risky. Then we will get into a combination of corners with medium difficulty level, but relax, the worst will come :) First we have this corner (#1). It's the most difficult one at this point of the game. You MUST brake entering it, and you must do it wisely going to the outside and cutting it just to exit near the edge on the other side. It's best to accelerate in the middle of the corner. Then we will have a highway - time to get some rest before next hellish combination. When we exit the highway, there will be another shortcut (#2), which will let us have higher speed on the next radar. After that we will encounter difficult combination of corners - entering this one properly (#3) will allow you to complete the next one with ease (#4). I think that the screens are showing all. Then it will be easy right to the finish line.
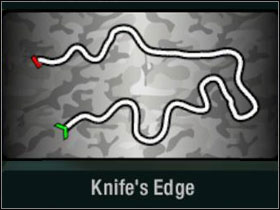
Type: Drift
Reward: Hood - package 3
I won't write too much about drifts. I will only say that Knife's Edge is the most difficult one - organic drift, taking part on the open area. Luckily, differently from U2 we won't encounter any traffic here. Anyway, Carbon drifts are so easy that I won't make any solutions or guides how to make through them. You will easily do it yourself.
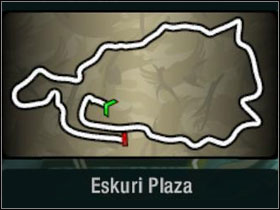
Type: Toolbotch
Reward: Gearbox - level 2 street package
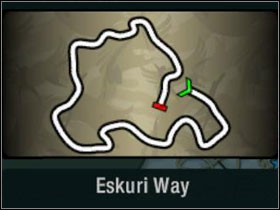
The word "Eskuri" in the name of this track could mean "difficult", but it's not as horrible as Eskuri Way. We start with the curves known from Dover Street, with it's typical straight. Then those three corners, which I described with Dover. This part is just cut out from Dover Street. To make it even more funny, after that we will get into the corners we know from Beachfront, but this time in reverse way (Race #2 - #1). Right after first checkpoint we will have a shortcut (#1), already know from Beachfront as well. Finally we will make it to the highway. The road will be wide, straight and fast, and speeding through it we will find another shortcut (#3). Then it will start to be a little more difficult - after long left curve a tight right reversal will appear. After that we will have another right corner, leading us into aqueduct. And straight to the finish line.
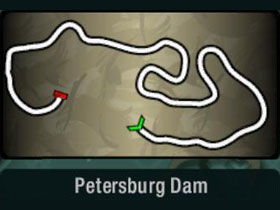
Type: Sprint
Reward: Wheels - package 2
Very nice and fast track. We won't find many shortcuts on it as well. At the beginning we should cut the islet through the middle (#1). In fact only one difficult corner here is the 90-degree (#3), which we should cut using the pavement. Just before the finish we will find a back street known from Beachfront (#4). On Petersburg Dam, like on the other fast-paced track, we should pay extra attention to avoid collisions with traffic - one can really decide the winner.
Type: Speedtrap
Reward: Brakes - level 2 street package
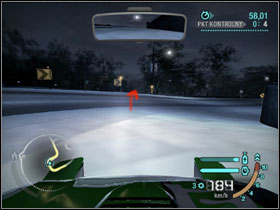
Very short and easy track, but because of it's aqueduct part it may cause some problems. There are no tight corners or tricky shortcuts, but driving between those stone walls is something to watch out. The rule is similar like in the all other aqueduct races. If you don't feel confident, just drive through the middle and watch out for the grass, it can limit your sight.
Type: Drift
Reward: Opalescent varnish
Time to relax - after few hours of racing on the streets, a little drift can give us some rest. It's an "organic" drift in a canyon, similar to all other drifts. Well known 180-degree corners all the time. But on this one we must watch out for the barriers. If we fall out to the canyon, we will lose instantly, and the number of barriers instead of solid walls will increase with every race.
Type: Speedtrap
Reward: Nitrous - level 2 race package
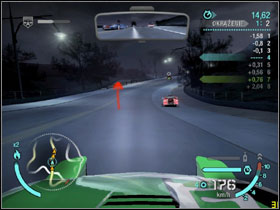
Very long, curvy and tricky track, full of police. Lots of difficult corners, only few shortcuts and annoying traffic - that's my characteristic of Newport Trainyard. In the beginning, right after first checkpoint we have two shortcuts (#1, #2), which are in fact one long back road. Then it's a tight right corner, which it's best to pass using brakes a little and cut it out just before the wall. The next two corners are easy to do in the same way, even without braking, but look out for traffic! Then an easy "S" turn and our common islet. Again a combination of fast and easy corners, but the best will come. Right after fifth checkpoint we will encounter a tricky left corner, which has to be cut from outside to inside. Besides, when we enter the corner we actually don't see what's on the other side, so it's easy to hit the traffic. Again there's a straight so we can accelerate, but right after sixth radar there will be the most tricky corner of the track (#3). It's very tight and we not only have to cut it out bravely, but attack in the right moment, a little earlier than usual. At least after it we will have long straight with only easy curves on it, and then the finish line. Well, it wasn't that bad, was it?
Type: Sprint
Reward: Wheels - package 4
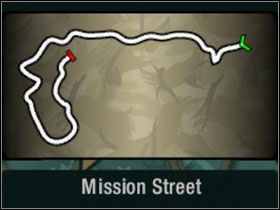
Right after the previous race Angie offers us an opportunity to do it now. It's about racing for Kempton of course :) But to keep the order it's good to check the last track in this district, which is Mission Street. Generally it's a synthesis of Beachfront and Dover Street. Tight right reversal in the beginning, then a long straight (don't use the tunnel). Here our maximum speed will be the thing that really counts. This part is REALLY LONG, and our only role will be to avoid the traffic. Then we will enter the part known from Beachfront and see our known reversals (Race #2 - #1). After that another long straight and a shortcut (#1). Only two easy, wide corners will separate you from the finish. Time to take out Angie!
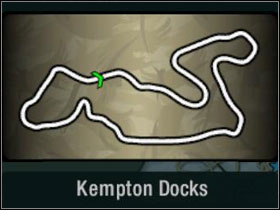

Part 1: Circuit (Kempton Docks, 2 laps)
Part 2: Canyon duel
Reward: Dodge Charger R/T
When you race the chick in a tuner car, it's easy to see all of muscle car's weaknesses. We start on Kempton Docks. It's a difficult, technical track, but if you drive it properly, then Angie will be left with no chance at all. Right after the start turn rapidly to the right and use the shortcut (#1), but only first part of it (#2). Then straight, left reversal, another straight and a corner, which is best to attack by cutting it right next to the sign. Long right reversal is easier to make by cutting it near the barrier (#3), so you will exit it on the outside. Another left and a straight, and then an entrance to the shortcut (#4). Keep your car on the left side and avoid the traffic. Use this fragment - it's the fastest place of entire track. Then an "S" and left reversal. You have to brake, there is no other way. Another straight and long right turn, in the middle of it there is another shortcut (#5). Repeat twice and Angie will be left with nothing.
Second part of the race is of course canyon. It's the easiest boss to beat in the duel, especially if you drive a tuner. The method is simple - keep as close to Angie as you can on the straight, and when she drift in the corner, get into her inside. I did it on the second curve :)
After you beat the boss of Kempton, you will become a new owner of this district and another person will join your team. The guy name is Samson and he's a really good blocker. Also next chapter of the mysterious bag case will be revealed. And before you enter the next district, complete the race war.
Type: Circuit
Number of laps: 2
Reward: $10,000
Another race war, which is basically "the best of district". It's a synthesis of the tracks we have completed in Kempton. The beginning is cut out from Beachfront (Race #2). Then the track turns and enters the straight known from, for example, Kempton Docks. The same "S" turn and left reversal with another straight, but this time we cannot enter the shortcut (Boss - Angie - #5). Instead of it we have some double corners and familiar islet we can cross through. Then some highway riding and another piece of Beachfront (last reversal and a shortcut before the starting straight - Race #2 - #4). Right after the jump we will cross the finish line.
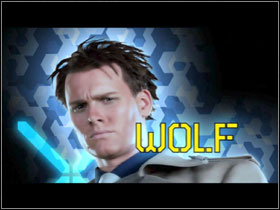
This territory is owned by TFK and a guy named Wolf, who drives an Aston DB9. He's a typical urban jerk and our task is to show him how to drive. It's easy to realise that this district is in possession of exotic cars. Also the tracks will be different from those you know from Downtown and Kempton. Well, don't waste your time, start racing!

Type: Toolboth
Reward: Gloss painting
As usual I will start from upper left corner of the map. University Avenue shows us exact what type of track we will encounter in Fortuna. They are curvy, often tight, technically difficult, with many uncommon placed shortcuts. Right after start we have first of them, it's not so easy to see, so be focused (#1). After you exit the shortcut avoid the newsbox and braking a little go through the left reversal. Then loooong right - watch out to not get thrown out to outside, cutting this amount of signs could bring your speed down. Next - another shortcut (#2). And again, when you exit it, look out for the newsbox. Additionally, this one is made from two parts, so watch out for the traffic while crossing! At last you will reach the first checkpoint, easy right corner then and a straight. After it you will have long, soft left reversal. Again, look out and avoid being thrown to the outside. Right after the corner there is an entrance to the tunnel (#3). Then another checkpoint and an easy part, which will lead us to the city. There we will find another shortcut (#4) - not worth using now, but remember it, will be very helpful on other tracks. Until the finish there will be no revelations, even this "snail", which looks so mean on the map is actually very wide and easy to pass.
Type: Drift
Reward: Spoilers - package 3
Another time to relax, like I said before I won't talk too much about drifts - it's no point to do so. Let's leave some space for fun, not only using the guide :) But I will give you a little advice: the players using manual gearbox should try to stay on the lowest possible gear to keep the rpm high while drifting, and all should avoid using the handbrake. It's better to brake, when you encounter problems.
Type: Circuit
Number of laps: 2
Reward: Body - package 4
Again one of my favourite tracks. It began with right corner, which you have to cut near the pavement. Next there is another right, in which advanced players use the trick with hitting the wall to get into the corner without loosing speed (#1). I will only say that this is definitely NOT easy, so if you are not confident in your abilities, don't even try to do it. The effect could be just opposite to the one it should give. Another corner is easy to cut without braking, then we enter the "S" in which is good to brake before the first part and using the second to accelerate. Then it will be familiar fragment from University Avenue with known shortcut (#2). It will be identical to the finish line, in the same way you should also use double shortcut before the finish (#3).
Type: Sprint
Reward: Rims - package 3
First 50% of this track is has no philosophy at all. Wide, fast corners and long straights. After that first shortcut will appear (#1), without a word worth to use and remember. It has two parts (#2), and entering the second requires a little correction to our route, which could be a little more difficult with high speeds - we will be driving upwards, so it's unable to see what's behind the top of the corner. Then use right side of the track and enter the part known from University Way. The road will change it's route and we will be forced to pass some 90-degree, then it will be straight to the finish.
Type: Sprint
Reward: Decals - package 1
Technically difficult canyon sprint. At least we can't fall out into deep, but there are many nasty corners. And remember that hitting a wall once can force you to do some ping-pong with the walls. No shortcuts, only canyons and typical reversals in high amount - all very, very tight.
Type: Drift
Reward: Decals - package 2
Now it will be funny - it's the same track for the second time, but this time you will complete it drifting. I wonder why the drift edition is 0,5km shorter, when all looks exactly the same? Well, not all actually. Here we will have the barriers allowing us to fall out to the canyon. But even with it, it's more fun to drift here than to race.
Type: Sprint
Reward: Body - package 3
I hardly know why it's Verona. There are no Montagues or Capulets, not any other involved couples. But there are cops. And few fast, mad roaring cars. First and only one difficult corner is the one before the reversal (#1). Cutting it using the pavement will do the trick. It became easy then, but remember to cut the corners sharply. There is also a shortcut allowing us to avoid nasty corner in the end of the track (#2).

Type: Speedtrap
Reward: Nitrous and tyres - level 2 pro package
A difficult one. In the beginning it's worth to use the back street (#1), which will surely help in gaining advantage over rivals. Remember to correct your route between two parts of it (#2). The exit from shortcut is not nice at all too, you have to cut it near the wall (#3), but it's definitely worth to. After two 90-degree and first checkpoint there is another shortcut (#4). Then at last some straight and another back road just before the tunnel (#5). It will help us avoiding sharp corner inside the tunnel, so we can make it to the radar with higher speed. Then straight, but just before the next radar look out for the kerb (#6) - it can throw our car in the air causing us to lose speed or even hit the wall. Let's stay on the left and go down, accelerating. Before the loop we have another shortcut (#7). Driving in it, look out for the sharp corners. The rest of the track will be easy, but notice the shortcut after sixth radar (#8).

Type: Circuit
Number of laps: 2
Reward: Suspension - level 2 pro package
Another difficult track. It will start with quite wide loops and straight, but the traffic will cause problems especially with our car having better speed and acceleration. After an easy part we will reach the "S" to the right and it will be the end of pleasure. Jump and an entrance to the first shortcut (#1) - remember about route correction while crossing to it's second part! Then our dodging skills will be tested - some Pinky or it's Brain put a truck in the middle of the road (#2). Next - another shortcut (#3), and if we decide not to use it, then the game will serve us another one (#4), more difficult to enter. Then another "S" and the finish line.

Type: Toolbotch
Reward: Hood - package 2
At last something easy and pleasant. From the start it will be nice long straight with only a few corners on it. The 90 near the first checkpoint is easy to cut using the pavement (#1). Then another straight part with easy corners. It's good to use familiar park alley (#2). Remember about it's second part (#3). On the "crossing" use the "down" part. Another easy loop and entrance to the tunnel (#4). Right after the checkpoint we will have the only one more difficult place here. This corner is tight and nasty, it has to be cut with braking and driving it to the outside part of the road (#5). Then two easy "snails" (the second one is sharper), the 90-degree and here we are in front of the finish line.
Type: Sprint
Reward: Window tints
Easy track, which is to complete in about one minute. The starting sequence is easy, when you remember to cut them on the pavements, from outside to inside. Then we will have our familiar shortcut, but reversed this time (#1). Two easy loops and we're half way home. This corner (#2) looks nasty only on map - it's easy to make it without braking if you will stay near the edge. Then another known shortcut (#3), this time it will be very useful. Another combination of easy corners and the back street (#4). It has two parts (#5). And then - the finish line.
Type: Toolbotch
Reward: Vinyls - tribal
Quite long track, but with it all an easy and pleasing one. Only before first checkpoint some more difficult corner will appear (#1). But it's easy to make with typical "from outside to inside" method (crossing the pavement, but not the grass) and drive away. After a combination of fast, wide loops our familiar mean corner will appear (#2). Make it like on the screenshot, but remember about braking. Next use the back road next to the tunnel (#4), and another checkpoint. Then for the long time nothing will happen on the track, and finally we will make it to the section from University Way - double 90-degree with a shortcut in the middle (#4). Also few next corners are taken directly from University Way, including the double shortcut (#6). Then the road will split. Let's stay on it's left side to avoid the jump (#6). Another familiar shortcut will help us avoid the loop (#7). After fourth checkpoint there will be another useful back road (#8) and then only straight road to the finish.
Type: Sprint
Reward: Turbo - level 2 street package
Be patient. It's almost the last race on our way to Wolf. The start is easy, you can use the wallride trick on the first tighter corner (#1). Then there is an entrance to the alley (#2), which will help us in shortening the route. After that there will be some easy, wide loops and another familiar shortcut (#3). Again an easy combination of loops and finally a little bit more difficult right (#4). Look out for the bus stop exiting it. And right after another corner familiar tunnel and a detour (#5). Then there will be nothing difficult to the very finish, let's just remember to use down part on the road.
Type: Circuit
Number of laps: 2
Reward: Body - package 2
Mm, yummy - another track, which I definitely like. It isn't very difficult either. Two easy lefts in the start, then straight, long left and a double 90-degree. Look out for the second one - try to stay outside to make it easier to enter the next corner. Another straight and 90-degree to the left, then a shortcut right after that (#1). Avoid the wall while driving down it. Then it will be an easy "S", long, easy curve and another shortcut (#2), which will guide us directly to the finish line. Time to face Wolf!
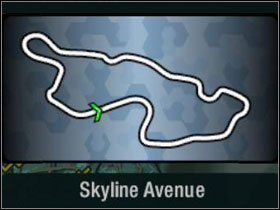
Part 1: Skyline Avenue (Circuit, 2 laps)
Part 2: Canyon Duel
Reward: Aston Martin DB9
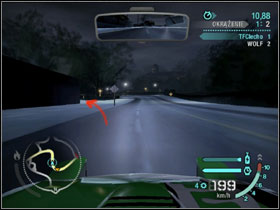
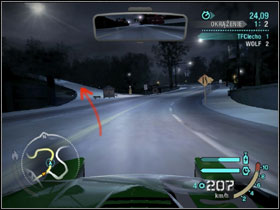
If we start from this district, beating using tuned up DB9 Wolf can be a difficult task. But if you are completing races with this guide, then this boss will be a formality. First part are two laps on Skyline Avenue. The track is generally easy and without many difficult corners on them. After the start and a little straight we have first shortcut (#1), which will help us making a gap over Wolf. Then another easy part and another shortcut (#2). We're going up and you better watch out to get properly into second part of the shortcut (#2). Then go down and enter the part known from University Way. After that there will be a sequence of left loop and right corner, and then an entrance to the tunnel (#4), leading us to the finish. I used a little bit tuned up Kenji's RX-7 and I managed to timeup Wolf (over 30 seconds of gap), so winning this race isn't something extremely difficult.
Also winning the canyon won't be any problem, even if the track itself is quite difficult. There are many uncommon curve sequences, but Wolf is taking many of them simply too wide, so it's easy to overtake him. A corner is a good place to attack, because on the straight his DB9 is fast and hard to catch. After beating Wolf you will surely await the ending section, but that won't happen! It will be revealed that Darius cheated on you and give you up to Cross. Without Nikki's help you would surely see the world from behind the crates for a loooong time. But our ex-girlfriend decides to join our group and Cross himself reveals to be a bounty hunter, so he has no interest in helping Darius in his mean businesses. So now we have a new task - we must kick Darius's ass on his own territory, Silverton! But first, let's do some race wars.
Type: Circuit
Number of laps: 2
Reward: $10,000
The track is mainly made from Beachfront, Condo Row and University Way parts. We have a long straight and some easy corners in the beginning - this part is from Condo, same as this shortcut (#1). Also few another corners are taken directly from Condo Row, so there is no point of repeating. The first change will be after the double right - on Condo we go left, here it's another right. We enter another "park valley", which is our familiar shortcut (#2). Look out for the second part crossing! Then use the down part of the road and move to the next shortcut (#3). After an easy sequence of long left loop and tighter right (you will have to brake) there is another shortcut (#4). We know this part from University Way, but this time we go backward. After well known part we will have a left loop and an entrance to the tunnel near wide right corner (#5). After that and a little straight we will encounter a difficult corner (#6). This is a tight loop in which you have to drive to the outside, brake, then cut it and accelerate in the middle of it. Only few easy loops will separate us from the finish, but you should brake a little on the last one.
Without any respect we're crossing into main boss's territory. By winning twenty races you will get a chance to race with Darius and his Audi Le Mans. But it won't be easy. In Silverton you will be facing strong third level cars, such as Chevrolet Corvette Z06, from the very beginning. And winning with a monster able to accelerate to over 400km/h will not be an easy task, but of course possible. So let's get it started!
Type: Sprint
Reward: Nitrous and tyres - level 3 street package
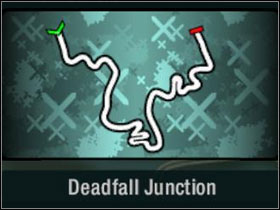
Just before the start we will realize that Darius has made a surprise for us. He gathered the bosses from previous districts, gave them new cars and made a team from them. And this team's only task is to not let us gain control over Silverton. So in the first race we will face Kenji, Wolf and Angie together, all of them using powerful tier 3 cars such as Mitsubishi Lancer or Dodge Challenger Concept. It won't be easy, but Deadfall Junction is a canyon - a place, where less power can be compensated with skill in cornering and agility. Only the Lancer will be something to fear, but if you have studied your homework from looping and will drive carefully (whole track is very dark, so the visibility can be a problem here) the devil won't be that bad.

Type: Circuit
Number of laps: 2
Reward: Brakes and suspension - level 3 street package
This track will be very tough and nasty until you get common with it and it's shortcuts especially. In the very beginning it attacks us with difficult right loop and after that there is first back road (#1). Then straight, but whole track is kind of "hilly", so watch out. After left corner there is another shortcut (#2), very useful, but dangerous - it has a tight left curve in it. Then another two corners - an "S", which is best to cut using the pavement and an entrance to the building (#3). The next shortcut is in the "casino", right after wide left loop (#4). On another right-left combo brake a little and use the pavement. Then you will make it to the corner with a tricky perspective (#5). Watch out and take it a little earlier than it actually looks, when you're watching purple arrows. Luckily, the rest is easy.
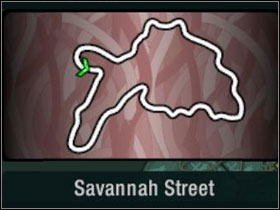
Type: Sprint
Reward: Gearbox - level 3 pro package
The start is similar to Savannah Street. Few first corners and a shortcut (#1). Then a tricky combination of 90-s and again some fast corners, in which we must use our car's agility to the maximum. Corvette's are still there. Then the reversal on which you must look out for the wall. The straight means pedal to the metal and then after it another shortcut (#2). We're entering the "industrial zone" - another combination of fast corners and straights, but look out for the pillars. It's easy to hit them, when you're driving with high speed. Cut the left corner using the pavement and full speed ahead again. But then you must brake before right corner. It's nearly the finish - only two easy corners left in this track.

Type: Sprint
Reward: Turbo - level 3 street package
Again a race in the city. It starts with some easy corners and one tricky, tight loop (#1). It's better to drive through it a little bit wider, because there is not many space on the outside. Right after it there will be first shortcut (#2). Look out for the jump in the middle of it. Then the loop and we enter the highway. The combo of two 90-degrees to cut out with the pavement (#3) and our familiar casino (#4). After the reversal another back street (#5). We're at the halfway point. On the left corner we will find another useful shortcut (#6) - there are many of then really, but this one was the last. Then straight and a combination of tricky corners. And a downhill to the finish.
Type: Circuit
Number of laps: 2
Reward: Plymouth Hemi Cuda
Very fast and curvy track that requires maximum concentration and focusing in avoiding the traffic. Also, some precision in the corners too. And again we have many shortcuts here. The first will be right after start (#1). Then look out for the pillars at the straight! On the crossing go right - it's the shorter route. Right after that use the shortcut (#3). Remember to cut the second part of the corner as well (#4). After a moment we will face another back road (#5). Then at last a part of straight, some easy corners and the finish line.
Type: Toolbotch
Reward: Engine - level 3 street package
Previous races definitely weren't the easiest ones - luckily, this one is. At the start we have the sequence of easy curves, able to cut using the pavements (#1). Then the 90-s and wide, left loop. After another loop we have the first checkpoint. This part of track is definitely fun. Another loooong straight and our familiar curvy shortcut, which will guide us directly to another checkpoint (#2). Now there will be a part cut out from Savannah Street. The "S" corner and an entrance to the building and then the casino (Race #2 - #3 and #4). Right after third checkpoint we're entering the garage (#3) and bust out to the highway. Another straight, checkpoint and a shortcut (#4). And then the finish.
Type: Sprint
Reward: Turbo - level 3 race package
It starts sleepy, but from about 20% the track will show it's character. After the 90-s we have first shortcut (#1). Then a corner able to cut with the pavement and a highway. Now focus on driving smoothly and avoid collisions. In the middle of the straight we have a jump. Look out with the landing. Then some wide corners and again the part from Savannah Street (Race #2 - #3 and #4), but with one important change. Someone had put a corner into the "casino" part (#2), so remember to drive on the left side to go through it smoothly.
Type: Circuit
Number of laps: 2
Reward: Nitrous and tyres - level 3 race package
The one from a few circuits that I simply hate. On the first sight there are no unknown parts, corners or such, but its combination is hellish. It starts easy with a straight and some curves. After the pursuit breaker a sequence of corners in the "downhill". Near the loop our known shortcut (#1). Then the sequence from Savannah Street, same corners, buildings and casino. Another dja vu - a garage shortcut from Troy (Race #6 - #3). Then highway and a corner in which someone has hidden the last shortcut (#2). It's difficult to enter, you have to drive wider than you should, when entering the corner, but it's worth to try - it can make our route to the finish much shorter.
Type: Speedtrap
Reward: Dodge Viper SRT-10
Better pimp your ride before the start - it's speedtrap, and Corvette's and Murcielago's can be hell fast on the straights. Right after first centre there is a shortcut (#1) which will guide you just to the first radar. Then a reversal, highway part and another radar. Don't forget about casino (#2) and the building (#3) - this time in different sequence. Another radar and a tricky corner behind it. Then an useful shortcut (#4) - it's the curvy one. The opponents use it very rarely, so it's an occasion to grab some meters, which may be important on the finish especially, when you realise that there will be no more difficult moments. The Viper is ours!
Type: Toolboth
Reward: Transmission - level 3 street package
I don't know about you, but I got a little bored of this combinations at this point. Again same beginning, right loop and first shortcut (#1). Then long fragment of straight and another shortcut near the "S" sequence (#2). Watch out for the pillars! Go right on the crossing, pass the second checkpoint and right after the double left corner there will be a shortcut (#3). Then the part known from North Broadway (Race #5 - #3 and #4). Right after you exit the corner there is another shortcut (#4). The road will become tight and curvy, but you already know all the corners here. You also know the shortcut after fifth checkpoint (#5). Then the part with casino - I wrote about it billion times, so won't do it again :) You only have to cross the "S" and the garage, a little straight and there is the finish line.
Type: Speedtrap
Reward: Nitrous and tyres - level 3 pro package
Right from the beginning this track greets us with a combo of tight corners and first shortcut (#1). Then the checkpoint, another bunch of corners and a straight ended with second radar. Next we have the "S" corners and the casino (#2). It helps us making higher speed on the next checkpoint. Before another combination of curves we have another shortcut (#3). Then a few dangerous, short loops ended with a back street (#4). Time for a little bit easier, faster part of he track. We pass another radars driving through familiar sequences of corners. Near the sixth radar we will have a difficult corner to pass (#5). You must drive to it's outside and braking a little cut it to the inside. Just after it there is another shortcut (#6) then the last radar, a loop and the finish line.

Type: Toolbotch
Reward: Chevrolet Corvette Z06
This curvy track doesn't match it's reward - Corvette Z06 - at all. Vette is hell fast, but hopeless in the corners. We start wit the casino (#1), but look out for the right corner just after it. Then double left and two familiar shortcuts (#2, #3). After you exit the right corner you will have an entrance to another shortcut, but using it will be difficult if you exit the corner to outside. Then a combination of wide and fast 90-s and another checkpoint. The track is becoming really tricky, so let's focus on driving. The straight parts are combinated with difficult corners on which you will be forced to take your right feet from the pedal. Fourth checkpoint starts the city part, with it's typical moments like this shortcut (#4). This time after it we have a tricky left corner - DON'T cut it, there's a wall. Then the last straight and finish line.

Type: Canyon duel
Reward: Lamborghini Murcielago
This race shows us what we will face in the end of the game. Again we have to race with Wolf, this time he drives a Murcielago, and again we have to show him his place in the canyon. It's possible that completing this race will require some restart, keyboard throwing or some bad words spoken to the monitor. Mainly because the track itself is very unpleasant - fast, without any room for errors. The curves are also tricky, very tight and nasty. Luckily, Murcielago is not very fast in cornering, so you may use the loop sequence in the middle of the track to attack. And finally, the last difficulty of Deadfall Junction is its length. It takes some time to complete the track, so it definitely can be frustrating to repeat it time by time.


Type: Speedtrap
Reward: Turbo - level 3 pro package
Pay attention to the starting point - we're on a hill. Right after a first corner we have a shortcut (#1). Then look out for the loop after checkpoint. It's wide, but the grass makes it easy to loose control over the car. In the middle of it there is another shortcut (#2). Then straight, checkpoint and tricky left to brake before (#3). Then the track will go literally upwards. Some fast, short corners and a little bit longer, but still easy ones. After a straight and another radar we have a curvy shortcut, which you surely know (#4). We exit it to the left, two wide corners, some highway and another track is completed.
Type: Drift
Reward: Transmission - level 3 race package
Bad news for drift maniacs - it's the last occasion to slide through the corners in the career mode. But don't be so sad, the reward is definitely worth it and you can always have some more drifting with the Quick Race mode. Journeyman's Bane is a short, not so difficult track and AI's scores are really tragic, so you won't have any problems in completing it.
Type: Canyon duel
Reward: Dodge Challenger Concept
In a moment another part of Darius' district will become ours, but to do so we must beat Angie in the canyon. For the second time. The track is typical for muscle cars - fast, with only a few corners and only one more difficult loop combination. But the solution for beating the chick and her Challenger is very easy. They seem to be weak in acceleration, so wait for the right moment and attack, especially just outside the corner.
Type: Circuit
Number of laps: 2
Reward: Engine - level 3 race package
Very fast, nice track. With a very nice reward as well :) The final engine package 10 minutes away from race with Darius is something that counts. From the start cut the corners bravely and look out for the pillars. Then fast, straight part and a tricky corner best to pass under the cookie (#1). Next is our familiar sequence of wide curves, easy to cut. The first shortcut appears near the end of the lap (#2). Then there will be another one (#3), but it's not very useful.
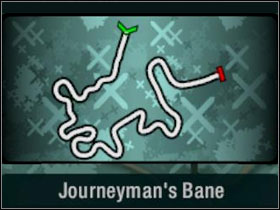
Type: Canyon duel
Reward: Mitsubishi Lancer
Do you remember this one? It appeared previously as a drift race. And do you remember Kenji? Yes, you do for sure. So now you will gather those memories into one and will be forced to beat Downtown's ex-boss on Journeyman's Bane. It's a curvy track, but not very difficult, even with Kenji's Lancer being extremely fast in the corners. But comparing it to the race with Wolf you will instantly see, that this one is not a problem at all. My advice: remember that Kenji with all of his acceleration, is not so fast on straights.
Type: Sprint
Reward: Engine - level 3 pro package
Cut the first corner using the pavement - your opponents won't do the same, so you will gain extra meters. Some easy corners, the straight and first shortcut just before another curve (#1). Left loop enters the highway - stay on the left side, so it will be easier to enter the next corner. In the middle of it you have to brake and cut it to the inside. Watch out for the pavement, it can bust you into the air. The jumps are dangerous thing on this track in general. After one of them there is a shortcut (#2). It's good to slow down a bit before the "hill" to enter it fast. Then go under the cookie and it will be another fast part. But again, look out for the jumps. After 80% of track you have another shortcut (#3). Last few corners can be avoided with the back street (#3). Only two nasty, short 90-s are left before the finish line.
Type: Toolboth
Reward: Brakes and suspension - level 3 race package
Ladies and Gentlemen - this is your last challenge before meeting Darius! And it's not difficult. Fast part for good start and drive under the cookie (#1), then some wide corners and first checkpoint. Cut the corners bravely and enter the highway. The combination of sleepy curves will continue to the next shortcut (#2). Slow down a bit before the left loop and don't cut it too much and now you will enter familiar city district, filled up with neons. After long right corner there is the third checkpoint and a sandy shortcut just after the sign (#3). Watch out now, there are many hills on this part, so you will not always see what's behind the top. Then we will have a little downhill with another checkpoint. Next a long part of straight and double corner behind it, but we can go through the middle of it using this shortcut (#4). Look out for the pillars! Well, you made it to the finish, so it's time to face Darius!
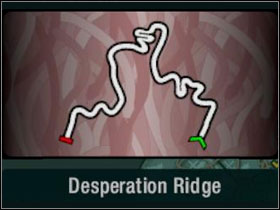


Part 1: Desperation Ridge (Canyon duel)
Part 2: Sprint
Part 3: Lucky Towers (Circuit, 2 laps)
Part 4: Canyon duel
Reward: Brakes and suspension - level 3 pro package (Part 1), Audi Le Mans Quattro (Part 4)
Yep, it's true. The last battle of the game contains FOUR races and what's worse all of them had to be done one after another. It means that we cannot complete for example first two of it and then exit the game to end our battle for Palmont later. In that case we would be forced to start it all over again.
You must start with beating Darius's dream team - Kenji, Angie and Wolf - for the third time, both in canyon and on the track. We start in the canyon and the Lancer will be only rival capable of making any danger. The track itself is very fast and the interesting thing about it is that you basically cannot fall out to the canyon - there are only solid walls, so you can charge a bit in the corners. Generally this race is not difficult, it's like a short breakfast before the main meal.
The sprint is more difficult. It's also long, about three and a half minutes. Just after the first corner we have a shortcut (#1). Watch out, it's tight and the speeds reached by our cars at this point are more than serious, so slow down a bit. The next few corners are familiar from, for example, Condo Row - but this time we drive them backwards. After tight left corner (which is possible to be made with full speed) go on the right side of the bridge. At this part of the track the speed is what values the most. Murcielago behind our back will be a strong rival. On a bridge behind the tunnel keep on the right side. It will make us avoiding the need of changing route in the end, where you have to slow down to 210km/h (that's the "safe" speed, of course so you can make it faster) and enter the double right. Then instead of straight you will find a tricky left (#2), which is best to attack through the pavement. The AI drivers always drive round it, so you will gain few meters. Cut another tunnel entrance. Feeling tired? It's the halfway point. Again go as fast as you can and cut the right corner preparing yourself for a difficult moment - sharp double left. If you use manual gearbox, then you will be grateful to yourself for that. A proper gear reduction allows you to throw into the corner properly. Otherwise, you will have to brake. Right after you exit it there is another shortcut (#3), a double one (#4), but it's not worth using - it will make our route even longer. It's better to go straight on. Then you will find another shortcut, the one, which AI drivers seem to like (#5). My advice is to stay on the road. After long left there is a difficult corner (#6). You must brake and cut it from outside, avoiding traffic in the same time. Another fast part ended with a right corner, then straight and a tunnel. Watch out - when the road will start to go up, then it's time to brake and go to the left side. After the "hill" there is a corner (#7). It's almost finish. Long curve and a combination of familiar corners ends the track. Time to face Darius himself.
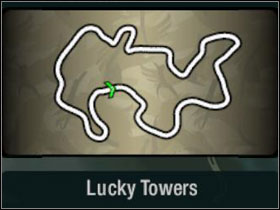
First part of the race - in the city - will be held on Lucky Towers. First few corners are easy to cut with the pavements, don't be afraid of doing such. Those corners are really fast and will let you drive over 230 kilometres per hour. When you will drive through the left loop, go a little bit wider and you will be thrown into an useful shortcut (#1). But watch out - it has two parts and between of them there is a jump and also a tricky corner in the second part, which you will probably slide using the wall. Then an easy right to cut. Another corner forces you to slow down to 200km/h. Then there will be a sequence of slow loops. In the middle of one of them (to the left) we have a shortcut (#2). After the straight part we have the left corner, which we can avoid driving through the shortcut without braking (#3). Then slow down on the left loop, cut the easy right and you're done.
Finally, it's the last race in Need for Speed: Carbon. A canyon clash with Darius is not the easiest one, especially with his Audi Le Mans Quattro being very agile in the corners and fast on straights. Watch out for the first sequence of loops. It's the most difficult part of the track, but if you studied the cornering during the whole 99% of career, then this race will be the test of your skills. That's why I left you with Darius in the canyon with belief what you will beat the boss and grab the keys to his car. And then only a short outro sequence, paylist and congratulations - you've just finished Need for Speed: Carbon!
So you did the career in 100% and you're still hungry for racing? It means that you have the rights to call yourself a maniac, but it's not bad while Carbon is a great game :) Also the main gametype is quite short and can be not as satisfying as it should. But the EA guys made few else interesting things for virtual racers. Let's take a look on the list below.
A pack of twelve challenges with three difficulty levels each: easy, medium and difficult. As it's easy to count, it gives us extra 36 races. Completing the easy race gives us bronze medal and an access to the medium one, which completing equals silver medal and an opportunity to fight for gold and the reward. They are maybe not very precious, but it's always nice to have bonus stickers or spoilers. In challenge series we cannot choose the car. Also in this mode there are several race types available: pursuits, toolbotchs, canyon duels, race wars, etc. Everyone will find something for him :) Some of the challenges - team challenges - can also be completed online.
Nothing to say about this. Simply a single race on a chosen track in chosen mode. We can set the number of laps, opponents, traffic and such. I didn't do it previously, so now it's time to describe the game modes.
It's another new element in NFS: Carbon. The reward cards have replaced Most Wanted's Challenges, but the idea is very similar. We have twenty "cards" with four challenges to be completed on each. To gain a card (and a reward from it) you have to complete its challenges. They are very different and have different difficulty levels. A challenge can be very easy, but also hell tricky. The level basically depends on the reward from the card - it's easier to gain extra spoiler than a car. Also, there are Online reward cards. This is an extra set of 10 Reward cards, which can be completed only when playing online.
The multiplayer scheme is a little different in Carbon than it was in Most Wanted. We still have the room and invites system, but now we can't choose the game in which want to play from the list. If we choose the Quick game option, we will be put automatically into a room chosen randomly by the server. The option My games allows us to create a race manually and then invite players from our buddylist or use the Search players option to play with random people. The maximum players number has increased to 8, so the races are now more interesting. We can also choose whether we want or don't want our game to be a ranking game. Our statistics are being held on Electronic Arts' servers, so you can always see how you match with the fastest guys. The Unranked mode can be an occasion to practice and also gain some Online Experience points. You have to know that for every race you complete you receive some EXP and making it to 50 level will unlock a bonus car - Lotus Europa S.
In NFS: Carbon for the first time we can use the possibility to build and manager a team, which will race alongside us - as our wingers. It will contain the NPC-s, which we will unlock with our progress during the game. Their choose is important for few reasons. At first, during the face we will be able to use only ONE winger's help. Also all of them have unique combinations of skills. The skills themselves are split into two categories. The primary describes the role a driver is playing during a race and the secondary one tells us about his additional skills. Generally, when it comes to race we can choose between four types of wingers:
The second divide is based on the secondary skills. Some of them are very useful, other not, but it's worth to know what the people in our team are capable of.
Throughout of the campaign I used mostly the blockers - Neville and Samson, replacing them in a few races with Colin or Nikki. It's important to remember that our wingers match their car's level with ours. The only exception is Nikki, which is always driving her Ford GT. Also watch out for the wingers during the race. Their AI is not the best thought and if they will make it passing us, they will block our way ahead until we give them a command. And it can be annoying. But enough of this whine, here is the list of available wingers.
Class: Blocker / Fixer
Additional skills: the pursuit level doesn't increase after races, +200 to winnings
Car: various
Neville is a funny fat guy, which is in our team from the very beginning. He hasn't had one predefined car, his ride is dependant from our choice (always the same class and tier). Very good and useful blocker, which also fills our pocket with additional cash - that's very important in the start.

Class: Scout / Fabricator
Additional skills: winning decreases police interesting, enables Autosculpt (body, hoods, roof scoops)
Cars: various
From the movie on which we meet Sal we will know that he is our great fan. You can easy spot that by watching his first steps in our garage. But on the track he is very solid crew member and is useful also because of the Autosculpt he unlocks. Same like Neville, he depends his car choice on ours.

Class: Scout / Mechanic
Additional skills: 25% better nitrous, 10% part discount
Cars: Mazda RX-8 / Mitsubishi Eclipse GT / Subaru Impreza WRX STi
This blue haired lady is so plastic that she can cause toothache. I really think that EA guys went a little bit too far with creating this character. Also the actress that is playing Yumi deserves the Plastic Raspberry for sure. The 25% more nitrous power may not be enough to hire her.
Class: Blocker / Fixer
Additional skills: rewards 10% higher, less police interest on our territory
Cars: Chevrolet Camaro SS / Dodge Charger RT / Plymouth Hemi Cuda
If I had to choose my favourite winger, I would pick Samson. He is a huge, dangerous guy driving a muscle car as big as himself. He has basically similar skills to Neville, so he can be his replacement due to his additional are a little better than Neville's.

Class: Drafter / Fabricant
Additional skills: better aerodynamic tunnel, enables Autosculpt (wheels, exhaust tips, spoilers and roof elevation)
Cars: Alfa Romeo Brera / Porsche Cayman S / Porsche Carrera GT
Same as Sal, Colin enables the Autosculpt and the range of his skills will be a tasty part especially for muscle car fans - because the roof elevation option. He uses hell fast Porsche Carrera GT, which is especially important, because the crew can also win the races for us.

Class: Drafter / Mechanic
Additional skills: 50% better nitrous, 10% car shop discount
Car: Ford GT
Our ex girlfriend joins us, when Darius' dirty tricks are revealed. I suggest to hire her immediately - 50% better nitrous is a huge bonus, which surely will help us more than once. Besides, be honest - which one of you don't want to drive alongside Emmanuelle Vaugier dressed in a short skirt? :)
OK., when you know who is who then it's time to think about making a team from these people. Remember that at one time you can have only three of them in the crew and also only one will race with you. So this only winger will assist you with its full skills. At the end of the game it's worth to choose Nikki. Her 50% more nitrous power is with no doubt a great bonus. As for the other two, I propose Samson and someone from the duo Sal/Colin, depends on which part of your car you wish to sculpt and if you whether want or don't want to use Scout. You don't have to care about the police, so Neville's skills won't be useful at the end of the game. Also remember, that you can tune your crew's cars absolutely FREE, so don't hesitate to doing it. Faster winger is better winger.
I will start with my favourite class. Tuners are mainly all Japanese rear wheel drive beasts, which can be geared up with massive tuning giving them great power and agility. Their handling allows tuners to be extremely fast in corners. They are also great for drift. We see many of them everyday on our cities' streets.
Tier 1
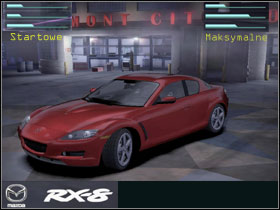
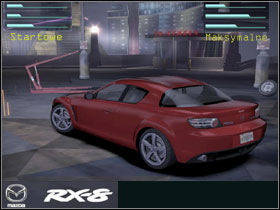
This car will be our first choose if we decide to drive tuner cars. Very good handling makes it easy to drive and the Mazda is very good for first track. When you tune it up, it will become faster, but it still lacks in acceleration. Anyway, it's an ideal car for the beginner due to great handling.
Tier I
Little, funny Mazda is a great car, when it comes to tuning. It has very similar parameters to RX-8, but it handles a little worse. It's not as fun to drive as RX-8 as well, but in the car itself there is something that makes you want to have it. Maybe it's her face saying: "buy me"? :)
Tier II
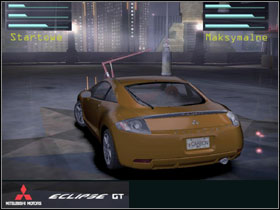
The first Mitsu in the game is a little faster car than Mazdas. It's a typical Japanese coupe with a nice look. Easy to handle, fast and agile in the corners. Also the name Eclipse is surely attracting the three diamond's fans.
Tier II
First of EA's surprises. The R32 has been put into tuner cars while it still is an European one. In Carbon this Golf is one of the best tier II cars, mostly because its unbelievable handling, which is even better than Clios.
Tier II

My darling bug from Most Wanted is not owning the streets in the same way it did in previous NFS, but you still should give it a closer look. It handles EXTREMELY well, besides it is small, which counts, when you race in the city streets, also is quite fast and looks like a shark, which will eat you if you don't choose it.
Tier II
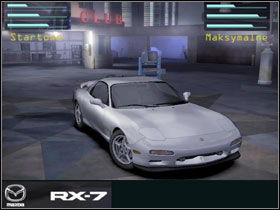
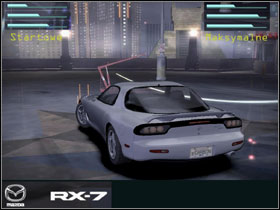
This is the car of the exotic's gang boss - Kenji. And he has the nose, RX-7 is a very good and solid car. It handles well and has proper amount of horses under its hood. Maybe it's not as effective as Clio, but it's slightly faster in the beginning. The strongest car from Underground is losing its position with time, but the old steroids still work.
Tier III
First tuner from tier III. And the weakest of them, which doesn't mean it's unworthy looking. It mainly attracts by it's visual design, which can be additionally tweaked up with tuning, also it has solid stats. But definitely 350Z is not in the Carbon's first league.
Tier III
When you look on the parameters then the Impreza is same to the 350Z. Luckily, the new one looks better than this frog-eyed thing from Most Wanted, so it's not a shame to drive it :) It handles very well like all tuners, also looks aggressive - what else do you want?
Tier III
It looks phenomenal in black and even without any tuning is quite strong. Definitely will do even in the end of the game, but it's not the strongest car of this class.
Tier III
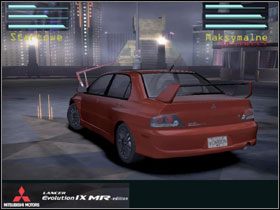
Well, this one is. Very fast, also has the best handling upon all cars in the game, acceleration demon and a three year warranty. That's this guide's author favourite car. Many of top Polish NFS players use this one and not without a reason. What? You heard that four door sedans are family cars? You heard wrong.
Tier III

It definitely doesn't look delicate with this wide standard bodykit, huge rear lamps and this spoiler. But if You can go on with it, there is a very good car, which loses with Lancer only in cornering.
Something for the American car fans and also those, who like... drifting. Muscle cars have impressive brake horse powers, but it's handling is very tricky. It takes a long practice to make sure that its rear will be where it should. Definitely a class for advanced players, it also gives a lot of fun.
Tier I
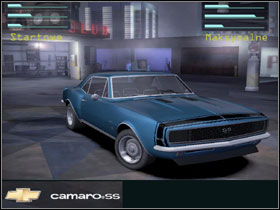
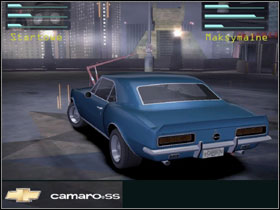
Just look, how much classical beauty this car has. And realise - when we, in Poland, had our Polonez or Russian Wolgas, the Americans drove those Chevrolet. Look at its shark nose or huge tyres and feel the atmosphere of those years. Well, it handles (no comments), but who cares about that?
Tier I
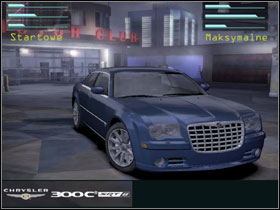
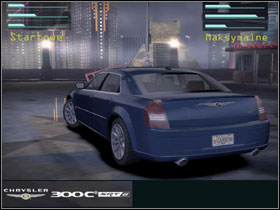
It's simply HUGE. Nearly doesn't fit to screen. And opposite to Chevrolet, it can corner, maybe in a little way, but it can. And who doesn't want to cruise through the town in this chrome dripping "baby" with it's rear seat full of naked chicks? :)
Tier II
Some very brave and venturesome Australian engineer took the Corvette's engine and put it into a chassis designed in the American 90-s sportscar style. And that's how the Choca.. em, Monaro was made. Very interesting car, it can be tuned quite well and also handles okay.
Tier II
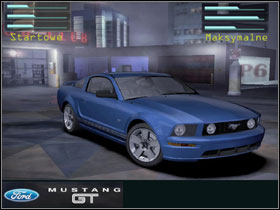
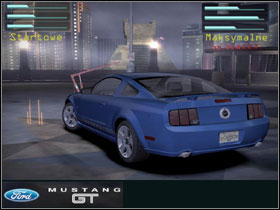
The American dream, best looking Mustang for years. Aggressive, predatorial and strong. Too bad that this amount of BHP put on the rear wheels simply had to make it very difficult to handle, especially for lesser experienced players. But those, who tame this horse, will have much fun driving it.
Tier II
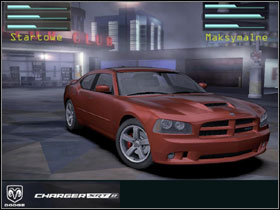
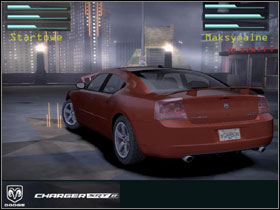
If I were in secondary school now, I would wish that my dad comes to take me from school in something like that. Really, the Americans with all their manner of re-naming the cars, have extraordinary talent to make saloons on steroids. Huge, powerful car, which is very unlike to tune up in other way, than putting another BHP under it's hood.
Tier II
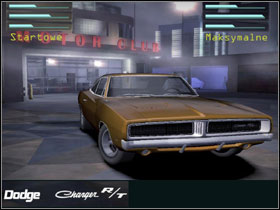
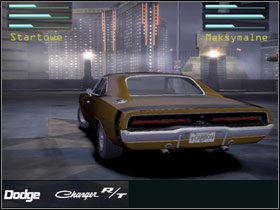
As you can see, both Chargers have only the same name. This one, named R/T, it's a living legend of American automotive, a star of "Bullitt" and one of the most famous muscle-cars in history. But it doesn't change the fact that Carbon developers gave those two cars nearly exactly the same parameters.
Tier III
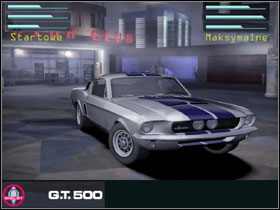
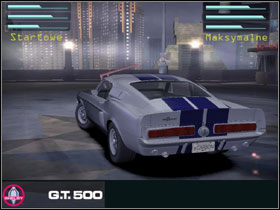
Another piece of art from the USA, Carrol Shelby's golden child. This famous car will be unlocked just before the end, but it's still worth looking just because it's beautiful. Again, you cannot tweak it up too much and its second name is drift. So what? You should forgive those sins to legends.
Tier III
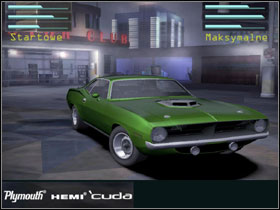
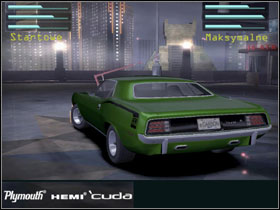
This car was the one in which the legendary HEMI engine had its debut. First since some time muscle car, which actually can be tuned mechanically, but like all other muscle cars it's not easy to handle.
Tier III
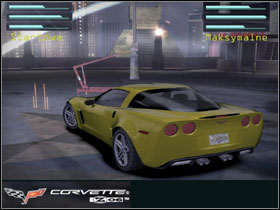
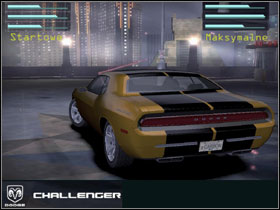
Very interesting design, a muscle made in new edge. Quite powerful and fast, but its handling is average. Also the Challenger is tuning-proof, so you won't make too much from its basic statistics.
Tier III
For some a masterpiece, and for the others - something, which was born in a madman's mind, which forced someone to put this 8-liter truck engine into the ultraflat chassis. The front hood takes about 2/3 of its length. Veeeery muscular, aggressive and hell fast car, which likes drifting as much as you like bread.
Tier III

Hail to the King, baby! This car is definitely strongest in the game, able to make over 400km/h (!) and accelerate in irrational way. Personally I don't like it very much, it handles like a bath with wheels, but after a dose of practice You can make miracles with Corvette. Without a word, the strongest muscle car.
All kinds of European supercar's - Porsche's, Mercedes's, Aston's, Lamborghini's etc. If you look on stats then they are the strongest class, but the stats are not racing. I will say more - exotics are the only class without a tier III car able to match Lancer and Corvette. The remedium is Audi Le Mans, but it's a bonus car able to unlock after finishing the career mode. You can say that this class was in some way harmed by EA.
Tier I
Beautiful car, but its BHP disappoints. Even with maximum tuning the Brera hardly gets to 200 kilometers per hour. It's definitely too slow to fight with higher tier rivals, but this Alfa is a very interesting car for the beginners. Its handling in the corner is very neutral, so it's easy to control.
Tier I
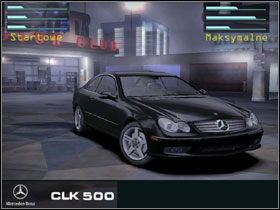
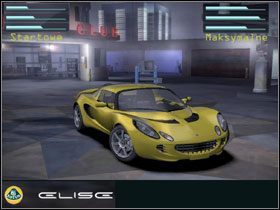
The Mercedes is at some point similar to Brera, but in my opinion handles a little bit worse than the small Alfa. But it accelerates a little faster than the Alfa and also looks phenomenally in black.
Tier II
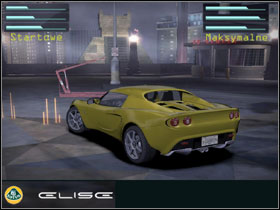
This little devilkin was the best car in Most Wanted. Better than Mercedes', Astons, Porsches - most of the players drove the Elise. In fact it didn't lose its main speed in Carbon, which is handling in the corners, but when compared to tier III cars it is simply too slow. But it's worth driving.
Tier II
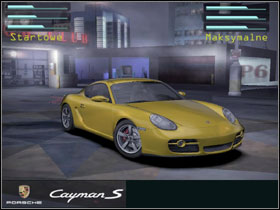
I think that Cayman is more succesful in computer games than on the roads. This Boxster with roof may be even a little faster than Elise, when tuned properly. You can also get used to it's back, although not many spoilers look good with it. Well, there's always Autosculpt left.
Tier II
The Aston was a supercar in Most Wanted. In Carbon it lost it's position visibly. It is still one of the strongest tier II cars, but has nothing to tell, when racing with fastest cars. But it's still an Aston - beautiful, powerful and legendary.
Tier II
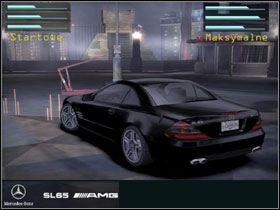
It's design is completely different than Astons. Brute, muscular and also great looking in black - that's the Mercedes. It's slightly faster than it's rival from the Isles, but in my opinion handles worse.
Tier III
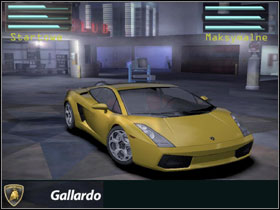
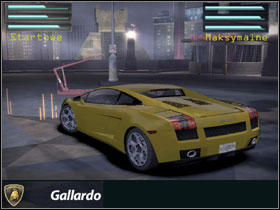
This car looks so fast that many players choose it to compete online. It has also nearly full statistics. But on the other hand it handles like a firetruck and is immune to fast cornering.
Tier III
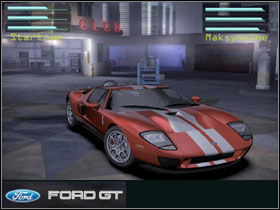
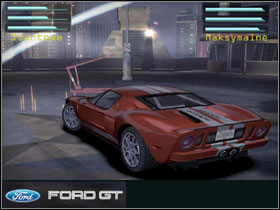
Well, that's a surprise, at least for me. This car is an icon of modern muscle cars, but the game developers put Ford GT into exotics. Nikki drives one and no doubt it has the power of speed, but when comes to handling it is close to it's origin.
Tier III
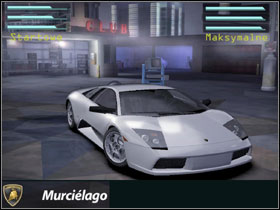
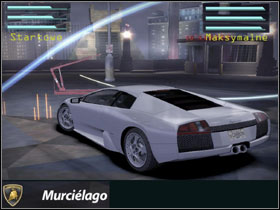
The Lambo has been seriously retarded by the guys from Electronic Arts. It is still fast, but has no handling and equals to be an average car. A little bit faster than Gallardo, but players still prefer it's younger brother. Maybe in the next NFS game the cars with bulls on their hoods will finally become supercars?
Tier III
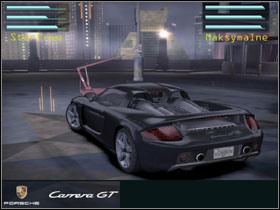
Carrera on steroids, the one that had put back Porsche into the superleague. It was so good in Most Wanted than it was.. prohibited in most tournaments. In Carbon this role comes with Corvette, but it doesn't mean that Carrera GT is weak. It's still a great car with no major negatives. The fastest exotic, excluding Audi.
Tier III
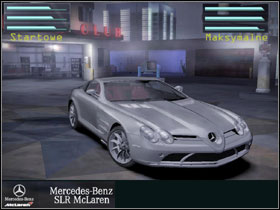
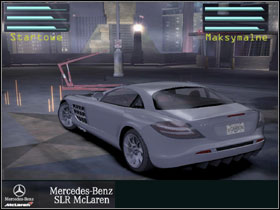
It looks like a F1 car with chassis and that's what its character is. Hell fast, aggressive and dynamic car, but again slower than Carrera GT. Still worth choosing, especially with it's nose come exactly from Raikkonen's car.
The game cannot be named NFS without this whole bunch of bonus cars, which can be unlocked with progress in the game. Carbon is not any different. We have high amount of bonus cars, some of them interesting and worth having, and some, which have to be treated as a joke (for example - the firetruck). There are even some prototypes. The "great trio" from NFS Carbon, which are Audi Le Mans, BMW M3 GTR and Koenigsegg CCX are also in the bonus pack. Although they are prohibited in most NFS leagues, they are the most powerful cars in the game. Some of the bonus cars come with few painting options, other has also its "tuned" version, but most of them cannot be tweaked in any way.
Tuner, tier I
Unlocking: finish the career mode
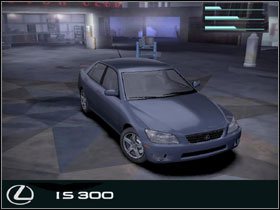

IS 300 was put as a standard car in Most Wanted and did well there. In Carbon it's a bonus car in two version: road, which is on the screens, and racing. The second one looks way better and you will be able to drive it for the first time in the challenge series.
Muscle, tier I
Unlocking: online reward cards
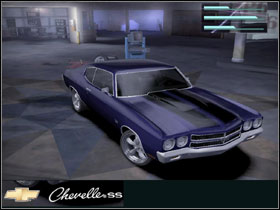
This beautiful car was at one time one of the most popular muscle cars. It handles... well, like a muscle car :) But it works out with its maximum speed.
Tuner, tier II
Unlocking: reward cards
This car was named "toaster" by Underground II fans. For unknown reasons it was the strongest car in that game, leaving no chance to supersport ultracars. We won't have any deja vus in Carbon, because this Corolla's speed matches Lancer's third gear.
Tuner, tier II
Unlocking: online reward cards
In Europe this car is mainly know to Toyota's fans, but in the USA and in Japan this small sports car with central engine was quite succesful. It's also liked by tuners and often armed with all type of bodykits and stuff - too bad we can't do it in game.
Tuner, tier II
Unlocking: reward cards

The previous Eclipse model is way more fondant than the newest one. The car was very popular all over the world and like most of the Japanese cars it was often used for all kinds of tuning.
Muscle, tier II
Unlocking: online reward cards
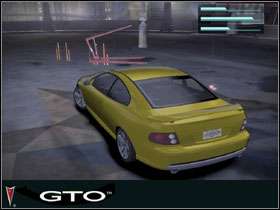
Nice, dynamic muscle car. It reminds Monaro thought - the same dashing lines and its front. Well, not without a reason. The Pontiac GTO is the American version of Vauxhall (Holden) Monaro with the left sided steering wheel. A little bit faster than the basic Monaro, but we cannot tune it up.
Muscle, tier II
Unlocking: finish the career mode
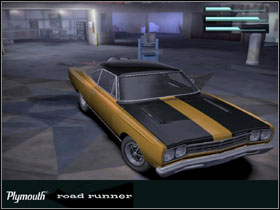
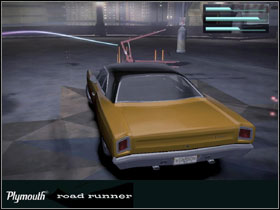
I always wondered if this car got his name after the Road Runner from Warner Bros cartoon. In Carbon we have the 1970 model. What's interesting about this car is that it could take 6 people and with 425 BHP HEMI engine it could make 1 mile in 13.4 seconds! As for 70-s it was the real Road Runned and even today many younger cars can't match it, when it comes to performance.
Exotic, tier II
Unlocking: make it to the 50 Online Exp. level
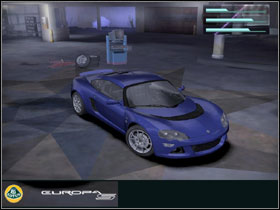
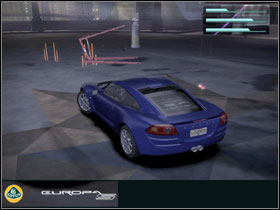
Lotus was building a car named Europa back in 1966-1975 years and it was one of the first construction with middle-placed engine. The one from Carbon is the new Europa, which will be liked especially by drift fans. Unlocking this little Lotus takes a lot of time and requires patience.
Muscle, tier III
Unlocking: reward cards
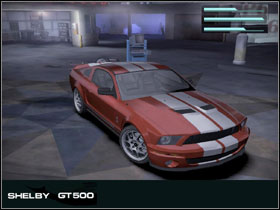
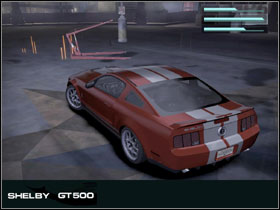
Shelby GT500 is nothing different but Ford Mustang GT on steroids. Different from many bonus cars it's slightly better than the career mode car.
Exotic, tier III
Unlocking: finish the career mode
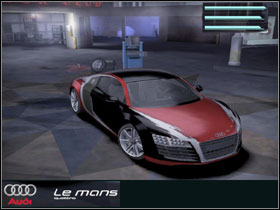
Most of the Carbon records are made with this car. I'm talking about world records, that is. Hell strong, fast and good looking, also has good grip and handles well. Feel jealous, when thinking about Darius driving one of them in front of your nose for the most of the game.
Exotic, tier III
Unlocking: online reward cards
This version of Porsche is the reward in most difficult Within challenges which we have to complete to unlock it, there is a win in a race with EA administrator! Definitely not an easy task, but the car itself is worth it.
Exotics, tier III
Unlocking: reward cards
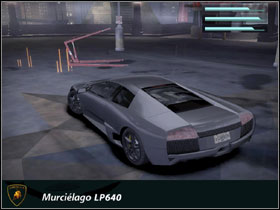
This Murcielago has 6,5 liter engine with 640 brake horse power. Because of that it can be faster and accelerate better than normal version, it has also some changes in aerodynamics, which can be pointed on the front bumper. Too bad that we can't tune it.
Exotic, tier III
Unlocking: reward cards
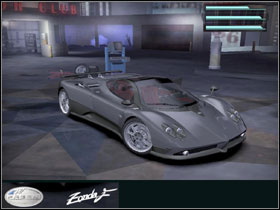
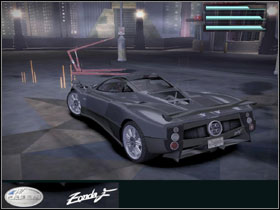
Beautiful limited car made in the Italian Pagani. Its design thrills, just look at this exhaustion tips. It hasn't that amount of power like CCX and Audi has, but its engine sounds great.
Exotic, tier III
Unlocking: reward cards
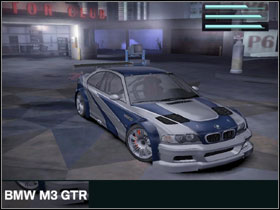
The symbol of NFS: Most Wanted is back in Carbon. Although we lose it in the career mode, but we can re-gain it with reward cards and race as much as we want to. It's still overpowered, one of the three most powerful in the game. Hard to unlock, but worth doing it.
Tuner, tier III
Unlocking: reward cards
We don't like seeing this one in our rear mirrors, but race in it? Why not! Especially if besides it's conservative look it can be really fast. And this feeling, when you win the race against your friends driving Porsches and Lambos, he, he :)
Muscle, tier III
Unlocking: reward cards
This Corvette with bodykit can be annoying in pursuits. But it's definitely not as fast as tweaked Z06, so it's more a tittle-tattle than a racing machine. By the way, I would like to see our police driving such Corvettes - I bet that the number of speeders would decrease dramatically, and also everyone would like to become a policeman :)
Muscle, tier II
Unlocking: reward cards
This car is more a ramming force than a real threat while pursuing. And the SUV drivers have worse "targeting" than they had in Most Wanted, so they hit us very seldom. There are no off-road in Palmont also, but it's fun to drive this car.
Muscle, tier 0
Unlocking: reward cards
First of two joke cars. The trash car is big, unwieldy and slow, but who cares? Find me one person who would try to force something on the road against this one.
Muscle, tier 0
Unlocking: reward cards

I made the screenshot from the same perspective like all other cars - to help you in realising how HUGE this one is. It drives even more specific than the trasher, but if you race with collision detection, then your opponents will quickly realise that size MATTERS.
If you spent extra cash on Carbon's Collector's Edition, then it's your time to celebrate. Cars from this section are available only for the owners of this edition and basically there is no other way to possess them. The only alternative is buying them directly from Electronic Arts webpage. That costs $10.
Tuner
At its time it was a cult car in Japan and USA. It was also present in previous NFS', like in Underground 2. It isn't maybe any supercar, but for sure an interesting proposition for Japanese automotive fans.
Exotic
A real white crow, another prototype in Carbon. It will start to be made in 2007 and is in a straight line an offspring of sport Jaguars. The design similarities between it and Aston Martin DB9 are not surprising, when you realise than both of them were designed by the same man - Ian Callum.
Muscle, tier III
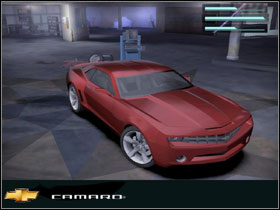
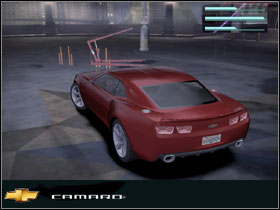
Definitely one of the best looking concept cars in the past few years, especially when it comes to American cars. It production is predicted to start in 2008, and first cars will be available to buy in 2009 first quarter. We don't have to wait that long (and spend that amount of cash) - it's enough to have Carbon's Collector's Edition to drive the Camaro Concept across Palmont.
Exotic, tier III
One of the most powerful car in the game. We may choose between the black and the yellow one. Like I said, very powerful, good handling - definitely one of the favourite car of many players, but it's prohibited in all most prestigious leagues.
Since first Underground tuning is a very important part of every Need for Speed game. Basically we can tune our car in two ways: visually and mechanically. The way you tune your own cars is only a matter of your taste. But it's good to know what and how you can change. Luckily, in this part the situation looks better than in Most Wanted. We have more options and more parts to tweak, although it still lacks the level it has in Underground 2, where you were able to tune almost everything, including side mirrors and lights. For it we have the Autosculpt - a powerful tool, which is very helpful in personalizing our car. To use it, we must have the fabricators in our crew (look at the part "Crew"). The whole fun with Autosculpt is based on the parts. They have some number of points in which the part's shape can be modified. This number is based on type of the part and using Autosculpt we can create our unique "body kits" being sure that no one else will have the same looking car.
We can sculpt the rims, front and rear bumper, side skirts, front hood, roof scoops, spoilers and exhaust tips and also lower the roof in muscle cars. The modifications can be made ONLY with parts from the Autosculpt menu. As I said, the number of points, which we can modify is based on the type of the part. Most often we can tweak its height, width and the shape in different ranges. Most fun and possibilities comes, when we are tuning the rims, you can make fancy combinations with them. Some parts, like hoods or spoilers, have also their carbon versions. Also we can tweak tyres' width (!) and ride height.
Of course, you don't have to use Autosculpt. If you prefer to buy ready parts, you can always use the secondary market option to choose one you want from the catalogue. There are hoods, roof scoops, spoilers and wheels. We don't have the bumpers, side skirts or exhaust tips here, but the choice is greater than in the Autosculpt, also we have entire body kits for different cars.
WARNING! The whole tuning system from Carbon has one big weakness. You cannot mix the Autosculpted parts with the ones from secondary market. It maybe isn't very disturbing, but you still can't put your own exhaust tip to a car with a ready body kit. And mounting custom bumper will force you to abandon your body kit. For visual maniacs it will be irritating, but you can at least mount sculpted roof scoop or wheels to a body kitted car.
The whole painting module is a separate thing. Paintings, vinyls, decals, window tints or painting the rims - there are MANY things to customize. Everyone will find a combination for himself. As for the decals, the EA guys got back to the system known from the Undergrounds. We can now use the layers so it's possible to put as many decals as you want to, but that's not all! you can also scale, drag and spin your decals! And when I say that there are hundreds of painting options, logotypes, vinyls, decals and such then it will mean many hours spent on painting and customising your own ride.
Since first Underground tuning is a very important part of every Need for Speed game. Basically we can tune our car in two ways: visually and mechanically. Very often the right setups are the element that separates the winners from the loosers. There are made within hours of testing and are the most secret weapons of the best NFS clans and players. Besides, the optimum setup depends on the player's racing style in many ways. But it's always good to know what makes what.
All of the mechanical tuning is in the Performance menu. Like in previous games, also in Carbon the parts have few levels: street, pro and racing. But this time the availability of the specific part depends on the car's level too. You cannot put the Carrera GT's turbo into Golf, it's obvious. The scale of modification depends then on the capabilities of a car so it's simple that your first car won't match the best in the game. Besides, differently from Most Wanted the parts are also split by tiers. It means that if we unlock tier I gearbox street package, then we cannot mount it in tier II car. It's also different for bonus cars, such like Audi Le Mans. We cannot tune them at all, visually nor mechanically.
Let's now focus on explaining where, what and how. When we buy a part, we have those mysterious three options, which can be set in three positions each. They are the one that decide how our car will handle on the street. This is how it goes:
It's good to know that the specify elements affect on each other in two "groups": those, who affect the car's acceleration and maximum speed and those, who change it's handling. The only one good method for making an optimum mechanical setup is to test, test and test, so you can find the best setups for your driving style, your car and the track. It's also good to be consequent in tuning the parts - acceleration tweaked gearbox with high RPM turbo doesn't have to be the best combination. It's a little bit different, when it comes to handling - there one setup can equal another to get the desired effect. Good luck tuners!
 Need for Speed: Most Wanted (2005) Game Guide & Walkthrough
 Neverwinter Nights 2: Mysteries of Westgate Game Guide & Walkthrough
 Naruto Shippuden: Ultimate Ninja Storm 3 Game Guide & Walkthrough
 Need For Speed: ProStreet Game Guide & WalkthroughNightmares from the Deep: The Sirens Call Game Guide & Walkthrough