Unofficial Metro: Last Light guide contains first of all very detailed walkthrough of all chapters in singleplayer campaign. Descriptions of particular levels are focused mainly on completing obtained tasks, but you'll find here also many tips on fighting or on remaining in hiding, especially that avoiding starting alarms is properly rewarded by the game (with additional achievements among others).
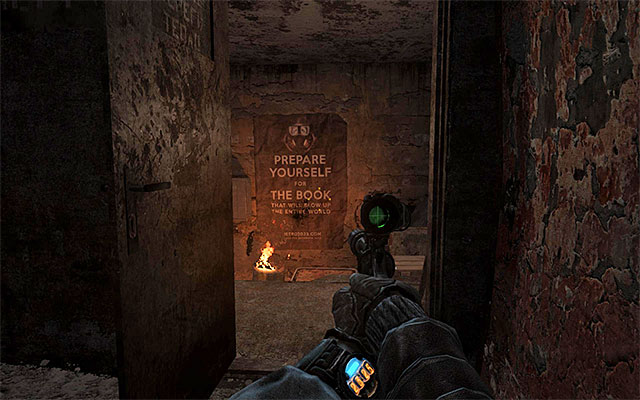
Metro: Last Light is:
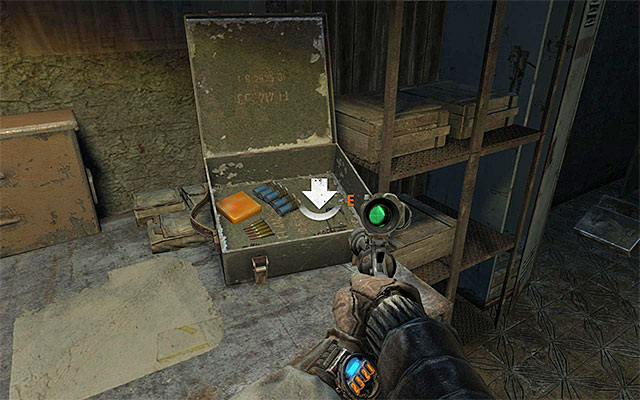
There are some color markings used in this guide. Green is used to indicate places, where main hero can find standard interactive items, like new weapons, ammo or med packs. Orange indicates locations, where you can collect secrets (Artyom's diary pages). Entire list of secrets is in addition posted at the end of this guide to help you to locate all missed notes.
Jacek "Stranger" Halas ()
Translated by: Maciej "Elrond" Myrcha

Move

Crouch

Jump

Sprint

Crouch Toggle

1st weapon

2nd weapon

3rd weapon

Shoot

Zoom / Alternative fire

Reload

Alternative attack

Melee

Use / Interact

Inventory

Gasmask

Swap Filter

Flashlight

Lighter / Diary (hold)

Use Med Pack

Night Vision
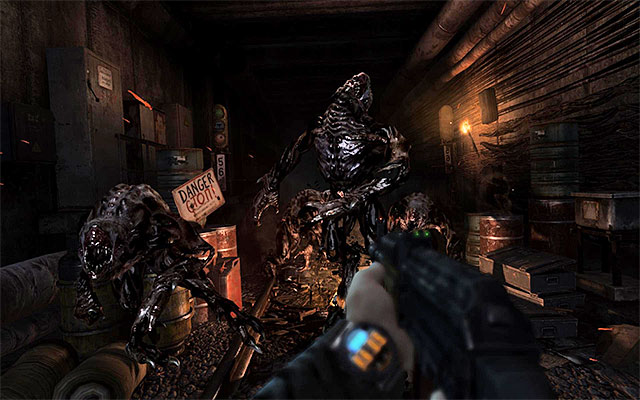
Metro: List Light definitely, is not lacking in the department of demanding skirmishes with monsters. Most often, these are the mutated creatures that operate in packs that aim at shortening the distance between themselves and Artyom, in order to inflict (heavy) damage in melee. The best method of dealing with monsters of this kind is to use any shotgun that have a large firepower at short distances. Remember, at the same time, that you need to remain in constant motion, especially if you are using a double-barreled shotgun or any other type of weapon that requires frequent reloading.
Apart from the abovementioned shotguns, in certain situations you can also employ different tactical solutions. If mutants appear at a larger distance, (e.g. the mission in which you ride the railway car along the derelict tunnels), you can discharge your machine gun at them, before they come closer. In the narrow corridors, on the other hand, a very good asset is the fact that you can use mines, which you can deploy in the mutants' path.
An important piece of information is that some of the mutants that you encounter later on, are not aware of Artyom's presence. In such a situation, you can try and walk around the creatures (it is important to do it at a safe distance and outside of their range of vision) or take them off guard. In the case of the latter, it is a good idea to use a suppressed weapon and aim at the head.
Another monster class that is quite frequent is the shrimps. You will face these creatures for the first time on your way to Venice. And they are plentiful also on the swamps. In the chapter entitled Sundown. To eliminate these creatures, you can also use a shotgun. Just remember not to shoot when they are covering with their armor because, the damage inflicted then is considerably lower.
Many of the shrimps do not attack Artyom until he visibly comes closer to them. That is why you can use grenades to fight them. It is also worth knowing that you can decrease the frequency with which you are attacked by them, by limiting the time you spend near water. What is even more, you can also try and flee from them as they are not as agile as the mutants described above.
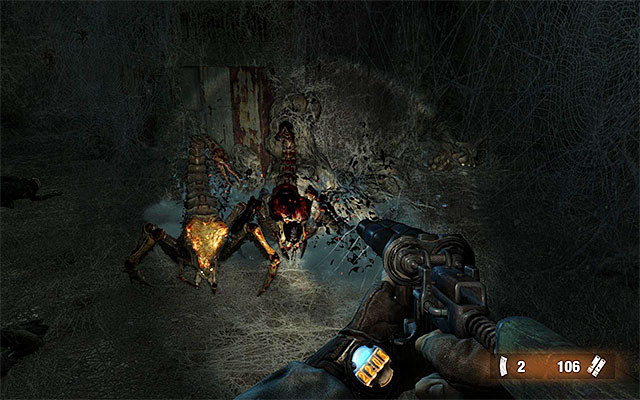
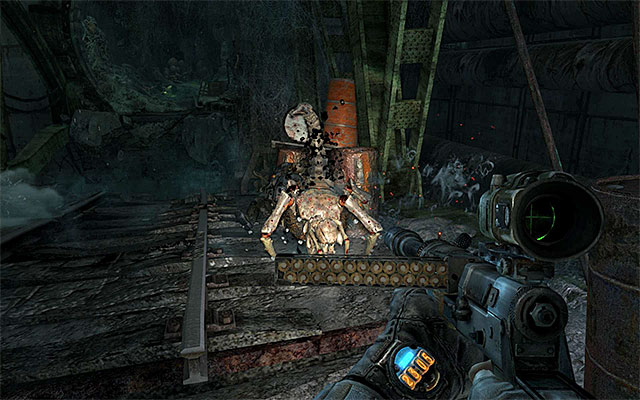
Another category of monsters is the radspiders that dwell only In the dimly-lit tunnels. They are not too demanding adversaries, but the strategy is quite atypical. Since radspiders are sensitive to light, initially, you should be lighting them with your torchlight charged to its maximum. Start shooting at them only after they flip over belly-up, because that is when they are defenseless and its bottom part, devoid of any armor, is exposed to your attacks. .
In some locations throughout the gameworld, these appear in unlimited numbers, and it is so until the power is restored. In such a situation, I recommend against wasting ammo, and trying to get through the area as quickly as possible. Escaping from radspiders is possible although, you need to make sure you are not running into a dead end where you will be cornered.
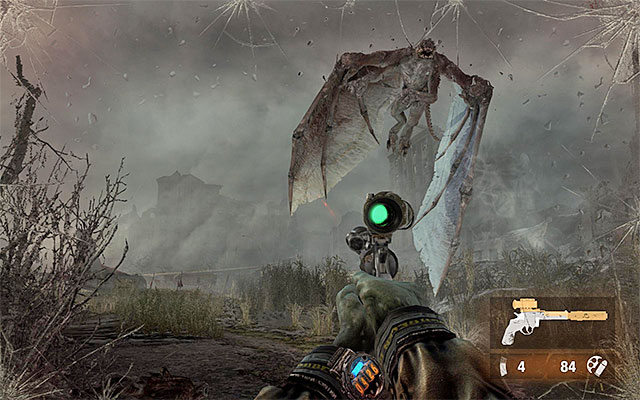
The last main category is the demon, i.e. the large flying monsters. If you want to fight them, I recommend that you use a good machine gun with a scope.
A very important issue, while fighting the demons, is that you cannot allow too many situations in which the demon grabs Artyom and inflicts heavy damage while airborne. You can prevent this from happening by finding yourself a shelter where you can hide under some sort of roof. This will make it more difficult, or even impossible, for the demon to attack. It is worth knowing that you do not have to kill all the demons.. In some situations it is a better idea to retreat from the areas patrolled by them (you do not need to worry that the demon will be chasing you until you reach the other end of the map).
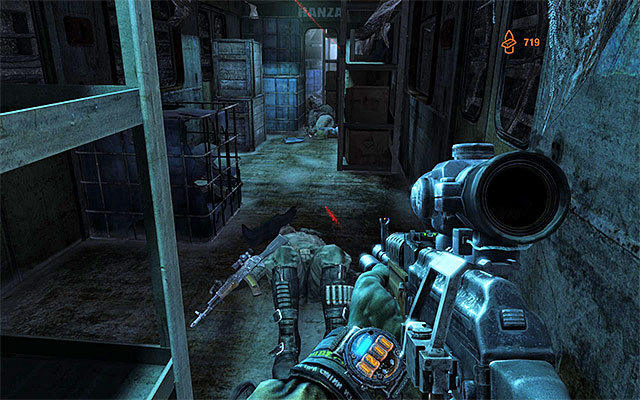
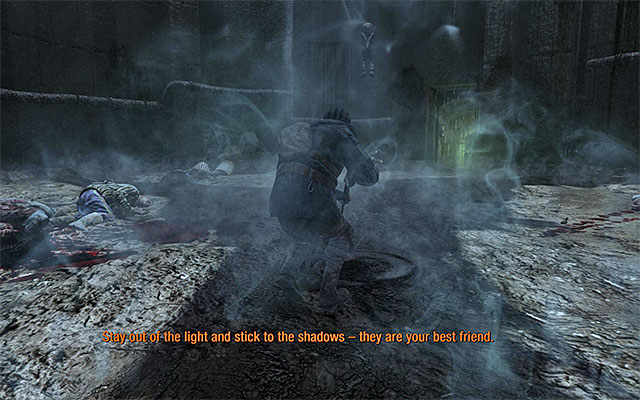
In large majority of cases, the enemies that you encounter are not aware of Artyom's presence. Therefore, they are not prepared for your arrival. This state of affairs encourages you to play in the shadows, which consists in avoiding or eliminating the enemies without raising alarm.
If you are not averse to killing the enemies, I personally recommend a suppressed weapon or throwing knives, especially that the knives can, later on, be retrieved from the corpses. If you are not going to kill anybody, you can still avoid the guards or, keep knocking them out in melee (make sure though, that you press the button for knocking out, and not for a silent execution with the knife). Personally, I prefer the latter because, you will be able to explore the area undisturbed, or search the guard (regardless of whether he is unconscious or dead).

It is not especially difficult to remain in shadows in Metro: Last Light. Still, it is a good idea to remember about several things. The most important thing is to stay out of light and here, you can make use of Artyom's watch, which tells you if you are in hiding, or you are in full light (blue light on). You can also destroy sources of light, and a suppressed pistol is the best for this job. You only need to make sure if there is no guard next to the source of light because, destroying a source of light might alert him. In such a situation, it is better to approach such a source of light (if possible) and turn it off, or blow it off. It is worth mentioning here, that further in the game, the guards come equipped with their own torchlights. Do not attempt to destroy them, of course. A way better idea is to get such guards from behind.
Another important issue, when it comes to sneaking, is that you shouldn't leave the bodies of the knocked out/killed guards out in the open, where they could be easily spotted. Because Artyom is not able to carry bodies, the best idea is to wait for individual guards to walk away from their group and then to attack them from shadows.
Some time into the game, you will have to take part in direct fights with the enemy units. What is most important in such situations is the ability to take cove effectively, to avoid taking too much damage. While caught in fire exchange, you need to remember to use the kind of weapon that is most effective at a given range. Therefore, you should be selecting which weapon to use, depending on whether it is a long range (machine guns) or medium range (shotguns) fight. At the same time, try and aim at the heads of your enemies, which will save you ammo and time while eliminating the threat. Apart from firearms, it is also a good idea to make use of grenades frequently, especially if you notice a larger group of enemies taking cover, and they do not plan to charge at Artyom.
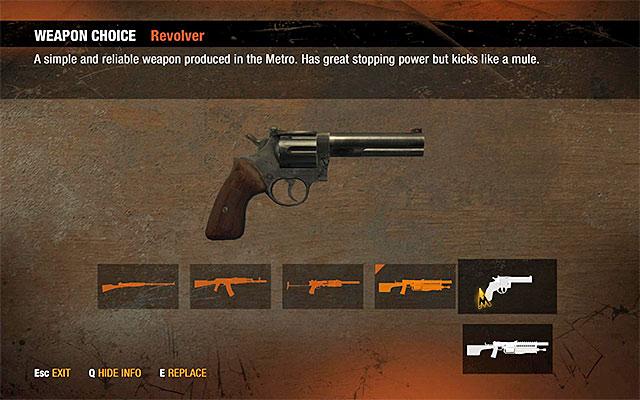
At any time, your character can have on him, at most, three different pieces of weaponry. The choice of weapons should be excusable by the preferred playing style. If you want to operate in shadows and fight only if you have to, it is best to choose a set of a pistol, an assault rifle and a double barreled shotgun/regular shotgun. If you, on the other hand, prefer to wreak havoc and go medieval on all the monsters and enemies, I recommend that you go for a rifle (sniper rifle for example) or a good machine gun.
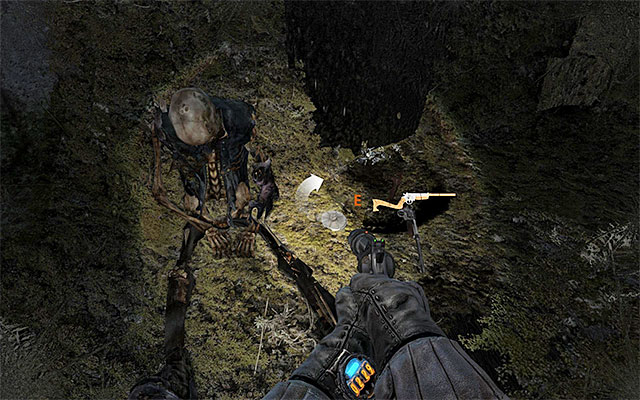
New kinds of weapon can be acquired in two different ways. Variant one consists in finding them in the game world. The weaponry that you can find at the killed enemies are usually nothing special. The most valuable ones can be found by means of exploring the world carefully, because the ones that you can find at the skeletons or in the crates are usually more interesting and they often come with modifications. (more about these further in this text).
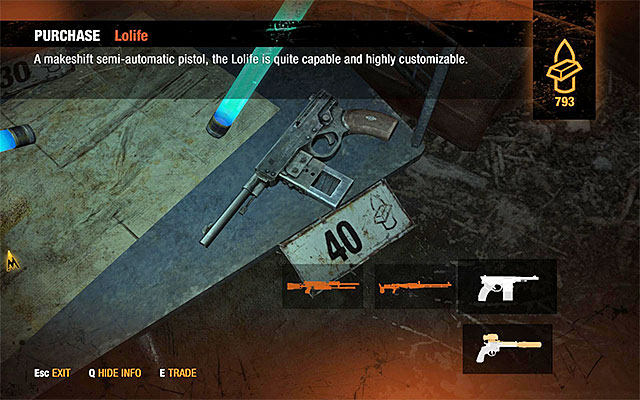
Variant two assumes that you buy these from local dealers. Every dealer that you meet has a selection of weapons on stock, including the ones that cannot be found anywhere else. That is why it is worth recommending that you check carefully what is on stock (the dealers' whereabouts have been given in the walkthrough section of this guide) because you can always find something that corresponds to your playing style.
The dealers also offer all sorts of modifications for weapons and I recommend that you purchase these for all the kinds of weaponry currently possessed. To the extent that it is possible, try to buy as many modifications as possible, and especially silencers, scopes or elements that improve stability. It is worth mentioning here that the best modifications become available towards the end of the game. Therefore you should check the inventory of every dealer that you meet during the campaign mode.
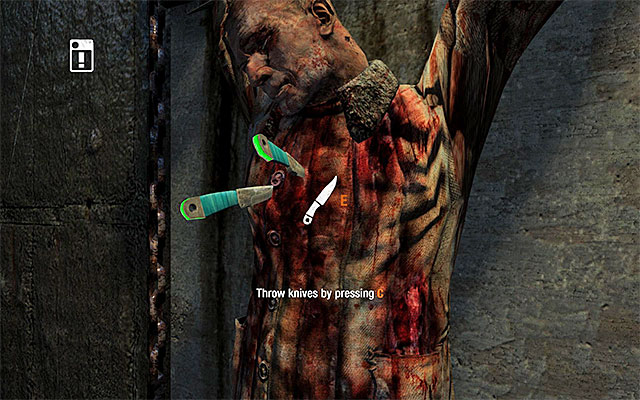
Apart from firearms, you can also use auxiliary equipment. In my opinion, throwing knives turn out to be the most useful. Like I have said earlier, knives are ideal to deal with enemies silently. Additionally, you do not need to worry about their supply because, you can retrieve them from the corpses of the soldiers you kill. The remaining ones are explosives. Grenades are very good when it comes to fighting shrimps and the living enemies. Claymore mines, on the other hand, are effective in battles with mutants that are more agile.
Regardless of your playing style (sneaking or getting involved in direct battles), you should always make sure that you have considerable amounts of ammo and explosives on you. This way you avoid dead ends when surprised by bosses or larger groups of mutants. Supplies (weapons, ammo, first-aid kits etc.), can always be scavenged for, and found in various crates, backpacks or lockers. Apart from that, you can always examine skeletons and corpses that you find. All the same, you need to remember that this may bring about the "bad" ending of the game (more about this in the section entitled Endings).
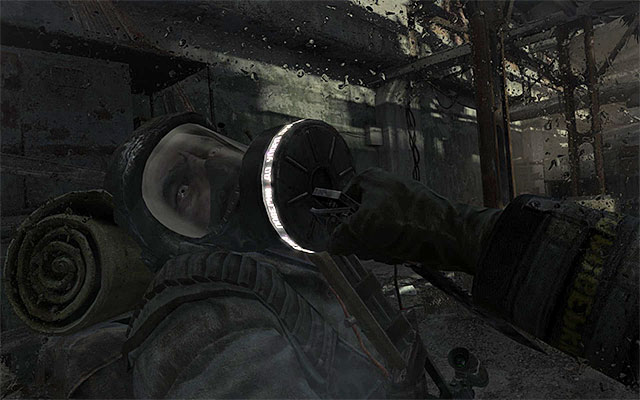
In Metro: Last Light Artyom gets to explore the outside world, and other irradiated areas, more often than it was the case in the previous installment. The general premises have not changed too much, when it comes to that. So, again, you will have to wear the gas mask with filters that grant the possibility to breathe clean air.
The appropriate management of the filters is one of the keys to succeed, because you can not afford a situation in which your character is far away from any safe shelter without the possibility to breathe clean air. The filters that you get from NPCs and find in the most obvious of places usually grant you as much as a safe passage to your destination. If you want to explore some more, you need, therefore, remember to explore the area thoroughly and look for filters in the same spots as for the "regular" supplies i.e. crates and corpses. What is interesting, the filters that you scavenge out in the open, are rarely new and they last not more than the "standard" five minutes. The game displays the overall amount of time, in minutes, for all of the items of this kind in your inventory, at the moment of collecting a new filter.
Apart from the filters described above, you should also remember about replacing your gas mask. As a result of the battles you fight, your mask is damaged, which is depicted by the cracks that gradually appear in your vision. That is why, apart from filters, it is also a good idea to search for new masks, which can usually be found on corpses. Otherwise, you may bring about a situation in which your current mask is totally destroyed, and you will have to find a new one as quickly as possible (which usually ends in failure and Artyom's death).
The game starts with partially interactive introduction, taking place in metro tunnel. After hearing strange noises and experiencing image distortions, attack your allies who transformed into mutated creatures, naturally using your firearms. This sequence will soon come to an end and it turns out that it was only Artyom's nightmare.
Wait, until main hero recovers himself. You do not have to hurry to get to the meeting place with Miller, so you might carefully check all areas of the camp, especially that interacting with environment elements (light switches, musical instruments, etc.) is required to complete some of achievements (there is a guitar and recorder in a start room among other things). You can check the currents objectives by selecting diary in your inventory (note the compass pointing the way to your destination).

Go out the room and start more linear exploration of the base. Along the way you should consider to stop often in order to listen to conversations of encountered characters and to check side rooms. After reaching a larger area with four allies, look around for a guitar and a recorder.
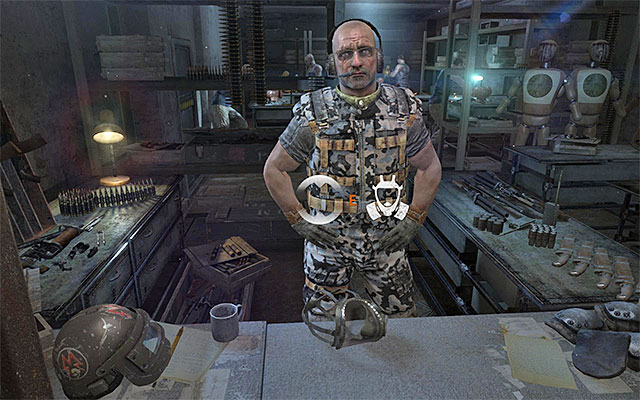
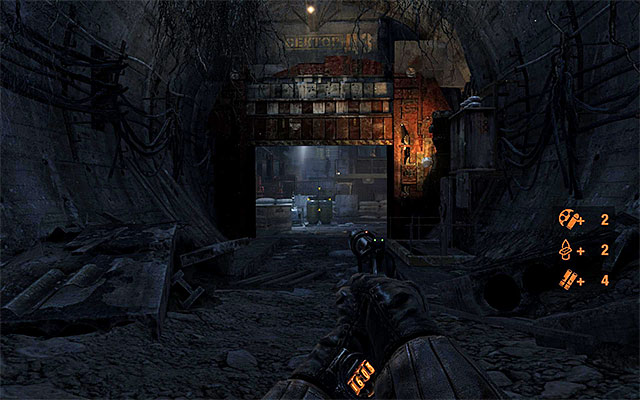
Soon you'll get to the armory. Listen to short conversation and collect all given items: gasmask, 2 gasmask filters, medkit and 160 military-grade rounds. Same as in the previous part of the game series, military-grade rounds acts also as currency, so it would be good to save them for later to buy new stuff from traders.
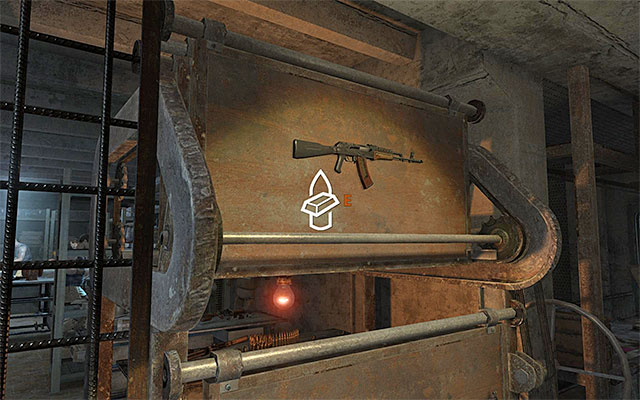
Now go to the rack located on the right. There are 5 types of weapons available there, but you can carry only three of them at a time. Personally I recommend taking a rifle, Kalash and a shotgun. It would be also good to upgrade each of them. Unfortunately, for now you can only mount a scope sight and a silencer (very useful modification if you prefer stealth type of gameplay in later chapters).
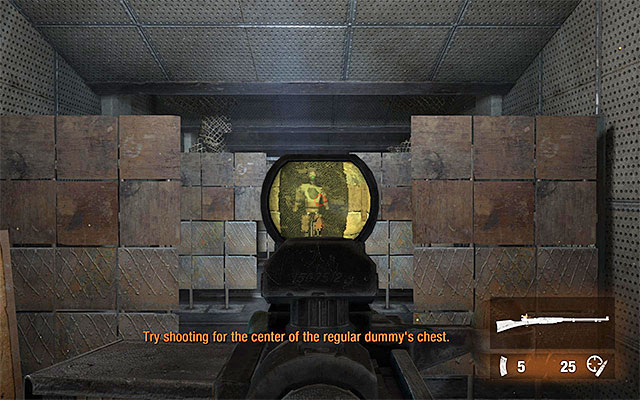
Once you choose your weapons go to the range located right to the weapons rack. You can test here attacking standard opponents and armored ones (in the latter case it would be good aiming for the head according to game suggestions). Depending on your preferences you can continue the training (push a red button) or after completing the basic tutorial, leave the place (do not forget to replenish ammo).
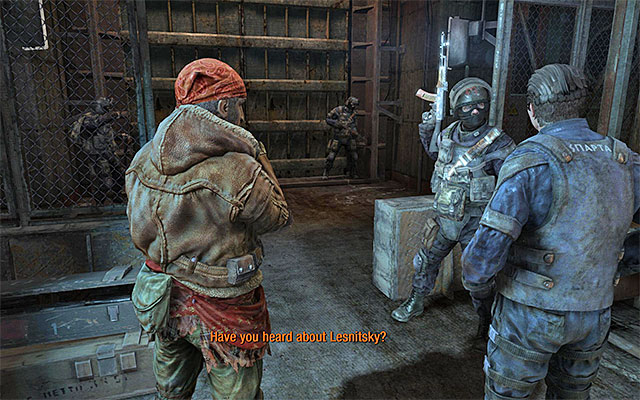
Turn around, get to the closest door and resume the linear walk. Stop only when you reach a barricade. Wait until the conversation is over and the large gate is opened. Use a newly unlocked passage and get inside the elevator which will get you to the new level.
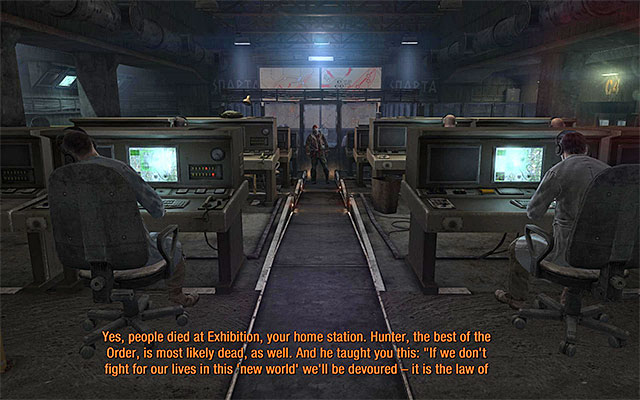
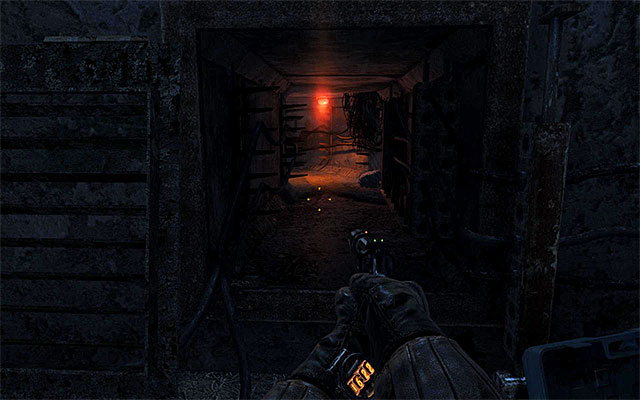
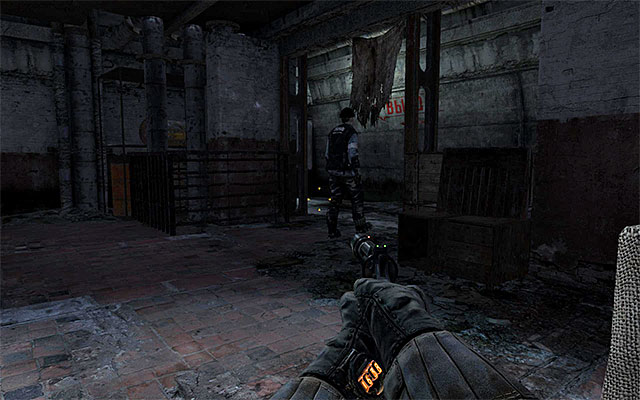
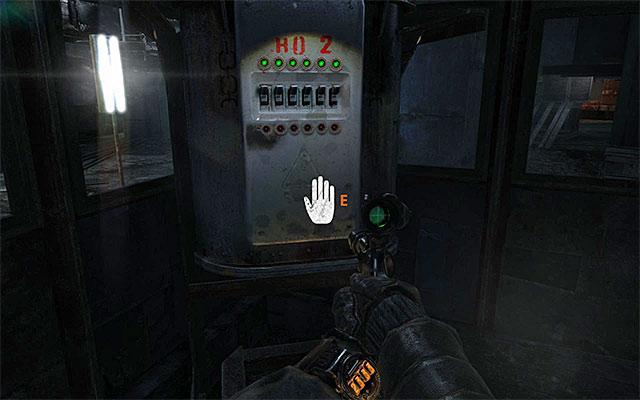
After getting to the lower level exit the elevator and move straight ahead. Same as previously, you can focus only on getting to the target or stop at the allies along your way to listen to their conversation. Your current objective is Order HQ shown on the above screen. Get inside a lower room, where Miller stays and watch longer cutscene.
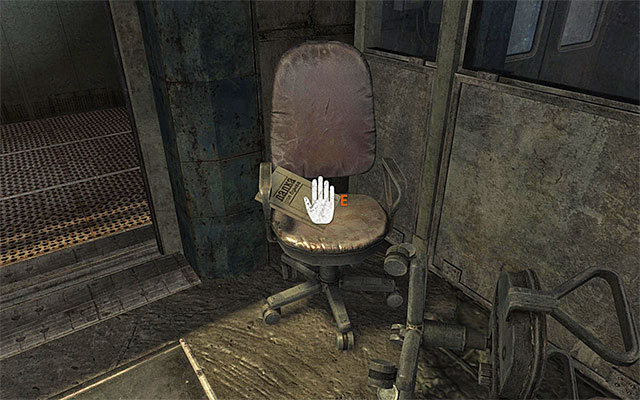
Follow Anna, choosing a new exit from the conference room. Stop in the next room and take a hidden Artyom's diary page shown on the above screen (collectible). It is worth to open a diary and read a new entry.
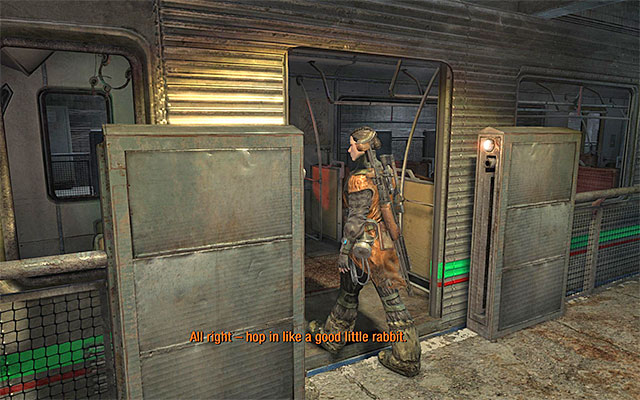
Now you can enter the elevator. After getting to the new level, wait until train appears. Enter the wagon, thus ending the first game chapter.
Wait until the train gets to a new platform and start exploring it. Follow Anna's suggestions and turn on the flashlight because the area is poorly lit. Locate the platform exit and pull the lever located right to the door in order to open it.
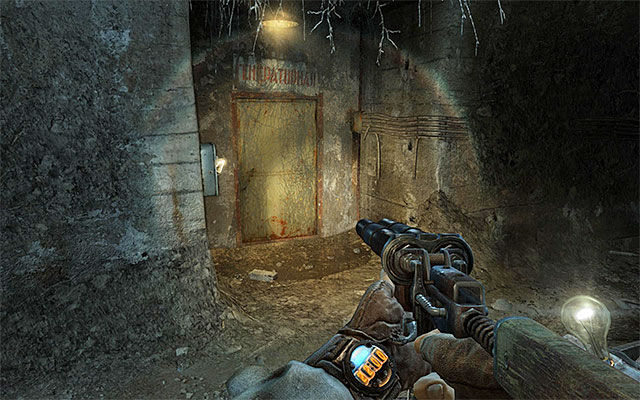
Follow Anna. Currently you won't encounter any monsters or enemies here, so you do not have to watch out particularly. But is it worth looking around for standard ammo and military-grade rounds. Open new door, leading to a tunnel.


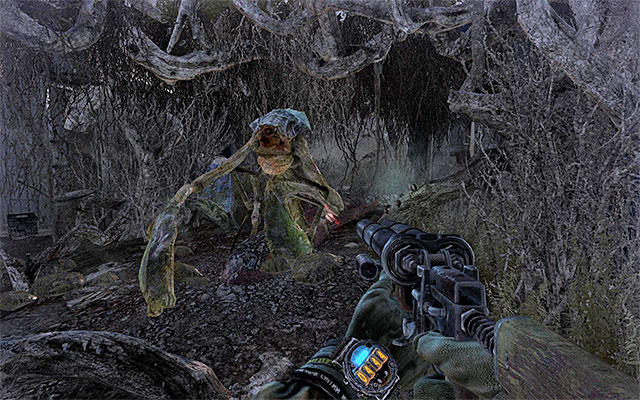
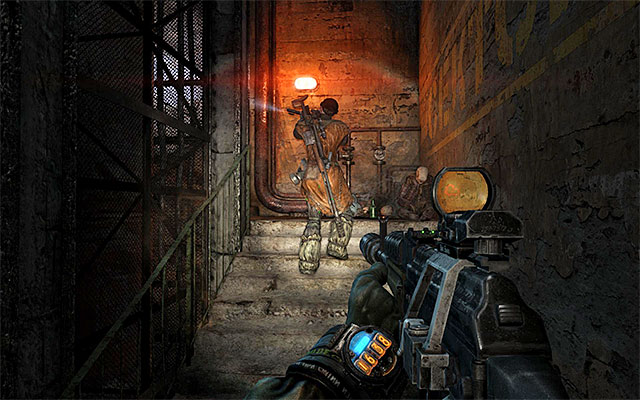
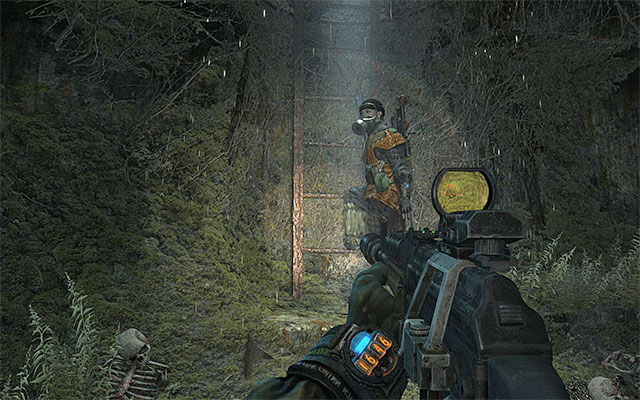
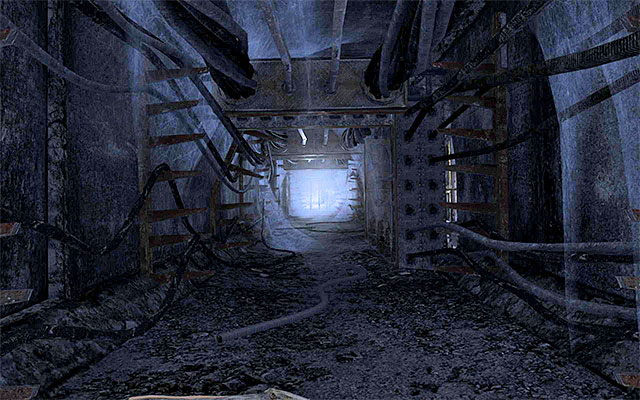
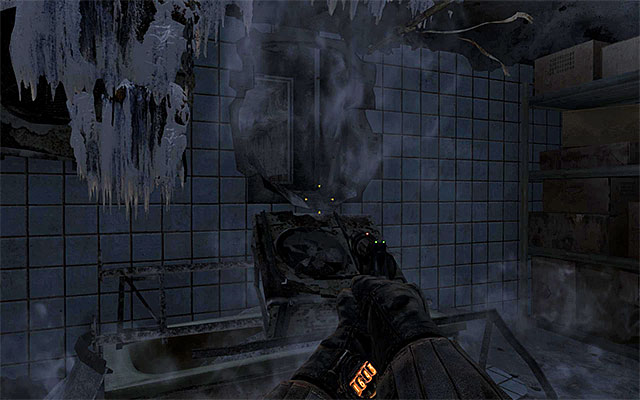
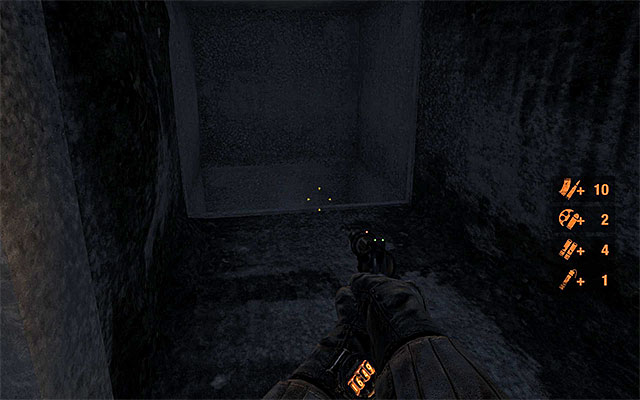
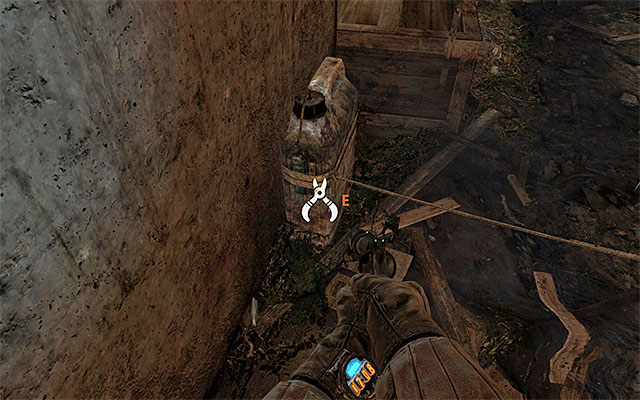
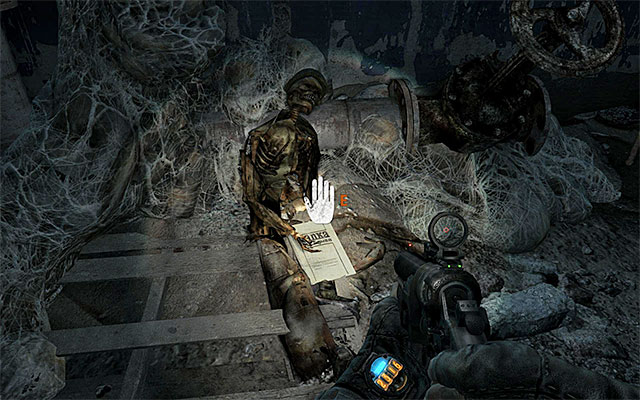
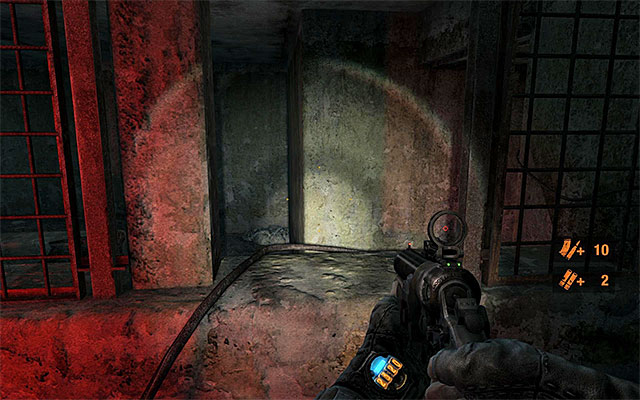
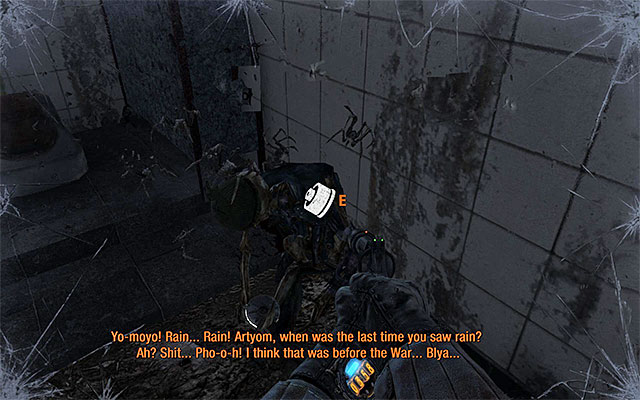
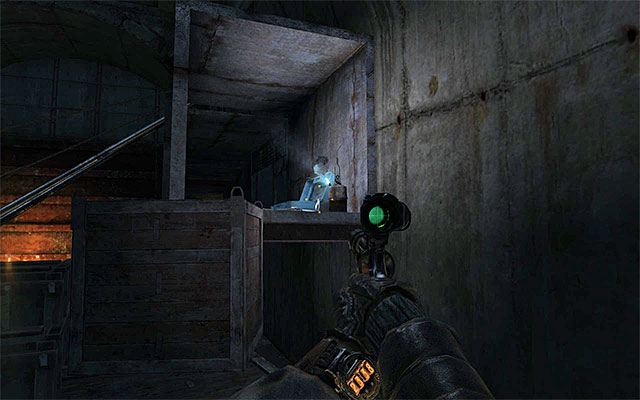
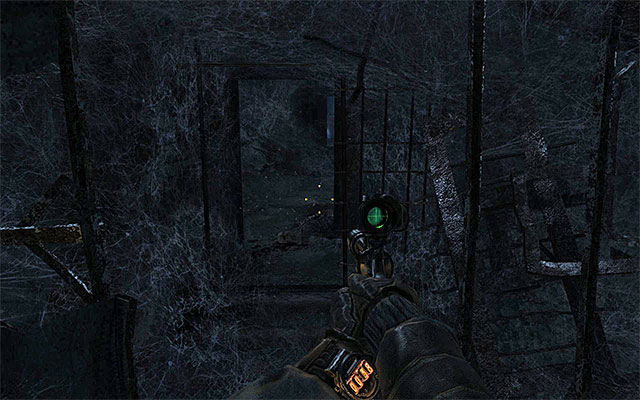
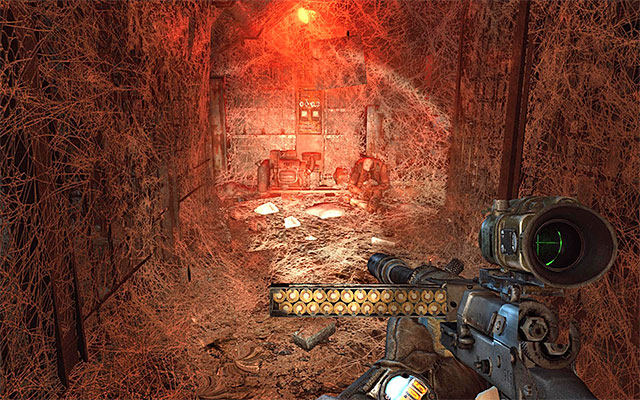
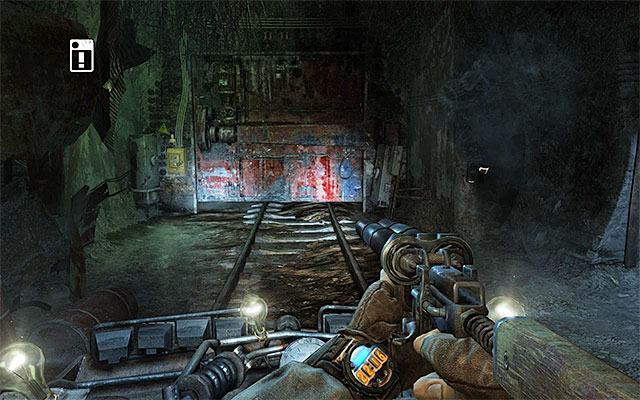
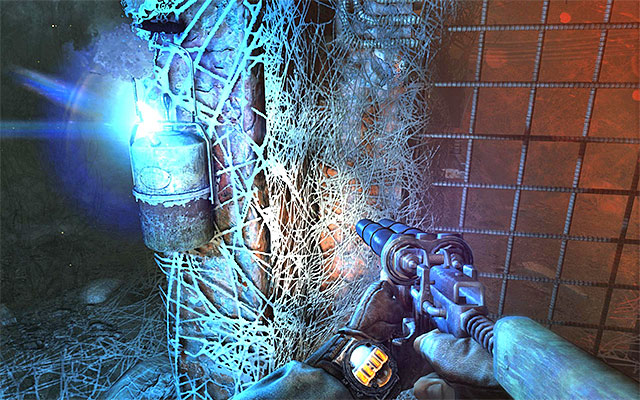
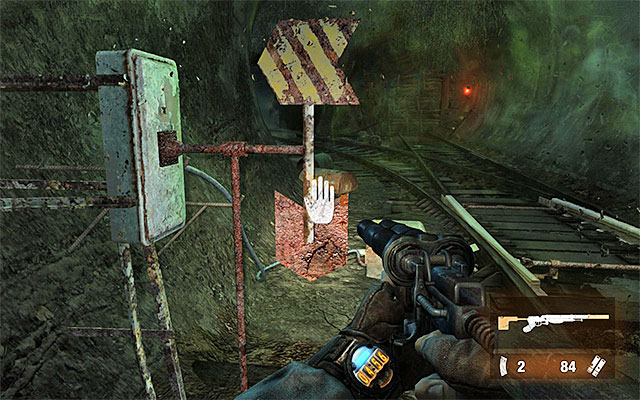
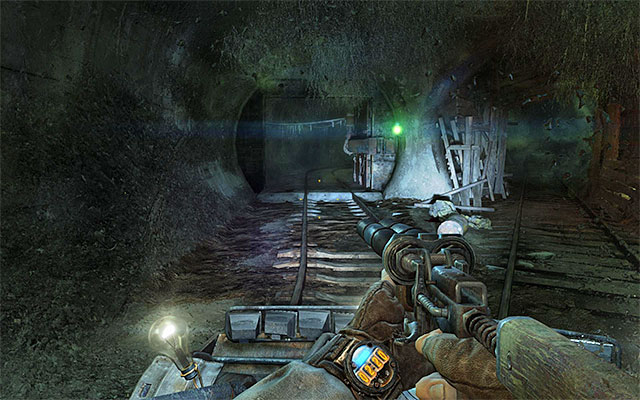
Turn right and move further, ignoring a single mutant, who will appear in a distance after a moment. After getting to the ladder, ignore Anna for a moment and examine the end part of the runnel. A corridor with spider webs shown on the screen 1 leads to the hidden Artyom's diary page lying on the ground, shown on the screen 2.
Now return to the ladder. Put on a gas mask and climb up the ladder, thus getting to the surface.
Keep following Anna. It is worth to sprint from time to time according to the game suggestions, because a single gas mask filter is good enough only for 5 minutes. After that you have to swap it for a new one (fortunately you got two of them free in the previous game chapter).

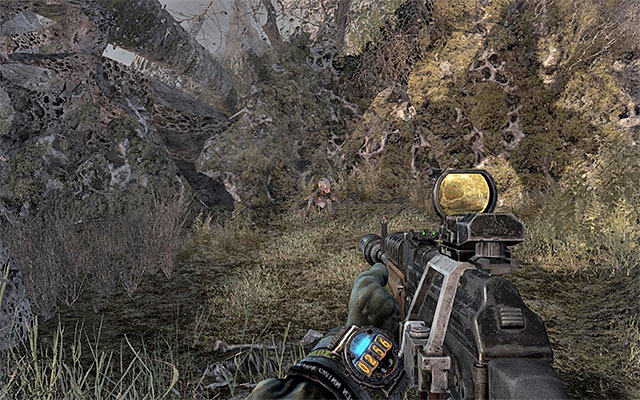
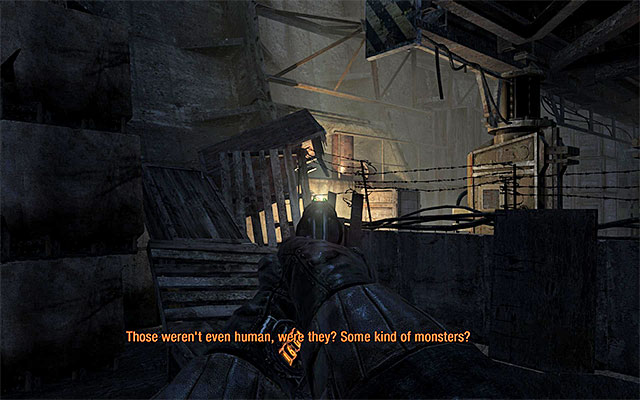
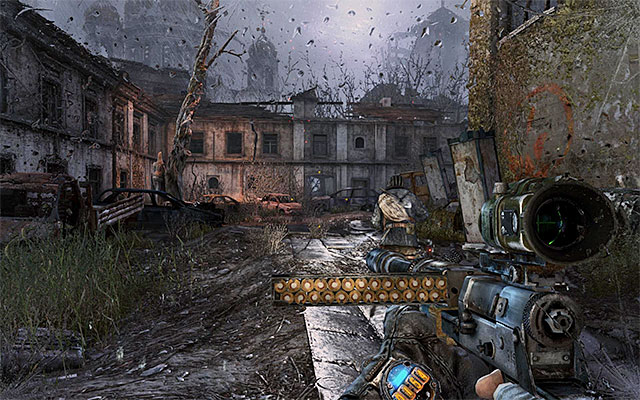
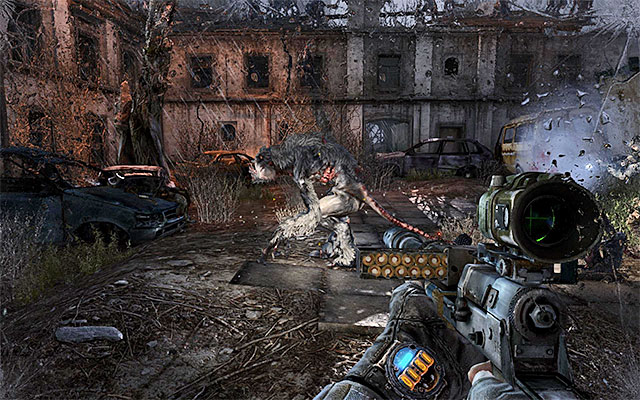
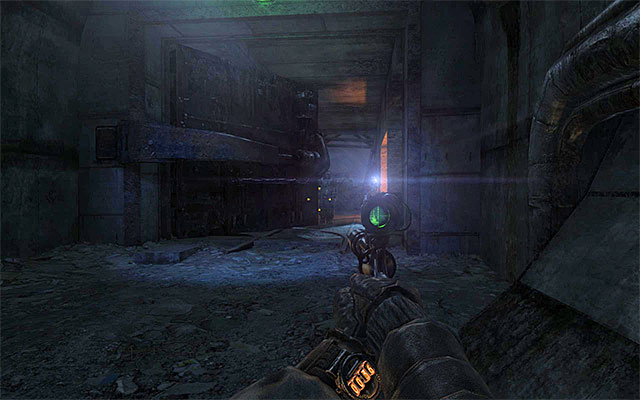
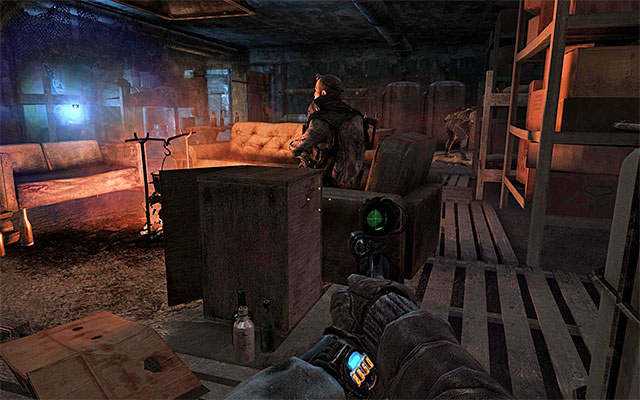
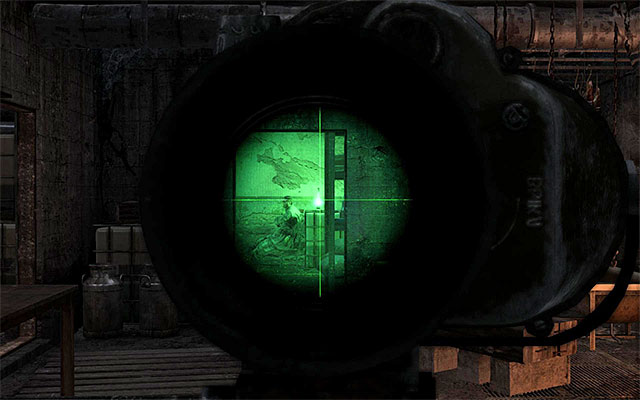
After getting near a bombed nest, Anna will stay at the good point for a sniper fire and send you to explore the mentioned location. After getting closer you'll be attacked by three mutants. Use the shotgun to eliminate opponents, since it has a big firepower.
Prepare for attacks of two more waves of monsters. Good news is that Anna will help you to kill them, so do not worry too much. After the battle check whether Artyom is hurt and use the medkit if needed.
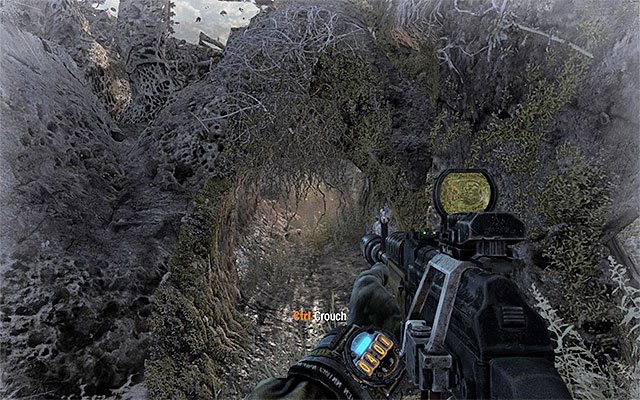
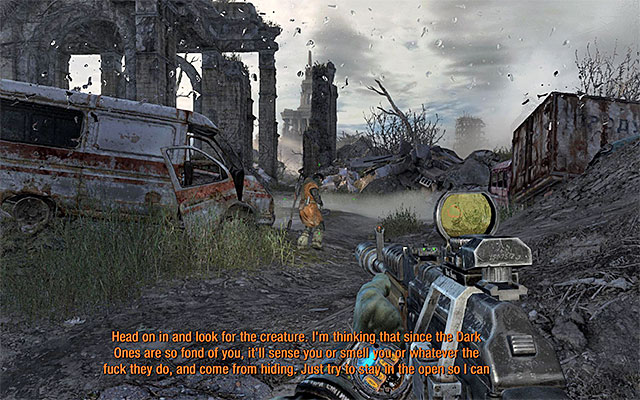
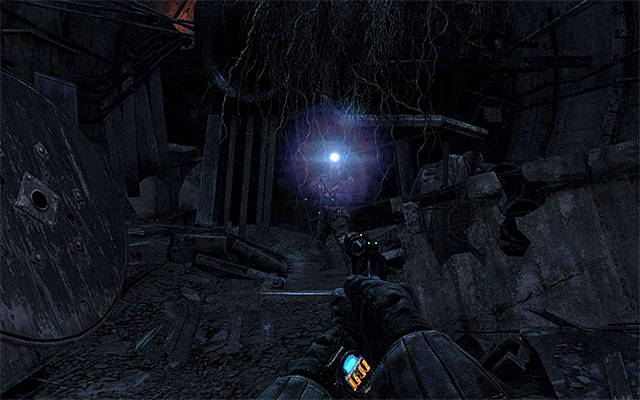
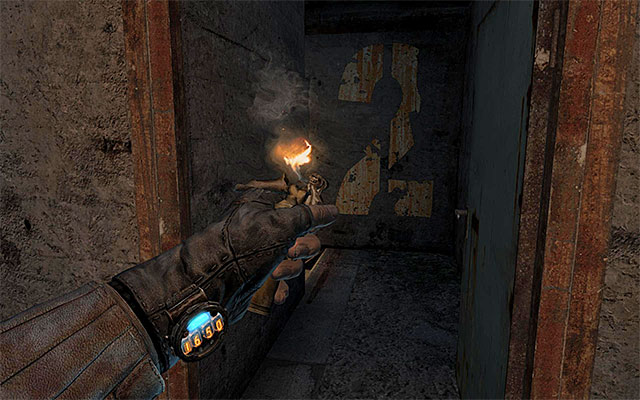
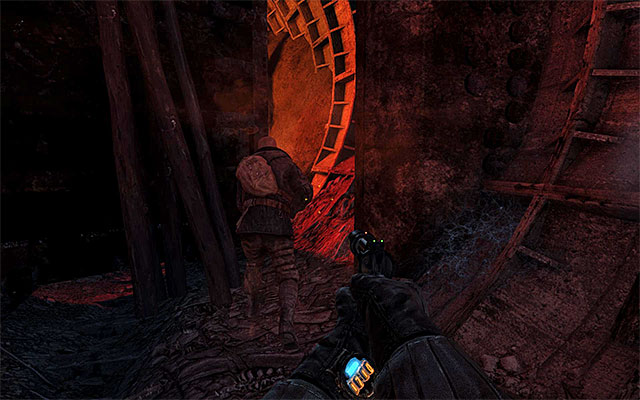
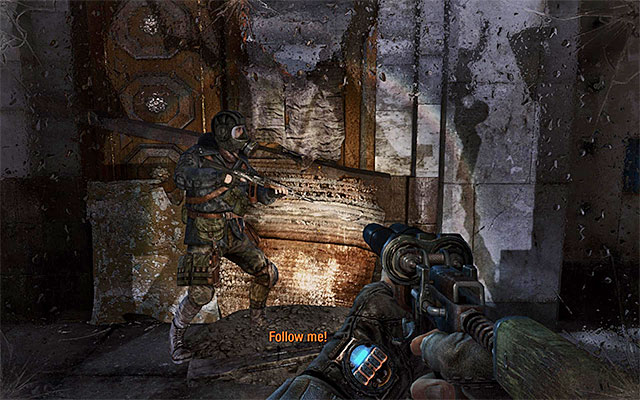
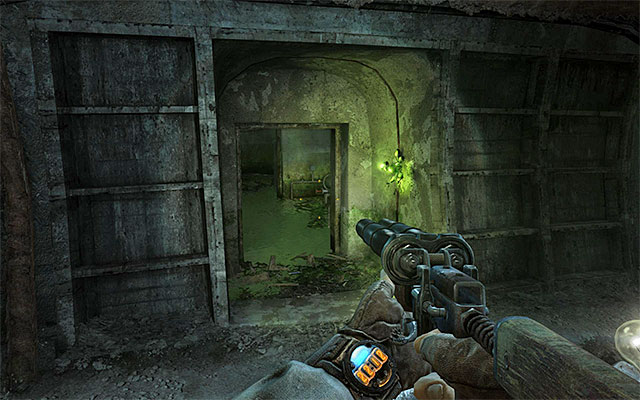
Head towards the crater, reaching after few moments a place where the Dark One is hiding. Do not try to attack this creature, because it will start fleeing and this is scripted behavior. So follow the Dark One, choosing a narrow passage (crouch in front of it - screen above).
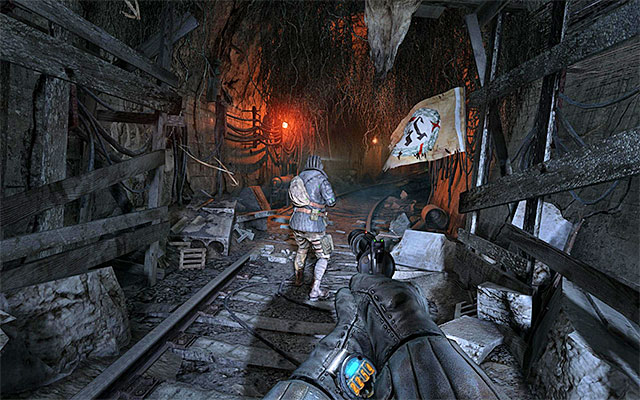
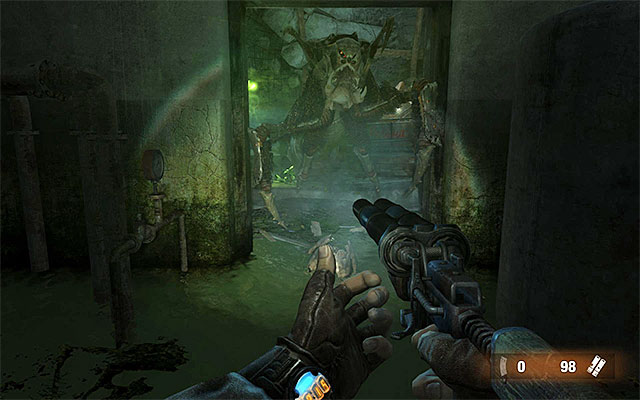
Keep chasing the Dark One. The game will allow you to catch it only after getting to the area shown on the screen. It would be good to use here a close/mid range weapon. Watch a series of cutscenes, which end the second game chapter.
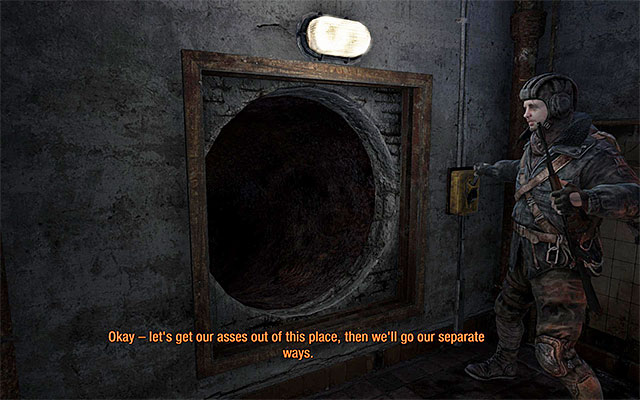
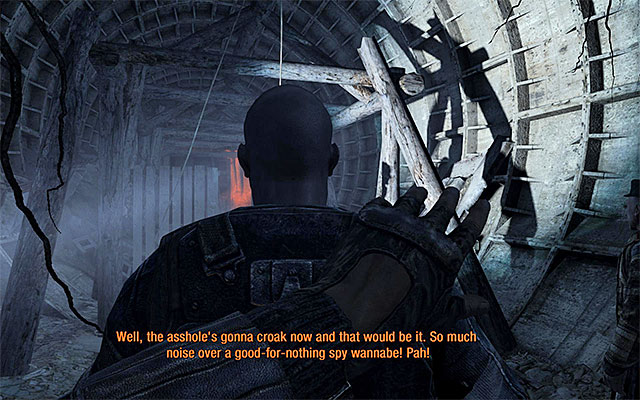
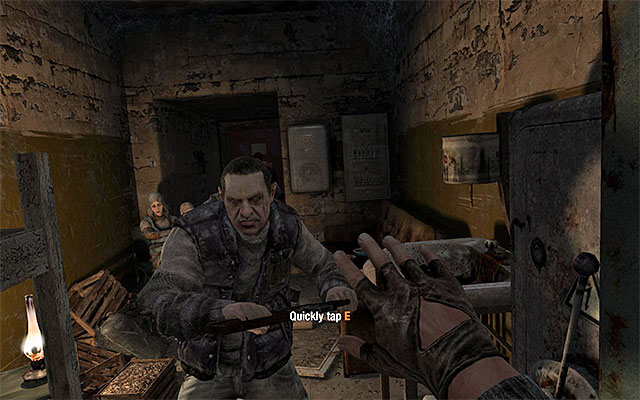
You'll regain control over Artyom only after killing a hostile officer. Note also that you've obtained a knife from Pavel. Wait until your ally unlock an access to the trash chute and jump inside, thus getting out from the locked room.
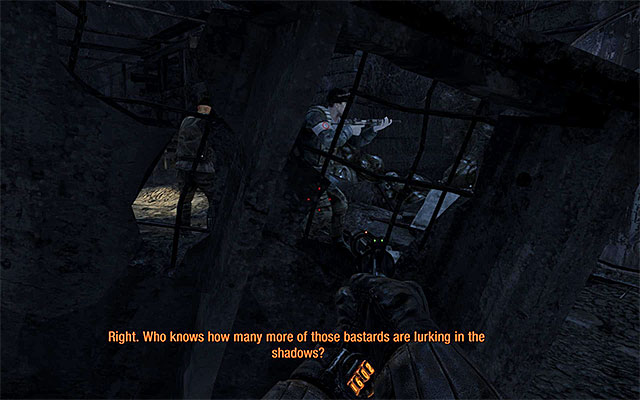
Follow Pavel. Right now you do not have any firearms but this is not a serious problem, since the beginning part of this chapter focuses only on staying in hidden. Stop after reaching larger oval area. Crouch and wait for Pavel's reaction.
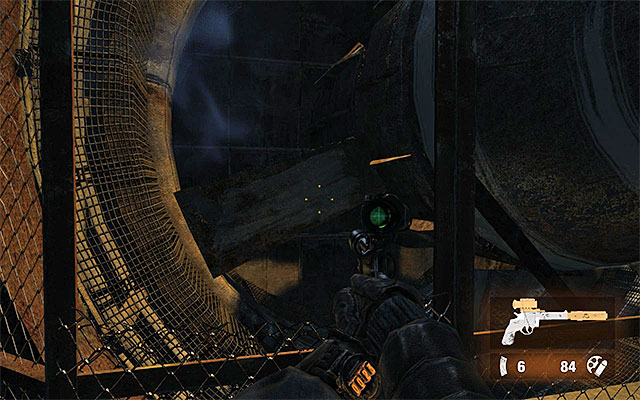
Keep close to Pavel and do not leave shadows, because that would mean detection and triggering an alarm. If you fail to make first move, wait until a large fan rotates sufficiently so you can choose an unlit path. Repeat those actions after a moment, again trying to stay in shadows.
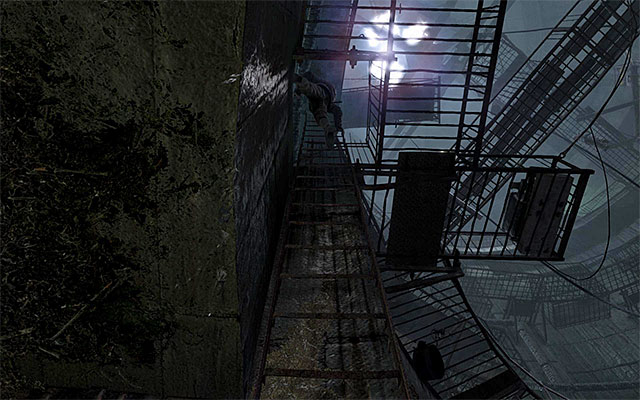
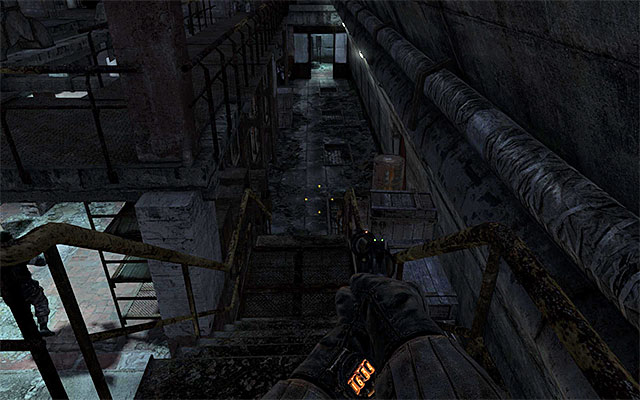
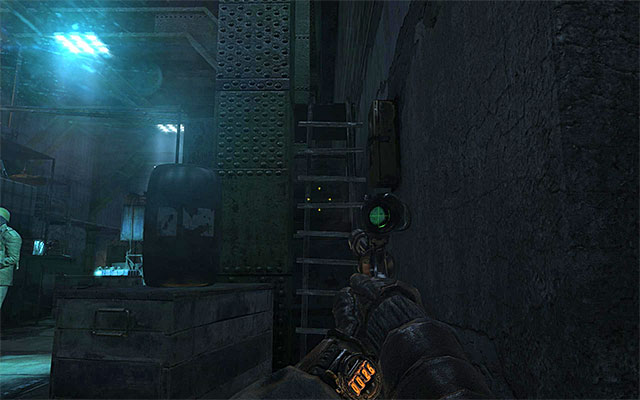
Listen to short speech from Pavel and approach him to give him a hand. Wait until you ally lowers a ladder for you. Use it and climb up, reaching upper metal balconies.
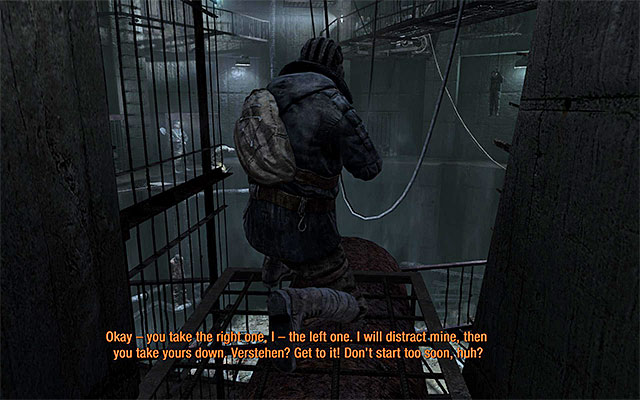
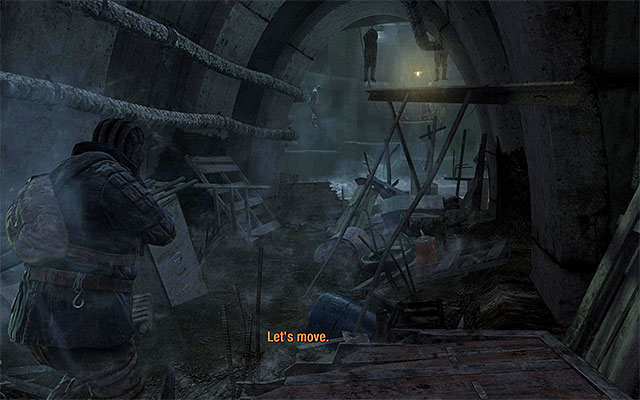
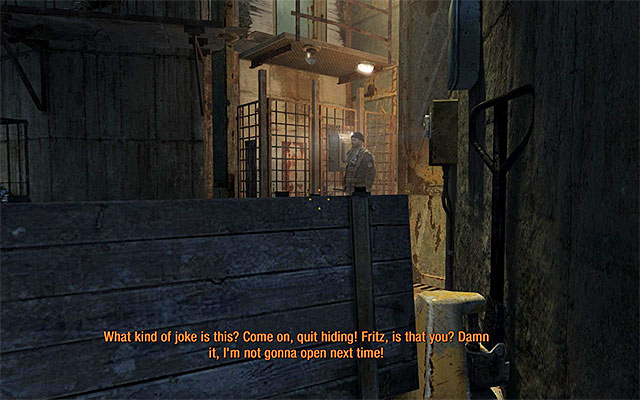
Make sure that you're crouching and slowly follow Pavel. Listen to your ally's instructions, stopping and resuming your march, according to his guidance. After reaching the elevation shown on the screen, listen to one more hint about silently getting rid of the right guard.
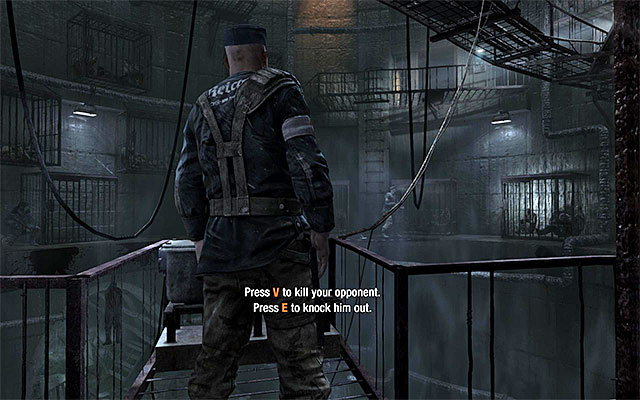
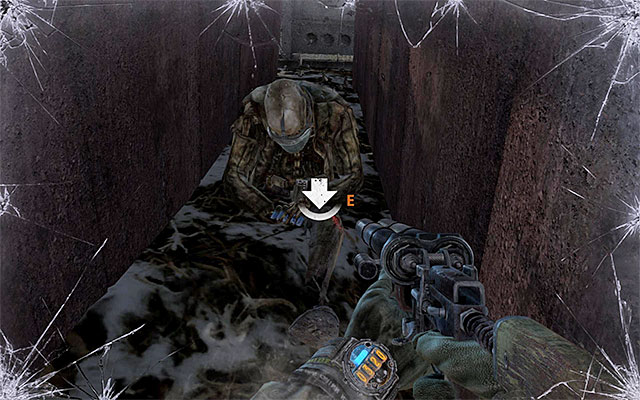
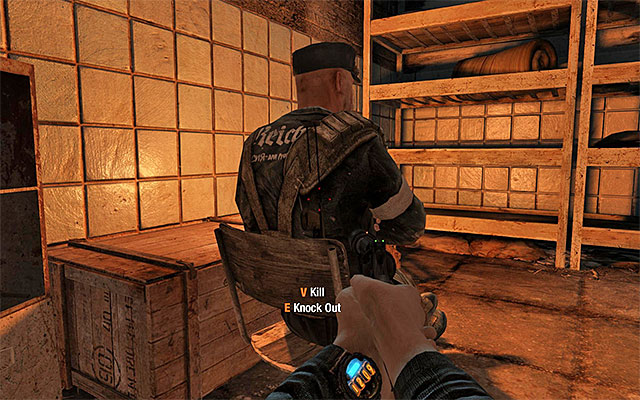
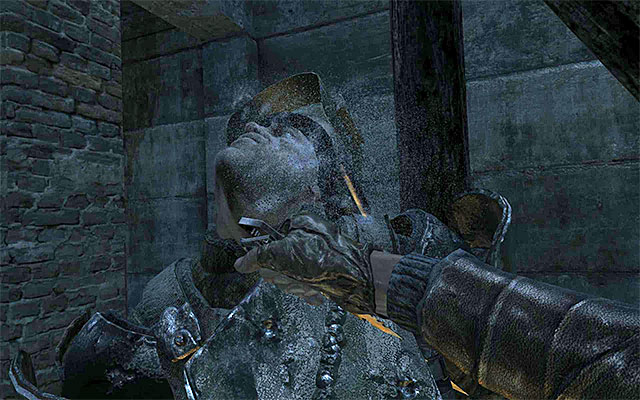
Turn right, jump down to the lover catwalk and carefully approach the opponent. Wait until Pavel distracts another guard visible in a distance and start your actions. Move behind the guard. Note, that you can either kill your opponent or just knock him out. The latter option is of course better, especially if you want to complete the game without any murders in order to get the proper achievement. After the successful action do not forget to examine the body (you can often find ammo, military-grade rounds and other interesting things).
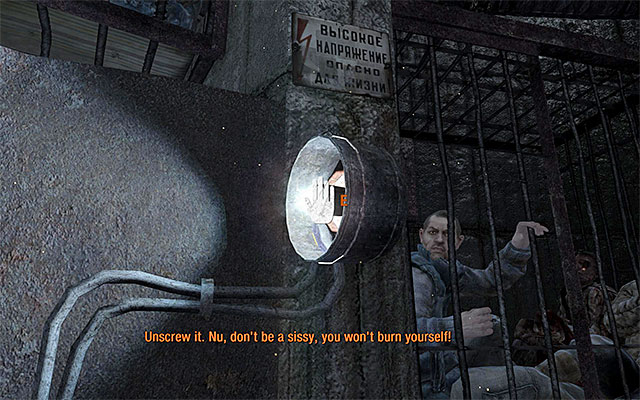
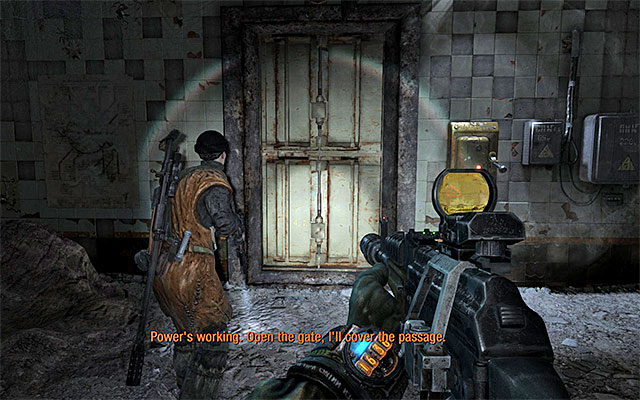
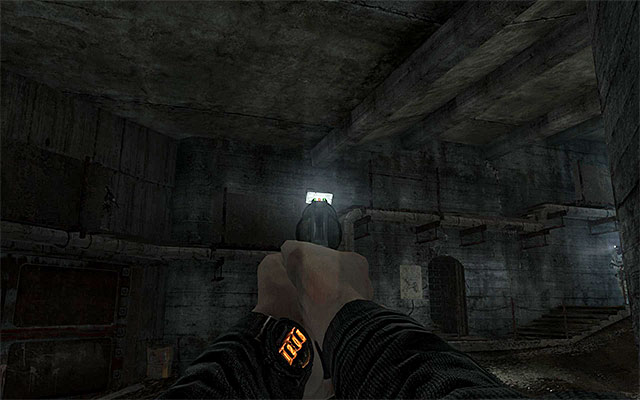
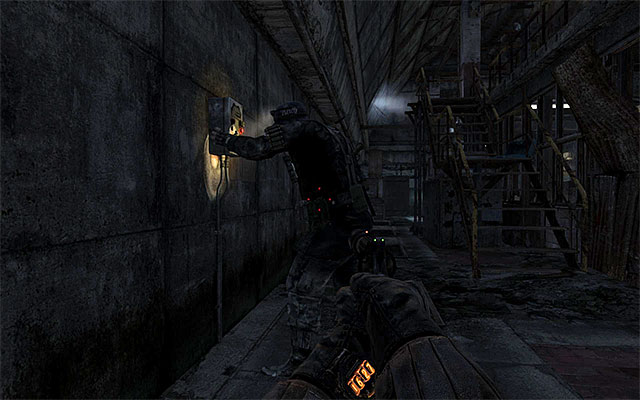
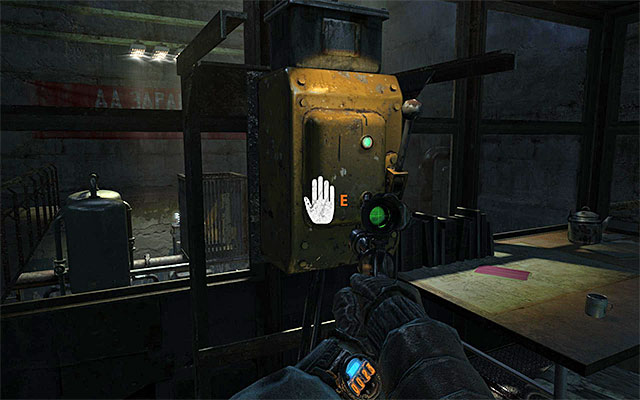
Pull the lever found near just neutralized guard, lowering the stairs leading to the upper level of explored constructions. Prepare for quite simple action - you have to ensure Pavel a safe entrance to the tunnel with a new enemy by unscrewing the light bulb in a reflector located on the right.
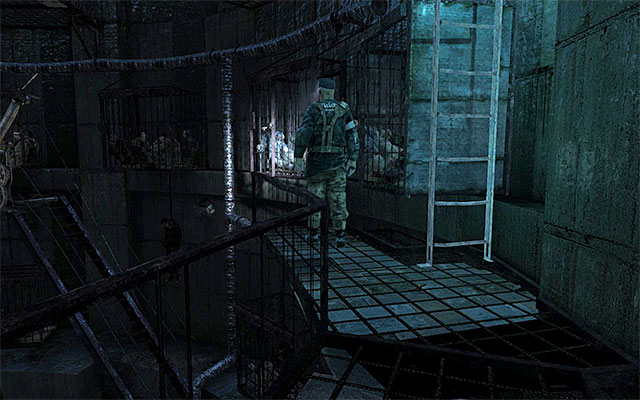
Turn around and wait until the guard visible in a distance goes to the left. Now go over the scaffolding here. After getting from the scaffolding turn left and get rid of the mentioned guard according to your preferences (kill/knock out).
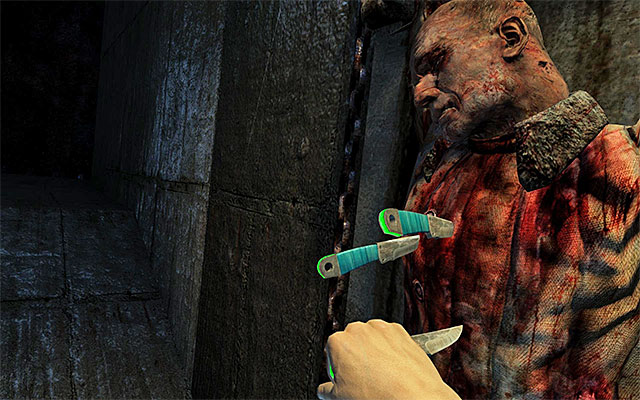
Now you can approach a new ladder, reaching an entrance to the narrow tunnel after a moment. Artyom will automatically start crawling here and it is worth to stop by along your way to listen to enemy conversations. After getting to the tunnel exit, your character will automatically obtain first throwing knife. Examine body of a dead ally, getting two more knives.
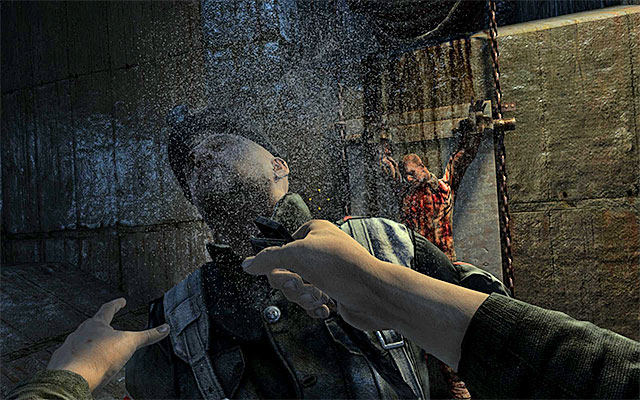
I suggest now to hide at some unlit places, because a single guard will appear here soon. It would be good of course to get rid of him. If you do not mind killing him, you can use a throwing knife. Otherwise it would be best to get him from behind and knock him out.
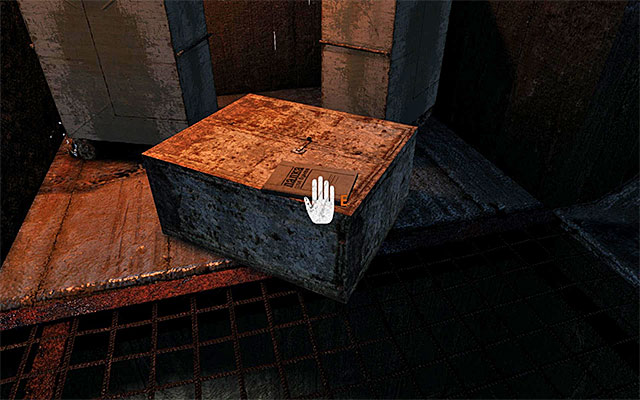
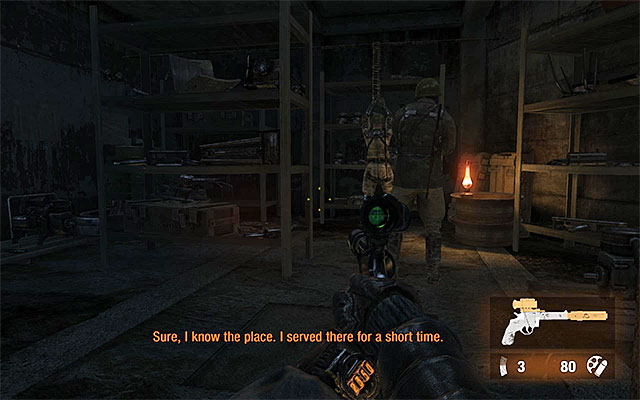
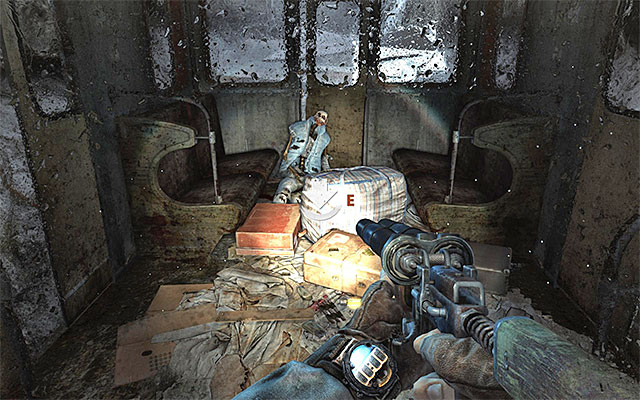
Stay in the room, where you got knives and eliminated a guard, because there is a hidden Artyom's diary page lying on the box shown on the above screen. Examine also a nearby corner, finding one more throwing knife. You can now take a narrow passage, used previously by a guard eliminated by you.
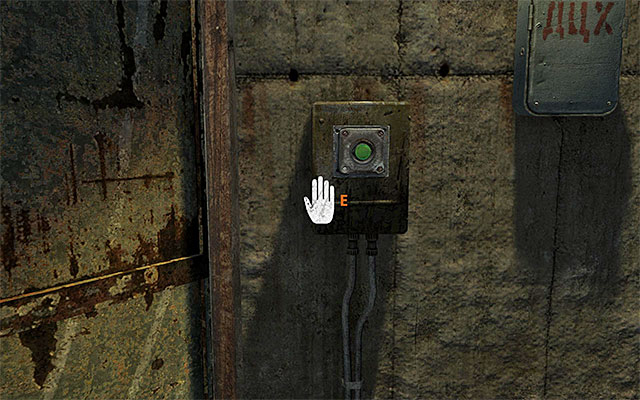
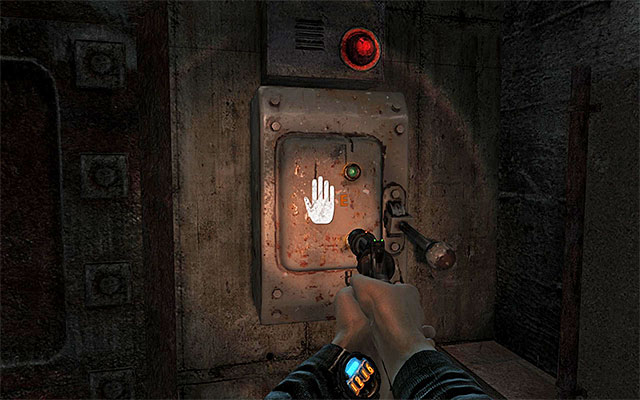
Go up the stairs to the upper level and wait until Pavel appears above you. Depending on your preferences you can examine the body of a guard killed by him or right away get to the button located on the right.
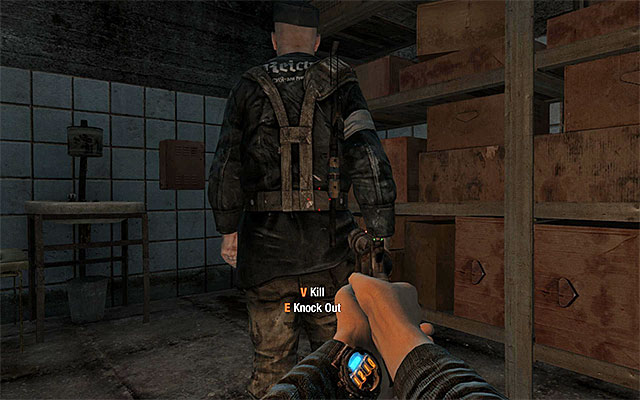
After pressing the button quickly hide behind the crate shown on the screen, because after the lock is open, a new guard will appear here. Wait until he goes to the left and get him from behind to kill him or knock him down.
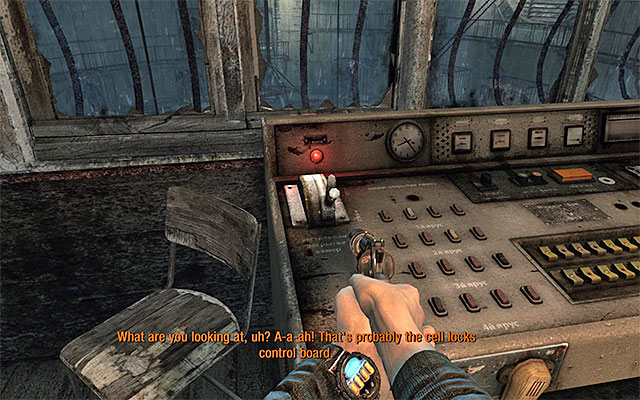
Now you can get to the newly unlocked passage. Pull the lever to close the lock and wait until you get an access to the new area. In the meantime Pavel will give you a revolver and a watch, informing about how visible you are (a blue lights means that you're visible to your enemies).
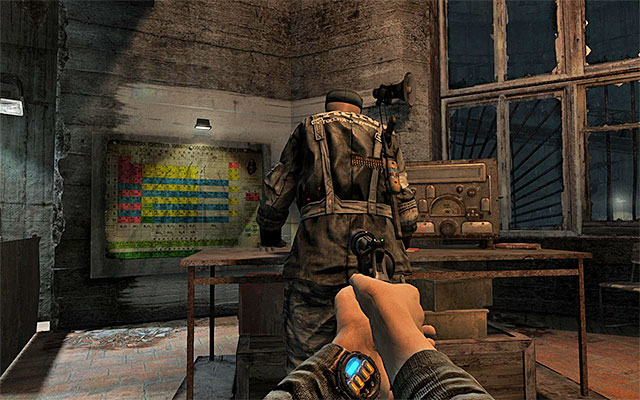
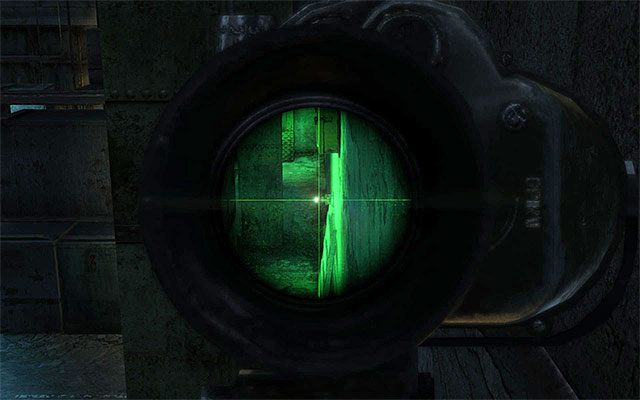
Move ahead. Starting from this point it would be good to neutralize all light sources along your way, thus increasing the effectiveness of remaining hidden. Unscrew the light bulb in the right lamp and then use the silenced revolver to destroy a reflector visible in a distance. Watch out for the guard heading there. You do not have to personally deal with him, because Pavel will eliminate him. You might of course examine the body, because in addition to standard supplies the guard has with him a machine gun.
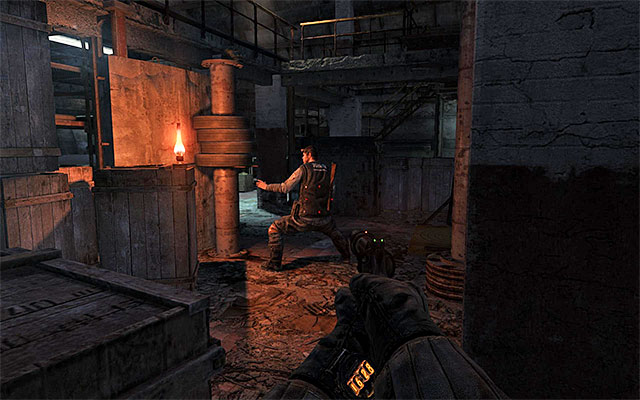
Keep moving, destroying two more reflectors after a while. Ignore a guard patrolling the upper balcony for a moment. Move straight ahead, staying close to the left wall. Turn left when it is possible and kill or knock out the opponent sitting on the chair. After that put out the oil lamp.
Turn right and wait until a guard comes to the adjacent room. Silently eliminate him and after that unscrew the light bulb in the nearby lamp.
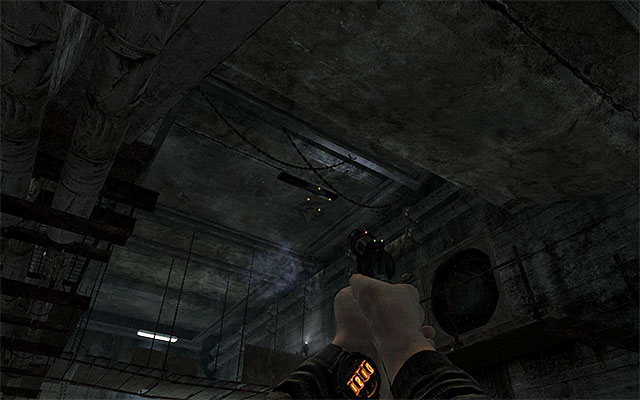
Return to the main tunnel and now focus on the previously mentioned guard patrolling upper balconies. Theoretically you could climb one of ladder leading there and deal with him personally but it is better to destroy a lamp hanging from the ceiling and wait until Pavel eliminated this guard.
There are two more opponents left, located in the guard room on the right. Elimination of them is quite easy because they do not leave their posts. So it would be best to get behind each of them and kill them or knock them out.
After securing the entire area I would suggest to spend some time on exploring it. If you pull the lever in the guard room, you'll free prisoners held in cages. Except that, it would be good to examine all bodies and look around for ammo crates (guard room) and crates with medkits (one of room on the left).
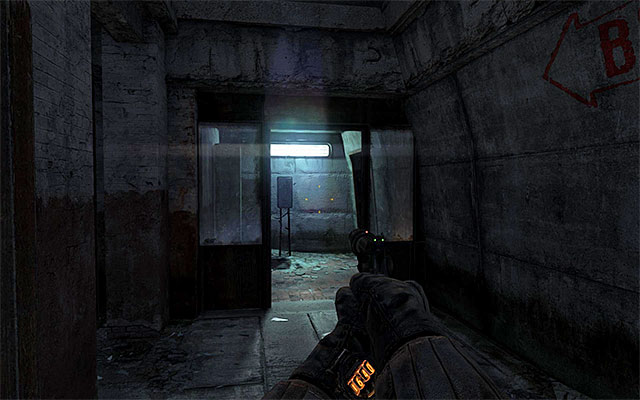
Once you have it all done, approach Pavel. Listen to his speech and go to the right lever in order to pull it. Choose a newly unlocked exit from this location. Wait until Pavel joins you, which ends this chapter.
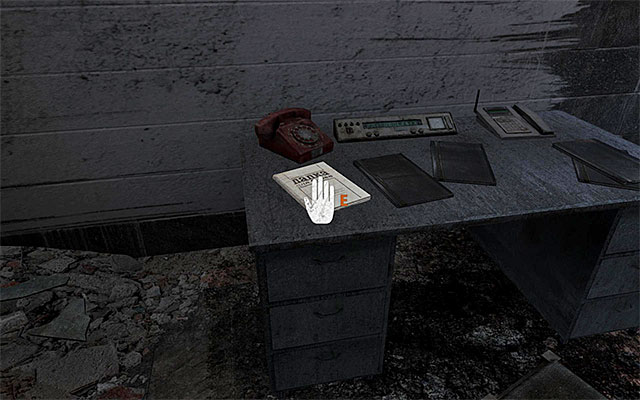
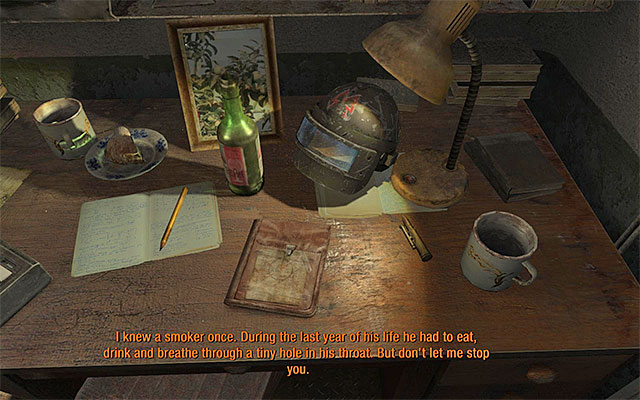
Move ahead. Be sure to examine a desk shown on the above screen, located in front of the starting point - you'll find there hidden Artyom's diary page. Now you can head to the right stairs.
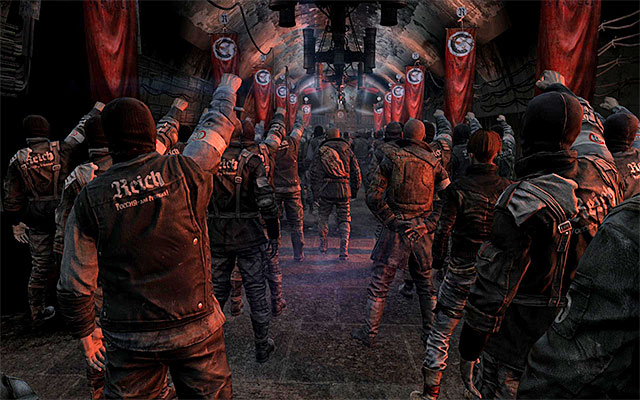
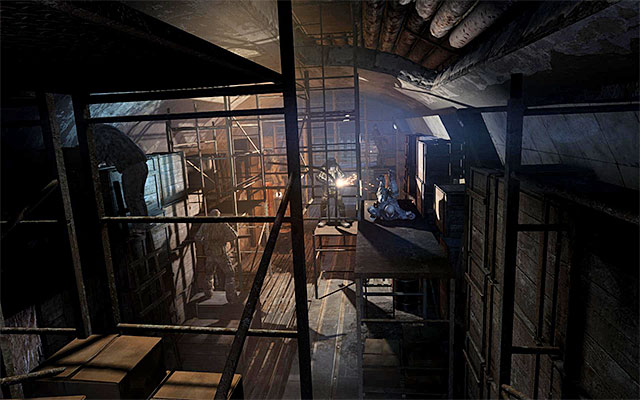
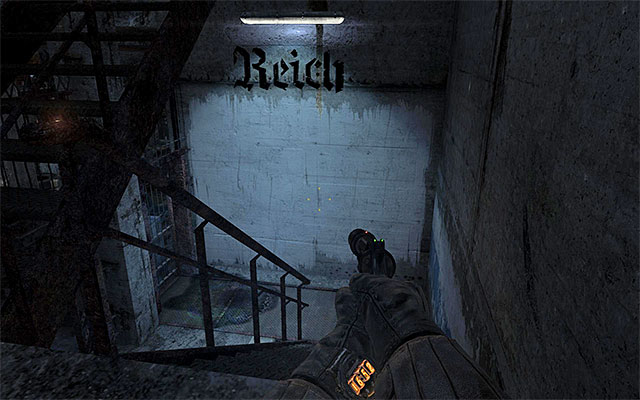
Soon you'll get to the large hall full of Reich soldiers, listening to the speech. Follow Pavel, squeezing between threat unconscious opponents. However you'll be recognized soon and that will imply the chase sequence.
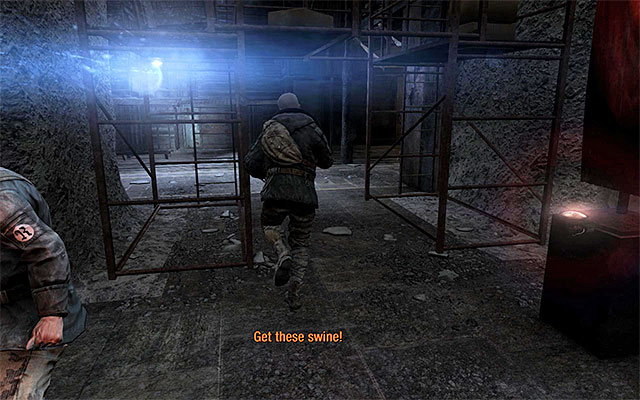
Do not wait what happens later but quickly run after Pavel, turning left and using sprint when needed. When you run under the scaffolding, turn right.
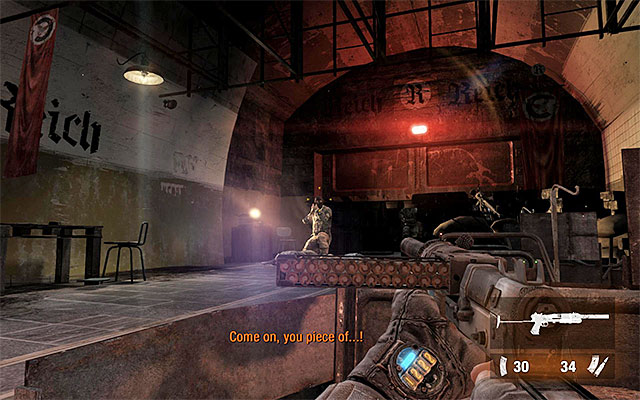
Run forwards, passing by civilians along your way and using stairs. Be ready to jump when you reach a point shown on the above screen.
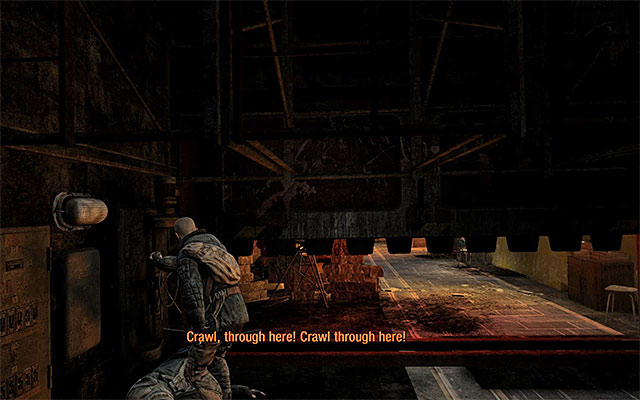
Keep running, paying no attention to view blur. You have to reach the closing gate and crouch to crawl under it in the last moment. The game will start a new cutscene now.
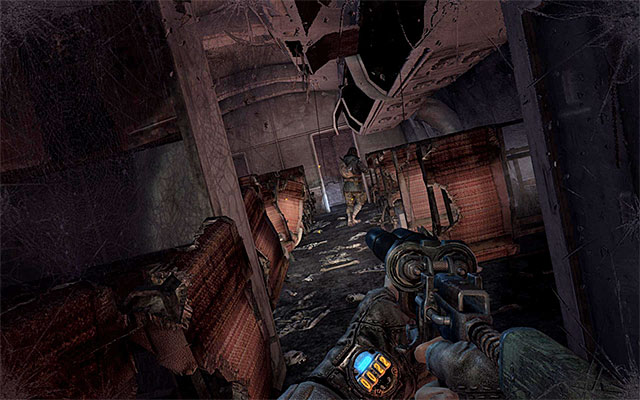
Once you get into the wagon, the main hero will automatically take a firearm from the inventory but you do not have to kill enemy soldiers, which appear near tracks. If you want to finish the game without killing humans then put your weapons away, especially that you shouldn't be hurt. This very short chapter will end soon.
Wait until the wagon stops and press proper key/button to exit it. Follow Pavel, using the flashlight when needed. After getting to the fork examine its left branch in order to find ammo crate. Now approach Pavel to give him a hand. Your ally will be unfortunately captured soon, so your priority is now freeing him.
Make sure that your flashlight is off and hide behind the obstacle where Pavel was standing previously. Wait until two guards appear. You can act here in two ways - get past them or attack them. If you choose the second option, then wait until guards move towards wagon and get behind each of them to kill him or just knock him out.
Regardless whether you eliminate or pass by guards mentioned above, you have to choose now newly unlocked side passage (screen above). Destroy flashing lamp on the right wall and carefully approach a new area. Wait until upper metal construction with a single guard moves away from this place.
There is a new area with opponents in front of you and, like in third chapter, it would be good to carry on stealth actions, eliminating enemies or passing them by without triggering an alarm. The main part of this location can be reached in two ways. The first option is to go to the left. You would have to destroy a lamp on the wall visible in a distance (silenced gun) and then climb up objects shown on the above screen, so you could jump over the fence.
The second variant is to go to the right. In that case you would have to deal with a single guard, which has to be killed or knocked out. Watch out also for an oil lamp and a fire place - neutralize these sources of light (you would have to get close to the fireplace but the lamp could be destroyed from a distance).
Both paths described above allow you to get close to the building occupied by enemy forces. I recommend starting with elimination of a single guard, who regularly comes close to the left fence. But watch out not to being seen by the guard patrolling upper balconies.
Carefully approach the side entrance to the previously mentioned main building (screen above). Unscrew the nearby light bulb instead of destroying it with a gun, because you could alarm some local enemies.
Wait until opponents on the ground floor moves aside so there will be only one of them in the main room. Depending on your preferences you can neutralize him (get him from behind) or pass him by. If you choose the first option, do not forget to unscrew the light bulb at the ceiling, so the body won't be noticed by other enemies.
Again you'll have to choose a path. I strongly recommend using the stairs leading to the upper floor. After getting to the destination stay focused because there are two guards in the area. Start with eliminating the one patrolling outer balconies.

After securing the balconies go back to the lit room on the floor and carefully get behind the second guard. You can now safely explore this room, finding hidden Artyom's diary page at the place shown on the above screen.
Return to the ground floor now, placing yourself at the passage shown on the screen. Notice two nearby guards - one of them stands still, while the other one walks between two locations. As usually, you can eliminate them (first attack the guard patrolling the area) or get past them.
Regardless whether you've eliminate the above mentioned guards or not, go to the left building exit. There is one more enemy on the right, but do not worry - he is sleeping. Thus you can easily get past him, although the game allows you to get him from behind and kill him or knock him out.
In order to leave that location you have to use the stairs shown on the screen (you might destroy the nearby oil lamp first). But before you get there, make sure that you carefully explored the area. First of all look around for new and/or upgraded weapons (a revolver with a sight and a silencer for example). In addition there are three crates with valuable supplies (ammo, medkits, military-grade rounds etc.).

Climb up the stairs to the very top, reaching a new door. Open it and approach the enemy soldier, who will surrender seeing you. Depending on your preferences you can ignore him, knock him out or kill him. Be sure to explore the room, where you met the guard, because there is a second hidden Artyom's diary page to be found here (screen above).
Use the only available passage. After few moments you'll get to the new narrow tunnel. Enter it to end this chapter.
Wait for the end of conversation with imprisoned Pavel and resume the crawling through a narrow tunnel, reaching the exit after few moments. Open two crates with ammo, throwing knives and medkits and then move straight ahead, putting off the oil lamp along your way.

Carefully approach larger two-level area with new guards. Turn right here, stopping by the stairs shown on the screen. You might consider putting off another oil lamp.
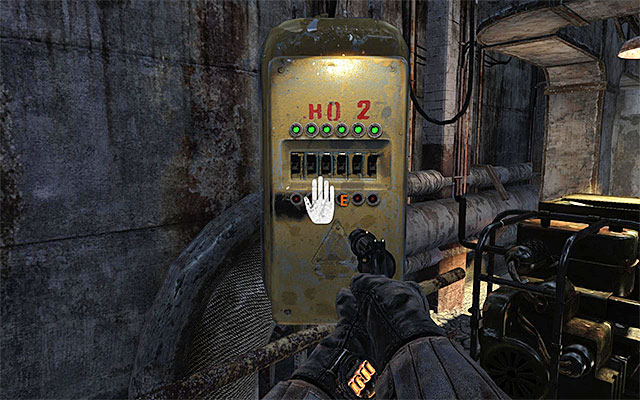
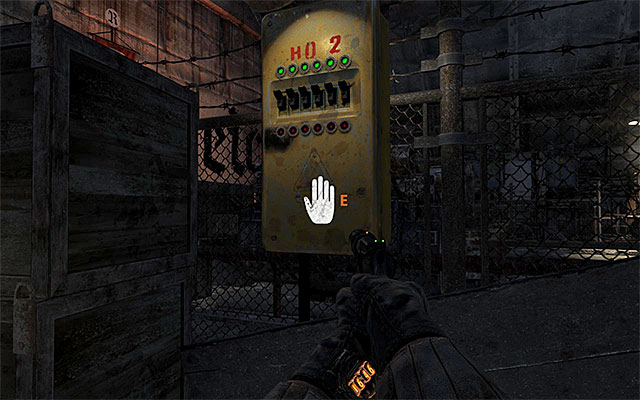
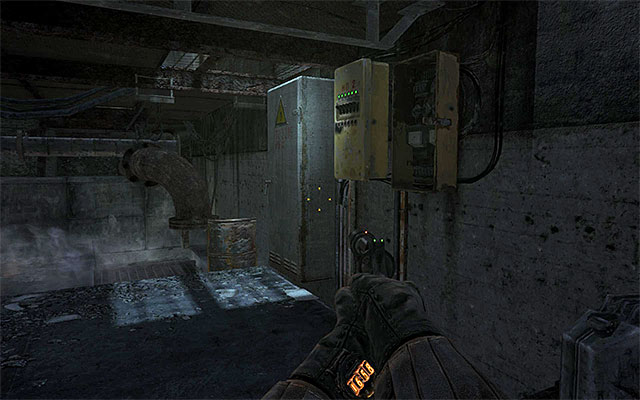
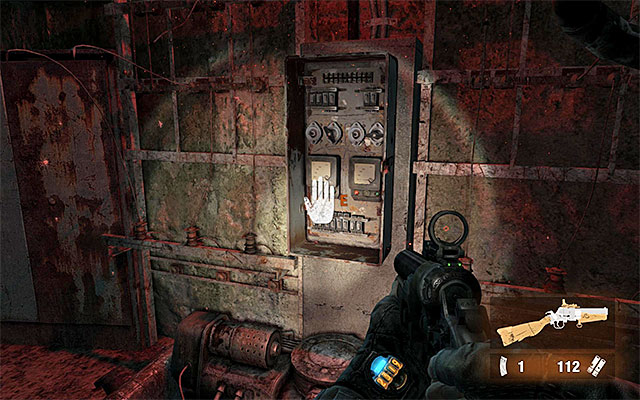
Your task is to get to the exit located on the ground floor on the other side of this area. It is easier to get there over the upper level (use the stairs). When you get to the floor, wait until guards goes away and approach to the fuse box shown on the screen, in order to switch off all nearby lamps.
It would be good to deal now with previously mentioned guards - try to get them from behind to kill them or to knock them out. Note - Do not attack guards when they're patrolling narrow catwalks because bodies might fall down and alarm guards on the ground floor.
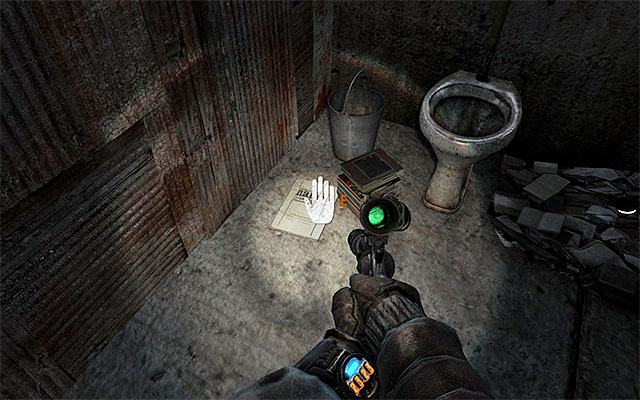
Eventually you have to get to the new stairs leading to the ground floor. Head forwards, avoiding both a guard who is in the right toilet (sound of destroyed lamps can alarm him!), as well as a person who stops near the exit from this location from time to time.
It is harder to get to the exit if you decide to move over the ground floor. In this case it would be good to hide behind crates at the beginning and wait until one of guards approach the intercom on the wall.
Another guard is training at the lit oil lamp. You can try to quickly approach the lamp and put it out or get the mentioned guard from the flank and kill him or knock him out. In both cases make sure to neutralize nearby light sources, so the body of eliminated enemy will remain unnoticed.
There are three enemies in the main room on the ground floor. The easiest one to be eliminated is the guard who from time to time stops at the right elevator. Wait until he gets away from his colleagues (destroy two nearby lamps) and quickly attack him from behind.
Before heading towards two more guards, make sure to destroy all local light sources because otherwise you might be seen by enemies occupying balconies on the floor. You do not have to attack an enemy on the left because he won't leave his post. So deal with the guard who walks between the room on the ground floor and the right corridor (screen above).
BOTH paths described above are leading to the same place - the exit from the first part of the facility, shown on the above screen. Before you use it, I would suggest exploring carefully the area (one floor or both, depending on your actions). In addition to valuable supplies (ammo, medkits, throwing knives and new weapons), you'll find a new interactive instrument on the ground floor (accordion).
Continue your march, reaching new door leading to the cooler room. You'll come across a single opponent here, who will surrender seeing you. I do not advise killing him. On the other hand you might steal from him a machine gun with night vision and a silencer. Get to the end part of the cooler room and go through a hole in the left wall, reaching a large location.
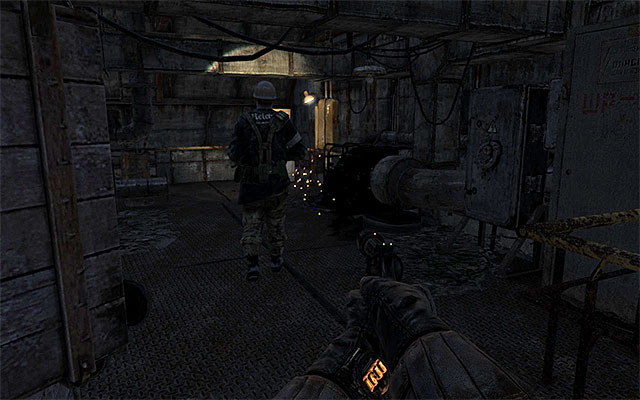
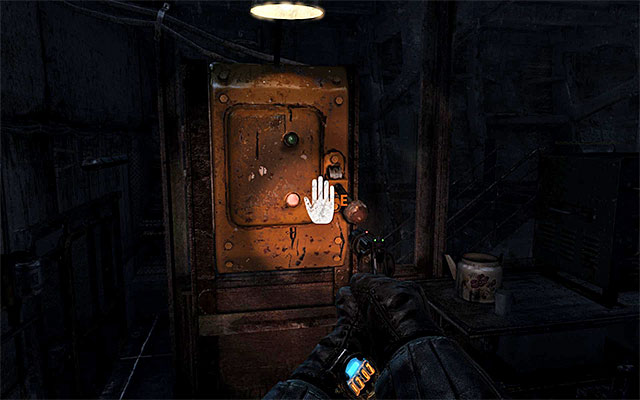
Head to the exit from the room with plants, finding a supply crate on your way. Carefully walk into a lit area with new enemies and start with approaching the fuse box located on the left (screen above) in order to cut off the power in the area.
Return for a moment to the previous room and wait until one of guards approaches the fuse box. Eliminate him before he manages to restore the power. Now you can choose the catwalk located in front of the starting point, the one which was used previously by one of guards.

Carefully approach a single guard. It would be best to attack him when he walks towards the lit oil lamp. After successful action examine his body and neutralize nearby light sources.
Go to the right. If you want to leave that location as fast as possible, then use the entrance to the ventilation shaft shown on the above screen, jumping down to the lower level and reaching yet another supply crate.
If you do not mind careful exploration of this area, take the corridor located right from the entrance to the ventilation shaft. Start with eliminating enemy sitting on the armchair, but do it when none of his colleagues is looking in this direction (do not forget about putting out the oil lamp).
Finally approach two guards guarding a corridor near the place, where you've starting exploration of this area and make sure to kill or knock out one of the guards when he is away from his colleague. Now you can explore the area with no problem (bodies, interactive containers, etc.). After that choose the stair shown on the screen.
Both path described above lead to the same place - the third, last location of this chapter, shown on the screen. You'll receive here updated objectives.
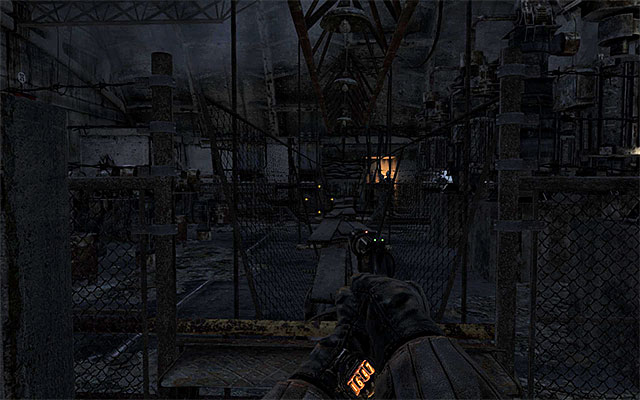
A switch you're looking for is located on the other side of the large hall with many opponents. Start with using the stairs to get close to the central part of this location (of course, destroy all light sources along your way so you won't be notices).
You can reach the mentioned switch in many ways. In my opinion the best idea is to choose a narrow path located on the right. Start with getting close to the fuse box, thus turning off some of lamps. Watch out for the sleeping guard and do not try to interact with a radio here, not to wake him up.
During your march over side balconies you'll probably encounter two more guards. You can try to avoid them or eliminate them. Regularly destroy also lamp along your way, so you can stay in the dark.
Another possible way is to get to the destination through the central part of the hall. In this case you main problem are larger groups of enemy soldiers. But on the other hand the game let you destroy lamps over their heads without alarming them. Thanks to that you can easily attack by surprises opponents standing in the dark or just get past them.

The last option which deserves consideration is to get to the destination through sewers. The entrance to the first part of the sewers is located near the starting point. Destroy the oil lamp and watch out for the single enemy patrolling sewers - it would be good to get him from behind and kill him or knock him out.
Unfortunately the game won't allow you to get to the other side of the hall right away. After leaving the first part of sewers you have to look around the left part of current area in order to find another descent (screen above). In this case you won't encounter any more enemies.
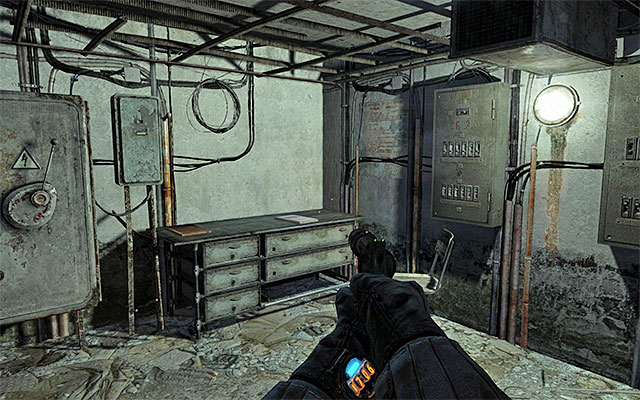
ALL paths described above will allow you to get to the other side of the explored area. Do not hurry with getting there though, but first locate a fuse box shown on the above screen. Interact with it, thus turning off lamps in the room above of you.
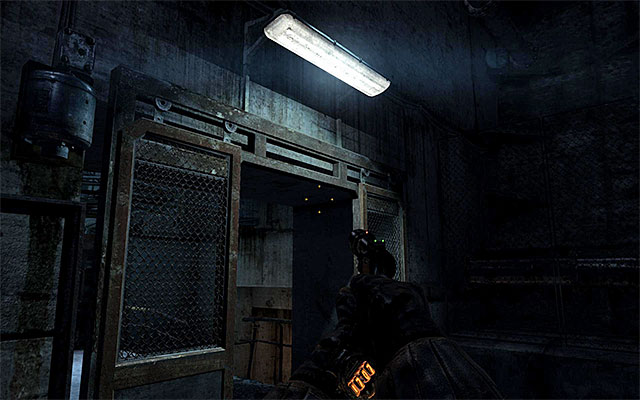
Locate the stairs leading to the upper balconies and deal with a single guard patrolling this area. Turn right. Interact with a switch cutting of the power to the hall (unless you've eliminated all guards) and then use the switch which opens the double doors (screen above).
BEFORE you leave this area, explore it carefully. First of all go to the lit room near the switch which opens the double doors (screen above). There is a hidden Artyom's diary page to be found here. In addition you can find many interactive containers and new weapons models.
Once you've done with everything, return downstairs and use the newly unlocked passage shown on the above screen.
Stop, when you get to the new corridor, because there is a line trap hidden here. Depending on your preferences you can disarm it (screen above) or jump over it. After that use the ladder and approach the new narrow tunnel.
After regaining control over Artyom you'll be forced to act quickly in order to save Pavel hanging on the line. Two guards can be killed or knocked out/murdered in melee fight after getting them from behind. After that run towards Pavel so main hero can free him automatically.
The last part of this chapter is just a formality. Follow the rescued Pavel. After a moment a game will start loading the new stage.
The first part of this chapter is very linear. Follow Pavel through metro tunnel, listening to his comments and looking for bodies which can be examined (ammo, new weapons and other valuable supplies). Nazis will soon cut off the power in tunnels, which means that you have to start using the flashlight.
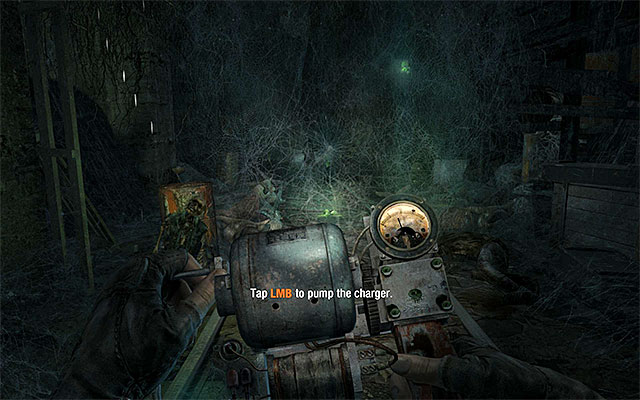
After few moments you'll reach the area with spiders' cocoons for the first time. According to Pavel's suggestion, you have to have the flashlight switched on all the time. In addition remember about charging flashlight batteries with charger. This device can be selected from the inventory by holding default flashlight key/button. Charging the flashlight will become especially important later on in this chapter, because you'll encounter then bigger and more aggressive monsters whose main weakness is the light.

Keep going, remembering about examining all bodies along your way. After reaching the collapsed part of the tunnel listen to the Pavel's commentary and approach him. Both of you have to raise a large grate and in order to do it you have to rhythmically press the key/button indicated by the game.
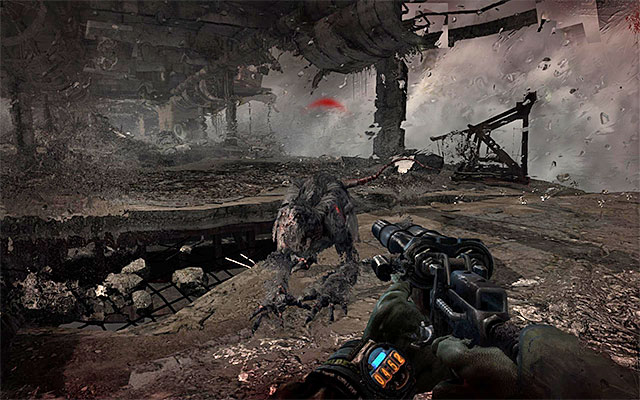
Jump to the hole and move on. New series of corridors will lead you to the elevator. Enter it and wait for its movement. Already during the elevator ride you'll have to be prepared to fight with dangerous radspiders. Lit them with the flashlight so they detach of the elevator and you can safely get to the new floor.
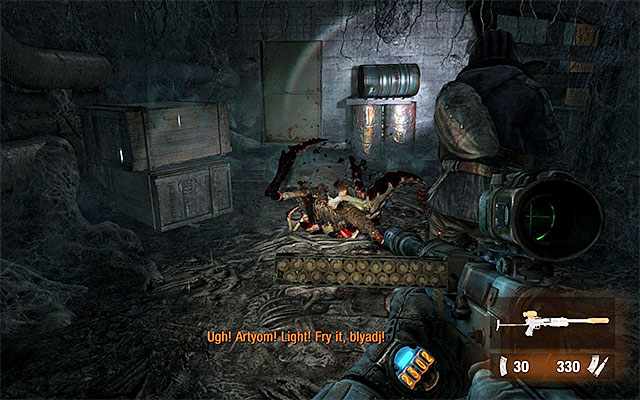
Exit the elevator and prepare for the direct confrontation with one radspiders. According to Pavel's hints you have to light the monster first (the stronger is the flashlight battery, the bigger damage it inflicts) and after that when it falls down on its back, shoot its exposed belly (it is good to use short/medium range weapons).
Wait until Pavel opens the door and enter new big tunnel. Depending on your preferences you can first look around on the right for a supply crate or go to the left right away. Move straight ahead, jumping to the lower level and eventually reaching larger abyss.
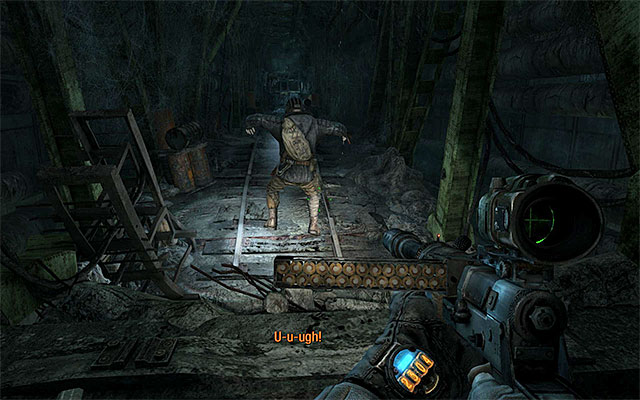
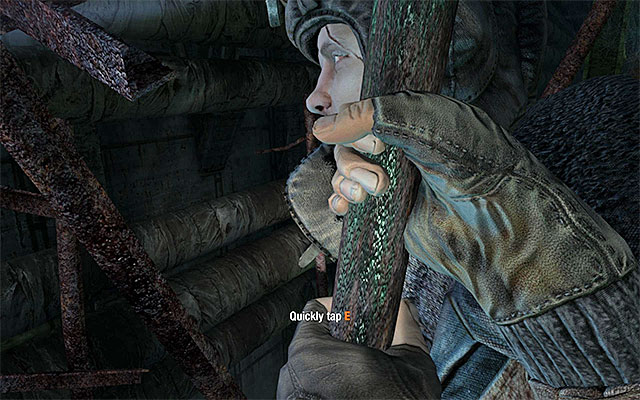
Turn around and start covering Pavel, who tries to think off the way to get past the abyss. You have to act the same as previously, so light radspiders and do not let them get close to you. Wait for a moment when you can shoot their bellies. Note - If you let one of radspiders get close to Artyom then the main hero might be knocked down by a monster. In such situation you have to free yourself and this can be done by rhythmically pressing the key/button indicated by the game.
Answer Pavel's crying for help as quick as possible because new radspiders appear in the area regularly. Run towards the ally and start rhythmically pressing the key/button indicated by the game. Wait until Pavel jumps over the abyss and quickly repeat the same action, so you won't waste too much ammo fighting another radspiders.

Once you get to the other side you have to be hurry, because more radspiders will start appearing here. Run towards the metro wagon and let Pavel give you a hand, thus starting a short cutscene.

Follow Pavel. Theoretically you should hurry up, because radspiders will chase you. But do not go too fast, because another hidden Artyom's diary page lies on the ground, near small cocoons (screen above). Pick up the secret and quickly join Pavel.
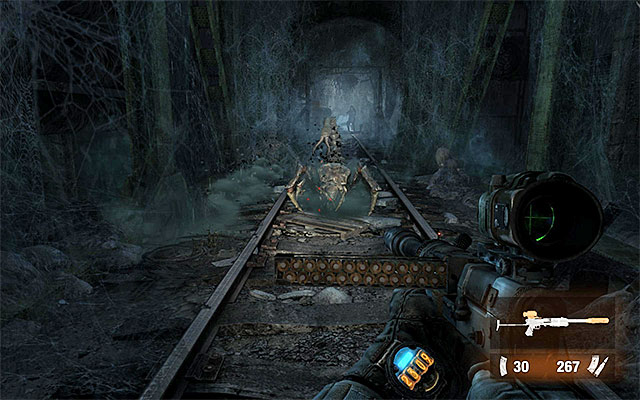
Once you get to the new tunnel go straight ahead, using sprint of course when needed. You must watch out, because new radspider will come running from side rooms. Try to avoid these monsters, eliminating only those spiders, which try to stop you. Eventually you have to get to the better lit place, where Pavel stands.
Wait until Pavel prepares a torch and follow him. According to his suggestions, it is would be good to not far behind him, so you do not have to fight radspiders often. Same applies to side rooms, because you could find there only small amount of ammo and thus exploring them is not very profitable. After reaching the closed door, you'll receive new objectives.

Turn right, going to the unexplored part of catacombs. Ignore closed door along your way, entering the room located right to them. During exploration of this area look around for the hidden Artyom's diary page left by the corpse.

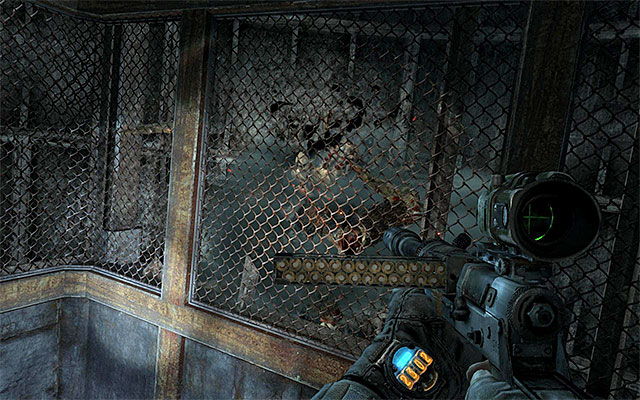
Stay alerted, because after few moments a group of radspiders will attack you. You can try to defeat these monsters or try to get to the fenced area shown on the above screen as fast as possible and light on the oil lamp then, thus ensuring a safe stop here. It is worth exploring this place, because you can find here some valuable supplies (ammo, medkits, etc.).
Keep going and prepare to deal with at least one radspider (you can also try to flee, using sprint). Your current target is a better lit area with a fuse box. Interact with it in order to restore power in the area.
Fortunately you do not have to return with the same way because the game will allow you to use the hole between grates shown on the screen. Jump down and return to Pavel. Once you enter the new room, the game will start loading the next chapter.
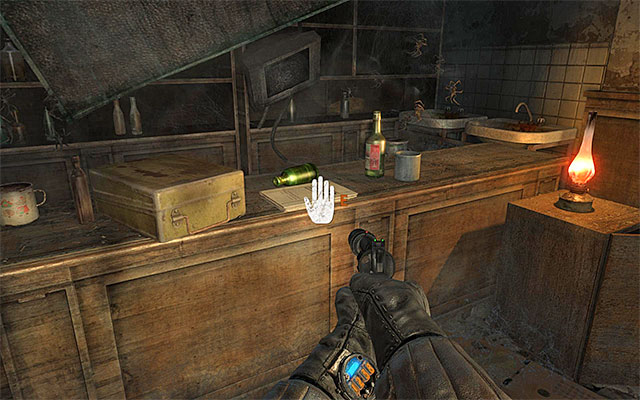
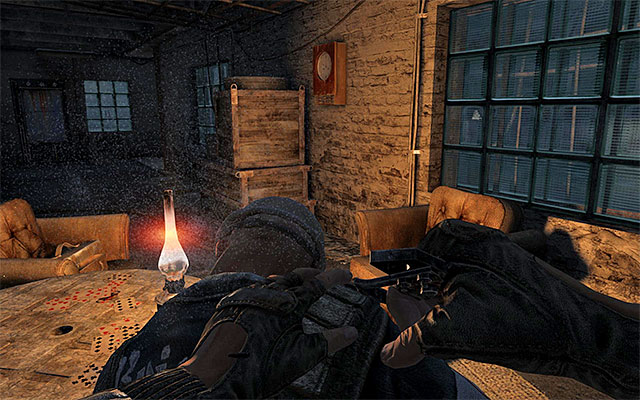
Take your time and don't hurry joining Pavel. Examine thoroughly the entire starting area. The most valuable collectible can be found on the counter to your left. It's the hidden Artyom's diary page shown in the above screenshot.

Only after you collect the abovementioned page, approach the chest with the filter and the gas mask in it (you lost such kit in one of the previous chapters of the game). You can now follow Pavel and take the stairs leading up to the surface.
Already here, you need to decide whether you want to examine the area above, or only focus on following Pavel. If you decide on the former, you need to keep in mind that you are going to "waste" most of the time, but you do not really have to bother about the shortage of filters because, you will be finding them while exploring the area, on a regular basis (note - second-hand filters often last shorter than the default five minutes!). The first one of the of the filters is near the corpse inside the ruins of the building close to the starting point.
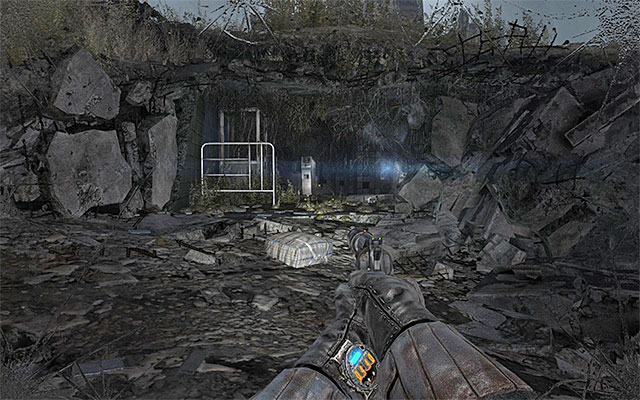
Another place that is worth visiting is the underground tunnels that will lead you up to a corpse with ammo and a new kind of weapon. There's also a fragment of a plane wreck, and a corpse with a filter on it. After you have explored thoroughly the area, go towards the entrance shown in the above screenshot, which will take you to another ruined area which is even bigger.

Examine the corpse that Pavel should stop over, to find some ammo and another filter. Move on to find yet another one in one of the side rooms.
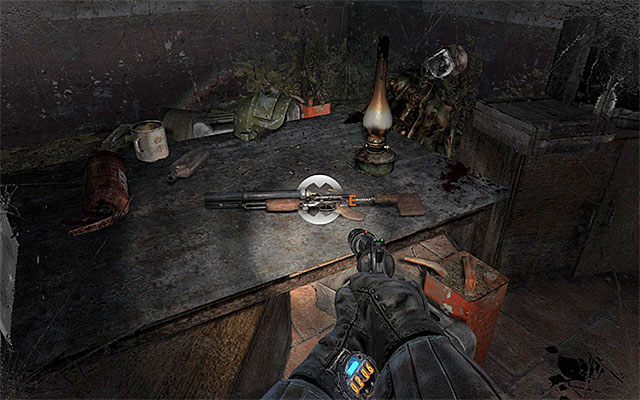
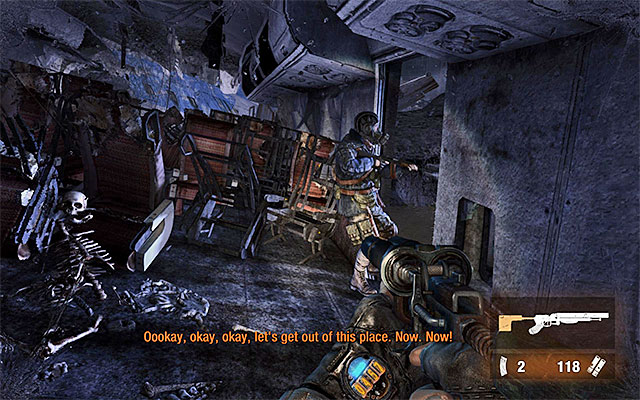
Stop after you reach a big staircase, In accordance with Pavel's suggestions, it is a good idea to examine several new rooms to the right. In the last one of them there is a chest with supplies and a double-barreled shotgun. As soon as you collect the weapon, you will be attacked by a monster. Still, Artyom will handle the beast automatically. Return to Pavel and go upstairs.
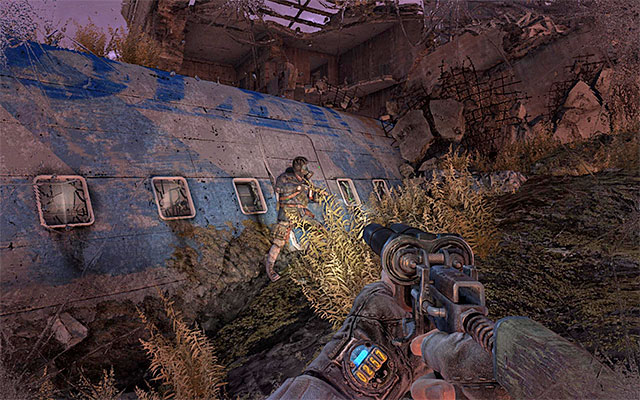
Take your position next to Pavel and fait for the band of mutants to move away. Only then should you resume your progression, coupled with exploration of the area. Thanks to this, you will find a corpse with a filter on it. In order to push the plot forward, you need to approach the plane's hull. To open the plane's door, you and Pavel need to cooperate, by pressing the correct button rhythmically.
First of all, go left to find the filter lying around. Only after that, follow Pavel. Do not pay attention to the distortion in your visuals, nor to the appearing corpses of passengers. As soon as you attempt to enter the cockpit, you will lose control over Artyom, and you will see a cutscene of the moment of the plane crash.

After you regain control over your character, turn around to face Pavel and turn your attention to the hidden Artyom's diary page shown in the above screenshot.
Only then should you join your companion to help him put the mask on. You can now start exploring the part of the hull that has been inaccessible this far (there is a filter for you to collect on the way. Before you leave the plane, prepare a long-range weapon.
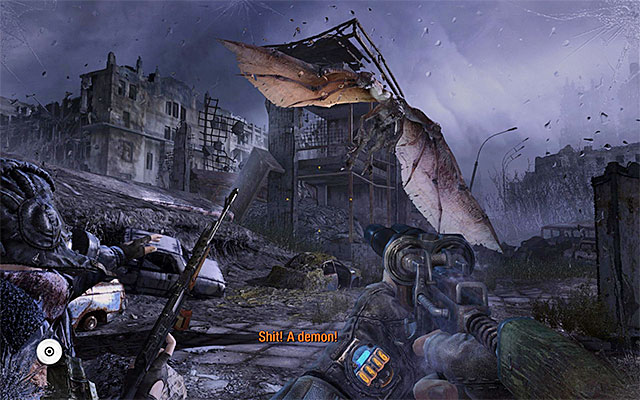
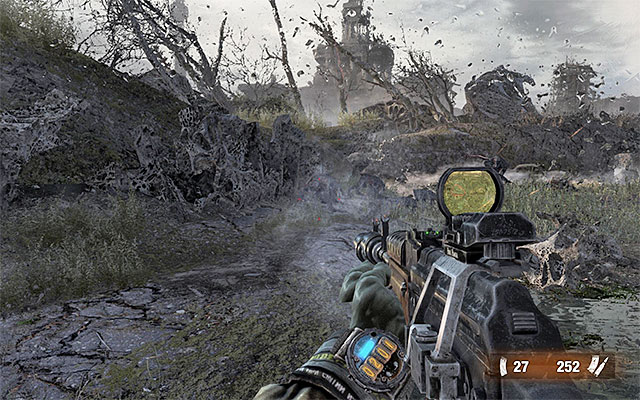
Soon, a demon, i.e. a flying monster will appear in the area. Start shooting at the beast with a long-range weapon.
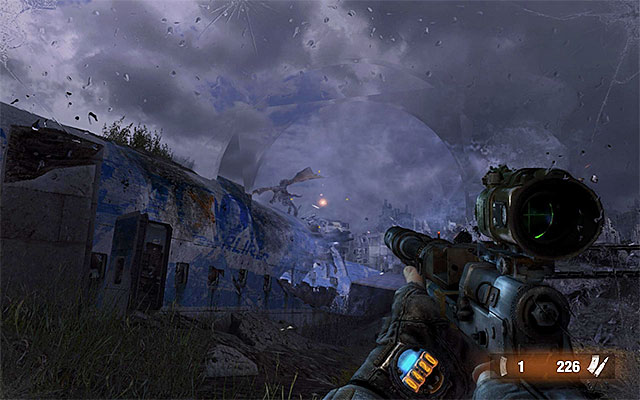
You need to be careful here, as you can be grabbed by the demon, which results in a loss of a large portion of health. To prevent that, you can shoot at the monster while standing at a wall, or while hiding next to the entrance to one of the nearby buildings. You need to keep fighting until the beast decides to fly away.
Follow Pavel. It is a good idea to take a peek into one of the buildings to the left, because there is another filter there, next to a corpse (additionally, you can swap the gas masks, if yours has been damaged during the battle with the demon). You are up for another stop in the area, where there will be mutants appearing in large quantities.
Try to keep the monsters at a moderate distance, and do not let them approach you too much to inflict damage in melee combat. What proves to be useful here, is the double-barreled shotgun that you acquired earlier, or any other piece of weaponry of considerable force.
Wait for Pavel's signal to resume on your path towards the theatre and follow him without waiting for the mutants to appear in the area again. Approach your ally to get across the nearby barricade.
Also here, you will be attacked by the kind of monsters you've already encountered. Just like in the previous case, wait for Pavel to give you a signal that you can go towards the nearby stairs leading to the station.

After you go down the stairs, turn around and start shooting at the mutants coming your way, first using long-range weapons, and then your shotgun or something else effective at short quarters. You need to hold your positions until the station door opens, which will complete this chapter.
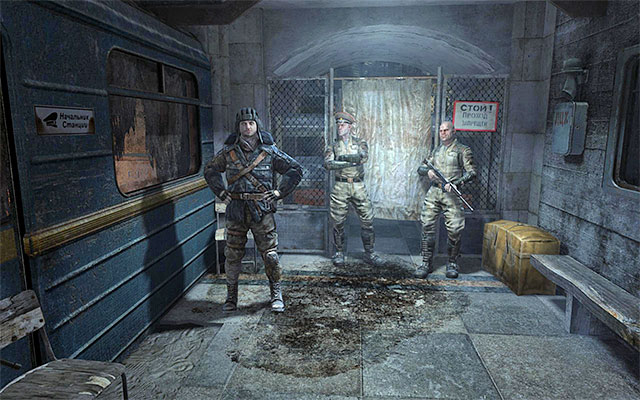
The entire chapter takes place in Bolshoi Theatre's building, which serves as a shelter to survivors. This means that you aren't going to encounter any enemies or monsters. At first, follow Pavel. Traditionally for this kind of situations, it is a good idea to stop every now and then to eavesdrop on what the Independent have to say. Also, interact with the guitar near the outpost with two guards, and approach Pavel to talk to him.
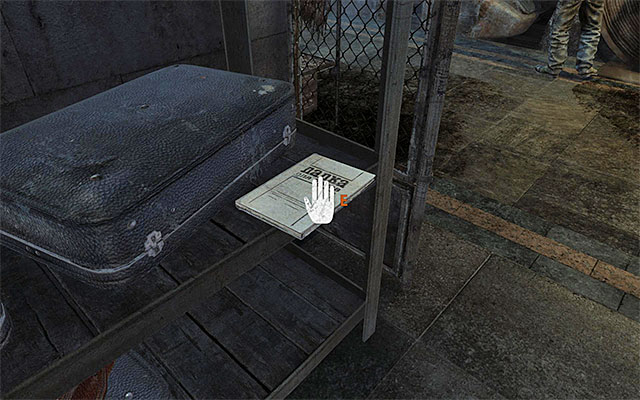
Walk through the tarp and immediately turn left to collect Artyom's diary note from the shelf shown in the above picture. You can now go on.
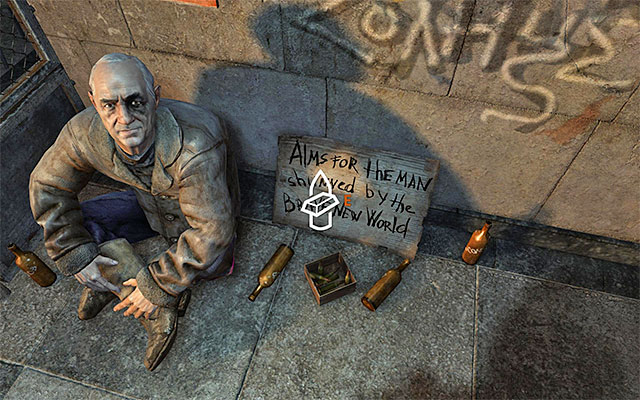
Won your way to the rendezvous point, you will encounter a beggar sitting on the ground. You can give him military grade rounds. Twice. After you reach the area with stalls, find another guitar.
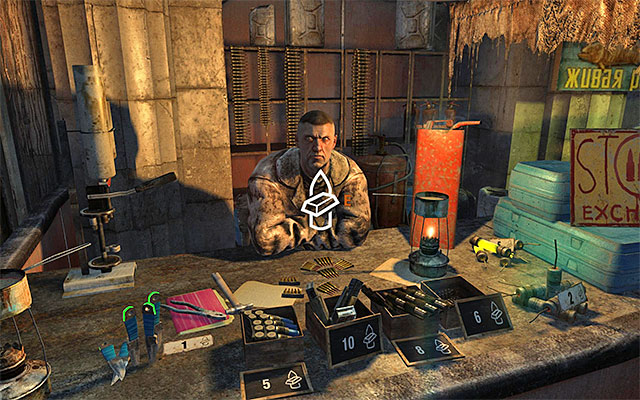
The new area is the Market. It is a good idea to barter with two characters here - the one with the stall to the left (screenshot 1), who barters in ammo, throwing knives, frag grenades and incendiary grenades. The character in the stall to the right (screenshot 2) specializes in trading weapon upgrades. Apart from that, also check out the last stall to the left, where there is another interactive guitar.
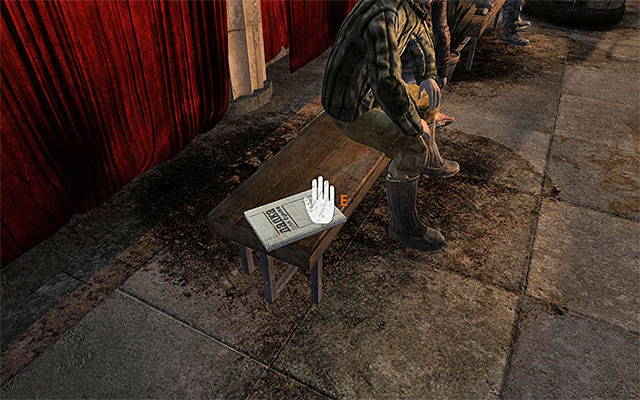
Move on to finally reach the entrance to the theatre, at which there are people herding. Examine the benches to the left to find Artyom's diary note hidden in one of them. Wait for Pavel to join you.
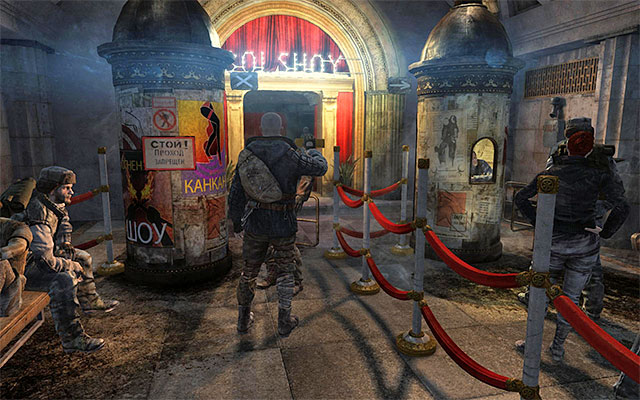
Follow Pavel. Wait for him to produce documents to the guards, thanks to which you can enter without taking your turn in the queue.
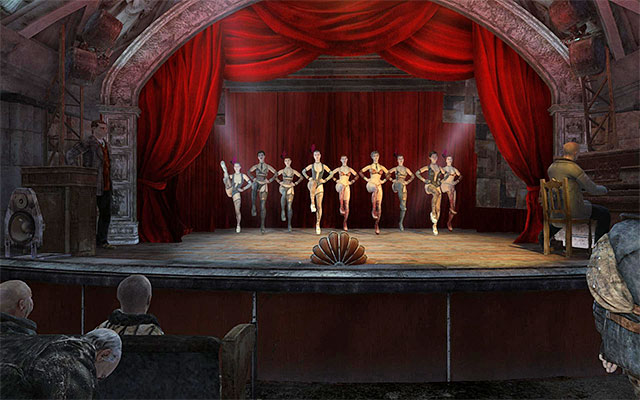
Enter the theatre's main hall. If you want to, you can stay and watch all of the performances (there's six of them in total), and it's worth knowing that it is requisite to win an achievement.
If you do not feel like it, or they already over, join up with Pavel standing to the right and walk through the dressing room.
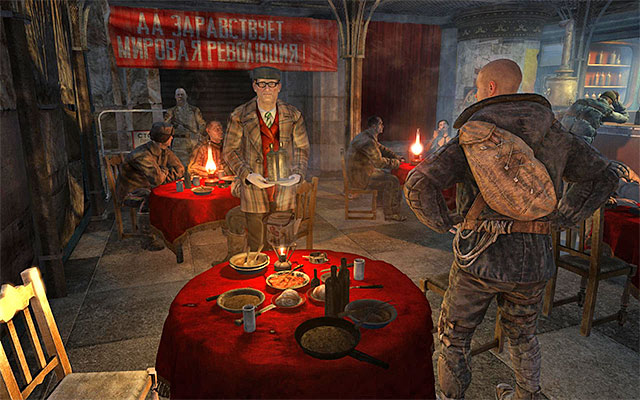
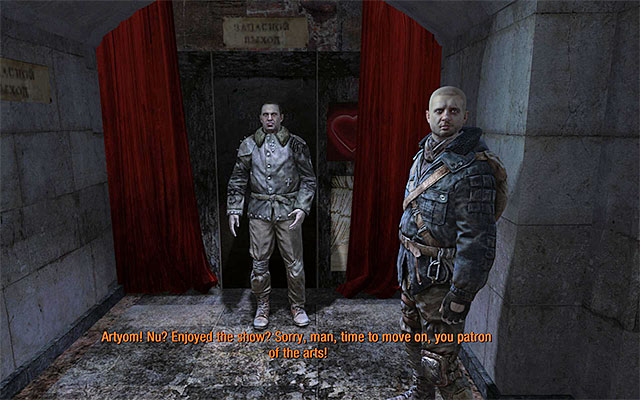
Follow Pavel at all times. The last area in your walk is the bar. You need to sit at the table here. This will initiate a cutscene, which will finish this chapter in a very unexpected way.
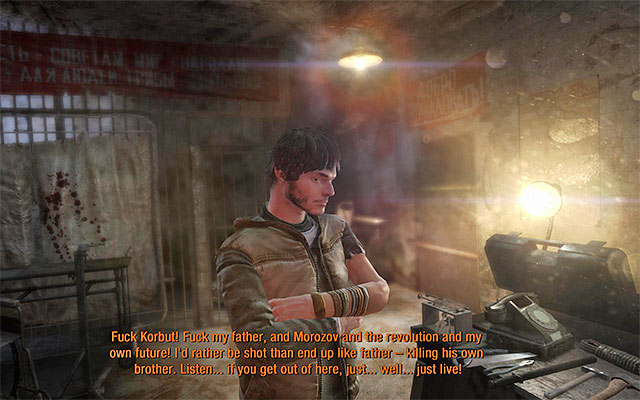
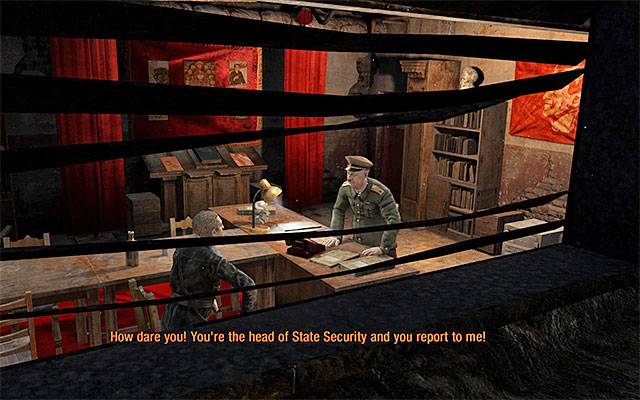
This chapter is similar the previous one in many respects. Also here, you won't have to fight anyone or hide. There is a strain of interesting cutscenes for you to watch. You will regain control over Artyom only after the brutal interrogation ends, after you are freed.
Since there are no valuable things in the interrogation room, approach the ventilation shaft to the left. Artyom will automatically climb it and start to squeeze through.
It is a good idea to make a few stops here and there, during your crawl through the vent, to eavesdrop on Moskvin's conversation with Korbut, among others. Getting through the vent will result in being promoted to the next chapter.

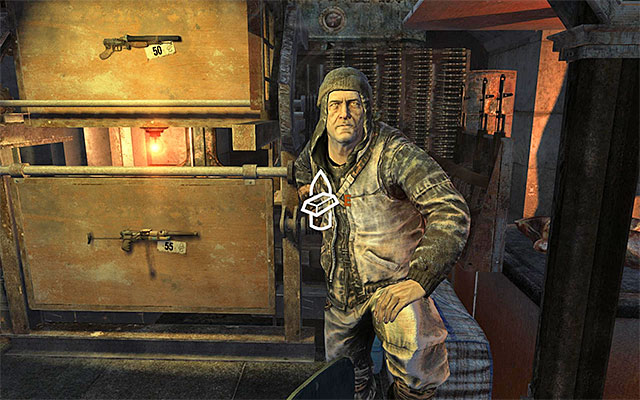
Wait for Artyom to retrieve all the gear that has been taken away from him earlier,. Remain in the starting room for a moment, because there are also crates with supplies and also a new kind of weaponry, an incendiary grenade and a gasmask (it is a good idea to swap masks if your current one has been damaged on your way to the Bolshoi theatre). Having taken care of all your business here, open the door.
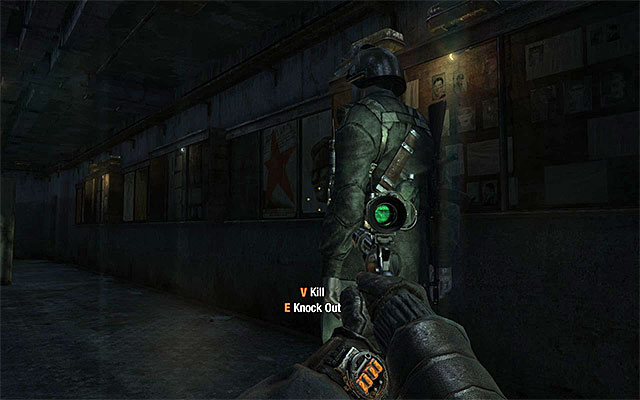
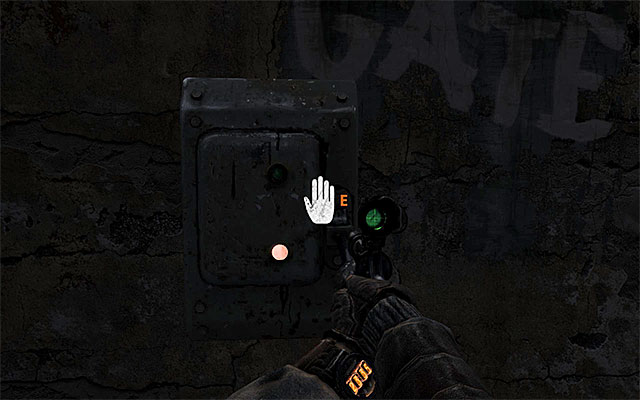
Turn right and approach, carefully, the gate metal detector. Take your time here, and wait for the guards to finish their conversation. One of them should start going your way. Wait for him to walk past you and then kill or knock him unconscious.
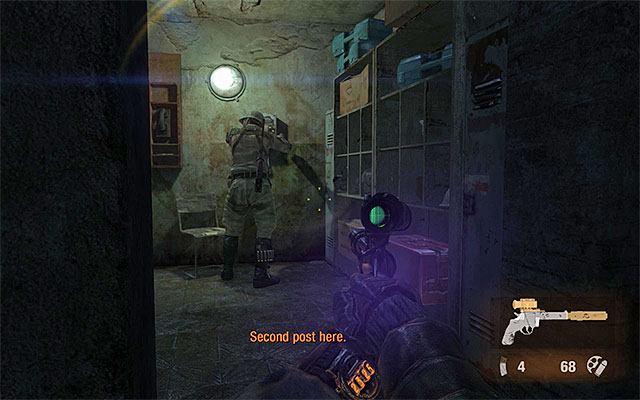
I definitely recommend walking around the gate by taking the narrow passageway shown in the above screenshot, which is located at the wall to the right. Approach the next opponent carefully and eliminate him in the manner of your choice. Go down now and smash the lamps on the staircase on your way. After you reach the room on the ground floor, you can attack the last remaining one of the guards, or wait until he finishes his conversation over the intercom.

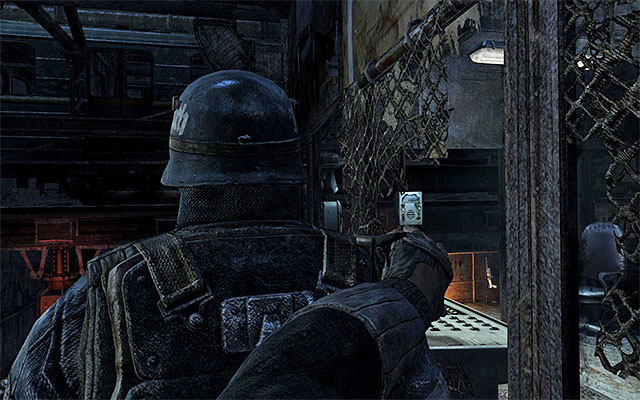
It is a good idea to peek into the nearby lockers (there is a filter in one of them) and examine the radio. Go now into the room with the intercom in it, to find a guitar on the desk, and an
Artyom's diary page. Only after you collect it, take the door to the first larger hall in the armory, because you won't be able to come back here once you progress in the story.
Legend:
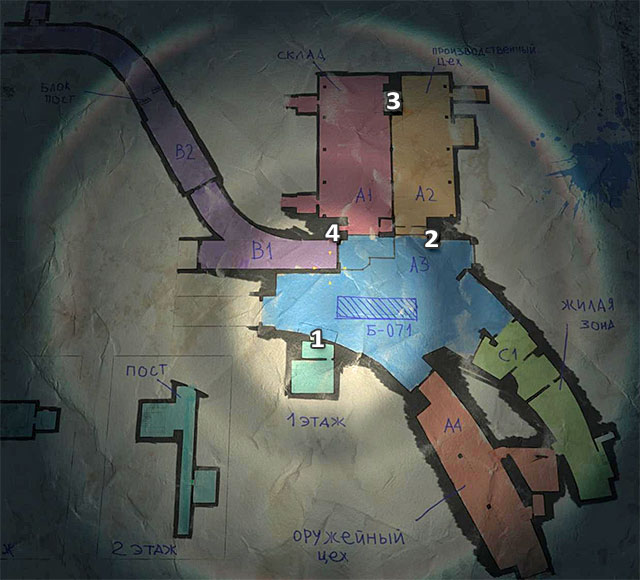
Note - Maps similar to the one presented above can be found in all main areas of this chapter. Each map is marked for your current position, which should additionally help you navigate around the compound.
The exploration of the first part of the armory starts in A3,and your aim will be to reach the passage in A2 (see: the attached map). Starting with this point, there is a large number of ceiling lamps which cannot, unfortunately, be smashed with your firearms. This means that in some places you will have to attach more attention to remaining in shadows. The good news, though, is that to the right of the starting point, there is a crate with a switch for shutting down some of the nearby "standard" lamps.

Start by going east and walk around the railway engine from the southern side. The guards you encounter can be eliminated or avoided, the choice is yours. In the case of the former, always make sure that the guard you intend to eliminate, always leaves into the shadows, thanks to which the chances of it being found by the others will drop. Do not forget to search each of the eliminated soldiers (most of them use machine guns and have a filter) and about opening all the interactive containers.
To the south-east of the starting point in A3, there are two other locations- A4 and C1 (see: the attached map). It is optional to explore them although it is a good idea to check them out, because you can find some easy loot there. The easiest way to reach A4 is through the venting shaft. The entrance to the shaft is located in the southern part of A3 and you will be able to recognize it be the lit oil lamp.
The main part of A4 is patrolled by, at least, three guards. You can make it easier to eliminate them by smashing ceiling lamps (if this alerts a guard, simply wait for a moment in hiding until he returns to his duties).It is also a good idea to take a peek into a small area between areas A4 and C1. Knock out the two people there and explore the area. In general, if you decide to explore the entire A4 area, you can count on finding ammo, the first aid kit, military-grade rounds and some new weaponry.
When it comes to area C1 you can access it from A4 or A3. If you want to start in area A3 to you need to reach its eastern part very carefully, and more precisely, the large gate. Start by locating the wire box and cut power off. Only after that, you should approach the lever that opens the gate.

Area C1 is barracks, where there should be four enemies in total. The fact that only one of them keeps patrolling the area, whereas the others remain on their positions, should make things easier. Start searching for possible loot only after you have secured the entire area. Traditionally, you can find ammo, first aid kits, throwing knives , military-grade rounds and new types of weaponry. Apart from that, find out the interactive piano and the Artyom's hidden diary page shown in the second screenshot.
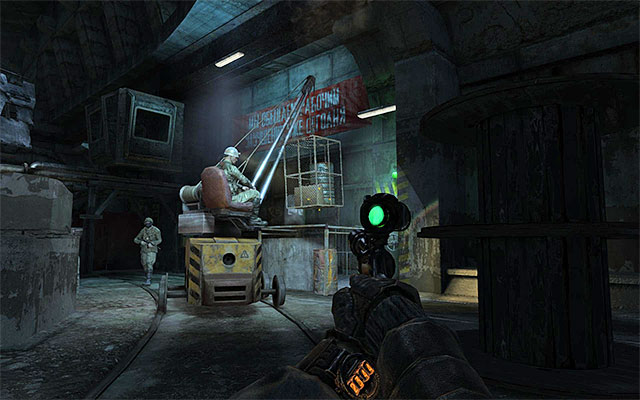
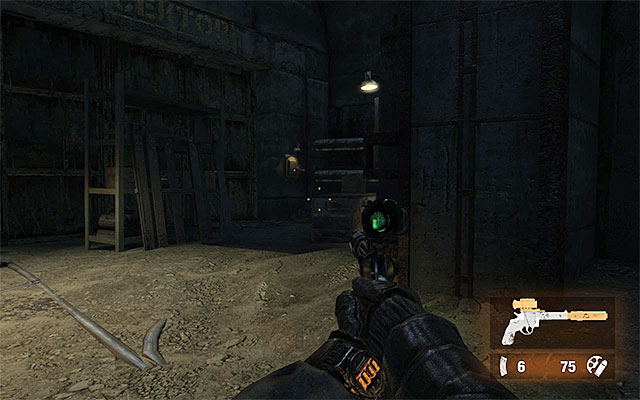
Regardless of whether you have decided to explore the areas described above, sooner or later you will reach the passageway to area A2. Walk around the enemies in the central part of A3, best by keeping to the eastern walls of this area. After you go around the largest group, take a turn to the north-east. This will take you to the crane shown in the screenshot.
You do not really have to rack your brain for possible strategy, because the operator will soon climb down the crane and go to the toilet. It would be good if you managed to get rid of this one as soon as possible. The other guard should in the meantime, turn all of the lamps off, which will allow you to approach him easily.
Right before you leave area A3, make sure that you have searched it thoroughly, because you won't be able to return here later on. Take the door shown in the above screenshot, which will take you to area A2.
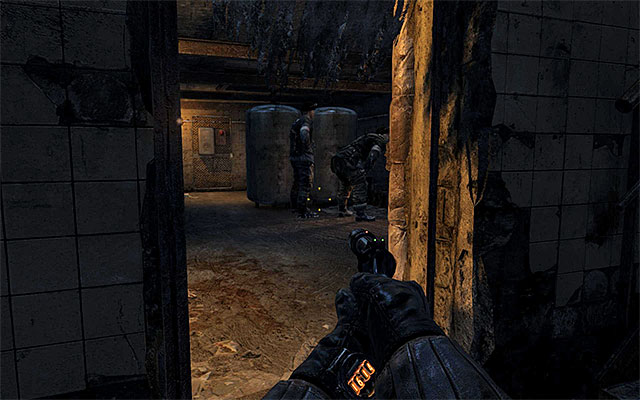
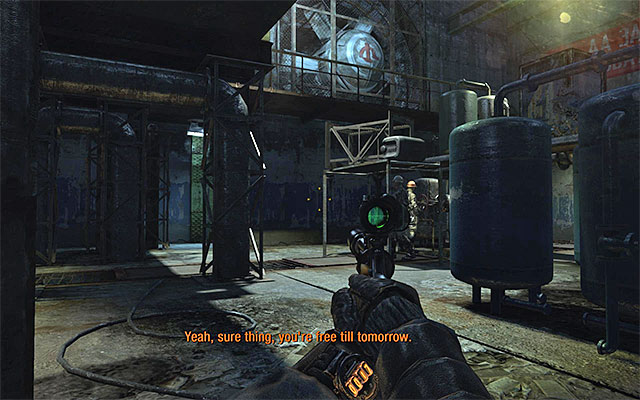
This objective will not appear in your log straight away, but it is good to know about it beforehand. The plan is to reach the northern part of A2, because that is where the huge fan between the armory areas (A1 and A2), is located as well as its control panel. On your way there, collect the filter, and approach the room occupied by the enemy forces.
I suggest that you start by approaching the box with the switch located to your right. Use it to turn some of the nearby lamps off. Unfortunately, the halogen lights hanging down from the ceiling can't be shut down nor destroyed, just like in the previous part.
The other end of the large location can be reached by in several ways. The most risky one is to follow the man inspecting the installations. If you chose to follow this way, remember that you will often have to balance between staying in hiding, and eliminating the enemies that walk away from their groups. You, of course, need to do it only in dimly-lit areas.
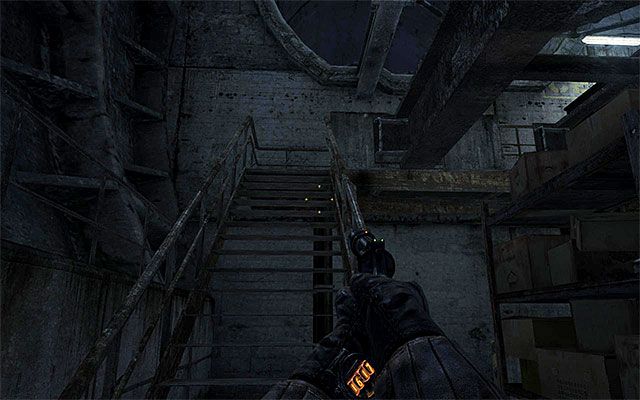
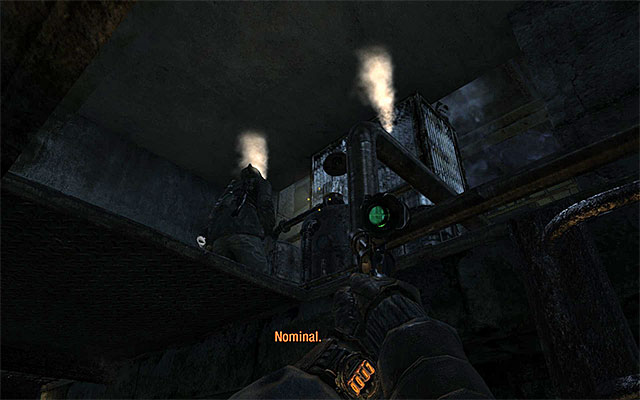
A way better idea, in my opinion, is to locate the ladder shown in the above screenshot. It leads to balconies that aren't guarded by anyone. Examine the supply crates and walk over the narrow pipes to get near the control room with the main switch.
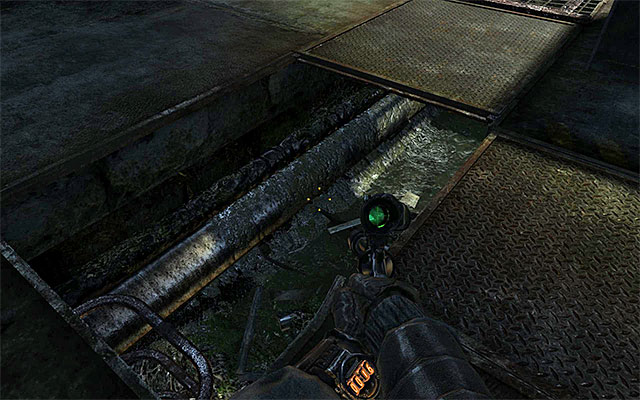
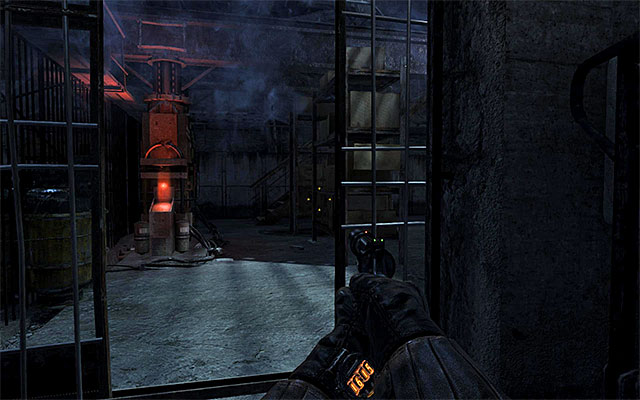
Both of the above variants will allow you to decrease the distance between Artyom and the main objective. The main path leading to the control room is well-lit, but this should be no problem because you can examine the part of the A2 area to the left (the western one). You will find there a manhole to the sewers, shown in the above screenshot.
Explore the sewers to find several supply crates. Do not assume non-linearity, because only one of the paths doesn't lead to a dead end and it leads to the right (the eastern one) part of area A2. Approach the sewer exit carefully and destroy the lamp above. Wait for the situation to quiet down and make your way upstairs. Eliminate the guard there who should be around.
Note that thanks to the sewers you can reach the north-most part of A2, i.e. the one located right behind the main control room. This location is patrolled by at least, two enemies, but do not worry. Their fields of vision do not overlap, so you will be able to eliminate them easily.
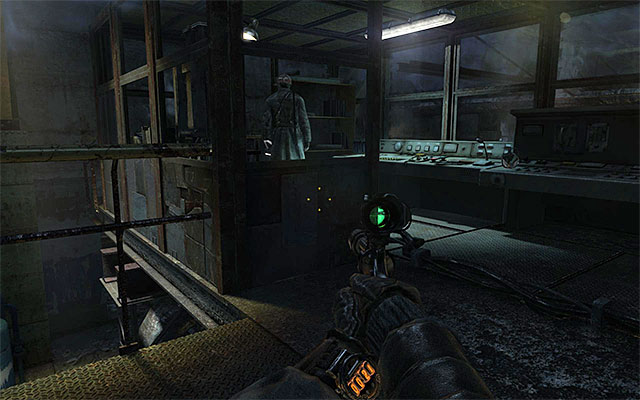

You can now take one of the ladders to the balconies above the control room. Carefully, approach the room and deal with the guard here. Devote now several moments to locate the filter shown in the above screenshot and the Artyom's diary page.
If there are no more enemies around, you should explore the entire A2 area, and find numerous supply crates (do not forget to search the corpses of the killed soldiers!). If you do not feel like doing it, remain in the control room and interact with the switch.
Leave the control room and approach the fan that you have just switched off. It is located in the north-western part of the A2 area. Jump into the hole between its blades to reach A1.

Start by taking the ladder. Remain in the northern part of area A1 and collect the Artyom's diary page shown in the above screenshot, while maintaining the necessary safety measures. Only after you do that, turn your attention to the problem of leaving the armory through the exit to the south.
In my opinion, the best way to reach there is to keep to the western wall. What speaks for the solution is that this area is not that heavily guarded and it is easier to stay in shadows here. What you would have to do here, is take the ladder (screenshot 1) and destroy, or remove, several light bulbs a bit further )screenshot 2). As far as the guards are concerned, you will encounter two at most, who can be easily avoided or neutralized.
Trying to make your way through the central part of this area is out of the question because of heavy lighting, which cannot be switched off. The only alternative here is to move keep moving near the eastern wall. Unfortunately, you need to consider the fact that you will encounter more enemies here so, bolting through better-lit areas may be necessary.
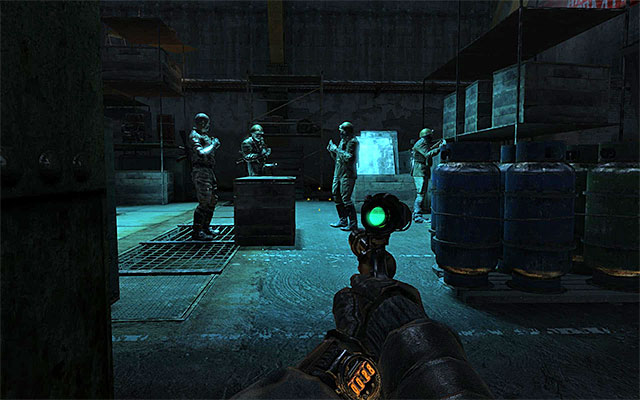
Both of the above options will allow you to get near the largest group of enemies shown in the above screenshot . You may try and walk around them entirely or wait for them to scatter, when you can neutralize them one by one.
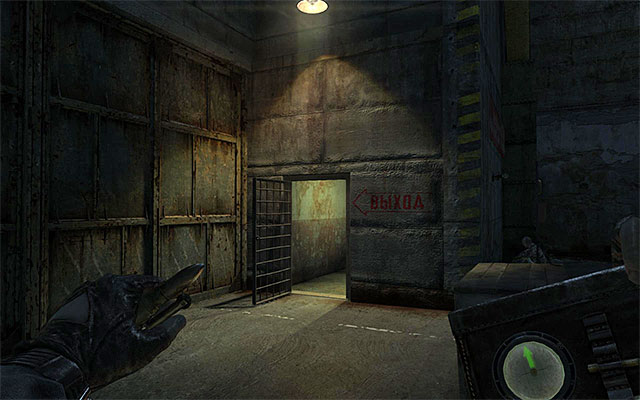
The armory's exit is located in the south-eastern part of area A1 (the above screenshot). Before you take it, do not forget to destroy the "regular" lamps in the area, as well as about exploring the area for supplies and new kinds of weapons (I especially recommend visiting a small room with a guard and a safe to the south-east).
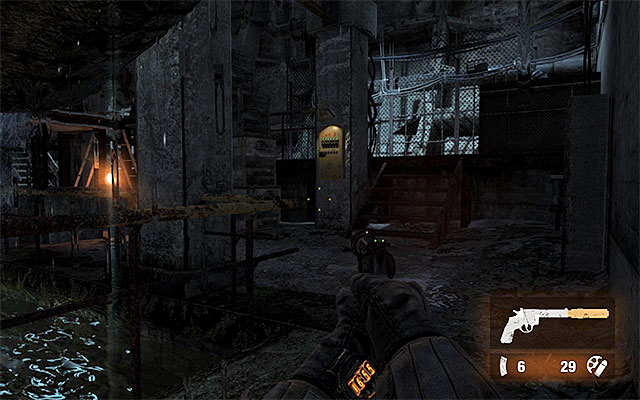
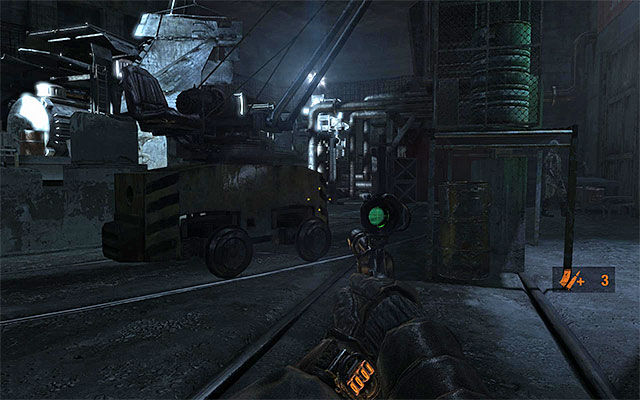
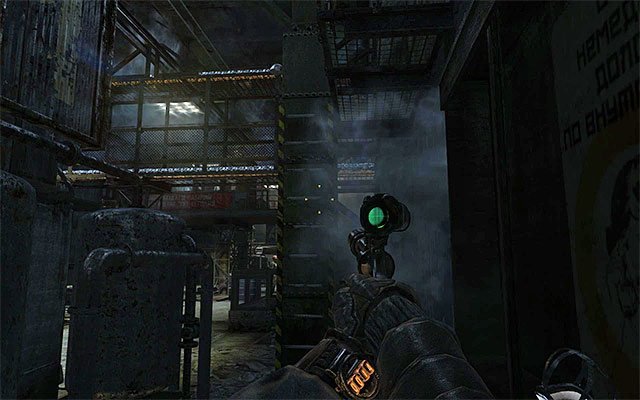
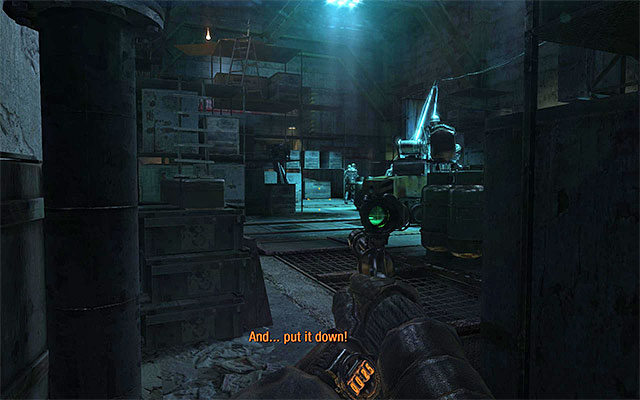
Follow the linear corridors and find an accordion in one of the lockers. After you reach a new, larger tunnel, turn right and approach the two guards carefully. Do not attempt to attack them, because they look at each other. Furthermore, the one to the right can make use of the turret any time.
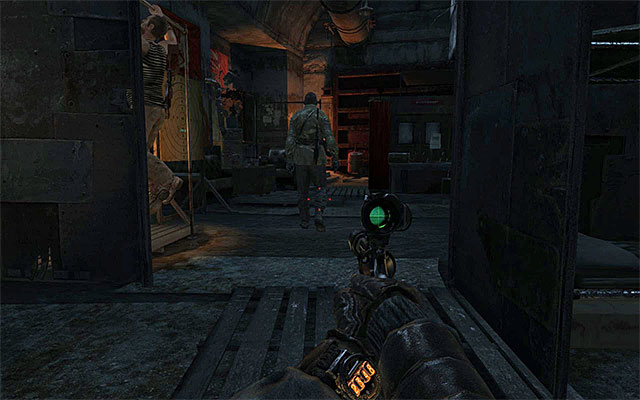
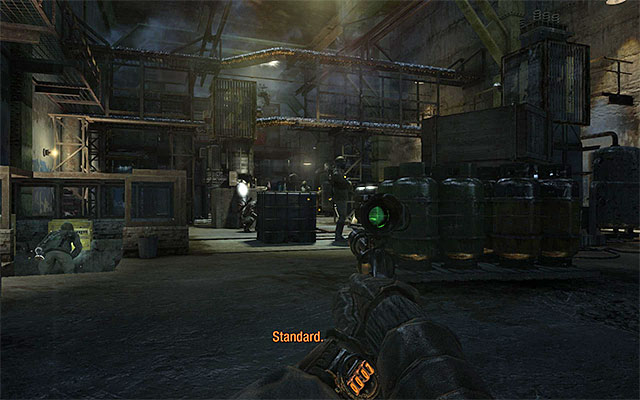
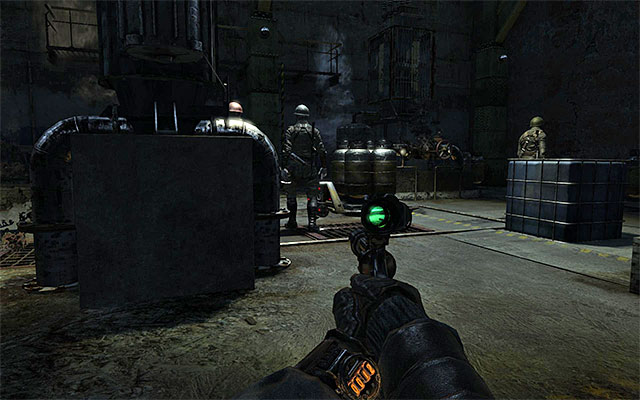
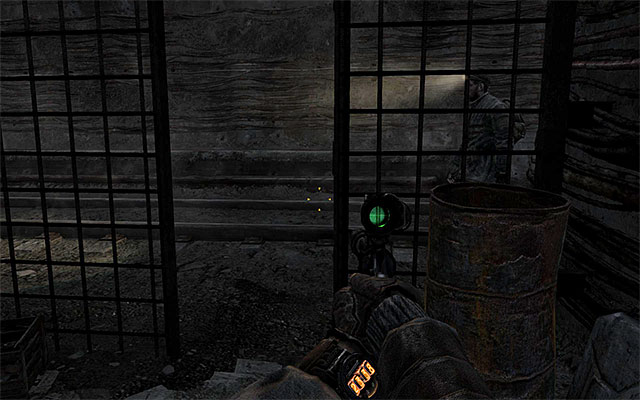
After you squeeze past the enemies, take the path to the right, but retreat and hide behind the barrels as soon as you notice the soldiers shown in the above screenshot. Wait for them to walk past you. It is worth noting here that you can eliminate all of the soldiers from this group, because they keep a considerable distance from each other and they remain in shadows for a long time.
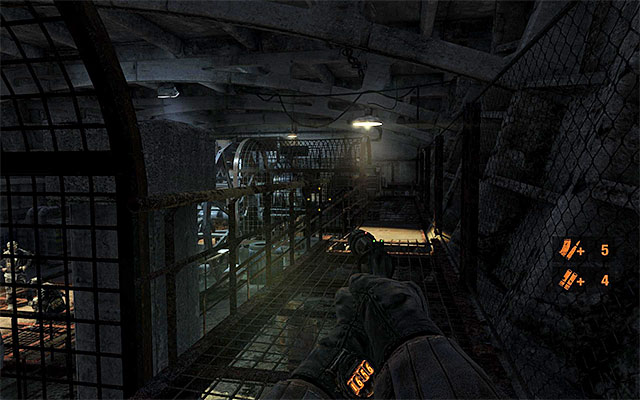
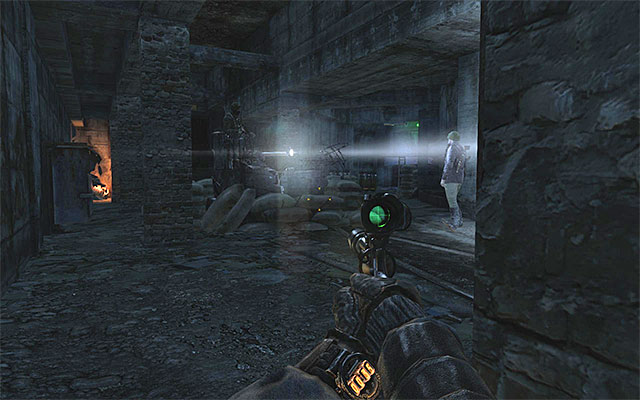
Go towards the passage where the last group of enemies appeared. Do not forget to destroy the sources of light at all times, because there is one more enemy on your way. He is not too much of a threat, because he does not use a torch.
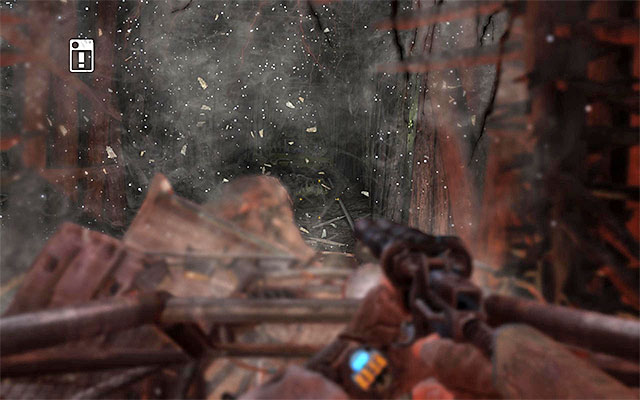
The final part of this chapter is very linear. You need to reach the end of the tunnel and turn right to walk through the tunnel with numerous cobwebs. There are only a few shafts ahead of you. After you leave them, the stage is over.

Start by listening to the conversation with Andrei. Follow him to a larger tunnel where he will present you with an armored, well lit railway car that he has prepared. Since there are no valuable items around here, you can take your seat in the vehicle.
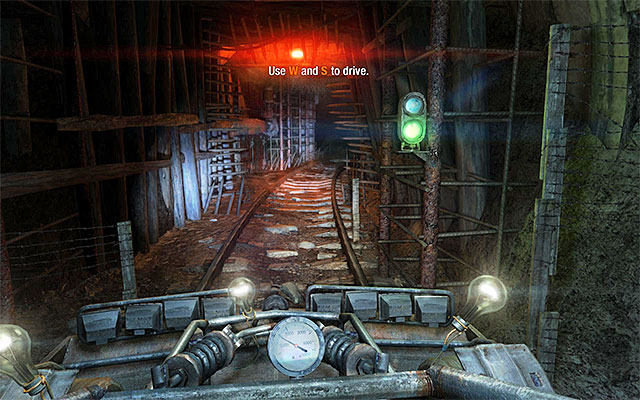
Acquaint yourself with the hints displayed by the game, concerning the keys for controlling the car. According to Andrei's suggestion, it is a good idea to keep the car's lighting on, especially that the batteries do not require regular recharging. You will soon realize why it is so important to keep the lights on, because you will not have to fear any unexpected radspiders attacks thanks to this. . Wait for Andrei to open the large gate and go ahead.

It is a good idea to take frequent stops, during the ride, in the places where there are entrances to side areas. It is not requisite to explore these areas, but thanks to this you will get additional supplies or weapons. The first such area has been shown in the above screenshot. Climb the stairs and check out the toilet. You will find there some military-grade rounds and an accordion.
Another optional area is located a bit further, also to the left. Collect the filter and open the door to the corridors occupied by spiders. A careful exploration is not a good idea, because the killed spiders will soon be replaced by new ones. Instead, try to run through the entire area to reach the well-lit spot shown in screenshot 2. There is a switch box here that activates the nearby lamps, thanks to which the spiders will retreat. Only then should you explore the entire area, and especially search the corpses and skeletons (with the most valuable collectible being a modified revolver).
Return to your car again to resume your ride. On your way, you will probably locate another skeleton, but there are only basic supplies on it. A bit further, there is another larger area to explore. After you enter, start by using the switch box to shed some light on the area. You can now look around for a modified machine gun, ammo, military-grade rounds, a filter and throwing knives. Note - When you will be trying to leave this area, quite unexpectedly, you will be attacked by a spider. You should prepare yourself for a mini-game that consists in pressing the specified key rhythmically.
Return to the car and move on. After you reach a large closed airlock you will receive new objectives.
Climb down the car and go right. Collect the filter, and open the door to the right. This location is very similar to the optional areas that you have visited earlier, because, also here, you will be encountering spiders. Start by turning on the oil lamp attached to the wall on the left.
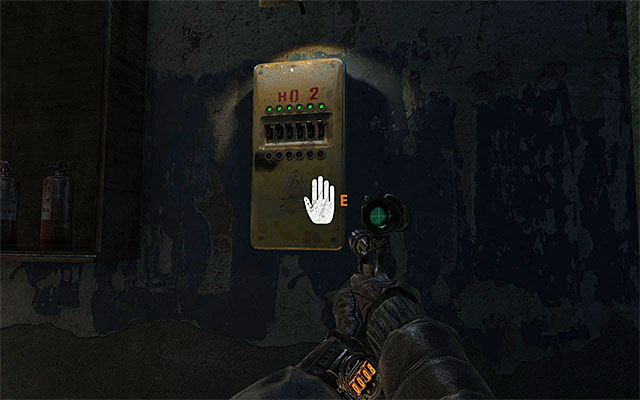
I recommend against wasting ammo and time to eliminate the spiders. Instead, sprint all the way through the linear corridors to reach the fuse box shown in the above screenshot. Interact with the box and restore power to the airlock.
You can now go back,. It is a good idea to look around for any skeletons, to find supplies, a two-barreled shotgun and a machine gun. Note - although you restored lighting, in some of the corridors lights are still off, and therefore, there may still be spiders lurking there.

After you return to the main tunnel, approach the airlock to the right and put the gasmask on before you pull the lever shown in the above screenshot. The air in the next areas of this chapter is contaminated.
I suggest that, for starters, you approach the switch shown in screenshot 1. After you interact with it, return to the car and go straight ahead. Gain speed so you can make your way through the wooden barricade shown in the screenshot 2. You can explore the "secret" area to find, among others, two corpses and an assault rifle.
Rev up the car to the airlock and interact with the switch again. You can now explore the tunnel to the left shown in the above screenshot.
After you reach another fork, climb down the car and consider exploring the optional tunnel to the left, which leads to a demolished railway cars. Keep vigilant here because, soon after you enter the first one of them, a mutant will appear behind you. Kill the monster and walk over to the last car, where you will find a locker with ammo, military-grade rounds and an incendiary grenade.
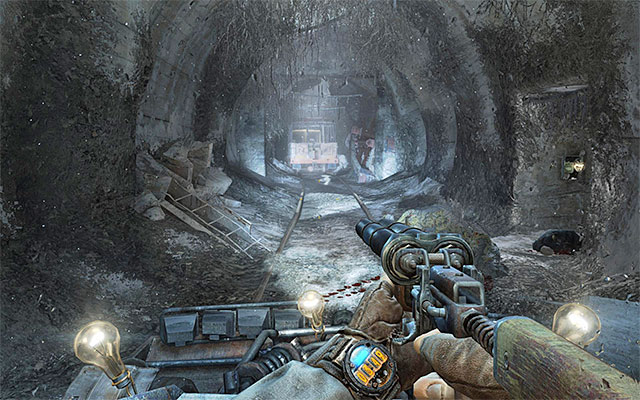
Return to your car and proceed on. Soon you will reach another obstacle, which is a train.
Before you decide to get to pushing the train out of the way, examine the optional area to the right. Collect the filter and enter to handle several mutants (since this is going to be a fight at close quarters, I recommend that you use either a shotgun or a double-barreled shotgun ). Having secured the area, explore to find shotgun, ammo and military grade rounds.
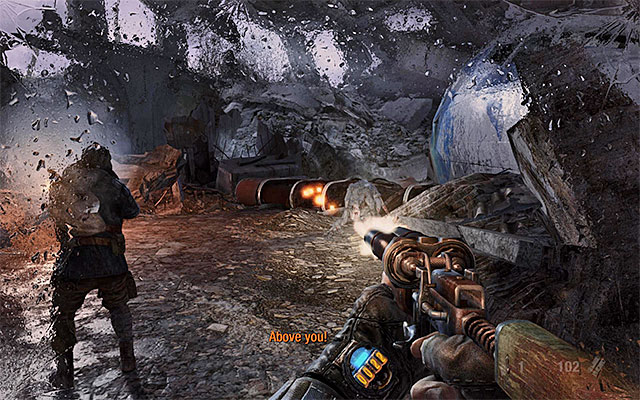
Return to your car and approach the train. You need to take into account that, as you are pushing the train, there will be mutants appearing behind your back every now and then. I recommend that you react to that as quickly as you can by first shooting the mutants in the distance (screenshot 1), and then at those that managed to catch on to your car (screenshot 2).
The fact that you are pushing the train does not mean that you should neglect the side areas that are suitable for a more thorough exploration. An entrance to one of such areas has been shown in the above screenshot. Explore the abandoned barracks to find there, among others, a filter and a rifle.


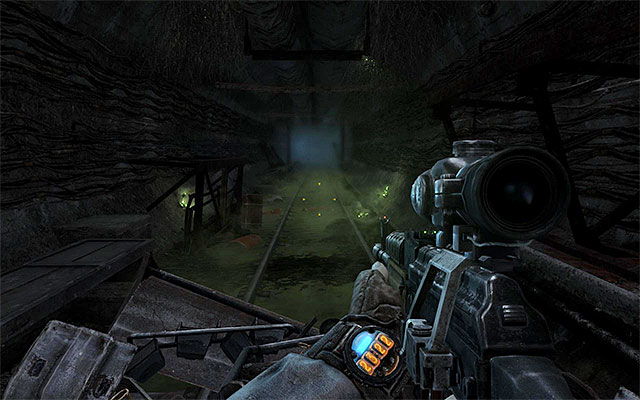
You will recognize the entrance to another optional area by green mushrooms growing out of the wall. You need to keep vigilant as the tunnels serve as a den of mutants. After you come close to the den, start eliminating the monsters, and be prepared to be attacked from various sides. (you can position yourself next to the collapsed tunnel to make it easier to fend off any attacks). After you are done, search the area for supplies and Artyom's diary page shown in screenshot 2.

Return to your car again and start the last part of the pushing process. After it rolls over the track to the right, approach the switch and interact with it. You can now move forward while gaining speed to ram through the wooden barricades, which will end this chapter.
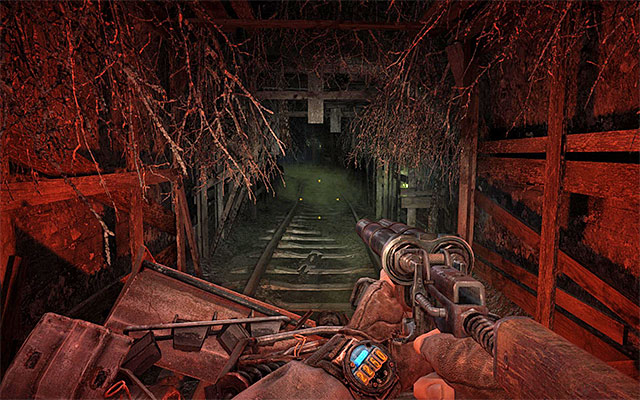
Start by taking your gas mask off, because you are not going to need it in this part of the tunnel. Mount onto the car and go straight ahead. Use acceleration to get through the areas of higher radiation quickly. Ram through another barricade to reach a small refugee encampment.

I recommend that you spend some time among the refugees and listen to what they say. You can also barter with two of them. The person in screenshot 1 barters in weapon modifications. The one visible in screenshot2 barters in ammo, throwing knives, frag grenades and incendiary grenades.
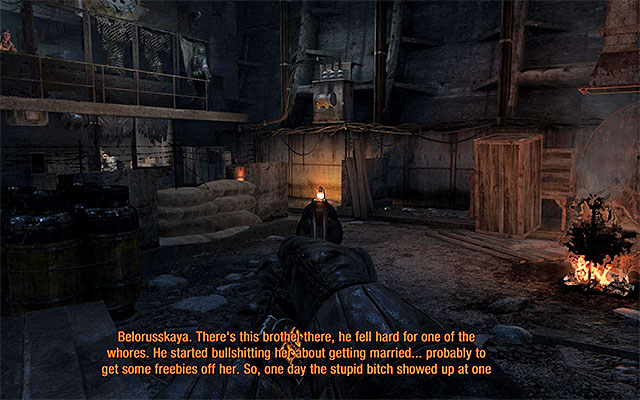
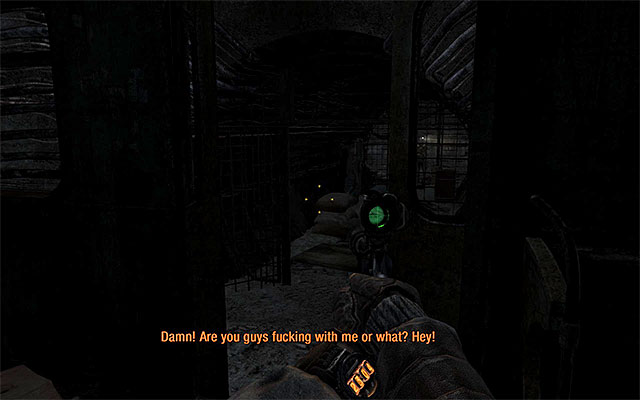
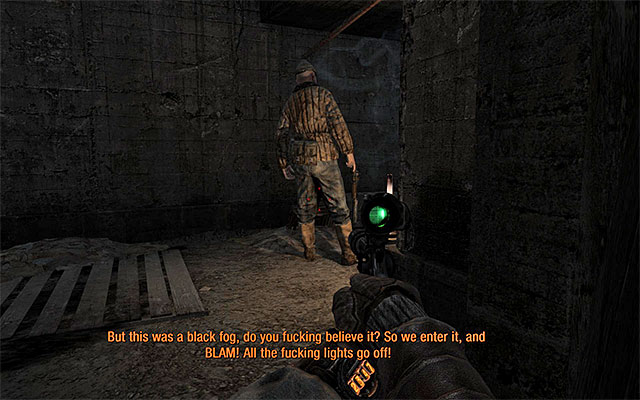
I recommend that you explore the further tunnels on foot, because you are slowly entering the areas occupied by bandits. It is because, even if you shut off the lights, you would be easily recognized anyways (what is even more the appearance of an empty car that they don't know will also alarm them) Go straight ahead and search the two skeletons on your way. Just like before, I recommend that you also search the optional areas so, at the first opportunity, take a turn to the right and blow out the oil lamp.
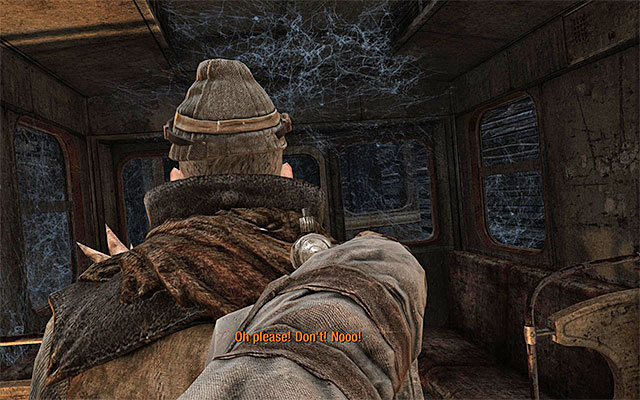
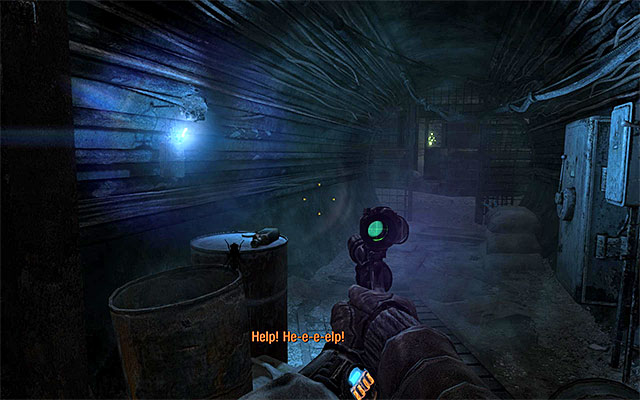
Near here, two bandits are keeping an innocent woman so, if you want to save her, you need to hurry. Go straight ahead, enter the train and turn right. The bandits need to be either shot or taken from behind and knocked unconscious. If you are too late and fail to save the woman, you need to take into account the fact that the bandits will be returning to the corridor you originally came from.
It is not the end of the problems because there is a single guard coming your way and he may be alarmed by no reaction from his colleagues. I recommend that you wait for this one near the entrance to the storage room and knock him down before he notices the other bandits.
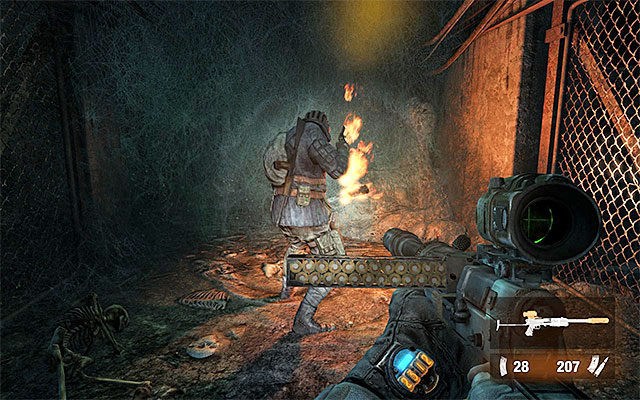
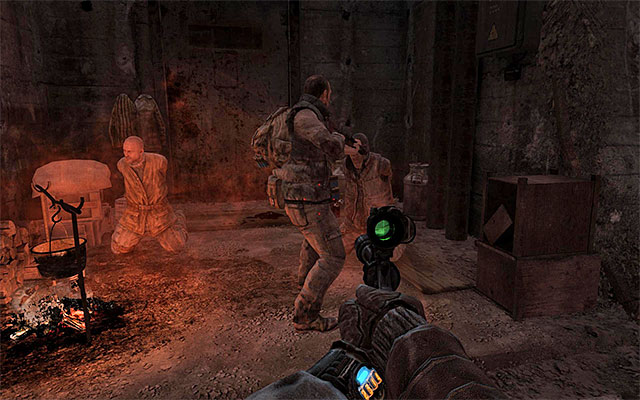
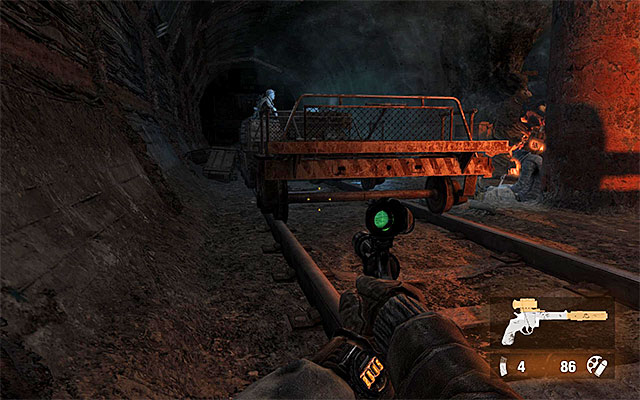
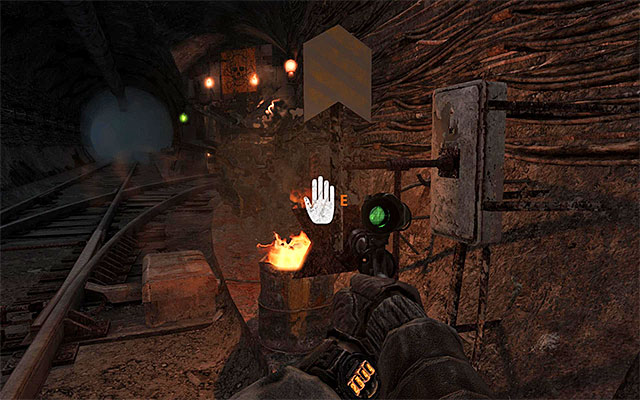
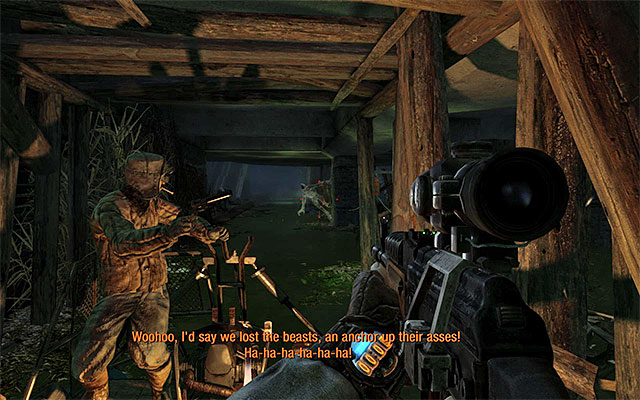
Return to the main tunnel now and carefully approach the area with two flaming railway cars, where there is a larger group of bandits. I recommend that you start by smashing the lamp to the left and eliminating the bandit with the petrol can.
If you are going to save even ore civilians, you will have to reach, quickly, the railway car shown in the above screenshot, with a bandit on it. Do not attempt to put off the oil lamp here too early, because this will alarm the guard. Put it off only after you knock the bandit down, or kill him.
Make your way a bit further and destroy the lamp hanging from the ceiling. First of All, kill Or knock out, the Man to the left of the tracks, and then the enemy standing next to the hostages. If you are quick enough, you will save two people. If not, you will save only one. (this won't prevent this task from being completed in any way).
Before one of the survivors helps you, you will have to dispose of all of the remaining bandits in this area, by killing or knocking them down. If you have acted in accordance with my instructions, there are , probably, only two enemies left, and they are staying next to the burning railway cars (the screenshot). First of all, attack the bandit sitting atop the car, and then the other one that is busy searching the corpses.
It would be good now to take care of the exploration of the area, by searching all the corpses and interactive containers. You can now return to the rescued civilian (the one that didn't run away) and free him. Wait for him to take his place in the railway car and unblock further passage.
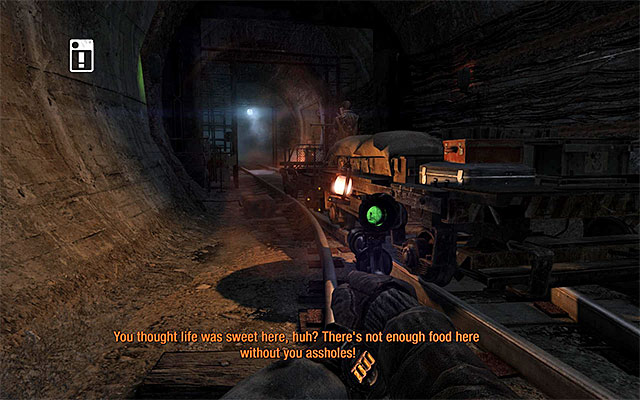
Since between you and the further part of the tunnel, there is an irradiated area, you need to return to your car now. Pass through all of the secured area on your car, right through the radioactive area. Stop right after the you leave them behind. Ahead of you there is a railway station that has been taken over by bandits.
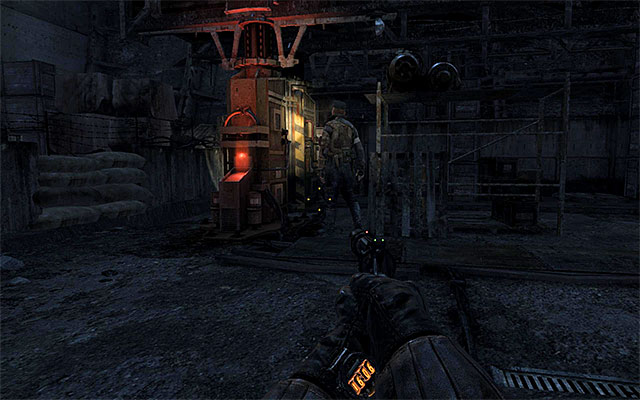
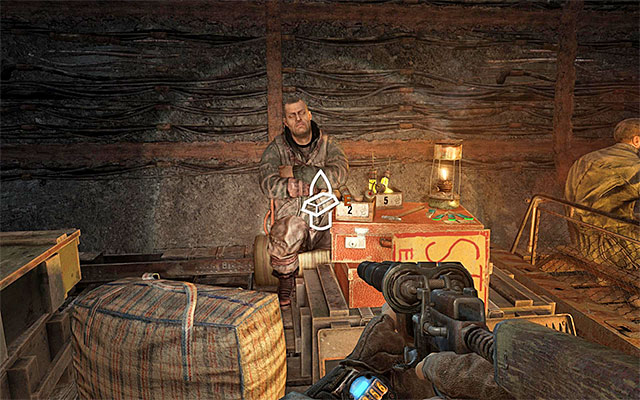
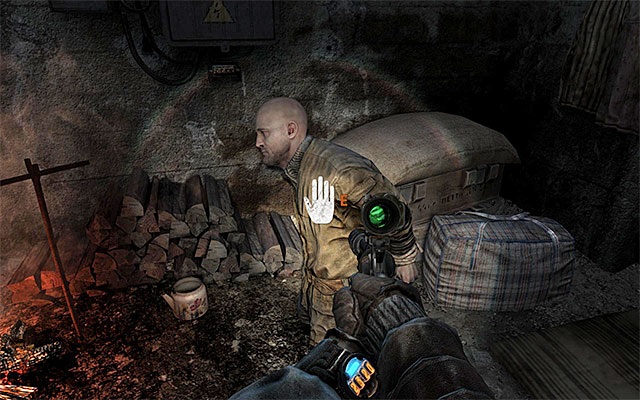
Go towards the station. Soon, a guard will start coming your way, and it would be a good idea to hide in one of the side-rooms, because he is equipped with a torchlight and he could notice you. After you knock him down, or kill him, search through the abovementioned side-room to find a lot of supplies and the Artyom's diary page shown in the above screenshot.
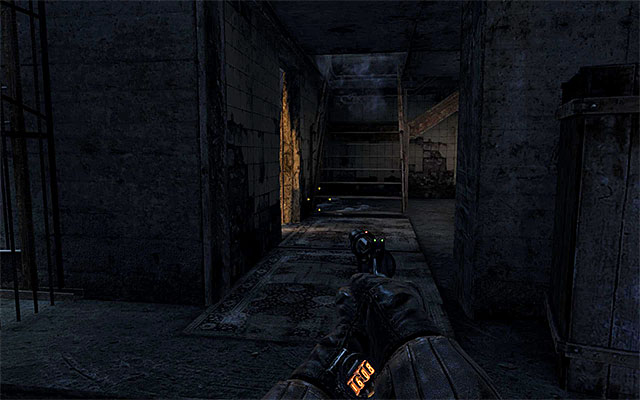
The railway station is, in a way, divided into two parts. It's the area to the left, and to the right of the tracks. I strongly recommend that you secure the entire area, because, even if you open the gate, you will have to ride through here. First of all, take care of the area to the right side of the tracks, because that is where most bandits, who are keeping an eye on the tracks, are staying. The closest entrance to the area to the right has been shown in the above screenshot.

Destroy the lamp you can see in the distance and come closer to the guard crouching over the fire. After you dispose of him, put out the fire. Remember, at the same time, to neutralize systematically all light sources as you go through the station.
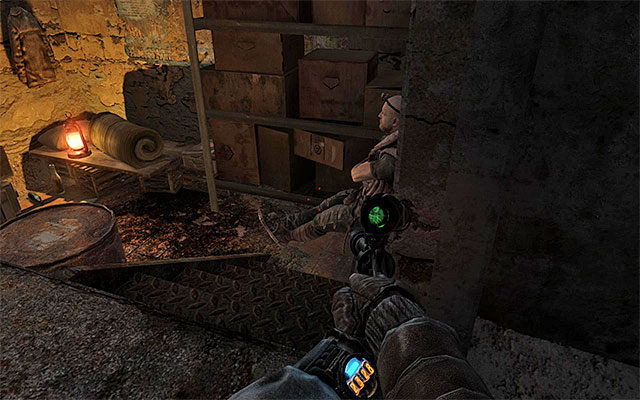
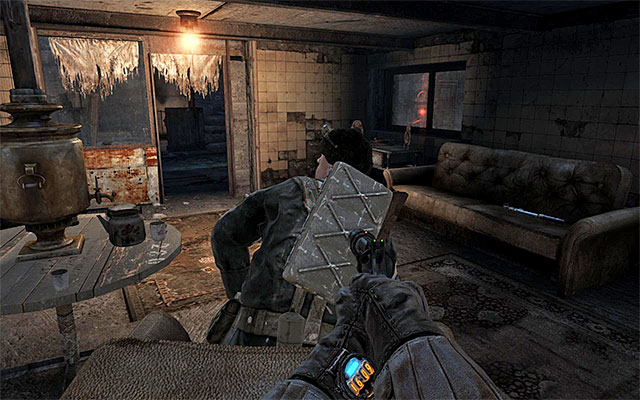
Go now through the narrow corridor and eliminate all of the guards on your way that are watching the tracks. The fact that they are turned away from you is going to make things way easier. Also, watch out for the guard sitting on the crates (the screenshot), and stay as close to the wall on your right as possible, while approaching him.
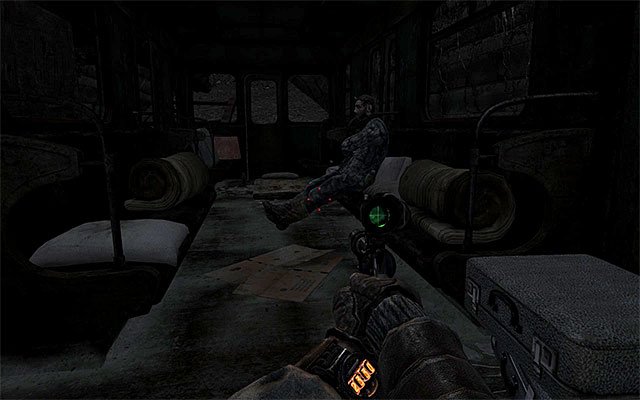
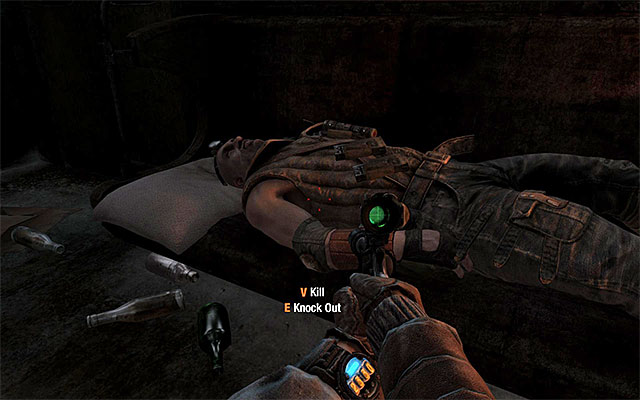
After you have secured the entire area to the right, search it for supplies (corpses, crates), return to where you have started and go left, for a change. Here, almost all of the bandits are staying inside the train so, be careful while approaching the standing or sitting enemies. (screenshot 1), and ignore, or kill, the sleeping ones (screenshot 2).
The only exception to the rule is the one shown in the above screenshot who, just like the bandits in the area to the right of the tracks, is looking at the tracks. Kill him or knock him out and put out the nearby oil lamp. Just like previously, after you have secured the entire area to the left of the tracks, search it thoroughly (corpses, containers).
Return now to the area to the right of the tracks and make your way to the very end to reach the switch shown in the above screenshot. Pulling the lever will open the passage to the last part of the tunnels.
Instead of returning to your car, start exploring the next tunnel on foot. Pay attention to the two guards coming your way - first eliminate the bandit walking in front, and then, the one that has been lagging behind. In both cases, it is a good idea to make use of the side rooms and hide there in wait for the right moment to strike. After you have dealt with them, search through the corpses, and also look around the area for a filter and military-grade rounds.

Walk now a bit further to reach the fork. It is a good idea to explore the one to the left, for starters. Locate supplies after you reach the end of the tunnel. Be careful, though, while searching one of the corpses (the ones with its legs sticking out from behind the wall). This will lead to you being attacked by a mutant (the mini-game connected with rhythmical pressing of the correct key).
Return to the fork now and interact with the switch here. Only after you do that, return to your car. Reach the switch with your car and go into the tunnel to the right, i.e. the one with the corpse and the torches to the side.

Stop after you reach the spike barricade, referred to in the headline to this task. Do not be to hasty about breaking through the barricade. Climb down the car and locate the door shown in the above screenshot, which will take you to the bandits' main hideout. It is not requisite to explore the area, yet it is recommendable, especially that, apart from the regular loot, there also is a collectible to find.
Wait for the guards to scatter and dispose of the one that has stayed in the area. You can now make your way to the headquarters, just do not forget to eliminate all of the nearby light sources. A bit further, you will notice two guards. Depending on how your preferences, you can either wait for them to walk away, or chose the corridor to the side to walk around them.
Enter now the area that serves as a makeshift abattoir. For starters, walk over to the left to enter the barracks here. In this area, there are three bandits in total, but none of them is either moving or looking towards the entrance. Thanks to this, eliminating them will be way easier. After you secure the barracks, perform the traditional exploration for supplies.
Return to the previous room, now and this time around, approach the corridor guarded by a sole bandit. What is interesting, it won't alarm him if you smash the lamp next to him, which will make disposing of him easy.

Walk over to the room with the murdered man in it (the above screenshot), who had been subjected to torture. Find here an Artyom's diary page on the table behind him. Take now the door to the right.
Opening the door will initiate a cutscene of a fight with the bandit mastermind, who has been keeping hostages. Just like in the case of the other mini-games of this type, tap rhythmically the correct keys. After you push the bandit away, shoot him, or run up to him quickly to knock him out. You do not need to walk through the entire hideout to leave. Instead, to return to the exit point, open the nearby door. Before you decide to leave, make sure that you searched it thoroughly.
Return to your car, again and mount onto it. Rear the car by a dozen or so meters, gain speed and press the key for additional acceleration. It is the only way you can ram through the spiked trap.
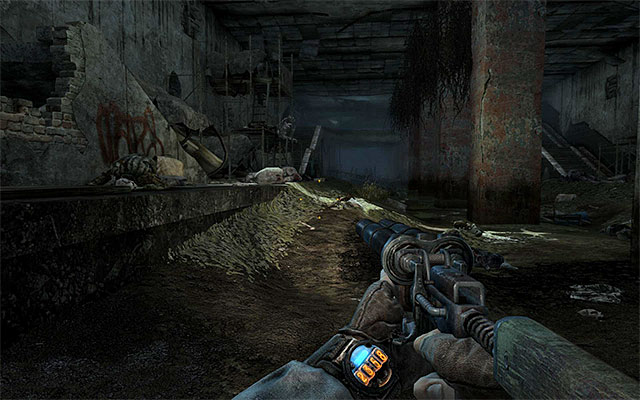
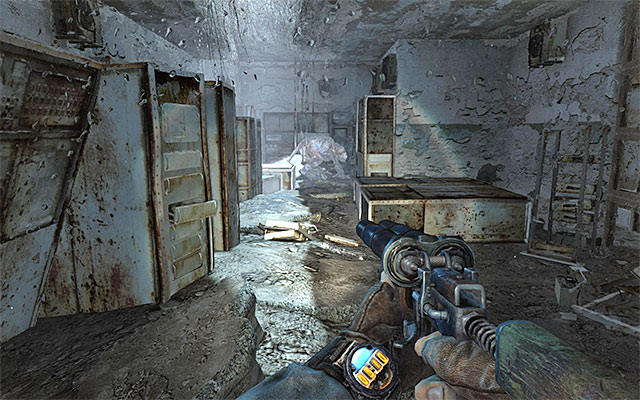
After you succeed, climb down the car and move straight ahead. Ahead of you, there is a linear journey during which you will have to make it through several demolished railway cars. Of course, it is a good idea to look around as you go, because there is at least one corpse with supplies on it there. Soon you will reach a larger location. Approach the flooded part of the chamber to receive new objectives.
As you can probably figure out, calling for a ferry will involve putting up another fight. You cannot really get prepared for what's coming but still, you should acquaint yourself with the chamber's structure, and remember the whereabouts of supplies (at the corpse on the upper level, there is a double-barreled shotgun). Once you decide you are ready, interact with the cord shown in the above screenshot.
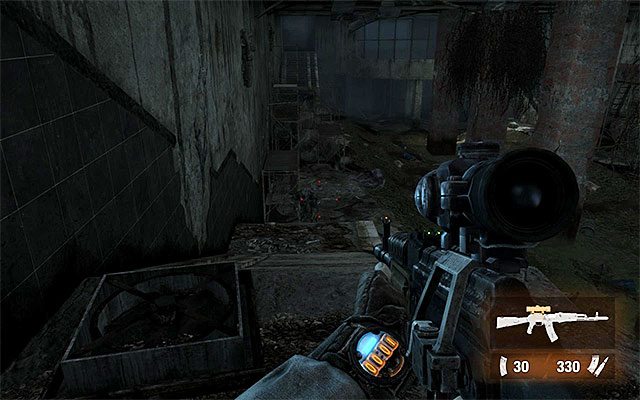

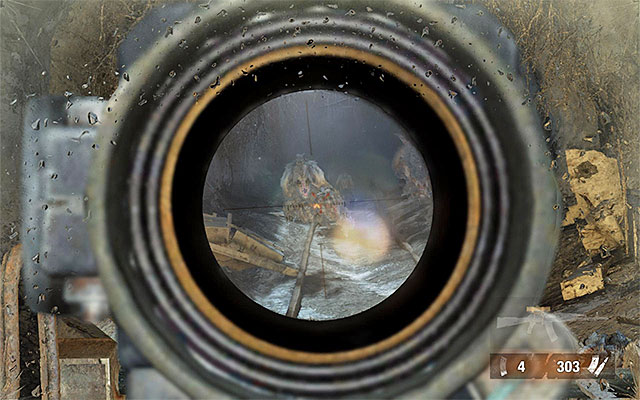
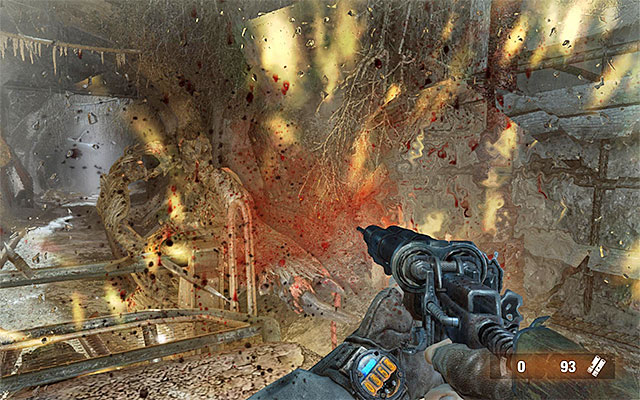
After a few moments, there will be mutants appearing in the area. I recommend that you utilize the strategy of attacking the monsters at a distance first (screenshot 1), and finish off the ones that made it closer with a shotgun or a different weapon effective at close quarters (screenshot 2). Try to remain in motion at all times , and do not let yourself be cornered. Make use of medicines if Artyom sustains heavy damage.
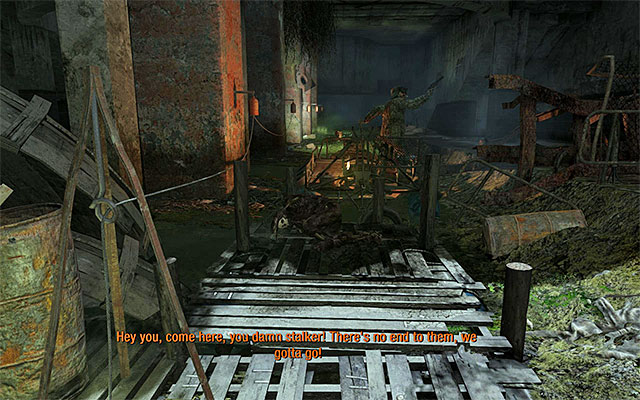
You need to keep fighting the monsters off until the ferryman lets you know that he has arrived. Do not continue to fight the mutants then, return quickly to the water reservoir and embark on the ferry.
The last part of this chapter is not too demanding. Keep firing at the monsters that chase the ferry - this shouldn't be too much of a problem. Soon, the loading of the next level will start.

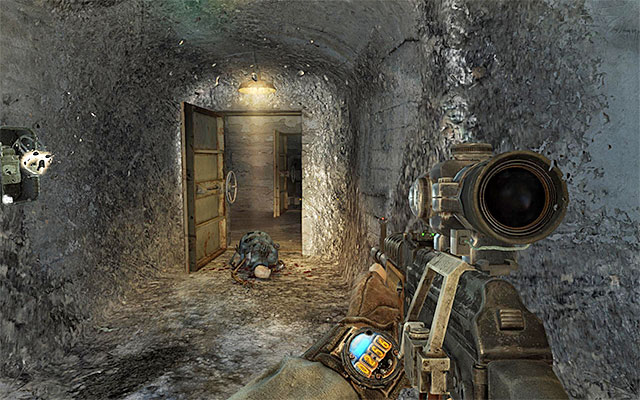
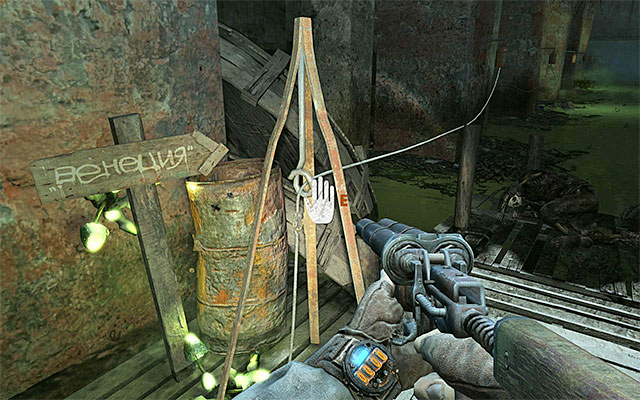
The initial part of the journey is quite quiet, so take your time and replenish your supplies from the crate, and collect the Artyom's diary page shown in the above screenshot.
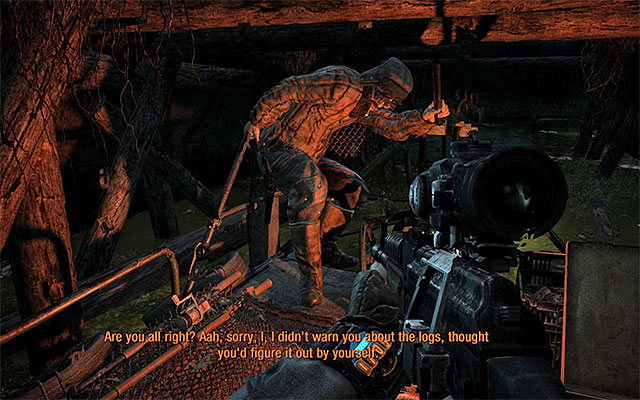
The boat will soon collide with a log of wood and, as a result, you will fall overboard. Wait for the ferryman to lend you a hand and pull you back onboard. A bit further, you'd better crouch to avoid being hit by ceiling beams.
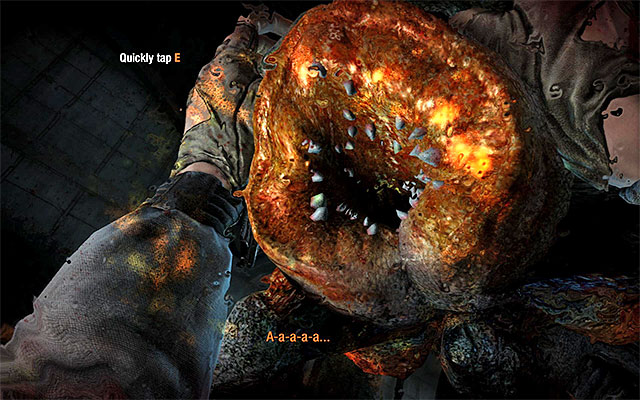
Soon, you reach a larger area, where there are monsters called shrimps. At first, do not react to their presence. Unfortunately, one of them will soon hop onboard and you need to tap rhythmically the correct key to deal with it.
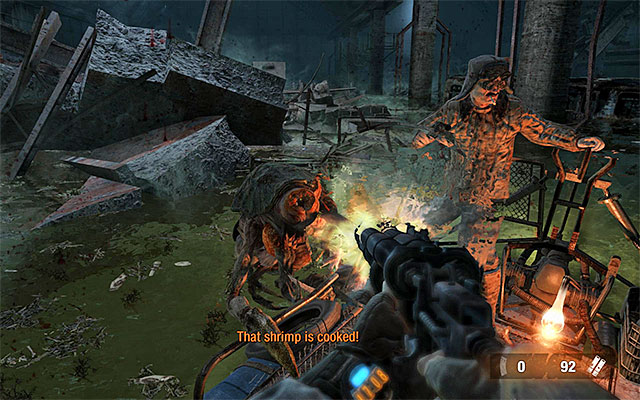
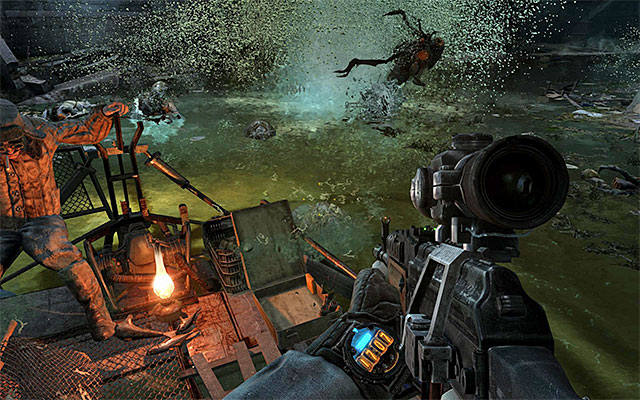
From now on, you can attack shrimps, best by aiming at their heads 9screenshot 1). Try an keep the monsters from getting onboard too often, this may result in the necessity to play the mini-game once again. You can also do as the boatman does, and throw your grenades at the monsters (screenshot 2)
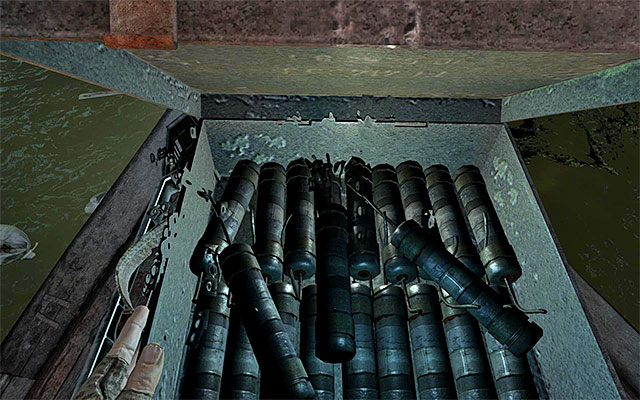
After you land in the water for the second time, start tapping the correct key quickly to return onto the board. Keep firing at the shrimps until you receive new objectives. The final part to this journey is very easy, because all you need to do is run up to the grenade box. After you have dealt with the shrimps, wait for the ferry to reach Venice.
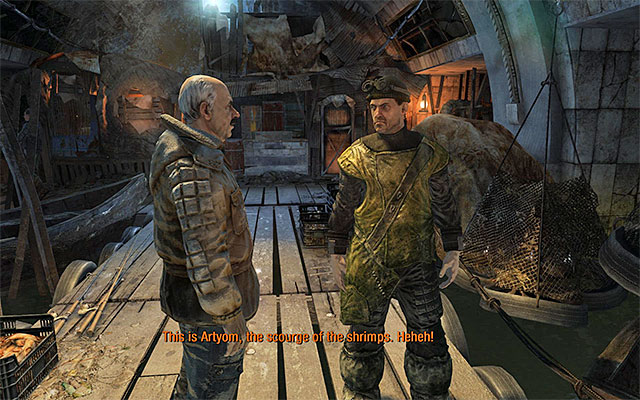
Wait now, for the ferry to reach the docks, and start your exploration of this area. This location is very much like the other places inhabited by survivors that you have already visited. That is why, you already know that you should make numerous stops while exploring, to listen to what the denizens have to say.
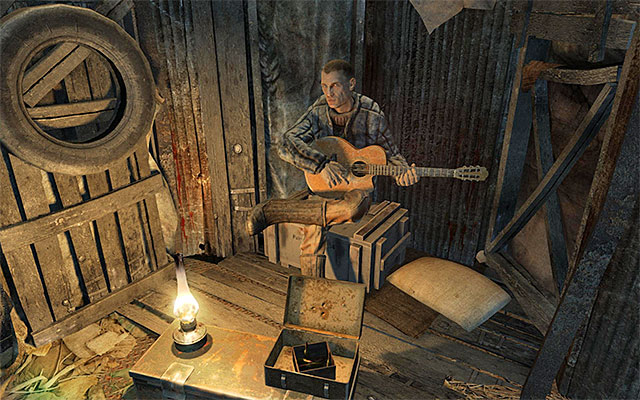
Start your exploration. I strongly advise against stealing from the fishing boat moored to the left, because this will be perceived as a bad deed. You should b, however, on the lookout for the "public" crates, because running through them does not carry any punishment. After you reach the area with a larger number of civilians staying in it, have a look around. You can knock on several doors, help the beggars, or give several army-grade rounds to the musician, thanks to which he will start playing for you.

While exploring the docks, keep looking for a path to the right, which will take you to a staircase. Enter the office. Listen to the conversation with this character and pick the Artyom's diary note from the box to the left (the above screenshot).
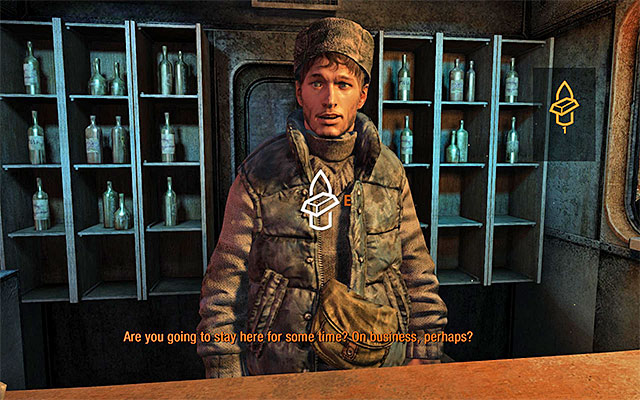
Resume your walk and reach the bar. Depending on your preference, you can either continue ahead, or stay here for a little bit longer. In the latter case, it is a good idea to turn your attention to the possibility of ordering a few drinks at the counter. What is interesting, after you have had a third one, Artyom will black out and start a brawl. In this situation, you can either ignore the moaning bartender, or give him several army-grade rounds for restoring the bar to its previous state.
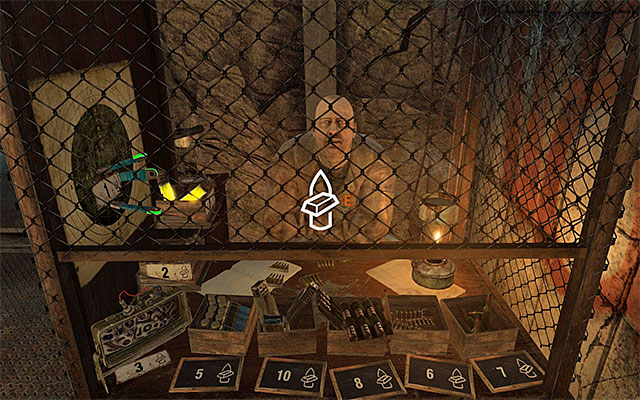
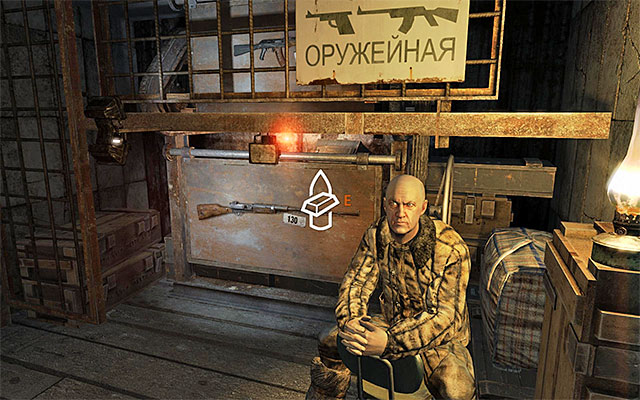
Having reached the next area, do not haste too much to go to the night club and turn left, first. In this area, there are two gun shops. The owner shown in screenshot 1 deals in ammo, throwing knives. Claymores, frag grenades and incendiary grenades, whereas the owner shown in screenshot 2 deals in weapon upgrades.

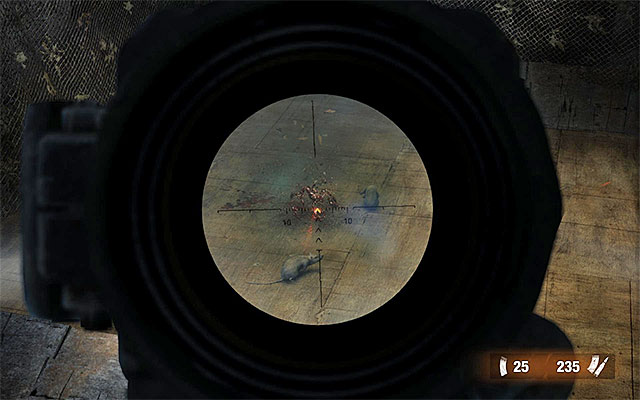
Another place that is worth seeing here is the shooting range (screenshot 1). Before you enter the competition, you need to put military-grade rounds on the scale pan (10 before the first round, 20 before the second round and 40 before the third round). Proceed then to the vantage point and start eliminating rats (5 in the first round, 10 in the second round and 15 in the third round) while trying not to exceed the allotted time (I recommend using a rifle or a machine gun with a scope. After each round, return for the reward ( which is twice as much as you bet).
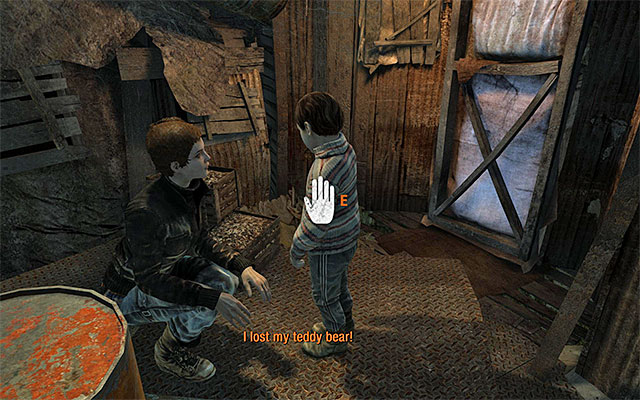
An additional reward for completing all three rounds in the shooting range is a teddy bear. Explore the area for a little boy, accompanied by his mother, who is currently complaining about having lost his favorite toy. Give the teddy bear to the boy, which will unlock an achievement.

Return into the vicinities of the night club and take the stairs. After you have entered the club's main area, you can stop for a moment to give military-grade rounds to the dancer and take your seat in an armchair to relax in a nice atmosphere.
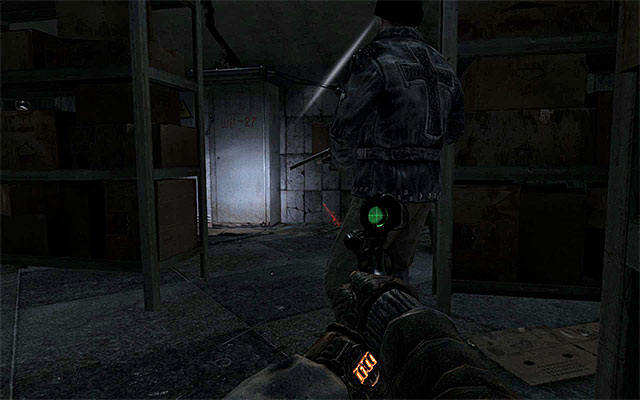
Go to the backroom now and, after you watch to a short cutscene, climb down the stairs. First of all, turn your attention to the Artyom's diary page on the aquarium. Only then, approach the door to the left, which will result in another cutscene being started.
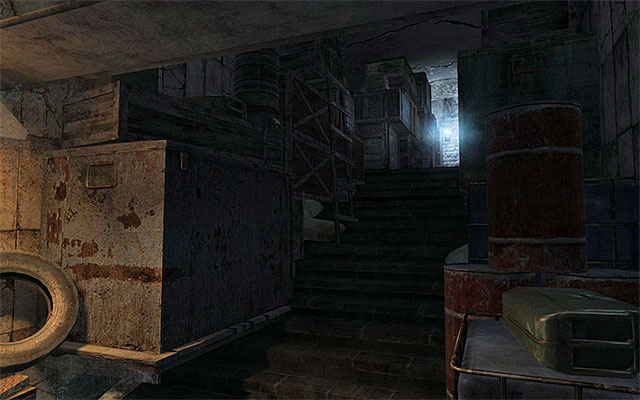
After you regain control over Artyom, you can request a private dance, or ignore the dancer completely and follow the characters that have just had a conversation in the room at the back of the club. Exit the club and turn right towards the market. In the end, you need to reach the stairs shown in the above screenshot, which has been blocked by two goons. Examine the crate to the left of the stairs and open the door at the end of the corridor.
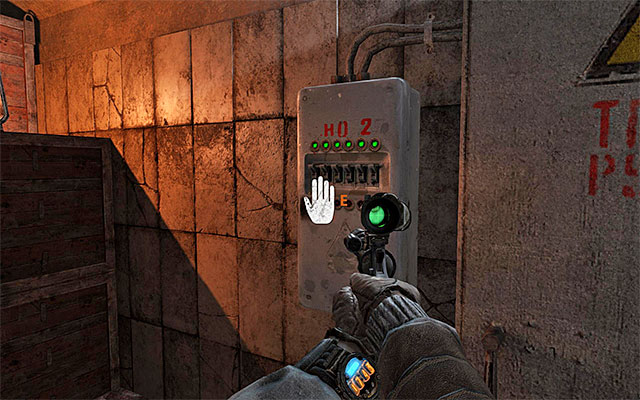
You need to watch out from now on, as Artyom is not authorized to access this part of Venice. As a result, you will be attacked by the nearby guards on sight. Remain close to the starting point and look around for the switchbox shown in the above screenshot. Cutting off the power in this section will make it much easier for you to explore the area. While you are at it, you can also blow out the nearby oil lamp.
Watch out for two guards coming your way. One of them will probably turn towards the switchbox, and the other to the door that you took to get here. Try to eliminate both of them. There is also a sole guardian standing at the two oil lamps - get him from behind and either knock him out or kill him.
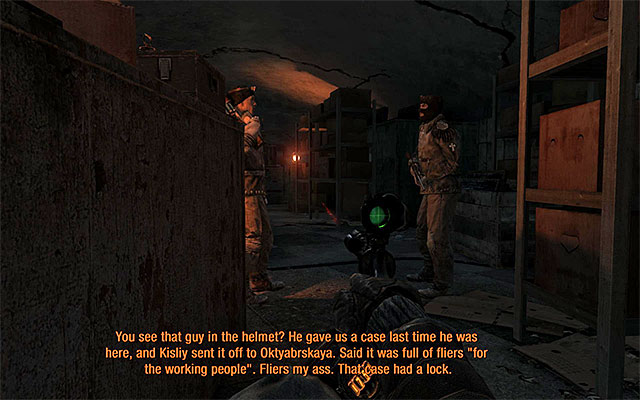
As you explore this area, you will be regularly running into further guards, which usually come in pairs. Do not destroy the oil lamps in this area, because you may alarm someone to your presence. Instead, wait for the enemies to go their way and walk around them, or eliminate them (kill or knock down).
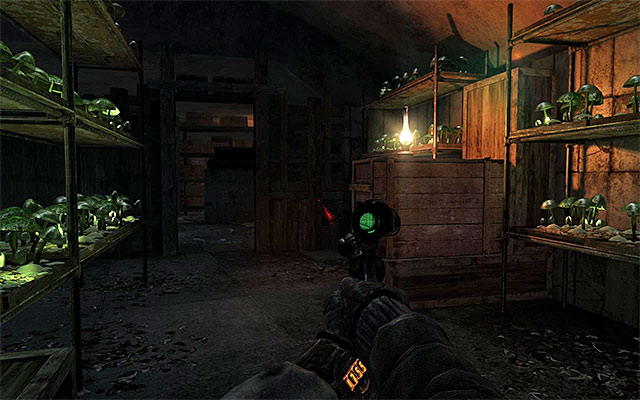
One of the enemy groups will not be that willing to go away from the blazing barrel, so walk around the guards and, at the same time, put out the oil lamp as you pass. Continue on your path and walk around the group at the furnace to the right. Search for any opportunities to strike at the guards patrolling some dimly-lit areas.
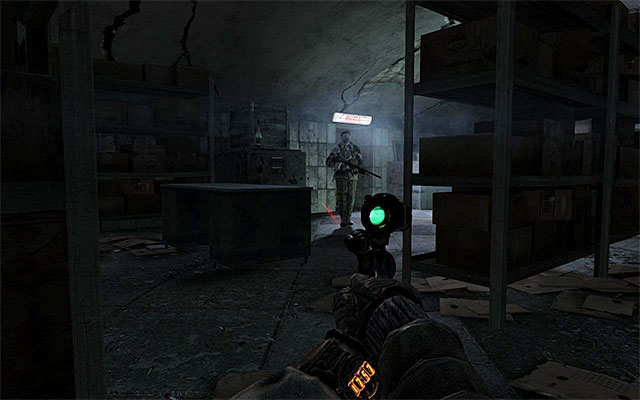
Your current destination is the well-lit passage shown in the above picture. After you eliminate the guard here, make sure that you have collected all of the valuable items, because you won't be able to return here.
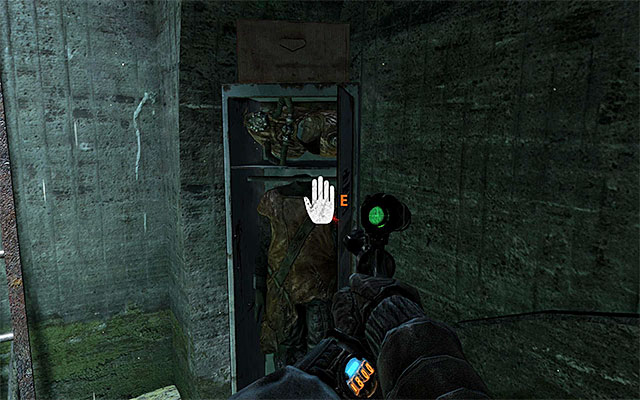
After you watch to the cutscene featuring Pavel, whom you have found, Walk through the passage. Put on the jumpsuit and take the ladder to the surface to reach the swamps, which will end chapter fifteen.
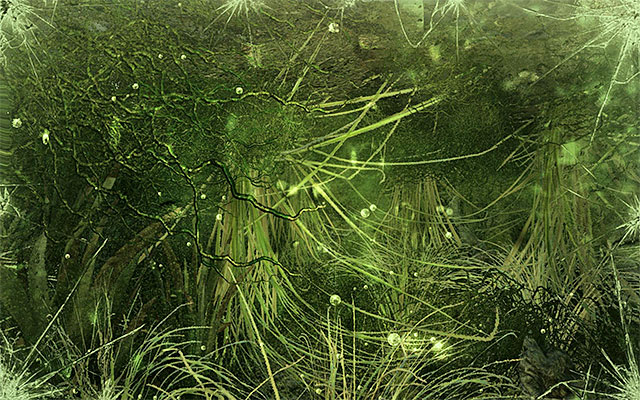
The swamp is a vast and dangerous area so, it is a good idea to learn several facts about it before you set out to find fuel. First of all, avoid water. Otherwise, Artyom will start to drown and take damage or(if he's already been wounded) he'll die. A similar type of traps are tripwires. Try to walk around them or jump over them, or disarm them.

Another very important issue, connected with the swamps, is that they are inhabited by monsters. Definitely, the type of monsters you are going to see most frequently, is the shrimp that comes here in two sizes. I recommend against eliminating all shrimps at all cost, or else you will simply run out of resources to secure this area. The monsters are best eliminated with a shotgun, or the double barreled shotgun, by shooting at them when they are exposed, instead of when they hide in their armor. Just like in the case of the ferry cross, incendiary and frag grenades are a good asset here.
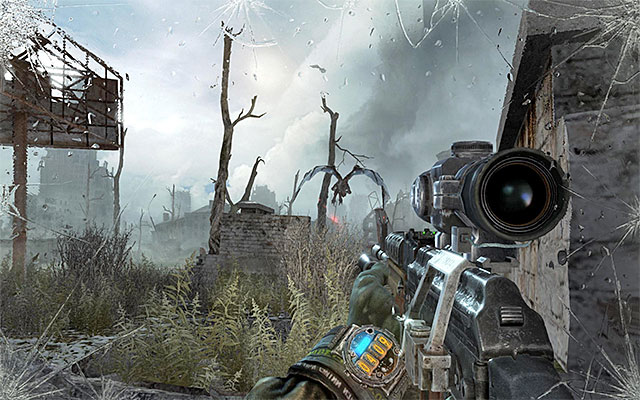
While crossing the swamps, you will also encounter, at least, two demons. Also here, you need to decide whether you want to try and kill the monsters (a good scoped type of weapon is recommended here), or just to avoid them. If you chose the latter, remember not to stay out in the open for too long. Otherwise you may be caught by the demon and sustain heavy damage as a result.

Since this area is really vast, you are not required o explore the entire area to push the plot forward. I recommend, of course, to explore the area in a more detailed way to find, among others, an abandoned encampment, secret stashes and corpses that you can search (for supplies, new weapon types - among others a sniper rifle in the booth in the camp and an assault rifle in the overgrown ruins). Remember though about frequent attacks by the shrimps, as well as about the time limit (the gas mask). Try and don't lead to a situation in which you almost entirely run out of supplies when surrounded by monsters.

Your current destination is the plane wreck shown in the above screenshot. It is located to the right of the starting point, quite far away from the ladder that you took to get to the surface. To find your directions, you can of course use the compass attached to Artyom's diary.
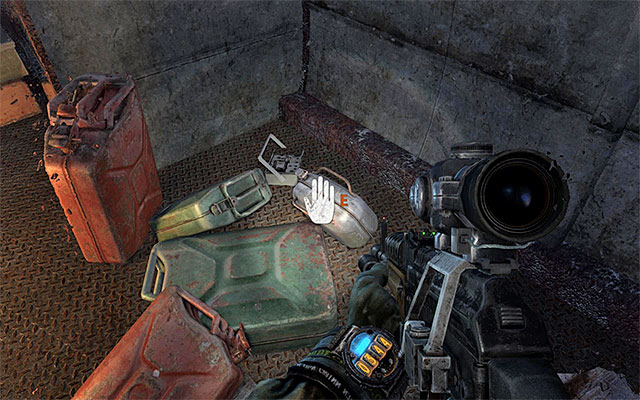
Enter the plane wreck and explore it thoroughly to find some supplies (Claymore mines among others, which will come in handy in the next chapter). The last thing to do here is to check out the gas canisters, to find out that they are empty.
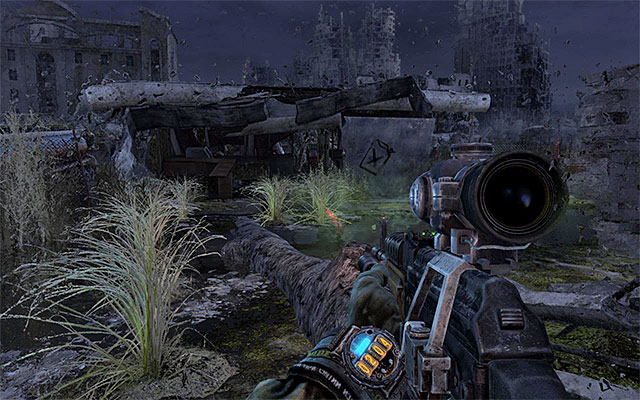
Do not worry about the attacking large green monster, because you do not need to fight it yet. Instead, wait inside the plane until the beast loses its interest in you and walk away to return to the swamps. You now need to set out towards the fuel station. For the next time, it is a good idea to use Artyom's compass to figure out the best route to get there.
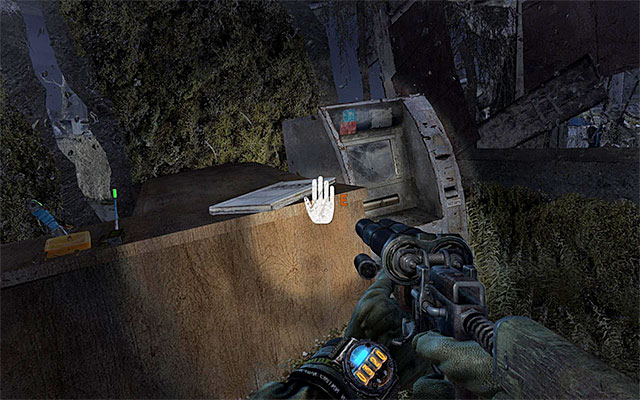
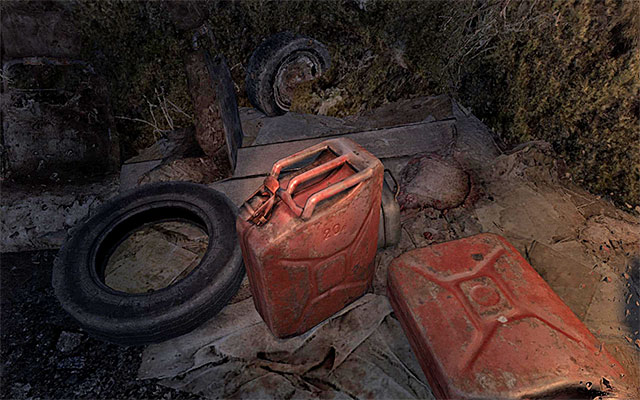
After you reach the gas station, explore the are thoroughly as, on the counter shown in screenshot 1, there is an Artyom's diary page. Only after you collect it, approach the gas canisters shown in screenshot 2. In one of them, Artyom will find fuel and take the canister (fortunately, this is not going to make him any slower).
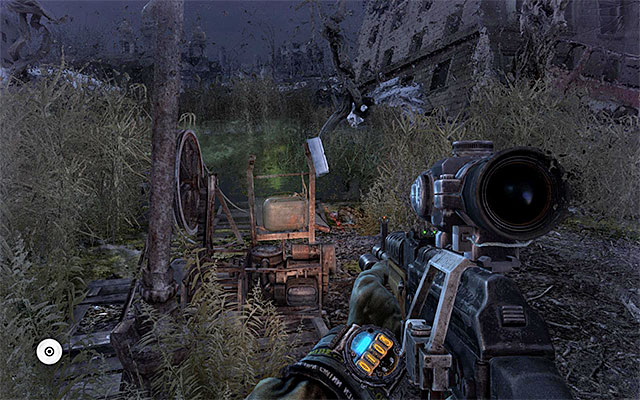
Once again, make use of your compass to determine the whereabouts of the quayside. Push towards the area, watch out for the shrimps and also make sure that you do not fall into water. After you have reached your destination (shown in the above screenshot) approach the winch and wait for your character to replace, automatically, the gas canister.
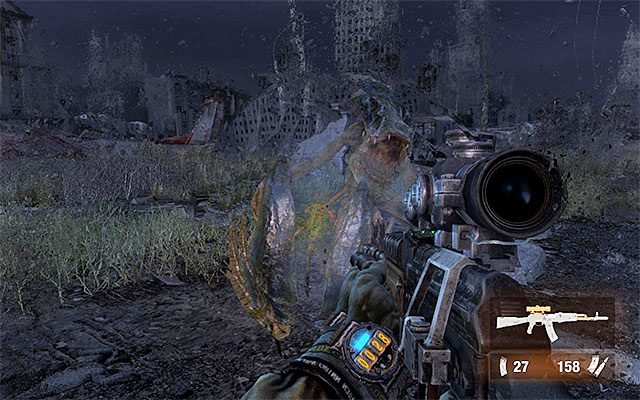
Move away from the quay and start attacking the shrimps that will be coming in waves. As was stated before, it is best to use here a shotgun, or any other weapon effective at close quarters. Aim at their heads and remember not to waste your ammo while they are hiding behind their armors.
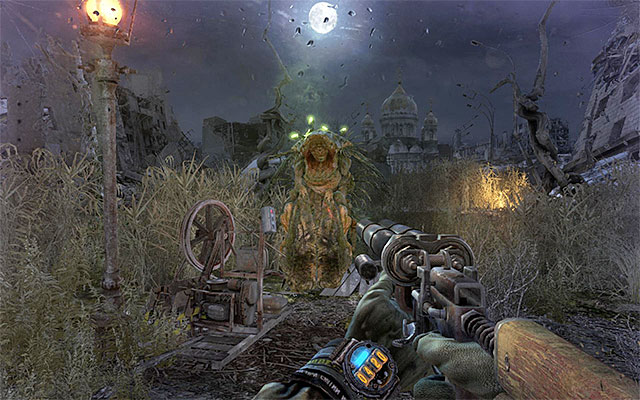
Wait for the wench to activate and press the red button to call for the ferry. Soon, the green monster that you have encountered while exploring the lane wreck, will emerge from water. It is necessary that you move away from the beast, due to its long limbs which it can use to deal heavy damage at a large distance. Try and remain in constant motion now and to take cover every time the monster charges at you.
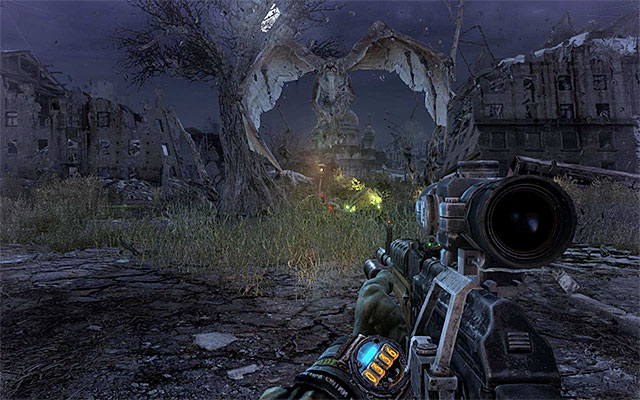
A good piece of news is that you do not have to fight the monster until it drops dead, because soon it will be attacked by a demon that arrives in the area. Move away and let the demon chase the large shrimp away, which will unblock the passage to the ferry.
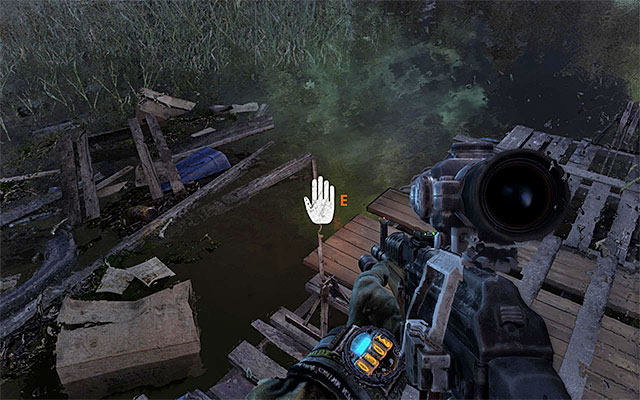
Keep watching the quayside and, as soon as the ferry arrives, run onto it and pull the lever, thus ending this exhausting chapter.
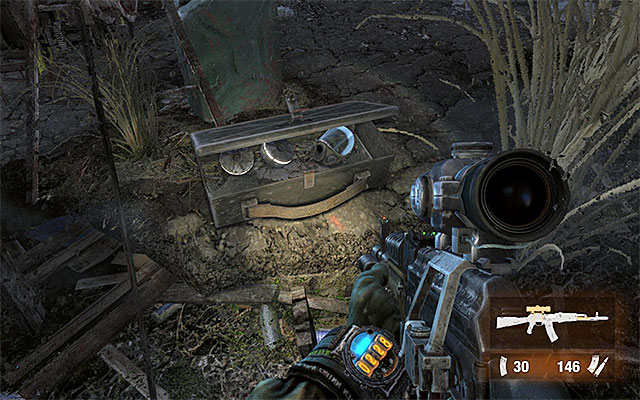
In some respects, this chapter is similar to the previous one, since it also offers you the possibility of exploration of a largish area. Start by examining the area near the quayside to find, among others three filters and gas masks (replace your mask if it is damaged).
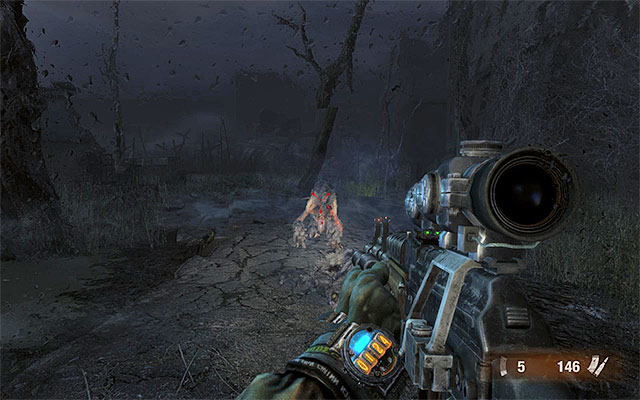
While exploring, remember of course not to enter the water and to manage your supplies with care. Instead of the shrimps, you will have to face mutants here. Just so that you remember, it is best to fight the beasts at a short and medium distance, by using the shotgun or any other weapon with big firepower.
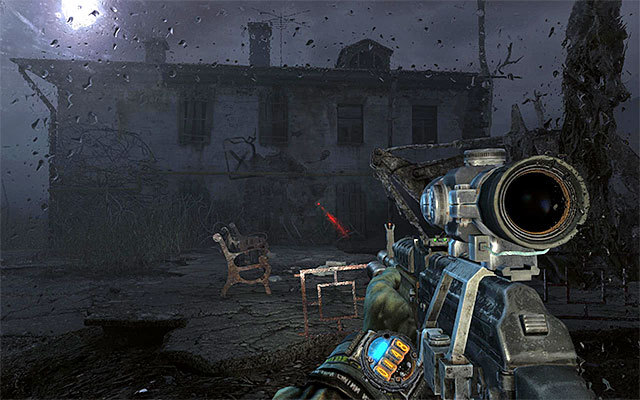
It is a good idea to explore the building shown in the above screenshot, located right next to the quayside. Watch out for numerous tripwires here and start by searching the first room in the building. Apart from the standard supplies, you can also find night vision goggles. From now on (not necessarily though) you can give up the torch light in favor of the night vision goggles.

Continue exploring the building to reach the door with another trap in front of it. In the room, you will find standard supplies, a tape recorder, and an Artyom's diary page on the floor (the above screenshot). Finally, interact with the switch box, which will result in spotlights around the building being turned on. You can now leave the place, best by following the same rout you took to get here (the area down below is heavily irradiated).
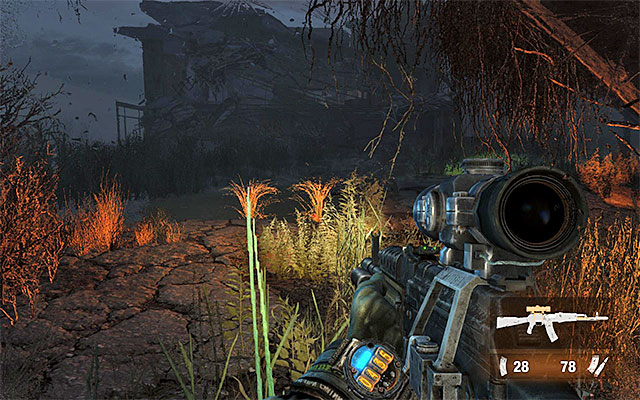
Go now towards the church. If you still cannot see your destination, do not worry about that and use the compass to help you navigate. As you walk on, look around for possible crates and corpses, and try to cut mutant encounters to a minimum, so you do not use up too much ammo and first aid kits. Also, avoid being attacked by the large green monster by skipping to the side.
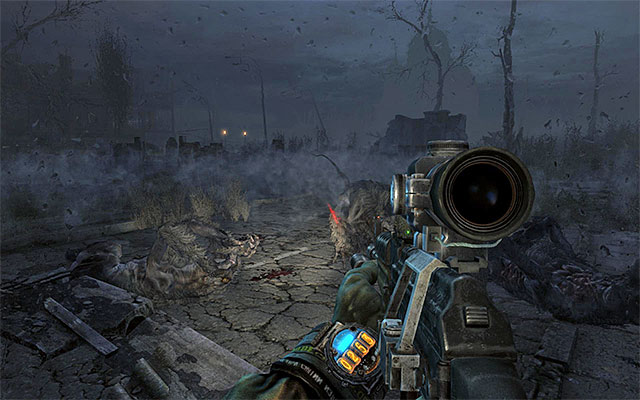
Follow the compass readings and pass a big ruined building to your right. Deal with the mutants in this area and turn left.

Be careful here, for it is the next time that the large green beast will cross your path(for a longer this time). Do not attempt to fight it and sprint to avoid its attacks. Go towards the building shown in the above screenshot and, to the extent it is possible, do not make any stops.
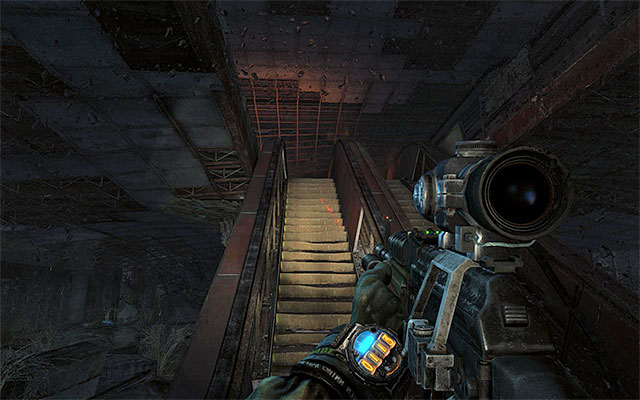
Explore thoroughly the ground floor f the building (it is worthwhile to collect all the supplies, because the clash with the boss is drawing near), and take the stairs to the first floor.
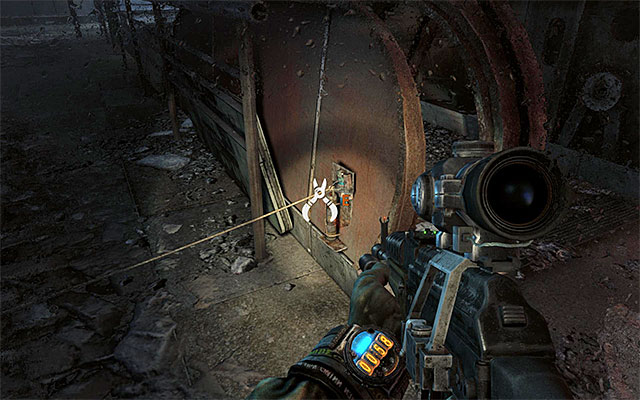
You shouldn't hurry too much while exploring the first floor, as there are numerous tripwires here (you can either avoid them or disarm them). Of course, you'd better explore the entire floor to find filters and Claymore mines.
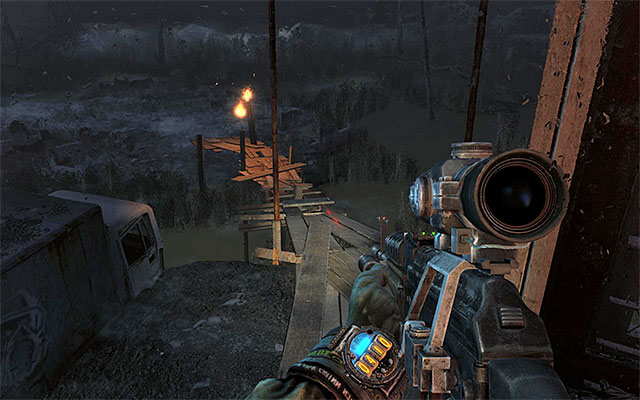
Go now towards the destroyed wall that is lit by the church's lights. Walk over the very narrow plank and jump down to the large "arena". The attempt to reach the church will fail, because the green creature will appear in front of you once again. It is time for the actual boss battle.
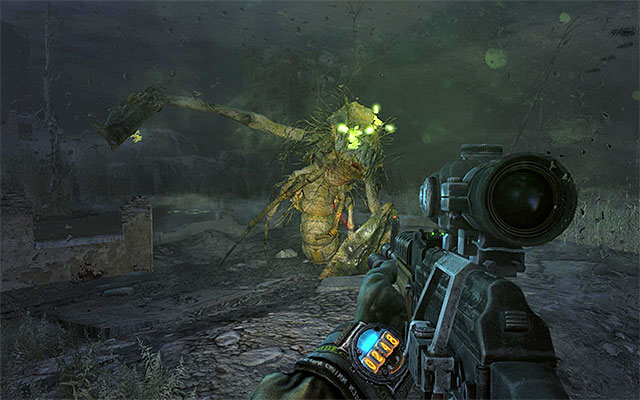
After the battle starts, devote some time to learning the boss's main attacks i.e. upper limb attacks and charge. In both cases, it is best to remain in constant movement combined with sprint and flashing between walls. At the same time, pay no attention to the "regular" shrimps because they will be taken care of by Anna and your allies.
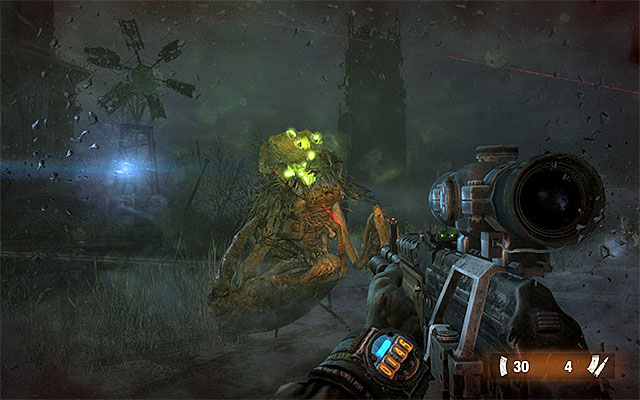
It is best to use firearms to deal damage to the boss. Aim at the general area of the head i.e. at the glowing mushrooms. Apart from that, it is recommended to deploy Claymores in the monster's path, and to throw grenades at it, especially that there is a grenade box around.
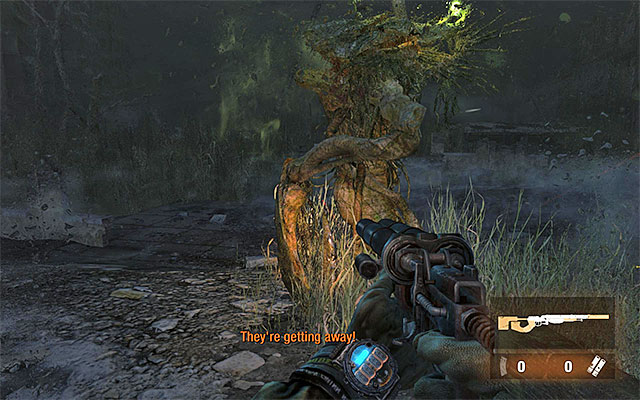
Do not forget to keep healing Artyom on a regular basis as soon as it takes considerable damage, or otherwise you can die quickly and have to play the battle over again. Keep fighting until the monster drops dead and your allies will inform you of the victory.
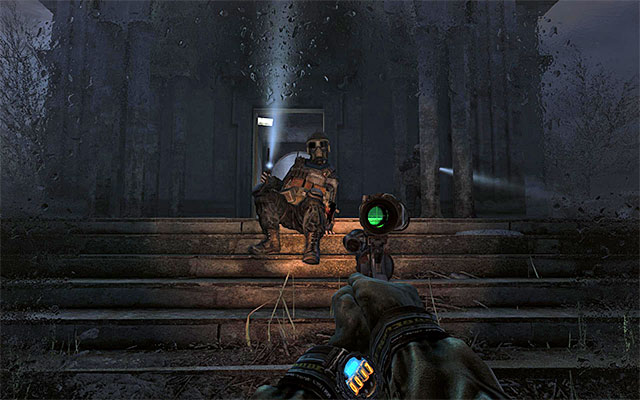
Once again try to walk over the fallen tree, which will end in a success this time. Entering the church will finish this mission.
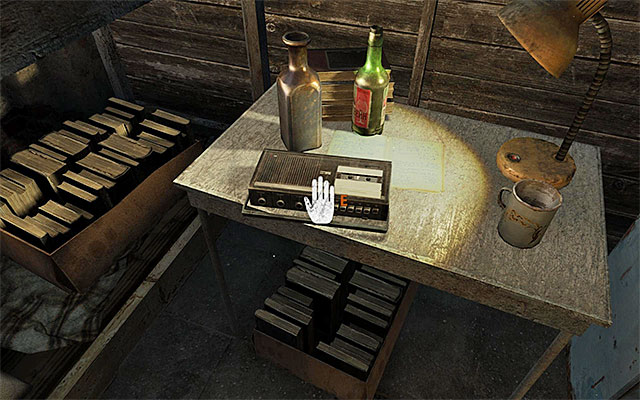
Listen to the conversation with Anna and devote several moments to exploring the room in which this level started. Apart from the standard supplies, you will find a tape recorder and interactive guitar.
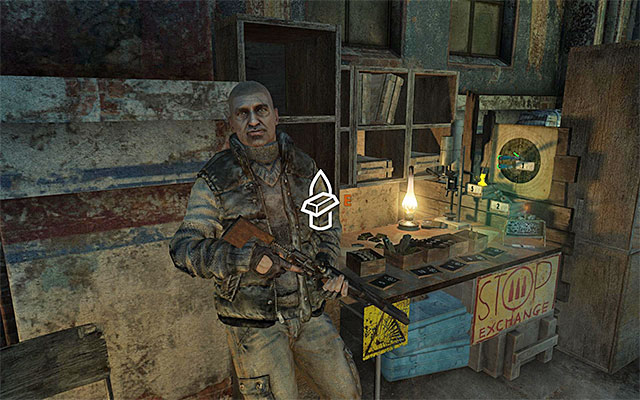
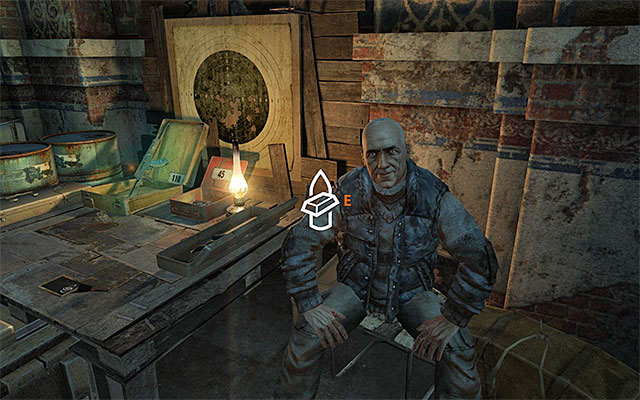
Walk over to the neighboring area, where there are two merchants. The person in screenshot 1 deals in ammo, throwing knives, Claymore mines, frag grenades and incendiary grenades. I strongly recommend that you replenish your supplies, because the they must have been seriously depleted while crossing the swamps.
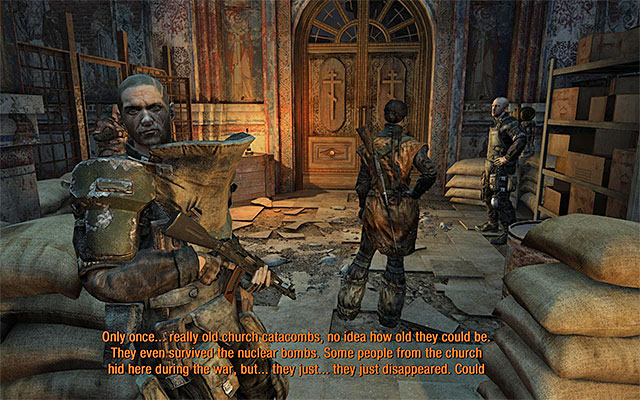
Finally, approach Anna to initiate a cutscene featuring Lesnicki's attack on the church.
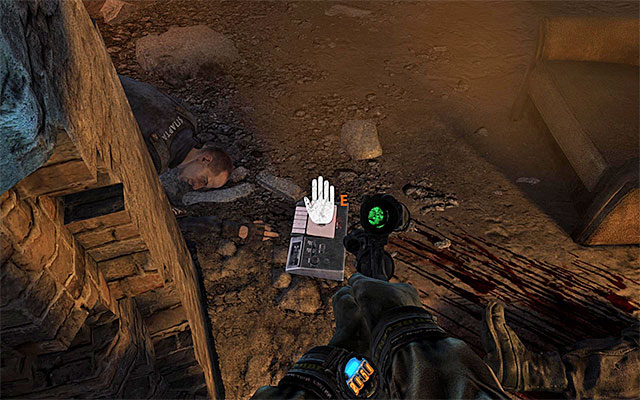
Take the only possible passage and follow the linear path. It is a good idea to interact with the tape recorder in one of the following rooms, which will result in a recording of the attack being played. In the same room, you will also find a double barreled shotgun and two different machine guns.
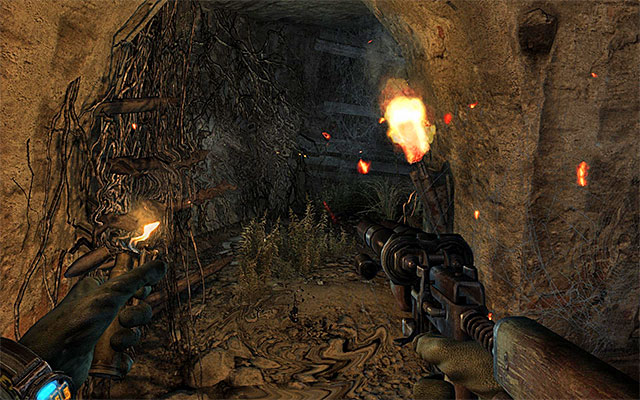
Resume your walk. From the moment in which you experience display distortions, you will not be able to use neither the torchlight nor the night vision goggles (temporarily, though). You can, of course, move around without any additional lighting but, it is good to know, that the game does not disable the lighter.
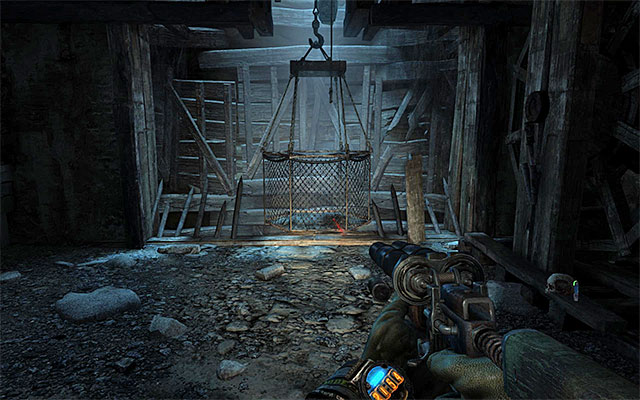
Follow the linear corridors and find Claymore mines, throwing knives, a supply box and a skeleton that you can search. Ultimately, you need to reach the small elevator shown in the above screenshot and enter it.
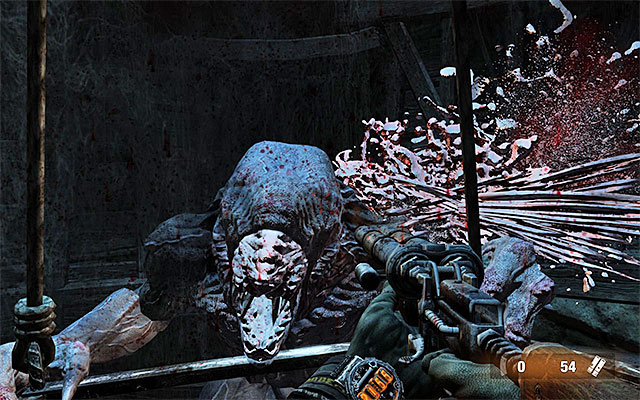
Get prepared because, during your ride, you will be attacked by several waves of mutants. The best solution here is to discharge the double-barreled shotgun right after they catch onto the elevator, i.e. as soon as you make sure that you do not miss. A single attack with the double-barreled shotgun (or any other, good shotgun) should be enough to kill one individual.
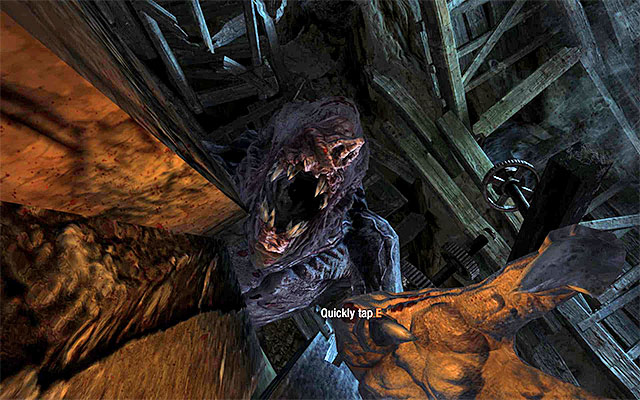
In the final phase of your ride, be ready for the rhythmical tapping of the correct key indicated by the game, thanks to which you will handle the last one of the mutants.
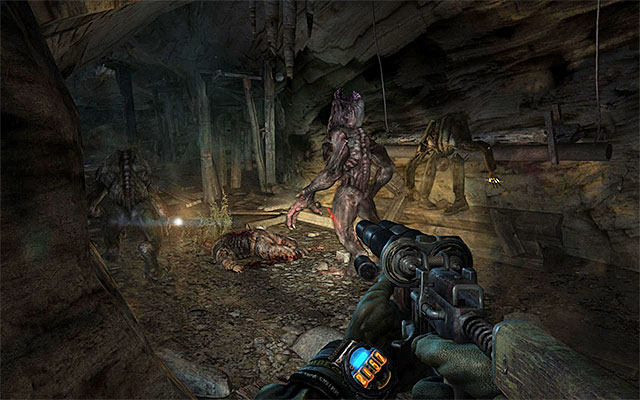
Turn back and start another linear march (you can use your torchlight and the night vision here, fortunately). Expect another wave of mutants to attack, as soon as you enter one of the corridors. First, start shooting at the monsters in the distance, then deal with the one at the short distance. Do not forget, also, to search all of the corpses you find on the way, thanks to which you will be able to replenish the much needed supplies (and weapons as well).
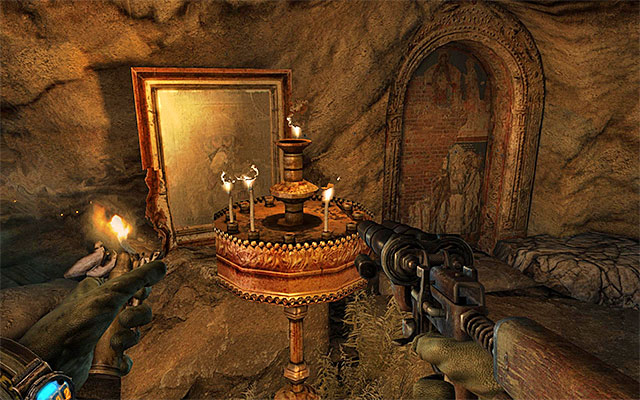
After a while, you will reach a fork. It is optional to explore the area to the right, and you would also have to use the lighter instead of the torchlight and the goggles. What you would find there is three altars that can be lit.
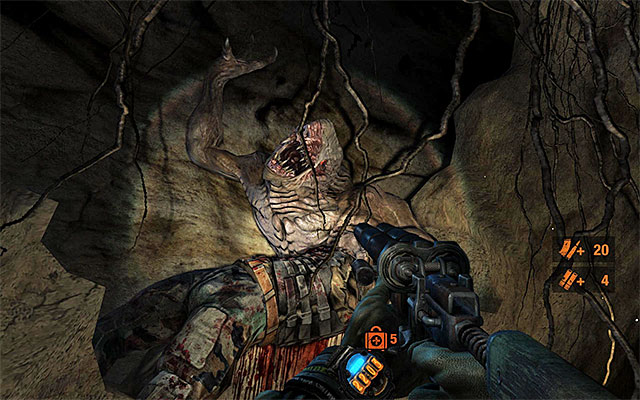
Regardless of whether you have decided to explore the abovementioned area, or not. Follow the corridors and pay attention to mutants. Be careful, as the examination of one of the corpses on the rocks to the right results in an attack by a monster, which needs to be handled.
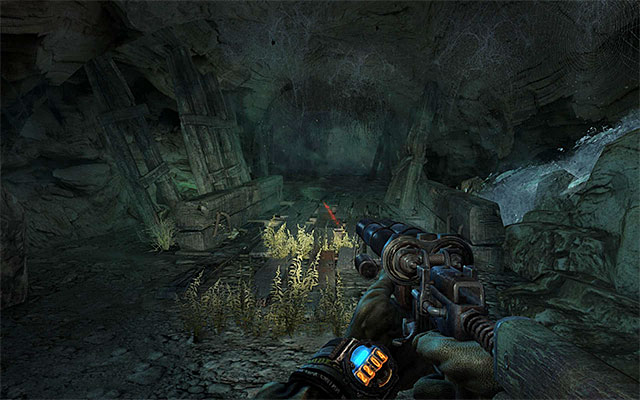
After you reach the bridge shown in the screenshot above, consider deploying several Claymores there. This is because soon a wave of monsters will appear here. Enter now the larges cave and approach the blocked passage.
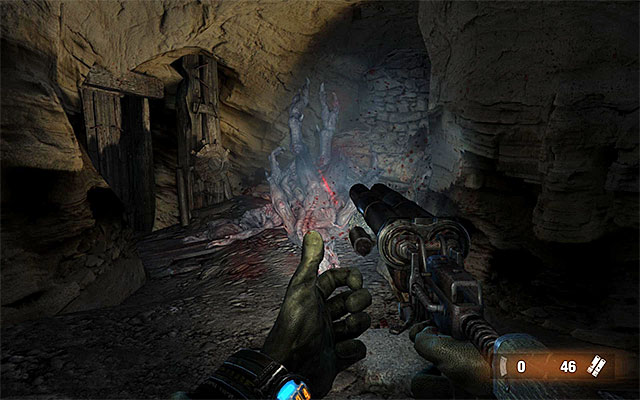
Turn around and get ready to repel a large wave of mutants. If, according to my suggestion, you have deployed Claymores on the bridge, some of the monsters will die on the spot. Regardless of how many mutants survive the blast, remember that you should be moving at all times to prevent yourself from being surrounded or cornered. Try to use your shotgun or the double barreled shotgun, and also make sure that Artyom's health does not drop too low, by using first-aid kits once he sustains heavy damage.
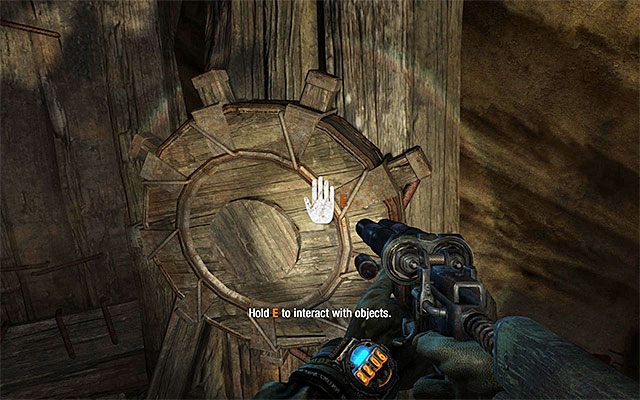
Once the battle is over, look around for corpses with supplies and approach the blocked passage again. You need to interact with the rotary mechanism shown in the above screenshot. You couldn't do it before the mutant attack, as opening it requires holding the correct key for a longer period of time. Do not release the key until the gate opens completely.
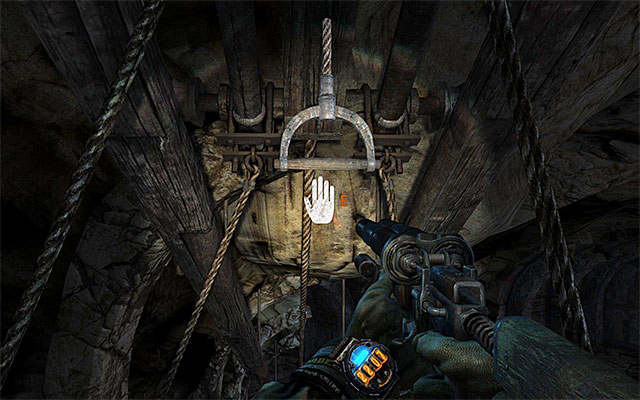
Start the exploration of this part of the catacombs. After you reach the void, turn left position yourself on a small wooden platform and pull the handle to make it start. Wait to be transported into a new location, climb down the stairs and explore the area for Claymore mines as well as supply crates.
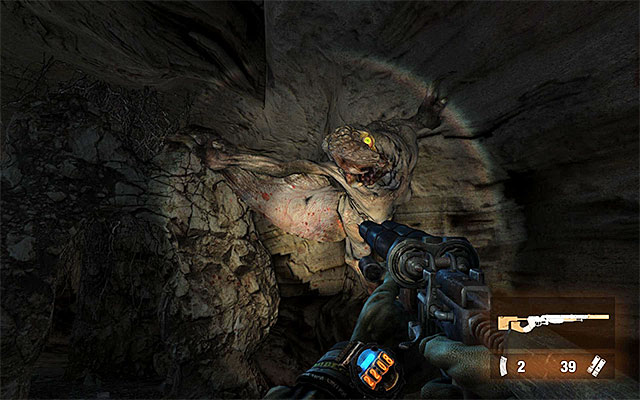
Carefully, enter the cave, which will start another battle. Apart from the kind of mutants that you have already seen, there will be different ones that walk along walls and attack you at a distance. To the extent to which it is possible, try to run up to this kind of the monsters and eliminate them with your shotgun, or any other short-range weapon, as they are not very tough.
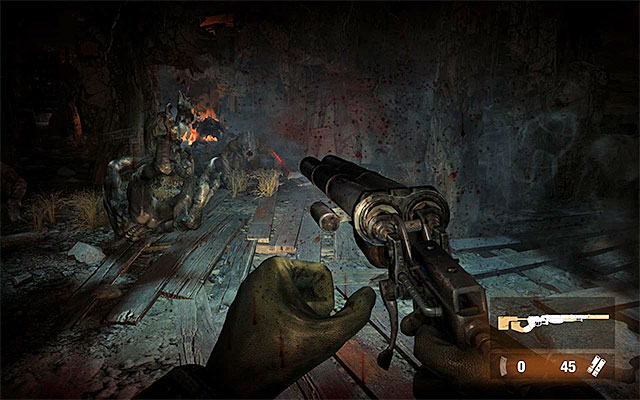
After you succeed, explore the area to find, among others a double-barreled shotgun with four barrels instead of two (a similar modification can be purchased from dealers so, it is not an absolute novelty). Find a spot in which you can jump down to a lower level and get rid of yet one more group of monsters. It is a good idea to put up fight in the place where you landed after the jump and help yourself with grenades, because there is only one narrow path that leads to this spot.
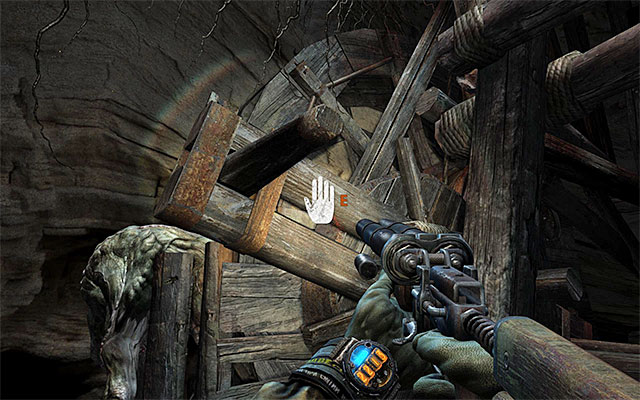
Start by searching all of the corpses and backpacks for supplies. I definitely recommend deploying all of the mines here that you have in stock. In a few moments, there will appear a large group of monsters here. After you get properly prepared, approach the big wooden elevator and pull the lever shown in the above screenshot.
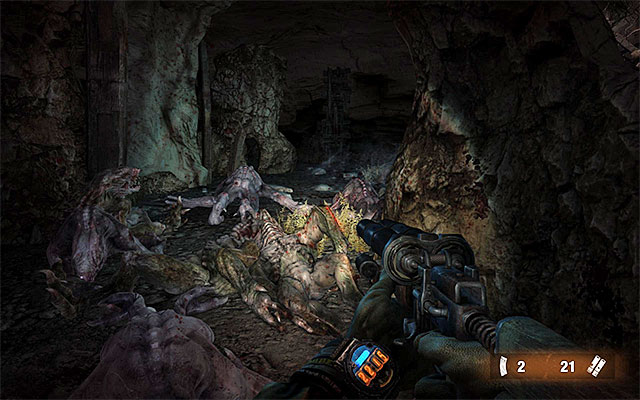
While waiting for the elevator to arrive, you will have to fight another battle with the monsters. A good way to survive the attack, is to position yourself in one of the side-rooms that only one entrance leads to. As long as you are accurate while aiming at the mutants (shotgun or the double barreled shotgun) you will be able to deal with them quickly and without any problems.
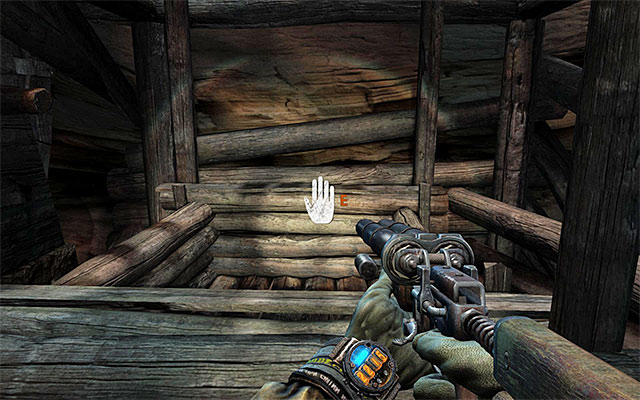
Once again, collect the supplies in the area approach and enter the elevator. Wait to be taken over to the next level. Fortunately, the ride does not abound in any additional monster battles.
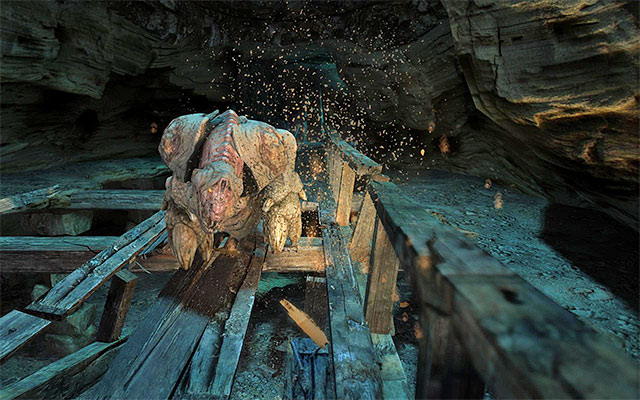
Go straight ahead to find a corpse with supplies on it. After you reach a not-so-stable bridge, you will encounter, for the first time, a monster called the Big Momma. The entire wooden structure will collapse, as a result of which, you and the best both land in the bottom "arena".
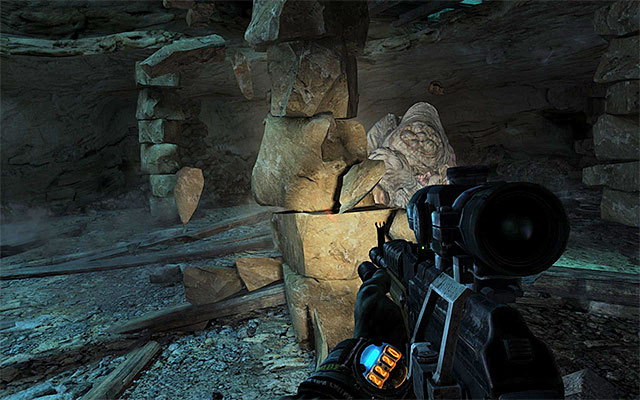
The most important piece of information, in connection with the (first) battle with Big Momma is that, although you don't really have to waist ammo or grenades on attacking it. Instead, take cover behind large pillars like the one in the above screenshot. The mutant will regularly perform charges at you and take damage while smashing the elements of the surroundings.
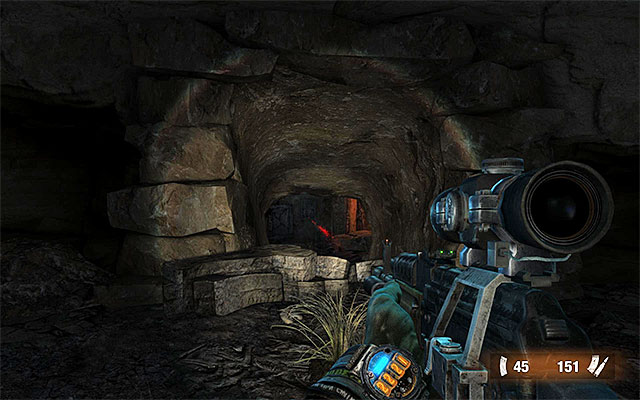
Continue avoiding Big Momma and sprint from on pillar to another. Wait there until the monster attacks with its charge. Repeat this maneuver until the moment when all the pillars are destroyed. The beast should then ram through one of the walls and leave the arena, and open a passage at the same time.
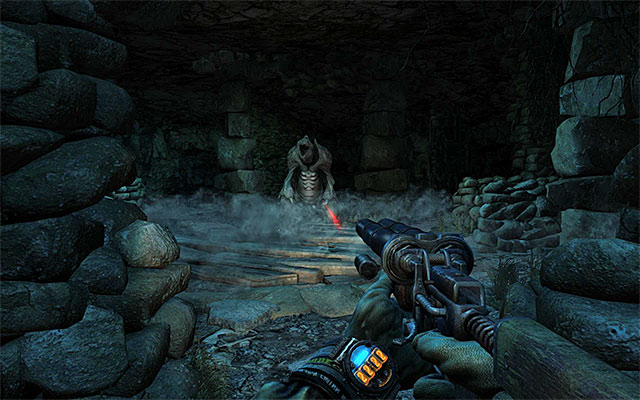
Take the tunnel and find a corpse on your way, along with a machine gun and a supply crate. After you reach another large cave, you will have to fight another battle with the Big Momma.
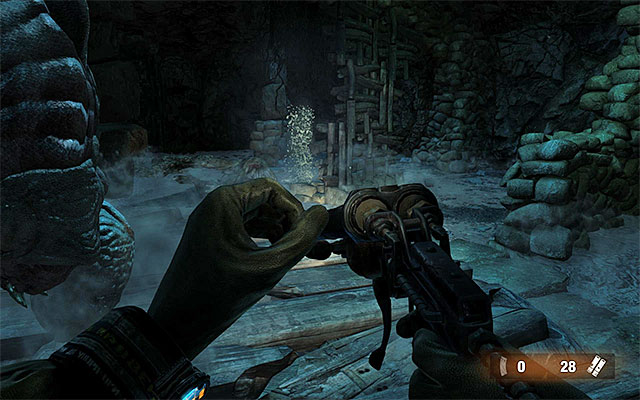
At the beginning of this battle, focus on eliminating mutants as quickly s possible, thanks to which the monsters will no longer interfere.
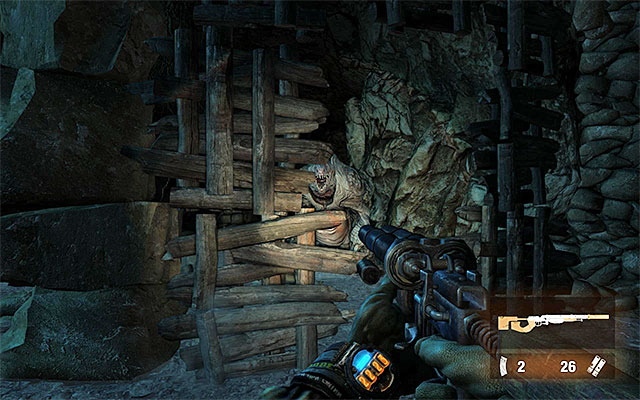
Phase two of the encounter is very similar to the previous instance so, you need to position yourself near the columns and wooden barricades to encourage the monster, in a way, to charge at you and take damage as a result of ramming into the obstacles.
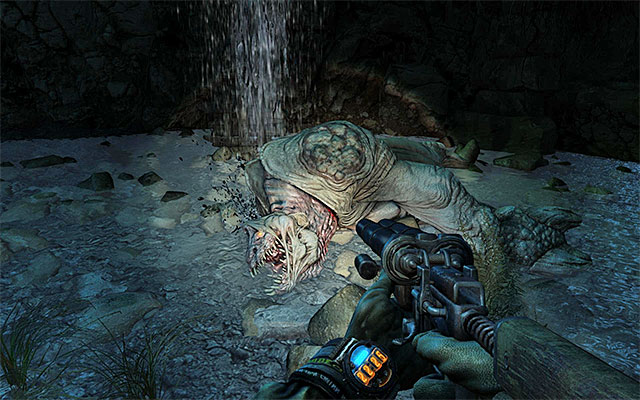
Keep running all around the arena and position yourself behind columns and barricades. Start attacking the monster only after big momma destroys all of the nearby obstacles. The good news is that the monster should already be exhausted by now, so a few shots with a good weapon, or a grenade, should do the trick.
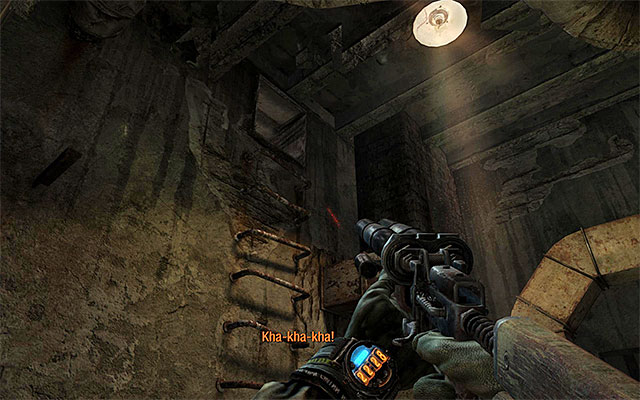
Go straight ahead and look around for a corpse with a backpack on it, which you should examine for supplies. Take the ladder leading to the venting shaft. On your way through, it is worthwhile to make two stops and eavesdrop on the conversations. This will let you figure out a bit about Anna's current situation.
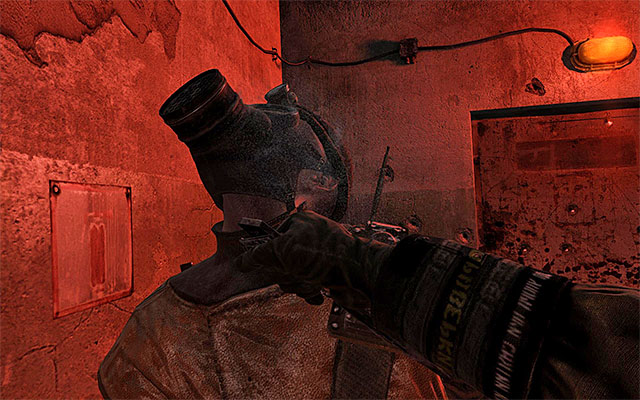
After you exit the shaft, you will start in a small room. Turn the tipped lamp off and wait for one of the guards to come. Knock him down or kill him and then approach his colleague carefully and strike from hiding.
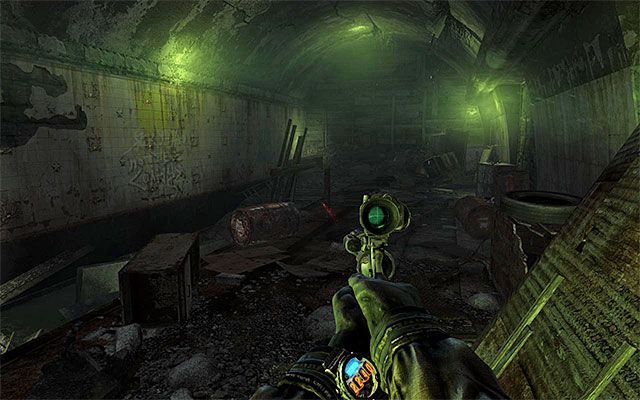
Examine both rooms for supplies and search the bodies of the neutralized guards. After you have performed all of these activities, take the passage and reach the metro tunnel. Find a corpse and go left. Carefully, approach the railway station occupied by enemy forces, while at the same time, destroying sources of light.
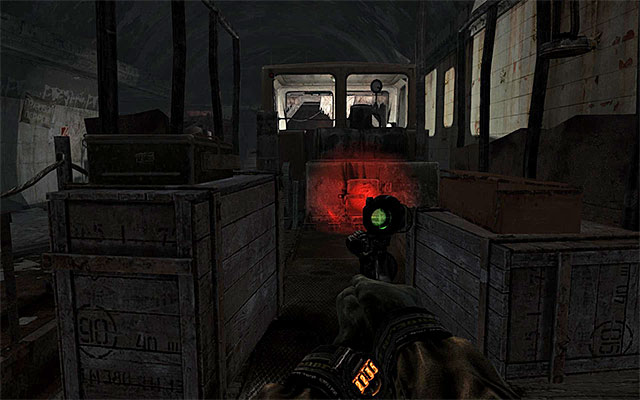
As you have probably noticed, one of the guards stopped next to the staircase to the left. It is not a serious problem though, because you can approach the railway engine located on the track and, thanks to it, make your way through to the platform. If you want to, you can, of course return to the guard and kill him or knock him down, just in case.
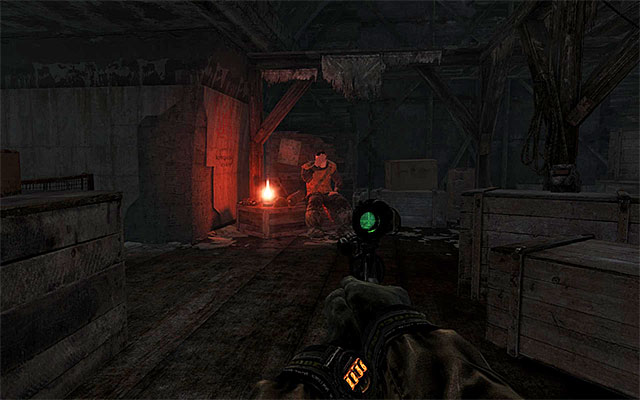
In the nearest proximity there are two other enemies. One of the guards is taking a stroll between the railway engine and the side room, while the other one is sitting at the oil lamp. Remember, at all times, to eliminate the existing light sources, thanks to which you will remain unnoticed. Also, examine the platform for a radio, military-grade rounds and filters.
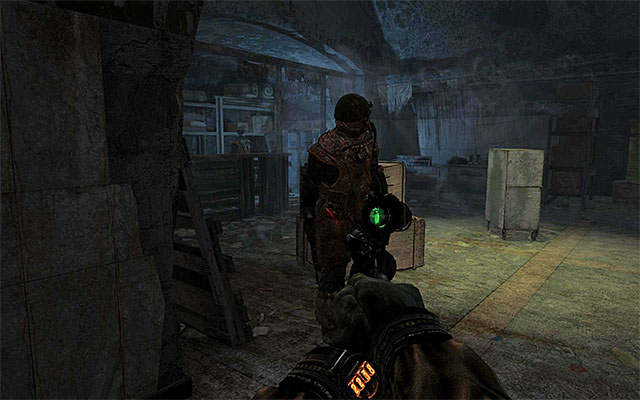
There are two rooms adjacent to the platform and it is a good idea to take a peek into the one to the left, first. There are two enemies in this one and eliminating them should not be a problem.
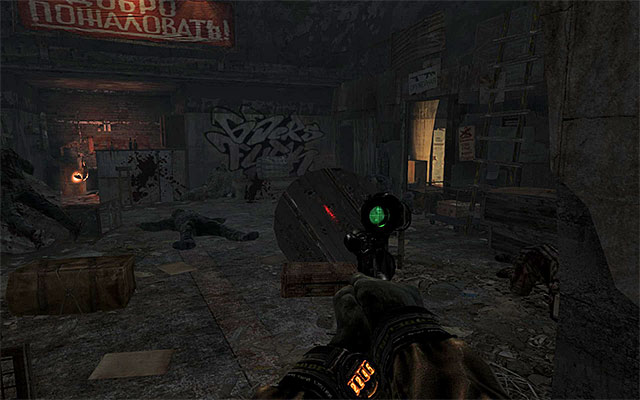
The next are in this location can be accessed in two different ways. Variant one assumes that you take the narrow passage leading from the room to the left to the unguarded tunnel shown in screenshot 1 (watch out for the tripwire!). Variant two assumes that you walk through the room to the right (screenshot 2). This is not going to be easy though. Most probably, there are three guards around (start eliminating them with the one at the door, after he turns away from the platform).
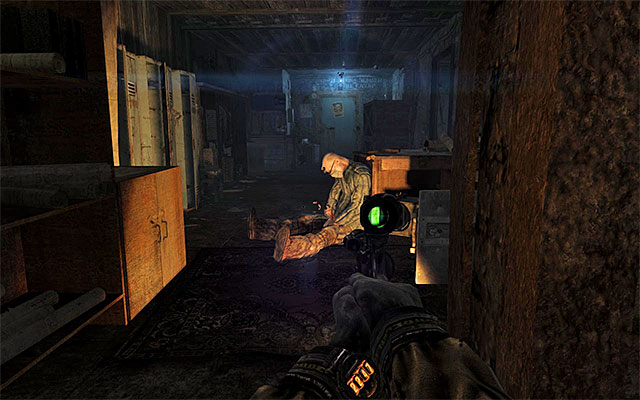
Both of the above variants will allow you to reach the side corridor shown in the screenshot.
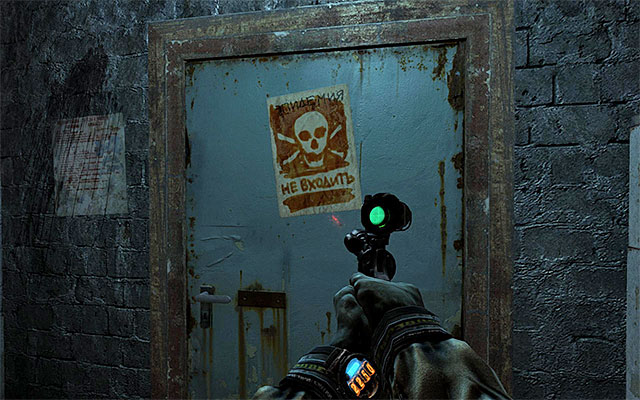
Examine the corridor, as well as the rooms you have just visited, and try to obtain as many filters as possible. Finally, approach the door with the skull on it. Before you open the door, put your gas mask on because, you are entering areas filled with smoke, where Artyom would suffocate really quickly.
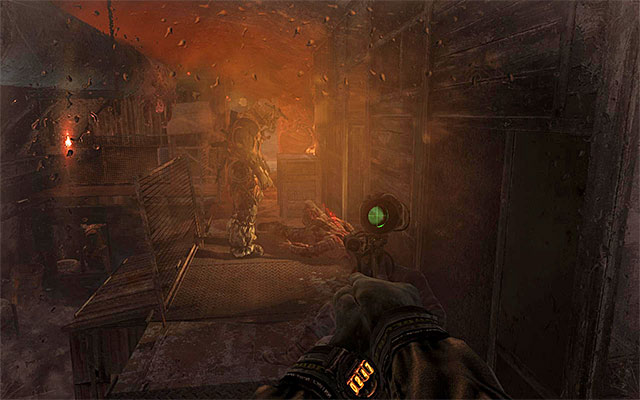
From now on, apart from the standard sources of light, you also need to pay attention to places where flames appear. These may, unexpectedly, expose you, which will result in your cover being blown. It is worth noting here that you can stop some guards while they are setting the surroundings on fire, which will make the exploration easier. You can take such an action in the area that you have just stepped into, and eliminate the guard on the upper balcony (the one that the ladder leads to).
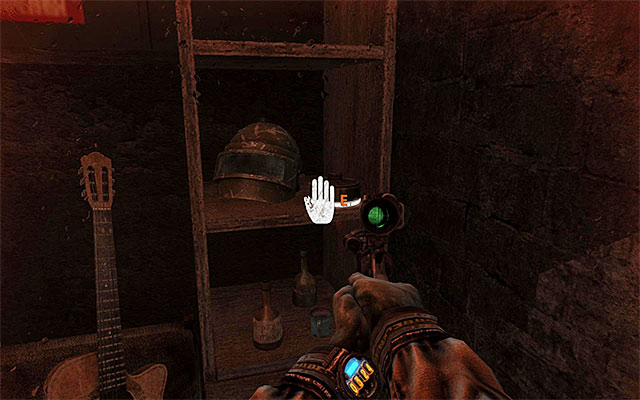
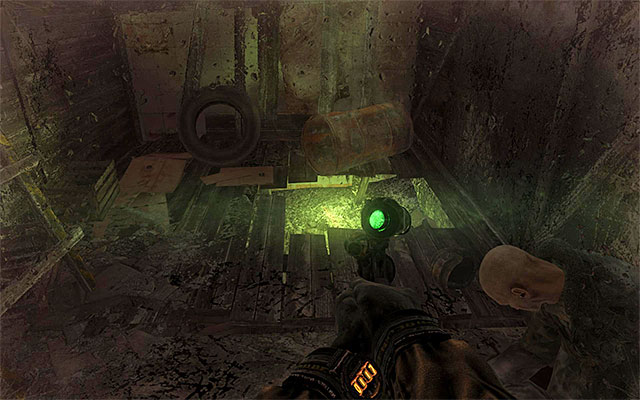
First of all, it would be a good idea to take a look around the area. At the end of the corridor, to the left of the starting point (screenshot 1) there area, among others, filters, a tape recorder and a guitar. Near the starting point, there is also a hole in the ground (screenshot 2) with a tunnel leading to the basement. After you getting down into the basement, you would meet two enemies where it is better to wait until the severely wounded soldier is finished off by his colleague.

You should now focus on your objective. You need to walk through the entire central area located to the left of the door by which you started. On the ground floor soldiers are being debriefed, after which they disperse, which will make it easier for you to walk around them. While taking the decision concerning the passage to the other end of the area, remember to stay away from the flames, as well as about not leaving the eliminated enemies out in the open.
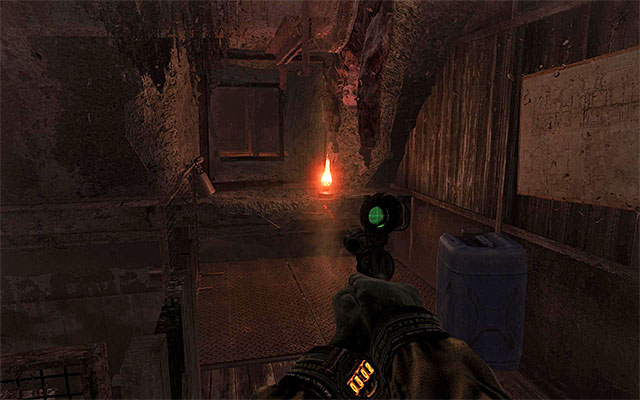
An alternative to this approach is to make your way to the upper balconies, best by taking the ladder located right next to the starting point. Once you are finally there, eliminate the single guard, and then locate the narrow passage shown in the above screenshot. Taking the passage will allow you to reach the top of the main hall and, as a result, walk around the guards below.

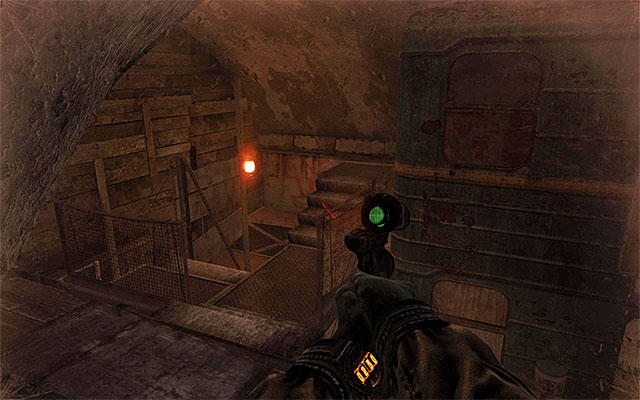
If you have decided to take the passage through the lower level, sooner or later you will end up against a locked gate blocking passage to the corridor to the right. Eavesdrop on the guards' conversation and go left, thus making your way to the stairs shown in screenshot 1. If you have, however, chosen to walk through the upper levels, you will reach the balconies shown in screenshot 2 right away. In both cases, watch out for the single guard and try to get him from behind, as soon as he turns his back at you.
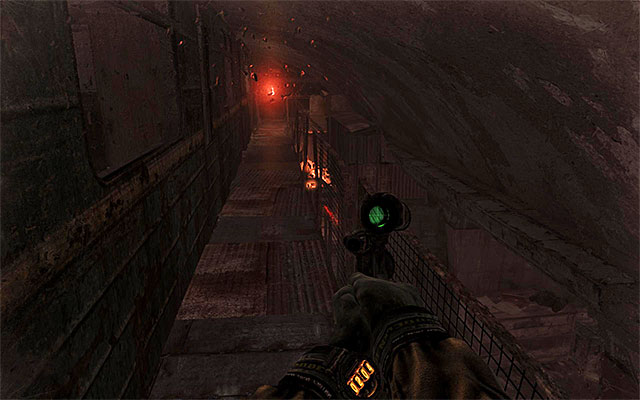
Before you go any further, make sure (to the extent to which it is possible) that you have explored the previous areas (supplies, weapons etc.). walk along the catwalks shown in the above screenshot, thanks to which you will go around the locked gate located below.
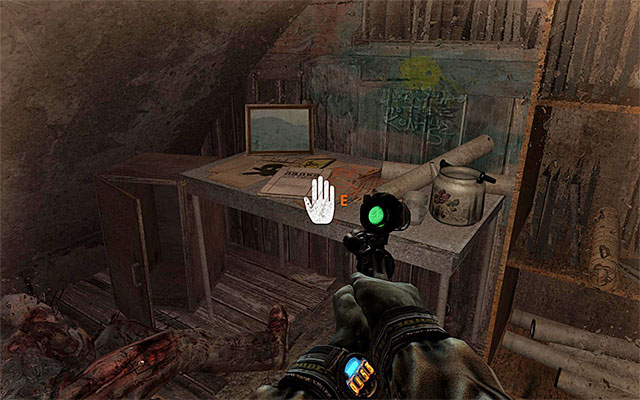
Stop after you reach the first well-lit rooms, to find here an Artyom's diary page (the above screenshot).
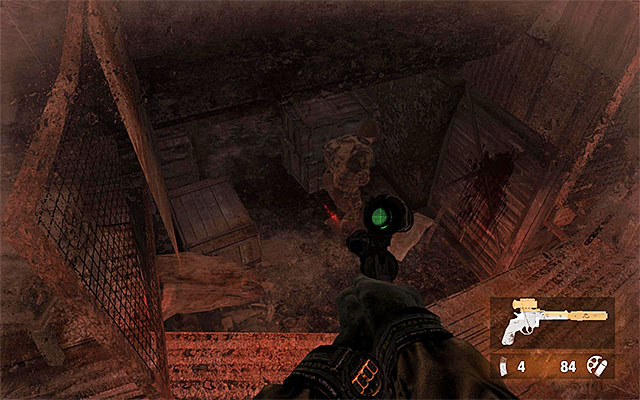
Proceed along your path and explore the rooms you enter (there are filters among others) and interact with a guitar. After you have reached the end of the catwalk, turn right and stand right next to the edge (the above screenshot). Jump down and deal quickly with the two guards by using the element of surprise to your advantage.
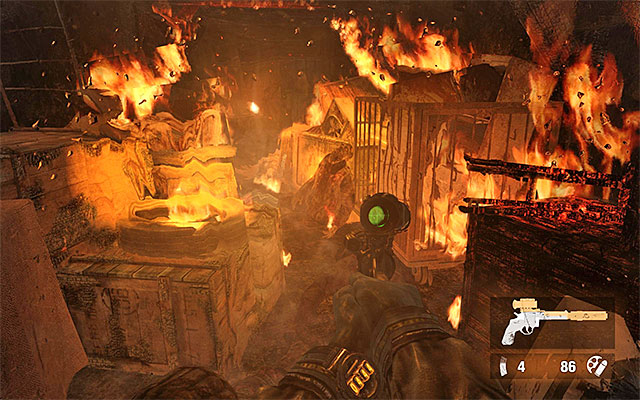
Enter the burning corridor and sprint through to avoid taking excessive damage. Turn then into the next tunnel and go towards the last one, in this chapter, large area, while remembering to collect all the filters on your way.
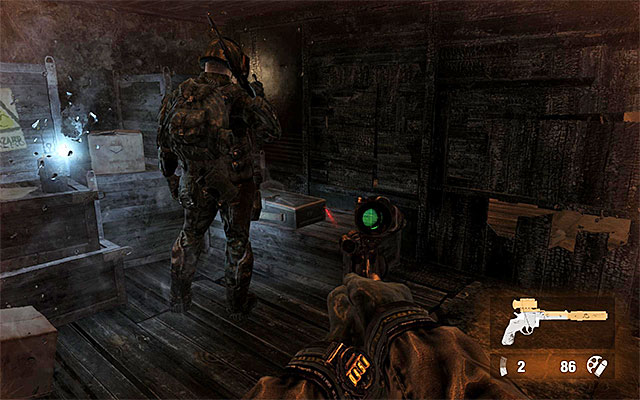
Carefully, approach the next location. I strongly recommend that you destroy all of the nearby sources of light and wait for the guards to disperse. The enemy that is still holding his ground needs to be taken from behind and knocked out or killed.
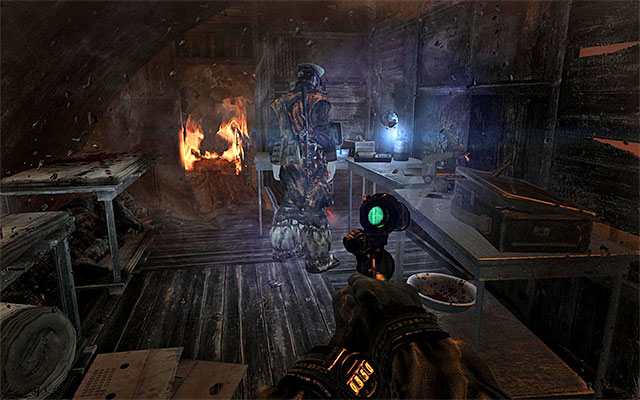
You must have already noticed that there is a staircase here, but the exploration of the upper floor is completely optional and will not get you any closer to the completion of this mission. Still, if you want to explore that area anyways, you need to watch out for the single officer. After you eliminate him, search the area for the regular supplies and a tape recorder.
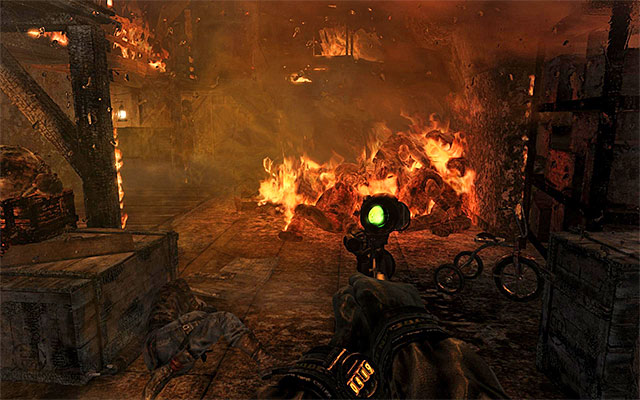
Return downstairs and enter a bigger area that is on fire. It is a good idea to eliminate all of the guards you encounter to minimize the risk of being noticed. At all times, try to look around for possible supplies, and especially for filters for your gas mask.
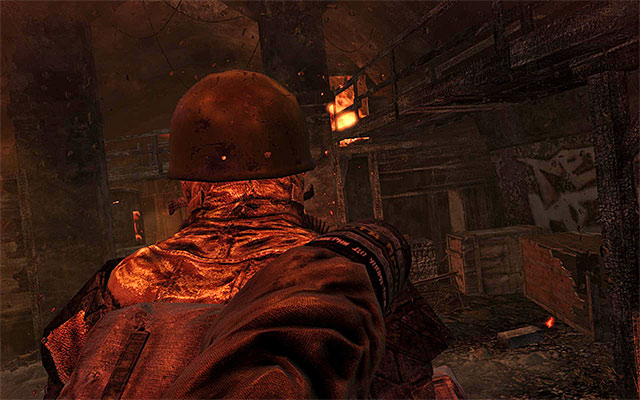
Stop where you encounter enemies having a conversation. Wait for them to go their ways , enter another blazing room and go right straight away, ignoring at the same time the guards further away. Take the narrow passage shown in the above screenshot.
Ahead of you, there are two enemies. If you were fast enough to get here, you will be able to take them by surprise. Otherwise, the enemies will already have taken their posts and you will have to dash up to one of them, so you can take him down with a melee attack before he manages to draw his weapon.
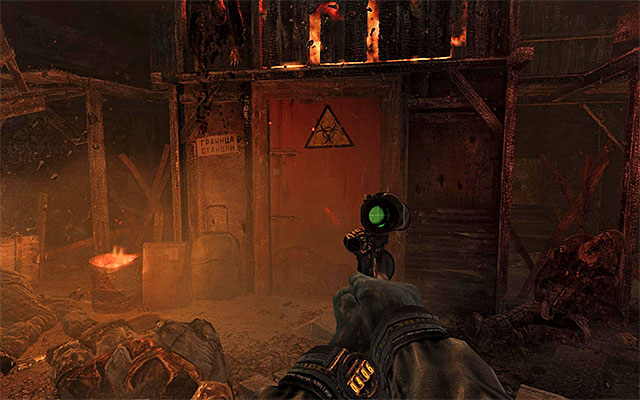
Regardless of how you dealt with the abovementioned guards, examine the area again, above all, to find new filters. Finally, take the door shown in the above screenshot.
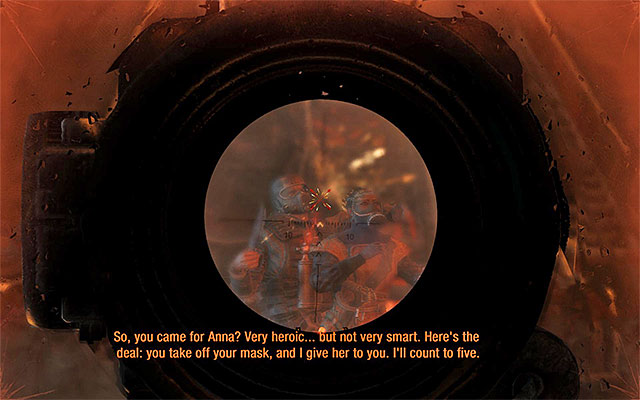
Right after you open the door, you will see a cutscene of you meeting the person that has been holding Anna hostage. In general, there are two alternatives here. Variant one is to shoot Lesnicki. What is interesting, you won't kill him, even if you have aimed at his gas mask.
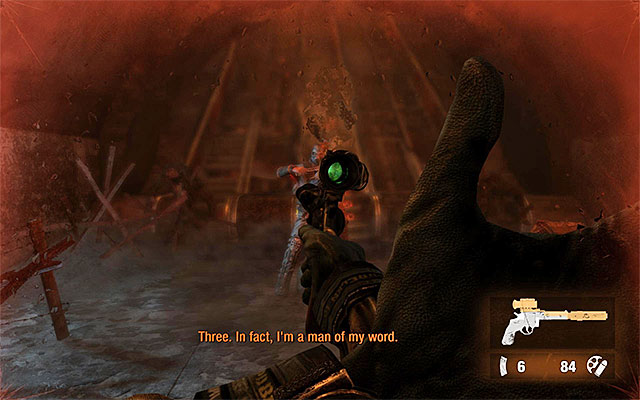
Variant two is following the order to give up, and taking off the mask. In both cases, Lesnicki will run away, and you will be able to save Anna, and evacuate from the are occupied by the enemy forces.
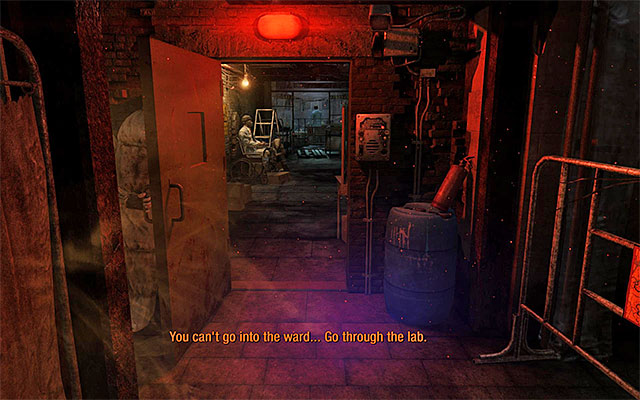
After you regain control over Artyom, start your walk through the quarantined area. Just like in the case of the previous stages, it is a good idea to stop here and there to eavesdrop on the NPCs' conversations. As you go, you will find another tape recorder.

Follow the military scientist into the decontamination area. Wait for the game to unlock the passage to the right for you, while listening, at the same time, to what the people have to say. Right after you enter the next area, look around for the Artyom's diary page on the desk to your left shown in the above screenshot.
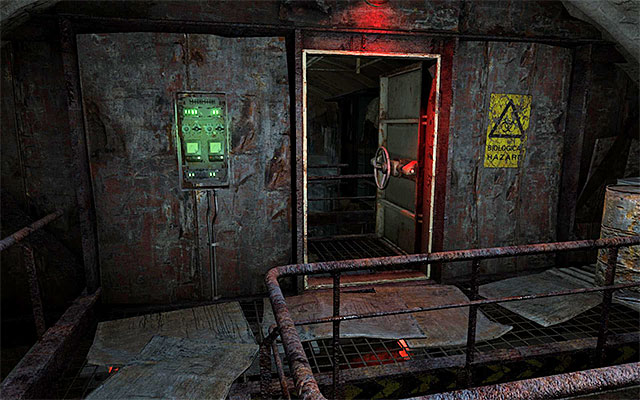
You can now approach the people that have gathered at the outpost and start elbowing your way through. You will reach a staircase to the balconies above. Starting with the moment you take the door shown in the above screenshot, start looking around for military-grade rounds left in the lockers (make use of the torchlight, or the night vision goggles to navigate through this area freely). In total, there are four lockers to be checked and finding all of them unlocks an achievement.
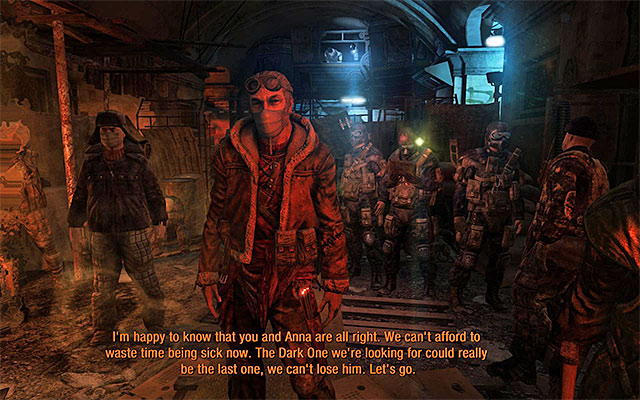
Make sure that you have found all of the rounds and only then approach Khan that is standing a bit further away, so you can receive further objectives.
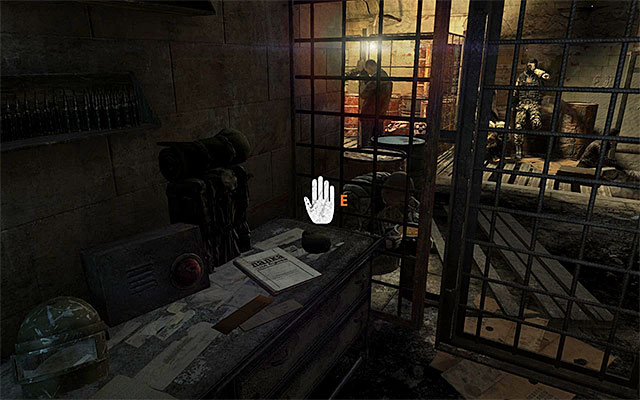
You, of course need to follow Khan. After you reach the locked door, seize the opportunity and, while Khan is busy talking to the guard at the door, explore the area to the right. In there, you will find another Artyom's diary page next to the gate shown in the screenshot. Return to Khan and take the newly opened passage.
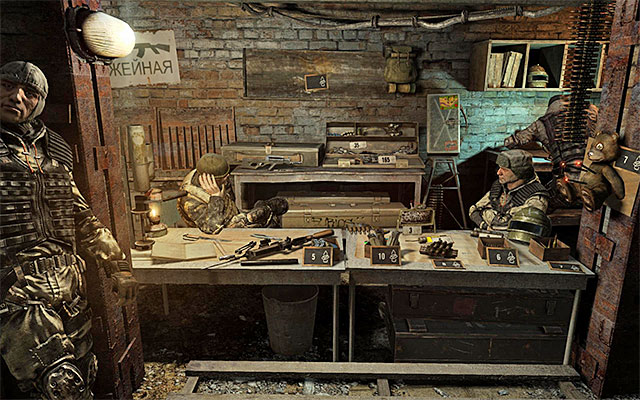
Stop right after you reach the next area because, there are two merchants here (the above screenshot). The one to the left deals in weapon upgrades, whereas the other one deals in ammo, Claymore mines, throwing knives frag grenades and incendiary grenades.
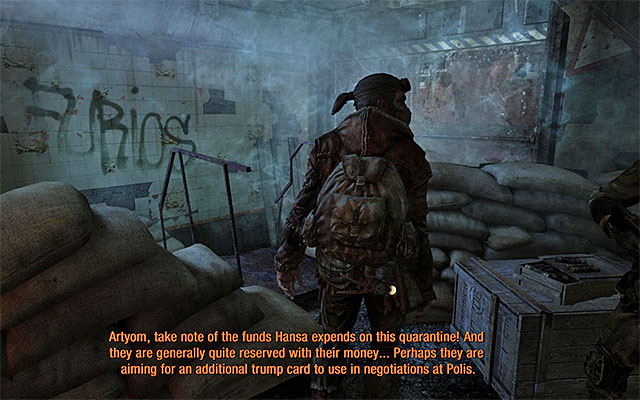
While in this location, also collect the two (free of charge) filters from the shelf to the right and interact with the guitar. You can now continue your walk. The walk's final part is very linear. Soon, the game will start loading the next stage.
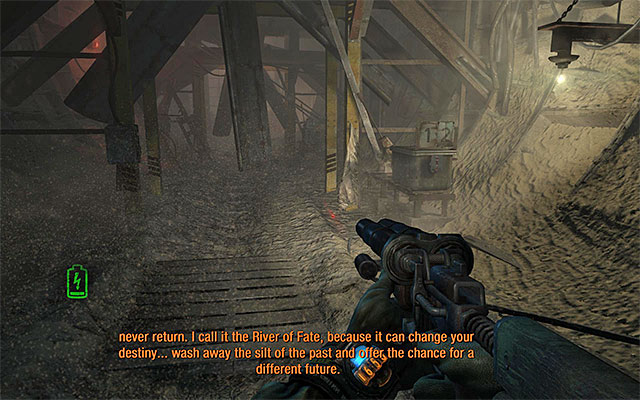
This chapter is very linear. Follow Khan and take the door to the right that has been opened by one of your allies. After you reach a tunnel with large fans in it, wait for Khan to stop the first one and proceed on. Stop at the second one and let Khan stop it.
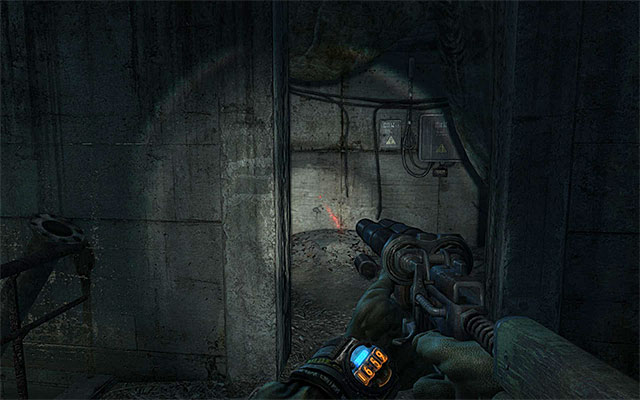

Stop for a moment where Khan jumps down to a lower ledge. Do not hurry with doing the same and examine the passage to the right shown in screenshot 1. This way, you will get to a corpse with military-grade rounds on it, and an Artyom's diary page shown in screenshot 2.
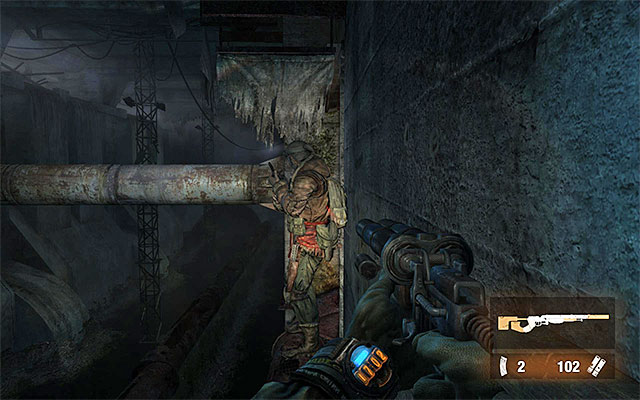
Only then return to the previous area and resume your walk. Be careful in the area with the destroyed staircase, and make sure that you do not lose your balance and fall.
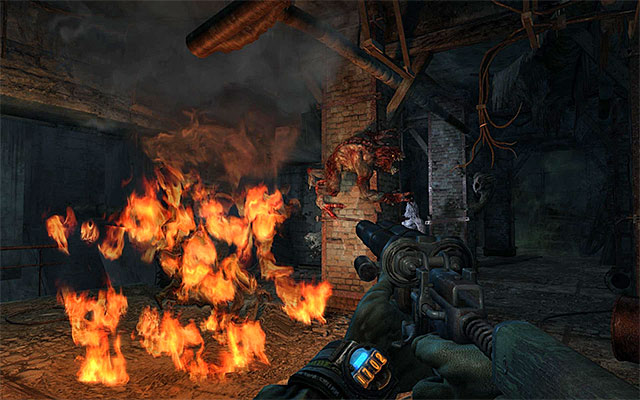
Soon, you will reach an area where you will have to fight a small group of mutants. Of course, the best way to get rid of them is with the double-barreled shotgun or the shotgun but, if you have the maximum permissible amount of grenades you can use several of them also, to ensure victory.
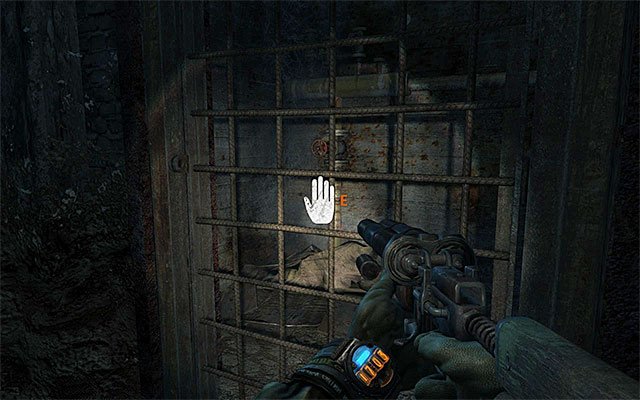
After you are done with the monsters, spend some time and explore this area to find an interactive gate to a corpse with the military-grade rounds on it. Return to Khan and go straight ahead, and eliminate one more mutant on your way. Crouch mow and jump down into the tunnel below.
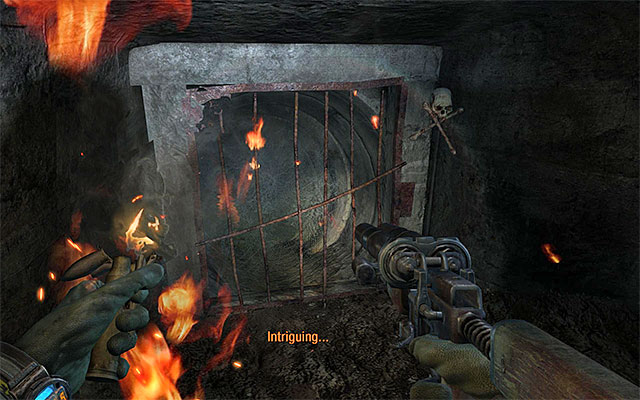
After you get into an area with no visible way out, act in accordance with Khans orders and start setting cobwebs on fire. Fortunately, instead of wasting precious incendiary grenades, you can easily make use of your lighter. Keep on setting the cobwebs on fire, until you unblock the passage shown in the above screenshot.
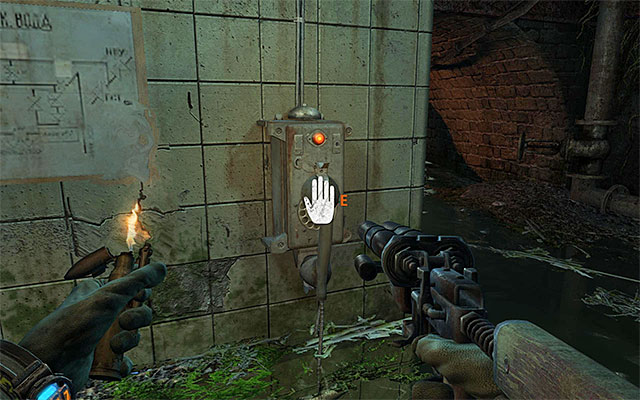
Remove a few more cobwebs, so as to ensure safe passage to the partially flooded area. Do not hide the lighter yet, because soon you won't be able to make use of your torchlight and the night vision goggles. Follow Khan and answer the phone on your way.
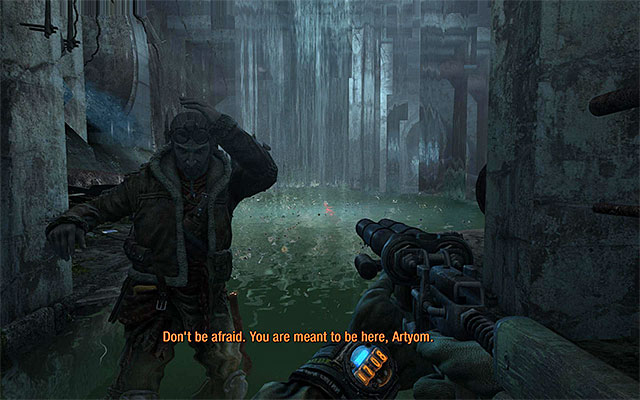
The next stop is the cave with waterfalls. Soon, you will be transferred to a new area, where you will be taking part in a vision of some sort. For the next few moments you won't have to do anything in particular.
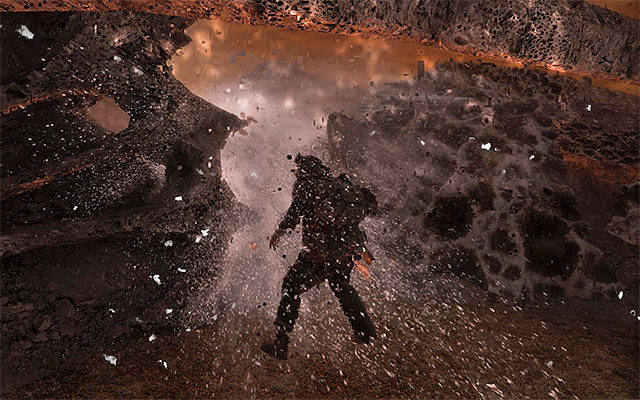
You will regain full control of Artyom only after you reach a place that resembles the den of the Dark Ones that you have seen at the beginning of the game. Follow Khan into the area where you previously caught up with the fleeing Dark One.
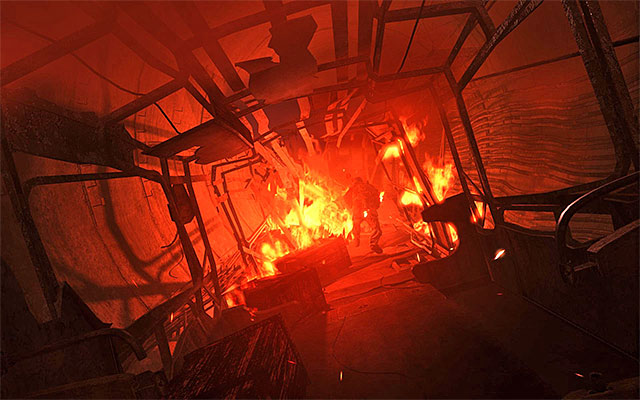
After the vision ends, start running after Khan and do not worry about the flames that appear around you. After you reach the train's last car, you will watch yet another cutscene.

Wait until you regain control over your character and get out of water. Go around the trap with the cans in one of the next tunnels (stick to the right-hand wall as closely as possible). Examine the next room to find a machine gun, ammo and first-aid kits. Finally take your seat in the car to finish this short chapter.
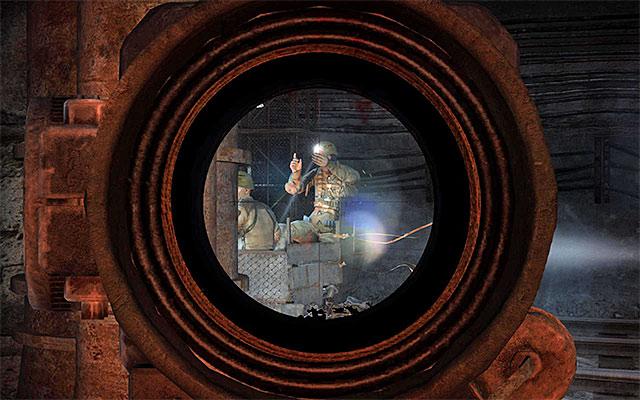
Get ready because, soon after you get near the train you are chasing, there will be cars with the Reds appearing to your right. There are two ways to deal with this situation. If you are OK with eliminating the enemies, start shooting at them with any machine gun or assault rifle you want, a scoped one would be best.
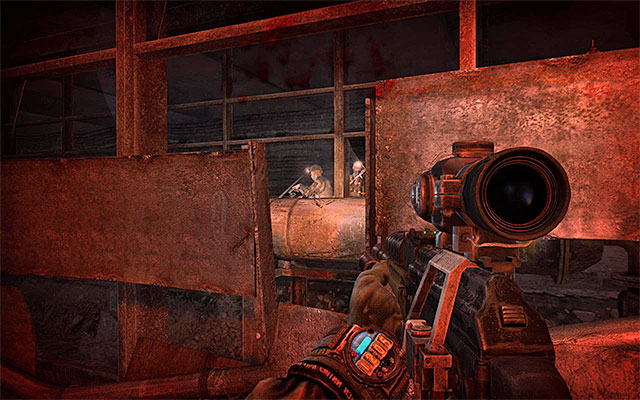
Still, if you are going to win an achievement or beating the game without killing anyone, you can try and survive the entire scene by crouching and healing yourself, if necessary.
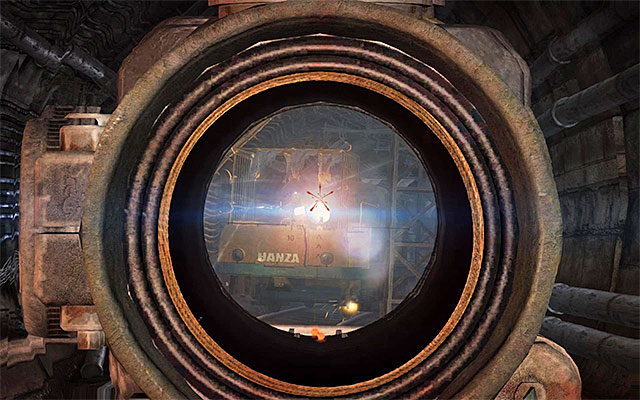
Continue attacking, or avoiding your enemies (watch out for the turret mounted onto the train!), and do so until Artyom jumps over onto the train (automatically).
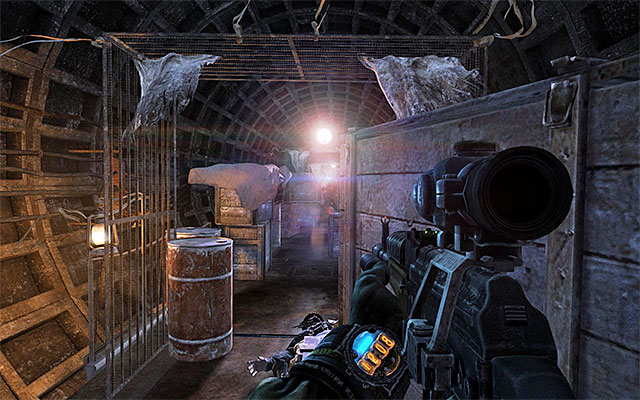
The assumptions of fights atop trains are similar to the ones in the beginning part of this level. If you are no stranger to killing the enemies, keep using the assault rifle or a different type of a medium-range weapon and, to the extend it is possible, aim at the enemies' heads.
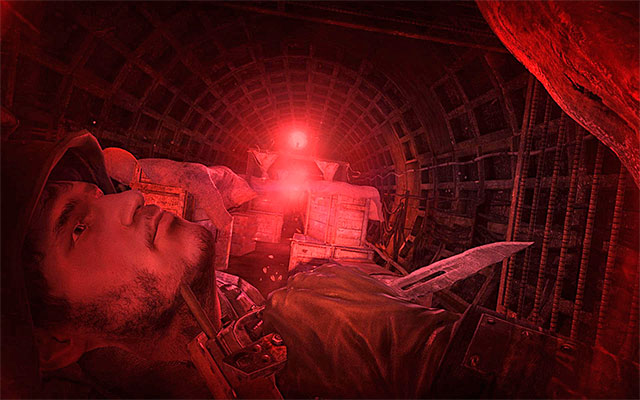
If you still want to "stain your hands with blood", keep running up to the enemies close enough to knock them out. It is very important here that you make use of the covers on the way, which will allow Artyom regenerate his health or use the first-aid kits.
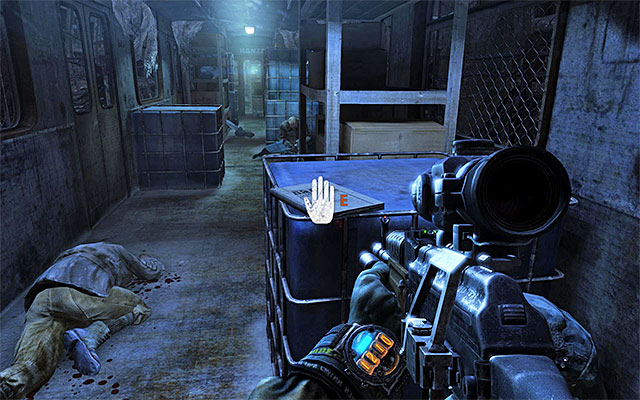
Stop when you reach the closed door to the car and collect the Artyom's diary page from the large crate shown in the above screenshot.
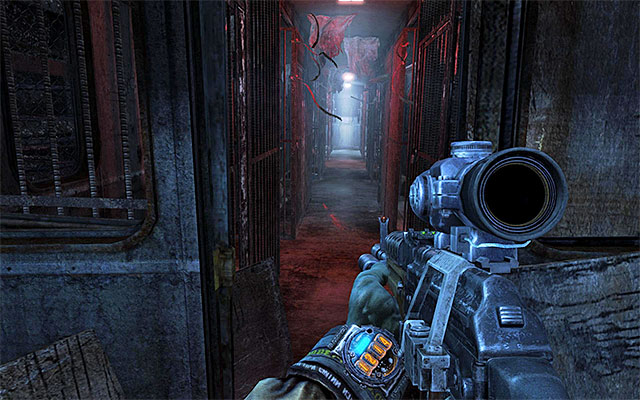
Continue on your path. Watch out for the heavily-armored soldier, especially if you are planning on eliminating all the enemies on the train. Soon after you deal with him, several long cutscenes will start and the chapter ends.
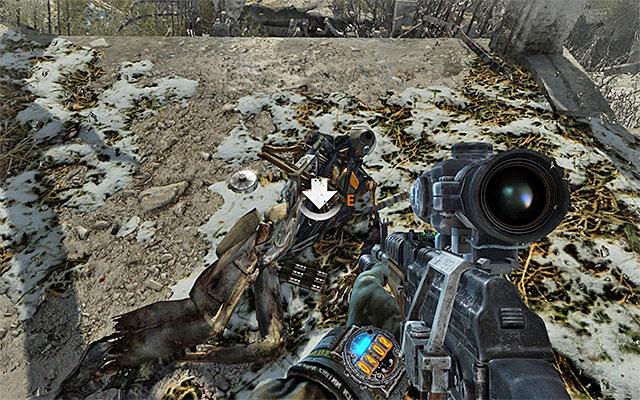
You will regain control over Artyom only after he defeats the Dark One. Start by exploring the nearest area for corpses. In the further part of this chapter, you could also allow yourself some more extensive exploration, unless you do not have enough filters at your disposal and, therefore, you cannot allow yourself longer stops.
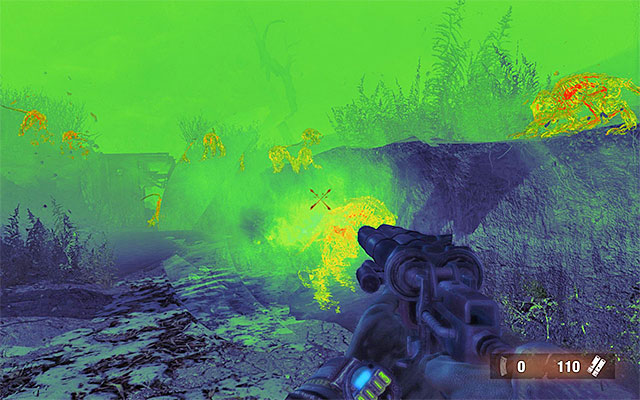
Go towards the stairs and, after you jump down, go right. Watch out because, on your way, you will be frequently attacked by mutants, which can be disposed of with shotgun, the double-barreled shotgun or grenades. Soon, the Dark One will modify your visor for a few moments, thanks to which you will be able to lock on the enemies and eliminate them.
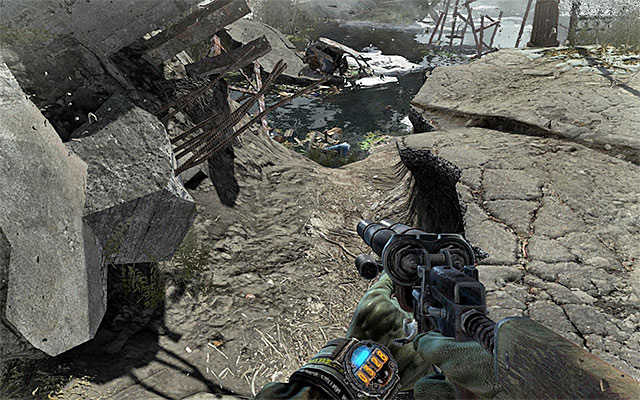
Pass through the derailed railway car and continue on your path. After you get down, turn left and take the path towards the water. Just like in the case of the swamps, avoid coming into contact with water to prevent drowning and taking serious damage. What is even more, coming close to the water may result in the shrimps appearing, which will make you fight additional, unnecessary battles.
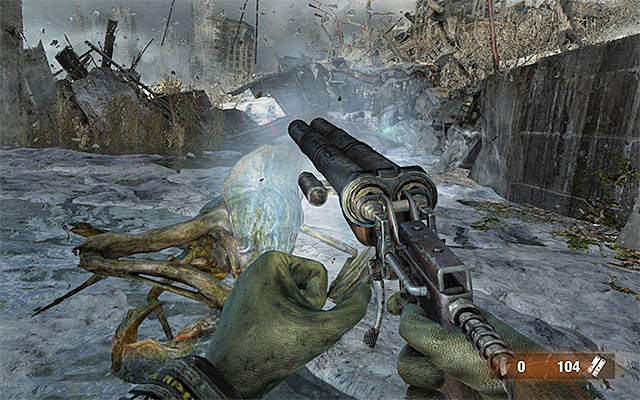
Keep moving ahead, best by keeping to the low walls to your right. Do not be bothered by the cracking ice but, on the other hand, watch out because it is almost certain that there will be at, least, one shrimp to attack you. The good news is that you will soon move away from the water.
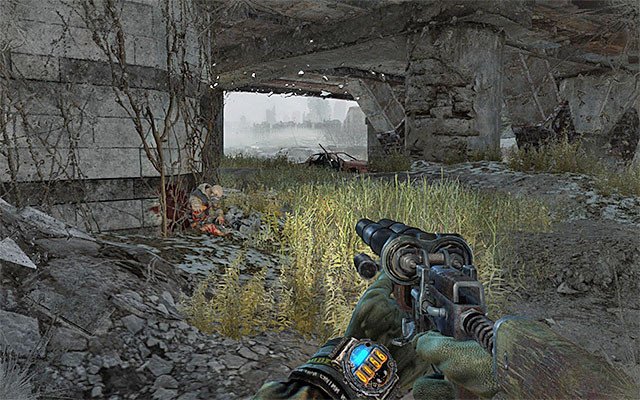

Take the first turn to the right and explore the optional area shown in screenshot 1. Locate the corpse shown in screenshot 2 and collect the Artyom's diary page. Watch out, though, because collecting this will make several mutants appear around.
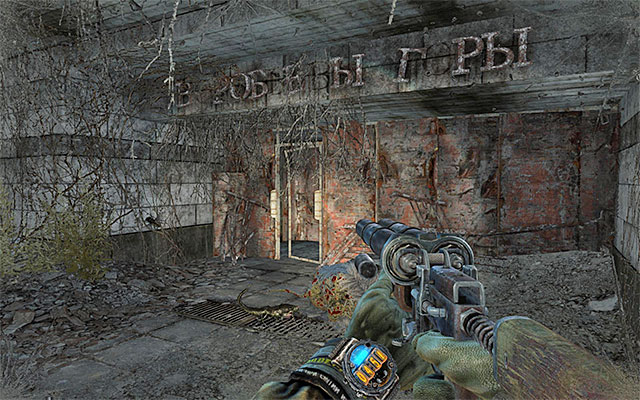
Return to the fork and take the stairs to the left this time. After you climb the stairs, enter the building to the right straight away.
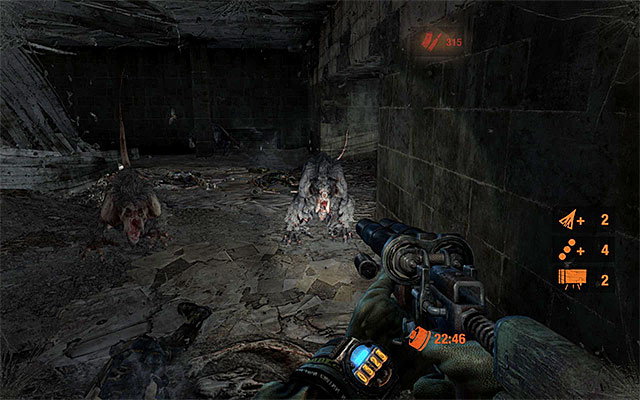
While exploring the building, look around for corpses and supplies. At the same time, keep listening to the environment, which will make you come prepared when you are attacked by mutants (deploy some mines around if you want to ensure your victory).
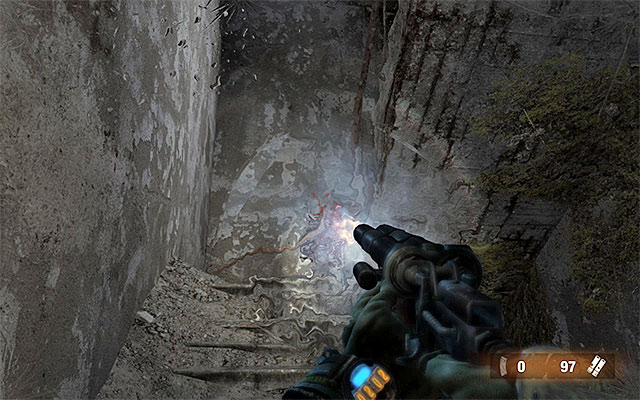
Keep moving. Open the gate to the staircase. Kill a mutant here. Before you go upstairs, check the area under the stairs to get some supplies. Only then, take the stairs to reach the building's exit.
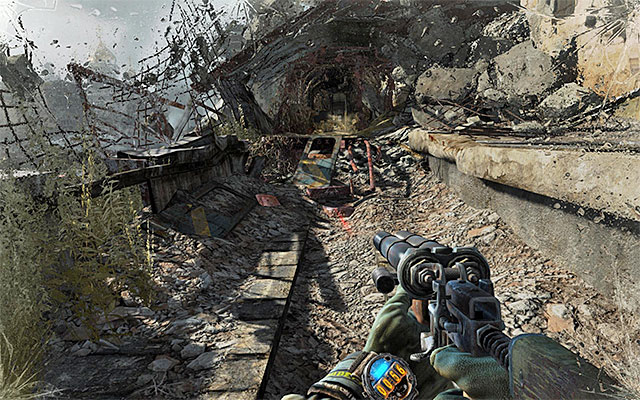
Turn right and enter one of the demolished railway cars ahead of you, which is another linear path. You will watch a cutscene of a demon attach, after which you will end up back near water.
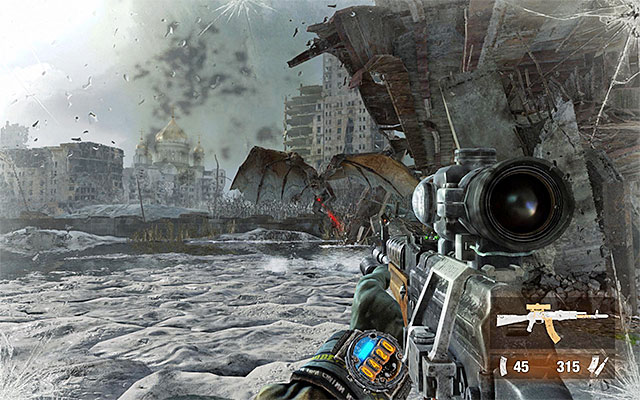
Before you continue on your path, it is a good idea to eliminate the demon that obstructed you from your march. Try to shoot longer series from your machine gun, or other good weapon, which will prevent it from getting near Artyom (you cannot take cover, though) While shooting at the creature, avoid coming too close to the water to prevent being attacked additionally by shrimps.

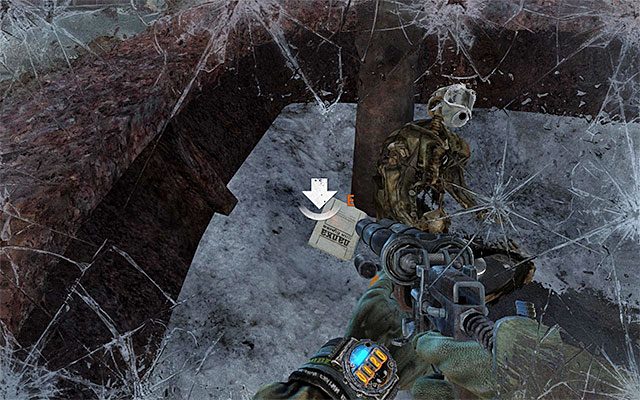
Move forward only after you dispose of the demon. Watch out for the abovementioned shrimps, but eliminate only those of the monsters, that visibly stand in your way. After you reach the shipwreck shown in screenshot 1, go right. Go aboard and find the Artyom's diary page shown in screenshot 2 (you can also switch your gas mask here if the one you are using has been damaged).
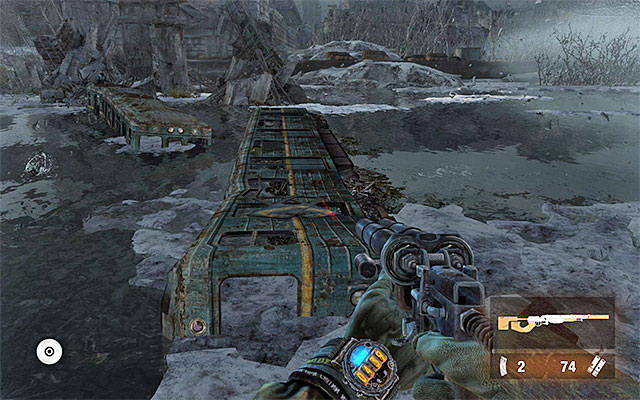
I recommend that you quickly leave this area, because there will appear another demon in the area. Go towards the partially flooded railway car shown in the above screenshot. Then, sprint-jump onto the next one to the left.
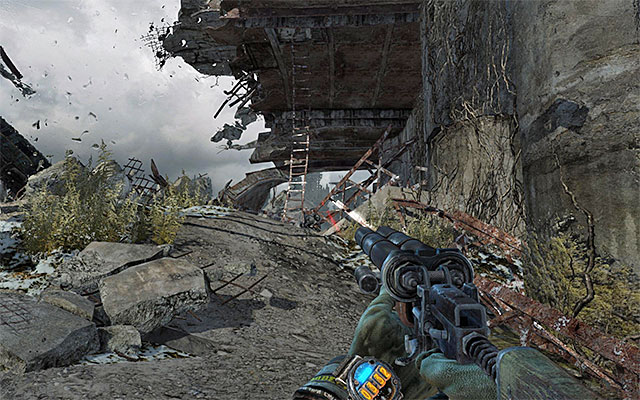
Jump off the second car to land on the ice. Once again, you need to be wary because you will be attacked by the shrimps quite regularly here. Follow the linear path near the water to approach a ladder after several moments. Taking the ladder will finish this chapter.
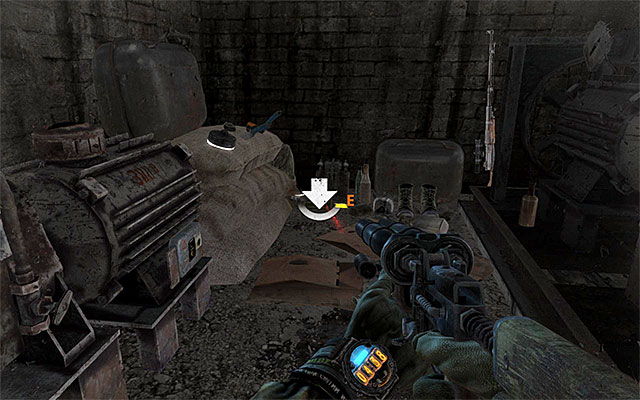
Follow the Dark One. Before you take the main ramp, explore the area to the left, where there are quite a lot of supplies and a sniper rifle.
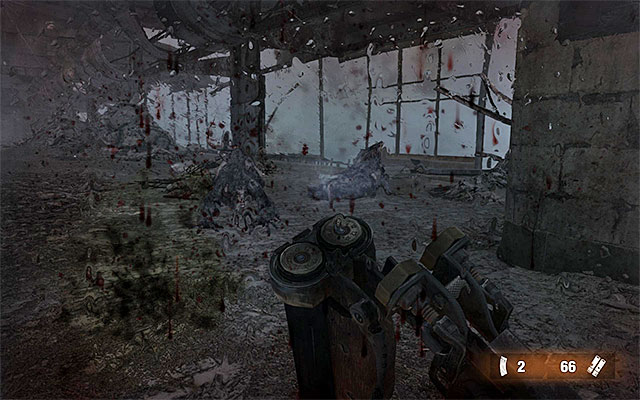
After you reach the bridge, move towards the first group of monsters. If you have nothing against it, it would be a good idea to kill out every last of them, first by attacking at a long range (that's where the sniper rifle you have just found comes in handy) and then by dealing with them at a short range (you can deploy mines first).
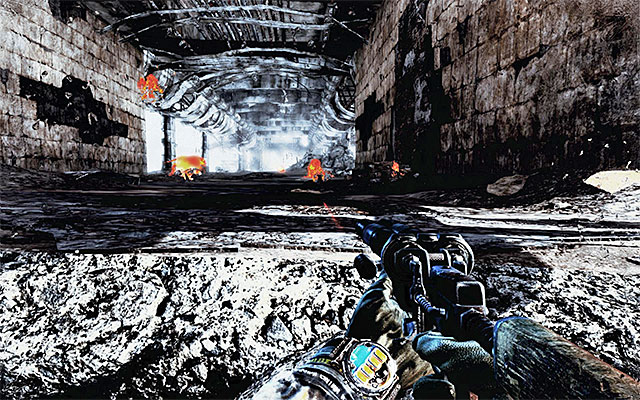
A way better idea, than fighting, is to avoid the mutants. This is because the game awards additional achievement for beating this level without killing monsters. If you decide to take this path, start by learning about the area, using the modified seeing mode received from the Dark One.
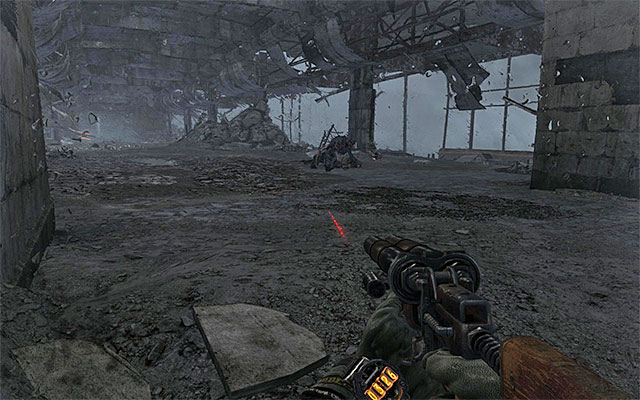
At first, keep close to the left wall and squeeze past the mutant that is feeding to your right. At the same time, make sure that you do not come too close to the beast staying on the left side.
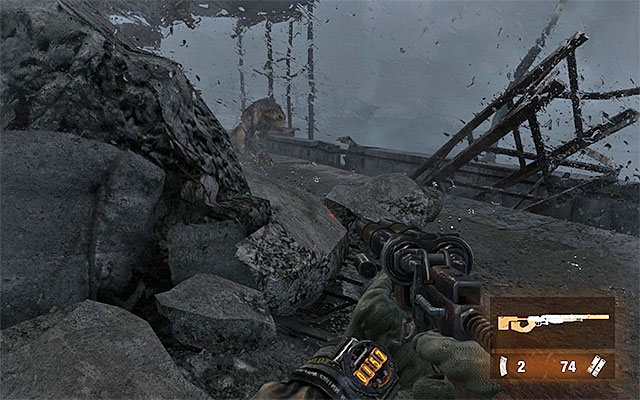
After you reach the demolished part of the bridge, turn left and carefully approach the area shown in the above screenshot. As you have probably noticed, the area is being patrolled by one of the mutants. Wait for the monster to turn away from you and start walking away. Only then, emerge from behind your cover and take the first turn to the left.
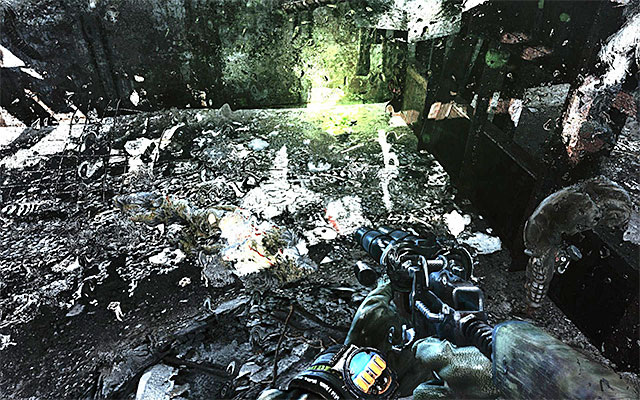
If you want to, you may take the ramp to the lower level to examine the area more thoroughly. Unfortunately, apart from a corpse and a measly amount of supplies, you won't find anything of interest here.
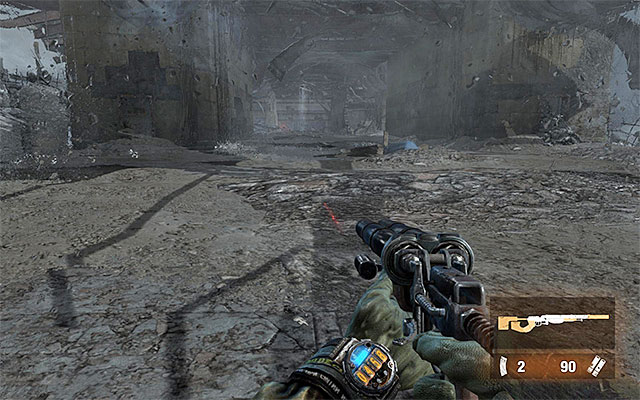
Return over the ramp to the top, and wait for the beast you have just squeezed past, to start walking towards your starting point for this chapter. Only then resume your walk by keeping to the left side of the bridge, and go towards another big area that has been shown in the above screenshot. At the same time, ignore the demon that will snatch at a mutant, because the beast is in no way a threat to you.
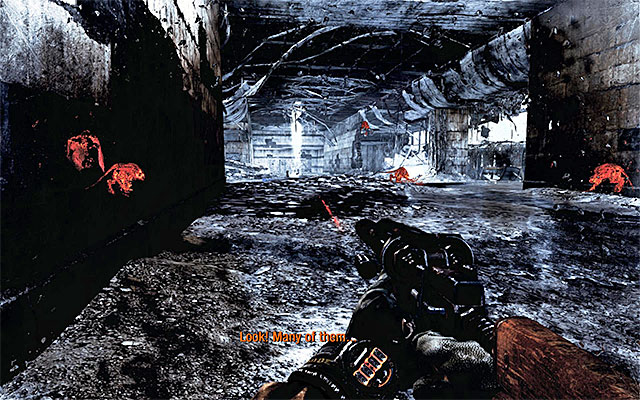
It would be a good idea to stop after you reach the other side of the bridge and use the "X-ray" mode to examine the surroundings and learn the location of mutants here.
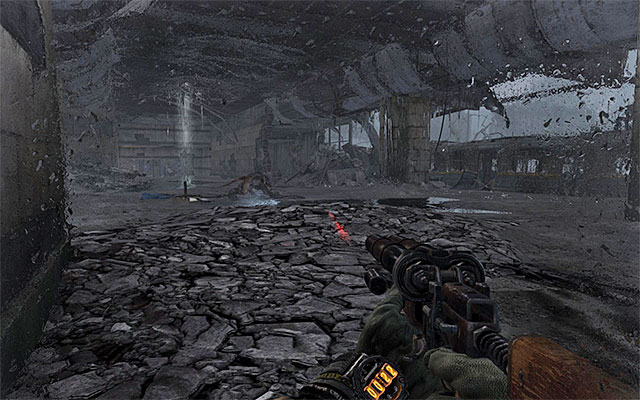
Just like previously, keep to the left wall, so that you go around the mutant, in the middle of the bridge, at a safe distance. At the first opportunity, jump down onto the track to the left.
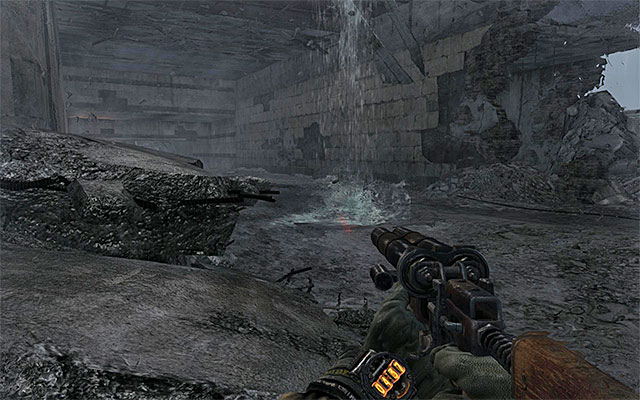
After you reach the final part of the track, with a demolished car on it, return to the platform above. Backtrack a bit and turn left to take the exit from this location shown in the above screenshot (optionally, you can also explore the small area to the right, but it is risky, because you could be noticed by the mutant staying atop the train to the right.
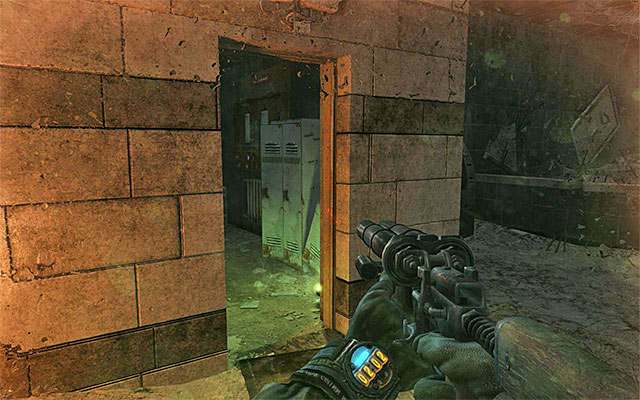
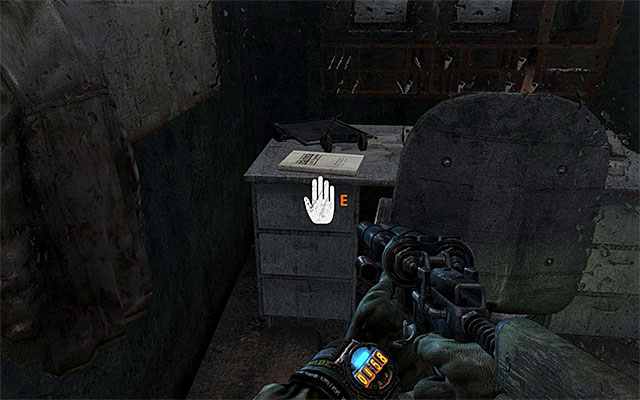
Go straight ahead, and take a good look around. Thanks to this you will find the entrance to the room on the left (screenshot 1). Examine the room to find an Artyom's diary page shown in screenshot 2. While you are here, also have a look into the nearby lockers to find ammo and military-grade rounds.
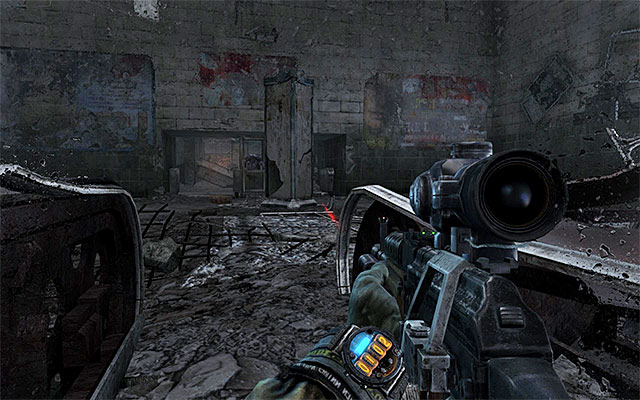
Leave the room and resume your walk by taking the disabled escalator. Stop once you reach the foot of the stairs and use your rifle scope, for example, to examine the area ahead.
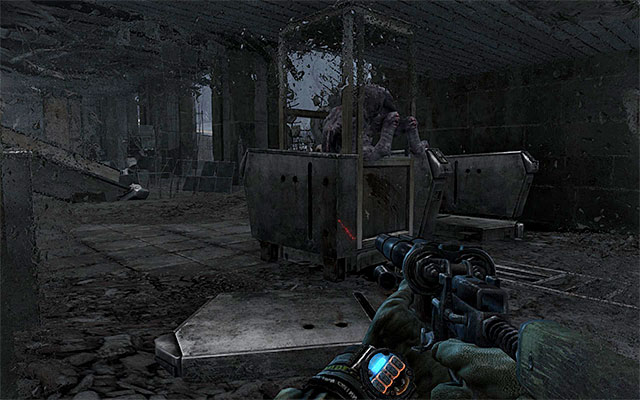
Carefully, walk around the monster to the right (the good news is that the mutants here attack only if you visibly approach them) and take the passage shown in the above screenshot, as you walk past the mutant.
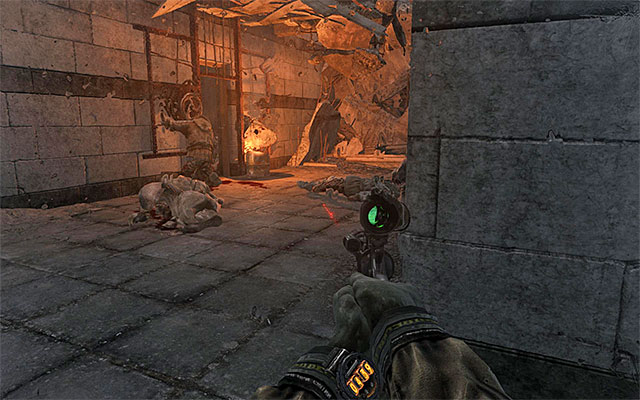
Follow the linear path and walk past the next clinging to the wall. Do not forget to look around for supplies, as you go, to find these mainly on two corpses. Finally, you should reach a corridor with a blazing barrel in it. Wait for one of the mutants to drag a corpse away and continue along your path.
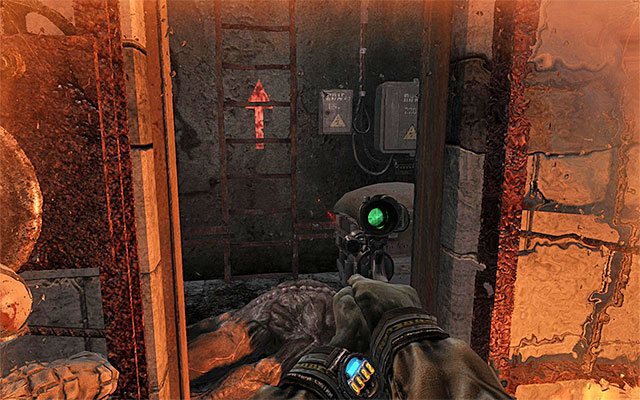
Take a look around in search of two corpses with a filter, plus a standard set of supplies on each one of them (ammo, new weapons etc.). After you have explored this part of the bridge, approach the ladder to the left and start climbing.
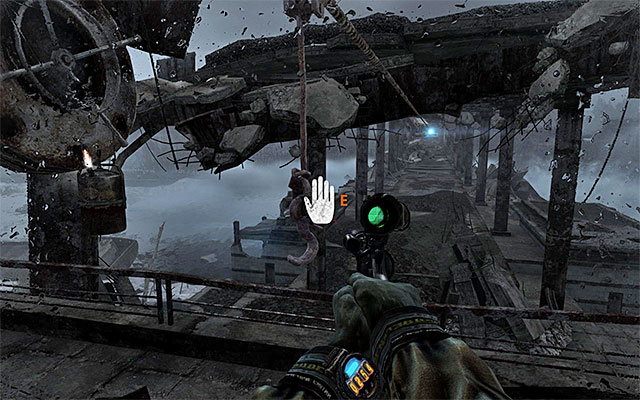
Go ahead and find a new filter on your way. Carefully, walk around the monster and approach the handle shown in the above screenshot.
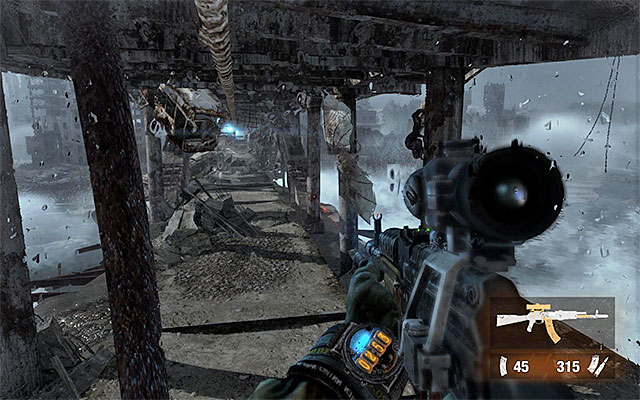
An important piece of information, here, is that you can ignore all of the monsters altogether while going down the zipline, including a demon (it is especially important if you are planning on unlocking the abovementioned achievement). The ride finishes as soon as the zipline is broken by the airborne beast (you had no influence on it whatsoever).
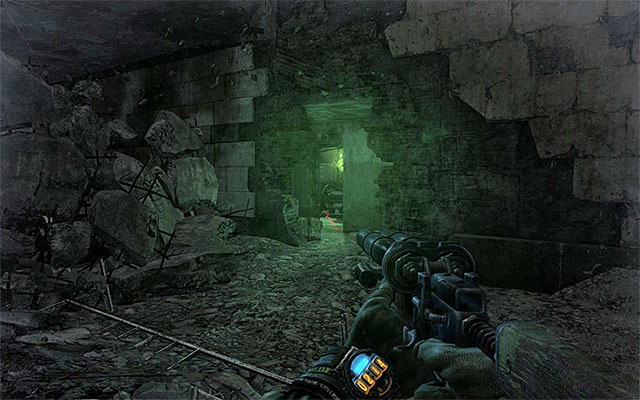
You will regain control over Artyom right after the Dark one drags away the demon responsible for breaking the zipline. Take the passage to the side, shown in the above screenshot, to approach a spot in which the game starts to load the next chapter.
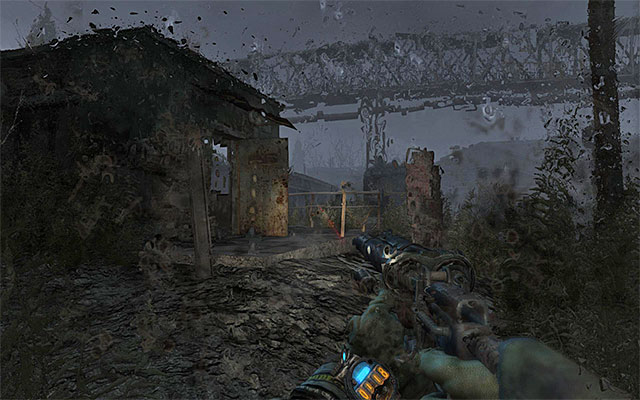
Start by emerging from the metro tunnel. Go towards the depot buildings that you can see up in the distance. On your way there, you can of course, take a look into a few several optional locations; a small outpost, and the garages with the truck parked, to name the few (watch out for the tripwire!).
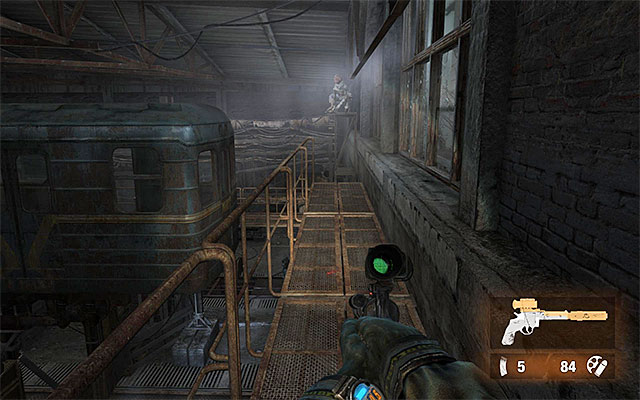
To push the story forward, go towards the building with the spotlight on; the one that the Dark One also stopped by. Explore several rooms to reach the door to a large hall, where there are several allies.
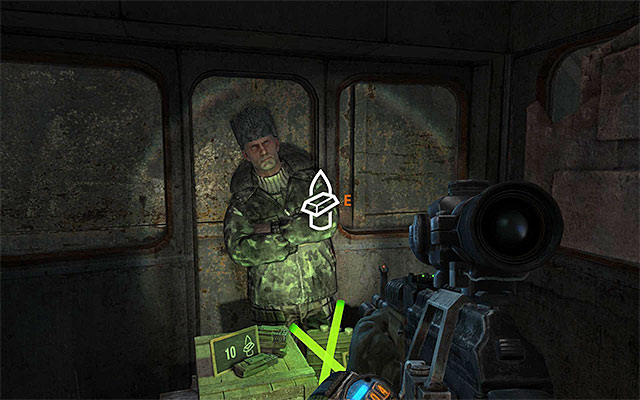
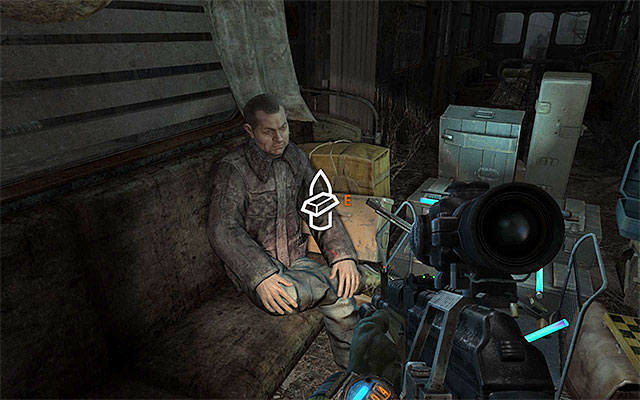
Start by taking off your mask, because you are not going to need it here. Go left and enter one of the railway cars. Inside, there are people you can barter with. The character shown in screenshot 1 deals in ammo, throwing knives, Claymores and grenades. The character shown in screenshot 2 deals in weapon modifications and new types of weaponry.
Leave the car and take the stairs to the catwalks above. Go towards the middle of the hall, which will result in the appearance of the hostile Reds. Stop atop one of the cars and wait until you receive and objectives update.
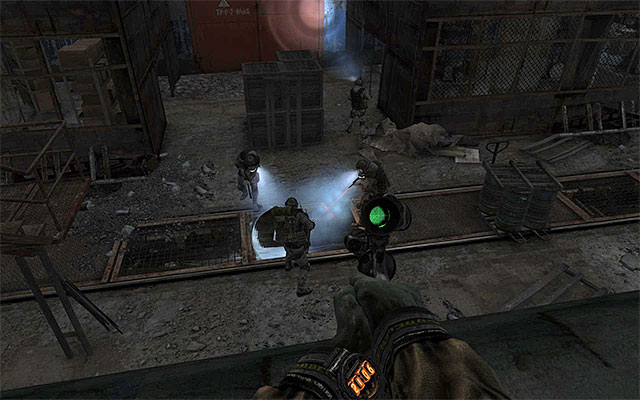
Position yourself near the edge of the car rooftop and wait for the enemies to disperse. From now on, you will have to watch your back at all times, as you are dealing now with well-trained, better equipped sort of enemy. I definitely recommend that you adopt stealthy approach to the battle here (further description assumes that this is the strategy you have adopted).
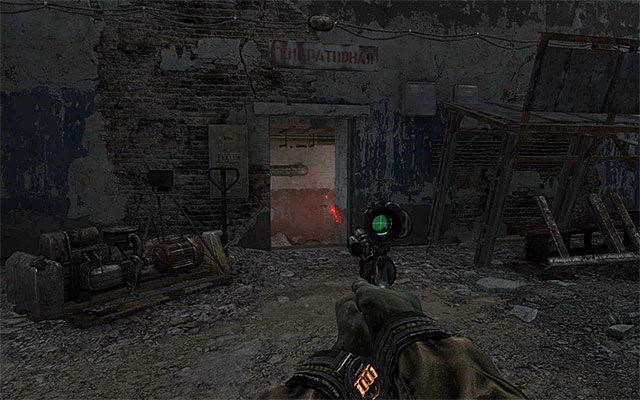
Your task now is to reach the side entrance shown in the above screenshot, which is located at the far end of the location and more precisely, to the left of the elevation occupied by two guards, near the generator (I recommend that you smash the lamp attached to it).
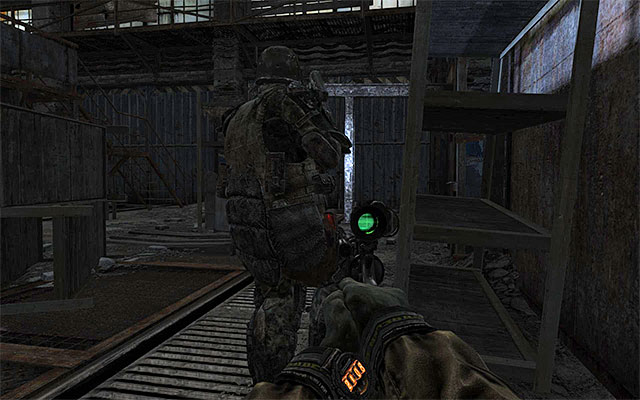
Jump down from the car and start moving, carefully, towards the entrance mentioned above. If you are planning on the elimination of enemy soldiers, you should watch out for the ones equipped with torches. Also remember to attack only the ones staying in the dark. It is also necessary that you search the enemies you take out because, apart from the standard supplies, they also drop filters.
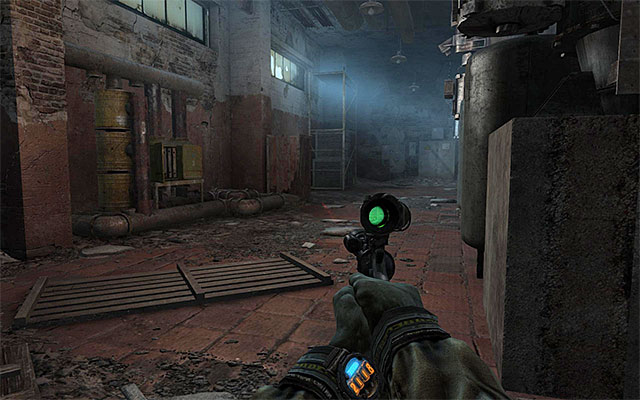
The good news is that you do not really have to bother about the two snipers here because they will not be alerted to your presence as long as you stay in the shadows. Depending on which you prefer, you can either secure the entire area (remember about the enemy patrolling the narrow underground tunnels), or go towards the exit straight away. Cross the empty room, find a filter on your way and reach the stairs. Put on your gas mask in here.
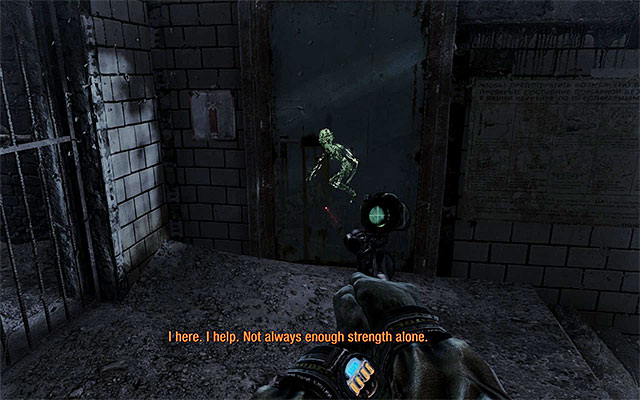
After you have climbed the stairs, turn your attention to the collectible behind the gate that the Dark One is crouching at. Wait for the ally to open it for you, after which you will be able to open it.
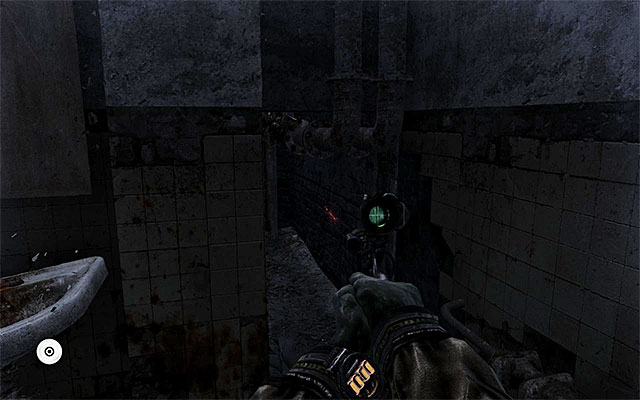
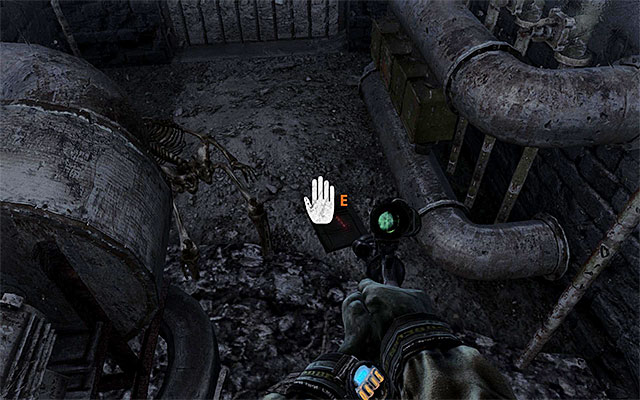
Right after you enter the new area, turn left and go to the toilet. The reason to do that is not only to avoid the enemies staying in the well-lit corridor, but also to reach the nearby collectible. Find the hole in the left wall, shown in screenshot 1, and crouch to squeeze across. You can now approach the gate and collect the Artyom's diary page from the ground (screenshot 2).
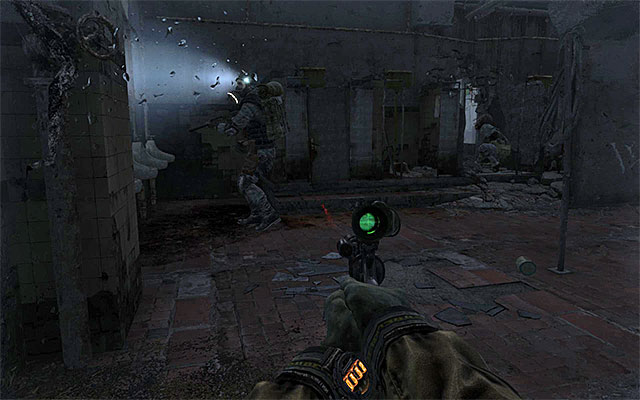
Remain where you have found the item, because two enemies will enter the toilet in a moment. What is even more, one of them will light the narrow passage that you took to get to the diary. Patiently, wait for the guards to turn away. Return to the toilet, then, and get each one from behind to knock them out or kill them.
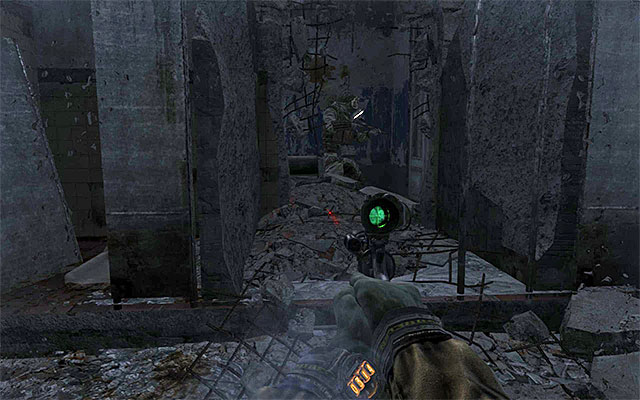
I recommend that you take the passage shown in the above screenshot, i.e. the one that is parallel to the main corridor, which is definitely too well-lit to ensure safe passage. Carefully, approach the sole guard and dispose of him. Continue your walk along the narrow corridors and eliminate one more guard on your way (make sure, here, that this one is turned away from you, because he is using a torch).
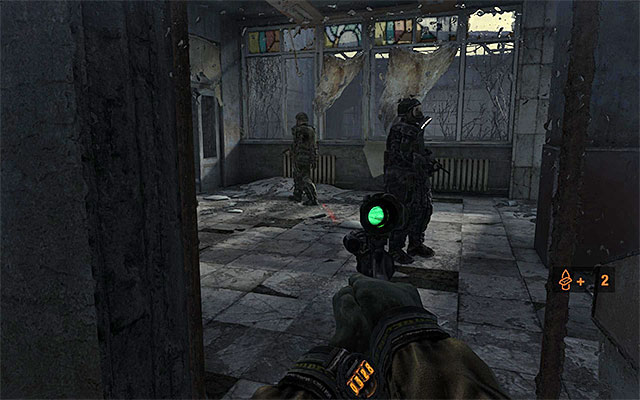
You can now position yourself in the spot shown in the above screenshot. Wait for the guards here to disperse and get rid of them quickly. You can now leave this location (the guard patrolling the area near the starting point can be ignored).
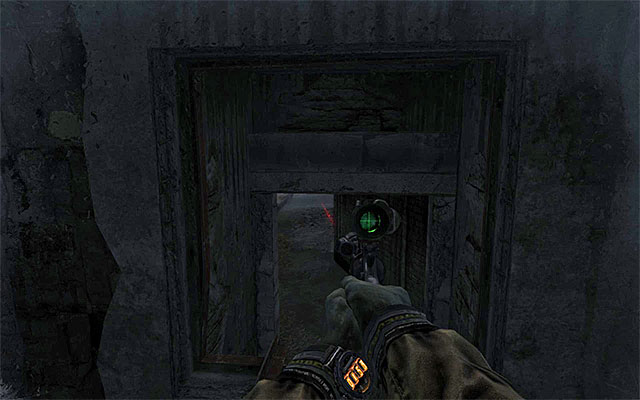
Go towards the staircase and climb down the stairs. After you reach the location where you meet the Dark One again, do not take the main corridor because this one leads to a door with a multitude of enemy soldiers (you would have no way of defending yourself). Instead, locate the sewer entrance (the above screenshot), and that is how you get to the main hall, while finding another filter on your way.
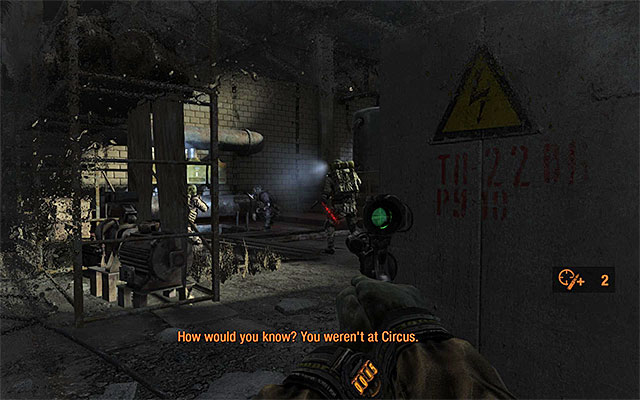
Depending on your preference, you can start be either disposing of several guards staying nearby, facing the main door (which you have ignored, in accordance with my suggestions), or by squeezing past them. Wait for the guards gathered at the next entrance to the sewers (to the left of the starting point) disperse.
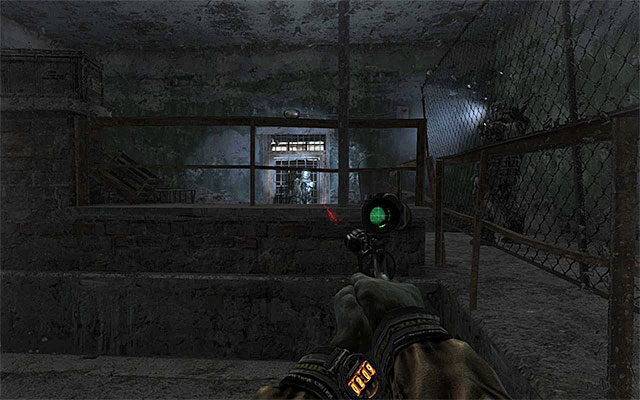
Your current objective is to reach the exit shown in the above screenshot, which is located at the other side of the fence. You can reach it in several ways.
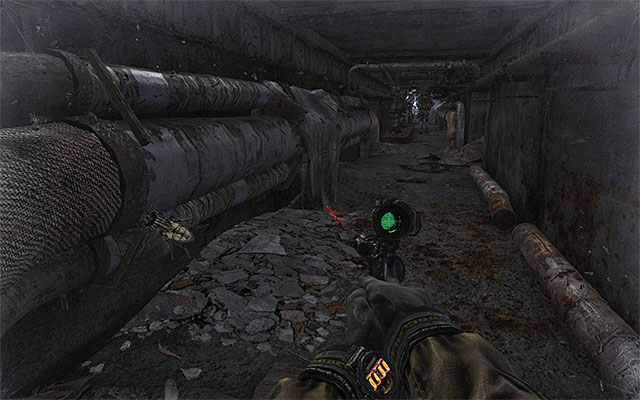
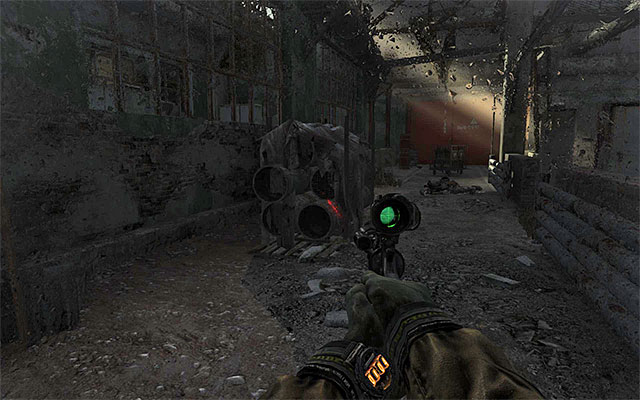
Variant one assumes that you take the sewers to get there. You would have to jump into the manhole mentioned above and dispose of a solitary guard while going along the tunnels. Variant two assumes that you get past the guards. In this case, you would first have to come close to the fence between you and your destination, turn right and walk by keeping close to the left wall.
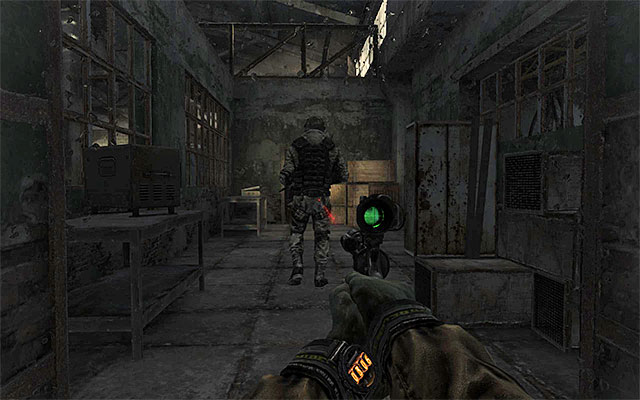
Regardless of how you have decided to act, make your way into the small room patrolled by a single guard (shown in the above screenshot). Wait for the guard to turn away from you and approach him quickly to knock him out or kill him (remember to run through the supply crate too)
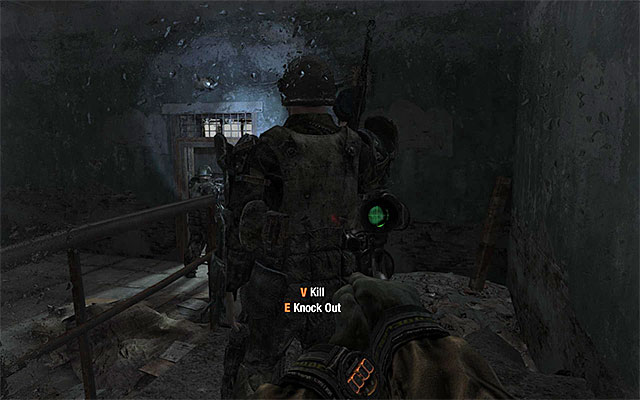
After you have explored this room, turn right. Jump down onto the next enemy, who should be looking the other way. Go towards the exit and eliminate (or walk around) the last guard from the group. Walk along until you reach the blue-colored door that leads to the last location in this level.
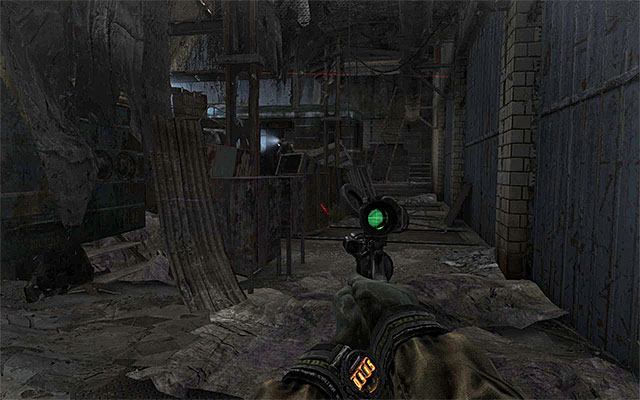
The enemies in this storage area are even more focused on Artyom's arrival. Because they are so much herded together (and often staying in lit areas), it is highly recommendable that you walk through this area without eliminating most of them and without alarming them to your presence. Move ahead, and crouch in the location shown in the above screenshot so you can dash from one cover to the next one to avoid being noticed.
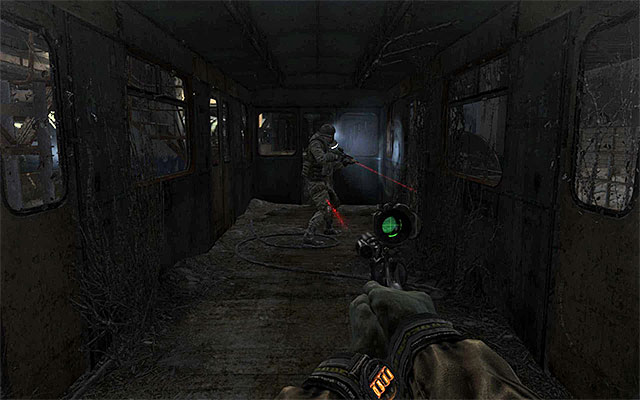
After you pass the area monitored by the guards, turn left and enter the closest railway car. The car is being patrolled by a single guard that would be best dead. Take all precautions while doing it, as the guard is equipped with a torch.
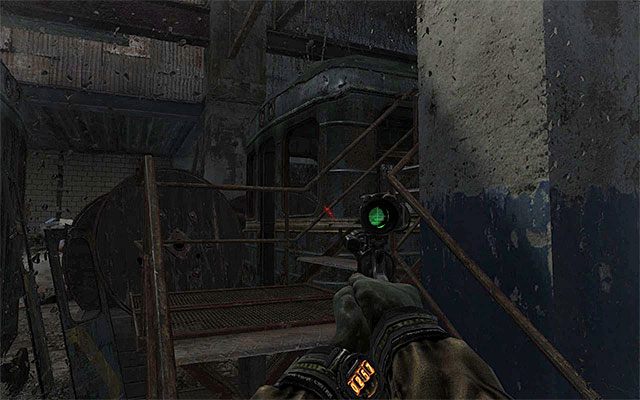
Exit the car carefully, and do not attack the guards because many of them are staying in lit areas, and this could cause alert being called. Instead, turn left and locate the stairs shown in the above screenshot, to the catwalks above.
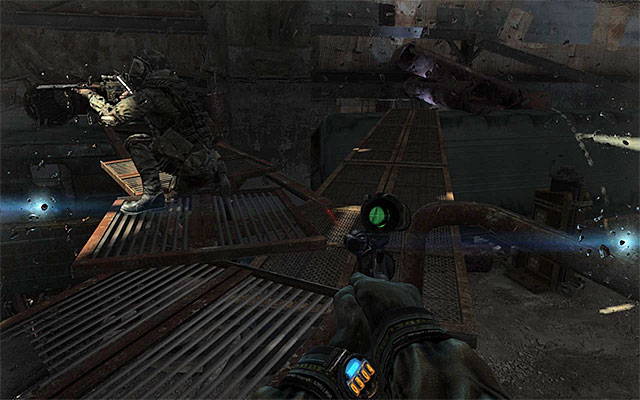
Once you get onto the catwalks, go to the right and sneak behind the back of a sniper (also this one you'd better leave alone).
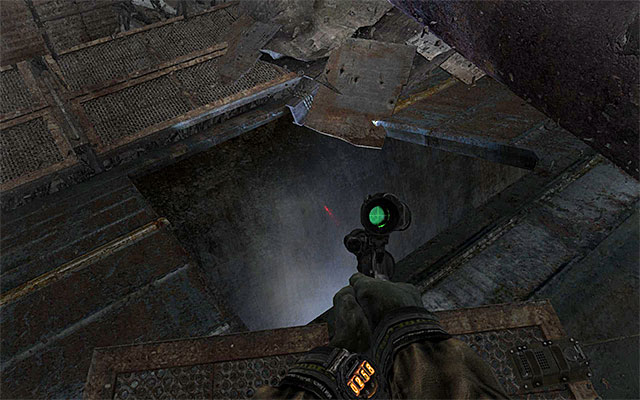
Having passed over the catwalks, you should end up in the area shown in the above screenshot, where there is an opening in the side of a railway car. Jump inside and then, jump down into a small tunnel, which should allow you to walk around the nearby Reds.
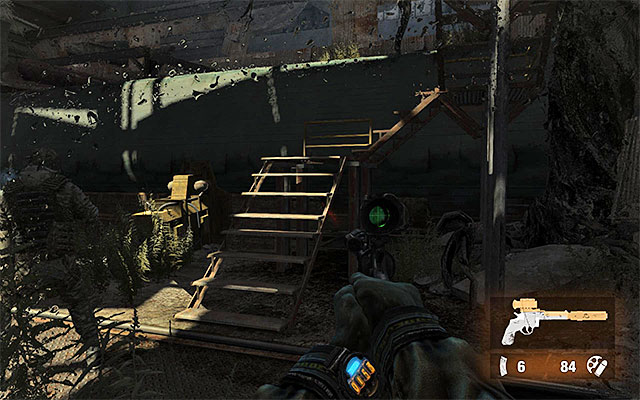
If you have done everything in accordance with my suggestions, after you leave the tunnel, you should be behind enemy lines. Quickly, take the stairs to the right to reach a room above. Find a filter and open the blue door.
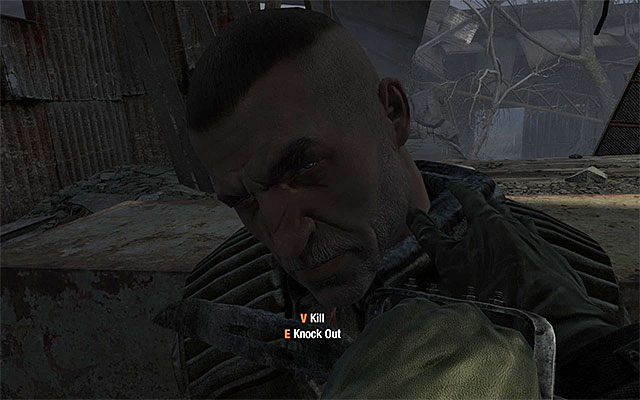
You are, now, up for a meeting with Lesnitsky. After watching all of the cutscenes, you will have to decide whether you want to kill Lesnitsky, or just to knock him out. If you are going to beat the campaign with the "Shadow Ranger" achievement and/or unlock the positive ending, you should definitely go for the latter.
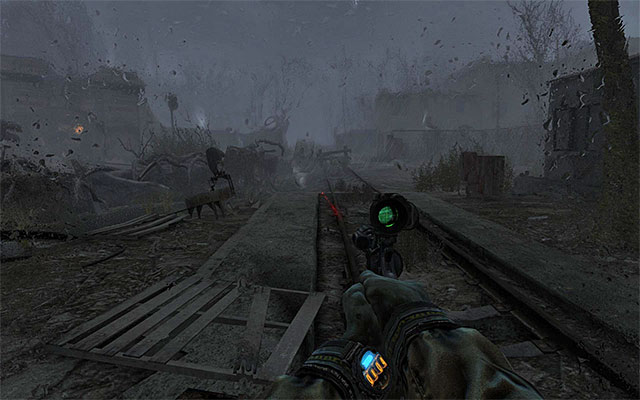
Regardless of how you behave towards Lesnitsky, the only thing left for you to do is leave the depot. Jump down and leave the building. Walk ahead. You can speed up in here, as there is nobody else in this area, and there are no supplies to be found. Soon, the next chapter will start to load.
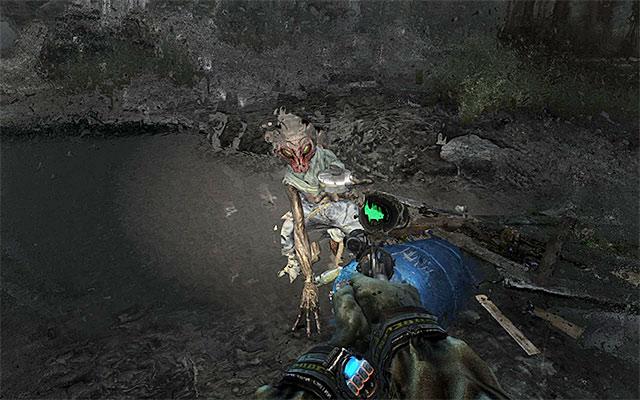
Go straight ahead. While exploring the Dead City, you should take your time, because often there are valuable collectibles, or interesting visions to have, inside the buildings. Also, do not ignore the Dark One accompanying you. First of all, it is a good idea to respond to all requests, directed to you, and concerning the supply transfers from the dark one (including filters, ammo and military-grade rounds).
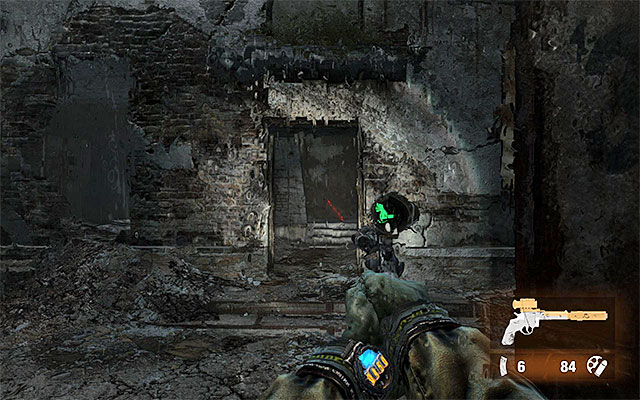
Start by exploring the building to the right. First of all, explore the first floor (jump onto the destroyed part of the stairs and jump onto the landing). Watch out for the nearby tripwire and find two supply crates and a tape recorder on this level. After you exit the building, walk over the debris to find one more supply crate.
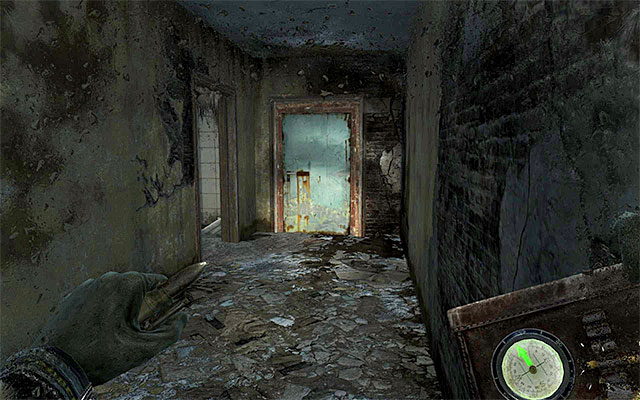
Enter now the building to the left. Do not enter to the basement to the left, as it is irradiated. Instead, go for the main entrance into the building straight away. Ultimately, you need to reach the blue door located on the first floor, which will take you to the next portion of the Dead City.
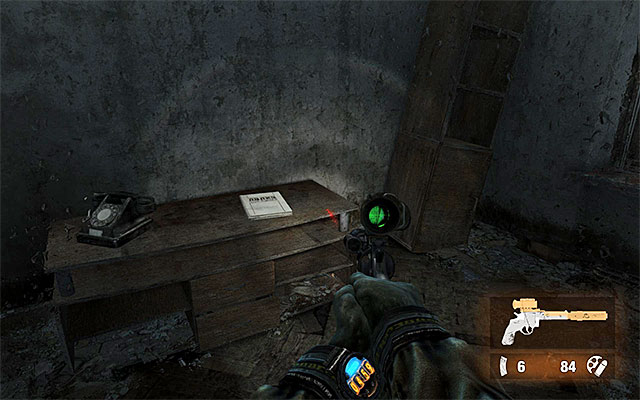
Stop soon after opening the door, and more precisely, right after you enter a small area with the table with red tablecloth on it. On the shelf shown in the above screenshot, there is an Artyom's diary page. You can now go to the exit, and collect a filter on your way out.
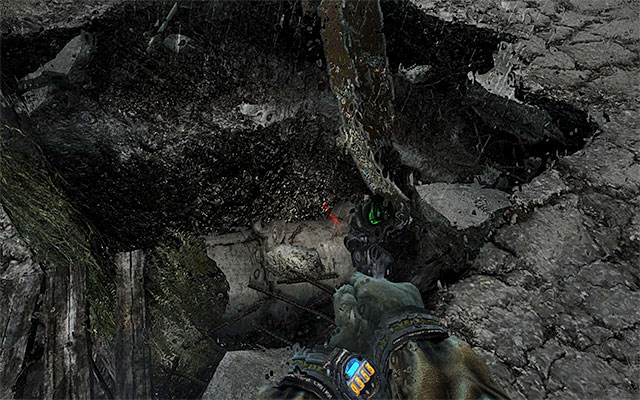
After you get to a destroyed playground, you will experience the first one of the several visions. Because there are no items or additional passages around, locate a hole in the ground and jump into it.
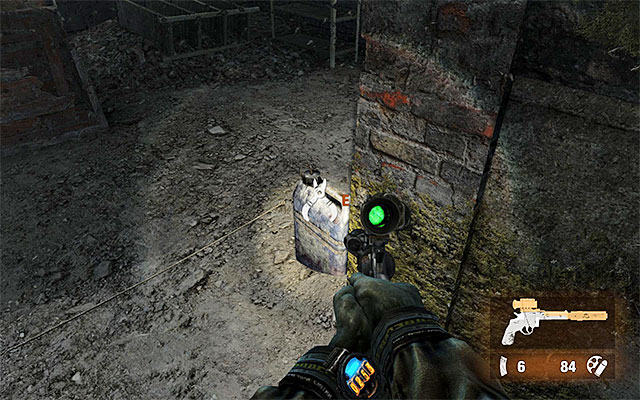
Once you get into the tunnels, turn your attention to exploring a narrow passage to the left that will take you to a room with a tripwire in it. Inside, there is a supply crate. Return to the location where you have started and go straight ahead. I recommend that you also explore the next optional room located at the end of this corridor. Inside, there are supplies and a weapon.
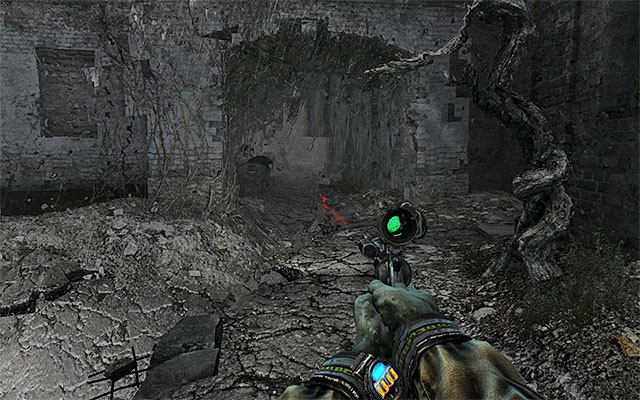
Return now to the main corridor and locate the exit to the surface. It is worthwhile to explore the building to the left, first. Reach the room on the first floor and experience another vision. There is also an interactive piano here. You can now return downstairs and take the tunnel shown in the above screenshot, which will take you to a much larger yard.
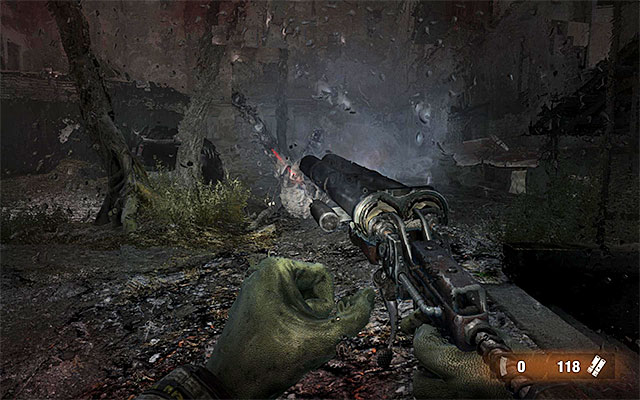
Open the nearby supply crate, jump down to a lower level and approach the main part of the yard. Keep vigilant, because you will be attacked by a single mutant right after you experience a vision with an approaching car. What is even more, while exploring the further parts of the yard, you should be prepared to deal with several additional monsters (you can deploy mines here by way of preparation).
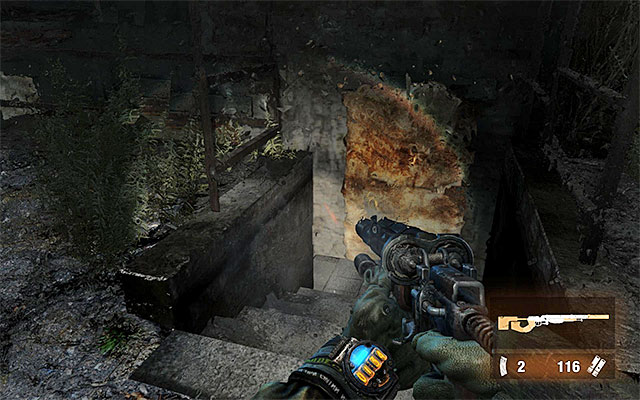
It would be a good idea to devote some time, now, to a thorough exploration of the area. You should especially pay attention to the stairs located to the right. It will take you to the basement of one of the buildings. Turn on the light and explore it thoroughly to find supplies and another tape recorder.
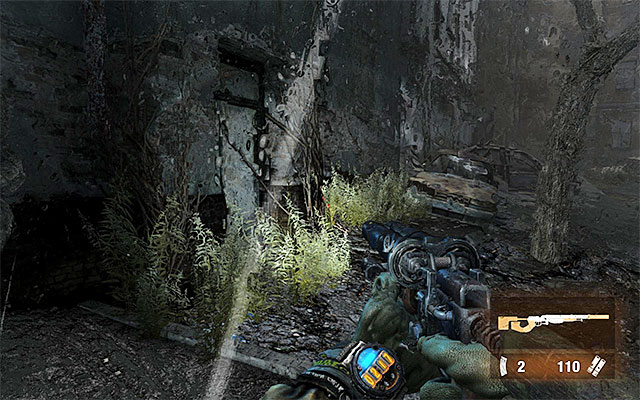
On the left side of the yard, there is another, optional, entrance to a building, which can be explored. After you reach the room upstairs, you will experience another vision and find a filter. In the toilet there is a corpse with a machine gun on it.
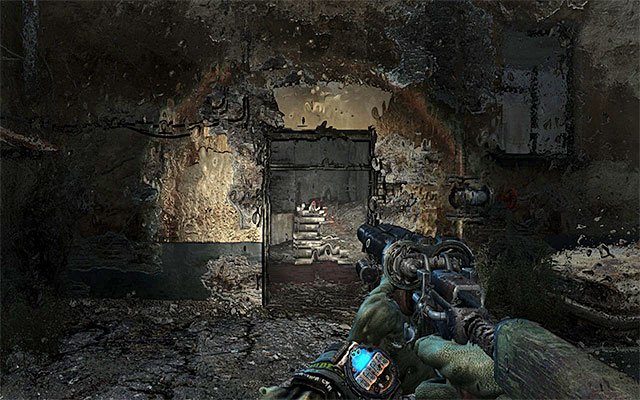
Finally, go through the passage to reach the parts of the building that are further away (the above screenshot). Also in this case, you need to reach the room upstairs and see a vision. Collect the filter, listen to what the Dark One has to say and climb through the window to the left to get to another large location within the Dead City.
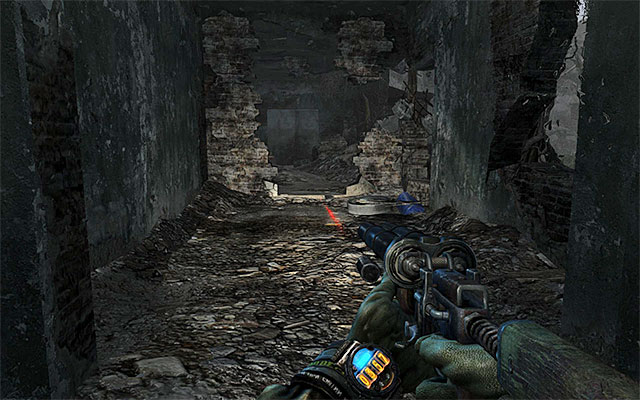
Go straight ahead and consider exploring the building to the left that you will soon approach. In one of the rooms upstairs there is a tape recorder. Before you reach it, though, you will have to disarm a tripwire.
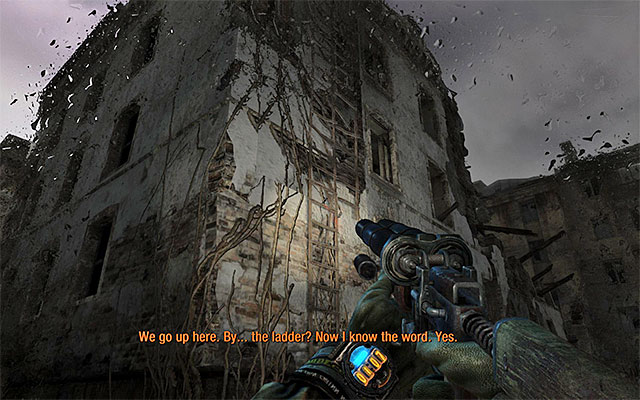
Leave the building and resume your march. I recommend that you check out the truck that you pass on your way, to find an ammo box. After you have explored the area, take the ladder shown in the above screenshot to get to the rooftops.
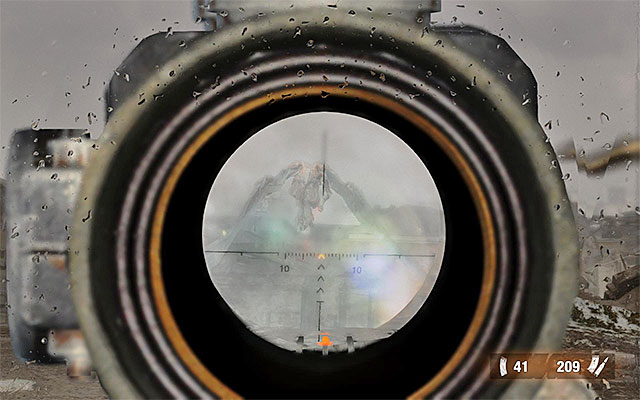
Carefully, approach the demon's nest, which will be equivalent to entering a fight with the beast. The Dark One will suggest that you do not need to kill the creature that is only protecting its nest, but you are not required to take the suggestion, and you can just as well eliminate it. If that is what you decide on, I recommend that you position yourself at the entrance to the staircase, thus avoiding being caught by the demon. Keep firing at the demon from a weapon effective at longer range.

Regardless of whether you have decided to kill the demon or not, approach the creature's nest (the above screenshot). Ignore the smaller demon and search through the nest to find, among others, a filter, ammo, an assault rifle and an Artyom's diary page (of course, plundering the nest will be way easier if you do not have to fear attacks from the "grown up" demon).
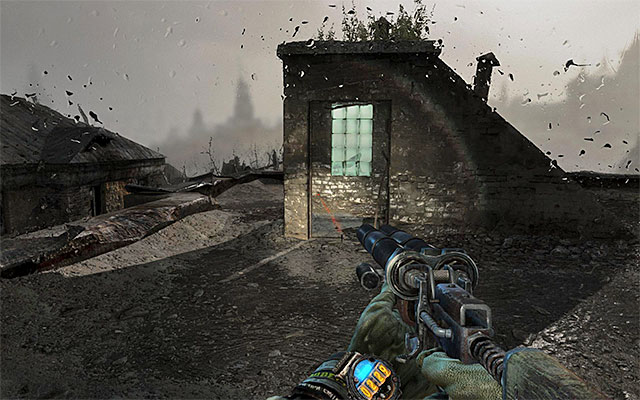
After you have explored the rooftop, locate the passage to the staircase. Walk through several rooms and watch another vision. After it ends, keep climbing down by jumping into the holes. This way you will reach the sewers.
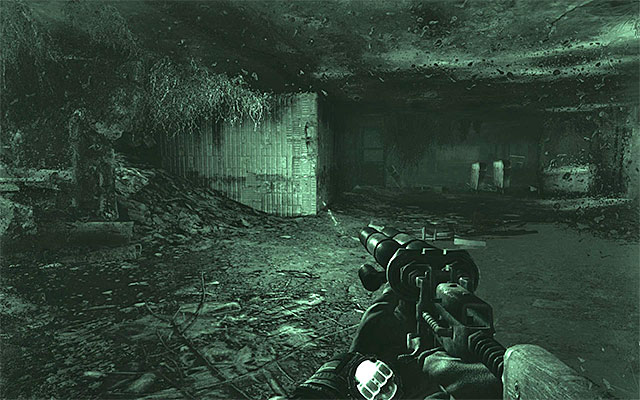
Start exploring the sewers and watch the last, and a bit more interactive, vision. Do not forget to look around frequently because, to find, there are, among others a gas mask and a supply crate. .
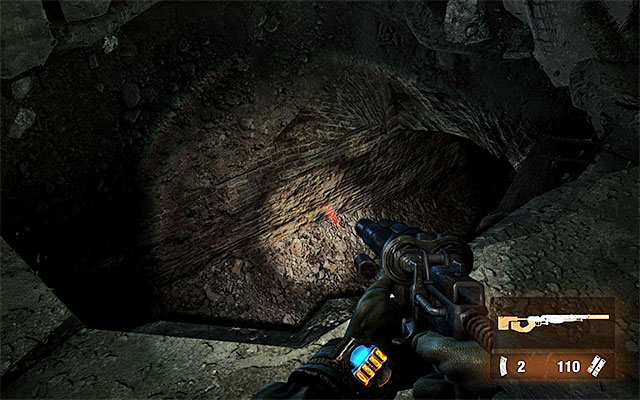
Do not worry too much if your torch and night vision goggles go down for a moment. There are no monsters in this part of the sewers. After you reach the final part of the corridor, jump into the hole and turn right, which will take you to the final part of this chapter.
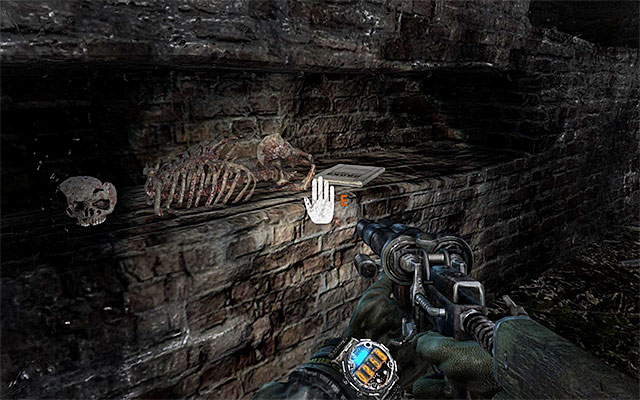
Right after you start this chapter, examine the wall to the left, because one of the skeletons has an Artyom's diary page on it (the above screenshot). Collect it and go on.
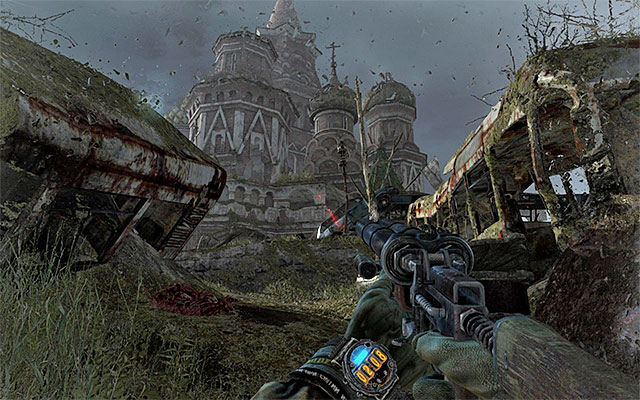
Once you are back on the surface, you are up for a linear path ahead, but it is worthwhile to make frequent stops to examine the corpses and gather supplies.
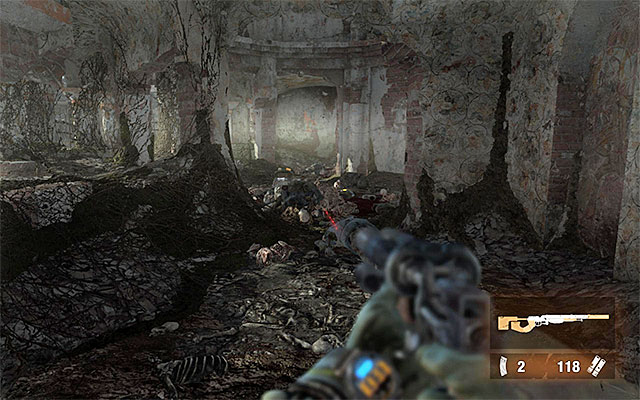
Ignore the mutants staying in the destroyed cathedral, as they are, in no way, a threat to you. It is a good idea to go towards the stairs that lead to the large building mentioned before. This way, you will reach a corridor with two heaps of corpses in it, and quite a few supplies at each.
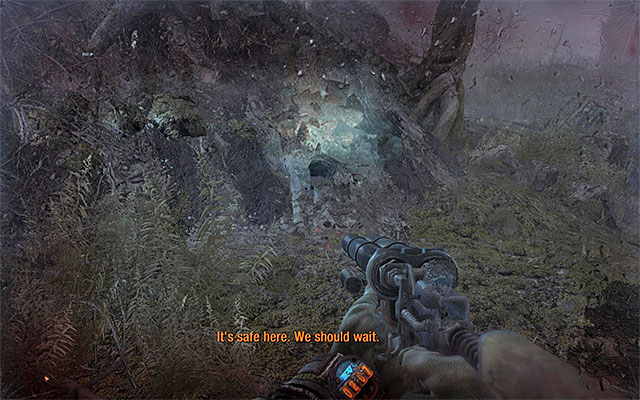
Having conducted a sufficient exploration of the area, resume your march and follow the Dark One. According to the Dark One, you need to find some shelter really quickly because there is a storm brewing and otherwise, you would start taking damage due to radiation. Stop next to the friend of yours.
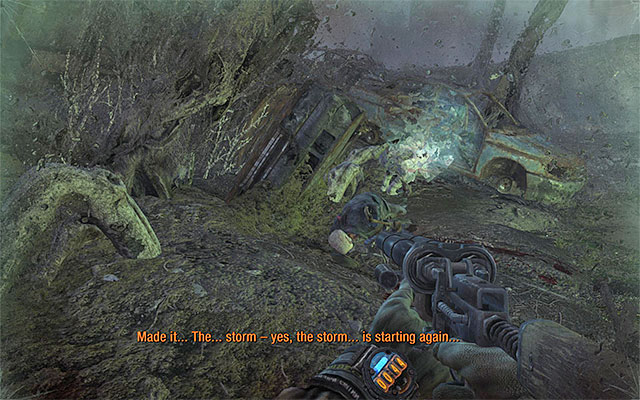
The next part of the journey is similar to the activities described above. You need to listen carefully to what the Dark One has to say, and follow it as soon as it decides it is safe to go. You also need to make stops whenever the Dark One does. . Do not try to stray too much from the main path and examine only the corpses that are right on the path.
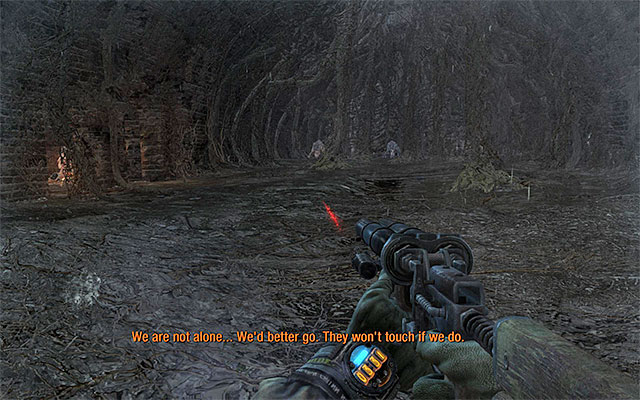
The single mutant that you encounter can be well ignored because, due to the storm, the beast will not attack you (if you really have to, approach the monster and search through the corpse next to it). Do not expect any hostile behavior on the part of the mutants staying in the nearby den although, in this particular case, an attempt to search the corpse may provoke an attack.
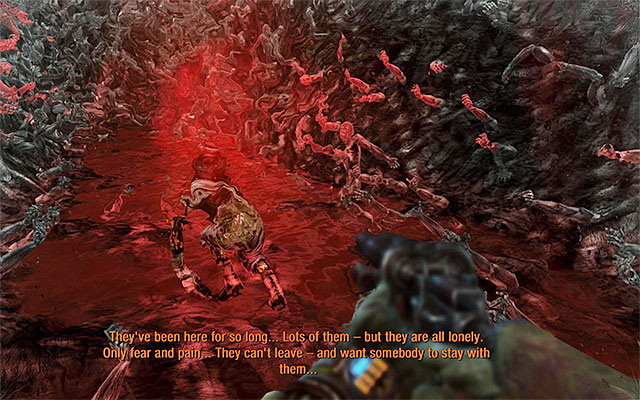
Keep following the Dark One and make sure that you do not lose the ground under your feet. Soon, you will experience an unique vision. After you regain control over Artyom, follow the Dark One. You really need to stay as close as possible (sprint if you have to) because, it is the only way to avoid taking damage.
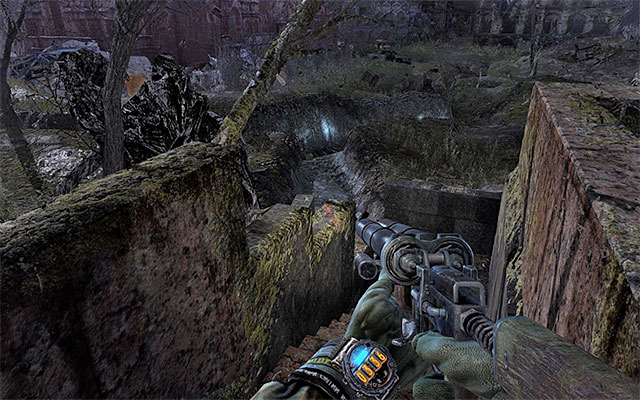
After you are back to the reality, go ahead. Explore the closest building in search of a sniper rifle (it is not necessary to collect this weapon, but you will make use with a long distance weapon towards the end of this chapter) and locate the demolished stairs leading to a narrow passage. Take this passage to reach a mausoleum.
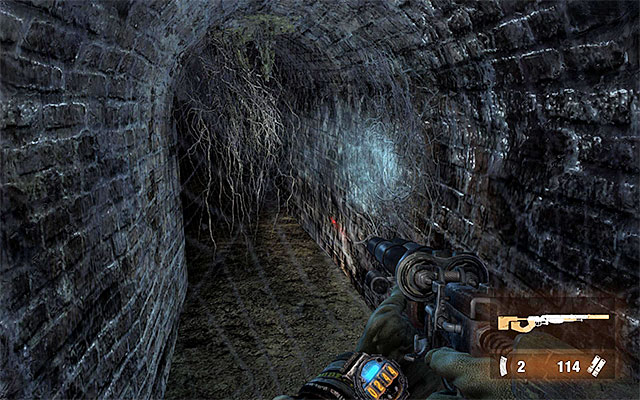

BEFORE go proceed any further, turn left and take the long corridors shown in screenshot 1, that leads inside the mausoleum. After you enter the area shown in screenshot 2, approach the sarcophagus in the centre and collect the Artyom's diary page lying at its feet. If you want to, you can keep exploring this area (two backpacks with supplies), or leave.

Go straight ahead and take the path going left, right behind the nearby hill. Your current destination is the square shown in the above screenshot. Before you jump down, however, reload your weapons and get ready for the forthcoming (and quite difficult) battle.
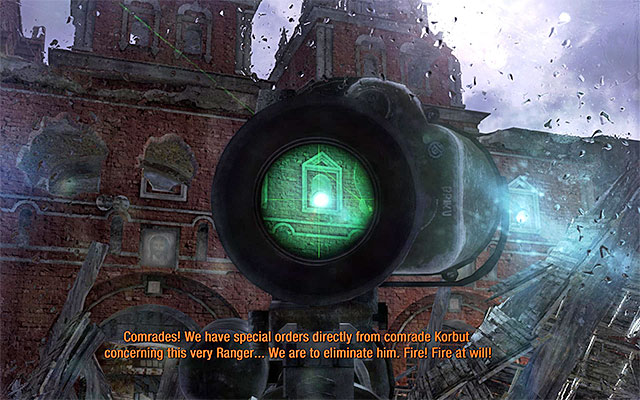
Start by examining the nearby corpses. Approaching the building that you can see in the distance, will cause shutters to spring open and snipers to appear. Quickly, destroy the two spotlights lighting the square.
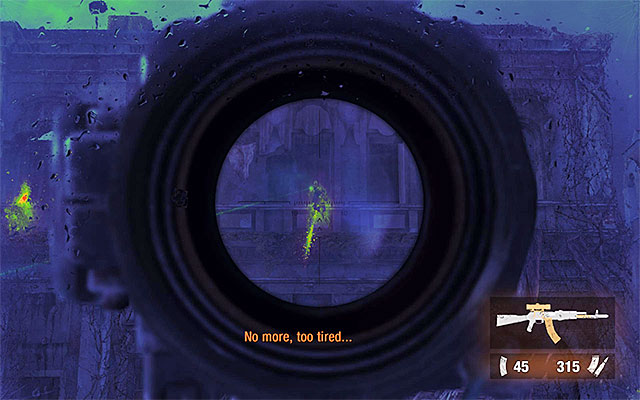
The best action to take here is to eliminate all the Reds, of course. Wait for the temporary change in the mode of seeing and then start shooting at the enemies. This is especially a good idea, because the change in mode is connected with a temporary time slow-down. After the effect wears off, take cover and continue attacking the enemies.

You have to take into account that some of the enemies will soon go downstairs and rush at you. Use the seeing mode "gifted" to you by the Dark One again. This will help you locate the enemies easily, and let you avoid being caught off guard. It is crucial that you do not let the enemy surround Artyom, or otherwise he will die quickly. You can also prepare yourself well in advance and deploy all of the mines you have.
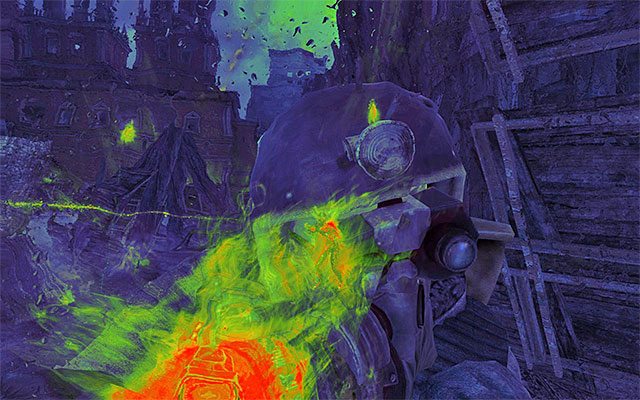
Note - if you want to unlock the achievement connected with beating the game without any kills, you are up for a DIFFICULT task here because, you cannot kill any of the enemies here. You would have to avoid taking damage from snipers first, and then, once the enemies appear down in the square, you would have to take from behind each and every one of them and knock them out. In this situation, I recommend that you play the lowest difficulty level, and make a frequent use of the first aid kit.
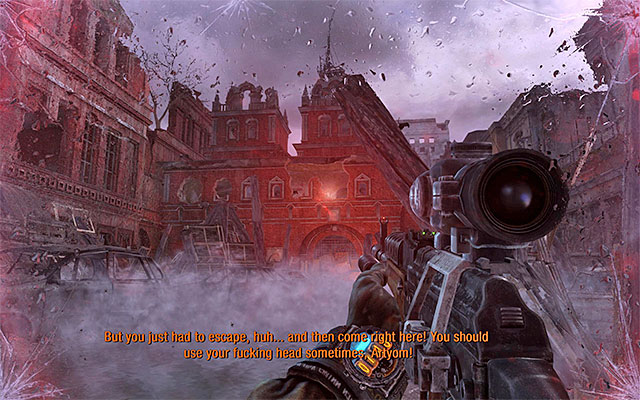
Regardless of how you are going to play it, you need to keep defending yourself until there is only Pavel upstairs (you can tell it by the red beam of the laser sight). Start shooting at him, while making extensive use of the covers. Keep fighting until the moment in which Pavel takes enough damage (do not worry about the achievement mentioned earlier, because you won't be able to kill Pavel for several good minutes).
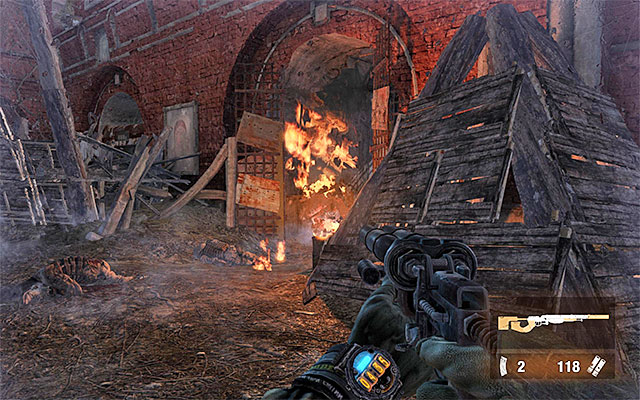
There is another battle with the "regular" soldiers ahead of you. They will appear near the gate at the to the starting point. Just like before, start killing the enemies, or wait for them to come close enough to be knocked out. In the case of the former, it is a good idea to make use of the grenades, especially if the enemies are deployed close to each other.
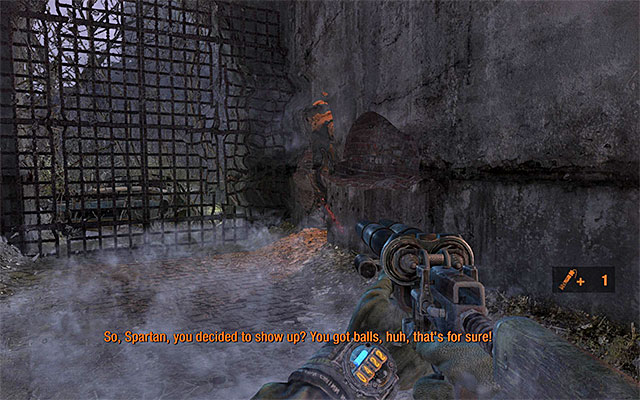
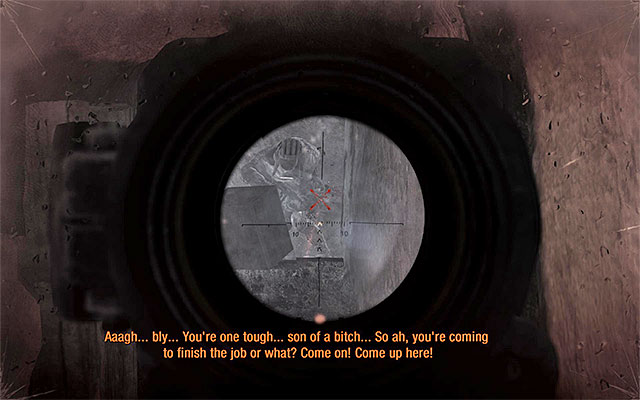
After you are done, go towards the gate that the enemies appeared next to and position yourself next to the passage to the right (screenshot 1). You need to keep leaning here from behind the wall to get Pavel, who is standing on the landing (screenshot 2). If you do not want to take too much risk, you can throw several grenades at Pavel.

After Pavel retreats to the higher level, go to the landing. Just like before, lean from behind the wall and use a good machine gun to inflict damage to Pavel. At the same time, remember to heal Artyom or you will have to start over in the case of taking terminal damage.

Soon, Pavel will retreat again. Climb the stairs to the very top, turn left and then right. Throw several grenades in Pavel's direction or inflict enough damage with your firearm.
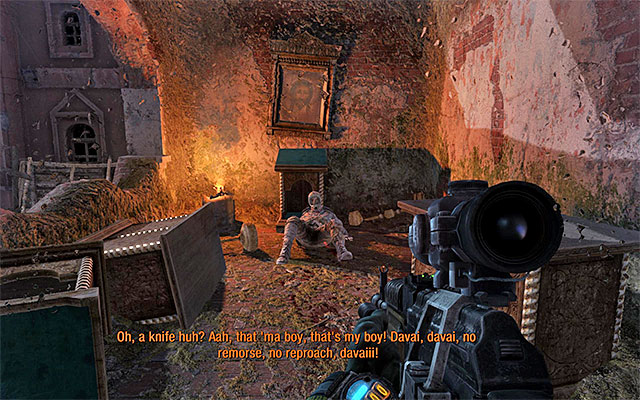
After Pavel manages to escape for the last time, you can move right after him because you do not have to fear any attacks from him. Approach the severely wounded enemy who is hiding in the last room. This will result in the last retrospection being displayed.
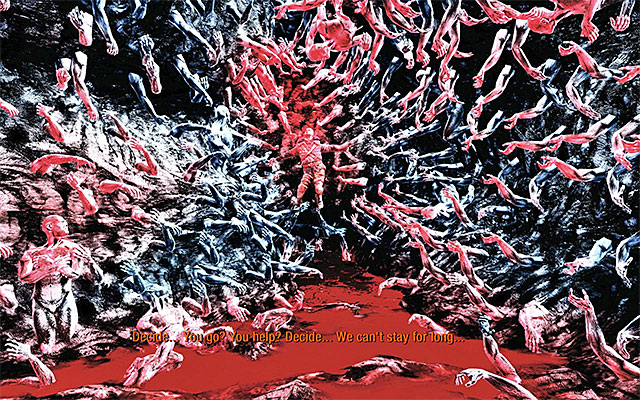
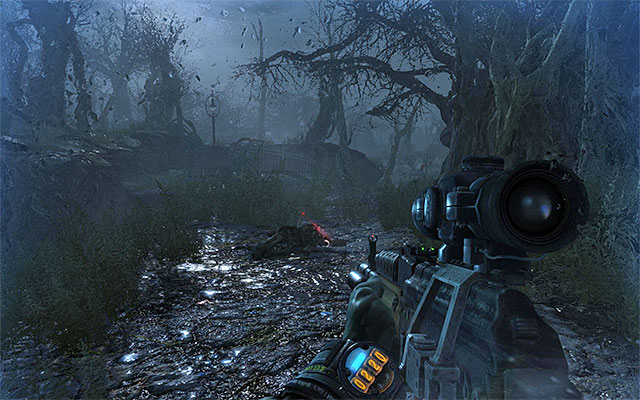
Just like in the case of one of the earlier chapters, you need to make a decision about whether you want to spare Pavel's life or not. If you want to dispose of him for good, remain put in one place after the vision starts (screenshot 1), and wait for it to end. If you want to save him, you need to run up to him.
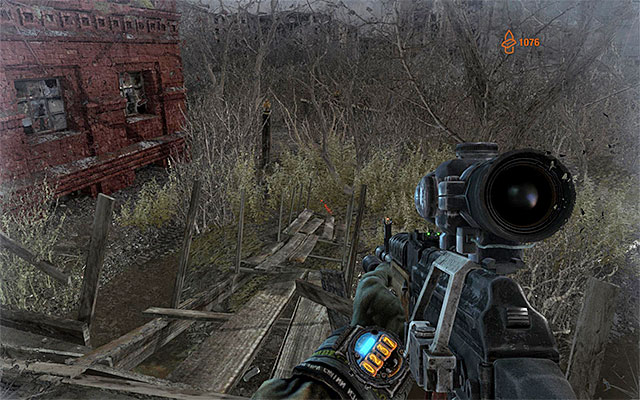
The only thing left here to do is take the passage to the left of the location that you found the dying Pavel in. Walk down the plank, which will start the loading process for the next chapter.
Wait until you regain control over Artyom and go straight ahead. This chapter is quite linear, but it is always a good idea to be on the lookout for corpses with more, or less useful supplies on them. In the initial part of the march, you can jump down into a lower level in search for more corpses.
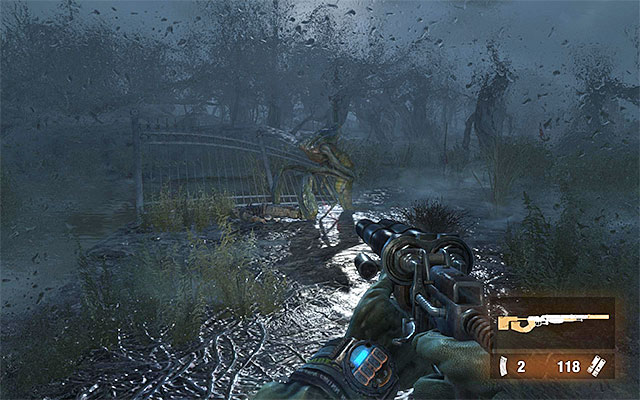
After you reach the swamps, try and keep to the narrow, hardened path as, just like in the previous chapters, falling into water will result in Artyom's drowning and taking considerable damage as a result. On your way, you should encounter a shrimp and, to defeat the monster, it is good to use a reliable short-range weapon.
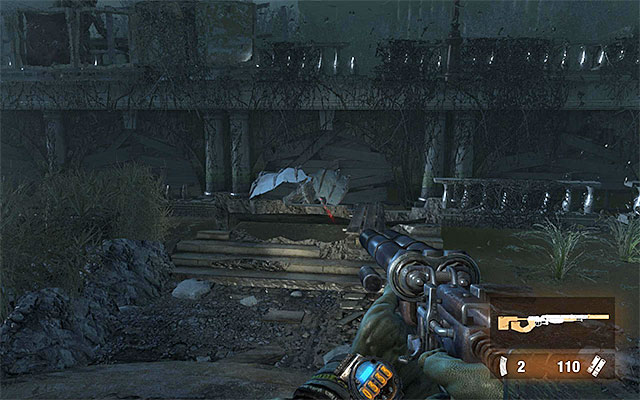
A bit further, you will encounter a group of mutants but, so far, you should have already learned how to deal with them. To your right there is a demon and you can well approach the beast. Although the creature goes airborne, it will start not attacking you but, thanks to scaring it away, you will gain access to another corpse and a supply crate.
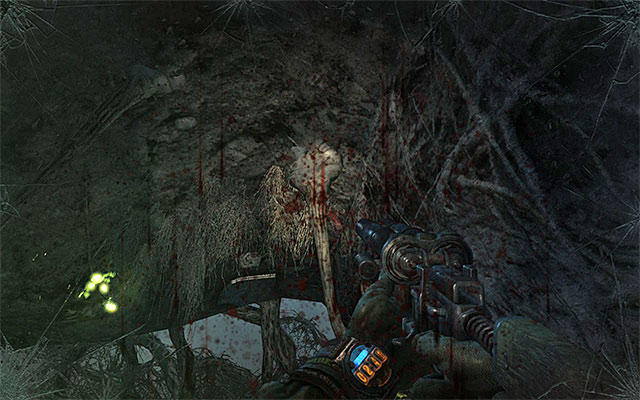
Keep moving. I recommend against examining the corpse in the small hollowing underneath the rocks, or you will be hit by the projecting boughs and take damage as a result (the boughs can be destroyed, but this involves wasting a part of your supplies).
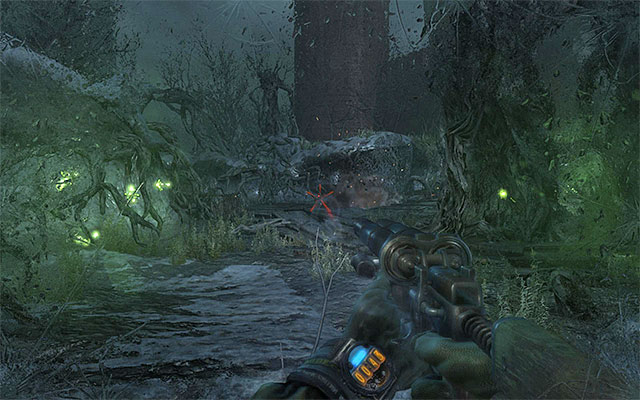
As you proceed, be prepared to eliminate further mutants. While fighting the largest wave, you'd better not use up all of your mines and grenades, because they will be needed later in the chapter. First of all, attack the mutants at a distance, and then fight them at medium and short range. At the same time, do not let them jump at Artyom too often or surround him.
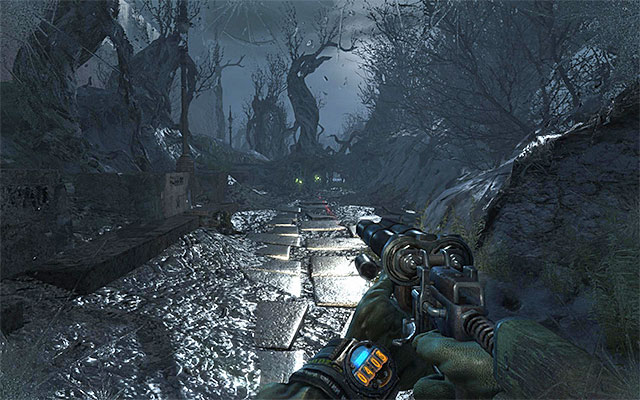
Take a look around for any corpses that can be looted for supplies and take the path to the right. After you reach a narrow tunnel, allow Artyom to creep into it automatically. While doing that, you will notice a female bear that you will soon meet.
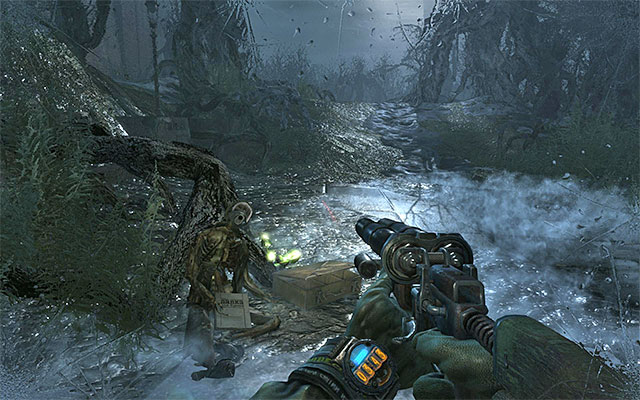
Wait for your character to stand up and approach the corpse to the left, shown in the above screenshot, to find standard supplies and an Artyom's diary page. Only then go towards the nearby elevation. Jump down to the "arena, where there you will have to fight the mutated bear that you saw earlier.
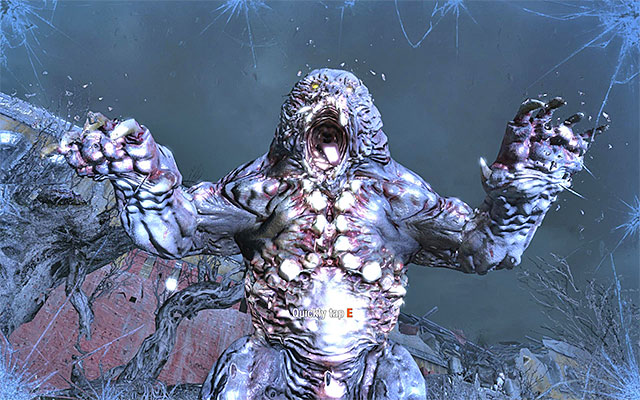
The beginning of the battle is very linear. Regardless of what you do, the bear will wrestle you down. As a result, start pressing the indicated key rhythmically in an attempt to prevent Artyom from being eaten alive.
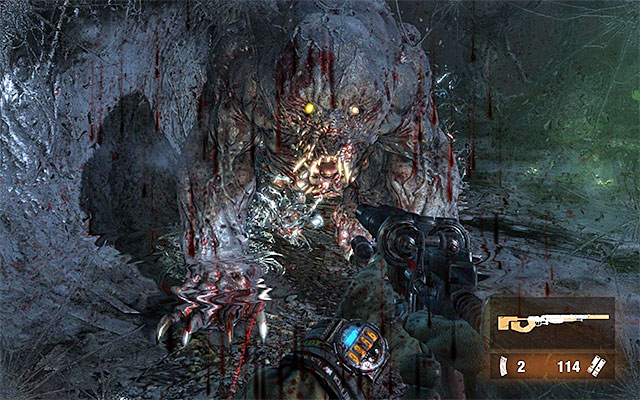
After the battle proper starts, start using your shotgun or a good assault rifle, while trying to shoot the bear on the head.

Try to remain in motion throughout the entire battle, and avoid fighting at close quarters. At the same time, pay attention to the arena's ground as, some of its fragments are slowing Artyom down. While moving around the arena, it is good put a Claymore mine here and there to deal more damage to the bear when it triggers them.
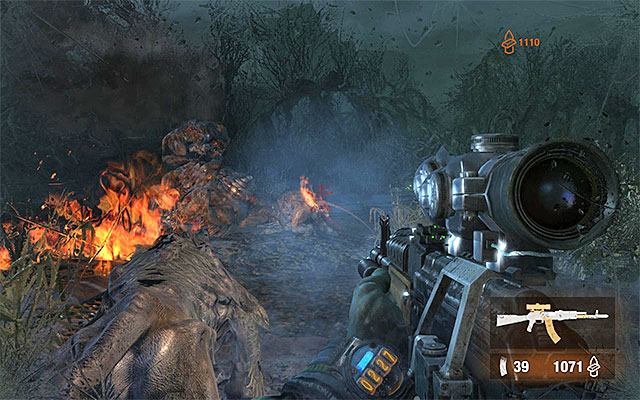
Dealing enough damage to the bear will result in the monster's being stunned temporarily, after which it falls to the ground. Notice that there are smaller mutants that appear at the arena. Attack the ones that jumped onto the bear, keep eliminating them, while ignoring the Dark One's hints concerning the bear's weak points.
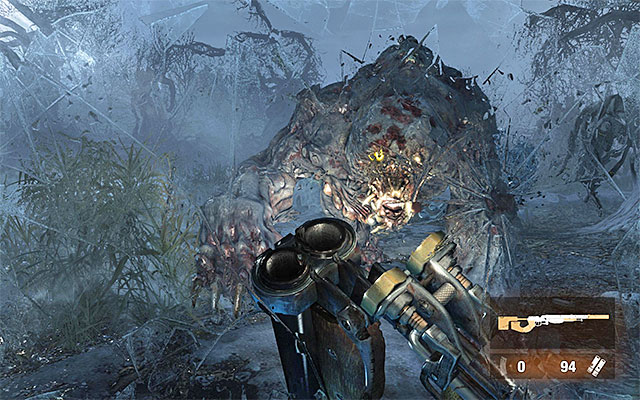
After the boss regains its strengths, repeat your actions. Keep shooting and do not stop, while aiming at the beast's head. The additional impediment is that the smaller mutants may also start getting at you, but try not to focus all your attention on them. This way you will avoid being caught off guard by the bear.
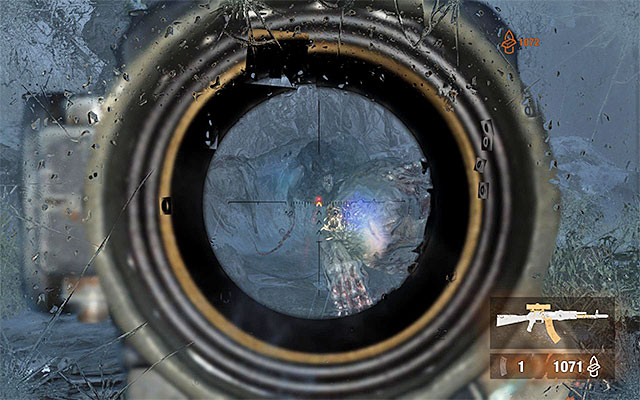
The next phase of the battle is very similar to the previous one. Each time the bear goes down, approach it as quickly as you can, and keep firing at the small creatures that jump onto it. Do not forget to monitor Artyom's health on a regular basis, which will prevent him from dying.
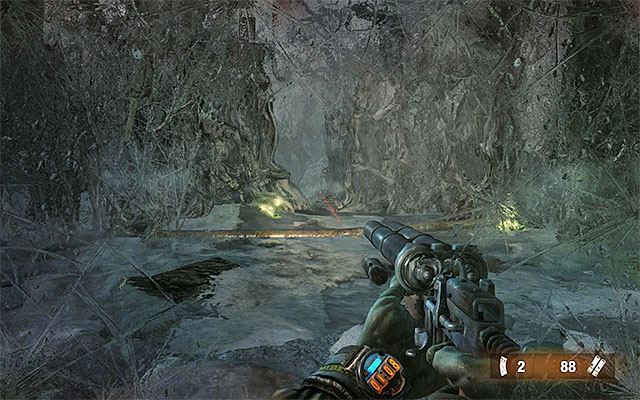
Continue performing the abovementioned actions and the bear will soon flee from the battlefield (the above screenshot). Note - if you notice that you are running out of ammo, take a quick look around the battlefield for corpses with additional supplies on them (there is even a shotgun on one of the corpses). It is a good idea to examine the corpses even after the bear flees, especially that your gas mask is probably damaged.
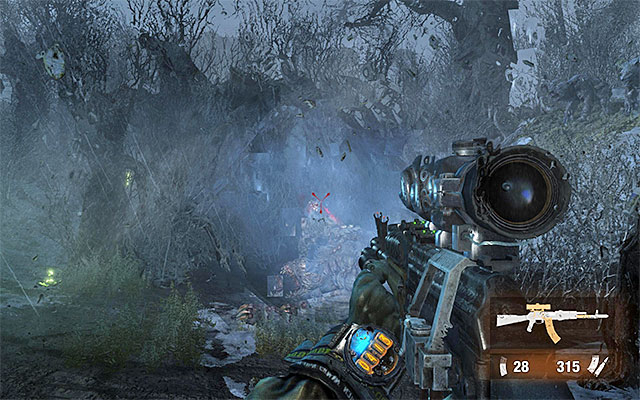
Follow the path cleared for you by the bear to reach the severely wounded beast. If you want to unlock an achievement, get rid of all the smaller monsters without killing the bear in the process (it has to get up finally and walk away). Otherwise, allow the bear to be mutilated and leave this location.
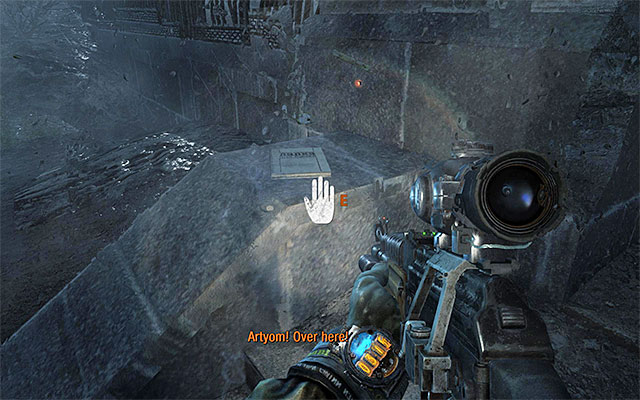
Move on and find, on your way, a backpack with supplies, among others. After you reach the stairs, start climbing but, before you join up with your allies, turn left and collect the Artyom's diary page from the low wall (the above screenshot).
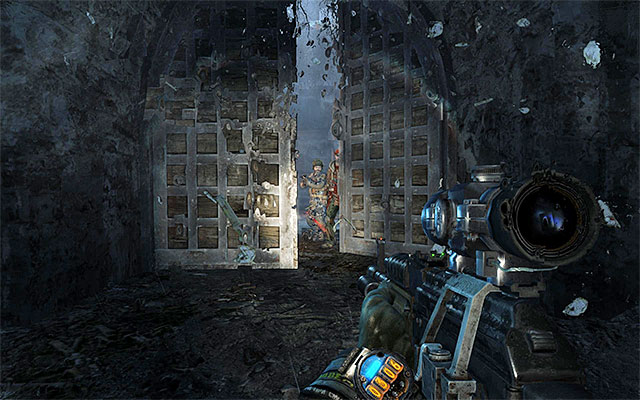
Only then, approach your allies. Wait for the door to shut and remove your gas mask, which will conclude this level.
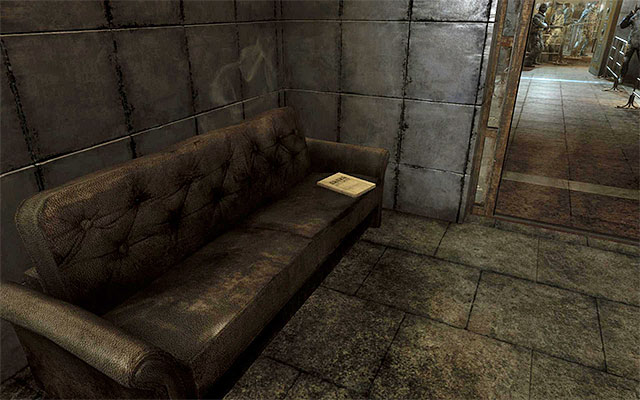
Keep following your allies, and devote some time to eavesdropping on people's conversations (also from the independent ones). After you pass through the long corridor, you will end up in a slightly bigger room. . Examine the couch to the left (the above screenshot) to find an Artyom's diary page.
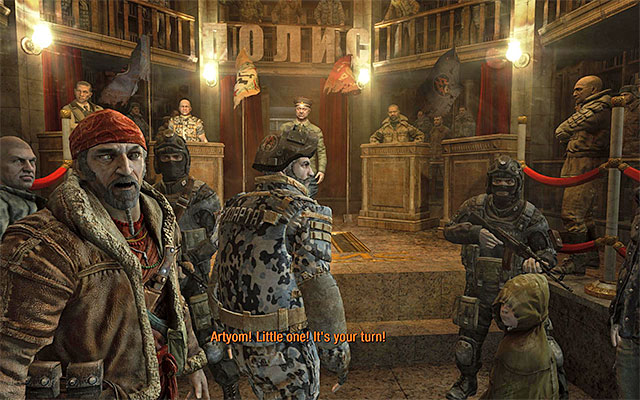
Walk now into a definitely bigger room and go straight ahead to reach the room with Moskvin in it. Wait now for the Dark One to take action.
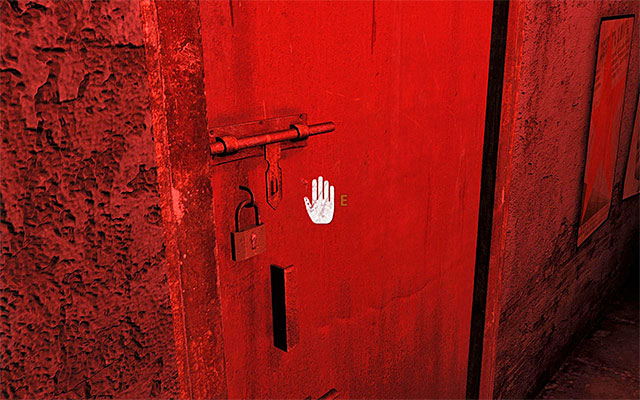
After you regain control over Artyom, start opening the door in the infinitely long corridor (it is completely up to you which ones you choose). After you open each door, you will watch a short retrospection. In total, there are four such retrospections for you to watch.

Wait until you return to the reality. Now, the game will play several additional cutscenes, after which this chapter concludes.

Wait for the train to pull in. Leave the car and listen to Miller's announcement broadcasted over the radio. After the soldiers disperse, approach the radio on your right, to find an Artyom's diary page.
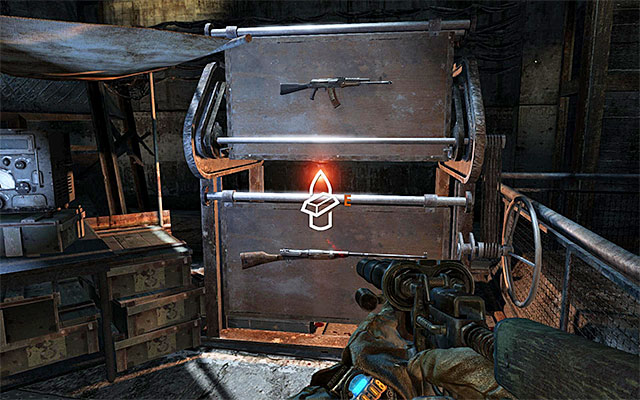
Remain, for a moment, in the location in which you have found it. Turn right and interact with the equipment stand shown in the above screenshot. In the battles to come, you will probably need a rifle (a regular or a sniper one - including a good telescope!) and an assault rifle. It is not that important which gun you choose as your tertiary weapon. Soon you will receive an unique weapon to fill in the third slot in your inventory.
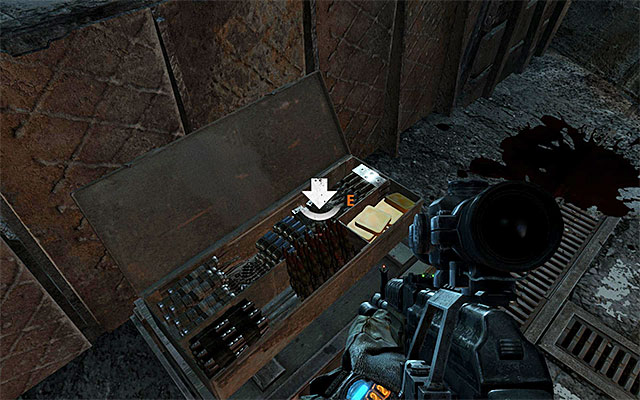
The last part to your preparations should be replenishing your ammo and first-aid kit supplies and that is why you should approach two nearby crates.
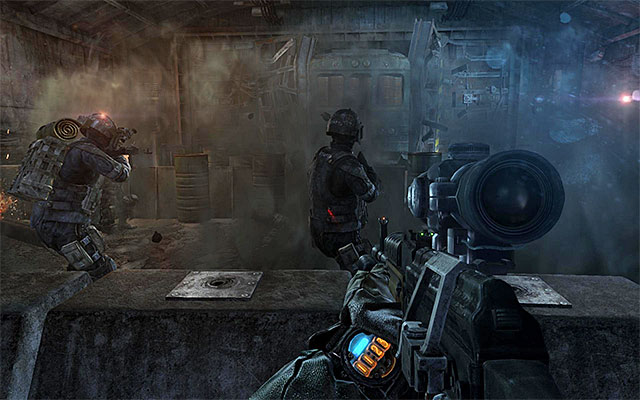
You can now position yourself behind the low wall that serves as a cover. Toggle crouch , as this is not going to limit your range dramatically and will allow you to limit the amount of damage you take in the forthcoming battles.
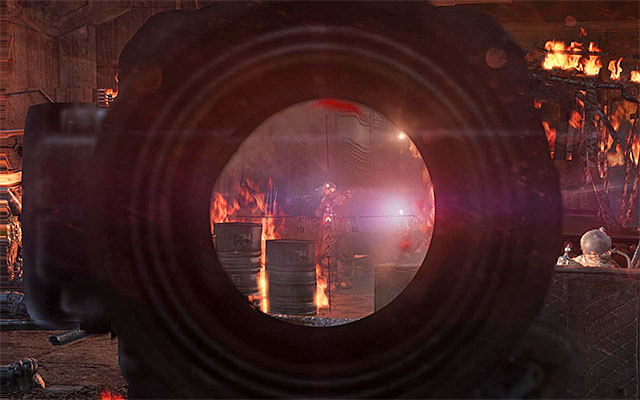
The enemy soldiers will launch their attack right after you experience a strong explosion. It is best to use the weaponry that was recommended earlier to eliminate them (i.e. a machine gun or an assault rifle, using the scope to your aid) (since the enemies are well armored, it is best to go for their heads). Apart from that, you can throw grenades at them on a regular basis, especially when they come in clusters.
Note - if you are planning on unlocking the achievement awarded for not killing anyone, unfortunately YOU CANNOT attack the Red Line soldiers (this applies to the entire chapter with the exception of the confrontation with the last group of soldiers). If this is the case, keep taking cover and allow your allies eliminate the enemy until you are promoted to the next scenes.
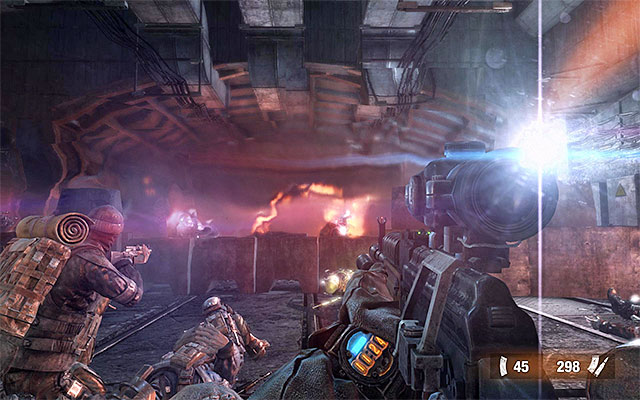
Do not worry if Artyom passes out for several moments. It is all pre-set. Continue shooting as you are being dragged away.
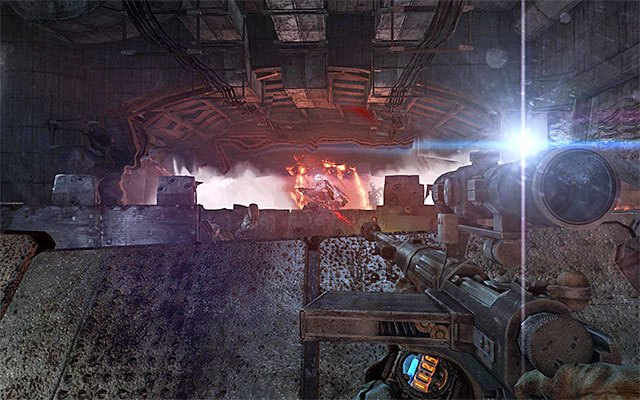
As soon as you regain control over your character, crouch as soon as possible, next to the closest metal cover and start shooting again at your enemies. Just like earlier, it is a good idea to make use of the weaponry at your disposal and to throw your grenades at them. Also, do not forget to keep healing Artyom, as soon as he sustains heavy damage, and he will be at the brink of dying.
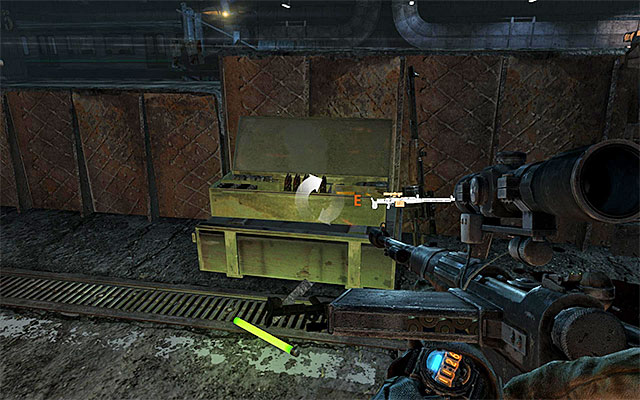
After you repel the enemy forces, make use of the nearby crates to replenish your supplies. If, in spite of my suggestions, you still have not equipped a scoped rifle you can make up for that and find one next to one of the crates. It is especially recommended, because it is soon going to be of use.
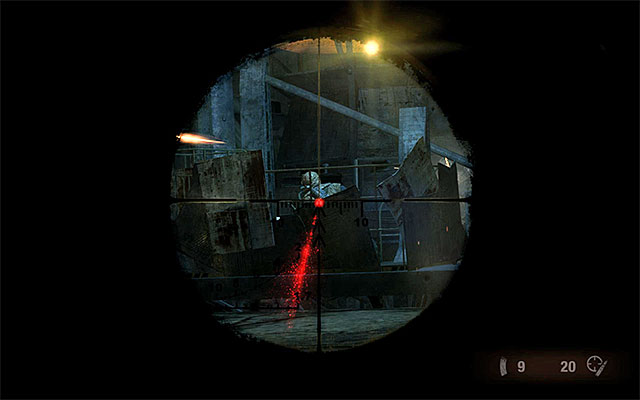
Position yourself next to the wall to your left and wait for a tank to appear on the tracks that you can see in the distance. Crouch and start shooting at the soldiers that walk next to the tank, while remembering not to lean too much from behind your cover.
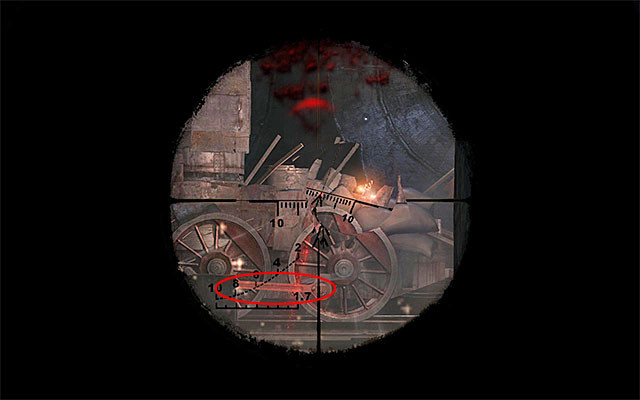
Wait for the tank to emerge from behind the cover and start shooting at the bar shown in the above screenshot. Continue until you destroy this element.
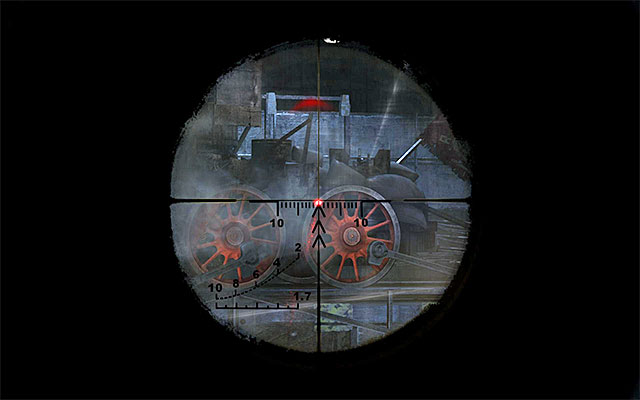
Start aiming now at the tank's wheels with your rifle, until you destroy them. Finally, keep shooting at the main part of the tank, i.e. the areas near the reflectors. You should soon destroy the enemy unit.
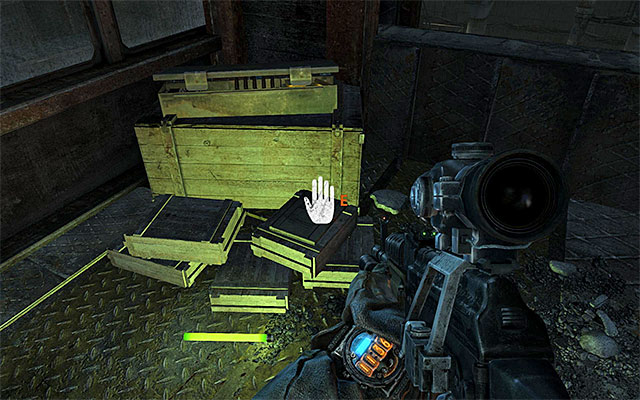
Turn left and go towards the wall that functions as the last barricade. Jump over it and examine the area to the right. On the crates, there is the last one of the Artyom's diary pages.
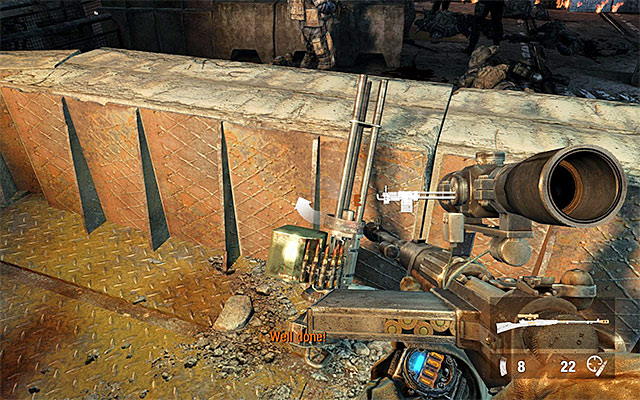
Replenish your supplies of ammo and pick up the Minigun (it is best to replace the gun for the one that you haven't used in the previous battles).
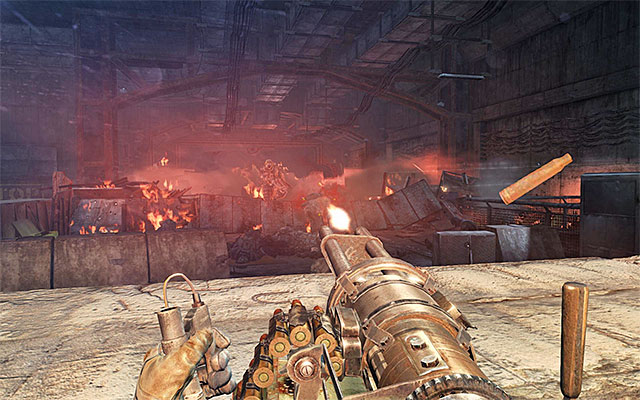
Crouch next to the wall that you have just jumped over, wait for the new units to arrive and discharge the minigun at them. To the extent it is possible, try and shoot in short series (you do not need to aim at the heads anymore), and eliminate, first, those who visibly come close to the barricade. Keep attacking until the next explosion occurs.
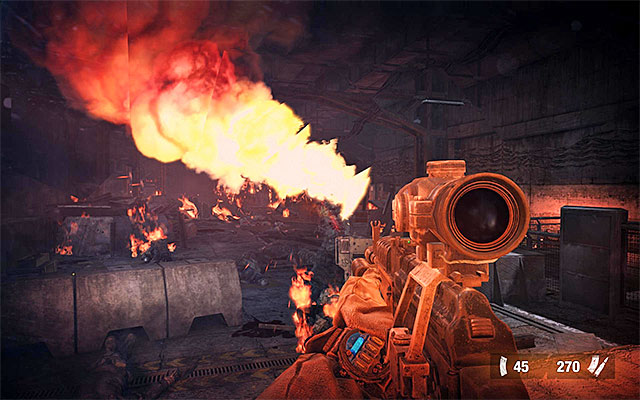
There are quite unclear premises when it comes to the last phase of the battle. You cannot do anything to make the soldiers with shields approach the barricade considerably, because the soldier wielding a flame thrower who follows them, will set this place on fire, which will kill you and the others.
Note - from now on, you can start eliminating the enemy soldiers, even if you want to unlock the achievement for not killing anyone.
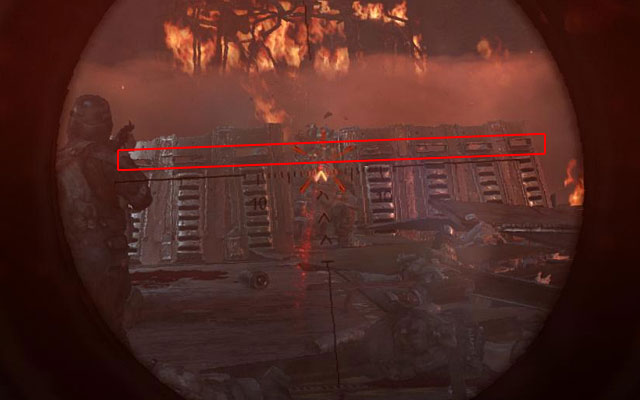
Prepare a weapon with a scope (the sniper rifle or the assault rifle) and aim it at the enemy soldiers. Notice that, thanks to the zooming function, you can now aim at the small holes in the enemy shields (the above screenshot). Thanks to this, you will be able to get the soldier behind the individual shield and kill him.
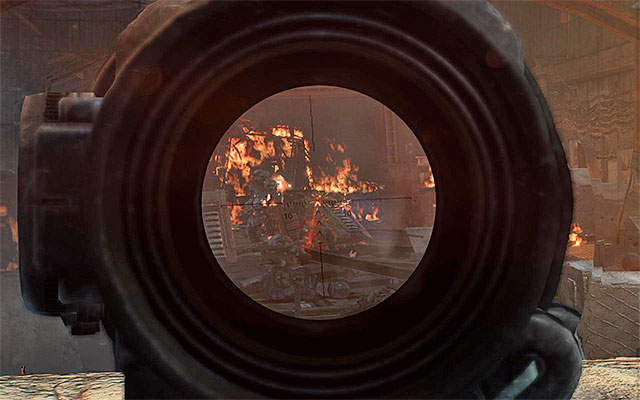
Continue killing the shielded enemy soldiers (occasionally, you can also throw a frag grenade for them to play with), which will result in breaches in the enemy lines. Ultimately, you need to eliminate every single soldier with a shield. What is interesting, you do not need to pay extra attention to the soldier with the flame thrower because, devoid of any reinforcements or cover, he will soon die.
Note- I recommend that you now start reading the next subchapter in this guide, entitled Endings, which lays out the possible final to your adventure, as well as possible impact you may have on it.
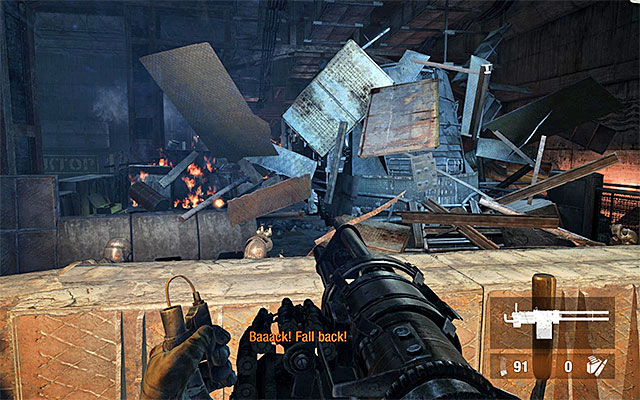
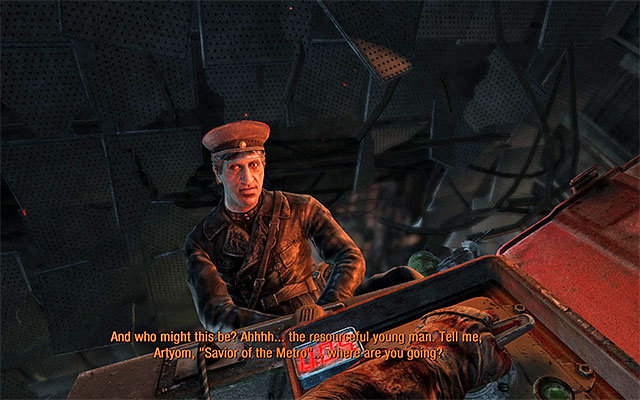
There are two endings to the game and they display right after you deal with the last wave of enemies. The initial parts for both endings are identical and they present an approaching train and Korbut's monologue (after Artyom regains consciousness), whose troops managed to seize every defender of the station. The endings "split" where Korbut approaches you, and Miller encourages Artyom to detonate the charges that had been set there. These are the available variants (SPOILER ALERT!)
Just like in the case of Metro 2033, which ending you get to see after you complete the last chapter, is not the question of any single choice you make, but rather depends on the choices that you have been making since the beginning of the game, as well as on your gaming style. These are the major factors that influence which ending you get to see:
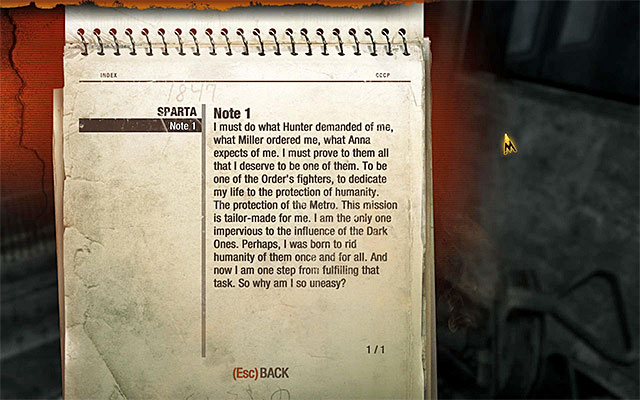
All said, there are 43 diary pages in the game, and they fulfill the role of collectibles. Each time after you collect a page, you can go to your inventory and read that page. The circumstances in which you find those have been included into the walkthrough for the main campaign mode. That is why this chapter should be used only for reference while determining if any of the collectibles have been missed, in order to return to them without having to play an individual chapter again (it is worth knowing that the game automatically saves the current status right after an individual page has been collected).
The below table informs of the allotment of pages to individual chapters:
CHAPTER TITLE
NUMBER OF PAGES TO BE FOUND
1: Sparta
1
2: Ashes
1
3: Pavel
1
4: Reich
1
5: Separation
2
6: Facility
1
7: Torchlight
2
8: Echoes
2
9: Bolshoi
2
10: Korbut
0
11: Revolution
4
12: Regina
1
13: Bandits
2
14: Dark Water
1
15: Venice
2
16: Sundown
1
17: Nightfall
1
18: Undercity
0
19: Contagion
1
20: Quarantine
2
21: Khan
1
22: The Chase
1
23: The Crossing
2
24: Bridge
1
25: Depot
1
26: The Dead City
2
27: Red Square
2
28: The Garden
2
29: Polis
1
30: D6
2

The page is on the revolving chair that you will notice at the very end of the chapter, right after the meeting with Miller on your way to the elevator with Anna.
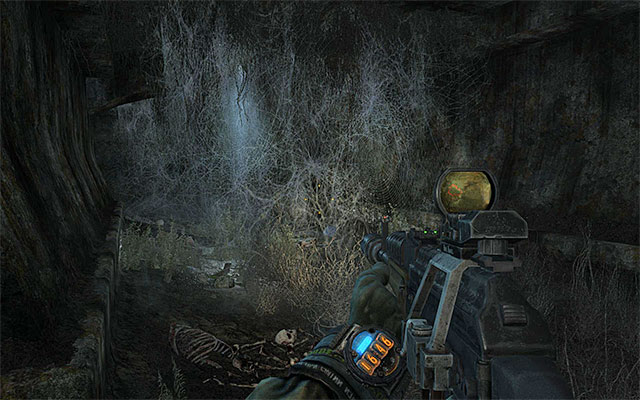
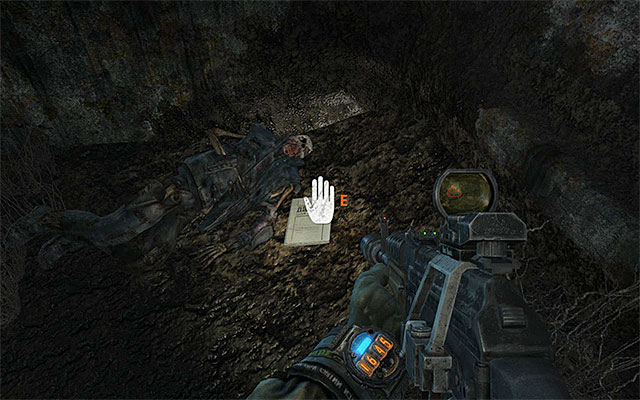
The page can be found in the derelict tunnels that you explore at the beginning of chapter 1 accompanied by Anna. Stop right after you reach the ladder to the surface. Do not take the ladder and explore the corridor to the right, shown in the above screenshot, which will take you to the corpse shown in screenshot 2.
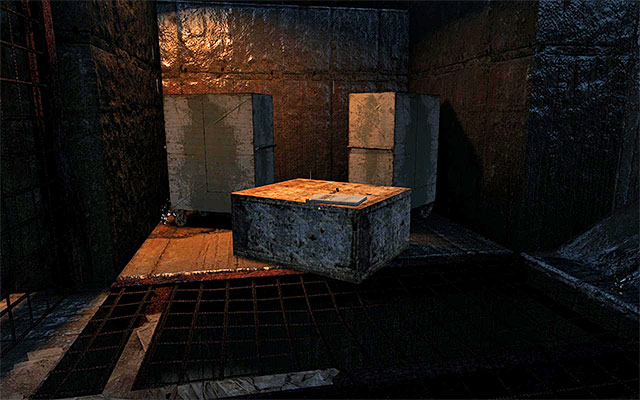
The page is lying on the large crate in the room that Artyom reaches after squeezing through the ventilation shaft. It is the room where you collect throwing knives by removing them from the corpse of the man subjected to torture.
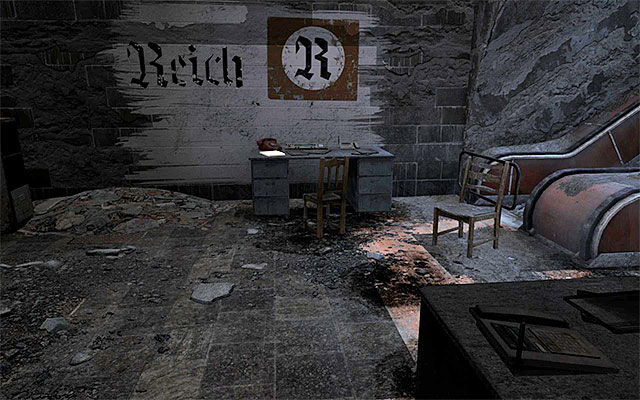
The page is lying on the desk across the starting point, to the left of the disabled escalator.
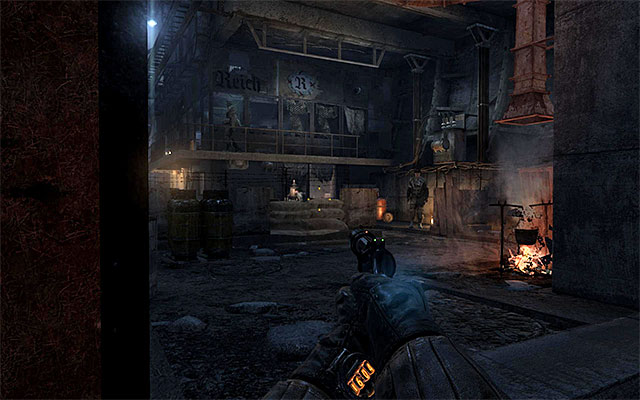
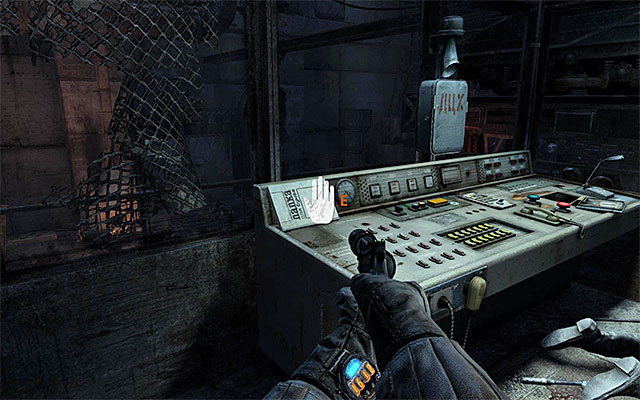
The page is in the first big area of this chapter, where you meet enemies (screenshot 1). Make your way to the main building in this location and locate the stairs to the upper floor. Approach the control console carefully to collect the page, because there is, at least, one guard around.
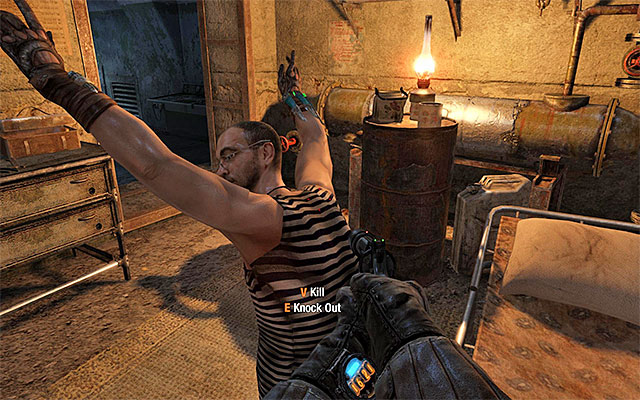
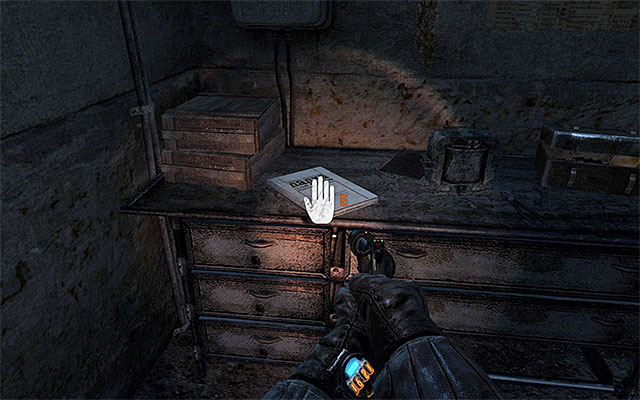
The page is in a small room that you get to right after you leave the first big area in this chapter. You will recognize the room by the soldier that gives up right after he sees you (screenshot 1). Explore the area to the left to find the page (screenshot 2).
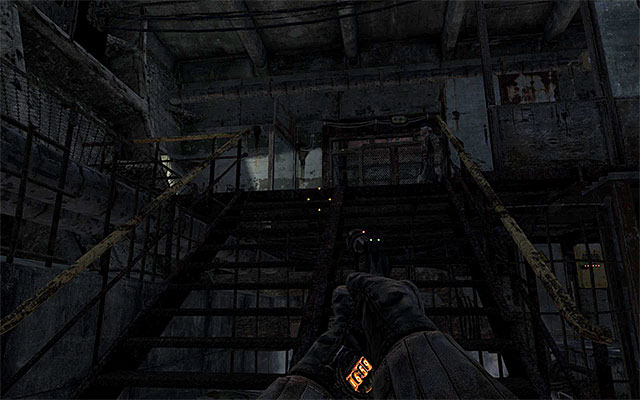
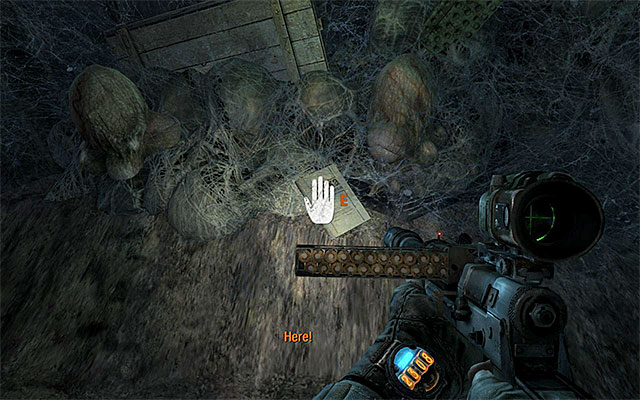
The page is in a small, well-lit room that you can check out towards the end of this chapter. You need to access the area that is locked behind a double door and more precisely, you need to make your way onto the elevation shown in screenshot 1. After you take the stairs, turn left and you will find the collectible lying on the desk shown in screenshot 2.
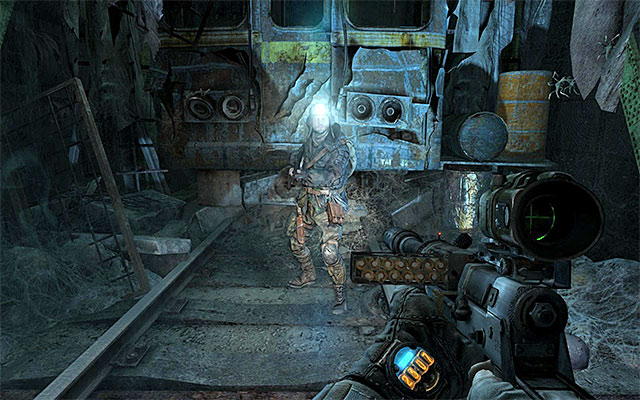
The page is in the tunnel infested with rad-spiders and, more precisely, in the part that you can reach soon after you climb onto the rooftop of the railway car shown in screenshot 1. After you regain control over your character, eliminate the rad-spiders and examine the ground to find the collectible next to the cocoons (screenshot 2)
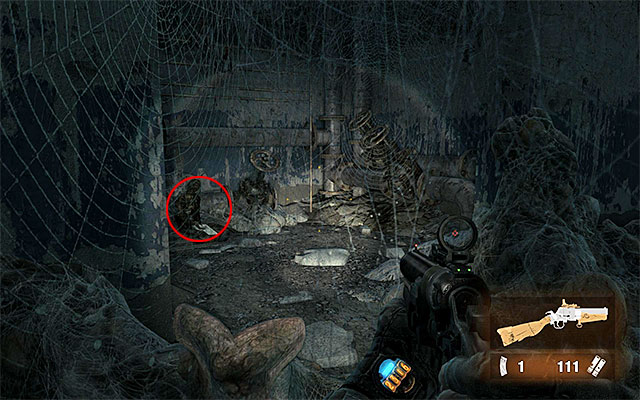
The page is in the last location in this chapter. It is the one that Artyom explores to find a fuse box. During your march towards the fuse-box, look out for a tunnel to the left, with a corpse in it. The page is lying next to the corpse.

The page is lying on the counter in the starting location for this chapter.
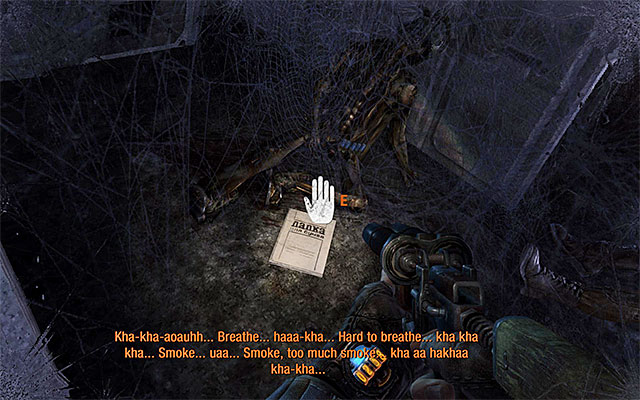
The page is inside the plane wreck that Artyom explores accompanied by Pavel. After you experience the vision of the catastrophe, turn to face Pavel and examine the area to the left. The collectible is lying next to the corpse of a crew member.
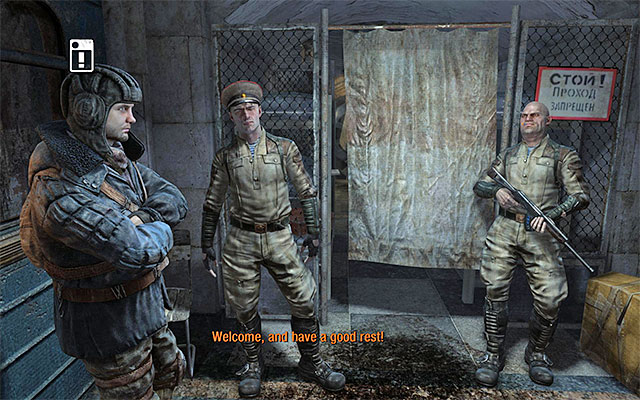

The page is in one of the first locations in the theatre. Pass the checkpoint with the two guards on it (screenshot 1), by walking across the tarp. Turn left and collect the collectible from the shelf.

The page is lying on one of the benches near the entrance to the theatre, i.e. where the people are queuing up. You will reach the location right after you are through the market.
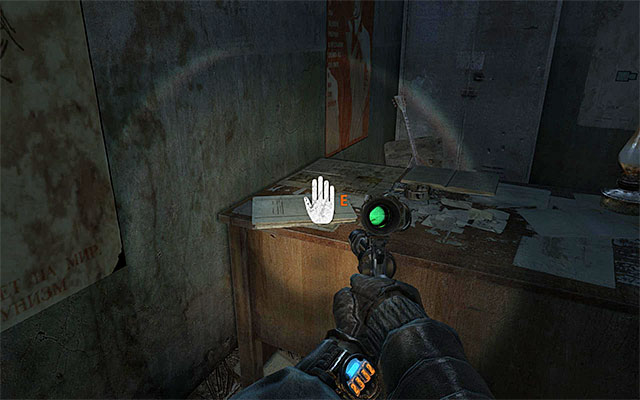
The page is lying on the desk in one of the first rooms. More precisely, it the one where the guard is talking over the intercom and where there is a manhole to the main part of the armory.
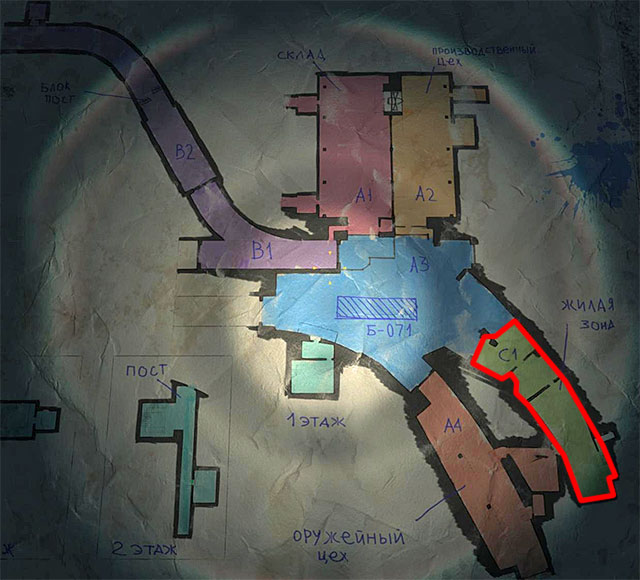
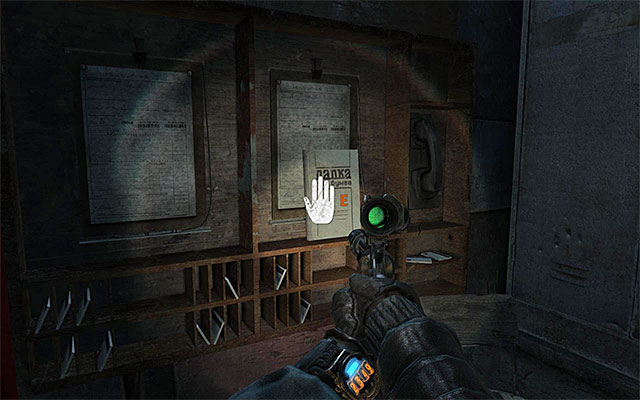
The page is in the barracks in area C1 of the armory.
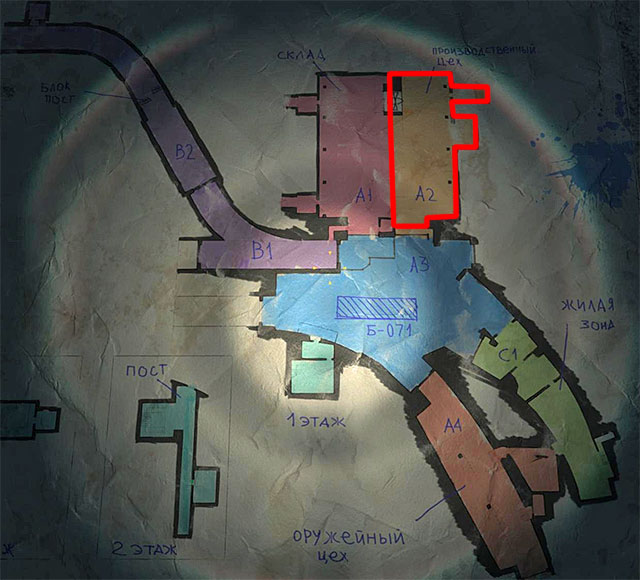
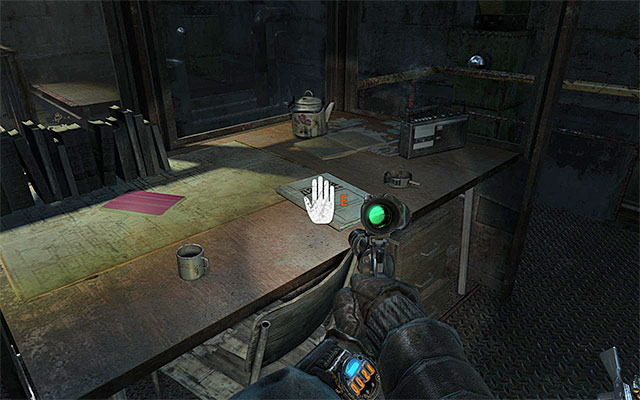
The page is lying on the big table in area A2 of the armory. You need to reach the control room guarded by a single guard, where there is also the switch disabling the large fan.
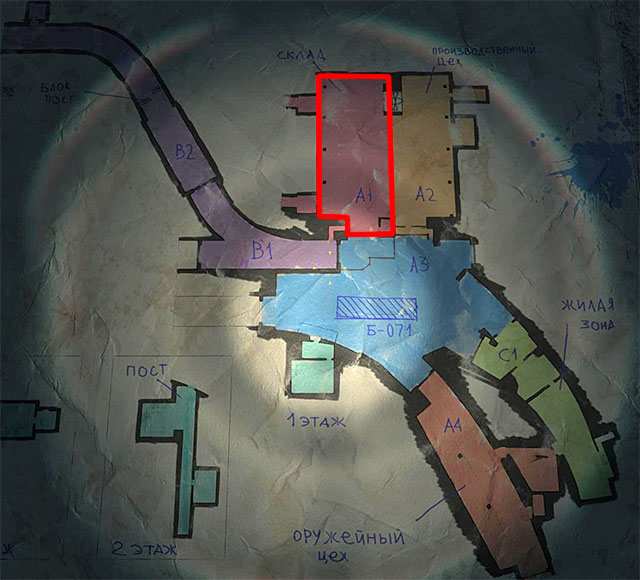
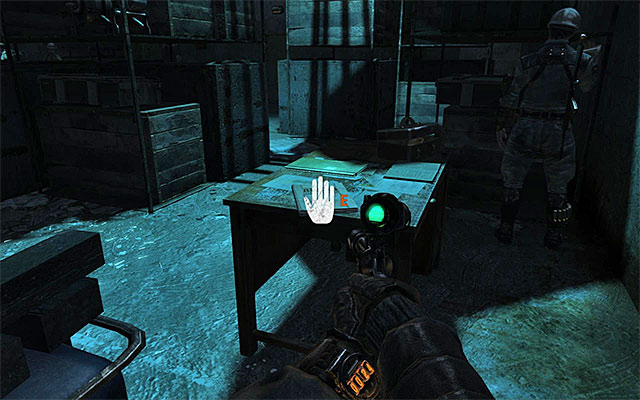
The page is lying on the small table in the northern part of area A1 of the armory, close to the upper catwalk that you started your exploration on.
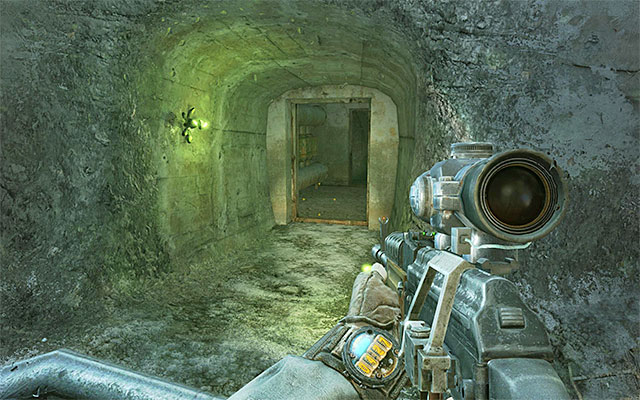
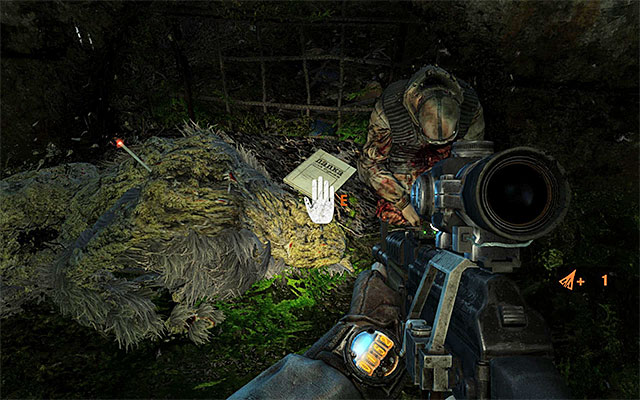
The page is in the mutant den, i.e. in one of the side areas adjacent to the tracks. You get the opportunity to examine the den towards the end of this chapter and more precisely, while pushing over the train. Locate the entrance to the den (screenshot 1), eliminate all the mutants and collect the page from the ground near the corpse (screenshot 2).


The page is in the toilet near the metro station occupied by the bandits, which you reach right after you go past the irradiated area (screenshot 1). Climb down your car and explore the side corridors, thanks to which you will get to the toilet with the collectible on the ground (screenshot 2).
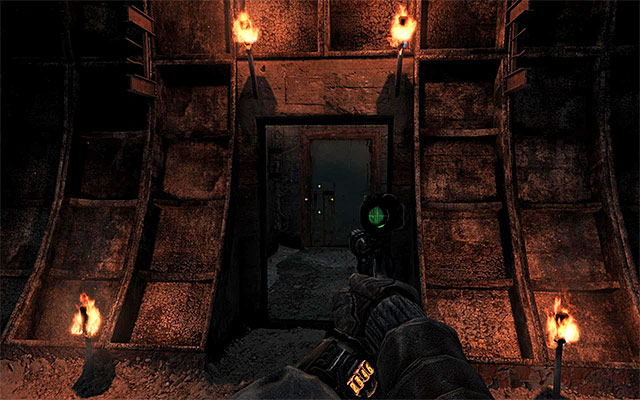
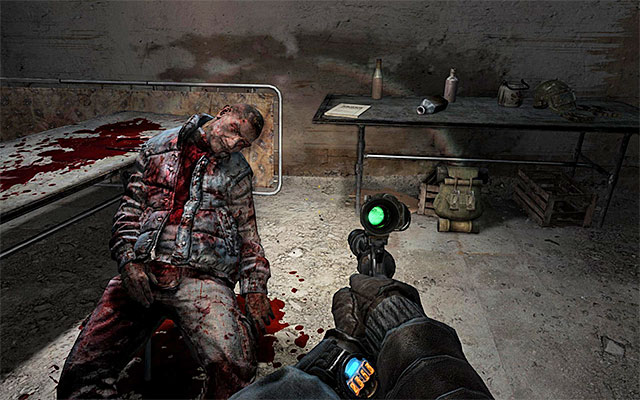
The page is in the bandits' hideout (screenshot 1), which you can visit at the very end of this chapter. Right after you start exploring the hideout, you need to reach the room with the murdered man that has been subjected to torture (screenshot 2). The page is lying on the table.
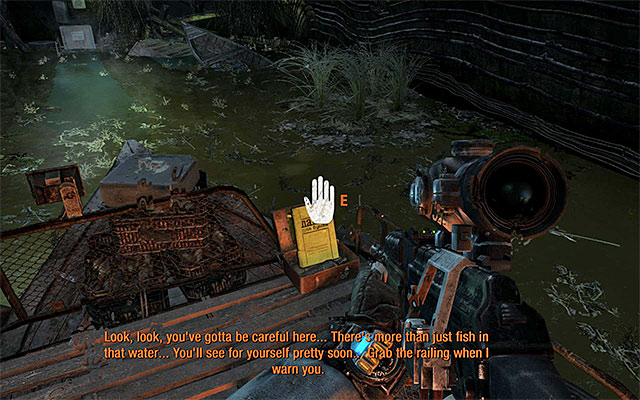
The page is onboard the ferry bound for Venice.
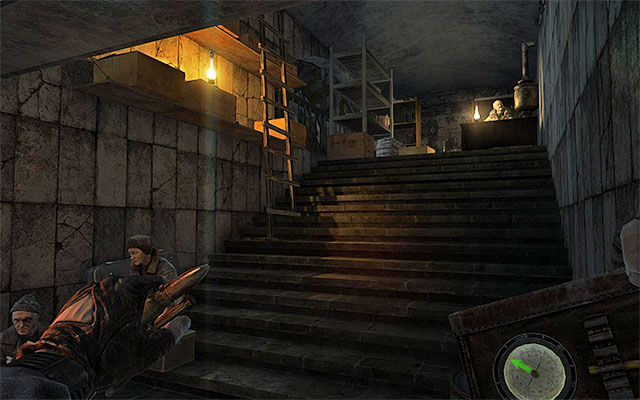
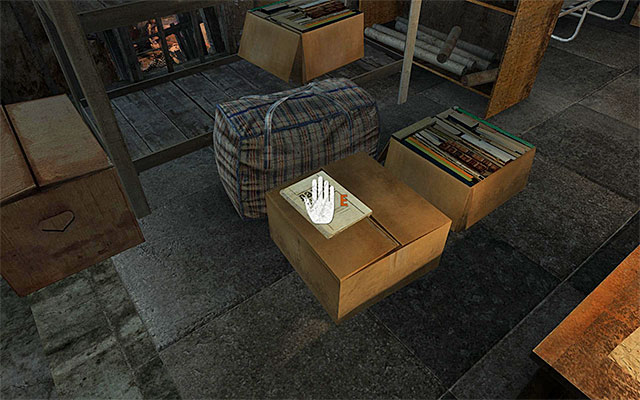
The page is in the office of the docks supervisor, which you may enter still before you set out for the market and the night club. To get to the office, you need to take the big stairs (screenshot 1). The page is in the office lying on one of the boxes. (screenshot 2).
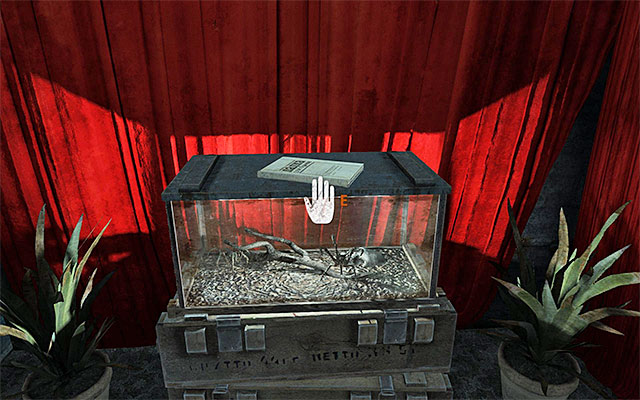
The page is lying on the aquarium at the back of the night club, i.e. where Artyom eavesdrops on the conversation between his enemies.


The page is inside the gas station (screenshot 1) located in the central part of the swamps. You visit the station in the middle of your search for a petrol can. The page is lying on the counter (screenshot 2).

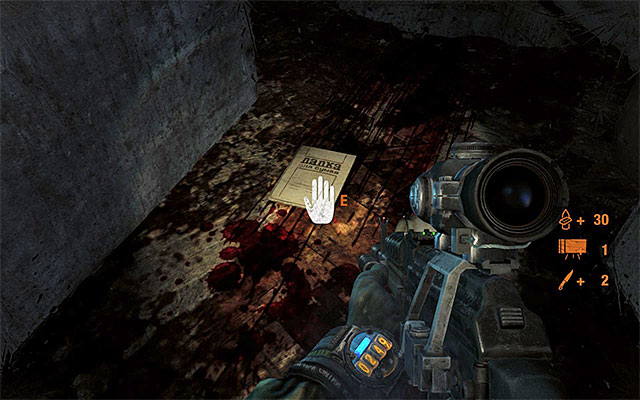
The page is inside the derelict tenement located near the starting point )screenshot 1=. Start exploring the building and reach a small room with an extended tripwire. The page is lying on the floor (screenshot 2).


The page is on the table in the area where Artyom needs to use his gas mask. You need to climb to the catwalks (screenshot 1) to walk around the locked gate. Explore every room adjacent to the catwalk and you will find the page in one of them.
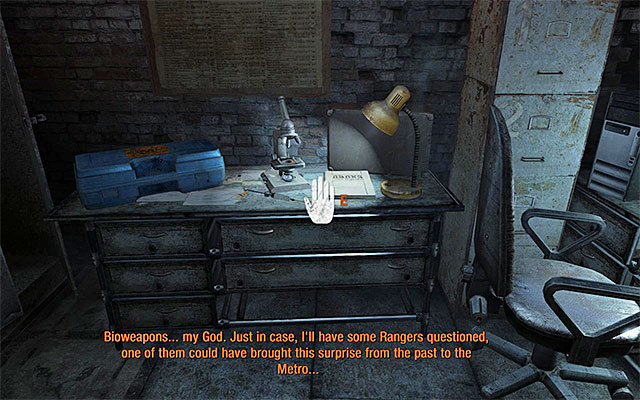
The page is on the desk in one of the first locations you visit in this chapter, which you visit to be subjected to decontamination.

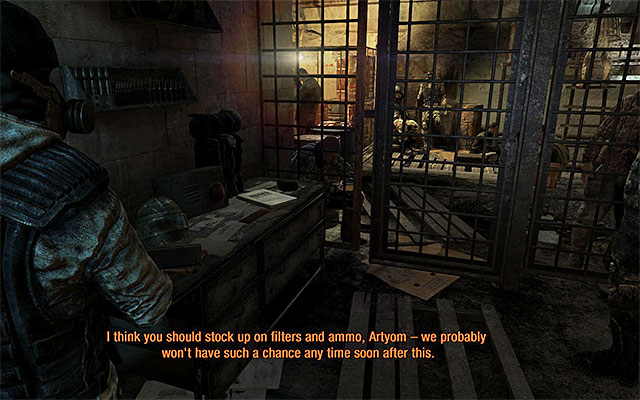
The page is lying on the table close to the place where you meet Khan (screenshot 1). Follow Khan and turn right at the first fork. Approach the table near the locked gate (screenshot 2).

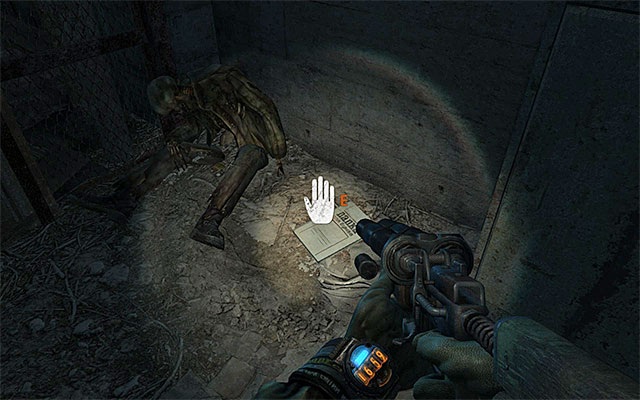
The page is in the side location that you can access at the beginning of this chapter. Stop where Khan jumps down to a ledge below and do not follow him. First, explore the passage to the right (screenshot 1). The page is lying at the corpse.

The page is lying on a large crate in one of the locked cars of the train.

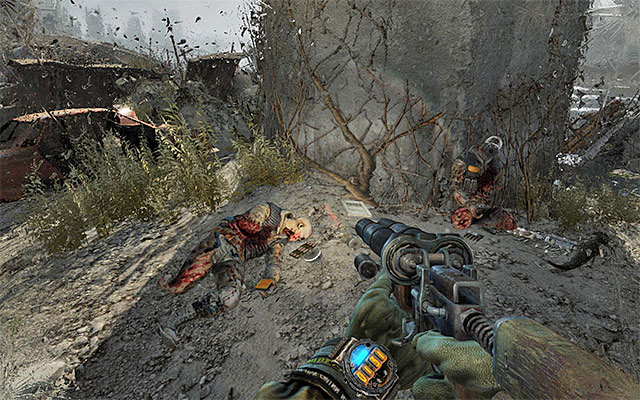
The page is on a small meadow that can be reached right after you walk through the first area near the water. At the first opportunity, turn right (screenshot 1). Pay attention to the mutants that may appear here. The page is lying next to a corpse (screenshot 2).
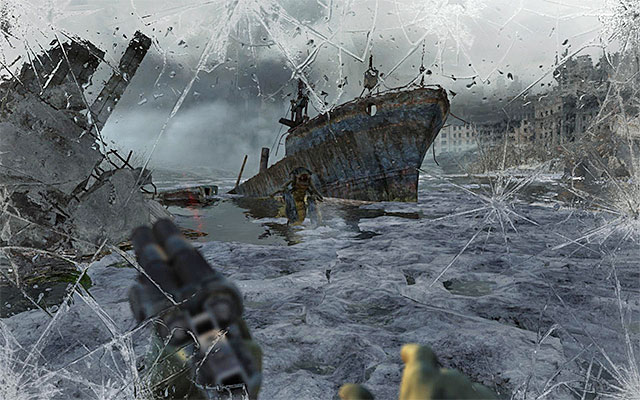

The page is onboard the ship whose wreck you can notice towards the end of this chapter (screenshot 1). Carefully, make your way to the shipwreck and locate the page lying next to the skeleton.

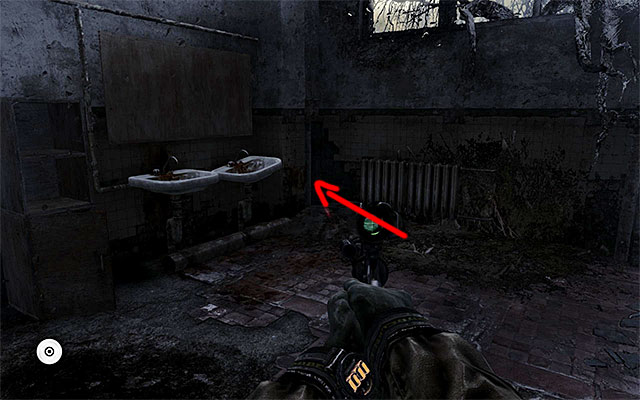
The page is in the side area that can be accessed after you cross the second area of the bridge, occupied by mutants (screenshot 1). Follow the linear path and look around for the entrance to the room on the left. The page is lying on the desk (screenshot 2).

The page is in a seemingly inaccessible area behind the bars (screenshot 1) that can be found after you leave the first big hall and take the stairs. Wait for the Dark One to open the door to the right for you and enter the toilet located to the left. Find a narrow passage near the wall (screenshot 2). That is where you collect the page from.
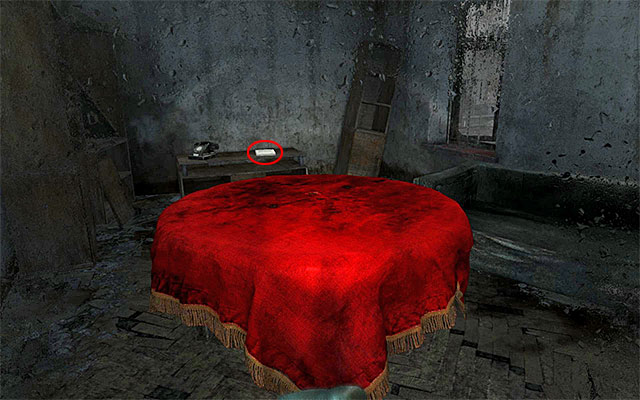
The page is on the shelf in the first room of the second part of the Dead City i.e. the location that you access after you open the blue door.

The page is in the Demon's nest, on the rooftop, where there is also a youngling.

The page is in the recess in the rock face right next to the skeleton. You can find it right after the chapter starts.
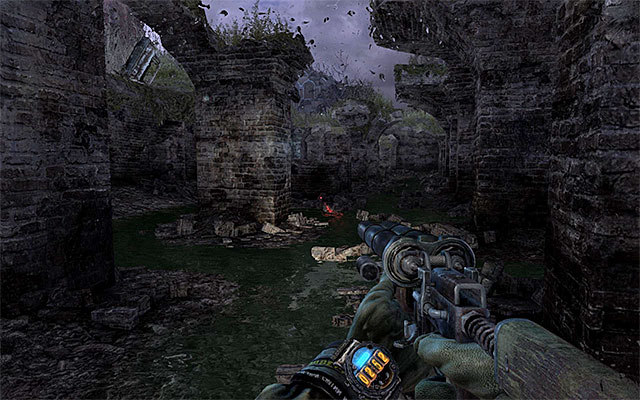
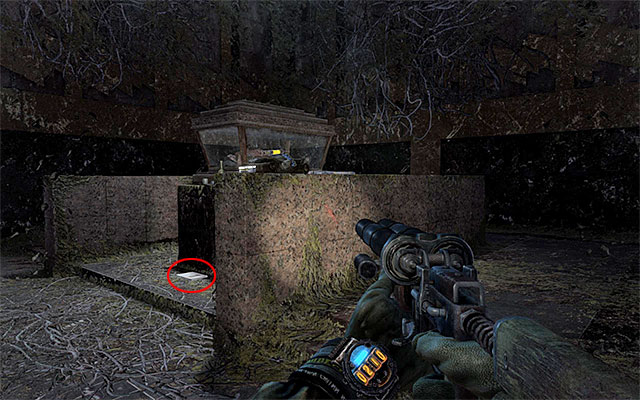
The page is inside the mausoleum that can be visited towards the end of this chapter. The entrance to the mausoleum is in the area shown in screenshot 1, to the left of the starting point. Follow the long corridor that leads into the room with the sarcophagus in it (screenshot 2). The page is lying at the foot of the sarcophagus.

The page is on a small meadow next to the hill that leads to the arena where you fight the female bear. The page is lying on the ground next to the corpse.
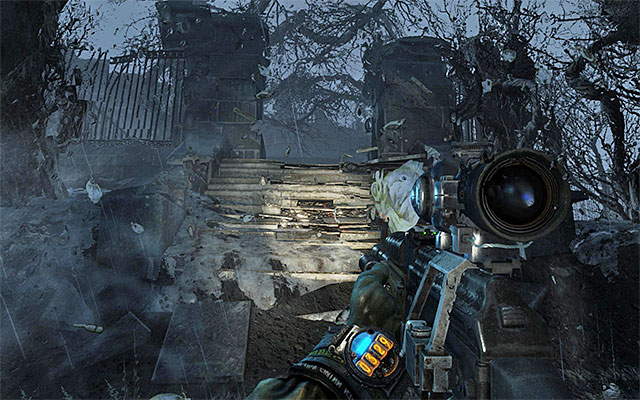

The page is lying on a low wall and you can obtain it towards the end of this chapter. You need to reach the stairs that lead to the encampment of survivors (screenshot 1). After you take the stairs, take your time before you join up with your allies, and examine the low wall (screenshot 2).

The page is lying on the couch in one of the rooms that you visit at the beginning of this chapter, on your way to see Moskvin.
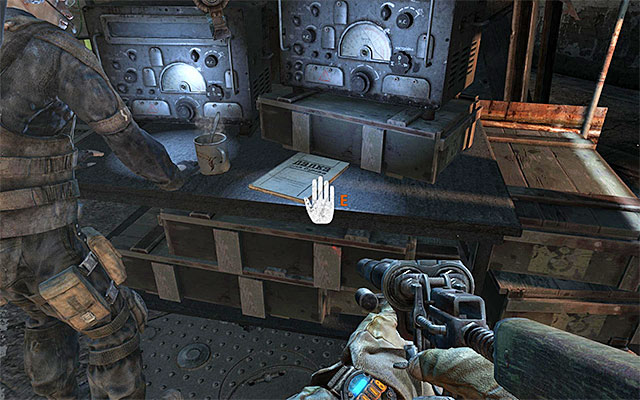
The page is lying on the table, next to the radio and the equipment stand. You can find it right at the beginning of this chapter.

The page is lying on the crates near the last barricade, i.e. the one where you collect the minigun. You can reach this barricade only after you destroy the enemy tank.
Interacting with the musical instruments that you find is an optional task. You can do it if you want to unlock the Musician achievement.
Note- You need to keep looking for, and interacting with the instruments at all times, while playing the campaign (at any difficulty level). Any attempts to return to a selected mission only to find the instrument to interact with it, will be a failed one. This will result in the achievement not being unlocked.
Below, there is a list of all seventeen interactive instruments, including hints concerning their whereabouts.
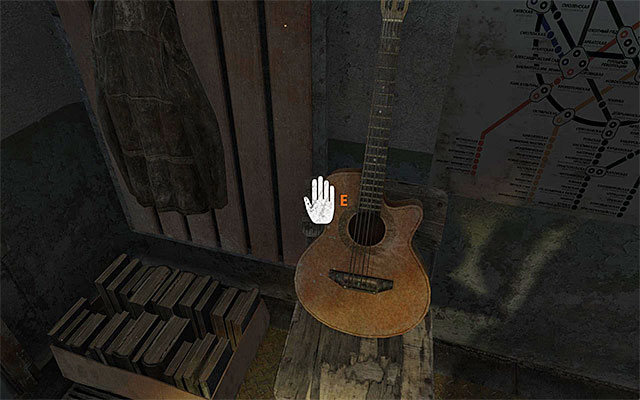
1) Guitar (Chapter 1 - Sparta) - The instrument is in the room in which you start the game proper, after you complete the short introduction.
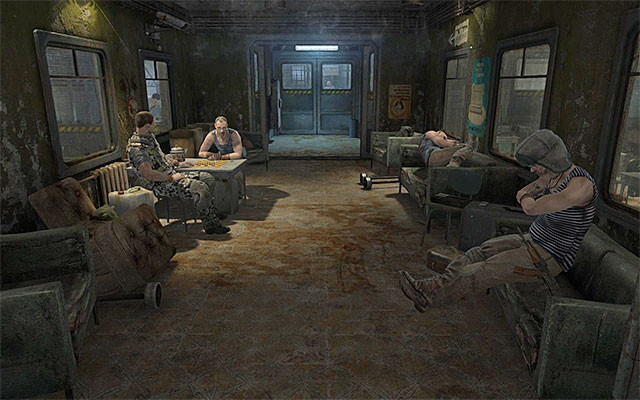
2) Guitar (Chapter 1 - Sparta) - The instrument is in one of the larger rooms of the headquarters, which you will have to go through on your way to meet Miller.
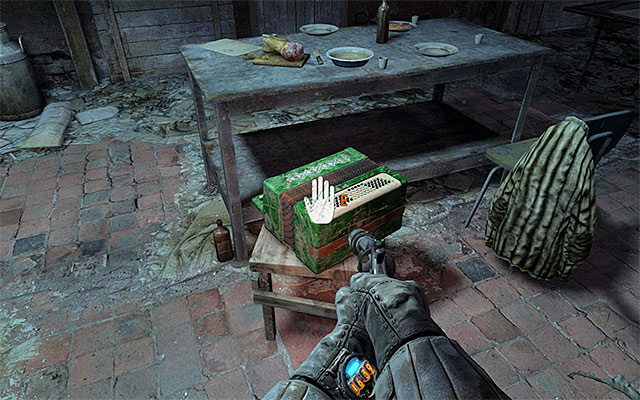
3) Accordion (Chapter 6 - Facility) - The instrument is at the ground floor of the first big, two-storey location explored within the framework of playing the sixth chapter of the game. Before you find the accordion, it would be a good idea to eliminate all the guards.
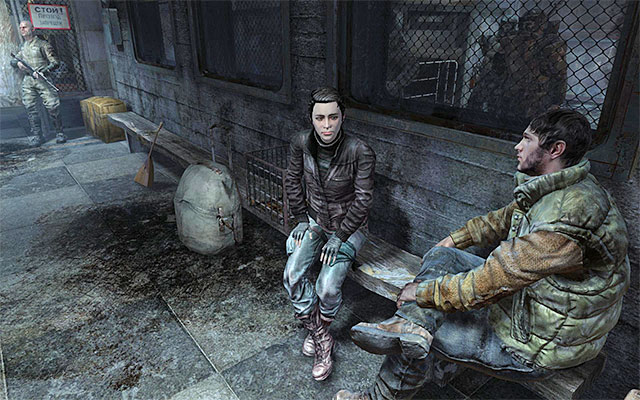
4) Guitar (Chapter 9 - Bolshoi) - The instrument is in one of the beginning areas of the theatre, namely in the corridor after you go through the checkpoint with two guards at it. The guitar is leaning against the bench.
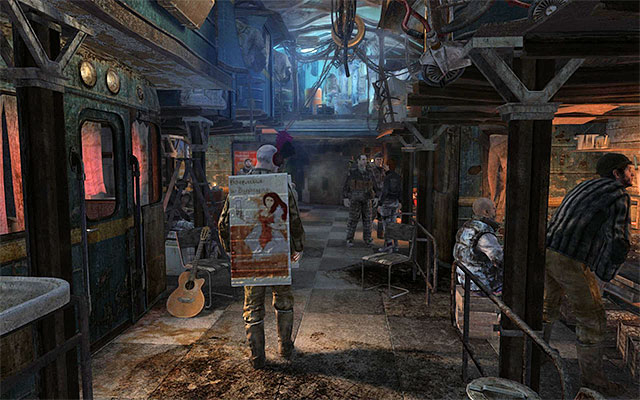
5) Guitar (Chapter 9 - Bolshoi) - The instrument is located in the large room with the bars and restaurants. It is leaning against one of the chairs.
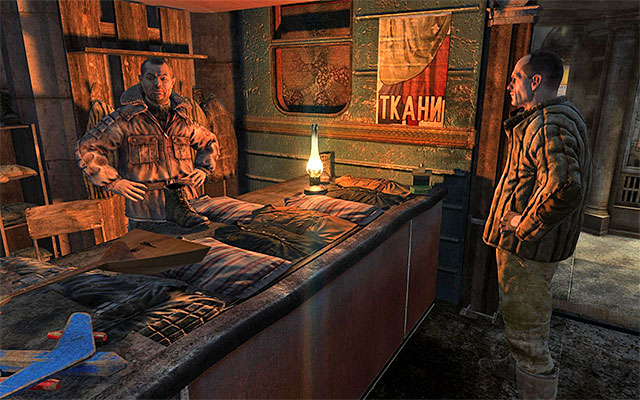
6) Guitar (Chapter 9 - Bolshoi) - The instrument is in the market place with two open shops. Examine one of the non-interactive stalls to notice the guitar lying on it.
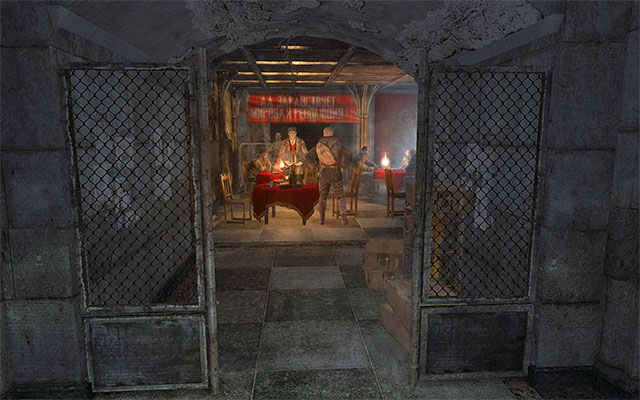
7) Guitar (Chapter 9 - Bolshoi) - The instrument is in the last location in the theatre you explore i.e. in the bar where Pavel wants to talk to Artyom. Examine the area to the right before you sit at the table (you won't be able to do it afterwards).
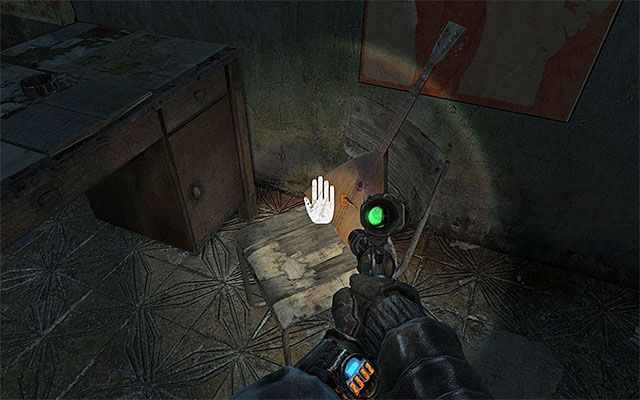
8) Guitar (Chapter 11 - Revolution) - The instrument is on the chair in one of the rooms at the beginning of this stage. It is the one where the guard is talking over the intercom and where there is a manhole leading up to the armory's main part.
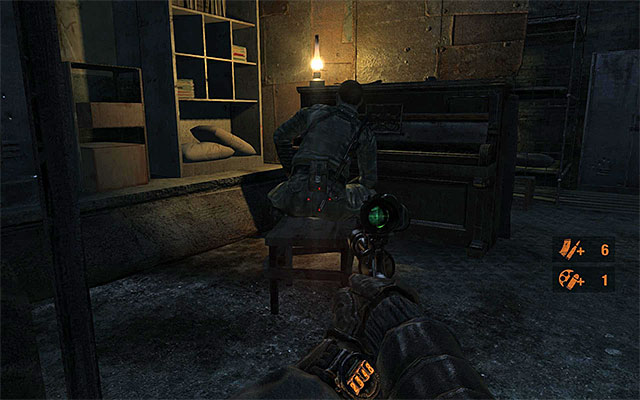
9) Piano (Chapter 11 - Revolution) - The instrument is in area C1 of the armory, which is the barracks. There is a guard sitting at the piano so, you need to eliminate him.
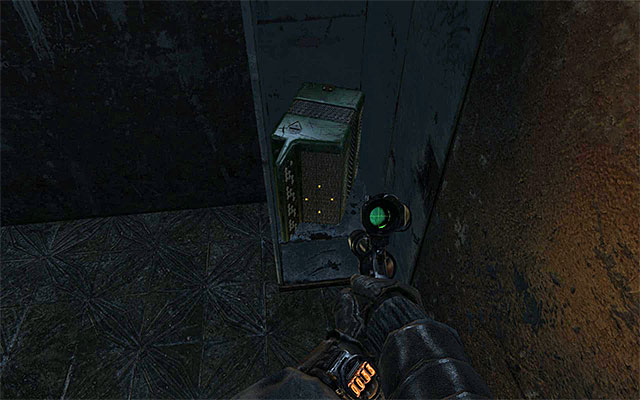
10) Accordion (Chapter 11 - Revolution) - The instrument is in the locker that you can reach right after you leave the last main part of the armory (A1), on your way to the metro tunnel (B1).
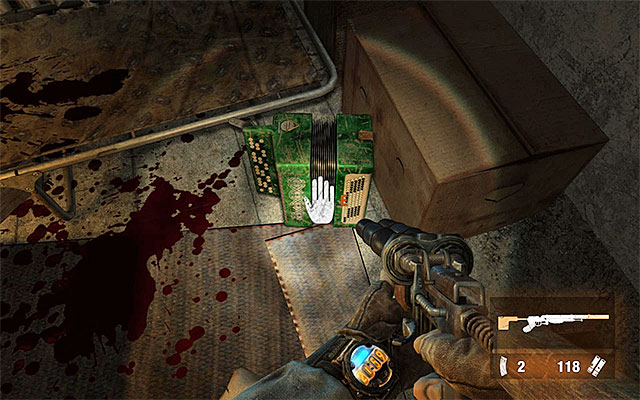
11) Accordion (Chapter 12 - Regina) - The instrument is in the first optional area that you can visit while riding the railway car. It is a small room adjacent to the toilet.
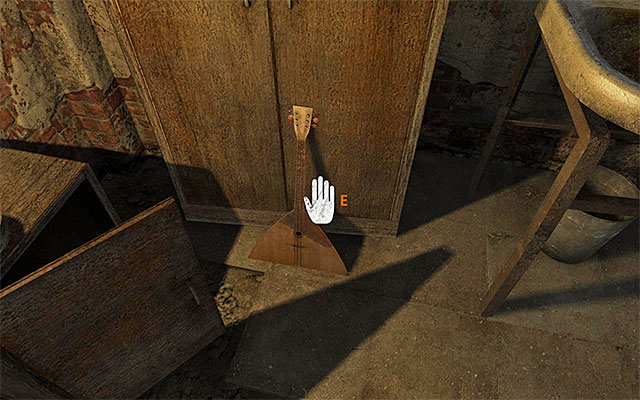
12) Guitar (Chapter 18 - Undercity) - the instrument is in the room where you start the stage. It is leaning against a wardrobe.
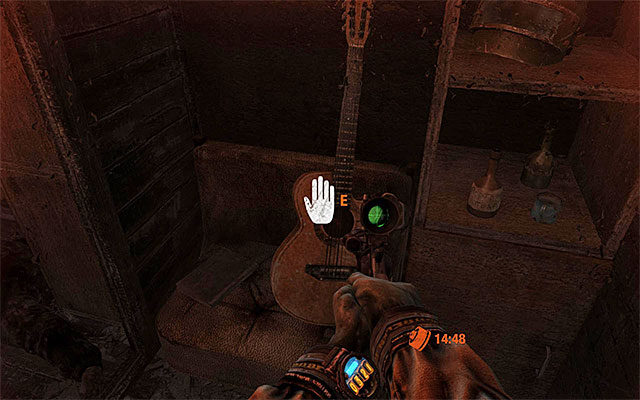
13) Guitar (Chapter 19 - Contagion) - The instrument is in one of the rooms at the ground floor of the first area where it is necessary to use the mask. The guitar is next to the corpse with the throwing knives sticking out of it.
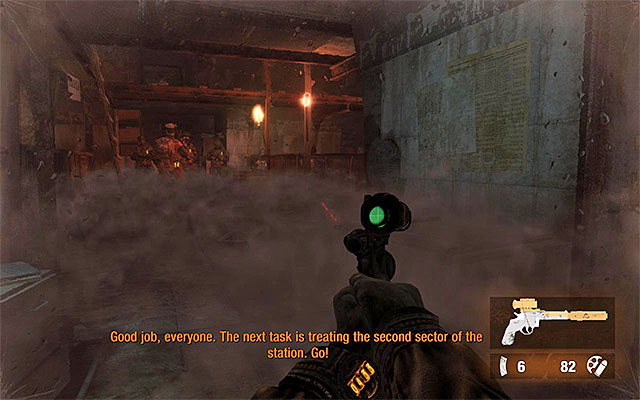
14) Guitar (Chapter 19 - Contagion) - The instrument is in the main room of the first area where it is necessary to wear your mask. It is a place where debriefing initially took place. Examine the central part of this room.
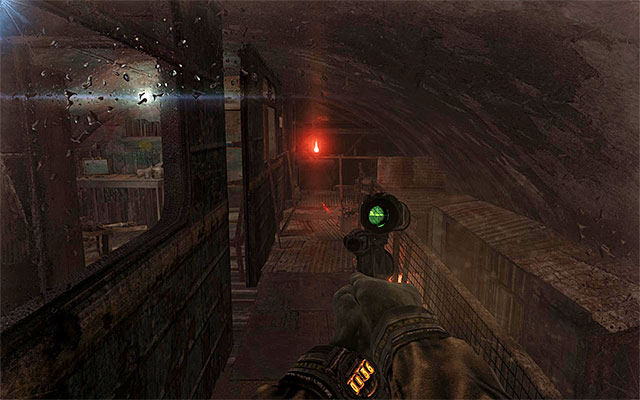
15) Guitar (Chapter 19 - Contagion) - The instrument is on the catwalks between the first and the second area in which it is necessary for you to use your gas mask. The catwalks can be explored while going around the locked gate on the ground floor. The guitar is in the armchair at the very end of the catwalk.
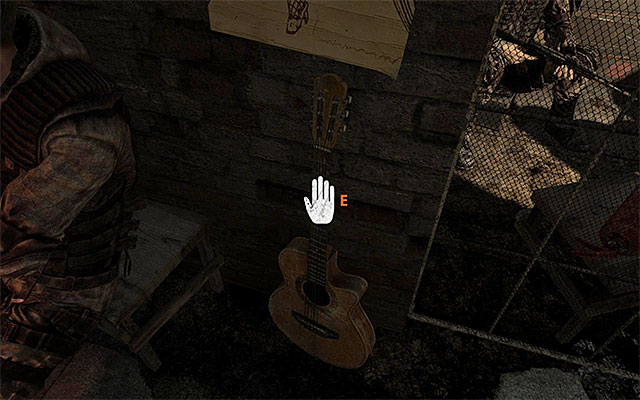
16) Guitar (Chapter 20 - Quarantine) - The instrument is to the left of the two open shops that you will reach in the company of Khan.

17) Piano (Chapter 26 -Dead City) - The instrument is on one of the levels of the side-buildings in the second part of the Dead City. This is where Artyom has a vision.
Finding all of the supply crates in the swamps is an optional task, which you can take up if you want to unlock the Equipped achievement/trophy.
The plan is that you conduct a very detailed exploration of two large patches of the swamps visited in the chapters entitled Sundown and Nightfall. To make it easier for you, I suggest that you equip yourself with a larger amount of gas masks and filters, and also play at the lowest possible difficulty level, so that any fights with the shrimps,, demons and mutants do not interfere with the actual exploration.
Below, you can find a revive of the most important places which you need to explore in each of the abovementioned chapters. Note - the game adds a given stash to the overall number of the stashes that you have already found, at the moment that you find it. Therefore, you do not need to worry if your inventory is already full and you cannot take everything with you.
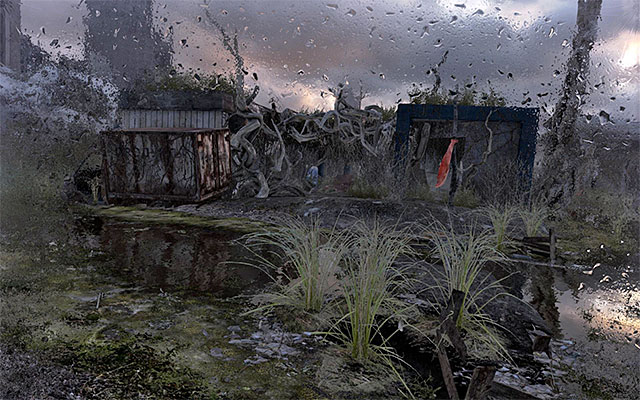
By going to the left of the starting point, you will reach overgrown ruins. Explore them carefully to find, first of all, a stash with an assault rifle (watch out for the tripwire!). Apart from that, there are a few skeletons around (you do not need to find them all at any cost, because only the actual stashes count).
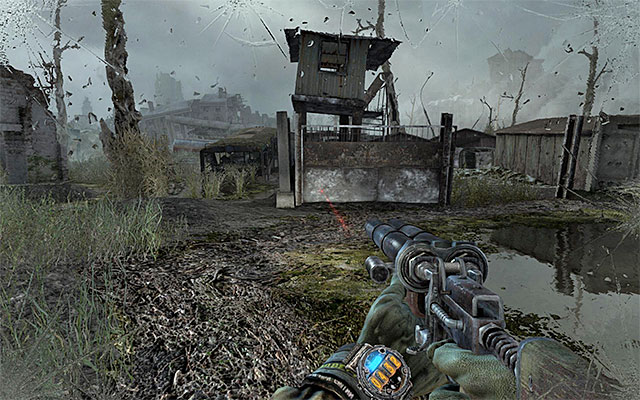
The encampment shown in the above screenshot is one of the most crucial locations in the swamps. It is located ahead of the starting point. First of all, examine the booth to the left of the main entrance. Inside, there is a sniper rifle, among others. Next, search out the corpse among the locked garages and walk into the only opened one. Watch out for a tripwire here. Search now the part of the camp to the right (walk around the central reservoir) and find the corpse and a uncovered truck (another tripwire here!). Finally, leave through the back exit from the camp to find yet another corpse.
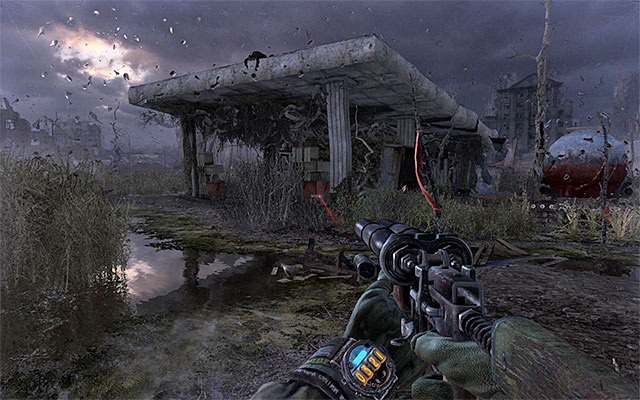
Near the encampment, there is a gas station. In its central part, apart from Artyom's diary page, there is a gas canister, a corpse and also a supply crate. After you examine the ground floor, walk over the thin metal structure to reach the rooftop of the gas station. Examine the roof to find another corpse and a crate.

As you go to the right from the starting point, you will reach a plane wreck. Apart from gas canisters, inside you can also find mines and two supply crates located right next to the cockpit. After you have explored the plane, you should return outside and walk over both wings of the plane to reach the seemingly unreachable shelf with an interactive box.
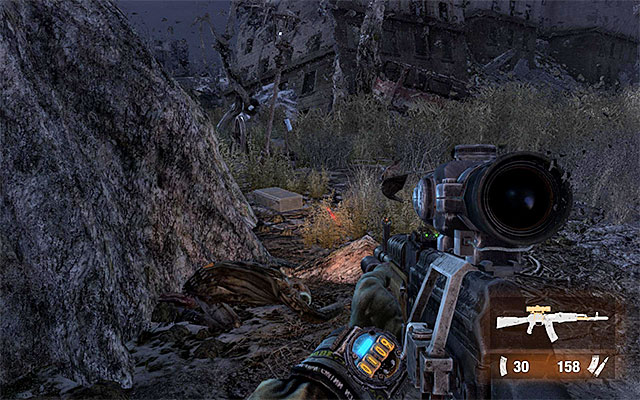
Finally, explore the area around the ferry pier that you need to reach in order to complete the chapter. Here you can find a crate and a corpse.

Start by examining the crate near the water and then go to the derelict building shown in the above screenshot, near the starting point. On the first floor, there are standard supplies and also night-vision goggles and an Artyom's diary page. Finally, go to the ground floor and quickly locate an interactive crate. Then, leave the place before radiation kills you.
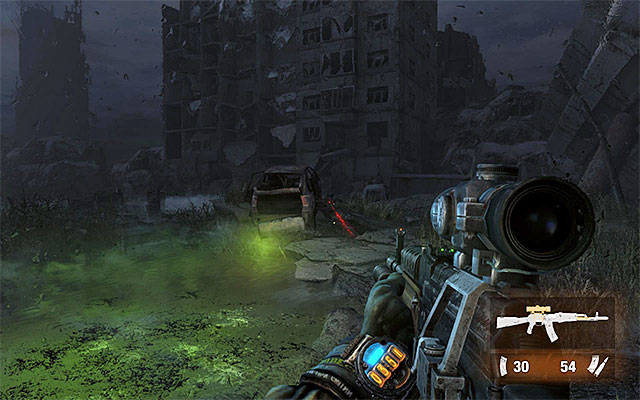
On your way to the next area on the swamps, you can, of course, look around for corpses but, as I have already mentioned, they are not required to unlock the achievement. After you reach the area neighboring with the demolished skyscraper (the above screenshot), turn your attention to the examination of the truck with its tilt off.
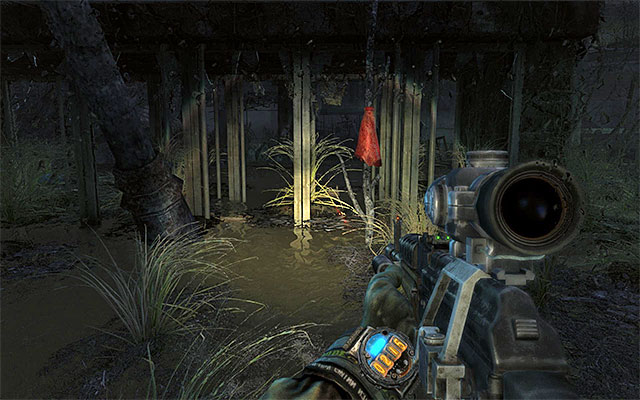
After you lose the big green beast, you will find yourself in a big, two-storey derelict building. On the ground floor there is only a corpse so, go upstairs. Examine all of the side rooms here, while minding numerous tripwires extended in this location. There is a corpse, an assault rifle and three legitimate supply crates.

Finally, approach the exit of the two-storey building (the above screenshot). Do not walk over the plank and jump down to take a look into the nearby truck with two interactive crates in it. This is the moment in which you should be awarded the achievement/trophy.
Finding all of the locations in the Dead City (chapter 26) where Artyom has visions, is purely optional. You can take it up if you want to unlock the (Back to the Past) achievement.
The places where these visions can be seen, have been listed below. I recommend that you acquaint yourself with the list because, some of the visions appear in the places that Artyom does not have to visit to progress the story.
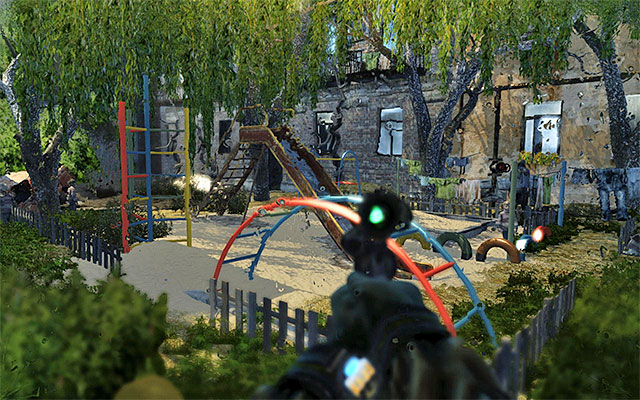
The first vision appears when you reach the second part of the city, namely when you approach the playground.
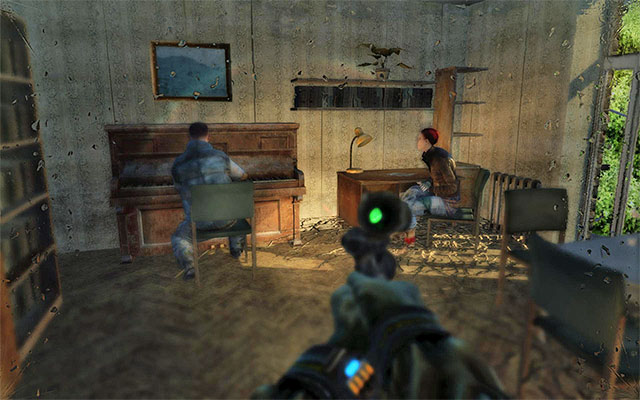
The second vision also starts in the second part of the city but, only after you walk through a small tunnel. Enter one of the side buildings and reach the room upstairs where there is a piano.
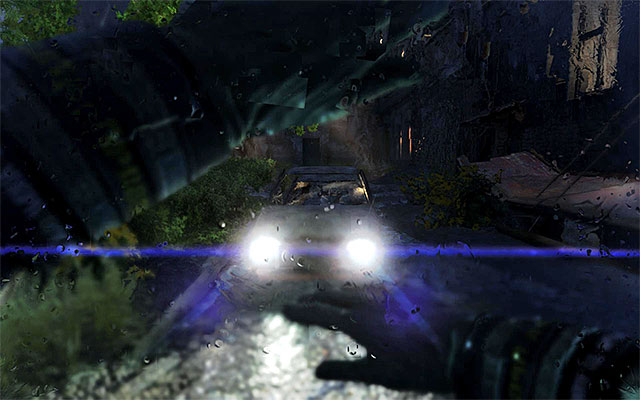
The third vision appears right after you reach the third part of the city, i.e. the large yard. The vision is going to be about an approaching car that is attacked by a mutant.
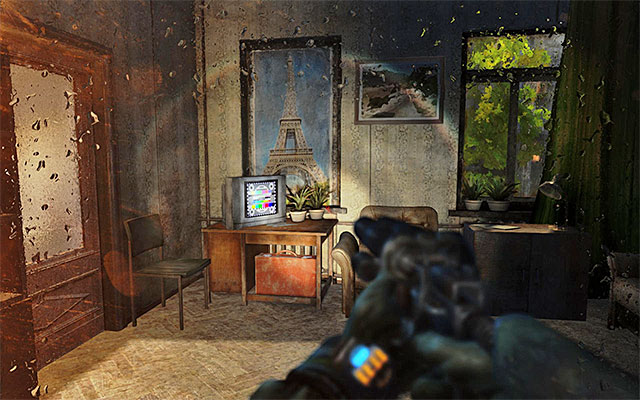
The fourth vision initiates during the exploration of the third part of the city. You need to enter one of the "optional" buildings to the side, and reach the room upstairs.
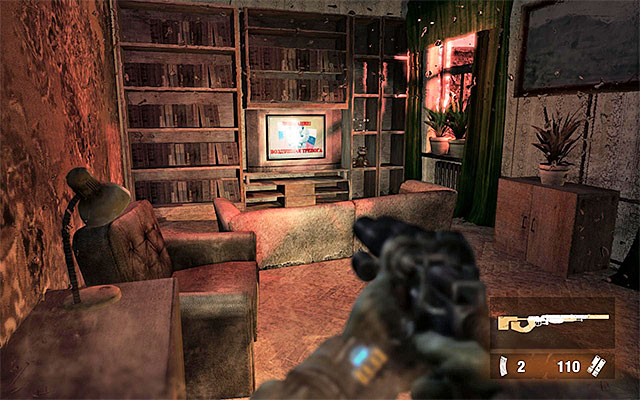
You get to see the fifth vision towards the end of the exploration of the city and more precisely, after you reach a room upstairs in which there is a shutter opened. After the vision ends, you are supposed to jump over the shutter.
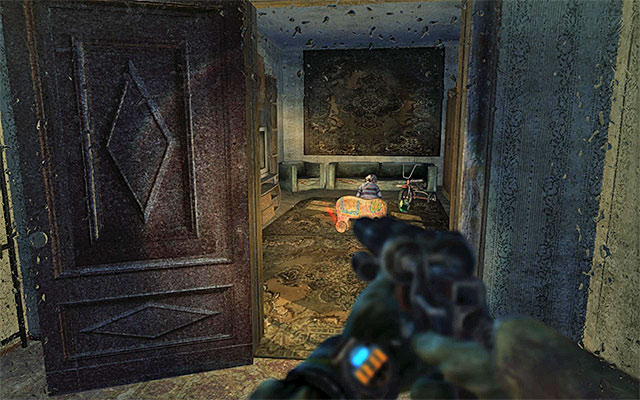
The sixth vision initiates after you leave the fourth part of the city i.e. after you walk down from the rooftop with the demon nest on it. Go towards the lower levels and stop in one of the larger rooms.

The last one of the visions (the seventh) initiates once you reach a large underground tunnel. It is different in that you will lose control over Artyom for several moments, as a result.
The below table lists all of the Steam achievements for the PC version of the game. They correspond to achievements in the Xbox360 version and trophies in the Playstation 3 version.
ACHIEVEMENT NAME
WAY TO UNLOCK/NOTES
Antibiotic
Kill 100 mutants
Businessman
Make 100 purchases at the local dealers
C'est la vie
Unlock the bad ending for the game(learn more in the subchapter entitled Endings)
Walking Bank
Collect a total of 1000 military-grade rounds. Remember to examine all of the corpses, rooms and containers that you find.
Published
Find all 43 Artyom's diary pages, one of the collectible category.
Edison
Turn off 40 sources of light without destroying them.
Ranger Elite
Beat the game in Ranger Mode.
Redemption
This achievement unlocks automatically after you beat the game.
Survivalist
Beat the game in Ranger Hardcore.
Commando
While playing the twelfth chapter (Bandits), you need to save all women and children without raising alarm.
Big Momma
This achievement unlocks automatically.
Patron of the Arts
While playing chapter nine (Bolshoi) you need to watch the entire show.
Musician
Play all the instruments in the game. A list of the instruments can be found in the chapter entitled Other Collectibles
Mouse
Finish chapter eight (Echoes) without being noticed by the guards.
Nobody's Home
In chapter twenty one (Khan), ignore the ringing phone on your way to the waterfalls.
Not a Rabbit
Finish chapter two (Ashes) without taking a hit. Keep the monsters at bay by using a good firearm and eliminating them before they get too close.
No Shooting Allowed
Kill 10 enemies in a row with throwing knives.
Invisible Intruder
Finish chapter five (Separation) without killing anyone or raising alarm.
Invisible Savior
Finish chapter six (Facility) without killing anyone or raising alarm.
Invisible Soldier
Finish chapter eleven (Revolution) without killing anyone or raising alarm.
Diver
Fall into swamps 10 times. The easiest way to unlock this achievement is while playing chapter sixteen (Sundown).
Within a Hair of Death
This achievement unlocks automatically.
Redemption
You need to unlock the game's good ending (See chapter Endings to learn more).
Inferno
You need to set on fire two enemies at the same time. It is best to use incendiary grenades for this, of course.
Back to the Past
While in chapter twenty six (Dead City) you need to see all visions. A list of all visions can be found in chapter Other Collectibles.
A Present
While in chapter six (Facility) reach the first big area and then allow the guard to finish his conversation over the intercom and then open his locker with a unique pistol. Approach the locker and collect the pistol.
Scram
In chapter twelve (Regina), kill all the monsters (guards) before they reach the railway car. It concerns the scene in which you need to push over the train blocking further passage and eliminate the monsters. It is best to use a scoped rifle for this purpose.
Rabbit
This achievement unlocks automatically.
Rain Man
Finish chapter twenty four (Bridge) without a kill.
Weapon Smith
Install all the modifications to your weaponry
Secret
This achievement unlocks automatically.
True Spartan
In the last chapter (D6), defend the platform without dying.
Shadow Ranger
Beat the game without killing your enemies. The only exception is the battle with the last wave of enemies i.e. the soldiers carrying shields followed by a man with a flame thrower.
Forest Guardian
While in chapter twenty eight (Garden), win the battle with the bear (the monster will flee from the battlefield), and eliminate the mutants that attack the bear, allowing it to move away from the battlefield (the bear cannot die).
Tesla
Destroy 50 sources of light.
Gunslinger
Kill at least one enemy with each kind of weapon available in the game. Remember to buy new, unique kinds of weapons from all the dealers.
Clean Escape
While in chapter four (Reich) escape from the Nazis without getting caught.
Van Helsing
Kill the demon with Van Helsing. This unique weapon can be bought from a dealer in the twentieth chapter (Quarantine) of the game.
Shadow
Sneak Kill 15 enemies.
Freedom
While in chapter three (Pavel) set all prisoners free. You do it by pulling the lever in the control room towards the end of the chapter.
First Draft
Find 10 Artyom's diary pages (one of the collectibles).
Derailed
Finish chapter eleven (Revolution) by killing all the enemies (including the reinforcements when alarm is raised).
Equipped
While in chapter sixteen (Sundown) find all the supply crates. A list of all crates can be found in chapter entitled Other Collectibles.
Forgotten
In chapter twenty (Quarantine) find all the side lockers with military-grade rounds.
Ever Vigilant
Disarm 10 tripwires.
Savior
Towards the end of chapter nineteen (Contagion) react to Lesnitski's request and remove your mask.
Revenge
In chapter twenty seven (Red Square) defeat Pavel and execute him.
Reunion
In chapter fifteen (Venice) win the teddy bear for the boy at the shooting range and return it to the child (he is around with his mother).
Soup
Kill 5 shrimps with grenades
Bloodlust
In chapter twenty two (Chase) kill all the Reds attacking Artyom. Especially, make sure that you kill all the enemies on the little railway cars because, time is short here.
Soldier
Kill 100 people.
Tortoise
Make 10 spiders flip belly-up by lighting them with your torchlight.


 Mafia II Game Guide & Walkthrough
 Mass Effect 2 Game Guide & Walkthrough
 Mass Effect 3 Game Guide & Walkthrough
 Mortal Kombat Game Guide & Walkthrough
 Mass Effect 3: Leviathan Game Guide & Walkthrough