The Hatred guide contains a detailed walkthrough of the simple player campaign, along with instructions concerning the ways of main, as well as optional objective completion. Additionally, here you will find the description of all the pieces of equipment available for the player (along with their usage, proper selection and the source of acquisition), enemies present in the game (coupled with information concerning their equipment, behavior, as well as the means to effectively combat each type of foe). The guide also contains a list of tips & tricks, which will surely come in handy to less experience players, or those, who are willing to complete the game on the hardest difficulty settings. The guide is closed with information about game controls, hardware requirements, and each and every achievement available in the game. Hatred, made by Destructive Creations studios, is a controversial, extremely violent isometric shooter, similar to the first installment of the Postal franchise. The player takes on the role of a character called "The Antagonist", a man driven by immense hatred towards humankind, and will accompany him through a series of mission, during which the player will visit places such as a metropolis, a military base, a train, or a nuclear plant. During the adventure The Antagonist will wield a variety of weapons, such as pistols, assault rifles, or rocket launchers. The game is powered by the newest version of the Unreal Engine (4), characterized by immense lightning effects and advanced physics.
Hatred guide contains:
Jakub Bugielski
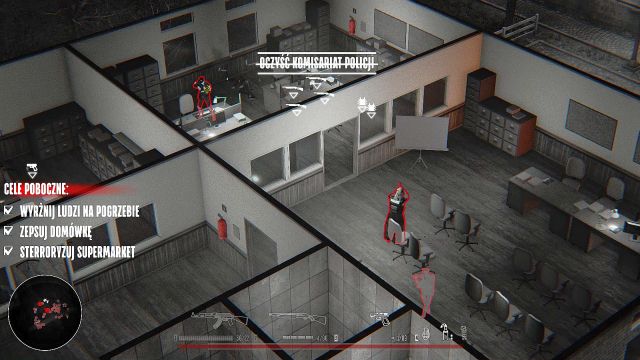
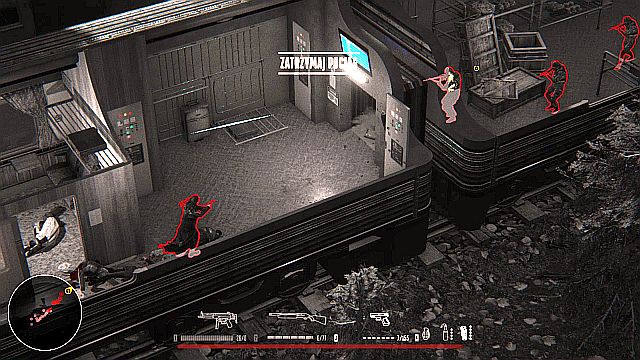
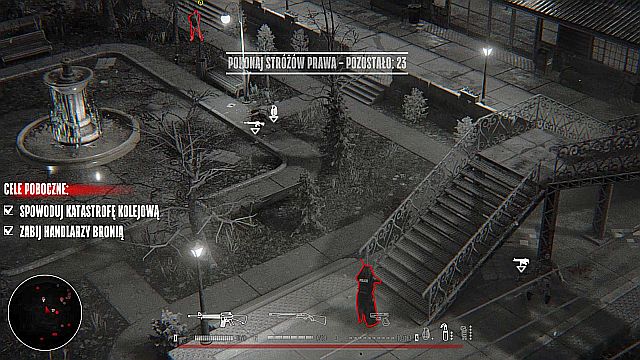
This section contains the information about the user interface. Interestingly enough, only a portion of the interface is always visible, the rest can be checked by pressing the appropriate button. As usual in titles such as Hatred, elements of the interface are scattered around the edges of the screen, leaving the center part perfectly clear, so that the player has no problem understanding the situation around the character.
You can see the information about the current, main quest located almost in the middle of the screen [1]. On the left side of the screen [2] there's a list and the information about all unlocked side quests. Just below the mentioned list [3] there's a radar-like minimap, showing the current situation in the world in the closest vicinity of the player. Along the bottom edge of the screen [4] you will find all your currently equipped weapons, and just below that [5] there's a health bar, connected with a bar representing the status of the bulletproof vest that the character is wearing.

Move / drive forward

Move / drive backwards

Move / drive left

Move / drive right

Execute

Fire

Aim

Kick

Reload weapon
Sprint

Crouch / enter the turret

Dodge / handbreak

Throw grenade

Use

Show objectives / highlight enemies

Select weapon in the first slot

Select weapon in the second slot

Select weapon in the third slot

Change the type of the grenade
The game, at least in theory, is rather simple, as it focuses mainly on shooting everything that moves, but the difficulty level (on the lower settings as well) will surely be of a problem to some of the players. Below you will find a list of tips & tricks, which might (and for some surely will) come in handy during your adventure with Hatred.
1. Don't waste your ammo, especially in the beginning missions - there's no point to just hold your finder on the fire button all the time, especially when your crosshair didn't even reach it's destination (target). Try to fire with short, three-or-so bullet series, and you will have a lot easier to eliminate your targets, not to mention that you will not waste so many bullets while doing so.
2. Don't waste ammo for your more valuable weapons (such as assault rifles, especially during the first couple of missions) to kill simple civilians - you can use pistols, as well as shotguns, to which there is an abundant amount of ammo. Remember, that you can also knock the civilian down with a kick, and then just use the execution - you won't waste a single bullet while doing so. Don't try this on cops, or soldiers, as they will almost always resist the kick and unload a series of bullets at your character.
3. Keep a constant watch over your health bar. Hatred is not a typical shooter-like game, in which, at the moment your character sustains serious injuries, you will just have to stick to a cover and just suck your thumb - it doesn't work like that here. You have to replenish the health of your character on your own, by performing executions.
4. If you have a low amount of health, it's worth to regenerate them by "using" civilians. First things first, the risk of sustaining any injuries is close to zero (provided that the civilian has not picked up a weapon), and secondly, you can just run towards such an individual, knock him/her down by using the kick action and finish it with an execution - this way you will replenish health and will not have to waste a single bullet.
5. Do not use weapons, which you will have a hard time getting ammo for (such as, for instance, AK-47, or the "typical" assault riffle during the first couple of missions), or those which share their ammo with others (like pistol and uzi) - by doing so, you will quickly run out of bullets and you will end up with two useless weapon slots, making you way more vulnerable to enemy attacks.
6. Adapt your weapon according to the situation. There's no point in shooting at the enemy on the other side of the screen by using a shotgun, as you will have to use multiple bullets in order to eliminate him.
7. Watch where you are shooting. There is a huge amount of different items in the game, which, upon being shot, explode violently - more than often the explosion is of the size of the whole screen, or consumes a series of buildings. A stray bullet may finish of an enemy, or can do the same with you, when you end up blowing the building in which you currently reside.
8. The same goes for explosives, mainly hand grenades and rocket launchers (as the molotov cocktail, as the fire itself, deals almost no damage to the player) - those two are enormously powerful weapons, but sometimes they can deal more harm than good (like, for instance, destroying a cover, which separated you from a group of armed enemies). Use them with extreme caution.
9. Complete side quests. Aside from the obvious rewards, such as bulletproof vests, and high amount of different types of weapons (or explosives), side quests allow you to unlock special respawn points, in which you will begin if your character gets killed during the mission. If you have no respawn points unlocked, or you have already depleted them all, upon death you will have to start the mission from the very beginning - some of them take more than a half hour to complete, meaning that a sudden death without the option to continue may be a painful experience.
10. Remember, that the game utilizes an advance physics engine, which translates to (sort of) realistic effects of destruction - instead of, for instance, running around the building in search of an entrance, you can just "make" your own entrance by blasting a wall with a rocket launcher, or a hand grenade.
11. Adjust the difficulty level to your playstyle. There's no point in trying to be a badass and play on the highest, extreme level of difficulty, when you will be dying 50 or so times in order to complete a single mission.
12. Collect ammunition from the fallen enemies. It is not replenished automatically upon reaching a checkpoint (which the game lacks, to be honest), and finding out that you ran out of bullets, when there is a dozen of enemies surrounding you may end up bad.
13. Reload your weapons before engaging enemies. If you have even as little as a few seconds of "free" time, when you are not fighting with anyone, reload all your weapons - by switching to the other gun you will have a full magazine and you will be able to use it immediately, without the need to reload, or you will not find yourself in a situation when an enemy closes on your position and you have 2 bullets left.
14. Try to approach enemies from the south (so that your targets are coming from the north). The reason is quite simple - by having your character on the bottom of the screen, you will be able to reach and see further (sometimes even several times further!) than when your character is on the top of the screen and the enemies are approaching from the south. By using this method you will be able to eliminate your enemies from a huge distance, almost always emerging from the fight without sustaining any injuries.
15. Use your grenades. From about the 4th mission you will have access to abundant amounts of grenades, meaning that you will be easily able to abuse them. You will stumble upon them way earlier as well, but you will have to take some effort in order to find them. A single, well-aimed grenade can get rid of a dozen of enemies at once.
16. Remember, that the amount of equipment your character carries is limited. You can only equip up to 3 different weapons, regardless of their sizes - you will have to decide, whether it is a good idea to bring a shotgun along, for which you will have abundant amounts of shells, but having in mind that the weapon itself is moderately effective in combat.
Main objectives
Optional objectives:
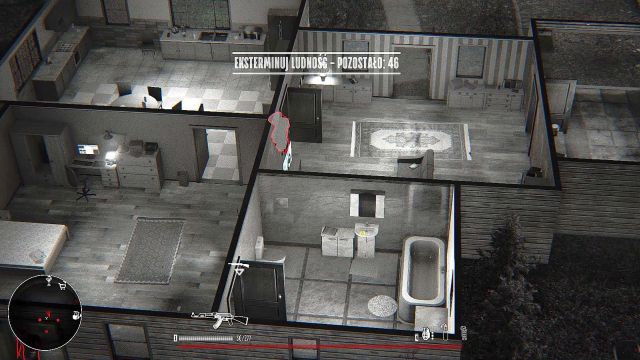 You should always inspect the insides of various buildings - you can find a lot of useful items there.
After finishing the tutorial level (which, by the way, is worth to complete, because it introduces all the main in-game mechanics to the player, while lasting for a couple of minutes only) you will end up in front of your house, where your adventure with The Antagonist begins. Your main objective during this mission is to kill 60 people - regardless of whether they are civilians, or policemen. However, there is really no point (if, of course, you do not feel like doing it) of starting a mindless killing spree, shooting at everything that moves - during the entirety of the mission you will kill several times more people. You should converse your ammo at the beginning of the mission, especially if you decided to play on the highest (extreme) level of difficulty.
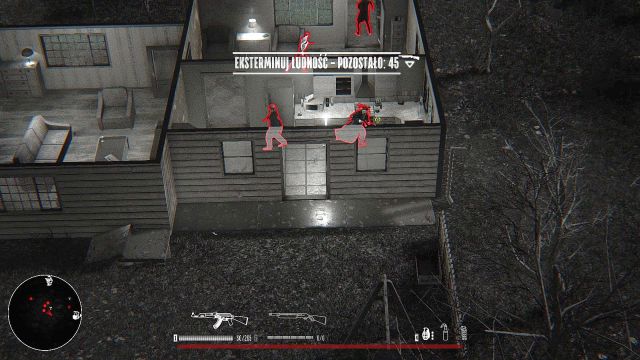 You can just ignore the people located inside of buildings - during the entirety of the mission you will kill several times more than required.
Leave the house and head South (you will pass a white vehicle along the way) to reach the next building. Inside, aside from cannon fodder, you will find a new weapon - Shotgun. To pick it up, you just have to run into it. The shotgun is, paradoxically, one of the worst weapons in the game (aside from using it on an extremely short range), because it does not deal enormous amounts of damage, and the long reload time (sometimes going over 5 seconds!) may expose you to the enemy gunfire without any means of countering it. After picking up the collectible, leave the building and head south, ignore the building (there is nothing to pick up here) and enter the next house you stumble upon - there is another Shotgun hidden inside. Additionally, prepare for the first portion of policemen and some exchange of fire.
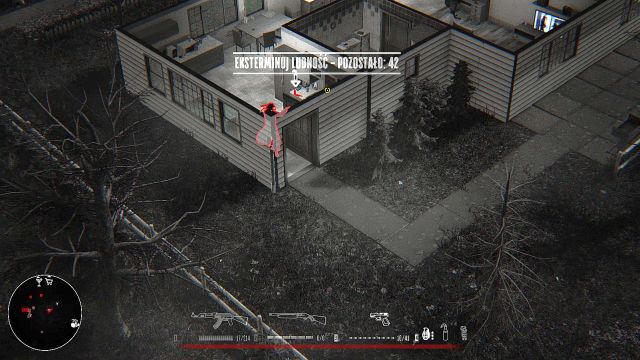 Molotov Cocktail will be useful during the completion of one of the optional objectives.
After you have dealt with them, do not forget to pick the gear they drop upon death - in this case pistols. The pistol is a well balanced gun, which combines high amount of damage with good rate of fire, along with a very short reload time. With a little bit of practice, as well as proper aim, it will use minimal amounts of ammo, making it useful throughout the whole game. Collect the equipment and head towards East again - there's a building with two Molotov Cocktails and an additional Pistol inside.
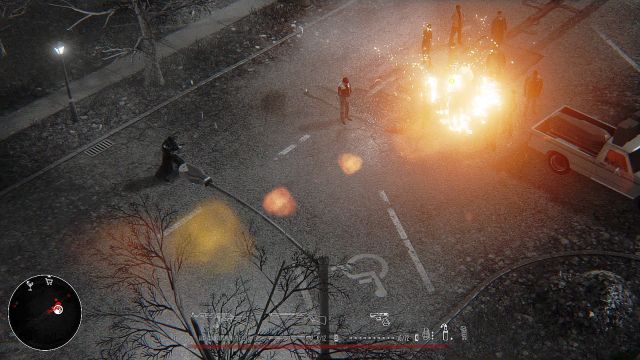 Molotov Cocktail is extremely effective against tightly packed groups of people.
After getting the said equipment, continue your march towards East - an optional objective, called "Kill the people on the funeral" (the place in which you can complete it is marked with the appropriate icon on the radar) should become active for you. As you have probably already guessed, you have to kill all the mourners gathered on the event. Remember those Molotov Cocktails you just picked up? You can use them here to kill most of the targets with a single blow. After finishing off the remaining people, you will be given a respawn point, and the place will soon be flooded with a couple of police patrols - exterminate them all, while replenishing your health with executions. After the battle is over, collect the gear they just dropped.
 There goes the party...
It's time to head towards the next optional objective - make your way towards North-West (in the direction of an icon resembling a drink). The buildings you will pass by have nothing of value (aside from a couple of Pistols, to which you should have plenty of ammunition by now), so you can just run past them without giving it much thought. While running towards your objective, do not forget about replenishing your life, as well as to eliminate any tail you might have caught by now - a rather large fight is about to happen, so it is good to clear out the neighborhood, even if a little bit.
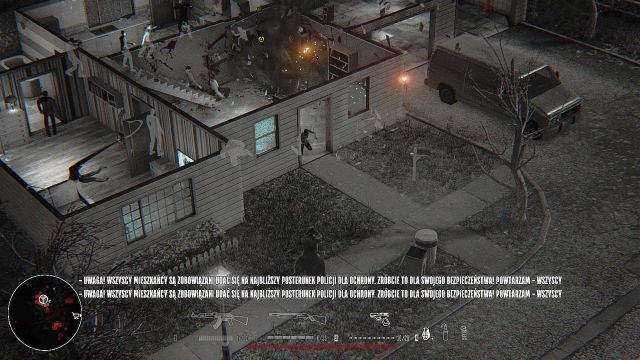
 Find a cover inside the building - it will make fighting the cops a lot easier.
Soon you should be given an optional objective called "Ruin the party", though the word "ruin" might just not be enough to express what must be done - you have to kill all the party attendees. This time you should make use of your grenades - a single, well-aimed grenade will blow up half of the house, killing most of the guests inside, leaving you with only a small number of survivors waiting to be finished off. After finishing the task and completing the objective you will be given another respawn point. Additionally, you will be visited by another group of policemen - hide inside one of the intact rooms (if any is still there) and kill the cops slowly, one by one. Before you leave the house, collect two Molotov Cocktails located in the Northern section of the house and then head East, towards the last remaining optional objective available for this mission (the objective is marked with an icon of a supermarket cart).
 Who keeps Molotov Cocktails inside a supermarket?!
After arriving at the place, an optional objective called "Terrorize the supermarket" will become available for you - yup, you guessed it, you have to kill everyone located inside the said shop. If someone runs out of the supermarket (and it will surely happen), do not mind - you do not have to chase and finish off the runners, you just have to make sure that there's no one (besides you) alive inside of the supermarket. While still inside, do not forget to visit a small room in the Southern section of the building - there you will find a Shotgun and some additional Molotov Cocktails. After completing the optional objective and unlocking the respawn point, kill all the policemen present on the scene, collect all the gear they dropped and most importantly: heal your wounds through executions, as the last main objective should be available to you.
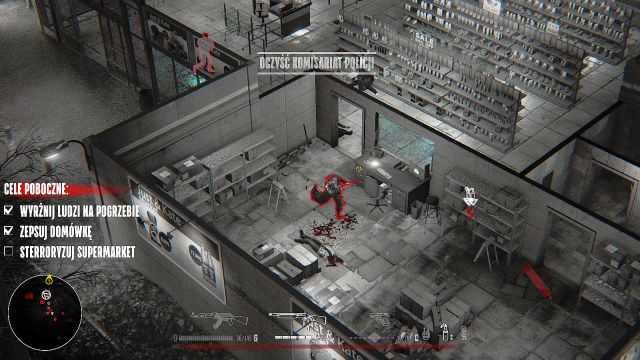
 There is some ammo and a couple of bulletproof vests inside the armory.
Head North, towards a yellow icon with an exclamation mark - here you will have to complete the last main objective of this mission, called "Clear the police station". There will be several dozens of cops stationed inside, and they will start running "happily" at you as soon as you get closer to the police station. To make the whole objective a lot easier, try to, as soon as possible, get inside the armory, located on the Northern side of the station. Inside of that small room you will find some ammunition for your weapons, as well as Bulletproof Vests, which increase your durability (any sustained damage when wearing a bulletproof vest is absorbed by it - you will start loosing health only when the armor is depleted).
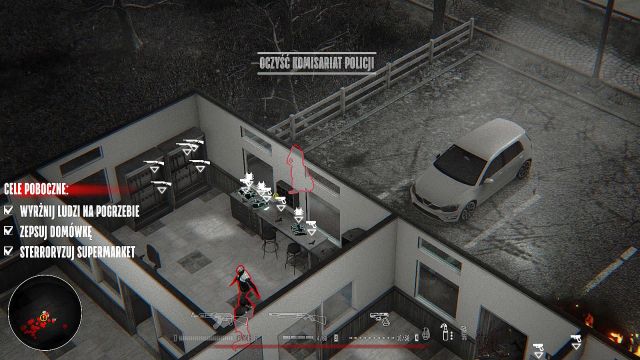
 After killing off the cops, do not forget to pick up all the gear left by them.
You can access the said armory by using two different methods - either running through the back entrance of the police station, which will surely expose you to enemy gunfire, making you sustain some damage, or to just "open" an alternative route, by blowing up the wall with a grenade. Regardless of your decision, focus on clearing out the building from the policemen - remember, that the police station has two floors (ground and first floor). After finishing this objective, as well as all the optional ones, heal your wounds through executions, collect all the ammo and a bulletproof vest and head towards the yellow icon marked on your radar.
Main Objectives
Optional Objectives
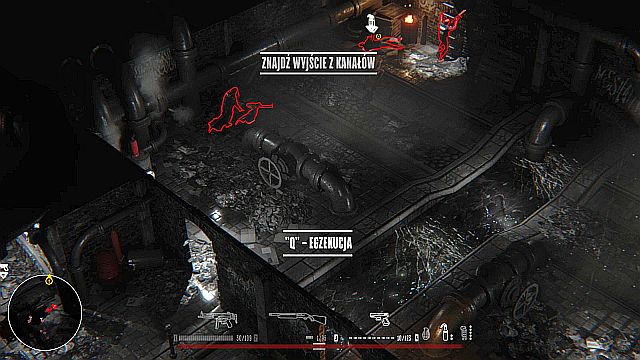
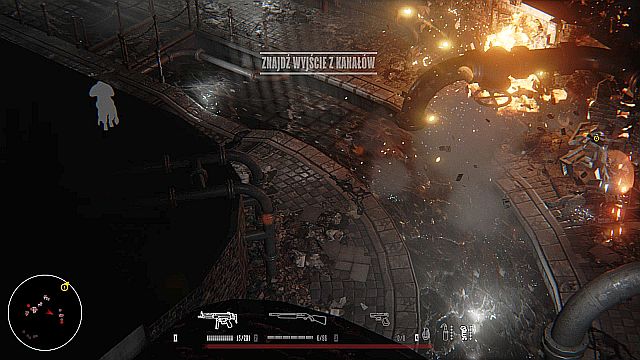
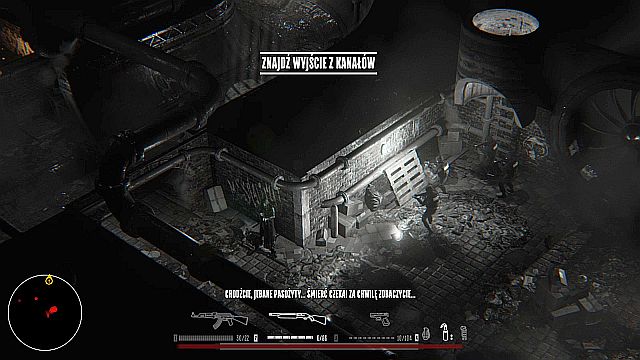 As soon as the mission starts, hide around the corner - you will have an easier time eliminating the tail.
The second mission of the campaign starts in the sewers. As soon as it beings, you should gain some distance from the cops chasing you and hide behind cover, as it will be a lot easier for you to eliminate them that way. Get behind the wall and wait for them to come at you. From their bodies you will collect two new pieces of equipment - SMG and Flashbangs. The first one, although slightly lacking in the power, has a very high rate of fire, as well as a large magazine, making up for that shortcoming a little. Flashbangs, on the other hand, disable all the targets hit for a few seconds, making them vulnerable to your attacks - it comes in handy when fighting in tight, narrow spaces, with large groups of enemies, when you are unable to use regular, explosive grenades. You can use both of those pieces of equipment during this section of the mission as much as you want, without worrying about running out of ammo - you will be dealing with tens of SWAT officers throughout the sewers, so you shouldn't run out of bullets.
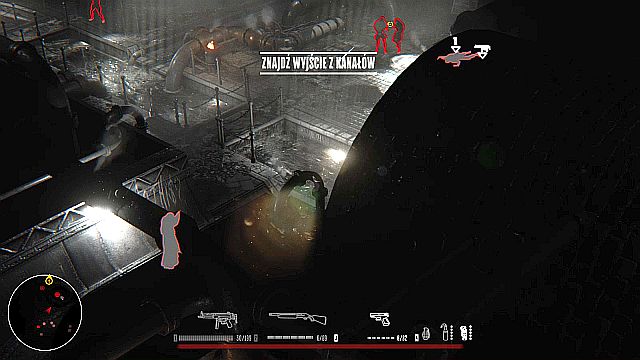
 Use the range of vision your position gives you to eliminate the enemies without sustaining any injuries.
Swap your Shotgun for the SMG if you have a decent amount of rounds for your Assault Rifle, and if you lack them, swap it for it instead (it should leave you with the SMG, a Shotgun and a Pistol). After finishing off the last SWAT member, you will have to deal with a lone policemen, coming at you from across the tunnel. Eliminate him and enter the room he just came from - there will be a target you can perform execution on in order to replenish health. Before you enter the said room, you will stumble upon a crossroads - tunnels leading to the left and to the right. The left tunnel contains a single target to execute, so if you do not need healing head to the right one instead.
 Watch out where you are shooting...
A small encounter with a group of policemen awaits you at the end of the said tunnel - fortunately, those are the "regular" cops, equipped with pistols, which shouldn't be a problem for you. If you want to conserve your ammo, there's an explosive barrel near them, which can be blown up by shooting at it - this should kill most of the cops. After arriving at a more open space, refrain from further exploration, as there is another group of enemies approaching your position - it is better to just hold your ground and eliminate them from afar, without the risk of sustaining any injuries.
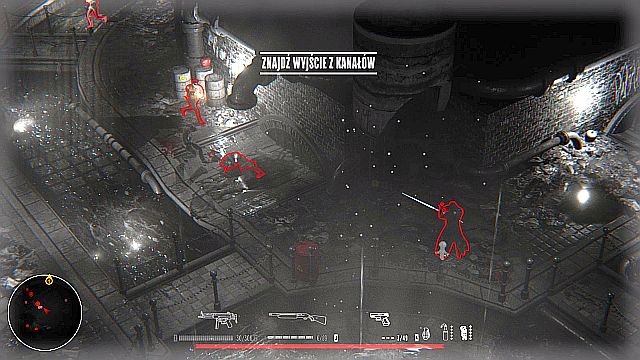
 Some of the tunnels lead to places with various, valuable items.
You will get to another crossroads - one way leading to the right, and the second one along the left wall. In the right one you will find a couple of Molotov Cocktails, and a small group of SWAT members will emerge from the hatch located there - it is a good idea to eliminate them, so that they will not be able to ambush you from behind. After finishing them off, collect SMGs and Flashbangs located near their corpses and head to the passageway on the left side, from which a few more SWAT officers will come at you.
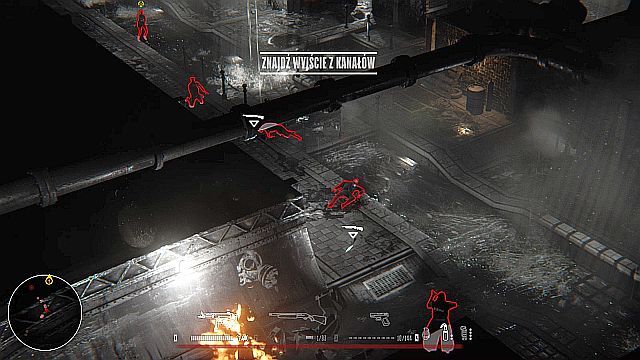
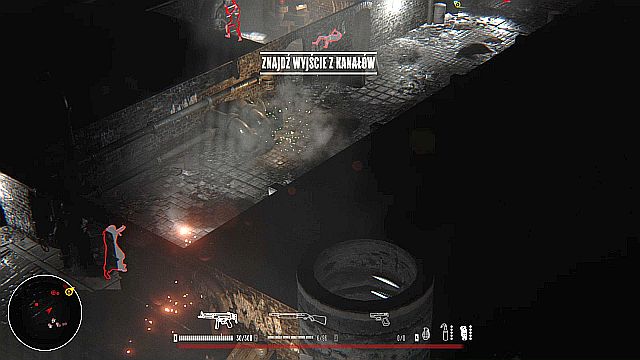
 Another good firing position.
After leaving the narrow passageway, you will arrive at the next open location. There is a group of SWAT officers closing on your position from the North - use the firing range given to you by your current position (hold the aim, which, by default, can be activated by pressing and holding the right mouse button) and eliminate them from a safe distance. Afterwards collect all the gear they dropped and continue your journey to the left side.
 If you are quick enough, you will be able to ambush the next police patrol.
It is worth to move a little faster here, as there is another group of SWAT officers closing on your position from the North, and an explosive barrel and a gas tank can be found on their route - you can fire at them a few seconds before they arrive at the exact spot to eliminate them without wasting any ammo. If you are unable to do so, do not worry - you should have more than enough ammo left to eliminate a larger group of cops with ease, and in case of sustaining serious injuries, you should be able to locate a large amount of executable targets in your closest vicinity.
 ... but the police can also ambush you...
Continuing your march, you will arrive at another open room - you can expect a group of SWATS officers coming at you from the North and North-Easter directions, but you have a perfect firing position, which should allow you to eliminate them from a safe distance. There is nothing else to do here, so pick up any gear they dropped and go further into the sewers. At the end of the corridor, on the right side, there will be an entrance to the further section of the tunnels - don't rush there, however, as your enemies have set up an ambush and will try to hit you with a Flashbang, making you a lot less effective for a couple of seconds. It's best to just run in and immediately leave the room, so that the flashbang blows up in the air, without the option to reach you. Now you just have to finish off the enemies, coming at you from the North-East.
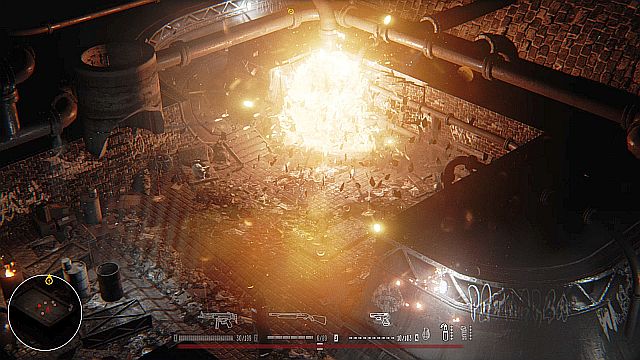
 Look around you, as you can eliminate a whole group of enemies with a single bullet.
After breaking through the ambush, you will arrive at another crossroads. A small group of enemies will approach you from the right side. After getting rid of them, replenish your ammunition, as well as health, and head towards the passageway leading to the North - there's no more enemies in the area, so you can travel without worrying about getting ambushed. Once you arrive at the hatch, a short cutscene will initiate and the scenery will change.
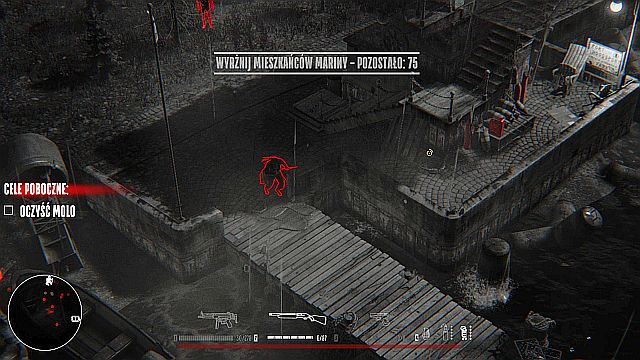 Start the mission from the Southern entrance to the pier.
You will be given a new task, to exterminate (80) residents of Marina. Similar to the previous mission, there is really no point in focusing solely on running around the map and killing people as fast as you can - by completing the optional objectives you will be able to kill several times more people. After emerging from the sewers, head East, to the place marked with a ship icon. Upon arrival, you will be given an optional objective called "Clear the Pier".
 Don't forget to collect grenades - they will soon come in handy.
You objective is to simply kill all the people located directly on the pier (scattered around the bridges, to the East of your current position), as well as those which can be found in the close vicinity of the water. Start the mission by entering the pier by using the Southern entrance - this way you will not be able to miss a single target, and after completing this objective you will arrive almost at the spot the next one starts at. You should explore the pier very carefully, as there is a large amount of different pieces of equipment to collect here (such as, for instance, Molotov Cocktails, or ammunition), or Grenades (which will soon come in handy) located in the Northern section of the pier After completing the optional objective, you will be given a respawn point.
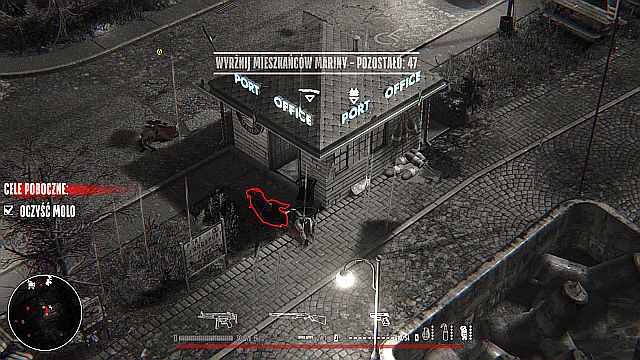 There is a bulletproof vest located in the building with a "Port Office" Logo.
After coming back to the mainland, you should be able to locate a small building (with the Port Office logo on it), located to the North of the exit from the pier you just came through. You can find a Shotgun, as well as a Bulletproof Vest inside the building. The second item is what matters the most - from the start of the mission and all those SWAT officers you have fought, you are surely lacking any protection at the very moment. Besides those two pieces of equipment, there are no valuables in the area, so just head North, until you reach the place in which you will unlock another optional objective.
 A single, well-aimed grenade is able to blow up a huge portion of the hotel.
After arriving at the location of a huge building, you will be given an optional objective called "Exterminate hotel guests" - the aim of this mission should be more than obvious. You should use your newly acquired grenades here - throwing a single, well-aimed grenade will cause an enormous explosion, blowing up a huge portion of the hotel, setting most rooms ablaze, and killing of majority of hotel guests located on the ground floor. Afterwards, just head on the first floor and eliminate all the remaining civilians. Making such an uproar will get the attention of the law enforcers, so be ready for some large group of cops closing in on your position.
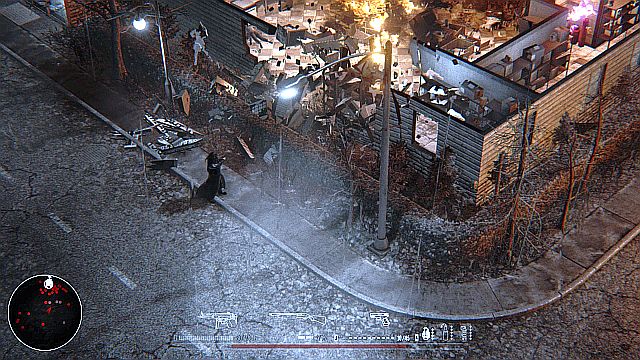
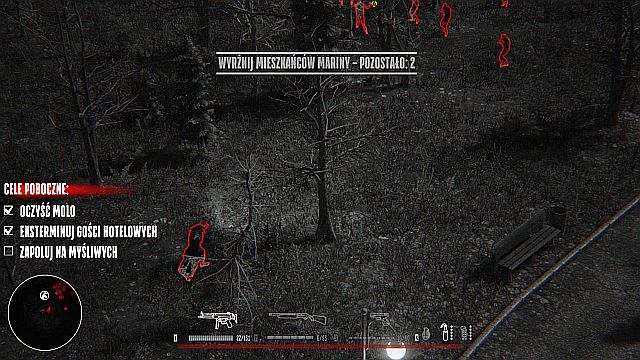 It's time to hunt the hunters!
After killing off all the hotel guests, as well as policemen, and unlocking another respawn point, collect all the pieces of equipment dropped by the cops and head North, to the last, third optional objective. There are no valuable items along the way (aside from Pistols, but after the last encounter with the cops you should have more than enough bullets for that weapon), which is why you should just focus on getting close to a small forest. There you will be given the optional objective called "Hunt the hunters" - you must kill all the shotgun-wielding hunters in the area. Watch out to not just run into all of them, because their weapons will shred you to pieces in a matter of seconds - exploit their weakness (short range of shotguns) and kill them off from afar. Afterwards you will be given another respawn point. Pick up all the ammo left by them - you will soon need it.
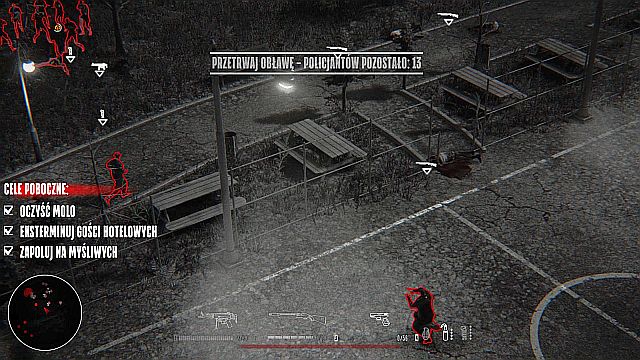 You will have to face a large group of SWAT officers at the end of the mission.
During the completion of one of your objectives (after killing 80 people), you will be given another main objective - "Survive the chase", during which you will have to eliminate 20 policemen, who will flood the area around your character as soon the requirements are met. It is a good idea to find some cover, even from a single direction, so that the enemies will not be able to surround you - this time you will be going against a SWAT unit, which can kill you off in a matter of second if they manage to catch you off guard, on an open terrain. Take care of them, heal your wounds by performing executions and head towards a zone marked with a green icon on your radar in order to finish this mission.
Main objectives:
Optional objectives:
 The beginning of the third mission differs greatly from the rest of the game - it's very linear.
The beginning of the third mission of the campaign differs from the rest of the game - there is no open world, full of various activities, there are no additional objectives, or the possibility of taking a different approach and route than the authors predicted. It is a very linear level, in which you just have to get from one end of the train to the other, killing everyone on your way there.
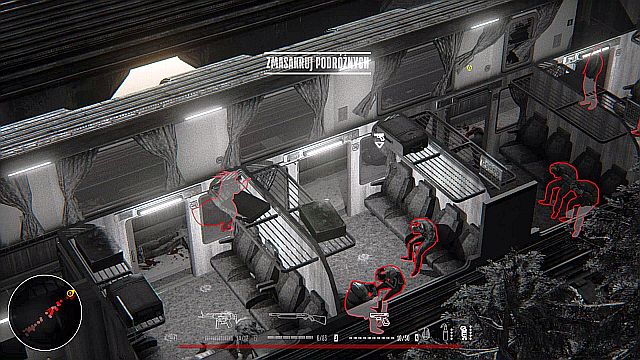 Pay attention to people sitting on seats - use them to replenish any missing health.
There are several different wagons, which, more or less, are filled with people, who have to be killed (hence the main objective "Massacre the travelers"). A thing worth mentioning is the fact, that during the whole train chapter, you won't encounter numerous police forces (there's only a couple of policemen present on the train), or anyone from the army (there's a few of them at the final wagon), but for a change a large fraction of civilians will be wielding firearms (mainly pistols). You should remember about that fact all the time - a single person with a pistol will not be able to do much to you, but if you rush into a group of such individuals unprepared, you might end up getting killed (especially on the highest difficulty setting).
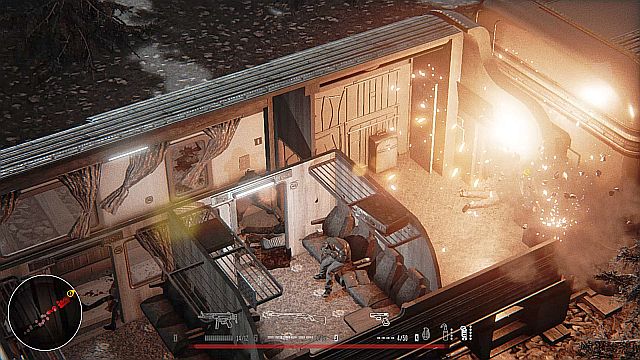 Use the common gas tanks and fire extinguishers to cause explosions.
Another thing that should not be forgotten are immensely common explosive items, such as gas tanks, or fire extinguishers. You can use them to easily get rid of a large group of people, but remember to stay away from them as far as possible - enemies might blow them up as well (even if they will not be aiming at them, a stray bullet can reach such an object), sometimes resulting in your instant death.
 Practically the only moment in the whole train level in which you must proceed with caution.
After you reached the penultimate wagon, a new main objective, called "Stop the train" will become active for you. Proceed to the next wagon with caution, as there is a small group of soldiers there, equipped with Assault Rifles (you can pick them up upon their death). This weapon deals extreme amounts of damage - 2-3 enemies wielding this firearm will be able to empty your entire health bar in a matter of seconds. You should take them out from a safe distance because of another reason - they are using Grenades (which can be picked up as well), which, as you can imagine, deal immense damage if you are in the vicinity of their impact (note that soldiers don't care about their surroundings and they will throw grenades even if a group of civilians will end up being blown up).
 He doesn't know yet...
The last thing to remember, is the lack of any optional objectives, what is closely associated with the lack of any respawn points. If the mentioned soldiers (or anyone else on the train) manage to kill you, you will have to play the whole mission from the very beginning. After you break through soldiers and enter the next wagon, a short cutscene initiates, and you will find yourself outside the train.
 3 stars won't be enough to ensure the safety of its guests...
You will be given a new main objective: "Clear the station". You have to kill 80 people, but as you probably already guessed, you will kill a lot more of them. In the area in which you start upon leaving the train you won't find a living soul, that is why you should head North, towards two icons on your radar - those are the only two optional missions available to you during this mission. Additionally, those are placed really close to one another.
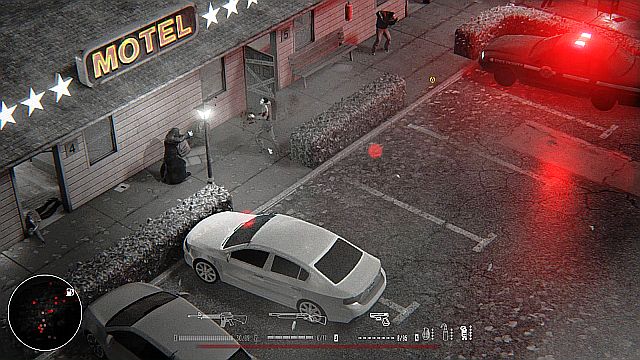
 Watch out for a group of shotgun-wielding policemen - they can dish out some real damage.
The first one is "Eliminate motel guests" - a very similar to the one you encountered in the previous mission. You have to clear the motel building itself, as well as the closest surround area from the people, after which you will be given a respawn point. While doing so, watch out for a group of cops approaching you from the North, as all of them are equipped with shotguns - if they all barge in into your room and they will be able to fire a few times, your character will soon be dead. It is better to just leave the motel via the Southern exit and wait for them to come at you.
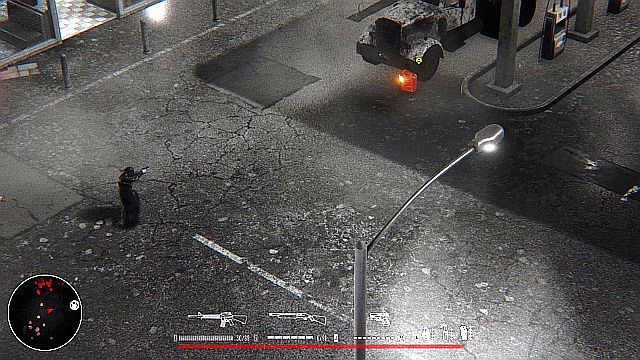 A single, well-aimed shot at the canister will blow up the entire fuel station.
The second optional objective, "Blow up the fuel station" can be done in a matter of seconds. After arriving at the fuel station, locate the fuel canister placed close to a parked truck - all you have to do is to shoot a single bullet at it, back away a little bit and, after a few seconds, observe, as the fuel station is destroyed in a chain of huge explosions. After you have completed the task, you will be given a respawn point.
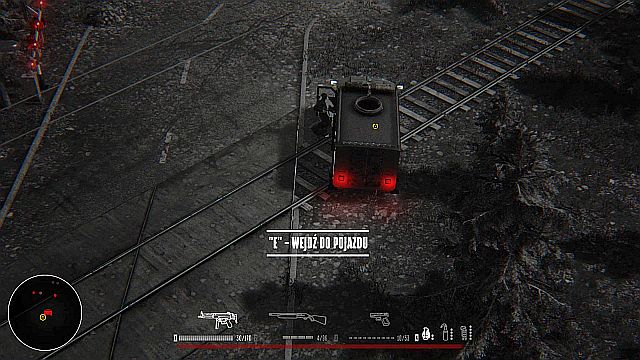 You have to end the mission by simply getting inside the marked vehicle.
After completing both optional objectives, you have to kill the remaining amount of people, to complete the main objective and receive another, final one during this mission: "Steal an armed SWAT truck". Before you steal it, move around the map to collect all the ammo from the fallen SWAT officers. There is nothing of importance to do here anymore, so just head towards the yellow marker on your radar and enter the indicated vehicle to finish the mission.
Main objectives:
Optional objectives:
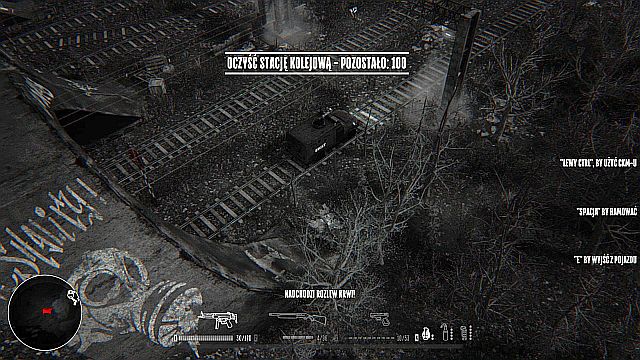 The SWAT armored vehicle is an interesting, yet problematic one.
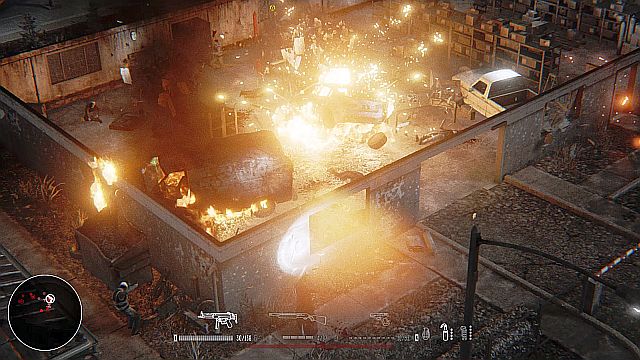
The fourth mission starts with your character inside the SWAR armored vehicle you stole during the previous mission. On one hand the truck is quite interesting, because of the HMG installed on the roof of it - that gun will easily kill even a soldier with a single bullet (and a few of them will blow all types of vehicles, including other armored trucks). On the other hand, the vehicle has some annoying and dangerous flaws as well. First things first, the necessity to jump from the driver to the gunner seat - you can either drive, or shoot, which leads to some silly situations, in which you get to the driver seat, drive a few inches closer to your target, and jump back to the gunner seat in hope that this time you will reach your target, and that the enemy will not reach you. The second, a lot more dangerous flaw is quite a low durability of the truck itself - a couple of policemen with shotguns won't do much, but starting from this mission you will have to deal with the military, whose equipment will make a short work of your armored vehicle in a matter of seconds.
 Don't shoot people if you don't have to - during this mission it's better to prepare yourself before the police and military arrives.
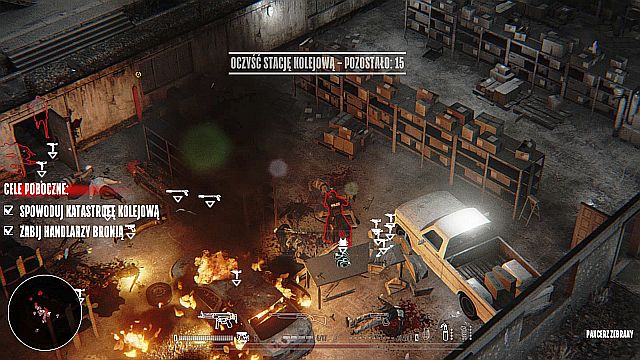
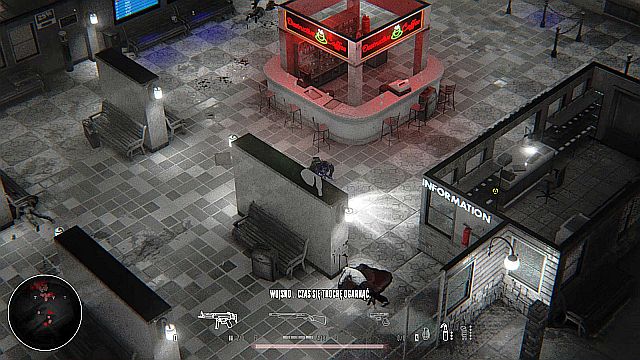
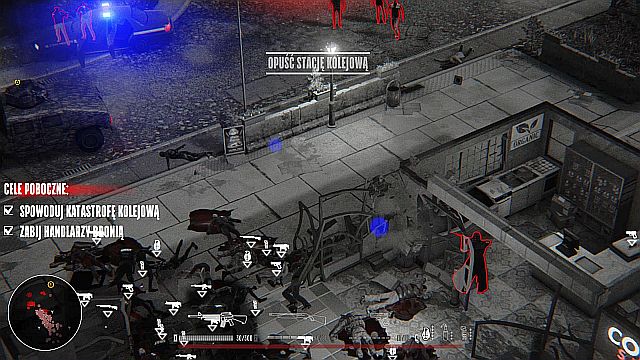
You can decide to either travel around the whole level behind the wheel of the truck, or on foot - the choice is yours. Yet again, during this mission you will have to exterminate a certain amount of people. It's worth to hold onto that, because after you've done that, the train station will be, literally, flooded with dozens of policemen and soldiers. It's a good idea to prepare for that beforehand, by completing optional objectives, unlocking respawn points and collecting equipment (armor and a new weapon - more on that will be mentioned later).
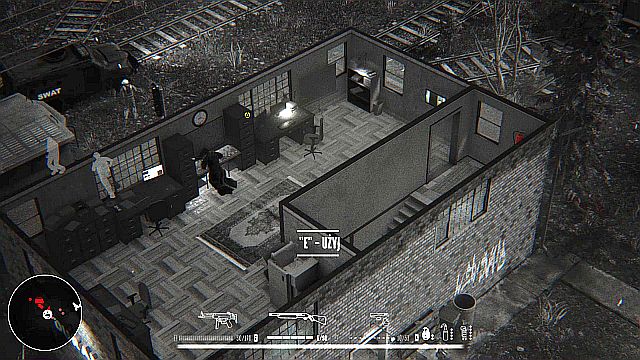 The first optional objective is limited to pushing a certain button.
First things first, head along the tracks towards the railway service station (marked by an icon on the radar), where the first, trivial optional objective awaits you - "Cause a train wreck". All you have to do is to go upstairs and activate the control panel. After a few seconds an explosion will occur in front of the building (remember to stay upstairs before it happens, as it's relatively safe here, whereas downstairs you might get seriously injured). Afterwards you will be given the respawn point, and the counter on the amount of people you need to kill will be decreased by 50.
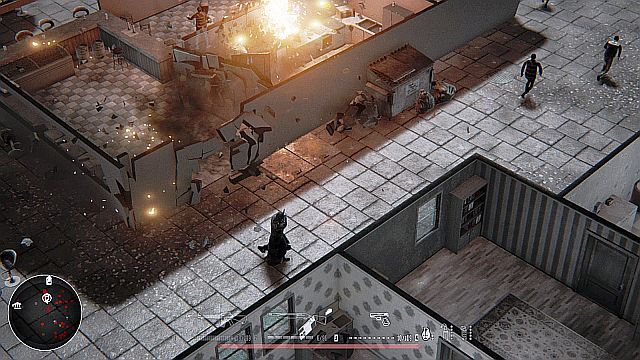
 A single, well-aimed grenade will eliminate most weapon dealers.
Go downstairs and head North-East, to the next optional objective marked with the pistol icon on the radar. After getting closer to the spot, you will be given an objective "Kill the weapon traders". It's one of the hardest, at least in theory, optional objectives in the game, as most of the targets inside the building are armed, meaning that a tactic involving you running inside through the main entrance will end one way - you getting killed. Wait for a couple of seconds until a car rams inside the building, and throw a grenade at it - after a few seconds a series of explosions will occur, and most of enemies inside will be either killed, or set ablaze. You just have to finish off the remaining enemies to unlock another respawn point.
 Inside the weapon dealers den you will find two new weapons: an Uzi and a flamethrower.
It's a perfect spot to fill up your ammo, because there's a lot of different guns scattered around here. Besides Bulletproof Vests and Pistols, you will find two new "toys" here: an Uzi and a Flamethrower. The first one is, basically, an upgraded version of the pistol, as it uses the same type of ammo (don't ever think about using both of those weapons simultaneously, as you will run out of ammo extremely fast), firing a lot faster, and having a larger clip size. However, swapping the pistol for uzi is quite unnecessary, as the former works incredibly good during the whole game. Flamethrower is extremely effective on a very short range - all you need to do is to "expose" the target to a little bit of the blazing fuel and it won't bother you again. It doesn't work on longer rangers because of it's short reach - if you want to use it, try to do so while being hidden behind a cover, so that enemies have to get close to you.
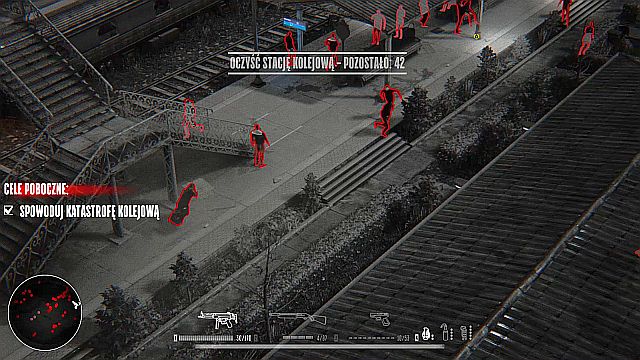
 Try to get rid of as many policemen / soldiers as possible, so that they won't have a chance to spread around the map.
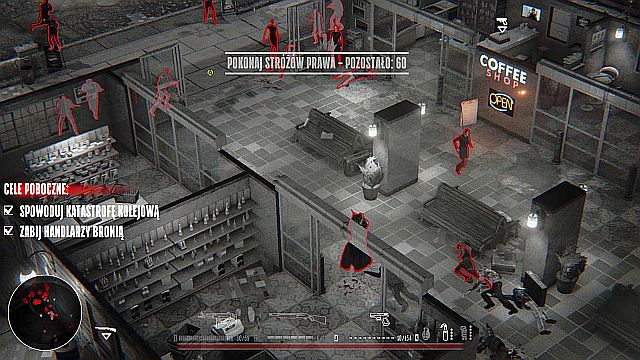
Collect the body armor, all the ammo you can carry, heal your wounds on civilians via executions and head North-West, to the building resembling a railway station. Kill the remaining people to activate the "Fight the law enforcement" objective and head to the northern entrance to the station. It's quite crucial, as it's the only way leading inside the terrain the whole map takes place on and all the enemies coming for you will have to go through that entrance - it will allow you to eliminate as many enemies as possible before they spread out around the map and start flanking you.
 When you are getting low on your health, head back to the weapon dealers den, collect armor and heal off civilians.
Use the advantage your position gives you (remember, that having the character at the bottom of the screen and aiming top you will have the longest reach out of any positions) and try to kill as many of them as possible before they are able to flood the building. At the beginning the enemies will consists of regular policemen, equipped with pistols and shotguns, and after the counter goes below 40 SWAT officers will replace them.
 Enemies will try to attack you from different sides.
The real encounter begins when the counter goes down to 25-30 law enforcers - soldiers, equipped with Assault Rifles and Grenades will replace the police. If previous enemies managed to take out your armor and a portion of your health, head back to the weapon dealers den, collect armor and heal off civilians, so that you have a higher chance of survival.
 Wait until the enemy stationed in the HMG empties the magazine and send him a grenade.
After killing the remaining law enforcers, you will be given a new objective to leave the train station (you need to head to the marked place). But there's a problem - as it was mentioned, there's only one exit from the train station (Northern exit, from the enemies flooded the place), and a truck with a HMG mounted on top of it is parked right in front of it. To get through it, stick to the wall on the right side of the railway station and hide behind the wall when the enemy starts shooting at you. Wait for a couple of second until he runs out of ammo (and starts reloading) and run out of your cover and throw a grenade (or two, if one is not enough) to blow up the truck. All you have to do now is to head towards the marker on your radar to finish the mission.
Main Objectives:
Optional Objectives:
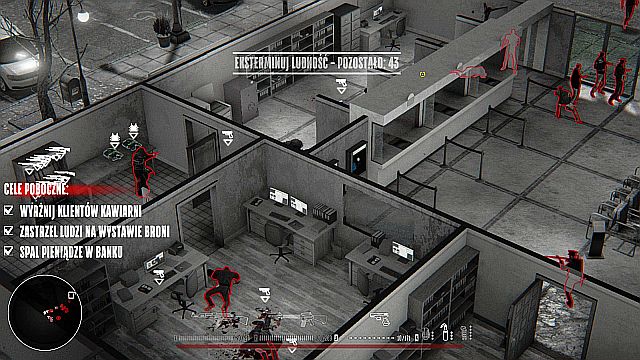
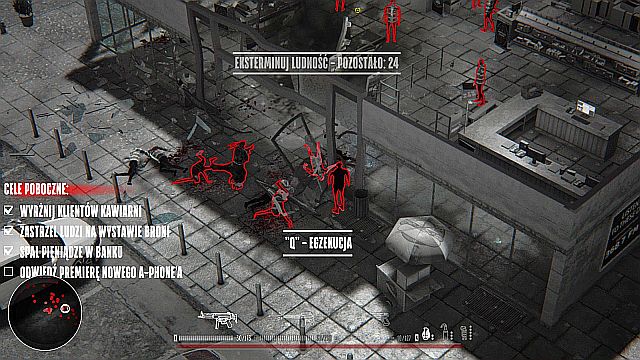
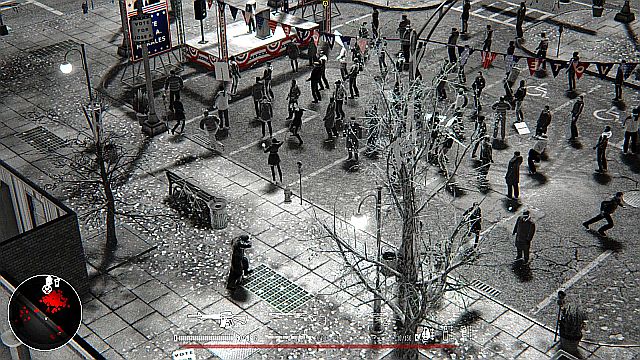 You can exterminate the guests on the election rally, but the politician is your primary target.
The next mission starts right next to an election rally - there are Molotov Cocktails next to your character as well. Additionally, it's a place in which you can complete a somehow hidden (as it's not shown on the side of the screen - there's only an icon on the radar, although it can simply be a mistake) optional objective - you have to kill the politician standing on the platform. You can, of course, start shooting at everybody present on the rally (especially given the fact, that you have to kill 150 people during this mission's main objective), but you should focus on the politician, so that he won't be able to run away from you. After killing him, you will be given a respawn point.
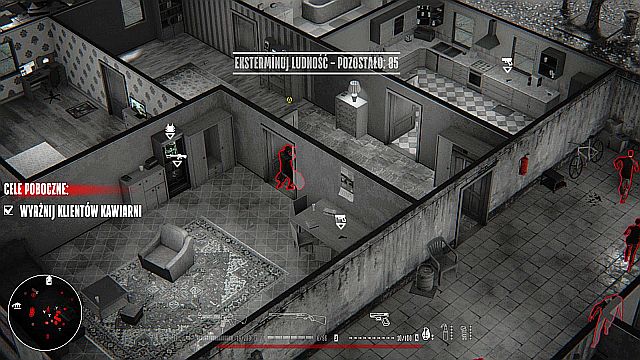
 A single grenade and there won't be much left of the cafe.
Afterwards, head North-East, in the direction of the cup-like icon on the radar. After arriving at the place, you will be given the "Slay the customers of the cafe" optional objective. The objective is fairly simple and can be done in a matter of seconds - all you have to do is to simply throw a grenade inside, or shoot at the propane bottles hidden in the back of the store. It will trigger a chain reaction, blowing up the whole building and killing most, if not all, people inside the cafe. You will also be given a respawn point.
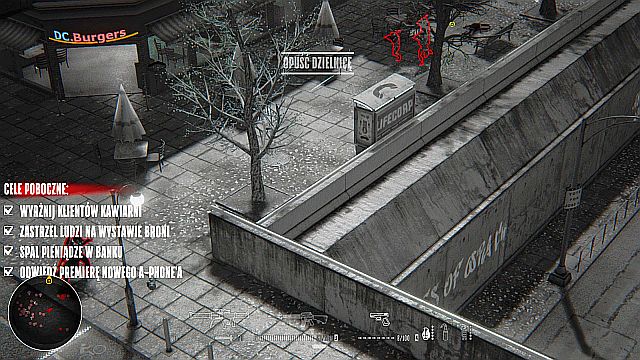
 Wait for the police and kill them all in a tight corridor.
Don't forget to pick up the Molotov Cocktails located near the place where the propare bottles were. Afterwards, go South from the destroyed cafe - inside you will find a room with a Bulletproof Vest and an Assault Rifle. Additionally, it's a good place to hide from the pursuit that is certainly coming for you - wait for them to enter the building and swiftly kill all of them. Don't forget to pick their SMGs!
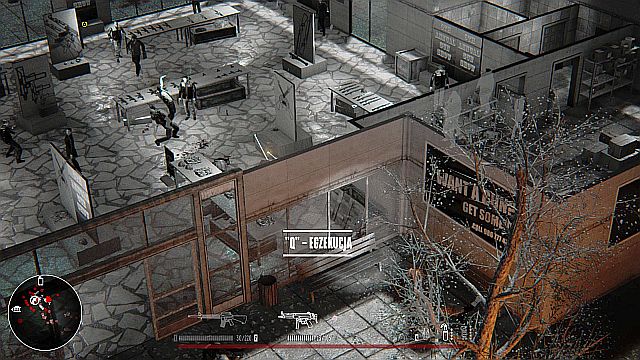 Almost nobody present on the weapons exhibition is armed.
Leave the building via the Eastern exit and head North, in the direction of an icon of a gun, to unlock another optional objective, "Shoot the people on the weapons exhibition". This time it will be the exhibition, not a den of dealers, meaning that most of people inside will be unarmed and completely harmless to you. There's no point to throw grenades inside, as nothing will explode together with them - go inside and exterminate everyone with your guns. Prepare for a huge wave of policemen / soldiers, that should be closing on your position.
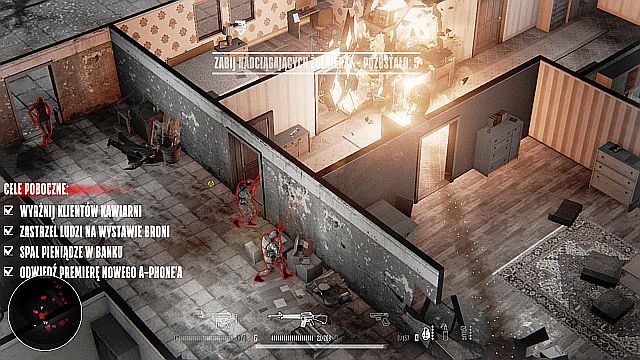
 After killing people on the weapon exhibition you should expect a tough company.
The place you just cleared (unlocking a new respawn point) holds two new, and at the same time last weapons in the game - another Assault Rifle (AK-47) and a Rocket Launcher. The first one is almost identical to a typical assault rifle (the only difference is the type of ammo both weapons use), and there's a low amount of ammo available here (and you won't find this weapon again in the game), so you can just ignore it. The Rocket Launcher, as you've probably guessed, offers extreme firepower (being several times stronger than grenades), and fires at really long ranges, but it's not worth to pick it up during this mission, because you won't have any opportunity to refill its ammo (the only exception to this rule is when you are playing on the highest difficulty settings and numerous soldiers will start running carrying this gun).
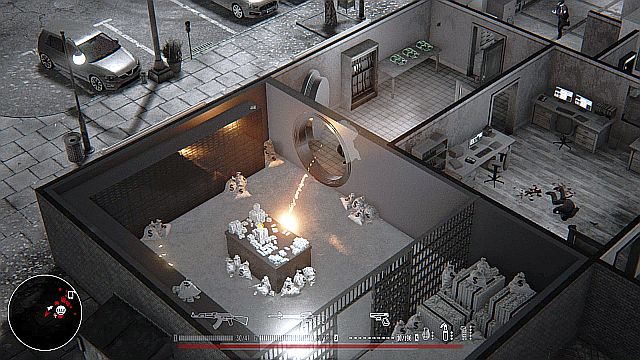 Such a waste...
Refill your ammo, armor and health and head North, get on the other side of the bridge and turn to left, to yet another optional objective. After arriving at the bank, you will be given the "Burn the money in the bank" objective. It's one of those rare occasions in which you don't have to kill a single person to complete a quest. You have to get inside the vault and set the money on fire. There are numerous ways to do so - you can throw a grenade, fire a rocket, or simply use Molotov Cocktails. After the cash starts burning, you will be given another respawn point.
 Another good spot to easily get rid of the pursuers.
You can be fairly certain that your actions in the back will trigger an alarm and soon the place will be crawling with cops. Use Bulletproof Vests and ammo lying near the entrance to the vault to easily repel the attackers. Afterwards, heal off civilians, refill your ammo and armor and head North-East, to the last optional objective during this mission.
 Even hipsters can't enjoy their new phones.
You will be given an objective titled "Visit the A-Phone premiere". "Visit" is certainly an understatement, as you have to kill everything that moves inside that building. Remember, that you don't have to chase those who left the building - all that needs to be done is to make the whole building clear, without a living soul inside, doesn't matter if you killed it, or let it run away. Afterwards you will be given a respawn point and you will have all the optional objectives completed.
 Three soldiers wielding RPGs is definitely not the sight you want to experience.
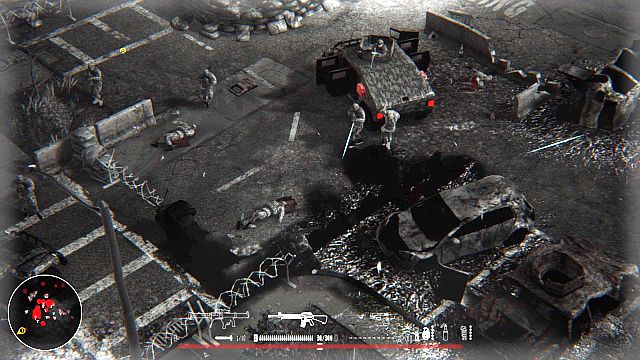
If it didn't happen already, the counter representing the amount of people you need to kill should soon reach 0. At that moment you will be given a new, and final main objective - "Kill the approaching army". You will have to kill several dozens of soldiers, some of which will be equipped with rocket launchers (on the highest difficulty there will be lots of them with that weapon) - you must kill them as soon as you locate them, as a single rocket is enough to kill you, even when you have a full health bar.
 Hiding inside buildings is not a viable option anymore...
Hiding in buildings won't help you at all, as the soldiers equipped with rockets launchers will demolish every single wall separating them from you, inflicting a huge amount of damage with each shot (hence all that optional objective work, so that you have several chances to respawn and try again). Car wreckages are good spots to hide behind - rockets won't reach you there, and the wreckages won't explode a second time. After you've killed the required amount of soldiers, scan around the map to collect ammo (Assault Rifles, SMGs and, if possible, Rocket Launchers) and body armor (remember, that you can find it in the bank, or on the weapons exhibition). Afterwards, head towards the yellow icon on the radar to finish the mission.
Main Objectives:
Optional Objectves:
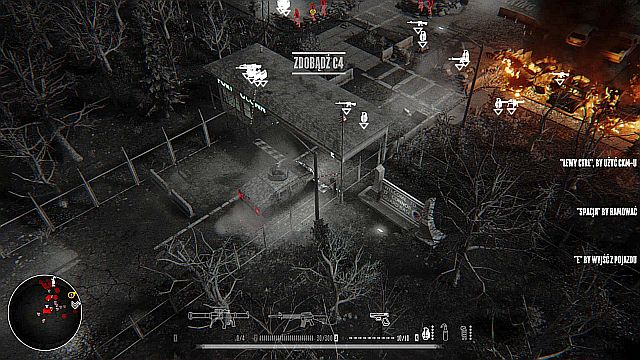 Eliminate the enemies one by one - driving through the gate will result in your death.
It's time to attack the military base. Your main objective isn't to kill a certain amount of people, but to acquire explosives (C4), which will be used during the next mission. The whole level starts with you behind the wheel of the armored vehicle - the only route leads North, so go along it until you reach the gate of the military base. Do not rush inside, as the military will quickly blow up your vehicle. Park the vehicle next to the concrete barricade and start shooting at soldiers - pay attention to the right side, because from time to time a soldier wielding a rocket launcher will attack from there. Move inch by inch, until you get rid of all the enemies stationed near the gate.
 You will find huge amount of buildings in the base, full of useful items.
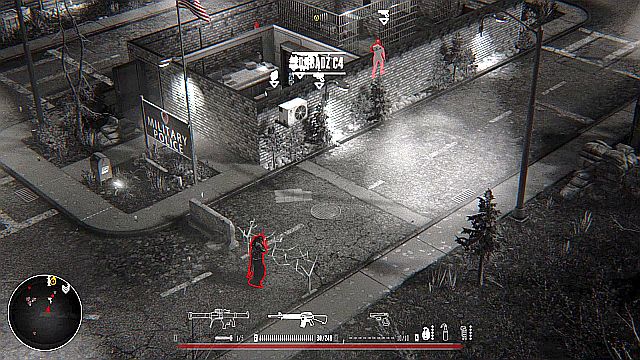
Remember to pick up ammo and a Bulletproof Vest located at the gate. After collecting them, head East, towards the icon on the radar. Whatever you do, don't go North, in the direction of a huge building, as it will trigger a trap-like mechanic, and the place will be flooded with soldiers, who will make short work of your character. During your march, try to kill enemies stationed at posts - you will have a lot easier time at the end of this mission.
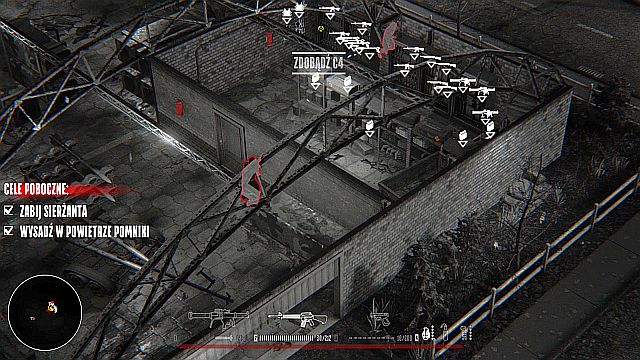
 You can abuse grenades as much as you want during this mission!
After arriving at the place, you will be given the "Kill the sergeant" optional objective. Its a soldier located on the upper floor - to get there, however, you first have to eliminate soldiers on the ground floor. Take advantage of the fact, that every killed soldier drops 2 grenades upon his death and use as many of them as you want - after a few of them the building will be clear and you will just have to go upstairs and finish the job. Afterwards you will be given a respawn point.
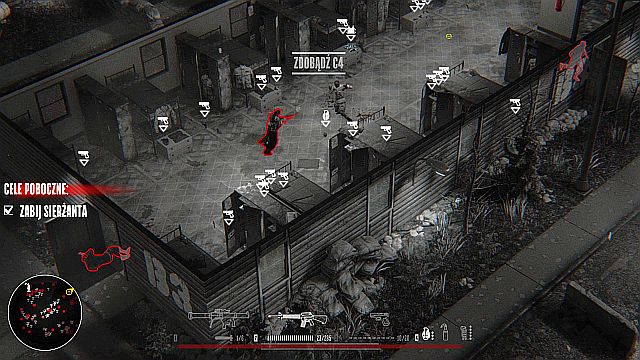 There are dozens of Bulletproof Vests scattered around the map!
Collect ammo and grenades (and, if there's a need for that, heal your wounds) and head North-West, to the last optional objective for this mission. On your way there you will pass by a lot of buildings resembling barracks, in which you can find a lot of ammo and a bulletproof vest. It's worth to visit them.
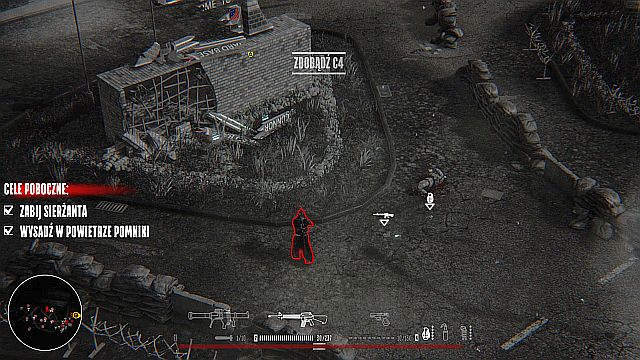 It was such a nice monument...
As soon as you arrive at the place, you will receive the "Blow up the statues" optional objective. Start by clearing the area - there are dozens of soldiers in the neighborhood, but given your position and the range you get from it, you should have no problems taking them out. All you have to do is to throw a grenade (or fire a rocket) at the marked monument to finish the objective and get a second respawn point. Pick up all the stuff lying around and head towards the yellow marker on the radar.
 There's an armory where you pick up the C4.
The route should be relatively clear, but you have to watch out for enemies with rocket launchers. After arriving at the place, a short cutscene will initiate, and you will be given an objective to leave the base (you have to get back to your starting location).
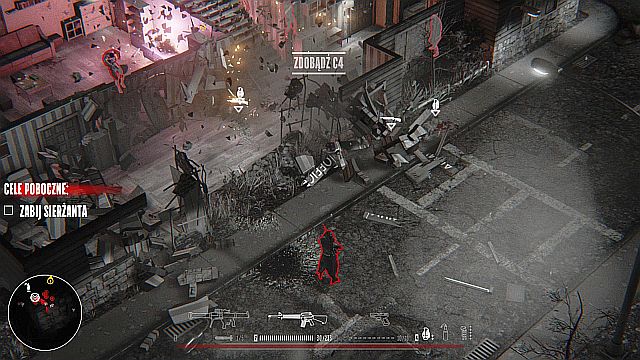
 Rushing won't help - you will be killed in a second.
It won't be so easy, however, as the whole base will be swarming with soldiers (where did they come from, if the whole population of the base is long dead?) - it's also the reason why you've been told to clear all the guard posts along your way here. Rushing to the yellow marker won't help - exits are blocked by armored vehicles and you be killed before you get anywhere. You have to move around slowly, killing any enemies approaching your position - it's best to stick to the Southern edge of the base, so that you have longer reach. After breaking through the barricade a cutscene will initiate and the mission will be over.
Main objectives:
 Use the HMG to kill the approaching soldiers without breaking a sweat.
And here you are, the last mission of the campaign. Yet again, the level begins with you inside the armored vehicle, and a large group of soldiers is approaching your position - use the HMG installed on the armored vehicle and get rid of them.
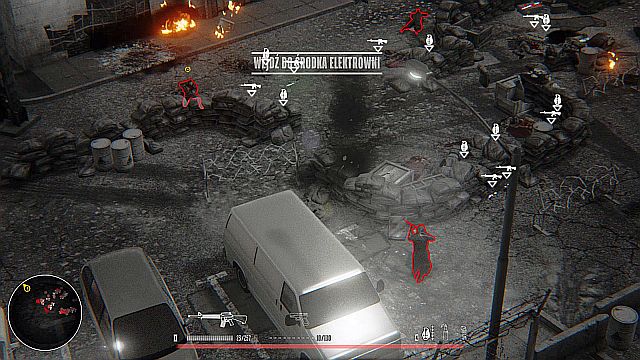 You can finish the remaining enemies on foot.
After you've eliminated the incoming soldiers, try to slowly approach the building of the power plant (just like in the previous mission), killing off any soldiers that get in your firing range along the way - sandbags which your enemies use offer then no protection, and you will be able to kill them with a single bullet even if they are perfectly hidden. Park your vehicle near the concrete barrier and eliminate the remaining enemies - also those, who will run out of the building.
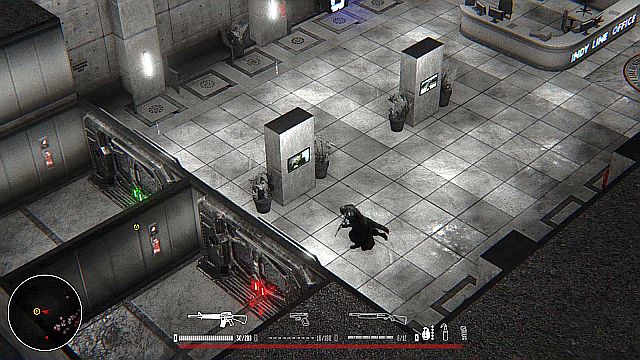 There's nothing interesting here, so just take the elevator.
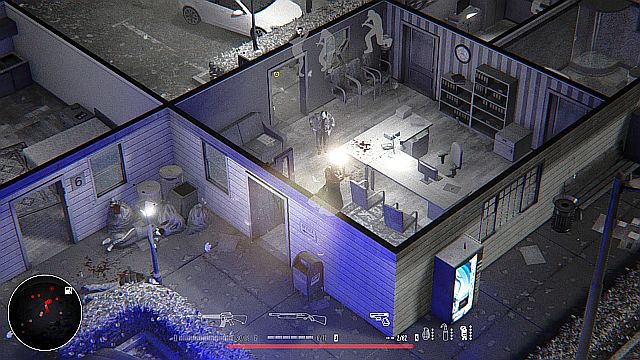
Collect the items dropped by the soldiers (if you aren't full yet) and heal your character if needed. Afterwards, enter the building. There's nothing interesting inside (apart from a small room in the Northern section of the building, where you can find a Shotgun), so you can just take the elevator and enter the proper section of the power plant.
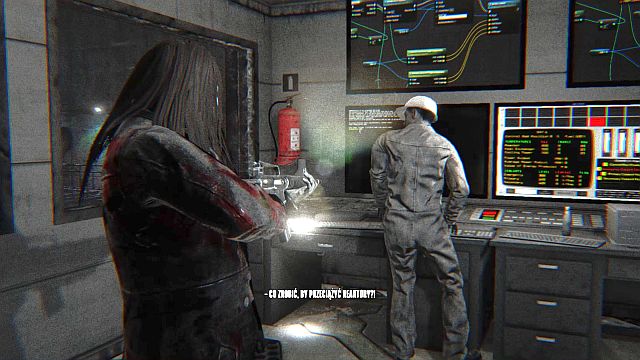
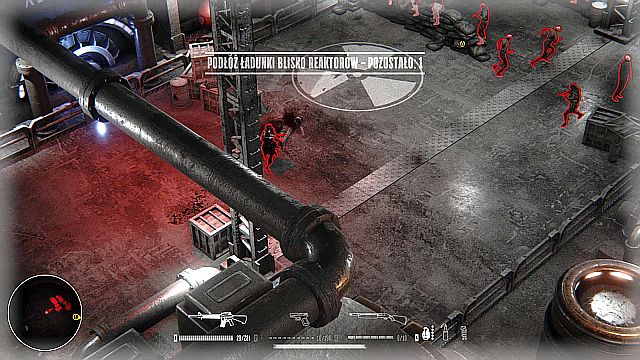 There's a couple of switches like this one during this mission.
After getting underground, you will for the first time be in a completely closed environment. There are three passageways leading from your current room. First things first, go to the left one, where you can find a supply of grenades and a couple of bulletproof vests. The entrance to the deeper section of the power plant is (for now) closed, so you have to go through the one located to the opposite of the armory. You can't really get lost here - go straight ahead until you reach a control room. Flip the switch and the previously closed doors will now be open. Clear the small group of policemen and go through the newly unlocked passageway.
 You can still use grenades freely - you won't run out of them during this mission for sure.
After getting to the next room, you will stumble upon a numerous group of soldiers - your current position should allow you to effortlessly eliminate them, without getting hit once. Once you get through the door they defended, you will end up in quite a spacious room, with two different routes - leading right and left. Go along the first one, eliminating the enemies on the other side of the room along the way.
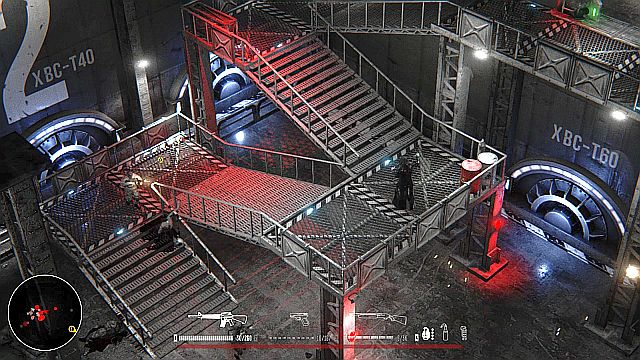
 Move slowly and kill enemies one by one.
Continue your journey, and when you reach a room with two oval generator-like objects, stop for a moment and look ahead - there's a huge group of soldiers awaiting you on the other side of the corridor. Try to move slowly and kill your enemies one by one, without exposing yourself to their fire. After getting rid of the group on the other side of the room, get back to the room with two generators and wait for another group of soldiers coming from the right side, marching along footbridge.
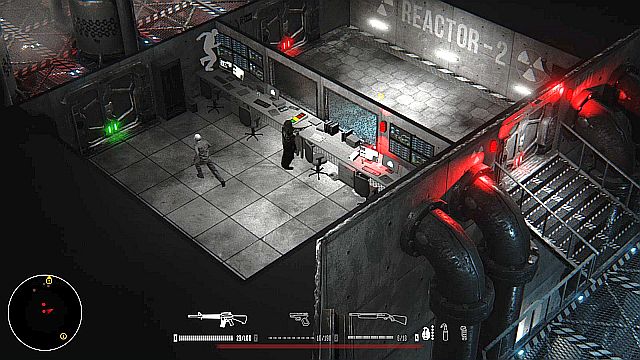 A switch blocking the entrance to the first generator.
Another group of enemies will attack you soon afterwards - fortunately for you, there will only be a few of them this time. Go all the way right until you reach a pair of doors - enter the bottom one first, flip the switch and go through the upper one afterwards, so that you can reach the first reactor. After approaching it a short cutscene will initiate and you will get a respawn point. Now all the way back to the crossroads.
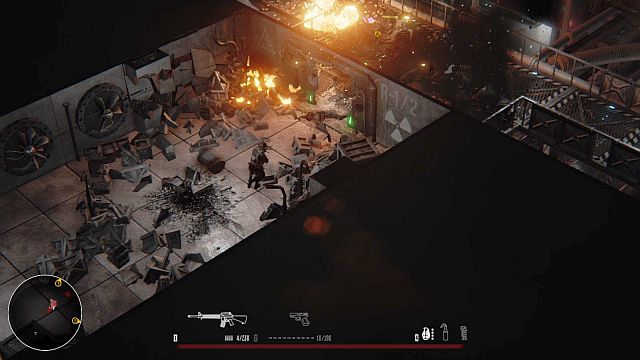
 You can always use explosive barrels.
Unfortunately, it won't be that easy - as you can probably guess, the passageway you cleared is now swarming with enemies again. Proceed just like before - move slowly and eliminate them one by one. Fortunately for you, enemies will only appear near the entrance to the generator, so after taking them out you can freely run to the crossroads, where another group awaits.
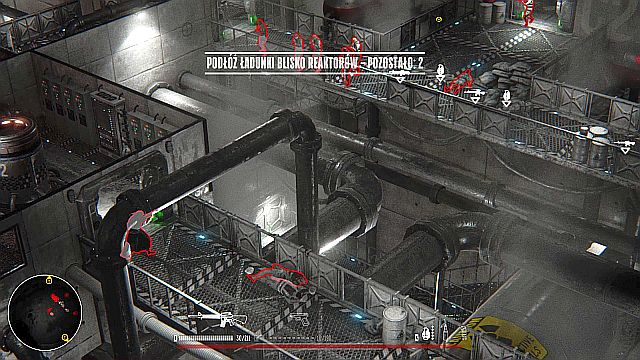
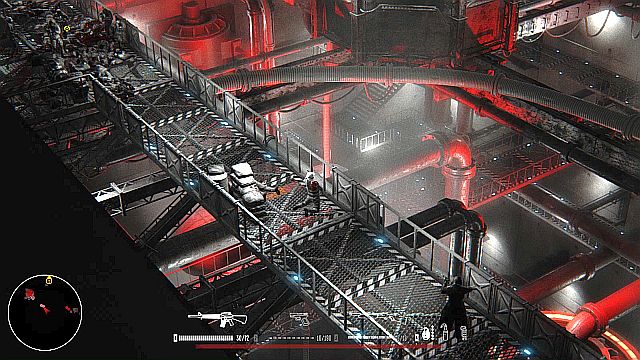 Places such as this one are perfect for player, because of the long vision range they give.
After arriving at the crossroads, go through the left passageway (or, from your perspective - North-Western) and continue along it. You will stumble upon another group of enemies, coming from the door on the left side, where you should go after you've dealt with them - nearby staircase leads nowhere, and the passageway on the right side is locked at the moment. Kill all the enemies, pick up ammo / grenades and the body armor (at the entrance to the power plant) and go left.
Don't rush - you will be quickly killed.Run down the stairs and head along the only possible route - don't rush, as there's a group of enemies awaiting your arrival. Kill them all by using the vast range your position gives. There's nothing of interest here, so just climb the stairs, flip the switch in the bottom room and go inside the reactor to plant a second explosive, unlocking a respawn point along the way.
 Wait until the enemies climb the staircase - you will be able to easily pick them out one by one.
You will receive your final objective: "Go to the control room". You have to go back to the place with the broken staircase and the locked entrance on the right side - it will now be open. After leaving the reactor stop at the top of the staircase for a second - a group of enemies is approaching your position and you will have a hard time fighting them from this side of the screen. Instead, wait at the top of the staircase and pick them out one by one.
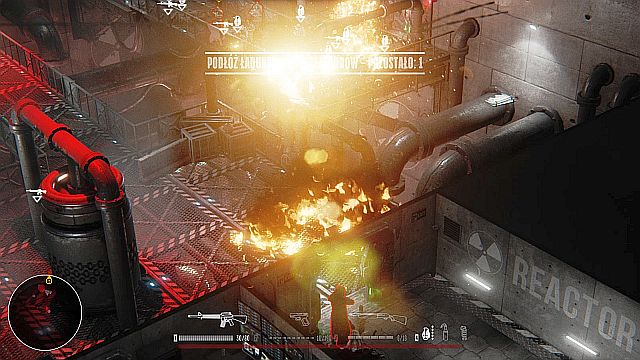
 An explosive finale finally approaches.
Now all you have to do is to go to the mentioned passageway (marked with the yellow icon on the radar) - there will be some soldiers along your way, but you should have no problem with them. After reaching your destination a cutscene will initiate, after which the mission, as well as the game, will end.
The equipment in the game, to make it simple, is rather moderately varied, because it lacks some of the classic weapons, such as a sniper rifle, or melee weapons, but it does not mean that there is nothing to choose from. There are no weapons which are completely useless (the case of the shotgun is a little controversial). Below you will find a short description of each and every weapon.
The pistol is probably the most common weapon in the game, and, paradoxically, one of the most effective ones as well. Single bullets fired from this weapon deal the highest amount of damage from all the firearms (aside from assault rifles, and, which is quite obvious, rocket launchers), while the player is able to carry up to 200 pistol rounds at the same time. This weapon lacks any flaws and most of players (including the author of this guide) will surely use it throughout the majority (if not entirety) of the game. Pistols are carried by "regular" cops, and a lot of them can be also found hidden inside various buildings and houses.
Uzi was assigned together with the pistol from a really simple reason - both weapons use the same type of ammunition. They almost do not differentiate from one another at all (aside from the rate of fire, obviously), although the Uzi seems to be dealing a little lower damage from the pair - the better choice is the pistol. Never use both of those weapons at the same time - you will quickly run out of bullets, leaving you with two completely useless slots of weapons.
The most common (after the pistol) weapon in the game. It might seem that this weapon will be extremely effective on close range - although there's a grain of truth in that. The weapon deals lethal damage (it kills everyone with a single shot), provided that the shot was made from a very close distance, and that the whole shot hit its target - otherwise the damage falls of considerably. This, coupled with low rate of fire and extremely long reload times (which can take up to five seconds when you want to fully load your weapon) makes this weapon fairly inefficient. If you have an option to swap your shotgun for any other weapon, you should do so without giving it a second thought - you will not miss it.
Shotguns are used by all enemies (aside from soldiers) in the game - a lot of those weapons can also be found hidden inside houses, or "armories".
One of three (together with Uzi and Assault Rifle) fully automatic guns in the game, allowing the player to continuously fire the weapon (provided that there are bullets in the magazine). SMG, despite dealing quite a low amount of damage (about half of which the pistol is capable of) with a single bullet, allows the player to carry a huge amount of bullets at the same time, and has the highest rate of fire from all the weapons in the game.
It comes in handy in situations, in which there are a lot of enemies closing in on your position, and you do not have time to aim your weapon properly. Later on in the game this weapon is replaced by the more common (and powerful) assault rifles. SMGs are used mainly by SWAT officers, and it cannot be acquired from other sources.
Without a doubt the most effective weapon in the game. The player starts off with it in the first mission of the campaign, but practically all the way to the fourth mission (aside from a single encounter with soldiers during the second mission) you will have no access to a new one in order to replenish your ammo reserves. The weapon can simply be characterized as a mixture of an SMG and a pistol - it combines the high rate of fire of the former, with huge damage dealt with every shot, which is the characteristic of the latter firearm.
Another advantage of the weapon is an easy access to ammo starting off from the fourth mission - you will frequently fight with soldiers, and every single one of them will be equipped with that weapon, so you will not have to preserve your ammo. This weapon is only used by the military, but it can sometimes be found hidden in houses, or "armories".
Another type of an assault riffle (because the most common resembles an M16) is the AK-47, but this weapon is available only during the 5th mission (weapon exposition) and there is really no point of taking it into consideration, as it is almost identical to the "typical" assault rifle.
An extremely effective weapon, but only on a very short distance, making it lethal in closed, narrow spaces, in which the player is able to set entire groups of enemies ablaze in a mtter of seconds. The weapon is completely useless on open terrain, in which you will have to run towards your enemies, exposing yourself to their gunfire.
Flame thrower is available purely as a "collectible" as no enemy in the game uses it. You can get it during the fourth (arms dealer den) and sixth (armory, in which you pick up the C4 explosives) missions.
The effectiveness of this weapon should be quite obvious to everyone - a single rocket is able to kill everyone, will blow up every vehicle (even the military armored trucks), or to level down a large portion of a building. Additionally, it has huge firing range, and the player is able to carry up to 11 rockets, which is a lot.
The only drawback is the long reload time, and the fact that using it on a close distance, or in tight, closed spaces may end up bad for the player. The weapon is also extremely dangerous in the hands of the enemy - a single rocket will almost always kill you, regardless of your health bar. You can find it in some buildings, "armories", and as a drop from some soldiers.
Grenades are one of the most effective weapons in the game - they can level up entire buildings, blow up series of cars, and if well aimed, they can kill entire groups of enemies. Unfortunately, at the same time, they are extremely dangerous to the player, as soldiers tend to throw them literally everywhere - you should watch out for that especially when you decided to take cover from the chase in a building.
You can find them in various places scattered around the maps, as well as by the bodies of killed soldiers (even those unarmed).
Flashbangs are effective almost only when they are used against the player - after getting hit by one you will have problems moving your character, and the bullets you fire will scatter around the whole screen. That effect lasts for approximately 5 seconds. When dealing with enemies, they are practically useless - they stun enemies for, literally, a split second, or do not work at all.
They are dropped only from dead SWAT officers - it cannot be found "loose" on the map.
The last weapon type in the game should be similar to most people. The popular "petrol in a bottle", when thrown at enemies, will set them ablaze, killing them off shortly after. For some reason this weapon is extremely effective against vehicles (even those armored) - a vehicle hit by molotov will start burning, and after a couple of seconds will explode.
Molotov Cocktails are the most common "thrown" weapon in the game, as you can find a lot of them hidden inside buildings, even on the streets, but there are no enemies in the game that carrying those with them.
The bulletproof vest gives you an additional "health bar", which protects the wearer from sustaining injuries. Any damage taken is first transferred to the vest, and only after the armor is no longer there the character will start loosing health. It means, that the bulletproof vest doubles the durability of the character wearing it.
Bulletproof vests can often be found in places in which you will be doing optional objectives, as well as on the police station (mission 1), or the military base (mission 6). No enemy drops them.
Types of enemies aren't very numerous in the game, you won't have to complete boss fights, during which you need to use creative tactics. There are only 3 types of enemies present in the game, differentiating between themselves by their durability, equipment, and, to some extend, by their behavior.
The most common (up to the fifth mission) type of enemy you will encounter in the game. They have a low durability (2-3 rounds from a pistol should suffice to kill them) and their equipment is limited to pistols and shotguns. Their behavior depends on their current equipment - cops wielding pistols are often trying to keep their distance from you and attack the character from different sides, while those equipped with a shotgun are almost always rushing at you, attacking from a very close distance. As far as pistol-wielding policemen are almost harmless, those carrying shotguns may be lethal, especially in larger numbers and if they are able to catch the player unprepared, in tight, narrow spaces.
They lack any special equipment, such as grenades, bulletproof vests, or rocket launchers.
This elite police unit (like in real life) is a lot more effective than a "regular" cop. SWAT Team members have higher durability, their main weapon is always an SMG, meaning that they are able to deal many times higher damage than a "regular" policeman. They are also equipped with lethal (to the player) Flashbangs, which, after hitting you, decrease the movement speed of the character, and making the bullets from your weapons scatter around the whole screen. It's a really dangerous scenario to be in, especially when there are numerous SWAT members nearby.
Their equipment causes them to focus on engaging the player in close combat, to either throw a flashbang, or fire a series off their SMG - try to keep them at a distance. SWAT Team members are the only source of SMGs, as well as flashbangs - you can't acquire those items from any other source.
The last, and at the same time the most dangerous type of enemy. Soldiers are equipped with bulletproof vests, making them the most durable foe in the game (it requires about the twice amount of firepower to bring down a soldier than to kill a normal cop).
They are equipped with assault rifles, as well as grenades, making them dangerous from a medium range, and when the player decides to take cover from the chase inside a building. It's a really bad idea when you are chased by soldiers, as they tend to use their grenades a lot, tossing them everywhere, changing your safe house into a place filled with dozens of holes, through which they can shoot at you.
Another type of a soldiers is one equipped with a rocket launcher - those individuals are without a doubt the most dangerous foe in the entire game. A single rocket is almost always guaranteed to kill you - it's a reason you must always focus them in combat and try to kill them from the furthest range possible.
Soldiers are the main source of grenades, assault rifles, and rocket launchers - the last one especially, as this weapon is really hard to acquire by other means.
Descrption: Kill 1,000 people.
Descrption: Kill 2,000 people.
Descrption: Kill 3,000 people.
Descrption: Kill 5,000 people.
Descrption: Kill 10,000 people.
Descrption: Kill 2,000 males.
Descrption: Kill 200 cops.
Descrption: Kill 500 cops.
Descrption: Kill 50 SWAT Team members.
Descrption: Kill 100 SWAT Team members.
Descrption: Kill 150 soldiers.
Descrption: Kill 300 soldiers.
Descrption: Kill 10 people with one grenade.
Descrption: Set 200 people on fire.
Descrption: Set 500 people on fire.
Descrption: Kill 5 people with a single car explosion.
Descrption: Execute 20 junkies.
Descrption: Kill 50 hipsters.
Wskazwki: Hipsters can be found, for instance, during the A-Phone premiere, one of the optional objectives during the 5th mission.
Descrption: Cause 10 people to be shot by police.
Descrption: See 5 stomp executions.
Descrption: Destroy 10 cars in 10 seconds.
Descrption: Destroy 50 explosive items.
Descrption: Perform 500 executions.
Descrption: Complete "Marina" level with all sidequests.
Descrption: Complete "Train" level with all sidequests.
Descrption: Complete "Train Station" level with all sidequests.
Descrption: Complete "Downtown" level with all sidequests.
Descrption: Complete "Power Plant" level.
Descrption: Fire 10,000 rounds.
Descrption: Fire 25,000 rounds.
Descrption: Fire 50,000 rounds.
Descrption: Break 50 TV's.
Descrption: Beat the game on easy difficulty.
Descrption: Beat the game on hard difficulty.
Descrption: Beat the game on extreme difficulty.
Descrption: Play Hatred being drunk
Hints: to get this achievement, you have to turn on a special option in the game options.
Hatred is powered by the newest Unreal Engine 4 and uses advanced visual effects, especially related to lightning and physics of the game. It makes it require a quite powerful configuration in order to function properly - this guide was prepared on a machine equipped with AMD Phenom II X4 B50 3.6GHz processor, 16GB of RAM and a GeForce GTX 650 Ti graphics card. The following configuration allowed for quite a smooth gameplay (30-40 frames per second) in high (aside from some effects) visual settings. Unfortunately, there were some extreme frame loses (reaching down to 10 frames per second), especially during some execution scenes. The game does not require constant Internet connection.
Singleplayer: Yes
Offline co-op (split screen/hot seat): No
Co-op over the Internet: No
Multiplayer: No
The guide has been written up PC version of the game. The PC specifications are as follow:
This configuration allowed the game to perform rather smoothly (30-40 frames per second) in high (aside from some effects) visual settings. Unfortunately, there were some extreme frame loses (reaching down to 10 frames per second), especially during some execution scenes. The game does not require constant Internet connection.

 Half-Life 2: Episode Two Game Guide & Walkthrough
 Half-Life 2: Episode One Game Guide & Walkthrough
 Heroes VI - Pirates of the Savage Sea Game Guide & Walkthrough
 Hearthstone: Heroes of Warcraft Game Guide & WalkthroughHeroes of Might and Magic V: Hammers of Fate Game Guide & Walkthrough