
Welcome to this unofficial Half Life 2: Episode Two walkthrough. It consists of game solution and a few pretty helpful clues that can help You survive in Half Life 2 world. If You're looking for some advice concerning weaponry, You should try Half Life 2 walkthrough. The weapons in Episode Two are the same and there are very few differences about the enemies. What that means is the info from that walkthrough can also be used in Episode Two. That pretty much sums up everything. Reload Your gun and fight!
Marcin "jedik" Terelak
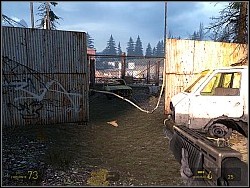
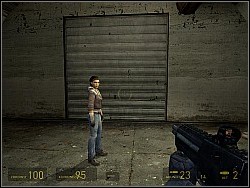
Go down the wagon and wait until Alyx opens it with the Gravity Gun. After that take the Gun from her.
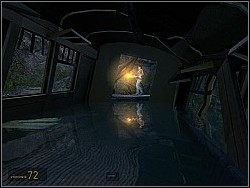
Go right towards the gate. Use the Gravity Gun to open it (LMB).
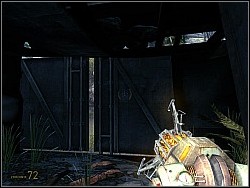
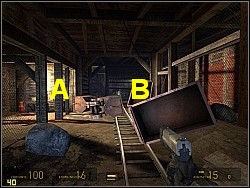
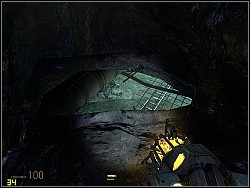
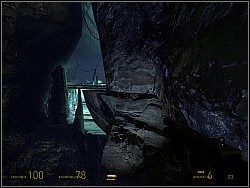
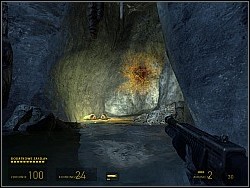
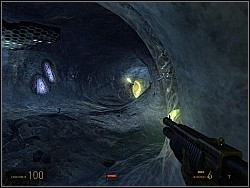
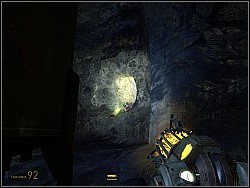
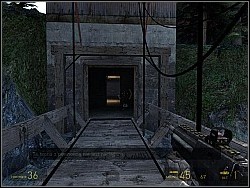
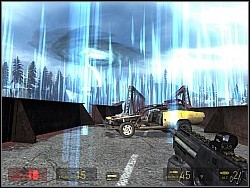
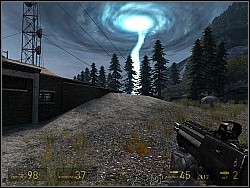
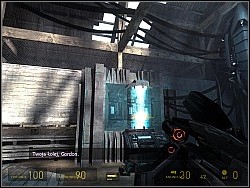
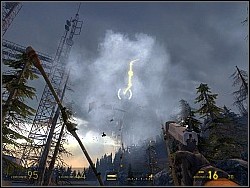
Walk through that gate and head towards the portal. After a while you will experience an electromagnetic discharge. It will destroy the bridge (B) and open, previously blocked, way to the underground (A). Go there and remember to turn on the flashlight.
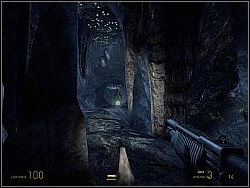
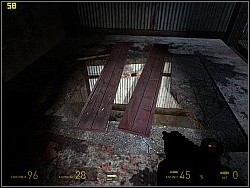
In a tunnel go straight. You will see a hole. Jump in. There will be a fence and a pass blocked with a wooden board. Use the gravity Gun to remove it. Crouch and go through.
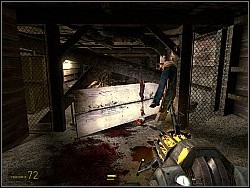
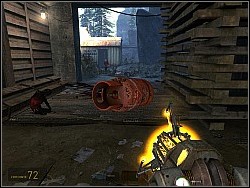
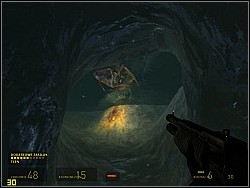
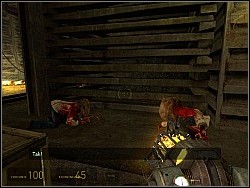
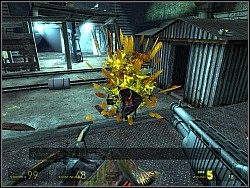
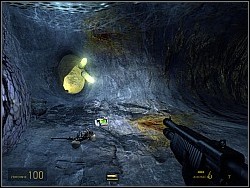
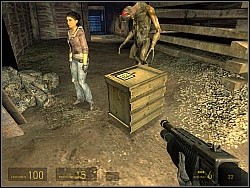
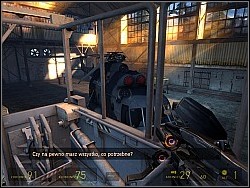
Go straight. You will get to a pretty big room and see zombies fighting with antlions. Don't interfere. When there's only one of the sides left, use Gravity Gun and barrels to destroy it. Use RMB to grab a barrel. Aim and hit LMB to throw it at the enemy.
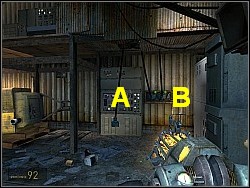
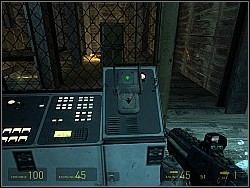
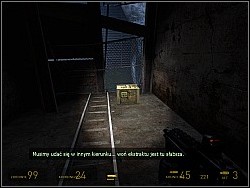
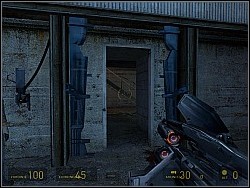
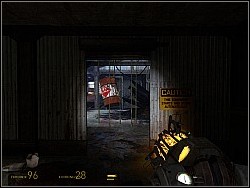
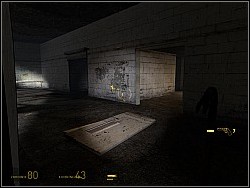
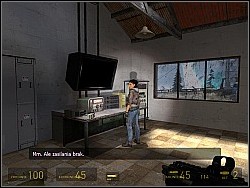
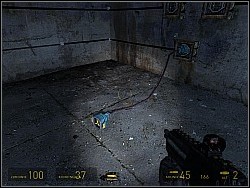
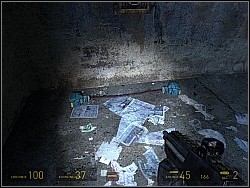
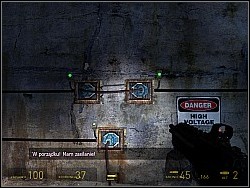
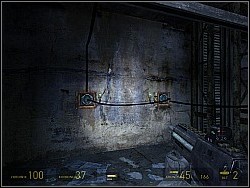
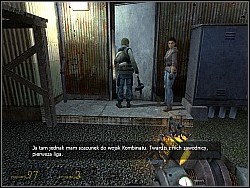
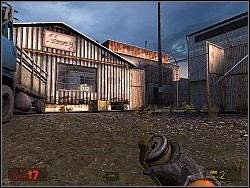
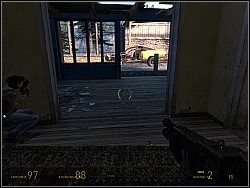
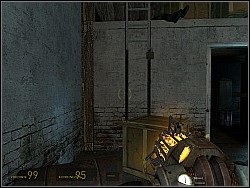
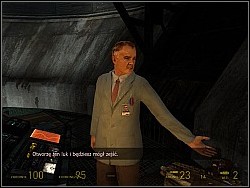
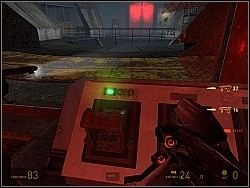
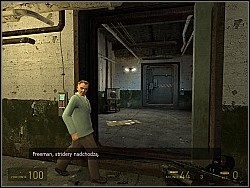
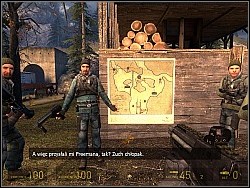
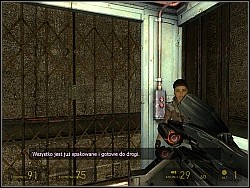
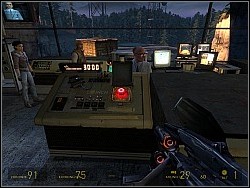
After dealing with the enemy go out and crash the box next to a white building. There are useful items in it. Go to the door and use action key (default E), to open it. Go inside and wait for Alyx to check out the communicator. It will turn out it's broken and you will have to help her. All you have to do is to plug the cord (A) into the outlet (B). To do so, grab the cord (with Gravity Gun or simply press the action key) and move it towards the very right outlet (the only one that is free). When you go to the outlet close enough, the plug will fit in.
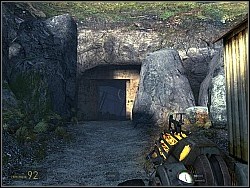
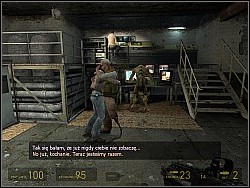
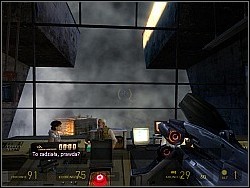
After you do it, Alyx will get back to the communicator and make contact with her father. You will learn that you have to get to the rebels' camp. The conversation will be interrupted by soldiers. When that happens turn around and walk out the door. Turn right and you will see an entrance to the underground.
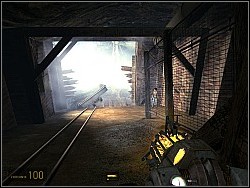
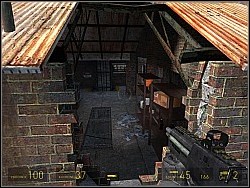
Go inside (Don't miss the crate on your way). Then turn right and go down the way. Soon you will see that the exit is blocked. Fortunately you will be able to deal with it. Turn left and go to the trolley up ahead.

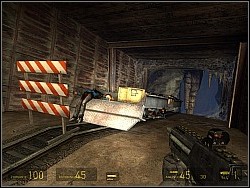
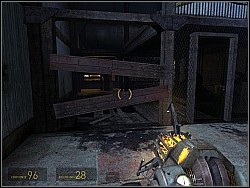
Going up you will notice that the trolley is blocked behind the boards. Remove them with the Gravity Gun. The trolley will go down the rails and get rid of the obstacle. Remember to move away from the rails!
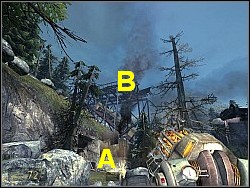
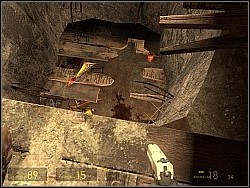
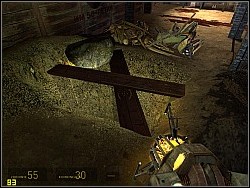
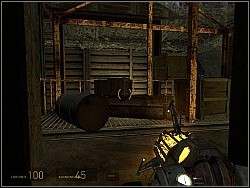
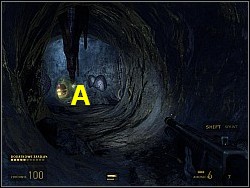
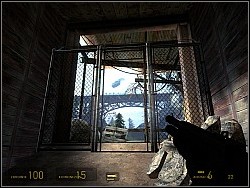
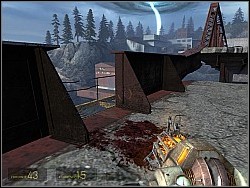
Go down and head up the hill on the right (A), then get behind the fence (B).

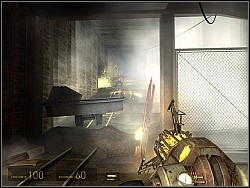
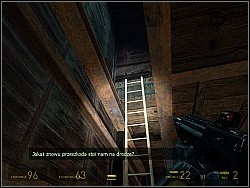
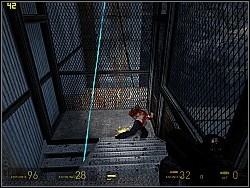
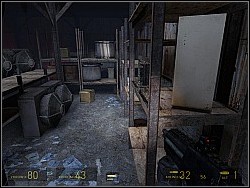
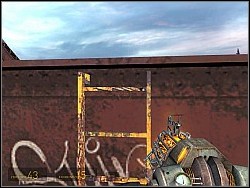
You'll get on a track-way. Unfortunately, besides you and Alyx there'll be someone else. Go between the wagons on the right and up the ladder (A).
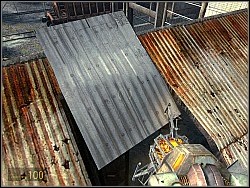
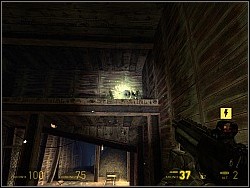
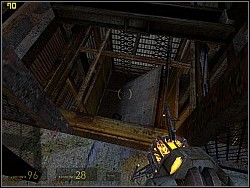
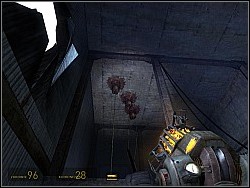
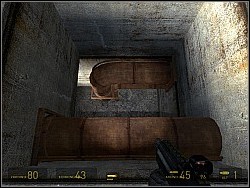
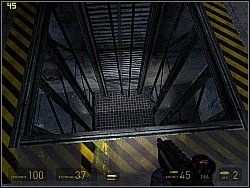
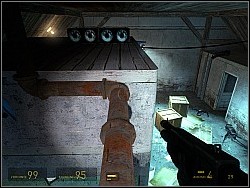
Then you should head right until you find a hole in the roof , which will be covered with a metal plate. Remove it with the Gravity Gun and jump inside.
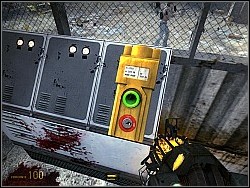
You will get to the control room. Get to the button and press it with an action key.
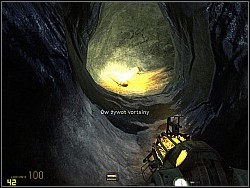
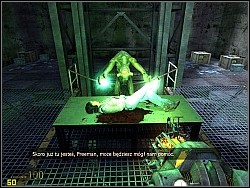
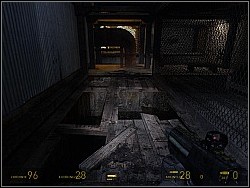
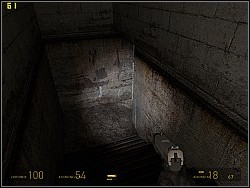
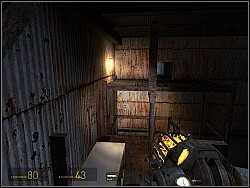
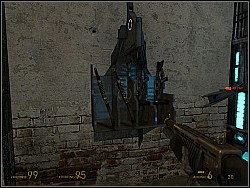
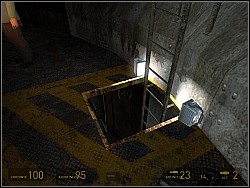
Turn around and light up the floor. There you'll find a hatch blocked with a rusty iron bar. Pull it out. The hatch is now open so go under the building. Remember to collect the items from the crate when getting under the building. When you're there, go straight and then right towards the light. You'll find Alyx there. Unfortunately she'll get attacked by a Hunter and nearly killed. You will get hit too and you will pass out. When you come round there will be antlion by the Alyx. However, the Vort will show up. He'll kill the antlion and heal Alyx partially.
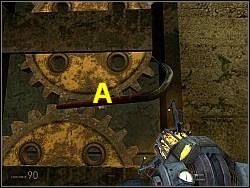
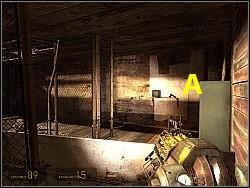
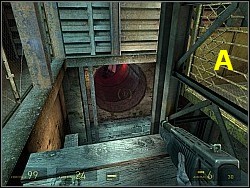
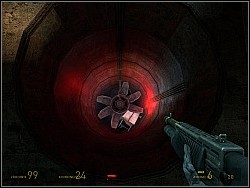
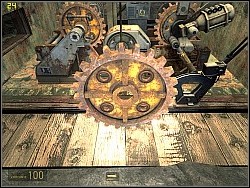
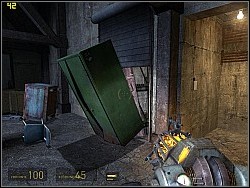
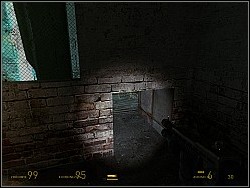
Vort will tell you that he can't heal Alyx fully by himself and that is why he has to get help from his kin. They are in the mines. That will be your destination. You won't be able to get there together and that is why you'll have to find another way down. Go right and then straight to the end of the corridor. Remove any obstacles with the Gravity Gun(LMB). When you reach the end of the corridor, turn left. Again, go to the end of the corridor and turn left. You'll get to the room with an open roof. To the left there will be a lift. When you get closer you'll see that the lift is out of order. Inside you'll notice a crowbar (A) stuck between the cogwheels. Get rid of it (action key or Gravity Gun). The lift will move down.
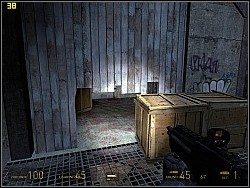
When you are down, the Vort will tell you that you're on your own now. Look for the door blocked with a white board and remove it.
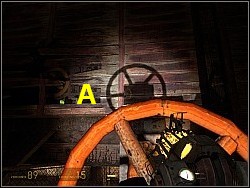
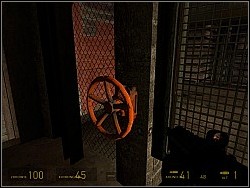
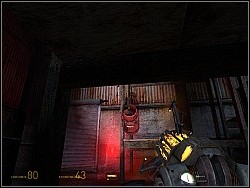
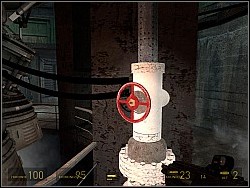
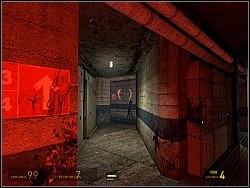
Go inside and head towards the red door. Open it and get on the lift. It goes up as long as you turn the orange valve. To turn it, just point at it and press the action key.
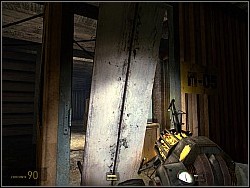
Try to go as high as possible. Above the platform, you have to jump on, there are some goods (A). You can get them with the Gravity Gun.
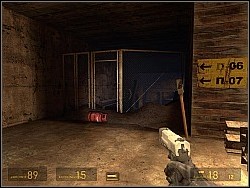
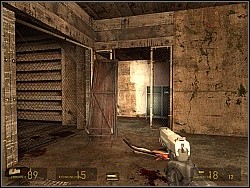
After doing so, jump down on the platform. Take the pistol (A) and head left.
You'll get to a hole leading to the lower level. Jump down.
Try to jump on the planks and kill the antlion. Then get the goods from a locker.
Then go back to where you landed and head right.
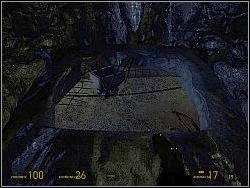
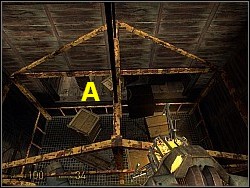
You'll get to another hole. Jump in. It's pretty deep so you'll have to jump from one joist to another (A). You'll get to the entrance to antlions' cave. Go inside.
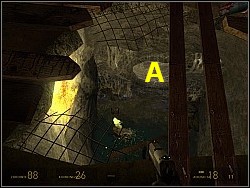
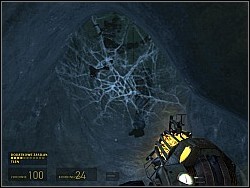
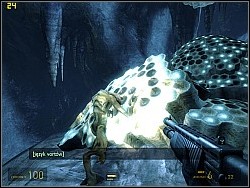
When you're in, go straight. To destroy the webs blocking your way use Gravity Gun(LMB). After walking through the shiny tunnel, you'll get to another hole. Jump in and be prepared for a fight. This is the territory of the acid-antlions.
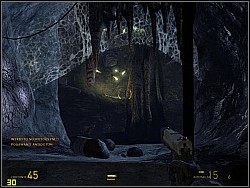
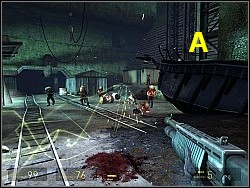
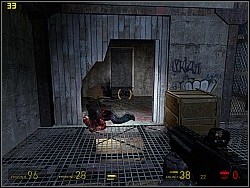
Hiding behind the trollies, kill acid-antlions so you can get to the corridor with a way to the left (A) and antlions behind the barricade (B). Try to get to the A point as fast as you can. If antlions are too much of a trouble, kill them.
There's a shotgun on the table and a locker with some goods. Collect it. There's also a hole blocked with some planks. Smash them and get in.
You'll get to another pretty big tunnel with springs and antlions. First of all get rid of the bugs. When it's done, get to the cave and head right.
You'll find a path which will lead you to the lake. Go straight, exterminating the bugs. You can use the gravity gun to push them into the water as well. You'll get to the end of the path and a hole. Jump in.
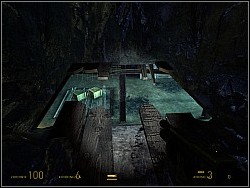
You'll get to another cave with a big crystal lake. Use it to drown the bugs. Just make them fall in. Do the same with the bugs that will show up on the right. When it's safe, dive into the lake and get through the underwater tunnel to the right side of it.
There you'll have to deal with antlions and barnacles, which hang at the ceiling and try to get you with their tongue. Use the gravity gun to push antlions towards the barnacles. The rest of them, just kill.
Afterwards kill the barnacles and collect the goods.
Go straight killing the antlions that will stand on your way. You will get to another lake. Then you'll find yourself in illuminated tunnels. You will have to struggle with antlions all the time. Finally you'll get to the place where next chapter begins - "This Vortal Coil".
Go down through a hole.
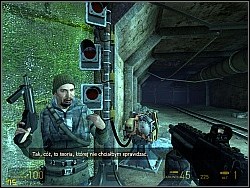
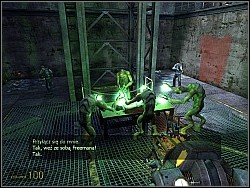
Walk straight ahead. You'll get to the temporary camp of the rebels and vorts. Pass the rebels and get to the table where vort is trying to heal Alyx. There are some goods here and there. Collect them. You will find a sub machine gun.
Soon after you will be asked for help. Rebels will explain to you that every entrance has motion detectors. If any light goes on, the antlions are coming. The more the lights the more the antlions to come.
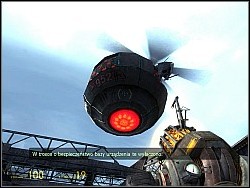
There are two turrets set to guard the entrances. The thing is, two is not enough. You will have to help the rebels to repulse the attack of the antlions. The first wave is easy. You will just have to put the turret where the light goes on.
Then there will be another wave. This time 2 lights will light up. Sometimes on the opposite directions. However, this won't be so bad. You just have to be fast. It's good to put 2 turrets at the same entrance. If the turrets are down just use your weapons to kill the antlions.
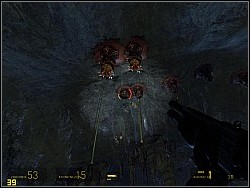
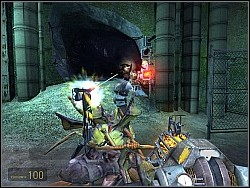
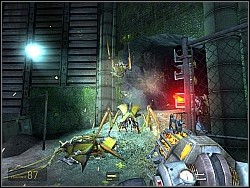
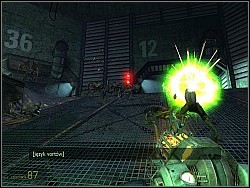
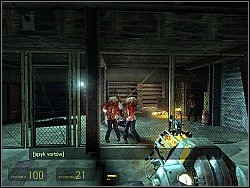
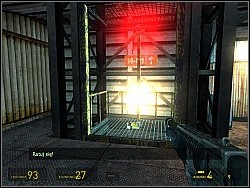
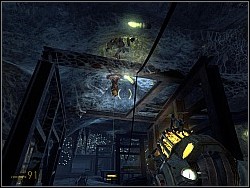
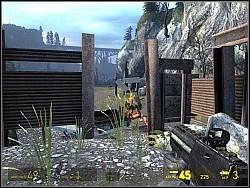
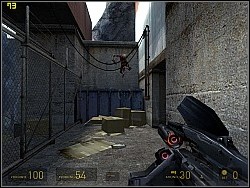
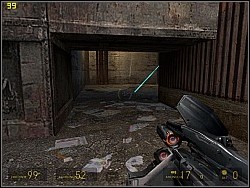
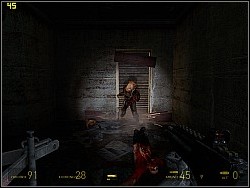
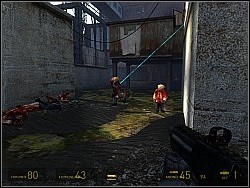
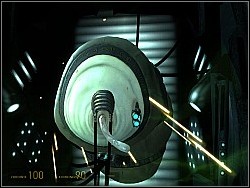
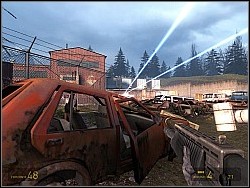
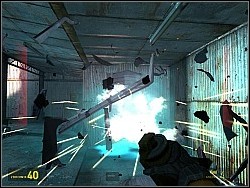
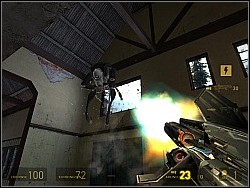
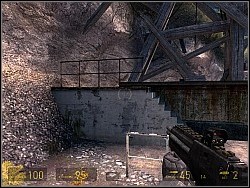
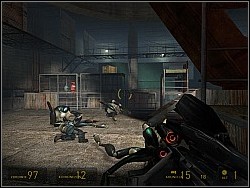
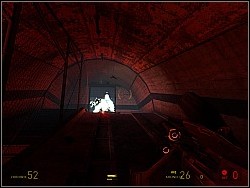
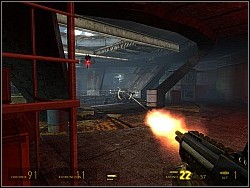
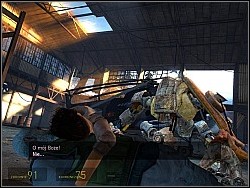
At some point the lights will light up at every entrance. If you still have any turret left use it. You should guard the very right entrance. That's the entrance you see on the screenshot. Anytime the antlion shows up in the range of gravity gun, use LMB to smash it against the ceiling .
Then there will be another wave, this time very strong. You will have to stand next to the table where vort is healing Alyx. Thanks to it you will be able to protect them. At this point you're free to use gravity gun, turret or any other weapon.
When this wave is over, 3 lights will light up at one of the entrances. However, it will turn out that it's not antlions but.. Vorts.
Suddenly 3 lights will go on at every entrance. This time this won't be Vorts but antlions attacking in great numbers. Stand next to Alyx and try to kill every antlion that will approach her. If you're out of ammo, use the gravity gun. Vorts will be very helpful in this fight.
When the attack is over, vorts will try to heal Alyx together. It will turn out, that Alyx's injuries are so grave that it's necessary to get the larvae extract from antlions' nest.
One of the vorts will go with you. When everything's talked over, follow him. He will open the gate leading to antlions' nest. Go inside.
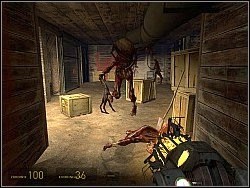
Go straight ahead killing antlions and its acid versions. You will get to the place with many paths.
Still, go straight. Turn left, and then right. Be prepared for heavy attacks. At this stage of the game they come from every direction, even from behind you. You have to get to the green path which is going up.

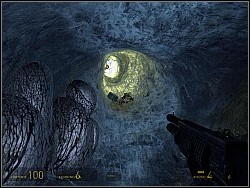
Go straight, the tunnel will lead you. You will get to some illuminated rocks . Go further until you see corpse behind the web. Destroy it and collect the goods.
Carry on with your walking. Remember to kill the larvas as they contain the essence that can heal you. You will get to a hole. Jump in.
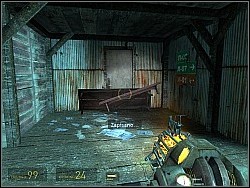
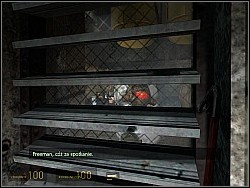
When you're there, the vort will join you. Before moving on, collect the goods from the crates. You can find them on the boards. It's good to get them with the gravity gun. Afterwards, go to the fence. When you're close enough, the zombies will stand up. Before you destroy the planks blocking your way, kill all the zombies.
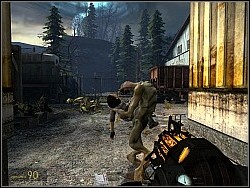
Go inside and head right. Take the goods from a locker and turn left. The zombie will jump out at you. Step back and kill it with a little help from vort.
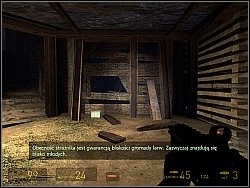
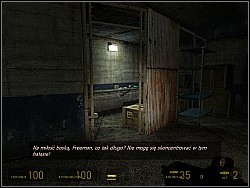
After killing it, go straight. Take the goods from the crates which you can see on the upper screenshot. You will get to some kind of a lift. To go down you will have to put something heavy on it. Use the gravity gun to do so. Then the lift will move down. Remember to jump on it before it's too low. Mind the crates with goods (A) when going down.
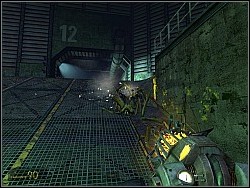
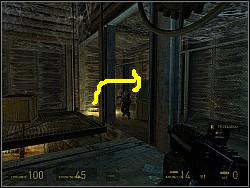
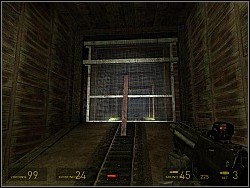
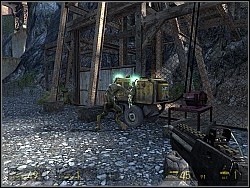
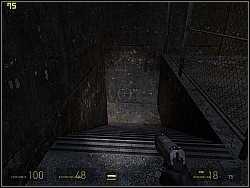
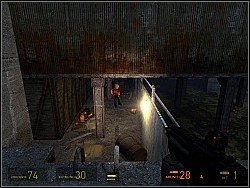
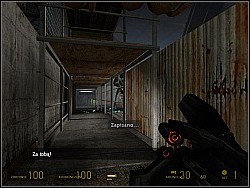
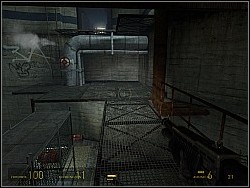
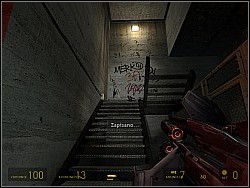
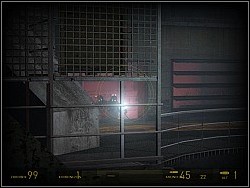
When your there, go straight. Be ready to face some zombies. You will get to a room with a blocked lift. You have to get to the control room. The arrow on the screen shows the entrance.
When you're there, press the action key to move the lever controlling the lift, and take all the goods.
Get back to the lift and look at the things on it. There are some iron bars and barrels. Start taking off the objects and the lift will move.
Jump on the lift. When you're up, the zombies will attack you. Kill them all.
Then go to the place with a valve and press the action key. The vort will join you again.
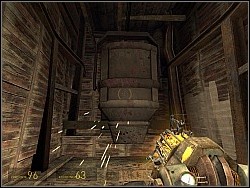
The vort will start up the power generator and you will be able to keep moving. You will get to the trollies standing on the verge of the abyss. There are some crates with goods in them. There are 2 ways of getting the crates. The first one is jumping inside, collecting the goods and jumping outside. The other one is getting the crates from the trollies with the gravity gun.
Keep going straight and you will get to the blockade. There will be some zombies but you will hear antlions too. These will be acid-antlions just above your head. First of all remove the planks and move on a bit. The trolley will start going towards you and make some mess. Then kill the zombies and keep going.
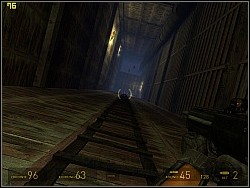
You should go backwards, pointing the gun above. There will be acid-antlions. If you're fast enough, they won't manage to hurt you.
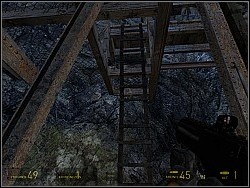
Keep moving and after a while vort will say that you have to find another way. Get to a ladder.
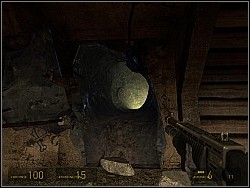
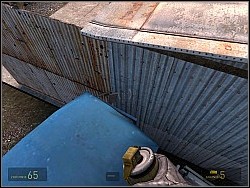
Climb up and go straight. You will find some kind of container and a hole underneath. Use the gravity gun to swing it (LMB). When the hole is no longer blocked, jump in.
You will land on a trolley that will immediately start moving. You will end up in the water. Swim up and get to a ladder.
At the top, the vort will join you. To the left there will be a tunnel leading to the caves. Go inside.
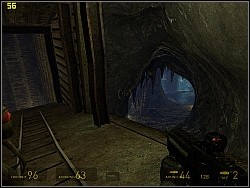
Stick to the left side of the path and go straight. You will see the device stomping on the ground which keeps antlions away. You have to get there. Follow the left path. When it's over jump on the right one.
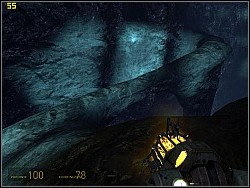
Keep going straight. Follow the path and you'll get to the other side of the abyss.
Kill the antlions in the vicinity of the device and get down.
In the left and right tunnel there are medkits. Use them if you need to. When you're in the middle of the room the fight will begin. The zombies will show up and antlions as well. Shotgun is really helpful here. Headshots and manoeuvring are the key to success. Try to repulse the first attack and head towards a lift. It's right behind the device when looking from the side of tunnels (A).
When you're there, call the lift. Stand next to the shaft. Before the lift gets to you, you will have to repulse the second attack. This time they'll attack mainly from the roofs.
When the lift is finally there, go inside immediately and press the button. On your way up, you will still have to fight with the antlions.
At some point you will notice that the vort is coming up in other lift. When you're at the top, get to the room A. Collect the goods and wait for the vort to start up the generator.

Go straight. You will see a door blocked with tables. Use the gravity gun to remove them.
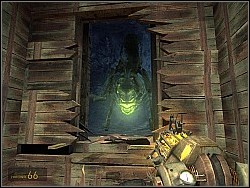
When you get to the next room, something will bang at one of the walls. Vort will tell you that it is the Guardian who is watching the larvae essence. At this point, however, you don't have to worry about him. Take the goods next to the wall and head left .
Walk straight. You will find a hole. Get down. Just follow the path and you will get to the blocked way. Remove the plank with the gravity gun (LMB or RMB) and keep going.
You will enter another tunnel. To the right you will see another entrance, enter it, but first get to the end of the tunnel and take the goods.
You will find a lift that is closed (A). You will have to unlock it. Vort will stay by the lift. You should go to the tunnel just behind it.
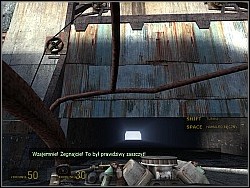
It will turn out that big fan is blocking it. The following film will show you how to deal with it. When it's done, keep going.
You will find another hole. Go down and straight ahead. You will fall into the water. When you swim up, you're almost at your destination. Dive into the water. Swim through the underwater tunnel and remove the web.
Kill the barnacles and head to the illuminated entrance (straight ahead and then left).
Keep going straight. You will get to a cave. Go further and you will get to a passage going over the abyss. The Guardian will be waiting there. You will have to pass him fast.
When you do this, head towards the illuminated tunnel (A). Be fast or else you will get hit pretty badly.
When you get to the end of the tunnel, save your game and be ready, cause this is the part of the game in which you have to be quick. Turn right and try to get to another illuminated tunnel.
And then to another one.
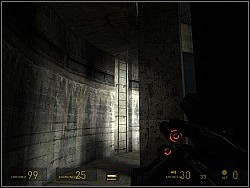
This is the task which depends on your skills. Finally you will get to the place that you can see on the screenshot.
The way to deal with the Guardian is shown in the following film. All in all you should get to the place seen on the screenshot.
Go down and straight ahead. You will get to the room with a lift. Kill any barnacles and walk to the lift.
It will turn out that the lift is broken. If you look carefully you will notice that one of the cogwheels is missing.
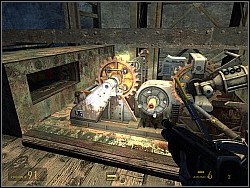
Turn around and go to the right side of the cave. Open the stash you will find there.
Then get to the boxes. There's the cogwheel you need. Grab it with the gravity gun (RMB).
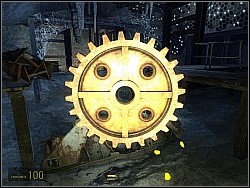
Take it to the lift mechanism and just put it on its place but before you do this, kill the barnacle above. Then pull the lever. Get on the platform and press the button. Wait for the vort to come down.
Follow Vort. He'll lead you to the extract. Wait until he collects it and get to the lift. When both of you are there, press the button. You will get straight to the room where Alyx is.
While Alyx is healed, you will see your "old friend" in a vision.

When Alyx is healed, you, she and vort will set off to find a working vehicle on the surface. Take the goods from a crate on your way up.
Get to a passage blocked with some planks. Remove them and walk through. The new chapter will begin.

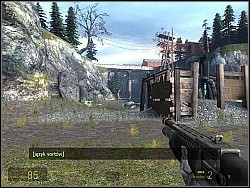
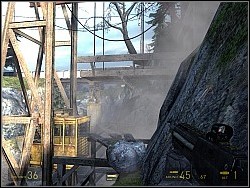
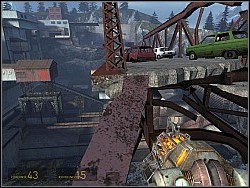
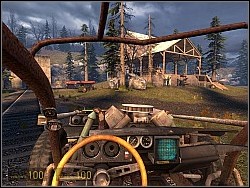
Get to the surface. You will see a bridge and the Combine moving its forces. Listen to Alyx and Vort and then head left.
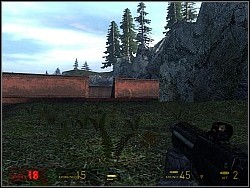
Follow the path, and exterminate antlions standing on your way.

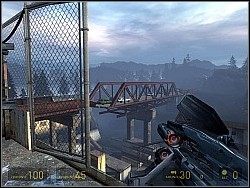
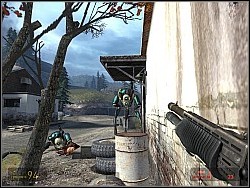
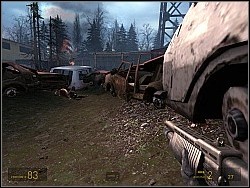
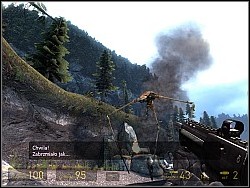
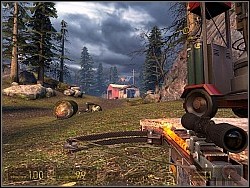
Don't worry about Alyx and Vort. When you get to the location you can see on the screenshot, they will join you.
As soon as you pass the wooden walls something will start to happen. Get back between those walls immediately.
It will turn out that 2 Guardians are after you. They can't hurt you, as long as you stay between the walls. However, they can throw objects at you. To kill them you will have to feed them with many bullets. Aim at head and shiny parts of their bodies.
After you kill them, head to a lift shaft. Vort will try to start up the generator but the lift will be blocked.
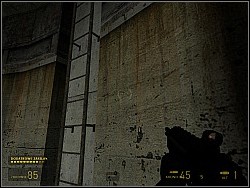
You will have to unblock it. Get to a ladder and climb up.
Turn right and then try to get on the green path.
Following it, you will have to remove some rocks. Use the gravity gun to do so (LMB). You will get above the lift.
Remove the rock standing on your way and move quickly to the lift. Jump on it. You will have to shake your leg pretty fast because the planks will brake soon. When you're on the lift, remove the bar blocking the hatch (LMB) and open it (RMB).

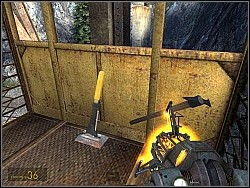
Get inside. You will see that the lever is blocked with a pickaxe. Remove it with the gravity gun (LMB).
The lift will go down. When Alyx and Vort are inside, press the button. At the top you will see a tunnel. Go inside.
Go straight. You will get to a place full of dead bodies. There are also plenty of goods. Collect it and head right. You will find a pulse rifle.
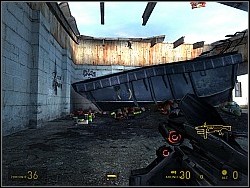
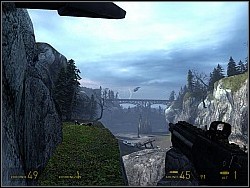
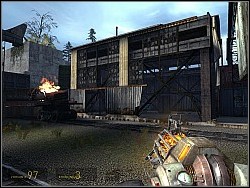
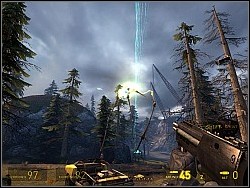
You will see a fallen bridge. If that's not enough, the vehicle you are looking for is on it.
Alyx and Vort will operate the turret. You will have to get to the door on the right that was blocked with a shield before.
Go in and up the stairs. You will get to a smashed room. You will have to move a green locker which is blocking your way.
Go down and walk straight. You will get to another room. Examine the left wall. There's a hole. Walk through it.
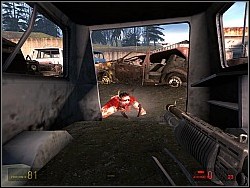
You will get to a door behind which there will be a zombie. Be ready for a quick retreat. The zombie will be strong enough to smash not only the door but also the wall.
When you kill the zombie, walk through the smashed door. You will get to a room with a hole in the middle of it. Remove the planks covering the hole and jump in.
Go straight. You will get to a lift. Open the hatch and step inside.
Kill the zombies and keep going. You will get to the stairs. Go down.
You will get to a door. Walk through it. The next room will be full of barnacles. Give them a barrel. Use the gravity gun to do it (LMB). When the barrel is up you are free to go.
In the next room a passage will be blocked. Remove the planks.
Afterwards, clear the ceiling.
When it's safe to go, you will have to run to get to the other side. The planks are rotten. Press the sprint key to run.
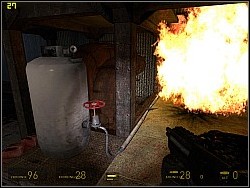
When you're there, turn off the valve. It will put out the fire.
Go straight and down the stairs. You will see a zombie banging at the door. Kill it.

Behind that door, there are some goods. As soon as you walk in, the light will go out and zombies will surround you. If you like fighting, choose that option. If not, just open the door and get the goods out with the gravity gun. Then go to the stairs behind you, and then turn right. When looking at the previous screenshot, the stairs mentioned above are to the right.
You will go outside. A zombie will attack you. Kill it.
Then get to the fence on the right. You will see that there's a padlock.
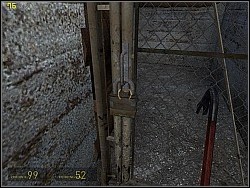
Remove the padlock with a crowbar, for instance. You will get to a narrow passage full of zombies. Kill them. Alyx will help you.
Get to the end of the tunnel. To the left you will find another passage. Crouch and walk through it.
When you get rid of all the enemies, examine the room, you will find some goods. Then walk down the stairs and turn left.
You will encounter a very fast zombie. Kill it. If you're fast enough, just shoot at the barrels right behind him.
Keep going and watch out for zombies and barnacles. Use the red flammable barrels to kill them.
When you get to the room with generator, you will have to kill a zombie that will carry a grenade. Then look at the pipes on the left. There's a crate with goods.
Then go straight and up the stairs. Mind the gun on the crate. You will get to a ladder with a zombie cut in half next to it. Climb up.
You will get on a roof. There will be some metal sheets. Remove them and try to kill every zombie you can. Then, get inside.
When you are inside, you will hear some music. That means you will have to clash with zombies. Take out the shotgun. Try to avoid zombies and get them in the places where Alyx will have a shot. Use the shotgun only when it's inevitable. The ammo is too precious.
When the music is over, kill the rest of the zombies and go into the opposite direction to the laser beam. There are some goods. Then go to the right and inside a tunnel. (A door is lying there).
You will get to a room with a fence. Crouch and get inside the tunnel.
Keep going and watch out for headcrabs. You will get to a room with barnacles. Use the gravity gun and the red barrels to kill some of them. And then use your gun.
Collect the goods and kill crawling zombies. Then jump on the platform right to the red lamp.

Climb up until you get to the highest platform. Get down. Find a big locker and try to push it on the pallet that is on the forks.
There's a red lever on the forklift. Move it by pressing the action key. The pallet will start going up .

When the pallet stops, get back on the highest platform. Then use the pallet to get to the other side.
Walk inside a shaft. Take the goods and head towards the white barriers.
You will get to a toxic swamp. The music will start to play again. Jump over the swamp .
When you get to the other side, kill the zombies and climb up the ladder.
Go straight. Take the ammo that you will find next to a white chair. Turn right and crawl under the pipes. There will be another swamp.
Get on the big pipes ahead. Turn right and jump from one car to another to get to the other side of the swamp.
You will have to get to a ladder next to the red container. If you find it difficult to fight with zombies, just run through the swamp. Climb up the ladder.
When you're at the top, search all the rooms. Take the goods. Mind the crate that is on the upper part of the building.
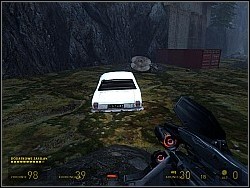
Afterwards, go up the hill and on the bridge.
As soon as you get to the car, the electromagnetic storm will come. It will destroy the bridge even more.
Get to the end of the bridge. There's a passage to the left.
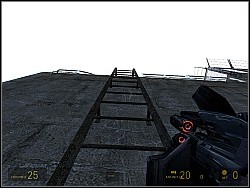
You will find a ladder there. Use it.
Get on the verge and jump on the part that will lead you up.
When you're on the other side of the bridge, move the cars from one end to another. The bridge will tilt. Get on the railing and go back to the car on the other side.
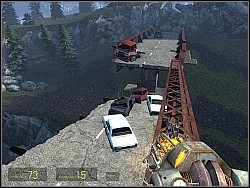
Get in the car and jump over to the other side. When you get to a gate, go left.
Climb up the ladder to get to the control room and push the lever. Then get back to your vehicle.
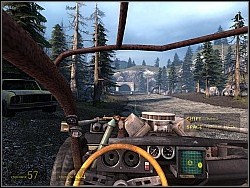
Vort will open the gate for you. When Alyx gets in the car, hit the road.
This chapter starts on the road. Follow it.
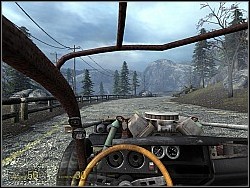
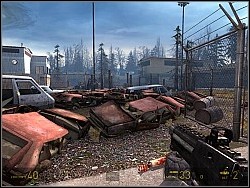
When you get to a roadblock, turn left towards the river.
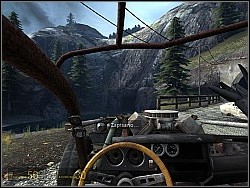
When you get to the end of the river, turn left. You will see an antenna.
Stick to the road. You will get to a radio tower.
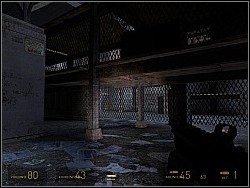
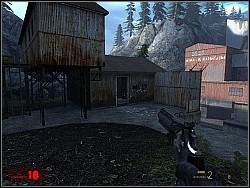
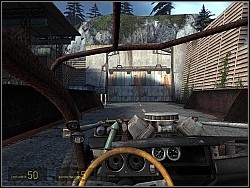
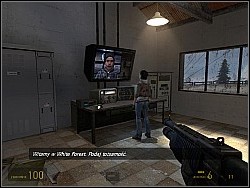
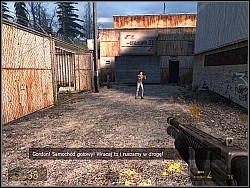
Park the car and get to the building that you can see on the screenshot.
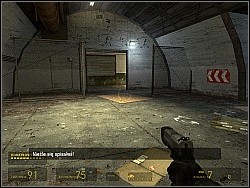
There will be a zombie inside. Kill it. Search the building. Get the goods from the crates in a toilet. Then get to the communication device. Alyx will find out that there is no power.
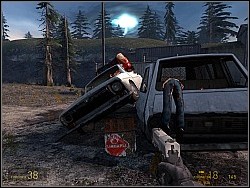
Get outside and head towards the right side of the building in front of you. You will find a soil bank there. Use it to get on the roof.
Get to the other side of the roof. Collect any goods you can find inside the roofless building. Then get back to the place where you jumped off the roof. There's a hole in the wall. Get inside.
You will find a lift shaft there. Jump in. Then get the medkits if you need it.
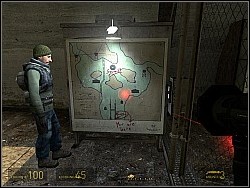
You will find that there are some disconnected wires.
To restore the power get towards the shaft. To the left there will be a pallet. Remove it and get the wire.
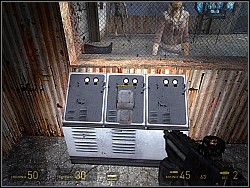
Connect two outlets with this wire (As shown on the screenshot). Then take the wire that is beneath and get back to where you found the short wire.
Use the longer wire to connect two outlets next to the shaft. Thanks to it, you will be able to get back to Alyx.
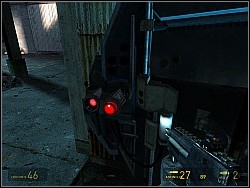
Get to the lift and press the button to go up. Not only will Alyx be there but also.. hunters.
Hide behind the wall and fight with hunters. Aim at their heads. What is effective there is shotgun and sub machine gun.

When you kill the hunters inside, get outside and kill the rest of them.
When it's done go to the communication room. Alyx will contact White Forest.
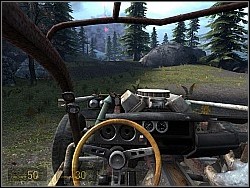
When the transmission is over, get back to the car and head towards a gate.
Follow the road until you get to a building. Park the car in such way, that the building with a broken roof is to your left.
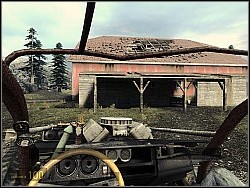
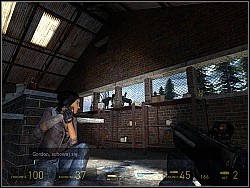
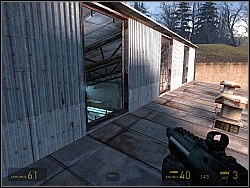
Get off the car and search the buildings to your right. Your consciousness will get disturbed somehow. When you search all the buildings get inside the one with the broken roof.
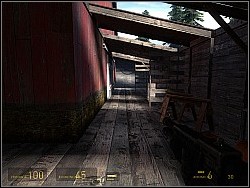
Go to the end of a corridor and turn left. Remove the padlock and keep going. You will see that there must have been a battle inside this building.
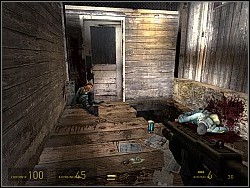
Take any supplies and get inside a whole in the floor. Go straight ahead. Collect any goods on your way. You will get to the stairs.
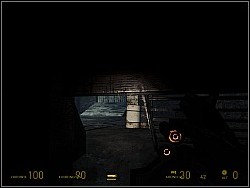
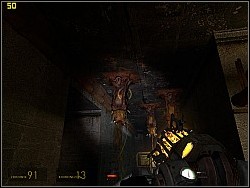
You will get inside a barn. It will be some kind of a breeding room for a creature that feeds on human brains. Alyx will say that it still can be killed. To do so you will have to shoot a few times in a blue energetic beam. Use the gravity gun(LMB).
After it's done, the creature will.. free itself. You will watch a cutscene. The creature will be wounded and will get away.
The Combine soldiers will show up. When you repulse the first wave, get outside.
On your way you will find a crossbow. When you're near the exit, soldiers will show up again.
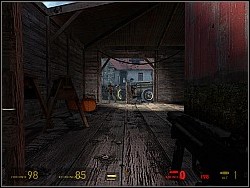
When you kill all of them, run to another building. There will be some soldiers and a hunter. After dealing with them, get back to the car and hit the road. Try not to stop.
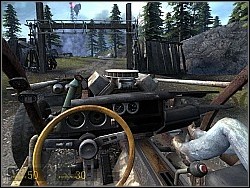
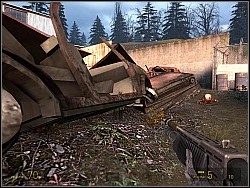
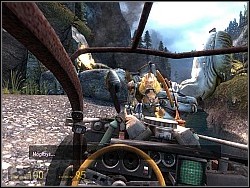
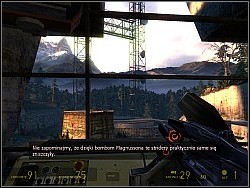
Stick to the road. Then turn left and you'll get on a railway. Get between the wagons and hit the pedal to the metal. Watch out for the bombs dropped from the chopper. They go off after few seconds.
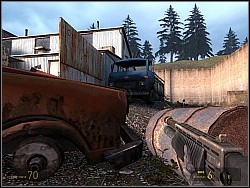
When you pass a tunnel get to the left side of the road and keep driving.
When the tunnel is over, do a U-turn and drive left to another tunnel. When you pass the bridge, head right towards the red barriers.
You will get to a fence with a logo of rebels on it. After you pass it your car will brake down.
Get out of the car and head to a tunnel.
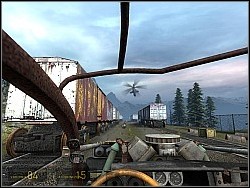
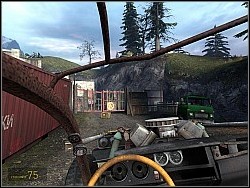
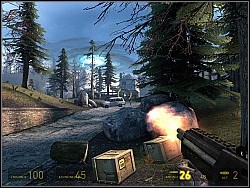
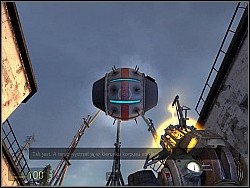
Keep going until you get on a yard. There will be a chopper flying above.
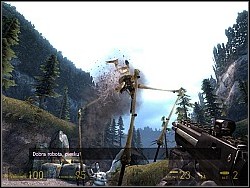
The chopper drops bombs that go off after a couple of seconds. You can grab them with the gravity gun (RMB) and throw them at the chopper (LMB). Do so do destroy the chopper. Grab them as soon as they touch the ground. Couple of shots and the chopper will crash.
To restore your health level go to the building shown on the screenshot. You can also recharge your armour there.
Get back to the soldiers and listen to what they've got to say. When you get to a building, new chapter will begin.
You will learn that the way to White Forest is being blocked by the Combine soldiers. Luckily, the rebels will show you a safe way to get to the barricade. Follow the soldier and jump into a hole in the floor.

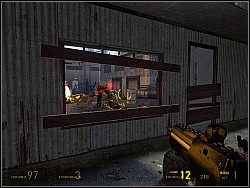
You will get to a room with windows boarded up. Remove the boards. There will be zombies outside so shoot them from inside the room. The won't get to you.
Get outside and on a lorry to the right. Take the supplies and climb up the roof.
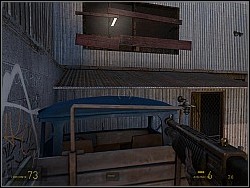
Remove the boards and get inside. Then walk to the stairs.
Get to a passage on the right. Remember to crouch.
Head towards a tunnel and watch out for crawling zombies and headcrabs.
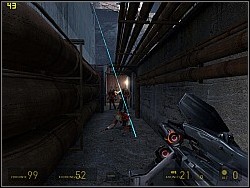
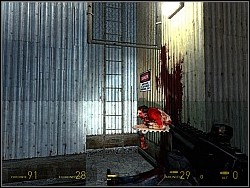
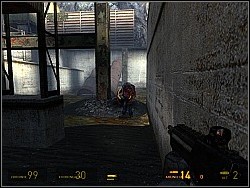
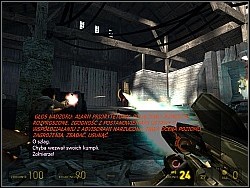
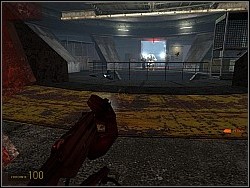
Get to the red car. You will have to destroy the turrets that you can see shooting on the screenshot.
Use the grenades to blow up the turret next to the building shown on the screenshot (it's surrounded by black smoke). It's not easy, but not impossible either. And still, remember to crouch.
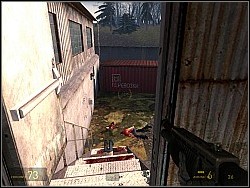
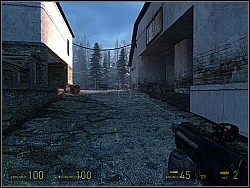
Head towards the building taking cover behind the cars.
Smash the window and get inside. There will be some soldiers. Kill them. Search the building and take any supplies. Then head towards a white van.
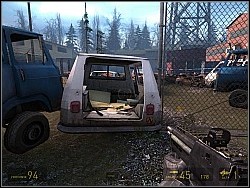
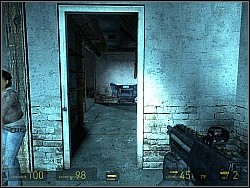
Walk through that van and watch out for headcrabs and zombies. Head left to another white car.
Walk through that car and kill a crawling zombie. Then turn left.
Get to a rusted car. Watch out for the soldiers!

Then keep going right.
You will get safely to the building with turrets from the right side. Get to a blue lorry. Mind the zombie behind the corner.
On the lorry there are some supplies. Take them and get on the roof.
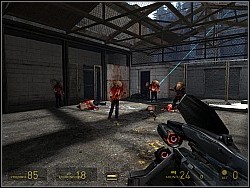
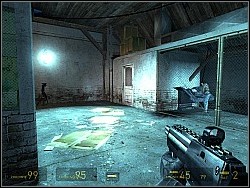
Walk to a shattered window. Get ready for a fight, there will be soldiers inside.
Get inside. Kill the soldiers and collect any goods. Then get to the control panel next to the turrets and open it by pressing the action key.
Throw in a grenade and step back.
Get outside. Be ready to kill some zombies that will stand on your way. Then move towards the direction from which you came.
You will meet Alyx on your way back. Follow her to a garage.
Get in the car and drive straight ahead. You will get to the first hidden spot with supplies. It will be a white van. To get your hands on the supplies just blow up a barrel standing there.
Get back to the car and head straight. When you get to a crossroad, turn left and drive towards a tunnel. There will be a hidden spot with rocket launcher there, but later you will get it anyway. Don't bother then.
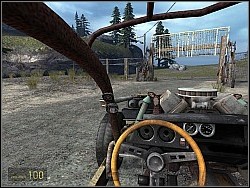
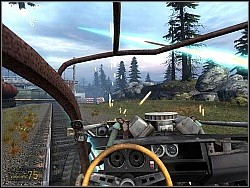
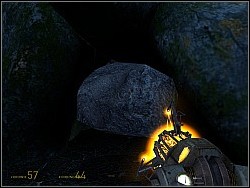
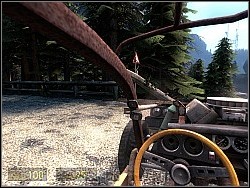
Follow the road and mind the curves. When you get to another hidden spot, park the car and go behind a black rock.
The spot will be right behind that rock (next to a fallen tree). It will be blocked. Remove the rock, get the supplies and get back to the car.
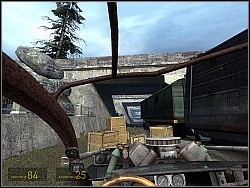
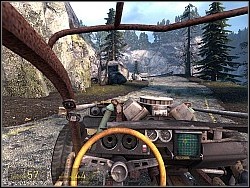
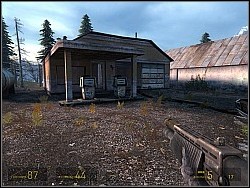
Keep driving. You will get to a gas station. Look around, collect some goods and get back to the car.
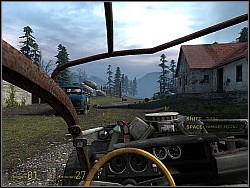
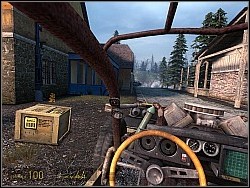
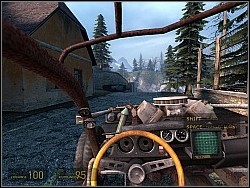
You will get to a small village. Stop the car right next to a blue house. Get inside and collect any goods. Have a look at the ground floor rooms. You'll be needing this.
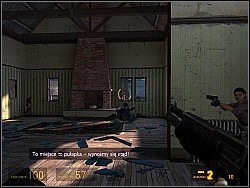
When you walk out of the house, the Combine will show up! There will be force shields around the house. Get back inside the house and stand with Alyx right next to the entrance. The first wave will strike there. Kill the soldiers.
Then get to a kitchen. The second wave will strike and there will be hunters too!
Then Alyx will decide to get the hell away as this place is a trap. Move to a room with a fireplace. There will be an exit.
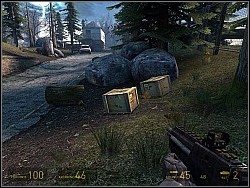
Wait for Alyx to join you and then get to the place marked on the screenshot as A.

You will get to some rocks. There will be crates with supplies as well. Get them.
When you get closer the soldiers will attack you again. Kill them all.
Then walk up the hill and get inside the building. The one with a red barrel next to it.
Alyx will notice that there is a shield generator inside. Turn right and walk to the wall. To the left you will see a control panel.
Alyx will be able to shut off the shield. However, when you walk to the main room, there will be some kind of malfunction and the shield will turn on again. You will have to figure something out to get rid of it.
Get to the ride side of the room. Remove a padlock that blocks the ladder. Then, climb up.
When you're there, head left. Watch out for headcrabs. You will get to a pipe. Use it to get to the other side.
Jump in to a room with guns and replenish your supplies if you have to.
Turn around. To the right there will be an entrance to the room with shield generator. Crawl in.
Stand next to the door and shoot at the generator with the gravity gun. The beam will turn into a ball. Shoot at it so it doesn't have a chance to transform again. After a while it will disappear and the shield will be turned off. Open the door and get back to the car with Alyx.
Drive straight. You will get to a roadblock. Turn left on a slope. Use the break to control the speed.
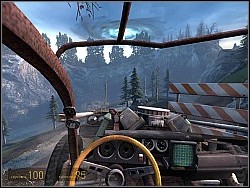
Then turn left and drive under a fallen tree. Keep going until you get to a tunnel.
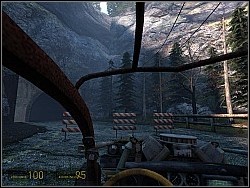
When you drive out of the tunnel you will hear a stider. Luckily it won't be there. Get to a sign and turn left.
You will drive into the river. Head towards a dam. When you're there, get out of the car and go up the stairs to the left.
A strider will show up.
You won't have to fight with it because Dog will take it down.
Dog will open the gate for you. Get back to the car and race with Dog to the base. If you're first, you will achieve one of the goals.
When your in the base, get out of the car and follow Alyx.
Follow Alyx and you will get to her father.
After meeting Alyx's father follow him to the silo. It will turn out that there are some problems with "pests". You will have to take care of it.
Go down through a hatch that Magnusson will open for you.
Then get to a lift and go down. Head towards the valve and turn it down.
Go straight ahead. You will get to a locked door. If Vort doesn't open it for you when you're there, just shoot at the window. He will notice you then.
Walk through the door he will show you and take the supplies on your way.
You will meet one of the rebels. Follow him. As soon as he walks through the door, the alarm will turn on. The door will close. Get to the stairs behind you. There is a passage to the left. Crawl in.

You will get to a warehouse full of hunters. Try to kill as many of them as possible (there will be 3 of them). Use the holes in the wall of the tunnel.
When you get rid of the hunters, go out of the tunnel.
Take any goods, then get on the upper level and head towards the left side of the room. There will be a valve. Turn it down and climb up the ladder.
Go straight ahead. You will get to a tunnel with flares. You will have to kill some Combine soldiers there. Be ready to destroy a turret which is at the end of the left corridor. When you do so, keep going the right corridor.
You will get to a flooded room. There will be some soldiers and a turret. You can destroy it using the gravity gun. You will just have to knock it down.
Go straight. You will get to a tunnel. Shoot the barrels when the soldiers show up. You will save some ammo.
You will get to a room with supplies. Grab them. Then you will get to a staircase. However, the stairs will be broken. Dive into the water under the stairs.
You will get to another room. Going straight ahead you will see a ladder.
Climb up. You will hear a music again. Combine soldiers will show up. You will have to close the silo. The silo is oval. On every level you will have to run around it to get to another ladder . Focus on running only, reduce the shooting to minimum. Climb up the ladders to get to the top.
When you're finally there. Walk across the footbridge.

Keep going. At the very top, you will have to deal with soldiers and flying drones.
Head towards the shooting gun. There is the switch closing the silo. To get there, you will have to walk around the silo.
When you get there, close the silo.
The entrance on the other side will open and Alyx with rebels will show up. Go there.
You will get back to the lab to watch the transmission that you brought. It will concern the mystic Borealis ship.

After watching it, Alyx's father will try start a conversation concerning you and Alyx. However, it will be interrupted as doctor Magnusson will rush in. You will have to lead a combat against the Combine. Follow him.
Magnusson will show you his very new invention called: Magnusson's Device. Listen to his instructions and practice with the device.
When you are ready, walk to Magnusson (he is right behind you). He will open the door for you. Get inside, take any goods and listen to the soldier. He will explain to you everything. Then, get in the car and drive out.
You will have to defend the base against the striders. To do so you will have to use the gravity gun to shot at striders with Magnusson's Device. When the device sticks to strider's body, you shoot at it and it goes off. First you will have to go to a sawmill. Drive straight, then left and to the end of the railway. You will find the sawmill there.
When you're there, park the car in such way that you can drive off quickly. Then listen to the commander.
The attack will begin during the meeting. You will see a strider coming. It will be guarded by hunters. Try to destroy strider first, then the hunters. When it's done, get in the car and go back to where you came from.
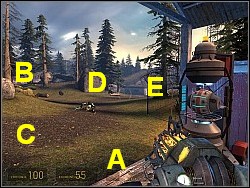
The fight with striders is the last combat of the game. It's pretty hard and everything happens so fast, that you won't have too much time to think. You have to get back near the base. In the vicinity there are two places where you can get Magnusson's device. The first one is marked as A. The other one which is outside is (D). The base is towards (E). Striders and hunters will be coming from 2 directions (B) (mainly) and C. No matter the direction, every strider will be passing D and will be heading towards E. The base will be destroyed when a strider gets to the gate. The tactics to win this battle are as follows. Every strider is guarded by 2 or 3 hunters. They have to be destroyed first. They are faster than strider so they usually are ahead of him. Retreating near the base makes sense, only because there are rebels that can help you. You're not alone then. Some of them get outside the base. They're not much of a help when it comes to destroying the hunters, but they draw their attention. Begin the battle from parking your car between point D and the base. It's important that it's close to the place where you can get Magnusson's device. Don't leave it in the middle of the road as striders will be passing through.
When you get a message that a strider is coming, get inside a hut. Most striders will come from the B direction. It will be easier to destroy the hunters from inside the building. To do so use the rocket launcher or the crossbow. If hunter is coming from C direction, it's better to stand next to D. In the case they come from 2 directions simultaneously, get inside the hut and get ready for a direct clash. Then you should use the rocket launcher or the shotgun. Then move to another strider. When the hunters are destroyed get to the D point.
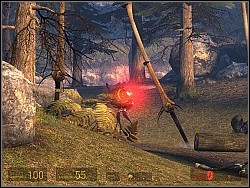
Standing there, wait for the strider to come closer. Using Magnusson's device on striders is not that easy. The bombs must stick to its armour, and to be specific to the orange part of it. If you throw the device at other part it will bounce. It's hard to hit the target when it's too far, so wait until it gets closer. When the bomb sticks, change your weapon immediately (by pressing Q) and shoot. It may even be the pistol.
Use this tactic until you get rid of all the striders. After repulsing the first wave, there will be another. And then another one - final. Remember to get supplies from the huts in B and D. After many (or maybe not so many) attempts, the base will finally be safe.
When you get the info that all the striders were defeated, get back to the base.
You will meet Alyx. Follow her. An epilogue will begin.

Follow Alyx to a lift and listen to what she's got to say.
You'll end up in the control room.
You will be asked to launch it. Get to the console and press the red button.
After half a minute, the rocket will start.
Follow Alyx and her father. You will finally get a chance to talk. You will learn some things about the next episode.

When the conversation is over, follow Alyx and her father outside. Then watch the portal.

Follow Alyx's father inside the building. He will see you off to a chopper.
Suddenly, two creatures will show up. In the cutscene, you will watch how Alyx's father is killed.
You and Alyx will be saved by Dog..


 Heroes of Might and Magic V Game Guide & Walkthrough
 Hitman: Blood Money Game Guide & Walkthrough
 Heroes & Generals Game Guide & Walkthrough
 Halo Wars Game Guide & Walkthrough
 Heroes VI - Pirates of the Savage Sea Game Guide & Walkthrough