
The following walkthrough guides you directly through Gordon Freeman's newest adventure, Half Life 2: Episode One. It details all steps you have to take in order to complete the game, using both text and screenshots to help you. Additionally, we included a walkthrough to a short episode named Lost Coast, released by Valve a few months ago. It's not long nor tough, but if you have any problems completing it, here we come to save the day.
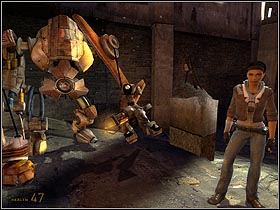
Your adventure kicks off by the ruined Citadel. You are buried under the rubble, but luckily enough Dog finds and rescues you in a few seconds. Take the gravity gun from the robot's hand (#1) and wait for the girl to finish talking. When they go up, use your gun to get rid of the planks holding the metal gate (#2). When it falls, it will create a bridge that will let you to join the rest of the company.
Alyx will contact her father and doctor Kleiner. It seems that you'll have to go back to the Citadel. Pick up the two health kits laying next to the monitor (#3) and listen to the transmission. The girl will ask Dog to make way for you. Crouch and follow them (#4).
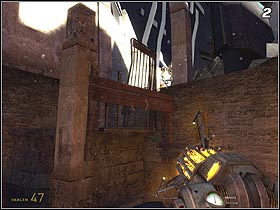
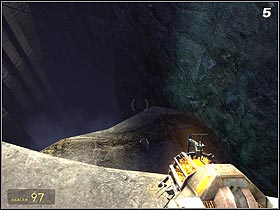
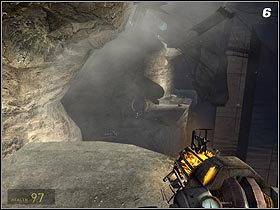
Approach the edge and look down (#5) to see a stone platform. Jump down on it, turn left and go forth (#6). Use the Gravity Gun to move the car that block your way and approach the bonfire. Alyx and Dog will soon join you back.
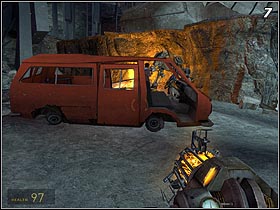
Dog will find a way for you to get back to the Citadel. The car might not look as trustworthy as you'd like to (#7), but it's the only way to cross the abyss. When Alyx finishes talking, take a sear inside and you'll be thrown to the other side.
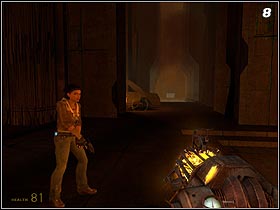
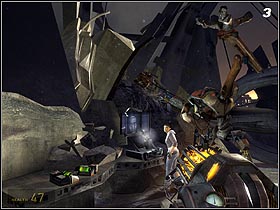
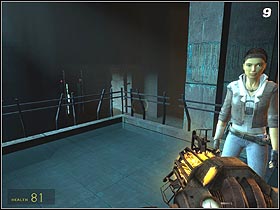
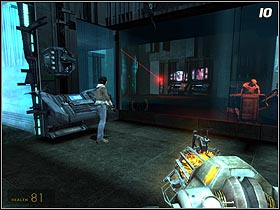
Once you're inside (#8), leave the car and turn left. Go straight ahead until you reach the railing (#9). Jump down and head to another corridor. The way is blocked by a force field (#10). The girl will suggest using Rollermines to get past it. Wait for her to deactivate the first barrier and go forth (#11).
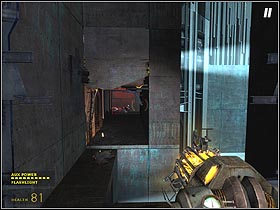
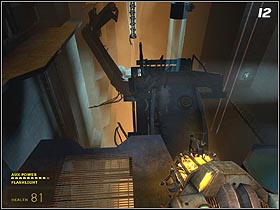
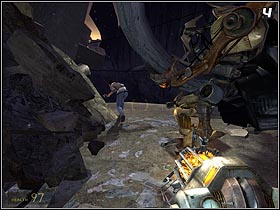
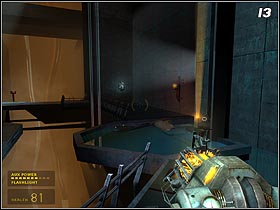
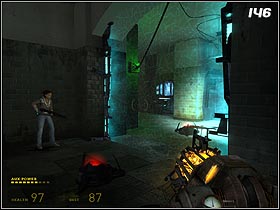
When you reach the end of the corridor, jump to the lower platform (#12) and immediately move to the sloping part of the construction to avoid falling down. Near the elevator (#13) there's a regeneration panel to help you with your health and armor, and also a narrow passage to the Rollermine container (#14). Press the red button and quickly grab one of the falling "balls". Use the elevator and approach Alyx.
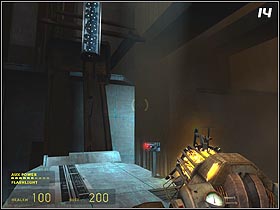
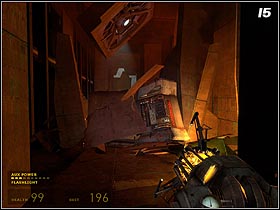
The girl will reprogram the mine so it doesn't hurt you. Approach the force field and let the "ball" into the room where Stalkers are. When they're dead, Alyx will deactivate the barrier that blocks your way. After a short walk you'll reach a pile of ruble (#15) that you have to remove using the Gravity Gun.
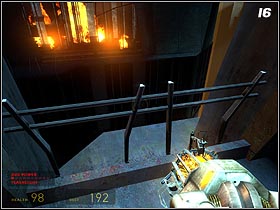
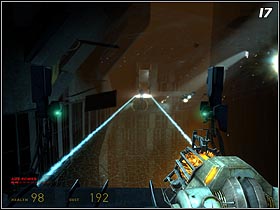
Having jumped across another railing (#16), you'll find yourself near a bridge. Notice the soldiers being blown away by the wind (#17). Wait for the situation to settle and run across to the other side. You'll have to be quick about it, as the pause between the blows is quite short. Alyx will join you in a moment.
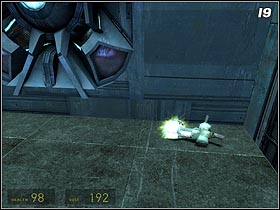
You'll reach a big room (#18). Jump down and wait for things to come. When it's over, continue on. You'll enter a room where your Gravity Gun gets an upgrade. Take the weapon from the floor (#19) and go forth.

When you reach the end of the corridor, you'll notice that only one of the strings creating a force bridge is active (#20). Use your gun to catch the energy ball floating around and throw it towards the mechanism to the left (the one with a red light). You'll be able to cross.
Once on the other side, you'll encounter first enemy soldiers in this expansion. Remember about the destructive power of your improved Gravity Gun, and use it to get rid of them. When no one's left to threaten you, create another bridge, sending two energy balls to the two mechanisms on both sides.
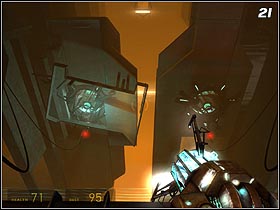
Go across the bridge and deal with even more soldiers. After the fight examine the bridge machinery. This time it won't be that easy, as the mechanism on the left is blocked (#21). Turn left and enter the huge corridor. Find a niche on the right and approach the edge. When you look down (#22), you'll see an energy ball channel. Grab one of them and shoot it so that it hits the glass (it will reflect it to hit the target). Shoot the second mechanism too - you're free to use another bridge.
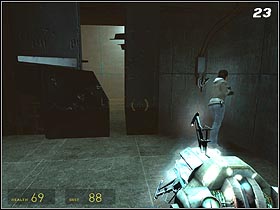
There's a longer walk before you now. Crouch below the collapsed ceiling, kill the soldiers and run forth, jumping across the missing part of the floor. At the end of your way you'll see a door (#23). Alyx will open it. If the girl's not with you, go back for her, as she's probably stuck in a fight with some soldiers you left behind.
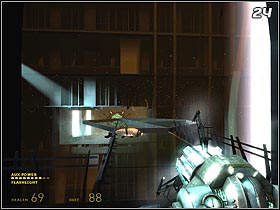
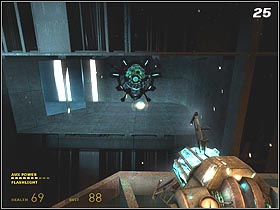
After a short walk you'll reach an elevator (#24). Enter the platform and examine the mechanism on the other side of the room (#25). It lacks the energy, so grab one of the balls from the corridor and send it towards it.
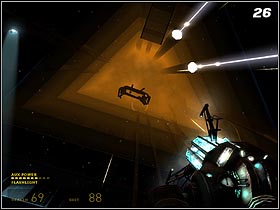
When you're going down, look up (#26) to see that there are huge fragments of the Citadel falling around. If any of them hits the platform, you'll both end up dead. Position yourself in the center and patiently wait for the junk to fall. When you see that it falls dangerously near, grab it with a Gravity Gun and throw away. Do so three times, and the platform will eventually stop.
Examine the mechanism on the wall (#27). Access to it is blocked by unbreakable glass. Use the Grav Gun to grab some pieces of the computer to the right, creating an opening, and send one of the energy balls in it. The elevator should resume its ride down.

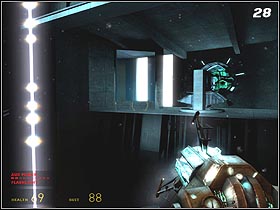
Use the Gravity Gun to grab another piece of junk falling from above. Examine the mechanism (#28). Grab one of the energy balls and send it towards it. Unfortunately, it didn't work - the problem is a Stalker in a nearby room. You have to kill him with an energy ball, but it will require a lot of precision. Shoot the white triangle (second from the left), and the bullet will reflect towards the enemy. Start the machinery once again and enjoy the rest of the ride.
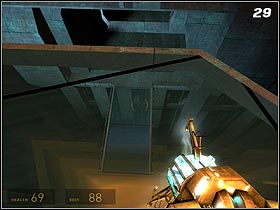
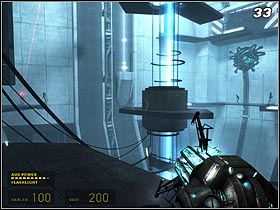
When Alyx shouts, reach the platform (#29) as soon as possible. There's a huge piece of junk falling from above and you can't stop it with a Gravity Gun. It will smash your transport into pieces. Go forth. There's a regeneration panel to the left of the gate. Use it before going through it.
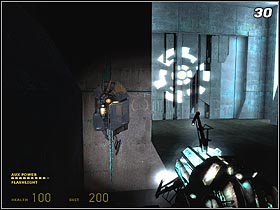
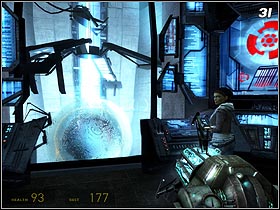
Go straight ahead and defeat the enemy soldiers. After you reach the control room (#31) it will turn out that you have to single handedly secure the reactor before it blows out. Follow Alyx to another room and wait for her to call an elevator (#32). Enter it and ride down.
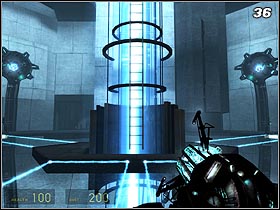
First eliminate the two Stalkers (#33), located on the opposite platforms. Use the energy balls to kill them. Also, use the all-purpose spheres to activate the two bridges, by shooting them into familiar mechanisms (#34). Go forth and use the red button (#35) when you see it.

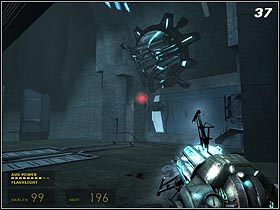
Thanks to the bridge rotation that it caused, you can now reach the ladder (#36) that leads to the upper level. When you're up, turn around and go straight ahead. Kill all the enemies and look around the room.
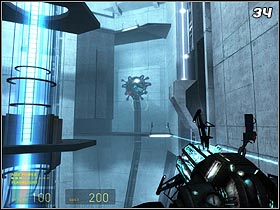
Just above the glass you'll notice a mechanism that lacks power (#37). Go back to the main hall and grab one of the energy balls. Shoot it towards the mechanism and you'll be 1/3 way through.

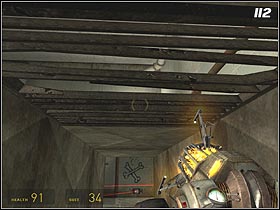
The door opens and enemy soldiers and Manhacks enter the room. Get rid of them and use the new passage to go further. At the end of the corridor grab a sheet of metal (#38) and crawl inside. Avoid contact with the balls (you can outmaneuver them, reflect with a Grav Gun, or jump over them) and go through the tunnel (#39).
Grab another sheet of metal from the wall and enter the opening you created this way. Kill the enemy soldiers and go forth - you'll reach the reactor core room. Enter the bridge (#40) and go to the other side of the room, avoiding the big ball in the center.
You'll reach another reactor control mechanism (#41). Eliminate all the enemies and grab an energy ball to shoot it toward it. Wait for the next door to open and enter the elevator.
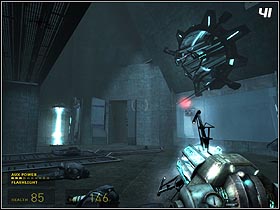
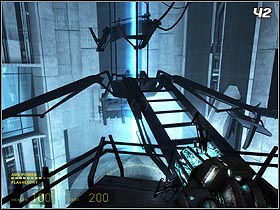
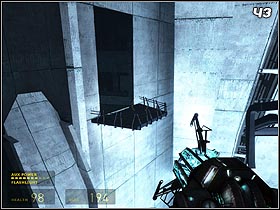
There are some enemies on your way, but you'll be able to regain your strengths here as well. At the end, jump across the railing on one of the rotating platforms (#42). Watch out for the Manhacks floating around (don't fight them) and jump to another platform (#43) across the room. You can now deal with Manhacks, grabbing them with your Gravity Gun and shooting against the walls.
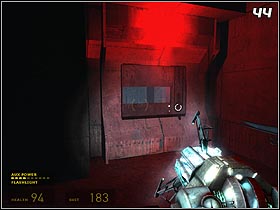
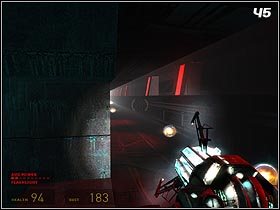
Go forth. At the end grab a sheet of metal (#44) from the wall and crawl through the opening. Go through the tunnel avoiding the energy balls once again (#45) and find another niche for a sheet of metal to grab. You'll end up by the final reactor control room.
Grab an energy ball from the tunnel and send it towards the mechanism. Something will go wrong and the machine won't function as it should. Enter the hole and check out the situation in the next room.
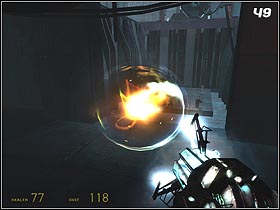
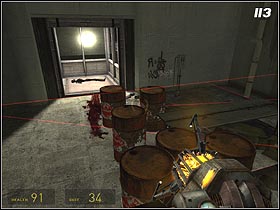
There are three cables before you (#47) that are out of power. You have to grab two balls from the tunnel through the opening in the ceiling (#48) and release them towards the generators. Before you shoot the third ball in there, retreat towards the platform. You'll be transported back up when the power's back on.
Grab a ball and start the final mechanism once again. The reactor is secured - at least for the time being. Wait for the gate to open and go forth. Approach Alyx (#50) and then follow her. The girl will explain you the present situation.
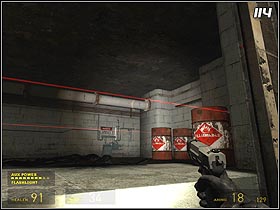
Run with her to the elevator. Run straight ahead until you reach a room filled with mines (#51). Grab one of them and approach the girl. When the "ball" is reprogrammed, do the same with a second one.
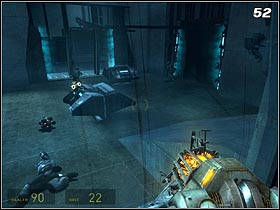
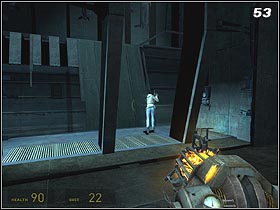
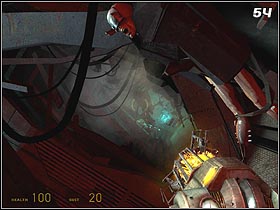
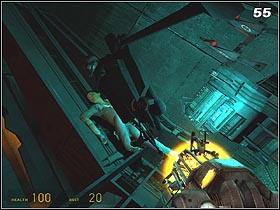
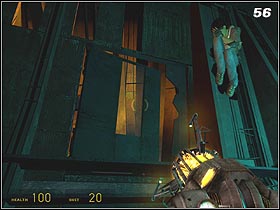
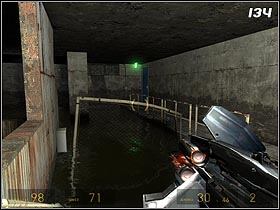
There're a lot of enemies in the nearby room. Shoot both mines in there (#52) and they'll soon be neutralized. Alyx will deactivate the force field and open the way to the train (#53). Recharge your energy if you need to and enter it. The ride will end with the train being derailed. Crawl towards the girl and move the container with a Stalker (#55). There's a door nearby (#56). Open it and go outside. Crouch down and go below the pile of junk.
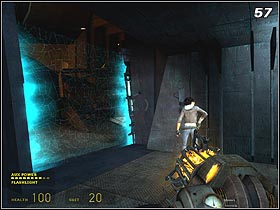
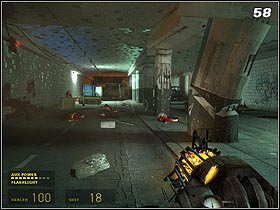
Wait until miss Vance comes back to senses and disables the force field (#57). After a short walk you'll be in a tunnel (#58) filled with Zombies and Headcrabs. You don't have any weapons on you, so leave them to Alyx. You can help her by throwing different objects at them.
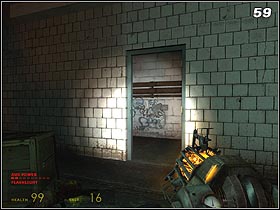
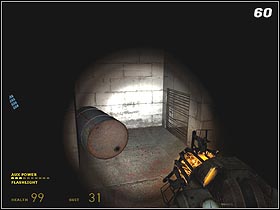
Find a way between the cars and head to a narrow passage (#59). There's a door on the other side of this corridor, but you can't open it due to the lack of power. Turn right. Next to the barrel there's an Air Vent (#60) which you can use after opening it with a Grav Gun.
Once inside, crawl through. You'll reach a small room. Turn right. There's a Shotgun, a Pistol and some other useful stuff behind a fence. You can reach them with a Grav Gun, pulling them through the hole under the ceiling.

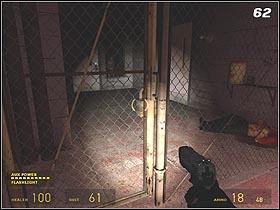
Approach the wired gate (#62) on the other side of the room. It's closed with a padlock - use your pistol on it. Find a fuse box a little bit further. Open it and power will be back on. Gather all other items and destroy the supply crates.

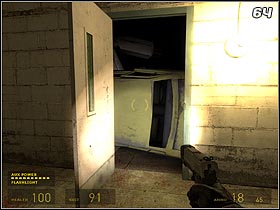
The way is blocked by a wrecked car (#64). Push it with your almighty Gravity Gun and enter the dark tunnel. It's filled with Zombies, but you don't have to fight them - Alyx will do just fine, you just point your flashlight at them. There's a battery and some ammunition to the left of the entrance. Head inside the tunnel and go between the cars. Dead Antlions (#65) show you the way to go.
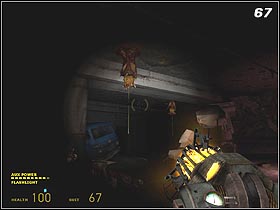
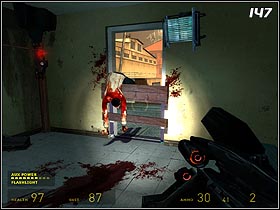
There's a wrecked train at the end of the tunnel. Approach it for a second and immediately retreat, as one of the enemies will throw a grenade in there. You'll be back in the tunnel, where you'll be attacked by Zombie soldiers. They are much tougher than their predecessors, so support Alyx this time. Use explosive barrels laying here and there to help yourself. Go further and you'll encounter Antlions and Barnacles (#67).
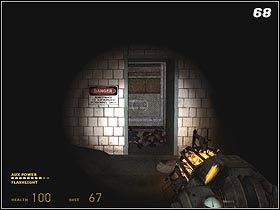
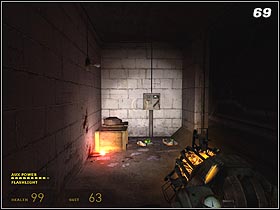
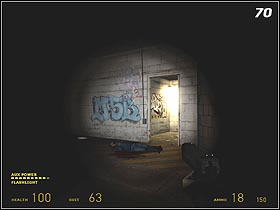
You'll reach a small room (#68) where you'll find a fuse box (#69). Use it and go back to the tunnel. You might have noticed an electronically locked door before. This time it's open (#70). Go upstairs and deal with the spiders.
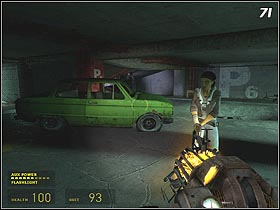
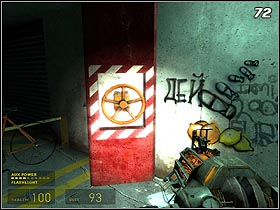
In the next room, being in fact one of the levels of an underground parking lot, there's a hole in the ground. It's being used by the Antlions as an entrance. You don't have enough ammo to fight them here. Instead of that, grab a green car (#71) with a Gravity Gun and throw it into the hole. Now turn the gauge (#72) to open the passage.
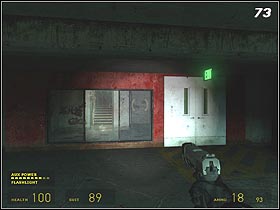
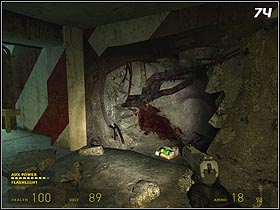
Go ahead, using the flashlight on the enemies. It's good to make use of Alyx and let her do the shooting, as your ammo is very limited. At the end of the way you'll see a door labeled Exit (#73). Before you use it, look for a crack in the wall (#74) on the other side of the tunnel. There's a med kit and some ammo.
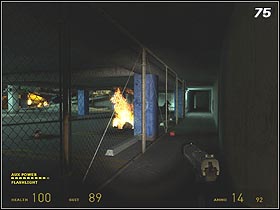
Use the staircase and you'll on the fifth level of the parking lot (#75). There are some Zombies here, but they're not the real problem. There are three holes in here, all of which serve as entrances for the Antlions. As you might have guessed, now it's up to you to close them all.

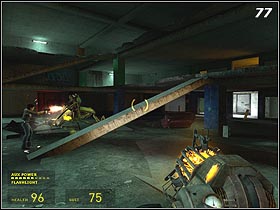
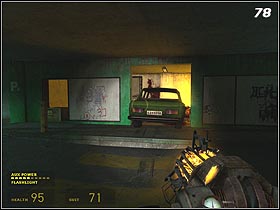
First grab a red car (#76) and throw into the first hole. The second car is on the first floor. You'll get to it using the plank (#77). Use the Grav Gun to push the vehicle to the lower level (#78) and use it to cover a hole.
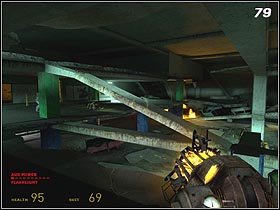
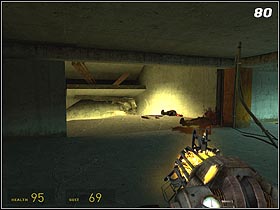
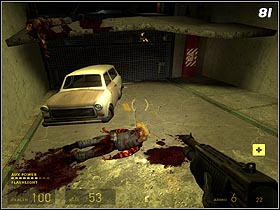
The third car is also on the first floor, but in order to get to it, you'll have to go even higher - using another plank (#79). Find a ruined exit (#80) and jump down from it. When you approach the car (#81), a Zombie will rise, so have your shotgun ready. After shooting his head off, use the gauge to open the gate. Throw the car down and use it to block the last hole. Look around the room for some supplies now.
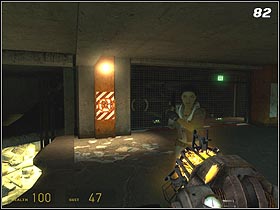
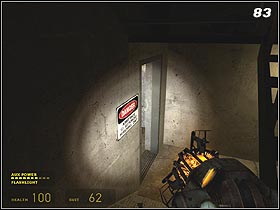
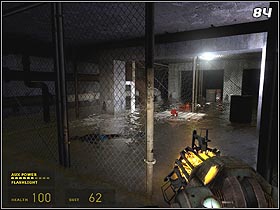
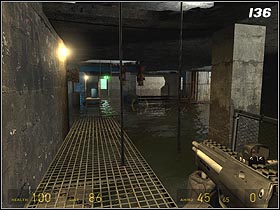
Run downstairs and join up with Alyx. There's another gauge nearby (#82) that will open the passage. Go through the door and use the stairs. You can go right through the door (#83), but it's useful to go lower and find a supply crate. You'll eventually reach flooded corridors (#84). Go through them, steadily eliminating the enemies.
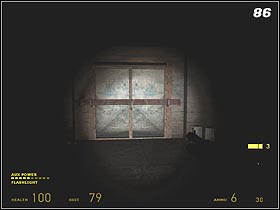
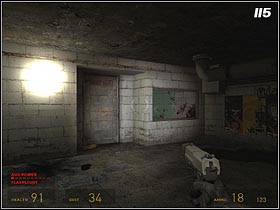
After a short walk you'll find yourself in a room with an elevator (#85). Alyx will try to call it, but electricity will fail you one more time. The girl will suggest that the nearby cable should lead you to a fuse box. Go along it until you see a locked door (#86) (look around for some ammo).
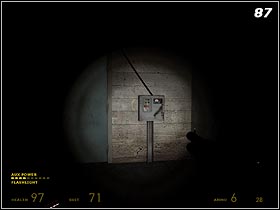
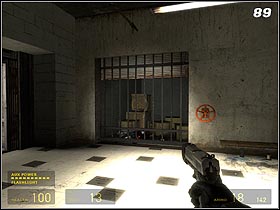
Open the door with your Gravity Gun and go inside. The fuse box (#87) is to the right. The elevator will work now, but some enemies will appear next to it as well. Get through them and enter the elevator (#88).
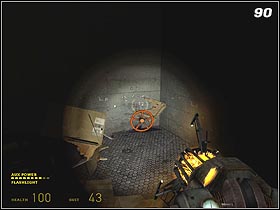
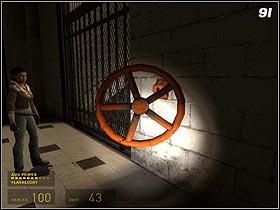
After leaving the elevator turn left (#89) and use the gauge to move the gate. Inside you will find some supply crates and other boxes. Destroy everything and use the Gravity Gun to pick up a loose gauge (#90) laying on the ground. Place it in the mechanism (#91) located near another gate.
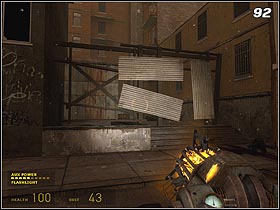
Go up through the gate. Now you'll be moving outdoors, through the ruined city. To get there, you have to use the Grav Gun to open the passage (#92). Enemies will appear around, so get rid of them.
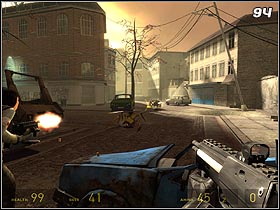
Wait until those huge, metal bars (#93) clear a way for you and prepare for another shootout. This time you will be fighting Antlions too. In order to stop the latter, you have to use the Grav Gun to cover all three holes in the ground with the cars laying around (#94).
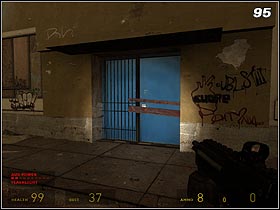
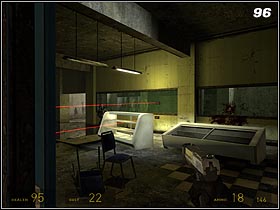
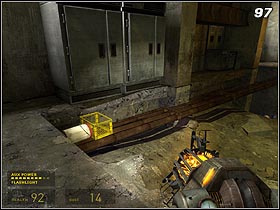
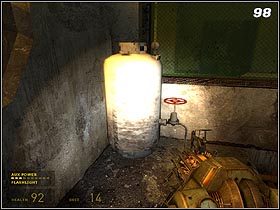
At the end of the street you'll see a blue door (#95). Grab the planks from there and enter. Kill the soldiers, destroy the laser traps (#96) and continue on to the next room. There are a few items laying on the pipes in there (#97). You have to bring and place some other objects in there to create a counterweight. When the pipes are able to support your weight, use them to reach the container (#98). Turn the gauge to stop the fire in the nearby room.
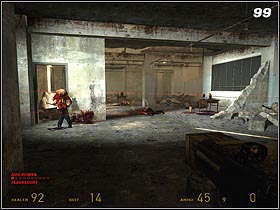
Go back to Alyx and use the staircase. Kill the enemies upstairs (#99), gather all the items and reprogram the mines with the girl's help as you did before. When going back down, watch out for a sniper who'll try to get you through the window.
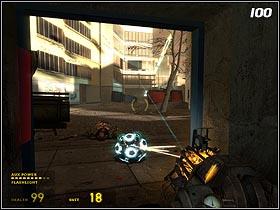
The mines will come in handy in eliminating the machine gun operator on the other side of the street (#100). Sniper in one of the windows is more troublesome than him, though. You have to get near the building he's in. Use car wrecks as your coves. When you're near the windows, throw a grenade in there or use one of the mines.
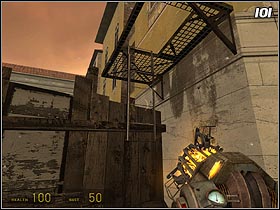
Wait for Alyx to go up and take the sniper's weapon. Approach the fence and use the small ladder (#101) to get to the other side. The area will be crawling with enemies - don't do anything, though, as Alyx can take them out easily.
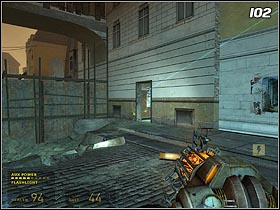
Use the open passage (#102) to the building on the right and continue on. When you're back on a street, kill the soldier hidden behind a barricade (#103) who's using the machine gun, and then use the car to block the hole in the ground that Antlions are coming outta.
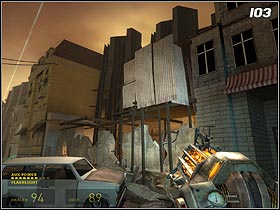
Approach the wall and wait until soldiers come. Take advantage of the fact that the gate is open and run to the other side (#105). Wait for Alyx and kill the Antlions that attack you. The girl will open the next passage.
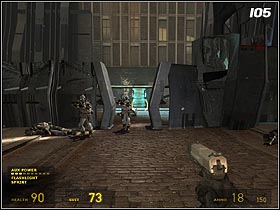
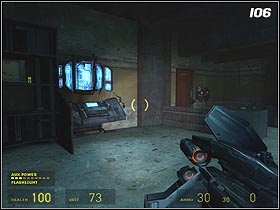
Go ahead, killing everyone in your way. You'll reach the armory (#106), where you'll find a lot of ammo and a Pulse Rifle. When the door's blown out, enemies will enter the room. Kill them all and use the panel on the wall to recharge your energy.
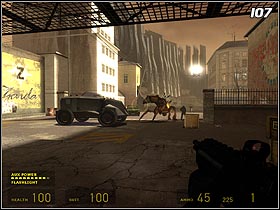
After a short walk you'll reach a crossing on which enemy soldiers are trying to kill Antlion queen (#107). Don't engage into combat until the enemies weaken the monster. Start to shoot when the armored vehicle gets destroyed. You can use the barrels laying around to help you defeat the beast, but it's way too fast to easily keep it at distance. Concentrate on using the machine gun - there's a lot of ammo in the crate near here.
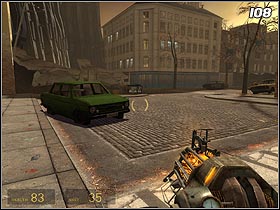
Killing the queen won't stop the Antlions from coming from the hole on the ground. As always, grab some cars and use them to fill the holes (#108). Approach the barricade (#109). Wait for the gate to open and go inside, killing more soldiers. Watch out for the ones that stand on the roofs.
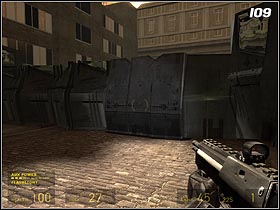
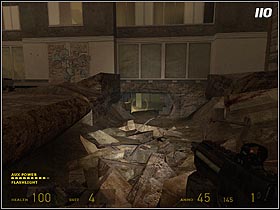
Find a hole in the wall (#110) somewhere between the rubble. Try to open the door - it turns out it's locked. Destroy the barrels, get rid of the mine and use the air vent (#111). Take the first right and you'll find some items to regenerate your armor (you have to pick them up with your Gravity gun, as you can't get close - the floor would break under your weight).
Reach the end of the air vent. There are two laser traps on both end of the tunnel you'll get into. You can't destroy them, as the explosion would tear you to pieces. Destroy the air vent in the ceiling (#112) and leave the tunnel. Pass to the other side of the room using the barrels (#113), but watch out that they don't explode.
Enter the elevator and wait for it to fall to the water. Use the Grav Gun to tear the ceiling and swim up. You'll get to another room (#114), which also is secured with laser traps. Throw a grenade in there and dive. The explosion won't harm you this way.
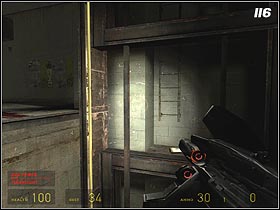
The door's closed, so use the broken window (#115). Enter another air vent and go straight ahead. After a while you'll find yourself in the elevator shaft. Jump to the ladder in front of you (#116) and climb up. Look to the right, and you'll notice another grate (#117). Use it to enter another tunnel.
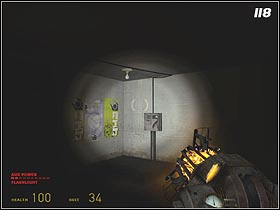
After a short walk you'll be above the next room. Use the Gravity Gun to destroy the grate. It will cause an explosion which will get rid of the barrels and laser traps down there. Jump down and open the fuse box (#118). Go further, along with Alyx.
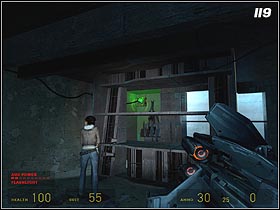
Destroy laser traps and barrels from a safe distance and prepare for the enemy attack. When you kill everyone that stands in your way, go up the stairs. Take the crossbow and destroy the supply crates (#119). Use the Gravity Gun to pull out the plus and go down. The force field is gone and you can go through.

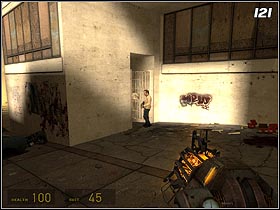
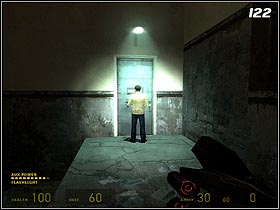
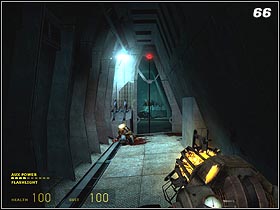
You're on the street (#120). Go ahead, exterminating the enemies. You'll find a rocket launcher by the dead ally's body - don't forget to snatch it. A rebel will point the way for you (#121). Follow him and wait until he opens the way to the hideout (#122).
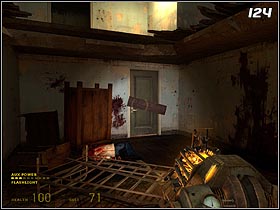
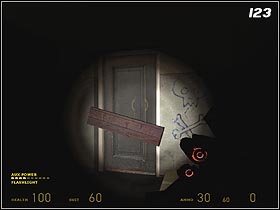
Use the staircase and head up. When a rocket strikes the building, find a planked door (#123). Get through it using the Gravity Gun and head forth. When the floor crushes under your weight, get rid of all the enemies. Behind one of the lockers you'll find another door (#124) - also blocked with a plank. Tear it out and go through.
You'll meet Alyx. Go up, avoiding the breakable planks in the floor. After a short walk you'll end up in a room where Barney is hiding. Wait until they finish talking, take a crowbar and use the passage between the buildings.
Use the crowbar to destroy the plank that is blocking your way (#125). Don't go down on the street, but turn left and use the staircase. You'll see another bridge. Kill the enemies in the opposite building and grab or destroy the plank that it blocking the bridge mechanism (#126). Get to the other side.
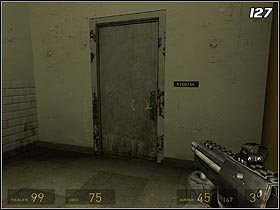
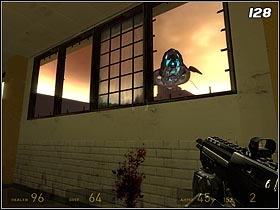
You're in a ruined hospital. At the end of the corridor there's a door labeled Storage (#127). Now you have to be cautious. There's a lot of enemies in this building, and a gunboat is floating outside. Stick close to the windows (#128) on the right side to avoid serious damage.
You'll have to destroy some laser traps (#129). Do it by grabbing any object with a Grav Gun and throwing it so it crosses one of the red laser strings.
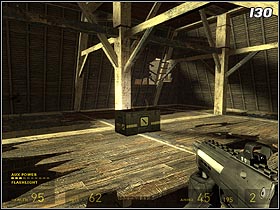
The corridor leads to the attic. You'll end up fighting a gunboat in here. You have an infinite amount of rockets in a crate (#130), but it still won't be easy - you'll have to target it very carefully. It's best to wait for it to circulate around the building. The gunboat will shoot bullets that will destroy the floor in here. If you fall down, you can return to the upper level using the stairs. When you finally destroy the enemy, it will crush into the building. Watch out so you don't get harmed in the process.

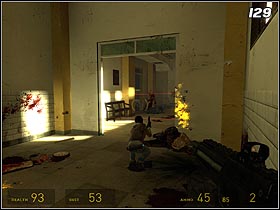
Go down and join Alyx (#131). Wait until the soldiers blow up the door and go further. Destroy the laser traps and wait for the girl do deactivate the force field ahead. Go forth, exterminating all the enemies in the hospital (#132). Destroy all the supply crates and search through the lockers - you'll find a lot of ammo and medicaments.
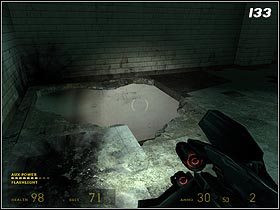
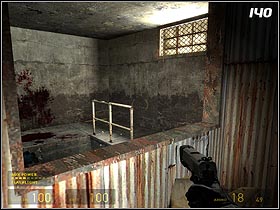
After a short walk you'll be in a room with a hole in the ground (#133). Jump down. The floor will collapse under your weight and you'll fall down to the water filled basement. Dive and swim ahead - you'll reach the stairs. There's a door nearby (#134) which is closed for the moment. Kill the Barnacles hanging on the ceiling and jump to the water through the railing. Swim to the other side of the room. There's a supply crate and a pillar, and on it - a switch (#135). Use it to open the door.
As you might have guessed, the water is electrified now, so don't enter it. Watch out, as there are also some new Barnacles here. Hit the switch again and look around the room (#136). You have to find a blue barrel that's somewhere around the door.
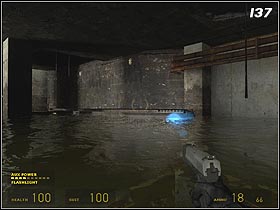
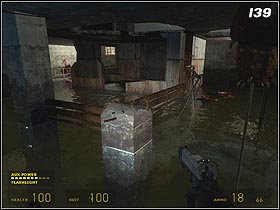
Grab the barrel with a Grav Gun and dive with it to place it under a metal platform (#137). Hit the switch one more time. Run and jump to the other platform (#138) near the power box, and then get on the pipes (#139). When you enter a small room, kill the spider and leave through the window (#140).
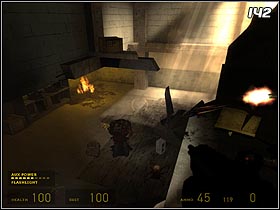
Alyx will join you (#141). Go forth. In the next room, jump down and prepare for some serious undead killing (#142). Use the mines (they're on the locker) to help you.
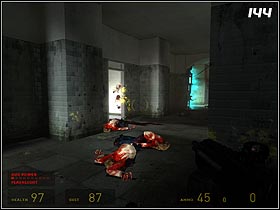
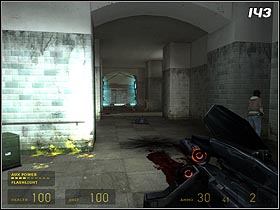
Go further, using the only available way. Stop when you're in the corridor (#143) which is secured by two machineguns. Run towards them, hiding behind the pillar. Now you have to deal with the rest of the enemies. When they're all dead, run to the room to the left (#144). Refill your ammo, grab one of the mines, and prepare to defend against a group of Zombies. When you succeed, run to the room they run out of.
Get rid of the mines and carefully approach the force field. You'll have to pull the plug (#146) with the Grav Gun to deactivate it. Go ahead. That's it for the game's longest episode.
Open the door and destroy the planks that block the passage (#147). You'll meet with Barney (#148) who'll ask you to escort a group of rebels to the train station. Wait for them to come here and find an entrance to the complex (#149). Look around the big hall. The hideout entrance is located behind one of the locomotives (#150). After a short walk you'll rendezvous with the rest of the team. There's a Colt in here, so take it.
Alyx will decide to take the machinegun and tell you to go for the other group. Watch out for the Manhacks, run towards the building where Barney has hidden himself. When you meet your companions, you'll be attacked by a group of enemy soldiers. Take them out and run back to the hideout.
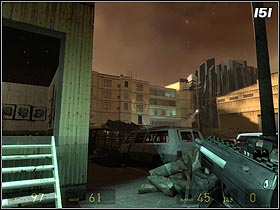
Time to evacuate the third group. When you leave, watch out for the sniper (#151) who is in one of the windows on the other side of the square. It's not easy - you have to get near him by hiding behind the car wrecks. When you manage to do that, throw a grenade into the window. Take the rest of the rebels with you.
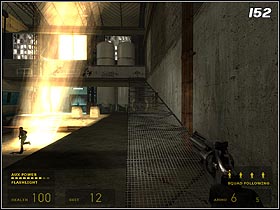
Take out the soldiers who appeared on the roof (Colt is beyond any competition here) and run to the station. Inside one of the enemies will block the way to Alyx by shooting the locomotive. Wind a platform to the right (#152) and reach the hideout the other way. Watch out for the enemies who attack you from above - and also remember to grab their ammo.
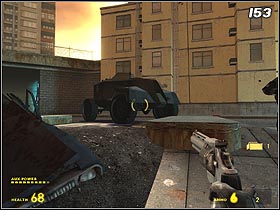
Wait until Alyx kills the enemies and go back to the square. You'll have to face some more soldiers, and eventually an ATV (#153). You'll have to use rockets on the latter. There's a lot of them in a crate near the entrance to the station (#154). When you're done here, take the group with you and run to the station. Kill all the soldiers and go inside.
Go back to the square to get the final group. Before you get to Barney, though, you'll have to deal with the enemy soldiers. When you start to head for the station, don't bother fighting them. Just run, exterminating only the ones inside the complex (there are Manhacks in here, too; use you Machinegun on them). When all the rebels are inside the hideout, join them in there.
Alyx will unlock another passage (#155). There's no time to loose, run forth. There's a gauge near the security room (#156), which you can use to open the gate. When the girl is on the other side, enemies will attack you, including a very irritating robot called Strider.


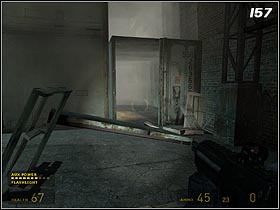
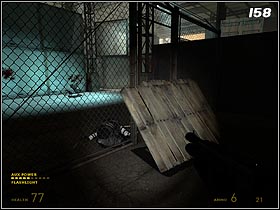
Leave the cage and hide behind the metal wall. Wait until the machine destroys the container to the right (#157). Use the new passage. Kill all the soldiers and destroy two pallets (#158) that block you way.
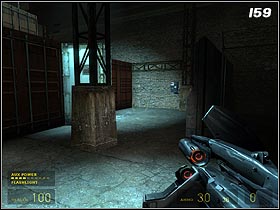
There's a health regeneration point nearby (#159). There's also an open container, that will let you pass to the other side of the complex. Turn right and get to the platform using the other container (#160).
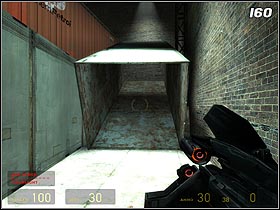
Go ahead. The robot will strike again, creating a new passage for you. Go forth, avoiding the bullets. At the end turn left, jump across the hole (#161) and run over the container.

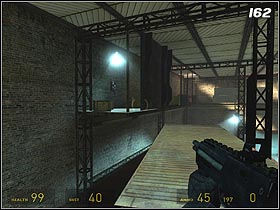
On the left you'll see a regeneration point (#162). You can regain your health there without being shot by anyone. Destroy the barrels before you and prepare for a little Grav Gun operation.
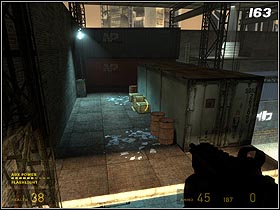
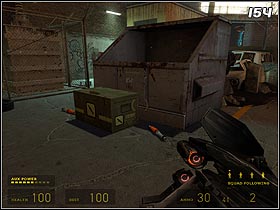
The platform that you're on is mined. You have to grab all the mines from the floor and throw them away. In order to do that without being hit by the droid, always get near them and crouch. When the way is secured, run forth and jump towards the other part of the base (#153). Destroy the supply crates and run to the right (#164 - don't take too long in here, as the droid will take advantage of it and strike you).
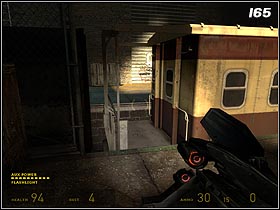
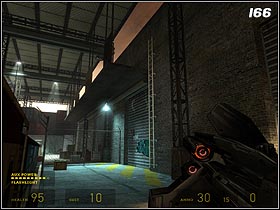
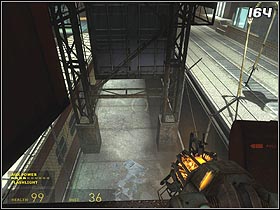
Jump down and run along the train, getting rid of the mines on your way. Just before the end of the corridor, turn left and go between the wagons to the other side of the station (#165). Now climb the ladder (#166). There's a crate filled with rockets here. As you might guess, they're for dealing with this darn droid. Target precisely. Those "guided" missiles have an annoying habit of turning over and destroying your cover.
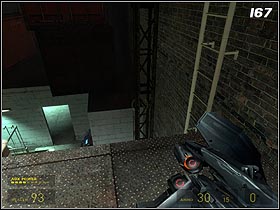
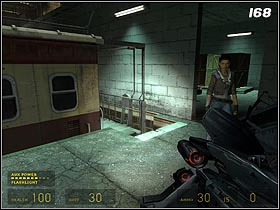
When Strider is defeated, go down using the second ladder (#167). After meeting with Alyx enter the train (#168) and wait patiently until you are as far as possible from this God forsaken city.
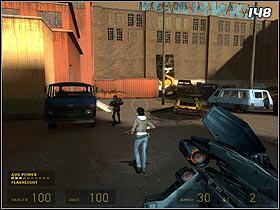
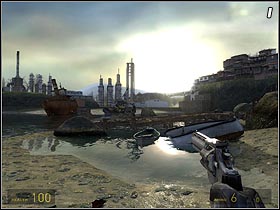
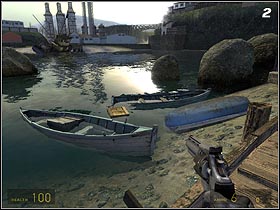
This scenario takes place in a ruined port (#1) which is controlled by the enemy soldiers. Enter the pier and approach the old man. Follow him to the gate, picking up the supply crates (#2) with a Gravity Gun (don't enter the water, some deadly fish in there).
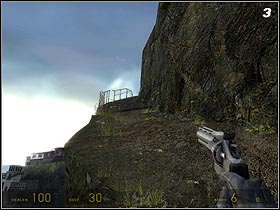
Head up (#3). In a moment you'll see the first enemy soldiers (#4). Kill them. Remember that you'll be attacked from above, so keep an eye on your surroundings. Use your Colt to eliminate distant targets.
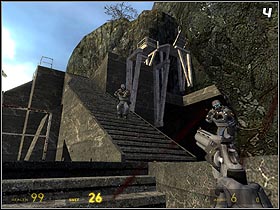
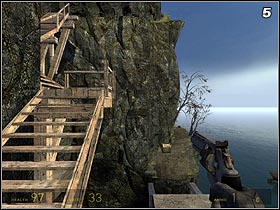
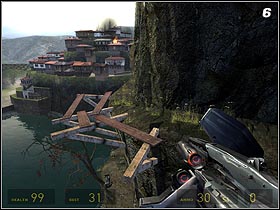
When you are up you'll see wooden stairs (#5). When you try to use them, they will be destroyed. Head down and jump towards the supply crate and another stone platform. Go forth, eliminating all the enemies. After a short walk you'll see the enemy soldiers dropping from above. Kill both them and the enemies who are on the lower level. Jump to the other platform (#6) and go up.
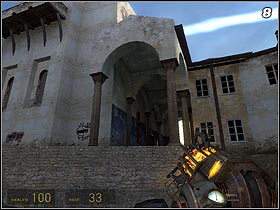
When you're near the first building (#7), you can rest for a while. You won't be attacked by anyone for a while. Look around your surroundings and find the supply crates. When you're ready to go, head for the church (#8).

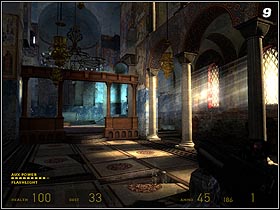
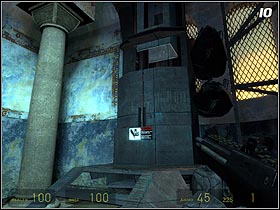
Open the door and enter the big hall (#9). Gather the ammo and use the regeneration points on the walls. Near the altar you'll find strange machinery (#10). Use the Gravity Gun to tear out the casing from I, and then throw something heavy in there. Prepare for a heavy fight.
First you'll be attacked by spiders. You'll hear a gunboat outside. Wait for the enemy soldiers to enter the church and kill them all. When the area is clear, go to the main entrance.
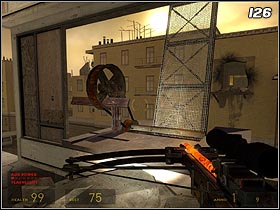
There's a small balcony to the left (#11). Here you can destroy the gunboat, using the rocket launcher (should you run out of rockets, there are some near the altar). When you shoot it down, go back to the church. Some new enemy soldiers will break in through the door (#12).
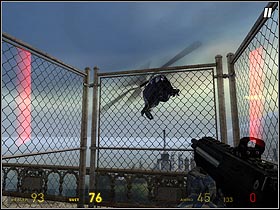
Turn right and enter the platform. There's a crate with rockets here (#13). Refill your ammo - you'll need it for another gunboat. The fight won't be easy. The chopper has a lot of free space to avoid the missiles, and you can only hide behind the sheets of metal that are easily destroyed by its attacks. When you destroy it, retreat back, as its pilot will decide to crush the airship into you.
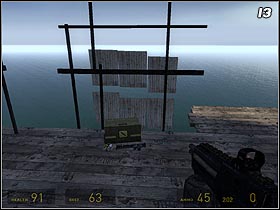
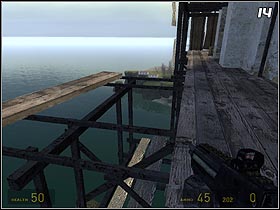
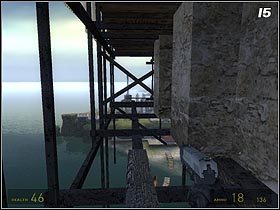
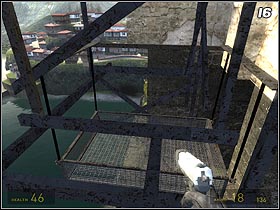
Move to the edge of the platform and jump down to the planks (#14). Find a passage between the scaffolds (#15) go forth. You'll see an elevator (#16) that will take you right to the end of the scenario.


 Hearthstone: Curse of Naxxramas Game Guide & WalkthroughHotline Miami 2: Wrong Number Game Guide & WalkthroughHearthstone: Heroes of Warcraft Game Guide & Walkthrough
 Heavy Rain Game Guide & Walkthrough
 Heroes & Generals Game Guide & Walkthrough