
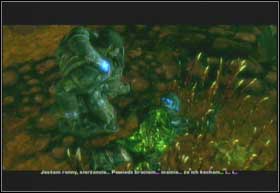
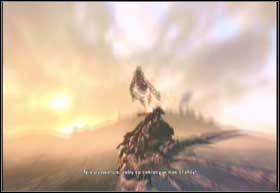
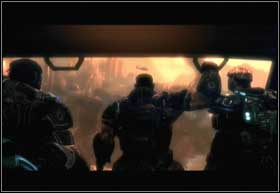
Welcome to the guide to one of the best games of 2008. Gears of War 2 is better than its predecessor in almost every aspect. In this guide you will find a description of the single player mode and ways to fight the bosses. Thanks to it you will also find all 41 hidden items and will get to know the requirements for each achievement. Have fun.
Przemek "g40st" Zamecki
Translated to English by Jakub "cilgan" Lasota

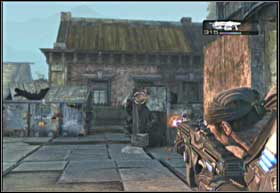
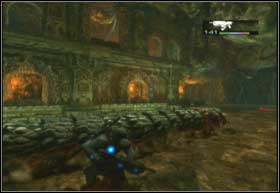
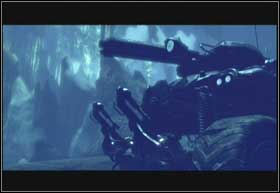
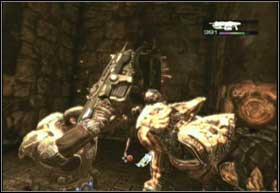
A typical cannon-fodder, sent to fight in great numbers. All drones are males, as their wives, berserkers, are far from being obedient soldiers. Can be met in all parts of planet Sera, most likely in several groups. Alone, they don't pose a threat.

They're easy on the lower difficulty settings, but the higher, the better accuracy they have, and the more damage they inflict. They can be a real pain, so if you're attacked by Drones and Snipers at the same time, get rid of Snipers first. Unless you have enough space and covers to maneuver.
Boom and you're dead. They're slow, but their bullets kill instantly. Fortunately, they're not too sharp, and have to say Boom! before every shot. Shoot their heads, they'll die quicker.
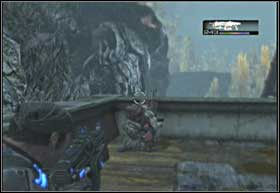
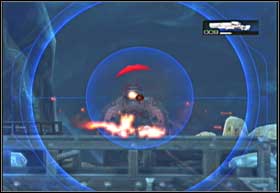
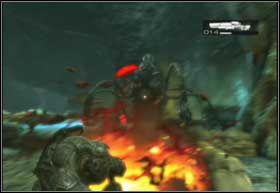
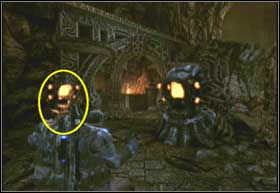
Very dangerous in close combat. They can fry wings quite nicely. Try to shoot the containers on their backs. One clear shot from the sniper rifle and the Flamer explodes along with his nearby companions.

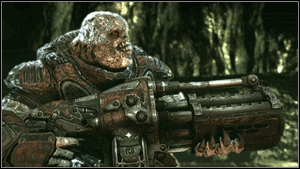
These guys are also very slow and they carry a minigun in their hands. Additionally, because of the helmet they're wearing, they're resistant to headshots. Patience and frequent cover change is important in eliminating them.
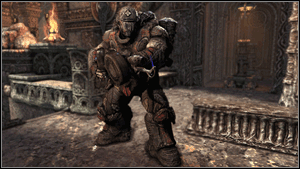
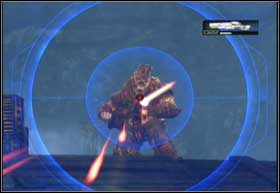
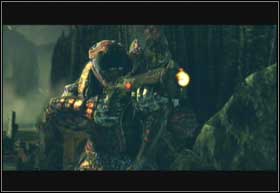
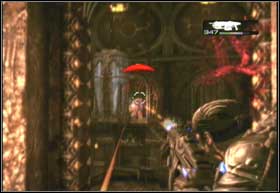
Monsters straight out of Nordic tales. They hide behind a mighty shield, and wield a great, explosive morgenstern. Shoot them in the head, and when they use the shield, target their calves. Don't ever get close to them. Warning: they can be quite fast.
Elite infantry of the Locust. On higher difficulty settings they're incredibly accurate, co don't get out of the cover for longer than it's needed. Wait for them to reload, and then shoot them.

These guys somewhat spiritual leaders among the Locust. They usually command the resistance points, but don't pose too much of a threat. They are much tougher than a basic Drone, but after some good shots in the face, they also hit the ground.
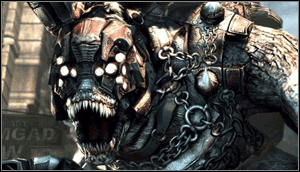
They're fast, and have a very strong kick. It's hard to get away from them, so keep your distance. Even when you kill the rider, the Bloodmount is still a dangerous animal.
Locust's air cavalry. Very dangerous and with great fire power. When they land, they're quite clumsy, but don't let them get too close to you. Even a barrier won't last an attack of their tentacle.
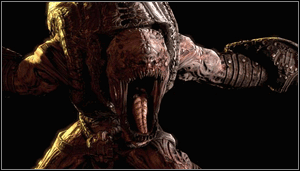
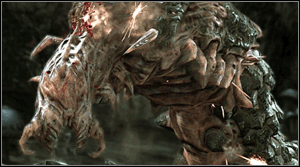
Foul creatures, stunning their enemies with a wild roar. They move on four limbs, and can be really fast. On the lower difficulty setting, you just have to hit them in the head with the butt. On higher settings, fighting them requires some more strategy and dextrous fingers. The shotgun works great against them.
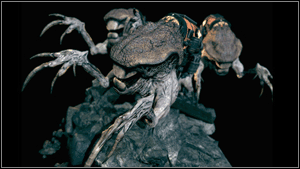
Small, filthy, fast and in addition they explode. You can eliminate them from distance, or wait for them to get closer and initiate the detonator. A quick roll helps to avoid damage then. Extremely dangerous to any vehicle.
Brumak or not, it's a good mount, and you'll experience it on your own. They are large beasts carrying a whole arsenal on their backs. Their weak points are the guns mounted on their backs and jaws. They're not too fast, so they're a perfect target.
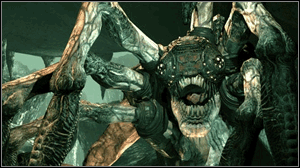
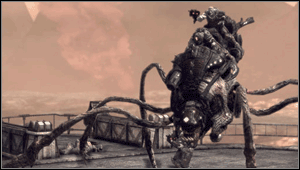
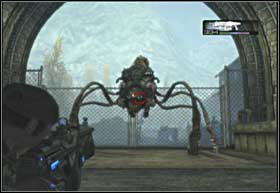
Used by the Locust to dig underground tunnels. They're extremely dangerous in close combat and can destroy a tank with one hit. They're impossible to damage when they cover with their long, spider-like limbs. Although they're harmless once they expose.
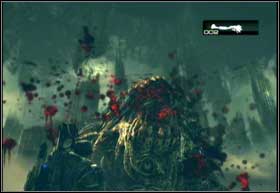
They have incredibly tough armour, and love the red fruits hanging in the caves. They're great as a moving cover, and will prove very useful in some fights with the Locust. They're not aggressive, but aren't good for hugging either. Mainly because of their size, and well, the looks.
Name
Points
Description
Green as Grass
10
Train the rook (any difficulty)
It's a Trap!
10
Story progression in Act 1, Chapter 2
Escort Service
10
Story progression in Act 1, Chapter 4
Girl About Town
10
Story progression in Act 1, Chapter 6
That Sinking Feeling
10
Story progression in Act 2, Chapter 4
Freebaird!
10
Story progression in Act 2, Chapter 5
Heartbroken
10
Story progression in Act 2, Chapter 6
Longitude and Attitude
10
Story progression in Act 3, Chapter 3
Tanks for the Memories
10
Story progression in Act 3, Chapter 4
Water Sports
10
Story progression in Act 3, Chapter 6
There's a Time for Us
10
Story progression in Act 4, Chapter 2
Better Wrapped in Beacon
10
Story progression in Act 4, Chapter 3
Have Fun Storming the Castle
10
Story progression in Act 4, Chapter 6
And the Horse You Rode in On
10
Story progression in Act 5, Chapter 1
You Are the Support, Son
10
Story progression in Act 5, Chapter 2
Brumak Rodeo
10
Story progression in Act 5, Chapter 4
Does This Look Infected to You?
10
Story progression in Act 5, Chapter 5
Suicide Missionary
150
Complete all campaign acts on Insane Difficulty
Artist of War
75
Complete all campaign acts on Hardcore Difficulty
Guerilla Tactician
50
Complete all campaign acts on Normal Difficulty
Guerilla Tactician
25
Complete all campaign acts on Casual Difficulty
Collector
5
Recover 5 collectibles (any difficulty)
Pack Rat
15
Recover 20 collectibles (any difficulty)
Completionist
30
Recover all 41 collectibles (any difficulty)
One-Night Stand
10
Complete 1 chapter in co-op on any difficulty (Marcus or Dom)
Open Relationship
30
Complete 10 chapters in co-op on any difficulty (Marcus or Dom)
Friends with Benefits
50
Complete all acts in co-op on any difficulty (Marcus or Dom)
Crossed Swords
10
Win 10 chainsaw duels (any mode)
Pound of Flesh
10
Use a meatshield to save your life 10 times (any mode)
Organ Grinder
10
Kill 30 enemies with a cover mounted Mulcher (any mode)
Shock and Awe
10
Kill 30 enemies with the heavy Mortar (any mode)
Said the Spider to the Fly
10
Kill 10 enemies with a planted grenade (any mode)
Crowd Control
10
Melee 10 enemies down with the Boomshield equipped (any mode)
Smells Like Victory
10
Kill 30 enemies with the Scorcher Flamethrower (any mode)
Once More, With Feeling
10
Perform 30 perfect active reloads (any mode)
Takes a Licking
30
Melee 30 Tickers (any mode)
Variety is the Spice of Death
30
Kill an enemy with every weapon in the game (any mode)
Kick 'Em When They're Down
10
Perform all 11 unique executions on a downed enemy
Seriously 2.0
50
Kill 100,000 enemies (any mode)
Photojournalist
10
Submit a spectator photo
Standing Here, Beside Myself
10
Win 3 matches of Wingman (public)
Beat the Meatflag
10
Capture 10 meatflags in Submission (public)
It's Good to be the King
10
Win 10 rounds of Guardian as the leader (public)
You Go Ahead, I'll Be Fine
10
Win three matches of King of the Hill (public)
Back to Basic
10
Successfully complete the 5 lessons of multiplayer Training Grounds
A Parting Gift
20
Kill 10 enemies with a grenade while down but not out (any mode)
Party Like It's 1999
30
Play 1999 rounds of multiplayer (any mode)
Around the World, Again
30
Win a multiplayer match on each map (any mode)
Dirty, Dirty Horde
20
Survive the first 10 waves of Horde (any difficulty, any map)
Hoard the Horde
30
Survive all 50 waves of Horde (any difficulty, any map)

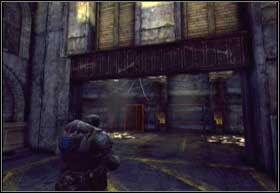
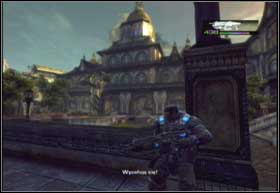
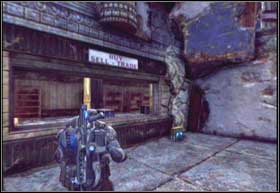
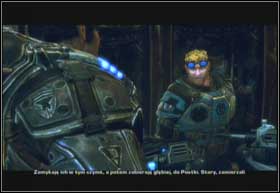
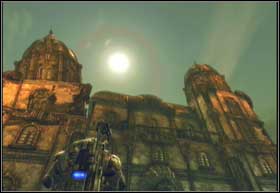
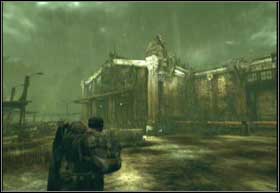
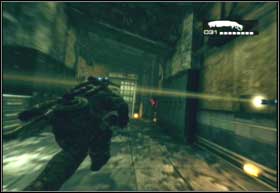
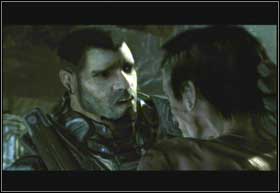
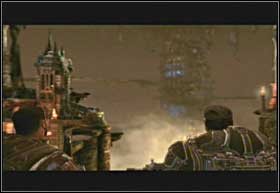
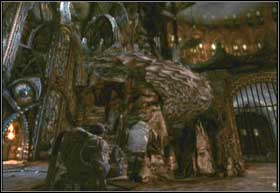
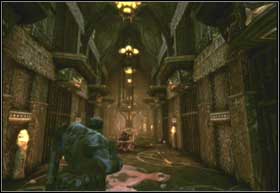
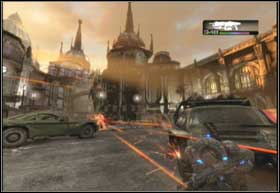
After watching the intro and listening to the dialogue regarding the current tactical situation, choose the tutorial. It's worth it even if you remember the previous game, because you will be able to collect two items for your War Journal. Take Carmine for the first patrol.
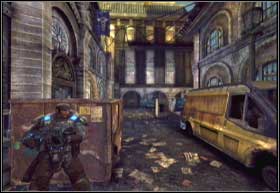
Listen to the dialogue in which Marcus will teach the newbie the golden rule. When walking, after a couple of meters you will receive the take cover command, press the A button on the controller and hug to an obstacle.
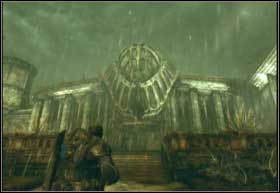
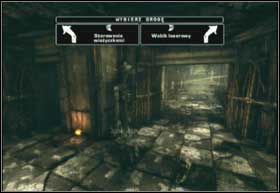
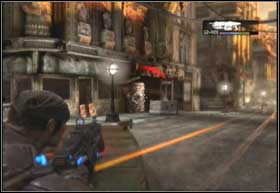
Before Jack opens the gate, pick up The Eagle Newspaper. When Dom will try to show off his accuracy, show what you're capable of. Hit the five bottles standing across the barricade. After the first shot choose the pistol and destroy the remaining bottles with it.
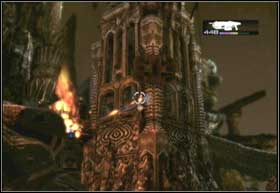
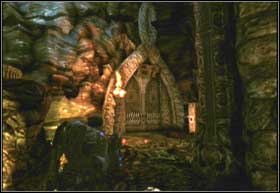
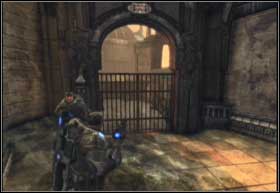
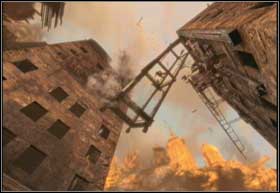
Right after you will see a Wretch, you will have to learn how to jump over obstacles. First hug to them with A, and then pull the analog stick forward and press A again. Marcus will nicely jump over the barricade. After that, force the gate open with the X button.
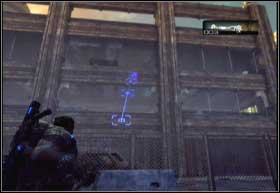
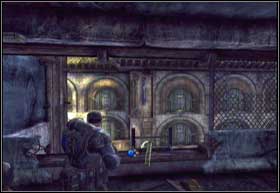
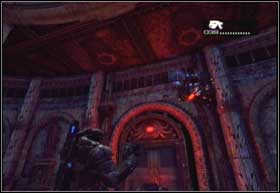
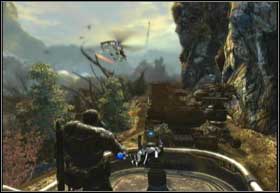
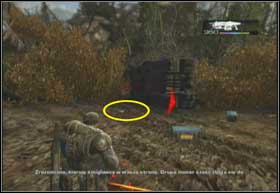
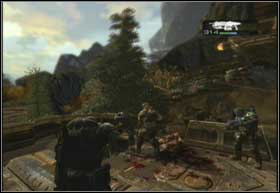
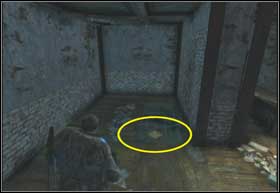
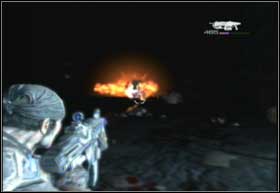
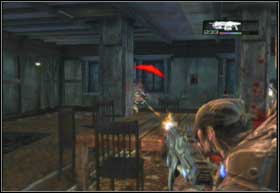
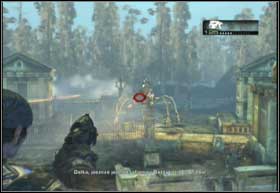
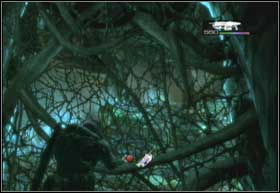
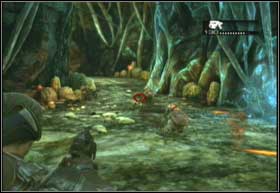
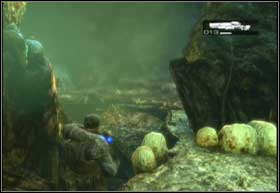
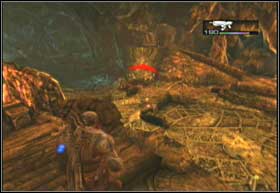
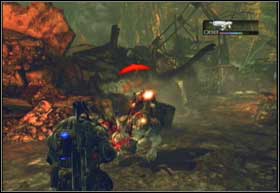
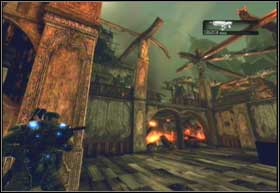
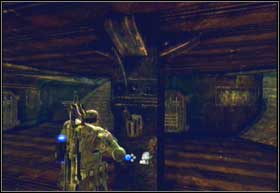
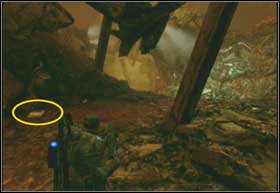
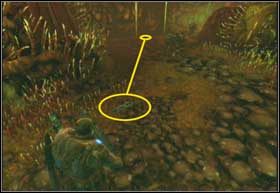
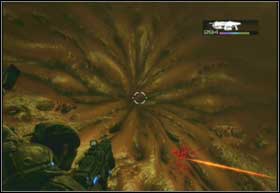
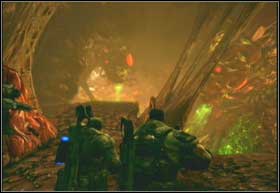
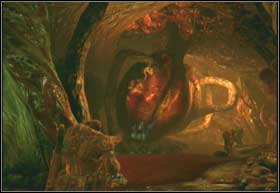
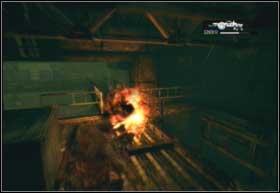
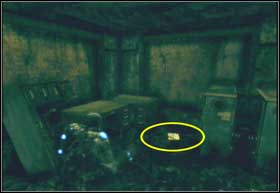
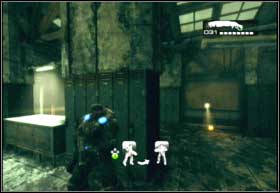
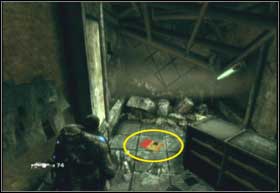
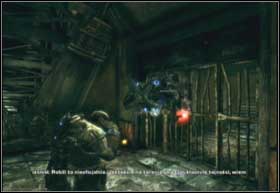
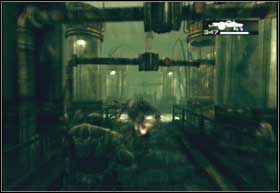
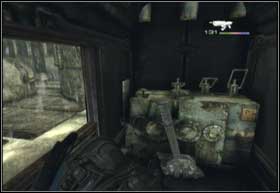
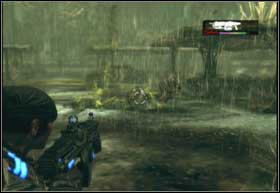
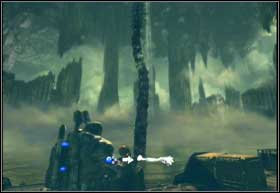
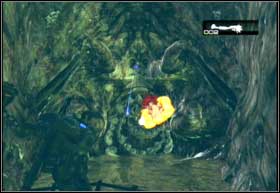
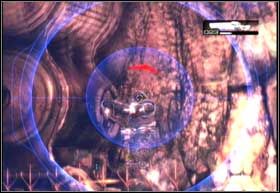
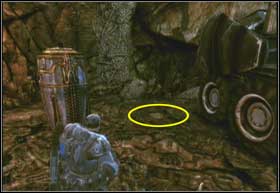
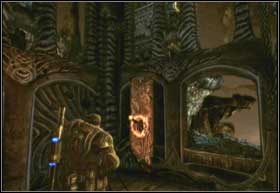
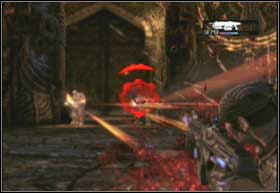
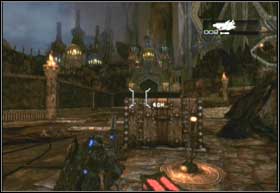
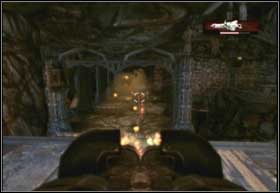
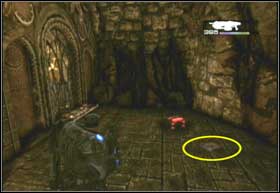
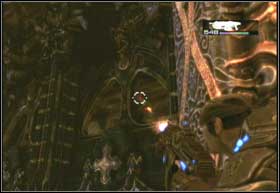
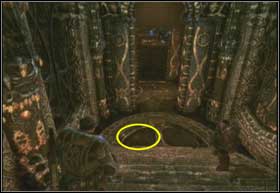
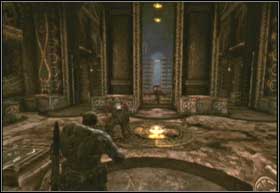
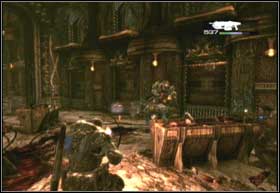
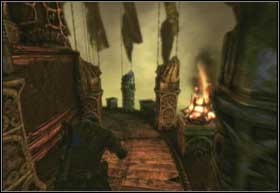
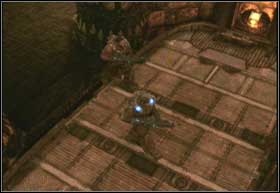
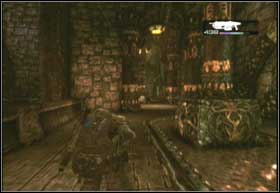
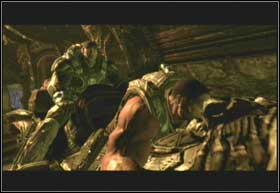
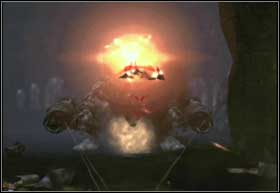
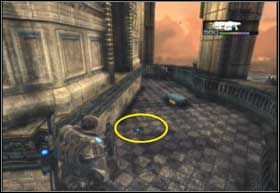
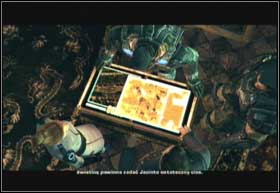
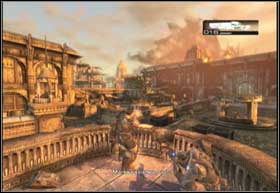
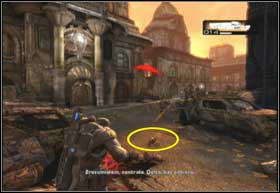
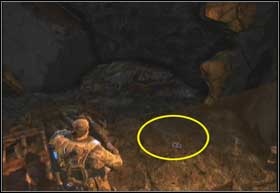
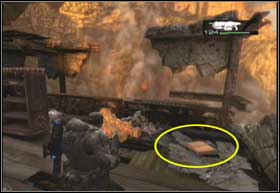
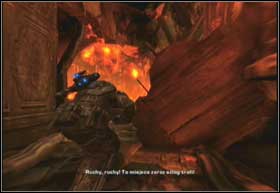
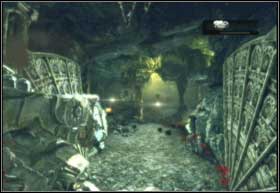
Wretches again. Pick up the grenades lying in the centre of the school court and throw them so they fall through the car park's window on the first floor. Aim at the right side, as shown on the picture above. Kill the wretch with the grenades. Unfortunately, Carmine will also throw a grenade, which won't end well for him and Dom. Reanimate your companions by walking to them and pressing X on the controller.
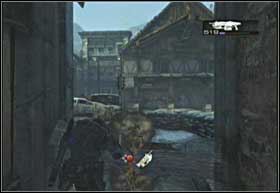
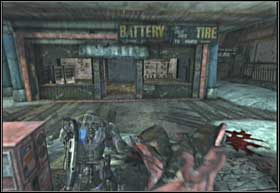
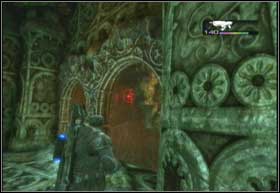
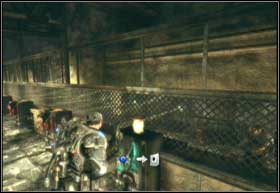
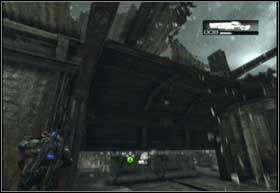
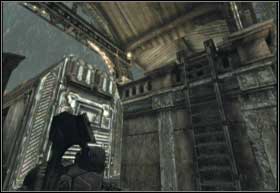
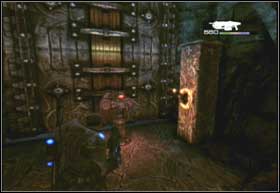
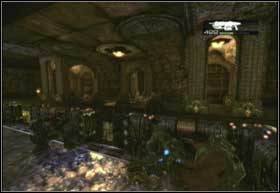
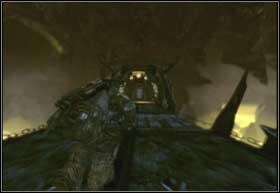
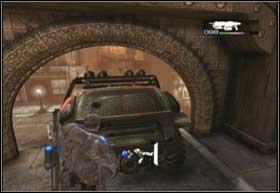
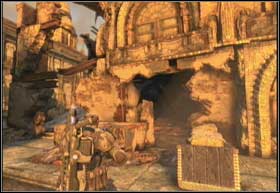
Now search the car park. The further part is blocked. Walk to the barricade and cut through it with the Lancer's chainsaw. In order to do that, press B on the controller. Follow your comrades and search the car park. At some point you will receive a message, that you completed the mission. Look around and go down the leader, under one of the windows,
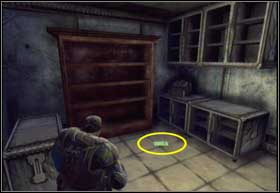
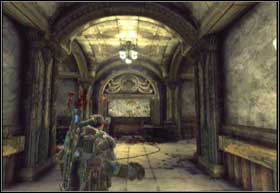
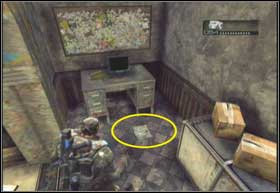
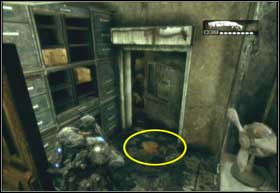
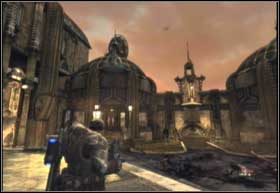
After getting down, look around. On the end of the street you should see a big, wide open door, leading to a spacey room. Enter it and next to the desk, you will find the Ambulance Driver's Log. Get back to the hospital.
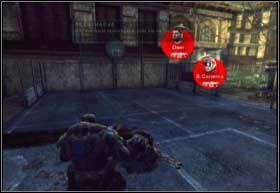
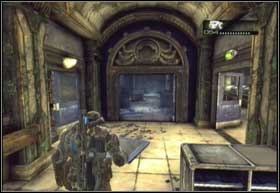
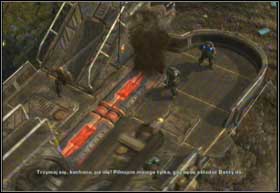
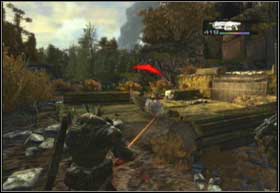
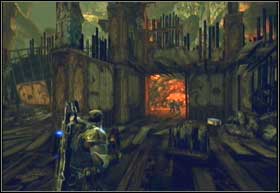
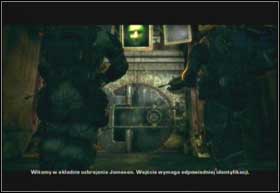
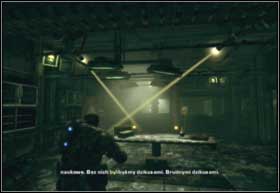
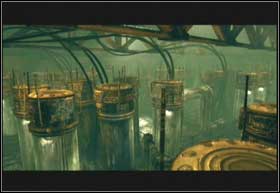
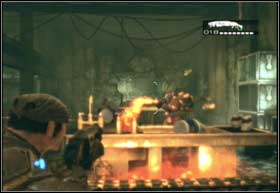
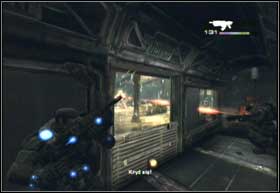
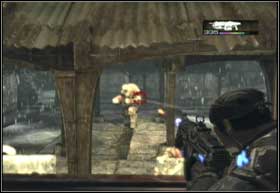
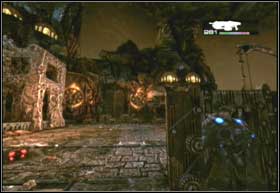
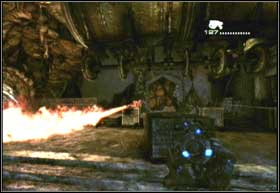
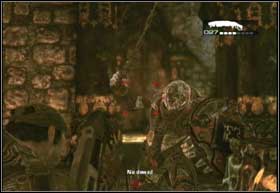
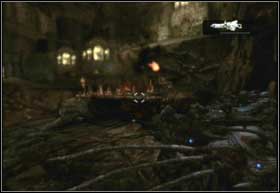
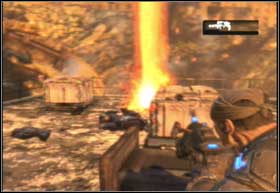
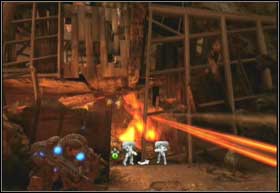
You're in a hospital, partially controlled by the Locust. Your mission is to eliminate all the enemies. Follow Tai, who will help you in the fight. After crossing the room with the diseased on wheelchairs prepare an ambush for the Locust team. Hide behind the wall next to the window and wait for the patrol to walk next to the containers on the courtyard. Then lean out and shoot the containers, which will cause them to explode.

The new order is get rid of the remaining Locust forces. Going through the hallway, notice an open door on the left, leading to a room. Go inside and on the floor you will find the Journal: Dr. Nicolette Shannon.
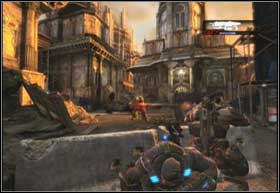
In the next hall you can shoot the escaping Locust soldiers from above. After that Tai and Dom will go down, but you continue forward. There are bloody fights taking place on the streets. Continuing forward, eliminate every single Locust resistance point.
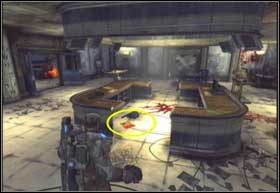
Thanks to splitting up, in the big room you will attack the Locust from two sides. In the centre you will find the Jacinto Medical Centre File: Jonathan Harper. Follow your comrades to the courtyard.

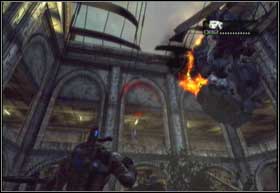
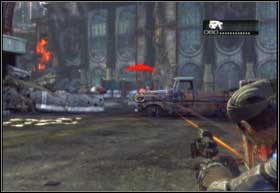
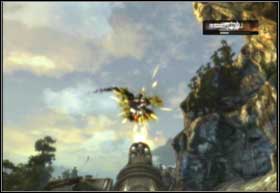
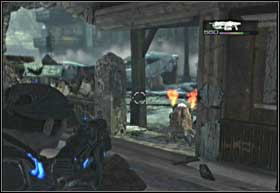
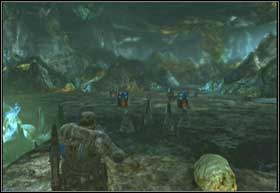
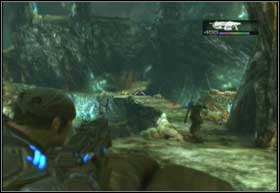
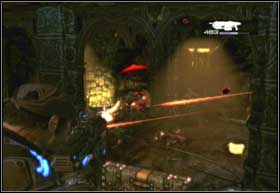
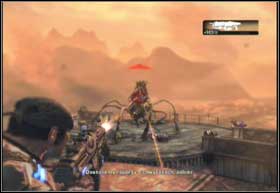
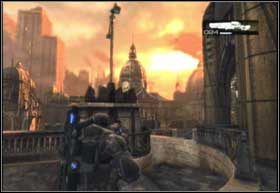
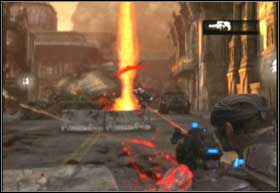
Before you there is an open area defended by the Locust. Gradually eliminate the enemies. At some point a Reaver will arrive. You have to look out for his rockets. Don't let him get too close to you, because it will try to crush you. After finishing the fight, go to the building on the other side.
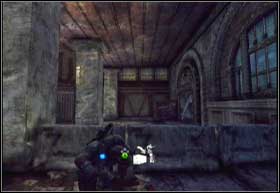
Inside eliminate a couple of Locust in the big room. The corridor then splits a while. Go left.
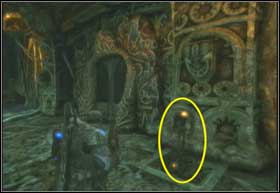
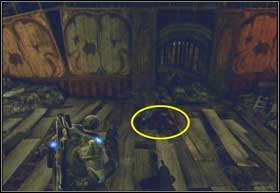
You should see three doors. You will find Locust on the right, so go left first. Inside you will find the COG Letterhead. The next fight will take place next to a wrecked helicopter. Try not to remain there too long and go towards the stairs on the left. When you reach the next room, don't go down, but go right till the end.
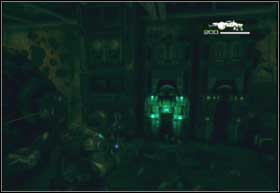
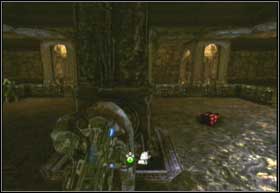
There you will find ammo and the COG Proclamation. There will be a blackout, and Jack will need time to open the door. Suddenly Locust will start to rush through the doors on the opposite sides of the room.
After the fight you will be informed, that you have completed the mission. Your next job will be to drive off the Locust from the streets.
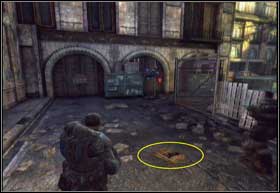
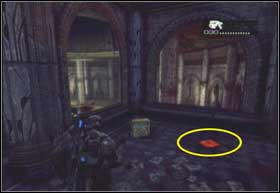
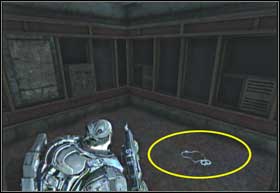
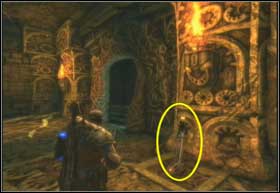
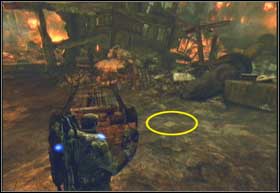
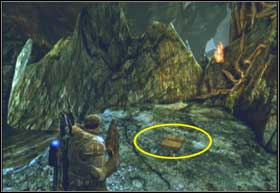
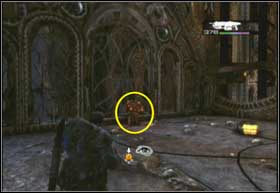
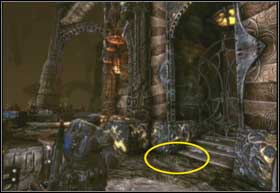
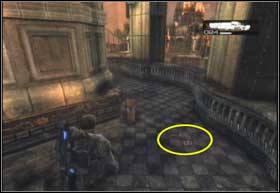
Right behind the door, next to the first column on the right lays COG Tag CSID:085177-MJ3V5-PB. After taking it, go to the street and kill a few enemies nearby.
Instead of charging through the main street, use the broken shop windows and attack the Locust from the side. Kill the remaining survivors.
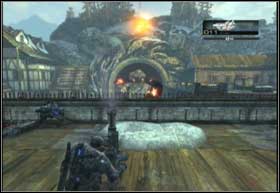
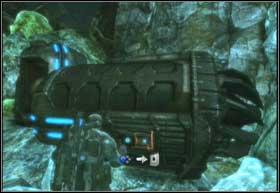
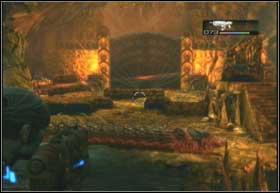
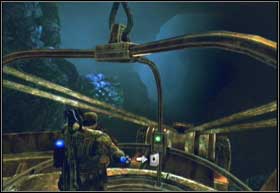
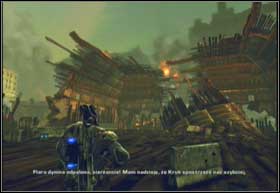
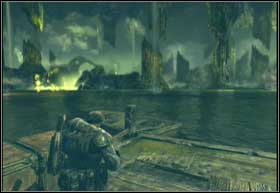
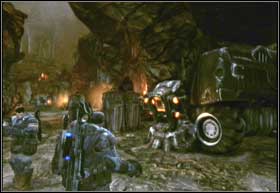
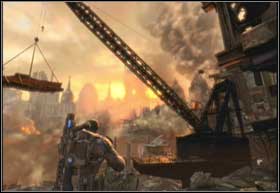
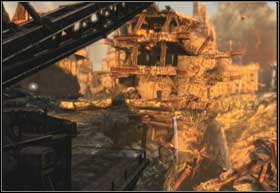
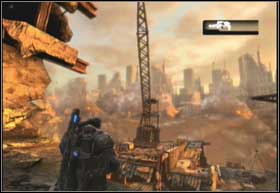
It's time to ride the dorrick. Unfortunately, the convoy heading towards the drilling hole has been attacked by the Locust. Turn around and take the Grindlift Notice, hanging next to the ladder. Your mission is to protect the drilling platform on its way to Landown.
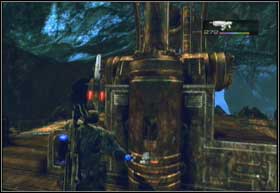
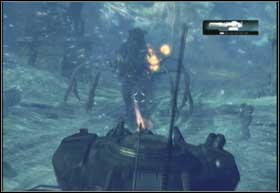
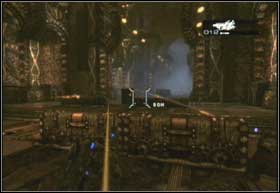
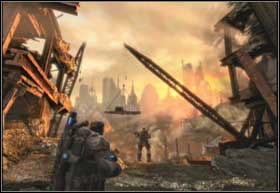
Go to the left side and go up a special platform with a turret. Shoot down the Nemacyst projectiles. The main problem is not to simply hit the projectiles, but to start shooting at the right moment. Unfortunately, the turret takes some time before it starts to shoot, and overheats quite fast, too.
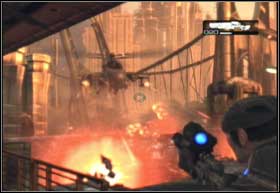
When the fire stops, another threat will show up on the left. Don't let go of the turret and kill the incoming Reavers. Aim at the pilot, his death will end the attack. Unfortunately, the dorrick's engine got damaged during the fight. You have to get off and defend Dizzy during the repairs, by organizing a defence point near the vehicle.
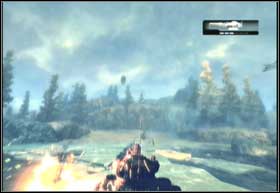
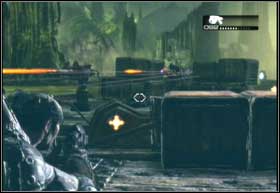
But before you begin, turn left. Just behind the derrick you will see a pile of ammo packs. Next to them lies the Munitions Requision Form. Kill the upcoming Locust while hiding behind the wooden logs. Hide behind the perpendicular logs to have cover from both sides. Although at some point, there will be just too many enemies and the platform will start working again. Rush in its direction by holding the A button.

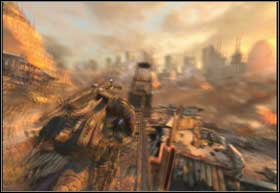
Defend your platform from the Locust and the Brumak. Try to use the Troika as much as possible.
At some point, the Locust will take over one of the platforms. Try to get rid of them with your Troika. You may also have to go down and help defending your own derrick from boarding.
After passing by the waterfall stand next to the Troika and wait for the window protecting the cockpit of the hijacked derrick to break. Quickly kill the driver of the hijacked platform.

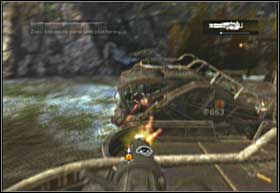
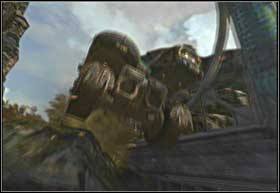
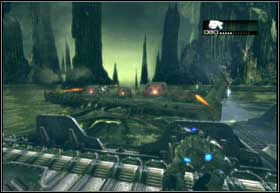
After crossing the bridge you will have to defend the platform attacked by Brumaks. Aim at their mouths or the guns mounted on their backs. You don't have to worry about the Corpser.
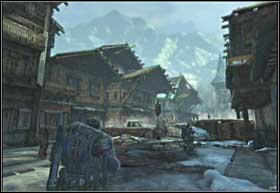
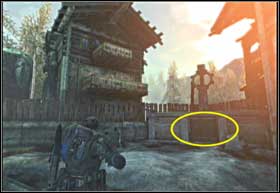
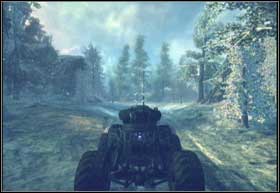
It's time to travel on your own legs. Your mission is to defend the platform on its way to the placing zone. The winter landscape resembles our Alps, but somewhere, between the lovely demolished houses, lingers the enemy. On you left you will find a door through which you will pass by kicking it three times (the X button).

There is a counter between the room and the stairs leading up. Jump over it and take the Jacinto Sentinel Newspaper from the 1st floor. After that, go down.
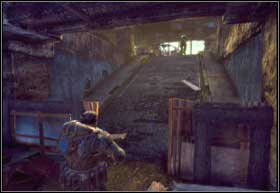
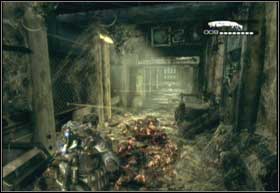
Before you exit the building, you will have to deal with some Tickers. These are small creatures with bombs mounted on their backs. They're extremely dangerous in direct contact, but there is a way of getting rid of them without wasting precious ammo. You just have to let them run close to you and jump to a safe spot when you see fire on their backs. Get rid of all the Tickers so the platform can move forward and cross the street. When a wooden barrier will block your way cut it with a Lancer.
After another fight with some Tickers you should find yourself at the end of the street. The proper road is the one on the left, but if you go right you'll find the Memorial Inscription. After getting on the proper route, you will find out that the rest of your squad is under fire. Take cover by running to the wall in the front.
Eliminate every enemy except the one using the Troika on the left. To get rid of him, you will have to wait for the reinforcements. Once the terrain is clear enter the building in front of you.
There you will find the Truck Driver's Note. Exit the building and go to the tunnel with the rest of your squad.
Clear the tunnel of the Tickers. It's a great occasion to make progress in getting the achievement of killing 30 of them.
When the road will be blocked by wrecked cars, you will find two doors on the left. One of the will be right before the stairs leading to the second one. Go through it and you will find the COG Tag CSID: 595506-GK8C6-9A.
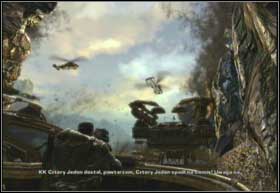
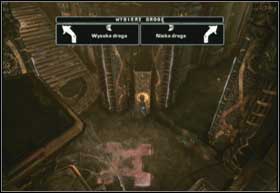
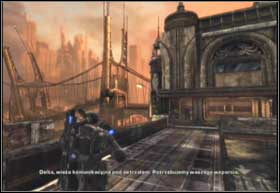
On the very end of the tunnel a Reaver will block your way. Kill the pilot first and then get rid of the creature. Before you lies a part of the city, which is under mortar fire. For the first time, you will have the possibility to choose a path and the team will have to split up. You can choose the road leading through the hotel or the rooftops.
Kill the Locust in the buildings. When you cross the first resistance point, you should see a ladder.
Go up and kill the Locust controlling the mortar, which will be helpful in clearing the path for the squad on the other side of the road. Target the roof which you must destroy and wait for the meter to show around 12. Let go of the trigger and watch a rain of missiles fall on the hotel.
Go down and wait for Jack to open the door. Deal with the rest of the Locust and take the mortar. After a while you will get a message about an incoming Brumak. Target the tunnel's exit and wait for the creature to show up. Then let the mortar's missiles do the job.

Deal with the Locust and go to the door on the opposite side of the roof. Wait for the second team to open you a route with the mortar and go forward.
Kill the locust in the room with the four columns and get rid of the mortar crew and their escort on the next roof. Afterwards take one of the mortars and aim at the tunnel on the other side. Once a Brumak shows up, shoot at the maximum range. If the salvo won't be enough, shoot once more, while correcting the distance.
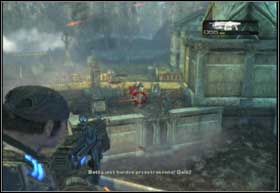
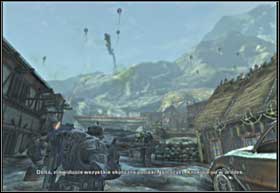
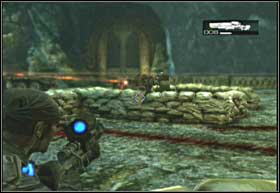
Defend the platforms while the elevators are being set. The first wave of Locust will be easy, and you'll get rid of them by using the Troika. Heat will go up when enemy mortars will show up on the cemetery. Usually they place the mortars right next to the wall in the lower right corner on the cemetery. When you get an adequate report, get rid of the mortar crew as fast as you can.
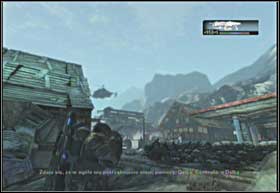
After getting rid of them, destroy the Boomer team. Right after them some Reavers will attack. Destroy them as well.
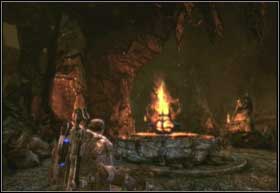
The invasion of the void has begun. Regroup with Carmine as his elevator has landed in a different part of the cave.
New elevators with soldiers will keep arriving the whole time. Behind the capsule in which Marcus and Dom came, there is a ladder. Climb it unto a ledge and run forward until you see a kind of a bridge. Cross it and cut the roots with your Lancer.
Defeat the Locust so that Jack can repair the lift. There will be lots of Locust coming out of the underground tunnels. Hide behind the wall on the right and start eliminating them.
At some moment also Tickets will start to attack. Move back a little, under the rocks on the left and try to kill them before they manage to run into the cliff on which you are standing. When Jack finishes the repairs collect the ammo, go to the lift and run it.
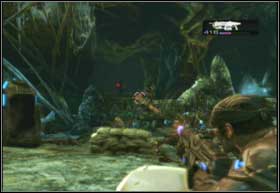
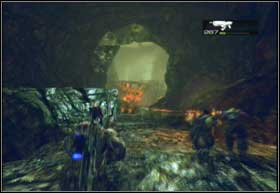
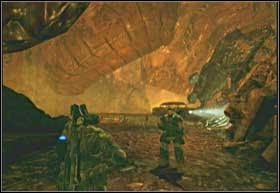
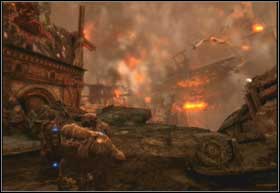
After crossing the newly made tunnel, you will have to help the Omega team in fighting the Locust. There will be Reavers, ordinary locust soldiers, Tickers and also Boomers, who will appear in the last phase of the battle. There are lots of covers around, so killing them shouldn't be too much of a problem. After defeating them you will receive an order of finding the course of the seismic activity. Get out of the cave using the tunnel from which Boomers entered. The tunnel will collapse and the only light source will be the red flowers and Jack's reflectors.
After a few steps Wretches will attack. Kill them with your butt or cut them with the Lancer's saw. Cut through the roots and you will be in the lightened part of the cave once again.
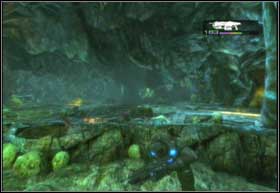
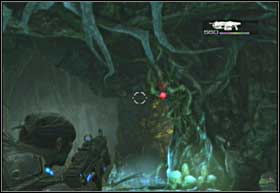
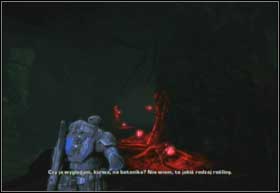
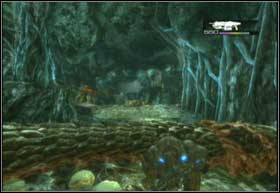
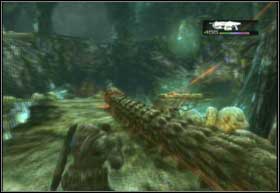
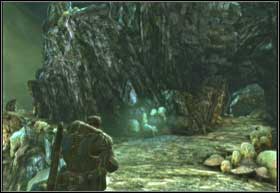
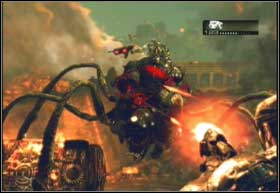
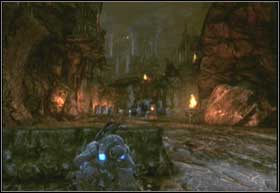
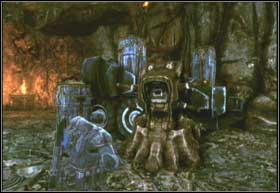
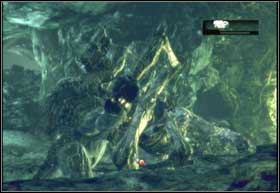
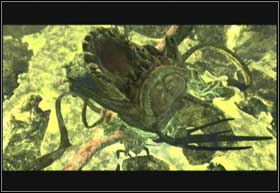
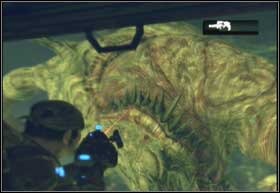
For the first time you will meet an indigenous of this area - a Rockworm. From the military point of view they're very useful, as their hard armour provides a great cover. To lure out the Rockworm, shoo the shiny fruit hanging right above the creature
A little further you will see a wide corridor and Carmine and Dom will run into it. Notice that on the left side there is a small area, with roots blocking the way. Cut through them. Inside you will find Gear's Journal and some ammo. Now follow your companions.
In a moment you will have an opportunity to test the Rockworm's armour. Destroy the Locust's control point, with a Troika defending it. Dom and Carmine will attack the post from the right side and you choose the left. Eliminate the defenders while hiding behind the Rockworm and a small barricade later on.

Take the ladder up, where you will be attacked by some Tickers.
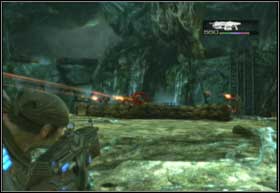
The wide passage is defended by the well placed post on the right. Don't waste your ammo and don't shoot. Wait for the Rockworm to appear and hide behind it. Thanks to it you will be able to make it to the other side. When you almost pass the post, you will get info about explosives located next to the Locust. A few good shots in the yellow containers and there will be only a pile of meat left of your enemies.
The passage ends with a branching. Choose the left path and pick up the sniper rifle. In a second you will have an occasion to test you shooting skills on the running Locusts.
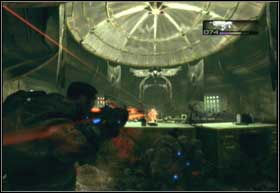
The sniper rifle is one of the most useful guns in the game, and you will get to know why in a moment. At the next enemy post, eliminate the Locust behind the Troikas using the rifle. Looking through the scope you will notice, that a part of their heads is vulnerable.
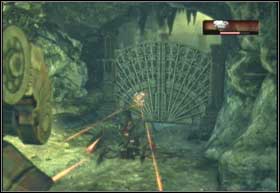
In the end you will have to fight a Reaver and two Boomers, who will enter through a big, close before, gate. Use the Troika and get rid of them. If the turret starts to overheat, stop shooting and hold the RB button to cool it down.
Standing next to the Troika look right, a little behind. Near the wall lies the Kantus Scroll. Take it and go through the gate. You will get a help request. Standing above the raging battlefield, use the sniper rifle to eliminate the Locust mortar crew. After completing the task continue forward till you reach another Troika. Help the Alpha team in their fight by getting rid of the attacking Locust. After the fight you will learn, that you have probably found the source of the seismic activity. Look for the enormous creature inside the cave.
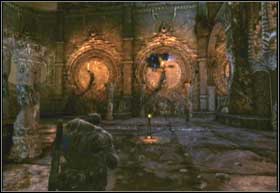
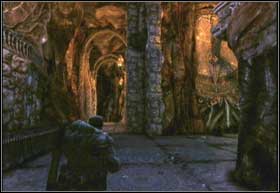
Stairs forged in stone and unnatural stone formations suggest that you're closer and closer to the centre of the Locust territory. At the foot of the formation you will have to fight some enemies. You will meet a Kantus for the first time. Use the Rockworms to get closer to the enemy.
Right past the gate, on the right you will find a Locust Emblem lying on the floor. After crossing the room you will have to choose - go left or right.

Don't waste ammo; use the Rockworm to flank the Troika. Just hide behind his body and patiently follow it. When it reaches the end, dispose of the two Locusts who were using the guns.
Pull the lever and enter the newly opened gate. You will reach a place below which another team is fighting a group of Locust commanded by a Kantus. Help them by shooting enemies from above.
Shoot the shiny fruit to lure out the Rockworm. And to be precise its three fruits thanks to which the team below will be able to cover behind the beast.
After shooting the last fruit you will be attacked by Wretches. Kill all of them and activate the lever coming out of the floor. Go through the door. During the road to the next post you will attack from below while hiding behind Rockworms and Dom with Carmine will attack from above. After killing the Kantus and the other defenders, Boomers will appear. You can use the Troika mounted next to the gate to get rid of them.
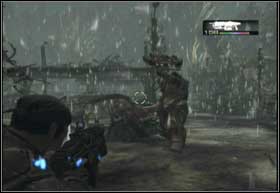
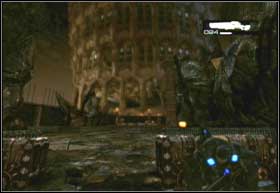
You're back on surface, but the area is completely demolished. In addition a helicopter will crash nearby, and you will receive a mission of taking a look around the crash site of the King Raven. Head down the street, where you will meet a new enemy - the Bloodmounts. They're extremely dangerous on higher difficulty settings. Don't let them get too close to you, one kick from the creature and you're dead.
When you see a fallen column, backtrack a little to the place where the top now lies.

Between the top of the column and the knocked over car you will find the Ilima City Help-Wanted Add. Before you get to the city you just have to fight some Locust going down the footbridge.

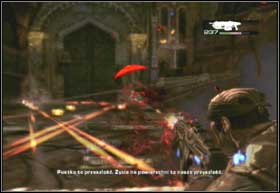
After a while you get to one of the ruined houses. The Locusts have set a trap for you. They will shoot you from the balcony around the building, so the safest place is the covered corner of the room. Don't get yourself killed and wait for Cole.
After meeting up with Cole don't leave the room, but go behind the curve to the left. Pick up the Tag CSID:085177-MJ3V5-PB and follow the others to find Baird and team Sigma.
You will find Baird at the very beginning of the mission, in one of the metal containers.
Search the area to find the other prisoners. A little further, behind the chests you will find the Stranded's Journal: Jennifer.
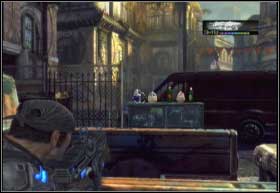
Finally you will reach an air barge carrying the prisoners. Kill the Locust guarding it (including a Boomer) and you will have to find a way to start the barge. When you get on deck, the driver will appear in the front part. Kill him and use the lift in which he arrived.
On the top deck you will find the switch starting the barge. At the same moment Reavers will start to attack you, so use the Troika mounted on the stern to kill them.
After a while, a barge packed with Locust will appear on the right. Kill the enemies, board the barge and search it. On the lower deck, behind one of the columns, you will find a switch. Press it.

After the cutscene you will be attacked by some Drones and a Grinder. Kill them and exit the barge. Find an adequate place to contact the HQ.
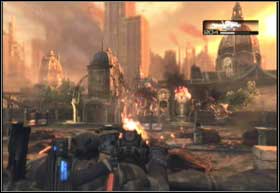
In order to find a safe escape point you have to exit the caves. Start to fight your way through the destroyed city.
The landing zone is on top of the building that Dom will show you. Get to the top and prepare to defend it. Some short-range weapons will be useful, as the fight will take place on a very small area. On top you will see time left to the arrival of the Raven King.
At the very beginning, to the left of the wooden columns lies the Car Gold Magazine. You have to find the riftworm's heart, but before that you will have to get through his digestive teeth. Their speed depends on the difficulty level you're playing on. Before you run through a tooth stand right next to it and when it start to rise, run through while pressing the A button. The same goes for all the teeth.
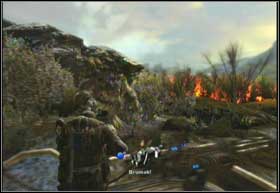
Behind the teeth you will find dying Carmine. After the scene you will be chased by a wall of debris.
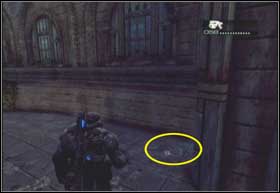
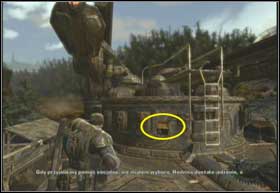
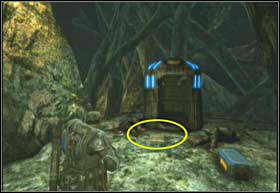
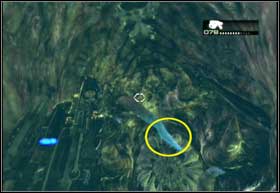
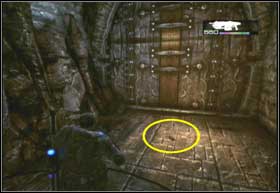
The COG is under the wall, straight from the rifle next to which the escape begins. It's hidden quite well, so you will find its exact location on the above screens. After collecting it, run straight while holding down the A button.
Once you reach a dead-end, shoot the crack, which should open after a few seconds. At the place in which the escape route is blocked by some roots you will find a thin membrane, which you should cut with your Lancer.
The wrecked car will be useful in crossing the acid puddle. Shoot it and it will fall down, forming a bridge.
After successfully running away you will have to cross the stomach. Avoid the spatters and puddles of acid by shooting the green ends of the nozzle. You will then have a couple of second to run next to the dangerous place.
Quickly cross the intestines to avoid suffocating. The most important rule is to run using the A button and choosing the light-ended tunnels. The dark ones are dead-ends. To simplify things - after getting to the intestines run right, then left, and then through the centre tunnel two times. At the end use the Lancer's saw to cut through the membrane.
You will get to the heart. Cut the two arteries to destroy the roftworm's heart. Unfortunately that won't do, because the monster has more of them. Run straight till you get to the next one. This time cut all three arteries. That also won't be enough, put you will feel the pressure with which the roftworm is pumping blood.
At the third heart cut four arteries. Unfortunately it won't be so easy this time, because you have to hurry and additionally you can be attacked. Time is crucial, so just focus on cutting the arteries. Other way you will drown as the room fills with blood.
Examine the abandoned object. Take a walk around it; you won't be attacked just yet.

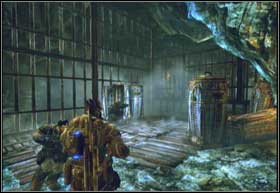
It's quite dark inside, so you have to get the power supply back. Follow Jack and be sure to take the flamethrower on your way.

In the last room, activate the switch. Get back to the centaur for the explosives. But first you will have to cross the abandoned warehouses.
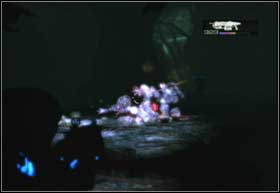
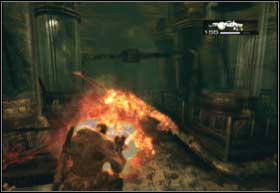
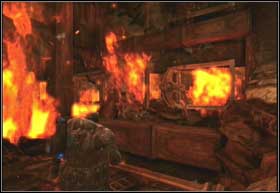
You will be attacked by a horde of Wretches. The flamethrower will do great against them. When you will get rid of all of them, pick up the flap blocking the way inside.
Take the explosives to the secured door. Go in through the opened flap. You will be able to use one-handed weapons only, and some Wretches will attack you on your way.

Search for info regarding the Locust's stronghold. Enter through the demolished door and to the room on the right. There lies the Interoffice Memo.
In the next room you will see a group of Wretches through the glass. Don't go inside but backtrack to the control room you went next to just a while ago. Turn on the alarm and turn it off after getting rid of all the creatures. Now continue forward.
In the room with the grated window you will find the Memo: Dr Doug Sato.
The security system won't react unless you touch the beam of light. At the first sensor, roll to the neighbouring room and shut it down. You have to remember about shutting down the system every time because otherwise Dom won't be able to follow you.
You will avoid the light beam in the locker-room by moving from one cover to the next one. Also, the beam won't react if you run through it.
In the corridor with three sensors, wait for all of them to turn left and use the switch on the right wall.

The flamethrower will prove useful once again, when you will have to cross a little courtyard. When you will get to the kitchen, wait for some of the Wretches to be killed by the security system. Kill those that manage to get through.
In the operating room, on the right side you will find a short corridor and a door, and inside the New Hope Medical File: Ruth.
Just run through the long corridor with multiple sensors. After a while you will have to split up with Dom.
If you decide to steer the turrets approach each swath and press it. When Dom gets through, activate the next one. In the end press the switch opening the bulkhead.
Stand before the beam and wait for Dom to deactivate it. Then quickly cross it and stand before the next one. At the end of the corridor, press the switch opening the bulkhead.

Go into the room with the containers and wait for Jack to open the passageway.

Inside press the switch. Something will come to life in the containers.
Something's not right. You have to go back to the Centaur. The problem is some monsters will start to come out of the containers.
While passing through the 3 container-filled rooms don't rush. Always try to have a wall behind you and eliminate the enemies as they approach. Running away isn't a good idea, because you will have to stop them either way to open the gate. So if you don't get rid of them all, they will kill you while you try to open it.
At the end of the second room you will find some additional ammo. When you will be sure there are no more enemies around, open the gate together with Dom.

Shut down the system and proceed. On your way you will have to fight some Locusts with flamethrowers. Try to shoot the containers on their backs.
In the round room don't fight the Locust, but hide behind a cover and wait. When the enemies will be under the glass dome it will fall down and they will be cut to pieces by the falling razorhail. You should definitely avoid the razorhail and under no circumstances leave the covered area. After crossing the room with the dome you will find yourself outside. Dom will run left and you quickly run to the building on the right.

At its end lies the Doctor's Journal: Dr. Stephanie Zimmer. Take it and then follow Dom.
Run into the wagon and release the brake. The train will start to move along the rails. During the ride Locust will attack from one side, but just hide and don't lean out and you'll safely arrive at the destination.
When the wagon stops, get off and follow Dom while killing the enemies, till you reach a demolished building. Kill the two Locusts inside.
Open the gates one after another to form a roof and pass under it. When Dom enters the wagon again don't follow him, but go along the roof.
When the roof ends, run through the opened door in the building straight ahead. Approach the wall and look at the Captivity Marks. Now go back to the wagon.
Release the break once again. This time the enemies will be shooting from both sides. When you shoot, concentrate on the Boomers. When the train stops get off, go to the beginning and take the ladder up.
Locust will start to appear from the holes. Don't hurry and eliminate them from distance. Only when you eliminate all of them run to the next shelter. Near the end some Maulers will appear. They hide behind a heavy shield and they wield an explosive morgenstern. Shoot them when they use their shields to protect from the razorhail. If they hide behind the shield, shot their legs. Try not to approach them. After killing them you will be able to use the shields yourself, hiding behind them while approaching the enemy,
Once the razorhail stops falling, run to the Centaur while eliminating the Locust.
The razorhail damaged the tank, and it needs some attention now. Defend Baird while he repairs the Centaur.
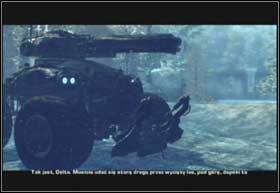
You will have to find a route to mount Kadar. The tank controls are very intuitive. You accelerate using the left analog stick and turn using the right stick. You zoom in by pressing the left trigger and shoot with the right trigger. To reload, use the RB button.
You can also boost with the A button, which is important in getting through the ramps. But during the mission, try to drive slowly, eliminating enemies from afar. Baird can fix the Centaur, so if you see fire coming out of the engine, stop for a couple second and wait for it to disappear.
Pass the frozen lake while driving slowly and carefully, because the slightest mistake can drown the tank. At the same time look out for Reavers. When you see one, stop and kill it and only then continue to drive. When you arrive at the bridge it will turn out to be destroyed. You will receive an order to find another way to pass the rift.
In order to do it, backtrack a bit and run over every single tree near the bridge. That way you will gain enough space to gain speed and jump over the rift using the ramp.
Don't stop before the icicles hanging from the ceiling. After the cutscene showing Locust preparing to defence stop and wait for Reavers to come from behind the hill. Get rid of them and the Locust accompanying them. Then destroy the troika near the gate.
In the end, concentrate on shooting the tower. By destroying it you will form yourself a passage towards the caves. Drive to Mount Kadar and look for the Locust's stronghold. The cave it pitch black, but the centaur has a searchlight. Drive forward, no one will attack you.
Until the Centaur breaks down, that is. During the breakdown three Corpsers will approach the tank. When only Braid fixes the engine and the spotlight, shoot them. But remember only to shoot once they've raised their limbs and exposed their vulnerable body parts. You should succeed if you will do it fast enough. The Corpser's speed depends on the difficulty level, but your tank will always be destroyed by a single hit and you'll have to start over from the beginning. The tank won't be able to move during the fight, so you only operate the gun.

After defeating the three Corpsers, three Brumaks will cross your way.
You will find the stranded camp; Marcus will send them to a safe place together with Cole and bard. You and Bard will search for a route to Nexus.
Going along the lake you will bump into a Theron using a crossbow with exploding quarrels. Don't approach him, but try to eliminate him from a distance. When only he starts to target, hide. You have to look out, because a single hit ends your game. After killing the Theron, take his crossbow.
After that you will arrive at some ancient ruins. A Locust gunboat will appear, but for now concentrate on the enemies on land. You will find the Stranded's Journal: Stu.
You will receive and order to immobilize the gunship. In order to do that, target the yellow containers and shoot them. They are at the front of the gunship, next to the Troika.
Use the destroyed gunship as a bridge and defeat the Bloodmount
Your target is the boat, but before you reach it you will have to fight with some more Locusts. Especially look out for Therons with crossbows.
After taking a look at the boat, a cutter will destroy the pier that you're standing on. Defend this raft from the attacking cutter.

Get on the enemy cutter and shoot the remaining enemies with the Troika.


In this chapter you will fight a Leviathan. When Dom notices the danger, collect the grenades. That is, if you don't already have some.
Equip the grenades and stand on the stern. Wait for the huge tentacle to hit the board, run to it and attach a grenade to it with B the button. Destroy three tentacles and the monster will raise its head.

When the Leviathan shows his head, target one of his eyes. Wait for it to open and shoot. The monster will open its mouth, so quickly run inside. There you will see some tentacles with blue endings that will attack you. Shoot them till they fall.
Then equip the grenades and throw them at the inner jaw. If you hit the spot, the Leviathan will spit you out and then explode. Remember that the Leviathan's resistance depends on the difficulty level. On the lowest you have to do the above things only once for it to die. The higher the difficulty, the longer the battle will take. So if you run out of grenades, you will find some more on the stern after the head disappears.
You will enter the Locust territory through the kitchen door. You will be given a mission of finding the highway do Nexus, but firstly you will help Dom search the work camp, in which Maria can be held. Go straight until you get to an elevator. Use it to reach the higher level.
In the big room divided by water canals close the valve. However when you will want to go forward, a few enemies will appear from the other side. One of them will rush to the valve, so kill him as fast as you can. Otherwise you will be flooded and will have to start over.
Continue moving forward until you reach a post with a searchlight. Destroy it and then get rid of the enemies.
Here you will find the Locust Terminal and a second one, which Jack will star to search for information about Maria.
Search for the Locust symbol in the terminals, the same that you have seen on the first machine. Dom will want to go first. Approach the first terminal and check the symbol. Unfortunately, it's not the one. You will see a Locust patrol. Hide behind something and wait for the creatures to go away from the second terminal. When Dom will tell, you can continue.
You won't find the symbol in the second terminal, but if you go left you will find the Prisoner's Journal: Jonathan Harper.
Follow the Locust's patrol, each time waiting for them to check the terminal. When you will be safe, run to the terminals and check the symbols. At some point you will find the correct one, but the Locust will attack. Defend Jack as he scans the containers.
You will have to survive four waves of enemies coming from both sides of the cave. The most dangerous part will be when two Bloodmounts will attack. Don't let them get close to you and start shooting the moment you notice them. Even from faraway. The mount is dangerous even after you kill the raider, as it can kill you with one kick.
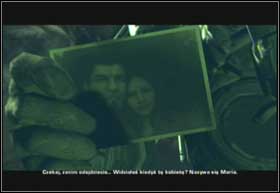
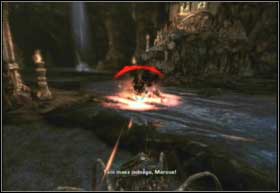
Watch the scene with Maria. Now it's time to get into the palace. Go straight, then right and under the rising bridge.
Behind the corner you will find the Locust Jailer Document. Go straight all the way and open the door with a nice kick. You will see the queen's castle in the distance. Now you will have to find a spot from which Jack will call for reinforcements.
Another hard fight awaits you near the tower with a switch. Get rid of the Drones and Therons and after that get upstairs and use the switch. Some Flamers will appear. Remember that the easiest way to get rid of them is to shoot the containers on their backs.
After entering through the gate you will have to defeat some Grinders equipped with Gatling guns.
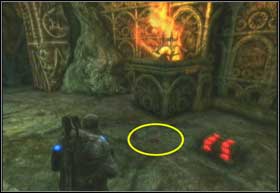
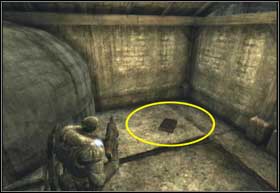
In the room in which wooden doors will start to close as soon as you enter there is a hidden item. So right after you enter, start running straight. Turn right and go through a gate, before it closes.
Right behind it lays the Human Finger Necklace. Turn the switch on the left and the gate will begin to rise. Kill the enemies using the nearby Troika.
You will find yourself near the palace door; it's a good spot for Jack to send info on your location. However you must eliminate all the enemies first.

After getting to the centre defend Jack while he transmits the data. Use the switch to raise covers from the ground. You will be attacked by normal Drones, Tickers and later by two Grinders. Look out for the gate, when it opens quickly eliminate the mortar crew. You'll have just a couple of seconds to do it.
Clear out the nearby terrain to ready it for the arrival of the Coalition. Eliminate every mortar crew first. You should find yourself a cover and fight with this weapon as well. However, when you hear Dom's warning about some incoming missiles, run as fast as you can to another cover.
Defend the rope-way from the Reavers. Find some cover and slowly target the incoming enemies. Defeat the Locust in the incoming cable car and then get on it before your cat falls. Again, shoot down the incoming Reavers.
Find your way to the queen's castle. Go up the spiral stairs. There you will find a shiny object - the Locust Calendar, so take it as a collectible item. Your team will have to split up.

If you choose to go down the stairs you will receive and order of finding two control panels for the elevator and activating them. The other members of the squad will cover you, shooting the Locust from the elevator.
Activate the panel, go to the lower floor and activate the next one. The elevator will also arrive at the lower level. Defeat the Locust and approach the large gate.
If you choose to stay on the platform, defend the squad members while they operate the elevator. The best way is of course to use the Troika.
Get rid of the Locust on all three levels and go to the gate preventing you from continuing. Press the switch on your right and go inside.
Below you will see some fighting Locust. Cross the bridge to the other side of the room.
Activate a switch here and get rid of the Locust. At the end of the hallway you will find the Locust Defence Plans.
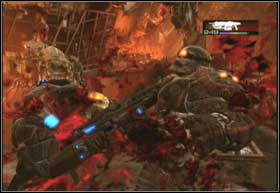
Kill the Boomers and follow the squad to the exit. In the hallway you will have to deal with some Drones and a Mauler.
Go into the palace and get ready for a hard fight. When you will try to enter the gate it will close, and Locust will start to attack you from above.
Hide behind a column and start eliminating your enemies. In the centre of the room there is a button, if you step on it some additional covers will appear. Kill every single enemy, go outside and turn right. Find another entrance to the palace.
After a while you will arrive at an elevator. Don't use it just yet. A little bit further, near the grated passage you will find the Locust Invasion Map. It's hardly visible, so don't miss it. Now backtrack to the elevator and activate it. Go to the lower parts of the palace.
You will find yourself in a long corridor, with locked beasts on each side. Get past them, and at the exit you will have to choose which road you will take.
If you choose the higher road, go up the stairs and start shooting at the Locust fighting below you.
Follow the corridor till the end and you will find the Trinity of Worms Artifact. Now go back and open the gate for the squad.
If you choose the lower road, enter the room and kill the Locust.
Wait for the gate to open and enter the big door in the centre.
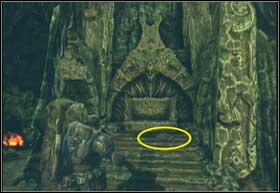
Exit through the newly opened gate. In front of you, between two columns you should see an obelisk. Shoot its higher part and you will discover that there is a toaster beneath the layer of rock. Approach the device, press X and a while to hear a funny comment. It's an Easter Egg which the creators hide in the game to please the curious seekers.
Slowly go down the spiral stairs. You will be attacked by guards and Therons with crossbows, so be careful and don't charge.

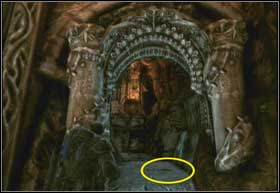
In the next chamber turn left immediately and behind the last column you will find the Locust Tablets.
Approach your squad and choose one of two paths.
Regardless of your choice, both rooms are very similar. Just go ahead and eliminate every enemy you see.
Among them there will be common Drones, Tickers, Therons and also Maulers.
On the right side, you will first meet some basic Drones and also some Tickers.
In the end you will to deal with two Maulers.
You're close to the queen's chamber. Use the mortar while fighting in the long corridor. When you reach the end the floor will go down, and you will be ambushed. Take cover in the corners of the lift and try to kill the enemies as fast as you can. They will appear from four different sides, but try not to run around and expose yourself.
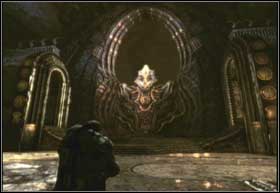
After killing everyone approach the handle and get back up. Enter the throne room.
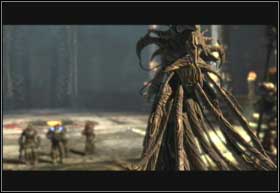
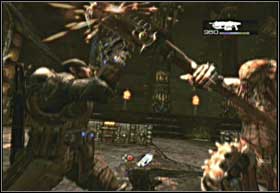
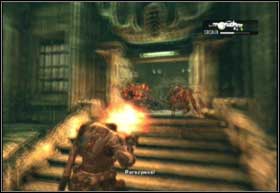
The queen's appearance can surprise you, but you have already seen Skorge - her sidekick. The fight consists of several phases. Firstly you will have to fight him with a chainsaw. When Skorge will attack you have to rapidly press the B button.

The second phase is all about shooting each other from behind the columns and fighting off Tickers. Avoid the shots by hiding behind covers, while Dom takes care of the Tickers. Nevertheless look out for them. Then he will throw gas grenades. Just avoid them and get out of the zone in which the gas is. Never stay in one place too long, as Skorge can rip off one of the stalactites from the ceiling.
The last phase is a column that will fall at you. Your only chance to avoid it is to jump sideways at the last moment. How much you will have to repeat each phase depends on the difficulty level you've chosen. After Skorge escapes you will receive an order - chase the Locust queen.
Cross the bridges to get to the Reaver stable. Run all the time and don't stop even for a second and you will manage to do it. Now it's time to escape from Nexus.
Controlling the Reaver is basically all about avoiding the enemy's missiles, which you do with the left analog stick and shooting from the mounted gun. You can fire missiles straight and on the back there is a machine-gun. In the first phase, fire missiles at the enemy towers and Brumaks. Once you land, protect the Coalition soldiers by shooting the Locust.

Fight off the enemies while Cole looks for an exit. Skorge didn't give up and now he's chasing you. Target the gun mounted on his back and his face. When the Hydra will fire missiles at you, remember to avoid them with the left stick.
Fly the Reavers do Jacinto and shoot the Locust that are chasing you. Concentrate on those that fly too close from behind or sideways.
In the last phase of the flight you have to defeat the Hydra. When it approaches you notice, that it will grab your Reaver with its tentacles. Focus your attack on them. When the hydra outruns you be ready to shoot it from the cannon. Do the same thing when it rushes at you. The monster's resistance depends on the difficulty level.
After the consultation get rid of the Locust on the courtyard and stand in the outside perimeter.
Clear the platform out of enemy troops and once you've done that, search for the COG Recon Report on of the terraces.


Now go to the western gate and help the soldiers. Follow the leader all the time, after completing each task he will open all the doors.
Defend the passageway to the courtyard. Kill all the enemies below and wait for the helicopter to arrive. Cross the bridge once it is ready.
Your next task is to defend the satellite communication network. Use the Troika and get rid of six Reavers. Move forward after completing the task.
You will be given an order of defending the northern gate. At the end of the corridor, on the terrace you will find the COG Tag CSID:911706-DZUHO-JN.

You will have to fight with a couple waves of enemies. Fortunately, there are some weapons and ammo on the terrace. To eliminate the Brumaks in the last phase, use the mortar and the Gatling gun.
Go to the sunken part of the city. Firstly however, you will have to deal with the Locust at the courtyard in front of the Archive.
Clear the building of enemies. Inside there will be some Drones under the command of a Kantus.
From the Archive you will enter a courtyard full of Locust. Firstly get rid of the one behind the Troika, and then take care of the rest.

When you eliminate all of the enemies you've met after exiting the Archive, some Wretches and two Boomers will attack. The best way to fight them is to run to the Troika and shooting them with it. In the end a Bloodmount will appear at the courtyard from the opposite building.
Open the gate together with Dom and enter the car park. Help the soldiers in dealing with the enemy forces and cross the car park.
However before you enter the Cooper street look behind and take the Jacinto Sentinel Newspaper. Now you will have to choose between the streets and the garage.
Hide behind the car wreck and eliminate the Locust hiding at the corner of the street. Target the Flamer and shoot the container of his back.
Make use of the covers on the left side of the street to continue. Eliminate the next flamer in the exact same way as the last one.
Shoot the unstable column at the other side of the street so that Dominic can hide behind something. Afterwards eliminate all the enemies in the further part of the garage.
Approach the car, push it and then jump over the barrier. After a while you should find yourself next to Dominic.
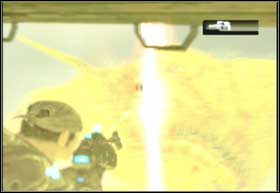
When you receive info about a big amount of Locust, pick up the Hammer of Dawn. You can shoot it only then when there are no clouds above the target. From now on it will be your primary weapon, you can use it nearly all the time until the end of the game. Remember that you can steer the beam by holding down the trigger and directing the gun at the desired place.
Right at the beginning of the chapter don't go in the direction of the crane, but backtrack a little to the hole through which you came a moment ago.
Go inside and take the COG Tag CSID:444526-MI2K9-3B. After that go to the crane and use it to get over the gap.
You control the crane with the analog stick. Steer it so that Damian can get on the arm. Afterwards steer the arm right and let him get on the ground.
Exit the crane and wait from Dom to knock down the arm of the second machine. Cross the gap and use the Hammer of Dawn to eliminate the foes.
In the corner of one of the rooms you will find the Stranded's Journal: Russell.
Cut the steel cables holding the tower.
And enter the knocked down structure.
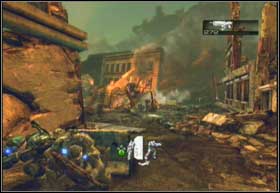
You will receive and order of finding the entrance to the cave and through the windows you will see a horde of attacking Locusts. The whole construction will crumble.
Escape the burning building as fast as you can. Run to the other side, switch on the elevator and jump in.
A Brumak also got stuck in the ruins. His guns are shooting all the time, so the safest way to pass him is to hide behind one cover and immediately go to another. After that kill the Brumak's driver.
Find a way to destroy Jacinto. Go straight with the Brumak while eliminating every enemy on the way. You will deal with the locked gates by approaching them and pressing the B button. Remember that the RB button will cool down the gun in case of overheating.
While going straight eliminate the Corpser, which shouldn't be too hard while being on the Brumak.
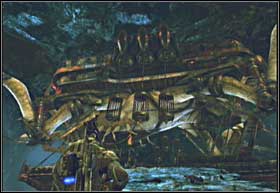
You can have a little problem with the beast-barge, but the Brumak is strong enough. When you make your way to the end, your Brumak will walk in an underground emulsion lake. You must get rid of some enemies before reinforcement will arrive. Destroy the incoming Nemacyst missiles and the crab-like creatures throwing them.
Afterwards destroy the three columns to create a hole for the choppers. When the ceiling crumbles the Coalition forces will start to show up and something strange will start to happen with the Brumak. Fortunately Markus and Dom will change their conveyance just in time.
Kill the infected Brumak from the board of chopper. Aim at him with the Hammer of Dawn and press the trigger. Keep it pressed and the monster should die after a couple of seconds.
All that's left now is to watch the credits and wait for the next part of the Delta team adventures.


 God of War 2 Game Guide & Walkthrough
 Grey Goo Game Guide & Walkthrough
 God of War 3 Game Guide & Walkthrough
 Gunpoint Game Guide & Walkthrough
 Game of Thrones: A Telltale Games Series Game Guide & Walkthrough