![This guide is a detailed walkthrough which let you complete all main quests (marked as [MQ]) and secondary quests ([SQ]) - Game of Thrones - Game Guide and Walkthrough](https://game.lhg100.com/Article/UploadFiles/201512/2015121519105524.jpg)
This guide is a detailed walkthrough which let you complete all main quests (marked as [MQ]) and secondary quests ([SQ]). It contains precise maps and screenshots which let you know your position in any moment of the game and find all collectibles.
You will find here information about solving main quests in a way which will give you only positive features. You will get to know when and how avoid difficult encounters (gaining the same amount of XP) and how possess precious allies what will make the game easier. You will also be acknowledged what decision you should make in crucial moments to unlock the best ending (out of four).
Detailed description of the fight system is both in the game instruction and in many tutorials in the game (I recommend to familiarize with them). In this guide I'll only suggest how to play the most difficult encounters so you won't have to repeat the tougher sections.
Signs on the maps

Mission goals/important points

Secondary quest

Interactive object

Codex

Treasure

Hidden treasure (Mors' dog, Vision of R'hllor Alestera)

NPC/dialogue

Merchant

Entrance/exit

Upstairs

Downstairs

Change of location
Your adventure in the Game of Thrones you begin from playing as a Mors Westford, scout of the Night Watch. Creating your character you can choose between three classes: Magnar (medium armor, dual wielding), Landed Knight (heavy armor, sword and shield) and Hedge Knight (heavy armor, two-handed weapon). More information about classes, stances, attributes and skills you can find in the game instruction. Small advice : choose traits which complement with the basis of your class. Mindless will be choosing the "Hematophobia" as the weakness (the hero gets weaker when he sees the blood) for Magnar who is specialized in causing hemorrhages. It's also good to plan earlier class of the second hero, Alester Sarwyck, so the two of them will be complementary to each other (e.g. tank and damage dealer, like in the MMO games). I recommend to take a longer look at the instruction before the game, what makes easier a choice of proper classes and attributes.
![Point 1 - For This Night and All Nights to Come [MQ] - Chapter 1 - Mors Westford - Game of Thrones - Game Guide and Walkthrough](https://game.lhg100.com/Article/UploadFiles/201512/2015121519105712.jpg)
Point 1
![After creating the hero and first few interactive scenes, you finally get the control over the character - For This Night and All Nights to Come [MQ] - Chapter 1 - Mors Westford - Game of Thrones - Game Guide and Walkthrough](https://game.lhg100.com/Article/UploadFiles/201512/2015121519105726.jpg)
After creating the hero and first few interactive scenes, you finally get the control over the character. Begin from taking the Executioner's Axe with which Mors killed the friend and follow the remaining Rangers. For now the choices during conversations won't affect the storyline too much.
Point 2
![On the square, on which young rangers are waiting for you, youll go through a short melee tutorial, tricky camouflaged as a new recruits training - For This Night and All Nights to Come [MQ] - Chapter 1 - Mors Westford - Game of Thrones - Game Guide and Walkthrough](https://game.lhg100.com/Article/UploadFiles/201512/2015121519105732.jpg)
On the square, on which young rangers are waiting for you, you'll go through a short melee tutorial, tricky camouflaged as a new recruits training. Follow the instructions on the screen and all will be good. Also here you may find a merchant who will buy items from you.
![Visiting the Common Hall on the Castle Black is now optional - For This Night and All Nights to Come [MQ] - Chapter 1 - Mors Westford - Game of Thrones - Game Guide and Walkthrough](https://game.lhg100.com/Article/UploadFiles/201512/2015121519105774.jpg)
Visiting the Common Hall on the Castle Black is now optional. All treasures (both visible and hidden) will be waiting here for you, independently on your choice of collecting them now or later. Two of hidden treasure you won't be able to find now. But you can talk with Walder who'll give you a secondary quest The Faith of Our Ancestor which is collecting the statuettes. But also with this quest there is no hurry and you don't have to talk with him in this chapter. A map of the Common Hall is in the description of the third chapter.
Point 3
![If you finished collecting the treasure planted in the Castle Black, go to the place 3 and talk with recruits to continue the main quest For This Night and All Nights to Come, leave the castle and head to the Icemark using the world map - For This Night and All Nights to Come [MQ] - Chapter 1 - Mors Westford - Game of Thrones - Game Guide and Walkthrough](https://game.lhg100.com/Article/UploadFiles/201512/2015121519105761.jpg)
If you finished collecting the treasure planted in the Castle Black, go to the place 3 and talk with recruits to continue the main quest For This Night and All Nights to Come, leave the castle and head to the Icemark using the world map.
![In the ruins of Icemark you have to find a betrayal Cregan before the wildings do - For This Night and All Nights to Come [MQ] - Chapter 1 - Mors Westford - Game of Thrones - Game Guide and Walkthrough](https://game.lhg100.com/Article/UploadFiles/201512/2015121519105765.jpg)
In the ruins of Icemark you have to find a betrayal Cregan before the wildings do. It'll be your first serious battlefield. Don't spare your abilities during fights, because after every battle your energy and health will be regenerated. Even if your hero or his companion will fall, they'll get up after the encounter as long, as at least one of them will survive. If all die, you'll see the game over screen.
Point 1
![First battle in ruins takes place at the first stairs - For This Night and All Nights to Come [MQ] - Chapter 1 - Mors Westford - Game of Thrones - Game Guide and Walkthrough](https://game.lhg100.com/Article/UploadFiles/201512/2015121519105704.jpg)
First battle in ruins takes place at the first stairs. You'll kill the savage immediately. Pick up the treasure he left. Behind the door you'll find a bit of gold. Pick up all you can. Among the found weapon and pieces of armors you'll find, for almost sure, something better than you equip.
Point 2
At the top of the staircase you'll be attacked again, this time by two enemies - it shouldn't be problematic.
Point 3
![In one of the chambers on the second floor youll find a dying Cregan - For This Night and All Nights to Come [MQ] - Chapter 1 - Mors Westford - Game of Thrones - Game Guide and Walkthrough](https://game.lhg100.com/Article/UploadFiles/201512/2015121519105841.jpg)
In one of the chambers on the second floor you'll find a dying Cregan. Talk with him before he dies and get a secondary quest Their Watch Is Ending. At Cregan's body you find keys necessary to continues the main quest. Pick up all things in this room and go through the doors on the north.
Point 4
![After getting on the snowed square youll see a wildings guarding the pyre - For This Night and All Nights to Come [MQ] - Chapter 1 - Mors Westford - Game of Thrones - Game Guide and Walkthrough](https://game.lhg100.com/Article/UploadFiles/201512/2015121519105842.jpg)
After getting on the snowed square you'll see a wildings guarding the pyre. Eliminate them but before you go to the [point 5] take care about secondary quest and clean up the vicinity from loots.
Point 5
![Now go to the door in [point 5] - For This Night and All Nights to Come [MQ] - Chapter 1 - Mors Westford - Game of Thrones - Game Guide and Walkthrough](https://game.lhg100.com/Article/UploadFiles/201512/2015121519105862.jpg)
Now go to the door in [point 5]. After opening them you'll be attacked by two, very powerful wildings, so it's good to save game earlier. Key to win this battles are abilities causing the haemorrhage or stun. Remember also that you have a companion - Celtigar. You can switch between him and Mors to use abilities of both of them. After the encounter you will surely find something useful by the bodies.
In the meantime you'll level up, so use the points, especially those from the Skinchanger bookmark: Immobilize and Remove Shield. On the way to the next point Poddy get scared and you'll have to motivate him (verbally) to action.
![After defeating the last of two thugs youll can kill him quickly or torture - For This Night and All Nights to Come [MQ] - Chapter 1 - Mors Westford - Game of Thrones - Game Guide and Walkthrough](https://game.lhg100.com/Article/UploadFiles/201512/2015121519105850.png)
After defeating the last of two thugs you'll can kill him quickly or torture. If you choose tortures you'll obtain the feature "Sadistic" what give you +3% to the Critical Damage. You shouldn't omit that.
Point 6
![Go to the balcony from which Poddy will cover your time - For This Night and All Nights to Come [MQ] - Chapter 1 - Mors Westford - Game of Thrones - Game Guide and Walkthrough](https://game.lhg100.com/Article/UploadFiles/201512/2015121519105875.jpg)
Go to the balcony from which Poddy will cover your time. Clean up the balcony and go downstairs.
Point 7
![Immediately after getting on the square youll be attacked by few wildings, but they arent a problem - For This Night and All Nights to Come [MQ] - Chapter 1 - Mors Westford - Game of Thrones - Game Guide and Walkthrough](https://game.lhg100.com/Article/UploadFiles/201512/2015121519105897.jpg)
Immediately after getting on the square you'll be attacked by few wildings, but they aren't a problem. Difficulties begin, when you get closer to the group of enemies trying to open the gate to Icemark. You'll fight few groups of enemies in a short time passages. First do in opponents without armors or those wearing leather ones. Use the new abilities of dog, until you get rid of the weaker ones. Don't care about loots now - you'll return here in the 3rd chapter.
Point 8
![At the end you will face the wildings leader, Gorn - For This Night and All Nights to Come [MQ] - Chapter 1 - Mors Westford - Game of Thrones - Game Guide and Walkthrough](https://game.lhg100.com/Article/UploadFiles/201512/2015121519105892.jpg)
At the end you will face the wildings' leader, Gorn. You'll fight with him alone, because Cetigar died, so use your dog to distract Gorn. Use all abilities you have, especially those stunning and causing bleeding. Try also to interrupt his powerful attacks, if you can.
![Killing Gorn is not all - For This Night and All Nights to Come [MQ] - Chapter 1 - Mors Westford - Game of Thrones - Game Guide and Walkthrough](https://game.lhg100.com/Article/UploadFiles/201512/2015121519105818.jpg)
Killing Gorn is not all. After the honorable encounter in which he fails, his fellows will attack you. Use the same rule as usual: firstly get rid of the weakest ones (archers) and then attack better armored enemies. Use flasks, if it is necessary. Finally Mors will be surrounded but it's a storyline part, on which you can affect.
![This quest begins after conversation with Cregan in the Icemarks ruin - Their Watch Is Ending [SQ] - Chapter 1 - Mors Westford - Game of Thrones - Game Guide and Walkthrough](https://game.lhg100.com/Article/UploadFiles/201512/2015121519105860.jpg)
This quest begins after conversation with Cregan in the Icemark's ruin. You have to find four bodies of Cregan's companions and take their belongings.
Point 1
![First belongings have Cregan - Their Watch Is Ending [SQ] - Chapter 1 - Mors Westford - Game of Thrones - Game Guide and Walkthrough](https://game.lhg100.com/Article/UploadFiles/201512/2015121519105991.jpg)
First belongings have Cregan.
Point 2
![First scout from Cregans group fires on the pyre - Their Watch Is Ending [SQ] - Chapter 1 - Mors Westford - Game of Thrones - Game Guide and Walkthrough](https://game.lhg100.com/Article/UploadFiles/201512/2015121519105920.jpg)
First scout from Cregan's group fires on the pyre. Take things you find at him.
Point 3
![Penultimate dead scout lies on the small clearing, on the west, behind Icemarks walls - Their Watch Is Ending [SQ] - Chapter 1 - Mors Westford - Game of Thrones - Game Guide and Walkthrough](https://game.lhg100.com/Article/UploadFiles/201512/2015121519105905.jpg)
Penultimate dead scout lies on the small clearing, on the west, behind Icemark's walls.
Point 4
![The body of the last scout is in the corridor leading to the balcony - Their Watch Is Ending [SQ] - Chapter 1 - Mors Westford - Game of Thrones - Game Guide and Walkthrough](https://game.lhg100.com/Article/UploadFiles/201512/2015121519105939.jpg)
The body of the last scout is in the corridor leading to the balcony. After taking his things, the secondary quest ends.
In this chapter you get to know Alester Sarwyck, the second hero of Game of the Thrones. During creating the character, use the same rules as in the case of Mors. Available classes: Water Dancer (light armor, one-handed weapon), Sellsword (medium armor, one-handed weapon) and Archer (light armor, bow).
![Point 1 - For All the Days Gone By [MQ] - Chapter 2 - Alester Sarwyck - Game of Thrones - Game Guide and Walkthrough](https://game.lhg100.com/Article/UploadFiles/201512/2015121519105958.jpg)
Point 1
![After exiting the boat, go to the group of civilians and speak to Tyrek, the instigator - For All the Days Gone By [MQ] - Chapter 2 - Alester Sarwyck - Game of Thrones - Game Guide and Walkthrough](https://game.lhg100.com/Article/UploadFiles/201512/2015121519105952.jpg)
After exiting the boat, go to the group of civilians and speak to Tyrek, the instigator. You'll meet him again, in less pleasant situation. Your main quest (For All the Days Gone By) is get to the castle on your father's funeral.
Point 2
![On the way to the castle the local armor merchant will start conversation with you and (if youd want) explain you how the particular armors work and which weapons are best with them - For All the Days Gone By [MQ] - Chapter 2 - Alester Sarwyck - Game of Thrones - Game Guide and Walkthrough](https://game.lhg100.com/Article/UploadFiles/201512/2015121519105948.jpg)
On the way to the castle the local armor merchant will start conversation with you and (if you'd want) explain you how the particular armors work and which weapons are best with them. Use this occasion to get acknowledged with few useful information.
Point 3
![When you get under the gate of castle, the guard wont let you in - For All the Days Gone By [MQ] - Chapter 2 - Alester Sarwyck - Game of Thrones - Game Guide and Walkthrough](https://game.lhg100.com/Article/UploadFiles/201512/2015121519105973.jpg)
When you get under the gate of castle, the guard won't let you in. Ryman Sarwyck, guards leader, also won't be friendly. During the dialogue you can pass up arguing (peaceful solution) or fight with Ryman. When the encounter gets serious, the Maester Harwyn will stop it.
Point 4
![Follow Harwyn, listening about newest events - For All the Days Gone By [MQ] - Chapter 2 - Alester Sarwyck - Game of Thrones - Game Guide and Walkthrough](https://game.lhg100.com/Article/UploadFiles/201512/2015121519105941.jpg)
Follow Harwyn, listening about newest events. When you get under the gate leading to the Godswood search the vicinity for the loots and go to the ceremony.
![Point 1 - For All the Days Gone By [MQ] - Chapter 2 - Alester Sarwyck - Game of Thrones - Game Guide and Walkthrough](https://game.lhg100.com/Article/UploadFiles/201512/2015121519110077.jpg)
Point 1
![After getting on the funeral youll be asked by Alesters sister, Elyana - For All the Days Gone By [MQ] - Chapter 2 - Alester Sarwyck - Game of Thrones - Game Guide and Walkthrough](https://game.lhg100.com/Article/UploadFiles/201512/2015121519110072.jpg)
After getting on the funeral you'll be asked by Alester's sister, Elyana. She'll won't be happy either seeing you and order you to honor your father.
![During the cut-scene notice the bald man in the crowd - its the Lord Harlton, crucial person in further chapters - For All the Days Gone By [MQ] - Chapter 2 - Alester Sarwyck - Game of Thrones - Game Guide and Walkthrough](https://game.lhg100.com/Article/UploadFiles/201512/2015121519110086.jpg)
During the cut-scene notice the bald man in the crowd - it's the Lord Harlton, crucial person in further chapters.
Point 2
![After the ceremony, youll be accosted by the nanny, upset about the show during the funeral - For All the Days Gone By [MQ] - Chapter 2 - Alester Sarwyck - Game of Thrones - Game Guide and Walkthrough](https://game.lhg100.com/Article/UploadFiles/201512/2015121519110004.jpg)
After the ceremony, you'll be accosted by the nanny, upset about the show during the funeral. You can play if peacefully or aggressively, it's all on you. After the conversation pick up the codex from the nearest trunk and go to the Riverspring Courtyard.
Point 3
![After entering the courtyard, you can listen the conversation between a bunch of people and the go talk with Harwyn - For All the Days Gone By [MQ] - Chapter 2 - Alester Sarwyck - Game of Thrones - Game Guide and Walkthrough](https://game.lhg100.com/Article/UploadFiles/201512/2015121519110047.jpg)
After entering the courtyard, you can listen the conversation between a bunch of people and the go talk with Harwyn. He'll tell you about planned, almost incestuous marriage of Elyana with your half-brother Valarr. He'll tell you also about his thought about your father's death. After a while the conversation will be interrupted, because a riot begins on the streets.
Point 4
![Before you get on the street, you can visit the governor to sell him useless things you have - For All the Days Gone By [MQ] - Chapter 2 - Alester Sarwyck - Game of Thrones - Game Guide and Walkthrough](https://game.lhg100.com/Article/UploadFiles/201512/2015121519110061.jpg)
Before you get on the street, you can visit the governor to sell him useless things you have.
Point 5
![Now head to the northern gate, through which you get on the rioted streets - For All the Days Gone By [MQ] - Chapter 2 - Alester Sarwyck - Game of Thrones - Game Guide and Walkthrough](https://game.lhg100.com/Article/UploadFiles/201512/2015121519110019.jpg)
Now head to the northern gate, through which you get on the rioted streets. Prepare to battle and diplomatic solutions.
![Point 1 - For All the Days Gone By [MQ] - Chapter 2 - Alester Sarwyck - Game of Thrones - Game Guide and Walkthrough](https://game.lhg100.com/Article/UploadFiles/201512/2015121519110011.jpg)
Point 1
![Within few minutes streets of your family city changed into the battle area, luckily Ryman joins you - For All the Days Gone By [MQ] - Chapter 2 - Alester Sarwyck - Game of Thrones - Game Guide and Walkthrough](https://game.lhg100.com/Article/UploadFiles/201512/2015121519110166.jpg)
Within few minutes streets of your family city changed into the battle area, luckily Ryman joins you. On the street you'll meet three fractions: guards, nobles and peasants, who began the whole riot. The way situation ends, depends on your diplomatic decisions.
![At the end of this chapter youll face Tyrek, the instigator - For All the Days Gone By [MQ] - Chapter 2 - Alester Sarwyck - Game of Thrones - Game Guide and Walkthrough](https://game.lhg100.com/Article/UploadFiles/201512/2015121519110121.png)
At the end of this chapter you'll face Tyrek, the instigator. It can be played on three ways.
A. Bloody ending of the riot
During the disputable situations, always stay on the nobles' side and at the end of riots you'll fight Tyrek and his thugs. To do so you have to:
If you stand on the nobles' side, you'll find an additional, connected with them, special merchant in the 4th chapter (in the docks).
B. Moderate ending of the riot
During the disputable situations stand mostly on the guards' side and at the end of the chapter you'll fight only Tyrek. To do so, you have to:
If you stand on the guards' side, you'll find an additional, connected with them, special merchant in the 4th chapter (in the docks).
C. Peaceful ending of the riot
During the disputable situations stand always on the peasants' side and at the end of the chapter you'll fight Tyrek only with words. To do so, you have to:
If you stand on the peasants' side, you'll find an additional, connected with them, special merchant in the 4th chapter (in the docks).
![If during riots you place all rebellions in the dungeons, then in the 12th chapter youll be able to ask them for help in fight - For All the Days Gone By [MQ] - Chapter 2 - Alester Sarwyck - Game of Thrones - Game Guide and Walkthrough](https://game.lhg100.com/Article/UploadFiles/201512/2015121519110142.png)
If during riots you place all rebellions in the dungeons, then in the 12th chapter you'll be able to ask them for help in fight. If you leave them free, they'll give you some small gifts.
Point 2
![Before you get through the main gate on the streets, go downstairs on the south - For All the Days Gone By [MQ] - Chapter 2 - Alester Sarwyck - Game of Thrones - Game Guide and Walkthrough](https://game.lhg100.com/Article/UploadFiles/201512/2015121519110183.jpg)
Before you get through the main gate on the streets, go downstairs on the south. Here the court martial takes place. Help in judging on every of them, after listening to the both sides. Honesty of your words depends only on you and on what you want to achieve.
Honesty sentences should be like that:
Point 3
![Another crisis situation takes place little on the north from the main gate - For All the Days Gone By [MQ] - Chapter 2 - Alester Sarwyck - Game of Thrones - Game Guide and Walkthrough](https://game.lhg100.com/Article/UploadFiles/201512/2015121519110132.jpg)
Another crisis situation takes place little on the north from the main gate. One of the guard barricaded the angry mob behind the heavy gate. If you'd like to solve the riot peacefully, let him keep them there. If you don't want to stand on the peasants' side, you can free them but you'll have to kill them.
Point 4
![Now get to the main gate leading on the streets - For All the Days Gone By [MQ] - Chapter 2 - Alester Sarwyck - Game of Thrones - Game Guide and Walkthrough](https://game.lhg100.com/Article/UploadFiles/201512/2015121519110190.jpg)
Now get to the main gate leading on the streets. Angry peasants on the other side of the gate are demanding food. You can offer them castle supplies (they'll look at you more friendly), promise an additional tax on nobles (nobles won't be happy) or try to scary them with violence, what'll make them even angrier. Whatever you'd do, they won't step aside, but your choices will have different consequences.
![If you offer food to peasants, you wont obtain the shield from Tytos Lannister in the 9th chapter - For All the Days Gone By [MQ] - Chapter 2 - Alester Sarwyck - Game of Thrones - Game Guide and Walkthrough](https://game.lhg100.com/Article/UploadFiles/201512/2015121519110111.png)
If you offer food to peasants, you won't obtain the shield from Tytos Lannister in the 9th chapter.
Point 5
![After going on the streets, youll see a group of rebellions fighting with the guard on the right - For All the Days Gone By [MQ] - Chapter 2 - Alester Sarwyck - Game of Thrones - Game Guide and Walkthrough](https://game.lhg100.com/Article/UploadFiles/201512/2015121519110147.jpg)
After going on the streets, you'll see a group of rebellions fighting with the guard on the right. Defeat them (piece of cake) and decide whether you should spare life of his leader or not. If you do so, the peasants will be grateful.
Point 6
![On the left from the stairs an identical situation takes place - angry mob imprisoned guard and is going to kill him - For All the Days Gone By [MQ] - Chapter 2 - Alester Sarwyck - Game of Thrones - Game Guide and Walkthrough](https://game.lhg100.com/Article/UploadFiles/201512/2015121519110150.jpg)
On the left from the stairs an identical situation takes place - angry mob imprisoned guard and is going to kill him. Again, after defeating them, you'll decide about their leader's life.
Point 7
![On the east from the bridge youll find another situation like that - For All the Days Gone By [MQ] - Chapter 2 - Alester Sarwyck - Game of Thrones - Game Guide and Walkthrough](https://game.lhg100.com/Article/UploadFiles/201512/2015121519110228.jpg)
On the east from the bridge you'll find another situation like that.
Point 8
![On the market square starts an argue between two groups of citizens - For All the Days Gone By [MQ] - Chapter 2 - Alester Sarwyck - Game of Thrones - Game Guide and Walkthrough](https://game.lhg100.com/Article/UploadFiles/201512/2015121519110212.jpg)
On the market square starts an argue between two groups of citizens. Ones stands on the rebellions side, the others think that the riot is a stupid thing. You have to pacify the situation. Depending on your goal in this chapter, you can frighten them with violence or gain their liking and offer a food from castle.
![If you offer the food, the citizens will demand you to swear on gods - For All the Days Gone By [MQ] - Chapter 2 - Alester Sarwyck - Game of Thrones - Game Guide and Walkthrough](https://game.lhg100.com/Article/UploadFiles/201512/2015121519110297.jpg)
If you offer the food, the citizens will demand you to swear on gods. If you decline, the fight will start. When you choose any other option, the thing ends up peacefully. If the encounter begin, be ready to a challenging fight which will require good planning from you.
Point 9
![By the platform youll run into a robbery - For All the Days Gone By [MQ] - Chapter 2 - Alester Sarwyck - Game of Thrones - Game Guide and Walkthrough](https://game.lhg100.com/Article/UploadFiles/201512/2015121519110280.jpg)
By the platform you'll run into a robbery. Talk with Habert to pacify the situation.
Point 10
![Behind the platform you find similar situation, but this time it wont be done without spilling the blood - For All the Days Gone By [MQ] - Chapter 2 - Alester Sarwyck - Game of Thrones - Game Guide and Walkthrough](https://game.lhg100.com/Article/UploadFiles/201512/2015121519110289.jpg)
Behind the platform you find similar situation, but this time it won't be done without spilling the blood. Kill enemies, to save guard's life.
Point 11
![Closer to the dock, get rid of another group of aggressive rebellions - For All the Days Gone By [MQ] - Chapter 2 - Alester Sarwyck - Game of Thrones - Game Guide and Walkthrough](https://game.lhg100.com/Article/UploadFiles/201512/2015121519110216.jpg)
Closer to the dock, get rid of another group of aggressive rebellions. After the encounter another dilemma: spare the life, or kill the leader?
Point 12
![In the dock you run into Robin, whove lost a family in the riot - For All the Days Gone By [MQ] - Chapter 2 - Alester Sarwyck - Game of Thrones - Game Guide and Walkthrough](https://game.lhg100.com/Article/UploadFiles/201512/2015121519110251.jpg)
In the dock you run into Robin, who've lost a family in the riot. He is desperate and wants kill himself. Talk with him about R'hillor to change his mind. If you do so, you'll meet him in further chapters as a merchant in the Godswood.
Point 13
![In the docks potentially bloody event is taking place - For All the Days Gone By [MQ] - Chapter 2 - Alester Sarwyck - Game of Thrones - Game Guide and Walkthrough](https://game.lhg100.com/Article/UploadFiles/201512/2015121519110215.jpg)
In the docks potentially bloody event is taking place. You can offer gold to rebellions for nobles' life (nobles will be grateful) or tell nobles to buy themselves out (peasants will be grateful). If none of this option satisfy you, you can fight but then one of the hostages, Rosamunda, will die.
![If you decide to fight and Rosamunda dies, then in the Red Keep youll be granted with rather a harsh welcome - For All the Days Gone By [MQ] - Chapter 2 - Alester Sarwyck - Game of Thrones - Game Guide and Walkthrough](https://game.lhg100.com/Article/UploadFiles/201512/2015121519110290.png)
If you decide to fight and Rosamunda dies, then in the Red Keep you'll be granted with rather a harsh welcome. Also you'll have to kill rebellions.
Point 14
![Now return under the castle gate where you meet Tyrek - For All the Days Gone By [MQ] - Chapter 2 - Alester Sarwyck - Game of Thrones - Game Guide and Walkthrough](https://game.lhg100.com/Article/UploadFiles/201512/2015121519110335.jpg)
Now return under the castle gate where you meet Tyrek. Depending on your actions during the riot, you'll fight or just have verbal clash. (details in point 1).
If you began the full conflict with your actions, you'll have a full of work now, because you'll fight alone against the whole group of rebellions or Tyrek only. In the first case, play smartly and eliminate foes from the weakest now. Tyrek should be the last one - use all you've got against him.
After the encounter you'll face the decision: kill Tyrek or throw him into the dungeon. He'll get to the dungeon whatsoever if you haven't fight.
![Point 1 - For All the Days Gone By [MQ] - Chapter 2 - Alester Sarwyck - Game of Thrones - Game Guide and Walkthrough](https://game.lhg100.com/Article/UploadFiles/201512/2015121519110370.jpg)
Point 1
![After entering the castle, search it carefully looking for loots and Codex marked on the map - For All the Days Gone By [MQ] - Chapter 2 - Alester Sarwyck - Game of Thrones - Game Guide and Walkthrough](https://game.lhg100.com/Article/UploadFiles/201512/2015121519110375.jpg)
After entering the castle, search it carefully looking for loots and Codex marked on the map.
Point 2
![When you take all, talk with the Harwyn about your brothers and situation in the Riverspring - For All the Days Gone By [MQ] - Chapter 2 - Alester Sarwyck - Game of Thrones - Game Guide and Walkthrough](https://game.lhg100.com/Article/UploadFiles/201512/2015121519110309.jpg)
When you take all, talk with the Harwyn about your brothers and situation in the Riverspring.
Point 3
![At the end of the chapter go to your chamber, to contact Rhlorrs temple and transform from the red priest into the true lord of this castle - For All the Days Gone By [MQ] - Chapter 2 - Alester Sarwyck - Game of Thrones - Game Guide and Walkthrough](https://game.lhg100.com/Article/UploadFiles/201512/2015121519110348.jpg)
At the end of the chapter go to your chamber, to contact R'hlorr's temple and transform from the red priest into the true lord of this castle.
![Point 1 - Between a Hunter and His Prey [MQ] - Chapter 3 - Mors Westford - Game of Thrones - Game Guide and Walkthrough](https://game.lhg100.com/Article/UploadFiles/201512/2015121519110328.jpg)
Point 1
![In this chapter you control Mors again - Between a Hunter and His Prey [MQ] - Chapter 3 - Mors Westford - Game of Thrones - Game Guide and Walkthrough](https://game.lhg100.com/Article/UploadFiles/201512/2015121519110385.jpg)
In this chapter you control Mors again. After dialogue with companions, search all bodies nearby (Gorn's especially) and start looking for Poddy, who disappeared mysteriously from the balcony from which he should covered you.
Point 2
![Whats left of Poddy is a bow - Between a Hunter and His Prey [MQ] - Chapter 3 - Mors Westford - Game of Thrones - Game Guide and Walkthrough](https://game.lhg100.com/Article/UploadFiles/201512/2015121519110357.jpg)
What's left of Poddy is a bow. Swap to the dog and use the bow to catch the scent of the fugitive. Poddy's scent is a yellow smudge you have to follow.
Point 3
![Following the scent, you get on the square with the pyre - Between a Hunter and His Prey [MQ] - Chapter 3 - Mors Westford - Game of Thrones - Game Guide and Walkthrough](https://game.lhg100.com/Article/UploadFiles/201512/2015121519110462.jpg)
Following the scent, you get on the square with the pyre. Here you'll find another scent. Blue scent means a hidden treasure which Mors wouldn't be able to find himself.
Point 4
![Follow the yellow scent until you get to the broken tree on the clearing out of the Icemarks walls - Between a Hunter and His Prey [MQ] - Chapter 3 - Mors Westford - Game of Thrones - Game Guide and Walkthrough](https://game.lhg100.com/Article/UploadFiles/201512/2015121519110444.jpg)
Follow the yellow scent until you get to the broken tree on the clearing out of the Icemark's walls. Now, you're sure that the Poddy deserted, and there is only one punishment for that.
![Point 1 - Between a Hunter and His Prey [MQ] - Chapter 3 - Mors Westford - Game of Thrones - Game Guide and Walkthrough](https://game.lhg100.com/Article/UploadFiles/201512/2015121519110495.jpg)
Point 1
![All loots in this forest are hidden and only Mors dog can trace them, so sometimes is good to walk out of the pace - Between a Hunter and His Prey [MQ] - Chapter 3 - Mors Westford - Game of Thrones - Game Guide and Walkthrough](https://game.lhg100.com/Article/UploadFiles/201512/2015121519110432.jpg)
All loots in this forest are hidden and only Mors' dog can trace them, so sometimes is good to walk out of the pace. Paddy will wait.
Point 2
![Just behind the bridge you meet Robin, who directs you to the camp of his family who may help you finding a deserter - Between a Hunter and His Prey [MQ] - Chapter 3 - Mors Westford - Game of Thrones - Game Guide and Walkthrough](https://game.lhg100.com/Article/UploadFiles/201512/2015121519110407.jpg)
Just behind the bridge you meet Robin, who directs you to the camp of his "family" who may help you finding a deserter.
Point 3
![Go to the camp and talk with Robins father - Between a Hunter and His Prey [MQ] - Chapter 3 - Mors Westford - Game of Thrones - Game Guide and Walkthrough](https://game.lhg100.com/Article/UploadFiles/201512/2015121519110457.jpg)
Go to the camp and talk with Robin's father. Ondrew claims that he saw a runaway and even offer one of his son to lead you there. Follow the man, in meantime having a educational conversation about prostitutes from the nearest village.
Point 4
![Robin and his family, as it turns out, are just a bunch of robbers who take you in an ambush - Between a Hunter and His Prey [MQ] - Chapter 3 - Mors Westford - Game of Thrones - Game Guide and Walkthrough](https://game.lhg100.com/Article/UploadFiles/201512/2015121519110442.jpg)
Robin and his family, as it turns out, are just a bunch of robbers who take you in an ambush.
You'll be surrounded by four thugs, two without any armor - kill them first. Encounter shouldn't be difficult if you use your abilities wisely and order your dog to distract stronger enemies.
![After the fight listen to one of the robbers, Cley - Between a Hunter and His Prey [MQ] - Chapter 3 - Mors Westford - Game of Thrones - Game Guide and Walkthrough](https://game.lhg100.com/Article/UploadFiles/201512/2015121519110484.jpg)
After the fight listen to one of the robbers, Cley. If you let him talk, you'll receive a secondary quest: Treasure Hunt (described at the end of the chapter).
Point 5
![Return to sniffing about the deserter - Between a Hunter and His Prey [MQ] - Chapter 3 - Mors Westford - Game of Thrones - Game Guide and Walkthrough](https://game.lhg100.com/Article/UploadFiles/201512/2015121519110425.jpg)
Return to sniffing about the deserter. Mors' dog will get to the fallen tree and only he'll be able to go under it. So the rest of the way you'll make in the warg's skin.
Point 6
![When you find Poddy, attack him and follow the instruction on the screen to kill him - Between a Hunter and His Prey [MQ] - Chapter 3 - Mors Westford - Game of Thrones - Game Guide and Walkthrough](https://game.lhg100.com/Article/UploadFiles/201512/2015121519110576.jpg)
When you find Poddy, attack him and follow the instruction on the screen to kill him. After the brute scene, return with the dog to the [point 1] and from there go to the Castle Black.
![Point 1 - Between a Hunter and His Prey [MQ] - Chapter 3 - Mors Westford - Game of Thrones - Game Guide and Walkthrough](https://game.lhg100.com/Article/UploadFiles/201512/2015121519110562.jpg)
Point 1
![Before you go to talk with Jeor, spare few moments on searching the Common Hall (even if you did so in the 1st chapter) - Between a Hunter and His Prey [MQ] - Chapter 3 - Mors Westford - Game of Thrones - Game Guide and Walkthrough](https://game.lhg100.com/Article/UploadFiles/201512/2015121519110549.jpg)
Before you go to talk with Jeor, spare few moments on searching the Common Hall (even if you did so in the 1st chapter). Using the warg's nose you'll find two additional treasures, one on the ground floor, nearby the fire-place and the second on the first floor, behind the bench.
Talk with Jeor, he'll give you a letter from the governor and send to the messenger who arrived here specially for you.
Point 2
![On the ground floor youll find the messenger, Godric - Between a Hunter and His Prey [MQ] - Chapter 3 - Mors Westford - Game of Thrones - Game Guide and Walkthrough](https://game.lhg100.com/Article/UploadFiles/201512/2015121519110553.jpg)
On the ground floor you'll find the messenger, Godric. During the conversation you agree to go with him to the Mole's Town to protect some mysterious woman. At the end one very bad news, will get to you.
Point 1
![After the encounter in the [point 4] chapter 3 listen what Clay wants to tell you, before you kill him - Treasure Hunt [SQ] - Chapter 3 - Mors Westford - Game of Thrones - Game Guide and Walkthrough](https://game.lhg100.com/Article/UploadFiles/201512/2015121519110532.jpg)
After the encounter in the [point 4] chapter 3 listen what Clay wants to tell you, before you kill him. That's how you obtain this quest.
Point 2
![Using the dogs nose find the hollow trunk on the hill nearby the camp in the point [3 - Treasure Hunt [SQ] - Chapter 3 - Mors Westford - Game of Thrones - Game Guide and Walkthrough](https://game.lhg100.com/Article/UploadFiles/201512/2015121519110573.jpg)
Using the dog's nose find the hollow trunk on the hill nearby the camp in the point [3.2.4]. You'll find there a promised gold.
Point 3
![Another trunk with gold youll scent behind the shrubs, on the northern-west from the camp, what ends this quest - Treasure Hunt [SQ] - Chapter 3 - Mors Westford - Game of Thrones - Game Guide and Walkthrough](https://game.lhg100.com/Article/UploadFiles/201512/2015121519110545.jpg)
Another trunk with gold you'll scent behind the shrubs, on the northern-west from the camp, what ends this quest.
![Point 1 - The Lions Will [MQ] - p. 1 - Chapter 4 - Alester Sarwyck - Game of Thrones - Game Guide and Walkthrough](https://game.lhg100.com/Article/UploadFiles/201512/2015121519110668.jpg)
Point 1
![First person you meet after getting to the Kings Landing is an Old Ren, the beggar - The Lions Will [MQ] - p. 1 - Chapter 4 - Alester Sarwyck - Game of Thrones - Game Guide and Walkthrough](https://game.lhg100.com/Article/UploadFiles/201512/2015121519110648.jpg)
First person you meet after getting to the King's Landing is an Old Ren, the beggar. Listen him and remember this face, because you'll meet again.
Point 2
![Before you go under the arc leading to the market save the game - The Lions Will [MQ] - p. 1 - Chapter 4 - Alester Sarwyck - Game of Thrones - Game Guide and Walkthrough](https://game.lhg100.com/Article/UploadFiles/201512/2015121519110673.jpg)
Before you go under the arc leading to the market save the game. Old Ren brought Reapers, a gang which wants to get a reward for your brother, Gawyn with your help.
![Fight with them can be avoided - The Lions Will [MQ] - p. 1 - Chapter 4 - Alester Sarwyck - Game of Thrones - Game Guide and Walkthrough](https://game.lhg100.com/Article/UploadFiles/201512/2015121519110611.jpg)
Fight with them can be avoided. It's enough for you to tell, that you come here only to judge your brother. Any other option ends up with the dangerous encounter. Make sure you used all your points on the 2nd level. To win this fight you have to use all the tricks you have, especially the R'hlorr abilities. Fire, paralysis, toppling are your best allies. If you choose the fight, you'll have to explain yourself in front of the Gold Cloaks.
Independently on your choice, the amount of XP will be the same.
Point 3
![Visit the market square, see is there any interesting for you, sell your own items - The Lions Will [MQ] - p. 1 - Chapter 4 - Alester Sarwyck - Game of Thrones - Game Guide and Walkthrough](https://game.lhg100.com/Article/UploadFiles/201512/2015121519110635.jpg)
Visit the market square, see is there any interesting for you, sell your own items. Most of things will be to expensive for you, but it's worth to know what you will buy in the future.
By the market square you'll find a hideout of Old Ren. Now you can pay him back for the treachery or spare his life.
Point 4
![In the alley behind the Sarwyck Manse youll get into another Reapers ambush - The Lions Will [MQ] - p. 1 - Chapter 4 - Alester Sarwyck - Game of Thrones - Game Guide and Walkthrough](https://game.lhg100.com/Article/UploadFiles/201512/2015121519110621.jpg)
In the alley behind the Sarwyck Manse you'll get into another Reapers' ambush. This time fight is the only way out, but it's easier than the previous one.
Point 5
![Following the streets you get on the square in front of the Manse entrance - The Lions Will [MQ] - p. 1 - Chapter 4 - Alester Sarwyck - Game of Thrones - Game Guide and Walkthrough](https://game.lhg100.com/Article/UploadFiles/201512/2015121519110628.jpg)
Following the streets you get on the square in front of the Manse entrance. You'll see a real face of your half-brother Valarr and get to know that he is also looking for Gawyn.
![Confrontation with Valarr isnt nice, but, at least for now, will work out without open fight - The Lions Will [MQ] - p. 1 - Chapter 4 - Alester Sarwyck - Game of Thrones - Game Guide and Walkthrough](https://game.lhg100.com/Article/UploadFiles/201512/2015121519110760.jpg)
Confrontation with Valarr isn't nice, but, at least for now, will work out without open fight. Let him know that you won't pass up that easily.
Point 6
![At the end talk with Hubb, the only survivor after the Valarrs visitation - The Lions Will [MQ] - p. 1 - Chapter 4 - Alester Sarwyck - Game of Thrones - Game Guide and Walkthrough](https://game.lhg100.com/Article/UploadFiles/201512/2015121519110715.jpg)
At the end talk with Hubb, the only survivor after the Valarr's visitation. Convince him to show you a secret passage to the Sarwyck Manse. After short conversation follow him.
![Point 1 - The Lions Will [MQ] - p. 1 - Chapter 4 - Alester Sarwyck - Game of Thrones - Game Guide and Walkthrough](https://game.lhg100.com/Article/UploadFiles/201512/2015121519110798.jpg)
Point 1
![There is no one in the Manse (besides guards outside), so you can search it carefully and collect loots - The Lions Will [MQ] - p. 1 - Chapter 4 - Alester Sarwyck - Game of Thrones - Game Guide and Walkthrough](https://game.lhg100.com/Article/UploadFiles/201512/2015121519110722.jpg)
There is no one in the Manse (besides guards outside), so you can search it carefully and collect loots.
Point 2
![In this room youll find one of two letters which youre looking for - The Lions Will [MQ] - p. 1 - Chapter 4 - Alester Sarwyck - Game of Thrones - Game Guide and Walkthrough](https://game.lhg100.com/Article/UploadFiles/201512/2015121519110743.jpg)
In this room you'll find one of two letters which you're looking for. It lies between papers under the window. It proves that the Gawen is innocent.
Point 3
![The second letter you find behind the shield in the looted bedroom - The Lions Will [MQ] - p. 1 - Chapter 4 - Alester Sarwyck - Game of Thrones - Game Guide and Walkthrough](https://game.lhg100.com/Article/UploadFiles/201512/2015121519110753.jpg)
The second letter you find behind the shield in the looted bedroom. It leads to the Madame Chataya brothel. After reading this, prepare to battle.
Point 4
![Exiting the bedroom youll be attacked by the Gold Cloaks - The Lions Will [MQ] - p. 1 - Chapter 4 - Alester Sarwyck - Game of Thrones - Game Guide and Walkthrough](https://game.lhg100.com/Article/UploadFiles/201512/2015121519110735.jpg)
Exiting the bedroom you'll be attacked by the Gold Cloaks. Use all you've got, starting from the weakest ones and the most armored guard finish at the end. After the battle exit the Manse the same way you entered it.
![Point 1 - The Lions Will [MQ] - p. 1 - Chapter 4 - Alester Sarwyck - Game of Thrones - Game Guide and Walkthrough](https://game.lhg100.com/Article/UploadFiles/201512/2015121519110775.jpg)
Point 1
![To Chatayas you get through the stairs in the northern part of the city - The Lions Will [MQ] - p. 1 - Chapter 4 - Alester Sarwyck - Game of Thrones - Game Guide and Walkthrough](https://game.lhg100.com/Article/UploadFiles/201512/2015121519110806.jpg)
To Chataya's you get through the stairs in the northern part of the city. Entrance is easily recognizable thanks to the specific lights.
![Inside speak with the owner to get to know where you can find a girl named Felena - The Lions Will [MQ] - p. 1 - Chapter 4 - Alester Sarwyck - Game of Thrones - Game Guide and Walkthrough](https://game.lhg100.com/Article/UploadFiles/201512/2015121519110881.jpg)
Inside speak with the owner to get to know where you can find a girl named Felena. On the way to her, explore remaining rooms to add few Codex entries and watch the local people.
Point 2
![Just near the Felenas room youll be accosted by the infamous spy, Varys - The Lions Will [MQ] - p. 1 - Chapter 4 - Alester Sarwyck - Game of Thrones - Game Guide and Walkthrough](https://game.lhg100.com/Article/UploadFiles/201512/2015121519110822.jpg)
Just near the Felena's room you'll be accosted by the infamous spy, Varys. It's obvious, that the eunuch in the brothel is more than the coincidence. He came here because he has few information for you, so it's worth to talk with him. After the conversation you obtain new trait: Nostalgic, thanks to which you get more skill points every level.
Point 3
![Felena waits in the next room - The Lions Will [MQ] - p. 1 - Chapter 4 - Alester Sarwyck - Game of Thrones - Game Guide and Walkthrough](https://game.lhg100.com/Article/UploadFiles/201512/2015121519110880.jpg)
Felena waits in the next room. Ask her about everything connected with Gawyn, at the end you receive your house cloak, Sarwyck Giltwaters. It's surely an upgrade to your current cloak.
Point 4
![At the exit from the building Golden Cloaks are waiting for you - The Lions Will [MQ] - p. 1 - Chapter 4 - Alester Sarwyck - Game of Thrones - Game Guide and Walkthrough](https://game.lhg100.com/Article/UploadFiles/201512/2015121519110872.jpg)
At the exit from the building Golden Cloaks are waiting for you. Somebody was following you, when you sneaked out of the Manse. To avoid the blood spilling in the brothel, you give yourself in their hands.
![Point 1 - The Lions Will [MQ] - p. 2 - Chapter 4 - Alester Sarwyck - Game of Thrones - Game Guide and Walkthrough](https://game.lhg100.com/Article/UploadFiles/201512/2015121519110842.jpg)
Point 1
Fate threw you from the brothel to the dungeon. Doesn't matter - Varys will come to help you. He grabs you key and help in escape.
Point 2
![After exiting the cell go to the guards post - Varys anaesthetized him - The Lions Will [MQ] - p. 2 - Chapter 4 - Alester Sarwyck - Game of Thrones - Game Guide and Walkthrough](https://game.lhg100.com/Article/UploadFiles/201512/2015121519110809.jpg)
After exiting the cell go to the guard's post - Varys anaesthetized him. Your weapon lies on the nearby table.
![Two guards will come out from the next room, but without heavy armors, so the encounter will be easy - The Lions Will [MQ] - p. 2 - Chapter 4 - Alester Sarwyck - Game of Thrones - Game Guide and Walkthrough](https://game.lhg100.com/Article/UploadFiles/201512/2015121519110997.jpg)
Two guards will come out from the next room, but without heavy armors, so the encounter will be easy.
Point 3
![In the room from which those men got out youll find the rest of your equipment, so put it up - The Lions Will [MQ] - p. 2 - Chapter 4 - Alester Sarwyck - Game of Thrones - Game Guide and Walkthrough](https://game.lhg100.com/Article/UploadFiles/201512/2015121519110949.jpg)
In the room from which those men got out you'll find the rest of your equipment, so put it up. Also here you'll get a key necessary to open remaining cells.
Point 4
![Open the gate by the sleeping guard and in the last cell find a place where you can use skill which was unavailable until now - Rhlorrs vision - The Lions Will [MQ] - p. 2 - Chapter 4 - Alester Sarwyck - Game of Thrones - Game Guide and Walkthrough](https://game.lhg100.com/Article/UploadFiles/201512/2015121519110940.jpg)
Open the gate by the sleeping guard and in the last cell find a place where you can use skill which was unavailable until now - R'hlorr's vision. It reveals the secret passage through which you get out from this part of dungeon.
Point 5
![From now on, you get into the labyrinth of corridors, which you have to go through to get out of the citadel - The Lions Will [MQ] - p. 2 - Chapter 4 - Alester Sarwyck - Game of Thrones - Game Guide and Walkthrough](https://game.lhg100.com/Article/UploadFiles/201512/2015121519110932.jpg)
From now on, you get into the labyrinth of corridors, which you have to go through to get out of the citadel. You'll be moving between three floors, but always forward. To make it easier, stairs leading to the next point are marked by the "hollow" numbers, and floors differ with numbers.
Point 6
![First stairs lead to the lower cellar, which you have to go through to get into the closed room in upper cellar - The Lions Will [MQ] - p. 2 - Chapter 4 - Alester Sarwyck - Game of Thrones - Game Guide and Walkthrough](https://game.lhg100.com/Article/UploadFiles/201512/2015121519110943.jpg)
First stairs lead to the lower cellar, which you have to go through to get into the closed room in upper cellar.
Point 7
![When you get there, youll find two levers - The Lions Will [MQ] - p. 2 - Chapter 4 - Alester Sarwyck - Game of Thrones - Game Guide and Walkthrough](https://game.lhg100.com/Article/UploadFiles/201512/2015121519110946.jpg)
When you get there, you'll find two levers. One opens passage to the further part of dungeons, the other the room in which you currently are, so you don't have to go back the way you get here.
![Point 8 - The Lions Will [MQ] - p. 2 - Chapter 4 - Alester Sarwyck - Game of Thrones - Game Guide and Walkthrough](https://game.lhg100.com/Article/UploadFiles/201512/2015121519110923.jpg)
Point 8
![After exiting the room with two levers youll fight two guards - The Lions Will [MQ] - p. 2 - Chapter 4 - Alester Sarwyck - Game of Thrones - Game Guide and Walkthrough](https://game.lhg100.com/Article/UploadFiles/201512/2015121519110960.jpg)
After exiting the room with two levers you'll fight two guards. After winning, you find out that you've saved one of Varys' "birds", who was sent by the spy to help you. From this moment, he'll fight on your side.
Point 9
![Bird will lead you to the another point where you have to use the Rhllors vision to find a needed mechanism - The Lions Will [MQ] - p. 2 - Chapter 4 - Alester Sarwyck - Game of Thrones - Game Guide and Walkthrough](https://game.lhg100.com/Article/UploadFiles/201512/2015121519110945.jpg)
Bird will lead you to the another point where you have to use the R'hllor's vision to find a needed mechanism. This passage gets you to the lower cellar.
Point 10
![You end up in the wine cellar, from which you notice another opponents - The Lions Will [MQ] - p. 2 - Chapter 4 - Alester Sarwyck - Game of Thrones - Game Guide and Walkthrough](https://game.lhg100.com/Article/UploadFiles/201512/2015121519110928.jpg)
You end up in the wine cellar, from which you notice another opponents. Use the surprise to cause few hard blows. Take care about the enemy in heavy armor, the bird easily do in this one in light armor.
Point 11
![On the top of stairs two enemies in medium armors await you - The Lions Will [MQ] - p. 2 - Chapter 4 - Alester Sarwyck - Game of Thrones - Game Guide and Walkthrough](https://game.lhg100.com/Article/UploadFiles/201512/2015121519111020.jpg)
On the top of stairs two enemies in medium armors await you. After dealing with them you get back to the upper cellar.
Point 12
![In the upper cellar youll have a bigger encounter with the guards - The Lions Will [MQ] - p. 2 - Chapter 4 - Alester Sarwyck - Game of Thrones - Game Guide and Walkthrough](https://game.lhg100.com/Article/UploadFiles/201512/2015121519111046.jpg)
In the upper cellar you'll have a bigger encounter with the guards. Area damage, fire, toppling and other abilities with the proper sequence of eliminating enemies et you win this struggle.
Point 13
![On the last staircase in this dungeon, the Little Bird let you so the coming, final battle youll fight alone - The Lions Will [MQ] - p. 2 - Chapter 4 - Alester Sarwyck - Game of Thrones - Game Guide and Walkthrough](https://game.lhg100.com/Article/UploadFiles/201512/2015121519111007.jpg)
On the last staircase in this dungeon, the Little Bird let you so the coming, final battle you'll fight alone.
Point 14
![After going through the secret door, youll be attacked by few guards in various armors - The Lions Will [MQ] - p. 2 - Chapter 4 - Alester Sarwyck - Game of Thrones - Game Guide and Walkthrough](https://game.lhg100.com/Article/UploadFiles/201512/2015121519111045.jpg)
After going through the secret door, you'll be attacked by few guards in various armors. Eliminate them one after another, but do not enter the room - thanks that you won't be attacked immediately by the second group and archers.
If you didn't enter the room during the encounter, do so now, to kill remaining guards.
![After the battle another, secret door opens - with Varys behind them - The Lions Will [MQ] - p. 2 - Chapter 4 - Alester Sarwyck - Game of Thrones - Game Guide and Walkthrough](https://game.lhg100.com/Article/UploadFiles/201512/2015121519111088.jpg)
After the battle another, secret door opens - with Varys behind them. He'll tell you that the door behind him lead just to the throne room and remind you to not tell anyone about his help.
Point 1
![To get in front of the queen you have to go upstairs - The Lions Will [MQ] - p. 2 - Chapter 4 - Alester Sarwyck - Game of Thrones - Game Guide and Walkthrough](https://game.lhg100.com/Article/UploadFiles/201512/2015121519111076.jpg)
To get in front of the queen you have to go upstairs. At the top of it Golden Cloaks will see you and take to the queen.
Point 2
![When you face the queen, dont refuse to tell how you get out of dungeons (otherwise youll die) - The Lions Will [MQ] - p. 2 - Chapter 4 - Alester Sarwyck - Game of Thrones - Game Guide and Walkthrough](https://game.lhg100.com/Article/UploadFiles/201512/2015121519111010.jpg)
When you face the queen, don't refuse to tell how you get out of dungeons (otherwise you'll die). Instead of this, lie, flatter her highness and at the end ask about taking off the reward for your brother, Gawyn. Queen agrees but you'll be forced to work with the Valarr.
Point 3
![After exiting the throne room youll meet Valarr - The Lions Will [MQ] - p. 2 - Chapter 4 - Alester Sarwyck - Game of Thrones - Game Guide and Walkthrough](https://game.lhg100.com/Article/UploadFiles/201512/2015121519111197.jpg)
After exiting the throne room you'll meet Valarr. Dialogue with him ends the chapter.
![Point 1 - Beauty and the Beast [MQ] - Chapter 5 - Mors Westford - Game of Thrones - Game Guide and Walkthrough](https://game.lhg100.com/Article/UploadFiles/201512/2015121519111131.jpg)
Point 1
![In the introduction you have nothing to do besides listening all dialogues and collecting all information about what youll have to do - Beauty and the Beast [MQ] - Chapter 5 - Mors Westford - Game of Thrones - Game Guide and Walkthrough](https://game.lhg100.com/Article/UploadFiles/201512/2015121519111161.jpg)
In the introduction you have nothing to do besides listening all dialogues and collecting all information about what you'll have to do. Your task is to find a mysterious girl in the Mole's Town and transport her to the safe place with Godrick. After the conversation you can search up the Castle Black using your warg to find two hidden treasures. When you're ready, go to the Mole's Town.
![Point 1 - Beauty and the Beast [MQ] - Chapter 5 - Mors Westford - Game of Thrones - Game Guide and Walkthrough](https://game.lhg100.com/Article/UploadFiles/201512/2015121519111159.jpg)
Point 1
![In the forest, which leads to the Moles Town, you can find few loots using the wargs nose - Beauty and the Beast [MQ] - Chapter 5 - Mors Westford - Game of Thrones - Game Guide and Walkthrough](https://game.lhg100.com/Article/UploadFiles/201512/2015121519111123.jpg)
In the forest, which leads to the Mole's Town, you can find few loots using the warg's nose. Do it at once, mark goals for Mors and pick them up on the way to the city.
Point 2
![In the Godrics people camp talk with Robart wholl introduce you in the current situation - Beauty and the Beast [MQ] - Chapter 5 - Mors Westford - Game of Thrones - Game Guide and Walkthrough](https://game.lhg100.com/Article/UploadFiles/201512/2015121519111177.jpg)
In the Godric's people camp talk with Robart who'll introduce you in the current situation.
Point 3
![When you get the Moles Town itself, just after the gate youll see the Godrics people harming one of the citizen - Beauty and the Beast [MQ] - Chapter 5 - Mors Westford - Game of Thrones - Game Guide and Walkthrough](https://game.lhg100.com/Article/UploadFiles/201512/2015121519111156.jpg)
When you get the Mole's Town itself, just after the gate you'll see the Godric's people harming one of the citizen. After the struggle with Jared, Godric will scold him and you can continue the quest.
Point 4
![Entrance to the Moles Town Tunnels is in the nearby brothel - Beauty and the Beast [MQ] - Chapter 5 - Mors Westford - Game of Thrones - Game Guide and Walkthrough](https://game.lhg100.com/Article/UploadFiles/201512/2015121519111133.jpg)
Entrance to the Mole's Town Tunnels is in the nearby brothel. It's lighted specifically, so you'll surely find it.
![Point 1 - Beauty and the Beast [MQ] - Chapter 5 - Mors Westford - Game of Thrones - Game Guide and Walkthrough](https://game.lhg100.com/Article/UploadFiles/201512/2015121519111238.jpg)
Point 1
![After entering the brothel talk with Sybelle and get an information about location of the Jeyne, girl youre looking for - Beauty and the Beast [MQ] - Chapter 5 - Mors Westford - Game of Thrones - Game Guide and Walkthrough](https://game.lhg100.com/Article/UploadFiles/201512/2015121519111299.jpg)
After entering the brothel talk with Sybelle and get an information about location of the Jeyne, girl you're looking for.
![By the way you can talk with the citizen youve saved before harming, Lommy - Beauty and the Beast [MQ] - Chapter 5 - Mors Westford - Game of Thrones - Game Guide and Walkthrough](https://game.lhg100.com/Article/UploadFiles/201512/2015121519111232.jpg)
By the way you can talk with the citizen you've saved before harming, Lommy. A merchant is standing nearby - you can sell your items and buy a useful precious thing: Silver Ring (health regeneration +10%). You'll find there also few other nice things, but you won't be able to afford them.
Point 2
![Going to the Jeynes room talk to one of the Night Watch ranger, Patrek - Beauty and the Beast [MQ] - Chapter 5 - Mors Westford - Game of Thrones - Game Guide and Walkthrough](https://game.lhg100.com/Article/UploadFiles/201512/2015121519111248.jpg)
Going to the Jeyne's room talk to one of the Night Watch ranger, Patrek. Listen to the story he exchanges with his friend and you get another post in Codex.
Point 3
![In the room where Jeyne should be, you find no one - Beauty and the Beast [MQ] - Chapter 5 - Mors Westford - Game of Thrones - Game Guide and Walkthrough](https://game.lhg100.com/Article/UploadFiles/201512/2015121519111285.jpg)
In the room where Jeyne should be, you find no one. There is a statue of Mother on which you can scent fresh smell of the girl, which your dog can catch.
What is more, the statue is one of the seven you have to find to complete a secondary quest The Faith of Our Ancestors. Remember to give it to the Walder in the Common Hall at the end of this chapter.
Point 4
Scent of the girl will lead you on the highest floor of the brothel.
![In the kitchen, through which the trace leads, you find an angry cook who doesn't like dogs - Beauty and the Beast [MQ] - Chapter 5 - Mors Westford - Game of Thrones - Game Guide and Walkthrough](https://game.lhg100.com/Article/UploadFiles/201512/2015121519111204.jpg)
In the kitchen, through which the trace leads, you find an angry cook who doesn't like dogs. There is a red circle of aggression and if your warg goes inside it, the cook will kick him out. Wait until the chef goes away from door to follow the trace or switch on Mors and talk with him.
Point 5
![After using the stairs behind the kitchen, you find a manhole leading to deeper tunnels - Beauty and the Beast [MQ] - Chapter 5 - Mors Westford - Game of Thrones - Game Guide and Walkthrough](https://game.lhg100.com/Article/UploadFiles/201512/2015121519111260.jpg)
After using the stairs behind the kitchen, you find a manhole leading to deeper tunnels.
Point 6
![Part of the tunnels will be unavailable for you, so switch on dog and follow the yellow scent - Beauty and the Beast [MQ] - Chapter 5 - Mors Westford - Game of Thrones - Game Guide and Walkthrough](https://game.lhg100.com/Article/UploadFiles/201512/2015121519111288.jpg)
Part of the tunnels will be unavailable for you, so switch on dog and follow the yellow scent.
Point 7
![Finally, warg run into a group of citizens, who doesnt like animals - Beauty and the Beast [MQ] - Chapter 5 - Mors Westford - Game of Thrones - Game Guide and Walkthrough](https://game.lhg100.com/Article/UploadFiles/201512/2015121519111389.jpg)
Finally, warg run into a group of citizens, who doesn't like animals. Switch on Mors and travel few following rooms.
Point 8
![On the way listen the citizens conversations and dont forget about looting - Beauty and the Beast [MQ] - Chapter 5 - Mors Westford - Game of Thrones - Game Guide and Walkthrough](https://game.lhg100.com/Article/UploadFiles/201512/2015121519111331.jpg)
On the way listen the citizens' conversations and don't forget about looting.
Point 9
![After exiting flats, control the dog again - Beauty and the Beast [MQ] - Chapter 5 - Mors Westford - Game of Thrones - Game Guide and Walkthrough](https://game.lhg100.com/Article/UploadFiles/201512/2015121519111397.jpg)
After exiting flats, control the dog again. At the end you get on the crossroads, both corridors and scents. An additional scent leads to the precious item, Neck Ring of the First Men (Luck +1).
Yellow scent takes you through the next house and, at last, to the proper corridor.
Point 10
![At the end of this corridor are doors, behind which you find the girl you need - Beauty and the Beast [MQ] - Chapter 5 - Mors Westford - Game of Thrones - Game Guide and Walkthrough](https://game.lhg100.com/Article/UploadFiles/201512/2015121519111340.jpg)
At the end of this corridor are doors, behind which you find the girl you need.
During the conversation with Jeyne she'll tell that your companion isn't a man he says he is. Godric is not a Godric.
![After a short dialogue, the encounter with false messenger begins - Beauty and the Beast [MQ] - Chapter 5 - Mors Westford - Game of Thrones - Game Guide and Walkthrough](https://game.lhg100.com/Article/UploadFiles/201512/2015121519111366.jpg)
After a short dialogue, the encounter with false messenger begins. It shouldn't be too difficult use your abilities and use warg. When health of false Godric descent below half, he'll run away.
Point 10
![But its not over - Beauty and the Beast [MQ] - Chapter 5 - Mors Westford - Game of Thrones - Game Guide and Walkthrough](https://game.lhg100.com/Article/UploadFiles/201512/2015121519111356.jpg)
But it's not over. Three more man will appear. Two have medium and one heavy armor, so adjust your tactic and weapon. Mors won't regenerate between those fights. After the encounter leave Mole's Town Tunnels via nearby door.
![Point 1 - Beauty and the Beast [MQ] - Chapter 5 - Mors Westford - Game of Thrones - Game Guide and Walkthrough](https://game.lhg100.com/Article/UploadFiles/201512/2015121519111327.jpg)
Point 1
![After exiting the tunnel, Patrek, who killed few of Godrics men joins you - Beauty and the Beast [MQ] - Chapter 5 - Mors Westford - Game of Thrones - Game Guide and Walkthrough](https://game.lhg100.com/Article/UploadFiles/201512/2015121519111441.jpg)
After exiting the tunnel, Patrek, who killed few of "Godric's" men joins you. From now on he is a team member who you can control. After a short talk you'll be attacked by the big group of enemies. Remember to use abilities of your new companion, especially those dealing area damage. Use also the warg.
![After this encounter you face a decision: fight with the remaining Godrics fellows personally or use the dog - Beauty and the Beast [MQ] - Chapter 5 - Mors Westford - Game of Thrones - Game Guide and Walkthrough](https://game.lhg100.com/Article/UploadFiles/201512/2015121519111427.jpg)
After this encounter you face a decision: fight with the remaining Godric's fellows personally or use the dog. Depending on difficulty level, the frontal attack can end up very badly - you may be easily surrounded. Using the dog is easier and bloodier.
Points 2-4
![Killing all, spread soldiers is easy - Beauty and the Beast [MQ] - Chapter 5 - Mors Westford - Game of Thrones - Game Guide and Walkthrough](https://game.lhg100.com/Article/UploadFiles/201512/2015121519111486.jpg)
Killing all, spread soldiers is easy. If you've played Metal Gear series, you'll finish them in few minutes. If not, just be careful about the red cone which is a line of enemies sight. As long as you don't step into it, the dog won't be noticed. So attack opponent from the back and tear apart his throat.
![Nearby the [point 4] enemies will be a bit closer to each other, so be more careful - Beauty and the Beast [MQ] - Chapter 5 - Mors Westford - Game of Thrones - Game Guide and Walkthrough](https://game.lhg100.com/Article/UploadFiles/201512/2015121519111478.jpg)
Nearby the [point 4] enemies will be a bit closer to each other, so be more careful. When they notice and kick you, you can begin stealth from the place where you left Mors.
Point 5
![Finally you get to the fireplace at which youd spoken with Robart earlier - Beauty and the Beast [MQ] - Chapter 5 - Mors Westford - Game of Thrones - Game Guide and Walkthrough](https://game.lhg100.com/Article/UploadFiles/201512/2015121519111435.jpg)
Finally you get to the fireplace at which you'd spoken with Robart earlier. Sniff out the hidden items, mark them for Mors and continue the hunt.
Point 6
![When therell be zero soldiers in the vicinity (besides one, look at the point 7) move north and as a warg go under the fallen trees - Beauty and the Beast [MQ] - Chapter 5 - Mors Westford - Game of Thrones - Game Guide and Walkthrough](https://game.lhg100.com/Article/UploadFiles/201512/2015121519111431.jpg)
When there'll be zero soldiers in the vicinity (besides one, look at the point 7) move north and as a warg go under the fallen trees.
![On the other side you listen to the conversation between few Crows and false Godrics men - Beauty and the Beast [MQ] - Chapter 5 - Mors Westford - Game of Thrones - Game Guide and Walkthrough](https://game.lhg100.com/Article/UploadFiles/201512/2015121519111454.jpg)
On the other side you listen to the conversation between few Crows and false Godric's men. This time they're gonna make an ambush - luckily now you're aware of it. Now you can leave the warg's body and reach the fire with Mors. On the way pick up all loots after defeated enemies.
Point 7
![The last one soldier couldnt be killed by the dog, because he couldnt attack him from the back - Beauty and the Beast [MQ] - Chapter 5 - Mors Westford - Game of Thrones - Game Guide and Walkthrough](https://game.lhg100.com/Article/UploadFiles/201512/2015121519111451.jpg)
The last one soldier couldn't be killed by the dog, because he couldn't attack him from the back. But two rangers slash him easily. After that go through the gate he was guarding.
Point 8
![On the nearest platform you meet Nights Watch men who try to get you into the ambush - Beauty and the Beast [MQ] - Chapter 5 - Mors Westford - Game of Thrones - Game Guide and Walkthrough](https://game.lhg100.com/Article/UploadFiles/201512/2015121519111485.jpg)
On the nearest platform you meet Night's Watch men who try to get you into the ambush. Make them aware that you know everything and kill quickly.
Point 9
![At the end you have to kill two soldiers waiting at the exit of the forest - Beauty and the Beast [MQ] - Chapter 5 - Mors Westford - Game of Thrones - Game Guide and Walkthrough](https://game.lhg100.com/Article/UploadFiles/201512/2015121519111568.jpg)
At the end you have to kill two soldiers waiting at the exit of the forest. Surprised by no support of others, will die quickly. After that leave this place and head to the Castle Black.
Point 1
![In the Castle Black Jeor Mormont is waiting for the report - Beauty and the Beast [MQ] - Chapter 5 - Mors Westford - Game of Thrones - Game Guide and Walkthrough](https://game.lhg100.com/Article/UploadFiles/201512/2015121519111509.jpg)
In the Castle Black Jeor Mormont is waiting for the report. But before you talk with him, sell loots in the Common Hall.
![In the meanwhile you can visit Walder and give him the statue, youve found in the brothel - Beauty and the Beast [MQ] - Chapter 5 - Mors Westford - Game of Thrones - Game Guide and Walkthrough](https://game.lhg100.com/Article/UploadFiles/201512/2015121519111574.jpg)
In the meanwhile you can visit Walder and give him the statue, you've found in the brothel.
![Return to Mormont and tell him what happened in Moles Town - Beauty and the Beast [MQ] - Chapter 5 - Mors Westford - Game of Thrones - Game Guide and Walkthrough](https://game.lhg100.com/Article/UploadFiles/201512/2015121519111589.jpg)
Return to Mormont and tell him what happened in Mole's Town. Godric's soldiers will be brought in front of you: you can attach them to the Night Watch or kill for treachery. If you choose the second option, you obtain additional XP and a trait: Unimpeachable Morals (Damage Resistance +1%).
![Point 1 - The Crowns Dog [MQ] - Chapter 6 - Alester Sarwyck - Game of Thrones - Game Guide and Walkthrough](https://game.lhg100.com/Article/UploadFiles/201512/2015121519111536.jpg)
Point 1
![Wait in the vestibule for Valarr and queen Cersei - The Crowns Dog [MQ] - Chapter 6 - Alester Sarwyck - Game of Thrones - Game Guide and Walkthrough](https://game.lhg100.com/Article/UploadFiles/201512/2015121519111553.jpg)
Wait in the vestibule for Valarr and queen Cersei. In the meantime you can collect inscribes to the Codex which are on the paintings. Queen will sent you on a mission with Valarr. How much uncomfortable it could be, to work with your half-brother, you have no choice.
![Point 1 - The Crowns Dog [MQ] - Chapter 6 - Alester Sarwyck - Game of Thrones - Game Guide and Walkthrough](https://game.lhg100.com/Article/UploadFiles/201512/2015121519111567.jpg)
Point 1
![With Valarr meet his Bloodseekers - The Crowns Dog [MQ] - Chapter 6 - Alester Sarwyck - Game of Thrones - Game Guide and Walkthrough](https://game.lhg100.com/Article/UploadFiles/201512/2015121519111595.jpg)
With Valarr meet his Bloodseekers. You'll quickly recognize a false Godric, who was beaten by the Mors. His real name is Yohn, and he is one of Valarr's officer.
You're looking for Harry, a boy, who queen wants to see dead. From now on during the dialogues you can speak both, for Alester and Valarr. As you can easily figure out, Valarr's lines are the mean ones and lead to bloody solutions, when Alester will be trying to make things peacefully.
![If you choose Valarrs statement, the fight begins immediately after getting into potters territory - The Crowns Dog [MQ] - Chapter 6 - Alester Sarwyck - Game of Thrones - Game Guide and Walkthrough](https://game.lhg100.com/Article/UploadFiles/201512/2015121519111675.jpg)
If you choose Valarr's statement, the fight begins immediately after getting into potters' territory. If Alester intervenes, then you'll be able to speak with master Jaremy and gain some information.
Point 2
![Whatever you do, finally youll have to fight with Hens guards - The Crowns Dog [MQ] - Chapter 6 - Alester Sarwyck - Game of Thrones - Game Guide and Walkthrough](https://game.lhg100.com/Article/UploadFiles/201512/2015121519111650.jpg)
Whatever you do, finally you'll have to fight with Hen's guards. During the battle remember about Valarr's skills, like Upheaval and Massacre. If Alester uses distance weapon, Valarr's skills will make easier to shot down enemies.
Point 3
After the encounter, enter the pottery where you see Harry who starts running. Follow him and don't lose from your eyes, or you'll have to go back to the pottery and torture the owner. Harry will fall barrels under you feet and mix with the crowd, so act quickly and omit the obstacles. Harry's route is marked on the map with the orange color.
![Omitting the few first barrels wont be difficult but when Harry blocks your way on the marketplace youll have run around the pillars on the left and then turn sharply right or youll lose him - The Crowns Dog [MQ] - Chapter 6 - Alester Sarwyck - Game of Thrones - Game Guide and Walkthrough](https://game.lhg100.com/Article/UploadFiles/201512/2015121519111674.jpg)
Omitting the few first barrels won't be difficult but when Harry blocks your way on the marketplace you'll have run around the pillars on the left and then turn sharply right or you'll lose him.
![Harry will run on the upper alleys of the city, and youll have to pass small groups of people on your way - The Crowns Dog [MQ] - Chapter 6 - Alester Sarwyck - Game of Thrones - Game Guide and Walkthrough](https://game.lhg100.com/Article/UploadFiles/201512/2015121519111666.jpg)
Harry will run on the upper alleys of the city, and you'll have to pass small groups of people on your way.
![Harry runs down, on the square in front of the Sarwyck Manse - The Crowns Dog [MQ] - Chapter 6 - Alester Sarwyck - Game of Thrones - Game Guide and Walkthrough](https://game.lhg100.com/Article/UploadFiles/201512/2015121519111670.jpg)
Harry runs down, on the square in front of the Sarwyck Manse. Here your paths split, because young lad jumps behind the gate on the left.
Point 4
![To continue a pursuit run to the gate in the next alley - The Crowns Dog [MQ] - Chapter 6 - Alester Sarwyck - Game of Thrones - Game Guide and Walkthrough](https://game.lhg100.com/Article/UploadFiles/201512/2015121519111680.jpg)
To continue a pursuit run to the gate in the next alley. You've lost a guy, but not for long.
![Just after opening the gate youll see the runaway again - The Crowns Dog [MQ] - Chapter 6 - Alester Sarwyck - Game of Thrones - Game Guide and Walkthrough](https://game.lhg100.com/Article/UploadFiles/201512/2015121519111697.jpg)
Just after opening the gate you'll see the runaway again. Continue the chase, until Harry gets to the Hen House.
Point 5
![In front of the Hen House Hens bodyguards are waiting for you - The Crowns Dog [MQ] - Chapter 6 - Alester Sarwyck - Game of Thrones - Game Guide and Walkthrough](https://game.lhg100.com/Article/UploadFiles/201512/2015121519111775.jpg)
In front of the Hen House Hen's bodyguards are waiting for you. Only few of them, so the battle should be quick. After that, Valarr's men join you and you enter the Hen House, where Harry is hiding.
![Point 1 - The Crowns Dog [MQ] - Chapter 6 - Alester Sarwyck - Game of Thrones - Game Guide and Walkthrough](https://game.lhg100.com/Article/UploadFiles/201512/2015121519111796.jpg)
Point 1
![After going inside, youll see soldiers waiting in the main hall - The Crowns Dog [MQ] - Chapter 6 - Alester Sarwyck - Game of Thrones - Game Guide and Walkthrough](https://game.lhg100.com/Article/UploadFiles/201512/2015121519111715.jpg)
After going inside, you'll see soldiers waiting in the main hall. Prepare to the biggest battle so far.
Point 2
![When you enter the hall, you find a man, whos pseudo is the Hen - The Crowns Dog [MQ] - Chapter 6 - Alester Sarwyck - Game of Thrones - Game Guide and Walkthrough](https://game.lhg100.com/Article/UploadFiles/201512/2015121519111726.jpg)
When you enter the hall, you find a man, who's pseudo is the Hen. It's no one else that true Ser Godric Donnerly. Unfortunately, your orders are to kill this man. Godric will run to the cellar and you'll be attacked by all guards. Remember, that you have Valarr and his men on your side. Use the area damage and stunning skills of Valarr and eliminate single enemies by yourself. Remember about frequently using abilities of both heroes and the battle will be much easier than it seems to be.
Point 3
![After the battle turn left, and follow the Hen - The Crowns Dog [MQ] - Chapter 6 - Alester Sarwyck - Game of Thrones - Game Guide and Walkthrough](https://game.lhg100.com/Article/UploadFiles/201512/2015121519111787.jpg)
After the battle turn left, and follow the Hen. On the way you meet more guards.
Point 4
![After going downstairs to the cellar youll see a single soldier - its an ambush - The Crowns Dog [MQ] - Chapter 6 - Alester Sarwyck - Game of Thrones - Game Guide and Walkthrough](https://game.lhg100.com/Article/UploadFiles/201512/2015121519111714.jpg)
After going downstairs to the cellar you'll see a single soldier - it's an ambush. When you get closer, more enemies will run out from the left..
Point 5
![At last you get to the final room, where Godric/Hen is waiting for you with his men - The Crowns Dog [MQ] - Chapter 6 - Alester Sarwyck - Game of Thrones - Game Guide and Walkthrough](https://game.lhg100.com/Article/UploadFiles/201512/2015121519111776.jpg)
At last you get to the final room, where Godric/Hen is waiting for you with his men. It's (theoretically) the most difficult battle so far, so save the game before you cross the doorstep.
Key to the win (rather easy, if you don't make a mistake) is constant distracting the Hen, especially by stumbling, paralysing and stunning. Hen has a Wildfire which can defeat you quickly. When you see that Godric is preparing to use a fire, interrupt it at all costs. It shouldn't be problematic as any of your hero has enough energy to use any interrupting skill. Meanwhile get rid of remaining guards.
Point 6
![After the encounter collect loots (especially keys and Hens weapon) and concentrate on Harry - The Crowns Dog [MQ] - Chapter 6 - Alester Sarwyck - Game of Thrones - Game Guide and Walkthrough](https://game.lhg100.com/Article/UploadFiles/201512/2015121519111888.jpg)
After the encounter collect loots (especially keys and Hen's weapon) and concentrate on Harry. Boy have to die, because that's what the queen ordered. It can be done by Alister (honorable) or by Valarr (brutally).
![Before you leave this room, look at the candlestick behind Harry - The Crowns Dog [MQ] - Chapter 6 - Alester Sarwyck - Game of Thrones - Game Guide and Walkthrough](https://game.lhg100.com/Article/UploadFiles/201512/2015121519111860.jpg)
Before you leave this room, look at the candlestick behind Harry. Use a R'gllor's Vision and you see a mechanism opening the secret passage. You'll find a treasure in the chest - Tyrell Cloak.
Point 7
![Having the keys in pocket, go upstairs, looting everything on your way - The Crowns Dog [MQ] - Chapter 6 - Alester Sarwyck - Game of Thrones - Game Guide and Walkthrough](https://game.lhg100.com/Article/UploadFiles/201512/2015121519111816.jpg)
Having the keys in pocket, go upstairs, looting everything on your way.
![At the end of corridor you find a room with waiting Yohn - The Crowns Dog [MQ] - Chapter 6 - Alester Sarwyck - Game of Thrones - Game Guide and Walkthrough](https://game.lhg100.com/Article/UploadFiles/201512/2015121519111886.jpg)
At the end of corridor you find a room with waiting Yohn. In the chest he's trying to open are documents you're looking for. After taking them, leave Hen House and return to Throne Room.
![Point 1 - The Crowns Dog [MQ] - Chapter 6 - Alester Sarwyck - Game of Thrones - Game Guide and Walkthrough](https://game.lhg100.com/Article/UploadFiles/201512/2015121519111821.jpg)
Point 1
![With Valarr report to the queen - The Crowns Dog [MQ] - Chapter 6 - Alester Sarwyck - Game of Thrones - Game Guide and Walkthrough](https://game.lhg100.com/Article/UploadFiles/201512/2015121519111841.jpg)
With Valarr report to the queen. If you chose Alester's statement, queen would be satisfied with minimizing the blood spilling. Queen gives you another task - find a Jeyne Greystone, the girl you've met in the previous chapter.
Point 2
![When you exit the Red Keep youll meet Lord Arwood Harlton - The Crowns Dog [MQ] - Chapter 6 - Alester Sarwyck - Game of Thrones - Game Guide and Walkthrough](https://game.lhg100.com/Article/UploadFiles/201512/2015121519111845.jpg)
When you exit the Red Keep you'll meet Lord Arwood Harlton. You'd met him on your father's funeral. He'll ask you for meeting in more discreet place, offering an interesting information about your lost brother, Gawen.
![Point 1 - Silence in the Ranks [SQ] - Chapter 6 - Alester Sarwyck - Game of Thrones - Game Guide and Walkthrough](https://game.lhg100.com/Article/UploadFiles/201512/2015121519111896.jpg)
Point 1
![In the throne room you met Uthor, knight - Silence in the Ranks [SQ] - Chapter 6 - Alester Sarwyck - Game of Thrones - Game Guide and Walkthrough](https://game.lhg100.com/Article/UploadFiles/201512/2015121519111902.jpg)
In the throne room you met Uthor, knight. He is one of the Godric's house member, who you've killed recently. He came here to complain about queen. If you try to solve this quest without blood (what impressed queen) try to convince him, what won't work for the first try.
Point 2
Tell about this event queen and try to follow her will. She doesn't want a blood in the throne room.
Return to Uthor and frighten him, making him aware about the consequences of his behavior. He'll calm down and go away.
Return to the queen who will be satisfied about what you've done. Besides XP you receive a precious shiny thing: Ring of the Lioness.
![Point 1 - Stray Dog [MQ] - p. 1 - Chapter 7 - Mors Westford - Game of Thrones - Game Guide and Walkthrough](https://game.lhg100.com/Article/UploadFiles/201512/2015121519111908.jpg)
Point 1
![After introductory dialogue with Mormonr, you receive two quests - Stray Dog [MQ] - p. 1 - Chapter 7 - Mors Westford - Game of Thrones - Game Guide and Walkthrough](https://game.lhg100.com/Article/UploadFiles/201512/2015121519111979.jpg)
After introductory dialogue with Mormonr, you receive two quests. Main one is to find the false Godric and the secondary is a recrutation of new members to the Night Watch. You will be doing the New Blood quest in four next chapters with Mors.
Point 2
![Next to the Mormont you find Adam Flowers, man who orders you an investigation about traitors on the Castle Black - Stray Dog [MQ] - p. 1 - Chapter 7 - Mors Westford - Game of Thrones - Game Guide and Walkthrough](https://game.lhg100.com/Article/UploadFiles/201512/2015121519111924.jpg)
Next to the Mormont you find Adam Flowers, man who orders you an investigation about traitors on the Castle Black. Accept the quest The Black Bloodhound and listen what he can say about every suspected.
Point 3
After completing the secondary quest, you need just to visit merchants and leave the Castle Black.
![Point 1 - Stray Dog [MQ] - p. 1 - Chapter 7 - Mors Westford - Game of Thrones - Game Guide and Walkthrough](https://game.lhg100.com/Article/UploadFiles/201512/2015121519111982.jpg)
Point 1
Under the ruined house you'll see one of your black brothers torturing by traitors. Eliminate them and Lothor, the saved man, will lead you to the man who tried to bribe him.
Point 2
![Follow Lothor to the place where he has seen Godrics men - Stray Dog [MQ] - p. 1 - Chapter 7 - Mors Westford - Game of Thrones - Game Guide and Walkthrough](https://game.lhg100.com/Article/UploadFiles/201512/2015121519111938.jpg)
Follow Lothor to the place where he've seen Godric's men. The corrupter is a man you know - Jared.
![Jared will attack you with his men, full of fear - Stray Dog [MQ] - p. 1 - Chapter 7 - Mors Westford - Game of Thrones - Game Guide and Walkthrough](https://game.lhg100.com/Article/UploadFiles/201512/2015121519112025.jpg)
Jared will attack you with his men, full of fear. Defeating them shouldn't be problematic. Try only to interrupt Jared's skills when you can.
Point 3
![After killing Jared and his band, switch on warg and notice three scents leading to Moles Town - Stray Dog [MQ] - p. 1 - Chapter 7 - Mors Westford - Game of Thrones - Game Guide and Walkthrough](https://game.lhg100.com/Article/UploadFiles/201512/2015121519112016.jpg)
After killing Jared and his band, switch on warg and notice three scents leading to Mole's Town. On the way one of them will turn sharply on left, so firstly follow him.
Point 4
![It quickly turns out that this scent belongs to the traitor who was killed and goes back to the exit from the forest - Stray Dog [MQ] - p. 1 - Chapter 7 - Mors Westford - Game of Thrones - Game Guide and Walkthrough](https://game.lhg100.com/Article/UploadFiles/201512/2015121519112054.jpg)
It quickly turns out that this scent belongs to the traitor who was killed and goes back to the exit from the forest.
Point 5
![The smell takes you to Raff, an old friend of Mors - Stray Dog [MQ] - p. 1 - Chapter 7 - Mors Westford - Game of Thrones - Game Guide and Walkthrough](https://game.lhg100.com/Article/UploadFiles/201512/2015121519112031.jpg)
The smell takes you to Raff, an old "friend" of Mors. Move to him and switch on Mors.
![After short discussion the encounter begins - Stray Dog [MQ] - p. 1 - Chapter 7 - Mors Westford - Game of Thrones - Game Guide and Walkthrough](https://game.lhg100.com/Article/UploadFiles/201512/2015121519112019.jpg)
After short discussion the encounter begins. After the fight ask dying Raff about Godric.
Switch on warg again and return to the place where three scents split.
Point 6
![Follow two remaining traces until one of them turns left, behind the gate of Moles Town - Stray Dog [MQ] - p. 1 - Chapter 7 - Mors Westford - Game of Thrones - Game Guide and Walkthrough](https://game.lhg100.com/Article/UploadFiles/201512/2015121519112073.jpg)
Follow two remaining traces until one of them turns left, behind the gate of Mole's Town. Sniff hidden coins in the hollow trunk.
![When you pick up the gold, its owner appears - Stray Dog [MQ] - p. 1 - Chapter 7 - Mors Westford - Game of Thrones - Game Guide and Walkthrough](https://game.lhg100.com/Article/UploadFiles/201512/2015121519112028.jpg)
When you pick up the gold, its "owner" appears. It's a swindler - prove it, and he starts running away.
Point 7
![Last trace leads to the brothel in Moles Town - Stray Dog [MQ] - p. 1 - Chapter 7 - Mors Westford - Game of Thrones - Game Guide and Walkthrough](https://game.lhg100.com/Article/UploadFiles/201512/2015121519112076.jpg)
Last trace leads to the brothel in Mole's Town.
![Point 1 - Stray Dog [MQ] - p. 1 - Chapter 7 - Mors Westford - Game of Thrones - Game Guide and Walkthrough](https://game.lhg100.com/Article/UploadFiles/201512/2015121519112095.jpg)
Point 1
![Talk with the owner inside, shell tell you where you can find remaining traitors and give keys to their rooms - Stray Dog [MQ] - p. 1 - Chapter 7 - Mors Westford - Game of Thrones - Game Guide and Walkthrough](https://game.lhg100.com/Article/UploadFiles/201512/2015121519112169.jpg)
Talk with the owner inside, she'll tell you where you can find remaining traitors and give keys to their rooms.
Point 2
![Go on the lower level of brothel and enter the room where traitors of Night Watch have fun with girls - Stray Dog [MQ] - p. 1 - Chapter 7 - Mors Westford - Game of Thrones - Game Guide and Walkthrough](https://game.lhg100.com/Article/UploadFiles/201512/2015121519112188.jpg)
Go on the lower level of brothel and enter the room where traitors of Night Watch have fun with girls. You'll get from them an information who the "Godric" really is and how find him. In return you can leave their fate for Mormont's decision or kill them.
Point 3
![After exiting the room, you meet two rangers sent by the saved Lothor - Stray Dog [MQ] - p. 1 - Chapter 7 - Mors Westford - Game of Thrones - Game Guide and Walkthrough](https://game.lhg100.com/Article/UploadFiles/201512/2015121519112111.jpg)
After exiting the room, you meet two rangers sent by the saved Lothor. From now on Myles and Wat will be guarding Jeyna, when you and Patrek will face more serious enemies.
Point 4
![Go downstairs through the kitchen - Stray Dog [MQ] - p. 1 - Chapter 7 - Mors Westford - Game of Thrones - Game Guide and Walkthrough](https://game.lhg100.com/Article/UploadFiles/201512/2015121519112185.jpg)
Go downstairs through the kitchen. But before you return to the main quest, remember about the recruit Willow mentioned about.
Point 5
![Now approach door to the cellar, say proper password, which traitors told you and rush into the room - Stray Dog [MQ] - p. 1 - Chapter 7 - Mors Westford - Game of Thrones - Game Guide and Walkthrough](https://game.lhg100.com/Article/UploadFiles/201512/2015121519112184.jpg)
Now approach door to the cellar, say proper password, which traitors told you and rush into the room.
Point 6
![Youll stand in front of closed rooms with Yohns men inside - Stray Dog [MQ] - p. 1 - Chapter 7 - Mors Westford - Game of Thrones - Game Guide and Walkthrough](https://game.lhg100.com/Article/UploadFiles/201512/2015121519112173.jpg)
You'll stand in front of closed rooms with Yohn's men inside. You can kill them by yourself if you'd like, or, what is more effective, switch on dog and tear their throats one after another. There are passages nearby door to every room, what makes it easy.
![1 - Stray Dog [MQ] - p. 1 - Chapter 7 - Mors Westford - Game of Thrones - Game Guide and Walkthrough](https://game.lhg100.com/Article/UploadFiles/201512/2015121519112172.jpg)
After killing three enemies, return to the human form and pick up all loots.
Point 7
![When you reach another row of closed doors repeat the dogs actions and kill as many as you can - Stray Dog [MQ] - p. 1 - Chapter 7 - Mors Westford - Game of Thrones - Game Guide and Walkthrough](https://game.lhg100.com/Article/UploadFiles/201512/2015121519112112.jpg)
When you reach another row of closed doors repeat the dog's actions and kill as many as you can.
![Some of them are wandering in the corridor, so attack them only when theyre alone - Stray Dog [MQ] - p. 1 - Chapter 7 - Mors Westford - Game of Thrones - Game Guide and Walkthrough](https://game.lhg100.com/Article/UploadFiles/201512/2015121519112292.jpg)
Some of them are wandering in the corridor, so attack them only when they're alone.
![Holes in walls let you enter rooms with guards - Stray Dog [MQ] - p. 1 - Chapter 7 - Mors Westford - Game of Thrones - Game Guide and Walkthrough](https://game.lhg100.com/Article/UploadFiles/201512/2015121519112213.jpg)
Holes in walls let you enter rooms with guards.
![After cleaning up first few rooms youll be able to bit for death the guard who observes the northern part of the corridor - Stray Dog [MQ] - p. 1 - Chapter 7 - Mors Westford - Game of Thrones - Game Guide and Walkthrough](https://game.lhg100.com/Article/UploadFiles/201512/2015121519112293.jpg)
After cleaning up first few rooms you'll be able to bit for death the guard who observes the northern part of the corridor.
![On the opposite to the last bitten guard you find a passage to the room where the last of Yohns man is waiting - Stray Dog [MQ] - p. 1 - Chapter 7 - Mors Westford - Game of Thrones - Game Guide and Walkthrough](https://game.lhg100.com/Article/UploadFiles/201512/2015121519112264.jpg)
On the opposite to the last bitten guard you find a passage to the room where the last of Yohn's man is waiting. The rest (up to the point 9) is "unbiteable".
![Switch on Mors - Stray Dog [MQ] - p. 1 - Chapter 7 - Mors Westford - Game of Thrones - Game Guide and Walkthrough](https://game.lhg100.com/Article/UploadFiles/201512/2015121519112287.jpg)
Switch on Mors. Remaining warriors are standing solo or in pairs.
Point 8
![Also here you find a group of enemies which dog couldnt beat - Stray Dog [MQ] - p. 1 - Chapter 7 - Mors Westford - Game of Thrones - Game Guide and Walkthrough](https://game.lhg100.com/Article/UploadFiles/201512/2015121519112229.jpg)
Also here you find a group of enemies which dog couldn't beat. After killing them personally, search carefully rooms from [points 7 and 8]. In one of them you find precious Baratheon Guard Shield.
Before moving on, stop at the store by the door to the next corridors. Here control the warg again.
Point 9
![In the last corridors youll be able to bit three more enemies and eavesdrop dialogue of next two - Stray Dog [MQ] - p. 1 - Chapter 7 - Mors Westford - Game of Thrones - Game Guide and Walkthrough](https://game.lhg100.com/Article/UploadFiles/201512/2015121519112200.jpg)
In the last corridors you'll be able to bit three more enemies and eavesdrop dialogue of next two.
![2 - Stray Dog [MQ] - p. 1 - Chapter 7 - Mors Westford - Game of Thrones - Game Guide and Walkthrough](https://game.lhg100.com/Article/UploadFiles/201512/2015121519112241.jpg)
![3 - Stray Dog [MQ] - p. 1 - Chapter 7 - Mors Westford - Game of Thrones - Game Guide and Walkthrough](https://game.lhg100.com/Article/UploadFiles/201512/2015121519112259.jpg)
![Two last stands close to each other, so use swords - Stray Dog [MQ] - p. 1 - Chapter 7 - Mors Westford - Game of Thrones - Game Guide and Walkthrough](https://game.lhg100.com/Article/UploadFiles/201512/2015121519112375.jpg)
Two last stands close to each other, so use swords. After searching rooms, exit tunnels.
![Point 1 - Stray Dog [MQ] - p. 2 - Chapter 7 - Mors Westford - Game of Thrones - Game Guide and Walkthrough](https://game.lhg100.com/Article/UploadFiles/201512/2015121519112369.jpg)
Point 1
![Just after entering The Gift youll see a camp of Yohn, our false Godric - Stray Dog [MQ] - p. 2 - Chapter 7 - Mors Westford - Game of Thrones - Game Guide and Walkthrough](https://game.lhg100.com/Article/UploadFiles/201512/2015121519112386.jpg)
Just after entering The Gift you'll see a camp of Yohn, our false Godric. In talk with Patrek choose a tactic way, to eliminate single groups of guards around the camp. Patrek splits from the team and wait with companions for you.
Point 2
![Firstly eliminate two guards on the south - Stray Dog [MQ] - p. 2 - Chapter 7 - Mors Westford - Game of Thrones - Game Guide and Walkthrough](https://game.lhg100.com/Article/UploadFiles/201512/2015121519112326.jpg)
Firstly eliminate two guards on the south. Dog won't be useful, because they're close to each other. After the encounter switch to the warg and move to the next point.
Point 3
This guard, luckily, is an idiot and watch nearest trees instead of guarding the camp. Kill him.
Point 4
![Last one sentinel is very close to the previous one, thanks to which you easily tear his throat - Stray Dog [MQ] - p. 2 - Chapter 7 - Mors Westford - Game of Thrones - Game Guide and Walkthrough](https://game.lhg100.com/Article/UploadFiles/201512/2015121519112395.jpg)
Last one sentinel is very close to the previous one, thanks to which you easily tear his throat. This place is ideal for your bowman.
Point 5
![After eliminating all watchmen return to Patrek and tell him that youre ready and found good position for a shooter - Stray Dog [MQ] - p. 2 - Chapter 7 - Mors Westford - Game of Thrones - Game Guide and Walkthrough](https://game.lhg100.com/Article/UploadFiles/201512/2015121519112370.jpg)
After eliminating all watchmen return to Patrek and tell him that you're ready and found good position for a shooter.
![Thanks to eliminating all idiots from Yohns group the swindler himself will be an easily target - Stray Dog [MQ] - p. 2 - Chapter 7 - Mors Westford - Game of Thrones - Game Guide and Walkthrough](https://game.lhg100.com/Article/UploadFiles/201512/2015121519112358.jpg)
Thanks to eliminating all idiots from Yohn's group the swindler himself will be an easily target. Try to immobilize him and cause bleeding, and you'll win quickly. After that conversation with Jeyna begins - tell her to wait a while. In the meantime collect all treasures, with Yohn's weapon, the Parade Sword.
![After collecting loots talk with Jeyna and say goodbye to Nights brothers - Stray Dog [MQ] - p. 2 - Chapter 7 - Mors Westford - Game of Thrones - Game Guide and Walkthrough](https://game.lhg100.com/Article/UploadFiles/201512/2015121519112408.jpg)
After collecting loots talk with Jeyna and say goodbye to Night's brothers. You'll go to the Riverlands with the girl to talk about her, King Robert and yourself.
![Point 1 - Stray Dog [MQ] - p. 2 - Chapter 7 - Mors Westford - Game of Thrones - Game Guide and Walkthrough](https://game.lhg100.com/Article/UploadFiles/201512/2015121519112448.jpg)
Point 1
![After reaching your family house, search it and watch Mors memories - Stray Dog [MQ] - p. 2 - Chapter 7 - Mors Westford - Game of Thrones - Game Guide and Walkthrough](https://game.lhg100.com/Article/UploadFiles/201512/2015121519112498.jpg)
After reaching your family house, search it and watch Mors' memories. You'll find few useful items.
![Among family treasures youll find a statue of Father, required to the quest The Faith of Our Ancestors - Stray Dog [MQ] - p. 2 - Chapter 7 - Mors Westford - Game of Thrones - Game Guide and Walkthrough](https://game.lhg100.com/Article/UploadFiles/201512/2015121519112435.jpg)
Among family treasures you'll find a statue of Father, required to the quest The Faith of Our Ancestors.
Point 2
![After exiting through back doors the cut scene displays, which explains few dramatic facts about Mors and Jeyna - Stray Dog [MQ] - p. 2 - Chapter 7 - Mors Westford - Game of Thrones - Game Guide and Walkthrough](https://game.lhg100.com/Article/UploadFiles/201512/2015121519112465.jpg)
After exiting through back doors the cut scene displays, which explains few dramatic facts about Mors and Jeyna. Chapter ends with an arrival of unidentified intruders.
![Point 1 - The Black Bloodhound [SQ] - Chapter 7 - Mors Westford - Game of Thrones - Game Guide and Walkthrough](https://game.lhg100.com/Article/UploadFiles/201512/2015121519112415.jpg)
Point 1
![Next to the Mormont you find Adam Flowers, man who orders you an investigation about traitors on the Castle Black - The Black Bloodhound [SQ] - Chapter 7 - Mors Westford - Game of Thrones - Game Guide and Walkthrough](https://game.lhg100.com/Article/UploadFiles/201512/2015121519112483.jpg)
Next to the Mormont you find Adam Flowers, man who orders you an investigation about traitors on the Castle Black. Accept the quest The Black Bloodhound and listen what he can say about every suspected.
Point 2
![First talk with Trebor and Artur - The Black Bloodhound [SQ] - Chapter 7 - Mors Westford - Game of Thrones - Game Guide and Walkthrough](https://game.lhg100.com/Article/UploadFiles/201512/2015121519112444.jpg)
First talk with Trebor and Artur. Trebor will be easily teased up and admit to murder one of traitors. You can leave it (they killed a traitor!) or report to Mormont. These are not traitors you're looking for.
Point 3
![Then accost Bartram on the same floor - The Black Bloodhound [SQ] - Chapter 7 - Mors Westford - Game of Thrones - Game Guide and Walkthrough](https://game.lhg100.com/Article/UploadFiles/201512/2015121519112528.jpg)
Then accost Bartram on the same floor. He'll speak against Janos.
Point 4
![During talking with Janos admit that you know about his intriguing - The Black Bloodhound [SQ] - Chapter 7 - Mors Westford - Game of Thrones - Game Guide and Walkthrough](https://game.lhg100.com/Article/UploadFiles/201512/2015121519112590.jpg)
During talking with Janos admit that you know about his intriguing. He'll admit that he stole gold from false Godric's men, but playing cards and dices. It's not your traitor. If you don't give him away, he'll pay you.
Point 5
![Old Grance did nothing, besides treating Godric friendly - The Black Bloodhound [SQ] - Chapter 7 - Mors Westford - Game of Thrones - Game Guide and Walkthrough](https://game.lhg100.com/Article/UploadFiles/201512/2015121519112516.jpg)
Old Grance did nothing, besides treating Godric friendly. He'll inform you that he saw Bartram talking with the swindler alone. Return to him. Caught on cheating, Bartram will try to fool you. Switch on dog and catch his scent.
Point 6
![Bartrams smell leads to the guard who stands by the doors to the Common Hall - The Black Bloodhound [SQ] - Chapter 7 - Mors Westford - Game of Thrones - Game Guide and Walkthrough](https://game.lhg100.com/Article/UploadFiles/201512/2015121519112525.jpg)
Bartram's smell leads to the guard who stands by the doors to the Common Hall. Wait until he starts digging in the bag with supplies and call Mors.
![Guard wont be pleased with your discover and attacks you - The Black Bloodhound [SQ] - Chapter 7 - Mors Westford - Game of Thrones - Game Guide and Walkthrough](https://game.lhg100.com/Article/UploadFiles/201512/2015121519112562.jpg)
Guard won't be pleased with your discover and attacks you. After that collect all Bartram's things from the bag. Then go talk with him again.
![After killing his fellow, show all evidences about planning desertion to the Bartram - The Black Bloodhound [SQ] - Chapter 7 - Mors Westford - Game of Thrones - Game Guide and Walkthrough](https://game.lhg100.com/Article/UploadFiles/201512/2015121519112563.jpg)
After killing his fellow, show all evidences about planning desertion to the Bartram. Traitor decides to fight to the end, so kill him quickly.
![After listening to all suspects and Bartrams execution, return to Addam - The Black Bloodhound [SQ] - Chapter 7 - Mors Westford - Game of Thrones - Game Guide and Walkthrough](https://game.lhg100.com/Article/UploadFiles/201512/2015121519112508.jpg)
After listening to all suspects and Bartram's execution, return to Addam. Reveal the true traitor and innocence of others.
![Point 1 - A New Hope [MQ] - p. 1 - Chapter 8 - Alester Sarwyck - Game of Thrones - Game Guide and Walkthrough](https://game.lhg100.com/Article/UploadFiles/201512/2015121519112588.jpg)
Point 1
![At the beginning of this chapter meet with Lord Harlton - A New Hope [MQ] - p. 1 - Chapter 8 - Alester Sarwyck - Game of Thrones - Game Guide and Walkthrough](https://game.lhg100.com/Article/UploadFiles/201512/2015121519112620.jpg)
At the beginning of this chapter meet with Lord Harlton. His residence lies nearby Chataya's.
![Arwood Harlton tells you his thoughts about Gawen and orders to search citys sewers - A New Hope [MQ] - p. 1 - Chapter 8 - Alester Sarwyck - Game of Thrones - Game Guide and Walkthrough](https://game.lhg100.com/Article/UploadFiles/201512/2015121519112639.jpg)
Arwood Harlton tells you his thoughts about Gawen and orders to search city's sewers. His man, Ser Desmond joins you. His skills will be very useful.
Point 2
![Desmond leads you to the closest entrance to Kings Landing Sewers, by the market square - A New Hope [MQ] - p. 1 - Chapter 8 - Alester Sarwyck - Game of Thrones - Game Guide and Walkthrough](https://game.lhg100.com/Article/UploadFiles/201512/2015121519112698.jpg)
Desmond leads you to the closest entrance to King's Landing Sewers, by the market square. Before going there make sure, that you have everything you need.
![Point 1 - A New Hope [MQ] - p. 1 - Chapter 8 - Alester Sarwyck - Game of Thrones - Game Guide and Walkthrough](https://game.lhg100.com/Article/UploadFiles/201512/2015121519112651.jpg)
Point 1
![Move along the corridors until you find door leading to the arena - A New Hope [MQ] - p. 1 - Chapter 8 - Alester Sarwyck - Game of Thrones - Game Guide and Walkthrough](https://game.lhg100.com/Article/UploadFiles/201512/2015121519112608.jpg)
Move along the corridors until you find door leading to the arena. In this part of sewers is nothing dangerous.
Point 2
![Search arena and remember it, because youll be back here further in this chapter and during one of the secondary quests - A New Hope [MQ] - p. 1 - Chapter 8 - Alester Sarwyck - Game of Thrones - Game Guide and Walkthrough](https://game.lhg100.com/Article/UploadFiles/201512/2015121519112681.jpg)
Search arena and remember it, because you'll be back here further in this chapter and during one of the secondary quests. Leave arena going on southern-west.
Point 3
![On the way you meet two Reapers - A New Hope [MQ] - p. 1 - Chapter 8 - Alester Sarwyck - Game of Thrones - Game Guide and Walkthrough](https://game.lhg100.com/Article/UploadFiles/201512/2015121519112658.jpg)
On the way you meet two Reapers. Kill them ASAP.
![After a while from the doors on both sides enemies will attack - A New Hope [MQ] - p. 1 - Chapter 8 - Alester Sarwyck - Game of Thrones - Game Guide and Walkthrough](https://game.lhg100.com/Article/UploadFiles/201512/2015121519112713.jpg)
After a while from the doors on both sides enemies will attack. Send Desmond to deal with of the group, while you're be killing the second one. After eliminating them search the bodies they were robbing. Pick up Key to the Sewer Drain, needed to open the gate on the beginning of sewers.
Point 4
![After entering this room youll hear two Reapers talking about their last task, when you approach to them the fight bursts - A New Hope [MQ] - p. 1 - Chapter 8 - Alester Sarwyck - Game of Thrones - Game Guide and Walkthrough](https://game.lhg100.com/Article/UploadFiles/201512/2015121519112793.jpg)
After entering this room you'll hear two Reapers talking about their last task, when you approach to them the fight bursts. They're well equipped and armored so try to immobilize/prostrate them as often as possible.
![One of Reapers is using the Wildfire - A New Hope [MQ] - p. 1 - Chapter 8 - Alester Sarwyck - Game of Thrones - Game Guide and Walkthrough](https://game.lhg100.com/Article/UploadFiles/201512/2015121519112724.jpg)
One of Reapers is using the Wildfire. When you see that he is preparing to do so, interrupt it at all costs, because they fight may end up very soon. Very badly for you, of course.
![After the encounter you can interrogate Porky, one of Reapers - A New Hope [MQ] - p. 1 - Chapter 8 - Alester Sarwyck - Game of Thrones - Game Guide and Walkthrough](https://game.lhg100.com/Article/UploadFiles/201512/2015121519112744.jpg)
After the encounter you can interrogate Porky, one of Reapers. Ask him about the medallion, which he found in the next room. After dialogue decide about his fate. If you spare him, you may profit from this in the future. Pick up keys (opens deeper sewers) from the body of second Reaper and go further.
Point 5
![Follow the gangs symbols painted on the walls - A New Hope [MQ] - p. 1 - Chapter 8 - Alester Sarwyck - Game of Thrones - Game Guide and Walkthrough](https://game.lhg100.com/Article/UploadFiles/201512/2015121519112722.jpg)
Follow the gang's symbols painted on the walls. In almost every corridor you meet small groups of Reapers. Try not run into them, to not alarm more groups, and eliminate them one after another. When you feel too much surrounded use Desmond's Bully, which attract enemies. He can hold opponents for a while using Retaliation. Remember to finish off those in weaker armors first.
![Nearby the [point 5] you find a hidden passage which can be a useful shortcut in case of retreat - A New Hope [MQ] - p. 1 - Chapter 8 - Alester Sarwyck - Game of Thrones - Game Guide and Walkthrough](https://game.lhg100.com/Article/UploadFiles/201512/2015121519112727.jpg)
Nearby the [point 5] you find a hidden passage which can be a useful shortcut in case of retreat.
Point 6
![In northern part of sewers you find levers which opens shortcut leading on the surface - A New Hope [MQ] - p. 1 - Chapter 8 - Alester Sarwyck - Game of Thrones - Game Guide and Walkthrough](https://game.lhg100.com/Article/UploadFiles/201512/2015121519112769.jpg)
In northern part of sewers you find levers which opens shortcut leading on the surface.
Point 7
![After cleaning up the sewers head to the main base of Reapers which can be recognized by the red-lighted doors - A New Hope [MQ] - p. 1 - Chapter 8 - Alester Sarwyck - Game of Thrones - Game Guide and Walkthrough](https://game.lhg100.com/Article/UploadFiles/201512/2015121519112781.jpg)
After cleaning up the sewers head to the main base of Reapers which can be recognized by the red-lighted doors. Go through the last corridors to the big room where you meet your old fellow, Axe.
Point 8
![Defeating Axe and his band requires good cooperation between Alester and Desmond - A New Hope [MQ] - p. 1 - Chapter 8 - Alester Sarwyck - Game of Thrones - Game Guide and Walkthrough](https://game.lhg100.com/Article/UploadFiles/201512/2015121519112708.jpg)
Defeating Axe and his band requires good cooperation between Alester and Desmond. Desmond lures and breaks enemies and Alester soften them with sword and fire.
![After encounter interrogate Axe - A New Hope [MQ] - p. 1 - Chapter 8 - Alester Sarwyck - Game of Thrones - Game Guide and Walkthrough](https://game.lhg100.com/Article/UploadFiles/201512/2015121519112875.jpg)
After encounter interrogate Axe. Ask him about all he know and after that decide what to do with him. If you spare him, he'll help you in the future.
![Axe tells you that you should look for more information in the Golden Cloaks quarter - A New Hope [MQ] - p. 1 - Chapter 8 - Alester Sarwyck - Game of Thrones - Game Guide and Walkthrough](https://game.lhg100.com/Article/UploadFiles/201512/2015121519112804.jpg)
Axe tells you that you should look for more information in the Golden Cloak's quarter. Go on the surface via the closest trapdoor. Now you have to get a town's watch uniform.
![Point 1 - A New Hope [MQ] - p. 1 - Chapter 8 - Alester Sarwyck - Game of Thrones - Game Guide and Walkthrough](https://game.lhg100.com/Article/UploadFiles/201512/2015121519112806.jpg)
Point 1
![You can get uniform on two ways: buy or be smart - A New Hope [MQ] - p. 1 - Chapter 8 - Alester Sarwyck - Game of Thrones - Game Guide and Walkthrough](https://game.lhg100.com/Article/UploadFiles/201512/2015121519112891.jpg)
You can get uniform on two ways: buy or be smart. Second option is not only free but you get a new trait: Resourceful (Chance of bonus loot +1%). Listening to the Desmond you'll figure out that getting the uniform should be easy. First man, who'll give you breastplate and helmet sleeps nearby.
Point 2
![Another sleepy lies next to the hidden passage to Sarwyck Manse - A New Hope [MQ] - p. 1 - Chapter 8 - Alester Sarwyck - Game of Thrones - Game Guide and Walkthrough](https://game.lhg100.com/Article/UploadFiles/201512/2015121519112845.jpg)
Another sleepy lies next to the hidden passage to Sarwyck Manse. Unfortunately, he'll wake up and you'll have to kill him. Take boots and gloves from the body.
Point 3
![The last one element of uniform, cloak, you find thanks to Chatayas kindness, who is standing outside the brothel - A New Hope [MQ] - p. 1 - Chapter 8 - Alester Sarwyck - Game of Thrones - Game Guide and Walkthrough](https://game.lhg100.com/Article/UploadFiles/201512/2015121519112818.jpg)
The last one element of uniform, cloak, you find thanks to Chataya's kindness, who is standing outside the brothel.
Point 4
![After completing all watchmans clothes put them on and go to the city watch tower - A New Hope [MQ] - p. 1 - Chapter 8 - Alester Sarwyck - Game of Thrones - Game Guide and Walkthrough](https://game.lhg100.com/Article/UploadFiles/201512/2015121519112803.jpg)
After completing all watchman's clothes put them on and go to the city watch tower. For the time of infiltration, Desmond will leave the team.
![Point 1 - A New Hope [MQ] - p. 2 - Chapter 8 - Alester Sarwyck - Game of Thrones - Game Guide and Walkthrough](https://game.lhg100.com/Article/UploadFiles/201512/2015121519112925.jpg)
Point 1
![Thanks to the disguise youll be able to move freely in all tower - A New Hope [MQ] - p. 2 - Chapter 8 - Alester Sarwyck - Game of Thrones - Game Guide and Walkthrough](https://game.lhg100.com/Article/UploadFiles/201512/2015121519112905.jpg)
Thanks to the disguise you'll be able to move freely in all tower. Use it to collect as many information as possible about events in sewers and Gawen.
Point 2
![Talk with all guards on the ground floor and ask about prisoner, his victim, bets and watchs leader - A New Hope [MQ] - p. 2 - Chapter 8 - Alester Sarwyck - Game of Thrones - Game Guide and Walkthrough](https://game.lhg100.com/Article/UploadFiles/201512/2015121519112958.jpg)
Talk with all guards on the ground floor and ask about prisoner, his victim, bets and watch's leader. Ask about everything.
Point 3
![When you gather enough information, talk to Caron, who is guarding an entrance to the cells - A New Hope [MQ] - p. 2 - Chapter 8 - Alester Sarwyck - Game of Thrones - Game Guide and Walkthrough](https://game.lhg100.com/Article/UploadFiles/201512/2015121519112960.jpg)
When you gather enough information, talk to Caron, who is guarding an entrance to the cells. Use bets as an excuse to make him let you in.
Point 4
![Talk with Humphrey in the dungeon - A New Hope [MQ] - p. 2 - Chapter 8 - Alester Sarwyck - Game of Thrones - Game Guide and Walkthrough](https://game.lhg100.com/Article/UploadFiles/201512/2015121519112931.jpg)
Talk with Humphrey in the dungeon. He'll let you in no matter what.
Point 5
In the room on the right you find presumed body of Gawen. Humphrey accosts you again and you'll have to trick him to make him let you go deeper, to the prisoner (Gawen's murderer). If you spoke with all guards upstairs, you can use a name of officer, Harrold, to frighten Humphrey.
Point 6
![Interrogate the prisoner, Orys, and hell tell you about Valarrs participation in murder of Gawen - A New Hope [MQ] - p. 2 - Chapter 8 - Alester Sarwyck - Game of Thrones - Game Guide and Walkthrough](https://game.lhg100.com/Article/UploadFiles/201512/2015121519112990.jpg)
Interrogate the prisoner, Orys, and he'll tell you about Valarr's participation in murder of Gawen. You may kill Orys, as an act of vengeance or spare him due to the information he revealed. If you save his life, he'll help you in the future.
Point 7
![Now you have to go upstairs, to the room of the watchs leader, Janos Slynt, who seems to be involved in the murder - A New Hope [MQ] - p. 2 - Chapter 8 - Alester Sarwyck - Game of Thrones - Game Guide and Walkthrough](https://game.lhg100.com/Article/UploadFiles/201512/2015121519112950.jpg)
Now you have to go upstairs, to the room of the watch's leader, Janos Slynt, who seems to be involved in the murder. Raymun tries to stop you - pretend that you have a task from Janos.
Point 8
![In the Janos room you find letter which confirms Orys version of incident - A New Hope [MQ] - p. 2 - Chapter 8 - Alester Sarwyck - Game of Thrones - Game Guide and Walkthrough](https://game.lhg100.com/Article/UploadFiles/201512/2015121519113070.jpg)
In the Janos' room you find letter which confirms Orys' version of incident.
![Before you return to Orys, pick up leaders seal from the bedside table - A New Hope [MQ] - p. 2 - Chapter 8 - Alester Sarwyck - Game of Thrones - Game Guide and Walkthrough](https://game.lhg100.com/Article/UploadFiles/201512/2015121519113079.jpg)
Before you return to Orys, pick up leader's seal from the bedside table. It'll be necessary if you want to leave the tower with the prisoner safely.
Point 9
![You can leave Orys to stay in prison (if you didnt kill him) or help him escape - A New Hope [MQ] - p. 2 - Chapter 8 - Alester Sarwyck - Game of Thrones - Game Guide and Walkthrough](https://game.lhg100.com/Article/UploadFiles/201512/2015121519113035.jpg)
You can leave Orys to stay in prison (if you didn't kill him) or help him escape. If you choose the second option, you get a new trait after this mission: Art of Escape (Deflection +1%).
Point 10
![On the way to exit you will be stopped by Caron - A New Hope [MQ] - p. 2 - Chapter 8 - Alester Sarwyck - Game of Thrones - Game Guide and Walkthrough](https://game.lhg100.com/Article/UploadFiles/201512/2015121519113032.jpg)
On the way to exit you will be stopped by Caron. Lie that you're moving the prisoner and use the leader's seal to avoid fight. Otherwise, you and Orys will have to kill all guards you've met.
![Point 1 - A New Hope [MQ] - p. 2 - Chapter 8 - Alester Sarwyck - Game of Thrones - Game Guide and Walkthrough](https://game.lhg100.com/Article/UploadFiles/201512/2015121519113028.jpg)
Point 1
![Return to Harlton and show new facts - A New Hope [MQ] - p. 2 - Chapter 8 - Alester Sarwyck - Game of Thrones - Game Guide and Walkthrough](https://game.lhg100.com/Article/UploadFiles/201512/2015121519113022.jpg)
Return to Harlton and show new facts. He'll order you to get some book and send you back to sewers, on the arena. There a man with this book should be waiting for you.
Point 2
![Nearby the sewers youll be accosted by Hubb - A New Hope [MQ] - p. 2 - Chapter 8 - Alester Sarwyck - Game of Thrones - Game Guide and Walkthrough](https://game.lhg100.com/Article/UploadFiles/201512/2015121519113043.jpg)
Nearby the sewers you'll be accosted by Hubb. After conversation you get a secondary quest (Self-Made Girl) which you get complete within few chapters. I recommend to do this quest now if you're an archer, because at the end you receive very good distance weapon.
![After that (and maybe completing the secondary quest) go to the arena - A New Hope [MQ] - p. 2 - Chapter 8 - Alester Sarwyck - Game of Thrones - Game Guide and Walkthrough](https://game.lhg100.com/Article/UploadFiles/201512/2015121519113158.jpg)
After that (and maybe completing the secondary quest) go to the arena.
![Point 1 - A New Hope [MQ] - p. 2 - Chapter 8 - Alester Sarwyck - Game of Thrones - Game Guide and Walkthrough](https://game.lhg100.com/Article/UploadFiles/201512/2015121519113175.jpg)
Point 1
![Meet Ruper on the arena - A New Hope [MQ] - p. 2 - Chapter 8 - Alester Sarwyck - Game of Thrones - Game Guide and Walkthrough](https://game.lhg100.com/Article/UploadFiles/201512/2015121519113149.jpg)
Meet Ruper on the arena. He promises to give you the book if you help him pay his debts. To do so, you'll have to fight on arena. During dialogue with Ossifer (organizer) choose your nickname. Choose nickname praying the R'hllor if you want to attract an attention of crowds.
Point 2
![Go downstairs, where participants are preparing - A New Hope [MQ] - p. 2 - Chapter 8 - Alester Sarwyck - Game of Thrones - Game Guide and Walkthrough](https://game.lhg100.com/Article/UploadFiles/201512/2015121519113163.jpg)
Go downstairs, where participants are preparing. Desmond will tell you about their flaws and virtues. The weak spot of strong guy you gonna fight is susceptibility to bleeding. But he can terrify (you can't use your skills). If you ask Desmond about virtues, you get a little bonus to terror resistance.
Point 3
Your enemy is Errok, huge and wild warrior from the lands on the other side of Wall. Through all the battle try to knock him down and stumble, regenerating your energy in the meantime. If you see that Errok is trying to use Fear, interrupt it. But when he succeed to do so, round him on the arena waiting for the effects to pass. Continue until you win the battle.
Point 4
![Return to Rupert and hell give you the book - A New Hope [MQ] - p. 2 - Chapter 8 - Alester Sarwyck - Game of Thrones - Game Guide and Walkthrough](https://game.lhg100.com/Article/UploadFiles/201512/2015121519113188.jpg)
Return to Rupert and he'll give you the book. What is more, Ossifer, will offer you participation in the arena fights. From now on you can return here to begin one of the most profitable secondary quest in the game, described at the end of this chapter. Remember, that you can complete it only in this chapter before you leave the King's Landing.
Point 5
![Desmond gives you keys to the entrance to arena, nearby the Harltons mansion - A New Hope [MQ] - p. 2 - Chapter 8 - Alester Sarwyck - Game of Thrones - Game Guide and Walkthrough](https://game.lhg100.com/Article/UploadFiles/201512/2015121519113183.jpg)
Desmond gives you keys to the entrance to arena, nearby the Harlton's mansion. Exit there and talk to the nobleman.
![Point 1 - A New Hope [MQ] - p. 2 - Chapter 8 - Alester Sarwyck - Game of Thrones - Game Guide and Walkthrough](https://game.lhg100.com/Article/UploadFiles/201512/2015121519113138.jpg)
Point 1
![Reading the book gives you astonishing information (if you didnt read book or watch the serial) about the royal family - A New Hope [MQ] - p. 2 - Chapter 8 - Alester Sarwyck - Game of Thrones - Game Guide and Walkthrough](https://game.lhg100.com/Article/UploadFiles/201512/2015121519113226.jpg)
Reading the book gives you astonishing information (if you didn't read book or watch the serial) about the royal family. Lord Harlton will send you to the Riverspring for information in your father's documents.
Point 2
![Marianne, Harltons niece, will accost you behind the city walls - A New Hope [MQ] - p. 2 - Chapter 8 - Alester Sarwyck - Game of Thrones - Game Guide and Walkthrough](https://game.lhg100.com/Article/UploadFiles/201512/2015121519113214.jpg)
Marianne, Harlton's niece, will accost you behind the city walls. After that move to Riverspring (or complete secondary quests in King's Landing).
Point 1
![In Riverspring youll be accosted by Victor, who offers free ferry to Castlewood anytime - A New Hope [MQ] - p. 2 - Chapter 8 - Alester Sarwyck - Game of Thrones - Game Guide and Walkthrough](https://game.lhg100.com/Article/UploadFiles/201512/2015121519113263.jpg)
In Riverspring you'll be accosted by Victor, who offers free ferry to Castlewood anytime.
Now you can also check how your actions in the 2nd chapter affected the city, talk with citizens you've saved and visit one of special merchants.
Point 2
![When you finish tour, go to the castle to talk with your sister, Elyana - A New Hope [MQ] - p. 2 - Chapter 8 - Alester Sarwyck - Game of Thrones - Game Guide and Walkthrough](https://game.lhg100.com/Article/UploadFiles/201512/2015121519113256.jpg)
When you finish tour, go to the castle to talk with your sister, Elyana.
![Point 1 - A New Hope [MQ] - p. 3 - Chapter 8 - Alester Sarwyck - Game of Thrones - Game Guide and Walkthrough](https://game.lhg100.com/Article/UploadFiles/201512/2015121519113248.jpg)
Point 1
![Elyana is waiting in the throne room - A New Hope [MQ] - p. 3 - Chapter 8 - Alester Sarwyck - Game of Thrones - Game Guide and Walkthrough](https://game.lhg100.com/Article/UploadFiles/201512/2015121519113243.jpg)
Elyana is waiting in the throne room. Tell her all what you've known about Gawen and Valarr's participation in the crime. Elyana won't be able to help you and send you to the Maester Harwyn. Elyana leaves the throne room and go out on the courtyard. She is bothered about something, what begins the secondary quest Rings and Chains. To continue it, meet Elyana on the courtyard. This quest may be done only in this chapter.
Point 2
![Harwyn you can find in dining room - A New Hope [MQ] - p. 3 - Chapter 8 - Alester Sarwyck - Game of Thrones - Game Guide and Walkthrough](https://game.lhg100.com/Article/UploadFiles/201512/2015121519113293.jpg)
Harwyn you can find in dining room. Tell him about Valarr's treachery and Gawen's fate.
Point 3
![Harwyn will tell you about disinherit of Gawen - A New Hope [MQ] - p. 3 - Chapter 8 - Alester Sarwyck - Game of Thrones - Game Guide and Walkthrough](https://game.lhg100.com/Article/UploadFiles/201512/2015121519113264.jpg)
Harwyn will tell you about disinherit of Gawen. During the story you'll be your father for a while. Playing as a Raynald go to his chamber on the first floor.
Point 4
![After regaining control over Alester, search the fathers office - A New Hope [MQ] - p. 3 - Chapter 8 - Alester Sarwyck - Game of Thrones - Game Guide and Walkthrough](https://game.lhg100.com/Article/UploadFiles/201512/2015121519113327.jpg)
After regaining control over Alester, search the father's office. What should interest you is a hidden mechanism on wall behind the desk.
![Using it reveals hidden doors and scroll about how to open it - A New Hope [MQ] - p. 3 - Chapter 8 - Alester Sarwyck - Game of Thrones - Game Guide and Walkthrough](https://game.lhg100.com/Article/UploadFiles/201512/2015121519113387.jpg)
Using it reveals hidden doors and scroll about how to open it. You'll need 7 keys hidden in the castle.
Point 5
![First key (Fathers Key) is in the fathers office - A New Hope [MQ] - p. 3 - Chapter 8 - Alester Sarwyck - Game of Thrones - Game Guide and Walkthrough](https://game.lhg100.com/Article/UploadFiles/201512/2015121519113330.jpg)
First key (Father's Key) is in the father's office. Use R'hllor's vision to find a secret room.
Point 6
![Warriors Key is hanged on the statue of... warrior, before the throne room - A New Hope [MQ] - p. 3 - Chapter 8 - Alester Sarwyck - Game of Thrones - Game Guide and Walkthrough](https://game.lhg100.com/Article/UploadFiles/201512/2015121519113345.jpg)
Warrior's Key is hanged on the statue of... warrior, before the throne room.
Point 7
![Strangers Key lies on the desk in first bedroom on the first floor - A New Hope [MQ] - p. 3 - Chapter 8 - Alester Sarwyck - Game of Thrones - Game Guide and Walkthrough](https://game.lhg100.com/Article/UploadFiles/201512/2015121519113371.jpg)
Stranger's Key lies on the desk in first bedroom on the first floor.
Point 8
![Maidens Key is hanged by the bed in the next room on the west - A New Hope [MQ] - p. 3 - Chapter 8 - Alester Sarwyck - Game of Thrones - Game Guide and Walkthrough](https://game.lhg100.com/Article/UploadFiles/201512/2015121519113353.jpg)
Maiden's Key is hanged by the bed in the next room on the west.
Point 9
![In the third room, on the wall, the Mothers Key is hanging - A New Hope [MQ] - p. 3 - Chapter 8 - Alester Sarwyck - Game of Thrones - Game Guide and Walkthrough](https://game.lhg100.com/Article/UploadFiles/201512/2015121519113318.jpg)
In the third room, on the wall, the Mother's Key is hanging.
Point 10
![Smiths Key is in the fireplace in Measters Harwynn room, on the ground floor - A New Hope [MQ] - p. 3 - Chapter 8 - Alester Sarwyck - Game of Thrones - Game Guide and Walkthrough](https://game.lhg100.com/Article/UploadFiles/201512/2015121519113365.jpg)
Smith's Key is in the fireplace in Measter's Harwynn room, on the ground floor.
Point 11
![Last key, the Crones Key is behind the throne - A New Hope [MQ] - p. 3 - Chapter 8 - Alester Sarwyck - Game of Thrones - Game Guide and Walkthrough](https://game.lhg100.com/Article/UploadFiles/201512/2015121519113308.jpg)
Last key, the Crone's Key is behind the throne.
Point 12
![With all keys you can open the secret door in your fathers office and go to the tunnels, looking for the documents - A New Hope [MQ] - p. 3 - Chapter 8 - Alester Sarwyck - Game of Thrones - Game Guide and Walkthrough](https://game.lhg100.com/Article/UploadFiles/201512/2015121519113467.jpg)
With all keys you can open the secret door in your father's office and go to the tunnels, looking for the documents.
Point 13
![There is a one more way to open the hidden doors - A New Hope [MQ] - p. 3 - Chapter 8 - Alester Sarwyck - Game of Thrones - Game Guide and Walkthrough](https://game.lhg100.com/Article/UploadFiles/201512/2015121519113444.png)
There is a one more way to open the hidden doors. You have to find your father's medallion which is hidden in the crypt.
![When you get keys from Hawryn youll be able to go there behind the throne room - A New Hope [MQ] - p. 3 - Chapter 8 - Alester Sarwyck - Game of Thrones - Game Guide and Walkthrough](https://game.lhg100.com/Article/UploadFiles/201512/2015121519113476.jpg)
When you get keys from Hawryn you'll be able to go there behind the throne room.
![Go downstairs until you get on the crossroads - A New Hope [MQ] - p. 3 - Chapter 8 - Alester Sarwyck - Game of Thrones - Game Guide and Walkthrough](https://game.lhg100.com/Article/UploadFiles/201512/2015121519113463.jpg)
Go downstairs until you get on the crossroads. Turn left.
![Follow the sarcophaguses and you get to end of corridor - A New Hope [MQ] - p. 3 - Chapter 8 - Alester Sarwyck - Game of Thrones - Game Guide and Walkthrough](https://game.lhg100.com/Article/UploadFiles/201512/2015121519113496.jpg)
Follow the sarcophaguses and you get to end of corridor. You can see a firing candles from far away.
![Open the sarcophagus and pick up the medallion which is the superior key to the hidden doors - A New Hope [MQ] - p. 3 - Chapter 8 - Alester Sarwyck - Game of Thrones - Game Guide and Walkthrough](https://game.lhg100.com/Article/UploadFiles/201512/2015121519113460.jpg)
Open the sarcophagus and pick up the medallion which is the superior key to the hidden doors. Alester won't feel great about his act, but he receives new trait: Morbid Curiosity (Chance of loot +2%).
![Point 1 - A New Hope [MQ] - p. 3 - Chapter 8 - Alester Sarwyck - Game of Thrones - Game Guide and Walkthrough](https://game.lhg100.com/Article/UploadFiles/201512/2015121519113407.jpg)
Point 1
![In tunnel you solve few minor riddles, so no fight and a single man to talk - A New Hope [MQ] - p. 3 - Chapter 8 - Alester Sarwyck - Game of Thrones - Game Guide and Walkthrough](https://game.lhg100.com/Article/UploadFiles/201512/2015121519113469.jpg)
In tunnel you solve few minor riddles, so no fight and a single man to talk.
Point 2
![First puzzle waits just behind the corner - A New Hope [MQ] - p. 3 - Chapter 8 - Alester Sarwyck - Game of Thrones - Game Guide and Walkthrough](https://game.lhg100.com/Article/UploadFiles/201512/2015121519113537.jpg)
First puzzle waits just behind the corner. Go to the mechanism on the right, by the closed doors, and answer like that:
Point 3
![Wandering through the next tunnel, take a look on mosaics on walls - they are hints to the next riddle - A New Hope [MQ] - p. 3 - Chapter 8 - Alester Sarwyck - Game of Thrones - Game Guide and Walkthrough](https://game.lhg100.com/Article/UploadFiles/201512/2015121519113536.jpg)
Wandering through the next tunnel, take a look on mosaics on walls - they are hints to the next riddle.
Point 4
![You get to the chamber in which you find seven rotate stones - A New Hope [MQ] - p. 3 - Chapter 8 - Alester Sarwyck - Game of Thrones - Game Guide and Walkthrough](https://game.lhg100.com/Article/UploadFiles/201512/2015121519113566.jpg)
You get to the chamber in which you find seven rotate stones. On every of them you have to choose the proper symbol.
![On mosaics in the corridor every symbol was shown in the particular number - A New Hope [MQ] - p. 3 - Chapter 8 - Alester Sarwyck - Game of Thrones - Game Guide and Walkthrough](https://game.lhg100.com/Article/UploadFiles/201512/2015121519113586.png)
On mosaics in the corridor every symbol was shown in the particular number. This number means on which podest (from left) you should place it.
![After placing all of them, pull the lever in the middle of room, and the hidden doors to the secret group, Shadow Council, chamber - A New Hope [MQ] - p. 3 - Chapter 8 - Alester Sarwyck - Game of Thrones - Game Guide and Walkthrough](https://game.lhg100.com/Article/UploadFiles/201512/2015121519113590.jpg)
After placing all of them, pull the lever in the middle of room, and the hidden doors to the secret group, Shadow Council, chamber.
Point 5
![One of the documents youre looking for is between the scrolls on the stand on the left - A New Hope [MQ] - p. 3 - Chapter 8 - Alester Sarwyck - Game of Thrones - Game Guide and Walkthrough](https://game.lhg100.com/Article/UploadFiles/201512/2015121519113523.jpg)
One of the documents you're looking for is between the scrolls on the stand on the left.
Point 6
![Another scroll lies on the desk in the room on the west - A New Hope [MQ] - p. 3 - Chapter 8 - Alester Sarwyck - Game of Thrones - Game Guide and Walkthrough](https://game.lhg100.com/Article/UploadFiles/201512/2015121519113512.jpg)
Another scroll lies on the desk in the room on the west. It's the last piece of the puzzle.
![In the same place you find a document about activity of someone called The Collector who is draining Riverspring - A New Hope [MQ] - p. 3 - Chapter 8 - Alester Sarwyck - Game of Thrones - Game Guide and Walkthrough](https://game.lhg100.com/Article/UploadFiles/201512/2015121519113552.jpg)
In the same place you find a document about activity of someone called The Collector who is draining Riverspring. Picking up this document you begin the secondary quest (Avenge Riverspring) which you can complete between 8th and 13th chapter.
Point 7
![After collecting all documents you can move to the Castlewood - A New Hope [MQ] - p. 3 - Chapter 8 - Alester Sarwyck - Game of Thrones - Game Guide and Walkthrough](https://game.lhg100.com/Article/UploadFiles/201512/2015121519113604.jpg)
After collecting all documents you can move to the Castlewood. Visit the market square to sell some useless things you have.
![When you are ready, meet with Victor in the docks and hell take you to the Lords Harlton mansion - A New Hope [MQ] - p. 3 - Chapter 8 - Alester Sarwyck - Game of Thrones - Game Guide and Walkthrough](https://game.lhg100.com/Article/UploadFiles/201512/2015121519113643.jpg)
When you are ready, meet with Victor in the docks and he'll take you to the Lord's Harlton mansion.
Point 1
![For now, there is nothing to do in Castlewood besides finding Harlton - A New Hope [MQ] - p. 3 - Chapter 8 - Alester Sarwyck - Game of Thrones - Game Guide and Walkthrough](https://game.lhg100.com/Article/UploadFiles/201512/2015121519113646.jpg)
For now, there is nothing to do in Castlewood besides finding Harlton. Go straight to the throne room.
Point 2
![Before you speak with Harlton listen to his conversation with other man - theyre talking about some powerful and well protected weapon - A New Hope [MQ] - p. 3 - Chapter 8 - Alester Sarwyck - Game of Thrones - Game Guide and Walkthrough](https://game.lhg100.com/Article/UploadFiles/201512/2015121519113674.jpg)
Before you speak with Harlton listen to his conversation with other man - they're talking about some powerful and well protected weapon.
Show what you have found to Harlton and he'll tell you few interesting facts about Jeyna.
Point 1
![This quest is available after ending the main quest in 8th chapter and you can complete it only in this chapter - Blood on the Sand [SQ] - Chapter 8 - Alester Sarwyck - Game of Thrones - Game Guide and Walkthrough](https://game.lhg100.com/Article/UploadFiles/201512/2015121519113653.jpg)
This quest is available after ending the main quest in 8th chapter and you can complete it only in this chapter. It's worth it, because you get no less than 8 golden dragons. When you add money from the bets, you have a big amount of money for an equipment. Before you begin the quest, buy wildfire oil and healing potions, they may be useful.
![Go to the arena and talk with Ossifer - Blood on the Sand [SQ] - Chapter 8 - Alester Sarwyck - Game of Thrones - Game Guide and Walkthrough](https://game.lhg100.com/Article/UploadFiles/201512/2015121519113641.jpg)
Go to the arena and talk with Ossifer. He'll offer you the first encounter, and you agree. Moneys are bad, but it'll be better.
![First encounter is an unpleasant surprise - Blood on the Sand [SQ] - Chapter 8 - Alester Sarwyck - Game of Thrones - Game Guide and Walkthrough](https://game.lhg100.com/Article/UploadFiles/201512/2015121519113667.jpg)
First encounter is an unpleasant surprise. You'll have to fight against three enemies and one of them has poison weapon. It's the short sword, so focus on the enemy with it and kill him quickly. Stun them and knock down. Also fire will be useful. In this battle good solution is to use skills with area damage.
![After fight demand half incomes from bets instead of the pay you agreed before with Ossifer - Blood on the Sand [SQ] - Chapter 8 - Alester Sarwyck - Game of Thrones - Game Guide and Walkthrough](https://game.lhg100.com/Article/UploadFiles/201512/2015121519113636.jpg)
After fight demand half incomes from bets instead of the pay you agreed before with Ossifer. He'll agree.
Point 2
![After the first fight, Rupert shows up in the preparation room - Blood on the Sand [SQ] - Chapter 8 - Alester Sarwyck - Game of Thrones - Game Guide and Walkthrough](https://game.lhg100.com/Article/UploadFiles/201512/2015121519113785.jpg)
After the first fight, Rupert shows up in the preparation room. You can bet (and arrange) fights with him. Listen carefully to his instructions. No matter if you want play good or dirty, you can bet 20 silver coins to multiply your money. Rupert will also advice you how to get a support of the crowd, what is useful when you lose the fight on the purpose. Before every fight you can check how much the crowd likes you and what the bets are.
Point 3
![Your second opponent is Ser Symon - Blood on the Sand [SQ] - Chapter 8 - Alester Sarwyck - Game of Thrones - Game Guide and Walkthrough](https://game.lhg100.com/Article/UploadFiles/201512/2015121519113711.jpg)
Your second opponent is Ser Symon. Tough warrior, who will be healing often during the encounter. If you interrupt it, you'll defeat him easily. Use the standard tactics. If you spare him after the fight, he'll pay you well for it, when you talk with him later.
![Before the third fight, youll be accosted by the arena guard, your opponents brother - Blood on the Sand [SQ] - Chapter 8 - Alester Sarwyck - Game of Thrones - Game Guide and Walkthrough](https://game.lhg100.com/Article/UploadFiles/201512/2015121519113773.jpg)
Before the third fight, you'll be accosted by the arena guard, your opponent's brother. If you agree to spare enemy (when crowd wants his blood) you get another 20 silver coins. Bayard isn't too difficult so classic tactic fire + stun/knock down should be enough. If you let him live, talk to his brother later and you get money.
![Fourth enemy is a water dancer, Alequo - Blood on the Sand [SQ] - Chapter 8 - Alester Sarwyck - Game of Thrones - Game Guide and Walkthrough](https://game.lhg100.com/Article/UploadFiles/201512/2015121519113772.jpg)
Fourth enemy is a water dancer, Alequo. He likes to stun so do it as a first and interrupt his skills. If you avoid stunning the battle will be easy. If you spare him, you will be able to talk with him later.
Fifth fight is a team battle. You can choose a partner from those enemies you spare. Ser Symon is the best option - he is strong and thanks to healing is tough to get rid of. Of course, other guys have other values - choice is yours.
![You stand against two warriors from the Iron Islands - Blood on the Sand [SQ] - Chapter 8 - Alester Sarwyck - Game of Thrones - Game Guide and Walkthrough](https://game.lhg100.com/Article/UploadFiles/201512/2015121519113783.jpg)
You stand against two warriors from the Iron Islands. As usual in team fight, try to focus on one enemy and then finish off the other.
![Before the fight with Lucifer, last opponent, Rupert tells you that crowd bets 4:1 against you and Ossifer double the max bet - Blood on the Sand [SQ] - Chapter 8 - Alester Sarwyck - Game of Thrones - Game Guide and Walkthrough](https://game.lhg100.com/Article/UploadFiles/201512/2015121519113789.jpg)
Before the fight with Lucifer, last opponent, Rupert tells you that crowd bets 4:1 against you and Ossifer double the max bet. Put 40 silver coins on you and enter the arena.
![Lucifer is the toughest enemy in all game so far - Blood on the Sand [SQ] - Chapter 8 - Alester Sarwyck - Game of Thrones - Game Guide and Walkthrough](https://game.lhg100.com/Article/UploadFiles/201512/2015121519113784.jpg)
Lucifer is the toughest enemy in all game so far. Key to the win is quick knocking down, stun and Wildfire. He has crazy amount of health and the Wildfire may take 1/4th of it at once, so do not hesitate. Save energy for knocking him down, to practically immobilize him. Heal yourself if it's necessary during the battle.
![After victory get your gold from Rupert and Ossifer - Blood on the Sand [SQ] - Chapter 8 - Alester Sarwyck - Game of Thrones - Game Guide and Walkthrough](https://game.lhg100.com/Article/UploadFiles/201512/2015121519113738.jpg)
After victory get your gold from Rupert and Ossifer. Everyone will be astonished, and the organizer, thanks to money he made, get retired. Rupert joins him.
![Point 1 - Rings and Chains [SQ] - Chapter 8 - Alester Sarwyck - Game of Thrones - Game Guide and Walkthrough](https://game.lhg100.com/Article/UploadFiles/201512/2015121519113829.jpg)
Point 1
![Rings and Chains is an another quest you can do only in the [8th chapter], before you head to the Castlewood - Rings and Chains [SQ] - Chapter 8 - Alester Sarwyck - Game of Thrones - Game Guide and Walkthrough](https://game.lhg100.com/Article/UploadFiles/201512/2015121519113813.jpg)
Rings and Chains is an another quest you can do only in the [8th chapter], before you head to the Castlewood. Talk with your sister on the courtyard to understand her worries. Ask Elyana about everything connected with canceled wedding and supposed betrayal. She also tells that in dungeons you can find Lord Roxton, member of a House with which Elyana has problems.
Point 2
![After dialogue with sister find a representative of Roxtons - Rings and Chains [SQ] - Chapter 8 - Alester Sarwyck - Game of Thrones - Game Guide and Walkthrough](https://game.lhg100.com/Article/UploadFiles/201512/2015121519113880.jpg)
After dialogue with sister find a representative of Roxtons. You'll hear about Elyana's debt and searching for Lord Roxton.
Point 3
![To know the truth, interrogate Criston, man who is supposed to be Elyanas lover - Rings and Chains [SQ] - Chapter 8 - Alester Sarwyck - Game of Thrones - Game Guide and Walkthrough](https://game.lhg100.com/Article/UploadFiles/201512/2015121519113815.jpg)
To know the truth, interrogate Criston, man who is supposed to be Elyana's lover. After going on the streets talk with guard to join him temporarily to the team.
![Go to the market square where, under the Cristons house, Roxtons men are waiting - Rings and Chains [SQ] - Chapter 8 - Alester Sarwyck - Game of Thrones - Game Guide and Walkthrough](https://game.lhg100.com/Article/UploadFiles/201512/2015121519113896.jpg)
Go to the market square where, under the Criston's house, Roxton's men are waiting. Accost one of bodyguards and ask Criston to go out to you. Bodyguards attack him at once - don't let him die, or the quest will fail.
Now you have to lead Criston to the castle, to explain all this chaos. Go through the main gate, because docks seem to be more dangerous.
Point 4
After exiting market square you'll be attacked again by the blue robes. Focus on enemies attacking the young lad, to distract them.
Point 5
Another group will attack you at the top of the bridge. Move back, downstairs, because Criston has a dangerous tendency to run into the center of enemies.
Point 6
![Just behind the gates youll be attacked once again - Rings and Chains [SQ] - Chapter 8 - Alester Sarwyck - Game of Thrones - Game Guide and Walkthrough](https://game.lhg100.com/Article/UploadFiles/201512/2015121519113870.jpg)
Just behind the gates you'll be attacked once again. Repeat your tactic and don't let them kill your companion.
Point 7
![With Criston talk to Elyana - Rings and Chains [SQ] - Chapter 8 - Alester Sarwyck - Game of Thrones - Game Guide and Walkthrough](https://game.lhg100.com/Article/UploadFiles/201512/2015121519113839.jpg)
With Criston talk to Elyana. She will confess that the innocent boy was only her tool to cancel betrothal with Roxton. You'll ask to bring Roxton, to clear the situation.
![Roxton demands compensation - Rings and Chains [SQ] - Chapter 8 - Alester Sarwyck - Game of Thrones - Game Guide and Walkthrough](https://game.lhg100.com/Article/UploadFiles/201512/2015121519113951.jpg)
Roxton demands compensation. You can pay off Elyana's debt, sacrifice Criston or fight for your honor (insulted during the conversation by Roxton). If you choose the last option, old Roxton nominates young Edwyn as his representative in the fight.
![You can fight personally or let Criston fight - Rings and Chains [SQ] - Chapter 8 - Alester Sarwyck - Game of Thrones - Game Guide and Walkthrough](https://game.lhg100.com/Article/UploadFiles/201512/2015121519113919.jpg)
You can fight personally or let Criston fight. Young will die easily, so it's better to fight alone. After your victory, Roxtons will get out of there and Elyana's debt will be canceled.
![Point 1 - Promise [MQ] - Chapter 9 - Mors Westford - Game of Thrones - Game Guide and Walkthrough](https://game.lhg100.com/Article/UploadFiles/201512/2015121519113961.jpg)
Point 1
![At the very beginning, Endrew, man of Lord Harlton, joins you - Promise [MQ] - Chapter 9 - Mors Westford - Game of Thrones - Game Guide and Walkthrough](https://game.lhg100.com/Article/UploadFiles/201512/2015121519113952.jpg)
At the very beginning, Endrew, man of Lord Harlton, joins you. It's a good, dual wielding warrior.
![After conversation with Endrew, Valarrs men surround the cottage - Promise [MQ] - Chapter 9 - Mors Westford - Game of Thrones - Game Guide and Walkthrough](https://game.lhg100.com/Article/UploadFiles/201512/2015121519113980.jpg)
After conversation with Endrew, Valarr's men surround the cottage. Prepare to challenging battle with many enemies. Your main task is not let any of Bloodseekers inside the building where Jeyna is. During the whole battle she'll be informing you from where enemies are coming and how's the endurance of the door.
Point 2
![You should concentrate on thugs, who will try to destroy door - Promise [MQ] - Chapter 9 - Mors Westford - Game of Thrones - Game Guide and Walkthrough](https://game.lhg100.com/Article/UploadFiles/201512/2015121519113943.jpg)
You should concentrate on thugs, who will try to destroy door. If you see that anyone is trying to get inside, attack him immediately. Endrew is a very good warrior, and he'll take care about the rest.
Point 3
![Counterclockwise round the cottage and eliminate next groups of Bloodseekers - Promise [MQ] - Chapter 9 - Mors Westford - Game of Thrones - Game Guide and Walkthrough](https://game.lhg100.com/Article/UploadFiles/201512/2015121519113966.jpg)
Counterclockwise round the cottage and eliminate next groups of Bloodseekers.
Point 4
![When you make a full circle around the house, another group will assault the front door - Promise [MQ] - Chapter 9 - Mors Westford - Game of Thrones - Game Guide and Walkthrough](https://game.lhg100.com/Article/UploadFiles/201512/2015121519113957.jpg)
When you make a full circle around the house, another group will assault the front door. If any of them get inside, the mission fails.
Point 5
![At the corner of cottage you meet Valarrs lieutenant, Deziel - Promise [MQ] - Chapter 9 - Mors Westford - Game of Thrones - Game Guide and Walkthrough](https://game.lhg100.com/Article/UploadFiles/201512/2015121519113977.jpg)
At the corner of cottage you meet Valarr's lieutenant, Deziel. He has a perfect crossbow, Rhoynish Pride, which deals additional damage against medium armor. Endrew has such type of armor, so try to distract Deziel while your friend will be finishing remaining opponents.
After killing Deziel and eliminating all remaining thugs search bodies (especially Deziel's). There will be lot of loots. Take crossbow, it could be useful (especially if your Alester is an archer).
Point 6
![When you get ready to leave your house, talk with Ethan - Promise [MQ] - Chapter 9 - Mors Westford - Game of Thrones - Game Guide and Walkthrough](https://game.lhg100.com/Article/UploadFiles/201512/2015121519114015.jpg)
When you get ready to leave your house, talk with Ethan. If you haven't visited your wife's tomb, now it's good time for it (you gain precious ring).
![Point 1 - Promise [MQ] - Chapter 9 - Mors Westford - Game of Thrones - Game Guide and Walkthrough](https://game.lhg100.com/Article/UploadFiles/201512/2015121519114018.jpg)
Point 1
![There is almost nothing to do in the Camp - Promise [MQ] - Chapter 9 - Mors Westford - Game of Thrones - Game Guide and Walkthrough](https://game.lhg100.com/Article/UploadFiles/201512/2015121519114053.jpg)
There is almost nothing to do in the Camp. First talk with Jeyna, ask about her child and its origins.
Point 2
![Then talk to Andrew - Promise [MQ] - Chapter 9 - Mors Westford - Game of Thrones - Game Guide and Walkthrough](https://game.lhg100.com/Article/UploadFiles/201512/2015121519114075.jpg)
Then talk to Andrew. Being aware that he is a spy, don't reveal to many facts about yourself.
Point 3
![Meet Ethan at pier - hell tell you about much of Lords Harlton interest about Jeyna - Promise [MQ] - Chapter 9 - Mors Westford - Game of Thrones - Game Guide and Walkthrough](https://game.lhg100.com/Article/UploadFiles/201512/2015121519114035.jpg)
Meet Ethan at pier - he'll tell you about much of Lord's Harlton interest about Jeyna.
![When you be ready to leave the Camp talk again with Jeyna - Promise [MQ] - Chapter 9 - Mors Westford - Game of Thrones - Game Guide and Walkthrough](https://game.lhg100.com/Article/UploadFiles/201512/2015121519114019.jpg)
When you be ready to leave the Camp talk again with Jeyna. But before that, search the vicinity looking for loots, especially an axe, which can be an upgrade for your current weapon.
![Point 1 - Promise [MQ] - Chapter 9 - Mors Westford - Game of Thrones - Game Guide and Walkthrough](https://game.lhg100.com/Article/UploadFiles/201512/2015121519114080.jpg)
Point 1
![After getting to the Castlewood courtyard you may talk with the blacksmith - Promise [MQ] - Chapter 9 - Mors Westford - Game of Thrones - Game Guide and Walkthrough](https://game.lhg100.com/Article/UploadFiles/201512/2015121519114167.jpg)
After getting to the Castlewood courtyard you may talk with the blacksmith. Surprisingly, it's a relative of Poddy who died in the 3rd chapter. Inform him about it. If you want, you can make small shopping before entering the castle. Changing your armor on castlewood set would be also profitable but only if Mors doesn't use heavy armors (if so, the armor found in his cottage will be perfect one).
![Its the only occasion for Mors to go shopping in this chapter - Promise [MQ] - Chapter 9 - Mors Westford - Game of Thrones - Game Guide and Walkthrough](https://game.lhg100.com/Article/UploadFiles/201512/2015121519114122.png)
It's the only occasion for Mors to go shopping in this chapter! Armor upgrade may be very useful.
![After entering the castle, meet with Lord Harlton - Promise [MQ] - Chapter 9 - Mors Westford - Game of Thrones - Game Guide and Walkthrough](https://game.lhg100.com/Article/UploadFiles/201512/2015121519114114.jpg)
After entering the castle, meet with Lord Harlton. Arwood offers Jeyna help of his maester. If you want, you can walk Jeyna to her chamber. Return to Harlton, who invites you on a supper.
Point 2
![Visit Jeyna - Promise [MQ] - Chapter 9 - Mors Westford - Game of Thrones - Game Guide and Walkthrough](https://game.lhg100.com/Article/UploadFiles/201512/2015121519114161.jpg)
Visit Jeyna. Talk with her when you'll be ready for a supper. I suggest searching castle for loots before the meal.
Point 3
![Before conversation with Harlton prepare to fight, which begins after the supper - Promise [MQ] - Chapter 9 - Mors Westford - Game of Thrones - Game Guide and Walkthrough](https://game.lhg100.com/Article/UploadFiles/201512/2015121519114104.jpg)
Before conversation with Harlton prepare to fight, which begins after the "supper". It won't be difficult, but very tricky if you care about prize for it.
![Make sure, that you have any weapon in the second weapon slot (stab weapon would be perfect) - Promise [MQ] - Chapter 9 - Mors Westford - Game of Thrones - Game Guide and Walkthrough](https://game.lhg100.com/Article/UploadFiles/201512/2015121519114186.png)
Make sure, that you have any weapon in the second weapon slot (stab weapon would be perfect). It'll be helpful in the next chapter, when you'll control Mors again.
Point 4
![During conversation you start to figurate out what Arwood wants do to with Jeyna - Promise [MQ] - Chapter 9 - Mors Westford - Game of Thrones - Game Guide and Walkthrough](https://game.lhg100.com/Article/UploadFiles/201512/2015121519114179.jpg)
During conversation you start to figurate out what Arwood wants do to with Jeyna. Besides, the host put something into Mors' wine. When it becomes obvious, Jeyna will be taken by Harlton's people, and you'll have to fight the rest of them.
![Fight with lords men is very specific - Promise [MQ] - Chapter 9 - Mors Westford - Game of Thrones - Game Guide and Walkthrough](https://game.lhg100.com/Article/UploadFiles/201512/2015121519114112.jpg)
Fight with lord's men is very specific. The poison you get takes you health and any potion can stop it. You'll fall anyway, but if you kill all six men before, you get a trait: Habit (Damage Resistance to critical hits +2%).
![Point 1 - Promise [MQ] - Chapter 9 - Mors Westford - Game of Thrones - Game Guide and Walkthrough](https://game.lhg100.com/Article/UploadFiles/201512/2015121519114152.jpg)
Point 1
![Arwood Harlton placed you in the dungeon to interrogate you (and torture, of course) - Promise [MQ] - Chapter 9 - Mors Westford - Game of Thrones - Game Guide and Walkthrough](https://game.lhg100.com/Article/UploadFiles/201512/2015121519114245.jpg)
Arwood Harlton placed you in the dungeon to interrogate you (and torture, of course). You have three options:
I suggest to don't say anything. Mors won't be so pretty anymore, but he receives a new trait: Indomitable Will (Damage Resistance +6%- Endurance -1). It's worth, especially to hear Mors' sharp tongue. But choice is yours. What is more, you'll have an opportunity to restore this lost point of Endurance soon.
![According that you dont say anything, Mors ends up first day with the broken nose - Promise [MQ] - Chapter 9 - Mors Westford - Game of Thrones - Game Guide and Walkthrough](https://game.lhg100.com/Article/UploadFiles/201512/2015121519114217.jpg)
According that you don't say anything, Mors ends up first day with the broken nose.
![Second day gives him few scars on torso - Promise [MQ] - Chapter 9 - Mors Westford - Game of Thrones - Game Guide and Walkthrough](https://game.lhg100.com/Article/UploadFiles/201512/2015121519114262.jpg)
Second day gives him few scars on torso.
![Lord Harlton will interrogate you personally at the third day - Promise [MQ] - Chapter 9 - Mors Westford - Game of Thrones - Game Guide and Walkthrough](https://game.lhg100.com/Article/UploadFiles/201512/2015121519114266.jpg)
Lord Harlton will interrogate you personally at the third day. When you still be mocking at him, Mors will be treated with the hot steel. But he'll live.
Point 2
![After tortures, Mors warg regain consciousness in one of cells - Promise [MQ] - Chapter 9 - Mors Westford - Game of Thrones - Game Guide and Walkthrough](https://game.lhg100.com/Article/UploadFiles/201512/2015121519114267.jpg)
After tortures, Mors' warg regain consciousness in one of cells. Wait until two guards split and leave the cell through the hole in the wall.
Point 3
![Follow the Mors scent and kill first guard in the northern corridor - Promise [MQ] - Chapter 9 - Mors Westford - Game of Thrones - Game Guide and Walkthrough](https://game.lhg100.com/Article/UploadFiles/201512/2015121519114292.jpg)
Follow the Mors' scent and kill first guard in the northern corridor.
Point 4
![Just after that one of remaining guards start chasing you - Promise [MQ] - Chapter 9 - Mors Westford - Game of Thrones - Game Guide and Walkthrough](https://game.lhg100.com/Article/UploadFiles/201512/2015121519114223.jpg)
Just after that one of remaining guards start chasing you. Do not hide or attack any other guard.
![Run corridor, passing Harltons men - Promise [MQ] - Chapter 9 - Mors Westford - Game of Thrones - Game Guide and Walkthrough](https://game.lhg100.com/Article/UploadFiles/201512/2015121519114218.jpg)
Run corridor, passing Harlton's men. At last you get to the room with broken bars. Go on the other side before chase gets you and kill single guard there.
Point 5
![Secret corridors and holes you get to the east corridor, patrolled by two soldiers - Promise [MQ] - Chapter 9 - Mors Westford - Game of Thrones - Game Guide and Walkthrough](https://game.lhg100.com/Article/UploadFiles/201512/2015121519114321.jpg)
Secret corridors and holes you get to the east corridor, patrolled by two soldiers. Wait for the proper moment and run across to the open cell with next hidden passage.
Point 6
![In the square room youll see two enemies - Promise [MQ] - Chapter 9 - Mors Westford - Game of Thrones - Game Guide and Walkthrough](https://game.lhg100.com/Article/UploadFiles/201512/2015121519114328.jpg)
In the square room you'll see two enemies. One of them shows you back, the other is walking back and forth. Use the moment of unawareness and kill them one after another or run to the open cell, on the opposite.
Point 7
![Using next passages in the walls you get to the southern corridor, in which co-prisoner of Mors is - Promise [MQ] - Chapter 9 - Mors Westford - Game of Thrones - Game Guide and Walkthrough](https://game.lhg100.com/Article/UploadFiles/201512/2015121519114344.jpg)
Using next passages in the walls you get to the southern corridor, in which co-prisoner of Mors is. Kill the last guard and the co-prisoner will be freed. You'll see also that the Mors' executioners have the last gift for him.
![Point 1 - Crossroads [MQ] - p. 1 - Chapter 10 - Alester Sarwyck - Game of Thrones - Game Guide and Walkthrough](https://game.lhg100.com/Article/UploadFiles/201512/2015121519114335.jpg)
Point 1
![Chapter begins from conversation with servant Shorei in Alesters bedroom - Crossroads [MQ] - p. 1 - Chapter 10 - Alester Sarwyck - Game of Thrones - Game Guide and Walkthrough](https://game.lhg100.com/Article/UploadFiles/201512/2015121519114319.jpg)
Chapter begins from conversation with servant Shorei in Alester's bedroom. She tells you that Marianne Harlton is waiting for you in the cellar. Weird...
Before you go talk with Marianne, you can search the mansion and even make a small shopping on the courtyard.
Point 2
![Marianne will try to convince you that she agrees with you about her uncles actions - Crossroads [MQ] - p. 1 - Chapter 10 - Alester Sarwyck - Game of Thrones - Game Guide and Walkthrough](https://game.lhg100.com/Article/UploadFiles/201512/2015121519114307.jpg)
Marianne will try to convince you that she agrees with you about her uncle's actions. Don't be fooled.
During conversation with Marianne, suddenly a stranger appears, putting a knife under her throat. It's your real brother, Gawen, who has been hold by Harlton in the dungeon for all months. It's also the mysterious co-prisoner of Mors.
During the nervous dialogue you'll have to choose side of Gawen or Marianne. Girl will betray you anyway, and you will fight all guards in the castle. Gwen will help you neutralize the lord's niece and quietly run from the castle.
Point 3
![Gawen has a Castlewood guard armor what wont alarm the rest of guards - Crossroads [MQ] - p. 1 - Chapter 10 - Alester Sarwyck - Game of Thrones - Game Guide and Walkthrough](https://game.lhg100.com/Article/UploadFiles/201512/2015121519114317.jpg)
Gawen has a Castlewood guard armor what won't alarm the rest of guards. But you need two things first, beginning with salve for Gawen's wounds. Visit Maester Martin and ask for medicament for your arm.
![Return to Gawen, give him a medicine and go for the other crucial thing - Crossroads [MQ] - p. 1 - Chapter 10 - Alester Sarwyck - Game of Thrones - Game Guide and Walkthrough](https://game.lhg100.com/Article/UploadFiles/201512/2015121519114391.jpg)
Return to Gawen, give him a medicine and go for the other crucial thing.
Point 4
![...which is a full helmet - Crossroads [MQ] - p. 1 - Chapter 10 - Alester Sarwyck - Game of Thrones - Game Guide and Walkthrough](https://game.lhg100.com/Article/UploadFiles/201512/2015121519114440.jpg)
...which is a full helmet. You'll find it in the chamber of castle guard, on the chair by the fireplace. Listen carefully to the guards talking.
![Return to your brother, who can complete his disguise - Crossroads [MQ] - p. 1 - Chapter 10 - Alester Sarwyck - Game of Thrones - Game Guide and Walkthrough](https://game.lhg100.com/Article/UploadFiles/201512/2015121519114453.jpg)
Return to your brother, who can complete his disguise. He'll join your team (but you can't control him) and you can freely move in the castle.
In the same time you get a secondary quest A Maggot in the Apple, which is described at the end of this chapter. I recommend to do it at once, what makes going through the castle much easier.
Point 5
![When you complete the secondary quest try to enter dungeon - Crossroads [MQ] - p. 1 - Chapter 10 - Alester Sarwyck - Game of Thrones - Game Guide and Walkthrough](https://game.lhg100.com/Article/UploadFiles/201512/2015121519114427.jpg)
When you complete the secondary quest try to enter dungeon. The door are shut. Meet with Shorei in the dining room and convince her to poison guards who have keys to dungeon.
![1 - Crossroads [MQ] - p. 1 - Chapter 10 - Alester Sarwyck - Game of Thrones - Game Guide and Walkthrough](https://game.lhg100.com/Article/UploadFiles/201512/2015121519114449.png)
![Alternatively, you can talk with Alesander (keys owner) and convince him that Shorei is waiting in dungeon, take him there and kill - Crossroads [MQ] - p. 1 - Chapter 10 - Alester Sarwyck - Game of Thrones - Game Guide and Walkthrough](https://game.lhg100.com/Article/UploadFiles/201512/2015121519114495.jpg)
Alternatively, you can talk with Alesander (keys owner) and convince him that Shorei is waiting in dungeon, take him there and kill.
![Visit again Maester Martin - Crossroads [MQ] - p. 1 - Chapter 10 - Alester Sarwyck - Game of Thrones - Game Guide and Walkthrough](https://game.lhg100.com/Article/UploadFiles/201512/2015121519114441.jpg)
Visit again Maester Martin. To not provoke any suspicions ask about his job and medicals, which, perhaps, can be lethal. You received vial with Ointments.
![Give the vial to Shorei and shell quickly deal with guards - Crossroads [MQ] - p. 1 - Chapter 10 - Alester Sarwyck - Game of Thrones - Game Guide and Walkthrough](https://game.lhg100.com/Article/UploadFiles/201512/2015121519114458.jpg)
Give the vial to Shorei and she'll quickly deal with guards. Pick up loots and keys to the dungeon.
Point 6
![On stairs leading to dungeon you meet three guards - Crossroads [MQ] - p. 1 - Chapter 10 - Alester Sarwyck - Game of Thrones - Game Guide and Walkthrough](https://game.lhg100.com/Article/UploadFiles/201512/2015121519114429.jpg)
On stairs leading to dungeon you meet three guards. Nothing will convince them to let you in, so kick their butts as on the screen above.
![Point 1 - Crossroads [MQ] - p. 2 - Chapter 10 - Alester Sarwyck - Game of Thrones - Game Guide and Walkthrough](https://game.lhg100.com/Article/UploadFiles/201512/2015121519114430.jpg)
Point 1
![In the dungeon, just after the first corner you meet few guards - Crossroads [MQ] - p. 2 - Chapter 10 - Alester Sarwyck - Game of Thrones - Game Guide and Walkthrough](https://game.lhg100.com/Article/UploadFiles/201512/2015121519114514.jpg)
In the dungeon, just after the first corner you meet few guards. If you have a distance weapon you can make few shots before they notice you.
Point 2
![Get into Mors cell where your paths cross for the first time - Crossroads [MQ] - p. 2 - Chapter 10 - Alester Sarwyck - Game of Thrones - Game Guide and Walkthrough](https://game.lhg100.com/Article/UploadFiles/201512/2015121519114520.jpg)
Get into Mors' cell where your paths cross for the first time. Alester kill executioners quickly and you'll have a moment to explain everything.
![But the joy wont last long - Endrew sneaks into the cell and kill (this time for real) Gawen - Crossroads [MQ] - p. 2 - Chapter 10 - Alester Sarwyck - Game of Thrones - Game Guide and Walkthrough](https://game.lhg100.com/Article/UploadFiles/201512/2015121519114587.jpg)
But the joy won't last long - Endrew sneaks into the cell and kill (this time for real) Gawen.
![After that, new companions (Mors and Alester) start fighting with the spy and his people - Crossroads [MQ] - p. 2 - Chapter 10 - Alester Sarwyck - Game of Thrones - Game Guide and Walkthrough](https://game.lhg100.com/Article/UploadFiles/201512/2015121519114568.jpg)
After that, new companions (Mors and Alester) start fighting with the spy and his people. If you listened to my advice in the previous chapter, you won't fight with your bare hands.
Alester and Mors are deathly duet, so it should be easy - use their skills. Area stunning make it even easier. After battle collect loots, especially Endrew's sword.
Point 3
![Next step is regaining Mors warg - Crossroads [MQ] - p. 2 - Chapter 10 - Alester Sarwyck - Game of Thrones - Game Guide and Walkthrough](https://game.lhg100.com/Article/UploadFiles/201512/2015121519114565.jpg)
Next step is regaining Mors' warg. He is nearby the cell in which he was initially kept. Kill the guards. From now on you have a warg mode available again - you can follow Jeyna's scent to find her in the Castlewood.
Point 4
![Girls scent leads to upper dungeon level - Crossroads [MQ] - p. 2 - Chapter 10 - Alester Sarwyck - Game of Thrones - Game Guide and Walkthrough](https://game.lhg100.com/Article/UploadFiles/201512/2015121519114588.jpg)
Girl's scent leads to upper dungeon level.
Point 5
![If you finished secondary quest The Maggot in the Apple, guards here wont be a threat, and Alester kills them immediately - Crossroads [MQ] - p. 2 - Chapter 10 - Alester Sarwyck - Game of Thrones - Game Guide and Walkthrough](https://game.lhg100.com/Article/UploadFiles/201512/2015121519114532.jpg)
If you finished secondary quest The Maggot in the Apple, guards here won't be a threat, and Alester kills them immediately. Otherwise, the encounter will be tough.
![Stop on the landing and use Rhllors Vision to find a secret passage - Crossroads [MQ] - p. 2 - Chapter 10 - Alester Sarwyck - Game of Thrones - Game Guide and Walkthrough](https://game.lhg100.com/Article/UploadFiles/201512/2015121519114566.jpg)
Stop on the landing and use R'hllor's Vision to find a secret passage. It isn't necessary but makes cleaning up this level easier. Find the single enemy on the other side of corridor and kill him before moving on.
![Thanks to eliminating him, two enemies on the next landing wont be a problem - Crossroads [MQ] - p. 2 - Chapter 10 - Alester Sarwyck - Game of Thrones - Game Guide and Walkthrough](https://game.lhg100.com/Article/UploadFiles/201512/2015121519114609.jpg)
Thanks to eliminating him, two enemies on the next landing won't be a problem.
Point 6
![On the ground floor another group of enemies attack you - Crossroads [MQ] - p. 2 - Chapter 10 - Alester Sarwyck - Game of Thrones - Game Guide and Walkthrough](https://game.lhg100.com/Article/UploadFiles/201512/2015121519114649.jpg)
On the ground floor another group of enemies attack you. Eliminate those on the bottom, the rest will come for you.
Point 7
![It will be tougher on the landing - Crossroads [MQ] - p. 2 - Chapter 10 - Alester Sarwyck - Game of Thrones - Game Guide and Walkthrough](https://game.lhg100.com/Article/UploadFiles/201512/2015121519114667.jpg)
It will be tougher on the landing. Use area skills of both your warriors to win almost harmlessly.
Point 8
![First enemy on the next floor can be bit to the death by Mors dog or just stabbed - Crossroads [MQ] - p. 2 - Chapter 10 - Alester Sarwyck - Game of Thrones - Game Guide and Walkthrough](https://game.lhg100.com/Article/UploadFiles/201512/2015121519114682.jpg)
First enemy on the next floor can be bit to the death by Mors' dog or just stabbed.
![Next enemies are hiding in the nearby room - Crossroads [MQ] - p. 2 - Chapter 10 - Alester Sarwyck - Game of Thrones - Game Guide and Walkthrough](https://game.lhg100.com/Article/UploadFiles/201512/2015121519114676.jpg)
Next enemies are hiding in the nearby room. Fight with them isn't obligatory, but it means additional XP and loots.
![Opposite to an entrance to the room on the first floor, you may find a secret passage using Alesters skills - Crossroads [MQ] - p. 2 - Chapter 10 - Alester Sarwyck - Game of Thrones - Game Guide and Walkthrough](https://game.lhg100.com/Article/UploadFiles/201512/2015121519114634.jpg)
Opposite to an entrance to the room on the first floor, you may find a secret passage using Alester's skills. You don't have to go this way, but it'll make the next floor easier and let you find a hidden treasure (dog will sniff it out).
Point 9
![If you used the secret passage, walk in the chamber on the 2nd floor as a warg and kill the enemy showing his back to the hall - Crossroads [MQ] - p. 2 - Chapter 10 - Alester Sarwyck - Game of Thrones - Game Guide and Walkthrough](https://game.lhg100.com/Article/UploadFiles/201512/2015121519114648.jpg)
If you used the secret passage, walk in the chamber on the 2nd floor as a warg and kill the enemy showing his back to the hall.
![Then open secret door leading inside and eliminate rest of guards - Crossroads [MQ] - p. 2 - Chapter 10 - Alester Sarwyck - Game of Thrones - Game Guide and Walkthrough](https://game.lhg100.com/Article/UploadFiles/201512/2015121519114617.jpg)
Then open secret door leading inside and eliminate rest of guards. One of them (in heavy armor) has a key to the 3rd floor. After encounter follow the scent on the next floor.
Point 10
![In front of the door should stay one man, who can be easily killed - Crossroads [MQ] - p. 2 - Chapter 10 - Alester Sarwyck - Game of Thrones - Game Guide and Walkthrough](https://game.lhg100.com/Article/UploadFiles/201512/2015121519114695.jpg)
In front of the door should stay one man, who can be easily killed.
![If you omit any loots on the way here, collect them now because entering the chamber begins the final of the chapter and return wont be possible without loading the game after a long cut scene - Crossroads [MQ] - p. 2 - Chapter 10 - Alester Sarwyck - Game of Thrones - Game Guide and Walkthrough](https://game.lhg100.com/Article/UploadFiles/201512/2015121519114771.jpg)
If you omit any loots on the way here, collect them now because entering the chamber begins the final of the chapter and return won't be possible without loading the game after a long cut scene.
Point 11
![In the chamber you meet Marianne Harlton and Jeyne - Crossroads [MQ] - p. 2 - Chapter 10 - Alester Sarwyck - Game of Thrones - Game Guide and Walkthrough](https://game.lhg100.com/Article/UploadFiles/201512/2015121519114734.jpg)
In the chamber you meet Marianne Harlton and Jeyne. Alester will put a knife to Mariann'es throat, like his brother earlier.
![When Lord Harlton rushes in the room, you have a choice - Crossroads [MQ] - p. 2 - Chapter 10 - Alester Sarwyck - Game of Thrones - Game Guide and Walkthrough](https://game.lhg100.com/Article/UploadFiles/201512/2015121519114783.png)
When Lord Harlton rushes in the room, you have a choice:
If you kill Marianne, Alester gets a trait Ladykiller (Critical Damage +2%). If you spare her, Mors gets trait Kindhearted (Chance of critical hit +1%). Choice is yours.
![Independently of what youve done, Harlton orders to kill you - Crossroads [MQ] - p. 2 - Chapter 10 - Alester Sarwyck - Game of Thrones - Game Guide and Walkthrough](https://game.lhg100.com/Article/UploadFiles/201512/2015121519114728.jpg)
Independently of what you've done, Harlton orders to kill you. Brave Jayne protects you with her own body, knowing, that he is too precious for the lord.
![Mors and Alester use the situation to jump out of window, what ends the 10th chapter - Crossroads [MQ] - p. 2 - Chapter 10 - Alester Sarwyck - Game of Thrones - Game Guide and Walkthrough](https://game.lhg100.com/Article/UploadFiles/201512/2015121519114794.jpg)
Mors and Alester use the situation to jump out of window, what ends the 10th chapter.
![1 - The Maggot in the Apple [SQ] - Chapter 10 - Alester Sarwyck - Game of Thrones - Game Guide and Walkthrough](https://game.lhg100.com/Article/UploadFiles/201512/2015121519114705.jpg)
![You receive this quest after meeting Gawen in the Castlewood cellar, but only if you chose his side - The Maggot in the Apple [SQ] - Chapter 10 - Alester Sarwyck - Game of Thrones - Game Guide and Walkthrough](https://game.lhg100.com/Article/UploadFiles/201512/2015121519114787.jpg)
You receive this quest after meeting Gawen in the Castlewood cellar, but only if you chose his side.
Point 1
![After equipping Gawen in guards suit (part of the main quest) get out on the exterior of Castlewood - The Maggot in the Apple [SQ] - Chapter 10 - Alester Sarwyck - Game of Thrones - Game Guide and Walkthrough](https://game.lhg100.com/Article/UploadFiles/201512/2015121519114739.jpg)
After equipping Gawen in guard's suit (part of the main quest) get out on the exterior of Castlewood. If you didn't make a shopping, now you should do so. I recommend buying a castlewood armor.
Talk with Domeric about Ser Ethan. Domeric sends you where Ethan and his people are training.
Point 2
![Meet with Ethan and propose a duel - The Maggot in the Apple [SQ] - Chapter 10 - Alester Sarwyck - Game of Thrones - Game Guide and Walkthrough](https://game.lhg100.com/Article/UploadFiles/201512/2015121519114855.jpg)
Meet with Ethan and propose a duel. Wildfire will be useful in the following battles, so buy it if your supplies are small (alchemist is on the other side of the exterior).
![During the dialogue with Ethan choose the battle with his men - The Maggot in the Apple [SQ] - Chapter 10 - Alester Sarwyck - Game of Thrones - Game Guide and Walkthrough](https://game.lhg100.com/Article/UploadFiles/201512/2015121519114838.jpg)
During the dialogue with Ethan choose the battle with his men. There are three of them, but you'll have to face, initially, one of them. Knock him down and regenerate energy when he is lying down. The encounter will be long, so you have to keep him on the ground - especially that you won't regenerate before the next encounter.
![After defeating him, you face two next of Ethans men - The Maggot in the Apple [SQ] - Chapter 10 - Alester Sarwyck - Game of Thrones - Game Guide and Walkthrough](https://game.lhg100.com/Article/UploadFiles/201512/2015121519114828.jpg)
After defeating him, you face two next of Ethan's men. Use wildfire on the crossbowman, to get rid of him ASAP. Then use group stunning and energy regeneration. When one enemy lefts, knocking him down.
![At the very end youll fight the Ser Ethan himself - The Maggot in the Apple [SQ] - Chapter 10 - Alester Sarwyck - Game of Thrones - Game Guide and Walkthrough](https://game.lhg100.com/Article/UploadFiles/201512/2015121519114808.jpg)
At the very end you'll fight the Ser Ethan himself. This time you'll get regenerated. If you interrupts his skills and hold him on the ground, the encounter shouldn't be problematic. In case of troubles use Wildfire.
![After the victory return to castle and go with Gawen to save Mors - The Maggot in the Apple [SQ] - Chapter 10 - Alester Sarwyck - Game of Thrones - Game Guide and Walkthrough](https://game.lhg100.com/Article/UploadFiles/201512/2015121519114841.jpg)
After the victory return to castle and go with Gawen to save Mors.
![Point 1 - Breaking Point [MQ] - Chapter 11 - Mors i Alester - Game of Thrones - Game Guide and Walkthrough](https://game.lhg100.com/Article/UploadFiles/201512/2015121519114807.jpg)
Point 1
![After jumping out of the window and the emotional, honest conversation of Alester and Mors you get to the Riverspring - Breaking Point [MQ] - Chapter 11 - Mors i Alester - Game of Thrones - Game Guide and Walkthrough](https://game.lhg100.com/Article/UploadFiles/201512/2015121519114840.jpg)
After jumping out of the window and the emotional, honest conversation of Alester and Mors you get to the Riverspring. You will run into Rymna, who tells you about seigeing the city by Valarr's men. Moment later you will be attacked by Bloodseekers. This and next encounters you will win easily, if you use lot of Mors and Alester skills. After that, Ryman sends you to Harwyn waiting in the docks.
Point 2
![Harwyn will clear the situation of Riverspring after Alesters disappearing - Breaking Point [MQ] - Chapter 11 - Mors i Alester - Game of Thrones - Game Guide and Walkthrough](https://game.lhg100.com/Article/UploadFiles/201512/2015121519114883.jpg)
Harwyn will clear the situation of Riverspring after Alester's disappearing. This talk begins also the secondary quest Safer Streets which is described at the end of this chapter.
Point 3
![After talking with Harwyn, meet with Alesters sister by the entrance to the Godswood - Breaking Point [MQ] - Chapter 11 - Mors i Alester - Game of Thrones - Game Guide and Walkthrough](https://game.lhg100.com/Article/UploadFiles/201512/2015121519114839.jpg)
After talking with Harwyn, meet with Alester's sister by the entrance to the Godswood. During this dialogue you have a choice: stand on Elyana's side and give her a proper place in the city or save all profits for you. If you stand on the her side, you'll avoid the battle on the Courtyard. .
Point 4
![When the talk ends, return to docks meet with Harwyn and Ryman who were looking for trustworthy men - Breaking Point [MQ] - Chapter 11 - Mors i Alester - Game of Thrones - Game Guide and Walkthrough](https://game.lhg100.com/Article/UploadFiles/201512/2015121519114933.jpg)
When the talk ends, return to docks meet with Harwyn and Ryman who were looking for trustworthy men. Only two men join you, but it's enough to get through Valar's men. During the dialogue you'll be attacked by Bloodseekers, but it shouldn't be problematic.
Point 5
![After that push your way through to the castle - Breaking Point [MQ] - Chapter 11 - Mors i Alester - Game of Thrones - Game Guide and Walkthrough](https://game.lhg100.com/Article/UploadFiles/201512/2015121519114992.jpg)
After that push your way through to the castle. If you've completed the quest Safer Streets before, no one will try to stop you. The one group of Valar's hounds will be standing under the very gate to castle.
Point 6
![After entering the Courtyard you have two options: fight with Waxs people or pass them by (if you choose Elyanas side in conversation by the mill) - Breaking Point [MQ] - Chapter 11 - Mors i Alester - Game of Thrones - Game Guide and Walkthrough](https://game.lhg100.com/Article/UploadFiles/201512/2015121519114953.jpg)
After entering the Courtyard you have two options: fight with Wax's people or pass them by (if you choose Elyana's side in conversation by the mill).
![Even after Elyanas intervation you can provoke Wax to send his men fight - Breaking Point [MQ] - Chapter 11 - Mors i Alester - Game of Thrones - Game Guide and Walkthrough](https://game.lhg100.com/Article/UploadFiles/201512/2015121519114957.jpg)
Even after Elyana's intervation you can provoke Wax to send his men fight. There is only three of them and the additional XP doesn't hurt you.
![Point 1 - Breaking Point [MQ] - Chapter 11 - Mors i Alester - Game of Thrones - Game Guide and Walkthrough](https://game.lhg100.com/Article/UploadFiles/201512/2015121519114931.jpg)
Point 1
![The time has come for the encounter youve been waiting the whole game - Breaking Point [MQ] - Chapter 11 - Mors i Alester - Game of Thrones - Game Guide and Walkthrough](https://game.lhg100.com/Article/UploadFiles/201512/2015121519114929.jpg)
The time has come for the encounter you've been waiting the whole game. After speaking with Valarr, Mors begin a honorable duel with him.
Before the fight Valarr will try to break your spirit. Do not discuss with him or Mors will begin with temporary weakness.
Key to the defeating Valarr is causing long lasting damage (bleeding/poison) combines with stunning and knocking down. Valarr has light armor so equip Mors in the blade weapon. Don't let the enemy to stun you, or you'll have problem. If Mors is well developed and equipped the fight will be easy.
![When you get 1/3rd HP of Valarr he tries to distract you again - Breaking Point [MQ] - Chapter 11 - Mors i Alester - Game of Thrones - Game Guide and Walkthrough](https://game.lhg100.com/Article/UploadFiles/201512/2015121519114907.jpg)
When you get 1/3rd HP of Valarr he tries to distract you again. Let him talk, what regenerates you before the next round. Continue your tactic until Valarr interrupt you again and annoy Mors for real.
![After the third round Valarr steps aside but only to use some cheap tricks - Breaking Point [MQ] - Chapter 11 - Mors i Alester - Game of Thrones - Game Guide and Walkthrough](https://game.lhg100.com/Article/UploadFiles/201512/2015121519114913.jpg)
After the third round Valarr steps aside but only to use some cheap tricks. Enough to be said that at the end of this chapter two important characters dies and Alester ends up buried alive in his father's tomb.
![Point 1 - Safer Streets [SQ] - Chapter 11 - Mors i Alester - Game of Thrones - Game Guide and Walkthrough](https://game.lhg100.com/Article/UploadFiles/201512/2015121519115044.jpg)
Point 1
![Talk with Harwyn at the beginning initiates a secondary quest - Safer Streets [SQ] - Chapter 11 - Mors i Alester - Game of Thrones - Game Guide and Walkthrough](https://game.lhg100.com/Article/UploadFiles/201512/2015121519115051.jpg)
Talk with Harwyn at the beginning initiates a secondary quest. It is eliminating single patrols of Bloodseekers what makes easier getting to the castle later on. Moving from group to the group remember, that you'll meet also random groups which can be dangerous.
Point 2
![First group stands by the platform nearby docks - Safer Streets [SQ] - Chapter 11 - Mors i Alester - Game of Thrones - Game Guide and Walkthrough](https://game.lhg100.com/Article/UploadFiles/201512/2015121519115029.jpg)
First group stands by the platform nearby docks. Valarr's boys hunted a girl from the vicinity. Hit them as hard as you can.
Point 3
![Three enemies waits in the passage leading to the castle gate - Safer Streets [SQ] - Chapter 11 - Mors i Alester - Game of Thrones - Game Guide and Walkthrough](https://game.lhg100.com/Article/UploadFiles/201512/2015121519115061.jpg)
Three enemies waits in the passage leading to the castle gate. They look bored so show them how you can be entertaining.
Point 4
![Another group is harming merchant, who was brave enough to stay on the market square - Safer Streets [SQ] - Chapter 11 - Mors i Alester - Game of Thrones - Game Guide and Walkthrough](https://game.lhg100.com/Article/UploadFiles/201512/2015121519115030.jpg)
Another group is harming merchant, who was brave enough to stay on the market square. Few slashes should give them a lesson.
Point 5
![Two thugs are blocking the passage by the bridge leading to the castle - Safer Streets [SQ] - Chapter 11 - Mors i Alester - Game of Thrones - Game Guide and Walkthrough](https://game.lhg100.com/Article/UploadFiles/201512/2015121519115043.jpg)
Two thugs are blocking the passage by the bridge leading to the castle. It's a quick fight.
Point 6
![Last brave soldiers of Valarr are beating some poor guy by the mill - Safer Streets [SQ] - Chapter 11 - Mors i Alester - Game of Thrones - Game Guide and Walkthrough](https://game.lhg100.com/Article/UploadFiles/201512/2015121519115067.jpg)
Last brave soldiers of Valarr are beating some poor guy by the mill. After defeating them quest is completed.
![Point 1 - Fight Fire with Fire [MQ] - p. 1 - Chapter 12 - Mors and Alester - Game of Thrones - Game Guide and Walkthrough](https://game.lhg100.com/Article/UploadFiles/201512/2015121519115079.jpg)
Point 1
![Ryman will take Alester out from his fathers coffin - Fight Fire with Fire [MQ] - p. 1 - Chapter 12 - Mors and Alester - Game of Thrones - Game Guide and Walkthrough](https://game.lhg100.com/Article/UploadFiles/201512/2015121519115194.jpg)
Ryman will take Alester out from his father's coffin. Your task is to save as many citizens as you can who will help you get the Riverspring back from the Valarr's hands. First group of enemies you meet at the crossroads. As you have Ryman again, use Bully to lure them out, when you stun and kill them. Remember that Ryman can heal himself and knock enemies down, so use it in difficult moments. This tactic will be good to the end of this chapter.
![If youre an archer, youll find the Percelions Sarwyck Bow which can be an upgrade for you - Fight Fire with Fire [MQ] - p. 1 - Chapter 12 - Mors and Alester - Game of Thrones - Game Guide and Walkthrough](https://game.lhg100.com/Article/UploadFiles/201512/2015121519115196.png)
If you're an archer, you'll find the Percelion's Sarwyck Bow which can be an upgrade for you.
Point 2
![Another group you find at the next crossroads, under the closed gate - Fight Fire with Fire [MQ] - p. 1 - Chapter 12 - Mors and Alester - Game of Thrones - Game Guide and Walkthrough](https://game.lhg100.com/Article/UploadFiles/201512/2015121519115197.jpg)
Another group you find at the next crossroads, under the closed gate. First get rid of light armored guys, then using blunt weapon eliminate this better armored.
Point 3
![In the northern-west corner eliminate the third group of enemies and then use Rhllors Vision to discover a passage to dungeon - Fight Fire with Fire [MQ] - p. 1 - Chapter 12 - Mors and Alester - Game of Thrones - Game Guide and Walkthrough](https://game.lhg100.com/Article/UploadFiles/201512/2015121519115164.jpg)
In the northern-west corner eliminate the third group of enemies and then use R'hllor's Vision to discover a passage to dungeon.
Point 4
![When you enter the prison, dont attack first met enemies - Fight Fire with Fire [MQ] - p. 1 - Chapter 12 - Mors and Alester - Game of Thrones - Game Guide and Walkthrough](https://game.lhg100.com/Article/UploadFiles/201512/2015121519115177.jpg)
When you enter the prison, don't attack first met enemies. They don't notice you, so round the room along the left wall. Moving clockwise and attacking single groups of enemies you avoid being surrounded and, probably, defeated.
![When all Valarrs men are dead, take keys to the cells from the table - Fight Fire with Fire [MQ] - p. 1 - Chapter 12 - Mors and Alester - Game of Thrones - Game Guide and Walkthrough](https://game.lhg100.com/Article/UploadFiles/201512/2015121519115125.jpg)
When all Valarr's men are dead, take keys to the cells from the table.
![1 - Fight Fire with Fire [MQ] - p. 1 - Chapter 12 - Mors and Alester - Game of Thrones - Game Guide and Walkthrough](https://game.lhg100.com/Article/UploadFiles/201512/2015121519115147.png)
![Meanwhile you can search body of Tyrek (if you threw him to the prison at the beginning of the game) - Fight Fire with Fire [MQ] - p. 1 - Chapter 12 - Mors and Alester - Game of Thrones - Game Guide and Walkthrough](https://game.lhg100.com/Article/UploadFiles/201512/2015121519115193.jpg)
Meanwhile you can search body of Tyrek (if you threw him to the prison at the beginning of the game). You'll find codex entry and Symbol of Defiance, useful ring for berserker (Mors
Point 5
![Use the key to free first of Ryman servants from the cell in the northern-east corner - Fight Fire with Fire [MQ] - p. 1 - Chapter 12 - Mors and Alester - Game of Thrones - Game Guide and Walkthrough](https://game.lhg100.com/Article/UploadFiles/201512/2015121519115121.jpg)
Use the key to free first of Ryman servants from the cell in the northern-east corner.
Point 6
![In the southern-west corner you find another group of the castle guard - Fight Fire with Fire [MQ] - p. 1 - Chapter 12 - Mors and Alester - Game of Thrones - Game Guide and Walkthrough](https://game.lhg100.com/Article/UploadFiles/201512/2015121519115110.jpg)
In the southern-west corner you find another group of the castle guard. After letting them go, take a look at the hidden passage in the cell.
![Now you can convince the rest of prisoners to join you - Fight Fire with Fire [MQ] - p. 1 - Chapter 12 - Mors and Alester - Game of Thrones - Game Guide and Walkthrough](https://game.lhg100.com/Article/UploadFiles/201512/2015121519115281.png)
Now you can convince the rest of prisoners to join you. Don't do that, if you want to recruit them for the Night Watch as a Mors, what is required to the quest New Blood.
Point 7
![After freeing all men, go to the door in the northern-east corner - Fight Fire with Fire [MQ] - p. 1 - Chapter 12 - Mors and Alester - Game of Thrones - Game Guide and Walkthrough](https://game.lhg100.com/Article/UploadFiles/201512/2015121519115211.jpg)
After freeing all men, go to the door in the northern-east corner. Alester will clothe as one of the Bloodseekers and you can continue the quest in disguise.
Point 8
![On the way to the castle you meet another group of Valarrs men - Fight Fire with Fire [MQ] - p. 1 - Chapter 12 - Mors and Alester - Game of Thrones - Game Guide and Walkthrough](https://game.lhg100.com/Article/UploadFiles/201512/2015121519115274.jpg)
On the way to the castle you meet another group of Valarr's men. Thanks to the disguise you can omit the battle if you choose the dialogue option: "This soldier is clearly not respecting the rules".
![After that exit the tunnels to meet Wex in the throne room - Fight Fire with Fire [MQ] - p. 1 - Chapter 12 - Mors and Alester - Game of Thrones - Game Guide and Walkthrough](https://game.lhg100.com/Article/UploadFiles/201512/2015121519115254.jpg)
After that exit the tunnels to meet Wex in the throne room.
![Point 1 - Fight Fire with Fire [MQ] - p. 2 - Chapter 12 - Mors and Alester - Game of Thrones - Game Guide and Walkthrough](https://game.lhg100.com/Article/UploadFiles/201512/2015121519115248.jpg)
Point 1
![During conversation with Wex be gentle, and he well be pleased and wont get suspicious - Fight Fire with Fire [MQ] - p. 2 - Chapter 12 - Mors and Alester - Game of Thrones - Game Guide and Walkthrough](https://game.lhg100.com/Article/UploadFiles/201512/2015121519115242.jpg)
During conversation with Wex be gentle, and he we'll be pleased and won't get suspicious. He get to know that Maester Harwyn lives and is taking care about one of Wex's men.
Point 2
![When you meet Harwyn, tell him to heal the wounded - Fight Fire with Fire [MQ] - p. 2 - Chapter 12 - Mors and Alester - Game of Thrones - Game Guide and Walkthrough](https://game.lhg100.com/Article/UploadFiles/201512/2015121519115238.jpg)
When you meet Harwyn, tell him to heal the wounded. Thanks to that your way will be much easier. Otherwise, you'll have to kill people in Harwyn's office and find other way to open the castle gate [point 4].
Point 3
![What is optional, you may save one of nobles who is forced to dance and sing for Valarrs men, and she is going to be killed by them - Fight Fire with Fire [MQ] - p. 2 - Chapter 12 - Mors and Alester - Game of Thrones - Game Guide and Walkthrough](https://game.lhg100.com/Article/UploadFiles/201512/2015121519115261.jpg)
What is optional, you may save one of nobles who is forced to dance and sing for Valarr's men, and she is going to be killed by them. Try to buy her.
Point 4
![If you killed soldiers in [point 2], killing Jorah let you get a ring needed to open the castle - Fight Fire with Fire [MQ] - p. 2 - Chapter 12 - Mors and Alester - Game of Thrones - Game Guide and Walkthrough](https://game.lhg100.com/Article/UploadFiles/201512/2015121519115231.jpg)
If you killed soldiers in [point 2], killing Jorah let you get a ring needed to open the castle. Kill him whatsoever, because he tried to please himself with beheaded body of Elyana. At sister's body you find also Gawen's Medallion and Codex entry.
Point 5
![In Alesters mother bedroom Valarrs men are mollesting servants - Fight Fire with Fire [MQ] - p. 2 - Chapter 12 - Mors and Alester - Game of Thrones - Game Guide and Walkthrough](https://game.lhg100.com/Article/UploadFiles/201512/2015121519115367.jpg)
In Alester's mother bedroom Valarr's men are mollesting servants. Kill the thugs. This part isn't obligatory.
Point 6
![Return to Wex who is in the good mood as you helped to heal his man - Fight Fire with Fire [MQ] - p. 2 - Chapter 12 - Mors and Alester - Game of Thrones - Game Guide and Walkthrough](https://game.lhg100.com/Article/UploadFiles/201512/2015121519115375.jpg)
Return to Wex who is in the good mood as you helped to heal his man. First, ask for Ravelle as a reward. For saving her like that you receive a statuette of Crone, required to the quest The Faith of Our Ancestors.
Then ask for permission to leave the castle. Wex won't oppose.
Point 7
![Get to the closed gate and tell the guard that Wex is sending you to the city and they let you exit - Fight Fire with Fire [MQ] - p. 2 - Chapter 12 - Mors and Alester - Game of Thrones - Game Guide and Walkthrough](https://game.lhg100.com/Article/UploadFiles/201512/2015121519115390.jpg)
Get to the closed gate and tell the guard that Wex is sending you to the city and they let you exit. If you didn't help heal Wex's man, use the Jorah's ring to convince them.
After opening the gate, Ryman with his men enters the castle. He joins you once again - you'll easily beat guards. Follow your known tactics.
Point 8
![Time for tactic decision comes after the encounter - Fight Fire with Fire [MQ] - p. 2 - Chapter 12 - Mors and Alester - Game of Thrones - Game Guide and Walkthrough](https://game.lhg100.com/Article/UploadFiles/201512/2015121519115381.jpg)
Time for tactic decision comes after the encounter. Take the left hall, it's more challenging. You and Ryman will handle with this easily, his man won't do that.
![Fight begins on the stairs - Fight Fire with Fire [MQ] - p. 2 - Chapter 12 - Mors and Alester - Game of Thrones - Game Guide and Walkthrough](https://game.lhg100.com/Article/UploadFiles/201512/2015121519115349.jpg)
Fight begins on the stairs. Adjust your weapon according to enemies' armors. Use Rymar as a tank.
Point 9
![In the dining room the bigger encounter awaits - Fight Fire with Fire [MQ] - p. 2 - Chapter 12 - Mors and Alester - Game of Thrones - Game Guide and Walkthrough](https://game.lhg100.com/Article/UploadFiles/201512/2015121519115318.jpg)
In the dining room the bigger encounter awaits. Ryman's healing will hold him standing, while you'll be eliminating enemies surrounding him.
![After cleaning up this room, enter the kitchen and eliminate remaining enemies - Fight Fire with Fire [MQ] - p. 2 - Chapter 12 - Mors and Alester - Game of Thrones - Game Guide and Walkthrough](https://game.lhg100.com/Article/UploadFiles/201512/2015121519115323.jpg)
After cleaning up this room, enter the kitchen and eliminate remaining enemies.
Point 10
![Go to the first floor, to your fathers office - Fight Fire with Fire [MQ] - p. 2 - Chapter 12 - Mors and Alester - Game of Thrones - Game Guide and Walkthrough](https://game.lhg100.com/Article/UploadFiles/201512/2015121519115361.jpg)
Go to the first floor, to your father's office. Three enemies there shouldn't be problematic.
Point 11
![Then go out on the terrace before the throne room - Fight Fire with Fire [MQ] - p. 2 - Chapter 12 - Mors and Alester - Game of Thrones - Game Guide and Walkthrough](https://game.lhg100.com/Article/UploadFiles/201512/2015121519115330.jpg)
Then go out on the terrace before the throne room. Choose blunt weapon, because enemies will be heavy armored. If you have a distance weapon, you'll be able to soften approaching enemies. It's even possible to attack them from the other side of balustrade. As usual, your best friends are stunning, knocking down and bullying.
Point12
![After finishing last enemy you meet Greydon and his people, who cleaned up the right wing - Fight Fire with Fire [MQ] - p. 2 - Chapter 12 - Mors and Alester - Game of Thrones - Game Guide and Walkthrough](https://game.lhg100.com/Article/UploadFiles/201512/2015121519115411.jpg)
After finishing last enemy you meet Greydon and his people, who cleaned up the right wing.
![While going to the throne room, loot the rooms which Greydon cleaned - Fight Fire with Fire [MQ] - p. 2 - Chapter 12 - Mors and Alester - Game of Thrones - Game Guide and Walkthrough](https://game.lhg100.com/Article/UploadFiles/201512/2015121519115414.jpg)
While going to the throne room, loot the rooms which Greydon cleaned.
Point 13
![Wex is waiting with his thug in the throne room - Fight Fire with Fire [MQ] - p. 2 - Chapter 12 - Mors and Alester - Game of Thrones - Game Guide and Walkthrough](https://game.lhg100.com/Article/UploadFiles/201512/2015121519115402.jpg)
Wex is waiting with his thug in the throne room. The biggest fight in the castle begins!
![Luckily, you have equal number of men - Fight Fire with Fire [MQ] - p. 2 - Chapter 12 - Mors and Alester - Game of Thrones - Game Guide and Walkthrough](https://game.lhg100.com/Article/UploadFiles/201512/2015121519115478.jpg)
Luckily, you have equal number of men. Focus on stunning Wex and use area skills when you can. In case of need, use the Wildfire. Greydon's men will get rid of weaker units, so you don't have to bother about them.
After battle pick up Wex's weapon, the Splash. Almost certainly it upgrades weapon of Alester or Mors.
Point 14
![Talk with Harwyn again to consult strategy of battle with Valarrs men - Fight Fire with Fire [MQ] - p. 2 - Chapter 12 - Mors and Alester - Game of Thrones - Game Guide and Walkthrough](https://game.lhg100.com/Article/UploadFiles/201512/2015121519115490.jpg)
Talk with Harwyn again to consult strategy of battle with Valarr's men. You can assign three groups of soldiers to Ryman, Jon and Greydon. For the best result assign like that:
![You lose the game if you assign armed citizens to Ryman, pikemen to Jon and archers with Greydon - Fight Fire with Fire [MQ] - p. 2 - Chapter 12 - Mors and Alester - Game of Thrones - Game Guide and Walkthrough](https://game.lhg100.com/Article/UploadFiles/201512/2015121519115482.png)
You lose the game if you assign armed citizens to Ryman, pikemen to Jon and archers with Greydon.
Point 15
![At the end of chapter go to the courtyard, find Mors body - Fight Fire with Fire [MQ] - p. 2 - Chapter 12 - Mors and Alester - Game of Thrones - Game Guide and Walkthrough](https://game.lhg100.com/Article/UploadFiles/201512/2015121519115419.jpg)
At the end of chapter go to the courtyard, find Mors' body. When Alester gives a ritual R'hllor's kiss to him, he revives!
![Point 1 - Bound [MQ] - Chapter 13 - Mors and Alester - Game of Thrones - Game Guide and Walkthrough](https://game.lhg100.com/Article/UploadFiles/201512/2015121519115448.jpg)
Point 1
![After the unbelievable resurrection, Mors gets to know about Valarrs plans who wants to take Jayne back from the Castlewood - Bound [MQ] - Chapter 13 - Mors and Alester - Game of Thrones - Game Guide and Walkthrough](https://game.lhg100.com/Article/UploadFiles/201512/2015121519115485.jpg)
After the unbelievable resurrection, Mors gets to know about Valarr's plans who wants to take Jayne back from the Castlewood.
Now it's a time for recruiting people to the Night Watch to finish the secondary quest New Blood. While wandering through the city, take a look at corpses - many of them has money and other loots.
![If havent done it yet, now its a good moment for visiting red priests in the Godswood and shopping for Alester - Bound [MQ] - Chapter 13 - Mors and Alester - Game of Thrones - Game Guide and Walkthrough](https://game.lhg100.com/Article/UploadFiles/201512/2015121519115595.jpg)
If haven't done it yet, now it's a good moment for visiting red priests in the Godswood and shopping for Alester. You should have enough gold to buy armors/weapons you like. If you have to choose, equip the character you'd prefer to play in the final chapters. Visit various merchants in the city.
Point 2
![When you be ready to leave Riverspring, meet with Victor in the docks and hell take you to the Castlewood - Bound [MQ] - Chapter 13 - Mors and Alester - Game of Thrones - Game Guide and Walkthrough](https://game.lhg100.com/Article/UploadFiles/201512/2015121519115580.jpg)
When you be ready to leave Riverspring, meet with Victor in the docks and he'll take you to the Castlewood.
![Point 1 - Bound [MQ] - Chapter 13 - Mors and Alester - Game of Thrones - Game Guide and Walkthrough](https://game.lhg100.com/Article/UploadFiles/201512/2015121519115564.jpg)
Point 1
![Victor will take you under the not secured gate - Bound [MQ] - Chapter 13 - Mors and Alester - Game of Thrones - Game Guide and Walkthrough](https://game.lhg100.com/Article/UploadFiles/201512/2015121519115585.jpg)
Victor will take you under the not secured gate. Profiting from the Valarr's attack you can sneak on the top of castle. You get also achievement for sneaking through the castle. To do so, you need Mors' dog, who you meet in the first corridor.
Point 2
![Bite to the death a guard patrolling stairs before the throne room and in the meantime pick up weapon form the guards room - Bound [MQ] - Chapter 13 - Mors and Alester - Game of Thrones - Game Guide and Walkthrough](https://game.lhg100.com/Article/UploadFiles/201512/2015121519115586.jpg)
Bite to the death a guard patrolling stairs before the throne room and in the meantime pick up weapon form the guards room.
![Its the weapon about which Lord Harlton was talking with his man in the [8th chapter] - Bound [MQ] - Chapter 13 - Mors and Alester - Game of Thrones - Game Guide and Walkthrough](https://game.lhg100.com/Article/UploadFiles/201512/2015121519115573.jpg)
It's the weapon about which Lord Harlton was talking with his man in the [8th chapter].
Point 3
![Omit quietly the throne room, and enter the corridor, on which corner the patrol is standing - Bound [MQ] - Chapter 13 - Mors and Alester - Game of Thrones - Game Guide and Walkthrough](https://game.lhg100.com/Article/UploadFiles/201512/2015121519115511.jpg)
Omit quietly the throne room, and enter the corridor, on which corner the patrol is standing. Don't approach them - send the dog after the Jeyna's scent.
Point 4
![Kill the guard who is an obstacle and, as a human, get to the dining room with the same route - Bound [MQ] - Chapter 13 - Mors and Alester - Game of Thrones - Game Guide and Walkthrough](https://game.lhg100.com/Article/UploadFiles/201512/2015121519115534.jpg)
Kill the guard who is an obstacle and, as a human, get to the dining room with the same route.
Point 5
![Wait a while in the dining room, to be sure that the guard patrolling this room has gone to the kitchen - Bound [MQ] - Chapter 13 - Mors and Alester - Game of Thrones - Game Guide and Walkthrough](https://game.lhg100.com/Article/UploadFiles/201512/2015121519115605.jpg)
Wait a while in the dining room, to be sure that the guard patrolling this room has gone to the kitchen. Send your dog there and kill him.
At guard's body you find key to the cellar, which leads to the next point.
Point 6
![At the top of the stairs you will notice the guard - Bound [MQ] - Chapter 13 - Mors and Alester - Game of Thrones - Game Guide and Walkthrough](https://game.lhg100.com/Article/UploadFiles/201512/2015121519115614.jpg)
At the top of the stairs you will notice the guard. Send warg when he won't be looking and kill him.
Point 7
![Staircase takes you to the next floor - Bound [MQ] - Chapter 13 - Mors and Alester - Game of Thrones - Game Guide and Walkthrough](https://game.lhg100.com/Article/UploadFiles/201512/2015121519115607.jpg)
Staircase takes you to the next floor. You'll be noticed and the guard will run to alarm rest of fellows. He isn't fast, so when you switch on the warg you'll get him easily. Kill him quickly.
Point 8
![Enter Harltons office and search it - Bound [MQ] - Chapter 13 - Mors and Alester - Game of Thrones - Game Guide and Walkthrough](https://game.lhg100.com/Article/UploadFiles/201512/2015121519115665.jpg)
Enter Harlton's office and search it. Using dog's nose you find Harlton's Bunch of Key in the fireplace. Using it you'll be able to open gate the running soldier closed.
![You can, optionally, find a hidden passage by the fireplace using the Rhllors Vision - Bound [MQ] - Chapter 13 - Mors and Alester - Game of Thrones - Game Guide and Walkthrough](https://game.lhg100.com/Article/UploadFiles/201512/2015121519115626.jpg)
You can, optionally, find a hidden passage by the fireplace using the R'hllor's Vision. Whatever you do, you get into Jayne's room without alarming anyone.
Point 9
![Unfortunately, Jayne is guarded by Ethan and his men - Bound [MQ] - Chapter 13 - Mors and Alester - Game of Thrones - Game Guide and Walkthrough](https://game.lhg100.com/Article/UploadFiles/201512/2015121519115659.jpg)
Unfortunately, Jayne is guarded by Ethan and his men. Guards' advantage and tiny room make hard to evade blows. But it has also benefits for you: area attacks of both your heroes will get everyone at once. Use special attacks of Alester and Mors alternately, so they won't run out of energy.
![After this victory, Harlton with small group of his best men will enter this floor - Bound [MQ] - Chapter 13 - Mors and Alester - Game of Thrones - Game Guide and Walkthrough](https://game.lhg100.com/Article/UploadFiles/201512/2015121519115657.jpg)
After this victory, Harlton with small group of his best men will enter this floor. It ends on the talking this time - Mors, Alester and Jeyna get barricaded in the bedroom. Use this moment to pick up loots after last battle. Thanks to the R'hllor's Vision you find a hidden passage to the staircase.
![Go downstairs, you find a lever which opens the entrance to dining room - Bound [MQ] - Chapter 13 - Mors and Alester - Game of Thrones - Game Guide and Walkthrough](https://game.lhg100.com/Article/UploadFiles/201512/2015121519115602.jpg)
Go downstairs, you find a lever which opens the entrance to dining room.
Point 10
![On the way through the dining room kill group of enemies, Jeyna starts suffering from the labour - Bound [MQ] - Chapter 13 - Mors and Alester - Game of Thrones - Game Guide and Walkthrough](https://game.lhg100.com/Article/UploadFiles/201512/2015121519115608.jpg)
On the way through the dining room kill group of enemies, Jeyna starts suffering from the labour.
Point11
![After opening the gates of dining room, youll be attacked by two groups of enemies - one from the southern, the other from the eastern wing - Bound [MQ] - Chapter 13 - Mors and Alester - Game of Thrones - Game Guide and Walkthrough](https://game.lhg100.com/Article/UploadFiles/201512/2015121519115661.jpg)
After opening the gates of dining room, you'll be attacked by two groups of enemies - one from the southern, the other from the eastern wing.
![Focus your attacks on the one group first, to neutralize it ASAP - Bound [MQ] - Chapter 13 - Mors and Alester - Game of Thrones - Game Guide and Walkthrough](https://game.lhg100.com/Article/UploadFiles/201512/2015121519115714.jpg)
Focus your attacks on the one group first, to neutralize it ASAP. In that way you avoid distraction and kill them quicker. Remember also that death of one hero isn't permanent as long as the other one survives.
Point 12
![At the end go to the throne room, where Harlton with his band is waiting - Bound [MQ] - Chapter 13 - Mors and Alester - Game of Thrones - Game Guide and Walkthrough](https://game.lhg100.com/Article/UploadFiles/201512/2015121519115791.jpg)
At the end go to the throne room, where Harlton with his band is waiting. You'll fight against your old fellow, Desmond. In this encounter focus on immobilizing him and during the time he is not moving, take care about archers and other, light armored enemies.
![When only Desmond left, use your old tactic knocking down, bleeding and finishing off - Bound [MQ] - Chapter 13 - Mors and Alester - Game of Thrones - Game Guide and Walkthrough](https://game.lhg100.com/Article/UploadFiles/201512/2015121519115740.jpg)
When only Desmond left, use your old tactic knocking down, bleeding and finishing off. Long lasting poison or fire would be a good idea also, because Desmond's health bar is incredibly long.
![After Desmonds death, rest of the Harltons men will run there - Bound [MQ] - Chapter 13 - Mors and Alester - Game of Thrones - Game Guide and Walkthrough](https://game.lhg100.com/Article/UploadFiles/201512/2015121519115742.jpg)
After Desmond's death, rest of the Harlton's men will run there. They have mostly medium armors, so defeating them should be easy. If you're wounded, you can move back to one of balconies for regeneration.
![After killing all guards, the final scenes of this chapter will be displayed - Bound [MQ] - Chapter 13 - Mors and Alester - Game of Thrones - Game Guide and Walkthrough](https://game.lhg100.com/Article/UploadFiles/201512/2015121519115748.jpg)
After killing all guards, the final scenes of this chapter will be displayed.
![Point 1 - Bound [MQ] - Chapter 13 - Mors and Alester - Game of Thrones - Game Guide and Walkthrough](https://game.lhg100.com/Article/UploadFiles/201512/2015121519115719.jpg)
Point 1
![Your team, without Jeyna but with her child, get to the Riverspring - Bound [MQ] - Chapter 13 - Mors and Alester - Game of Thrones - Game Guide and Walkthrough](https://game.lhg100.com/Article/UploadFiles/201512/2015121519115789.jpg)
Your team, without Jeyna but with her child, get to the Riverspring. From dialogue with Harwyn, you get to know about king's death and you'll leave him the baby. You get also a secondary quest Not So Wild which takes you to the Castle Black. There you receive another quest, Rituals and Litanies. Both quests are described at the end of this chapter.
![1 - Bound [MQ] - Chapter 13 - Mors and Alester - Game of Thrones - Game Guide and Walkthrough](https://game.lhg100.com/Article/UploadFiles/201512/2015121519115740.png)
![In this moment you have the last chance for completing secondary quests and calm shopping - Bound [MQ] - Chapter 13 - Mors and Alester - Game of Thrones - Game Guide and Walkthrough](https://game.lhg100.com/Article/UploadFiles/201512/2015121519115880.jpg)
In this moment you have the last chance for completing secondary quests and calm shopping.
Point 2
![When you get ready to finish chapter, go to the Alesters chamber on the first floor of Riverspring Castle - Bound [MQ] - Chapter 13 - Mors and Alester - Game of Thrones - Game Guide and Walkthrough](https://game.lhg100.com/Article/UploadFiles/201512/2015121519115883.jpg)
When you get ready to finish chapter, go to the Alester's chamber on the first floor of Riverspring Castle.
![2 - Bound [MQ] - Chapter 13 - Mors and Alester - Game of Thrones - Game Guide and Walkthrough](https://game.lhg100.com/Article/UploadFiles/201512/2015121519115805.png)
![In this moment, you have to decide which of your hero will be the main character in this history - Bound [MQ] - Chapter 13 - Mors and Alester - Game of Thrones - Game Guide and Walkthrough](https://game.lhg100.com/Article/UploadFiles/201512/2015121519115877.jpg)
In this moment, you have to decide which of your hero will be the main character in this history. It's the first crossroads leading to one of four ending in the Game of Thrones.
![Point 1 - Not So Wild [SQ] - Chapter 13 - Mors and Alester - Game of Thrones - Game Guide and Walkthrough](https://game.lhg100.com/Article/UploadFiles/201512/2015121519115819.jpg)
Point 1
![This quest begins during the conversation with Harwyn at the end of the [13th chapter] - Not So Wild [SQ] - Chapter 13 - Mors and Alester - Game of Thrones - Game Guide and Walkthrough](https://game.lhg100.com/Article/UploadFiles/201512/2015121519115891.jpg)
This quest begins during the conversation with Harwyn at the end of the [13th chapter]. Meet with Qhorin in Common Hall of Castle Black. He orders you to trace wildings, who attacked your brothers builders. Go to Mole's Town.
![There is nothing interesting in the forest, so run to the Moles Town - Not So Wild [SQ] - Chapter 13 - Mors and Alester - Game of Thrones - Game Guide and Walkthrough](https://game.lhg100.com/Article/UploadFiles/201512/2015121519115864.jpg)
There is nothing interesting in the forest, so run to the Mole's Town. When you cross the gate, you'll see three persons who run when notice you. Two of them get into brothel, one right into Mole's Town Tunnels. Get to the tunnels - it's completely optional, but this route has better loots and is more interesting.
Point 2
![After getting there, catch the scent leading deeper - Not So Wild [SQ] - Chapter 13 - Mors and Alester - Game of Thrones - Game Guide and Walkthrough](https://game.lhg100.com/Article/UploadFiles/201512/2015121519115839.jpg)
After getting there, catch the scent leading deeper. Remember to collect all loots (marked on the map).
Point 3
![Following the trace you get to the dead end - Not So Wild [SQ] - Chapter 13 - Mors and Alester - Game of Thrones - Game Guide and Walkthrough](https://game.lhg100.com/Article/UploadFiles/201512/2015121519115834.jpg)
Following the trace you get to the dead end. Use R'hllor's vision to find a hidden passage.
Point 4
![This passage on west leads to place of the ritual kill one of night watchmen - Not So Wild [SQ] - Chapter 13 - Mors and Alester - Game of Thrones - Game Guide and Walkthrough](https://game.lhg100.com/Article/UploadFiles/201512/2015121519115960.jpg)
This passage on west leads to place of the ritual kill one of night watchmen. But the scent leads to the passage on south.
Point 5
![Optionally, you can find the second scent (this which would take you here through the brothel), thanks to which you get a bag with complete armor of wildings - Not So Wild [SQ] - Chapter 13 - Mors and Alester - Game of Thrones - Game Guide and Walkthrough](https://game.lhg100.com/Article/UploadFiles/201512/2015121519115950.jpg)
Optionally, you can find the second scent (this which would take you here through the brothel), thanks to which you get a bag with complete armor of wildings. It's nothing great, but it's worth something.
Point 6
![Scents from both crossroads take you to the hideout of merchant Byam - Not So Wild [SQ] - Chapter 13 - Mors and Alester - Game of Thrones - Game Guide and Walkthrough](https://game.lhg100.com/Article/UploadFiles/201512/2015121519115948.jpg)
Scents from both crossroads take you to the hideout of merchant Byam. Force him to tell who the strangers were and where they have gone. It turns out, that Byam is a traitor who is trading with wildings. You can kill him or let him live. In the first option his friends will run to help him. Nevertheless, the fight should be piece of cake.
Point 7
![After the fight switch on dog and follow the earlier scent - Not So Wild [SQ] - Chapter 13 - Mors and Alester - Game of Thrones - Game Guide and Walkthrough](https://game.lhg100.com/Article/UploadFiles/201512/2015121519115995.jpg)
After the fight switch on dog and follow the earlier scent. Wildings' smell leads to exit from the tunnels, running to The Gidt.
![Point 8 - Not So Wild [SQ] - Chapter 13 - Mors and Alester - Game of Thrones - Game Guide and Walkthrough](https://game.lhg100.com/Article/UploadFiles/201512/2015121519115933.jpg)
Point 8
After exiting the undergrounds, switch on warg and continue your hunting.
![Group of wildings stopped at the fireplace (the same youve defeated Yohn once) - Not So Wild [SQ] - Chapter 13 - Mors and Alester - Game of Thrones - Game Guide and Walkthrough](https://game.lhg100.com/Article/UploadFiles/201512/2015121519115998.jpg)
Group of wildings stopped at the fireplace (the same you've defeated Yohn once). Approach them and call Mors.
Point 9
![Encounter bursts after short dialogue, which has to let wildings girl, Thistle, run away - Not So Wild [SQ] - Chapter 13 - Mors and Alester - Game of Thrones - Game Guide and Walkthrough](https://game.lhg100.com/Article/UploadFiles/201512/2015121519115918.jpg)
Encounter bursts after short dialogue, which has to let wildings' girl, Thistle, run away. The fight shouldn't be difficult, but don't underestimate enemies.
Point 10
![Continue hunting the runaway - Not So Wild [SQ] - Chapter 13 - Mors and Alester - Game of Thrones - Game Guide and Walkthrough](https://game.lhg100.com/Article/UploadFiles/201512/2015121519115974.jpg)
Continue hunting the runaway. Scent will take you to the edge of forest, where Mors finds out where the girl is heading.
Point 11
![Chase takes you to the Icemark, where wildings are camping - Not So Wild [SQ] - Chapter 13 - Mors and Alester - Game of Thrones - Game Guide and Walkthrough](https://game.lhg100.com/Article/UploadFiles/201512/2015121519120082.jpg)
Chase takes you to the Icemark, where wildings are camping. You have to make a decision: kill them all or conclude peace. Instinct says that you have to eliminate them, but reason whispers that they're not here to loot and murder. Sabraque and his family are running away from the winter and white travelers. The best solution is to make it peacefully.
Point 12
![If you choose the peace, you get an item upgrading wargs skills from Sabraque: Wilding Bracelet - Not So Wild [SQ] - Chapter 13 - Mors and Alester - Game of Thrones - Game Guide and Walkthrough](https://game.lhg100.com/Article/UploadFiles/201512/2015121519120079.jpg)
If you choose the peace, you get an item upgrading warg's skills from Sabraque: Wilding Bracelet.
![If you choose fight, prepare to difficult encounter - Not So Wild [SQ] - Chapter 13 - Mors and Alester - Game of Thrones - Game Guide and Walkthrough](https://game.lhg100.com/Article/UploadFiles/201512/2015121519120023.jpg)
If you choose fight, prepare to difficult encounter. To win this battle you have to use area damage, stun and knock down at maximum. In the meantime send your dog at magnar, so he doesn't hit you with the flaming sword. This battle doesn't give you anything besides XP and satisfaction.
![Return to Qhorin in the Castle Black to report about everything and end the quest - Not So Wild [SQ] - Chapter 13 - Mors and Alester - Game of Thrones - Game Guide and Walkthrough](https://game.lhg100.com/Article/UploadFiles/201512/2015121519120057.jpg)
Return to Qhorin in the Castle Black to report about everything and end the quest.
![Point 1 - Rituals and Litanies [SQ] - Chapter 13 - Mors and Alester - Game of Thrones - Game Guide and Walkthrough](https://game.lhg100.com/Article/UploadFiles/201512/2015121519120065.jpg)
Point 1
![After arriving the Castle Black in the [13th chapter], youll see a Duncan with few soldiers holding your old fellow, Patrek by the entrance to the Common Hall - Rituals and Litanies [SQ] - Chapter 13 - Mors and Alester - Game of Thrones - Game Guide and Walkthrough](https://game.lhg100.com/Article/UploadFiles/201512/2015121519120039.jpg)
After arriving the Castle Black in the [13th chapter], you'll see a Duncan with few soldiers holding your old fellow, Patrek by the entrance to the Common Hall. He is accused of ritual killing his friends. Of course it isn't true, but you have to prove it.
Point 2
![Talk with the Addam Flowers, who is on the crime scene - Rituals and Litanies [SQ] - Chapter 13 - Mors and Alester - Game of Thrones - Game Guide and Walkthrough](https://game.lhg100.com/Article/UploadFiles/201512/2015121519120056.jpg)
Talk with the Addam Flowers, who is on the crime scene. He'll try to put it on Patrek, but those are false traces.
Point 3
![Knowing that something is wrong, switch on the warg and catch the smell of victim, Myles - Rituals and Litanies [SQ] - Chapter 13 - Mors and Alester - Game of Thrones - Game Guide and Walkthrough](https://game.lhg100.com/Article/UploadFiles/201512/2015121519120046.jpg)
Knowing that something is wrong, switch on the warg and catch the smell of victim, Myles.
![Scent takes you to the Myles house, with two guards nearby - Rituals and Litanies [SQ] - Chapter 13 - Mors and Alester - Game of Thrones - Game Guide and Walkthrough](https://game.lhg100.com/Article/UploadFiles/201512/2015121519120066.jpg)
Scent takes you to the Myles' house, with two guards nearby. Call Mors to get know that Patrek was seen with the victim just before the murder.
![Talk with Patrek and shake the truth out of him - Rituals and Litanies [SQ] - Chapter 13 - Mors and Alester - Game of Thrones - Game Guide and Walkthrough](https://game.lhg100.com/Article/UploadFiles/201512/2015121519120125.jpg)
Talk with Patrek and shake the truth out of him. Yes, Patrek and Myles have been secret meetings, but it doesn't make Patrek a murderer.
Point 4
![Patrek mentioned that Myles has a squabble with Wat - Rituals and Litanies [SQ] - Chapter 13 - Mors and Alester - Game of Thrones - Game Guide and Walkthrough](https://game.lhg100.com/Article/UploadFiles/201512/2015121519120139.jpg)
Patrek mentioned that Myles has a squabble with Wat. Find Wat on the bridge and talk with him about it. As it turns out, all victims have been on a patrol years ago, on which something terrible happened.
Point 5
![Look into reports, which can be found on the second floor of Common Hall, to find out who else was on this patrol - Rituals and Litanies [SQ] - Chapter 13 - Mors and Alester - Game of Thrones - Game Guide and Walkthrough](https://game.lhg100.com/Article/UploadFiles/201512/2015121519120134.jpg)
Look into reports, which can be found on the second floor of Common Hall, to find out who else was on this patrol. Addam Flowers participated in that patrol too.
Point 6
![Go on the ground floor and search Flowers chest - Rituals and Litanies [SQ] - Chapter 13 - Mors and Alester - Game of Thrones - Game Guide and Walkthrough](https://game.lhg100.com/Article/UploadFiles/201512/2015121519120166.jpg)
Go on the ground floor and search Flowers' chest. You'll find evidences that he's a ritual killer.
![Inform Duncan about your discover and hunt Addam, who, with the lest participant of the unlucky patrol, has gone to the forest in Moles Town - Rituals and Litanies [SQ] - Chapter 13 - Mors and Alester - Game of Thrones - Game Guide and Walkthrough](https://game.lhg100.com/Article/UploadFiles/201512/2015121519120117.jpg)
Inform Duncan about your discover and hunt Addam, who, with the lest participant of the unlucky patrol, has gone to the forest in Mole's Town.
Point 7
![Before you leave the Castle Black few guards, dissatisfied that Patrek wont be punished, accost you - Rituals and Litanies [SQ] - Chapter 13 - Mors and Alester - Game of Thrones - Game Guide and Walkthrough](https://game.lhg100.com/Article/UploadFiles/201512/2015121519120104.jpg)
Before you leave the Castle Black few guards, dissatisfied that Patrek won't be punished, accost you. Tell them who is really guilty, and they won't attack you.
Point 8
![After short walk you see that youre late and Addam is killing his last victim - Rituals and Litanies [SQ] - Chapter 13 - Mors and Alester - Game of Thrones - Game Guide and Walkthrough](https://game.lhg100.com/Article/UploadFiles/201512/2015121519120153.jpg)
After short walk you see that you're late and Addam is killing his last victim. You can't do anything.
Point 9
![Now you just need to get Addam, who lost his mind - Rituals and Litanies [SQ] - Chapter 13 - Mors and Alester - Game of Thrones - Game Guide and Walkthrough](https://game.lhg100.com/Article/UploadFiles/201512/2015121519120118.jpg)
Now you just need to get Addam, who lost his mind. He is a tough enemy, but he won't face skills of Alester, Mors and warg's teeth. After the fight, return to Duncan and tell him everything. Patrek will be released and returned to the service.
![Point 1 - Light and Shadow [MQ] - p. 1 - Chapter 14 - Mors and Alester - Game of Thrones - Game Guide and Walkthrough](https://game.lhg100.com/Article/UploadFiles/201512/2015121519120138.jpg)
Point 1
![At the good beginning youll be accosted by the Gold Cloak patrol, whose leader is a Red Cloak, an elite kings watch unit - Light and Shadow [MQ] - p. 1 - Chapter 14 - Mors and Alester - Game of Thrones - Game Guide and Walkthrough](https://game.lhg100.com/Article/UploadFiles/201512/2015121519120235.jpg)
At the good beginning you'll be accosted by the Gold Cloak patrol, whose leader is a Red Cloak, an elite king's watch unit. He'll recognize you whatsoever. You have a choice: you can bribe him with two golden dragons or fight. If you bribe him, you get an achievement.
![If you decide to fight, prepare for a challenge - Light and Shadow [MQ] - p. 1 - Chapter 14 - Mors and Alester - Game of Thrones - Game Guide and Walkthrough](https://game.lhg100.com/Article/UploadFiles/201512/2015121519120238.jpg)
If you decide to fight, prepare for a challenge. As usual in group fight, focus on eliminating weaker armored enemies first, keeping Red Cloak down with your skills. Elite units always have heavy armors, so use blunt weapon. If you know how to fight and your heroes are well developed, you shouldn't have a problem.
![Maybe its time to think about new equipment - Light and Shadow [MQ] - p. 1 - Chapter 14 - Mors and Alester - Game of Thrones - Game Guide and Walkthrough](https://game.lhg100.com/Article/UploadFiles/201512/2015121519120273.png)
Maybe it's time to think about new equipment? It's almost end of the game, so further saving money is worthless. Merchants in King's Landing have lot of great things - buy them! It's your last chance for arming!
Point 2
![If youve saved Orys and/or Axe in the previous chapters, you meet him (or them) in front of the next gate - Light and Shadow [MQ] - p. 1 - Chapter 14 - Mors and Alester - Game of Thrones - Game Guide and Walkthrough](https://game.lhg100.com/Article/UploadFiles/201512/2015121519120282.jpg)
If you've saved Orys and/or Axe in the previous chapters, you meet him (or them) in front of the next gate. They'll join you and help during two next parts of this chapter. If it happens, fights on the streets of King's Landing will be a piece of cake. Alester and Mors can focus on the toughest enemies, leaving the easier ones for companions.
![You meet lot of patrols on the streets - Light and Shadow [MQ] - p. 1 - Chapter 14 - Mors and Alester - Game of Thrones - Game Guide and Walkthrough](https://game.lhg100.com/Article/UploadFiles/201512/2015121519120274.png)
You meet lot of patrols on the streets. Before you start completing rest of quests you have, eliminate them all. You obtain loot, XP and avoid many unexpected battles.
Take a look at dead members of Stark's guard(white clothes with wolf at the chest). Every corpse has a good weapon or armor. Place where you can find them are marked by sac with white glow.
Point3
![When you get to the meeting point with Harwyn, he wont be there - Light and Shadow [MQ] - p. 1 - Chapter 14 - Mors and Alester - Game of Thrones - Game Guide and Walkthrough](https://game.lhg100.com/Article/UploadFiles/201512/2015121519120285.jpg)
When you get to the meeting point with Harwyn, he won't be there. You can use warg's nose or talk with Falen. Second option is easier, because she shows you at once where Harwyn is hiding. But you have to be kind to her, to hear that.
Point 4
![Harwyn was caught by Varys and is waiting for you in the gate, nearby Sarwyck Manse - Light and Shadow [MQ] - p. 1 - Chapter 14 - Mors and Alester - Game of Thrones - Game Guide and Walkthrough](https://game.lhg100.com/Article/UploadFiles/201512/2015121519120248.jpg)
Harwyn was caught by Varys and is waiting for you in the gate, nearby Sarwyck Manse. Varys hints that a sword of valyrian steel is required to fight Valarr. In this city only one person has such sword: an old knight Clement Buckler.
Point 5
![You meet Clement under his house in the southern part of the city - Light and Shadow [MQ] - p. 1 - Chapter 14 - Mors and Alester - Game of Thrones - Game Guide and Walkthrough](https://game.lhg100.com/Article/UploadFiles/201512/2015121519120387.jpg)
You meet Clement under his house in the southern part of the city. Unfortunately, he won't give you the sword without a fight. Defeat him, and he'll give you the weapon.
![Return to Varys - Light and Shadow [MQ] - p. 1 - Chapter 14 - Mors and Alester - Game of Thrones - Game Guide and Walkthrough](https://game.lhg100.com/Article/UploadFiles/201512/2015121519120354.jpg)
Return to Varys. This weapon is a two-handed sword, so if it isn't fit your style, reforge it in something more useful. Varys sends you to a blacksmith who knows how to deal with such kind of steel.
Point 6
![At blacksmith you can reforge the sword on every weapon you like, from axe to arrowheads - Light and Shadow [MQ] - p. 1 - Chapter 14 - Mors and Alester - Game of Thrones - Game Guide and Walkthrough](https://game.lhg100.com/Article/UploadFiles/201512/2015121519120318.jpg)
At blacksmith you can reforge the sword on every weapon you like, from axe to arrowheads. This weapon will cause great damage to shadows which Valarr is summoning.
After choosing weapon, go talk with Varys. He'll send you to sewers, where you have to find a hidden passage to Maegor's Holdfast.
Point 7
![Go to the entrance to the arena, nearby the Harltons mansion - Light and Shadow [MQ] - p. 1 - Chapter 14 - Mors and Alester - Game of Thrones - Game Guide and Walkthrough](https://game.lhg100.com/Article/UploadFiles/201512/2015121519120393.jpg)
Go to the entrance to the arena, nearby the Harlton's mansion. By the way eliminate nearby patrols and pick up remaining loots.
![Point 1 - Light and Shadow [MQ] - p. 1 - Chapter 14 - Mors and Alester - Game of Thrones - Game Guide and Walkthrough](https://game.lhg100.com/Article/UploadFiles/201512/2015121519120337.jpg)
Point 1
![Varys will be waiting in the secret corridor in the southern part of sewers - Light and Shadow [MQ] - p. 1 - Chapter 14 - Mors and Alester - Game of Thrones - Game Guide and Walkthrough](https://game.lhg100.com/Article/UploadFiles/201512/2015121519120344.jpg)
Varys will be waiting in the secret corridor in the southern part of sewers. The passage is marked by the purple light.
Point 2
Initially you will meet single enemies, who will easily die under your blows.
Point 3
![All sewers are full of Bloodseekers - Light and Shadow [MQ] - p. 1 - Chapter 14 - Mors and Alester - Game of Thrones - Game Guide and Walkthrough](https://game.lhg100.com/Article/UploadFiles/201512/2015121519120471.jpg)
All sewers are full of Bloodseekers. You can avoid most of them (e.g. using hidden passages), but you'll lose chance for getting additional XP and loots. Enemies shouldn't be problematic.
Point 4
![At the end you get to the marked place - Light and Shadow [MQ] - p. 1 - Chapter 14 - Mors and Alester - Game of Thrones - Game Guide and Walkthrough](https://game.lhg100.com/Article/UploadFiles/201512/2015121519120458.jpg)
At the end you get to the marked place. After killing the nearby patrol, use the R'hllor's Vision to discover mechanism opening the closest wall.
Point 5
![Before you talk with Varys consider if you need anything from the surface - Light and Shadow [MQ] - p. 1 - Chapter 14 - Mors and Alester - Game of Thrones - Game Guide and Walkthrough](https://game.lhg100.com/Article/UploadFiles/201512/2015121519120462.jpg)
Before you talk with Varys consider if you need anything from the surface. You have a last chance to buy/sell something. After talking with Varys, you'll be lead to the Maegor's Holdfast, and Orys and Axe leave you.
![Point 1 - Light and Shadow [MQ] - p. 2 - Chapter 14 - Mors and Alester - Game of Thrones - Game Guide and Walkthrough](https://game.lhg100.com/Article/UploadFiles/201512/2015121519120436.jpg)
Point 1
![The goal of your dungeon travelling is meet Varys in the throne room - Light and Shadow [MQ] - p. 2 - Chapter 14 - Mors and Alester - Game of Thrones - Game Guide and Walkthrough](https://game.lhg100.com/Article/UploadFiles/201512/2015121519120414.jpg)
The goal of your dungeon travelling is meet Varys in the throne room. You've been here before, so finding a way shouldn't be problematic.
Point 2
![Your first serious opponent will be a pyromancer, hired by the Valarr - Light and Shadow [MQ] - p. 2 - Chapter 14 - Mors and Alester - Game of Thrones - Game Guide and Walkthrough](https://game.lhg100.com/Article/UploadFiles/201512/2015121519120417.jpg)
Your first serious opponent will be a pyromancer, hired by the Valarr. With him a group of Bloodseekers will attack you. Concentrate on the pyromancer, because his fire attacks are very powerful. Don't let him use his vials.
After killing the alchemist, get rid of remaining Valarr's men. It should be easy if you use area stun and damage.
Point 3
![Follow Petyr, the second pyromancer who run upstairs - Light and Shadow [MQ] - p. 2 - Chapter 14 - Mors and Alester - Game of Thrones - Game Guide and Walkthrough](https://game.lhg100.com/Article/UploadFiles/201512/2015121519120424.jpg)
Follow Petyr, the second pyromancer who run upstairs. There are Bloodseekers between you. Pass them and, again, focus totally on the alchemist with all your skills and the rest will be defeated easily. Pick all his things, especially the ring and Silver Key.
Point4
![Staircase takes you to a hidden passage which leads to the throne room - Light and Shadow [MQ] - p. 2 - Chapter 14 - Mors and Alester - Game of Thrones - Game Guide and Walkthrough](https://game.lhg100.com/Article/UploadFiles/201512/2015121519120451.jpg)
Staircase takes you to a hidden passage which leads to the throne room.
![Point 1 - Light and Shadow [MQ] - p. 2 - Chapter 14 - Mors and Alester - Game of Thrones - Game Guide and Walkthrough](https://game.lhg100.com/Article/UploadFiles/201512/2015121519120481.jpg)
Point 1
![After exiting the dungeons, you get on a secret staircase leading to the throne room - Light and Shadow [MQ] - p. 2 - Chapter 14 - Mors and Alester - Game of Thrones - Game Guide and Walkthrough](https://game.lhg100.com/Article/UploadFiles/201512/2015121519120562.jpg)
After exiting the dungeons, you get on a secret staircase leading to the throne room. You'll have a final battle with Valarr in a while, so prepare yourself (equipment, potions).
Point 2
![From terrace over the throne room youll see entering it Valarr - Light and Shadow [MQ] - p. 2 - Chapter 14 - Mors and Alester - Game of Thrones - Game Guide and Walkthrough](https://game.lhg100.com/Article/UploadFiles/201512/2015121519120538.jpg)
From terrace over the throne room you'll see entering it Valarr. If you're ready, go downstairs to face him.
Point 3
![This time Valarr also has a medium armor, so, besides the valyrian steel weapon, have something sticky with you - Light and Shadow [MQ] - p. 2 - Chapter 14 - Mors and Alester - Game of Thrones - Game Guide and Walkthrough](https://game.lhg100.com/Article/UploadFiles/201512/2015121519120598.jpg)
This time Valarr also has a medium armor, so, besides the valyrian steel weapon, have something sticky with you.
![Begin from ordering Mors dog to jump at Valarrs throat, to knock him down - Light and Shadow [MQ] - p. 2 - Chapter 14 - Mors and Alester - Game of Thrones - Game Guide and Walkthrough](https://game.lhg100.com/Article/UploadFiles/201512/2015121519120541.jpg)
Begin from ordering Mors' dog to jump at Valarr's throat, to knock him down. Meanwhile use alternately Alester's and Mors's skills. Try not let Valarr use his special attacks. Don't save energy, because after every cut-scene it gets regenerated.
![When Valarrs health drops to half, he summons the first shadow - Light and Shadow [MQ] - p. 2 - Chapter 14 - Mors and Alester - Game of Thrones - Game Guide and Walkthrough](https://game.lhg100.com/Article/UploadFiles/201512/2015121519120552.jpg)
When Valarr's health drops to half, he summons the first shadow. Now, change tactic: hero with the valyrian steel should attack the shadow, the other one holds Valarr on the ground.
![After killing the shadow, return to your previous tactic - Light and Shadow [MQ] - p. 2 - Chapter 14 - Mors and Alester - Game of Thrones - Game Guide and Walkthrough](https://game.lhg100.com/Article/UploadFiles/201512/2015121519120504.jpg)
After killing the shadow, return to your previous tactic. When Valarr's health bar decreases to 1/4th he'll summon a shadow again.
![With the second shadow do, like with the first one - Light and Shadow [MQ] - p. 2 - Chapter 14 - Mors and Alester - Game of Thrones - Game Guide and Walkthrough](https://game.lhg100.com/Article/UploadFiles/201512/2015121519120518.jpg)
With the second shadow do, like with the first one. If you haven't defeated the first shadow yet, now you'll have to fight both of them at once.
After finishing the second shadow, throw all you've got against Valarr. If you're on the edge of exhaustion, use the Wildfire. Valarr will soon fall on the iron throne.
![During the last scene Valarr confesses about Mors family death, what takes you automatically to the next chapter - Light and Shadow [MQ] - p. 2 - Chapter 14 - Mors and Alester - Game of Thrones - Game Guide and Walkthrough](https://game.lhg100.com/Article/UploadFiles/201512/2015121519120503.jpg)
During the last scene Valarr confesses about Mors' family death, what takes you automatically to the next chapter.
![Point 1 - Old Scar [MQ] - Chapter 15 - Game of Thrones - Game Guide and Walkthrough](https://game.lhg100.com/Article/UploadFiles/201512/2015121519120656.jpg)
Point 1
![15th chapter is a memory about events in the Westford Cottage, after sending Mors on the Wall - Old Scar [MQ] - Chapter 15 - Game of Thrones - Game Guide and Walkthrough](https://game.lhg100.com/Article/UploadFiles/201512/2015121519120681.jpg)
15th chapter is a memory about events in the Westford Cottage, after sending Mors on the Wall. Lord Tywin Lanister sent Alester and Valarr to kill Mors' family.
Point 2
![Whatever youd like to do, Morss wife will die from your hand, when Valarr is taking care about her daughter - Old Scar [MQ] - Chapter 15 - Game of Thrones - Game Guide and Walkthrough](https://game.lhg100.com/Article/UploadFiles/201512/2015121519120695.jpg)
Whatever you'd like to do, Mors's wife will die from your hand, when Valarr is taking care about her daughter. The best option is to quickly kill Cerenna, so she doesn't have to watch at her daughter's death. Remember - all this already had happen.
![Valarr, full of joy about the work, will exit the cottage - Old Scar [MQ] - Chapter 15 - Game of Thrones - Game Guide and Walkthrough](https://game.lhg100.com/Article/UploadFiles/201512/2015121519120642.jpg)
Valarr, full of joy about the work, will exit the cottage. Alester, who is rather disgusted, will leave a bloody mark on his face and ends this chapter.
![Point 1 - Ice and Fire [MQ] - Chapter 16 - Mors or Alester - Game of Thrones - Game Guide and Walkthrough](https://game.lhg100.com/Article/UploadFiles/201512/2015121519120664.jpg)
Point 1
![The final battle has come - Ice and Fire [MQ] - Chapter 16 - Mors or Alester - Game of Thrones - Game Guide and Walkthrough](https://game.lhg100.com/Article/UploadFiles/201512/2015121519120644.jpg)
The final battle has come. This time, best friends will be fighting against each other. Independently who you chose in [13th chapter, point 3] Alester and Mors will fight. Try to save the game between cut scenes and an encounter. It will be also an autosave, but it can easily overwritten.
![If you play as a Mors, remember to send a warg at Alester - Ice and Fire [MQ] - Chapter 16 - Mors or Alester - Game of Thrones - Game Guide and Walkthrough](https://game.lhg100.com/Article/UploadFiles/201512/2015121519120669.jpg)
If you play as a Mors, remember to send a warg at Alester. Independently from who is your hero, use long lasting damage (bleeding/poison) and all you've got to stun and knock down. Look carefully at your energy bar. Try to always have a little, to interrupt enemy's special attack.
Point 2
![When enemys health drops to half, Golden Cloaks enters the throne room - Ice and Fire [MQ] - Chapter 16 - Mors or Alester - Game of Thrones - Game Guide and Walkthrough](https://game.lhg100.com/Article/UploadFiles/201512/2015121519120733.jpg)
When enemy's health drops to half, Golden Cloaks enters the throne room. For a while, Alester and Mors will fight together, against the new threat. Use your well known tactics. In critical situation you can use Wildfire, if you have any left. If you have to regenerate energy, don't let Alester and Mors do it simultaneously. If you get surrounded, use pillars to split guards and recover some energy.
Point 3
![After defeating Gold Cloaks, return to previous tactic in fight friend against friend - Ice and Fire [MQ] - Chapter 16 - Mors or Alester - Game of Thrones - Game Guide and Walkthrough](https://game.lhg100.com/Article/UploadFiles/201512/2015121519120778.jpg)
After defeating Gold Cloaks, return to previous tactic in fight friend against friend. When you decrease opponent's health to half, he'll do some unexpected trick. Alester fires his weapon what causes long lasting damages, Mors will jump at Alester causing immediately damages and shortening distance.
![When you reduce enemys health to half, hell pick another ace out of his sleeve - Ice and Fire [MQ] - Chapter 16 - Mors or Alester - Game of Thrones - Game Guide and Walkthrough](https://game.lhg100.com/Article/UploadFiles/201512/2015121519120779.jpg)
When you reduce enemy's health to half, he'll pick another ace out of his sleeve. Alester calls power of R'hllor, Mors will brutally retaliate.
![Play the rest fight, as the previous parts, use vials and oils - Ice and Fire [MQ] - Chapter 16 - Mors or Alester - Game of Thrones - Game Guide and Walkthrough](https://game.lhg100.com/Article/UploadFiles/201512/2015121519120743.jpg)
Play the rest fight, as the previous parts, use vials and oils. This is almost the end, don't spare on anything. At last, your friend dies from your hand.
Point 4
![After the fight Varys brings the Jeynas child to the throne room - Ice and Fire [MQ] - Chapter 16 - Mors or Alester - Game of Thrones - Game Guide and Walkthrough](https://game.lhg100.com/Article/UploadFiles/201512/2015121519120725.jpg)
After the fight Varys brings the Jeyna's child to the throne room. This moment is an another crossroads, leading to one out of four endings (two for every character).
![If you play as a Mors choose taking care about the child, to see the best possible ending - Ice and Fire [MQ] - Chapter 16 - Mors or Alester - Game of Thrones - Game Guide and Walkthrough](https://game.lhg100.com/Article/UploadFiles/201512/2015121519120744.png)
If you play as a Mors choose taking care about the child, to see the best possible ending. Remaining ones can't be named the happy ends, but you can check it on your own.
This quest differs a bit from other secondary quests in Game of Thrones. You'll have a lot more time to complete them, and, usually, they jump between chapters. You have to notice how much time you have for every of it. Not completing the quest at time, fails it. In every of following quests you'll find an information about its time, items which you can't omit and relations with other quests.
This quest you can begin in the [1st chapter] while talking with Walder in the Common Hall of Castle Black. You'll have to find seven statuettes, which Walder will repair what provides you a powerful amulet. Some of them you find during main quests, some needs special trip.
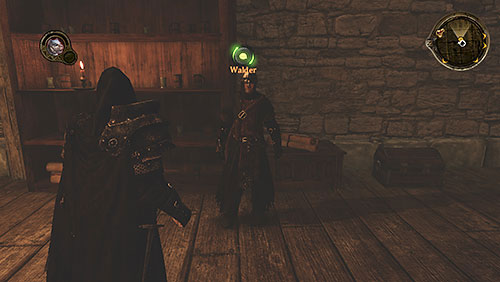
This statuette you get from Walder in the Castle Black.
![After collecting all seven statuettes visit Walder in the [13th chapter], and hell create an amulet from them: Glory of the Seven (+120 health and -25% energy costs on abilities, only for Mors) - The Faith of Our Ancestors - chapters from 1 to 13 - Continuous quests - Game of Thrones - Game Guide and Walkthrough](https://game.lhg100.com/Article/UploadFiles/201512/2015121519120723.jpg)
After collecting all seven statuettes visit Walder in the [13th chapter], and he'll create an amulet from them: Glory of the Seven (+120 health and -25% energy costs on abilities, only for Mors). During conversation between Mors and Alester you can burn this amulet, you obtain Ashes of the Seven (+12 energy recovery, only for Alester). Take an amulet for the hero you'd like to play in the last chapters.
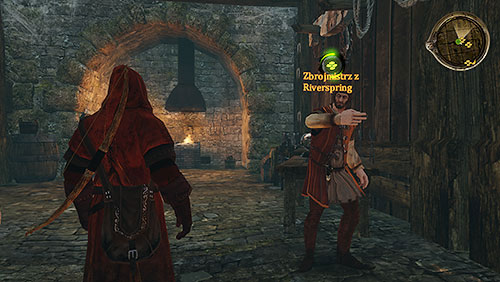
The Smith you can purchase from Riverspring Armor Merchant for 1 golden dragon and 20 silver (you can get it at any time, between chapter 2 and 13).
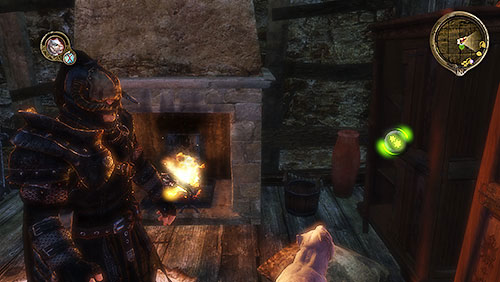
The Mother lies in the wardrobe in Jayne's room in Mole's Town. It's also a storyline item in the [5th chapter] so you can't omit it.
![You can find The Father in one of boards in Westford Cottage in [7th chapter] - The Faith of Our Ancestors - chapters from 1 to 13 - Continuous quests - Game of Thrones - Game Guide and Walkthrough](https://game.lhg100.com/Article/UploadFiles/201512/2015121519120878.jpg)
You can find The Father in one of boards in Westford Cottage in [7th chapter]. You have to take it before you leave, otherwise it's gone.

You get The Maiden from Bethany in King's Landing after completing the Self-Made Girl.
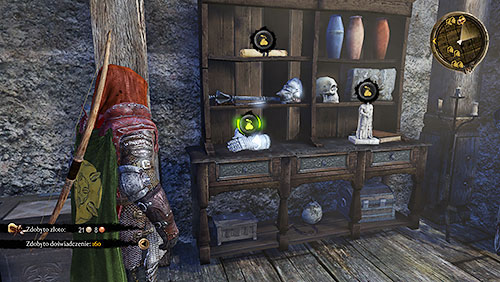
The Stranger hides in the Collector's office in King's Landing. To get it complete the quest Avenge Riverspring.
![To get The Crone, demand Ravella from Wex in [12th chapter] - The Faith of Our Ancestors - chapters from 1 to 13 - Continuous quests - Game of Thrones - Game Guide and Walkthrough](https://game.lhg100.com/Article/UploadFiles/201512/2015121519120817.jpg)
To get The Crone, demand Ravella from Wex in [12th chapter]. Otherwise you'll find the statuette at Ravella's body in [13th chapter].
![You can begin recruitment after conversation with Jeor Mormont in [7th chapter] but most of the recruits you get later - New Blood - chapters from 7 to 13 - Continuous quests - Game of Thrones - Game Guide and Walkthrough](https://game.lhg100.com/Article/UploadFiles/201512/2015121519120899.jpg)
You can begin recruitment after conversation with Jeor Mormont in [7th chapter] but most of the recruits you get later. You get a storyline item, Recruiter's Cloak (health +35, +3% to evade), but it isn't obligatory to wear it.
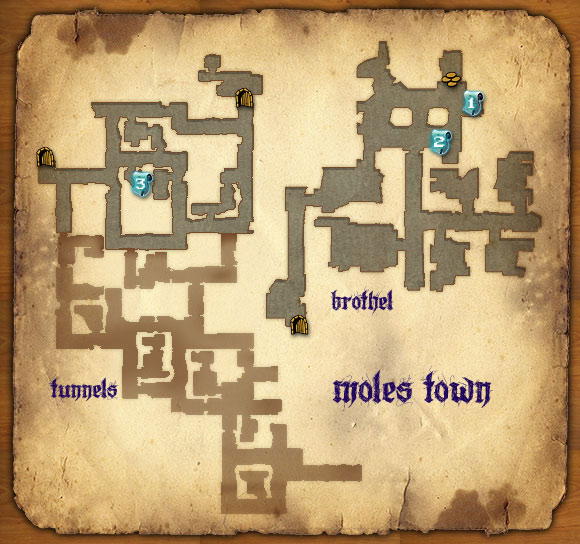
In Mole's Town you can look for first recruits to Night Watch.
Point 1
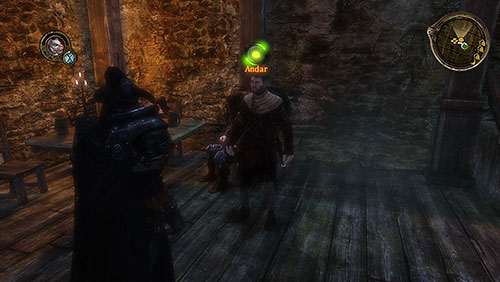
Deserter Andar is standing by the bar. Instead of killing him, force him to return to the Castle Black.
Point 2
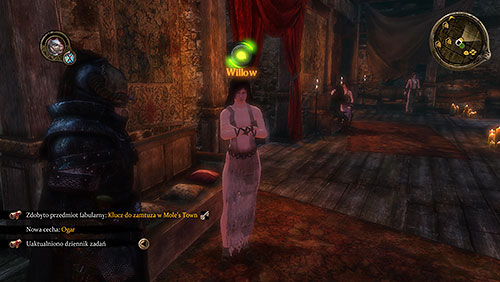
In the brothel talk with Willow, a prostitute, who has one "eager man" for you - Gulian. You find him on a lower level of tunnels.
Point 3
Gulian can be found in the northern part of tunnels, which you've visited last time. Persuade him that in the Castle Black he'll be able to show his artistic soul.
![Recruits here you can get not until the [11th chapter], after freeing Mors from the Castlewood Dungeons - New Blood - chapters from 7 to 13 - Continuous quests - Game of Thrones - Game Guide and Walkthrough](https://game.lhg100.com/Article/UploadFiles/201512/2015121519120981.jpg)
Recruits here you can get not until the [11th chapter], after freeing Mors from the Castlewood Dungeons. Leave Riverspring to start search. You'll find 6 recruits here.
Point 1
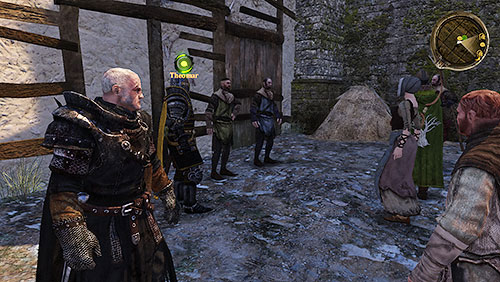
At good beginning talk with Morros, standing in front of the city gate - he'll tell you where to look for recruits.
Point 2
In the slums a lynch law takes place on two unbalanced men. Talk with the guard Theomar, to know what they did. Those two you can possess in two ways: convince them how wonderful the life on the Wall is (angry mob will attack you) or tell how terrible the conditions are there (mob will accept it as a good punishment).
Point 3
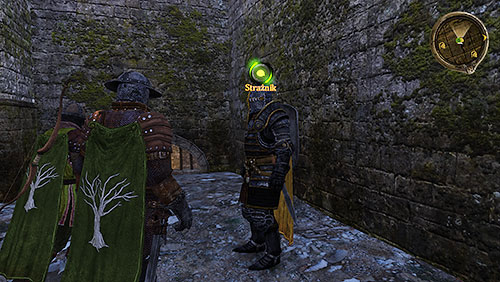
At entrance to the Red Keep talk with anonymous guard. He leads you to dungeon, so you can find some new men.
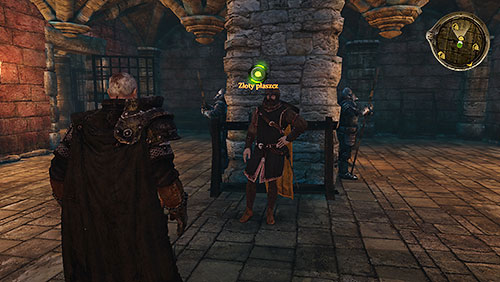
Meet with Golden Cloak in and talk about recruits. He isn't too eager to cooperate, but if you still have Gerold Hightower's Gauntlets from the quest Avenge Riverpsring you can trade it to the Golden Cloak, but bargain just once with him. If you try to bargain more, he'll attack you with 3 prisoners, so you end up with one recruit instead of four.
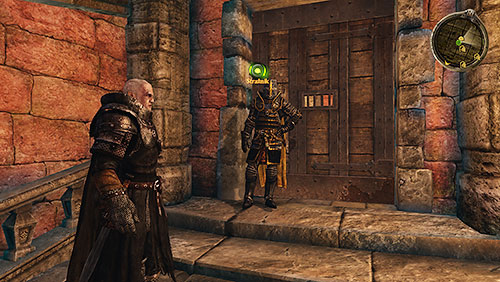
After ending recruitment in the Red Keep talk with nameless guard and he'll take you back to the city.
![In [13th chapter] after liberating Riverspring youd be able to recruit new men - New Blood - chapters from 7 to 13 - Continuous quests - Game of Thrones - Game Guide and Walkthrough](https://game.lhg100.com/Article/UploadFiles/201512/2015121519120998.jpg)
In [13th chapter] after liberating Riverspring you'd be able to recruit new men. Depending on your previous actions, you'll have between 4 to 8 recruits.
Point 1
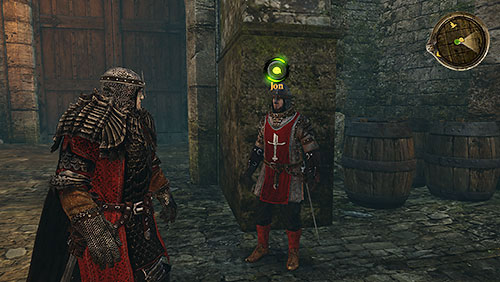
Talk with Jon standing nearby the city gates. He'll suggest to look for desperate people, ready to move on the Wall after they've lost everything during battle of Riverspring.
Point 2
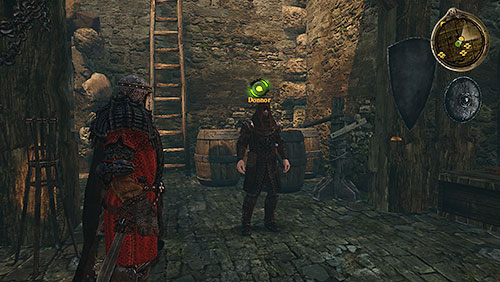
You meet Donnor, a perfect swordsman, on the market square. He accepts your proposition, if you defeat him in a duel.
Point 3
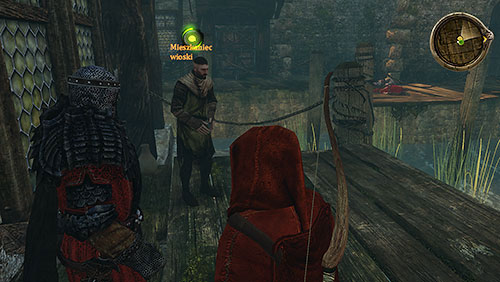
Another recruit is by the docks. Villager will tell you about his problems with local thieves, you'll meet a bit on south.
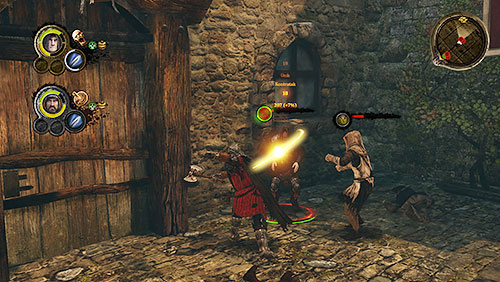
Defeat those thieves, and you'll be able to incorporate their leader. What is more, you can also take the Villager if you persuade him that such problem won't happen in the future.
Point 4
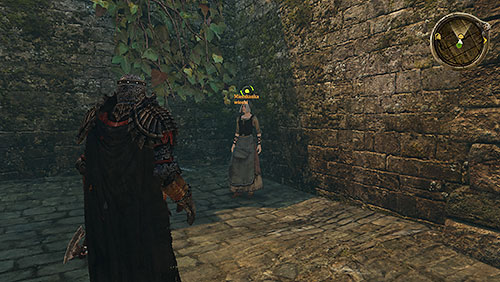
Next to the castle gate you meet a woman, who is eager to join the Watch. Unfortunately, Mormont will be disappointed about such recruit. Persuade her that it's a bad idea.
Point 5

By the mill you find Waltyr, a smith, who agrees eagerly.
Point 6
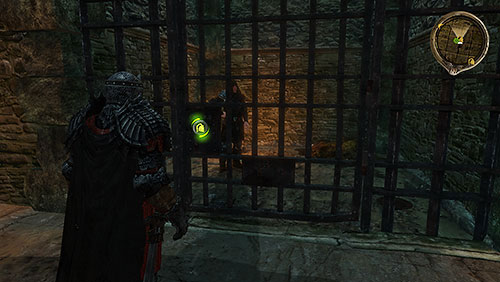
Last recruits you find in dungeons under the castle. Their number depends on Alester's decisions in previous chapter. There can be 4 for them as a maximum.
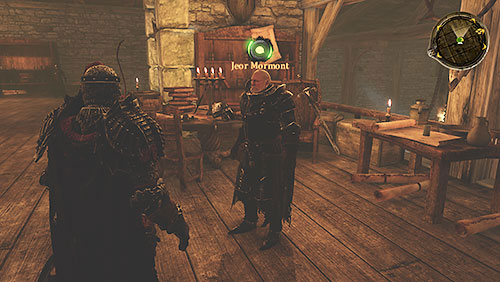
After recruiting all men, return to the Castle Black and report to Mormont. After recruit's inspection talk with him again to end the quest. You get an upgrade to the cloak you've received at the beginning of this quest (health +56, every hit after your evasion, will be a critical hit).
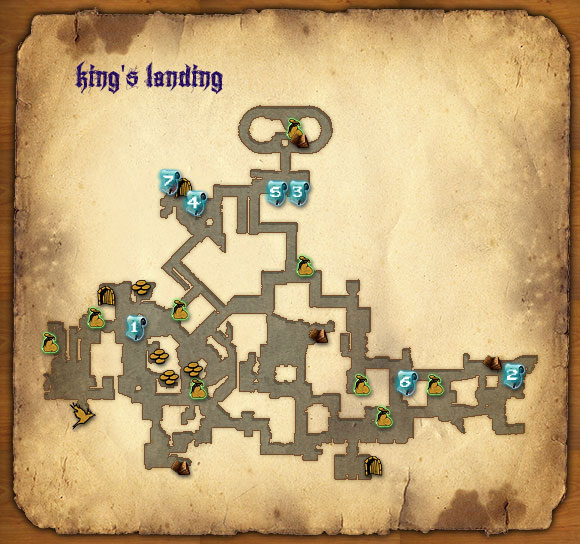
Point 1
![After completing main quest in [8th chapter] Hubb appears by the city gates - Self-Made Girl - chapters from 8 to 13 - Continuous quests - Game of Thrones - Game Guide and Walkthrough](https://game.lhg100.com/Article/UploadFiles/201512/2015121519121121.jpg)
After completing main quest in [8th chapter] Hubb appears by the city gates. He'll tell you about his friend Bethany and her trouble. Go talk with her.
Point 2
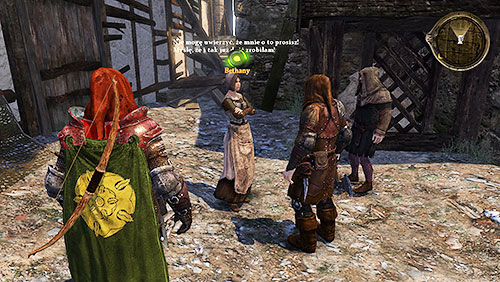
Bethany lives in the slums. She'll tell you about her love - but the man isn't talking with her for a long time. She suspects that his family forbid him to meet with Bethany.
Point 3
Under the house of Ser Gyles ask his guard to call his master. Gyles will reveal that he s going to marry someone else, and Bethany is a prostitute from Chataya's. Before the wedding Gyles doesn't want to be seen with such a girl. Tell Gyles that you have to check some things.
Point 4
Go to the brothel and talk with Chataya. She reveals another interesting facts about this history. Bethany left with a big debt. Chataya wants to get back money or the girl.
Chataya let you look around in Bethany's room. In the night table you find a letter confirming Ser Gyles' version. Bethany is lying.
Use R'hllor's Vision by the fireplace to find a mysterious herbs.
Go downstairs and ask Chataya about herbs. Bethany says she's in pregnant with Ser Gyles but Chataya's story and explanation about herbs denies it.
Point 5
As it turns out, Gyles is also a Chataya's debtor. Noble won't take a responsibility for his acts, but convince him to come and see with Bethany.
Point 6
During conversation between lovers it's obvious that Bethany is trying to use him and get money. If you choose Beth's side Gyles will give money, and Bethany pays you. Additionally she gives you a statuette of The Maiden.
If you choose Gyles's side, Bethany calls "boys" and you begin surprisingly difficult battle. The toughest enemy is Guncer. The rest of them are thick as a stick. At the beginning focus on Guncer, and while he is lying on the ground, try to kill someone from the mob around you. Save energy for knocking down and stunning, because using everything at once, you won't win. When Guncer is over, use area skills to defeat remaining enemies.
Killed archer has a weapon which should be an upgrade for you.
Point 7
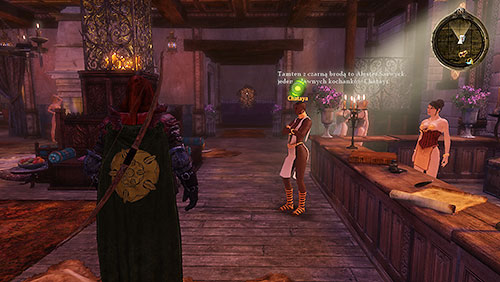
Return to Chataya. It turns out that Beth returned to brothel, so visit her.
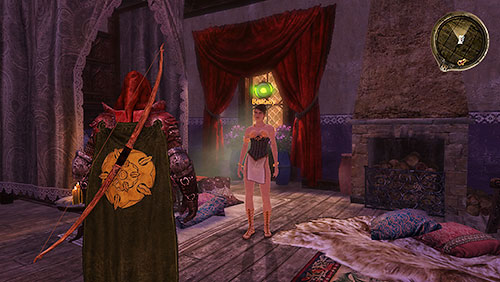
Bethany received a harsh lesson of life and decided to return to old work. As a form of "thank you" she gives you The Maiden.
![In Tunnels under Riverspring at the end of [8th chapter] you find a document about activity of Collector, who is draining the Riverspring - Avenge Riverspring -chapters from 8 to 13 - Continuous quests - Game of Thrones - Game Guide and Walkthrough](https://game.lhg100.com/Article/UploadFiles/201512/2015121519121243.jpg)
In Tunnels under Riverspring at the end of [8th chapter] you find a document about activity of Collector, who is draining the Riverspring. You have to eliminate him.
Point 1

After finding documents go to the King's Landing. Entrance to his manse is between the brothel and Harlton's mansion. If this quest seems to be too difficult you can return here with Mors in [11th chapter].
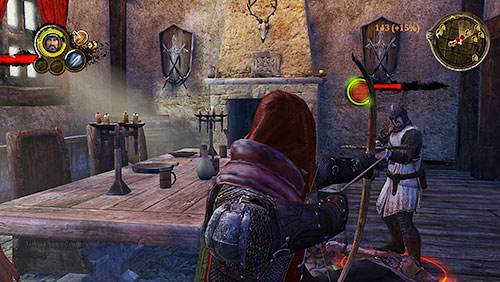
Your only task is to kill everybody in the manse, otherwise they'll kill you. Fight begin at the doorstep. Enemies in the manse have almost every type of weapons and armors, so prepare for challenging battle. Prepare different weapons for different armors. Loot everything you can.
Point 2
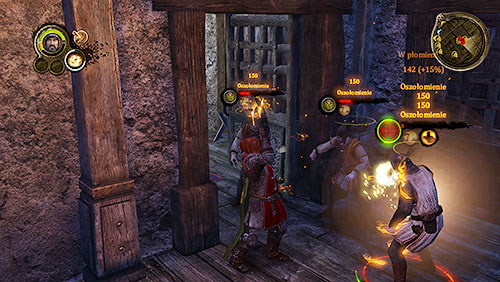
First you have to find a greeter, who is hiding in the eastern part of the manse. On the way there visit other rooms with enemies and loots. If you don't clean up those rooms before finding the greeter, some of soldiers may attack you and you'll be surrounded.
When you finally kill greeter, pick up his Key to the Collector's Cellars and return on the lower floor.
Point 3
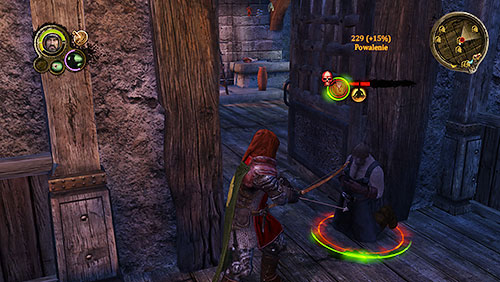
Angry man is guarding the kitchen you have to go through. Kill him.
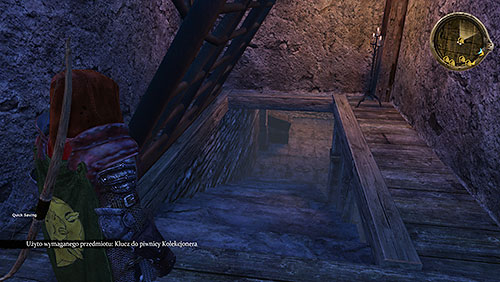
Open the hatch to cellars.
Point 4
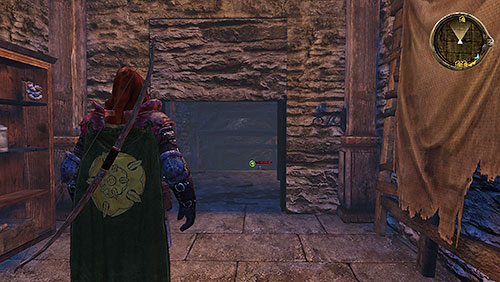
At the end of the cellar you find a dead end. Use R'hllor's Vision to find a mechanism which opens a way to the secret cellar. In the next corridors you'll face single bodyguards.
Point 5
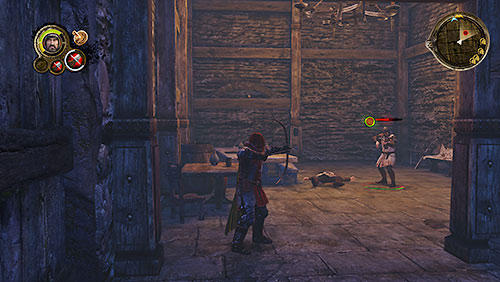
Wandering through the corridors you find cells with many slaves inside. You'll free them soon, but firstly you have to find a key.
Point 6
In this room bigger but not challenging battle takes place. Find a man in purple robe among the attackers.
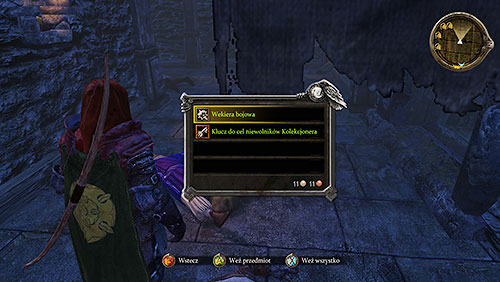
This man is a steward with Key to the Collector's Slave Cells.
![Return to [point 5] and open all cells, freeing slaves - Avenge Riverspring -chapters from 8 to 13 - Continuous quests - Game of Thrones - Game Guide and Walkthrough](https://game.lhg100.com/Article/UploadFiles/201512/2015121519121456.jpg)
Return to [point 5] and open all cells, freeing slaves. One of them shouts that he left a gift for you in the hay.
Point 7
Wandering further you find another quasi dead end. Again, use the R'hllor's Vision to find an opening mechanism.
Point 8
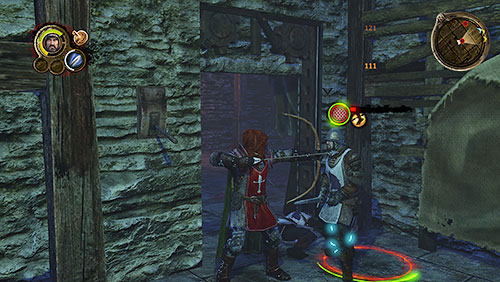
Immediately after opening the secret tunnel you get attacked by two guards.
Point 9
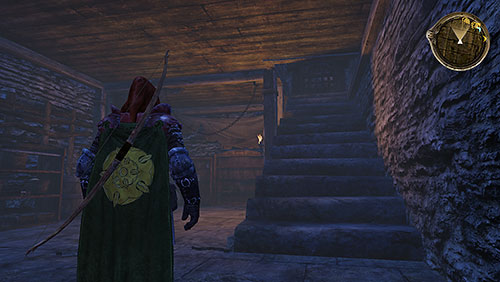
Leave the cellar to get to the last wing of Collector Manse. As in the case of greeter, first search all rooms, then attack the Collector himself.
Point 10
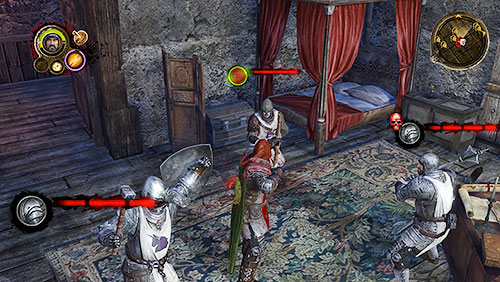
When you enter the Collector's room prepare for a hard battle. Switch on a blunt weapon, because Collector and one of his guard have a heavy armor. First eliminate the one in light armor and try to stun Collector. Don't hesitate to use one or two healing vials. If your heath drops under the half, Collector may kill you in a single hit.
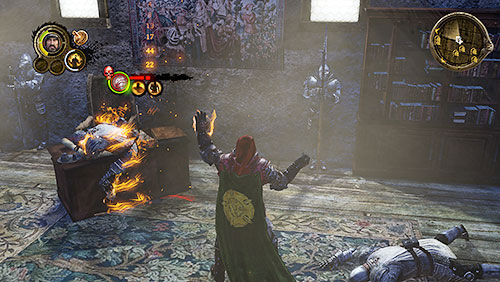
When you kill the second bodyguard, attack Collector with all you've got. Wildfire will be useful.

After the encounter loot the Collector's chamber and take everything. Among those things you find the statuette of The Stranger. Revenge is best served cold.


 Grand Theft Auto V Game Guide & Walkthrough
 Gears of War (PC) Game Guide & Walkthrough
 Grand Theft Auto: Chinatown Wars Game Guide & Walkthrough
 Ghostbusters The Video Game Game Guide & Walkthrough
 Guild Wars Game Guide & Walkthrough