This guide was made for an expansion to the Dungeon Siege 2 game released in 2005. You don't have to finish the base DS 2 in order to play Broken World, but saved characters can be transferred without problem.
In this guide you'll find full description of main quests and side quests, maps, lists of unique items and item sets.
Developers have added some new essential things in the Broken World expansion:
New race - Dwarf:
Two new character classes (described later):
Blood Assassin (mix of Ranger + Combat Mage)
Fist of Stone (mix of Fighter + Nature Mage)
Trainer (Trainer Vireni from The Dryad Outpost) - She can reset your skill points for some amount of money. After this you can spend those points again on new skills.
Henchmen - there will be three new brands (Yoren, Ressa, Celeb'hel), which you can add to your party later in the game after finishing some side quests.
F&K Society representative - this is quite innovatory, owners of the Dungeon Siege: Throne of Agony game for the PSP can now transfer their items using special codes. Additionally players can exchange Ancient Agallan Tablet found in the game for some unique items.
New pets - in Broken World you get two new pets (available from the start): Pack Ram and Kohl Beast
Pet:
Weapon:
Power:
Emanation:
Pack Ram
Kick
Earthquake - makes impact waves, which make damage and stun enemies
Determination - raises maximum health and strength of your party

Kohl Beast
Claw Slash
Flurry - for 4 seconds Kohl Beast raises his attack speed and strength
Deadly Strike - raises frequency and strength of critical damage
Reagent Recipes - with those recipes you can make unique items (even set items!), every recipe tells, which reagents are needed for enchanting.
Blood Assassin - it's a very interesting character class. Ranger with offensive spells from Combat Mage plus some new unique abilities. He's got the ability to mark more than one target at the time and cast a spell on these marked objects.
Blood Assassin Powers:
Execute
Horrific finishing move that activates the marks on enemies around the Blood Assassin, rending them, cursing them, or immolating them, depending on the mark
Damages all Marked targets according to Mark Spell damage
Ravaging Strike
Devastating shot that rips through multiple foes in an instant, stunning them in pain
Costs 40% Health of Blood Assassin
Rune of Blood
Creates a deadly rune trap
The first enemy to draw near activates it. After a short delay, the rune's magic reaches out and tears the blood from everything around it
Rune of Sacrifice
Create a rune that allows for augmented fighting abilities -- for a price
Increases damage from normal and power attacks at cost of -300% Party Health Regeneration
Blood Assassin Skills:
Shred Blood
Assassin's ranged attacks, through malicious intent and practice, can make their victims hemorrhage blood
Gives chance of extra damage
Mark Mastery
Through meditation and study, the Blood Assassin can drastically increase the potency of her marks. An enemy marked by a full master is truly living on borrowed time
Increases damage to Marked targets, duration of Marks, recovery rate of Execute Power
Bloodsoaked Shoots
With no care for the consequences, trained Blood Assassins anoint their weapons with their blood, increasing their damage
Increased ranged attack damage at the cost of character's health
Rune Mastery
Blood Assassins gain the ability to recover quickly from preparing magical traps
Increases Rate of Rune Power recharge, gives chance of instant recharge of Rune Power
Living Death
Assassin can straddle the gap between life and death. Doing so, allows her to shrug off attacks, but as she slips into realm of the dead her vulnerability to fire increases.
Increases physical damage resistance, decreases fire damage resistance
Improved Weapon Enhancements
Blood Assassin can pursue additional power through her weaponry. In doing so, she increases the potency of her weapon enhancements
Increases duration and power of weapon enchant spells
Ignite Blood
The Blood Assassin's Ravaging Strike power will set its victims' blood on fire, dealing extra damage over time
(one point skill)
70 Damage Per Second for 5 Seconds
Improved Runes
This skill increases the radius of the Blood Assassin's rune powers: Rune of Blood and Rune of Sacrifice
(one point skill)
+1 Meter to Radius of Rune Powers
Improved Execute
Talented Assassins scoff at those, whose Execute ability does not reach far enough to slay all their marked foes at once
(one point skill)
+4 Meters to Radius of Execute Power
Grace of the Night
By fully embracing the dark path of power at any cost, the Assassin enhances both her weapon skill and magical power
(one point skill)
+24 Dexterity
+16 Intelligence
Fist of Stone - this class is more defensive and used to fight in direct combat. Mixture of Nature Mage and Fighter with some new abilities.
Fist of Stone Powers:
Stone Form
A Fist of Stone's initial training is only considered complete, when he masters the ability to transform his allies into stone juggernauts with intimidating strength and resilience
Automatically Enhances Allies
Normal Recharge
Duration 10 Seconds
Radius 12 Meters
Earthquake Aura
Earthquake Aura causes the ground around the Fist of Stone to ripple and shake with his rage, destroying everything around him as he wades into battle
Automatically Enhances Self
Slow Recharge
Duration (X) Seconds
Radius 2.5 Meters
Fault Line
A Fist of Stone need only gesture to create a Fault Line in the earth. The ground along the line trembles and shakes, stunning and pummeling any enemy that tries to cross it
Targets Terrain
Normal Recharge
Duration (X) Seconds
Length (X) Meters
Eruption
Dark times require drastic measures. The Fist of Stone causes huge blocks of earth to rise up around him, encasing opponents in stone and inflicting tremendous damage
Automatically Strikes Enemies around Self
Slow Recharge
Radius (X) Meters
Petrify Duration (X) Seconds
Fist of Stone Skills:
Tremor
Melee attacks occasionally unleash a minor quake, dealing damage to nearby opponents
Causes Additional Tremor Damage on Some Attacks
Chant of Stone
Training allows the Fist of Stone to focus the power to fortify his armor and increase his health
Increases Armor and Health
Soul of Protection
Soul of Protection not only enhances defensive weapon enchantments, but also gives a chance to recover instantly after using a defensive power
Increases Power of Defensive Weapon Enchant Spells, Gives Chance of Instant Defensive Power Recharge
Soul of Strength
Imbues the Fist of Stone's offensive weapon enchantments with great strength and sometimes allows him to recovery instantly after using an offensive power
Increases Power of Offensive Weapon Enchant Spells, Gives Chance of Instant Offensive Power Recharge
Fast Recovery
Recover quickly from being knocked unconscious, allowing to heal companions and return to battle
Increases rate of health regeneration while unconscious, increases amount of health, when gaining consciousness
Quake
The Fist of Stone Raknor Earthdelver perfected his Tremor skill, causing it to crack the earth with even greater force. Many students learned his techniques before his passing
Increases Tremor Radius & Damage
Improved Fault Line
Through meditation and practice, a Fist of Stone can maintain a Fault Line longer than normal, keeping its victims stunned
(one point skill)
Increases Fault Line duration by 3 seconds
Healing Hands
Channeling life and strength through his hands, a Fist of Stone can return mortally wounded soldiers to battle within seconds
(one point skill)
Increases healing effectiveness by 125%
Strength of the Mountain
Tapping into the enduring power of the earth, warriors of stone enhance both their body's strength and their mind's wisdom
(one point skill)
+16 Strength
+12 Intelligence
Improved Tremor
The greatest Fists of Stone wade fearlessly in to hordes of foes, causing the earth to shudder with each blow
(one point skill)
+15 Tremor Damage
Groundshaker
Raknor Earthdelver was called the 'Groundshaker'. When he unleashed his strongest powers, the destruction was fearsome
(one point skill)
+0.5 Meters Earthquake Aura Radius
+0.75 Meters Eruption Radius
Quests have been divided into main quests and side quests. First described are the main quests with some short introduction to side quests.
The side quests can be completed in other order, but the solution given in this document saves a lot of walking here and there.
Completing side quests is often rewarded with unique items, so it's really worth to spend some time on them. If for some reason you can't move further in some quest, it seems that you missed something or someone. Try to read carefully the quest description and look into the journal.
The numbers describing quests are: The main quests have 1 as the second number, and the side quests 2.
For example
Part 1 (main quests)
Recommended level: 39
Objectives: 4
Maps: The Blasted Valley, The Blighted Hills

Recommended level: 40
Objectives: 4
Maps: The Blighted Hills, A Dusty Cavern, The Kelvaran Waste

Recommended level: 41
Objectives: 4
Maps: Arinth's Gorge, Hak'u Tunnels, Arinth's Heights
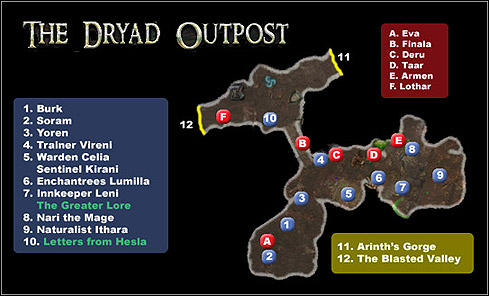
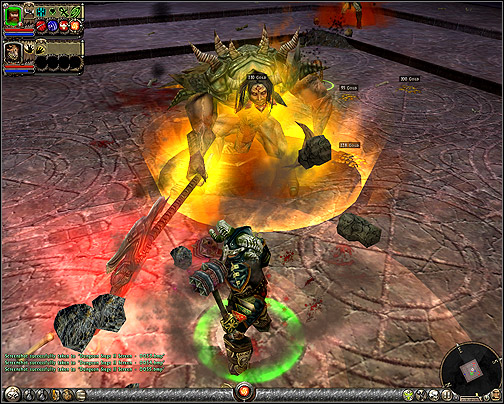
1.1.1 Kandred the Mage
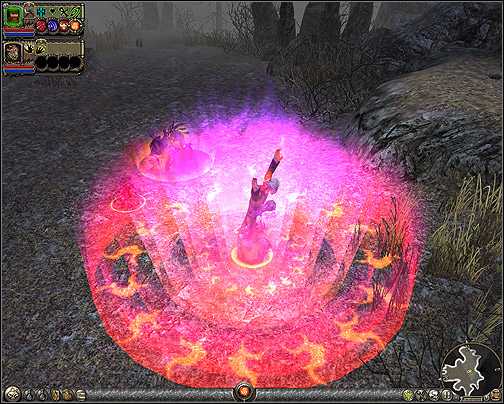
You start the game in Dryads camp [01. The Dryad Outpost], awoke by arguing Dryad and human refugee Burk. Talk to him and he'll tell you about his brother, pursued by the Dryads. Kandred was an apprentice mage taking magic lessons from unknown master. He went insane shortly after starting taking these lessons. Kandred have become unpredictable and started to threaten the Dryads. They found him dangerous and want to kill him. Burke thinks that his brother isn't dangerous at all, he only needs help. He asks you to find his brother faster than Dryads. This is your first main quest.
Objectives:
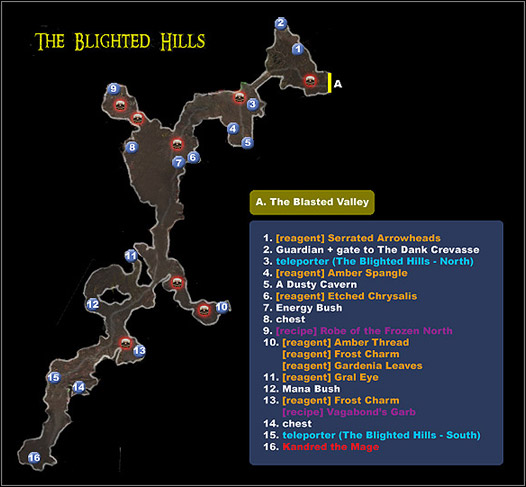
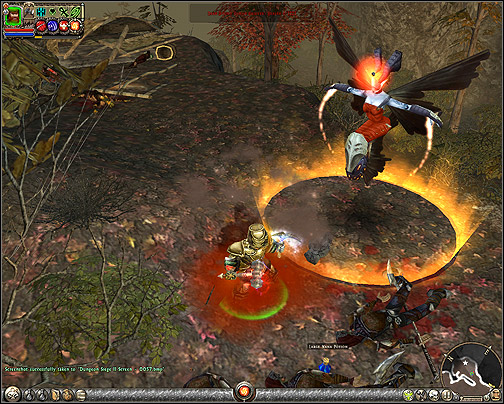
First, try to make a little lookup in the camp. Find places and characters, which you'll be often visiting. You'll find here some characters from past adventures, but you can clearly see that they're not pleased by seeing you here. To reach the location, where Kandred can be found [03. The Blighted Hills - 16], you'll have to go through The Blasted Valley and The Blighted Hills. Meantime you can complete two side quests (1.2.3 Lumilla's Special Recipe and 1.2.5 Anya). On route to Kandred you can find some reagents for enchanting. After you reach the Kandred's location, it'll appear that he's under someone's control. Your attempt to speak with him will end with a fight. Defeating him will give you very important item - Kandred's Broken Staff. With this staff you'll be able to pass the cave entrance blocked with magic. The Dryads hunting for Kandred will show up complaining about your interference. Return to The Dryad Outpost and tell Burk about his brother.
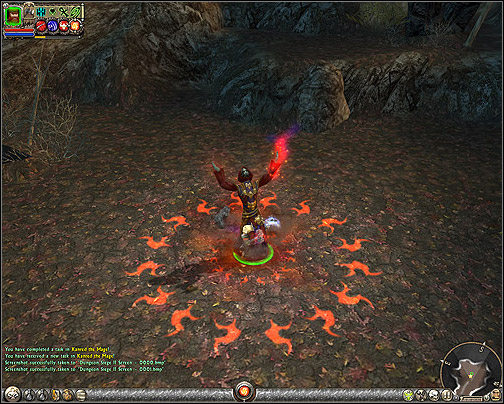
Kandred and his magic show.
1.1.2 The Mage's Tutor
Burk tells you, that during your search for Kandred, he's tutor appeared in the camp. He was chased off to the cavern in The Blighted Hills [5].
Objectives:
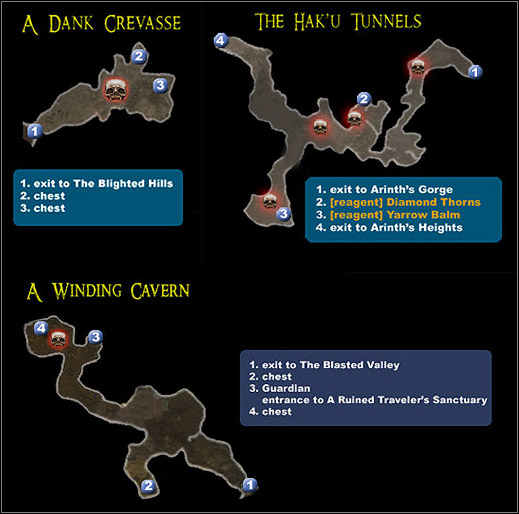
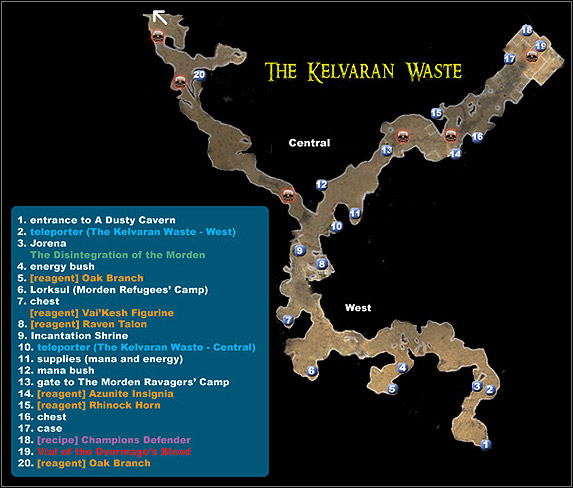
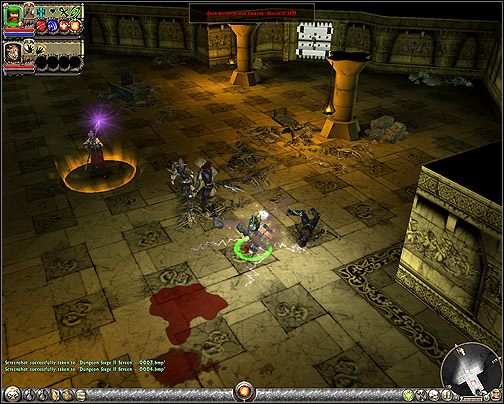
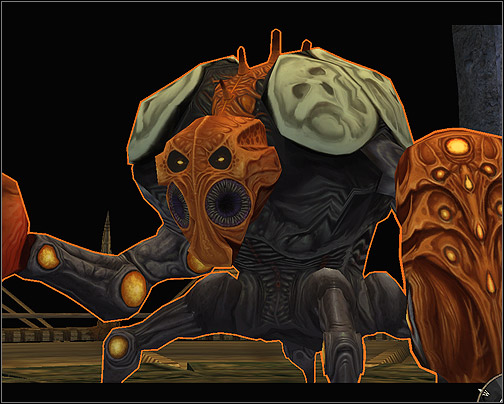
Go to the cavern you've been told about [The Blighted Hills - 5]. Thanks to Kandred's staff you'll be able to pass through the magic cave entrance (Dusty Cavern). In this point of game you can explore the other two caves, which are connected with some side quests (Dark Cave, Winding Cavern). Exploring the Dusty Cavern will lead you to another region - The Kelvaran Waste. This land is divided into three parts (West, Central, East). Some side quests are waiting for you in this region (1.2.7 Morden Redemption, 1.2.8 Morden Ravagers, 1.2.9 Greylok of the Kurgan). Kandred's tutor (Overmage of the Cinbri) you're searching for is at the end of The Kelvaran Waste - East [6]. You'll meet him earlier, his projection will be summoned by Lorksul. When you reach his location, he'll summon a beast to fight with you. After defeating it return to the outpost and speak with Sentinel Kirani [The Dryad Outpost - 5]. She tells you that Warden Celia went hunting for another rouge mage. Kirani will give you password to open the gates guarded by Stone Guardians (the password is: "peace and order"). After receiving the password, go to the Dank Crevasse cave [The Blights Hills - 2]. There's nothing quest oriented, but it's worth to explore this place for some good items.
Overmage of the Cinbri and Kikrak the Morden.
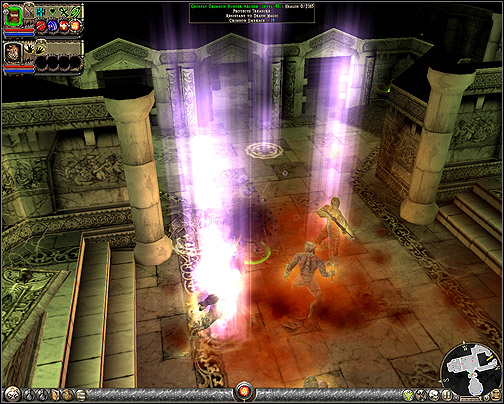
1.1.3 In Search of Celia
It appears that in this region showed up another rogue mage. Celia went hunting after him to Arinth's Height's. You'll have to find her - only Celia can open a passage to Aman'lu for you.
Objectives:
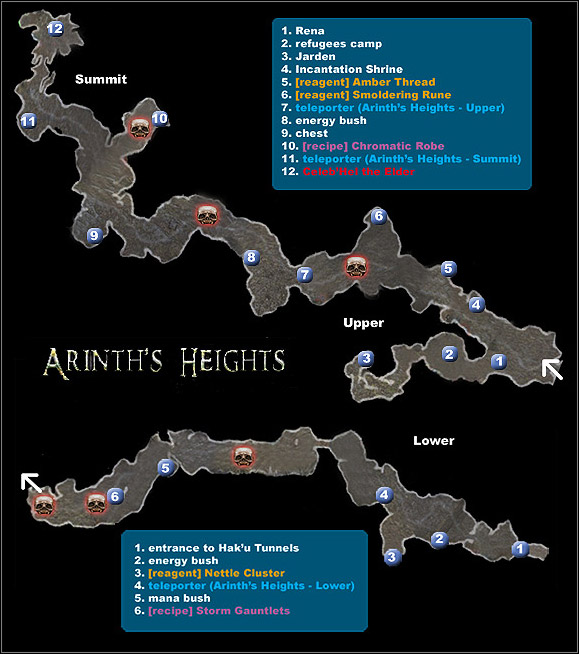
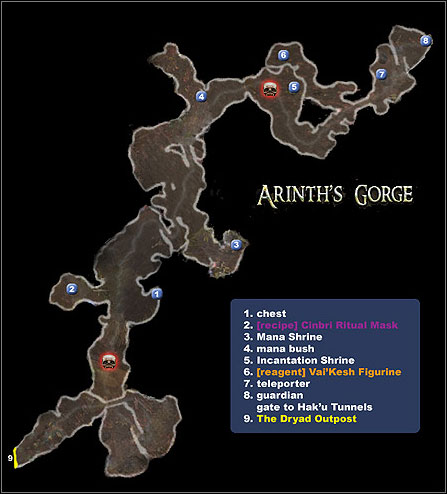
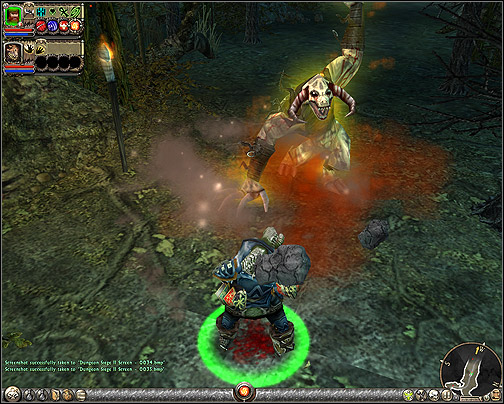
With Kirani's password you'll open the guarded gate at the end of Arinth's Gorge [Arinth's Gorge - 8]. You'll enter the Hak'u Tunnels, which leads to Arinth's Heights. This region is also divided into three parts (Lower, Upper, Summit). At the Upper part you'll find Rena [1], she starts another side quest (10. The Human Refugees). When you will reach the end of Arinth's Heights - Summit you'll encounter one of Aman'lu elders [12] - Celeb'hel. He is, like Kandred, gone completely mad. Speaking with him will lead to fight. He's much more dangerous and stronger than previous two (Kandred and Kikrak the Morden), so you must be prepared. After killing him, Celia will appear. Talk to her about passage to Aman'lu. Reward in this quest is Celeb'hels Soulstone needed later in the game.
Celeb'hel is much stronger than previous bosses...
Part 1 (side quests)

Recommended level: 39
Objectives: 6
Maps: The Blasted Valley, Glorydeep Enclave, The Halls of the Overseers

Recommended level: 39
Objectives: 2
Maps: The Blasted Valley, A Winding Cavern

Recommended level: 39
Objectives: 1
Maps: The Blasted Valley, The Blighted Hills
Recommended level: 39
Objectives: 6
Maps: The Blasted Valley, The Blighted Hills, Arinth's Gorge, The Passage to Aman'lu

Recommended level: 39
Objectives: 2
Maps: The Blasted Valley

Recommended level: 40
Objectives: 8
Maps: A Dark Cave, Arinth's Gorge, The Town of Aman'lu, The Calennor Wood, Western Vai'kesh Forest, City of Cinbri

Recommended level: 40
Objectives: 5
Maps: The Kelvaran Waste

Recommended level: 41
Objectives: 2
Maps: The Kelvaran Waste
Recommended level: 40
Objectives: 3
Maps: The Kelvaran Waste
Recommended level: 42
Objectives: 4
Maps: Arinth's Heights
1.2.1 Hunt for the Lost Dwarves
In the Dryad Outpost you'll find Yoren, a Dwarf searching his relatives, who went 150 years ago for a search of legendary Glorydeep Mine. There's no sign of life from them. Yoren suspects that they found a treasure in Glorydeep Mine and don't want to share it with other Dwarves - this is the reason for not giving a sign of life. Yoren will give you a huge Glorydeep Ruby as a confirmation of his own words. He needs someone to help him search the Dwarves and mine or any clues, which may lead him to them.
Objectives:
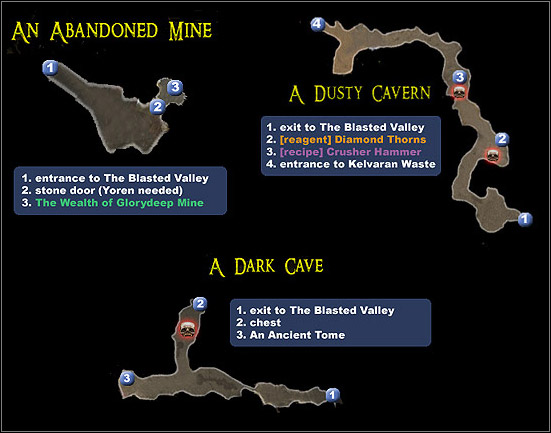
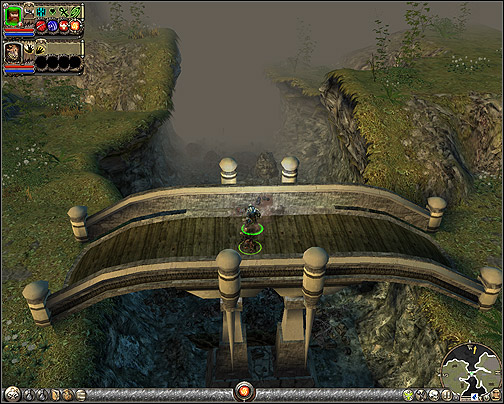
This quest goes on really long. While exploring The Blasted Valley you'll encounter a cave, only one that is unblocked at the beginning of the game. This is Abandoned Mine [18], where you can find a clue about Yoren's quest. Return to the Dryad Outpost and speak with him. He wants to see this mine, so take him with you and go back to the Abandoned Mine [18]. The fastest way to get there is using teleport to The Blighted Hills - North [3] and then across the bridge. This time you'll be able to open hidden cache, [Abandoned Mine - 2] where you can find a book about the Glorydeep Mine [Abandoned Mine - 3]. This quest will continue in the last chapter of the game. In Glorydeep Enclave you'll find a Dwarf named Rockmover, [The Halls of the Overseers - 3] which knows something about the Glitterdelve family. Again, bring over Yoren and the quest will be finished.
First clue leads to the Abandoned Mine.
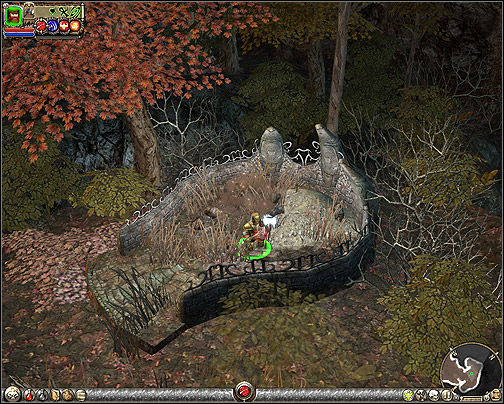
1.2.2 Missing
In the Dryad Outpost find the man named Soram. He came to this camp with his child and wife Eliza seeking safety, but recently Eliza went to the forest to gather some fruits and didn't come back. Despaired Soram tried to look for help among Dryads, but they ignore him and don't allow to go outside the camp for searching.
Objectives:
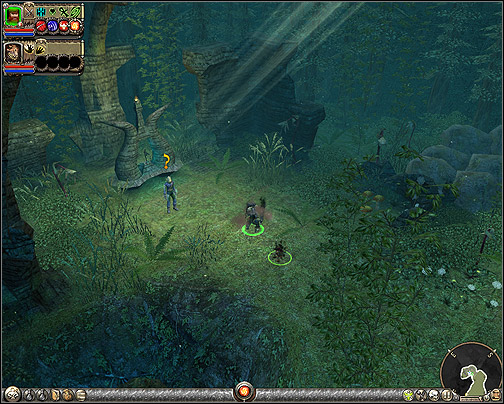
Soram tells you that his wife went south from the outpost. He's frighten that the Dryads could refuse her to enter the outpost. In such situation she would go to a place called A Ruined Traveller's Sanctuary, where she could wait for help. The get there you must go to the Blasted Valley and find a cavern [10]. Inside you'll find entrance to the place you've been told about by Soram, but it's guarded (the password is given to you by Kirani at the beginning of the 1.1.3 quest - In Search of Celia). The problem is, that the sanctuary has been raided by some kind of demonic monsters and Eliza was changed into one of them! There's no other way than killing her. Take her locket and give it back to Soram. He won't believe you at all and will attack you. You can kill him or spare his life, your choice won't affect later game.
Eliza went to gather fruits and ended in place like this...
1.2.3 Lumilla's Special Recipe
This quest is to introduce the basics of using reagent recipes. Enchantress Lumilla learned the art of using recipes and will share this knowledge with you. She needs some reagents to show you how this works. In reward you'll get a unique ring.
Objectives:
This quest is simple. You have to find needed reagents - here's, where they can be found:
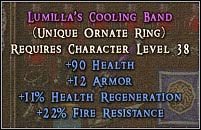
Lumilla will reward you with this ring.
1.2.4 Naturalist Ithara's Research
Ithara is studying strange creatures, which appeared lately in the forest. After seeing some species, she needs more samples to continue studies.
Objectives:
Getting all the samples won't be hard. While exploring new areas you'll fight with brand new species of monsters and the samples will be collected automatically after killing first monster from a specie. Itchara will reward you with unique armor and new task.
Places to find samples:
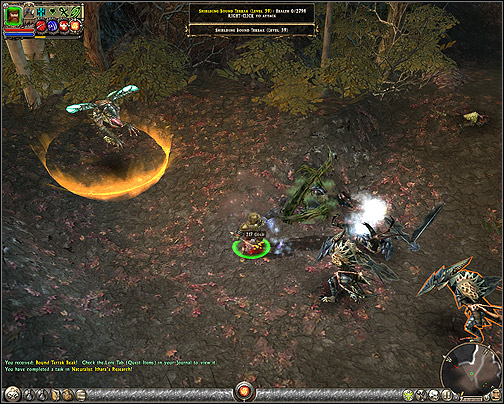
Getting samples for Ithara.
1.2.5 Anya
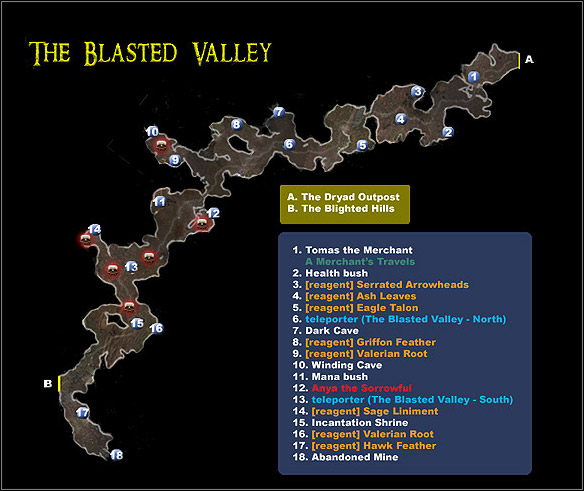
Right after you past the south gate of the Dryad outpost you'll meet Tomas, a merchant traveller. He's got problem with his business partner Anya. She's gone mad (just like Kandred...) and she started to kill. When Tomas tried to stop her, she managed to escape and steal his backpack. Without his backpack he's ruined, so he wants you to help him regain it. Near Tomas you'll find a lore book called "A Merchant's Travels".
Objectives:
This is side quest, which you can finish first. Anya can be found in the Blasted Valley [12]. Going there try to pick up reagents found on your route. You'll encounter two cave entrances[5 and 10], but they gonna be blocked with magic. When you'll be near Anya's camp, you'll see her from a small hill. Not far from this place is a mana bush [11] and teleporter [13], so you can prepare for a fight with Anya. She's easy enough to kill, but has minions along. After defeating her get A Leather-Bound Backpack and bring it back to Tomas. As reward he'll give you a recipe. After this quest Tomas will transform into normal merchant.
Anya, a really hot girl...
1.2.6 The Ancient Tome
While exploring the cave in the Blasted Valley area, [7] you'll find a strange looking book [A Dark Cave - 3]. You can fell the magic emanating from it, but unfortunately you can't read the words written on its pages.
Objectives:
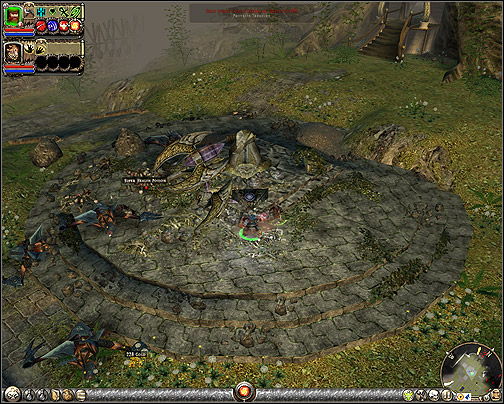
In this quest you'll need help from Nari [The Dryad Outpost - 8]. Show her the ancient tome, and she will tell you that this book is used to summon the legendary spirit of Nymphara. Nari thinks that summoning this spirit could be helpful in solving the mystery of murdered Arisu, which was killed recently. Nari have read from the book, that she will need a few strange ingredients. You'll have to get:
When you'll collect all the items, Nari will be able to summon the ghost of Arisu with help of Nymphara. Talk to Arisu and you will be rewarded.
Here you'll find a Mana Shrine Stone.
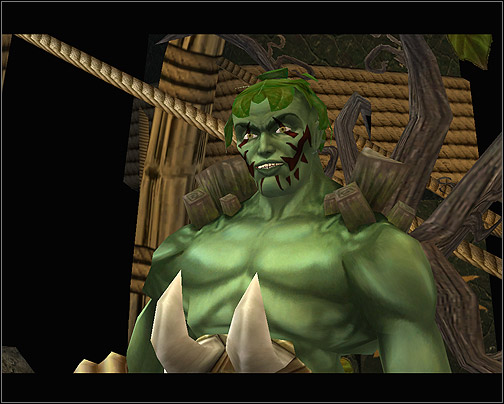
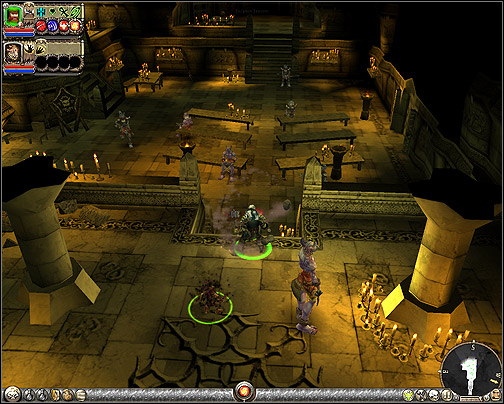
1.2.7 Morden Redemption
During your journey through the Kelvaran Waste - West you'll encounter a small Morden camp [6]. They look really pathetic and weak. Their leader, Lorksul, tells you that some strange kind of plague is responsible for their condition. It weakens their powers and minds. But not every Morden are dying, there's a group called Ravagers. They are strong at cost of being Overmage's servants. They often attack the remains of Lorksul's camp, the consequence is that dying Morden can't go out the camp for some food. You'll be asked to bring some food. To finish this quest you'll have to complete the 1.2.8 quest first.
Dying Morden.
Objectives:
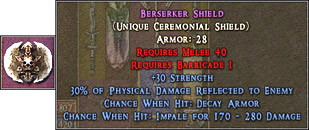
Return to the Dryad Outpost and speak with Quatermaster Olara (she's near the Ithara's place). Because the Dryads do not sympathize with the Morden, you'll be given a pack of food with a poisoned addition. Go back to Lorksul [The Kelvaran Waste - West - 6] and give him the food pack. Decision about giving him the poison doesn't have any influence on the later game. When Lorksul gets the food, he will tell you a story about a vial of Overmage's blood. He suspects that Morden Ravagers get their strength from it. He wants to get this vial to summon projection of Overmage and ask him a few questions about the plague. Bring it to him (it's a 1.2.8 quest). The projection will tell Lorksul that the Mordens are doomed and there is no way to change this back. In reward you'll get a Berserker Shield and Bone Helm Recipe.
A gift from Lorksul.
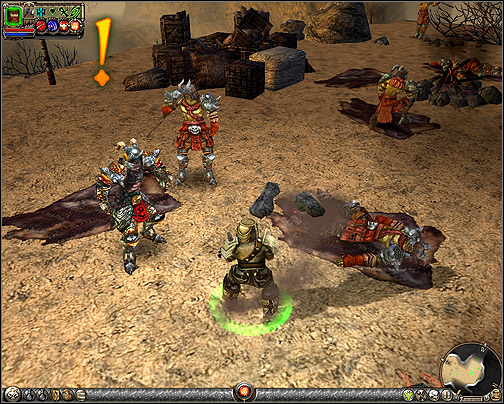
1.2.8 Morden Ravagers
The Ravagers faction you've been told about keeps their powers for loyalty to Overmage. Their skin is pale white and they have to carry sign of the Overmage on their bodies. Lorksul thinks that the vial of blood is the source of their power. If someone could take it away from them, they'll be doomed like the other Morden and Lorksul could speak with projection of the Overmage. This quest is required for 1.2.7 Morden Redemption.
Objectives:
The Morden Ravagers camp is in The Kelvaran Waste - Central [13]. Before entering there you can quickly take something from [11] and [12]. In Morden camp search over buildings, you can find there some reagents [14 and 15] and a chest [16]. Vial of blood can be found at the end of this map, it's guarded by strong group of Morden Ravagers. When you get it, you're back in the 1.2.7 quest.
Morden Ravagers are not really pleased with your presence.
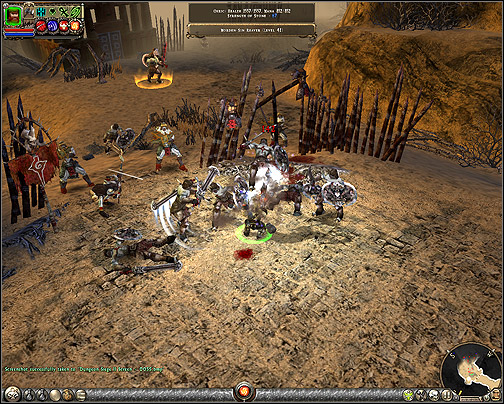
1.2.9 Greylok of the Kurgan
Just after you'll enter The Kelvaran Waste, you'll meet Jorena [3]. She's trying to hunt down gigantic, wolf-like beast, which appeared in this region. The beast is not only huge, but also can talk. It has told Jorena that this region is very suitable for living and wants to settle here. She is scared with the plans of the beast. You'll have to help her getting rid of it.
Objectives:
Jorena have prepared some trap for the beast. To find Greylok, you'll have to go to The Kelvaran Waste - East [2]. Leave the trap in front of the cave and wait for the beast. Kill it and take Greylok's Skin. Return to Jorena and give her the skin. You'll be rewarded with Greylok Skin Gloves.
Reward for killing the beast.
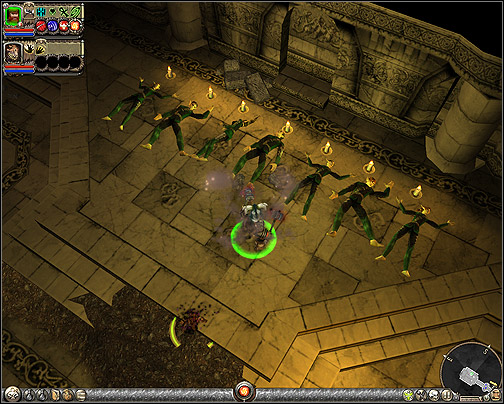
1.2.10 The Human Refugees
In Arinth's Heights - Upper you'll find Watcher Rena [1]. She warns you before entering further into canyon and tells a story about massacred refugee camp. Her Dryad sisters are gone mad and started to kill everyone in the camp. She's too weak to handle this, but maybe you can go there and see what's happening there.
Objectives:
The canyon is right behind Rena. When you'll enter the refugee camp, [2] you'll see a real massacre. Bounded Dryads are killing everything in their sight. You can't help them, so kill them. Follow the blood marks on the ground and you'll find a living man at the end of the road [3]. Jarden will tell you, what happened here. After that return to Rena and speak with her.
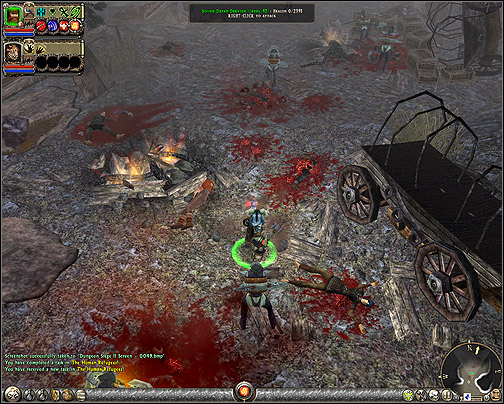
Remains of the refugee camp.
Part 2 (main quests)
Recommended level: 43
Objectives: 3
Maps: Hak'u Tunnels, Old Aman'lu, The Town of Aman'lu

Recommended level: 43
Objectives: 5
Maps: The Town of Aman'lu, Western Vai'lutra Forest, Abandoned Elven Ruin
Recommended level: 45
Objectives: 4
Maps: The Town of Aman'lu, Western Vai'lutra Forest, Calennor Stronghold

Recommended level: 46
Objectives: 6
Maps: The Town of Aman'lu, Solanum
2.1.1 Elves Under Siege
After confrontation with Celeb'hel in Arinth's Heights, you're very concerned about Aman'lu. If the Overmage was able to control one of Aman'lus elders then the whole city is in great danger! You have to get there!
Objectives:
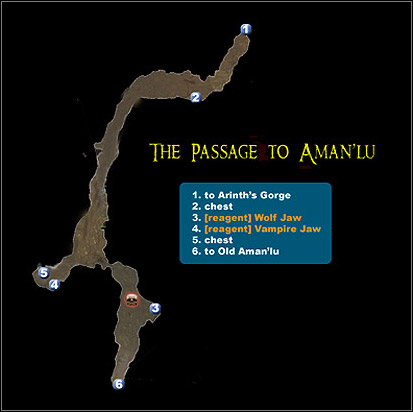
Celia will open the passage to Aman'lu for you. Teleport to the Dryad Outpost and go to Arinth's Gorge. There's Celia near the bridge. Talk with her. She'll open the cave entrance. In the Passage to Aman'lu you will find the last sample for Ithara's quest (A Bound Hyena Head). Go back to the Dryad Outpost and finish this quest. Return to the passage and go to the Old Aman'lu. This is ruined part of the city, full of monsters. The part called The Town of Aman'lu is hidden behind the hill. Find it and you'll finish this quest.
Ruined Aman'lu.
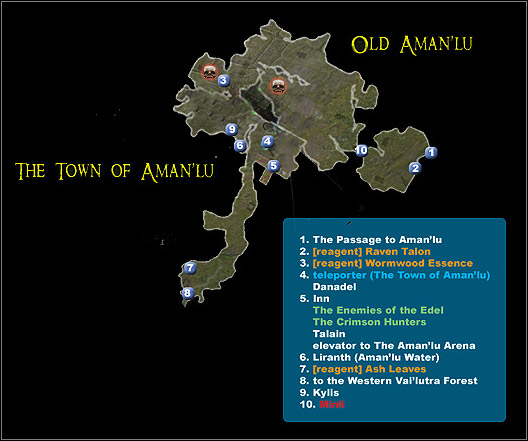
In the Town of Aman'lu you'll find your new base. There's a merchant, teleporter and so on. But you won't find here some of the characters from the Dryad Outpost like pet trainer or F&K Society Representative, so you'll have to teleport back to the Dryad Outpost when needed. At the inn [5] you can find an elevator to the arena known from DS 2, where you can take another side quest (2.2.4 The Aman'lu Arena). In Aman'lu you can find some characters, which are giving side quests. One of them can be done almost instantly, just speak with Kylis [9] (2.2.3 Minli the Fearie). Near the water can be found Liranth, he'll give you Vial of Aman'lus Blessed Water needed for Nari's quest (1.2.6 The Ancient Tome). At the inn you'll find Talain. He seeks for his lost companions (2.2.6 The Vai'kesh).
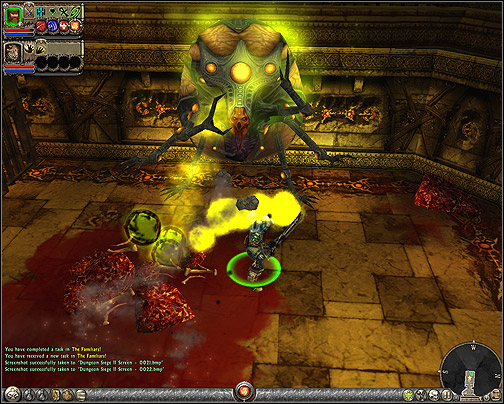
2.1.2 The Familiars
As you suspected, the Aman'lu has been destroyed. Many Elves died and those, who survived lost their powers. Their leader Danadel could help you in your fight with Overmage, but first you have to help him and his people. The city is danger caused by terrible monsters coming from the forest. They are created by demonic creature called Familiar Surgeon.
Objectives:
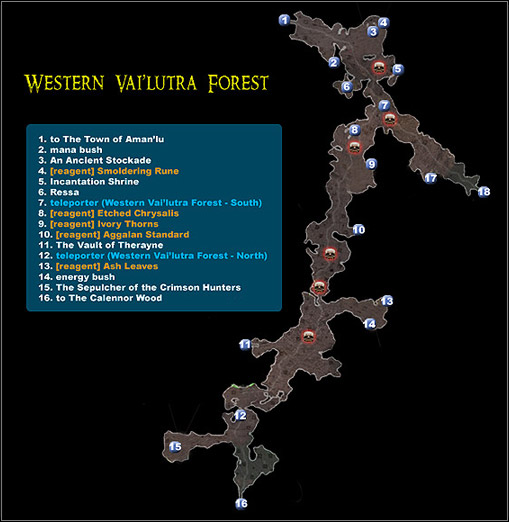
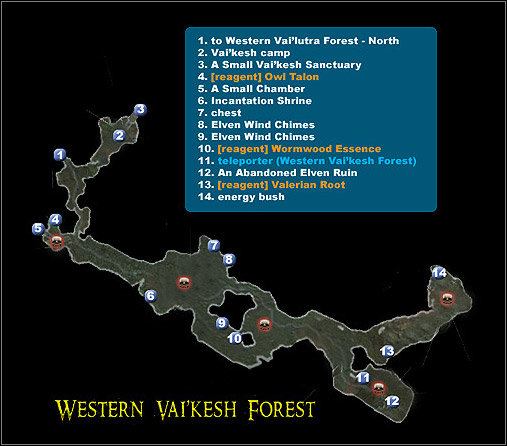
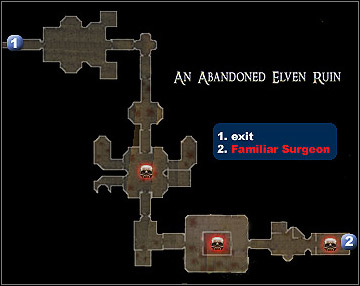
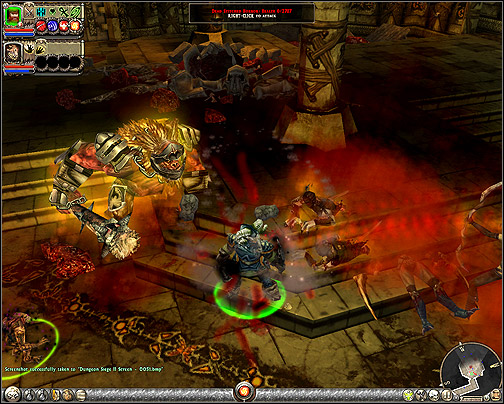
Danadel tells you that those creatures are coming from The Western Vai'lutra Forest and the Familiar Surgeon itself can be hidden in some underground hideout. The Vai'lutra Forest is divided into two parts (South, North). The path from Aman'lu leads to south part of Western Vai'lutra Forest [1]. This place looks really creepy. Not far from the forest entrance you'll find strange building with terrifying doors [3]. You can't open those doors at the moment, so go to the place, where you'll find Ressa [6]. This Blood Assassin gives you a side quest (2.2.5 Questionable Methods). Activate nearby teleporter [7] and go to the Vai'kesh Forest, [18] where Talain's people had been lost (2.2.6 The Vai'kesh). As you enter the Vai'kesh Forest, you'll find a Vai'kesh camp, [Western Vai'kesh Forest - 2] where the 2.2.6 quest continues. Go into the deeper part of the forest. At the end activate teleporter [11] and just behind it, you'll find the entrance to the Familiar Surgeon's hideout [12]. After entering there (An Abandoned Elven Ruin) you'll see a real horror. It's a place filled with blood, body parts and mutants. At the end of this dungeon [2] you'll meet the author of this mess. He's very dangerous and hard to defeat. He summons crawling minions and shoot series of magic projectiles, which can do serious damage as they bounce from the walls! Very helpful in this fight would be high Death Magic Resistance. You can always flee from Familiar Surgeon's chamber, when it's too hard. After killing him speak with Dranjul. There's another Familiar Surgeon hidden somewhere! You receive two keys: Calennor Stronghold Key and Unidentified Object. First key opens the doors to the place, where's the second creature hiding. Second is for the strange doors you saw earlier [Western Vai'lutra Forest - 3].
Big, bad and ugly.
2.1.3 The Second Familiar Surgeon
Objectives:
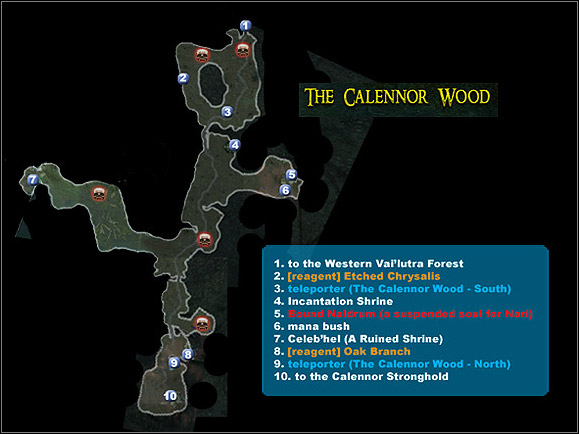
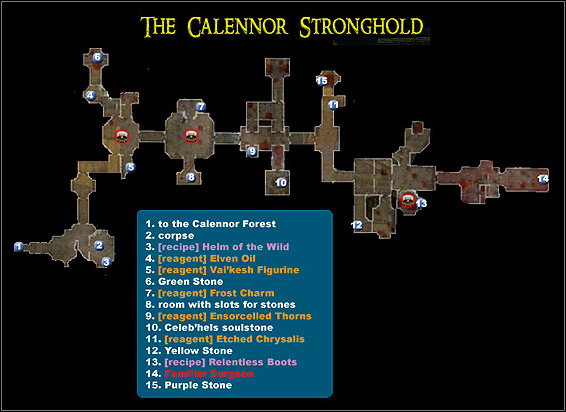
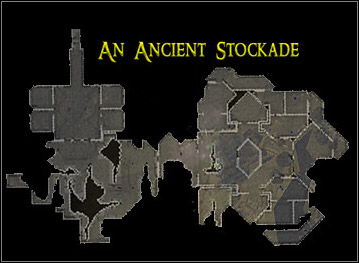
Now it's time to use the key you've got after defeating first Familiar Surgeon. Go to the building with strange doors [Western Vai'lutra Forest - 3]. Use the key and kill the mutant. Enter the tomb. You're in the place called An Ancient Stockade. There's nothing special in here, just some hidden rooms with treasures (search with map). After exploring this place, go deeper into the Vai'lutra Forest. You'll encounter Bound Elves, which will drop vials of blood, when killed. These are needed for Ressa's quest (2.2.5 Questionable Methods). During your journey through the forest, you'll find another tomb, [11] where another side quest waits (2.2.8 Treasure Hunting). When you arrive to the Calennor Wood activate the teleporter [The Calennor Wood - 3]. In this forest you'll find next item for Nari's quest (1.2.6 The Ancient Tome). Kill the Bound Naldrum [6] and you'll get the suspended soul (A Pixie Preserved in Amber). There's also strange place full of flowers, [7] where another side quest awaits (2.2.2 Celeb'hel The Elder). Go to the Calennor Stronghold [10]. This creepy place is full of secrets. Search with map for hidden rooms. Near the entrance is a room with a corpse. It's no ordinary corpse, because it has sticking Vai'kesh sword. This will lead you to 2.2.7 The Vai'kesh, Part 2. Search the rooms for stones, [6, 12, 15] which can be used in special room [8] for opening hidden chest. In the prison area you'll find Celeb'hels Soulstone needed for quest 2.2.2. At the end of this place waits for you another Familiar Surgeon. Fight with him looks the same as the previous one.
One of the monsters waiting for you at the Calennor Stronghold.
2.1.4 Solanum
You've defeat two Familiar Surgeons and the Elves won't help you! They want to isolate from the world and heal their wounds... Danadel will tell you very interesting thing. The Dryads leader is a man! He wants to gather all the magic power from Aranna to bring back peace and order. It seems that you'll have to talk with this freaky guy.
Overmage as Dryad Leader.
Objectives:
After everything you've done for Elves Danadel at least will open for you portal to Solanum. After you arrive there the real masqueradebegins. The naive Dryads follow every order of Overmage in disguise. After he spots you, Keirok the Devourer is summoned. This beast is huge and strong. It uses some nasty special attacks, so try to avoid direct combat. When he is killed, use the Overmage's portal. You'll be teleported to a strange cavern and a group of Dwarves will come to speak with you.
Overmage's pet.
Part 2 (side quests)

Recommended level: 43
Objectives: 6
Maps: Western Vai'lutra Forest, Western Vai'kesh Forest

Recommended level: 43
Objectives: 5
Maps: The Calennor Wood, A Small Vai'kesh Sanctuary, Calennor Stronghold,

Recommended level: 43
Objectives: 4
Maps: The Town of Aman'lu, Old Aman'lu

Recommended level: 43
Objectives: 11
Maps: The Town of Aman'lu

Recommended level: 43
Objectives: 6
Maps: Western Vai'lutra Forest, The Dryad Outpost, The Sepulcher of the Crimson Hunters

Recommended level: 44
Objectives: 3
Maps: Western Vai'kesh Forest, The Town of Aman'lu

Recommended level: 45
Objectives: 7
Maps: Calennor Stronghold, Western Vai'kesh Forest, A Small Vai'kesh Sanctuary, The Town of Aman'lu

Recommended level: 45
Objectives: 4
Maps: The Vault of Therayne (puzzles)
2.2.1 Naturalist Ithara's Research, Part II
After finishing her first quest, she'll give you another. It's the same type of quest - bring some samples.
Objectives:
Good sample of Bound Taugrim.
2.2.2 Celeb'hel the Elder
The killing of mad Celeb'hel in Arinth's Heights was successful. After this fight you've got Celeb'hel's Soulstone, which purpose is unknown to you.
Objectives:
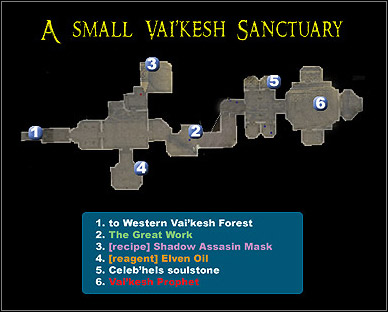
In the Calennor Wood you'll find a strange place full of flowers [The Calennor Wood - 7]. The person standing there is... Celeb'hel! He didn't die, because you've killed his "shadow". The real Celeb'hel wants to save the Elves using his "shadows" to collect magic energy sources. He needs their soulstones. One of them is in Vai'kesh Sanctuary [A Small Vai'kesh Sanctuary - 5], but you can't go there now. First go for search of the second soulstone, which is somewhere in The Calennor Stronghold [The Calennor Wood - 10]. When you'll find there a corpse with Vai'kesh sword, the other soulstone from Vai'kesh Sanctuary can be obtained. Go to the Vai'kesh camp [Western Vai'kesh Forest - 3] and enter the sanctuary. Return with soulstones to Celeb'hel. When he gets the stone, he'll die. If you decide not give them to him, he'll transform to a henchman.
Celeb'hel and his hideout.
2.2.3 Minli the Fearie
In Aman'lu you can find Kylis [9]. He's the Elf, which wants to build a new town. Minli, his old friend, has been bounded and she's now attacking Kylis, when he goes out for some materials. He asks you to kill her to stop her suffering as bounded creature.
Objectives:
Minli likes glowing objects, so Kylis gives you a bunch of metal scraps to lure her. Go to the nearby bridge in Old Aman'lu [10] and drop the metal object on the ground. Bound Faerie's will appear on both sides of the bridge. Kill them. Now it's time for Minli. After defeating her go back to Kylis.
You have a date with Minli here.
2.2.4 The Aman'lu Arena
This quest is known from the base version of Dungeon Siege 2. Rules are the same. You have to buy a special token, which will allow fighting on the arena. There are ten fights. When the fight is over, you can open one of the arena doors with a special key to get the treasure.
The entrance to the arena can be found at the inn [Town of Aman'lu - 5]. You have to push a lever to use an elevator. In the arena you'll meet Daesthai, which sells tokens. If you win all the ten fights, he'll reward you with Ancient Agallan Tablet (it can be exchanged for a unique item in the Dryad Outpost).
One of your arena enemies.
2.2.5 Questionable Methods
In the Western Vei'lutra Forest you'll find Ressa [6]. This Blood Assassin wants to fight with the evil creatures, but she needs a special blade. She asks you to bring her few ingredients needed in enchanting.
Objectives:
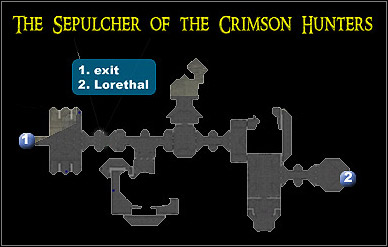
Ressa needs for her magic: Elves blood and child's tears. First ingredient you can found deeper in the Western Vai'lutra Forest, where the Bound Elves appear. Kill them and collect ten vials of blood. Bring them to Ressa. The Second ingredient is a tricky one. Do you remember a child standing near Soram in The Dryad Outpost? Go there and talk to child. Make him cry and the tears are yours. Return to Ressa. She will need one more thing. You'll have to bind Lorethal's soul in a bloodstone. Go to The Sepulcher of the Crimson Hunters [15]. You'll notice that it's empty and silent. On the end of this tomb is Lorethal's grave. Talk with him. The place will fill with ghosts of Crimson Hunters. They're dangerous, so try to avoid being surrounded by them. After you'll manage to escape, go back to Ressa. She'll make that blade and give it to you as reward. From now on Ressa is a henchman.
 Ghosts of the legendary Crimson Hunters.
2.2.6 The Vai'kesh
At the inn [The Town of Aman'lu - 5] you'll meet Talain. He tells you a story about Estelath Warriors. He's one of them and their goal is to fight with evil. Recently his men were lost near the ai'kesh Forest.
 Vai'kesh Sanctuary - how romantic!
Objectives:
Go to the Vai'kesh camp [Western Vai'kesh Forest - 2]. Their leader Rinerel will tell you how his men found dead Elves in the forest. Only one managed to survive and he confirms Rinerel's words. The corpses are in a small tomb not far away. Vai'kesh leader tells you that they want to live in peace with Elves and only alliance with them can save the Vai'kesh from the powers of evil, which are coming from these forests. To confirm his words go check that tomb he was talking about [5]. Everything seems right, so go back to Talain and tell him about this.
 Dead Elves found by Vai'kesh.
2.2.7 The Vai'kesh, Part II
When you'll explore the Calennor Stronghold [10], you will discover a corpse with a Vai'kesh sword sticking out of it [2].
Objectives:
After you discover the corpse in the Calennor Stronghold, go back to Aman'lu and speak with Talain. He was suspecting that the tricky Vai'kesh prepares something. Go to the Vai'kesh camp [Western Vai'kesh Forest - 2] and speak with Rienerel. He's going to attack you. Kill him and enter the sanctuary. There are many Vai'kesh inside, so look out. Inside you'll find another Celeb'hels soulstone needed for the 2.2.2 quest [5]. At the end of the sanctuary kill the prophet and return to Talain.
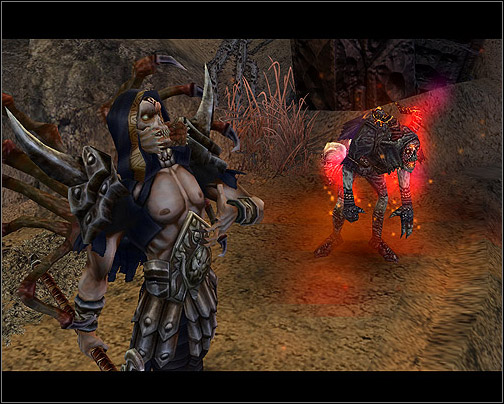
 Vai'kesh Prophet.
2.2.8 Treasure Hunting
In the Vai'lutra Forest you'll encounter a strange tomb [11]. Inside you'll find a woman trapped in some sort of magic cage. To free her you must turn off all magic lights. This room is very simple but next are tricky, if not impossible to pass. The released woman will tell you her story.
Objectives:
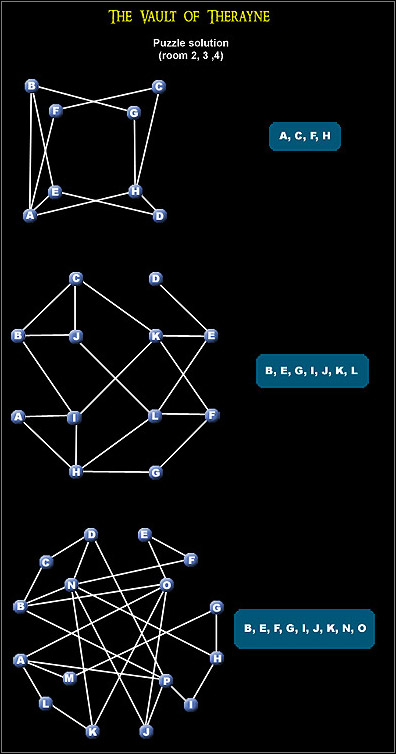
The woman's name is Meraliss and she came here to search for legendary treasure, which was supposed to be buried in this tomb. She was caught into a magic prison while exploring the place. She doesn't want to seek the treasure anymore. But you can try. In the next room you'll find similar situation. Treelus caged by magic and a lights puzzle. The difficulty level is much higher (look at the solution in the Maps section). Free Treelus and kill him. Return to Meraliss. This will end this quest. You don't have to solve the two remaining puzzles in this tomb. But if you'll do it, there's a surprise waiting for you.
 Hardest puzzle in The Vault of Therayne.
Part 3 (main quests)
Recommended level: 46
Objectives: 7
Maps: Glorydeep Enclave, The Halls of the Overseers
Recommended level: 46
Objectives: 7
Maps: City of Cinbri
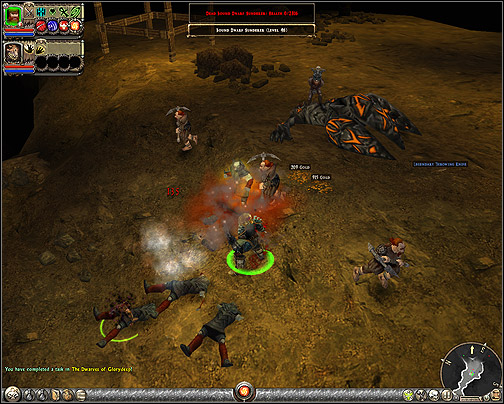
3.1.1 The Dwarves of Glorydeep
After using teleport opened by Overmage you'll end in some cavern. Go forward and you'll encounter a group of Dwarves. It's the next part of Yoren's quest (1.2.1) from first chapter. You are in the Glorydeep Mine! The Dwarf (Stonepick) will tell you their story. They're ready to help you, but first you'll have to free the imprisoned Dwarves.
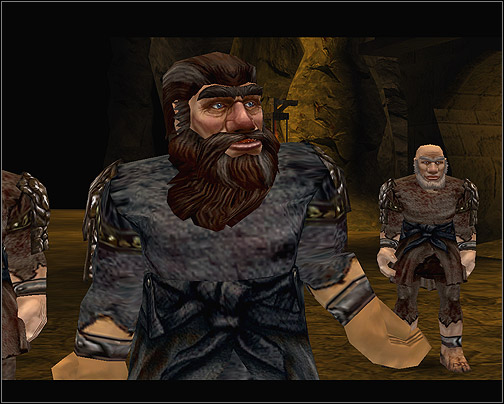 Enslaved Dwarves.
Objectives:
This quest is simple. After you'll leave the Glorydeep Enclave you'll start to encounter beasts you're supposed to kill. Watch out, after you kill them they resurrect after few seconds causing a circle of fire to blow up (just like some of the monsters from Vai'kesh Forest). It's good to have high Fire Resistance. You'll find Strongespade, [4] which will tell you about Dwarves imprisoned nearby (3.2.2). Free them and they'll help you later in the game. Go further and you'll find another Dwarf, Pitforger, who needs help with his explosives (3.2.3). If you have completed those two side quests, the Dwarves will show up to help you with three Familiar Overseers [11]. After the battle go to Stonepick [12]. He will open the bridge to the City of Cinbri.
 One of the Familiar Overseers.
3.1.2 The Overmage of the Cinbri
With the help of Dwarves you have managed to get to the City of Cinbri - the home of Overmage. Stonepick told you that Overmage wants to unite with Zaramoth during some kind of ritual. You have to hurry up!
Objectives:
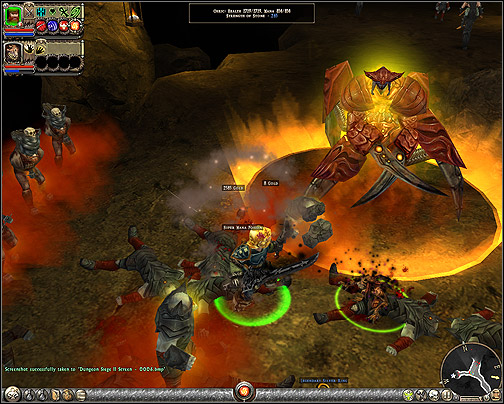
In the City of Cinbri you'll encounter really hard enemies in almost every room. In case of troubles use the teleporters you'll find on your way. Maps are not needed in this part of game, because you just go forward and kill monsters. Try to look around, there are quite many reagents waiting to pick up. In one of the rooms you'll find last item needed by Nari for the 1.2.6 The Ancient Tome quest (there's a book glowing on a bookcase). When you'll get to the Overmage's place, speak with him. After that the fight will begin. This one is really long and hard. The battle is divided into two parts. The first is that, when the Overmage stands in the middle of chamber and summon minions. Don't attack him! When he summons he's invulnerable. Kill his minions and shortly after that Overmage will make a pause. This is the time! Attack him with everything you've got. Then he's invulnerable again and summons minions. This cycle takes about 2-3 such changes. Defeated Overmage will transform into huge monster - Zaramoth. If you're not fighting from distance you're in big trouble. You must have in your party someone strong with ranged weapons. He's very strong and uses special attacks. Avoid direct contact with him. If you manage to kill him, this will be the end. Speak with Kirani. After this you can go and finish any unfinished quests.
 Zaramoth.
Part 3 (side quests)

Recommended level: 46
Objectives: 5
Maps: The Halls of the Overseers, The City of Cinbri

Recommended level: 46
Objectives: 4
Maps: Glorydeep Enclave, The Halls of the Overseers

Recommended level: 46
Objectives: 3
Maps: Glorydeep Enclave, The Halls of the Overseers
3.2.1 Naturalist Ithara's Research, Part III
Another side quest from Ithara. Bring her samples of creatures.
Objectives:
3.2.2 Captured Miners
In the Halls of the Overseers you'll find Strongspade [4]. He wants you to free the Dwarves and they'll help you in battle.
 Dwarves are fighting very well.
Objectives:
This quest is quick to finish and simple. Go and kill monsters guarding the prison cells. Free the Dwarves.
3.2.3 The Explosives Tunnel
In the mine you'll encounter a Dwarf pyrotechnist- Pitforger, [6] who installed explosives nearby to blow up the monsters, but he forgot to attach the fuse. Help him, and he'll help you.
Objectives:
Go to the end of tunnel (right behind Pitforger) and attach the fuse to the explosives. Go back to Pitforger and speak with him. Now you can go and use the detonator [10]. Use it and look the effects of Pitforger's work.
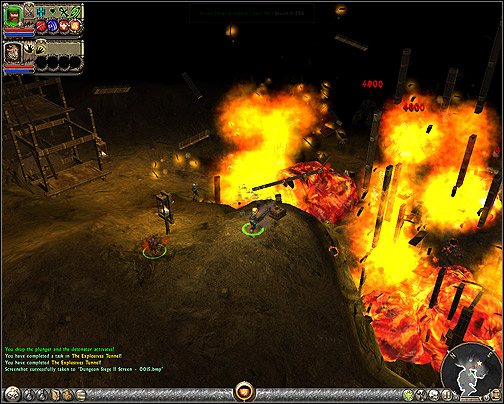 Excellent Pitforger's work.
Here's the appendix with reagent recipes, which can be found during the game. You don't have to find a recipe to use it! If you know the reagents needed, then you can make the same item without recipe.
Name
Reagents
Effects
Amulet of Kings
(Legendary Amulet)
Angelica Root
Ironwood Timber
Spectral Dust
Prismatic Bauble
Yarrow Balm
+1 to Fist of Stone Skills
+1 to Blood Assassin Skills
+1 to Ranged Skills
+1 to Melee Skills
+2 to Nature Magic Skills
+2 to Combat Magic Skills
+15% Melee and Ranged Resistance
+3% Chance When Hit: Superior Invulnerability
Archdruid's Station
(Legendary Mage Staff)
Verbena Flowers
Ironwood Timber
Quicksilver Oil
Spectral Dust
+55 Intelligence
+30% Nature Magic Damage
+12% Power Recharge Rate
+2 to Nature Magic Skills
Archmage's Amulet
(Legendary Amulet)
Spectral Dust
Wormwood Essence
Prismatic Bauble
Sage Liniment
Ash Leaves
+26 Intelligence
+13% Melee Resistance
+10% Power Recharge Rate
+24% Nature Magic Damage
+27% Combat Magic Damage
Arclight Boots
(Exceptional Combat Mage Boots)
Ensorcelled Thorns
Amber Thread
Nettle Cluster
Requires Combat Magic 38
+12 Armor
+5% Power Recharge Rate
+17% Lightning Magic Damage
3% Chance When Hit: Multispark for 135 - 225 Damage
+2 to Brilliance, Amplified Lightning, and Arcing
Beastmaster Staff
(Legendary Mage Staff)
Set item
Beastmaster
(Nature Mage, 5 parts)
Wormwood Essence
Vampire Jaw
Raven Talon
Wolf Jaw
Requires Nature Magic 43
+55% Summoned Creature Damage
+7% Summoned Creature Attack Speed
+13% Melee Resistance
+2 to Summon Fortitude, Summon Might, and Summon Bond
Bloodsoaked Gloves
(Exceptional Ranger Gloves)
Set item
Bloodsoaked Armor
(Blood Assassin, 4 parts)
Ash Leaves
Agallan Standard
Betony Salve
Requires Ranged 36, Combat Magic 29
+10% Health Regeneration
7% Health Steal
3% Chance When Hit: Decay Armor
+2 to Shred Blood and Bloodsoaked Shots
Bone Helm
(Legendary Fighter Helm)
Azunite Insignia
Vai'Kesh Figurine
Diamond Thorns
Pine Splinter
Requires Melee 40
+12 Armor
3% Chance When Hit: Major Infect
3% Chance When Hit: Decay Armor
3% Chance When Hit: Impale for 170 - 280 Damage
Champion's Defender
(Exceptional One Handed Mace)
Oak Branch
Mythril Alloy
Rhinock Horn
Raven Talon
+90 Health
9% Damage Goes to Mana
35% of Physical Damage Reflected to Enemy
+2 to Barricade, Toughness, and Reinforced Armor
Chromatic Robe
(Exceptional Combat Mage Robe)
Amber Thread
Smoldering Rune
Frost Charm
Nettle Cluster
Requires Combat Magic 38
+90 Health
+15% Lightning Resistance
+15% Fire Resistance
+15% Ice Resistance
3% Chance When Hit: Fire Wave for 115 - 195 Damage
3% Chance When Hit: Call Lightning for 155 - 460 Damage
6% Chance When Hit: Cold Snap for 70 - 120 Damage
Cinbri Ritual Mask
(Exceptional Combat Mage Helm)
Set item
Cinbri Vestments
(Combat Mag, 4 parts)
Vai'Kesh Figurine
Carved Carapace
Yarrow Balm
Diamond Thorns
Requires Combat Magic 39
+23% Death Magic Damage
+12 Armor
8% Chance When Hit: Drown
8% Chance When hit: Infect
+2 to Debilitation, Grim Necromancy, and Vampirism
Coral-Encrusted Shield
(Legendary Fighter Shield)
Engraved Plating
Ironwood Timber
Rowan Leaves
Diamond Thorns
Patterned Shell
Requires Melee 64, Nature magic 56, Barricade 1
12% Damage Goes to Mana
3% Chance When Hit: Superior Drown
6% Chance When Hit: Cold Snap for 230 - 385 Damage
+2 to Fist of Stone Skills
Corrosive Claws
(Legendary Cestus)
Quicksilver Oil
Wormwood Essence
Demon Jaw
Raven Talon
Henbane Leaves
+220 Mana
+32% Death Magic Damage
8% Mana Steal
+3 to Debilitation, Grim Necromancy, and Vampirism
Crusher Hammer
(Great Two Handed Hammer)
Crystal Pommelstone
Rhinock Horn
Whetstone
Pine Splinter
+40% Damage
+15% Melee Critical Hit Chance
+35% Melee Critical Hit Damage
+1 to Fist of Stone Skills
Cultivation Robes
(Legendary Nature Mage Armor)
Verbena Flowers
Engraved Plating
Rowan Leaves
Malachite Powder
Requires Nature Magic 58
+225 Mana
+40% Healing Effectiveness
3% Chance When Hit: Grasping Vines for 565 - 940 Damage
+3 to Nurturing Gift, Enveloping Embrace, and Feral Wrath
Dragon Crest
(Legendary Combat Mage Helm)
Scarab Husk
Igneous Rune
Patterned Shell
Half-Giant Pennant
Requires Combat Magic 58
+36 Intelligence
+25% Fire Magic Damage
+26% Fire Resistance
6% Chance When Hit: Repulsion Blast
+3 to Devastation, Searing Flames, and Ignite
Druid's Walking Stick
(Exceptional Mage Staff)
Valerian Root
Malachite Powder
Gardenia Leaves
Eagle Talon
+75 Health
+20% Nature Magic Damage
+30% Healing Effectiveness
+2 to Nurturing Gift, Enveloping Embrace, and Feral Wrath
Elven Hero's Regalia
(Legendary Ranger Body Armor)
Engraved Plating
Ironwood Timber
Quicksilver Oil
Gold Ribbon
Requires Ranged 68
+80 Dexterity
+12% Power Recharge Rate
6% Chance When Hit: +300 Armor for 10 Seconds
+3 to Critical Shot, Dodge, and Survival
Flowing Stride
(Legendary Nature Mage Boots)
Engraved Plating
Icicle Talisman
Henbane Leaves
Sage Liniment
Henbane Leaves
Requires Nature Magic 63
+275 Mana
+15% Mana Regeneration
6% Chance When Hit: Cold Snap for 230 - 385 Damage
+2 to Nature Magic Skills
Forester Cowl
(Legendary Ranger Helm)
Scarab Husk
Icicle Talisman
Sandalvine Tincture
Requires Ranged 53
+15 Armor
Restores 14 Health Per Hit
+16% Magic Damage Resistance
3% Chance When Hit: Grasping Vines for 565 - 940 Damage
Frostbite
(Great Thrown Weapon)
Elven Oil
Serrated Arrowheads
2x Coral Fragment
10% Chance on Hit: Freeze Enemy for 2 Seconds
10% Chance on Hit: Ice Burst for 80 - 140 Damage
+2 to Quick Draw, Bleed, and Penetrate
Fusillade
(Exceptional Crossbow)
Griffon Feather
2x Serrated Arrowheads
Amber Spangle
Hawk Feather
+45% Damage
+8% Power Recharge Rate
+42% Ranged Critical Hit Damage
10% Chance on Hit: Rapid Attack
Gloves of Command
(Legendary Combat Mage Gloves)
Scarab Husk
Azunite Insignia
Ash Leaves
Requires Combat Magic 48 or Nature Magic 48
+64% Summoned Creature Damage
6% Chance When Hit: Petrify Attacker for 3 Seconds
+3 to Summoned Alacrity and Quickened Casting
+4 to Summon Fortitude, Summon Might, and Summon Bond
Hands of Flame
(Great Cestus)
Valerian Root
Vampire Jaw
+60 Health
+22% Fire Magic Damage
3% Chance When Hit: Fire Wave for 115 - 195 Damage
+2 to Devastation, Searing Flames, and Ignite
Hands of the North
(Legendary Cestus)
Spectral Dust
Wormwood Essence
Owl Talon
Gral Eye
+35 Intelligence
+32% Ice Magic Damage
6% Chance When Hit: Cold Snap for 25 - 45 Damage
+3 to Aquatic Affinity, Arctic Mastery, and Freezing
Helm of Nobility
(Legendary Fighter Helm)
Etched Chrysalis
Azunite Insignia
Vai'Kesh Figurine
Mandrake Root
Requires Melee 36
+22 Strength
Restore 10 Health Per Hit
3% Chance When Hit: Stun Opponent for 3 Seconds
+1 to Melee Skills
Helm of the Wild
(Exceptional Nature Mage Helm)
Wormwood Essence
Etched Chrysalis
Oak Branch
Requires Nature Magic 43
+24 Intelligence
+100 Health
+60% Summoned Creature Damage
+2 to Summon Fortitude, Summon Might, and Summon Bond
Lava Plate
(Exceptional Fighter Body Armor)
Smoldering Rune
Sandalvine Tincture
Half-Giant Pennant
Requires Melee 34, Nature Magic 27
+14 Strength
+9 Intelligence
+22% Fire Resistance
3% Chance When Hit: Plasma Globes for 185 - 310 Damage
+1 to Fist of Stone Skills
Lumilla's Cooling Band
(Exceptional Ring)
Ash Leaves
Sage Liniment
Gardenia Leaves
+90 Health
+12 Armor
+11% Health Regeneration
+22% Fire Resistance
Magister's Station
(Legendary Mage Staff)
Verbena Flowers
2x Ironwood Timber
Spectral Dust
Henbane Leaves
+56 Intelligence
+35% Combat Magic Damage
+17% Magic Damage Resistance
+2 to Combat Magic Skills
Marksman's Ring
(Exceptional Ring)
Gold Ribbon
Prismatic Bauble
Skull Fragment
+65 Dexterity
+2 to Critical Shot, Dodge, and Survival
+2 to Biting Arrow, Far Shot, and Shockwave
Meteoric Shield
(Exceptional Fighter Shield)
Lion Crest
Oak Branch
Ash Leaves
Requires Melee 38, Barricade 1
+90 Health
+15% Fire Resistance
6% Chance When Hit: Repulsion Blast
+2 to Barricade, Toughness, and Reinforced Armor
The Onslaught Flame
(Legendary Two Handed Sword)
Demon Jaw
Oak Branch
Sapphire Pommelstone
Ruby Pommelstone
+35 Strength
10% Chance on Hit: Rapid Attack
10% Chance on Hit: Fire Burst for 235 - 290 Damage
+3 to Fortitude, Overbear, and Smite
Plague Razor
(Exceptional Thrown Weapon)
2x Onyx Spangle
Serrated Arrowheads
Griffon Feather
+20 Dexterity
+14 Intelligence
10% Chance on Hit: Death Burst for 180 - 305 Damage
10% Chance on Hit: Shockwave for 60 - 95 Damage
+1 to Blood Assassin Skills
Ravager Armor
(Legendary Fighter Body Armor)
Set item
Ravager's Kit
(Fighter, 3 parts)
Ensorcelled Thorns
Vai'Kesh Figurine
Sandalvine Tincture
Mandrake Root
Requires Melee 37
+38% Melee Critical Hit Damage
6% Health Steal
3% Chance When Hit: Decay Armor
3% Chance When Hit: Grave Beam for 370 - 620 Damage
Relentless Boots
(Legendary Ranger Boots)
Set item
Relentless
(Ranger, 3 parts)
Etched Chrysalis
Ensorcelled Thorns
Elven Oil
Vai'Kesh Figurine
Frost Charm
Requires Ranged 44
+22 Dexterity
+14 Armor
+13% Magic Resistance
3% Chance When Hit: Repulsion Blast
Robe of the Frozen North
(Exceptional Nature Mage Armor)
Etched Chrysalis
2x Frost Charm
Gral Eye
Requires Nature Magic 38
+18 Intelligence
+25% Ice Magic Damage
6% Chance When Hit: Freeze Enemy for 2 Seconds
+2 to Aquatic Affinity, Arctic Mastery, and Freezing
Rune Slayer
(Legendary Bow)
Demon Jaw
Owl Talon
Onyx Spangle
Serrated Arrowheads
Wolf Jaw
+58% Damage
+52% Ranged Critical Hit Damage
10% Chance on Hit: Penetrating Projectile
+2 to Shred Blood and Bloodsoaked Shots
Runemaster's Chain
(Legendary Ranger Body Armor)
Korven Fetish
Etched Chrysalis
Elven Oil
Diamond Thorns
Gral Eye
Requires Ranged 44, Combat Magic 36
+17 Dexterity
+12 Intelligence
+55% Armor
6% Chance When Hit: Repulsion Blast
+3 to Mark and Rune Mastery
Shadow Assassin Mask
(Exceptional Ranger Helm)
Etched Chrysalis
Agallan Standard
Elven Oil
Requires Ranged 36, Combat Magic 29
+14 Dexterity
+10 Intelligence
7% Mana Steal
+10% Chance to Dodge Melee Attacks
+1 to Blood Assassin Skills
Statesman's Robe
(Legendary Combat Mage Robe)
Engraved Plating
Patterned Shell
Azunite Insignia
Valerian Root
Requires Combat Magic 68
+50 Intelligence
+32% Combat Magic Damage
6% Chance When Hit: Invulnerability for 5 Seconds
+2 to Combat Magic Skills
Stone of Greilyn
(Legendary Ring)
Quicksilver Oil
2x Rowan Leaves
Valerian Root
Smoldering Rune
+50 Max Damage
+15% Mana Regeneration
+25% Death Resistance
3% Chance When Hit: Petrify Attacker for 3 Seconds
Storm Gauntlets
(Great Fighter Gauntlets)
Amber Thread
Frost Charm
Mandrake Root
Requires Melee 33
+20 Strength
+10% Health Regeneration
+20% Lightning Resistance
+8% Power Recharge Rate
3% Chance When Hit: Call Lightning for 50 - 155 Damage
Storm Hood
(Great Nature Mage Helm)
2x Amber Thread
Malachite Powder
Requires Nature Magic 33
+20% Nature Magic Damage
+20% Lightning Resistance
+8% Power Recharge Rate
3% Chance When Hit: Call Lightning for 155 - 460 Damage
Stormspire
(Exceptional Mage Staff)
Owl Talon
Malachite Powder
Valerian Root
+24 Intelligence
+26% Lightning Magic Damage
+23% Lightning Resistance
+3 to Brilliance, Amplified Lightning, and Arcing
Treasure Seeker
(Great Amulet)
Smoldering Rune
Frost Charm
2x Rainbow Trinket
+55 Health
+8% Health Regeneration
+28% Chance to Find Magic Items
+45% Gold Dropped
Vagabond's Garb
(Exceptional Ranger Body Armor)
Elven Oil
2x Carved Carapace
Requires Ranged 33
+28 Dexterity
+44% Armor
+75 Health
+2 to Quick Draw, Bleed, and Penetrate
Volcano Boots
(Exceptional Fighter Boots)
Ash Leaves
Smoldering Rune
Carved Carapace
Ivory Thorns
Requires Melee 32, Nature Magic 25
+12 Armor
Adds 25 to 30 Fire Damage
3% Chance When Hit: Fire Wave for 115 - 195 Damage
+2 to Chant of Stone and Soul of Protection
Adventurer's Ring
(Gold Ring)
+15 Strength
+12 Armor
+17% Fire Resistance
+14% Chance to Find Magic Items
Amulet of Resolve
(Amulet)
+36 Intelligence
+18 Armor
Restores 16 Health Per Hit
+14% Health Regeneration
Attuned Staff
(Druid Staff)
+45% Healing Effectiveness
+20% Magic Damage Resistance
+75% Summoned Creature Damage
+10% Summoned Creature Attack Speed
+3 to Summon Fortitude, Summon Might, and Summon Bond
Berserker Shield
(Ceremonial Shield)
+30 Strength
30% of Physical Damage Reflected to Enemy
3% Chance When Hit: Decay Armor
3% Chance When Hit: Impale for 170 - 280 Damage
Bloodstained Boots
(Boots)
+20 Dexterity
+16 Intelligence
+50 Health
+1 to Blood Assassin Skills
Bolt Driver
(Crossbow)
+32% Damage
+30% Ranged Critical Hit Damage
10% Chance on Hit: Penetrating Projectile
10% Chance on Hit: Shockwave for 40 - 60 Damage
Bolt Flingers
(Sorcerer Gloves)
+15 Armor
+20% Lightning Resistance
+10% Lightning Magic Damage
+2 to Brilliance, Amplified Lightning, and Arcing
Bounteous Sapling
(Ritual Staff)
+145 Mana
+23 Intelligence
+34% Healing Effectiveness
+2 to Nurturing Gift, Enveloping Embrace, and Feral Wrath
Conqueror Gauntlets
(Mythril Gauntlets)
+120 Health
+33 Strength
+8% Power Recharge Rate
+2 to Fortitude, Overbear, and Smite
Consuming Gloves
(Elven Gloves)
+145 Health
8% Health Steal
+10% Power Recharge Rate
+1 to Blood Assassin Skills
Corrupted Sentinel Armor
(Corrupted Armor)
+70 Health
+12 Armor
+20% Death Resistance
5% Chance when Hit: Drown
Corrupted Watcher Suit
(Corrupted Armor)
+14 Armor
+10% Health Regeneration
+22% Death Resistance
3% Chance when Hit: Major Infect
Crimson Channeler Staff
(Elven Staff)
+24 Intelligence
7% Health Steal
+15% Fire Magic Damage
+9% Power Recharge Rate
Deviant Claymore
(Claymore)
8% Health Steal
+75% Melee Critical Hit Damage
10% Chance on Hit: Death Burst for 375 - 625 Damage
+4 to Fortitude, Overbear, and Smite
Elven Wedding Ring
(Ornate Ring)
+36 Intelligence
+32% Nature Magic Damage
+32% Combat Magic Damage
+2 to Nature Magic Skills
+2 to Combat Magic Skills
Enkindled Cleaver
(War Axe)
-25% Ice Resistance
Adds 10 to Fire Damage
10% Chance on Hit: Fire Burst for 475 - 580 Damage
+2 to Fortitude, Overbear, and Smite
Eye of the Storm
(Staff)
+35% Fire Magic Damage
+35% Lightning Magic Damage
+3 to Brilliance, Amplified Lightning, and Arcing
+3 to Devastation, Searing Flames, and Ignite
Fallen Blademaster's Heirloom
(Talisman)
+54% Melee Critical Hit Damage
+12% Health Regeneration
6% Chance When Hit: +180 Armor for 10 Seconds
+3 to Critical Strike, Dual Wield, and Alacrity
Familiar's Eye
(Jeweled Ring)
+30 Strength
+30 Dexterity
+30 Intelligence
+100 Health
+145 Mana
Gladiator's Cuffs
(Cuffs)
+20 Strength
+8% Melee Resistance
3% Chance When Hit: Major Drown
+8% Power Recharge Rate
Granite Helm
(Obsidian Helmet)
+18 Strength
+12 Intelligence
+50% Armor
6% Chance when Hit: Petrify
+3 to Tremor and Soul of Strength
Greater Purifier Vestments
(Mystic Armor)
+136 Mana
+1 to Nature Magic Skills
6% Chance when Hit: Invulnerable
+2 to Nurturing Gift, Enveloping Embrace, and Feral Wrath
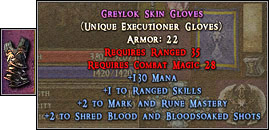
Greylok Skin Gloves
(Executioner Gloves)
+130 Mana
+1 to Ranged Skills
+2 to Mark and Rune Mastery
+2 to Shred Blood and Bloodsoaked Shots
Helm of the Unknown Comic
(Helmet)
+5% Power Recharge Rate
Malignant Force
(Bow)
+10 Min Damage
+20 Max Damage
10% Chance on Hit: Rapid Attack
+2 to Critical Shot, Dodge, and Survival
Mana Vortex
(Amulet)
+20 Intelligence
+100 Mana
10% Damage Goes to Mana
+10% Mana Regeneration
Mantle of the Frost Maiden
(Cap)
+24 Intelligence
+15% Ice Magic Damage
6% Chance When Hit: Cold Snap for 140 - 235 Damage
+3 to Aquatic Affinity, Arctic Mastery, and Freezing
Mask of Slaughter
(Twilight Mask)
+33 Dexterity
+22 Intelligence
55% of Physical Damage Reflected to Enemy
+4 to Critical Shot, Dodge, and Survival
+4 to Shred Blood and Bloodsoaked Shots
Mind Eater
(Curve Bow)
-35 Intelligence
+25 Max Damage
10% Chance on Hit: Silence
+25% Ranged Critical Hit Damage
+12% Magic Damage Resistance
Nature's Blessing
(Staff)
+20 Armor
+35% Healing Effectiveness
+15% Magic Damage Resistance
+8% Power Recharge Rate
Nature's Fury
(Short Sword)
+12% Power Recharge Rate
10% Chance on Hit: Lightning Burst for 225 - 680 Damage
10% Chance on Hit: Superior Berserking
Nature's Vengeance
(Elaborate Ring)
+20 Intelligence
7% Mana Steal
+55% Summoned Creature Damage
+1 to Nature Magic Skills
Polychromatic Shiv
(Throwing Shiv)
10% Chance on Hit: Ice Burst for 145 - 240 Damage
10% Chance on Hit: Fire Burst for 145 - 180 Damage
10% Chance on Hit: Lightning Burst for 105 - 315 Damage
+2 to Quick Draw, Bleed, and Penetrate
Rampage
(Cleaver)
+25 Strength
10% Chance on Hit: Major Berserk
10% Chance on Hit: Rapid Attack
Repulsive Ring
(Gilded Ring)
30% of Physical Damage Reflected to Enemy
+15% Ranged Resistance
3% Chance When Hit: Repulsion Blast
+2 to Critical Shot, Dodge, and Survival
Retribution Gloves
(Dragon Gloves)
+15 Intelligence
3% Chance when Hit: Drown
6% Chance when Hit: Cold Snap for 45 - 70 Damage
35% of Physical Damage Reflected to Enemy
Risk Taker's Pendant
(Amulet)
3% Chance When Hit: Plasma Globes for 535 - 890 Damage
3% Chance When Hit: Superior Infect
3% Chance When Hit: Fire Wave for 345 - 575 Damage
3% Chance When Hit: Call Lightning for 405 - 1220 Damage
Rune Tracers
(Twilight Boots)
+18% Health Regeneration
+15% Chance to Dodge Melee Attacks
+15% Chance to Dodge Ranged Attacks
+4 to Mark and Rune Mastery
Stone Cleaver
(War Axe)
+45% Damage
+18% Melee Critical Hit Chance
+33% Melee Critical Hit Damage
+2 to Fortitude, Overbear, and Smite
The Corrupter's Mark
(Curve Bow)
+16 Dexterity
+12 Intelligence
8% Mana Steal
10% Chance on Hit: Shockwave for 60 - 95 Damage
+3 to Rune and Mark Mastery
The Frozen Flame
(Elven Sword)
+11 to Fire Damage
+16% Ice Resistance
10% Chance on Hit: Fire Burst for 145 - 180 Damage
10% Chance on Hit: Freeze Enemy for 2 Seconds
Timecutter
(Glaive)
+30% Ranged Critical Hit Chance
10% Chance on Hit: Rapid Attack
+12% Power Recharge Rate
+3 to Quick Draw, Bleed, and Penetrate
Trickster's Crown
(Warlock Mask)
10% Chance when Hit: Repulsion Blast
6% Chance When Hit: Invulnerable for 6 Seconds
3% Chance When Hit: Plasma Globes for 535 - 890 Damage
3% Chance When Hit: Multispark for 125 - 205 Damage
Truesight Helm
(Elven Helm)
+18 Armor
+13% Chance to Dodge Melee Attacks
+3 to Quick Draw, Bleed, and Penetrate
+3 to Critical Shot, Dodge, and Survival
Vitality Boots
(Obsidian Greaves)
+116 Health
+34% Healing Effectiveness
10% Damage Goes to Mana
3% Chance when Hit: Grasping Vine for 340 - 565
+1 to Fist of Stone Skills
Water Spirit's Blessing
(Amulet)
+22 Intelligence
+95 Mana
8% Mana Steal
+12% Mana Regeneration
+9% Power Recharge Rate
Beastmaster (Nature Mage, 5 parts)
Beastmaster Garb
(Dragon Armor)
Requires Nature Magic 48
+30% Ice Magic Damage
10% Chance When hit: Freeze
+80% Armor
+2 to Summon Fortitude, Summon Might, and Summon Bond
Beastmaster Helmet
(Dragon Helm)
Requires Nature Magic 38
+19 Intelligence
+110 Mana
+30% Healing Effectiveness
+2 to Summon Fortitude, Summon Might, and Summon Bond
Beastmaster Boots
(Dragon Boots)
Requires Nature Magic 33
+16 Intelligence
+3% Summoned Creature Attack Speed
+11% Mana Regeneration
+15 Armor
Beastmaster Gloves
(Dragon Gloves)
Requires Nature Magic 28
+17% Nature Magic Damage
+45% Summoned Creature Damage
+10 Armor
+7% Power Recharge Rate
Beastmaster Staff
(Bladed Staff)
Can be made with reagents
Requires Nature Magic 43
+55% Summoned Creature Damage
+7% Summoned Creature Attack Speed
+13% Melee Resistance
+2 to Summon Fortitude, Summon Might, and Summon Bond
Bonus for completing:
Bonus for 2 parts
+5 Intelligence
+25 Health
1% Mana Steal
+1 to Summon Fortitude, Summon Might, and Summon Bond
Bonus for 3 parts
+10 Intelligence
+50 Health
2% Mana Steal
+2 to Summon Fortitude, Summon Might, and Summon Bond
Bonus for 4 parts
+15 Intelligence
+75 Health
4% Mana Steal
+2 to Summon Fortitude, Summon Might, and Summon Bond
Bonus for 5 parts
+25 Intelligence
+115 Health
7% Mana Steal
+3 to Summon Fortitude, Summon Might, and Summon Bond
Bloodsoaked Armor (Blood Assassin, 4 parts)
Bloodsoaked Leather
(Twilight Armor)
Requires Ranged 22, Combat Magic 15
+7 Dexterity
+4 Intelligence
Restores 5 Health Per Hit
+35% Armor
3% Chance When Hit: Minor Infect
Bloodsoaked Gloves
(Twilight Gloves)
Can be made with reagents
Requires Ranged 36, Combat Magic 29
+10% Health Regeneration
7% Health Steal
3% Chance When Hit: Decay Armor
+2 to Shred Blood and Bloodsoaked Shots
Blood Drinker
(Throwing Shiv)
Requires Ranged 29, Combat Magic 22, Quick Draw 1
10% Chance on Hit: Shockwave for 25 - 35 Damage
12% Health Steal
+2 to Shred Blood and Bloodsoaked Shots
Bloodsoaked Ring
(Ornate Ring)
Requires Ranged 26, Combat Magic 19
+8 Dexterity
+5 Intelligence
+66 Health
+19% Death Resistance
+2 to Shred Blood and Bloodsoaked Shots
Bonus for completing:
Bonus for 2 parts
+5 Dexterity
+3 Intelligence
+5 Armor
+5% Power Recharge Rate
Bonus for 3 parts
+10 Dexterity
+7 Intelligence
+10 Armor
+6% Power Recharge Rate
+2 to Exsanguinate and Blood Shots
Bonus for 4 parts
+15 Dexterity
+9 Intelligence
+15 Armor
+7% Power Recharge Rate
+2 to Exsanguinate and Blood Shots
Cinbri Vestments (Combat Mage, 4 parts)
Cinbri Overmage Robes
(Warlock Robe)
Requires Combat Magic 59
+34 Intelligence
+32% Fire Magic Damage
+80% Armor
+3 to Devastation, Searing Flames, and Ignite
Cinbri Ritual Mask
(Warlock Mask)
Can be made with reagents
Requires Combat Magic 39
+23% Death Magic Damage
+12 Armor
8% Chance When Hit: Drown
8% Chance When hit: Infect
+2 to Debilitation, Grim Necromancy, and Vampirism
Cinbri Plaguebearers
(Spirit Cestus)
Requires Combat Magic 43 or Nature Magic 43
+22% Combat Magic Damage
+26% Death Magic Damage
+8% Power Recharge Rate
+1 to Combat Magic Skills
Cinbri Focusing Ring
(Ornate Ring)
Requires Character Level 51
+26 Intelligence
+170 Mana
7% Health Steal
+10% Fire Resistance
+10% Death Resistance
Bonus for completing:
Bonus for 2 parts
+10 Armor
+20 Intelligence
+1 to Debilitation, Grim Necromancy, and Vampirism
+1 to Devastation, Searing Flames, and Ignite
Bonus for 3 parts
+18 Armor
+25 Intelligence
+2 to Debilitation, Grim Necromancy, and Vampirism
+2 to Devastation, Searing Flames, and Ignite
Bonus for 4 parts
+25 Armor
+30 Intelligence
+3 to Debilitation, Grim Necromancy, and Vampirism
+3 to Devastation, Searing Flames, and Ignite
Elven Battlemage Equipment (Combat Mage, 4 parts)
Elven Battlemage Robe
(Istauri Robe)
Requires Combat Magic 50
+25 Intelligence
+28% Lightning Magic Damage
+80% Armor
+1 to Combat Magic Skills
Elven Battlemage Cowl
(Istauri Hood)
Requires Combat Magic 74
+50 Intelligence
+35 Armor
+30% Lightning Resistance
+4 to Brilliance, Amplified Lightning, and Arcing
Elven Battlemage Gloves
(Istauri Gloves)
Requires Combat Magic 58
+26% Combat Magic Damage
+20% Magic Damage Resistance
3% Chance When Hit: Call Lightning for 265 - 765 Damage
+11% Power Recharge Rate
Elven Battlemage Boots
(Istauri Boots)
Requires Combat Magic 65
+34% Lightning Magic Damage
+15% Melee and Ranged Resistance
3% Chance When Hit: Multispark for 135 - 225 Damage
+3 to Brilliance, Amplified Lightning, and Arcing
Bonus for completing:
Bonus for 2 parts
+15 Intelligence
+5% Mana Regeneration
+3% Damage Added to Mana
+10% Power Recharge Rate
Bonus for 3 parts
+35 Intelligence
+10% Mana Regeneration
+4% Damage Added to Mana
+12% Power Recharge Rate
Bonus for 4 parts
+60 Intelligence
+20% Mana Regeneration
+5% Damage Added to Mana
+15% Power Recharge Rate
Glitterdelve Heirlooms (Fist of Stone, 4 parts)
Glitterdelve Plate
(Full Plate)
Requires Melee 38, Nature Magic 30
+50% Armor
+20% Fire Resistance
3% Chance When Hit: Grasping Vines for 290 - 480 Damage
+1 to Fist of Stone Skills
Glitterdelve Gloves
(Plate Gauntlets)
Requires Melee 40, Nature Magic 32
+15 Armor
+22% Lightning Resistance
+9% Power Recharge Rate
+2 to Chant of Stone and Soul of Protection
Glitterdelve Hammer
(Hammer)
Requires Melee 35, Nature Magic 28
+14 Strength
+9 Intelligence
+130 Mana
+54% Damage
10% Chance on Hit: Petrify for 2 Seconds
+1 to Fist of Stone Skills
Glitterdelve Signet
(Ornate Ring)
Requires Character Level 36
+11 Strength
+7 Intelligence
6% Health Steal
+18% Death Resistance
+2 to Tremor and Soul of Strength
Bonus for completing:
Bonus for 2 parts
+5 Strength
+4 Intelligence
+15% Melee Critical Hit Damage
+17% Healing Effectiveness
Bonus for 3 parts
+10 Strength
+8 Intelligence
+30% Melee Critical Hit Damage
+25% Healing Effectiveness
Bonus for 4 parts
+16 Strength
+12 Intelligence
+45% Melee Critical Hit Damage
+34% Healing Effectiveness
3% Chance When Hit: Call Lightning for 25-42 Damage
Indomitable Faith (Fighter, 2 parts)
Apostle's Hammer
(Hammer)
Requires Melee 36, Nature Magic 28
7% Mana Steal
+50 Health
Restores 10 Mana Per Hit
+1 to Fist of Stone Skills
Bulwark of Faith
(Shield)
Requires Melee 60, Nature Magic 52, Barricade 1
+25 Strength
+18 Intelligence
12% Damage Goes to Mana
3% Chance When Hit: Stun Opponent for 2 Seconds
+3 to Barricade, Toughness, and Reinforced Armor
Bonus for completing:
Bonus for 2 parts
+27 Strength
+18 Intelligence
+1 to Melee Skills
+1 to Fist of Stone Skills
Ravager's Kit (Fighter, 3 parts)
Ravager Armor
(Studded Tunic)
Can be made with reagents
Requires Melee 37
+38% Melee Critical Hit Damage
6% Health Steal
3% Chance When Hit: Decay Armor
3% Chance When Hit: Grave Beam for 370 - 620 Damage
Ravager Helm
(Studded Helm)
Requires Melee 43
40% of Physical Damage Reflected to Enemy
3% Chance When Hit: Fire Wave for 115 - 195 Damage
+1 to Melee Skills
+2 to Critical Strike, Dual Wield, and Alacrity
Ravager Axe
(Elven Axe)
Requires Melee 34
+22 Strength
+17% Melee Critical Hit Chance
10% Chance on Hit: Berserk
5% Health Steal
Bonus for completing:
Bonus for 2 parts
3% Health Steal
+4% Chance to Dodge Melee Attacks
+20% Chance to Find Magic Items
+3 Melee Damage
Bonus for 3 parts
4% Health Steal
+6% Chance to Dodge Melee Attacks
+25% Chance to Find Magic Items
+5 Melee Damage
+1 to Critical Strike, Dual Wield, and Alacrity
Relentless (Ranger, 3 parts)
Relentless Gloves
(Explorer Gloves)
Requires Ranged 43
+12% Ranged Resistance
+12 Armor
+8% Power Recharge Rate
+2 to Critical Shot, Dodge, and Survival
Relentless Boots
(Explorer Boots)
Can be made with reagents
Requires Ranged 44
+22 Dexterity
+14 Armor
+13% Magic Resistance
3% Chance When Hit: Repulsion Blast
Relentless Amulet
(Talisman)
Requires Character Level 39
+18 Dexterity
+12 Armor
+10% Melee Resistance
+2 to Biting Arrow, Far Shot, and Shockwave
Bonus for completing:
Bonus for 2 parts
+18 Ranged Min Damage
+18 Ranged Max Damage
+8 Armor
+5% Power Recharge Rate
Bonus for 3 parts
+35 Ranged Min Damage
+35 Ranged Max Damage
+15 Armor
+10% Power Recharge Rate
Teasha's Armament (Fighter, 2 parts)
Teasha's Fury
(Katana)
+20 Strength
+12 Min Damage
+20 Max Damage
10% Chance on Hit: Lightning Burst for 105 - 315 Damage
Taesha's Ire
(Katana)
Requires Melee 40
+20 Strength
+25% Damage
10% Chance on Hit: Death Burst for 180 - 305 Damage
+2 to Critical Strike, Dual Wield, and Alacrity
Bonus for completing:
Bonus for 2 parts
Adds 10 to 16 Death Damage
8% Health Steal
+6% Power Recharge Rate
+2 to Critical Strike, Dual Wield, and Alacrity
Traveller's Trinkets (Mage, 2 parts)
Traveller's Handbook
(Book)
Requires Combat Magic 41 or Nature Magic 41
+75 Health
+15% Ice Resistance
+15% Fire Resistance
+15% Lightning Resistance
+15% Death Resistance
Traveller's Medallion
(Amulet)
Requires Character Level 43
+75 Health
+15% Ice Resistance
+15% Fire Resistance
+15% Lightning Resistance
+15% Death Resistance
Bonus for completing:
Bonus for 2 parts
+90 Health
+10% Health Regeneration
+70% Gold Dropped
+30% Chance to Find Magic Items


 DMC: Devil May Cry Game Guide & Walkthrough
 Darkest Dungeon Game Guide & Walkthrough
 Dragon Age: Origins - Awakening Game Guide & Walkthrough
 Dark Messiah of Might and Magic Game Guide & WalkthroughDragon Ball: Xenoverse Game Guide & Walkthrough